
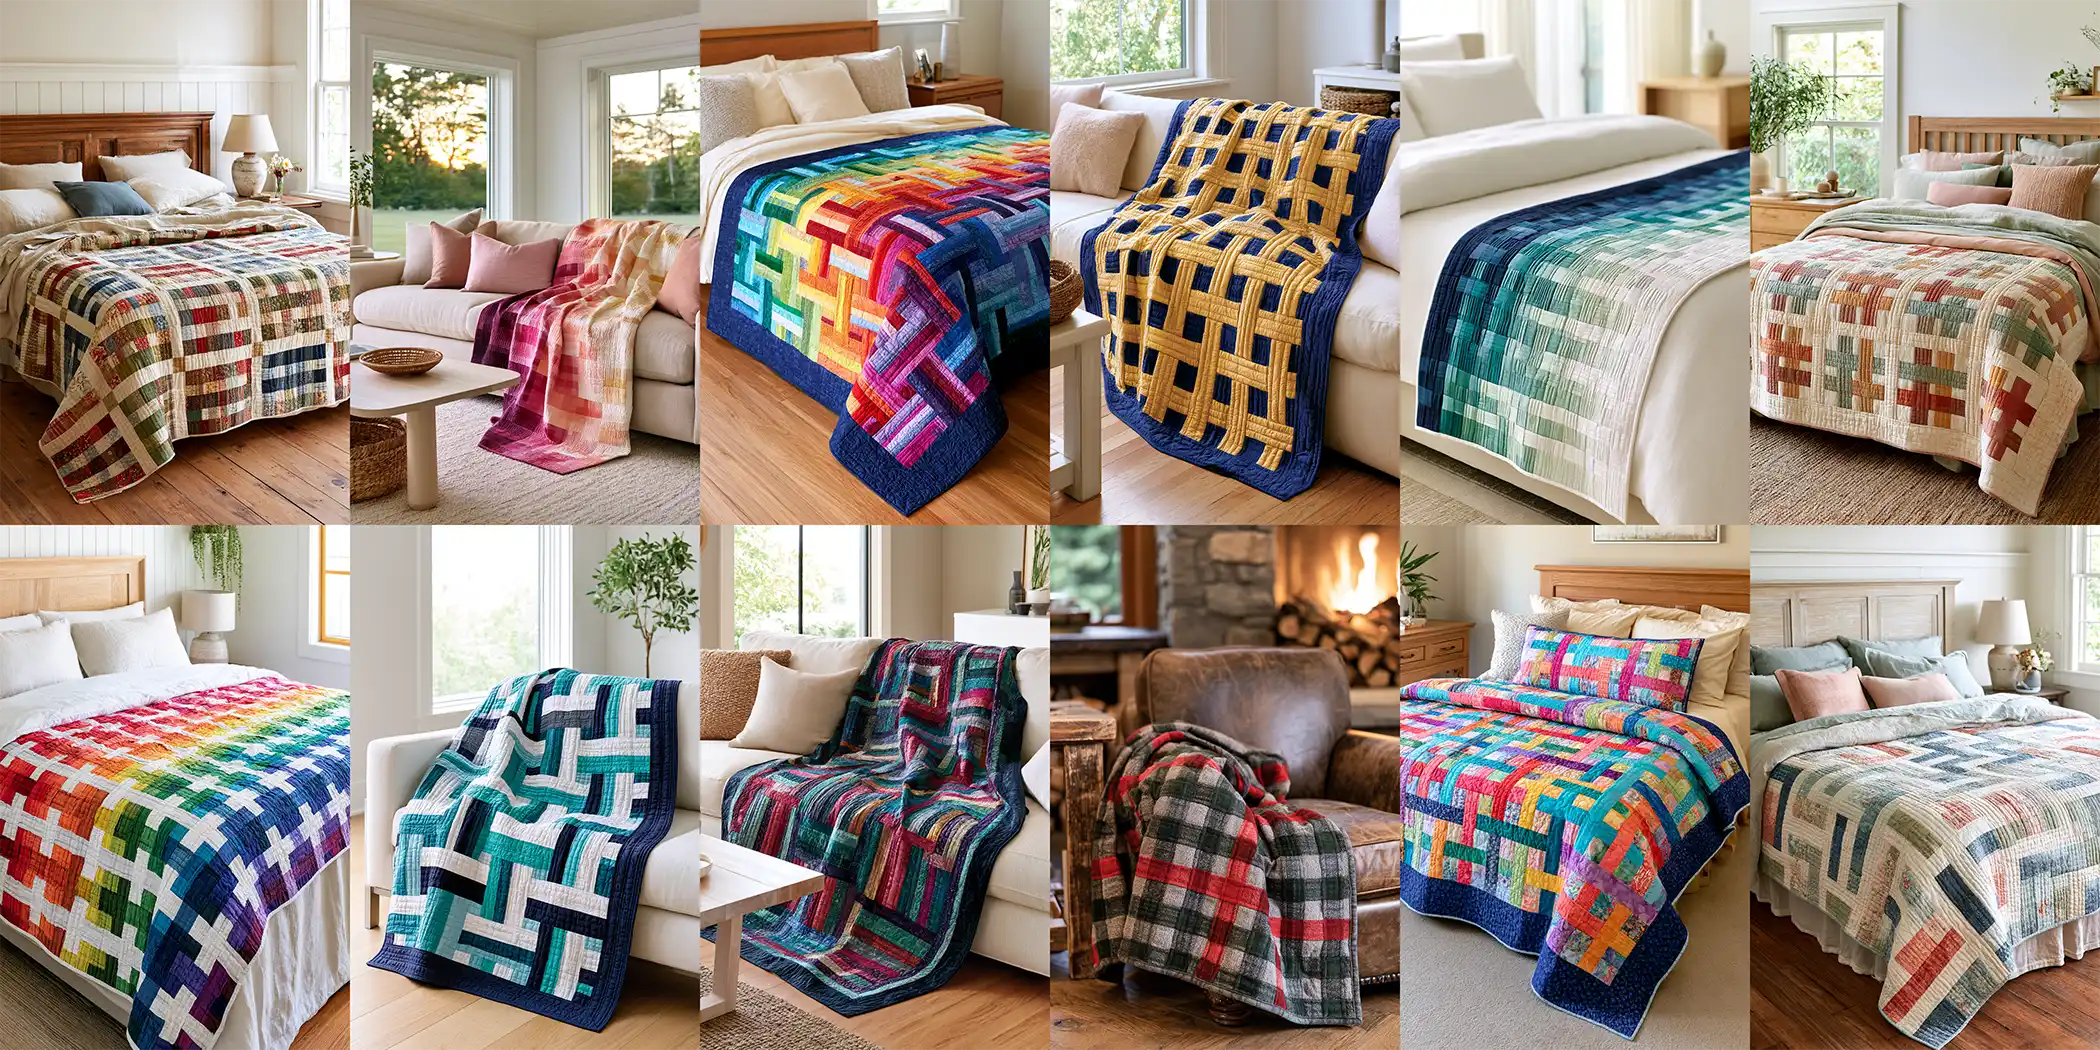
Rail Fence Quilt Pattern Ideas: 15 Easy Designs for Beginner Quilters
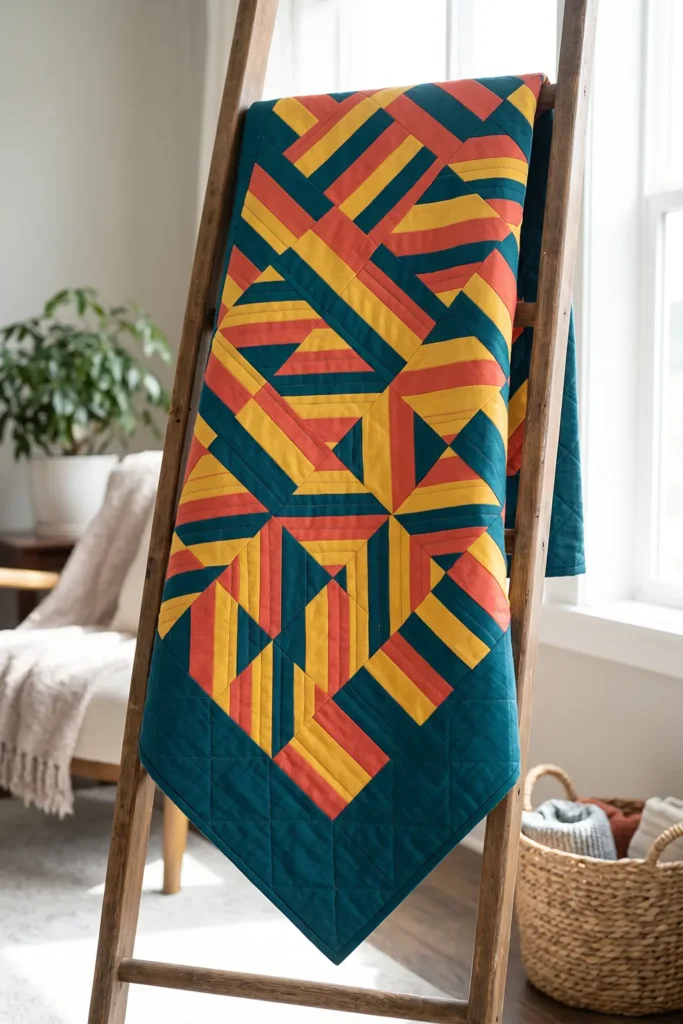
If you’re looking for your first quilt, the Rail Fence Quilt Pattern is where most quilters are told to start – and for good reason. The block couldn’t be simpler: three or four fabric strips sewn side by side into a square, and that’s the whole thing. There are no triangles, no points to match, no curves, and nothing cut on the bias.
What makes it look far more complicated than it is happens at the layout stage, when you rotate the blocks. Turn one square so its strips run horizontally, and the next so they run vertically, and the strips appear to interlock and weave over and under one another, like the stacked rails of an old zigzag fence – which is exactly where the name comes from.
Rail Fence Quilt Pattern Ideas
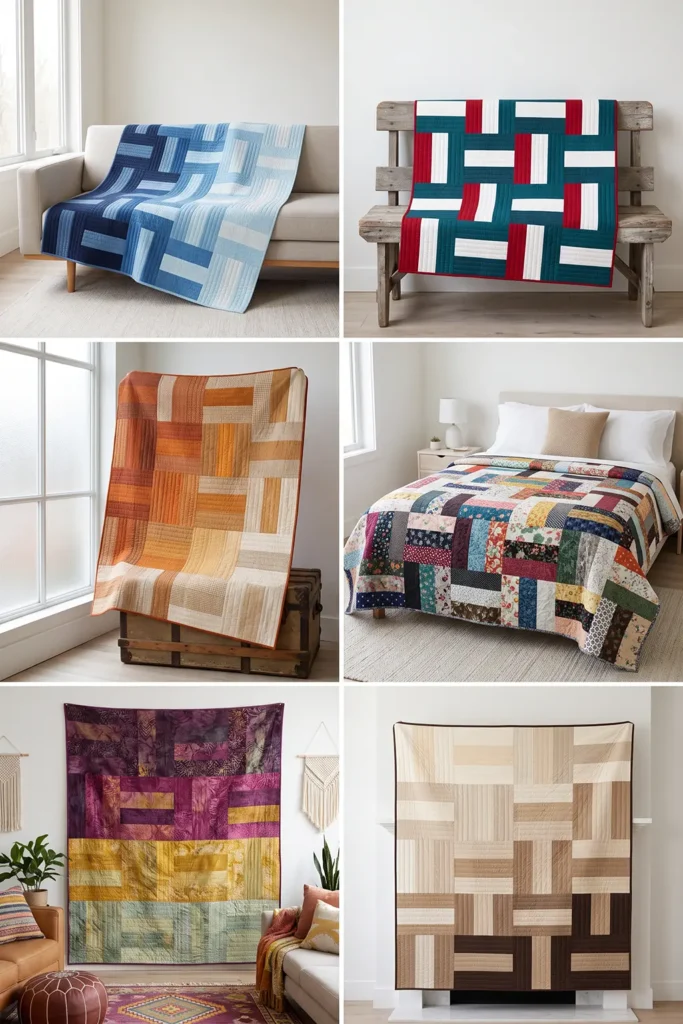
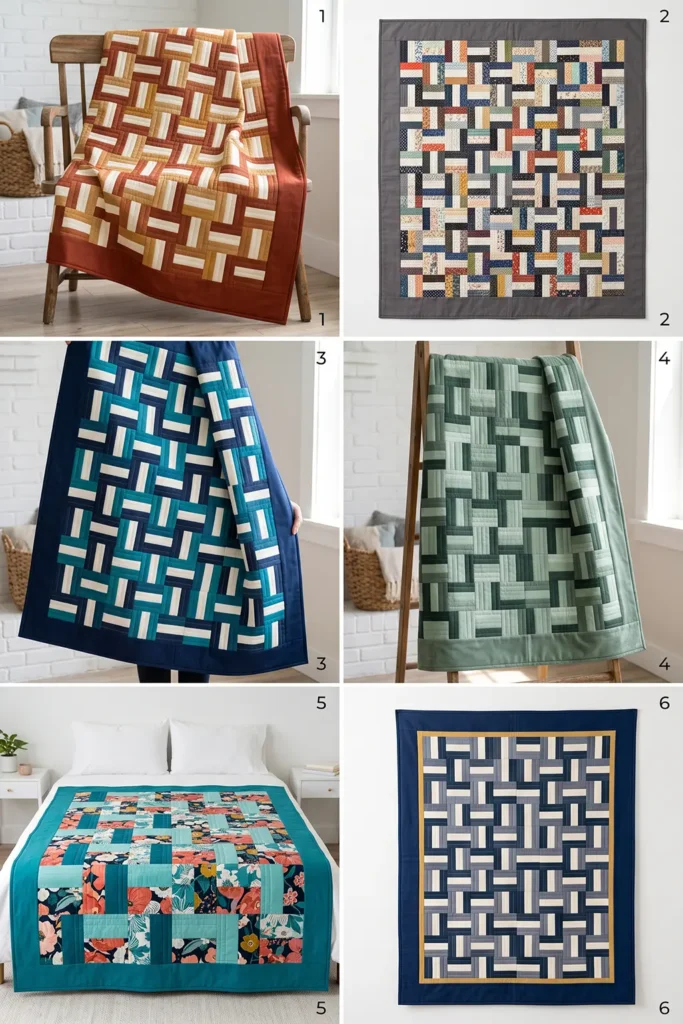
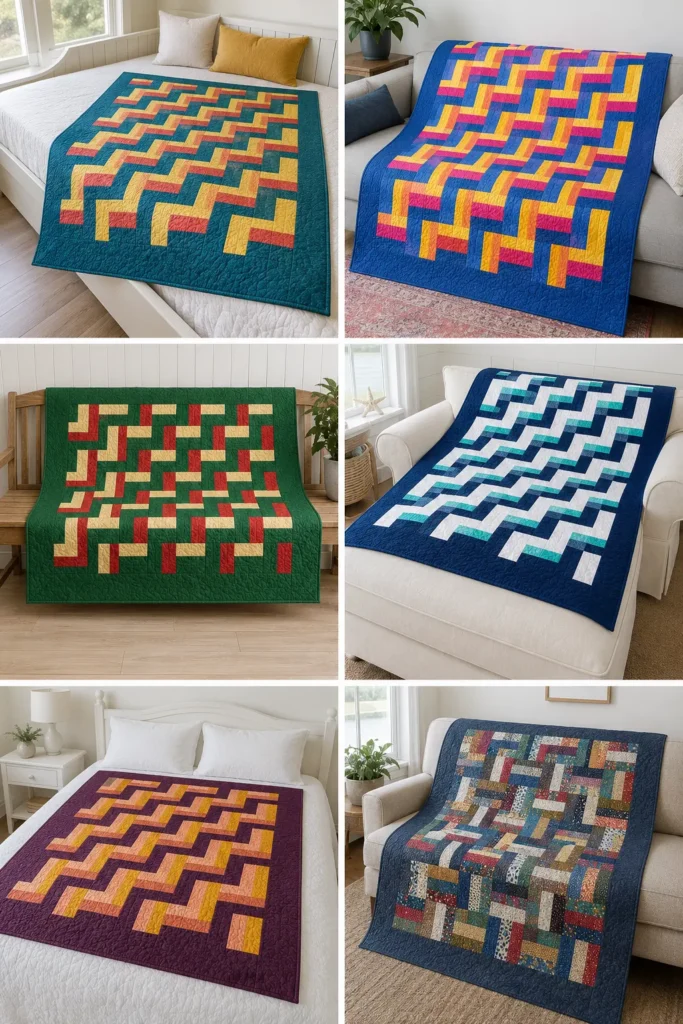
This collection of Rail Fence Quilt Pattern Ideas gathers fifteen ways to take that one simple block somewhere different. You’ll find the classic three-strip version for an absolute first quilt and a bolder four-strip variation, then four layout arrangements that transform the same block completely – basket weave, straight furrows, zigzag, and an on-point diagonal setting. Color treatments suit every taste, from crisp two-color and flowing ombre to scrappy, rainbow, and calm farmhouse neutrals, plus fabric-led options like a fast jelly roll version and a cozy flannel one. And there are two smaller projects – a table runner and a baby quilt – for when you want something finished in a weekend. Same block, fifteen genuinely different quilts.
Why Make a Rail Fence Quilt
Rail fence quilts are worth making because they deliver an impressive result with almost no risk. Every seam is straight, every block is identical, and nothing is cut on the bias, so there’s no stretching, no distortion, and no points that can end up chopped off. That forgiveness is why it’s the block most often recommended for a first quilt – a slightly wobbly seam simply doesn’t show. What sets it apart from other beginner patterns is that the design isn’t in the piecing at all; it’s in the arrangement.
Because the woven effect comes from rotating identical blocks, one set of blocks can produce a basket weave, diagonal furrows, or a zigzag depending purely on how you lay them out – which means you can decide what the quilt looks like after all the sewing is done. It’s also exceptionally fast. Strip-piecing means you sew long seams and cut multiple blocks at once rather than assembling small pieces, so a throw comes together in a weekend.
Tips for Choosing Fabrics and Colors
The woven illusion depends entirely on value contrast – the difference between light and dark – so that’s the thing to get right. Within each block, use strips that are clearly different from one another; three or four fabrics all of a similar depth will blur into a muddy square no matter how neatly you sew. The most reliable approach is to include one clearly light strip in every block, which gives the eye something to follow as the weave travels across the quilt. Beyond that, keep the same color-and-value sequence in every block – the actual prints can vary, but if position one is always dark and position two always light, the pattern will read cleanly.
Precuts are a natural fit: a jelly roll’s 2½-inch strips need no cutting, and a 2½-inch strip set finishes at 6 inches for a three-strip block or 8 inches for a four-strip one. For fabric, quilting cotton is easiest to handle, while flannel gives a warmer, heavier quilt but shrinks noticeably more and should be prewashed consistently. Plan light quilting rather than dense quilting, so the finished quilt stays soft and drapes well.
See also: Layer Cake Quilt Pattern – Summer Quilt Pattern – Bargello Quilt Pattern – Cat Quilt Pattern
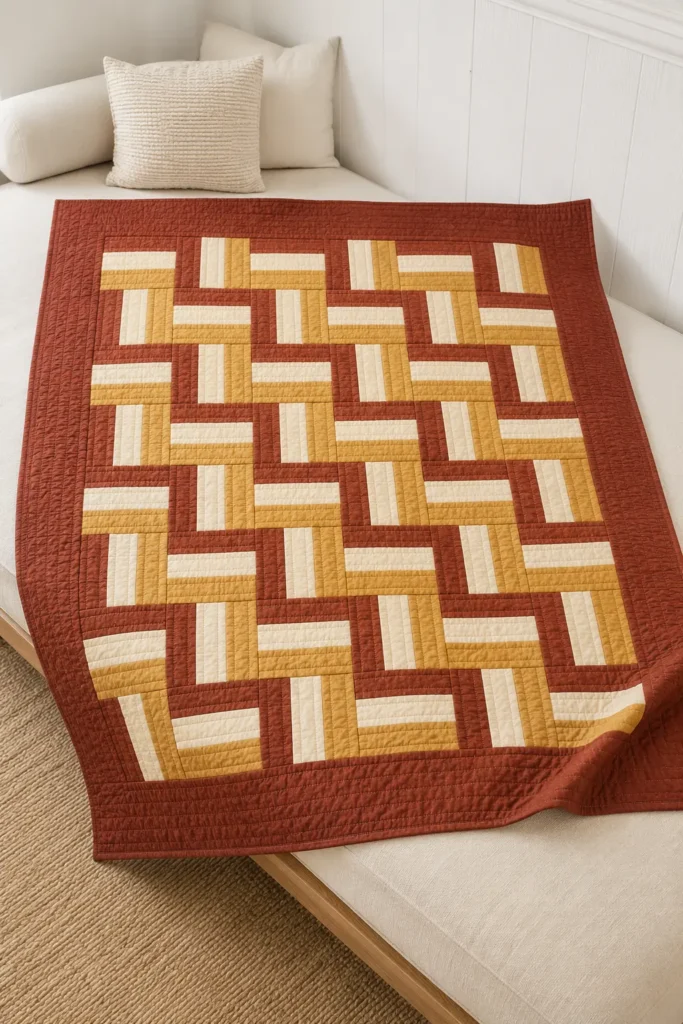
1. Classic Three-Strip Rail Fence Quilt for Absolute Beginners
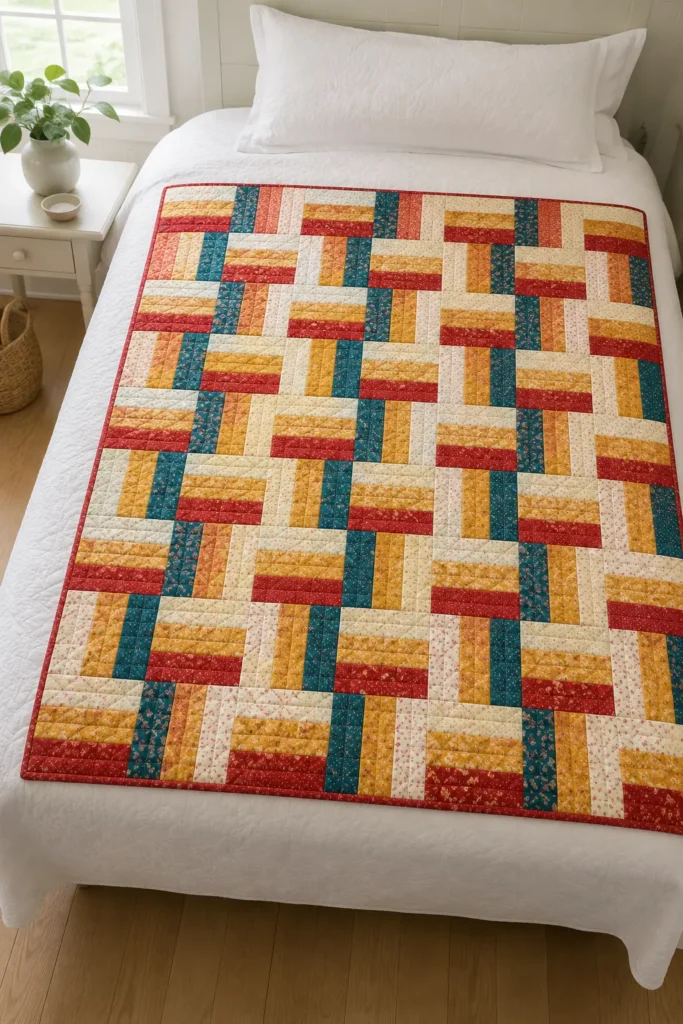
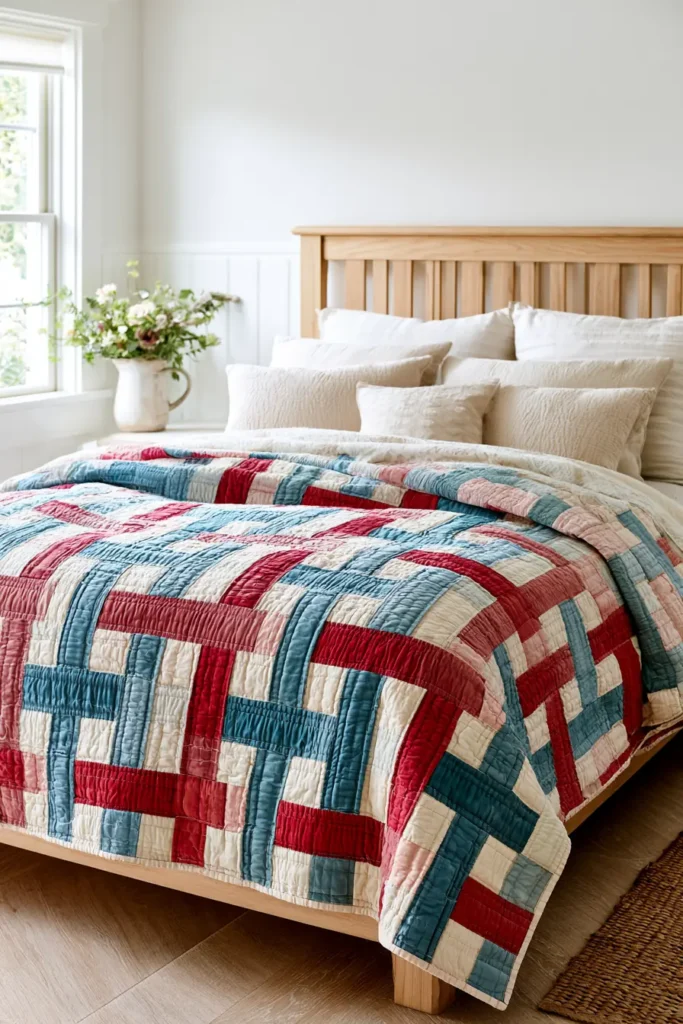
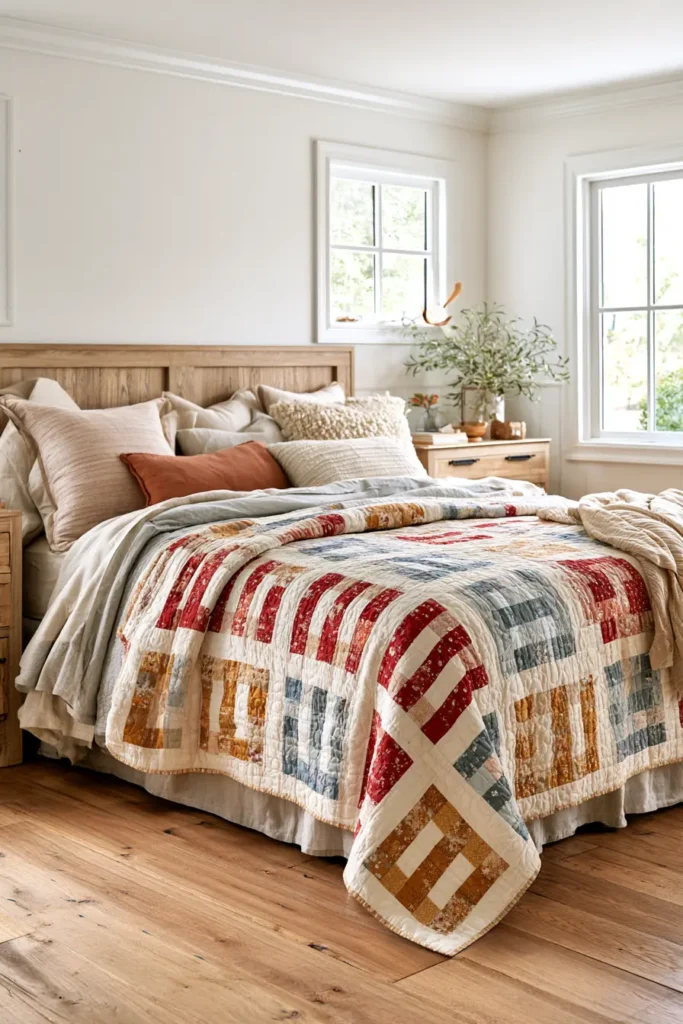
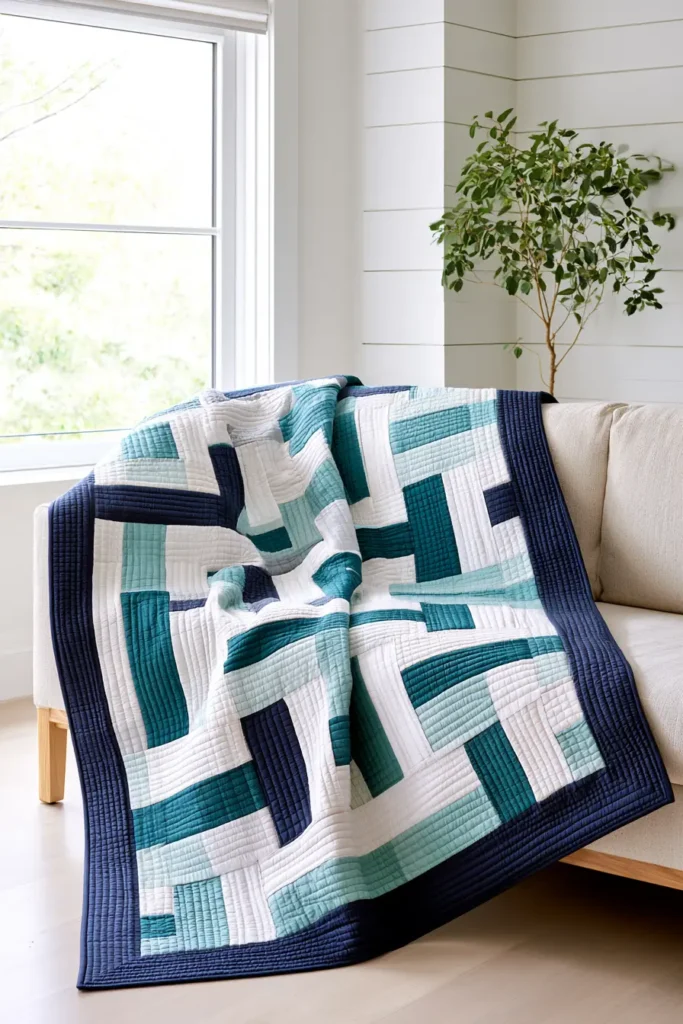
This is the quilt to make first. Three strips of fabric sewn side by side, cut into squares, and turned – that’s genuinely the whole pattern. There are no triangles, no points to match, no curves, and not a single bias edge to stretch out of shape. And yet the finished quilt has an interlocking woven texture that looks like it took far more skill than it did, because the design doesn’t come from the piecing at all. It comes from rotating identical blocks.
In vibrant colors – cherry red, teal, mustard, and cream, or any combination you love – a classic three-strip rail fence gives a beginner a proper, satisfying result on the very first attempt. That’s exactly why it’s been the block handed to new quilters for well over a century.
A Little History: The Zigzag Fence
The block is named after the split-rail fence of early rural America – and specifically the “worm fence” or “snake fence,” where split wooden rails were stacked in an interlocking zigzag rather than being nailed to posts. It was a clever solution to a practical problem: settlers had abundant timber but very little iron, so a fence that needed no nails at all and could be taken apart and moved when the field boundary changed was worth more than a neater one.
Look at a rail fence quilt, and you can see exactly that structure – rails locking together at right angles, holding without fastening. It sits alongside Log Cabin, Churn Dash, and Bear’s Paw in the family of blocks named for the everyday world of the people who first stitched them.
Design Inspirations – Digitally Modified Images. Texture and color may vary from the actual product.
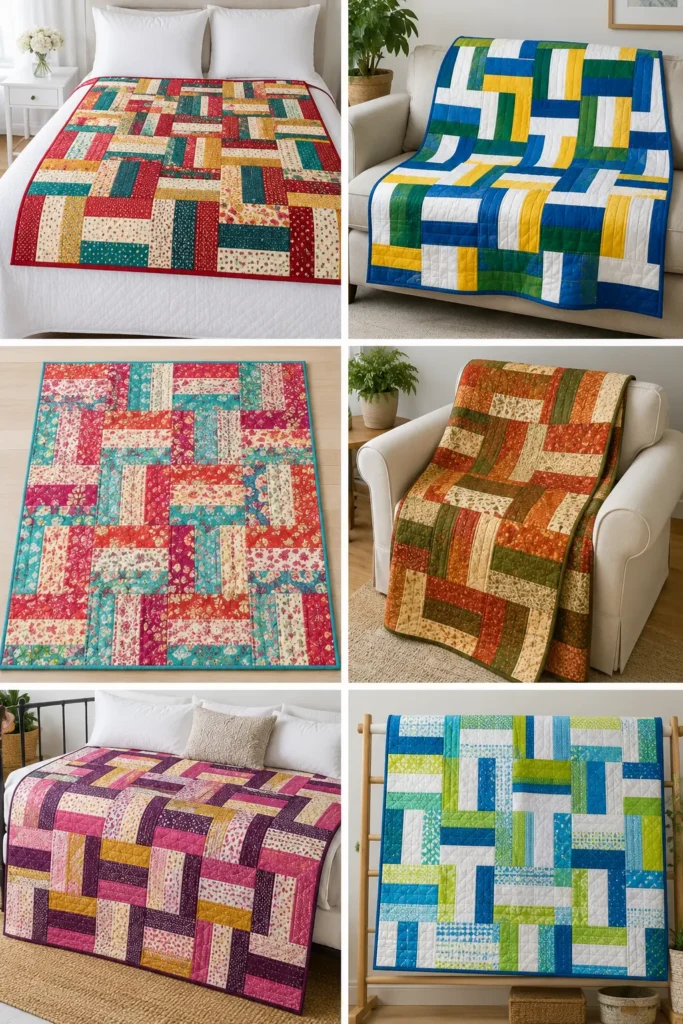
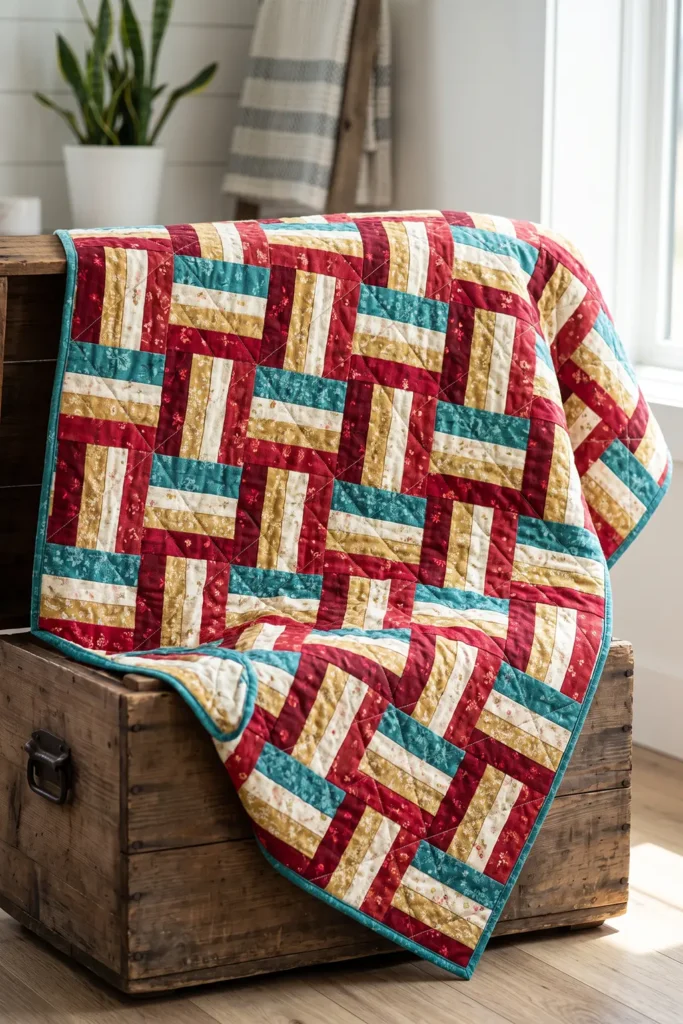
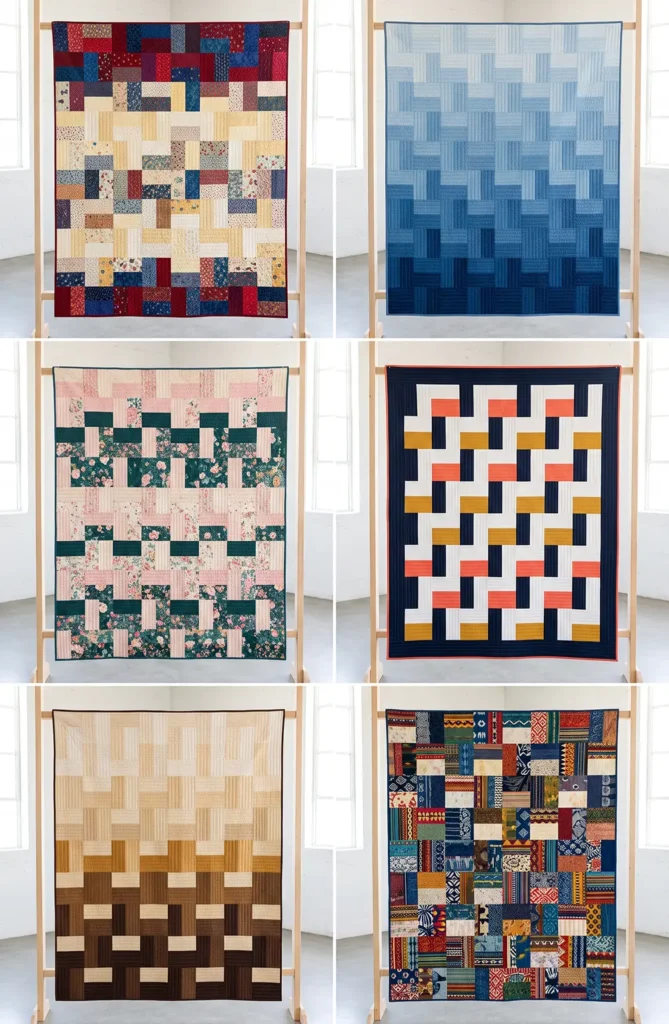
How the Block Works
The whole quilt is built from one block, repeated:
- Three strips cut 2½ inches wide, sewn together along their long edges
- Joined with ¼-inch seams, that set measures exactly 6½ inches wide
- Cut across the set at 6½-inch intervals. Each section is a 6½-inch unfinished block, which finishes at 6 inches once it’s sewn into the quilt – no trimming needed
Each block finishes at 6 inches in the quilt. Every block shares the same construction, value order, and dimensions – though the individual fabrics can vary from block to block.
Where the Weave Comes From
This is the part worth understanding before you start, because it’s the entire design.
Lay two blocks side by side. Turn one so its strips run horizontally and the other so they run vertically. Where they meet, the strips appear to pass over and under one another. Repeat that alternation across a whole quilt – like a checkerboard, but of directions rather than colors – and the blocks lock into a woven basket-weave texture.
Nothing else creates it. Same block construction, same value order, same seams – just rotation. The individual fabrics can vary from block to block without affecting it.
The One Rule That Makes It Work
The weave only reads if the strips within each block are clearly different from one another in value – that is, in lightness and darkness, not just color.
Three medium-toned fabrics will blur into a muddy square no matter how neatly you sew. The reliable fix: include one clearly light strip in every block. That light rail is what the eye follows as the weave travels across the quilt.
And keep the same sequence in every strip set. The prints can vary – an assorted bundle won’t contain eleven identical strips of anything – but if position one is always dark, position two always light, and position three always medium, the pattern will read cleanly across all 63 blocks.
Finished Size
- Block: 6 inches finished (6½ inches unfinished)
- Layout: 7 blocks across × 9 blocks down = 63 blocks
- Quilt top: 42½ × 54½ inches unfinished
- Finished quilt: about 42 × 54 inches after binding and before washing – a generous lap quilt or throw. Expect slight shrinkage in the first wash
- Skill level: true beginner
- Core techniques: strip sets, straight cutting, block rotation, binding
Materials Needed
- 1 jelly roll (about 40 strips, 2½ inches × width of fabric) – you’ll use 33 strips for the blocks and 6 for the binding, so a 40-strip bundle covers the whole quilt with one to spare. Count your strips before starting, though – bundle sizes vary between manufacturers. Alternatively, cut 39 strips at 2½ inches from about 2¾ yards of assorted fabric
- Backing: 3½ yards of standard-width fabric left unwashed (3¾ yards if you plan to prewash it), cut into two equal lengths and seamed along their long edges. Two 63-inch lengths joined this way give a panel about 63 × 81 inches, comfortably more than the 48 × 60 inches needed; or 1¾ yards of 108-inch wide backing
- Batting: at least 48 × 60 inches. That gives about 2¾ inches of spare backing and batting beyond every edge of the top, which is fine for careful quilting on a domestic machine. If you’re sending the quilt to a longarm quilter, ask what allowance they need first – many want at least 4 inches per side
- Binding: 6 strips at 2½ inches
- Thread: neutral cotton
- Rotary cutter, cutting mat, quilting ruler, pins or clips, iron
Beginner tip: don’t prewash the jelly roll strips. Precut strips have pinked edges, and washing 2½-inch strips causes fraying and distortion that ruins their accuracy. If you’re cutting your own strips from yardage, leave that unwashed too, so everything in the quilt top shrinks together in the first wash. You can prewash the backing if you prefer.
Choosing Your Colors
Vibrant palettes suit this block especially well, because the woven structure gives busy colors somewhere to sit:
- Bright and cheerful: cherry red, teal, and cream
- Warm: rust, mustard, and oatmeal
- Bold modern: navy, coral, and white
- Fresh: grass green, sky blue, and pale yellow
- Scrappy but ordered: many different fabrics, but always dark-light-medium in that order
Whatever you choose, remember the rule above: one clearly light strip per block, and the same value order every time. Those two habits do more for the finished quilt than any amount of careful sewing.
Cutting Measurements
- Strip sets: 11 sets, each made from 3 strips sewn along their long edges. Each set measures 6½ inches wide × about 40 inches long once selvages are removed
- Blocks: cut 6½-inch squares across each set – 6 per set, giving 66 blocks. You need 63, leaving three spares
- Backing panel: at least 48 × 60 inches
- Batting: 48 × 60 inches
- Binding: six strips, 2½ inches × width of fabric
Step-by-Step Guide
Step 1 – Prepare your strips. Leave the jelly roll strips unwashed. Set aside 6 strips for binding, then take 33 strips for the blocks and remove any selvage from their ends. If you decided to prewash your backing, wash and dry it now, before you measure and cut it.
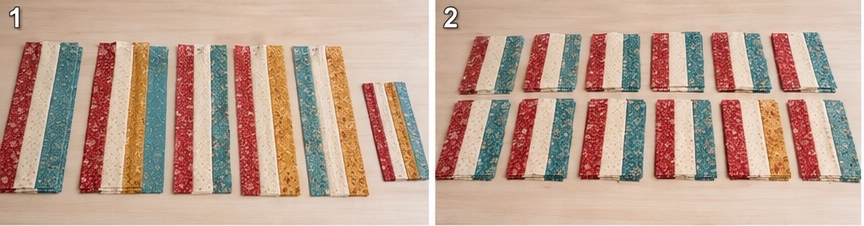
Step 2 – Decide your value sequence. Choose the three-position order you’ll repeat in every set – for example, dark, light, medium. Write it down. Repeating this sequence keeps the rails visually consistent from block to block; the rotation later on is what creates the woven layout.
Step 3 – Sort the strips into eleven groups of three. Divide all 33 strips into eleven piles, each following your chosen sequence. Do this before sewing anything: it’s how you discover now that you’re two light strips short, rather than after eight sets are done.
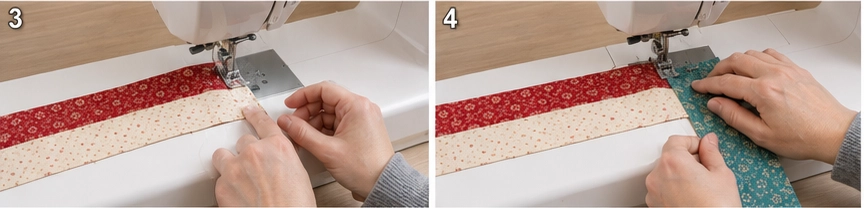
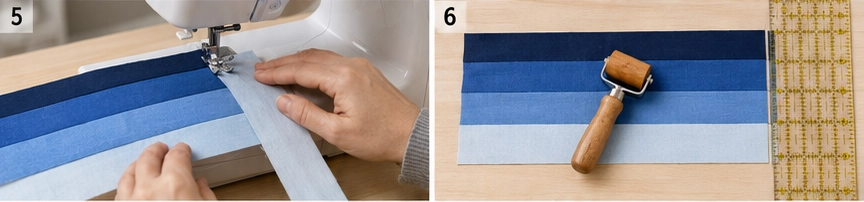
Step 4 – Sew the first strip set. Sew the first two strips together along their long edges with a ¼-inch seam. Then add the third strip – but start this second seam from the opposite end of the set. Sewing both long seams in the same direction encourages a strip set to bow into a shallow curve; starting from opposite ends balances the feeding distortion and keeps that to a minimum. Let the machine feed the fabric rather than pulling it through.
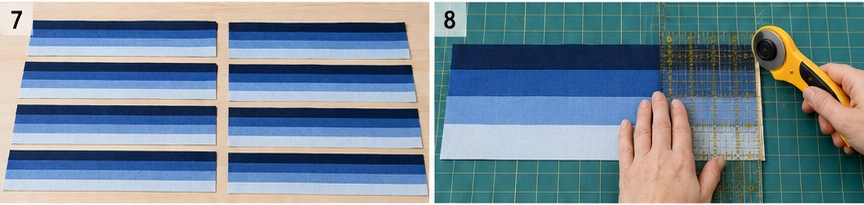
Step 5 – Press the set. Press each seam allowance away from the light center strip and toward the darker rail beside it. That keeps a dark seam allowance from sitting behind your lightest fabric, where it can shadow through. Press from the back first, then from the front, without stretching the set.
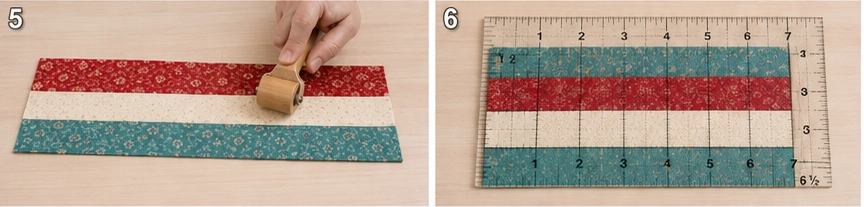
Step 6 – Check the width. Measure across the pressed set: it should be exactly 6½ inches. If it’s narrower, your seam allowance is too wide – adjust your machine now, before making ten more sets. This one measurement is the accuracy of every block in the quilt.
Step 7 – Make the remaining ten sets. Repeat steps 4 to 6 until you have eleven strip sets, all following the same sequence and all measuring 6½ inches wide.
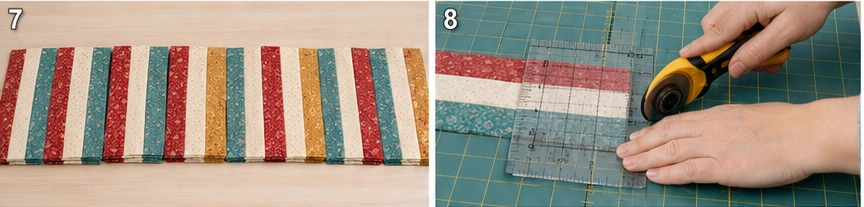
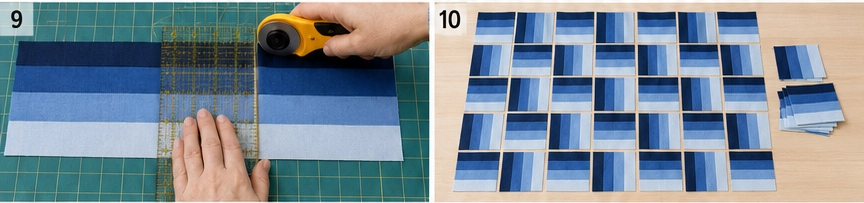
Step 8 – Square one end of a set. Lay a set on the cutting mat and trim a clean edge at one end, cutting at a true right angle to the long seams. Everything you cut from this set is only square if that first cut is.
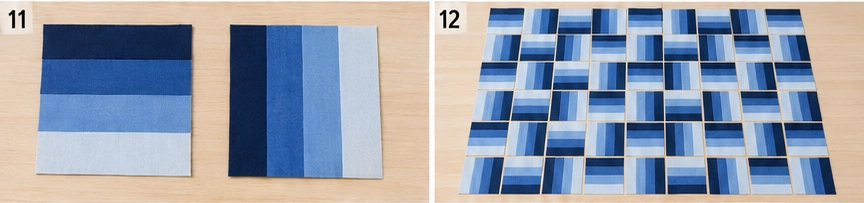
Step 9 – Cut and check the first block. Measure from the squared end and cut one 6½-inch section. Turn it on the mat and check with a ruler that it measures 6½ inches in both directions with four square corners. A bowed set or a slightly angled first cut gives you a parallelogram rather than a square, and it’s far better to find that out on block one.
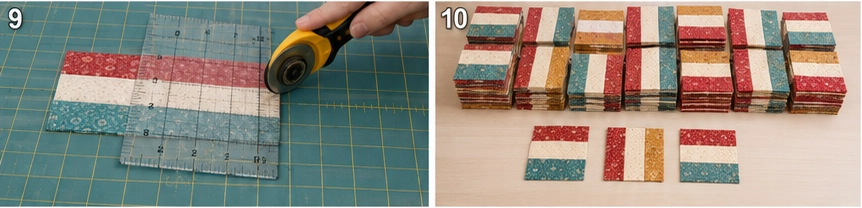
Step 10 – Cut the remaining blocks. Once the first checks out, cut up to five more from that set, then work through all eleven sets. Most sets give six blocks, for 66 in total; a short or heavily squared set may give only five. Since you need 63, as many as three sets can come up one block short and you’ll still have enough.
Step 11 – Try the rotation. Take two blocks. Turn one so its strips run horizontally and the other so they run vertically, and set them side by side. That’s the weave – and that’s the entire design decision you’ll be repeating 63 times.
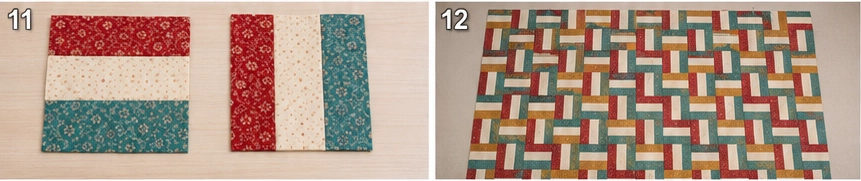
Step 12 – Lay out the quilt. Arrange the blocks 7 across × 9 down, alternating direction like a checkerboard: horizontal, vertical, horizontal, vertical along each row, and starting each new row with the opposite direction to the row above.
There’s a second thing to check that’s easy to miss: a block can be facing the right way and still be upside down. Turned 180 degrees, its strips still run horizontally, but the dark and medium rails have swapped places. Use the same rotation throughout – if the dark rail sits at the top of every horizontal block, it should sit on the same side of every horizontal block. Set out the first four blocks carefully and use them as your reference for the rest.
Step 13 – Photograph and label the rows. Take a photo, then place a numbered label beside each row. Gather each row from left to right and pin its label to the first block, keeping every stack facing upward. Blocks are extremely easy to rotate by accident on the way to the machine.
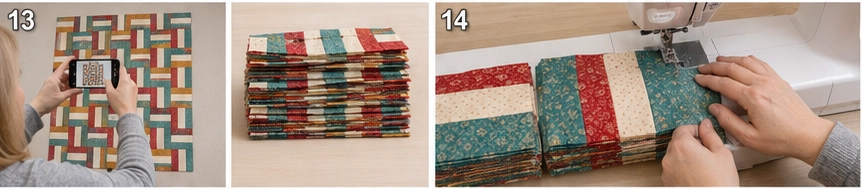
Step 14 – Sew the first row. Sew the seven blocks of row one together with a ¼-inch seam, checking each block’s direction against your photo as you go. The finished row should measure 42½ × 6½ inches.
Step 15 – Press the first row. Press its seams to the right.
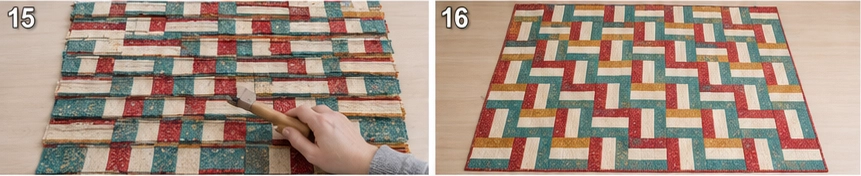
Step 16 – Sew and press the remaining rows. Sew each of the other eight rows the same way, checking directions as you go. Press odd-numbered rows to the right and even-numbered rows to the left, so the seams will nest when you join the rows.
Step 17 – Join the rows. Sew the nine rows together in order, pinning at each seam junction where the opposing press directions lock together. Press the top well. It should measure 42½ × 54½ inches.
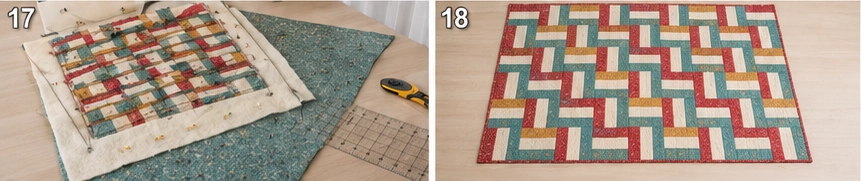
Step 18 – Prepare the backing. If your backing is unwashed, cut the 3½ yards into two equal lengths of about 63 inches. If you bought 3¾ yards and prewashed it, measure what you actually have after washing and divide that into two equal lengths. Either way, trim the selvages and sew the two pieces together along their long edges. Press the seam open, then trim the panel to at least 48 × 60 inches.
Step 19 – Make the quilt sandwich. Lay the backing wrong side up, center the batting on it, then the quilt top right side up. Smooth everything from the center outward and baste with pins or basting spray.
Step 20 – Quilt it. Simple quilting suits this design perfectly – an all-over diagonal grid, straight lines running the length of the quilt, or stitching in the ditch along the block seams. A walking foot keeps the layers feeding evenly.
Before you decide on spacing, check your batting packaging for its maximum quilting distance – most battings specify how far apart the lines can be before the fibers start to shift and bunch in the wash, and it varies a lot between cotton, wool, and polyester. Quilt at least as closely as it asks, but no denser than you need to, so the quilt stays soft.
Step 21 – Trim and square up. Trim the excess batting and backing level with the edge of the quilt top, squaring the corners. Preserve as much of the top as you can – quilting always draws the layers up a little, so it may finish just under 42½ × 54½ inches, which is normal. Trim only the excess batting and backing – don’t reduce the dimensions of the quilt top unless a small amount of squaring is genuinely needed. That outer ¼ inch is the binding’s seam allowance.
Step 22 – Bind and finish. Join the six 2½-inch binding strips into one long strip, press in half lengthwise, and sew to the front of the quilt with a ¼-inch seam. Fold to the back and stitch down. Before washing, the finished quilt measures about 42 × 54 inches; expect it to come out slightly smaller and softly crinkled after its first wash. Wash gently on cold with a color catcher and tumble dry low.
Assembly at a Glance
- Leave the jelly roll strips unwashed; set aside 6 binding strips, take 33 for blocks.
- Fix a three-position value sequence (e.g. dark, light, medium).
- Sort the 33 strips into eleven groups of three.
- Sew strips 1 and 2, then add strip 3 starting from the opposite end (helps prevent bowing).
- Press both seam allowances away from the light center rail.
- Check the set measures 6½ inches wide.
- Make eleven sets the same way.
- Square one end of a set.
- Cut one block and check it’s 6½ inches square with true corners.
- Cut up to 5 more per set → about 66 blocks (63 needed).
- Turn two blocks to see the horizontal/vertical weave.
- Lay out 7 × 9, alternating direction – and check no block is turned 180 degrees.
- Photograph and label the nine rows.
- Sew row 1 → 42½ × 6½ in.
- Press row 1 seams right.
- Sew all nine rows; press odd rows right, even rows left.
- Join the rows, nesting seams → 42½ × 54½ top.
- Seam the backing along its long edges; trim to 48 × 60.
- Layer and baste.
- Quilt simply and lightly.
- Trim batting and backing level with the top.
- Bind with six strips → about 42 × 54 inches.
Beginner Tips for Success
- Check your first strip set at 6½ inches before making ten more – it’s the whole quilt’s accuracy in one measurement.
- Include one clearly light strip in every block; that’s what makes the weave visible.
- Keep the same value order in all eleven sets. The prints can vary, the order can’t.
- Square one end of each set before cutting blocks.
- Cut and check the first block in both directions before cutting the remaining blocks.
- Photograph and label the rows before carrying blocks to the machine.
- Press odd rows right and even rows left so the seams nest at every junction.
- Watch for blocks turned 180 degrees – the direction can look right while the rails have reversed.
- Check your batting’s maximum quilting distance before choosing how far apart to stitch.
- Don’t prewash the strips; keep the whole quilt top in the same condition.
Scaling It to Other Sizes
Because every block finishes at 6 inches, resizing is simple arithmetic – add or remove blocks:
- Baby quilt: 6 across × 7 down = 36 × 42 inches (42 blocks, 7 strip sets)
- Lap quilt (as written): 7 × 9 = 42 × 54 inches (63 blocks, 11 sets)
- Twin: 10 × 14 = 60 × 84 inches (140 blocks, 24 sets)
- Queen: 14 × 16 = 84 × 96 inches (224 blocks, 38 sets)
Each strip set normally gives six blocks. Divide the number of blocks you need by six and round up to the next whole number for the number of strip sets, then multiply that by three for the strips needed in the quilt top. Work out binding separately.
Styling It & Gift Ideas
A rail fence quilt has a warm, woven, slightly homespun look that suits almost any room – folded over the back of a sofa, spread on a chair, or laid across the end of a bed. The texture reads as classic rather than trend-driven, so it sits happily alongside whatever else is in the room.
Because it’s quick and genuinely forgiving, it’s an excellent gift:
- A first quilt to make with someone learning to sew, since success is close to guaranteed
- A baby quilt, scaled down to 6 × 7 blocks
- Several gifts at once – strip-piecing makes it easy to batch quilts for teachers, neighbors, or cousins
- A graduation or new-home gift in the recipient’s favorite colors
If you’re teaching someone to quilt, this is the pattern to teach them on. Nothing in it punishes a slightly wobbly seam, and the finished result looks genuinely impressive.
Final Thoughts
A classic three-strip rail fence is the friendliest quilt there is. Three strips make a block, sixty-three blocks make a quilt, and the woven basket-weave pattern appears from nothing more than turning every other block a quarter turn. Keep one light strip in every set, check that first set at 6½ inches, and photograph your layout before you sew – do those three things and you’ll finish with a warm, handsome quilt and no bias, no points, and no stress along the way.
Other Design Inspirations – Digitally Modified Images. Texture and color may vary from the actual product.
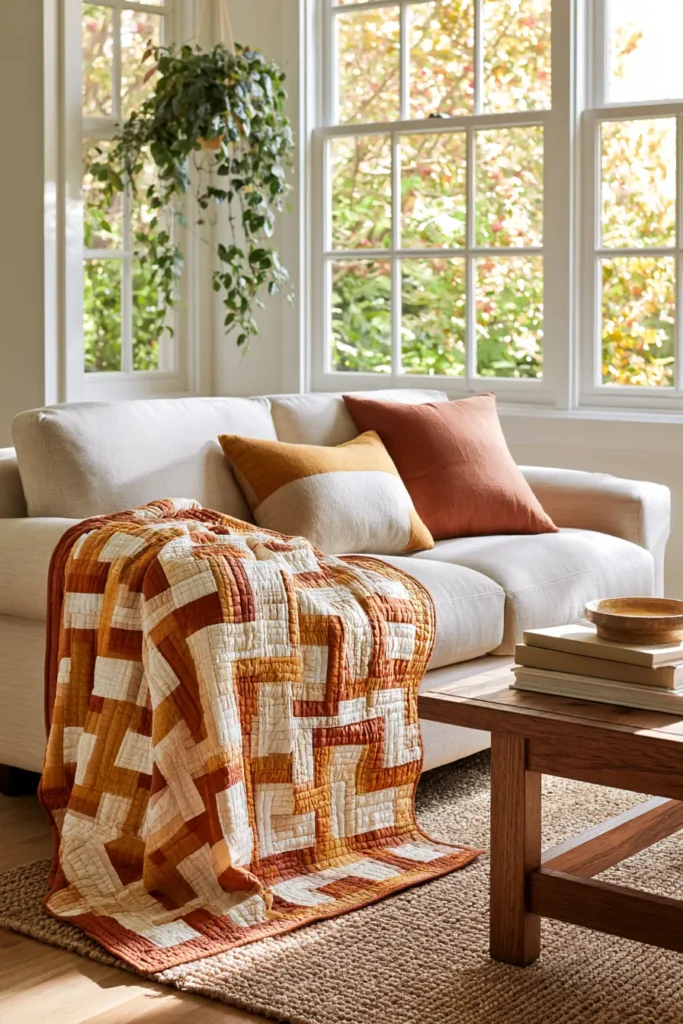
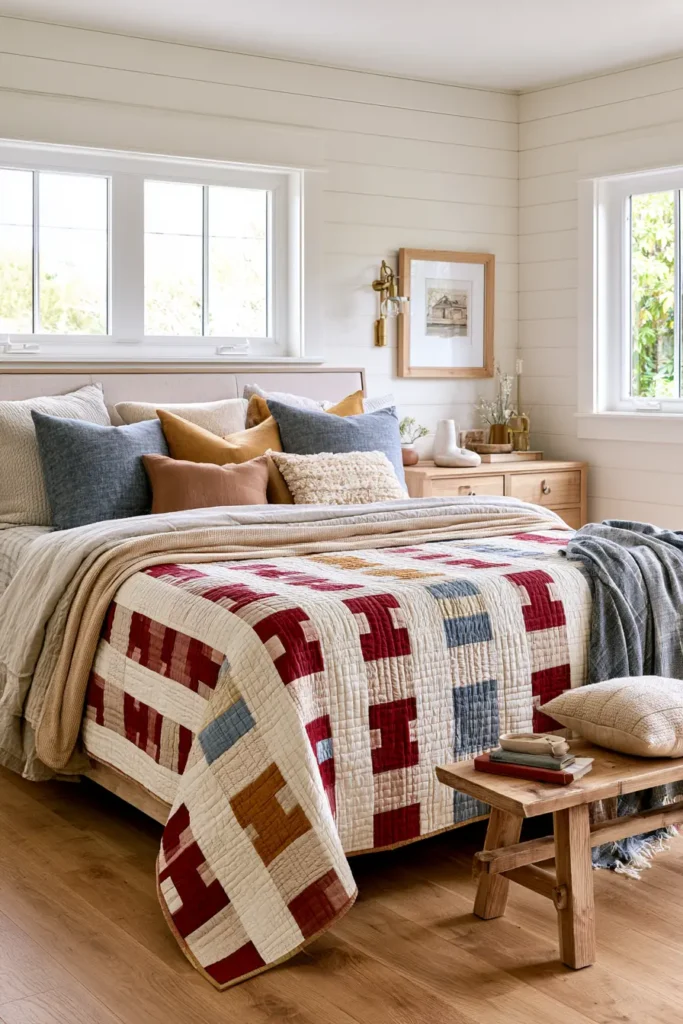
2. Four-Strip Rail Fence Quilt for a Bolder Woven Look
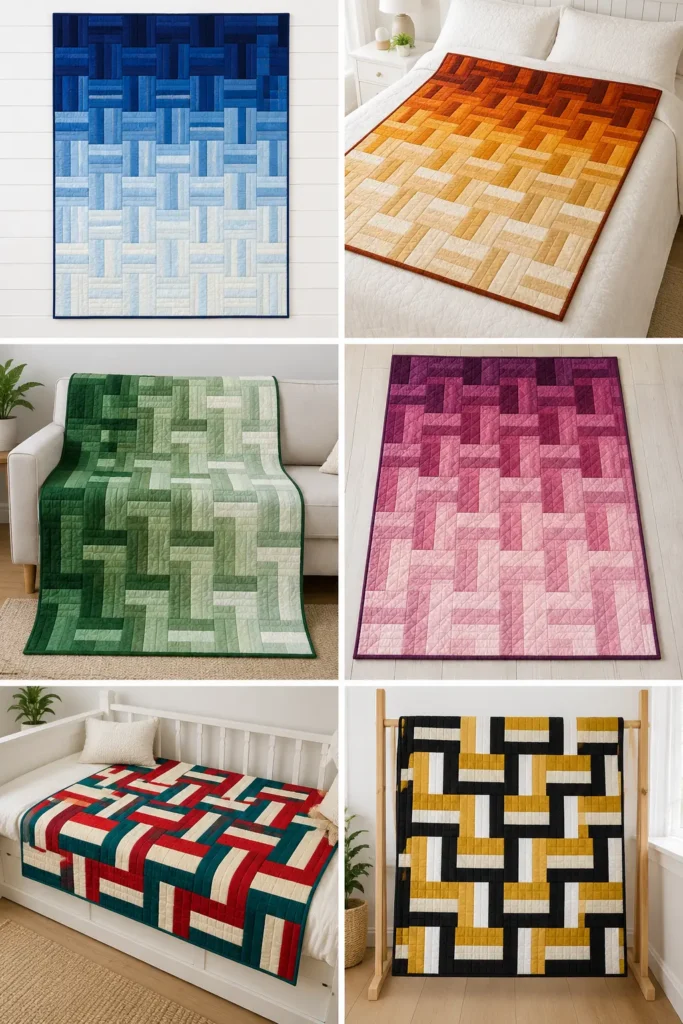
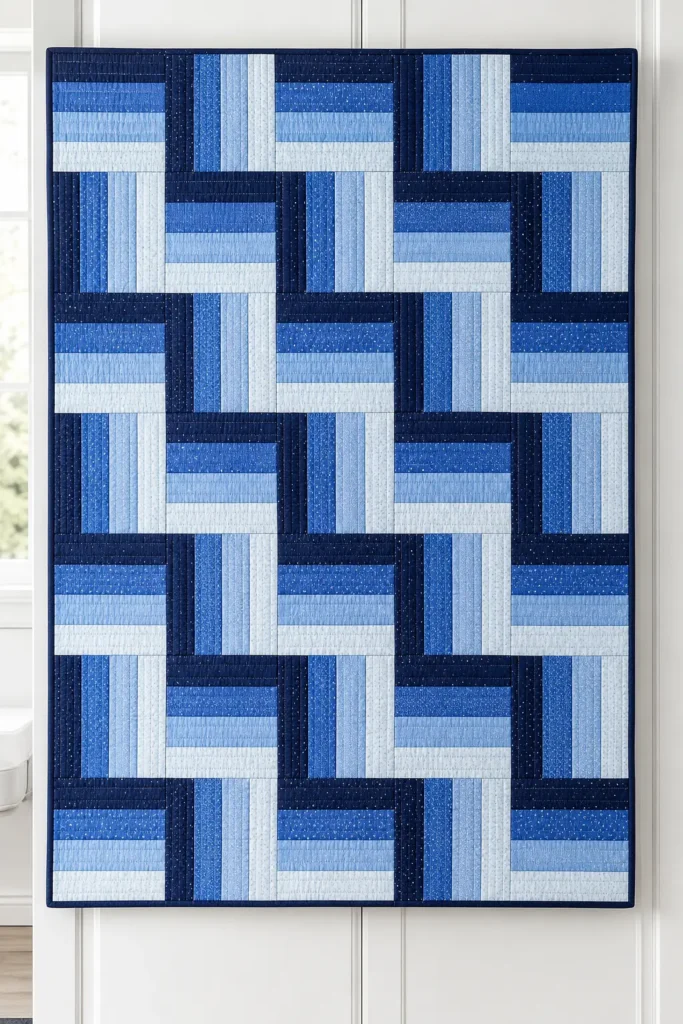
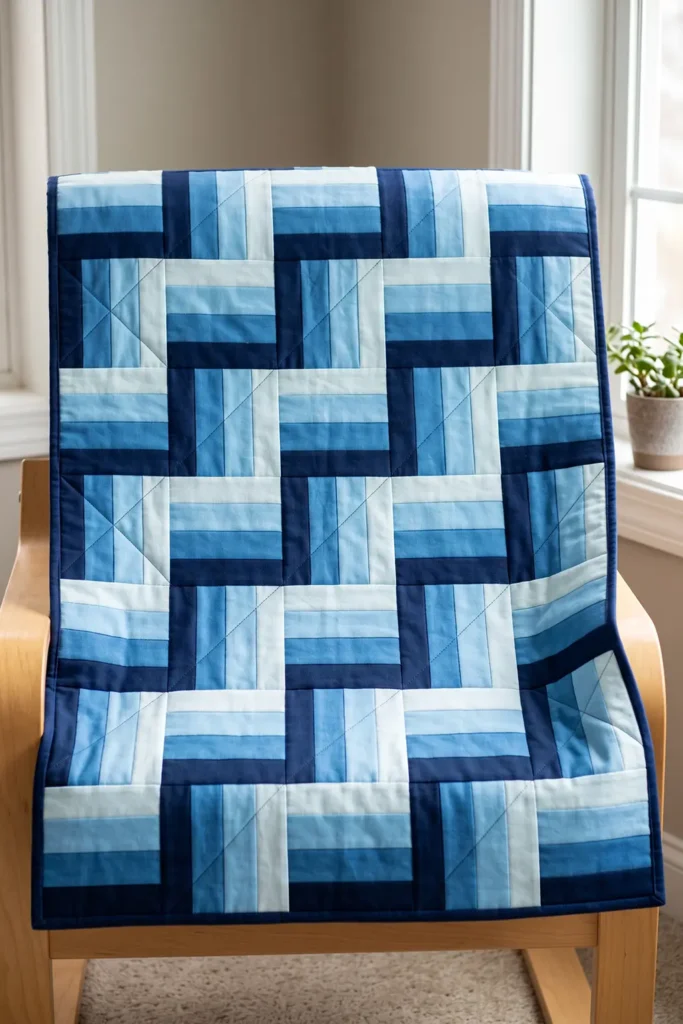
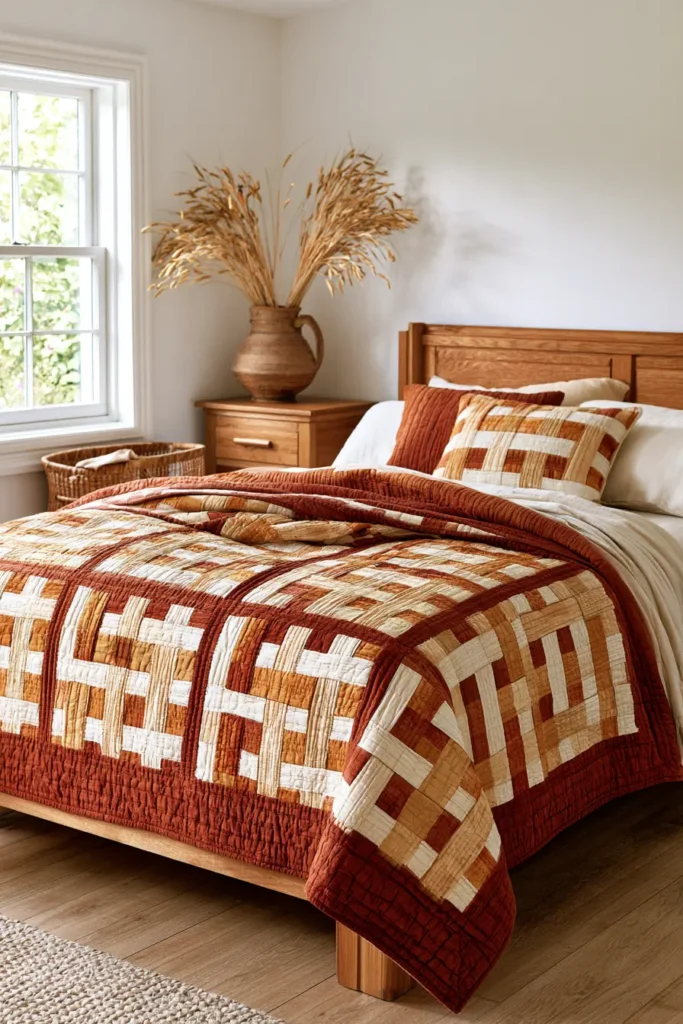
Adding one more strip to the rail fence block changes it more than you’d expect. Four strips instead of three gives you an 8-inch finished block rather than a 6-inch one, so the woven bars are wider, the pattern reads from further away, and the whole quilt has a bolder, more graphic presence. It also comes together faster – bigger blocks cover more ground, so a throw needs 35 blocks instead of 63.
There’s a second, subtler advantage, and it’s the reason many quilters prefer four rails once they’ve made a few. An even number of strips means the block has no single center rail – and it gives you an extra value step, which allows a smoother shading effect than three rails can produce.
What Four Rails Let You Do
With three strips, there’s a definite center rail. You can arrange the values symmetrically – dark, light, dark – so the eye reads a bar with a highlight down the middle, or run a simple three-step gradient of dark, medium, light.
With four, there’s no middle rail at all, and you gain an extra value step. A four-step gradient – dark, medium-dark, medium-light, light – shades more smoothly than a three-step one, so each woven bar appears to grade from one edge to the other, as though it has depth and is catching the light along one side. Alternate those blocks in the usual rotation and the whole quilt takes on a subtle three-dimensional quality, like real timber rails with a shadow along one edge.
You don’t have to use a gradient. Four rails also work beautifully as dark, light, dark, light, which gives a crisper, more graphic checkerboard weave. A three-strip block can be graded too, but the extra step here makes the shading noticeably smoother, and it’s worth trying at least once.
Design Inspirations – Digitally Modified Images. Texture and color may vary from the actual product.
Why Rail Counts Vary
Rail fence blocks are made with three, four, five, and sometimes more rails, and in scrap quilting the count is often influenced simply by the strips to hand. The effect of the choice is real, though: when the strip width stays the same, more rails mean a wider block and a bolder, chunkier weave, while fewer rails give a finer, busier one. It’s the simplest way to change the scale of a quilt without changing anything about how it’s sewn – which is a genuinely useful thing to know when you’re sizing a design to a bed rather than a sofa.
How the Block Works
- Four strips cut 2½ inches wide, sewn together along their long edges
- Joined with ¼-inch seams, the set measures exactly 8½ inches wide
- Cut across the set at 8½-inch intervals. Each section is an 8½-inch unfinished block, which finishes at 8 inches in the quilt
Every block shares the same construction, value order, and dimensions, though the individual fabrics can vary from block to block.
Where the Weave Comes From
Exactly as in the three-strip version: lay two blocks side by side, turn one so its strips run horizontally and the other so they run vertically, and the bars appear to pass over and under one another. Repeat that alternation across the whole quilt and the blocks lock into a basket weave.
Same block construction, same value order, same seams – just rotation.
Finished Size
- Block: 8 inches finished (8½ inches unfinished)
- Layout: 5 blocks across × 7 blocks down = 35 blocks
- Quilt top: 40½ × 56½ inches unfinished
- Finished quilt: about 40 × 56 inches after binding and before washing – a good lap quilt or sofa throw. Expect slight shrinkage in the first wash
- Skill level: true beginner
- Core techniques: strip sets, straight cutting, block rotation, binding
Materials Needed
- 1 jelly roll containing at least 40 strips (2½ inches × width of fabric). The quilt mathematically needs 36 strips in nine sets, but this version uses all 40 to make ten sets – that gives up to 40 blocks, 35 for the quilt and five spares, and covers you if a set or two comes up short. Count your strips before starting, as bundle sizes vary. If you’re planning a four-step gradient, check the bundle actually holds roughly ten strips in each of your four value ranges – mixed bundles often skew light or dark, and you may need to supplement one group with coordinating yardage. Alternatively, cut 40 strips at 2½ inches from at least 2⅞ yards of fabric (3 yards is a safer buy); if you only want nine sets, allow 2⅝ yards so there’s fabric to straighten the cut edge
- Binding: ½ yard of a coordinating solid, cut into 6 strips at 2½ inches (six strips need 15 inches; half a yard gives 18, so there’s a little to spare). Cutting binding from yardage rather than the bundle means it’s one consistent fabric, which frames a bold weave better
- Backing: 3½ yards of standard-width fabric left unwashed (3¾ yards if you plan to prewash it), cut into two equal lengths and seamed along their long edges. Two 63-inch lengths joined this way give a panel about 63 × 81 inches, comfortably more than the 46 × 62 inches needed; or 1¾ yards of 108-inch wide backing if left unwashed, 2 yards if you plan to prewash it
- Batting: at least 46 × 62 inches. That gives about 2¾ inches of spare backing and batting beyond every edge, which is fine for careful quilting on a domestic machine. If you’re using a longarm quilter, ask what allowance they need – many want at least 4 inches per side
- Thread: neutral cotton
- Rotary cutter, cutting mat, quilting ruler, pins or clips, iron
Beginner tip: don’t prewash the jelly roll strips. Precut strips have pinked edges, and washing 2½-inch strips causes fraying and distortion that ruins their accuracy. If you’re cutting your own strips from yardage, leave that unwashed too, so everything in the quilt top shrinks together in the first wash. You can prewash the backing if you prefer.
Choosing Your Colors
Four positions give you more to work with than three, so decide which effect you’re after:
For a shaded, dimensional weave – run a gradient in the same color family:
- Navy, medium blue, sky blue, pale ice
- Deep rust, pumpkin, amber, cream
- Forest, grass green, sage, pale mint
- Plum, magenta, dusty pink, blush
For a bold graphic weave – alternate strong and light:
- Cherry red, cream, teal, cream
- Black, white, mustard, white
- Navy, coral, navy, coral
Either way, keep the same value order in every strip set. The prints can vary – an assorted bundle won’t hold ten identical strips of anything – but if position one is always your darkest and position four always your lightest, the pattern will read cleanly across all 35 blocks.
Cutting Measurements
- Strip sets: 10 sets, each made from 4 strips sewn along their long edges. Each set measures 8½ inches wide × about 40 inches long once selvages are removed
- Blocks: cut 8½-inch squares across each set – 4 per set, giving 40 blocks. You need 35, leaving five spares
- Backing panel: at least 46 × 62 inches
- Batting: 46 × 62 inches
- Binding: six strips, 2½ inches × width of fabric
Step-by-Step Guide
Step 1 – Prepare your strips. Leave the jelly roll strips unwashed and remove any selvage from their ends. If you decided to prewash your backing, wash and dry it now, before measuring and cutting it.
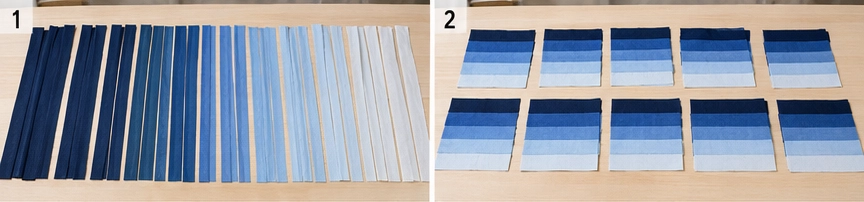
Step 2 – Decide your value sequence. Choose the four-position order you’ll repeat in every set – a gradient like dark, medium-dark, medium-light, light, or an alternating dark, light, dark, light. Write it down. Repeating this sequence keeps the rails consistent from block to block; it’s the rotation later on that creates the woven layout.
Step 3 – Sort the strips into ten groups of four. Divide your strips into ten piles, each following your chosen sequence. Do this before sewing anything – it’s how you find out now that you’re short of a mid-tone, rather than after seven sets are already done.
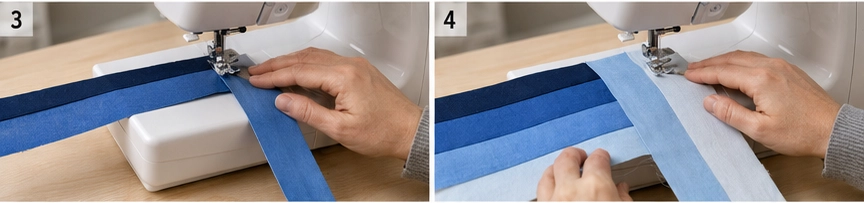
Step 4 – Sew the first strip set. Sew strips one and two together with a ¼-inch seam. Add strip three starting from the opposite end of the set, then strip four starting from the first end again. Sew every long seam in the same direction to encourage the set to bow into a shallow curve; alternating directions as you build keeps that to a minimum. Let the machine feed the fabric rather than pulling it through.
Step 5 – Press the set. How you press depends on which sequence you chose.
For a gradient, press all three seam allowances in the same direction, toward the darkest end of the set.
For an alternating arrangement, there is no single dark end – so press each seam allowance toward the darker of the two fabrics beside it. The allowances won’t all face the same way, and that’s correct.
Either way, the aim is the same: keep dark seam allowances from sitting behind a pale strip, where they can shadow through from the front. Press from the back first, then the front, without stretching the set.
Step 6 – Check the width. Measure across the pressed set: it should be exactly 8½ inches. If it’s narrower, your seam allowance is too wide – adjust your machine now, before making nine more sets. This one measurement determines the accuracy of every block in the quilt.
Step 7 – Make the remaining nine sets. Repeat steps 4 to 6 until you have ten strip sets, all following the same sequence and all measuring 8½ inches wide.
Step 8 – Square one end of a set. Lay a set on the cutting mat and trim a clean edge at one end, cutting at a true right angle to the long seams. Everything you cut from this set is only square if that first cut is.
Step 9 – Cut and check the first block. Measuring from the squared end, cut one 8½-inch section. Turn it on the mat and check with a ruler that it measures 8½ inches in both directions with four square corners. A bowed set or a slightly angled first cut gives a parallelogram rather than a square, and it’s far better to discover that on block one.
Step 10 – Cut the remaining blocks. Once the first checks out, cut up to three more from that set, then work through all ten sets. Most sets give four blocks, for 40 in total; a short or heavily squared set may give only three. Since you need 35, as many as five sets can come up one block short and you’ll still have enough.
Step 11 – Try the rotation. Take two blocks. Turn one so its strips run horizontally and the other so they run vertically, and set them side by side. That’s the weave, and that’s the decision you’ll repeat 35 times.
Step 12 – Lay out the quilt. Arrange the blocks 5 across × 7 down, alternating direction like a checkerboard: horizontal, vertical, horizontal, vertical along each row, and starting each new row with the opposite direction to the row above.
Then check something easy to miss: a block can be facing the right way and still be upside down. Turned 180 degrees, its strips still run horizontally, but the value order has reversed – and with a gradient that reversal is very obvious. Use the same rotational pattern throughout – for example, put the darkest rail at the top of every horizontal block and at the left of every vertical block. Which sides you choose doesn’t matter; what matters is that they stay consistent. Set out the first four blocks carefully and use that four-block unit as your reference for the whole layout.
Step 13 – Photograph and label the rows. Take a photo, then place a numbered label beside each row. Gather each row from left to right and pin its label to the first block, keeping every stack facing upward.
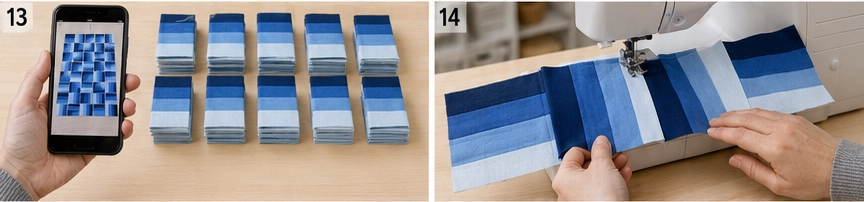
Step 14 – Sew the first row. Sew the five blocks of row one together with a ¼-inch seam, checking each block’s direction against your photo as you go. The finished row should measure 40½ × 8½ inches.
Step 15 – Press the first row. Press its seams to the right.
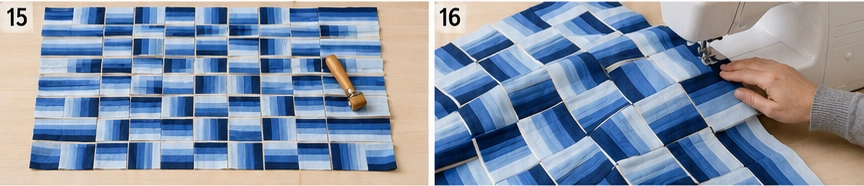
Step 16 – Sew and press the remaining rows. Sew each of the other six rows the same way, checking directions as you go. Press odd-numbered rows to the right and even-numbered rows to the left, so the seams nest when you join the rows.
Step 17 – Join the rows. Sew the seven rows together in order, pinning at each seam junction where the opposing press directions lock together. Press well. The top should measure 40½ × 56½ inches.
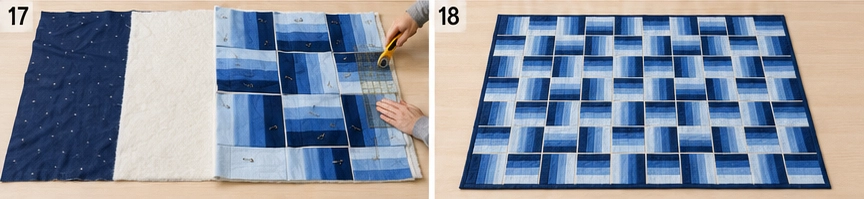
Step 18 – Prepare the backing. Using standard-width fabric: if it’s unwashed, cut the 3½ yards into two equal lengths of about 63 inches; if you bought 3¾ yards and prewashed it, measure what you actually have and divide that in two. Trim the selvages, sew the pieces together along their long edges, and press the seam open.
Using 108-inch wide backing: no seam is needed – simply square one end and cut a single panel.
Either way, confirm the finished panel measures at least 46 × 62 inches before you layer the quilt.
Step 19 – Make the quilt sandwich. Lay the backing wrong side up, center the batting on it, then the quilt top right side up. Smooth everything from the center outward and baste with pins or basting spray.
Step 20 – Quilt it. Simple quilting suits this design – an all-over diagonal grid, straight lines running the length of the quilt, or stitching in the ditch along the block seams. A walking foot keeps the layers feeding evenly.
Before deciding on spacing, check your batting packaging for its maximum quilting distance. Most battings specify how far apart the lines can be before the fibers shift and bunch in the wash, and it varies considerably between cotton, wool, and polyester. Quilt at least as closely as it asks, and no denser than you need to, so the quilt stays soft.
Step 21 – Trim and square up. Trim the excess batting and backing level with the edge of the quilt top, squaring the corners. Quilting always draws the layers up a little, so the top may finish just under 40½ × 56½ inches, which is normal. Trim only the excess batting and backing – don’t reduce the quilt top’s dimensions unless a small amount of squaring is genuinely needed. That outer ¼ inch is the binding’s seam allowance.
Step 22 – Bind and finish. Join the six 2½-inch binding strips into one long strip, press in half lengthwise, and sew to the front of the quilt with a ¼-inch seam. Fold to the back and stitch down. Before washing, the finished quilt measures about 40 × 56 inches; expect it to come out slightly smaller and softly crinkled after its first wash. Wash gently on cold with a color catcher and tumble dry low.
Assembly at a Glance
- Leave the jelly roll strips unwashed; remove selvages.
- Fix a four-position value sequence – gradient or alternating.
- Sort the strips into ten groups of four.
- Sew strips 1+2, then add 3 and 4 alternating the sewing direction (helps prevent bowing).
- Press toward the darkest end (gradient) or toward each darker rail (alternating).
- Check the set measures 8½ inches wide.
- Make ten sets the same way.
- Square one end of a set.
- Cut one block; check it’s 8½ inches square with true corners.
- Cut up to 3 more per set → about 40 blocks (35 needed).
- Turn two blocks to see the horizontal/vertical weave.
- Lay out 5 × 7, alternating direction – and check no block is turned 180 degrees.
- Photograph and label the seven rows.
- Sew row 1 → 40½ × 8½ in.
- Press row 1 seams right.
- Sew all seven rows; press odd rows right, even rows left.
- Join the rows, nesting seams → 40½ × 56½ top.
- Prepare a 46 × 62-inch backing panel – seam two standard-width lengths, or cut one piece from wide backing.
- Layer and baste.
- Quilt simply; check the batting’s maximum quilting distance first.
- Trim batting and backing level with the top.
- Bind with six strips → about 40 × 56 inches before washing.
Beginner Tips for Success
- Check your first strip set at 8½ inches before making nine more.
- Try a four-step gradient at least once – it shades more smoothly than a three-rail gradient can.
- Keep the same value order in all ten sets. The prints can vary, the order can’t.
- Alternate the direction you sew each long seam, to keep the set from bowing.
- Press toward the darkest end for a gradient, or toward each darker rail for an alternating set – either way, keep dark allowances out from behind pale strips.
- Cut and check the first block in both directions before cutting the rest.
- Watch for blocks turned 180 degrees – very visible when you’re using a gradient.
- Check your batting’s maximum quilting distance before choosing how far apart to stitch.
- Don’t prewash the strips; keep the whole quilt top in the same condition.
Scaling It to Other Sizes
Every block finishes at 8 inches, so resizing is simple arithmetic:
- Baby quilt: 5 across × 6 down = 40 × 48 inches (30 blocks, 8 strip sets)
- Lap quilt (as written): 5 × 7 = 40 × 56 inches (35 blocks; 9 sets minimum, 10 as written for spares)
- Twin: 8 × 11 = 64 × 88 inches (88 blocks, 22 sets)
- Queen: 11 × 12 = 88 × 96 inches (132 blocks, 33 sets)
Each strip set normally gives four blocks. Divide the number of blocks you need by four and round up to the next whole number for the minimum number of strip sets, then multiply that by four for the strips needed in the quilt top. For the lap quilt that gives nine sets, this pattern uses a tenth as a cutting allowance and a source of spare blocks. Work out binding separately.
Note how much faster this is than the three-strip version: a queen-size four-strip quilt needs 132 blocks, where the same quilt in 6-inch blocks would need well over 200.
Styling It & Gift Ideas
The bolder scale of a four-strip weave suits larger pieces and larger rooms – it reads clearly across a bed or a big sofa, where a finer 6-inch weave can look busy from a distance. Fold it at the end of a bed, drape it over a sectional, or use it as a picnic quilt where the sturdy blocks take a bit of rough handling.
Because it’s fast and forgiving, it makes a fine gift:
- A housewarming or wedding quilt, since the graphic scale suits most rooms
- A college or first-apartment quilt – hardwearing and simple to wash
- A quick large gift, since 8-inch blocks cover ground far faster than smaller ones
- A dimensional gradient version in someone’s favorite color family, which looks far more considered than the effort involved
Final Thoughts
A four-strip rail fence gives you everything the classic version does at a bolder scale, with a smoother shading option besides – four value steps grade more gradually than three, so the woven bars can look as though they have real depth. Keep the value order consistent, alternate the direction you sew each seam, and check that first set at 8½ inches, and you’ll have a graphic, generous quilt built from nothing more complicated than four strips and a quarter turn.
Other Design Inspirations – Digitally Modified Images. Texture and color may vary from the actual product.
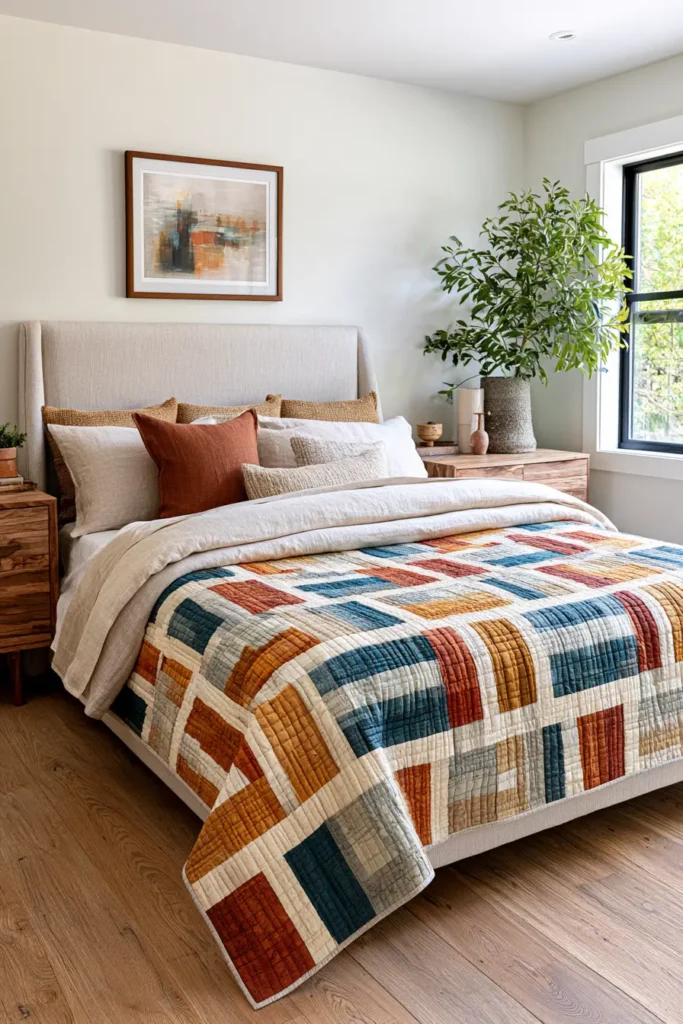
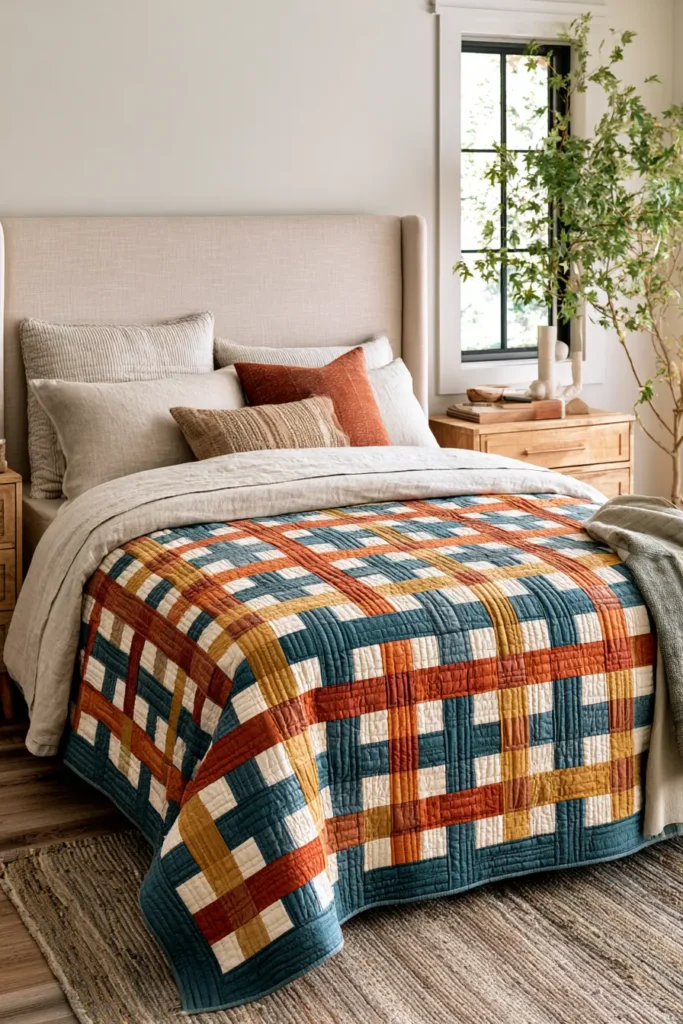
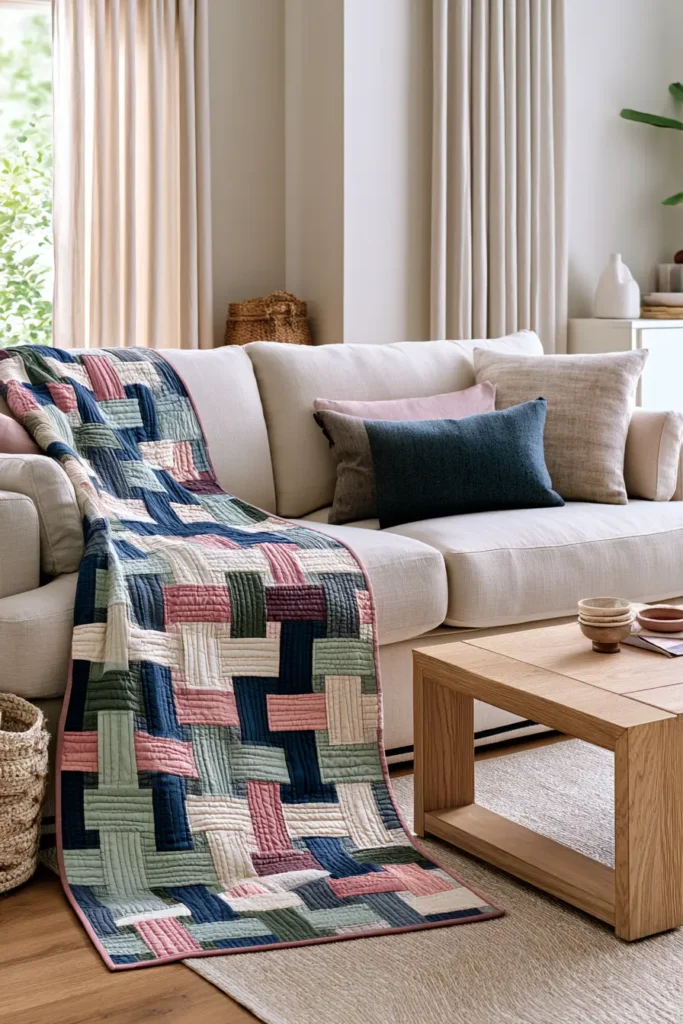
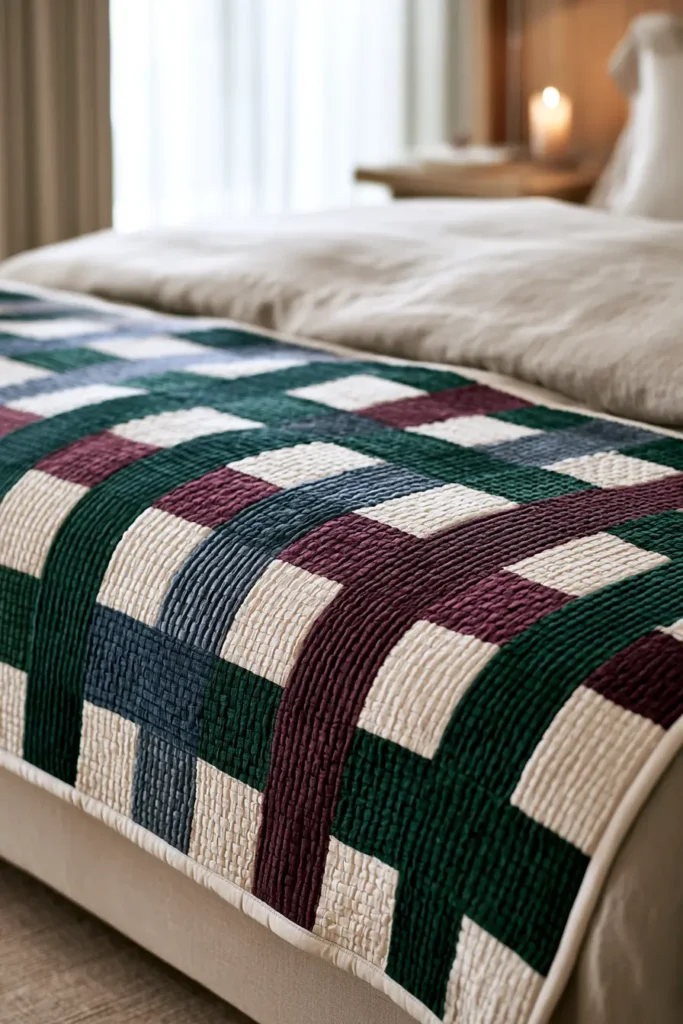
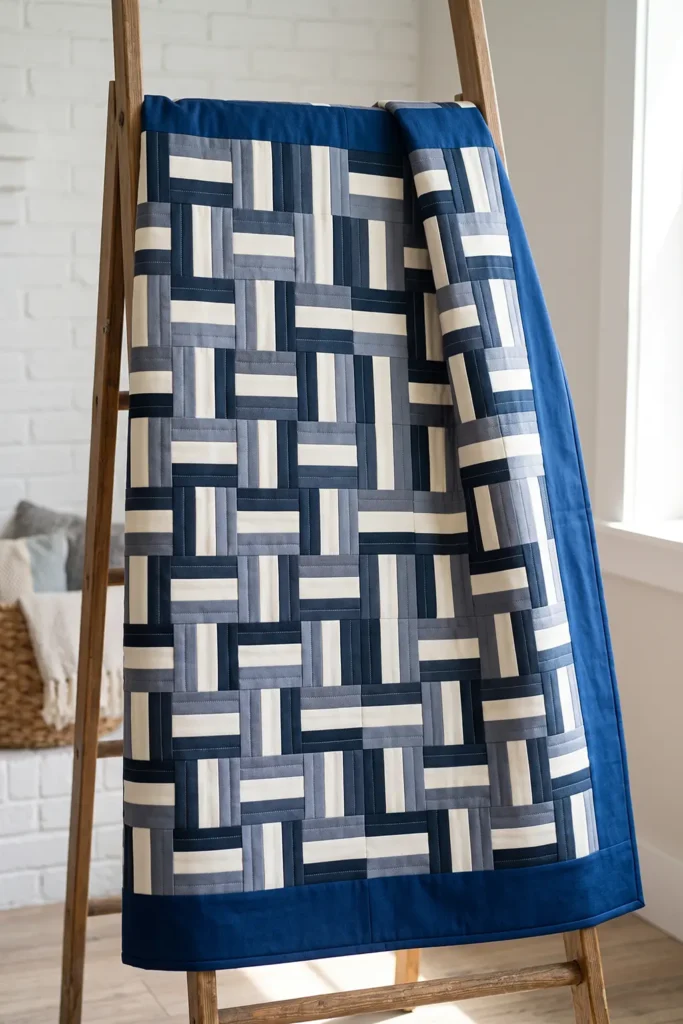
3. Basket Weave Rail Fence Quilt for Timeless Texture
Here’s the thing about a rail fence quilt: the classic alternating layout already produces a woven look. So what makes a basket weave version different?
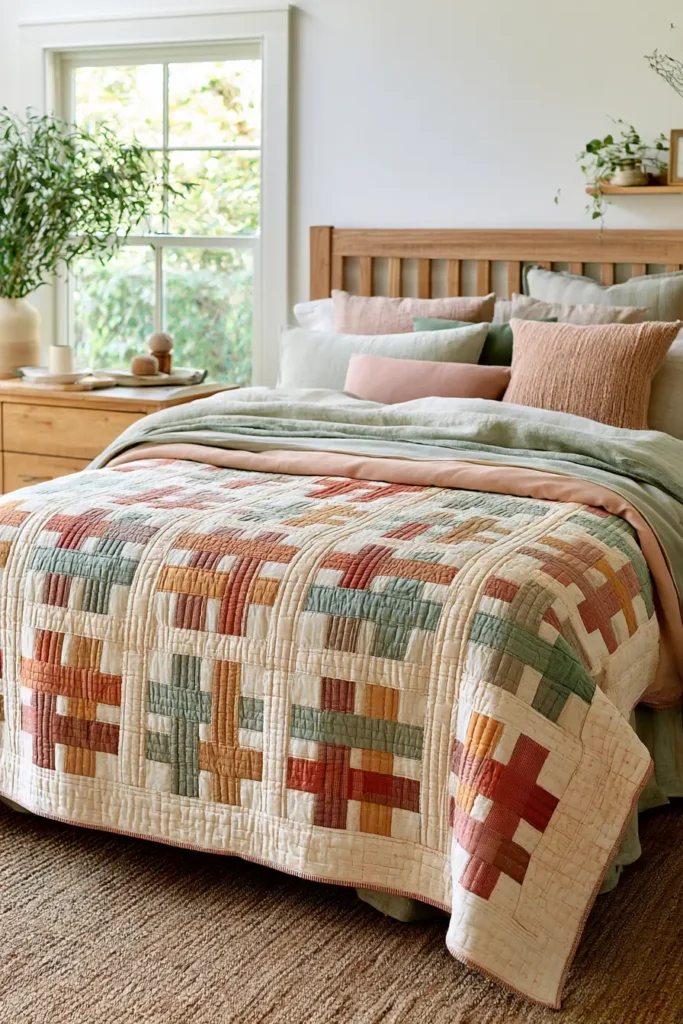
The answer is scale. Instead of turning every single block, you arrange the blocks in 2 × 2 groups, with all four blocks in a group facing the same direction to form a 12-inch square, and alternate those larger groups instead. The woven bands double in width, the over-under structure becomes obvious rather than subtle, and the quilt stops looking like fine texture and starts looking like an actual basket. Framed with a generous border in a vibrant solid, it has a calm, substantial, timeless quality that the finer version doesn’t quite reach.
The block itself is identical to the classic three-strip rail fence. Everything that changes happens at the layout stage.
Why Grouping Blocks Makes It a Basket Weave
This isn’t just a visual trick – it mirrors how basket weave actually works as a textile structure.
In plain weave, single threads pass over and under one another, one at a time. In basket weave, two or more threads are grouped and woven as if they were one thicker thread – over two, under two – which is what gives basket-weave fabric its chunky, blocky character compared with the fine grid of plain weave.
Grouping four blocks into a single 12-inch unit does exactly the same thing in patchwork. Each woven band is now two blocks wide instead of one, so the eye reads bold interlocking bands rather than a delicate checkerboard. Same block, same fabrics, same seams – the pattern shifts entirely because the unit of the weave got bigger.
Design Inspirations – Digitally Modified Images. Texture and color may vary from the actual product.
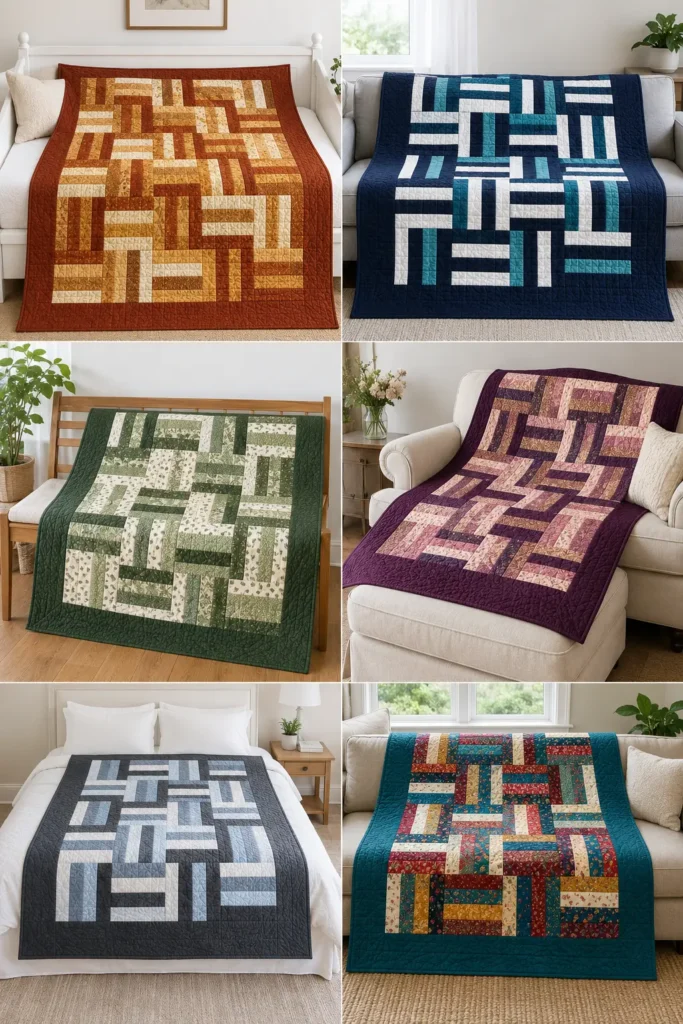
How the Layout Works
- Each block is a three-strip square finishing at 6 inches
- Four blocks facing the same direction form a weave group finishing at 12 inches
- Those groups alternate horizontal and vertical, checkerboard fashion, across the quilt
In practice you won’t sew the groups separately – you’ll lay out all 48 blocks in a 6 across × 8 down grid and sew ordinary rows. The grouping is purely a matter of which way each block faces:
- Columns pair up: blocks 1-2, 3-4, and 5-6
- Rows pair up: rows 1-2, 3-4, 5-6, and 7-8
- Within each pair-of-columns and pair-of-rows, all four blocks face the same direction, and each group faces the opposite way to its neighbors
How the Block Works
- Three strips cut 2½ inches wide, sewn together along their long edges
- Joined with ¼-inch seams, the set measures exactly 6½ inches wide
- Cut across the set at 6½-inch intervals. Each section is a 6½-inch unfinished block, finishing at 6 inches in the quilt
Every block shares the same construction, value order, and dimensions, though the individual fabrics can vary.
Getting the Weave to Read
Two habits matter more here than in a fine-scale version, because the bands are wider and any inconsistency shows up at a larger size:
Include one clearly light strip in every block. The weave depends on value contrast, not color. Three medium-toned fabrics will blur into a muddy square no matter how neatly you sew.
Keep the same value order in every strip set. The prints can vary – an assorted bundle won’t hold nine identical strips of anything – but if position one is always dark, position two always light, and position three always medium, the bands will read cleanly across all 48 blocks.
Finished Size
- Block: 6 inches finished (6½ inches unfinished)
- Weave group: 4 blocks = 12 inches finished
- Center panel: 6 blocks across × 8 down = 48 blocks, measuring 36½ × 48½ inches unfinished
- Border: 6 inches finished all around
- Quilt top: 48½ × 60½ inches unfinished
- Nominal design size: 48 × 60 inches
- Actual bound size: roughly 48-48½ × 60-60½ inches before washing, depending on how much the quilting draws the layers up. Expect a little more shrinkage in the first wash
- Skill level: true beginner
- Core techniques: strip sets, straight cutting, grouped block rotation, borders, binding
Materials Needed
- 1 jelly roll (about 40 strips, 2½ inches × width of fabric). You’ll use 27 strips to make nine strip sets. Each set can yield up to six blocks, so as many as 54 – against the 48 the quilt needs. Check your usable strip lengths before sewing (see Step 1). Count your strips before starting, as bundle sizes vary. Alternatively, cut 27 strips at 2½ inches from at least 2 yards of assorted fabric
- Border fabric: 1¾ yards, cut lengthwise into four strips 6½ inches wide × about 63 inches long, so the borders need no piecing
- Binding: ½ yard, cut into 7 strips at 2½ inches. The top’s perimeter is about 218 inches, and diagonal joins eat roughly 2½ inches each, so six strips leaves almost nothing spare
- Backing: 3¾ yards of standard-width fabric left unwashed (4 yards if you plan to prewash it), cut into two equal lengths and seamed along their long edges; or 2 yards of 108-inch wide backing unwashed, 2¼ yards if prewashing
- Batting: at least 54 × 66 inches. That leaves about 3 inches beyond every edge of the top, fine for careful quilting on a domestic machine. If you’re using a longarm quilter, ask what allowance they need – many want at least 4 inches per side
- Thread: neutral cotton
- Rotary cutter, cutting mat, quilting ruler, pins or clips, iron
Beginner tip: don’t prewash the jelly roll strips. Precut strips have pinked edges, and washing 2½-inch strips causes fraying and distortion. Leave the border fabric unwashed too, so the whole quilt top shrinks together in the first wash. You can prewash the backing if you prefer.
Choosing Your Colors
Wider bands carry stronger color well, and the border is doing real work here:
- Warm and classic: rust, cream, and gold rails inside a deep rust border
- Bold modern: navy, white, and teal inside a navy border
- Fresh: grass green, cream, and sage inside a green border
- Rich: plum, blush, and gold inside a plum border
- Scrappy but ordered: many fabrics, always dark-light-medium in that order, inside a single solid border
Two things to plan deliberately:
Pick the border from the darkest value in your blocks. A dark frame contains all that woven movement and makes the center panel look intentional rather than sprawling.
Keep the light strip genuinely light. At this scale, a “medium-light” reads as just another medium, and the weave loses its structure.
Cutting Measurements
- Strip sets: 9 sets, each made from 3 strips sewn along their long edges. Each set measures 6½ inches wide × about 40 inches long once selvages are removed
- Blocks: cut 6½-inch squares across each set. A set yields up to six blocks, but only if it has a little more than 39 inches of usable length once you square one end. Nine sets should give around 54 blocks against the 48 needed – and even if six of the nine give only five, you’d still have 48
- Side borders: two strips at 6½ × 48½ inches
- Top and bottom borders: two strips at 6½ × 48½ inches
- Backing panel: at least 54 × 66 inches
- Batting: 54 × 66 inches
- Binding: seven strips, 2½ inches × width of fabric
Step-by-Step Guide
Step 1 – Prepare your strips and check their length. Leave the jelly roll strips unwashed. Select 27 strips for the blocks and remove any selvage from their ends.
Now measure what you actually have. Six blocks need 39 inches of strip set plus a little extra for squaring one end. If most of your strips come in comfortably over 40 inches, nine sets will be plenty. If they’re running short, do the arithmetic: you need 48 blocks, so at least three sets must give six blocks if the other six give only five. If that looks marginal, prepare a tenth set now rather than discovering the shortfall at block 45. If you decided to prewash your backing, wash and dry it now, before measuring and cutting it.
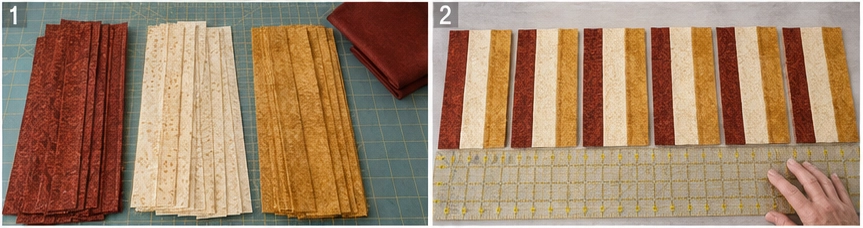
Step 2 – Cut the border strips. From your 1¾ yards of border fabric, cut four strips 6½ inches wide, parallel to the selvages, using the full length of the cut. Cutting lengthwise means the borders need no piecing and have no join to disguise. Leave them long for now – you’ll trim them to the quilt’s actual measurements in Steps 18 and 19. Set them aside.
Step 3 – Set your value sequence. Use dark, light, medium – with the light strip in the center position – and repeat it in every set. The light rail needs to be in the middle for this design, because it lets you press both seam allowances away from it in the next step; a light strip on the outside would end up with a dark allowance behind it. Write the order down. Repeating this sequence keeps the rails consistent from block to block; the grouped rotation later creates the basket weave.
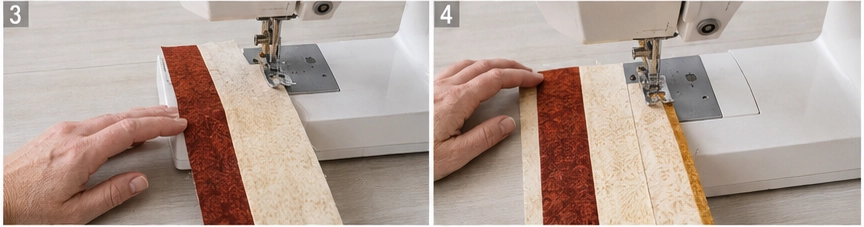
Step 4 – Sort the strips into nine groups of three. Divide all 27 strips into nine piles, each following your chosen sequence. Do this before sewing anything – it’s how you find out now that you’re two light strips short, rather than after six sets are done.
Step 5 – Sew the first strip set. Sew the first two strips together with a ¼-inch seam. Add the third strip, but start that seam from the opposite end of the set. Sewing both long seams in the same direction encourages a strip set to bow into a shallow curve; starting from opposite ends keeps that to a minimum.
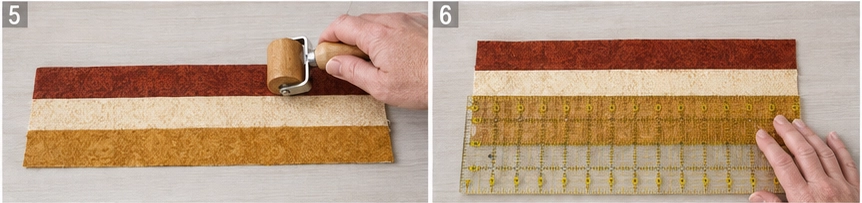
Step 6 – Press the set. Press both seam allowances away from the light strip, toward the darker fabric on either side. That keeps a dark seam allowance from sitting behind your lightest rail, where it can shadow through from the front. Press from the back first, then the front, without stretching.
Step 7 – Check the width. Measure across the pressed set: it should be exactly 6½ inches. If it’s narrower, your seam allowance is running wide – adjust your machine now, before making eight more sets. This one measurement determines the accuracy of every block.
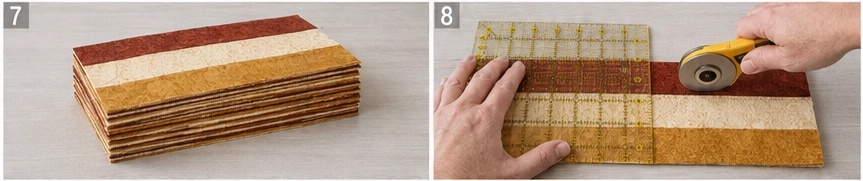
Step 8 – Make the remaining eight sets. Repeat steps 5 to 7 until you have nine strip sets, all following the same sequence and all measuring 6½ inches wide.
Step 9 – Square one end of a set. Lay a set on the cutting mat and trim a clean edge at one end, cutting at a true right angle to the long seams. Anything you cut from this set is only square if that first cut is.
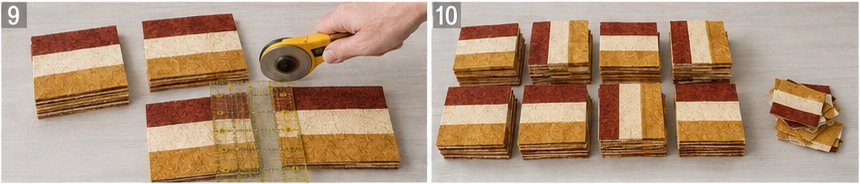
Step 10 – Cut and check the first block. Measuring from the squared end, cut one 6½-inch section. Turn it on the mat and check with a ruler that it measures 6½ inches in both directions with four square corners. A bowed set or a slightly angled first cut gives a parallelogram rather than a square, and it’s far better to find that out on block one.
Step 11 – Cut the remaining blocks. Once the first checks out, cut up to five more from that set, then work through all nine sets. Most sets give six blocks, for 54 in total; a short or heavily squared set may give only five. Since you need 48, there’s a comfortable margin.
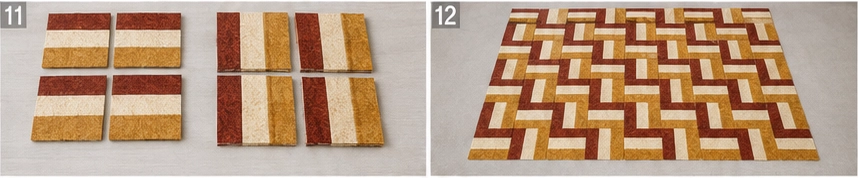
Step 12 – Understand the grouping. Take four blocks and set them in a 2 × 2 square, all facing the same direction – all with their rails running horizontally. That 12-inch square is one weave group. Now make a second group with all four blocks running vertically, and set the two groups side by side. That over-two, under-two rhythm is the whole design.
Step 13 – Lay out the center panel. Arrange 48 blocks in a grid 6 across × 8 down. Working in 2 × 2 groups: the first two blocks of rows 1 and 2 all run horizontally, the next two columns all run vertically, the last two columns horizontally again. Rows 3 and 4 then start with a vertical group, rows 5 and 6 with a horizontal one, and rows 7 and 8 with a vertical one. Step back and check the chunky over-under bands read clearly.

Step 14 – Check for upside-down blocks. A block can face the right way and still be turned 180 degrees, with its dark and medium rails swapped. Use the same rotation throughout – for example, the dark rail at the top of every horizontal block and at the left of every vertical one. Which sides you choose doesn’t matter; consistency does. Set out one horizontal group and one vertical group carefully and use them as your reference.
Step 15 – Photograph and label the rows. Take a photo, then place a numbered label beside each row. Gather each row from left to right and pin its label to the first block, keeping every stack facing upward. With 48 similar blocks and a grouped layout, this is the step that saves you from unpicking later.
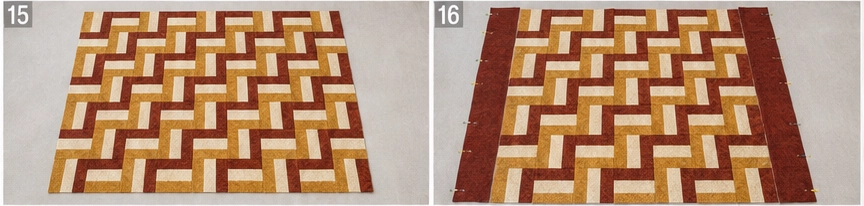
Step 16 – Sew the rows. Sew each row of six blocks together with a ¼-inch seam, checking directions against your photo as you go. Each row should measure 36½ × 6½ inches. Press odd-numbered rows to the right and even-numbered rows to the left, so the seams nest.
Step 17 – Join the rows. Sew the eight rows together in order. Pin at every block boundary, where the opposing row press directions lock the seams together.
There’s a second thing to match that’s specific to this grouped layout. Rows 1 and 2 belong to the same weave groups, so a vertical-rail block in row 1 sits directly above a vertical-rail block in row 2 – and their internal rail seams need to line up across the row seam so each group reads as one continuous 12-inch unit. Those rail seams should continue in one straight line from the block above into the block below. They cross the horizontal row seam at right angles, and because their allowances were pressed the same way they won’t nest – so align and pin them by eye, and check before sewing. The same applies to rows 3-4, 5-6, and 7-8.
Press the row seams open to spread the bulk, or all in one direction if you prefer. The center panel should measure 36½ × 48½ inches.
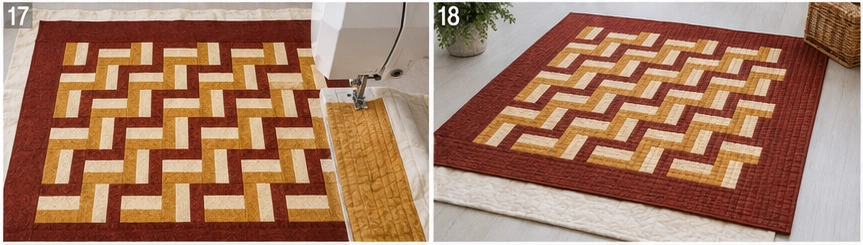
Step 18 – Add the side borders. First measure the center panel vertically through its middle, not along the edges – edges stretch, and the middle is the true measurement. It should be about 48½ inches. Trim two border strips to 6½ inches by that measurement, and sew one to each long side. Pin the ends, the center, and the quarter points before sewing – a stretched border is the commonest cause of a wavy quilt. Press the seams toward the border. The panel now measures 48½ × 48½ inches.
Step 19 – Add the top and bottom borders. Now measure horizontally through the middle of the panel, including the side borders you just added. It should be about 48½ inches. Trim the remaining two strips to 6½ inches by that measurement, then sew one across the top and one across the bottom, pinning the same way. Press toward the border. The quilt top should now measure 48½ × 60½ inches.
Step 20 – Prepare the backing. Using standard-width fabric: if unwashed, cut the 3¾ yards into two equal lengths of about 67½ inches; if you bought 4 yards and prewashed it, measure what you actually have and divide that in two. Trim the selvages, sew the pieces together along their long edges, and press the seam open. Using 108-inch wide backing: no seam is needed – square one end and cut a single panel from your 2 yards. Either way, confirm the panel measures at least 54 × 66 inches before you layer the quilt.
Step 21 – Make the quilt sandwich. Lay the backing wrong side up, center the batting on it, then the quilt top right side up. Smooth everything from the center outward and baste with pins or basting spray.
Step 22 – Quilt it. Straight-line quilting suits the grouped weave especially well – quilting along the rails within each group emphasizes the over-under structure, while an all-over diagonal grid gives a softer finish. The wide border is a good place for something a little more decorative, since it has room to show.
Before choosing your spacing, check your batting packaging for its maximum quilting distance. Most battings specify how far apart the lines can be before the fibers shift in the wash, and it varies between cotton, wool, and polyester.
Step 23 – Trim and square up. Trim the excess batting and backing level with the edge of the quilt top, squaring the corners. Quilting always draws the layers up a little, so the top may finish just under 48½ × 60½ inches, which is normal. Trim only the excess batting and backing – don’t reduce the quilt top unless a small amount of squaring is genuinely needed. That outer ¼ inch is the binding’s seam allowance.
Step 24 – Make and attach the binding. Take it in order:
- Join the seven strips end to end with diagonal seams – lay two strip ends at right angles, right sides together, sew corner to corner across the overlap, trim the excess to ¼ inch, and press that seam open. Diagonal joins spread the bulk instead of stacking it in one visible line.
- Press the whole strip in half lengthwise, wrong sides together.
- Start partway along one side, not at a corner, and leave the first 8-10 inches unsewn as a tail – you’ll need it to join the two ends at the finish.
- Sew the binding to the front with a ¼-inch seam, stopping ¼ inch before each corner.
- Miter each corner: fold the binding straight up to form a 45-degree diagonal, then fold it back down level with the next edge, and resume sewing from the fold.
- Join the two tails where they meet, trim the excess, and finish the last stretch of seam.
- Fold the binding to the back and stitch it down by hand or machine, folding the mitered corners neatly as you reach them.
Before washing, the quilt should measure roughly 48-48½ × 60-60½ inches. Wash gently on cold with a color catcher and tumble dry low; expect it to come out slightly smaller and softly crinkled.
Assembly at a Glance
- Leave the jelly roll strips unwashed; take 27 for blocks.
- Cut four 6½-inch border strips lengthwise; set aside.
- Use dark, light, medium in every set, with the light strip in the center.
- Sort the 27 strips into nine groups of three.
- Sew strips 1+2, then add strip 3 starting from the opposite end.
- Press both seams away from the light strip.
- Check the set measures 6½ inches wide.
- Make nine sets the same way.
- Square one end of a set.
- Cut one block and check it’s 6½ inches square with true corners.
- Cut up to 5 more per set → about 54 blocks (48 needed).
- Build one horizontal and one vertical 2 × 2 group to see the weave.
- Lay out 6 × 8, alternating 2 × 2 groups checkerboard fashion.
- Check no block is turned 180 degrees.
- Photograph and label the eight rows.
- Sew rows of six → 36½ × 6½; press odd right, even left.
- Join the rows → 36½ × 48½ center panel.
- Add side borders (6½ × 48½) → 48½ × 48½.
- Add top and bottom borders (6½ × 48½) → 48½ × 60½ top.
- Prepare a 54 × 66-inch backing panel.
- Layer and baste.
- Quilt along the rails; check the batting’s maximum quilting distance.
- Trim batting and backing level with the top.
- Bind with seven strips → about 48-48½ × 60-60½ inches before washing.
Beginner Tips for Success
- Check your first strip set at 6½ inches before making eight more.
- Include one clearly light strip in every block – at this scale a medium-light reads as just another medium.
- Alternate the sewing direction on the two long seams to keep sets from bowing.
- Press both seams away from the light rail so allowances don’t shadow through.
- Build one horizontal and one vertical 2 × 2 group first and keep them as your reference.
- Watch for blocks turned 180 degrees – the direction can look right while the rails have reversed.
- Photograph and label the rows before carrying blocks to the machine.
- Pin borders at ends, center, and quarters; stretched borders make a quilt wave.
- Cut the borders lengthwise so they need no piecing.
Scaling It to Other Sizes
Every weave group finishes at 12 inches, so it’s easiest to resize in whole groups. The border adds 12 inches to each dimension:
- Baby quilt: 2 groups × 3 groups = 24 × 36 center, plus border = 36 × 48 inches (24 blocks, 4 sets)
- Lap quilt (as written): 3 × 4 groups = 36 × 48 center, plus border = 48 × 60 inches (48 blocks, 9 sets)
- Twin: 4 × 6 groups = 48 × 72 center, plus border = 60 × 84 inches (96 blocks, 16 sets)
- Queen: 6 × 7 groups = 72 × 84 center, plus border = 84 × 96 inches (168 blocks, 28 sets)
The strip-set counts above are theoretical minimums. Each set can yield up to six blocks when it has slightly more than 39 inches of usable length after squaring one end – so divide your block count by six and round up for the minimum, then add one extra set as cutting insurance unless you’ve confirmed every strip is long enough. Multiply the number of sets by three for the strips needed in the quilt top, and work out borders, backing, batting, and binding separately for each size.
Styling It & Gift Ideas
The wider bands and framing border give this version a settled, furnished look – it suits a bed dressed simply, a sofa in a plain room, or a chair by a window. Because the weave reads as texture rather than pattern, it sits comfortably alongside other prints and colors, which makes it easier to place than a bolder graphic quilt.
Its calm, substantial quality makes it a good gift:
- A wedding or housewarming quilt, since a woven-texture design suits almost any home
- A guest room quilt in neutral rails with a deeper border
- A baby quilt at 2 × 3 groups, finished quickly
- A quilt for someone who dislikes busy patterns – the texture is interesting without being loud
Final Thoughts
A basket weave rail fence takes the same three-strip block and simply changes the scale of the weave. Group four blocks facing one way, alternate those groups, and the fine checkerboard becomes bold over-two, under-two banding – the exact structure that gives real basket-weave cloth its character. Keep one strip genuinely light, hold your value order steady across all nine sets, and frame it with a border cut from your darkest rail, and you’ll have a quilt with timeless woven texture and nothing difficult in it anywhere.
Other Design Inspirations – Digitally Modified Images. Texture and color may vary from the actual product.
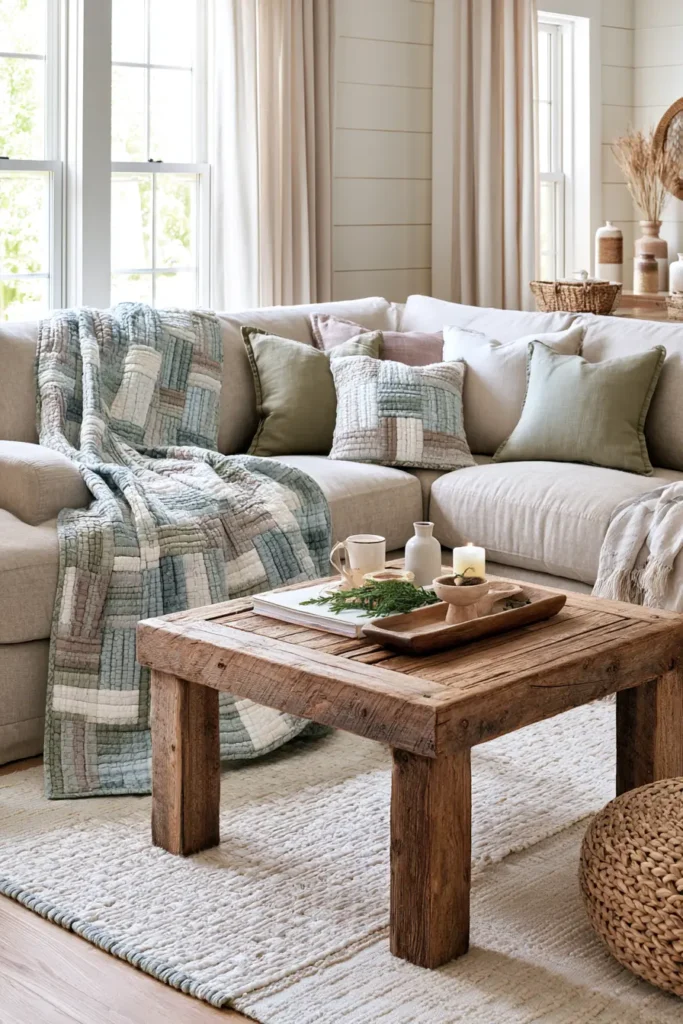
4. Straight Furrows Rail Fence Quilt for Striking Diagonal Lines
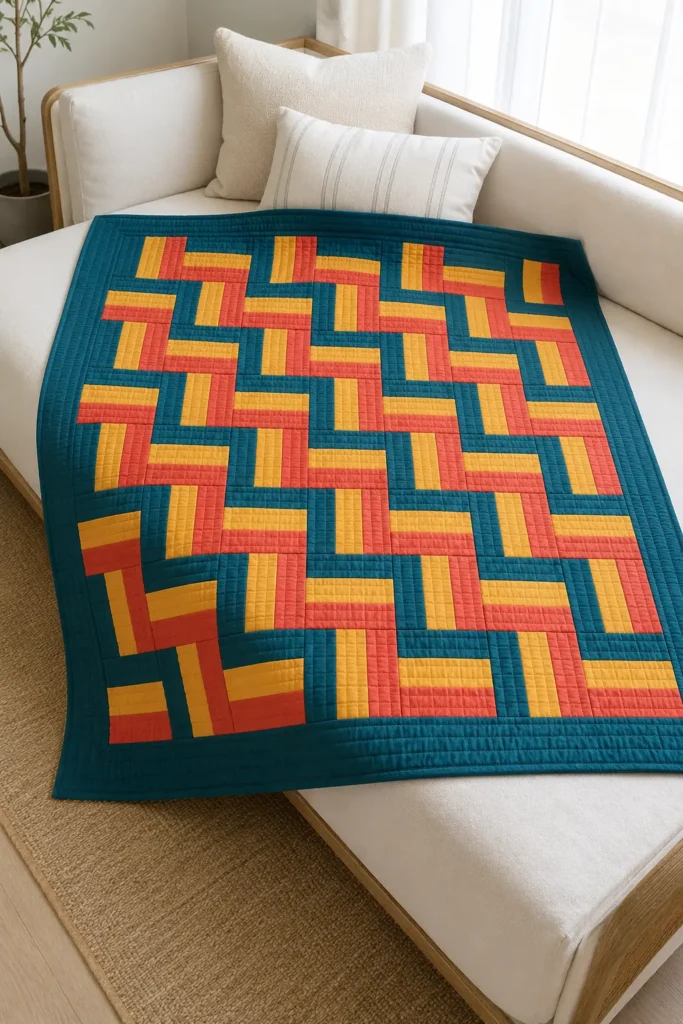
A standard Rail Fence block is simple: sew parallel strips together, cut the strip set into squares, and rotate the blocks to create the layout. The Straight Furrows version shows just how much movement can come from that very basic construction.
Instead of grouping several blocks in the same direction, each neighboring block turns 90 degrees. With the fabric colors kept in the same order, those alternating rotations create long diagonal pathways that appear to travel across the quilt like rows cut through a field.
The name “straight furrows” comes from that visual resemblance. A furrow is the long narrow groove made through soil when a field is plowed. In this layout, the repeated rails form similarly strong parallel diagonal lines.
Design Inspirations – Digitally Modified Images. Texture and color may vary from the actual product.
How the Layout Works
Each block is a three-strip Rail Fence square finishing at 6 inches.
The blocks alternate orientation one at a time:
- Horizontal
- Vertical
- Horizontal
- Vertical
The following row reverses the sequence:
- Vertical
- Horizontal
- Vertical
- Horizontal
Continue alternating this way across the entire quilt.
The rotation creates diagonal visual pathways through the blocks rather than the checkerboard effect of a basic Rail Fence layout.
How the Block Works
Three strips are cut 2½ inches wide and sewn together along their long edges.
With two ¼-inch seams:
2½ + 2½ + 2½ – ½ – ½ = 6½ inches
The completed strip set therefore measures 6½ inches wide.
Cut the strip set crosswise every 6½ inches to produce 6½-inch unfinished blocks.
Each block finishes at 6 inches square once sewn into the quilt.
Getting the Diagonal Furrows to Read
Two things make the diagonal lines much clearer.
First, use fabrics with noticeably different values. Three similarly bright fabrics may look attractive individually, but the diagonal pathways can disappear when all three have similar visual weight.
Second, keep the fabric order identical in every strip set.
For this vibrant version, use:
- Deep teal — dark
- Sunshine yellow — light
- Coral red — medium
Every strip set should follow:
deep teal → sunshine yellow → coral red
You can vary the prints within those color families, but keeping the value sequence consistent gives the finished quilt its clear diagonal rhythm.
Finished Size
Block: 6 inches finished (6½ inches unfinished)
Center panel: 6 blocks across × 8 blocks down = 48 blocks
Center panel finished size: 36 × 48 inches
Center panel unfinished size: 36½ × 48½ inches
Border: 6 inches finished on all four sides
Quilt top unfinished size: 48½ × 60½ inches
Nominal finished size: 48 × 60 inches
Actual bound size before washing: approximately 48–48½ × 60–60½ inches, depending on quilting density.
Skill level: Beginner
Core techniques: strip piecing, rotary cutting, block rotation, row assembly, borders, quilting, and binding
Materials Needed
- 1 jelly roll, approximately 40 strips measuring 2½ inches × width of fabric
- Use 27 strips to make nine three-strip sets
- 1¾ yards deep teal fabric for the border
- ½ yard binding fabric
- 3¾ yards standard-width backing fabric, unwashed
- Or approximately 2 yards 108-inch-wide backing
- Batting at least 54 × 66 inches
- Neutral or coordinating cotton thread
- Rotary cutter
- Cutting mat
- Quilting ruler
- Pins or quilting clips
- Sewing machine
- Iron
The quilt needs only 48 blocks, while nine full-length strip sets can produce as many as 54. That gives a useful margin for short strips, trimming, or an imperfect block.
Beginner tip: don’t prewash jelly roll strips. Narrow precut strips can fray and distort considerably in the washing machine. Leave the border fabric unwashed as well so the quilt top shrinks consistently after the first wash.
Choosing Your Colors
The Straight Furrows arrangement is especially effective with strong color contrast.
For this version:
Vibrant: deep teal, sunshine yellow, and coral red inside a deep teal border
Other combinations that work beautifully:
Tropical: cobalt blue, mango yellow, and hot pink
Jewel tone: emerald, pale gold, and ruby
Fresh: navy, white, and turquoise
Sunset: plum, apricot, and golden yellow
Scrappy: assorted fabrics kept consistently dark-light-medium
One clearly light rail is particularly useful because the eye follows the contrast through the rotating blocks.
Avoid putting three equally dark or equally bright colors together unless you deliberately want a softer, less obvious diagonal effect.
Cutting Measurements
Strip sets: 9 sets, each made from 3 jelly roll strips
Each completed strip set: approximately 6½ inches × 40 inches, depending on the usable strip length after selvages are removed
Blocks: cut 6½-inch squares
Each full strip set can yield up to six blocks
Nine sets can therefore produce up to 54 blocks
Blocks required: 48
Side borders: two strips approximately 6½ × 48½ inches
Top and bottom borders: two strips approximately 6½ × 48½ inches
Backing: at least 54 × 66 inches
Batting: at least 54 × 66 inches
Binding: seven strips, 2½ inches × width of fabric
Step-by-Step Guide
Step 1 – Prepare the Jelly Roll Strips
Leave the jelly roll strips unwashed.
Select 27 strips for the quilt center.
Sort them into three value groups:
- 9 dark teal
- 9 sunshine yellow
- 9 coral red
If you’re using assorted prints rather than identical fabrics, concentrate on value rather than exact color.
Remove the selvages from the ends.
Measure several strips before sewing.
To cut six 6½-inch blocks you need:
6 × 6½ = 39 inches
You also need a little extra length to square one end.
If your strips are noticeably shorter than 40 inches after removing the selvages, prepare a tenth strip set as insurance.
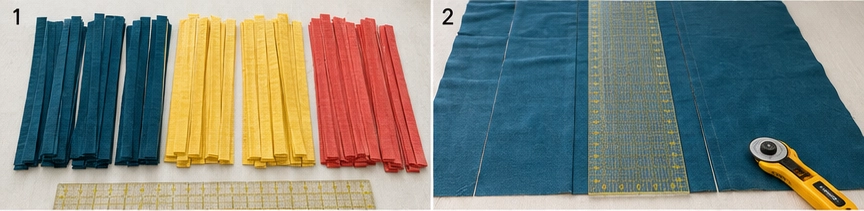
Step 2 – Cut the Border Strips
From the 1¾ yards of deep teal border fabric, cut four strips measuring 6½ inches wide, parallel to the selvages.
Cutting lengthwise allows the border pieces to run the full required length without seams.
Leave all four strips slightly long for now.
You’ll trim them to the actual quilt measurements after assembling the center panel.
Step 3 – Establish the Fabric Order
Set one strip of each color on the table.
Arrange them:
deep teal → sunshine yellow → coral red
Keep this order for every strip set.
Consistency matters because the same rails need to continue visually as the blocks rotate through the Straight Furrows layout.
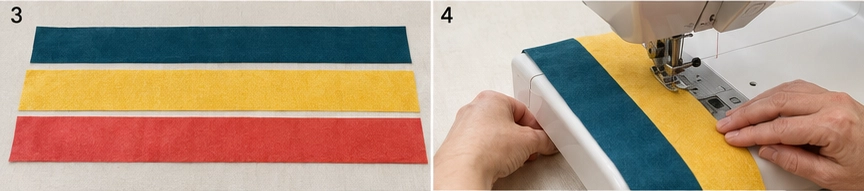
Step 4 – Sort Nine Strip Sets
Divide the 27 strips into nine groups of three.
Each group should contain:
- 1 deep teal strip
- 1 sunshine yellow strip
- 1 coral red strip
Lay each group in the same dark-light-medium order before sewing.
Step 5 – Sew the First Two Strips
Place the deep teal and sunshine yellow strips right sides together.
Sew along one long edge using an accurate ¼-inch seam allowance.
Avoid pulling or stretching the fabric as you sew.
Step 6 – Add the Third Strip
Place the coral strip right sides together with the opposite edge of the sunshine-yellow strip.
Sew with another ¼-inch seam.
Start this second long seam from the opposite end of the strip set.
Changing sewing direction helps prevent the long strip set from gradually bowing or curving.
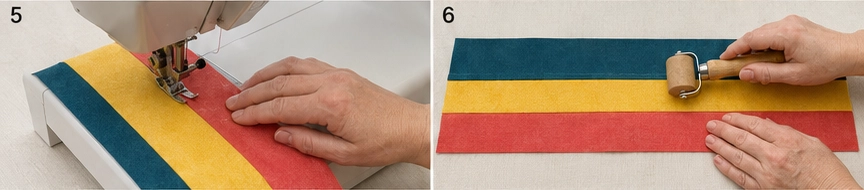
Step 7 – Press the Strip Set
Press the seams carefully without stretching the fabric.
Because the sunshine-yellow rail is the lightest fabric, press both seam allowances away from it.
That helps prevent darker seam allowances from showing through the yellow fabric.
Press from the back first, then lightly from the front.
Step 8 – Check the Width
Measure across the completed strip set.
It should measure exactly:
6½ inches
If it’s noticeably narrower, your seam allowance is too wide.
If it’s wider, your seam allowance is too narrow.
Correct the seam allowance before constructing the remaining eight sets.
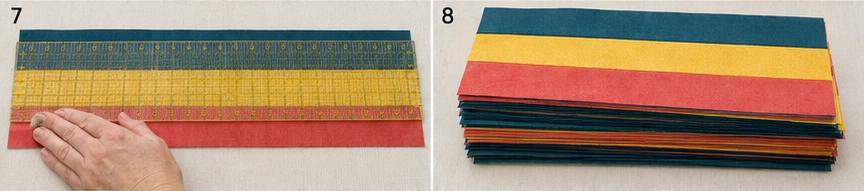
Step 9 – Make the Remaining Strip Sets
Repeat Steps 5 through 8 until you have nine completed strip sets.
Check each set periodically.
They should all measure approximately 6½ inches wide and follow the identical:
teal → yellow → coral
color order.
Step 10 – Square One End
Place the first strip set on your cutting mat.
Align a ruler with the long strip seams.
Trim one end at a true 90-degree angle.
This first cut matters because you’ll measure every subsequent 6½-inch block from it.

Step 11 – Cut the First Block
Measure 6½ inches from the squared end.
Cut across the strip set.
The resulting block should measure:
6½ × 6½ inches
Check all four corners with your ruler.
If the block is slightly diamond-shaped rather than square, straighten the strip set before continuing.
Step 12 – Cut the Remaining Blocks
Continue cutting 6½-inch sections.
A full usable strip set can provide:
6 blocks
Repeat with the remaining sets.
Nine sets can yield as many as:
9 × 6 = 54 blocks
You need 48 blocks, so choose the best 48 and reserve the extras for testing quilting stitches, labels, or another small project.
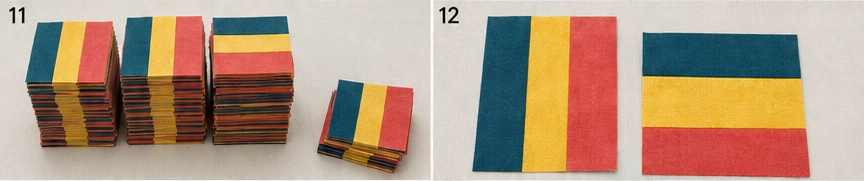
Step 13 – Make Two Reference Blocks
Place one block so its rails run vertically.
The colors should read from left to right:
teal | yellow | coral
Place another block beside it and rotate that block 90 degrees.
Its rails now run horizontally.
These two orientations become your reference blocks.
The exact starting orientation isn’t important. What matters is repeating the rotation consistently throughout the quilt.
Step 14 – Test the Straight Furrows Pattern
Lay out nine blocks temporarily in a 3 × 3 arrangement.
Use:
Row 1: vertical, horizontal, vertical
Row 2: horizontal, vertical, horizontal
Row 3: vertical, horizontal, vertical
Step back several feet.
You should see diagonal pathways beginning to travel across the arrangement.
If the lines look interrupted, check whether one horizontal or vertical block has accidentally been turned 180 degrees.
Step 15 – Lay Out All 48 Blocks
Arrange the blocks 6 across × 8 down.
Use this orientation:
Row 1: V – H – V – H – V – H
Row 2: H – V – H – V – H – V
Row 3: V – H – V – H – V – H
Continue alternating the two row arrangements until all eight rows are complete.
Walk away from the layout and look at it from several feet back.
Strong diagonal furrows should now cross the center panel.

Step 16 – Check Every Block’s Rotation
This check is important.
A block can have horizontal rails in the correct position but still be turned 180 degrees.
That reverses the color sequence and breaks the diagonal pathway.
Compare every block against your reference blocks.
Look specifically at where teal, yellow, and coral rails meet neighboring blocks.
The color progression should repeat consistently across the entire layout.
Step 17 – Photograph and Label the Layout
Take a clear overhead photograph.
Label the rows:
1 through 8
Gather Row 1 from left to right and attach the number 1 to the first block.
Repeat for every row.
Keep all stacks facing upward.
This prevents the most common Straight Furrows mistake: rotating a block accidentally while carrying it from the layout to the sewing machine.
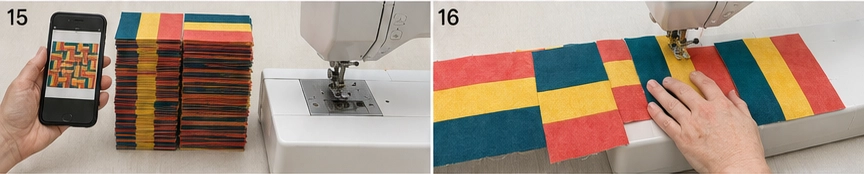
Step 18 – Sew the Individual Rows
Sew the six blocks of Row 1 together using ¼-inch seams.
Continue with all eight rows.
Each completed row should measure approximately:
36½ × 6½ inches
Press seam allowances in odd-numbered rows toward the right.
Press seam allowances in even-numbered rows toward the left.
This makes the block intersections nest when the rows are joined.
Step 19 – Recheck the Diagonal Pattern
Before joining any rows, return them to the floor or design wall.
Arrange Rows 1 through 8 in order.
Check the furrows again.
It’s much easier to correct a reversed block now than after the entire quilt center has been assembled.
Step 20 – Join the Rows
Place Rows 1 and 2 right sides together.
Because the seams were pressed in opposite directions, the block intersections should nest.
Pin at every block boundary.
Sew with a ¼-inch seam.
Continue attaching Rows 3 through 8 in order.
Press the row seams open to reduce bulk, or press consistently to one side.
The completed center panel should measure approximately:
36½ × 48½ inches
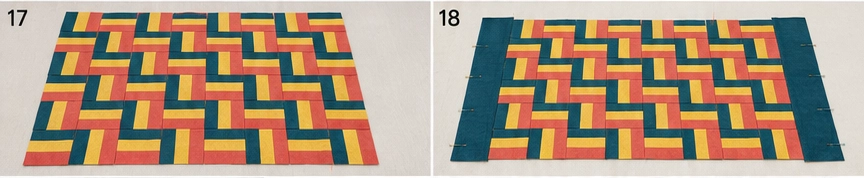
Step 21 – Measure for the Side Borders
Don’t simply cut the side borders to 48½ inches without checking the actual quilt.
Measure vertically through the center of the quilt panel.
Ideally, the measurement will be approximately:
48½ inches
Trim two border strips to:
6½ inches × your measured center length
Mark the center and quarter points on both the quilt and border.
Step 22 – Sew the Side Borders
Pin each border at:
- Both ends
- The center
- Both quarter points
Ease the fabric evenly between the pins.
Sew one border to each long side using a ¼-inch seam.
Press the seams toward the border.
The quilt should now measure approximately:
48½ × 48½ inches
Step 23 – Add the Top and Bottom Borders
Measure horizontally through the middle of the quilt, including both side borders.
The measurement should be approximately:
48½ inches
Trim the remaining two border strips to:
6½ inches × that measurement
Pin the centers, ends, and quarter points.
Sew one border to the top and one to the bottom.
Press toward the border.
The quilt top should measure approximately:
48½ × 60½ inches
Step 24 – Prepare the Backing
For standard-width backing fabric, divide the 3¾ yards into two approximately equal lengths.
Trim away the selvages.
Place the two panels right sides together and sew along one long edge.
Press the seam open.
Trim the resulting backing panel so it remains at least:
54 × 66 inches
That provides about 3 inches of extra backing beyond each side of the quilt top.
If your longarm quilter requires 4 inches or more of extra backing on every side, prepare a larger backing according to their instructions.
Step 25 – Prepare the Batting
Cut or unfold batting measuring at least:
54 × 66 inches
Check the manufacturer’s instructions before quilting.
Different battings have different maximum distances allowed between quilting lines.
Step 26 – Make the Quilt Sandwich
Lay the backing fabric wrong side up.
Smooth it flat.
Center the batting over it.
Place the quilt top right side up over the batting.
Smooth all three layers from the center toward the edges.
Baste thoroughly with safety pins, curved quilting pins, or your preferred basting method.

Step 27 – Quilt the Layers
Straight-line quilting works especially well with Straight Furrows.
One simple option is to quilt approximately ¼ inch beside the major rail seams.
This follows the patchwork and reinforces the diagonal movement without overwhelming it.
Another option is a diagonal grid running in the same general direction as the furrows.
Whichever method you choose, make sure the quilting spacing stays within the maximum distance recommended for your batting.
Step 28 – Trim and Square the Quilt
After quilting, place the quilt on a large cutting surface.
Trim away excess batting and backing so they’re level with the quilt top edge.
Square the corners carefully.
Quilting usually draws the fabric inward slightly, so don’t worry if the quilt is now a little smaller than 48½ × 60½ inches.
Step 29 – Prepare the Binding
Cut:
7 strips at 2½ inches × width of fabric
Join the strips end to end using diagonal seams.
Trim each joining seam to approximately ¼ inch.
Press the seams open.
Press the entire long binding strip in half lengthwise, wrong sides together.
Step 30 – Attach the Binding
Begin midway along one side of the quilt.
Leave approximately 8–10 inches of binding loose before beginning to sew.
Attach the binding to the front of the quilt using a ¼-inch seam.
Stop ¼ inch before each corner.
Fold the binding upward at a 45-degree angle, then fold it back down along the next edge to create the miter.
Continue around all four sides.
Join the beginning and ending tails with a diagonal seam.
Finish stitching the remaining section.
Fold the binding over the raw edge to the back of the quilt and stitch it securely by hand or machine.
Before washing, expect the quilt to measure approximately:
48–48½ × 60–60½ inches
After its first wash and dry, the quilt will usually shrink slightly and develop the soft crinkled texture associated with traditional cotton quilts.
Assembly at a Glance
Leave jelly roll strips unwashed.
Choose 27 strips.
Arrange every set in the same dark-light-medium order.
Make 9 three-strip sets.
Sew with ¼-inch seams.
Press seam allowances away from the light rail.
Check every set measures 6½ inches wide.
Square one end.
Cut 6½-inch blocks.
Make at least 48 blocks.
Use one vertical and one horizontal block as orientation references.
Lay out 6 blocks across × 8 blocks down.
Alternate vertical and horizontal blocks in every row.
Reverse the sequence on the following row.
Check carefully for blocks accidentally rotated 180 degrees.
Photograph and label the layout.
Sew six blocks into each row.
Press odd and even rows in opposite directions.
Join eight rows.
Center panel → approximately 36½ × 48½ inches
Add two 6½-inch side borders.
Add two 6½-inch top and bottom borders.
Quilt top → approximately 48½ × 60½ inches
Prepare backing and batting at least 54 × 66 inches.
Layer and baste.
Quilt along the rails or use a diagonal grid.
Trim the quilt square.
Bind using seven 2½-inch strips.
Finished quilt → approximately 48 × 60 inches
Beginner Tips for Success
Check your first strip set before sewing the remaining eight.
Use a true ¼-inch seam allowance. Small inaccuracies multiply quickly in strip-pieced blocks.
Keep one rail noticeably lighter than the others so the diagonal layout remains easy to see.
Sew the second long seam of each strip set from the opposite direction to help prevent bowing.
Don’t stretch the strip sets while pressing them.
Square one end of every strip set before cutting blocks.
Check the first 6½-inch block from each set before cutting the rest.
Keep the same color order in every strip set.
Use reference blocks when rotating the layout.
Watch carefully for 180-degree rotation errors.
Photograph the layout before moving anything.
Label every row before taking the blocks to your sewing machine.
Measure the quilt through its center before cutting border lengths.
Pin borders at their centers and quarter points to prevent waving.
Scaling It to Other Sizes
Each block finishes at 6 inches, making the design easy to resize.
Keeping the same 6-inch finished border:
Baby quilt:
4 blocks × 6 blocks center = 24 × 36 inches
With borders = approximately 36 × 48 inches
Blocks needed = 24
Lap quilt, as written:
6 blocks × 8 blocks center = 36 × 48 inches
With borders = approximately 48 × 60 inches
Blocks needed = 48
Twin quilt:
8 blocks × 12 blocks center = 48 × 72 inches
With borders = approximately 60 × 84 inches
Blocks needed = 96
Queen quilt:
12 blocks × 14 blocks center = 72 × 84 inches
With borders = approximately 84 × 96 inches
Blocks needed = 168
For larger sizes, recalculate border yardage, backing, batting, and binding separately.
Each three-strip set can yield up to six blocks when it has slightly more than 39 inches of usable length. Divide the required number of blocks by six and round upward to estimate the minimum strip sets, then add an extra set if your strip lengths are uncertain.
Styling It & Gift Ideas
The strong diagonal movement makes a Straight Furrows Rail Fence quilt particularly effective in rooms with simple furniture and solid bedding, where the patchwork can become the main source of color.
The teal, yellow, and coral version works beautifully against white, cream, pale oak, or warm neutral surroundings.
For a quieter bedroom, try navy, ivory, and sage.
For a dramatic living room throw, use plum, magenta, and golden yellow.
It also makes an appealing:
- Housewarming quilt
- Colorful guest-room throw
- Graduation gift
- Beginner’s first full quilt
- Sofa throw
- Dorm-room quilt
- Children’s reading-corner quilt
Because the construction uses only straight strip seams and block rotations, it gives beginners a visually impressive result without requiring triangles, curves, templates, or complicated piecing.
Final Thoughts
The Straight Furrows layout is a perfect example of how block placement can completely transform an uncomplicated quilt.
Every block is still just three straight strips sewn together. The drama comes when alternating blocks rotate 90 degrees and the repeated color order begins forming diagonal pathways across the surface.
Keep your strip order consistent, use enough contrast between the three rails, check every rotation before sewing the rows together, and the diagonal furrows will emerge naturally. With vibrant teal, sunshine yellow, and coral framed in a deep border, the finished quilt feels bold and energetic while remaining genuinely approachable for a beginner.
Other Design Inspirations – Digitally Modified Images. Texture and color may vary from the actual product.
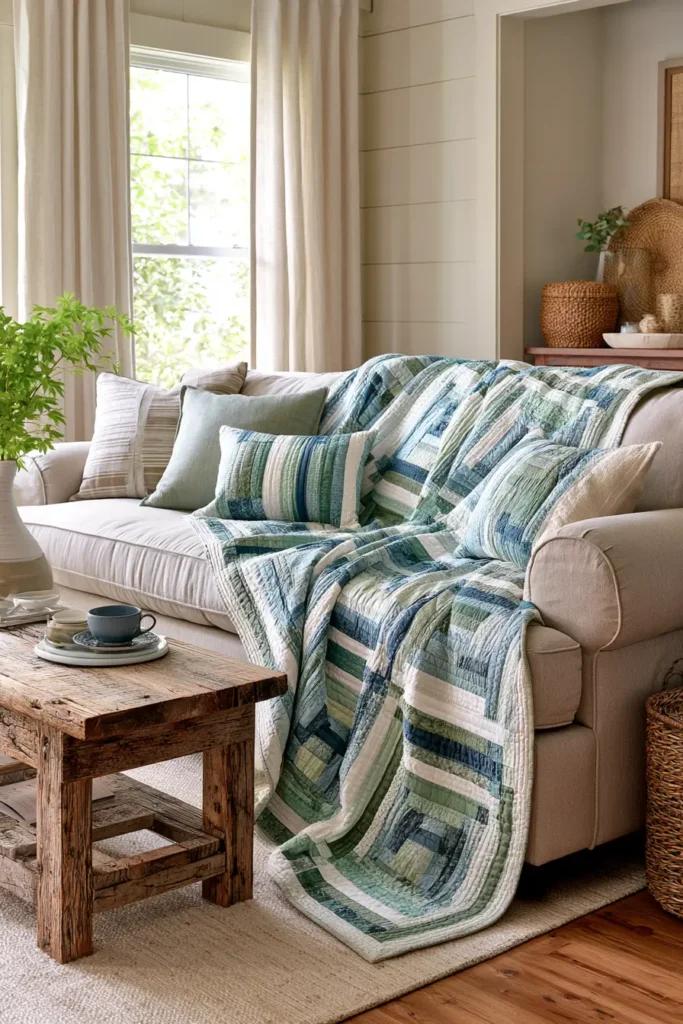
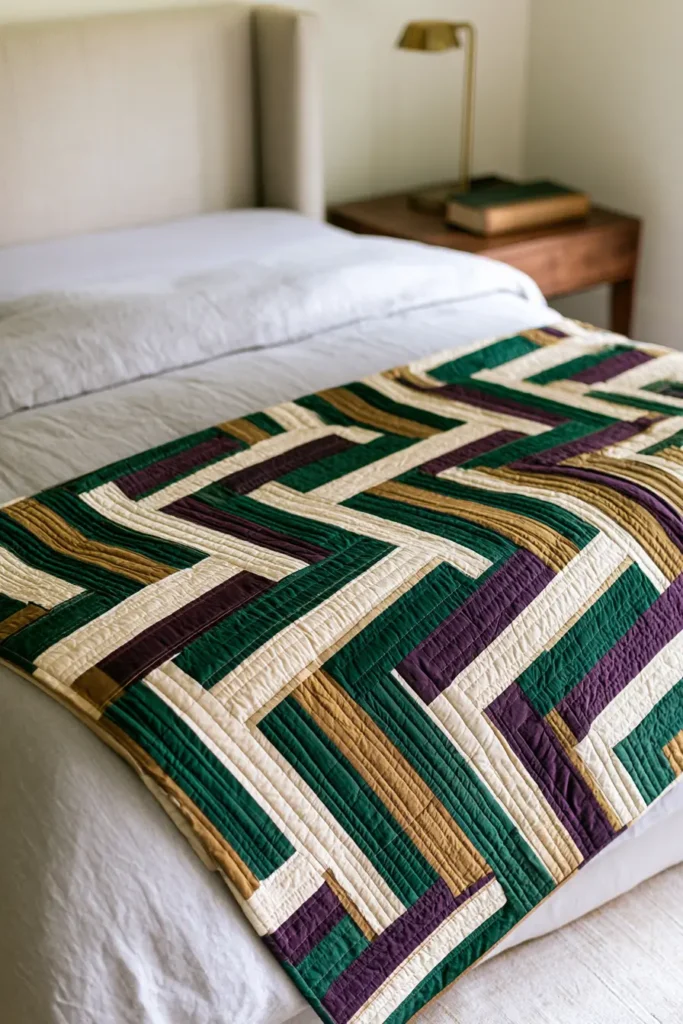
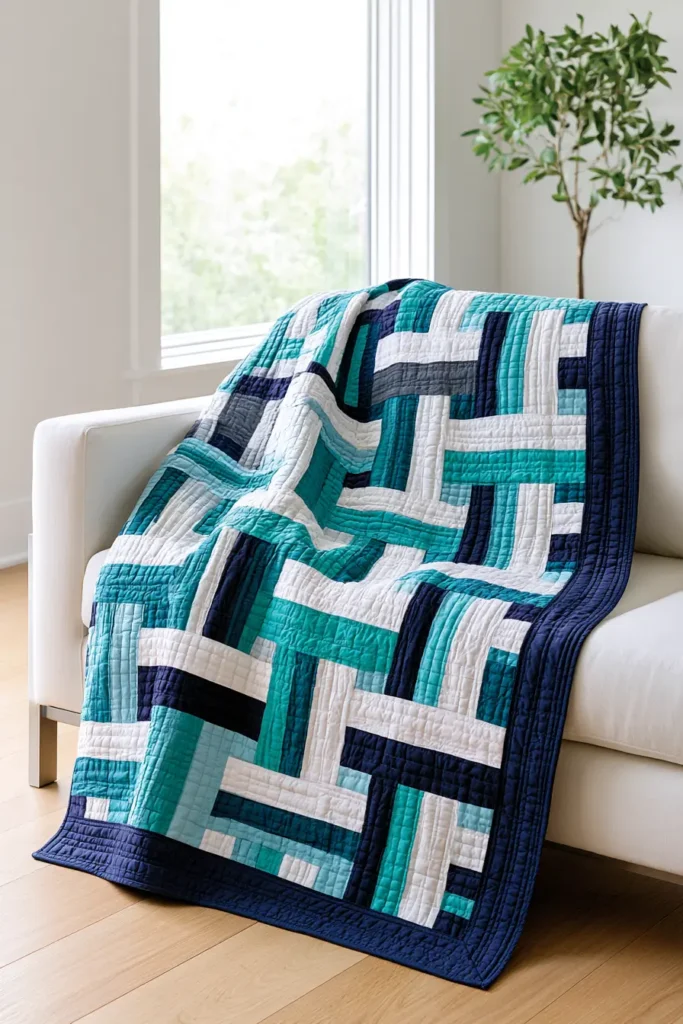
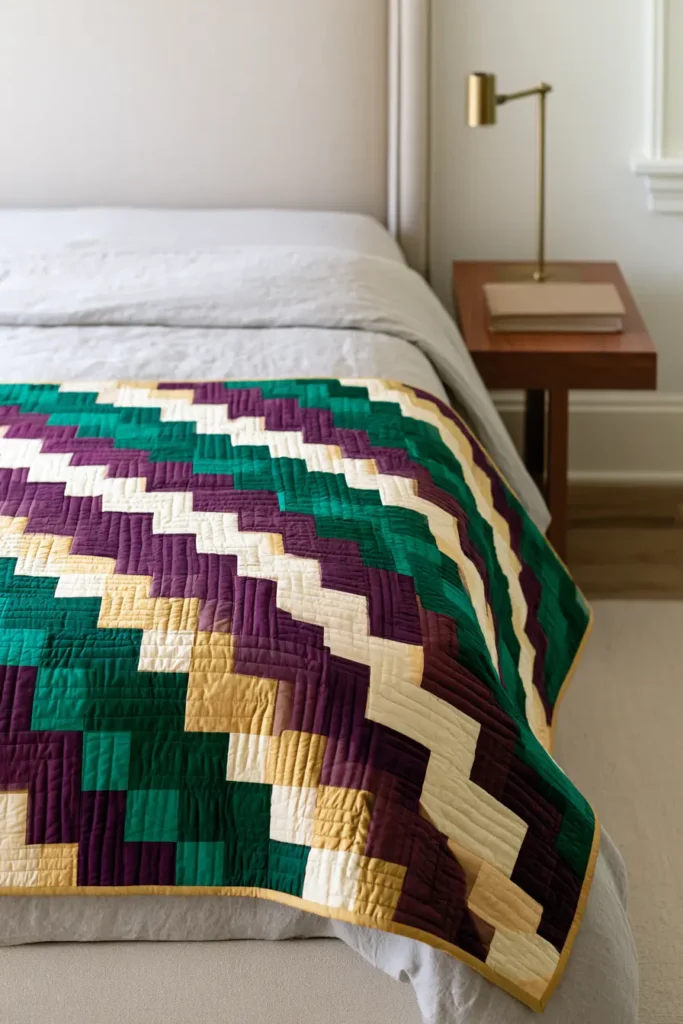
5. Zigzag Rail Fence Quilt for Playful Movement
A straight furrow layout sends diagonal bands marching steadily across a quilt. A zigzag layout does the same thing – and then turns around. The bands travel diagonally for a few rows, reverse, and travel back the other way, folding into big chevrons that bounce across the surface. It’s the liveliest arrangement in this collection and, like every rail fence variation, it needs nothing more than straight seams and careful placement.
In vibrant colors – hot pink, lime, and turquoise, or cobalt, tangerine, and cream – the zigzag reads as pure energy. It’s a wonderful choice for a child’s quilt, a bright sofa throw, or anywhere a room could do with waking up.
The Layout Rule
The layout begins with a repeating four-block sequence:
H, H, V, V, H, H, V, V…
Each following row shifts that sequence one place across the quilt. Here’s the part that makes it a zigzag rather than a straight diagonal: the shift moves right for two rows and then back left for two, so the diagonal bands reverse direction and fold into chevrons.
Here’s the shift sequence for this quilt – nine rows, eight blocks across:
| Row | Shift | Block orientation across the row |
|---|---|---|
| 1 | 0 | H H V V H H V V |
| 2 | 1 | V H H V V H H V |
| 3 | 2 | V V H H V V H H |
| 4 | 1 | V H H V V H H V |
| 5 | 0 | H H V V H H V V |
| 6 | 1 | V H H V V H H V |
| 7 | 2 | V V H H V V H H |
| 8 | 1 | V H H V V H H V |
| 9 | 0 | H H V V H H V V |
The shift climbs 0, 1, 2, then comes back down 1, 0 – and repeats. Rows 3 and 7 are the turning points where each chevron reaches its tip.
Follow any band of matching blocks down the quilt, and you’ll see it travel right for two rows, then left for two, then right again. That’s your zigzag.
Design Inspirations – Digitally Modified Images. Texture and color may vary from the actual product.
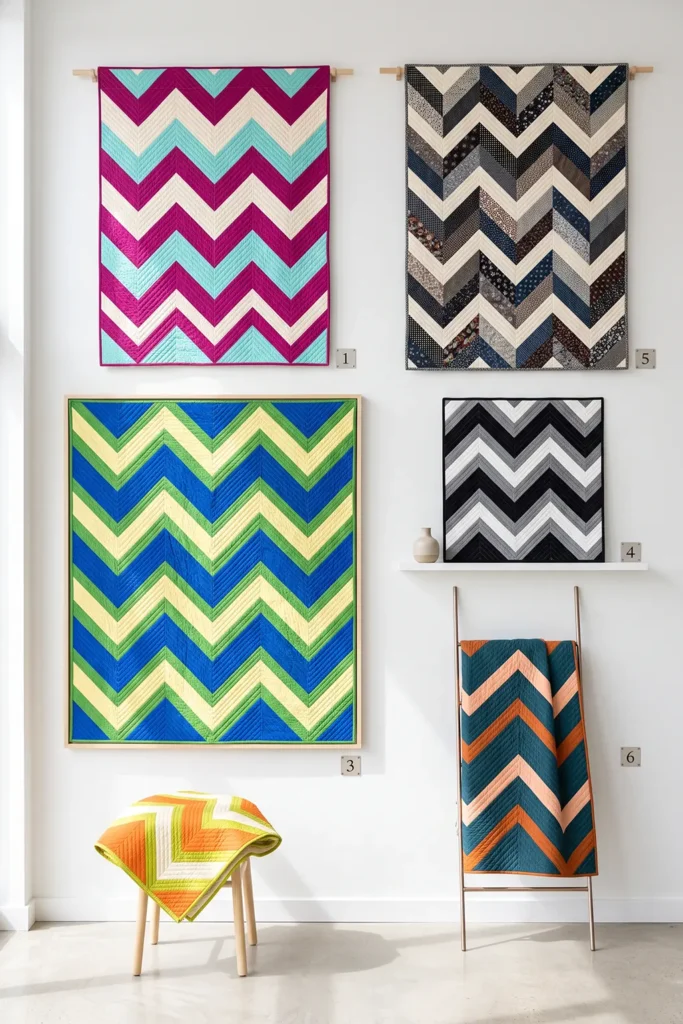
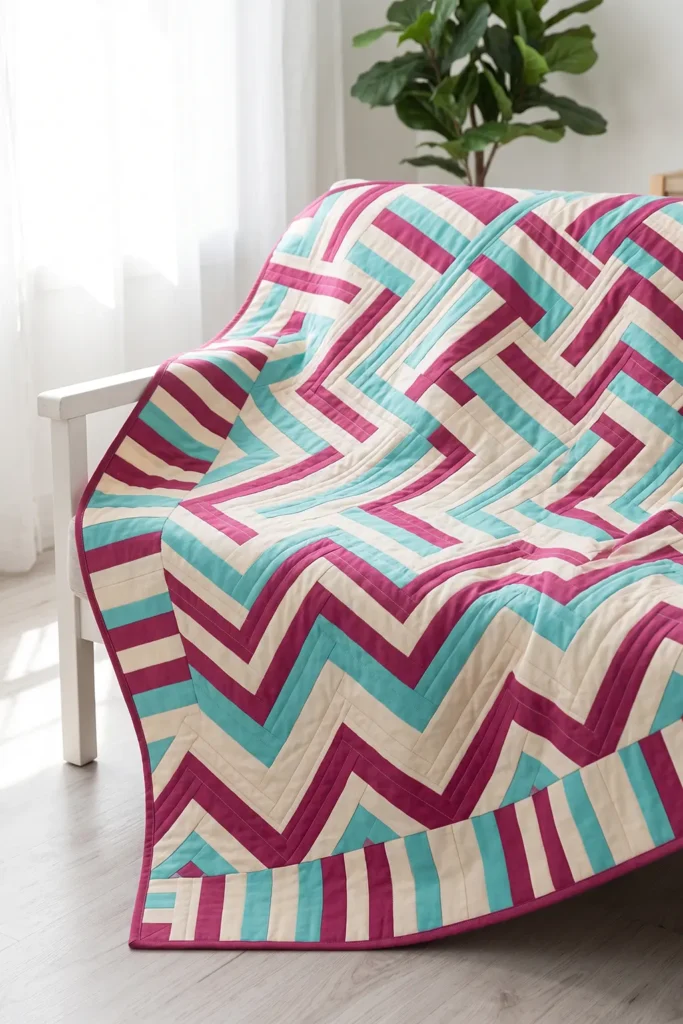
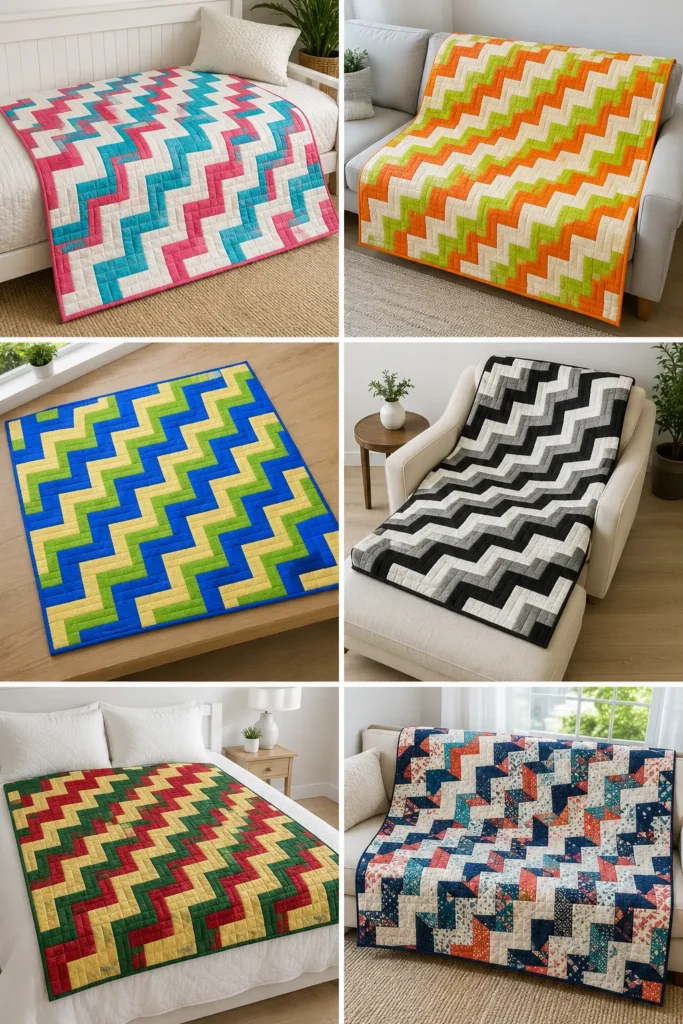
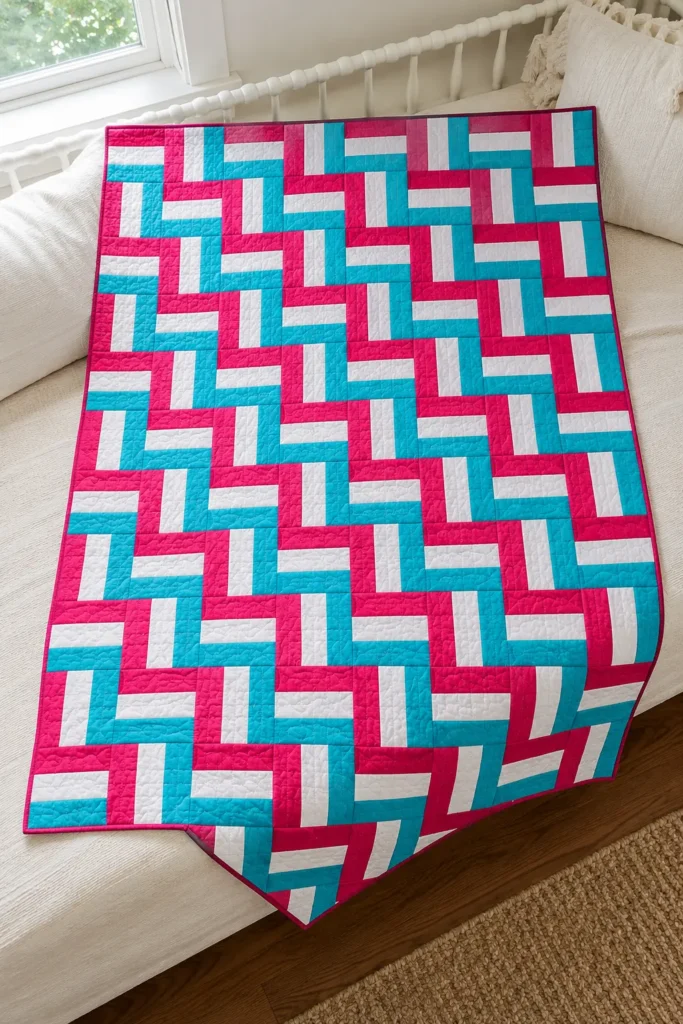
Why the Light Rail Goes in the Middle
For straight furrows, a graded block – dark, medium, light – works beautifully, because the bands all run the same way and the shading runs with them.
Zigzag is different. The bands reverse direction halfway through each chevron, so a graded block that looked right on the way down looks backward on the way back up.
A light-centered arrangement reduces the problem. Use dark, light, medium with the light strip in the middle. That pale rail stays centered whichever way a block faces, so your eye can follow it around the corners of each chevron – and both seam allowances can be pressed away from it, so no dark allowance shadows through.
It isn’t fully symmetrical, though, and it’s worth being clear about that: turn a block 180 degrees and the dark and medium outer rails swap places. That’s why the rotation check at Step 14 still matters. If you want genuine rotational symmetry you’d need matching outer rails – dark, light, dark – but that gives a two-color block and a different look, so dark-light-medium is the better trade here.
A Little History: Streak of Lightning
A closely related traditional zigzag setting has a much better name: Streak of Lightning. It’s a documented historical quilt-pattern name, most closely associated with log cabin blocks arranged into bold zigzag bands, and surviving examples date from the nineteenth and early twentieth centuries. The description is exactly right – a bolt frozen mid-flash across the surface.
This rail fence version borrows the same visual idea, reversing the diagonal movement to make lightning-like chevrons, but gets there with simple three-rail blocks. That’s the principle behind this whole article: the block does the sewing, and the layout does the design.
How the Block Works
- Three strips cut 2½ inches wide, sewn together along their long edges
- Joined with ¼-inch seams, the set measures exactly 6½ inches wide
- Cut across the set at 6½-inch intervals. Each section is a 6½-inch unfinished block, finishing at 6 inches in the quilt
Every block shares the same construction, value order, and dimensions, though the individual fabrics can vary.
Finished Size
- Block: 6 inches finished (6½ inches unfinished)
- Layout: 8 blocks across × 9 blocks down = 72 blocks
- Quilt top: 48½ × 54½ inches unfinished
- Nominal design size: 48 × 54 inches
- Actual bound size: roughly 48-48½ × 54-54½ inches before washing, depending on how much the quilting draws the layers up. Expect a little more shrinkage in the first wash
- Skill level: true beginner to sew; the layout needs care
- Core techniques: strip sets, straight cutting, reversing shifted layout, binding
Materials Needed
- At least 39 suitable strips at 2½ inches × width of fabric, made up of 13 dark, 13 light, and 13 medium. A 40-strip jelly roll covers this only just – it leaves a single spare strip, not enough for an extra set – and a mixed bundle may not hold thirteen in each value group. Either start with a bundle or selection holding at least 14 dark, 14 light, and 14 medium suitable strips, or keep three coordinating full-width strips aside as insurance – a 42-strip bundle doesn’t guarantee the right value distribution. Alternatively, cut 39 strips from at least 2⅞ yards of fabric
- Binding: ½ yard, cut into 7 strips at 2½ inches
- Backing: 3¾ yards of standard-width fabric left unwashed (4 yards if you plan to prewash it), cut into two equal lengths and seamed along their long edges; or 2 yards of 108-inch wide backing unwashed, 2¼ yards if prewashing
- Batting: at least 54 × 60 inches. That leaves about 2¾ inches beyond every edge of the top, fine for careful quilting on a domestic machine. If you’re using a longarm quilter, ask what allowance they need – many want at least 4 inches per side
- Thread: neutral cotton
- Rotary cutter, cutting mat, quilting ruler, pins or clips, iron
Beginner tip: don’t prewash the jelly roll strips. Precut strips have pinked edges, and washing 2½-inch strips causes fraying and distortion. If you cut your own strips from yardage, leave that unwashed too, so the whole quilt top shrinks together in the first wash. The backing can be prewashed if you prefer.
Choosing Your Colors
Zigzag suits bright, high-energy palettes better than any other layout here:
- Playful: hot pink, white, and turquoise
- Citrus: tangerine, cream, and lime
- Cobalt bright: cobalt blue, pale yellow, and grass green
- Bold neutral: black, white, and mid gray for a graphic version
- Scrappy: many fabrics, always dark-light-medium in that order
Whatever you choose, the middle rail must be genuinely light. It’s the thread your eye follows around every corner of the zigzag, and if it sits too close in value to the outer rails the chevrons soften into texture and the movement disappears.
You can happily vary the prints – several different fabrics within each value group look livelier than three repeated across all 72 blocks – as long as each stays firmly in its value lane.
Cutting Measurements
- Strip sets: 13 sets, each made from 3 strips in dark-light-medium order. Each set measures 6½ inches wide × about 40 inches long once selvages are removed
- Blocks: cut 6½-inch squares across each set. A set yields up to six blocks, but only with slightly more than 39 inches of usable length after squaring one end. Thirteen sets should give around 78 blocks against the 72 needed
- Backing panel: at least 54 × 60 inches
- Batting: 54 × 60 inches
- Binding: seven strips, 2½ inches × width of fabric
Step-by-Step Guide
Step 1 – Prepare your strips and check their length. Leave the jelly roll strips unwashed. Select 39 strips and remove any selvage from their ends.
Measure a handful of them. A strip needs about 40 inches of usable length to give six blocks (six cuts at 6½ inches, plus a little for squaring one end). If yours are comfortably over that, you’re in good shape. If several are running short, don’t worry yet – you’ll do the arithmetic properly once the strips are grouped, at the end of Step 3.
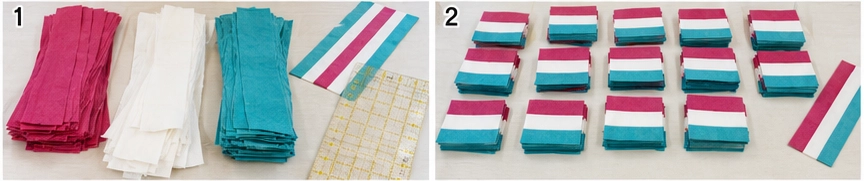
Step 2 – Set your value sequence. Arrange every set as dark, light, medium, with the light strip in the center. Write it down. The centered light rail is what carries the eye around the corners of each chevron, and it must be identical in all thirteen sets.
Step 3 – Sort the strips into groups and calculate the yield. Divide your 39 strips into thirteen piles of three, each in dark-light-medium order. Doing this before you sew lets you see now that you’re short on lights, rather than after ten sets are done.
Now work out what those groups will actually produce, because “just add one more set” isn’t reliable arithmetic here. For each group, take the shortest strip in it, subtract about an inch for squaring, and divide what’s left by 6½ inches – that’s the number of blocks that set will give.
Add the thirteen figures together and check the total reaches 72. As a guide: if at least seven groups will give six blocks and the rest five, thirteen sets are enough (7 × 6 + 6 × 5 = 72). If the total falls short, make up as many extra complete groups as the arithmetic requires – thirteen sets all yielding five would give only 65, so a single extra set wouldn’t close that gap.

Step 4 – Sew the first strip set. Sew the dark and light strips together with a ¼-inch seam. Add the medium strip to the other side of the light one, but start that seam from the opposite end of the set. Sewing both long seams in the same direction encourages a strip set to bow into a shallow curve; starting from opposite ends keeps that to a minimum.

Step 5 – Press the set. Press both seam allowances away from the light center strip, toward the darker fabric on either side. That keeps a dark seam allowance from sitting behind your palest rail, where it can shadow through from the front. Press from the back first, then the front, without stretching.
Step 6 – Check the width. Measure across the pressed set: it should be exactly 6½ inches. If it’s narrower, your seam allowance is running wide – adjust your machine now, before making twelve more sets. This one measurement determines the accuracy of every block.

Step 7 – Make the remaining sets. Repeat steps 4 to 6 until you have completed all thirteen primary sets plus any additional sets your Step 3 calculation called for – all in dark-light-medium order and all measuring 6½ inches wide.
Step 8 – Square one end of a set. Lay a set on the cutting mat and trim a clean edge at one end, cutting at a true right angle to the long seams. Anything you cut from this set is only square if that first cut is.

Step 9 – Cut and check the first block. Measuring from the squared end, cut one 6½-inch section. Turn it on the mat and check with a ruler that it measures 6½ inches in both directions with four square corners. A bowed set or a slightly angled first cut gives a parallelogram rather than a square, and it’s far better to discover that on block one.
Step 10 – Cut the remaining blocks. Once the first checks out, cut up to five more from that set, then work through every set you prepared. Keep cutting until you have at least 72 accurate, usable blocks – thirteen full-length sets can give as many as 78.

Step 11 – Make two reference blocks. Set one block with its rails running horizontally and another with its rails running vertically, and keep them beside your layout area. Every block you place gets checked against these two. It takes seconds and prevents the most common mistake in a shifted layout.
Step 12 – Test the pattern on a small scale. Before committing all 72 blocks, lay out just the first three rows using the table above: H H V V H H V V, then V H H V V H H V, then V V H H V V H H. Step back several feet. You should see the bands stepping to the right. That’s the first arm of your zigzag.

Step 13 – Lay out the full quilt. Arrange all 72 blocks 8 across × 9 down, following the shift sequence: rows 1 to 3 step right (shift 0, 1, 2), rows 4 and 5 step back left (shift 1, 0), rows 6 and 7 step right again (shift 1, 2), and rows 8 and 9 come back (shift 1, 0).
Rows 3 and 7 are your turning points. Stand back and check the chevrons read: the bands should travel right, fold back, and travel right again.
Step 14 – Check every block’s rotation. A block can face the right way and still be turned 180 degrees, which reverses its dark and medium rails. Compare each block against your two reference blocks, and set a rule you hold to throughout: dark rail at the top of every horizontal block, and at the left of every vertical block. Which sides you choose doesn’t matter; consistency does.

Step 15 – Photograph and label the rows. Take a clear overhead photo, then place a numbered label beside each row. Gather each row from left to right and pin its label to the first block, keeping every stack facing upward. With a shifting layout, one row assembled in the wrong sequence breaks every chevron across the quilt.
Step 16 – Sew the rows. Sew each row of eight blocks together with a ¼-inch seam, checking every block’s direction against your photo as you go. Each row should measure 48½ × 6½ inches. Press the block-joining seam allowances of odd-numbered rows to the right and those of even-numbered rows to the left, so they nest when you join the rows.

Step 17 – Recheck the layout before joining. Return the nine sewn rows to the floor or design wall in order and look at the chevrons again. Correcting a reversed block now means unpicking one row seam; correcting it after the whole center is assembled means unpicking several.
Step 18 – Join the rows. Sew the nine rows together in order, pinning at each block boundary, where the opposing row press directions lock the seams together.
Where two vertical-rail blocks sit one above the other, their internal rail seams should continue in a straight line across the row seam. Those seams cross the row seam at right angles and won’t nest, so align and pin them by eye before sewing. Press the row seams open to spread the bulk, or consistently to one side. The top should measure 48½ × 54½ inches.
Step 19 – Prepare the backing. Using standard-width fabric: if unwashed, cut the 3¾ yards into two equal lengths of about 67½ inches; if you bought 4 yards and prewashed it, measure what you actually have and divide that in two, confirming each piece is still at least 60 inches long after squaring. Trim the selvages, sew the pieces together along their long edges, and press the seam open. Using 108-inch wide backing: no seam is needed – square one end and cut a single panel. Either way, confirm the panel measures at least 54 × 60 inches.
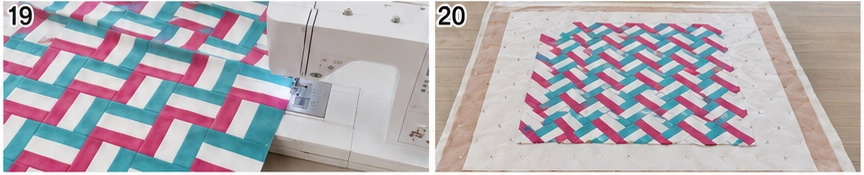
Step 20 – Make the quilt sandwich. Lay the backing wrong side up, center the batting on it, then the quilt top right side up. Smooth everything from the center outward and baste with pins or basting spray.
Step 21 – Quilt it. An all-over design suits zigzag well, because the layout is already busy – a gentle meander or a simple diagonal grid lets the chevrons speak without competing. If you want to emphasize the movement instead, quilt straight lines that follow the zigzag itself, turning at rows 3 and 7.
Before choosing your spacing, check your batting packaging for its maximum quilting distance. Most battings specify how far apart the lines can be before the fibers shift in the wash, and it varies between cotton, wool, and polyester.
Step 22 – Trim and square up. Trim the excess batting and backing level with the edge of the quilt top, squaring the corners. Quilting always draws the layers up a little, so the top may finish just under 48½ × 54½ inches, which is normal. Trim only the excess batting and backing – don’t reduce the quilt top unless a small amount of squaring is genuinely needed. That outer ¼ inch is the binding’s seam allowance.
Step 23 – Make and attach the binding. Take it in order:
- Cut seven strips at 2½ inches × width of fabric, then join them end to end with diagonal seams – lay two strip ends at right angles, right sides together, sew corner to corner across the overlap, trim the excess to ¼ inch, and press that seam open.
- Press the whole strip in half lengthwise, wrong sides together.
- Start partway along one side, not at a corner, and leave the first 8-10 inches unsewn as a tail.
- Sew the binding to the front with a ¼-inch seam, stopping ¼ inch before each corner.
- Miter each corner: fold the binding straight up to form a 45-degree diagonal, then fold it back down level with the next edge, and resume sewing from the fold.
- Join the two tails where they meet, trim the excess, and finish the last stretch of seam.
- Fold the binding to the back and stitch it down, folding the mitered corners neatly as you reach them.
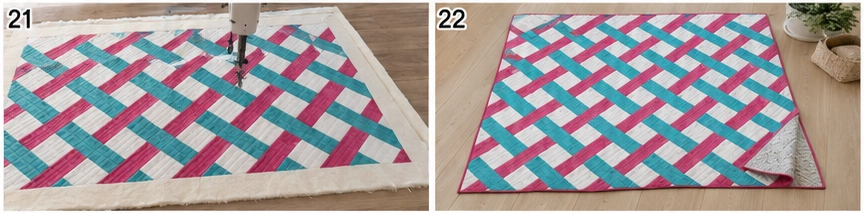
Step 24 – Wash and finish. Before washing, the quilt should measure roughly 48-48½ × 54-54½ inches. Wash gently on cold with a color catcher and tumble dry low; expect it to come out slightly smaller and softly crinkled.
Assembly at a Glance
- Leave strips unwashed; take 39 and measure their usable length.
- Use dark, light, medium in every set, with the light strip in the center.
- Sort into thirteen groups of three, then calculate each group’s yield and add complete groups until the total reaches 72 blocks.
- Sew dark+light, then add medium starting from the opposite end.
- Press both seams away from the light center strip.
- Check the set measures 6½ inches wide.
- Make all thirteen primary sets, plus any extras your calculation required.
- Square one end of a set.
- Cut one block and check it’s 6½ inches square with true corners.
- Cut from every set until you have at least 72 usable blocks.
- Make one horizontal and one vertical reference block.
- Test the first three rows and check the bands step right.
- Lay out 8 × 9 with shifts 0, 1, 2, 1, 0, 1, 2, 1, 0.
- Check no block is turned 180 degrees.
- Photograph and label the nine rows.
- Sew rows of eight → 48½ × 6½; press odd right, even left.
- Recheck the chevrons before joining.
- Join the rows, matching block boundaries and vertical rail seams → 48½ × 54½ top.
- Prepare a 54 × 60-inch backing panel.
- Layer and baste.
- Quilt; check the batting’s maximum quilting distance.
- Trim batting and backing level with the top.
- Bind with seven strips, diagonal joins and mitered corners.
- Wash cold with a color catcher → about 48-48½ × 54-54½ inches.
Beginner Tips for Success
- Calculate the expected yield after grouping and add as many complete sets as the arithmetic requires – not automatically just one.
- Keep the center rail genuinely light – it’s what carries the eye around each chevron.
- Alternate the sewing direction on the two long seams to keep sets from bowing.
- Press both seams away from the light center strip.
- Make two reference blocks and check every block against them as you lay out.
- Test three rows before committing all 72 blocks.
- Remember rows 3 and 7 are the turning points – that’s where the shift reverses.
- Recheck after sewing the rows but before joining them. Much cheaper to fix at that stage.
- Photograph and label the rows before carrying blocks to the machine.
Scaling It to Other Sizes
Every block finishes at 6 inches. The shift sequence repeats every four rows (0, 1, 2, 1), so row counts in multiples of four plus one give the tidiest chevrons – 9, 13, or 17 rows:
- Baby quilt: 6 across × 9 down = 36 × 54 inches (54 blocks)
- Lap quilt (as written): 8 × 9 = 48 × 54 inches (72 blocks)
- Twin topper: 10 × 13 = 60 × 78 inches (130 blocks) – sized for the mattress top; add rows for a longer drop
- Queen: 14 × 17 = 84 × 102 inches (238 blocks)
For strip sets, divide your block count by the number of blocks each set will actually yield, and keep adding sets until the total reaches what you need. If you’ve confirmed every set will give six, divide by six, round up, and add one more as cutting insurance. Multiply the number of sets by three for the strips needed, and work out backing, batting, and binding separately.
Styling It & Gift Ideas
Zigzag is the most energetic layout here, so it belongs where a room could use some lift – a child’s bedroom, a sunny reading corner, a plain sofa that needs waking up. Bright palettes suit it best; against white walls and simple furniture, the chevrons do all the work.
Its playfulness makes it a natural gift:
- A children’s quilt – the bouncing chevrons are genuinely fun to look at
- A baby quilt at 6 × 9 blocks, in bright or pastel versions
- A dorm or first-apartment quilt, cheerful and hardwearing
- A gift for someone who likes bold color and would find a calm neutral quilt dull
Final Thoughts
A zigzag rail fence is the straight furrows layout with a change of heart. Same block, same four-block pattern, same one-step shift – but instead of continuing in one direction, the shift climbs and then falls back, folding the diagonals into chevrons that bounce across the quilt. Keep the center rail genuinely light so the eye can follow the turns, check every block against your two references, and recheck the chevrons before you join the rows. Do that, and you’ll finish with the liveliest quilt in this collection from nothing more than straight seams and careful placement.
Other Design Inspirations – Digitally Modified Images. Texture and color may vary from the actual product.
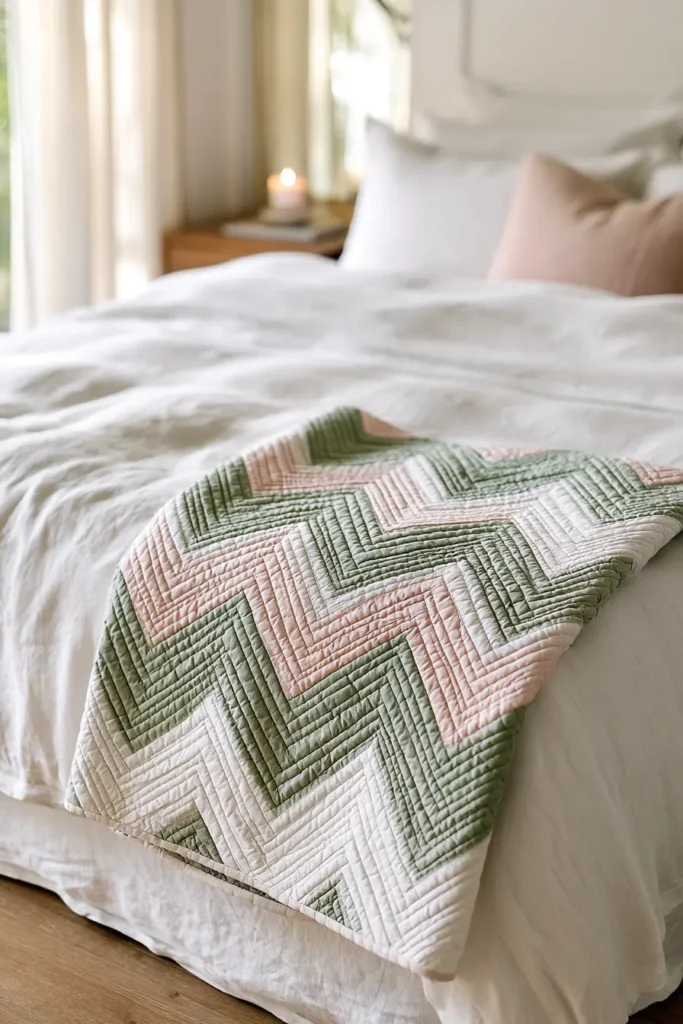
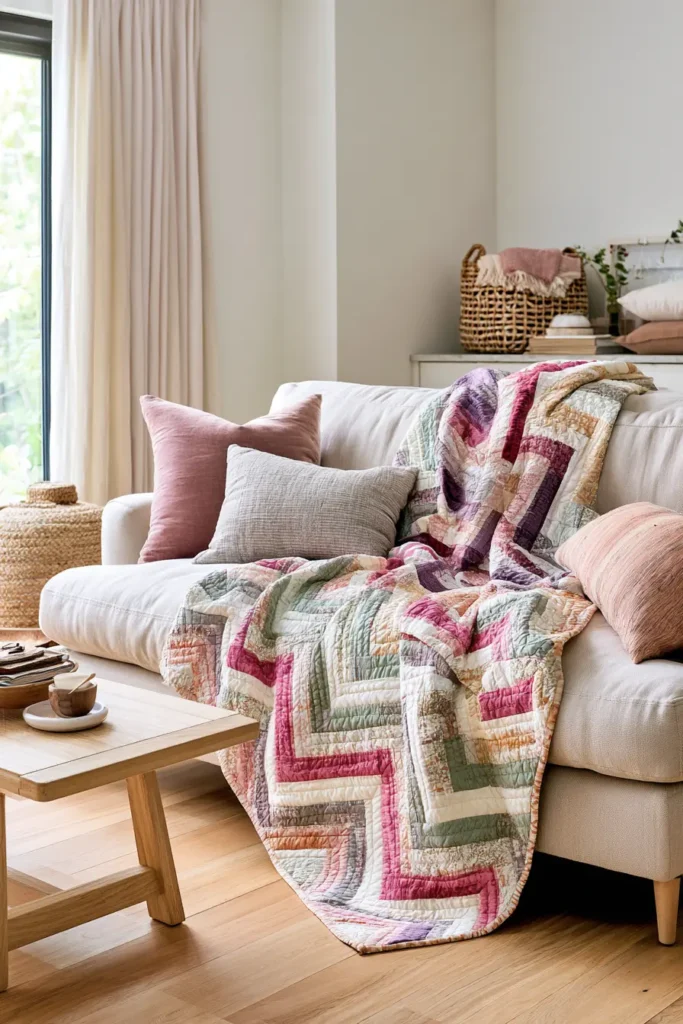
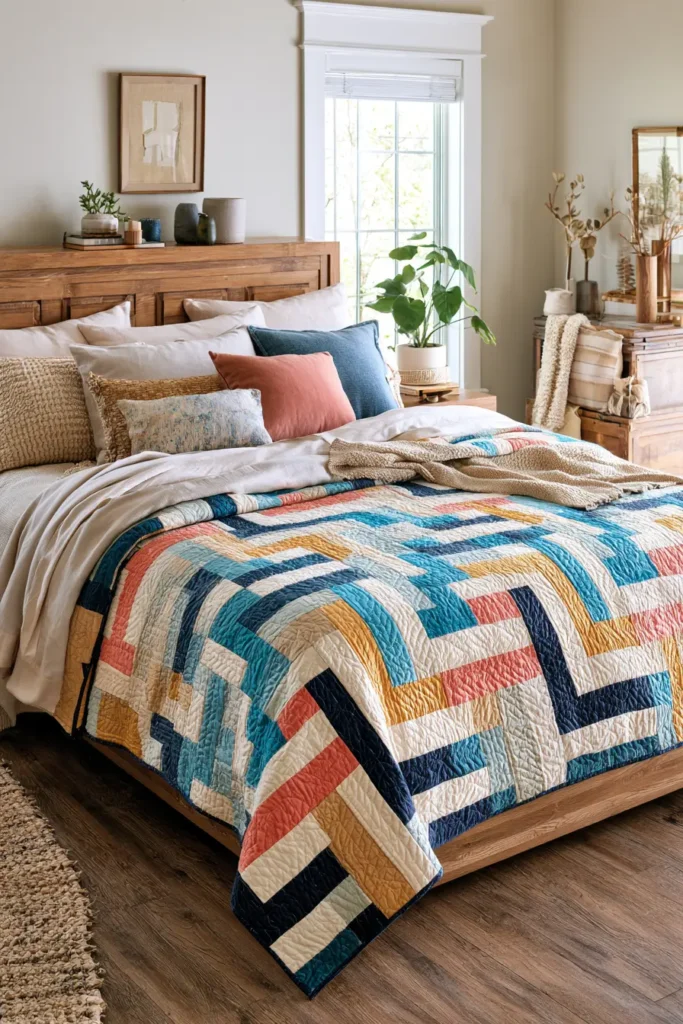
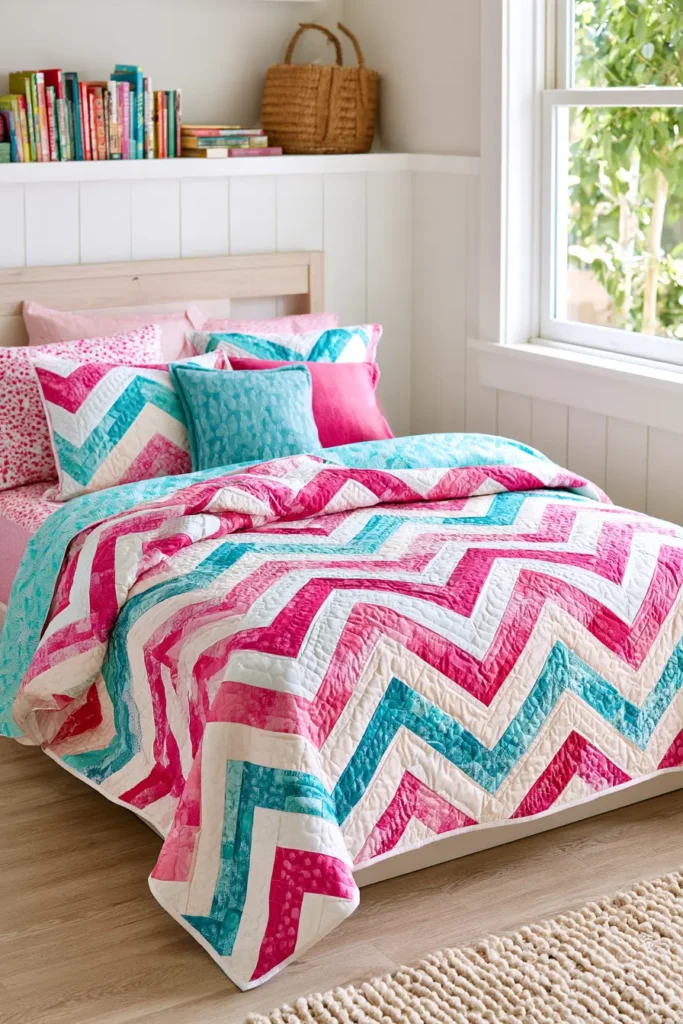
6. Two-Color Rail Fence Quilt for Modern Graphic Style
A Rail Fence quilt does not need a large fabric collection to make a strong visual statement. Reducing the design to only two colors strips away the distraction of multiple prints and lets the geometry become the main feature.
For this version, every block uses three rails in the same sequence:
navy → white → navy
Then rotate the blocks 90 degrees in alternating positions. The repeated dark rails frame the light center rail, producing crisp graphic bars that shift direction across the quilt.
Two-color quilts have long been popular because contrast can make very simple patchwork look remarkably sophisticated. Here, the construction remains completely beginner-friendly: straight strips, straight cuts, square blocks, and straightforward block rotation.
How the Block Works
Each block is constructed from three 2½-inch-wide strips.
Use:
- Navy
- White
- Navy
After sewing the two long seams with a ¼-inch seam allowance:
2½ + 2½ + 2½ – ½ – ½ = 6½ inches
The completed strip set measures:
6½ inches wide
Cut the set crosswise into:
6½-inch squares
Each block therefore measures:
6½ × 6½ inches unfinished
and finishes at:
6 × 6 inches
inside the quilt.
Design Inspirations – Digitally Modified Images. Texture and color may vary from the actual product.
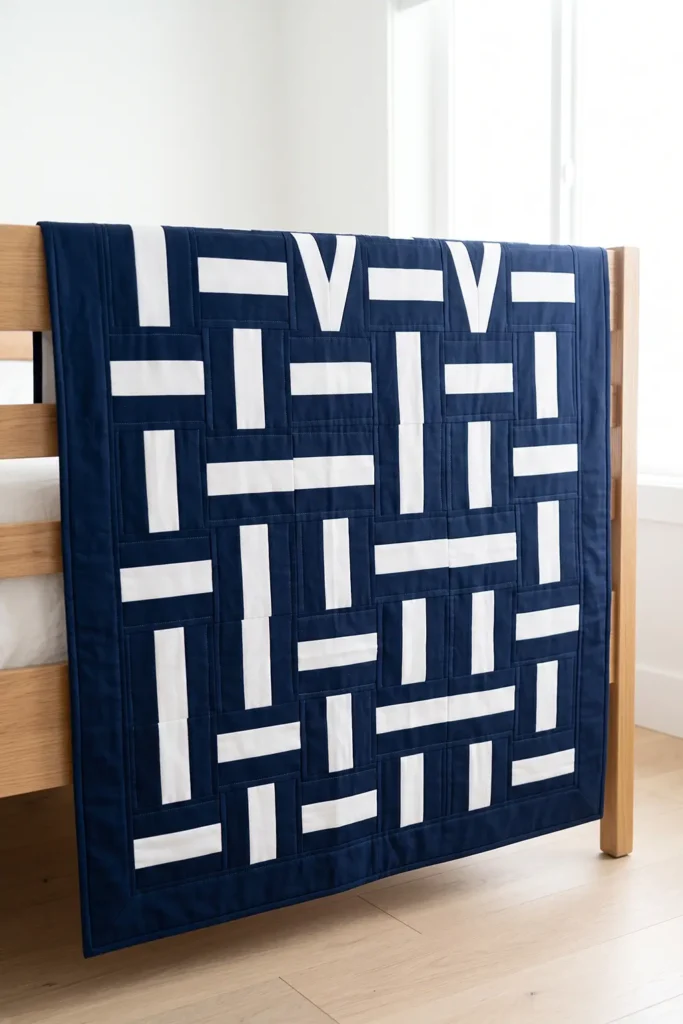
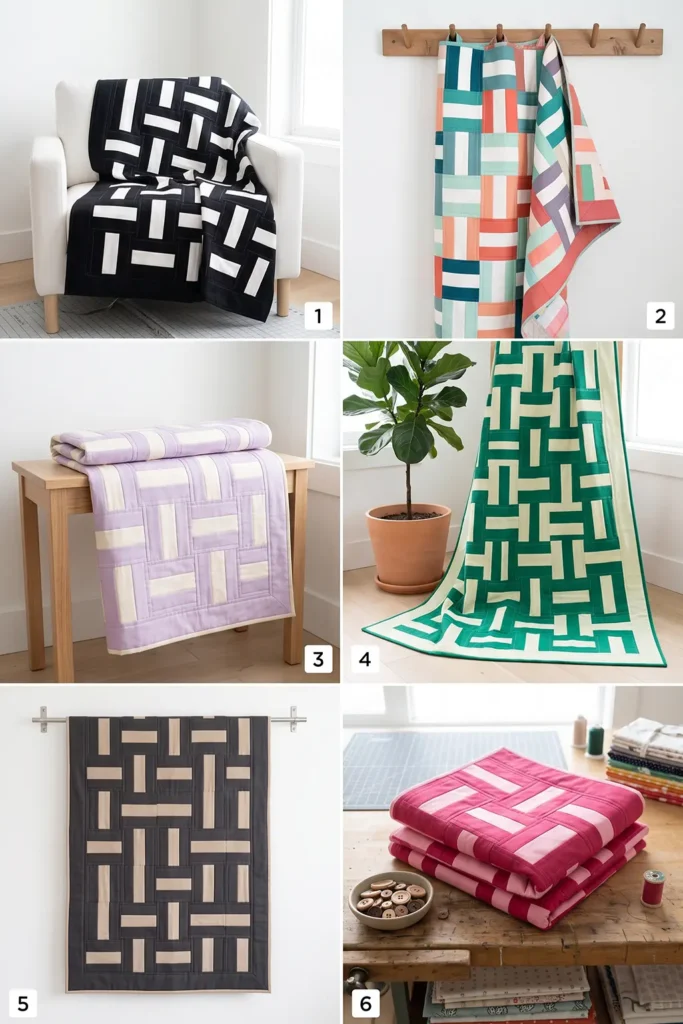
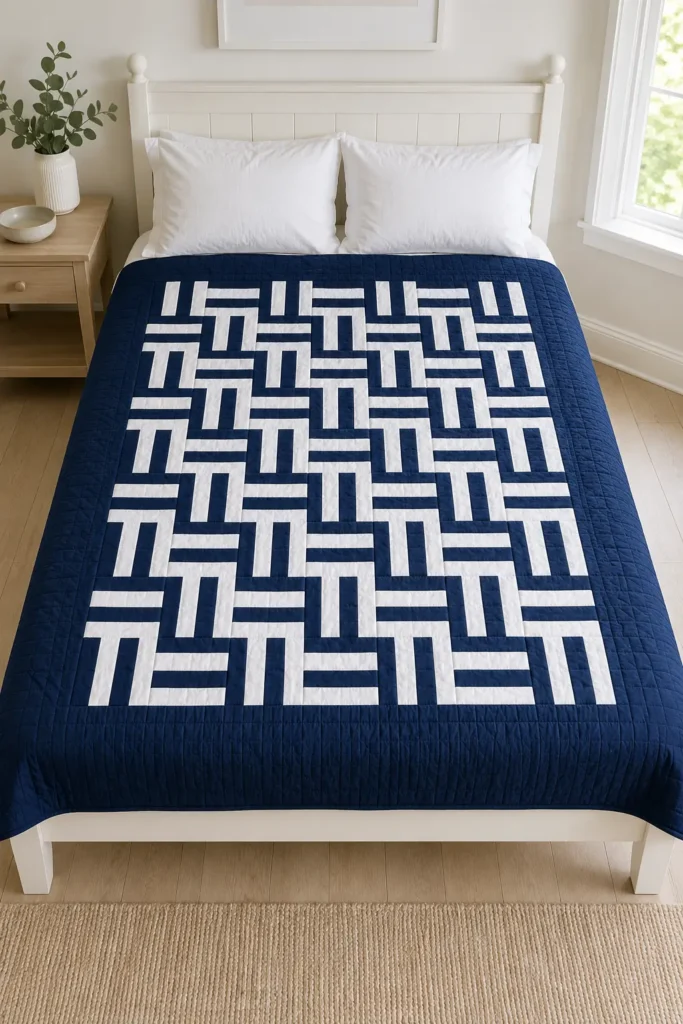
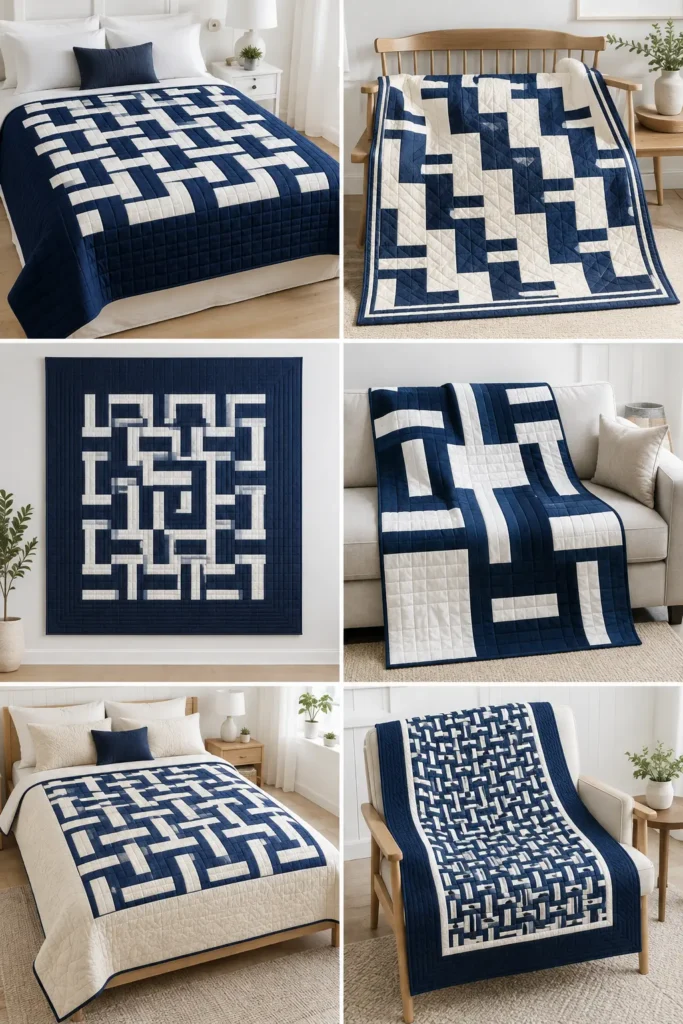
How the Layout Works
The modern graphic effect comes from alternating block orientation.
Use:
Row 1: vertical, horizontal, vertical, horizontal, vertical, horizontal
Row 2: horizontal, vertical, horizontal, vertical, horizontal, vertical
Repeat those two rows throughout the center.
Because every block uses the same navy-white-navy arrangement, the repeated rotations create bold dark and light pathways without requiring complicated piecing.
Getting the Two-Color Pattern to Read Clearly
Contrast is everything in this quilt.
Choose one fabric that is clearly dark and another that is clearly light.
For this version:
- Deep navy — dark
- Bright white — light
Other successful combinations include:
- Black and white
- Cobalt and ivory
- Emerald and cream
- Raspberry and pale pink
- Deep purple and soft lavender
- Charcoal and bright yellow
Avoid choosing two fabrics that are close in value. Medium blue and medium gray, for example, may merge visually and soften the graphic effect considerably.
Solid fabrics create the cleanest modern look, but small-scale prints can also work if they still read clearly as light and dark from several feet away.
Finished Size
Block: 6 inches finished
Block unfinished: 6½ inches square
Center layout: 6 blocks across × 8 blocks down
Blocks required: 48
Center finished size: 36 × 48 inches
Center unfinished size: 36½ × 48½ inches
Border: 6 inches finished on all four sides
Quilt top unfinished size: 48½ × 60½ inches
Nominal finished size: 48 × 60 inches
Actual size before washing: approximately 48–48½ × 60–60½ inches, depending on quilting density
Skill level: Beginner
Core techniques: strip piecing, rotary cutting, block rotation, row assembly, borders, quilting, and binding
Materials Needed
For the blocks:
- 18 navy jelly roll strips, 2½ inches × width of fabric
- 9 white jelly roll strips, 2½ inches × width of fabric
Or cut equivalent 2½-inch strips from yardage.
Also:
- 1¾ yards navy fabric for the border
- ½ yard white, navy, or contrasting fabric for binding
- 3¾ yards standard-width backing fabric
- Or about 2 yards of 108-inch-wide backing
- Batting at least 54 × 66 inches
- Coordinating cotton thread
- Rotary cutter
- Cutting mat
- Quilting ruler
- Sewing machine
- Pins or quilting clips
- Iron
You’ll make nine three-strip sets.
Each set contains:
navy + white + navy
Nine full-length sets can produce up to 54 blocks, while the quilt requires only 48.
That leaves a useful margin for trimming or short strips.
Choosing Your Colors
Classic Modern
Deep navy + bright white
High Contrast
Black + crisp white
Vibrant Contemporary
Cobalt blue + sunny yellow
Jewel Tone
Emerald green + pale cream
Bold Feminine
Raspberry + blush pink
Dramatic
Deep violet + warm ivory
For the strongest graphic effect, let one color dominate.
In this design, navy appears twice in every block while white appears once. That gives the quilt more visual weight and keeps the light rails from overpowering the composition.
Cutting Measurements
For the strip sets:
- 18 navy strips, 2½ inches × width of fabric
- 9 white strips, 2½ inches × width of fabric
Make:
9 strip sets
Each finished strip set should measure approximately:
6½ inches wide × about 40 inches long
after selvages are removed.
Cut each strip set into:
6½-inch squares
A full set can yield up to:
6 blocks
Nine sets can therefore yield:
54 blocks
Blocks needed:
48
Side borders:
2 strips approximately 6½ × 48½ inches
Top and bottom borders:
2 strips approximately 6½ × 48½ inches
Backing:
At least 54 × 66 inches
Batting:
At least 54 × 66 inches
Binding:
7 strips, 2½ inches × width of fabric
Step-by-Step Guide
Step 1 – Prepare the Fabrics
Leave precut jelly roll strips unwashed.
Select:
- 18 navy strips
- 9 white strips
Remove selvages from both ends.
If cutting your own strips from yardage, cut accurately at:
2½ inches wide
Measure several strips before sewing.
Six 6½-inch blocks require:
39 inches
of usable strip-set length, plus a little extra for squaring one end.
If your usable strips are significantly shorter than 40 inches, make an additional strip set as insurance.

Step 2 – Cut the Border Strips
From the navy border fabric, cut four strips:
6½ inches wide
Cut them parallel to the selvage so the strips run along the length of the yardage.
Leave them slightly long.
They will be trimmed to the actual quilt measurements after the center is assembled.
Step 3 – Establish the Strip Sequence
Every strip set must follow:
navy → white → navy
Do not reverse the order in some sets.
The repeated symmetrical sequence is what gives the finished quilt its strong two-color rhythm.
Step 4 – Sort the Strips into Nine Sets
Make nine piles.
Each pile should contain:
- 2 navy strips
- 1 white strip
Lay them out in:
navy | white | navy
order.
Doing this before sewing prevents accidental color-order changes.

Step 5 – Sew the First Two Strips
Place one navy strip and one white strip right sides together.
Sew along one long edge with an accurate:
¼-inch seam
Do not pull the strips as they pass through the machine.
Place the second navy strip against the remaining long edge of the white strip.
Sew with another ¼-inch seam.
Begin this seam from the opposite end of the strip set.
Alternating sewing direction helps prevent the long strip set from gradually bowing.

Step 7 – Press the Strip Set
Press both seam allowances:
away from the white center rail
and toward the navy rails.
This is useful for two reasons.
First, darker seam allowances are less likely to shadow through the white fabric.
Second, the strip set stays visually crisp from the front.
Press rather than slide the iron back and forth aggressively.
Step 8 – Check the Width
Measure across the pressed strip set.
It should measure exactly:
6½ inches
If it’s narrower, your seam allowance is probably slightly too wide.
If it’s wider, the seam allowance may be too narrow.
Correct the machine setup now before making the remaining sets.

Step 9 – Sew the Remaining Eight Strip Sets
Repeat the same process until you have:
9 navy-white-navy strip sets
Check several along their lengths.
Each should remain close to:
6½ inches wide
Step 10 – Square One End
Place the first strip set on your cutting mat.
Carefully align the ruler with the long seams.
Trim one end so it forms a true 90-degree angle.
This becomes the reference edge for every block cut from that set.

Step 11 – Cut the First Block
Measure:
6½ inches
from the squared end.
Cut across the strip set.
Check that the block measures:
6½ × 6½ inches
and has four square corners.
Step 12 – Cut the Remaining Blocks
Continue cutting 6½-inch sections from the strip set.
You may obtain up to:
6 blocks per set
Repeat for all nine strip sets.
Nine full sets can yield:
54 blocks
Set aside the best:
48 blocks
for the quilt.

Step 13 – Create the Two Block Orientations
Place one block so the rails run vertically.
Because the sequence is symmetrical, it reads:
navy | white | navy
from left to right.
Rotate another block 90 degrees so the rails run horizontally.
These are the only two orientations needed.
Step 14 – Test the Graphic Pattern
Arrange four blocks in a 2 × 2 square:
Top left: vertical
Top right: horizontal
Bottom left: horizontal
Bottom right: vertical
Stand several feet away.
You should see dark and light bars changing direction sharply between blocks.
That directional contrast is the foundation of the modern graphic effect.
Step 15 – Lay Out All 48 Blocks
Arrange the blocks:
6 across × 8 down
Use:
Row 1: V – H – V – H – V – H
Row 2: H – V – H – V – H – V
Repeat this sequence until you have laid out all eight rows.
The result should resemble a bold woven grid with dark rails and narrow light pathways moving across the surface.

Step 16 – Check the Overall Balance
Walk away from the layout.
Look for:
- Equal distribution of vertical and horizontal blocks
- No two same-orientation blocks touching where they shouldn’t
- Consistent navy-white-navy rails
- Even overall color balance
Because the strip sequence is symmetrical, a 180-degree rotation doesn’t change this particular block visually. That makes this two-color version especially forgiving for beginners.
Step 17 – Photograph and Label the Rows
Photograph the finished layout before moving anything.
Label:
Rows 1 through 8
Stack each row from left to right.
Attach its row number to the first block.
Keep all stacks facing upward.
Step 18 – Sew Row 1
Join the six blocks in Row 1 using:
¼-inch seams
Check each block orientation before sewing.
The completed row should measure approximately:
36½ × 6½ inches

Step 19 – Sew the Remaining Rows
Repeat for Rows 2 through 8.
Press seam allowances:
- Odd rows toward the right
- Even rows toward the left
Opposing seam directions help the block intersections nest cleanly.
Step 20 – Reassemble the Rows
Place all eight sewn rows back on the floor or design wall.
Compare them with your photograph.
Check that the vertical-horizontal rhythm remains correct.
Correct any misplaced block now, before joining the rows.
Step 21 – Join Rows 1 and 2
Place Rows 1 and 2 right sides together.
Match every block boundary.
The alternating pressing directions should allow the seams to nest.
Pin each intersection.
Sew using a:
¼-inch seam

Step 22 – Join All Eight Rows
Continue attaching rows in numerical order.
Check orientation after each seam.
Once assembled, the center panel should measure approximately:
36½ × 48½ inches
Press the row seams open or consistently to one side.
Assembly
At this stage, the entire graphic center is complete.
Before adding borders:
- Place the quilt center flat.
- Check all edges for obvious distortion.
- Measure through the vertical center.
- Measure through the horizontal center.
- Use those center measurements—not stretched outer edges—to determine border lengths.
This keeps the borders flat and prevents waviness.
Step 23 – Measure the Side Borders
Measure vertically through the center panel.
The expected measurement is approximately:
48½ inches
Trim two border strips to:
6½ inches × the measured length
Mark the midpoint and quarter points.

Step 24 – Attach the Side Borders
Pin one border to each long side.
Match:
- Ends
- Centers
- Quarter points
Distribute any tiny difference evenly.
Sew with a ¼-inch seam.
Press toward the navy border.
The quilt should now measure approximately:
48½ × 48½ inches
Step 25 – Measure the Top and Bottom
Measure horizontally through the center of the bordered quilt.
The expected measurement is approximately:
48½ inches
Trim the remaining two border strips to that length.
Step 26 – Add the Top and Bottom Borders
Pin using the ends, midpoint, and quarter points.
Sew with a:
¼-inch seam
Press toward the border.
The completed quilt top should measure approximately:
48½ × 60½ inches
Step 27 – Prepare the Backing
For standard-width fabric, divide:
3¾ yards
into two approximately equal pieces.
Remove the selvages.
Sew the two pieces together along their long edges.
Press the seam open.
Trim and square the backing so it remains at least:
54 × 66 inches
If a longarm quilter will quilt it, confirm their preferred backing allowance first. Some require more than 3 inches beyond each edge.
Step 28 – Prepare the Batting
Cut batting at least:
54 × 66 inches
Check the batting package for its maximum recommended quilting distance.

Step 29 – Layer the Quilt
Place the backing:
wrong side up
Place batting on top.
Center the quilt top:
right side up
Smooth all layers from the center outward.
Make sure no backing folds remain underneath.
Step 30 – Baste
Secure the three layers with:
- Curved safety pins
- Thread basting
- Or your preferred quilt-basting method
Work from the center outward.
Step 31 – Quilt the Layers
Straight-line quilting complements the modern two-color design particularly well.
One easy approach is to quilt approximately:
¼ inch from the strip seams
This emphasizes the changing direction of the blocks.
Another option is a simple diagonal grid.
Keep quilting lines within the maximum spacing recommended by the batting manufacturer.
Step 32 – Trim and Square
After quilting, trim excess backing and batting level with the quilt top.
Check the corners with a large square ruler.
Do not aggressively trim the patchwork simply to reach an exact measurement.
A little quilting draw-up is normal.

Step 33 – Make the Binding
Cut:
7 strips at 2½ inches × width of fabric
Join the ends with diagonal seams.
Trim seam allowances to:
¼ inch
Press the joins open.
Fold the entire binding strip in half lengthwise:
wrong sides together
and press.
Step 34 – Attach the Binding
Begin along one side, away from a corner.
Leave an:
8–10-inch loose tail
Sew the binding to the quilt front using a:
¼-inch seam
Stop ¼ inch before each corner.
Fold the binding upward at 45 degrees, then fold it back down along the next edge to create a mitered corner.
Continue around the quilt.
Join the two binding tails with a diagonal seam.
Finish sewing the remaining section.
Fold the binding to the back and stitch it securely by hand or machine.
The completed quilt should measure approximately:
48 × 60 inches
before normal washing shrinkage.
Assembly at a Glance
Choose 18 dark strips + 9 light strips.
Make 9 navy-white-navy strip sets.
Use ¼-inch seams.
Press both seam allowances away from the white center strip.
Check each strip set at 6½ inches wide.
Square one end.
Cut 6½-inch blocks.
Make at least 48 blocks.
Arrange:
6 across × 8 down
Alternate vertical and horizontal blocks.
Reverse the orientation sequence on each following row.
Photograph and label the layout.
Sew six blocks into each row.
Press odd and even rows in opposite directions.
Join eight rows.
Center panel → approximately 36½ × 48½ inches
Measure through the center.
Add two 6½-inch side borders.
Add top and bottom 6½-inch borders.
Top → approximately 48½ × 60½ inches
Prepare backing and batting at least 54 × 66 inches.
Layer and baste.
Straight-line quilt.
Trim.
Bind with seven 2½-inch strips.
Finished quilt → approximately 48 × 60 inches
Beginner Tips for Success
Use fabrics with strong light-dark contrast.
Solid fabrics make the geometry especially easy to see.
Check your seam allowance before sewing all nine strip sets.
Press darker seam allowances away from the white center rail.
Alternate the direction you sew long strip seams to reduce bowing.
Square one strip-set end before measuring blocks.
Check your first 6½-inch block before cutting the rest.
Photograph the block layout before moving it.
Label every row.
Recheck orientation before joining rows.
Measure through the quilt center before cutting borders.
Never force a border to match a stretched quilt edge.
Check batting instructions before deciding quilting-line spacing.
Scaling It to Other Sizes
With 6-inch finished blocks and 6-inch finished borders:
Baby Quilt
Center:
4 × 6 blocks = 24 × 36 inches
With borders:
36 × 48 inches
Blocks required:
24
Lap Quilt — As Written
Center:
6 × 8 blocks = 36 × 48 inches
With borders:
48 × 60 inches
Blocks required:
48
Twin Quilt
Center:
8 × 12 blocks = 48 × 72 inches
With borders:
60 × 84 inches
Blocks required:
96
Queen Quilt
Center:
12 × 14 blocks = 72 × 84 inches
With borders:
84 × 96 inches
Blocks required:
168
Each strip set can produce up to six blocks when its usable length is slightly greater than 39 inches.
For other sizes, divide the required block count by six and round upward to estimate strip sets.
Then recalculate border yardage, backing, batting, and binding separately.
Styling It & Gift Ideas
The strong two-color contrast makes this quilt especially suited to contemporary interiors.
A navy-and-white version looks crisp against:
- White walls
- Natural oak
- Cream upholstery
- Charcoal accents
- Pale gray bedding
For a more energetic room, try cobalt and golden yellow.
For a softer modern look, use raspberry and blush.
Black and white creates the strongest graphic effect and works particularly well in minimalist rooms.
This quilt also makes a practical:
- Housewarming gift
- Graduation quilt
- First-apartment quilt
- Guest-room throw
- Sofa quilt
- Teen bedroom quilt
- Beginner quilting project
Because you only manage two colors, it’s also easier to plan than a scrappy Rail Fence while still producing plenty of visual movement.
Final Thoughts
A Two-Color Rail Fence quilt proves that simple construction does not have to produce a simple-looking result.
Three strips create each block. Two colors create the contrast. Alternating block rotations create the movement.
The navy-white-navy sequence gives each block a bold dark frame around a narrow light rail, while the alternating horizontal and vertical placement turns those repeated rails into a clean graphic pattern.
Keep the contrast strong, maintain an accurate ¼-inch seam allowance, check the first strip set carefully, and preserve the block orientation during assembly. The result is a modern quilt that looks crisp and deliberate while remaining completely accessible to a beginner.
Other Design Inspirations – Digitally Modified Images. Texture and color may vary from the actual product.
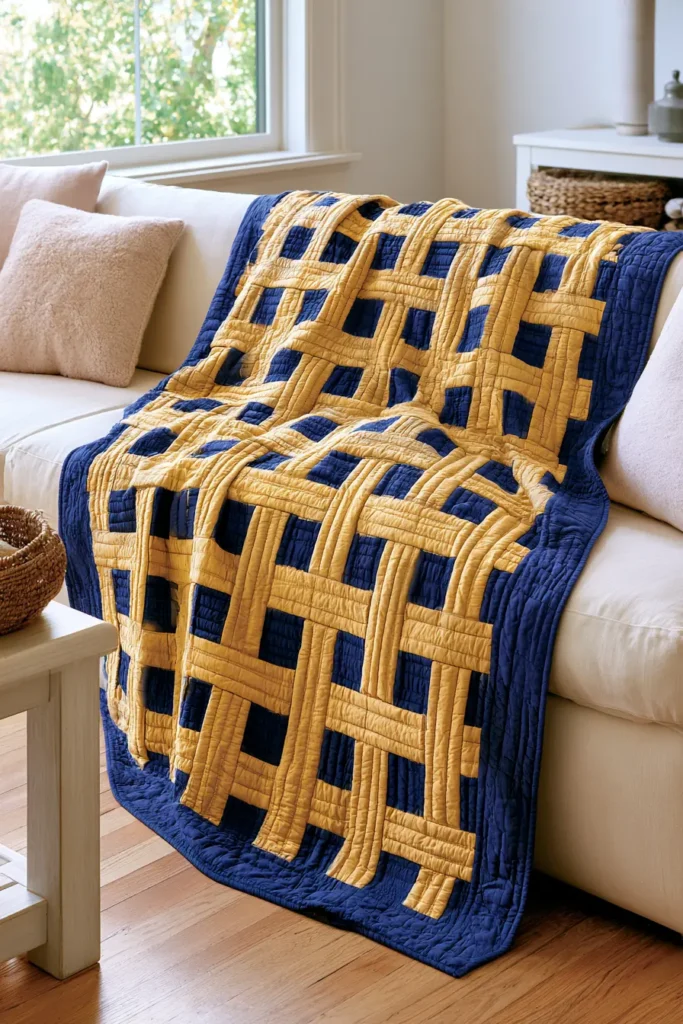
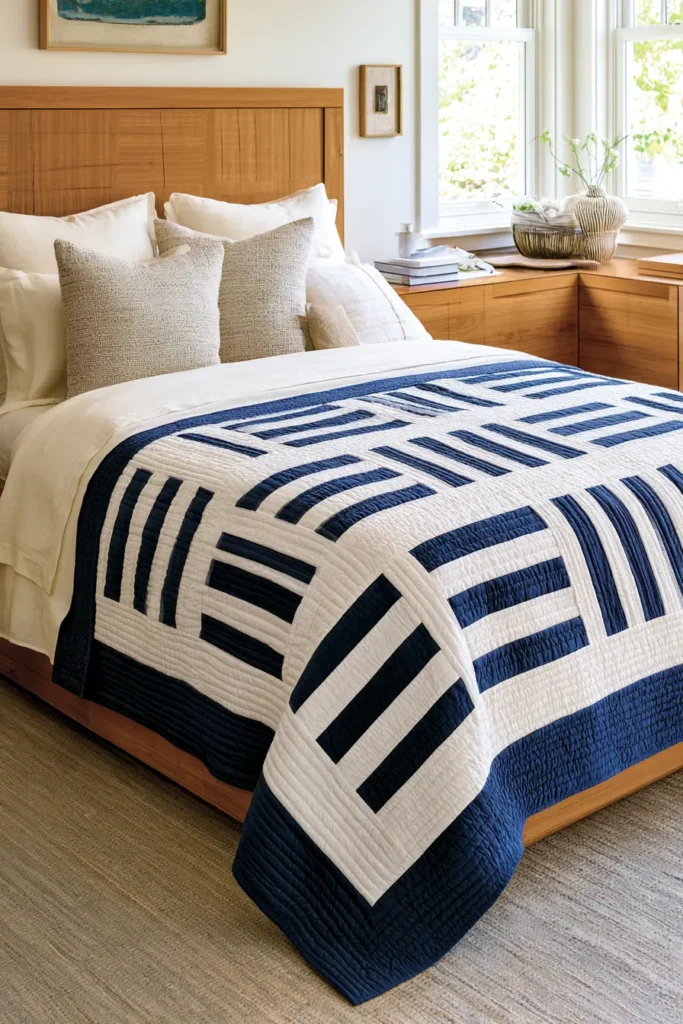
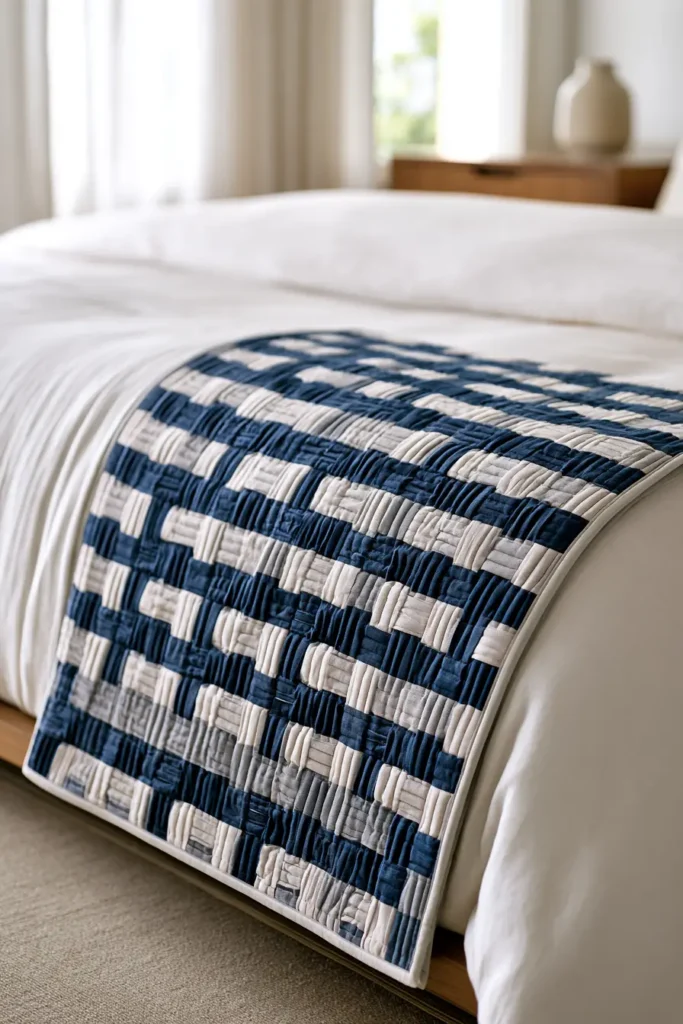
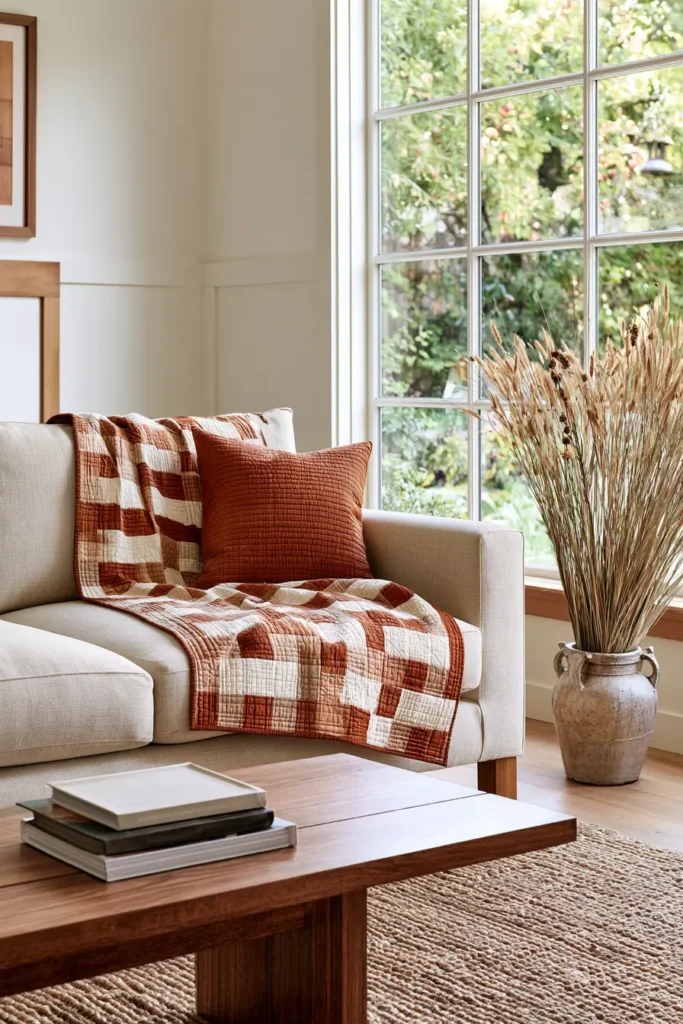
7. Scrappy Rail Fence Quilt for Using Up Leftover Strips
A scrappy Rail Fence quilt is one of the most practical ways to turn leftover fabric into something bright, useful, and genuinely beautiful. Instead of needing a perfectly matched bundle, this design works best when many different prints and colors come together. The variety gives the quilt energy, while the simple strip-pieced construction keeps the process beginner-friendly.
Rail Fence quilts have been popular for generations because they make smart use of fabric and stitch up quickly. Scrappy versions are especially satisfying because they continue a long quilting tradition of saving usable leftovers and turning them into a finished quilt with real purpose. This version uses vibrant color, simple 3-strip blocks, and an easy alternating layout that creates movement without complicated piecing.
How the Block Works
Each Rail Fence block is made from three 2½-inch-wide strips sewn side by side.
After sewing the strips together with two ¼-inch seams, the unit measures:
- 6½ inches wide
Cut that unit into 6½-inch segments, and each segment becomes one block.
So each block measures:
- 6½” × 6½” unfinished
- 6″ × 6″ finished
For this project, the quilt center uses:
- 6 blocks across
- 8 blocks down
That gives a center measuring:
- 36″ × 48″ finished
Then a 6-inch finished border is added all around, bringing the quilt to about:
- 48″ × 60″ finished
That is a very practical throw size for a sofa, reading chair, guest room, or child’s bed.
Design Inspirations – Digitally Modified Images. Texture and color may vary from the actual product.
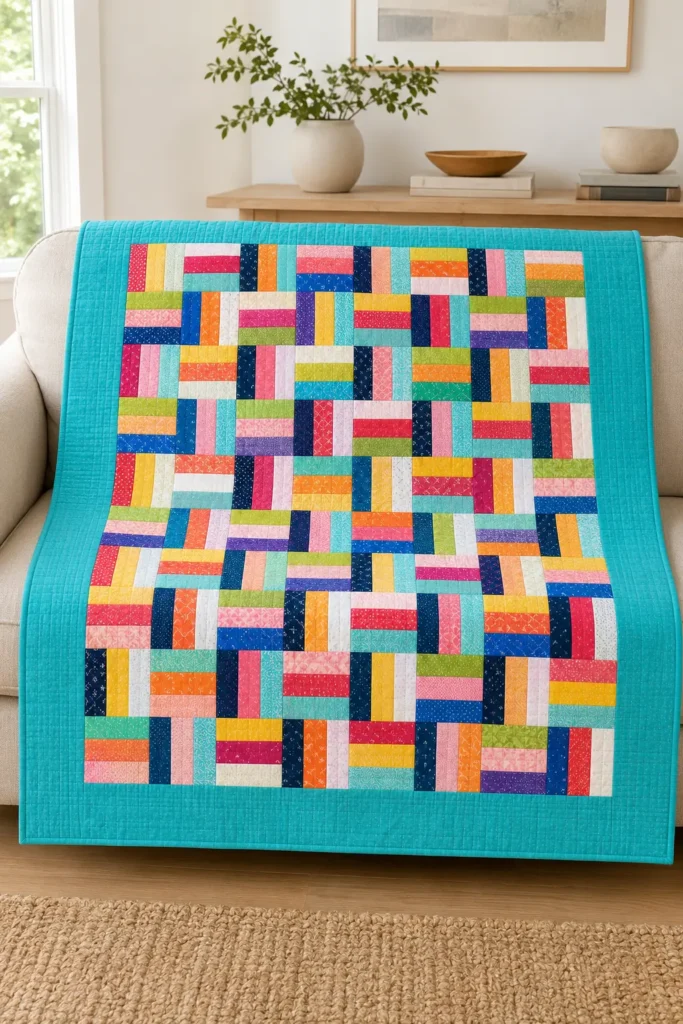
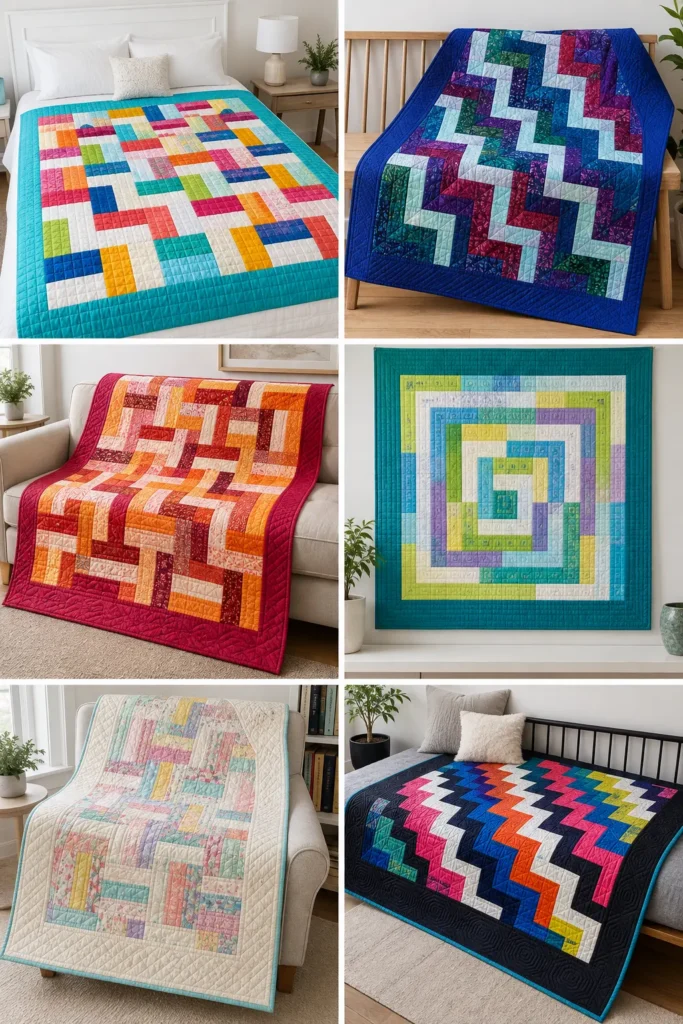
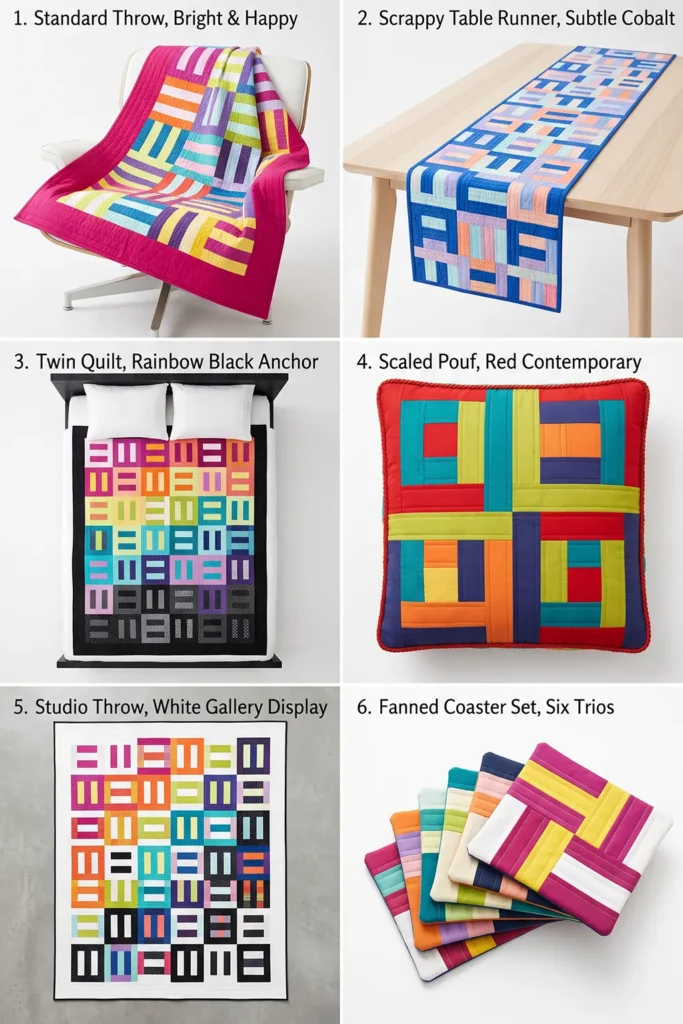
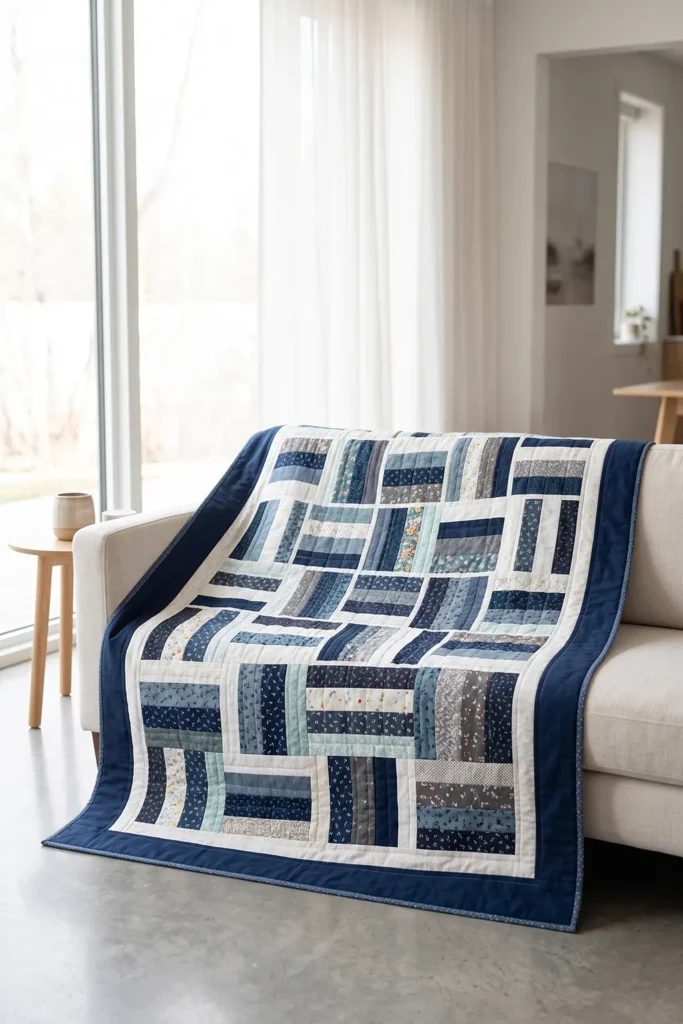
Why This Scrappy Version Works So Well
A scrappy quilt can get messy if you treat everything completely randomly, so this pattern works best when you organize scraps by value rather than exact color. In other words, sort fabrics into:
- lights
- mediums
- darks
Each block should contain one strip from each value group. That way, even though the prints and colors vary, the overall design still reads clearly from a distance.
This is the key to making a scrappy Rail Fence feel lively rather than chaotic.
Finished Size
- Block size: 6″ finished
- Block size unfinished: 6½” square
- Center layout: 6 × 8 blocks
- Blocks needed: 48
- Center finished size: 36″ × 48″
- Border width: 6″ finished
- Finished quilt size: about 48″ × 60″
Materials Needed
Fabrics for the blocks
You need enough leftover strips to make 9 strip sets, each one made from:
- 1 light strip
- 1 medium strip
- 1 dark strip
Each strip should be:
- 2½ inches wide
- and at least 40 inches usable length after joining scraps together
That means you need the equivalent of approximately:
- 9 light strips
- 9 medium strips
- 9 dark strips
Each at 2½” × 40″ to 42″
If your scraps are shorter, simply join them end to end first.
Other materials
- 1¾ yards border fabric
A bold solid works well, such as turquoise, cobalt, fuchsia, or black. - ½ yard binding fabric
- 3¾ yards backing fabric (44/45″ wide), or about 2 yards of 108″ backing
- Batting at least 54″ × 66″
- Coordinating thread
- Rotary cutter
- Acrylic ruler
- Cutting mat
- Sewing machine
- Pins or clips
- Iron
Color Planning
This quilt shines with bright, happy fabric combinations. Good scrappy palettes include:
- turquoise, coral, lemon yellow, magenta, lime, and white
- cobalt, orange, hot pink, aqua, and violet
- red, teal, chartreuse, tangerine, and indigo
- rainbow brights anchored with black or white
A helpful approach is this:
- lights = white, pale aqua, pale yellow, soft pink
- mediums = orange, grass green, cobalt, orchid
- darks = navy, black, deep purple, deep teal
The exact prints do not need to match. What matters is that each strip set includes clear contrast.
Cutting Measurements
For the strip sets
Prepare:
- 27 total strips, each 2½” wide
- grouped into:
- 9 light strips
- 9 medium strips
- 9 dark strips
Join shorter leftovers until each strip is at least:
- 40″ long usable length
For the blocks
From each finished strip set, cut:
- up to 6 blocks, each 6½” wide
From 9 strip sets, you can cut up to 54 blocks
You only need:
- 48 blocks
This gives you a few extras in case one block is too short or you want to swap colors around.
Borders
Cut:
- 2 side borders: 6½” × 48½”
- 2 top/bottom borders: 6½” × 48½”
Always measure the quilt center before cutting final border length.
Binding
Cut:
- 7 strips, each 2½” × width of fabric
Step-by-Step Guide
Step 1: Sort the Leftover Fabric
Gather leftover strips and scraps from previous quilting projects. Trim them so they are all:
- 2½ inches wide
If some scraps are narrower, don’t use them in this pattern unless you recut them consistently.
Sort the strips into three piles:
- light
- medium
- dark
This value sorting is what keeps the finished quilt looking intentional.

Step 2: Join Short Scraps into Long Strips
If many of your leftovers are short, sew them end to end to create longer strips.
Each finished strip should be at least:
- 40 inches long
A diagonal seam reduces bulk, but straight seams are also acceptable for a scrappy quilt.
Press the seams open or to one side, then trim any dog ears. Keep the strip width consistent at:
- 2½ inches
Make:
- 9 light strips
- 9 medium strips
- 9 dark strips

Step 3: Sew the Strip Sets
Take:
- 1 light strip
- 1 medium strip
- 1 dark strip
Sew them together lengthwise with a ¼-inch seam allowance.
A good order is:
- dark – medium – light
or
- light – medium – dark
What matters most is using the same structure throughout each set so the quilt keeps a balanced look.
Make:
- 9 total strip sets
After pressing, each strip set should measure:
- about 6½ inches wide

Step 4: Press and Check the Strip Sets
Press the strip sets flat.
Check the width of each set. It should be very close to:
- 6½ inches
If a strip set is too narrow, the seam allowance may be too wide. It is worth catching that now before cutting all the blocks.

Step 5: Square One End and Cut the Blocks
Trim one end of the strip set so it is straight and square.
Then cut crosswise into segments measuring:
- 6½ inches
Each segment becomes one Rail Fence block.
Continue cutting until you have:
- 48 usable blocks
You may end up with a few extra blocks. Keep them nearby in case you want to swap one into the layout.

Step 6: Arrange the Blocks into a Rail Fence Layout
Lay out the blocks in:
- 6 columns across
- 8 rows down
Rotate alternating blocks 90 degrees to create the classic Rail Fence effect.
For example:
- Row 1: vertical, horizontal, vertical, horizontal, vertical, horizontal
- Row 2: horizontal, vertical, horizontal, vertical, horizontal, vertical
Continue alternating like this through all 8 rows.
Because the fabrics are scrappy, step back a few times and check that no single area becomes too dark or too light.


Step 7: Fine-Tune the Scrappy Balance
This is one of the most important steps in a scrappy quilt.
Before sewing anything together, look at the layout and move blocks around if needed so that:
- similar colors are spread out
- heavy dark prints are not clumped together
- very pale blocks are distributed across the quilt
- the quilt feels lively and balanced
Take a photo before sewing. That makes it much easier to keep the layout in order.

Step 8: Sew the Blocks into Rows
Sew each row together using a ¼-inch seam allowance.
Each row contains:
- 6 blocks
Each finished row should measure about:
- 36½” × 6½” unfinished
Press the seam allowances in alternating directions from row to row. For example:
- Row 1 seams to the right
- Row 2 seams to the left
That helps the seams nest neatly later.

Step 9: Join the Rows
Sew the rows together in order.
Match the block intersections carefully and pin where needed.
After joining all 8 rows, the center should measure approximately:
- 36½” × 48½” unfinished
Assembly
At this point, the quilt center is complete. Before adding borders, lay it flat and measure through the center, not along the outer edges.
This helps prevent wavy borders.

Step 10: Add the Side Borders
Cut two side borders to the measured length of the quilt center. This will usually be about:
- 48½ inches
Each strip should be:
- 6½ inches wide
Sew one border to each long side.
Press toward the border.
Step 11: Add the Top and Bottom Borders
Measure the quilt across the center after the side borders are attached.
This should be about:
- 48½ inches
Cut the top and bottom border strips to this measurement.
Each should be:
- 6½ inches wide
Sew them on and press toward the border.
Your quilt top should now measure about:
- 48½” × 60½” unfinished
Quilting and Finishing
Step 12: Prepare the Backing and Batting
Cut or piece the backing so it is at least:
- 54″ × 66″
Cut batting to the same size or slightly larger.
This gives enough extra fabric around all sides for quilting.

Step 13: Make the Quilt Sandwich
Layer the quilt in this order:
- backing, wrong side up
- batting
- quilt top, right side up
Smooth everything carefully and baste with pins, thread, or your preferred method.
Step 14: Quilt the Layers
A scrappy Rail Fence quilt works well with simple quilting.
Good choices include:
- straight lines along the strip seams
- straight lines ¼” away from each strip seam
- an all-over diagonal grid
- gentle wave quilting for a softer look
Straight-line quilting is especially beginner-friendly and suits the simple geometry of the design.

Step 15: Trim and Bind
Trim away excess batting and backing.
Cut:
- 7 binding strips, each 2½ inches wide
Join them end to end, fold in half lengthwise, and attach the binding to the quilt.
After binding, the finished quilt should measure approximately:
- 48″ × 60″
Assembly at a Glance
- Sort scraps into light, medium, and dark
- Trim or cut all strips to 2½ inches wide
- Join short leftovers until each strip is at least 40 inches long
- Sew 9 strip sets
- Each strip set = 3 strips
- Press each set to 6½ inches wide
- Cut 6½-inch blocks
- Make 48 blocks
- Arrange them 6 across × 8 down
- Alternate block direction for the Rail Fence layout
- Sew blocks into rows
- Sew rows into a center panel
- Center panel finishes at 36″ × 48″
- Add 6-inch finished borders
- Quilt top finishes around 48″ × 60″
- Layer, baste, quilt, and bind
Interesting Notes
Scrappy quilts are rooted in thrift, but they are far from second-best quilts. In many quilting traditions, scrap quilts became the most loved because they brought pieces from many earlier projects together in one place. A scrappy Rail Fence quilt can quietly become a fabric memory quilt without ever being formally labeled that way.
Rail Fence blocks are also popular because they teach several core quilting skills at once:
- consistent strip cutting
- accurate ¼-inch seams
- rotary cutting
- layout balance
- row assembly
That makes this pattern a strong beginner project and a very satisfying stash-busting project for more experienced quilters.
Final Thoughts
A Scrappy Rail Fence quilt is one of the best patterns for using up leftover strips because it turns variety into a strength. The construction is simple, the measurements are straightforward, and the layout gives structure to all that color.
The secret is not total randomness. It is controlled variety. If you sort the strips by value, cut the blocks accurately, and balance the layout before sewing, the finished quilt feels cheerful, vibrant, and surprisingly polished.
Other Design Inspirations – Digitally Modified Images. Texture and color may vary from the actual product.
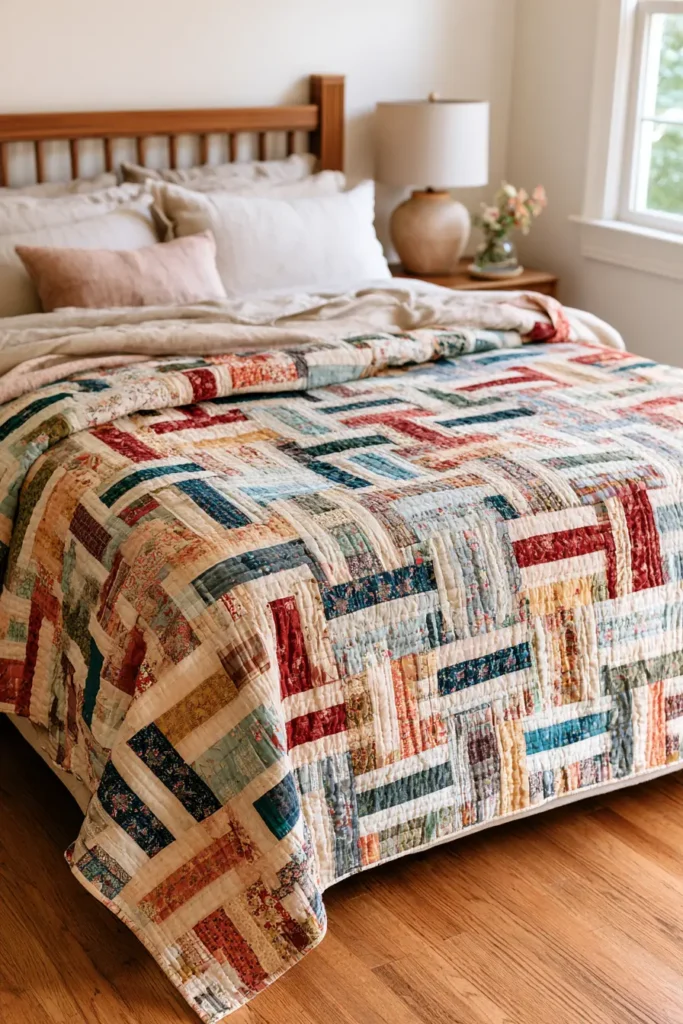
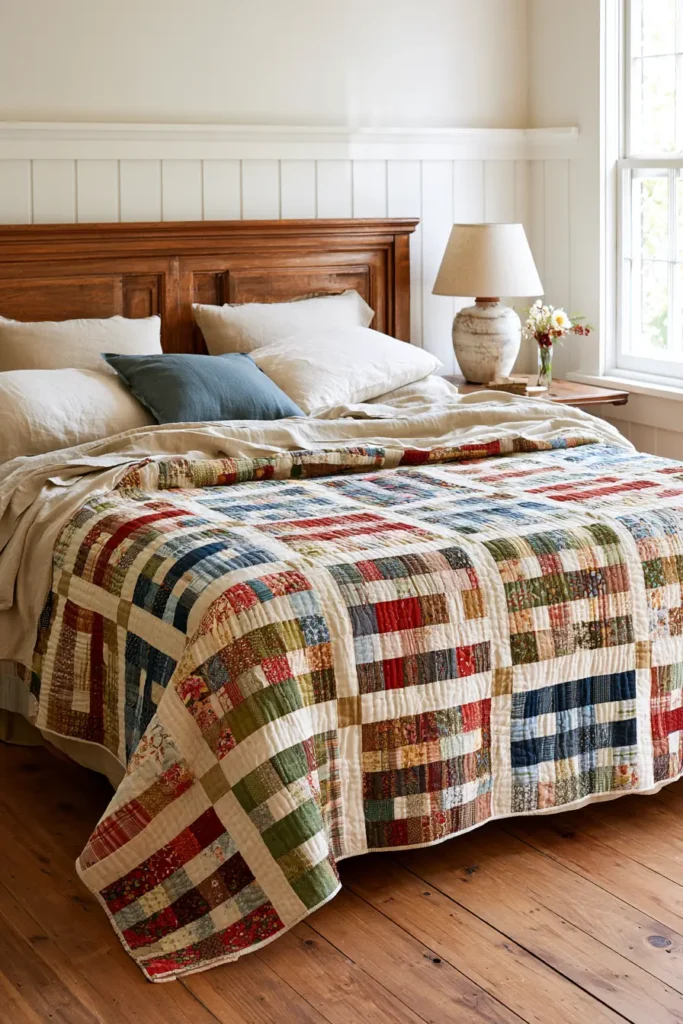
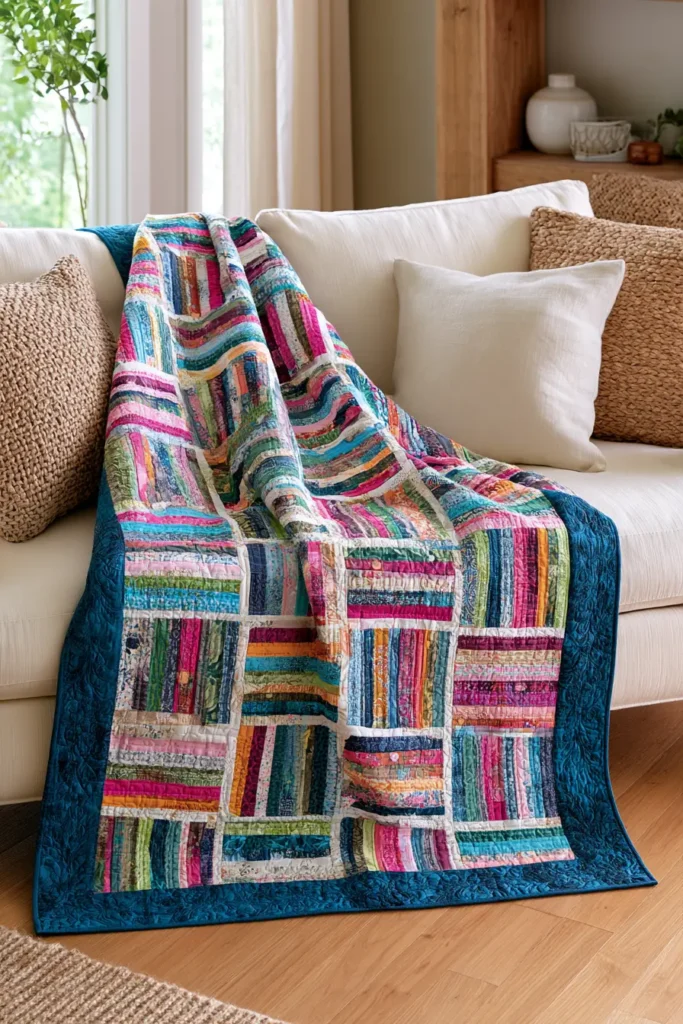
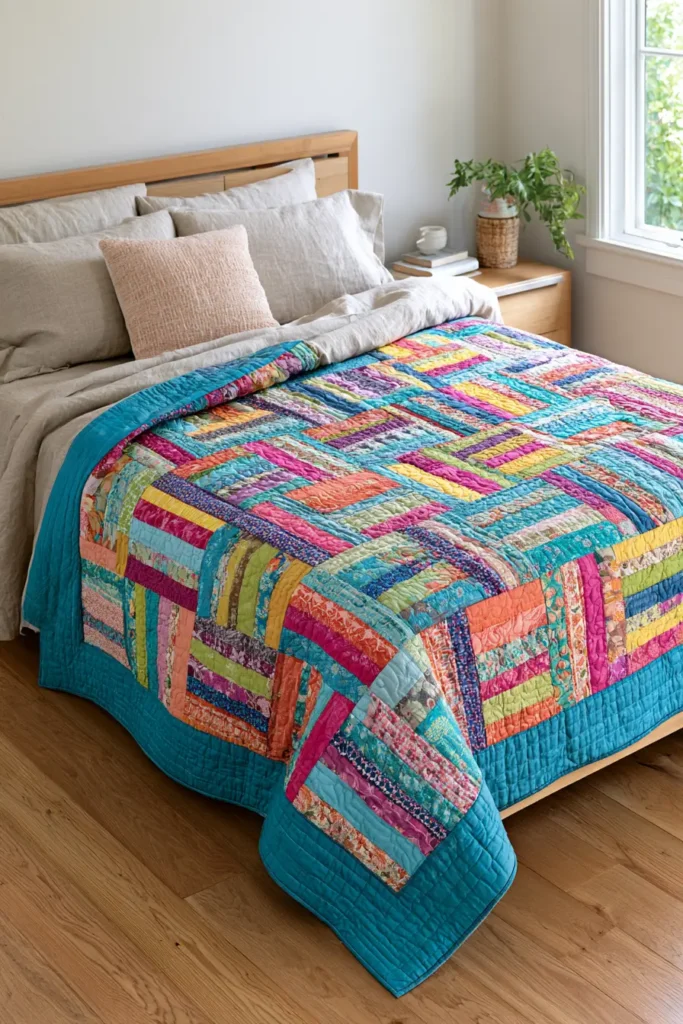
8. Rainbow Rail Fence Quilt for Bright Handmade Style
A Rainbow Rail Fence quilt combines one of quilting’s simplest strip-pieced blocks with a full spectrum of bright color. The block itself is straightforward—three strips sewn together and cut into squares—but careful color placement turns those basic units into a lively quilt filled with movement.
For this version, the rainbow is divided into three-color families rather than mixing every shade randomly:
- Red → orange → yellow
- Lime → emerald → turquoise
- Cobalt → violet → magenta
Each family becomes a set of Rail Fence blocks. The blocks are distributed across the quilt and rotated 90 degrees in alternating positions, allowing warm and cool colors to travel through the layout without becoming muddy or chaotic.
Rail Fence quilts have long been valued as economical scrap and utility quilts because strips can be cut efficiently from yardage or leftovers. A rainbow palette gives that traditional construction a much brighter contemporary character.
How the Block Works
Each Rail Fence block begins with:
- 3 strips
- Each strip 2½ inches wide
Sew the three strips together lengthwise using two ¼-inch seams.
The strip-set width becomes:
2½ + 2½ + 2½ – ¼ – ¼ – ¼ – ¼ = 6½ inches
Or more simply, two ¼-inch seams consume 1 inch of total fabric width:
7½ inches raw width – 1 inch = 6½ inches
Cut the finished strip set crosswise into:
6½-inch sections
Each section becomes:
- 6½” × 6½” unfinished
- 6″ × 6″ finished
Design Inspirations – Digitally Modified Images. Texture and color may vary from the actual product.
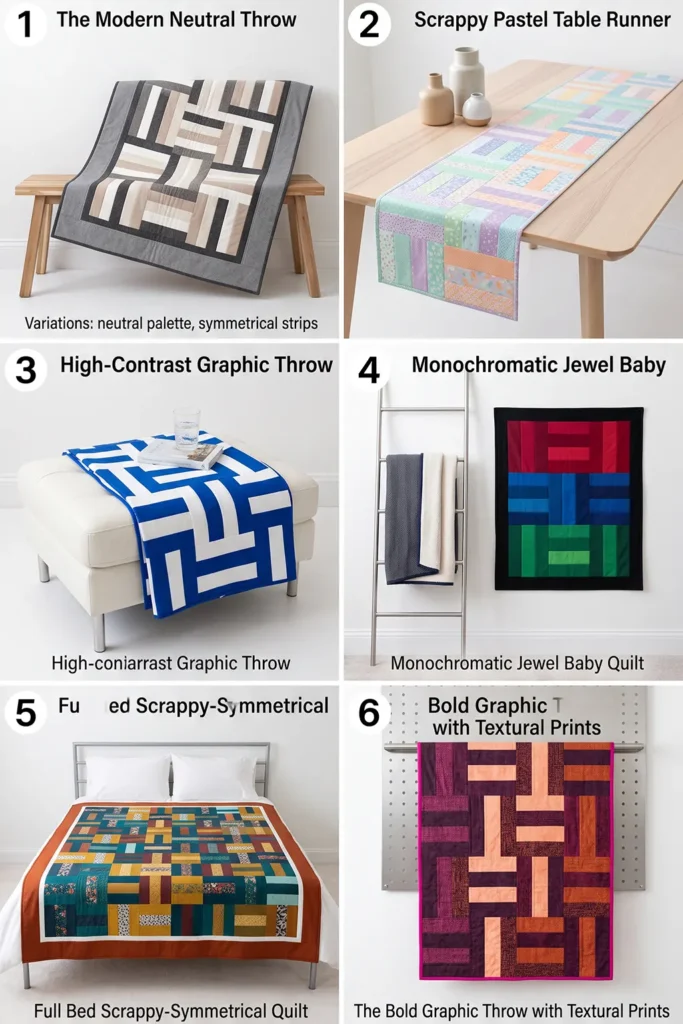
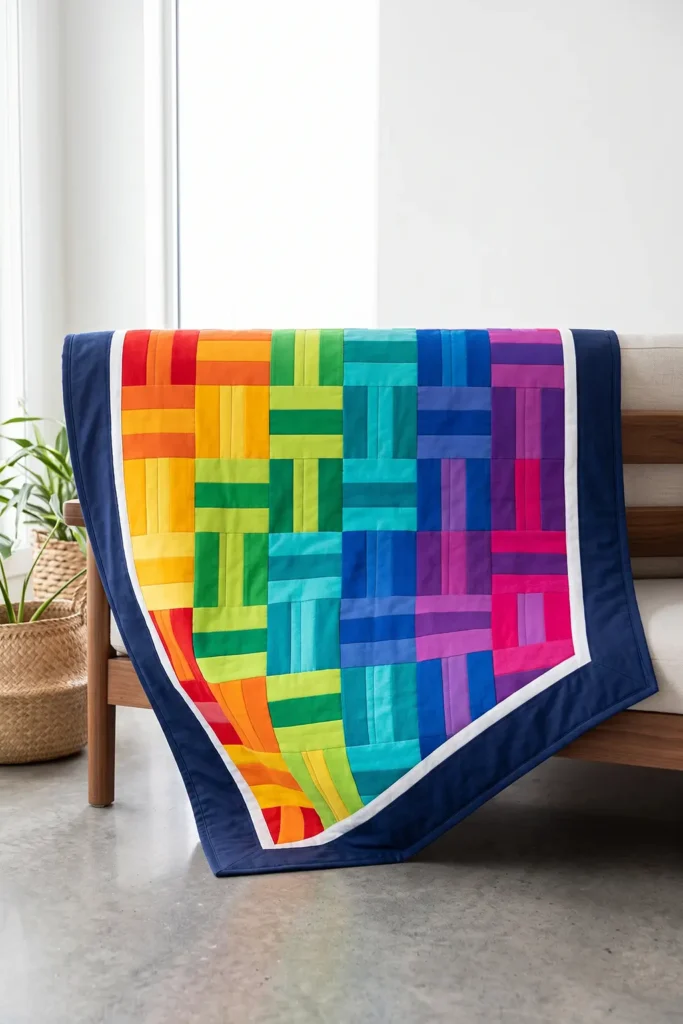
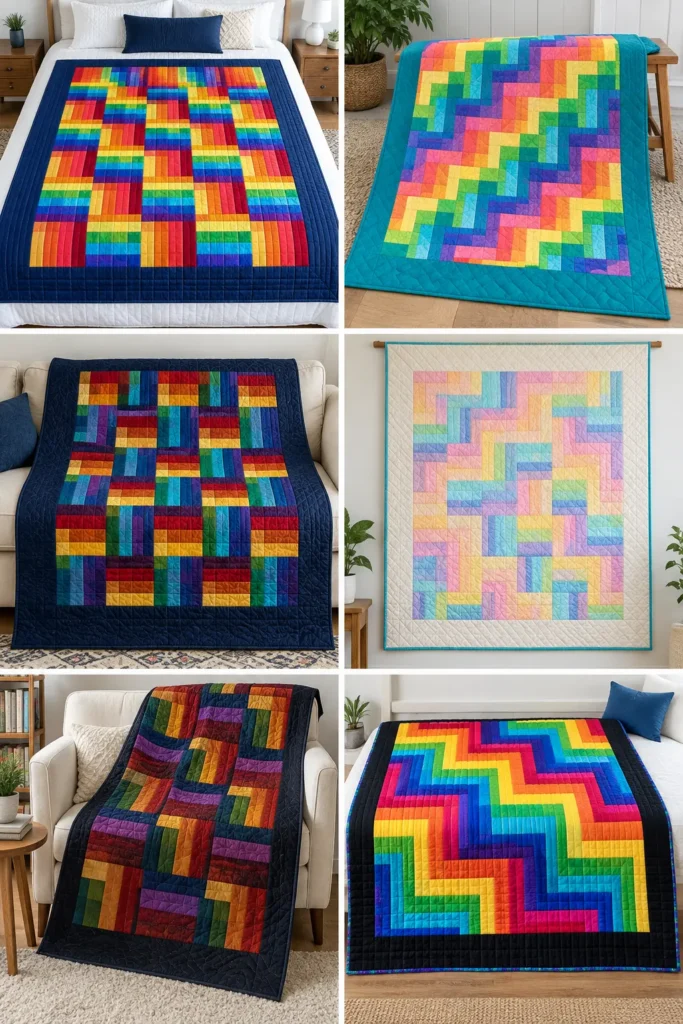
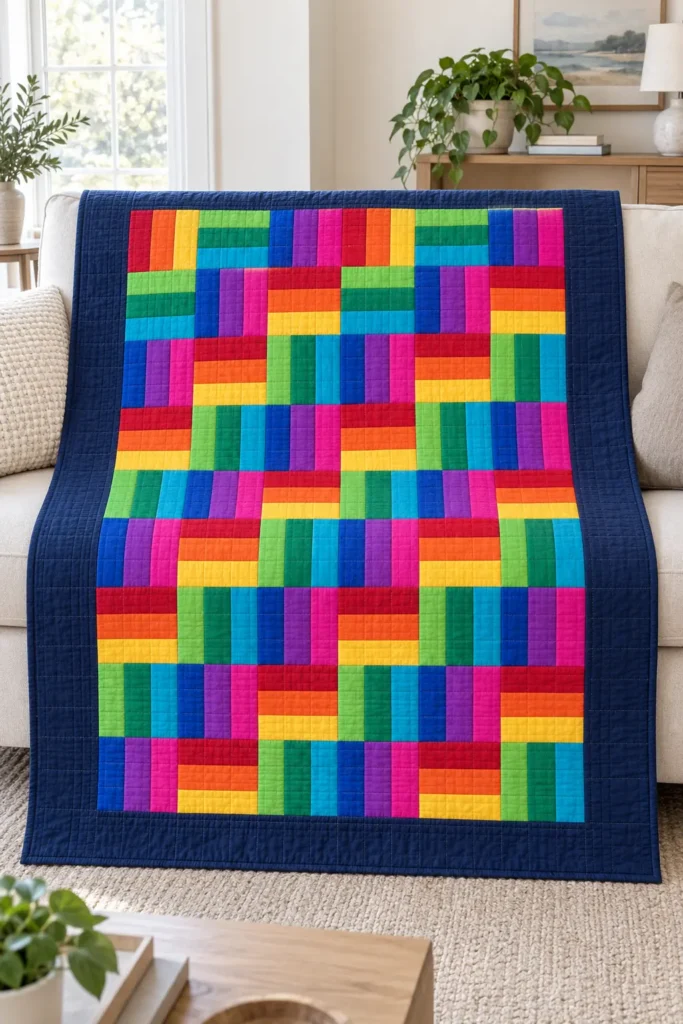
How the Rainbow Layout Works
Rather than squeezing all seven traditional rainbow colors into each block, this quilt uses coordinated three-color strip sets.
Make three families:
Warm
Red | Orange | Yellow
Fresh
Lime | Emerald | Turquoise
Cool-Bright
Cobalt | Violet | Magenta
Make three strip sets from each family.
That gives:
- 3 warm sets
- 3 fresh sets
- 3 cool-bright sets
- 9 strip sets total
After cutting, you’ll have enough blocks to distribute all three color families across the quilt.
Why Controlled Rainbow Color Works Better
A successful rainbow quilt needs variety, but it also needs repetition.
If every strip is chosen randomly, neighboring colors can blend together and the Rail Fence geometry may disappear.
Repeating three defined color sequences gives the eye something to follow.
The colors remain vibrant, but the construction still reads clearly from across the room.
A dark border—deep navy works especially well—also gives the rainbow center a strong visual frame.
Finished Size
Block:
6 inches finished
Block unfinished:
6½ inches square
Center layout:
6 blocks across × 8 blocks down
Blocks required:
48
Center finished size:
36 × 48 inches
Center unfinished size:
36½ × 48½ inches
Border:
6 inches finished on all four sides
Finished quilt:
Approximately 48 × 60 inches
Quilt top before quilting:
Approximately 48½ × 60½ inches
Skill level:
Beginner
Core techniques:
Strip piecing, rotary cutting, color placement, block rotation, row assembly, borders, quilting, and binding
Materials Needed
Rainbow strips
You’ll need 27 strips, each:
2½ inches × width of fabric
Use:
- 3 red
- 3 orange
- 3 yellow
- 3 lime
- 3 emerald
- 3 turquoise
- 3 cobalt
- 3 violet
- 3 magenta
These create:
9 three-strip sets
If you’re using a rainbow jelly roll, select 27 strips that fit these approximate color families.
Also prepare:
- 1¾ yards deep navy fabric for borders
- ½ yard binding fabric
- 3¾ yards standard 42″–44″ backing fabric
- Or approximately 2 yards of 108-inch-wide backing
- Batting at least 54 × 66 inches
- Coordinating cotton thread
- Rotary cutter
- Cutting mat
- Quilting ruler
- Sewing machine
- Pins or clips
- Iron
Beginner tip: don’t prewash jelly roll strips. Their narrow precut edges can fray or distort. If you’re using yardage cut into strips, either use everything unwashed or prewash all yardage consistently before cutting.
Choosing Your Colors
The palette written for this quilt is deliberately saturated:
Warm Family
- Cherry red
- Tangerine orange
- Sunshine yellow
Fresh Family
- Lime green
- Emerald
- Turquoise
Cool-Bright Family
- Cobalt
- Violet
- Magenta
The deep navy border prevents the saturated center from visually spilling into the surrounding room.
Other rainbow approaches can work too:
Tropical Rainbow
Coral, mango, lemon, lime, aqua, cobalt, orchid, and hot pink
Jewel Rainbow
Ruby, amber, citrine, emerald, sapphire, amethyst, and garnet
Pastel Rainbow
Blush, peach, butter yellow, mint, aqua, lavender, and soft pink
Deep Rainbow
Burgundy, rust, mustard, forest green, teal, navy, and plum
Whatever palette you choose, keep enough contrast between neighboring rails that the three strips remain visibly distinct.
Cutting Measurements
Make:
9 strip sets
Each set contains:
3 strips measuring 2½ inches × width of fabric
After sewing:
Each strip set should measure approximately:
6½ inches wide × about 40 inches usable length
Cut each strip set into:
6½-inch squares
One sufficiently long set can yield:
6 blocks
Nine sets can therefore yield up to:
54 blocks
Blocks required:
48
This leaves up to six spare blocks.
Borders
Cut four strips:
6½ inches wide
Cut them lengthwise from the border yardage if possible so the long side borders do not need piecing.
Final lengths will be trimmed after measuring the assembled center.
Binding
Cut:
7 strips at 2½ inches × width of fabric
Backing and Batting
Backing:
At least 54 × 66 inches
Batting:
At least 54 × 66 inches
Step-by-Step Guide
Step 1 – Select the Rainbow Strips
Choose 27 strips.
Sort them into nine color piles:
- 3 red
- 3 orange
- 3 yellow
- 3 lime
- 3 emerald
- 3 turquoise
- 3 cobalt
- 3 violet
- 3 magenta
Remove the selvages.
Check the usable length.
Six blocks require:
6 × 6½ = 39 inches
plus a little extra for squaring one end.
If several strips are shorter than about 40 inches, prepare an extra strip set rather than risking a shortage later.

Step 2 – Cut the Border Strips
From the deep navy border fabric, cut:
4 strips at 6½ inches wide
Cut parallel to the selvages so you can use the yardage length for the long borders.
Leave them longer than needed.
They’ll be trimmed after the quilt center is assembled and measured.
Step 3 – Organize the Strip Sets
Create three identical warm sets:
Red | Orange | Yellow
Create three fresh sets:
Lime | Emerald | Turquoise
Create three cool-bright sets:
Cobalt | Violet | Magenta
You now have:
9 strip sets ready to sew
Keep the order identical within each color family.

Step 4 – Sew the First Warm Strip Set
Place red and orange strips right sides together.
Sew along one long edge using an accurate:
¼-inch seam
Do not stretch the strips.
Step 5 – Add the Yellow Strip
Place the yellow strip right sides together with the free edge of the orange strip.
Sew using another:
¼-inch seam
Begin this second seam from the opposite end of the strip set.
Changing sewing direction reduces the tendency of a long strip set to bow.

Step 6 – Press the Strip Set
Press the seams carefully.
Press both seam allowances consistently toward the darker neighboring fabric where practical.
Avoid stretching the strip set while pressing.
Lay it flat afterward.
Step 7 – Check the Width
Measure across the strip set.
It should be:
6½ inches wide
Check near both ends and in the middle.
If the measurement is consistently wrong, correct your seam allowance before continuing.

Step 8 – Complete All Nine Strip Sets
Repeat the process for:
- 3 red-orange-yellow sets
- 3 lime-emerald-turquoise sets
- 3 cobalt-violet-magenta sets
All nine sets should measure approximately:
6½ inches wide
Step 9 – Square the First Strip Set
Place a strip set on the cutting mat.
Align your ruler with the strip seams.
Trim one end at a true right angle.
Do not skip this step. A slightly angled starting cut creates increasingly crooked blocks.

Step 10 – Cut the First Block
Measure:
6½ inches
from the squared end.
Cut across the strip set.
Check that the block measures:
6½ × 6½ inches
and that the corners are square.
Step 11 – Cut the Remaining Blocks
Continue cutting 6½-inch sections.
Cut up to six blocks from each strip set.
Nine full sets can produce:
54 blocks
You need:
48
Keep the extra blocks available while planning the layout.

Step 12 – Sort the Blocks by Color Family
Make three stacks:
- Warm blocks
- Fresh blocks
- Cool-bright blocks
You should have roughly equal numbers of each.
This makes it easier to distribute the rainbow around the quilt without forming large patches of one color family.
Step 13 – Establish Two Block Orientations
Place one block with its rails running vertically.
Place another with its rails running horizontally.
These two orientations will alternate throughout the layout.
You don’t need any more complicated rotation than this.

Step 14 – Start the Rainbow Layout
Lay out:
6 blocks across × 8 blocks down
For Row 1, use:
V – H – V – H – V – H
For Row 2:
H – V – H – V – H – V
Continue alternating those orientations through all eight rows.
Step 15 – Distribute the Color Families
Now adjust which color-family blocks occupy each position.
Avoid placing all warm blocks together.
A useful starting rhythm across Row 1 is:
Warm – Fresh – Cool – Warm – Fresh – Cool
On Row 2, shift the sequence:
Fresh – Cool – Warm – Fresh – Cool – Warm
On Row 3:
Cool – Warm – Fresh – Cool – Warm – Fresh
Repeat that general color movement while maintaining the required vertical-horizontal block rotation.
This creates a balanced spectrum across the quilt instead of obvious bands of one family.

Step 16 – Check the Whole Layout
Stand several feet away.
Look for:
- even color distribution
- strong contrast
- no large red or blue clusters
- balanced warm and cool areas
- correct alternating block orientation
If one corner feels unusually dark or intensely warm, swap blocks with another area.
Step 17 – Photograph and Label the Layout
Take a clear photo.
Label the rows:
1 through 8
Stack each row from left to right.
Keep the blocks face up and attach the corresponding row label.
This preserves both color placement and block orientation.
Step 18 – Sew Row 1
Join the six blocks of Row 1 using:
¼-inch seams
Check the photograph before attaching each block.
The row should measure approximately:
36½ × 6½ inches

Step 19 – Sew Rows 2 Through 8
Repeat with every row.
Press seams:
- odd-numbered rows in one direction
- even-numbered rows in the opposite direction
This lets the block seams nest when the rows are joined.
Step 20 – Recheck the Rainbow Layout
Place all eight sewn rows back in order.
Compare them with your photograph.
Check both:
- color sequence
- block orientation
Correct mistakes before joining the rows.
Step 21 – Join Rows 1 and 2
Place Rows 1 and 2 right sides together.
Match each block intersection.
The opposing seam allowances should nest.
Pin at each intersection.
Sew with a:
¼-inch seam

Step 22 – Join the Remaining Rows
Continue joining Rows 3 through 8 in order.
After all eight rows are attached, the center panel should measure approximately:
36½ × 48½ inches
Press the row seams open or consistently to one side.
Assembly
Before adding borders, place the center panel flat.
Measure:
- vertically through the middle
- horizontally through the middle
Don’t automatically use the dimensions of the stretched outer edges.
Borders cut to the center measurement help keep the quilt flat and square.
Step 23 – Measure the Side Borders
Measure vertically through the center.
The expected measurement is approximately:
48½ inches
Trim two navy border strips to:
6½ inches × the actual measured length
Mark:
- both ends
- center
- quarter points
Step 24 – Attach the Side Borders
Match the border and quilt at each marked point.
Pin.
Sew with a:
¼-inch seam
Press toward the navy border.
The panel should now measure approximately:
48½ × 48½ inches
Step 25 – Measure for the Top and Bottom Borders
Measure horizontally through the center of the quilt, including the side borders.
The expected measurement is:
about 48½ inches
Trim the remaining two border strips accordingly.

Step 26 – Attach the Top and Bottom Borders
Pin the ends, center, and quarter points.
Sew with a:
¼-inch seam
Press toward the border.
The quilt top should measure approximately:
48½ × 60½ inches
Step 27 – Prepare the Backing
If using standard-width fabric, cut your 3¾ yards into two equal lengths of about:
67½ inches
Remove selvages.
Sew the panels together along their long edges.
Press the seam open.
Trim the backing to remain at least:
54 × 66 inches
If using a longarm quilter, confirm their required backing allowance first.
Step 28 – Prepare the Batting
Cut batting at least:
54 × 66 inches
Read the packaging before quilting so you know the manufacturer’s maximum recommended distance between quilting lines.
Step 29 – Make the Quilt Sandwich
Place the backing:
wrong side up
Center the batting on top.
Place the quilt top:
right side up
Smooth all three layers from the middle outward.
Step 30 – Baste the Layers
Secure the quilt using:
- safety pins
- thread basting
- or another preferred quilting-basting method
Work outward from the center to prevent wrinkles.
Step 31 – Quilt It
Simple quilting allows all the rainbow color to remain the focal point.
Good options include:
- straight lines along the rail seams
- quilting ¼ inch beside the rail seams
- diagonal crosshatching
- gentle organic waves
For a beginner, straight-line quilting parallel to the rails is especially manageable.
Follow the batting manufacturer’s maximum quilting-distance requirement.
Step 32 – Trim and Square
After quilting, trim the excess batting and backing level with the quilt top.
Check that all four corners remain square.
A small amount of quilting shrinkage is normal.
Step 33 – Prepare the Binding
Cut:
7 strips at 2½ inches × width of fabric
Join them end to end using diagonal seams.
Trim those seams to:
¼ inch
Press open.
Fold the binding in half lengthwise:
wrong sides together
and press.

Step 34 – Attach the Binding
Begin partway along one side.
Leave:
8–10 inches
of binding loose at the beginning.
Sew the binding to the quilt front using a:
¼-inch seam
Stop ¼ inch before each corner.
Fold up at a 45-degree angle, fold back down along the next edge, and continue sewing to form a miter.
After going around all four sides:
- join the binding tails
- finish the remaining seam
- fold the binding to the back
- stitch securely by hand or machine
The completed quilt should measure approximately:
48 × 60 inches
before normal washing shrinkage.
Assembly at a Glance
Choose 27 rainbow strips.
Create three color families:
- red-orange-yellow
- lime-emerald-turquoise
- cobalt-violet-magenta
Make 3 sets of each family.
Total:
9 strip sets
Sew using ¼-inch seams.
Check every set at:
6½ inches wide
Square one end.
Cut:
6½-inch blocks
Make at least:
48 blocks
Sort blocks by color family.
Arrange:
6 across × 8 down
Alternate vertical and horizontal orientation.
Distribute warm, fresh, and cool blocks evenly.
Photograph the layout.
Label all eight rows.
Sew six blocks per row.
Press alternating rows in opposite directions.
Join the eight rows.
Center panel:
36½ × 48½ inches
Add 6½-inch side borders.
Add 6½-inch top and bottom borders.
Quilt top:
48½ × 60½ inches
Prepare backing and batting at least:
54 × 66 inches
Layer and baste.
Quilt.
Trim.
Bind with:
7 strips at 2½ inches
Finished quilt:
Approximately 48 × 60 inches
Beginner Tips for Success
Use clearly different colors within each three-strip combination.
Keep the color order identical within each family.
Check the first strip set before sewing all nine.
Use an accurate ¼-inch seam.
Alternate the direction of the two long strip seams to reduce bowing.
Don’t stretch strip sets while pressing.
Square one end before cutting blocks.
Check the first 6½-inch block from every set.
Balance warm and cool blocks across the entire layout.
Stand back before sewing to judge the color distribution.
Photograph the layout before moving anything.
Label every row.
Recheck orientation before joining blocks.
Measure through the quilt center before cutting border lengths.
Use a dark solid border if the rainbow center needs visual containment.
Scaling It to Other Sizes
Every block finishes at:
6 inches
With the same 6-inch finished border:
Baby Quilt
Center:
4 × 6 blocks = 24 × 36 inches
With borders:
Approximately 36 × 48 inches
Blocks:
24
Lap Quilt — As Written
Center:
6 × 8 blocks = 36 × 48 inches
With borders:
Approximately 48 × 60 inches
Blocks:
48
Twin Quilt
Center:
8 × 12 blocks = 48 × 72 inches
With borders:
Approximately 60 × 84 inches
Blocks:
96
Queen Quilt
Center:
12 × 14 blocks = 72 × 84 inches
With borders:
Approximately 84 × 96 inches
Blocks:
168
Because one full strip set can produce up to six blocks, divide your required block count by six and round upward to estimate the minimum number of sets.
For larger quilts, calculate the border, backing, batting, and binding separately.
Styling It & Gift Ideas
A Rainbow Rail Fence quilt already carries plenty of visual energy, so it looks particularly striking in a room with quieter furnishings.
The vibrant version works beautifully with:
- white bedding
- cream upholstery
- pale oak
- natural linen
- warm neutral walls
- simple contemporary furniture
The deep navy border helps connect all the individual rainbow shades.
For a softer bedroom, use a pastel spectrum.
For a child’s room, lean into vivid primary and secondary colors.
For a sophisticated living room throw, use jewel tones rather than pure rainbow brights.
It also makes a cheerful:
- Birthday quilt
- Graduation gift
- Child’s bed quilt
- First-apartment throw
- Housewarming gift
- Reading-chair quilt
- Scrap-friendly beginner project
Final Thoughts
The Rainbow Rail Fence quilt gets its impact from carefully organizing simple elements.
Each block requires only three straight strips. The color families supply the variety, alternating block orientations create movement, and a dark border gives the vibrant center a strong finishing frame.
The most important step happens before you sew the blocks into rows: distribute the warm, green-blue, and violet-pink sections evenly across the quilt. Once the color balance feels right, the rest is straightforward Rail Fence construction.
The result is bright, energetic handmade patchwork without complicated piecing—a particularly satisfying way for a beginner to explore color while practicing accurate strip cutting and ¼-inch seams.
Other Design Inspirations – Digitally Modified Images. Texture and color may vary from the actual product.
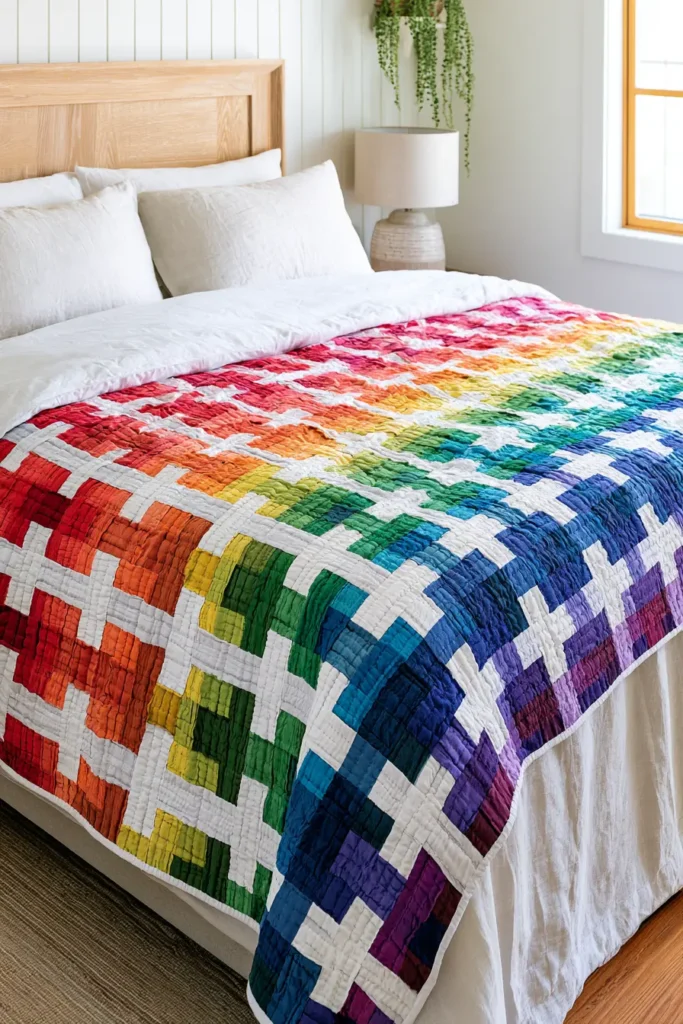
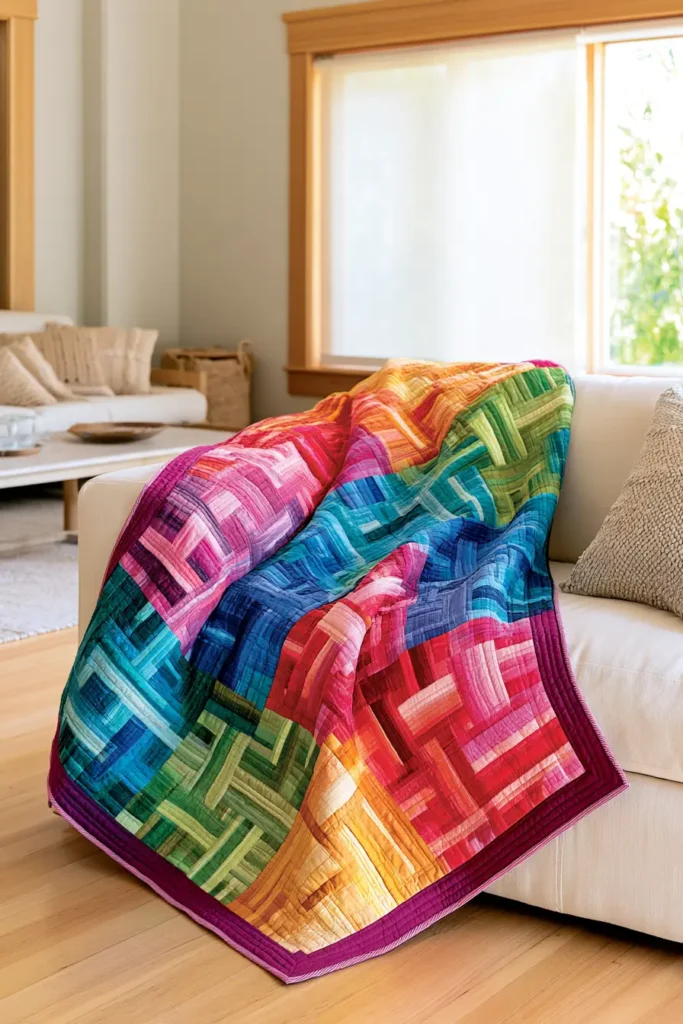
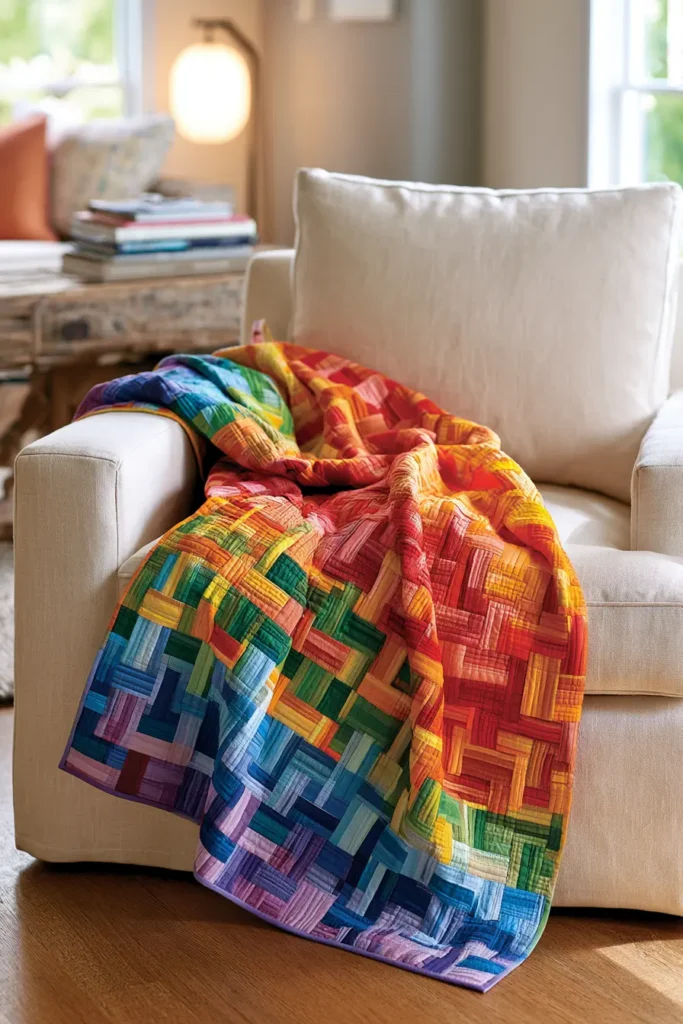
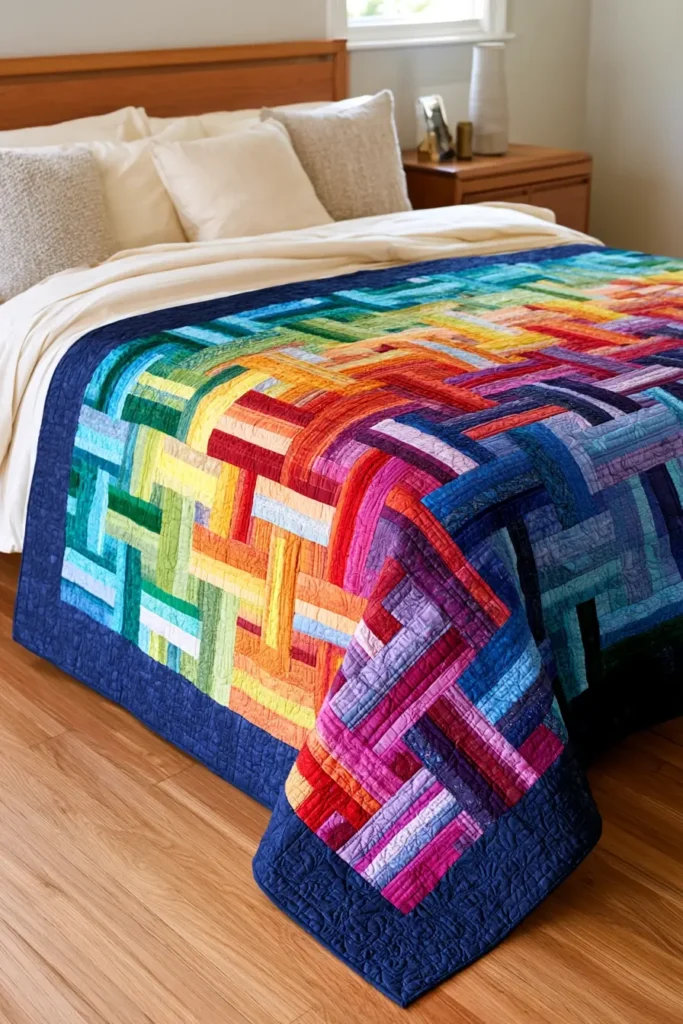
9. Neutral Rail Fence Quilt for Cozy Farmhouse Décor
A neutral rail fence quilt is the one that suits any room you put it in – warm oatmeal, flax, mushroom, and soft greige woven into a quiet basket-weave texture that reads as calm rather than colorful. It’s the quilt for a farmhouse bedroom with white walls and worn wood, or a living room where the sofa is already doing enough talking.
It’s also, honestly, the hardest version in this collection to get right – and it’s worth knowing that before you buy fabric.
Why Neutrals Are the Difficult Choice
The rail fence weave doesn’t depend on color at all. It depends on value – how light or dark each rail is. In a bright quilt, strong colors carry enough value difference to make the pattern read almost by accident.
Neutrals don’t do that. Oatmeal, sand, greige, and mushroom sit close together on the value scale by definition, which is exactly what makes them restful and exactly what makes the weave disappear. Choose three neutrals you love and there’s a real chance they’ll blur into one soft square, and you won’t discover it until the quilt is on the bed.
The fix is straightforward, and it takes two minutes.
The Grayscale Test
Lay your three candidate fabrics side by side, photograph them on your phone, and convert the picture to black and white. Every phone can do this in the editing screen.
Color is stripped away and only value remains. If the three fabrics still read as clearly light, medium, and dark, your weave will work. If two of them turn into the same gray, swap one out and test again.
Do this before you buy if you can, or at least before you cut. It’s the single most useful thing on this page.
Design Inspirations – Digitally Modified Images. Texture and color may vary from the actual product.
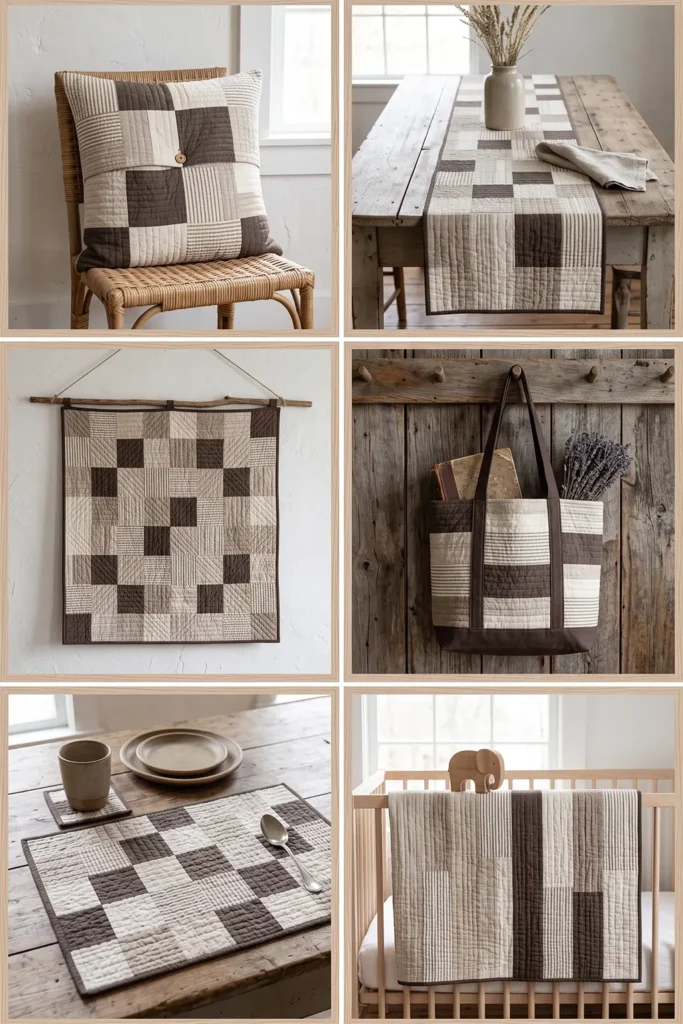
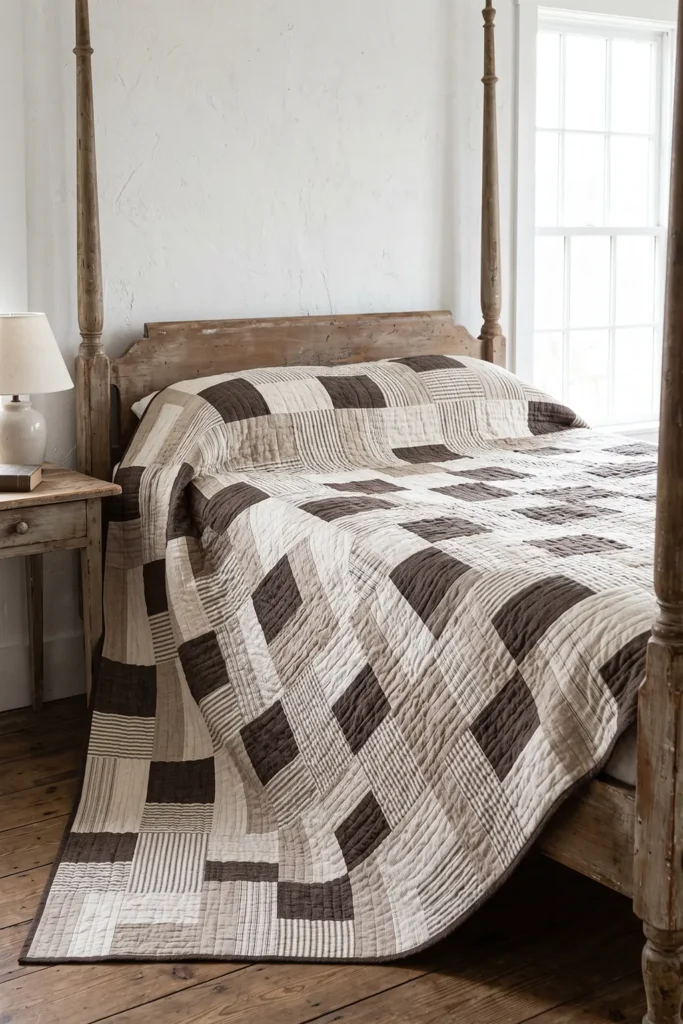
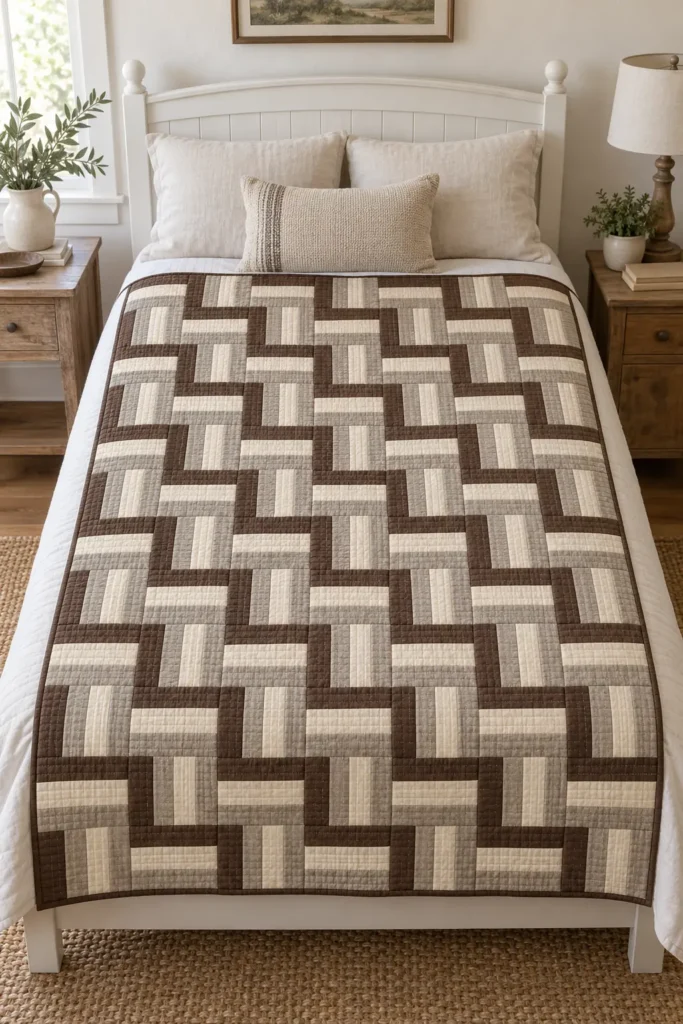
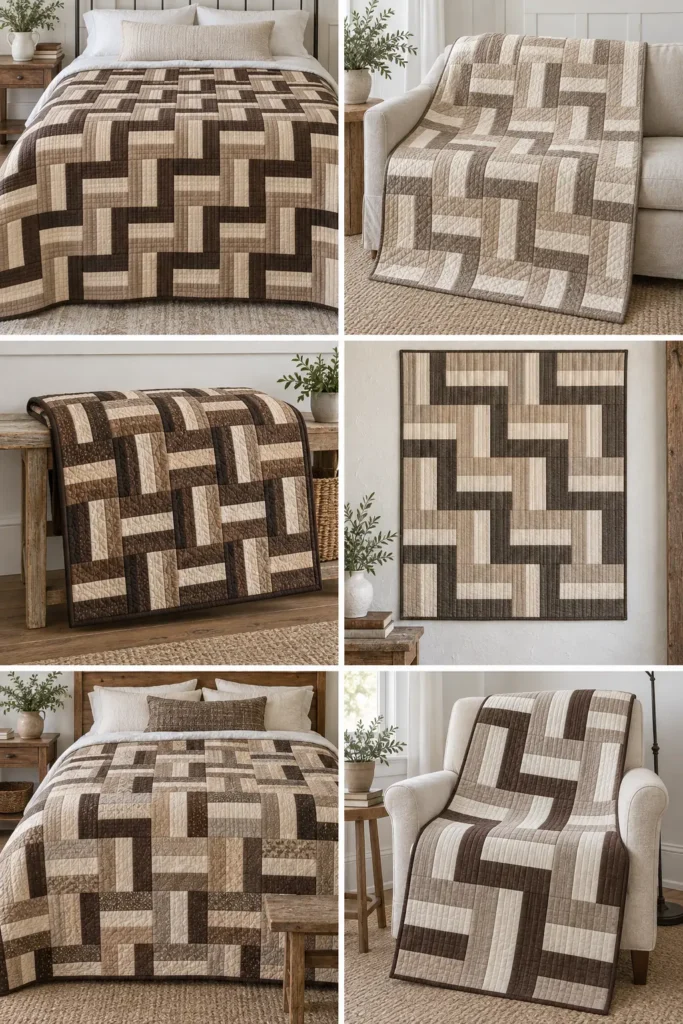
Let Texture Do What Color Isn’t
With a quiet palette, texture becomes the interest. Neutrals in flat quilting cotton can look a little lifeless; the same shades in fabrics with visible weave look expensive.
Worth seeking out:
- Slubbed linen or linen-cotton – irregular natural texture
- Chambray – subtle woven depth, and it presses beautifully
- Woven textures like herringbone or fine ticking stripe
- Tone-on-tone prints – pattern without color
- Low-volume prints – tiny motifs on a pale ground that read as texture from a distance
Mixing a smooth cotton with a slubby linen in the same block adds far more than mixing two smooth cottons in slightly different shades.
One caution about mixing fiber types. Pure linen shrinks considerably more than quilting cotton, and if the two go into the same unwashed quilt, the linen will pull tighter than everything around it in the first wash. Either choose quilting-weight linen-cotton blends, which shrink at much the same rate as cotton, or prewash all your fabrics consistently so they’ve already shrunk before you cut. Don’t mix prewashed and unwashed fabrics in the same quilt top.
Keep the Neutrals Warm
For farmhouse warmth, keep everything on the warm side of neutral – oatmeal, flax, sand, camel, mushroom, warm greige. Cool gray-neutrals will make the quilt read as modern and slightly chilly rather than cozy.
The quickest way to check: hold your fabrics against unbleached calico. Warm neutrals sit comfortably beside it; cool ones look faintly blue by comparison.
A Little Background: Quilts Before Bright Dye
We tend to picture antique quilts as brightly colored, but a great many everyday ones weren’t. Dye was expensive, and cloth for ordinary use was often left undyed or only lightly colored, so a large proportion of utility quilts – the ones made to be worn out rather than displayed – lived in exactly this range of creams, tans, and soft browns.
Synthetic dyes arrived from the 1850s onward and made strong color far cheaper and more widely available, which is a good part of why the quilts that survive in collections look brighter than the average quilt of the period. A neutral quilt isn’t a modern minimalist idea so much as a return to what many humble quilts always looked like.
How the Block Works
- Three strips cut 2½ inches wide, sewn together along their long edges
- Joined with ¼-inch seams, the set measures exactly 6½ inches wide
- Cut across the set at 6½-inch intervals. Each section is a 6½-inch unfinished block, finishing at 6 inches in the quilt
Every block shares the same construction, value order, and dimensions, though the individual fabrics can vary.
The blocks are set in the classic alternating layout – one horizontal, one vertical, checkerboard fashion – which gives the softly woven texture that suits a quiet palette best.
Finished Size
- Block: 6 inches finished (6½ inches unfinished)
- Layout: 7 blocks across × 10 blocks down = 70 blocks
- Quilt top: 42½ × 60½ inches unfinished
- Nominal design size: 42 × 60 inches
- Actual bound size: roughly 42-42½ × 60-60½ inches before washing, depending on how much the quilting draws the layers up. Expect a little more shrinkage in the first wash
- Skill level: true beginner to sew; fabric selection needs care
- Core techniques: strip sets, straight cutting, block rotation, binding
Materials Needed
- 36 strips at 2½ inches × width of fabric – 12 dark, 12 light, and 12 medium in warm neutrals. A neutral or low-volume jelly roll may cover this, but check the value spread before buying, since many neutral bundles skew light. That’s the minimum; keep three spare strips available in case your yield calculation calls for a thirteenth set. If cutting your own, allow at least 2¾ yards for the full 39 strips – 3 yards is safer when working from assorted cuts
- Binding: ½ yard, cut into 7 strips at 2½ inches. A binding in your darkest neutral frames the quilt and stops the edge from dissolving into the wall behind it
- Backing: 3¾ yards of standard-width fabric left unwashed (4 yards if you plan to prewash it), cut into two equal lengths and seamed along their long edges; or 2 yards of 108-inch wide backing unwashed, 2¼ yards if prewashing
- Batting: at least 48 × 66 inches. That leaves about 2¾ inches beyond every edge of the top, fine for careful quilting on a domestic machine. If you’re using a longarm quilter, ask what allowance they need – many want at least 4 inches per side
- Thread: a warm neutral cotton. On a quilt this quiet the quilting thread is visible, so choose it deliberately – one shade darker than your lightest fabric shows the stitching as a gentle shadow
- Rotary cutter, cutting mat, quilting ruler, pins or clips, iron, and basting spray if you prefer it to pins
Beginner tip: don’t prewash precut strips – their narrow pinked edges fray, and 2½-inch strips distort in the machine. Yardage can stay unwashed too, as long as all your fabrics have similar fiber content and shrinkage. If you’re mixing pure linen with cotton, prewash all the yardage consistently before cutting instead. You can prewash the backing either way, as long as you buy the extra allowance.
Choosing Your Colors
Three warm neutrals with clear steps between them:
- Classic farmhouse: dark walnut brown, cream, and warm oatmeal
- Soft and pale: taupe, ivory, and mushroom
- Linen tones: flax, bone, and warm sand
- With more depth: espresso, cream, and camel
- Slightly cooler, still warm enough: warm gray, off-white, and greige
Whichever you pick, grayscale-test them first. And be a little braver with the dark than feels natural – the commonest mistake in a neutral quilt is choosing three shades that are all essentially light, which produces a pretty piece of fabric and no visible pattern at all.
Cutting Measurements
- Strip sets: 12 sets, each made from 3 strips in dark-light-medium order (light in the center). Each set measures 6½ inches wide × about 40 inches long once selvages are removed
- Blocks: cut 6½-inch squares across each set. A set yields up to six blocks, but only with slightly more than 39 inches of usable length after squaring one end
- Backing panel: at least 48 × 66 inches
- Batting: 48 × 66 inches
- Binding: seven strips, 2½ inches × width of fabric
Step-by-Step Guide
Step 1 – Choose and test your neutrals. Before anything else, lay your candidate fabrics side by side, photograph them, and convert the photo to black and white. If they read as clearly light, medium, and dark in grayscale, they’ll work. If two merge into the same gray, replace one and test again. Don’t skip this – it’s the whole difference between a woven quilt and a soft blur.
If you’re using several different fabrics rather than just three, grayscale-test all of them together and sort them into three piles: light, medium, and dark. Leave out any fabric you can’t confidently place in one pile.

Step 2 – Prepare your strips. Whether to prewash depends on what you’re using. If your fabrics are precut strips, quilting cotton, or linen-cotton blends, leave them unwashed – they shrink at similar rates and will settle together in the first wash. If you’re mixing pure linen with cotton, prewash everything consistently before cutting, since linen shrinks noticeably more. Either way, never combine prewashed and unwashed fabrics in the same quilt top.
Select 36 strips – twelve dark, twelve light, twelve medium – and remove any selvage from the ends. Measure them – or at minimum the shortest strip in each planned trio, since that’s what limits the whole set. A strip needs about 40 inches of usable length to yield six blocks.
Step 3 – Set your value sequence. Arrange every set as dark, light, medium, with the light strip in the center. Write it down. The centered light rail is what the eye follows through the weave, and it also means you can press both seam allowances away from your palest fabric.

Step 4 – Sort into groups and calculate the yield. Divide the 36 strips into twelve piles of three, each in dark-light-medium order.
Now check the arithmetic before sewing. For each group, take the shortest strip, subtract about an inch for squaring, divide what’s left by 6½ inches, and round down – 5.8 doesn’t make six blocks. That’s the number the set will actually give. Add the twelve figures together and confirm the total reaches 70. Twelve full sets give 72, so the margin is slim: if the total falls short, make up a thirteenth group from your spare strips and recount.
Step 5 – Sew the first strip set. Sew the dark and light strips together with a ¼-inch seam. Add the medium strip to the other side of the light one, but start that seam from the opposite end of the set. Sewing both long seams in the same direction encourages a strip set to bow into a shallow curve; starting from opposite ends keeps that to a minimum.

Step 6 – Press the set. Press both seam allowances away from the light center strip, toward the darker fabric on either side. On a pale quilt this matters more than usual – a dark seam allowance behind a light rail will shadow through and show. Press from the back first, then the front, without stretching.
Step 7 – Check the width. Measure across the pressed set: it should be exactly 6½ inches. If it’s narrower, your seam allowance is running wide – adjust your machine now, before making the rest. This one measurement determines the accuracy of every block.

Step 8 – Make the remaining sets. Repeat steps 5 to 7 until you have completed all twelve sets, plus any extra your Step 4 calculation called for, all measuring 6½ inches wide.
Step 9 – Square one end of a set. Lay a set on the cutting mat and trim a clean edge at one end, cutting at a true right angle to the long seams. Anything you cut from this set is only square if that first cut is.

Step 10 – Cut and check the first block. Measuring from the squared end, cut one 6½-inch section. Turn it on the mat and check with a ruler that it measures 6½ inches in both directions with four square corners. A bowed set or a slightly angled first cut gives a parallelogram rather than a square, and it’s far better to discover that on block one.
Step 11 – Cut the remaining blocks. Once the first checks out, cut up to five more from that set, then work through every set you prepared. Keep cutting until you have at least 70 accurate, usable blocks.

Step 12 – Make two reference blocks. Set one block with its rails running horizontally and another with them running vertically, and keep the pair beside your layout area. With neutrals, this matters more than usual – the fabrics look alike at a glance, and a misplaced block is much harder to spot than it would be in bright colors.
Step 13 – Lay out the quilt. Arrange the blocks 7 across × 10 down, alternating direction like a checkerboard: horizontal, vertical, horizontal, vertical along each row, and starting each new row with the opposite direction to the row above. Step back several feet and check the weave reads. If it doesn’t, that’s your grayscale test telling you something after the fact. It’s still fixable at this stage – swap in higher-contrast spare blocks where the weave looks weakest, and if you don’t have suitable spares, make up one more strip set with a genuinely darker rail and cut replacement blocks from it.

Step 14 – Check every block’s rotation. A block can face the right way and still be turned 180 degrees, which swaps its dark and medium rails. Compare each against your reference blocks, and hold to one rule: dark rail at the top of every horizontal block, and at the left of every vertical block.
Step 15 – Photograph and label the rows. Take a photo, then place a numbered label beside each row. Gather each row from left to right and pin its label to the first block, keeping every stack facing upward.

Step 16 – Sew the rows. Sew each row of seven blocks together with a ¼-inch seam, checking directions against your photo as you go. Each row should measure 42½ × 6½ inches. Press the block-joining seam allowances of odd-numbered rows to the right and even-numbered rows to the left, so they nest when you join the rows.
Step 17 – Recheck before joining. Return the ten sewn rows to the floor or design wall in order and look at the weave once more. Correcting a reversed block now means unpicking one row seam rather than several.

Step 18 – Join the rows. Sew the ten rows together in order, pinning at all six block boundaries along each row seam, where the opposing press directions lock the seams together.
That’s the only matching this layout needs. Because the orientations alternate between rows, every vertical-rail block meets a horizontal-rail block above and below it – so the internal rail seams don’t continue across the row seam and there’s nothing to line up there. Press the row seams open to spread the bulk, or consistently to one side, without stretching the top. It should measure 42½ × 60½ inches.
Step 19 – Prepare the backing. Using standard-width fabric: if unwashed, cut the 3¾ yards into two equal lengths of about 67½ inches; if you bought 4 yards and prewashed it, measure what you actually have and divide that in two, confirming each piece is still at least 66 inches long. Trim the selvages, sew the pieces together along their long edges, and press the seam open. Using 108-inch wide backing: no seam is needed – square one end and cut a single panel. Either way, confirm the panel measures at least 48 × 66 inches.

Step 20 – Make the quilt sandwich. Lay the backing wrong side up, center the batting on it, then the quilt top right side up. Smooth everything from the center outward and baste with pins or basting spray.
Step 21 – Quilt it – and give this real thought. On a neutral quilt the quilting is far more visible than on a busy one, because there’s no color competing with it. That’s an opportunity rather than a problem: a dense straight-line grid, close parallel lines, or a simple all-over curve will read as genuine surface texture and add a great deal to a quiet palette.
Use thread one shade darker than your lightest fabric so the stitching casts a soft shadow rather than disappearing. And before choosing your spacing, check your batting packaging for its maximum quilting distance – most battings specify how far apart the lines can be before the fibers shift in the wash, and it varies between cotton, wool, and polyester.
Step 22 – Trim and square up. Trim the excess batting and backing level with the edge of the quilt top, squaring the corners. Quilting always draws the layers up a little, so the top may finish just under 42½ × 60½ inches, which is normal. Trim only the excess batting and backing – don’t reduce the quilt top unless a small amount of squaring is genuinely needed. That outer ¼ inch is the binding’s seam allowance.
Step 23 – Make and attach the binding. Take it in order:
- Cut seven strips at 2½ inches × width of fabric, then join them end to end with diagonal seams – lay two strip ends at right angles, right sides together, sew corner to corner across the overlap, trim the excess to ¼ inch, and press that seam open.
- Press the whole strip in half lengthwise, wrong sides together.
- Start partway along one side, not at a corner, and leave the first 8-10 inches unsewn as a tail.
- Sew the binding to the front with a ¼-inch seam, stopping ¼ inch before each corner.
- Miter each corner: fold the binding straight up to form a 45-degree diagonal, then fold it back down level with the next edge, and resume sewing from the fold.
- Join the two tails where they meet, trim the excess, and finish the last stretch of seam.
- Fold the binding to the back and stitch it down, folding the mitered corners neatly as you reach them.
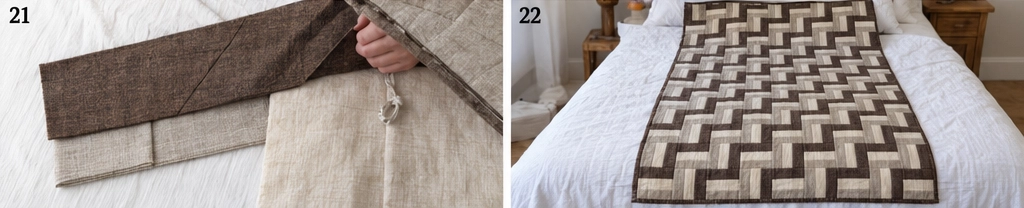
Step 24 – Wash and finish. Before washing, the quilt should measure roughly 42-42½ × 60-60½ inches. Wash gently on cold and tumble dry low; it will come out slightly smaller and softly crinkled, which suits a neutral quilt particularly well.
Assembly at a Glance
- Grayscale-test three warm neutrals before buying or cutting.
- Leave strips unwashed (or prewash everything if mixing pure linen with cotton); take 36 and measure them.
- Set every group as dark, light, medium, light in the center.
- Sort into twelve groups, calculate each yield (round down), and add a thirteenth if the total falls under 70.
- Sew dark+light, then add medium starting from the opposite end.
- Press both seams away from the light center strip.
- Check the set measures 6½ inches wide.
- Make all twelve sets, plus any extras.
- Square one end of a set.
- Cut one block and check it’s 6½ inches square with true corners.
- Cut from every set until you have at least 70 usable blocks.
- Make one horizontal and one vertical reference block.
- Lay out 7 × 10, alternating direction like a checkerboard.
- Check no block is turned 180 degrees.
- Photograph and label the ten rows.
- Sew rows of seven → 42½ × 6½; press odd right, even left.
- Recheck the weave before joining.
- Join the rows, matching the six block boundaries per row → 42½ × 60½ top.
- Prepare a 48 × 66-inch backing panel.
- Layer and baste.
- Quilt deliberately – the stitching is visible on a quiet quilt.
- Trim batting and backing level with the top.
- Bind with seven strips, diagonal joins and mitered corners.
- Wash cold → about 42-42½ × 60-60½ inches.
Beginner Tips for Success
- Grayscale-test your fabrics before buying. It’s the difference between a woven quilt and a blur.
- Be braver with the dark than feels natural – three light shades give no pattern at all.
- Keep all three neutrals warm; cool grays read modern rather than cozy.
- Choose textured fabrics – slubbed linen, chambray, tone-on-tone – since texture is doing the work color usually would.
- Press both seams away from the light center strip; a dark allowance behind a pale rail will shadow through.
- Make reference blocks. Neutral fabrics look alike, and misplaced blocks are hard to spot.
- Plan the quilting deliberately and use thread a shade darker than your lightest fabric.
- Bind in your darkest neutral so the edge doesn’t dissolve into the wall behind it.
Scaling It to Other Sizes
Every block finishes at 6 inches:
- Baby quilt: 6 across × 8 down = 36 × 48 inches (48 blocks)
- Lap quilt (as written): 7 × 10 = 42 × 60 inches (70 blocks)
- Twin topper: 10 × 14 = 60 × 84 inches (140 blocks)
- Queen: 14 × 16 = 84 × 96 inches (224 blocks)
For strip sets, divide your block count by the number of blocks each set will actually yield, and keep adding sets until the total reaches what you need. If every set is confirmed to give six, divide by six, round up, and add one more as insurance. Multiply the number of sets by three for the strips required, and work out backing, batting, and binding separately.
Styling It & Gift Ideas
A neutral rail fence quilt is the most placeable quilt in this collection – it will sit happily in almost any room without clashing with anything. Fold it at the end of a bed with white linen, drape it over a worn leather chair, or layer it on a sofa with a wool throw. It works especially well in farmhouse and country interiors, where its texture reads as part of the room’s fabric rather than as decoration.
That easy compatibility makes it a genuinely safe gift:
- A wedding or housewarming quilt, since it suits any décor
- A gift for someone whose taste you don’t know well – neutrals rarely go wrong
- A guest room quilt that won’t fight the existing bedding
- A baby quilt at 6 × 8 blocks in soft creams and oatmeal
Final Thoughts
A neutral rail fence is deceptively demanding. The sewing is identical to every other version in this collection – three strips, one square, no points and no bias – but the fabric choice carries all the weight, and neutrals are unforgiving about value. Grayscale-test before you buy, be braver with the dark than instinct suggests, reach for textured cloth over flat cotton, and put real thought into the quilting. Get those four things right and you’ll have a quiet, warm, endlessly wearable quilt that looks at home wherever you put it.
Other Design Inspirations – Digitally Modified Images. Texture and color may vary from the actual product.
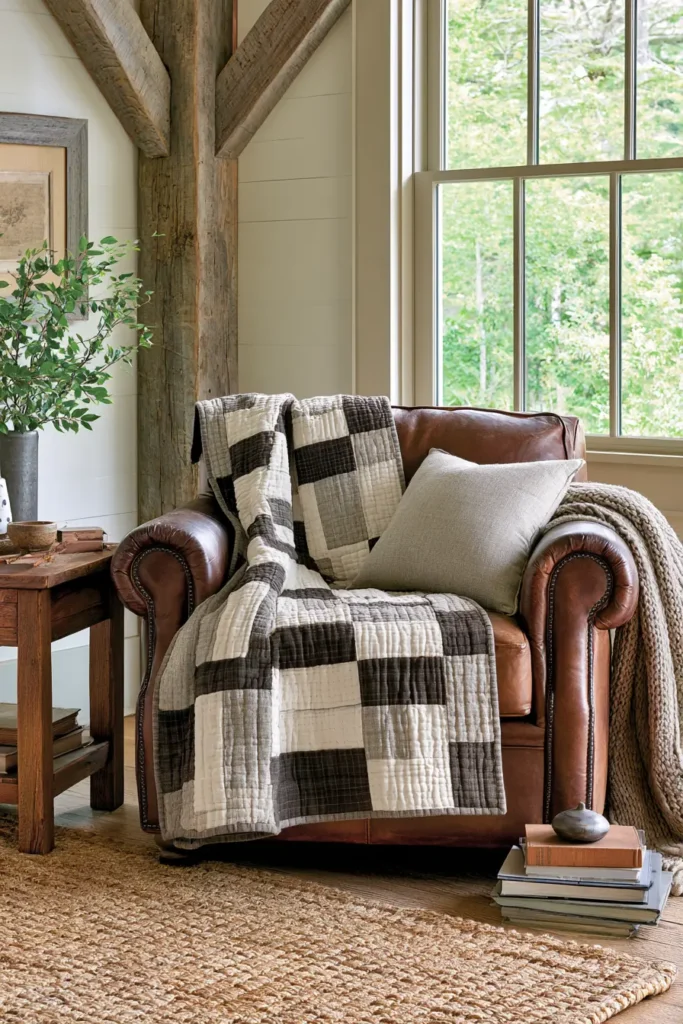
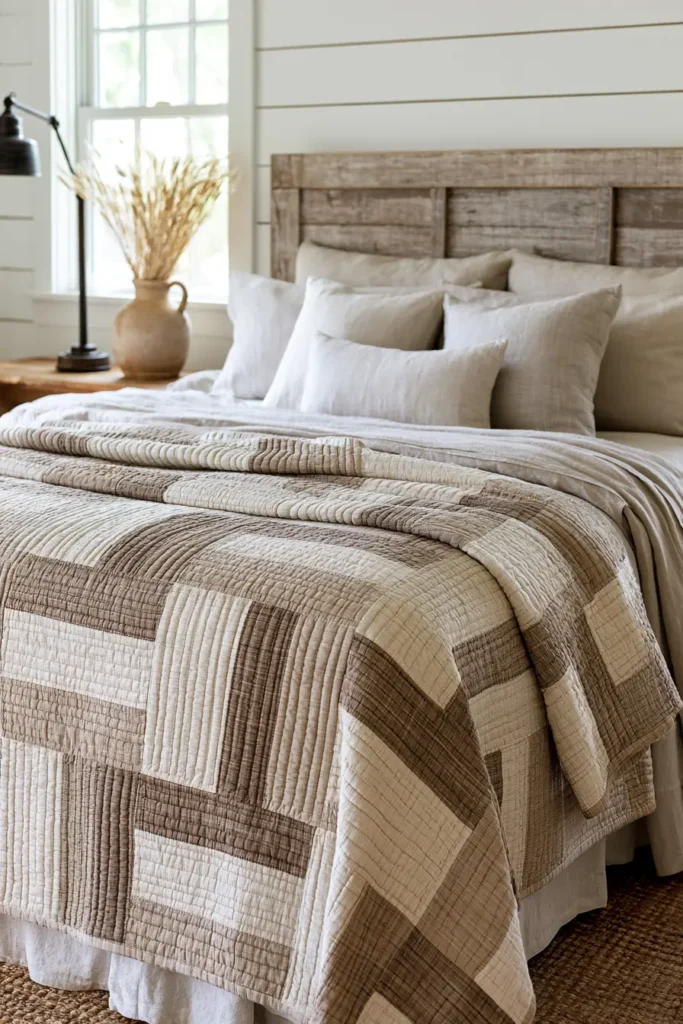
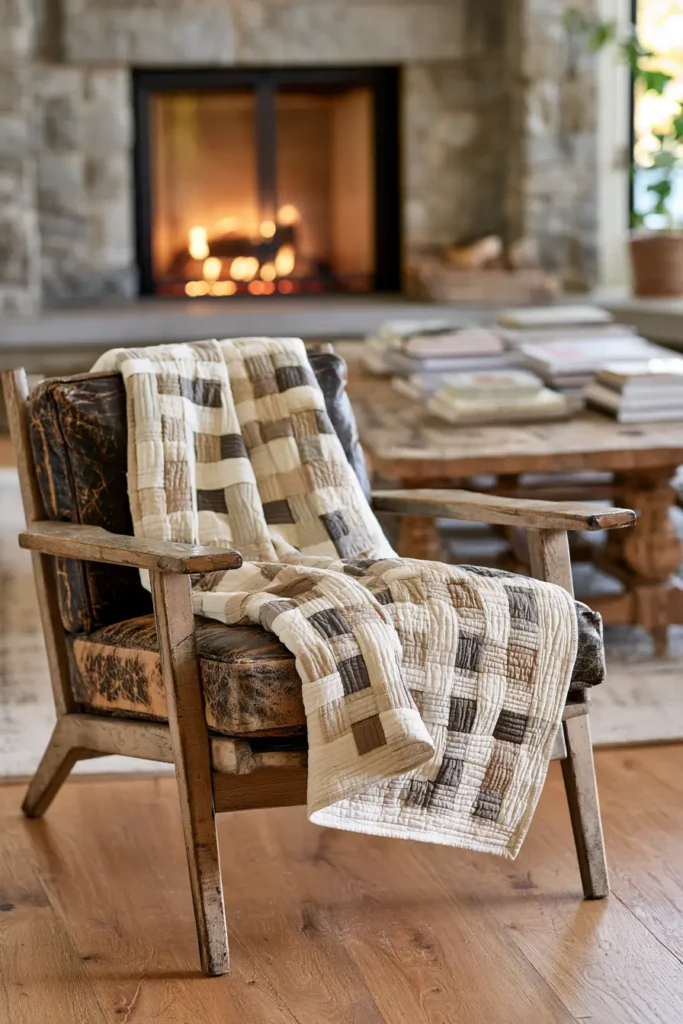
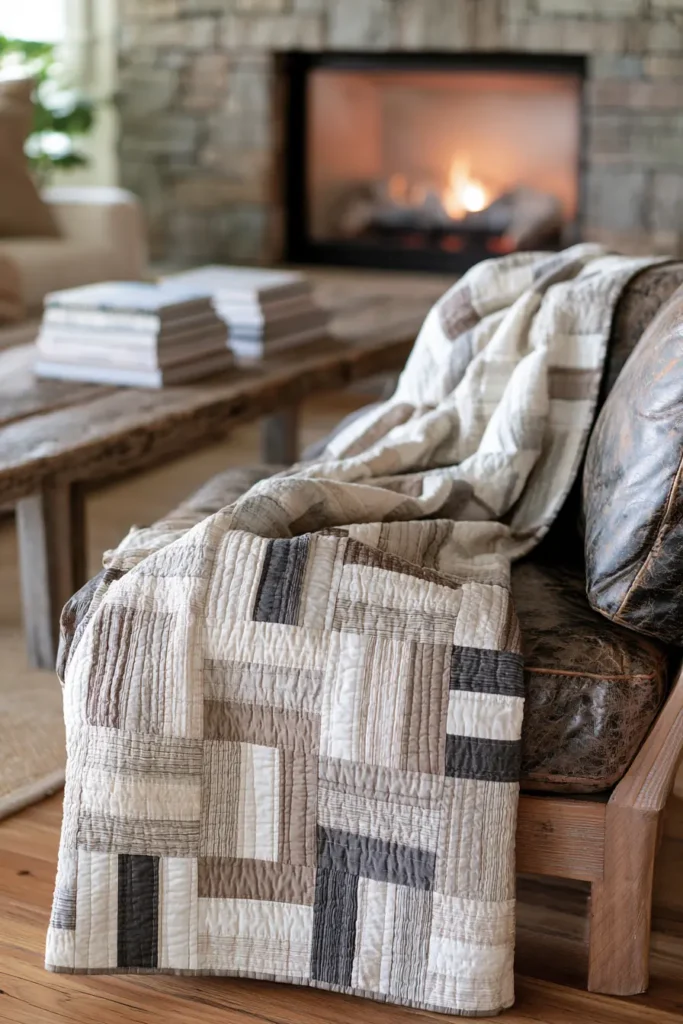
10. Jelly Roll Rail Fence Quilt for Fast Precut Sewing
A Jelly Roll Rail Fence quilt is one of the quickest ways to turn precut 2½-inch strips into a full quilt top. The Rail Fence block was already well suited to strip piecing, so jelly rolls make the process even faster: most of the cutting has already been done before you begin.
For this version, three jelly roll strips are sewn together lengthwise, cut into square blocks, and rotated throughout the layout. The result is a bright, lively quilt with plenty of movement but very little complicated piecing.
A standard jelly roll usually contains around 40–42 strips measuring 2½ inches × width of fabric, although bundle counts vary by manufacturer. This quilt uses 27 strips for the center, so one standard bundle is normally more than enough.
How the Block Works
Each Rail Fence block starts with:
- 3 jelly roll strips
- Each strip measuring 2½ inches wide
Sew the three strips together along their long edges with ¼-inch seams.
The raw width is:
2½ + 2½ + 2½ = 7½ inches
Two ¼-inch seams consume a total of 1 inch across the strip set:
7½ – 1 = 6½ inches
The completed strip set therefore measures:
6½ inches wide
Cut the strip set crosswise every:
6½ inches
Each block becomes:
- 6½” × 6½” unfinished
- 6″ × 6″ finished
Design Inspirations – Digitally Modified Images. Texture and color may vary from the actual product.
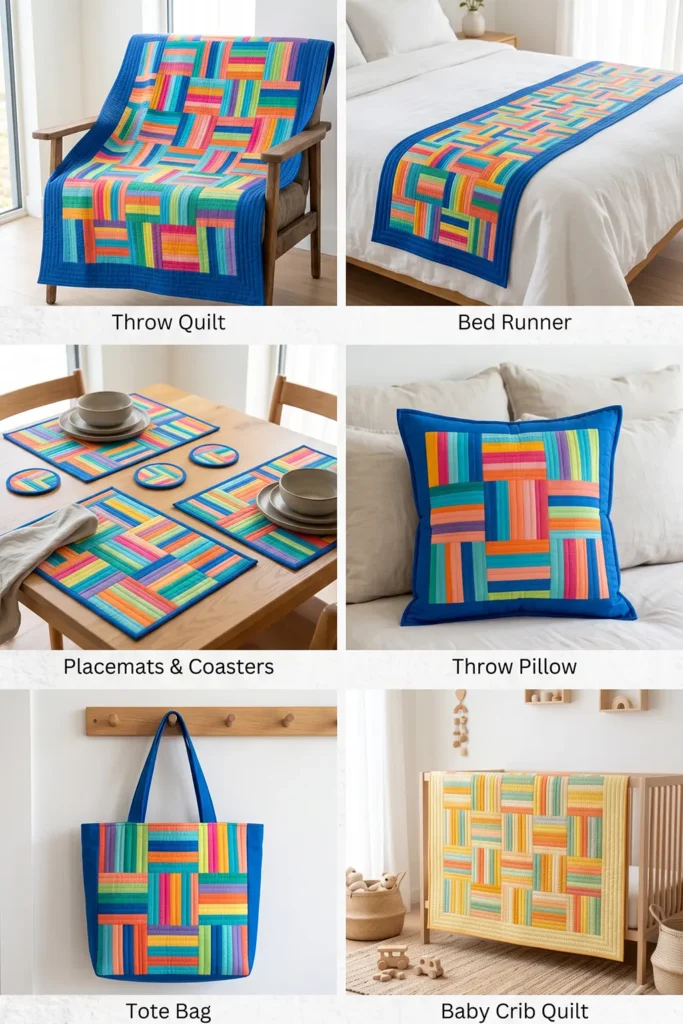
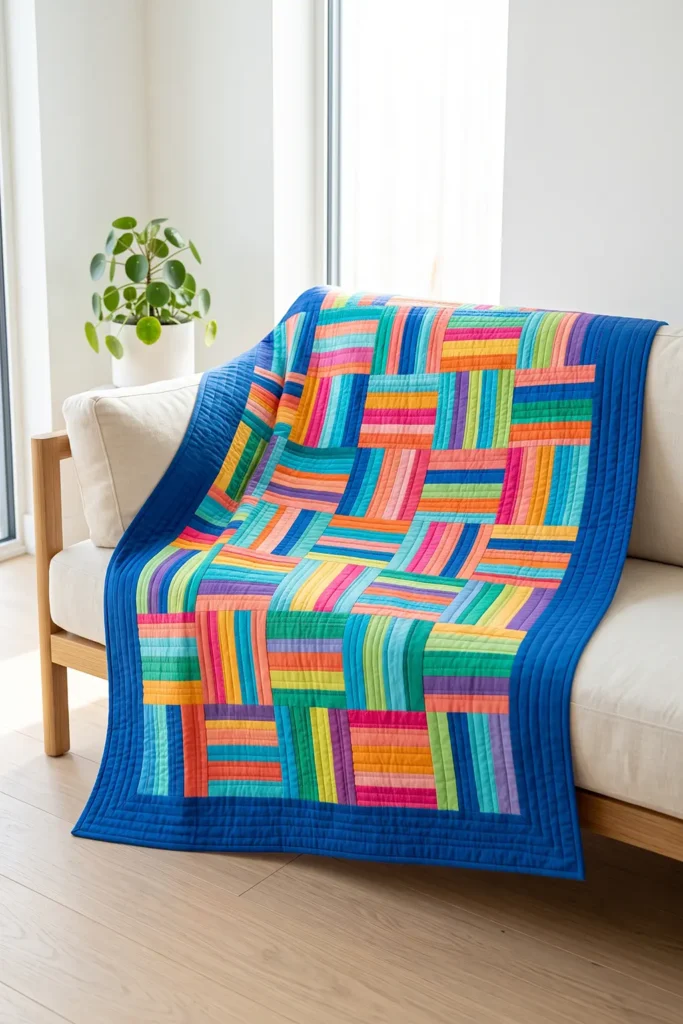
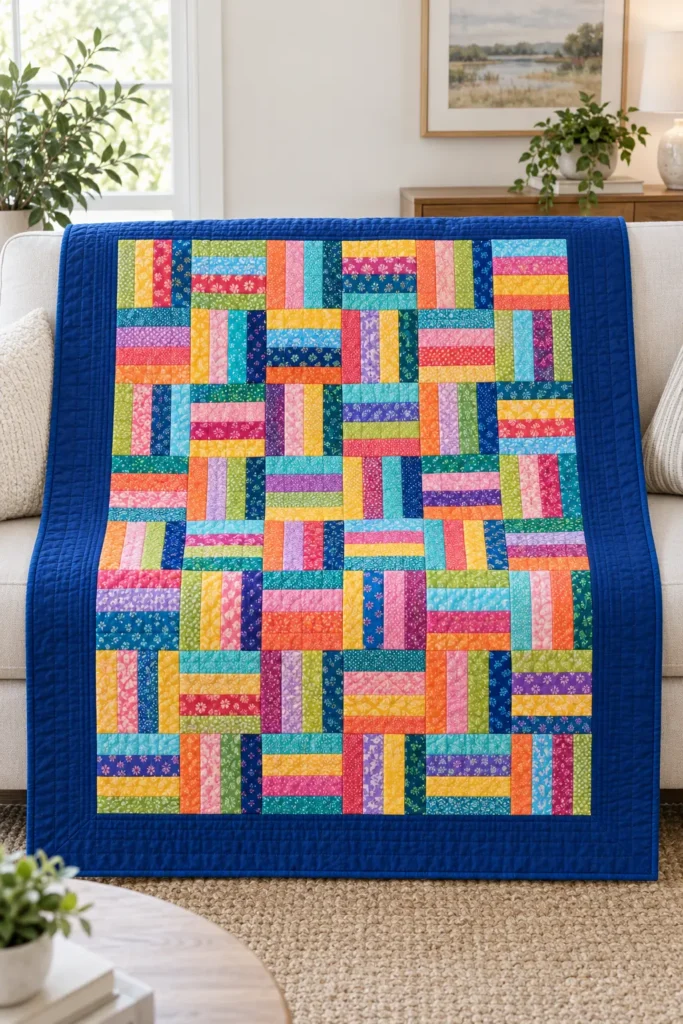
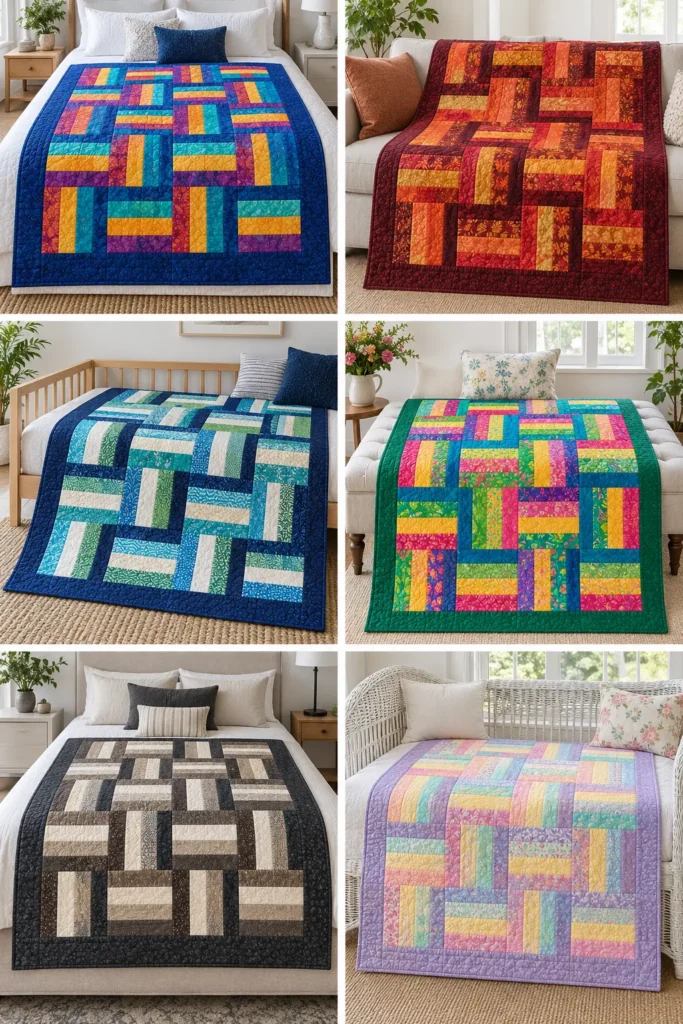
How the Layout Works
Arrange the blocks in alternating orientations.
Use:
Row 1: vertical, horizontal, vertical, horizontal, vertical, horizontal
Row 2: horizontal, vertical, horizontal, vertical, horizontal, vertical
Repeat those two rows through the quilt.
The changing rail direction creates the familiar Rail Fence movement while keeping the construction extremely simple.
Why Jelly Rolls Work So Well for Rail Fence Quilts
Rail Fence blocks are based entirely on strips, so precut bundles eliminate one of the slowest early stages of quilt making.
You don’t need to:
- square large pieces of yardage
- cut dozens of long 2½-inch strips
- coordinate every fabric individually
The bundle already provides variety and usually includes prints designed to work together.
That makes Rail Fence one of the most natural patterns for jelly roll sewing.
Finished Size
Block:
6 inches finished
Block unfinished:
6½ inches square
Center layout:
6 blocks across × 8 blocks down
Blocks required:
48
Center finished size:
36 × 48 inches
Center unfinished size:
36½ × 48½ inches
Border:
6 inches finished on all four sides
Nominal finished quilt size:
48 × 60 inches
Quilt top unfinished:
Approximately 48½ × 60½ inches
Skill level:
Beginner
Core techniques:
Jelly roll strip piecing, rotary cutting, block rotation, row assembly, borders, quilting, and binding
Materials Needed
- 1 jelly roll, approximately 40–42 strips, each 2½ inches × width of fabric
- Use 27 strips for the quilt center
- 1¾ yards border fabric
- ½ yard binding fabric
- 3¾ yards standard-width backing fabric
- Or about 2 yards of 108-inch-wide backing
- Batting at least 54 × 66 inches
- Coordinating cotton thread
- Sewing machine
- Rotary cutter
- Cutting mat
- Quilting ruler
- Pins or clips
- Iron
For the written version, use a vibrant jelly roll containing:
- turquoise
- cobalt
- coral
- hot pink
- orange
- golden yellow
- lime
- emerald
- violet
A deep cobalt or navy border gives the colorful center a strong frame.
Beginner tip: don’t prewash jelly roll strips. Their pinked or precut edges can fray and distort in the washing machine.
Choosing Your Colors
A coordinated jelly roll makes this project especially easy, but color placement still matters.
Vibrant Modern
Turquoise, cobalt, coral, golden yellow, fuchsia, lime, violet
Tropical
Aqua, mango, coral, lime, teal, hot pink
Jewel Tone
Emerald, sapphire, ruby, plum, amber, teal
Bright Floral
Pink, orange, yellow, leaf green, aqua, purple
Scrappy Rainbow
Red, orange, yellow, green, blue, violet, magenta
For more visual structure, try to include one clearly light, medium, and dark strip in each set.
This isn’t mandatory, but it helps the Rail Fence pattern remain visible even when the prints are busy.
Cutting Measurements
For the quilt center:
Use:
27 jelly roll strips
Divide them into:
9 groups of 3 strips
After sewing, each strip set should measure:
6½ inches wide
and approximately:
40 inches usable length
depending on the strip length after the selvages are removed.
From each set, cut:
6½-inch blocks
A sufficiently long strip set can yield:
6 blocks
Nine sets can therefore produce up to:
54 blocks
You need:
48 blocks
That leaves up to six extras for layout changes or imperfect cuts.
Borders
Cut four strips:
6½ inches wide
Leave them long initially and trim to the actual center measurements after assembly.
Binding
Cut:
7 strips, 2½ inches × width of fabric
Backing
Prepare at least:
54 × 66 inches
Batting
Prepare at least:
54 × 66 inches
Step-by-Step Guide
Step 1 – Open and Sort the Jelly Roll
Unroll the jelly roll carefully.
Count the strips before starting because bundle sizes can vary.
Select:
27 strips
for the quilt center.
Set the remaining strips aside for another project, scrappy binding, or extra blocks.

Step 2 – Remove the Selvages
Trim away the selvage from both ends of the selected strips.
Keep the strips as long as possible.
Check a few usable lengths.
To cut six blocks, each strip set needs:
6 × 6½ = 39 inches
plus a little extra for squaring one end.
If your usable strips are shorter than about 40 inches, make a tenth strip set as insurance.
Step 3 – Sort the Strips into Nine Groups
Divide the 27 strips into:
9 groups of 3
Aim for strong contrast in each group.
A simple approach is:
- 1 light
- 1 medium
- 1 dark
For example:
yellow | coral | cobalt
or:
lime | turquoise | violet
This helps the rails remain distinct after the blocks are rotated.

Step 4 – Set the Strip Order
Arrange each group in the order you want it sewn.
Once you’ve chosen the order for a particular set, keep it consistent through that strip set.
You can vary the colors from one set to another because the jelly roll is meant to look lively and coordinated.
Step 5 – Sew the First Two Strips
Place the first two strips right sides together.
Sew along one long edge using an accurate:
¼-inch seam
Avoid stretching the fabric as it feeds through the machine.

Step 6 – Add the Third Strip
Place the third strip right sides together with the free edge of the second strip.
Sew using another:
¼-inch seam
Begin this seam from the opposite end.
Alternating sewing direction helps reduce bowing in long strip sets.
Step 7 – Press the Strip Set
Press the seams carefully.
If one strip is noticeably lighter than the others, press seam allowances away from it when practical.
Otherwise, press consistently toward the darker fabrics.
Avoid dragging the iron along the strip set, which can stretch it out of shape.

Step 8 – Check the Width
Measure across the pressed strip set.
It should be:
6½ inches wide
Check near:
- one end
- the center
- the opposite end
If the width is wrong, correct the seam allowance before sewing the remaining sets.
Step 9 – Make the Remaining Eight Sets
Repeat the process until you have:
9 completed strip sets
Each should measure approximately:
6½ inches wide

Step 10 – Square One End of the First Set
Place the first strip set on your cutting mat.
Align your ruler with the strip seams.
Trim one end at a true right angle.
This gives you an accurate starting point for cutting the blocks.
Step 11 – Cut the First Block
Measure:
6½ inches
from the squared edge.
Cut across the strip set.
Check that the block measures:
6½ × 6½ inches
with square corners.

Step 12 – Cut the Remaining Blocks
Continue cutting 6½-inch sections.
A strip set with enough usable length can yield:
6 blocks
Repeat for all nine sets.
Maximum possible:
54 blocks
Blocks needed:
48
Keep the best 48.
Step 13 – Sort the Blocks by Color
Spread all the blocks out.
Separate very similar blocks if necessary.
You don’t want all the bright red blocks, for example, concentrated in one corner.
The jelly roll will already coordinate, but a little layout planning improves the finished quilt considerably.

Step 14 – Establish the Two Orientations
Place one block so the rails run:
vertically
Rotate another block 90 degrees so the rails run:
horizontally
These are the two orientations you’ll alternate throughout the quilt.
Step 15 – Lay Out the First Two Rows
Arrange six blocks for Row 1:
V – H – V – H – V – H
Arrange Row 2:
H – V – H – V – H – V
Check both direction and color balance.

Step 16 – Complete the 6 × 8 Layout
Continue until you have:
6 blocks across × 8 rows down
Alternate the same two row patterns.
Move blocks around until the bright colors feel evenly spread across the quilt.
Step 17 – Check for Color Clumps
Stand several feet away.
Look specifically for:
- too many dark blocks together
- several red or orange blocks grouped in one area
- an overly pale corner
- repeated identical prints touching
Swap blocks until the distribution feels balanced.
Step 18 – Photograph the Layout
Take a clear photograph before moving anything.
This becomes your assembly reference.
Step 19 – Label the Rows
Label:
Rows 1 through 8
Stack each row from left to right.
Attach the row number to the first block.
Keep each stack face up.
Step 20 – Sew Row 1
Join the six blocks using:
¼-inch seams
Check orientation against your photograph as you sew.
The row should measure approximately:
36½ × 6½ inches
Step 21 – Sew the Remaining Rows
Repeat for all eight rows.
Press:
- odd-numbered rows in one direction
- even-numbered rows in the opposite direction
This lets neighboring seams nest during row assembly.

Step 22 – Recheck the Layout
Place the eight completed rows back in order.
Compare them with the photograph.
Check:
- block orientation
- color placement
- row order
Fix any mistake before joining rows.
Step 23 – Join Rows 1 and 2
Place Rows 1 and 2 right sides together.
Match each block intersection.
Pin the nested seams.
Sew using:
¼-inch seam allowance
Step 24 – Join the Remaining Rows
Continue adding Rows 3 through 8.
After all rows are attached, the center panel should measure approximately:
36½ × 48½ inches
Press the row seams open or consistently to one side.
Assembly
At this stage, the strip-pieced center is complete.
Before adding borders:
- Lay the center flat.
- Measure vertically through its middle.
- Measure horizontally through its middle.
- Use those measurements to determine exact border lengths.
Measuring through the center rather than along potentially stretched edges reduces the chance of wavy borders.
Step 25 – Measure and Cut the Side Borders
Measure vertically through the quilt center.
It should be close to:
48½ inches
Trim two border strips to:
6½ inches × the actual measured length
Mark:
- ends
- center
- quarter points
Step 26 – Attach the Side Borders
Pin the border to the center at all marked points.
Sew with a:
¼-inch seam
Press toward the border.
The quilt should now measure approximately:
48½ × 48½ inches
Step 27 – Measure for the Top and Bottom Borders
Measure horizontally through the center of the quilt, including the new side borders.
The expected measurement is approximately:
48½ inches
Trim the remaining two border strips accordingly.

Step 28 – Add the Top and Bottom Borders
Pin at:
- ends
- center
- quarter points
Sew using:
¼-inch seams
Press toward the border.
The quilt top should now measure approximately:
48½ × 60½ inches
Step 29 – Prepare the Backing
If using standard-width fabric, divide:
3¾ yards
into two approximately equal lengths of about:
67½ inches
Remove selvages.
Sew the panels together along their long edges.
Press the seam open.
Trim or square the backing while keeping it at least:
54 × 66 inches
If you’re using a longarm quilter, ask how much extra backing they require before trimming.
Step 30 – Prepare the Batting
Cut batting measuring at least:
54 × 66 inches
Check the batting packaging for maximum quilting-distance recommendations.
Step 31 – Make the Quilt Sandwich
Lay the backing:
wrong side up
Place batting on top.
Center the quilt top:
right side up
Smooth all three layers from the center outward.
Step 32 – Baste
Baste with:
- safety pins
- thread
- or your preferred basting method
Work evenly from the center toward the outside edges.
Step 33 – Quilt It
Simple straight-line quilting works especially well with the Rail Fence geometry.
Good options include:
- stitch approximately ¼ inch beside strip seams
- quilt along block boundaries
- use a diagonal grid
- use gentle wavy lines for a softer finish
For fast domestic-machine quilting, parallel straight lines are one of the easiest choices.
Always stay within the maximum quilting distance recommended for your batting.

Step 34 – Trim and Square
After quilting, trim excess batting and backing level with the quilt top.
Check that the corners remain square.
Some quilting draw-up is normal, so don’t trim aggressively just to restore the exact pre-quilting measurement.
Step 35 – Prepare the Binding
Cut:
7 strips at 2½ inches × width of fabric
Join them end to end with diagonal seams.
Trim the joins to:
¼ inch
Press the seams open.
Fold the entire binding strip in half lengthwise:
wrong sides together
and press.
Step 36 – Attach the Binding
Begin partway along one quilt side.
Leave:
8–10 inches
of binding loose.
Sew to the front using:
¼-inch seam allowance
Stop:
¼ inch before each corner
Fold the binding upward at 45 degrees, then fold it back down along the next edge to form the miter.
Continue around the quilt.
Join the beginning and ending tails with a diagonal seam.
Finish the remaining section.
Fold the binding to the back and stitch securely by hand or machine.
The finished quilt should measure approximately:
48 × 60 inches
before normal washing shrinkage.
Assembly at a Glance
Count the jelly roll strips.
Choose:
27 strips
Sort into:
9 groups of 3
Sew three strips together.
Use:
¼-inch seams
Check each strip set:
6½ inches wide
Make:
9 strip sets
Square one end.
Cut:
6½-inch blocks
Make at least:
48 blocks
Arrange:
6 across × 8 down
Alternate vertical and horizontal blocks.
Balance colors across the layout.
Photograph and label all eight rows.
Sew six blocks per row.
Press alternate rows in opposite directions.
Join all eight rows.
Center:
36½ × 48½ inches
Measure through the center.
Add:
6½-inch side borders
Add:
6½-inch top and bottom borders
Quilt top:
Approximately 48½ × 60½ inches
Prepare backing and batting:
At least 54 × 66 inches
Layer.
Baste.
Quilt.
Trim.
Bind with:
7 strips at 2½ inches
Finished size:
Approximately 48 × 60 inches
Beginner Tips for Success
Don’t prewash jelly roll strips.
Count the bundle before planning the quilt.
Check strip lengths after removing selvages.
Use an accurate ¼-inch seam.
Alternate the direction of long seams to reduce bowing.
Check the width of the first strip set before sewing all nine.
Square one end before cutting blocks.
Check the first 6½-inch block from every strip set.
Don’t rely entirely on randomness—spread similar colors around the quilt.
Photograph the layout before moving blocks.
Label rows immediately.
Recheck block orientation while sewing.
Measure borders through the center of the quilt.
Pin borders at ends, center, and quarter points.
Check batting quilting-distance instructions before quilting.
Scaling It to Other Sizes
Every block finishes at:
6 inches
Using the same 6-inch finished border:
Baby Quilt
Center:
4 × 6 blocks = 24 × 36 inches
With borders:
Approximately 36 × 48 inches
Blocks needed:
24
Lap Quilt — As Written
Center:
6 × 8 blocks = 36 × 48 inches
With borders:
Approximately 48 × 60 inches
Blocks needed:
48
Twin Quilt
Center:
8 × 12 blocks = 48 × 72 inches
With borders:
Approximately 60 × 84 inches
Blocks needed:
96
Queen Quilt
Center:
12 × 14 blocks = 72 × 84 inches
With borders:
Approximately 84 × 96 inches
Blocks needed:
168
A full strip set can produce up to six blocks when the usable strip length is slightly more than 39 inches.
For larger quilts, divide the required block count by six and round upward to estimate the minimum strip sets.
Add a little extra cutting insurance, then calculate border, backing, batting, and binding separately.
Styling It & Gift Ideas
A bright Jelly Roll Rail Fence quilt works especially well when the surrounding room is simple.
Try styling the vibrant version with:
- cream bedding
- white walls
- pale oak furniture
- natural linen
- neutral upholstery
- understated accessories
This keeps the jelly roll fabrics as the focal point.
For a stronger contemporary look, use a navy or cobalt border.
For a cottage version, choose a floral jelly roll and a soft green border.
For a children’s quilt, use primary colors with turquoise.
For an elegant version, choose jewel tones such as emerald, sapphire, ruby, and plum.
This design also makes a practical:
- Housewarming quilt
- Graduation gift
- Weekend sewing project
- Beginner’s first throw
- Guest-room quilt
- Sofa throw
- Jelly roll stash project
Final Thoughts
The Jelly Roll Rail Fence quilt takes full advantage of what precut strips do best: fast, accurate strip piecing with plenty of coordinated color already built in.
Nine three-strip sets provide enough fabric for the 48 blocks required for this 48 × 60-inch throw, with a few extras available for layout adjustments.
The construction stays simple from beginning to end—straight seams, square cuts, alternating block rotations, straightforward borders, and uncomplicated quilting.
Use a vibrant jelly roll, spread similar colors throughout the layout, and frame the center with a strong solid border, and you get a quilt that looks energetic and detailed without requiring difficult piecing.
Other Design Inspirations – Digitally Modified Images. Texture and color may vary from the actual product.
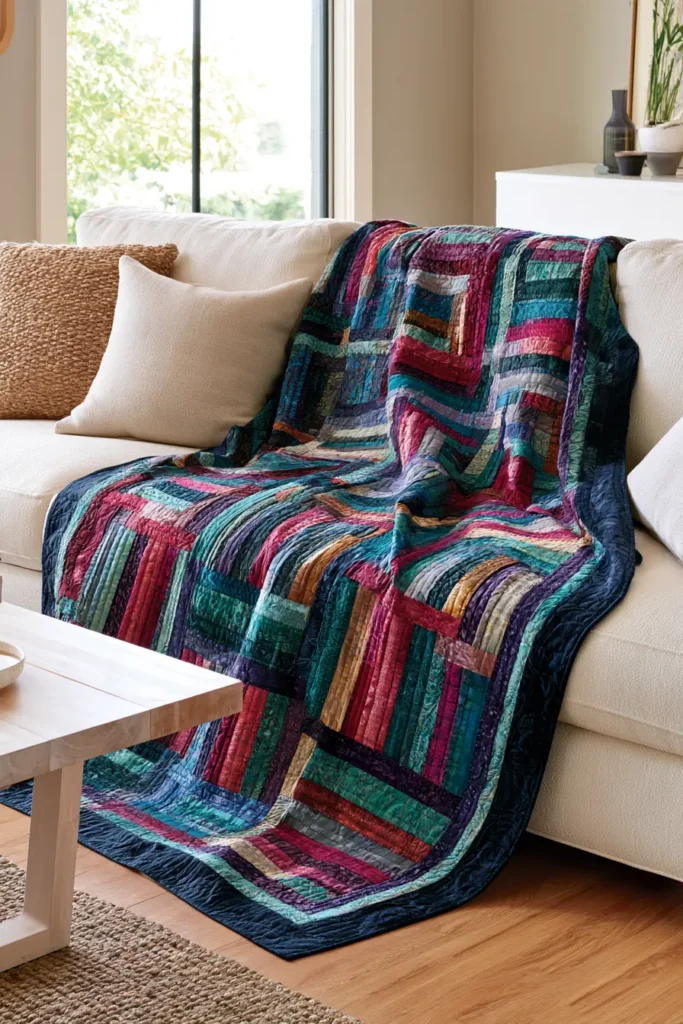
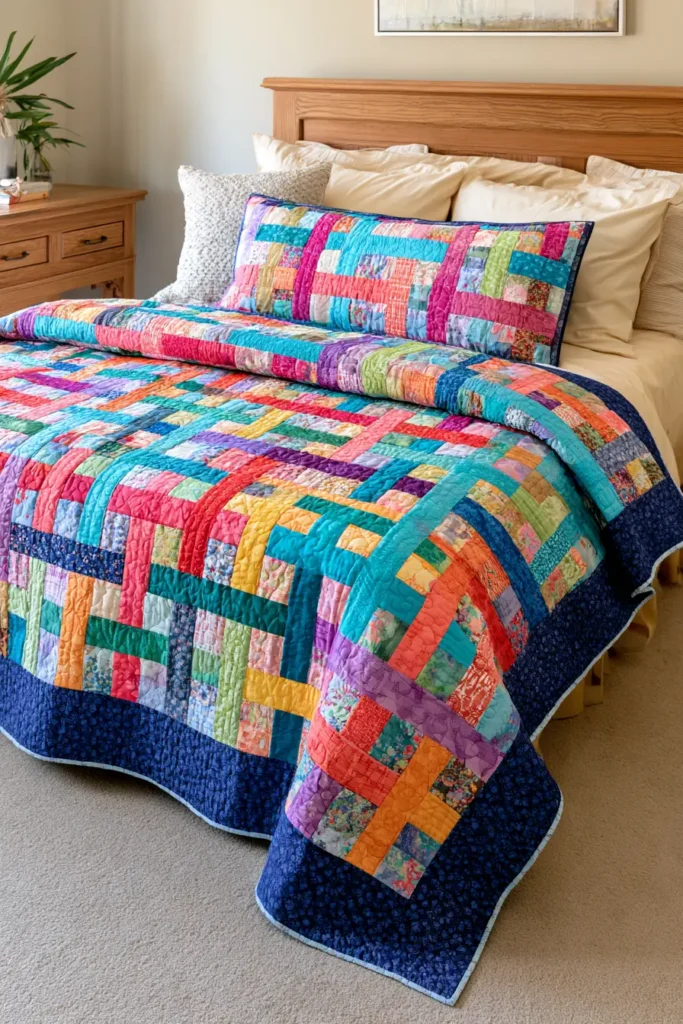
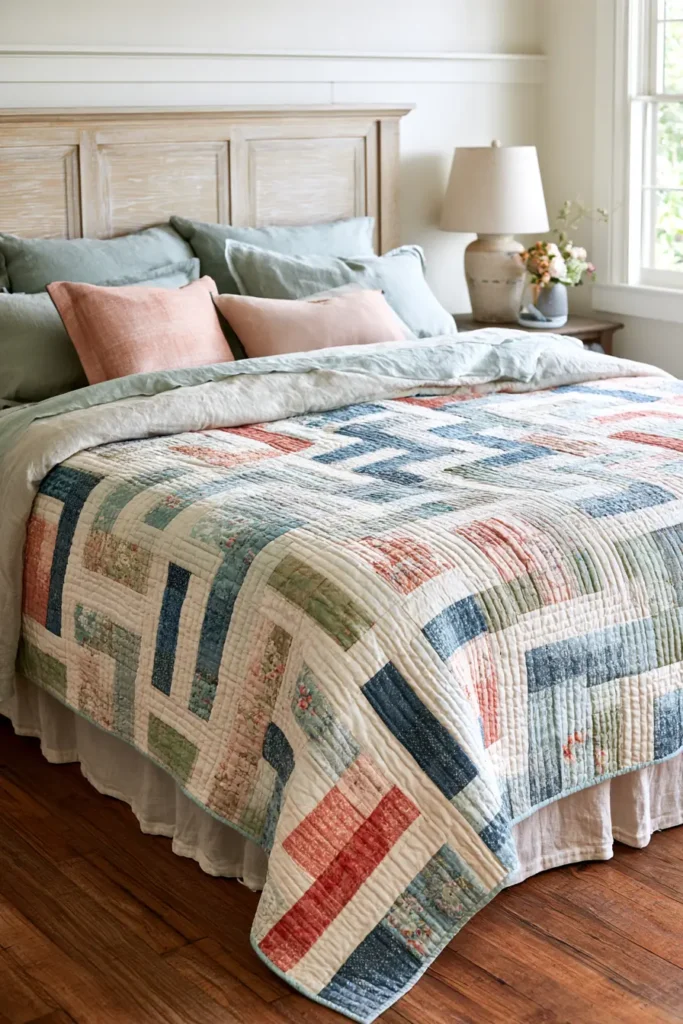
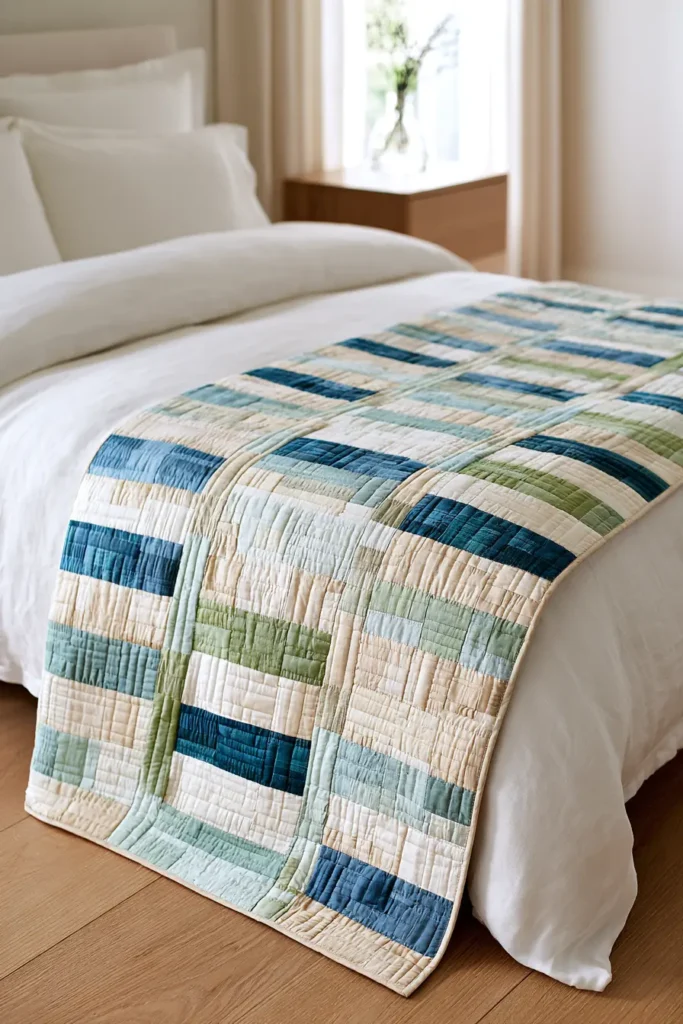
11. Flannel Rail Fence Quilt for Extra Cozy Warmth
A Flannel Rail Fence quilt takes an already beginner-friendly block and gives it a noticeably softer, warmer character. The construction is still based on simple strips and straight seams, but the brushed surface of flannel adds loft, texture, and the kind of warmth that makes a quilt especially inviting in colder weather.
This version uses a vibrant combination of deep teal, ruby red, and golden mustard rather than the muted plaids often associated with flannel. The richer colors keep the quilt lively while the fabric itself supplies the cozy feel.
Flannel needs slightly different handling from ordinary quilting cotton. It can shrink more in the first wash, its cut edges fray readily, and its soft weave can stretch if pulled while sewing or pressing. Prewashing yardage before cutting and handling the blocks gently solves most of those issues.
How the Block Works
Each Rail Fence block begins with three strips:
- 2½ inches wide
- Approximately 40–42 inches long
Use the color order:
Deep teal | Golden mustard | Ruby red
Sew the strips together lengthwise using two ¼-inch seams.
Before sewing, the three strips total:
2½ + 2½ + 2½ = 7½ inches
Two ¼-inch seam allowances consume 1 inch in total:
7½ – 1 = 6½ inches
The completed strip set should therefore measure:
6½ inches wide
Cut across the strip set every:
6½ inches
Each block measures:
- 6½” × 6½” unfinished
- 6″ × 6″ finished
Design Inspirations – Digitally Modified Images. Texture and color may vary from the actual product.
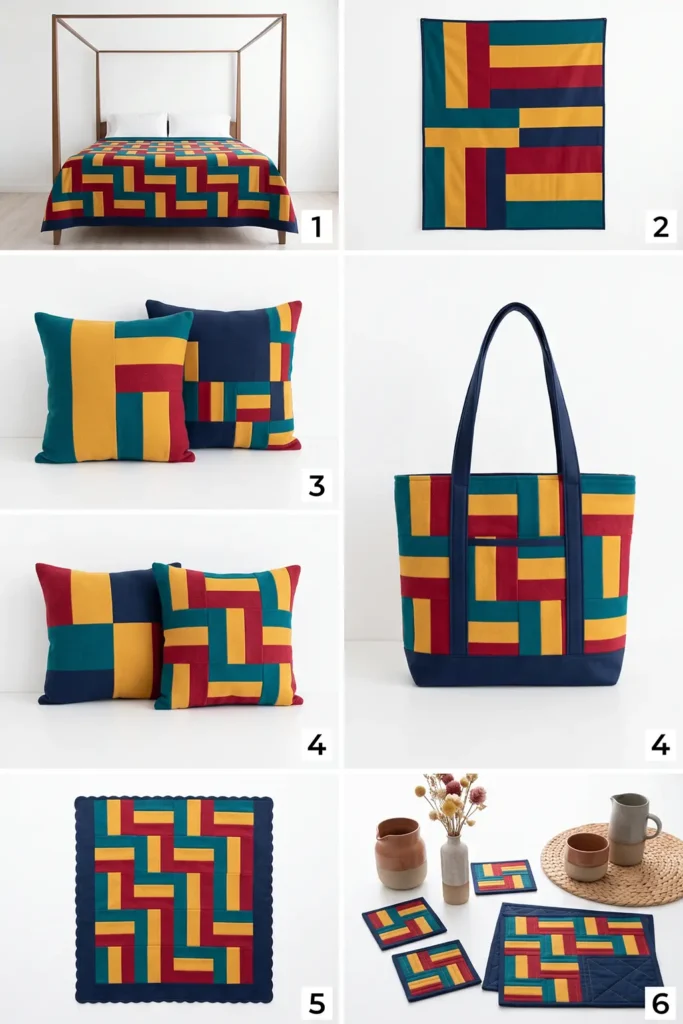
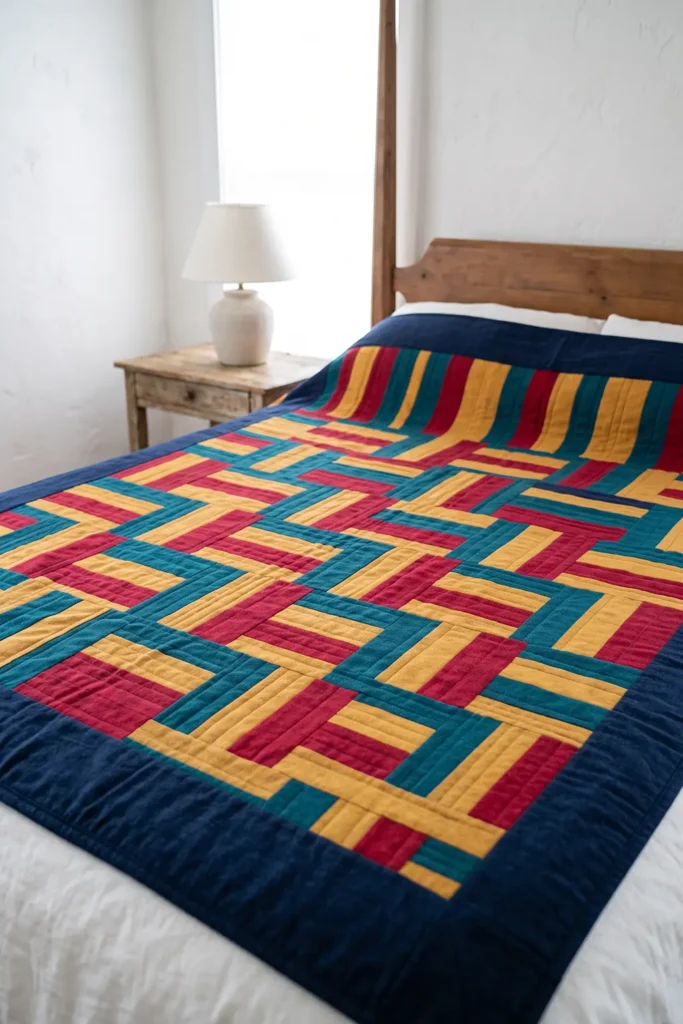
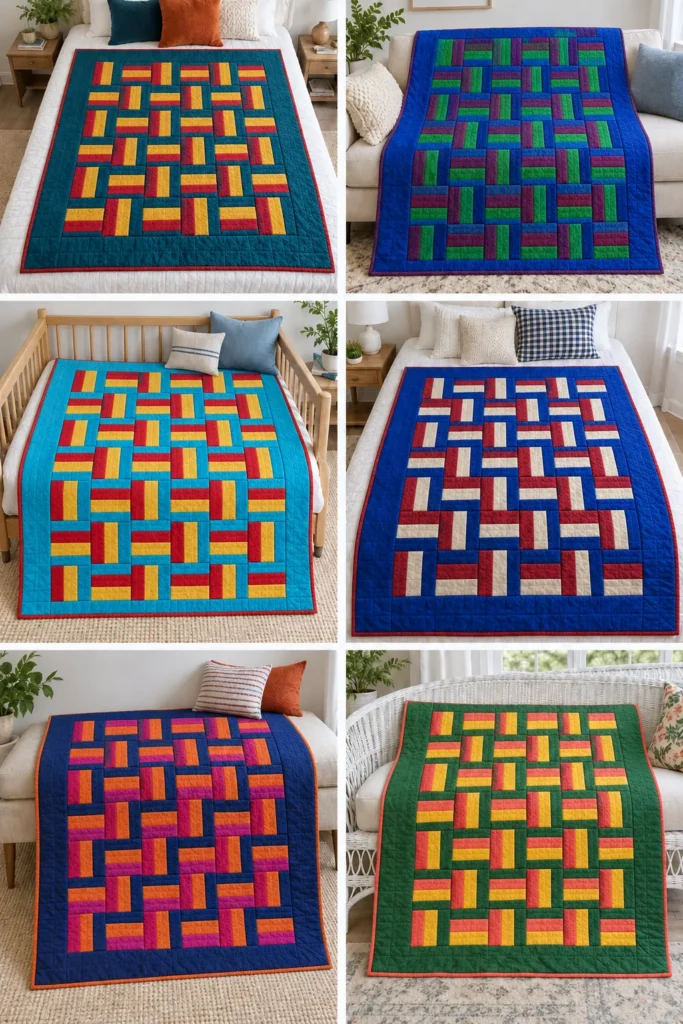
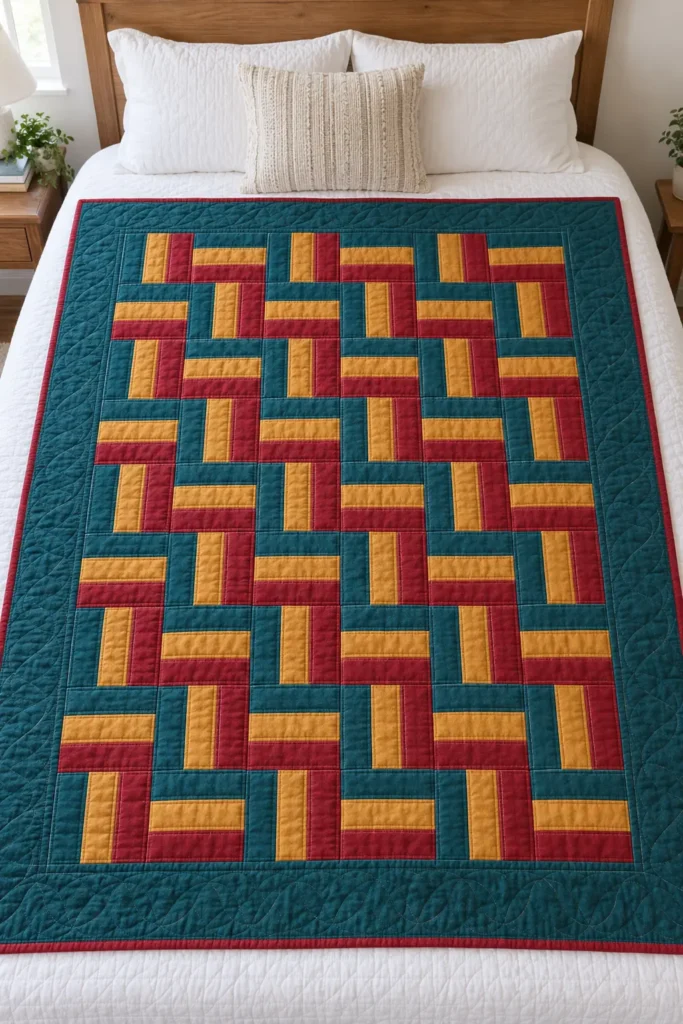
How the Layout Works
The blocks alternate between vertical and horizontal rails.
Use:
Row 1: V – H – V – H – V – H
Row 2: H – V – H – V – H – V
Repeat those two rows throughout the quilt.
This creates the classic interlocking Rail Fence rhythm while allowing the thick, textured flannel and saturated colors to remain the main attraction.
Why Flannel Changes the Quilt
Flannel is usually woven with a relatively loose structure and then brushed to raise its soft surface.
That brushing traps air and gives flannel its familiar warm hand, but it also means:
- edges fray more readily
- fabric can distort more easily
- seams become bulkier
- shrinkage may be greater than with ordinary quilting cotton
None of this makes flannel difficult to quilt. It simply rewards careful preparation.
For this project, prewash and dry all flannel yardage before cutting. That allows most of the initial shrinkage to occur before the quilt is assembled.
Finished Size
Block:
6 inches finished
Block unfinished:
6½ inches square
Center layout:
6 blocks across × 8 blocks down
Blocks required:
48
Center finished size:
36 × 48 inches
Center unfinished size:
36½ × 48½ inches
Border:
6 inches finished on all four sides
Quilt top unfinished size:
Approximately 48½ × 60½ inches
Nominal finished size:
Approximately 48 × 60 inches
Skill level:
Beginner
Core techniques:
Strip piecing, flannel handling, rotary cutting, block rotation, row assembly, borders, quilting, and binding
Materials Needed
For the Rail Fence blocks
Use approximately:
- 1 yard deep teal flannel
- 1 yard golden mustard flannel
- 1 yard ruby red flannel
This provides enough fabric to cut the required strips after reasonable prewashing shrinkage, with some useful cutting allowance.
You’ll need:
- 9 teal strips
- 9 mustard strips
- 9 ruby strips
Each strip:
2½ inches × usable width of fabric
Also prepare:
- 1¾ yards coordinating flannel or quilting cotton for borders
- ⅝ yard binding fabric
- 4 yards standard-width flannel backing, especially if prewashing
- Or a sufficiently large wide backing
- Batting at least 54 × 66 inches
- Quality cotton or polyester thread
- Rotary cutter
- Sharp rotary blade
- Cutting mat
- Quilting ruler
- Sewing machine
- Pins or clips
- Iron
A fresh rotary blade is particularly helpful because flannel’s thicker surface can make a dull blade skip threads.
Choosing Your Colors
Flannel doesn’t have to mean subdued farmhouse shades.
For a vibrant quilt, try:
Rich Autumn
Deep teal, golden mustard, ruby red
Jewel Tone
Emerald, sapphire, plum
Cabin Bright
Red, turquoise, golden yellow
Winter Bold
Cobalt, cranberry, ivory
Modern Cozy
Magenta, burnt orange, deep navy
Forest Bright
Pine green, coral, sunflower yellow
Clear contrast between the three rails helps the Rail Fence pattern remain visible through the texture of the flannel.
Prewashing the Flannel
Unlike precut jelly roll strips, full flannel yardage is worth prewashing before cutting.
Wash all block, border, binding, and backing flannel using the same method you expect to use for the finished quilt.
A practical approach is:
- cool or warm wash
- normal detergent
- tumble dry
After drying, press the yardage lightly before cutting.
Don’t cut the strips first and then wash them. Narrow flannel strips can fray severely in the washing machine.
Cutting Measurements
From the prewashed block fabrics, cut:
Deep Teal
9 strips at 2½ inches × usable width
Golden Mustard
9 strips at 2½ inches × usable width
Ruby Red
9 strips at 2½ inches × usable width
Total:
27 strips
Arrange them into:
9 three-strip sets
Each set uses:
- 1 teal
- 1 mustard
- 1 ruby
After sewing, each strip set should measure:
6½ inches wide
Cut each completed set into:
6½-inch blocks
A strip set with at least slightly more than 39 inches of usable length can provide:
6 blocks
Nine strip sets can therefore yield up to:
54 blocks
You need:
48
Border
Cut four strips:
6½ inches wide
Leave them long until the quilt center is measured.
Binding
Cut:
7 strips at 2½ inches × width of fabric
The extra binding yardage is useful with flannel because the thicker fabric makes joins and trimming slightly less forgiving.
Backing
Prepare at least:
54 × 66 inches
Batting
Prepare at least:
54 × 66 inches
Step-by-Step Guide
Step 1 – Prewash the Flannel
Wash and dry all flannel yardage before cutting.
This includes:
- block fabrics
- flannel borders
- flannel binding, if using
- flannel backing
Flannel can shrink noticeably, and different flannels may shrink by slightly different amounts.
Prewashing before cutting helps stabilize the fabric before the precise patchwork begins.

Step 2 – Press and Square the Yardage
After washing and drying, press the flannel gently.
Avoid stretching it with the iron.
Square one edge of each fabric before cutting strips.
Because flannel can shift slightly more than quilting cotton, align the fold and selvages carefully.
Step 3 – Cut the Block Strips
Cut:
- 9 teal strips
- 9 mustard strips
- 9 ruby strips
Each strip should measure:
2½ inches wide
Use a sharp rotary blade and firm ruler pressure.
Check every few cuts to make sure the strips remain truly 2½ inches wide.

Step 4 – Cut the Border Strips
From the prewashed border fabric, cut four strips:
6½ inches wide
Cut them lengthwise if the available yardage allows it so the long side borders don’t require piecing.
Leave them long for now.
Step 5 – Sort the Block Strips
Make nine groups.
Each group contains:
- 1 teal strip
- 1 mustard strip
- 1 ruby strip
Arrange each set:
teal | mustard | ruby
Keep this order consistent.

Step 6 – Sew the First Two Strips
Place the teal and mustard strips right sides together.
Pin or clip occasionally because flannel layers can creep more than quilting cotton.
Sew along the long edge using an accurate:
¼-inch seam allowance
Do not stretch either strip.
Step 7 – Add the Ruby Strip
Place the ruby strip right sides together with the free edge of the mustard strip.
Sew with another:
¼-inch seam
Begin from the opposite end of the strip set.
Alternating sewing direction helps prevent the long unit from bowing.

Step 8 – Press the Strip Set
Press the seams gently.
For this palette, press the seam allowances:
away from the golden mustard center strip
and toward teal and ruby.
This keeps the darker seam allowances from shadowing through the lighter mustard fabric.
Don’t aggressively slide the iron along the seams.
Step 9 – Check the Strip-Set Width
Measure across the strip set.
It should be:
6½ inches
Check at several points.
If it’s significantly narrow or wide, correct the seam allowance before sewing the other eight sets.

Step 10 – Make the Remaining Eight Sets
Repeat Steps 6–9.
You should end with:
9 strip sets
Each follows:
teal | mustard | ruby
and each measures approximately:
6½ inches wide
Step 11 – Square the First Strip Set
Place one strip set flat on the cutting mat.
Align the ruler with the strip seams.
Trim one end at a true 90-degree angle.
Because flannel can shift during cutting, make this first squaring cut carefully.

Step 12 – Cut the First Block
Measure:
6½ inches
from the squared edge.
Cut across the strip set.
Check that the block measures:
6½ × 6½ inches
Check all four corners.
Step 13 – Cut the Remaining Blocks
Continue cutting:
6½-inch sections
from each strip set.
If the usable strip length allows, each set can yield up to:
6 blocks
Nine sets can produce up to:
54 blocks
Select the best:
48 blocks
for the quilt.

Step 14 – Handle the Block Edges Carefully
Flannel edges can fray more than ordinary quilting cotton.
Avoid repeatedly moving, folding, and handling the blocks before assembly.
If a few threads fray from an edge, trim only the loose threads.
Don’t repeatedly square blocks smaller unless a block is genuinely distorted.
Step 15 – Establish the Two Orientations
Place one block with the rails running vertically.
Place a second block beside it with the rails running horizontally.
These two orientations create the Rail Fence layout.

Step 16 – Lay Out Row 1
Arrange six blocks:
V – H – V – H – V – H
Keep the color order consistent as the blocks rotate.
Step 17 – Lay Out Row 2
Arrange:
H – V – H – V – H – V
This reverses the orientation of the row above it.

Step 18 – Complete the Layout
Continue until you have:
6 blocks across × 8 rows down
for a total of:
48 blocks
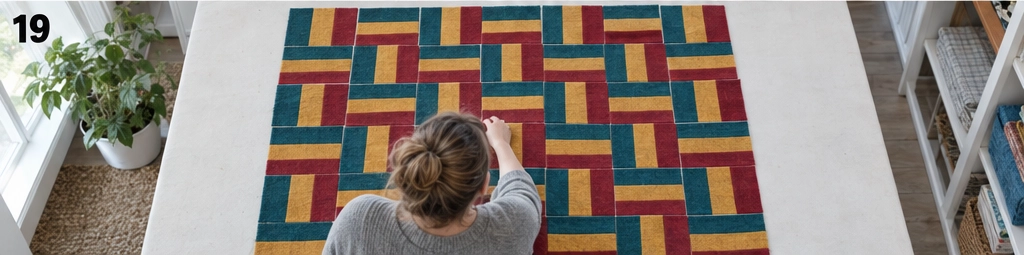
Step 19 – Check the Color Distribution
Step several feet away.
Even though every block uses the same three colors, individual flannel prints may vary.
Look for:
- overly dark clusters
- repeated prints touching
- directional prints facing unexpectedly
- incorrect block orientation
Move blocks where necessary.
Step 20 – Photograph the Layout
Take a clear photograph.
This becomes your visual reference during sewing.

Step 21 – Label the Rows
Label the rows:
1 through 8
Stack each row from left to right.
Keep every block face up.
Flannel grips neighboring fabric more than smooth cotton does, so row stacks generally stay together well—but labels are still worth using.
Step 22 – Sew Row 1
Join the six blocks using:
¼-inch seams
Because flannel is thicker, don’t push or pull the layers through the machine.
Let the feed dogs move the fabric naturally.
The row should measure approximately:
36½ × 6½ inches

Step 23 – Sew the Remaining Rows
Repeat with Rows 2–8.
Press seams:
- odd-numbered rows in one direction
- even-numbered rows in the opposite direction
This helps intersections nest when the rows are joined.
Step 24 – Recheck Before Row Assembly
Place all eight rows back in position.
Compare the quilt with your photograph.
Verify:
- row order
- block orientation
- color direction
Correct any mistakes before proceeding.

Step 25 – Join Rows 1 and 2
Place Rows 1 and 2 right sides together.
Nest the opposing seams.
Pin or clip each block intersection.
Sew with a:
¼-inch seam
Step 26 – Join All Eight Rows
Continue joining rows in order.
After all eight are attached, the quilt center should measure approximately:
36½ × 48½ inches
Because flannel is thicker, pressing row seams open can reduce bulk.
Assembly
Lay the completed quilt center flat before adding borders.
Measure through the center vertically and horizontally.
Don’t use the outer edges alone as your measurement reference because repeated handling can stretch them slightly.
The expected center size is:
36½ × 48½ inches unfinished

Step 27 – Measure the Side Borders
Measure vertically through the middle.
The expected measurement is approximately:
48½ inches
Trim two border strips to:
6½ inches × the actual measured length
Mark:
- ends
- center
- quarter points
Step 28 – Attach the Side Borders
Match the border marks to corresponding points on the quilt.
Pin generously.
Flannel’s grippy surface makes pinning especially useful on long seams.
Sew using:
¼-inch seam allowance
Press toward the border.
The quilt should now measure approximately:
48½ × 48½ inches

Step 29 – Measure the Top and Bottom Borders
Measure horizontally through the middle of the quilt after the side borders are attached.
The expected measurement is approximately:
48½ inches
Trim the remaining two border strips to that measurement.
Step 30 – Attach the Top and Bottom Borders
Pin at:
- ends
- center
- quarter points
Sew using:
¼-inch seams
Press toward the borders.
The completed quilt top should measure approximately:
48½ × 60½ inches

Step 31 – Prepare the Backing
If using standard-width prewashed flannel backing, prepare a panel at least:
54 × 66 inches
Because flannel shrinks significantly during prewashing, buying approximately:
4 yards
before washing provides a safer allowance than cutting the minimum from unwashed yardage.
Piece two backing lengths together along their long edges if necessary.
Remove the selvages before joining.
Press the backing seam open.
Step 32 – Choose the Batting
For an extra-cozy quilt, you have several options.
A medium-loft cotton or cotton-blend batting adds warmth without making the quilt excessively bulky.
Polyester batting gives more loft.
Wool is warm and light but behaves differently in washing and quilting.
Whichever you choose, check the manufacturer’s:
maximum quilting distance
before planning the quilting pattern.

Step 33 – Make the Quilt Sandwich
Place the backing:
wrong side up
Add the batting.
Place the quilt top:
right side up
Smooth carefully from the center outward.
Because flannel naturally grips batting, the layers may shift less than slick quilting cotton, but they should still be basted thoroughly.
Step 34 – Baste
Baste using:
- curved safety pins
- thread basting
- or your preferred method
Work from the center toward the edges.

Step 35 – Quilt the Layers
Simple quilting works beautifully with flannel.
Good choices include:
- straight lines beside the rail seams
- quilting through the center of each rail
- diagonal crosshatching
- a simple large-scale grid
For a beginner, straight lines following the patchwork are particularly manageable.
Avoid excessively dense quilting if your goal is a soft, flexible, cozy finish.
Still, never exceed the maximum quilting spacing recommended by the batting manufacturer.
Step 36 – Trim the Quilt
After quilting, trim excess batting and backing level with the quilt-top edges.
Square the corners.
Flannel may create slightly more quilting draw-up because of its thickness, so a small reduction from the original dimensions is normal.

Step 37 – Prepare the Binding
Cut:
7 strips at 2½ inches × width of fabric
Join them using diagonal seams.
Trim each joining seam to:
¼ inch
Press open to distribute the bulk.
Fold the complete binding strip lengthwise:
wrong sides together
and press.
If you find flannel binding too bulky, quilting cotton in a coordinating color is an excellent alternative.
Step 38 – Attach the Binding
Begin partway along one side.
Leave:
8–10 inches
of loose binding at the start.
Sew the binding to the quilt front with:
¼-inch seam allowance
Stop:
¼ inch before each corner
Fold the binding upward at 45 degrees.
Fold it back down along the next side to create the miter.
Continue around the quilt.
Join the beginning and ending tails with a diagonal seam.
Finish sewing the final section.
Fold the binding to the back and stitch it securely by hand or machine.
The completed quilt should measure approximately:
48 × 60 inches
with minor variation caused by quilting and the characteristics of the flannel.
Assembly at a Glance
Prewash and dry all flannel yardage.
Press gently.
Cut:
- 9 teal strips
- 9 mustard strips
- 9 ruby strips
Each:
2½ inches wide
Create:
9 three-strip sets
Use:
teal | mustard | ruby
Sew with:
¼-inch seams
Press away from the light center rail.
Check each strip set:
6½ inches wide
Square one end.
Cut:
6½-inch blocks
Make at least:
48 blocks
Arrange:
6 across × 8 down
Alternate horizontal and vertical blocks.
Photograph the layout.
Label Rows 1–8.
Sew six blocks per row.
Press alternating rows in opposite directions.
Join all eight rows.
Center:
36½ × 48½ inches
Measure through the center.
Add:
6½-inch side borders
Add:
6½-inch top and bottom borders
Top:
Approximately 48½ × 60½ inches
Prepare backing and batting at least:
54 × 66 inches
Layer.
Baste.
Quilt.
Trim.
Bind with:
7 strips at 2½ inches
Finished quilt:
Approximately 48 × 60 inches
Beginner Tips for Success
Prewash flannel yardage before cutting.
Don’t prewash already-cut narrow strips.
Use a sharp rotary blade.
Handle cut block edges as little as possible.
Expect more lint than when sewing ordinary quilting cotton.
Clean lint from the sewing-machine bobbin area periodically during the project.
Use an accurate ¼-inch seam.
Pin longer seams when necessary.
Alternate sewing direction on strip sets to reduce bowing.
Don’t stretch flannel while pressing.
Check the first strip set at 6½ inches wide.
Square one end before cutting blocks.
Photograph the layout.
Label every row.
Press bulky row seams open if necessary.
Measure through the center before cutting border lengths.
Avoid excessively dense quilting if you want maximum softness.
Check batting instructions before deciding quilting spacing.
Scaling It to Other Sizes
Each block finishes at:
6 inches
Using the same 6-inch finished border:
Baby Quilt
Center:
4 × 6 blocks = 24 × 36 inches
With borders:
Approximately 36 × 48 inches
Blocks required:
24
Lap Quilt — As Written
Center:
6 × 8 blocks = 36 × 48 inches
With borders:
Approximately 48 × 60 inches
Blocks required:
48
Twin Quilt
Center:
8 × 12 blocks = 48 × 72 inches
With borders:
Approximately 60 × 84 inches
Blocks required:
96
Queen Quilt
Center:
12 × 14 blocks = 72 × 84 inches
With borders:
Approximately 84 × 96 inches
Blocks required:
168
A sufficiently long strip set yields up to six blocks.
For larger versions, calculate the required number of strip sets first, then recalculate yardage for:
- borders
- backing
- batting
- binding
Because flannel can shrink considerably during prewashing, include more yardage allowance than you would for ordinary quilting cotton.
Styling It & Gift Ideas
A Flannel Rail Fence quilt naturally suits cozy spaces, but vibrant colors prevent it from feeling heavy or overly rustic.
The teal, mustard, and ruby version works especially well with:
- cream bedding
- natural oak
- warm white walls
- woven baskets
- chunky knits
- simple farmhouse furniture
For a cabin look, use red, navy, cream, and plaid flannels.
For a more contemporary room, try cobalt, coral, mustard, and deep teal.
For winter bedrooms, jewel tones such as emerald, cranberry, sapphire, and plum look especially rich.
A flannel Rail Fence quilt also makes an excellent:
- Winter housewarming gift
- Holiday gift
- Guest-room quilt
- Sofa throw
- Cabin quilt
- Reading-chair blanket
- College or dorm quilt
- Cold-weather beginner project
Final Thoughts
The Flannel Rail Fence quilt combines two qualities that work naturally together: exceptionally simple patchwork and exceptionally cozy fabric.
The block still requires nothing more complicated than three strips, two long seams, and a few square cuts. What changes is the handling. Prewash the flannel, use a sharp blade, avoid stretching it, manage the extra seam bulk carefully, and handle the cut edges as little as possible.
Rich teal, golden mustard, and ruby red keep this version vibrant, while the brushed flannel surface gives it softness and warmth. The result is a practical 48 × 60-inch throw that feels substantial and cozy without asking a beginner to tackle complicated piecing.0
Other Design Inspirations – Digitally Modified Images. Texture and color may vary from the actual product.
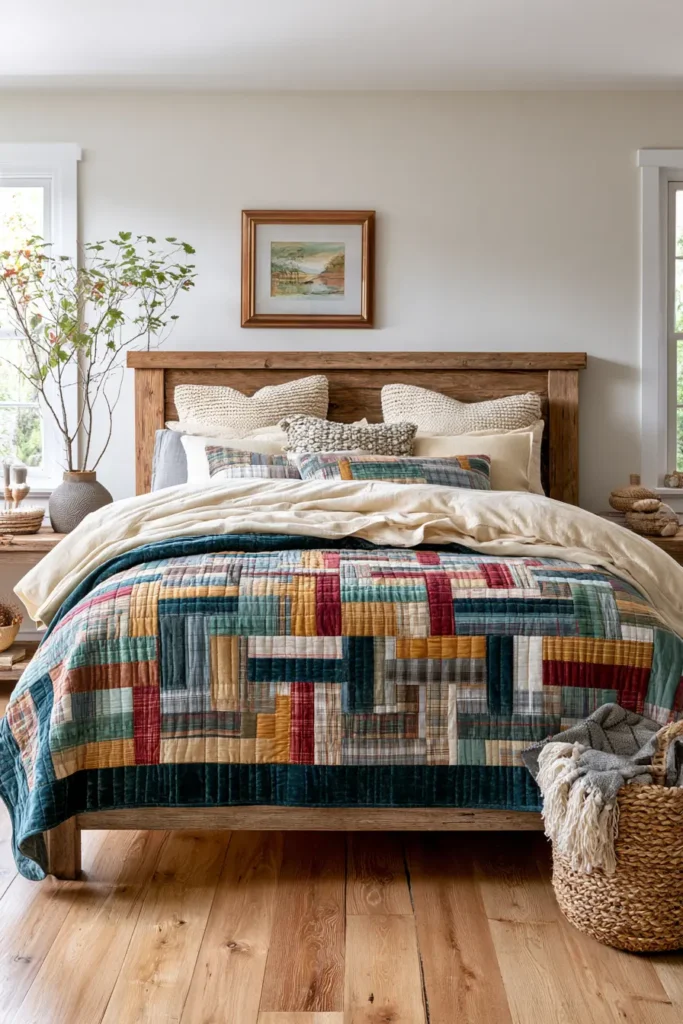
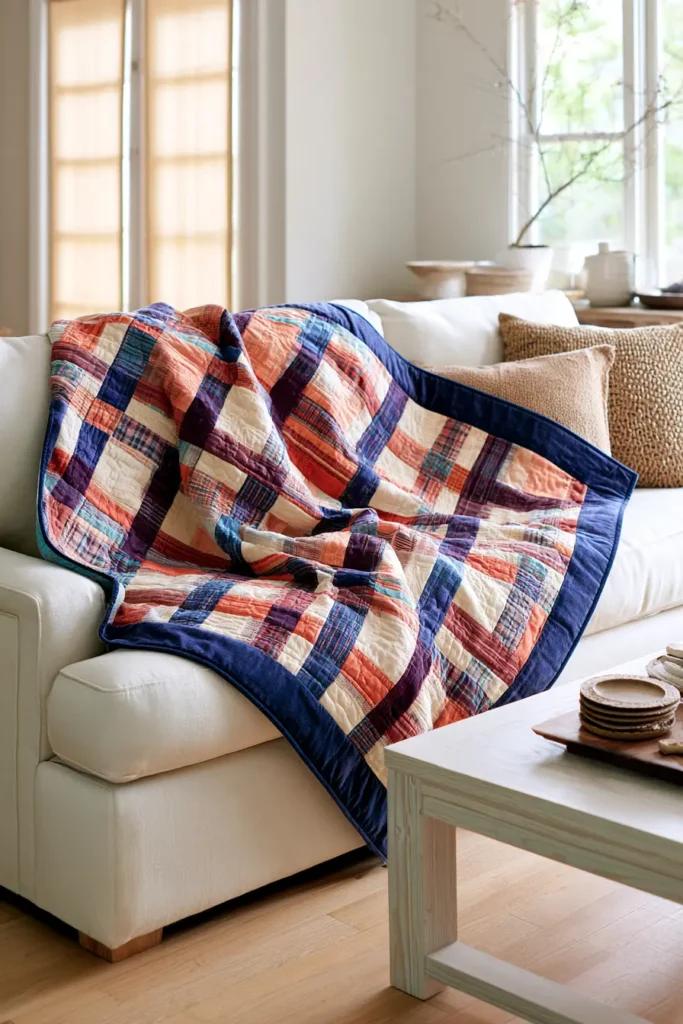
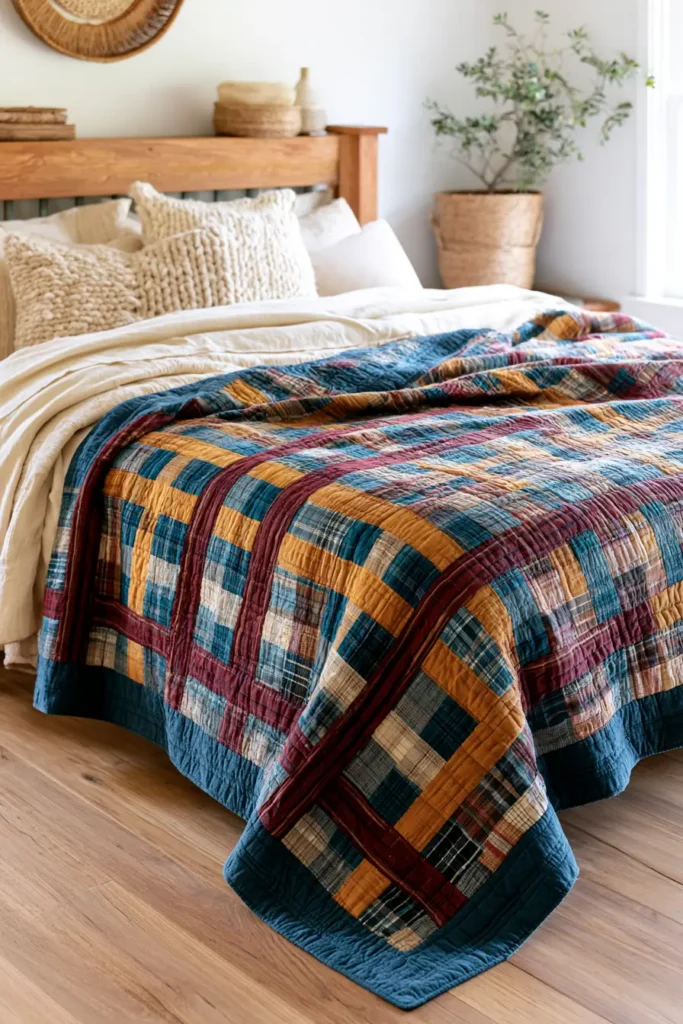
12. On-Point Rail Fence Quilt for a Dynamic Diagonal Setting
An On-Point Rail Fence Quilt takes one of the easiest beginner quilt blocks and gives it a much more dramatic look. The block itself is still wonderfully simple—just three strips sewn together and cut into squares—but rotating the finished layout on point turns those straight rails into energetic diagonals that sweep across the quilt. It is a smart way to make a basic strip-pieced block feel more polished and eye-catching.
This version uses vibrant colors so the diagonal setting really stands out. Think turquoise, fuchsia, and sunny yellow, or cobalt, coral, and lime. Rail Fence quilts have been popular for generations because they are fast, efficient, and ideal for showing off color. Setting the blocks on point adds that extra sense of movement without making the piecing much harder.
Finished Size
For this tutorial, the quilt finishes at approximately 50″ × 50″.
That comes from:
- 25 Rail Fence blocks
- each block finishes at 6″ square
- arranged in an on-point diamond layout
- with a 4″ finished border
The on-point center will finish at about 42 1/2″ square, and the borders bring it up to roughly 50 1/2″ square before quilting and binding. After quilting, a final size of about 50″ square is realistic.
Design Inspirations – Digitally Modified Images. Texture and color may vary from the actual product.
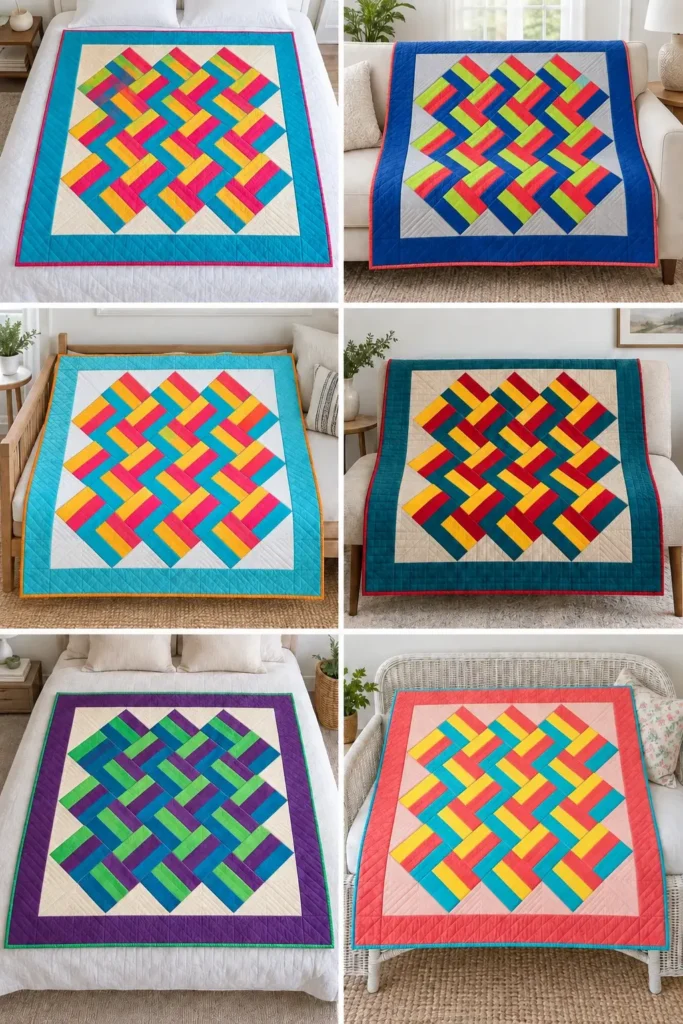
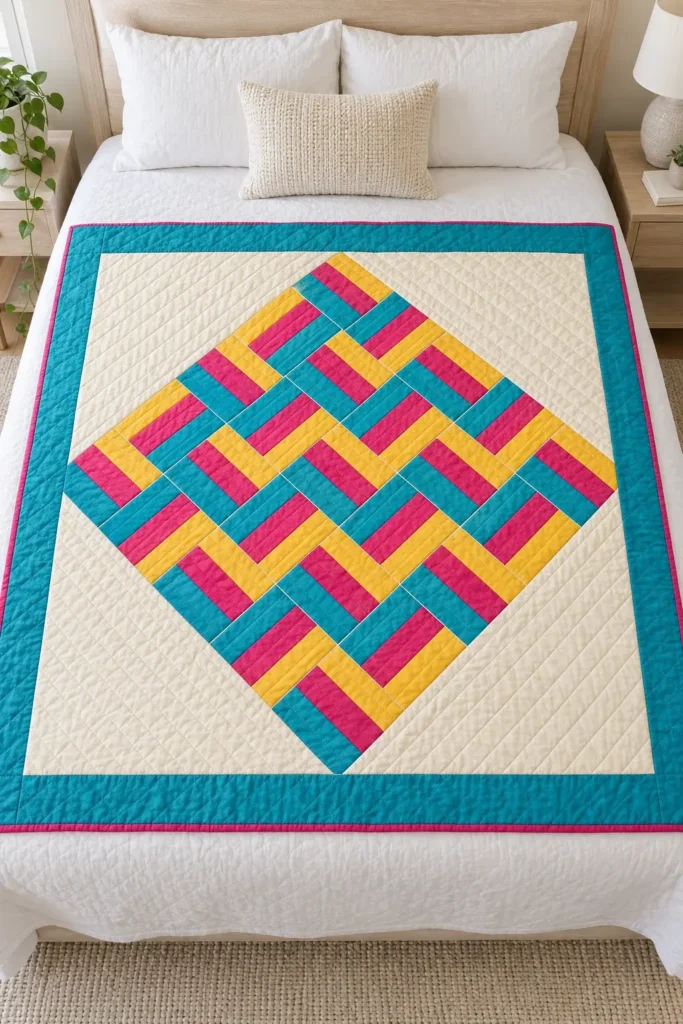
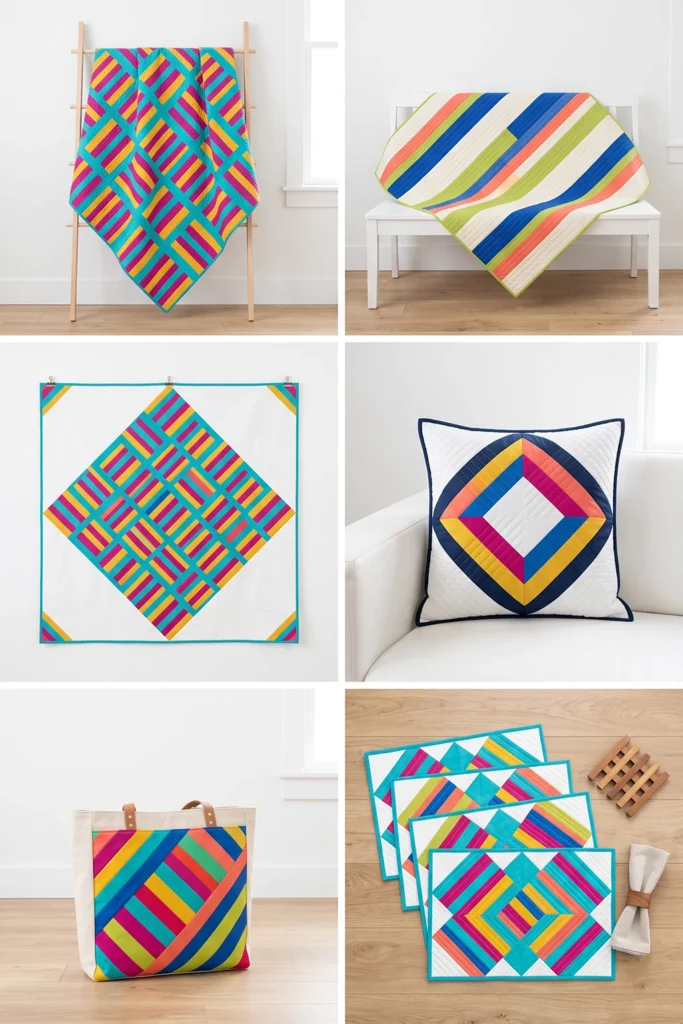
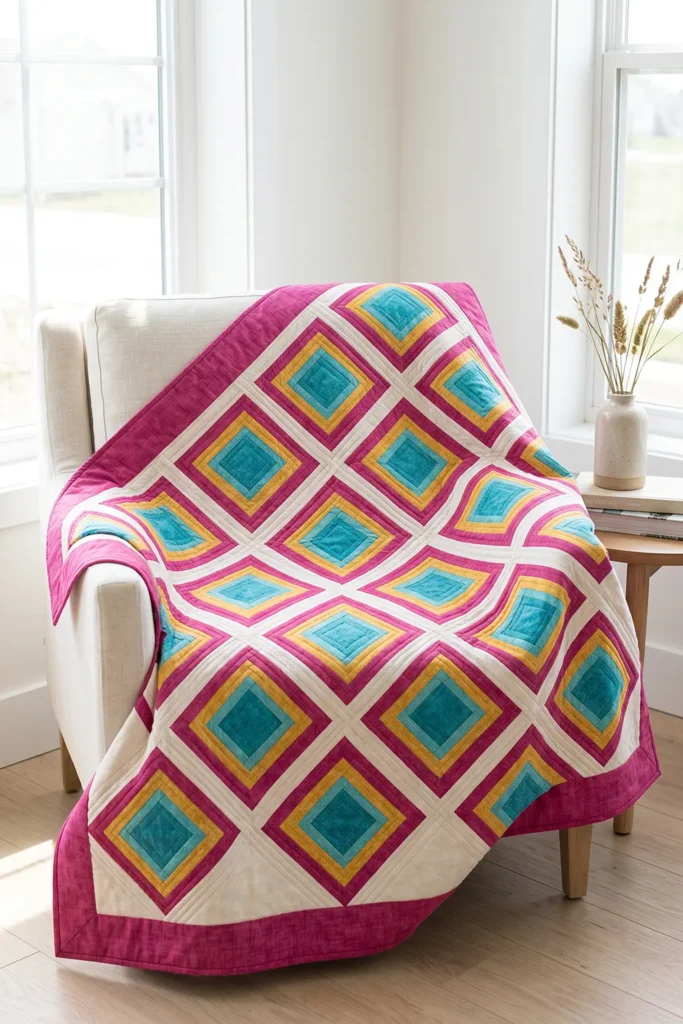
Materials Needed
Fabrics for the blocks
Choose 3 vibrant quilting cottons.
You will need approximately:
- 1/2 yard turquoise
- 1/2 yard fuchsia
- 1/2 yard golden yellow
This gives enough fabric for the strip sets, a little trimming room, and a few extra blocks.
Background and finishing fabrics
- 1 yard background fabric for the setting triangles
- 3/4 yard border fabric
- 5/8 yard binding fabric
- 3 1/4 yards backing fabric (42″-wide, pieced)
or about 1 5/8 yards of 108″-wide backing - Batting at least 58″ × 58″
Notions and tools
- Rotary cutter
- Quilting ruler
- Cutting mat
- Sewing machine
- Thread
- Pins or clips
- Iron and pressing surface
- Safety pins or basting spray
Cutting List
Block strips
From each of the 3 block fabrics, cut:
- 5 strips, 2 1/2″ × width of fabric
That gives:
- 5 turquoise strips
- 5 fuchsia strips
- 5 golden yellow strips
Total: 15 strips
Side setting triangles
From the background fabric, cut:
- 6 squares, 9 3/4″ × 9 3/4″
Cut each square once diagonally to make:
- 12 side setting triangles
Corner triangles
From the background fabric, cut:
- 1 square, 5 1/8″ × 5 1/8″
Cut it twice diagonally to make:
- 4 corner triangles
Borders
From the border fabric, cut:
- 4 strips, 4 1/2″ × width of fabric
Binding
From the binding fabric, cut:
- 6 strips, 2 1/2″ × width of fabric
Step-by-Step Guide
Step 1: Sew the strip sets
Take one strip from each color and arrange them in this order:
- turquoise
- fuchsia
- golden yellow
Sew the three strips together lengthwise using a 1/4″ seam allowance.
A quick measurement check:
- 3 strips at 2 1/2″ each = 7 1/2″
- 2 seams use up 1/2″ total
- finished strip-set width = 6 1/2″
Make 5 strip sets total.
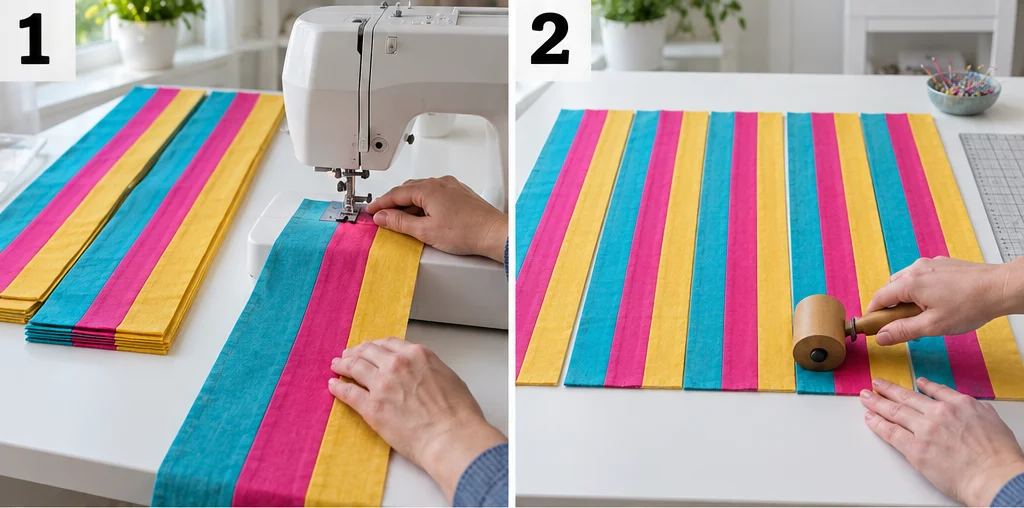
Step 2: Press the strip sets
Press the seams carefully after sewing.
You can press both seams in one direction, or press them away from the center strip if that works better with your fabric. What matters most is keeping the strip sets flat and not stretched.
Each finished strip set should still measure about 6 1/2″ wide.
Step 3: Cut the Rail Fence blocks
Square up one end of a strip set.
Then cut the strip set into 6 1/2″ segments.
Each segment becomes one 6 1/2″ unfinished Rail Fence block, which finishes at 6″ square in the quilt.
A typical strip set will yield about 6 blocks, depending on usable fabric width.
From 5 strip sets, you should get about 30 blocks.
Choose the best 25 blocks for the quilt top.
Save the extra blocks for a pillow, pouch, or matching table topper.
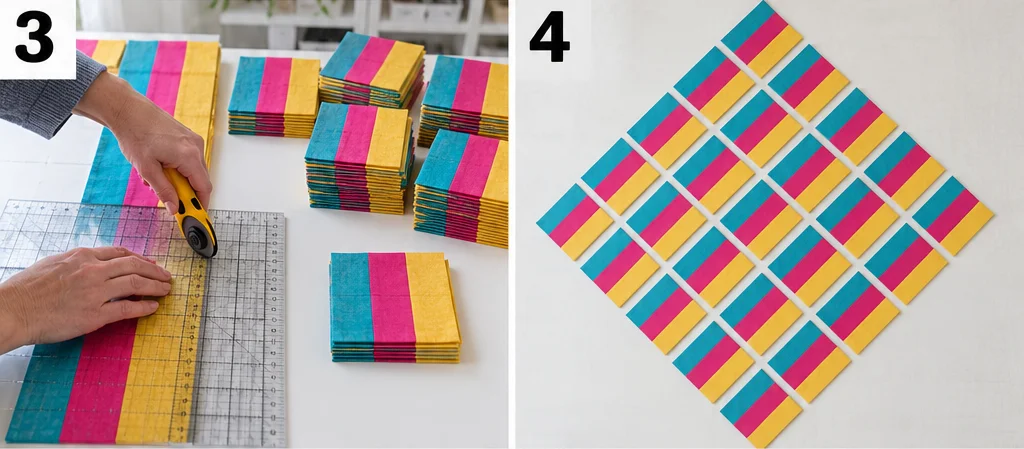
Step 4: Lay out the blocks in an on-point diamond
Now arrange the 25 blocks in diagonal rows to form a diamond.
Use this row count:
- Row 1: 1 block
- Row 2: 2 blocks
- Row 3: 3 blocks
- Row 4: 4 blocks
- Row 5: 5 blocks
- Row 6: 4 blocks
- Row 7: 3 blocks
- Row 8: 2 blocks
- Row 9: 1 block
That gives:
1 + 2 + 3 + 4 + 5 + 4 + 3 + 2 + 1 = 25 blocks
This is the central on-point diamond.
For a clean, strong diagonal effect, keep all the blocks oriented the same way. The rails will naturally form lively diagonal lines once the quilt is set on point.
Step 5: Sew the diamond center
Sew the blocks together row by row, following the diamond layout.
Start with the small diagonal rows and build upward toward the middle, then back down again. Press each row flat after sewing.
Then join the rows together carefully, matching points and intersections as neatly as you can.
At this stage, you will have the 25-block diamond center.
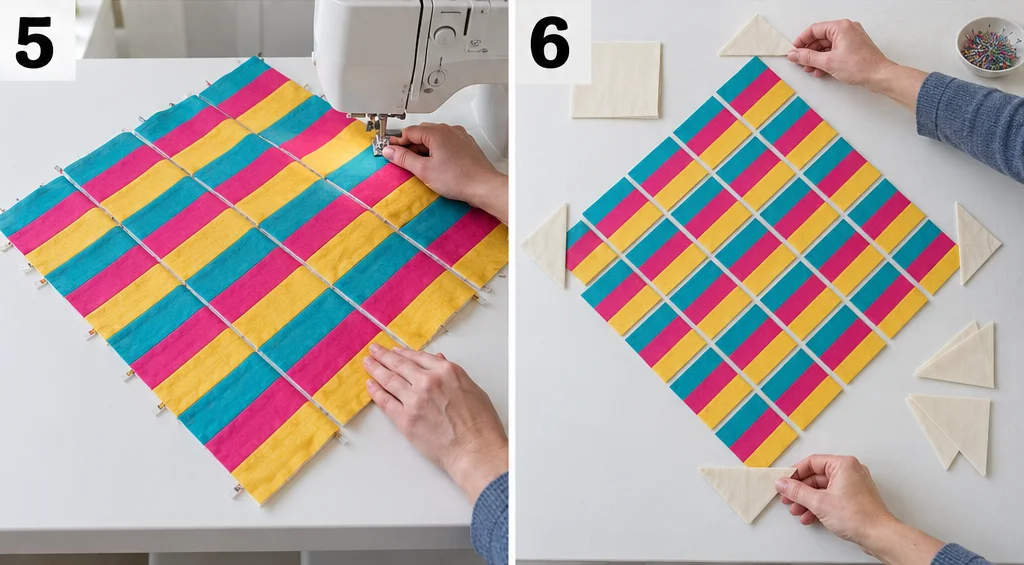
Step 6: Prepare and attach the corner triangles
Take the 4 quarter-square corner triangles cut from the 5 1/8″ square.
Attach one triangle to each of the 4 points of the diamond.
These fill in the top, bottom, left, and right points so the quilt begins to square up.
Sew gently and avoid stretching the triangle edges, especially on the bias.
Step 7: Attach the side setting triangles
Now attach the 12 side setting triangles around the remaining outside edges of the diamond.
These come from the 6 larger 9 3/4″ squares, each cut once diagonally.
Work your way around the quilt one side at a time. Once you attach all the side triangles, the quilt top will become a square.
This is the step that transforms the Rail Fence diamond into a finished on-point quilt center.
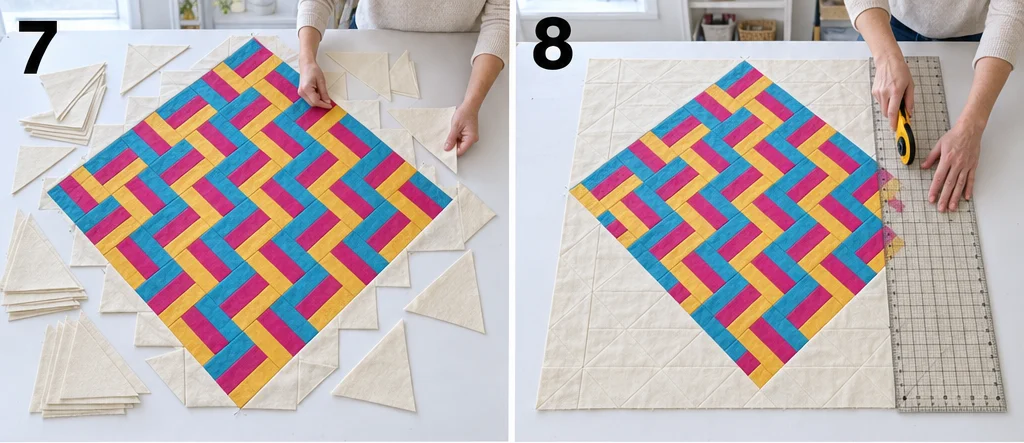
Step 8: Square up the quilt center
After you sew on all the triangles, press the quilt top well and square it up.
Your on-point center should measure about:
- 42 1/2″ × 42 1/2″
It may vary slightly depending on seam accuracy, so measure your actual quilt center before cutting border lengths.
That measurement is more important than forcing a theoretical number.
Step 9: Add the borders
Using the 4 1/2″ border strips, add borders in this order:
- Left border
- Right border
- Top border
- Bottom border
Because the center is about 42 1/2″ square, each border strip will be trimmed to fit your measured top.
The borders finish at 4″ wide.
After borders, the quilt top should measure roughly:
- 50 1/2″ × 50 1/2″
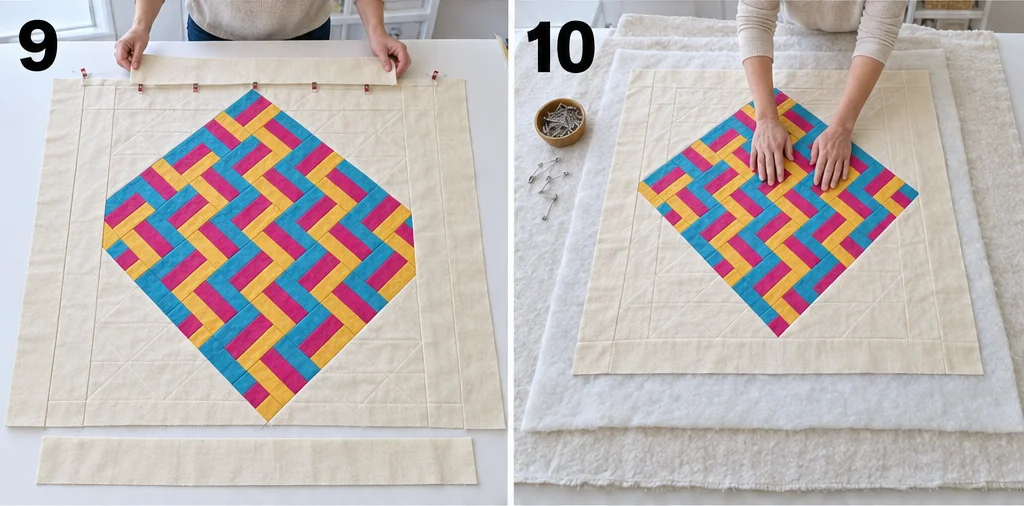
Step 10: Make the quilt sandwich
Layer the quilt in this order:
- backing, wrong side up
- batting
- quilt top, right side up
Smooth everything carefully and baste well with pins or spray.
Use backing and batting at least 58″ × 58″ so you have enough trimming room.
Step 11: Quilt the layers
This design looks especially good with quilting that supports the diagonal movement.
A few good options are:
- straight-line quilting following the rails
- diagonal crosshatch quilting
- echo quilting around the block lines
For beginners, simple straight lines about 1″ to 2″ apart work beautifully.
Quilt from the center outward to reduce shifting.
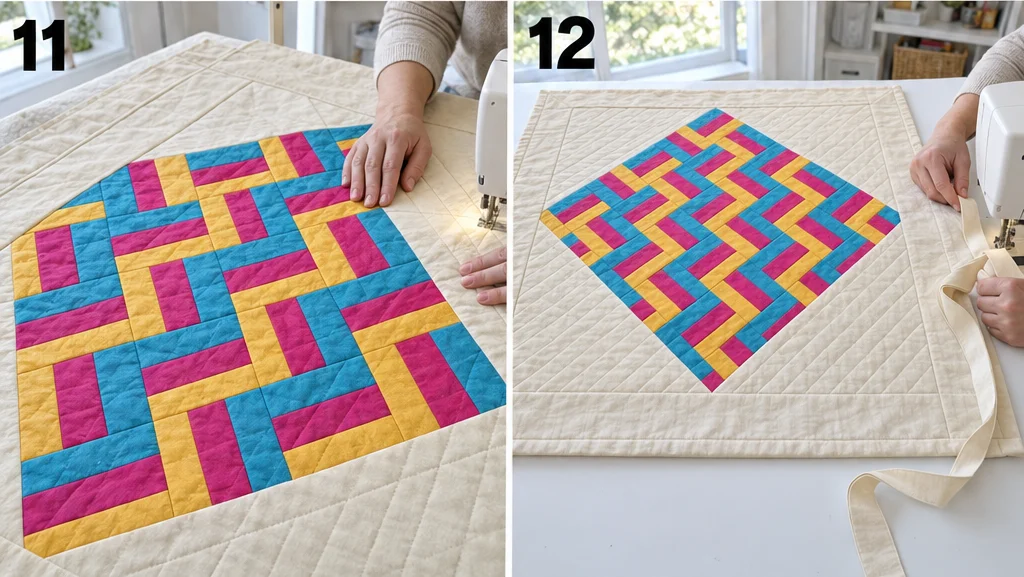
Step 12: Trim and bind
Trim away the extra batting and backing.
Join the 2 1/2″ binding strips end to end, press them in half lengthwise, and sew the binding around the quilt using a 1/4″ seam allowance.
Fold the binding to the back and finish by hand or machine.
Your finished quilt should come out at about:
- 50″ × 50″
Assembly at a Glance
- Cut 15 block strips total
- Sew 5 three-strip sets
- Cut about 30 Rail Fence blocks
- Select 25 blocks
- Arrange them in rows: 1-2-3-4-5-4-3-2-1
- Sew the central diamond
- Add 4 corner triangles
- Add 12 side setting triangles
- Square up the center to about 42 1/2″
- Add 4 1/2″ borders
- Quilt, trim, and bind
Interesting Notes About This Design
Rail Fence is a classic quilt pattern because it wastes very little fabric and comes together quickly. Beginners have long loved it, as have experienced quilters who want a design that shows off fabric rather than complicated piecing.
The on-point setting changes the quilt’s personality. The actual Rail Fence block is still simple, but once you rotate the layout, the eye reads the strips as bold diagonal movement. It is one of the easiest ways to make a familiar block look more dramatic and more custom.
Color Ideas
If you want this quilt to feel bright and energetic, try one of these vibrant combinations:
- Turquoise, fuchsia, and golden yellow
- Cobalt, coral, and lime
- Orange, hot pink, and aqua
- Red, teal, and sunflower yellow
- Purple, peacock blue, and bright green
For the background, white, cream, pale gray, or soft beige all work nicely. A quiet background helps the colorful Rail Fence blocks stand out.
Final Thoughts
An On-Point Rail Fence Quilt is a great next step if you already love simple strip piecing but want a more dynamic layout. The block construction is still easy and beginner-friendly, but the diagonal setting gives the finished quilt much more motion and visual interest.
The combination of a classic Rail Fence block, vibrant fabric choices, and an on-point arrangement creates a quilt that feels cheerful, modern, and full of energy. It is a practical project, but it also looks more intricate than it really is—which is always a satisfying combination.
Other Design Inspirations – Digitally Modified Images. Texture and color may vary from the actual product.
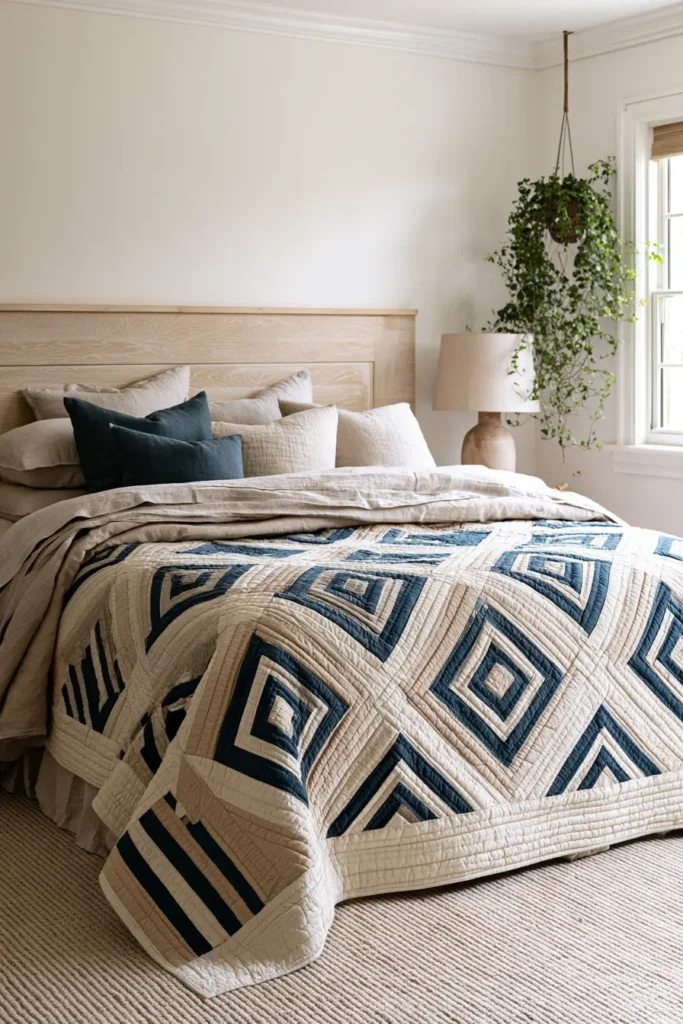
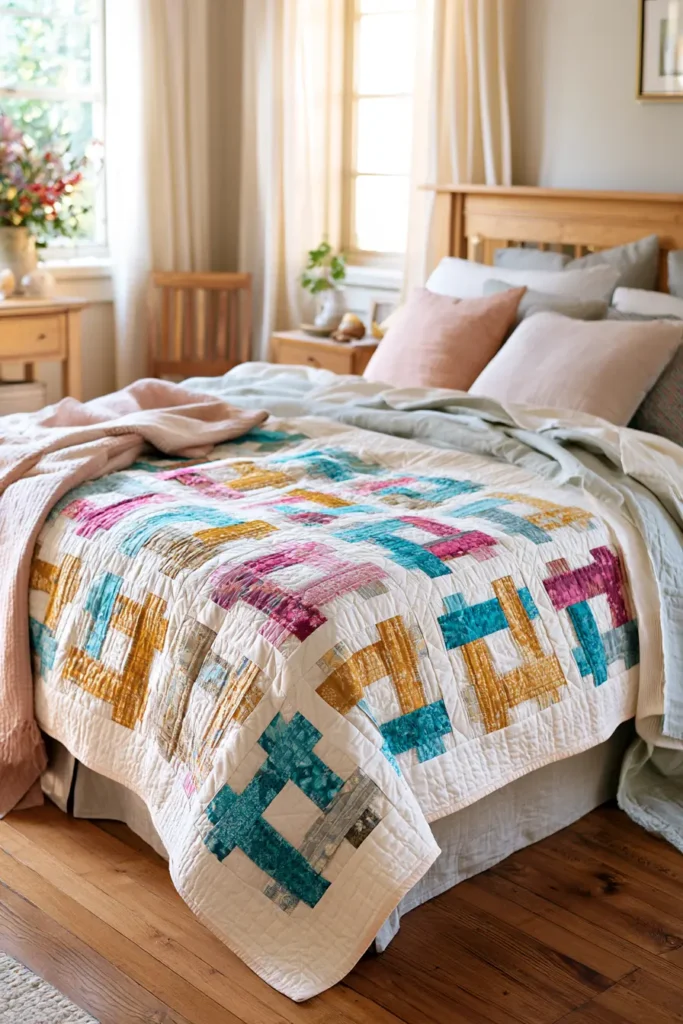
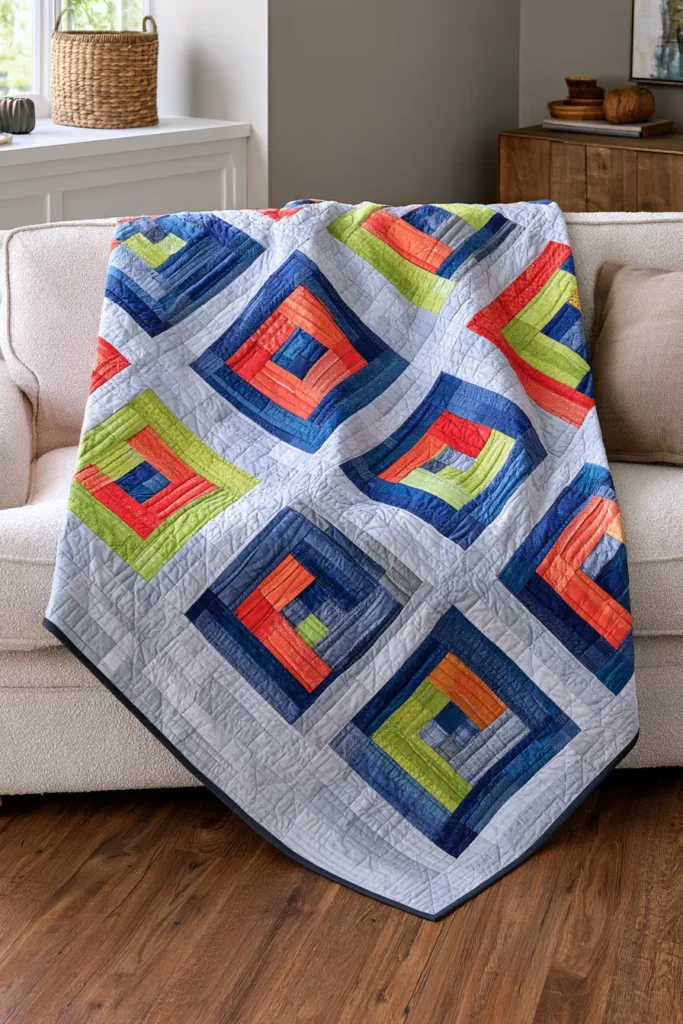
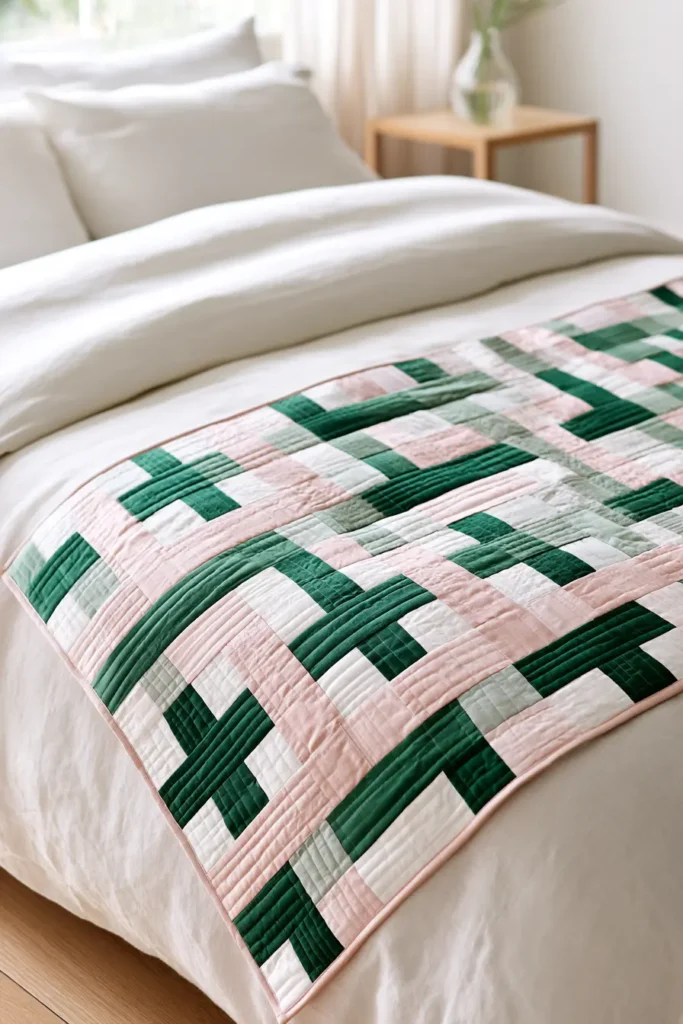
13. Rail Fence Table Runner for Easy Home Décor
A table runner is the fastest way to get a rail fence quilt into your house. It uses nine strips, takes an afternoon rather than a weekend, and changes the look of a dining table, a sideboard, or a hall console the moment you lay it down. The woven blocks read beautifully at this scale, and because the whole thing is small, it’s a genuinely good place to try the block for the first time before committing to a full quilt.
It’s also the natural home for leftovers. If you’ve made one of the bigger quilts in this collection you’ll have spare strips and probably a few spare blocks, and a runner needs so little that it can usually be built entirely from what’s already in the scrap basket.
Measure Your Table First
This is the one step that has no equivalent in a quilt, and it’s worth doing before anything else, because runner proportions are set by the furniture rather than by a pattern.
There are two conventions, and both look deliberate:
- Leave bare table at each end – about 6 inches of visible wood beyond the runner at either end
- Overhang the ends – the runner drops 6 to 8 inches over each end of the table
What looks wrong is a runner that stops flush with the table edge, or one that overhangs by an inch or two. Pick one convention and commit to it.
The runner below finishes at 16 × 40 inches, which suits a table of roughly 52 inches with 6 inches bare at each end, or a 26-inch console with a 7-inch drop on each side. Adjust the length by whole rows – each row adds or removes 6 inches and takes two more blocks, since the runner is two blocks wide – and adjust the width by adding a third column if your table is generous.
Design Inspirations – Digitally Modified Images. Texture and color may vary from the actual product.
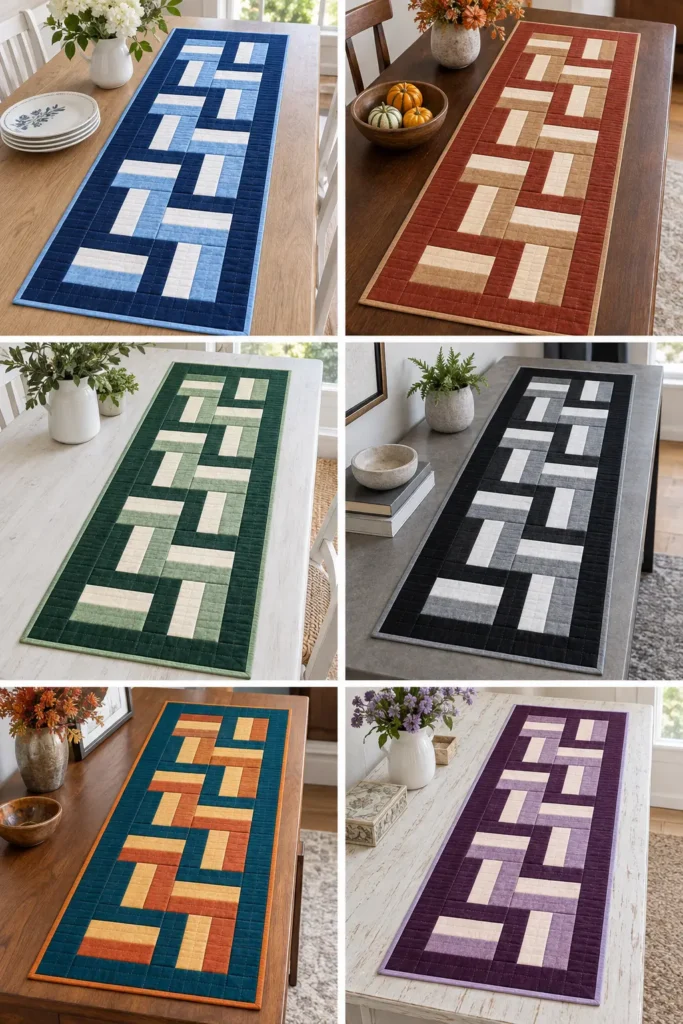
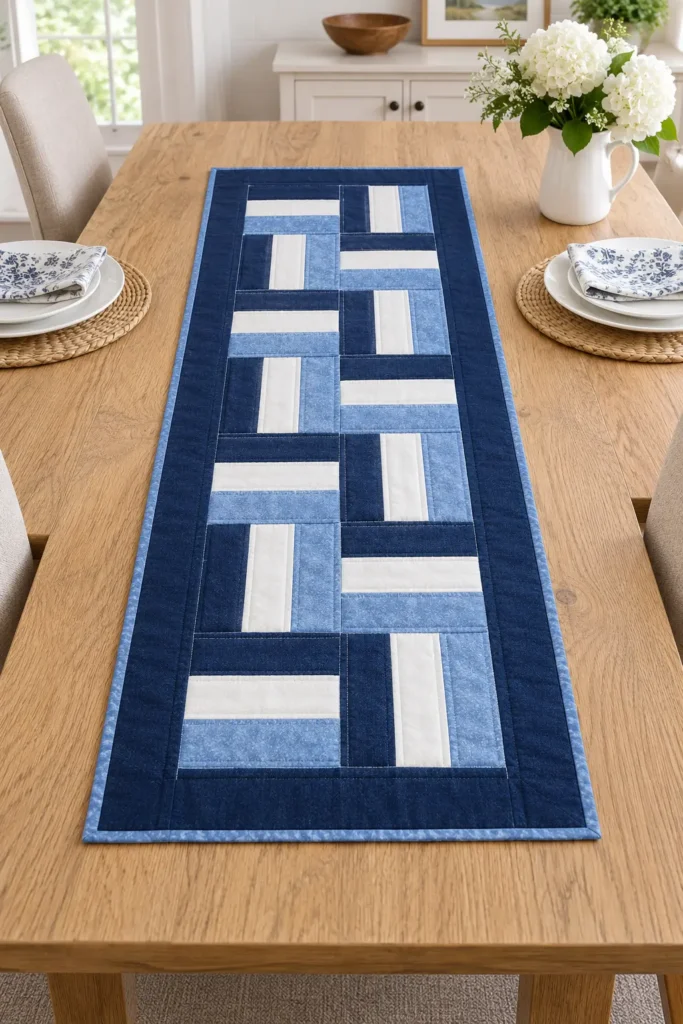
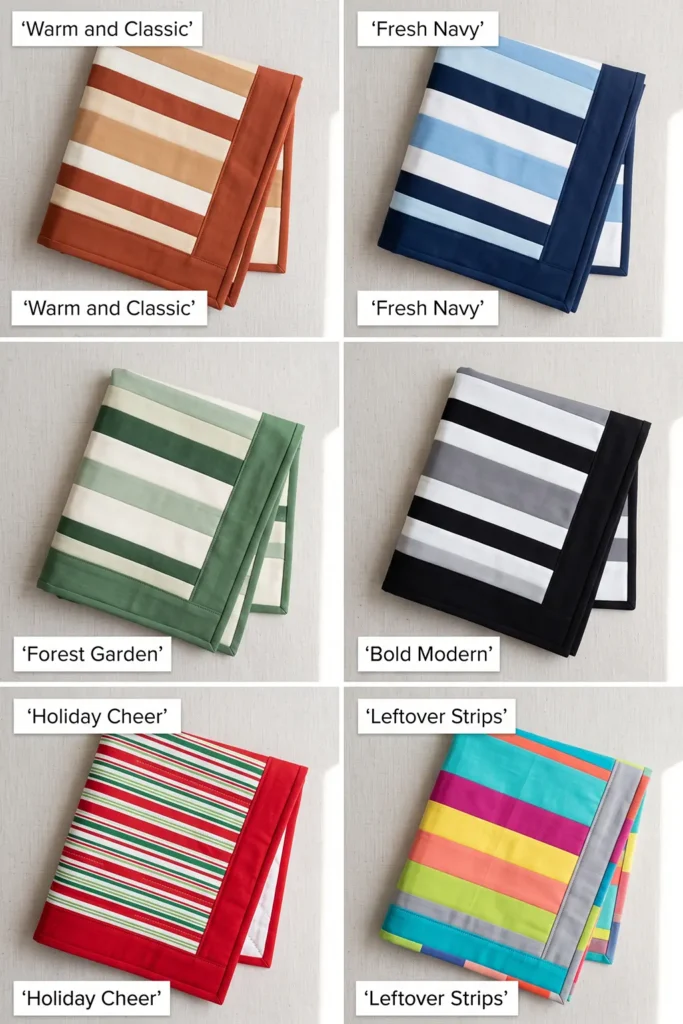
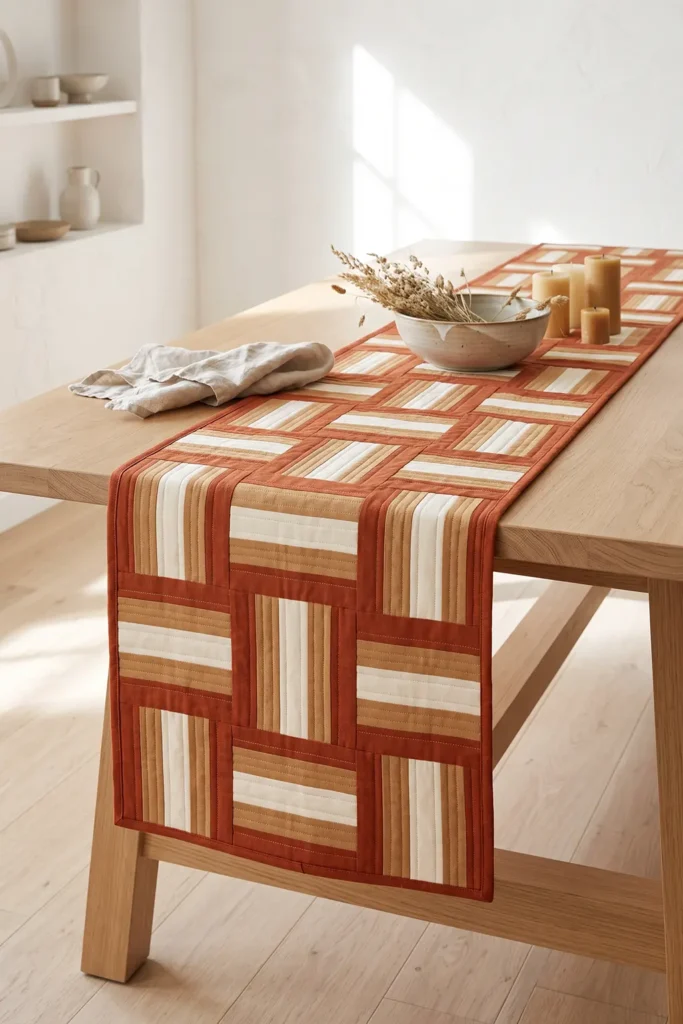
How the Block Works
- Three strips cut 2½ inches wide, sewn together along their long edges
- Joined with ¼-inch seams, the set measures exactly 6½ inches wide
- Cut across the set at 6½-inch intervals. Each section is a 6½-inch unfinished block, finishing at 6 inches in the runner
The blocks alternate horizontal and vertical in a checkerboard, giving the woven texture in miniature.
A Note on Runners: They Have to Lie Flat
A quilt can ripple slightly and nobody notices, because it drapes. A runner lies on a hard flat surface, and any waviness shows immediately.
Two things keep it flat:
Quilt lightly. Dense quilting stiffens and cups the layers. Straight lines through the blocks, stitching in the ditch, or a simple grid are all you need – and leave the border plain or give it a single line.
Measure through the middle before cutting borders. Edges stretch as you handle a piece; the center is the true measurement. Cutting borders to a stretched edge measurement is the commonest cause of a rippling runner.
Finished Size
- Block: 6 inches finished (6½ inches unfinished)
- Center panel: 2 blocks across × 6 down = 12 blocks, measuring 12½ × 36½ inches unfinished
- Border: 2 inches finished all around
- Runner top: 16½ × 40½ inches unfinished
- Nominal design size: 16 × 40 inches
- Actual bound size: roughly 16-16½ × 40-40½ inches before washing
- Skill level: true beginner – the smallest project in this collection
- Core techniques: strip sets, straight cutting, block rotation, borders, binding
Materials Needed
- 9 strips at 2½ inches × width of fabric – 3 dark, 3 light, 3 medium. Leftovers from a larger project are ideal, or cut them from about ¾ yard of assorted fabric
- Border fabric: ⅜ yard, cut into 5 strips at 2½ inches across the width. Two become the side borders and one supplies both end borders, with spares
- Backing: 1⅜ yards, cut to a single piece 22 × 46 inches – no seaming needed
- Batting: one piece 22 × 46 inches – a craft-size packet, or a scrap from a bigger quilt
- Binding: ⅜ yard, cut into 4 strips at 2½ inches
- Thread: neutral cotton
- Sewing machine, rotary cutter, cutting mat, quilting ruler, pins or clips for piecing, iron
- Curved safety pins for basting, or basting spray – ordinary straight pins aren’t suitable for holding the three layers
Beginner tip: don’t prewash precut strips – pinked edges fray and 2½-inch strips distort. Whatever you decide, keep it consistent: if the strips are unwashed, use unwashed border, binding, and backing fabric too, so everything shrinks together in the first wash. If you’re working from previously washed scraps, avoid mixing them with unwashed fabric in the same piece. Because a runner lives under food, candles, and drinks, it will be washed regularly – so test a scrap of your darkest fabric for colorfastness and use a color catcher every time.
Choosing Your Colors
A runner is small and seen close up, so contrast matters more than variety:
- Warm and classic: rust, cream, and camel inside a rust border
- Fresh: navy, white, and sky blue inside a navy border
- Garden: forest green, ivory, and sage inside a green border
- Bold modern: black, white, and mid gray inside a black border
- Seasonal: whichever three colors suit the time of year – runners are small enough to make several
Two practical points. Keep the light rail genuinely light, since it carries the weave at this small scale. And avoid a pale border if the runner will see heavy use, because the edges take the most handling and marks show first there.
Cutting Measurements
- Strip sets: 3 sets, each made from 3 strips in dark-light-medium order (light in the center). Each set measures 6½ inches wide × about 40 inches long once selvages are removed
- Blocks: cut 6½-inch squares across each set – up to six per set, giving as many as 18. You need 12, so there’s a comfortable margin
- Side borders: two strips at 2½ × 36½ inches
- End borders: two strips at 2½ × 16½ inches
- Backing: one piece, 22 × 46 inches
- Batting: 22 × 46 inches
- Binding: four strips, 2½ inches × width of fabric
Step-by-Step Guide
Step 1 – Measure your table. Decide whether you want a bare table at each end or an overhang, then work out your finished length. Each row adds or removes 6 inches and takes two blocks, so adjust the row count now rather than trying to fix the length with wider borders later.
Everything that follows assumes the 2 × 6-block runner finishing at 16 × 40 inches. If you change the size, recalculate the blocks, strip sets, borders, backing, batting, and binding before you cut anything – the numbers below won’t carry over.
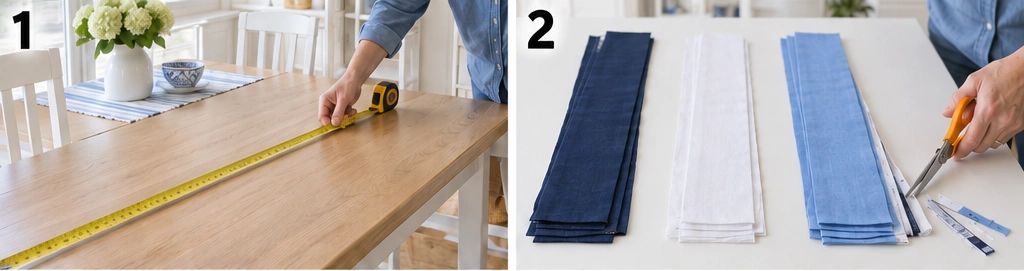
Step 2 – Prepare your strips. Leave the strips unwashed. Select 9 strips – three dark, three light, three medium – and remove any selvage from the ends. Check that they’re at least 40 inches long; that’s what you need for six blocks per set.
Step 3 – Cut the border strips. From your ⅜ yard, cut 5 strips at 2½ inches across the width of the fabric. Set them aside – you won’t need them until Step 14.
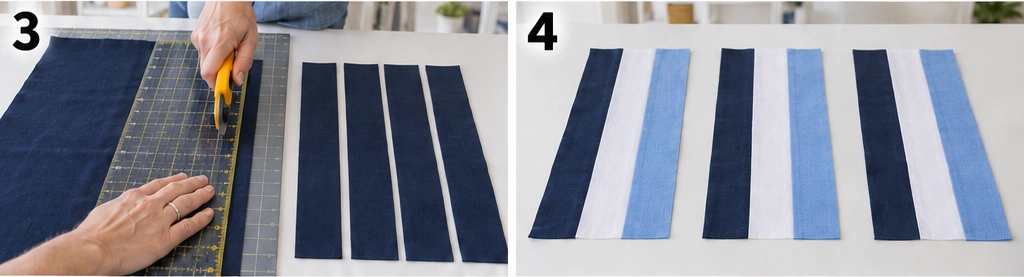
Step 4 – Set your value sequence and sort. Arrange each set as dark, light, medium, with the light strip in the center, and sort the nine strips into three groups in that order. The centered light rail carries the weave and lets you press both seam allowances away from your palest fabric.
Check the yield while you’re here: take the shortest strip in each group, subtract about an inch for squaring, divide by 6½ inches and round down. Three sets should give at least 12 blocks comfortably.
Step 5 – Sew the first strip set. Sew the dark and light strips together with a ¼-inch seam. Add the medium strip to the other side of the light one, but start that seam from the opposite end of the set. Sewing both long seams in the same direction encourages a strip set to bow; starting from opposite ends keeps that to a minimum.
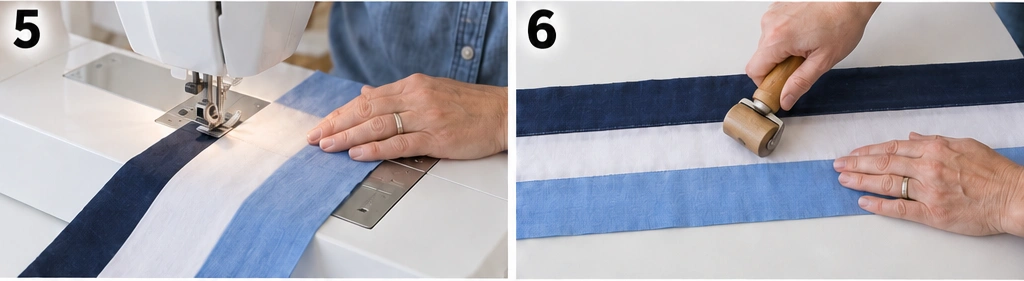
Step 6 – Press the set. Press both seam allowances away from the light center strip, toward the darker fabric on either side, so no dark allowance shadows through your palest rail. Press from the back first, then the front, without stretching.
Step 7 – Check the width. Measure across the pressed set: it should be exactly 6½ inches. If it’s narrower, your seam allowance is running wide – correct it before making the other two sets.
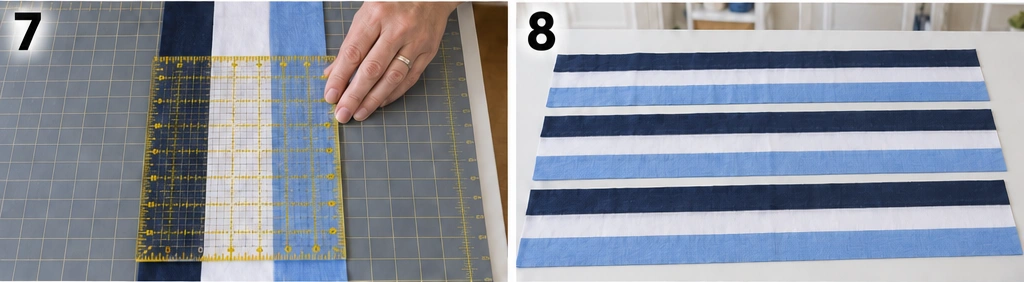
Step 8 – Make the remaining two sets. Repeat steps 5 to 7 until you have three strip sets, all measuring 6½ inches wide.
Step 9 – Square one end and cut the first block. Trim a clean edge at one end of a set, cutting at a true right angle to the long seams. Then cut one 6½-inch section and check it measures 6½ inches in both directions with four square corners. A bowed set or an angled first cut gives a parallelogram, and it’s better to know now.
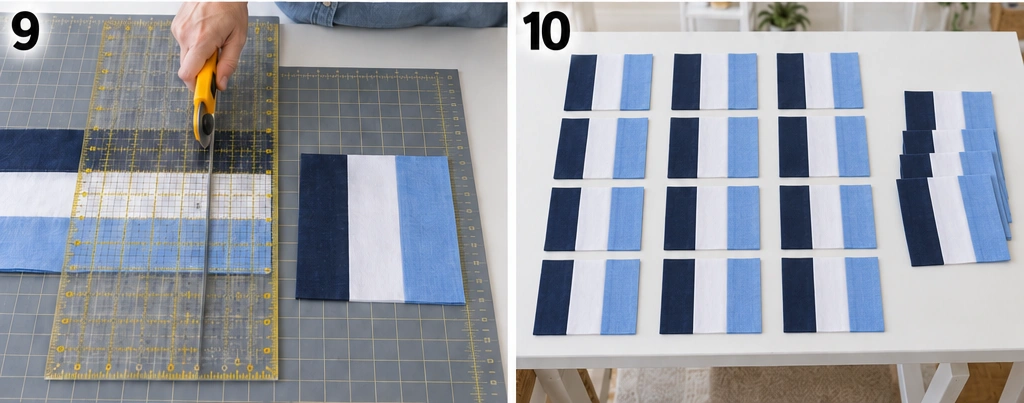
Step 10 – Cut the remaining blocks and choose your twelve. Cut up to five more from that set, then work through the other two – three full sets give as many as 18 blocks. Now pick the best 12 for the runner, setting aside any that are slightly off-square or where the fabrics feel wrong beside each other. Put the spares away for a matching pair of placemats.
Step 11 – Lay out the center panel. Arrange 12 blocks 2 across × 6 down, alternating direction like a checkerboard: horizontal then vertical in row one, vertical then horizontal in row two, and so on down.
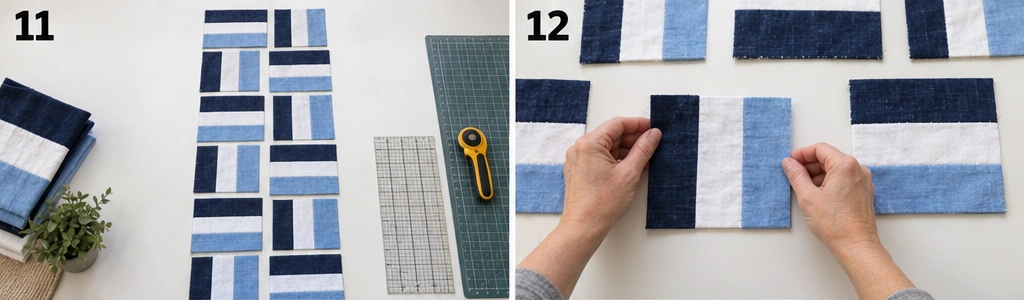
Step 12 – Check every block’s rotation. A block can face the right way and still be turned 180 degrees, which swaps its dark and medium rails. Set one rule and hold to it: dark rail at the top of every horizontal block, and at the left of every vertical block. With only 12 blocks this takes a moment, and a reversed block is very visible on something this small.
Step 13 – Sew the rows and join them. Sew each row of two blocks together with a ¼-inch seam – six rows, each measuring 12½ × 6½ inches. Press odd-numbered rows to the right and even-numbered rows to the left so the seams nest. Then join the six rows in order, pinning at each block boundary. Press the five row-to-row seams open to reduce bulk, or consistently in one direction if you prefer. The center panel should measure 12½ × 36½ inches.
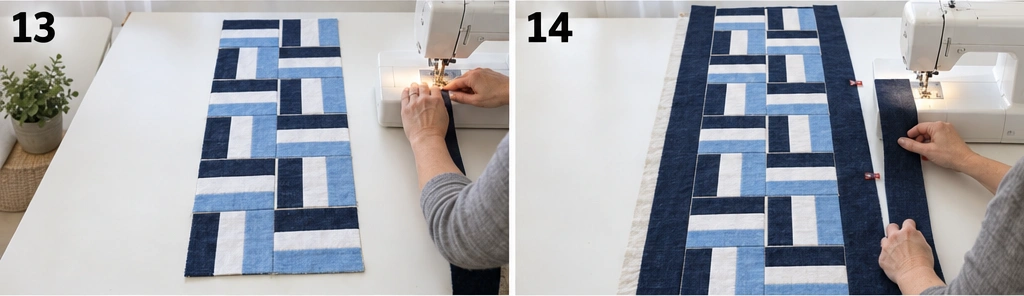
Step 14 – Measure and add the side borders. Measure the panel lengthwise through its middle, not along the edges – it should be about 36½ inches. Trim two border strips to 2½ inches by that measurement, then sew one to each long side, pinning at the ends, center, and quarter points. Press the seams toward the border. The panel now measures 16½ × 36½ inches.
Step 15 – Measure and add the end borders. Now measure across the middle, including the side borders you just added – about 16½ inches. Trim two strips to 2½ inches by that measurement and sew one to each end, pinning the same way. Press toward the border. The runner top should measure 16½ × 40½ inches.
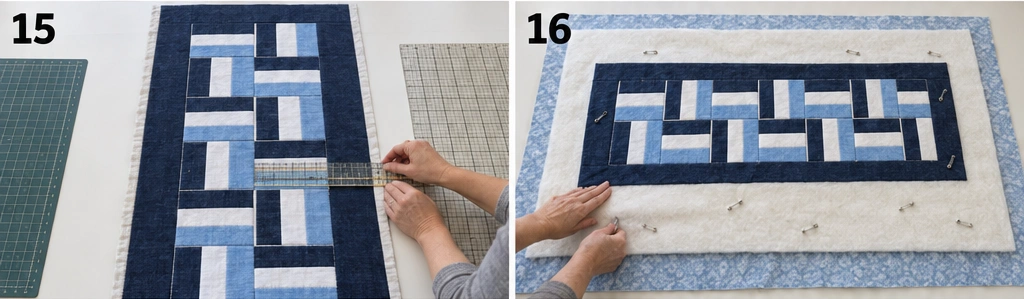
Step 16 – Make the runner sandwich. Cut the backing to 22 × 46 inches and the batting to match. Lay the backing wrong side up, center the batting, then the runner top right side up. Smooth from the center outward and baste with pins or spray.
Step 17 – Quilt it lightly. Keep the quilting simple and open so the runner lies flat – straight lines through the blocks, stitching in the ditch along the seams, or a wide diagonal grid. Give the border a single line or leave it unquilted. Dense quilting will stiffen the runner and make it cup on the table, which is the one thing you want to avoid.
Check your batting packaging for its maximum quilting distance and stay within it, but don’t go denser than you need to.
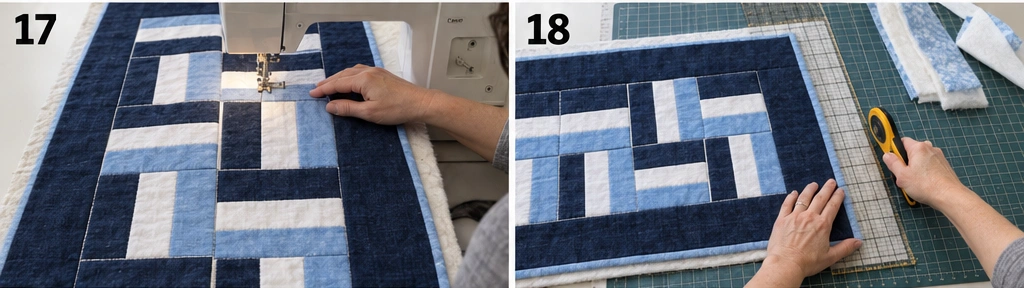
Step 18 – Trim and square up. Trim the excess batting and backing level with the edge of the runner top, squaring the corners. Quilting draws the layers up slightly, so it may finish a fraction under 16½ × 40½ inches, which is normal. Trim only the excess batting and backing – that outer ¼ inch of the top is the binding’s seam allowance.
Step 19 – Make and attach the binding. Take it in order:
- Cut four strips at 2½ inches × width of fabric, then join them end to end with diagonal seams – lay two strip ends at right angles, right sides together, sew corner to corner, trim to ¼ inch, and press that seam open.
- Press the whole strip in half lengthwise, wrong sides together.
- Start partway along one side, not at a corner, leaving the first 8-10 inches unsewn as a tail.
- Sew the binding to the front with a ¼-inch seam, stopping ¼ inch before each corner.
- Miter each corner: fold the binding straight up into a 45-degree diagonal, fold it back down level with the next edge, and resume sewing from the fold.
- Join the two tails. Overlap them by 2½ inches – the same as your binding width – and trim off the excess. Open both ends, place them right sides together at right angles, and sew diagonally across the corner. Trim that seam to ¼ inch, press it open, then check the binding lies flat against the edge before sewing the final section closed.
- Fold the binding to the back and stitch it down, folding the mitered corners neatly.
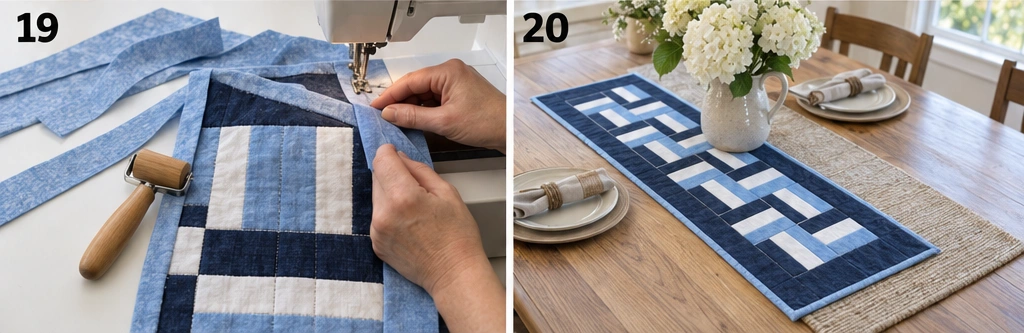
Step 20 – Press and use. Give the finished runner a good press – runners look best crisp rather than crinkled, unlike a quilt. Wash on cold with a color catcher whenever it needs it, and press again while slightly damp.
Assembly at a Glance
- Measure your table and adjust the row count – each row is 6 inches and takes two blocks.
- Leave strips unwashed; take 9 (3 dark, 3 light, 3 medium).
- Cut 5 border strips at 2½ inches; set aside.
- Sort into three groups as dark, light, medium; check the yield (round down).
- Sew dark+light, then add medium starting from the opposite end.
- Press both seams away from the light center strip.
- Check the set measures 6½ inches wide.
- Make three sets.
- Square one end; cut and check one block at 6½ inches square.
- Cut the rest → up to 18 blocks; choose the best 12.
- Lay out 2 × 6, alternating direction.
- Check no block is turned 180 degrees.
- Sew six rows of two; press odd right, even left; join → 12½ × 36½.
- Measure through the middle; add side borders (2½ × 36½) → 16½ × 36½.
- Measure across the middle; add end borders (2½ × 16½) → 16½ × 40½.
- Layer with 22 × 46 backing and batting; baste.
- Quilt lightly so it lies flat.
- Trim batting and backing level with the top.
- Bind with four strips, diagonal joins and mitered corners.
- Press well → about 16 × 40 inches.
Beginner Tips for Success
- Measure your table first and set the length in whole blocks.
- Quilt lightly. A runner sits on a hard flat surface, and dense quilting makes it cup.
- Measure through the middle before cutting borders; edge measurements stretch and cause ripples.
- Keep the light rail genuinely light – it carries the weave at this small scale.
- Avoid a pale border on a runner that will see heavy use; the edges mark first.
- Check the first strip set at 6½ inches before making the other two.
- Watch for blocks turned 180 degrees – very visible on a piece this small.
- Press the finished runner crisp rather than letting it crinkle.
- Use a color catcher every wash. This is a piece that lives under food and candles.
Other Sizes
Every block finishes at 6 inches, and the border adds 4 inches to each dimension:
- Short console runner: 2 × 4 blocks = 12 × 24 center → 16 × 28 inches (8 blocks, 2 sets)
- As written: 2 × 6 blocks = 12 × 36 center → 16 × 40 inches (12 blocks, 3 sets)
- Long dining runner: 2 × 8 blocks = 12 × 48 center → 16 × 52 inches (16 blocks, 3 sets)
- Wide table runner: 3 × 8 blocks = 18 × 48 center → 22 × 52 inches (24 blocks; four sets only if every one yields six, so five sets is the safer plan)
Note that side borders longer than about 40 inches will need piecing, since a strip cut across the fabric width won’t reach. For the long dining and wide table versions, either join two strips end to end with a diagonal seam, or cut the borders lengthwise from yardage.
Styling It & Gift Ideas
Lay the runner down the center of a dining table with simple plates and a low arrangement, or use it on a sideboard beneath a lamp and a few framed pictures. Because it’s small and washable, it earns its place year-round rather than coming out for occasions – and a set of two or three in different colorways lets you change the table with the season.
Its speed makes it one of the best gifts here:
- A hostess gift, finished in an afternoon and usable the same evening
- A teacher or neighbor gift – quick enough to make several from one set of strips
- A matching pair of runner and placemats from the same fabrics
- A first quilting project for someone learning, since it teaches strip sets, blocks, borders, and binding in one small piece
Final Thoughts
A rail fence table runner is the whole technique in miniature – strip sets, rotated blocks, borders, and binding – finished in an afternoon and using barely nine strips. Measure your table before you start, keep the quilting open so it lies flat, and measure through the middle before cutting your borders. Do those three things, and you’ll have a woven, handsome runner that comes out for every meal and takes almost nothing to make.
Other Design Inspirations – Digitally Modified Images. Texture and color may vary from the actual product.
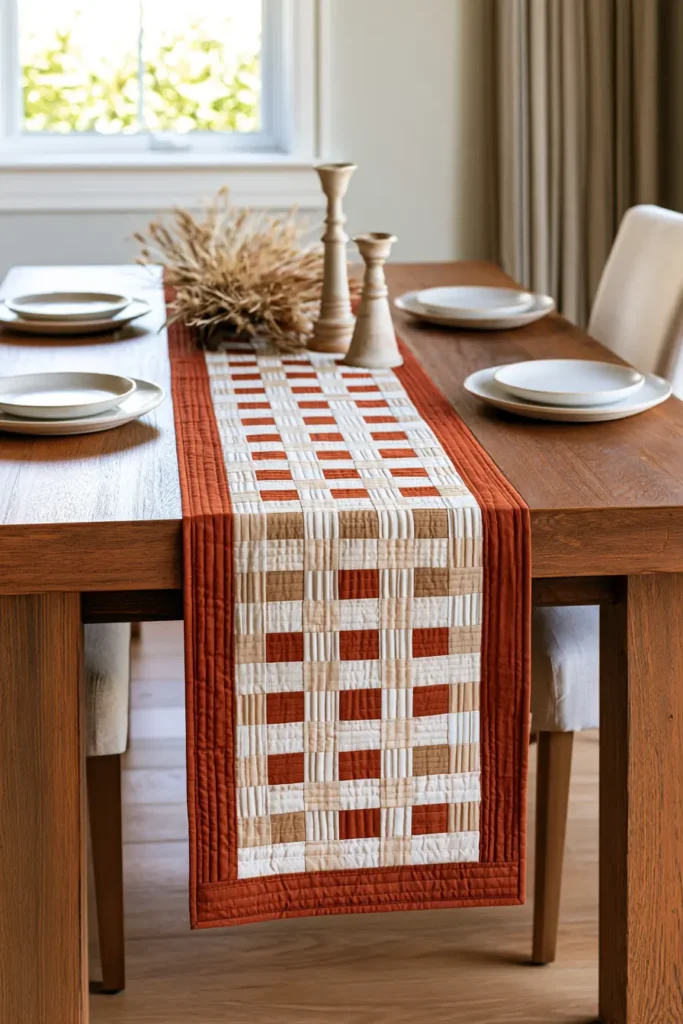
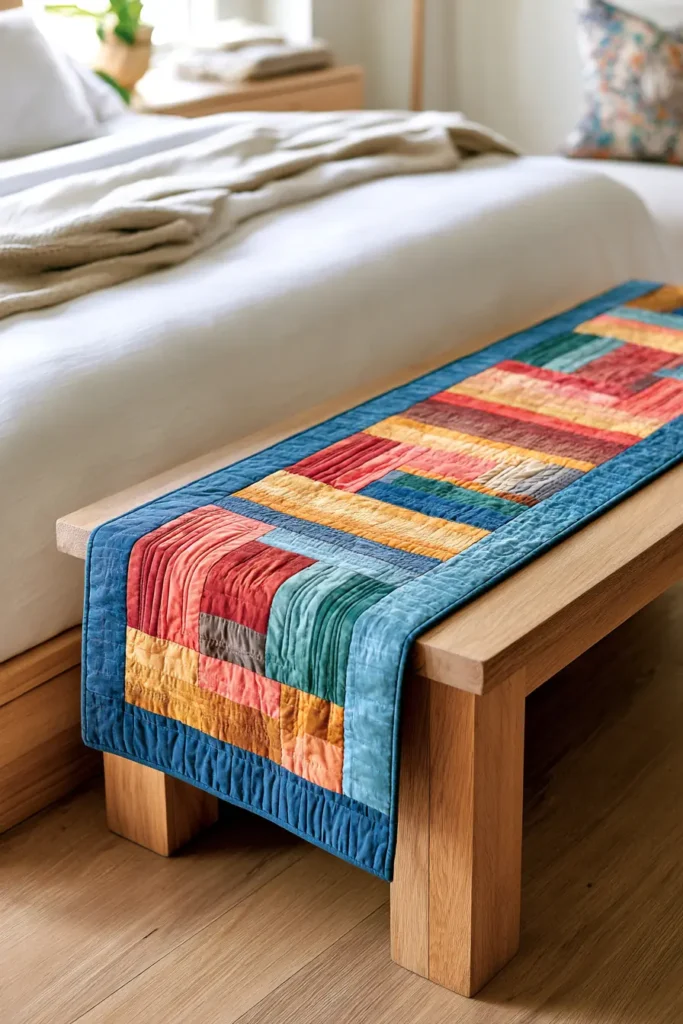
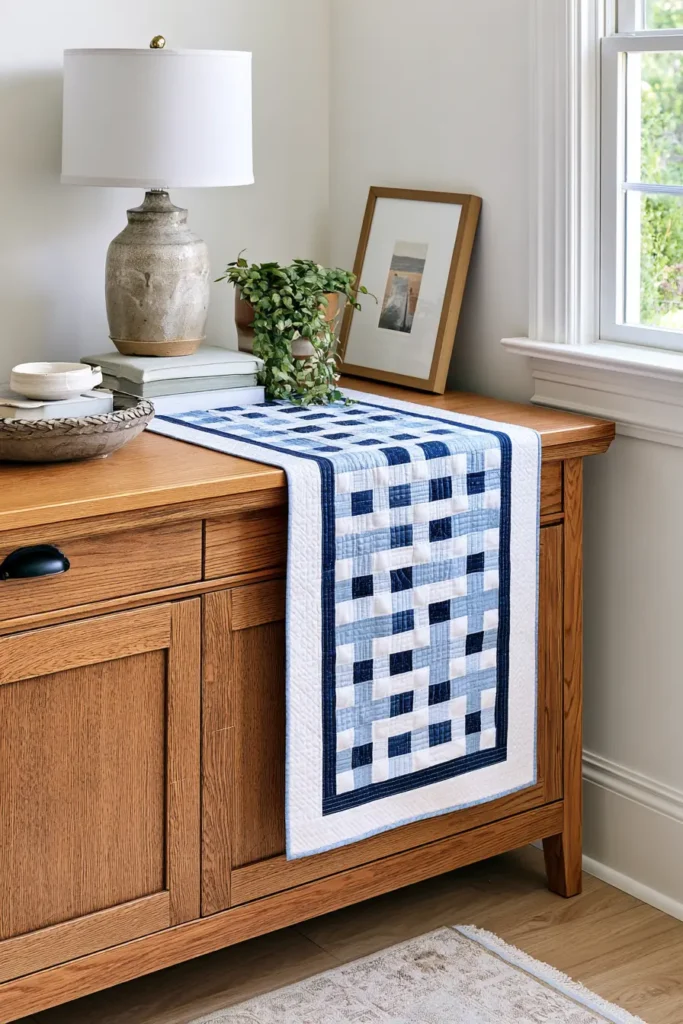
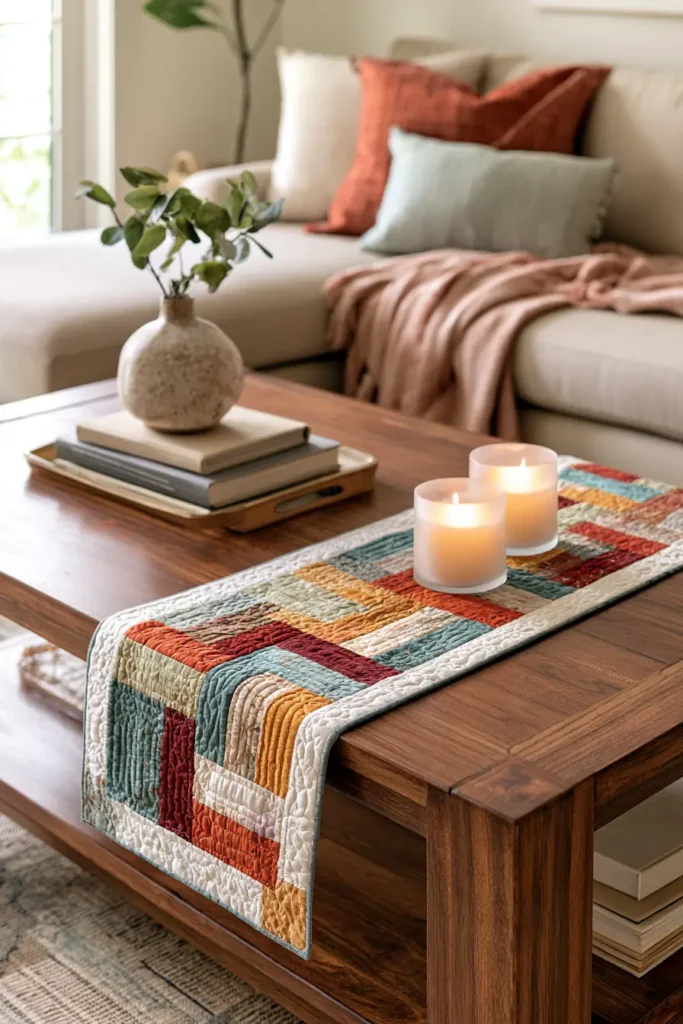
14. Baby Rail Fence Quilt for a Quick Handmade Gift
A baby quilt is the most-given handmade gift there is, and the rail fence is close to the perfect pattern for one. It’s fast – 42 small blocks from eight strip sets – it’s forgiving enough that a first-time quilter can finish it confidently, and the woven texture looks far more accomplished than the straight seams involved.
There’s also a genuinely happy coincidence at work. This block needs strong value contrast for the weave to read, and newborns see strong contrast best – their vision develops over the first months, and bold light-dark differences hold their attention long before subtle shades do. The design choice that makes a good rail fence quilt is also the one that makes a good baby quilt. Bright, punchy fabrics serve both purposes at once.
What Makes a Baby Quilt Different
The construction is identical to any other rail fence. What changes is everything around it, because this quilt will be handled, chewed, dragged, and washed far more than a quilt for a bed.
No embellishments at all. No buttons, ribbons, appliqué, yo-yos, or anything else that could work loose. Patchwork and quilting only.
Wash it before it’s given. A finished quilt should be washed and dried once before it goes to a baby – it softens the fabric, removes any residues, and lets you see that everything holds together.
Quilt closer than you would a bed quilt. Denser quilting keeps the batting from shifting and bunching after dozens of washes. Check your batting’s maximum quilting distance and stay comfortably inside it rather than at the limit.
Bind by machine on both sides. Hand-stitched binding is lovely and it’s also the first thing to fail on a quilt that’s washed weekly. Machine stitching the binding down on the back is far more durable, and nobody will mind.
Choose a soft, low-loft batting. Cotton or a cotton blend is washable, breathable, and drapes well on a small quilt. What matters most is avoiding high loft and checking that the care instructions and maximum quilting distance suit frequent laundering.
Design Inspirations – Digitally Modified Images. Texture and color may vary from the actual product.
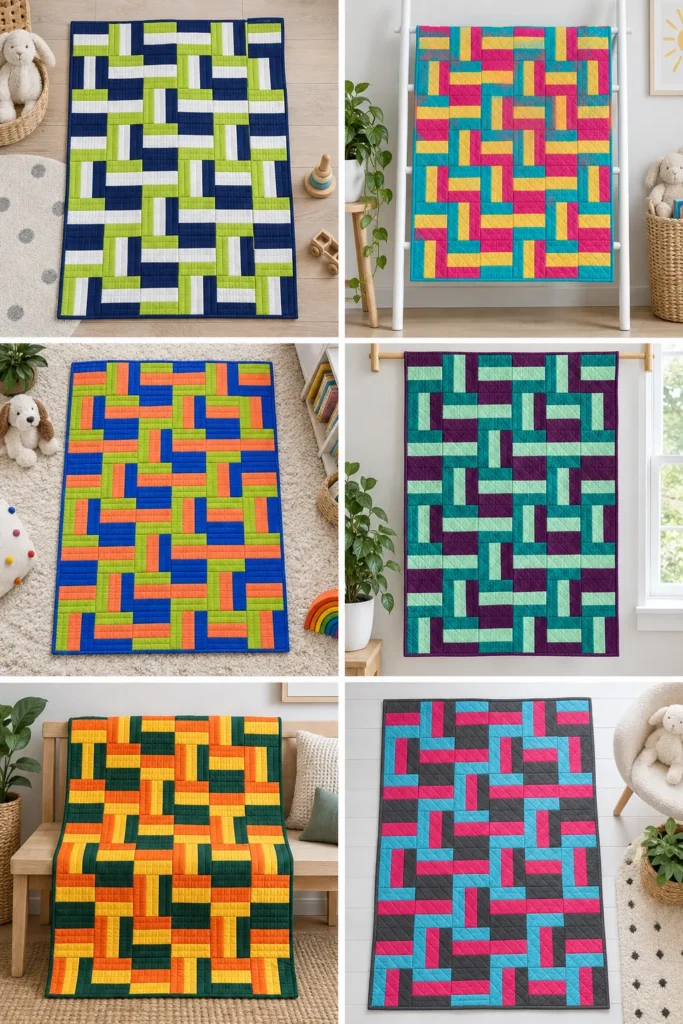
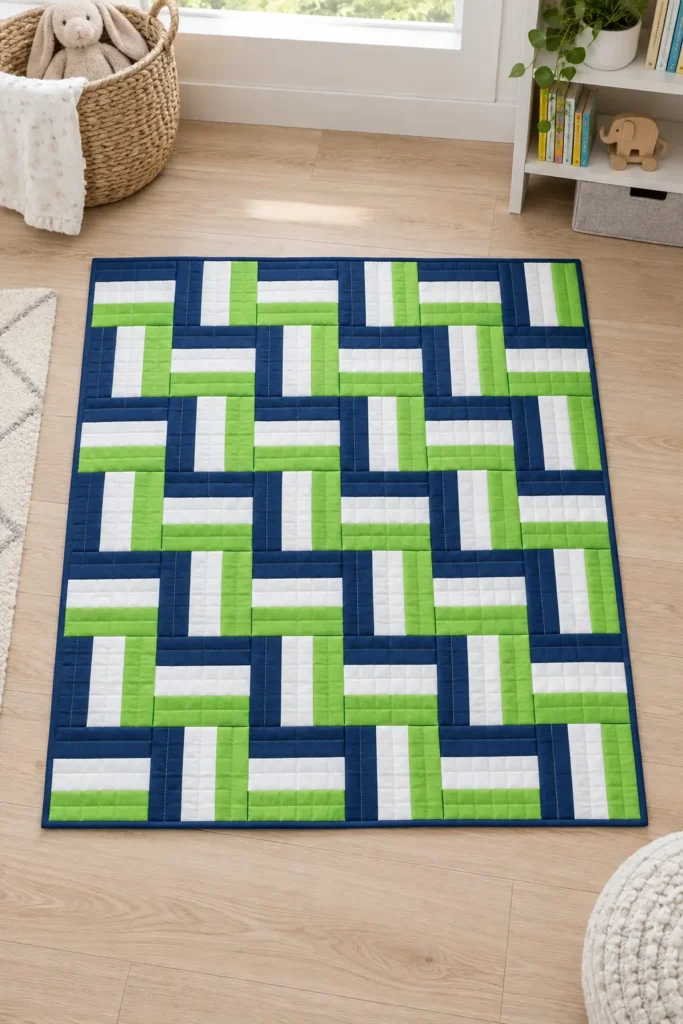
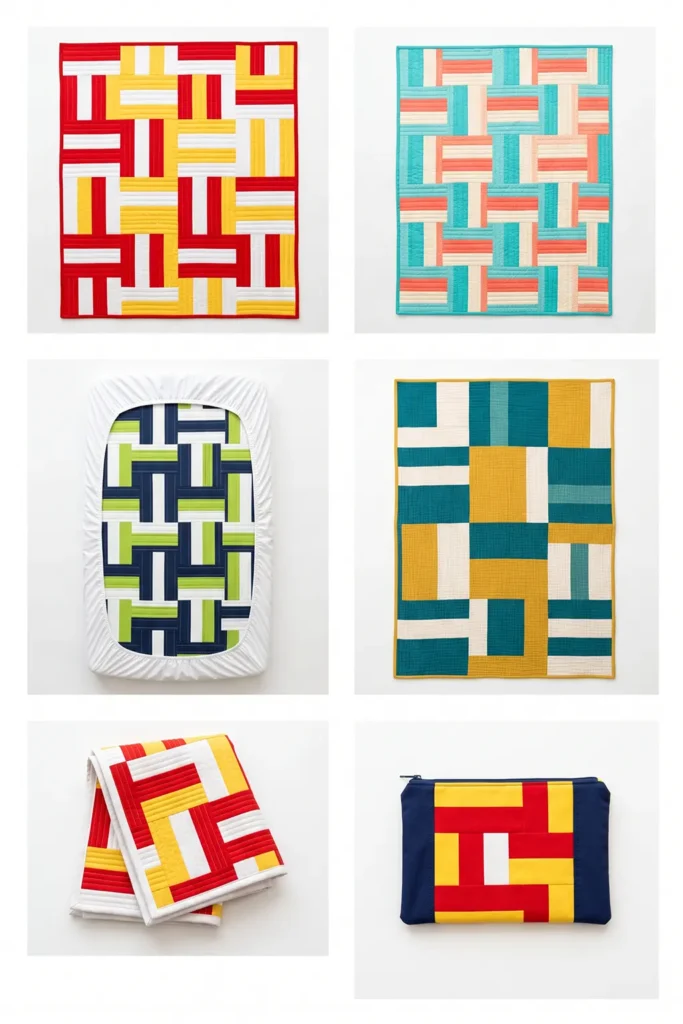
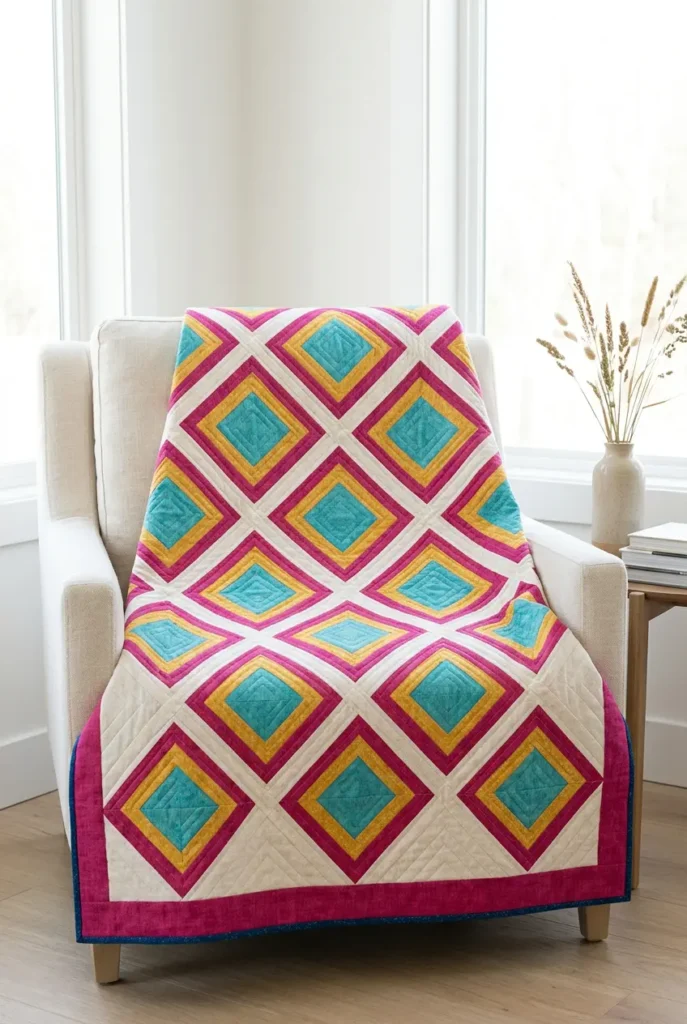
Sizing It for the Job
Baby quilts get used in three quite different ways, and the right size depends on which one you have in mind:
- Play mat – roughly 36 × 42 inches, which is what this pattern makes. Big enough for tummy time and floor play, small enough to fold into a bag
- Stroller quilt – about 30 × 36 inches, for supervised stroller use. If it’s used in a car seat, fasten and tighten the harness first, then lay the quilt over the fastened straps only – never underneath the baby, and never between the baby and the harness. Keep the face uncovered
- Crib quilt – 36 × 54 inches, sized to a standard crib mattress
Every block finishes at 6 inches, so all three are just different block counts. The play-mat size below is the most useful all-rounder and the one most people mean by “baby quilt.”
An important note on sleep: current safe-sleep guidance is to keep quilts, blankets, pillows, and any other loose bedding completely out of an infant’s sleep space for the first year. A crib-sized quilt should be used for supervised awake time – floor play, feeding, stroller use – or kept as a keepsake for when the child is older. It isn’t baby bedding.
How the Block Works
- Three strips cut 2½ inches wide, sewn together along their long edges
- Joined with ¼-inch seams, the set measures exactly 6½ inches wide
- Cut across the set at 6½-inch intervals. Each section is a 6½-inch unfinished block, finishing at 6 inches in the quilt
The blocks alternate horizontally and vertically in a checkerboard, creating the woven basket-weave texture.
Finished Size
- Block: 6 inches finished (6½ inches unfinished)
- Layout: 6 blocks across × 7 blocks down = 42 blocks
- Quilt top: 36½ × 42½ inches unfinished
- Nominal design size: 36 × 42 inches
- Actual bound size: roughly 36-36½ × 42-42½ inches before washing. Expect a little shrinkage in the first wash
- Skill level: true beginner
- Core techniques: strip sets, straight cutting, block rotation, machine binding
Materials Needed
- 24 strips at 2½ inches × width of fabric – 8 dark, 8 light, 8 medium. That’s slightly more than half a standard jelly roll, so a single bundle covers it with plenty over. If you cut from three fabrics instead, buy about ⅝ yard of each (1⅞ yards total). Choose fabrics with strong value contrast; soft pastels of similar depth will lose the weave entirely
- Backing: for quilting on a domestic machine, buy 1½ yards and cut it 48 inches long, keeping the full usable width – that should give at least 40½ × 48 inches. Measure your fabric’s usable width after trimming the selvages, and if it comes in under 40½ inches, piece the backing instead. For longarm quilting, ask your quilter for their required backing size before buying, since allowances vary and many want at least 4 inches beyond every edge. Around 3 yards of standard-width fabric, seamed into two lengths, gives a comfortable margin, as does 1½ yards of 108-inch wide backing
- Batting: low-loft cotton or cotton blend, cut to match your backing – the batting should never extend beyond it. A standard crib-size batting packet is usually 45 × 60 inches, which is ideal; trim it to the same size as your prepared backing and keep the offcut
- Binding: ½ yard, cut into 5 strips at 2½ inches
- Thread: neutral cotton
- Sewing machine, rotary cutter, cutting mat, quilting ruler, pins or clips for piecing, iron
- Curved safety pins for basting, or basting spray
Beginner tip: don’t prewash precut strips – pinked edges fray and 2½-inch strips distort. Keep it consistent: if the strips are unwashed, use unwashed backing and binding fabric too, so everything shrinks together. Test a scrap of your darkest fabric for colorfastness, and use a color catcher in the first wash – a baby quilt gets washed constantly and a dye bleed on the first go would be a shame.
Choosing Your Colors
This is the one section in the collection where bold, saturated color is unambiguously the right answer:
- Primary brights: true red, sunny yellow, and white
- Playful: turquoise, coral, and cream
- Fresh modern: navy, lime, and white
- Warm: tangerine, buttercup, and soft white
- Gender-neutral bold: teal, mustard, and ivory
The temptation with a baby gift is soft pastels, and there’s nothing wrong with them – but three pastels of similar depth will produce a pretty quilt with no visible pattern at all. If you want a gentle palette, make sure one rail is still clearly darker than the others so the weave survives. A black-and-white photo will tell you in seconds whether you’ve got enough separation.
Novelty prints work nicely here too, as long as they sit in the right value group. Small-scale prints read better than large ones at this block size.
Cutting Measurements
- Strip sets: 8 sets, each made from 3 strips in dark-light-medium order (light in the center). Each set measures 6½ inches wide × about 40 inches long once selvages are removed
- Blocks: cut 6½-inch squares across each set – up to six per set, giving as many as 48. You need 42, leaving six spares
- Backing and batting: matching pieces, each at least 40½ × 48 inches (42 × 48 is more comfortable). Piece the backing if your fabric’s usable width falls short
- Binding: five strips, 2½ inches × width of fabric
Step-by-Step Guide
Step 1 – Decide the size and check your fabrics. Settle on the play-mat size below, or adjust the block count for a stroller or crib quilt. Then lay your three fabrics side by side, photograph them, and convert the photo to black and white. If they read as clearly light, medium, and dark, the weave will show. If two merge, swap one for something bolder.
Steps 2 to 21 assume the 6 × 7-block play-mat version. If you’d rather make another size, take your block and strip-set counts from the “Other Sizes” section below, and recalculate the backing, batting, and binding before you cut anything.
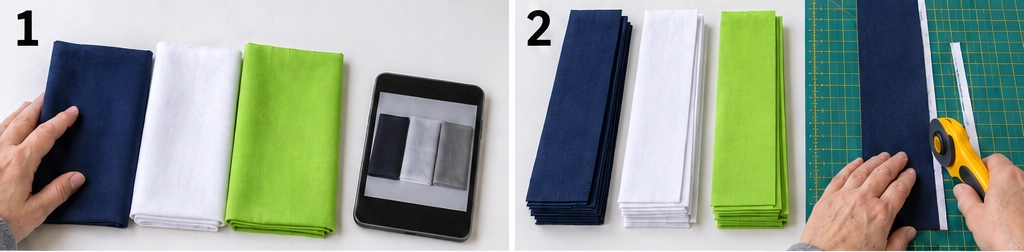
Step 2 – Prepare your strips. Leave the strips unwashed. Select 24 strips – eight dark, eight light, eight medium – and remove any selvage from the ends. Check that they’re at least 40 inches long, which is what’s needed for six blocks per set.
Step 3 – Set your value sequence. Arrange every set as dark, light, medium, with the light strip in the center. Write it down. The centered light rail carries the weave, meaning both seam allowances can be pressed away from your palest fabric.
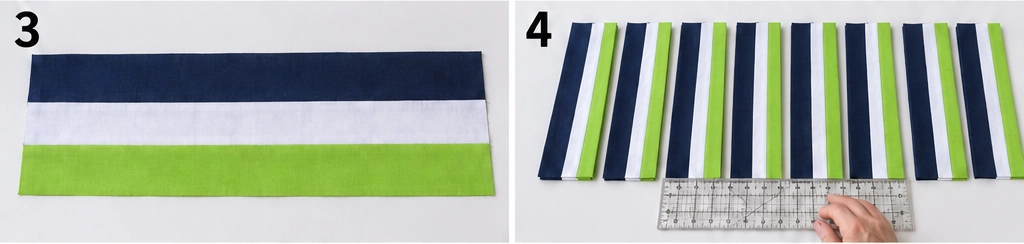
Step 4 – Sort into groups and check the yield. Divide the 24 strips into eight piles of three, each in dark-light-medium order. Then take the shortest strip in each pile, subtract about an inch for squaring, divide what’s left by 6½ inches, and round down. Add the eight figures: you need 42 blocks, and eight full sets give 48, so there’s a comfortable margin.
Step 5 – Sew the first strip set. Sew the dark and light strips together with a ¼-inch seam. Add the medium strip to the other side of the light one, but start that seam from the opposite end of the set. Sewing both long seams in the same direction encourages a strip set to bow; starting from opposite ends keeps that to a minimum.
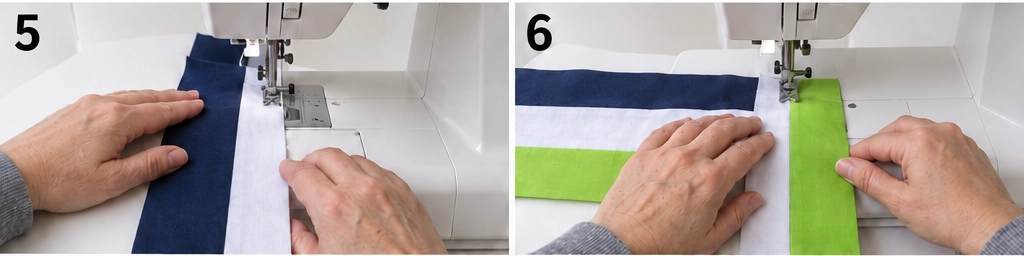
Step 6 – Press the set. Press both seam allowances away from the light center strip, toward the darker fabric on either side, so no dark allowance shadows through the pale rail. Press from the back first, then the front, without stretching.
Step 7 – Check the width. Measure across the pressed set: it should be exactly 6½ inches. If it measures less than 6½ inches your seam allowance is too wide; if it measures more, it’s too narrow. Correct it now, before making seven more sets.
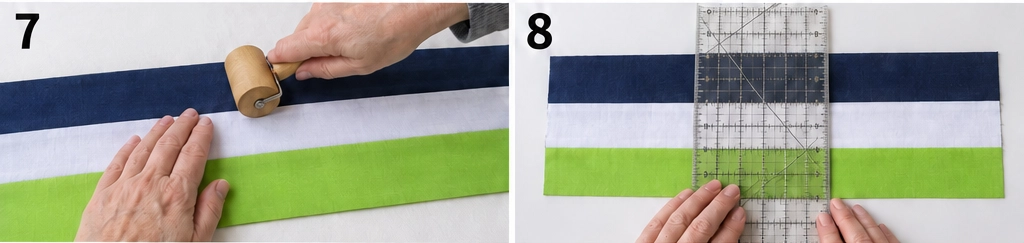
Step 8 – Make the remaining seven sets. Repeat steps 5 to 7 until you have eight strip sets, all measuring 6½ inches wide.
Step 9 – Square one end and cut the first block. Trim a clean edge at one end of a set, cutting at a true right angle to the long seams. Cut one 6½-inch section and check it measures 6½ inches in both directions with four square corners. A bowed set or an angled first cut gives a parallelogram, and it’s better to find out now.
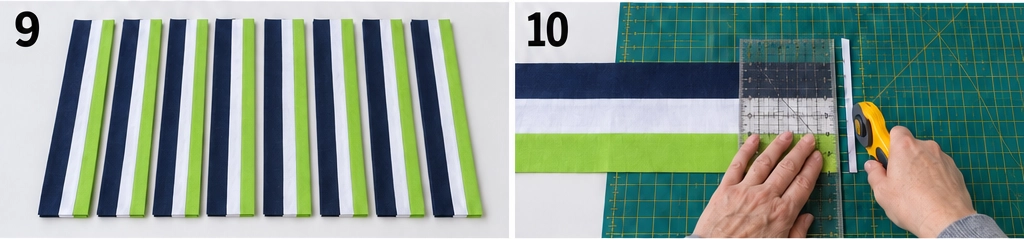
Step 10 – Cut the remaining blocks. Cut up to five more from that set, then work through all eight – as many as 48 blocks. Choose the best 42 for the quilt and set the spares aside; they’ll make a matching cushion cover or a burp cloth.
Step 11 – Lay out the quilt. Arrange the 42 blocks 6 across × 7 down, alternating direction like a checkerboard: horizontal, vertical, horizontal, vertical along each row, and starting each new row with the opposite direction to the row above. Step back and check the weave reads clearly.
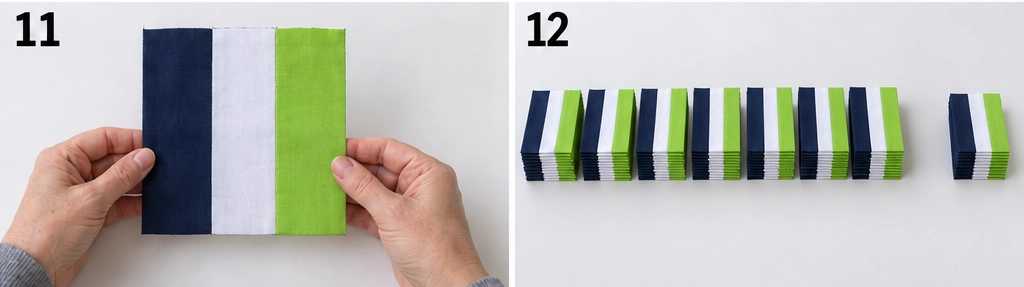
Step 12 – Check every block’s rotation. A block can face the right way and still be turned 180 degrees, which swaps its dark and medium rails. Set one rule and hold to it: dark rail at the top of every horizontal block, and at the left of every vertical block.
Step 13 – Photograph and label the rows. Take a photo, then place a numbered label beside each row. Gather each row from left to right and pin its label to the first block, keeping every stack facing upward.
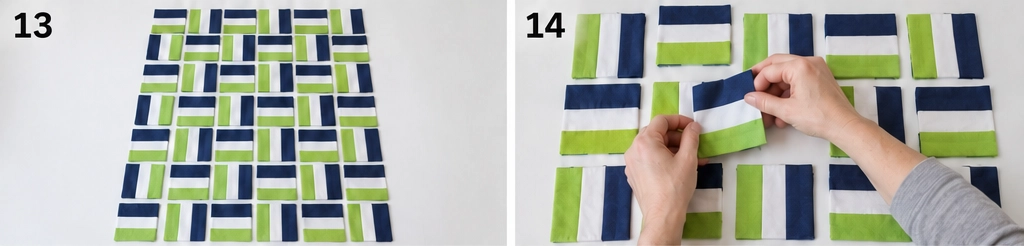
Step 14 – Sew the rows. Sew each row of six blocks together with a ¼-inch seam, checking directions against your photo as you go. Each row should measure 36½ × 6½ inches. Press the block-joining seam allowances of odd-numbered rows to the right and even-numbered rows to the left, so they nest.
Step 15 – Join the rows. Sew the seven rows together in order, pinning at all five block boundaries along each row seam. Press the row-to-row seams open to reduce bulk, or consistently in one direction. The top should measure 36½ × 42½ inches.
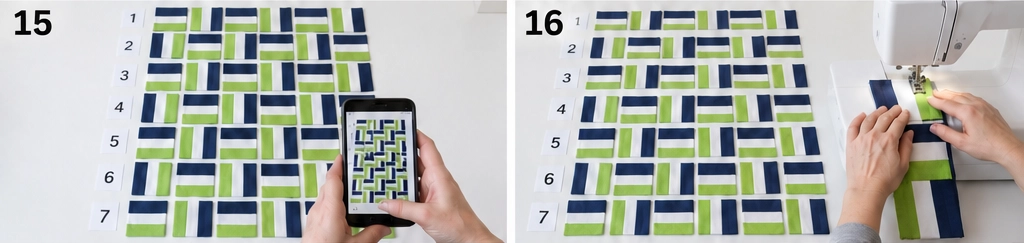
Step 16 – Prepare the backing. Cut a single piece 48 inches long, keeping the full usable width of the fabric – aim for at least 40½ × 48 inches. Measure it once the selvages are off: if the width falls short of 40½ inches, seam a strip along one side rather than working with too little margin. If you bought extra yardage to piece, join two lengths along their long edges and press the seam open.
This gives roughly 2 inches spare beyond each edge of the top, which is manageable on a domestic machine but leaves little room for error – so baste carefully at the next step.
Now trim your batting to match the backing exactly. Batting that extends past the backing will catch and drag as you quilt.
Step 17 – Make the quilt sandwich. Lay the backing wrong side up, center the batting on it – they should be the same size – then the quilt top right side up. Smooth everything from the center outward and baste thoroughly with curved safety pins or basting spray. On a small quilt with a modest backing margin, thorough basting matters more than usual.
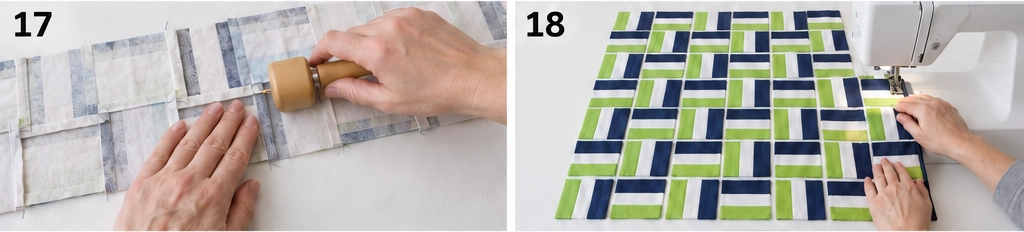
Step 18 – Quilt it, and quilt it closer than you would a bed quilt. An all-over grid, straight lines through the blocks, or stitching in the ditch all work well. A walking foot keeps the layers feeding evenly.
Check your batting packaging for its maximum quilting distance and stay comfortably inside it rather than at the limit. A baby quilt will be washed dozens of times, and generous quilting is what stops the batting shifting and bunching over its life.
Step 19 – Trim and square up. Trim the excess batting and backing level with the edge of the quilt top, squaring the corners. Quilting draws the layers up slightly, so it may finish a fraction under 36½ × 42½ inches, which is normal. Trim only the excess batting and backing – that outer ¼ inch of the top is the binding’s seam allowance.
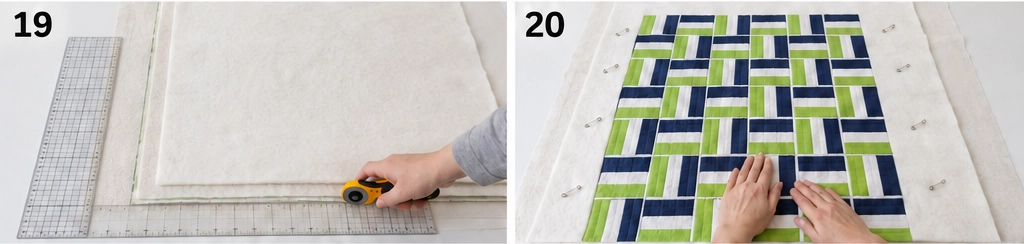
Step 20 – Make and attach the binding. Take it in order:
- Cut five strips at 2½ inches × width of fabric, then join them end to end with diagonal seams – lay two strip ends at right angles, right sides together, sew corner to corner, trim to ¼ inch, and press that seam open.
- Press the whole strip in half lengthwise, wrong sides together.
- Start partway along one side, not at a corner, leaving the first 8-10 inches unsewn as a tail.
- Sew the binding to the front with a ¼-inch seam, stopping ¼ inch before each corner.
- Miter each corner: fold the binding straight up into a 45-degree diagonal, fold it back down level with the next edge, and resume sewing from the fold.
- Join the two tails. Overlap them by 2½ inches – the same as the binding width – and trim off the excess. Open both ends, place them right sides together at right angles, sew diagonally across the corner, trim that seam to ¼ inch, press it open, then check the binding lies flat before closing the final section.
- Fold the binding to the back and machine-stitch it down. Hand stitching is prettier, but machine stitching is far more durable on a quilt that gets washed weekly – and this one will.
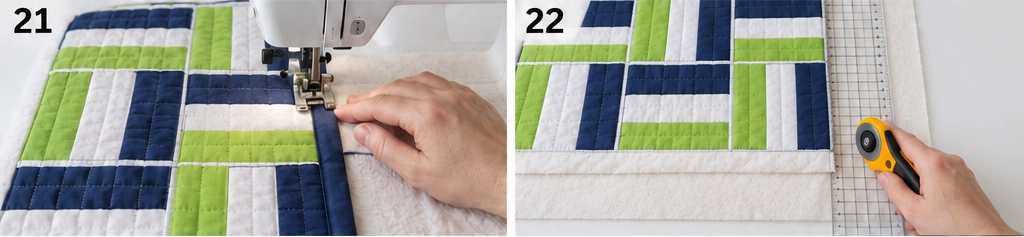
Step 21 – Wash it before you give it. Wash gently on cold with a color catcher and tumble dry low. This softens the quilt, removes any residue from marking or spray basting, and lets you check every seam and the binding have held. Give it a press if you like, though most baby quilts look best soft and crinkled.
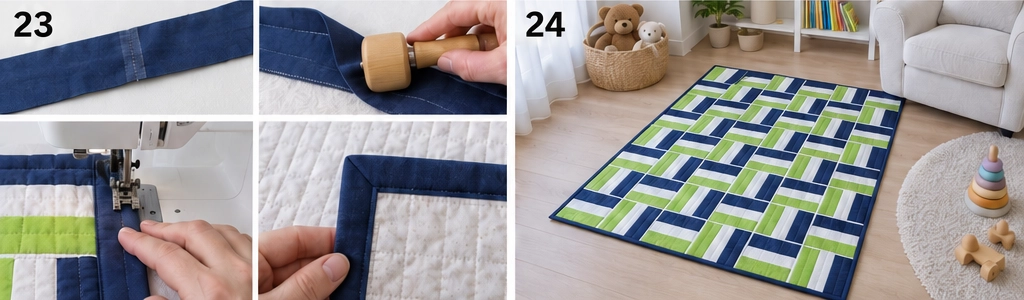
Assembly at a Glance
- Choose the size; grayscale-test your three fabrics for contrast.
- Leave strips unwashed; take 24 (8 dark, 8 light, 8 medium).
- Set every group as dark, light, medium, light in the center.
- Sort into eight groups; check the yield (round down) reaches 42.
- Sew dark+light, then add medium starting from the opposite end.
- Press both seams away from the light center strip.
- Check the set measures 6½ inches wide.
- Make eight sets.
- Square one end; cut and check one block at 6½ inches square.
- Cut the rest → up to 48 blocks; choose the best 42.
- Lay out 6 × 7, alternating direction.
- Check no block is turned 180 degrees.
- Photograph and label the seven rows.
- Sew rows of six → 36½ × 6½; press odd right, even left.
- Join the rows → 36½ × 42½ top.
- Prepare matching backing and batting, each at least 40½ × 48 inches (42 × 48 preferable).
- Layer backing, batting, and top; baste thoroughly.
- Quilt closely – inside the batting’s maximum spacing, not at it.
- Trim batting and backing level with the top.
- Bind with five strips; machine-stitch the back for durability.
- Wash and dry before giving.
Beginner Tips for Success
- Grayscale-test your fabrics. Three pastels of similar depth give a pretty quilt with no visible pattern.
- Use strong contrast – it suits the block, and it’s what a newborn’s developing eyes register best.
- No embellishments. Patchwork and quilting only; nothing that can work loose.
- Choose a low-loft cotton or cotton-blend batting with care instructions that allow frequent washing.
- Quilt more densely than you would a bed quilt, staying inside the batting’s maximum spacing.
- Machine-stitch the binding on the back. It’s the part that fails first on a quilt washed weekly.
- Wash and dry it before giving it, so it arrives soft, and you know it holds together.
- Use a color catcher every wash, especially with strong reds.
Other Sizes
Every block finishes at 6 inches:
- Stroller quilt: 5 across × 6 down = 30 × 36 inches (30 blocks; 5 sets only if every one yields six, so 6 sets is safer)
- Play mat (as written): 6 × 7 = 36 × 42 inches (42 blocks, 8 sets – comfortable, with six spares)
- Crib quilt: 6 × 9 = 36 × 54 inches (54 blocks; 9 sets gives exactly 54, so 10 sets is safer)
- Toddler bed quilt: 7 × 10 = 42 × 60 inches (70 blocks, 12 sets – gives 72, with two spares)
Divide your block count by the number each set will actually yield, round up, and add a set as insurance. Multiply the sets by three for the strips needed, and recalculate backing, batting, and binding for each size – the numbers above are for the 36 × 42 version only.
Styling It & Gift Ideas
A bright baby quilt photographs beautifully folded in a nursery basket, draped over the arm of a rocking chair, or spread on a wooden floor for tummy time. Bold colors suit a modern nursery and stand up to the visual clutter that arrives with a baby.
It’s the ideal quick gift:
- A new-baby gift that can be started and finished in a weekend
- A shower gift – and one you can make several of from a single jelly roll, if several friends are due
- A first quilt to make with someone, since the small size keeps the project from becoming daunting
- A matching set – use the spare blocks for a cushion cover or a small wall hanging for the nursery
Adding a fabric label with the baby’s name and the year turns it from a lovely gift into something kept for decades.
Final Thoughts
A baby rail fence quilt is the fastest, most useful thing you can make from this block – 42 blocks, eight strip sets, and an afternoon of laying out and sewing. Choose fabrics with real contrast so the weave shows and the baby can actually see it, quilt more closely than you would for a bed, machine-stitch that binding, and wash it before you hand it over. It’ll be dragged around a house for years, and it’ll look better for it.
Other Design Inspirations – Digitally Modified Images. Texture and color may vary from the actual product.
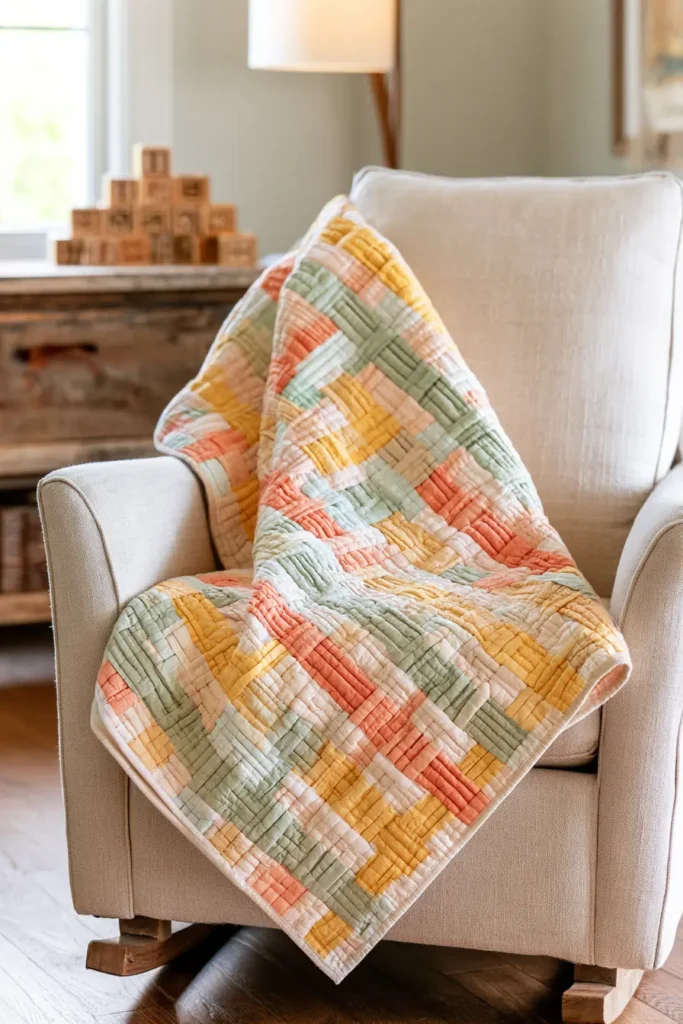
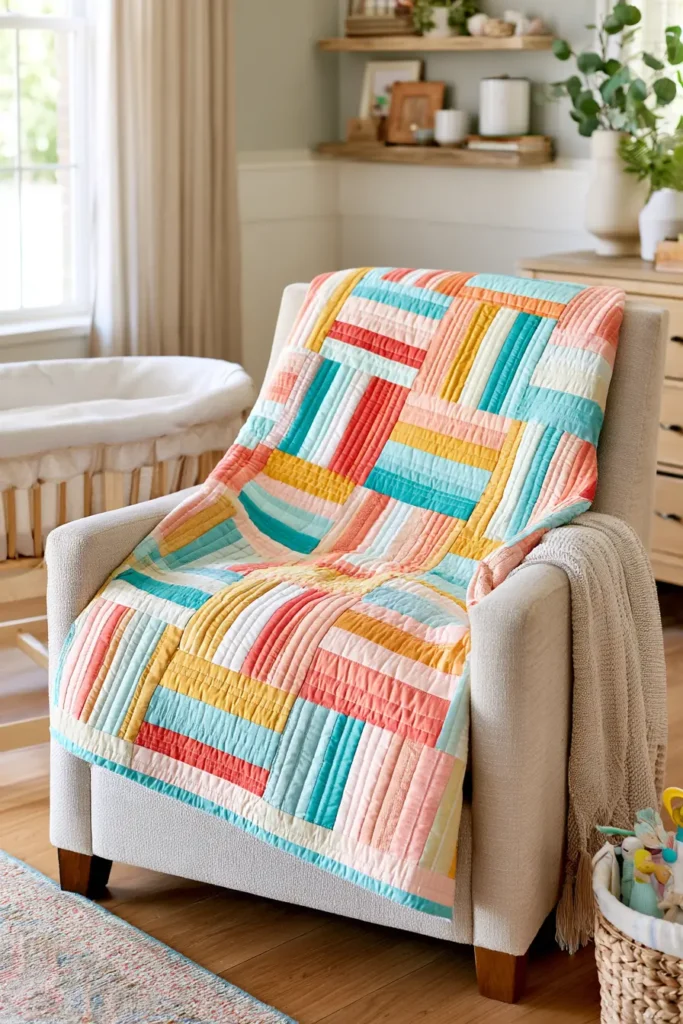
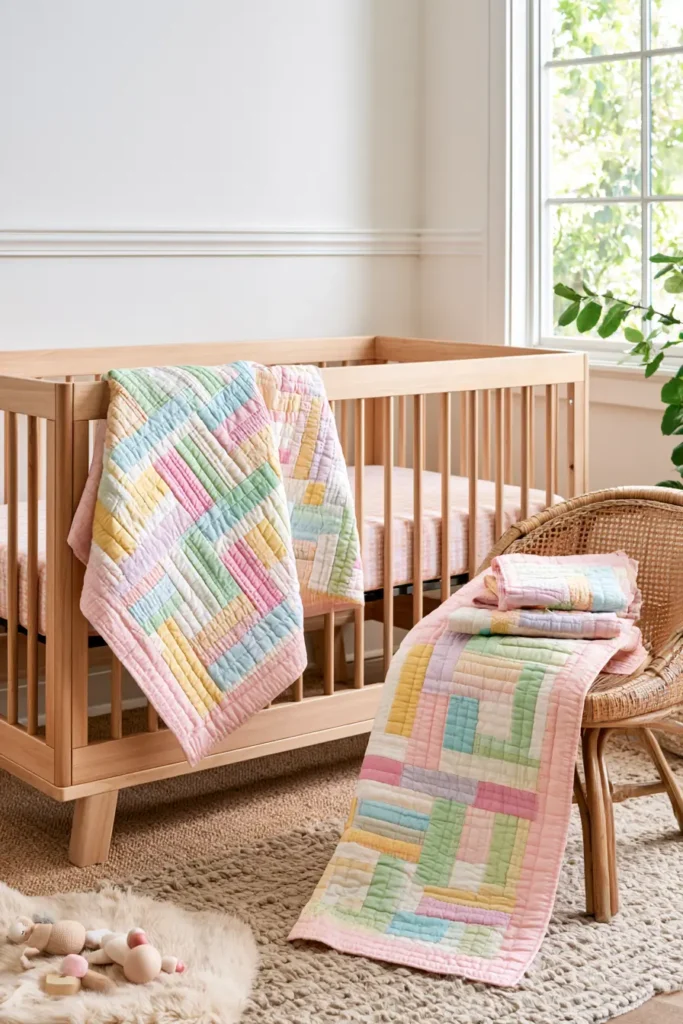
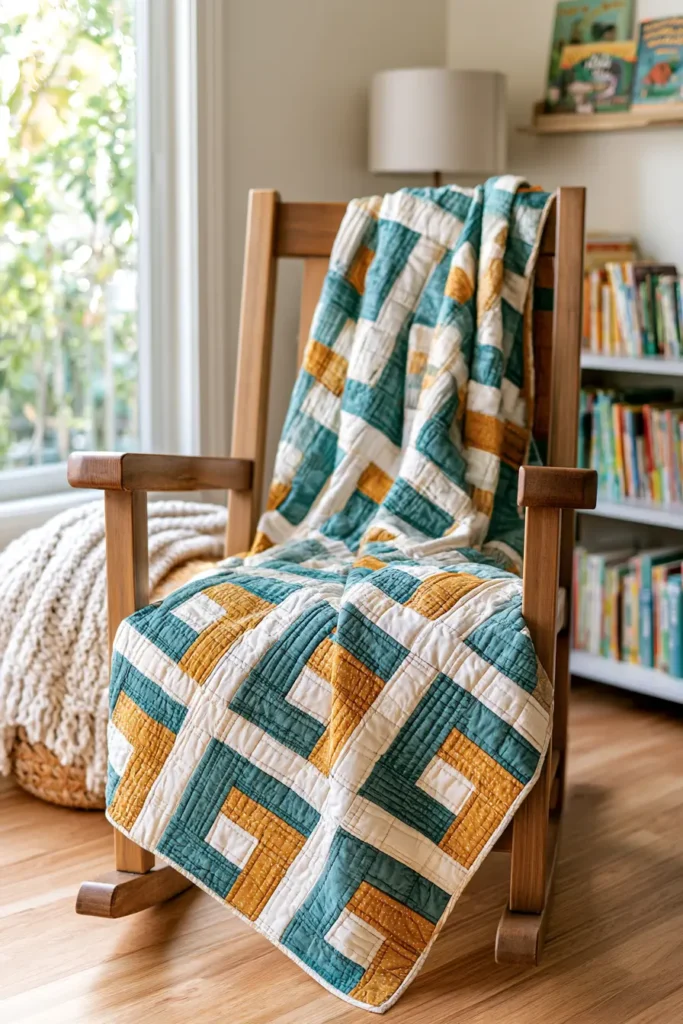
15. Ombre Rail Fence Quilt for Beautiful Color Transitions
An ombre quilt shifts gradually from pale to deep across its surface, and it’s one of the most striking things you can do with simple patchwork. Applied to a rail fence, it gives you the woven basket-weave texture and a flowing color transition running down the quilt – one row palest at the top, deepening steadily to the richest shade at the bottom.
There’s a genuine design problem to solve first, though, and it’s worth understanding before you buy fabric.
The Ombre Problem – and the Fix
The rail fence weave depends on value contrast within each block. Meanwhile, the gradient changes the value across the quilt.
Those two things fight each other. If every block is made from three shades taken from the same point in the gradient, the blocks at the pale end have no internal contrast, the blocks at the deep end have none either, and the weave disappears at both extremes – leaving a nice piece of shaded fabric with no visible pattern.
The fix is a constant light rail. Every block in the quilt uses the same cream or white strip down its center, with the two outer rails cut from whichever gradient shade that row calls for. The cream stays put while the color darkens around it, so every single block keeps strong internal contrast no matter where it sits in the gradient. The weave reads at the top of the quilt and at the bottom equally well.
Design Inspirations – Digitally Modified Images. Texture and color may vary from the actual product.
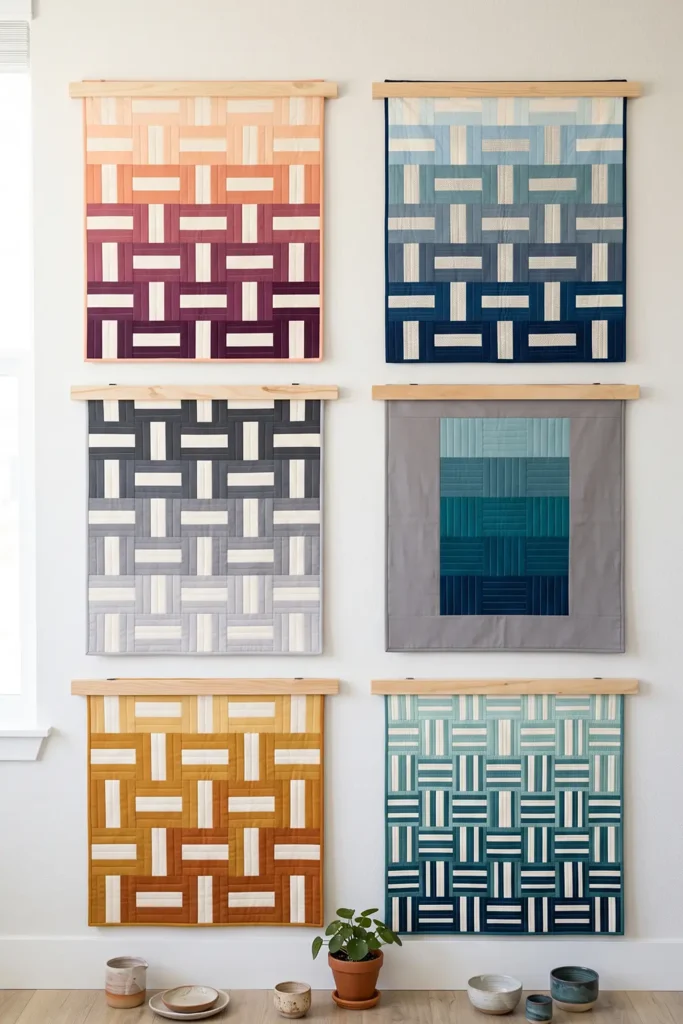
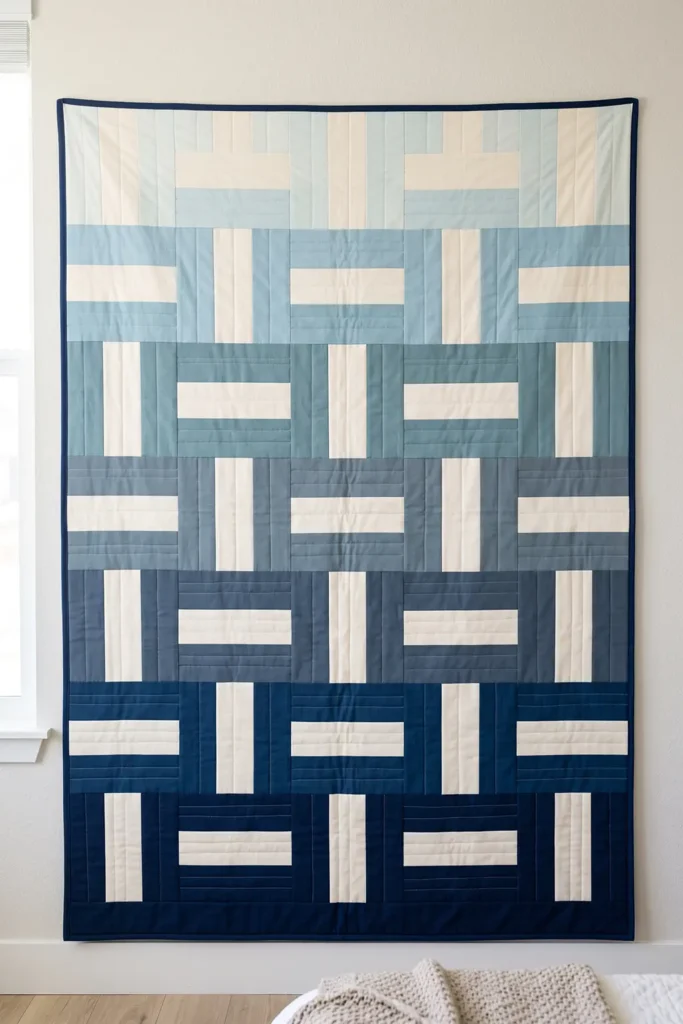
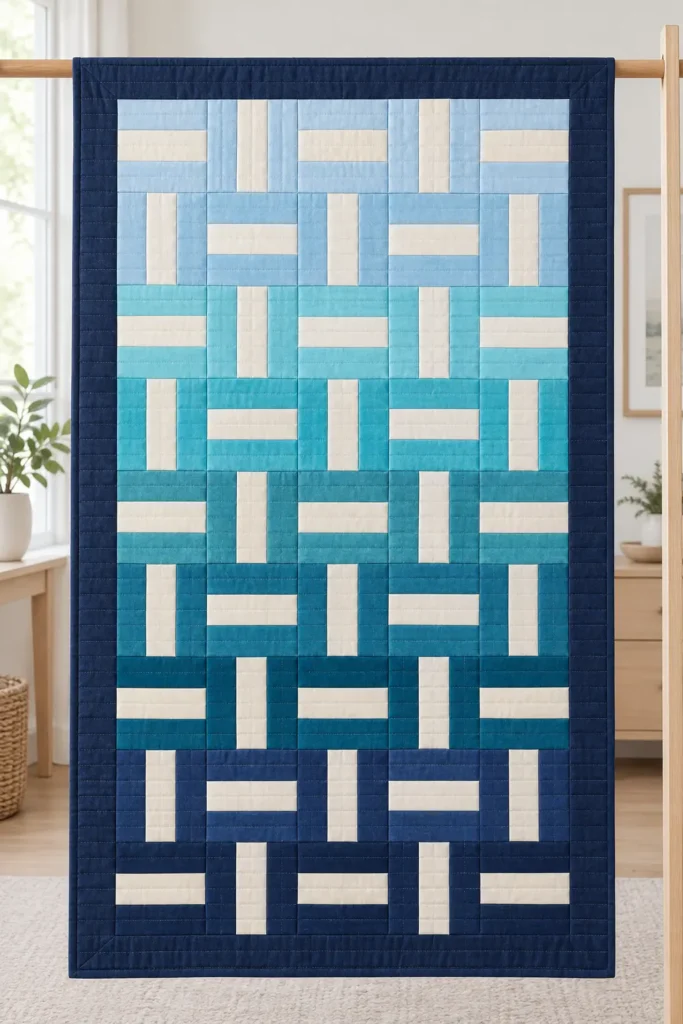
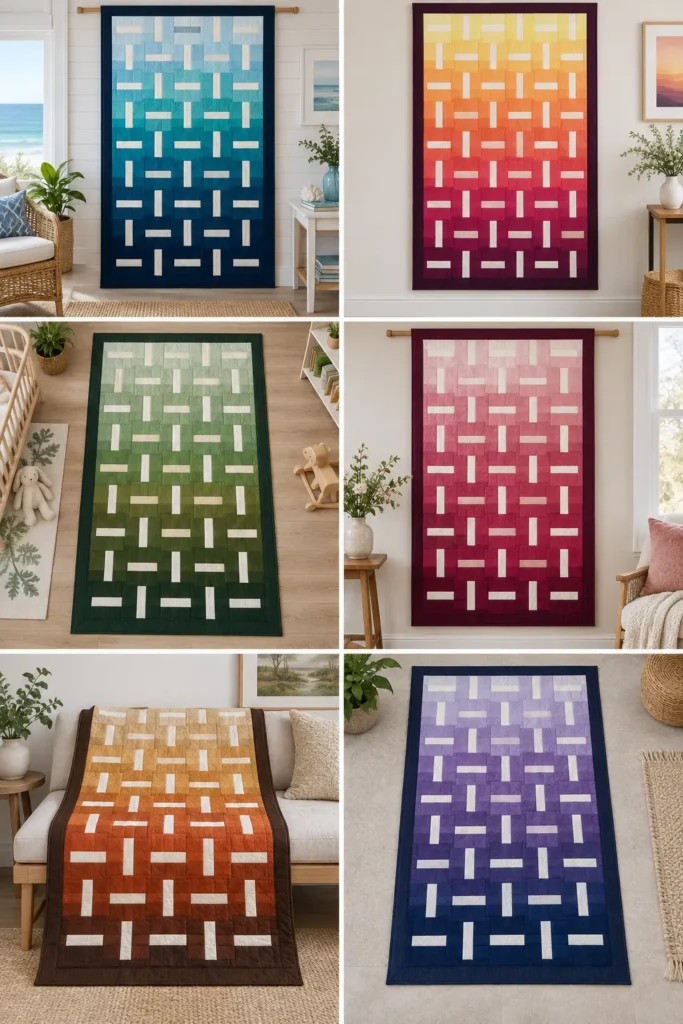
A Useful Side Effect: No Upside-Down Blocks
Because both outer rails in each block come from the same gradient shade, the block is genuinely symmetrical – shade, cream, shade.
That means it reads identically whichever way up it sits. Every other layout in this collection needs a rotation check to catch blocks turned 180 degrees; this one doesn’t. It’s the most forgiving version here at the layout stage, which is a welcome trade for the extra care needed when choosing fabric.
A Little Background: Shading in Quilts
Ombre comes from the French ombré, meaning shaded, and grading color from light to dark is one of the oldest ideas in textile design – it turns up in dip-dyed cloth, gradient-dyed yarn, and graduated weaving across many cultures.
Quilters took the idea up seriously in the colorwash and watercolor quilts that became popular in the late twentieth century, where hundreds of small squares were sorted purely by value and arranged so the light flowed across the surface. Those quilts made the point that value, not color, does most of the visual work in patchwork – which is exactly the principle this section depends on.
How the Block Works
- Three strips cut 2½ inches wide: a gradient shade, a cream, and the same gradient shade again
- Joined with ¼-inch seams, the set measures exactly 6½ inches wide
- Cut across the set at 6½-inch intervals. Each section is a 6½-inch unfinished block, finishing at 6 inches in the quilt
Each strip set makes one row of the quilt. Set one is your palest shade, set nine your deepest, and the rows are laid in that order down the quilt.
Finished Size
- Block: 6 inches finished (6½ inches unfinished)
- Center panel: 5 blocks across × 9 down = 45 blocks, measuring 30½ × 54½ inches unfinished
- Border: 3 inches finished all around
- Quilt top: 36½ × 60½ inches unfinished
- Nominal design size: 36 × 60 inches
- Actual bound size: roughly 36-36½ × 60-60½ inches before washing. Expect a little shrinkage in the first wash
- Skill level: true beginner to sew; fabric selection needs the most thought
- Core techniques: strip sets, straight cutting, ordered row assembly, borders, binding
Materials Needed
- Gradient fabrics: nine shades running from palest to deepest, ¼ yard of each (about 2¼ yards total). You need two strips of each shade at 2½ inches. An ombre-designed jelly roll works well if it holds two full width-of-fabric strips in each of nine shades. Otherwise, nine coordinated ¼-yard cuts are the simplest route. Avoid fat quarters here – at roughly 18 × 21 inches they’re far too short for the continuous strips this method needs
- Constant light fabric: ¾ yard of cream or white, cut into 9 strips at 2½ inches – one for every set. Nine strips need exactly 22½ inches, so ⅝ yard leaves nothing for straightening the cut edge
- Border fabric: 1¾ yards, cut lengthwise into four strips 3½ inches wide × about 63 inches long, so the borders need no piecing. Your deepest gradient shade makes the best border, anchoring the dark end of the transition
- Backing: 3¾ yards of standard-width fabric left unwashed (4 yards if you plan to prewash it), cut into two equal lengths and seamed along their long edges; or 2 yards of 108-inch wide backing unwashed, 2¼ yards if prewashing
- Batting: low-loft cotton, cut to match your backing – at least 42 × 66 inches, and never larger than the backing
- Binding: ½ yard, cut into 6 strips at 2½ inches
- Thread: neutral cotton
- Sewing machine, rotary cutter, cutting mat, quilting ruler, pins or clips, iron
- Curved safety pins for basting, or basting spray
Beginner tip: don’t prewash precut strips – pinked edges fray and 2½-inch strips distort. Keep everything consistent: if the strips are unwashed, leave the border, binding, and backing unwashed too, so the whole quilt shrinks together. Test a scrap of your deepest shade for colorfastness and use a color catcher in the first wash, since a dark dye bleeding onto a pale gradient would be genuinely ruinous.
Choosing Your Gradient
This is where the whole quilt is won or lost, and it takes more thought than any other section here.
You need nine shades with even steps between them. Lay them in order, stand back, and look for any place where two neighbors seem almost identical, or where one jump feels bigger than the rest. Either fault shows badly in the finished quilt – a stalled gradient reads as a mistake rather than a design.
Photograph the row and convert it to black and white. Color can disguise an uneven gradient; grayscale can’t. If the strip of nine shades steps smoothly from white to near-black in the grayscale image, your gradient will flow.
Palettes that work well:
- Ocean: pale sky through aqua and teal to deep navy
- Sunset: butter yellow through apricot and coral to deep plum
- Forest: palest sage through olive and moss to dark pine
- Berry: blush through rose and raspberry to deep wine
- Warm earth: cream through sand and rust to chocolate
Keep the center rail constant and genuinely light – a cream or soft white that stays lighter than every one of your nine shades, including the palest. If your lightest gradient shade is nearly as pale as your cream, the top rows will lose their weave.
Cutting Measurements
- Strip sets: 9 sets, one per gradient shade. Each is shade, cream, same shade – two gradient strips and one cream. Each set measures 6½ inches wide × about 40 inches long once selvages are removed
- Blocks: cut 6½-inch squares across each set – up to six per set. You need five blocks from each set, so one spare per row
- Side borders: two strips at 3½ × 54½ inches
- End borders: two strips at 3½ × 36½ inches
- Backing and batting: matching pieces, at least 42 × 66 inches
- Binding: six strips, 2½ inches × width of fabric
Step-by-Step Guide
Step 1 – Order and test your gradient. Lay your nine shades in sequence from palest to deepest, with the cream beside them. Photograph the row and convert it to black and white. Check two things: that the steps are even, and that the cream reads clearly lighter than every shade including the palest. Fix any problem now – once the sets are sewn, the gradient is locked in.
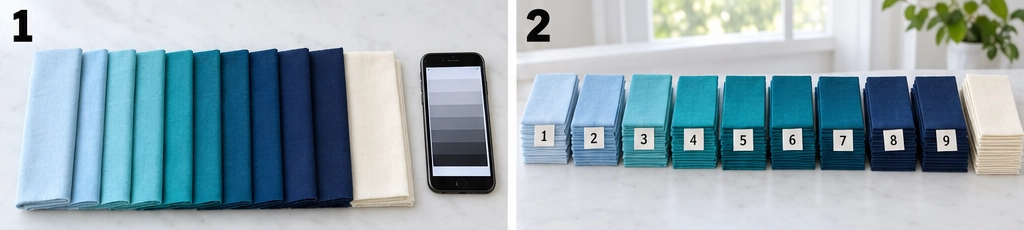
Step 2 – Number your shades. Label them 1 to 9, palest to deepest, with a pin and a paper tag or a note on each stack. From here on, everything depends on knowing which shade is which, and once they’re cut into strips the middle shades become genuinely difficult to tell apart.
Step 3 – Cut your strips. From each gradient shade, cut two strips at 2½ inches. From the cream, cut nine strips at 2½ inches. Keep each gradient shade with its number.
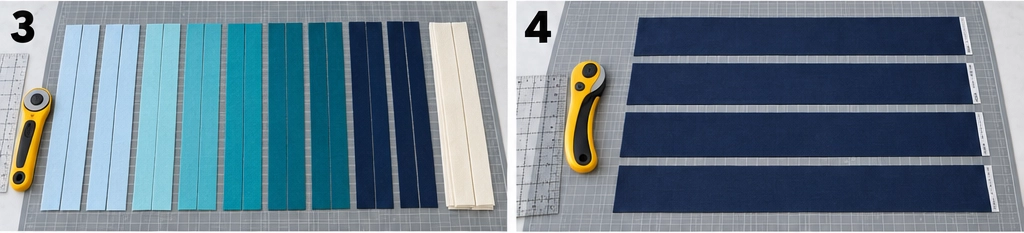
Step 4 – Cut the border strips. From your 1¾ yards of border fabric, cut four strips 3½ inches wide, parallel to the selvages, using the full length of the cut. Cutting lengthwise means no piecing and no join to disguise. Leave them long for now and set them aside until Step 15.
Step 5 – Check the yield. Each set must give at least five 6½-inch blocks, which means at least 33½ inches of usable length once you’ve allowed about an inch for squaring one end. A sixth block is a bonus, not a requirement.
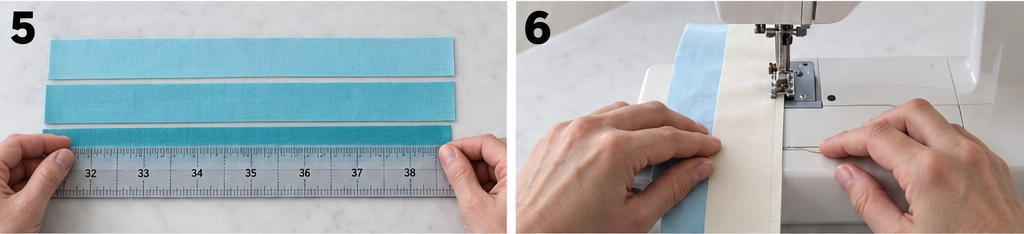
Measure the shortest strip in each trio – that’s what limits the whole set – and check it clears 33½ inches. If one falls short, or is damaged or badly distorted, replace it with a longer strip before you sew the set. Don’t try to make up the difference with another short piece – the set is only ever as long as its shortest rail.
Step 6 – Sew strip set 1. Take shade 1 and one cream. Sew a shade strip to one long edge of the cream with a ¼-inch seam, then sew the second shade strip to the other edge – but start that second seam from the opposite end of the set. Sewing both long seams in the same direction encourages a strip set to bow; alternating keeps it flat.
Step 7 – Press the set. Press both seam allowances away from the cream center, toward the colored rails on either side. This matters more than usual here – a colored seam allowance behind a pale cream strip will shadow through, and it would show right down the quilt. Press from the back first, then the front, without stretching.
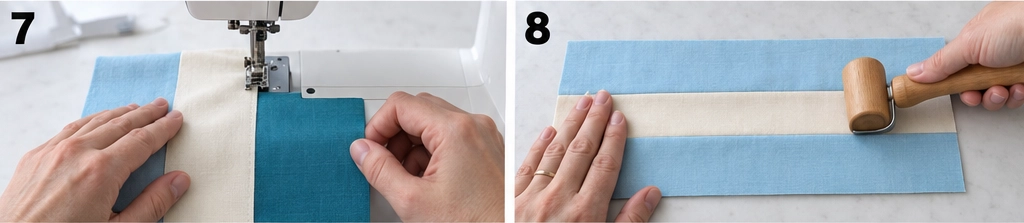
Step 8 – Check the width and label it. Measure across the pressed set: it should be exactly 6½ inches. If it measures less, your seam allowance is too wide; if more, too narrow. Correct it before continuing. Then pin a label to the set marked “Row 1” – this is the step that keeps the gradient in order.
Step 9 – Make sets 2 through 9. Repeat steps 6 to 8 for each shade in turn, labeling each set with its row number as you finish it. Keep the labeled sets in order in a stack.
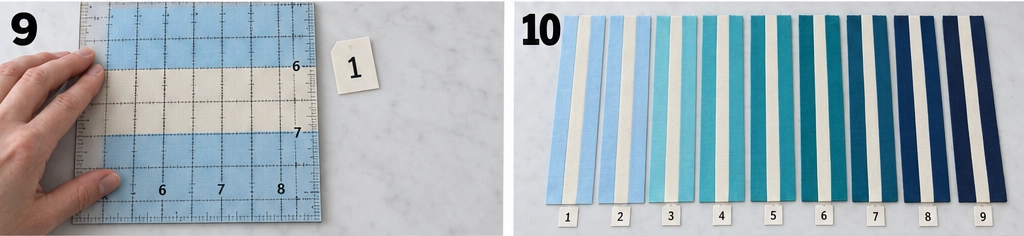
Step 10 – Square one end and cut the first block. Take set 1, trim a clean edge at one end at a true right angle to the long seams, then cut one 6½-inch section. Check it measures 6½ inches in both directions with four square corners. A bowed set or an angled first cut gives a parallelogram, and it’s better to know now.
Step 11 – Cut all the blocks, keeping them in row order. Square one end of each of the remaining eight sets before cutting from it, exactly as you did in Step 10 – each set needs its own true right-angle starting edge. Then cut five or six blocks from each, and keep each set’s blocks in their own labeled pile. Nine small stacks, each tagged with its row number. Once the blocks are cut, adjacent gradient shades are surprisingly hard to distinguish, and a block filed in the wrong pile puts a visible jump in the finished gradient.
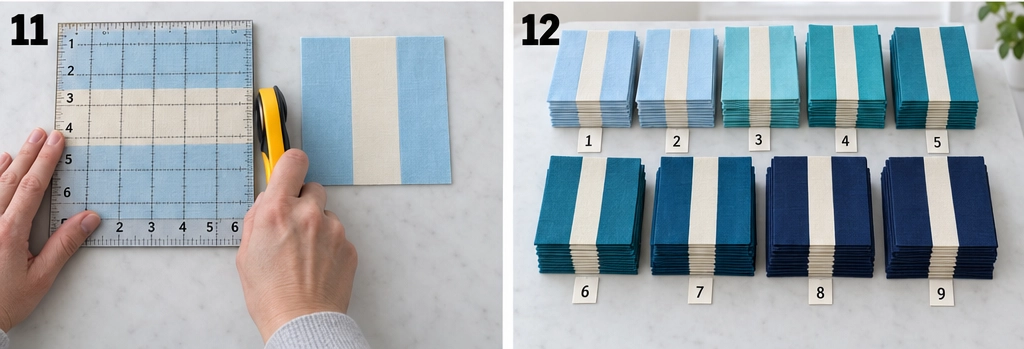
Step 12 – Lay out the quilt. Place five blocks from set 1 across the top as row one, five from set 2 as row two, and so on down to set 9 at the bottom. Within each row, alternate the direction: horizontal, vertical, horizontal, vertical, horizontal. Start row two with a vertical block, row three with a horizontal, and so on, so the orientations checkerboard down the quilt.
There’s no need to check for upside-down blocks in this design – because both outer rails are the same shade, the blocks are symmetrical and read the same either way up. All you’re checking is that each row uses the right shade and the orientations alternate.
Step 13 – Stand back and check the flow. Look at the whole layout from several feet away, and if you can, photograph it and convert the picture to black and white again. Any stalled or jumping step in the gradient will be obvious. If two rows look too similar, this is the last easy moment to swap a shade.
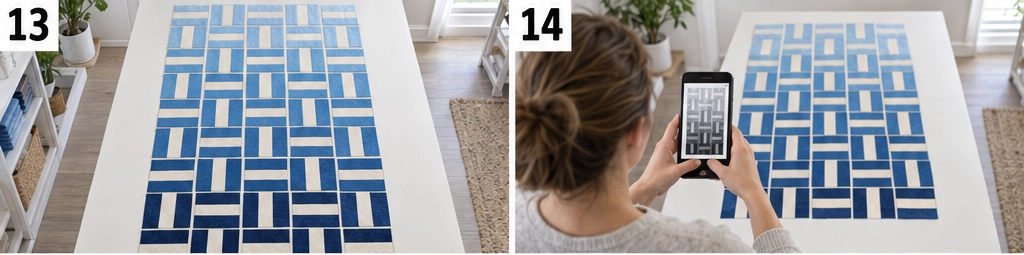
Step 14 – Sew the rows and join them. Sew each row of five blocks with a ¼-inch seam – nine rows, each measuring 30½ × 6½ inches. Press the block-joining seam allowances of odd-numbered rows to the right and even-numbered rows to the left, so they nest.
Then join the nine rows in gradient order, pinning at all four block boundaries along each row seam. Press the row-to-row seams open to reduce bulk, or consistently in one direction. The center panel should measure 30½ × 54½ inches.
Step 15 – Measure and add the side borders. Measure the panel lengthwise through its middle, not along the edges – it should be about 54½ inches. Trim two border strips to 3½ inches by that measurement and sew one to each long side, pinning at the ends, center, and quarter points. Press the seams toward the border. The panel now measures 36½ × 54½ inches.
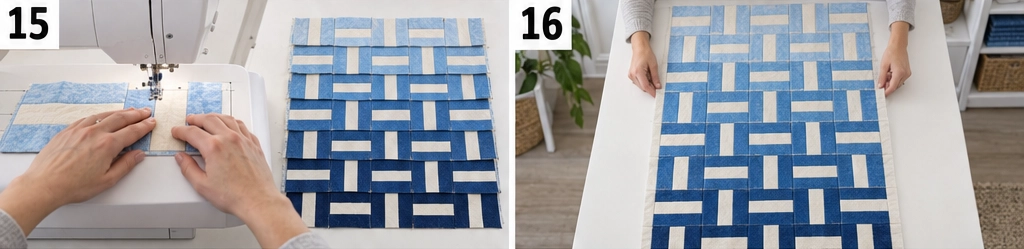
Step 16 – Measure and add the end borders. Measure across the middle, including the side borders – about 36½ inches. Trim the remaining two strips to 3½ inches by that measurement, sew one to each end, and press toward the border. The quilt top should measure 36½ × 60½ inches.
Step 17 – Prepare the backing and batting. Using standard-width fabric: if unwashed, cut the 3¾ yards into two equal lengths of about 67½ inches; if you prewashed it, measure what you actually have and divide that in two. Trim the selvages, sew the pieces together along their long edges, and press the seam open. Using 108-inch wide backing: square one end and cut a single panel.
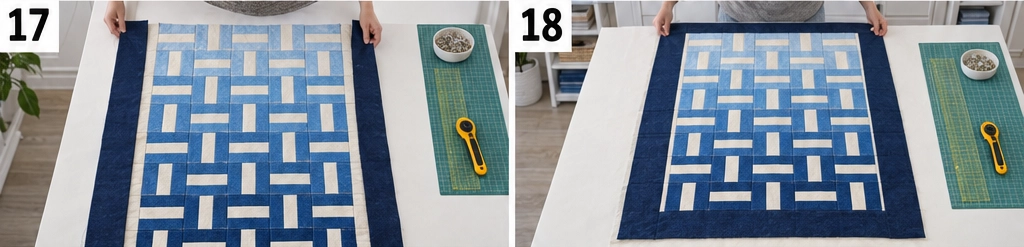
Either way, the panel should measure at least 42 × 66 inches, which leaves about 2¾ inches beyond every edge of the top – make it 43 × 67 inches if you’d prefer a full 3 inches all round – then trim your batting to match the backing exactly, so it can’t extend beyond it and drag as you quilt.
Step 18 – Make the quilt sandwich. Lay the backing wrong side up, center the batting on it, then the quilt top right side up. Smooth everything from the center outward and baste with curved safety pins or basting spray.
Step 19 – Quilt it. Keep the quilting even across the whole quilt – an all-over grid, straight lines, or stitching in the ditch. Resist the temptation to quilt the dark end more densely than the pale end; uneven density will make the quilt hang unevenly and undermine the smooth transition you worked for.
Check your batting packaging for its maximum quilting distance and stay within it.
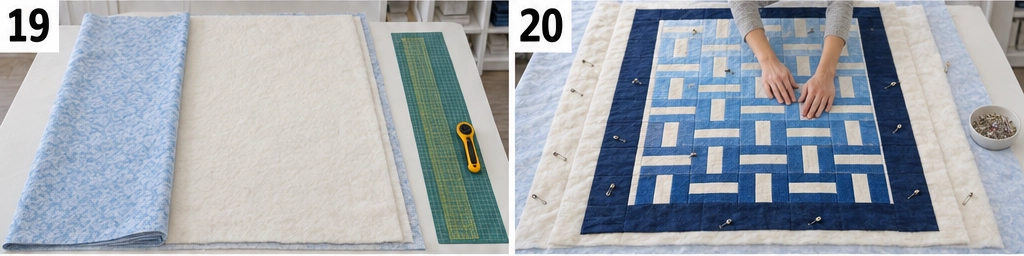
Step 20 – Trim and square up. Trim the excess batting and backing level with the edge of the quilt top, squaring the corners. Quilting draws the layers up slightly, so the top may finish just under 36½ × 60½ inches, which is normal. Trim only the excess batting and backing – that outer ¼ inch of the top is the binding’s seam allowance.
Step 21 – Make and attach the binding. Take it in order:
- Cut six strips at 2½ inches × width of fabric, then join them end to end with diagonal seams – lay two strip ends at right angles, right sides together, sew corner to corner, trim to ¼ inch, and press that seam open.
- Press the whole strip in half lengthwise, wrong sides together.
- Start partway along one side, not at a corner, leaving the first 8-10 inches unsewn as a tail.
- Sew the binding to the front with a ¼-inch seam, stopping ¼ inch before each corner.
- Miter each corner: fold the binding straight up into a 45-degree diagonal, fold it back down level with the next edge, and resume sewing from the fold.
- Join the two tails. Overlap them by 2½ inches – the same as the binding width – and trim the excess. Open both ends, place them right sides together at right angles, sew diagonally across the corner, trim that seam to ¼ inch, press it open, then check the binding lies flat before closing the final section.
- Fold the binding to the back and stitch it down, folding the mitered corners neatly.
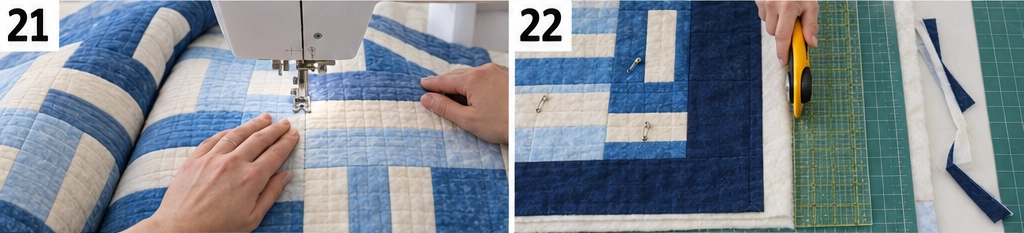
Step 22 – Wash and finish. Before washing, the quilt should measure roughly 36-36½ × 60-60½ inches. Wash gently on cold with a color catcher – essential on a quilt with pale rows and deep dyes together – and tumble dry low.
Once it’s dry, go over the whole quilt: check the binding is secure all the way round, look for skipped quilting stitches, snip any loose threads, and run your hands over it to find any basting pin you missed. A pin left in a finished quilt is easily done and worth ruling out before it goes anywhere.
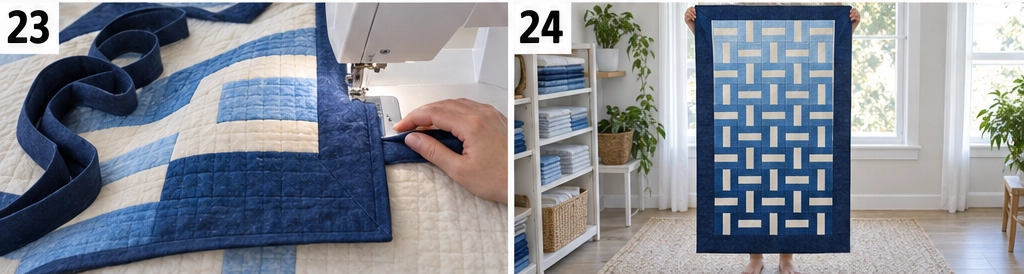
Assembly at a Glance
- Order nine shades palest to deepest; grayscale-test for even steps and check the cream is lighter than all of them.
- Number the shades 1 to 9 and label the stacks.
- Cut two strips of each shade and nine cream strips.
- Cut four 3½-inch border strips lengthwise; set aside.
- Check the yield (round down) – each set must give five usable blocks.
- Sew each set as shade, cream, same shade, second seam from the opposite end.
- Press both seams away from the cream center.
- Check 6½ inches wide, then label the set with its row number.
- Make all nine sets, labeled in order.
- Square one end; cut and check one block at 6½ inches square.
- Cut five or six blocks per set, keeping each set’s blocks in a labeled pile.
- Lay out 5 × 9, one set per row in gradient order, alternating orientation.
- Stand back and check the flow – grayscale-photograph it again.
- Sew rows of five; press odd right, even left; join in gradient order → 30½ × 54½.
- Measure through the middle; add side borders (3½ × 54½) → 36½ × 54½.
- Measure across the middle; add end borders (3½ × 36½) → 36½ × 60½.
- Prepare matching backing and batting, at least 42 × 66 inches.
- Layer and baste.
- Quilt evenly across the whole quilt.
- Trim batting and backing level with the top.
- Bind with six strips, diagonal joins and mitered corners.
- Wash cold with a color catcher → about 36 × 60 inches.
Beginner Tips for Success
- Grayscale-test the gradient before buying. Uneven steps are the one fault that ruins an ombre quilt, and color hides them.
- Keep the center rail constant and genuinely light – lighter than every gradient shade, including the palest.
- Number your shades and label every strip set with its row. Middle shades are very hard to tell apart once cut.
- Press both seams away from the cream; a colored allowance behind the pale rail would show down the whole quilt.
- No rotation check needed here – the symmetrical block reads the same either way up.
- Keep each set’s blocks in separate labeled piles so none strays into the wrong row.
- Quilt evenly across the quilt; don’t quilt the dark end more densely than the pale end.
- Use a color catcher – deep dyes bleeding onto pale rows would spoil the whole effect.
Other Sizes
Each strip set makes one row, and each block finishes at 6 inches. To resize, change the number of shades (rows) or the blocks per row – and remember each set gives up to six blocks, so a row wider than six needs two sets of that shade:
- Baby quilt: 5 across × 6 shades = 30 × 36 center → 36 × 42 inches with 3-inch borders (30 blocks, 6 sets)
- As written: 5 across × 9 shades = 30 × 54 center → 36 × 60 inches (45 blocks, 9 sets)
- Wider throw: 6 across × 9 shades = 36 × 54 center → 42 × 60 inches (54 blocks, 9 sets – but with no spare block per row, so check strip lengths carefully)
- Twin topper: 6 across × 12 shades = 36 × 72 center → 42 × 78 inches (72 blocks, 12 sets)
Recalculate borders, backing, batting, and binding for any size other than the one written here.
Styling It & Gift Ideas
An ombre quilt is a genuine statement piece, and it looks best where the whole surface is visible – spread across a bed, hung over a banister, or draped so the transition runs top to bottom rather than bunched. Keep the room around it simple; the gradient is doing plenty on its own.
Its striking, considered look makes it a memorable gift:
- A milestone gift – it reads as designed rather than simply made
- A gift in someone’s favorite color, graded from pale to deep, which feels genuinely personal
- A baby quilt in a soft six-shade gradient
- A wedding gift, where the flowing transition suits the occasion
Final Thoughts
An ombre rail fence gives you two effects at once – the woven texture of the block and a color transition flowing down the whole quilt. The trick that makes both work together is the constant cream rail: it holds the contrast steady while the color darkens around it, so the weave stays visible from the palest row to the deepest. Test your gradient in grayscale before you buy, number your shades, label every set with its row, and the sewing itself is as simple as any other quilt in this collection.
Other Design Inspirations – Digitally Modified Images. Texture and color may vary from the actual product.
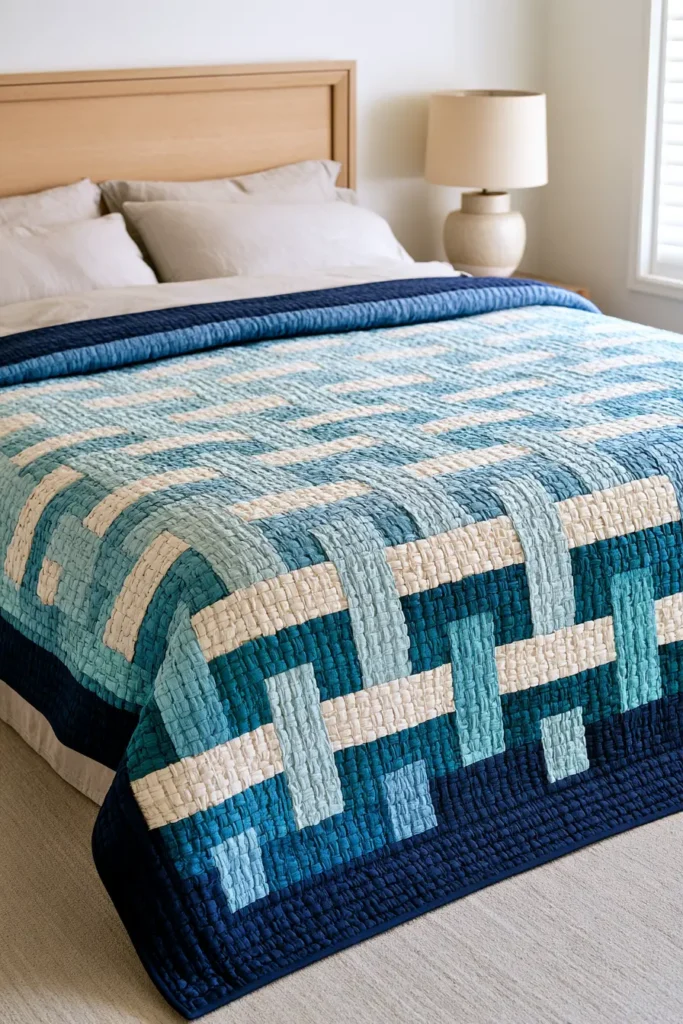
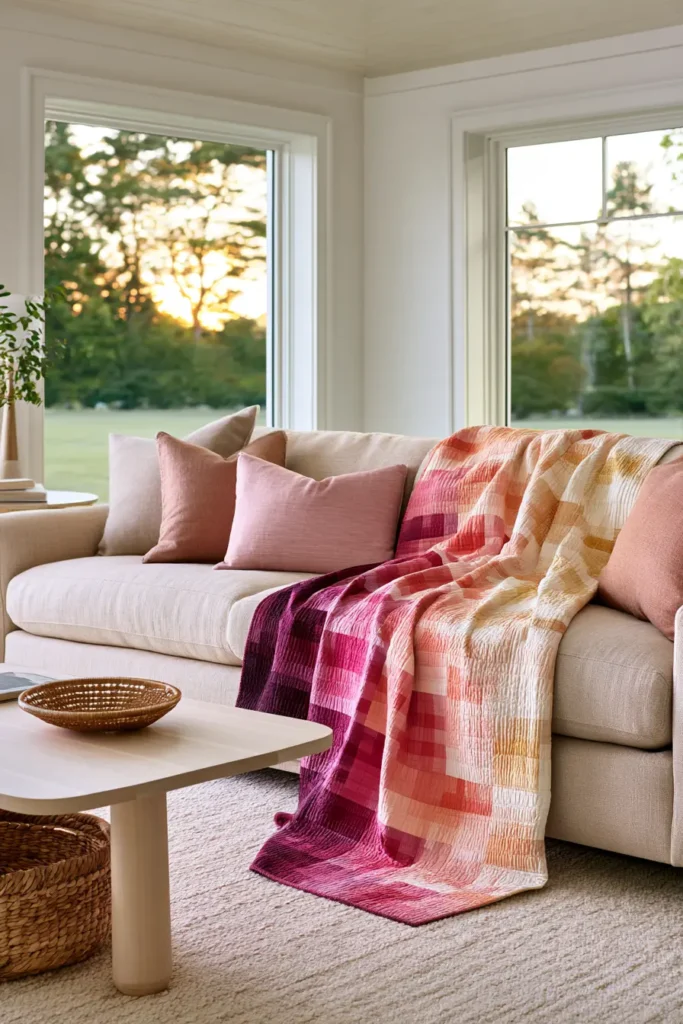
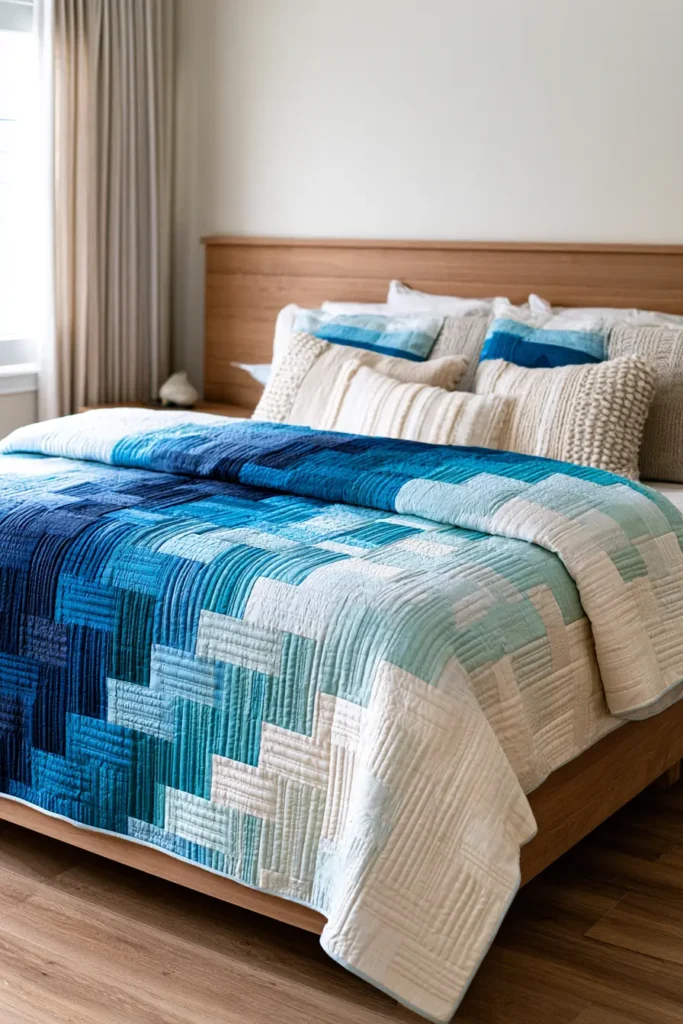
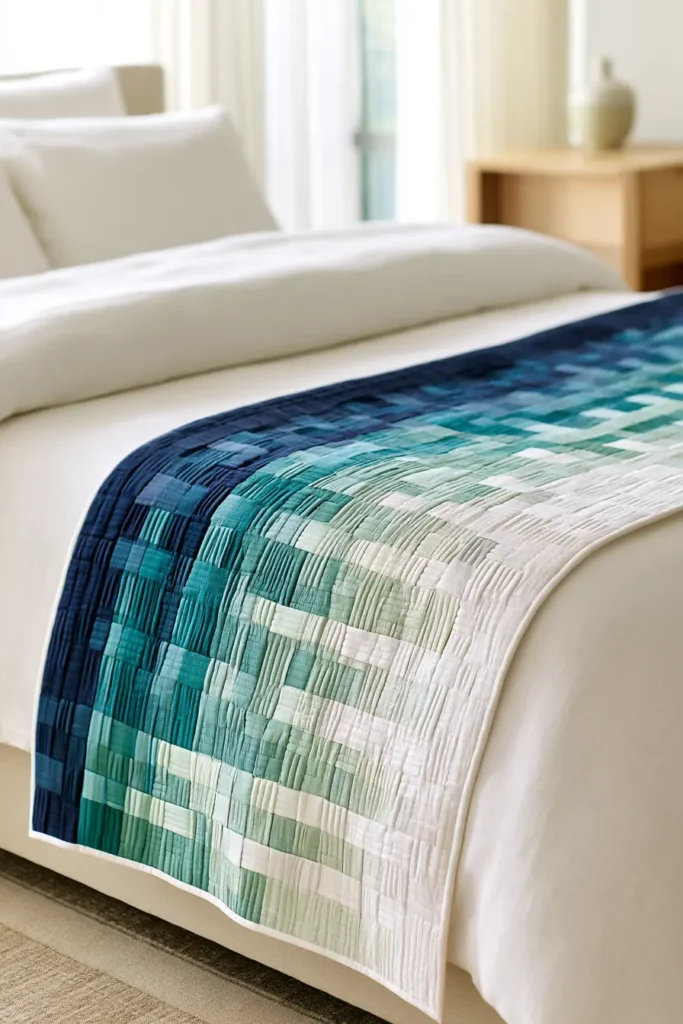
Conclusion
The real appeal of a rail fence quilt is how much it gives back for how little it asks. Nothing in the construction can go badly wrong, yet the finished quilt has a woven, interlocking texture that looks genuinely accomplished. It’s the pattern that has taught more people to quilt than almost any other, precisely because it rewards a beginner with a proper result on the first attempt – and it’s the one experienced quilters keep coming back to when they want something restful to sew or a fast, reliable gift.
The best Rail Fence Quilt Pattern Ideas match your time and your fabric. Start with the classic three-strip version if this is your first quilt, or the four-strip for a bolder weave. Choose basket weave or straight furrows for a traditional look, zigzag or on-point for more movement, and two-color, ombre, or neutral for a modern, calm feel. Reach for a jelly roll when you want speed, flannel when you want warmth, and the table runner or baby quilt when you need a handmade gift by the weekend. Whichever you pick, the same simple block is doing the work – and that’s exactly what makes rail fence such a satisfying place to begin.

