
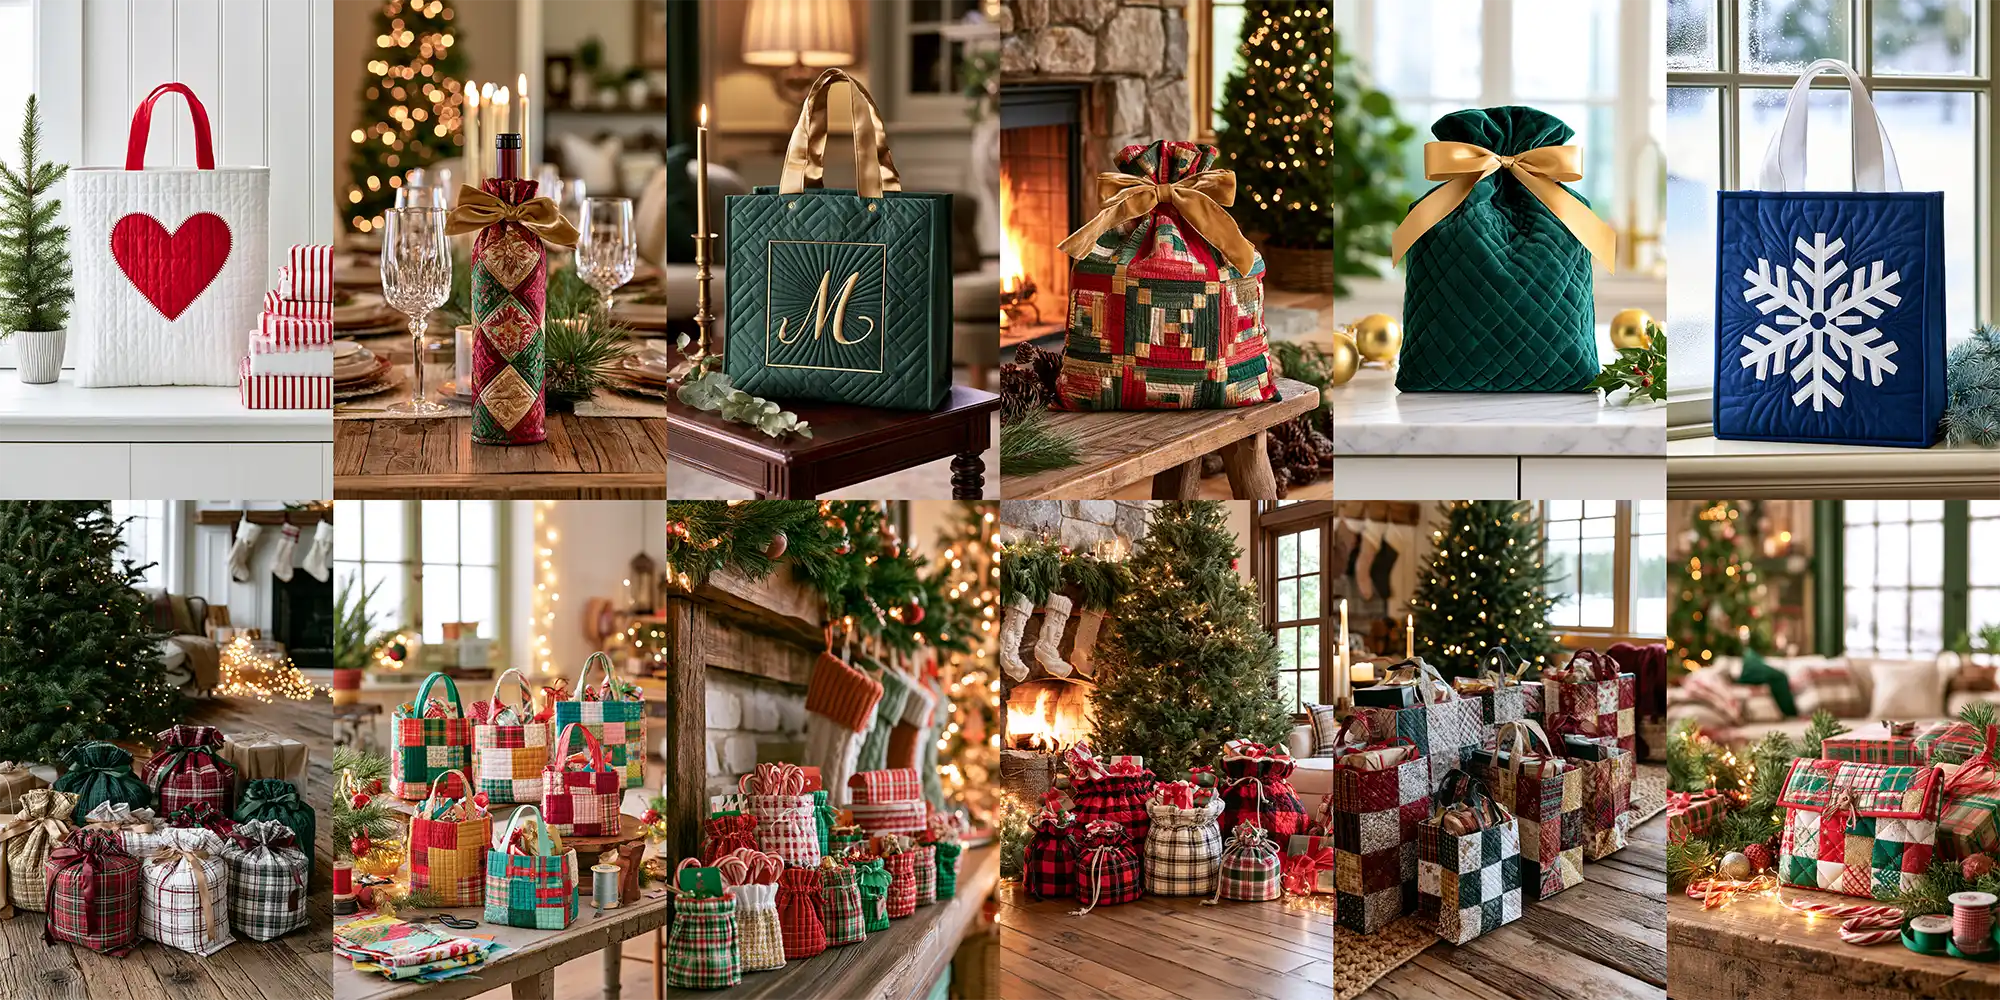
15 Quilted Christmas Gift Bag Ideas to Sew for a Handmade Holiday
Wrapping paper gets torn open in about four seconds, and then it’s in the landfill. A quilted gift bag does the same job, looks considerably better under a tree, and comes back out of the closet year after year — which is why quilted Christmas gift bag ideas have become one of the most searched-for holiday sewing projects going. The concept is straightforward: two layers of fabric with batting sandwiched between, quilted together and stitched into a bag with a drawstring, a fold-over flap, or a simple tie closure.
The quilting adds structure, so the bag stands up on its own instead of slumping, and the batting gives it that soft, padded weight that makes even a modest present feel considered. Growing up in Dhaka around Nakshi Kantha work, I watched worn saris get layered and stitched into something new and better than what they started as — that instinct for turning fabric into a keepsake rather than a wrapper is exactly what these bags do.
Quilted Christmas Gift Bag Ideas
The fifteen designs below span the full range of skill levels, sizes, and holiday aesthetics. Some are built for speed — a jelly roll bag comes together in an evening when December has gotten away from you. Others, like a log cabin block or a hand-appliquéd snowflake panel, are the kind of project you settle into with a podcast on. There are pouches sized for stocking stuffers and jumbo Santa sacks for the awkward, boxy gifts nothing else fits; scrappy versions that clear out your leftover bin and velvet ones that read as genuinely luxurious.
Each entry covers the construction approach, the fabric weight that works best, and roughly what size to cut, so you can pick a style and start cutting rather than hunting for a pattern.
See also: Boho Quilt Tote Bag – Chic Jelly Roll Quilt Tote Bag – Japanese Quilted Bag Ideas – Stylish Quilted Tote Bag Patterns
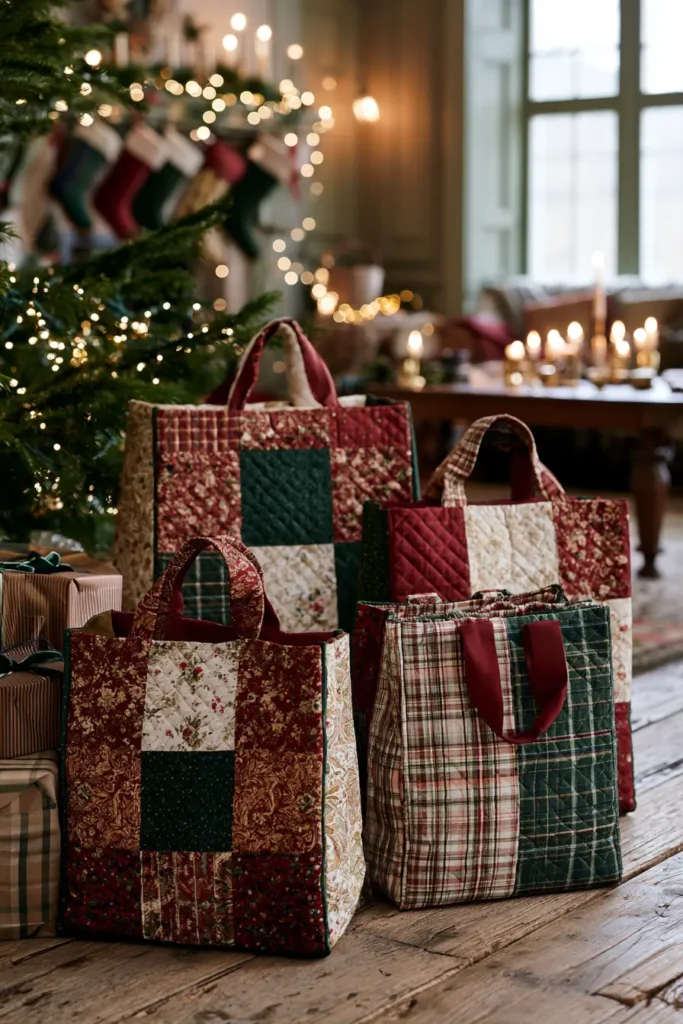
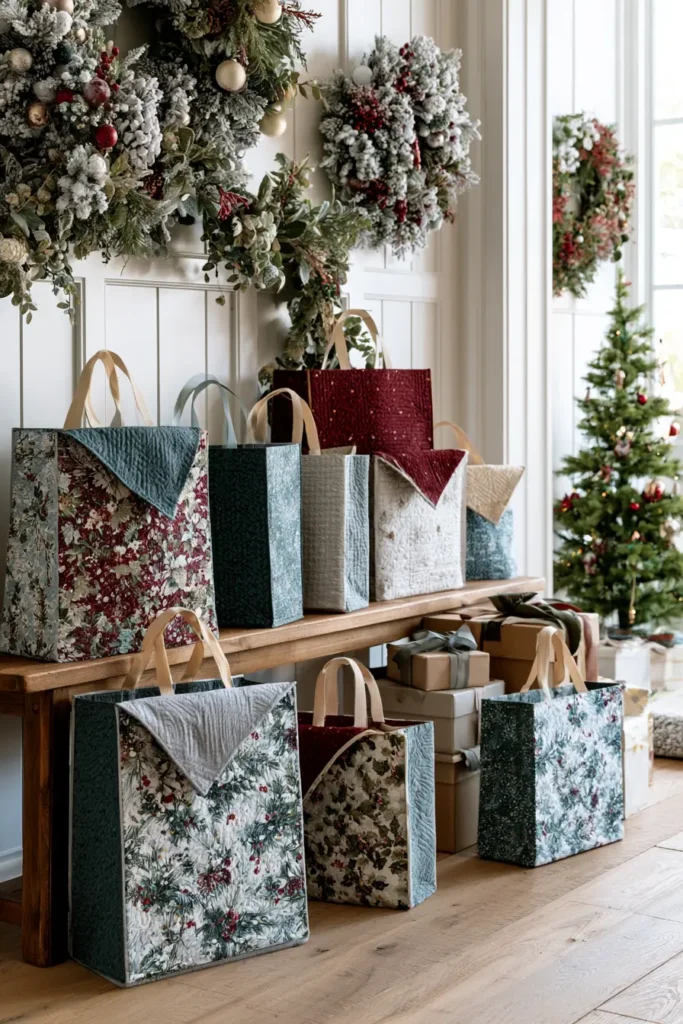
1. Classic Patchwork Quilted Christmas Gift Bags
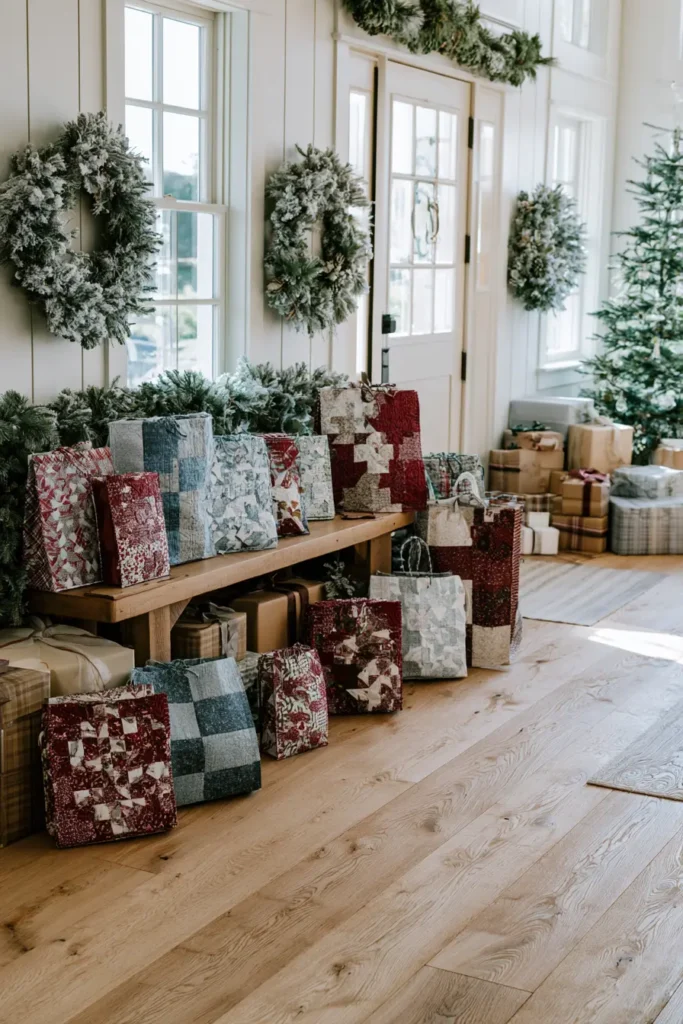
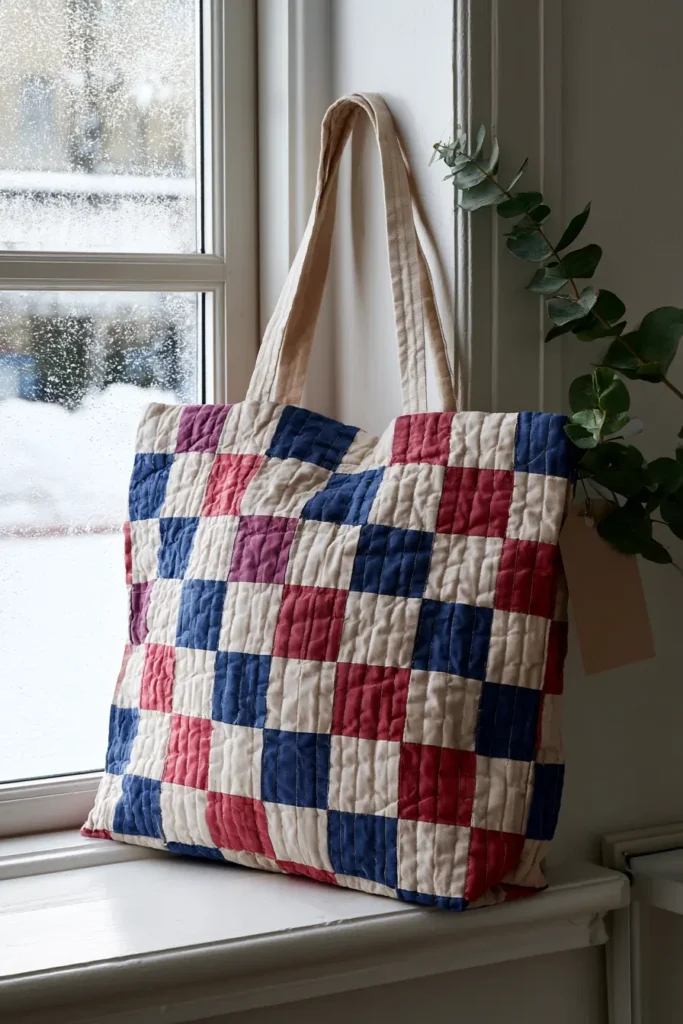
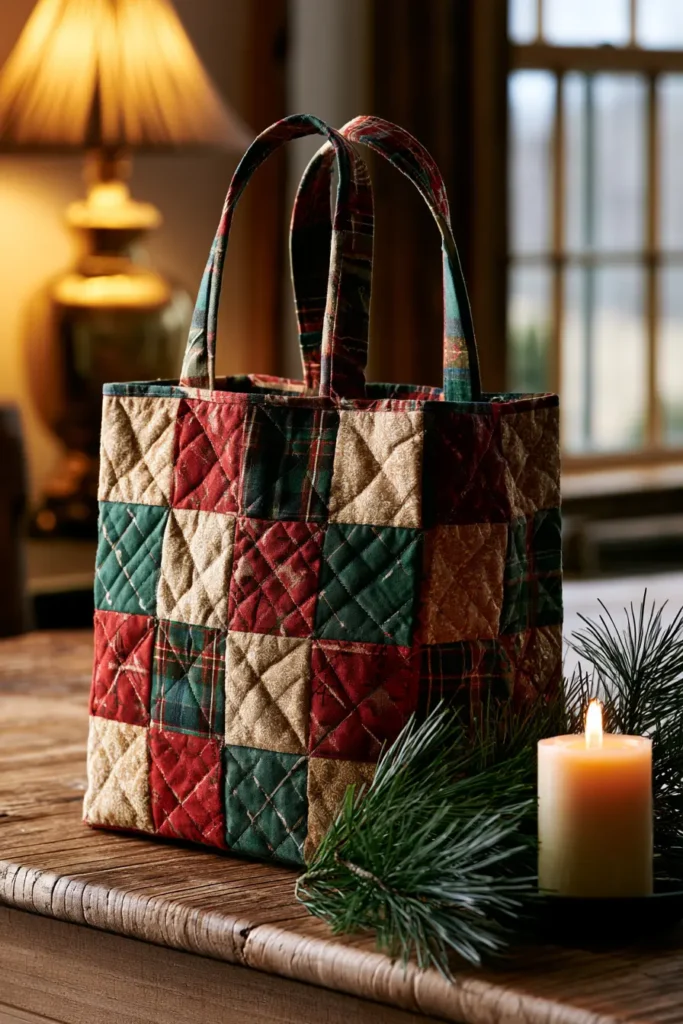
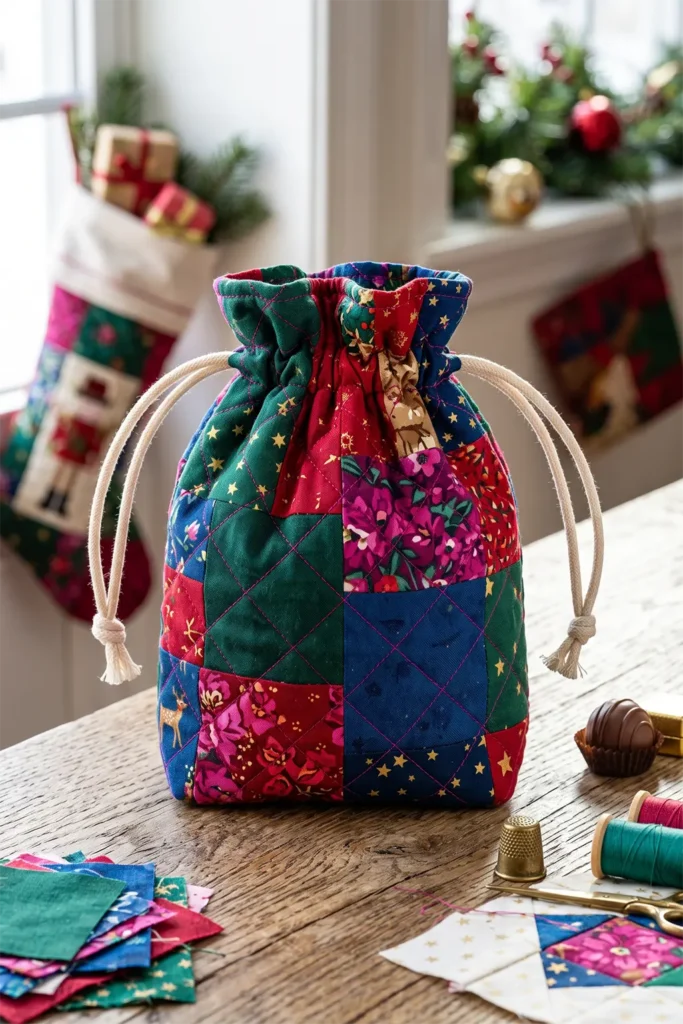
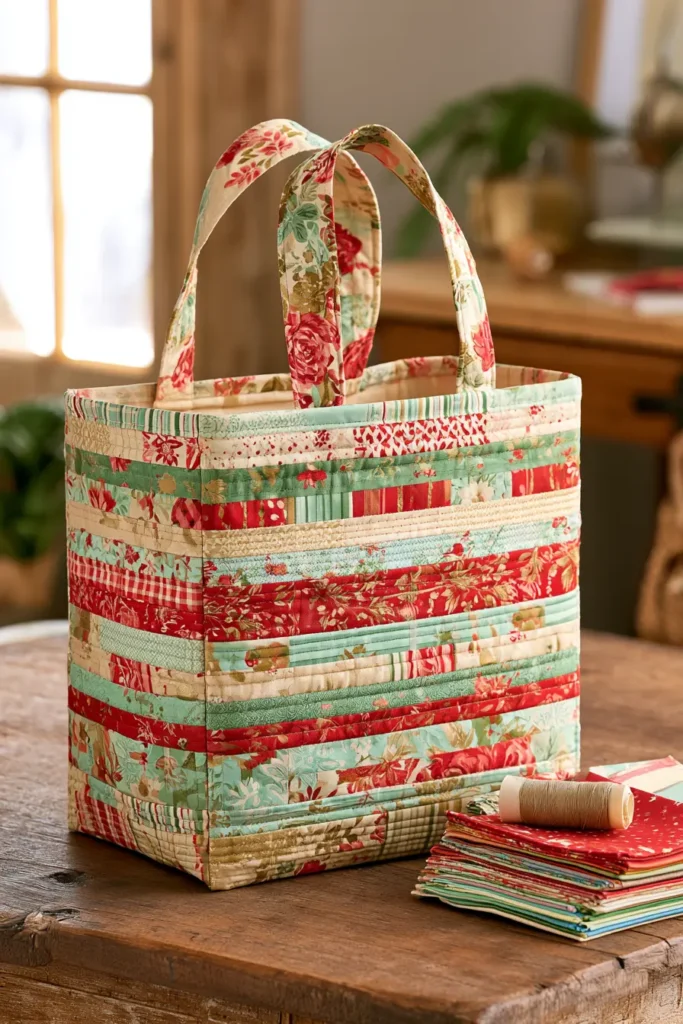
Patchwork is the oldest answer to the question of what to do with fabric too good to throw away, and a gift bag is one of the best small canvases for it. This version pieces a grid of 2½” squares into two panels, quilts them, and finishes the bag with a lining and boxed corners so it stands on its own under the tree.
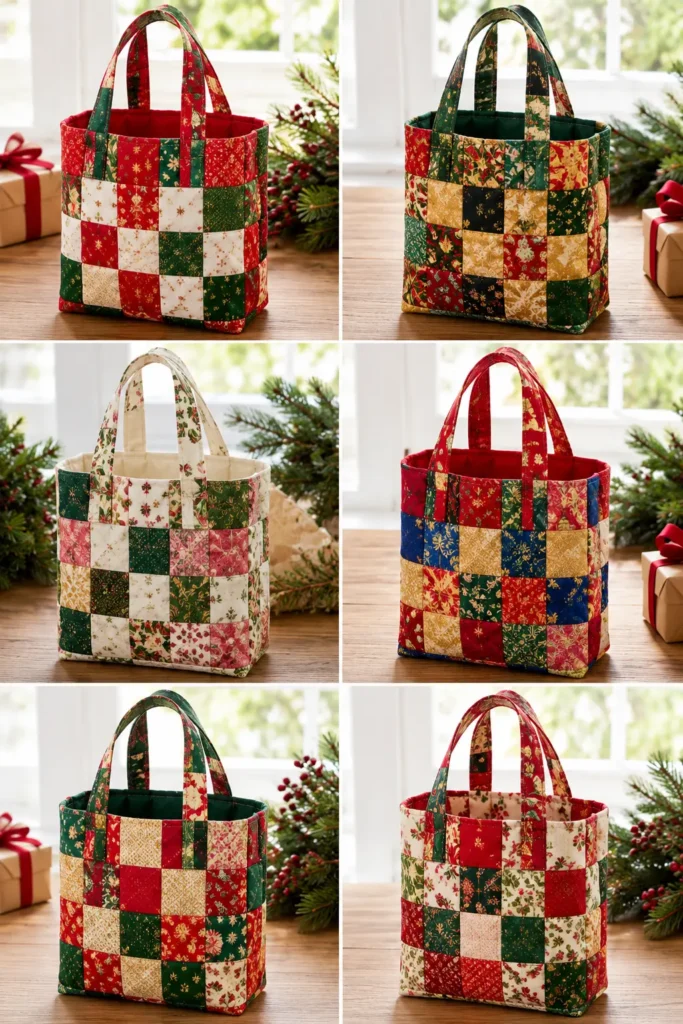
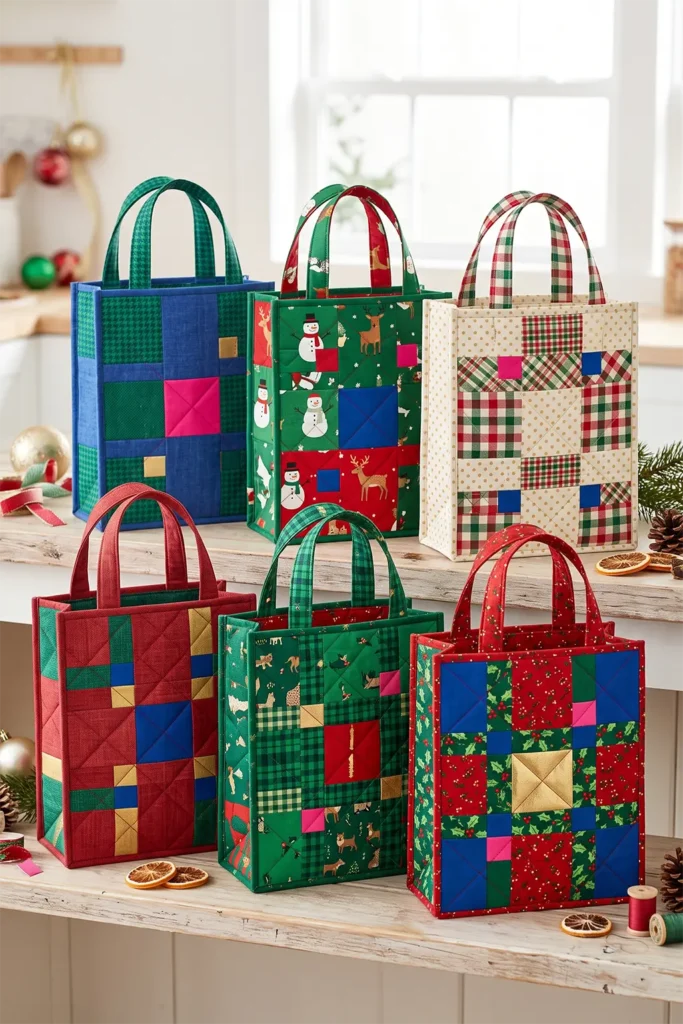
A note on color: the classic Christmas patchwork palette is red and green because of dye chemistry, not sentiment. Turkey red — a madder-based dye perfected in the 18th century through a notoriously smelly, multi-week process involving rancid oil and animal dung — was one of the only reds that wouldn’t fade or bleed in the wash. Quilters hoarded it. Pair it with a strong emerald, punch in gold, cobalt, and a shot of hot pink where you’d expect cream, and the grid stops looking like a fabric-shop sample and starts looking deliberate.
Finished size: approximately 7″ wide × 9½” tall × 3″ deep. Roomy enough for a candle and a jar of something, or a folded scarf.
Cutting List
Patchwork squares: 60 squares, 2½” × 2½” (30 per panel). A charm pack works perfectly — they come precut at exactly this size.
Batting or fusible fleece: 2 pieces, 11″ × 13″
Lining: 2 pieces, 10½” × 12½”
Handles: 2 strips, 2½” × 14″
Corner notches: 1½” squares, cut later
Seam allowance is ¼” throughout unless stated otherwise.
Step 1 — Piece the Patchwork Panels
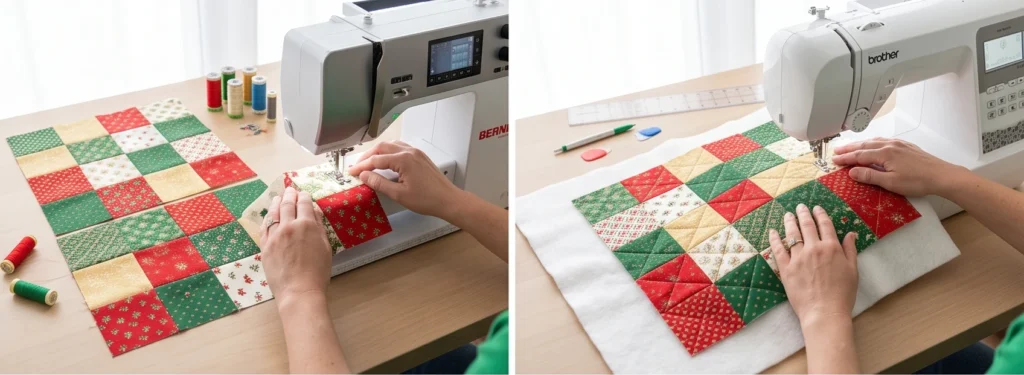
Lay out 30 squares in a grid 5 across and 6 down. Shuffle so no two identical prints touch, and scatter the brightest fabrics rather than clustering them — a lone gold square in a field of red and green does more work than a whole gold row.
Sew each horizontal row together, pressing seams in alternating directions row by row. This lets the seams nest when you join the rows, which gives you flat intersections without bulk. Join the six rows. The finished panel measures 10½” × 12½”. Repeat for the second panel.
Step 2 — Quilt the Outer Panels
Layer each patchwork panel over a piece of batting cut slightly larger. If you’re using fusible fleece, press it to the wrong side of the patchwork and skip the pinning.
Quilt as desired. Straight lines set at 45° to the grid produce a diamond overlay that reads as a second pattern on top of the first — mark one line corner to corner, stitch it, then use the edge of your presser foot or a machine guide bar to space the rest. Stitch-in-the-ditch along the seam lines is the faster option and keeps the patchwork itself dominant.
Trim both quilted panels back to 10½” × 12½”.
Step 3 — Make the Handles
Press each 2½” × 14″ strip in half lengthwise, wrong sides together, then open it out. Fold both long raw edges in to meet the center crease and press. Fold in half again along the original crease, enclosing all raw edges, and press firmly.
Edge-stitch ⅛” from both long edges. You’ll have two handles roughly ⅝” wide.
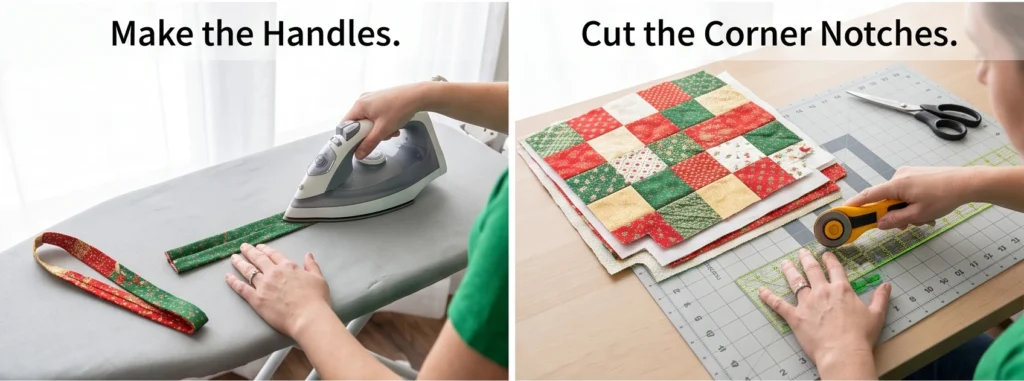
Step 4 — Cut the Corner Notches
Stack the two quilted outer panels and the two lining panels. From the two bottom corners of each of the four pieces, cut a 1½” square. Cutting them stacked keeps all four identical, which matters more than the exact measurement.
Each notch produces half the depth, so two 1½” notches per corner give you a 3″ base.
Assembly
Step 5 — Build the Outer Bag
Place the two quilted panels right sides together, matching the patchwork seams at the side edges. Pin at every seam intersection.
Stitch down one side, across the bottom, and up the other side, leaving the notched corners open. Backstitch at the start and finish.
To box each corner, pull the cut opening apart so the side seam lies directly on top of the bottom seam, forming a straight line. Match and pin the two seams — press one open first so they nest flat. Stitch straight across. Repeat on the second corner. Turn the bag right side out and push the corners into shape.
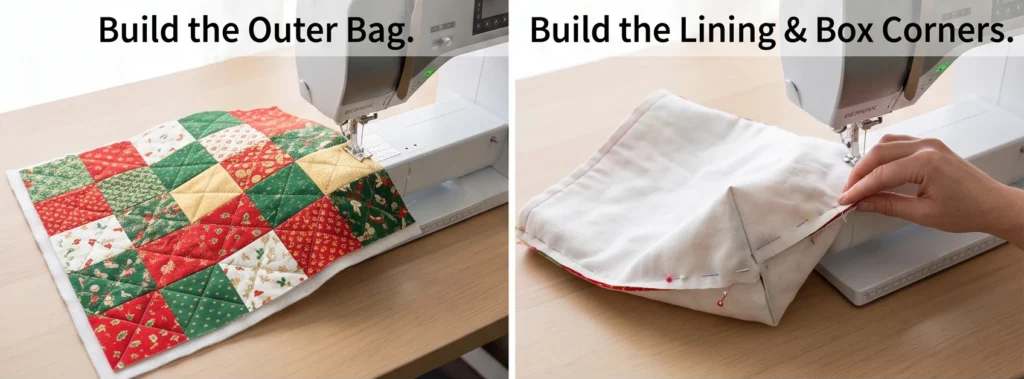
Step 6 — Build the Lining
Repeat Step 5 exactly, with one change: leave a 4″ gap in the bottom seam, backstitching firmly at both ends of the opening. A quilted bag needs a wider turning gap than an unquilted one — 4″ is not excessive, and a narrow gap makes the next step genuinely unpleasant.
Leave the lining wrong side out.
Step 7 — Attach the Handles
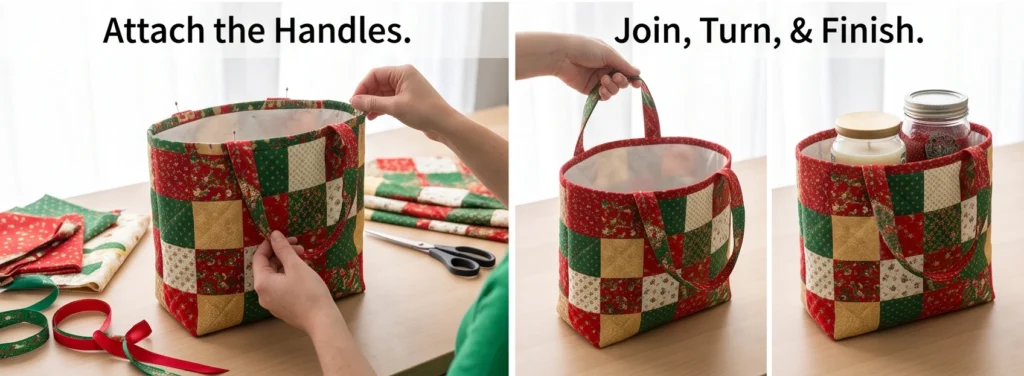
With the outer bag right side out, mark handle placement on both panels: measure 2¼” in from each side seam along the top edge.
Pin one handle to the outside of the bag at each pair of marks, raw ends aligned with the top raw edge and the loop hanging down toward the bottom of the bag. Check that neither handle is twisted. Baste each end in place ⅛” from the edge.
Step 8 — Join Outer and Lining
Drop the outer bag down inside the lining so the two are right sides together, and the handles are sandwiched between the layers. Match the side seams and pin all the way around the top edge, adding extra pins at each handle.
Stitch around the entire top opening using a ½” seam allowance — the extra width helps with the bulk at the handle joins. Go back and forth twice over each handle end.
Step 9 — Turn and Finish
Reach through the gap in the lining and pull the whole bag through. Take your time here; the fleece resists, and forcing it is how seams tear. Work the outer bag out first, then the lining.
Close the lining gap by folding the raw edges in and edge-stitching ⅛” from the fold, or slip-stitch by hand for an invisible finish.
Push the lining down into the bag. Roll the top seam between your fingers until the lining sits just below the outer edge, and press hard. Topstitch ⅛” around the top opening — this keeps the lining from creeping up and gives the rim a crisp, finished line.
Other Design Inspirations – Digitally Modified
2. Easy Quilted Drawstring Gift Bags for Beginners
The drawstring pouch is the oldest bag design still in regular use, and for a long stretch of history it was the only bag — before pockets were stitched into clothing, a drawstring pouch hung from the belt or the wrist and carried everything. Tudor England had a version called the sweet bag: a small embroidered drawstring pouch filled with dried herbs and lavender, and one of the standard New Year’s gifts presented at court. Elizabeth I received dozens of them. The form has barely changed in four hundred years, which tells you something about how well it works.
It’s also the right first project. There are no handles to align, no corner geometry, and the drawstring casing is stitched after the bag is finished — so if it goes crooked, you can unpick two lines of stitching rather than rebuilding the bag.
Finished size: approximately 8″ wide × 10″ tall. Skip the muted holiday palette here — a bag this simple carries strong color well. Fuchsia, tangerine, and lime against cobalt looks far better than another red-and-green print, and it reads instantly on a Pinterest feed.
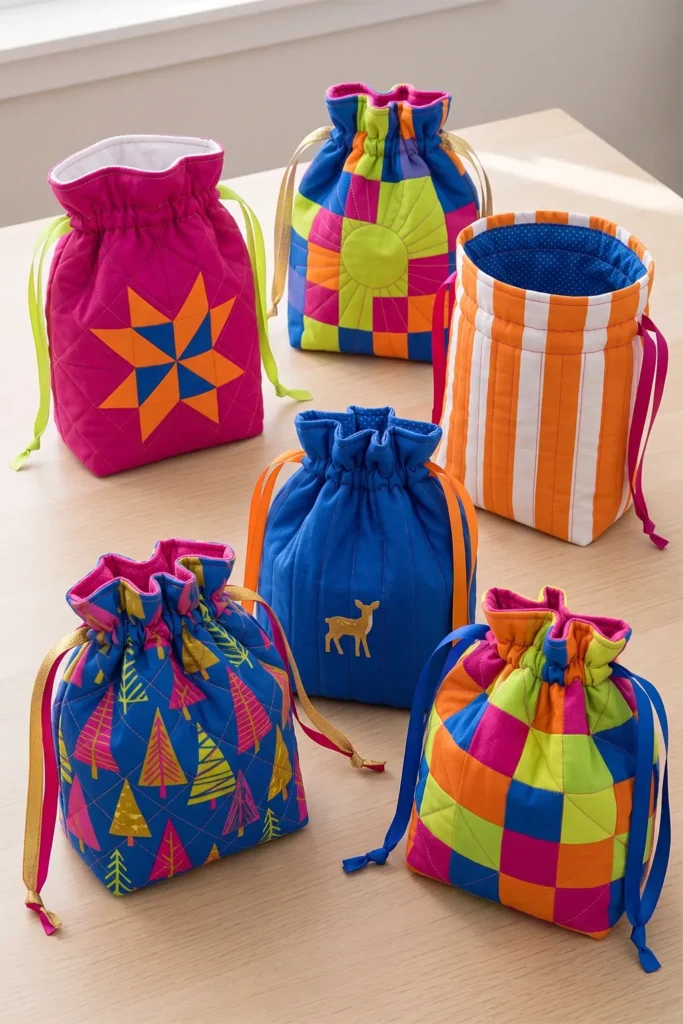
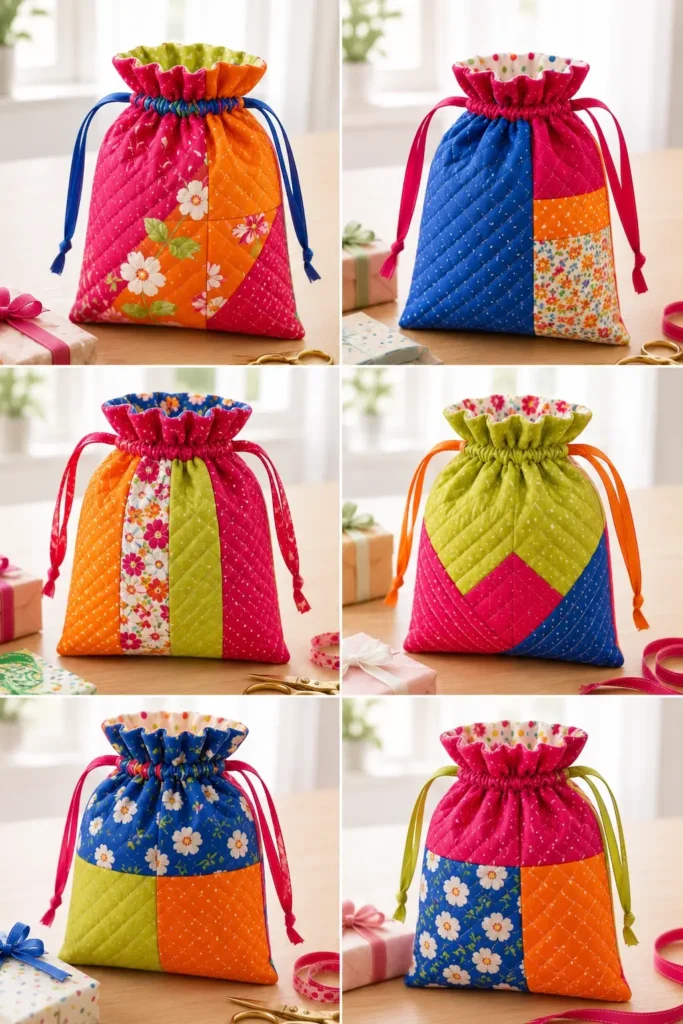
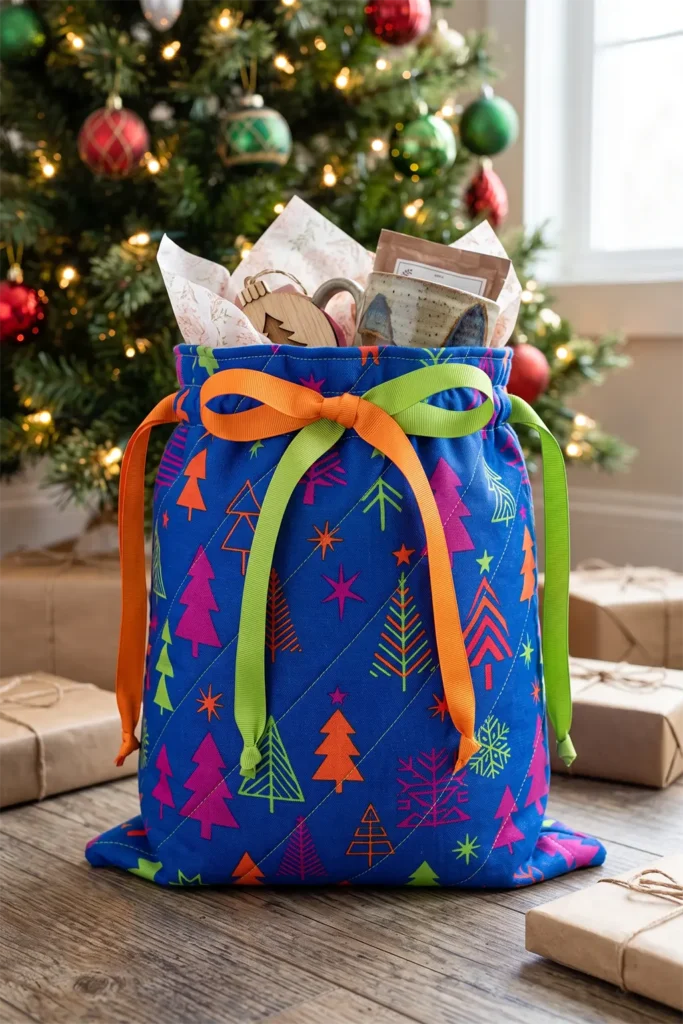
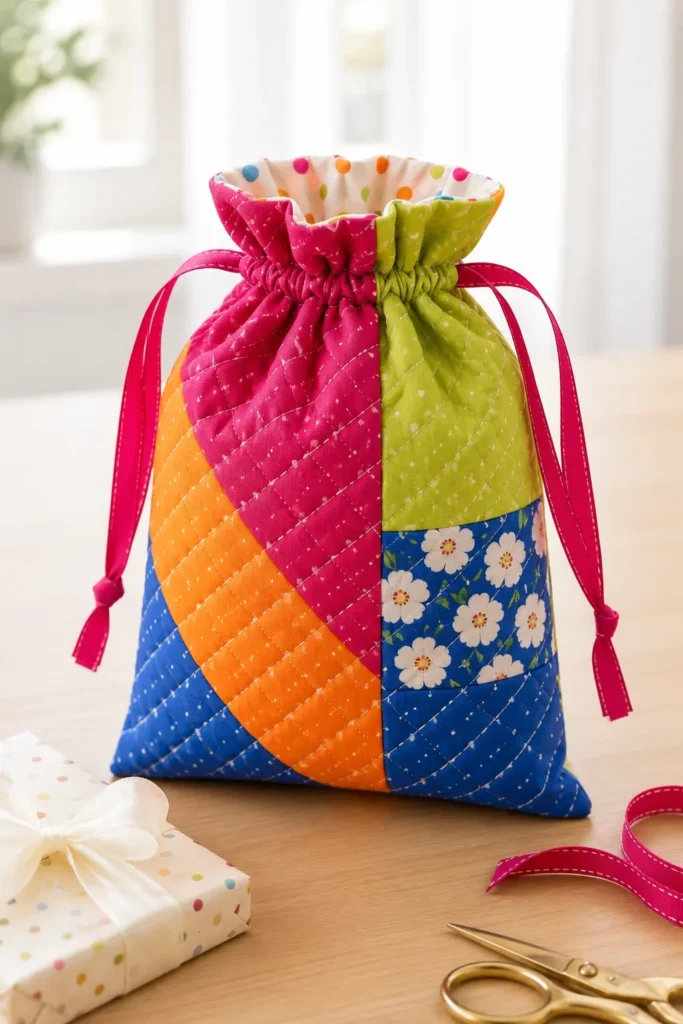
Gifts that fit this size: a mug with cocoa sachets tucked around it, a fat quarter bundle, soap and hand cream, a paperback, a pair of thick socks with a chocolate bar, wooden ornaments wrapped in tissue, spice jars, a small jewelry box, or a bag of coffee beans.
Cutting List
Outer fabric: 2 pieces, 8½” × 11″
Fusible fleece: 2 pieces, 8½” × 11″
Lining: 2 pieces, 8½” × 11″
Ribbon or cord: 2 lengths, 24″ each, about ⅜” wide
Seam allowance is ¼” throughout.
Step 1 — Fuse and Quilt the Outer Panels
Press a piece of fusible fleece to the wrong side of each outer panel, following the manufacturer’s timing — most need eight to ten seconds with steam and a firm press rather than a slide.
Quilt each panel. For a first project, straight lines spaced 1″ apart are the easiest thing to keep tidy: mark a single diagonal line corner to corner, stitch it, then space the remaining lines off that first one using the edge of your presser foot or a machine guide bar. Lengthening the stitch to 3.5 or 4 makes quilting lines look intentional rather than tight.
Trim both panels back to a true 8½” × 11″ once quilted — fleece draws the fabric in slightly, and squaring up now prevents mismatched seams later.
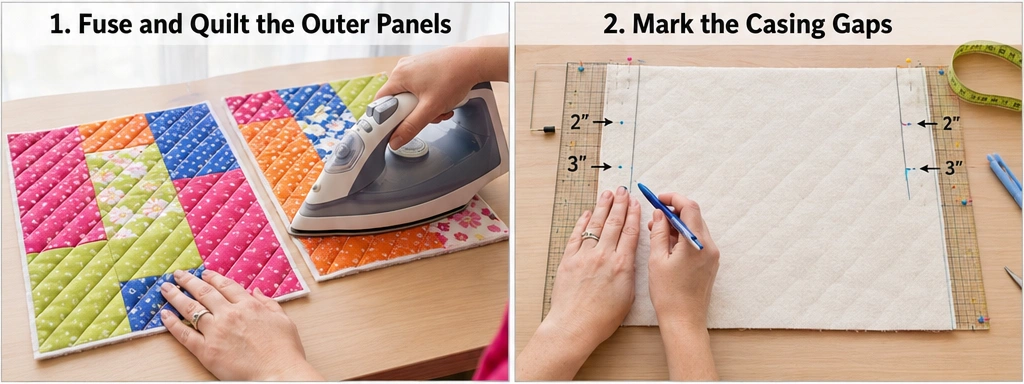
Step 2 — Mark the Casing Gaps
This is the step that makes the drawstring work, and it’s easy to forget.
On each side edge of both outer panels, measure down 2″ from the top raw edge and place a mark. Measure down 3″ and place a second mark. That 1″ span will be left unstitched so the ribbon has somewhere to enter and exit.
Four marks per panel, eight in total. Mark them on the wrong side.
Step 3 — Sew the Outer Bag
Place the two quilted panels right sides together, aligning the marks on both sides.
Stitch down one side from the top raw edge to the first mark and backstitch. Lift the needle, skip the 1″ gap, and resume stitching at the second mark — backstitch again, then continue down the side, across the bottom, and up the second side, leaving the matching gap there as well. Backstitch firmly at every start and stop; these openings take strain when the drawstring is pulled.
Press both side seams open across the gap area. Getting them flat now means the casing lies flat later.
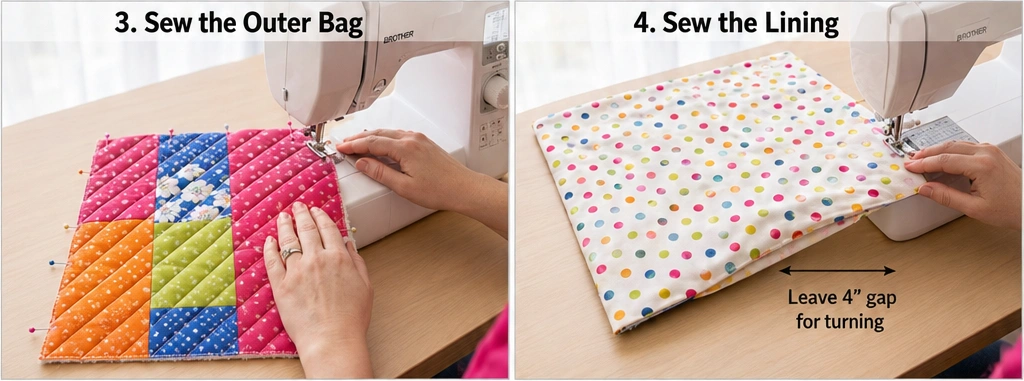
Step 4 — Sew the Lining
Place the lining pieces right sides together. Stitch down one side, across the bottom, and up the other side — no casing gaps in the lining.
Leave a 4″ opening in the bottom seam for turning, backstitching at both ends. Four inches sounds generous for a bag this size, and it isn’t. Pulling a fleece-interfaced bag through a narrow gap is the single most frustrating moment in bag-making, and a wider opening costs you nothing.
Leave the lining wrong side out. Turn the outer bag right side out.
Assembly
Step 5 — Join Outer and Lining
Drop the outer bag down inside the lining so the two are right sides together, top raw edges aligned. Match the side seams and pin all the way around the opening.
Stitch around the entire top edge with a ¼” seam. Because you’re sewing in a continuous circle, mark your starting point with a pin so you know where to stop.
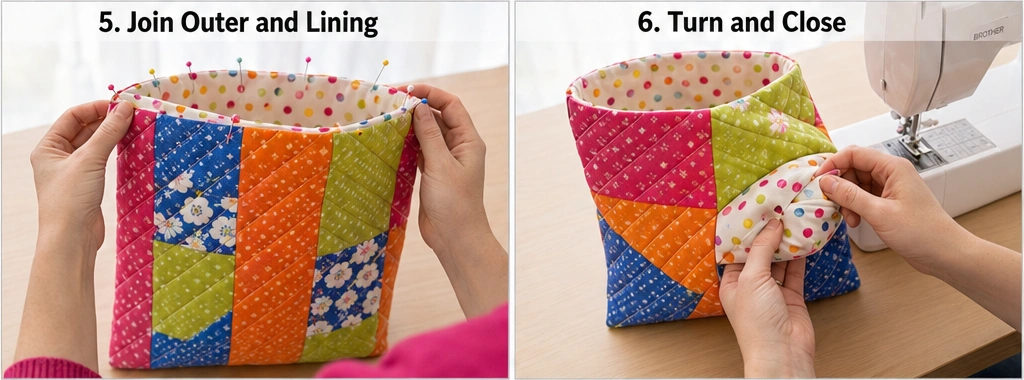
Step 6 — Turn and Close
Reach through the gap in the lining and pull the bag through, outer fabric first. Work slowly — the fleece resists, and yanking is what tears seams.
Fold the raw edges of the lining gap inward and edge-stitch ⅛” from the fold to close it. Push the lining down inside the bag.
Roll the top seam between your fingers until the lining sits just below the outer edge, then press firmly. Topstitch ⅛” around the top opening.
Step 7 — Stitch the Casing
Measure down 1¾” from the finished top edge and mark a line all the way around the bag. Mark a second line at 2½”. The 1″ gaps in your side seams should sit between these two lines with a little room to spare.
Stitch on both marked lines, through all layers, going all the way around the bag. Backstitch where you meet your starting point. You now have a ¾” channel — wide enough for ⅜” ribbon to pass through with room to slide.
The channel width formula, if you use different ribbon: ribbon width + ¼”. Anything tighter binds when you pull.
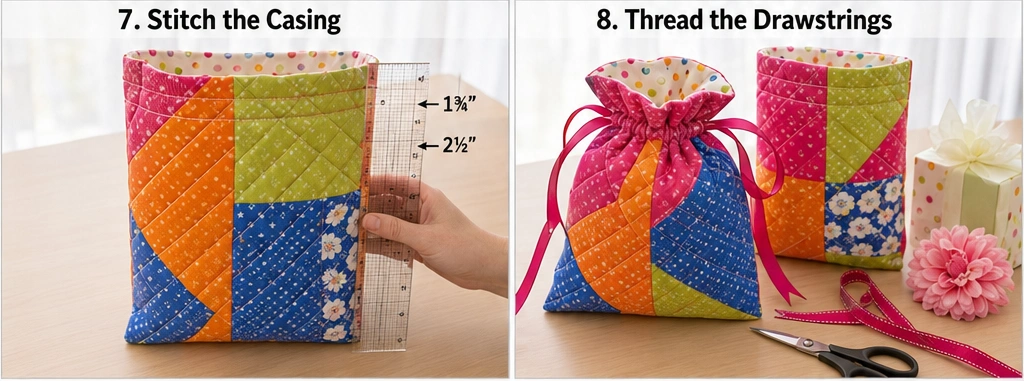
Step 8 — Thread the Drawstrings
Wrap a small piece of tape around each ribbon end. This stiffens the tip and stops it from fraying while you work it through.
Attach a safety pin to the first ribbon and feed it into the left-hand gap, all the way around the channel, and out the same gap it entered. Both ends now hang from the left side. Tie them together.
Take the second ribbon and repeat from the right-hand gap — in, around, and back out the right side. The two ribbons form opposing C-shapes inside the channel, which is what lets the bag cinch evenly when you pull from both sides. A single drawstring pulls the bag closed lopsided; this is the detail that fixes it.
Even up the tails, knot each pair, and pull both sides to gather the top.
Other Design Inspirations – Digitally Modified
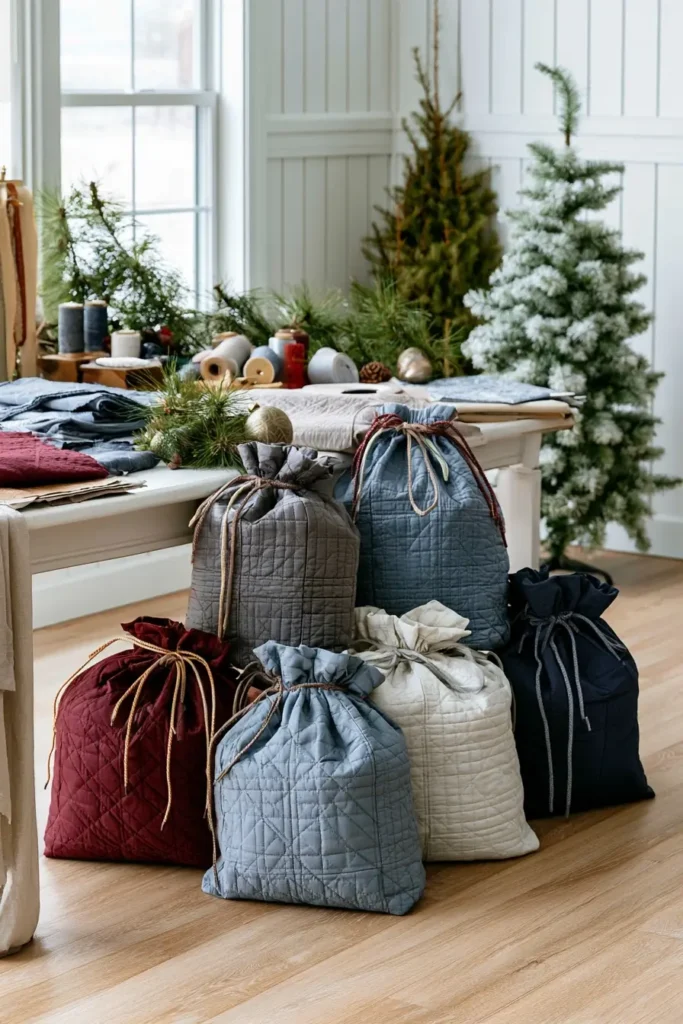
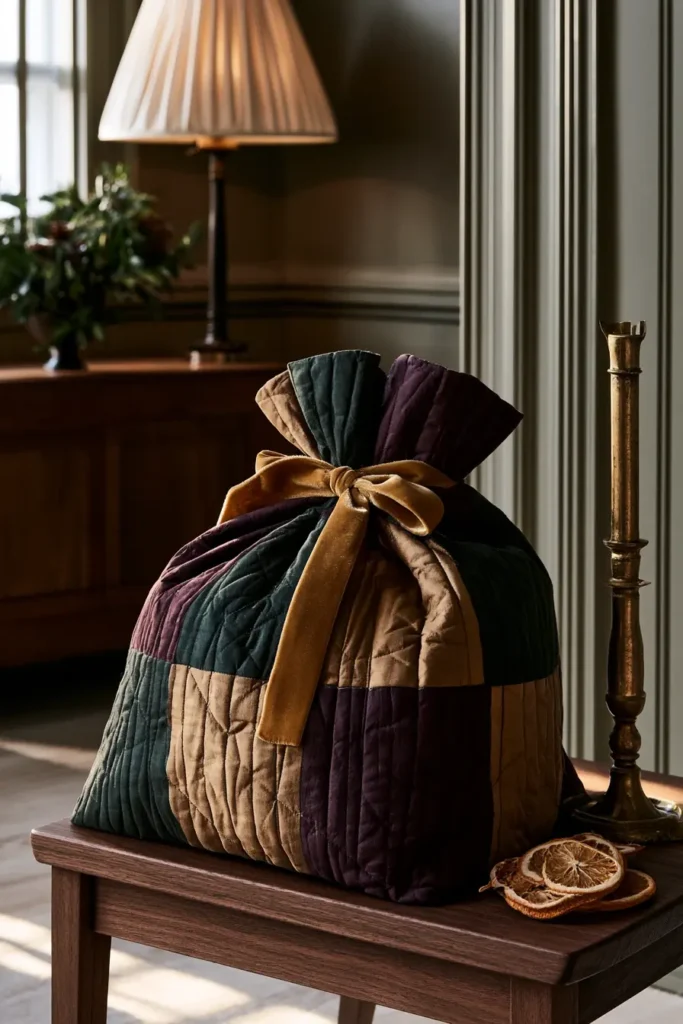
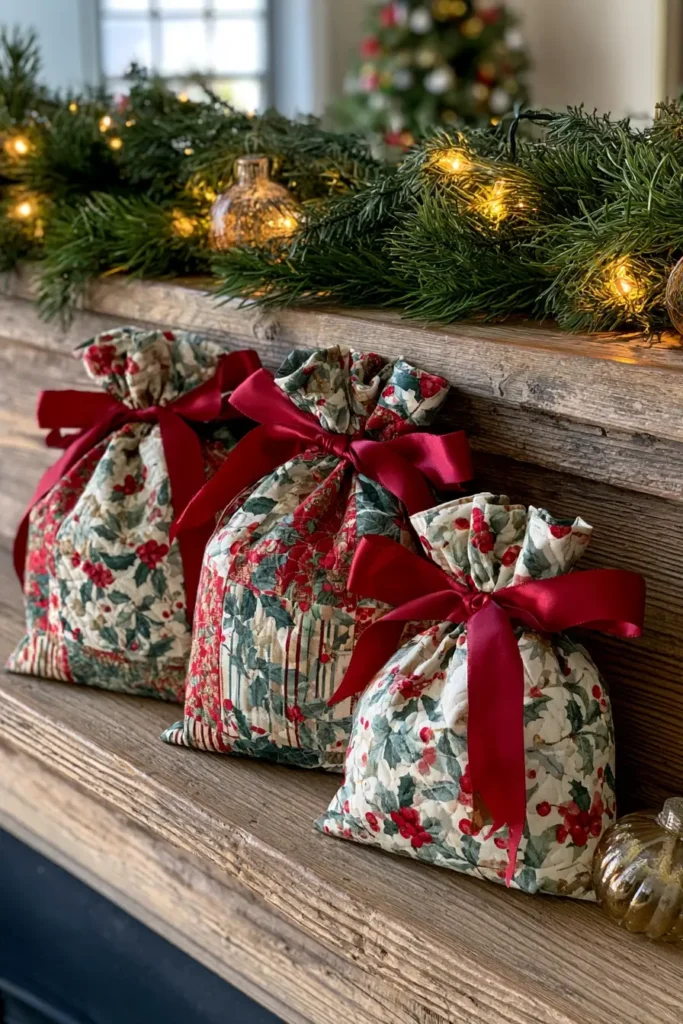
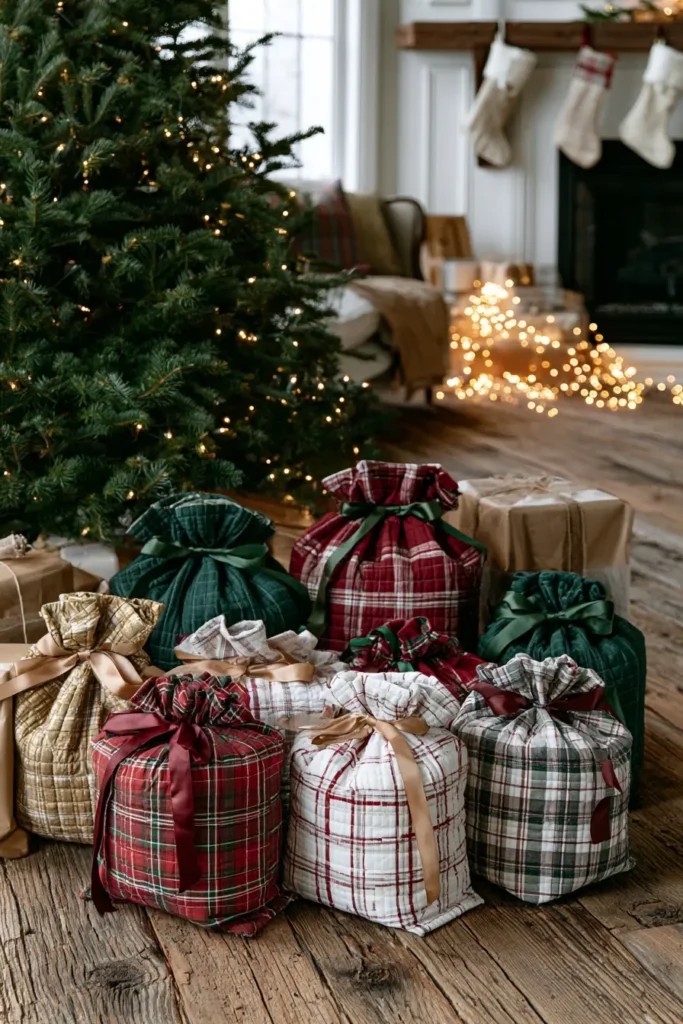
3. Reversible Quilted Christmas Gift Bags
Most lined bags have a public face and a hidden one. A reversible bag has neither — every seam is bound rather than buried, so both surfaces are finished and either one can be the outside. Turn it inside out and you’ve effectively got a second bag.
The construction differs from every other bag in this list in one important way: there’s no turning through a lining gap. The pieces go together wrong sides facing, which puts the seam allowances on the outside where you’d normally never want them, and then binding wraps those raw edges into a deliberate contrast line. It’s the same logic behind kantha, the running-stitch quilting tradition of Bengal, where the stitching reads identically on both faces — nothing is hidden because nothing needs to be.
Pick two prints that genuinely differ. Hot pink with turquoise on one face and lime with gold on the other gives you a bag that changes character completely when flipped, which is the whole point. The binding shows on both sides, so choose a color that holds its own against each.
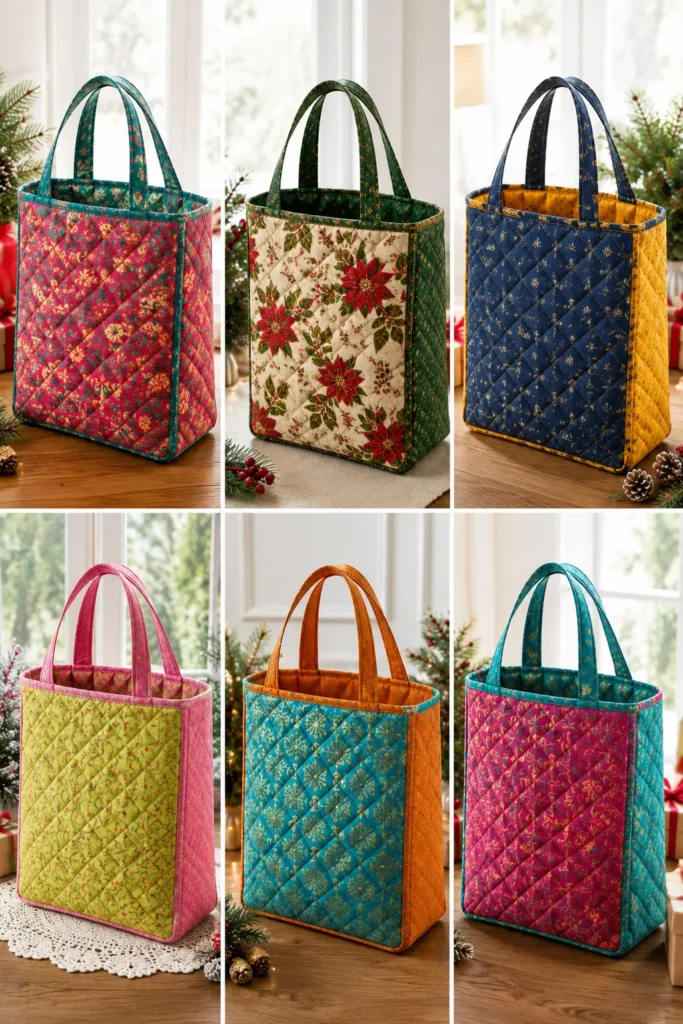
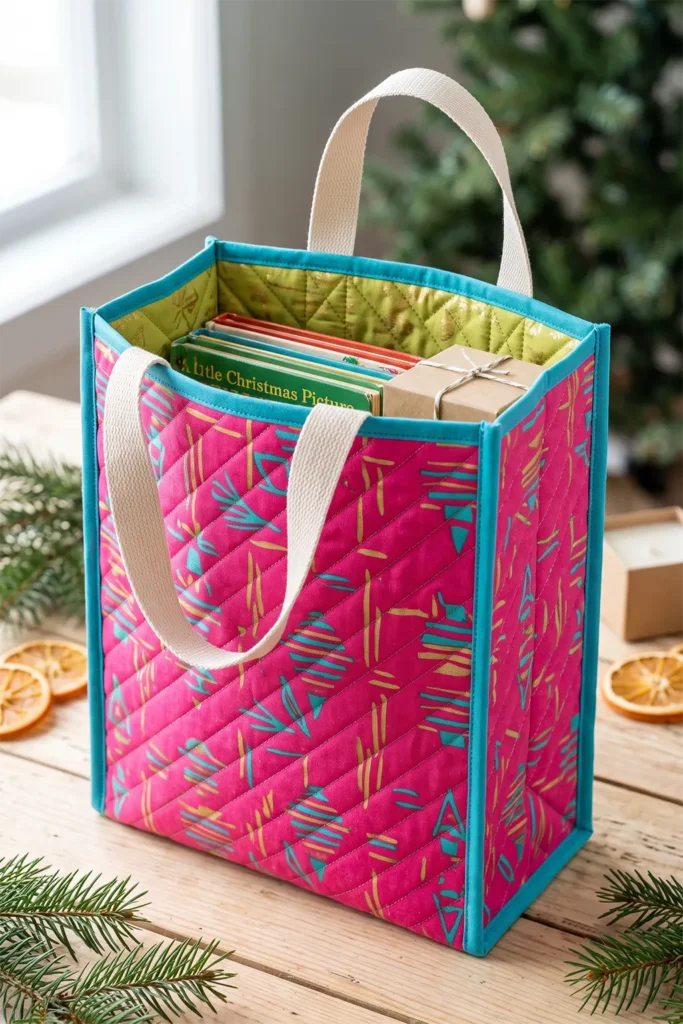
Finished size: approximately 8″ wide × 10″ tall × 4″ deep.
Gifts that fit this size: a boxed candle set, a stack of children’s books, a bakery box of cookies, a folded sweater or scarf set, a board game, two jars of preserves nested in a tea towel, a skincare gift set, or a mug with a bag of coffee and a chocolate bar.
Cutting List
Face A fabric: 2 panels at 8″ × 10″, plus 1 gusset strip at 4″ × 30″
Face B fabric: 2 panels at 8″ × 10″, plus 1 gusset strip at 4″ × 30″
Fusible fleece: 2 pieces at 8″ × 10″, plus 1 piece at 4″ × 30″
Binding: 2½”-wide strips — roughly 100″ total, pieced on the diagonal
Handles: 2 lengths of 1″ webbing or folded fabric strips, 16″ each
The gusset forms both sides and the bottom in one continuous piece. Its length comes from a simple formula: height + width + height. For this bag, 10 + 8 + 10 = 28″. Cut it at 30″ and trim the excess at the end rather than fighting for precision now.
Step 1 — Build the Quilt Sandwiches
Press fusible fleece to the wrong side of each Face A piece — both panels and the gusset strip.
Lay the matching Face B piece against the fleece, wrong sides together, and smooth it flat. Fusible fleece grips well enough to hold the second layer without basting spray; a firm press is usually enough. You now have three sandwiches: two panels and one long gusset, each with a finished fabric on both faces.
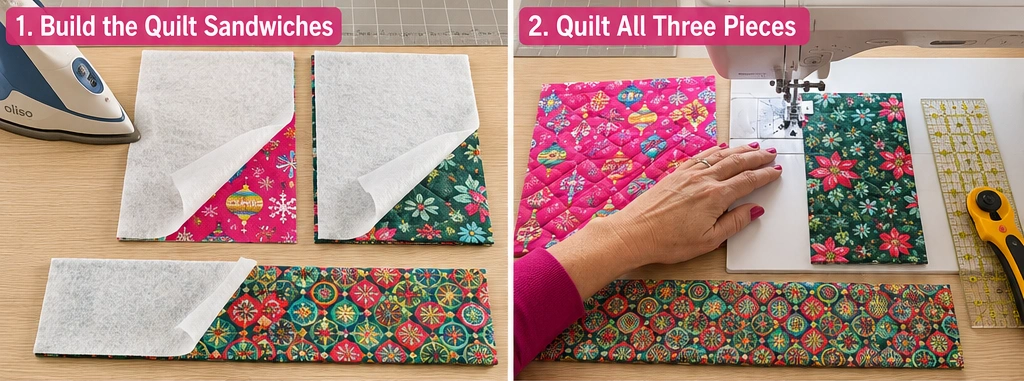
Step 2 — Quilt All Three Pieces
Mark a single diagonal line corner to corner on each panel and stitch it. Space the remaining lines off that first one using a machine guide bar or the edge of your presser foot — ¾” apart suits a bag this size.
Carry the same angle across the gusset strip. It doesn’t need to align with the panels when assembled; matching quilting density matters more than matching lines.
Thread choice deserves a moment here. Both faces will show your stitching, so either pick a thread that works on both fabrics, or run two colors — one on top, one in the bobbin — chosen to suit each side.
Square everything up after quilting: panels back to 8″ × 10″, gusset to 4″ wide.
Step 3 — Mark the Centers
Fold the gusset strip in half crosswise and crease to find the center of the bottom. Mark it on both long edges.
Fold each panel in half and mark the center of the bottom edge.
These four marks are what keep the gusset from drifting off-center during assembly, and they replace a lot of measuring.
Assembly
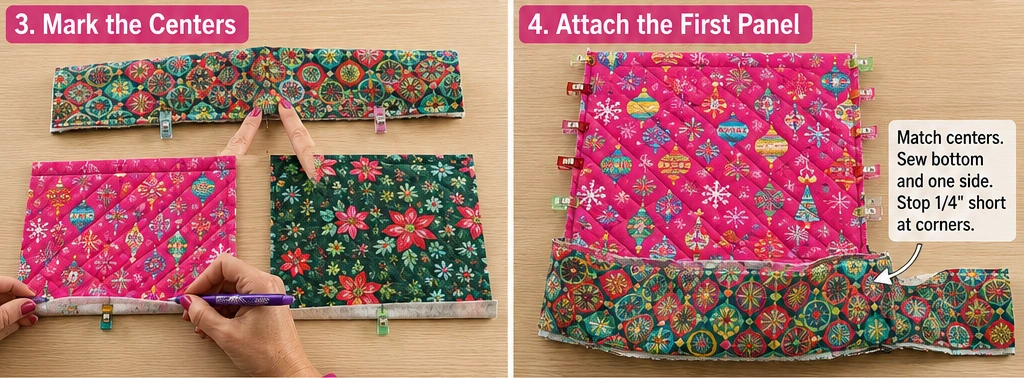
Step 4 — Attach the First Panel
Place one panel against the gusset with wrong sides together — seam allowances will sit on the outside, which is correct here. Match the bottom center marks and pin outward from there.
Stitch with a ¼” seam, starting at one bottom corner and stopping ¼” short of the top edge. Backstitch. The gusset needs to pivot at the corners, and stitching all the way to the edge locks it, so that quarter-inch stop is not optional — mark it with a pin if you’re likely to sail past it.
Pivot the gusset around the corner, pin up the side, and stitch that seam, again stopping ¼” from the top. Repeat for the second side.
Step 5 — Attach the Second Panel
Same process on the opposite edge of the gusset: match bottom centers, stitch the bottom seam, stop ¼” short at each corner, pivot, and stitch up both sides.
The bag now has its shape. Stand it up and check it — with fleece in every panel, it should hold itself open.
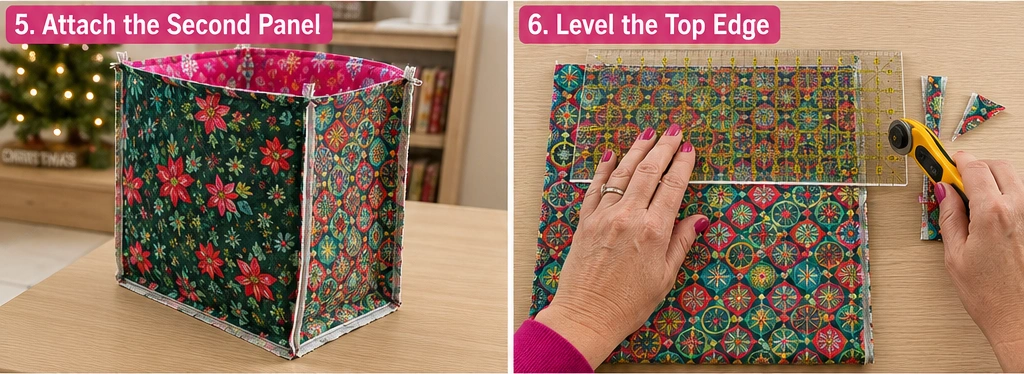
Step 6 — Level the Top Edge
The gusset was cut long, so the top will be uneven. Fold the bag flat, line up the top edges of both panels, and lay a ruler across. Trim the excess gusset flush so the entire rim sits level.
Trim any loose threads along the outside seams while you’re here — binding covers a multitude of things, but not bulk.
Step 7 — Bind the Side and Bottom Seams
Cut 2½” strips, join them on the diagonal, and press in half lengthwise, wrong sides together.
Working on one side-and-bottom seam at a time, align the binding’s raw edges with the raw seam edge and stitch with a ¼” seam. At each corner, stop, lift the presser foot, pivot off the edge and stitch clear — then fold the binding back on itself and forward again to form a mitered corner before continuing. That double fold is what gives you enough fabric to turn a clean corner when you flip the binding over.
Wrap the folded edge around to the opposite side and edge-stitch it down about ⅛” from the fold. Repeat on the second seam.
Both faces now show a bound seam. Neither shows a raw edge.
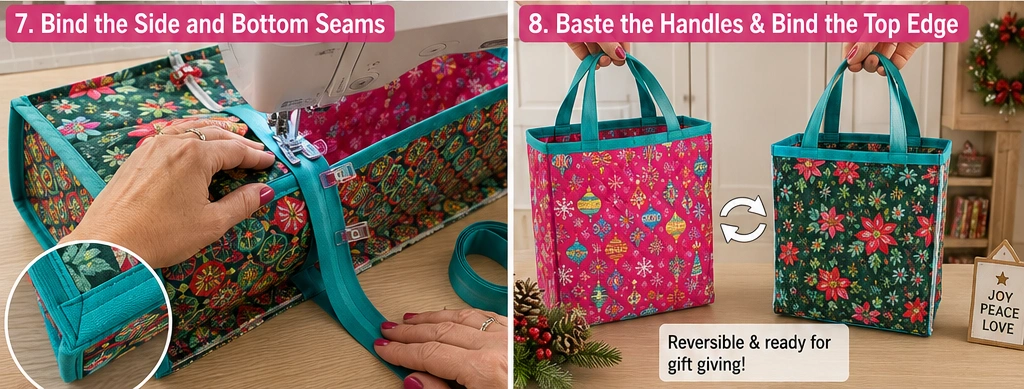
Step 8 — Baste the Handles
Decide which face you want the handles to sit against — they’ll be visible from both sides regardless, so this is aesthetic rather than structural.
Pin one handle to each panel with the raw ends level with the top raw edge, positioned about 2¼” in from each side seam. Check for twists. Baste ⅛” from the edge, stitching back and forth two or three times over each end.
Step 9 — Bind the Top Edge
The top binding has visible ends, so it needs a proper join rather than an overlap.
Fold ¼” to the wrong side at the starting end of your binding strip and press. Begin stitching partway along one panel, leaving the first 2–3″ of binding unattached — this creates a pocket. Stitch around the entire rim with a ¼” seam, working the bag’s bulk out of the way as you go and keeping the needle down whenever you stop to reposition.
When you return to the start, trim the tail at an angle and tuck it inside the pocket you left. Finish stitching that last section closed.
Flip the binding to the opposite face, clip it in place, and stitch in the ditch from the front — the needle running in the groove where the binding meets the bag, catching the folded edge on the reverse. If you fold the handles upward before this pass, the stitching will catch them, and they’ll stand up naturally instead of flopping.
Other Design Inspirations – Digitally Modified

4. Buffalo Plaid and Flannel Quilted Gift Sacks
Buffalo plaid has a good origin story, and it’s worth knowing because it explains why the pattern reads as “cozy” before you’ve done anything with it. The large two-color block check was popularized in North America by the Woolrich mill in the 1850s, and the “buffalo” name is usually traced to a designer said to have kept a herd of buffalo. Whatever the truth of that, the pattern got its identity from heavy wool workwear — lumberjack coats, hunting jackets, winter bedrolls — so it carries a built-in association with warmth and the outdoors that no amount of styling can undo. Put it on a gift sack and the sack looks snug before it holds anything.
Flannel is the natural partner. It’s cotton (or wool) that’s been brushed to raise a soft nap, and that same nap is why flannel demands a little respect when you quilt it: it shifts under the needle, frays more than quilting cotton, and stretches if you pull it. A walking foot and a fusible fleece backing tame most of that.
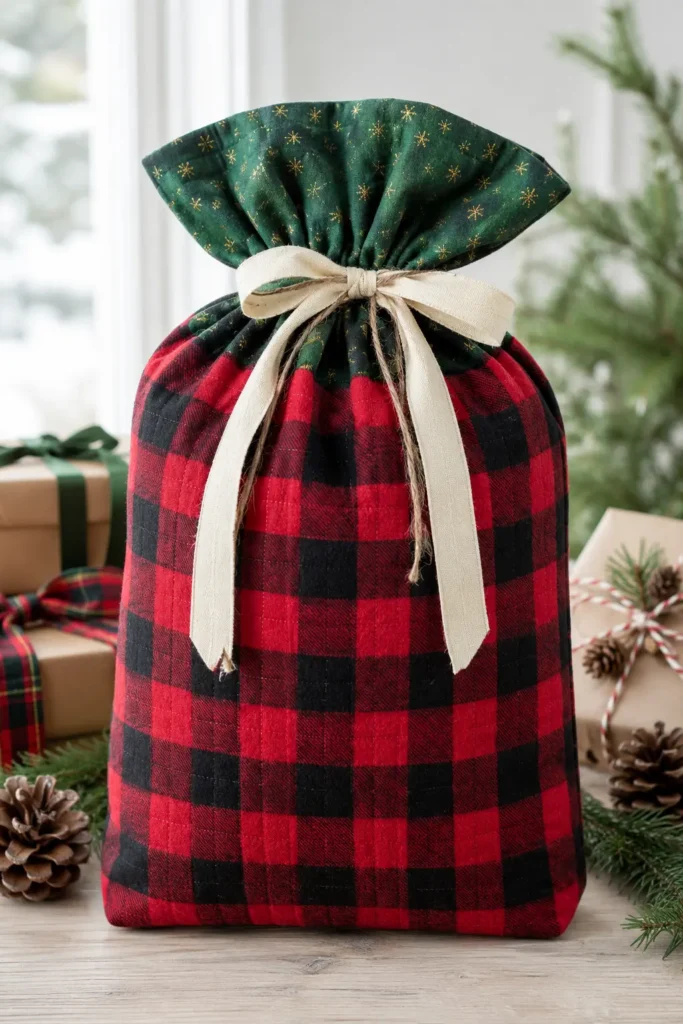
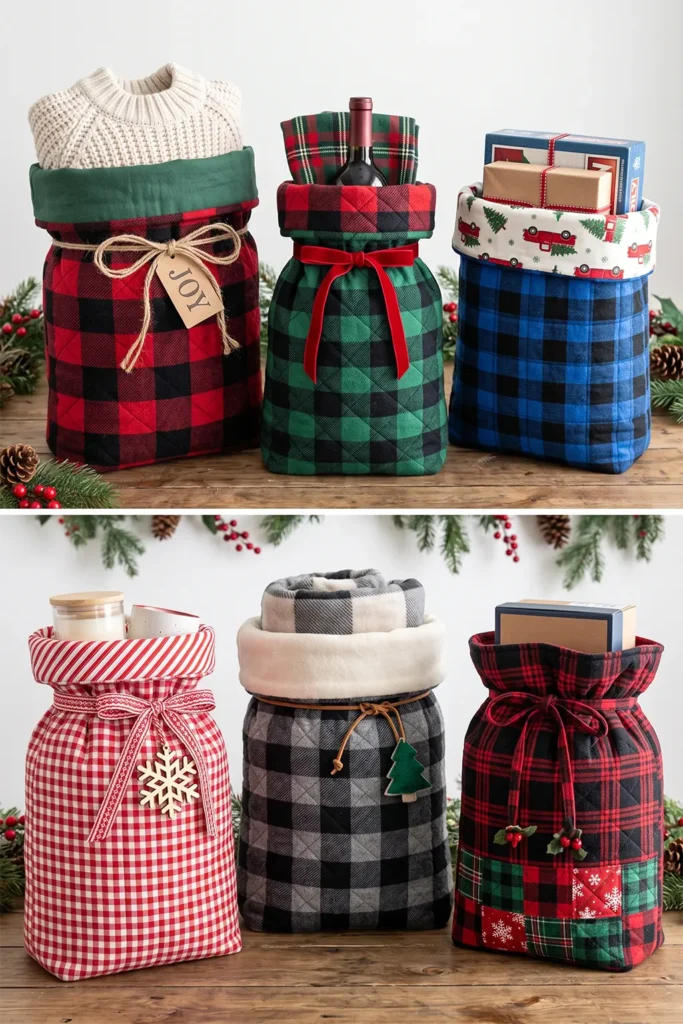
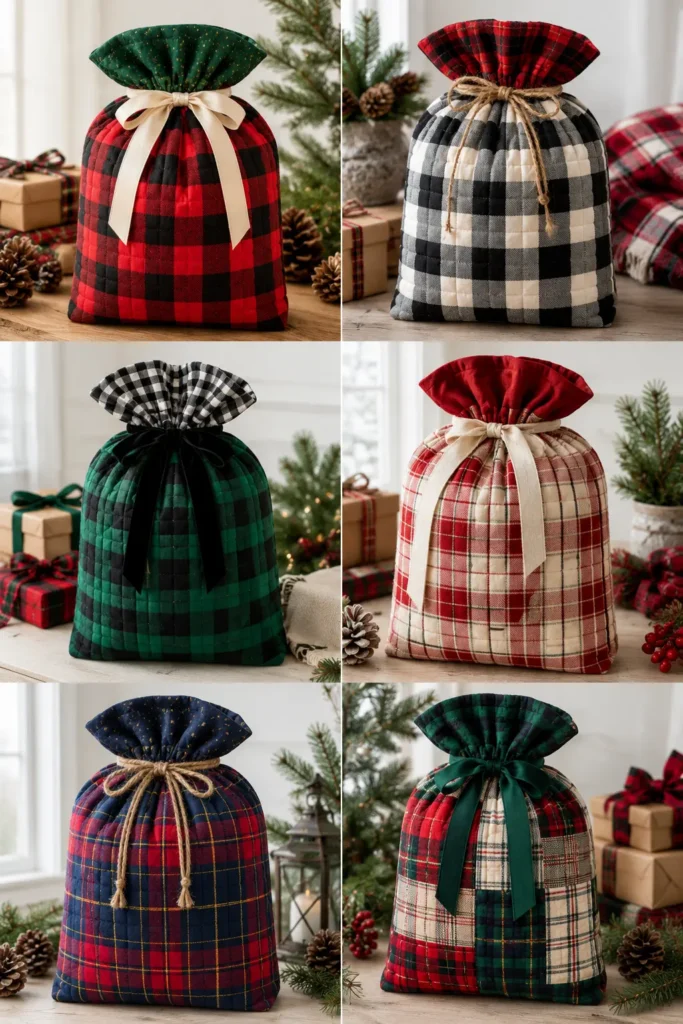
This is a large sack — think fold-over top rather than drawstring or handles, sized for the awkward, bulky gifts that nothing else fits.
Finished size: approximately 12″ wide × 16″ tall × 4″ deep.
Gifts that fit this size: a folded throw blanket, a chunky knit sweater, a boxed pair of boots, a bottle of wine bundled with glasses and a tea towel, a stack of board games, bed linens, a large candle-and-mug hamper, or several smaller wrapped gifts grouped as one.
Cutting List
Outer flannel (buffalo plaid): 2 panels at 13″ × 17″
Fusible fleece: 2 pieces at 13″ × 17″
Lining (contrast flannel or quilting cotton): 2 panels at 13″ × 17″
Fold-over cuff accent (optional): 2 strips at 13″ × 4″, in a contrasting plaid
Corner notches: 2″ squares, cut later
Seam allowance is ½” throughout — flannel frays, and the wider allowance holds better.
A note before cutting: press your flannel first but don’t stretch it, and cut on a single layer if the plaid is even slightly off-grain. A buffalo check that runs crooked will announce itself on a finished bag more than any other pattern, so line the grid up square to your ruler, not to the fabric’s cut edge.
Step 1 — Fuse and Stabilize
Press fusible fleece to the wrong side of each plaid panel. Flannel and fleece both respond to heat and steam, so use a pressing cloth and lift-and-press rather than sliding the iron, which can distort the nap and skew the check.
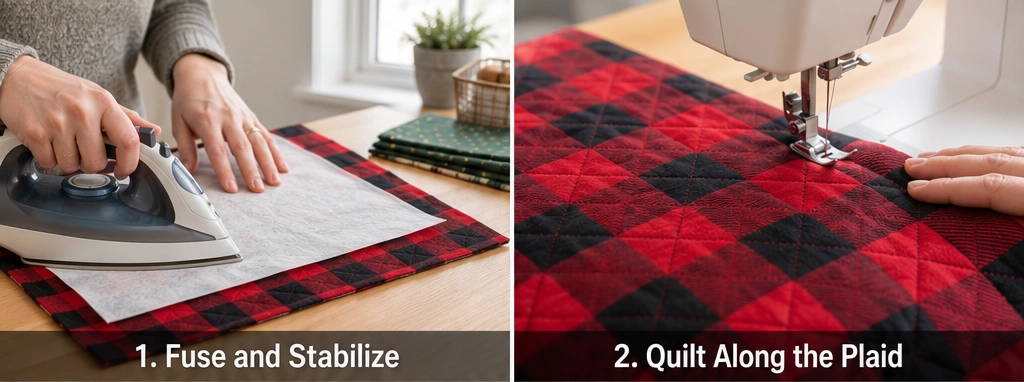
Step 2 — Quilt Along the Plaid
Buffalo plaid gives you a free quilting guide: the grid lines are already there. Stitch directly along the boundaries of the check — either following every dark block or every other line for a roomier diamond or square grid. This is called “quilting to the print,” and it makes the quilting look purpose-designed while sparing you any marking at all.
Use a walking foot if you have one. It feeds the top and bottom layers evenly and is the single best defense against flannel shifting and puckering. Lengthen the stitch slightly, to about 3, so the stitches sit on top of the soft nap rather than sinking into it.
Trim both panels to a true 13″ × 17″ once quilted.
Step 3 — Cut the Corner Notches
Stack both outer panels and both lining panels. Cut a 2″ square from each bottom corner of all four pieces. A 2″ notch on each side of a corner produces the 4″ depth this sack needs.
Cutting all four pieces stacked keeps them identical, which matters more than hitting exactly 2″.
Assembly
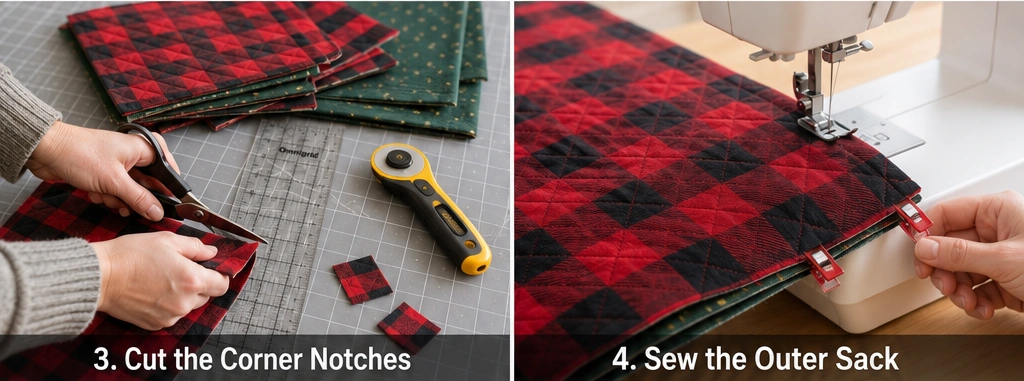
Step 4 — Sew the Outer Sack
Place the two plaid panels right sides together. Here’s where the check earns its keep: line the plaid up across the side seams so the horizontal bars match, and pin at each bar. A matched plaid across a seam is the mark of careful work and takes only a minute of pinning.
Stitch down one side, across the bottom, and up the other side with a ½” seam, leaving the notched corners open. Backstitch at each end.
Step 5 — Box the Corners
Pull one notched corner open so the side seam lies directly on top of the bottom seam. Press the two seams in opposite directions so they nest, match them, and pin. Stitch straight across the opening with a ½” seam. Repeat on the second corner.
Turn the outer sack right side out and push the corners square.
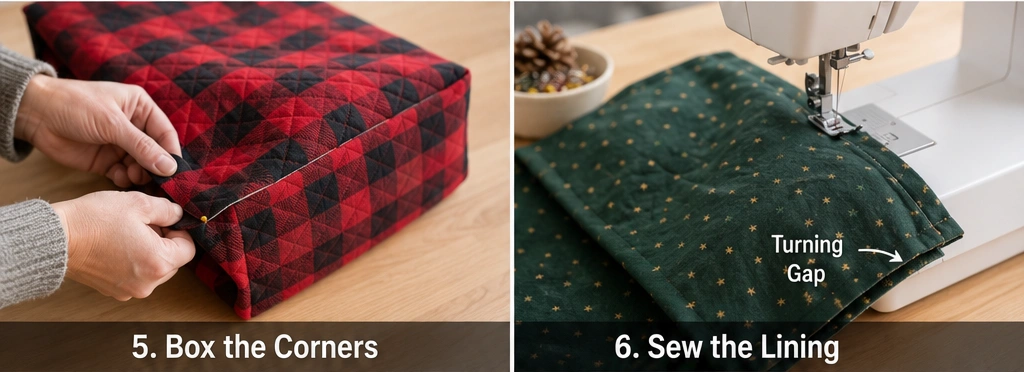
Step 6 — Sew the Lining
Repeat Steps 4 and 5 with the lining panels, with one change: leave a 5″ gap in the bottom seam for turning, backstitching at both ends. This is a large, fleece-heavy bag, so err on the generous side on the gap — a cramped opening turns a two-minute step into a ten-minute wrestling match.
Leave the lining wrong side out.
Step 7 — Join Outer and Lining
Drop the outer sack down inside the lining, right sides together, matching the side seams. Pin around the top edge.
Stitch around the entire opening with a ½” seam. Mark your starting point with a pin so you know where to stop on the way around.
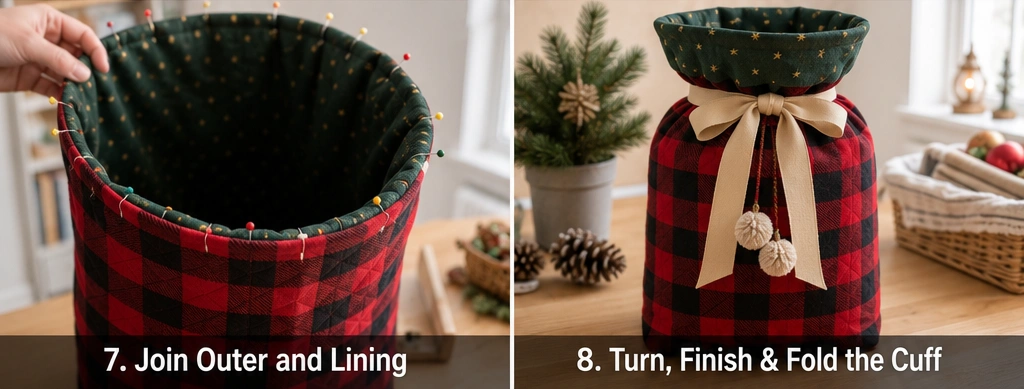
Step 8 — Turn and Finish
Reach through the lining gap and pull the whole sack through, outer fabric first. Go slowly — this is the bulkiest bag in the series, and the fleece will resist.
Fold the raw edges of the gap inward and edge-stitch ⅛” from the fold to close it, or slip-stitch by hand. Push the lining down inside.
Roll the top seam so the lining sits just below the outer edge and press firmly with a cloth. Topstitch ⅛” around the top.
Step 9 — Set the Fold-Over Cuff
The finishing move on a sack this size is the cuff. Fold the top edge down 3–4″ to the outside, so the contrasting lining (or your accent strip) shows as a turned-back band. Press the fold.
If you added contrast cuff strips, this is where they reveal themselves — a second plaid folded against the first is the detail that lifts the sack from plain to considered. The cuff can be left loose so the recipient sees the surprise of the lining, or tacked at the side seams with a few hand stitches to hold it crisp. To close for gifting, gather the top above the cuff and tie with wide ribbon, twine, or a strip of the lining flannel.
Other Design Inspirations – Digitally Modified
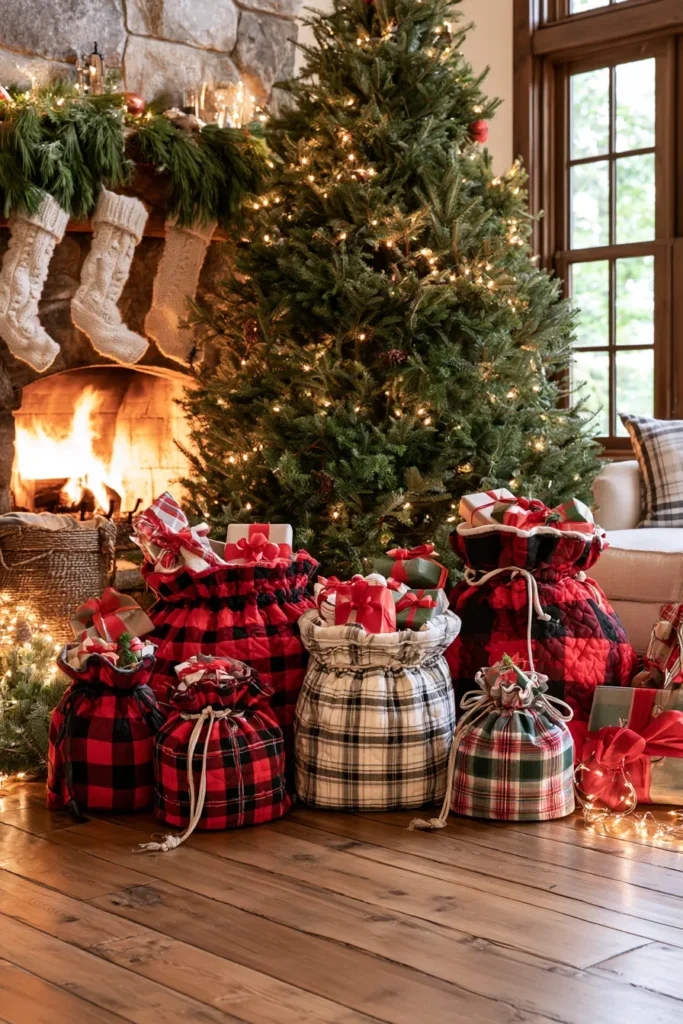
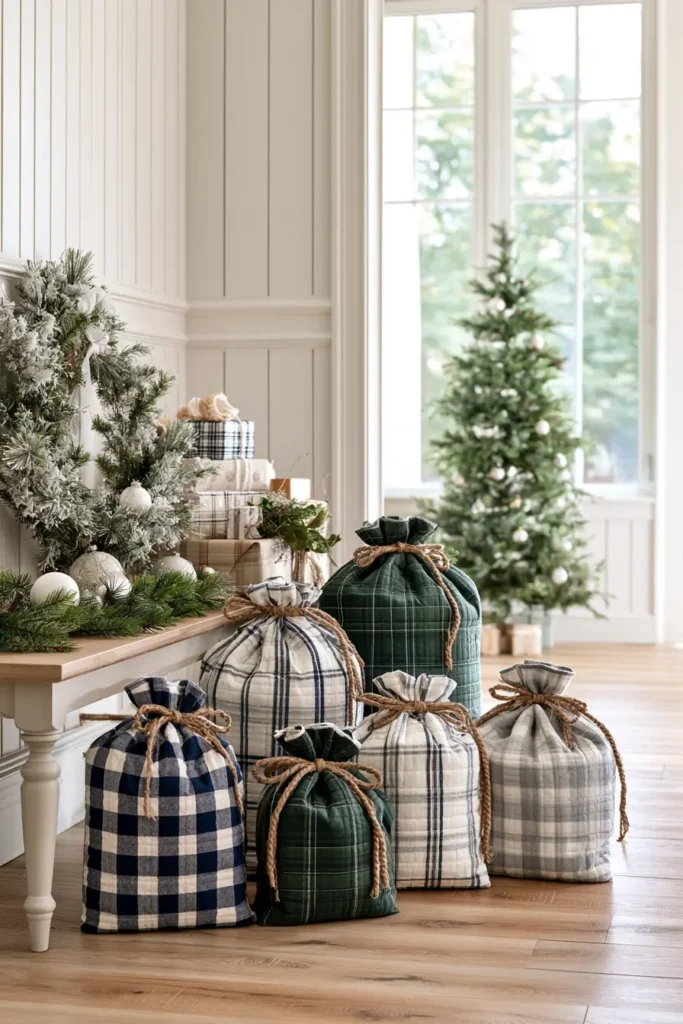
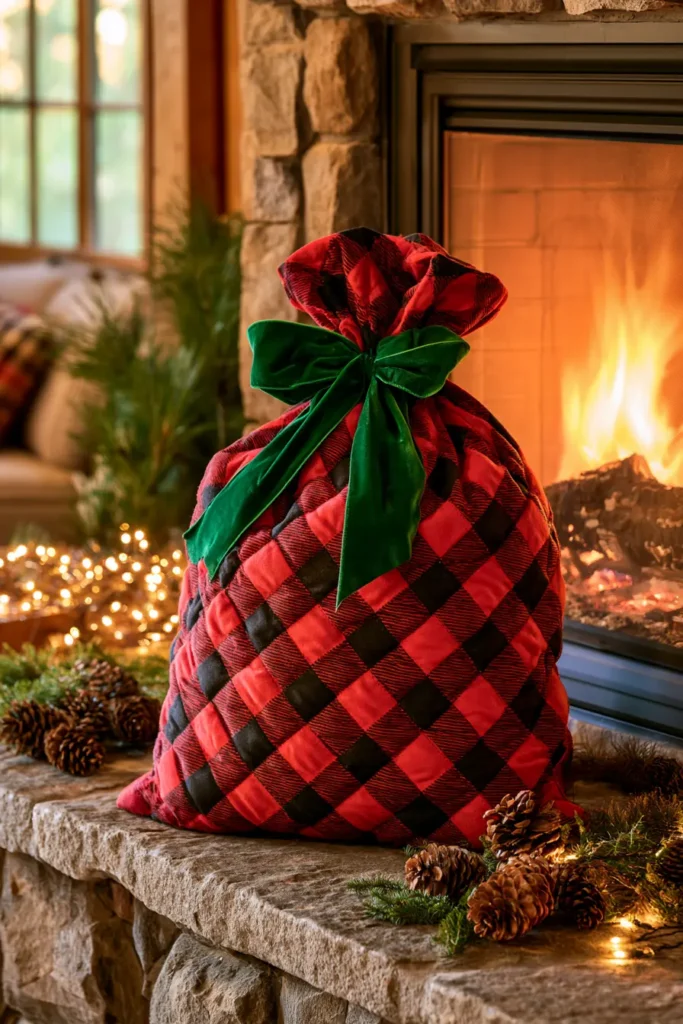
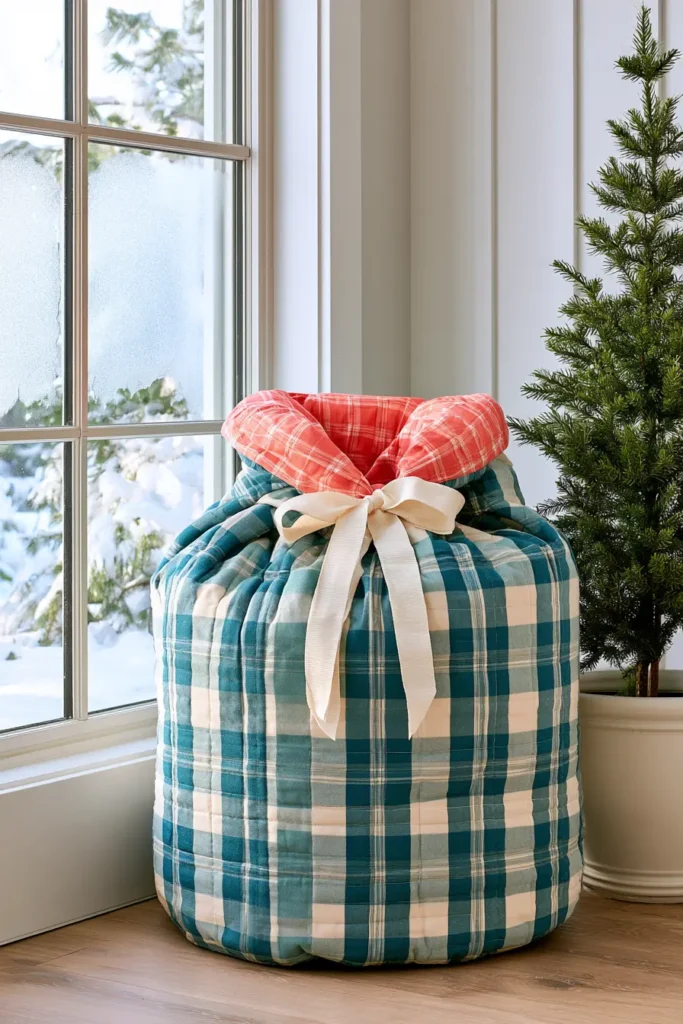
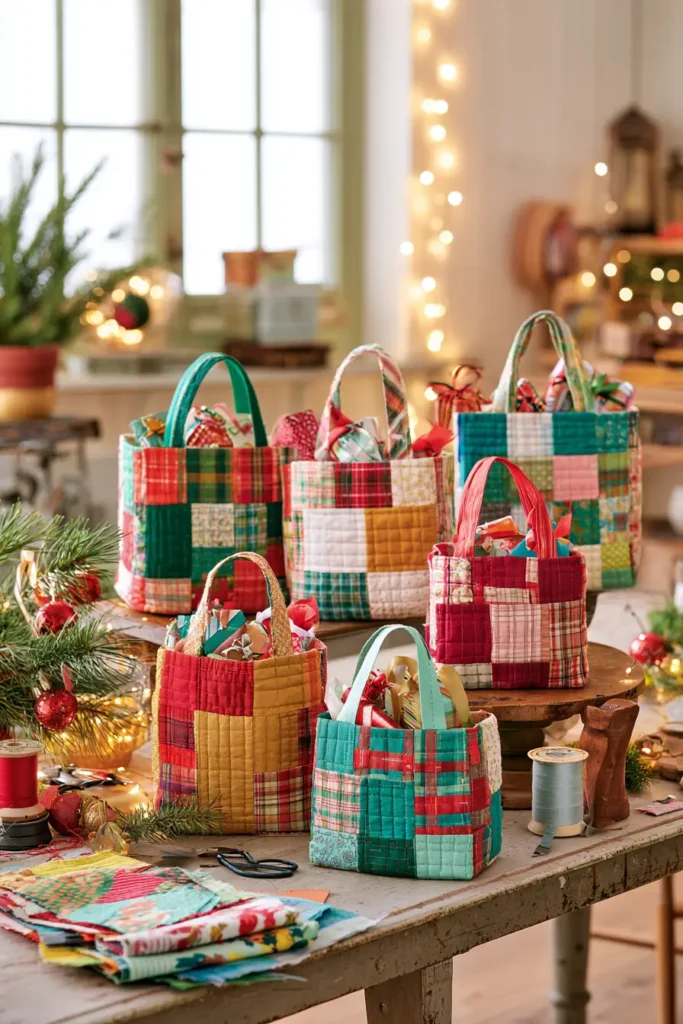
5. Scrappy Quilted Gift Bags from Fabric Leftovers
Every quilter accumulates a scrap bin, and the scrap bin is a moral problem. The fabric is too good to throw away and too small to plan around, so it sits — and this bag is one of the best ways to spend it down.
There’s history in that instinct. The scrappy quilt tradition ran deepest in periods and places where fabric was scarce and waste was unthinkable: Depression-era quilters built entire quilts from feed sacks, the printed cotton bags that flour and grain shipped in, and manufacturers eventually started printing them in attractive patterns because they knew women were sewing clothing and quilts from the empties. A scrappy gift bag sits squarely in that lineage — nothing wasted, something useful made from the remnants.
The technique here is quilt-as-you-go, or “stitch and flip.” You build the quilted panel and piece the scraps in a single pass, sewing each new scrap directly onto a foundation of batting. There’s no separate piecing step and no separate quilting step — they happen at once, which is what makes this both beginner-friendly and genuinely fast.
Because the fabric is whatever you have, this is the one bag where you can’t over-color. Clashing is the aesthetic. The more jarring the mix — a hot pink floral against an orange geometric against a lime dot — the more the finished bag looks like a deliberate scrap celebration rather than an accident.
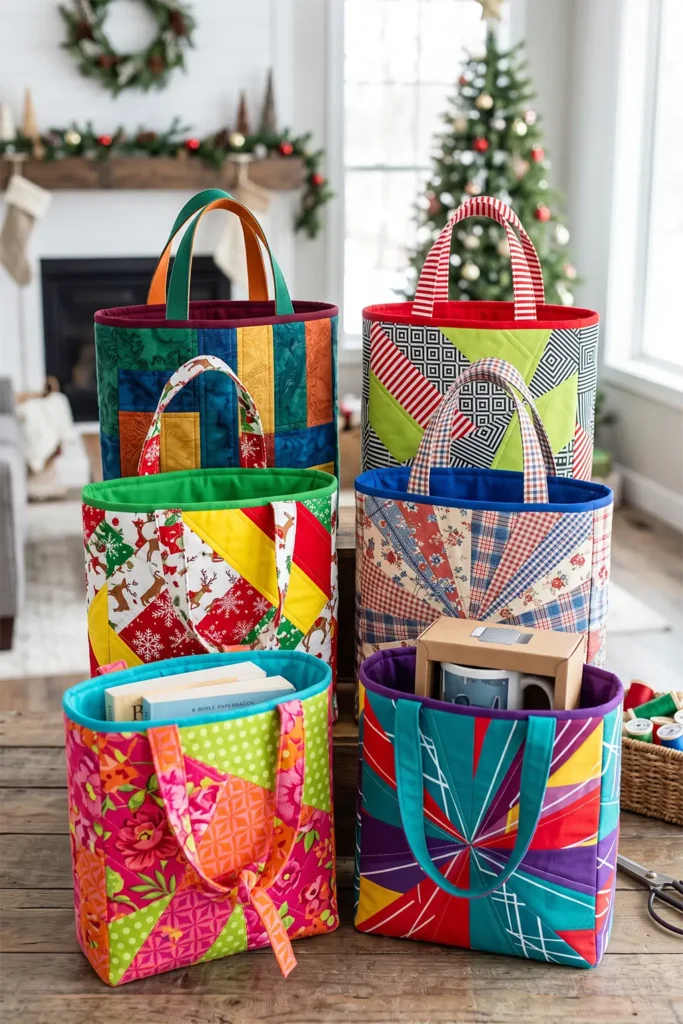
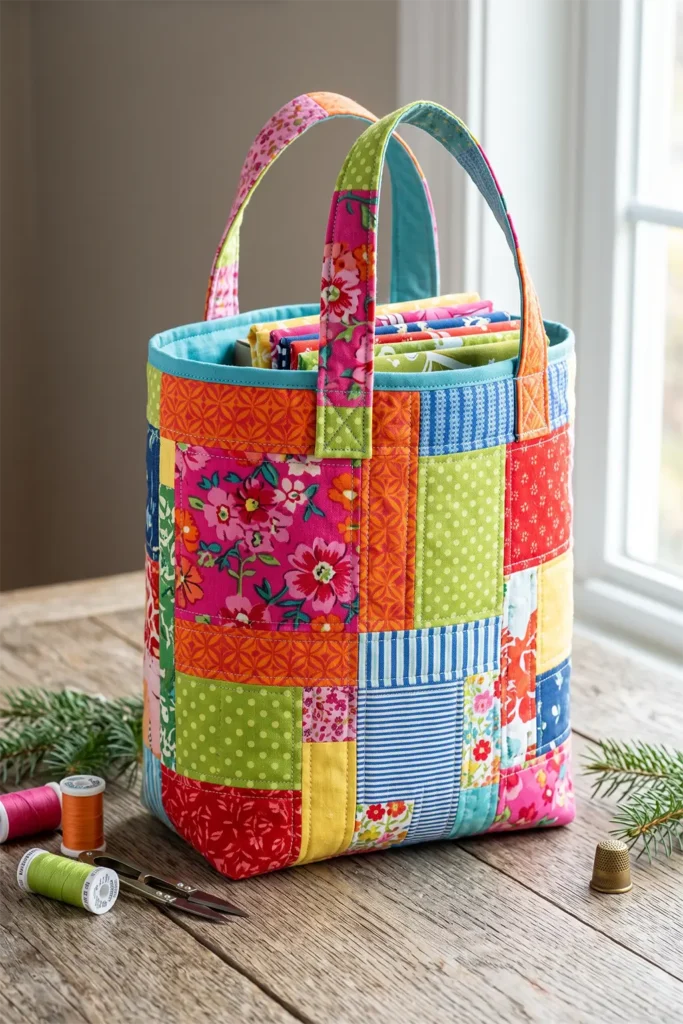
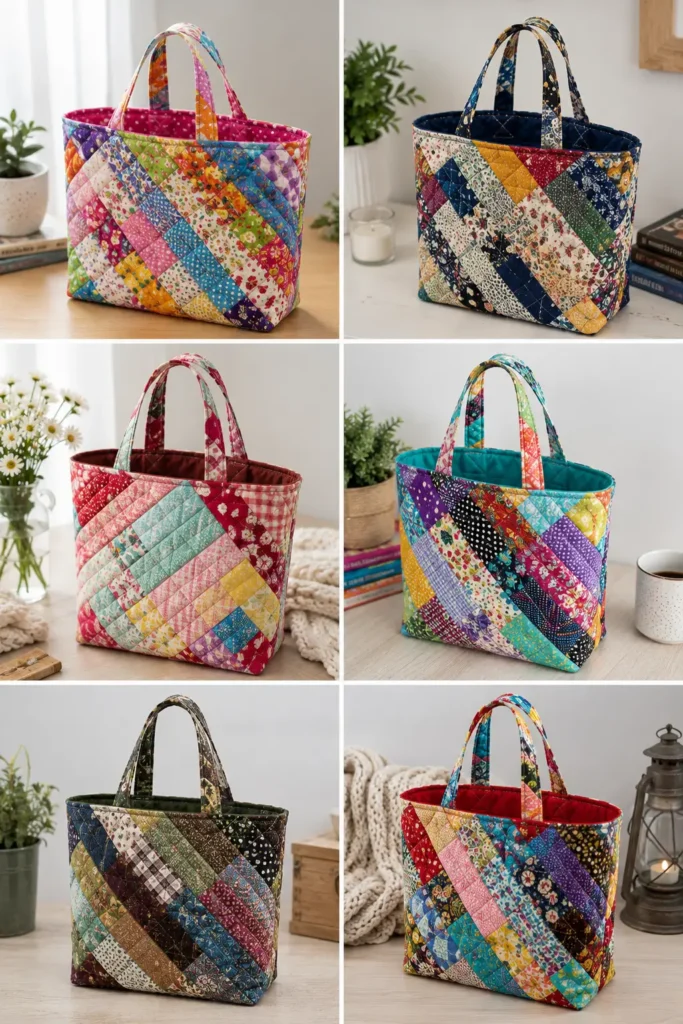
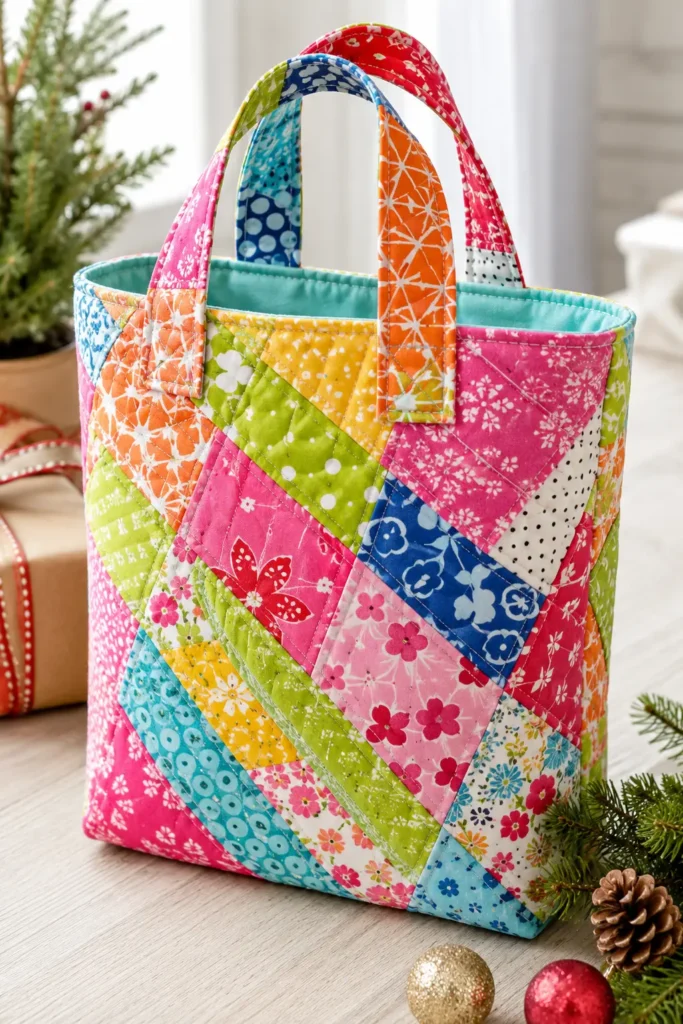
Finished size: approximately 9″ wide × 11″ tall × 3″ deep.
Gifts that fit this size: a bundle of fat quarters (fittingly), a couple of paperbacks, a boxed mug set, bath bombs and soap, a small game, kitchen gadgets grouped together, a jar of preserves with a wooden spoon, or a child’s soft toy.
Cutting List
Batting foundation: 2 pieces at 10″ × 12″ (the batting is the backing for the piecing — cotton batting works best as it grips the scraps)
Scraps: a generous heap, in strips and chunks roughly 2″–4″ wide, any length. You’ll trim as you go.
Lining: 2 pieces at 9½” × 11½”
Handles: 2 strips at 2½” × 14″, or 14″ webbing
Corner notches: 1½” squares, cut later
Seam allowance is ¼” throughout.
Step 1 — Anchor the First Scrap
Lay one batting foundation flat. Place your first scrap right side up, anywhere on it — a corner, an edge, the center. Diagonal placement gives the liveliest results, so try laying the first scrap at an angle rather than square to the batting.
Pin it or press it lightly; cotton batting holds it well enough on its own.
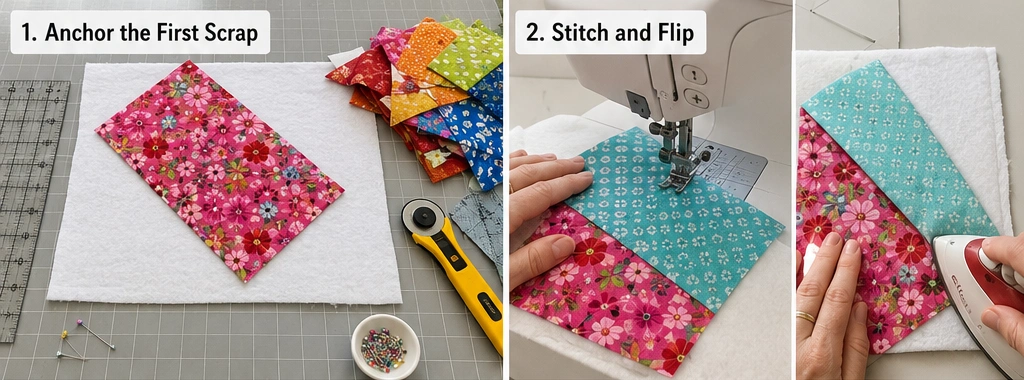
Step 2 — Stitch and Flip
Take a second scrap and lay it face down on the first, aligning one raw edge. Sew that shared edge through all layers — scrap, scrap, batting — with a ¼” seam.
Flip the second scrap open so it lies right side up. Finger-press the seam flat, then press with an iron. You’ve now covered a strip of batting with two scraps and quilted them down in one motion. That’s the entire technique; everything after is repetition.
Step 3 — Build Out the Panel
Keep adding scraps the same way, working outward until the batting is completely covered. Rotate the piece as you go and vary the angles so the seams run in different directions — a panel where every seam is parallel looks striped; one where they fan and cross looks scrappy in the good sense.
Don’t worry about scraps overhanging the batting edge. When the foundation is fully covered, flip the panel over and trim everything flush to the batting, then square it to 10″ × 12″. Build the second panel the same way. The two panels don’t need to match — they shouldn’t.
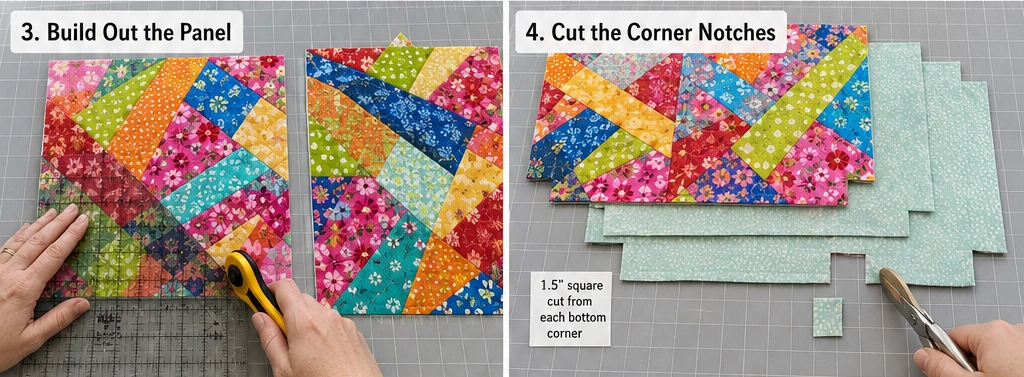
Step 4 — Cut the Corner Notches
Stack both quilted panels and both lining panels. Cut a 1½” square from each bottom corner of all four. Two 1½” notches per corner produce the 3″ base.
Assembly
Step 5 — Sew the Outer Bag
Place the two scrappy panels right sides together. The seams won’t line up across the side edges and they aren’t meant to — that’s the nature of a scrap bag. Pin and stitch down one side, across the bottom, and up the other side, leaving the notched corners open. Backstitch at both ends.
To box each corner, pull the opening apart so the side seam sits on top of the bottom seam in a straight line. Match, pin, and stitch across. Repeat on the second corner. Turn right side out.
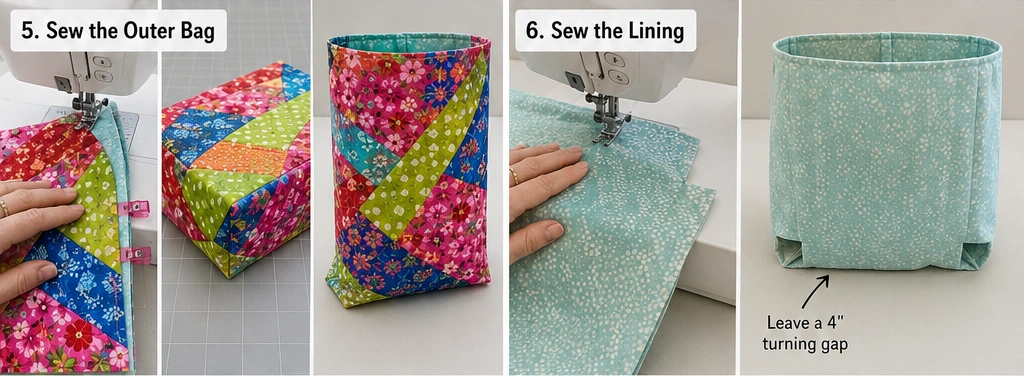
Step 6 — Sew the Lining
Repeat Step 5 with the lining panels, leaving a 4″ gap in the bottom seam for turning and backstitching at both ends. Leave the lining wrong side out.
Consider a solid lining here — a calm interior gives the eye somewhere to rest against all that exterior activity, and a single bright solid pulled from one of the scraps ties the whole thing together.
Step 7 — Make and Attach the Handles
If sewing fabric handles, press each 2½” × 14″ strip in half lengthwise, open it out, fold both long edges to the center crease, fold in half again, and edge-stitch both sides.
With the outer bag right side out, mark handle placement 2¼” in from each side seam. Pin a handle to the outside at each pair of marks, raw ends level with the top edge and the loop hanging down. Check for twists and baste ⅛” from the edge.
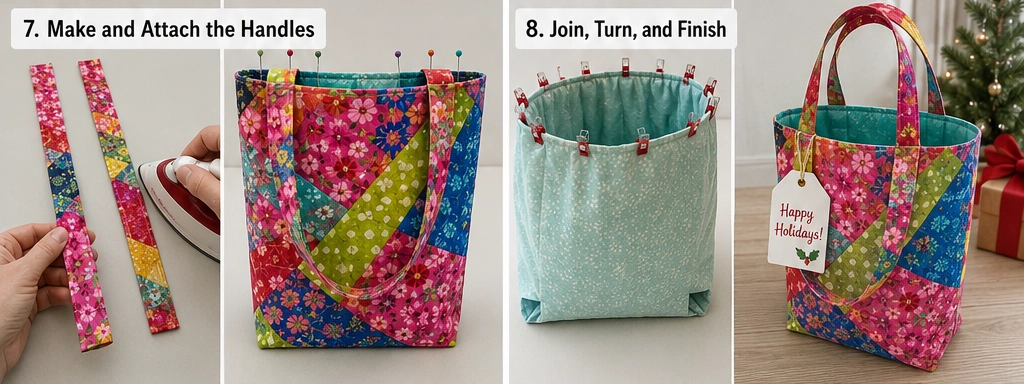
Step 8 — Join, Turn, and Finish
Drop the outer bag inside the lining, right sides together, handles sandwiched between. Match the side seams and pin around the top. Stitch the full opening with a ½” seam, going twice over each handle.
Pull the bag through the lining gap, outer fabric first. Close the gap by folding the raw edges in and edge-stitching ⅛” from the fold. Push the lining down, roll the top seam so the lining sits just below the rim, press, and topstitch ⅛” around the opening.
Other Design Inspirations – Digitally Modified
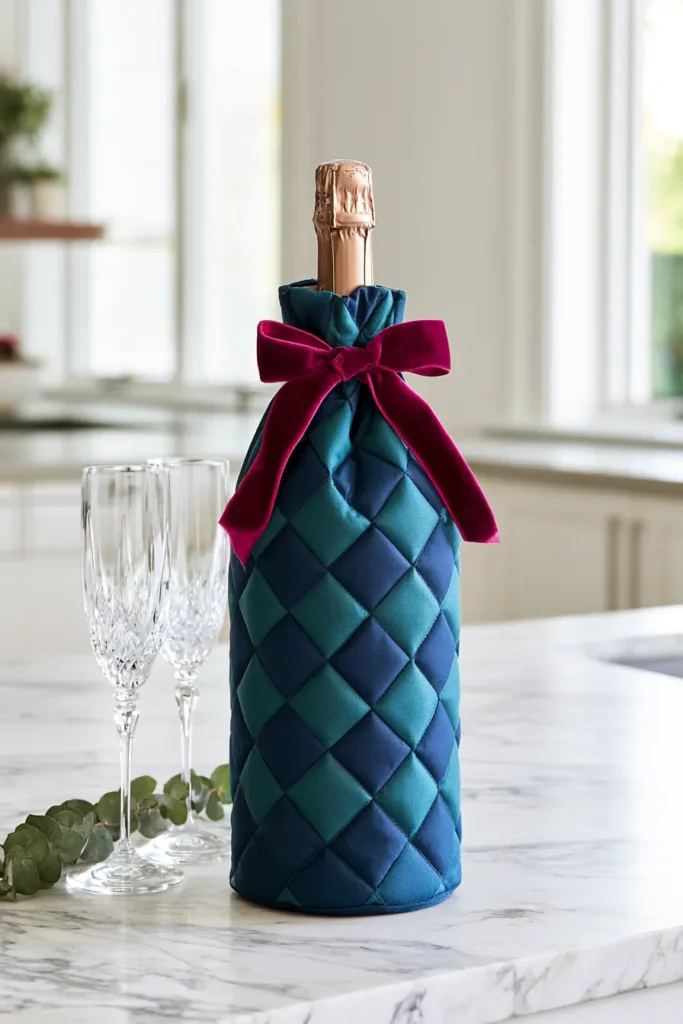
6. Quilted Wine Bottle Gift Bags for Holiday Hosts
Arriving at a holiday party with a bottle is an old courtesy, and dressing that bottle is older than you’d think. The tradition of not showing up empty-handed traces back centuries, and the specific idea of concealing the gift’s identity until it’s opened has roots in various customs where the wrapping was itself part of the gesture. A quilted bottle bag does both jobs at once: it hides the label until the moment of giving, and unlike a paper bag or tissue, it stays with the host as something they’ll reuse — which quietly turns a bottle of wine into a bottle of wine plus a handmade gift.
The construction is one of the most satisfying in this collection because it starts from a single quilted square. You quilt one panel, fold it in half, seam two sides, box the corners, and you have a bottle-shaped tube — no separate front, back, and gusset to align. It’s the closest thing to instant gratification quilting offers.
A standard 750ml wine bottle is about 12″ tall and 3″–3½” in diameter, and this bag is sized to fit it with a little room at the top for a fold-over or a ribbon tie.
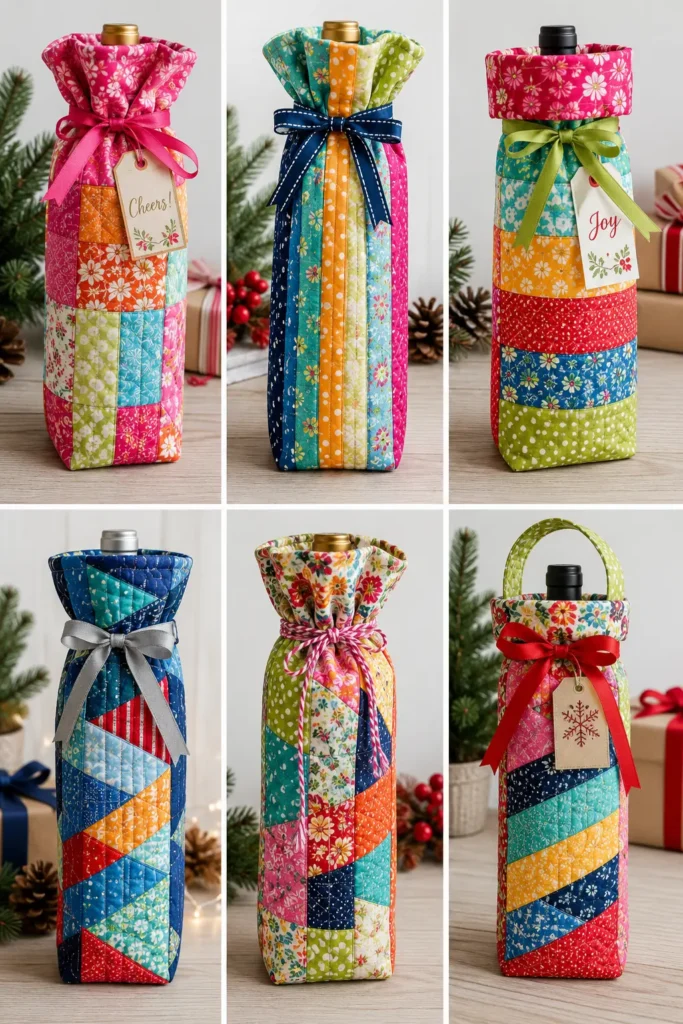
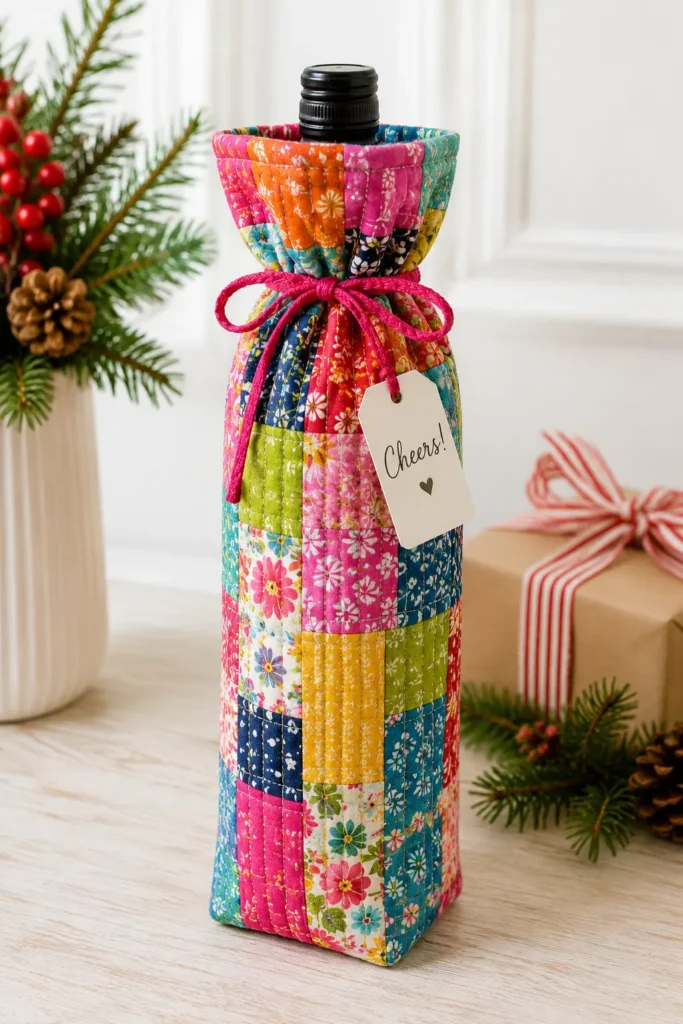
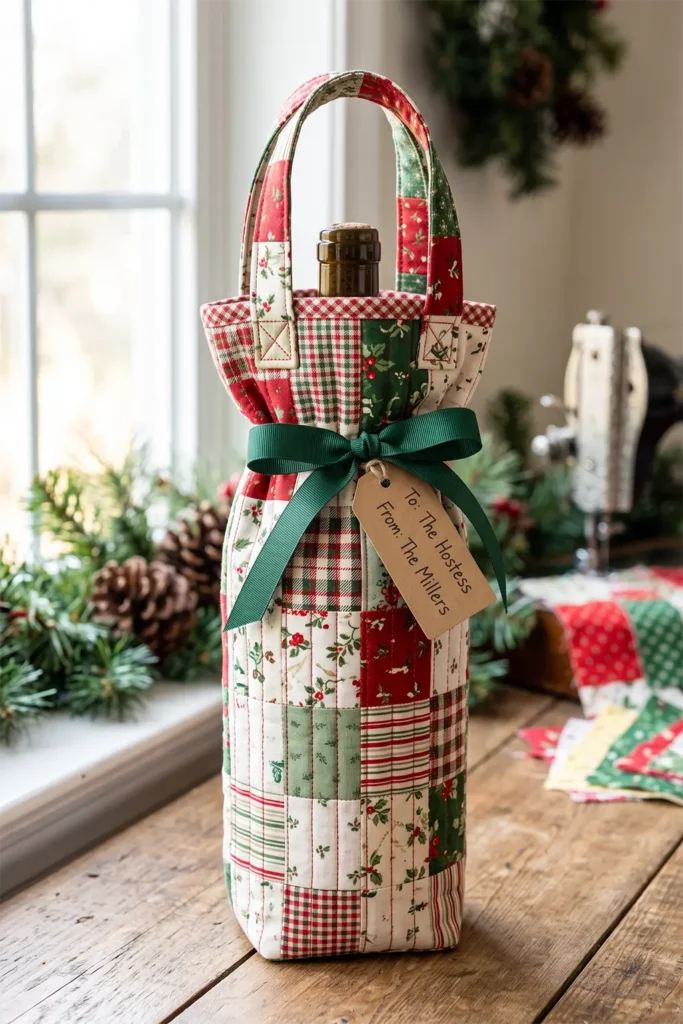
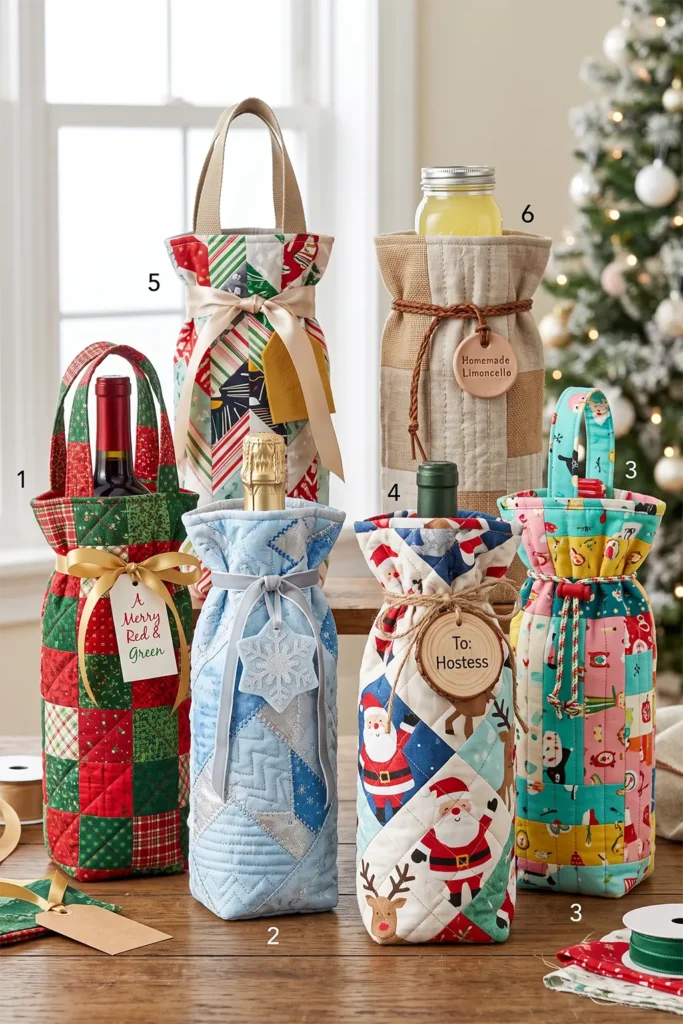
Finished size: fits a standard 750ml bottle; approximately 4″ wide × 13″ tall × 3″ deep.
Gifts that fit this bag: a bottle of wine, champagne, or prosecco, of course — but also olive oil or balsamic vinegar, a bottle of maple syrup or specialty spirits, a tall jar of homemade limoncello, sparkling cider for a dry household, or a bottle of hot sauce or artisan soda for a novelty gift.
Cutting List
Outer fabric: 1 piece at 13″ × 13″
Batting (thin): 1 piece at 13″ × 13″ — thin is the operative word; thick batting makes the bag too stiff to fold and cinch
Lining: 1 piece at 13″ × 13″
Handles (optional): 2 strips at 2½” × 10″
Seam allowance is ¼” to ½” — a little wider gives a snugger fit around the bottle.
A thin cotton or cotton-blend batting is worth seeking out here. The whole bag is one small quilt sandwich, and a low-loft batting quilts up firm and flexible, holds the bottle shape without bulking at the seams, and lets the top fold over cleanly instead of standing up like a stovepipe.
Step 1 — Build the Quilt Sandwich
Lay the lining piece down, wrong side up. Center the batting on top and smooth it flat. Lay the outer fabric on top, right side up. You now have a 13″ square quilt sandwich.
If you have fusible batting, this is an ideal project for it — a quick press locks all three layers with no basting and no shifting while you quilt.
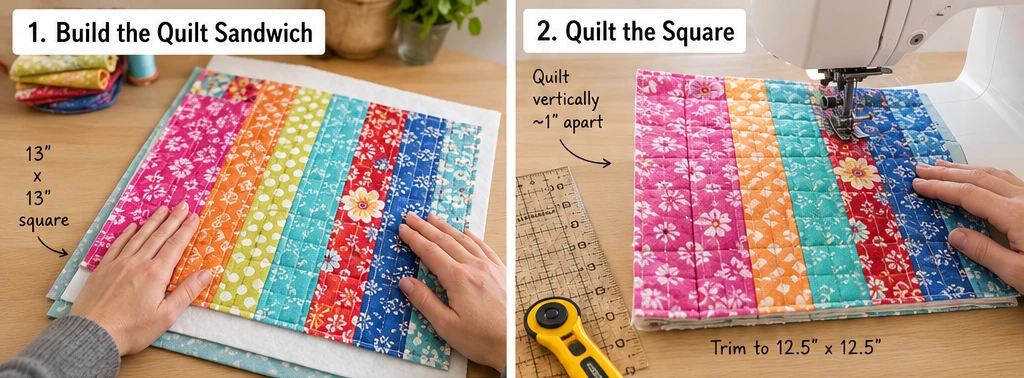
Step 2 — Quilt the Square
Quilt as desired. Straight lines running in one direction are enough for a bag this small — a full crosshatch looks handsome but isn’t necessary. Mark your first line, stitch it, and space the rest off it with a guide bar or the edge of the presser foot.
If you’d rather keep it simple, quilt straight vertical lines about 1″ apart. They’ll run up the height of the finished bottle bag and echo its tall, narrow shape.
Once quilted, trim the square down to a clean 12½” × 12½”.
Step 3 — Make the Handles (Optional)
If you want handles, press each 2½” × 10″ strip in half lengthwise, open it, fold the long edges to the center, fold in half again, and edge-stitch both sides. Set aside. Many bottle bags skip handles entirely in favor of a simple ribbon cinch, so this step is genuinely optional.
Assembly
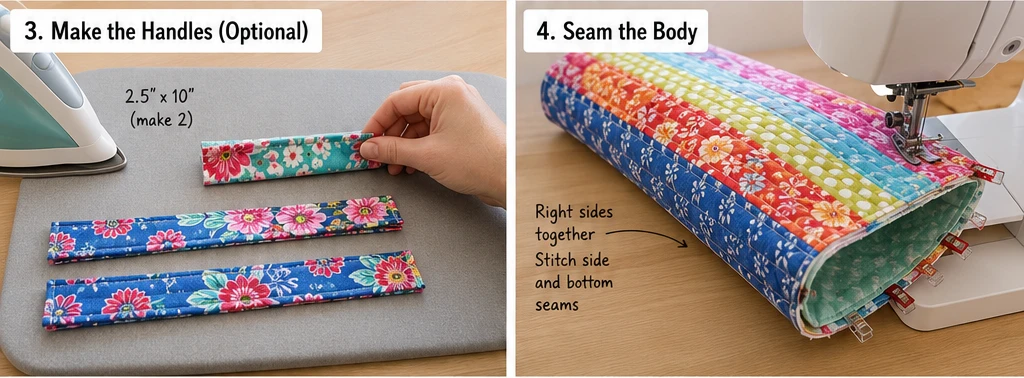
Step 4 — Seam the Body
Fold the quilted square in half, right sides together, bringing the two side edges to meet. You’ll have a folded tube open at the top and along one long side.
Stitch down the open long side and across the bottom with a ¼”–½” seam. A slightly wider seam here makes a snugger sleeve, which helps the bottle sit securely — but check the fit against your actual bottle before committing, since batting loft varies. Backstitch at both ends.
Step 5 — Box the Corners
Box both bottom corners to give the bag a flat base the bottle can stand on. Pull one corner open so the side seam lies directly over the bottom seam, forming a point. Measure 1″ in from the point and mark a line across — the base is narrow because the bottle is narrow. Because this panel is quilted and the space is tight, this corner is a little fiddlier than on a roomier bag; take it slowly and keep the seams aligned.
Stitch across the marked line. Repeat on the second corner. Trimming the corner triangles is optional — leaving them adds a little strength at the base, which is welcome under the weight of a full bottle.
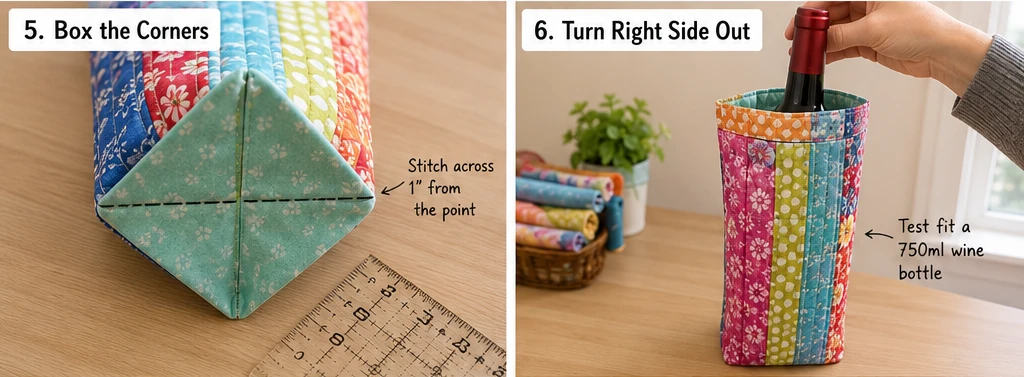
Step 6 — Turn Right Side Out
Turn the bag right side out and push both corners into shape. Slip your test bottle in and check the fit — snug but not straining, with a few inches to spare at the top for the finish.
Step 7 — Finish the Top Edge
Because the bag isn’t separately lined, the top raw edge gets a double fold to enclose it cleanly.
Fold the top edge down toward the outside by about ½”, then fold again by another ½”–1″, tucking the raw edge under itself. The quilted layers make this bulky, so pin generously — the stripes of your quilting, if you ran vertical lines, help you keep the fold even all the way around.
Stitch around the fold about ½” down, catching the inner folded edge. This gives you a clean, finished rim with no raw edge in sight.
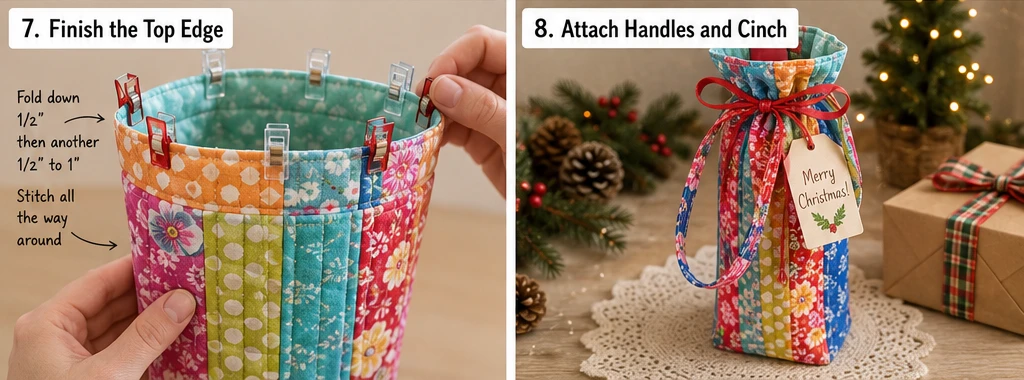
Step 8 — Attach Handles and Cinch (Optional)
If using handles, position each end just inside the top edge, about 1″ in from the side seams, and stitch a small box-and-X at each attachment point for strength — a full bottle is heavy and the handle joins take real load.
Whether or not you add handles, finish by cinching the top with wide ribbon, cord, or a strip of coordinating fabric tied in a bow just below the bottle’s neck. A gift tag threaded onto the ribbon completes it.
Other Design Inspirations – Digitally Modified



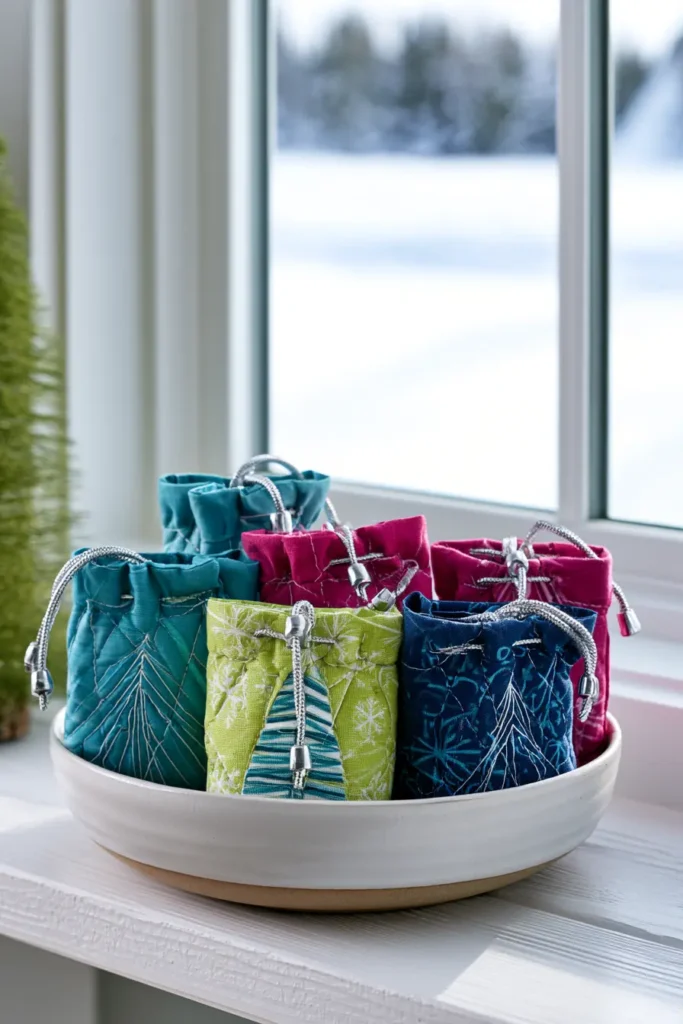
7. Mini Quilted Gift Pouches for Stocking Stuffers
The small drawstring pouch is the direct ancestor of the modern stocking itself. Before commercial gift wrap existed, small treasures were given in little cloth bags, and the whole custom of the Christmas stocking grows from the same root — the legend of St. Nicholas dropping coins into stockings hung by the fire is, in essence, a story about a gift delivered in a soft cloth container rather than a box. A mini quilted pouch is a stocking stuffer that’s also, in miniature, a stocking in spirit.
These are the fastest projects in the collection and the best use for your tiniest scraps — the pieces too small even for the scrappy bag. They stitch up in fifteen minutes once you’ve made one, so they’re ideal for batch-sewing an afternoon’s worth. Make a dozen and every small gift in the house has a home.
Because they’re small, they take bold color beautifully. A single vivid print or a handful of jewel-bright scraps reads better at this scale than anything subtle — the pouch is too little to carry a quiet palette.
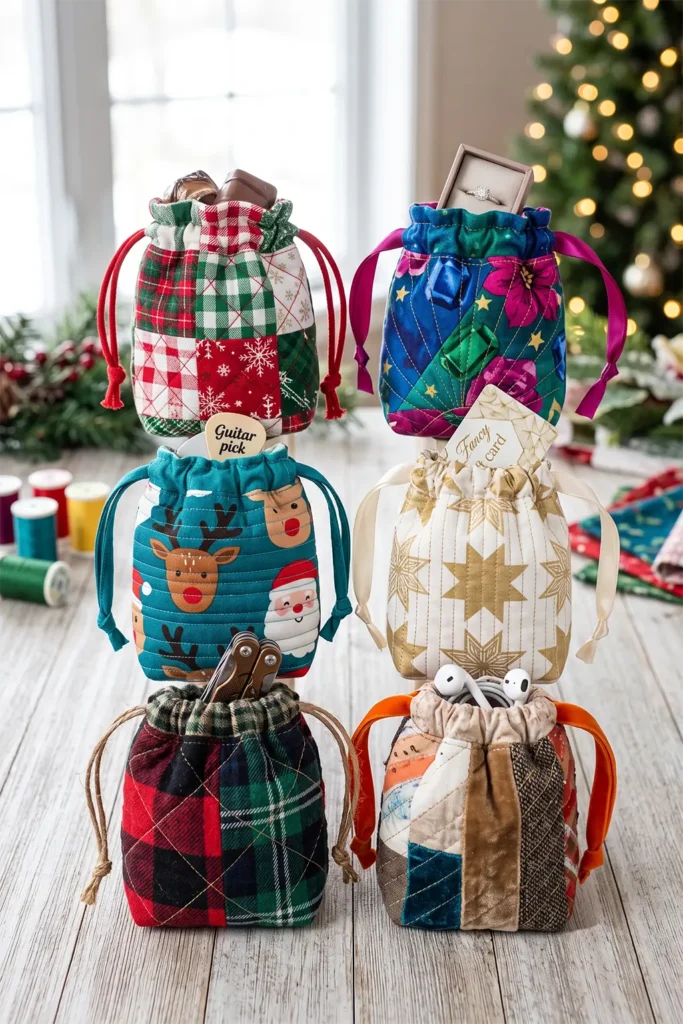
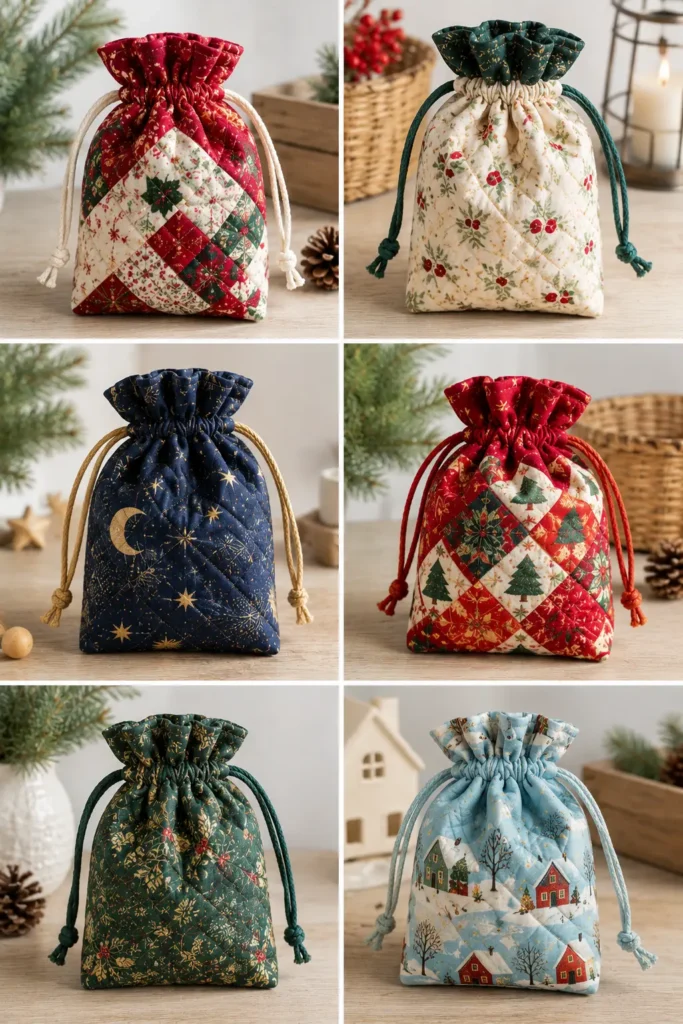
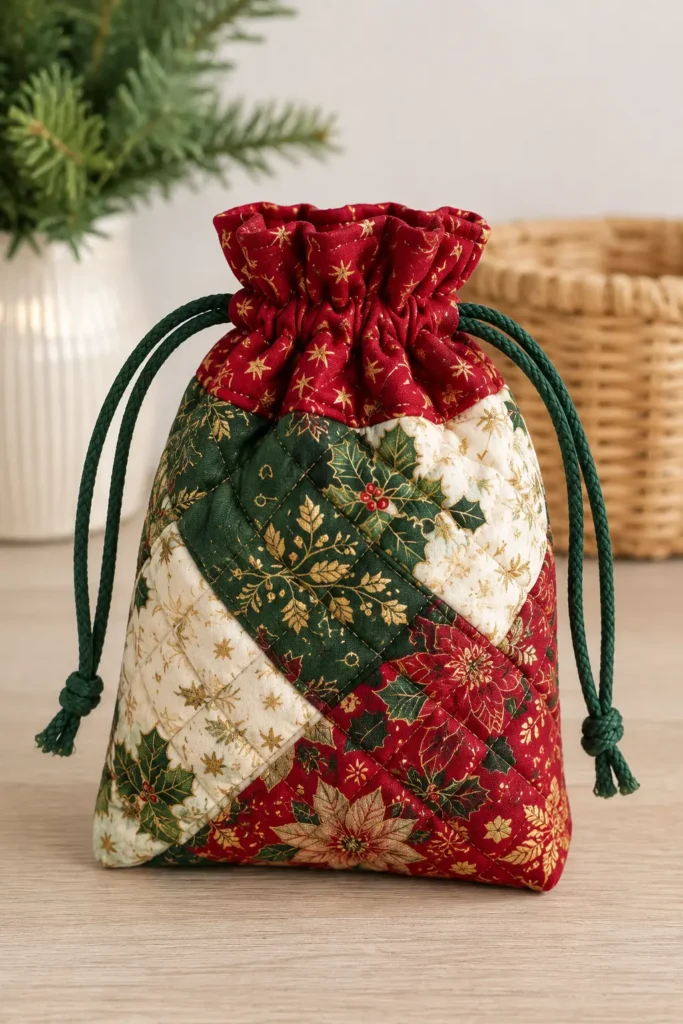
Finished size: approximately 5″ wide × 6″ tall. Scale everything up or down freely; the method doesn’t change.
Gifts that fit these pouches: jewelry, a watch, earrings, or a ring box; chocolates, candy, or a few gourmet truffles; a gift card or folded cash; lip balm and mini cosmetics; guitar picks or earbuds; a pocketknife or multitool; dice or game tokens; a small ornament; hair ties and clips; or a USB drive and small tech.
Cutting List
Outer fabric: 2 pieces at 5½” × 7″
Fusible fleece or thin batting: 2 pieces at 5½” × 7″
Lining: 2 pieces at 5½” × 7″
Cord or ribbon: 2 lengths at 16″, about ¼” wide
Seam allowance is ¼” throughout.
At this size, fusible fleece is easier to handle than a loose batting sandwich — one press and the layer is anchored, with no shifting to fight on such small pieces.
Step 1 — Fuse and Quilt
Press a piece of fusible fleece to the wrong side of each outer piece.
Quilt each panel simply — a small diamond crosshatch or a few straight diagonal lines is plenty. On a piece this small, three or four quilting lines make the point; you don’t need dense quilting. Trim each panel back to a true 5½” × 7″.
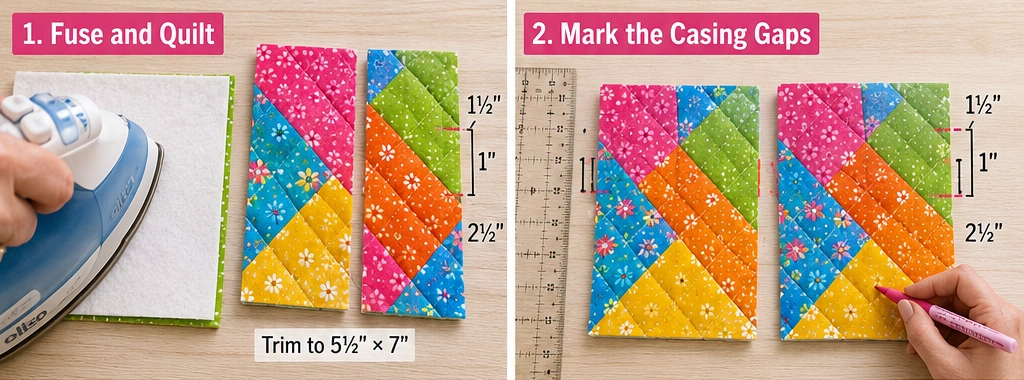
Step 2 — Mark the Casing Gaps
On each side edge of both panels, measure down 1½” from the top raw edge and mark, then down 2½” and mark again. That 1″ span stays unstitched to let the drawstring pass through. Four marks per panel, eight in all.
Assembly
Step 3 — Sew the Outer Pouch
Place the two quilted panels right sides together, matching the casing marks on both sides.
Stitch down one side from the top to the first mark, backstitch, skip the 1″ gap, resume at the second mark and backstitch, then continue down the side, across the bottom, and up the other side — leaving the matching gap on that side too. Backstitch firmly at every opening; the drawstring pulls hard on these small seams.
Press the side seams open across the gap area so the casing will lie flat.
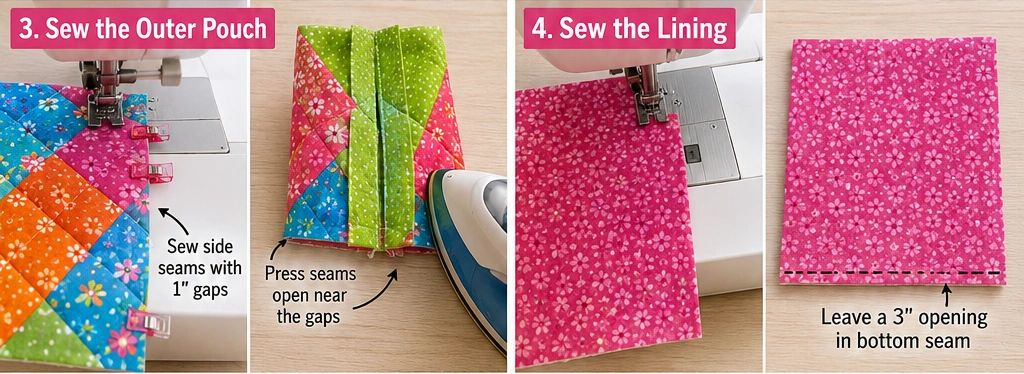
Step 4 — Sew the Lining
Place the lining pieces right sides together. Stitch down one side, across the bottom, and up the other — no casing gaps. Leave a 3″ opening in the bottom seam for turning, backstitching at both ends. Even on a small pouch, don’t skimp on this gap; fleece is stubborn to turn through a tight hole.
Leave the lining wrong side out. Turn the outer pouch right side out.
Step 5 — Join Outer and Lining
Drop the outer pouch inside the lining, right sides together, top edges aligned and side seams matched. Pin around the opening and stitch the full circle with a ¼” seam. Mark your start with a pin.
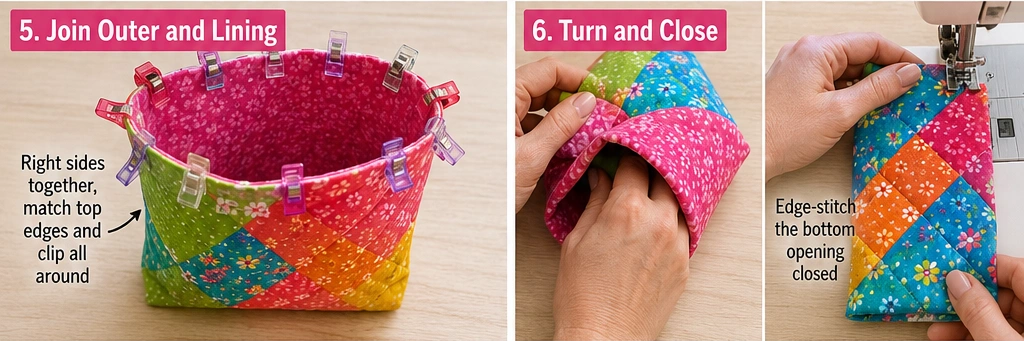
Step 6 — Turn and Close
Pull the pouch through the lining gap, outer fabric first. Fold the gap’s raw edges in and edge-stitch ⅛” from the fold to close it. Push the lining down inside.
Roll the top seam so the lining sits just below the rim, press, and topstitch ⅛” around the opening.
Step 7 — Stitch the Casing
Measure down 1¼” from the finished top edge and mark a line around the pouch; mark a second line at 2″. Your side-seam gaps should sit between these lines.
Stitch on both lines, through all layers, all the way around. You now have a ¾” channel.
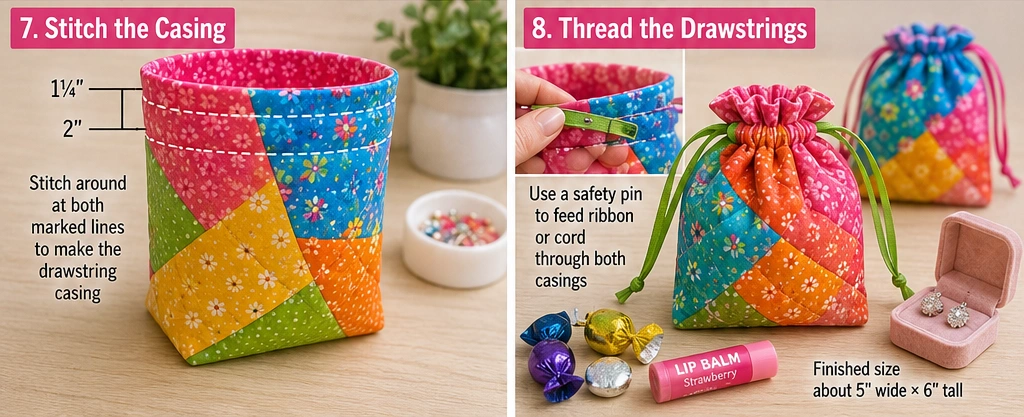
Step 8 — Thread the Drawstrings
Tape the ends of each cord to stiffen them. Attach a safety pin to the first cord, feed it in through the left gap, around the channel, and back out the left gap; tie those ends. Repeat with the second cord from the right gap. The two cords form opposing loops, so pulling both sides cinches the pouch evenly. Even up the tails and knot each pair.
A quick tip for batch-sewing: chain-piece the pouches. Feed one after another through the machine at each step without cutting the thread between them, then snip them apart. A dozen pouches go together nearly as fast as one this way.
Other Design Inspirations – Digitally Modified

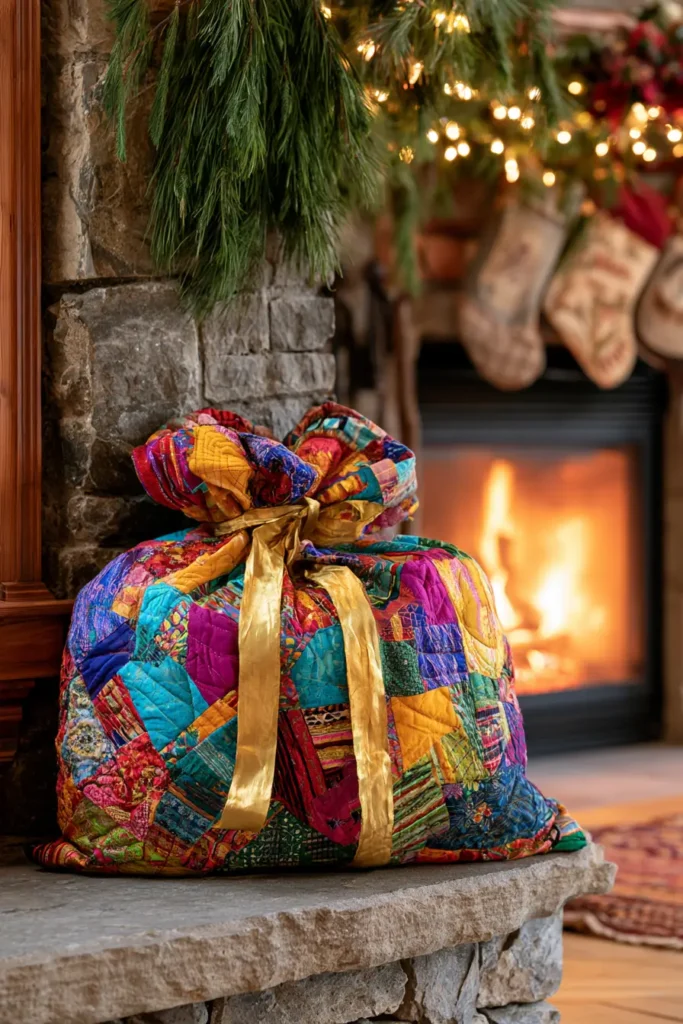
8. Jumbo Quilted Santa Sacks for Oversized Presents
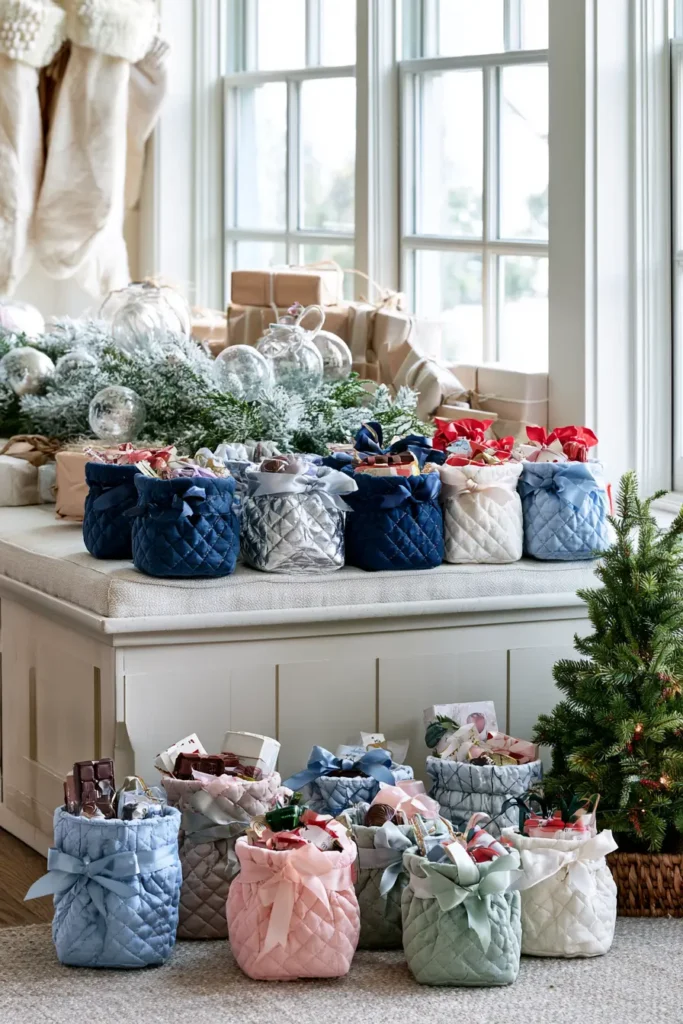
The Santa sack has a real lineage worth knowing. The image of a gift-bringer with a sack slung over one shoulder predates the modern Santa Claus and draws on older European figures — the sack was practical iconography before it was decorative, the obvious way to carry many gifts at once on foot or by sleigh. Victorian Christmas cards cemented the picture, and the oversized cloth sack has been shorthand for holiday abundance ever since. A jumbo quilted version turns that shorthand into something a family keeps and refills every year, and it solves a genuinely annoying problem: the bicycle, the giant plush, the boxed appliance that no roll of wrapping paper will ever cover neatly.
At this scale, construction changes character. The sewing is still simple — it’s a big rectangle folded and seamed — but the handling is the challenge. A yard of quilted fabric is heavy and slippery, so the tips throughout are less about technique and more about wrangling bulk. A large flat surface and a walking foot are your two best friends here.
Because the sack is large and often reused for years, this is a place to go bold and durable: a saturated red with a wide contrast cuff, or a bright modern print that won’t look dated by the third December. Vibrant holds up; muted disappears under the tree.
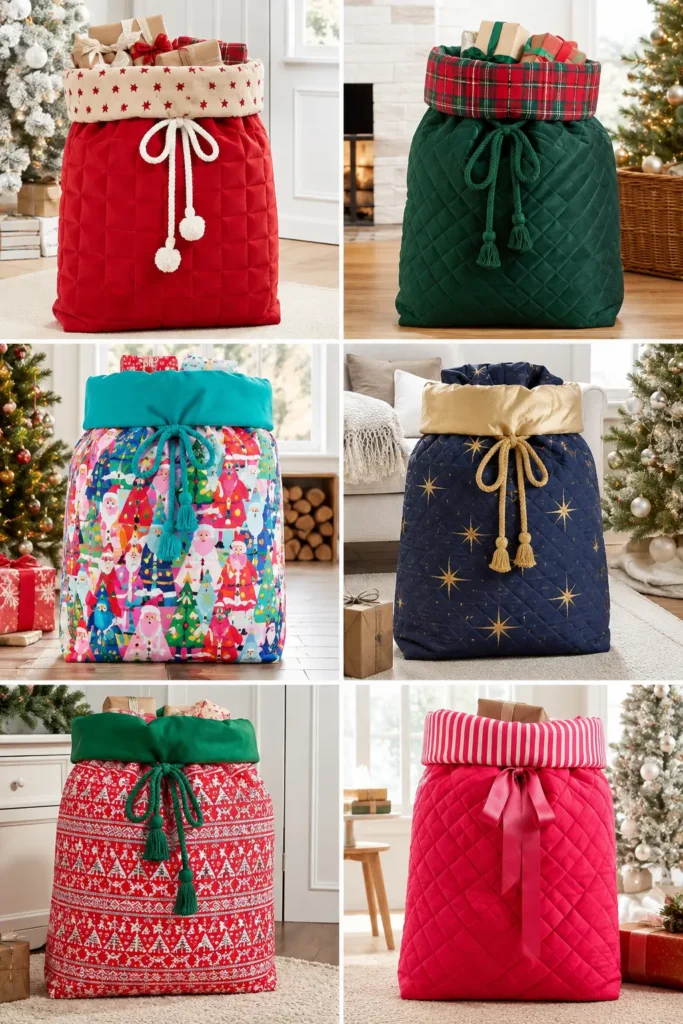
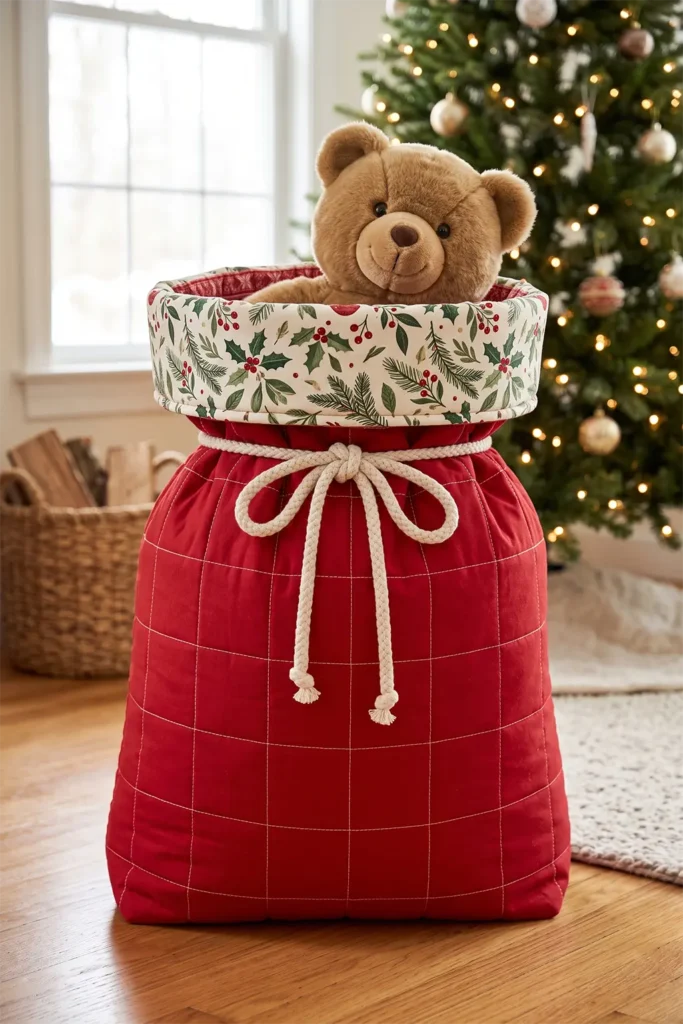
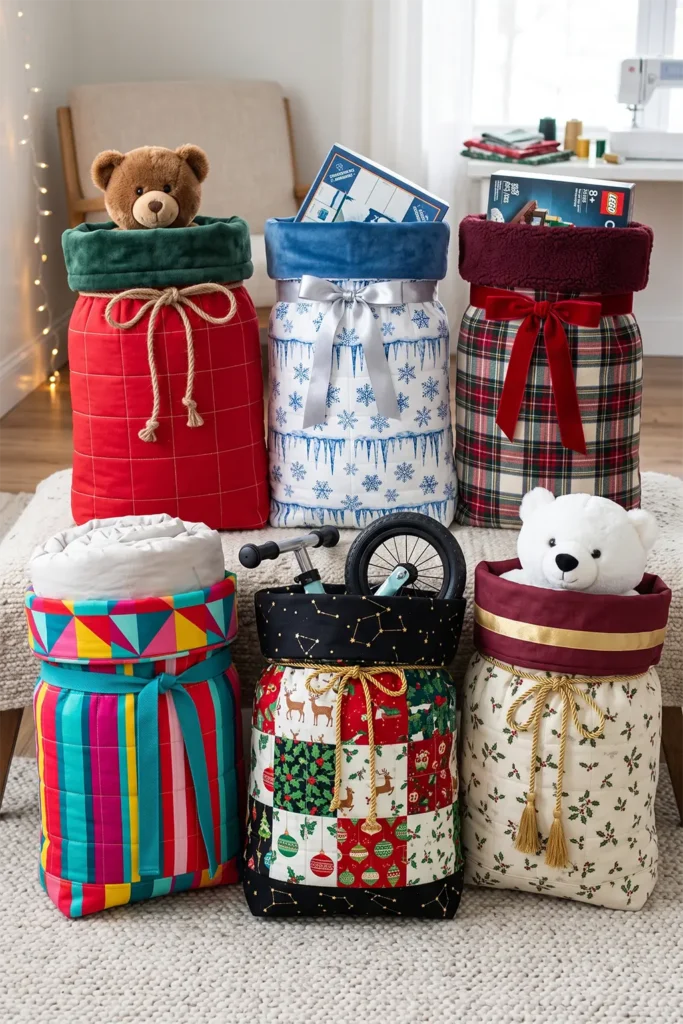
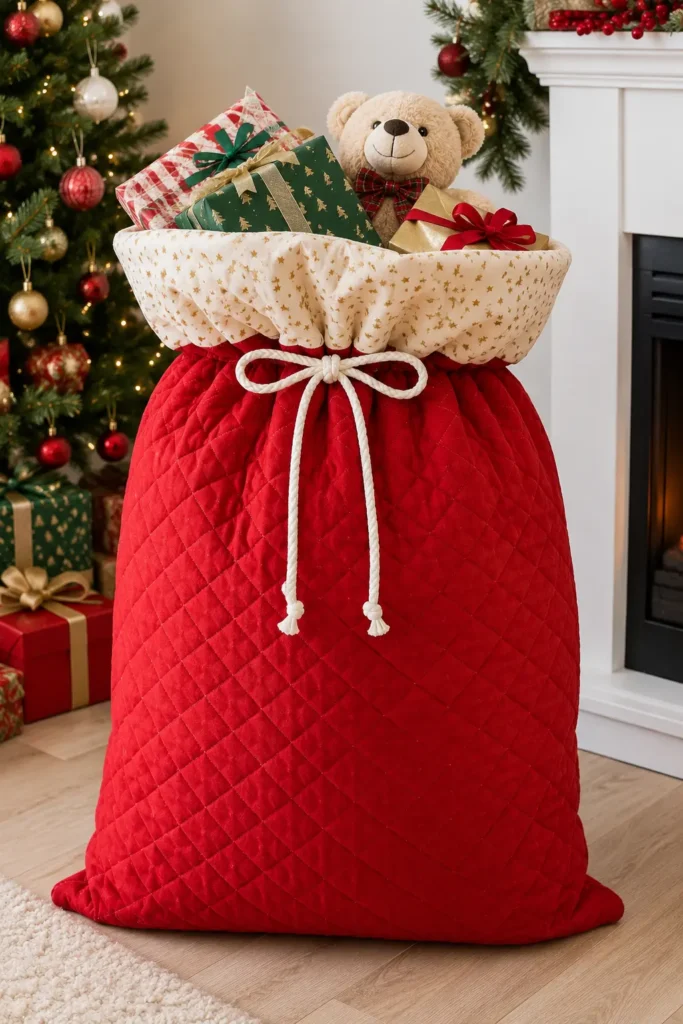
Finished size: approximately 24″ wide × 30″ tall × 6″ deep. Genuinely large — adjust freely, as the method is identical at any size.
Gifts that fit this sack: a children’s bicycle or scooter, a large stuffed animal, a boxed board game bundle, bed pillows or a duvet, a bulky winter coat, sports equipment, a big LEGO or toy set, several wrapped gifts grouped into one grand reveal, or a beanbag or floor cushion.
Cutting List
Because quilting cotton is typically 42″–44″ wide, a jumbo sack usually means piecing or working with wide backing fabric. This version assumes 44″ fabric used efficiently.
Outer fabric: 2 panels at 25″ × 31″
Batting or fusible fleece: 2 pieces at 25″ × 31″
Lining: 2 panels at 25″ × 31″
Contrast cuff: 2 strips at 25″ × 10″ (folded double for a plush turned-down band)
Cord or heavy ribbon for the tie: 2 yards, at least ¾” wide
Seam allowance is ½” throughout — a wider allowance stands up to the weight and stress a full sack puts on its seams.
At this size, a quilt-as-you-go approach or a lightly quilted fusible-fleece panel both work; dense quilting isn’t necessary and adds a lot of weight. A wide grid — lines 2″–3″ apart — keeps the layers together without turning the sack into a stiff board.
Step 1 — Quilt the Large Panels
Fuse fleece to the wrong side of each outer panel, or build a full batting sandwich if you prefer. Work on the largest flat surface you have; a panel this size will drag and distort off the edge of a small table.
Quilt a wide grid — mark your first line, stitch, and space the rest 2″–3″ apart with a guide bar. A walking foot is close to essential here to keep the layers feeding evenly across such a long run. Trim both panels to a true 25″ × 31″.
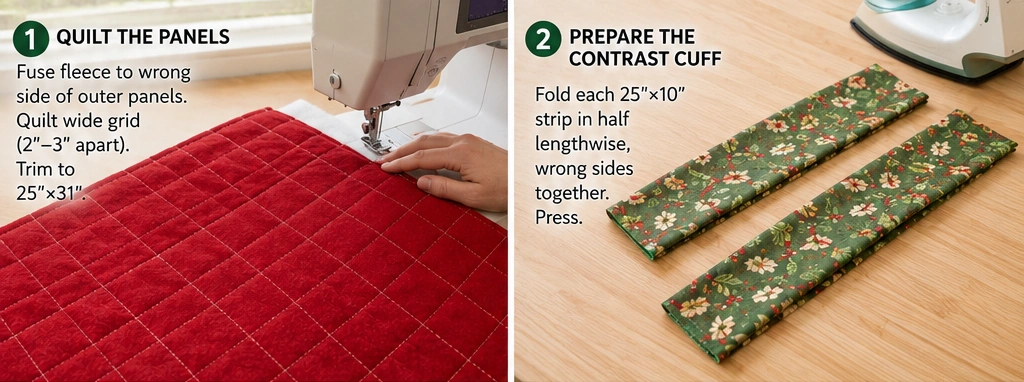
Step 2 — Prepare the Contrast Cuff
Fold each 25″ × 10″ cuff strip in half lengthwise, wrong sides together, to make a doubled 25″ × 5″ band with one long raw edge. Press. The doubled fabric gives the turned-down cuff body and weight so it flops over crisply rather than curling.
Assembly
Step 3 — Attach the Cuffs
Lay one quilted panel right side up. Place a folded cuff on top, raw edges aligned with the top edge of the panel, and baste across ½” from the edge. Repeat with the second cuff on the second panel. The cuffs are now anchored and will be caught in the top seam later.
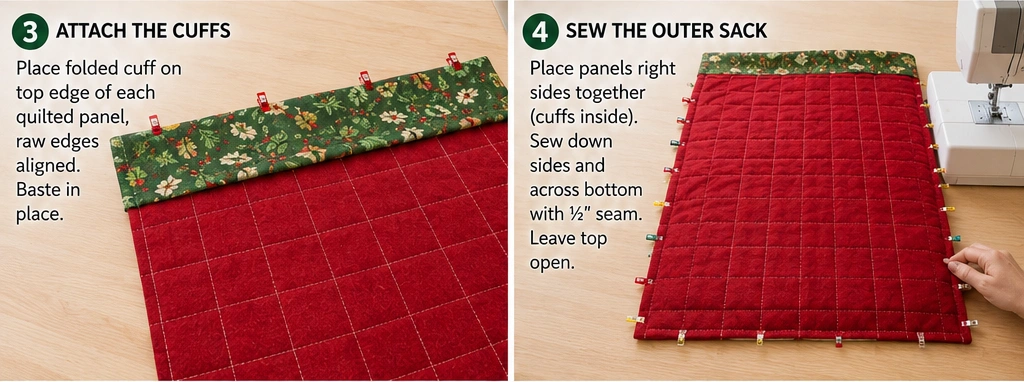
Step 4 — Sew the Outer Sack
Place the two quilted panels right sides together — cuffs sandwiched inside, out of the way of the side and bottom seams. Pin generously; big quilted panels shift, and pins every few inches keep the edges honest.
Stitch down one side, across the bottom, and up the other side with a ½” seam, leaving the top open. Backstitch at both ends and consider a second pass over the bottom seam for strength — this seam carries the weight of whatever’s inside.
Step 5 — Box the Corners
Box both bottom corners for a flat, roomy base. Pull one corner open so the side seam lies over the bottom seam. Measure 3″ in from the point and mark a line across — 3″ on each side gives the 6″ base. Stitch across, backstitch, and repeat on the second corner. Trim the corner triangles and consider zigzagging the raw edge, since a heavily loaded sack stresses these cuts.
Turn the outer sack right side out and push the corners square.
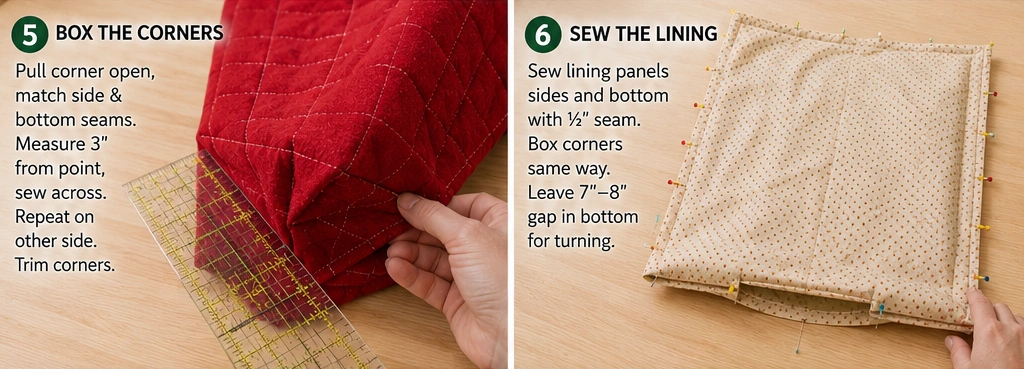
Step 6 — Sew the Lining
Place the lining panels right sides together and sew down both sides and across the bottom with a ½” seam, boxing the corners exactly as you did the outer sack. Leave a 7″–8″ gap in the bottom seam for turning — at this scale, a generous gap is essential, because pulling a sack this heavy through a small opening is genuinely difficult. Leave the lining wrong side out.
Step 7 — Join Outer and Lining
Drop the outer sack down inside the lining, right sides together, with the cuffs tucked down between the layers. Match the side seams and pin around the entire top opening — a lot of pins here, as there’s a lot of edge and a lot of bulk.
Stitch around the full opening with a ½” seam. Mark your starting point so you know where to stop.
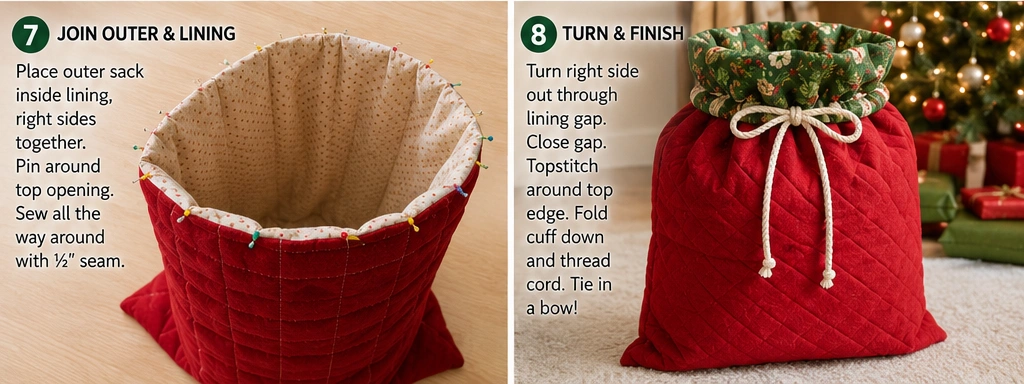
Step 8 — Turn and Finish
Pull the whole sack through the lining gap, outer fabric first. This takes patience with a piece this size — feed it through steadily rather than yanking.
Close the lining gap by folding the raw edges in and edge-stitching, or slip-stitching by hand. Push the lining down inside; the cuff will flip up above the top edge. Fold it down to the outside so the contrast band shows, and press.
Topstitch ½” around the top edge to hold the lining and cuff in place. To close for gifting, gather the top and tie with heavy cord or ribbon in a big bow — or add a simple casing in the cuff and thread a drawstring for a true Santa-sack cinch.
Other Design Inspirations – Digitally Modified
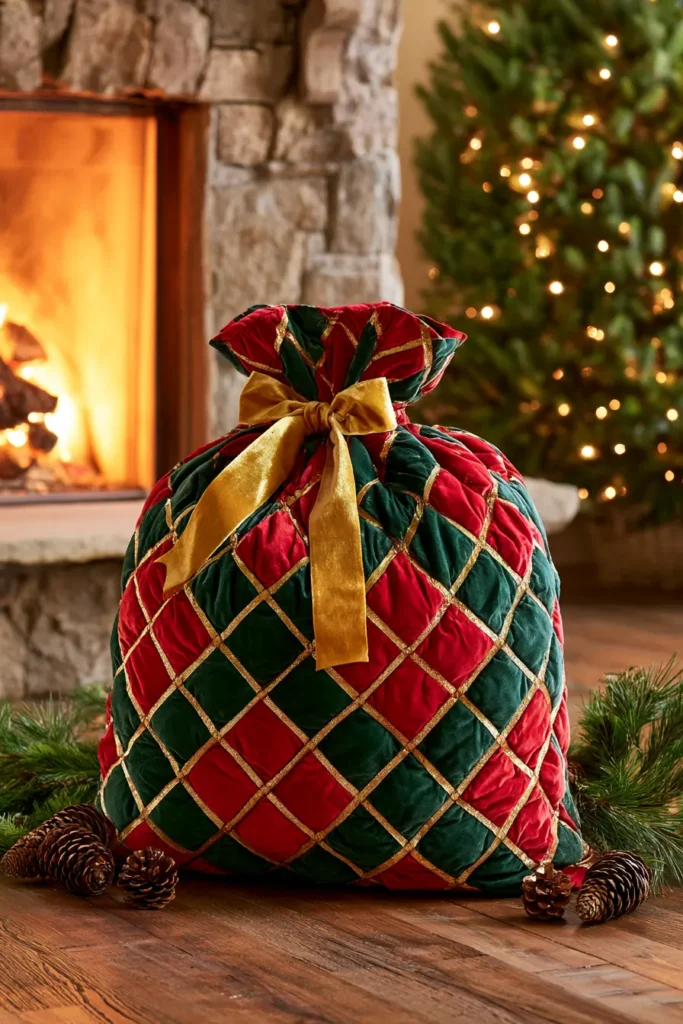
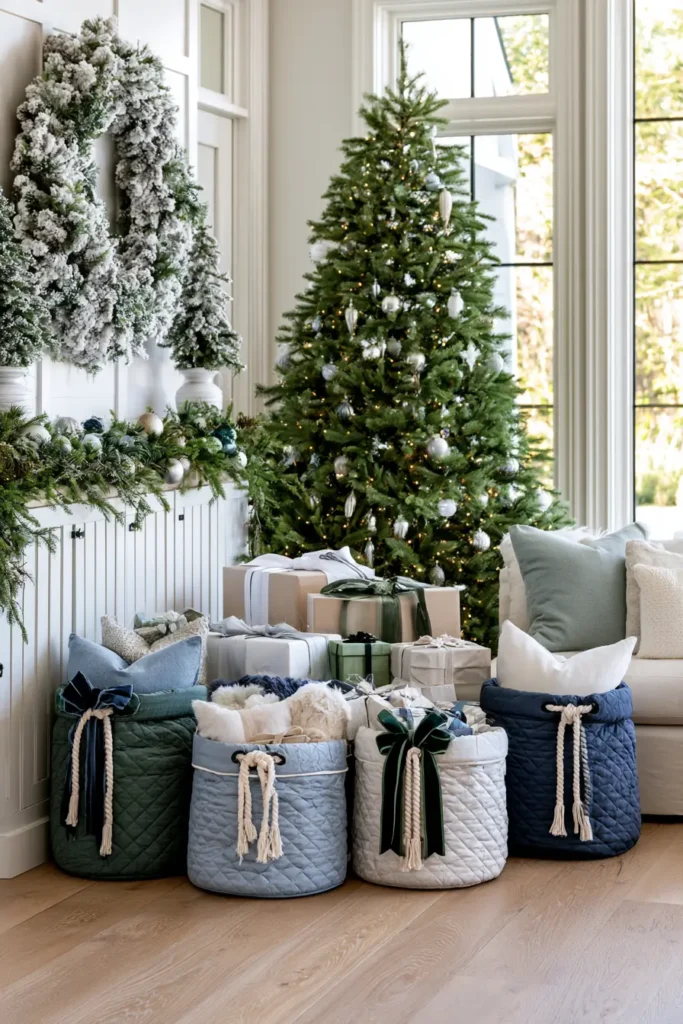
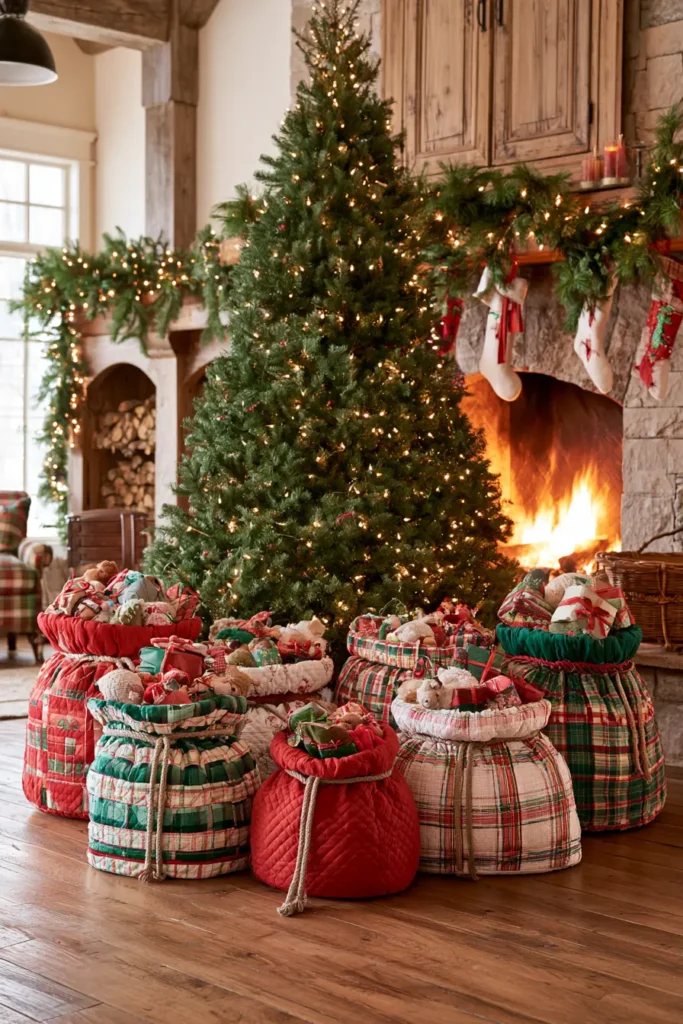
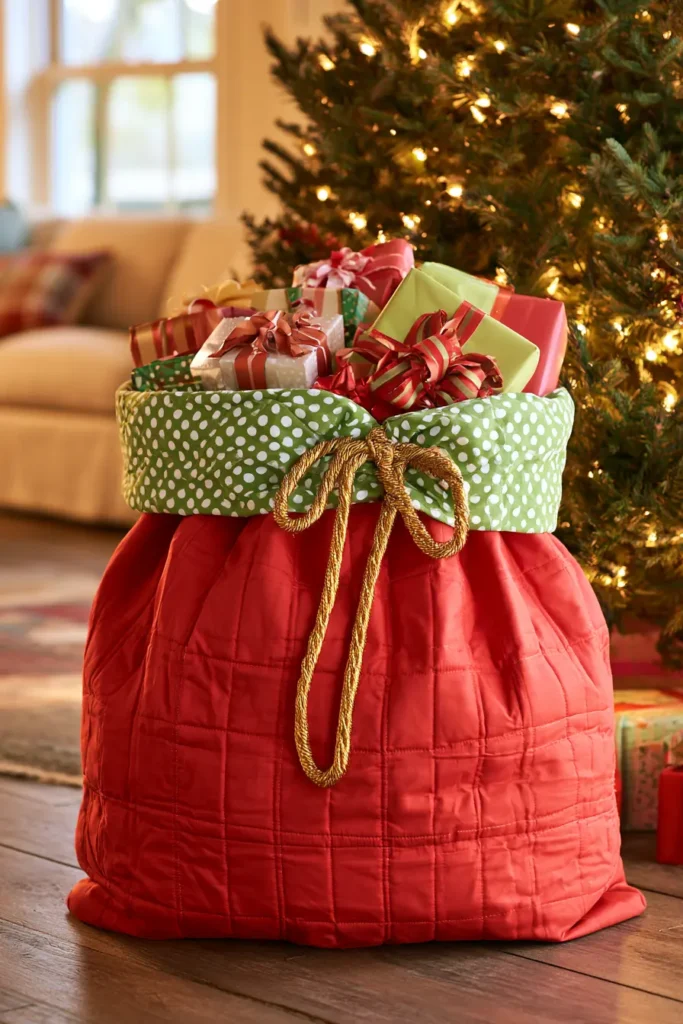
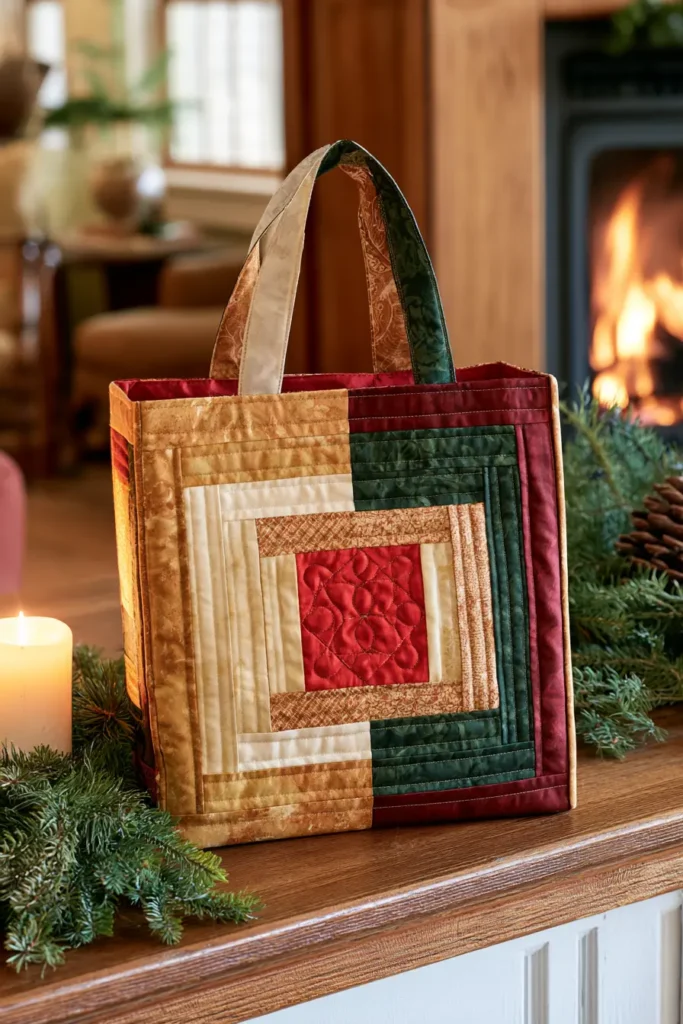
9. Log Cabin Block Quilted Christmas Gift Bags
The log cabin is one of the most storied blocks in quilting, and its rules carry meaning worth knowing before you cut a single strip. The block is built around a center square — traditionally red, representing the hearth fire at the heart of the home, or sometimes yellow for the light in the window. Strips (“logs”) are added around that center in rounds, and here’s the defining rule: one half of the block is built from light fabrics, the other from dark. That light-and-dark split is said to represent the two sides of a log cabin — the sunlit side and the shadowed side, or in the folk reading, the joys and sorrows of the household.
The block rose to huge popularity during and after the American Civil War, and a persistent piece of quilt lore holds that a log cabin quilt with a black center square hung in a window signaled a safe house on the Underground Railroad. Historians treat that story with caution, but it has traveled with the block for generations.
For a gift bag, you need just one log cabin block per side, built large. Keep the red center for tradition, run the “light” half in bright golds, creams, and pinks, and the “dark” half in deep greens, cranberries, and cobalt, and the diagonal split becomes a bold graphic feature rather than a subtle one.
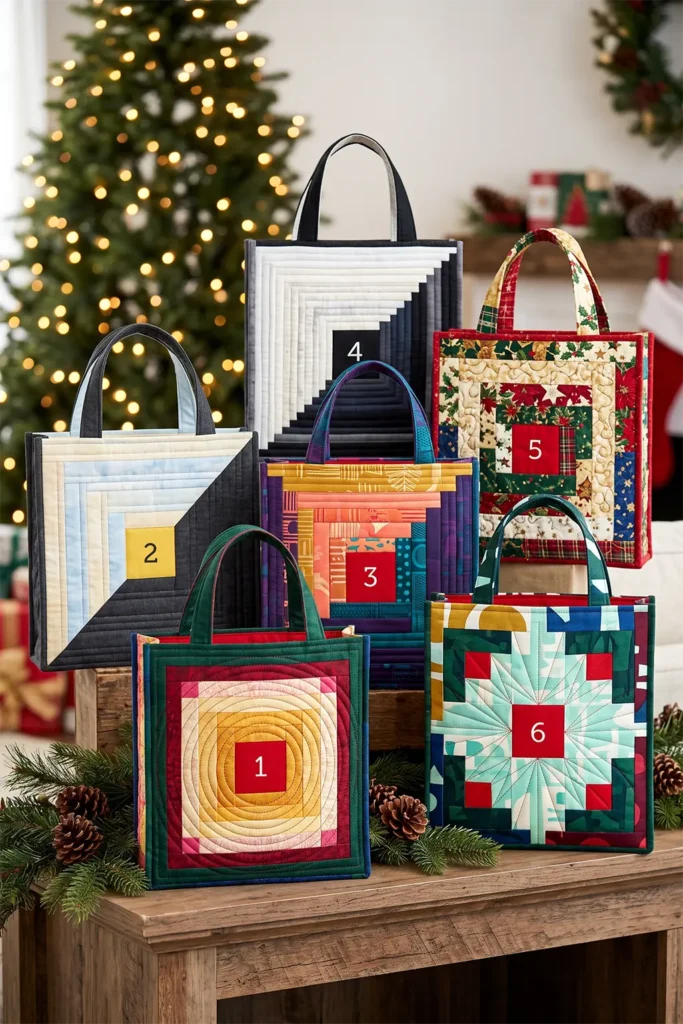
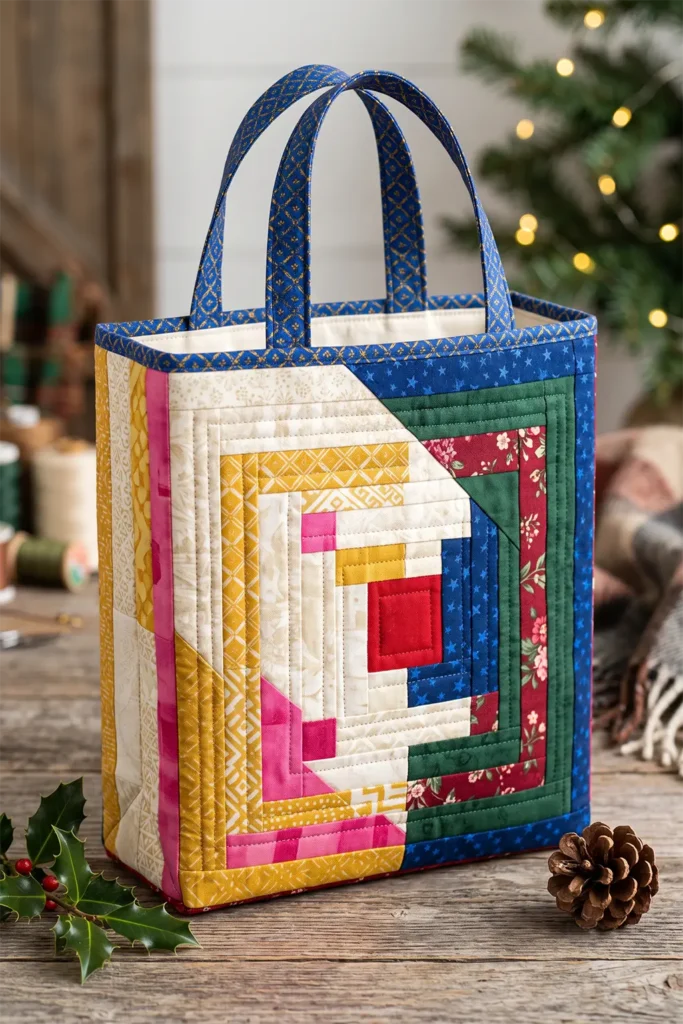
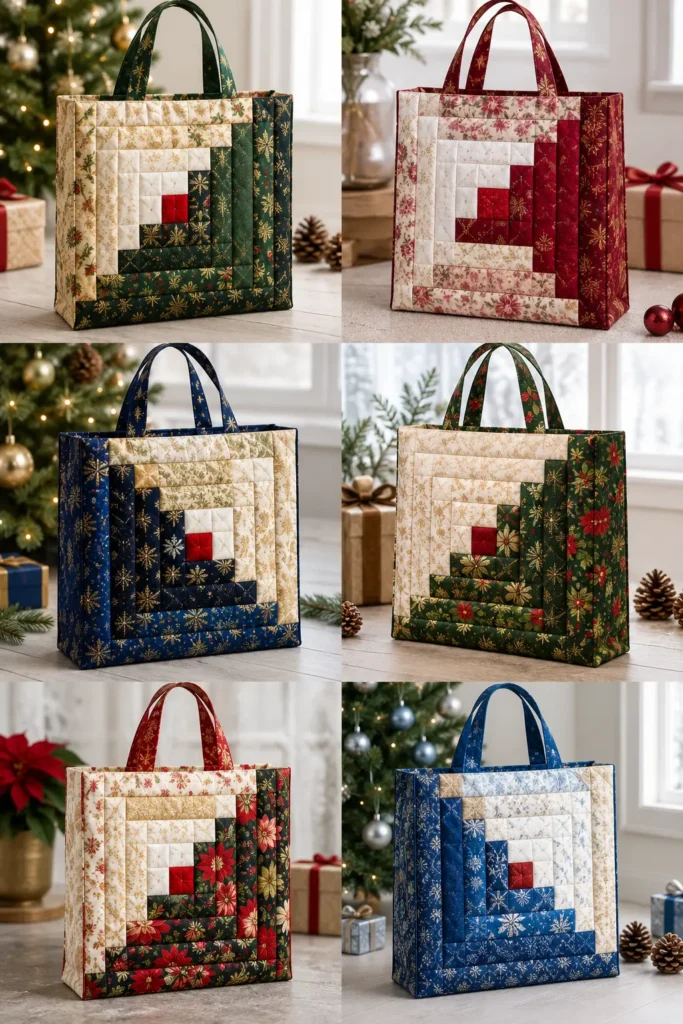
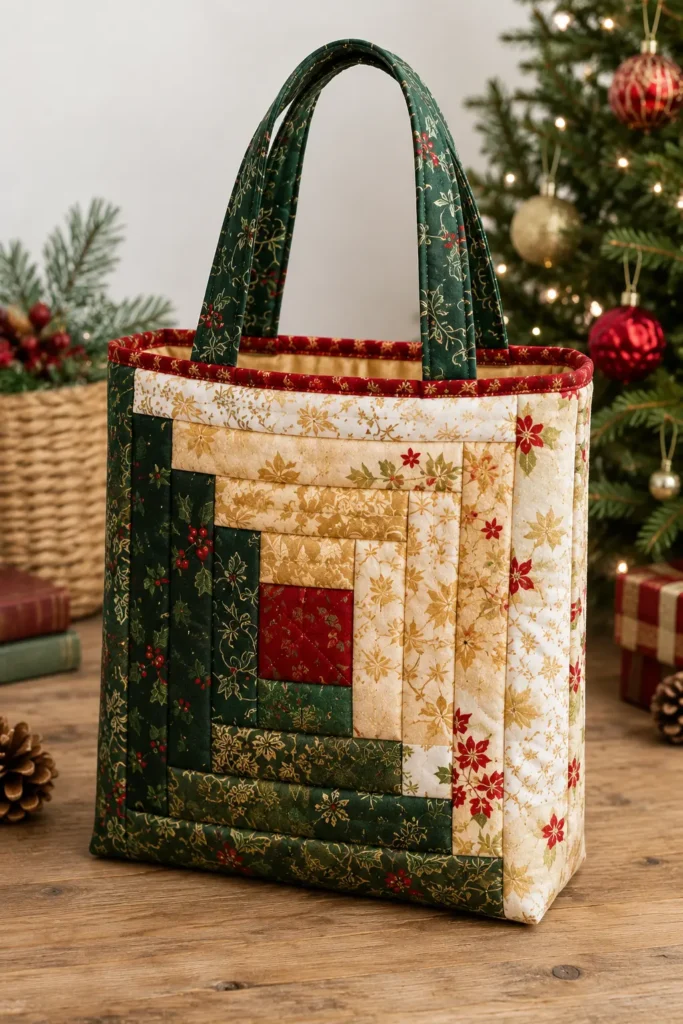
Finished size: approximately 10″ wide × 11″ tall × 3″ deep, built from two 10″ finished log cabin blocks.
Gifts that fit this bag: a folded quilt or table runner (fittingly), a boxed candle set, a coffee-table book, a bundle of gourmet coffee or tea with a mug, a cozy throw, a photo album, or a small framed print bundled with chocolates.
Cutting List (per block — make two)
Center square: 1 at 2½” × 2½” (red)
Logs: cut 1½”-wide strips, trimmed to length as you build. In order:
- Log 1 & 2 (light): 2½”, then 3½”
- Log 3 & 4 (dark): 3½”, then 4½”
- Log 5 & 6 (light): 4½”, then 5½”
- Log 7 & 8 (dark): 5½”, then 6½”
- Log 9 & 10 (light): 6½”, then 7½”
- Log 11 & 12 (dark): 7½”, then 8½”
- Log 13 & 14 (light): 8½”, then 9½”
- Log 15 & 16 (dark): 9½”, then 10½”
This builds a 10½” unfinished block (10″ finished).
Batting or fusible fleece: 2 pieces at 11″ × 12″
Lining: 2 pieces at 10½” × 11½”
Handles: 2 strips at 2½” × 14″
Corner notches: 1½” squares, cut later
Seam allowance is ¼” throughout — non-negotiable on a pieced block, since the logs won’t finish to the right size if it drifts.
Step 1 — Build the Log Cabin Blocks
Start with the red center square. Sew Log 1 (a light 1½” × 2½” strip) to one edge, right sides together; press the seam outward, away from the center. Always press outward — it’s what keeps the block flat as it grows.
Rotate the block a quarter turn and add Log 2 (light, 1½” × 3½”) to the next edge. Press out. Continue around: the rule is that the two light logs sit on two adjacent sides and the two dark logs on the opposite two, so a clear light/dark diagonal builds across the block.
Keep rotating in the same direction, adding logs in numbered order and pressing outward each time, until all 16 logs are attached. The block should measure 10½” square. Build the second block identically.
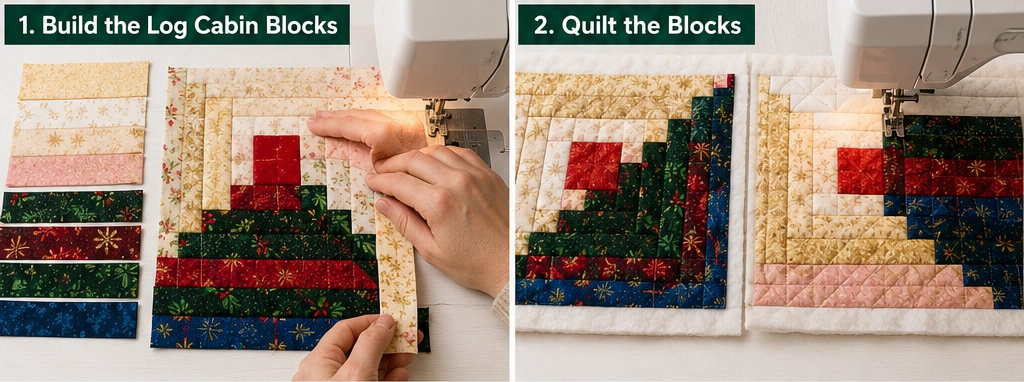
Step 2 — Quilt the Blocks
Layer each block over batting (or fuse fleece to the back). The classic way to quilt a log cabin is to stitch-in-the-ditch along the log seams, which emphasizes the concentric-square structure without competing with it. Alternatively, run a straight diagonal line through the light/dark division to underline that split.
Trim both quilted blocks to a true 10½” × 11½” (the extra length below the block gives the bag its height; center the block or place it toward the top as you prefer).
Step 3 — Make the Handles
Press each 2½” × 14″ strip in half lengthwise, open it out, fold both long edges to the center crease, fold in half again, and edge-stitch both long sides. Set the two handles aside.
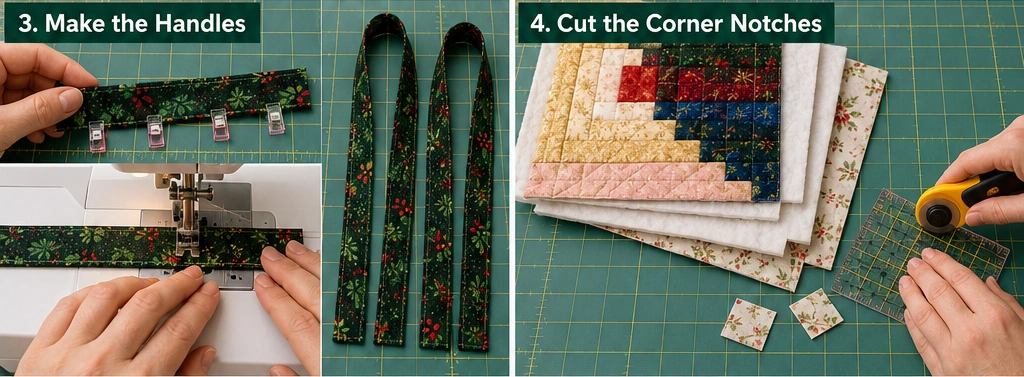
Step 4 — Cut the Corner Notches
Stack both quilted panels and both lining panels and cut a 1½” square from each bottom corner of all four. Two 1½” notches per corner give the 3″ base.
Assembly
Step 5 — Sew the Outer Bag
Place the two panels right sides together, aligning the blocks. Pin at the seams. Stitch down one side, across the bottom, and up the other side with a ¼” seam, leaving the notched corners open. Backstitch at both ends.
Box each corner: pull the opening apart so the side seam lies over the bottom seam, match, pin, and stitch across. Repeat on the second corner. Turn the outer bag right side out.
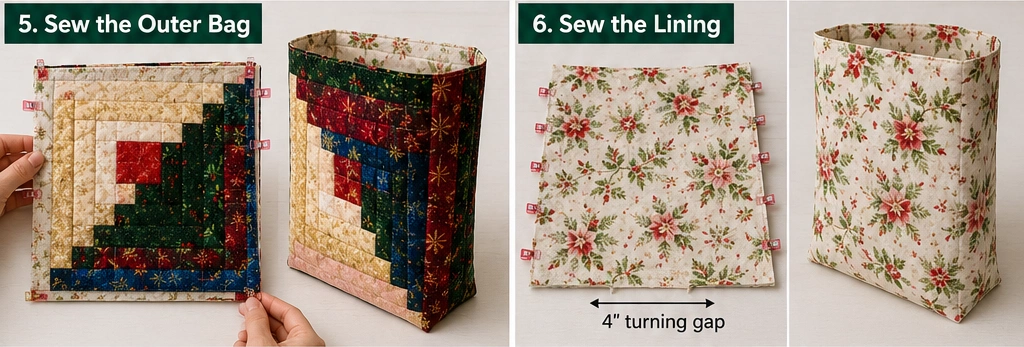
Step 6 — Sew the Lining
Repeat Step 5 with the lining, leaving a 4″ gap in the bottom seam for turning and backstitching at both ends. Leave the lining wrong side out.
Step 7 — Attach the Handles
With the outer bag right side out, mark handle placement 2¼” in from each side seam along the top edge. Pin a handle to the outside at each pair of marks, raw ends level with the top edge, loop hanging down. Check for twists and baste ⅛” from the edge.
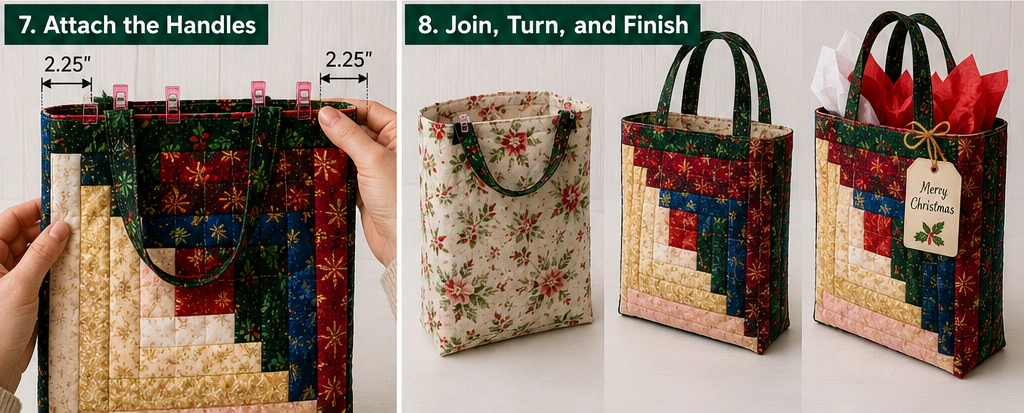
Step 8 — Join, Turn, and Finish
Drop the outer bag inside the lining, right sides together, handles sandwiched between the layers. Match the side seams and pin around the top. Stitch the full opening with a ½” seam, going twice over each handle.
Pull the bag through the lining gap, outer fabric first. Close the gap by folding the raw edges in and edge-stitching ⅛” from the fold. Push the lining down, roll the top seam so the lining sits just below the rim, press, and topstitch ⅛” around the opening.
Other Design Inspirations – Digitally Modified
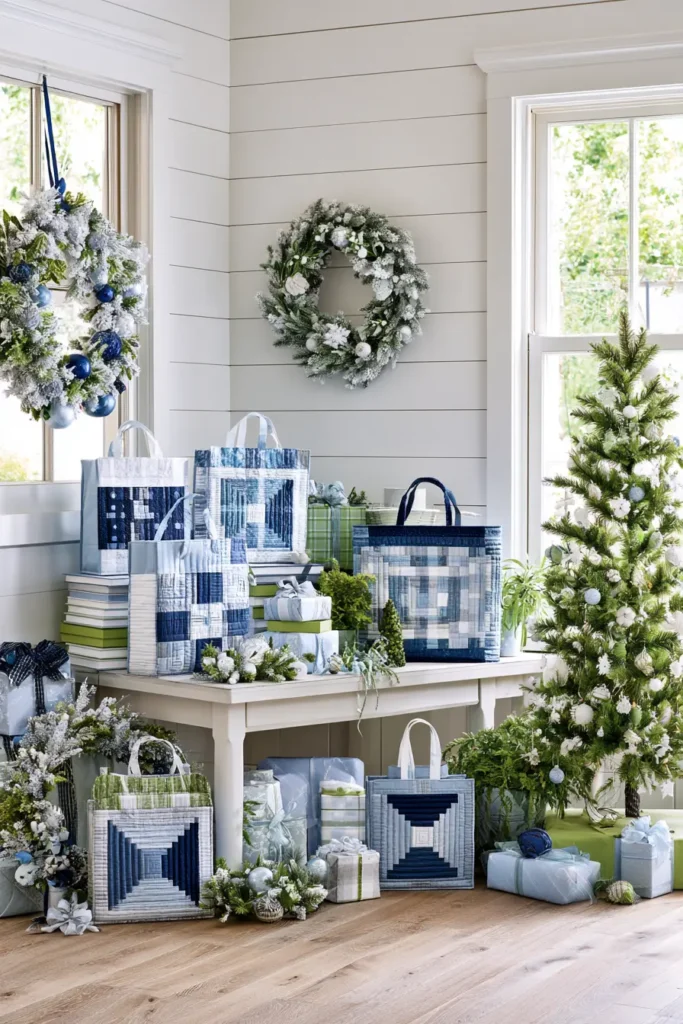
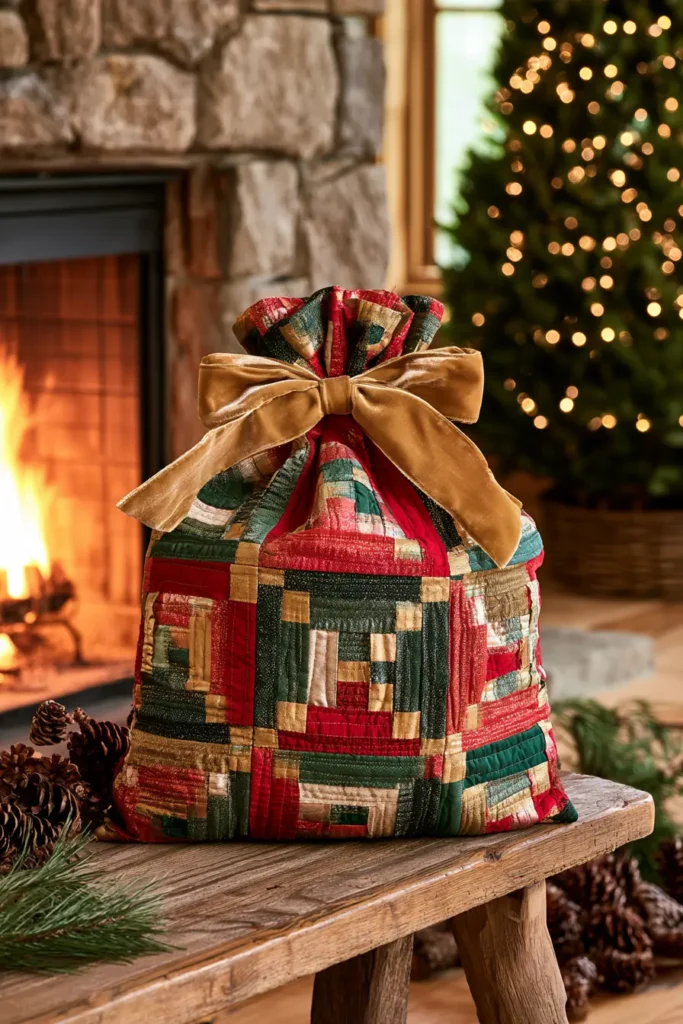
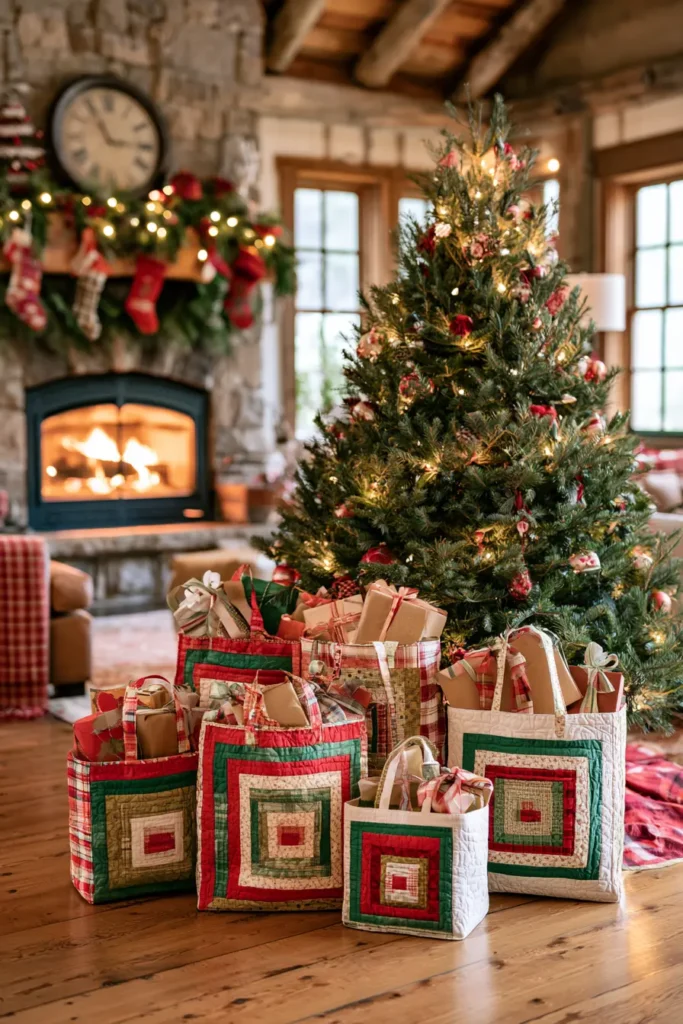
10. Jelly Roll Quilted Gift Bags for Last-Minute Sewing
The jelly roll is a relatively recent invention that changed how quilters shop and sew. It’s a bundle of forty or so fabric strips, each cut 2½” wide by the full width of the fabric, rolled up to look — with a little imagination — like a rolled jelly-roll cake, which is where the name comes from. The whole point of a precut like this is that the cutting is already done and the fabrics are guaranteed to coordinate, since they’re pulled from a single designer collection. For last-minute sewing that’s the entire game: you skip fabric selection and skip cutting, the two steps that eat the most time, and go straight to the machine.
The technique that pairs best with a jelly roll is strip piecing — sewing strips together side by side into a striped panel, then treating that panel as your bag fabric. It’s fast, it’s forgiving, and the built-in coordination of the roll means even a random grab of strips looks intentional.
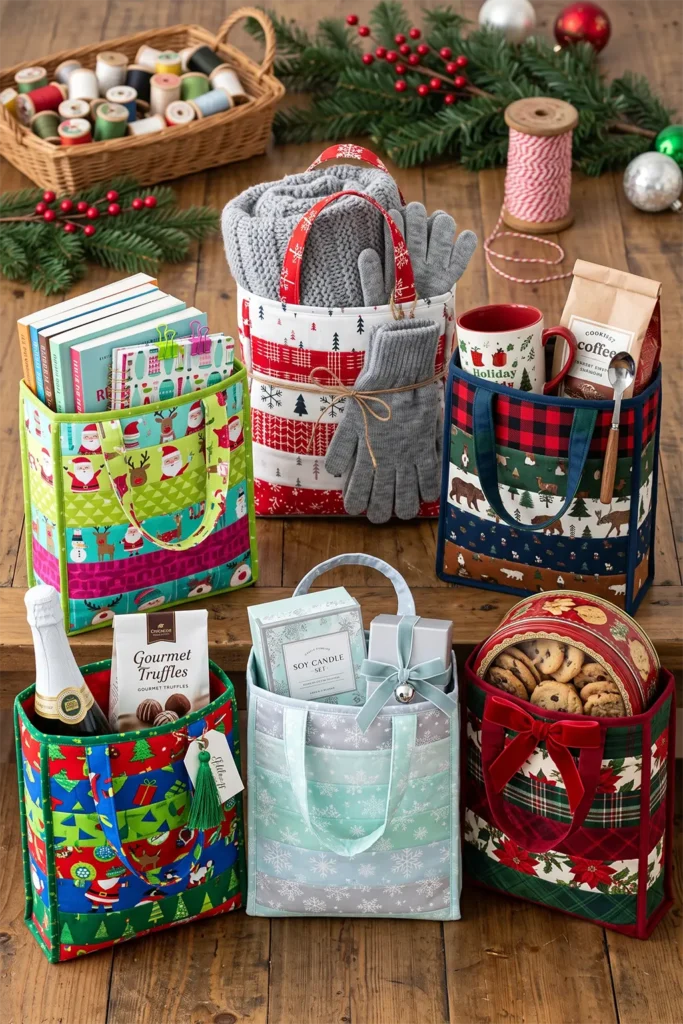
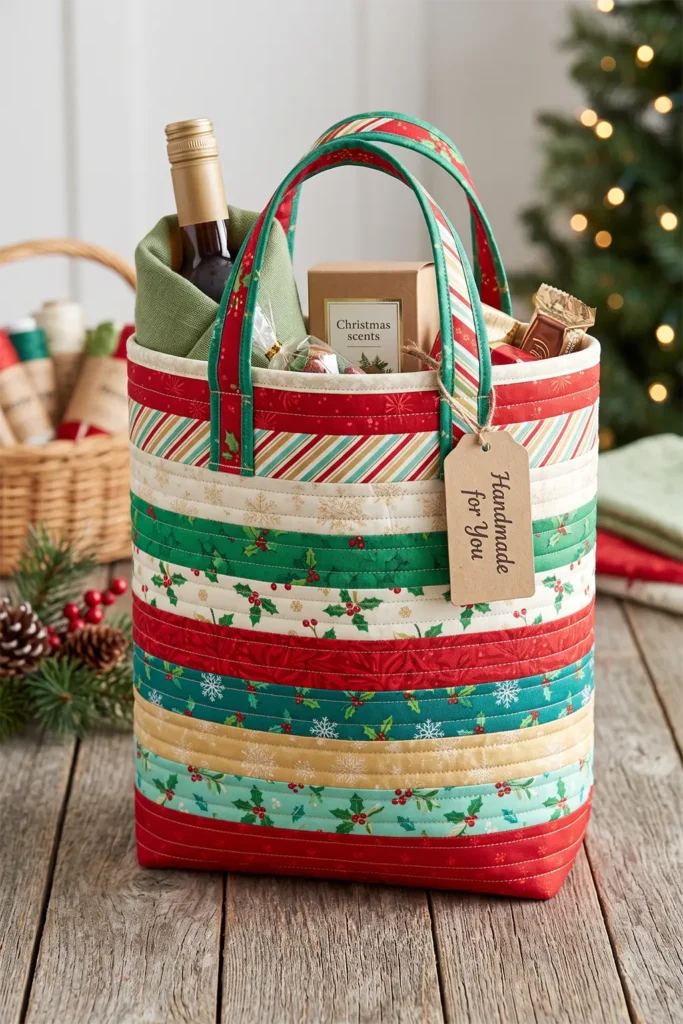
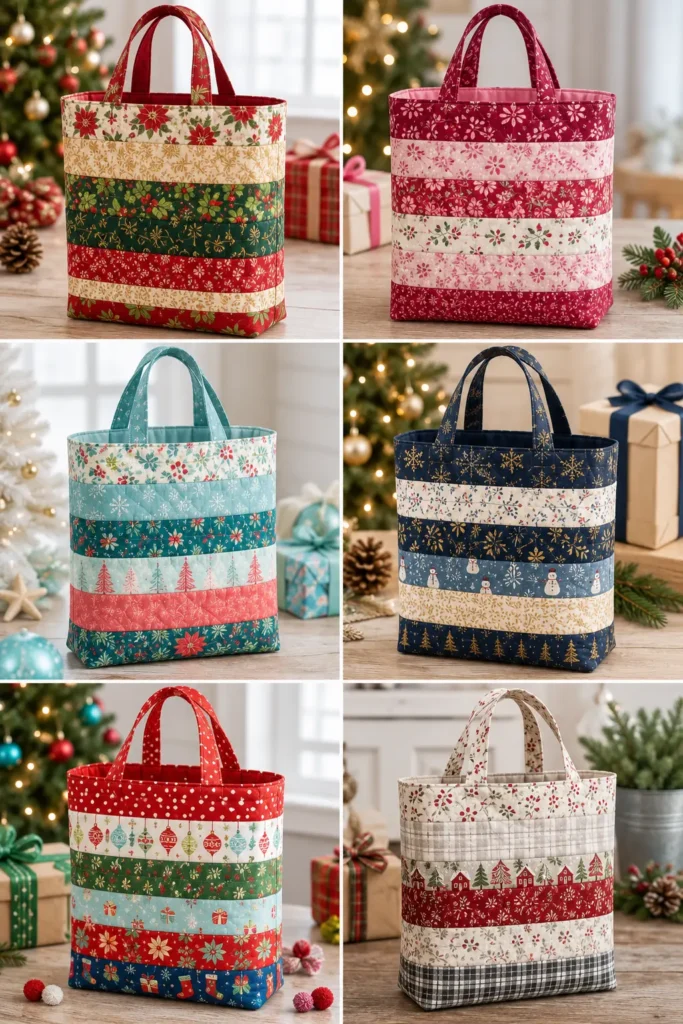
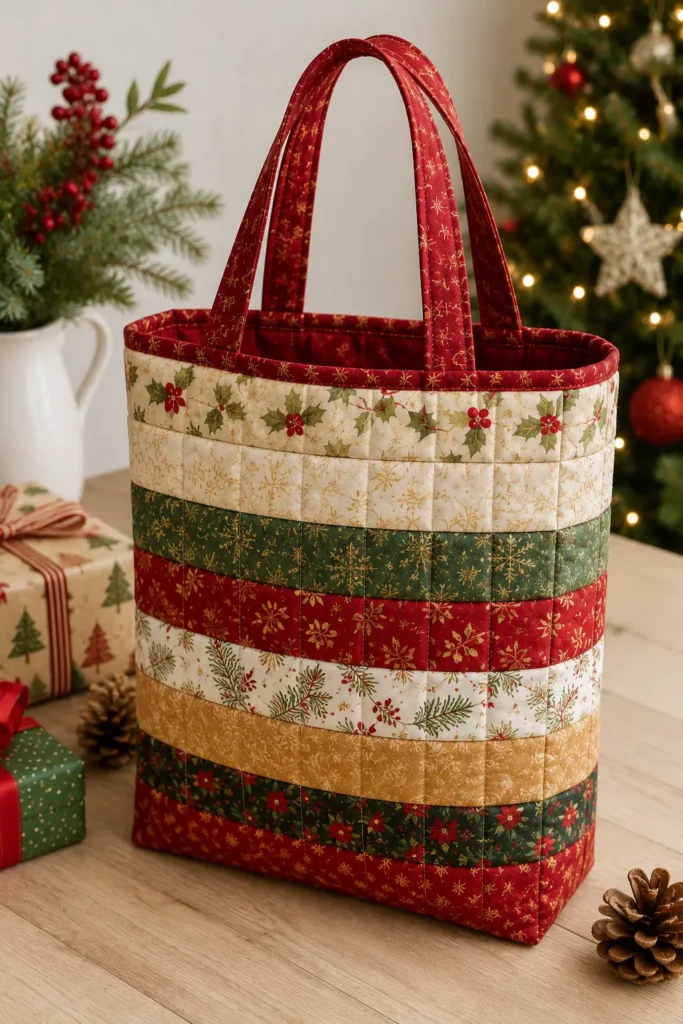
A single jelly roll is enough for many bags, so this is the project to reach for when you need several gifts handled in one evening. Pick the brightest strips in the roll — jelly rolls often include a full value range, and the vivid ones make the liveliest bags.
Finished size: approximately 9″ wide × 11″ tall × 3″ deep.
Gifts that fit this bag: a bottle of wine bundled with treats, a boxed candle, a folded scarf or gloves set, a couple of books, a mug and coffee, baked goods in a tin, or a small games-and-snacks bundle.
Cutting List
Jelly roll strips: 8 strips at 2½” × width of fabric (roughly 42″). Each strip yields the length you need with room to spare.
Batting or fusible fleece: 2 pieces at 10″ × 12″
Lining: 2 pieces at 9½” × 11½”
Handles: 2 strips at 2½” × 14″ (use two more jelly roll strips)
Corner notches: 1½” squares, cut later
Seam allowance is ¼” throughout.
Because the strips come precut at exactly 2½”, the only cutting you do is trimming the pieced panels to size and cutting the corner notches — most of the fabric prep is simply done for you.
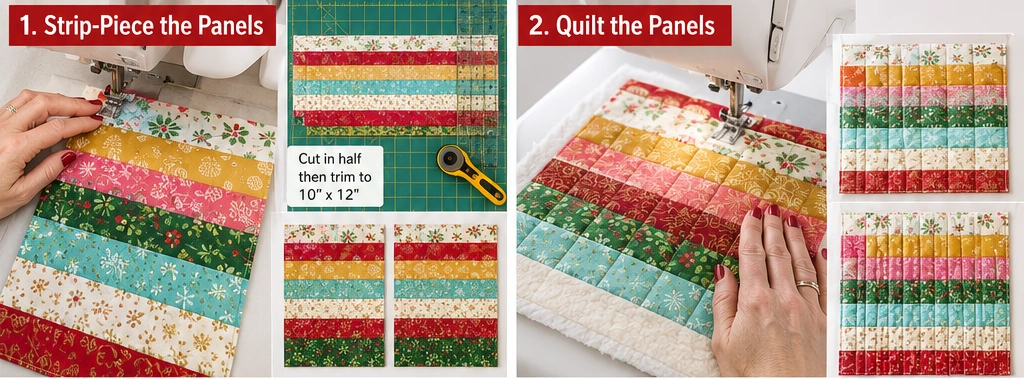
Step 1 — Strip-Piece the Panels
Take 8 strips and sew them together along their long edges, right sides together, ¼” seam, to make a striped panel. Press all the seams in the same direction (toward the darker strip where possible) as you add each one.
To keep a long strip-set from bowing into a banana shape, alternate your sewing direction — sew the first seam top to bottom, the next bottom to top, and so on. This is the classic fix for the curve that strip-piecing tends to produce.
You’ll end up with one long striped panel roughly 16½” × 42″. Cut it in half to yield two panels around 16½” × 21″, then trim each to 10″ × 12″. You now have two striped outer panels with the stripes running horizontally.
Step 2 — Quilt the Panels
Layer each striped panel over batting, or fuse fleece to the back. Quilt simply — stitch-in-the-ditch along the strip seams is the fastest option and reinforces the stripes, or run vertical lines perpendicular to the stripes for a grid effect. On a rushed project, ditch-quilting the existing seams means almost no marking.
Trim both quilted panels to a true 10″ × 12″.
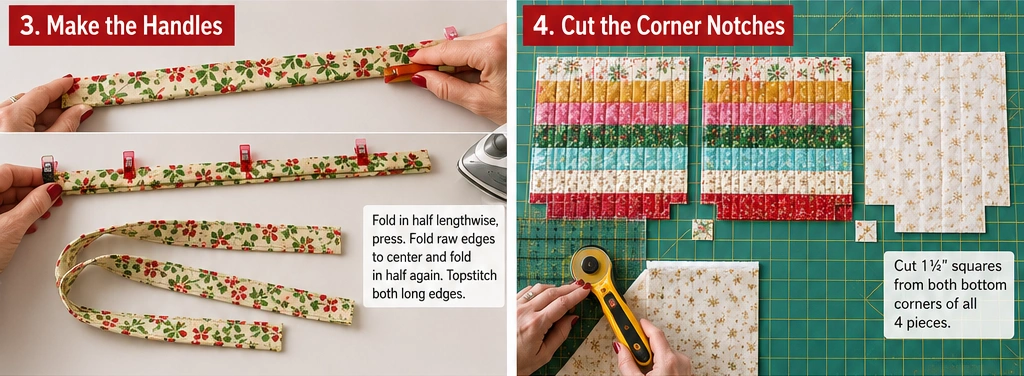
Step 3 — Make the Handles
Press each handle strip in half lengthwise, open it, fold both long edges to the center, fold in half again, and edge-stitch both sides. Two jelly roll strips make perfect handles with no extra fabric.
Step 4 — Cut the Corner Notches
Stack both quilted panels and both lining panels and cut a 1½” square from each bottom corner of all four. Two 1½” notches per corner give the 3″ base.
Assembly
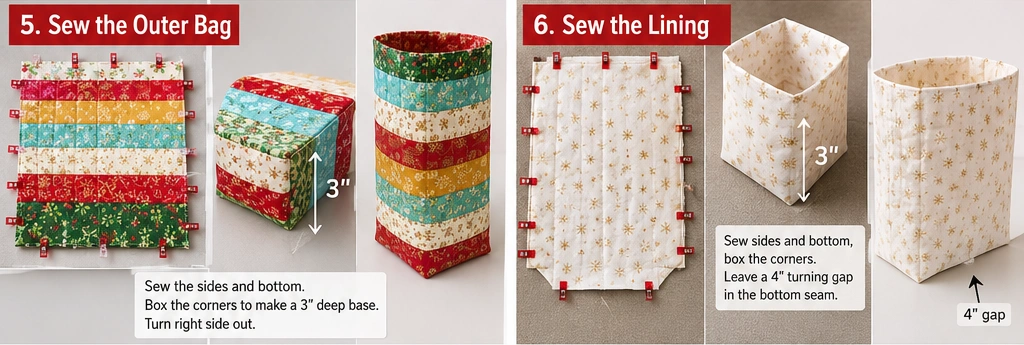
Step 5 — Sew the Outer Bag
Place the two striped panels right sides together, aligning the stripes across the side seams so they match — a lined-up stripe across the seam is a quick win that makes strip piecing look polished. Pin at each stripe.
Stitch down one side, across the bottom, and up the other side with a ¼” seam, leaving the notched corners open. Backstitch at both ends.
Box each corner: pull the opening apart so the side seam lies over the bottom seam, match, pin, and stitch across. Repeat on the second corner. Turn the outer bag right side out.
Step 6 — Sew the Lining
Repeat Step 5 with the lining panels, leaving a 4″ gap in the bottom seam for turning and backstitching at both ends. Leave the lining wrong side out.
Step 7 — Attach the Handles
With the outer bag right side out, mark handle placement 2¼” in from each side seam along the top edge. Pin a handle to the outside at each pair of marks, raw ends level with the top edge, loop hanging down. Check for twists and baste ⅛” from the edge.
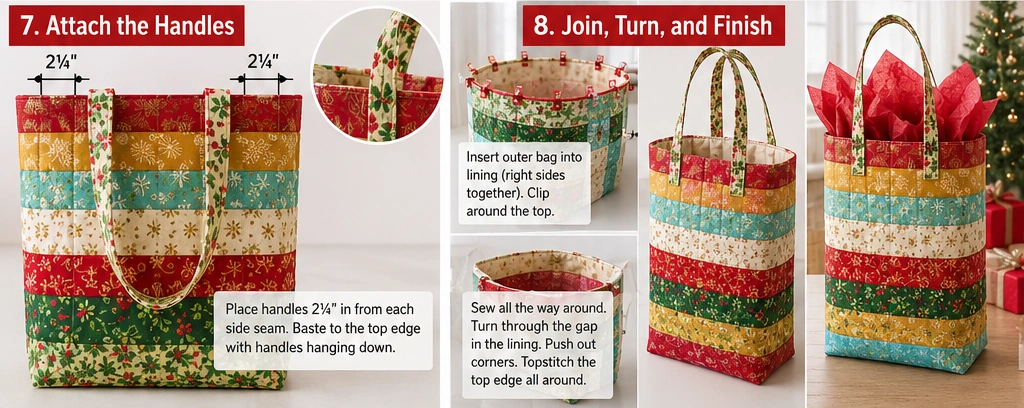
Step 8 — Join, Turn, and Finish
Drop the outer bag inside the lining, right sides together, handles sandwiched between the layers. Match the side seams and pin around the top. Stitch the full opening with a ½” seam, going twice over each handle.
Pull the bag through the lining gap, outer fabric first. Close the gap by folding the raw edges in and edge-stitching ⅛” from the fold. Push the lining down, roll the top seam so the lining sits just below the rim, press, and topstitch ⅛” around the opening.
Other Design Inspirations – Digitally Modified
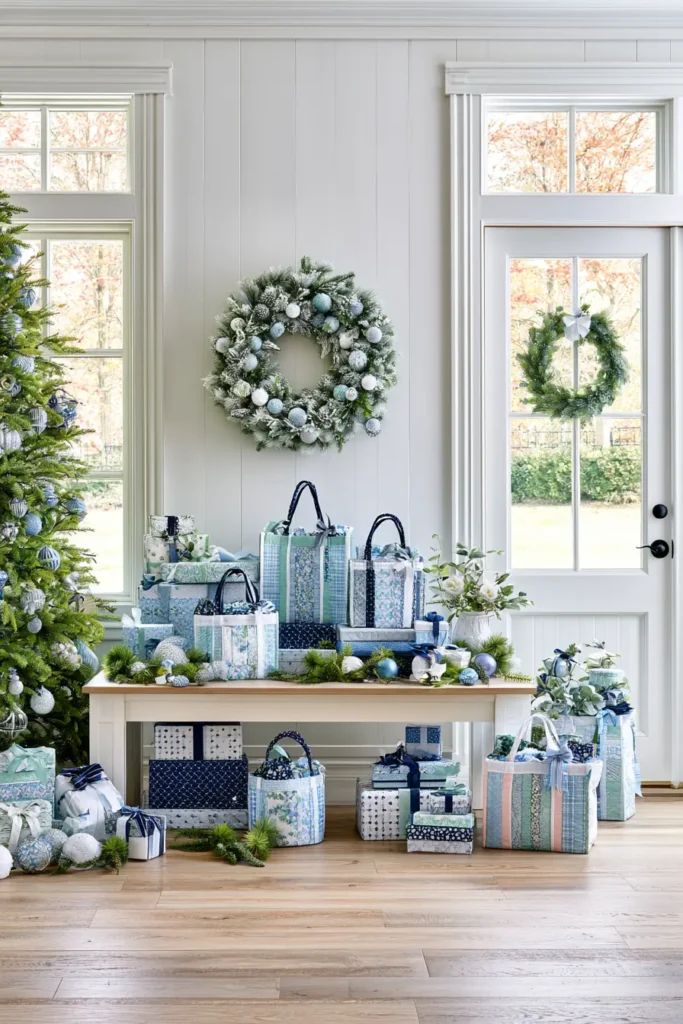
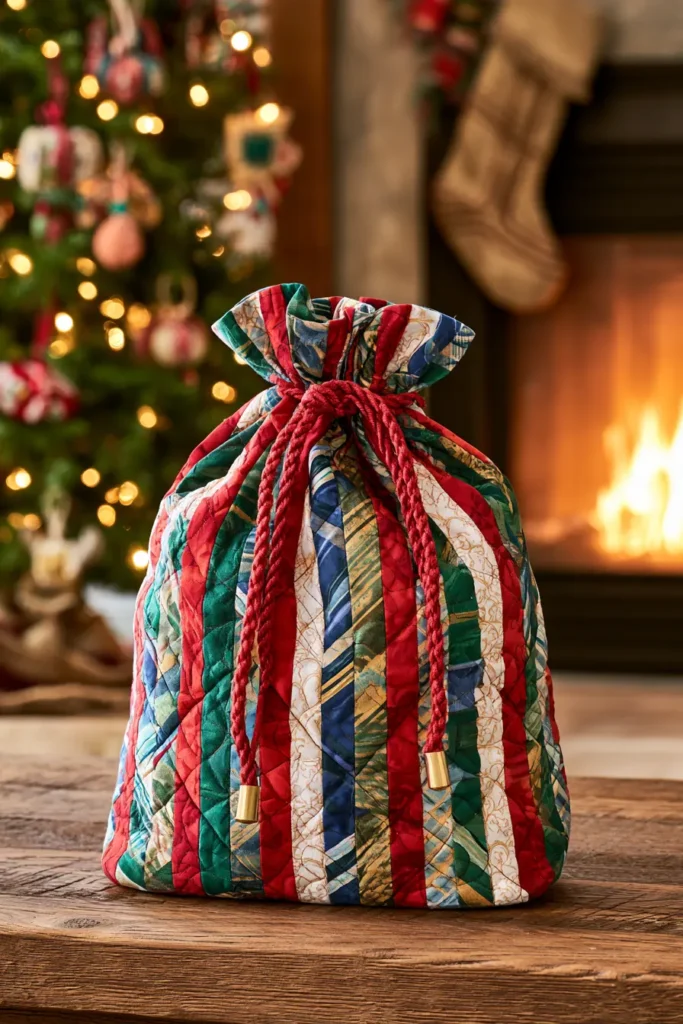
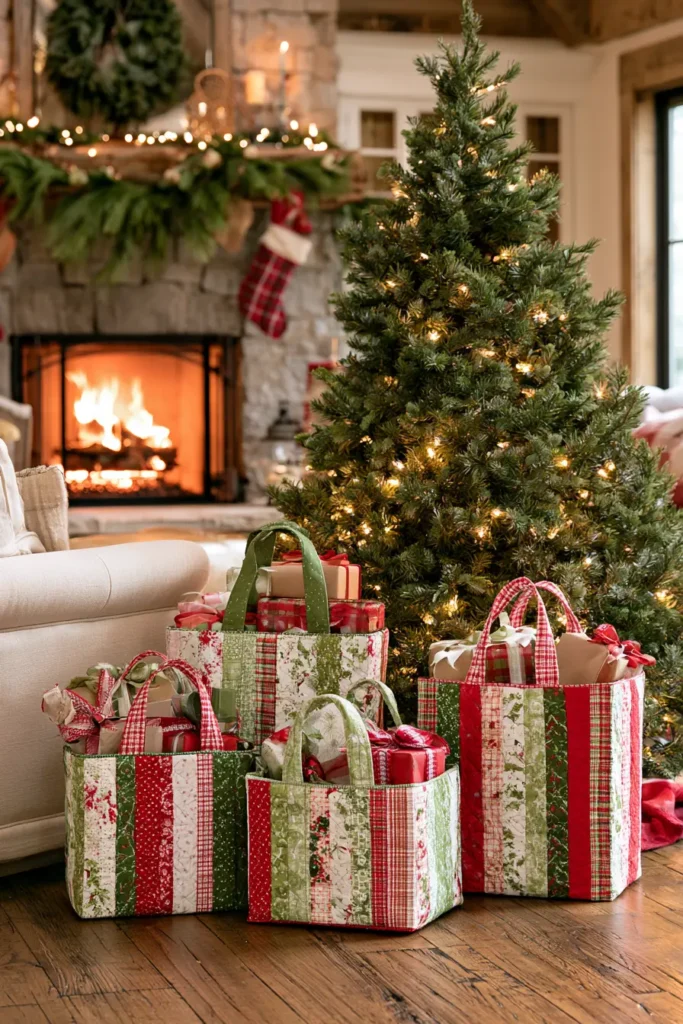
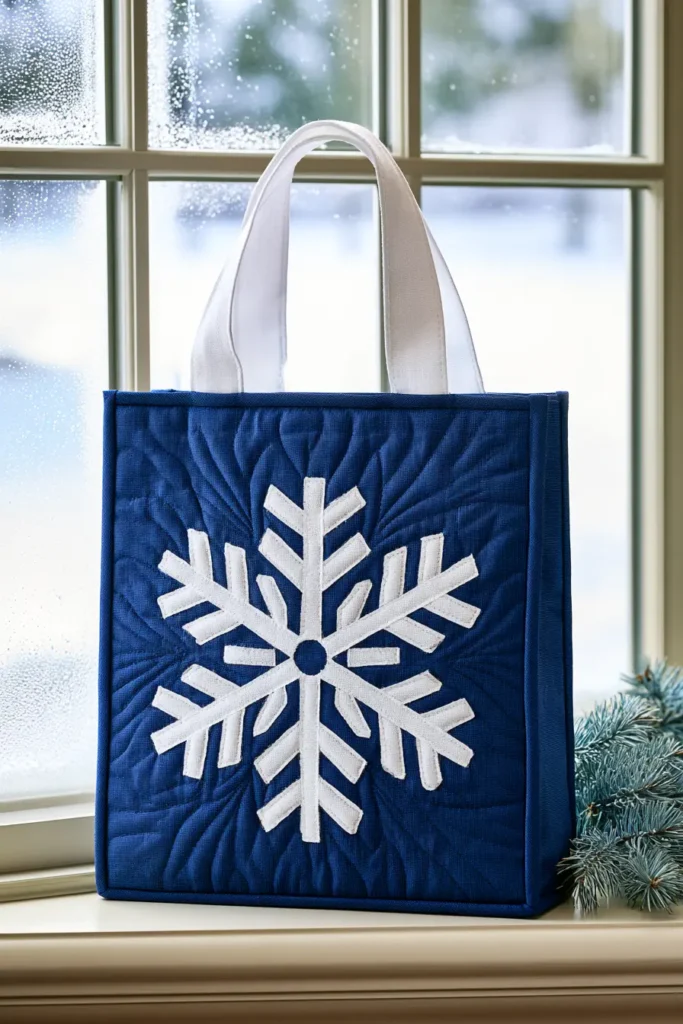
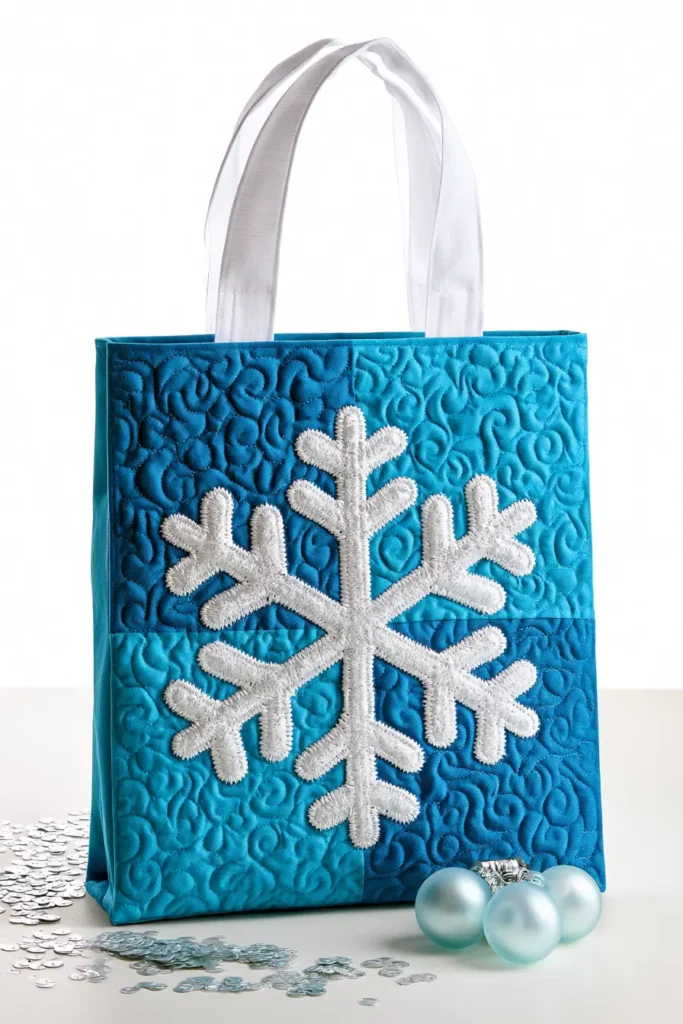
11. Snowflake Appliqué Quilted Gift Bags in Blue and White
There’s a lovely fact behind the snowflake that makes it a rewarding motif to appliqué: real snow crystals are almost always six-sided. Water molecules freeze into a hexagonal lattice, and that six-fold symmetry propagates as the crystal grows, which is why a genuine snowflake has six arms — never five, never eight.
Wilson Bentley, a Vermont farmer, spent his life from the 1880s onward photographing thousands of them through a microscope, and it was his images that popularized the idea that no two are alike. So when you cut a snowflake to appliqué, fold your fabric into sixths rather than the fourths most people default to — the six-armed version is both more accurate and more elegant than the four-armed shape that looks, on close inspection, more like a plus sign than a snowflake.
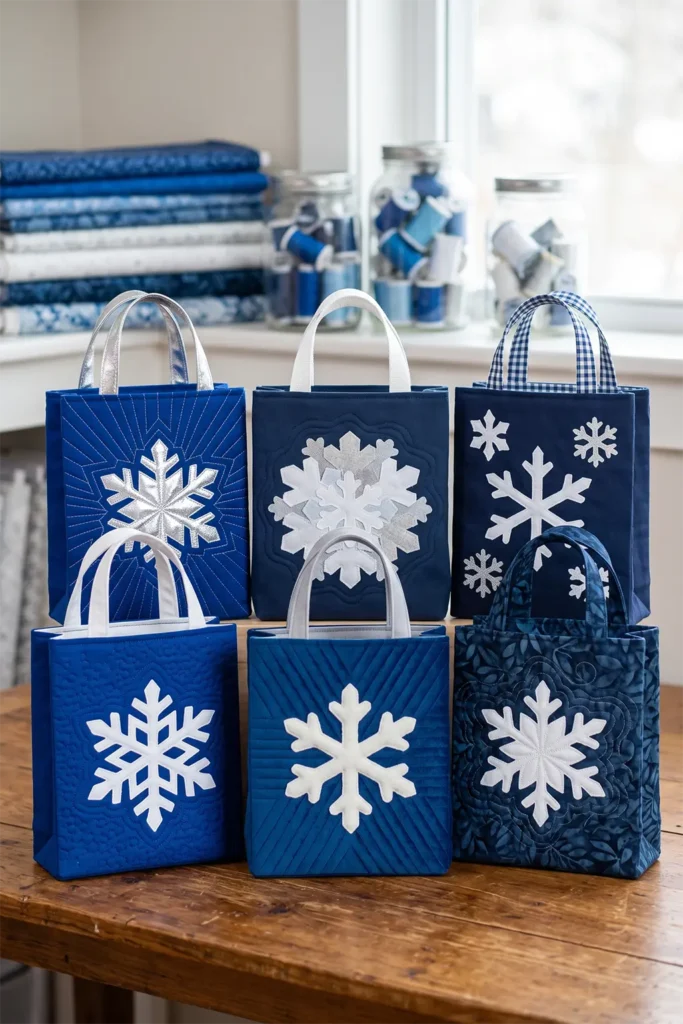
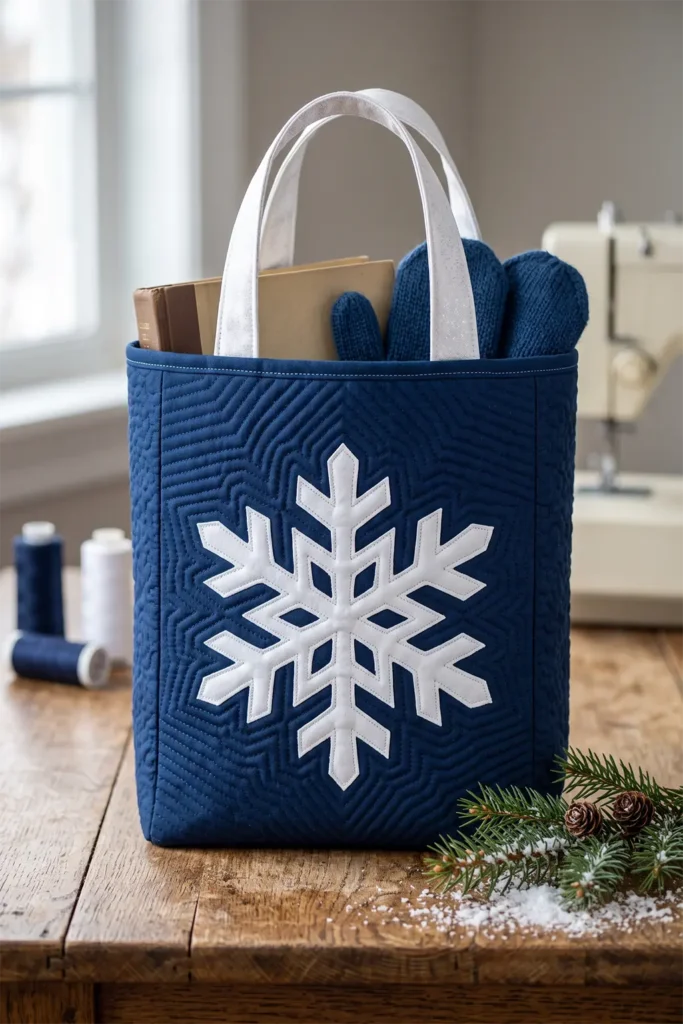
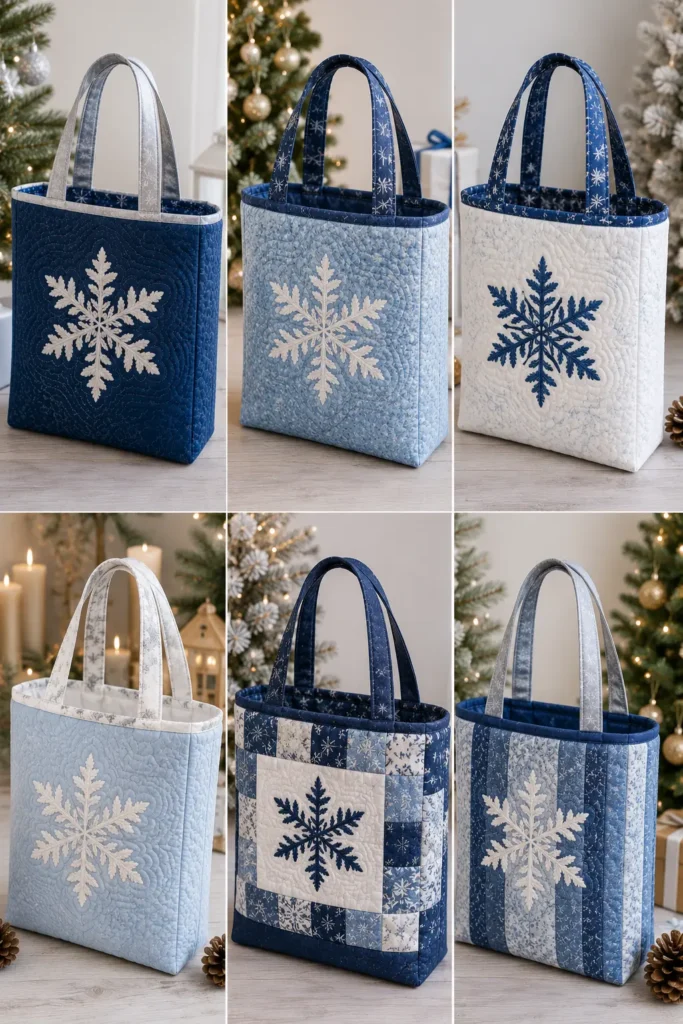
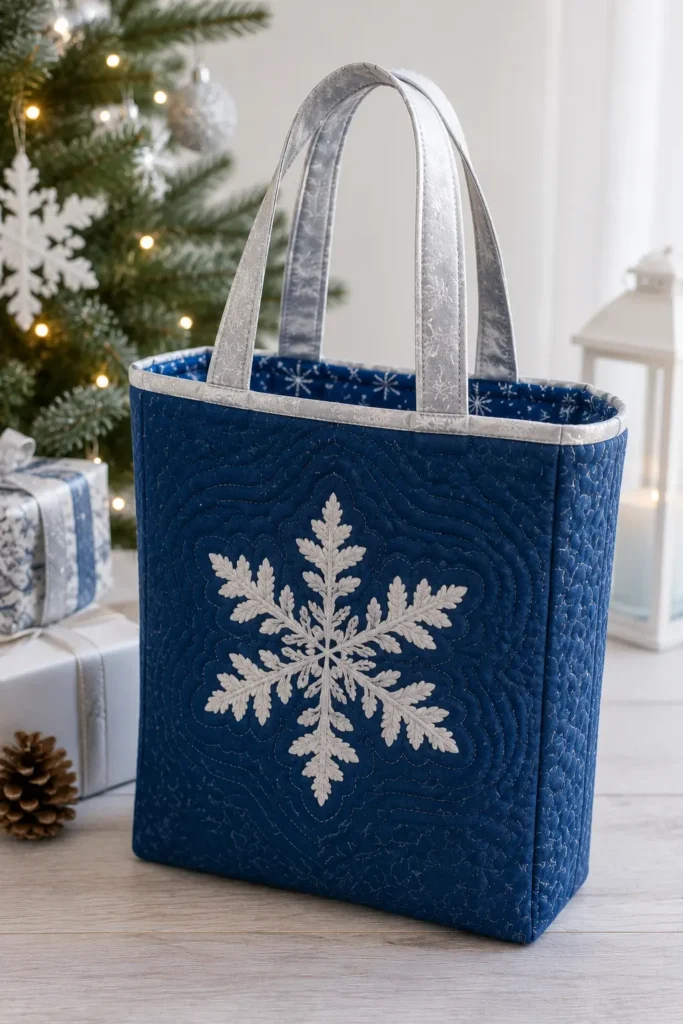
Appliqué is the craft of stitching one fabric shape on top of another, and it dates back thousands of years across many cultures as a way to decorate and reinforce cloth. For a snowflake, the crisp contrast of white on deep blue is unbeatable — the classic winter palette — and it photographs beautifully.
Finished size: approximately 9″ wide × 11″ tall × 3″ deep.
Gifts that fit this bag: a boxed candle or bath set, a folded pashmina or winter scarf, a pair of cozy mittens with hot cocoa, a hardcover book, a mug and tea bundle, jewelry in a box, or a small skincare set.
Cutting List
Outer fabric (deep blue): 2 panels at 10″ × 12″
Appliqué fabric (white or silver): scraps large enough for your snowflake, roughly 6″–7″ square
Fusible web: a piece to match the appliqué scrap (e.g. a paper-backed fusible)
Batting or fusible fleece: 2 pieces at 10″ × 12″
Lining: 2 pieces at 9½” × 11½”
Handles: 2 strips at 2½” × 14″
Corner notches: 1½” squares, cut later
Seam allowance is ¼” throughout.
Step 1 — Cut the Snowflake
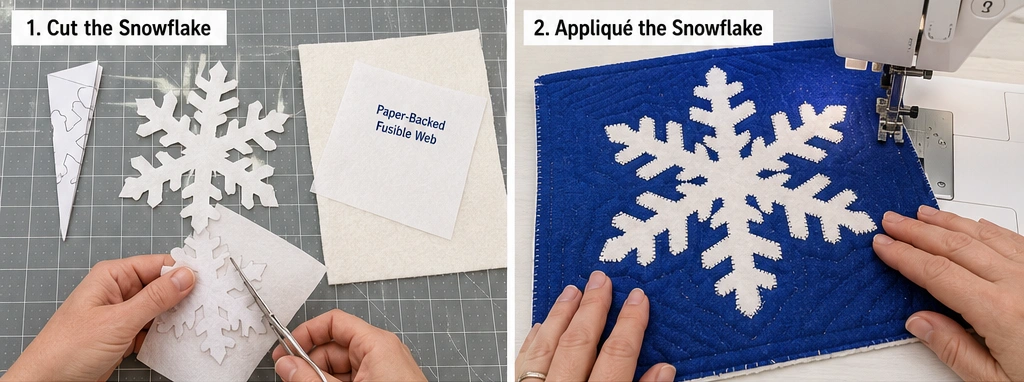
Trace or draw a six-armed snowflake. The fold-and-cut method is quickest: take a square of paper, fold it into sixths (fold in half, then fold that into thirds, forming a narrow wedge), sketch a design along the folded edges, and cut. Unfold for a symmetrical six-pointed flake. Use this as your template.
For fabric, apply paper-backed fusible web to the wrong side of your white scrap first, then trace the snowflake onto the paper backing and cut it out. Fusing before cutting keeps the delicate arms from fraying and distorting.
Step 2 — Appliqué the Snowflake to the Front Panel
Peel the paper backing off the fused snowflake, center it on the right side of one blue outer panel, and press to fuse it in place.
Secure the edges with stitching — a machine blanket stitch or a narrow zigzag around every edge of the snowflake holds it permanently and gives a crisp finished outline. Take the delicate arms slowly, pivoting with the needle down at each point. This front panel is the only one that gets a snowflake; the back stays plain (or add a smaller flake if you like).
Step 3 — Quilt the Panels
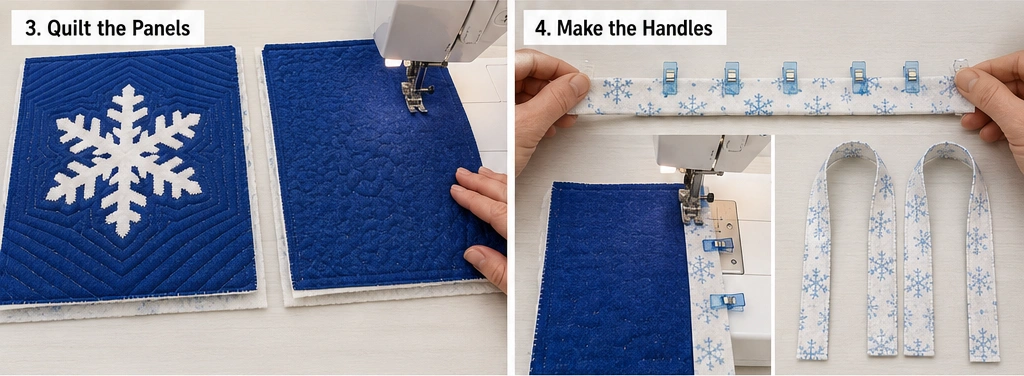
Layer each panel over batting or fuse fleece to the back. Quilt around the snowflake to make it stand out — echo quilting (lines that follow the snowflake’s outline, radiating outward) throws the motif into relief beautifully. Fill the background with those echo lines or a simple stipple. Quilt the back panel to match the density.
Trim both quilted panels to a true 10″ × 12″.
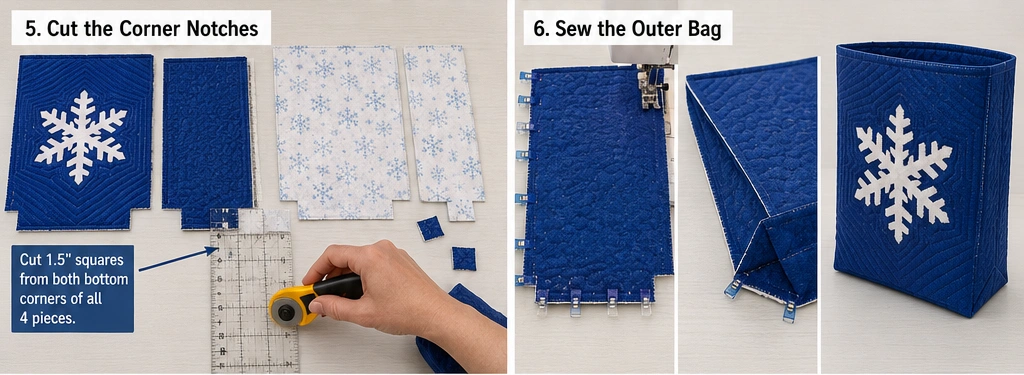
Step 4 — Make the Handles
Press each 2½” × 14″ strip in half lengthwise, open it, fold the long edges to the center, fold in half again, and edge-stitch both sides. Silver or white handles suit this palette. Set aside.
Step 5 — Cut the Corner Notches
Stack both quilted panels and both lining panels and cut a 1½” square from each bottom corner of all four. Two 1½” notches per corner give the 3″ base.
Assembly
Step 6 — Sew the Outer Bag
Place the two panels right sides together, front panel’s snowflake facing in. Pin. Stitch down one side, across the bottom, and up the other side with a ¼” seam, leaving the notched corners open. Backstitch at both ends.
Box each corner: pull the opening apart so the side seam lies over the bottom seam, match, pin, and stitch across. Repeat on the second corner. Turn the outer bag right side out and check that the snowflake sits centered and upright.
Step 7 — Sew the Lining
Repeat Step 6 with the lining panels, leaving a 4″ gap in the bottom seam for turning and backstitching at both ends. Leave the lining wrong side out.
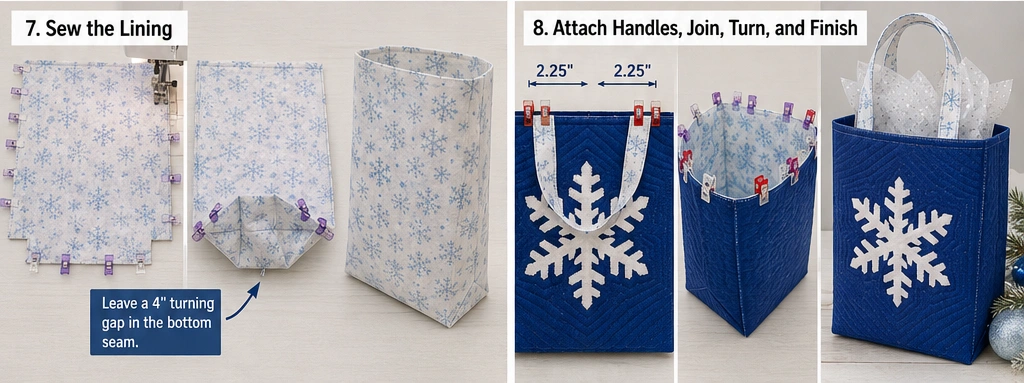
Step 8 — Attach the Handles
With the outer bag right side out, mark handle placement 2¼” in from each side seam along the top edge, positioning them so they frame the snowflake evenly. Pin a handle to the outside at each pair of marks, raw ends level with the top edge, loop hanging down. Check for twists and baste ⅛” from the edge.
Step 9 — Join, Turn, and Finish
Drop the outer bag inside the lining, right sides together, handles sandwiched between the layers. Match the side seams and pin around the top. Stitch the full opening with a ½” seam, going twice over each handle.
Pull the bag through the lining gap, outer fabric first. Close the gap by folding the raw edges in and edge-stitching ⅛” from the fold. Push the lining down, roll the top seam so the lining sits just below the rim, press, and topstitch ⅛” around the opening.
Other Design Inspirations – Digitally Modified
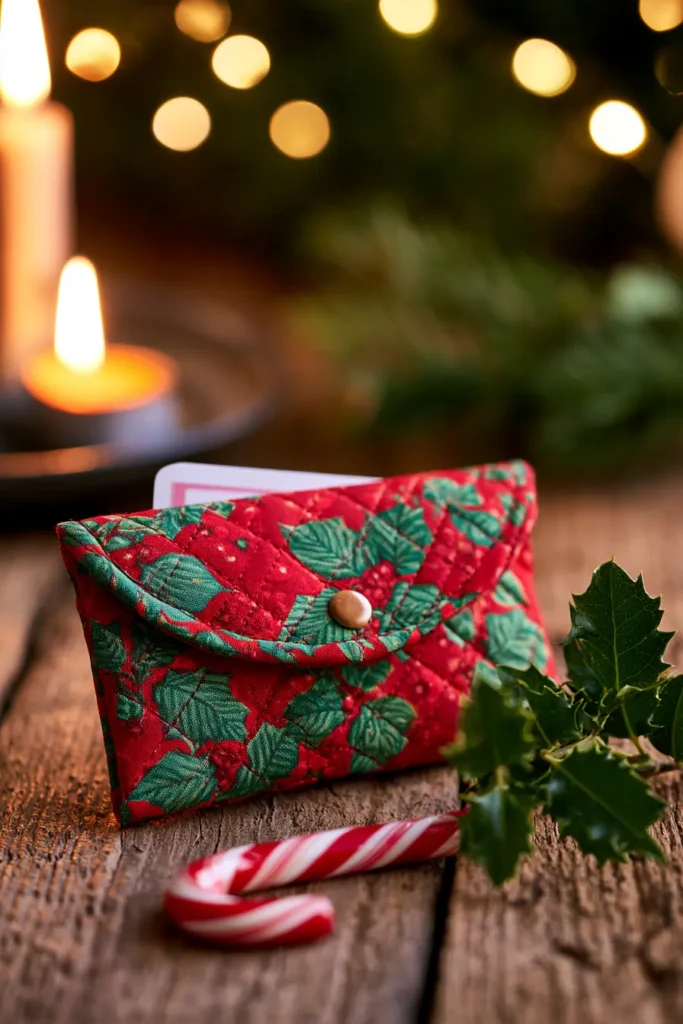
12. Quilted Gift Card Holder Pouch
Gift cards solve a real problem — you know they want the right thing — and create a small one: a plastic card in a paper sleeve feels like the least personal object under the tree. A quilted holder fixes that entirely. It reframes the card as something considered, tucks it inside a tiny handmade quilt with a fold-over flap, and gives the recipient a little pouch they’ll keep long after the card’s been spent — for the next card, for a hotel key, for stamps or SIM cards or a spare bit of cash.
It’s also the smallest, fastest project in this collection and the most efficient way to burn through your prettiest tiny scraps. A fat quarter makes several. Because a gift card is a fixed size — the standard is 3⅜” × 2⅛”, the same ID-1 dimensions as a credit card, set by an international standard so cards work in every reader worldwide — you can size the pocket precisely and know it’ll fit every card every time.
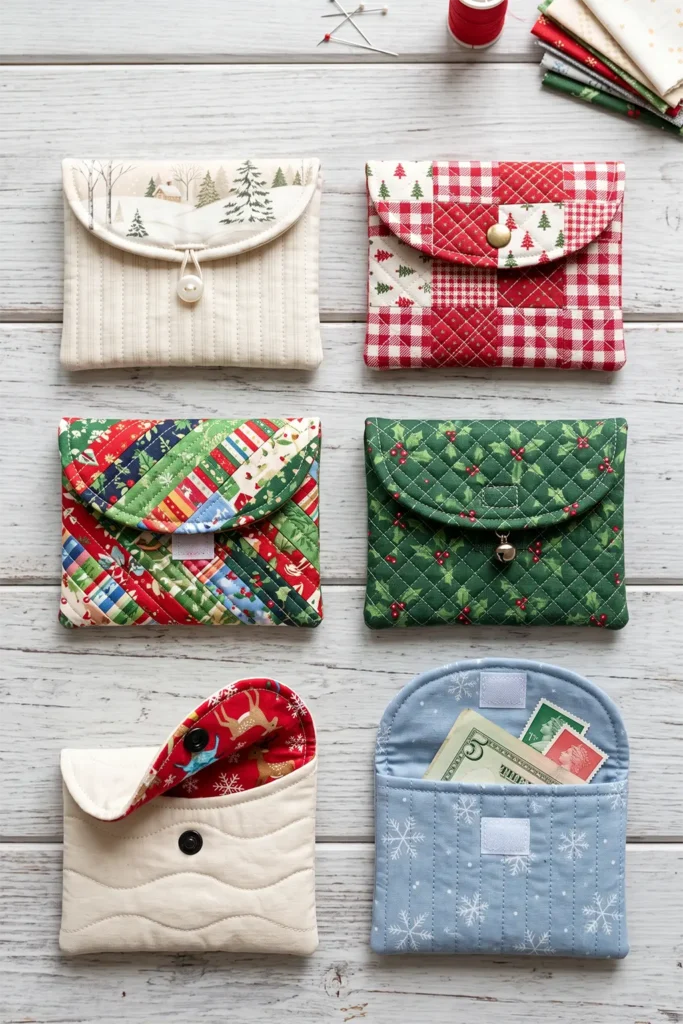
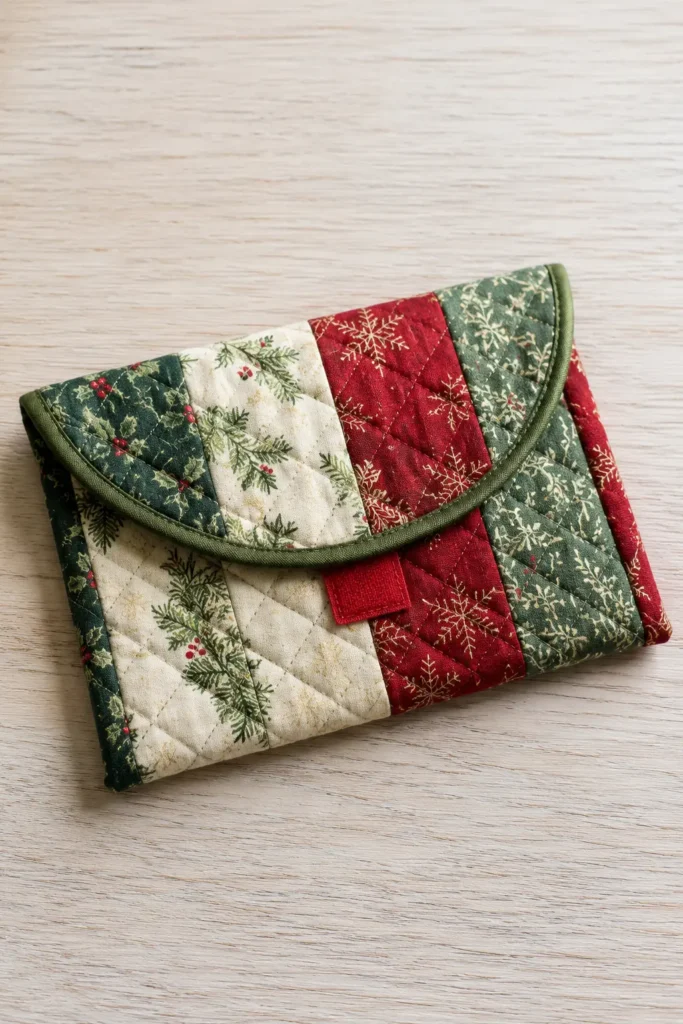
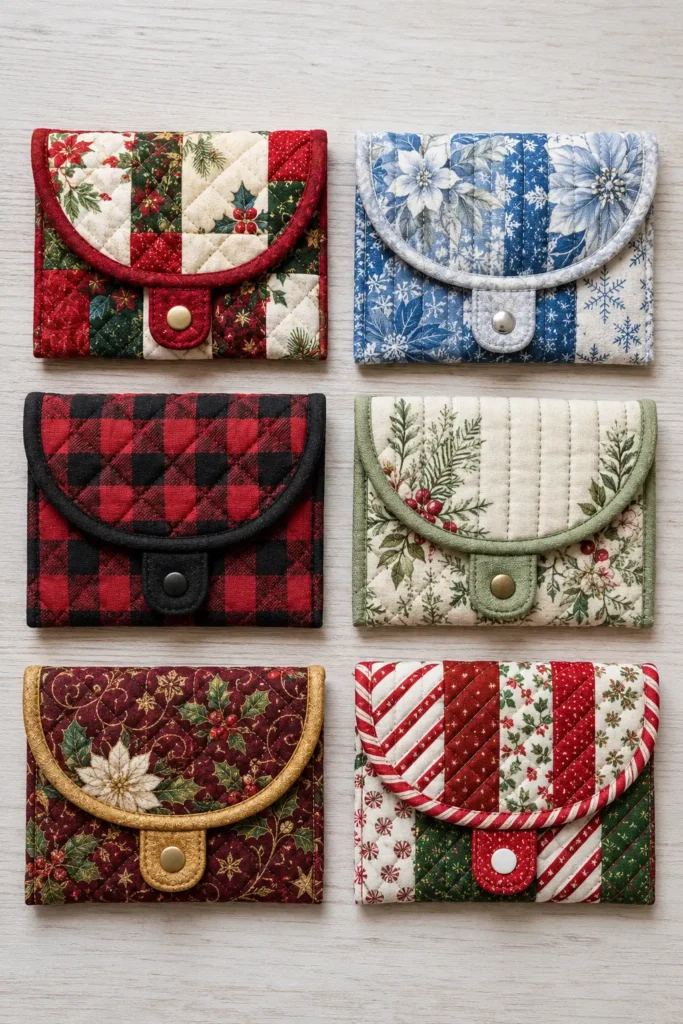
Finished size: approximately 4½” wide × 3½” tall closed, opening to a flat pouch with a curved flap.
What it holds: any gift card, of course — but also a folded banknote, a credit or loyalty card, a hotel key card, a transit pass, business cards, stamps, guitar picks, or a SIM card and tool.
Cutting List
Outer fabric: 1 piece at 5″ × 9″
Thin batting: 1 piece at 5″ × 9″ (low loft — a bulky batting won’t fold crisply at this size)
Muslin or scrap backing: 1 piece at 5″ × 9″ (this sits against the batting and won’t be seen)
Lining fabric (visible inside): 1 piece at 4½” × 8″
Closure: a small piece of hook-and-loop (about 1½”), or a sew-on snap or button
Seam allowance is ¼” throughout.
Round object for the flap curve: a 6″ embroidery hoop, a jar lid, or a small plate — anything to trace a smooth arc.
Step 1 — Build and Quilt the Panel
Layer the muslin backing on the bottom, the batting in the middle, and the outer fabric right side up on top — a small quilt sandwich, 5″ × 9″.
Quilt as desired. Dense quilting looks especially good at this small scale, so tighter lines than usual are worth the few extra minutes — narrow straight lines or a fine crosshatch give the pouch a jewel-like finish. Once quilted, trim the panel down to a clean 4½” × 8″.
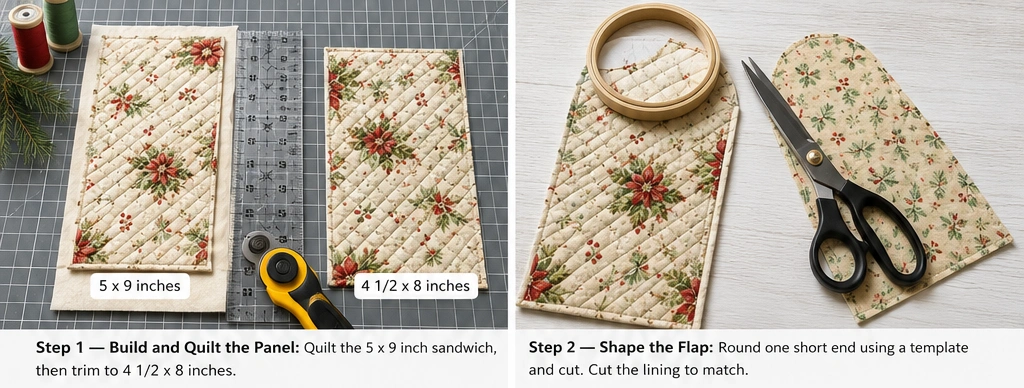
Step 2 — Shape the Flap
One short end of the panel becomes the flap and gets rounded off. Lay your round template (hoop, lid, or plate) over one short end, centered, and trace a smooth arc from one side to the other. Cut along the line through all quilted layers.
Cut the lining piece to match: lay the quilted panel on the lining, right sides together, and cut the lining’s flap end to the same curve.
Step 3 — Add the Closure (Part One)
Position the “hook” half of the hook-and-loop (or one half of the snap) on the right side of the lining, near the curved flap end, placed so it will meet the pouch front when folded. Stitch it down now, while the pouch is flat and easy to handle — reaching in to attach a closure after assembly is far more awkward.
Assembly
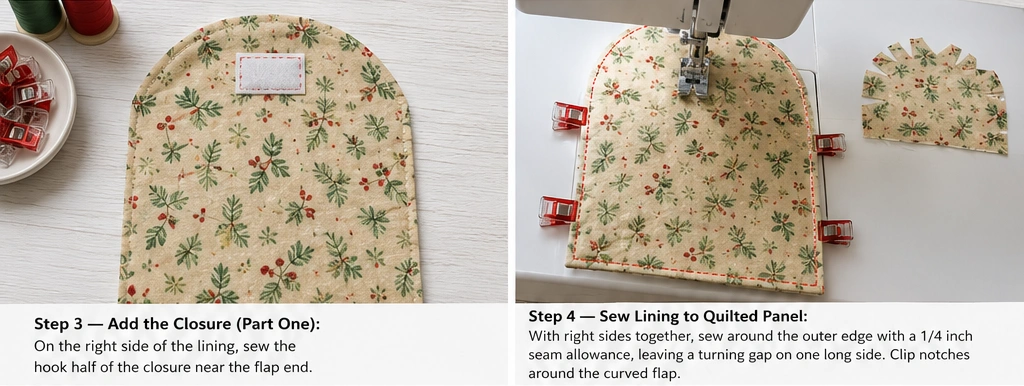
Step 4 — Sew Lining to Quilted Panel
Place the quilted panel and the lining right sides together, matching the curved flap ends and edges.
Stitch around the entire outside with a ¼” seam, leaving a 2″ gap along one long side for turning. Backstitch at both ends of the gap. Clip the curve of the flap — small notches into the seam allowance around the arc — so it will turn smoothly without puckering. Don’t cut through the stitching.
Step 5 — Turn and Press
Turn the pouch right side out through the gap. Use a chopstick or blunt tool to push the curved flap fully out and smooth the arc. Fold the raw edges of the gap inward and press the whole piece flat. Edge-stitch the gap closed, or catch it in the topstitching in the next step.
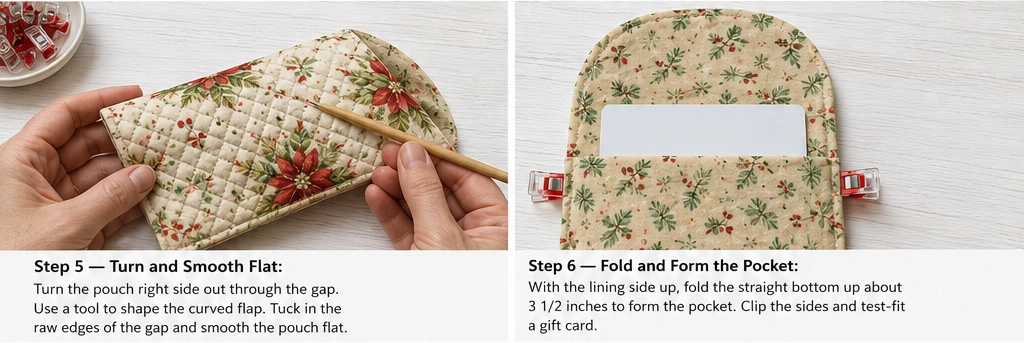
Step 6 — Fold and Form the Pocket
Lay the piece lining-side up, flap at the top. Fold the straight bottom end up to form the pocket — bring it up about 3½”, leaving the curved flap free at the top. The fold should create a pocket deep enough to hold a card with a little to spare.
Pin the folded sides. Check the fit by slipping a card (or a 3⅜” × 2⅛” spacer) into the pocket before you stitch.
Step 7 — Topstitch the Pouch Together
Starting at one top corner of the folded pocket, topstitch down that side, across the folded bottom, and up the other side, ⅛” from the edge, backstitching firmly at the two open top corners where the card goes in and out. This closes the pocket sides and finishes the edges in one pass. The curved flap remains free.
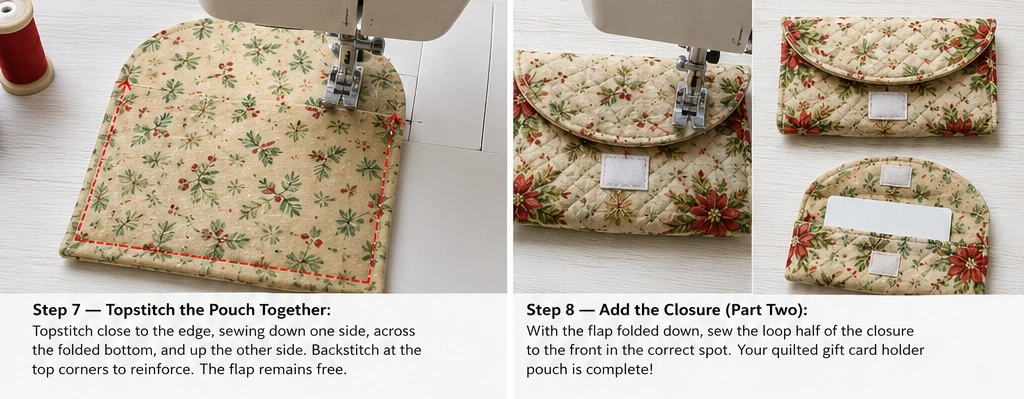
Step 8 — Add the Closure (Part Two)
Fold the flap down over the front of the pouch and mark where the “loop” half of the hook-and-loop (or the mating snap half) should sit to meet the piece already attached inside the flap. Stitch it to the pouch front. Press the flap closed — the pouch is done, ready to hold a card.
Other Design Inspirations – Digitally Modified

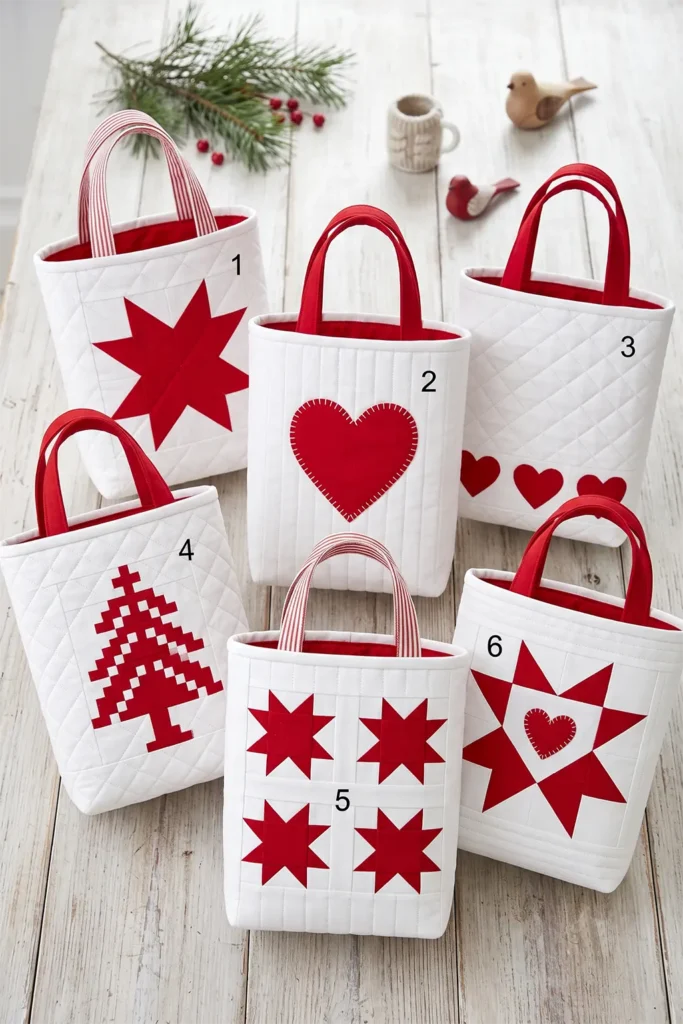
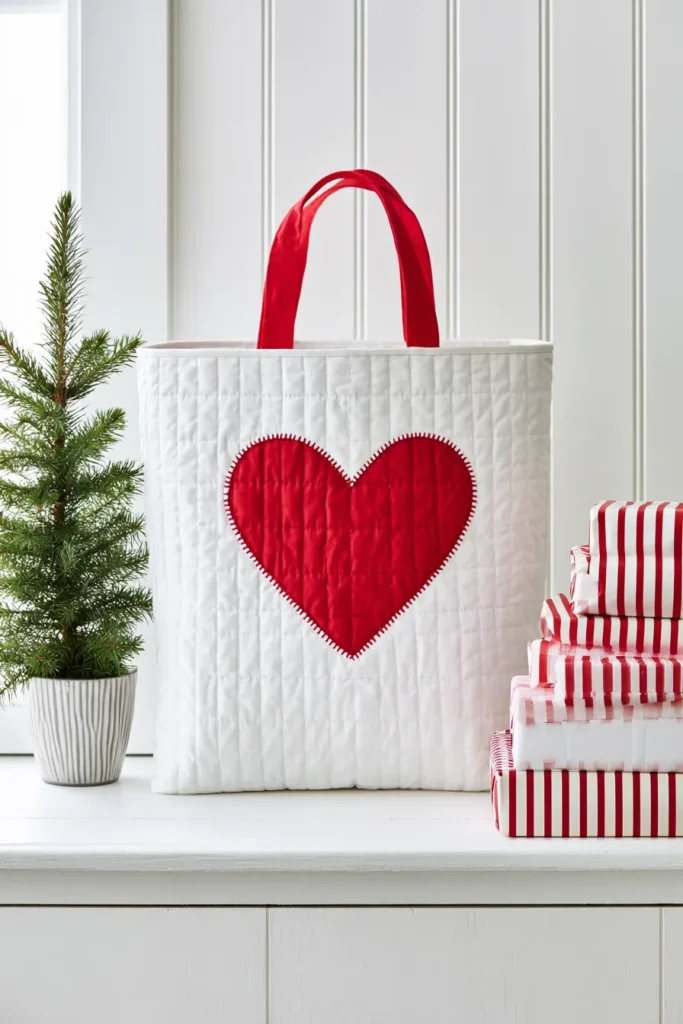
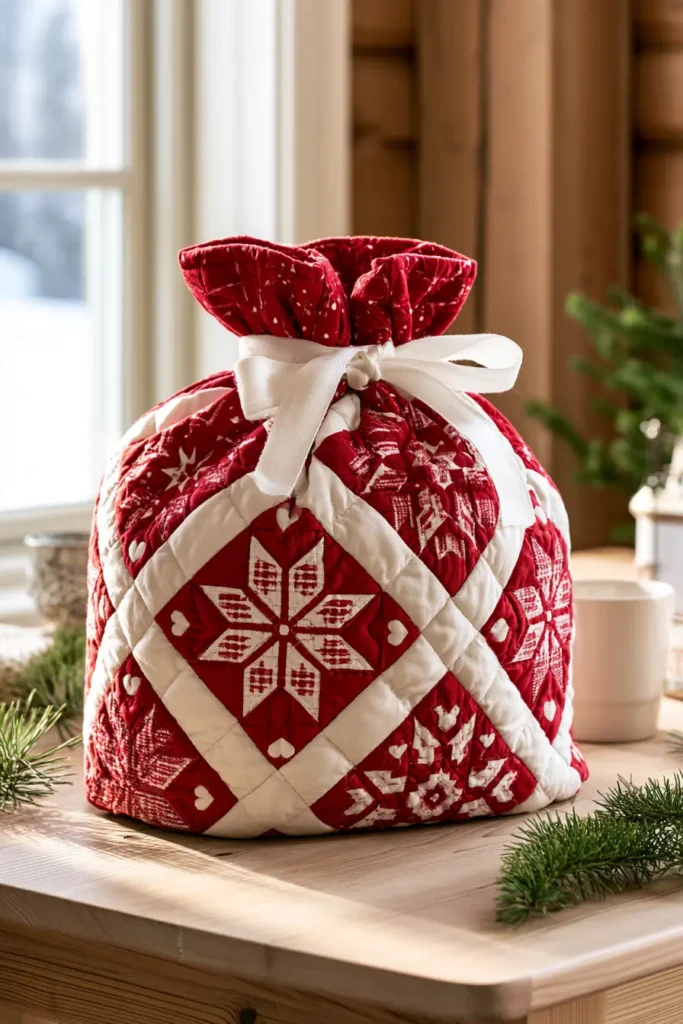
Scandinavian Christmas design has a specific look — crisp red on white, tidy geometric motifs, hearts and eight-pointed stars and rows of little folk figures — and there’s a word for the feeling it’s built to produce: hygge, the Danish concept of cozy contentment, of warmth and simple comfort against a dark winter.
The red-and-white palette isn’t arbitrary either. In the long, low-lit Nordic winter, a bright clean red against white reads as warmth and life when the world outside is grey and snow-covered, which is exactly why it became the signature holiday scheme across Sweden, Norway, and Denmark. The eight-pointed star — the julstjärna or Advent star — and the simple heart are the classic motifs, often rendered in the tidy, pixel-like geometry of cross-stitch and Selbu knitting.
This bag brings that aesthetic to a gift bag with a pieced or appliquéd red motif on a white ground, kept deliberately clean and graphic. Where other bags in this collection pile on color, this one earns its impact from restraint — a single saturated red against crisp white, and nothing else competing.
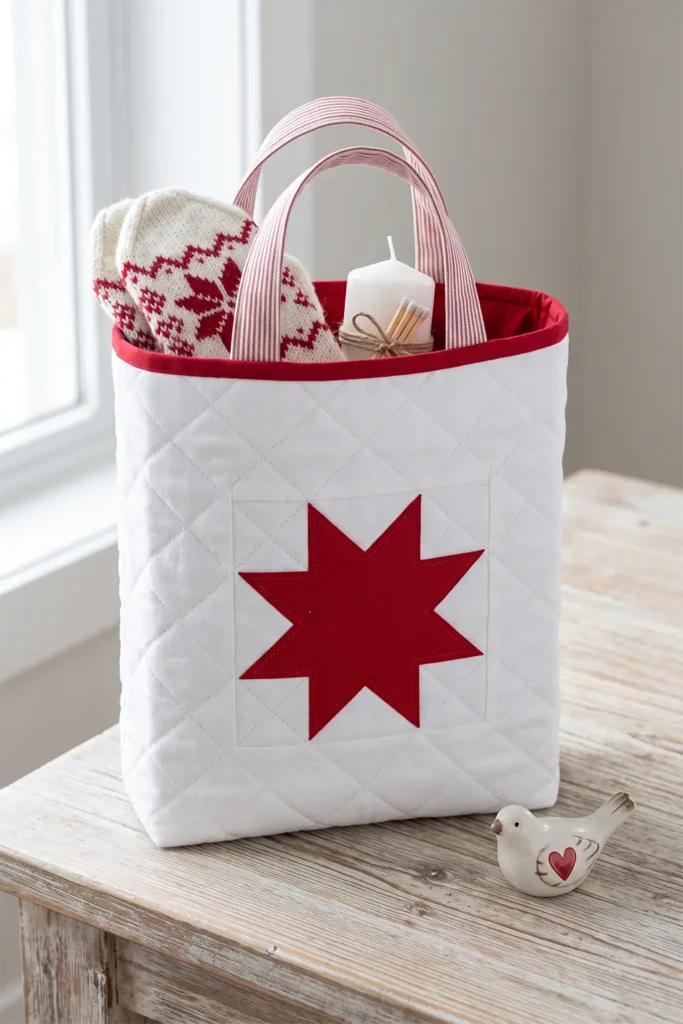
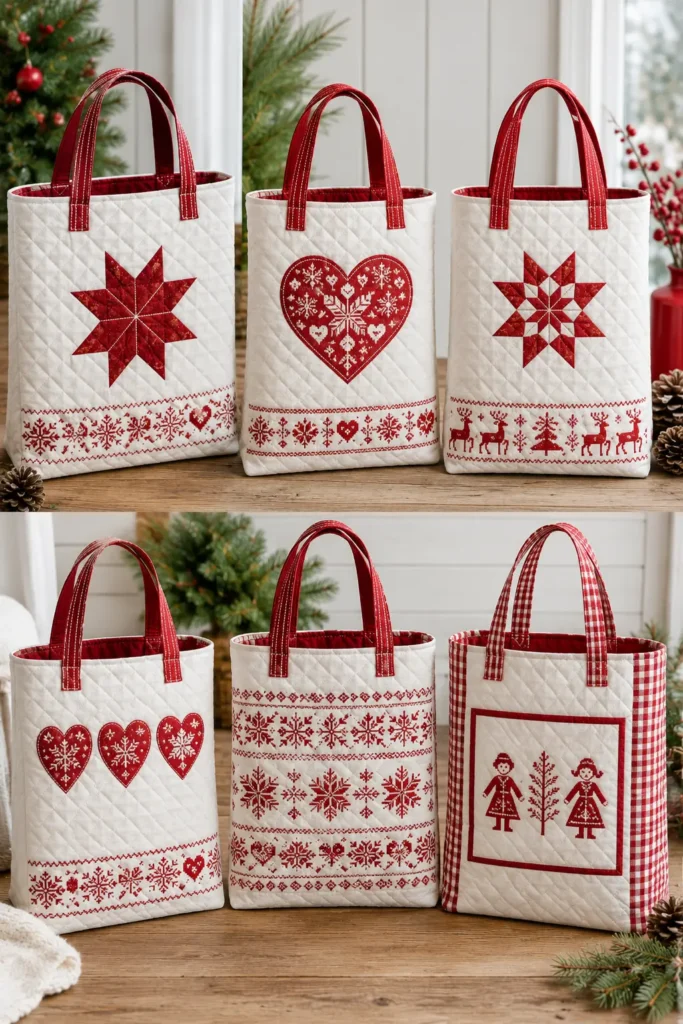
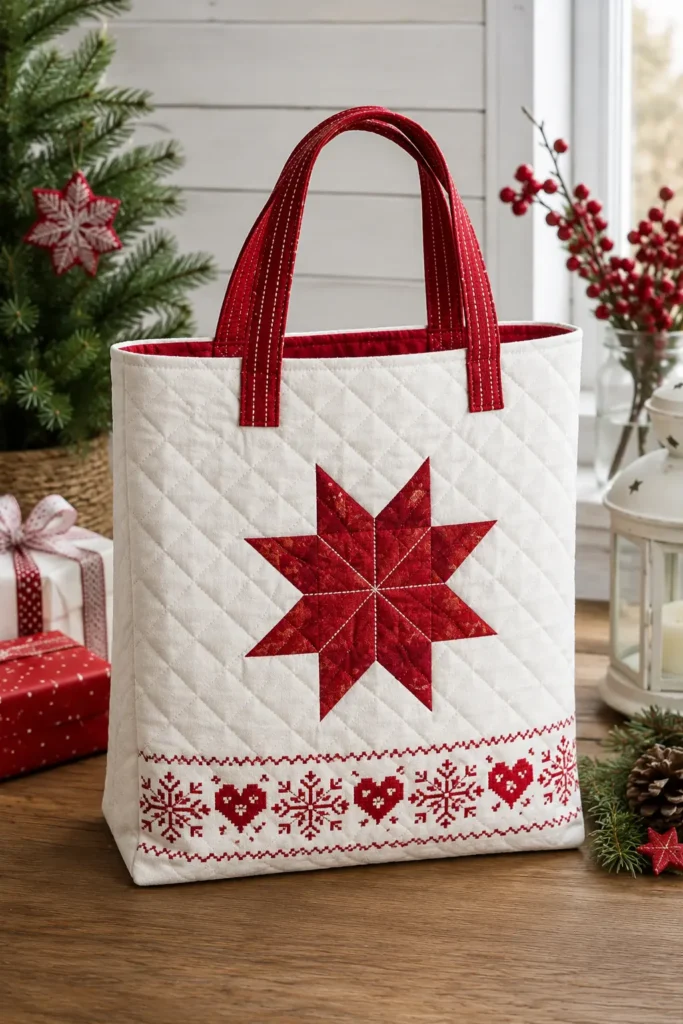
Finished size: approximately 9″ wide × 11″ tall × 3″ deep.
Gifts that fit this bag: a folded knit sweater or Nordic mittens, a candle and matches set, a book, mulled wine spices with a mug, a pair of wool socks with chocolate, hand-knit items, or a small ceramic or wooden ornament.
Cutting List
Outer fabric (white or cream): 2 panels at 10″ × 12″
Motif fabric (saturated red): scraps for appliqué, or red print for a pieced star
Fusible web: to back the red appliqué scraps
Batting or fusible fleece: 2 pieces at 10″ × 12″
Lining (red, to tie it together): 2 pieces at 9½” × 11½”
Handles: 2 strips at 2½” × 14″ (red, or red-and-white ticking)
Corner notches: 1½” squares, cut later
Seam allowance is ¼” throughout.
A note on the white: a true white or a warm cream both work, but press it well and keep it clean-handed as you sew — the whole Scandinavian effect depends on that ground staying crisp, so this is a good project to keep away from the coffee cup.
Step 1 — Prepare the Motif
Choose one clean motif for the front: an eight-pointed star, a heart, or a row of small hearts along the base.
For appliqué, apply paper-backed fusible web to the wrong side of your red fabric, trace the motif onto the paper (remember to reverse asymmetrical shapes), and cut it out. A heart is the simplest starting point; the eight-pointed star is the most authentically Scandinavian — fold-and-cut it from paper first to get a symmetrical template.
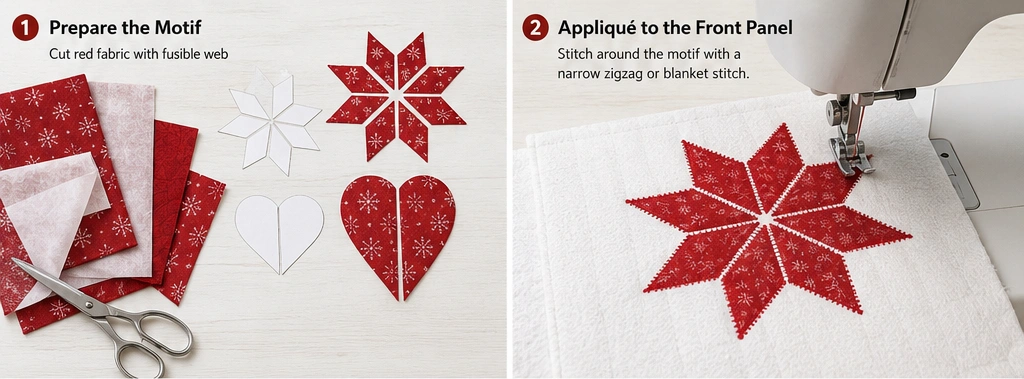
Step 2 — Appliqué to the Front Panel
Peel the backing, center the red motif on the right side of one white panel, and press to fuse. Secure the edges with a machine blanket stitch or narrow zigzag in matching red or a contrasting white thread. Pivot slowly at the star’s points, needle down. Keep the back panel plain, or add a smaller matching motif.
Step 3 — Quilt the Panels
Layer each panel over batting or fuse fleece to the back. Simple straight-line quilting suits the clean aesthetic best — an even diagonal grid or straight vertical lines. Avoid anything too busy; the Scandinavian look wants calm, ordered stitching, not dense freeform. Echo around the motif if you’d like it to stand out. Trim both quilted panels to a true 10″ × 12″.
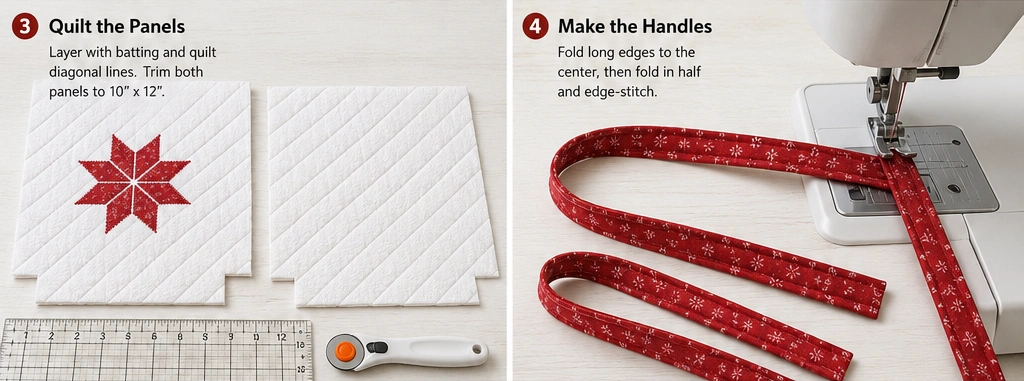
Step 4 — Make the Handles
Press each 2½” × 14″ strip in half lengthwise, open it, fold the long edges to the center, fold in half again, and edge-stitch both sides. Red or red-and-white ticking handles reinforce the palette. Set aside.
Step 5 — Cut the Corner Notches
Stack both quilted panels and both lining panels and cut a 1½” square from each bottom corner of all four. Two 1½” notches per corner give the 3″ base.
Assembly
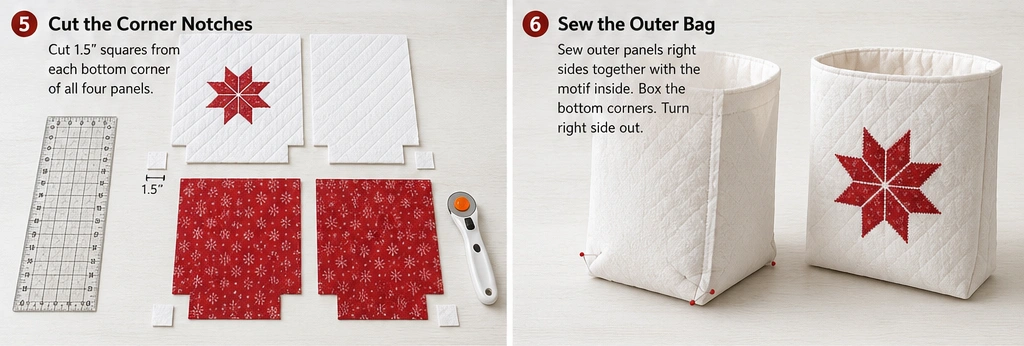
Step 6 — Sew the Outer Bag
Place the two panels right sides together, motif panel facing in. Pin. Stitch down one side, across the bottom, and up the other side with a ¼” seam, leaving the notched corners open. Backstitch at both ends.
Box each corner: pull the opening apart so the side seam lies over the bottom seam, match, pin, and stitch across. Repeat on the second corner. Turn the outer bag right side out and check the motif sits centered and upright.
Step 7 — Sew the Lining
Repeat Step 6 with the red lining panels, leaving a 4″ gap in the bottom seam for turning and backstitching at both ends. Leave the lining wrong side out.
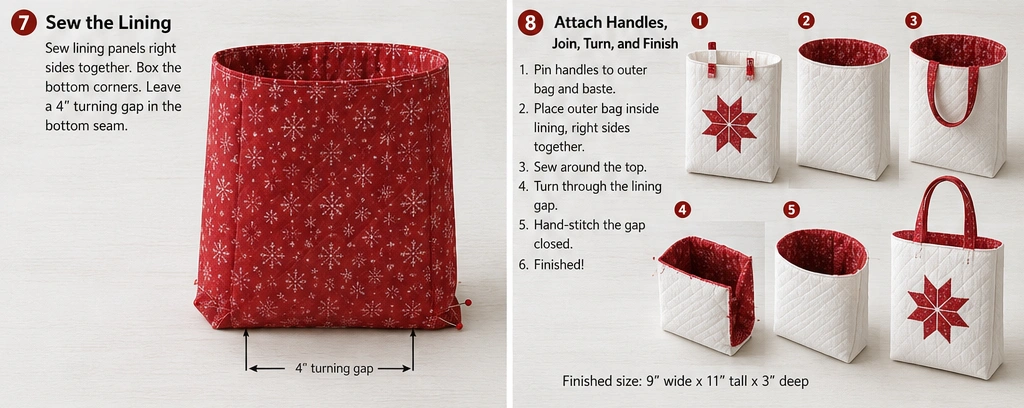
Step 8 — Attach the Handles
With the outer bag right side out, mark handle placement 2¼” in from each side seam along the top edge, framing the motif evenly. Pin a handle to the outside at each pair of marks, raw ends level with the top edge, loop hanging down. Check for twists and baste ⅛” from the edge.
Step 9 — Join, Turn, and Finish
Drop the outer bag inside the lining, right sides together, handles sandwiched between the layers. Match the side seams and pin around the top. Stitch the full opening with a ½” seam, going twice over each handle.
Pull the bag through the lining gap, outer fabric first. Close the gap by folding the raw edges in and edge-stitching ⅛” from the fold. Push the lining down, roll the top seam so the lining sits just below the rim, press, and topstitch ⅛” around the opening. The red lining will peek just below the white rim — a small deliberate flash of the palette.
Other Design Inspirations – Digitally Modified
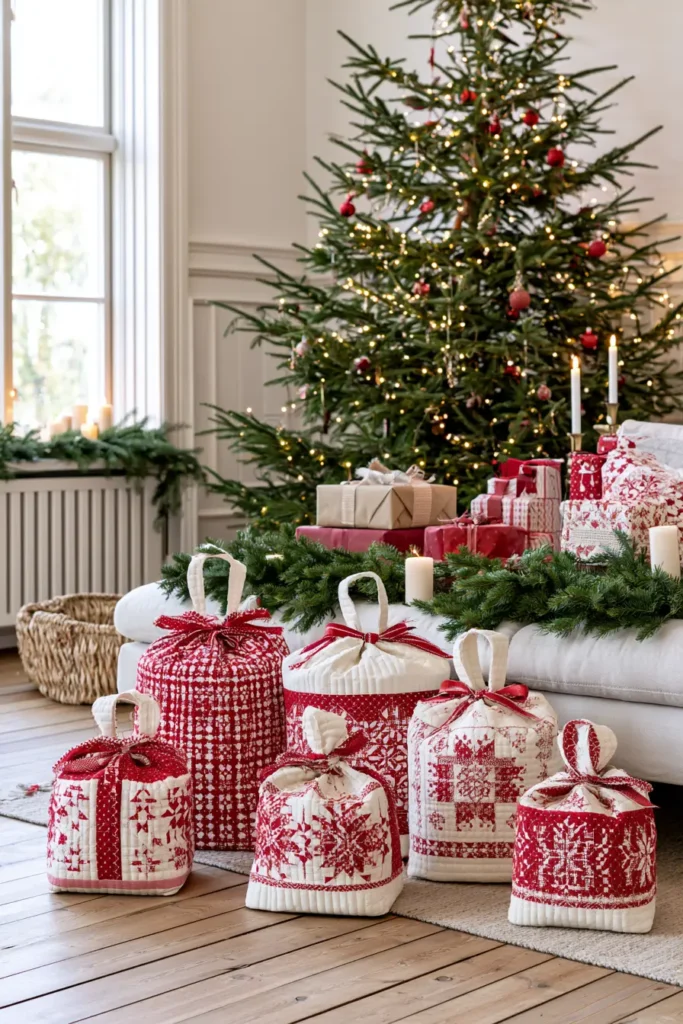
14. Personalized Monogrammed Quilted Gift Bags
The monogram is one of the oldest ways humans have marked ownership and identity. Rulers stamped combined letters on coins in the ancient world; medieval artisans signed their work with interwoven initials; and by the Victorian era, monogramming linens and personal goods had become both a mark of status and a practical way to identify belongings in an age of shared laundries and boarding houses. On a gift, a monogram does something specific and warm: it says this was made for you, not pulled off a shelf. A single embroidered or appliquéd initial turns a generic bag into that person’s bag, and it’s the detail that makes a handmade gift feel truly bespoke.
The good news for the sewist is that a monogram is the easiest possible way to personalize — one letter, one technique, endless recipients. The same bag pattern serves everyone on your list; only the initial changes. And modern machines make it nearly effortless: most have built-in lettering, or you can appliqué a bold letter by hand.
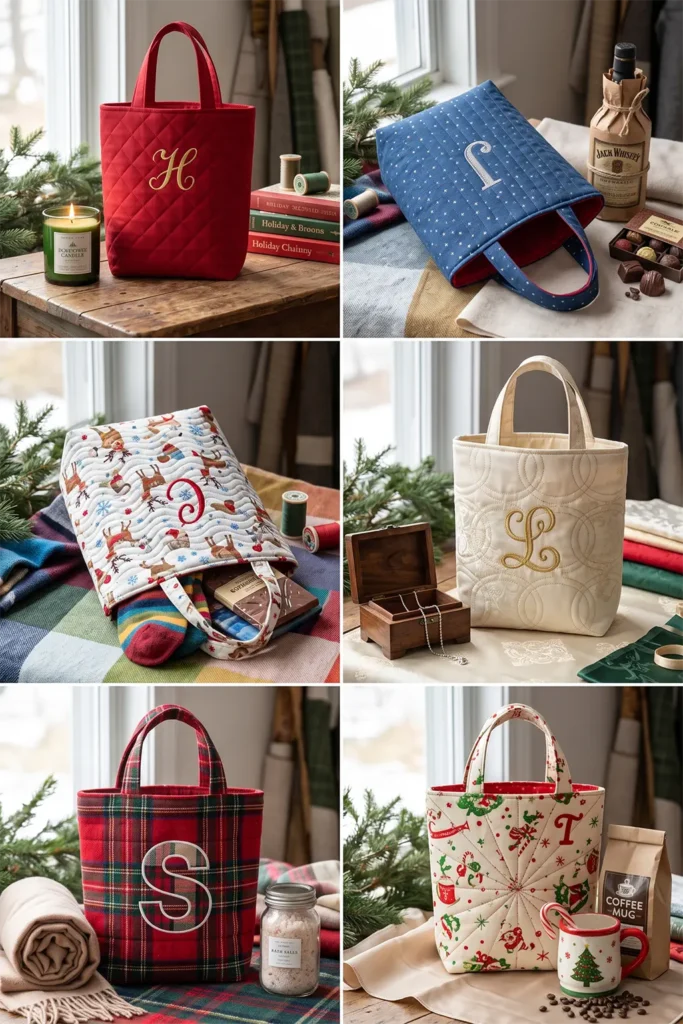
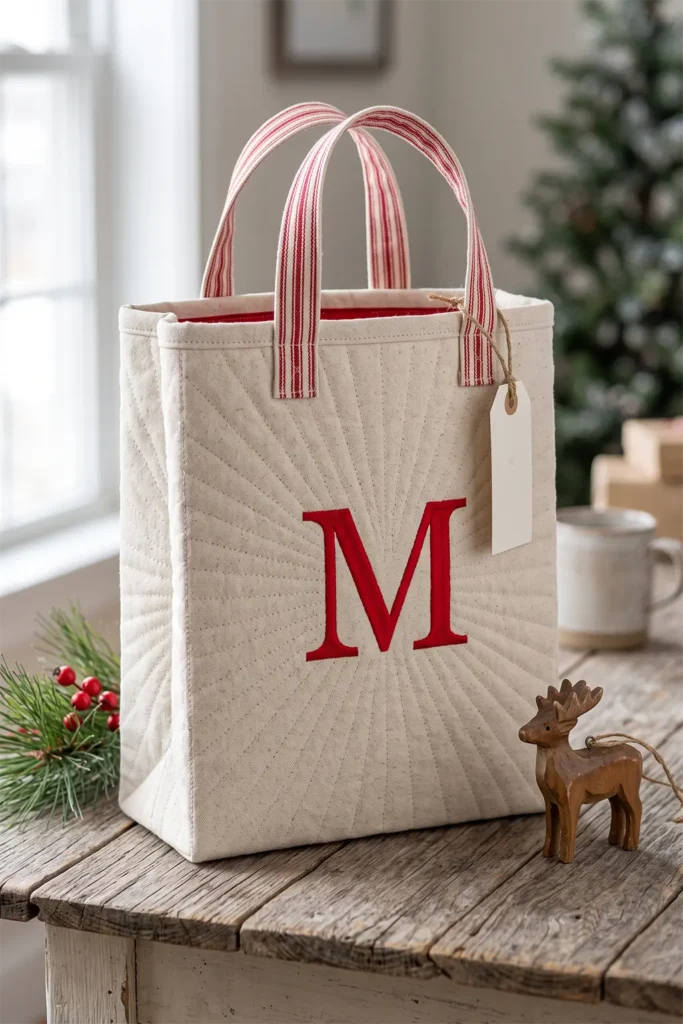
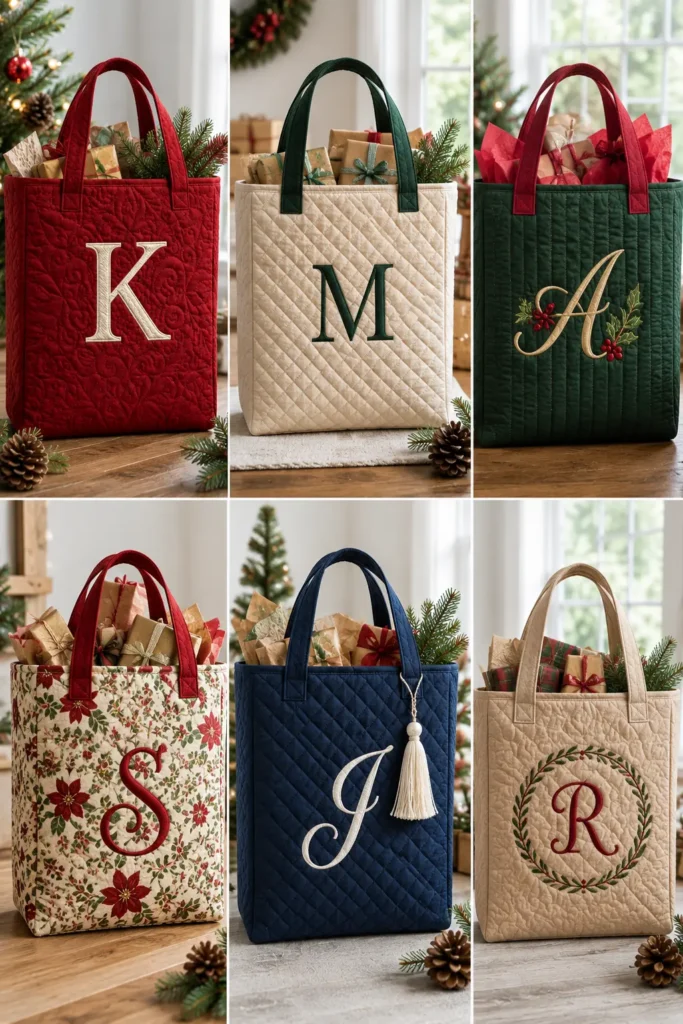
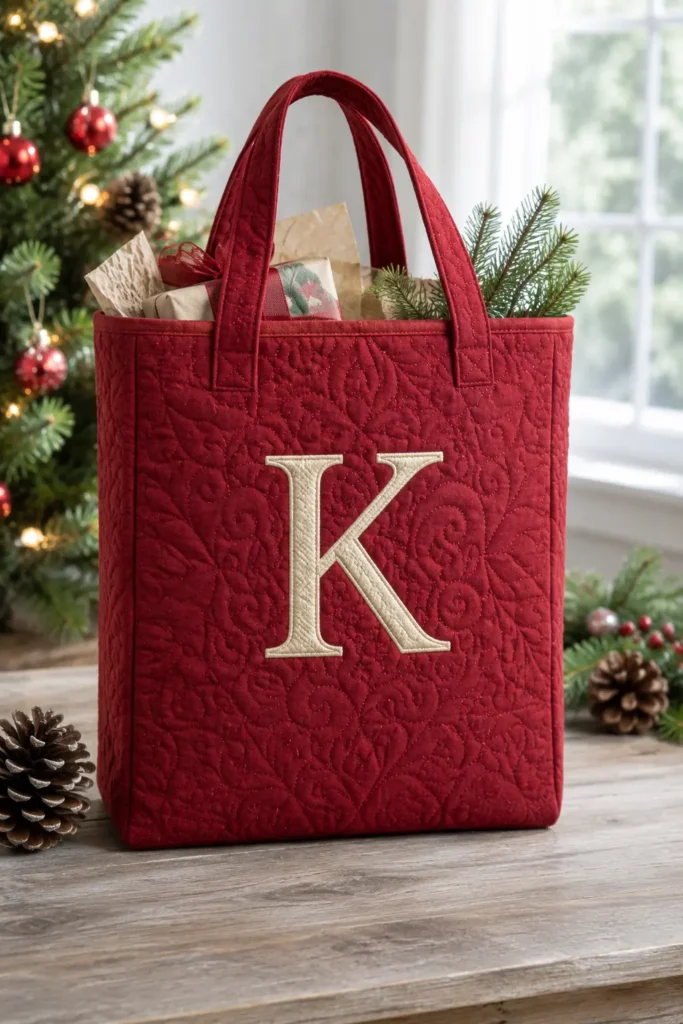
Finished size: approximately 9″ wide × 11″ tall × 3″ deep.
Gifts that fit this bag: anything you’d give with a personal touch — a monogrammed bag suits a candle, a book, a bottle bundled with treats, cozy socks and chocolate, jewelry, a scarf, bath products, or a mug and coffee. The bag itself becomes part of the gift, keepable and clearly theirs.
Cutting List
Outer fabric: 2 panels at 10″ × 12″ (a rich solid or tonal print shows a monogram best)
Monogram fabric (contrasting) or embroidery thread: for appliqué, a bold contrasting scrap; for embroidery, thread in a standout color
Fusible web: to back the appliqué letter (if appliquéing)
Batting or fusible fleece: 2 pieces at 10″ × 12″
Lining: 2 pieces at 9½” × 11½”
Handles: 2 strips at 2½” × 14″
Corner notches: 1½” squares, cut later
Seam allowance is ¼” throughout.
Step 1 — Create the Monogram
Choose your method:
Machine embroidery — if your machine has built-in fonts, hoop the front panel with stabilizer behind it and stitch the initial directly. A bold serif or script letter, 3″–4″ tall, sits well on this bag size.
Appliqué — print or draw a large letter, reverse it (crucial for asymmetrical letters, or it’ll come out mirrored), and trace it onto paper-backed fusible web applied to your contrasting fabric. Cut it out.
Hand embroidery — trace the letter onto the fabric with a water-soluble pen and satin-stitch it by hand for an heirloom touch.
Whichever you choose, do the lettering now, on the flat front panel, before any assembly — working a monogram on a finished bag is far harder.
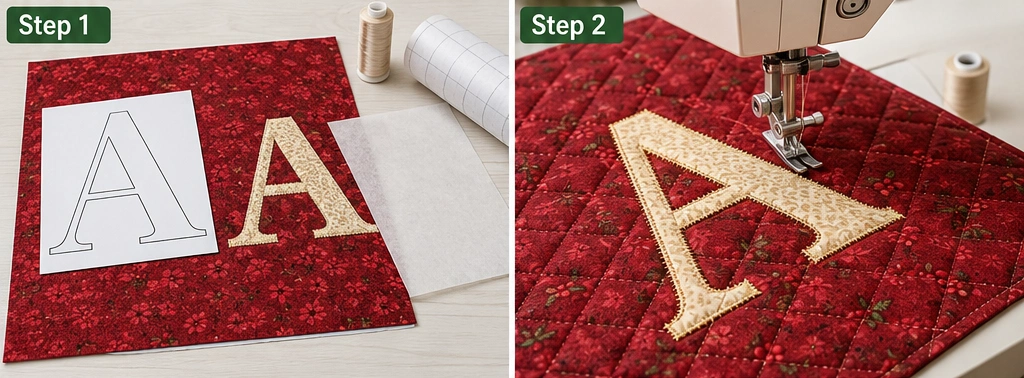
Step 2 — Apply the Monogram
For appliqué: peel the backing, position the letter on the right side of one panel — centered, or upper-third for a classic placement — and press to fuse. Secure the edges with a machine blanket stitch or narrow satin zigzag, pivoting slowly around curves and into corners with the needle down. The back panel stays plain.
Step 3 — Quilt the Panels
Layer each panel over batting or fuse fleece to the back. Quilt around the monogram so it stands proud — echo quilting radiating from the letter, or a simple background grid that stops short of the letter, both work well. Trim both quilted panels to a true 10″ × 12″.
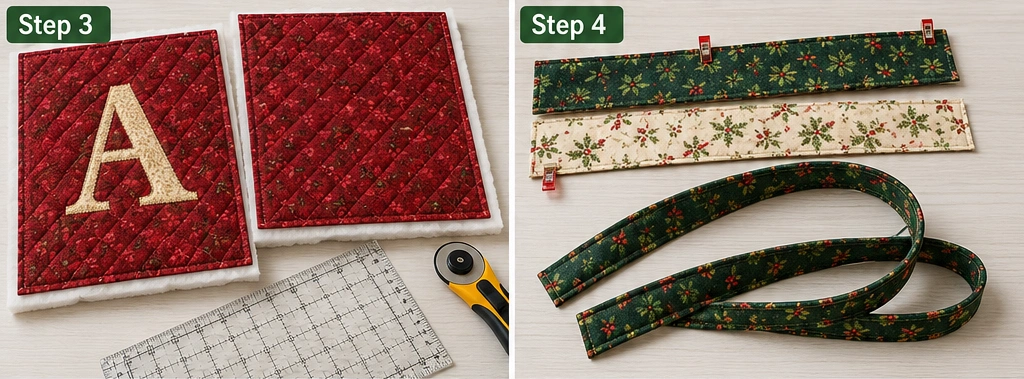
Step 4 — Make the Handles
Press each 2½” × 14″ strip in half lengthwise, open it, fold the long edges to the center, fold in half again, and edge-stitch both sides. Set aside.
Step 5 — Cut the Corner Notches
Stack both quilted panels and both lining panels and cut a 1½” square from each bottom corner of all four. Two 1½” notches per corner give the 3″ base.
Assembly
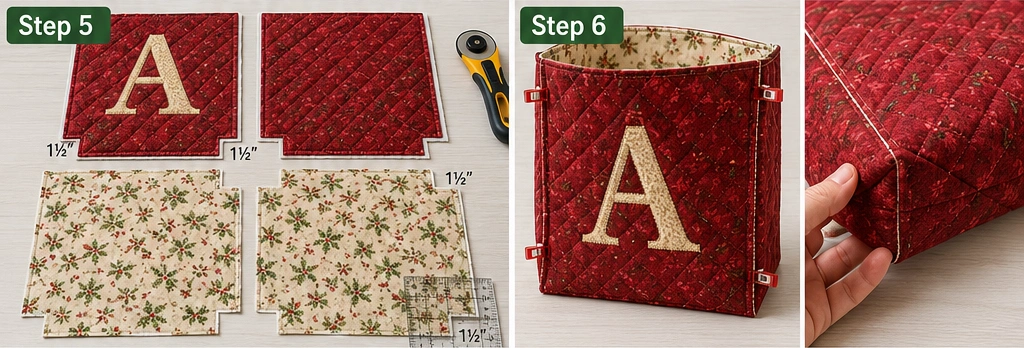
Step 6 — Sew the Outer Bag
Place the two panels right sides together, monogram panel facing in. Pin. Stitch down one side, across the bottom, and up the other side with a ¼” seam, leaving the notched corners open. Backstitch at both ends.
Box each corner: pull the opening apart so the side seam lies over the bottom seam, match, pin, and stitch across. Repeat on the second corner. Turn the outer bag right side out and check the monogram sits centered and upright.
Step 7 — Sew the Lining
Repeat Step 6 with the lining panels, leaving a 4″ gap in the bottom seam for turning and backstitching at both ends. Leave the lining wrong side out.
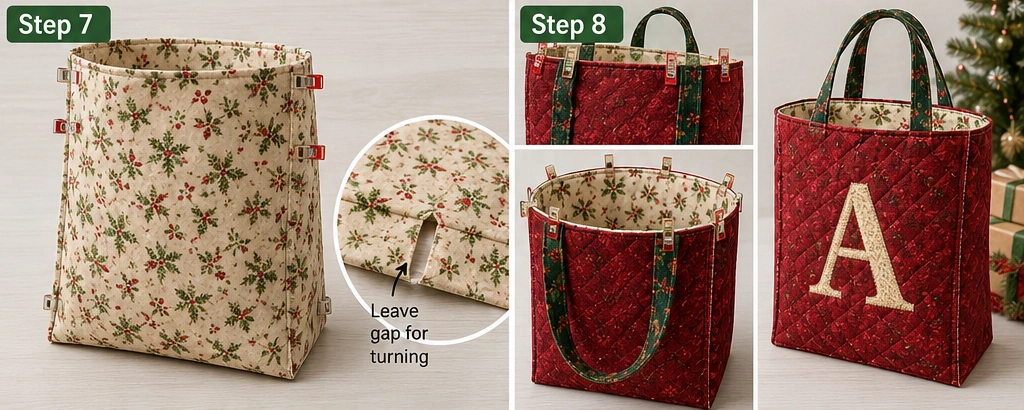
Step 8 — Attach the Handles
With the outer bag right side out, mark handle placement 2¼” in from each side seam along the top edge, positioned to frame the monogram. Pin a handle to the outside at each pair of marks, raw ends level with the top edge, loop hanging down. Check for twists and baste ⅛” from the edge.
Step 9 — Join, Turn, and Finish
Drop the outer bag inside the lining, right sides together, handles sandwiched between the layers. Match the side seams and pin around the top. Stitch the full opening with a ½” seam, going twice over each handle.
Pull the bag through the lining gap, outer fabric first. Close the gap by folding the raw edges in and edge-stitching ⅛” from the fold. Push the lining down, roll the top seam so the lining sits just below the rim, press, and topstitch ⅛” around the opening.
Other Design Inspirations – Digitally Modified
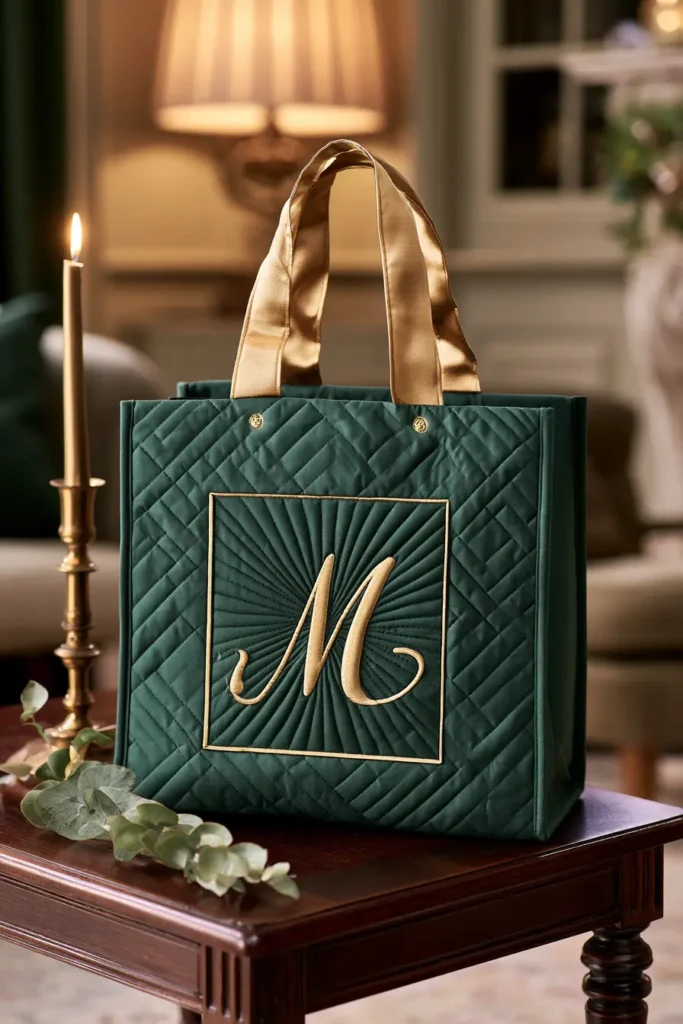
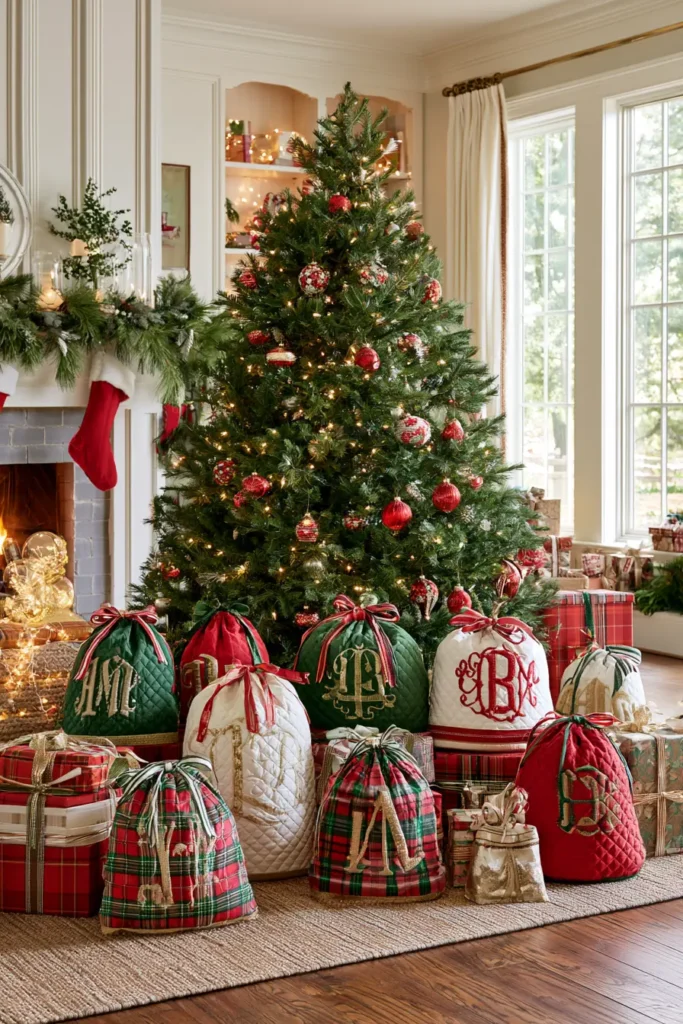
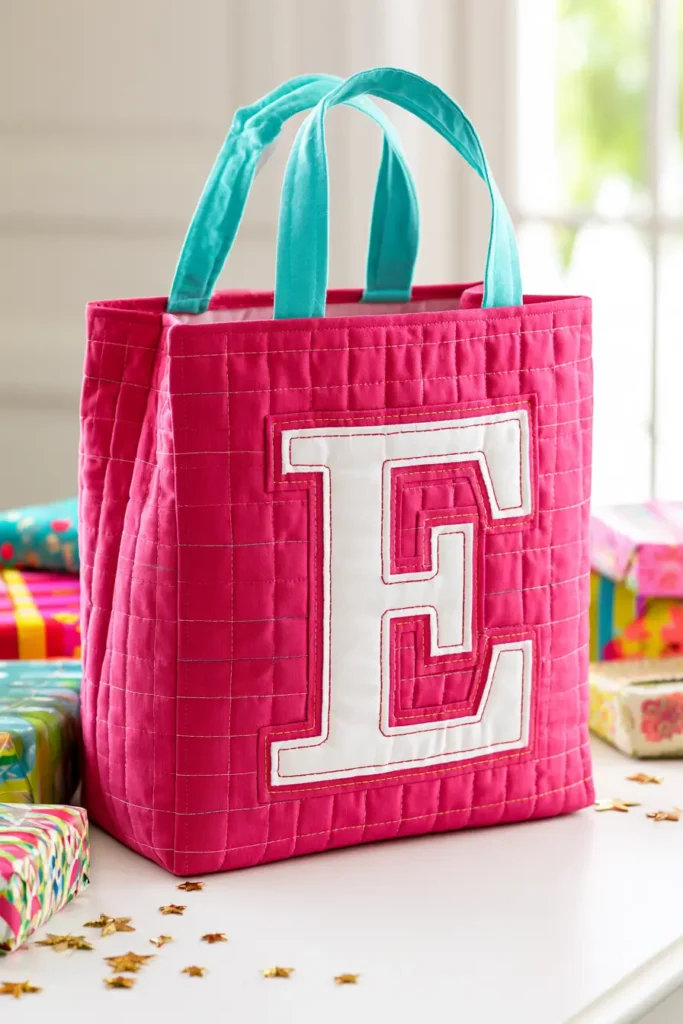
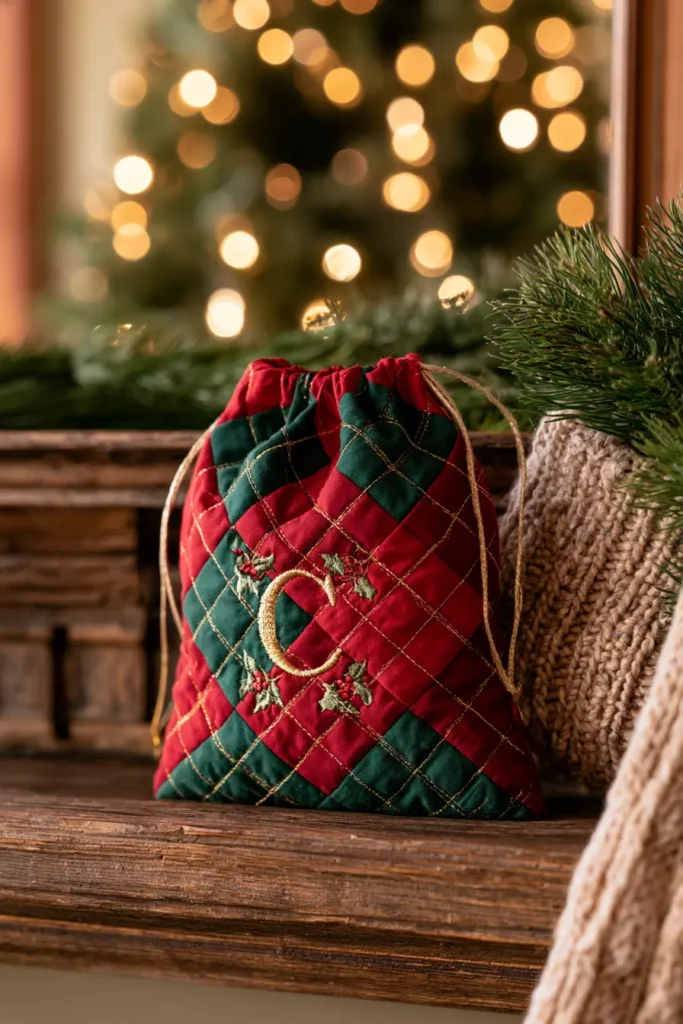
15. Elegant Velvet Quilted Gift Bags for Luxury Presents
Velvet has signaled luxury for most of its history for a simple reason: it was extraordinarily difficult and expensive to make. The dense pile is created on a specialized loom that weaves two layers of fabric face-to-face, then slices them apart to leave that upright, light-catching surface — a technique perfected in the Renaissance workshops of Italy, where cities like Venice and Florence grew wealthy on the velvet trade.
For centuries it was reserved for royalty, clergy, and the very rich; some places even passed sumptuary laws dictating who was permitted to wear it. That heritage is exactly why a velvet gift bag reads as expensive at a glance — the fabric carries five hundred years of association with wealth and ceremony, and it turns even a modest gift inside into something that feels indulgent.
Velvet does demand respect at the machine. The pile makes the two layers creep apart as you sew; it shows every pin mark and every press of a too-hot iron, and it sheds. A walking foot, a “with-nap” cutting layout (all pieces facing the same direction so the sheen is uniform), and pressing from the back on a towel are the three things that keep velvet behaving.
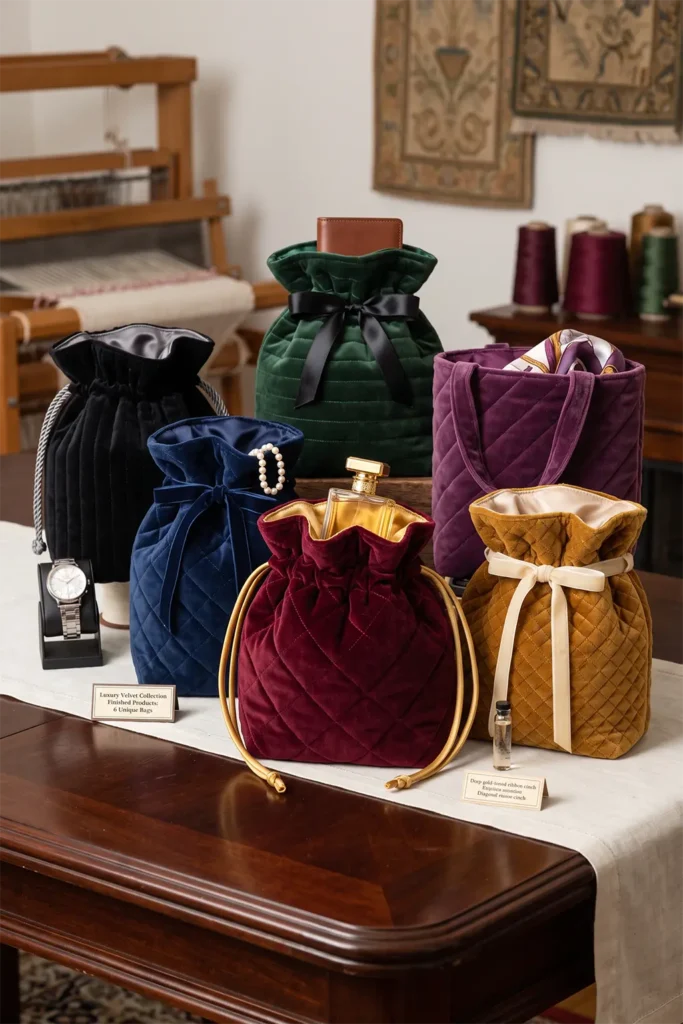
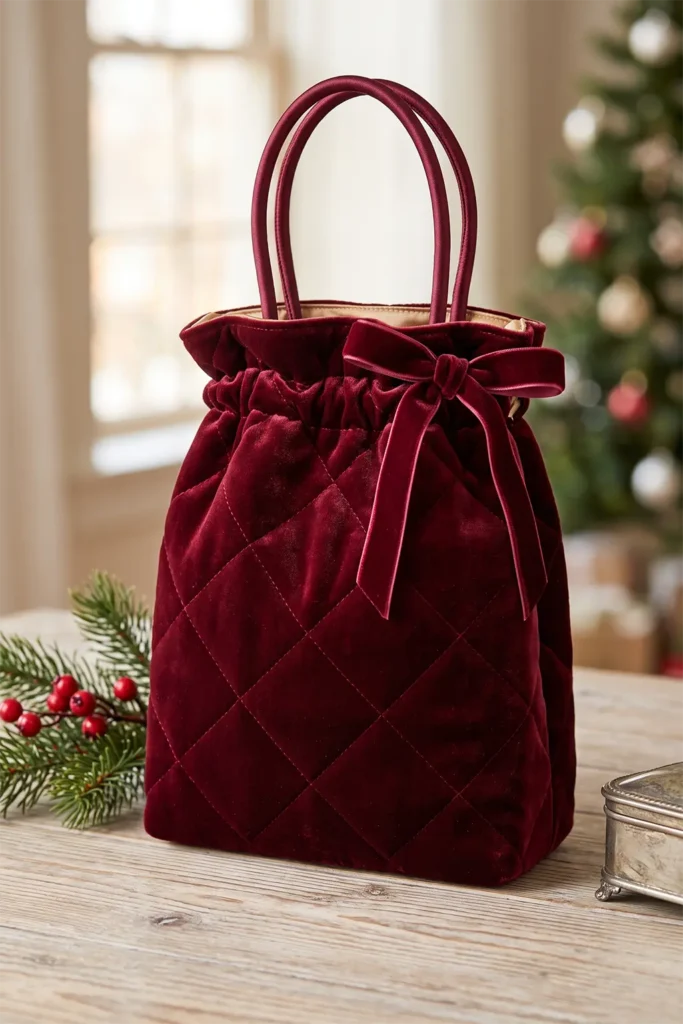
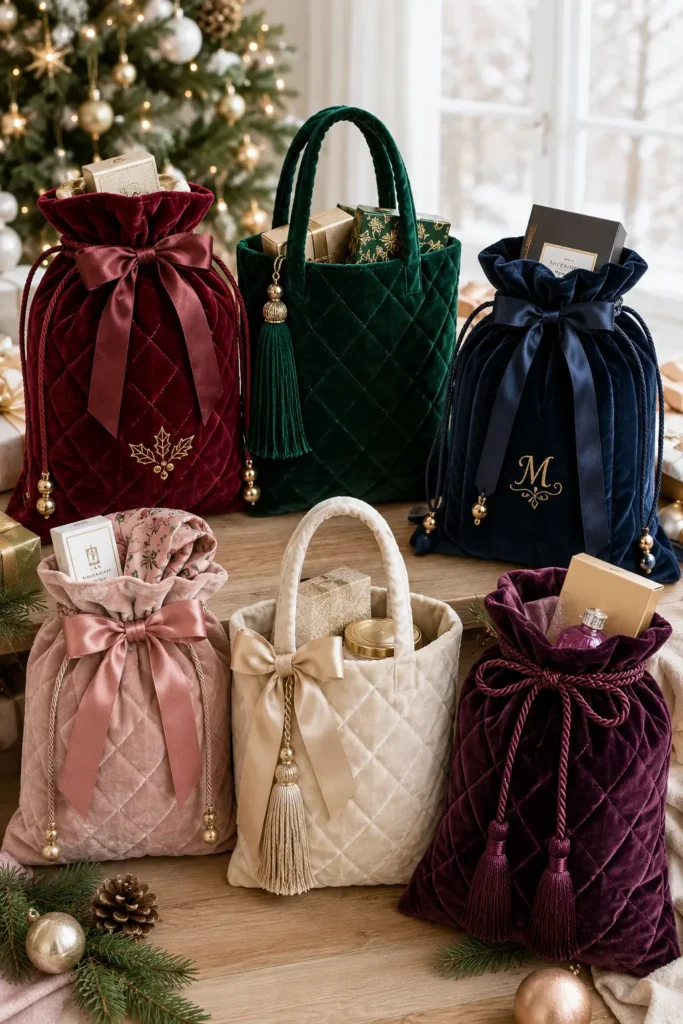
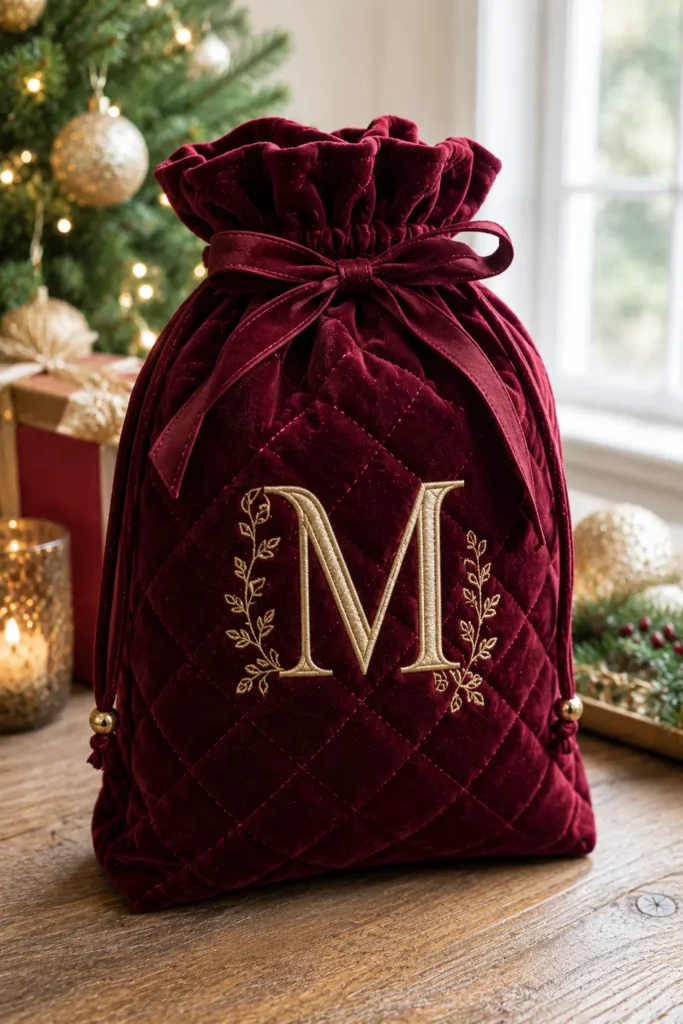
Finished size: approximately 8″ wide × 10″ tall × 3″ deep. Kept a touch smaller and more refined than the everyday bags, in keeping with its purpose.
Gifts that fit this bag: fine jewelry or a watch, a bottle of perfume or cologne, a luxury candle, a silk scarf, a leather wallet or small accessory, premium chocolates or truffles, a special piece of glassware, or a keepsake box.
Cutting List
Outer velvet: 2 panels at 9″ × 11″ — cut with the nap running the same direction on both (brush your hand along the pile; smooth-down is the standard “with nap” direction)
Batting or fusible fleece: 2 pieces at 9″ × 11″ — a low-loft cotton batting is gentler on velvet than fusing; if you do fuse, use a low iron temperature and a pressing cloth so you don’t crush the pile
Lining (satin, or a smooth cotton): 2 pieces at 8½” × 10½”
Cord or ribbon (satin or velvet) for a cinch: 2 lengths at 22″, or handles if preferred
Corner notches: 1½” squares, cut later
Seam allowance is ¼” throughout.
A word before you start: baste rather than pin within the seam allowance wherever you can, or use fine pins only inside the seam line, because velvet remembers pin holes. And clean your machine afterward — velvet lint gets everywhere.
Step 1 — Quilt the Velvet Gently
Velvet is best quilted sparingly; dense quilting flattens the pile and defeats the point of using it. Layer each velvet panel over low-loft batting. If basting, use spray or hand-baste rather than heavy pinning.
Quilt a simple, open design — a wide diagonal grid with lines 2″–3″ apart, or straight lines echoing one direction. Use a walking foot and sew in the direction of the nap where possible to reduce creep. Lengthen the stitch slightly. Handle the panel lightly and let the machine feed it rather than pushing. Trim both panels to a true 9″ × 11″.
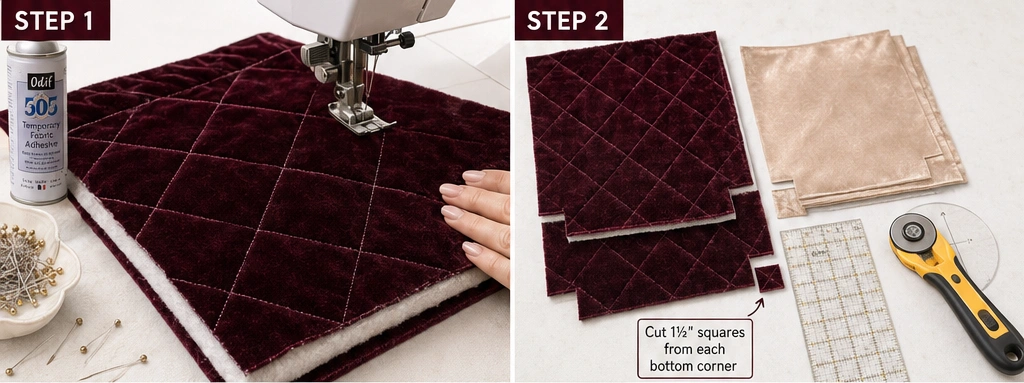
Step 2 — Cut the Corner Notches
Stack both quilted velvet panels and both lining panels and cut a 1½” square from each bottom corner of all four. Two 1½” notches per corner give the 3″ base. Cut carefully — velvet frays, so avoid over-handling the cut edges.
Assembly
Step 3 — Sew the Outer Bag
Place the two velvet panels right sides together. Velvet’s pile will want to shift, so hand-baste the seams first if you can, or pin densely within the seam allowance only. Stitch down one side, across the bottom, and up the other side with a ¼” seam, leaving the notched corners open, using a walking foot throughout. Backstitch at both ends.
Box each corner: pull the opening apart so the side seam lies over the bottom seam, match, pin within the allowance, and stitch across. Repeat on the second corner. Turn the outer bag right side out and gently brush the pile smooth.
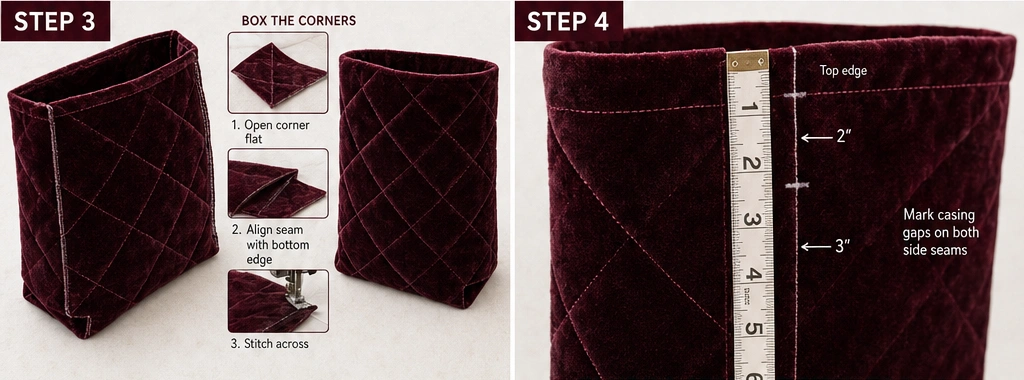
Step 4 — Mark the Casing Gaps (for a cinch closure)
If finishing with a drawstring cinch rather than handles, mark the casing openings now on the velvet: on each side seam, measure down 2″ from the top raw edge and mark, then down 3″ and mark. Leave that 1″ span unstitched — but since the outer bag is already sewn, instead simply note these points; the casing will be topstitched after lining, and you’ll leave the side-seam areas of the casing open at these marks. (If you prefer handles, skip this and baste handles on as in the other bags.)
Step 5 — Sew the Lining
Place the lining panels right sides together. A satin lining is a beautiful, tactile contrast to velvet and worth the small extra care it takes to sew. Stitch down both sides and across the bottom with a ¼” seam, boxing the corners to match. Leave a 4″ gap in the bottom seam for turning, backstitching at both ends. Leave the lining wrong side out.
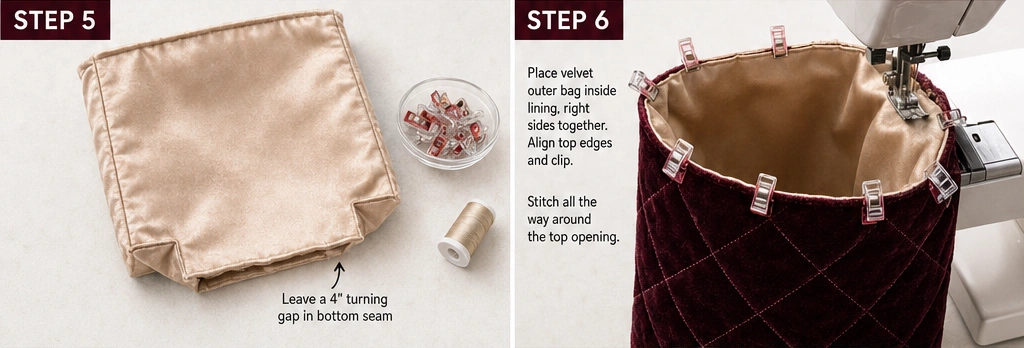
Step 6 — Join Outer and Lining
Drop the velvet outer bag down inside the lining, right sides together, matching the side seams. If using handles, they’re sandwiched between the layers now; baste them to the velvet first, 2¼” in from each seam. Pin around the top within the seam allowance and stitch the full opening with a ¼” seam. Go slowly — velvet plus satin is a slippery combination, and a walking foot earns its keep here.
Step 7 — Turn and Finish
Pull the bag through the lining gap, velvet first, easing rather than yanking so the pile isn’t stressed. Close the lining gap by folding the raw edges in and slip-stitching by hand — a hand finish avoids topstitching that would show on satin. Push the lining down inside.
Roll the top seam so the lining sits just below the velvet rim and press gently from the lining side on a towel, never pressing the velvet face directly. A light topstitch ⅛” from the top is optional; on velvet, many prefer to skip it and keep the rim pile-smooth, securing the lining with a few hidden hand tacks at the seams instead.
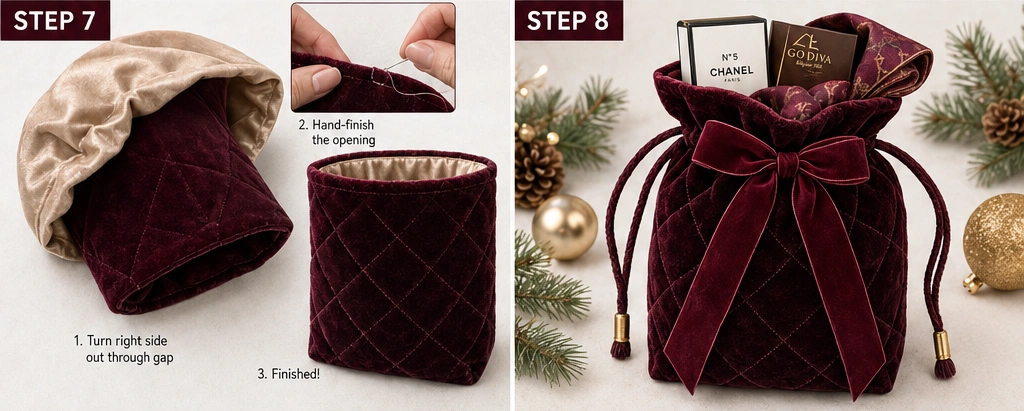
Step 8 — Add the Closure
For a cinch: measure down 1¾” and 2½” from the top edge, mark casing lines, and stitch them through all layers around the bag, leaving the side-seam gaps open for the cord. Thread two satin or velvet cords through in opposing directions (in and out the same side each) so the bag gathers evenly. Tie the tails.
For handles: they’re already attached; simply press and finish.
A velvet bow or satin ribbon tied at the gathered top is the finishing flourish that completes the luxury look.
Other Design Inspirations – Digitally Modified

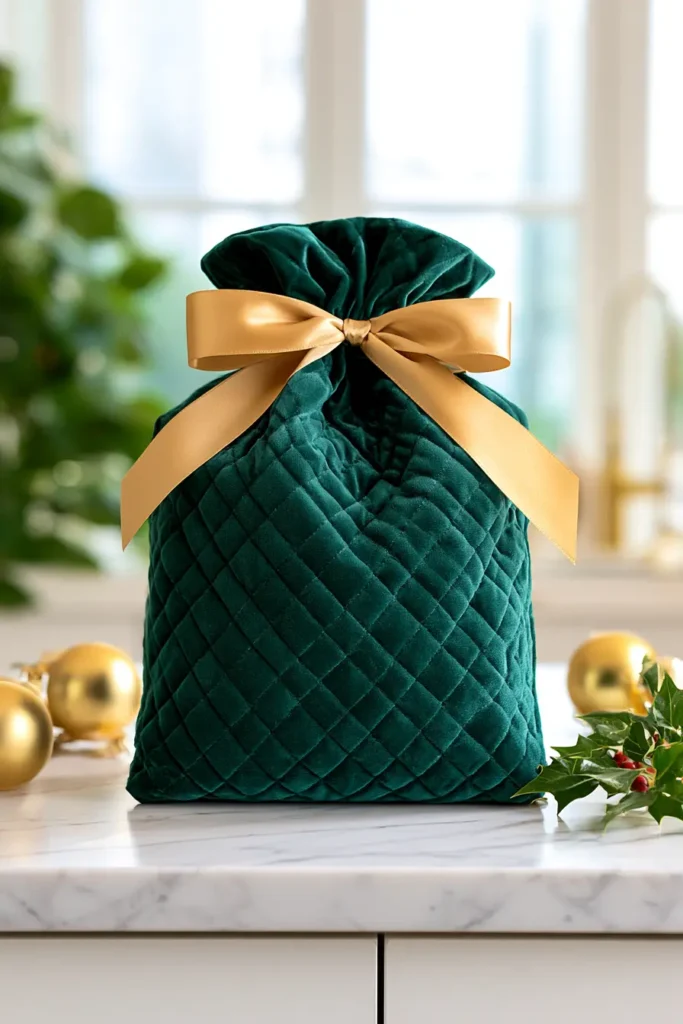
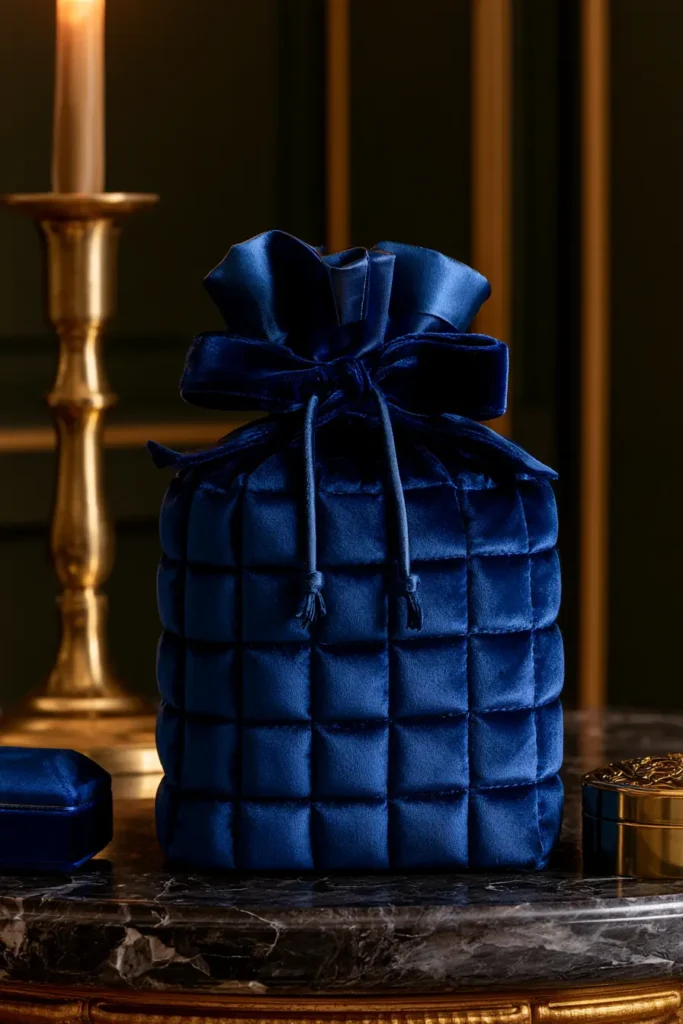

Conclusion
The real argument for sewing these isn’t the aesthetic, though a stack of patchwork bags under a tree does look better than anything from a roll. It’s that the bag outlasts the gift. Hand someone a present in a quilted sack, and they keep the sack — it turns into next year’s wrapping, or a project bag, or the thing that holds their knitting. A handful of well-made bags in mixed sizes will cover most of a household’s gifting for years, which quietly makes this one of the few Christmas projects that pays for itself. Start with two or three in the sizes you reach for most, and add to the collection each season.
Sewing Your Own Handmade Holiday Tradition
If you’re new to quilting, begin with the drawstring or scrappy versions — both are forgiving, both use straight seams, and neither punishes an imperfect corner. Once the basic construction makes sense, the decorative work opens up: appliqué, monograms, contrast binding, ribbon ties. Fabric choice does more heavy lifting than technique here, so a simple bag in a good Scandinavian red-and-white print will outshine a complicated one in a print you were lukewarm about. Cut generously, press every seam, and let the quilting lines be visible — that texture is the whole point.

