
Jelly Roll Christmas Quilt Jacket and Vest Ideas: 10 Fast Festive Layers to Sew
December has a deadline, and that’s exactly why a Jelly Roll Christmas Quilt Jacket and Vest makes so much sense. A jelly roll is a bundle of about forty fabric strips, each cut 2½ inches wide across the full width of the fabric and coordinated to work together straight out of the packet. All the cutting is done, all the color choices are already made, and every strip is the same width – which means you can go from bundle to sewn panel in an afternoon. Turn those panels into a jacket or vest, and you have festive outerwear built from the fastest starting point in quilting.
Jelly Roll Christmas Quilt Jacket and Vest Ideas
This collection of Jelly Roll Christmas Quilt Jacket and Vest ideas gathers ten festive layers, each built from 2½-inch strips. You’ll find the two quickest methods first – a jelly roll race jacket made with one continuous seam, and a quilt-as-you-go jacket where the strips are stitched straight onto the batting so piecing and quilting happen at once.
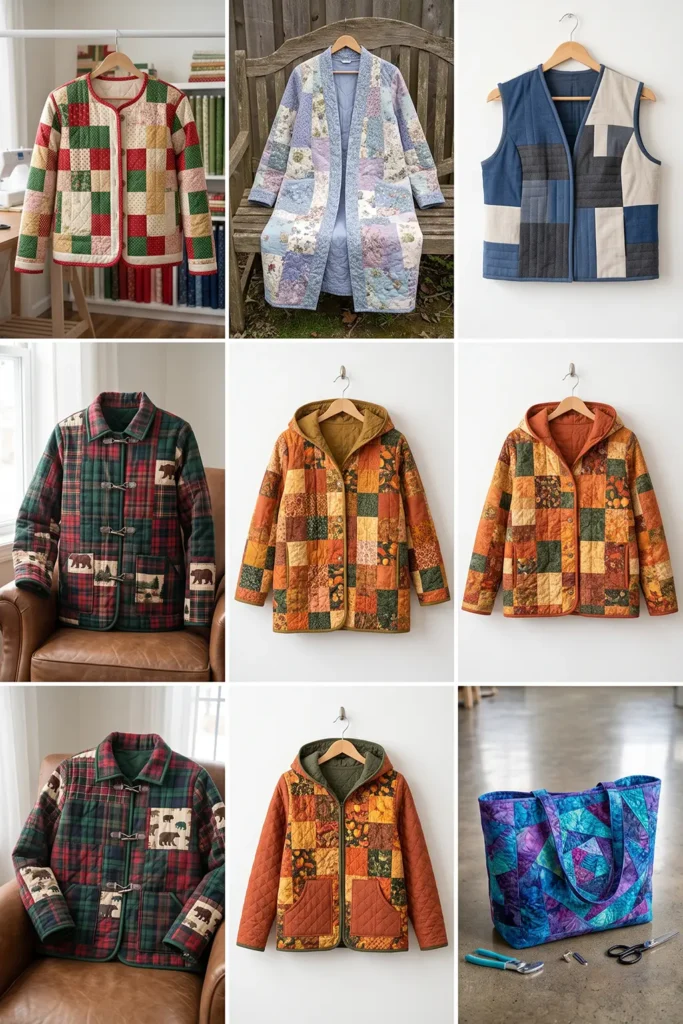
From there come the strip patterns that give real visual interest: a classic red-and-green patchwork jacket, a bold chevron, and a woven rail fence vest. And then the silhouettes – a colorful scrappy vest, a reversible one that gives two looks from a single garment, a cozy plaid shacket for everyday December, a cropped vest for parties, and a longline duster for evenings out.
Why Make a Jelly Roll Christmas Jacket or Vest
The case for starting with a jelly roll is simple: it removes the two stages that slow a project down. There’s no cutting – forty strips arrive ready to sew – and no agonizing over whether your fabrics work together, because the bundle was designed as a collection. That matters more at Christmas than at any other time of year, when you’re sewing against a date rather than at leisure.
What’s different about using strips for a garment rather than a quilt is that the strip width does the design work for you: 2½-inch strips finish at 2 inches, which is a flattering scale on a jacket or vest, and because every strip is identical, you can piece long panels quickly and cut your pattern pieces straight from them. A single bundle will make most vests outright and takes you a long way into a jacket. And unlike a quilt, which lives on a bed, a quilted layer goes out into the world – to the market, the carol service, the school concert – so all that work gets seen.
Tips for Choosing Fabrics and Colors
The most important rule for any quilted garment is low-loft batting. Bed-quilt loft is far too puffy to wear; use thin cotton batting, or cotton flannel as the middle layer for warmth with almost no bulk. Keep quilting lines around 2 inches apart so the garment drapes rather than standing stiff, and don’t prewash the strips – pinked edges fray, and 2½-inch strips distort in the machine – but do prewash any flannel yardage, which shrinks noticeably more.
On color, the useful thing to know is that red and green are often the same value, so a bundle made only of those two can muddy together; look for one that includes a good proportion of cream, ivory, or gold to separate them, and if yours doesn’t, supplement it. Beyond the traditional palette, gold and cream reads elegant, blue and silver reads frosty, and both stay wearable right through February. Two last things worth checking: count the strips before you commit, since bundles vary between 40 and 42, and choose small-scale prints – a 2-inch finished strip chops a large motif into an unreadable fragment.
See also: Jelly Roll Quilted Jackets and Vests – Farmhouse Quilt Jackets & Vests – Sashiko Quilt Jackets and Vests – Fall Quilted Jacket and Vest – Nakshi Kantha Jackets and Vests
1. Jelly Roll Race Christmas Jacket for the Fastest Festive Make
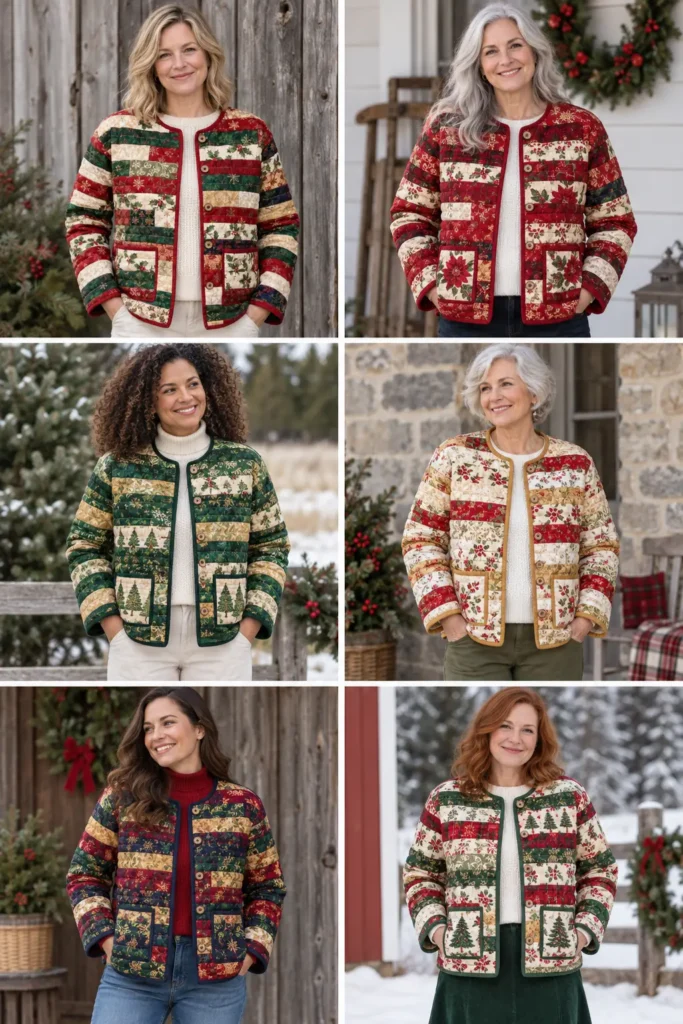
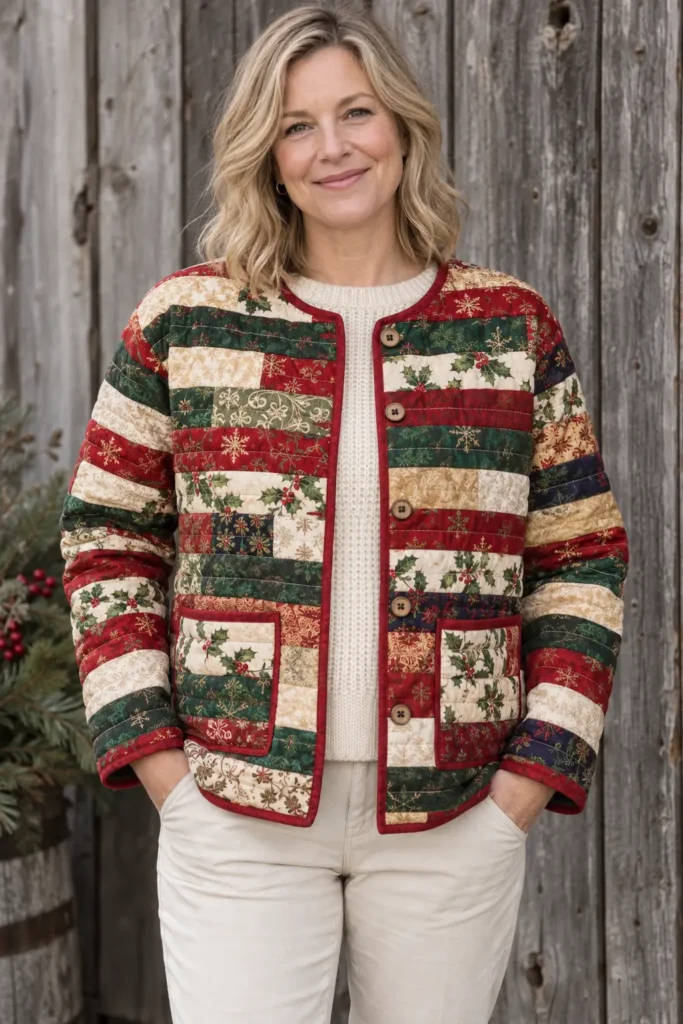
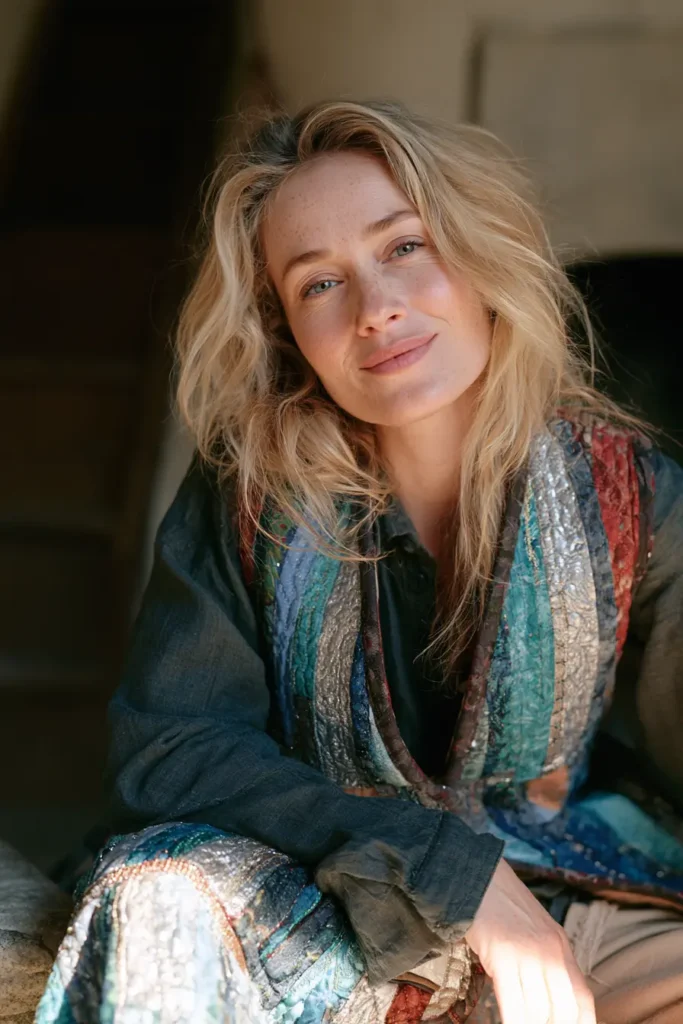
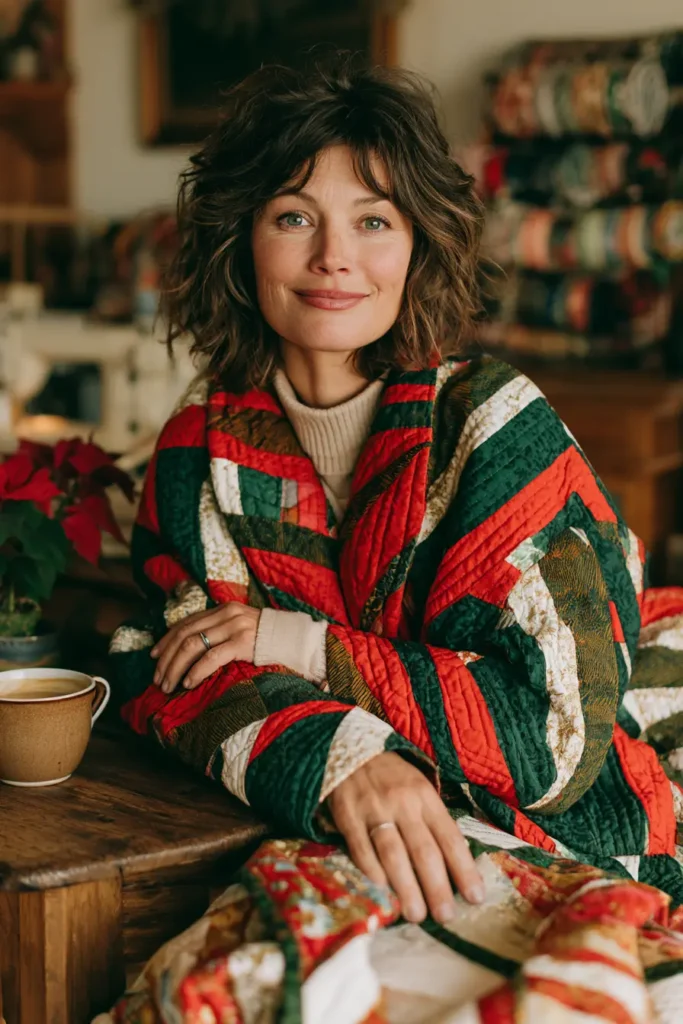
A Jelly Roll Race Christmas jacket takes one of quilting’s fastest strip-piecing methods and turns it into a colorful wearable layer. Instead of arranging dozens of individual blocks, the 2½-inch strips are first joined into one extremely long ribbon, folded in half, stitched along the long edge, cut at the fold, and repeated. Each round makes the strip shorter and the patchwork wider until it becomes a large piece of quilted yardage.
For a festive jacket, that speed is particularly useful. A vibrant mix of cranberry, holly green, pine, ivory, warm gold, berry pink, and a few darker winter prints produces a patchwork surface with plenty of movement without spending hours designing individual blocks.
There is one important difference between making a Jelly Roll Race bed quilt and making a jacket: a standard 40-strip race quilt is usually too small to provide enough uninterrupted yardage for an adult jacket. This version uses 52 full-width 2½-inch strips, giving a race panel large enough to rough-cut the back, two fronts, and two sleeves before quilting.
The Jelly Roll Race Idea
The method became popular because the quilt top appears almost magically from one continuous strip.
Beginning with a 2½-inch strip, every long seam approximately doubles its width:
- Start: 2½ inches
- After Round 1: 4½ inches
- After Round 2: 8½ inches
- After Round 3: 16½ inches
- After Round 4: 32½ inches
- After Round 5: 64½ inches
At the same time, each round approximately halves the length.
If the joined strip measures at least:
1,920 inches
before the first fold, five rounds give a final length of roughly:
60 inches
because:
1,920 ÷ 32 = 60
That gives a target race panel of approximately:
60 × 64½ inches
before quilting.
That size is much more realistic for cutting an adult jacket than the roughly 50-inch-long panel made from a typical 40-strip bundle.
Design Inspirations – Digitally Modified Images. Texture and color may vary from the actual product.
Why 52 Strips Instead of One Jelly Roll
A standard jelly roll commonly contains around 40-42 strips, depending on the manufacturer.
For this jacket, use:
52 strips total
A practical combination is:
- 1 standard jelly roll
- Plus 10-12 coordinating 2½-inch WOF strips
Or cut all 52 strips from assorted yardage.
Fifty-two 40-inch usable strips contain approximately:
52 × 40 = 2,080 inches
before joining.
Even after accounting for joining seams and trimming, that gives useful insurance above the 1,920-inch minimum target.
If your joined strip measures less than 1,920 inches, simply splice in one or two additional strips before beginning the race.
Making Christmas Color Look Intentional
Jelly Roll Race patchwork is deliberately unpredictable. After several rounds of folding and sewing, individual fabrics no longer stay where you originally placed them.
That’s part of the charm, but it means the palette needs to work as a whole.
For this festive version, use roughly:
- 14 strips cranberry, ruby, and warm red
- 14 strips pine, holly, and emerald green
- 10 strips ivory, cream, and pale gold
- 8 strips warm gold, mustard, and festive metallic-look prints
- 6 strips berry, plum, or deep navy accents
Total:
52 strips
The generous amount of cream and pale gold is important. Red and green often have surprisingly similar value, so lighter strips keep the finished patchwork from turning into one dark mass.
A Little History: Why It’s Called a “Race”
The Jelly Roll Race earned its name from quilting events where several people began with long strip bundles and competed to see who could finish the quilt top first.
The construction is unusually fast because every pass reduces the number of seams still ahead of you. The first seam is extremely long, but each following round is approximately half as long as the one before.
For a garment, there is no reason to literally race the machine. Accurate seams and flat strip sets matter more than speed. But the technique still creates a large piece of colorful patchwork much faster than piecing dozens of separate blocks.
How It’s Built
The construction order is:
- Choose a simple quilt-jacket pattern
- Prepare 52 coordinating 2½-inch strips
- Join them into one continuous strip
- Complete five Jelly Roll Race rounds
- Square and measure the race panel
- Rough-cut five oversized garment panels
- Layer each panel with lining and low-loft batting
- Quilt the five panels
- Cut the final garment pieces
- Make and attach the pockets
- Sew and bind the shoulders
- Set and bind the sleeves
- Sew and bind the underarm/side seams
- Bind the outer perimeter and cuffs
- Add buttons and finish
This keeps bare batting away from the machine bed and avoids the much harder process of bagging a separate lining into an already quilted jacket.
Finished Garment
- Style: relaxed collarless quilt jacket
- Length: approximately 28-30 inches
- Fit: boxy with approximately 4-6 inches total bust ease
- Front: true button-front overlap
- Sleeves: full-length, slightly relaxed
- Buttons: approximately 5
- Pockets: two patch pockets
- Outer construction: Jelly Roll Race strip patchwork
- Strip width: 2½ inches
- Quilting: approximately 2 inches apart, or closer if required by batting
- Skill level: confident beginner
- Core techniques: Jelly Roll Race piecing, quilted yardage, garment cutting, bound seams, buttonholes
Materials Needed
For an average adult jacket:
- 52 strips at 2½ inches × WOF
- One 40-42-strip jelly roll plus 10-12 extra coordinating strips works well
- Or approximately 3¾-4 yards total assorted quilting cotton if cutting all strips yourself
- Lining: approximately 3¾ yards of 44-45-inch-wide soft cotton, lawn, chambray, or lightweight flannel
- Low-loft batting: approximately 2 yards of 90-inch-wide batting, or enough to cut five oversized panel pieces
- Binding: approximately 1 yard quilting cotton
- Buttons: approximately 5, around ¾-1 inch diameter
- Neutral piecing thread
- Coordinating quilting thread
- 90/14 needle
- Walking foot
- Rotary cutter
- Quilting ruler
- Large cutting mat
- Pins or clips
- Iron
- A collarless, dartless, button-front boxy jacket pattern with a real center-front overlap and dropped or uncomplicated sleeves
Beginner tip: don’t prewash precut jelly-roll strips. Their narrow pinked edges can fray badly. If you’re cutting your own strips from yardage, either prewash all of that yardage before cutting or use everything consistently unwashed.
Choosing Your Colors
A vibrant Christmas palette could include:
Reds
- Cranberry
- Ruby
- Cherry
- Burgundy
Greens
- Pine
- Holly
- Emerald
- Sage
Lights
- Ivory
- Cream
- Pale gold
- Warm white
Bright Accents
- Mustard gold
- Berry pink
- Plum
- Deep navy
- Subtle metallic gold print
Avoid using 52 equally busy novelty prints.
A few Christmas motifs are charming, but mix them with:
- Plaids
- Dots
- Small florals
- Stars
- Tone-on-tones
- Geometrics
- Near-solids
That keeps the jacket looking like handmade patchwork rather than a novelty costume.
Cutting Measurements
Before the race:
- 52 strips: 2½ inches × usable WOF
After joining:
- Target continuous-strip length: at least 1,920 inches
After five race rounds:
- Target panel: approximately 60 × 64½ inches
Your actual measurements will vary slightly depending on:
- Strip length
- Joining method
- Squaring
- Seam accuracy
For an average jacket, plan these rough-cut panels from the finished race top:
- Back: approximately 26 × 32 inches
- Left front: approximately 18 × 32 inches
- Right front: approximately 18 × 32 inches
- Left sleeve: approximately 22 × 28 inches
- Right sleeve: approximately 22 × 28 inches
A convenient theoretical layout is:
Across the top section:
26 + 18 + 18 = 62 inches
Below that:
22 + 22 = 44 inches
So a race panel around:
64½ inches wide × at least 60 inches long
can accommodate the five rough panels efficiently.
Always lay the actual jacket pattern pieces over the panel before making the rough cuts. Larger sizes may require more strips or a second small race panel.
Step-by-Step Guide
Step 1 – Choose the Jacket Pattern and Check the Layout
Choose a pattern with:
- Collarless neckline
- Dartless body
- Genuine button-front overlap
- Straight or lightly shaped sides
- Dropped or uncomplicated sleeves
- Patch pockets
- Minimal facings
Check its finished measurements.
Aim for approximately:
4-6 inches total bust ease
for winter layering.
Next, note the approximate bounding rectangle for each pattern piece.
For this tutorial, the rough panel targets are:
- Back: 26 × 32 inches
- Each front: 18 × 32 inches
- Each sleeve: 22 × 28 inches
If your pattern needs substantially more room, increase the strip count before beginning the race.
Step 2 – Select and Count 52 Strips
Choose:
52 strips at 2½ inches × WOF
Spread the colors across your red, green, light, gold, and accent groups.
Don’t worry about arranging an exact final sequence – the race construction will scramble it.
Do make sure there are enough light strips to separate darker red and green fabrics visually.
Trim away selvages while preserving as much strip length as possible.
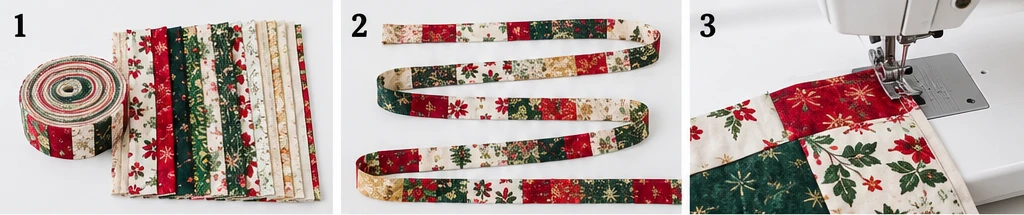
Step 3 – Join the Strips into One Continuous Ribbon
Join all 52 strips end to end.
Diagonal joins reduce bulky seam stacks.
To make one:
- Place two strip ends right sides together at right angles.
- Sew diagonally from corner to corner.
- Trim the excess fabric to approximately ¼ inch.
- Press the seam open.
- Add the next strip.
Continue until all 52 strips form one enormous continuous ribbon.
Now measure it.
You want at least:
1,920 inches
of usable length.
If it falls short, add another strip or two before proceeding.
Step 4 – Stagger the First Join
Before folding the long strip for the first race seam, cut approximately:
18-20 inches
from one end.
This traditional Jelly Roll Race trick helps prevent the joining seams from repeatedly lining up in obvious vertical stacks during later folds.
The exact amount isn’t critical.
After trimming, recheck that your strip still provides enough length to reach the required final panel. If you’ve dropped below the target, splice in one additional strip.
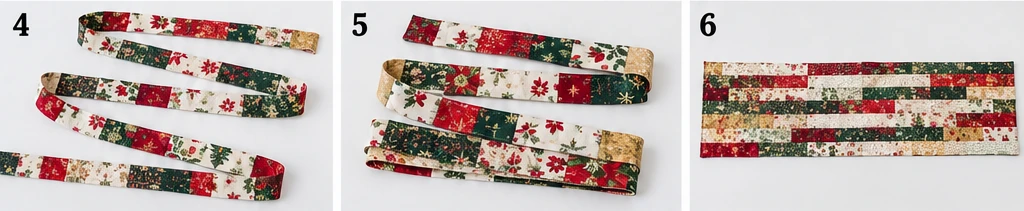
Step 5 – Complete Race Round 1
Fold the extremely long strip in half:
right sides together
Match the long raw edges.
The strip is now approximately half as long.
Starting at the joined end, sew the entire long edge using:
¼-inch seam allowance
Don’t pull either layer.
When you reach the folded end, cut directly across the fold.
Open the piece.
It should now be approximately:
4½ inches wide
and roughly half the original length.
Press the long seam carefully.
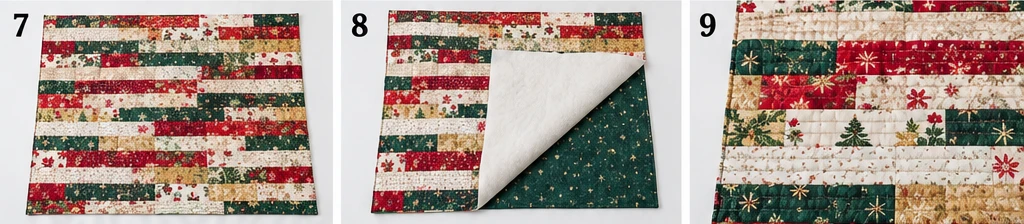
Step 6 – Complete Race Rounds 2 and 3
For Round 2:
- Fold the strip in half lengthwise again, right sides together.
- Match the long edges.
- Sew with a ¼-inch seam.
- Cut the fold.
- Open and press.
The panel should now be approximately:
8½ inches wide
and one-quarter of the original strip length.
Repeat for Round 3.
After Round 3:
- Width: approximately 16½ inches
- Length: approximately one-eighth of the original long strip
Keep the panel supported on the sewing table rather than letting its weight pull from the machine.
Step 7 – Complete Race Rounds 4 and 5
Repeat the same fold-sew-cut-open process.
After Round 4:
- Width: approximately 32½ inches
- Length: approximately one-sixteenth of the original
After Round 5:
- Width: approximately 64½ inches
- Length: approximately one-thirty-second of the original
If your pre-race strip measured around 1,920-2,000+ inches, the final panel should be about:
60-62+ inches long
The exact number isn’t important as long as your garment layout fits.
Step 8 – Press, Measure, and Square the Race Panel
Spread the completed Jelly Roll Race panel on a large flat surface.
Press it carefully from the back.
Check:
- Overall width
- Overall length
- Straightness of edges
- Any bowed seams
- Any missed stitching
Don’t aggressively trim the panel into a perfect rectangle yet.
First place your jacket pattern pieces over it.
For the sample layout, position:
- Back plus two fronts across one 32-inch-deep section
- Both sleeves across the remaining approximately 28-inch-deep section
Make sure the pattern pieces fit before cutting anything.
Step 9 – Rough-Cut the Five Oversized Garment Panels
Once the layout works, rough-cut:
- 1 back panel around 26 × 32 inches
- 2 front panels around 18 × 32 inches
- 2 sleeve panels around 22 × 28 inches
These are not the final garment shapes.
They’re simply manageable quilt panels that remain approximately:
2-3 inches larger than the final pattern pieces
where possible.
Keep the larger leftover pieces for patch pockets.
Step 10 – Prepare Lining, Batting, and Quilt Sandwiches
For each rough-cut patchwork panel, cut:
- Low-loft batting approximately 1-2 inches larger on every side
- Final lining approximately 1-2 inches larger on every side
Layer each sandwich:
- Lining right side down
- Low-loft batting
- Jelly Roll Race patchwork right side up
Smooth carefully.
Baste thoroughly.
Do this for:
- Back
- Two fronts
- Two sleeves
The lining is now part of the quilt sandwich, so no bare batting needs to drag across the machine bed.
Step 11 – Quilt All Five Panels
Use a walking foot.
Straight-line quilting suits the Jelly Roll Race construction especially well.
Good options include:
- Lines approximately ¼ inch beside selected strip seams
- Vertical lines about 2 inches apart
- Gentle diagonal lines
For a soft wearable jacket, aim for quilting roughly:
2 inches apart
unless the batting manufacturer requires closer spacing.
Check the lining side repeatedly for folds or tucks.
After quilting, inspect all five panels and trim the excess batting and lining level with the patchwork.
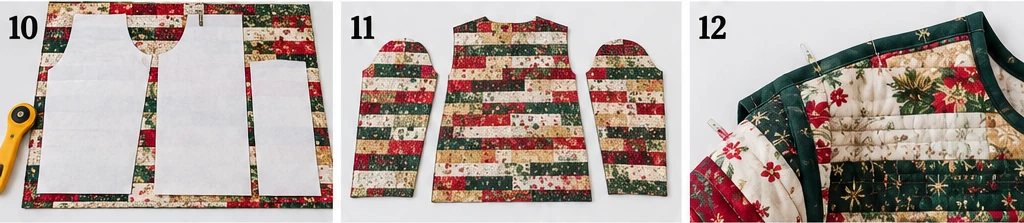
Step 12 – Cut the Final Jacket Pieces
Lay your jacket pattern on the quilted panels.
Cut:
- 1 back
- 2 fronts
- 2 sleeves
Shift the pattern slightly where possible so very bulky race-strip intersections don’t land directly at:
- Shoulder endpoints
- Armhole curves
- Underarm intersections
- Buttonhole line
Transfer all pattern markings.
The rough-cut-then-quilt method gives you enough freedom to make these final adjustments accurately.
Step 13 – Make and Attach the Patch Pockets
From leftover Jelly Roll Race patchwork, prepare two quilt sandwiches slightly larger than:
8 × 9 inches
Quilt lightly.
Trim each to:
7 × 8 inches
Fold the top edge down twice:
½ inch + ½ inch
and stitch.
Trim a tiny diagonal from each lower corner to reduce bulk.
Press the sides and bottom under by approximately:
½ inch
Position each pocket roughly:
- 3 inches below the underarm
- 2-3 inches from the finished front opening
adjusting for the wearer’s size.
Topstitch approximately:
⅛ inch from the folded edge
around the sides and bottom.
Bar-tack both upper corners.
Step 14 – Sew and Bind the Shoulder Seams
Place the fronts right sides together with the back.
Sew both shoulders using:
½-inch seams
or the seam allowance specified by your compatible pattern.
Keep each pair of seam allowances together.
Encase them in binding.
Press the finished bound seam toward the back.
Binding them now keeps the interior clean and prevents exposed batting.
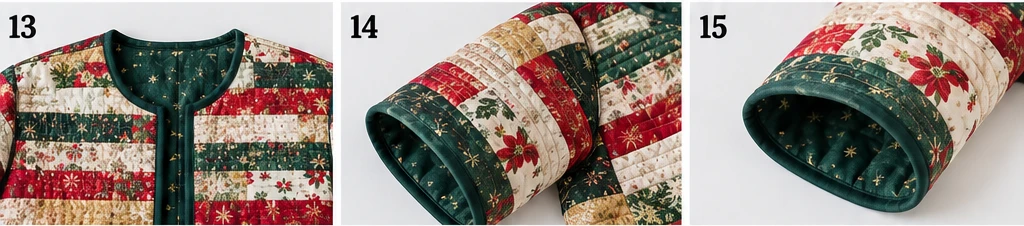
Step 15 – Set the Sleeves and Bind the Armhole Seams
Keep the garment flat with side seams open.
Pin each sleeve into its armhole.
Match:
- Sleeve center
- Shoulder seam
- Front notch
- Back notch
- Underarm marks
Sew using approximately:
½-inch seam allowance
or the pattern’s specified allowance.
Immediately bind the armhole seam while it is still easy to access.
Keep both raw allowances together inside the binding.
Press toward the sleeve.
Repeat on the other side.
Step 16 – Sew, Fit, and Bind the Underarm/Side Seams
Fold the jacket right sides together.
Starting at the sleeve cuff, sew continuously:
cuff → underarm → side → hem
Repeat on the second side.
Now try the jacket on before binding these seams.
Check:
- Bust ease
- Hip ease
- Sleeve length
- Arm movement
- Jacket length
- Center-front overlap
- Pocket position
Make any necessary adjustment.
Once the fit is correct, bind both cuff-to-underarm-to-side seam allowances, keeping each pair together as one unit.
Assembly
The jacket is now structurally complete.
You should have:
- One Jelly Roll Race quilted back
- Two quilted fronts
- Two quilted sleeves
- Two patch pockets
- Bound shoulder seams
- Bound armholes
- Bound underarm and side seams
- Finished lining already quilted into every garment piece
Only these edges remain unfinished:
- Front openings
- Neckline
- Hem
- Cuffs
Step 17 – Bind the Body Perimeter and Cuffs
Prepare joined binding strips approximately:
2-2½ inches wide
For the body, bind continuously around:
one lower front → front opening → neckline → opposite front → hem
Work slowly around the neckline.
At the lower front corners, form neat miters or gently rounded corners according to your jacket pattern.
Wrap the binding evenly to the lining side and stitch securely.
Then bind each cuff separately as a closed loop.
Before finishing the second cuff, compare sleeve lengths so both sides match.
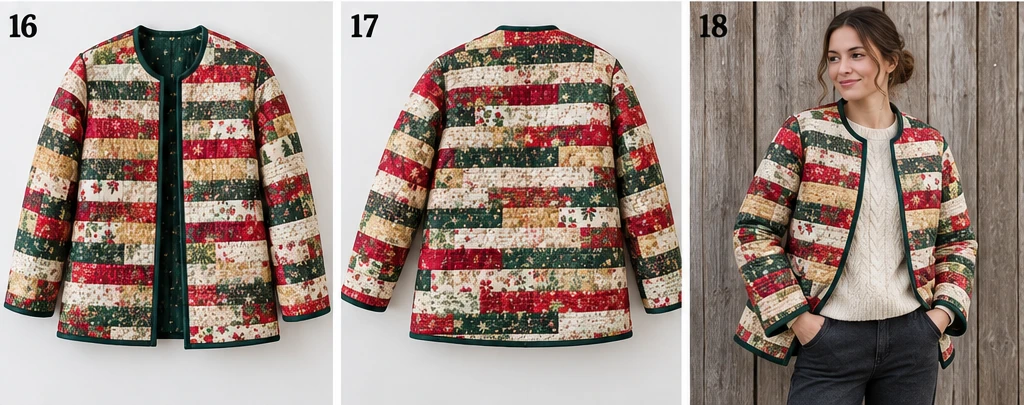
Step 18 – Mark the Buttons, Finish, and Press
Put the jacket on over the kind of layer you’ll normally wear beneath it.
Overlap the fronts naturally.
Mark approximately:
5 button positions
For a 28-30-inch jacket, spacing around:
4 inches apart
is a practical starting point.
Place one button close to the fullest bust point to reduce gaping.
Make sure no buttonhole falls directly over a very bulky strip intersection.
Sew the buttonholes.
Close the jacket and mark the button locations directly through each finished buttonhole.
Attach the buttons securely.
Finally:
- Trim loose threads
- Check every binding join
- Inspect the lining
- Check the pockets
- Test the buttons
- Give the jacket a gentle press
If washing, follow the combined care instructions for the outer fabrics, batting, and lining.
Use a color catcher during the first wash because saturated Christmas reds and greens can release dye.
The finished jacket should feel:
softly quilted, colorful, flexible, and comfortable enough for real winter layering.
Assembly at a Glance
- Choose a collarless button-front jacket pattern.
- Prepare 52 strips at 2½ inches × WOF.
- Join the strips end-to-end and verify at least 1,920 inches total length.
- Remove 18-20 inches from one end to stagger the joins.
- Race Round 1 → approximately 4½ inches wide.
- Rounds 2-3 → approximately 8½ then 16½ inches wide.
- Rounds 4-5 → approximately 32½ then 64½ inches wide.
- Measure and plan the garment layout.
- Rough-cut the back, two fronts, and two sleeves.
- Layer each with lining and low-loft batting.
- Quilt approximately 2 inches apart.
- Cut the final garment pieces.
- Make and attach two patch pockets.
- Sew and bind the shoulder seams.
- Set sleeves and bind armholes while flat.
- Sew cuff-to-underarm-to-side seams, fit, and bind.
- Bind the body perimeter and both cuffs.
- Add approximately 5 buttons, press, and finish.
Beginner Tips for Success
- A normal 40-strip jelly roll isn’t enough for this adult-jacket layout.
- Use 52 strips or measure the finished long strip before racing.
- You need at least about 1,920 inches before the first fold to target a 60-inch final length after five rounds.
- If you’re short, add more strips before beginning the race.
- Use a generous amount of cream and pale gold to separate red and green visually.
- Remove approximately 18-20 inches from the starting end so strip joins don’t stack too neatly.
- Don’t literally race your sewing machine – accurate long seams matter more than speed.
- Support the enormous strip on the table while sewing.
- Use an accurate ¼-inch seam during the race.
- Press after every round.
- Always check the actual garment layout before rough-cutting the race panel.
- Rough-cut the panels first, then quilt them, and cut the final garment shapes afterward.
- Quilt the final lining into each panel rather than quilting against loose batting.
- Use low-loft batting.
- Keep quilting around 2 inches apart for drape unless the batting requires closer spacing.
- Use a walking foot.
- Keep bulky race-strip joins away from armholes and buttonholes where possible.
- Bind shoulders immediately after sewing.
- Bind armholes while the jacket is still flat.
- Try the jacket on before binding the side seams.
- Bar-tack the pocket corners.
- Mark buttons while wearing the jacket.
- Use a 90/14 needle for quilted layers.
- Use a color catcher during the first wash.
Styling It & Gift Ideas
The patchwork is already the strongest visual element, so simple clothes underneath work best:
- Cream turtleneck
- Black knit top
- Dark denim
- Straight black trousers
- Camel corduroy
- Ivory sweater dress
A red-green-gold race jacket also looks beautiful with:
- Tan boots
- Dark brown leather
- Gold jewelry
- Cream scarves
For a brighter playful version, use berry pink and turquoise among the Christmas fabrics.
For a more elegant jacket, emphasize:
- Cranberry
- Pine
- Ivory
- Antique gold
- Deep navy
The jacket also makes a memorable:
- Christmas gift
- Holiday-market jacket
- Winter travel layer
- Mother-daughter jacket pair
- Memory jacket using festive strips collected from previous projects
- Jelly-roll stash project
Because the race method mixes fabrics unpredictably, it is especially good for using a collection where you love every print but don’t want to spend hours planning exact block placement.
Final Thoughts
The Jelly Roll Race Christmas Jacket works because the fastest part of the quilt becomes the fabric for the slowest part: a carefully finished garment.
The race construction turns 52 ordinary 2½-inch strips into a patchwork panel roughly 60 × 64½ inches, large enough for an efficient adult-jacket layout when the joined starting strip measures at least about 1,920 inches.
From there, the project becomes conventional quilt-coat construction: rough-cut oversized panels, quilt each one with low-loft batting and its final lining, cut the garment pieces accurately, assemble the jacket, and bind every exposed quilted seam.
The result keeps the spontaneous character that makes Jelly Roll Race quilts fun while giving the patchwork a completely different purpose – a vibrant Christmas layer you can actually wear.
Other Design Inspirations – Digitally Modified Images. Texture and color may vary from the actual product.
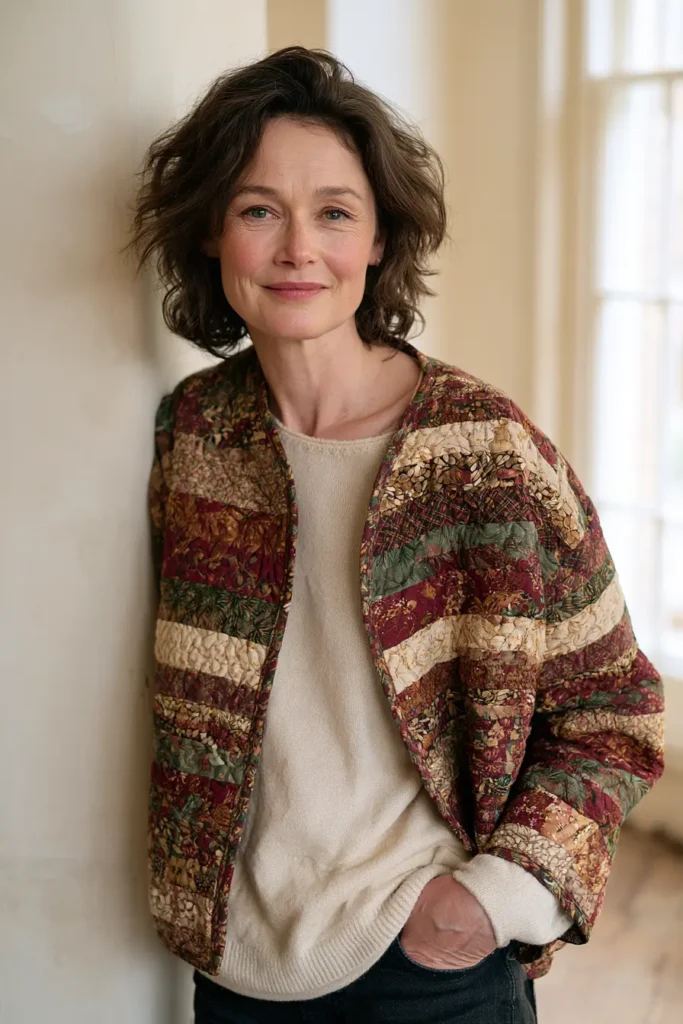
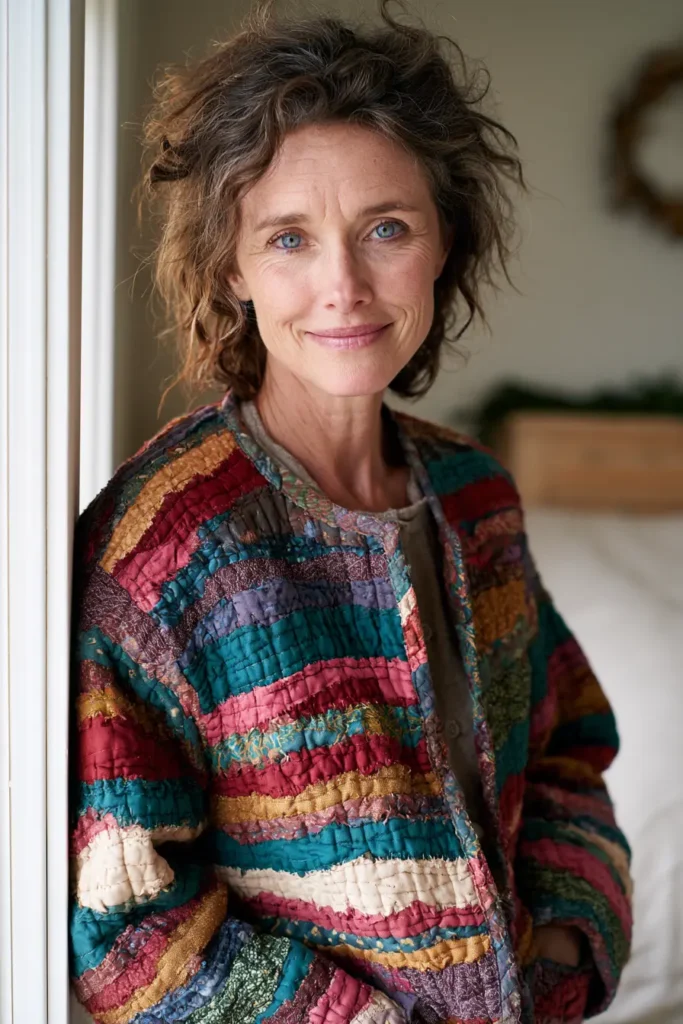
2. Quilt-As-You-Go Jelly Roll Christmas Jacket for a Fast Festive Finish
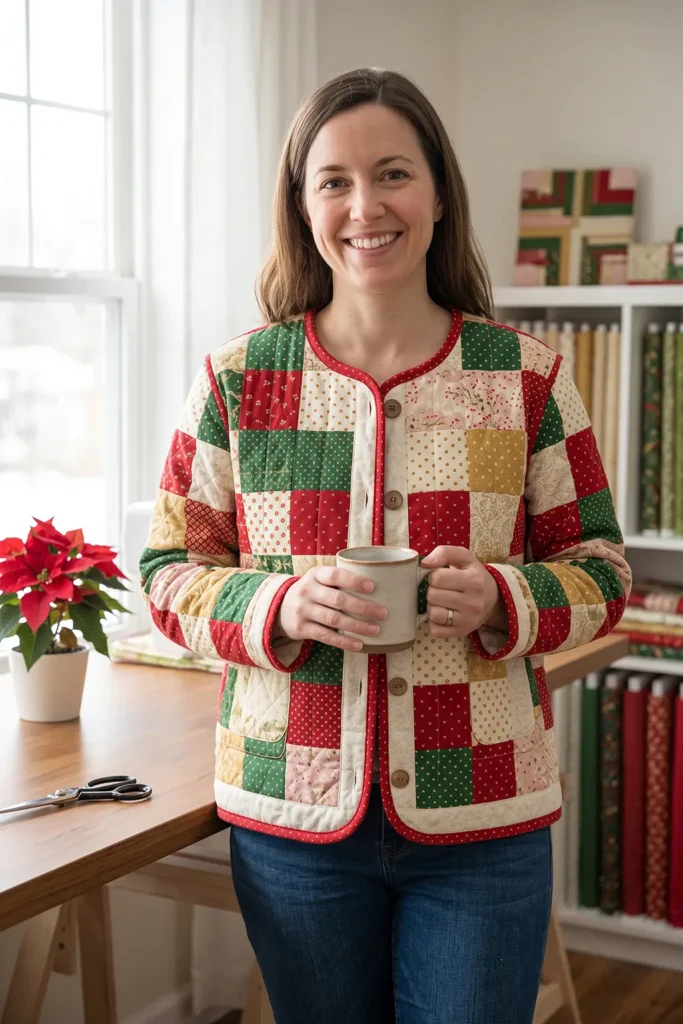
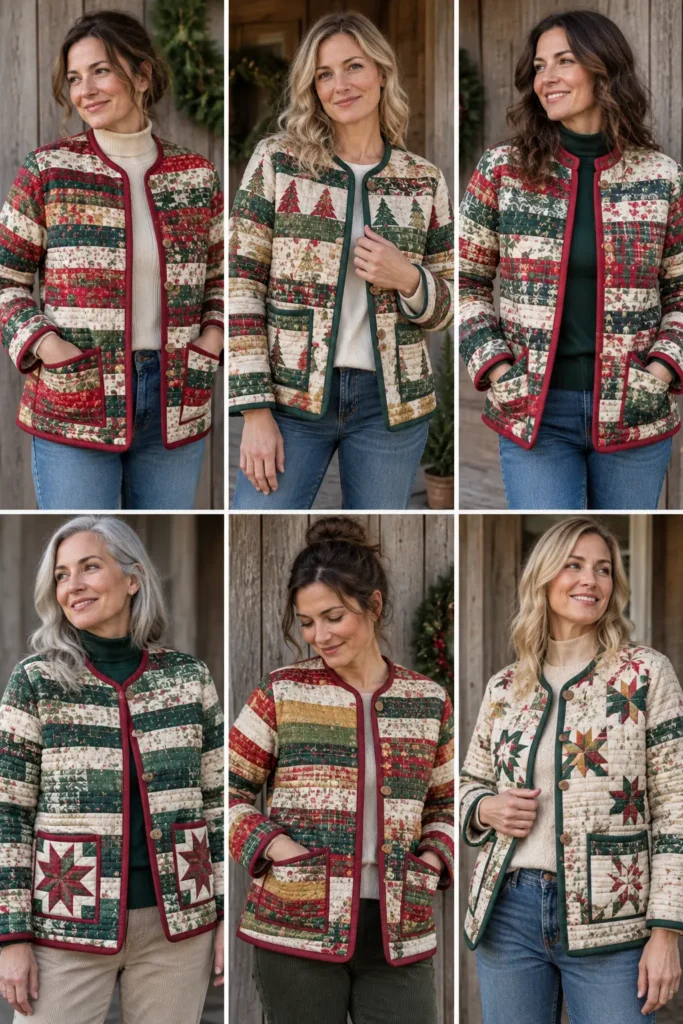
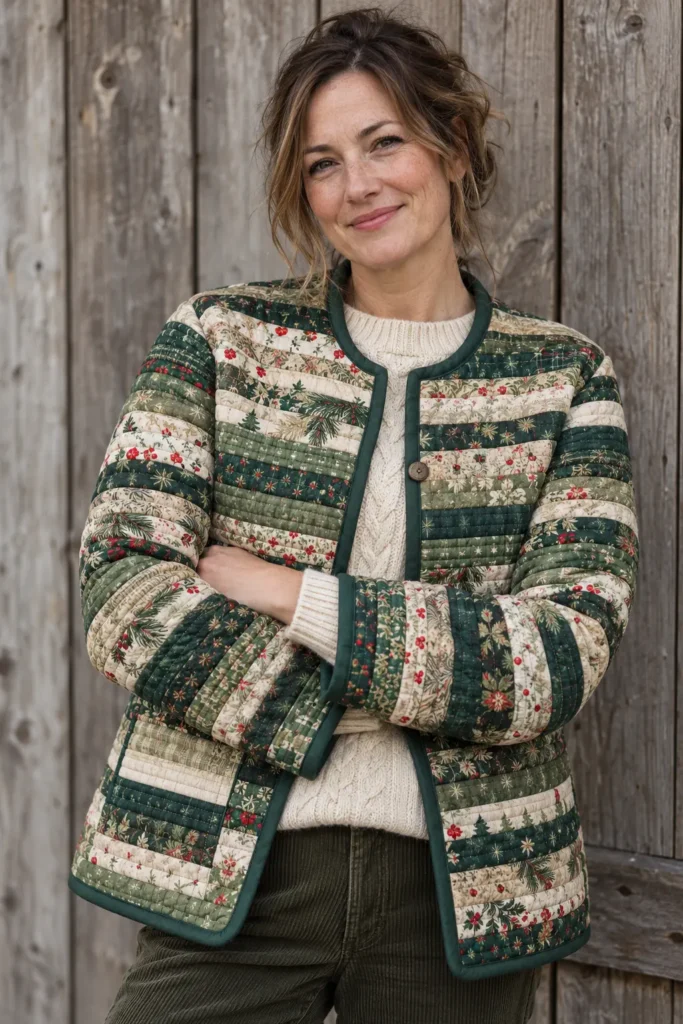
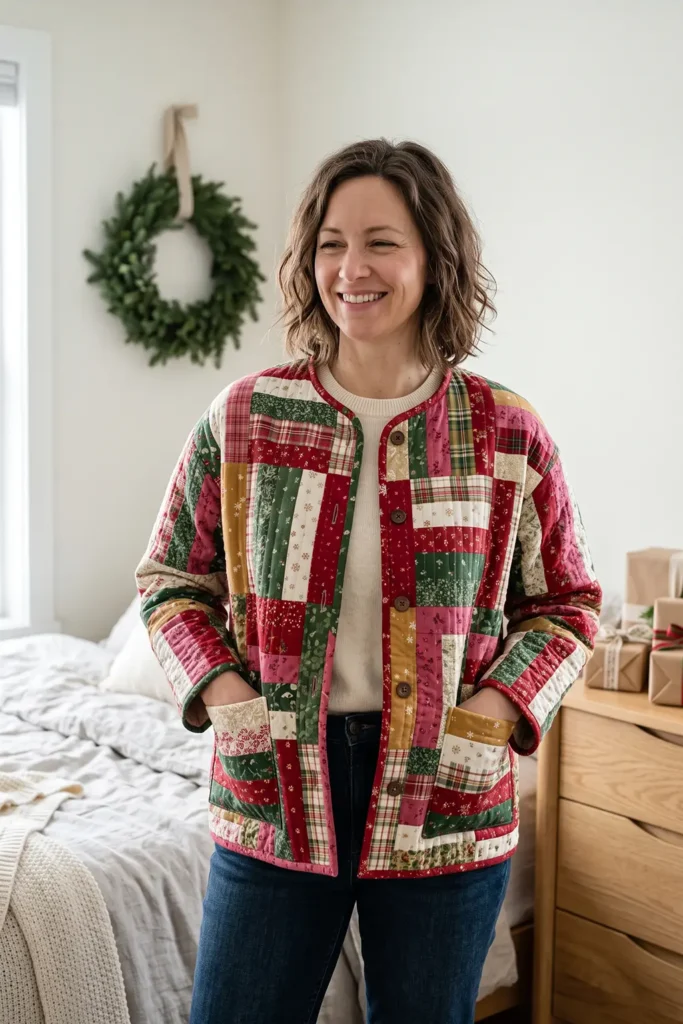
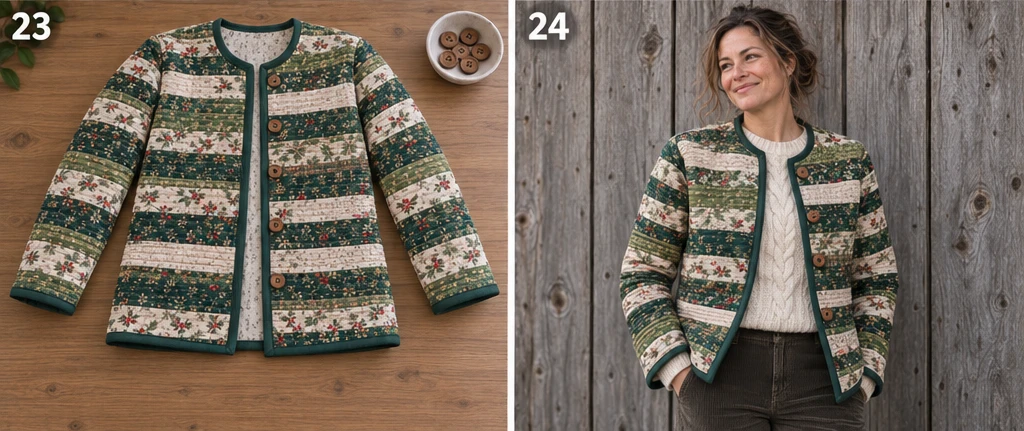
A Quilt-As-You-Go Jelly Roll Christmas jacket is one of the fastest ways to turn festive 2½-inch strips into a wearable holiday layer. Instead of piecing one large quilt top first and quilting it afterward, each section is built directly onto batting and a lightweight backing as you sew. That means the patchwork and quilting happen at the same time, which saves a lot of time and keeps the project beginner-friendly.
This method works especially well for Christmas fabrics because the narrow strips create lively movement across the jacket without needing precise block matching. Rich reds, holly greens, candy-cane whites, pine, gold, berry, and even a little winter blue all blend beautifully in a quilted garment. Quilt-as-you-go is also a practical technique with deep roots in utility sewing, because quilters have long used it to manage bulky layers in smaller, more controllable sections before assembling them into a finished quilt or garment.
Why This Idea Is Worth Making
This idea is worth making because it gives you the festive look of a patchwork quilt coat without the slower process of piecing and then quilting a full jacket-size top. Each panel is made separately, so the project feels more manageable from the very beginning.
It is also a great way to use Jelly Roll strips efficiently. The strip width is already ideal for quilt-as-you-go construction, and the finished jacket has a cheerful handmade look that feels cozy, colorful, and unmistakably seasonal without being difficult to sew.
Design Inspirations – Digitally Modified Images. Texture and color may vary from the actual product.
Interesting Notes Before You Start
Quilt-as-you-go has always appealed to practical makers because it breaks a big quilted surface into smaller units that are easier to handle under a domestic sewing machine. For jackets, that advantage is even more noticeable, because you are working with garment-shaped sections rather than wrestling a full bed quilt through a small throat space.
Jelly Rolls also make this kind of jacket visually interesting very quickly. Since the strips are cut to a standard 2½-inch width, the patchwork stays balanced even when you mix prints like plaids, tiny florals, dots, stars, candy-cane stripes, and tone-on-tone Christmas blenders.
Materials Needed
For an average women’s medium relaxed-fit jacket:
- 1 Jelly Roll with 40 strips at 2½” × 42″
- 10 to 14 extra coordinating strips at 2½” × 42″ if you want more control over color placement or are making a larger size
- Lightweight cotton or cotton-lawn backing/foundation fabric, about 3 yards
- Low-loft cotton or cotton-blend batting, about 2½ yards
- Binding fabric, about ¾ yard, or 8 to 9 strips at 2½” × WOF
- Lightweight fusible interfacing, about ½ yard for front edges and optional facing support
- 5 to 6 buttons, ¾” to 1″
- Matching or neutral thread
- Walking foot
- Rotary cutter, ruler, mat
- Tailor’s chalk or washable marker
- Pins or clips
- Iron and pressing surface
- A simple collarless or band-collar jacket pattern with relaxed fit and front button closure
Color Plan
For a vibrant Christmas version, a good strip balance is:
- 16 strips in reds and berry tones
- 14 strips in greens
- 8 strips in creams, ivory, or soft white
- 6 strips in gold, mustard, or metallic-look prints
- 6 strips in accent colors like navy, teal, pink, or winter blue
This keeps the jacket lively while preventing the red and green from visually blending into one dark block of color.
Finished Size
This tutorial assumes a relaxed jacket approximately:
- Bust: 44″ to 46″ finished
- Length: 27″ to 28″
- Sleeve length: about 22″ from shoulder seam
- Hem sweep: about 46″ to 48″
The project is easy to scale up or down by adjusting the paper or pattern pieces before cutting the quilted sections.
Assembly at a Glance
- Prepare the jacket pattern and oversized foundations.
- Cut backing and batting for each main jacket section.
- Build the quilt-as-you-go back panel.
- Build the two front panels.
- Build the two sleeve panels.
- Square and stabilize the quilted sections.
- Cut the final garment pieces from the quilted panels.
- Make patch pockets.
- Sew shoulders.
- Add sleeves flat.
- Sew side and underarm seams.
- Finish edges with binding.
- Add closures and final details.
Step-by-Step Guide
Step 1: Choose and Prep the Jacket Pattern
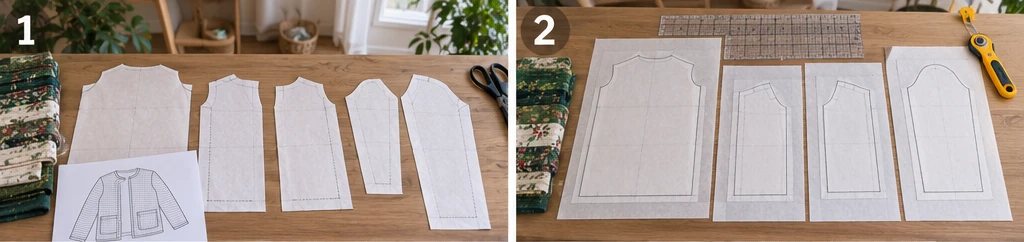
Choose a simple jacket pattern with a relaxed shape, minimal shaping, and a front opening that can be bound cleanly. A collarless jacket is the easiest option for quilt-as-you-go because it avoids a bulky collar stand and keeps the festive patchwork as the star.
Trace or prepare these five main sections from your pattern:
- Back
- Left front
- Right front
- Left sleeve
- Right sleeve
If your pattern includes facings, you can either keep them or use bound edges instead. For this version, bound edges are the simplest finish.
Step 2: Make Oversized Cutting Guides
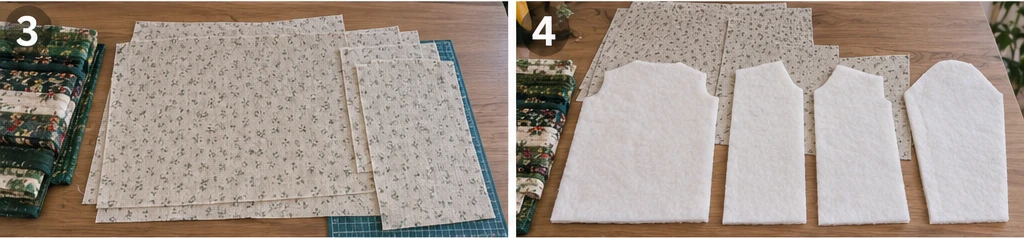
Because the quilted panels will be trimmed later, do not sew directly to the exact final pattern size. Instead, create oversized rectangles or rough foundations for each piece.
Cut paper templates or note the needed minimum working sizes:
- Back panel foundation: 27″ × 32″
- Each front panel foundation: 19″ × 32″
- Each sleeve panel foundation: 24″ × 28″
These extra margins give room for trimming, quilting shift, and accurate final cutting.
Step 3: Cut the Backing/Floating Foundation Pieces
Cut lightweight backing/foundation fabric to the oversized measurements:
- 1 back at 27″ × 32″
- 2 fronts at 19″ × 32″
- 2 sleeves at 24″ × 28″
This fabric acts as the inner support while you build each quilted section. It also makes the panels easier to handle than quilting directly onto loose batting alone.
Step 4: Cut the Batting for Each Section
Cut batting slightly larger than the backing pieces:
- 1 back at about 29″ × 34″
- 2 fronts at about 21″ × 34″
- 2 sleeves at about 26″ × 30″
The slightly oversized batting ensures the quilted edges stay fully covered after stitching and squaring.
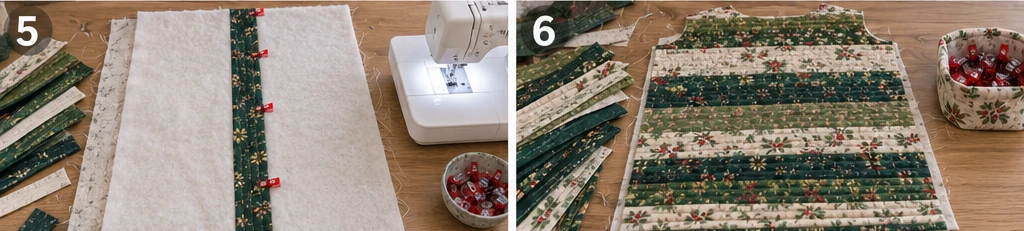
Step 5: Build the First Strip on the Back Panel
Place the back foundation wrong side down, then center the batting on top. Choose a strong opening strip for the back panel and lay it right side up roughly down the center of the batting, either vertically or on a slight diagonal.
A vertical or gently diagonal strip layout works especially well for jackets because it visually lengthens the body. Pin or baste the first strip in place and stitch close to both long edges to anchor it.
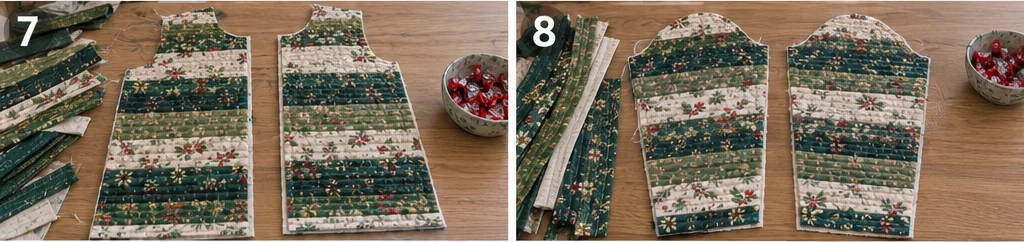
Step 6: Add Strips Quilt-As-You-Go to Complete the Back
Place the second strip right sides together on one side of the center strip and sew with a ¼” seam. Flip it open, press, and quilt it down through all layers by stitching near the seam line or down the center of the strip.
Continue adding strips one at a time on alternating sides until the entire back panel is covered. If a strip does not run the full length, piece two shorter lengths together first. Keep the strips straight and smooth so the panel does not bow. You will usually use about 12 to 14 strips for the back, depending on orientation and piecing.
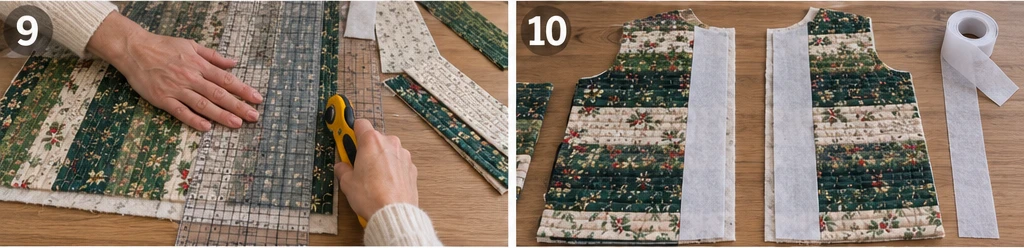
Step 7: Build the Two Front Panels
Repeat the same quilt-as-you-go method for the left and right fronts. These panels work well when the strips run vertically or at a gentle angle, similar to the back, so the jacket feels coordinated.
Use about 7 to 8 strips per front, depending on the layout. Try to distribute the lightest strips near the face and upper chest so the finished jacket looks bright and balanced. Avoid placing too many very dark strips right along the center front where the buttons will go.
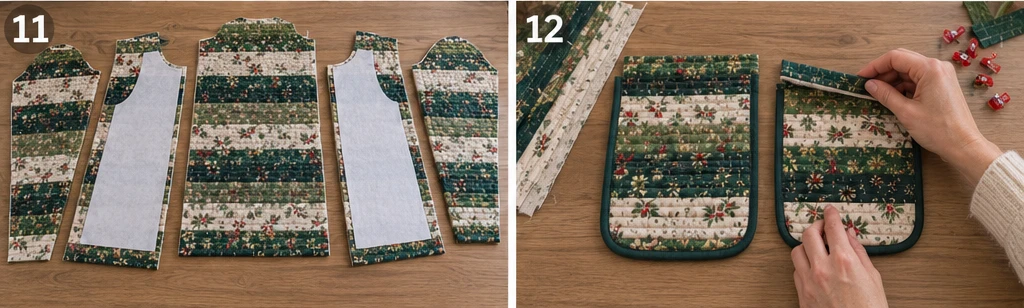
Step 8: Build the Sleeve Panels
Construct each sleeve panel the same way, again working from a center strip outward. Sleeves often look best when the strips run lengthwise from shoulder to cuff, or slightly diagonally for more movement.
Use around 8 to 10 strips per sleeve, depending on sleeve width and whether some strips are pieced. Keep both sleeves visually balanced, though they do not have to match exactly.
Step 9: Press, Inspect, and Square All Quilted Panels
After all five sections are fully covered, press them thoroughly from the fabric side. Check for any missed edges, shifting batting, or puckered strips.
Trim away excess batting and square the quilted panels so they remain slightly larger than the final pattern pieces. Do not cut the final garment shapes yet until you confirm the grain, strip direction, and placement.
Step 10: Stabilize the Front Edges
Fuse strips of lightweight interfacing to the wrong side of the two front panels where the button band area will sit. A strip about 1½” wide and the full front length is usually enough.
This step is worth doing because quilted jackets can stretch slightly at the front opening. A little stabilization keeps the front edges neater and helps the buttonholes hold their shape.
Step 11: Cut the Final Jacket Pieces
Lay your pattern pieces onto the quilted panels and cut:
- 1 back
- 2 fronts
- 2 sleeves
Match the pair of sleeves carefully. If your quilted strip direction is strongly noticeable, make sure both sleeves are cut as mirror images so they feel intentional.
Mark notches, shoulder points, underarm points, and pocket placement lines with chalk or thread marks.
Step 12: Cut and Make the Patch Pockets
From leftover quilted panel fabric or extra quilt-as-you-go patchwork, cut two pocket rectangles at about 7½” × 8½”. Finish them into pockets measuring about 6½” × 7½” after turning the edges.
Fold the top edge down ½”, then another 1″, and stitch. Turn the other three sides under by ½” and press. Topstitch the finished pockets onto the front panels about 3″ to 4″ below the waistline, or wherever feels balanced on your pattern.
Step 13: Sew the Shoulder Seams
Place the two front pieces right sides together with the back and sew the shoulder seams using a ½” seam allowance or the allowance your pattern uses.
Because quilted layers are bulkier than ordinary garment fabric, press the shoulder seams open if possible, or gently to the back. If the batting feels bulky, trim the batting out of the seam allowance only, reducing thickness without affecting the quilted body.
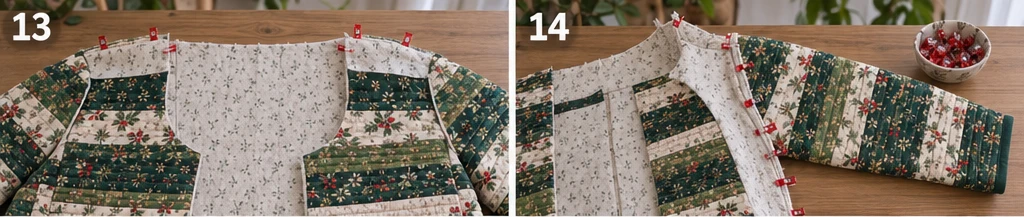
Step 14: Attach the Sleeves Flat
With the jacket body still open, pin each sleeve into its armhole and stitch. Setting the sleeves flat before sewing the side seams is much easier for a quilted jacket than sewing them in the round.
Match the center sleeve mark to the shoulder seam and ease carefully. Since this is a relaxed jacket, the sleeve cap should not need much easing. If necessary, clip the seam allowance slightly in the tighter curves.

Assembly
At this stage, the jacket begins to come together quickly. The main body is already joined, and the remaining work is mostly construction and finishing. Keeping the jacket flat as long as possible makes the bulky quilted layers much easier to manage.
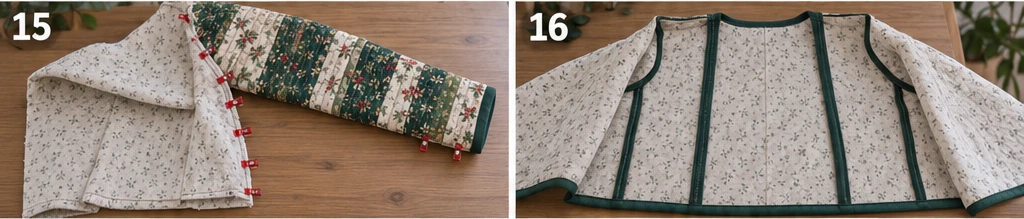
Step 15: Sew the Side Seams and Underarm Seams
Fold the jacket right sides together and sew continuously from the sleeve cuff to the underarm and down to the hem on each side.
Use plenty of clips or pins, especially where the sleeve seam crosses the armhole seam. A walking foot helps the layers feed evenly here. After sewing, trim bulky batting from the seam allowances if needed and press carefully.
Step 16: Bind the Inner Seams or Finish Them Neatly
For a clean quilt-coat look, cover the raw seam allowances with binding strips cut at 2″ wide. Fold each strip around the seam allowance and stitch it down.
This finish looks polished inside the jacket and is a classic method for quilted garments. If you prefer, you can also serge or zigzag the seams, but bound seams usually look much nicer in a handmade quilted jacket.
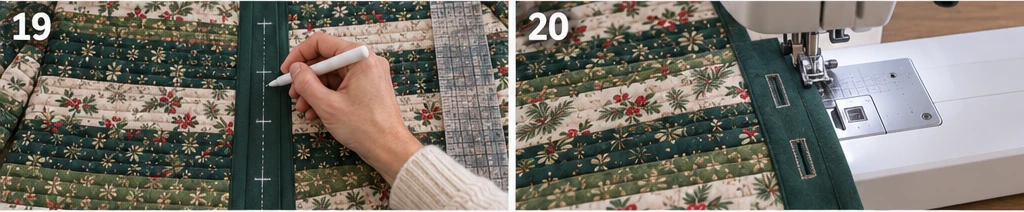
Step 17: Bind the Outer Edges
Join enough binding strips to finish the full outer perimeter of the jacket:
- Front edge
- Neckline
- Hem
- Cuffs
You will usually need about 280″ to 300″ of total binding length, so cut about 8 to 9 WOF strips at 2½” wide. Sew the binding to the right side, wrap it around, and finish neatly on the inside.
Take extra care around the neckline and front corners so the jacket hangs cleanly.
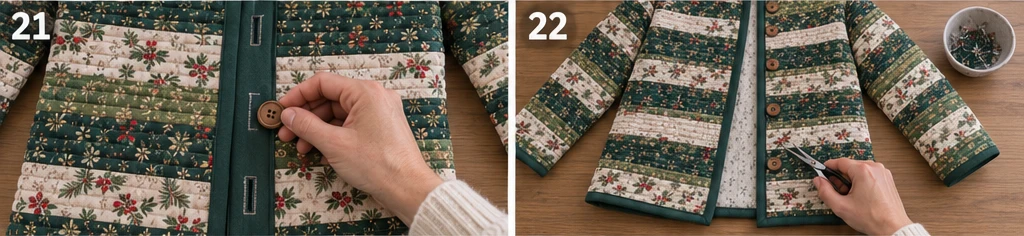
Step 18: Mark Button Placement and Finish
Try the jacket on and mark 5 to 6 button positions along the front opening. Space them evenly, often about 4″ to 4½” apart, depending on the jacket length.
Sew the buttonholes on the stabilized front edge, then attach the buttons to the opposite side. Give the entire jacket a final press, clip any loose threads, and check that the hem, cuffs, and neckline sit smoothly.
Extra Tips for Better Results
Keep the Quilting Manageable
The whole point of quilt-as-you-go is speed and control. Work panel by panel rather than trying to create one massive sheet of quilted fabric. That is what makes this method so well suited to jackets.
Balance the Prints
Very novelty-heavy Christmas prints can overwhelm a jacket. Mix in solids, near-solids, tone-on-tones, plaids, and small-scale blenders so the finished garment still feels wearable.
Use Low-Loft Batting
A lofty batting may look cozy, but it can make the jacket stiff and bulky at the seams. Low-loft cotton or cotton-blend batting gives warmth while still allowing the jacket to drape nicely.
Think About Wearability
This jacket looks especially good over:
- Cream sweaters
- Black turtlenecks
- Straight-leg denim
- Corduroy trousers
- Soft knit dresses
A festive palette does not have to be limited to classic red and green either. Cranberry with blush pink, pine with teal, or navy with gold can feel just as Christmas-ready.
Other Design Inspirations – Digitally Modified Images. Texture and color may vary from the actual product.

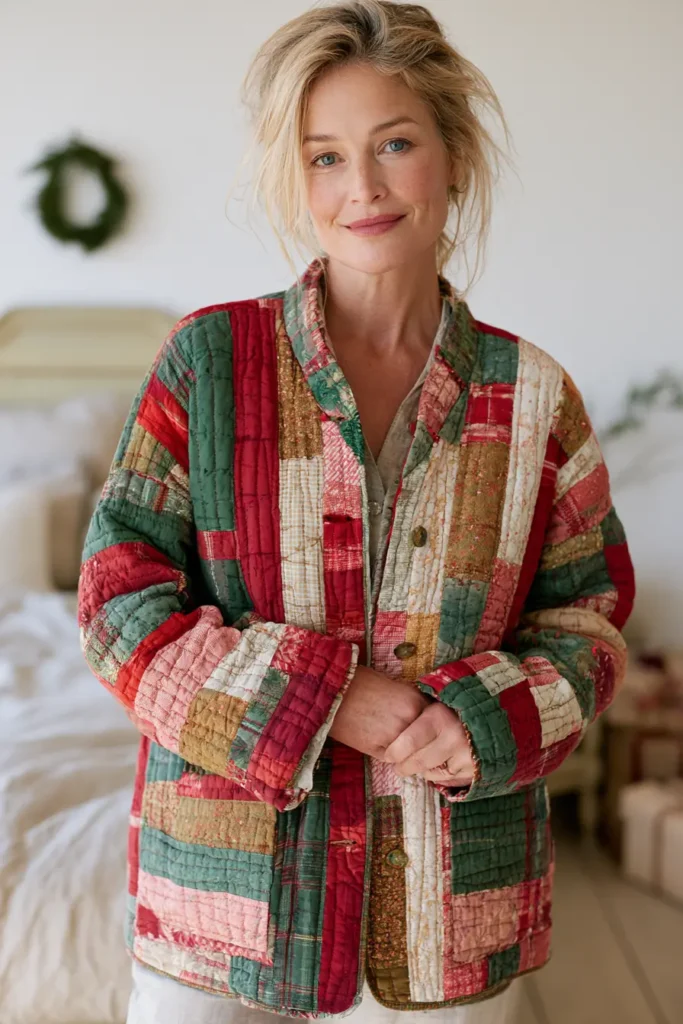
3. Classic Red and Green Jelly Roll Christmas Jacket for Festive Holiday Style
Design Inspirations – Digitally Modified Images. Texture and color may vary from the actual product.
Other Design Inspirations – Digitally Modified Images. Texture and color may vary from the actual product.
4. Chevron Jelly Roll Christmas Jacket for Bold Holiday Style
Design Inspirations – Digitally Modified Images. Texture and color may vary from the actual product.
Other Design Inspirations – Digitally Modified Images. Texture and color may vary from the actual product.
5. Rail Fence Jelly Roll Christmas Vest for Easy Woven Texture
Design Inspirations – Digitally Modified Images. Texture and color may vary from the actual product.
Other Design Inspirations – Digitally Modified Images. Texture and color may vary from the actual product.
6. Scrappy Jelly Roll Christmas Quilted Vest for Colorful Winter Layering
Design Inspirations – Digitally Modified Images. Texture and color may vary from the actual product.
Other Design Inspirations – Digitally Modified Images. Texture and color may vary from the actual product.
7. Reversible Jelly Roll Christmas Vest for Two Festive Looks
Design Inspirations – Digitally Modified Images. Texture and color may vary from the actual product.
Other Design Inspirations – Digitally Modified Images. Texture and color may vary from the actual product.
8. Cozy Plaid and Check Jelly Roll Christmas Shacket for Everyday Wear
Design Inspirations – Digitally Modified Images. Texture and color may vary from the actual product.
Other Design Inspirations – Digitally Modified Images. Texture and color may vary from the actual product.
9. Cropped Jelly Roll Christmas Vest for Holiday Party Layering
Design Inspirations – Digitally Modified Images. Texture and color may vary from the actual product.
Other Design Inspirations – Digitally Modified Images. Texture and color may vary from the actual product.
10. Longline Jelly Roll Christmas Duster Vest for Chic Seasonal Layering
Design Inspirations – Digitally Modified Images. Texture and color may vary from the actual product.
Other Design Inspirations – Digitally Modified Images. Texture and color may vary from the actual product.
Conclusion
What makes these projects worth the effort is that they’re wearable rather than decorative. A quilt gets admired at home; a quilted jacket goes everywhere with you, and it only improves with wearing – softening, crinkling, settling into something that feels more yours each winter. Starting from a jelly roll simply means you get there faster, with the cutting done and the palette already resolved.
Jelly Roll Christmas Quilt Jacket and Vest Ideas
The best Jelly Roll Christmas Quilt Jacket and Vest ideas match the time you actually have. Reach for the race jacket or the quilt-as-you-go jacket when the calendar is closing in, and you need something finished this week.
Choose the chevron, rail fence, or classic red-and-green patchwork when you want the strips to do something visually interesting. Pick the reversible vest if you’d like the piece to keep working long after the decorations come down, the plaid shacket for everyday December warmth, and the cropped or longline vest depending on the kind of evening you’re dressing for. Whichever you choose, it’s the same forty strips doing the work – and one festive layer you made yourself is worth a dozen bought ones.

