
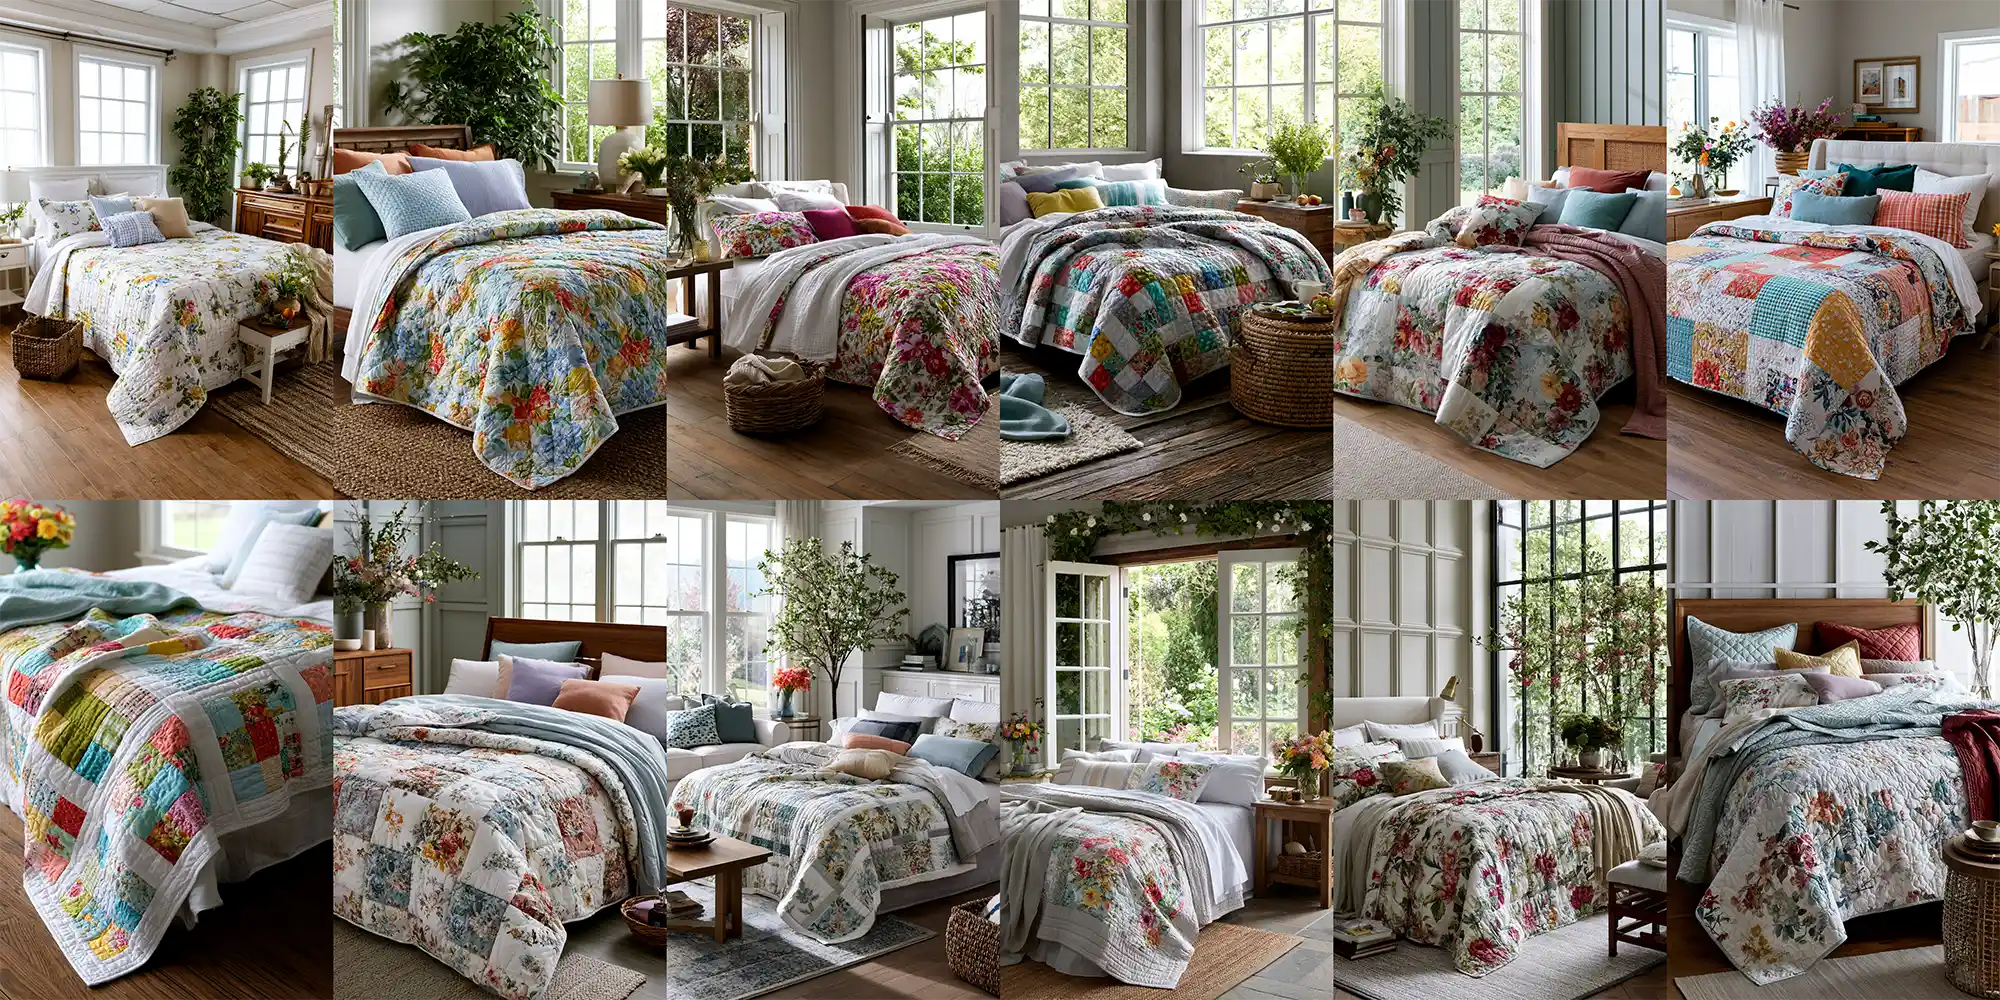
7 Summer Quilt Pattern Ideas: Stylish, Cozy & Elegant Designs for Warm Weather Comfort
There’s a moment every June when I realize my winter quilt has become the enemy. It sits on the bed like a weighted anchor, trapping heat, disrupting sleep, turning what should be restful into sweaty and restless. That’s when I reach for summer quilts—and the entire bedroom dynamic shifts. If you’ve struggled through hot nights under traditional comforters, or worse, kicked off all your bedding and woken up cold at 3 AM, you understand the genuine problem that seasonal quilts solve.
Summer Quilt Pattern: Summer quilts work because they’re engineered differently from year-round bedding. They use breathable fabrics—lightweight cotton, linen blends, moisture-wicking constructions—and lower-loft batting that allows air circulation without sacrificing warmth. Unlike heavy comforters that trap body heat or thin blankets that offer no structure, a well-designed summer quilt keeps you at exactly the right temperature. It’s the difference between fighting your bedding and actually sleeping.
Why they matter in summer: Hot sleepers, anyone in warm climates, and people who’ve resigned themselves to sleeping under sheets alone will recognize the relief summer quilts provide. They’re not compromises—they’re intentional solutions. The quilting community has known this for years; the rest of the world is catching up.
What makes them different: Materials matter immensely. A lightweight cotton quilt breathes. A linen-blend quilt naturally regulates moisture and temperature. Reversible designs give you two aesthetic options without adding bulk. Coordinated sham and coverlet sets create a polished, layered bedroom design without the weight of traditional bedding. These aren’t marketing angles; they’re actual design choices with measurable differences in comfort.
The best part? Transitioning to summer quilts doesn’t mean abandoning sophisticated design. Elegant coastal patterns, vibrant florals, modern patchwork, and minimalist geometrics prove that seasonal bedding can be deeply stylish. The design concepts curated here are visual inspirations—ways to envision your bedroom transformed for warm months while maintaining that layered, intentional aesthetic you love.
Whether you’re a hot sleeper, live in a warm climate, or simply want better sleep during summer, these pattern ideas show that comfort and elegance aren’t competing values. They’re the entire point.
Summer Quilt Pattern Ideas: Materials & Design Directions
Summer quilts are the best option for warm-weather bedding because they’re breathable, lightweight, moisture-wicking, and thermally regulating—keeping you cool and cozy all night long, unlike heavy comforters or synthetic blankets. They’re especially transformative for hot sleepers and anyone in warm climates who wants better, more restful sleep
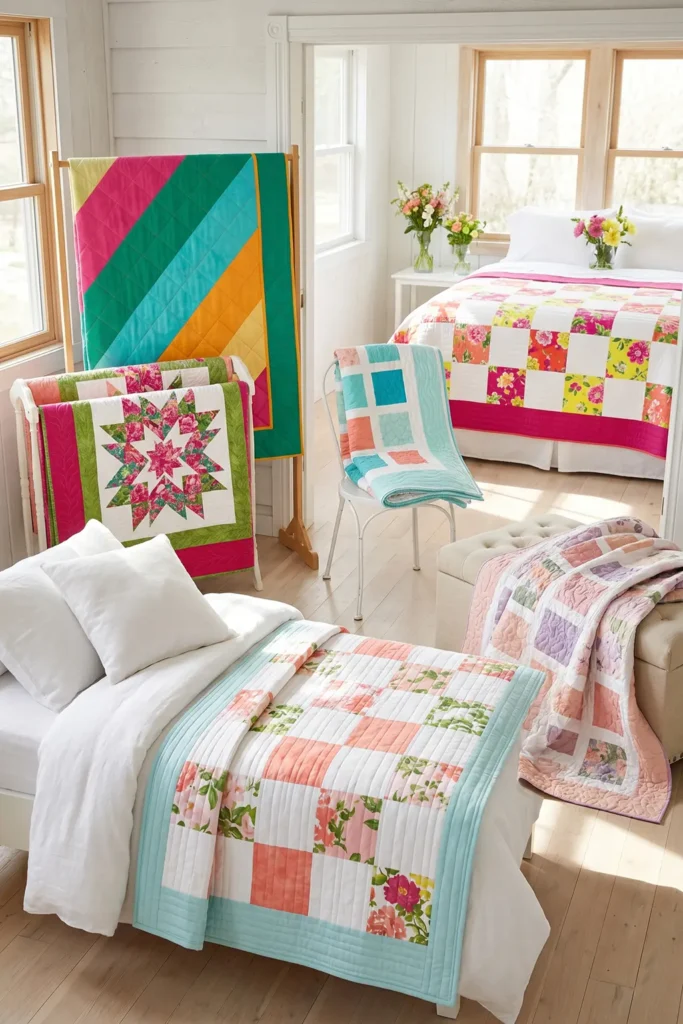
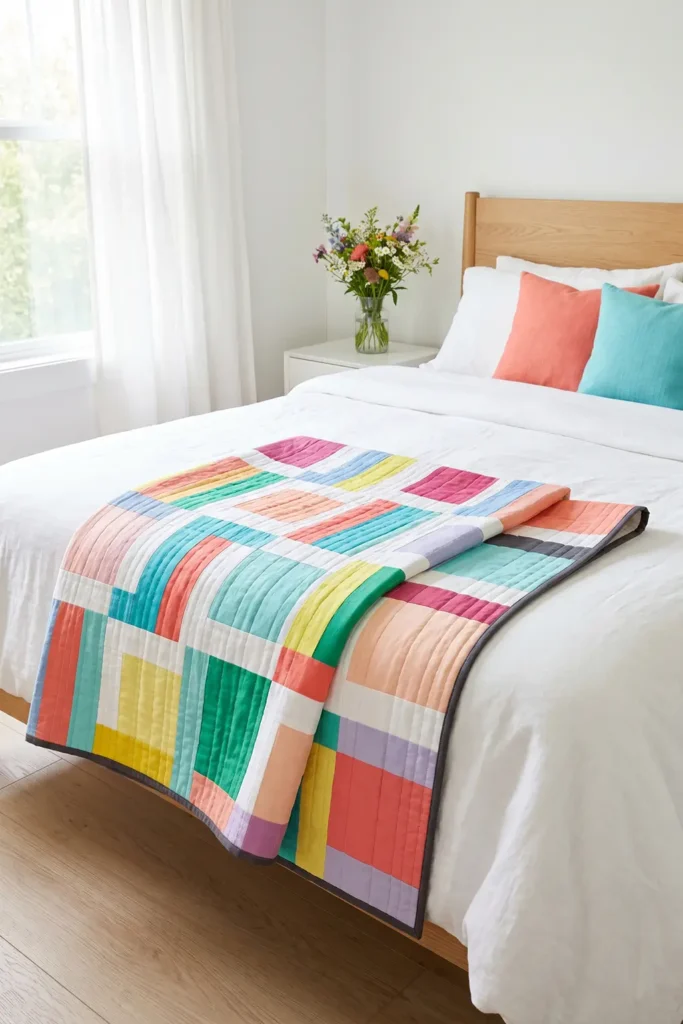
1. Elegant Lightweight Summer Quilt Patterns for Breathable Bedroom Comfort
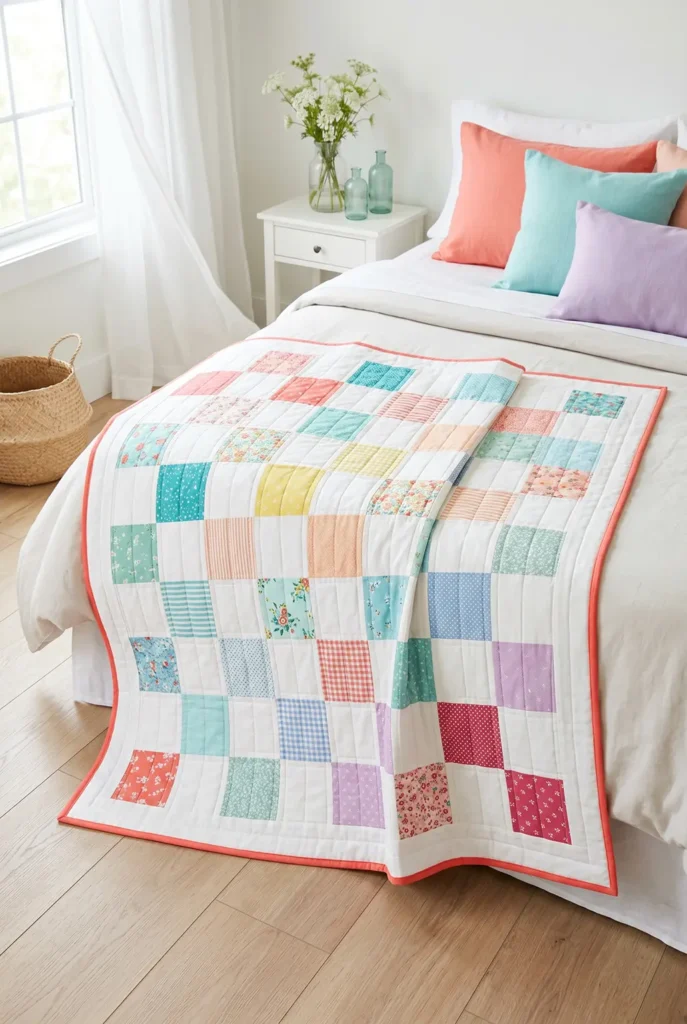
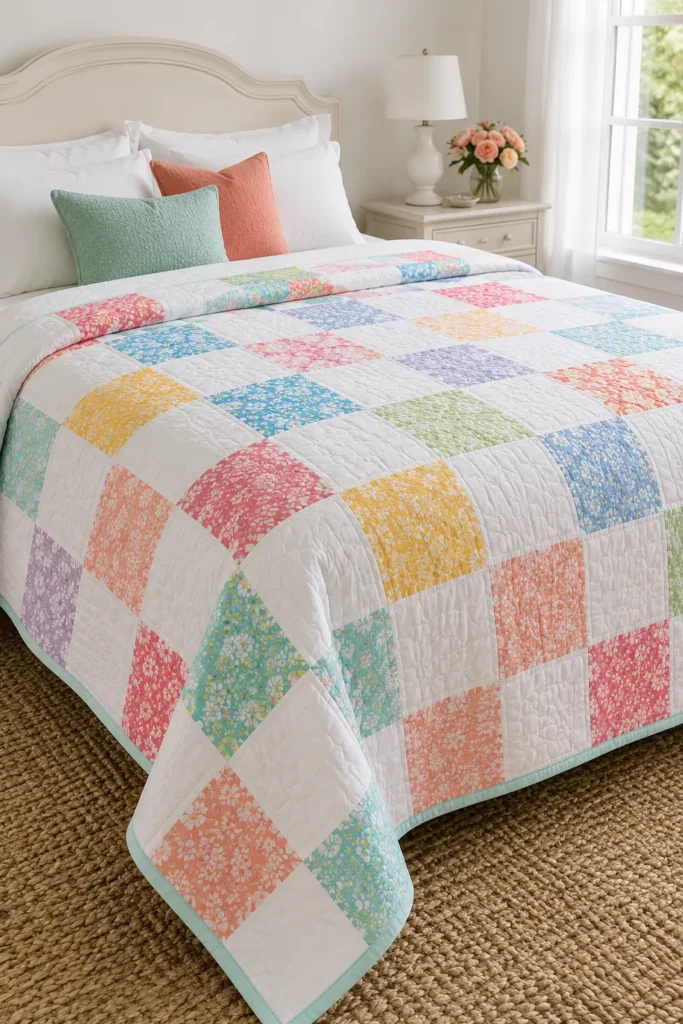
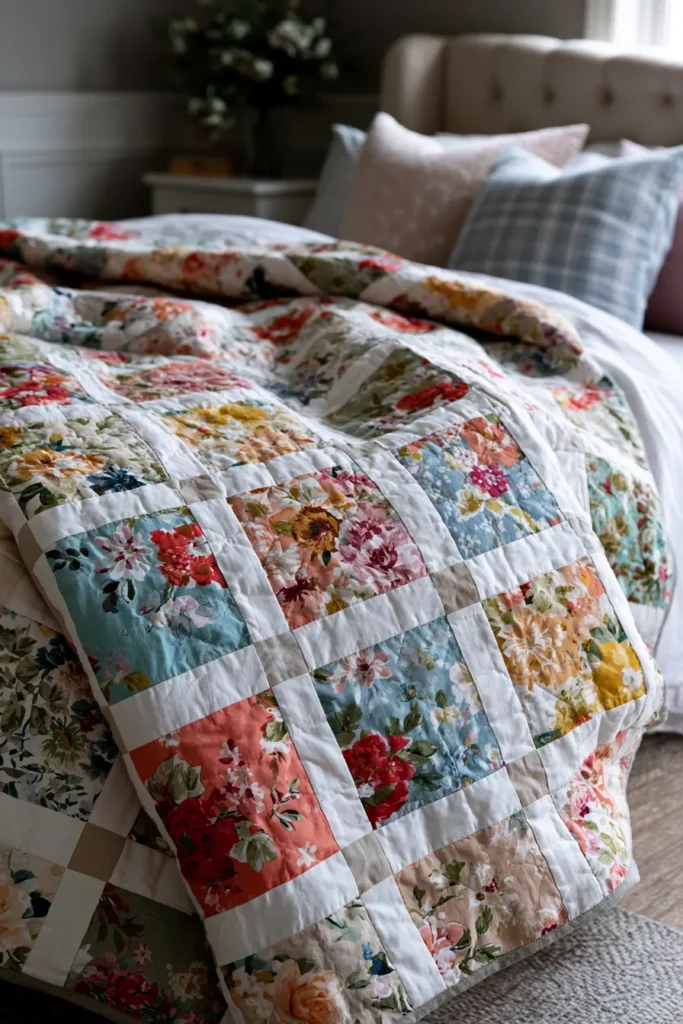
An elegant, lightweight summer quilt is made for warm nights, breezy bedrooms, and relaxed seasonal styling. Instead of using thick batting or heavy fabrics, this design keeps the layers soft, breathable, and easy to drape. It gives you the comfort of a quilt without the weight of a winter blanket.
For a vibrant summer look, use fresh colors such as coral, aqua, turquoise, lemon yellow, soft peach, crisp white, sea-glass green, sky blue, lavender, and raspberry pink. These shades make the quilt feel bright and airy while still looking polished enough for a beautiful bedroom.
Why I Made It
I made this quilt because I wanted something light enough for summer evenings but still cozy enough to make the bed feel finished. A heavy quilt can feel too warm in hot weather, but a lightweight cotton quilt gives just the right amount of softness.
The backstory behind this idea comes from the tradition of summer coverlets and light bed quilts. Many warm-weather quilts were made with thinner batting, cotton backing, or even no batting at all, so they could add beauty and comfort without trapping too much heat. This version keeps that practical spirit but uses fresh, cheerful colors for a modern bedroom.
Why This Idea Is Worth Making
This idea is worth making because it gives you a breathable quilt you can use daily in warm weather. It is lighter than a traditional bed quilt, easier to wash, and simple enough for beginners. The design also works beautifully as a summer bedspread, picnic quilt, guest-room layer, or folded accent at the foot of the bed.
Finished Size
This guide makes a lightweight throw or small bed quilt measuring approximately 54 x 66 inches.
It works well for:
- A summer bedroom layer
- A sofa throw
- A guest-room quilt
- A folded bed-end accent
- A lightweight travel or picnic quilt
For a larger twin-size version, increase the layout to about 60 x 80 inches.
Materials Needed
For one lightweight summer quilt, gather:
- Assorted quilting cottons: 2½ to 3 yards total
- Background fabric: 1½ yards, such as white, ivory, pale blue, or soft gray
- Lightweight cotton batting, flannel, or muslin middle layer: 2 yards
- Backing fabric: 3½ yards
- Binding fabric: ½ yard
- Thread: white, ivory, pale blue, coral, or coordinating color
- Rotary cutter and cutting mat
- Quilting ruler
- Pins or sewing clips
- Sewing machine
- Iron and ironing board
Beginner tip: For the most breathable quilt, use lightweight cotton batting, cotton flannel, or cotton muslin as the middle layer. Avoid thick polyester batting for a summer quilt.
Bright Summer Color Palette
A fresh bedroom palette could include:
- Crisp white
- Aqua
- Turquoise
- Coral
- Lemon yellow
- Peach
- Sea-glass green
- Sky blue
- Lavender
- Raspberry pink
For an elegant look, use white or ivory as the background and let the bright colors appear in clean patchwork blocks.
Cutting Measurements
This quilt uses simple 9-inch finished blocks.
Cut:
- 42 feature squares: 9½ x 9½ inches
- 42 background or low-volume squares: 9½ x 9½ inches
- Backing fabric: one piece at least 60 x 72 inches
- Middle layer: one piece at least 60 x 72 inches
- Binding strips: 7 strips measuring 2½ inches x width of fabric
Layout:
- 6 blocks across
- 7 blocks down
- Total blocks: 42
- Finished quilt center: about 54 x 63 inches
- With slight quilting shrinkage, finished size will be approximately 54 x 66 inches if you add a narrow border or allow for generous finishing.
Optional border:
- Cut 2 side borders: 3½ x 63 inches
- Cut 2 top and bottom borders: 3½ x 60 inches
Step-by-Step Guide
Step 1: Choose a Breathable Fabric Plan
Choose lightweight quilting cottons in cheerful summer colors. A beautiful combination is coral, aqua, lemon yellow, peach, lavender, sea-glass green, and crisp white.
Keep the prints small to medium scale so the quilt feels airy. Florals, stripes, tiny dots, gingham, and tone-on-tone prints all work well.
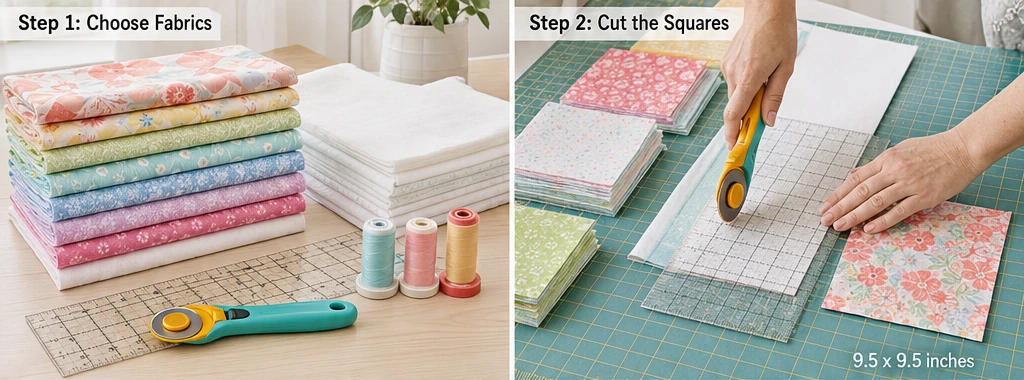
Step 2: Cut the Quilt Squares
Cut 42 colorful feature squares at 9½ x 9½ inches.
Cut 42 background or low-volume squares at 9½ x 9½ inches.
The large squares make the quilt beginner-friendly and quick to assemble. They also help the finished quilt feel relaxed and breathable rather than overly dense.
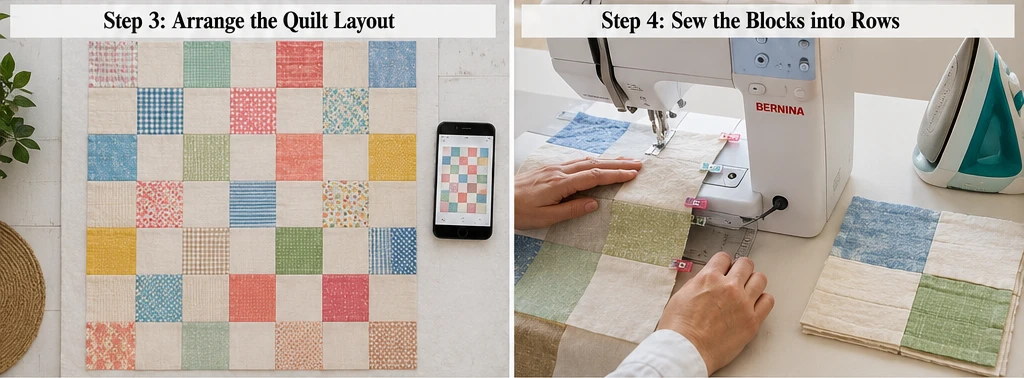
Step 3: Arrange the Quilt Layout
Lay the squares in a 6 x 7 grid. Alternate colorful squares with background squares for a simple checkerboard look.
For a softer layout, scatter the colors randomly but evenly. Place bold shades like coral, raspberry, and turquoise in different areas so one side does not feel too heavy.
Take a photo before sewing so you can remember the arrangement.
Step 4: Sew the Blocks into Rows
Sew each row together using a ¼-inch seam allowance. Press seams in alternating directions from row to row.
For example, press Row 1 seams to the right, Row 2 seams to the left, and continue alternating. This helps the seams nest when you join the rows.
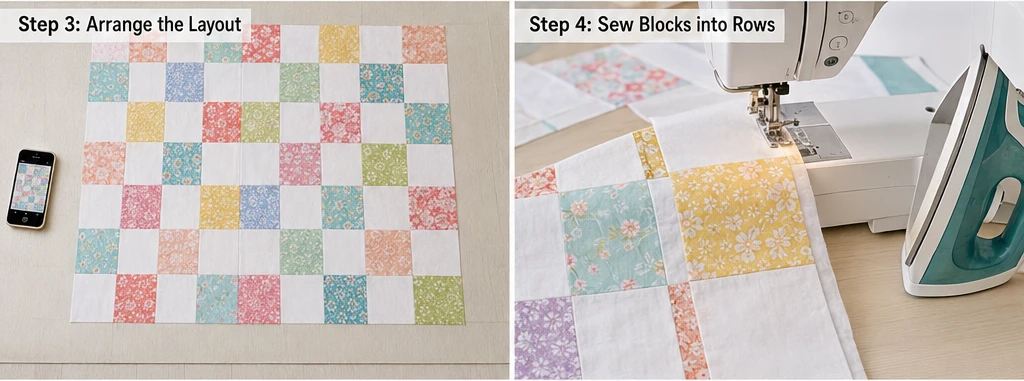
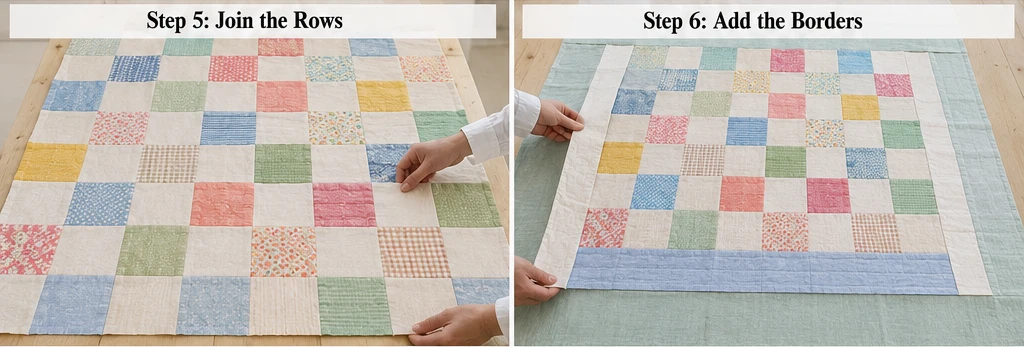
Step 5: Join the Rows
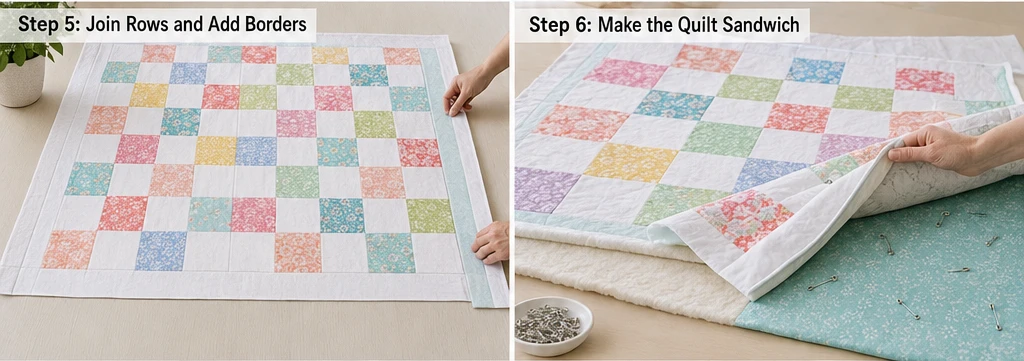
Sew the rows together, matching seam intersections carefully. Pin or clip where the seams meet.
Press the finished quilt top gently. Avoid stretching the fabric as you press. The quilt top should measure about 54½ x 63½ inches before borders.
Step 6: Add Optional Borders
If you want a more finished bedspread look, add a 3½-inch border around the quilt top.
Sew the side borders first, then the top and bottom borders. White, ivory, pale aqua, or soft peach borders keep the quilt looking fresh and elegant.
Borders also give the quilt a little extra size and make the design feel framed.
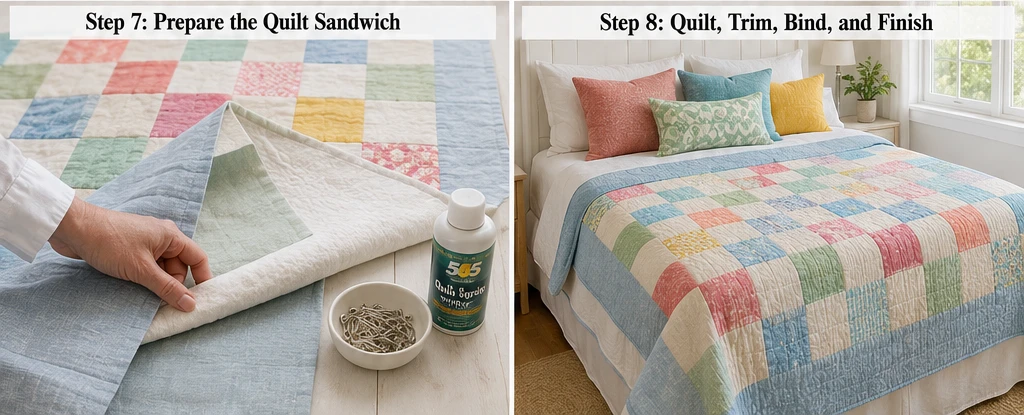
Step 7: Prepare the Lightweight Quilt Sandwich
Place the backing fabric wrong side up, the lightweight batting or muslin in the middle, and the quilt top right side up.
Smooth everything carefully and baste with safety pins or spray. Place pins every 4 to 5 inches so the layers do not shift while quilting.
For the coolest summer quilt, use muslin or flannel instead of regular batting.
Step 8: Quilt with Simple, Open Lines
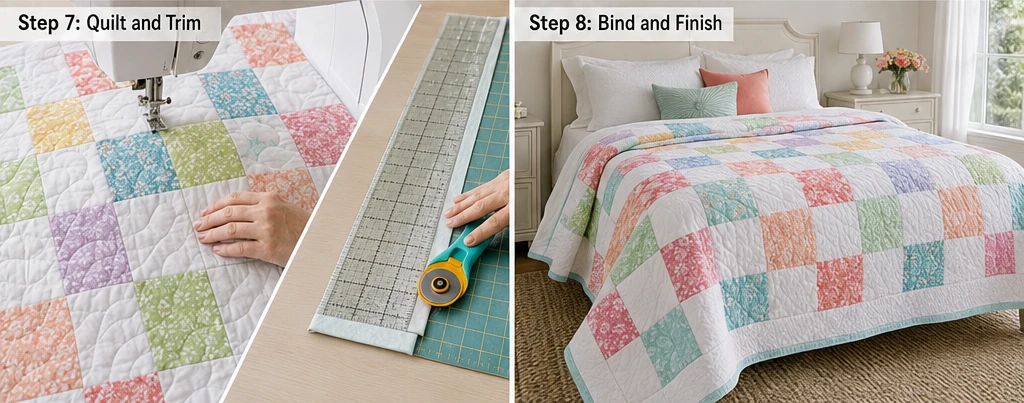
Quilt with straight lines, soft waves, or a loose diagonal grid. Space quilting lines about 3 to 4 inches apart for a softer, airier drape.
Avoid dense quilting because it can make the quilt stiffer and warmer. Open quilting helps the quilt stay lightweight and breathable.
Step 9: Trim and Square the Quilt
After quilting, trim the extra batting and backing even with the quilt top.
Use a long ruler to square the corners as neatly as possible. This makes binding easier and gives the quilt a clean finish.
Step 10: Bind the Quilt
Join the 2½-inch binding strips end to end. Press the binding in half lengthwise.
Sew the binding around the quilt front, fold it to the back, and stitch it down by hand or machine.
A binding in coral, turquoise, lemon yellow, lavender, sea-glass green, or crisp white gives the quilt a fresh summer frame.
Assembly at a Glance
- Choose lightweight cotton fabrics in bright summer colors.
- Cut 42 feature squares at 9½ x 9½ inches.
- Cut 42 background squares at 9½ x 9½ inches.
- Arrange blocks in a 6 x 7 layout.
- Sew blocks into rows with a ¼-inch seam allowance.
- Join the rows to complete the quilt top.
- Add optional 3½-inch borders.
- Layer with backing and lightweight batting, flannel, or muslin.
- Quilt with open lines spaced 3 to 4 inches apart.
- Trim the quilt square.
- Bind with 2½-inch binding strips.
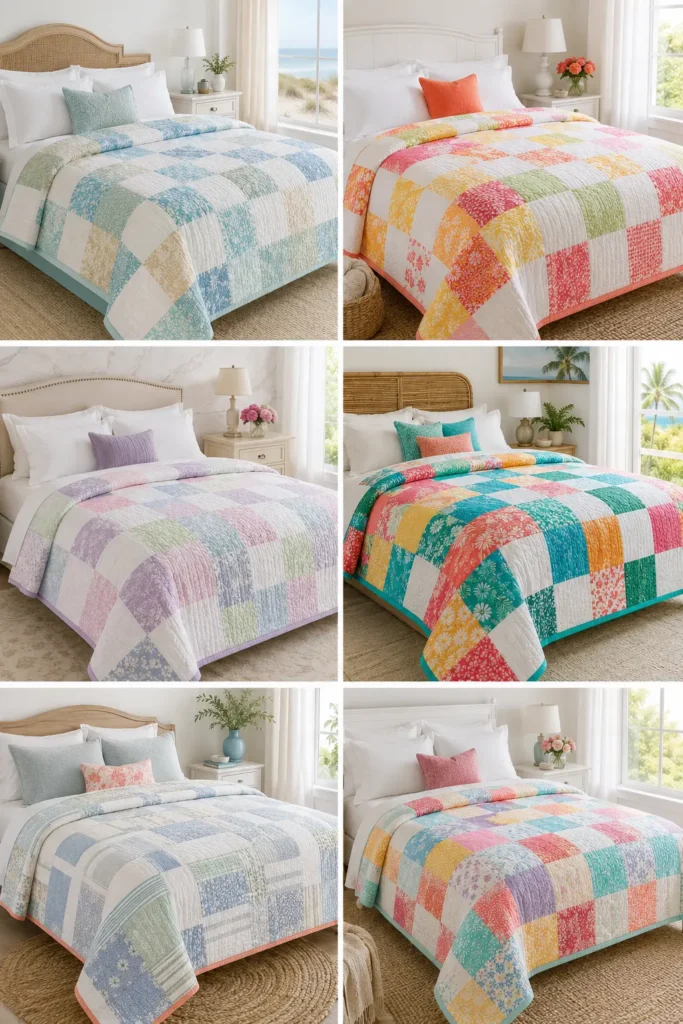
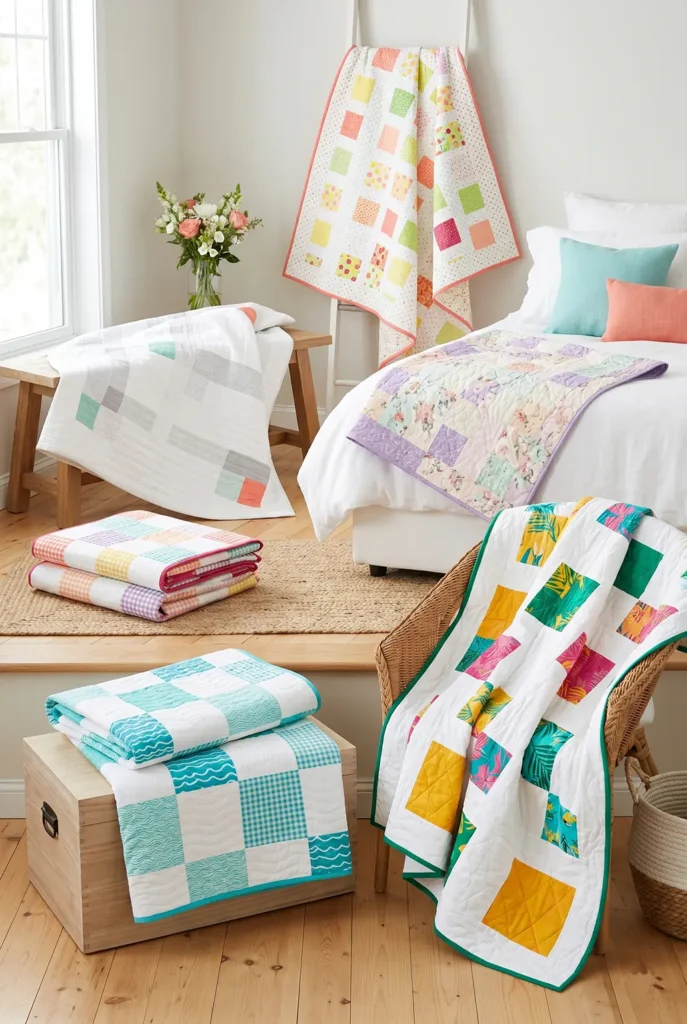
Summer Color Combination Ideas
For a coastal bedroom quilt, use aqua, turquoise, white, sea-glass green, sandy beige, and sky blue.
For a cheerful citrus quilt, use lemon yellow, coral, peach, white, lime green, and raspberry pink.
For a soft romantic summer quilt, use lavender, blush pink, ivory, pale peach, mint green, and powder blue.
For a bold tropical quilt, use turquoise, coral, emerald, hot pink, saffron yellow, and crisp white.
For a calm, elegant bedroom, use white, pale blue, soft gray, sea-glass green, and one coral accent.
Beginner Tips for Success
Use lightweight cotton fabrics so the quilt breathes well in warm weather.
Choose large blocks for an easy first summer quilt. Fewer seams make the quilt faster and softer.
Use muslin, flannel, or thin cotton batting as the middle layer. This keeps the quilt lighter than a winter quilt.
Quilt with wider spacing. Dense quilting can make a summer quilt feel too stiff or warm.
Prewash fabrics if you want a soft, crinkly finish and less shrinkage later.
Use a light-colored backing for the coolest feel, especially if the quilt will be used in a sunny bedroom.
Styling Tip
Layer the finished summer quilt over white sheets, linen bedding, or a pale neutral duvet. Add pillows in coral, aqua, lemon yellow, lavender, turquoise, or sea-glass green to echo the quilt colors. The result is a breathable, cheerful bedroom layer that feels elegant, fresh, and perfect for warm-weather comfort.
Other Design Inspirations – Digitally Modified
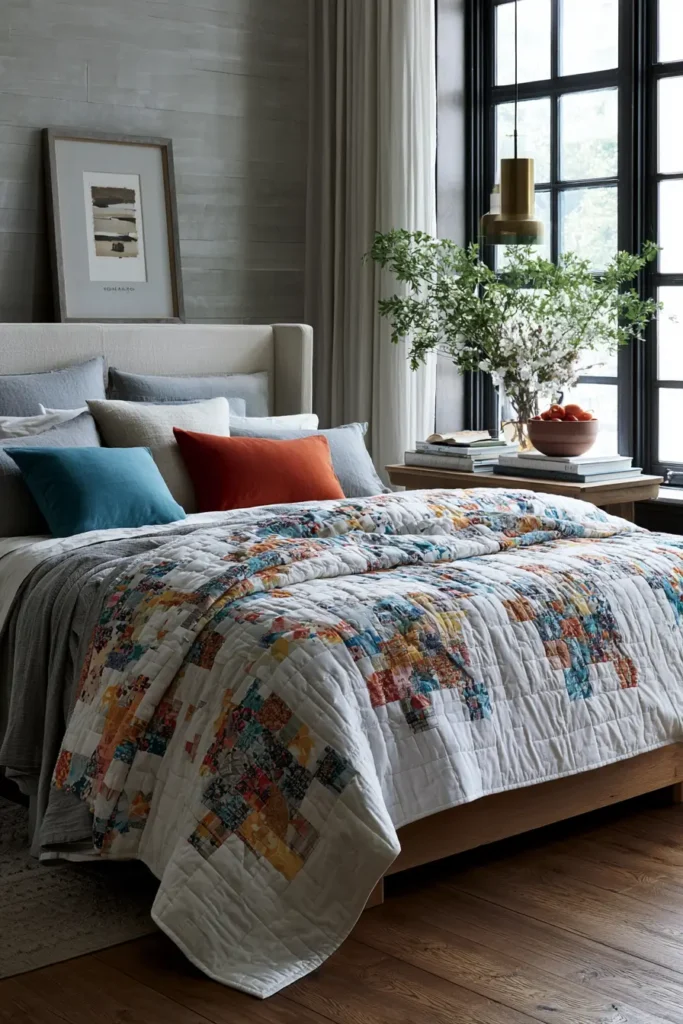
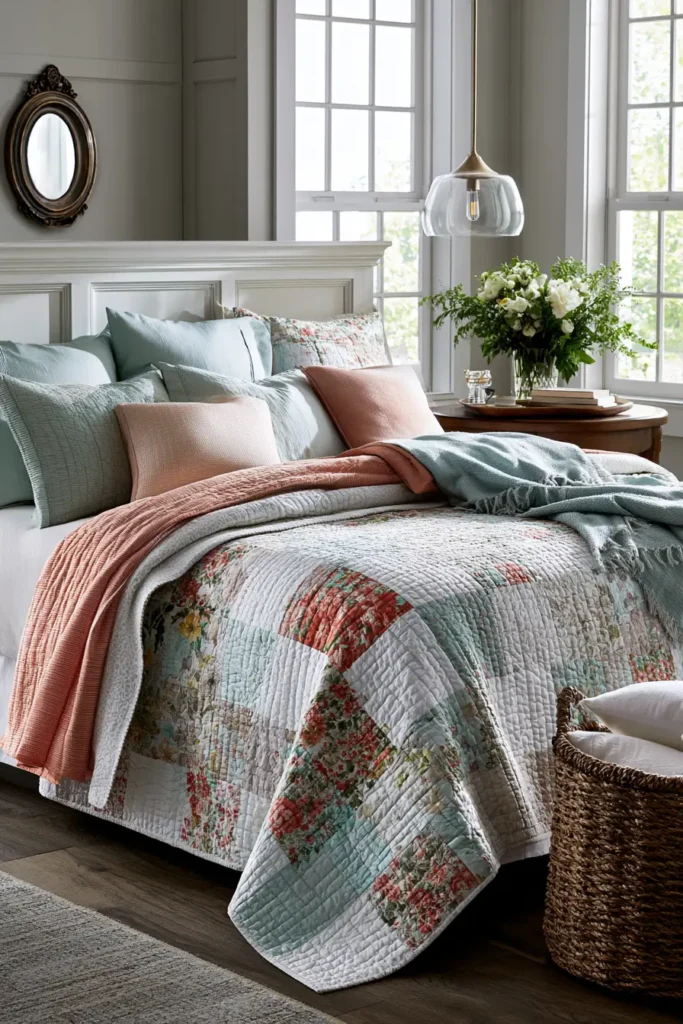
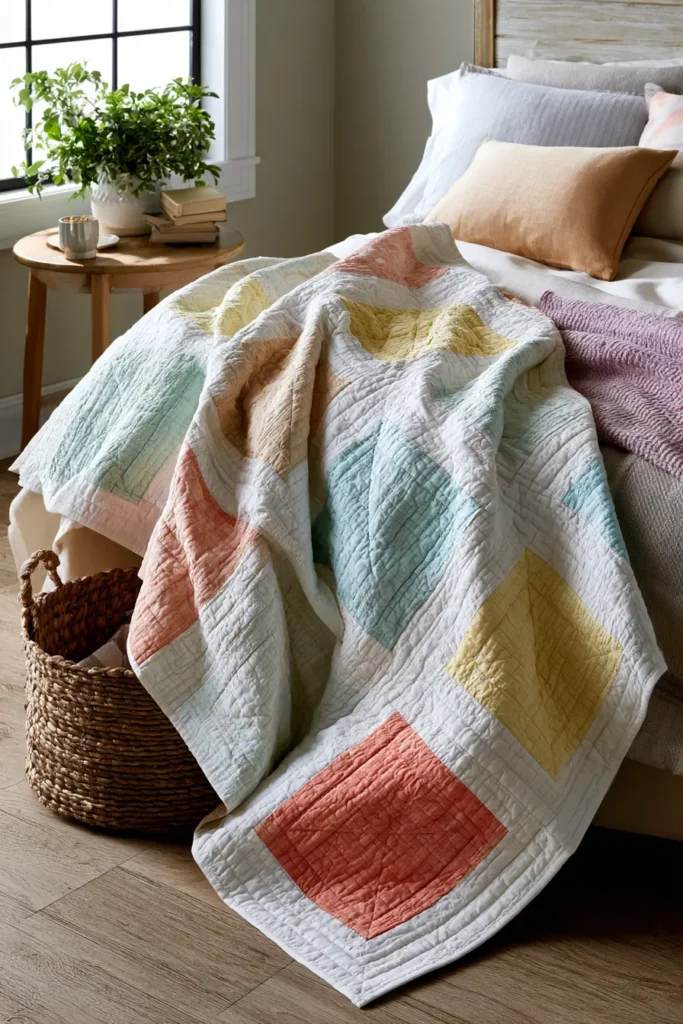
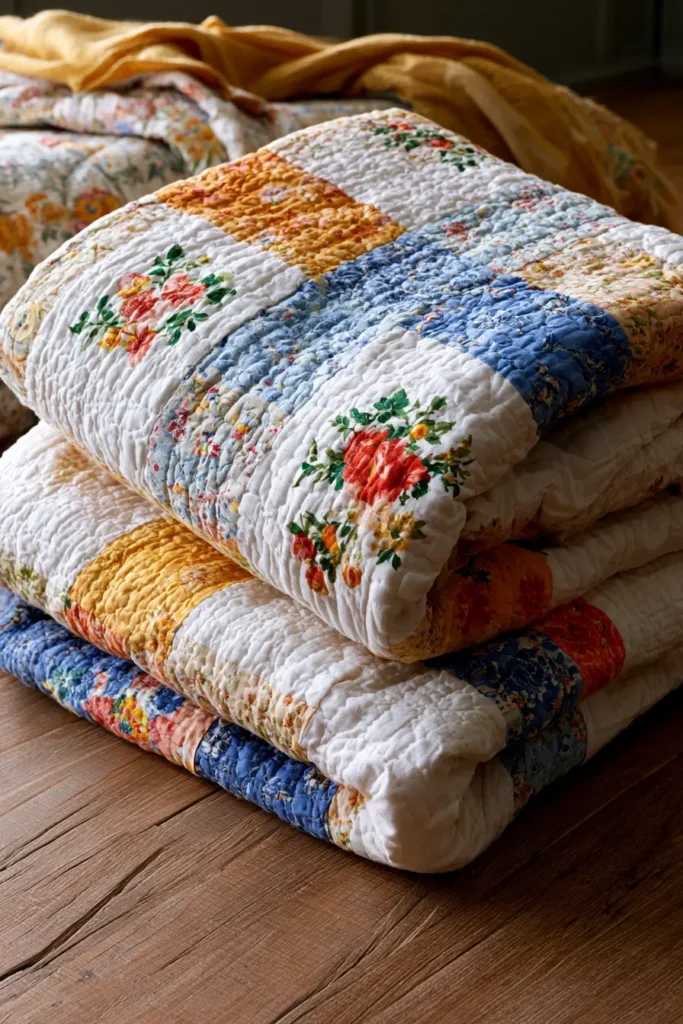
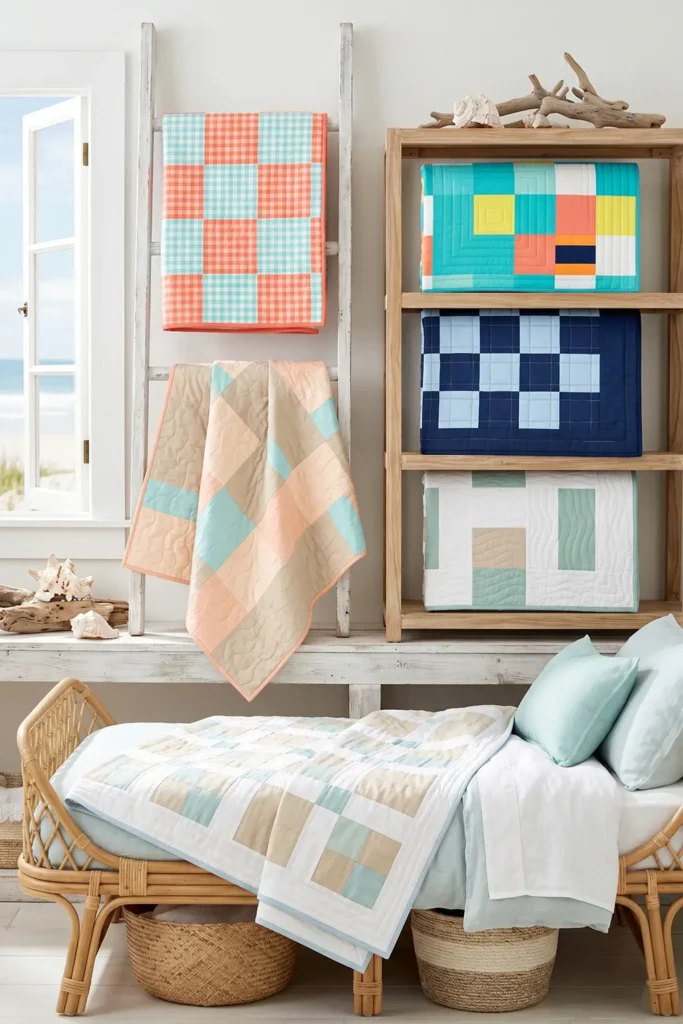
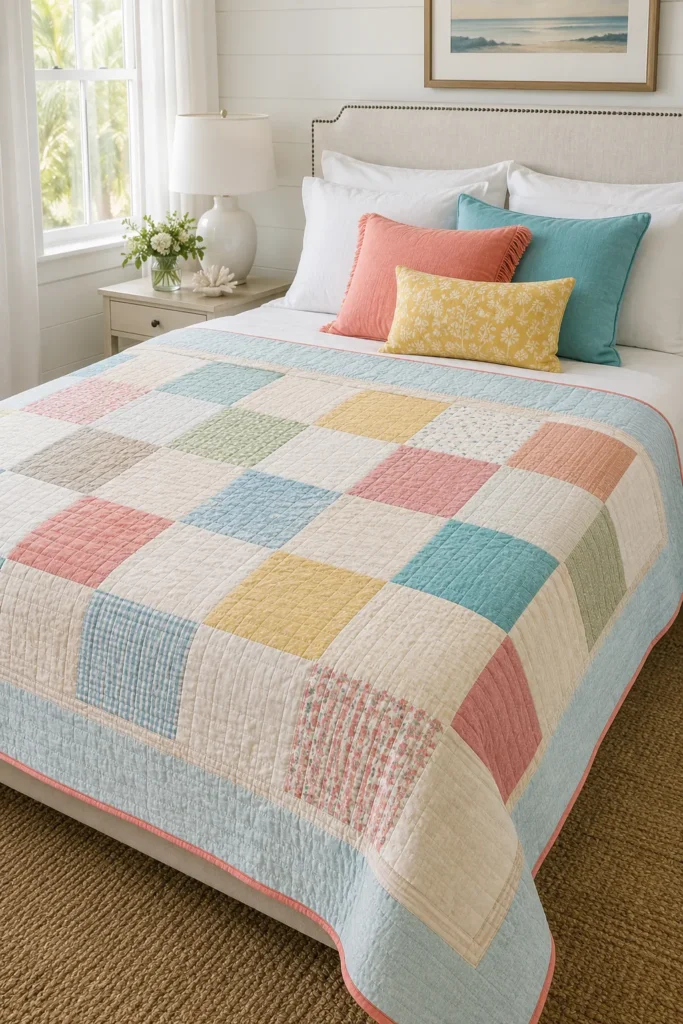
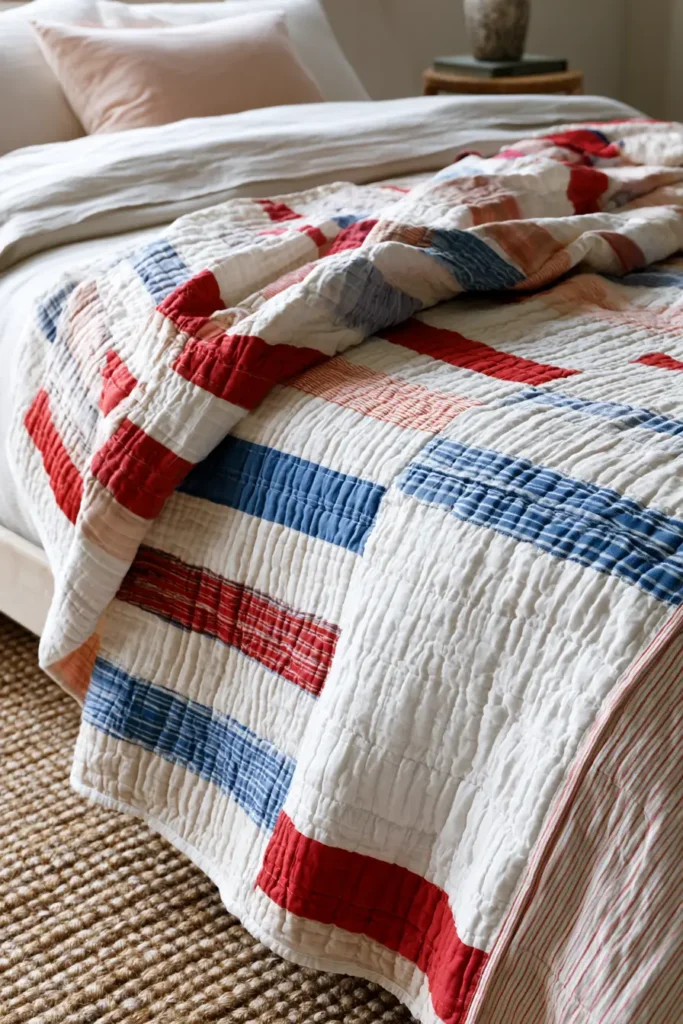
2. Chic Coastal-Inspired Summer Quilts for Relaxed Warm Weather Style
A chic coastal-inspired summer quilt brings the feeling of breezy beach mornings, pale sand, clear water, and sunlit rooms into your home. This quilt is designed to be lightweight, breathable, and easy to layer, making it perfect for warm-weather bedrooms, guest rooms, porch naps, sofa throws, or relaxed weekend lounging.
For a vibrant coastal palette, use aqua, turquoise, sea-glass green, coral, sandy beige, crisp white, sky blue, navy, lemon yellow, and soft peach. The colors feel fresh and cheerful, while the lightweight construction keeps the quilt comfortable during warmer months.
Why I Made It
I made this quilt because I wanted a summer bed layer that felt cool, bright, and easygoing. Heavy quilts are wonderful in winter, but during warm weather, I reach for something softer, lighter, and more breathable.
The inspiration came from simple coastal rooms: white sheets, woven baskets, sun-faded blues, coral accents, and the relaxed feeling of open windows. A summer quilt does not need to be complicated to be beautiful. With large blocks, airy colors, and open quilting, it can feel elegant and casual at the same time.
Why This Idea Is Worth Making
This idea is worth making because it gives you a practical, warm-weather quilt that is light enough for summer but still cozy enough to make a room feel finished. The pattern is beginner-friendly, uses simple squares and rectangles, and lets the coastal colors do most of the design work.
It is also versatile. You can use it as a bedroom quilt, beach-house throw, picnic blanket, guest-room layer, or folded accent at the foot of the bed. The finished quilt adds color without feeling heavy or fussy.
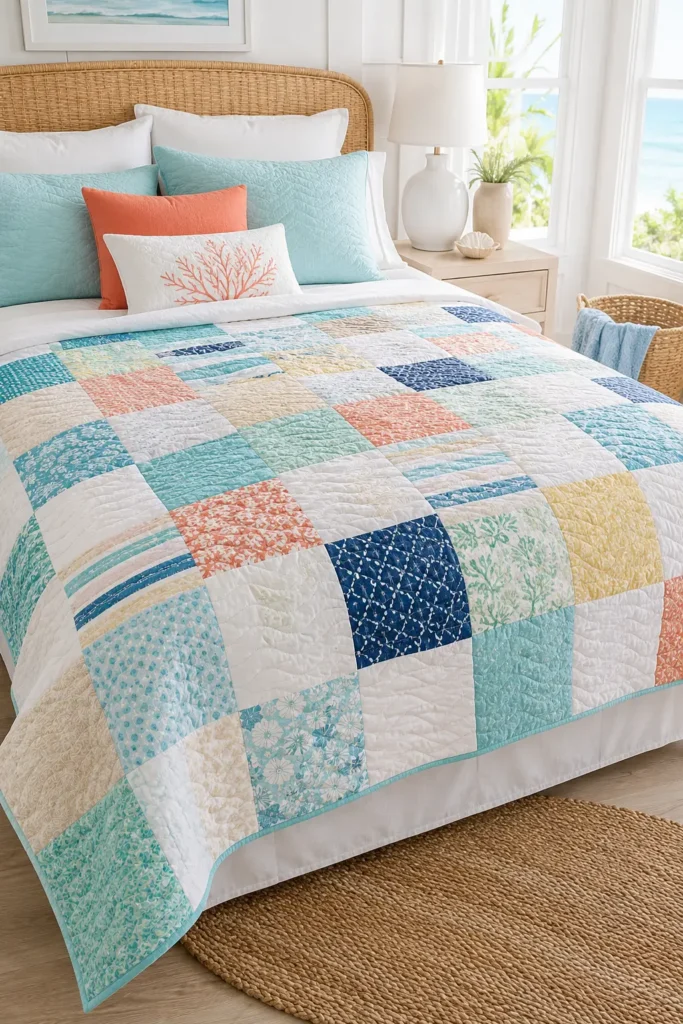
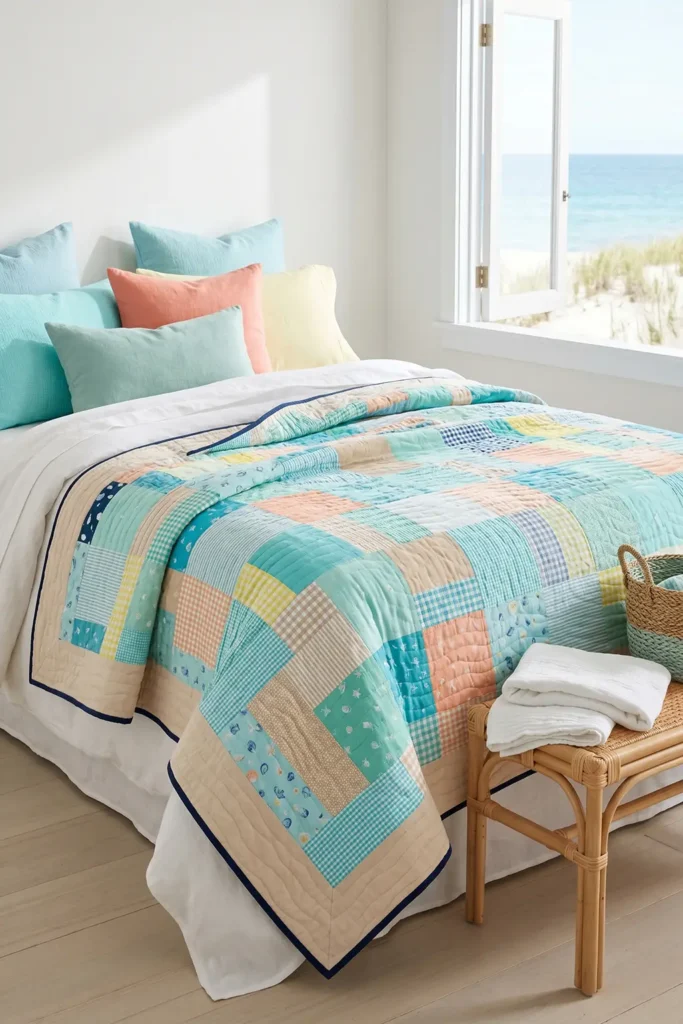
Finished Size
This guide makes a lightweight throw or small bed quilt measuring approximately 54 x 66 inches.
It works well for:
- A summer bedroom quilt
- A sofa throw
- A guest-room accent
- A porch or sunroom quilt
- A lightweight picnic quilt
- A folded quilt at the foot of a bed
For a twin-size version, increase the layout to about 60 x 80 inches by adding more blocks or wider borders.
Materials Needed
For one coastal-inspired summer quilt, gather:
- Assorted quilting cottons: 2½ to 3 yards total
- Background fabric: 1½ yards in white, ivory, pale aqua, or soft sand
- Lightweight middle layer: 2 yards of thin cotton batting, cotton flannel, or muslin
- Backing fabric: 3½ yards
- Binding fabric: ½ yard
- Thread: white, ivory, pale blue, aqua, or sandy beige
- Rotary cutter and cutting mat
- Quilting ruler
- Pins or sewing clips
- Sewing machine
- Iron and ironing board
Beginner tip: For the coolest summer quilt, use cotton muslin or lightweight flannel instead of thick batting. This keeps the quilt soft, breathable, and easy to wash.
Coastal Color Palette
A fresh coastal palette could include:
- Crisp white
- Sandy beige
- Aqua
- Turquoise
- Sea-glass green
- Sky blue
- Navy
- Coral
- Lemon yellow
- Soft peach
For a calmer version, use mostly white, sand, aqua, and pale blue. For a brighter summer look, add coral, lemon yellow, turquoise, and navy accents.
Cutting Measurements
This quilt uses simple 9-inch finished blocks with a few accent rectangles for a beachy, striped effect.
Cut:
- 28 feature squares: 9½ x 9½ inches
- 28 background squares: 9½ x 9½ inches
- 14 accent rectangles: 4½ x 9½ inches
- 14 background rectangles: 4½ x 9½ inches
- Backing fabric: one piece at least 60 x 72 inches
- Middle layer: one piece at least 60 x 72 inches
- Binding strips: 7 strips measuring 2½ inches x width of fabric
Optional border:
- 2 side borders: 3½ x 63 inches
- 2 top and bottom borders: 3½ x 60 inches
Use a ¼-inch seam allowance for piecing.
Step-by-Step Guide
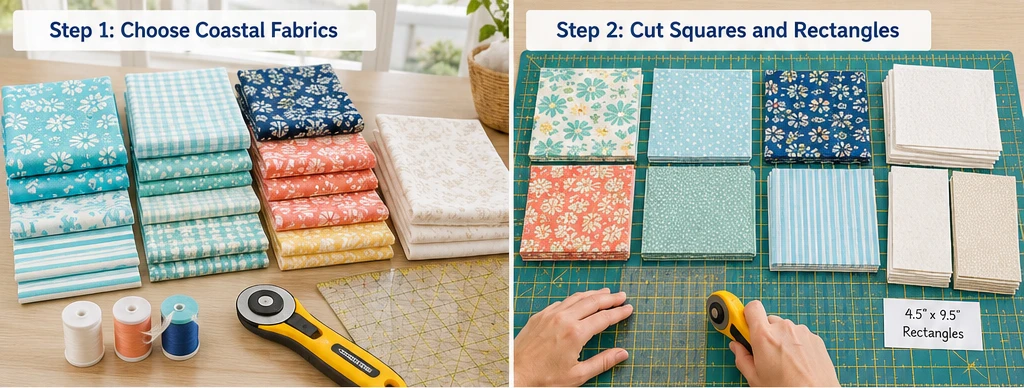
Step 1: Choose a Breezy Coastal Fabric Mix
Choose lightweight quilting cottons in ocean-inspired colors. A balanced mix could include aqua, turquoise, sea-glass green, navy, coral, sandy beige, white, and sky blue.
Use small prints, tone-on-tone designs, stripes, gingham, dots, or subtle florals. Avoid too many heavy, dark fabrics so the quilt keeps its airy summer feel.
Step 2: Cut the Squares and Rectangles
Cut 28 feature squares at 9½ x 9½ inches and 28 background squares at 9½ x 9½ inches.
Then cut 14 accent rectangles and 14 background rectangles at 4½ x 9½ inches. These rectangular units add a simple striped movement that feels coastal without making the pattern difficult.
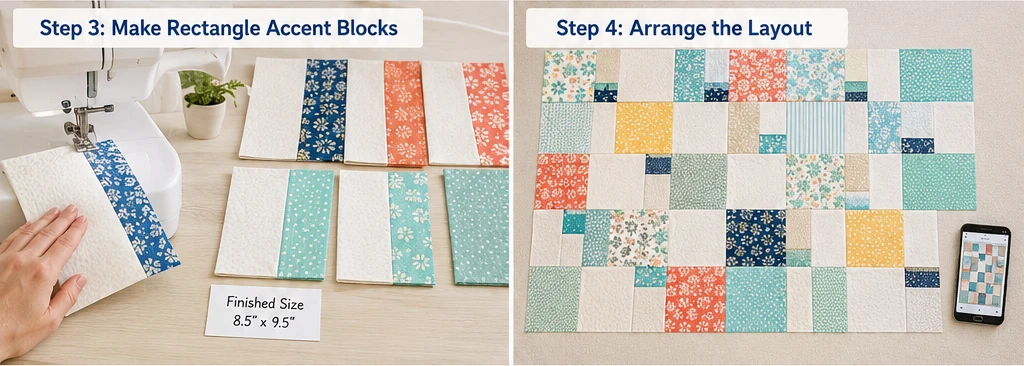
Step 3: Make the Rectangle Accent Blocks
Pair one accent rectangle with one background rectangle. Sew them together along the long edge using a ¼-inch seam allowance.
Press the seam toward the darker fabric.
Each finished rectangle block should measure 8½ x 9½ inches before being sewn into the quilt. Trim gently if needed so the pieces line up neatly.
Step 4: Arrange the Quilt Layout
Lay out the quilt in a relaxed 6 x 7 block-style grid. Mix the square blocks with the rectangle accent blocks.
A simple arrangement idea:
- Alternate colorful squares with background squares.
- Place the rectangle blocks in gentle diagonal paths.
- Scatter coral and navy accents evenly so they do not collect in one corner.
- Keep white, sand, and pale aqua near the center for a bright, open look.
Take a photo before sewing so you can remember the layout.
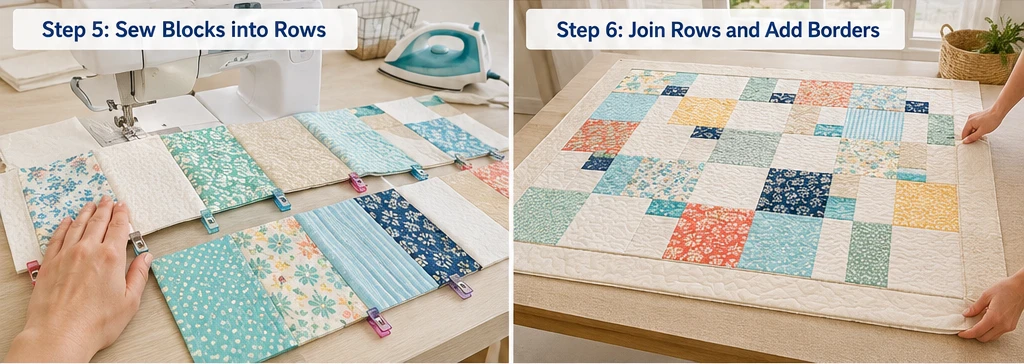
Step 5: Sew Blocks into Rows
Sew the blocks together row by row using a ¼-inch seam allowance.
Press seams in alternating directions from row to row. This helps the seams nest when you join the rows and makes the quilt top flatter.
Step 6: Join the Rows
Sew the rows together, matching seam intersections carefully. Pin or clip at the seams so the blocks stay aligned.
Press the finished quilt top gently from the back. Avoid stretching the fabric as you press.
Step 7: Add Optional Borders
For a polished coastal bedspread look, add 3½-inch borders.
Sew the side borders first, then the top and bottom borders. Good border colors include crisp white, sandy beige, pale aqua, navy, or sea-glass green.
A white or sand border keeps the quilt light, while a navy border gives it a crisp nautical frame.
Step 8: Prepare the Lightweight Quilt Sandwich
Place the backing fabric wrong side up, the lightweight middle layer in the center, and the quilt top right side up.
Smooth the layers carefully and baste with safety pins or spray. Place pins every 4 to 5 inches so the layers stay secure while quilting.
Step 9: Quilt with Open, Airy Lines
Quilt simple straight lines, soft waves, or a loose diagonal grid. Space quilting lines about 3 to 4 inches apart.
For a coastal look, gentle wave quilting is especially pretty. It suggests water movement while keeping the quilt soft and breathable.
Avoid dense quilting because it can make a summer quilt feel stiff and warmer.
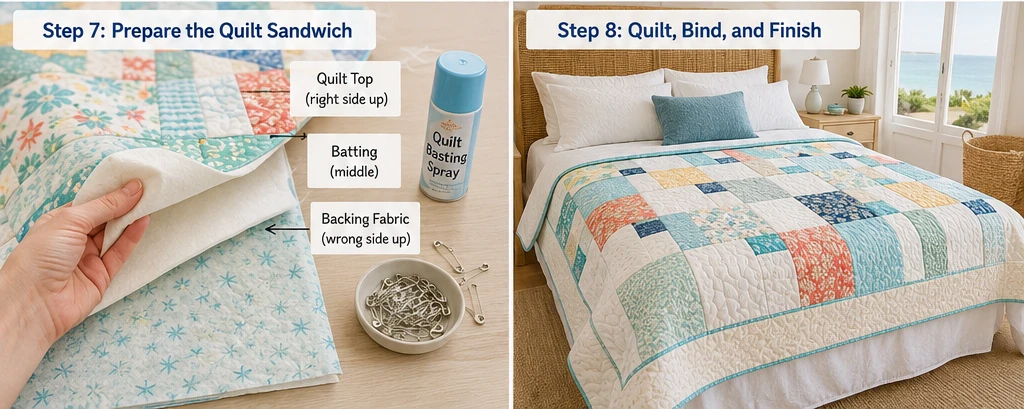
Step 10: Trim and Square the Quilt
After quilting, trim the excess backing and middle layer to match the quilt top.
Square the corners with a ruler so the binding attaches smoothly. This step gives the quilt a clean, finished shape.
Step 11: Bind the Quilt
Join the 2½-inch binding strips end to end. Press the binding in half lengthwise.
Sew the binding to the front of the quilt, fold it to the back, and stitch it down by hand or machine.
Binding colors that work beautifully include coral, turquoise, navy, sea-glass green, sandy beige, or crisp white.
Assembly at a Glance
- Choose lightweight cotton fabrics in coastal colors.
- Cut 28 feature squares at 9½ x 9½ inches.
- Cut 28 background squares at 9½ x 9½ inches.
- Cut accent and background rectangles at 4½ x 9½ inches.
- Sew rectangle pairs into simple accent blocks.
- Arrange the quilt in a relaxed 6 x 7 layout.
- Sew blocks into rows with a ¼-inch seam allowance.
- Join the rows to complete the quilt top.
- Add optional 3½-inch borders.
- Layer with backing and a lightweight middle layer.
- Quilt with open lines spaced 3-4 inches apart.
- Trim, square, and bind with 2½-inch strips.
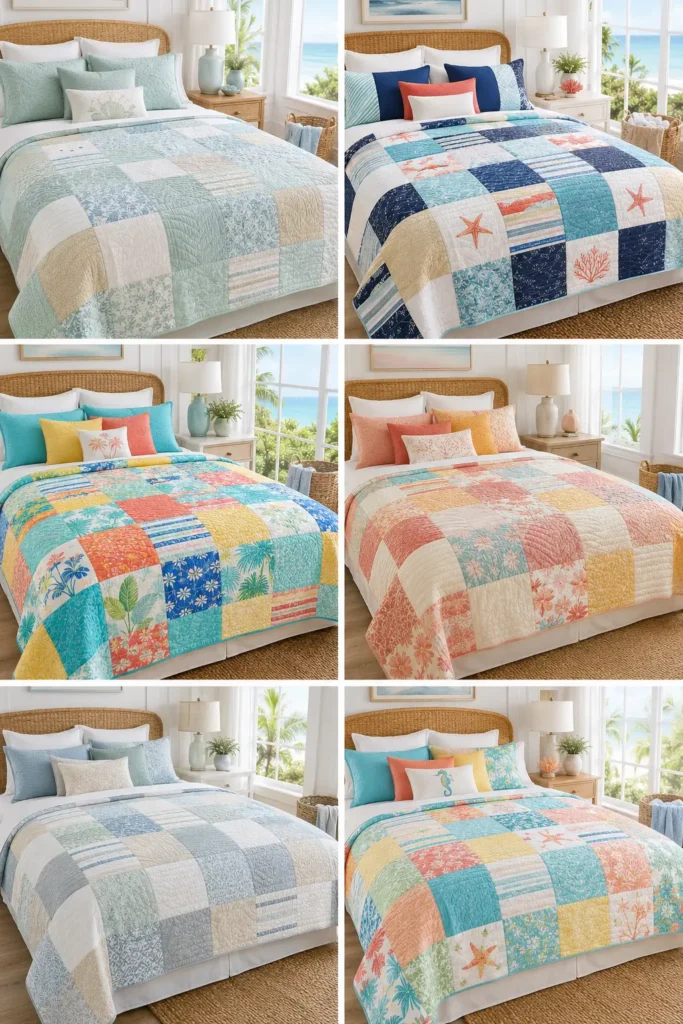
Coastal Color Combination Ideas
For a classic beach-house quilt, use white, navy, aqua, sandy beige, and coral.
For a soft sea-glass quilt, use pale aqua, mint, sea-glass green, ivory, sky blue, and soft peach.
For a bright tropical coastal quilt, use turquoise, coral, lemon yellow, emerald, white, and cobalt blue.
For a calm, elegant bedroom quilt, use white, sand, pale blue, soft gray, seafoam, and one navy accent.
For a sunset-by-the-water look, use coral, peach, raspberry, lemon yellow, aqua, and warm cream.
Beginner Tips for Success
Choose breathable cotton fabrics so the quilt feels comfortable in warm weather.
Use large blocks for an easier summer quilt. Fewer seams make the quilt softer and quicker to finish.
Use muslin, flannel, or thin cotton batting as the middle layer. This keeps the quilt lighter than a winter quilt.
Keep quilting lines open and spaced apart. Dense quilting can make the quilt stiff and less breathable.
Use white or pale backing fabric if the quilt will be used in a sunny bedroom or beach-style room.
Prewash fabrics if you want a soft, crinkly finish and less shrinkage after the first wash.
Styling Tip
Layer the finished coastal summer quilt over white sheets, linen bedding, a rattan bench, or a pale sofa. Add pillows in aqua, coral, navy, sea-glass green, lemon yellow, or sandy beige to echo the quilt colors. The result is relaxed, breathable, and cheerful—perfect for warm-weather comfort with a polished coastal touch.
Other Design Inspirations – Digitally Modified
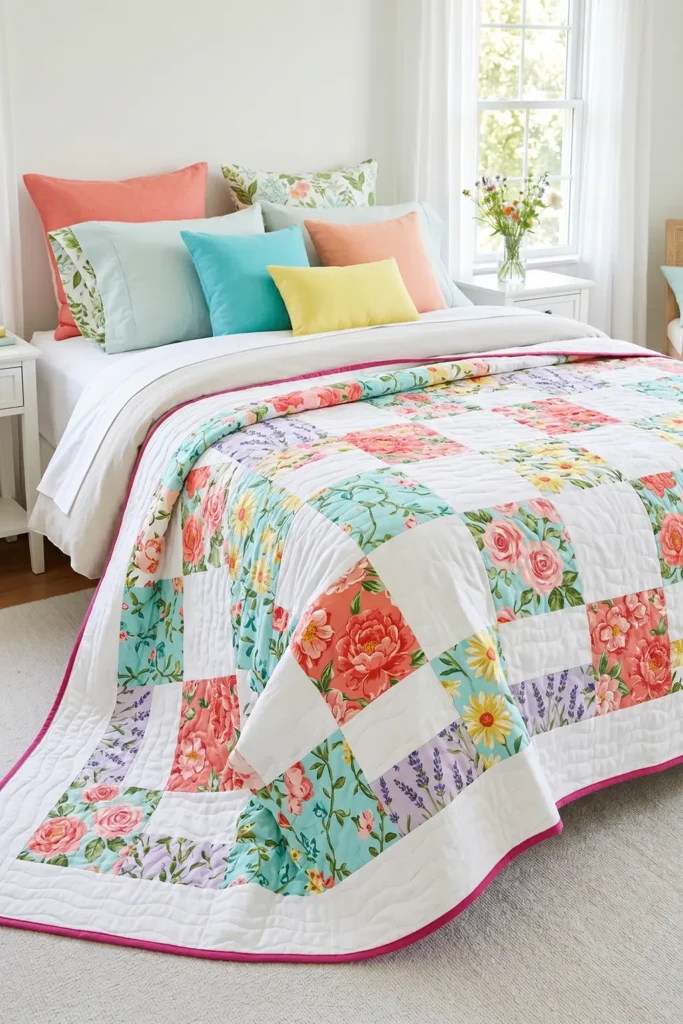
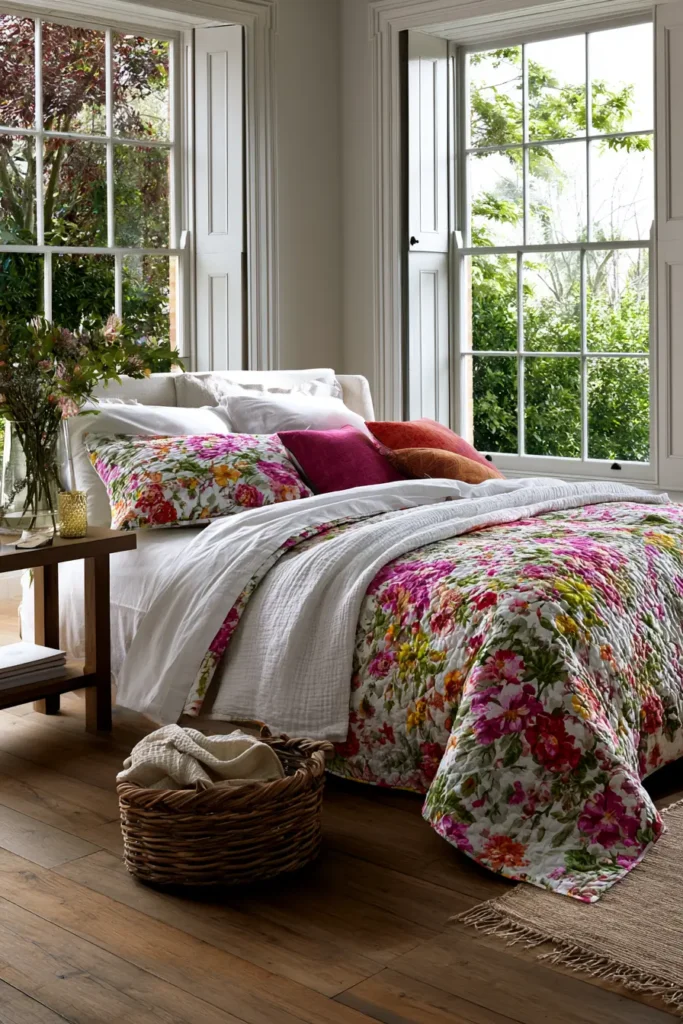
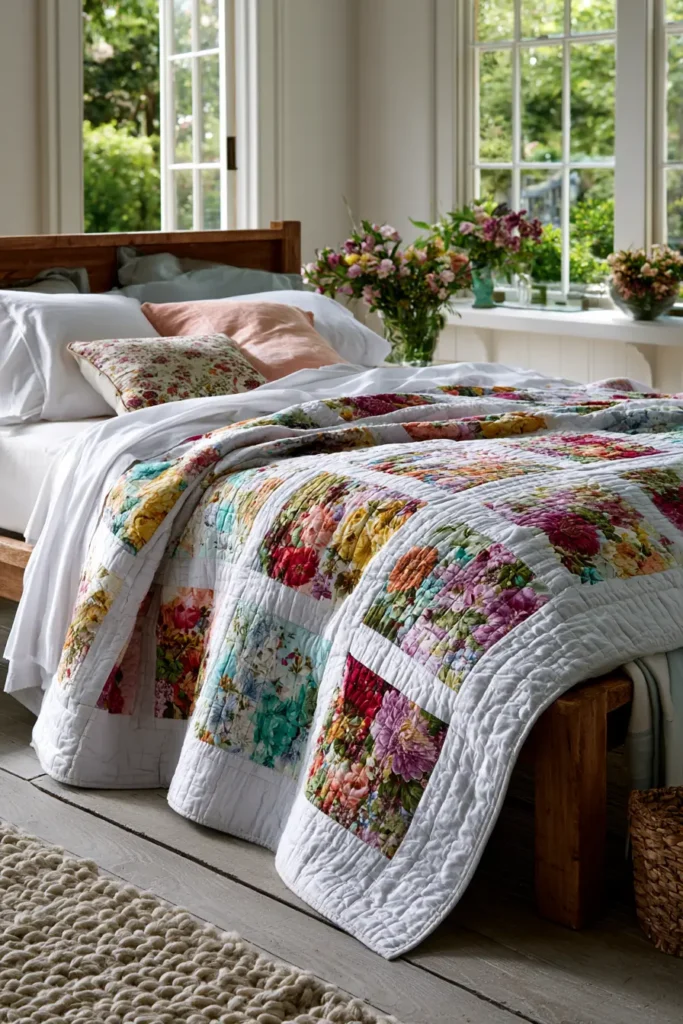
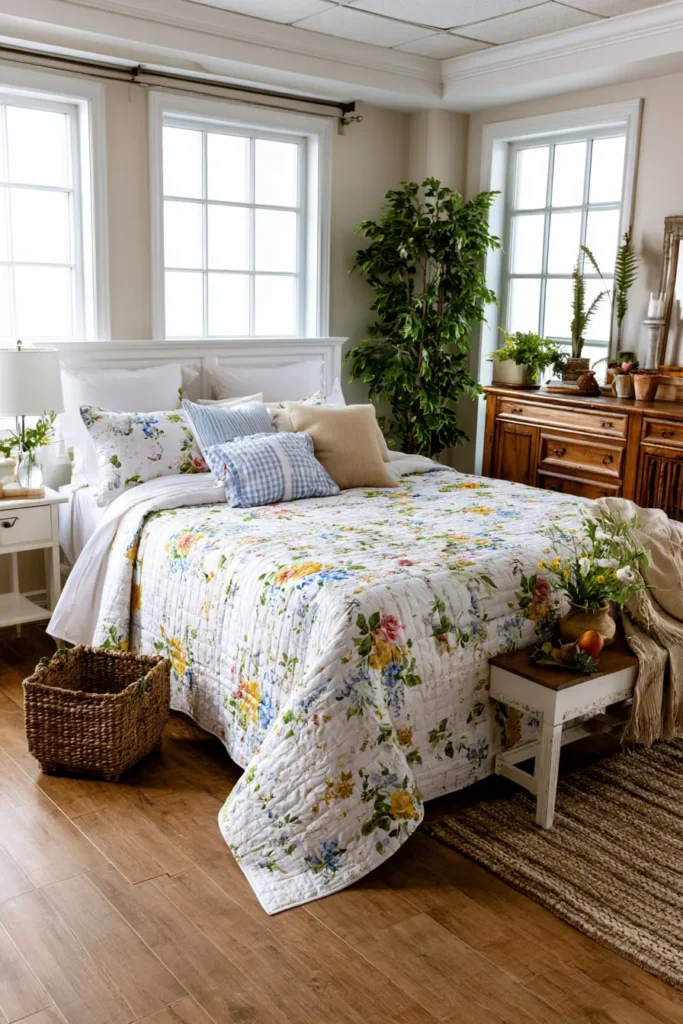
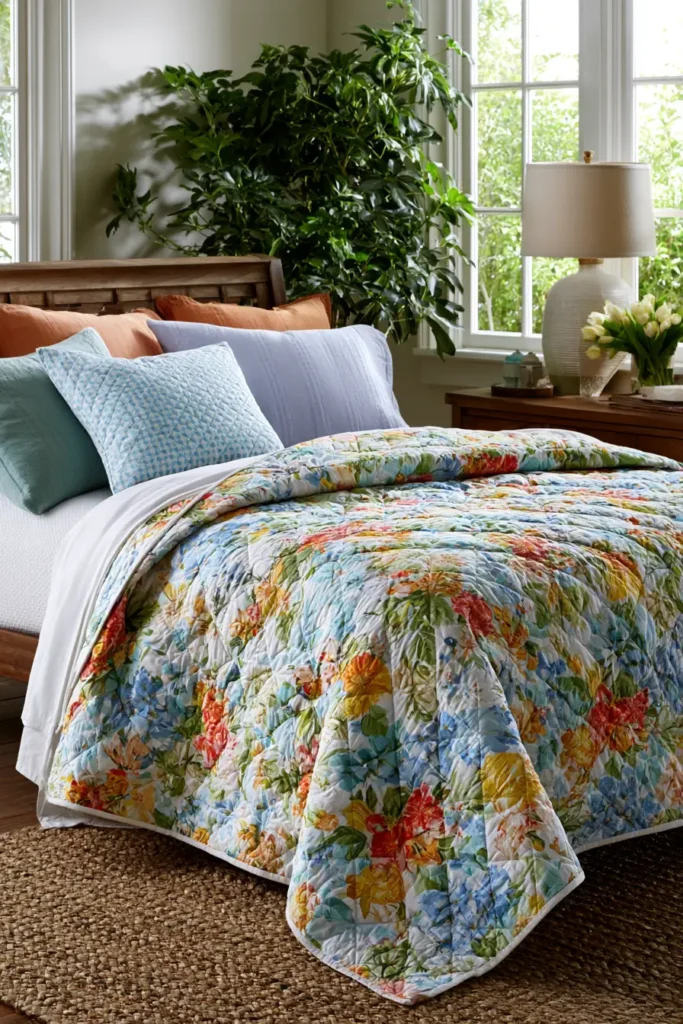
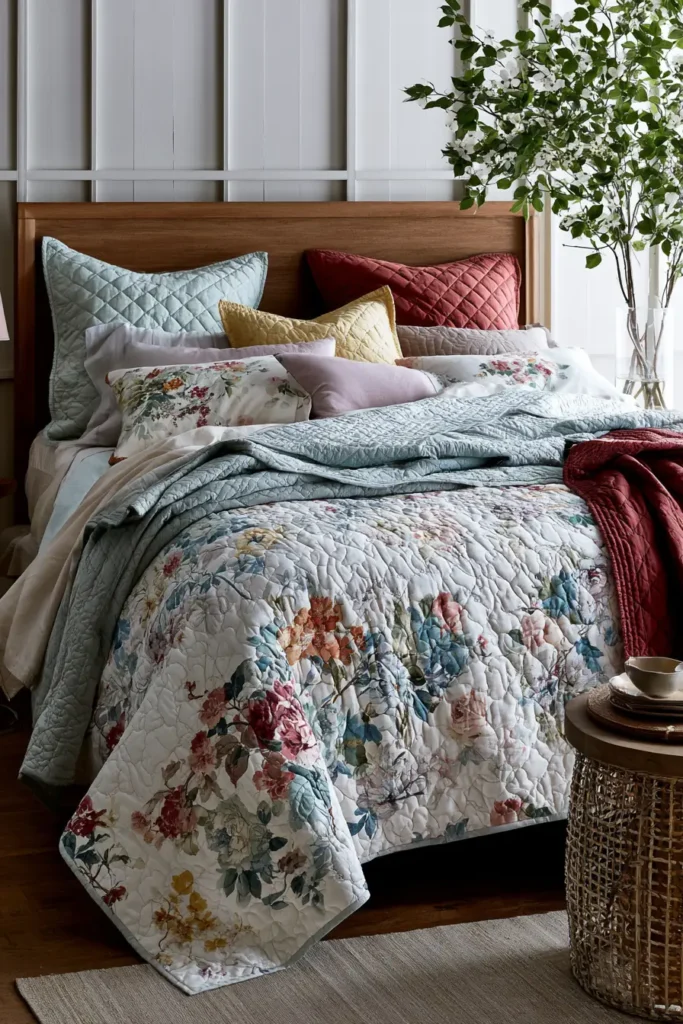
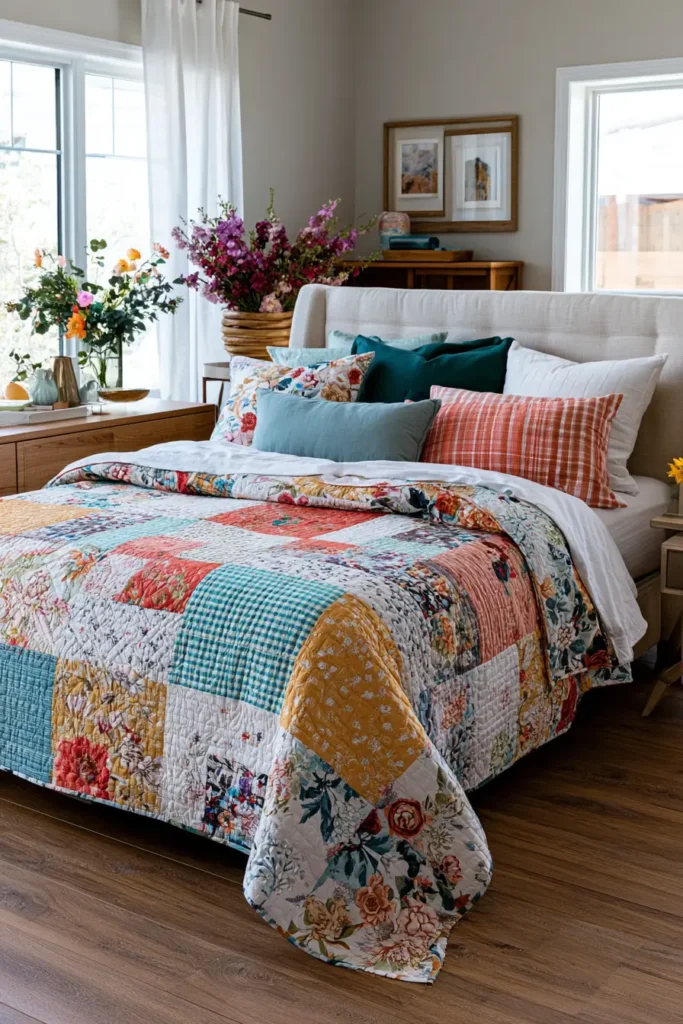
3. Vibrant Floral Summer Bed Covers for Bright, Stylish Master Bedrooms
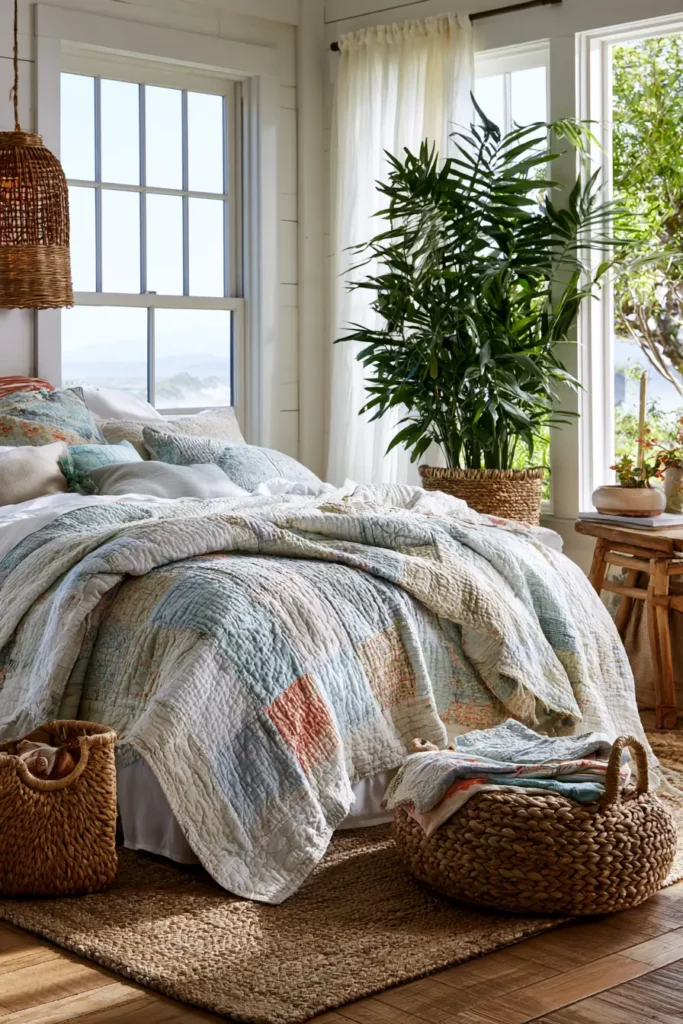
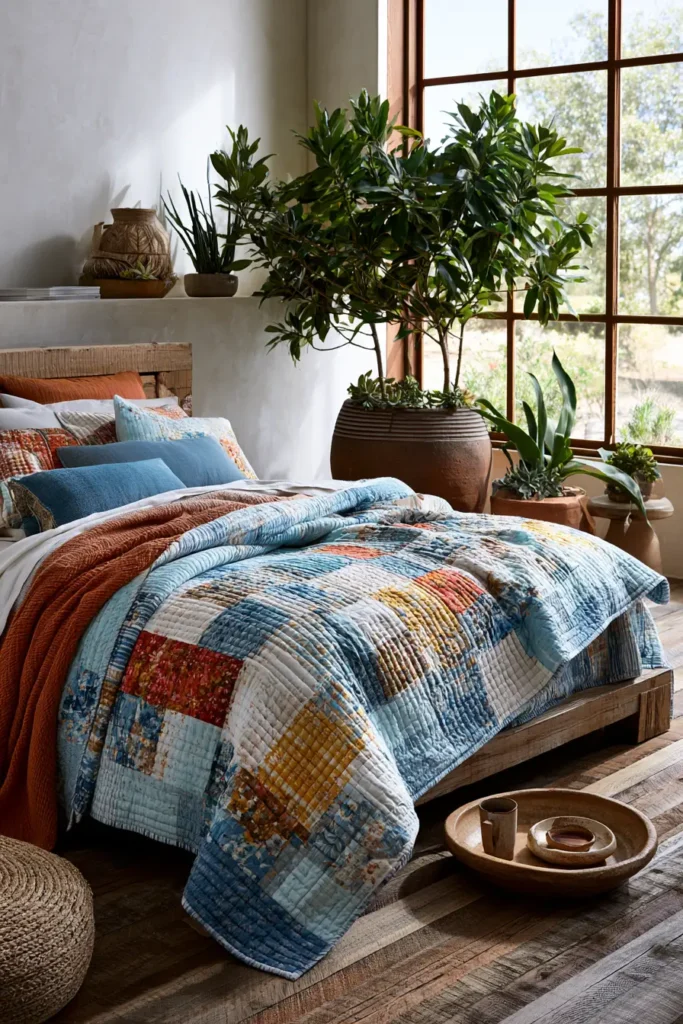
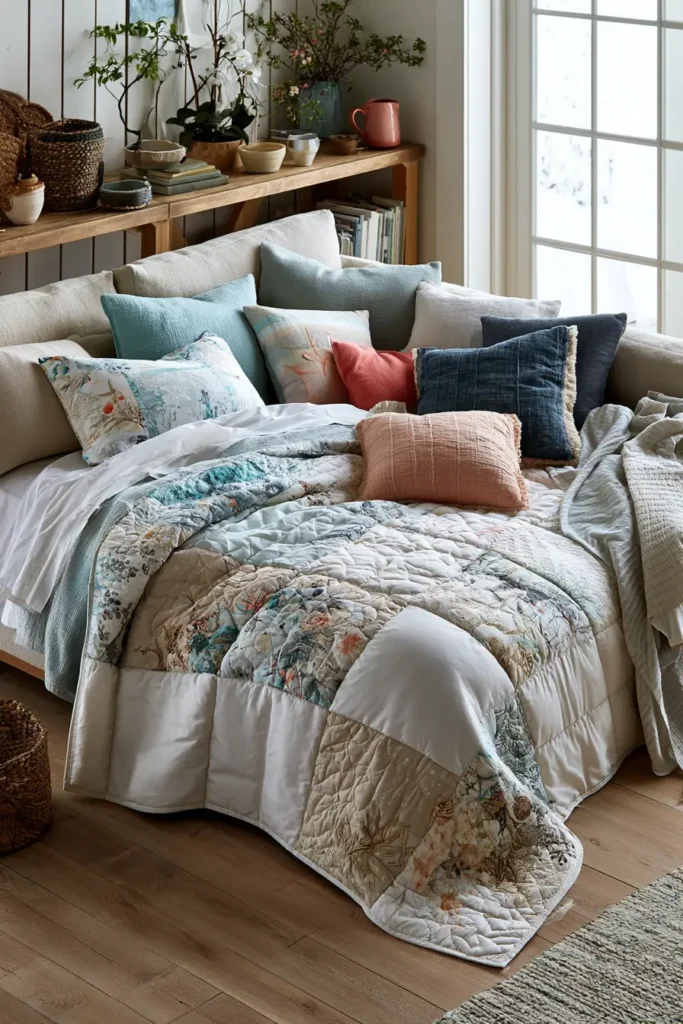
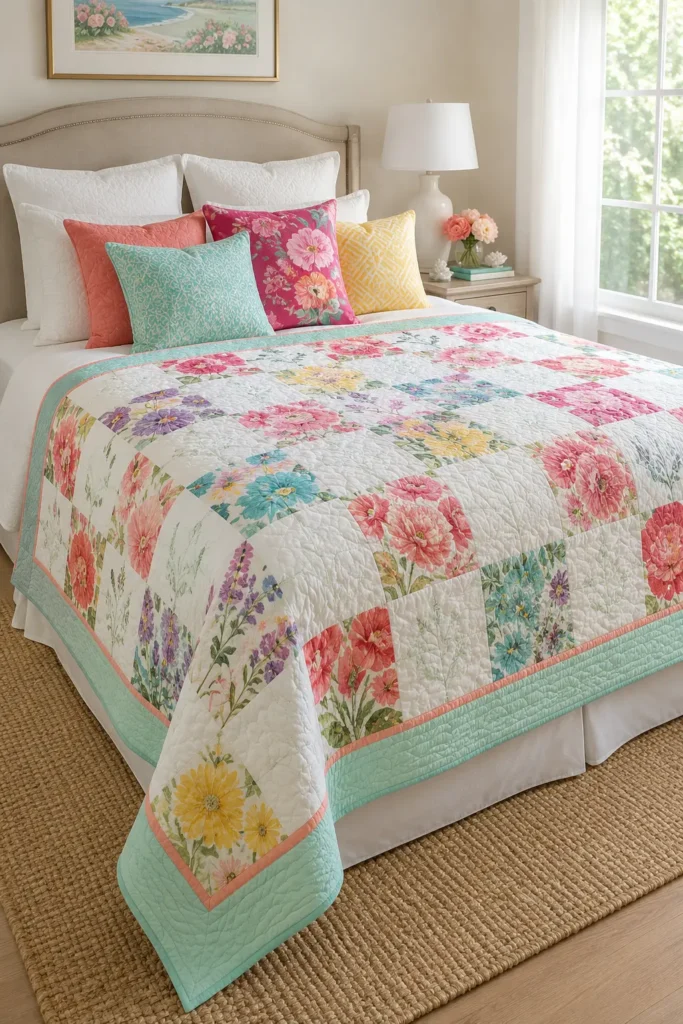
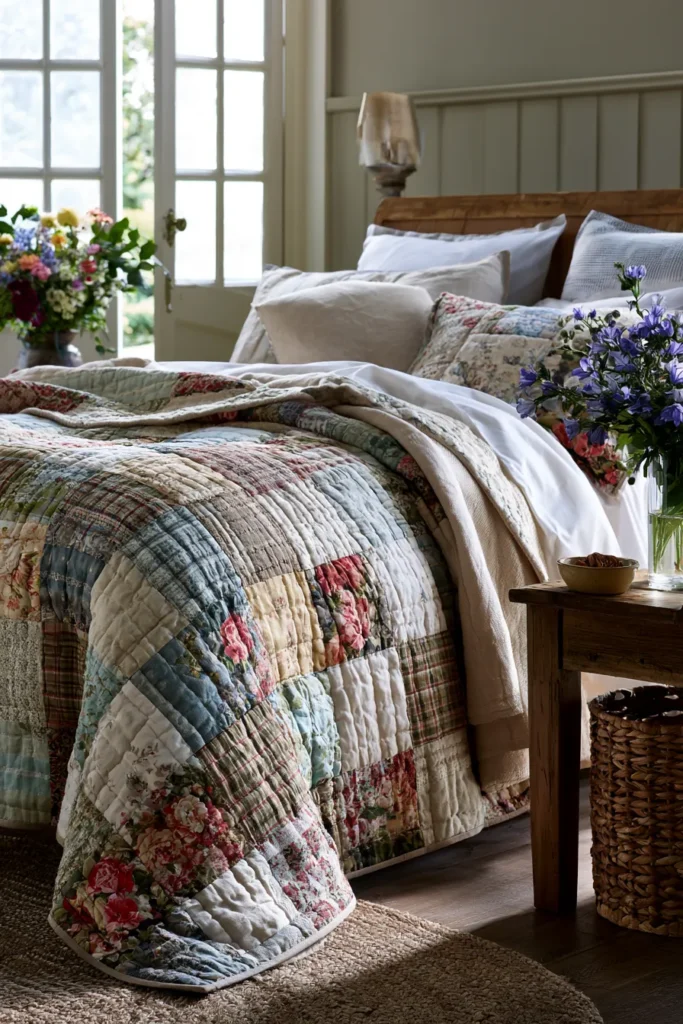
A vibrant floral summer bed cover is a beautiful way to refresh a master bedroom for warm weather. It gives the bed a polished, inviting look without the heaviness of a winter quilt. This design uses large floral blocks, airy background fabric, and a lightweight middle layer so the finished quilt feels breathable, soft, and easy to drape.
For a bright summer bedroom palette, choose colors like coral, fuchsia, raspberry pink, lemon yellow, aqua, turquoise, leafy green, lavender, peach, crisp white, and sky blue. The florals bring energy and romance, while the lightweight construction keeps the quilt comfortable on warmer nights.
Why I Made It
I made this quilt because I wanted a summer bed cover that could make the whole room feel brighter without adding too much warmth. In summer, I like bedding that feels fresh, breathable, and easy to wash, but I still want the bed to look styled and finished.
The inspiration came from garden rooms and sunny master bedrooms—white sheets, open windows, fresh flowers, and a quilt folded loosely across the bed. Floral quilts have always had a place in cozy homes, but using large blocks and vibrant colors gives this version a cleaner, more modern summer feel.
Why This Idea Is Worth Making
This idea is worth making because it creates a beautiful, warm-weather bed layer that is practical, cheerful, and beginner-friendly. The large-block layout is easy to sew, the floral fabrics do most of the visual work, and the lightweight middle layer keeps the quilt breathable.
It is also a wonderful way to update a bedroom without changing the whole room. A floral summer bed cover can brighten neutral bedding, soften a modern space, or make a master bedroom feel more relaxed and welcoming.
Finished Size
This guide makes a lightweight bed cover measuring approximately 72 x 84 inches, a generous size for layering on a full or queen bed.
It works well as:
- A summer master-bedroom bed cover
- A queen bed accent quilt
- A folded quilt at the foot of the bed
- A lightweight guest-room quilt
- A bright seasonal bedding refresh
For a smaller throw, reduce the layout to 6 blocks across by 7 blocks down for a quilt around 54 x 63 inches before borders.
Materials Needed
For one floral summer bed cover, gather:
- Large-scale floral quilting cottons: 3 to 3½ yards total
- Background fabric: 2½ yards in white, ivory, pale aqua, blush, or soft cream
- Lightweight middle layer: 3 yards of thin cotton batting, cotton flannel, or muslin
- Backing fabric: 5¼ yards
- Binding fabric: ¾ yard
- Thread: white, ivory, pale pink, coral, or coordinating color
- Rotary cutter and cutting mat
- Quilting ruler
- Pins or sewing clips
- Sewing machine
- Iron and ironing board
Beginner tip: For a breathable summer bed cover, use thin cotton batting, cotton flannel, or muslin instead of thick batting. This keeps the quilt light and soft.
Vibrant Floral Color Palette
A bright floral master-bedroom palette could include:
- Crisp white
- Coral
- Fuchsia
- Raspberry pink
- Lemon yellow
- Aqua
- Turquoise
- Leafy green
- Lavender
- Peach
For a more elegant finish, use white or ivory as the background and let the vivid floral fabrics shine in the main blocks.
Cutting Measurements
This quilt uses simple 9-inch finished blocks.
Cut:
- 56 floral feature squares: 9½ x 9½ inches
- 56 background or low-volume squares: 9½ x 9½ inches
- Backing fabric: one piece at least 78 x 90 inches
- Middle layer: one piece at least 78 x 90 inches
- Binding strips: 9 strips measuring 2½ inches x the width of the fabric
Layout:
- 8 blocks across
- 7 blocks down
- Total finished blocks: 56
- Finished quilt center: about 72 x 63 inches
To make the bed cover longer, add borders:
- 2 side borders: 4½ x 63 inches
- 2 top and bottom borders: 10½ x 80 inches, or adjust to desired length
With borders, the finished quilt will be approximately 72 x 84 inches, depending on seam allowance, quilting shrinkage, and trimming.
Step-by-Step Guide
Step 1: Choose the Floral Fabric Story
Choose several floral fabrics that feel bright but coordinated. A beautiful mix might include coral peonies, pink roses, yellow daisies, aqua vines, lavender sprigs, and leafy green accents.
Balance large floral prints with smaller supporting prints. If every print is very large, the quilt can feel busy. Add white, ivory, or pale aqua background squares to give the eye a place to rest.
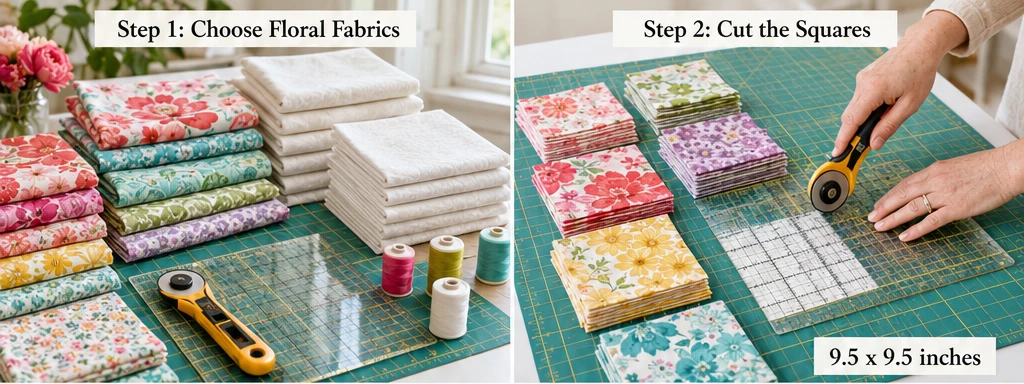
Step 2: Cut the Floral and Background Squares
Cut 56 floral feature squares at 9½ x 9½ inches.
Cut 56 background or low-volume squares at 9½ x 9½ inches.
Large squares are ideal for floral fabrics because they show off the print beautifully. They also make the quilt faster and more beginner-friendly.
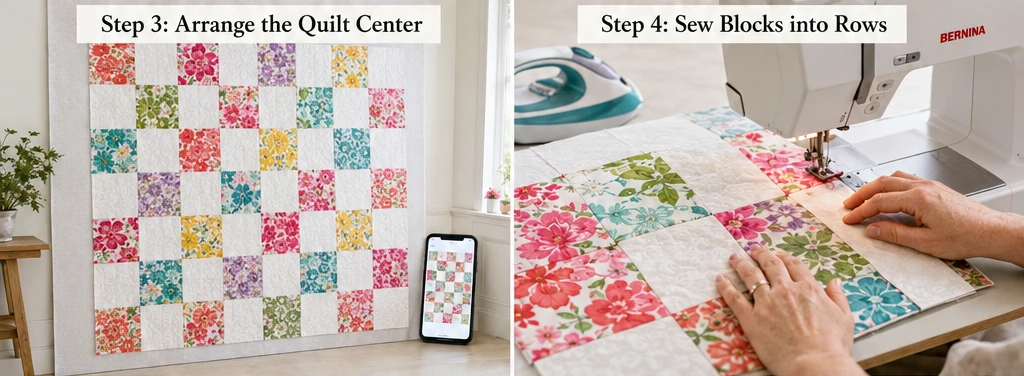
Step 3: Arrange the Quilt Center
Lay the squares in an 8 x 7 grid. Alternate floral squares with background squares for a light checkerboard effect, or scatter the florals randomly for a garden-inspired look.
Place bold colors like fuchsia, coral, raspberry, and turquoise evenly across the quilt. Keep lighter fabrics near the center and corners so the design feels balanced.
Take a photo of the layout before sewing.
Step 4: Sew the Blocks into Rows
Sew each row together using a ¼-inch seam allowance.
Press seams in alternating directions from row to row. For example, press Row 1 to the right, Row 2 to the left, and continue alternating. This helps the seams nest neatly when the rows are joined.
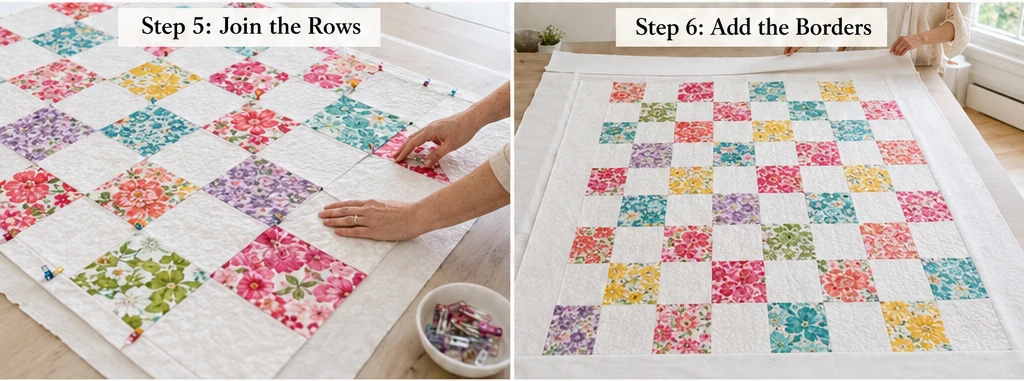
Step 5: Join the Rows
Sew the rows together, matching seam intersections carefully. Pin or clip at each seam so the blocks line up.
Press the completed quilt center gently from the back. The quilt center should measure approximately 72½ x 63½ inches before borders.
Step 6: Add the Side Borders
Sew one 4½ x 63-inch border strip to each side of the quilt center. Press the seams toward the border.
Side borders help frame the floral blocks and add a little extra width. Good side-border colors include white, ivory, pale aqua, soft peach, or leafy green.
Step 7: Add the Top and Bottom Borders
Sew one 10½ x 80-inch border strip to the top and one to the bottom. Trim evenly if needed after sewing.
These wider borders lengthen the quilt into a more useful bed-cover shape. A crisp white or ivory border keeps the quilt bright, while coral or turquoise gives it a bolder summer finish.
Step 8: Prepare the Lightweight Quilt Sandwich
Place the backing fabric wrong side up, the lightweight middle layer in the center, and the quilt top right side up.
Smooth the layers carefully. Baste with safety pins or spray, placing pins every 4 to 5 inches.
For warm-weather use, keep the quilt sandwich light and flexible. Muslin or flannel as the middle layer will make the bed cover especially breathable.
Step 9: Quilt with Open, Soft Lines
Quilt simple straight lines, soft waves, or a loose diagonal grid. Space quilting lines about 3 to 4 inches apart so the quilt stays soft and airy.
For a floral summer look, gentle wavy lines are lovely because they suggest garden paths, breezes, or flowing stems. Avoid dense quilting, which can make the quilt warmer and stiffer.
Step 10: Trim and Square the Quilt
After quilting, trim away the extra backing and middle-layer fabric.
Use a ruler to square the corners and straighten the edges. This makes the binding easier to attach and gives the bed cover a clean finish.
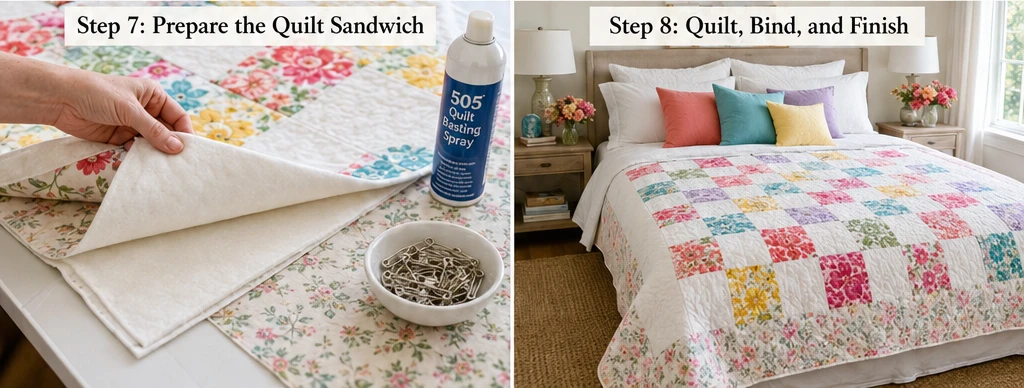
Step 11: Bind the Bed Cover
Join the 2½-inch binding strips end to end and press them in half lengthwise.
Sew the binding to the front of the quilt, fold it to the back, and stitch it down by hand or machine.
Beautiful binding colors include coral, turquoise, raspberry, leafy green, lavender, lemon yellow, or crisp white.
Assembly at a Glance
- Choose vibrant floral fabrics and an airy background fabric.
- Cut 56 floral squares at 9½ x 9½ inches.
- Cut 56 background squares at 9½ x 9½ inches.
- Arrange the blocks in an 8 x 7 layout.
- Sew the blocks into rows with a ¼-inch seam allowance.
- Join rows to complete the quilt center.
- Add 4½-inch side borders.
- Add 10½-inch top and bottom borders.
- Layer with backing and a lightweight middle layer.
- Quilt with open lines spaced 3 to 4 inches apart.
- Trim, square, and bind with 2½-inch strips.
Floral Summer Color Combination Ideas
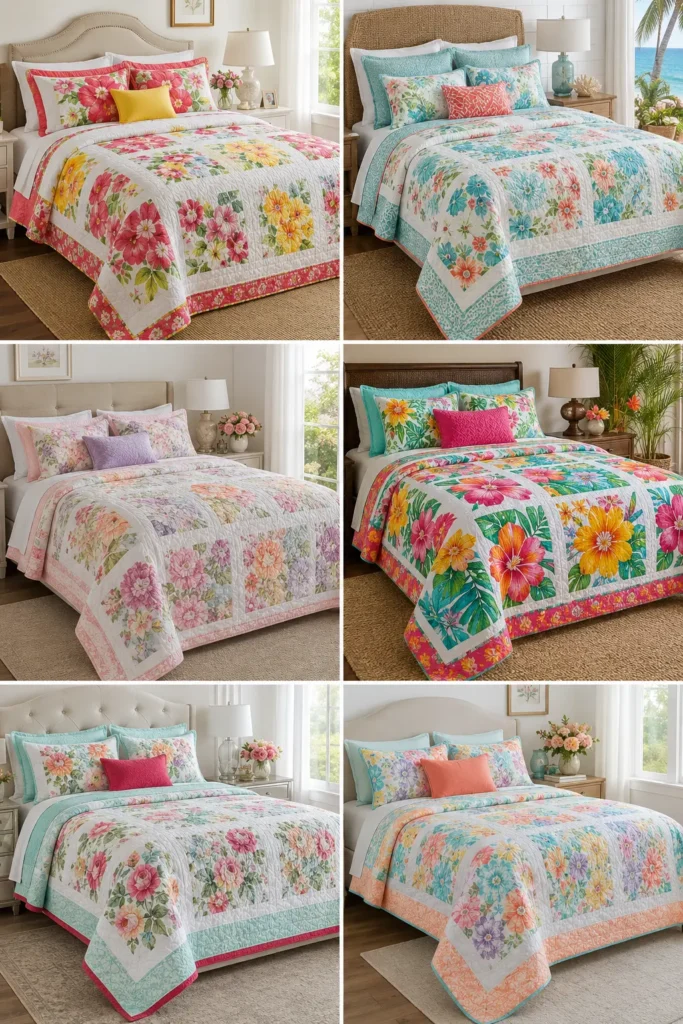
For a bright garden-bedroom quilt, use coral, fuchsia, raspberry, lemon yellow, leafy green, and white.
For a coastal floral quilt, use aqua, turquoise, coral, sea-glass green, sky blue, and ivory.
For a romantic summer bed cover, use blush pink, lavender, peach, cream, sage green, and soft yellow.
For a bold tropical floral look, use hot pink, emerald, turquoise, saffron yellow, coral, and crisp white.
For an elegant master bedroom, use white, pale aqua, rose pink, soft peach, leafy green, and one deep raspberry accent.
Beginner Tips for Success
Choose large floral prints for the feature squares. The 9½-inch squares let the prints show clearly.
Use white or low-volume background squares to keep the quilt from feeling too busy.
Use a lightweight middle layer. Thin cotton batting, flannel, or muslin will keep the bed cover breathable.
Quilt with wider spacing. Open quilting helps the quilt drape softly and stay cooler in warm weather.
Prewash fabrics if you want a soft, crinkly summer finish and less shrinkage later.
Choose a smooth cotton backing. It will feel cooler and more breathable against the bed.
Styling Tip
Layer the finished floral summer bed cover over crisp white sheets, linen pillowcases, or a pale neutral duvet. Add accent pillows in coral, turquoise, raspberry, lemon yellow, lavender, peach, or leafy green. The quilt will instantly brighten the master bedroom while keeping the bed breathable, stylish, and comfortable in warm weather.
Other Design Inspirations – Digitally Modified
4. Linen-Blend Quilts: Durable, Airy Designs for Warm Weather
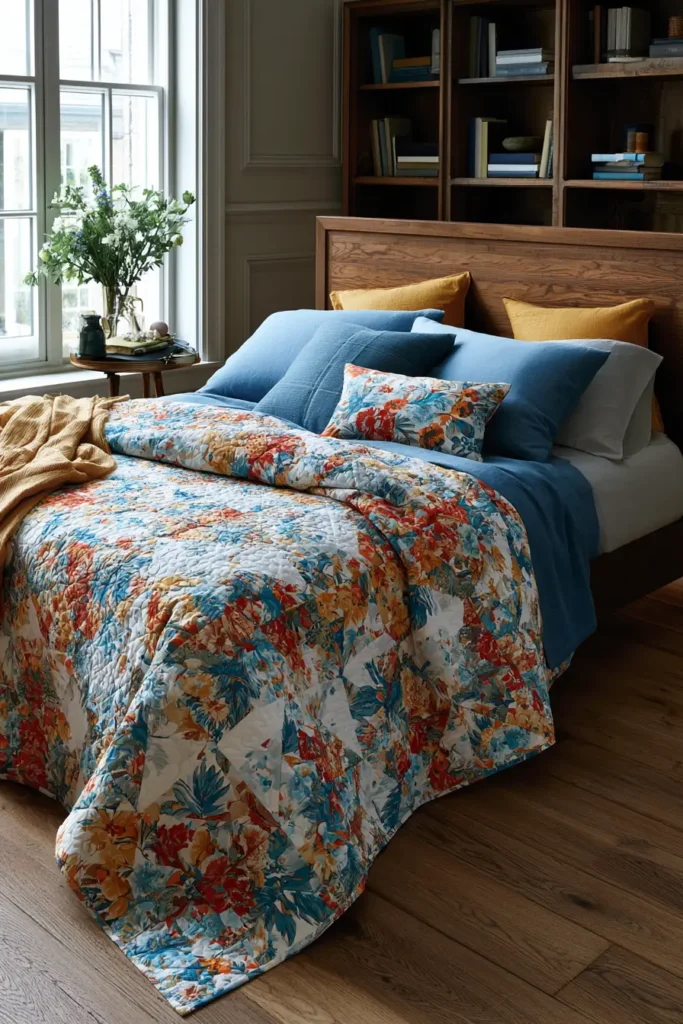
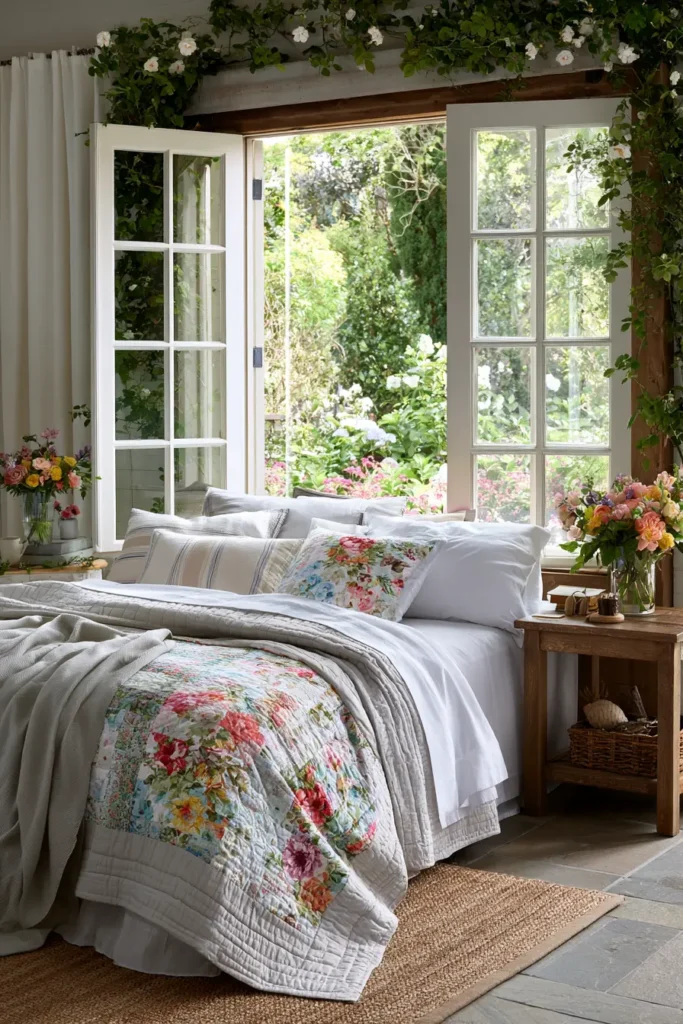
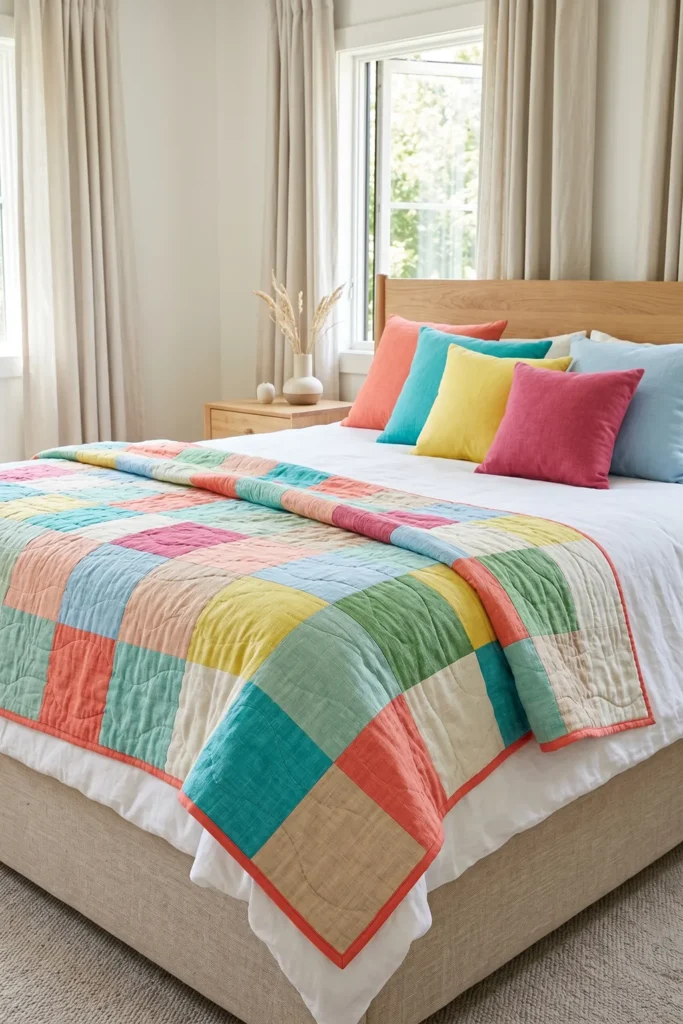
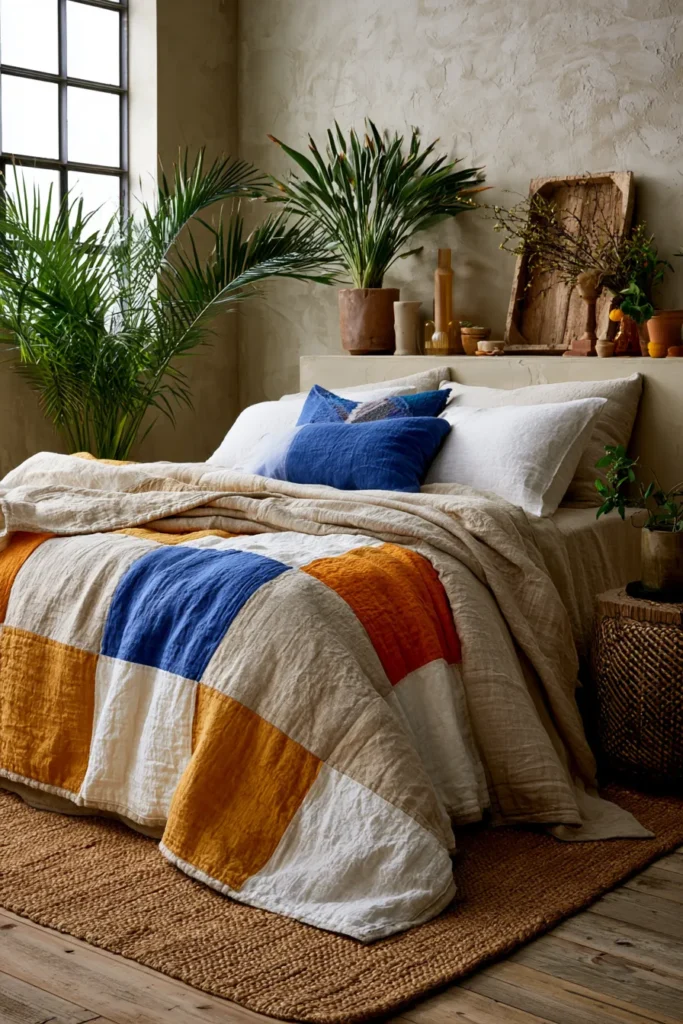
A linen-blend summer quilt is perfect when you want something breathable, relaxed, and long-lasting. Linen-blend fabrics have a slightly textured look that feels elegant without being formal, and they soften beautifully with use. For warm weather, this kind of quilt provides a light layer that feels airy on the bed yet still adds color, texture, and handmade comfort.
For a vibrant summer palette, try coral, turquoise, sea-glass green, lemon yellow, sky blue, raspberry pink, soft peach, ivory, sandy beige, and leafy green. The linen texture keeps the quilt feeling natural and breezy, while the bright colors make it fresh enough for summer bedrooms, guest rooms, sunrooms, or relaxed sofa styling.
Why I Made It
I made this quilt because I wanted a summer layer that felt cooler and more relaxed than a traditional heavy quilt. Linen-blend fabric has that lovely lived-in texture that makes a room feel calm, casual, and thoughtfully styled.
The backstory behind this design comes from the practical history of linen itself. Linen has long been valued for warm-weather clothing and household textiles because it feels breathable, durable, and naturally textured. Using linen-blend fabrics in a quilt gives that same airy feeling while making the fabric a little easier to sew and care for than pure linen.
Why This Idea Is Worth Making
This idea is worth making because it creates a quilt that is both beautiful and useful in warm weather. It is lighter than a winter quilt, more breathable than a thick blanket, and durable enough for everyday use. The simple block layout makes it beginner-friendly, while the linen-blend texture gives the finished piece a polished, designer-style look.
It is also a great choice if you love quilts that get better over time. Linen-blend fabrics soften with washing and use, so the quilt becomes more comfortable and relaxed the more it is loved.
Finished Size
This guide makes a lightweight summer quilt measuring approximately 60 x 72 inches.
It works well as:
- A summer bed quilt
- A guest-room quilt
- A sofa throw
- A sunroom or porch quilt
- A folded bed-end accent
- A lightweight travel quilt
For a larger bed quilt, add more blocks or wider borders. For a smaller throw, reduce the layout to 5 blocks across by 6 blocks down.
Materials Needed
For one linen-blend summer quilt, gather:
- Assorted linen-blend fabrics: 3 yards total
- Background linen-blend or quilting cotton: 1½ yards
- Lightweight middle layer: 2½ yards of cotton muslin, lightweight flannel, or thin cotton batting
- Backing fabric: 4 yards
- Binding fabric: ⅝ yard
- Thread: ivory, beige, pale blue, coral, or coordinating cotton thread
- Rotary cutter and cutting mat
- Quilting ruler
- Pins or sewing clips
- Sewing machine
- Iron and ironing board
- Spray bottle, optional, for pressing linen blends
Beginner tip: Linen blends can shift slightly more than quilting cotton. Use pins or clips generously, press carefully, and sew slowly for neat seams.
Airy Summer Color Palette
A bright but relaxed linen-blend palette could include:
- Ivory
- Sandy beige
- Sky blue
- Turquoise
- Sea-glass green
- Lemon yellow
- Coral
- Soft peach
- Raspberry pink
- Leafy green
For a calmer version, use mostly ivory, sand, pale blue, and sea-glass green, then add coral or lemon yellow as the accent.
Cutting Measurements
This quilt uses simple 10-inch finished blocks, which are easy to sew and show off the linen texture beautifully.
Cut:
- 36 feature squares: 10½ x 10½ inches
- 36 background or low-volume squares: 10½ x 10½ inches
- Backing fabric: one piece at least 66 x 78 inches
- Middle layer: one piece at least 66 x 78 inches
- Binding strips: 8 strips measuring 2½ inches x width of fabric
Layout:
- 6 blocks across
- 6 blocks down
- Total blocks: 36
- Finished quilt center: about 60 x 60 inches
To make the quilt longer, add borders:
- 2 side borders: 3½ x 60 inches
- 2 top and bottom borders: 6½ x 66 inches
With borders, the finished quilt will be approximately 60 x 72 inches, depending on seam allowance, quilting shrinkage, and trimming.
Step-by-Step Guide
Step 1: Choose and Prewash the Linen-Blend Fabrics
Choose linen-blend fabrics in a mix of solids, subtle stripes, tiny checks, and small prints. A good combination is ivory, sandy beige, turquoise, sea-glass green, coral, lemon yellow, and sky blue.
Prewash and dry the fabrics before cutting. Linen blends can shrink, and prewashing helps the finished quilt keep its shape. Press the fabric well before cutting.
Step 2: Cut the Quilt Squares
Cut 36 feature squares at 10½ x 10½ inches.
Cut 36 background or low-volume squares at 10½ x 10½ inches.
Large squares are beginner-friendly and ideal for linen blends because they reduce the number of seams. Fewer seams also help the quilt stay soft and airy.
Step 3: Arrange the Quilt Layout
Lay the squares in a 6 x 6 grid. Alternate feature squares with background squares for a clean checkerboard effect.
For a more relaxed summer look, scatter the colors randomly but evenly. Keep bright colors like coral, raspberry, turquoise, and lemon yellow balanced across the quilt so that neither side feels too heavy.
Take a photo before sewing so you can remember the arrangement.
Step 4: Sew the Blocks into Rows
Sew each row together using a ¼-inch seam allowance.
Because linen blends can shift, pin or clip the squares before sewing. Press seams in alternating directions from row to row. For example, press Row 1 to the right, Row 2 to the left, and continue alternating.
This helps the seams nest neatly when joining rows.
Step 5: Join the Rows
Sew the rows together, carefully matching seam intersections. Pin at each seam intersection to keep the blocks aligned.
Press the quilt top gently from the back. Use steam if your fabric allows it, but do not stretch the fabric while pressing.
The quilt center should measure approximately 60½ x 60½ inches before borders.
Step 6: Add Side Borders
Sew one 3½ x 60-inch border strip to each side of the quilt center.
Good border choices include ivory, sand, pale blue, soft peach, or sea-glass green. A calm border helps frame the brighter blocks and gives the quilt a polished summer look.
Press seams toward the borders.
Step 7: Add Top and Bottom Borders
Sew one 6½ x 66-inch border strip to the top and one to the bottom.
These wider borders lengthen the quilt and make it more useful as a bed layer. Trim evenly if needed after sewing.
A slightly wider top and bottom border gives the quilt a relaxed coverlet feel.
Step 8: Prepare the Lightweight Quilt Sandwich
Place the backing fabric wrong side up, the lightweight middle layer in the center, and the quilt top right side up.
Smooth all layers carefully and baste with safety pins or spray. Place pins every 4 to 5 inches.
For the airiest version, use cotton muslin as the middle layer. For a little more body, use thin cotton batting.
Step 9: Quilt with Open, Simple Lines
Quilt straight lines, soft waves, or a loose diagonal grid. Space quilting lines about 3 to 4 inches apart so the quilt stays flexible and breathable.
For a linen-blend quilt, simple quilting looks especially elegant. Straight lines give a modern coverlet look, while soft waves make the quilt feel breezy and relaxed.
Avoid dense quilting because it can make the quilt stiffer and warmer.
Step 10: Trim and Square the Quilt
After quilting, trim away the extra backing and middle layer.
Use a ruler to square the corners and straighten the edges. Linen blends can soften and shift slightly, so take your time with this step.
Step 11: Bind the Quilt
Join the 2½-inch binding strips end to end and press them in half lengthwise.
Sew the binding to the front of the quilt, fold it to the back, and stitch it down by hand or machine.
Beautiful binding colors include coral, turquoise, leafy green, sandy beige, raspberry, lemon yellow, or ivory.
Assembly at a Glance
- Choose and prewash linen-blend fabrics.
- Cut 36 feature squares at 10½ x 10½ inches.
- Cut 36 background squares at 10½ x 10½ inches.
- Arrange blocks in a 6 x 6 layout.
- Sew blocks into rows using a ¼-inch seam allowance.
- Join rows to complete the quilt center.
- Add 3½-inch side borders.
- Add 6½-inch top and bottom borders.
- Layer with backing and a lightweight middle layer.
- Quilt with open lines spaced 3 to 4 inches apart.
- Trim, square, and bind with 2½-inch strips.
Linen-Blend Summer Color Combination Ideas
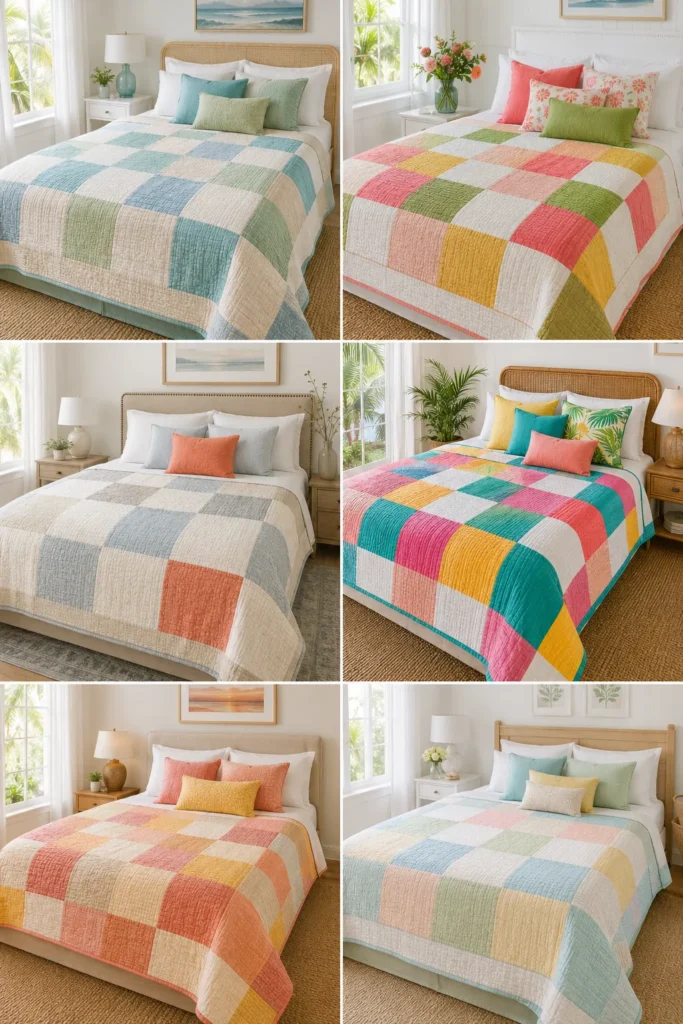
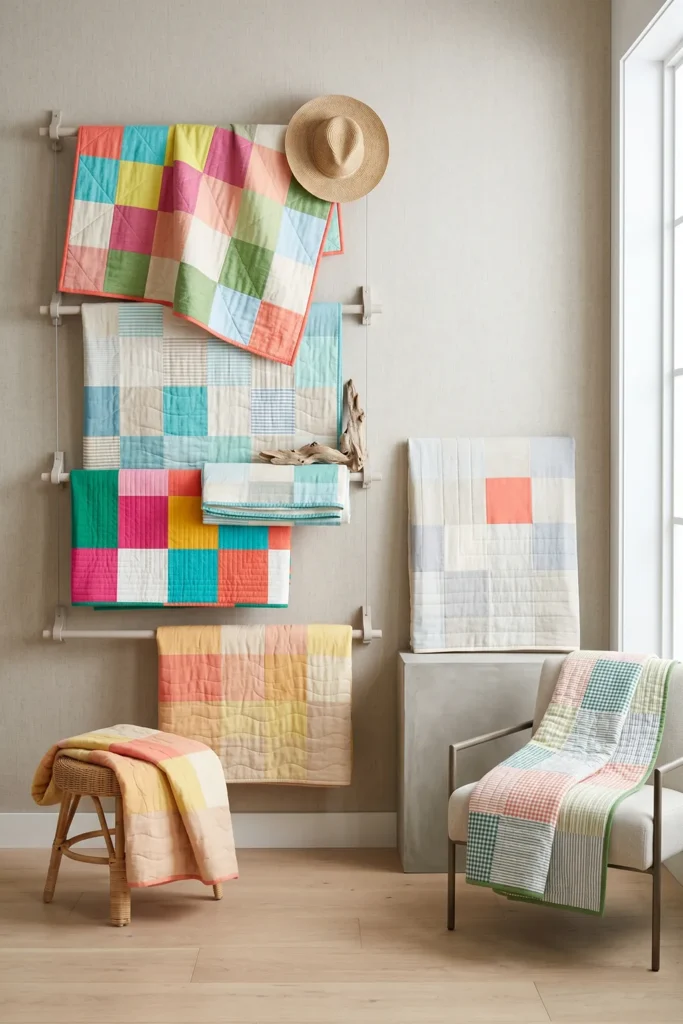
For a coastal linen quilt, use ivory, sandy beige, aqua, turquoise, sky blue, and sea-glass green.
For a bright garden quilt, use coral, raspberry, lemon yellow, leafy green, peach, and crisp white.
For a calm, elegant bedroom, use natural linen, ivory, pale gray, soft blue, and one coral accent.
For a tropical summer quilt, use turquoise, emerald, saffron yellow, hot pink, coral, and white.
For a warm sunset quilt, use peach, coral, raspberry, lemon yellow, sand, and cream.
Beginner Tips for Success
Prewash linen-blend fabrics before cutting. This helps reduce surprise shrinkage later.
Use larger blocks for your first linen-blend quilt. They are easier to control than tiny pieces.
Pin or clip generously. Linen blends can shift more than standard quilting cotton.
Press carefully instead of dragging the iron. This keeps the blocks from stretching.
Use a lightweight middle layer. Muslin, flannel, or thin cotton batting keeps the quilt breathable.
Quilt with open spacing. Wider quilting lines help the quilt stay airy and soft.
Styling Tip
Layer the finished linen-blend quilt over white sheets, cotton bedding, or a natural linen duvet. Add pillows in coral, turquoise, lemon yellow, sea-glass green, raspberry, or sky blue to bring out the quilt colors. The result is durable, airy, and relaxed—perfect for warm-weather comfort with an elegant handmade finish.
Other Design Inspirations – Digitally Modified
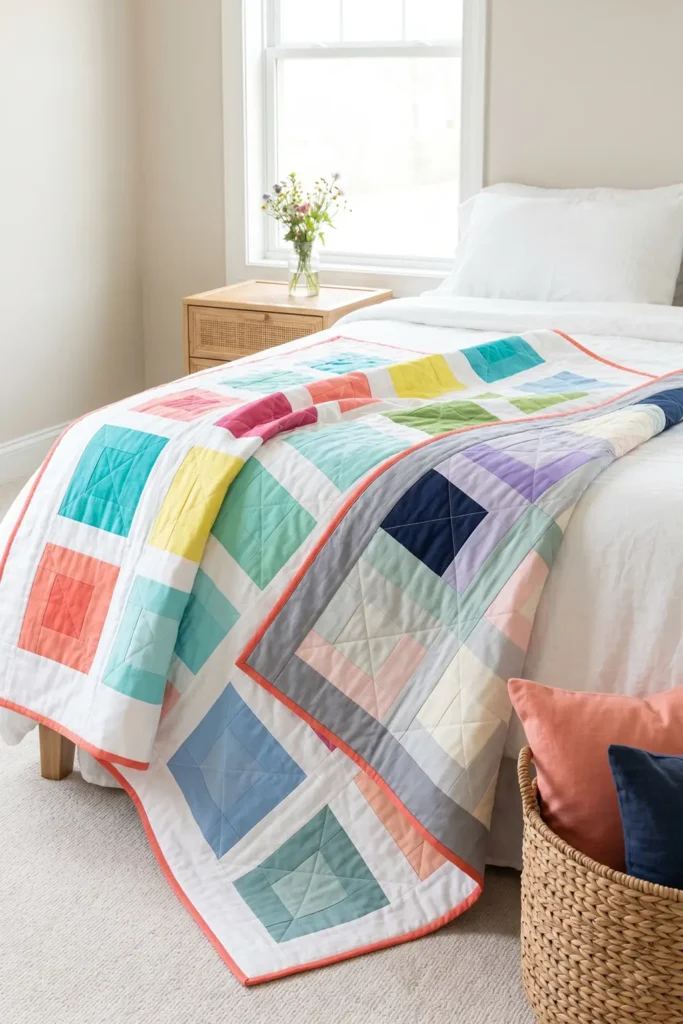
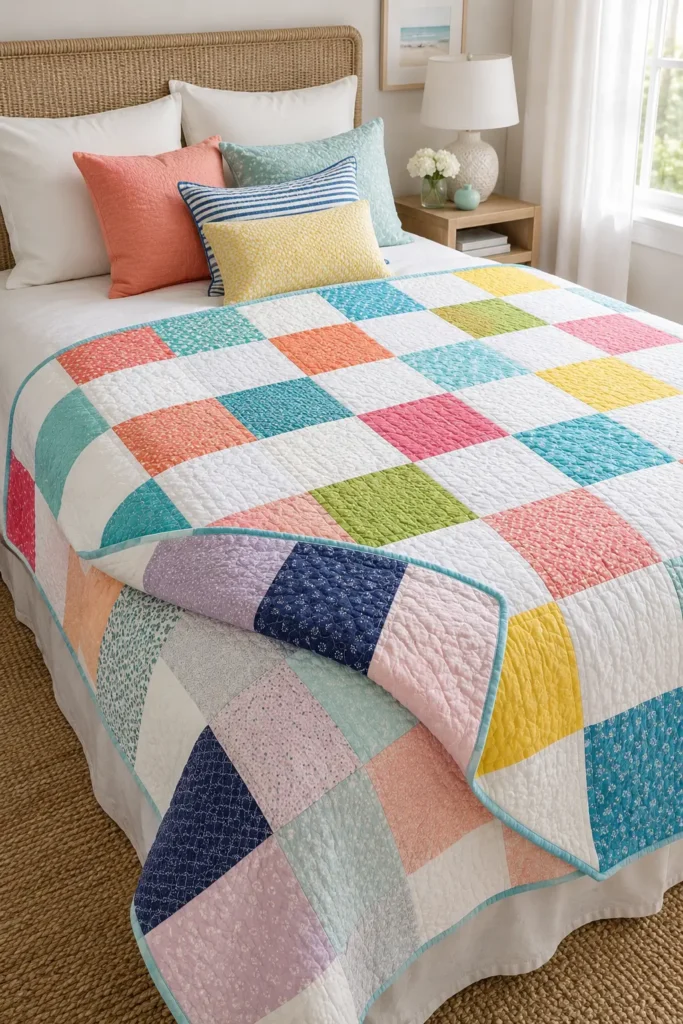
5. Reversible Summer Quilts: Versatile Styles for Day and Night
A reversible summer quilt is a smart, beautiful way to get two looks from one lightweight quilt. One side can feel bright and cheerful for daytime styling, while the reverse side can feel calmer, softer, and more restful for evening use. It is especially useful in warm weather because you can keep the construction breathable while still making the bed, sofa, or guest room look polished.
For the daytime side, use vibrant colors such as coral, turquoise, lemon yellow, aqua, raspberry pink, leafy green, sky blue, and crisp white. For the nighttime side, use softer shades like navy, lavender, sea-glass green, blush, pale gray, ivory, soft peach, and muted teal. The finished quilt feels fresh, practical, and easy to style in more than one way.
Why I Made It
I made this quilt because I wanted one summer quilt that could shift with the mood of the room. During the day, I love bedding that feels bright, sunny, and energetic. At night, I prefer something calmer and softer.
A reversible quilt solves that beautifully. The bright side can wake up the room in the morning, while the quieter side creates a peaceful feeling in the evening. It is also practical for guest rooms, small spaces, and seasonal decorating because one quilt gives you two coordinated styles.
The backstory behind this idea comes from old-fashioned utility quilts, where both sides were often made to be useful and attractive. This version keeps that practical spirit but gives it a modern summer twist with breathable fabrics and fresh color planning.
Why This Idea Is Worth Making
This idea is worth making because it gives you a versatile warm-weather quilt without needing to make two separate projects. It is beginner-friendly, useful, and easy to personalize. The reversible design also makes the quilt feel more polished because both sides are intentional.
It is perfect for anyone who likes changing a room’s look without storing extra bedding. Flip the quilt to the bright side for daytime color, then turn it to the softer side for a relaxed evening bedroom.
Finished Size
This guide makes a reversible summer quilt measuring approximately 60 x 72 inches.
It works well as:
- A lightweight summer bed quilt
- A reversible guest-room quilt
- A sofa throw
- A folded bed-end accent
- A porch or sunroom quilt
- A travel or picnic quilt
For a smaller throw, make a 48 x 60-inch version. For a larger bed quilt, add more blocks or wider borders.
Materials Needed
For one reversible summer quilt, gather:
- Daytime feature fabrics: 2 yards total
- Nighttime reverse fabrics: 2 yards total
- Background fabric for quilt top: 1½ yards
- Lightweight middle layer: 2½ yards of cotton muslin, lightweight flannel, or thin cotton batting
- Binding fabric: ⅝ yard
- Thread: white, ivory, pale blue, coral, or coordinating color
- Rotary cutter and cutting mat
- Quilting ruler
- Pins or sewing clips
- Sewing machine
- Iron and ironing board
- Walking foot, helpful but optional
Beginner tip: For the coolest reversible quilt, use cotton muslin as the middle layer. For a slightly cozier version, use lightweight cotton batting.
Day and Night Color Palette
A bright daytime palette could include:
- Crisp white
- Coral
- Turquoise
- Lemon yellow
- Aqua
- Raspberry pink
- Leafy green
- Sky blue
A calmer nighttime palette could include:
- Navy
- Lavender
- Pale gray
- Ivory
- Sea-glass green
- Blush pink
- Soft peach
- Muted teal
For the binding, choose a color that works with both sides, such as navy, coral, turquoise, ivory, sea-glass green, or soft gray.
Cutting Measurements
This quilt uses simple 10-inch finished blocks.
For the daytime quilt top, cut:
- 36 feature squares: 10½ x 10½ inches
- 36 background squares: 10½ x 10½ inches
For the reversible backing side, cut:
- 36 reverse-side squares: 10½ x 10½ inches
- 36 reverse-side background squares: 10½ x 10½ inches
For the middle layer, cut:
- One piece at least 66 x 78 inches
For binding, cut:
- 8 strips measuring 2½ inches x width of fabric
Layout:
- 6 blocks across
- 6 blocks down
- Finished quilt center: about 60 x 60 inches
To make the quilt longer, add borders:
- 2 side borders: 3½ x 60 inches
- 2 top and bottom borders: 6½ x 66 inches
With borders, the finished quilt will be approximately 60 x 72 inches, depending on quilting shrinkage and trimming.
Step-by-Step Guide
Step 1: Plan the Two Quilt Personalities
Choose one side to be bright and energetic, and the other side to be calm and restful.
For the daytime side, try coral, turquoise, lemon yellow, aqua, and white. For the nighttime side, try navy, lavender, sea-glass green, pale gray, and blush.
Lay the fabrics side by side before cutting to make sure the two palettes coordinate. A good reversible quilt should feel different on each side but still look related.
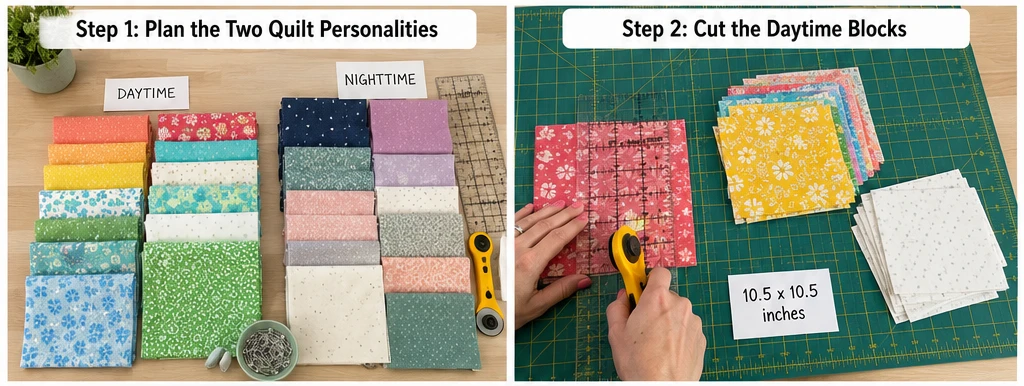
Step 2: Cut the Daytime Blocks
Cut 36 daytime feature squares at 10½ x 10½ inches.
Cut 36 daytime background squares at 10½ x 10½ inches.
Large squares make this quilt beginner-friendly and let the bright summer fabrics stand out clearly.
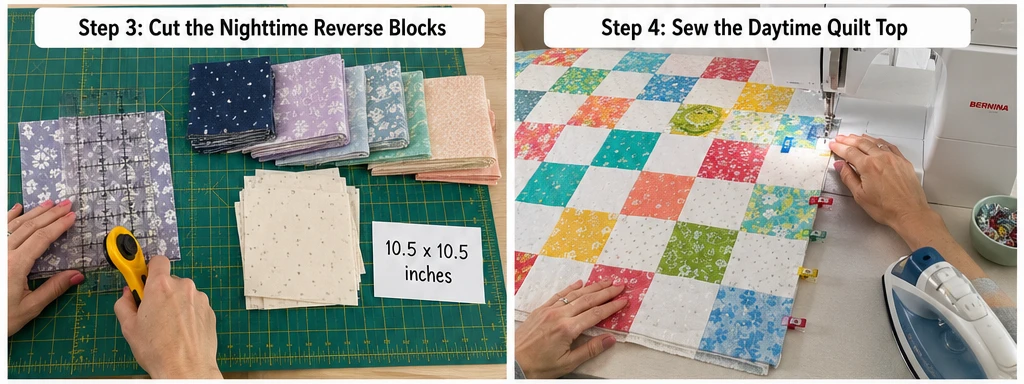
Step 3: Cut the Nighttime Reverse Blocks
Cut 36 nighttime feature squares at 10½ x 10½ inches.
Cut 36 nighttime background squares at 10½ x 10½ inches.
Choose calmer prints for this side, such as tiny florals, soft stripes, low-volume dots, linen-look cotton, pale solids, or gentle tone-on-tone designs.
Step 4: Sew the Daytime Quilt Top
Arrange the daytime blocks in a 6 x 6 grid, alternating feature squares and background squares.
Sew the blocks into rows using a ¼-inch seam allowance. Press seams in alternating directions from row to row. Then sew the rows together, matching seam intersections carefully.
Press the finished daytime top gently from the back.
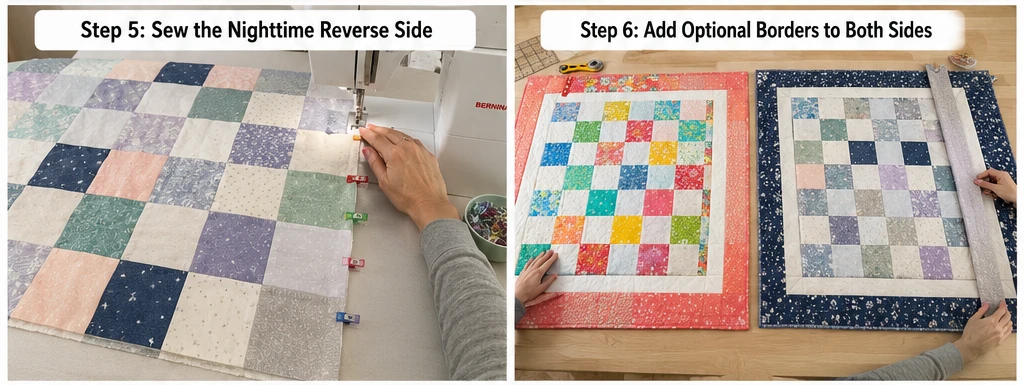
Step 5: Sew the Nighttime Reverse Side
Arrange the nighttime blocks in a matching 6 x 6 grid.
Sew the blocks into rows using a ¼-inch seam allowance, then join the rows. Press well.
Beginner tip: Try to keep the daytime and nighttime sides close in size. Trim gently if needed so both sides match before layering.
Step 6: Add Optional Borders to Both Sides
If you want a longer bed-cover shape, add borders to both the daytime top and the nighttime reverse side.
Sew 3½-inch side borders first, then 6½-inch top and bottom borders. Use colors that match each side but still feel connected.
For example, use crisp white borders on the daytime side and pale gray or navy borders on the nighttime side.
Step 7: Prepare the Reversible Quilt Sandwich
Place the nighttime side wrong side up, the lightweight middle layer in the center, and the daytime quilt top right side up.
Smooth everything carefully. Because both sides are pieced, take extra time to keep the layers straight.
Baste with safety pins or spray, placing pins every 4 to 5 inches.
Step 8: Quilt with Simple Open Lines
Quilt with straight lines, soft waves, or a loose diagonal grid. Space quilting lines about 3 to 4 inches apart so the quilt stays soft and breathable.
For a reversible quilt, choose a quilting design that looks good on both sides. Simple lines are best for beginners and keep both fabric layouts visible.
Thread colors that work well include white, ivory, pale gray, soft blue, or light coral.
Step 9: Trim and Square the Quilt
After quilting, trim the excess middle layer and carefully square the edges.
Because both sides are meant to be seen, check the front and back before trimming. Make sure no important fabric detail is cut off unevenly.
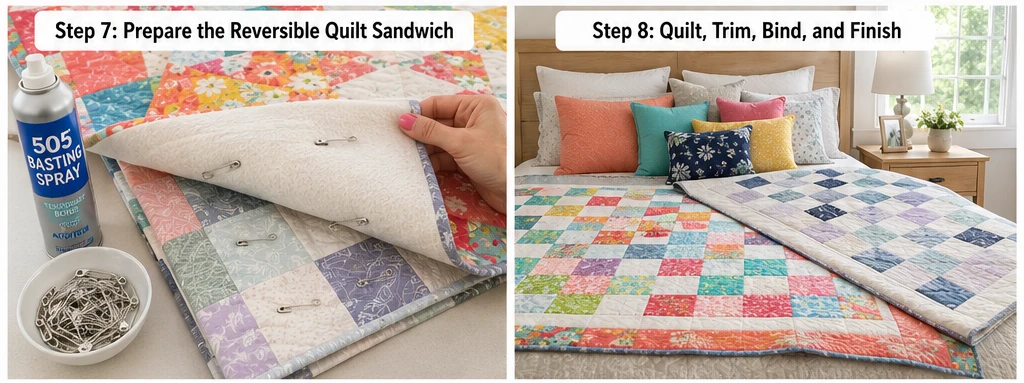
Step 10: Bind the Reversible Quilt
Join the 2½-inch binding strips end to end and press them in half lengthwise.
Sew the binding around the quilt, ensuring it looks neat on both sides. For a reversible quilt, machine stitching can work well if you stitch slowly and keep the fold even.
Good binding colors include navy, coral, turquoise, ivory, lemon yellow, soft gray, or sea-glass green.
Assembly at a Glance
- Choose a bright daytime palette and a calm nighttime palette.
- Cut 36 daytime feature squares at 10½ x 10½ inches.
- Cut 36 daytime background squares at 10½ x 10½ inches.
- Cut 36 nighttime feature squares at 10½ x 10½ inches.
- Cut 36 nighttime background squares at 10½ x 10½ inches.
- Sew the daytime quilt top in a 6 x 6 layout.
- Sew the nighttime reverse side in a 6 x 6 layout.
- Add optional borders to both sides.
- Layer nighttime side, lightweight middle layer, and daytime side.
- Quilt with open lines spaced 3 to 4 inches apart.
- Trim, square, and bind with 2½-inch strips.
Reversible Summer Color Combination Ideas
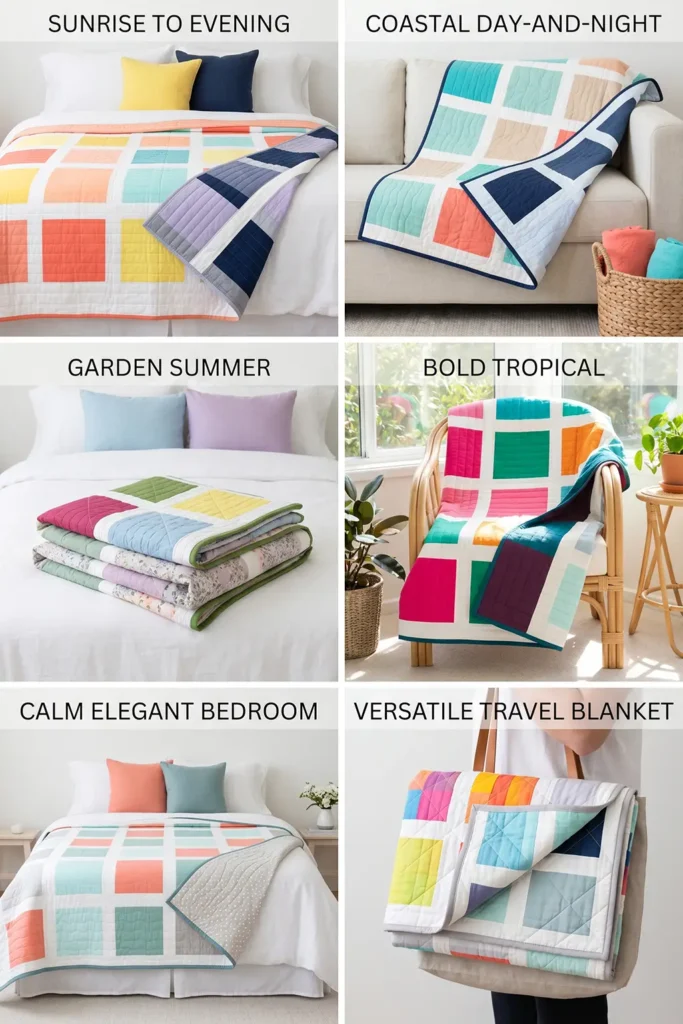
For a sunrise-to-evening quilt, use coral, lemon yellow, peach, aqua, and white on one side with navy, lavender, gray, and blush on the reverse.
For a coastal day-and-night quilt, use turquoise, sea-glass green, sand, coral, and white on one side with navy, pale blue, soft gray, and ivory on the reverse.
For a garden summer quilt, use raspberry, leafy green, lemon yellow, sky blue, and cream on one side with sage, lavender, blush, and pale peach on the reverse.
For a bold tropical quilt, use hot pink, emerald, turquoise, saffron, and crisp white on one side with deep teal, plum, soft aqua, and ivory on the reverse.
For a calm, elegant bedroom quilt, use white, pale aqua, coral, and sea-glass green on one side with soft gray, ivory, muted teal, and blush on the reverse.
Beginner Tips for Success
Use the same block size on both sides. This makes the reversible quilt easier to layer and square.
Keep both sides simple for your first reversible quilt. Large squares are easier than tiny patchwork.
Use a lightweight middle layer. A reversible summer quilt has two pieced sides, so thick batting can make it too heavy.
Quilt with open spacing. This keeps the quilt breathable and flexible.
Choose a thread that looks good on both sides. Pale gray, ivory, or white often works well.
Baste carefully. Pieced front and back layers can shift, so secure the sandwich well before quilting.
Styling Tip
Use the bright side during the day to bring energy to the bedroom, guest room, or sofa. Flip to the calmer side in the evening for a softer, restful look. Pair the quilt with pillows in coral, turquoise, lemon yellow, navy, lavender, sea-glass green, blush, or ivory so both sides feel coordinated and intentional.
Other Design Inspirations – Digitally Modified
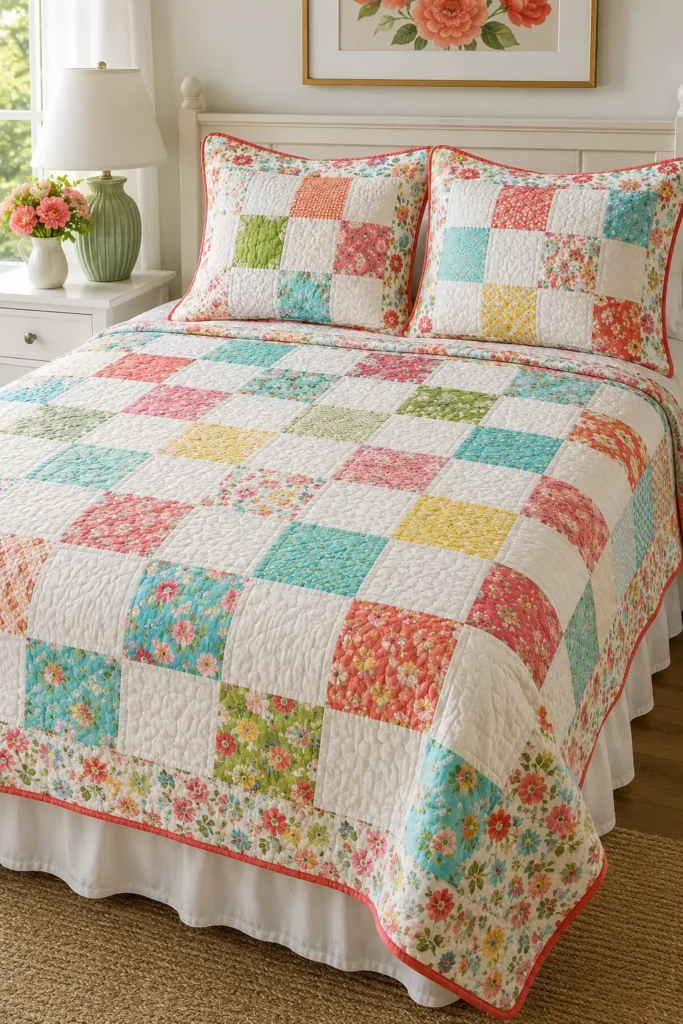
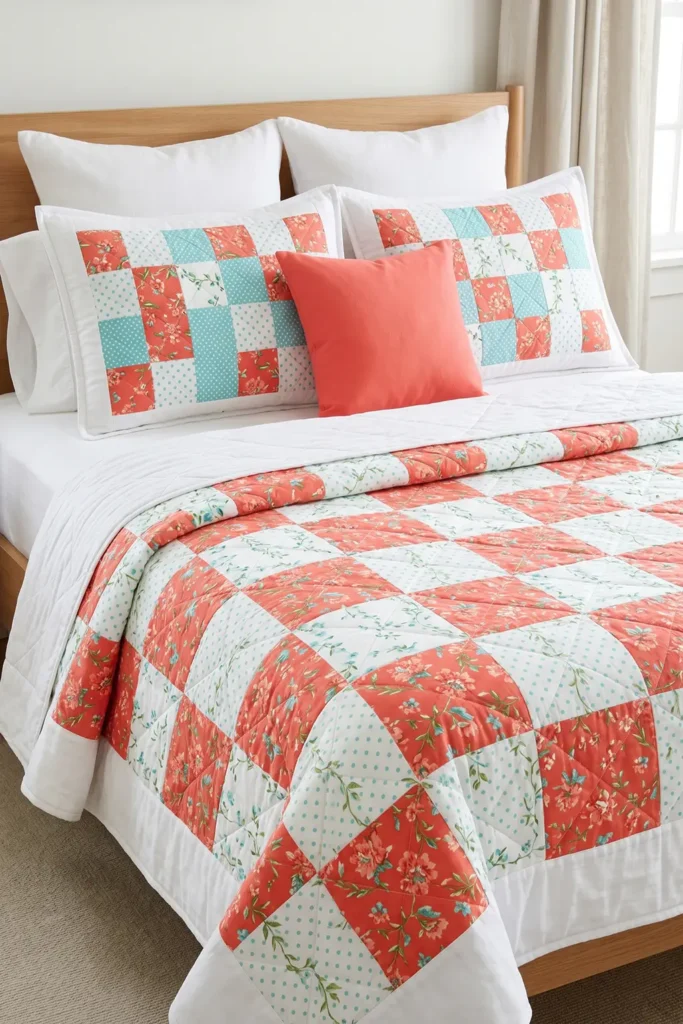
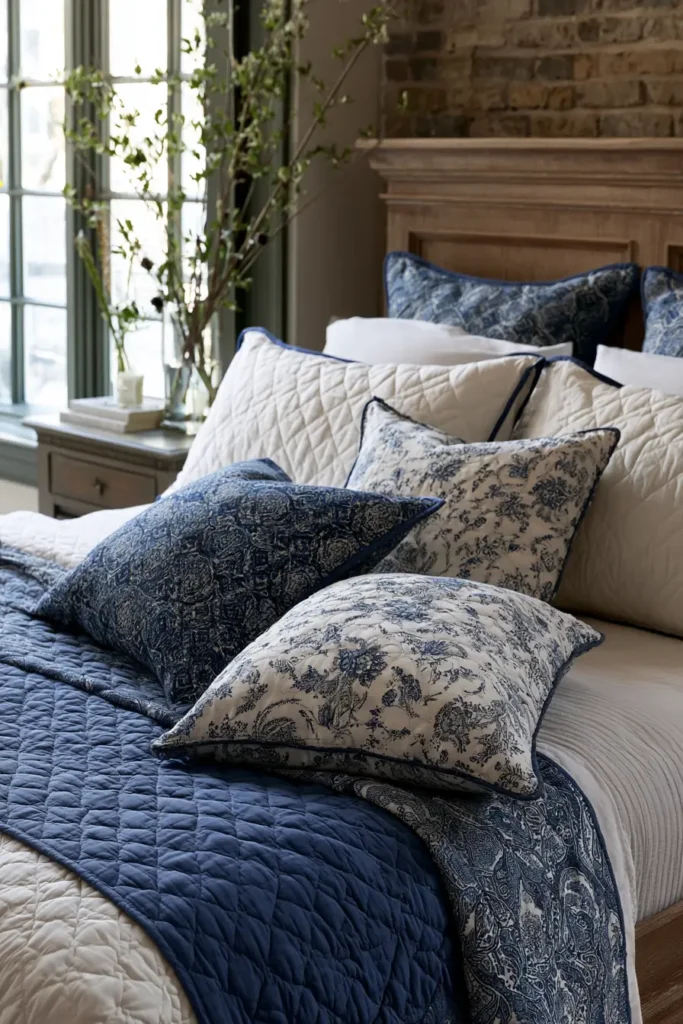
6. Quilted Sham & Coverlet Sets: Coordinated Looks for a Polished Bed
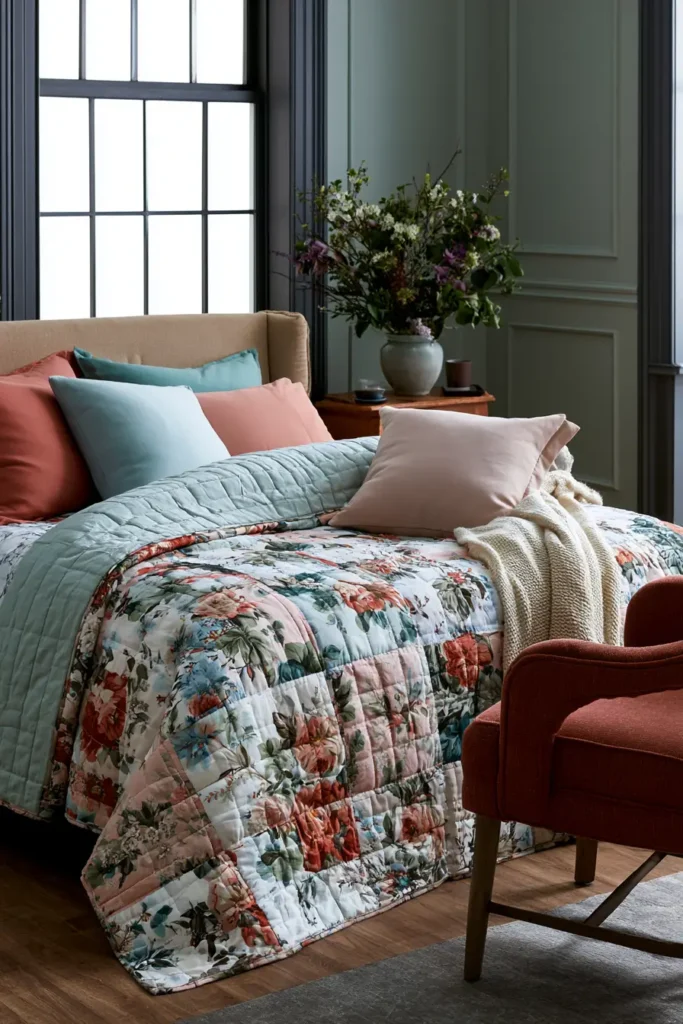
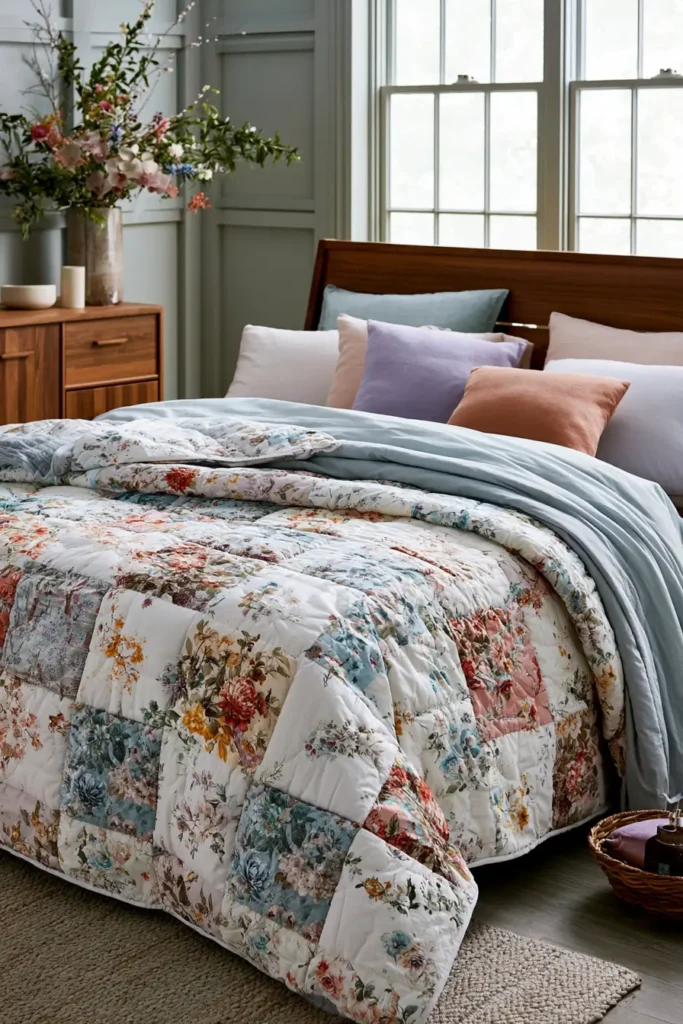
A quilted sham and coverlet set is one of the easiest ways to make a bed look styled, intentional, and elegant during warm weather. The coverlet gives the bed a lightweight quilted layer, while the matching shams pull the whole look together without needing heavy blankets or bulky bedding.
For a vibrant summer bedroom palette, try coral, turquoise, aqua, lemon yellow, raspberry pink, leafy green, lavender, soft peach, crisp white, and sky blue. Use the brighter colors in the coverlet blocks, then repeat one or two of them in the shams so the bed feels coordinated but not overly matched.
Why I Made It
I made this set because I wanted a summer bed that looked finished without feeling too warm. A full comforter can be too heavy in hot weather, but a lightweight coverlet with matching shams gives the room that polished, hotel-inspired feeling while staying breathable and easy to use.
The backstory behind this idea comes from traditional coverlets, which were often lighter than quilts and used as decorative bed layers. Adding quilted shams makes the design feel more complete and modern, especially in a master bedroom or guest room where presentation matters.
Why This Idea Is Worth Making
This idea is worth making because it gives you a complete bedding look from one coordinated sewing project. The coverlet is practical for warm nights, the shams add softness and style, and the whole set can refresh a bedroom without changing the furniture, curtains, or wall color.
It is also beginner-friendly because the coverlet uses simple, large blocks, and the shams use the same block style on a smaller scale. Once you learn the basic construction, you can easily make more sets in different colors for each season.
Finished Size
This guide makes a coordinated summer bedding set for a full or queen bed.
Finished approximate sizes:
- Coverlet: 72 x 84 inches
- Two standard pillow shams: 20 x 26 inches each
- Sham flange: optional 2-inch border around each sham
- Coverlet style: lightweight quilted bed layer
- Sham style: envelope-back quilted pillow cover
For a king bed, increase the coverlet to about 90 x 96 inches and make king shams at about 20 x 36 inches.
Materials Needed
For one coverlet and two standard shams, gather:
- Feature fabrics: 3½ to 4 yards total
- Background fabric: 2½ yards in white, ivory, pale aqua, soft gray, or blush
- Lightweight middle layer: 3½ yards of thin cotton batting, cotton flannel, or muslin
- Backing fabric for coverlet: 5¼ yards
- Sham backing fabric: 1½ yards
- Binding fabric: 1 yard
- Thread: white, ivory, pale blue, coral, or coordinating color
- Rotary cutter and cutting mat
- Quilting ruler
- Pins or sewing clips
- Sewing machine
- Iron and ironing board
Beginner tip: For the coolest summer set, use cotton muslin or lightweight flannel as the middle layer instead of thick batting.
Bright Summer Color Palette
A polished summer palette could include:
- Crisp white
- Coral
- Turquoise
- Aqua
- Lemon yellow
- Raspberry pink
- Leafy green
- Lavender
- Soft peach
- Sky blue
For the most coordinated look, choose one background fabric and repeat it in both the coverlet and shams.
Cutting Measurements
For the coverlet, cut:
- 56 feature squares: 9½ x 9½ inches
- 56 background squares: 9½ x 9½ inches
- Coverlet backing: one piece at least 78 x 90 inches
- Middle layer: one piece at least 78 x 90 inches
- Binding strips: 9 strips measuring 2½ inches x width of fabric
Coverlet layout:
- 8 blocks across
- 7 blocks down
- Finished quilt center: about 72 x 63 inches
To lengthen the coverlet, cut:
- 2 side borders: 4½ x 63 inches
- 2 top and bottom borders: 10½ x 80 inches
For two standard pillow shams, cut:
- Sham fronts: 2 quilted panels measuring 21 x 27 inches before finishing
- Feature squares for sham fronts: 12 squares measuring 5½ x 5½ inches
- Background squares for sham fronts: 12 squares measuring 5½ x 5½ inches
- Sham middle layer: 2 pieces measuring 23 x 29 inches
- Sham lining/backing for quilted front: 2 pieces measuring 23 x 29 inches
- Envelope backs: 4 rectangles measuring 21 x 17 inches
- Optional flange or binding strips: 2½ inches wide
Use a ¼-inch seam allowance for quilt piecing and a ½-inch seam allowance for sham construction.
Step-by-Step Guide
Step 1: Choose the Coordinated Fabric Story
Choose fabrics that feel bright, fresh, and bedroom-friendly. A beautiful summer combination is coral florals, turquoise dots, lemon-yellow gingham, leafy green vines, raspberry-pink accents, and crisp white background fabric.
Keep the background fabric consistent across the coverlet and shams. This makes the set look intentional even when you use several vibrant prints.
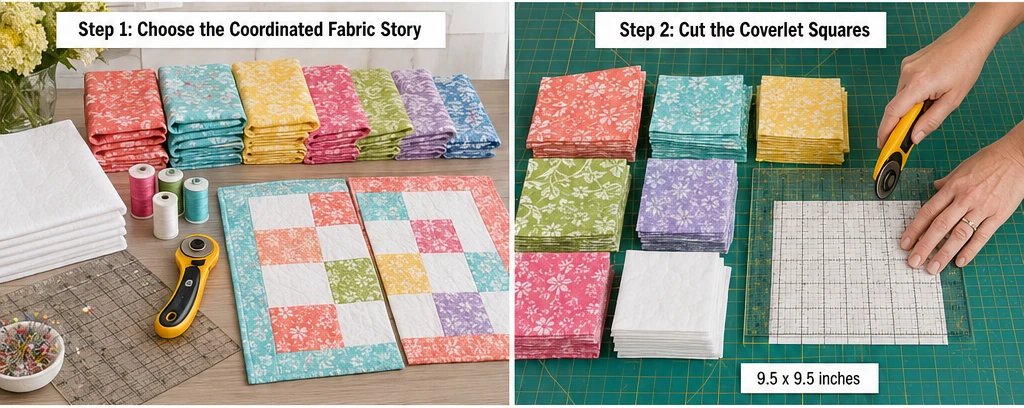
Step 2: Cut the Coverlet Squares
Cut 56 feature squares at 9½ x 9½ inches.
Cut 56 background squares at 9½ x 9½ inches.
These large blocks are beginner-friendly, quick to sew, and perfect for showing off bright summer fabrics.
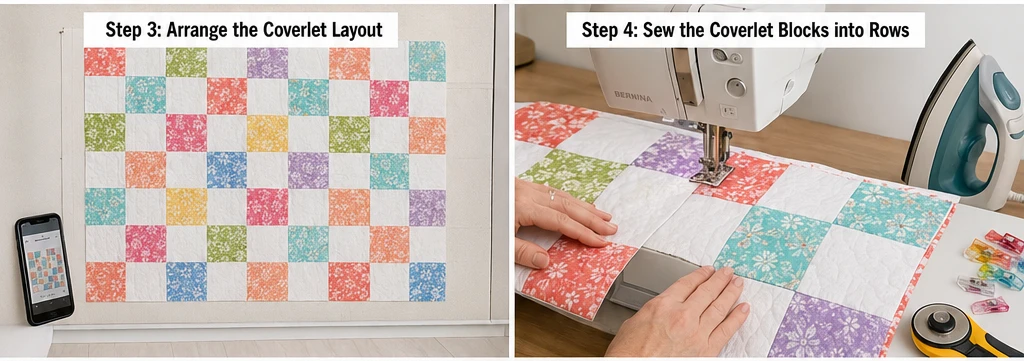
Step 3: Arrange the Coverlet Layout
Lay the coverlet blocks in an 8 x 7 grid. Alternate feature squares and background squares for a clean checkerboard look, or scatter the feature squares for a softer garden-style layout.
Balance strong colors like coral, raspberry, turquoise, and lemon yellow across the quilt so no one area feels too heavy.
Take a photo before sewing.
Step 4: Sew the Coverlet Blocks into Rows
Sew each row together with a ¼-inch seam allowance.
Press seams in alternating directions from row to row. This helps the seams nest neatly when joining the rows.
Step 5: Join the Coverlet Rows
Sew the rows together, carefully matching seam intersections. Pin or clip at each seam intersection.
Press the completed coverlet center gently from the back. The center should measure about 72½ x 63½ inches before borders.
Step 6: Add the Coverlet Borders
Sew the 4½-inch side borders to the left and right sides first. Press seams toward the borders.
Then sew the 10½-inch top and bottom borders to lengthen the coverlet. This turns the quilt center into a more useful bed-cover shape, approximately 72 x 84 inches after finishing.
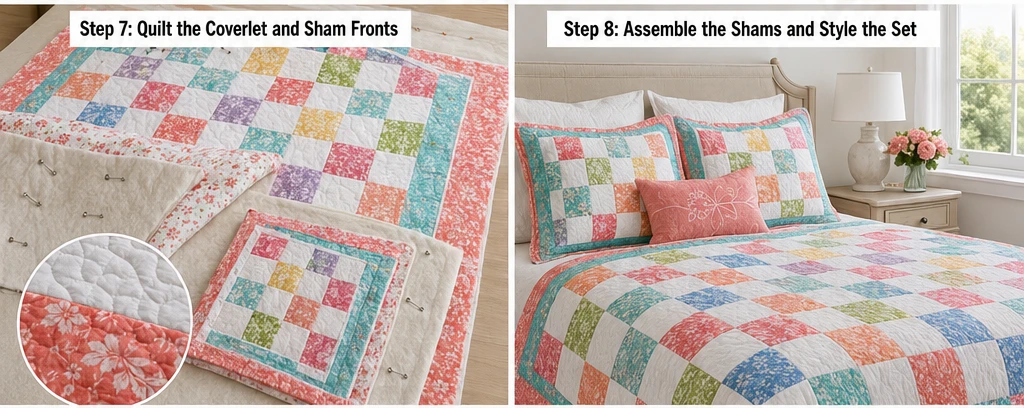
Step 7: Make the Sham Fronts
For each sham front, arrange 12 small squares measuring 5½ x 5½ inches in a simple grid.
Use the same fabrics from the coverlet so the shams coordinate. You can make each sham identical, or make them sister-style by using the same colors in a different arrangement.
Sew the small squares together with a ¼-inch seam allowance and trim each sham front panel to about 21 x 27 inches.
Step 8: Quilt the Coverlet and Sham Fronts
Layer the coverlet backing wrong side up, the lightweight middle layer in the center, and the coverlet top right side up. Baste with pins or spray at 4- to 5-inch intervals.
For the sham fronts, layer each front with a middle layer and a backing fabric.
Quilt with simple straight lines, soft waves, or a loose diagonal grid. Space quilting lines about 3 to 4 inches apart for the coverlet and about 2 to 3 inches apart for the shams.
Step 9: Make the Envelope Sham Backs
For each sham, take two backing rectangles measuring 21 x 17 inches.
Hem one long edge of each rectangle by folding it under ½ inch, pressing, folding again ½ inch, and stitching.
These two pieces will overlap on the back of the sham so the pillow can slide in easily without a zipper.
Step 10: Assemble the Pillow Shams
Place one quilted sham front right side up. Place two envelope back pieces right-side down on top, overlapping the hemmed edges at the center.
Pin or clip around all edges. Sew around the sham with a ½-inch seam allowance.
Turn the right side out and press gently. Repeat for the second sham.
Step 11: Bind or Finish the Coverlet
Trim the coverlet edges square after quilting.
Join the 2½-inch binding strips end to end, press in half lengthwise, and sew around the coverlet.
Beautiful binding colors include coral, turquoise, raspberry, leafy green, lemon yellow, lavender, or crisp white.
Step 12: Press and Style the Set
Give the shams and coverlet a gentle final press. Insert standard pillows into the shams.
Place the coverlet over the bed, then add the matching shams at the head of the bed. The repeated fabrics will make the whole bed look polished and coordinated.
Assembly at a Glance
- Choose a bright summer fabric palette and one consistent background fabric.
- Cut 56 feature squares at 9½ x 9½ inches.
- Cut 56 background squares at 9½ x 9½ inches.
- Arrange the coverlet in an 8 x 7 layout.
- Sew coverlet blocks into rows and join the rows.
- Add side, top, and bottom borders.
- Piece two smaller sham fronts using 5½-inch squares.
- Layer and quilt the coverlet and sham fronts.
- Hem the envelope-back sham pieces.
- Sew the sham fronts and backs together.
- Bind the coverlet with 2½-inch strips.
- Insert pillows and style the coordinated bedding set.
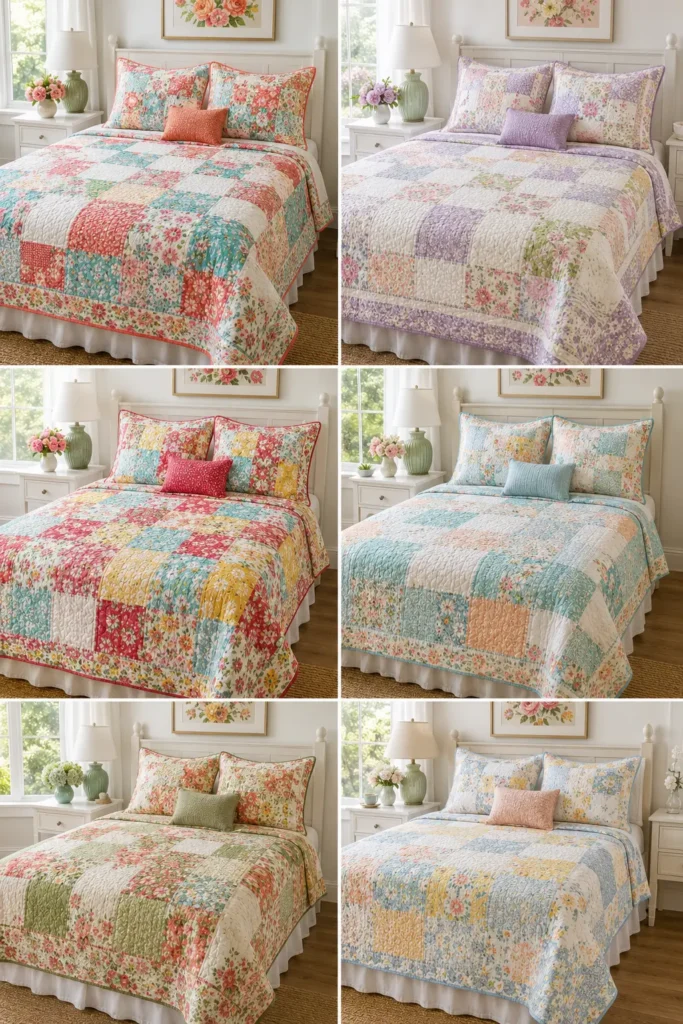
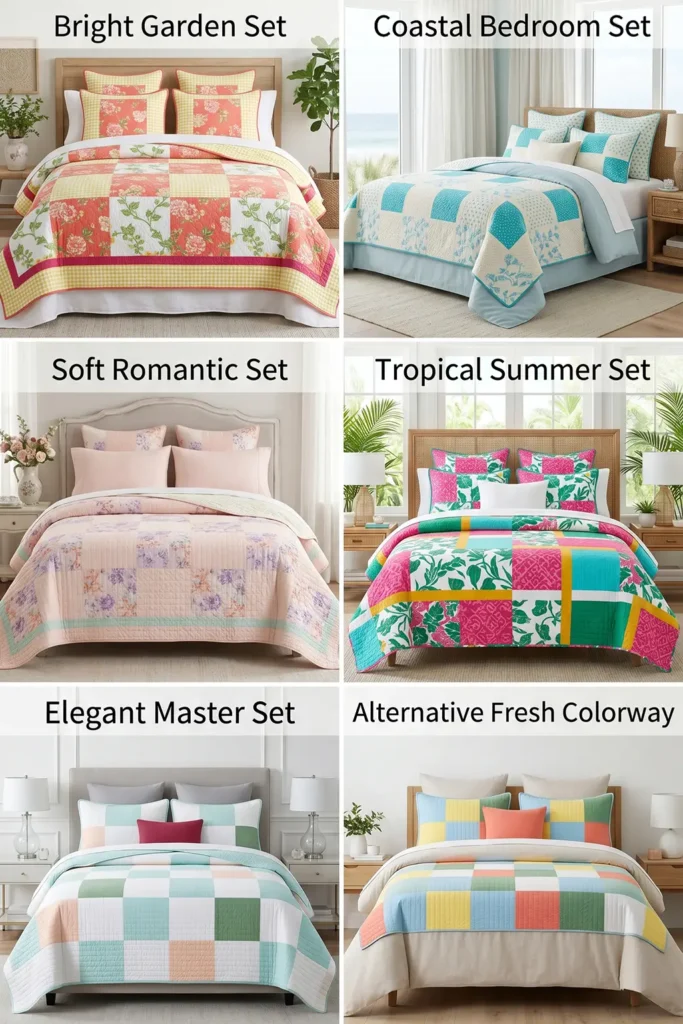
Coordinated Summer Color Combination Ideas
For a bright garden set, use coral, raspberry, lemon yellow, leafy green, and white.
For a coastal bedroom set, use turquoise, aqua, sky blue, sandy beige, coral, and ivory.
For a soft romantic set, use blush pink, lavender, peach, mint green, cream, and pale yellow.
For a tropical summer set, use hot pink, emerald, turquoise, saffron yellow, coral, and crisp white.
For an elegant master bedroom set, use white, pale aqua, soft peach, leafy green, and one deep raspberry accent.
Beginner Tips for Success
Use large blocks for the coverlet. They sew quickly and keep the design airy.
Repeat at least three fabrics from the coverlet in the shams. This makes the set look coordinated.
Use a lightweight middle layer. Thick batting can make summer bedding too warm.
Quilt with open spacing. Wider quilting lines keep the coverlet soft and breathable.
Make envelope-back shams instead of zipper shams for an easier beginner finish.
Prewash fabrics if you want a soft, crinkly summer look and less shrinkage later.
Styling Tip
Layer the finished coverlet over white sheets, linen bedding, or a pale neutral duvet. Place the matching shams behind everyday sleeping pillows, then add one small accent pillow in coral, turquoise, lemon yellow, raspberry, lavender, or leafy green. The finished bed will feel bright, coordinated, breathable, and polished for warm-weather comfort.
Other Design Inspirations – Digitally Modified
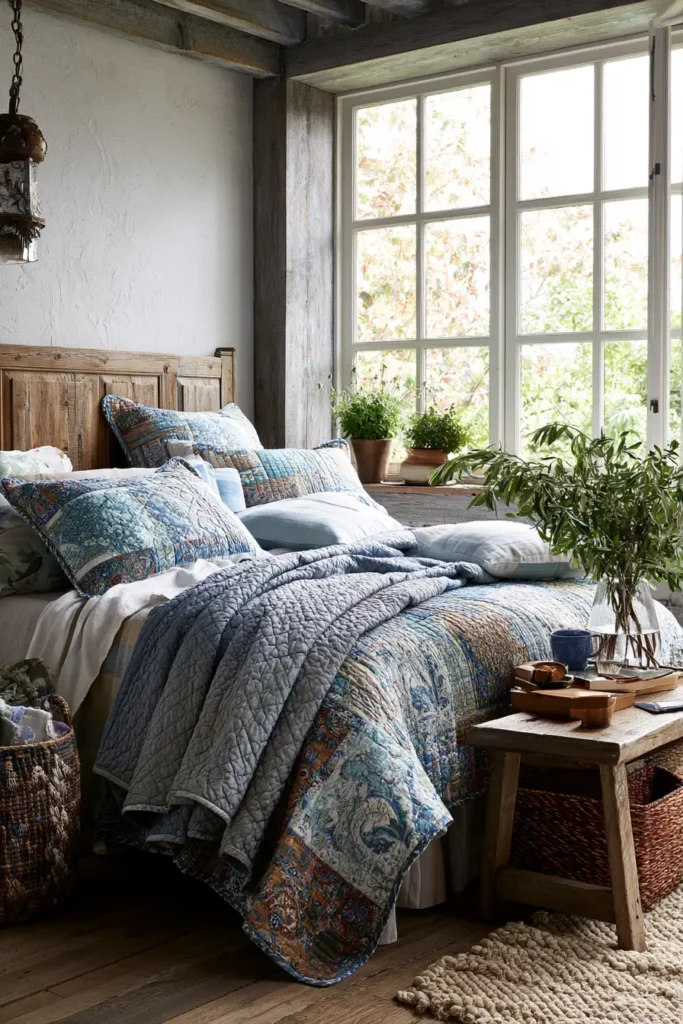
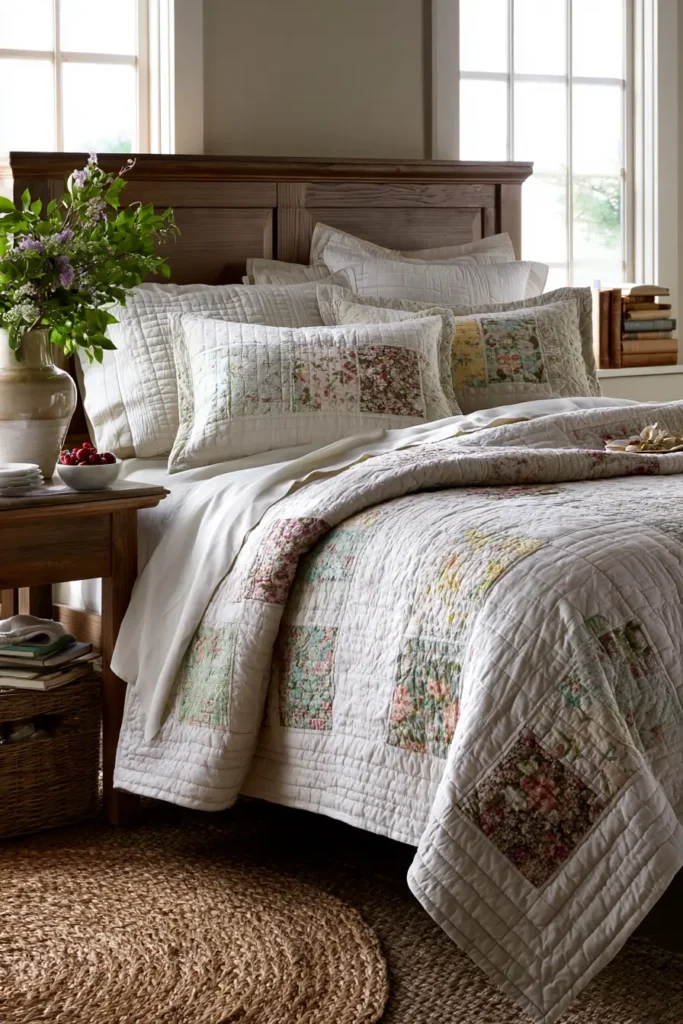
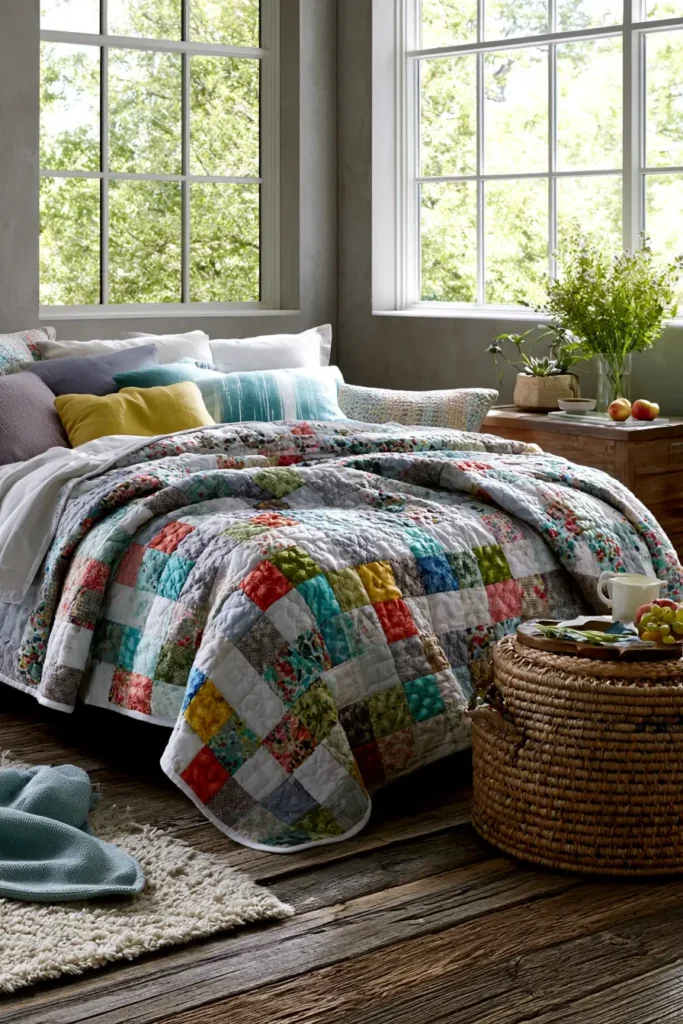
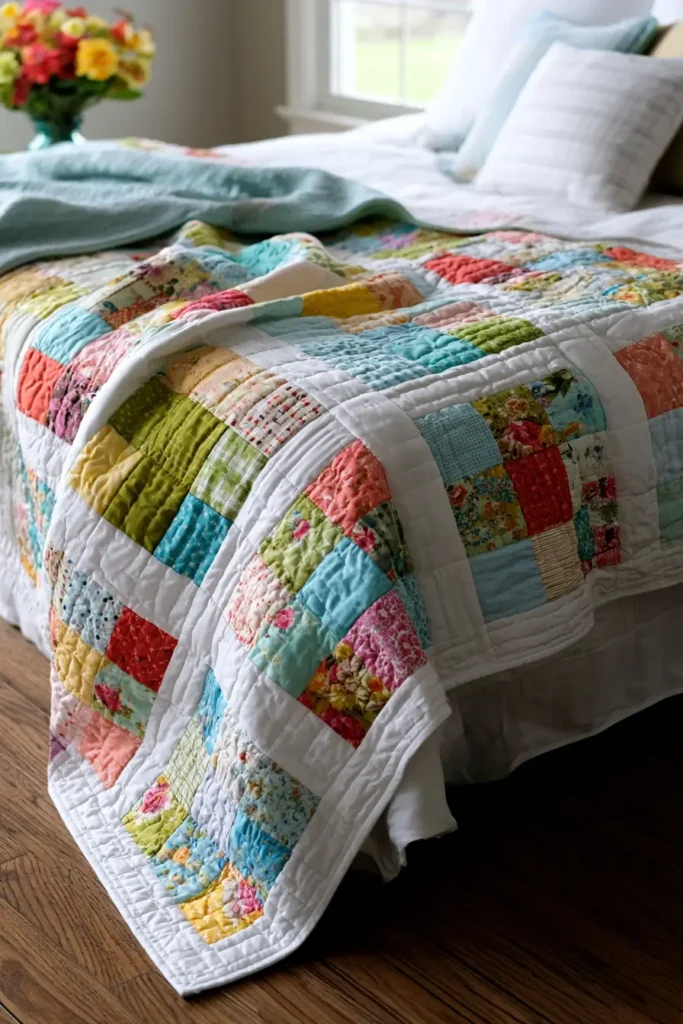
7. Modern Patchwork Summer Quilts for Lightweight Warm Weather Comfort
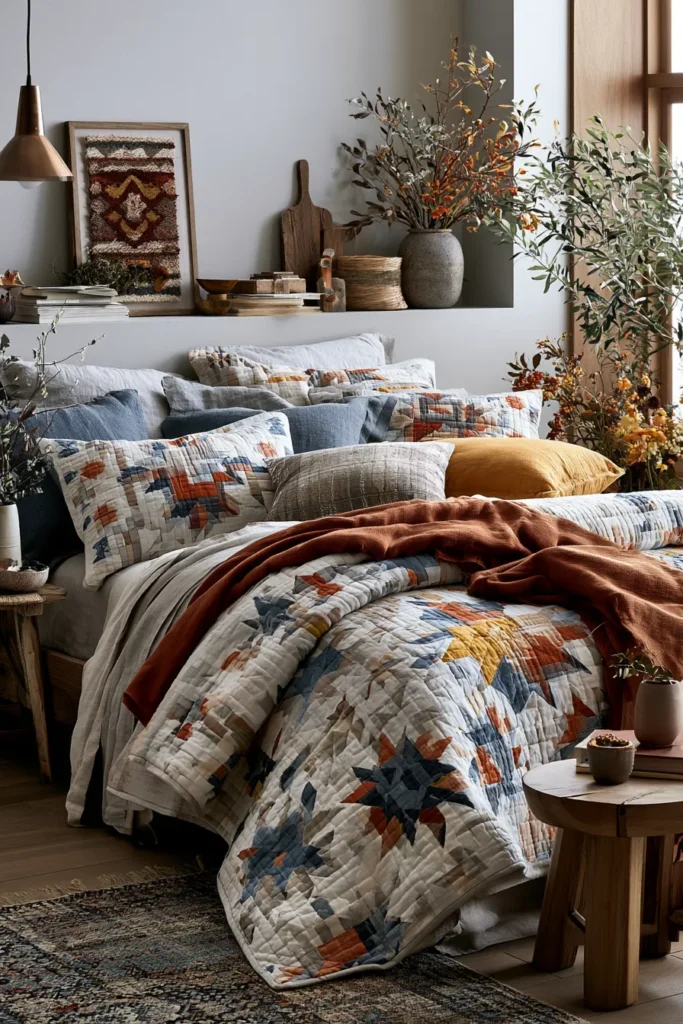
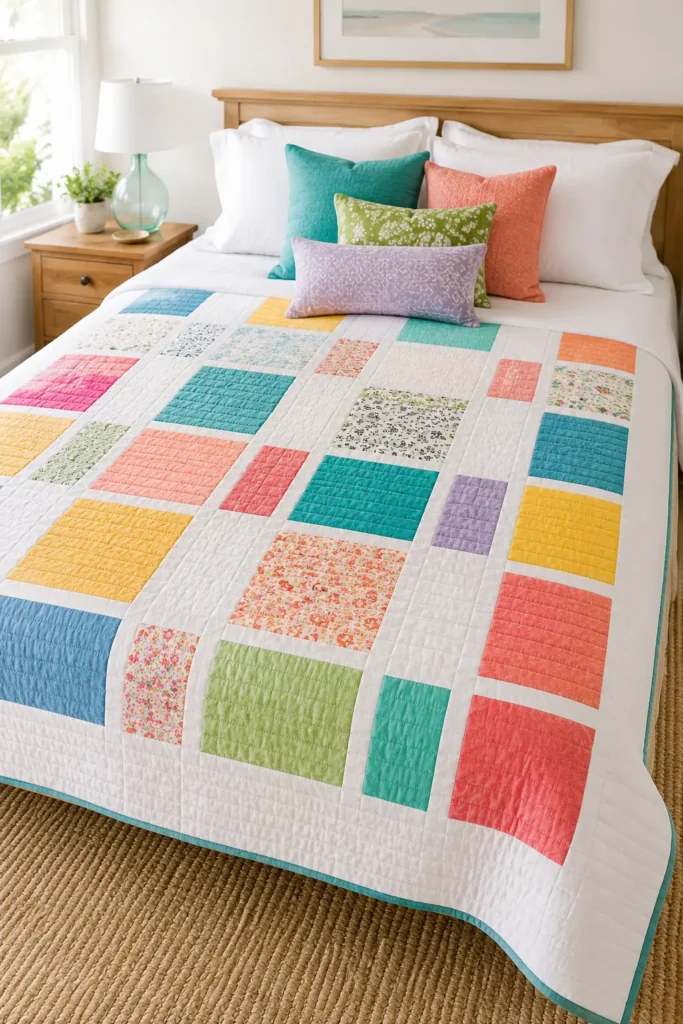
A modern patchwork summer quilt is a fresh, colorful way to add comfort to warm-weather bedrooms without the heaviness of a winter quilt. This design uses large squares and simple rectangles, so the quilt feels clean, airy, and beginner-friendly while still looking stylish and intentional.
For a vibrant summer palette, use coral, turquoise, lemon yellow, emerald green, sky blue, raspberry pink, soft peach, lavender, crisp white, and charcoal accents. The bright colors give the quilt energy, while the lightweight construction keeps it breathable enough for summer nights, guest rooms, sofa lounging, or weekend naps.
Why I Made It
I made this quilt because I wanted a summer layer that felt modern, cheerful, and easy to live with. In warm weather, I like quilts that add softness to the bed without feeling too thick or heavy. Large patchwork blocks are perfect for that because they add color and pattern to the quilt without adding too many seams.
The inspiration came from simple summer rooms: white sheets, open windows, colorful flowers, and a light quilt folded at the foot of the bed. Modern patchwork lets the colors do the work, so the finished quilt feels bright and stylish without being complicated.
Why This Idea Is Worth Making
This idea is worth making because it gives you a practical, warm-weather quilt that is easy to sew, easy to style, and comfortable to use. The large-block design is beginner-friendly, while the color placement makes it look more polished than a basic square quilt.
It is also a wonderful project for using favorite fabrics. You can mix solids, small florals, gingham, stripes, dots, and tone-on-tone prints into one cheerful summer quilt that feels personal and fresh.
Finished Size
This guide makes a lightweight summer quilt measuring approximately 60 x 72 inches.
It works well as:
- A summer bed quilt
- A guest-room quilt
- A sofa throw
- A folded bed-end accent
- A porch or sunroom quilt
- A lightweight picnic quilt
For a smaller throw, make a 48 x 60-inch version by reducing the number of blocks. For a larger bed quilt, add more rows or wider borders.
Materials Needed
For one modern patchwork summer quilt, gather:
- Assorted quilting cottons: 3 yards total
- Background fabric: 1½ yards in white, ivory, pale gray, or soft aqua
- Lightweight middle layer: 2½ yards of cotton muslin, lightweight flannel, or thin cotton batting
- Backing fabric: 4 yards
- Binding fabric: ⅝ yard
- Thread: white, ivory, pale gray, coral, aqua, or coordinating color
- Rotary cutter and cutting mat
- Quilting ruler
- Pins or sewing clips
- Sewing machine
- Iron and ironing board
Beginner tip: For the most breathable summer quilt, use cotton muslin as the middle layer. For a slightly cozier quilt, use thin cotton batting.
Vibrant Modern Summer Palette
A bright modern palette could include:
- Crisp white
- Coral
- Turquoise
- Lemon yellow
- Emerald green
- Sky blue
- Raspberry pink
- Soft peach
- Lavender
- Charcoal
For a softer version, use mostly white, pale blue, peach, and lavender, then add coral or turquoise as the accent. For a bolder version, add charcoal or navy to make the bright colors pop.
Cutting Measurements
This quilt uses a mix of 10-inch finished squares and simple rectangle blocks.
Cut:
- 30 feature squares: 10½ x 10½ inches
- 30 background squares: 10½ x 10½ inches
- 12 feature rectangles: 5½ x 10½ inches
- 12 background rectangles: 5½ x 10½ inches
- Backing fabric: one piece at least 66 x 78 inches
- Middle layer: one piece at least 66 x 78 inches
- Binding strips: 8 strips measuring 2½ inches x width of fabric
Layout:
- Main layout: 6 blocks across by 6 blocks down
- Finished quilt center: about 60 x 60 inches
- Add borders to reach approximately 60 x 72 inches
Optional borders:
- 2 side borders: 3½ x 60 inches
- 2 top and bottom borders: 6½ x 66 inches
Use a ¼-inch seam allowance for piecing.
Step-by-Step Guide
Step 1: Choose the Modern Patchwork Fabric Mix
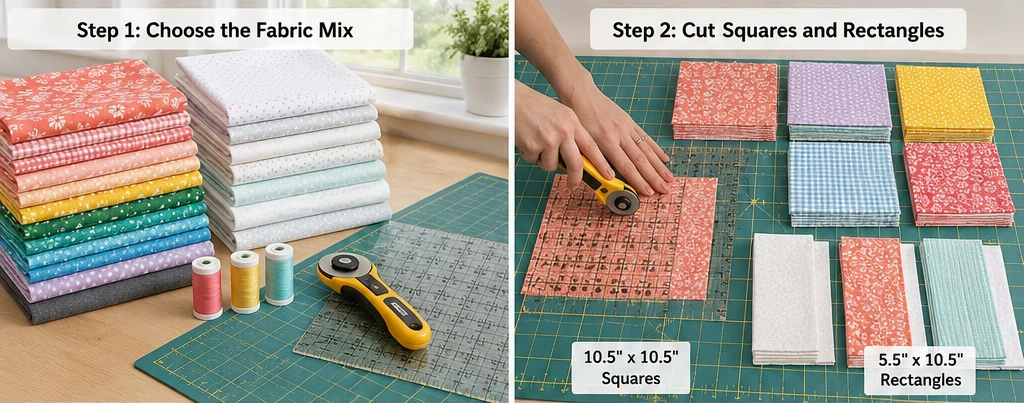
Choose lightweight quilting cottons in a mix of solids and simple prints. A beautiful summer combination is coral, turquoise, lemon yellow, emerald, sky blue, raspberry, peach, lavender, and crisp white.
For a modern look, include a few solids or tone-on-tone prints. If every fabric is busy, the quilt can feel crowded. A little white, pale gray, or soft aqua gives the eye a place to rest.
Step 2: Cut the Squares and Rectangles
Cut 30 feature squares at 10½ x 10½ inches.
Cut 30 background squares at 10½ x 10½ inches.
Cut 12 feature rectangles and 12 background rectangles at 5½ x 10½ inches.
The large pieces make this quilt fast and beginner-friendly. The rectangles add a modern patchwork feel without requiring tricky angles or tiny blocks.
Step 3: Make the Rectangle Accent Blocks
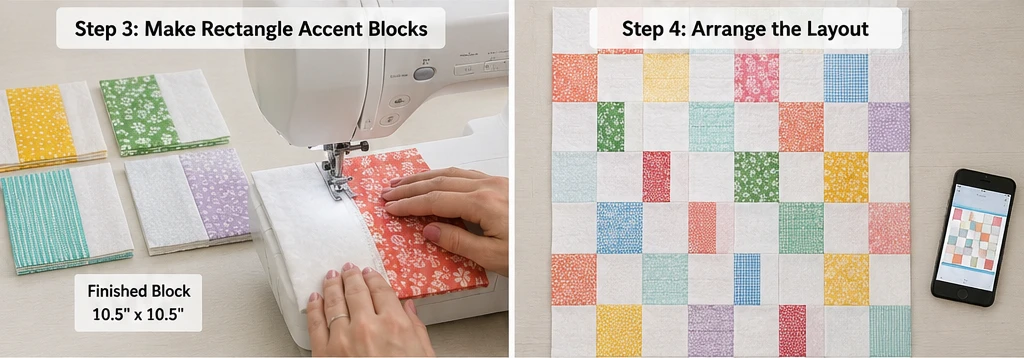
Pair one feature rectangle with one background rectangle. Sew them together along the long edge using a ¼-inch seam allowance.
Press the seam toward the darker fabric.
Each rectangle accent block should measure 10½ x 10½ inches after sewing. These blocks create a clean color-block effect that makes the quilt look modern and graphic.
Step 4: Arrange the Quilt Layout
Lay the blocks in a 6 x 6 grid. Mix full squares with rectangle accent blocks.
A simple layout idea:
- Place rectangle blocks in a loose diagonal path.
- Scatter bright colors evenly across the quilt.
- Keep white or pale background blocks between bold colors.
- Use charcoal or navy accents sparingly for contrast.
Take a photo before sewing so you can remember the layout.
Step 5: Sew Blocks into Rows
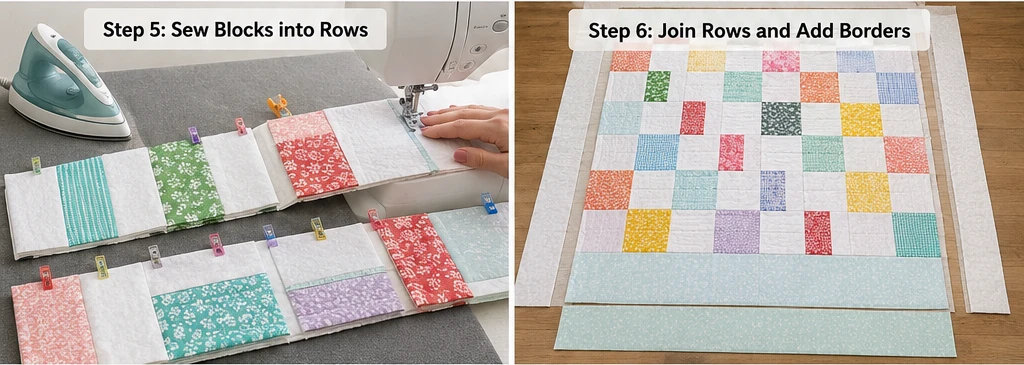
Sew the blocks together row by row using a ¼-inch seam allowance.
Press seams in alternating directions from row to row. For example, press Row 1 seams to the right, Row 2 seams to the left, and continue alternating.
This helps the seams nest when the rows are joined.
Step 6: Join the Rows
Sew the rows together, matching seam intersections carefully. Pin or clip at each seam intersection to keep the blocks aligned.
Press the finished quilt center gently from the back. The center should measure approximately 60½ x 60½ inches before borders.
Step 7: Add the Side Borders
Sew one 3½ x 60-inch border strip to each side of the quilt center.
Good border colors include crisp white, pale aqua, soft gray, sea-glass green, or charcoal. A light border keeps the quilt airy, while a dark border gives it a more graphic modern frame.
Press seams toward the borders.
Step 8: Add the Top and Bottom Borders
Sew one 6½ x 66-inch border strip to the top and one to the bottom.
These wider borders lengthen the quilt so it works better as a bed layer or generous throw. Trim evenly if needed after sewing.
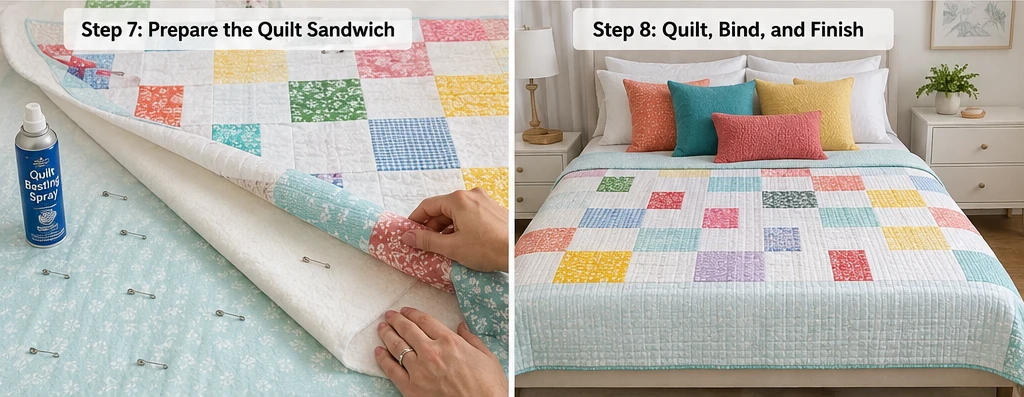
Step 9: Prepare the Lightweight Quilt Sandwich
Place the backing fabric wrong side up, the lightweight middle layer in the center, and the quilt top right side up.
Smooth all layers carefully and baste with safety pins or spray. Place pins every 4 to 5 inches so the layers stay secure while quilting.
For a very light summer quilt, choose muslin as the middle layer. For a little more loft, use thin cotton batting.
Step 10: Quilt with Open Lines
Quilt simple straight lines, gentle waves, or a loose diagonal grid. Space quilting lines about 3 to 4 inches apart.
Open quilting keeps the quilt softer and more breathable. Dense quilting can make a summer quilt feel stiffer and warmer.
For a modern look, straight-line quilting works beautifully with the square and rectangle patchwork.
Step 11: Trim and Square the Quilt
After quilting, trim away the extra backing and middle layer.
Use a ruler to square the corners and straighten the edges. This step helps the binding look smooth and professional.
Step 12: Bind the Quilt
Join the 2½-inch binding strips end to end and press them in half lengthwise.
Sew the binding to the front of the quilt, fold it to the back, and stitch it down by hand or machine.
Beautiful binding choices include coral, turquoise, charcoal, lemon yellow, emerald, raspberry, sky blue, or crisp white.
Assembly at a Glance
- Choose lightweight cotton fabrics in bright summer colors.
- Cut 30 feature squares at 10½ x 10½ inches.
- Cut 30 background squares at 10½ x 10½ inches.
- Cut feature and background rectangles at 5½ x 10½ inches.
- Sew rectangle pairs into 10½-inch accent blocks.
- Arrange blocks in a 6 x 6 layout.
- Sew blocks into rows with a ¼-inch seam allowance.
- Join rows to complete the quilt center.
- Add 3½-inch side borders.
- Add 6½-inch top and bottom borders.
- Layer with backing and a lightweight middle layer.
- Quilt with open lines spaced 3 to 4 inches apart.
- Trim, square, and bind with 2½-inch strips.
Modern Summer Color Combination Ideas
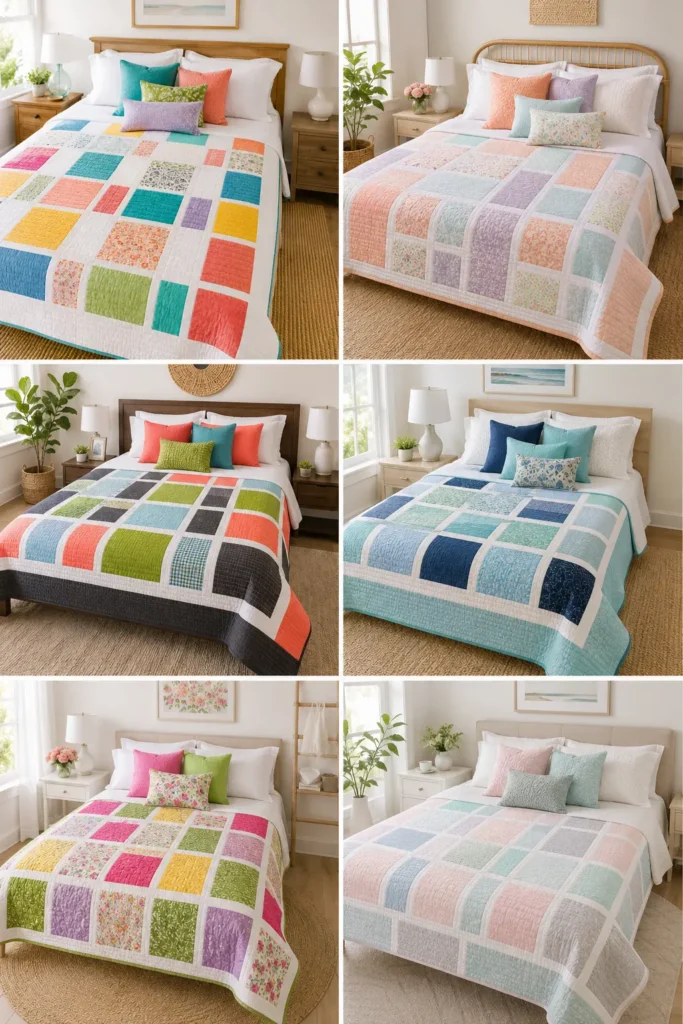
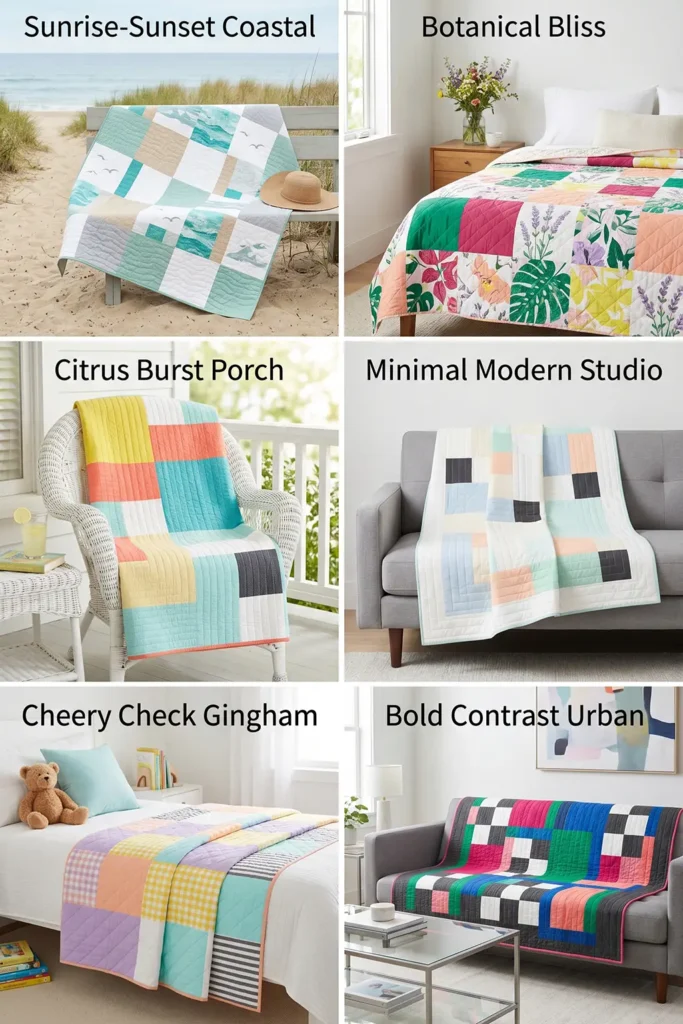
For a bright, fresh quilt, use coral, turquoise, lemon yellow, emerald, white, and sky blue.
For a soft, warm-weather quilt, use peach, lavender, pale aqua, ivory, mint, and blush pink.
For a bold modern quilt, use charcoal, crisp white, cobalt blue, coral, lime green, and saffron yellow.
For a coastal summer quilt, use aqua, turquoise, sea-glass green, sandy beige, navy, and white.
For a garden-inspired summer quilt, use raspberry, leafy green, lemon yellow, coral, lavender, and cream.
Beginner Tips for Success
Use large blocks for your first modern patchwork quilt. They sew quickly and keep the quilt soft.
Choose a lightweight middle layer. Muslin, flannel, or thin cotton batting will keep the quilt breathable.
Use background fabric generously. White, ivory, or pale gray helps bright colors feel clean and modern.
Quilt with wider spacing. Open quilting keeps the quilt airy and flexible.
Press carefully after each row. Neat pressing makes simple patchwork look polished.
Prewash fabrics if you want a softer, crinklier summer finish and less shrinkage later.
Styling Tip
Layer the finished modern patchwork summer quilt over white sheets, a linen duvet, a pale sofa, or a woven bench. Add pillows in coral, turquoise, lemon yellow, emerald, raspberry, sky blue, or charcoal to echo the quilt colors. The result is lightweight, colorful, and stylish—perfect for warm-weather comfort with a fresh modern feel.
Other Design Inspirations – Digitally Modified
Conclusion
Summer quilts solve a real problem: how to stay cool without losing sophistication. Whether you’re drawn to breathable linen blends, coastal color palettes, vibrant florals, or the versatility of reversible designs, these pattern ideas prove that lightweight bedding can be genuinely beautiful. I’ve watched quilters and designers embrace seasonal quilting because it finally answers the question of how to sleep well and sleep stylishly.
Exploring these digital design concepts—from modern patchwork to coordinated coverlet sets—helps you visualize your own bedroom refresh. The beauty of seasonal quilts lies in their honesty: they acknowledge that your needs change with the weather, and your bedding should too. By welcoming these elegant, practical design inspirations into your space, you’re crafting a bedroom that works for your life, celebrates summer’s bright energy, and delivers the rest you actually deserve.

