
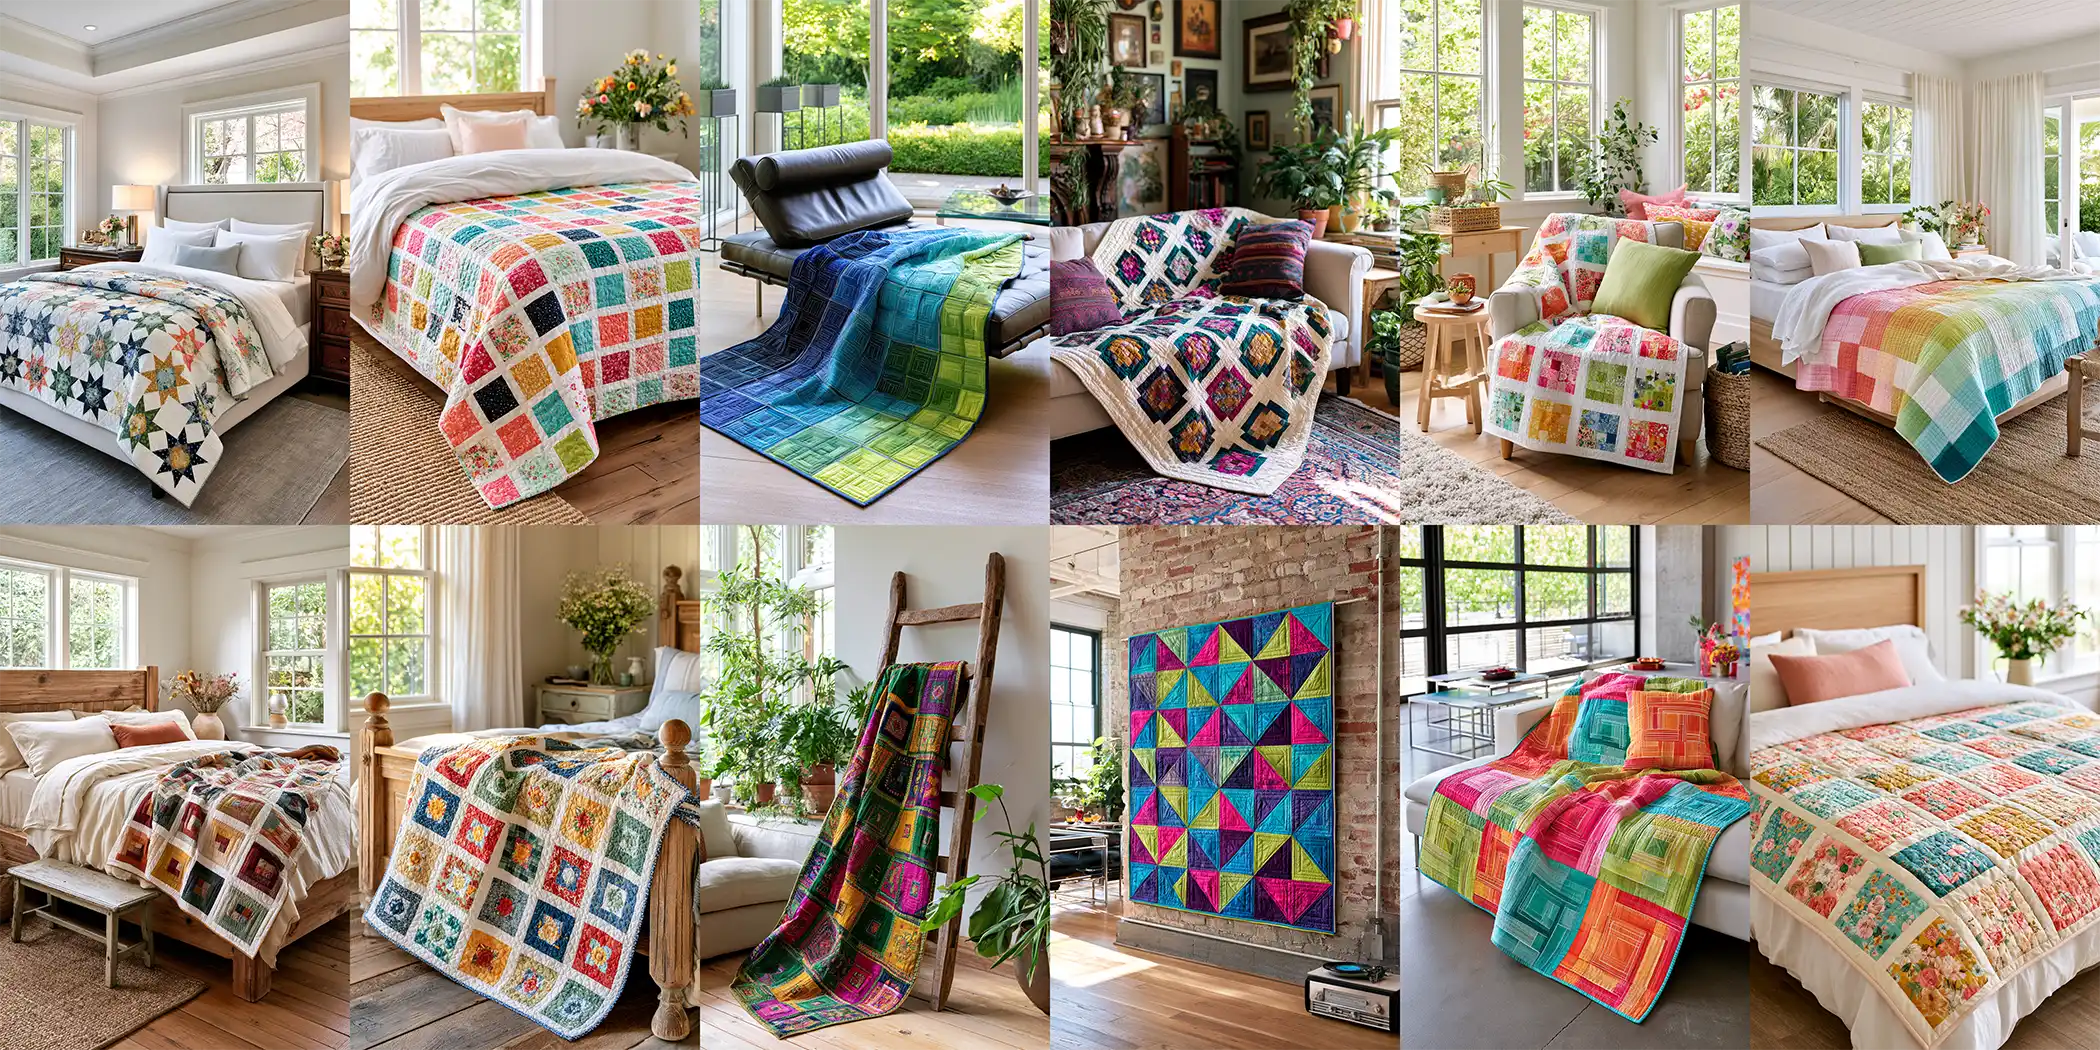
12 Layer Cake Quilt Pattern Ideas: Simple, Stunning Quilts Using 10-Inch Fabric Squares
If you love the idea of a beautiful quilt but dread the endless cutting, Layer Cake Quilt Pattern Ideas are about to become your favorite shortcut. A layer cake is a precut fabric bundle — typically 42 squares, each a generous 10 inches, all from a single coordinated collection — so the color choosing and much of the cutting are already done for you. That head start is exactly why these quilts are so beloved: you skip straight to the fun part, piecing simple squares into stunning designs, with the fabrics guaranteed to work together because a designer already made sure they do.
Layer Cake Quilt Pattern Ideas
This collection of Layer Cake Quilt Pattern Ideas gathers twelve simple, striking ways to turn those 10-inch squares into finished quilts, from true-beginner projects to designs with a little more wow. You’ll find easy charm-square and four-patch quilts perfect for a first project, classic pieced blocks like half-square triangles, disappearing nine patch, pinwheels, sawtooth stars, log cabin, and flying geese, and color-led ideas like a flowing ombre gradient. Whether you want a quick weekend throw or an elegant quilt for the bed, each idea makes the most of the layer cake’s built-in convenience — so you spend less time cutting and more time creating.
What Makes a Layer Cake Quilt Different
The whole appeal of a layer cake quilt comes down to that precut 10-inch square. Because every piece starts the same size and the colors are pre-coordinated, layer cake quilts are faster to make, easier to plan, and far more forgiving than starting from yardage — there’s no fussing over fabric matching and far less cutting to do. The 10-inch square is also wonderfully versatile: leave it whole for a super-quick quilt, cut it once for four-patches or half-square triangles, or slice it into strips for rail fence and coin designs. One simple precut becomes dozens of possible patterns, which is why layer cakes are a favorite for beginners and busy quilters alike.
Tips for Choosing Fabrics for Layer Cake Quilts
Because a layer cake is pre-coordinated, the hardest fabric decisions are already made — but a few choices still make a big difference. Look for a collection with a good range of values, meaning a mix of lights, mediums, and darks; patterns like half-square triangles and pinwheels only pop when there’s real contrast between the squares. Consider the print scale, too — a bundle with a blend of large florals, small prints, and near-solids (called “blenders”) reads as more balanced than one where every square competes for attention.
Think about whether you want a coordinated look (stick to the single collection) or a scrappy one (mix two layer cakes for extra variety). And always buy a little coordinating yardage for sashing, borders, and binding — a solid or blender that ties the collection together will frame your squares beautifully and stretch the quilt to your desired size.
See also: New to precuts? Start with jelly rolls – Jelly Roll Quilt Pattern Ideas – Jelly Roll Quilted Jackets and Vests – Jelly Roll Quilt Tote Bag Ideas – Layer Cake Quilt Pattern Ideas
1. Simple Layer Cake Charm Quilt for Easy Beginner Projects
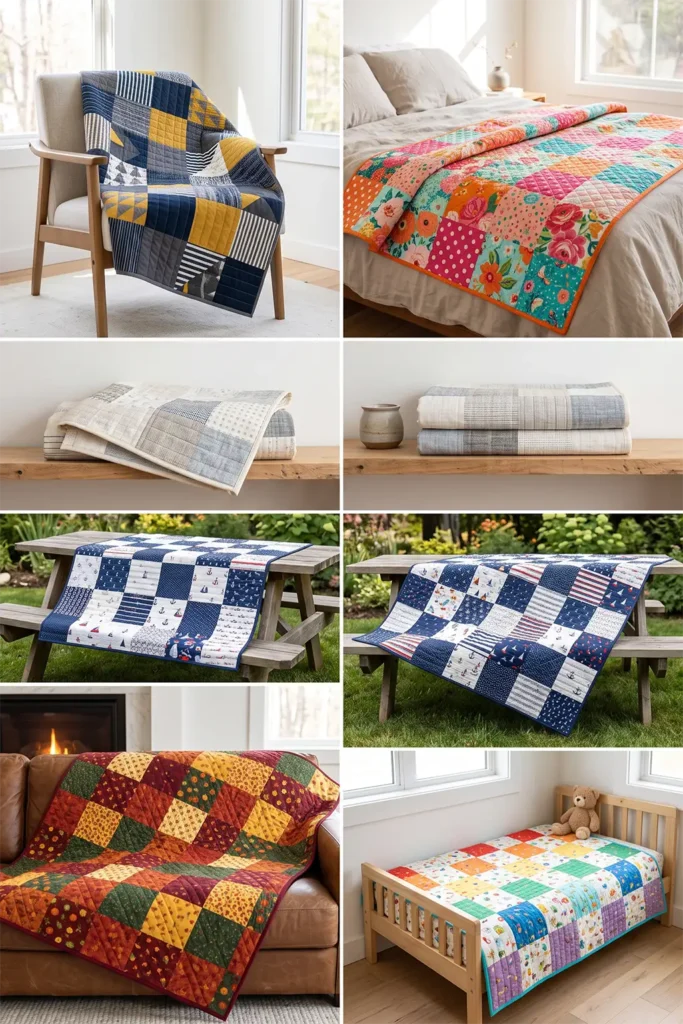
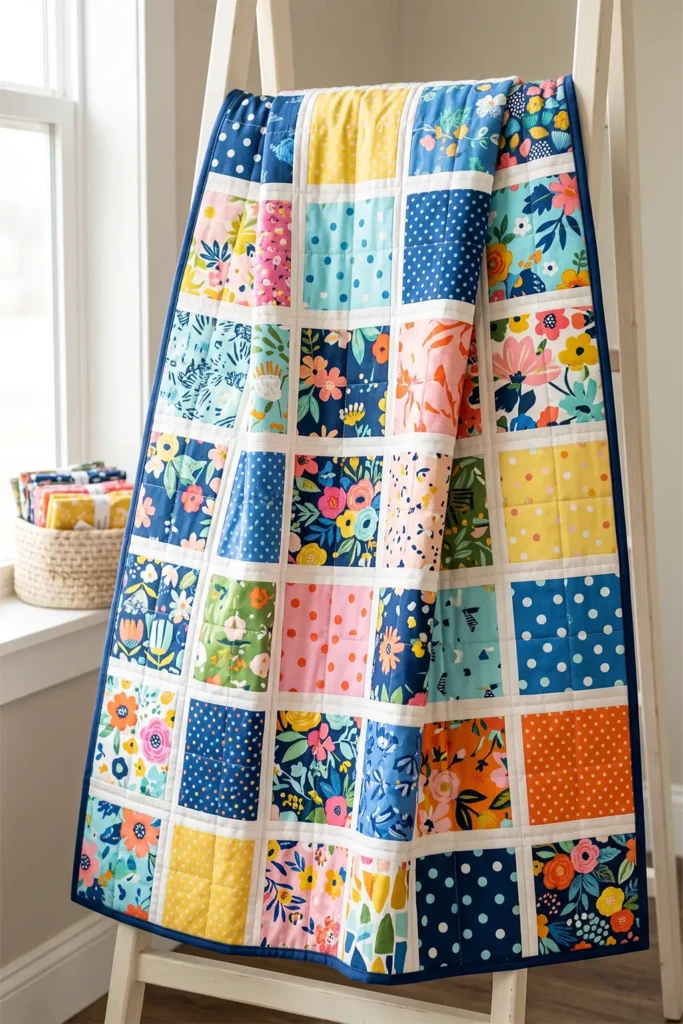
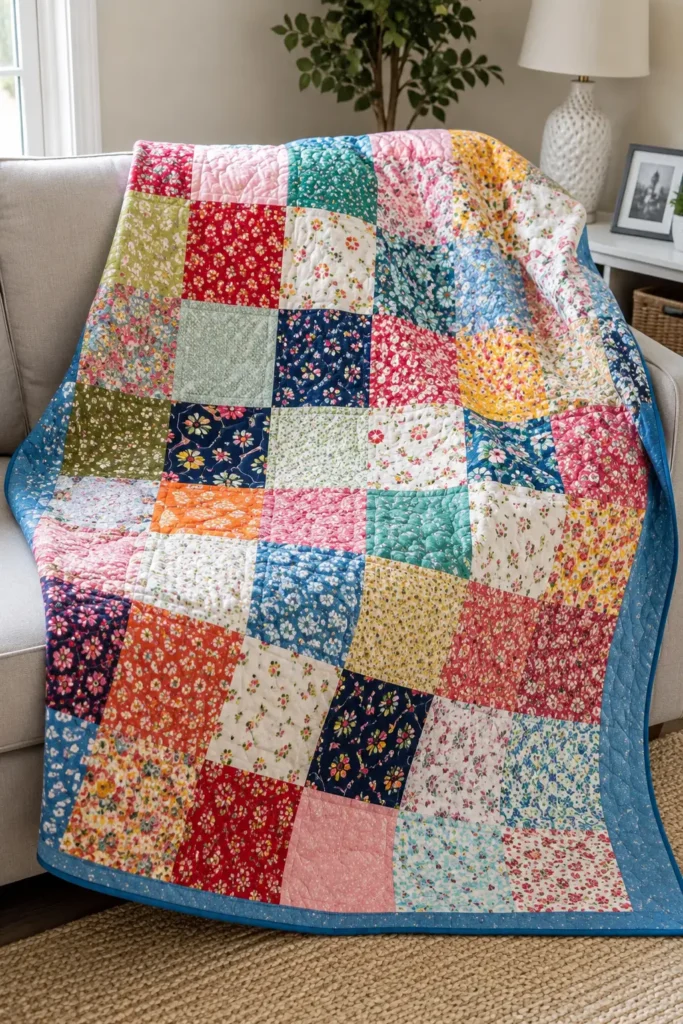
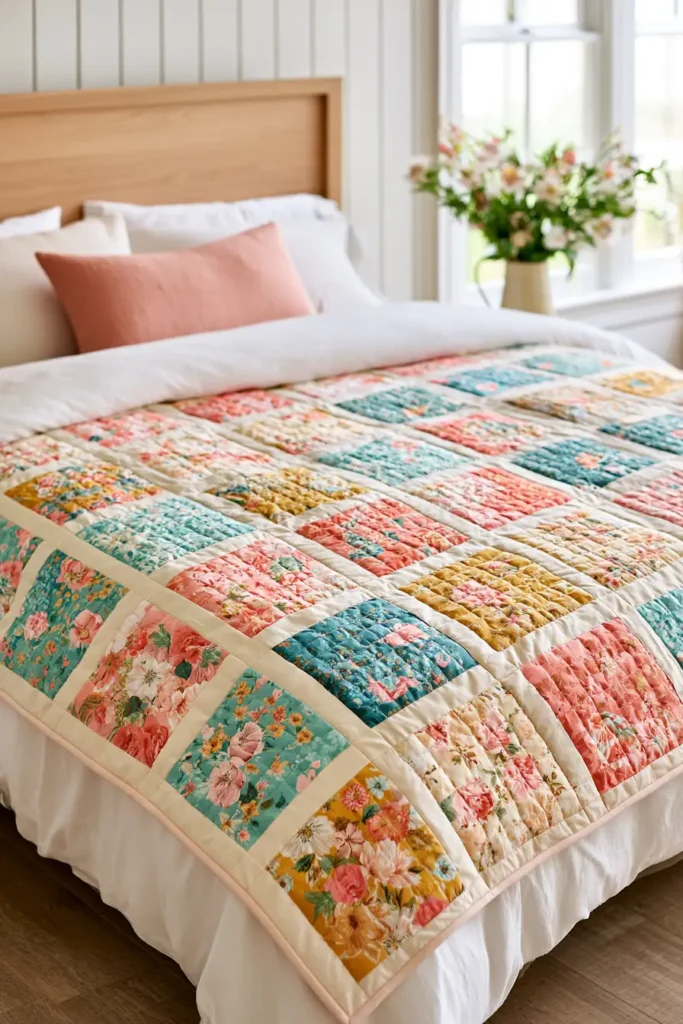
If you’ve never made a quilt before, this is the one to start with. A simple charm quilt uses the layer cake exactly as it comes — whole 10-inch squares, sewn edge to edge in a grid, with no cutting and no piecing beyond straight seams. That’s it. The pre-coordinated fabrics do all the design work, so even a first-ever quilt comes out looking polished and intentional, and in vibrant, cheerful colors it’s genuinely stunning for how little effort it takes. It’s the fastest route from “I’d love to try quilting” to “I made this quilt,” and it teaches you every fundamental you’ll use in every pattern that follows.
Because the squares stay whole, this quilt is really a lesson in the three skills at the heart of all quilting — a consistent seam, good pressing, and matching your seams as you join rows. Master them here on easy, forgiving squares, and you’ll be ready for half-square triangles, pinwheels, and stars with confidence.
A Little Layer Cake History
Ever wondered about the delicious name? Precut fabric bundles like these are named for what they look like: a stack of same-sized fabric squares, piled up, looks just like the layers of a layer cake. The precut revolution was popularized by the Moda fabric company in the 2000s, which gave the bundles their bakery-inspired names — a layer cake is the 10-inch squares, a charm pack is smaller 5-inch squares, and a jelly roll is 2½-inch strips rolled up like a Swiss roll.
The names stuck because they’re charming and memorable, and they completely changed quilting by letting sewists skip straight past cutting to the fun of piecing. This quilt honors that original idea in its purest form: a stack of squares, barely touched, made beautiful.
That spirit of letting the fabric shine with minimal cutting isn’t new, either. In many hand-stitching traditions — including the Nakshi Kantha tradition of my own family’s background — beautiful quilts were built from simple pieces of cloth joined plainly, letting the fabric itself, not fancy cutting, carry the beauty.
Why This Idea Is Worth Making
This idea is worth making because it’s the easiest possible quilt and the perfect first project — no cutting, no complex blocks, just straight seams and a beautiful result. The layer cake’s coordinated colors mean it looks designed no matter what, so beginners get a genuinely lovely quilt on their very first try, which is the best possible encouragement to keep going. It’s also fast enough to finish in a weekend, makes a wonderful gift, and teaches the core skills every other pattern relies on. Simple, quick, forgiving, and stunning.
Finished Size
- Finished quilt: about 57 × 66 inches — a generous throw or lap quilt
- Finished square: 9½ inches (the 10-inch square loses ½ inch to seam allowances)
- Layout: 6 squares across × 7 squares down = 42 squares (exactly one layer cake!)
- Skill level: true beginner — the ideal first quilt
- Core techniques: ¼-inch seam, pressing to nest seams, row-by-row assembly, basting, binding
Materials Needed
- 1 layer cake (42 coordinated 10-inch squares) — a single bundle makes the whole top
- Backing: 3¾ yards (or wide backing)
- Batting: at least 63 × 72 inches (cotton is easiest for beginners)
- Binding: ⅝ yard of a coordinating solid or blender
- Thread: neutral, good-quality cotton
- Rotary cutter and ruler (just for squaring up), cutting mat, pins or clips, iron, sewing machine with a ¼-inch foot
Beginner tip: the single most important habit in quilting is a consistent ¼-inch seam allowance. A ¼-inch presser foot makes it automatic — it’s the best small investment a new quilter can make.
Choosing Your Colors
The layer cake does the coordinating for you, so this is refreshingly easy — but a couple of choices help:
- Pick a vibrant, cheerful collection you love; the whole quilt is those fabrics, so choose a bundle that makes you happy
- Look for a mix of values (lights, mediums, and darks) so the finished quilt has depth rather than blending into one tone
- Choose a binding in a solid or near-solid that picks up one color from the bundle — it frames the quilt and makes the squares pop
- Because there’s no piecing to create pattern, let the fabrics themselves be bold — bright florals, lively prints, and rich colors shine in this simple layout
Cutting Measurements
- Squares: none needed! Use the 42 layer cake squares exactly as they come (10 × 10 inches)
- Backing: 63 × 72 inches
- Batting: 63 × 72 inches
- Binding: seven strips, 2½ inches × width of fabric
Step-by-Step Guide
Step 1 — Lay out your squares. Arrange all 42 squares in a grid 6 across × 7 down on a design wall, floor, or bed. Move them around until you’re happy — spread the colors and values so no two very similar squares sit side by side. Photograph the layout on your phone so you can put it back the same way.
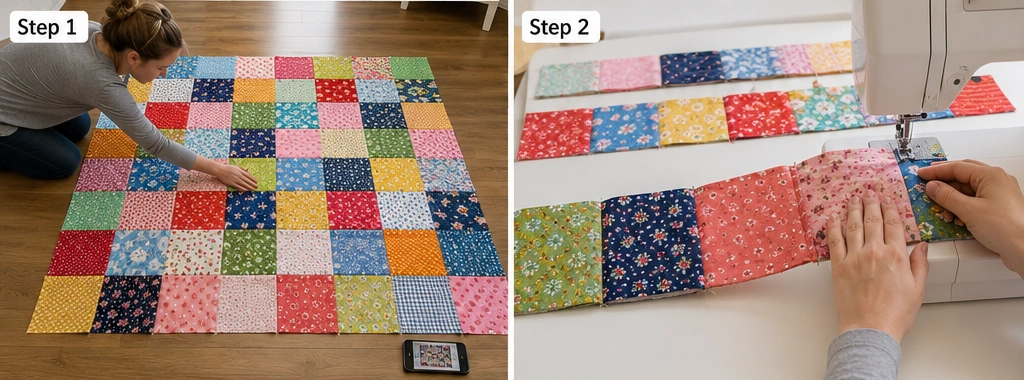
Step 2 — Sew the squares into rows. Working one row at a time, sew the six squares of each row together with a ¼-inch seam, right sides together. Keep your seam allowance consistent — that’s the whole skill here. You’ll have 7 rows of 6 squares.
Step 3 — Press the seams. Press the seams of each row to one side, alternating direction by row: press row 1’s seams to the right, row 2’s to the left, row 3’s to the right, and so on. This is the secret that makes the next step easy.
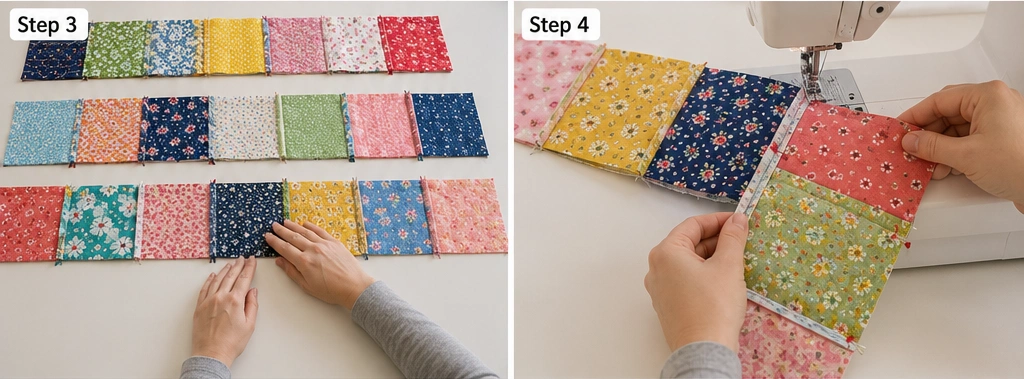
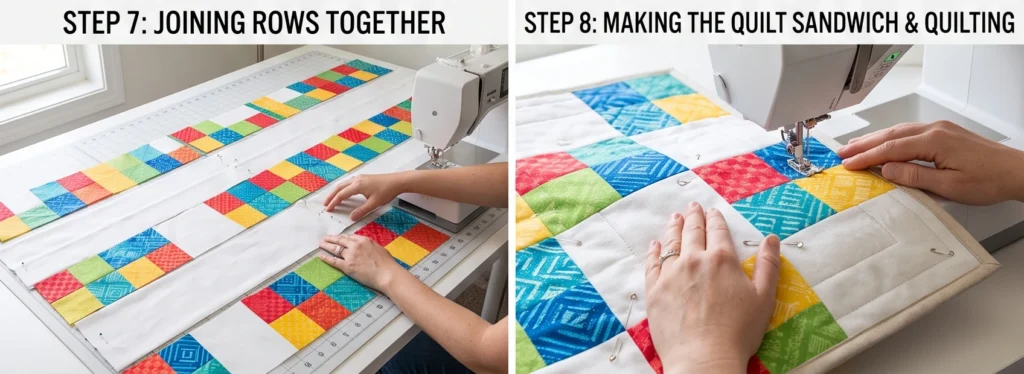
Step 4 — Join the rows (nesting the seams). Sew the rows together in order with a ¼-inch seam. Because you pressed alternate rows in opposite directions, the seams will “nest” — lock neatly against each other — so your squares line up perfectly at the corners. Pin at each seam to keep them matched.
Step 5 — Press the quilt top. Press all the long horizontal seams (either direction is fine), and give the whole top a good press. Your quilt top is done — it should measure about 57½ × 66½ inches.
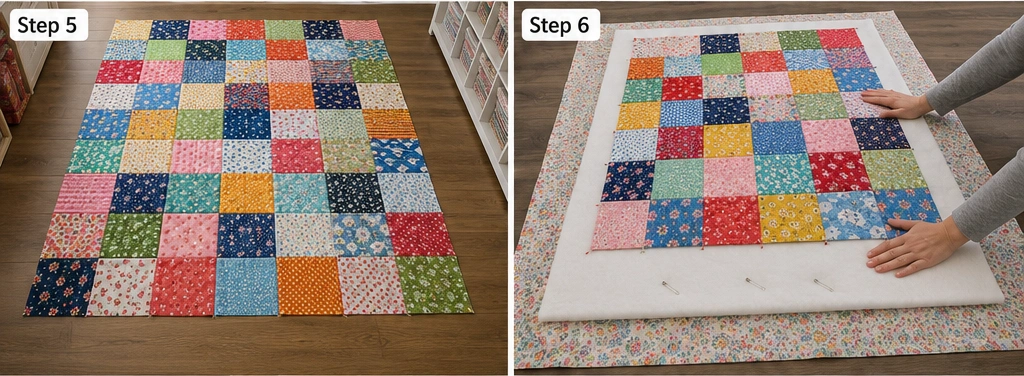
Step 6 — Make the quilt sandwich. Lay the backing wrong side up, center the batting on top, then the quilt top right side up. Smooth out every wrinkle from the center outward, then baste the three layers with pins or basting spray.
Step 7 — Quilt it. For a first quilt, keep it simple: quilt straight lines across the squares, stitch “in the ditch” along the seams, or quilt an all-over diagonal grid. A walking foot keeps the layers feeding evenly.
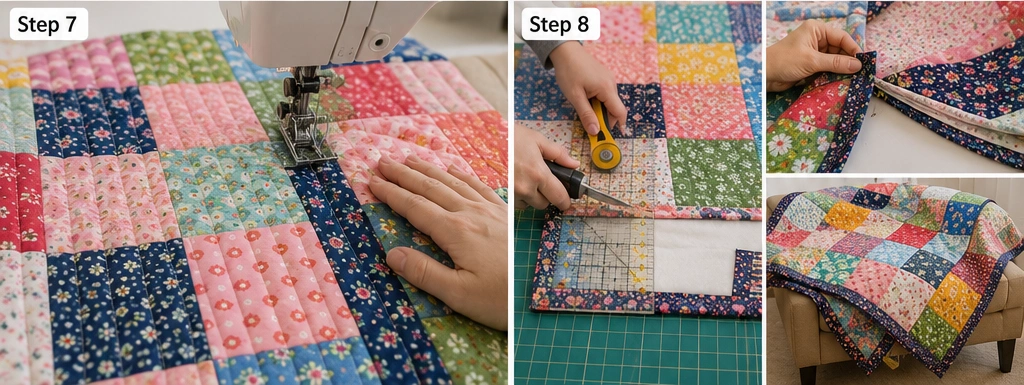
Step 8 — Trim and square up. Trim the excess batting and backing even with the quilt top, using your ruler to square the corners. The quilt should measure about 57 × 66 inches.
Step 9 — Bind and finish. Join the 2½-inch binding strips into one long strip, press in half, sew to the front of the quilt, then fold to the back and stitch down. Give it a final press, and your first quilt is finished.
Assembly at a Glance
- Arrange 42 squares in a 6 × 7 grid; photograph the layout.
- Sew squares into 7 rows of 6, with a ¼-inch seam.
- Press seams to alternating sides, row by row.
- Join rows, nesting the seams; pin at each junction → 57½ × 66½ inch top.
- Press the whole top.
- Layer backing, batting, and top; baste.
- Quilt simply — straight lines, in the ditch, or a grid.
- Trim and square to 57 × 66 inches.
- Bind with 2½-inch strips, then press.
Beginner Tips for Success
- Hold a consistent ¼-inch seam — a ¼-inch foot makes it foolproof.
- Press seams in alternating directions by row so they nest when you join rows.
- Pin at every seam junction; that’s how you get crisp, matched corners.
- Lay out and photograph the whole quilt before sewing, so the colors are well spread.
- Don’t aim for perfection on your first quilt — a charm quilt is beautifully forgiving.
Styling It & Gift Ideas
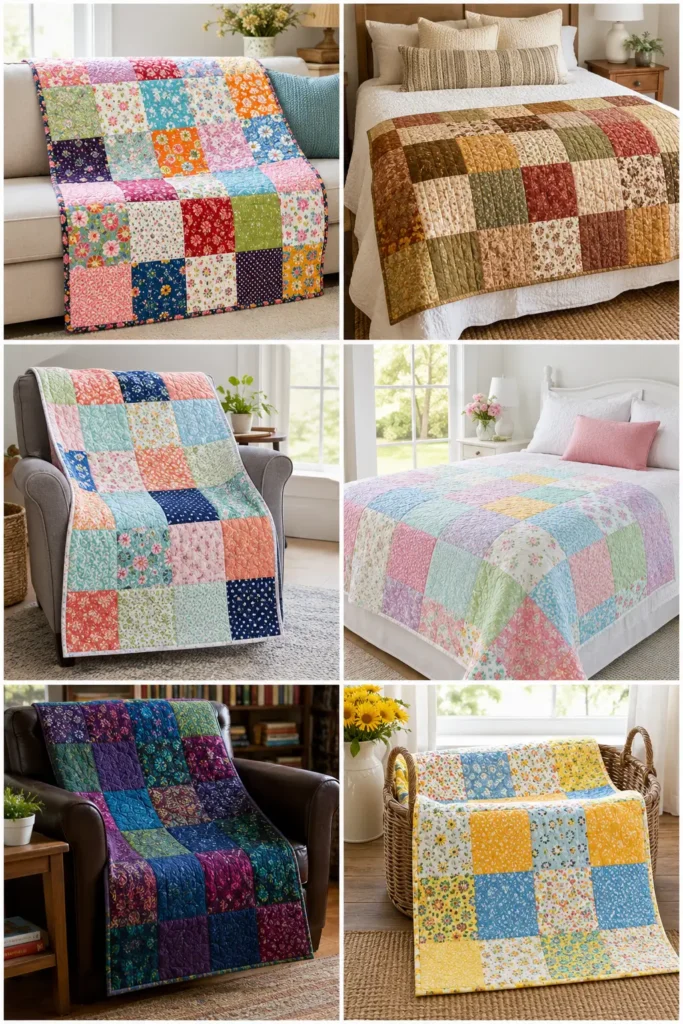
A simple charm quilt suits almost any room, so let the fabric set the mood — a bright floral bundle feels fresh and cheerful on a bed or sofa, while a bold modern collection reads graphic and contemporary over a chair. Fold it at the foot of a bed, drape it on a couch, or roll it in a basket for cozy movie nights.
It also makes a wonderful, quick handmade gift — and because it sews up fast, you can size it for the occasion:
- A baby or crib quilt (use fewer squares, about 4 × 5) for a new-parent gift — soft, safe, and treasured
- A lap or throw quilt for a housewarming, wedding, or graduation
- A cozy sofa throw for a cold-weather or holiday gift
- A pet-bed topper or picnic quilt from a leftover partial bundle
A handmade quilt is one of the most meaningful gifts there is, and a charm quilt makes it achievable even on a deadline.
Final Thoughts
A simple layer cake charm quilt is the perfect first project — and proof that beautiful quilting doesn’t have to be complicated. By using the 10-inch squares exactly as they come, it removes every barrier that stops people from starting: no cutting, no tricky blocks, no color anxiety. You just sew squares into rows, nest your seams, and end up with a warm, vibrant, genuinely lovely quilt. It honors the original spirit of the layer cake — a stack of pretty squares, made beautiful with the simplest of stitches — and it’s very likely to be the quilt that turns you into a quilter.
Other Design Inspirations – Digitally Modified
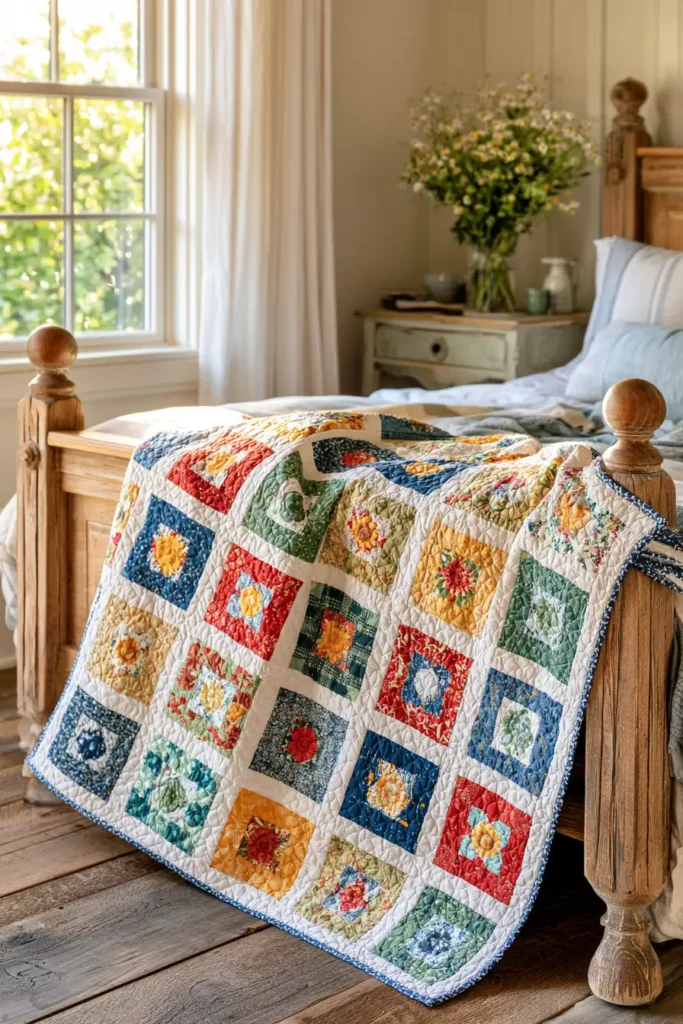
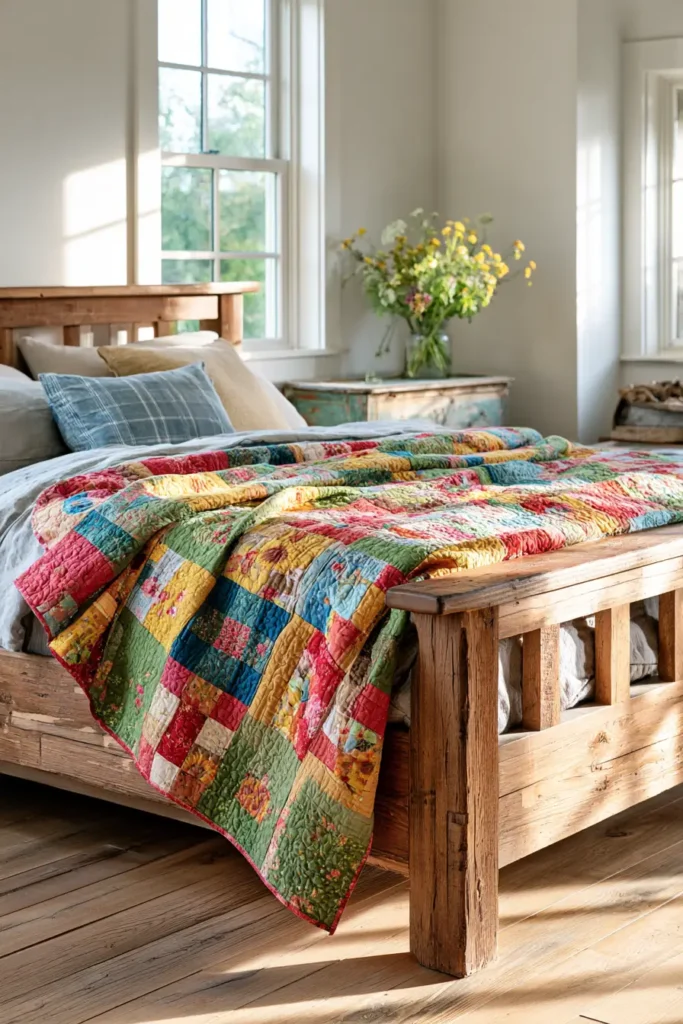
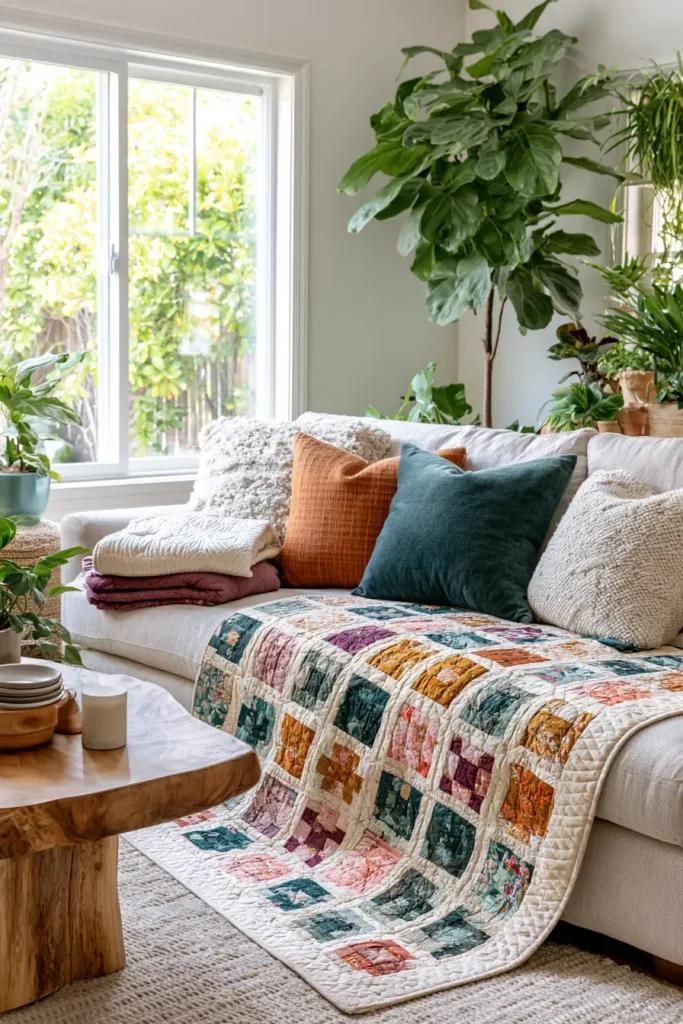
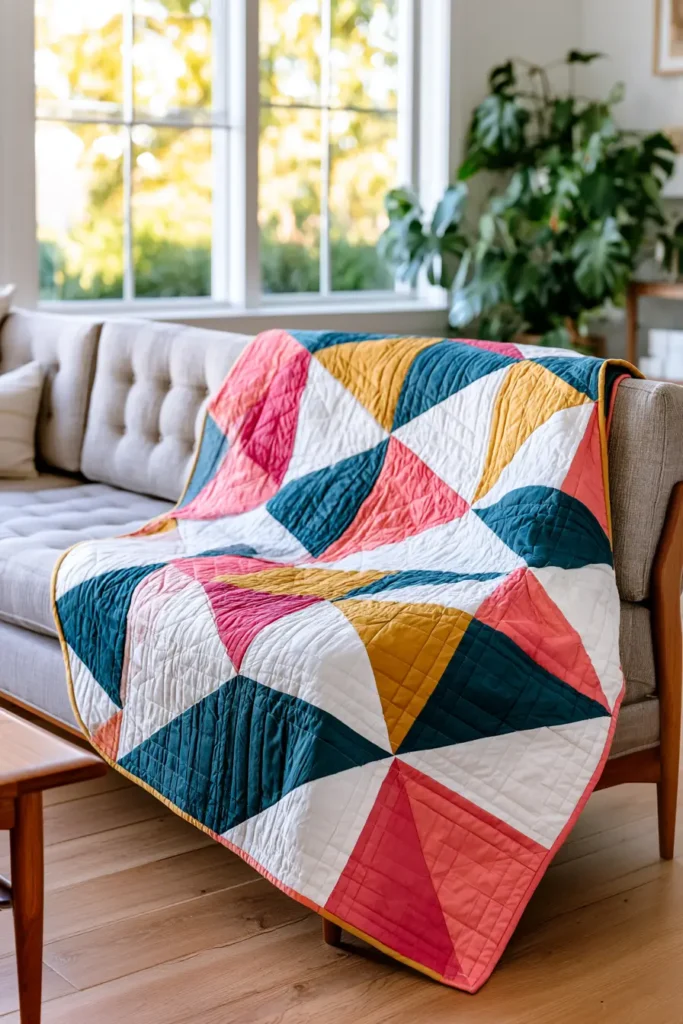
2. Modern Half-Square Triangle Layer Cake Quilt for Geometric Style
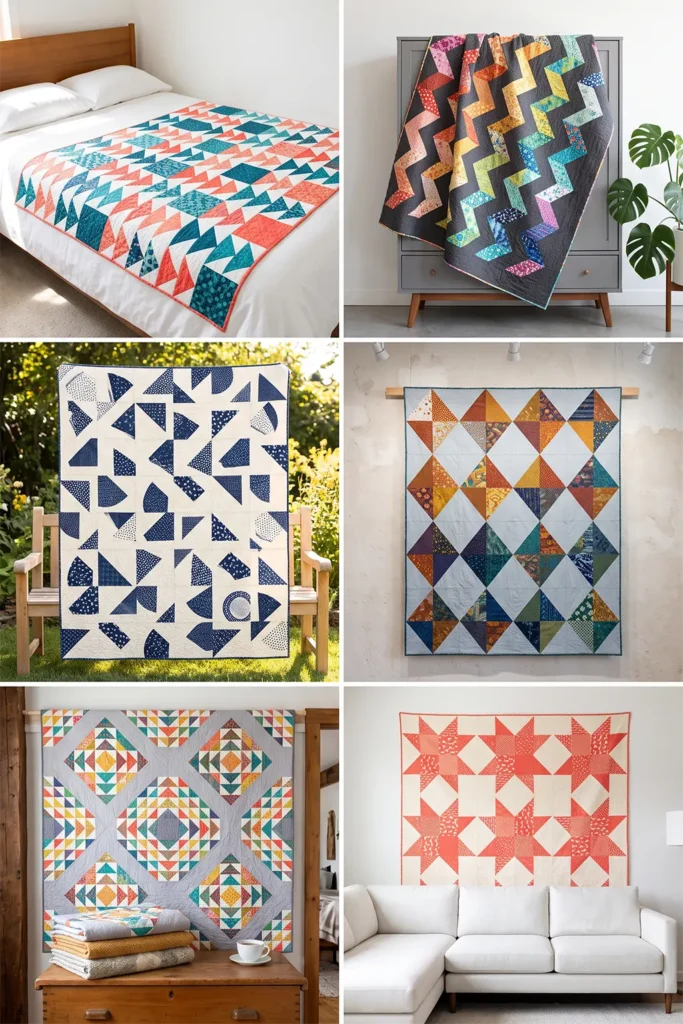
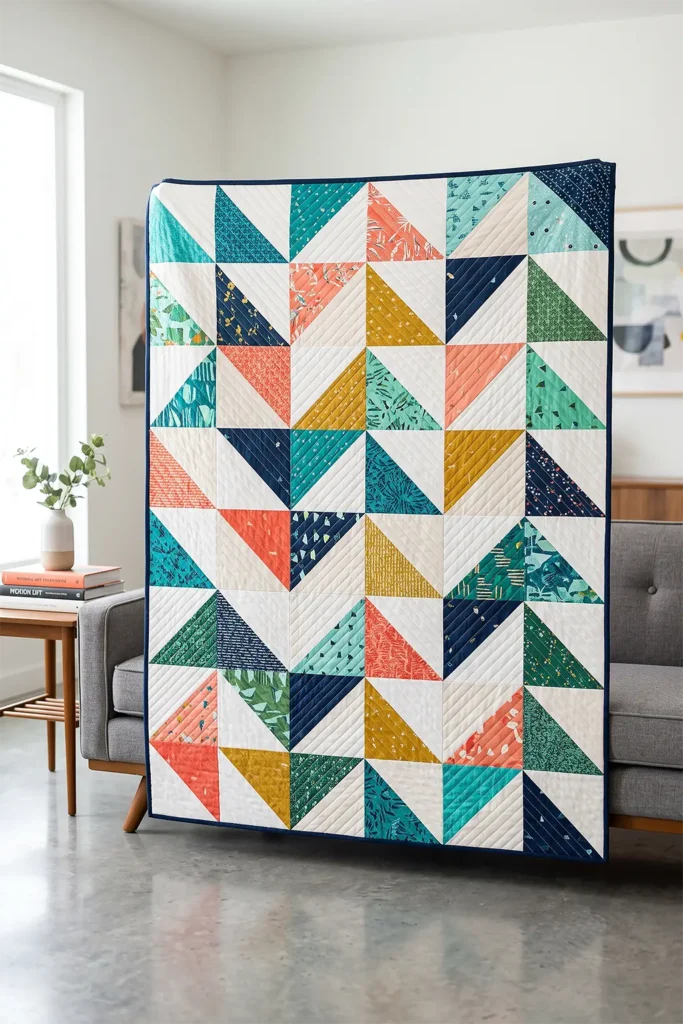
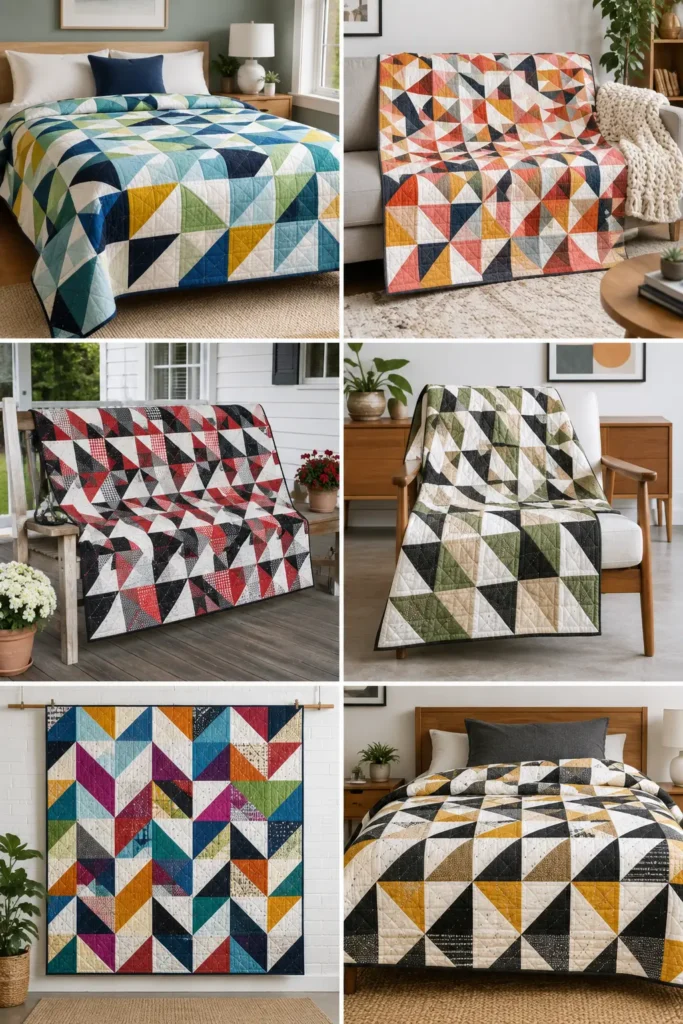
If the charm quilt teaches you to sew, the half-square triangle quilt teaches you to design. The half-square triangle — or HST — is the single most versatile unit in all of quilting: a square made of two triangles, one in each color, split along the diagonal. On its own it’s simple, but arranged in a grid, HSTs create arrows, diamonds, zigzags, chevrons, and stars, all from the same little block. Made from a vibrant layer cake in a bold modern palette, an HST quilt has crisp, graphic, geometric energy that looks thoroughly contemporary — and the 10-inch square happens to be the perfect size to make them two at a time.
This is the pattern that unlocks dozens of others. Once you can make a clean half-square triangle, you can make pinwheels, flying geese, sawtooth stars, and chevron quilts, because each one is built from this exact unit. Learn it well here, and the rest of quilting opens up.
A Little History: The Humble HST
The half-square triangle is one of the oldest and most fundamental units in patchwork, appearing in quilts for well over two centuries. Because it’s simply a square divided on the diagonal, it was a natural, economical shape for early quilters working with scraps — two colors, one seam, endless arrangements. Traditional block names built from HSTs read like a catalog of quilting history: Pinwheel, Flying Geese, Sawtooth, Broken Dishes, Ohio Star, and Birds in the Air, to name a few. What makes it feel so modern today is exactly what made it useful then — its clean geometry and infinite rearrangement. The same unit that filled nineteenth-century scrap quilts now drives some of the most striking contemporary designs.
There’s a nice echo of that make-something-from-simple-shapes spirit in hand-stitching traditions worldwide, including the Nakshi Kantha tradition of my own family’s background, where bold geometry was built up from the plainest pieces of cloth.
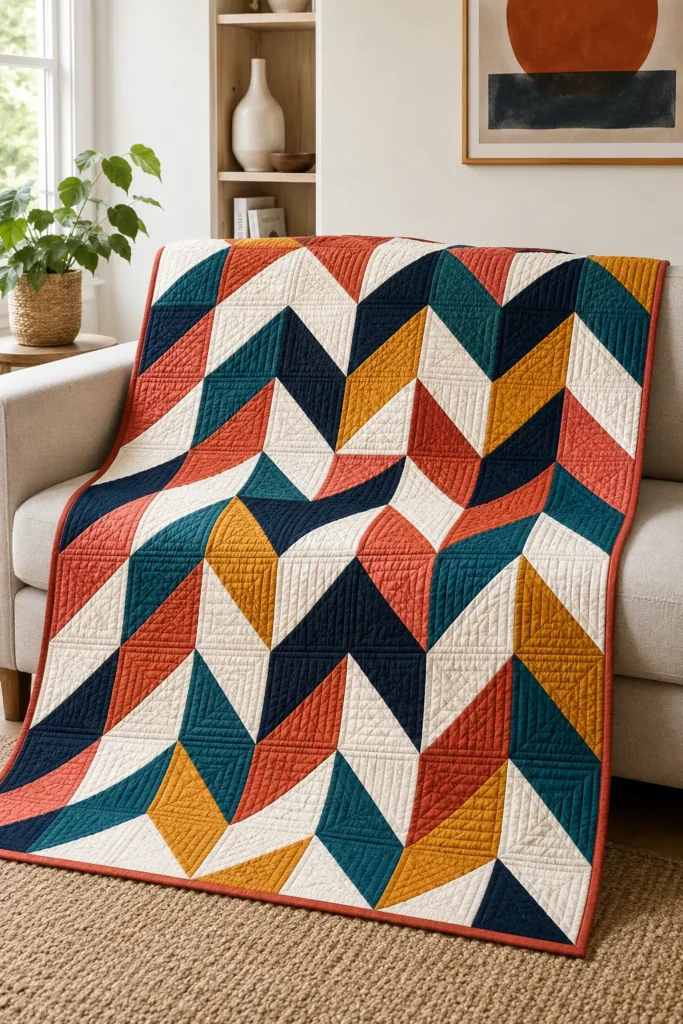
Why This Idea Is Worth Making
This idea is worth making because it teaches the most valuable skill in quilting inside a genuinely stunning, modern quilt. The two-at-once HST method turns each pair of layer cake squares into two matching units fast, the geometric layouts look impressively intricate for how simple they are to sew, and the graphic result suits contemporary homes beautifully. Best of all, the skill transfers everywhere — master HSTs and you can tackle pinwheels, stars, chevrons, and flying geese next. It’s the highest-value technique in this whole collection.
Finished Size
- Finished quilt: about 54 × 72 inches — a throw or twin quilt
- Finished HST unit: 9 inches (trimmed from the oversized square)
- Layout: 6 units across × 8 units down = 48 HST units
- Skill level: confident beginner (a step up from the charm quilt)
- Core techniques: two-at-once half-square triangles, trimming for accuracy, geometric layout, binding
Materials Needed
- 1 layer cake — you’ll pair squares, so you get two HSTs per pair (24 pairs → 48 HSTs). For strong two-color contrast, pair light squares with dark ones
- (Optional) a few extra coordinating 10-inch squares or ½ yard of a solid to control the color story
- Backing: 3½ yards
- Batting: at least 60 × 78 inches
- Binding: ⅝ yard of a coordinating solid
- Thread: neutral cotton
- Rotary cutter, cutting mat, quilting ruler with a 45° diagonal line (essential for trimming HSTs), pins, iron, sewing machine
Beginner tip: a square ruler with a clear 45-degree line is the key tool here. Line that diagonal up with your HST’s seam when trimming, and every unit comes out perfectly square with the points in the right place.
The Two-at-a-Time HST Method
This is the magic that makes layer cakes and HSTs a perfect match. From two 10-inch squares you get two identical 9-inch finished HSTs:
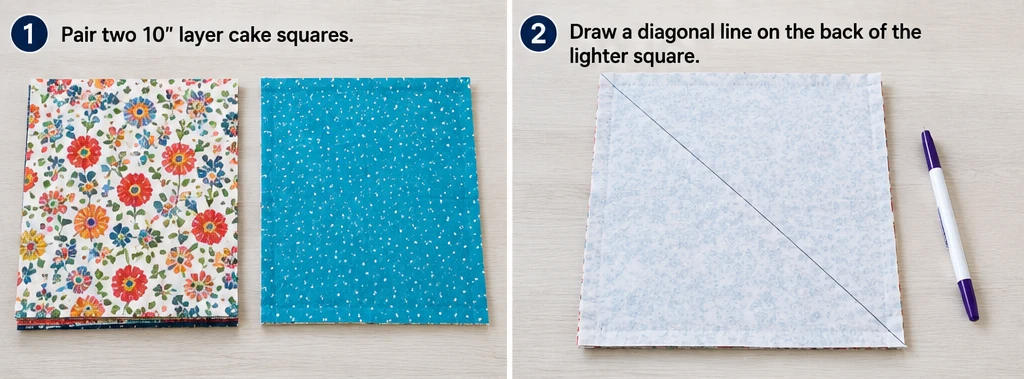
- Pair two contrasting squares right sides together, edges aligned.
- On the back of the lighter square, draw a diagonal line corner to corner.
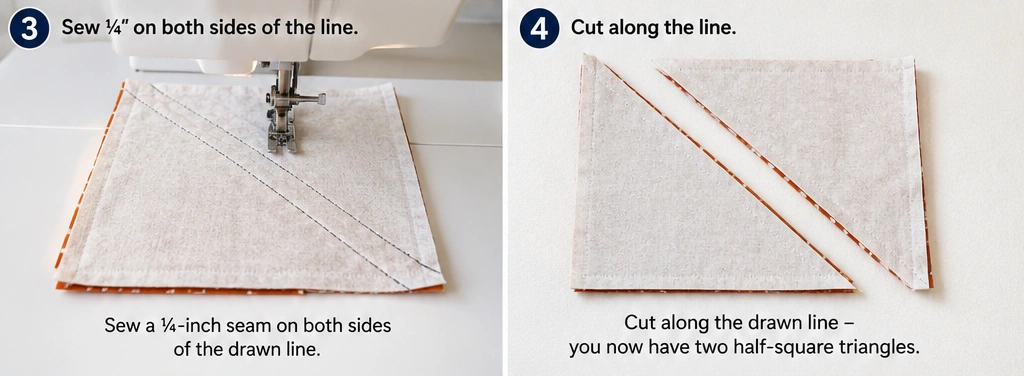
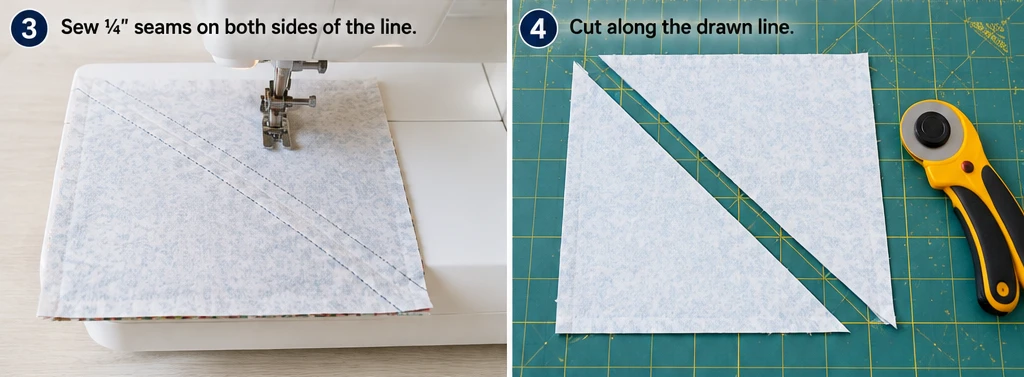
- Sew a ¼-inch seam on both sides of that drawn line.
- Cut along the drawn line — you now have two HST units.
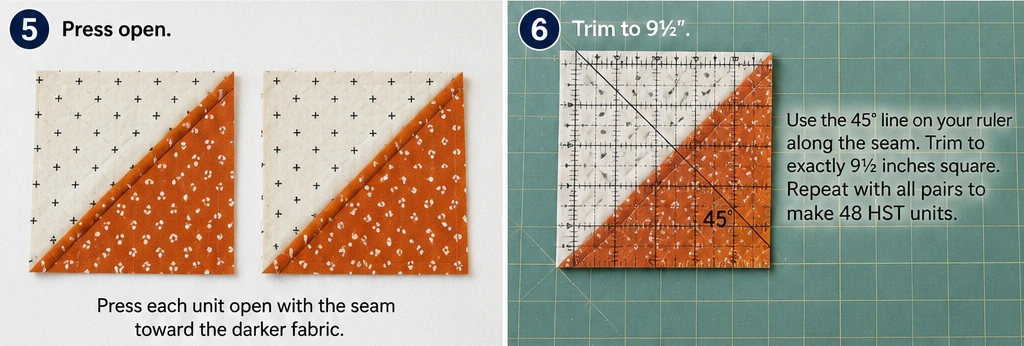
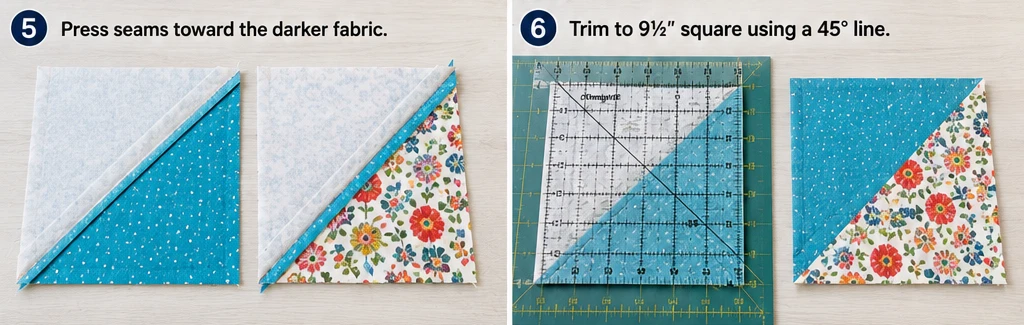
- Press each open (seam toward the darker fabric) and trim to exactly 9½ inches square, using the 45° line on your ruler along the seam.
Repeat with all your pairs. This method wastes almost nothing and gives you two matched units every time.
Choosing Your Colors
HSTs are all about contrast, so a bold, high-contrast palette makes the geometry sing:
- Two-color modern: pair a vibrant color (teal, coral, mustard, navy) with white or cream for maximum graphic punch
- Warm and cool: pair warm squares (rust, gold) against cool ones (teal, indigo) for rich contrast
- Rainbow modern: use the full vibrant layer cake against a single solid, so the colors pop individually
- Bold and simple: the higher the contrast between the two triangles, the crisper the pattern
Whatever you choose, value contrast is everything — light against dark is what makes arrows and zigzags read. Two similar-value fabrics will blur the design.
The Layout: One Unit, Many Patterns
Here’s where HSTs get exciting. Arrange your 48 units differently for completely different quilts:
- Flying geese / arrows: point all triangles the same direction for a strong directional flow
- Zigzag / chevron: alternate the direction row by row for a lightning pattern
- Diamonds: rotate units into diamond formations
- Pinwheels: rotate four units around a center point
- Broken Dishes: a classic scattered arrangement
Lay them out and photograph a few options before you commit — the same 48 units genuinely make a dozen different quilts.
Cutting Measurements
- HST units: pair and sew 24 pairs of 10-inch squares → 48 HSTs, trimmed to 9½ inches each
- Backing: 60 × 78 inches
- Batting: 60 × 78 inches
- Binding: seven strips, 2½ inches × width of fabric
Step-by-Step Guide
Step 1 — Pair your squares. Sort the layer cake into contrasting pairs — a lighter square with a darker one, or a warm with a cool. Make 24 pairs.
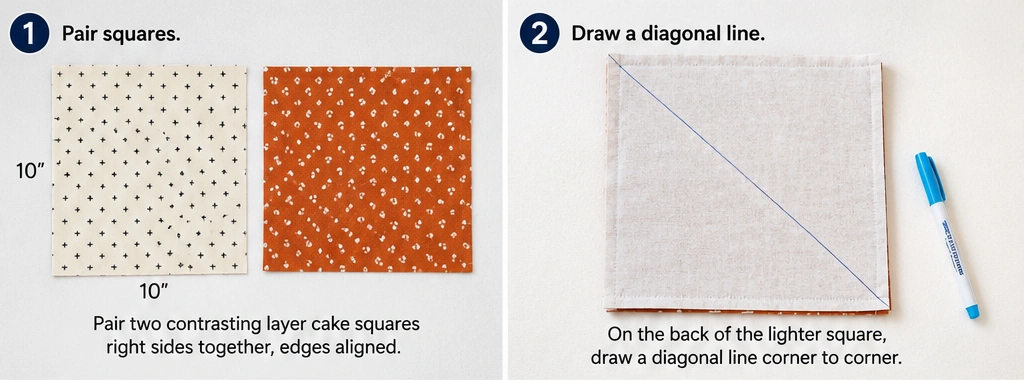
Step 2 — Make the HSTs (two at a time). For each pair, draw a diagonal line on the back of the lighter square, sew ¼ inch on both sides, cut on the line, and press open toward the darker fabric. Each pair yields two HSTs, for 48 total.
Step 3 — Trim every unit. Trim each HST to exactly 9½ inches square, lining the ruler’s 45° line along the diagonal seam. Don’t skip this — trimming is what gives crisp points and a flat quilt. Consistent units are the whole secret to HST success.
Step 4 — Design your layout. Arrange the 48 units 6 across × 8 down in your chosen pattern — arrows, zigzag, diamonds, or pinwheels. Play with rotations, then photograph the layout you love.
Step 5 — Sew the units into rows. Sew each row of 6 units together with a ¼-inch seam, keeping every unit in its correct orientation (easy to flip by mistake, so check against your photo). Press seams to alternate directions row by row.
Step 6 — Join the rows. Sew the 8 rows together, nesting the seams at each junction and pinning so the points meet. Press. The top should measure about 54½ × 72½ inches.
Step 7 — Make the quilt sandwich. Layer the backing wrong side up, batting centered, then the top right side up. Smooth from the center and baste.
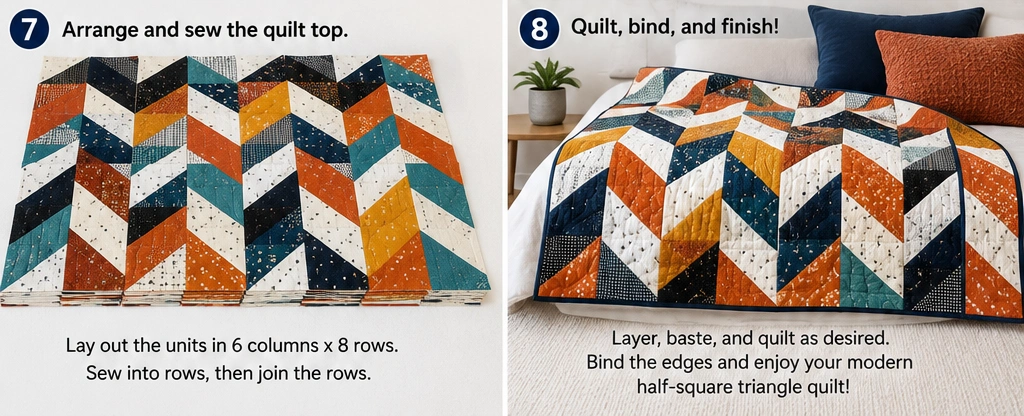
Step 8 — Quilt it. Straight-line quilting suits the geometry — quilt along the diagonals, in a grid, or echo the pattern’s lines. Keep it clean and modern to match the HST look.
Step 9 — Trim, bind, and finish. Trim to 54 × 72 inches, square the corners, and bind with the 2½-inch strips. Press, and admire your geometry.
Assembly at a Glance
- Sort the layer cake into 24 contrasting pairs.
- Make HSTs two at a time (draw, sew both sides, cut, press) → 48 units.
- Trim each to 9½ inches using the ruler’s 45° line.
- Lay out 6 × 8 in your chosen pattern; photograph it.
- Sew units into 8 rows of 6 (¼-inch seams), watching orientation.
- Join rows, nesting seams and matching points → 54½ × 72½ top.
- Layer backing, batting, and top; baste.
- Quilt along the diagonals or in a grid.
- Trim to 54 × 72 inches; bind and press.
Beginner Tips for Success
- Always trim your HSTs to size — it’s the difference between crisp points and a wonky quilt.
- Use a ruler with a 45° line and align it on the seam for perfect squares.
- Choose high-contrast pairs; value contrast is what makes the pattern read.
- Press seams toward the darker fabric so they don’t shadow through the light triangle.
- Check unit orientation against your layout photo before sewing — HSTs flip easily.
Styling It & Gift Ideas
A bold HST quilt is a graphic statement, so let it lead in a modern room — over a bed with plain white linens, or draped on a contemporary sofa against simple, solid furnishings. The clean geometry suits minimalist and mid-century spaces especially well.
It also makes a fantastic gift, since the striking design looks impressive and thoroughly modern:
- A throw quilt for a stylish friend’s housewarming or a wedding
- A graduation gift in a grad’s school or team colors (HSTs make two-color palettes easy)
- A baby quilt in bright, high-contrast colors (babies love bold contrast) — scale down to about 4 × 5 units
- A gender-neutral new-baby gift in modern two-tone shades
The two-color nature of HSTs makes it easy to personalize a gift to someone’s favorite colors or a team.
Final Thoughts
A modern half-square triangle layer cake quilt is where quilting gets genuinely exciting — the moment you realize that one simple unit, arranged with intention, can make a dozen different striking designs. It’s the most valuable technique in this whole collection, unlocking pinwheels, stars, chevrons, and flying geese down the road, and it’s beautiful in its own right: crisp, graphic, and modern. Trim your units well, choose bold contrast, and one vibrant layer cake becomes a piece of geometric art for your home.
Other Design Inspirations – Digitally Modified
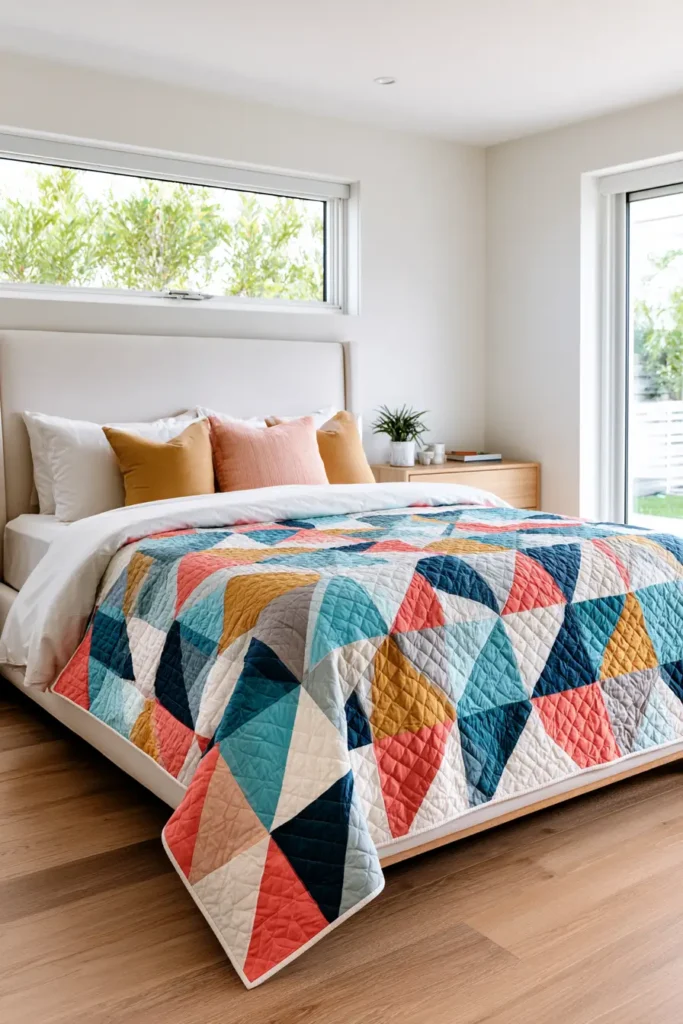
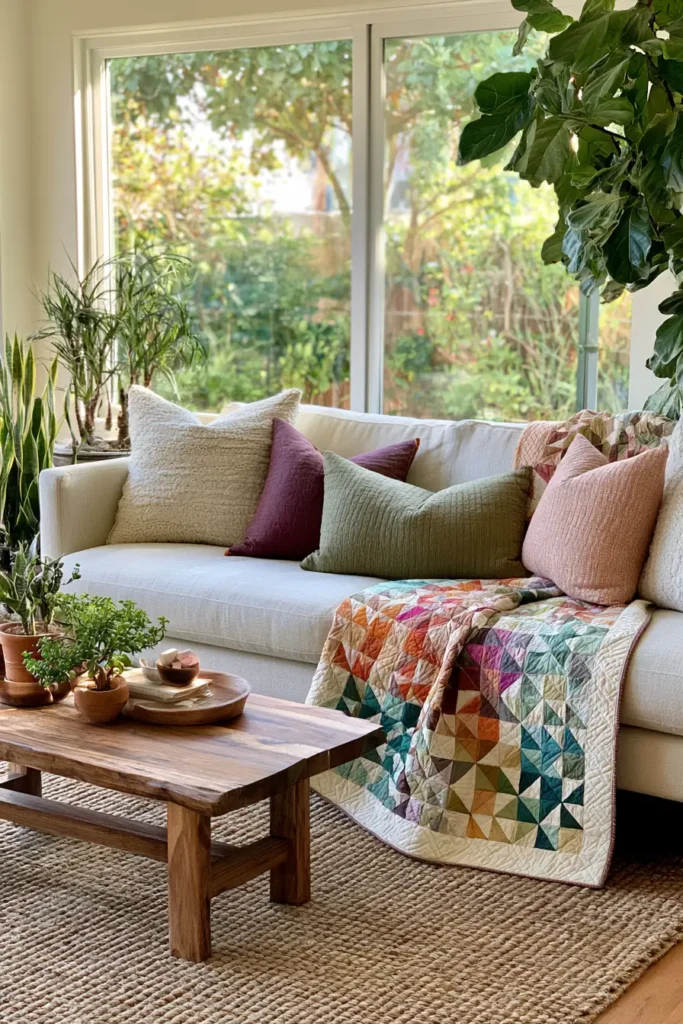
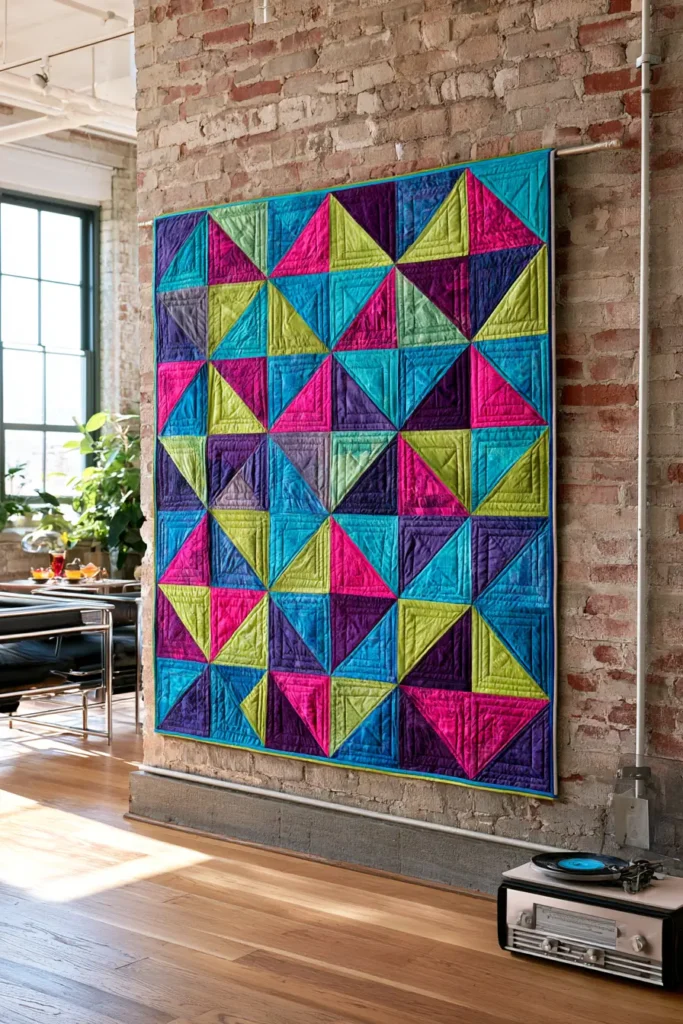
3. Disappearing Nine Patch Layer Cake Quilt for Stunning Visuals
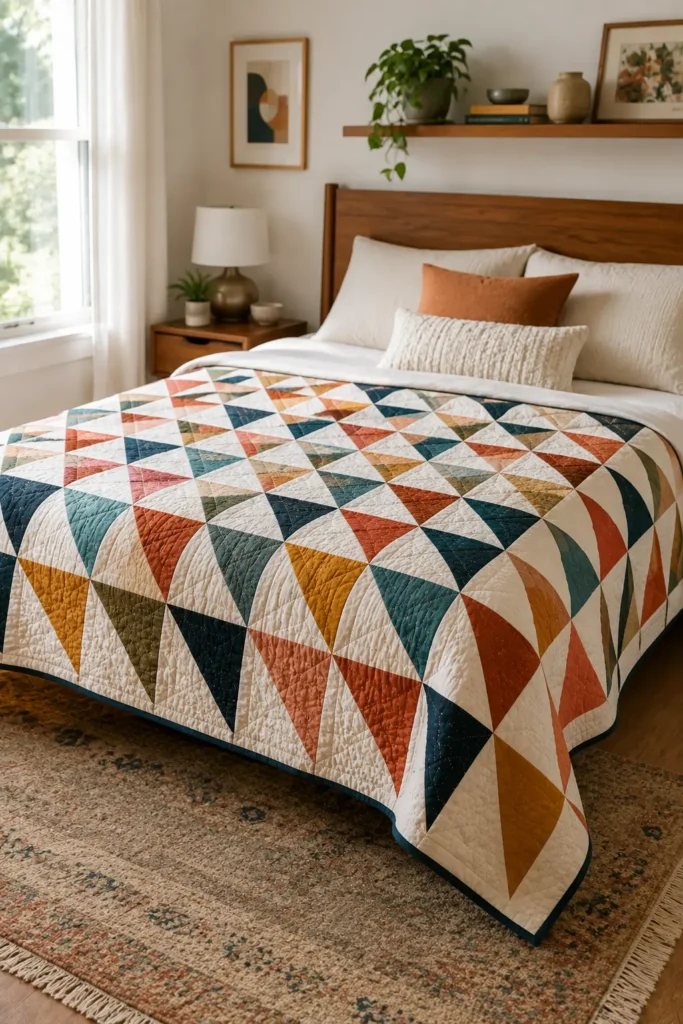
The disappearing nine patch is the cleverest trick in beginner quilting — and one of the most fun blocks you’ll ever make. Here’s the magic: you sew nine squares into a simple grid (a “nine patch”), then you cut the whole block apart and rearrange the pieces. When you sew them back together, a complex, intricate-looking pattern appears — one that looks far more advanced than the simple squares you started with. The original nine patch “disappears” into something new and stunning, which is exactly how the block gets its name. Made from a vibrant layer cake, the result is a rich, dynamic quilt that looks like serious work but is genuinely beginner-friendly.
It’s the perfect next step after a charm quilt. You’re still sewing straight seams and simple squares, but with one extra move — cut and rearrange — you unlock a whole new level of visual complexity. Few techniques give you this much “wow” for so little added difficulty.
A Little History: The Magic of “Disappearing” Blocks
The disappearing nine patch rose to popularity in the modern quilting era of the 2000s, right alongside precut fabrics, and it kicked off a whole family of “disappearing” blocks — the disappearing four patch, the disappearing hourglass, and more. The idea behind all of them is the same and slightly magical: build a simple block, cut it up, shuffle the pieces, and rejoin them so a more intricate secondary pattern emerges. It’s a technique built on a delightful bit of geometry — that cutting through your seams and offsetting the pieces creates brand-new intersections and shapes. Quilters love it because it turns the plainest nine-patch into something that looks intricately pieced, with almost no extra skill required.
There’s a lovely resonance here with older traditions of making complexity from simple, repeated pieces — including the Nakshi Kantha tradition of my own family’s background, where rich, elaborate-looking cloth was built up from the humblest squares and stitches.
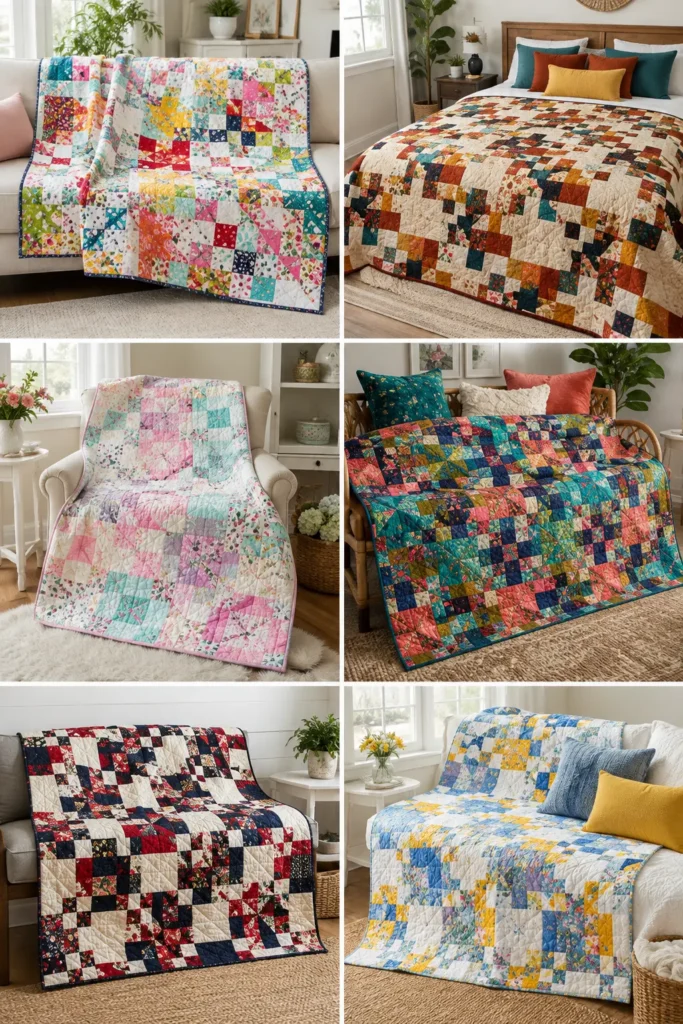
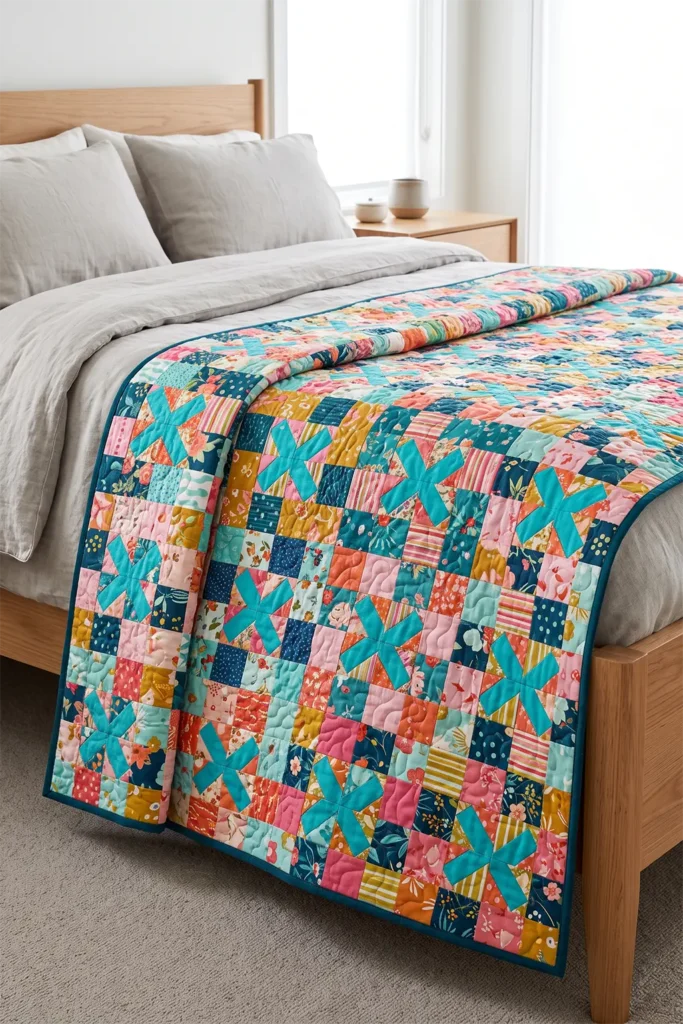
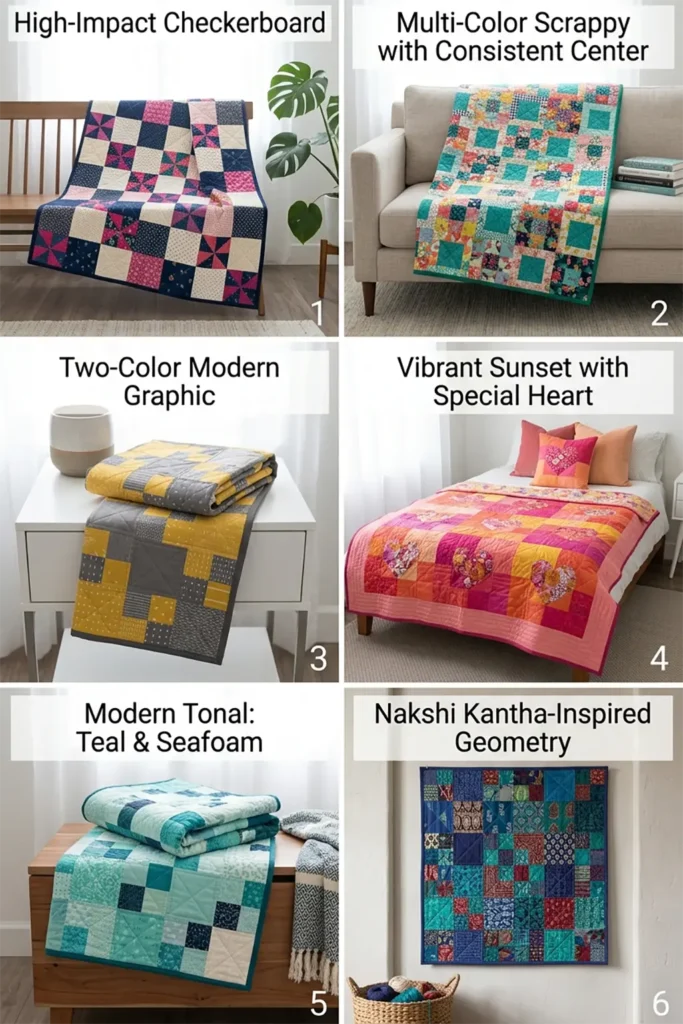
Why This Idea Is Worth Making
This idea is worth making because it delivers the biggest visual payoff for the least added effort in this whole collection. If you can sew a straight line and make a nine patch, you can make this — the only new skill is cutting the block apart and rearranging it, which is genuinely fun. The finished quilt looks intricate and impressive, hiding just how simple it was to piece, and the layer cake’s coordinated colors make even a scrappy version look designed. It’s fast, forgiving, and the kind of project that makes beginners feel like experts.
Finished Size
- Finished quilt: about 54 × 72 inches — a throw or twin quilt
- Finished block: about 13½ inches (each disappearing nine patch, after cutting and rejoining)
- Layout: 4 blocks across × 5 blocks down = 20 blocks
- Skill level: confident beginner (a fun step up from the charm quilt)
- Core techniques: nine-patch piecing, the “disappearing” cut, rearranging, block assembly, binding
Materials Needed
- 1 layer cake (42 squares) — each disappearing nine patch block uses 9 squares, but you’ll cut them smaller, so a layer cake makes plenty of blocks with squares to spare (or supplement with extra squares for a larger quilt)
- Backing: 3½ yards
- Batting: at least 60 × 78 inches
- Binding: ⅝ yard of a coordinating solid
- Thread: neutral cotton
- Rotary cutter, cutting mat, quilting ruler, pins, iron, sewing machine
Beginner tip: the key to this block is a single clean cut across the middle in each direction. A long quilting ruler and a sharp rotary blade make that cut straight and accurate, which keeps all your pieces lining up when you rejoin them.
How the “Disappearing” Trick Works
Before the steps, here’s the concept in plain terms:
- Sew 9 squares into a 3 × 3 nine patch.
- Cut that block once vertically and once horizontally, straight through the center — this gives you 4 smaller squares, each containing parts of several original fabrics.
- Rotate two of those four quarters (usually the diagonal pair) 180 degrees, or rearrange them.
- Sew the four quarters back together. New seam intersections create a pinwheel-like secondary pattern in the center — the nine patch has “disappeared” into something more intricate.
That’s the whole trick. Simple cut, small rotation, big transformation.
Choosing Your Colors
This block shines with contrast between the center and corners of each nine patch:
- Classic high-impact: alternate a dark/bold square and a light square in a checkerboard within each nine patch, so the cut reveals a crisp secondary pattern
- Vibrant scrappy: mix bright layer cake prints freely, with one consistent color (or a solid) as the center square of every nine patch to tie them together
- Two-color modern: use just two strongly contrasting colors for a bold, graphic result
- The center square of each nine patch becomes the visual “heart” after cutting, so make it count — a vibrant pop there reads beautifully
Contrast is what makes the disappearing effect show, so avoid nine patches where all nine squares are similar in value.
Cutting Measurements
- Per block: use 9 squares, each trimmed to a uniform size. Trim the 10-inch layer cake squares to 4½ × 4½ inches (four small squares from each 10-inch square if you want to stretch the bundle, or use nine trimmed squares per block for larger blocks)
- Simplest approach: cut each 10-inch square into four 5-inch squares, and build nine-patches from these — a layer cake yields 168 small squares, plenty for many blocks
- Backing: 60 × 78 inches
- Batting: 60 × 78 inches
- Binding: seven strips, 2½ inches × width of fabric
(Using 5-inch squares, each nine patch finishes about 13½ inches after the disappearing cut and ¼-inch seams.)
Step-by-Step Guide
Step 1 — Cut your squares. Cut each 10-inch layer cake square into four 5-inch squares. Sort them so you can build high-contrast nine patches (mixing lights, darks, and a vibrant center).
Step 2 — Sew a nine patch. Arrange 9 squares in a 3 × 3 grid with good contrast (a checkerboard of light and dark works beautifully, with a bold center). Sew into three rows with a ¼-inch seam, press seams to alternate directions, then join the rows. You have one nine-patch block, about 13½ inches.
Step 3 — Make the “disappearing” cuts. Place the nine-patch on your mat and cut it once straight down the vertical center and once straight across the horizontal center, giving you four equal quarters. Cut precisely — accuracy here keeps everything aligned.
Step 4 — Rearrange the quarters. Rotate the quarters to create the secondary pattern — the classic move is to turn two diagonal quarters 180°, or rotate each quarter so the small corner pieces meet in the center to form a pinwheel. Play with the arrangement until you like it.
Step 5 — Sew the block back together. Rejoin the four quarters with a ¼-inch seam, nesting the seams where they meet. Press. Your disappearing nine patch block is complete — and looks far more complex than the simple nine patch you started with. Make 20 blocks.
Step 6 — Lay out the quilt. Arrange the 20 blocks 4 across × 5 down, rotating them for the best flow of color and pattern. Photograph your layout.
Step 7 — Assemble the top. Sew the blocks into rows with a ¼-inch seam, press seams to alternate directions, then join the rows, nesting the seams. The top should measure about 54½ × 72½ inches.
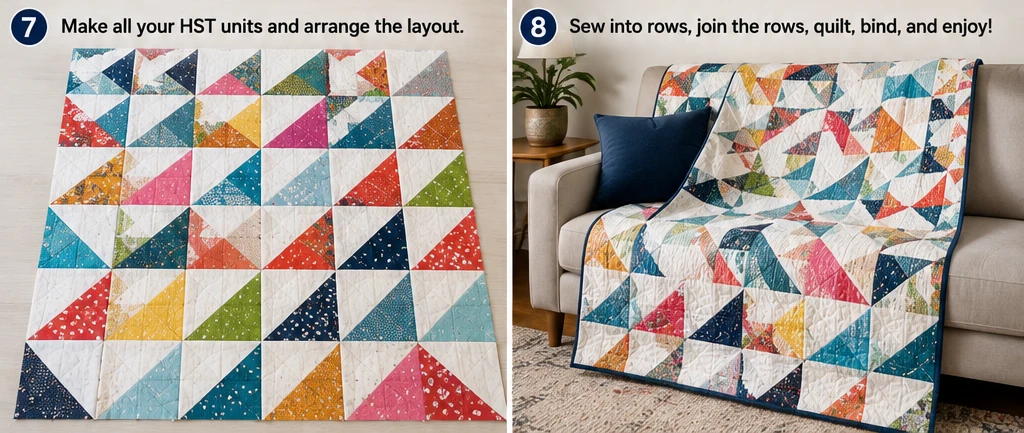
Step 8 — Make the quilt sandwich and quilt. Layer backing (wrong side up), batting, and top (right side up); baste. Quilt with an all-over design, straight lines, or stitching that follows the pinwheel centers.
Step 9 — Trim, bind, and finish. Trim to 54 × 72 inches, square the corners, bind with the 2½-inch strips, and press.
Assembly at a Glance
- Cut each 10-inch square into four 5-inch squares.
- Sew a high-contrast 3 × 3 nine patch (¼-inch seams), pressing alternate rows.
- Cut the block once vertically and once horizontally through the center → 4 quarters.
- Rotate/rearrange the quarters to form the secondary pattern.
- Sew the quarters back together → one disappearing nine patch block (~13½ inches). Make 20.
- Lay out 4 × 5, rotating blocks; photograph.
- Sew into rows, press alternating, join rows → 54½ × 72½ top.
- Layer, baste, and quilt.
- Trim to 54 × 72 inches; bind and press.
Beginner Tips for Success
- Build high-contrast nine patches; the disappearing effect only shows with clear light/dark difference.
- Make the center square a vibrant pop — it becomes the heart of the finished block.
- Cut the block precisely through the center both ways; accuracy keeps the rejoined pieces aligned.
- Nest your seams when rejoining the quarters for crisp intersections.
- Try a few quarter rotations before sewing — different arrangements give different secondary patterns.
Styling It & Gift Ideas
A disappearing nine patch quilt has a lively, intricate look that suits both cozy and modern rooms — its busy, colorful pattern feels cheerful on a bed, welcoming on a sofa, and right at home in an eclectic, maximalist space. Because the design reads as complex, it makes a real impression for a quilt that’s genuinely easy to make.
That “looks impressive, sews up quick” quality makes it a brilliant gift:
- A throw quilt for a wedding or big-birthday gift, where the intricate look feels special
- A baby quilt in bright, contrasting prints (scale down to fewer blocks) — cheerful and eye-catching for little ones
- A graduation or new-home gift in the recipient’s favorite colors
- A quick-but-wow holiday gift when you want maximum impact for your sewing time
It’s the quilt that makes people think you spent far longer than you did — perfect when a gift needs to look extra special.
Final Thoughts
A disappearing nine patch layer cake quilt is proof that a little cleverness beats a lot of complexity. By sewing a simple nine patch, cutting it apart, and rearranging the pieces, you conjure an intricate secondary pattern from the plainest of squares — a genuinely magical bit of quilting that stays completely beginner-friendly. Choose bold, contrasting colors, make that center square sing, and one vibrant layer cake becomes a stunning, dynamic quilt that looks like it took far more skill than it actually did.
Other Design Inspirations – Digitally Modified
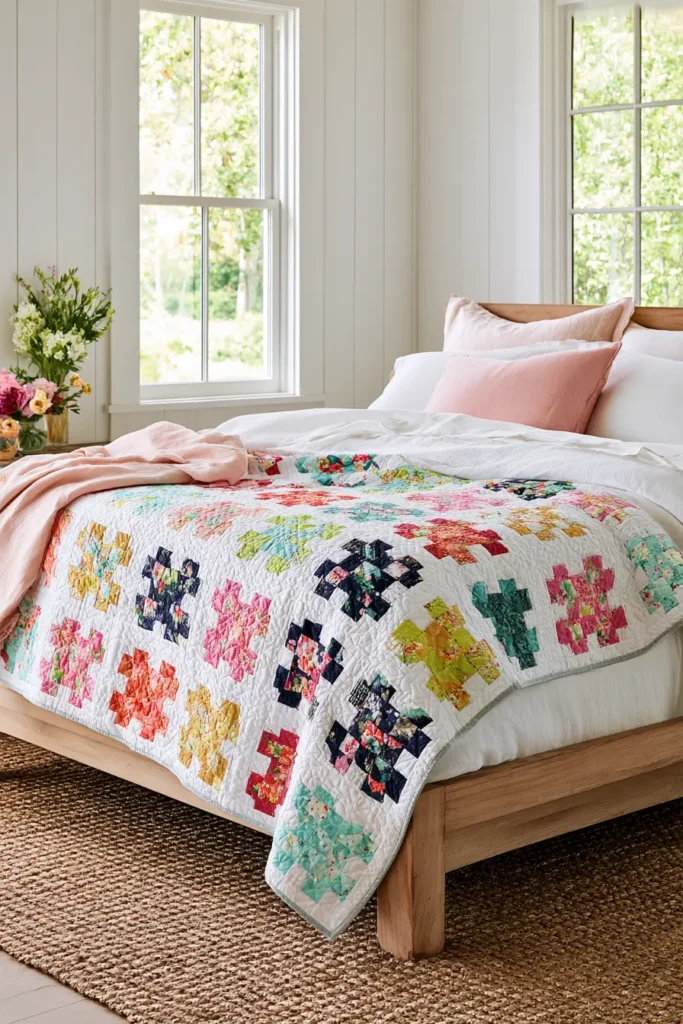
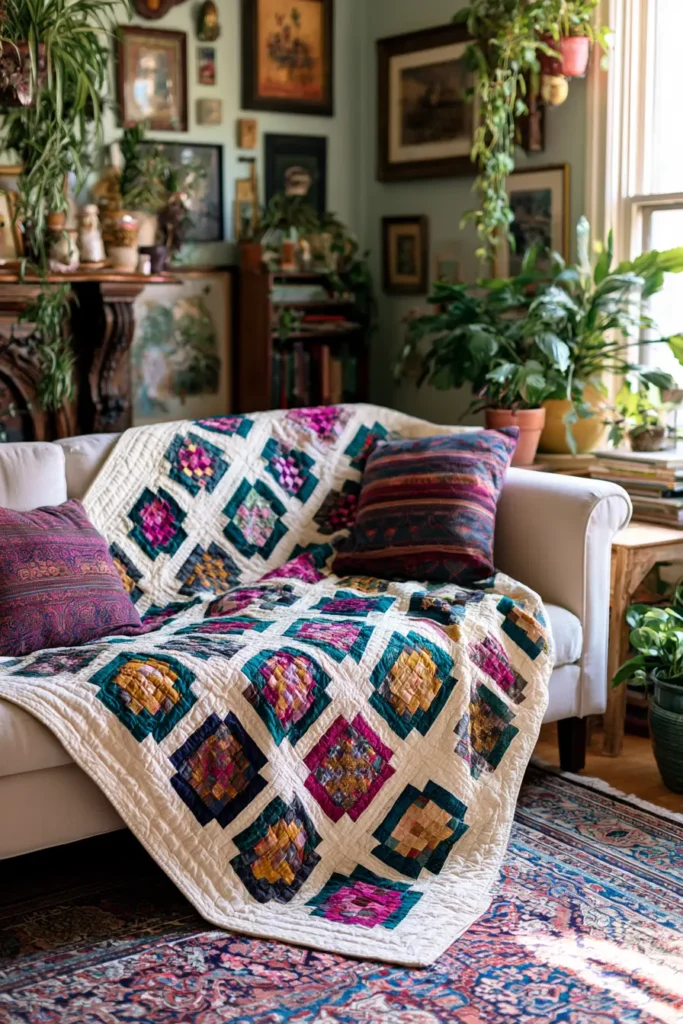
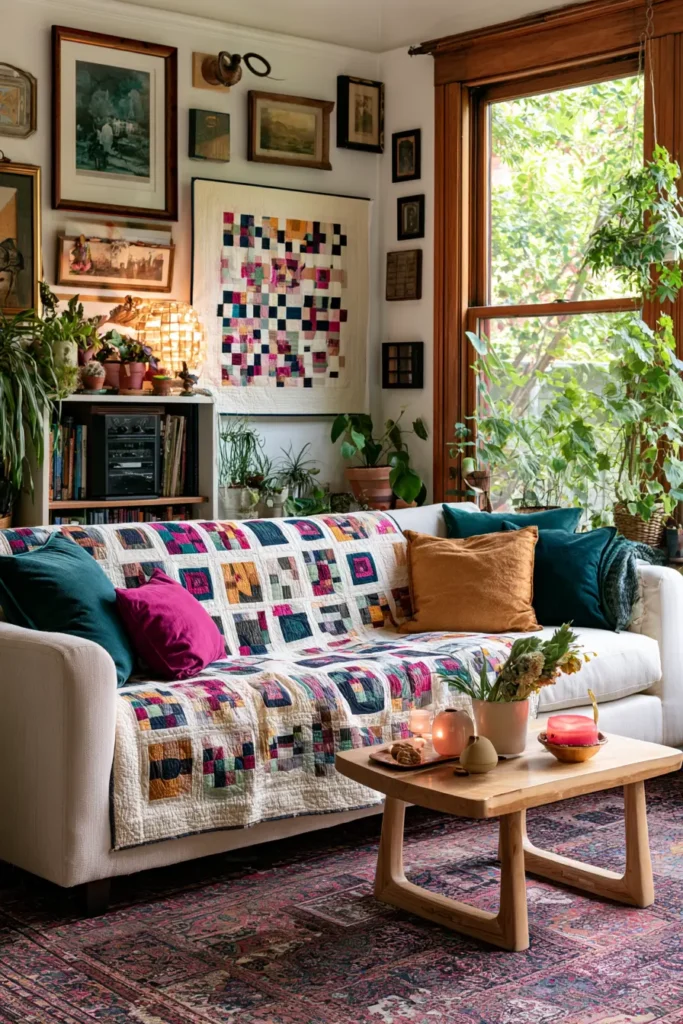
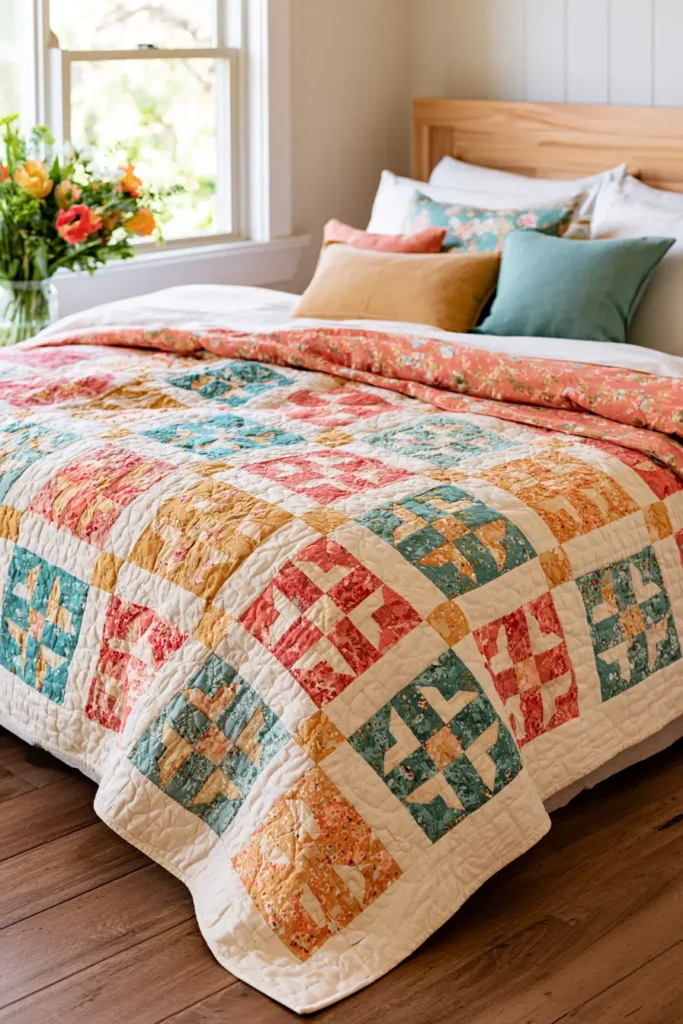
4. Fast Four-Patch Layer Cake Quilt for Quick Weekend Sewing
When you want a finished quilt fast, the four-patch is your best friend. It’s one of the simplest blocks in all of quilting — just four squares arranged two-by-two — and with a clever shortcut called strip-piecing, you can make dozens of them in a single afternoon. Alternate those checkerboard four-patch blocks with whole layer cake squares, and you get a crisp, cheerful quilt with real visual rhythm, finished in a weekend. In vibrant colors, the little checkerboards pop against the plain squares like confetti, proving that the quickest quilts can also be some of the prettiest.
The speed secret here is that you won’t sew squares together one at a time. Instead, you’ll sew long strips together, then slice them into ready-made units — a technique that turns what could be tedious into something genuinely fast. It’s the same efficiency trick behind jelly roll quilts, applied to your layer cake.
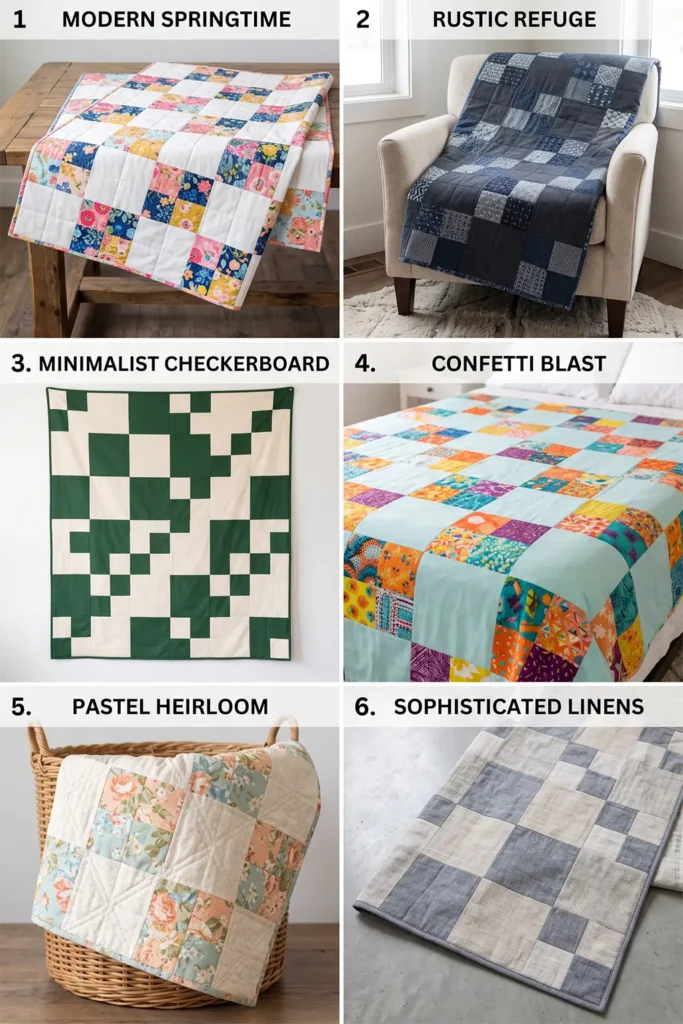
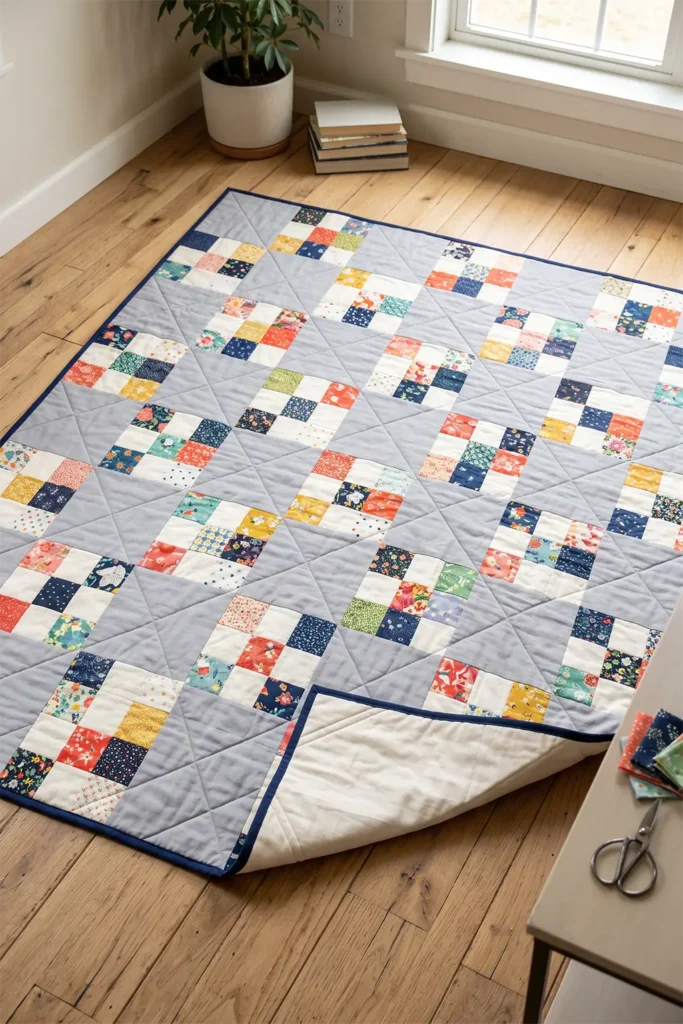
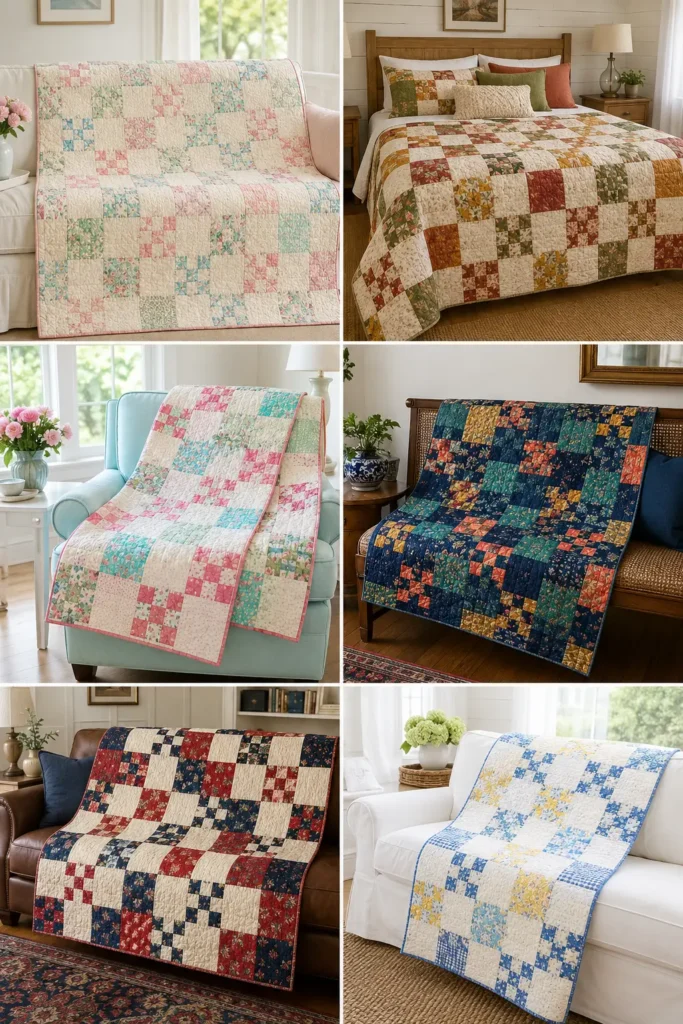
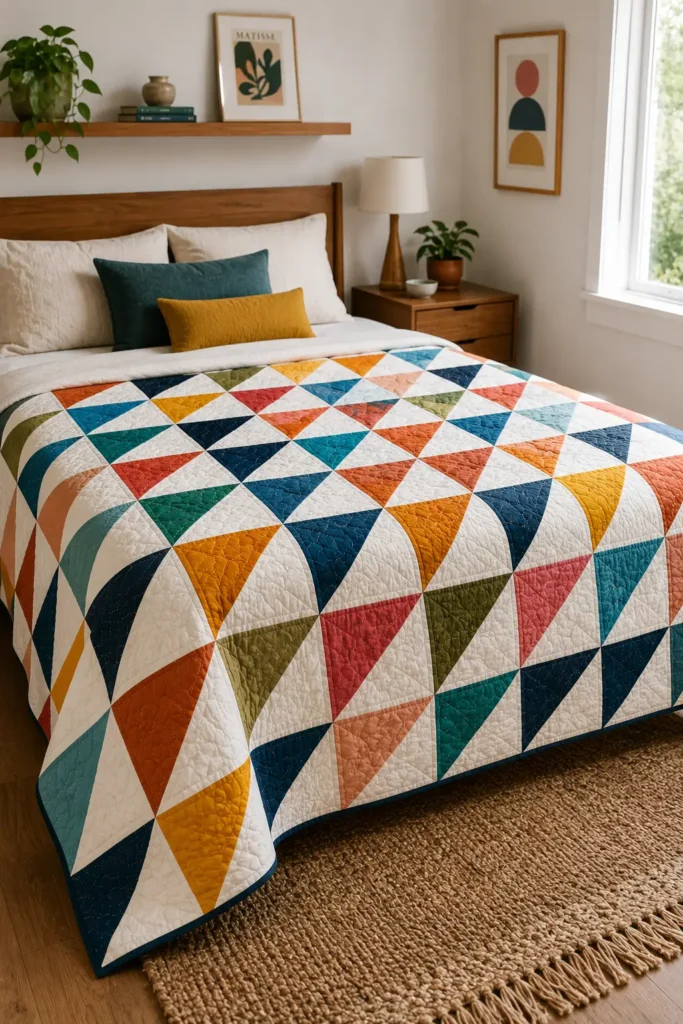
A Little History: The Humble Four-Patch
The four-patch is one of the oldest and most fundamental blocks in quilting, right alongside the nine-patch and the half-square triangle. Its simplicity made it a first block for countless beginning quilters across generations — four squares, four seams, an easy checkerboard — and a practical way to use up small scraps. It’s also the foundation of many more complex designs: the Double Four-Patch, the Jacob’s Ladder, and the Broken Dishes block all build on it. Few blocks have taught more people to quilt, precisely because it’s so forgiving and so quick.
That idea of building beauty quickly from the plainest squares runs through hand-stitching traditions worldwide, including the Nakshi Kantha tradition of my own family’s background, where simple pieced cloth became warm, cheerful quilts with the most straightforward of techniques.
Why This Idea Is Worth Making
This idea is worth making because it’s the fastest real quilt in this collection — a genuine weekend project. Strip-piecing the four-patches means you make them in batches instead of one at a time, so the sewing flies by, and alternating them with whole squares means half your quilt top needs no piecing at all. The checkerboard-against-plain layout looks lively and designed, the layer cake keeps the colors coordinated, and the whole thing is beginner-friendly. When you want the satisfaction of a finished quilt without a long commitment, this is the one.
Finished Size
- Finished quilt: about 60 × 72 inches — a generous throw or twin quilt
- Finished block: 9 inches (both the four-patch blocks and the plain alternate squares)
- Layout: 6 blocks across × 8 blocks down = 48 blocks (24 four-patches + 24 plain squares, alternating)
- Skill level: beginner — the fastest project here
- Core techniques: strip-piecing, subcutting, alternating-block layout, binding
Materials Needed
- 1 layer cake (42 squares) — split between four-patch blocks and whole alternate squares
- (Optional) a coordinating solid to pair with prints for crisp checkerboards
- Backing: 3¾ yards
- Batting: at least 66 × 78 inches
- Binding: ⅝ yard of a coordinating solid
- Thread: neutral cotton
- Rotary cutter, cutting mat, quilting ruler, pins, iron, sewing machine
Beginner tip: chain-piecing speeds this up even more — feed your strip pairs through the machine one after another without cutting the thread between them, then snip them apart afterward. It keeps the rhythm going and makes fast work of the whole quilt.
The Strip-Piecing Shortcut
Here’s what makes this quilt so fast. Instead of cutting and sewing individual small squares, you work with strips:
- Cut your chosen squares into strips.
- Sew two contrasting strips together along their length into a strip set.
- Subcut that strip set into segments.
- Pair two segments (rotated) and sew — instant four-patch, no fiddly individual squares.
You’ll make many four-patches from just a few strip sets, which is why the technique is so beloved for speed.
Choosing Your Colors
Four-patches shine on contrast — the checkerboard needs to read clearly:
- Print + solid: pair each vibrant layer cake print with a crisp white or cream for a fresh, modern checkerboard
- Light + dark: pair light squares against dark ones for bold little checkers
- Two-color: use two strongly contrasting colors throughout for a graphic, cohesive look
- Vibrant scrappy: mix bright prints freely for the four-patches, and use coordinating whole squares as the alternate blocks
Keep the alternate plain squares either coordinating or calm, so the busy four-patches have somewhere for the eye to rest. High contrast within each four-patch is what makes the checkerboard pop.
Cutting Measurements
- For the four-patch blocks: you need 24 blocks, each finishing 9 inches (9½ unfinished). Each four-patch uses four 5-inch squares (finishing 4½ inches). Cut 5-inch strips from your chosen squares and strip-piece them (see steps)
- For the alternate blocks: cut 24 whole squares down to 9½ × 9½ inches each
- Backing: 66 × 78 inches
- Batting: 66 × 78 inches
- Binding: seven strips, 2½ inches × width of fabric
Step-by-Step Guide
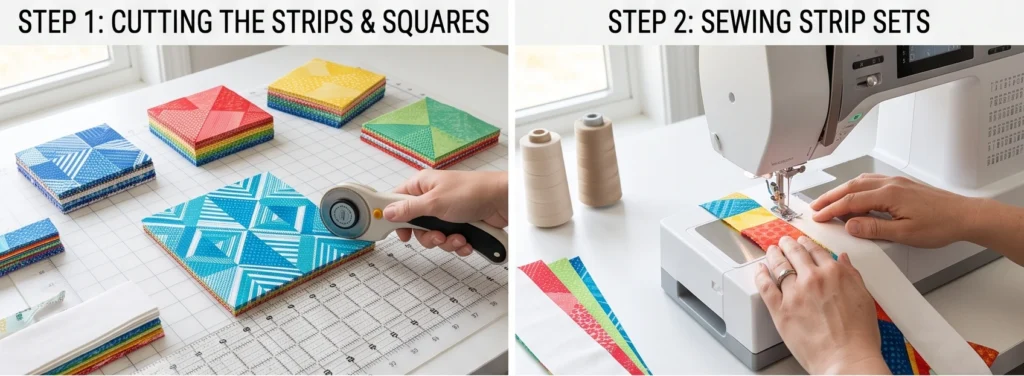
Step 1 — Cut your strips and alternate squares. For the four-patches, cut 5-inch-wide strips from your prints and contrast fabric. For the alternate blocks, trim 24 layer cake squares to 9½ × 9½ inches.
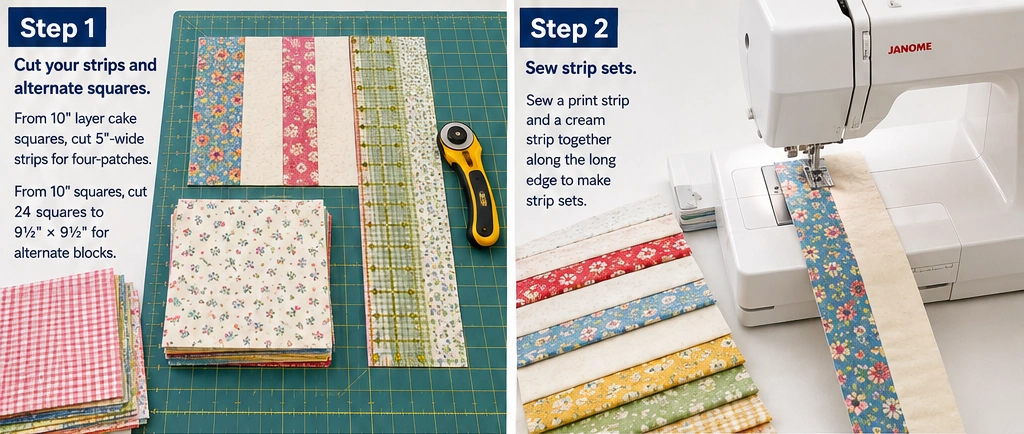
Step 2 — Sew strip sets. Sew a print strip and a contrast strip together along their long edges with a ¼-inch seam. Press the seam toward the darker fabric. Each joined pair is a “strip set.”
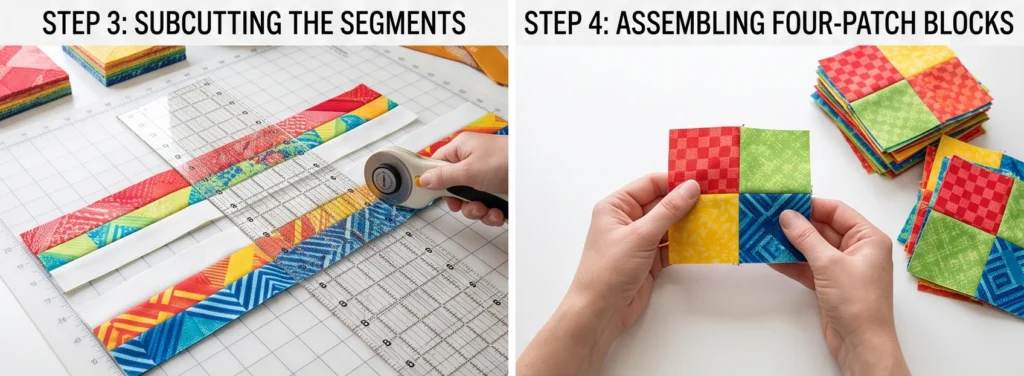
Step 3 — Subcut the strip sets. Cut across each strip set every 5 inches, giving you two square segments. Each segment is half a four-patch.
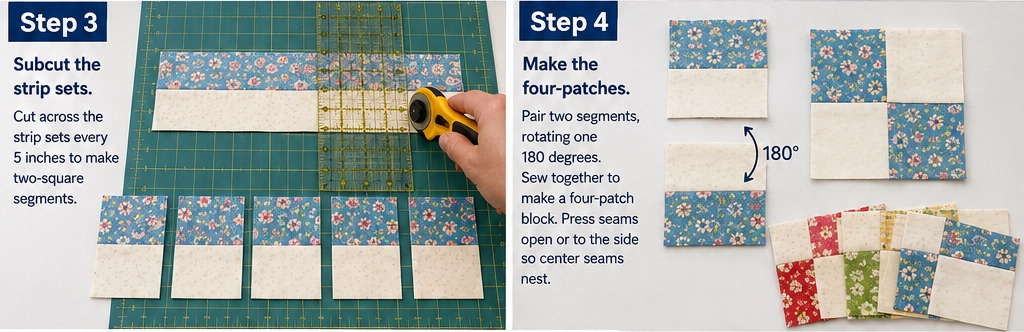
Step 4 — Make the four-patches. Take two segments, rotate one 180° so the colors alternate in a checkerboard, and sew them together with a ¼-inch seam, nesting the center seam. Press. You’ve got a four-patch block, 9½ inches unfinished. Make 24.
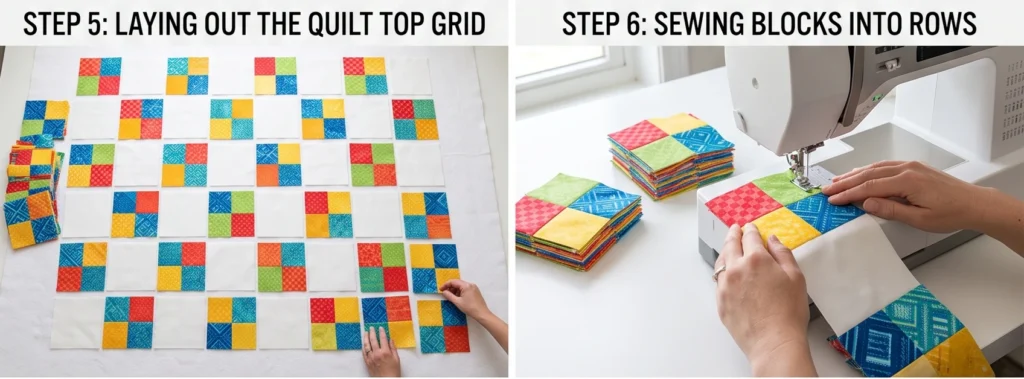
Step 5 — Lay out the quilt. Arrange your blocks 6 across × 8 down in a checkerboard of block types — four-patch, plain, four-patch, plain — so the pieced and plain blocks alternate. Turn the four-patches so their checkers align pleasingly. Photograph the layout.
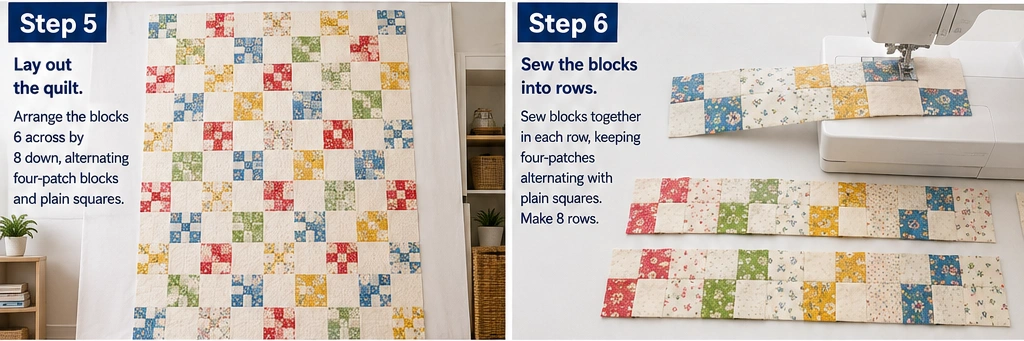
Step 6 — Sew the blocks into rows. Sew each row of 6 blocks with a ¼-inch seam, pressing seams toward the plain blocks so they nest. You’ll have 8 rows.
Step 7 — Join the rows. Sew the rows together, nesting seams at each junction and pinning to match. Press. The top should measure about 60½ × 72½ inches.
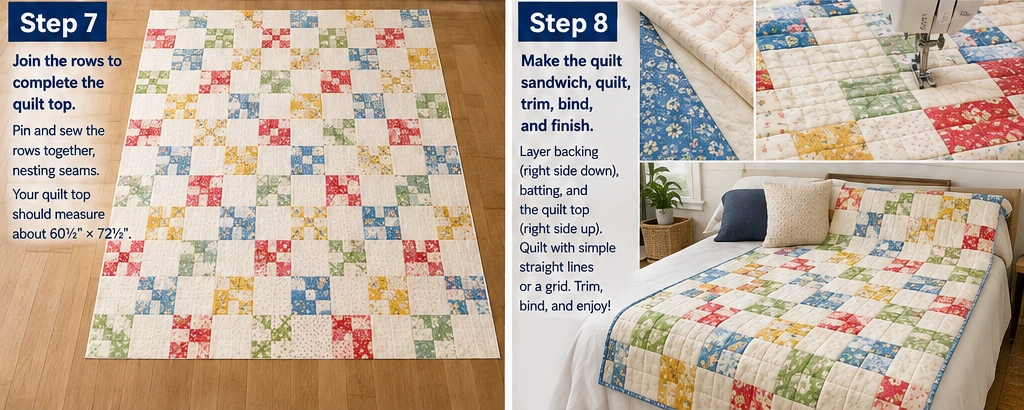
Step 8 — Make the quilt sandwich and quilt. Layer backing (wrong side up), batting, and top (right side up); baste. Quilt simply — an all-over grid, straight lines, or diagonal quilting all suit this cheerful design.
Step 9 — Trim, bind, and finish. Trim to 60 × 72 inches, square the corners, bind with the 2½-inch strips, and press. Done in a weekend!
Assembly at a Glance
- Cut 5-inch strips for four-patches; trim 24 alternate squares to 9½ inches.
- Sew print + contrast strips into strip sets (¼-inch seams); press to the dark.
- Subcut strip sets every 5 inches into two-square segments.
- Rotate and pair segments into 24 four-patches, nesting the center seam.
- Lay out 6 × 8, alternating four-patch and plain blocks; photograph.
- Sew into 8 rows of 6 (¼-inch seams), pressing toward the plain blocks.
- Join rows, nesting seams → 60½ × 72½ top.
- Layer, baste, and quilt.
- Trim to 60 × 72 inches; bind and press.
Beginner Tips for Success
- Strip-piece and chain-piece to make the four-patches in fast batches — that’s the speed secret.
- Press the strip-set seam toward the darker fabric, so the center seams nest when you pair segments.
- Keep high contrast within each four-patch so the checkerboard reads clearly.
- Use calm alternate squares to rest the eye against the busy four-patches.
- Nest every seam junction for crisp, aligned corners.
Styling It & Gift Ideas
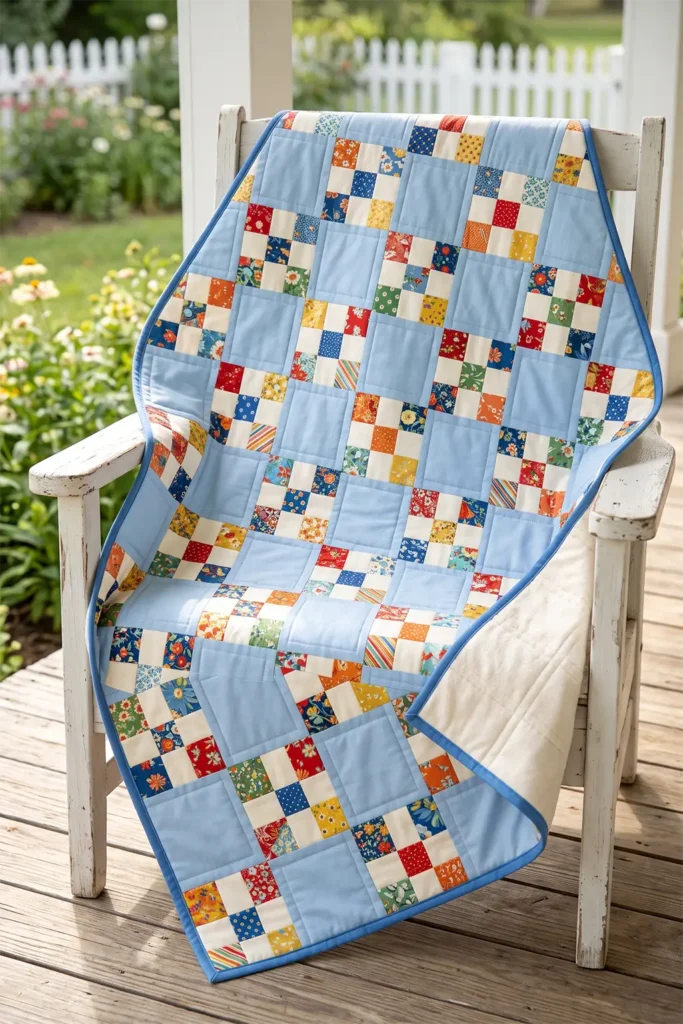
A four-patch quilt has a cheerful, timeless, slightly retro charm that suits cozy and country rooms beautifully — lovely folded on a bed, draped on a porch chair, or spread for a picnic. Its bright checkerboard rhythm feels friendly and welcoming rather than fussy.
Because it’s so quick to make, it’s the ultimate last-minute or make-several gift:
- A baby quilt in bright, happy prints (scale down to fewer blocks) — fast enough to finish before the shower
- A housewarming or wedding throw that looks classic and handmade
- A picnic or car quilt from a cheerful, hardwearing bundle
- Several matching gifts at once — strip-piecing makes it easy to batch out quilts for multiple people (teachers, cousins, teammates)
When you need a handmade gift this weekend, the four-patch delivers.
Final Thoughts
A fast four-patch layer cake quilt is the quickest route to a finished, beautiful quilt — proof that speed and style aren’t opposites. By strip-piecing the four-patches and alternating them with whole squares, you cut the work in half and still end up with a lively, cheerful checkerboard quilt. It’s built on one of quilting’s oldest and friendliest blocks; it’s endlessly forgiving, and it’s ready in a weekend. When you want the joy of finishing something without the long haul, one vibrant layer cake and a few smart shortcuts are all it takes.
Other Design Inspirations – Digitally Modified
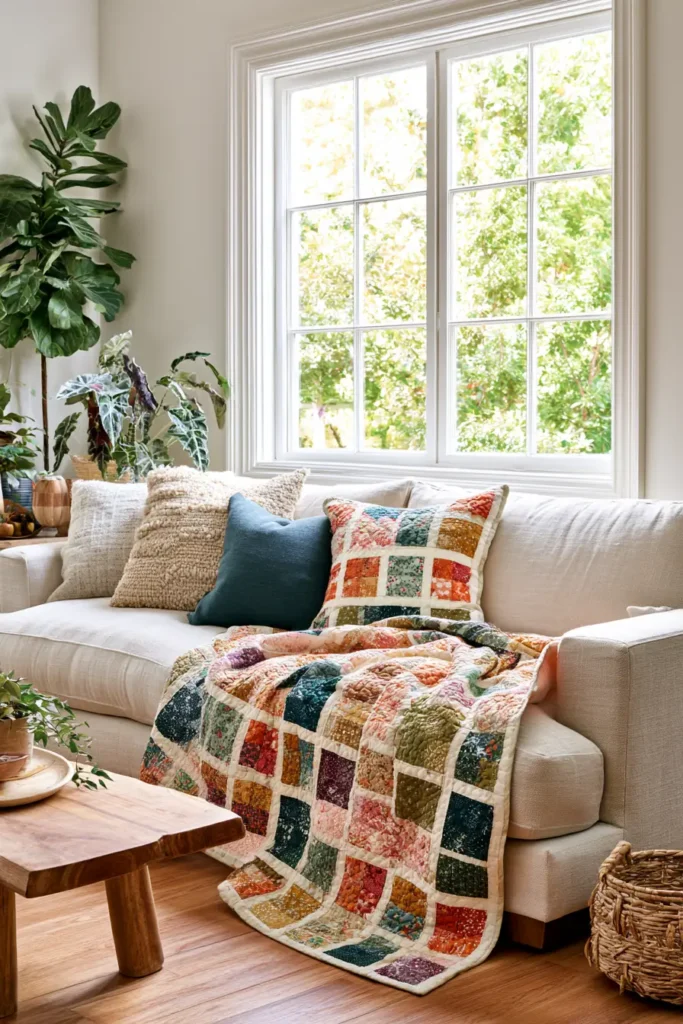
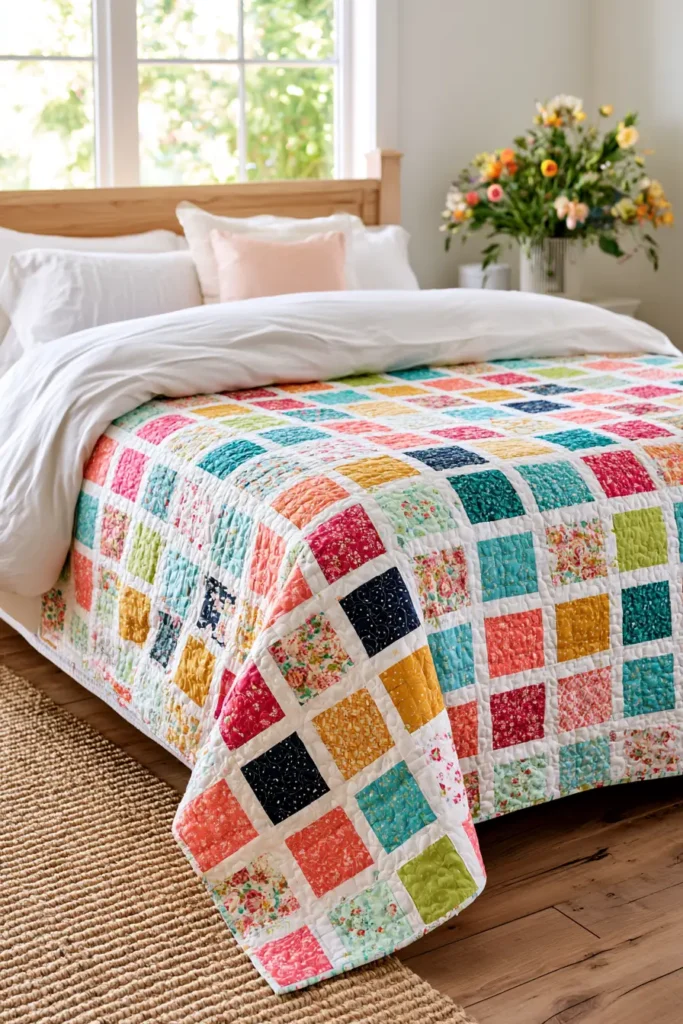
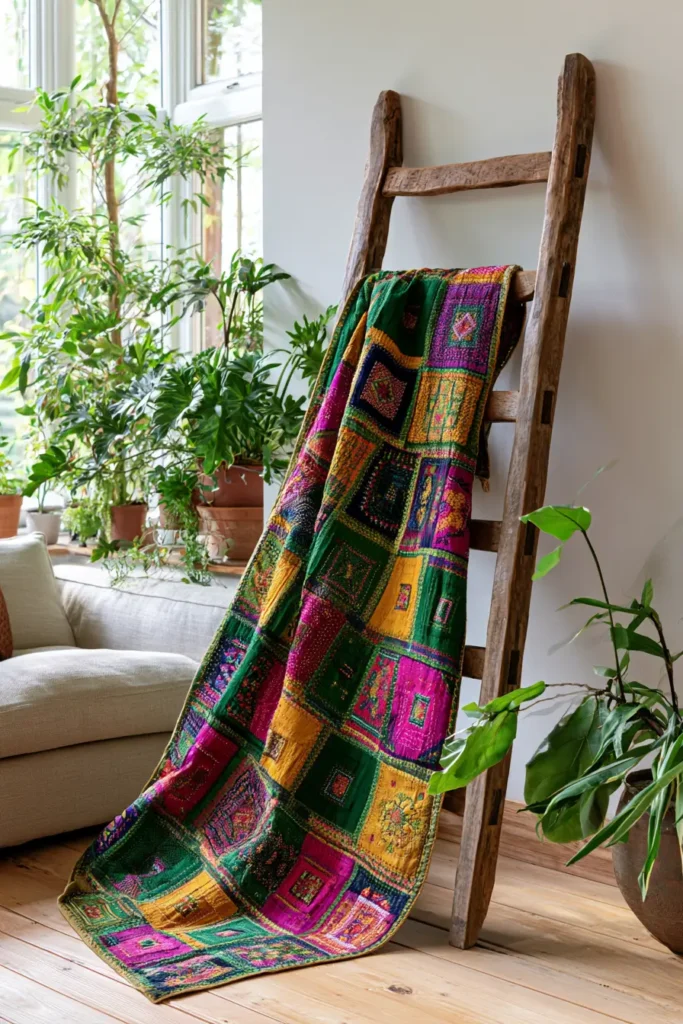
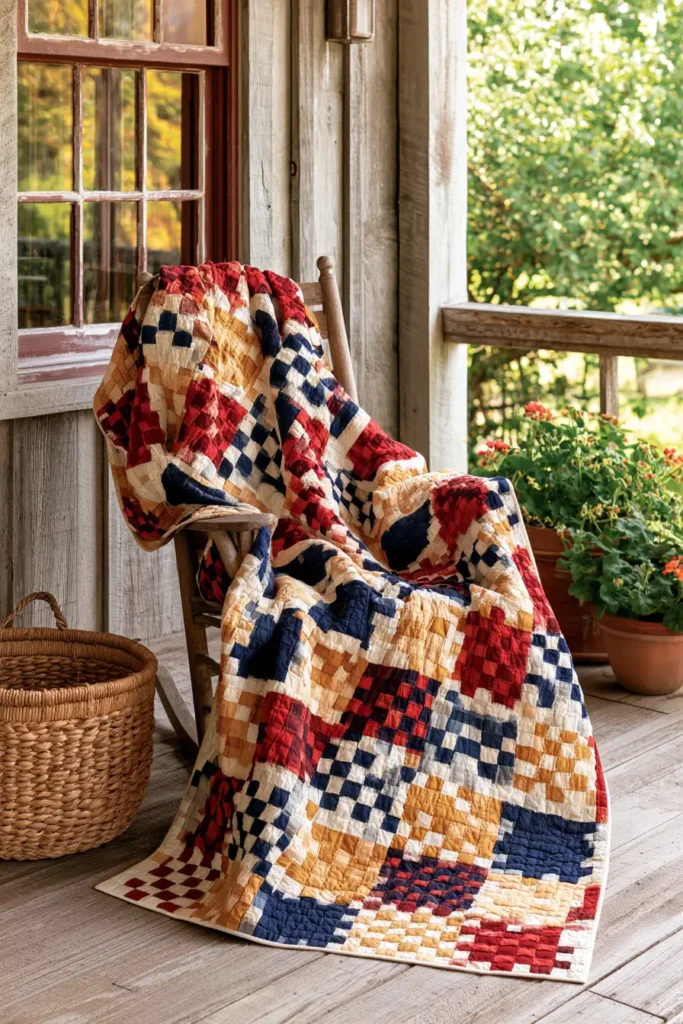
5. Playful Pinwheel Layer Cake Quilt for Movement and Charm
Some quilts sit still, and some quilts spin. The pinwheel is the playful one — a block that looks like it’s whirling right there on the fabric, four triangles pinwheeling around a center point just like the paper pinwheels of childhood. It’s cheerful, full of movement, and surprisingly easy, because a pinwheel is really just four half-square triangles rotated around a center. If you’ve already made an HST quilt, you know almost everything you need; if you haven’t, this is a delightful place to learn. In vibrant, contrasting colors, a pinwheel quilt has a joyful, spinning energy that brings instant charm to a room.
The whole magic is in the rotation. Take four identical half-square triangles, spin them so their diagonals all point around a central pivot, and the eye reads the result as motion. It’s a wonderful lesson in how arrangement creates illusion — the same trick that makes so many classic quilt blocks come alive.
(New to half-square triangles? The Half-Square Triangle section of this collection walks through the two-at-once method step by step — it’s the foundation this block builds on.)
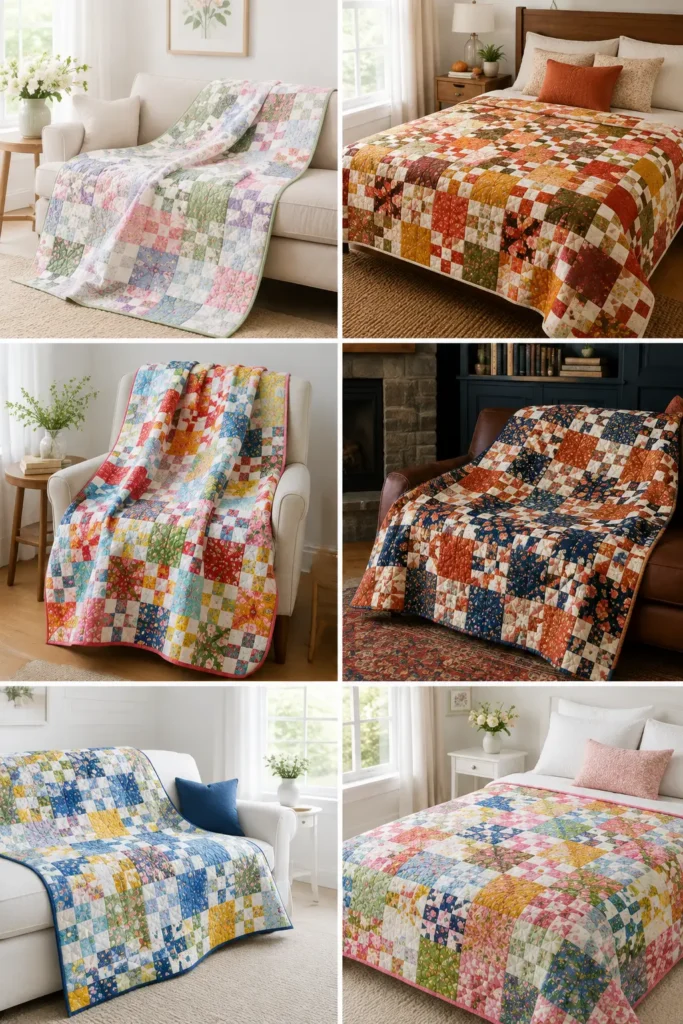
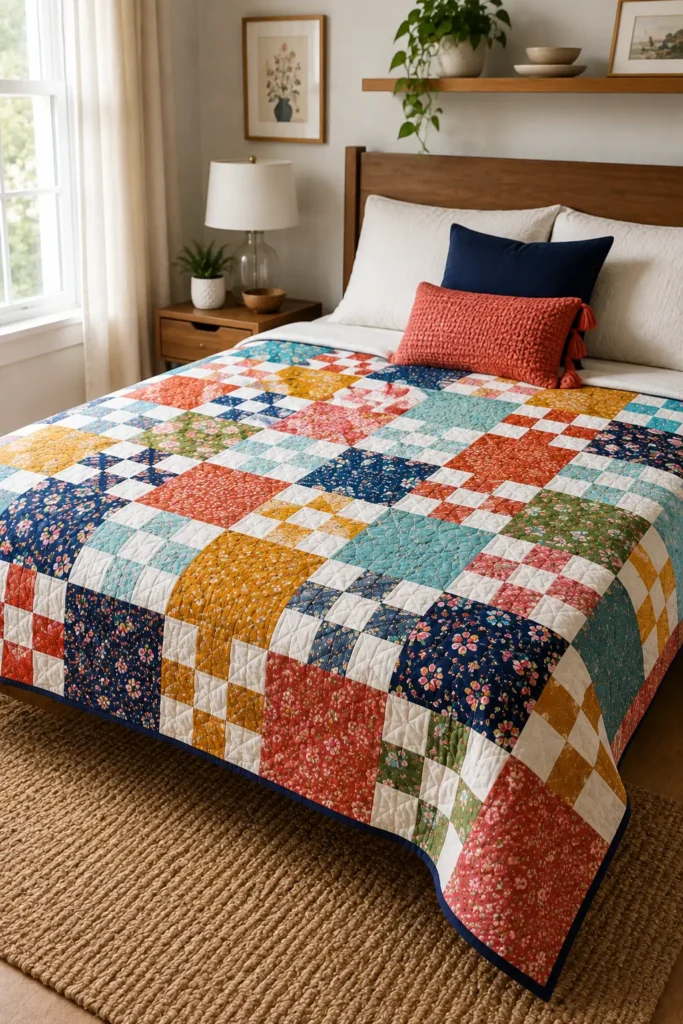
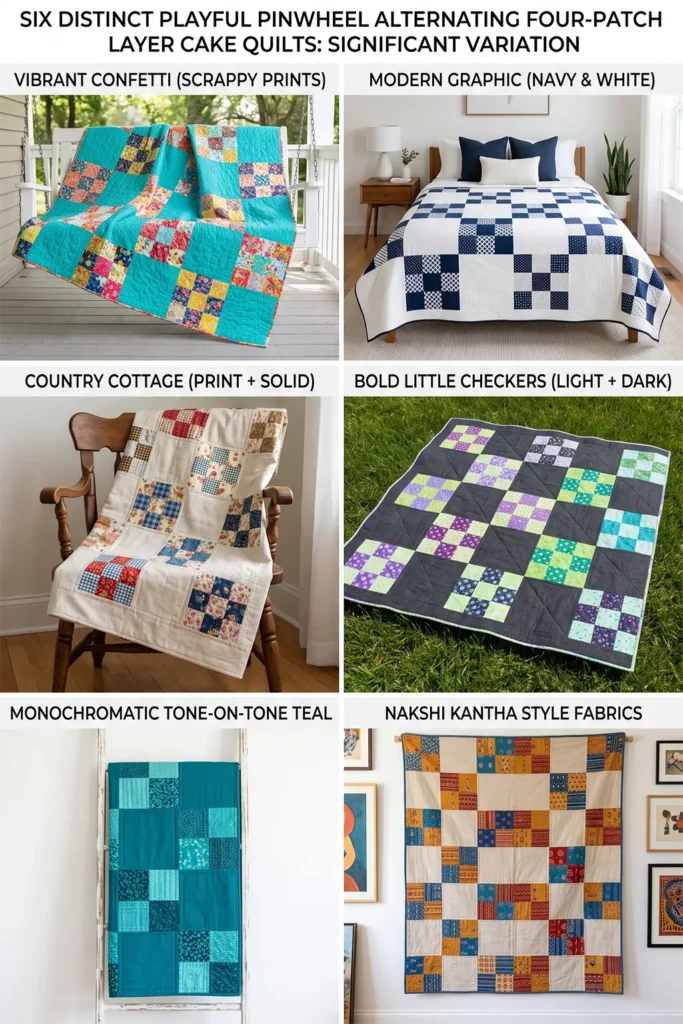
A Little History: The Ever-Spinning Pinwheel
The pinwheel is a classic, centuries-old quilt block, one of the most recognizable in the whole tradition. Built entirely from half-square triangles, it has appeared under many names over the years — Pinwheel, Whirligig, and Water Wheel among them — all describing the same sense of spinning motion. It was a favorite in scrap quilts because it needs only two contrasting fabrics per block and creates such lively movement from such simple pieces. Its cheerful, childlike energy has made it a perennial favorite for baby and children’s quilts especially, though it’s just as charming in a sophisticated palette for grown-up rooms.
That delight in creating movement and life from plain geometric pieces is something quilters share with hand-stitching traditions everywhere, including the Nakshi Kantha tradition of my own family’s background, where lively patterns were coaxed from the simplest shapes and stitches.
Why This Idea Is Worth Making
This idea is worth making because it turns the humble half-square triangle into pure joy — a quilt with genuine movement and personality, still built from beginner-friendly units. It’s the natural next step after an HST quilt, adding just one new idea (rotating four units into a spinning block), and the payoff in charm is huge. The layer cake’s coordinated colors keep even a scrappy pinwheel looking designed, the spinning blocks suit everything from nurseries to modern living rooms, and it’s genuinely fun to lay out. Movement, charm, and simplicity all at once.
Finished Size
- Finished quilt: about 54 × 72 inches — a throw or twin quilt
- Finished pinwheel block: 12 inches (four 6-inch finished HSTs)
- Layout: 4 blocks across × 6 blocks down = 24 pinwheel blocks
- Skill level: confident beginner (a fun step up from a basic HST quilt)
- Core techniques: half-square triangles, rotating units into pinwheels, managing the center seam, binding
Materials Needed
- 1 layer cake — pair contrasting squares to make HSTs (each pinwheel needs four matching HSTs, so pair squares in sets that share a color story)
- (Optional) extra coordinating squares or a solid for consistent contrast
- Backing: 3½ yards
- Batting: at least 60 × 78 inches
- Binding: ⅝ yard of a coordinating solid
- Thread: neutral cotton
- Rotary cutter, cutting mat, quilting ruler with a 45° line, pins, iron, sewing machine
Beginner tip: the center of a pinwheel is where eight seams meet, which can get bulky. Press the four HST seams so they “spin” in the same rotational direction around the center — then the seam allowances nest and swirl instead of piling up, and the center lies flat.
The Pinwheel Formula: Four HSTs, Rotated
A pinwheel block is beautifully simple to understand:
- Make four identical half-square triangles (two contrasting fabrics — see the HST method).
- Arrange them in a 2 × 2 grid, but rotate each one so all the diagonals point around the center in the same direction (clockwise or counterclockwise).
- Sew them together, and the four triangles form a spinning pinwheel.
The direction you rotate them sets which way the pinwheel spins — pick one direction and keep it consistent, or mix directions for variety.
The Two-at-a-Time HST Reminder
Since pinwheels are all HSTs, here’s the quick method: pair two 10-inch squares right sides together, draw a diagonal on the back of the lighter one, sew ¼ inch on both sides, cut on the line, press open, and trim to 6½ inches. Each pair gives two HSTs; you’ll want four matching HSTs per pinwheel, so make them from coordinating squares. You need 96 HSTs total for 24 blocks.
Choosing Your Colors
Pinwheels spin most clearly with strong contrast between the two triangle fabrics:
- Print + white: each vibrant print against crisp white makes the pinwheel shape leap out
- Two-color bold: a single bright color against a neutral for a graphic, cohesive quilt
- Rainbow scrappy: a different vibrant color for each pinwheel, all against a shared background, for a joyful mix
- Playful brights: think primary and candy colors for a nursery, or rich jewel tones for a grown-up room
Keep the background consistent (one white, cream, or neutral) so the colored blades of each pinwheel read clearly and the “spin” stays obvious.
Cutting Measurements
- HSTs: pair and sew squares → 96 HSTs, trimmed to 6½ inches each (four per block × 24 blocks)
- Backing: 60 × 78 inches
- Batting: 60 × 78 inches
- Binding: seven strips, 2½ inches × width of fabric
Step-by-Step Guide
Step 1 — Make your HSTs. Using the two-at-a-time method, pair contrasting 10-inch squares, sew, cut, press, and trim each HST to 6½ inches. Make 96 HSTs, keeping matching sets of four together for each pinwheel.
Step 2 — Lay out each pinwheel. For each block, arrange four matching HSTs in a 2 × 2 grid, rotating each so the diagonals all swirl around the center in the same direction. Check that it “reads” as a pinwheel before sewing.
Step 3 — Sew the pinwheel together. Sew the top two HSTs together and the bottom two together with a ¼-inch seam, then join the two halves, matching the center carefully. Press the seams to spin around the center so it lies flat. Each block should measure 12½ inches. Make 24.
Step 4 — Lay out the quilt. Arrange the 24 pinwheels 4 across × 6 down. Spread the colors evenly, and decide whether all pinwheels spin the same way or alternate. Photograph the layout.
Step 5 — Sew the blocks into rows. Sew each row of 4 blocks together with a ¼-inch seam, pressing seams to alternate directions row by row. You’ll have 6 rows.
Step 6 — Join the rows. Sew the rows together, nesting the seams at each junction and pinning to keep the pinwheel points crisp. Press. The top should measure about 54½ × 72½ inches.
Step 7 — Make the quilt sandwich. Layer backing (wrong side up), batting, and top (right side up); baste well.
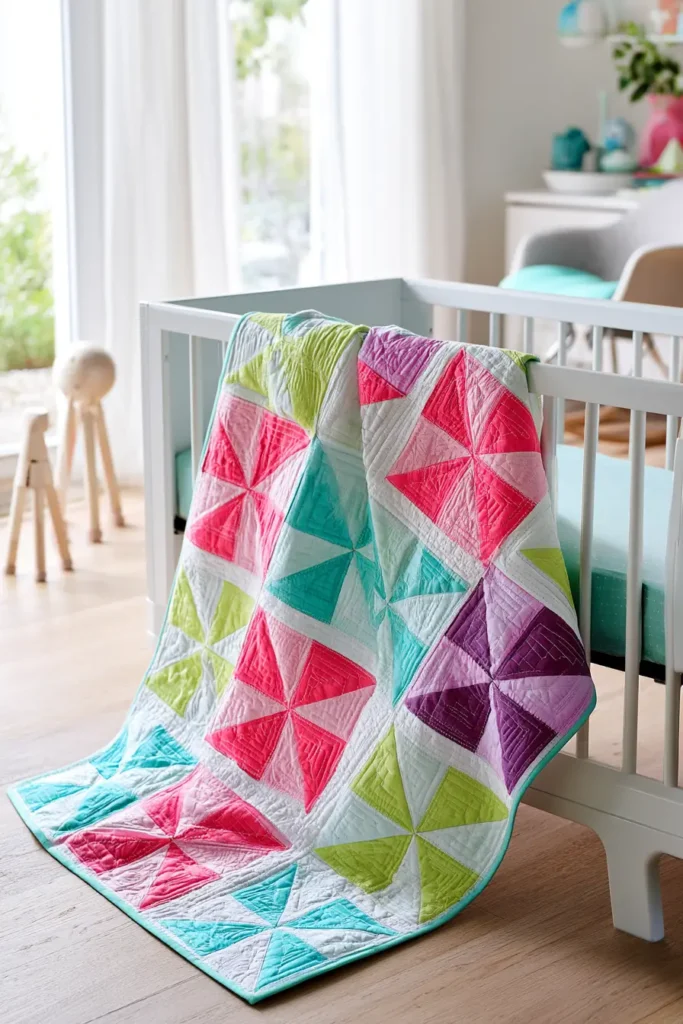
Step 8 — Quilt it. Quilt to enhance the movement — swirls or curved lines echo the spinning theme beautifully, or keep it simple with an all-over pattern or straight diagonal lines.
Step 9 — Trim, bind, and finish. Trim to 54 × 72 inches, square the corners, bind with the 2½-inch strips, and press.
Assembly at a Glance
- Make 96 HSTs (two-at-a-time), trimmed to 6½ inches, in matching sets of four.
- For each block, rotate four HSTs into a spinning 2 × 2 pinwheel.
- Sew each pinwheel, pressing the center seams to swirl → 12½-inch block. Make 24.
- Lay out 4 × 6; choose consistent or alternating spin; photograph.
- Sew into 6 rows of 4 (¼-inch seams), pressing alternate rows.
- Join rows, nesting seams and matching points → 54½ × 72½ top.
- Layer, baste.
- Quilt with swirls or an all-over design.
- Trim to 54 × 72 inches; bind and press.
Beginner Tips for Success
- Trim every HST to 6½ inches — accurate units make crisp pinwheel points.
- Rotate all four HSTs the same direction around the center so the pinwheel actually spins.
- Press the center seams to swirl around the middle, so eight seam allowances lie flat instead of bunching.
- Keep a consistent background so the colored blades read clearly.
- Match your center point carefully; it’s where the block’s charm lives.
Styling It & Gift Ideas
A pinwheel quilt’s spinning, playful energy suits cheerful rooms wonderfully — bright and joyful over a child’s bed, charming in a sunny reading nook, or fun and graphic in a modern space with a bolder palette. Its sense of movement keeps a room feeling lively and warm.
That playful charm makes it an especially lovely gift:
- A baby or nursery quilt — the pinwheel’s spinning, toy-like motion is perfect for little ones (scale down to fewer blocks)
- A children’s quilt in bright primary or candy colors
- A cheerful throw for a friend who loves color and fun
- A new-baby gift in soft pastels or bold gender-neutral brights
Because each pinwheel needs only two fabrics, it’s easy to make a gift in someone’s favorite color against a clean background.
Final Thoughts
A playful pinwheel layer cake quilt turns four simple half-square triangles into pure spinning charm. It’s the joyful next step after a basic HST quilt — one small rotation transforms plain triangles into blocks that look like they’re whirling across the bed. Cheerful, full of movement, and endlessly adaptable from nursery to modern living room, it proves once again that in quilting, arrangement is everything. Choose bold contrast, keep your pinwheels spinning the same way, and one vibrant layer cake becomes a quilt full of motion and joy.
Other Design Inspirations – Digitally Modified
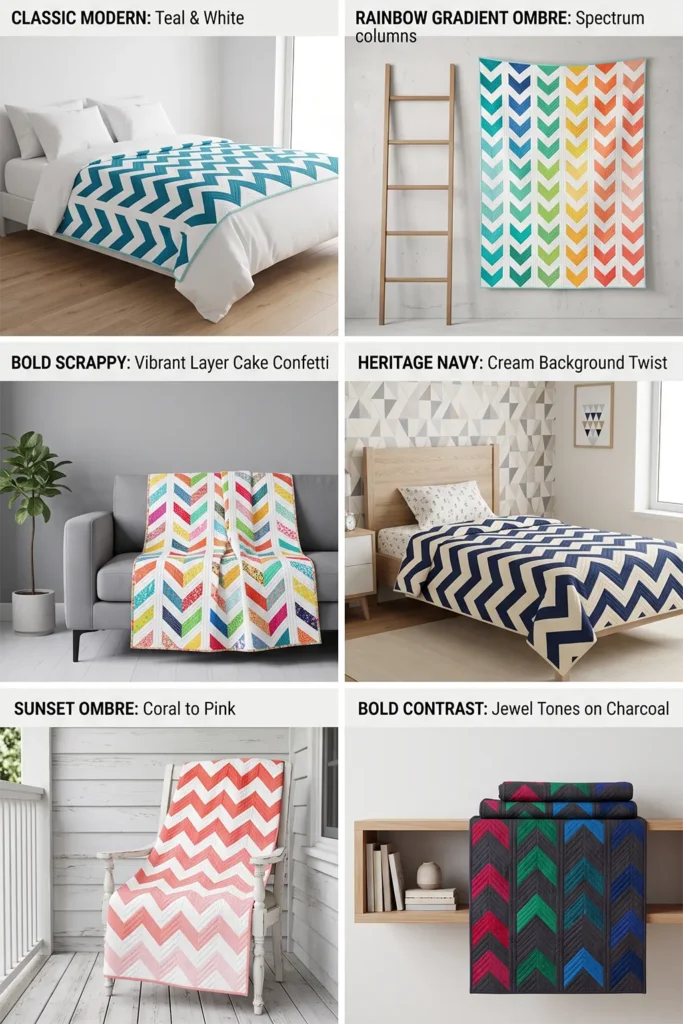
6. Bold Chevron Layer Cake Quilt for Contemporary Appeal
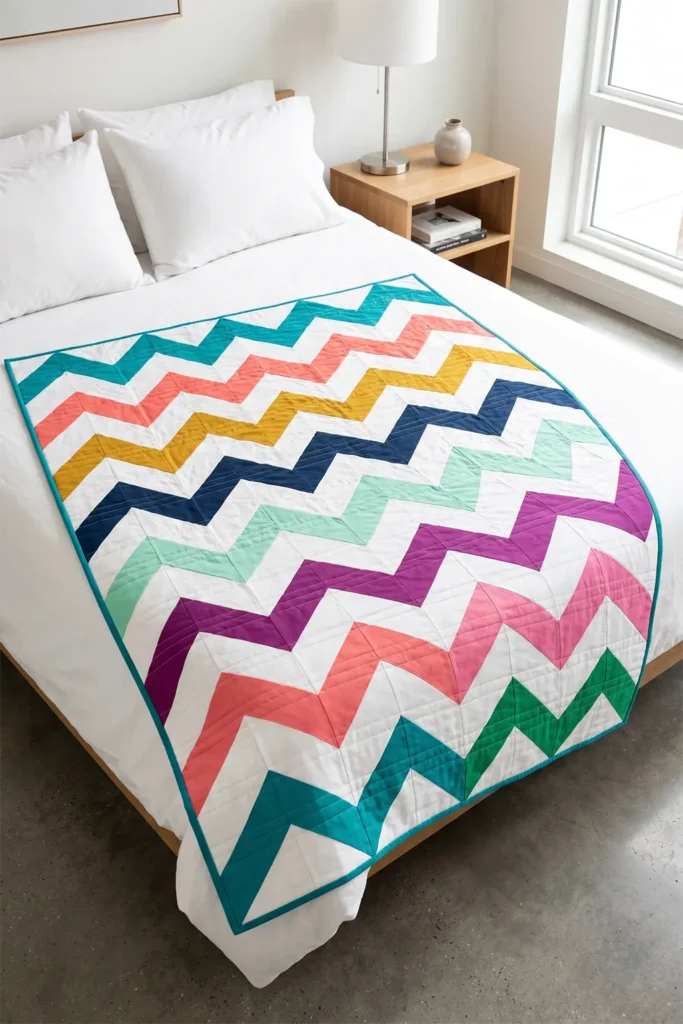
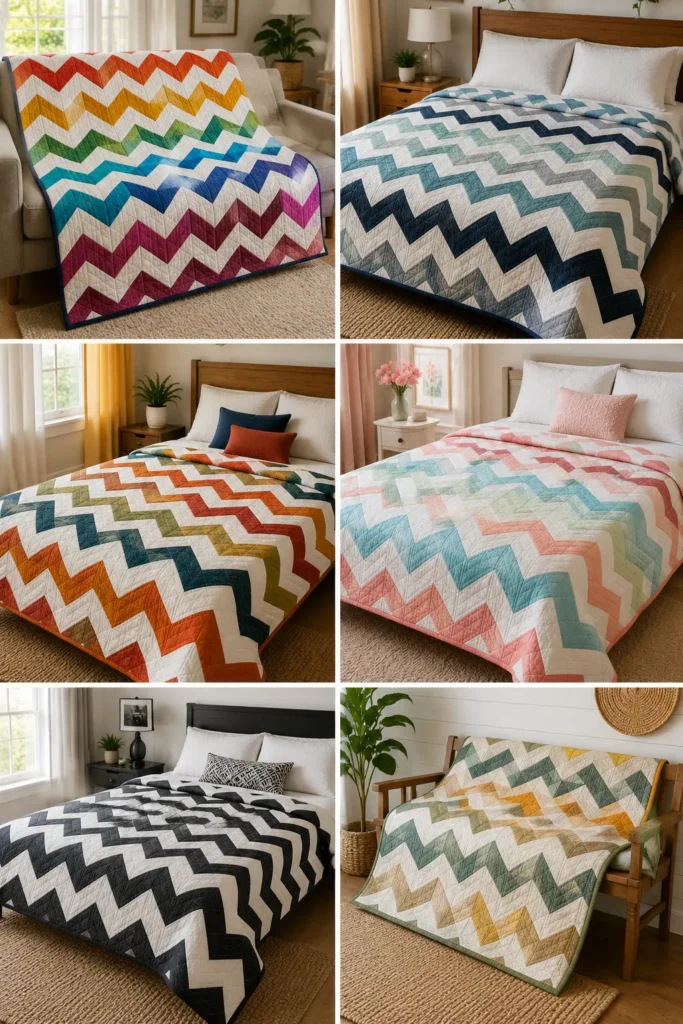
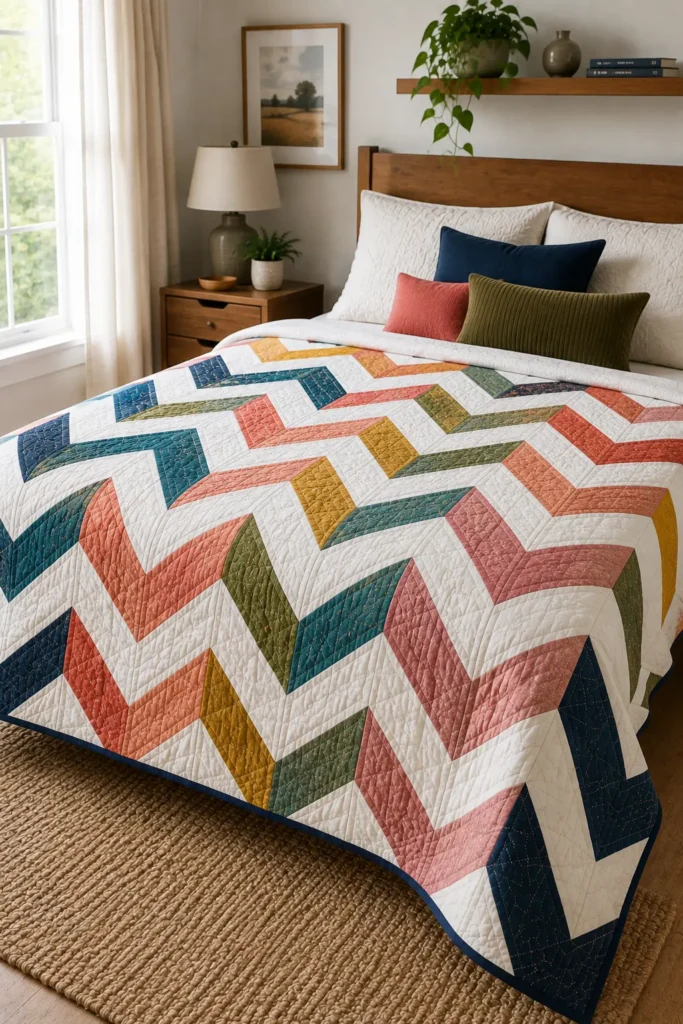
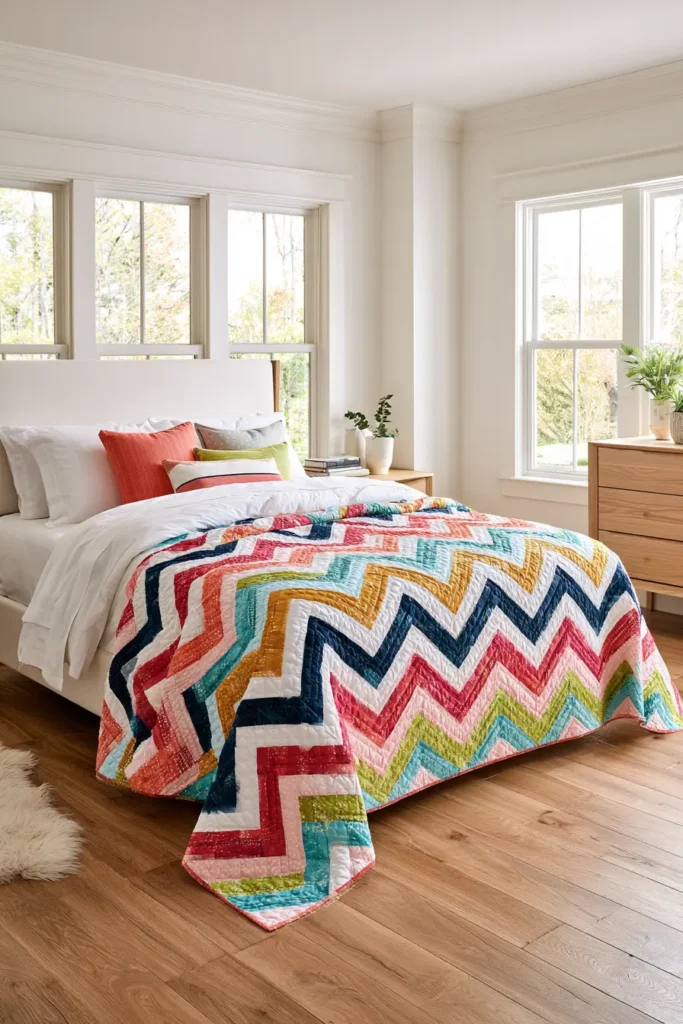
Few patterns say “modern” as instantly as the chevron. Those bold zigzag stripes marching across a quilt in crisp Vs have a clean, graphic, contemporary energy that suits stylish homes beautifully — and here’s the happy secret: a chevron quilt is built entirely from half-square triangles, the same simple unit behind pinwheels and stars. Line those HSTs up so their diagonals form continuous peaks and valleys, and the individual triangles vanish into strong, sweeping zigzags. In vibrant colors against a clean background, a chevron layer cake quilt looks like sophisticated modern design, yet it’s genuinely achievable for a confident beginner.
What makes a chevron different from the pinwheel is scale. A pinwheel spins within its own little block; a chevron ignores block boundaries entirely, running its zigzags right across the whole quilt in continuous columns. That means the magic is all in the arrangement — getting every triangle pointing the right way so the Vs connect seamlessly.
(This quilt builds on the half-square triangle — the Half-Square Triangle section of this collection covers the two-at-once method in full if you’d like a refresher first.)
A Little History: The Ancient Zigzag
The chevron may look thoroughly modern, but it’s one of the oldest decorative motifs known to humanity. The V-shaped zigzag appears in ancient pottery, in Greek and Roman art, and famously in heraldry, where the chevron has been a standard shape on coats of arms for centuries — thought to represent the rafters of a roof, a symbol of protection and home. It runs through architecture, textiles, and design across countless cultures precisely because it’s so satisfying to the eye: strong, rhythmic, and full of directional energy. What reads as cutting-edge on a modern quilt is really a pattern humans have loved for thousands of years.
That deep, cross-cultural love of rhythmic geometry is something quilters share with weavers and stitchers everywhere — including the Jamdani and Nakshi Kantha traditions of my own family’s background, where bold repeating patterns have always been prized.
Why This Idea Is Worth Making
This idea is worth making because it delivers a high-end, contemporary look from beginner-friendly units. Every piece is a simple half-square triangle; the sophistication comes purely from how you arrange them, which makes a chevron quilt a wonderful confidence-builder — impressive results, straightforward sewing. The bold zigzags suit modern and minimalist homes especially well, the layer cake keeps the colors coordinated, and the pattern works in countless palettes, from two-color graphic to a vibrant rainbow. It’s the most contemporary-looking quilt in this collection, and one of the most satisfying to lay out.
Finished Size
- Finished quilt: about 54 × 72 inches — a throw or twin quilt
- Finished HST unit: 9 inches
- Layout: 6 units across × 8 units down = 48 HST units, arranged in continuous zigzag columns
- Skill level: confident beginner (simple units, careful arrangement)
- Core techniques: half-square triangles, directional layout, column alignment, binding
Materials Needed
- 1 layer cake — pair squares to make HSTs; for classic chevrons, pair each vibrant color with a consistent background (white, cream, or a solid)
- Background fabric: consider ½–1 yard of a coordinating solid or extra light squares, so every HST shares the same background color for clean, continuous zigzags
- Backing: 3½ yards
- Batting: at least 60 × 78 inches
- Binding: ⅝ yard of a coordinating solid
- Thread: neutral cotton
- Rotary cutter, cutting mat, quilting ruler with a 45° line, pins, iron, sewing machine
Beginner tip: for the cleanest chevrons, keep one consistent background fabric across all your HSTs. When the “valley” side of every zigzag is the same color, the Vs connect into unbroken stripes; mismatched backgrounds break the flow.
The Chevron Formula: HSTs in Marching Columns
A chevron is simpler than it looks once you see the logic:
- Make HSTs, each with a colored half and a background half.
- Arrange them in vertical columns. Within a column, the HSTs alternate direction so the colored triangles form a continuous zigzag — up-slope, down-slope, up-slope — creating peaks and valleys.
- Line the columns up side by side so the peaks and valleys march across the quilt in unbroken Vs.
The entire effect depends on orientation. Every HST must point exactly the right way — which is why laying out and checking before you sew is the real work here.
The Two-at-a-Time HST Reminder
Pair two 10-inch squares (a color and your background) right sides together, draw a diagonal on the back of the lighter one, sew ¼ inch on both sides, cut on the line, press toward the color, and trim to 9½ inches. Each pair makes two HSTs; you need 48 HSTs total. Pairing colored squares with a single consistent background fabric gives the cleanest chevrons.
Choosing Your Colors
Chevrons are made for bold, contemporary color:
- Two-color modern: one vibrant color (teal, coral, navy, mustard) zigzagging against white — the classic graphic chevron
- Rainbow chevron: each row of Vs a different vibrant color, all sharing one background, for a joyful spectrum
- Ombre chevron: shift the colored triangles gradually from light to dark down the quilt for a gorgeous gradient zigzag
- Bold and simple: the stronger the contrast between color and background, the crisper the zigzag
Whatever palette you pick, the background must stay consistent — that’s what lets the zigzags read as continuous stripes.
Cutting Measurements
- HSTs: pair and sew 24 pairs (color + background) → 48 HSTs, trimmed to 9½ inches
- Backing: 60 × 78 inches
- Batting: 60 × 78 inches
- Binding: seven strips, 2½ inches × width of fabric
Step-by-Step Guide
Step 1 — Make your HSTs. Using the two-at-a-time method, pair each colored 10-inch square with a background square, sew, cut, press toward the color, and trim each to 9½ inches. Make 48 HSTs.
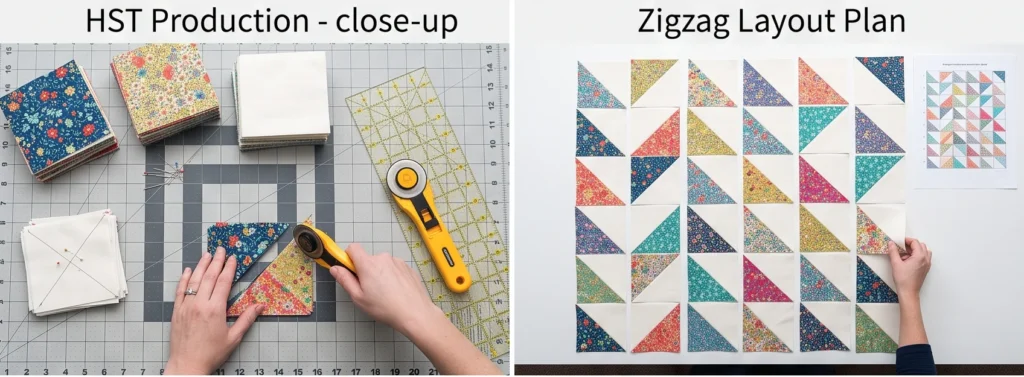
Step 2 — Plan the zigzag layout. This is the crucial step. Arrange the 48 HSTs 6 across × 8 down, orienting each so the colored triangles form continuous vertical zigzags — the colored halves meeting point-to-point up and down each column. Step back and check that every V connects.
Step 3 — Photograph the layout. Because orientation is everything, take a clear photo of the approved layout before you touch a single unit. You’ll refer to it constantly — a chevron is very easy to break by flipping one HST.
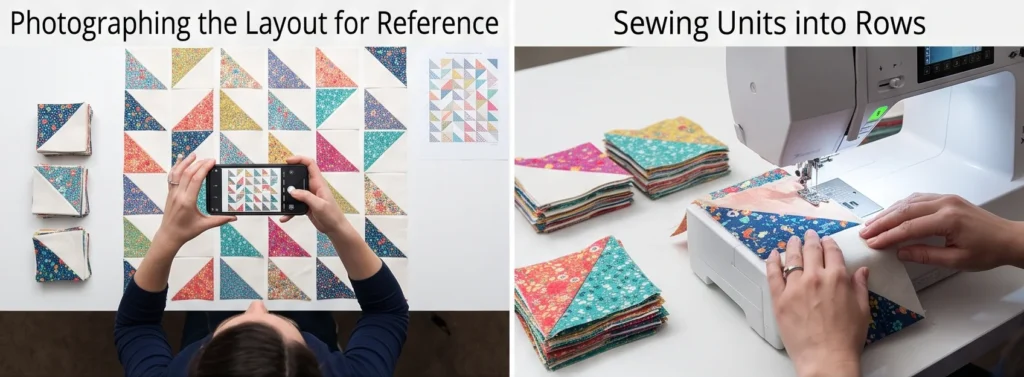
Step 4 — Sew the units into rows. Sew each row of 6 HSTs together with a ¼-inch seam, checking each unit’s direction against your photo as you go. Press seams to alternate directions row by row.
Step 5 — Join the rows. Sew the 8 rows together, nesting the seams and pinning at each junction so the zigzag points meet precisely. Press. The top should measure about 54½ × 72½ inches.
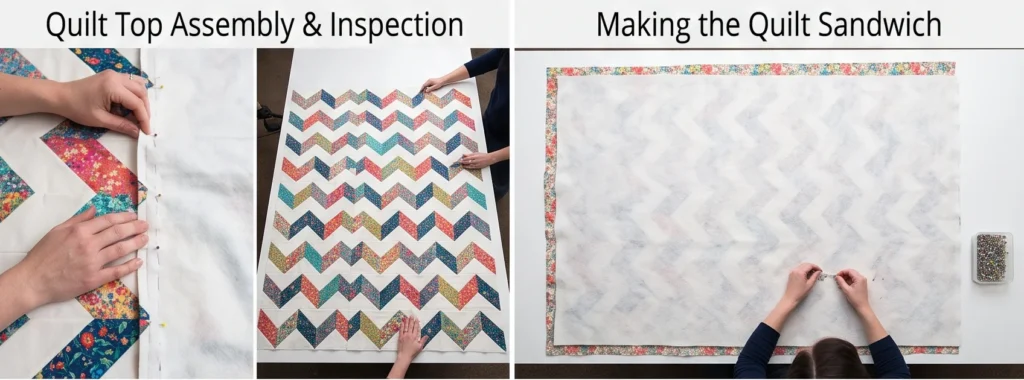
Step 6 — Check your chevrons. Lay the finished top out and admire the unbroken zigzags. If any V is interrupted, now (before quilting) is the easiest time to notice — though careful layout in Step 2 should prevent it.
Step 7 — Make the quilt sandwich. Layer backing (wrong side up), batting, and top (right side up); baste well.
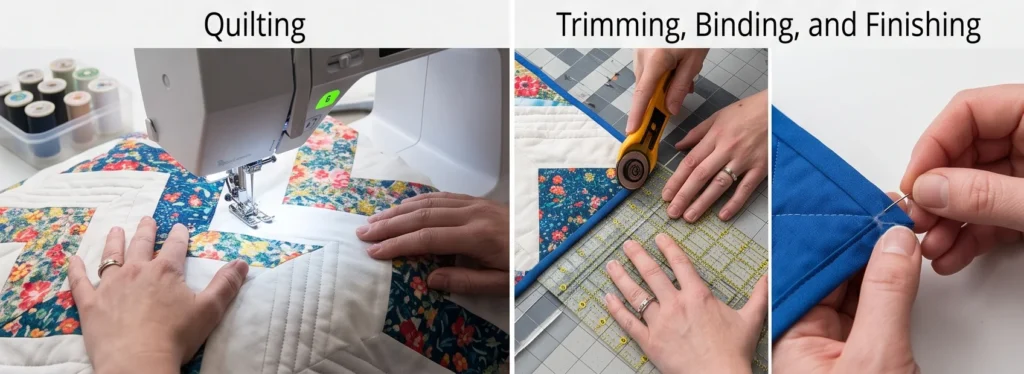
Step 8 — Quilt it. Straight-line quilting suits the chevron’s clean lines — quilt following the zigzags for emphasis, or in vertical or horizontal straight lines for a crisp modern finish.
Step 9 — Trim, bind, and finish. Trim to 54 × 72 inches, square the corners, bind with the 2½-inch strips, and press.
Assembly at a Glance
- Make 48 HSTs (color + consistent background), trimmed to 9½ inches.
- Lay out 6 × 8, orienting HSTs into continuous vertical zigzags.
- Photograph the layout — orientation is everything.
- Sew into 8 rows of 6 (¼-inch seams), checking direction against the photo.
- Press alternate rows; join rows, nesting seams and matching points → 54½ × 72½ top.
- Check the zigzags are unbroken.
- Layer, baste.
- Quilt following the zigzags or in straight lines.
- Trim to 54 × 72 inches; bind and press.
Beginner Tips for Success
- Keep one consistent background so the zigzags connect into clean stripes.
- Photograph your layout and check every HST’s direction before and during sewing — one flipped unit breaks the chevron.
- Trim all HSTs to exactly 9½ inches for points that meet precisely.
- Press seams toward the colored fabric so they don’t shadow through the background.
- Nest seams at every junction so the Vs align sharply across columns.
Styling It & Gift Ideas
A bold chevron quilt is a graphic, contemporary statement, so let it lead in a modern room — over a bed with plain white linens, on a sleek sofa, or as a striking accent in a minimalist space. Its strong directional lines make a room feel dynamic and current, and it pairs beautifully with solid, uncluttered furnishings.
Its modern, high-end look makes it a standout gift:
- A stylish throw for a design-loving friend’s housewarming or wedding
- A graduation gift in the recipient’s school or team colors (two-color chevrons are perfect for this)
- A modern baby quilt in bold, high-contrast shades — babies love strong contrast, and it suits a contemporary nursery
- A statement gift for anyone who loves clean, modern design
The two-color versatility makes it easy to tailor a chevron gift to someone’s favorite palette.
Final Thoughts
A bold chevron layer cake quilt is contemporary style made simple — sweeping zigzags that look like high-end modern design but are built from nothing more than half-square triangles arranged with care. It’s a brilliant lesson in how orientation alone can transform simple units into something striking, and it carries a motif humans have loved since ancient times into a fresh, modern quilt. Keep your background consistent, your triangles pointing the right way, and one vibrant layer cake becomes a graphic, eye-catching centerpiece for any modern home.
Other Design Inspirations – Digitally Modified
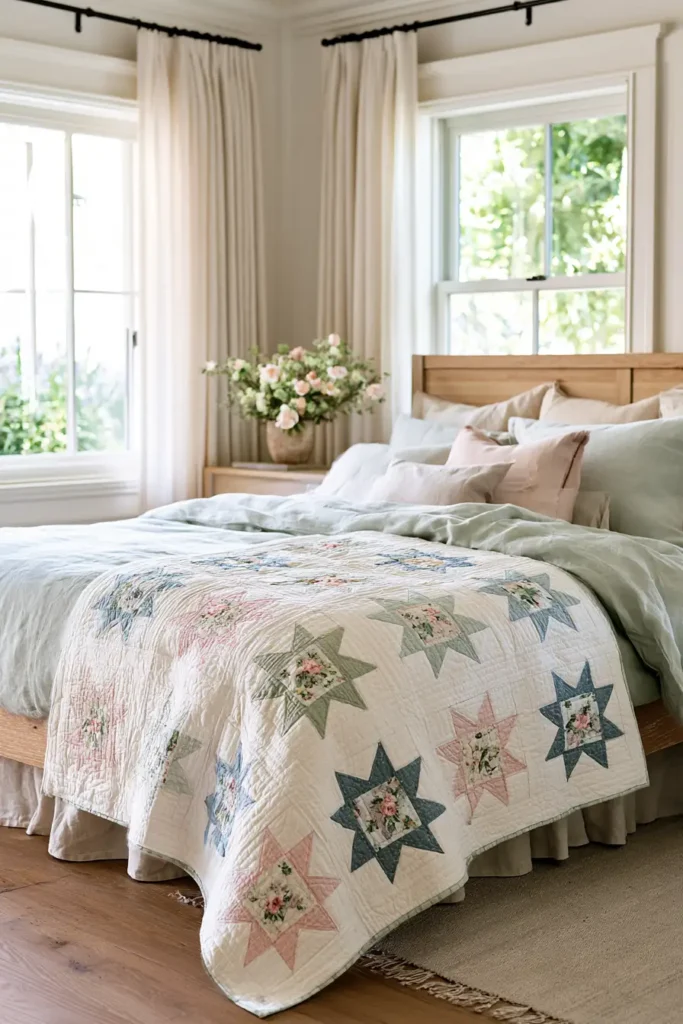
7. Elegant Sawtooth Star Layer Cake Quilt for Sophisticated Bedrooms
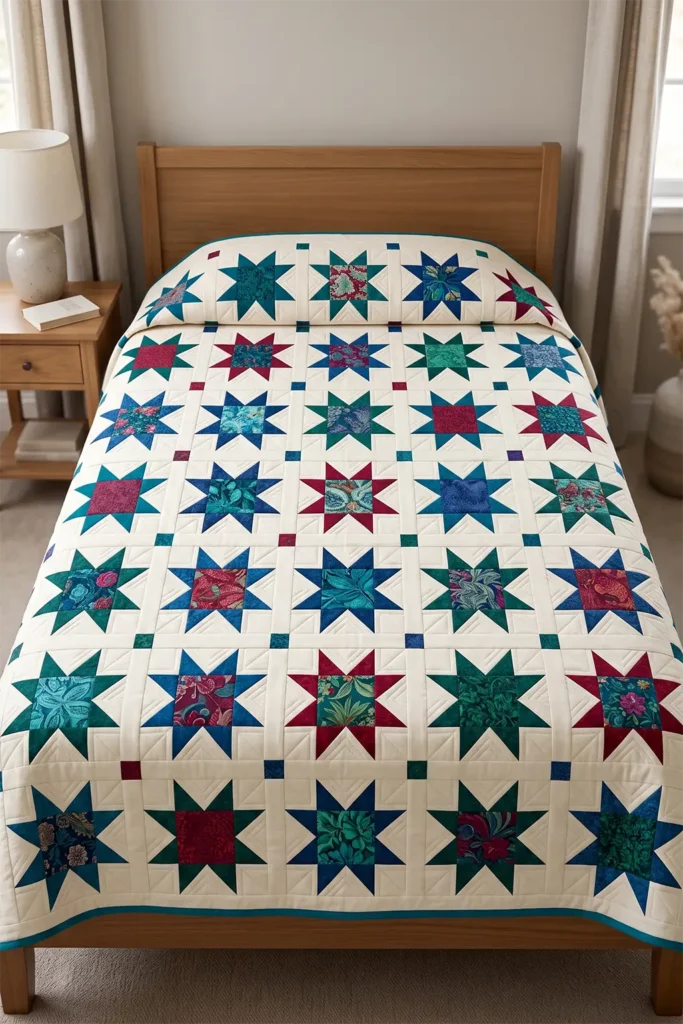
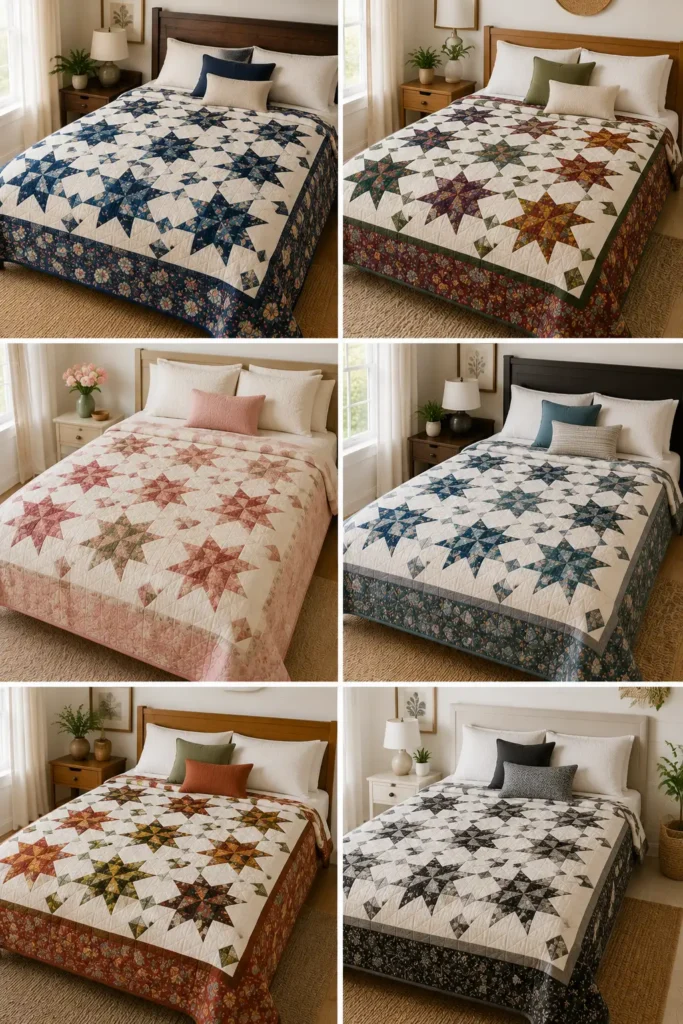
If most layer cake quilts are about ease, the sawtooth star is about elegance. The classic eight-pointed star — a center square framed by sharp points radiating outward — is one of quilting’s most timeless and sophisticated blocks, and in a refined palette it gives a bedroom real grace. It’s a slight step up in piecing from the simple squares and pinwheels earlier in this collection, but the layer cake makes it very manageable: the generous 10-inch squares give you plenty of fabric for the star points, the center, and the corners. Made in vibrant jewel tones or soft sophisticated shades, a sawtooth star quilt is the piece that turns a bed into a centerpiece.
This block is where you graduate from simple HSTs to star points, made with an easy stitch-and-flip method. It asks for a little more precision than a charm quilt, and rewards it with a genuinely stunning, heirloom-quality result — the kind of quilt that looks like it belongs in a beautiful, grown-up bedroom.
(Star points are made from flying-geese units — closely related to the half-square triangles covered in the Half-Square Triangle section of this collection. If you’ve made those, you’re most of the way there.)
A Little History: The Variable Star
The sawtooth star — also known as the Variable Star — is one of the oldest and most widespread star blocks in quilting, a fixture of American quilts for well over two centuries. That second name holds a lovely bit of history: the center square was the “variable,” the spot where a quilter would showcase a favorite fabric, a fussy-cut motif, or a signature print. It was the block’s little stage, the place to put something special. Stars in general were beloved in early quilting for their beauty and their symbolism — of guidance, hope, and the night sky — and the sawtooth star’s crisp points made it a favorite showcase of a quilter’s skill.
That instinct to place your finest fabric at the very heart of a piece is one shared across textile traditions — including the Jamdani and Nakshi Kantha traditions of my own family’s background, where the most beautiful work is often reserved for the center, the focal point everything else frames.
Why This Idea Is Worth Making
This idea is worth making because it delivers the most elegant, sophisticated result in this collection while teaching the single most valuable precision skill in quilting: crisp points. The stitch-and-flip star points are beginner-achievable, the layer cake supplies perfectly sized fabric, and the finished quilt has a timeless, refined beauty that suits a grown-up bedroom far better than a busy scrappy design. It’s also endlessly customizable — feature a special fabric in the center of each star — and the skills carry straight into countless other star and geese patterns. A little more effort, a lot more elegance.
Finished Size
- Finished quilt: about 60 × 72 inches — a throw or twin bed topper
- Finished star block: 12 inches (12½ inches unfinished)
- Layout: 5 blocks across × 6 blocks down = 30 star blocks (or fewer stars alternated with plain squares for a calmer, elegant look)
- Skill level: confident beginner (the precision step-up of this collection)
- Core techniques: stitch-and-flip flying geese, point matching, block assembly, binding
Materials Needed
- 1 layer cake (42 squares) — the 10-inch squares cut down neatly for star points, centers, and corners
- Background fabric: 2–2½ yards of a consistent solid (cream, white, or a soft neutral) for the geese backgrounds and corner squares — a unified background makes the stars shine
- Backing: 3¾ yards
- Batting: at least 66 × 78 inches
- Binding: ⅝ yard of a coordinating solid
- Thread: neutral cotton
- Rotary cutter, cutting mat, quilting ruler, pins, iron, sewing machine
Beginner tip: the star lives or dies on a scant ¼-inch seam — a thread’s width narrower than a full quarter inch, to allow for the fold when you press. Test it on scraps first; it’s what keeps your points sharp.
Anatomy of a Sawtooth Star
Each 12-inch star is a 3 × 3 arrangement of three simple unit types:
- One center square — 6 inches finished, your “variable” showcase spot
- Four flying-geese units — each 3 × 6 inches finished, forming the eight points (two points per unit)
- Four corner squares — 3 inches finished, in the background fabric
The center is a feature fabric; the geese carry the star points; the background fills the geese and corners.
Cutting Measurements (per star block)
From your layer cake and background:
- Center square: one at 6½ × 6½ inches (feature fabric)
- Star points: eight squares at 3½ × 3½ inches (star-color fabric)
- Geese backgrounds: four rectangles at 3½ × 6½ inches (background)
- Corner squares: four at 3½ × 3½ inches (background)
For the quilt:
- Backing: 66 × 78 inches
- Batting: 66 × 78 inches
- Binding: seven strips, 2½ inches × width of fabric
Step-by-Step Guide
Step 1 — Cut your pieces. For each block, cut one 6½-inch center, eight 3½-inch star-point squares, four 3½ × 6½-inch background rectangles, and four 3½-inch background corner squares. Keep each block’s pieces together.
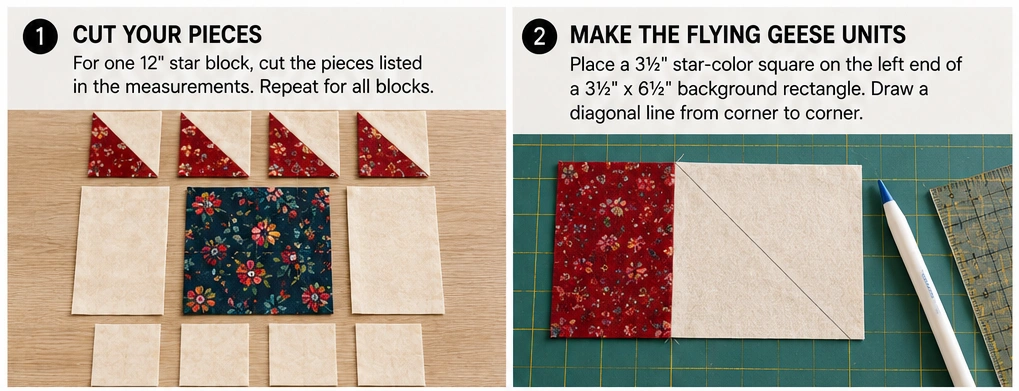
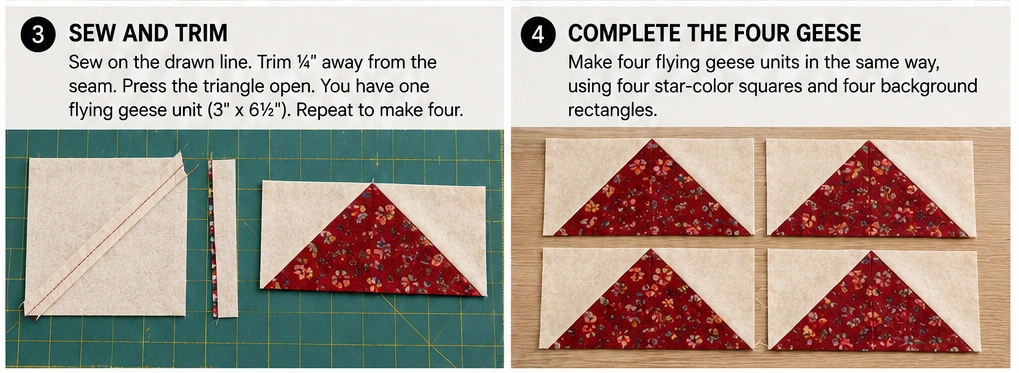
Step 2 — Make the flying geese (stitch and flip). Draw a diagonal line on the back of each 3½-inch star square. Place one on the left end of a 3½ × 6½ background rectangle, right sides together, sew on the line, trim the excess to ¼ inch, and press open. Repeat on the right end with a second square. That’s one geese unit with two star points. Make four per block.
Step 3 — Check the geese. Each unit should measure exactly 3½ × 6½ inches, and here’s the critical check: the point of the star must sit ¼ inch below the top raw edge. That quarter inch is the seam allowance your assembly will consume — without it, the points get cut off. This one check saves more stars than anything else.
Step 4 — Assemble the star block. Lay out the nine units in three rows: corner, geese (points out), corner on top; geese, center, geese in the middle; corner, geese, corner on the bottom. Sew each row with a scant ¼-inch seam, pressing the geese seams open to reduce bulk, then join the rows. The block should measure 12½ inches. Make 30.
Step 5 — Lay out the quilt. Arrange the blocks 5 across × 6 down, spreading the star colors evenly. (For an especially elegant, calmer look, alternate star blocks with plain background squares.) Photograph the layout.
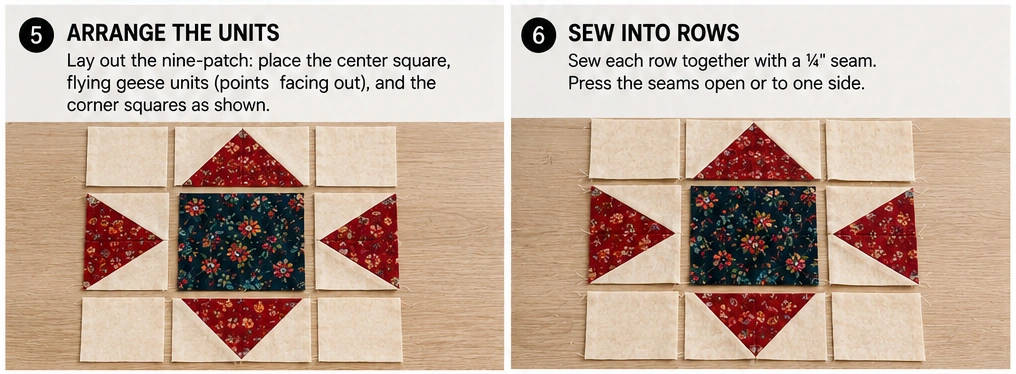
Step 6 — Sew the blocks into rows. Sew each row of blocks together with a ¼-inch seam, pressing seams to alternate directions row by row. You’ll have 6 rows.
Step 7 — Join the rows. Sew the rows together, nesting the seams and pinning to keep the star points crisp. Press. The top should measure about 60½ × 72½ inches.
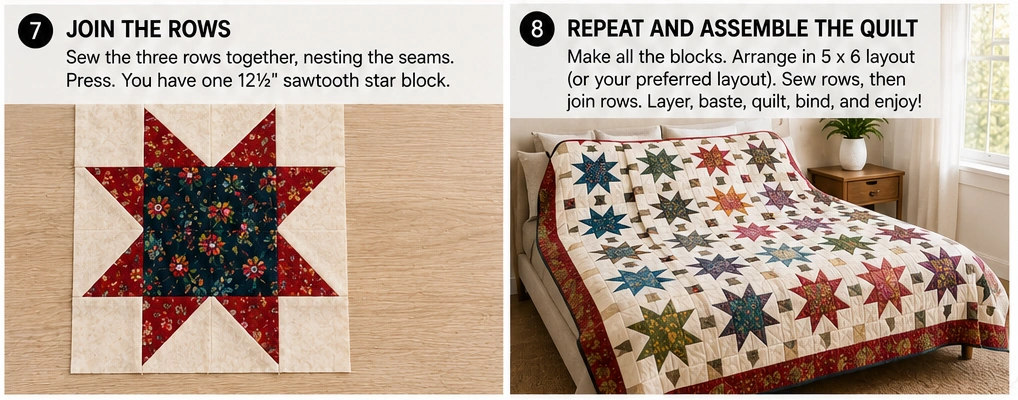
Step 8 — Make the quilt sandwich and quilt. Layer backing (wrong side up), batting, and top (right side up); baste. Quilt elegantly and simply — echo quilting around each star, straight lines, or an all-over design that lets the stars lead.
Step 9 — Trim, bind, and finish. Trim to 60 × 72 inches, square the corners, bind with the 2½-inch strips, and press.
Assembly at a Glance
- Per block, cut a 6½ center, eight 3½ star squares, four 3½ × 6½ and four 3½ background pieces.
- Stitch-and-flip four flying-geese units per block.
- Check each geese unit is 3½ × 6½ with ¼-inch apex clearance.
- Assemble the 3 × 3 star; press geese seams open; join rows → 12½ block. Make 30.
- Lay out 5 × 6 (or alternate with plain squares); photograph.
- Sew into 6 rows (scant ¼-inch seams), pressing alternate rows.
- Join rows, nesting seams and matching points → 60½ × 72½ top.
- Layer, baste, and quilt simply.
- Trim to 60 × 72 inches; bind and press.
Choosing Your Colors
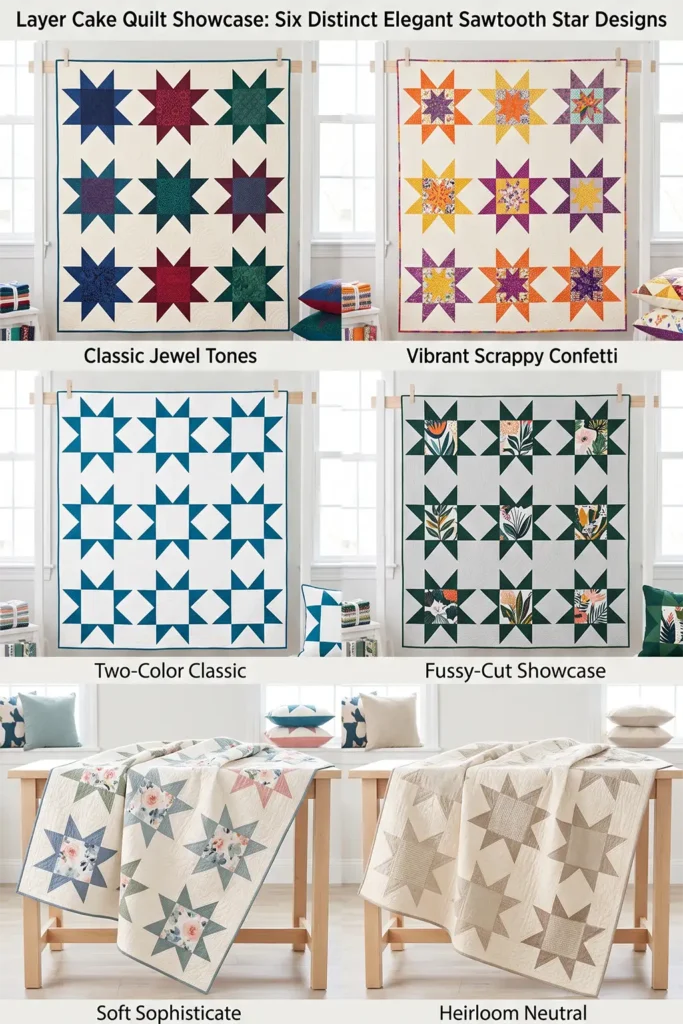
Sawtooth stars look sophisticated in a controlled, elegant palette:
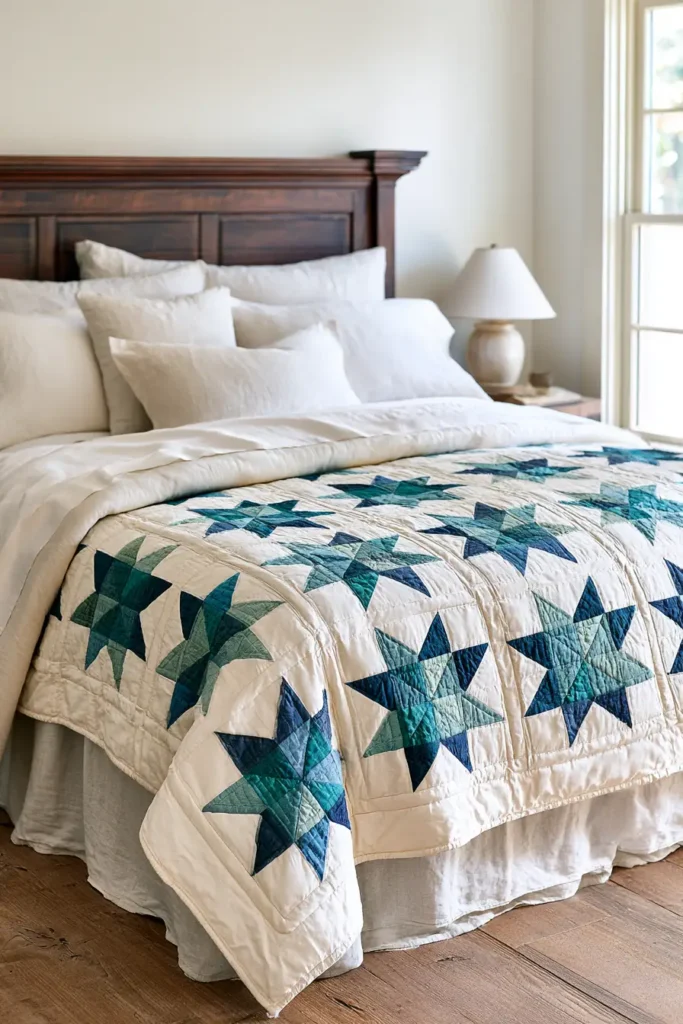
- Jewel tones: deep teal, sapphire, ruby, or emerald stars against cream — rich and refined
- Soft sophisticate: dusty blue, sage, or blush stars on a warm white, for a calm, elegant bedroom
- Two-color classic: a single vibrant star color throughout against a crisp background, for timeless impact
- Feature centers: use a special large-scale print, fussy-cut, in the center of each star — the “variable” tradition
Keep the background consistent (one cream, white, or soft neutral) so the points stay crisp, and let the stars themselves carry the color.
Beginner Tips for Success
- Sew a scant ¼-inch seam — test it first; it’s the whole game for sharp points.
- Check the ¼-inch apex clearance on every geese unit before assembling — it’s the single best way to save your star points.
- Press geese seams open to reduce bulk where points converge.
- Keep the background consistent so the stars read cleanly.
- Feature a special fabric in the center square — it’s the block’s traditional showcase.
Styling It & Gift Ideas
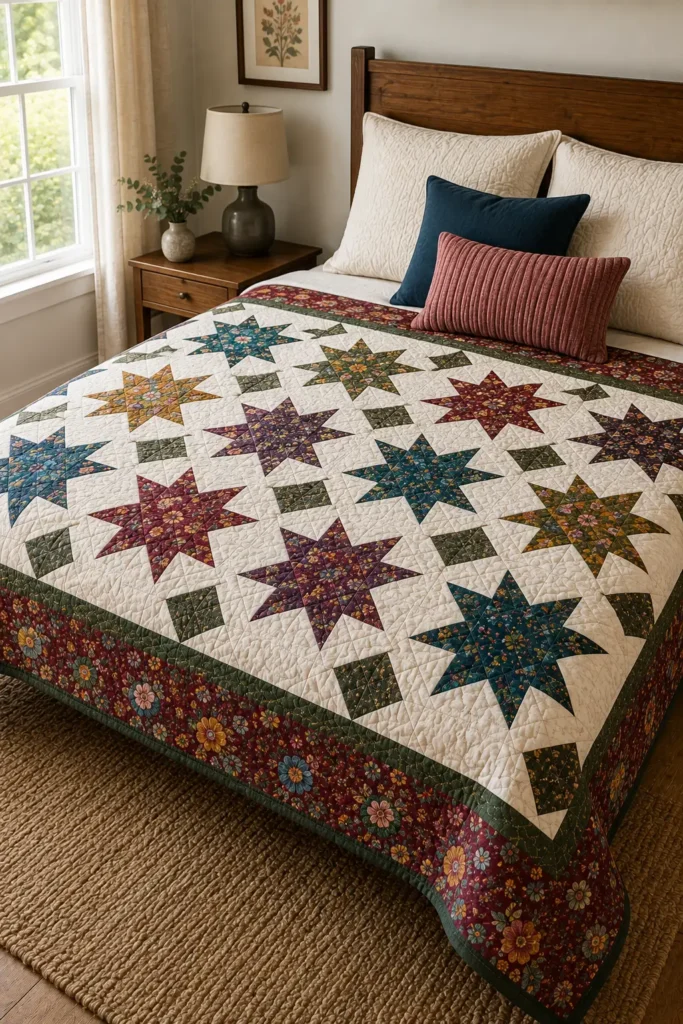
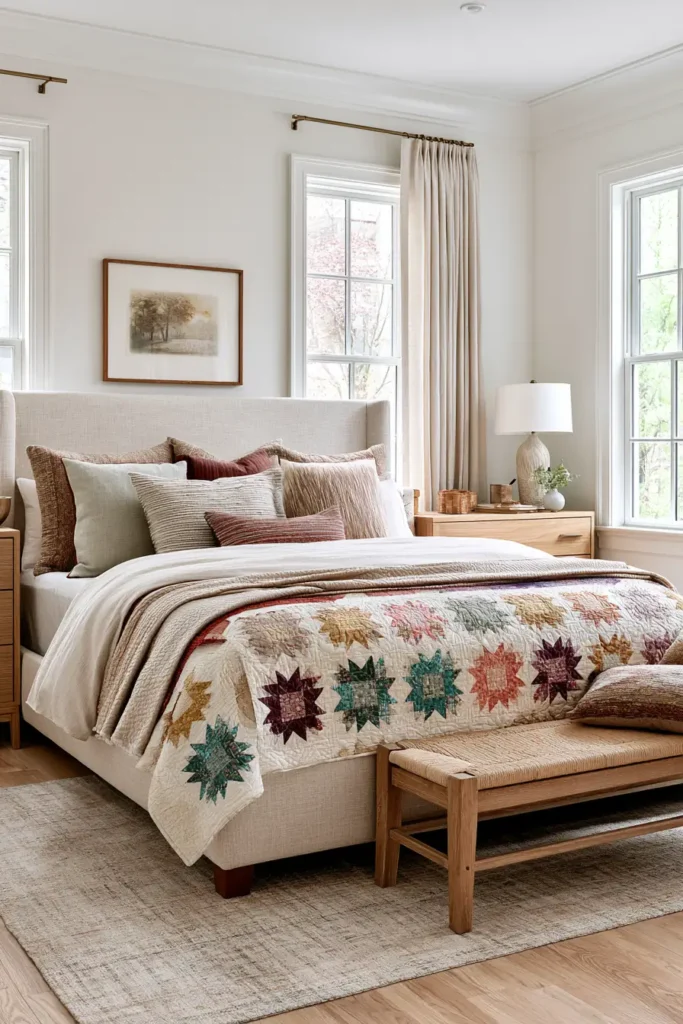
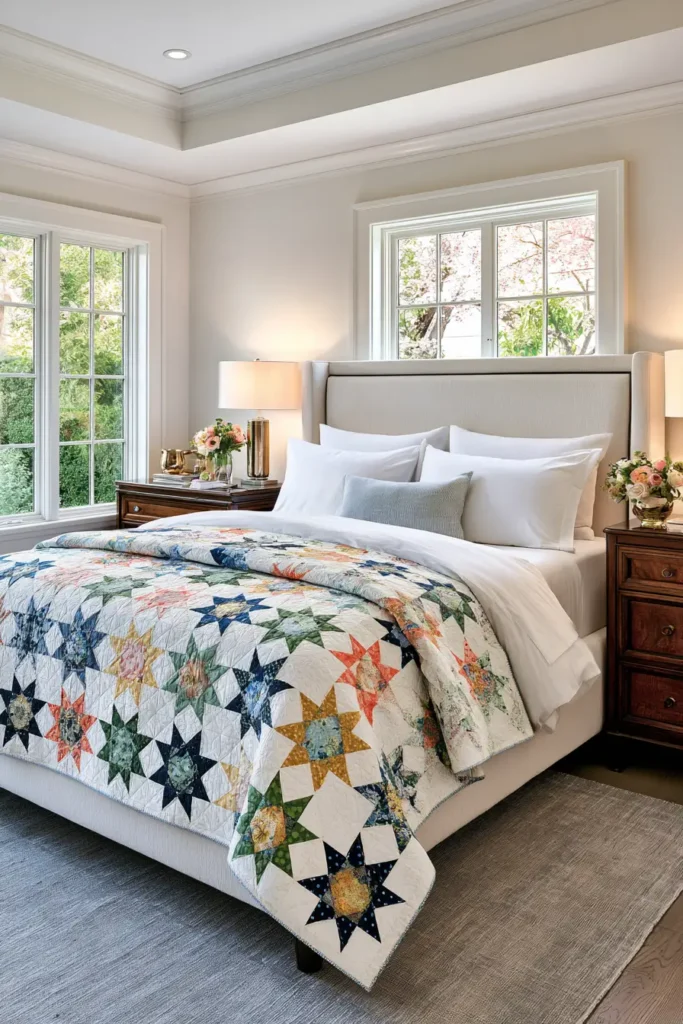
A sawtooth star quilt is refined and grown-up, so style it in a sophisticated bedroom with elegant, uncluttered bedding — crisp white or soft neutral linens, natural wood, a simple lamp, one or two cushions echoing a star color. The stars are the statement, so let everything around them stay calm. It’s the layer cake quilt most suited to a beautiful, adult bedroom rather than a casual throw.
Its heirloom elegance makes it a truly special gift:
- A wedding or anniversary quilt — stars symbolize hope and guidance, a meaningful gift for a couple
- A milestone gift (a special birthday, a new home) where you want something that feels considered and timeless
- A graduation quilt in the recipient’s colors, with a fussy-cut center featuring something personal
- A keepsake baby quilt in soft, sophisticated tones for a nursery with a calmer palette
The feature-center tradition makes it easy to personalize — tuck a meaningful print into the heart of each star.
Final Thoughts
An elegant sawtooth star layer cake quilt is the sophisticated centerpiece of this collection — timeless, refined, and genuinely impressive, yet built from beginner-friendly stitch-and-flip units. It asks for a bit more care than a simple square quilt, and rewards it with crisp, radiant stars that turn a bed into something special. Carrying the old “Variable Star” tradition of showcasing a favorite fabric at its heart, it’s the layer cake quilt to make when you want elegance, and one vibrant bundle is all it takes to fill a sophisticated bedroom with stars.
Other Design Inspirations – Digitally Modified
8. Classic Log Cabin Layer Cake Quilt for Timeless Elegance
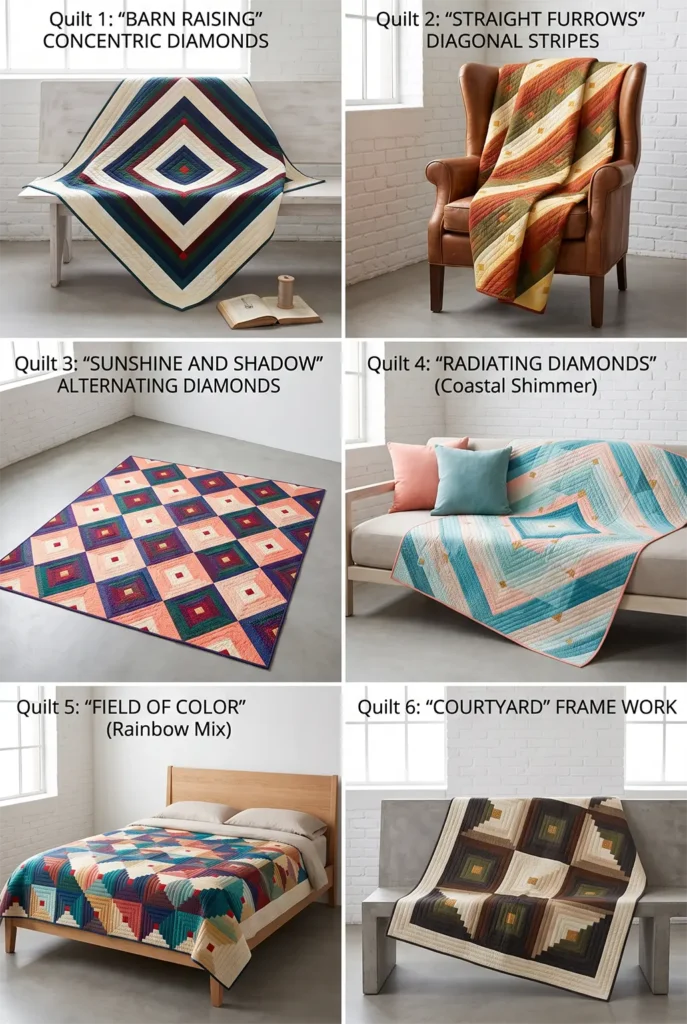
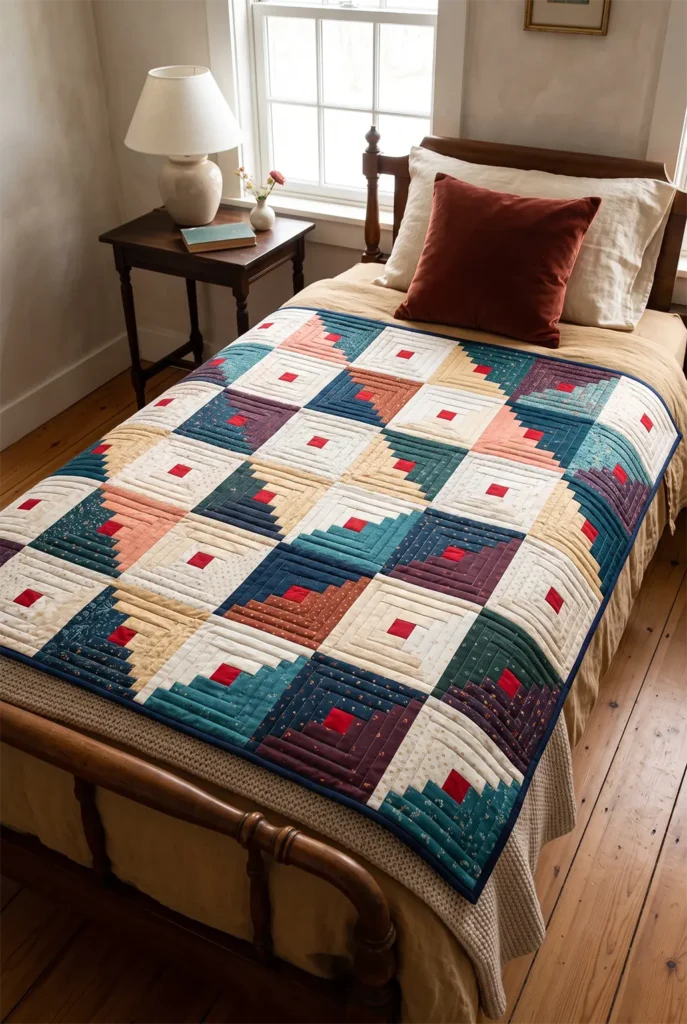
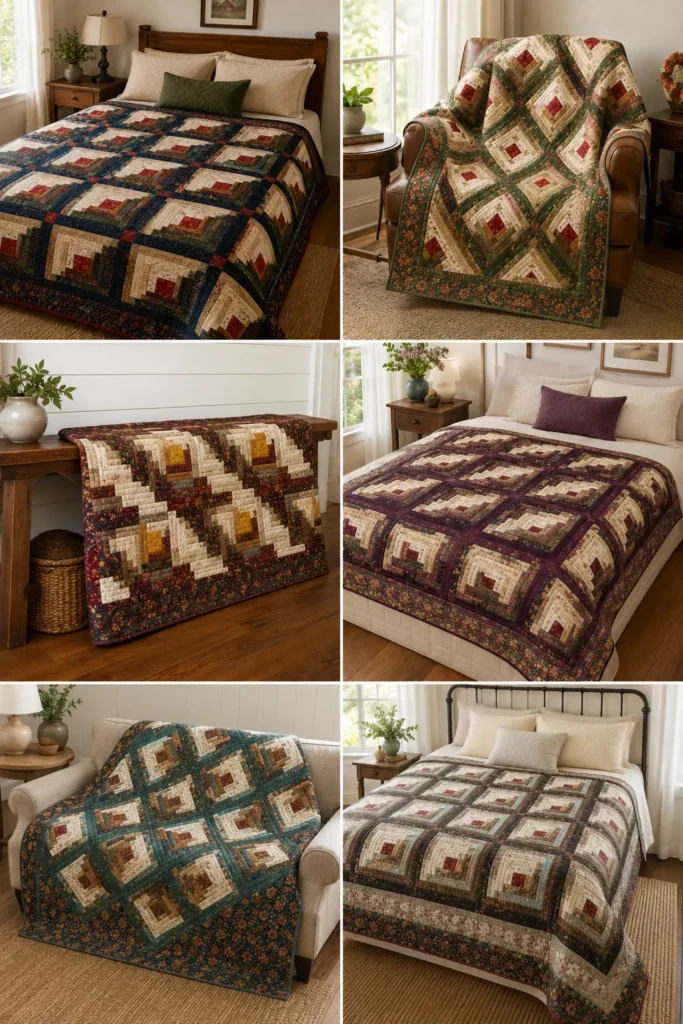
The log cabin is quilting’s most beloved classic, and it brings a warm, timeless elegance no other block quite matches. Each block is built like the cabin it’s named for — strips of fabric (“logs”) added round and round a small center square, growing outward. The magic is in the light-and-dark split: one half of every block uses light logs, the other half dark, so a diagonal line of shadow runs through each block. Arrange those blocks different ways and you get radiating diamonds, sweeping diagonals, or glowing fields of color. Made from a vibrant layer cake, a log cabin quilt is rich, dimensional, and endlessly rearrangeable — a true heirloom design.
A quick, honest note on fabric: a layer cake gives you beautiful 10-inch squares, and log cabins are built from strips — so for this quilt, you’ll cut your logs from the layer cake squares. The coordinated colors are perfect for it; you just do a little slicing first. It’s a wonderful way to turn those squares into one of the most classic quilts there is.
(Prefer working from whole squares? The Simple Charm and Four-Patch sections of this collection use the squares with minimal cutting — this one asks for a bit more, and rewards it richly.)
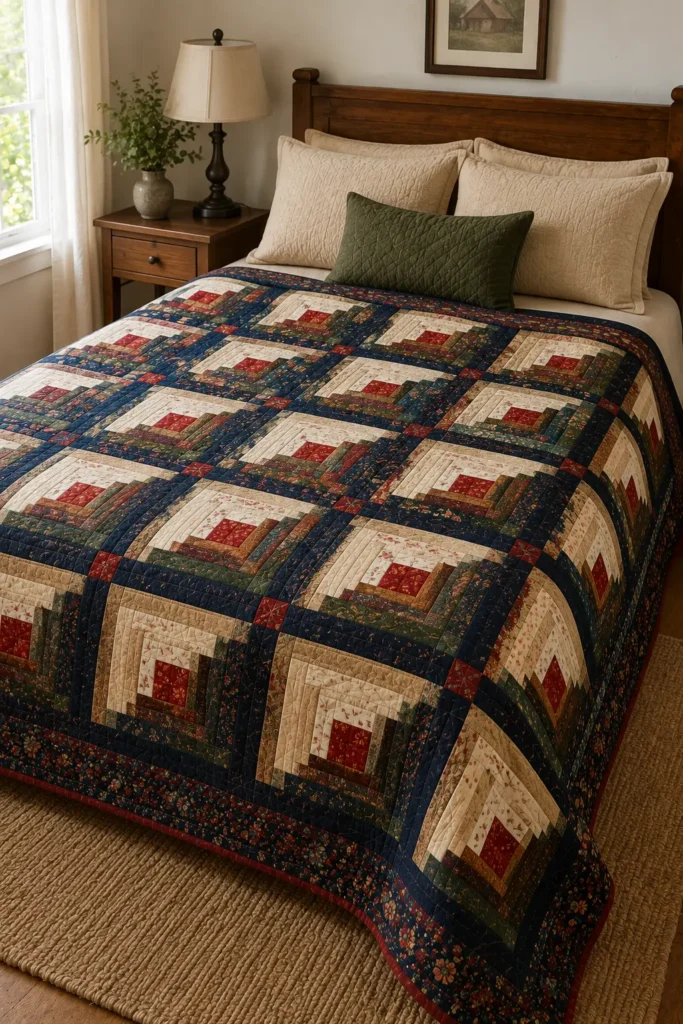
A Little History: The Hearth at the Center
The log cabin is steeped in meaning. It surged in popularity in nineteenth-century America, and by tradition the center square was stitched in red or gold to represent the hearth — the warm fire at the heart of the home — while the light and dark sides stood for the sunny and shadowed sides of the house. Some say log cabin quilts with black centers were even used as quiet signals on the Underground Railroad, though that story is debated by historians. What’s certain is the block’s deep association with home, warmth, and shelter, which is part of why it has stayed beloved for so long.
The log cabin also teaches quilting’s most important lesson: that value — light versus dark — matters more than color itself. That truth echoes across textile traditions, including the Jamdani and Nakshi Kantha traditions of my own family’s background, where the play of light and dark, tone against tone, has always been as important as the pattern itself.
Why This Idea Is Worth Making
This idea is worth making because it turns a simple layer cake into a genuine heirloom, and teaches the single most useful concept in quilting along the way: value placement. There are no points to match and no curves — just straight strips added in order — yet the finished quilt looks rich and intricate. Best of all, the way you arrange the blocks changes everything, so one set of blocks can make a dozen completely different quilts. Warm, timeless, and endlessly versatile, it’s the classic every quilter returns to.
Finished Size
- Finished quilt: about 60 × 72 inches — a throw or twin quilt
- Finished block: 12 inches (12½ inches unfinished)
- Layout: 5 blocks across × 6 blocks down = 30 blocks
- Log width: 2 inches finished (2½ inches cut)
- Skill level: beginner (a change of pace from the star — no points, just strips)
- Core techniques: strip-piecing, light/dark value placement, block-rotation layouts, binding
Materials Needed
- 1 layer cake — sorted into light squares and dark squares, then cut into logs
- Center-square fabric: ¼ yard of red or gold (the traditional hearth)
- (Optional) extra light and dark coordinating fabric, since cutting logs from squares uses fabric quickly — supplement if you want a bigger quilt
- Backing: 3¾ yards
- Batting: at least 66 × 78 inches
- Binding: ⅝ yard of a deep coordinating solid
- Thread: neutral cotton
- Rotary cutter, cutting mat, quilting ruler, pins, iron, sewing machine
Beginner tip: sort your layer cake firmly into lights and darks before you cut a single log, and squint at the two piles. If a fabric is hard to place, set it aside. Clean value separation is the entire secret to a log cabin that reads well.
Understanding the Block: Light, Dark, and the Hearth
Every log cabin block follows the same simple logic:
- A center square (the hearth), traditionally red or gold
- Logs added around it in order, working outward
- Two adjacent sides get light logs; the other two get dark logs, so a diagonal line splits the block corner to corner
- Keep the lights always on the same two sides and the darks on the other two — that consistency is everything
Cutting Logs From Your Layer Cake
Cut all logs 2½ inches wide, slicing them from your sorted light and dark squares (a 10-inch square yields several 2½-inch strips). Cut logs to these lengths as you build:
- Center square: 2½ × 2½ inches (hearth fabric)
- Log 1 (light): 2½ × 2½ in · Log 2 (light): 2½ × 4½ in
- Log 3 (dark): 2½ × 4½ in · Log 4 (dark): 2½ × 6½ in
- Log 5 (light): 2½ × 6½ in · Log 6 (light): 2½ × 8½ in
- Log 7 (dark): 2½ × 8½ in · Log 8 (dark): 2½ × 10½ in
- Log 9 (light): 2½ × 10½ in · Log 10 (light): 2½ × 12½ in
- Log 11 (dark): 2½ × 12½ in
That’s a center plus eleven logs, finishing at 12½ inches unfinished. Repeat for all 30 blocks.
For the quilt:
- Backing: 66 × 78 inches
- Batting: 66 × 78 inches
- Binding: seven strips, 2½ inches × width of fabric
Step-by-Step Guide
Step 1 — Sort and cut. Sort the layer cake into lights and darks. Cut 2½-inch-wide strips from the squares, and cut your center squares from the hearth fabric.
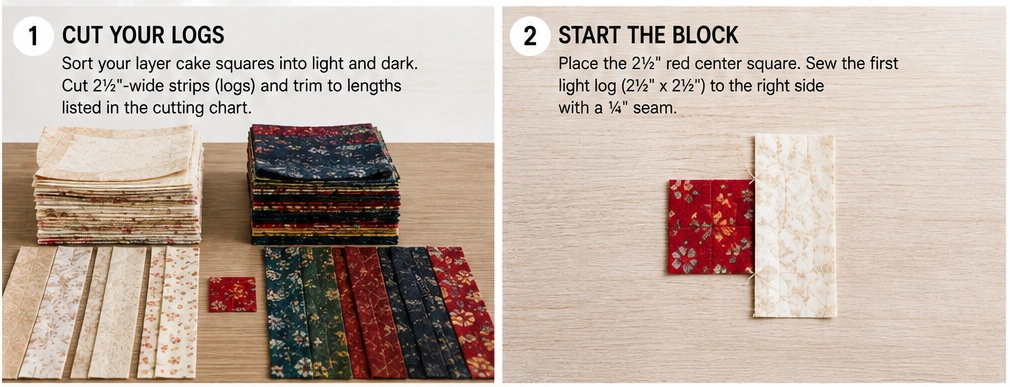
Step 2 — Add the first two light logs. Sew a 2½-inch light log to one side of the center square with a ¼-inch seam; press outward. Rotate and add the 4½-inch light log to the next side; press. The center now has light on two adjacent sides.
Step 3 — Add the first two dark logs. Continuing around in the same direction, add the 4½-inch dark log, then the 6½-inch dark log, to the remaining two sides. Press each outward. Round one is complete — light on two sides, dark on two.
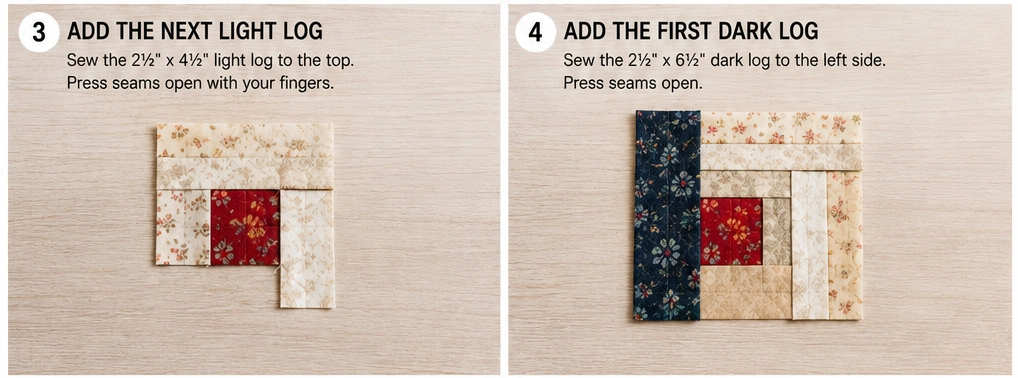
Step 4 — Build rounds two and three. Keeping the same rotation and the light/dark sides consistent, add logs 5–6 (light) and 7–8 (dark), then logs 9–10 (light) and 11 (dark), pressing each outward. Check the block measures 12½ inches. Make 30 blocks.
Step 5 — Choose your layout. This is the fun part. Arrange the blocks 5 across × 6 down, rotating the light/dark halves into a setting:
- Barn Raising: concentric diamonds of light and dark radiating from the center
- Straight Furrows: diagonal stripes of light and dark across the quilt
- Sunshine and Shadow: alternating light and dark diamonds
Play on the floor before committing — the same blocks make dramatically different quilts.
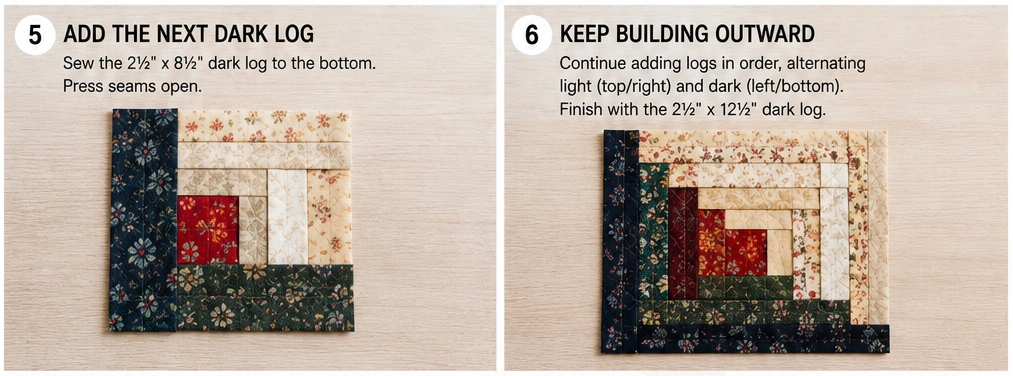
Step 6 — Sew the blocks into rows. Once you love the arrangement, sew the blocks into rows with a ¼-inch seam, pressing seams to alternate directions row by row. You’ll have 6 rows.
Step 7 — Join the rows. Sew the rows together, nesting the seams and pinning at each junction. Press. The top should measure about 60½ × 72½ inches.
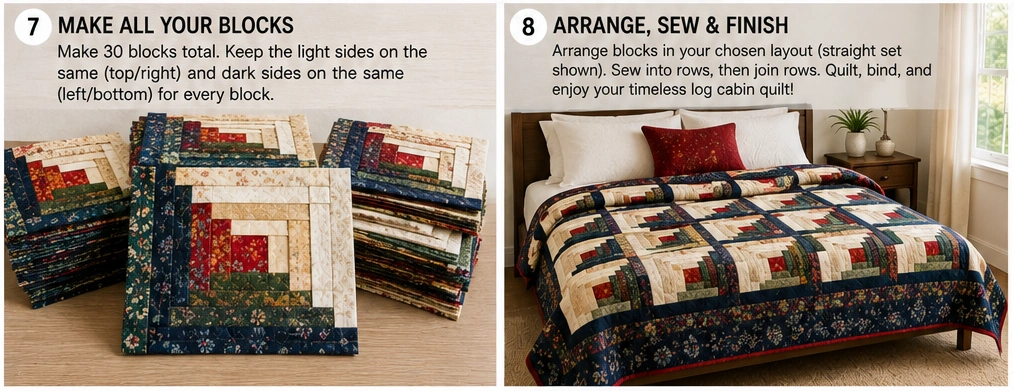
Step 8 — Make the quilt sandwich and quilt. Layer backing (wrong side up), batting, and top (right side up); baste. Straight-line quilting suits the log cabin — echo the logs, or quilt diagonal lines through the light/dark seams.
Step 9 — Trim, bind, and finish. Trim to 60 × 72 inches, square the corners, bind with the 2½-inch strips, and press.
Assembly at a Glance
- Sort the layer cake into lights and darks; cut all logs 2½ inches wide.
- Add two light logs to adjacent sides of the center square.
- Add two dark logs to the remaining sides → round one.
- Build rounds two and three, keeping light/dark sides consistent → 12½ block. Make 30.
- Arrange 5 × 6, rotating halves into a setting (Barn Raising, Straight Furrows…).
- Sew into 6 rows (¼-inch seams), pressing alternate rows.
- Join rows, nesting seams → 60½ × 72½ top.
- Layer, baste, and quilt (echo logs or diagonal lines).
- Trim to 60 × 72 inches; bind and press.
Choosing Your Colors
The log cabin wants clear value contrast in a warm, vibrant palette:
- Hearth center: classic red, or golden yellow
- Lights: cream, buttermilk, pale gold, soft coral
- Darks: teal, navy, deep rust, plum, forest green
- Mix prints and near-solids within each value group for depth
The one rule that never fails: keep lights clearly light and darks clearly dark. Vibrant color is wonderful here — just make sure each fabric reads firmly as either a “light” or a “dark.”
Beginner Tips for Success
- Sort by value, not color — squint at your piles; if you can’t tell light from dark, neither will the quilt.
- Always add logs in the same rotational direction, or the block won’t build square.
- Press every log outward, away from the center, for flat blocks.
- Keep lights on the same two sides in every block so your layout works.
- Lay the whole quilt out and photograph it before sewing — the setting is where the magic happens.
Styling It & Gift Ideas
A log cabin quilt has warm, timeless, slightly traditional character that suits cozy and classic rooms beautifully — lovely on a bed with warm neutral linens, draped over a wingback chair, or folded on a bench. Its strong geometry anchors a room, so keep the surroundings warm and simple and let the quilt lead.
Rich in meaning as well as beauty, it’s a deeply special gift:
- A wedding or housewarming quilt — the hearth-and-home symbolism makes it perfect for a new home or marriage
- An heirloom gift for a milestone, meant to be kept and passed down
- A cozy throw in a loved one’s favorite colors, sorted into lights and darks
- A meaningful keepsake — mention the hearth tradition in a note, and the gift carries a story
Few quilts say “home” as warmly as a log cabin, which makes it one of the most heartfelt gifts you can give.
Final Thoughts
A classic log cabin layer cake quilt is timeless elegance built from the simplest strips around a glowing hearth center. It teaches the most useful lesson in all of quilting — that value carries a design — and rewards you with a block you can arrange a dozen ways. Cut your logs from those coordinated layer cake squares, keep your lights and darks firmly sorted, and one vibrant bundle becomes an heirloom quilt full of warmth, history, and the enduring feeling of home.
Other Design Inspirations – Digitally Modified
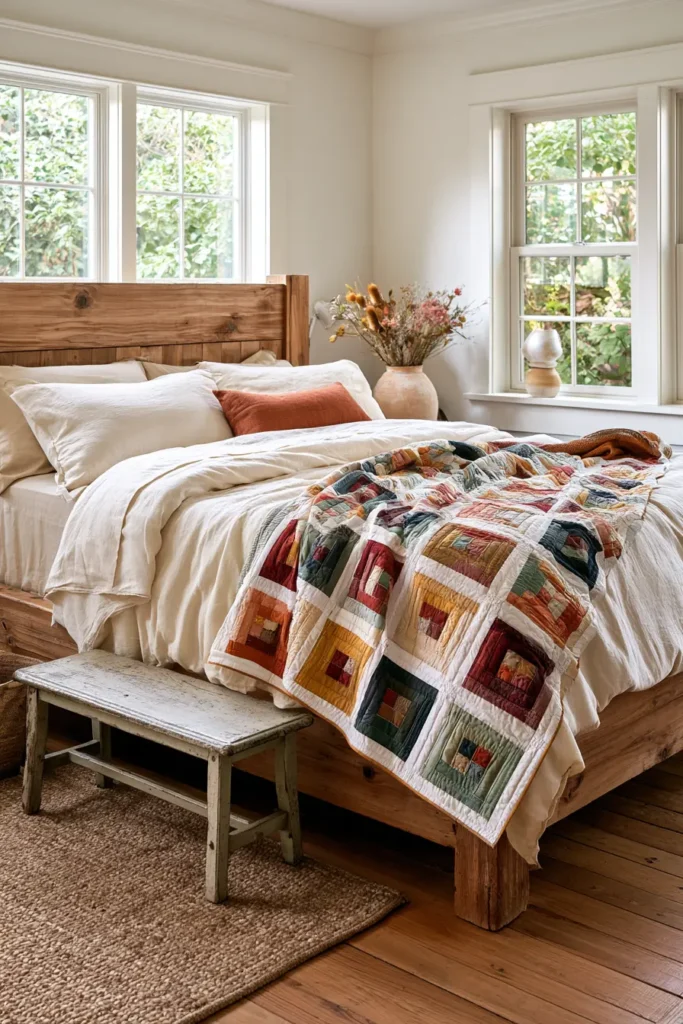
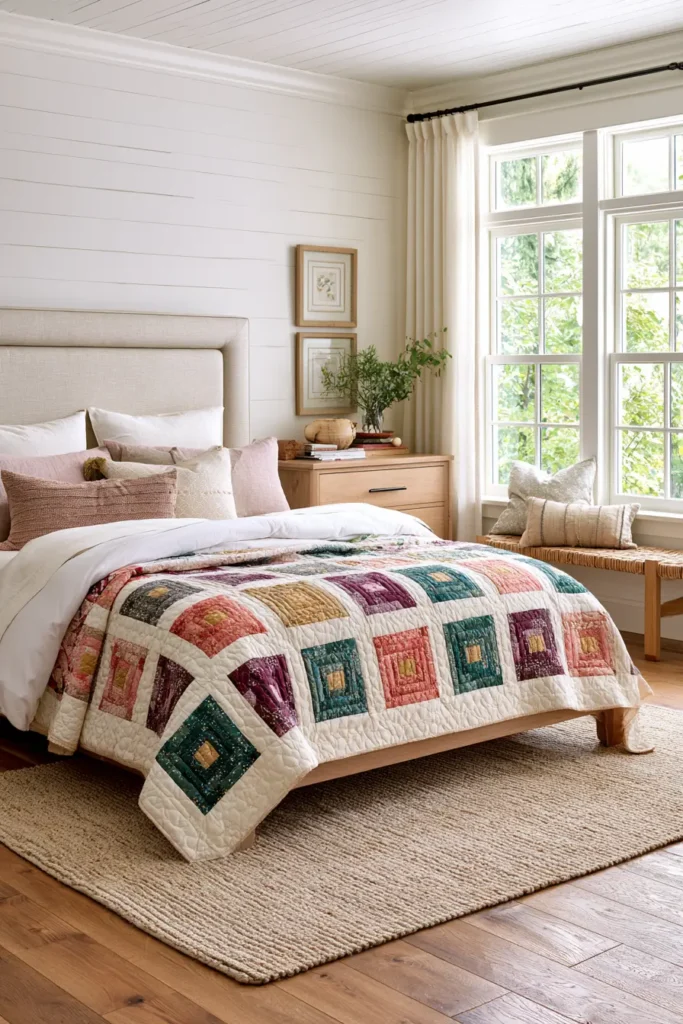
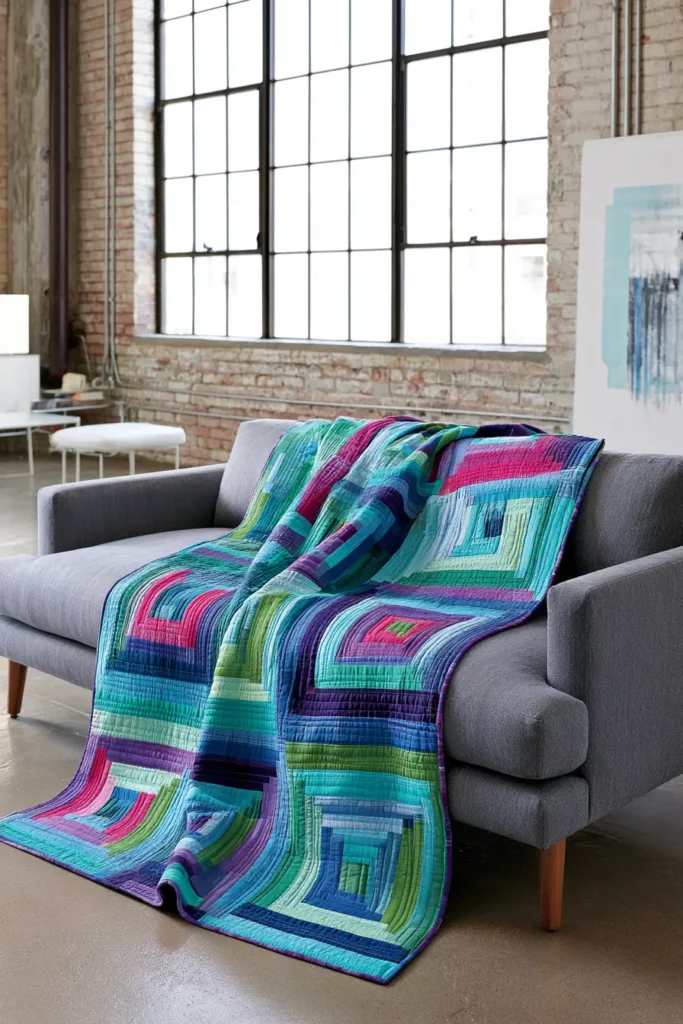
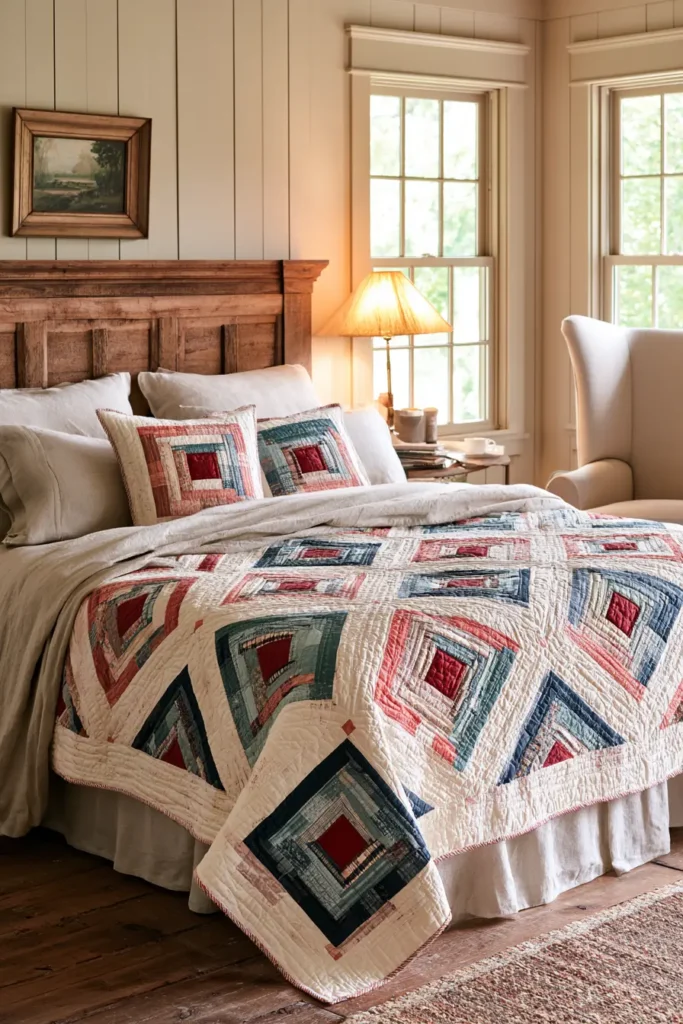
9. Striking Flying Geese Layer Cake Quilt for Directional Design
Flying geese is one of quilting’s most satisfying units, and when you set the geese free to stream across an entire quilt — rather than caging them inside a star — you get a design with real energy and motion. Each unit is a large triangle (the “goose”) flanked by two smaller background triangles (the “sky”), and stacked into long columns, they march up the quilt like a flock crossing an autumn sky. Made from a vibrant layer cake, every goose a different color against a shared background, a flying geese quilt becomes a striking, directional piece full of forward movement — bold, modern, and impossible to look away from.
The difference from the sawtooth star is all about scale and freedom. In a star, four geese point inward to frame a center. Here, the geese are the whole show, all pointing the same way (or shifting direction for rhythm), streaming across the quilt in continuous columns. It’s one of the most graphic, dynamic quilts you can make from simple units.
(You met flying geese inside the Sawtooth Star section of this collection — here they step out on their own. The no-waste method below makes them by the dozen.)
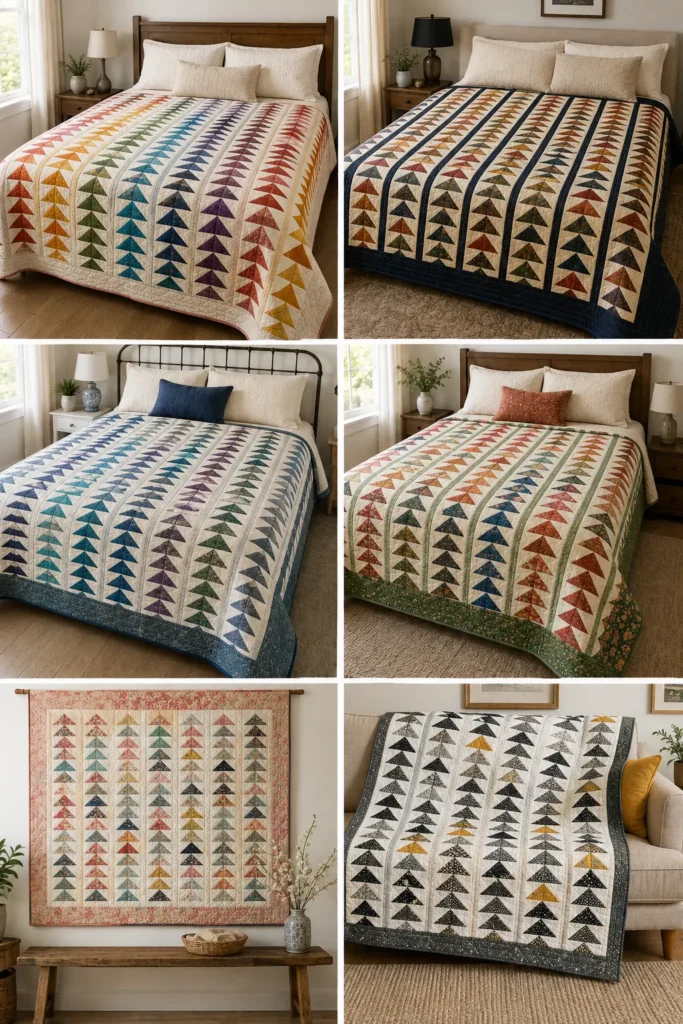
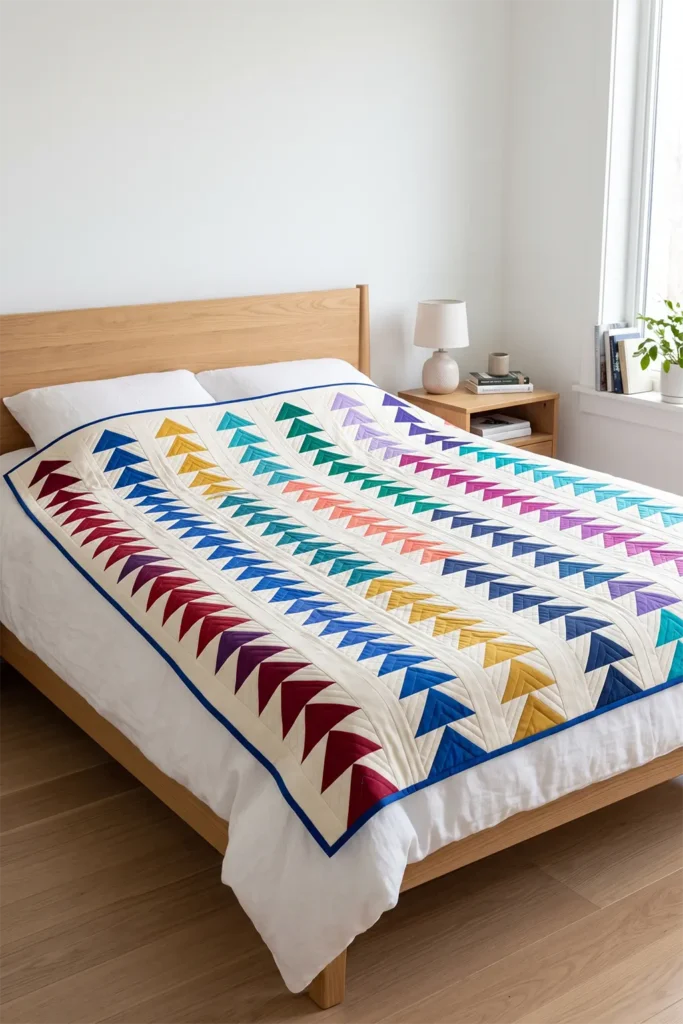
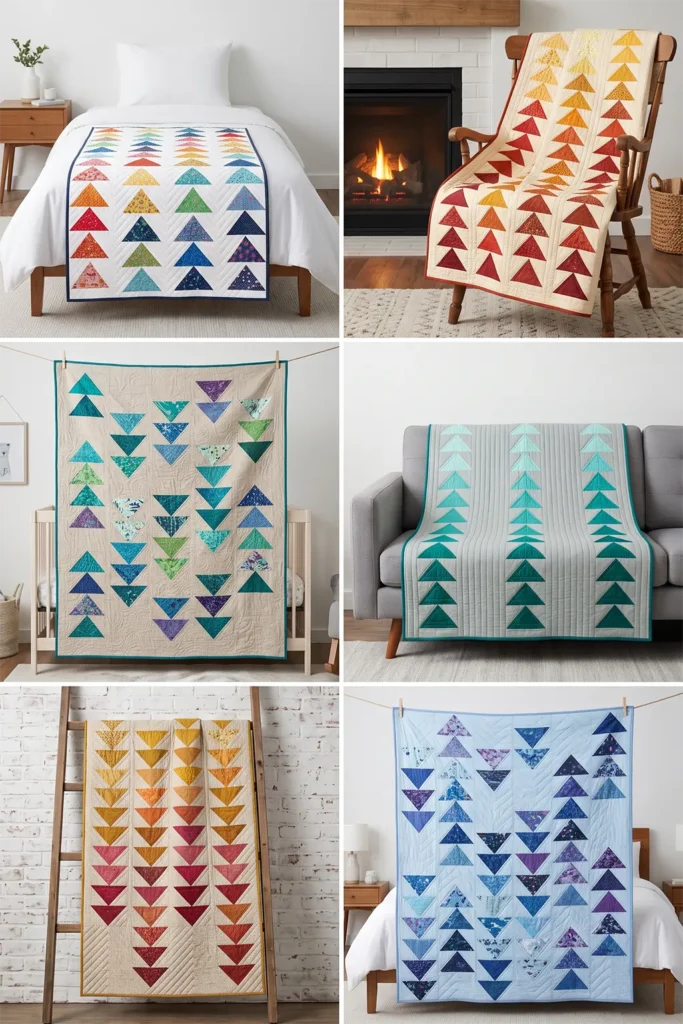
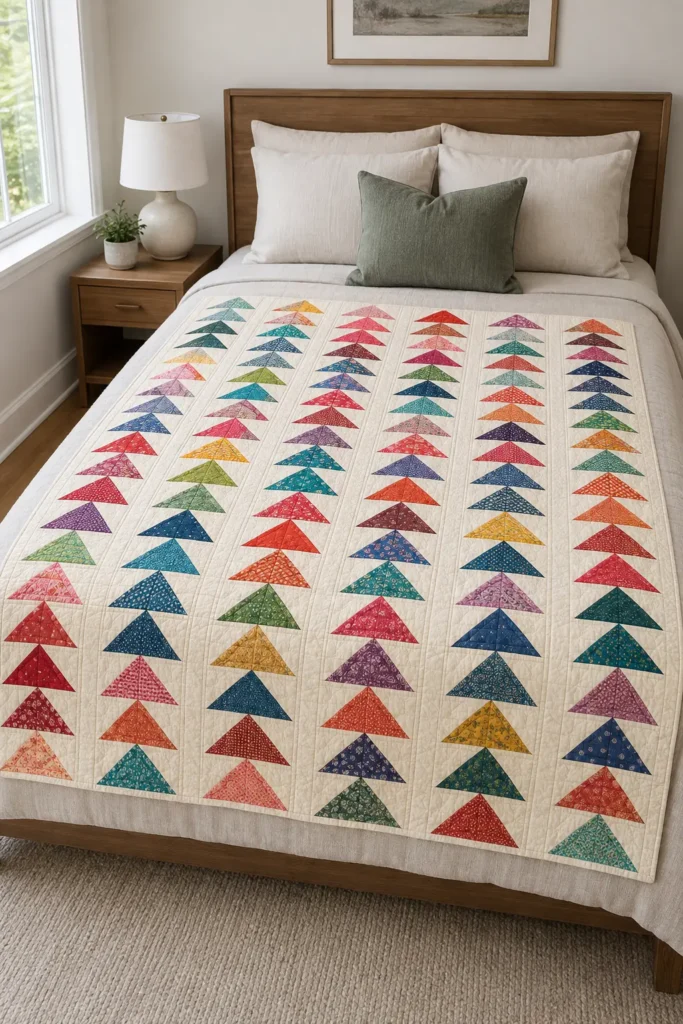
A Little History: A Flock in Fabric
The name isn’t decorative — it’s literal. The block is called flying geese because a column of these triangles looks exactly like birds in formation, all pointing the same direction, the way real geese fly in a V across the sky. It’s one of quilting’s oldest and most enduring units, valued for that unmistakable sense of movement and direction. In quilting lore, flying geese blocks are sometimes tied to themes of journey and migration, and like many traditional blocks, they carry a quiet association with travel and finding one’s way. Whether pointing the flock in a single bold direction or zigzagging them for energy, quilters have loved this unit for centuries precisely because it moves.
That love of capturing motion and rhythm in cloth is shared across textile traditions, including the Jamdani and Nakshi Kantha traditions of my own family’s background, where directional, repeating patterns bring a length of fabric to life.
Why This Idea Is Worth Making
This idea is worth making because it delivers bold, graphic, directional impact from a single simple unit — and there are no points to match the way a star demands, since the geese simply stack. The no-waste four-at-once method makes the many units you need quickly, the layer cake keeps the colors coordinated, and the strong directional flow gives the finished quilt a modern, dynamic look that suits contemporary rooms beautifully. It’s a fast, rhythmic sew with serious visual payoff, and endlessly adaptable — point the flock one way, or send it zigzagging.
Finished Size
- Finished quilt: about 54 × 72 inches — a throw or twin quilt
- Finished geese unit: 3 × 6 inches (3½ × 6½ inches unfinished)
- Layout: 9 columns × 24 geese per column, with narrow background sashing between columns
- Skill level: beginner (repetitive and forgiving)
- Core techniques: no-waste flying geese, column assembly, directional layout, binding
Materials Needed
- 1 layer cake — the “goose” triangles, in a vibrant scrappy mix (each large goose square is cut from a layer cake square)
- Background fabric: 2½–3 yards of a single consistent solid (cream, white, or a soft neutral) — one steady “sky” makes the flock read clearly
- Backing: 3½ yards
- Batting: at least 60 × 78 inches
- Binding: ⅝ yard of a coordinating solid
- Thread: neutral cotton
- Rotary cutter, cutting mat, quilting ruler, pins, iron, sewing machine
Beginner tip: keep the background a single consistent fabric even though the geese are scrappy and colorful. A steady “sky” is what lets a wildly varied flock look intentional instead of chaotic.
The No-Waste Flying Geese Method (4 at a Time)
An all-over geese quilt needs a lot of units, so use the four-at-once method — it’s fast and wastes nothing. For four finished 3 × 6-inch geese, you need:
- One large “goose” square: 7¼ × 7¼ inches (cut from a layer cake square)
- Four small “sky” squares: 3⅞ × 3⅞ inches (background)
The steps:
- Draw a diagonal line on the back of each small square.
- Place two small squares on opposite corners of the large square, right sides together, overlapping slightly in the center, their drawn lines forming one continuous diagonal. Sew ¼ inch on each side of the line, then cut along the line — you’ll get two heart-shaped units.
- On each unit, place a third small square on the remaining corner, sew ¼ inch on each side of its line, and cut. Press open.
- You now have four flying geese, each trimming to 3½ × 6½ inches.
You need 216 geese total, so make them in a steady rhythm — it’s a satisfying, meditative step.
Choosing Your Colors
Scrappy and vibrant is the goal, unified by one calm sky:
- Rainbow flock: every goose a different bright color from the layer cake, all against one white or cream sky — joyful and bold
- Warm flock: rich reds, oranges, golds, and pinks streaming against cream
- Cool flock: teals, blues, greens, and purples for a serene but striking gradient
- Ombre flow: arrange the geese so the colors shift gradually down each column, from light to dark
Whatever palette you choose, the single consistent background is what turns “random” into “rich,” letting each colorful goose stand out crisply.
Cutting Measurements
- Geese: 54 large “goose” squares at 7¼ inches (from layer cake squares) + 216 small background squares at 3⅞ inches → 216 geese
- Column sashing: ten strips at 1½ × 72½ inches (background), between and outside the nine columns
- Backing: 60 × 78 inches
- Batting: 60 × 78 inches
- Binding: seven strips, 2½ inches × width of fabric
Step-by-Step Guide
Step 1 — Cut the pieces. Cut 54 large goose squares at 7¼ inches from your layer cake, and 216 small background squares at 3⅞ inches. Cut the ten 1½ × 72½-inch sashing strips.
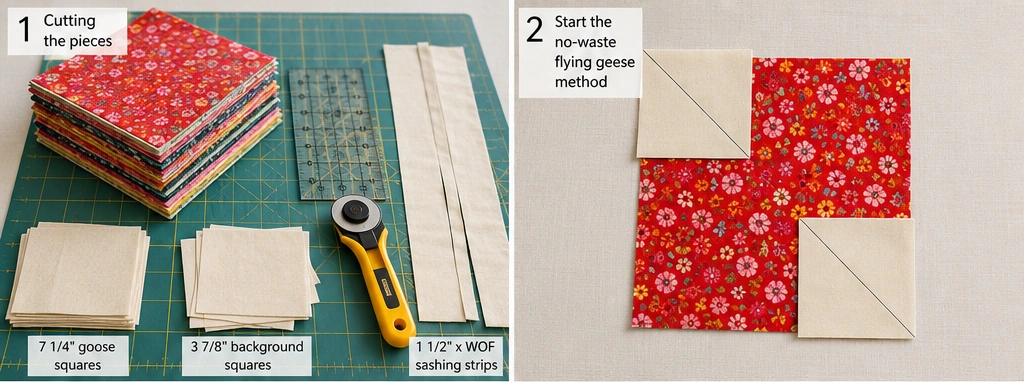
Step 2 — Make the geese (four at a time). Using the no-waste method above, make your geese in batches of four. Settle in and work through all 54 sets to make 216 geese.
Step 3 — Trim every unit true. Trim each goose to exactly 3½ × 6½ inches, checking the point sits ¼ inch below the top raw edge so it survives the seam. Consistent trimming keeps long columns straight.
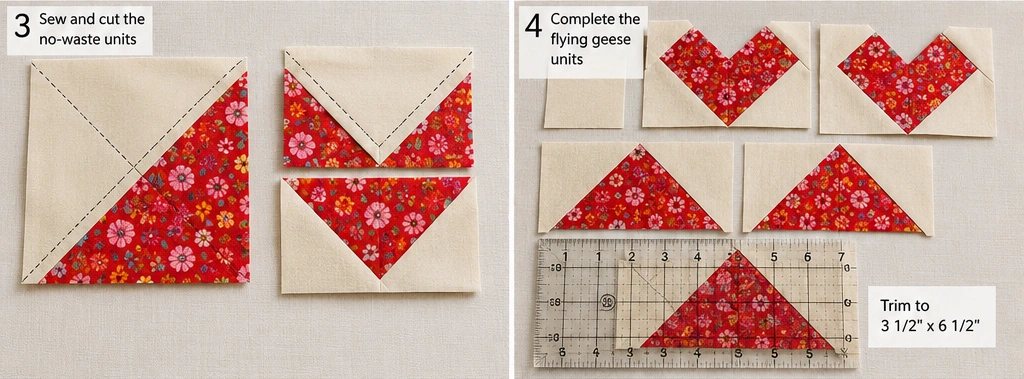
Step 4 — Build the columns. Decide your direction — all geese pointing up the quilt gives a strong, unified flock; alternating direction column to column gives a zigzag rhythm. Sew 24 geese into a column, all oriented your chosen way, pressing seams up (or open). Each column finishes about 72½ inches long. Make 9 columns.
Step 5 — Add the sashing. Sew a 1½ × 72½-inch background strip to the right of each column, plus one on the far left, so narrow “sky” separates each stream of geese and keeps the columns crisp.
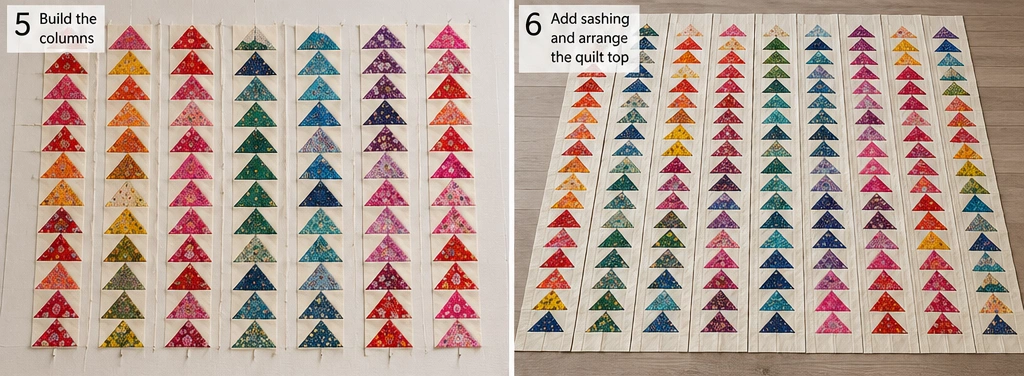
Step 6 — Join the columns. Sew the nine sashed columns together side by side, matching the tops carefully so the flock stays level. Press. The top should measure about 54½ × 72½ inches.
Step 7 — Make the quilt sandwich. Layer backing (wrong side up), batting, and top (right side up); baste well.
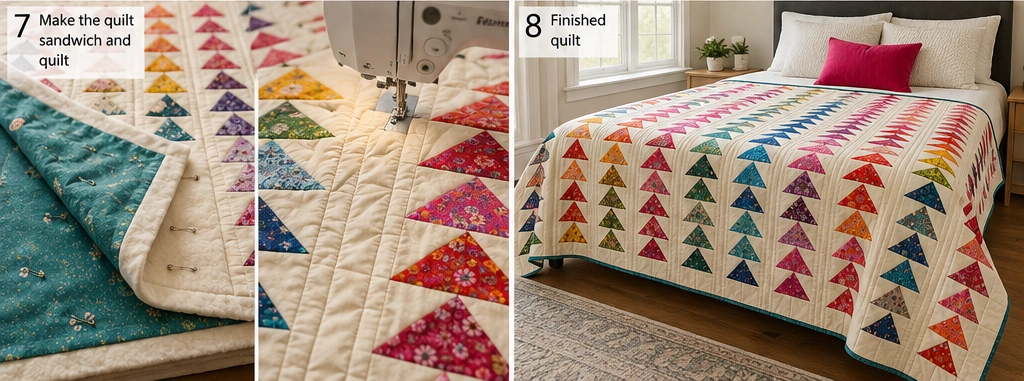
Step 8 — Quilt it. Quilting that follows the geese looks wonderful — straight lines up each column, or gentle chevrons echoing the points. Keep it even so the directional flow stays clean.
Step 9 — Trim, bind, and finish. Trim to 54 × 72 inches, square the corners, bind with the 2½-inch strips, and press.
Assembly at a Glance
- Cut 54 goose squares at 7¼ (from the layer cake) and 216 background squares at 3⅞.
- Make geese four-at-a-time with the no-waste method → 216 geese.
- Trim each to 3½ × 6½ inches, checking the ¼-inch point clearance.
- Sew 24 geese per column, all facing your chosen direction → 9 columns.
- Add 1½ × 72½ background sashing between and outside the columns.
- Join the columns, matching tops → 54½ × 72½ top.
- Layer, baste.
- Quilt following the geese.
- Trim to 54 × 72 inches; bind and press.
Beginner Tips for Success
- Keep one consistent background — a steady sky is what makes a scrappy flock read.
- Use the no-waste 4-at-once method; making 216 geese one at a time is a long road.
- Trim every unit to size and check the ¼-inch point clearance before building columns.
- Decide your direction up front — all-one-way for calm, alternating for zigzag energy.
- Chain-piece the geese in batches to keep the rhythm going and the sewing fast.
Styling It & Gift Ideas
A flying geese quilt is a bold, directional statement, so orient it with intention — the geese “fly” best pointing upward, and over a bed the columns running head to foot make the bed feel calm and elongated. Keep the bedding neutral so the flock leads, and echo one goose color nearby. The strong movement suits modern and contemporary rooms especially well.
Its dynamic, meaningful design makes a memorable gift:
- A graduation or new-journey gift — the flying, forward-moving geese beautifully suit someone starting a new chapter
- A modern throw for a design-loving friend’s housewarming
- A going-away or good-luck quilt, playing on the geese’s association with travel and finding one’s way
- A bold baby quilt in bright, high-contrast colors for a contemporary nursery
The “journey” symbolism makes it especially thoughtful for anyone moving, graduating, or setting off on something new.
Final Thoughts
A striking flying geese layer cake quilt is motion made from the simplest of units — a whole flock streaming across the quilt, bold and directional and full of life. Set free from the star, the geese become the entire design, and with the no-waste method they’re quick to make by the dozen. Choose a vibrant scrappy flock against one calm sky, point them with purpose, and one layer cake becomes a dynamic, graphic quilt that carries all the movement of birds crossing the sky.
Other Design Inspirations – Digitally Modified
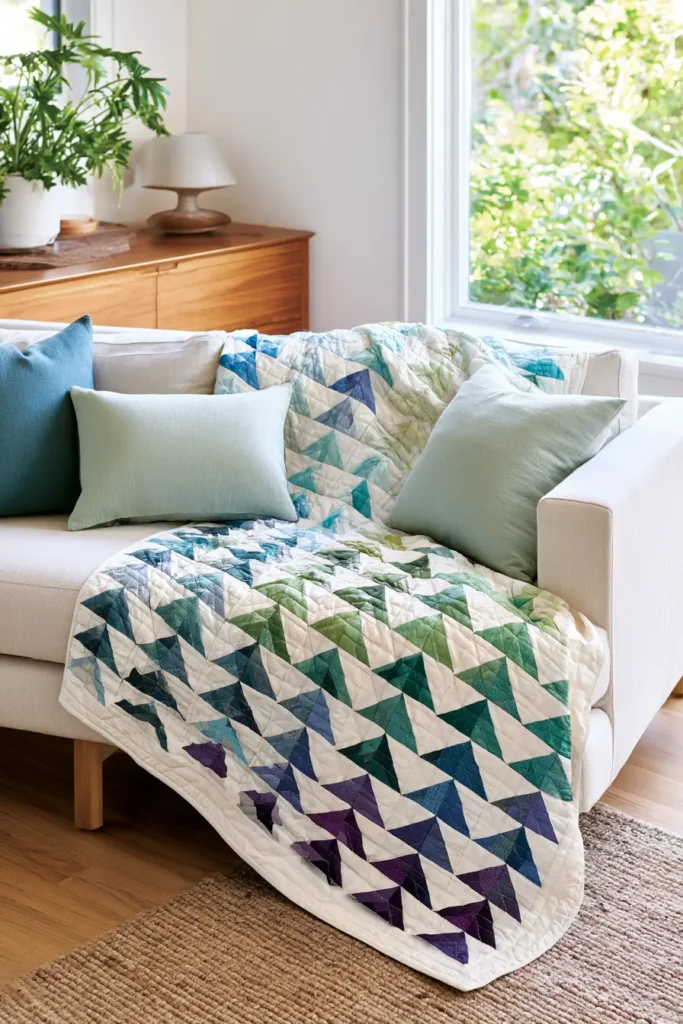
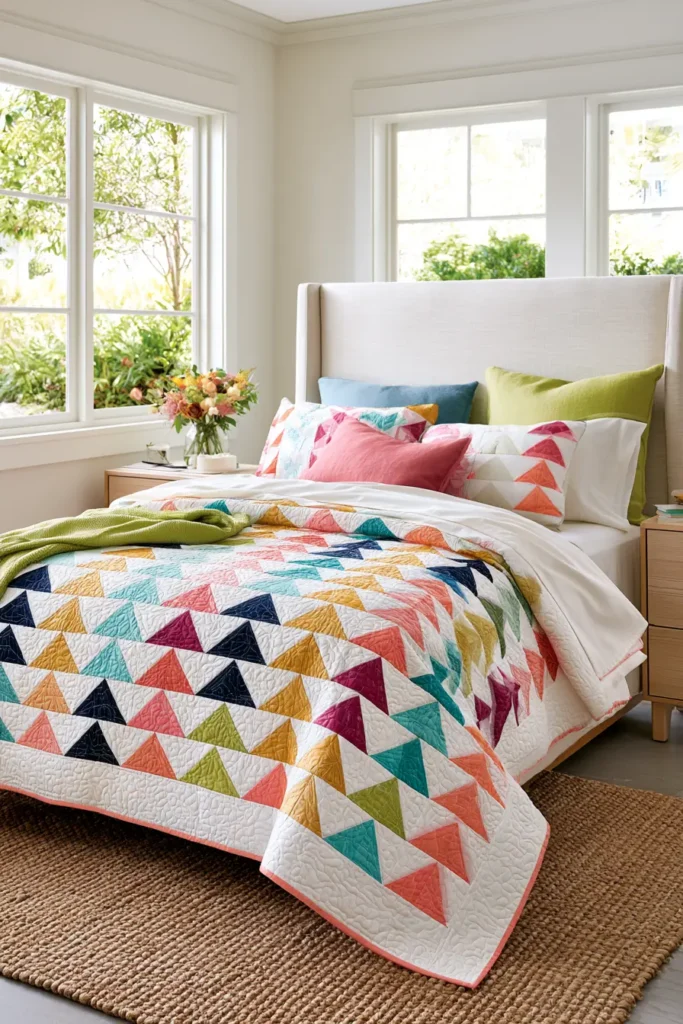
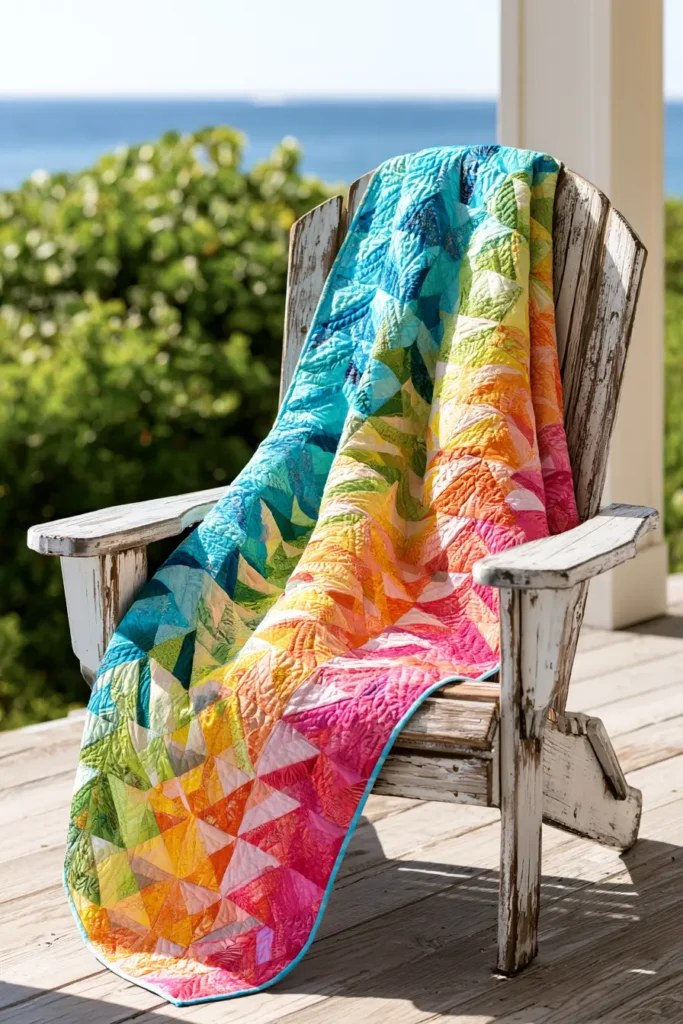
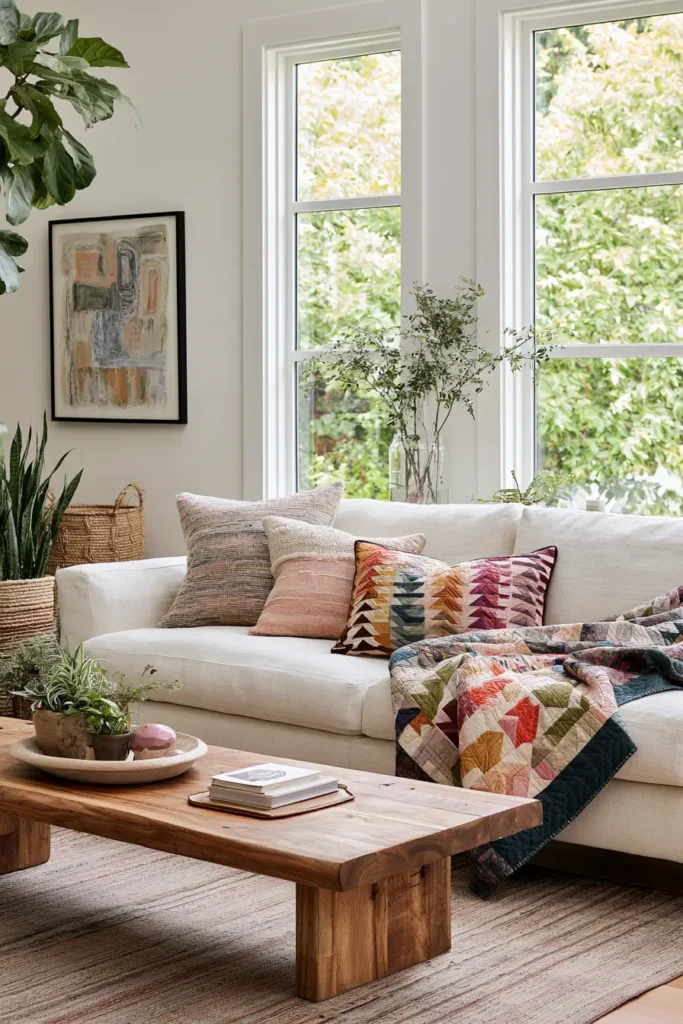
10. Ombre Gradient Layer Cake Quilt for Stunning Color Transitions
Sometimes the most breathtaking quilt has no pieced block at all — just pure, flowing color. An ombre gradient quilt arranges whole 10-inch squares in a smooth transition from light to dark, or from one color into another, so the whole quilt glows like a sunset caught in fabric. There’s no motif and no fussy piecing; the beauty comes entirely from the arrangement of color, lightest to deepest, in a seamless flow. It’s the simplest quilt in this collection to sew — just squares in a grid — and arguably the most striking to look at, because a well-planned gradient does something quietly mesmerizing: the eye travels across it the way it travels across a dawn sky.
This is where quilting comes closest to painting. Instead of piecing a picture, you compose with pure color and value, blending one shade into the next until the whole quilt reads as a single, glowing gradient. The sewing couldn’t be simpler; the artistry is all in the planning.
(This is the whole-square cousin of a technique you may know from the Amber & Rust Ombre quilt in the Fall collection — here the layer cake’s coordinated shades make the gradient especially easy to build.)
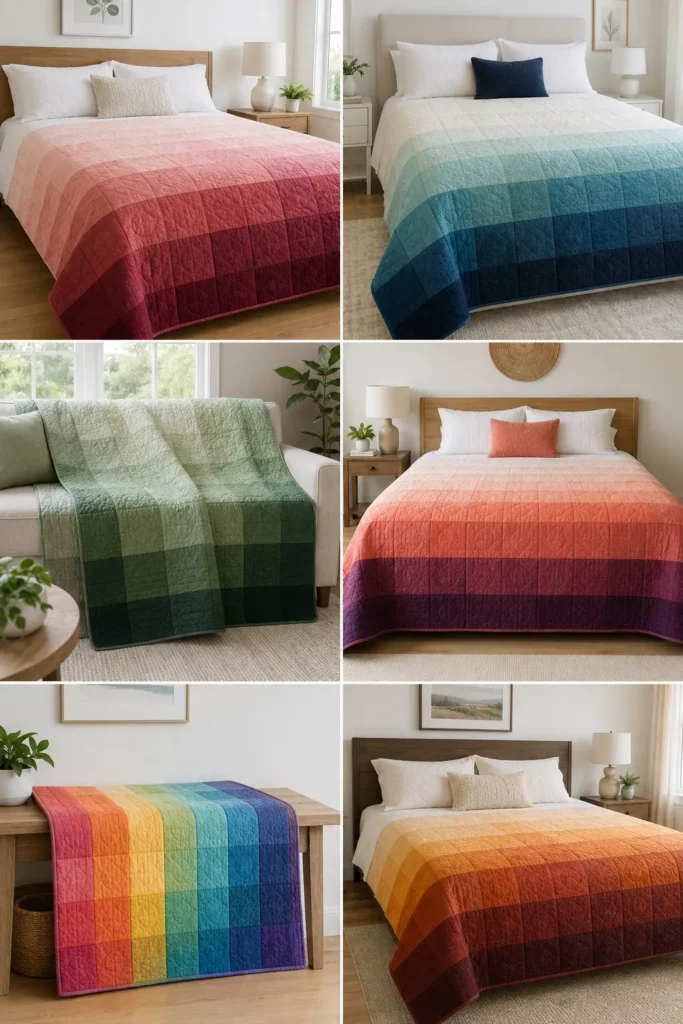
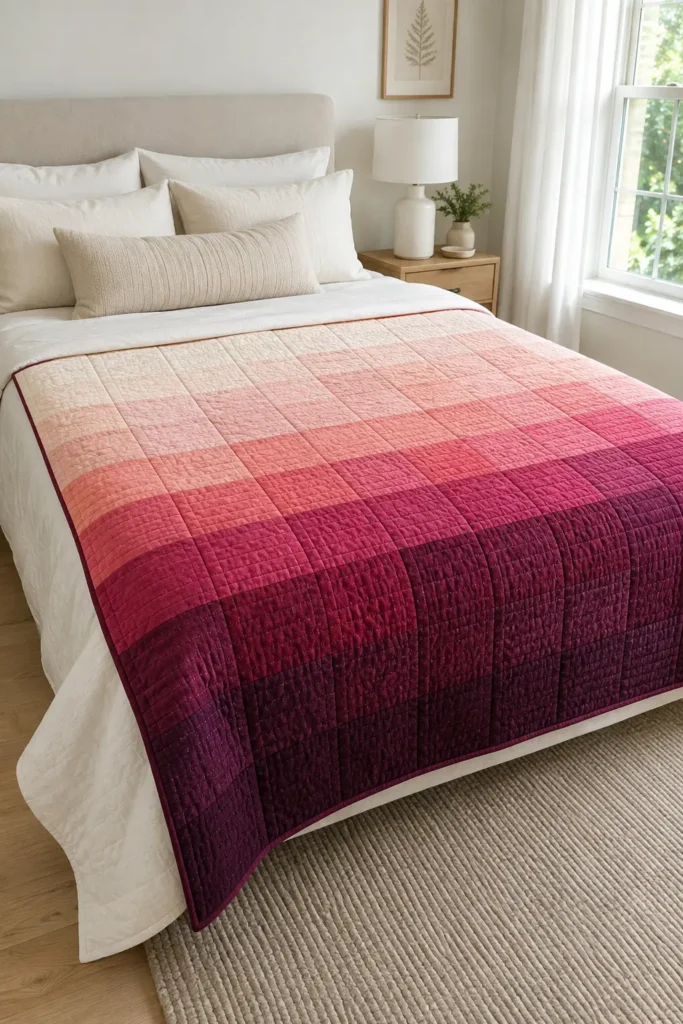
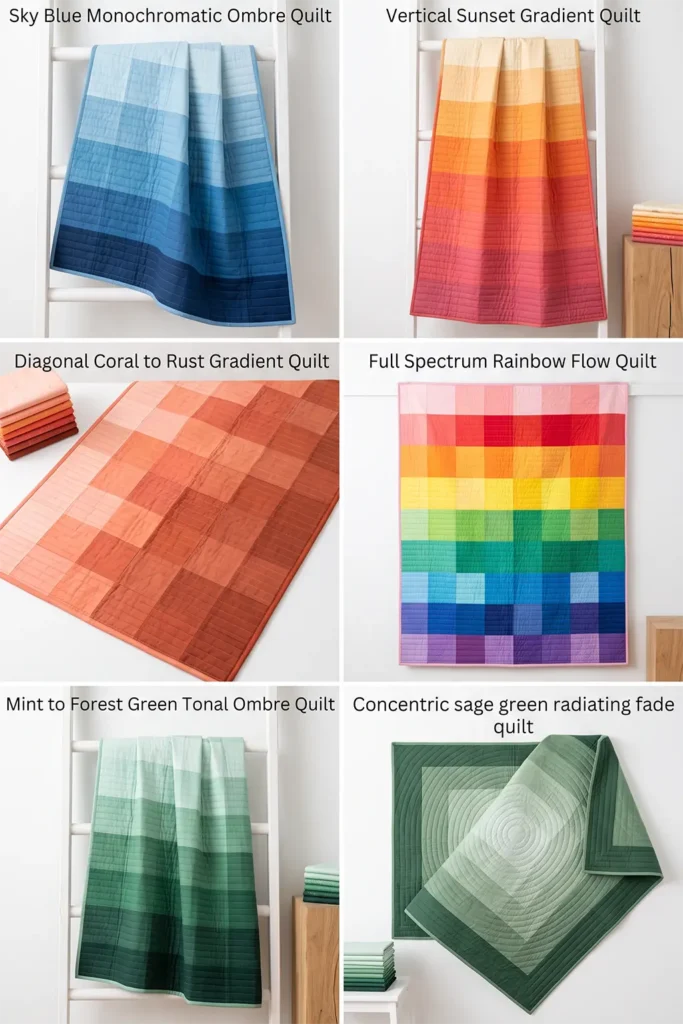
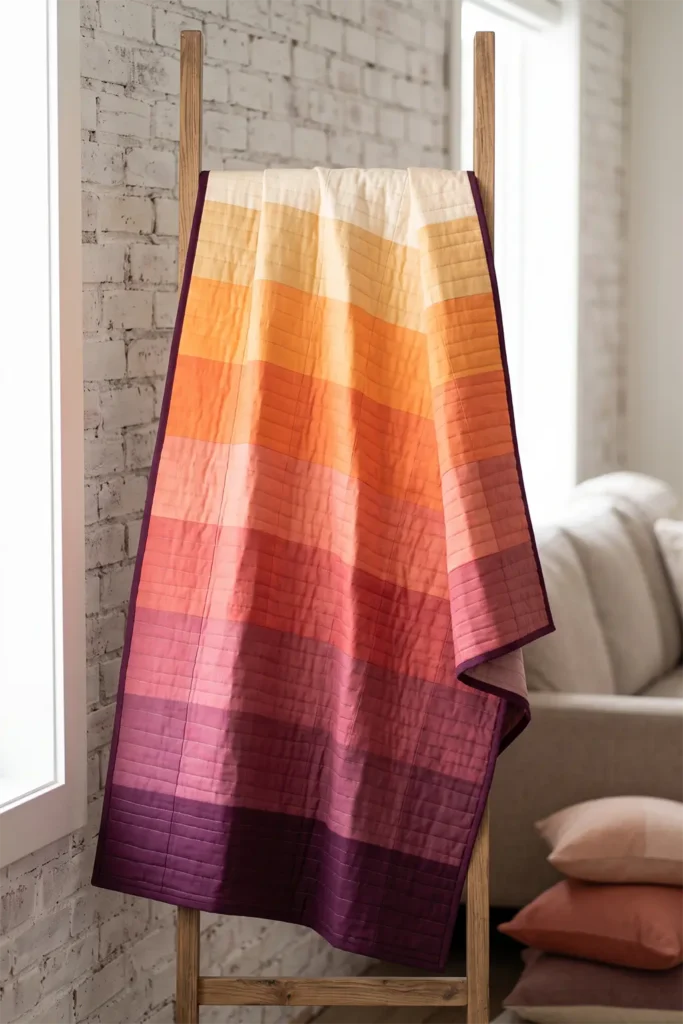
A Note on Fabric: Choosing Your Gradient
One honest tip before you start: a standard scrappy layer cake is a mix of colors, not automatically a gradient. To get that flowing ombre effect, you have two easy options:
- Buy an ombre-designed layer cake — many fabric collections are made specifically as gradients, with squares that already run light to dark. This is the effortless route.
- Sort and supplement — take a tonal or limited-palette layer cake and arrange its squares by value, filling any gaps with a few extra 10-inch squares in the missing shades.
Either way, the goal is a set of squares that steps evenly from light to dark. Once you have that, the quilt almost designs itself.
A Little History: What “Ombre” Means
The word ombre comes from the French ombré, meaning “shaded” — and the technique of grading color from light to dark is one of the oldest ideas in textile design. You’ll find it in dip-dyed silks, in hand-painted fans, in gradient-dyed yarns, and in graduated weaving across many cultures and centuries. It has always carried a sense of quiet luxury, because a smooth transition of color reads as considered and refined. Modern quilters have embraced ombre enthusiastically, and precut fabrics — with their coordinated, ready-graded collections — have made this once-painstaking effect wonderfully achievable.
That deep attention to tone and gradient is something I find especially beautiful, and it runs through the weaving traditions of my own family’s background — in Jamdani muslin, the subtle handling of tone and shade is read as carefully as any pattern.
Why This Idea Is Worth Making
This idea is worth making because it delivers the most sophisticated, striking result in this collection from the very simplest construction. It’s just squares sewn in a grid — no points, no piecing, no templates — so it’s genuinely the easiest quilt here to sew. The skill is entirely in planning the gradient, which is a wonderful, low-pressure way to train your eye for color and value. The finished quilt is calm, modern, and quietly luxurious, a stunning statement piece that looks like fine art yet requires only straight seams. Maximum beauty, minimum difficulty.
Finished Size
- Finished quilt: about 54 × 72 inches — a throw or twin quilt
- Finished square: 9 inches (the 10-inch square, trimmed slightly, or left at 9½ finished)
- Layout: 6 squares across × 8 squares down = 48 squares, graded top to bottom
- Skill level: beginner (the sewing is simple; the planning is the art)
- Core techniques: value-gradient planning, simple square-grid patchwork, binding
Materials Needed
- 1 ombre or tonal layer cake (or a sorted layer cake plus a few extra graded squares) — enough for 48 squares running light to dark
- Backing: 3½ yards
- Batting: at least 60 × 78 inches
- Binding: ⅝ yard in a shade from one end of the gradient
- Thread: neutral cotton
- Rotary cutter, cutting mat, quilting ruler, a design wall or clear floor space, pins, iron, sewing machine
Beginner tip: choose squares that step evenly from light to dark. Lay them in a row and squint — if two neighbors look like the same value, the gradient will stall there. You want smooth, even steps, not a jump.
The Real Skill: Planning the Gradient
The sewing is easy; the gradient is everything. A few principles:
- Work in bands. Assign each shade to one or more rows. With 8 rows, group your squares so each shade fills a row or two, blending into the next.
- Blend the transitions. For an even smoother flow, mix two neighboring shades within a transition row, so the colors melt rather than stripe.
- Decide your direction. Light at the top fading to dark at the bottom is classic; dark-to-light, or light in the center fading dark to both edges, are equally beautiful. Decide before you sew.
- Photograph your layout in black and white. This is the pro trick: a grayscale photo strips away color and shows you value alone, instantly revealing any spot where the gradient jumps or stalls. Adjust until the grayscale flow is smooth.
Choosing Your Colors
The ombre method works with any vibrant range — pick a flow you love:
- Single-color ombre: one hue from palest tint to deepest shade — blush to burgundy, sky to navy, mint to forest
- Sunset: pale gold through orange and coral into deep rose or plum
- Ocean: cream through aqua and teal into deep indigo
- Rainbow flow: the full spectrum shifting gradually across the quilt, red through violet
- Warm to cool: a bold transition from warm tones into cool ones across the surface
Whatever range you choose, keep the steps even — a gradient is only as smooth as its most abrupt transition.
Cutting Measurements
- Squares: 48 squares at 9½ × 9½ inches (trim the 10-inch squares slightly to square them up), arranged by value
- Backing: 60 × 78 inches
- Batting: 60 × 78 inches
- Binding: seven strips, 2½ inches × width of fabric
Step-by-Step Guide
Step 1 — Square up your squares. Trim each 10-inch square to a clean 9½ × 9½ inches. Keep them sorted by value as you go.
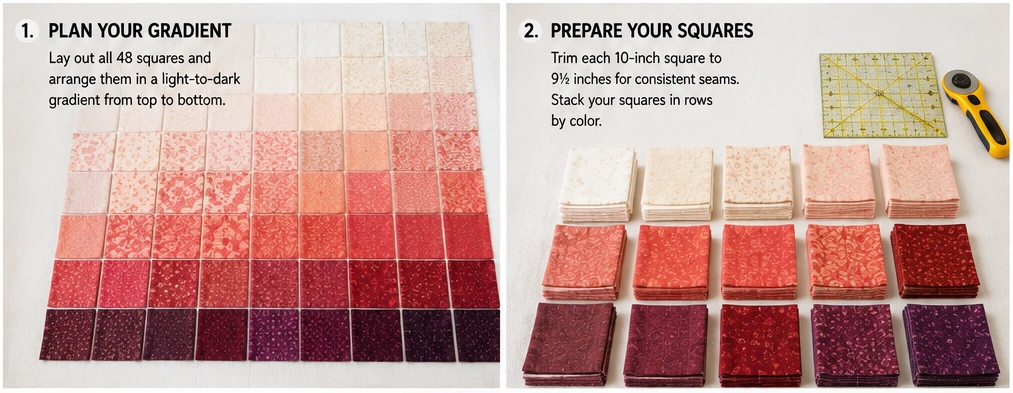
Step 2 — Plan the gradient on a design wall. Lay the squares out 6 across × 8 down, arranging them from lightest at the top to darkest at the bottom (or your chosen direction). Blend the transition rows by mixing neighboring shades. Take your time — this is the whole quilt.
Step 3 — Check it in grayscale. Photograph the full layout, then convert the photo to black and white on your phone. Any place the gradient jumps or flattens will show instantly. Adjust squares until the grayscale flow is smooth.
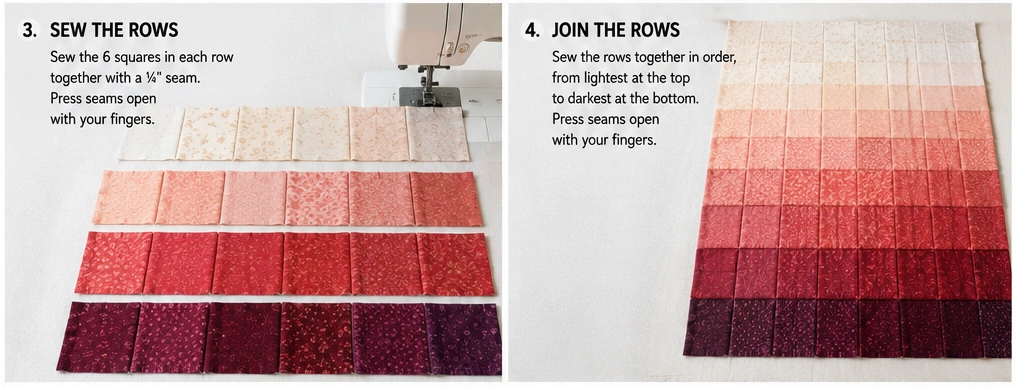
Step 4 — Sew the rows. Working one row at a time so you keep your arrangement, sew each row of 6 squares with a ¼-inch seam. Press the seams of odd rows one way and even rows the other, so they nest. Return each finished row to its place.
Step 5 — Join the rows. Sew the 8 rows together in order, matching seams and always keeping the light-to-dark direction correct. Press. The top should measure about 54½ × 72½ inches.
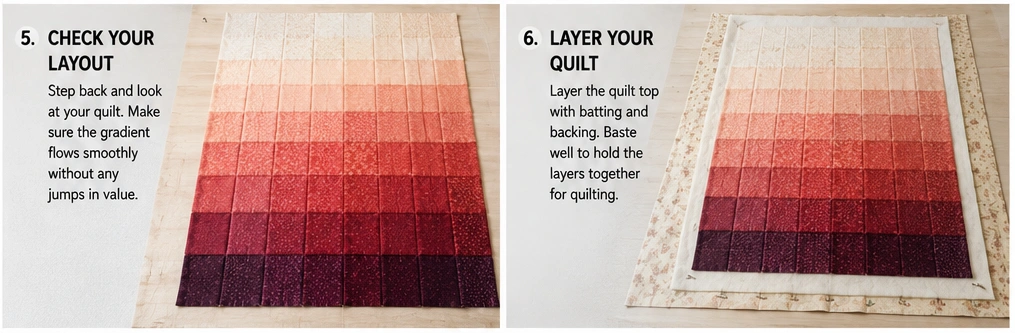
Step 6 — Make the quilt sandwich. Layer the backing (wrong side up), batting, and top (right side up). Smooth from the center outward and baste well.
Step 7 — Quilt it. Keep the quilting simple and horizontal so it doesn’t fight the gradient — straight lines across the rows, or an all-over grid, both let the color flow lead. Avoid busy motifs that would distract from the ombre.
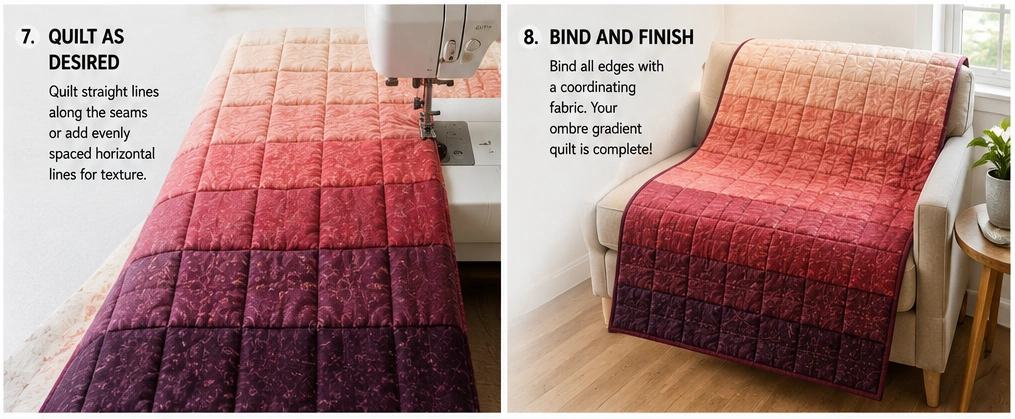
Step 8 — Trim and bind. Trim to 54 × 72 inches, square the corners, and bind with the 2½-inch strips in a shade from one end of the gradient.
Step 9 — Wash and finish. Wash gently in cold with a color catcher (deep shades can bleed), and tumble dry low for a soft, elegant drape.
Assembly at a Glance
- Trim 48 squares to 9½ inches, sorted by value.
- Lay out 6 × 8 on a design wall, graded light-to-dark, blending transitions.
- Check the layout in a black-and-white photo; smooth any jumps.
- Sew rows of 6, pressing odd/even rows opposite; keep them in order.
- Join the 8 rows, keeping the gradient direction → 54½ × 72½ top.
- Layer, baste.
- Quilt with simple horizontal lines so the flow leads.
- Trim to 54 × 72 inches; bind in an end-of-gradient shade.
- Wash cold with a color catcher; tumble low.
Beginner Tips for Success
- Choose squares that step evenly light-to-dark — even steps make a smooth gradient.
- Plan the whole layout before sewing; the gradient is the design.
- Use the grayscale-photo trick to check value flow — it never lies.
- Blend transition rows (mixing two neighboring shades) for the smoothest melt.
- Keep quilting simple and horizontal so nothing competes with the color flow.
Styling It & Gift Ideas
An ombre quilt is a calm, modern statement, so let the gradient lead — dress a bed so the color flows across the whole surface (light pooling at the head, deepening toward the foot), and keep everything else tonal and quiet. Its painterly, sophisticated look suits modern and minimalist rooms beautifully, and it works as a serene focal point rather than a busy accent.
Its striking, artful beauty makes it a memorable gift:
- A statement throw for a design-loving friend — the ombre effect looks impressively high-end
- A wedding or milestone gift in the couple’s or recipient’s favorite color, palest to deepest
- A soothing baby quilt in a gentle single-color gradient (blush, sky, or sage) — calm and modern for a nursery
- A housewarming gift that coordinates effortlessly with almost any room, thanks to its tonal simplicity
A single-color ombre in someone’s favorite shade makes a beautifully personal, genuinely stunning gift.
Final Thoughts
An ombre gradient layer cake quilt proves that the most stunning quilt can be the simplest to sew — just squares, arranged with care, flowing from light to deep like color caught mid-transformation. Composed like a painting but pieced with nothing more than straight seams, it’s the easiest quilt in this collection and among the most beautiful. Choose a gradient you love, plan it with the grayscale trick, and one thoughtfully arranged layer cake becomes a mesmerizing wash of color for any modern home.
Other Design Inspirations – Digitally Modified
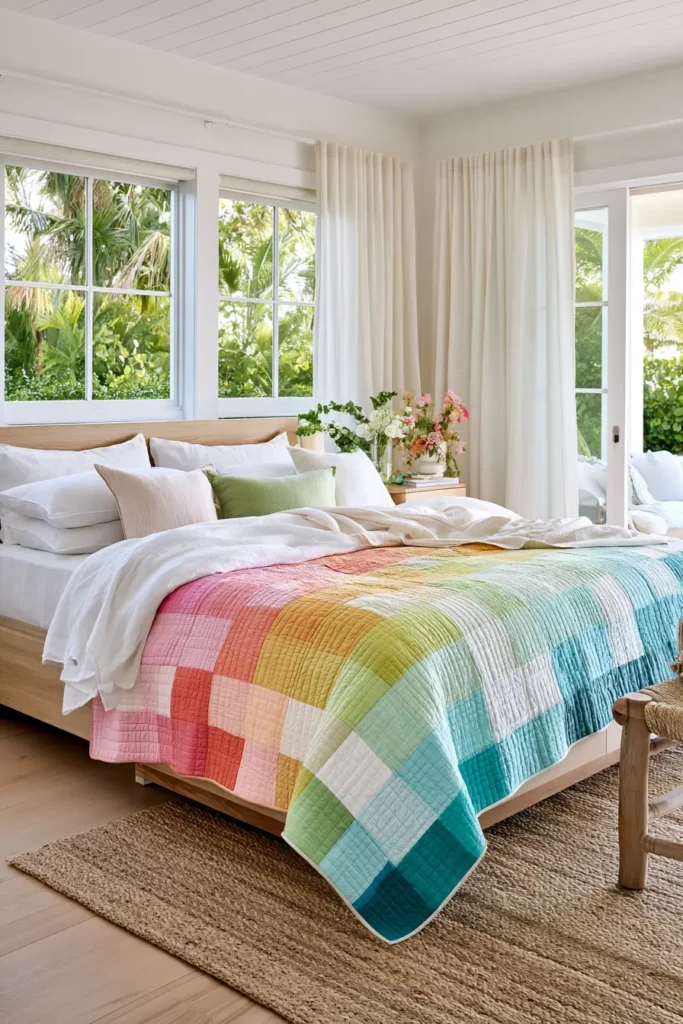
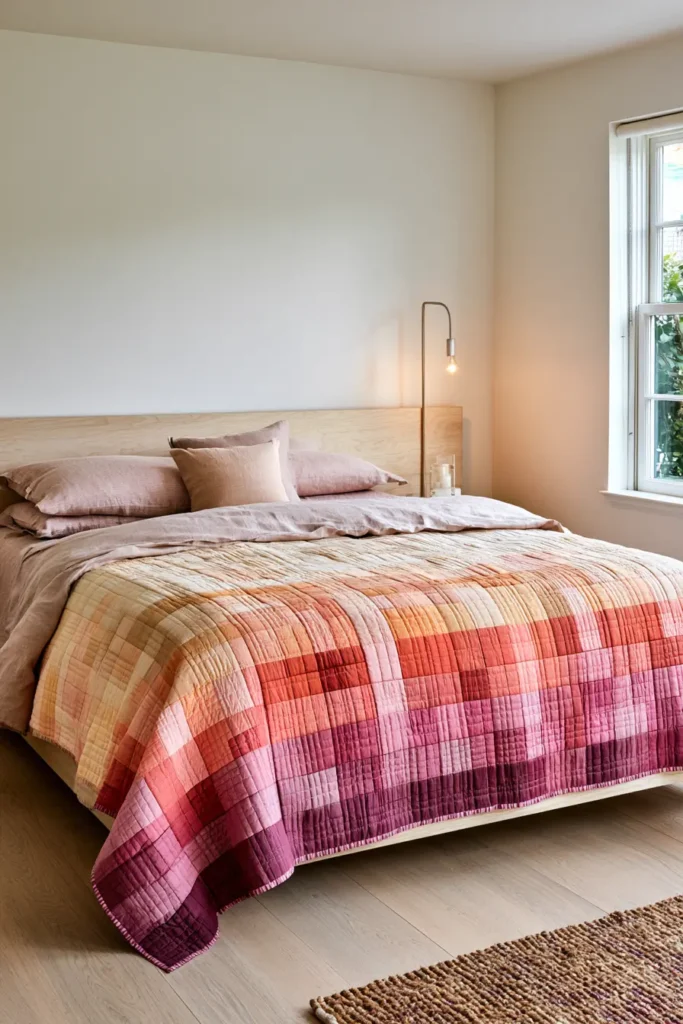
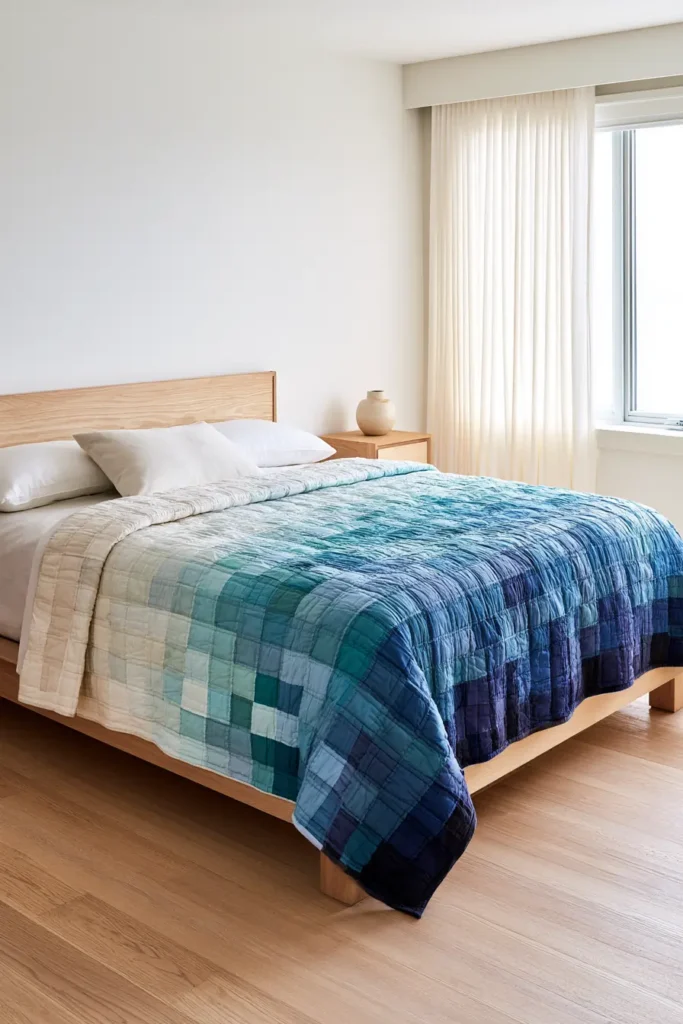
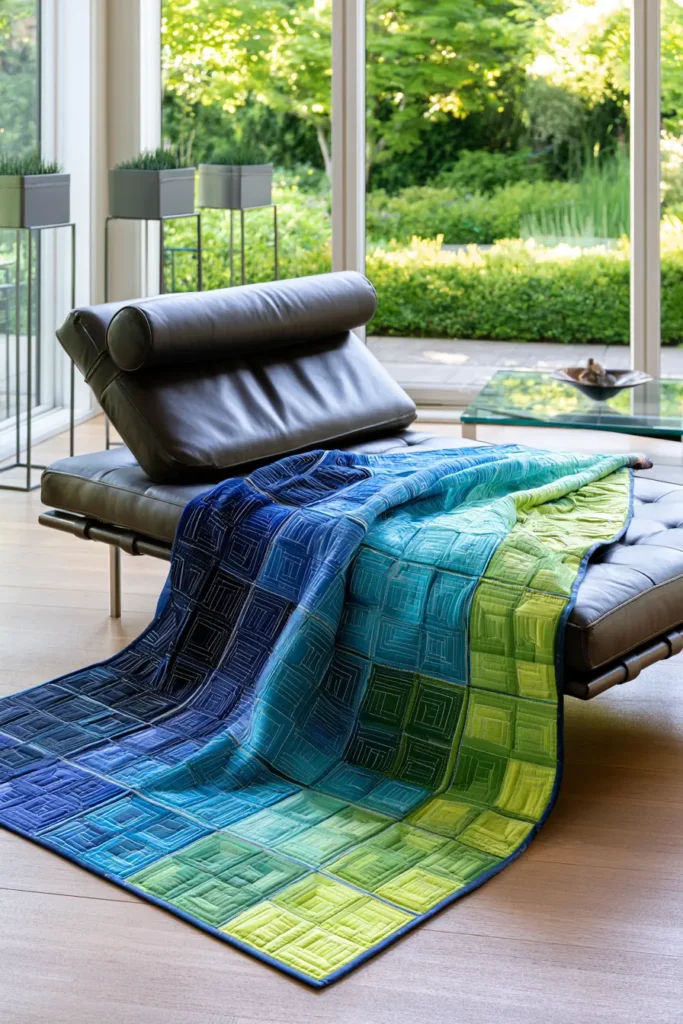
11. Cozy Rail Fence Layer Cake Quilt for Timeless Simplicity
The rail fence is one of the friendliest, most timeless blocks in all of quilting — and one of the very easiest. Each block is simply three strips sewn side by side into a square, and the magic happens when you rotate those blocks: alternate them horizontal, vertical, horizontal, vertical, and the strips interlock into a woven, basket-weave pattern that looks far more complex than it is. There’s no cutting into triangles, no points to match, no curves — just straight strips and a clever rotation. Made from a vibrant layer cake, a rail fence quilt has a warm, cozy, classic charm that never goes out of style, and it comes together beautifully fast.
It’s the perfect quilt for a beginner who wants a little more visual interest than plain squares, but none of the fuss of pieced points. The woven effect is pure illusion, created entirely by turning simple blocks — a wonderful lesson in how rotation alone can make a pattern come alive.
(Enjoyed the strip-piecing in the Four-Patch section of this collection? The rail fence uses the same easy strip technique, arranged a different way.)
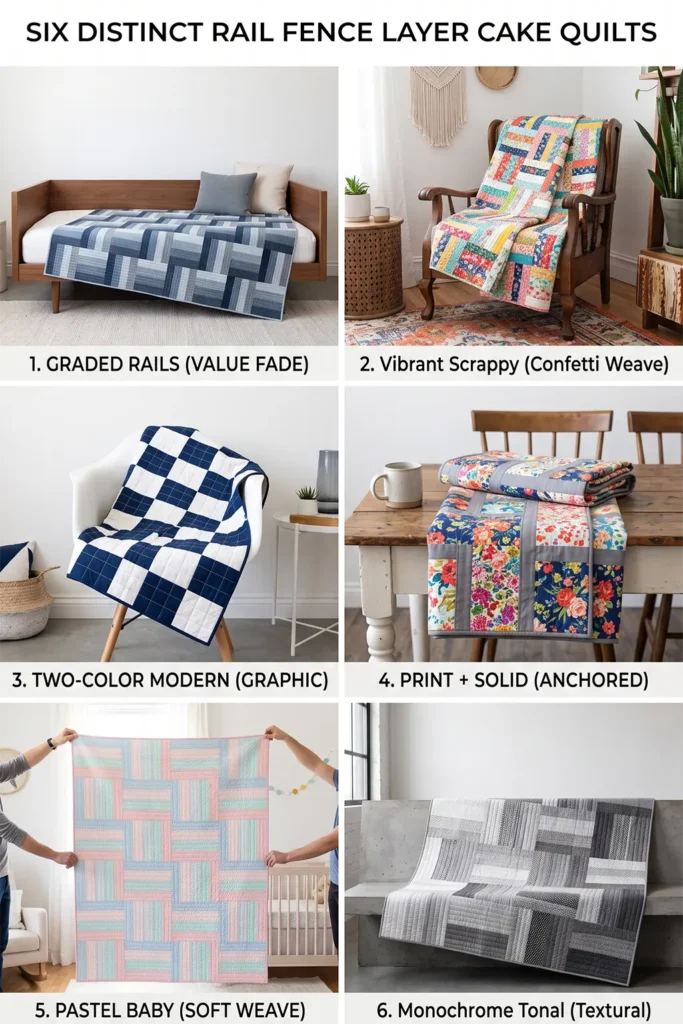
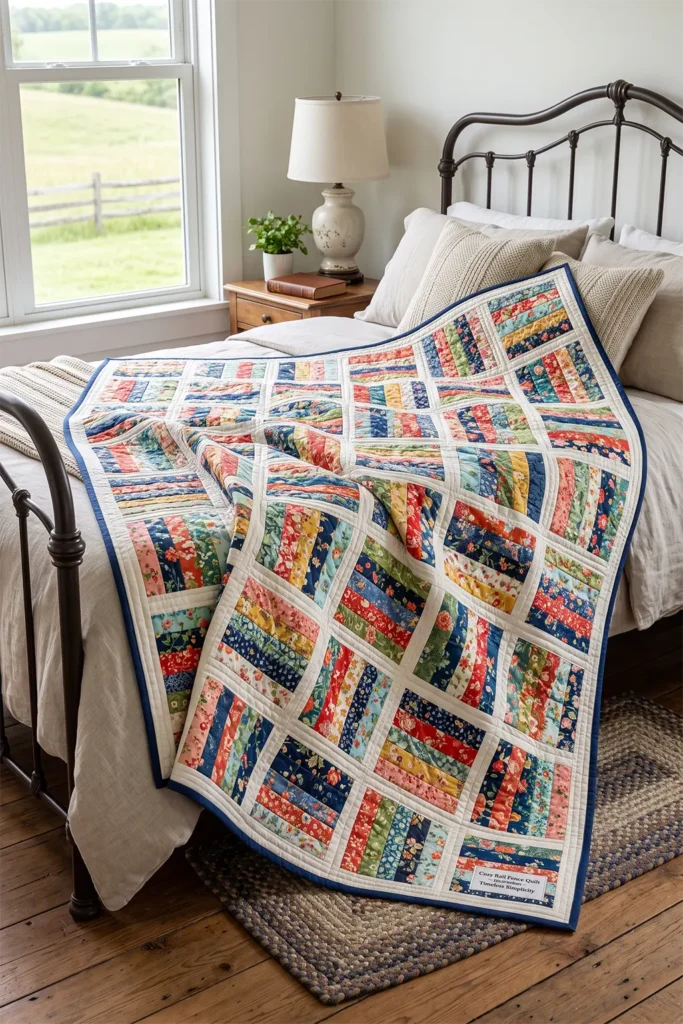
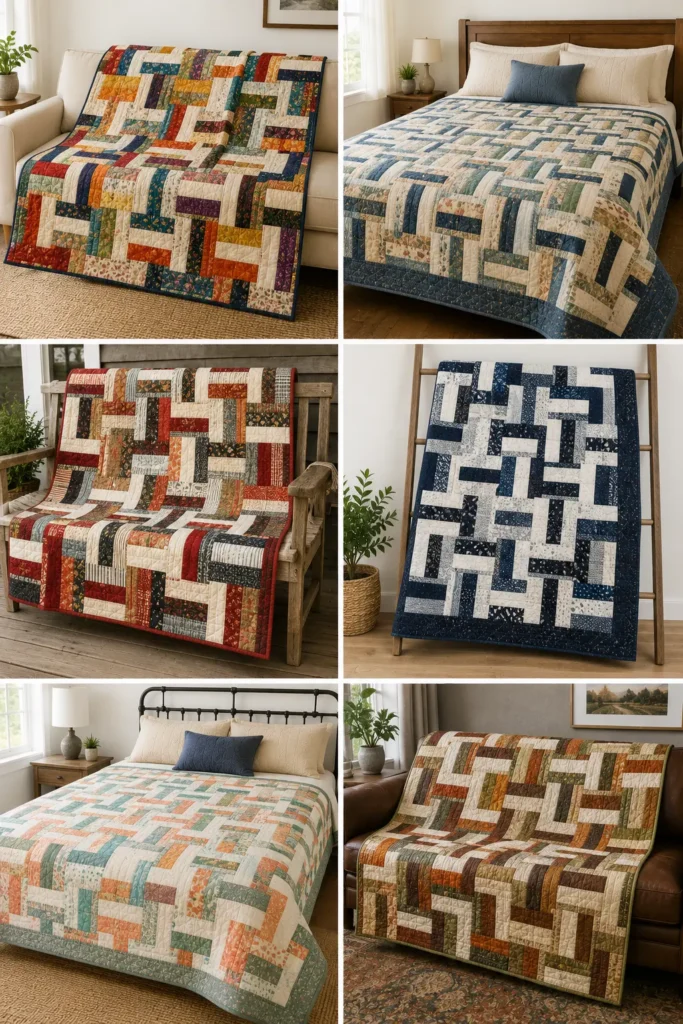
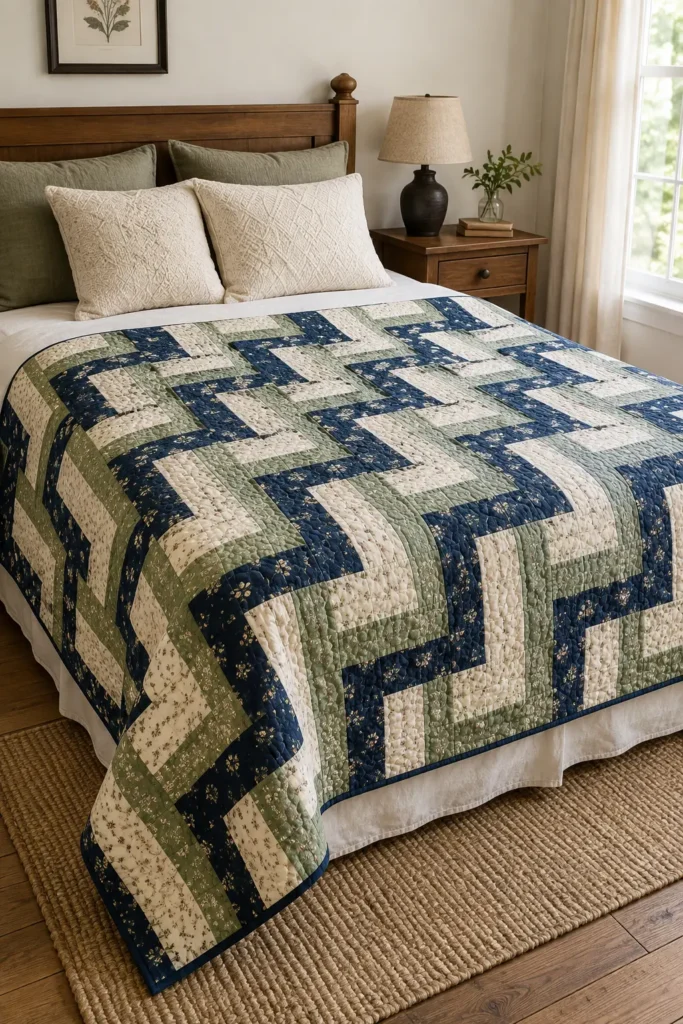
A Little History: The Zigzag Fence
The rail fence block is named for a real thing: the split-rail fences of early rural America, where wooden rails were stacked in a zigzagging, interlocking line to enclose fields without a single nail. Look at a traditional rail fence quilt and you can see it — the strips zigzag and interlock just like those old wooden rails. It’s one of many classic quilt blocks named for the everyday farm and frontier life around early quilters, alongside patterns like Log Cabin, Churn Dash, and Bear’s Paw. That homespun, rural heritage is a big part of the block’s enduring, cozy appeal — it carries the warmth of the countryside right in its name.
That instinct to build a warm, useful thing quickly from simple strips of cloth is one shared across textile traditions, including the Nakshi Kantha tradition of my own family’s background, where beauty was always drawn from the plainest, most practical pieces.
Why This Idea Is Worth Making
This idea is worth making because it’s one of the easiest, fastest, most forgiving quilts there is — and it still looks woven and intricate thanks to that simple rotation. There are no points to match, so it’s wonderfully beginner-friendly and stress-free, the strip-piecing makes it quick, and the layer cake’s coordinated colors guarantee it looks designed. The woven basket-weave effect gives it timeless, cozy charm that suits almost any room. When you want a relaxing, satisfying sew with a classic result, the rail fence delivers every time.
Finished Size
- Finished quilt: about 54 × 72 inches — a throw or twin quilt
- Finished block: 9 inches (9½ inches unfinished)
- Layout: 6 blocks across × 8 blocks down = 48 blocks, alternating horizontal and vertical
- Skill level: true beginner — as easy as it gets
- Core techniques: strip-piecing, block rotation for the woven effect, binding
Materials Needed
- 1 layer cake — cut into strips to make the three-strip blocks (each block uses three strips)
- (Optional) a coordinating solid, if you’d like every block to share one anchor color among its three strips
- Backing: 3½ yards
- Batting: at least 60 × 78 inches
- Binding: ⅝ yard of a coordinating solid
- Thread: neutral cotton
- Rotary cutter, cutting mat, quilting ruler, pins, iron, sewing machine
Beginner tip: chain-piece your strip sets — feed them through the machine one after another without snipping the thread between — to build all your blocks quickly and keep an easy rhythm going.
The Rail Fence Formula: Three Strips, Rotated
The block and its magic are simple:
- Sew three strips together side by side into a square block (three “rails”).
- Arrange the blocks in a grid, rotating every other one 90° — so one block’s rails run horizontal, the next’s vertical, alternating like a checkerboard.
- Where a horizontal block meets a vertical one, the strips appear to interlock and weave, creating the basket-weave illusion.
That alternating rotation is the entire secret. Same block, turned different ways, makes the woven pattern.
Choosing Your Colors
Rail fence looks great with either contrast or blend among the three rails:
- Graded rails: a light, a medium, and a dark strip in each block, always in the same order — this makes the woven, dimensional effect strongest
- Vibrant scrappy: mix bright layer cake prints freely for a cheerful, colorful weave
- Two-color modern: alternate strips of two strong colors for a bold, graphic basket-weave
- Print + solid: pair vibrant prints with a consistent solid rail to tie the whole quilt together
For the clearest woven look, keep the value order consistent within each block (e.g., always light-medium-dark) so the “weave” reads across the whole quilt.
Cutting Measurements
- Strips: cut 3½-inch-wide strips from your layer cake squares (each 10-inch square yields a couple of strips). You’ll sew three strips into each 9½-inch block
- Per block: three strips at 3½ × 9½ inches, sewn together → a 9½-inch square block
- Backing: 60 × 78 inches
- Batting: 60 × 78 inches
- Binding: seven strips, 2½ inches × width of fabric
Step-by-Step Guide
Step 1 — Cut your strips. Cut 3½-inch-wide strips from your layer cake squares. You’ll need three strips per block, for 48 blocks — so 144 strips at 3½ × 9½ inches (or cut long strips and subcut after sewing).
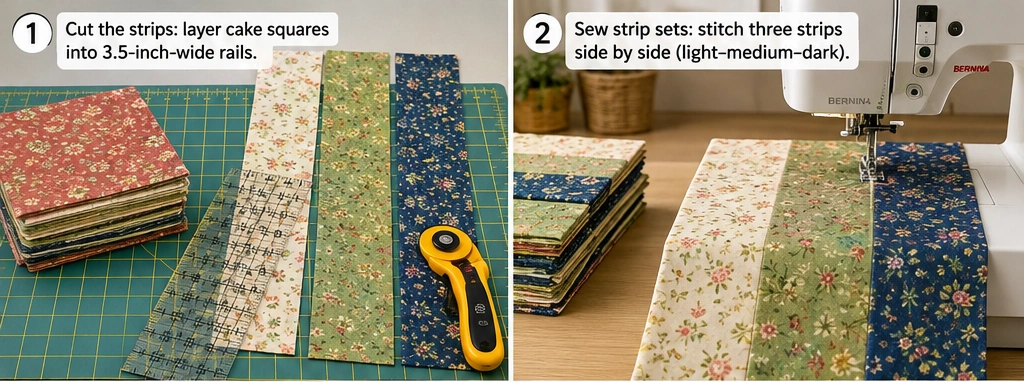
Step 2 — Sew the strip sets. Sew three strips together along their long edges with a ¼-inch seam, keeping your value order consistent (light-medium-dark, if using). Press the seams to one side. Each set forms one 9½-inch block.
Step 3 — Square up the blocks. Trim each block to a clean 9½ × 9½ inches if needed, so they all match. Make 48 blocks.
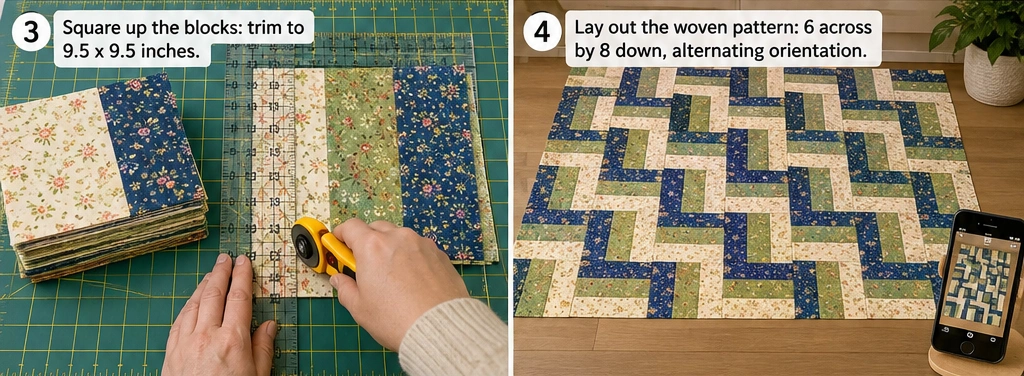
Step 4 — Lay out the woven pattern. Arrange the blocks 6 across × 8 down, rotating every other block 90° — horizontal, vertical, horizontal, vertical — in a checkerboard of directions. Step back and watch the basket-weave appear. Photograph the layout.
Step 5 — Sew the blocks into rows. Sew each row of 6 blocks together with a ¼-inch seam, keeping every block in its correct orientation (easy to turn by mistake, so check against your photo). Press seams to alternate directions row by row.
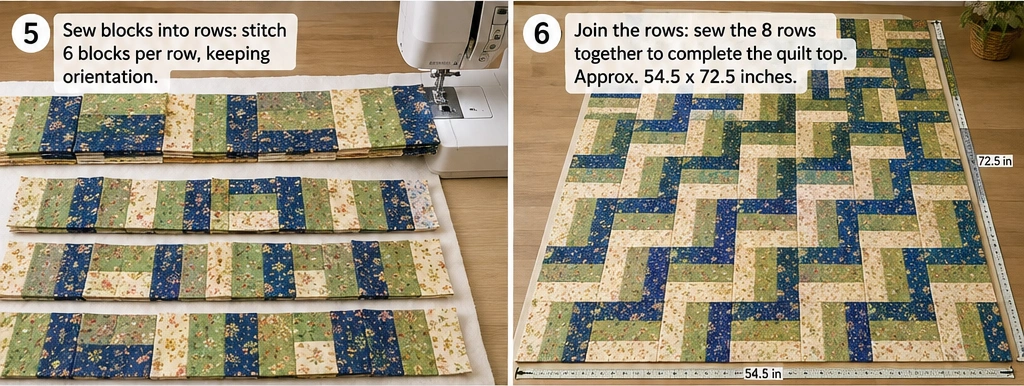
Step 6 — Join the rows. Sew the 8 rows together, nesting the seams and pinning at each junction. Press. The top should measure about 54½ × 72½ inches.
Step 7 — Make the quilt sandwich. Layer backing (wrong side up), batting, and top (right side up); baste well.
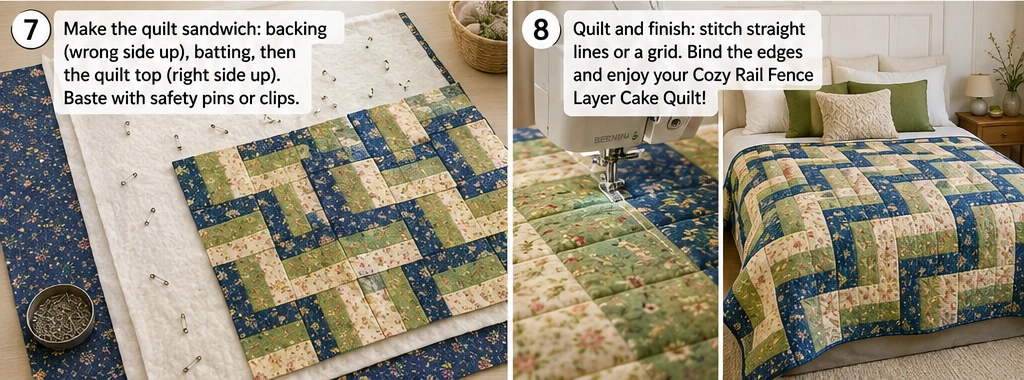
Step 8 — Quilt it. Rail fence suits simple quilting beautifully — straight lines, a diagonal grid, or an all-over pattern all work, letting the woven design shine.
Step 9 — Trim, bind, and finish. Trim to 54 × 72 inches, square the corners, bind with the 2½-inch strips, and press.
Assembly at a Glance
- Cut 3½-inch strips from the layer cake squares.
- Sew three strips into each block (¼-inch seams), consistent value order → 9½ block.
- Square up; make 48 blocks.
- Lay out 6 × 8, rotating every other block 90° for the woven effect; photograph.
- Sew into 8 rows of 6 (¼-inch seams), checking orientation; press alternate rows.
- Join rows, nesting seams → 54½ × 72½ top.
- Layer, baste.
- Quilt simply (straight lines or a grid).
- Trim to 54 × 72 inches; bind and press.
Beginner Tips for Success
- Keep a consistent value order (light-medium-dark) in every block for the strongest woven look.
- Chain-piece the strip sets to build all 48 blocks quickly.
- Rotate every other block exactly 90° — the alternating direction is what creates the weave.
- Check block orientation against your layout photo before sewing; it’s easy to turn one wrong.
- Press seams consistently so the blocks nest neatly when you join them.
Styling It & Gift Ideas
A rail fence quilt has a warm, woven, timeless charm that suits cozy and classic rooms wonderfully — lovely folded on a bed, draped over a sofa, or spread on a porch. Its basket-weave texture feels welcoming and traditional without being fussy, and it pairs easily with rustic and country décor.
Because it’s so quick and forgiving, it’s a brilliant gift:
- A baby quilt in soft or bright rails (scale down to fewer blocks) — fast and cheerful for a new arrival
- A housewarming or wedding throw with classic, cozy appeal
- A graduation or off-to-college quilt in the recipient’s favorite colors — hardwearing and homey
- Several quick gifts at once — strip-piecing makes it easy to batch out rail fence quilts for multiple people
When you want a heartfelt handmade gift without a long project, the rail fence is one of the easiest to make beautifully.
Final Thoughts
A cozy rail fence layer cake quilt is timeless simplicity at its very best — three strips, a simple rotation, and a woven basket-weave pattern that looks far more intricate than it is. Named for the zigzagging split-rail fences of early America, it carries genuine homespun warmth, and it’s about as easy and forgiving as quilting gets. Keep your value order consistent, rotate those blocks, and one vibrant layer cake becomes a classic, cozy, beautifully woven quilt with charm that never fades.
Other Design Inspirations – Digitally Modified
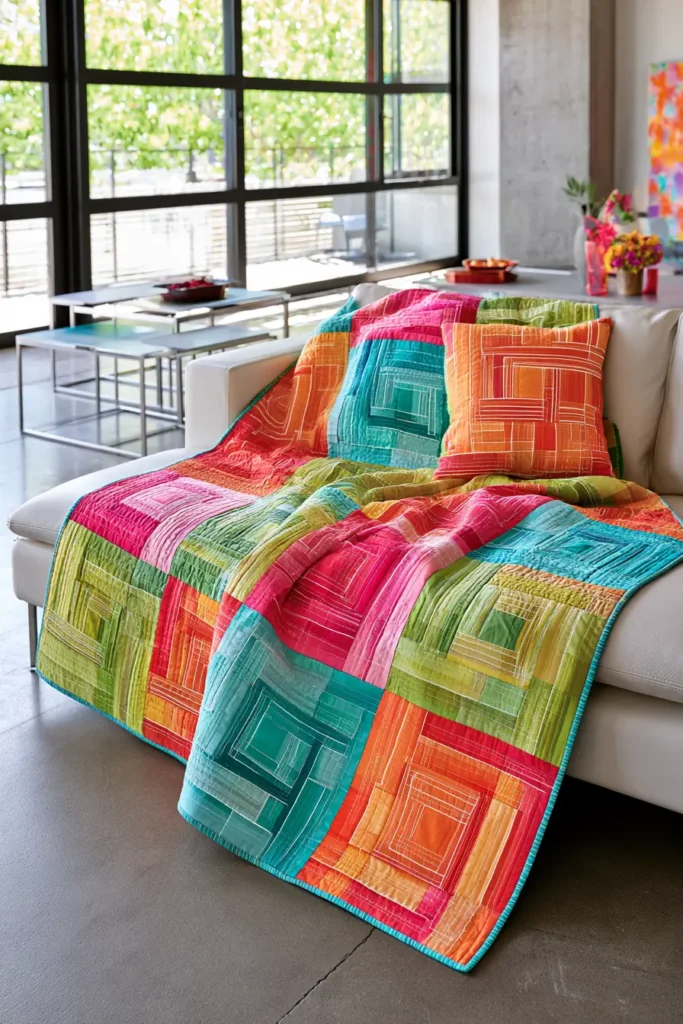
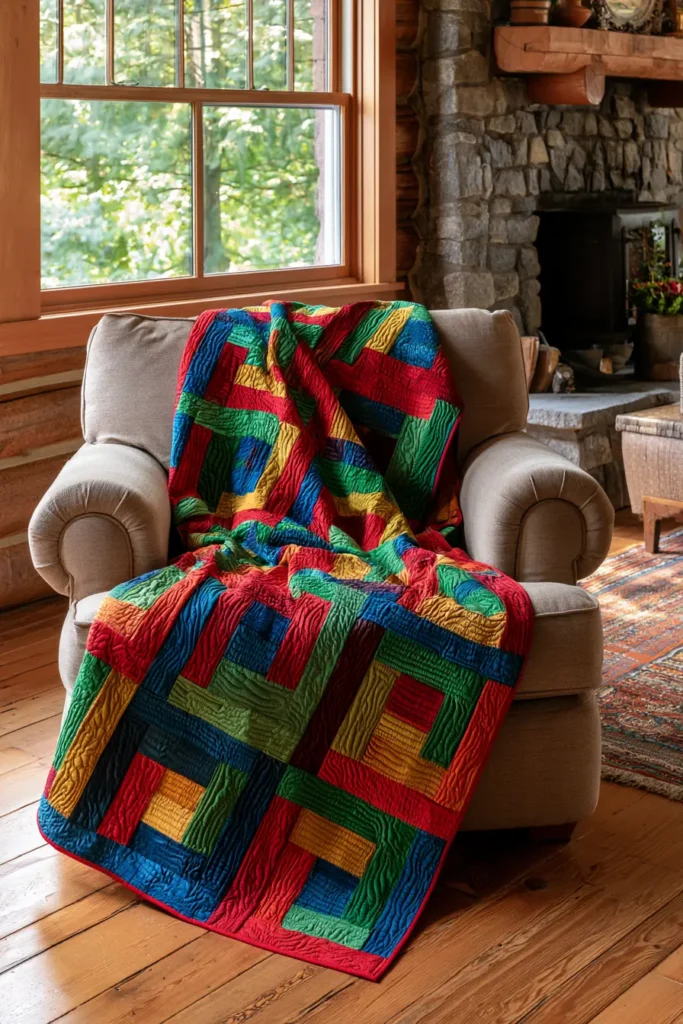
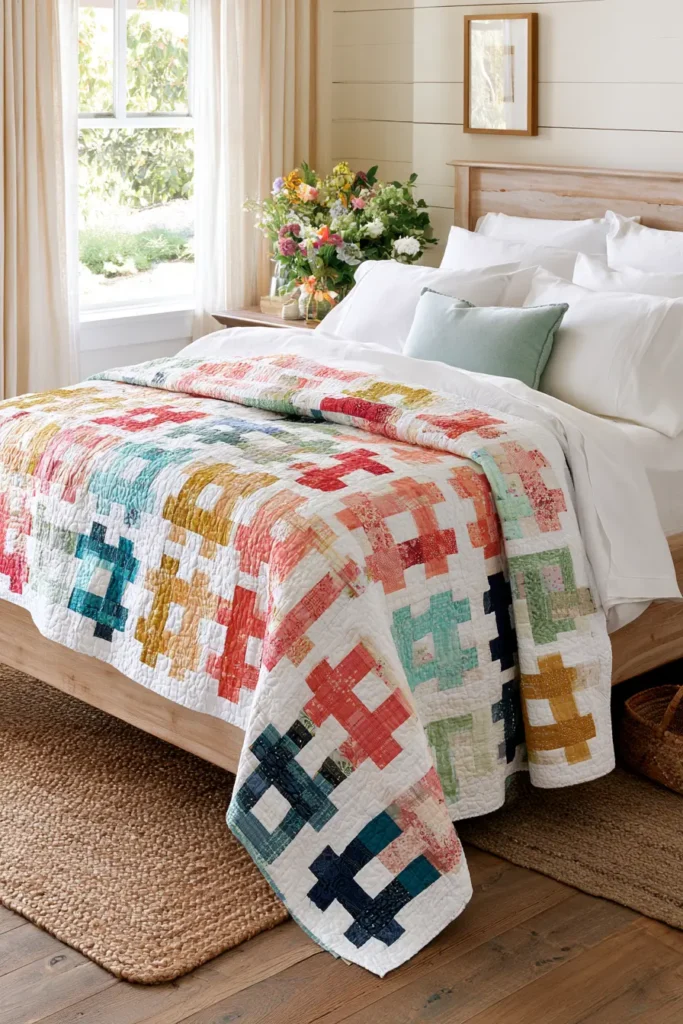
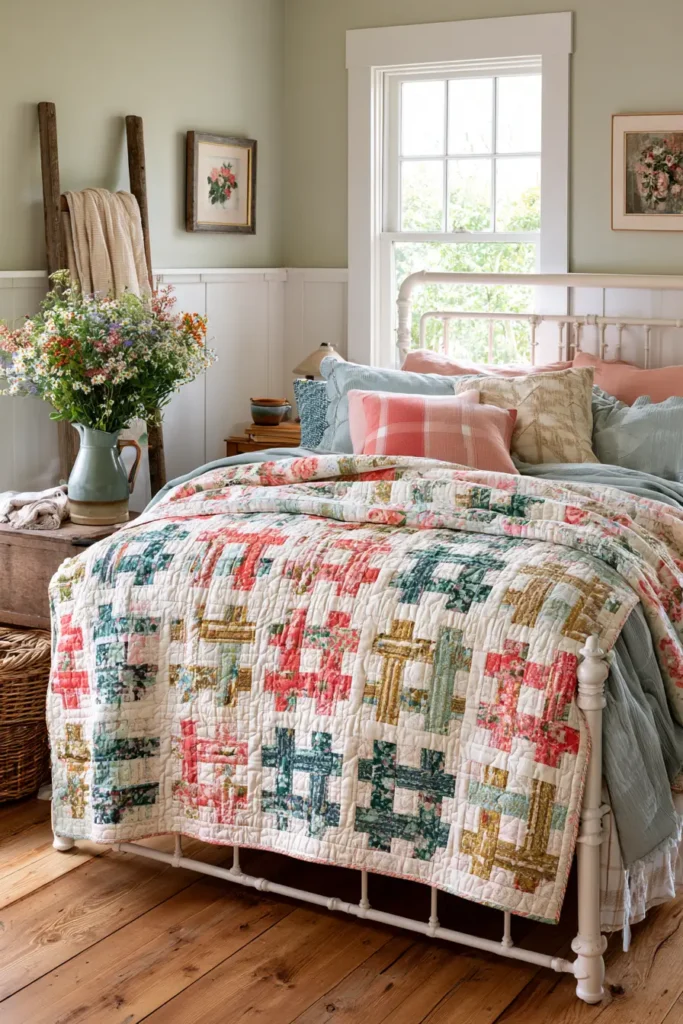
12. Scrappy Layer Cake Throw Quilt for Vibrant, Colorful Style
After all the structured blocks, here’s the quilt that sets you free. A scrappy layer cake throw is the joyful, anything-goes finale — a vibrant, colorful mix of squares thrown together with abandon, celebrating color and variety for their own sake. There are no matching points, no careful blocks, no rules: just a happy jumble of prints and colors sewn into a warm, cheerful throw. It’s the most relaxing quilt in this whole collection to make, and often the most personal, because “scrappy” is really an invitation to use everything — a full layer cake, the leftover squares from every other project in this collection, and any favorite scraps in your stash.
That freedom is exactly the point. A scrappy quilt looks abundant and alive precisely because it isn’t controlled. It’s the perfect way to use up a bright layer cake, combine bits of several bundles, or fold in the orphan pieces left over from the charm, pinwheel, and star quilts you’ve already made. Nothing is wasted, and everything is welcome.
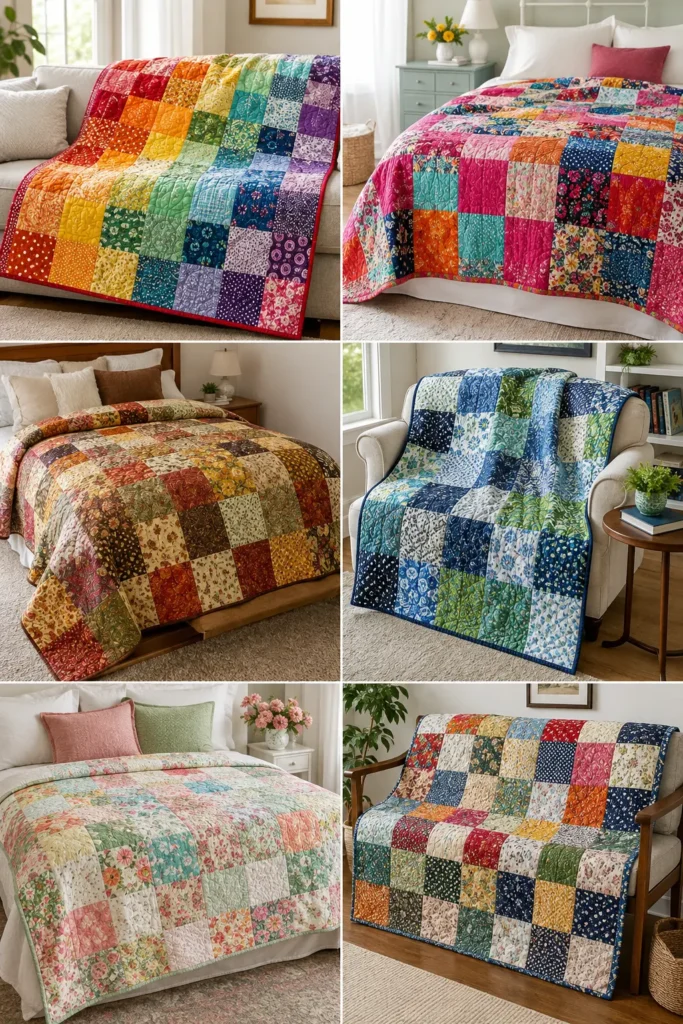
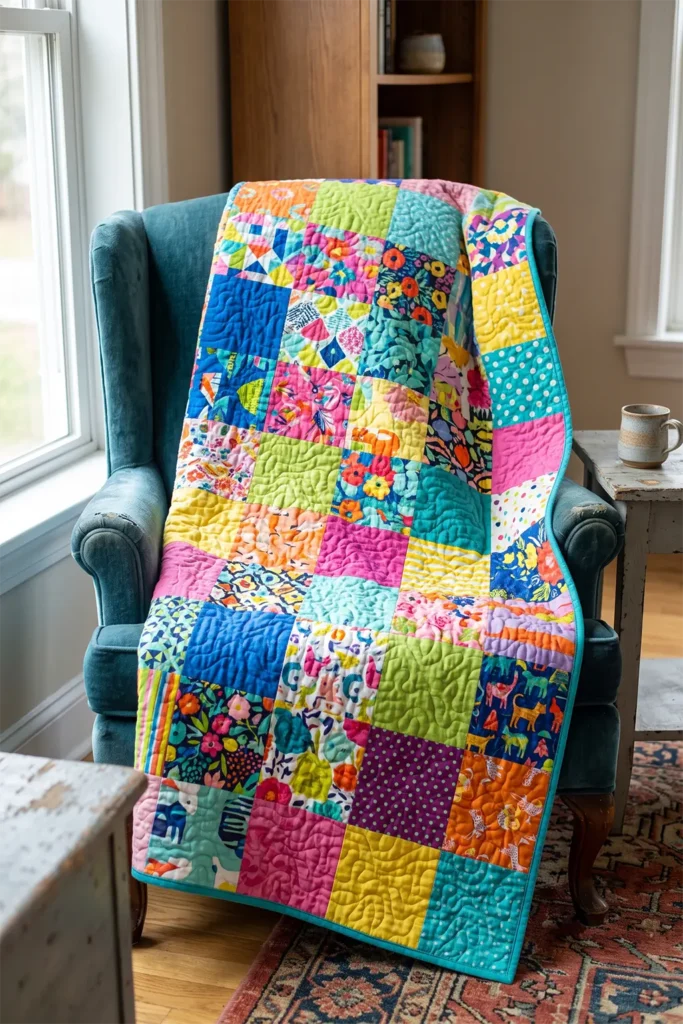
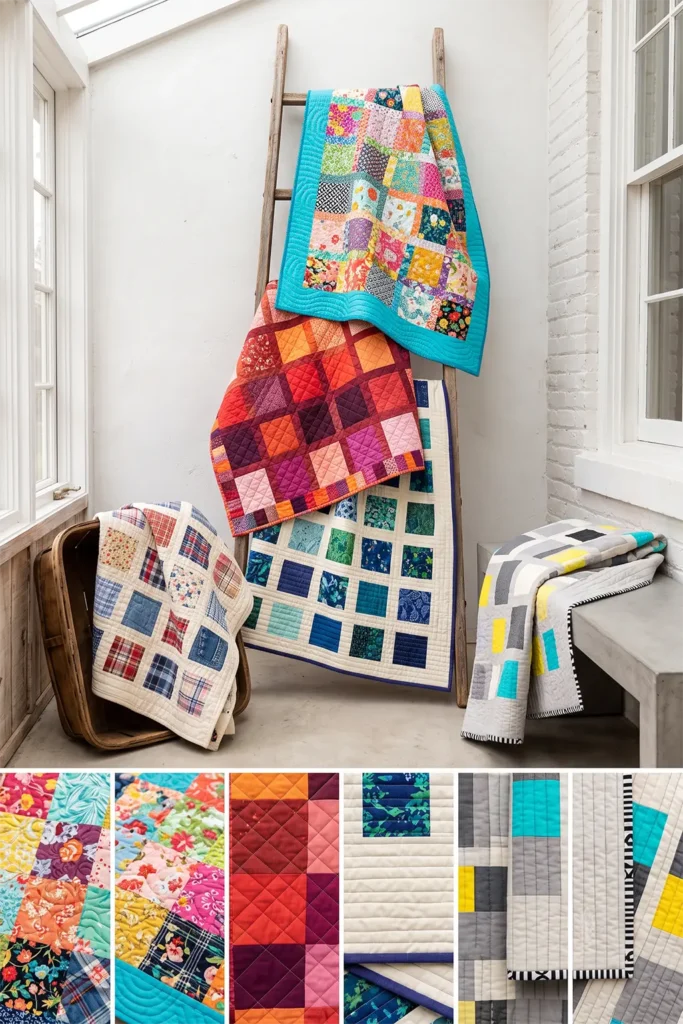
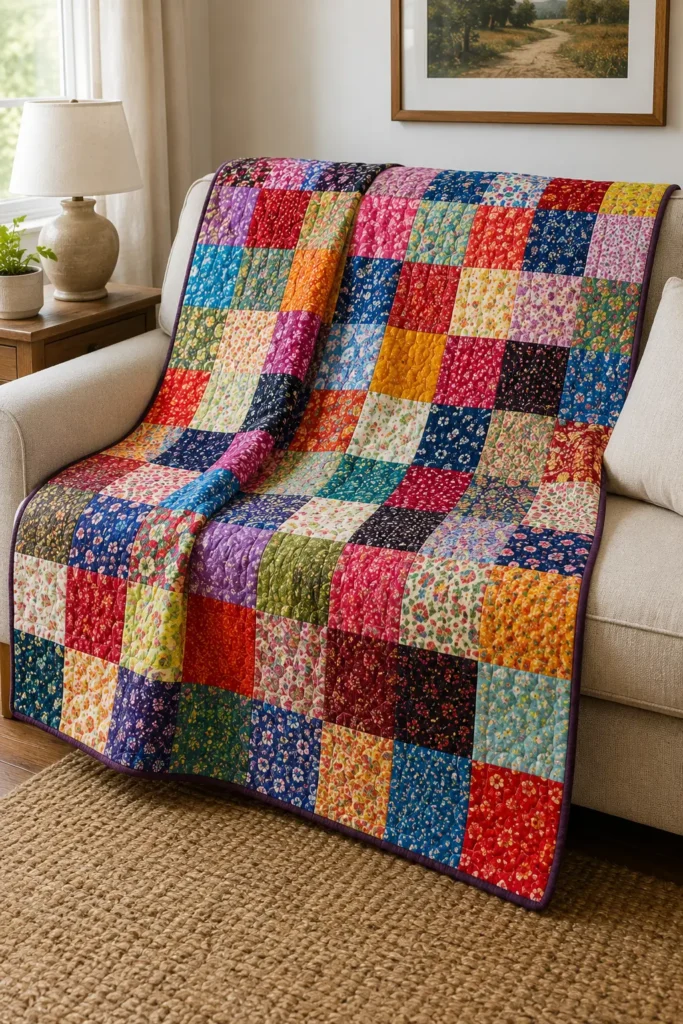
A Little History: The Original Scrap Quilt
Scrappy quilts are the oldest kind of quilt there is. Long before coordinated fabric collections and precut bundles, quilts were made entirely from scraps — worn-out clothing, flour sacks, dressmaking leftovers, and treasured remnants — pieced together out of thrift and necessity. A scrap quilt was a patchwork of a family’s life, each fabric carrying a memory of the dress or shirt it came from. That make-do resourcefulness produced some of the most beloved and beautiful quilts in history, and it’s the very root of the entire quilting tradition.
Today’s scrappy quilt keeps that generous, waste-nothing spirit while adding the joy of vibrant modern fabrics. It’s a tradition that spans the world, too — including the Nakshi Kantha tradition of my own family’s background, where quilts were built from layered, repurposed cloth, each piece given a warm second life. A scrappy quilt is quilting at its most honest and most human.
Why This Idea Is Worth Making
This idea is worth making because it’s the most relaxing, forgiving, and personal quilt in this collection — pure joyful color with none of the pressure. There are no points to match and no precision required, so it’s wonderfully stress-free and beginner-friendly. It’s the ideal way to use up a whole layer cake, mix several bundles, or finally use those leftover squares and scraps you’ve been saving. The vibrant, abundant result brings instant cheer to any room, and because it’s a throw size, it’s quick to finish. Freedom, color, and coziness all at once.
Finished Size
- Finished throw: about 57 × 66 inches — a generous, cozy throw
- Finished square: 9½ inches (or trim to 9 inches for a crisper grid)
- Layout: 6 squares across × 7 squares down = 42 squares (one layer cake — or a joyful mix of leftovers)
- Skill level: true beginner — the easiest, most relaxed quilt here
- Core techniques: simple square patchwork, scrappy color balance, binding
Materials Needed
- 1 layer cake — or, even better, a mix of layer cake squares, leftover squares from other projects, and favorite stash scraps cut to size
- Backing: 3¾ yards
- Batting: at least 63 × 72 inches
- Binding: ⅝ yard — a bold solid or a scrappy pieced binding for extra fun
- Thread: neutral cotton
- Rotary cutter, cutting mat, quilting ruler, pins, iron, sewing machine
Beginner tip: to trim leftover or stash fabrics to match your layer cake, cut them all to a uniform 10 × 10 inches (or whatever finished square size you choose). Consistent square size is the one bit of order a scrappy quilt needs — everything else can be gloriously random.
The Secret to “Scrappy” That Works
Here’s the one real skill in a scrappy quilt: making the happy chaos look intentional rather than muddy. Two simple tricks do it:
- Add a unifying element. A scrappy quilt reads best with something tying it together. That might be a consistent value balance (spread your lights, mediums, and darks evenly so no area clumps), a shared background if you’re mixing in solids, or a single binding color that frames the whole riot of color. One unifying thread turns “random” into “designed.”
- Balance the color across the quilt. Lay everything out and make sure the boldest and brightest squares are spread around, not bunched in one corner. Photographing the layout helps you spot clumps of the same color instantly.
Do those two things, and even the wildest scrappy mix looks cheerful and cohesive rather than chaotic.
Choosing Your Colors
Scrappy is the place to be as vibrant and joyful as you like:
- Full rainbow: every color, mixed freely, for maximum cheer
- Vibrant brights: saturated, happy colors for a modern, energetic throw
- Controlled scrappy: many prints but within one family (all warm, or all cool) for a slightly calmer riot
- Mix your bundles: combine two or more layer cakes, or fold in leftovers, for the richest variety
The one guideline: spread your values and boldest colors evenly, and consider a single calm binding to frame all that vibrant energy. Otherwise, let it be as colorful as your heart desires.
Cutting Measurements
- Squares: use the 42 layer cake squares as they come, and/or trim leftovers and scraps to 10 × 10 inches to match
- Backing: 63 × 72 inches
- Batting: 63 × 72 inches
- Binding: seven strips, 2½ inches × width of fabric (or scrappy pieced binding)
Step-by-Step Guide
Step 1 — Gather and cut your squares. Collect your layer cake, any leftover squares from other projects, and favorite scraps. Trim everything to a uniform 10 × 10 inches. Aim for 42 squares (or more for a bigger throw).
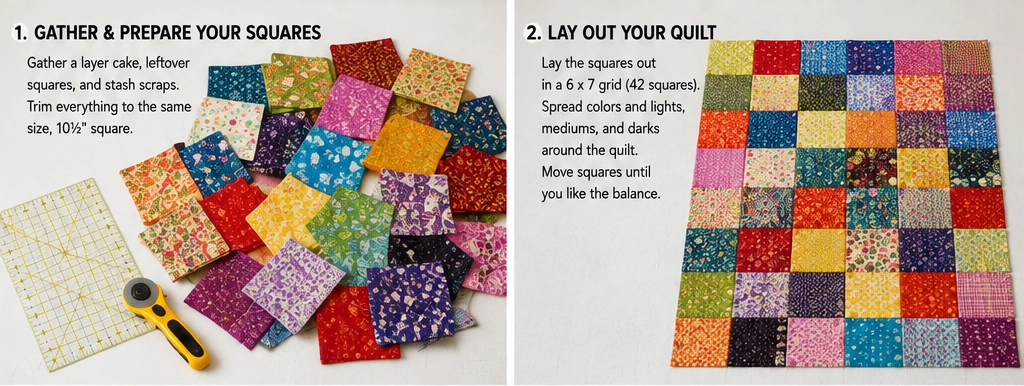
Step 2 — Lay out the squares. Arrange all 42 squares in a grid 6 across × 7 down, mixing colors and prints freely — but spread the boldest colors and the lights/darks evenly so no area clumps. Photograph the layout to check the balance.
Step 3 — Adjust for balance. Look at your photo (in color, and in black and white if you like) and swap any squares that bunch up too much color or value in one spot. This quick check is what makes scrappy look intentional.
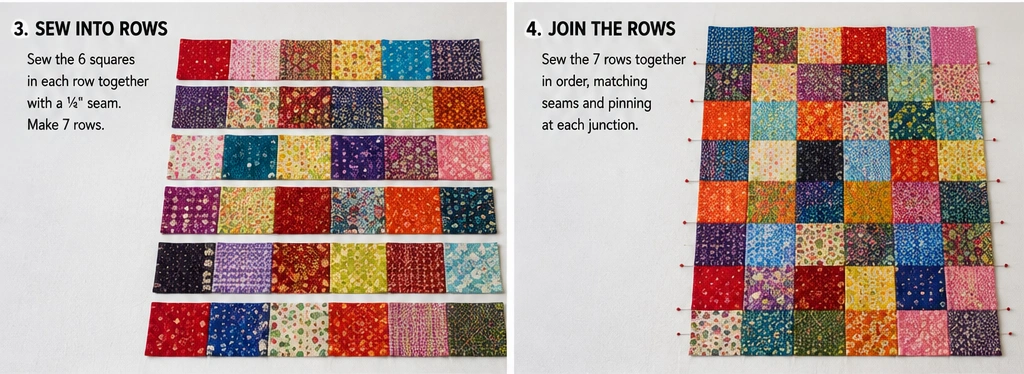
Step 4 — Sew the squares into rows. Sew each row of 6 squares together with a ¼-inch seam. Press the seams of odd rows one way and even rows the other, so they nest. You’ll have 7 rows.
Step 5 — Join the rows. Sew the rows together, nesting the seams at each junction and pinning to match. Press. The top should measure about 57½ × 66½ inches.
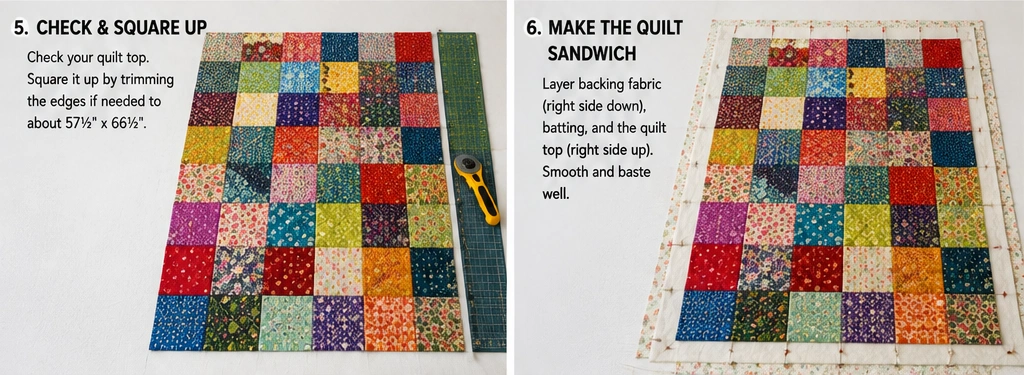
Step 6 — Make the quilt sandwich. Layer the backing (wrong side up), batting, and top (right side up). Smooth from the center outward and baste well.
Step 7 — Quilt it. Anything goes here — an all-over pattern, straight lines, a diagonal grid, or free-motion swirls all suit a scrappy throw’s relaxed spirit.
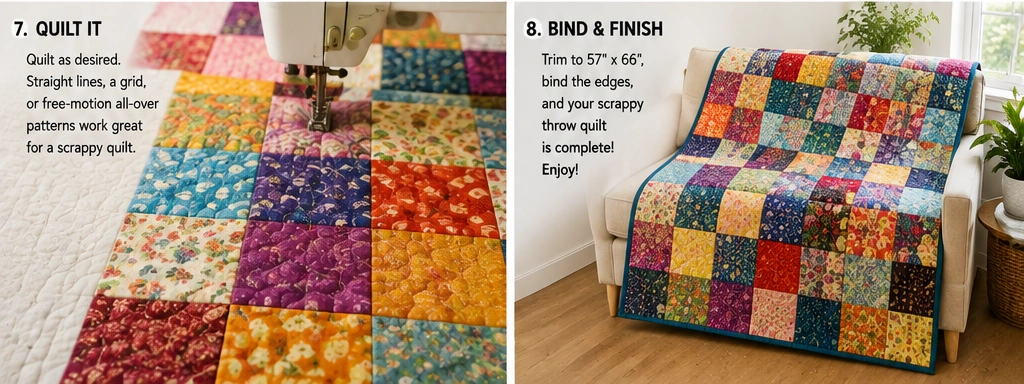
Step 8 — Trim and bind. Trim to 57 × 66 inches, square the corners, and bind with the 2½-inch strips — a single bold color frames the scrappy top beautifully, or go scrappy with the binding too.
Step 9 — Wash and enjoy. Wash gently in cold with a color catcher (all those colors can bleed), and tumble dry low for a soft, crinkly, cozy finish.
Assembly at a Glance
- Gather layer cake + leftovers + scraps; trim all to 10 × 10 inches (~42 squares).
- Lay out 6 × 7, spreading bold colors and values evenly; photograph.
- Swap squares to balance the color and value.
- Sew into 7 rows of 6 (¼-inch seams), pressing odd/even rows opposite.
- Join rows, nesting seams → 57½ × 66½ top.
- Layer, baste.
- Quilt any way you like.
- Trim to 57 × 66 inches; bind (single bold color or scrappy).
- Wash cold with a color catcher; tumble low.
Beginner Tips for Success
- Cut everything to a uniform square size — that’s the only order a scrappy quilt needs.
- Spread your bold colors and values evenly so no area clumps; photograph to check.
- Add a unifying element — an even value balance or a single binding color — to make scrappy look intentional.
- Use a color catcher in the first wash; many mixed colors can bleed.
- Relax and enjoy it — there are no points to match and no wrong choices.
Styling It & Gift Ideas
A scrappy throw is pure cheerful color, so let it be a room’s bright spot — tossed over a sofa, folded in a basket, draped on a bed or a reading chair. Its vibrant, abundant look suits eclectic, boho, and cozy maximalist spaces beautifully, and it brings instant warmth and personality to a plainer room. Because it’s a throw, it’s made to be grabbed and used, so don’t be precious with it.
Its joyful, personal nature makes it a wonderful gift:
- A cozy throw for a friend who loves color — cheerful and full of personality
- A memory quilt made from meaningful scraps (a loved one’s shirts, baby clothes, or fabric with a story) — deeply personal and treasured
- A housewarming or graduation gift in a bright, happy mix
- A quick, use-what-you-have gift that turns your stash into something warm and generous
A scrappy quilt made from fabrics that mean something is one of the most heartfelt gifts you can give.
Final Thoughts
A scrappy layer cake throw is the perfect finale to a collection of quilt ideas — the quilt that reminds you quilting is meant to be joyful, forgiving, and free. Built from a vibrant layer cake and whatever leftovers and scraps you love, it carries the oldest, warmest tradition in all of quilting: making something beautiful and cozy from a happy jumble of cloth. There are no rules, no points, and no wrong choices — just color, warmth, and the simple pleasure of piecing. Gather your brightest squares, spread them with a little balance, and let one glorious scrappy throw celebrate everything a quilt can be.
Other Design Inspirations – Digitally Modified
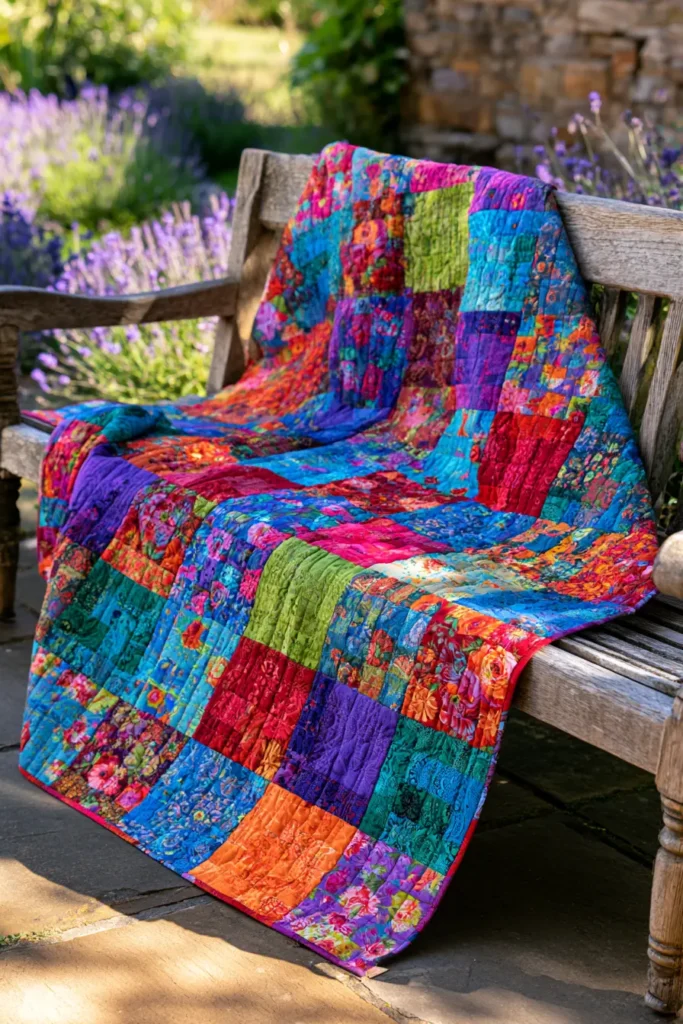
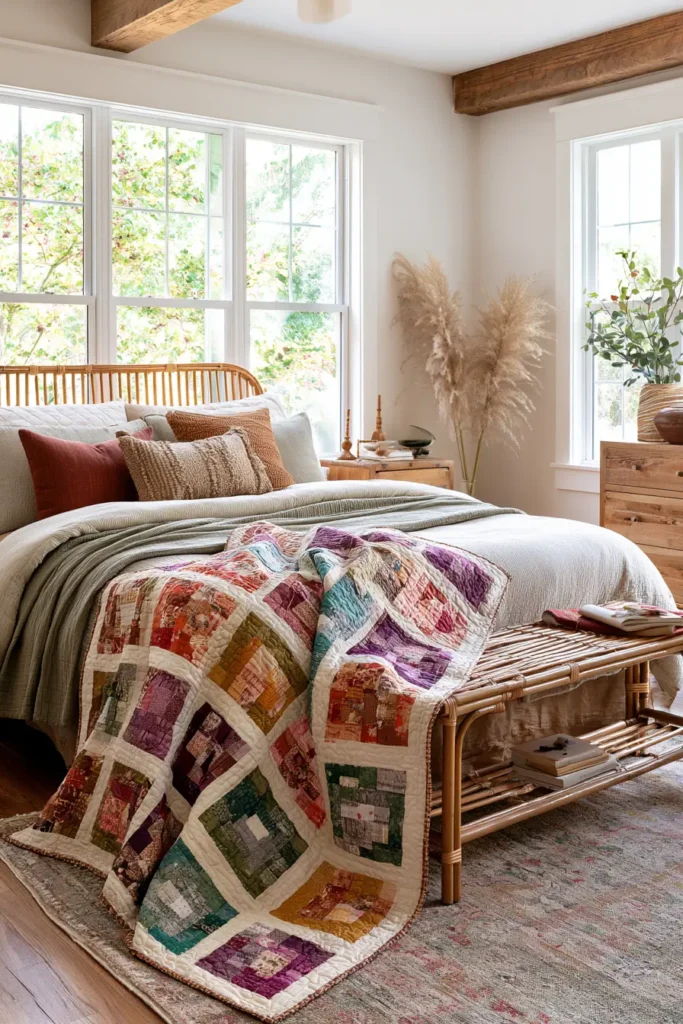
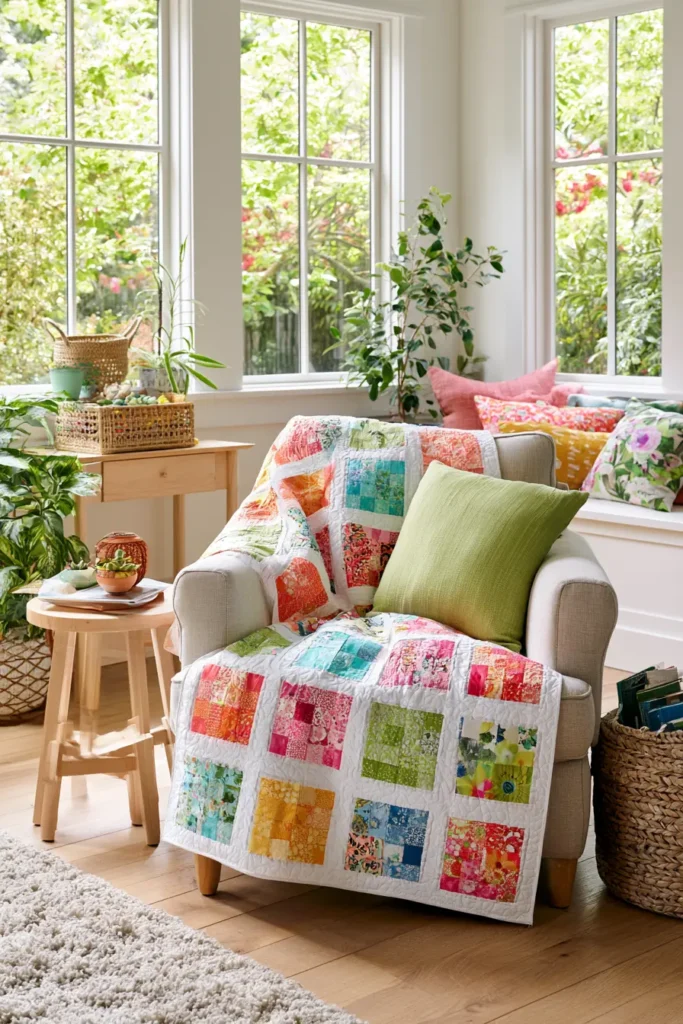

Conclusion
The beauty of a layer cake quilt is how much it gives back for how little it asks. Starting with those pre-cut, pre-coordinated 10-inch squares removes the two things that stop many people from quilting — the cutting and the color-matching — and leaves you free to enjoy the satisfying part: watching simple squares come together into something genuinely beautiful. Whether you leave the squares whole for a fast, modern throw or piece them into stars and pinwheels for an heirloom bed quilt, the layer cake does the hard work of coordination so your finished quilt looks polished and professional almost automatically.
The best Layer Cake Quilt Pattern Ideas are the ones that match your time and your skill. Reach for a charm-square, four-patch, or rail fence design if you’re new or want a quick weekend finish; try half-square triangles, disappearing nine patch, or a bold chevron when you’re ready for a little more pattern; and save the sawtooth star, log cabin, flying geese, or a flowing ombre gradient for when you want a real showpiece. Whichever you choose, one humble bundle of 10-inch squares is all it takes to make a warm, handmade quilt — proof that beautiful quilting doesn’t have to be complicated, slow, or hard.

