
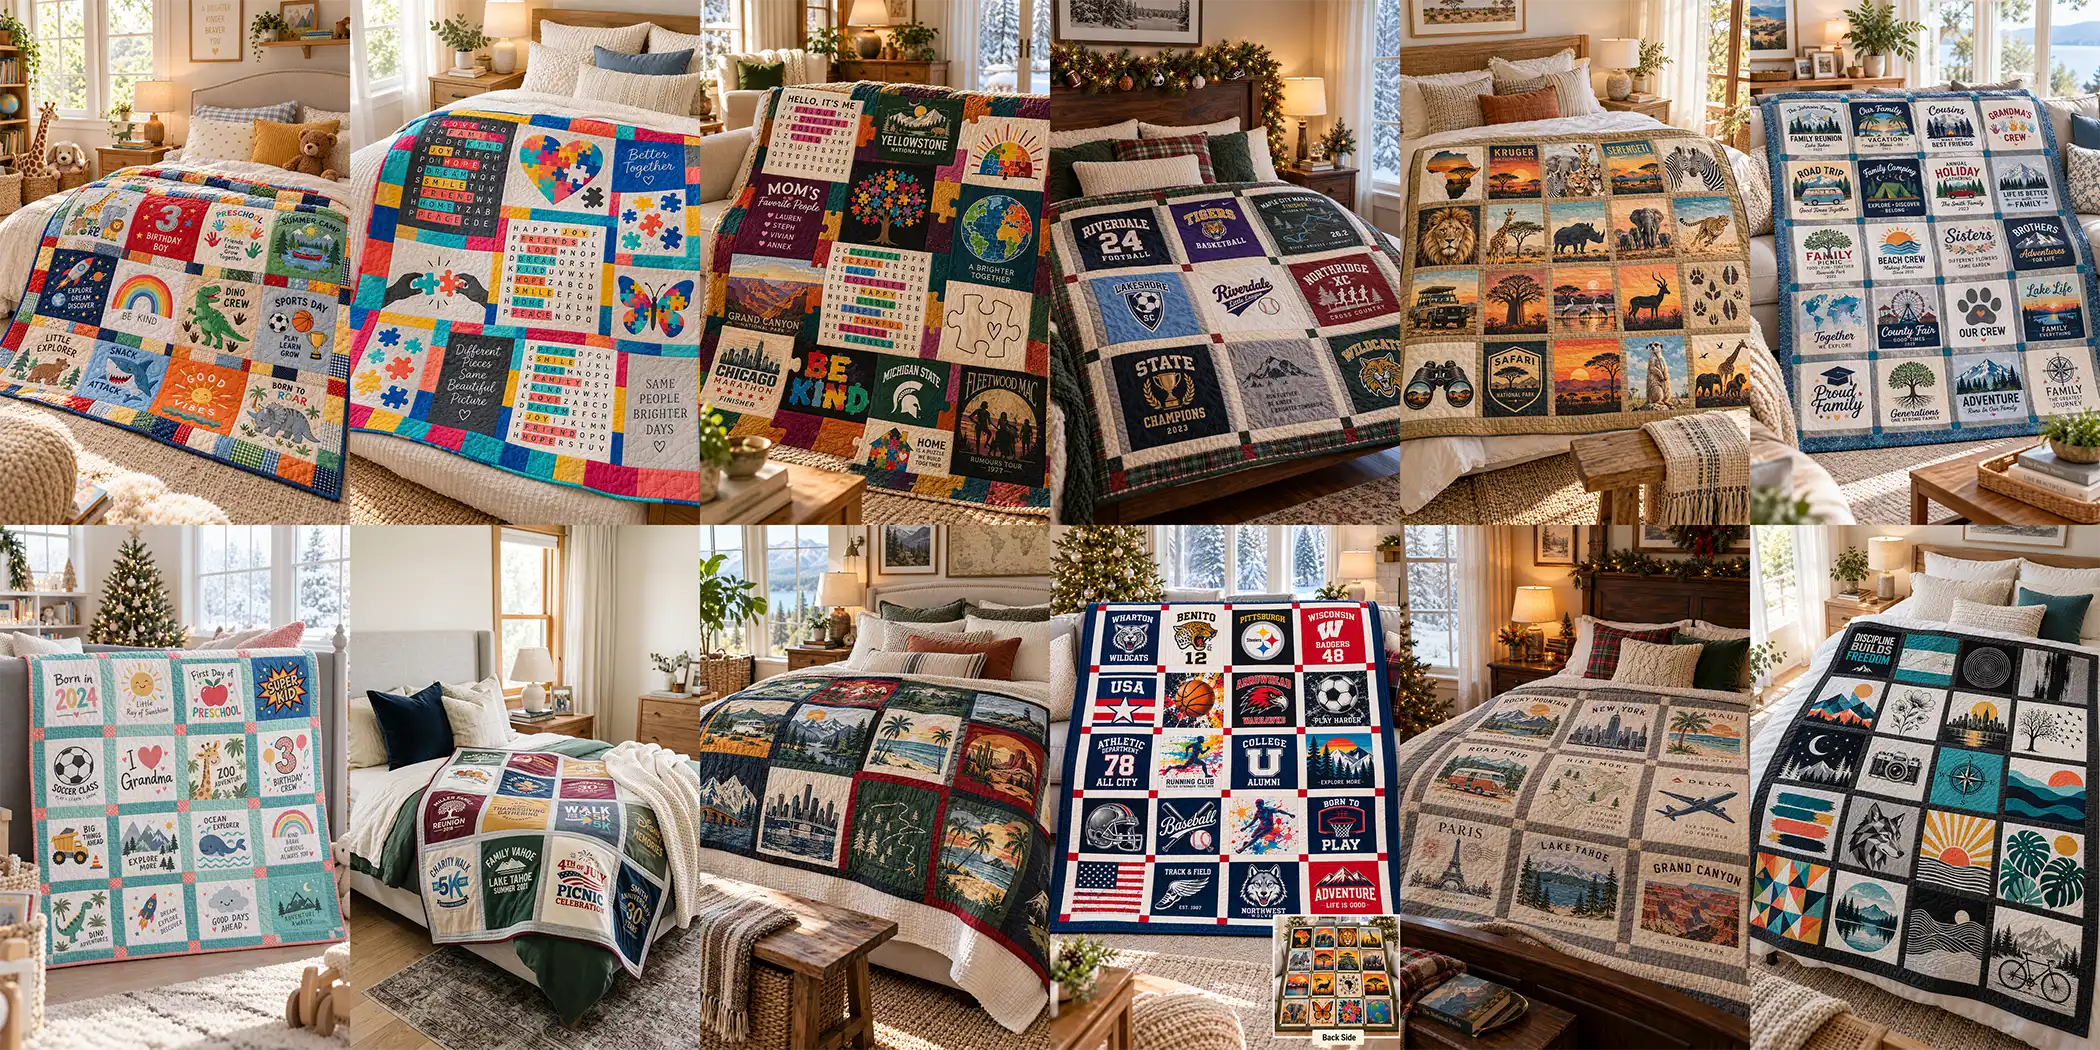
T-Shirt Quilt Ideas: Sustainable & Sentimental Designs to Preserve Special Memories
T-Shirt Quilt Ideas turn a drawer full of shirts nobody wears into something somebody actually uses. A t-shirt quilt is exactly what the name suggests: old t-shirts cut into squares or panels, stabilized with interfacing, and pieced together into a quilt. The graphics on each shirt become the design — every square is already printed, dyed, and meaningful before a single seam is sewn.
Unlike a traditional patchwork quilt, which requires you to source fabric and compose a design from scratch, a t-shirt quilt begins with material that already carries a story. A race shirt from a marathon, a band tee from a concert years ago, a kid’s camp shirt from every summer of childhood — each one is a small record of something that happened, and the quilt is the archive.
T-Shirt Quilt Ideas
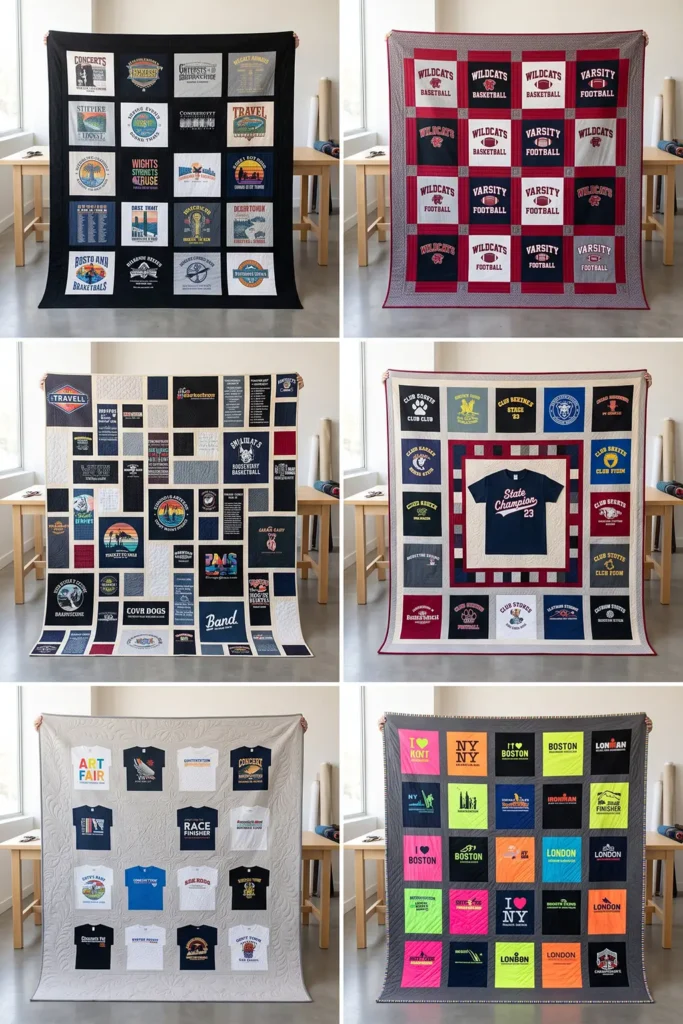
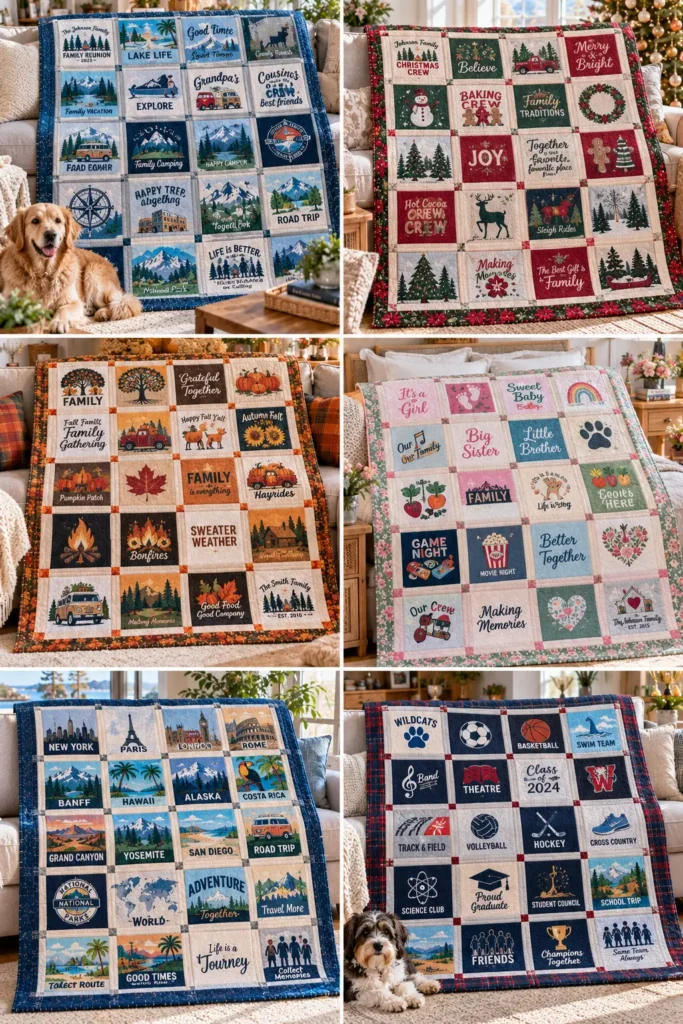
This collection of T-Shirt Quilt Ideas covers twelve approaches for preserving different kinds of memories in different kinds of homes. The classic grid layout is the starting point – clean, even squares, nothing complicated. From there, the designs branch out to cover specific occasions: graduation shirts, sports and race shirts, baby and kids’ clothing, travel tees, and family memories.
The puzzle-style layout handles the problem every t-shirt quilt maker faces eventually – shirts of wildly different sizes and graphic proportions that refuse to cut into the same square. Modern sashing gives the whole thing a more considered, less collage-like finish. And at the practical end, there’s a flannel-backed version for warmth, a reversible one for double the upcycled life, and a sustainable scrap-busting version for everything outgrown, worn out, or simply no longer worn.
See also: Sashiko Quilt Jackets and Vests – Farmhouse Quilt Jackets & Vests – Scandinavian Quilted Jackets – Jelly Roll Quilted Jackets and Vests – Japanese Quilt Jackets, Vests
Why Make a T-Shirt Quilt
The argument for a t-shirt quilt is straightforward: it solves a problem most people recognize but don’t know how to resolve. The shirts are too meaningful to throw away and too unworn to keep in a drawer. A quilt takes them out of storage and puts them back into daily life in a form that’s actually used rather than preserved in guilt.
What’s different about this kind of quilt from any other is that the emotional work is already done before you start sewing – the meaning is in the fabric. The sewing is the craft; the shirts are the content. That’s also what makes it genuinely sustainable. No new fabric is bought, no virgin cotton is processed, and nothing is sent to landfill. A t-shirt quilt is upcycling at its most literal and most emotionally effective.
A note on logos and branded graphics: t-shirt designs often include trademarked logos, team insignia, licensed artwork, band imagery, and corporate branding, all owned by their respective rights holders. Making a quilt for personal or household use from shirts you already own falls within normal personal use. However, reproducing those graphics in quilts made for sale, publishing close-up images of protected logos in commercial content, or creating patterns that incorporate specific trademarked designs raises intellectual property concerns. For that reason, this article focuses on quilt construction and personal memory rather than featuring or replicating specific branded imagery. The shirts are yours; the graphics on them belong to someone else.
Tips for Choosing Fabrics and Colors
The single most important step in a t-shirt quilt is one most beginners skip: iron-on interfacing on every single panel before cutting. T-shirt fabric is knit – it stretches, it rolls at the edges, and it distorts under the sewing machine foot. Iron a piece of medium-weight fusible interfacing to the back of each panel before cutting to turn stretchy knit into something that behaves like quilting cotton. Without it, every seam will ripple, and the quilt will never lie flat. Use a pressing cloth when fusing, since direct iron contact can scorch a print or cause some inks to transfer.
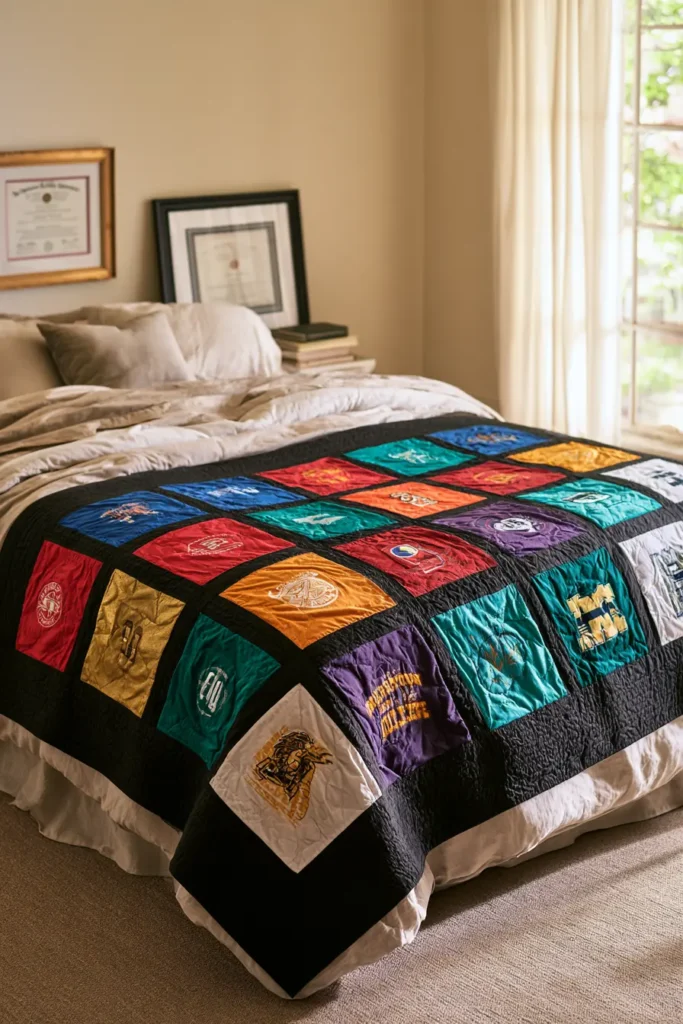
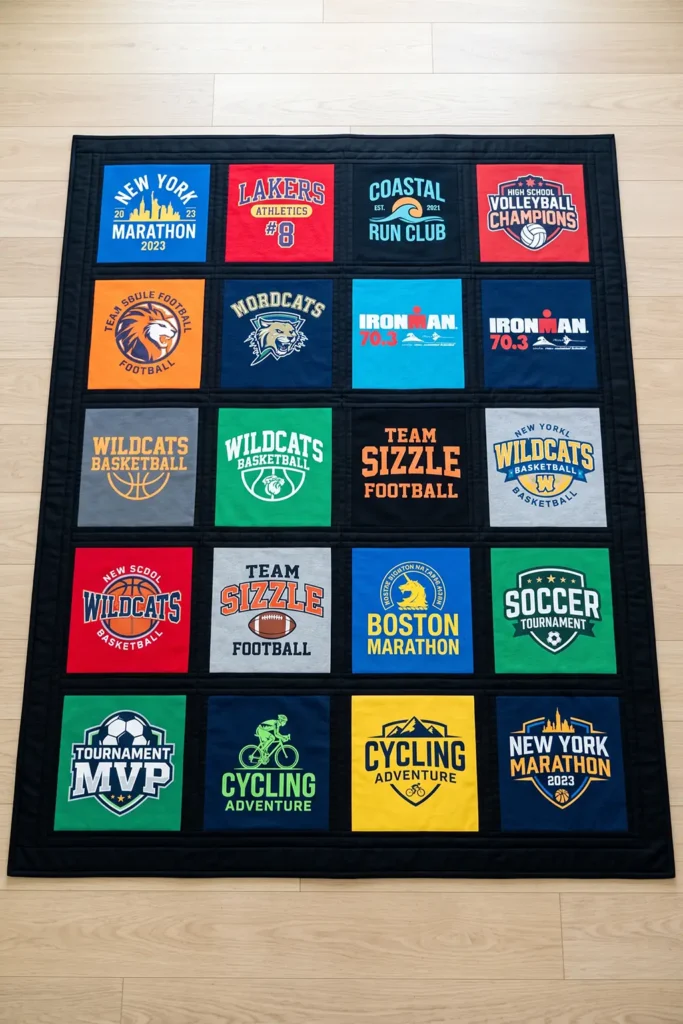
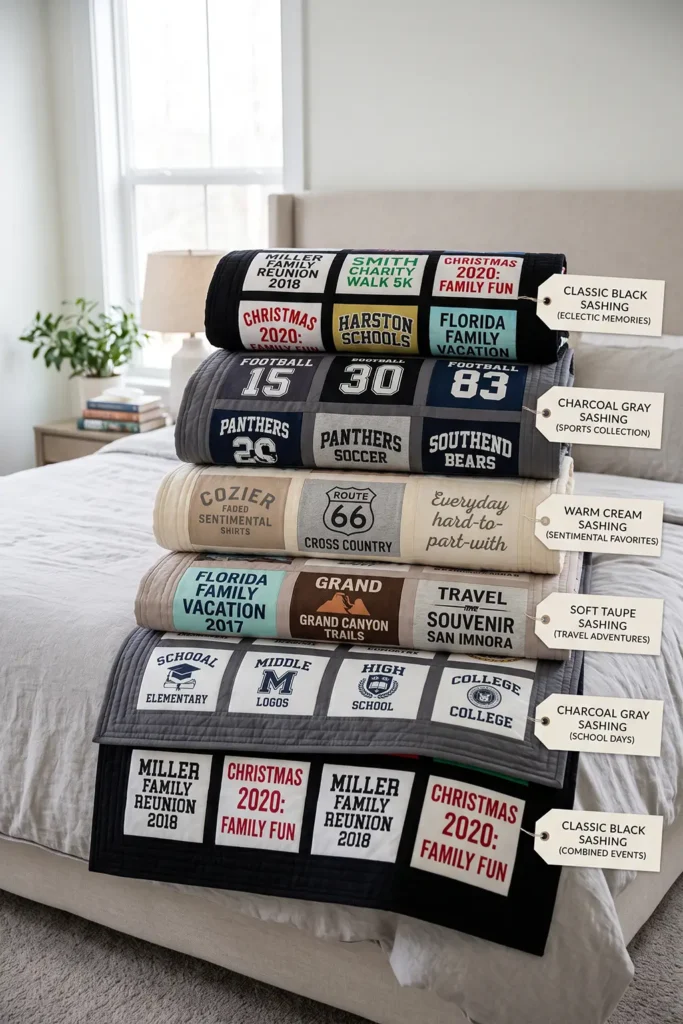
On color, t-shirt quilts often resist planning because the shirts already have their colors. The most effective approach is to sort by tone rather than by color family – separating the dark shirts from the medium ones and the light ones, and distributing them across the layout so nothing clumps. Alternating dark and light panels throughout gives the quilt visual rhythm even when the colors themselves are all over the place. For sashing, a neutral – cream, gray, or black – tends to frame the graphics without competing with them. Black sashing is particularly effective when the shirts are many different colors, since black reads as the absence of color competition rather than as another color to fight.
Common Mistakes to Avoid When Sewing
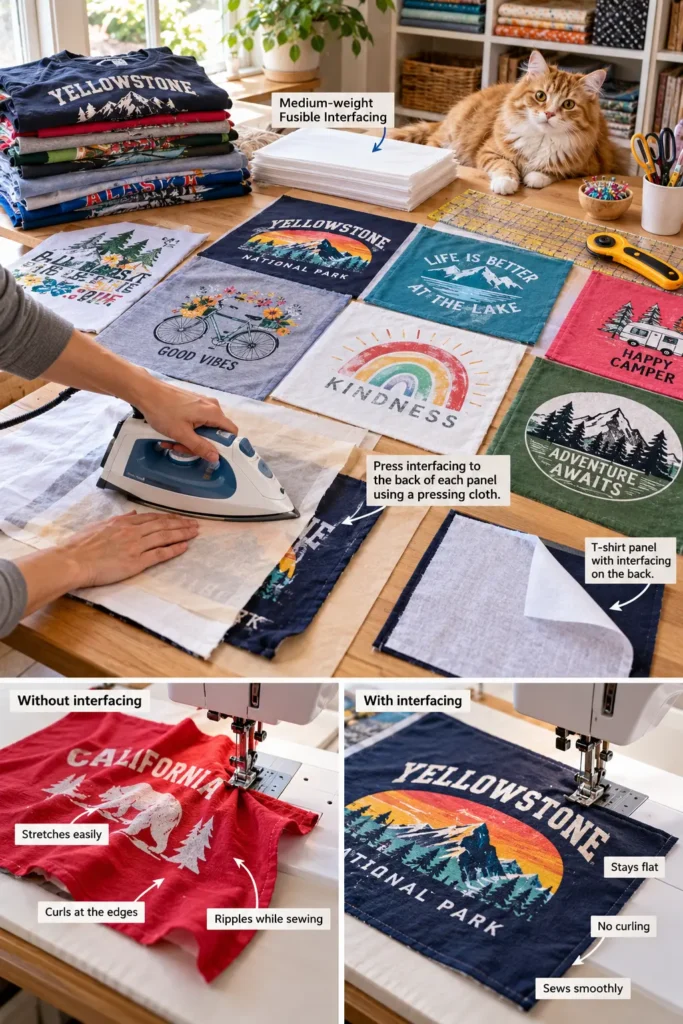
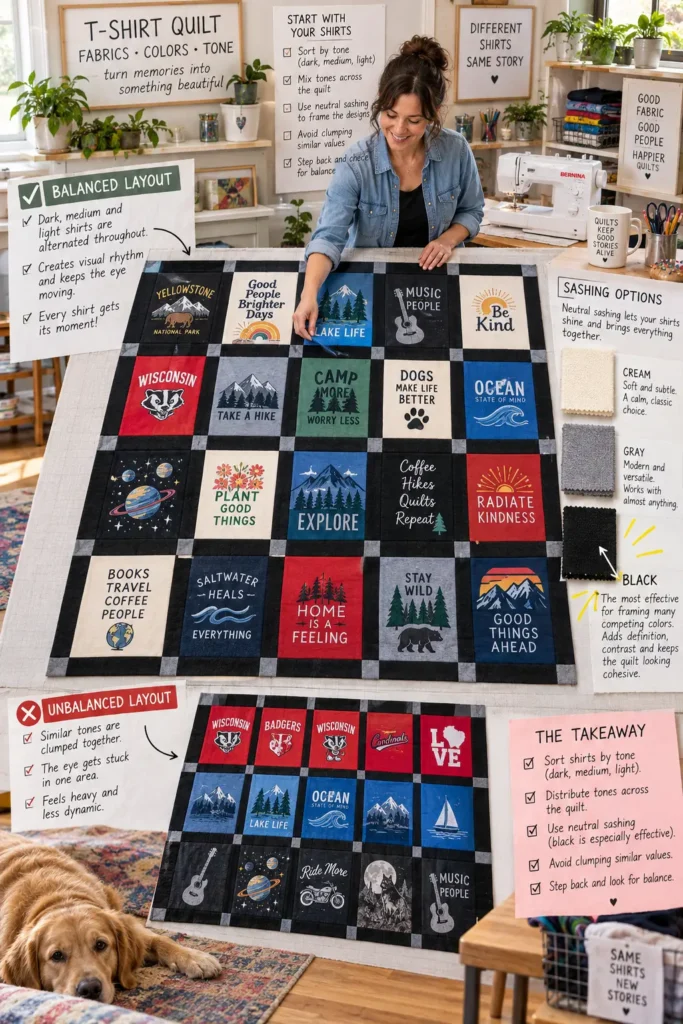
Not using interfacing is the first and most consequential mistake. The second is cutting panels too small– T-shirt graphics need breathing room, and a panel cropped right to the edge of a graphic looks unfinished. Leave at least an inch of plain fabric around every image where possible. Third is using a regular presser foot on the knit fabric – even with interfacing, a walking foot or a roller foot keeps the layers feeding evenly and prevents the slight wavy distortion that a standard foot can introduce.
Fourth: not accounting for seam allowances in the layout. A grid of twelve-inch finished squares needs twelve-and-a-half-inch cut panels, and if you cut to the finished size and then sew a quarter-inch seam, your squares will come out at eleven-and-a-half inches, and the grid won’t line up. Decide on your finished block size first, then add half an inch all round before cutting. Fifth: wash the shirts before making the quilt, but not the backing or sashing. Mixing prewashed knit with unwashed woven fabric will cause the quilt to pucker and pull unevenly after its first wash. Everything going into the quilt should be in the same state – all prewashed, or all unwashed – before a stitch is sewn.
1. Classic Grid T-Shirt Quilt for a Clean, Timeless Memory Layout
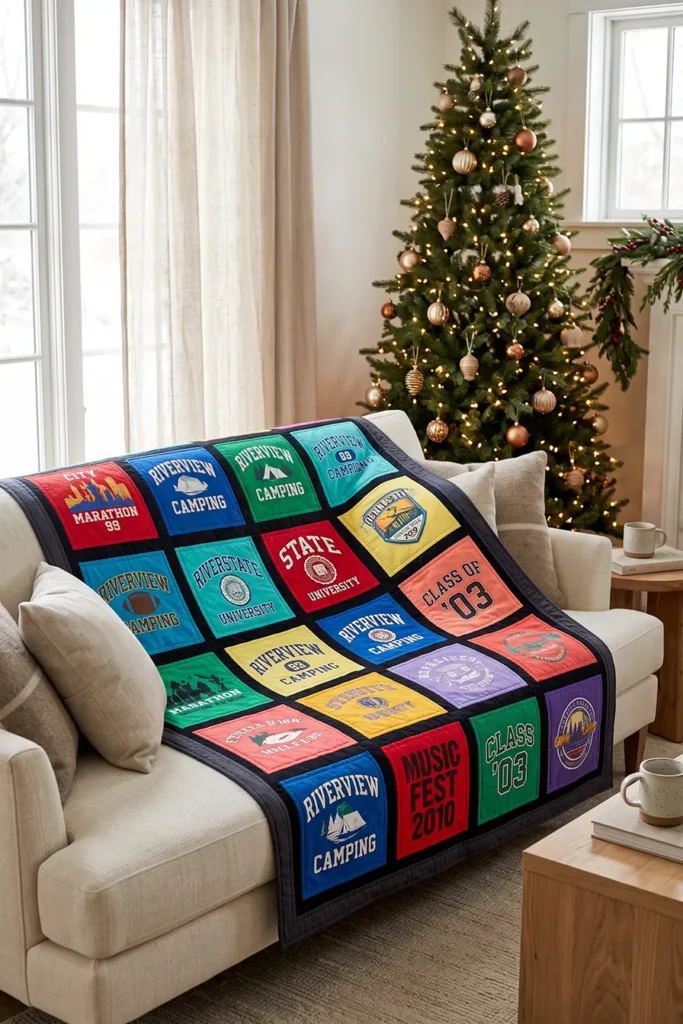
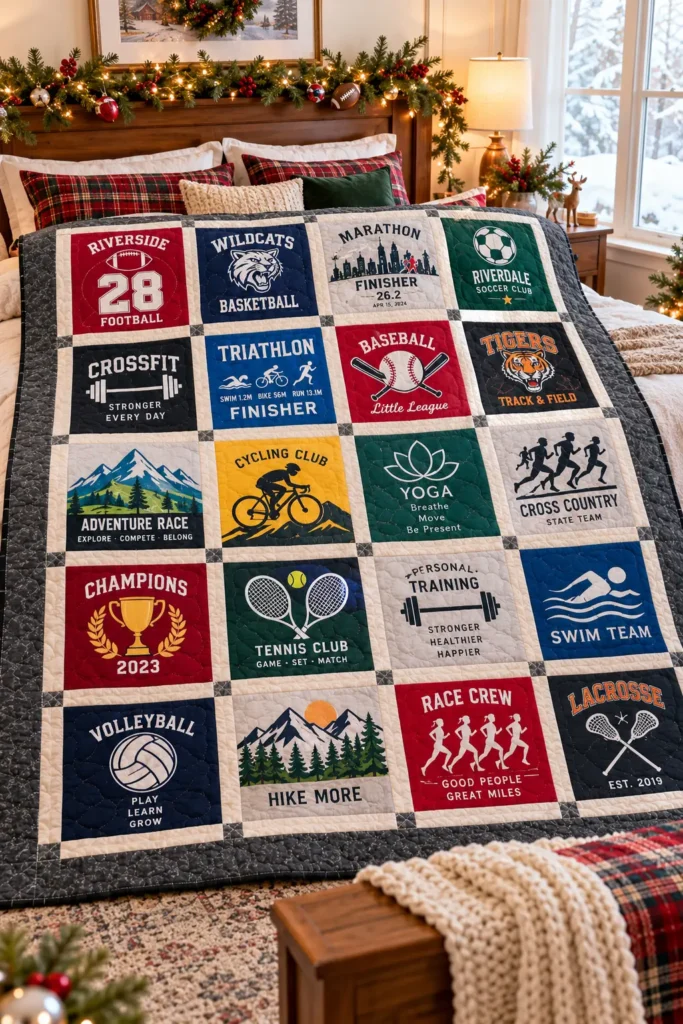
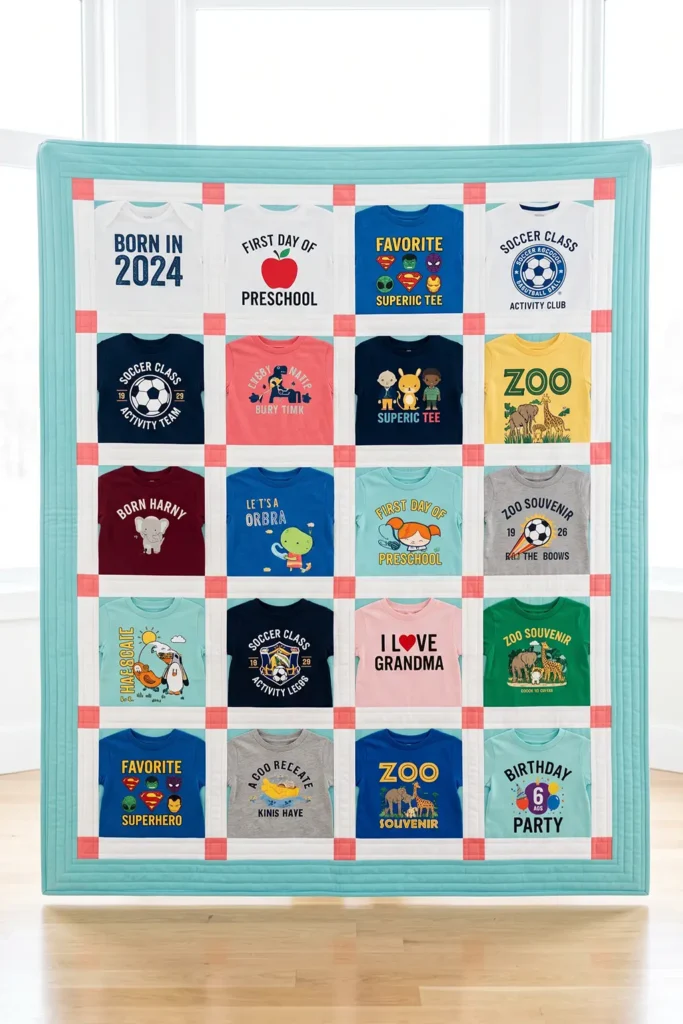
A classic grid T-shirt quilt gives treasured shirts a clean, orderly framework without losing the personality of the original graphics. Equal-size shirt panels sit in straight rows, separated by narrow sashing that keeps colorful logos, school shirts, concert tees, sports graphics, travel souvenirs, and other memories from visually running together. The structure is simple, but that simplicity is exactly what makes the finished quilt feel timeless.
T-shirt quilts differ from ordinary patchwork because jersey knit stretches, curls, and can distort as it moves through a sewing machine. The key is stabilizing each shirt panel with fusible interfacing before the final square is cut. Once stabilized, the knit behaves much more like quilting cotton and can be accurately trimmed, pieced, quilted, and bound.
For this version, 20 stabilized T-shirt blocks are arranged in a 4-column × 5-row grid with 2″ finished sashing and a 3″ finished outer border. The result is a generous throw measuring approximately 60″ × 74″.
Project Details
- Finished quilt size: approximately 60″ × 74″
- T-shirt blocks: 20
- Layout: 4 blocks across × 5 blocks down
- Finished block size: 12″ × 12″
- Cut block size: 12 1/2″ × 12 1/2″
- Finished sashing width: 2″
- Finished outer border: 3″
- Patchwork seam allowance: 1/4″
- Skill level: confident beginner
- Best use: throw quilt, graduation quilt, sports memory quilt, family keepsake, travel-shirt quilt
Design Inspirations – Digitally Modified Images. Texture and color may vary from the actual product.
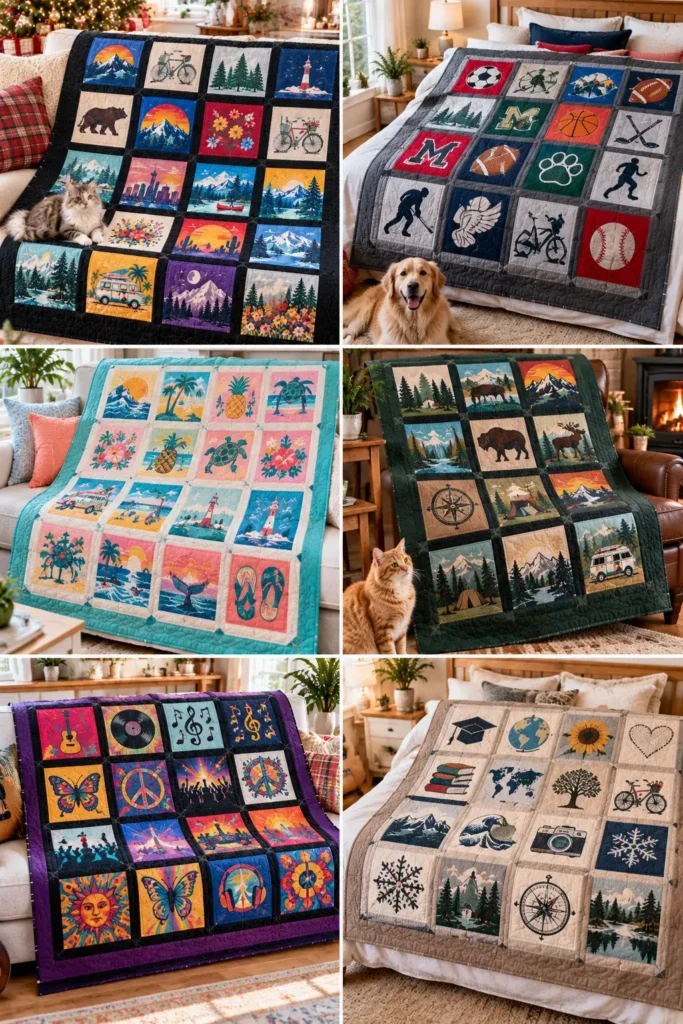
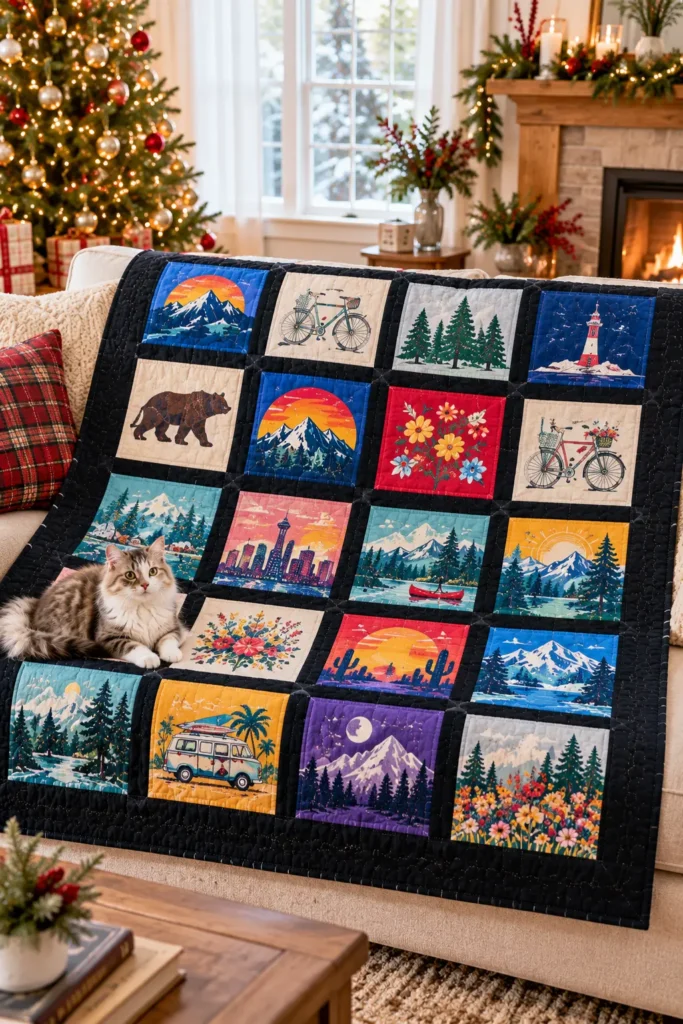
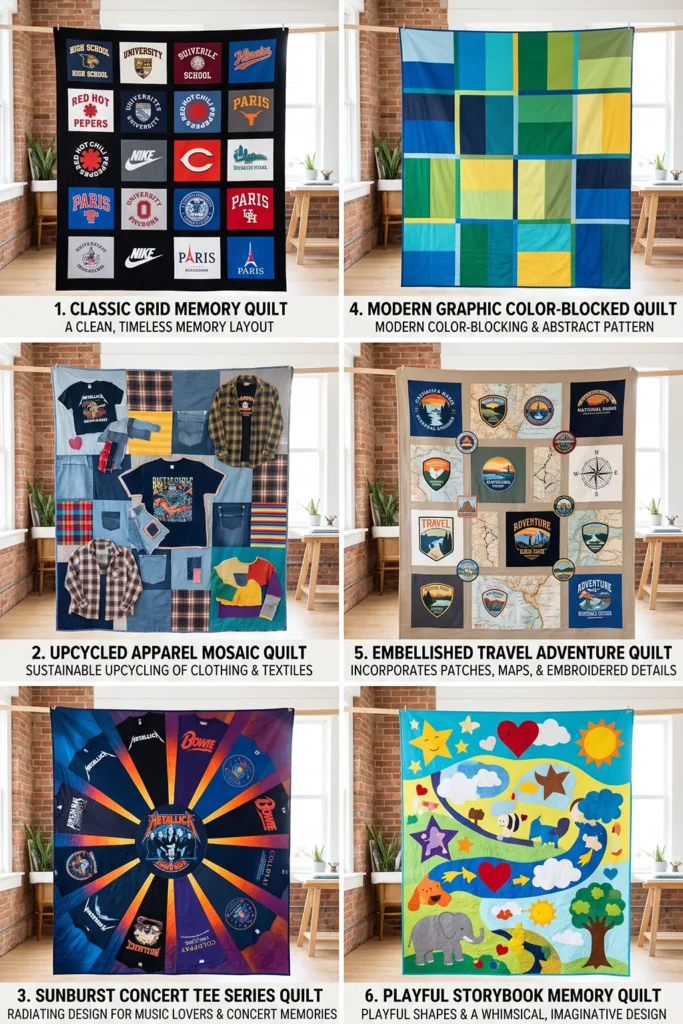
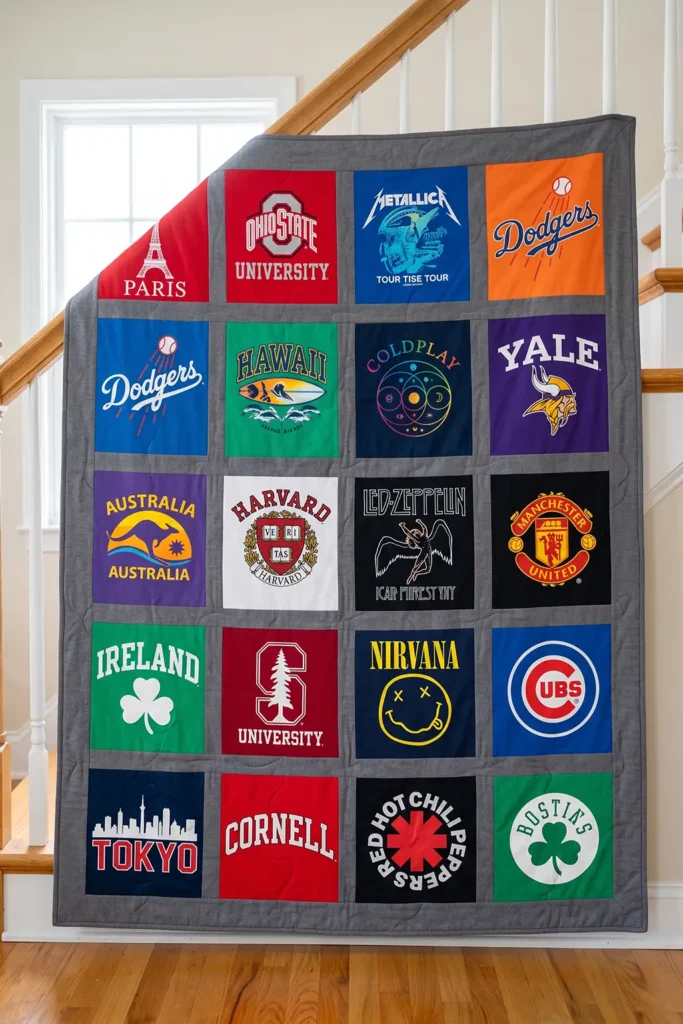
Materials
For a 60″ × 74″ quilt, gather:
- 20 T-shirts, or enough shirts to provide 20 usable front or back graphics
- Approximately 7 1/2–8 yards of medium-weight fusible interfacing, depending on interfacing width and graphic size
- 1 yard neutral fabric for sashing
- 1 yard coordinating fabric for outer borders
- 1/2 yard binding fabric
- Backing approximately 68″ × 82″
- Batting approximately 68″ × 82″
- Coordinating polyester or cotton-poly thread
- Rotary cutter
- Large acrylic ruler
- Cutting mat
- 12 1/2″ square ruler if available
- Sewing machine
- Walking foot for quilting if available
- Iron
- Pressing cloth
- Pins, clips, or basting supplies
Color and Fabric Plan
T-shirt quilts usually contain colors that were never originally intended to appear together. Rather than trying to force the shirts into one color family, organize them by value or tone.
Separate the shirts roughly into:
- light
- medium
- dark
Then distribute those values across the grid. Avoid grouping all the dark shirts in one corner or placing several very bright graphics together.
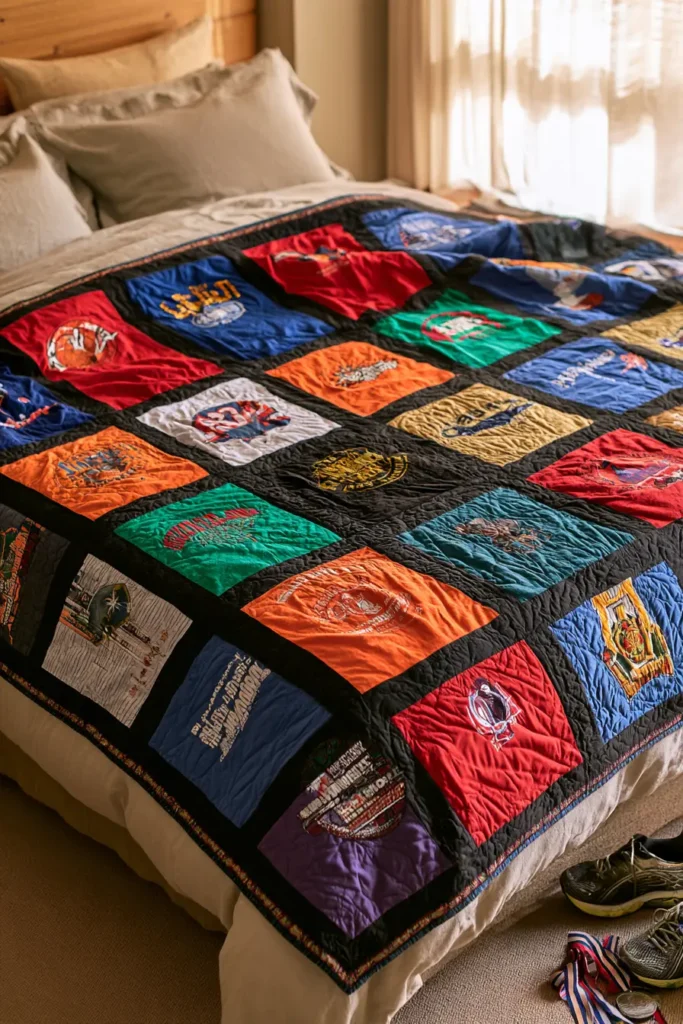
For a vibrant collection of red, royal blue, emerald, orange, yellow, purple, turquoise, and multicolored shirts, a neutral sashing color gives the eye somewhere to rest.
Good choices include:
- black for highly multicolored shirts
- charcoal gray for a softer contemporary look
- warm cream for lighter vintage shirts
- pale gray for a modern neutral effect
Black is particularly effective when almost every shirt is a different color because it visually separates the graphics rather than introducing another competing hue.
Cutting Plan
T-Shirt Blocks
Prepare:
- 20 stabilized blocks at 12 1/2″ × 12 1/2″
Each block finishes at 12″ × 12″ after 1/4″ seams.
Vertical Sashing
Cut:
- 15 pieces at 2 1/2″ × 12 1/2″
There are three vertical sash strips in each of the five block rows.
Horizontal Sashing
Cut:
- 4 strips at 2 1/2″ × 54 1/2″
Because standard quilting cotton is usually narrower than 54 1/2″, piece these strips from shorter lengths. Stagger the joining seams rather than placing every join in the same position.
Borders
Cut enough 3 1/2″-wide strips to assemble:
- 2 side borders at 3 1/2″ × 68 1/2″
- 2 top/bottom borders at 3 1/2″ × 60 1/2″
Piecing border strips from width-of-fabric lengths is perfectly acceptable.
Binding
Cut:
- 7 strips at 2 1/2″ × width of fabric
Join them end to end with diagonal seams.
Finished-Size Check
The block grid without sashing would measure:
- Width: 4 × 12″ = 48″
- Height: 5 × 12″ = 60″
Add vertical sashing:
- 3 × 2″ = 6″
Center width becomes:
48″ + 6″ = 54″
Add horizontal sashing:
- 4 × 2″ = 8″
Center height becomes:
60″ + 8″ = 68″
Add 3″ borders to all four sides:
- Width: 54″ + 6″ = 60″
- Height: 68″ + 6″ = 74″
Finished quilt: approximately 60″ × 74″.
Assembly at a Glance
- Select 20 usable shirt graphics.
- Rough-cut oversized panels.
- Prepare fusible interfacing.
- Stabilize every T-shirt panel.
- Trim panels to 12 1/2″ squares.
- Arrange the 4 × 5 grid.
- Sew vertical sashing between blocks.
- Complete all five block rows.
- Prepare horizontal sashing.
- Join the rows.
- Add side borders.
- Add top and bottom borders.
- Prepare backing and batting.
- Baste the quilt.
- Quilt the layers.
- Square and trim.
- Prepare and attach binding.
- Finish the binding and inspect the quilt.
Step-by-Step Guide
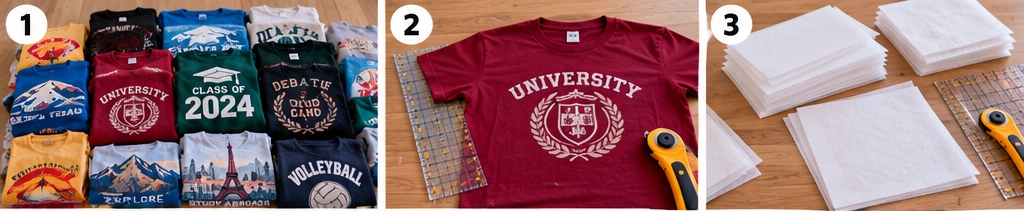
Step 1: Select the 20 T-Shirt Panels
Choose 20 shirt fronts or backs with graphics that fit comfortably inside a 12″ finished square.
Before cutting anything, check the usable graphic area. Ideally, the important lettering or image should fit within approximately 11 1/2″ × 11 1/2″, leaving enough breathing room around it for trimming and seams.
Do not cut the finished 12 1/2″ square yet. T-shirt knit must be stabilized first.

Step 2: Rough-Cut Each Shirt Oversize
Lay each shirt flat and separate the front from the back by cutting along the side seams, around the armholes, and across the shoulders.
Rough-cut the chosen graphic to approximately 14″–15″ square, or slightly larger if the shirt allows.
Leaving extra fabric is important. Stabilizing can change the shape slightly, and the final accurate trimming happens afterward.
Step 3: Cut the Fusible Interfacing
Cut a piece of medium-weight fusible interfacing for each panel, slightly smaller than the rough-cut T-shirt section but comfortably larger than the eventual 12 1/2″ square.
A piece around 13 1/2″–14″ square works for most panels.
Make sure the fusible side—the side carrying the adhesive—is facing the wrong side of the shirt.

Step 4: Fuse Every T-Shirt Panel Before Final Cutting
Place the T-shirt panel wrong side up on the pressing surface. Position the fusible interfacing adhesive-side down against the fabric.
Cover the shirt with a pressing cloth, especially when working near screen-printed graphics.
Press according to the interfacing manufacturer’s instructions, lifting and repositioning the iron rather than sliding it across the fabric.
Sliding can stretch the knit before the adhesive sets.
Allow each panel to cool completely before moving it.
This stabilization step is one of the most important differences between sewing a conventional cotton quilt and a T-shirt quilt. Properly fused jersey becomes dramatically easier to square and sew.
Step 5: Trim All 20 Blocks to 12 1/2″
Once the panels are cool and stable, trim each one to exactly:
12 1/2″ × 12 1/2″
Center the important graphic before cutting.
A 12 1/2″ square quilting ruler makes this particularly easy, but a long ruler and cutting mat also work.
All 20 blocks must be the same size before assembly begins.

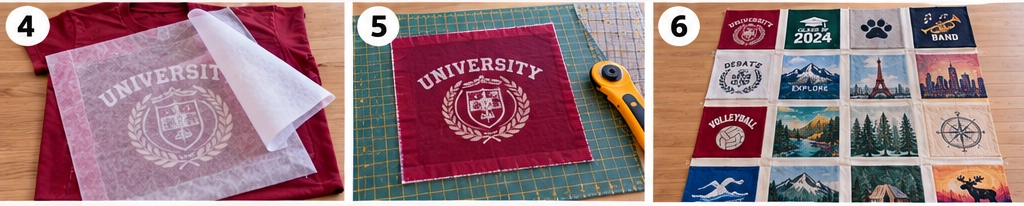
Step 6: Arrange the Blocks in a 4 × 5 Grid
Lay the blocks on the floor, a large table, or a design wall:
- 4 blocks across
- 5 blocks down
Now check the tonal balance.
Distribute dark, medium, and light shirts across the entire layout. If three dark shirts have collected in one corner, move one elsewhere. Do the same with especially bright or visually dominant graphics.
Also check graphic orientation. Unless deliberately creating a playful layout, keep text and logos upright.
Take a photograph of the final arrangement before moving the pieces.
Step 7: Add Vertical Sashing to the First Row
For each row, you need:
- 4 T-shirt blocks
- 3 sash strips measuring 2 1/2″ × 12 1/2″
Arrange:
Block – Sashing – Block – Sashing – Block – Sashing – Block
Pin carefully so the stable woven sashing does not shift against the T-shirt panels.
Sew each seam with a consistent 1/4″ seam allowance.

Step 8: Complete All Five Block Rows
Repeat Step 7 until you have 5 completed rows.
Each row should contain:
- 4 T-shirt blocks
- 3 vertical sash strips
After sewing, each row should measure approximately:
54 1/2″ × 12 1/2″ unfinished
Press the seams carefully. Rather than aggressively ironing back and forth, use a lifting-and-pressing motion.
Step 9: Prepare the Four Horizontal Sashing Strips
Prepare 4 horizontal sash strips, each measuring:
2 1/2″ × 54 1/2″
If your fabric is standard width, piece shorter lengths together using 1/4″ seams until each strip reaches the required length.
Press those joining seams open to reduce bulk.
Measure the completed quilt rows before final trimming of the sash strips. If minor sewing variation has changed a row slightly, cut the horizontal strips to the actual consistent row width rather than stretching the quilt to fit them.

Step 10: Join the First Two Rows
Place one horizontal sash strip along the bottom edge of Row 1, right sides together.
Pin at:
- both ends
- center
- quarter points
Sew with a 1/4″ seam allowance.
Then attach Row 2 to the opposite edge of that same sash strip.
The horizontal sash should now sit cleanly between the two T-shirt rows.
Step 11: Add the Remaining Rows and Sashing
Continue adding:
- horizontal sash
- next T-shirt row
- horizontal sash
- next row
until all 5 rows and 4 horizontal sash strips are joined.
The completed quilt center should measure approximately:
54 1/2″ × 68 1/2″ unfinished
Check that the rows remain straight before proceeding.

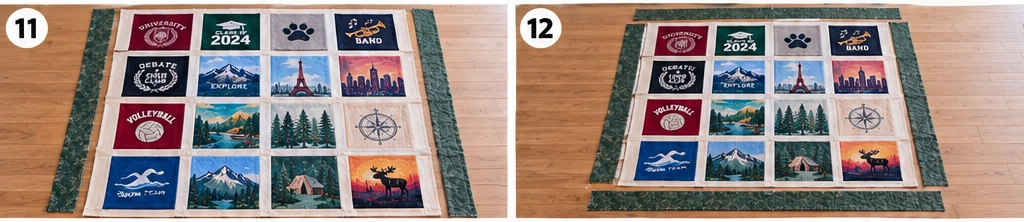
Step 12: Add the Two Side Borders
Measure the quilt vertically through the center.
The target unfinished center height is approximately 68 1/2″.
Prepare two border strips measuring:
3 1/2″ × 68 1/2″
Pin one border to each long side, matching ends, center, and quarter points.
Sew each with a 1/4″ seam allowance and press toward the borders.
The quilt top should now measure approximately:
60 1/2″ × 68 1/2″
Step 13: Add the Top and Bottom Borders
Prepare two border strips measuring approximately:
3 1/2″ × 60 1/2″
Again, measure the actual quilt width through the center before cutting the final strips.
Sew one border to the top and one to the bottom with 1/4″ seams.
The completed quilt top should now measure approximately:
60 1/2″ × 74 1/2″ unfinished
Once bound, the quilt will finish at roughly 60″ × 74″.

Step 14: Prepare the Backing and Batting
For comfortable quilting margins, prepare:
- Backing: approximately 68″ × 82″
- Batting: approximately 68″ × 82″
The backing will usually need to be pieced because standard quilting cotton is not wide enough for this quilt.
Remove selvages before joining backing lengths. Sew the backing seam with about a 1/2″ seam allowance and press it open.
Lay the backing flat with the wrong side facing up.
Step 15: Build and Baste the Quilt Sandwich
Layer:
- backing, wrong side up
- batting
- T-shirt quilt top, right side up
Center the quilt top so the backing and batting extend approximately 4″ beyond it on every side.
Smooth everything carefully.
Baste using:
- safety pins
- quilting spray
- long hand-basting stitches
Make sure no T-shirt panel develops folds or ripples during this process.

Step 16: Quilt the Three Layers Together
Simple quilting works especially well on T-shirt quilts because the graphics should remain the visual focus.
Good options include:
- stitching approximately 1/4″–1/2″ inside the sashing
- straight-line quilting through the sashing and borders
- a loose grid
- simple meandering in larger open areas
Avoid extremely dense quilting directly through thick screen printing.
A walking foot is useful because it helps move the stretchy shirt fabric, batting, and backing through the machine at the same rate.
Begin near the center and work gradually toward the outer edges.
Step 17: Square the Quilt and Attach the Binding
After quilting, trim the excess batting and backing even with the quilt top.
Check all four corners for square.
Join the 7 binding strips at 2 1/2″ wide with diagonal seams. Press those seams open, then fold the long binding strip in half lengthwise, wrong sides together.
Attach the binding to the front using a 1/4″ seam allowance, mitering the corners.
Leave approximately 8″–10″ of unsewn binding at the beginning so the ends can be joined cleanly.
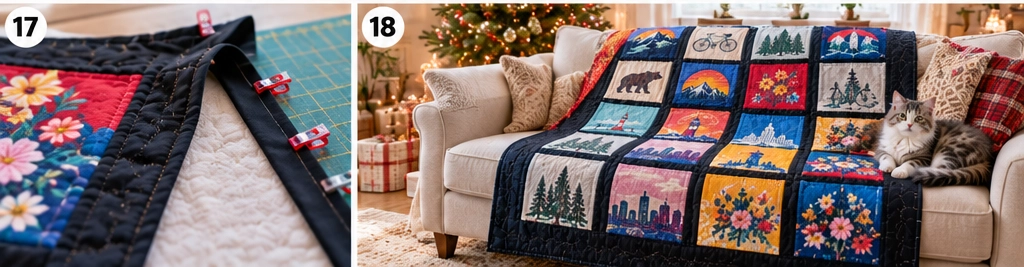
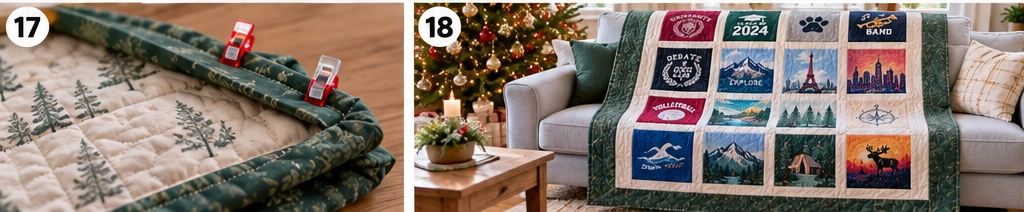
Step 18: Finish the Binding and Complete the Quilt
Join the binding ends, finish sewing the remaining section, then fold the binding over the quilt edge.
Finish it either:
- by hand with a ladder or slip stitch for a traditional appearance, or
- by machine for extra durability
Inspect the entire quilt one final time. Check that:
- every T-shirt panel lies flat
- the sashing remains straight
- graphics are correctly oriented
- the binding is fully secured
- quilting lines have no skipped sections
- loose threads have been trimmed
The completed quilt should measure approximately 60″ × 74″, with 20 memory-shirt panels displayed in a clean, balanced grid.
Tips for the Best Finished Result
Always stabilize first and trim second. Cutting an exact block from an unstabilized T-shirt and then trying to fuse interfacing afterward makes it much easier for the block to stretch or shrink away from the intended measurement.
Pay particular attention to very old, thin, or heavily worn shirts. If one feels noticeably stretchier than the others, a slightly firmer interfacing may help it behave consistently with the rest of the quilt.
When arranging highly colorful shirts, think in terms of light, medium, and dark values before worrying about whether red sits beside blue or green beside orange. Value distribution usually has more impact on whether the quilt feels visually balanced.
Neutral sashing does more than separate the blocks. It creates a consistent visual pause between memories, allowing each graphic to stand on its own.
Other Design Inspirations – Digitally Modified Images. Texture and color may vary from the actual product.
2. Graduation T-Shirt Quilt for School and College Keepsakes
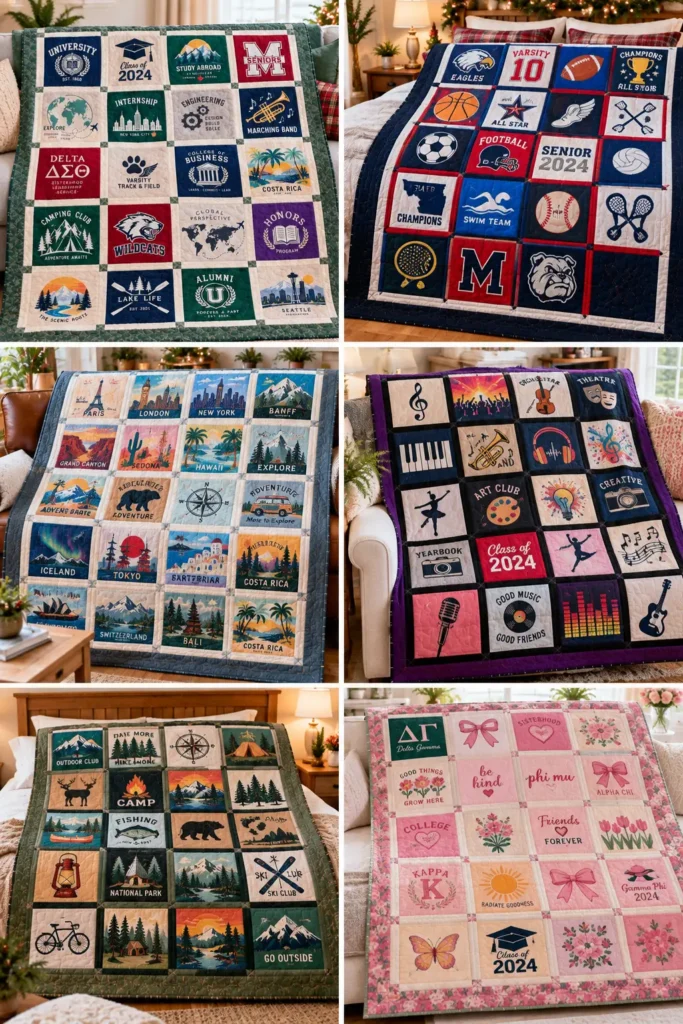
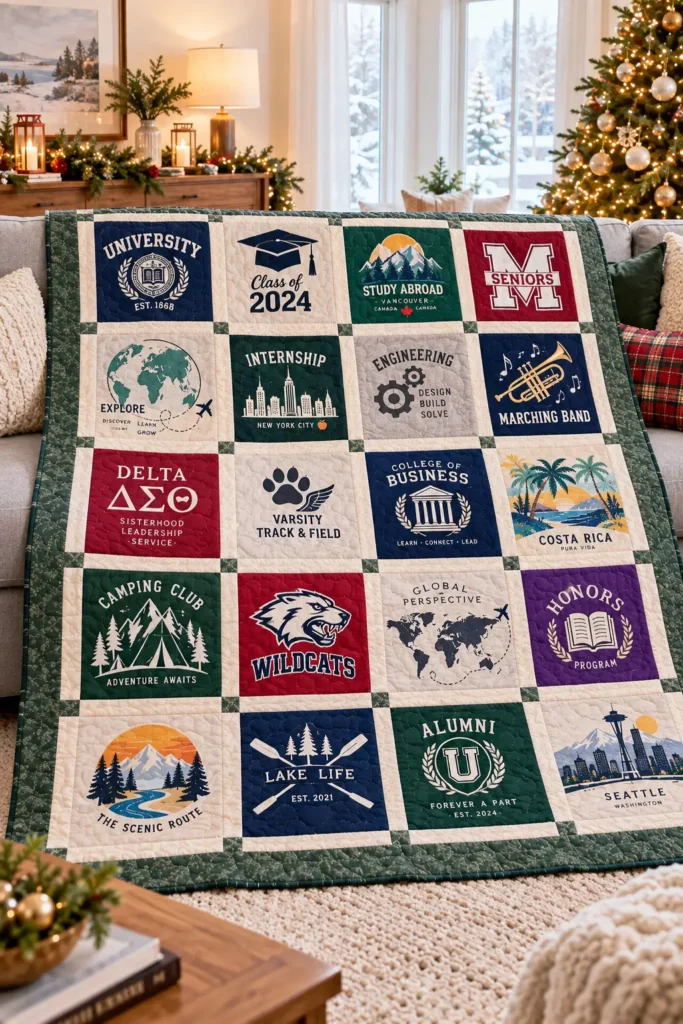
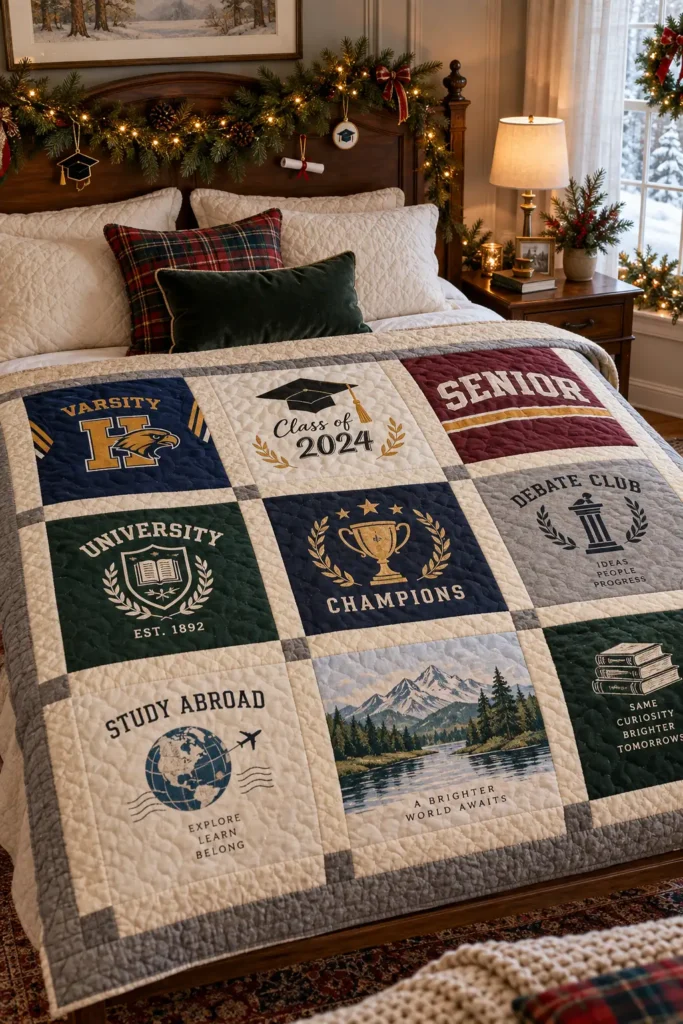
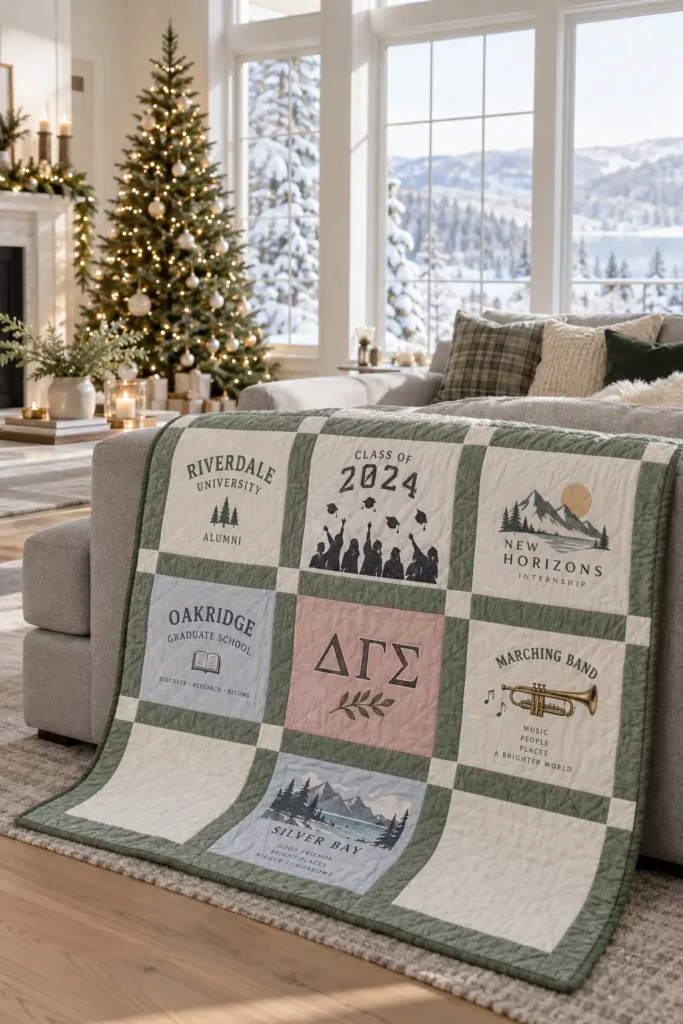
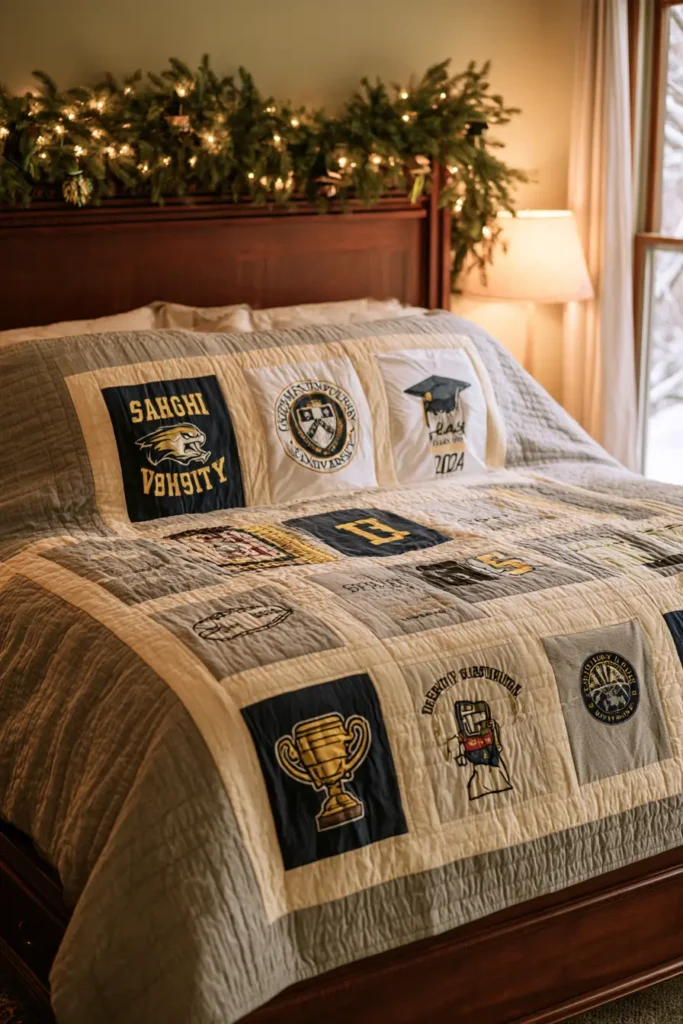
A graduation T-shirt quilt is one of the clearest, most meaningful ways to preserve the story of school and college years. It gathers club shirts, senior week tees, sports shirts, orientation tops, college event shirts, department designs, class trip souvenirs, and campus memories into one clean, usable quilt. A structured layout works especially well for this theme because graduation keepsakes often come from many different years and color palettes, and a consistent grid helps them feel unified.
T-shirt quilts differ from ordinary quilts because jersey knit behaves very differently from quilting cotton. It stretches, rolls at the edges, and can distort under the machine foot if it is not stabilized first. That is why fusible interfacing is essential. Once each shirt panel is stabilized and trimmed, the quilt can be pieced accurately and will lie much flatter. For this version, the quilt is built as a 20-block memory throw with neutral sashing and borders, giving the bright school colors room to stand out without competing with one another.
Project Details
- Finished quilt size: approximately 60″ x 74″
- Layout: 4 blocks across x 5 blocks down
- Number of T-shirt blocks: 20
- Finished block size: 12″ x 12″
- Cut block size: 12 1/2″ x 12 1/2″
- Finished sashing width: 2″
- Finished outer border width: 3″
- Seam allowance: 1/4″
- Skill level: confident beginner
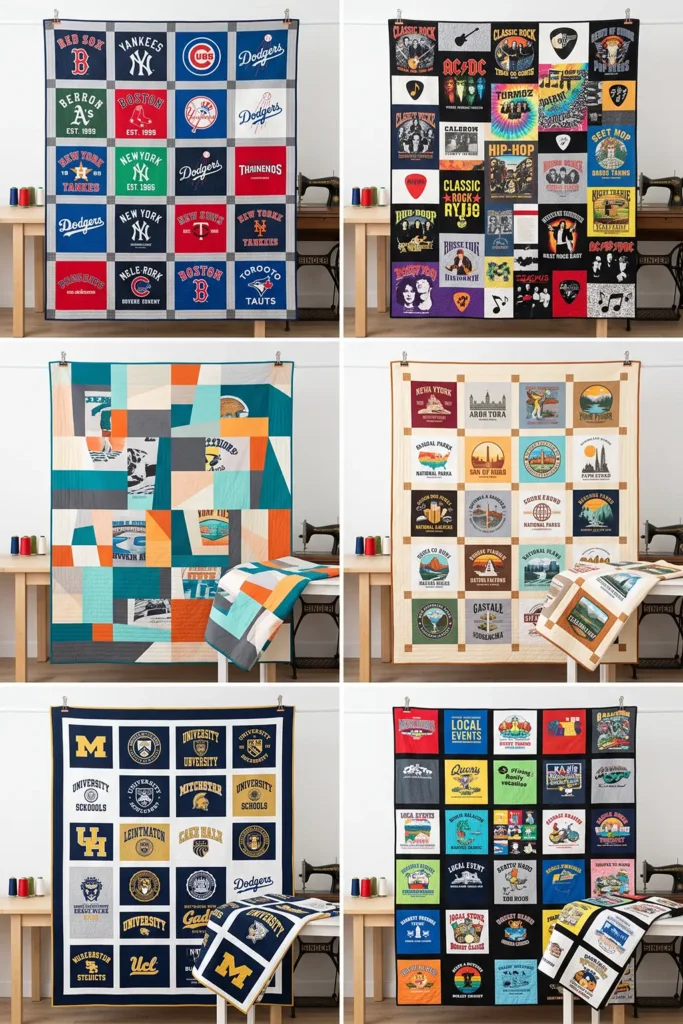
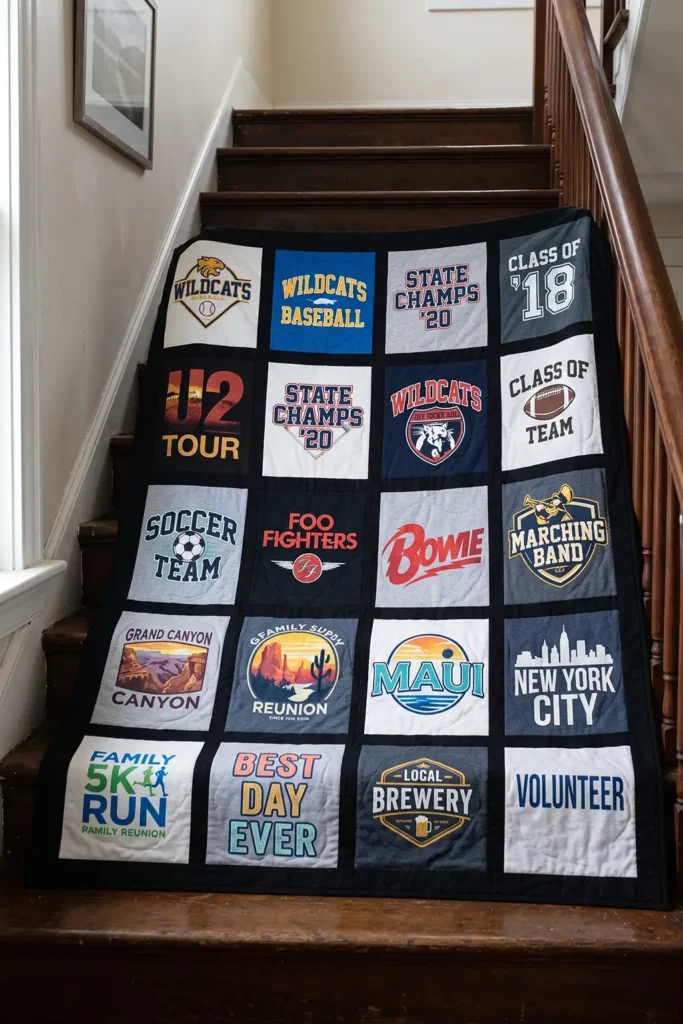
Design Inspirations – Digitally Modified Images. Texture and color may vary from the actual product.
Materials
- 20 T-shirts with usable school or college graphics
- Medium-weight fusible interfacing, enough for 20 blocks
- 1 yard neutral sashing fabric
- black, charcoal, cream, or soft gray all work well
- 1 yard coordinating border fabric
- Backing fabric large enough for about 68″ x 82″
- Batting about 68″ x 82″
- Binding fabric: about 1/2 yard
- Coordinating thread
- Rotary cutter and mat
- Quilting ruler
- 12 1/2″ square ruler if available
- Iron
- Pressing cloth
- Sewing machine
- Walking foot if available
- Pins or clips
Fabric and Color Tips
Graduation quilts often include shirts in strong school colors such as royal blue, red, gold, green, black, orange, maroon, or purple. Instead of trying to group colors by family, sort the shirts by tone:
- light
- medium
- dark
Then spread those tones across the quilt top so the layout feels balanced.
A neutral sashing color helps organize the busy graphics. For graduation quilts, black sashing is especially popular because it separates bright school colors cleanly and gives the quilt a classic memory-quilt look. Gray gives a softer, more modern feel, while cream works well with lighter vintage shirts.
Cutting Plan
T-shirt blocks
- 20 stabilized blocks at 12 1/2″ x 12 1/2″
Vertical sashing
- 15 pieces at 2 1/2″ x 12 1/2″
Horizontal sashing
- 4 strips at 2 1/2″ x 54 1/2″
Borders
Cut enough 3 1/2″-wide strips to assemble:
- 2 side borders at 3 1/2″ x 68 1/2″
- 2 top and bottom borders at 3 1/2″ x 60 1/2″
Binding
- 7 strips at 2 1/2″ x width of fabric
Finished Size Math
The 20-block grid finishes like this:
- 4 blocks across = 4 x 12″ = 48″
- 5 blocks down = 5 x 12″ = 60″
- Add 3 vertical sashings at 2″ finished = 6″
- Add 4 horizontal sashings at 2″ finished = 8″
So the quilt center finishes at:
- 48″ + 6″ = 54″ wide
- 60″ + 8″ = 68″ high
Then add the outer borders:
- 54″ + 3″ + 3″ = 60″
- 68″ + 3″ + 3″ = 74″
Finished quilt size: approximately 60″ x 74″.
Assembly at a Glance
- Select the 20 graduation-themed shirt panels.
- Rough-cut the shirt sections oversize.
- Cut fusible interfacing for each panel.
- Fuse every shirt panel before final trimming.
- Trim all blocks to 12 1/2″.
- Arrange the 4 x 5 layout.
- Sew vertical sashing into each row.
- Complete all five quilt rows.
- Prepare horizontal sashing strips.
- Join the rows with horizontal sashing.
- Add side borders.
- Add top and bottom borders.
- Prepare the backing and batting.
- Baste the quilt sandwich.
- Quilt the layers together.
- Trim and square the quilt.
- Attach the binding.
- Finish the binding and inspect the quilt.
Step-by-Step Guide
Step 1: Select the 20 graduation shirt panels
Choose 20 shirts with graphics that represent school and college memories. A nice mix often includes senior shirts, college welcome shirts, club or society shirts, sports shirts, department event shirts, alumni reunion shirts, or special school celebration tees.
Check that the main graphic on each shirt can fit within about 11 1/2″ to 12″ square once trimmed. That gives enough room for seam allowances without cutting into important text or imagery.
Step 2: Rough-cut each shirt section oversize
Cut the shirt front or back away from the rest of the shirt by trimming along the side seams, shoulder seams, and underarm area. Then rough-cut the usable graphic area to about 14″ to 15″ square.
Do not trim the final square size yet. The panel still needs interfacing, and leaving extra room prevents distortion during stabilization.
Step 3: Cut the interfacing pieces
Cut 20 pieces of medium-weight fusible interfacing, each roughly 13 1/2″ to 14″ square, or large enough to cover the future 12 1/2″ block with a little extra around it.
This is one of the most important preparation steps in a T-shirt quilt. Graduation shirts are often soft from years of wear, which makes stabilization even more important.
Step 4: Fuse the interfacing to every T-shirt panel
Place each shirt panel wrong side up. Position the interfacing adhesive side down on the back of the shirt panel. Cover it with a pressing cloth, then press according to the interfacing instructions.
Lift and press rather than sliding the iron. Sliding can stretch the knit. Let the panel cool fully before moving it so the adhesive sets properly.
Step 5: Trim all 20 blocks to 12 1/2″
Once stabilized, trim every panel to exactly 12 1/2″ x 12 1/2″. Center the most important part of the design before cutting.
Using the same size for all 20 blocks is what gives the quilt its clean, classic grid layout.
Step 6: Arrange the blocks in a 4 x 5 layout
Lay out the blocks:
- 4 across
- 5 down
Mix light, medium, and dark shirts across the arrangement so the quilt feels balanced. Also check the direction of the graphics so words and logos appear upright.
This is a good stage to spread out particularly bright school colors such as red, gold, royal blue, and emerald rather than clustering them all together.
Step 7: Sew the vertical sashing into Row 1
Take 4 T-shirt blocks and 3 vertical sashing strips, each 2 1/2″ x 12 1/2″.
Arrange them as:
Block – Sashing – Block – Sashing – Block – Sashing – Block
Sew them together with a 1/4″ seam allowance.

Step 8: Complete all five rows
Repeat the same process until you have 5 completed rows.
Each row should measure approximately 54 1/2″ x 12 1/2″ unfinished.
Press carefully after sewing. Since T-shirt panels still have a bit more body than standard cotton blocks, pressing gently and accurately helps keep everything flat.
Step 9: Prepare the horizontal sashing strips
Cut or piece 4 horizontal sashing strips measuring 2 1/2″ x 54 1/2″.
If your fabric is narrower than 54 1/2″, piece shorter lengths together. Press the seams open to reduce bulk.

Step 10: Join the first two rows with horizontal sashing
Place one horizontal sashing strip between Row 1 and Row 2. Pin at both ends, the center, and quarter points so the strip is distributed evenly.
Sew Row 1 to one side of the sashing strip, then sew Row 2 to the other side.
Step 11: Add the remaining rows and horizontal sashings
Continue joining the remaining rows with the remaining 3 horizontal sashings until the full quilt center is complete.
The finished quilt center should measure approximately 54 1/2″ x 68 1/2″ unfinished.
Step 12: Add the side borders
Cut or piece 2 side borders at 3 1/2″ x 68 1/2″.
Sew one border to each side of the quilt center using a 1/4″ seam allowance. Match the ends and center points before sewing.
After this step, the top should measure about 60 1/2″ x 68 1/2″ unfinished.
Step 13: Add the top and bottom borders
Cut or piece 2 top and bottom borders at 3 1/2″ x 60 1/2″.
Sew one to the top and one to the bottom. Your finished quilt top should now measure approximately 60 1/2″ x 74 1/2″ unfinished.
This size finishes at about 60″ x 74″ once quilted and bound.

Step 14: Prepare the backing and batting
Cut or piece the backing to about 68″ x 82″. Cut the batting to the same size.
That gives roughly 4″ of extra backing and batting on all sides, which is a practical amount for basting and quilting.
Step 15: Build and baste the quilt sandwich
Layer the quilt in this order:
- Backing, wrong side up
- Batting
- Quilt top, right side up
Smooth all layers carefully and baste with safety pins, spray baste, or long hand-basting stitches.
Check that no T-shirt block has folded or bubbled underneath before you begin quilting.

Step 16: Quilt the layers together
Quilt using a simple design that supports the shirt graphics without overpowering them. Good choices include:
- stitching close to the sashing
- straight-line quilting through the sashing and borders
- a loose grid
- simple meandering in open areas
A walking foot is especially helpful here. It keeps the quilt layers moving more evenly, which matters when jersey-knit shirt blocks are mixed with woven fabrics.
Step 17: Trim the quilt and attach the binding
Trim away the extra batting and backing, squaring all four corners.
Join the 7 binding strips end to end with diagonal seams. Press the long strip in half lengthwise, wrong sides together. Sew the binding to the front of the quilt with a 1/4″ seam allowance, mitering the corners neatly.
Step 18: Finish the binding and inspect the quilt
Fold the binding over the edge and hand-stitch or machine-stitch it in place.
Then inspect the whole quilt carefully. Check that:
- the blocks lie flat
- the graphics are upright
- the sashing is straight
- the borders are even
- the quilting is secure
- loose threads are trimmed
The finished quilt should measure about 60″ x 74″ and display the graduation shirts in a clean, organized layout that feels bright, celebratory, and timeless.
Helpful Notes
- Graduation memory quilts often look best when the sashing and border stay simple and neutral, letting the shirt graphics tell the story.
- Many school keepsake shirts are heavily printed, so avoid very dense quilting directly through thick screen-printed areas.
- If some shirts are much thinner than others, stabilizing all of them first helps the entire quilt behave more consistently.
- A classic grid layout remains popular because it is easy to read visually. Each shirt has its own clear space, which is especially helpful when preserving dates, school names, and event graphics.
Other Design Inspirations – Digitally Modified Images. Texture and color may vary from the actual product.
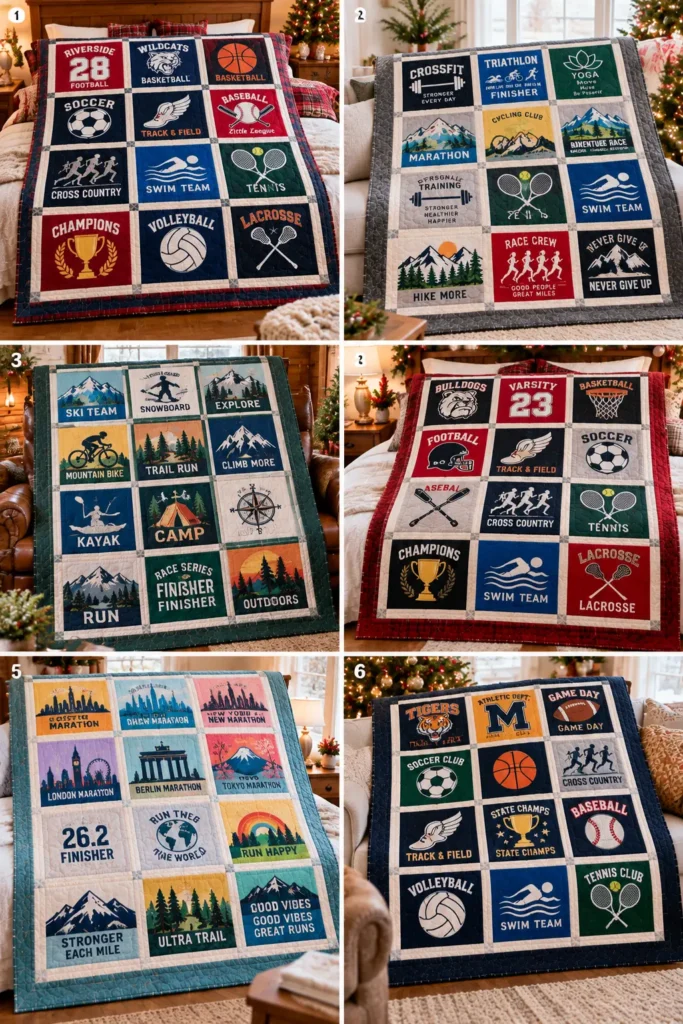
3. Sports T-Shirt Quilt for Team, Race, and Athletic Memories
A sports T-shirt quilt is one of the most rewarding ways to preserve years of team spirit, training milestones, race entries, school athletics, tournament participation, and personal fitness achievements. Jerseys and event tees often carry bold graphics, bright colors, dates, team names, and sponsor logos, so they already tell a story. A structured quilt layout gives those memories a clear, organized setting without letting the design feel cluttered.
T-shirt quilts require a slightly different approach from standard cotton quilts because knit fabric stretches, rolls at the edges, and can distort under the sewing machine foot. The most important preparation step is stabilizing every shirt panel with fusible interfacing before trimming the final blocks. Once stabilized, the shirts behave much more like quilting cotton, which makes the piecing more accurate and helps the quilt lie flat. For this version, the quilt is built as a 20-block throw with neat sashing and borders, creating a classic sports memory quilt with a finished size of about 60″ x 74″.
Project Details
- Finished quilt size: approximately 60″ x 74″
- Layout: 4 blocks across x 5 blocks down
- Number of T-shirt blocks: 20
- Finished block size: 12″ x 12″
- Cut block size: 12 1/2″ x 12 1/2″
- Finished sashing width: 2″
- Finished border width: 3″
- Seam allowance: 1/4″
- Skill level: confident beginner
Design Inspirations – Digitally Modified Images. Texture and color may vary from the actual product.
Materials
- 20 sports T-shirts with usable graphics
- Medium-weight fusible interfacing, enough for 20 blocks
- 1 yard sashing fabric
- 1 yard border fabric
- Backing fabric large enough for about 68″ x 82″
- Batting about 68″ x 82″
- Binding fabric: about 1/2 yard
- Coordinating thread
- Rotary cutter and mat
- Quilting ruler
- 12 1/2″ square ruler if available
- Iron
- Pressing cloth
- Sewing machine
- Walking foot if available
- Pins or clips
Fabric and Color Tips
Sports quilts are usually bold by nature. Team shirts, race tees, and athletic event tops often include bright reds, royal blues, black, neon green, orange, gold, purple, and white. Rather than grouping the shirts by color family, sort them by tone:
- light
- medium
- dark
Then distribute those values throughout the layout.
This approach prevents all the darkest race shirts from clumping in one area or several bright neon tops from dominating one corner. A neutral sashing color helps frame the graphics and adds visual rhythm to the quilt. Good choices include:
- black for strong contrast and a sporty finish
- charcoal gray for a softer athletic look
- cream for lighter vintage sports shirts
- navy if you want a deeper but still coordinated neutral
Black sashing is especially effective when the shirt colors vary widely, which is common in sports quilts.
Cutting Plan
T-shirt blocks
- 20 stabilized blocks at 12 1/2″ x 12 1/2″
Vertical sashing
- 15 pieces at 2 1/2″ x 12 1/2″
Horizontal sashing
- 4 strips at 2 1/2″ x 54 1/2″
Borders
Cut enough 3 1/2″-wide strips to assemble:
- 2 side borders at 3 1/2″ x 68 1/2″
- 2 top and bottom borders at 3 1/2″ x 60 1/2″
Binding
- 7 strips at 2 1/2″ x width of fabric
Finished Size Math
The 20-block quilt center works out as follows:
- 4 blocks across = 4 x 12″ = 48″
- 5 blocks down = 5 x 12″ = 60″
- Add 3 vertical sashings at 2″ finished = 6″
- Add 4 horizontal sashings at 2″ finished = 8″
So the center finishes at:
- 48″ + 6″ = 54″ wide
- 60″ + 8″ = 68″ high
Then add the outer borders:
- 54″ + 3″ + 3″ = 60″
- 68″ + 3″ + 3″ = 74″
Finished quilt size: approximately 60″ x 74″.
Assembly at a Glance
- Select the 20 sports shirt graphics.
- Rough-cut all panels oversize.
- Cut the interfacing pieces.
- Fuse every shirt panel.
- Trim all blocks to size.
- Arrange the 4 x 5 layout.
- Add vertical sashing to make rows.
- Complete all five rows.
- Prepare horizontal sashing.
- Join the rows into the center.
- Add the side borders.
- Add the top and bottom borders.
- Prepare the backing and batting.
- Baste the quilt sandwich.
- Quilt the layers.
- Trim and square the quilt.
- Attach the binding.
- Finish the binding and inspect the quilt.
Step-by-Step Guide
Step 1: Select the 20 sports shirt panels
Choose 20 shirt fronts or backs that best represent team, race, and athletic memories. A balanced mix might include school team shirts, race participation tees, club athletics shirts, training camp tops, tournament shirts, charity run tees, or marathon event shirts.
Check that each graphic can fit inside a 12 1/2″ square. Ideally, the most important part of the design should fit within about 11 1/2″ to 12″ so no major text or logo is lost in the seam allowance.
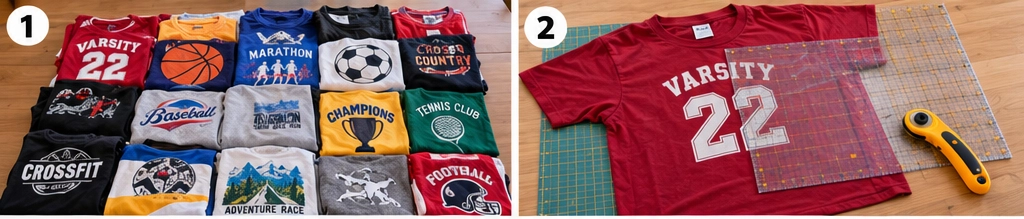
Step 2: Rough-cut each shirt panel oversize
Cut each selected shirt panel away from the rest of the garment, separating front and back if needed. Then rough-cut the graphic area to about 14″ to 15″ square.
Do not trim the final block yet. Sports shirts are often soft and stretchy from wear, and leaving extra fabric now makes stabilization safer and more accurate.
Step 3: Cut the fusible interfacing
Cut 20 pieces of medium-weight fusible interfacing, each about 13 1/2″ to 14″ square, or large enough to cover the future 12 1/2″ block with a little extra around the edges.
This stabilizing layer is what transforms the knit shirt fabric into something much easier to piece cleanly.

Step 4: Fuse the interfacing to every T-shirt panel
Place one shirt panel wrong side up on the ironing surface. Lay the interfacing adhesive side down on the back of the shirt. Cover with a pressing cloth and fuse according to the product instructions.
Lift and lower the iron instead of sliding it. Sliding can stretch the knit and throw off the shape. Let each panel cool completely before moving it.
This step is especially important for sports shirts because many have large printed graphics, and the pressing cloth helps protect the print surface.
Step 5: Trim all 20 blocks to 12 1/2″
After stabilizing, trim each shirt panel to exactly 12 1/2″ x 12 1/2″.
Center the main part of the graphic before cutting. If a shirt has a race date, team name, medal graphic, or event logo, make sure those details stay well positioned. Uniform block size is what creates the clean, classic grid.

Step 6: Arrange the blocks in a 4 x 5 layout
Lay out the blocks in 4 columns and 5 rows.
Distribute light, medium, and dark shirts evenly. Also spread out shirts with very large or very bright graphics so the whole quilt feels balanced. Keep all readable text upright unless you want a deliberately casual layout.
Photograph the arrangement before sewing so you can return to it easily.
Step 7: Sew the first row with vertical sashing
Take 4 T-shirt blocks and 3 vertical sashing strips, each measuring 2 1/2″ x 12 1/2″.
Arrange them as:
Block – Sashing – Block – Sashing – Block – Sashing – Block
Sew with a 1/4″ seam allowance. Pin carefully, especially where knit shirt blocks meet woven sashing.

Step 8: Complete all five rows
Repeat the same process until you have 5 completed quilt rows.
Each row should measure approximately 54 1/2″ x 12 1/2″ unfinished.
Press carefully after sewing. Use a gentle pressing motion so the stabilized shirts stay square and the seams remain flat.
Step 9: Prepare the horizontal sashing strips
Cut or piece 4 horizontal sashing strips, each measuring 2 1/2″ x 54 1/2″.
If your sashing fabric is not wide enough, piece shorter lengths together. Press those joining seams open to reduce bulk.

Step 10: Join the first two rows with one horizontal sash strip
Place one horizontal sashing strip between Row 1 and Row 2. Pin at both ends, the center, and quarter points. Sew Row 1 to one side of the strip, then sew Row 2 to the other side.
This creates the beginning of the full quilt center.
Step 11: Add the remaining rows and horizontal sashing
Continue joining the remaining rows with the remaining sash strips until the full quilt center is assembled.
At this stage, the quilt center should measure approximately 54 1/2″ x 68 1/2″ unfinished.
Check that the rows remain straight and that no block has been sewn upside down.

Step 12: Add the side borders
Cut or piece 2 side borders at 3 1/2″ x 68 1/2″.
Sew one border to each side of the quilt center using a 1/4″ seam allowance. Match the ends and center points first so the border sits evenly.
After this step, the quilt top should measure about 60 1/2″ x 68 1/2″ unfinished.
Step 13: Add the top and bottom borders
Cut or piece 2 top and bottom borders at 3 1/2″ x 60 1/2″.
Sew one to the top and one to the bottom. The completed quilt top should now measure approximately 60 1/2″ x 74 1/2″ unfinished, which will finish near 60″ x 74″ after quilting and binding.

Step 14: Prepare the backing and batting
Cut or piece the backing to approximately 68″ x 82″. Cut the batting to the same size.
That gives about 4″ extra on all sides, which is a practical amount for basting and machine quilting.
Step 15: Build and baste the quilt sandwich
Layer the quilt in this order:
- Backing, wrong side up
- Batting
- Quilt top, right side up
Smooth the layers well and baste with safety pins, basting spray, or long hand-basting stitches.
Check carefully that no folds or bubbles have developed under the shirt blocks.
Step 16: Quilt the layers together
Use a quilting design that supports the sports graphics rather than competing with them. Good options include:
- straight-line quilting along the sashing
- quilting close to the shirt-block edges
- a loose grid
- simple meandering in the open background areas
A walking foot is especially useful here because it helps feed the mixed fabric layers evenly. Avoid very dense quilting across thick printed graphics, especially on older race shirts or heavily screened team tops.
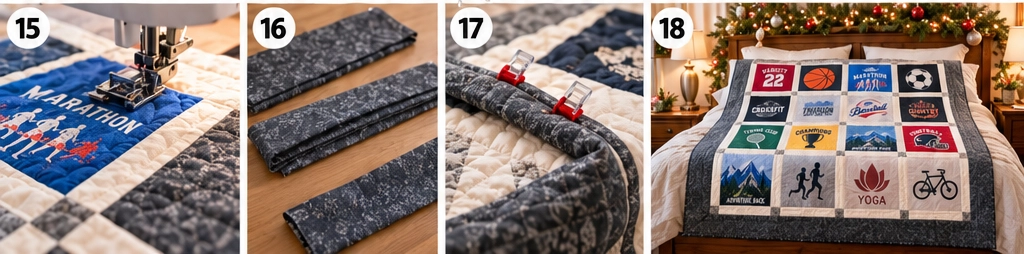
Step 17: Trim the quilt and attach the binding
Trim the extra batting and backing even with the quilt top, squaring the corners carefully.
Join the 7 binding strips with diagonal seams, press the seams open, and fold the long binding strip in half lengthwise, wrong sides together. Sew the binding to the front of the quilt with a 1/4″ seam allowance, mitering the corners neatly.
Step 18: Finish the binding and inspect the quilt
Fold the binding over the raw edge and hand-stitch or machine-stitch it in place.
Inspect the finished quilt carefully. Check that:
- the shirt graphics are upright
- the blocks lie flat
- the sashing is straight
- the borders are even
- the quilting is secure
- loose threads are trimmed
The completed quilt should measure about 60″ x 74″ and display the athletic memories in a bright, orderly layout that feels energetic but timeless.
Helpful Notes
- Sports T-shirt quilts often include race shirts from different years, and those shirts can vary a lot in fabric quality. Stabilizing them all first helps the final quilt behave consistently.
- Race and athletic event shirts frequently have large sponsor graphics, so a clean grid layout works especially well because it gives each shirt enough room to be seen.
- If several shirts are very dark, place them across the quilt rather than in one section. This keeps the overall layout lively and balanced.
- Simple neutral sashing gives the quilt the visual feel of framed memories, which suits keepsake sports quilts beautifully.
Other Design Inspirations – Digitally Modified Images. Texture and color may vary from the actual product.
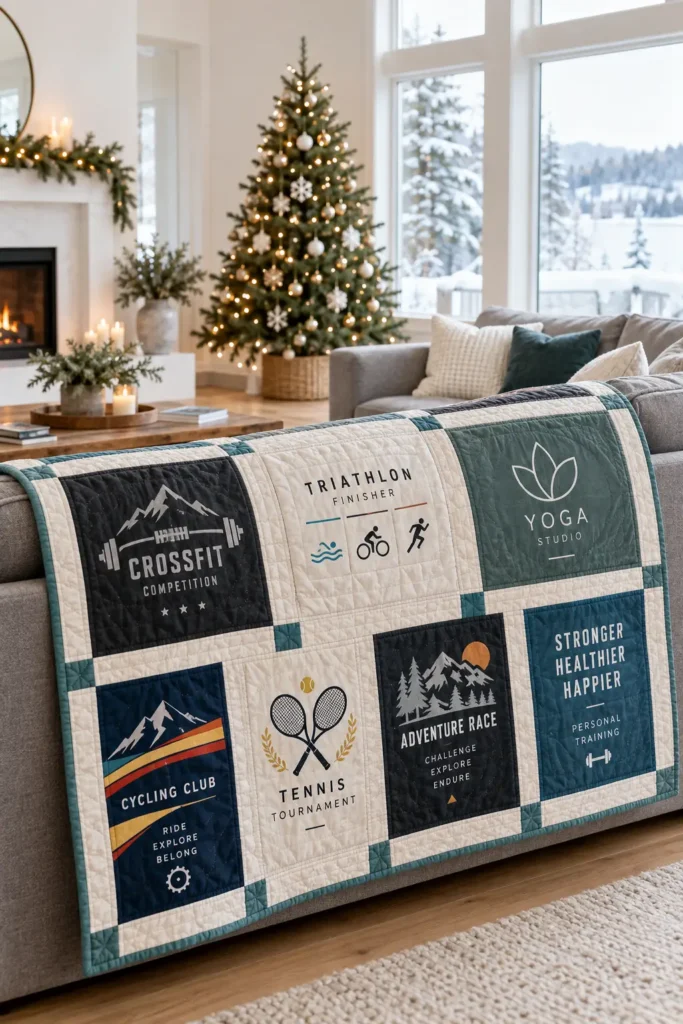
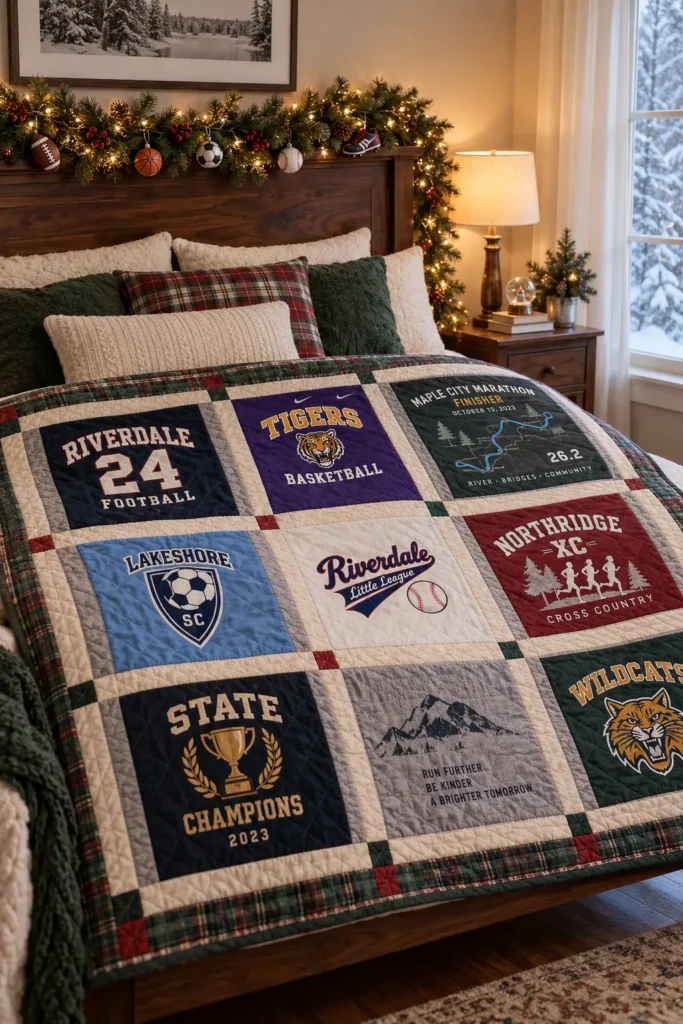
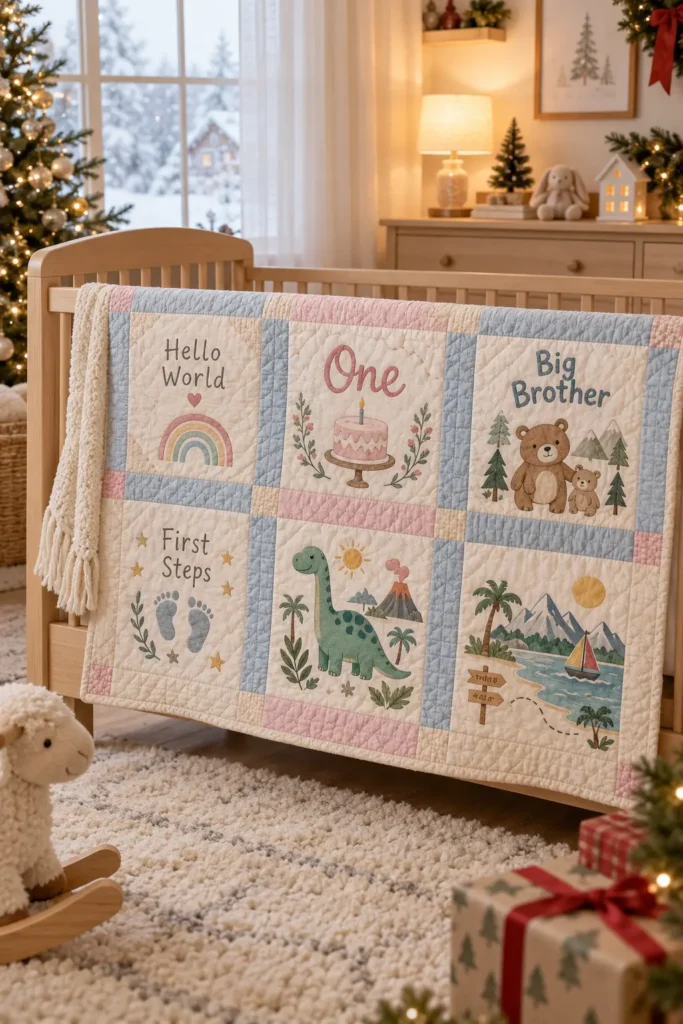
4. Baby and Kids’ T-Shirt Quilt for Preserving Childhood Memories
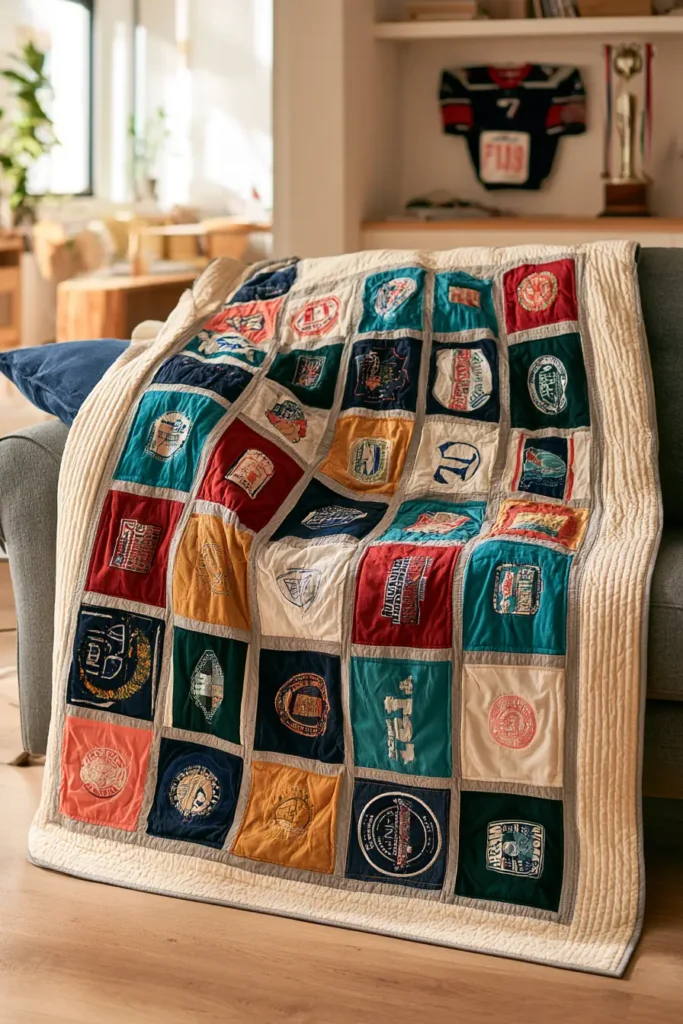
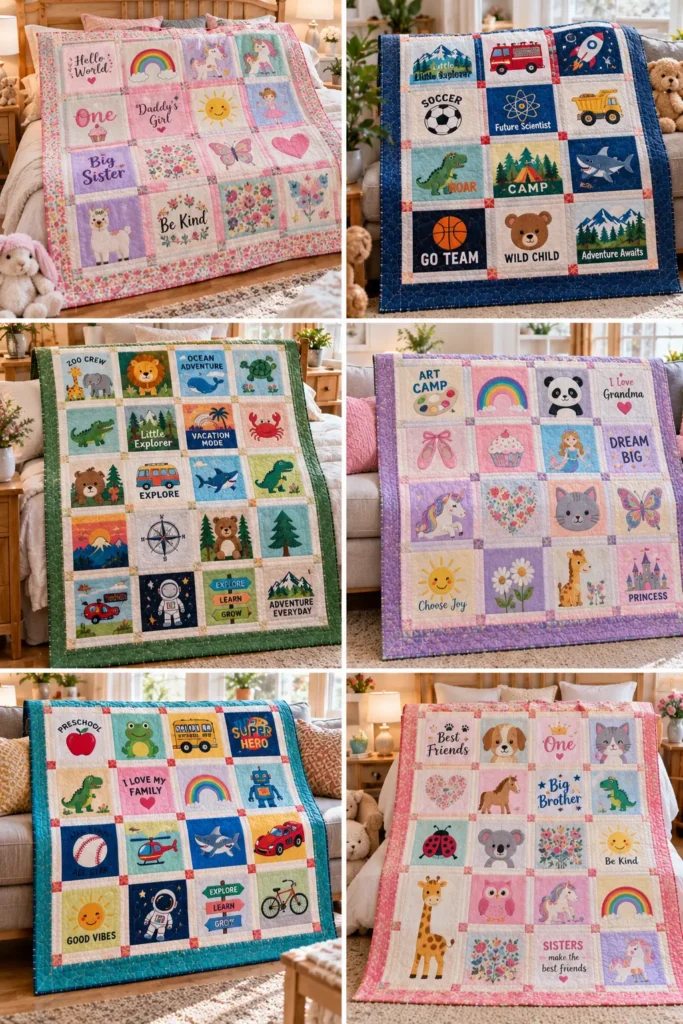
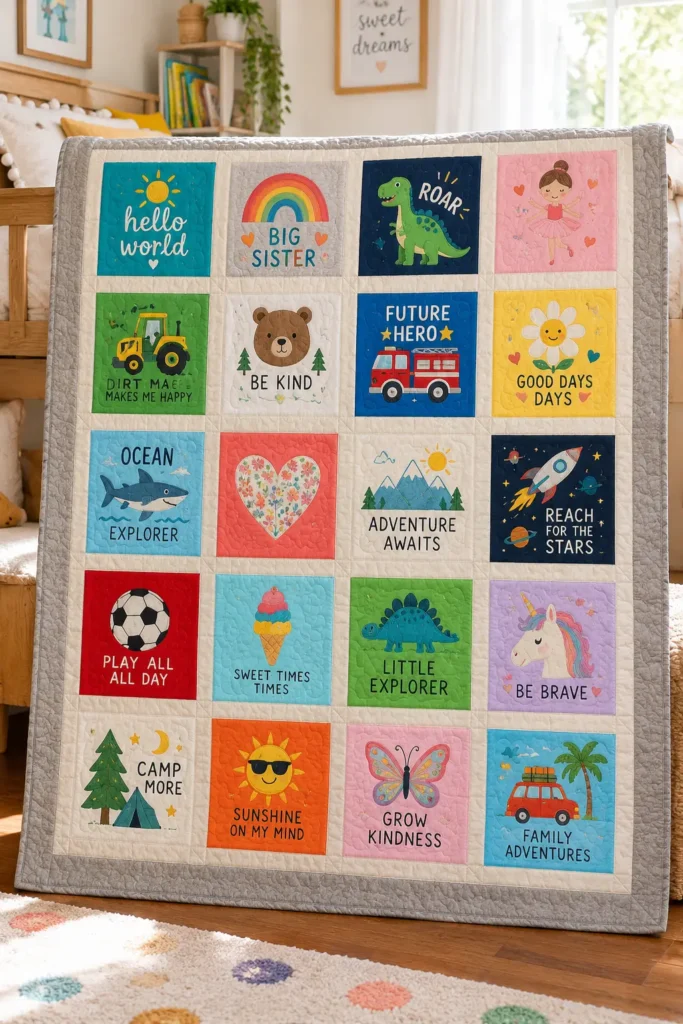
A baby and kids’ T-shirt quilt has a softer, sweeter character than many memory quilts because the shirts often come from early milestones, preschool days, family outings, birthday parties, holiday photos, sports lessons, and favorite cartoon phases. The prints may be smaller, the colors brighter, and the fabrics more varied, but a structured quilt layout helps all those little memories come together into one polished keepsake.
Because children’s T-shirts are usually smaller than adult shirts, this version uses a slightly more compact block size than a standard adult memory quilt. That makes it easier to preserve smaller graphics without cutting away too much of the design. As with all T-shirt quilts, the most important technical step is stabilizing every panel with fusible interfacing before trimming the final blocks. Once stabilized, the knit fabric behaves much more like quilting cotton and can be pieced neatly into a clean, timeless layout.
For this quilt, 20 stabilized T-shirt blocks are arranged in a 4-column by 5-row grid with 2″ finished sashing and a 3″ finished border. The result is a bright, balanced quilt measuring approximately 52″ x 64″, a practical size for a child’s bed, a sofa throw, or a memory blanket to keep and display.
Project Details
- Finished quilt size: approximately 52″ x 64″
- Layout: 4 blocks across x 5 blocks down
- Number of T-shirt blocks: 20
- Finished block size: 10″ x 10″
- Cut block size: 10 1/2″ x 10 1/2″
- Finished sashing width: 2″
- Finished border width: 3″
- Seam allowance: 1/4″
- Skill level: confident beginner
Materials
- 20 baby or kids’ T-shirts with usable graphics
- Medium-weight fusible interfacing, enough for 20 blocks
- 3/4 yard to 1 yard sashing fabric
- 3/4 yard border fabric
- Binding fabric: about 1/2 yard
- Backing fabric: enough for approximately 60″ x 72″
- Batting: approximately 60″ x 72″
- Coordinating thread
- Rotary cutter and cutting mat
- Quilting ruler
- 10 1/2″ square ruler if available
- Iron
- Pressing cloth
- Sewing machine
- Walking foot if available
- Pins or clips
Design Inspirations – Digitally Modified Images. Texture and color may vary from the actual product.
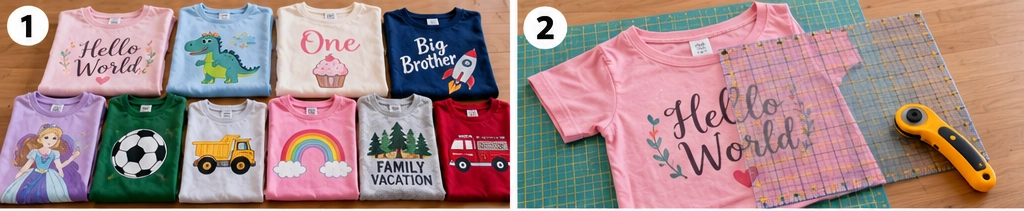
Fabric and Color Tips
Baby and children’s shirts often come in especially cheerful colors such as turquoise, coral, yellow, grass green, sky blue, red, orange, pink, and purple. Rather than trying to sort them by color family, it is more effective to organize them by tone:
- light
- medium
- dark
Then spread those values across the layout. This keeps several very pale shirts from ending up in one area and prevents a cluster of darker shirts from making one corner feel heavy.
For sashing, neutral colors work especially well because children’s shirt graphics are often busy, playful, and multicolored. Good choices include:
- white or warm cream for a bright playful look
- soft gray for a modern nursery-friendly finish
- charcoal for stronger contrast
- black if the shirt colors are extremely varied
Cutting Plan
T-shirt blocks
- 20 stabilized blocks at 10 1/2″ x 10 1/2″
Vertical sashing
- 15 pieces at 2 1/2″ x 10 1/2″
Horizontal sashing
- 4 strips at 2 1/2″ x 46 1/2″
Borders
Cut enough 3 1/2″-wide strips to assemble:
- 2 side borders at 3 1/2″ x 58 1/2″
- 2 top and bottom borders at 3 1/2″ x 52 1/2″
Binding
- 7 strips at 2 1/2″ x width of fabric
Finished Size Math
The quilt center is calculated as follows:
- 4 blocks across = 4 x 10″ = 40″
- 5 blocks down = 5 x 10″ = 50″
- Add 3 vertical sashings at 2″ finished = 6″
- Add 4 horizontal sashings at 2″ finished = 8″
So the quilt center finishes at:
- 40″ + 6″ = 46″ wide
- 50″ + 8″ = 58″ high
Then add the borders:
- 46″ + 3″ + 3″ = 52″
- 58″ + 3″ + 3″ = 64″
Finished quilt size: approximately 52″ x 64″.
Assembly at a Glance
- Select the best shirt graphics.
- Rough-cut the panels oversize.
- Cut fusible interfacing.
- Fuse every panel.
- Trim the final blocks.
- Arrange the 4 x 5 layout.
- Sew vertical sashing into each row.
- Complete all five rows.
- Prepare the horizontal sashing.
- Join the rows into the quilt center.
- Add the side borders.
- Add the top and bottom borders.
- Prepare backing and batting.
- Baste the quilt sandwich.
- Quilt the layers.
- Trim and square the quilt.
- Attach the binding.
- Finish the binding and inspect the quilt.
Step-by-Step Guide
Step 1: Select the 20 shirt panels
Choose 20 shirt fronts or backs that represent babyhood and childhood memories clearly. Good choices might include favorite animal shirts, birthday tops, preschool shirts, holiday tees, school-event shirts, sports or dance class tops, vacation shirts, or special milestone tops.
Because children’s shirts are smaller, check each one carefully to make sure the main graphic can fit comfortably within about 10″ square finished, which means roughly 9 1/2″ to 10″ of usable design space is ideal.
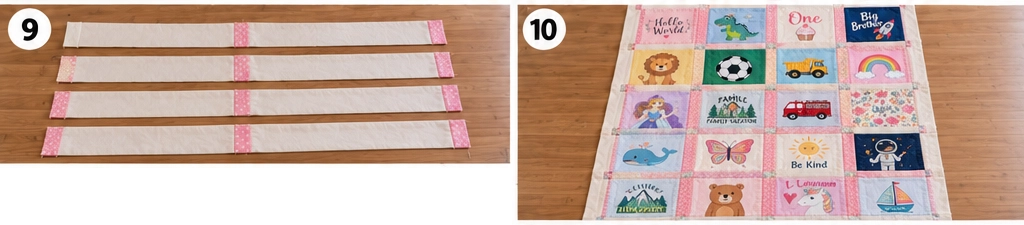
Step 2: Sort the shirts by tone and theme
Before cutting, sort the chosen shirts into light, medium, and dark groups. Also note which shirts are visually busier and which are calmer.
This helps later when arranging the quilt. Childhood memory quilts often contain many bright novelty prints, so a little planning keeps the finished layout lively without becoming chaotic.
Step 3: Rough-cut each shirt section oversize
Cut the chosen shirt front or back away from the rest of the shirt, trimming around side seams, sleeves, and shoulders. Then rough-cut the usable area to about 12″ to 13″ square.
Do not trim the final block size yet. The panel still needs stabilizing, and the extra fabric gives you room to center the design accurately later.

Step 4: Cut the interfacing pieces
Cut 20 pieces of medium-weight fusible interfacing, each about 11 1/2″ to 12″ square.
This size is slightly larger than the final 10 1/2″ block, which gives enough room to stabilize the fabric fully before final trimming.
Step 5: Fuse the interfacing to every T-shirt panel
Place one shirt panel wrong side up on the ironing surface. Position the interfacing adhesive side down on the back of the knit fabric. Cover it with a pressing cloth and fuse it according to the manufacturer’s instructions.
Use a lift-and-press motion rather than sliding the iron. Sliding can stretch the knit. Let each panel cool completely before moving it.
This step is especially important with children’s shirts, since many are made from softer, thinner knits that distort easily.

Step 6: Trim all 20 blocks to 10 1/2″
Once all the panels are stabilized and cool, trim them to exactly 10 1/2″ x 10 1/2″.
Center the graphic carefully before trimming. If a shirt has a cute animal, name, birthday number, or school print, make sure the most important part sits comfortably within the square.
Step 7: Cut the vertical sashing pieces
Cut 15 vertical sashing pieces, each measuring 2 1/2″ x 10 1/2″.
Each row will need 3 of these pieces, and there are 5 rows, so:
- 3 sashings per row x 5 rows = 15 vertical sashings

Step 8: Arrange the blocks in a 4 x 5 layout
Lay the 20 blocks out in 4 columns and 5 rows.
Spread light, medium, and dark shirts across the quilt. Also separate very bold shirts so they do not all sit together. Keep text and graphics upright unless you deliberately want a more playful arrangement.
Take a photograph once you are happy with the layout.
Step 9: Sew the first row with vertical sashing
Take the first 4 T-shirt blocks and 3 vertical sashing pieces. Arrange them as:
Block – Sashing – Block – Sashing – Block – Sashing – Block
Sew them together with a 1/4″ seam allowance.
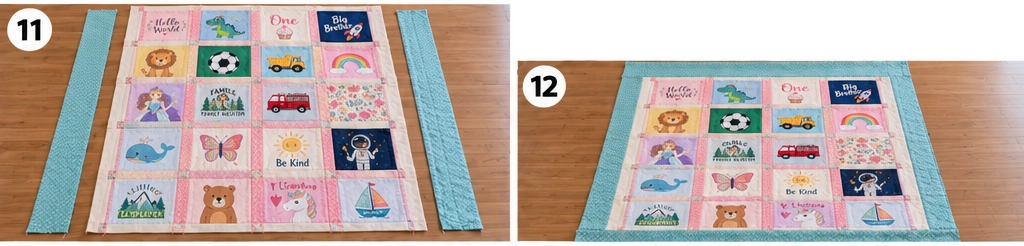
Step 10: Complete all five rows
Repeat the process until you’ve assembled all 5 quilt rows.
Each row should now measure approximately:
46 1/2″ x 10 1/2″ unfinished
That measurement comes from:
- 4 blocks at 10 1/2″ cut width = 42″
- plus 3 sashings at 2 1/2″ cut width = 7 1/2″
- minus 6 seams at 1/2″ total each = 3″
- total = 46 1/2″
Step 11: Prepare the horizontal sashing strips
Cut or piece 4 horizontal sashing strips, each measuring 2 1/2″ x 46 1/2″.
If the sashing fabric is not wide enough in one length, piece shorter sections together. Press those joining seams open to reduce bulk.
Step 12: Join the first two rows with horizontal sashing
Place one horizontal sashing strip between Row 1 and Row 2. Pin at the ends, center, and quarter points. Sew Row 1 to one side of the strip, then sew Row 2 to the other side.
This creates the beginning of the quilt center.
Step 13: Add the remaining rows and horizontal sashing
Continue joining the remaining rows with the remaining 3 horizontal sashings until the full quilt center is complete.
At this point, the quilt center should measure approximately 46 1/2″ x 58 1/2″ unfinished.

Step 14: Add the side borders
Cut or piece 2 side borders at 3 1/2″ x 58 1/2″.
Sew one border to each side of the quilt center using a 1/4″ seam allowance. Match the ends and center points before sewing to keep the border even.
After this step, the quilt top should measure about 52 1/2″ x 58 1/2″ unfinished.
Step 15: Add the top and bottom borders
Cut or piece 2 top and bottom borders at 3 1/2″ x 52 1/2″.
Sew them to the top and bottom. The finished quilt top should now measure approximately 52 1/2″ x 64 1/2″ unfinished, which will become about 52″ x 64″ finished after quilting and binding.
Step 16: Prepare the backing, batting, and quilt sandwich
Cut or piece the backing to about 60″ x 72″. Cut the batting to the same size.
Layer the quilt as follows:
- Backing, wrong side up
- Batting
- Quilt top, right side up
Smooth the layers well and baste with pins, spray baste, or hand basting.
Step 17: Quilt the layers and trim the quilt
Quilt the layers together using a simple design that supports the T-shirt graphics. Good options include:
- stitching close to the sashing
- straight-line quilting through the sashing and borders
- a loose grid
- gentle all-over meandering in open areas
A walking foot is very helpful here. Once quilting is complete, trim away the excess batting and backing and square the quilt.
Step 18: Attach the binding, finish, and inspect
Join the 7 binding strips end to end with diagonal seams. Fold the long strip in half lengthwise, wrong sides together, and sew it to the front of the quilt with a 1/4″ seam allowance, mitering the corners.
Fold the binding to the back and hand-stitch or machine-stitch it in place.
Inspect the finished quilt carefully. Check that:
- the blocks lie flat
- graphics are upright
- the sashing is straight
- the borders are even
- the quilting is secure
- loose threads are trimmed
The completed quilt should measure about 52″ x 64″ and display childhood keepsakes in a bright, clean layout that feels playful and lasting at the same time.
Helpful Notes
- Children’s shirts are often smaller, which is why a 10″ finished block is more practical here than a larger adult-quilt block.
- If a particularly tiny shirt graphic feels too small even for this format, it can be centered within extra coordinating fabric before being trimmed to size.
- Baby and kids’ shirts often come in exceptionally cheerful colors, so a neutral sashing color is especially helpful for visual balance.
- Memory quilts of children’s clothing have become especially popular because they preserve everyday childhood moments, not only major events.
Other Design Inspirations – Digitally Modified Images. Texture and color may vary from the actual product.
5. Travel T-Shirt Quilt Using Shirts from Memorable Trips and Adventures
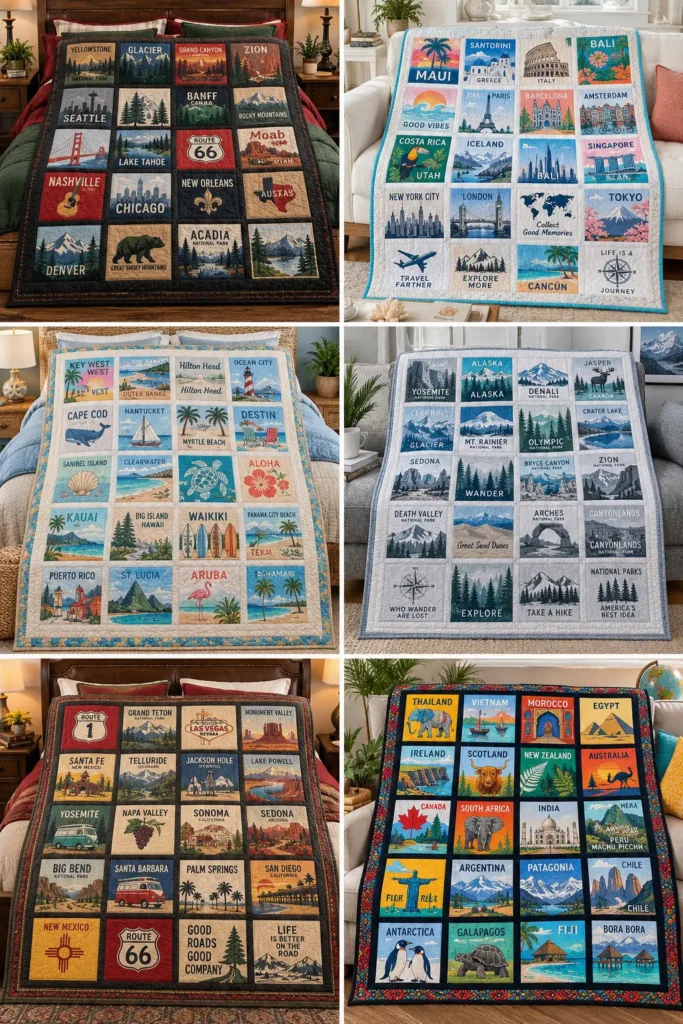
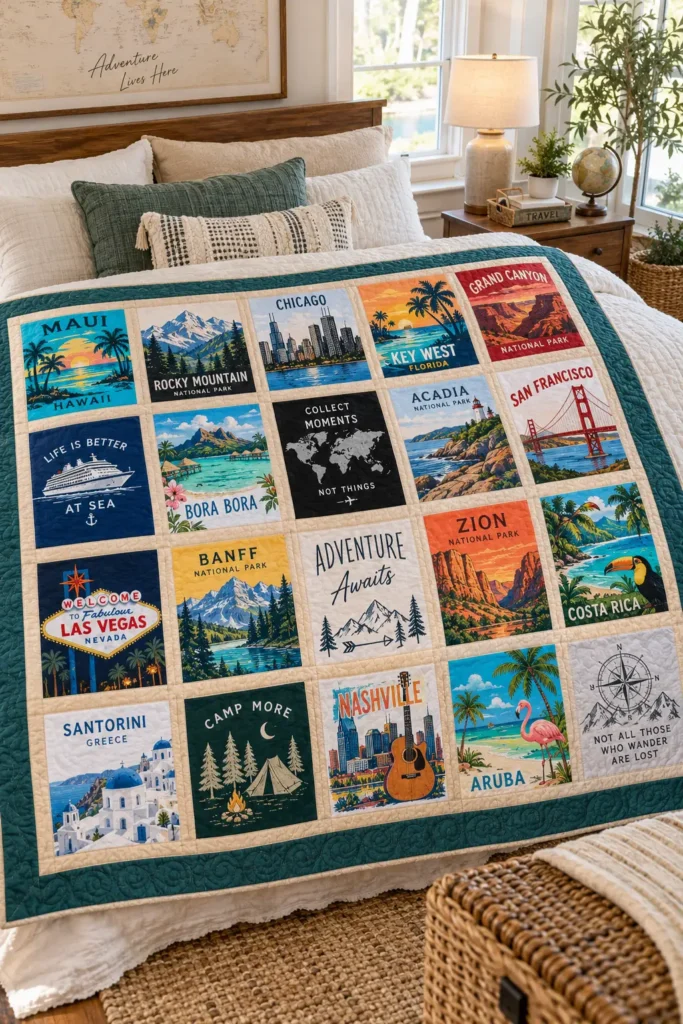
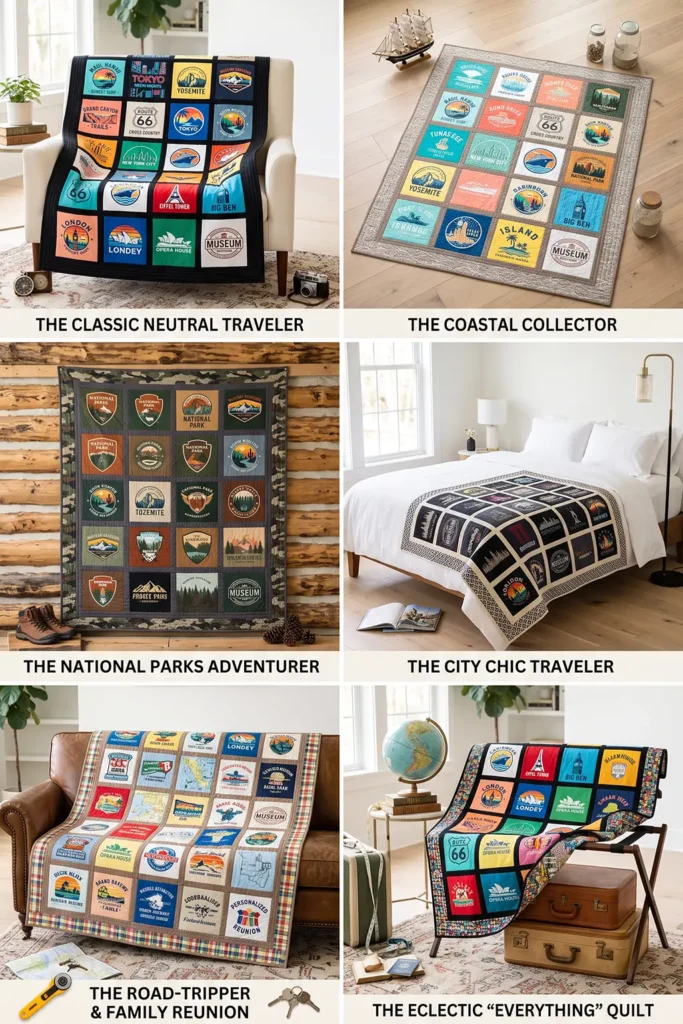
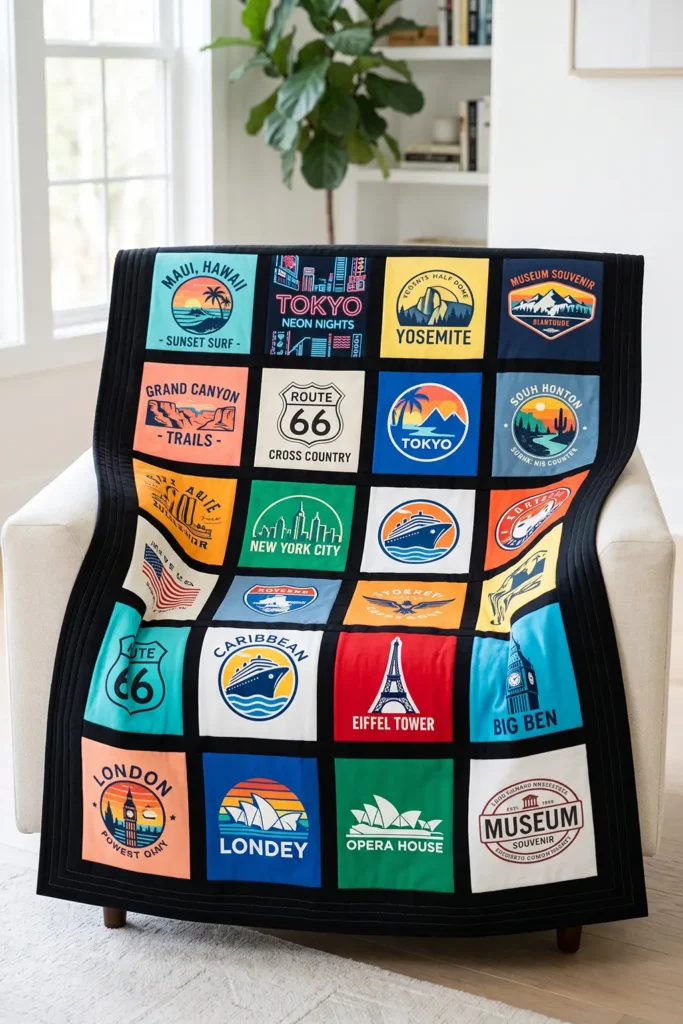
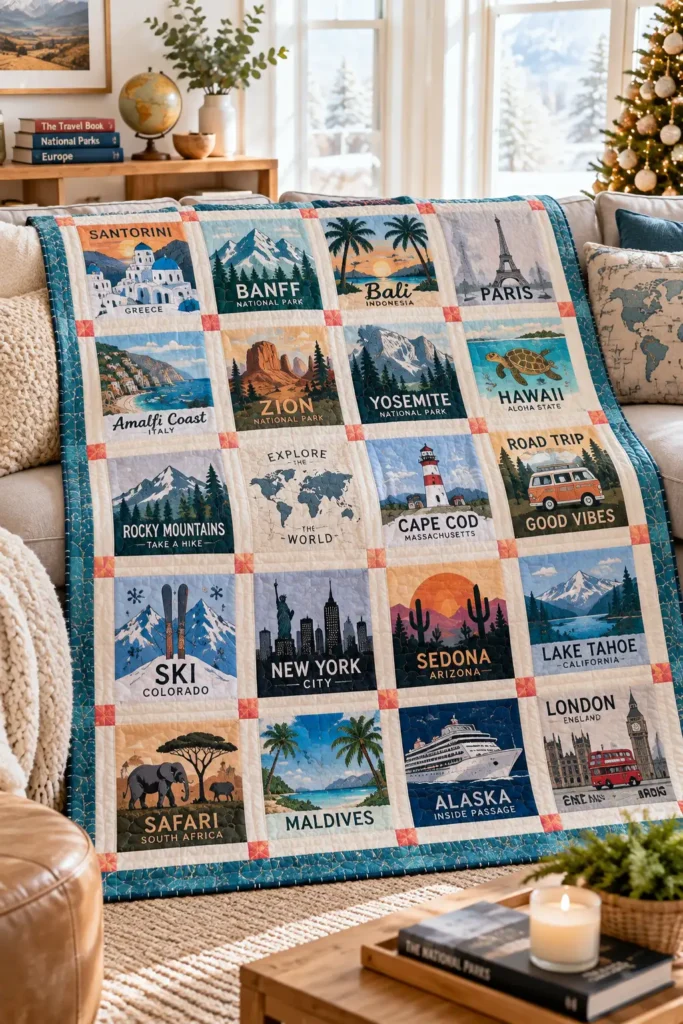
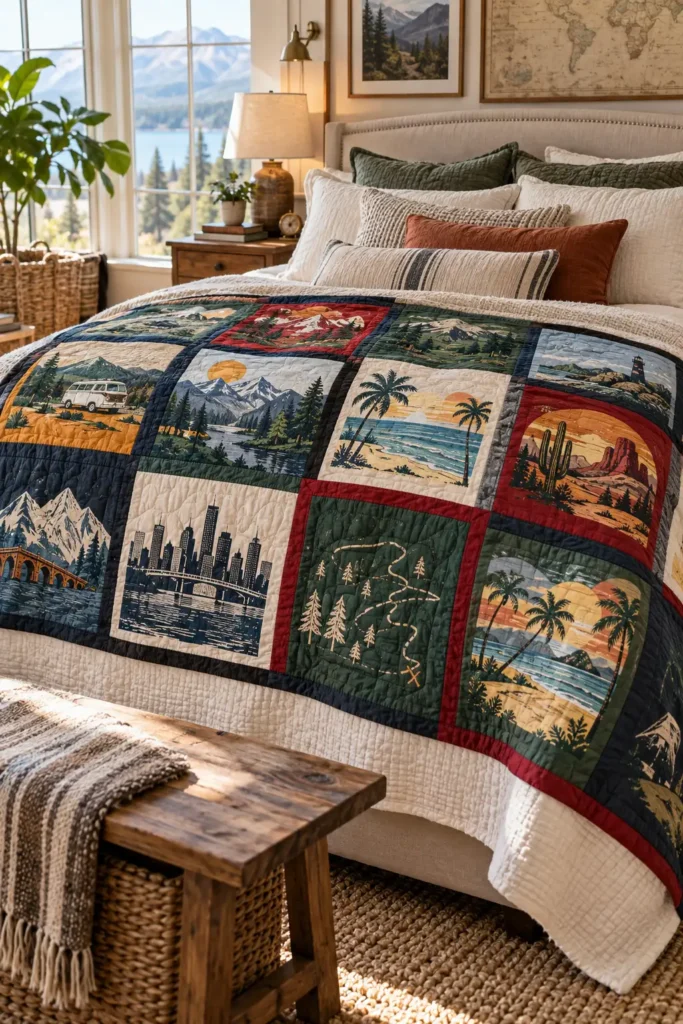
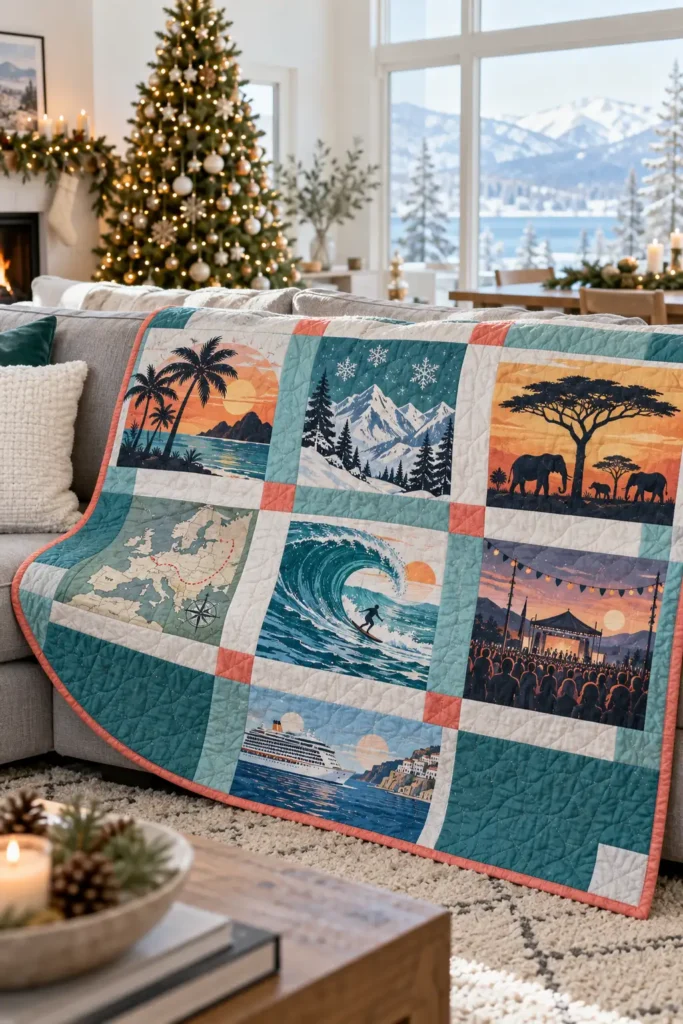
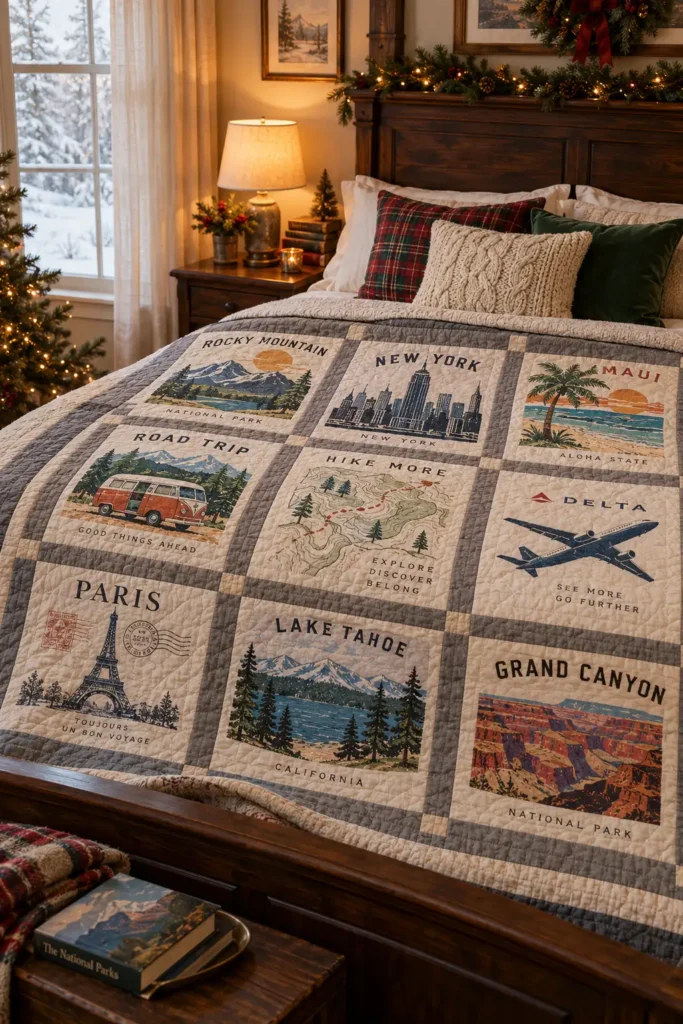
A travel T-shirt quilt turns trip souvenirs into a keepsake that feels both personal and practical. Shirts from beach vacations, city breaks, road trips, national parks, cruises, study tours, family reunions, and favorite destinations often carry bold graphics, bright colors, and place names that instantly bring back memories. A structured quilt layout gives those varied designs a clean framework, so the finished quilt feels polished rather than crowded.
Travel shirts are often especially colorful, which makes layout planning important. Instead of trying to group shirts by color family, it usually works better to spread light, medium, and dark designs evenly across the quilt. As with all T-shirt quilts, the most important technical step is stabilizing every knit panel with fusible interfacing before the final cutting. Once that is done, the shirt panels behave much more like quilting cotton and can be pieced accurately into a smooth, flat quilt.
This version uses 20 T-shirt blocks arranged in a 4-column by 5-row grid, with 2″ finished sashing and a 3″ finished outer border. The result is a bright memory quilt measuring approximately 60″ x 74″, a comfortable throw size for a sofa, guest room, or favorite chair.
Project Details
- Finished quilt size: approximately 60″ x 74″
- Layout: 4 blocks across x 5 blocks down
- Number of T-shirt blocks: 20
- Finished block size: 12″ x 12″
- Cut block size: 12 1/2″ x 12 1/2″
- Finished sashing width: 2″
- Finished border width: 3″
- Seam allowance: 1/4″
- Skill level: confident beginner
Design Inspirations – Digitally Modified Images. Texture and color may vary from the actual product.
Materials
- 20 travel T-shirts with usable graphics
- Medium-weight fusible interfacing, enough for 20 blocks
- 1 yard sashing fabric
- 1 yard coordinating border fabric
- Backing fabric large enough for approximately 68″ x 82″
- Batting approximately 68″ x 82″
- Binding fabric: about 1/2 yard
- Coordinating thread
- Rotary cutter and mat
- Quilting ruler
- 12 1/2″ square ruler if available
- Iron
- Pressing cloth
- Sewing machine
- Walking foot if available
- Pins or clips
Fabric and Color Tips
Travel shirts often come in a wide mix of colors: turquoise, coral, sunny yellow, cobalt, emerald, orange, red, white, black, and multicolored tourist graphics. The easiest way to make all those colors work together is to sort the shirts by tone:
- light
- medium
- dark
Then distribute those tones across the quilt so no section becomes too heavy or too pale.
For sashing, a neutral usually works best because it frames the shirt graphics without fighting them. Good choices include:
- black for high contrast and especially colorful shirts
- charcoal gray for a softer modern look
- cream for lighter or more vintage-feeling travel shirts
- soft taupe if the shirts lean warm and sun-faded
Black sashing is particularly effective when the shirts are all different colors, because it separates the memories visually without introducing another strong competing hue.
Cutting Plan
T-shirt blocks
- 20 stabilized blocks at 12 1/2″ x 12 1/2″
Vertical sashing
- 15 pieces at 2 1/2″ x 12 1/2″
Horizontal sashing
- 4 strips at 2 1/2″ x 54 1/2″
Borders
Cut enough 3 1/2″-wide strips to assemble:
- 2 side borders at 3 1/2″ x 68 1/2″
- 2 top and bottom borders at 3 1/2″ x 60 1/2″
Binding
- 7 strips at 2 1/2″ x width of fabric
Finished Size Math
The quilt center is calculated like this:
- 4 blocks across = 4 x 12″ = 48″
- 5 blocks down = 5 x 12″ = 60″
- Add 3 vertical sashings at 2″ finished = 6″
- Add 4 horizontal sashings at 2″ finished = 8″
So the quilt center finishes at:
- 48″ + 6″ = 54″ wide
- 60″ + 8″ = 68″ high
Then add the borders:
- 54″ + 3″ + 3″ = 60″
- 68″ + 3″ + 3″ = 74″
Finished quilt size: approximately 60″ x 74″.
Assembly at a Glance
- Select the 20 travel shirt graphics.
- Rough-cut the panels oversize.
- Cut and prepare fusible interfacing.
- Fuse every shirt panel.
- Trim all blocks to size.
- Arrange the 4 x 5 layout.
- Sew vertical sashing into the rows.
- Complete all five rows.
- Prepare the horizontal sashing.
- Join the rows into the quilt center.
- Add the side borders.
- Add the top and bottom borders.
- Prepare the backing and batting.
- Baste the quilt sandwich.
- Quilt the layers.
- Trim and square the quilt.
- Attach the binding.
- Finish the binding and inspect the quilt.
Step-by-Step Guide
Step 1: Select the 20 travel shirt panels
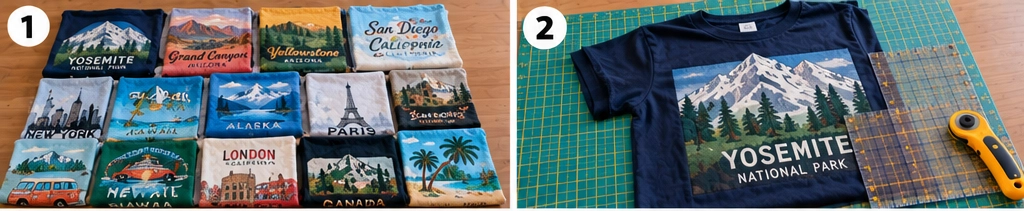
Choose 20 shirt fronts or backs that clearly represent memorable trips and adventures. Good choices include shirts from beach holidays, mountain trips, city tours, cruises, theme parks, country visits, museum trips, and national park vacations.
Check that the main design on each shirt can fit inside a 12 1/2″ square. Ideally, the most important part of the print should fit within about 11 1/2″ to 12″, allowing room for trimming and seam allowances.
Step 2: Sort the shirts by tone and visual weight
Before cutting, separate the shirts into light, medium, and dark groups. Also note which prints are especially bold and which are calmer.
This makes layout planning much easier later. Travel shirts often have large colorful graphics, so spreading out the strongest designs helps the quilt feel balanced.
Step 3: Rough-cut each shirt panel oversize
Cut the chosen shirt front or back away from the rest of the garment by trimming around the side seams, sleeves, and shoulders. Then rough-cut the usable graphic section to about 14″ to 15″ square.
Do not cut the final block size yet. The extra fabric gives you room to stabilize the panel and center the design accurately afterward.

Step 4: Cut the interfacing pieces
Cut 20 pieces of medium-weight fusible interfacing, each about 13 1/2″ to 14″ square.
This size covers the future 12 1/2″ block with a little extra room around the edges, which makes final trimming more accurate.
Step 5: Fuse the interfacing to every T-shirt panel
Place each shirt panel wrong side up on the ironing surface. Lay the interfacing adhesive side down on the back of the shirt. Cover it with a pressing cloth and fuse according to the manufacturer’s instructions.
Use a lift-and-press motion rather than sliding the iron. Sliding can stretch the knit. Let each panel cool completely before moving it.
This step is what turns stretchy jersey into a more stable fabric that behaves much more like quilting cotton.

Step 6: Trim all 20 blocks to 12 1/2″
Once stabilized, trim every panel to exactly 12 1/2″ x 12 1/2″.
Center the key part of the travel design before cutting. If the shirt includes a location name, date, skyline, map motif, or landmark graphic, keep those details clearly visible within the square.
Step 7: Cut the vertical sashing pieces
Cut 15 vertical sashing pieces, each measuring 2 1/2″ x 12 1/2″.
You need:
- 3 sashings per row
- 5 rows total
So:
- 3 x 5 = 15 vertical sashings

Step 8: Arrange the blocks in a 4 x 5 layout
Lay the 20 blocks out in 4 columns and 5 rows.
Mix the light, medium, and dark shirts across the quilt. Also spread out especially bright or heavily printed shirts so one area does not dominate. Keep text and graphics upright unless you want a more playful look.
Take a quick photo of the arrangement before sewing.
Step 9: Sew the first row with vertical sashing
Take 4 T-shirt blocks and 3 vertical sashings. Arrange them as:
Block – Sashing – Block – Sashing – Block – Sashing – Block
Sew them together with a 1/4″ seam allowance.
Pin carefully where the knit shirt blocks meet the woven sashing so everything stays aligned.

Step 10: Complete all five rows
Repeat the same process until you have 5 completed rows.
Each row should measure approximately 54 1/2″ x 12 1/2″ unfinished.
That comes from:
- 4 blocks at 12 1/2″ cut width = 50″
- plus 3 sashings at 2 1/2″ cut width = 7 1/2″
- minus 6 seams at 1/2″ total each = 3″
- total = 54 1/2″
Step 11: Prepare the horizontal sashing strips
Cut or piece 4 horizontal sashing strips, each measuring 2 1/2″ x 54 1/2″.
If your fabric width is not long enough in one piece, join shorter lengths together. Press those joining seams open to reduce bulk.
Step 12: Join the first two rows with horizontal sashing
Place one horizontal sashing strip between Row 1 and Row 2. Pin at the ends, center, and quarter points. Sew Row 1 to one side of the strip and Row 2 to the other side.
This begins the full quilt center.
Step 13: Add the remaining rows and horizontal sashing
Continue joining the remaining rows with the remaining 3 horizontal sashing until the quilt center is complete.
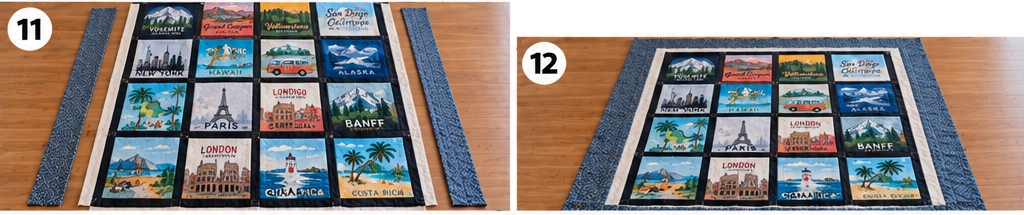
At this point, the quilt center should measure approximately 54 1/2″ x 68 1/2″ unfinished.
Check that all shirt graphics are still upright and that the rows remain straight.

Step 14: Add the side borders
Cut or piece 2 side borders at 3 1/2″ x 68 1/2″.
Sew one border to each side of the quilt center using a 1/4″ seam allowance. Match the ends and center points before sewing to keep the borders even.
After this step, the quilt top should measure about 60 1/2″ x 68 1/2″ unfinished.
Step 15: Add the top and bottom borders
Cut or piece 2 top and bottom borders at 3 1/2″ x 60 1/2″.
Sew one to the top and one to the bottom. The completed quilt top should now measure approximately 60 1/2″ x 74 1/2″ unfinished, which will finish at about 60″ x 74″ after quilting and binding.
Step 16: Prepare the backing, batting, and quilt sandwich
Cut or piece the backing to about 68″ x 82″. Cut the batting to the same size.
Layer the quilt as follows:
- Backing, wrong side up
- Batting
- Quilt top, right side up
Smooth the layers well and baste with safety pins, spray baste, or hand basting.
Step 17: Quilt the layers and trim the quilt
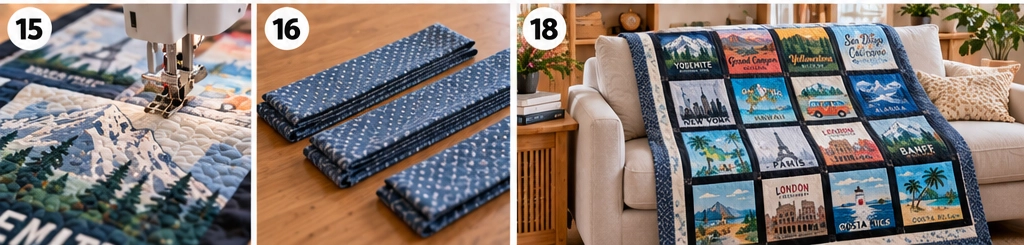
Quilt the layers together using a simple design that supports the travel graphics rather than competing with them. Good choices include:
- stitching close to the sashing
- straight-line quilting through the sashing and borders
- a loose grid
- gentle meandering in the open areas
A walking foot is especially helpful here. Once quilting is complete, trim the excess batting and backing and square the quilt.
Step 18: Attach the binding, finish, and inspect
Join the 7 binding strips end to end with diagonal seams. Fold the long strip in half lengthwise, wrong sides together, and sew it to the front of the quilt with a 1/4″ seam allowance, mitering the corners neatly.
Fold the binding to the back and hand-stitch or machine-stitch it in place.
Inspect the finished quilt carefully. Check that:
- the blocks lie flat
- the travel graphics are upright
- the sashing is straight
- the borders are even
- the quilting is secure
- loose threads are trimmed
The completed quilt should measure about 60″ x 74″ and preserve the color, energy, and memories of favorite trips in a clean, timeless layout.
Helpful Notes
- Travel T-shirt quilts often include shirts from many different climates and years, so the fabric feel can vary a lot. Stabilizing every panel first helps everything behave more consistently.
- If one design is especially small, center it within the block so it still reads clearly in the finished quilt.
- Place visually similar destination shirts in different areas of the layout instead of clustering them together. This helps the whole quilt feel more dynamic.
- Travel keepsake quilts are particularly satisfying because they preserve both the place name and the mood of the trip in a format you can still use every day.
Other Design Inspirations – Digitally Modified Images. Texture and color may vary from the actual product.
6. Family Memory T-Shirt Quilt for Meaningful Handmade Keepsakes
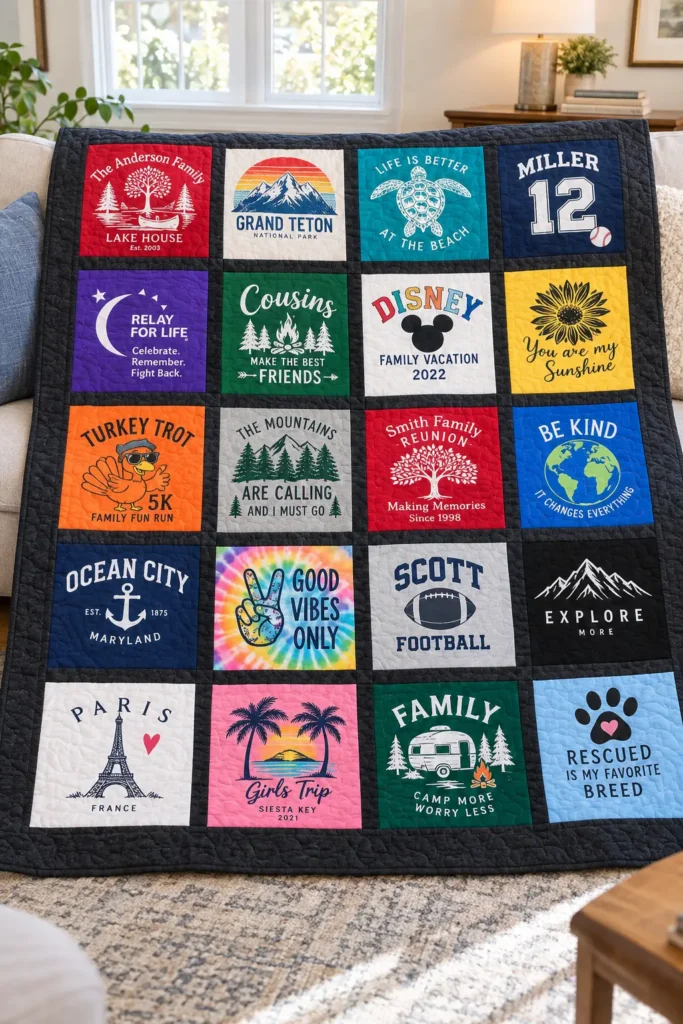
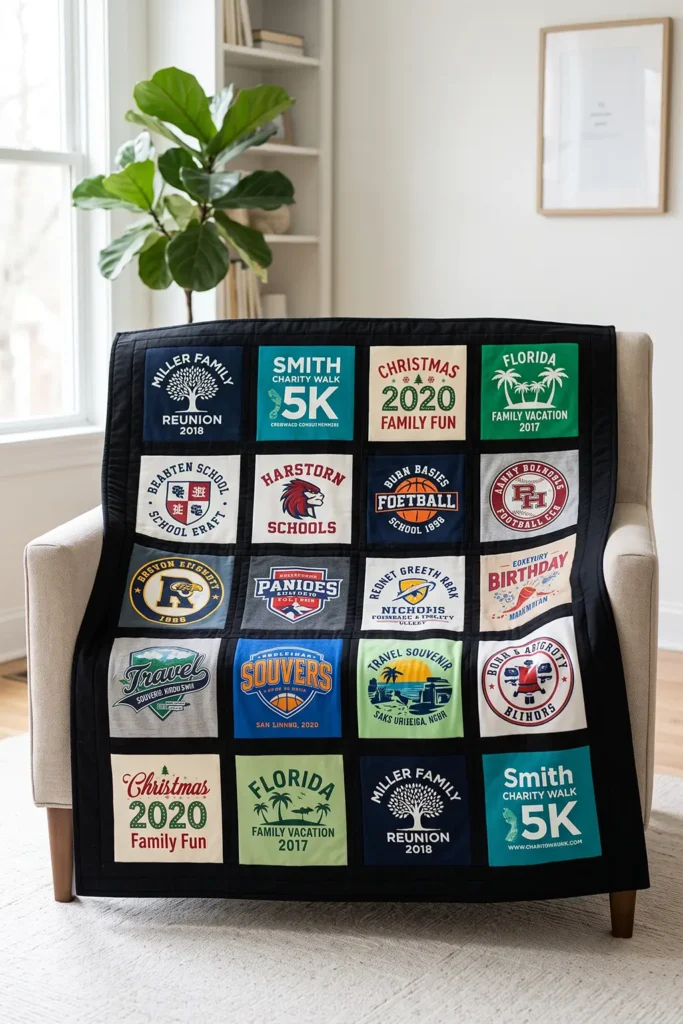
A family memory T-shirt quilt brings together the everyday pieces that quietly hold a family’s story: reunion shirts, holiday event tees, school shirts, travel tops, charity walk shirts, vacation souvenirs, sports shirts, and favorite everyday designs that are hard to part with. A clean grid layout works especially well for this kind of quilt because it gives each memory its own space while still allowing many years, colors, and occasions to live together in one finished piece.
T-shirt quilts belong to a long tradition of memory sewing, but they need a slightly different method than ordinary patchwork. Knit T-shirt fabric stretches, curls, and shifts under the sewing machine, so the most important technical step is stabilizing every panel with fusible interfacing before final cutting. Once the shirt panels are stabilized, they behave much more like quilting cotton and can be trimmed and sewn into a smooth, flat quilt.
For this version, the quilt uses 20 stabilized T-shirt blocks arranged in a 4-column by 5-row grid, with 2″ finished sashing and a 3″ finished outer border. The finished quilt measures approximately 60″ x 74″, a practical throw size that works well on a sofa, guest bed, or favorite chair.
Project Details
- Finished quilt size: approximately 60″ x 74″
- Layout: 4 blocks across x 5 blocks down
- Number of T-shirt blocks: 20
- Finished block size: 12″ x 12″
- Cut block size: 12 1/2″ x 12 1/2″
- Finished sashing width: 2″
- Finished border width: 3″
- Seam allowance: 1/4″
- Skill level: confident beginner
Design Inspirations – Digitally Modified Images. Texture and color may vary from the actual product.
Materials
- 20 T-shirts with usable family-related graphics
- Medium-weight fusible interfacing, enough for 20 blocks
- 1 yard neutral sashing fabric
- 1 yard coordinating border fabric
- Backing fabric large enough for approximately 68″ x 82″
- Batting approximately 68″ x 82″
- Binding fabric: about 1/2 yard
- Coordinating thread
- Rotary cutter and cutting mat
- Quilting ruler
- 12 1/2″ square ruler if available
- Iron
- Pressing cloth
- Sewing machine
- Walking foot if available
- Pins or clips
Fabric and Color Tips
Family memory quilts often combine many different color stories. You may have shirts in red, turquoise, cobalt, emerald, sunny yellow, orange, purple, black, white, and multicolor prints all in the same quilt. Instead of trying to group them by color family, sort the shirts by tone:
- light
- medium
- dark
Then spread those values across the layout so no corner becomes too heavy or too pale.
For sashing, neutrals work best because they frame the shirt graphics without competing with them. Good options include:
- black for strong contrast
- charcoal gray for a softer modern look
- cream for a warmer, homey finish
- soft taupe for a gentle neutral effect
Black is especially effective when the shirts are highly varied, because it visually separates the panels and lets the bright colors stand on their own.
Cutting Plan
T-shirt blocks
- 20 stabilized blocks at 12 1/2″ x 12 1/2″
Vertical sashing
- 15 pieces at 2 1/2″ x 12 1/2″
Horizontal sashing
- 4 strips at 2 1/2″ x 54 1/2″
Borders
Cut enough 3 1/2″-wide strips to assemble:
- 2 side borders at 3 1/2″ x 68 1/2″
- 2 top and bottom borders at 3 1/2″ x 60 1/2″
Binding
- 7 strips at 2 1/2″ x width of fabric
Finished Size Math
The quilt center is calculated like this:
- 4 blocks across = 4 x 12″ = 48″
- 5 blocks down = 5 x 12″ = 60″
- Add 3 vertical sashings at 2″ finished = 6″
- Add 4 horizontal sashings at 2″ finished = 8″
So the quilt center finishes at:
- 48″ + 6″ = 54″ wide
- 60″ + 8″ = 68″ high
Then add the borders:
- 54″ + 3″ + 3″ = 60″
- 68″ + 3″ + 3″ = 74″
Finished quilt size: approximately 60″ x 74″.
Assembly at a Glance
- Select the 20 family memory shirt graphics.
- Rough-cut the shirt panels oversize.
- Cut fusible interfacing for each panel.
- Fuse every shirt panel before final trimming.
- Trim all blocks to 12 1/2″.
- Arrange the 4 x 5 layout.
- Sew vertical sashing into each row.
- Complete all five quilt rows.
- Prepare the horizontal sashing.
- Join the rows into the quilt center.
- Add the side borders.
- Add the top and bottom borders.
- Prepare the backing and batting.
- Baste the quilt sandwich.
- Quilt the layers.
- Trim and square the quilt.
- Attach the binding.
- Finish the binding and inspect the quilt.
Step-by-Step Guide
Step 1: Select the 20 shirt panels
Choose 20 shirt fronts or backs that represent family memories clearly. Good examples include reunion shirts, family vacation shirts, school event tees, holiday celebration shirts, sports day shirts, charity walk shirts, birthday shirts, and everyday favorites with sentimental value.
Check that each graphic can fit comfortably within a 12 1/2″ square. Ideally, the main part of the design should fit within about 11 1/2″ to 12″, leaving room for trimming and seam allowances.
Step 2: Sort the shirts by tone and visual weight
Before cutting, separate the chosen shirts into light, medium, and dark groups. Also note which graphics are especially bold and which are calmer.
This makes the final arrangement much easier. Family memory quilts often pull from many different years and occasions, so a little sorting helps the finished layout feel balanced rather than crowded.
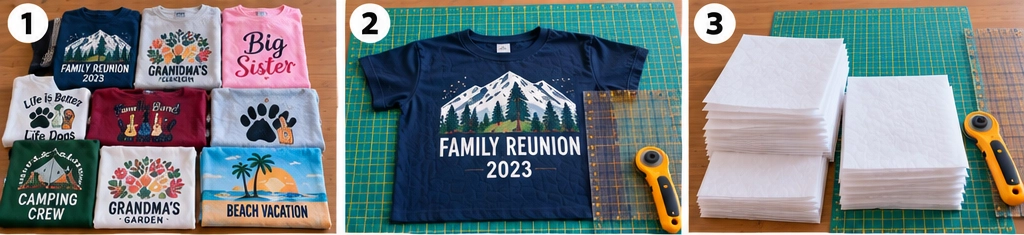
Step 3: Rough-cut each shirt panel oversize
Cut the chosen shirt front or back away from the rest of the garment, trimming around side seams, sleeves, and shoulder seams. Then rough-cut the usable graphic section to about 14″ to 15″ square.
Do not cut the final size yet. The extra fabric gives you room to stabilize the knit and center the design accurately afterward.
Step 4: Cut the interfacing pieces
Cut 20 pieces of medium-weight fusible interfacing, each about 13 1/2″ to 14″ square.
This is slightly larger than the final 12 1/2″ block, which makes final trimming more accurate and ensures the entire block is stabilized.
Step 5: Fuse the interfacing to every T-shirt panel
Place each shirt panel wrong side up on the ironing surface. Position the interfacing adhesive side down on the back of the knit. Cover it with a pressing cloth and fuse according to the manufacturer’s instructions.
Use a lift-and-press motion rather than sliding the iron. Sliding can stretch the knit. Let the panel cool completely before moving it.
This step is what turns soft knit fabric into a much more manageable quilt block material.
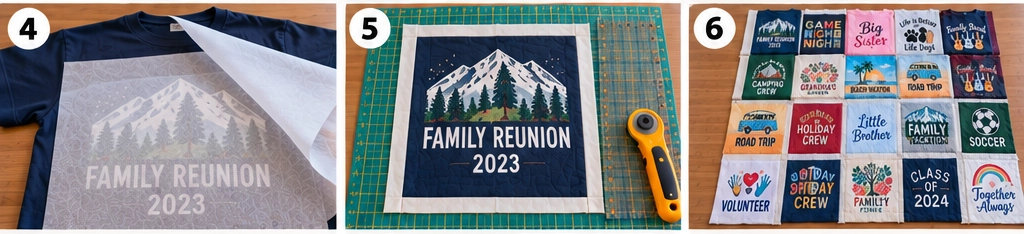
Step 6: Trim all 20 blocks to 12 1/2″
Once the panels are stabilized and cool, trim each one to exactly 12 1/2″ x 12 1/2″.
Center the most important part of the graphic before trimming. If the panel includes a family name, year, event title, or favorite phrase, keep that detail clearly visible.
Step 7: Cut the vertical sashing pieces
Cut 15 vertical sashing pieces, each measuring 2 1/2″ x 12 1/2″.
You need:
- 3 sashings per row
- 5 rows total
So:
- 3 x 5 = 15 vertical sashings
Step 8: Arrange the blocks in a 4 x 5 layout
Lay the 20 blocks out in 4 columns and 5 rows.
Distribute light, medium, and dark shirts evenly. Spread out especially bright or visually dominant shirts so the quilt feels balanced across the whole surface. Keep text and graphics upright unless you deliberately want a more playful arrangement.
Take a photo of the layout before sewing.
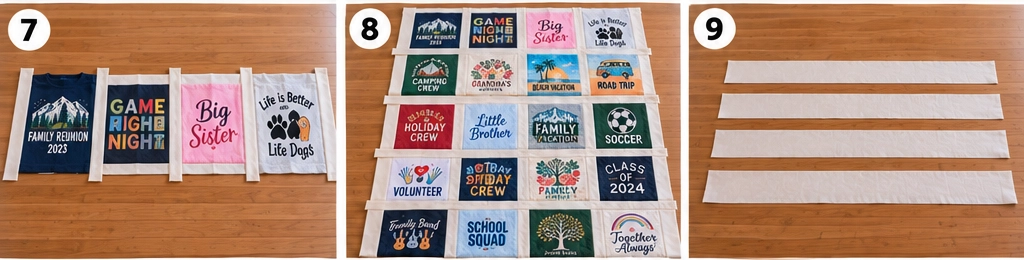
Step 9: Sew the first row with vertical sashing
Take 4 T-shirt blocks and 3 vertical sashing pieces. Arrange them as:
Block – Sashing – Block – Sashing – Block – Sashing – Block
Sew them together with a 1/4″ seam allowance.
Pin carefully, especially where stabilized knit meets woven sashing fabric.
Step 10: Complete all five rows
Repeat the same process until you have 5 completed rows.
Each row should measure approximately 54 1/2″ x 12 1/2″ unfinished.
That comes from:
- 4 blocks at 12 1/2″ cut width = 50″
- plus 3 sashings at 2 1/2″ cut width = 7 1/2″
- minus 6 seams at 1/2″ total each = 3″
- total = 54 1/2″
Step 11: Prepare the horizontal sashing strips
Cut or piece 4 horizontal sashing strips, each measuring 2 1/2″ x 54 1/2″.
If your fabric width is not long enough in one piece, join shorter sections together. Press those joining seams open to reduce bulk.
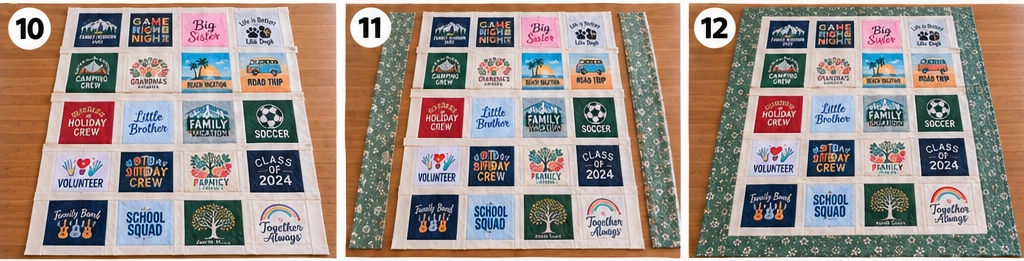
Step 12: Join the first two rows with horizontal sashing
Place one horizontal sashing strip between Row 1 and Row 2. Pin at the ends, center, and quarter points. Sew Row 1 to one side of the strip and Row 2 to the other side.
This begins the full quilt center.
Step 13: Add the remaining rows and horizontal sashing
Continue joining the remaining rows with the remaining 3 horizontal sashings until the quilt center is complete.
At this point, the quilt center should measure approximately 54 1/2″ x 68 1/2″ unfinished.
Check that all graphics are still upright and that the rows remain straight.
Step 14: Add the side borders
Cut or piece 2 side borders at 3 1/2″ x 68 1/2″.
Sew one border to each side of the quilt center using a 1/4″ seam allowance. Match the ends and center points before sewing to keep the borders even.
After this step, the quilt top should measure about 60 1/2″ x 68 1/2″ unfinished.
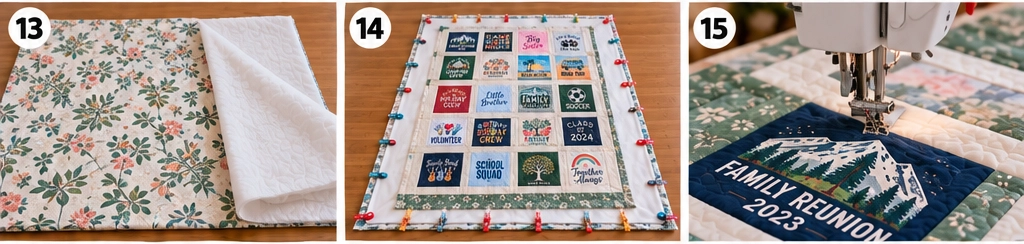
Step 15: Add the top and bottom borders
Cut or piece 2 top and bottom borders at 3 1/2″ x 60 1/2″.
Sew one to the top and one to the bottom. The completed quilt top should now measure approximately 60 1/2″ x 74 1/2″ unfinished, which will finish at about 60″ x 74″ after quilting and binding.
Step 16: Prepare the backing, batting, and quilt sandwich
Cut or piece the backing to about 68″ x 82″. Cut the batting to the same size.
Layer the quilt as follows:
- Backing, wrong side up
- Batting
- Quilt top, right side up
Smooth the layers well and baste with safety pins, spray baste, or hand basting.
Step 17: Quilt the layers and trim the quilt
Quilt the layers together using a simple design that supports the shirt graphics without overwhelming them. Good choices include:
- stitching close to the sashing
- straight-line quilting through the sashing and borders
- a loose grid
- gentle meandering in the open areas
A walking foot is especially helpful here. Once quilting is complete, trim the excess batting and backing and square the quilt.
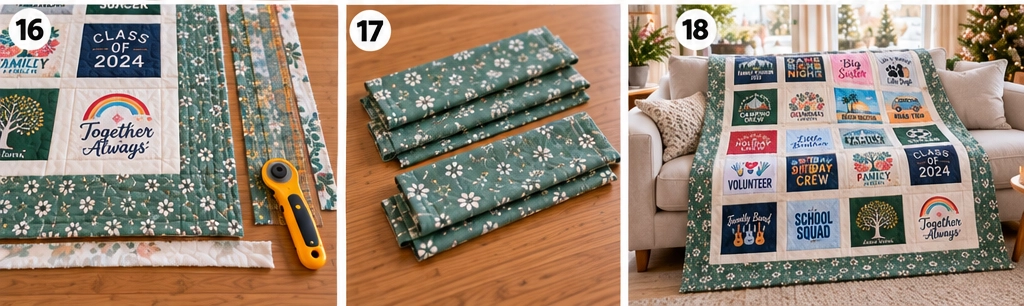
Step 18: Attach the binding, finish, and inspect
Join the 7 binding strips end to end with diagonal seams. Fold the long strip in half lengthwise, wrong sides together, and sew it to the front of the quilt with a 1/4″ seam allowance, mitering the corners neatly.
Fold the binding to the back and hand-stitch or machine-stitch it in place.
Inspect the finished quilt carefully. Check that:
- the blocks lie flat
- the graphics are upright
- the sashing is straight
- the borders are even
- the quilting is secure
- loose threads are trimmed
The completed quilt should measure about 60″ x 74″ and display family memories in a bright, organized layout that feels warm, personal, and timeless.
Helpful Notes
- Memory quilts made from family shirts have become especially popular because they preserve not just one event, but the layered story of a household over time.
- If one family shirt has a smaller graphic than the others, it can still work beautifully if you center it carefully within the block.
- A neutral sashing color helps lively family shirts feel connected, even when the designs come from many different occasions.
- A classic grid remains one of the most practical layouts because it makes each shirt easy to read while keeping the full quilt visually calm.
Other Design Inspirations – Digitally Modified Images. Texture and color may vary from the actual product.
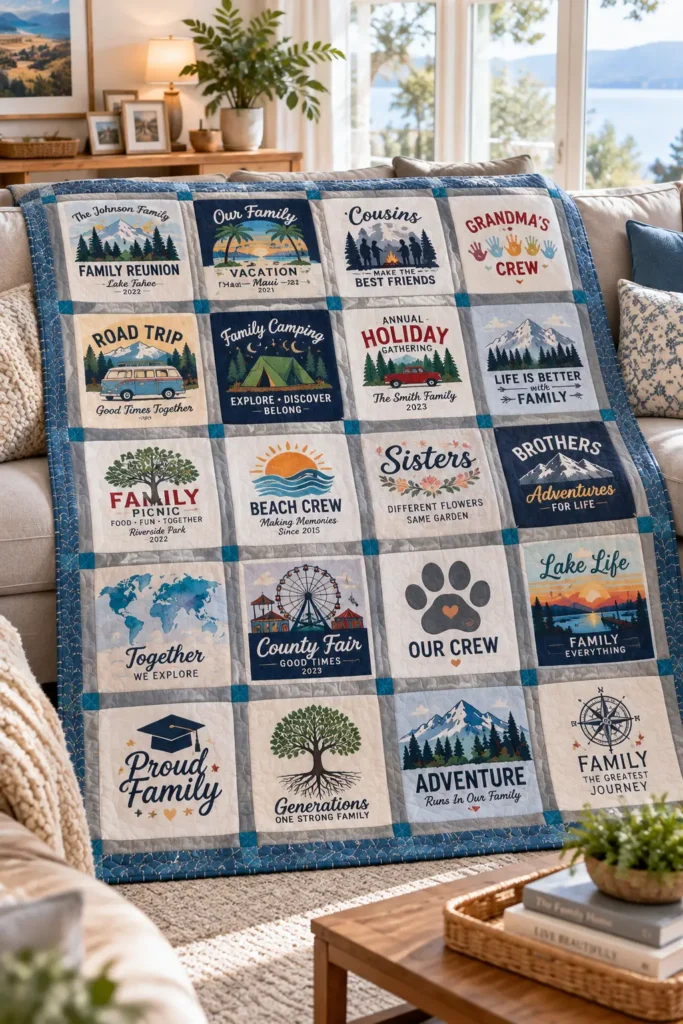
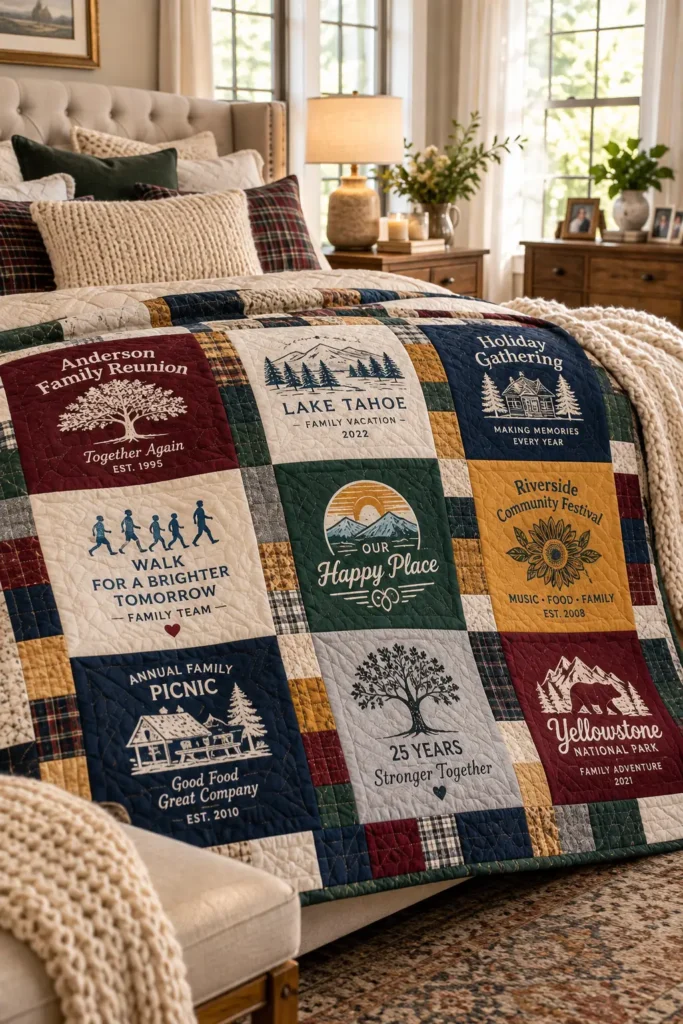
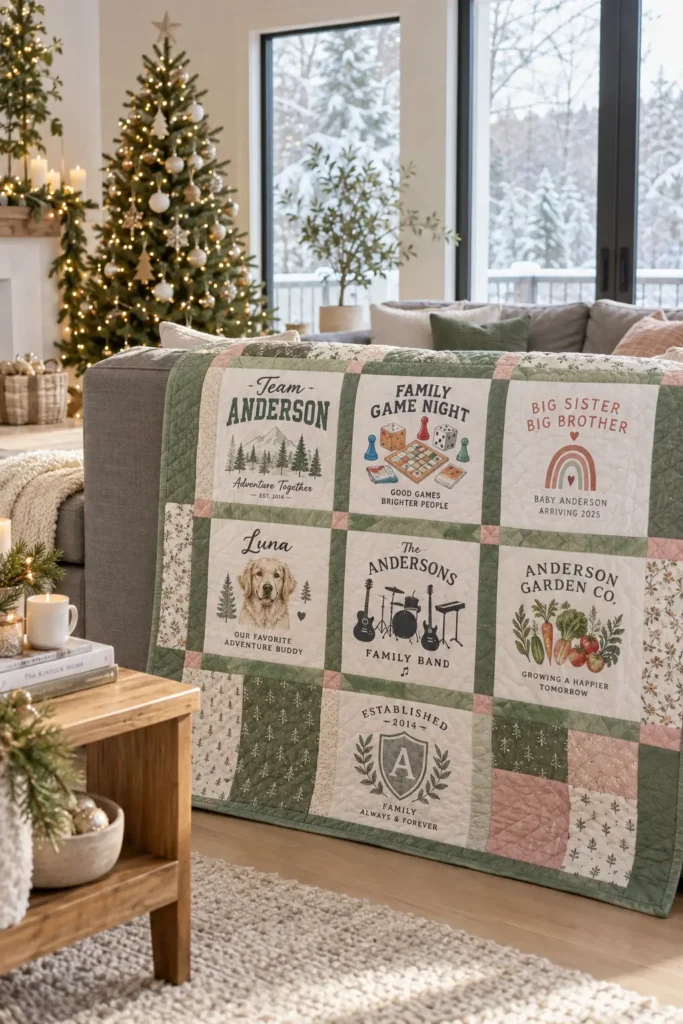
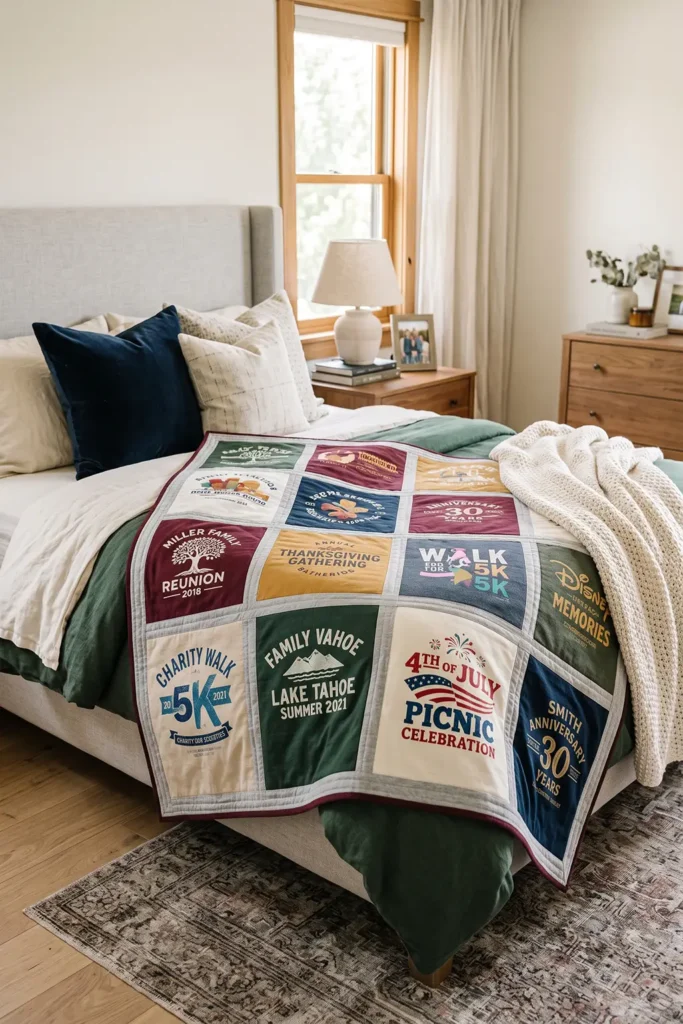
7. Puzzle-Style T-Shirt Quilt for Mixed Shirt Sizes and Graphics
A puzzle-style T-shirt quilt is especially suited to collections where the printed designs vary dramatically in size and shape. Instead of forcing every shirt into an identical square, larger graphics, narrow designs, small logos, and rectangular prints are stabilized and trimmed individually, then fitted together like pieces of a larger puzzle.
For this version, the visual theme comes from two kinds of puzzle-inspired T-shirts. Some shirts contain genuine word-search designs—letter grids with meaningful words hidden horizontally, vertically, or diagonally—while others feature colorful jigsaw-puzzle illustrations. The contrast between orderly letter grids and playful puzzle-piece artwork gives the finished quilt a strong, cohesive identity while still allowing every block to look different.
Use vibrant colors throughout: turquoise, cobalt blue, coral, raspberry, sunflower yellow, lime, violet, emerald, and bright orange work particularly well against white, gray, navy, and black T-shirt backgrounds.
Suggested Finished Size
This guide makes a generous throw approximately:
60″ wide x 72″ long
The quilt is planned around a flexible 6″ finished modular grid, which makes it easier to combine differently sized T-shirt graphics without creating awkward partial measurements.
Common finished block sizes can include:
- 6″ x 6″
- 6″ x 12″
- 12″ x 12″
- 12″ x 18″
- 18″ x 18″
- 18″ x 24″
Add 1/2″ to both dimensions when cutting an individual stabilized block because the quilt uses 1/4″ seams.
For example:
- 12″ x 12″ finished block → cut 12 1/2″ x 12 1/2″
- 12″ x 18″ finished block → cut 12 1/2″ x 18 1/2″
- 18″ x 24″ finished block → cut 18 1/2″ x 24 1/2″
Design Inspirations – Digitally Modified Images. Texture and color may vary from the actual product.
T-Shirt Design Ideas
Choose approximately 18–24 shirts, depending on the size of the printed areas.
For the word-puzzle shirts, use actual word-search graphics similar in structure to the examples provided: a square or rectangular grid of letters with meaningful words hidden among unrelated letters.
Good combinations include:
- BE KIND – FIND JOY – STAY TRUE
- LOVE – LAUGH – DREAM – SMILE
- FAMILY – HOME – TOGETHER
- HOPE – PEACE – COURAGE
- CREATE – INSPIRE – BELIEVE
- HAPPY – THANKFUL – BLESSED
- FRIEND – TRUST – LOYAL
- EXPLORE – DISCOVER – ADVENTURE
The hidden words can run vertically, horizontally, and diagonally, with selected letters highlighted in coral, turquoise, pink, blue, yellow, or red. Keeping random letters around the meaningful words makes each design look like a genuine puzzle rather than ordinary typography.
For the jigsaw-puzzle shirts, vary the imagery rather than repeating the same puzzle-piece design. Good choices include:
- A multicolored jigsaw heart with one missing piece
- A bright butterfly assembled from puzzle pieces
- A tree with puzzle-piece leaves
- A colorful globe made from interlocking pieces
- A small house constructed from puzzle shapes
- Two hands connecting matching puzzle pieces
- A rainbow assembled from curved puzzle sections
- A group of scattered pieces forming a sun or star
- A partially completed bird silhouette
- A large puzzle piece surrounded by several smaller loose pieces
This mix makes the quilt look deliberately puzzle-themed rather than like a random collection of graphic shirts.
Materials
- 18–24 T-shirts with word-search and jigsaw-puzzle graphics
- 4–5 yards lightweight fusible knit or woven interfacing
- 1 1/2–2 yards quilting cotton for filler blocks and coping strips
- Batting approximately 68″ x 80″
- Backing approximately 68″ x 80″
- About 5/8 yard binding fabric
- Coordinating polyester or cotton-poly thread
- Rotary cutter
- Large cutting mat
- 6″ x 24″ quilting ruler
- Square rulers if available
- Sewing machine
- Walking foot
- Iron and pressing cloth
- Safety pins or basting spray
Assembly at a Glance
Think of the finished 60″ x 72″ quilt as a 10 x 12 grid of invisible 6″ squares.
Instead of sewing 120 small squares, combine those imaginary units into larger T-shirt sections:
- 2 x 2 modules = 12″ x 12″
- 2 x 3 modules = 12″ x 18″
- 3 x 3 modules = 18″ x 18″
- 3 x 4 modules = 18″ x 24″
Build several rectangular sections first, then join those sections into larger rows or columns. The seams do not need to line up from one side of the quilt to the other. That deliberate offset is what creates the puzzle effect.
Step-by-Step Guide
Step 1: Choose the Puzzle-Themed T-Shirts
Lay out all potential shirts and select approximately 18–24 with usable graphics.
Aim for roughly equal numbers of:
- word-search designs
- jigsaw illustrations
- a few simpler coordinating graphics
Avoid placing too many visually complicated shirts together. A large jigsaw illustration looks stronger beside a simpler word-search block than beside another extremely busy image.
Step 2: Establish the Color Palette
Sort the shirts by dominant color.
For a vibrant quilt, distribute colors such as:
- turquoise
- cobalt
- raspberry
- red
- orange
- yellow
- lime
- violet
- emerald
Use white, charcoal, navy, and light gray shirts as visual resting points.
Choose two or three bright quilting cottons for filler pieces. These are useful when the T-shirt graphics do not naturally fit the modular measurements.
Step 3: Photograph the Original Shirts
Before cutting, take a quick photograph of each shirt.
This creates a useful visual reference when arranging the quilt later, especially if the graphics include word-search puzzles whose highlighted words need to remain upright and readable.
Step 4: Wash and Prepare the Shirts
Wash and completely dry all T-shirts without fabric softener.
Do not cut shirts while they are stretched or damp. Knit fabric can distort easily, and accurate cutting later depends on letting each shirt return to its natural shape.
Step 5: Separate the Usable Shirt Panels
Cut along both side seams.
Cut across the shoulders and around the neckline so the front or back panel containing the desired design lies completely flat.
Leave at least 2″–3″ of extra fabric around each graphic at this stage.
Do not trim precisely yet.
Step 6: Measure Every Graphic
Measure the printed area rather than the shirt itself.
For example:
- Small word-search design: 8″ x 9″
- Medium jigsaw heart: 10″ x 12″
- Tall word puzzle: 9″ x 15″
- Large puzzle butterfly: 14″ x 16″
Write the measurements on small paper notes and place one beside each shirt panel.
Step 7: Assign Each Graphic a Modular Block Size
Choose the smallest 6″ modular size that comfortably surrounds each graphic.
For example:
An 8″ x 9″ word-search graphic fits comfortably inside a 12″ x 12″ finished block.
A 9″ x 15″ vertical word puzzle can become a 12″ x 18″ finished block.
A 14″ x 16″ jigsaw butterfly works well as an 18″ x 18″ finished block.
Allow at least 3/4″–1″ of clear fabric around important printed elements whenever possible.
Step 8: Rough-Cut the Interfacing
Cut lightweight fusible interfacing approximately 1″ larger than the final block size.
For a planned 12 1/2″ square block, for example, cut interfacing approximately 13 1/2″ square.
For a 12 1/2″ x 18 1/2″ block, cut roughly 13 1/2″ x 19 1/2″.
The excess will be trimmed away later.
Step 9: Stabilize Every T-Shirt Panel
Place the shirt wrong side up.
Position the fusible interfacing behind the graphic with the adhesive side facing the fabric. Fuse according to the manufacturer’s instructions, using a pressing cloth when necessary.
Do not drag the iron across the knit fabric. Lift and reposition it instead so the shirt does not stretch.
Stabilizing is especially important around large printed word grids because even slight distortion can make the rows and columns appear crooked.
Step 10: Square and Trim the Word-Search Blocks
Trim each stabilized word-puzzle shirt to its assigned size.
Keep the rows of letters parallel with the ruler edges.
Typical cuts might be:
- 12 1/2″ x 12 1/2″
- 12 1/2″ x 18 1/2″
- 18 1/2″ x 18 1/2″
Make sure important highlighted words remain readable.
A design containing LOVE, LAUGH, DREAM, and SMILE, for example, should not lose the first or last letter of a word at a seam.
Step 11: Trim the Jigsaw-Graphic Blocks
Now square the illustrated shirts.
Use varying sizes to emphasize the puzzle layout.
For example:
- Jigsaw heart: 12 1/2″ x 12 1/2″
- Puzzle butterfly: 18 1/2″ x 18 1/2″
- Puzzle globe: 18 1/2″ x 24 1/2″
- Puzzle tree: 12 1/2″ x 18 1/2″
- Puzzle house: 12 1/2″ x 12 1/2″
Do not center every graphic automatically. A slightly off-center image can make a puzzle-style composition more interesting.
Step 12: Create Filler and Coping Pieces
Some gaps will remain between the larger shirt blocks.
Cut vibrant quilting cotton into modular pieces such as:
- 6 1/2″ x 6 1/2″
- 6 1/2″ x 12 1/2″
- 6 1/2″ x 18 1/2″
- 12 1/2″ x 12 1/2″
Also cut several strips:
- 2 1/2″ wide
- 3 1/2″ wide
- 6 1/2″ wide
These are coping strips. They allow an unusually sized graphic to reach the next convenient modular dimension without trimming away important artwork.
Step 13: Arrange the Quilt on a Floor or Design Wall
Mark an approximate 60″ x 72″ rectangle.
Place the largest shirt blocks first.
Spread the visual weight around the quilt:
- Put a large puzzle butterfly toward one area.
- Balance it with a puzzle globe or tree elsewhere.
- Separate large jigsaw illustrations with word-search blocks.
- Rotate colors around the composition.
Keep all readable word puzzles upright.
Avoid placing three white word-search shirts together simply because their backgrounds match.
Step 14: Build Small Puzzle Units
Rather than attempting to sew the entire layout immediately, identify sections that form clean rectangles.
For example, a section measuring 24″ x 18″ finished might contain:
- one 12″ x 18″ word-search block
- two 12″ x 9″ equivalent sections created with fillers
Another 24″ x 24″ section could combine:
- one 12″ x 12″ word puzzle
- one 12″ x 12″ jigsaw heart
- one 24″ x 12″ combined lower unit
Sew the smallest pieces together first.
Use a consistent 1/4″ seam allowance.
Step 15: Add Coping Strips Where Necessary
If one section is slightly smaller than the rectangle beside it, add a coping strip instead of stretching the T-shirt fabric.
For example, if a stabilized graphic unit is 10 1/2″ wide but needs to reach 12 1/2″ unfinished, a 2 1/2″ strip sewn with a 1/4″ seam adds 2″ of finished width.
This is one of the most useful techniques in irregular T-shirt quilts.
Step 16: Join the Puzzle Sections
Once smaller rectangular sections are complete, combine them into progressively larger units.
A practical order is:
- Make small rectangular units.
- Join them into approximately 24″–36″ sections.
- Combine those into larger horizontal or vertical panels.
- Join the final panels to complete the top.
Measure after every major join.
The finished quilt top should be approximately 60 1/2″ x 72 1/2″ before quilting and binding.
Minor variation is normal, but square the outer edges before proceeding.
Step 17: Prepare and Quilt the Sandwich
Cut backing and batting approximately 68″ x 80″, giving about 4″ of excess on every side.
Layer:
- backing, wrong side up
- batting
- quilt top, right side up
Smooth carefully and baste every 4″–5″.
Straight-line quilting is especially suitable for this design.
Quilt approximately 1 1/2″–3″ apart, depending on the batting manufacturer’s recommendations.
Avoid repeatedly stitching through thick rubberized screen printing. Quilt beside or around particularly heavy printed areas when practical.
Step 18: Square, Bind, and Finish
After quilting, trim the batting and backing flush with the quilt top.
For approximately 264″ of quilt perimeter, prepare about 290″ of binding to allow comfortable joining.
Cut 7 strips measuring 2 1/2″ x width of fabric from standard 42″–44″ quilting cotton. Seven 42″ strips provide about 294″ before joining, which is sufficient for this quilt.
Join the strips diagonally, press them in half lengthwise, and attach the binding with a 1/4″ seam.
Fold the binding around the quilt edge and secure it by machine or hand.
Check that the word-search designs remain correctly oriented, remove loose threads, and give the finished quilt a gentle final press where appropriate.
Helpful Note
The easiest way to make a convincing puzzle-style T-shirt quilt is not to begin by cutting every shirt into random sizes. First establish a hidden measurement system—in this case, multiples of 6″ finished—and then allow the graphics to determine which modular block each shirt becomes. The finished quilt will look irregular and spontaneous, but the underlying measurements remain controlled.
For the word-puzzle shirts, treat the letter grid as part of the artwork. Keep its rows straight, preserve enough surrounding letters for the design to read as a genuine word-search puzzle, and make sure the highlighted words form recognizable ideas such as BE KIND, FIND JOY, STAY TRUE, LOVE MORE, CHOOSE HOPE, FAMILY, TOGETHER, COURAGE, or DREAM. Avoid using a shirt that simply prints these phrases as ordinary text—the random surrounding letters are what make the design visibly puzzle-like.
Likewise, vary the jigsaw imagery throughout the quilt. A heart, butterfly, globe, tree, house, rainbow, bird, or two connecting hands creates much more visual interest than repeating the same loose puzzle-piece graphic. Using both puzzle types in different sizes gives this quilt its distinctive mixed-graphic character.
Other Design Inspirations – Digitally Modified Images. Texture and color may vary from the actual product.
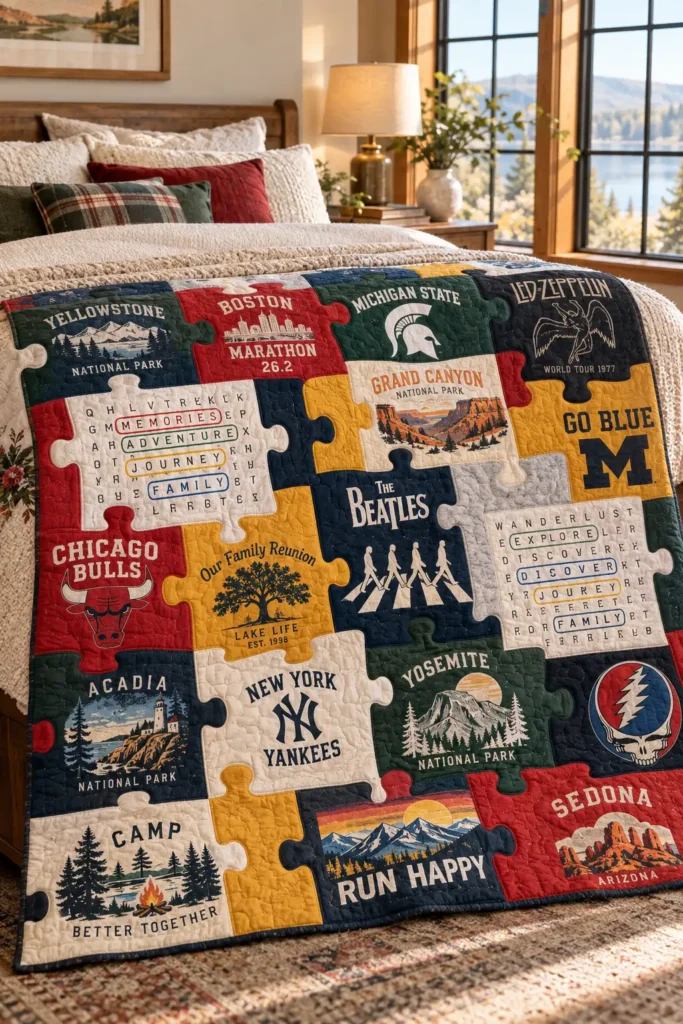
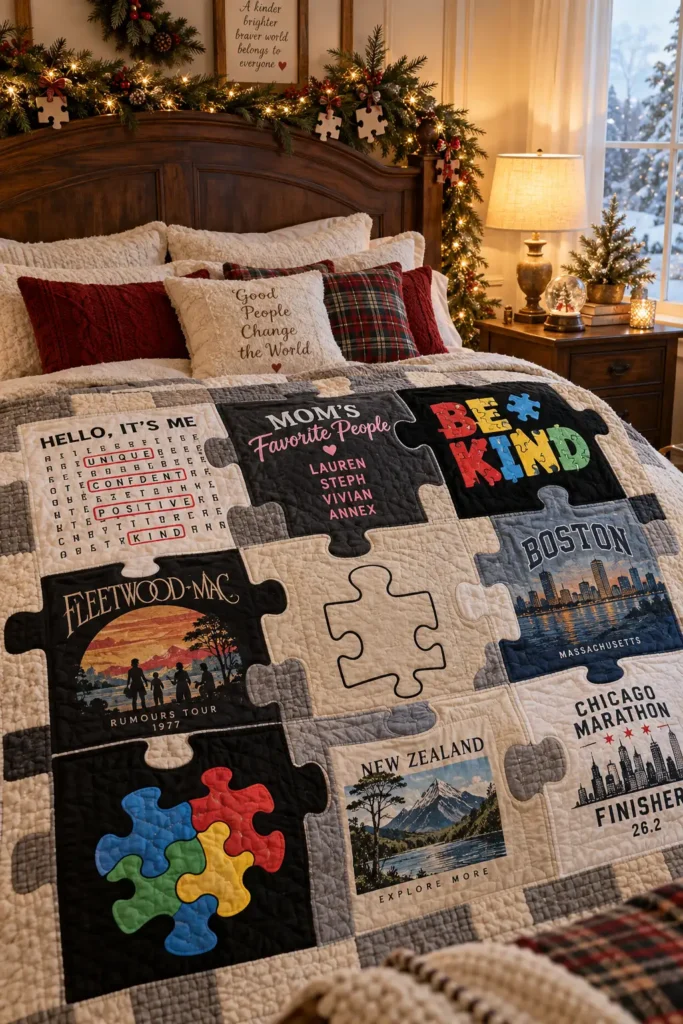
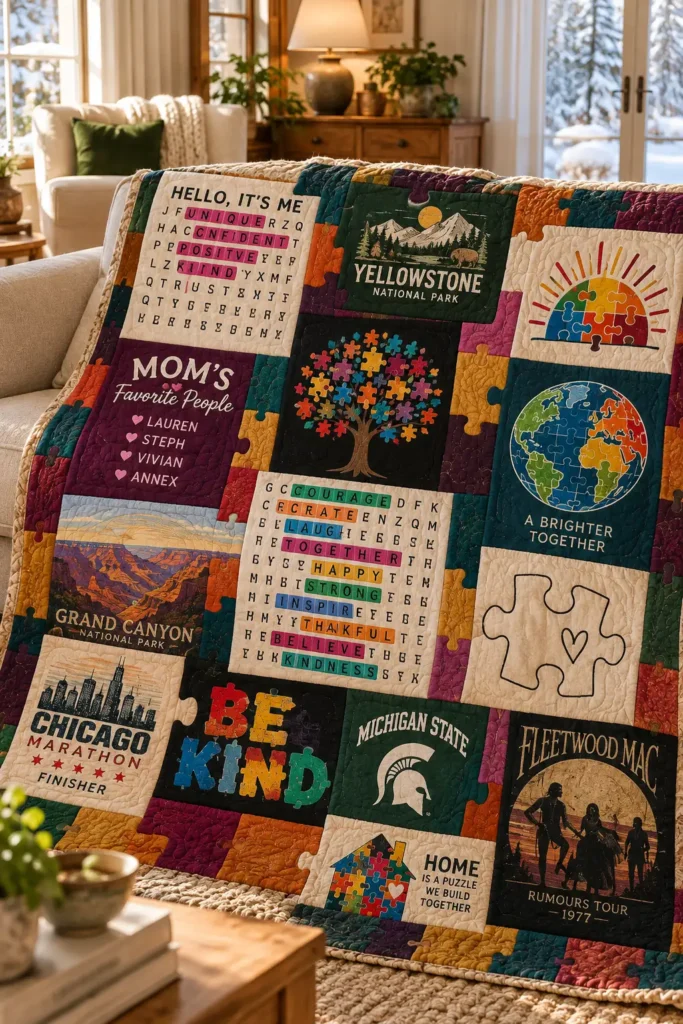
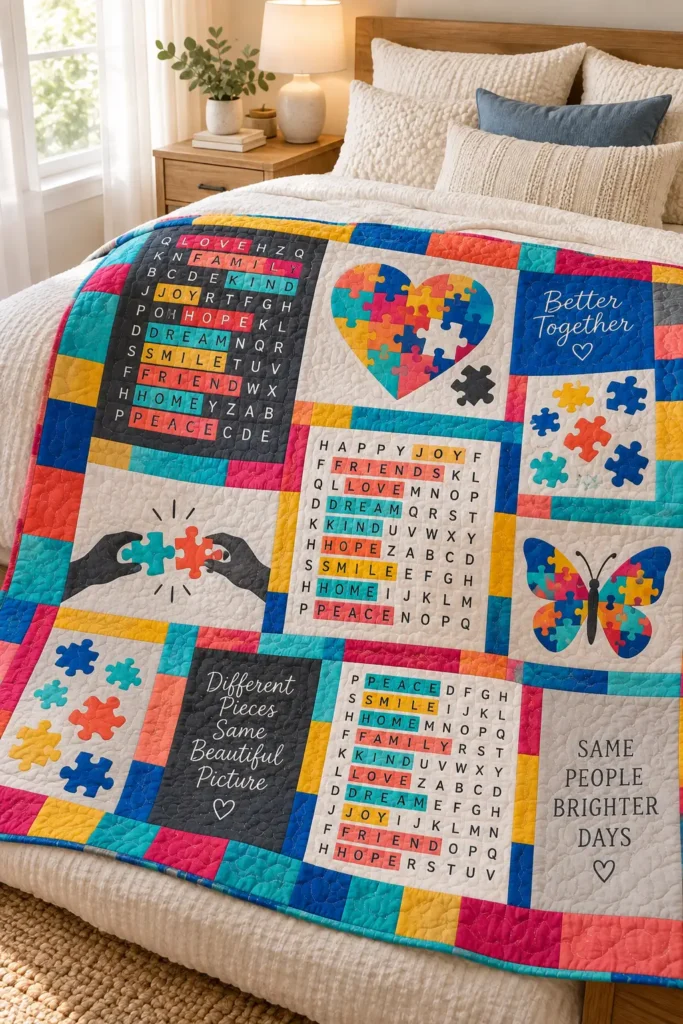
8. Modern T-Shirt Quilt with Sashing for a Polished Custom Look
A modern T-shirt quilt with sashing is one of the cleanest ways to turn mixed graphics into a finished quilt that looks intentional rather than crowded. The sashing acts like a frame around each shirt design, giving every image its own visual space while tying the whole quilt together with a crisp, custom feel.
For this version, use the supplied T-shirt images as style samples and build the quilt with a different image on every T-shirt block. The overall look should mix bold modern motifs: a motivational typography shirt, a color-block map-band shirt, an abstract concentric-circle design, a black-and-gray brushstroke split design, a minimalist tree-and-birds silhouette, and other modern graphic tees in a similarly polished style. Bright, energetic color accents keep the quilt lively, while the sashing keeps it neat and balanced.
Finished Size
This guide makes a quilt approximately 60″ x 72″ finished.
Block and Layout Plan
- 20 T-shirt blocks total
- Layout: 4 blocks across x 5 blocks down
- Each T-shirt block finishes at 12″ x 12″
- Cut each stabilized T-shirt block to 12 1/2″ x 12 1/2″
- Sashing finishes at 2″ wide
- Cut sashing strips 2 1/2″ wide
- Side borders finish at 3″
- Top and bottom borders finish at 2″
Suggested T-Shirt Image Direction
Use 20 different T-shirt images in the quilt. The supplied examples can guide the style, but each block should feel distinct. A good mix could include:
- Bold motivational text similar to “Discipline Today, Success Tomorrow”
- A teal-and-white color-block shirt with a map-style horizontal band
- A black abstract concentric circles and splatter motif
- A black-and-gray split-tone brushstroke design
- A white shirt with a tree and flying birds silhouette
- A geometric mountain sunrise
- A modern rainbow waveform
- A stylized leaf line drawing
- A bold city skyline silhouette
- An abstract paint drip composition
- A crescent moon and stars design
- A minimalist bird or origami bird
- A graphic sunburst
- A retro cassette or music-themed print
- A camera or travel graphic
- A bold checker stripe or racing stripe
- A low-poly animal silhouette
- A modern compass or map marker
- A floral peace or hope motif
- A strong abstract geometric pattern
The aim is not to match the graphics exactly, but to keep the quilt modern, varied, and visually coordinated.
Design Inspirations – Digitally Modified Images. Texture and color may vary from the actual product.
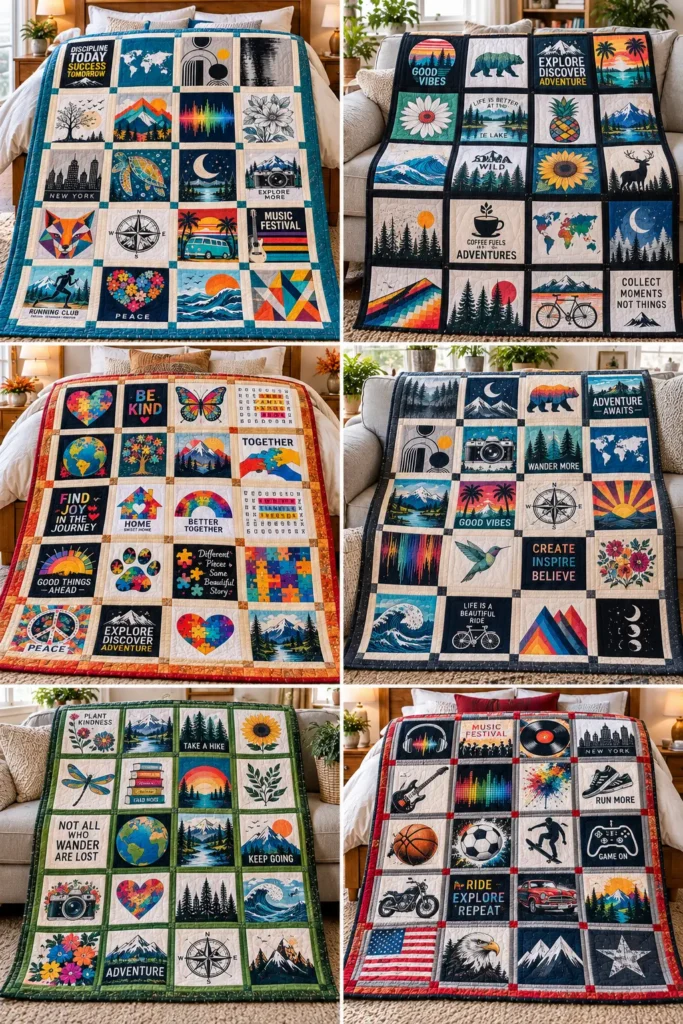
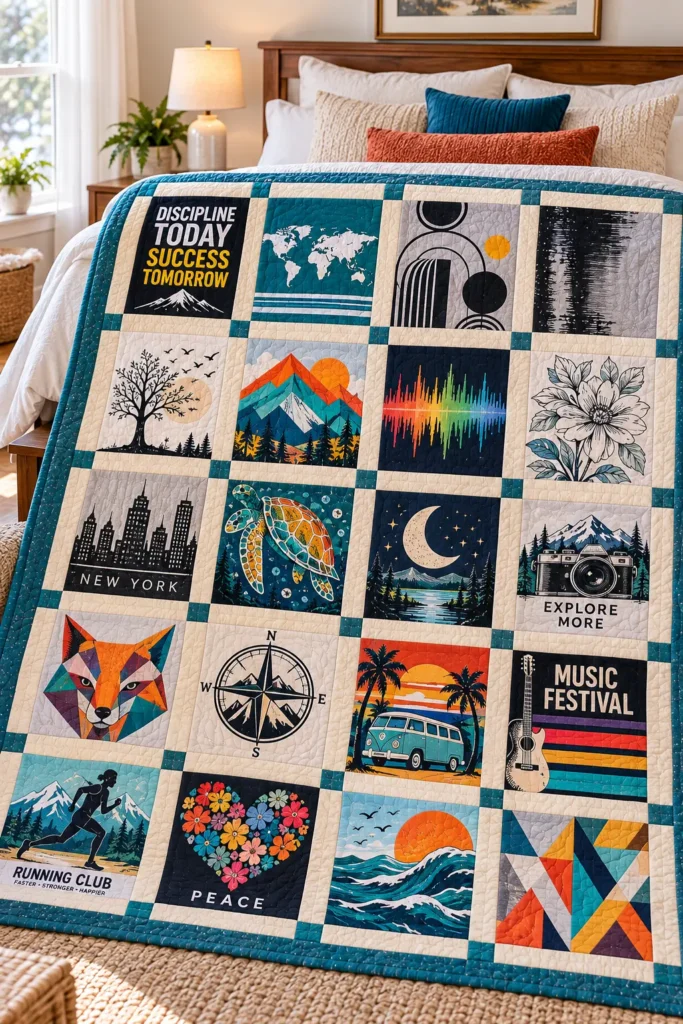
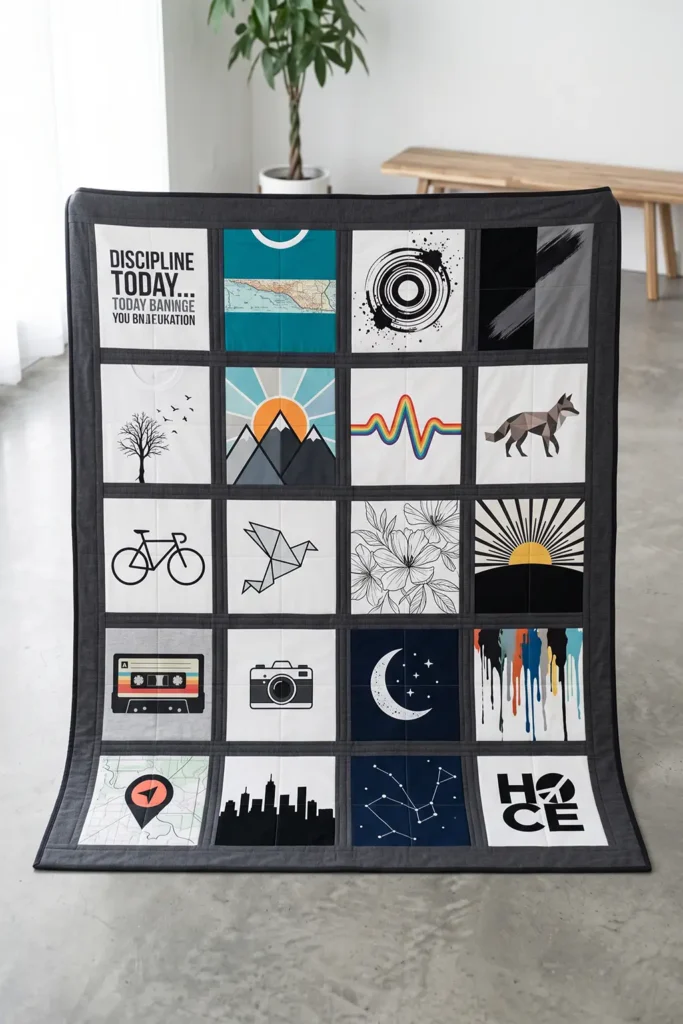
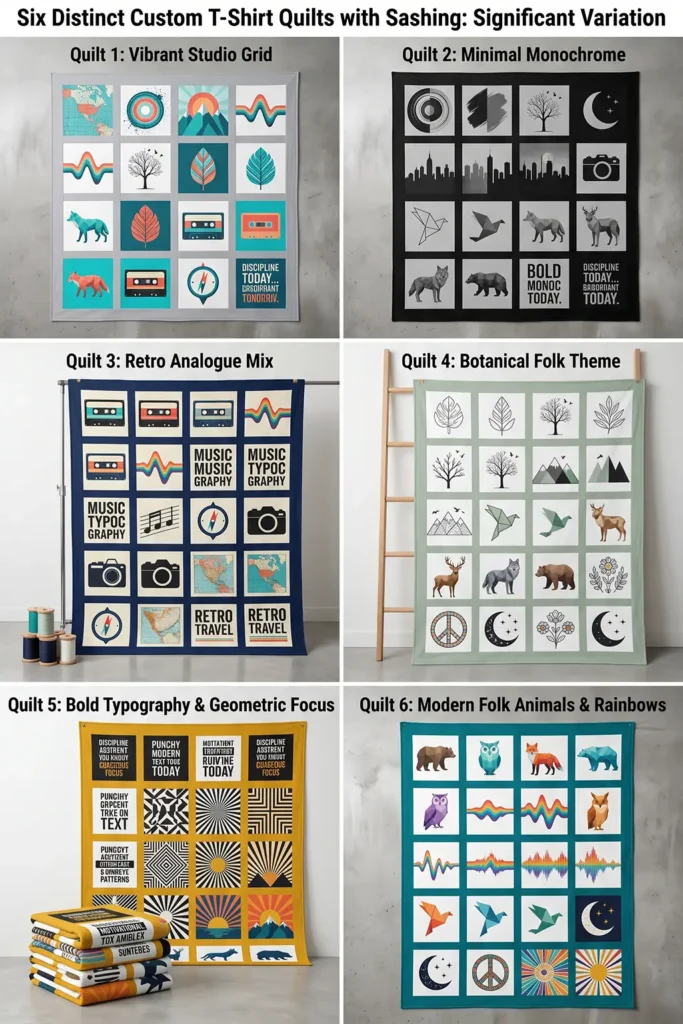
Materials
- 20 graphic T-shirts
- 4 yards lightweight fusible interfacing
- 1 1/2 to 2 yards quilting cotton for sashing and borders
- Batting at least 68″ x 80″
- Backing at least 68″ x 80″
- 5/8 yard binding fabric
- Coordinating thread
- Rotary cutter and mat
- Acrylic ruler
- 12 1/2″ square ruler if available
- Iron and pressing cloth
- Sewing machine
- Walking foot
- Safety pins or basting spray
Assembly at a Glance
- Prepare and stabilize 20 T-shirt blocks
- Trim all blocks to 12 1/2″ square
- Sew 5 rows, each with 4 blocks and 3 vertical sashing strips
- Join the 5 rows with 4 horizontal sashing strips
- Add side borders, then top and bottom borders
- Quilt and bind
The center of the quilt will finish at 54″ x 68″, and the borders bring it to 60″ x 72″.
Step-by-Step Guide
Step 1: Select 20 Different T-Shirts
Choose 20 shirts with 20 different images. Keep the look modern and varied. Use the sample designs as inspiration, but do not repeat the same image style too often. For example, if one block is bold typography and another is a map band, let the next blocks shift toward abstract art, silhouette graphics, or clean modern motifs.
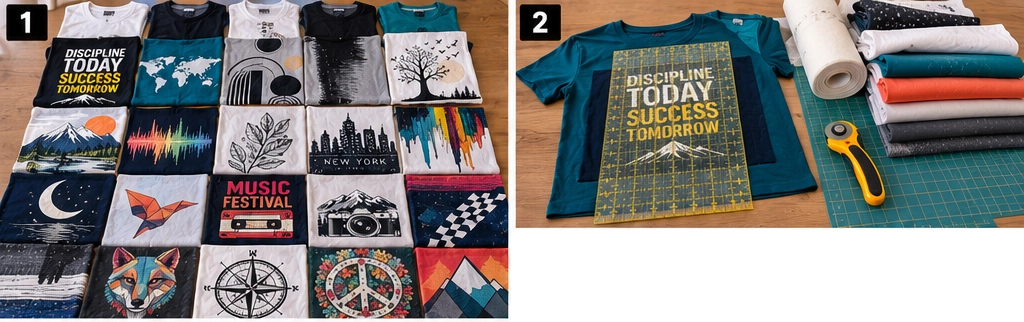
Step 2: Check Which Part of Each Shirt You Want to Feature
Lay each shirt flat and decide exactly which image area you want to preserve. For this quilt, the design should fit inside a 12 1/2″ square cut size, so check whether the main artwork will sit comfortably inside that space.
Step 3: Plan the Color Story
Because the quilt uses modern graphic shirts, it helps to settle on a unifying palette before cutting. A polished bright scheme might include turquoise, cobalt, mustard, coral, black, white, gray, teal, bright orange, and soft sage. The T-shirts can vary, but the sashing should be one consistent color, such as charcoal, white, navy, or warm cream.
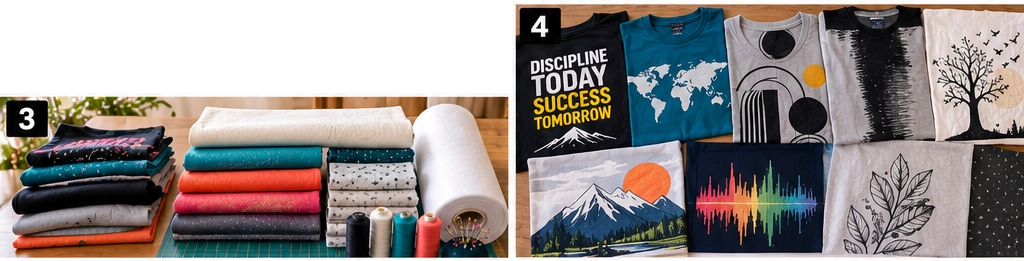
Step 4: Wash and Dry the T-Shirts
Wash and dry all shirts first so they shrink before you cut them. T-shirt quilts became especially popular as memory and keepsake projects, but unlike quilting cotton, knit jersey stretches easily, so prewashing and proper preparation matter more than many beginners expect.
Step 5: Cut the Shirts Apart
Cut up the side seams, remove the sleeves, and cut through the shoulder seams so each usable front or back panel lies flat. Leave 2″ to 3″ extra fabric around the graphic for now. Do not trim to final size yet.

Step 6: Cut the Interfacing
Cut 20 pieces of interfacing, each about 14″ x 14″. The slightly oversized cut gives room to stabilize the knit fabric before final trimming. Lightweight fusible interfacing is one of the biggest differences between a successful T-shirt quilt and a wavy, difficult one.
Step 7: Fuse the Interfacing to Each T-Shirt Panel
Place each shirt panel wrong side up. Center the interfacing behind the chosen design and fuse it according to the product instructions. Use a pressing cloth if needed. Press by lifting and placing the iron rather than dragging it, so the knit fabric does not stretch out of shape.

Step 8: Trim the 20 T-Shirt Blocks
Trim each stabilized panel to 12 1/2″ x 12 1/2″. Center the artwork when it makes sense, but do not force perfect centering on every block. A tall abstract motif or a sweeping tree design may look better slightly off center, which often gives a more modern, custom appearance.
Step 9: Arrange the Initial Layout
Lay the 20 blocks out in a 4-by-5 arrangement. Spread similar values and motifs across the quilt. Do not place all dark shirts in one corner or all bold text shirts next to one another. For example, balance the bold typography block with quieter designs like the tree silhouette or map-band shirt in nearby rows.
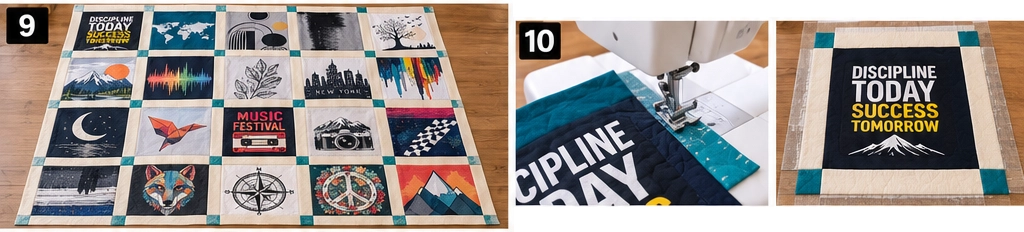
Step 10: Cut the Vertical Sashing
Each of the 5 rows needs 3 vertical sashings. Cut:
- 15 strips at 2 1/2″ x 12 1/2″
These will finish at 2″ x 12″ once sewn between the blocks.
Step 11: Sew the Five Rows
Sew each row in this order:
Block – Sashing – Block – Sashing – Block – Sashing – Block
Use a 1/4″ seam allowance throughout. Press the seams toward the sashing if possible. Each finished row should measure about 54 1/2″ wide x 12 1/2″ high unfinished.

Step 12: Cut the Horizontal Sashing
Now cut the horizontal sashing that separates the rows. You need:
- 4 strips at 2 1/2″ x 54 1/2″
Because this is longer than typical fabric width, you may need to piece the strips. Join the pieces neatly and press the seams open or to one side.
Step 13: Join the Rows
Sew the 5 rows together with the 4 long horizontal sashing strips between them. The sequence becomes:
- Row 1
- Sashing
- Row 2
- Sashing
- Row 3
- Sashing
- Row 4
- Sashing
- Row 5
After joining, the quilt center should measure about 54 1/2″ x 68 1/2″ unfinished.

Step 14: Check the Center and Square It Up
Before adding borders, measure the center through several points. It should be close to 54″ x 68″ finished. Trim any uneven edges carefully so the outer borders go on straight. This is a small step, but it has a big effect on whether the quilt looks polished.
Step 15: Cut and Add the Side Borders
To bring the width to 60″ finished, add side borders that finish at 3″. Cut:
- 2 side borders at 3 1/2″ x 68 1/2″
Sew one to each side using a 1/4″ seam allowance. After this step, the quilt should measure about 60 1/2″ x 68 1/2″ unfinished.
Step 16: Cut and Add the Top and Bottom Borders
To bring the height to 72″ finished, cut:
- 2 top/bottom borders at 2 1/2″ x 60 1/2″
Sew one to the top and one to the bottom. The quilt top should now measure about 60 1/2″ x 72 1/2″ unfinished, which finishes to approximately 60″ x 72″ after quilting and binding.
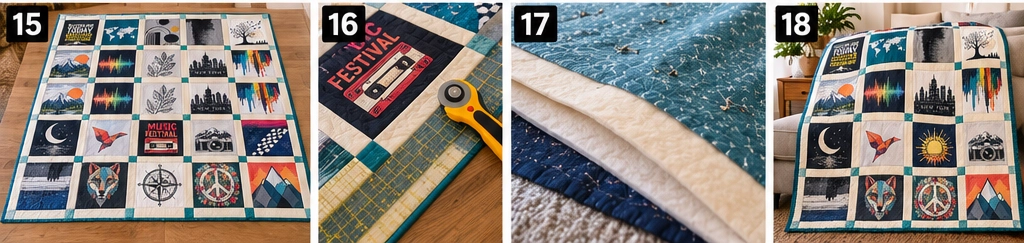
Step 17: Layer, Baste, and Quilt
Cut batting and backing to about 68″ x 80″, giving yourself several extra inches on every side. Layer the backing right side down, then batting, then quilt top right side up. Baste well. Quilt in a way that supports the modern design. Stitching near both sides of each sashing strip creates a crisp grid, and a few additional straight quilting lines through the blocks can keep the look clean and contemporary.
Step 18: Bind the Quilt
A 60″ x 72″ quilt has a perimeter of 264″, so prepare about 285″ to 290″ of binding to allow for joining and finishing. Cut:
- 7 strips at 2 1/2″ x width of fabric
Join the strips, press the binding in half lengthwise, and sew it around the quilt with a 1/4″ seam. Fold it over and finish by machine or by hand.
Helpful Note
Sashing works so well in T-shirt quilts because it gives every knit block a stable frame. In traditional quilt history, sashing has often separated feature blocks and made a busy design feel more orderly. That same idea is especially useful here. When every T-shirt image is different, the sashing creates breathing room and makes the entire quilt look more intentional.
For the strongest result, keep the T-shirt images genuinely varied. A motivational quote shirt, a teal map-band design, an abstract circle print, a black-and-gray brushstroke V-neck, a tree-and-birds silhouette, and other modern graphic styles will produce a quilt that feels collected and custom rather than repetitive.
Other Design Inspirations – Digitally Modified Images. Texture and color may vary from the actual product.
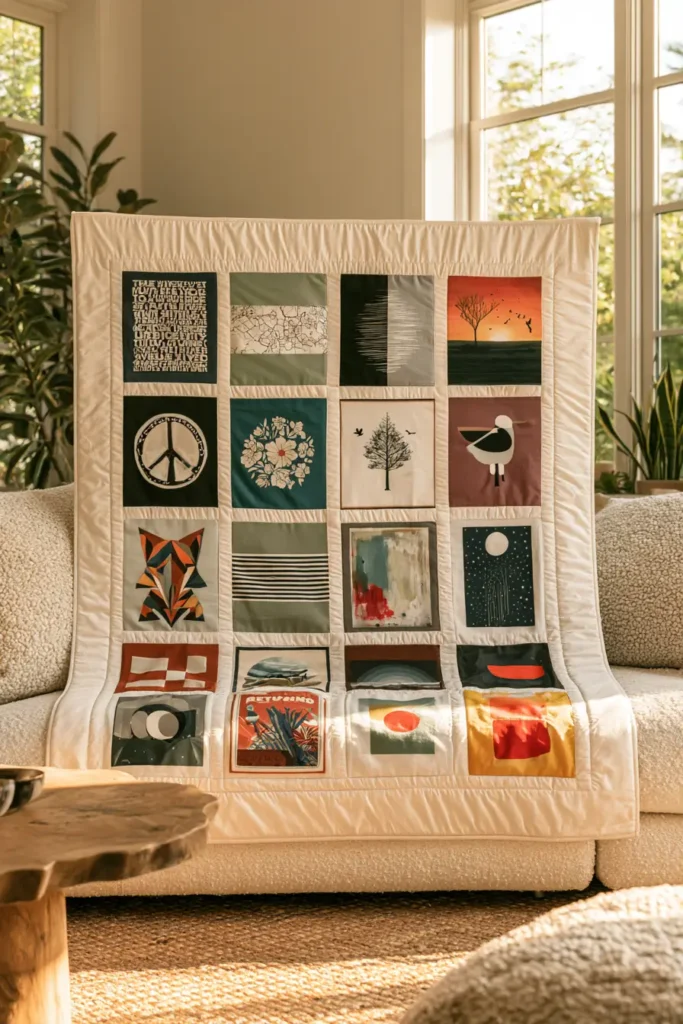
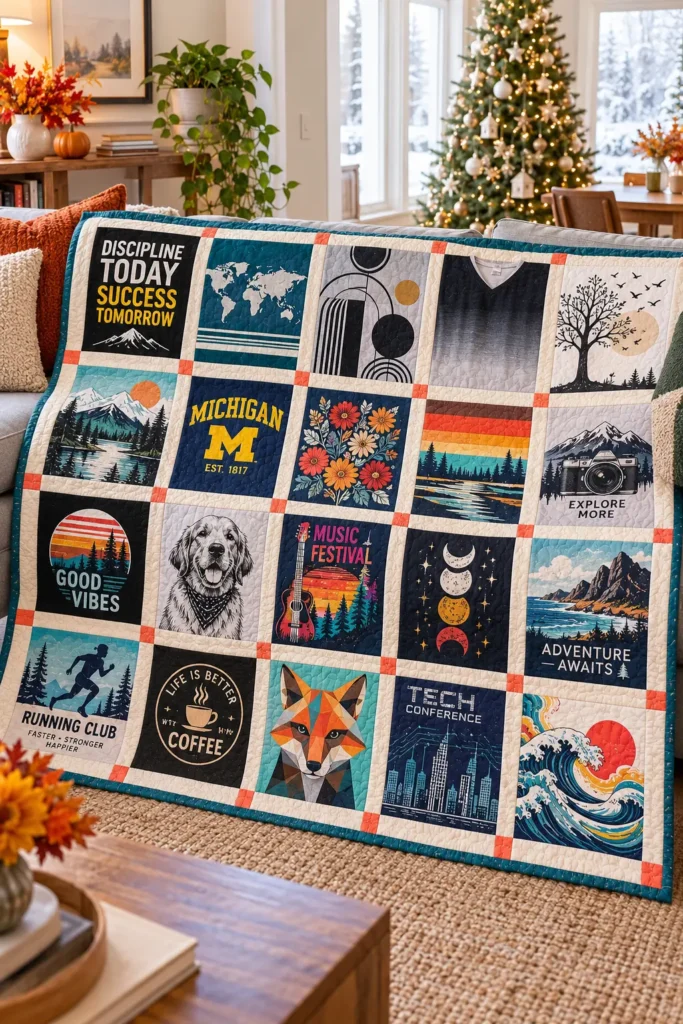
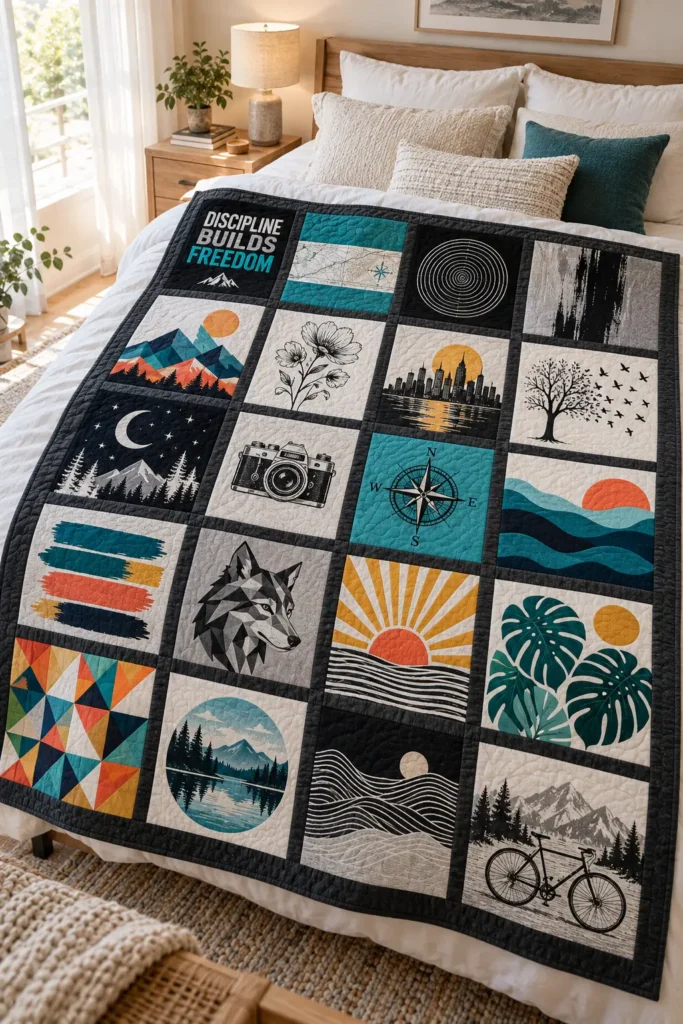
9. Safari Park Animal T-Shirt Quilt for Wild Adventure Memories
A safari park animal T-shirt quilt is a lively way to bring together bold wildlife graphics, travel-inspired prints, and memorable adventure-themed shirts in one colorful finished quilt. The supplied samples already point to a strong visual direction: animal silhouettes, Africa map graphics, vintage-style national park prints, and playful multi-animal designs. For the best result, use a different image on every T-shirt block so the quilt feels rich, varied, and full of visual discovery.
Safari-themed shirts work especially well in quilts because the artwork is often bold and readable from a distance. Many travel and souvenir shirts borrow from classic poster design, using sunset bands, animal silhouettes, park names, and map outlines. That makes them ideal for a quilt with strong block-to-block contrast and a bright, adventurous personality.
Finished Size
This guide makes a quilt approximately 60″ x 72″ finished.
Suggested T-Shirt Design Direction
Use 20 different T-shirt images, with each block featuring a different safari or wildlife-themed design. Base the visual style on the sample shirts you provided, and keep each shirt image distinct. A strong lineup could include:
- Africa map silhouette with giraffe, elephant, lion, and birds
- Vintage Kruger National Park striped sunset design
- Playful multi-animal “selfie” collage with elephant, lion, giraffe, rhino, zebra, and antelope
- Retro Serengeti Tanzania travel-poster graphic
- Zebra pair in grassland silhouette
- Lion portrait with warm sunset background
- Giraffe beside an acacia tree
- Rhino silhouette with tall grass
- Elephant herd walking across a horizon line
- Leopard face or leopard spot-inspired wildlife graphic
- Cheetah running design
- Safari jeep under a golden sky
- Baobab tree with birds at sunset
- Waterhole scene with flamingos or cranes
- Antelope or gazelle silhouette
- Wildlife tracks with compass graphic
- Safari binoculars with horizon scene
- Vintage park badge or travel emblem
- African savannah landscape with layered sunset colors
- Monkey or meerkat group illustration
The blocks do not all need the same background color, but black, white, warm sand, sky blue, rust, mustard, and golden orange will all work beautifully together.
Design Inspirations – Digitally Modified Images. Texture and color may vary from the actual product.
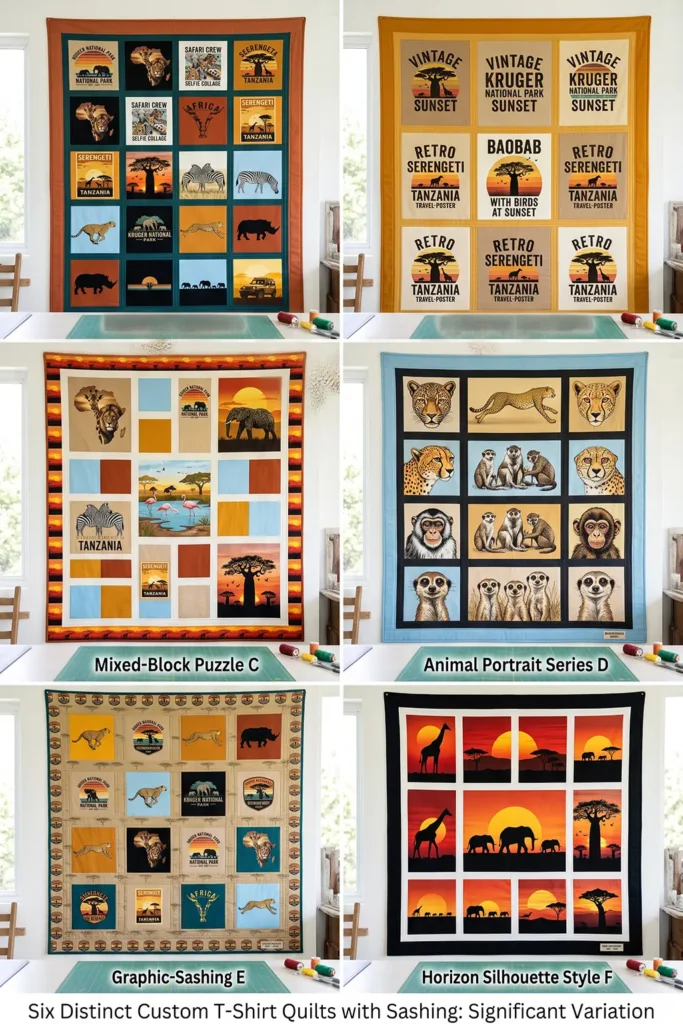
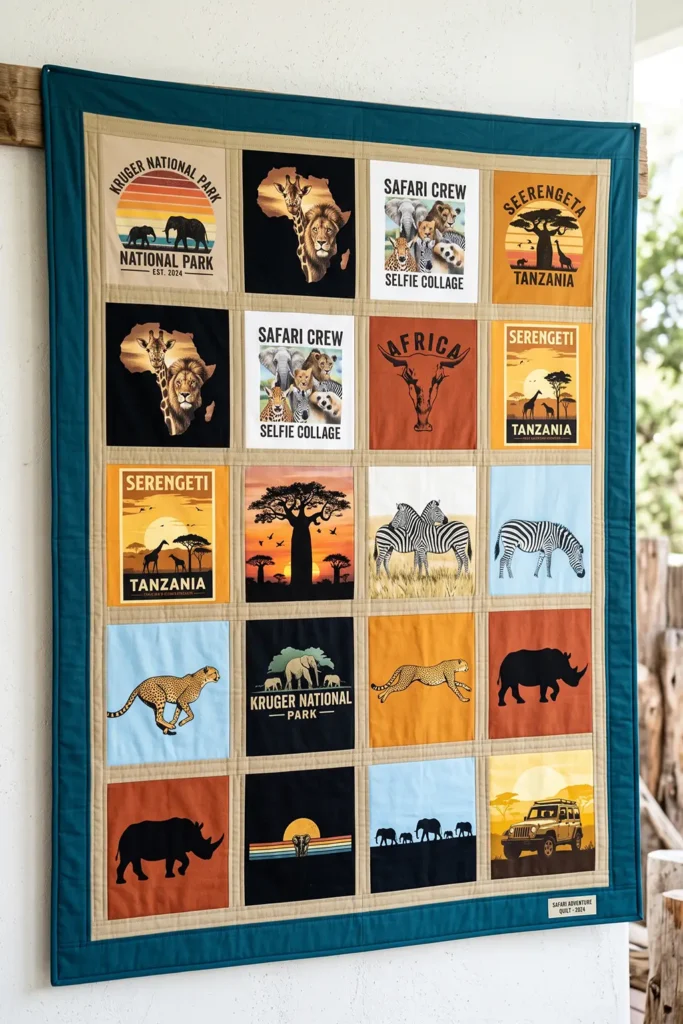
Materials
- 20 graphic T-shirts with different safari or wildlife designs
- 3 1/2 to 4 yards lightweight fusible interfacing
- 1 3/4 to 2 yards quilting cotton for sashing and borders
- Batting at least 68″ x 80″
- Backing at least 68″ x 80″
- 5/8 yard binding fabric
- Coordinating thread
- Rotary cutter and cutting mat
- Acrylic quilting ruler
- 12 1/2″ square ruler if available
- Iron and pressing cloth
- Sewing machine
- Walking foot
- Safety pins or basting spray
Assembly at a Glance
This quilt uses a clean, organized layout that helps many different shirt graphics work together.
- 20 T-shirt blocks
- Layout: 4 blocks across x 5 blocks down
- Each block finishes at 12″ x 12″
- Cut each stabilized shirt block to 12 1/2″ x 12 1/2″
- Sashing finishes at 2″ wide
- Cut sashing strips 2 1/2″ wide
- Side borders finish at 3″
- Top and bottom borders finish at 2″
Center quilt area after sashing: about 54″ x 68″ finished
Finished quilt with borders: about 60″ x 72″
Step-by-Step Guide
Step 1: Choose the 20 T-Shirts
Select 20 shirts with 20 different safari-themed images. Use the sample shirts as your visual guide, but avoid repeating the same kind of print too often. For example, if you already have one Africa-map silhouette shirt and one vintage park-poster shirt, let the next blocks shift toward animal portraits, jeep scenes, trees, wildlife collages, or horizon silhouettes.

Step 2: Decide on the Quilt Size and Layout
Plan for a 60″ x 72″ finished quilt with 20 blocks in a 4-by-5 arrangement. This is a practical throw size and large enough to show off the shirt graphics clearly without cropping them too tightly.
Step 3: Choose the Quilt Color Story
Because the shirt prints will vary, pick a unifying color palette before cutting. A bright safari-inspired palette works well here: golden yellow, sunset orange, sky blue, teal, grass green, black, white, rust, warm sand, and coral accents. Choose one consistent sashing color, such as warm khaki, deep teal, black, or cream, to hold the quilt together visually.

Step 4: Wash and Dry the T-Shirts
Wash and dry all shirts before cutting. This removes shrinkage and helps the knit fabric settle into its natural shape. T-shirt quilts became especially popular as memory quilts because people wanted to preserve meaningful prints, but knit jersey behaves very differently from quilting cotton, so preparation matters.
Step 5: Cut the Shirts Apart
Cut along the side seams, remove the sleeves, and cut through the shoulder seams so the graphic section lies flat. Leave at least 2″ to 3″ of extra fabric around each printed design. Do not trim to final size yet.

Step 6: Cut the Interfacing
Cut 20 pieces of lightweight fusible interfacing, each approximately 14″ x 14″. These slightly oversized pieces will stabilize the shirt panels before you trim them to size.
Step 7: Fuse the Interfacing to the Shirt Panels
Place each shirt panel wrong side up and center the interfacing behind the design. Fuse according to the product instructions. Use a pressing cloth if needed, and press by lifting and placing the iron rather than sliding it so the knit fabric does not stretch or distort.

Step 8: Check the Graphic Placement
Lay a 12 1/2″ square ruler or template over each stabilized shirt. Decide whether the design should be centered or slightly offset. A lion face or park logo often looks best centered, while a tree silhouette or horizon scene may look more natural with a little extra space on one side.
Step 9: Add Framing Fabric to Smaller Designs if Needed
If a design is too small to fill a pleasing 12 1/2″ square, add narrow strips of coordinating quilting cotton around it before the final trim. For example, if a small park-badge print only fills about 9″ x 10″, add simple borders or side strips to enlarge the usable block. This is especially helpful for smaller souvenir prints.
Step 10: Trim All 20 Blocks
Trim all stabilized shirt panels to exactly 12 1/2″ x 12 1/2″. You should now have 20 matching quilt blocks, each with a different safari-themed image.
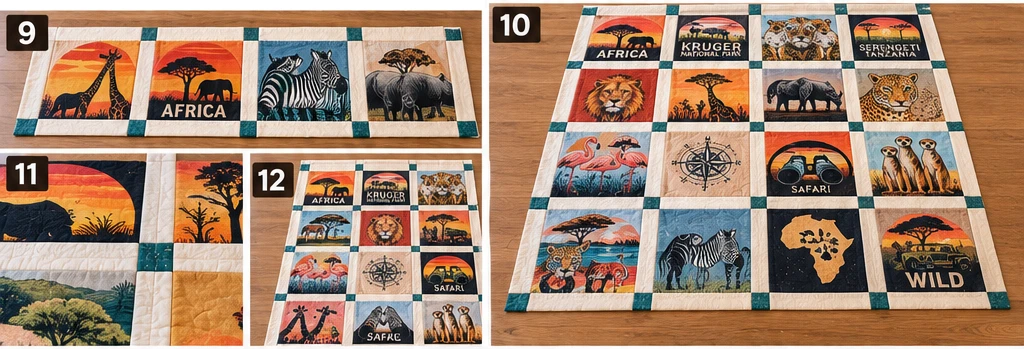
Step 11: Arrange the Quilt Layout
Lay the 20 blocks out in a 4-block by 5-block grid. Spread similar colors and motifs around the quilt. Do not cluster all the black shirts together or place several horizon-silhouette designs side by side. For example, separate the Africa-map shirt, the Kruger design, the animal selfie shirt, and the Serengeti poster so each stands out.
Step 12: Cut the Vertical Sashing
Each of the 5 rows needs 3 vertical sashing strips. Cut:
- 15 strips at 2 1/2″ x 12 1/2″
These will finish at 2″ x 12″ between the blocks.
Step 13: Sew the Five Rows
Sew each row in this order:
Block – Sashing – Block – Sashing – Block – Sashing – Block
Use a 1/4″ seam allowance throughout. Press the seams toward the sashing if possible. Each row should measure about 54 1/2″ wide x 12 1/2″ high unfinished.
Step 14: Cut the Horizontal Sashing
Now cut the long horizontal sashings that will separate the rows. Cut:
- 4 strips at 2 1/2″ x 54 1/2″
If your fabric width is not long enough, piece the strips and press the joining seams neatly.
Step 15: Join the Rows into the Quilt Center
Sew the 5 rows together with the 4 horizontal sashing strips between them. The center section should measure about 54 1/2″ x 68 1/2″ unfinished, finishing to about 54″ x 68″.
Step 16: Add the Borders
To bring the quilt to about 60″ x 72″ finished, add the borders in two stages.
Cut and sew the side borders first:
- 2 side borders at 3 1/2″ x 68 1/2″
Then cut and sew the top and bottom borders:
- 2 top/bottom borders at 2 1/2″ x 60 1/2″
The completed quilt top should now measure about 60 1/2″ x 72 1/2″ unfinished.

Step 17: Layer, Baste, and Quilt
Cut batting and backing to about 68″ x 80″ so you have several extra inches on each side. Layer the backing right side down, then batting, then the quilt top right side up. Baste thoroughly. Straight-line quilting works especially well for this project. Stitching close to both sides of the sashing helps emphasize the tidy block structure, while a few additional quilting lines across the blocks keep the quilt stable.
Step 18: Bind and Finish
A 60″ x 72″ quilt has a perimeter of 264″, so prepare about 285″ to 290″ of binding. Cut:
- 7 binding strips at 2 1/2″ x width of fabric
Join the strips, press the binding in half lengthwise, sew it around the quilt with a 1/4″ seam, miter the corners, and fold it over to finish by machine or hand.
Helpful Note
Safari-themed T-shirt quilts look strongest when every block contributes something different to the story. Mix park-name shirts, wildlife silhouettes, colorful animal portraits, savannah scenes, map graphics, safari vehicles, birds, and vintage travel-style artwork instead of repeating the same lion, elephant, or giraffe motif.
When arranging the blocks, spread the largest and darkest graphics across the quilt rather than clustering them together. A bold black Africa-map shirt can be balanced by a lighter sky-blue animal print elsewhere, while sunset-orange and golden-yellow designs can be distributed through different rows to keep the quilt vibrant without making one area feel too heavy.
If a favorite safari graphic does not fit neatly inside the 12 1/2″ block size, do not crop important features such as an animal’s head, park name, map outline, or sunset scene. Add coordinating fabric strips around the stabilized T-shirt panel first, then trim the enlarged unit to 12 1/2″ square. This preserves the artwork while keeping every block compatible with the quilt layout.
For quilting, avoid very dense stitching over thick screen-printed areas. Quilting along the sashing and around major graphic elements usually keeps the quilt flatter and softer while keeping the wildlife artwork as the focus.
Other Design Inspirations – Digitally Modified Images. Texture and color may vary from the actual product.
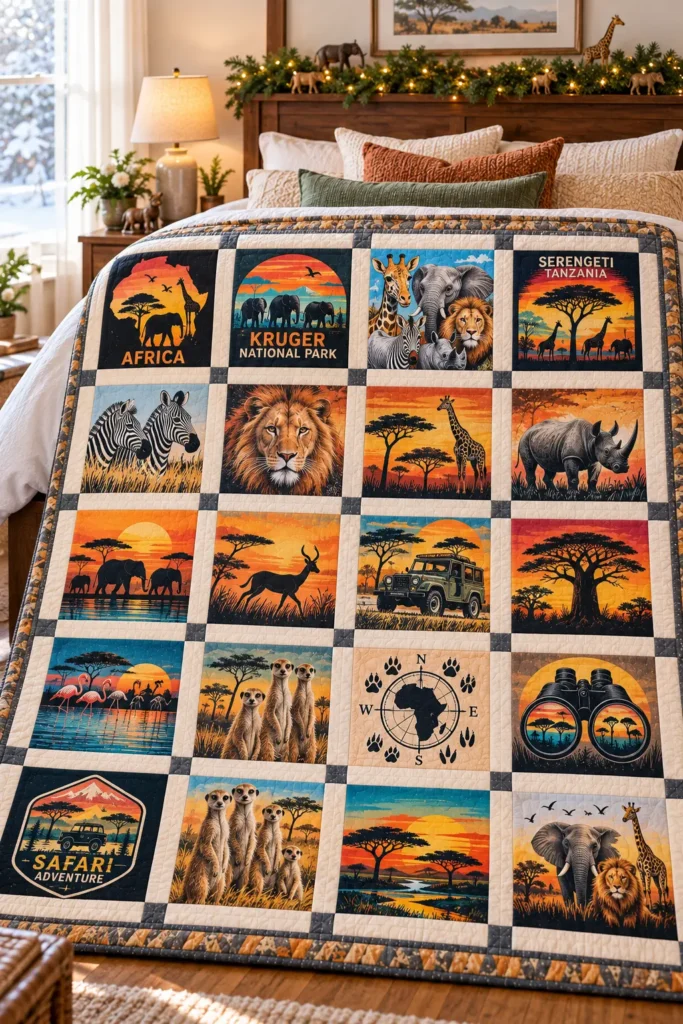
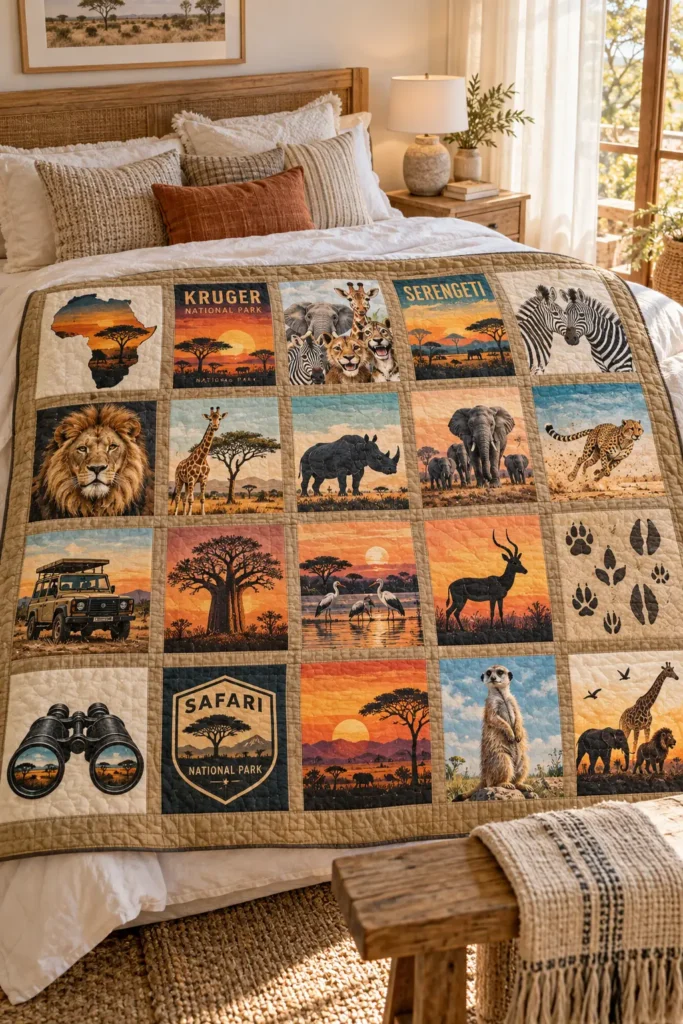
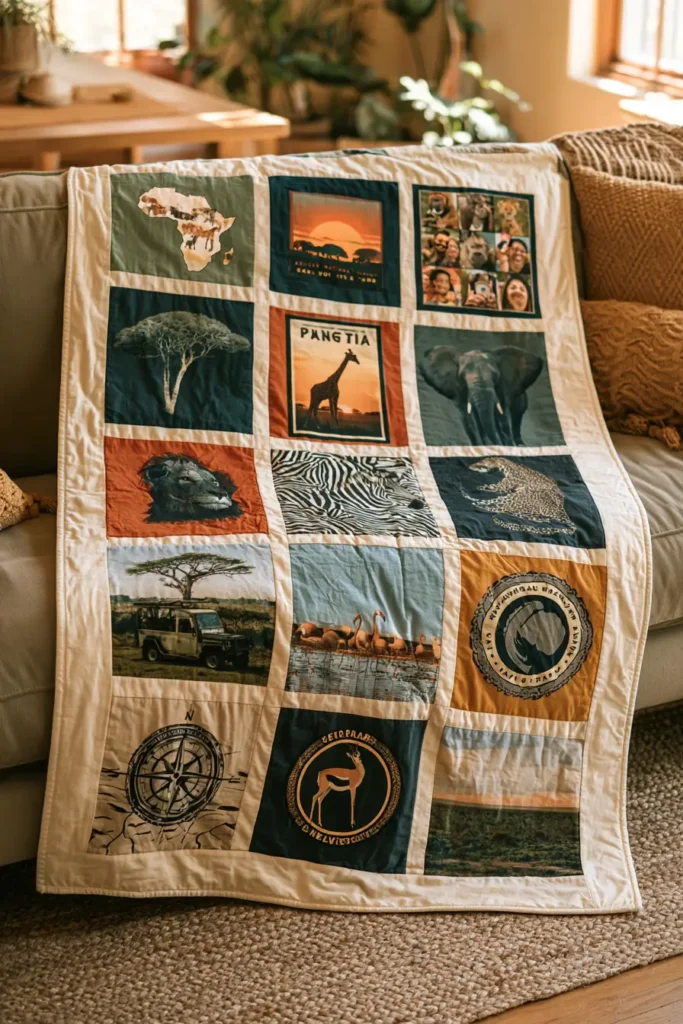
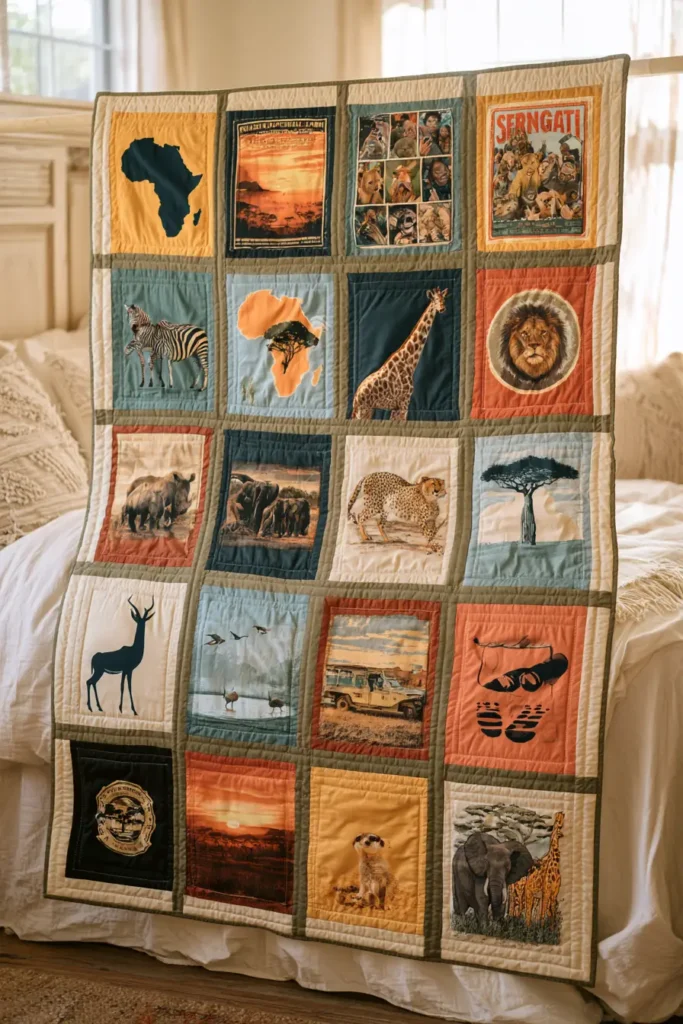
10. Reversible T-Shirt Quilt for Double the Upcycled Memories
A reversible T-shirt quilt is a wonderful way to make the most of a larger shirt collection because it gives you two usable quilt faces instead of one. Rather than choosing only a single side for the featured graphics, this style lets you build a polished quilt top on the front and a second coordinated T-shirt design layout on the back. The result is practical, colorful, and especially satisfying when you have more meaningful shirts than can comfortably fit into one ordinary quilt top.
For this version, use the supplied T-shirt images as style samples and make sure each T-shirt block uses a different image. One side can include bold modern graphics such as motivational typography, abstract circle art, black-and-gray brushstroke designs, map-band shirts, and minimalist tree silhouettes, while the reverse side can feature a different mix of safari animal shirts, travel-poster graphics, geometric motifs, florals, landscapes, and other bold prints. Keep the overall palette vibrant so both sides feel lively and visually rich.
Finished Size
This guide makes a reversible quilt approximately 60″ x 72″ finished.
Materials
- 40 T-shirts total, ideally 20 for the front and 20 for the back
- 4 1/2 to 5 yards lightweight fusible interfacing
- 2 to 2 1/4 yards quilting cotton for sashing and borders
- Low-loft cotton batting, at least 68″ x 80″
- 5/8 yard binding fabric
- Coordinating thread
- Rotary cutter and mat
- Acrylic ruler
- 12 1/2″ square ruler if available
- Iron and pressing cloth
- Sewing machine
- Walking foot
- Safety pins or basting spray
Suggested T-Shirt Image Direction
Use different images for every T-shirt block on both sides of the quilt.
Front side ideas
- bold motivational typography
- teal-and-white map-band design
- black abstract concentric-circle motif
- black-and-gray split brushstroke design
- minimalist tree with flying birds
- geometric mountain sunrise
- rainbow waveform
- floral line drawing
- city skyline
- paint-drip composition
- crescent moon and stars
- origami bird
- sunburst
- camera graphic
- compass design
- checker stripe
- geometric fox
- tropical leaf illustration
- cassette or music graphic
- abstract geometric print
Back side ideas
- Africa map with safari animals
- vintage Kruger National Park design
- playful multi-animal safari collage
- Serengeti travel-poster shirt
- zebra silhouette
- lion portrait
- giraffe and acacia tree
- rhino silhouette
- elephant herd
- cheetah graphic
- safari jeep scene
- baobab tree at sunset
- waterhole birds
- antelope silhouette
- wildlife tracks and compass
- park badge emblem
- savannah sunset landscape
- butterfly design
- bright floral peace motif
- colorful globe or travel image
This approach gives the quilt two distinct personalities while keeping both sides bold and cohesive.
Design Inspirations – Digitally Modified Images. Texture and color may vary from the actual product.
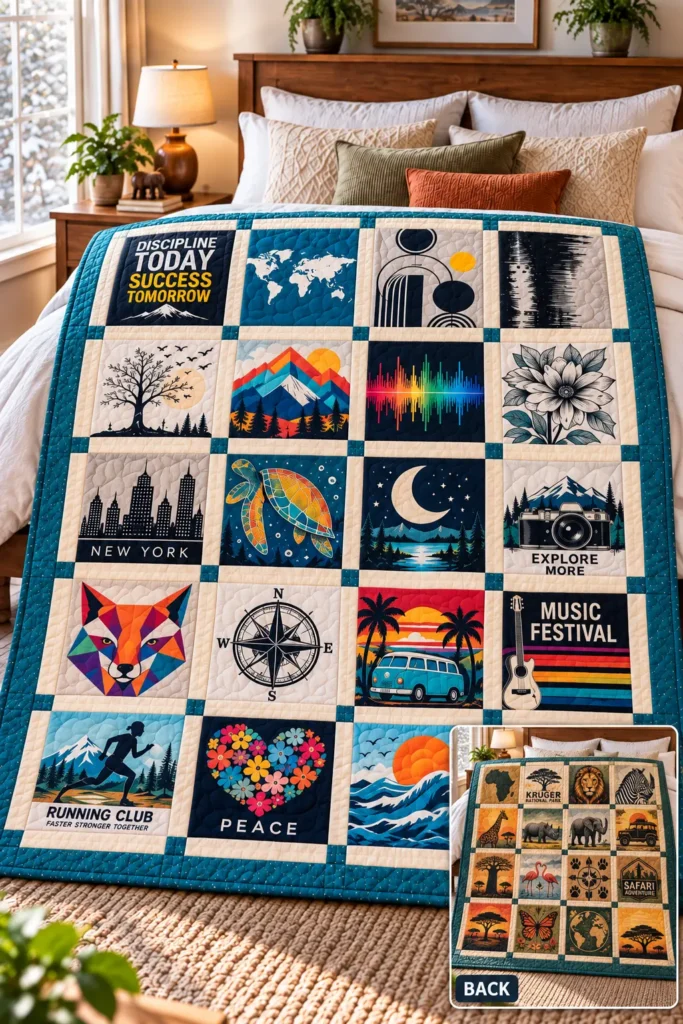
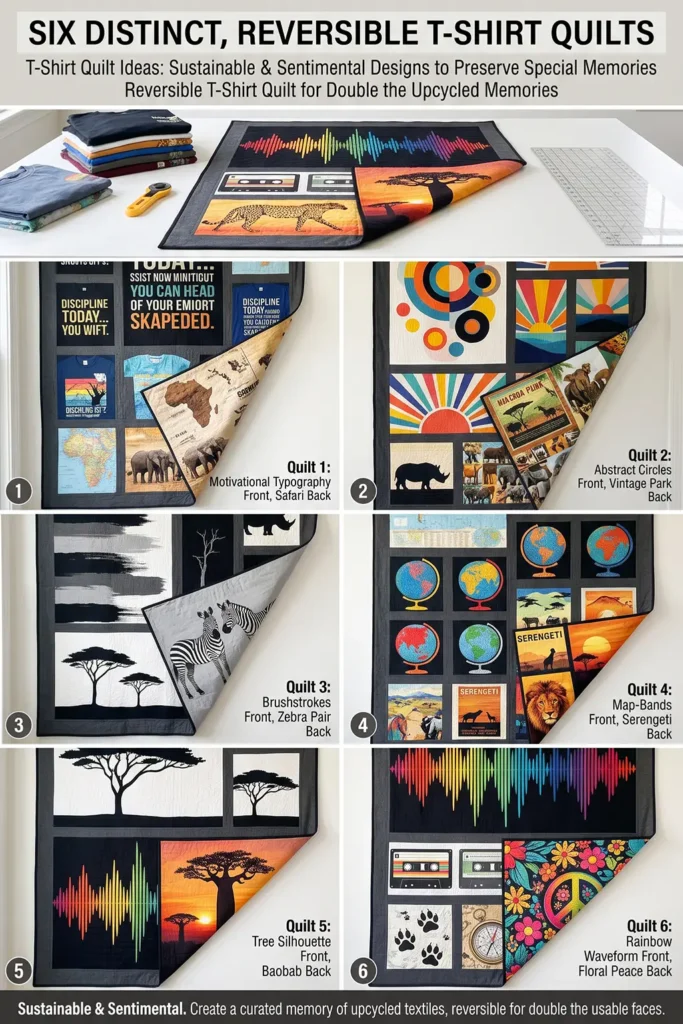
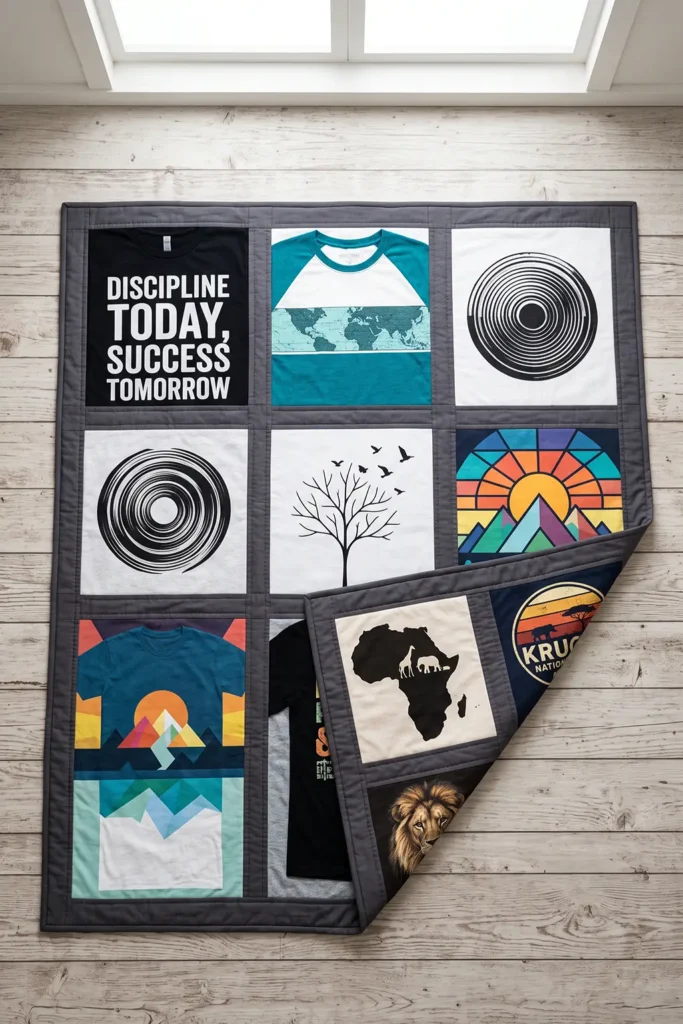
Assembly at a Glance
This quilt uses the same structure on both sides:
- 20 blocks per side
- layout: 4 blocks across x 5 blocks down
- each T-shirt block finishes at 12″ x 12″
- trim each block to 12 1/2″ x 12 1/2″
- sashing finishes at 2″ wide
- cut sashing strips 2 1/2″ wide
- side borders finish at 3″
- top and bottom borders finish at 2″
Each pieced side finishes at about 60″ x 72″ after borders are added, then the two sides are layered with batting between them and bound like a standard quilt.
Step-by-Step Guide
Step 1: Sort the T-Shirts Into Front and Back Groups
Choose 40 T-shirts and divide them into two groups of 20. One group will form the front of the quilt and the other the reverse side. Keep every shirt image different. This prevents the quilt from feeling repetitive and gives the reversible design its “double memory” appeal.
Step 2: Plan the Quilt Size and Block Layout
Decide on a finished size of 60″ x 72″. For each side, use a layout of 4 blocks across by 5 blocks down. Each block will finish at 12″ x 12″, which is large enough for most T-shirt graphics while still fitting 20 blocks on a throw-size quilt.

Step 3: Choose the Color Direction for Both Sides
Pick a bright, coordinated palette for the whole quilt. A practical combination might include turquoise, cobalt, coral, teal, golden yellow, orange, black, white, soft gray, lime, and warm sand. You do not need both sides to match exactly, but using a few repeated accent colors helps the reversible quilt feel intentional.
Step 4: Select the Sashing and Border Fabric
Choose one sashing-and-border fabric color that works with both sets of shirts. Charcoal, deep navy, warm cream, or black are all good options. Because the same fabric appears on both faces, it becomes the visual bridge that unifies the reversible quilt.
Step 5: Wash and Dry the T-Shirts
Wash and dry all T-shirts before cutting. T-shirt quilts grew out of the tradition of preserving beloved wearable graphics, but knit jersey is much stretchier than quilting cotton. Prewashing removes shrinkage and helps the shirts relax into their true shape before stabilizing.
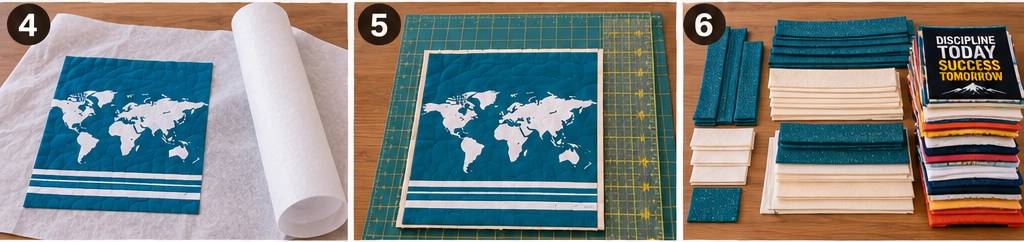
Step 6: Cut the Shirts Apart
Cut up the side seams, remove the sleeves, and cut through the shoulder seams so each graphic panel lies flat. Leave 2″ to 3″ extra fabric around each design at this stage. Do this for both the front-side group and the back-side group.
Step 7: Cut the Interfacing
Cut 40 interfacing pieces, each about 14″ x 14″. This gives enough coverage to stabilize each shirt before final trimming. Lightweight fusible interfacing is especially important in reversible quilts because both outer surfaces are knit and need structure.
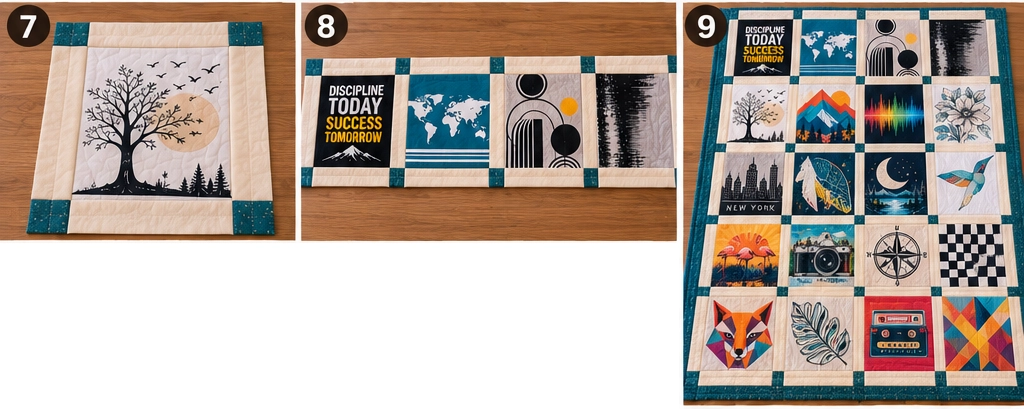
Step 8: Fuse the Interfacing to All Shirt Panels
Place each T-shirt panel wrong side up and center an interfacing square behind the chosen image. Fuse according to the product directions. Use a pressing cloth if needed, and press by lifting and placing the iron rather than sliding it to avoid stretching the fabric.
Step 9: Trim the 20 Front Blocks
Trim the front-side T-shirt panels to 12 1/2″ x 12 1/2″. Keep text upright and center the artwork when appropriate. You now have 20 stabilized front blocks.
Step 10: Trim the 20 Back Blocks
Trim the back-side panels to 12 1/2″ x 12 1/2″ as well. Matching block sizes on both sides is essential because the seam structure needs to align cleanly once the two pieced sides are layered together.
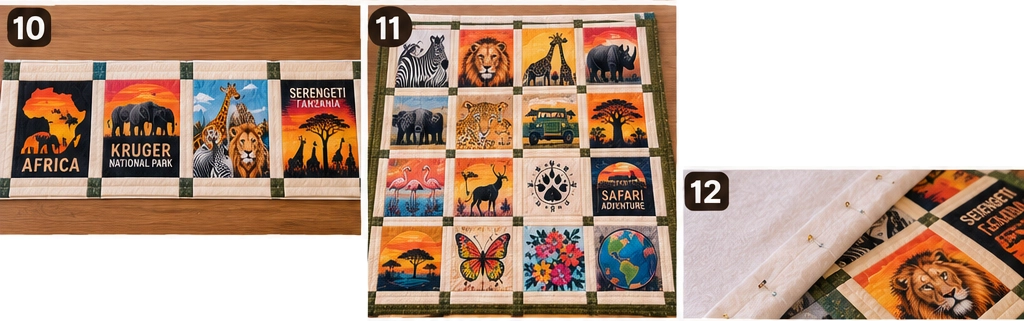
Step 11: Lay Out the Front Quilt Face
Arrange the 20 front blocks in a 4-by-5 grid. Spread similar colors and graphic weights around the surface. For example, separate bold typography, strong dark prints, and large abstract motifs so they do not cluster too heavily in one section.
Step 12: Lay Out the Back Quilt Face
Arrange the 20 back blocks in a second 4-by-5 grid. Spread out the safari and travel motifs the same way. Keep the most dramatic prints—such as the Africa map, the animal collage, and the Serengeti poster—well distributed across the back.
Step 13: Cut the Vertical Sashing for Both Sides
Each side has 5 rows, and each row needs 3 vertical sashing strips. For one side, that is 15 strips; for both sides, cut:
- 30 strips at 2 1/2″ x 12 1/2″
These will finish at 2″ x 12″ between the blocks.
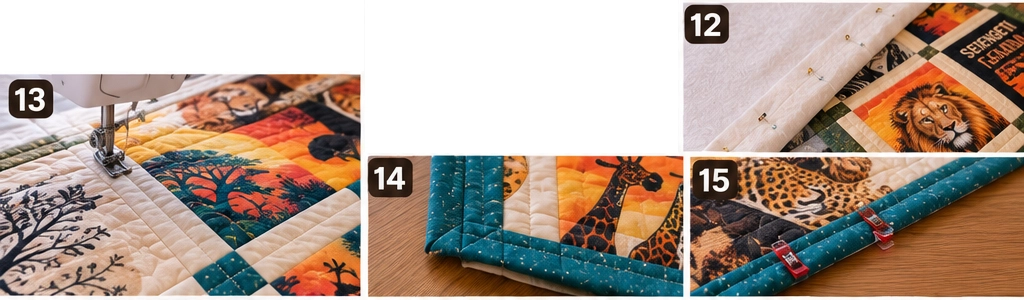
Step 14: Sew the Rows for the Front and Back
For each side, sew the rows in this order:
Block – Sashing – Block – Sashing – Block – Sashing – Block
Make 5 rows for the front and 5 rows for the back. Each completed row should measure about 54 1/2″ wide x 12 1/2″ high unfinished.
Step 15: Cut the Horizontal Sashing for Both Sides
Each side needs 4 long horizontal sashing strips. For both sides, cut:
- 8 strips at 2 1/2″ x 54 1/2″
Piece the strips as needed, and press the seams neatly.
Step 16: Join the Rows and Add Borders
Join the rows on each side with the long horizontal sashing strips. Each quilt center should measure about 54 1/2″ x 68 1/2″ unfinished.
Then add borders to each side:
- 4 side borders total at 3 1/2″ x 68 1/2″
- 4 top/bottom borders total at 2 1/2″ x 60 1/2″
After borders are attached, each pieced side should measure about 60 1/2″ x 72 1/2″ unfinished.
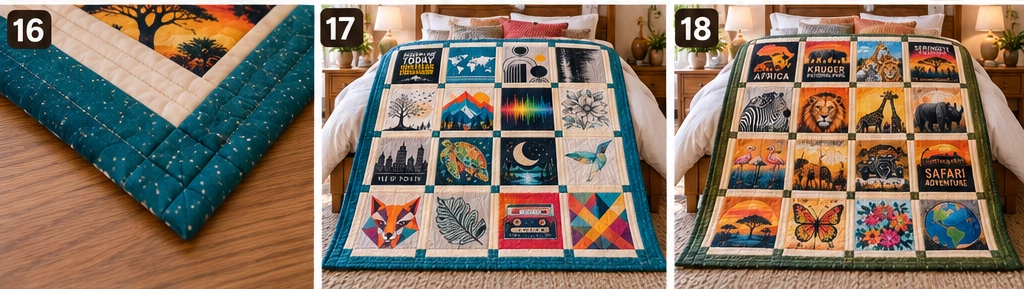
Step 17: Layer the Reversible Quilt
Cut batting to about 68″ x 80″. Lay one completed T-shirt quilt face right side down, place the batting on top, then place the second quilt face right side up. Match the edges carefully. Pin or baste thoroughly so the seam lines stay aligned. This layering method creates a truly reversible quilt with T-shirt designs on both sides.
Step 18: Quilt and Bind
Quilt through all three layers. Straight-line quilting works especially well: quilting close to both sides of the sashing keeps the structure crisp and helps manage the extra weight of two pieced knit faces. After quilting, trim everything square. A 60″ x 72″ quilt has a perimeter of 264″, so prepare about 285″ to 290″ of binding by cutting:
- 7 strips at 2 1/2″ x width of fabric
Join the binding strips, press in half lengthwise, sew them around the quilt with a 1/4″ seam, and finish the binding by machine or hand.
Helpful Note
Reversible T-shirt quilts are heavier than standard T-shirt quilts because they combine two pieced knit surfaces with batting in the middle. For that reason, lightweight interfacing and low-loft batting make a real difference. They help the quilt stay soft and flexible instead of becoming stiff or bulky.
Also remember that a reversible quilt is not just “a front and a back.” It is really two fully designed quilt tops that need to work structurally together. Matching block sizes, consistent seam allowances, and careful alignment matter more here than in a simple one-sided T-shirt quilt.
For the most interesting result, avoid repeating shirt artwork. A bold quote shirt, an abstract black-and-gray design, a tree silhouette, a safari animal map, a travel-poster shirt, and other completely different graphics will make both sides feel rich, surprising, and full of personality.
Other Design Inspirations – Digitally Modified Images. Texture and color may vary from the actual product.
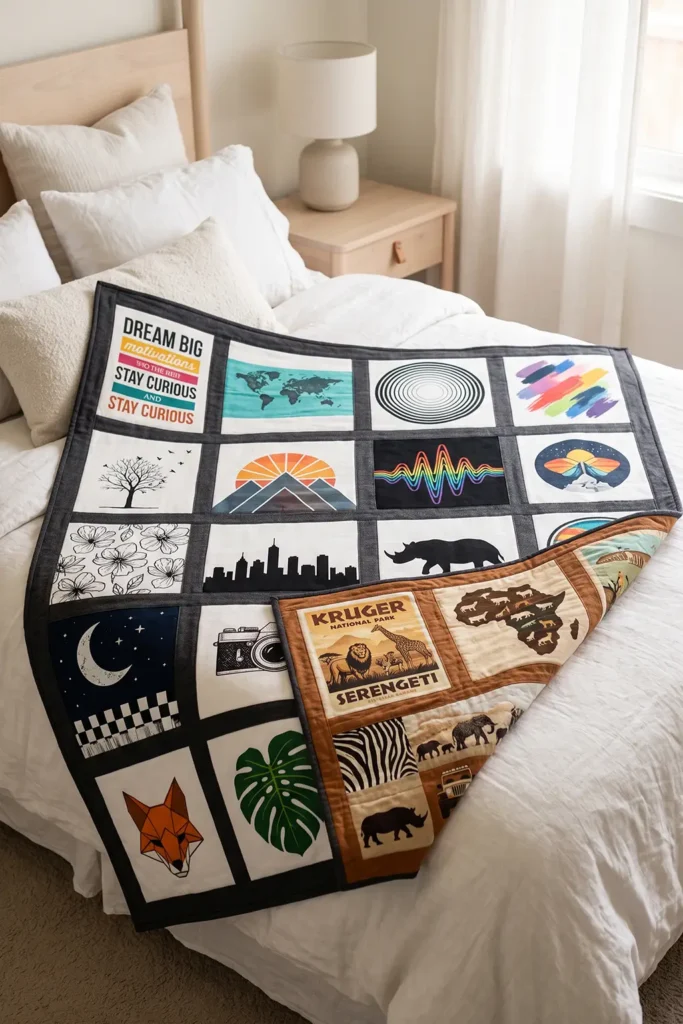
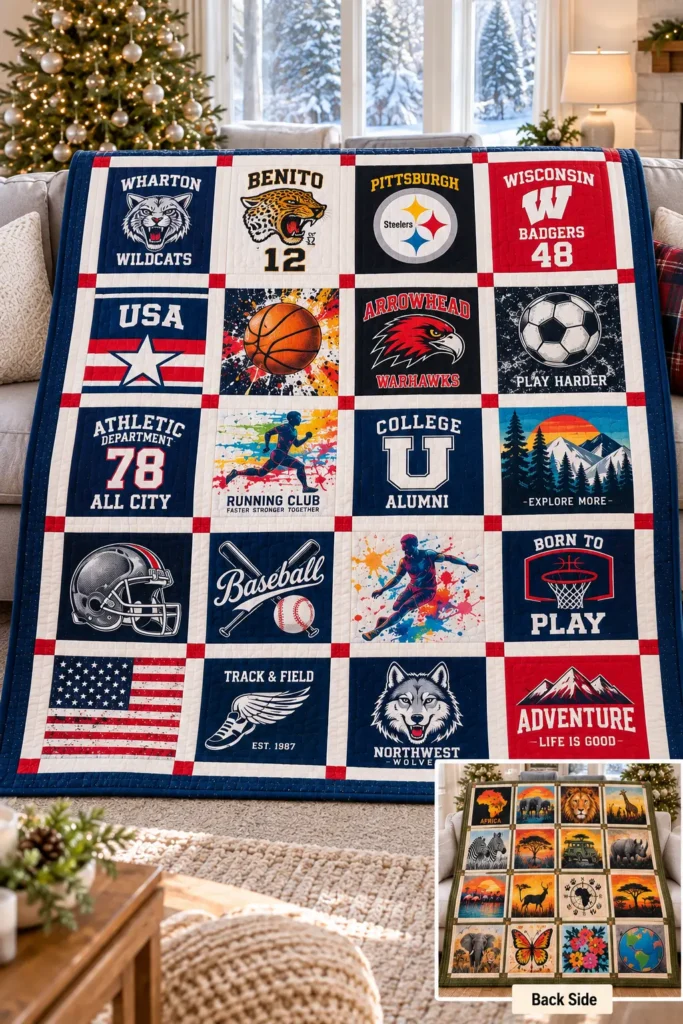
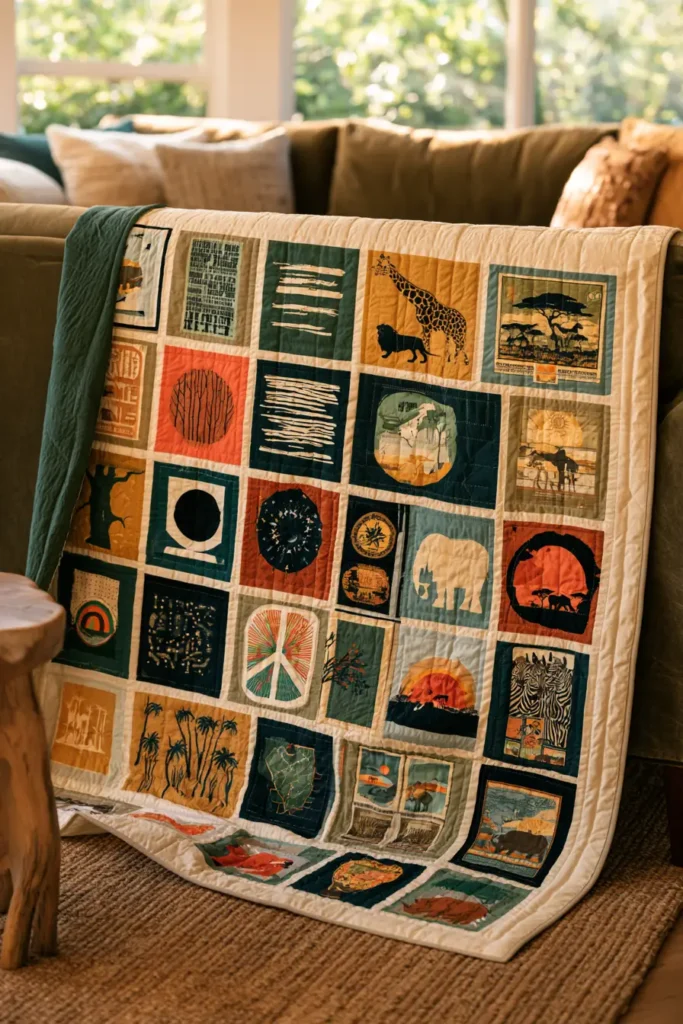
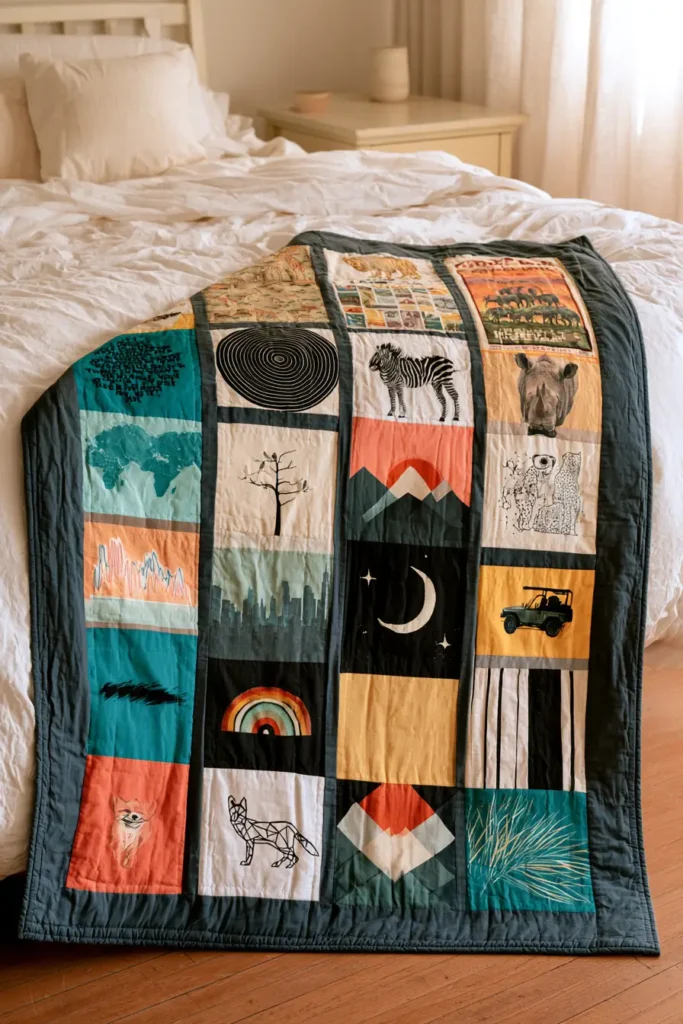
11. Flannel-Backed T-Shirt Quilt for Extra Warmth and Cozy Comfort
A flannel-backed T-shirt quilt combines the softness of well-worn jersey with the cozy warmth of brushed flannel, making it especially inviting for cooler bedrooms, family rooms, reading chairs, and winter evenings. The T-shirt side can be colorful and energetic, while the flannel backing gives the quilt a softer, more traditional feel against the body.
This version uses 20 different T-shirt graphics in a clean 4-by-5 arrangement. Mix vibrant typography, travel designs, wildlife, florals, landscapes, abstract graphics, sports-inspired artwork, music motifs, and other distinctive prints so every block has its own personality. Deep teal, cobalt, coral, raspberry, mustard, orange, lime, turquoise, and violet look especially lively when balanced with black, white, charcoal, and heather gray shirts.
Finished Size and Layout
The finished quilt measures approximately 60″ x 72″.
Use:
- 20 T-shirt blocks
- 4 blocks across x 5 blocks down
- T-shirt blocks finish at 12″ x 12″
- Cut blocks at 12 1/2″ x 12 1/2″
- Sashing finishes at 2″
- Cut sashing at 2 1/2″ wide
- Side borders finish at 3″
- Top and bottom borders finish at 2″
The block-and-sashing center finishes at approximately 54″ x 68″. Borders bring the finished quilt to about 60″ x 72″.
Suggested T-Shirt Graphics
For a lively quilt, use a different design on every block. For example:
- Bold motivational typography
- Retro striped sunset
- Mountain landscape
- Colorful butterfly
- Vintage bicycle
- Safari animal silhouette
- Abstract circles
- Floral graphic
- Cassette tape or music motif
- Tree and flying birds
- Travel-map design
- Bright geometric pattern
- Camera graphic
- Rainbow artwork
- Moon and stars
- City skyline
- Wildlife portrait
- Sunflower graphic
- Retro camper van
- Graphic bird or leaf design
A consistent sashing color will bring these very different shirts together.
Materials
- 20 T-shirts
- Approximately 4 yards lightweight fusible interfacing
- 1 3/4 to 2 yards quilting cotton for sashing and borders
- Approximately 5 yards of 42″–44″ wide flannel for a pieced backing
- Batting at least 68″ x 80″
- 5/8 yard binding fabric
- Coordinating thread
- Rotary cutter
- Cutting mat
- Acrylic rulers
- 12 1/2″ square ruler if available
- Iron and pressing cloth
- Sewing machine
- Walking foot or even-feed foot
- Safety pins or basting spray
Prewash the flannel before measuring and cutting it. Flannel can shrink noticeably, often more than ordinary quilting cotton.
Design Inspirations – Digitally Modified Images. Texture and color may vary from the actual product.

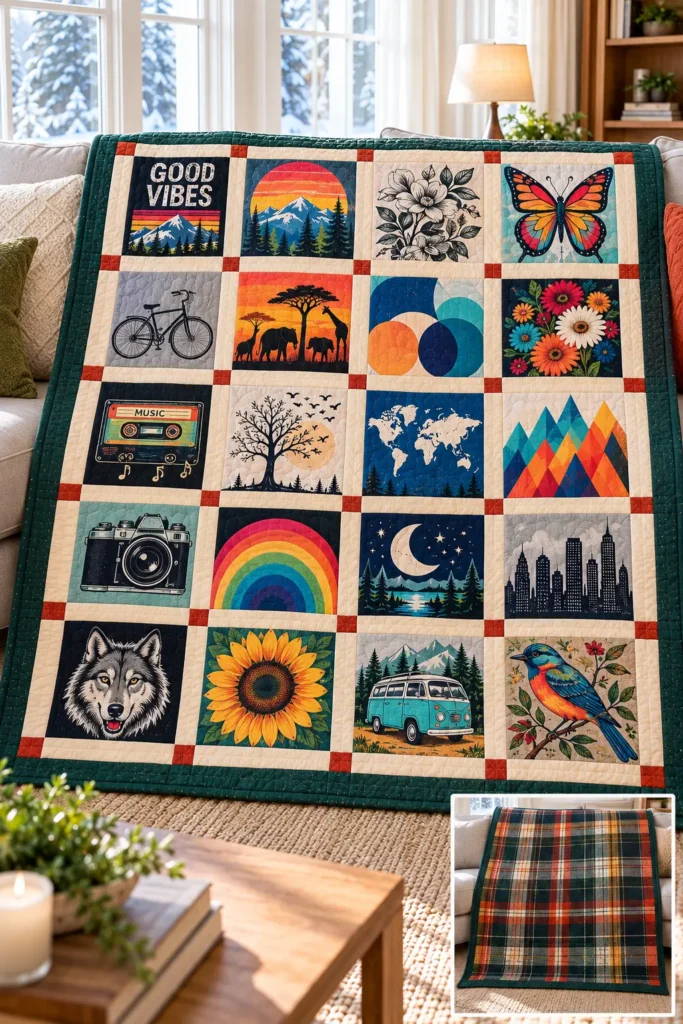


Assembly at a Glance
The construction sequence is:
- Prepare and stabilize 20 T-shirt panels.
- Trim all blocks to 12 1/2″ square.
- Arrange them in 5 rows of 4 blocks.
- Add vertical sashing inside each row.
- Add horizontal sashing between the rows.
- Add side borders.
- Add top and bottom borders.
- Piece and square the flannel backing.
- Layer the flannel, batting, and quilt top.
- Quilt and bind.
Step-by-Step Guide
Step 1: Select 20 Different T-Shirts
Choose 20 T-shirts with clearly different graphics. A mixture of light and dark shirt colors generally produces a more interesting quilt than twenty shirts with similar backgrounds.
Look for graphics that will fit comfortably inside a 12″ finished square without losing important wording, faces, logos, or artwork in the seam allowances.
Step 2: Choose the Sashing and Flannel Colors
Select one consistent sashing fabric to visually organize all the different shirt graphics.
Good choices include:
- deep navy
- charcoal
- crisp white
- warm cream
- dark teal
For the backing, choose a flannel that complements rather than competes with the front.
A buffalo plaid, windowpane check, subtle tartan, small geometric print, or soft solid flannel works especially well.
For a vibrant quilt front, consider a backing in deep teal, navy-and-rust plaid, raspberry check, forest green, or warm charcoal.
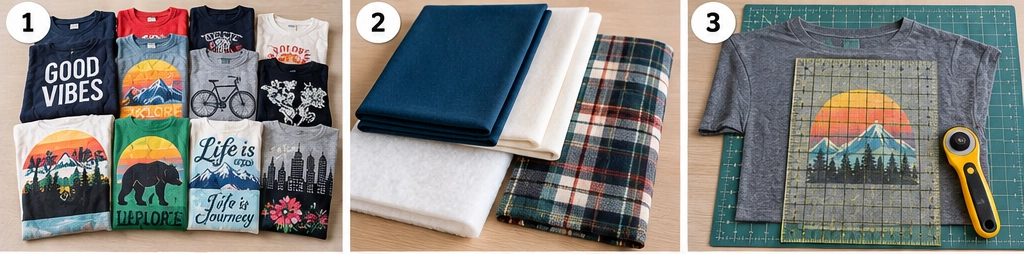
Step 3: Prewash the T-Shirts and Flannel
Wash and dry all T-shirts before cutting.
Wash and machine-dry the flannel separately. This is particularly important because loosely woven flannel tends to shrink more than stabilized T-shirt blocks.
Do not skip this step and then use unwashed flannel on the back; uneven shrinkage can distort the finished quilt after its first wash.
Step 4: Separate the T-Shirt Panels
Cut along the shirt side seams.
Remove the sleeves and cut through the shoulders so the printed front or back becomes one flat piece.
Leave approximately 2″–3″ of extra shirt fabric around the graphic.
Do not cut the final 12 1/2″ square yet.
Step 5: Inspect and Measure the Graphics
Place a 12 1/2″ square ruler or paper template over each design.
Make sure all essential artwork fits inside the square with some breathing room.
Ideally, keep important printing at least 3/4″ from the raw edge, because 1/4″ will disappear into the seam, and additional clearance helps prevent the design from looking cramped.
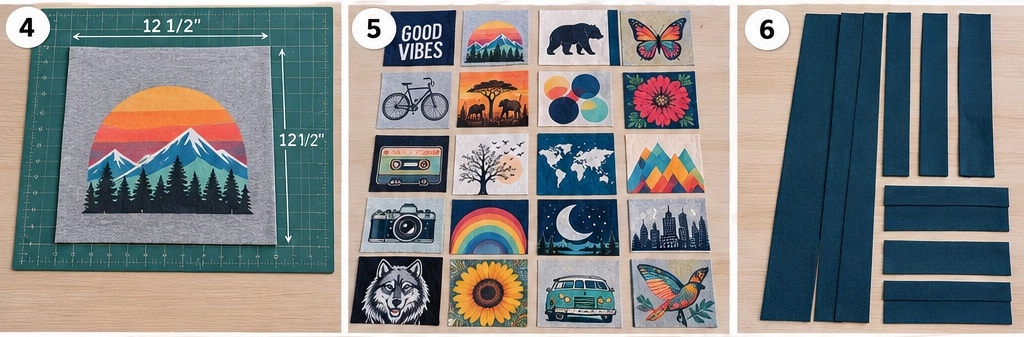
Step 6: Cut the Fusible Interfacing
Cut 20 pieces of lightweight fusible interfacing approximately:
14″ x 14″
The extra size lets you stabilize the knit fabric before trimming accurately.
Choose lightweight interfacing rather than heavy craft interfacing. The goal is to control stretch without making the finished quilt stiff.
Step 7: Stabilize the T-Shirt Panels
Place a shirt panel wrong side up.
Position the fusible side of the interfacing against the wrong side of the T-shirt.
Follow the interfacing manufacturer’s heat and pressing instructions.
Use a pressing cloth when appropriate and press rather than slide the iron. Sliding can stretch jersey and distort printed graphics.
Let each piece cool before trimming.
Step 8: Trim All 20 Blocks
Trim every stabilized shirt panel to:
12 1/2″ x 12 1/2″
Center designs when appropriate, but allow intentionally asymmetrical artwork to remain slightly off-center if that improves the composition.
Keep text, horizons, and other directional graphics upright.
You should now have 20 accurately sized blocks.
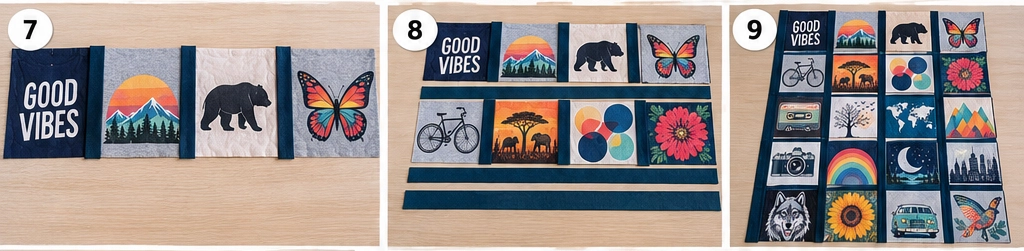
Step 9: Plan the 4-by-5 Layout
Arrange the blocks in:
4 columns x 5 rows
Step back and examine the overall balance.
Spread dominant colors around the quilt rather than placing all bright orange, teal, or black blocks together. Also separate similar subjects; for example, avoid putting two landscape graphics or two text-heavy shirts directly beside each other.
Photograph the final arrangement before sewing.
Step 10: Cut the Vertical Sashing
Each row contains four T-shirt blocks, so each row needs three vertical sashing strips.
For five rows, cut:
15 strips measuring 2 1/2″ x 12 1/2″
After sewing with 1/4″ seam allowances, these strips finish at 2″ wide.
Step 11: Assemble the Five Rows
Sew each row:
Block – Sashing – Block – Sashing – Block – Sashing – Block
Use a consistent 1/4″ seam allowance.
Press seams toward the sashing where practical. Quilting cotton is generally less bulky than stabilized jersey, so this helps the seams sit flatter.
Each completed row should measure approximately:
54 1/2″ x 12 1/2″ unfinished
Make five rows.
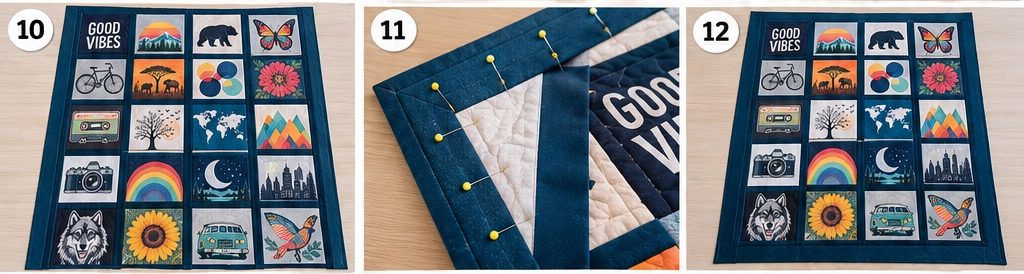
Step 12: Prepare the Horizontal Sashing
The five rows require four horizontal sashing strips.
Make:
4 strips measuring 2 1/2″ x 54 1/2″
Standard quilting cotton generally is not wide enough to cut these as single width-of-fabric strips, so piece shorter lengths together.
Press the joining seams before attaching the strips.
Step 13: Join the Five Rows
Place one horizontal sashing strip between each pair of rows.
Assemble in this order:
Row 1
Sashing
Row 2
Sashing
Row 3
Sashing
Row 4
Sashing
Row 5
Pin carefully so the vertical sashing lines remain aligned.
After sewing, the center should measure approximately:
54 1/2″ x 68 1/2″ unfinished
Step 14: Add the Side Borders
Cut:
2 strips measuring 3 1/2″ x 68 1/2″
Measure the actual quilt center before cutting the final length and adjust slightly if necessary.
Sew one border to each long side using a 1/4″ seam.
The quilt should now measure about:
60 1/2″ x 68 1/2″ unfinished

Step 15: Add the Top and Bottom Borders
Cut:
2 strips measuring 2 1/2″ x 60 1/2″
Attach one to the top and one to the bottom.
After sewing, the quilt top should measure approximately:
60 1/2″ x 72 1/2″ unfinished
Square the corners and check that opposite edges measure the same.
Step 16: Piece the Flannel Backing
For a comfortable quilting margin, prepare the backing at approximately:
68″ x 80″
If using approximately 42″–44″ wide flannel, buy about 5 yards before prewashing.
After washing and drying, cut two lengths roughly 80″–82″ long, depending on the remaining fabric size.
Remove selvages before joining the lengths because tight selvages can cause puckering.
Sew the two pieces together using approximately a 1/2″ seam allowance, then press the seam open.
Trim the finished backing to at least 68″ x 80″.
Unlike a one-piece 108″ backing, pieced flannel has a seam. Avoid placing that seam exactly down the center of the quilt if possible; shifting it slightly to one side can prevent a noticeable ridge along the most heavily used area.
Step 17: Layer, Baste, and Quilt
Lay the flannel backing right side down and smooth it carefully without stretching it.
Add batting approximately 68″ x 80″.
Center the quilt top over the batting, right side up.
Baste thoroughly, roughly every 4″–5″, because flannel creates more friction than smooth quilting cotton.
A walking foot is particularly useful here.
Straight-line quilting works beautifully with this design. Quilt along the sashing edges and add additional lines through the blocks as needed.
Follow the batting manufacturer’s maximum quilting-distance recommendation rather than relying on one universal spacing.
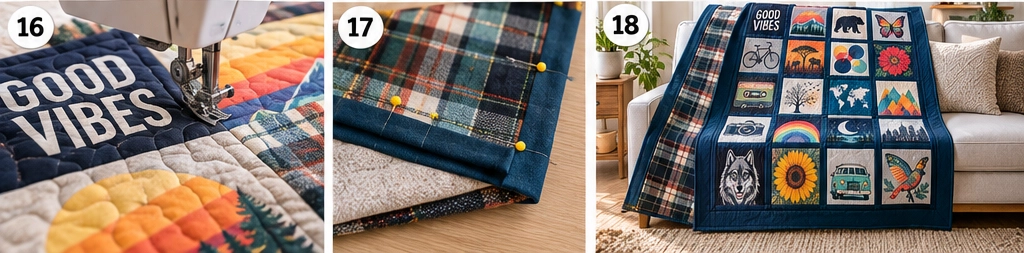
Step 18: Square and Bind the Quilt
After quilting, trim the backing and batting even with the quilt top.
A 60″ x 72″ finished quilt has a perimeter of:
60 + 72 + 60 + 72 = 264″
Allow roughly 285″–290″ of binding for joins, corners, and finishing.
Cut:
7 strips measuring 2 1/2″ x width of fabric
Seven 42″ strips provide approximately 294″ before joining.
Join the strips diagonally, trim the seam allowances, and press the long binding strip in half.
Attach the binding with a 1/4″ seam, miter the corners, and finish the folded edge by hand or machine.
Helpful Note
Flannel is what makes this quilt especially cozy, but it behaves differently from ordinary cotton backing. Prewash it before cutting, because flannel can shrink substantially and may continue releasing lint during its first few washes. Cleaning the dryer’s lint filter during prewashing is a sensible precaution.
For warmth without excessive bulk, pair the flannel backing with a low- or medium-loft batting rather than an extremely thick batting. The stabilized T-shirts already add more weight than ordinary quilting cotton, and the flannel contributes additional warmth.
Also avoid pulling the flannel taut while basting. Smooth it flat, but leave it in its natural relaxed state. Stretching the backing during assembly can cause ripples or puckers after you release the basting or wash the quilt.
If the quilt is intended for frequent couch or bed use, the combination of stabilized jersey, cotton sashing, moderate batting, and prewashed flannel gives a good balance of warmth, softness, durability, and drape.
Other Design Inspirations – Digitally Modified Images. Texture and color may vary from the actual product.
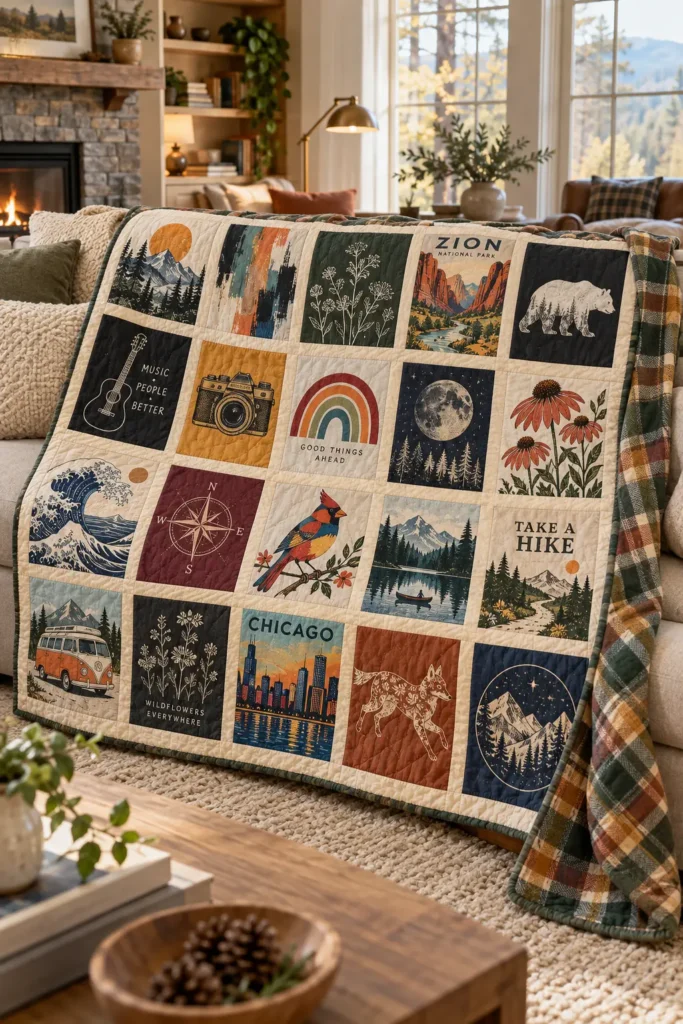
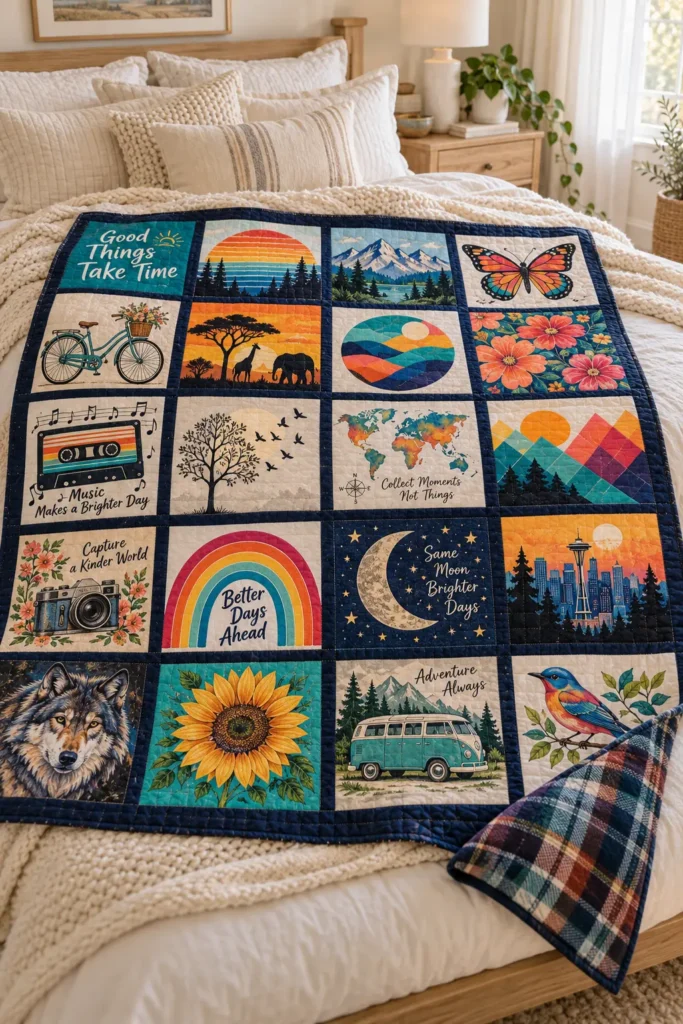
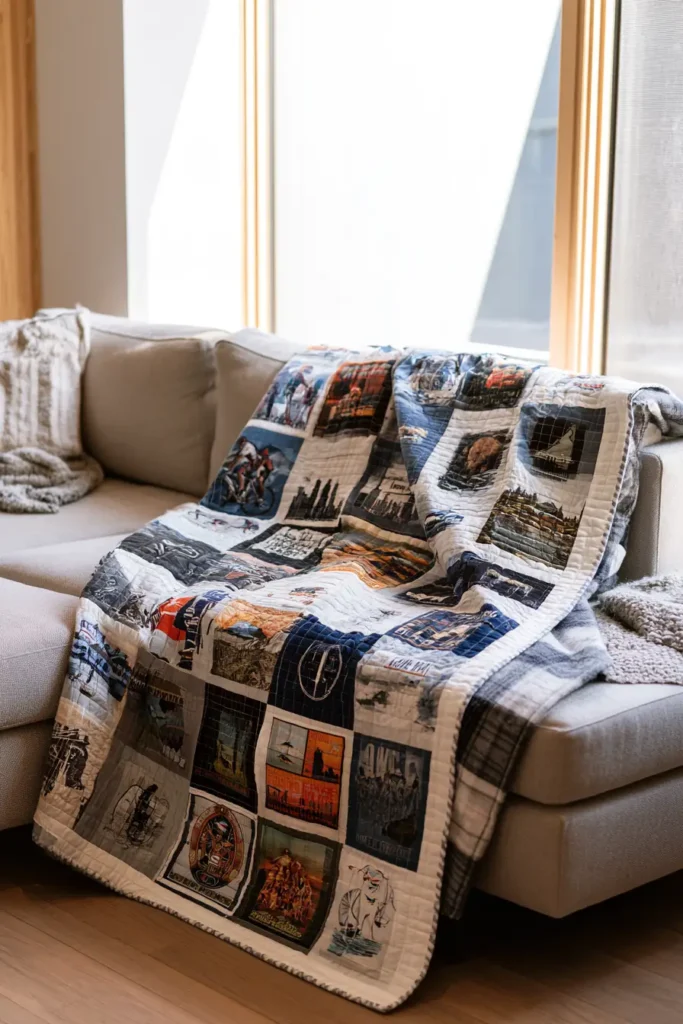
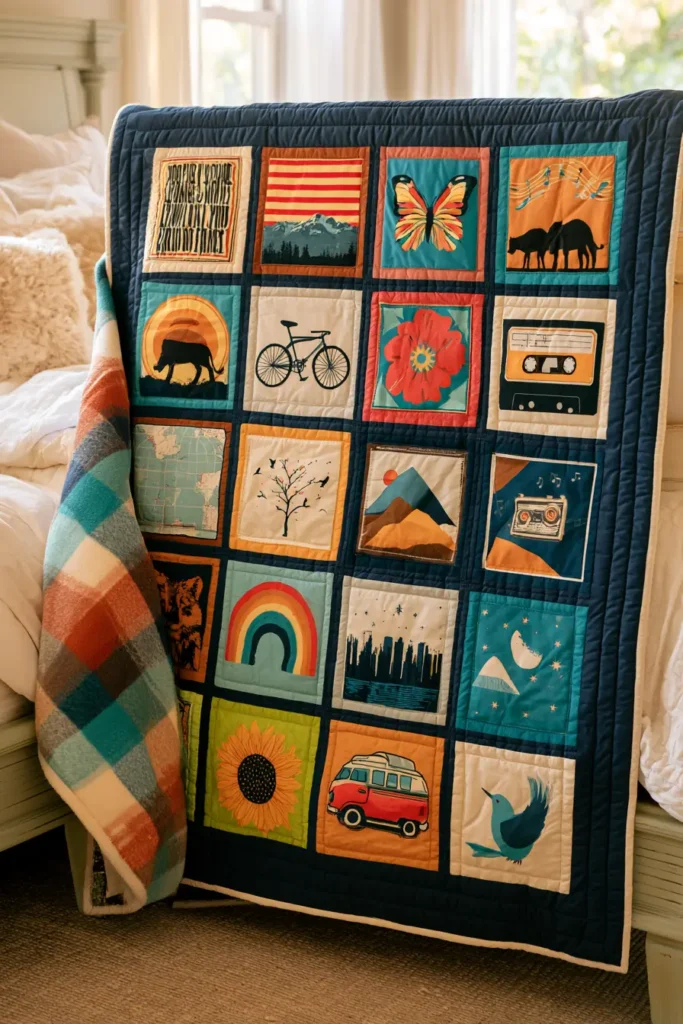
12. Sustainable Scrap-Busting T-Shirt Quilt Using Old and Outgrown Shirts
A sustainable scrap-busting T-shirt quilt is a practical way to turn worn, outgrown, and leftover shirts into a bright, useful quilt without wasting the smaller pieces that are often left behind after cutting large graphics. Instead of relying only on full-size shirt designs, this version combines larger T-shirt panels with pieced scrap sections made from sleeves, backs, plain knit areas, and smaller printed motifs. The result feels lively, resourceful, and full of personality.
This design works especially well for a colorful memory quilt because it allows a wider range of materials to be included. Large front graphics can become feature blocks, while pocket logos, small printed areas, stripes, plain jersey pieces, and leftover cotton scraps can all be turned into patchwork filler blocks. In spirit, it sits somewhere between a classic memory quilt and a scrap quilt, which has long been one of quilting’s most thrifty and creative traditions.
Finished Size and Quilt Plan
This quilt finishes at approximately 60″ x 72″.
Use a layout based on 30 blocks total, arranged 5 blocks across x 6 blocks down.
Each block finishes at:
- 12″ x 12″
Cut each finished block to:
- 12 1/2″ x 12 1/2″ unfinished
To make the quilt more scrap-friendly, use two kinds of blocks:
- 15 feature T-shirt blocks
- 15 scrap-pieced patchwork blocks
This alternating approach keeps the quilt balanced and helps smaller shirt remnants go much farther.
Materials
- 15 to 20 old or outgrown T-shirts, depending on size
- Leftover T-shirt scraps from fronts, backs, and sleeves
- Optional small pieces of quilting cotton for extra color and stability
- 3 1/2 to 4 yards lightweight fusible interfacing
- Batting at least 68″ x 80″
- Backing at least 68″ x 80″
- 5/8 yard binding fabric
- Coordinating thread
- Rotary cutter and mat
- Acrylic ruler
- 12 1/2″ square ruler if available
- Iron and pressing cloth
- Sewing machine
- Walking foot
- Safety pins or basting spray
Design Inspirations – Digitally Modified Images. Texture and color may vary from the actual product.
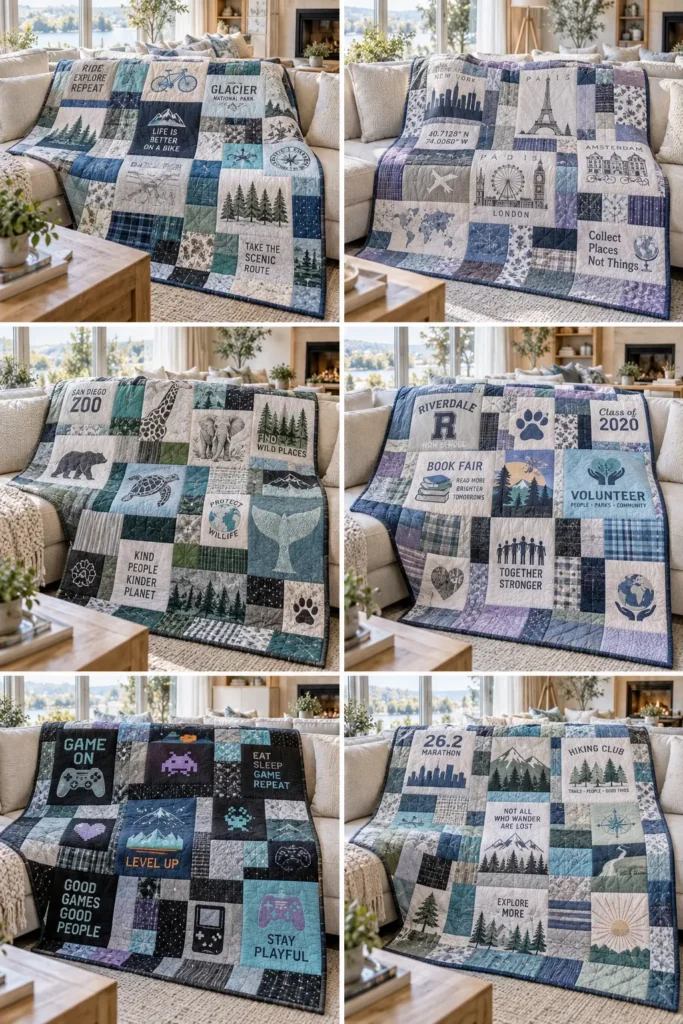
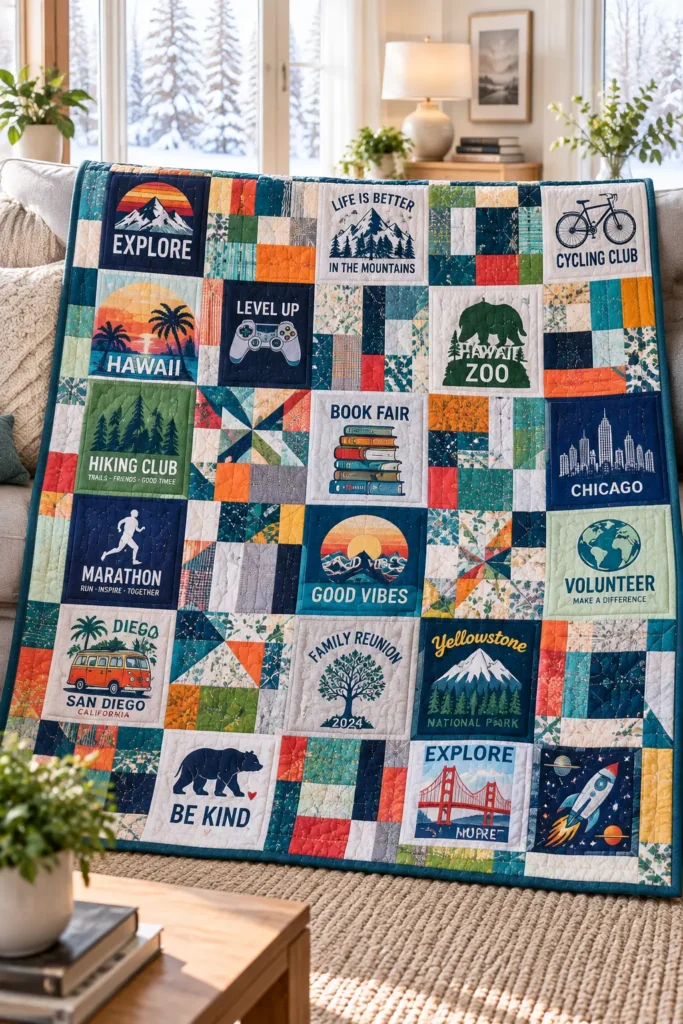
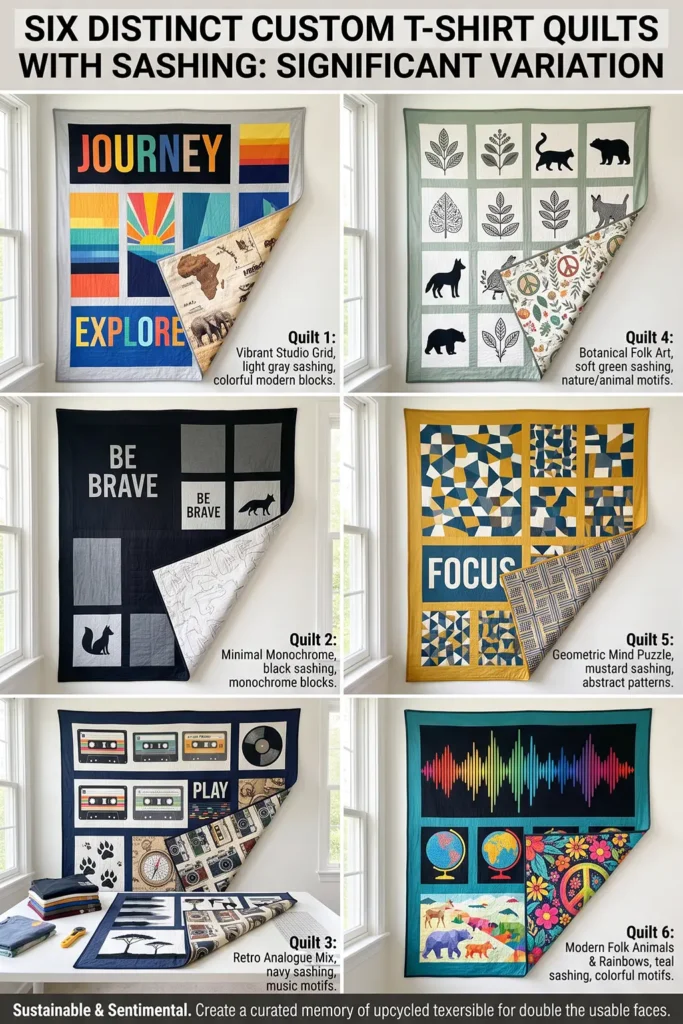
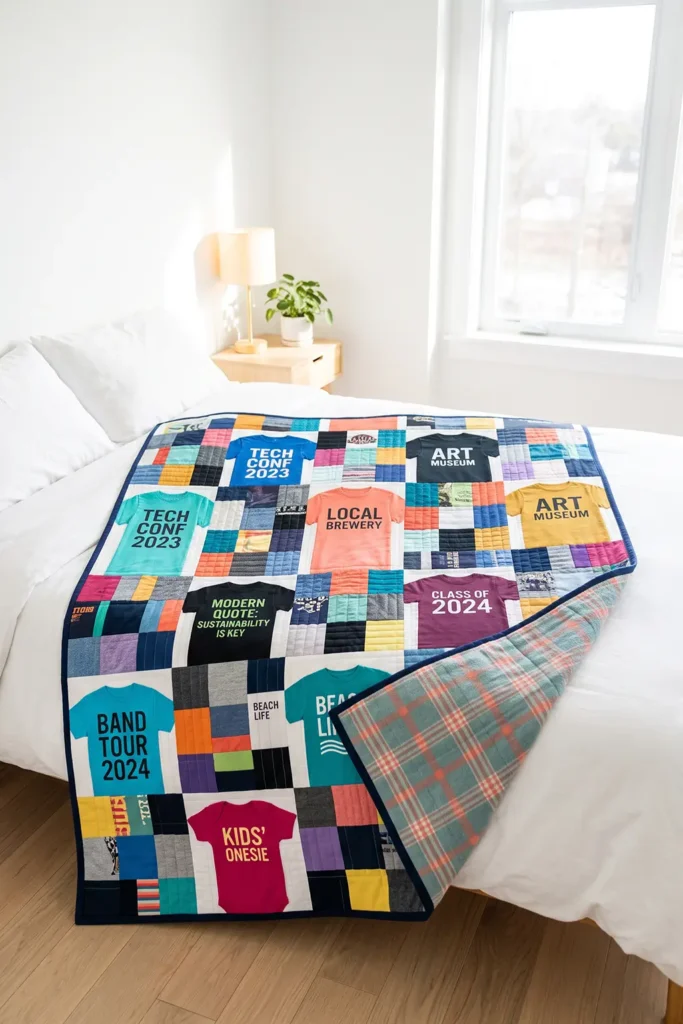
Suggested Color Direction
Because this is a scrap-busting quilt, the colors can be lively and mixed. A bright palette works beautifully here:
- turquoise
- coral
- cobalt
- mustard
- lime
- orange
- raspberry
- teal
- violet
- sunny yellow
Balance these with black, white, navy, gray, and heather tones from the T-shirts.
Assembly at a Glance
The quilt is made from 30 blocks:
- 15 feature blocks cut from larger shirt graphics
- 15 scrap-pieced blocks made from smaller remnants
Layout:
- 5 columns
- 6 rows
Each block is 12 1/2″ square unfinished, so the quilt top measures:
- 60 1/2″ x 72 1/2″ unfinished
After quilting and binding, it finishes at about:
- 60″ x 72″
A simple alternating layout works well:
- Row 1: feature, scrap, feature, scrap, feature
- Row 2: scrap, feature, scrap, feature, scrap
- Repeat this checkerboard-style arrangement through all 6 rows
This keeps the larger graphics evenly spaced and lets the scrap blocks act like colorful connectors.
Step-by-Step Guide
Step 1: Sort the Shirts Into Large Graphics and Small Usable Pieces
Go through the old and outgrown shirts and divide them into categories:
- large graphics suitable for full blocks
- smaller prints, logos, and motifs
- plain colored jersey areas
- sleeves and back panels that can become patchwork pieces
For this quilt, aim to collect enough material for 15 feature blocks and 15 scrap-pieced blocks.
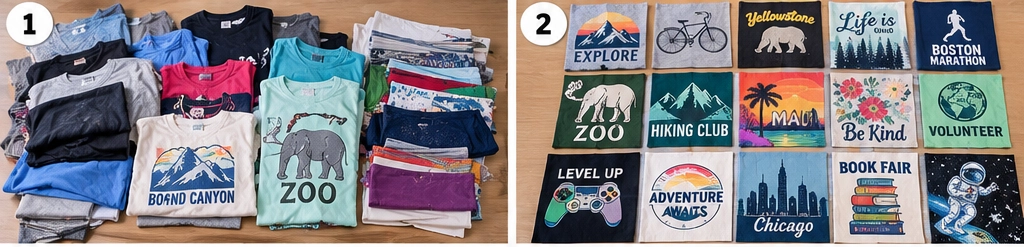
Step 2: Decide Which Shirts Will Become Feature Blocks
Choose 15 strong graphics for the main feature blocks. These can include school shirts, event tees, travel shirts, sports shirts, band tees, fun sayings, or colorful kid shirts. Make sure each design can fit comfortably inside a 12 1/2″ square.
Step 3: Reserve the Remaining Shirts for Scrap Blocks
Set aside the leftovers from the chosen shirts and any additional old or outgrown shirts. These will be cut into smaller shapes for the scrap-pieced blocks. This is where the “scrap-busting” part really happens, because even modest shirt remnants become useful.

Step 4: Wash and Dry Everything
Wash and dry all shirts before cutting. If you plan to include any quilting cotton in the scrap blocks or for the backing, prewash that too. T-shirt quilts hold up best when shrinkage is dealt with before construction.
Step 5: Cut the Shirts Apart
Cut along the side seams, remove sleeves, and separate the front and back panels. Keep the offcuts organized. Do not throw away plain colored areas yet—those pieces are often perfect for patchwork filler.

Step 6: Cut the Interfacing
Cut 15 interfacing squares about 14″ x 14″ for the large feature blocks.
Then cut additional interfacing pieces for the scrap work. For the scrap blocks, it is helpful to cut 15 foundation squares at 12 1/2″ x 12 1/2″. These can serve as foundations for building the pieced jersey blocks more neatly.
Step 7: Fuse the Interfacing to the Feature Panels
Place each large graphic panel wrong side up and fuse one 14″ x 14″ interfacing square behind it according to the product instructions. Press by lifting and placing the iron, not sliding it, so the knit fabric does not stretch.

Step 8: Trim the 15 Feature Blocks
Trim the stabilized feature panels to exactly:
- 12 1/2″ x 12 1/2″
Center the design when appropriate, but slight off-centering can work well if the artwork has a directional look. You should now have 15 finished feature blocks ready for the layout.
Step 9: Cut the Scrap Pieces for the Patchwork Blocks
From the remaining shirt pieces, cut a mix of shapes such as:
- 2 1/2″ x 4 1/2″
- 2 1/2″ x 6 1/2″
- 4 1/2″ x 4 1/2″
- 4 1/2″ x 6 1/2″
- 6 1/2″ x 6 1/2″
These measurements include seam allowance and are easy to combine into 12 1/2″ square unfinished blocks. If a small printed motif is worth saving, cut around it generously and build around it later.

Step 10: Build the 15 Scrap-Pieced Blocks
Use the smaller shirt pieces to assemble 15 patchwork blocks, each measuring 12 1/2″ x 12 1/2″ unfinished. You can sew them in rows, columns, or small sections first.
One simple recipe is:
- four 6 1/2″ squares in a 2 x 2 arrangement
Another option is:
- one 6 1/2″ x 12 1/2″ strip section
- plus two 6 1/2″ squares
Mix the shapes so the blocks feel varied. If you are using the 12 1/2″ interfacing squares as foundations, build the patchwork directly on those for extra control.
Step 11: Press and Square the Scrap Blocks
After sewing each scrap block, press it flat and trim it to exactly:
- 12 1/2″ x 12 1/2″
This step is important. Scrap-pieced jersey can shift more than quilting cotton, so accurate squaring now makes the full quilt much easier to assemble later.
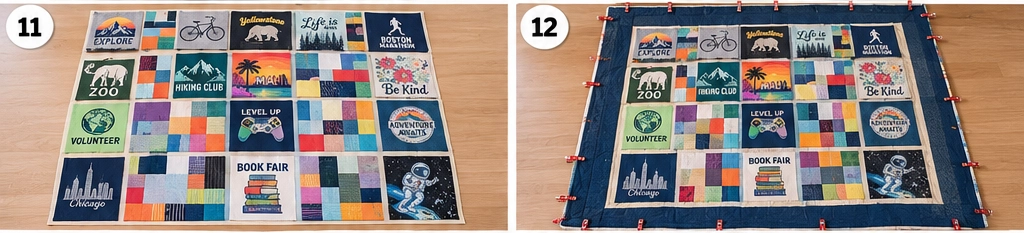
Step 12: Lay Out the Quilt Top
Arrange the 30 blocks in 6 rows of 5 blocks each. Alternate the feature blocks and scrap blocks as much as possible. Spread bright colors evenly across the quilt. If one area feels too dark or too busy, switch blocks around before sewing.
Step 13: Sew the Blocks Into Rows
Sew each row with 5 blocks using a 1/4″ seam allowance.
Each finished row should measure approximately:
- 60 1/2″ wide x 12 1/2″ high unfinished
Make all 6 rows, checking that the blocks remain oriented correctly and that the feature designs stay upright.

Step 14: Join the Rows
Sew the 6 rows together in order. Pin carefully at the block intersections to keep the rows aligned. Once assembled, the quilt top should measure approximately:
- 60 1/2″ x 72 1/2″ unfinished
This will finish to about 60″ x 72″ after quilting and binding.
Step 15: Prepare the Backing and Batting
Cut the batting and backing to about:
- 68″ x 80″
This gives several extra inches on every side for quilting and trimming. If the backing must be pieced, press the seams flat before layering.

Step 16: Layer and Baste the Quilt
Lay the backing right side down, then the batting, then the quilt top right side up. Smooth each layer carefully. Baste with pins or spray, placing basting points roughly every 4″ to 5″ so the T-shirt blocks stay stable.
Step 17: Quilt the Layers
Straight-line quilting works especially well for this style. Quilt either:
- along the block seams and then add a second line 1″ inside some blocks, or
- use a light all-over grid spaced 2″ to 4″ apart, depending on batting requirements
Avoid stitching too densely through thick printed areas. Quilt enough to stabilize the scrap blocks well, since pieced jersey has more seams than the larger feature blocks.

Step 18: Trim and Bind the Quilt
Trim the quilt square after quilting. A 60″ x 72″ quilt has a perimeter of 264″, so prepare about 285″ to 290″ of binding.
Cut:
- 7 strips at 2 1/2″ x width of fabric
Join the strips, press them in half lengthwise, and sew the binding to the quilt using a 1/4″ seam allowance. Fold to the back and finish by hand or machine.
Helpful Note
A scrap-busting T-shirt quilt works best when you do not think of the leftovers as second-class fabric. Small shirt pieces can add as much character as the main graphics, especially if they include stripes, small motifs, unusual colors, or partial designs that still look interesting when cut smaller.
If a scrap block looks too chaotic, add structure by repeating one color in several places or by pairing busy pieces with a few calm solids cut from plain T-shirt backs. Quilters have used this kind of balance for generations in scrap quilts, where variety is the charm but rhythm keeps the design from becoming messy.
Because knit fabric stretches, it is worth taking extra time to keep the scrap blocks square. Even though the quilt is meant to look casual and resourceful, accurate measuring and trimming are what make the finished quilt look polished.
Other Design Inspirations – Digitally Modified Images. Texture and color may vary from the actual product.
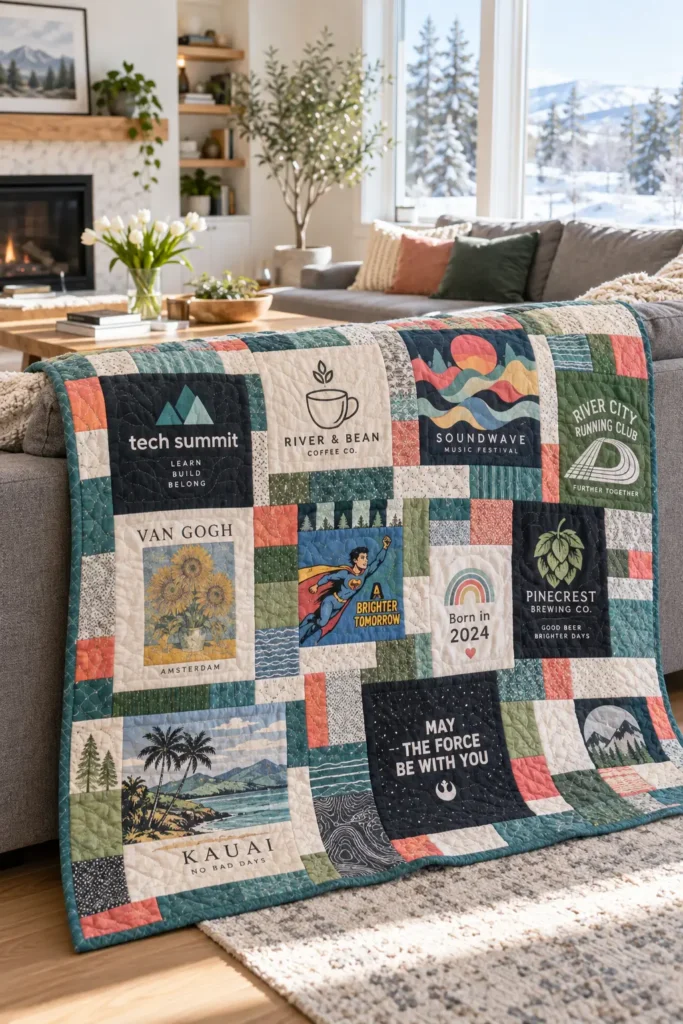
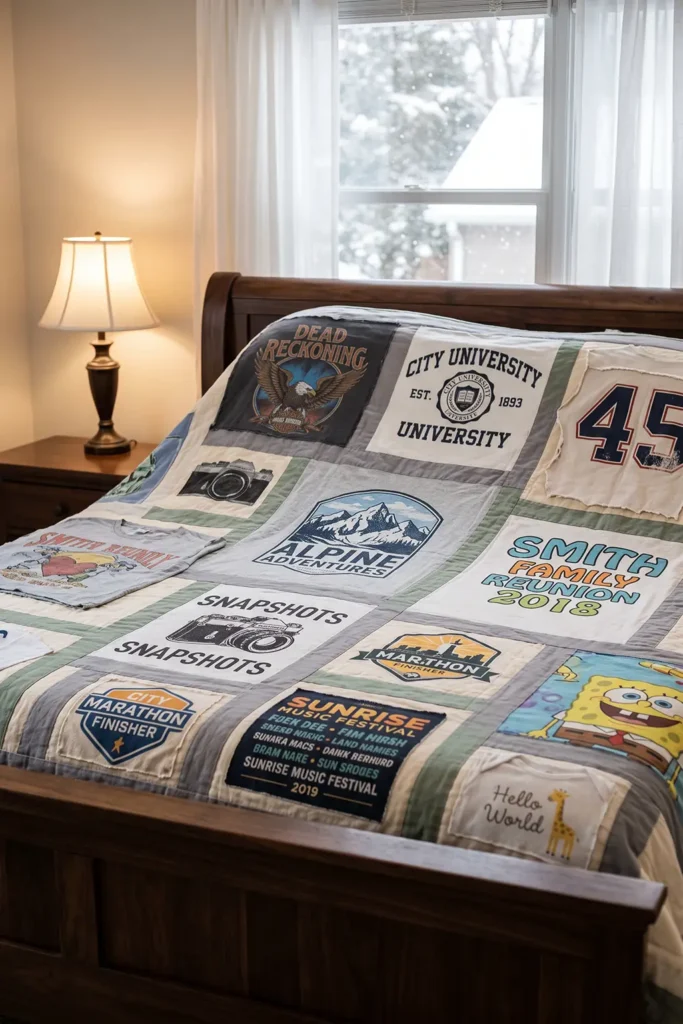
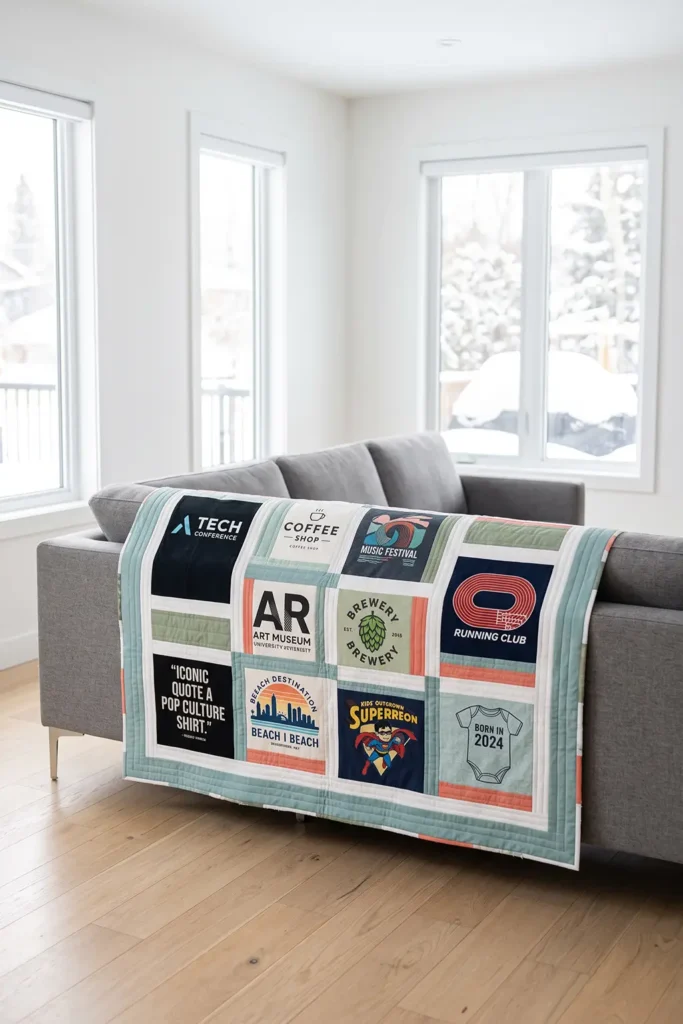
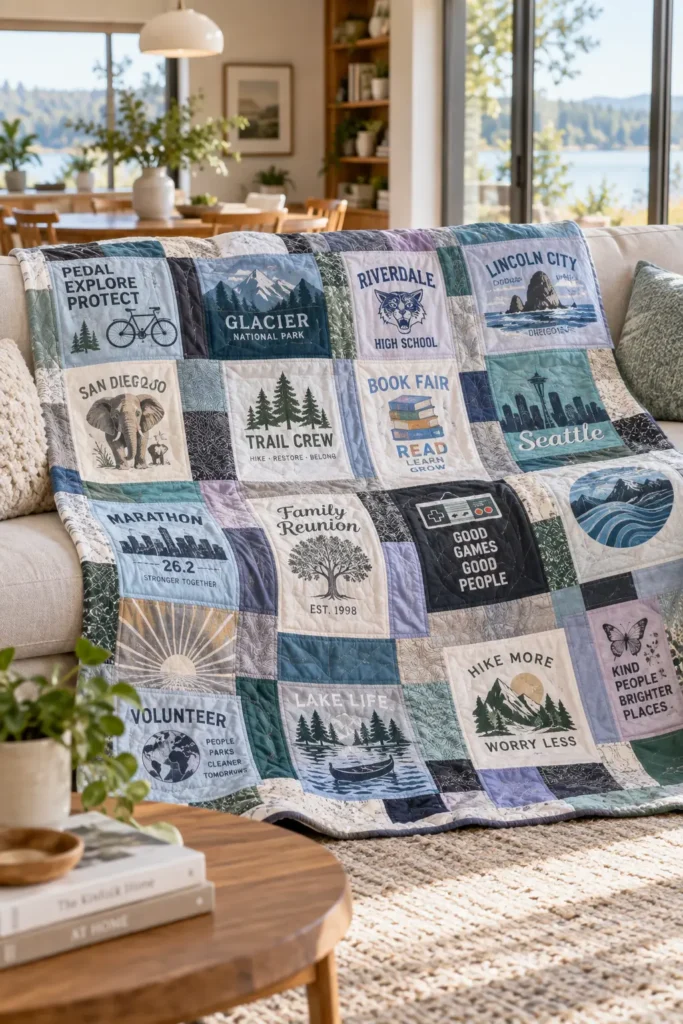
Conclusion
A t-shirt quilt is the most personal quilt most people will ever own, because it was already personal before it was a quilt. The craft is in the making; the meaning was there from the start. And unlike most sentimental objects, which sit in boxes and are discovered at house moves, a quilt gets used. It goes on the sofa, the bed, or the chair in the corner, and the shirts it’s made from are seen and handled, not stored. That’s what makes it worth the time.
T-Shirt Quilt Ideas
The best T-Shirt Quilt Ideas match the shirts you actually have. A drawer full of college shirts calls for the graduation layout. A decade of race bibs and athletic tees calls for the sports version. Baby clothes that have been sitting in a bin since a child started school are ready for the kids’ memory quilt. And if the shirts are simply miscellaneous – a lifetime of accumulated fabric with no single theme – the puzzle layout and the color-coordinated version are both built for exactly that. Whatever the starting point, the process is the same: stabilize, cut, piece, and quilt. The shirts do the rest.

