

Quilted Cat Bed and Mat Ideas: 10 Cozy Handmade Designs to Sew
Quilted Cat Bed and Mat Ideas begin with the same three-layer construction as any quilt — pieced top, batting, backing — but scaled down to suit an animal that weighs eight pounds, sleeps eighteen hours a day, and has very specific opinions about where it does so. A cat bed is essentially a small lap quilt with one job: to be the place a cat actually chooses to sleep rather than the arm of the sofa you were hoping to protect.
That’s a harder brief than it sounds, because cats are selective in a way dogs generally aren’t. Get the size, the softness, and the warmth right and the bed gets used. Get any one of them wrong, and it becomes a surface the cat walks past.
Quilted Cat Bed and Mat Ideas
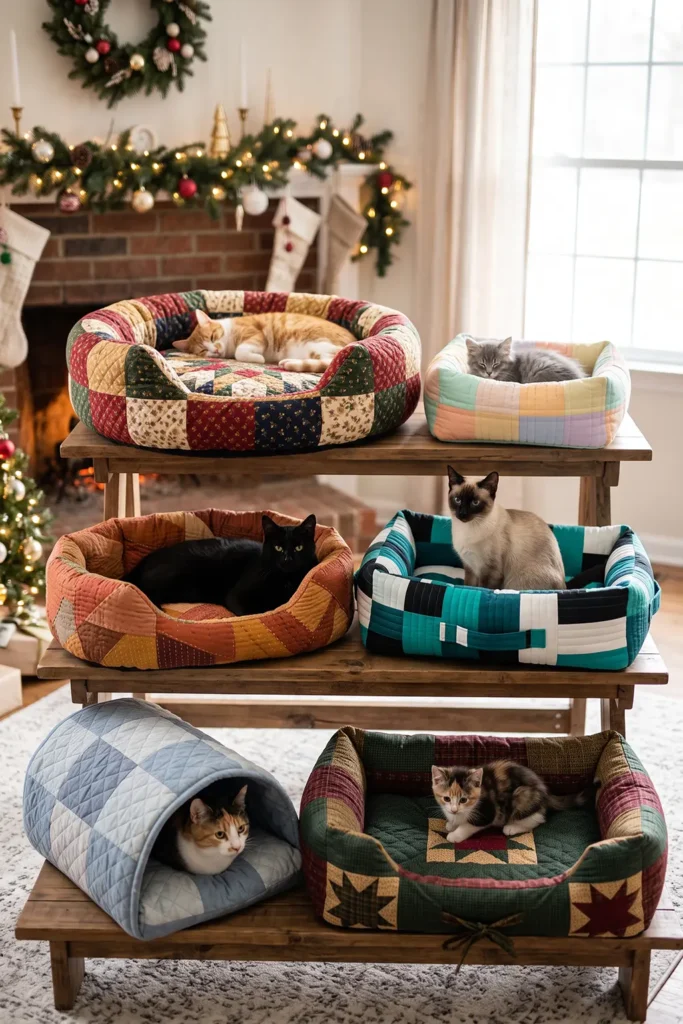
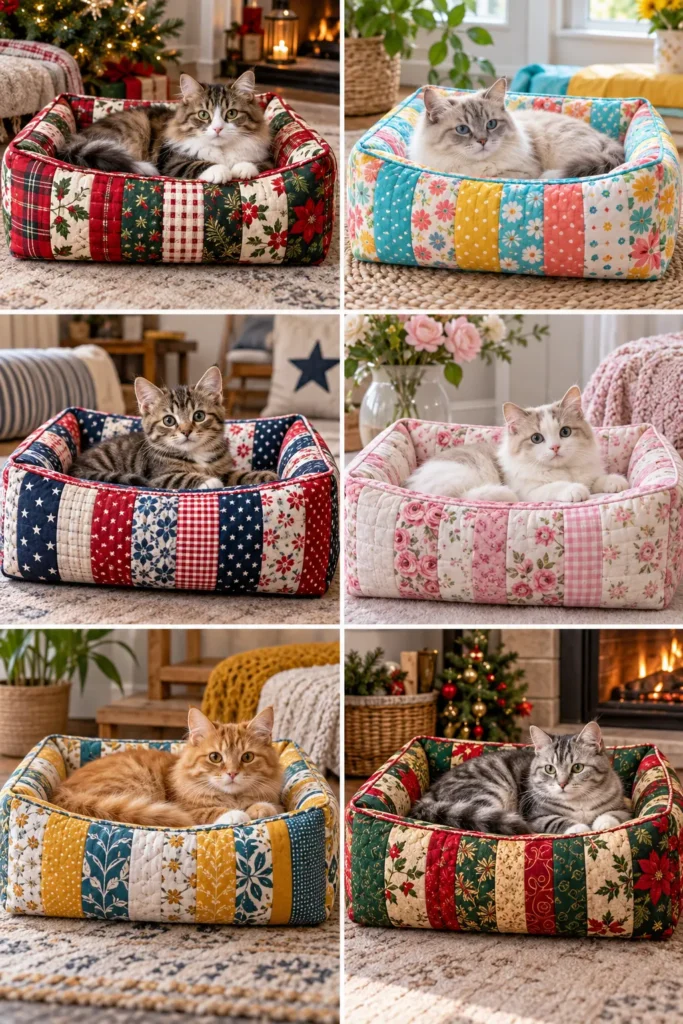
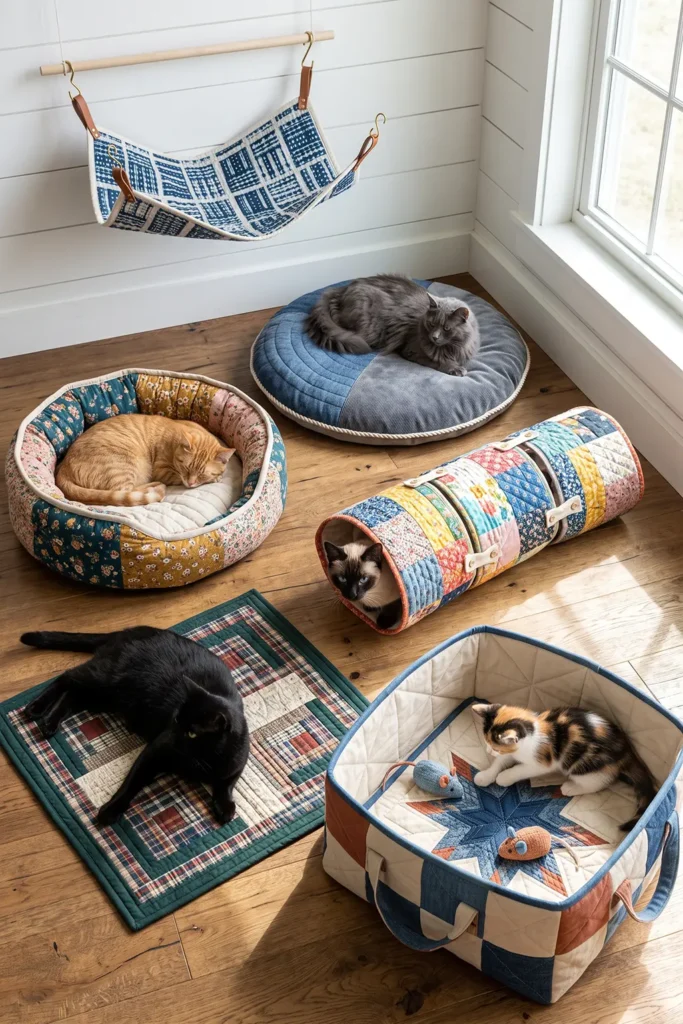
This collection of Quilted Cat Bed and Mat Ideas covers ten designs for cats of every temperament and homes of every style. The classic patchwork bed and the jelly roll version are the fastest starting points, built from straightforward techniques and finished in a weekend. The round bed with raised sides suits the curler — the cat that likes to press its back against a wall — while the flat scrappy mat suits the sprawler who finds enclosed spaces too confining.
The flannel bed adds softness for winter, the Scandi-style pad and geometric mat keep things looking designed rather than obviously pet-themed, and the farmhouse plaid bed sits comfortably in rooms already leaning that way. For pampered indoor cats, there’s a proper quilted lounger, and for cats that travel — or whose sleeping spots move between rooms — there’s a portable mat that works in a carrier, a crate, or on a windowsill.
See also: Quilted Dog Bed Ideas – Quilted Christmas Throw – Farmhouse Quilt Jackets & Vests – Sashiko Quilt Jackets and Vests – Fall Quilted Jacket and Vest – Nakshi Kantha Jackets and Vests
Why Make a Quilted Cat Bed
The practical case is the same as for any handmade pet bed: fit, material choice, and washability. A cat bed made to your cat’s actual measurements, from fabric you’ve tested for texture and smell, and that you can wash as often as you need, is almost always better than a store-bought one on all three counts. But one cat-specific reason makes the handmade version particularly worth the effort.
Cats respond to scent and texture in ways dogs don’t — a bed that smells faintly of you, made from fabric similar in texture to something the cat already kneads and sleeps on, is far more likely to be adopted than something that arrived in plastic packaging. Putting a worn piece of your clothing inside the first time helps, but using familiar-feeling fabric from the start is more likely to convert a suspicious cat. Sewing for a cat rather than a dog differs mainly in the scale of the forces involved. Cats are light; they don’t drag beds across rooms, and they’re self-cleaning — so durability matters slightly less than it does for a dog bed, and softness matters considerably more.
Tips for Choosing Fabrics and Colors
Softness is the first priority for cats. Unlike a dog bed, which needs to resist claws and dragging, a cat bed needs to feel good underfoot — cats knead before lying down, and a fabric that catches their claws or feels unpleasant will be rejected immediately. Tightly woven quilting cotton is a safe choice, but cotton flannel, brushed cotton, and minky are even better received by most cats, since their surface texture is closer to fur. Avoid loosely woven fabrics that snag claws, and avoid anything with a strong chemical smell from dyes or finishes — wash everything before use.
For batting, high-loft polyester is the most practical choice: it’s light, washable, dries quickly, and gives the plush depth cats seem to prefer over a flat, firm surface. Low-loft cotton batting makes a thinner, firmer bed more suited to a mat than a sleeping spot. For the base, add a layer of non-slip fabric or a few rows of non-slip stitching — a mat that slides across the floor the moment a cat lands on it will be abandoned.
On color, the honest answer is that medium-toned prints hide cat hair better than anything else — solids show every strand. Dark fabrics show light-colored hair and light fabrics show dark hair, so a busy, small-scale mid-tone print is the most forgiving choice. If the bed is for a specific room, match it to the room rather than to the cat, since the cat will choose the sunny spot regardless of color.
Common Mistakes to Avoid When Sewing
The most common is making it too small. Cats like to fit with room to spare, and a bed that’s exactly cat-sized will be used occasionally and ignored most of the time. Add at least 3-4 inches in each direction beyond your cat’s measured length. The second is using batting that’s too thin. A single layer of low-loft batting compresses under a sleeping cat to almost nothing within a few weeks and offers no warmth or cushioning. Use high-loft batting, or two layers of medium-loft, and expect some compression over time.
Third is forgetting to pre-wash everything. A cat bed washed at 40-60 degrees will shrink if the fabric and batting weren’t pre-shrunk first, and a bed that comes out misshapen after its first wash is a wasted project. Wash and dry all fabrics before cutting. Fourth: not reinforcing the hanging loop or handle if you add one — a cat that uses a raised bed will apply real downward force on anything used to hang or move it, and an unstrengthened loop will fail. Stitch any attachment point through all layers and backstitch generously.
Fifth, and specific to cats: avoid using strong-smelling products anywhere near the bed during construction — spray adhesives, certain batting treatments, or heavily scented pressing sprays. A cat that decides a bed smells wrong will never use it, and you can’t recover from that.
1. Classic Patchwork Quilted Cat Bed for Cozy Everyday Naps
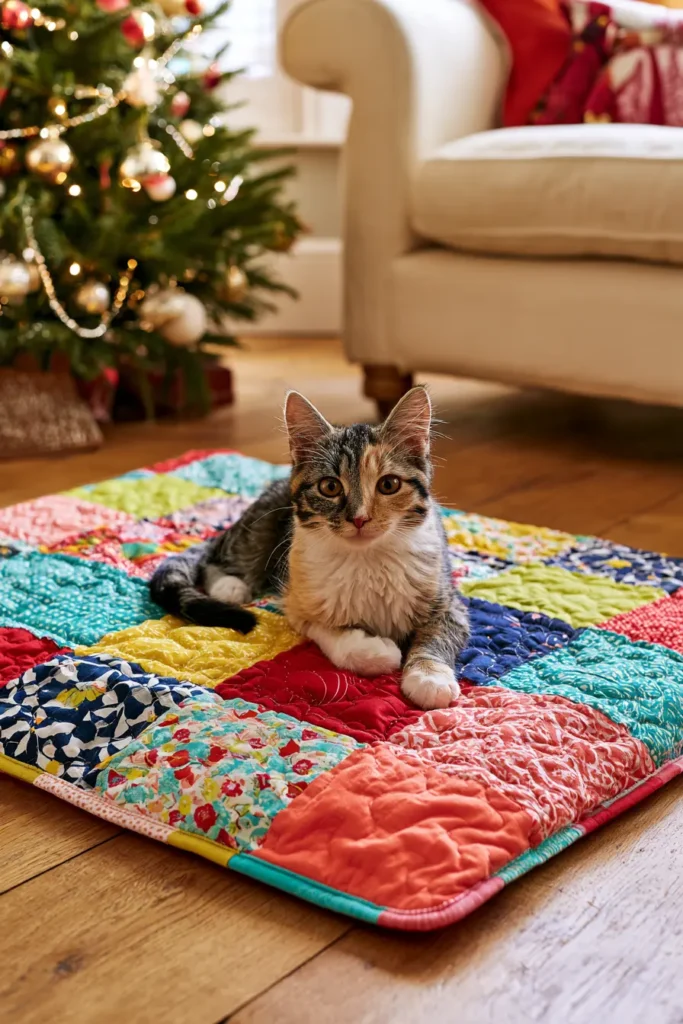
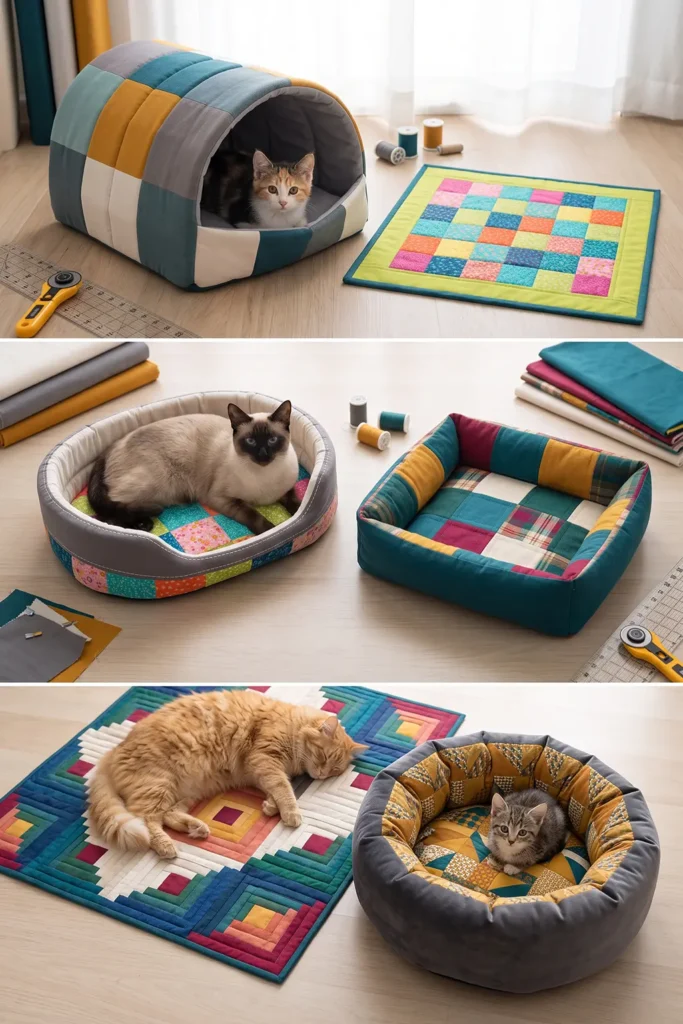
A classic patchwork quilted cat bed is one of those projects that feels both cheerful and practical. It combines the charm of traditional patchwork with the comfort of a softly padded pet bed, creating a cozy spot that looks right at home in a living room, bedroom, or sunny corner. For this version, the look is bright and lively, with vibrant quilt-cotton squares framed by a neat border and shaped into a simple boxed bed.
Patchwork has a long history of turning small pieces of fabric into something durable and useful, which makes it especially fitting for pet sewing. This project keeps that spirit intact while using realistic construction methods and clear measurements. The result is a quilted cat bed with a structured base, softly padded sides, and a comfortable center for everyday naps.
Project Details
- Finished bed size: approximately 20″ x 24″
- Finished side height: approximately 4″
- Skill level: confident beginner to intermediate
- Main fabric style: vibrant quilting cottons
- Seam allowances:
- 1/4″ for patchwork piecing
- 1/2″ for bed construction unless otherwise noted
Design Inspirations – Digitally Modified Images. Texture and color may vary from the actual product.
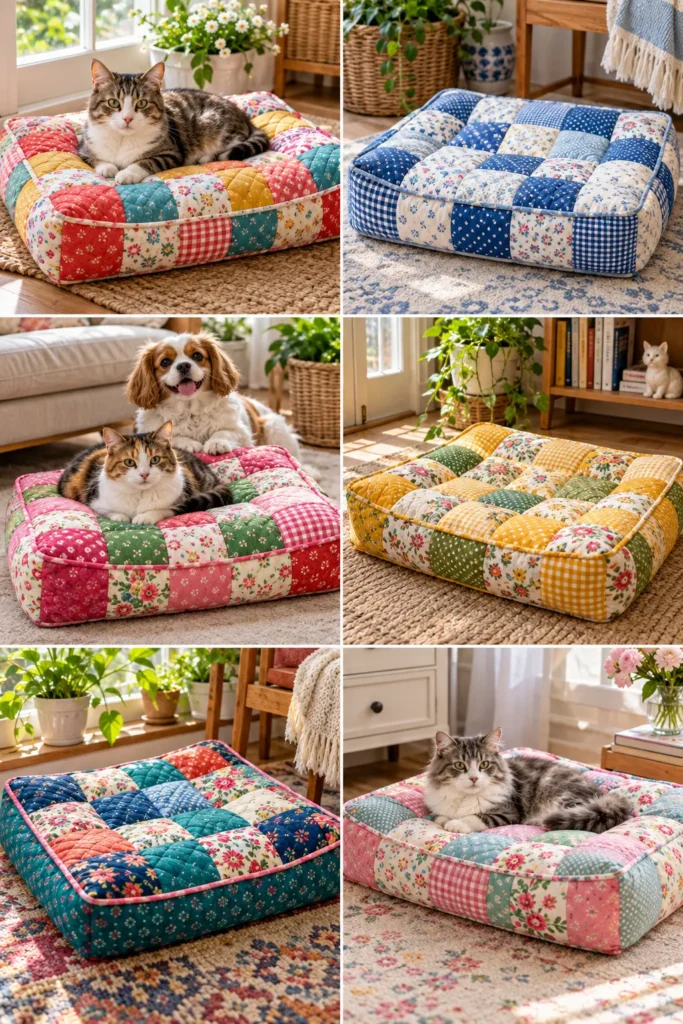
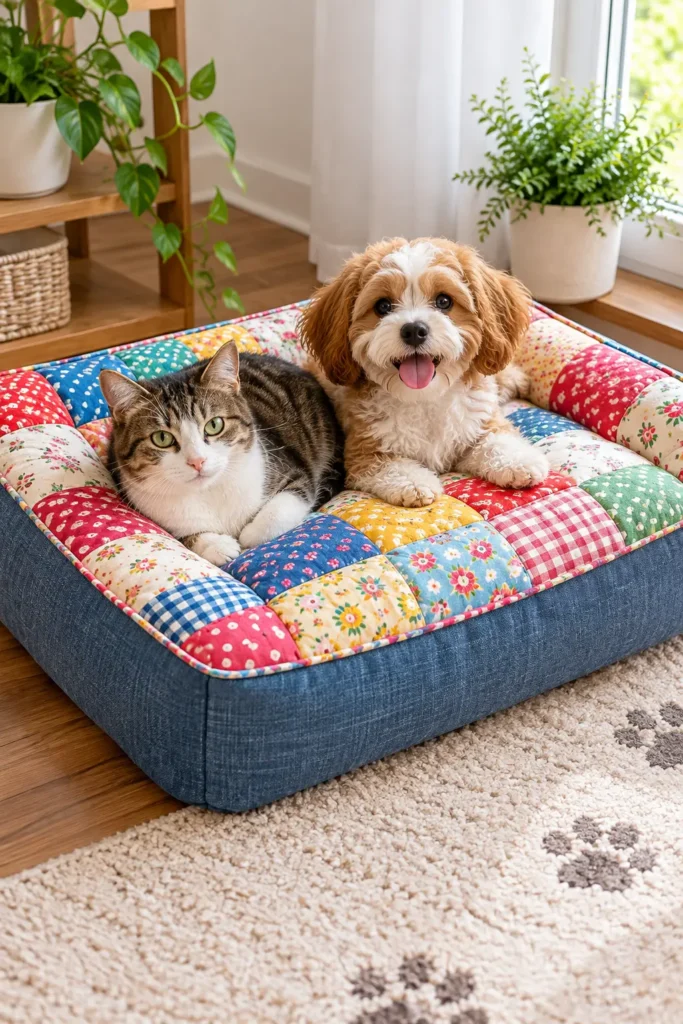
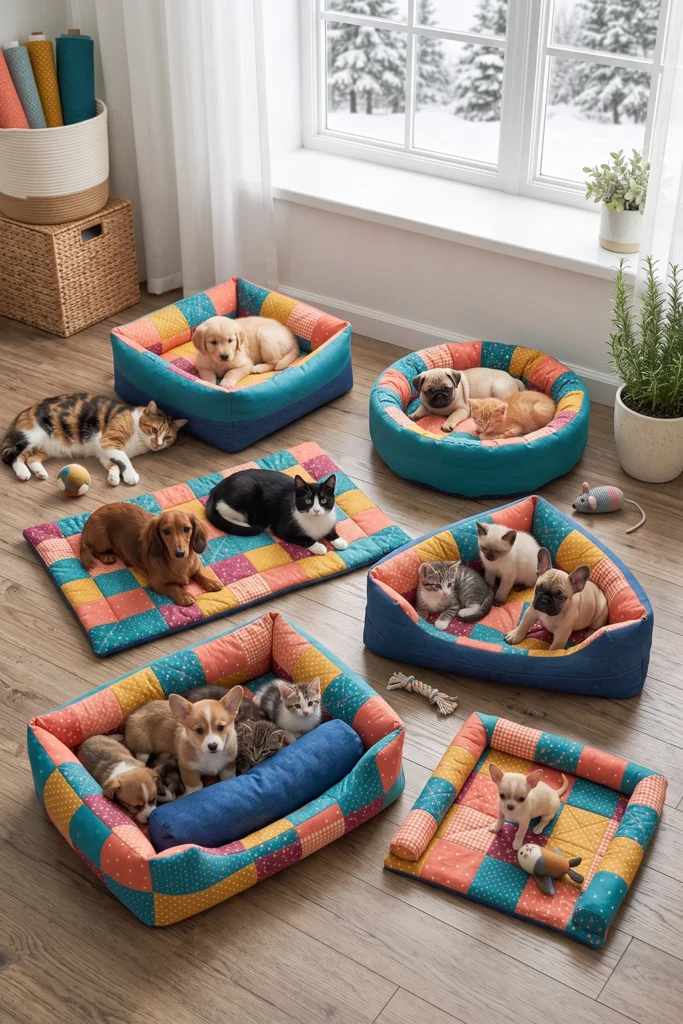
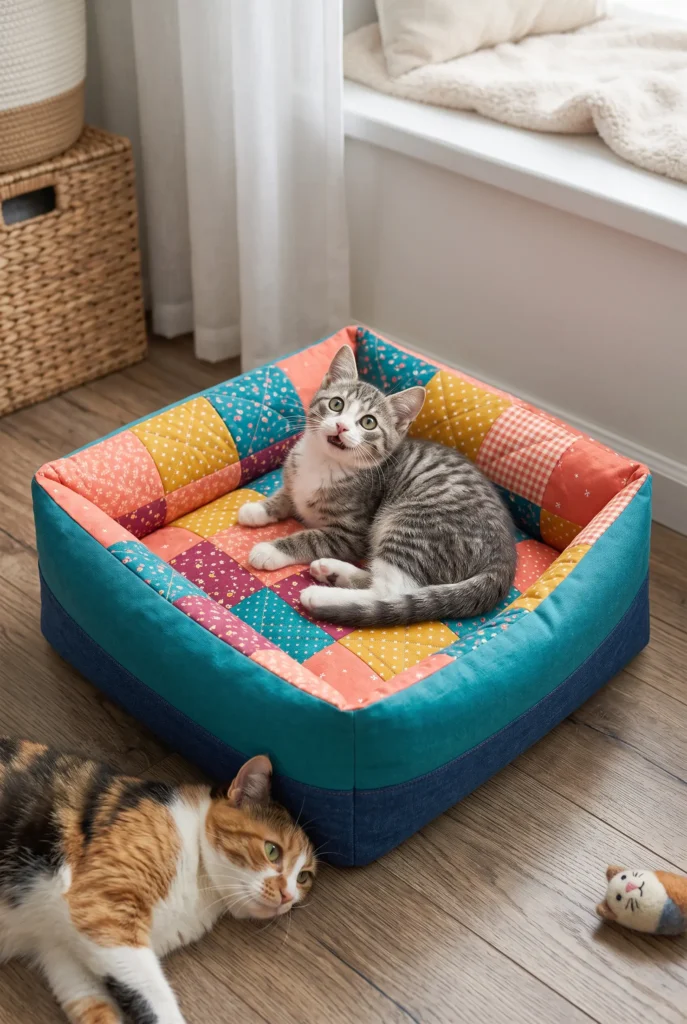
Materials
- 5 to 7 vibrant quilting cotton prints for the patchwork top
- 1 yard coordinating fabric for side lining and bottom
- 1/2 yard border or accent fabric
- 1 piece cotton batting, at least 24″ x 28″
- Additional low-loft batting or foam for the base support
- Polyester fiberfill for the side walls
- Non-slip fabric for the underside if desired
- Coordinating thread
- Rotary cutter, ruler, cutting mat
- Pins or clips
- Sewing machine
- Iron and pressing surface
Cutting Plan
For the patchwork top:
- Cut 20 squares at 4 1/2″ x 4 1/2″
Arrange them 4 across and 5 down - Cut 4 border strips at 2 1/2″ x 20 1/2″
For the bed body:
- Cut 1 bottom panel at 20 1/2″ x 24 1/2″
- Cut 1 outer side band at 90 1/2″ x 5 1/2″
- Cut 1 lining side band at 90 1/2″ x 5 1/2″
- Cut 1 batting strip for side band at 90″ x 4 1/2″
- Cut 1 extra padded base insert
Either:- 2 to 3 layers of batting at 19 1/2″ x 23 1/2″, or
- foam at 19″ x 23″ for a firmer bed
Assembly at a Glance
- Piece the patchwork center.
- Add borders to create the quilted top.
- Quilt the top with batting and backing.
- Prepare the bed bottom.
- Sew the side bands into loops.
- Join and turn the side wall unit.
- Attach side walls to the base.
- Add base padding.
- Stuff side walls evenly.
- Close and finish neatly.
Step-by-Step Guide
Step 1: Choose the patchwork layout
Select 20 fabric squares in a bright, balanced mix. A lively combination such as coral, turquoise, yellow, red, leaf green, and white works beautifully for a classic cheerful look. Lay them out in 4 rows across and 5 rows down so the colors feel evenly distributed.
At 4 1/2″ cut size, each square finishes at 4″, so the patchwork center will finish at 16″ x 20″.
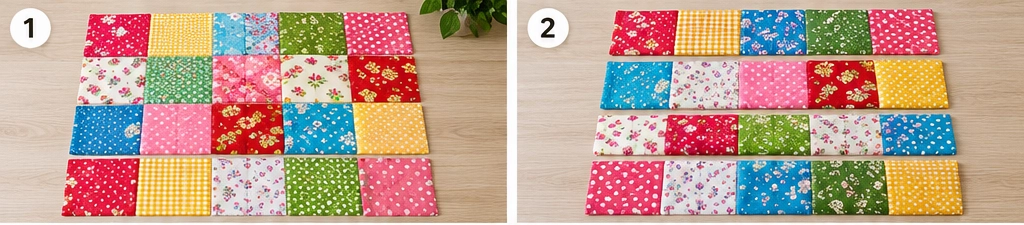
Step 2: Sew the squares into rows
Sew the squares into 5 rows of 4 squares each, using a 1/4″ seam allowance. Press the seams in alternating directions from row to row so they nest well later.
Each row should measure 16 1/2″ long x 4 1/2″ high before joining the rows.
Step 3: Join the rows into the patchwork center
Sew the 5 rows together in order. Match the seam intersections carefully so the squares line up cleanly. Press the full patchwork center flat.
The unfinished patchwork center should now measure approximately 16 1/2″ x 20 1/2″, which becomes 16″ x 20″ finished.
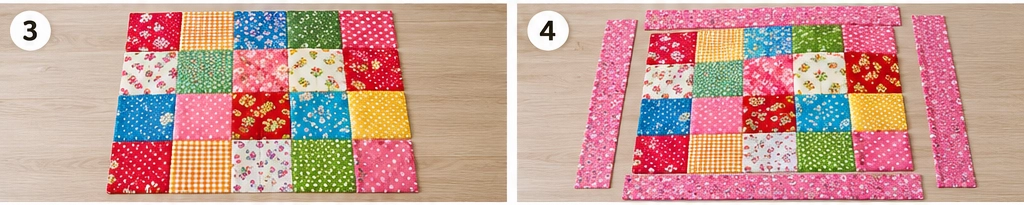
Step 4: Add the border strips
Attach the border strips to frame the patchwork center.
- Sew one 2 1/2″ x 20 1/2″ strip to each long side first.
- Then sew the remaining 2 1/2″ x 20 1/2″ strips to the top and bottom.
After sewing, the quilt top should measure 20 1/2″ x 24 1/2″ unfinished, which will finish at 20″ x 24″.
This bordered layout gives the bed a classic quilt look and also helps the center patchwork stand out.
Step 5: Build the quilt sandwich for the bed top
Layer the pieces in this order:
- Backing fabric, right side down
- Batting
- Patchwork top, right side up
Make the backing and batting at least 2″ larger on all sides than the top to allow for quilting shift. Smooth everything היט and baste with pins or spray baste.

Step 6: Quilt the top panel
Quilt the top using straight lines, gentle diagonal lines, or simple grid quilting. For a classic patchwork style, stitching 1/4″ to 1/2″ away from the seams works especially well and helps define each square.
Trim the quilted panel back down to 20 1/2″ x 24 1/2″ once quilting is complete.
Step 7: Prepare the bottom panel
Cut the bottom panel to 20 1/2″ x 24 1/2″. If you want extra durability, use a sturdy coordinating cotton, canvas-weight quilting cotton, or add a layer of batting behind it. If the bed will sit on smooth floors, a non-slip underside fabric is a useful option.
Set this bottom panel aside for final assembly.

Step 8: Sew the outer side band into a loop
Take the outer side band measuring 90 1/2″ x 5 1/2″. Join the short ends with a 1/2″ seam allowance to make a continuous loop.
The finished loop length will be 90″, which matches the perimeter of the 20 1/2″ x 24 1/2″ base:
- 20 1/2 + 20 1/2 + 24 1/2 + 24 1/2 = 90″
Press the seam open.
Step 9: Sew the lining side band into a loop
Repeat the same process with the lining side band, sewing the short ends together with a 1/2″ seam allowance. Press the seam open.
Now you should have:
- 1 outer side loop
- 1 lining side loop

Step 10: Add batting to the side walls
Lay the 90″ x 4 1/2″ batting strip against the wrong side of the outer side loop. Center it so there is a little fabric free at the top and bottom edges. Baste it in place close to the long raw edges if needed.
This gives the side walls soft structure without making them too bulky.
Step 11: Join the outer and lining side loops
Place the outer loop and lining loop right sides together. Sew around one long edge with a 1/2″ seam allowance. This seam becomes the finished top edge of the bed wall.
Turn the long tube right side out and press the top edge neatly. The side unit should now resemble a soft fabric ring.

Step 12: Mark quarter points on the base and side loop
Fold the quilted top/base and mark the center of each side with pins or clips. Do the same with the side loop. These matching points make it easier to ease the loop around the corners evenly.
This step is simple but important for keeping the walls smooth and balanced.
Step 13: Attach the outer side wall to the quilted top edge
With the quilted top panel right side up, pin or clip the raw lower edge of the outer side wall around the perimeter, right sides together. Match the quarter points first, then ease the band into place.
Sew with a 1/2″ seam allowance, pivoting carefully at the corners. Clip the seam allowance at the corners if needed so the wall turns smoothly.
At this point, the quilted top becomes the visible inner sleeping surface of the bed.

Step 14: Attach the lining side wall to the bottom panel
Take the bottom panel and sew the raw lower edge of the lining side wall to it, right sides together, again using a 1/2″ seam allowance. Leave a 6″ to 8″ opening along one long side for inserting the base padding and for final stuffing adjustments.
You now have the bed nearly enclosed, with one opening left for filling.
Step 15: Turn the bed right side out
Turn the whole bed through the opening. Push out the corners gently and shape the box form with your hands. The bed should now have a defined base and low fabric walls joined by a neat finished top edge.
Check that the seams sit evenly and that the side height is close to 4″ finished.
Step 16: Insert the base padding
Slide the prepared base insert into the floor of the bed through the opening.
For a soft but supportive result, use:
- 2 to 3 layers of batting trimmed to about 19 1/2″ x 23 1/2″, or
- foam trimmed to about 19″ x 23″
The insert should fit inside without buckling. Smooth it flat so the cat’s sleeping area stays comfortable.
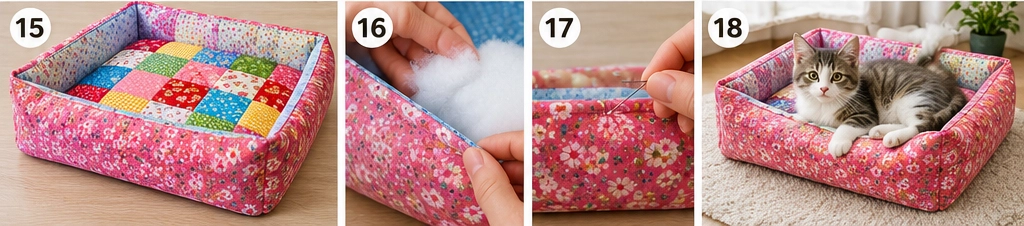
Step 17: Stuff the side walls evenly
Add polyester fiberfill into the side wall channel, distributing it evenly all the way around. Pack it firmly enough that the walls stand softly upright, but not so firmly that they feel hard.
A good guide is to stuff until the walls feel rounded and supportive, with no obvious hollow areas, especially at the corners.
Step 18: Close the opening and finish the bed
Fold in the raw edges of the opening and stitch it closed by hand with a ladder stitch or by machine close to the edge. Give the bed a final shaping by hand, patting the corners and smoothing the center.
If you want a slightly more tailored look, topstitch 1/8″ from the base seam around the outer perimeter. This helps the sides sit neatly and stabilizes the shape.
Finishing Notes
- Washable quilting cotton makes this project easier to maintain.
- A medium-density foam insert gives the bed a more polished, boutique feel.
- If you want a softer look, use extra batting instead of foam.
- Classic patchwork remains popular in both quilting and pet sewing because it makes excellent use of smaller cuts while still looking full of personality.
Other Design Inspirations – Digitally Modified Images. Texture and color may vary from the actual product.
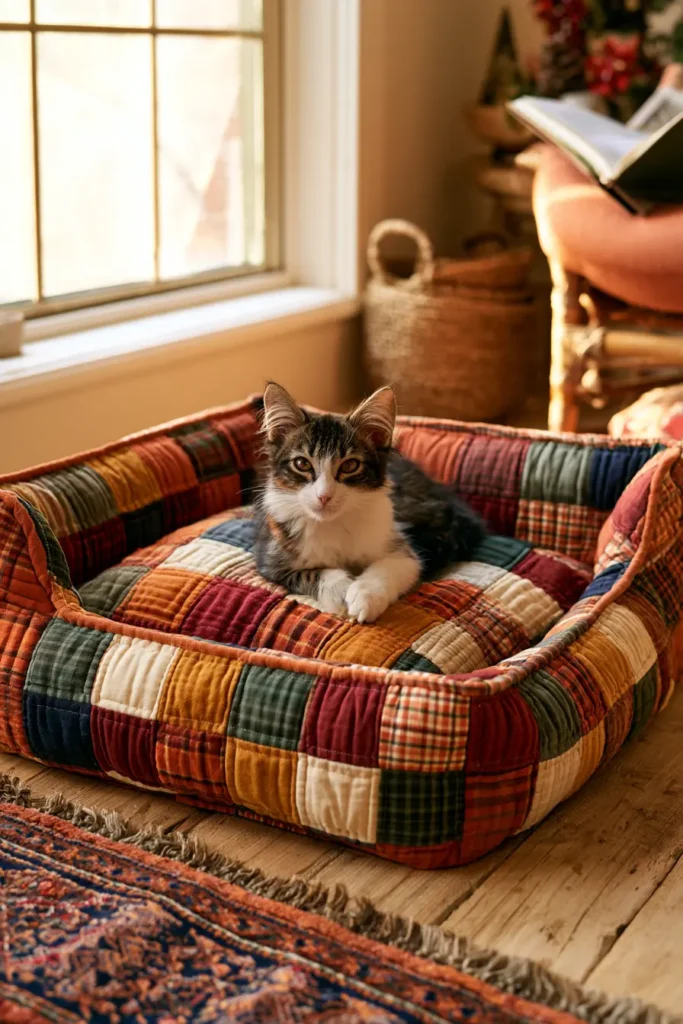


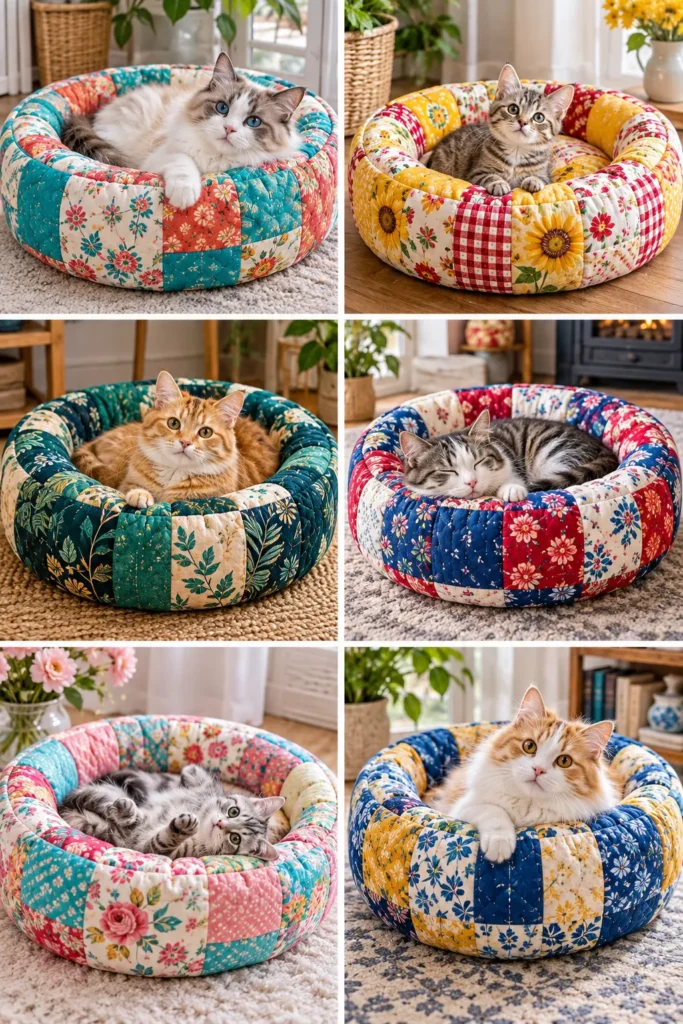
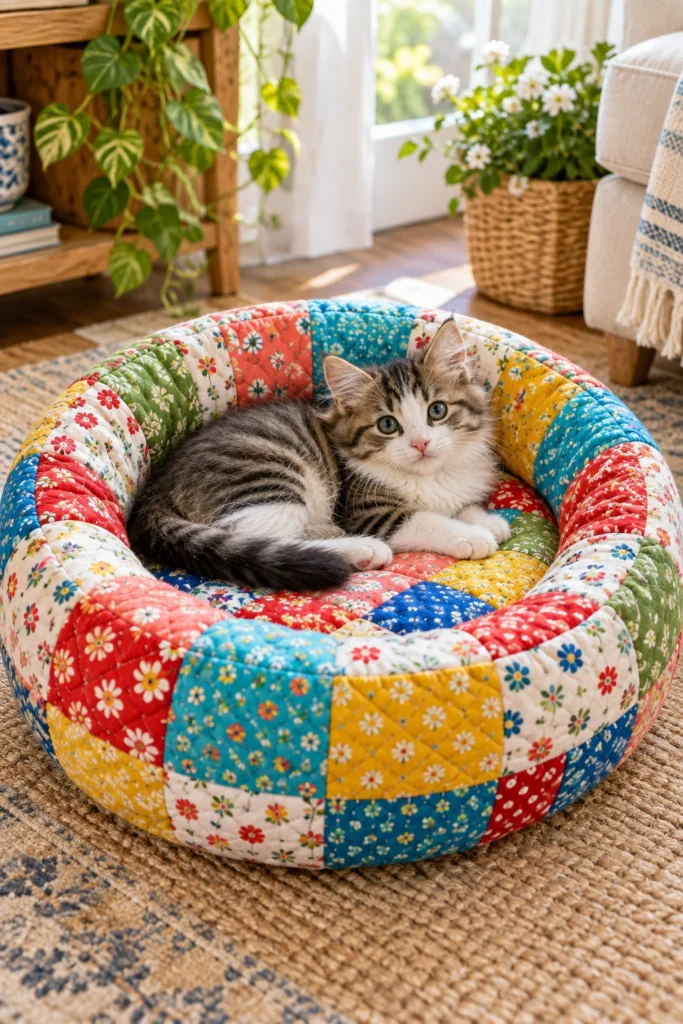
2. Round Quilted Cat Bed with Raised Sides for Curl-Up Comfort
A round quilted cat bed has a naturally cozy shape that suits the way many cats love to sleep—curled into a soft circle with their paws tucked in and their tail wrapped close. This version combines a quilted sleeping base with gently padded raised sides, creating a nest-like bed that feels secure and comfortable while still looking bright and decorative in the room.
Round pet beds have been popular for years because the circular form softens the look of a space and makes excellent use of patchwork or color-rich quilting cottons. For this design, vibrant prints keep the project cheerful and lively, while the construction stays practical and realistic for everyday use.
Project Details
- Finished size: about 22″ diameter
- Finished side height: about 4″
- Skill level: confident beginner to intermediate
- Seam allowances:
- 1/4″ for patchwork piecing
- 1/2″ for bed construction
Materials
- 25 quilting cotton squares in vibrant colors, each 5 1/2″ x 5 1/2″
- Backing fabric, at least 25″ x 25″
- Bottom fabric, at least 25″ x 25″
- 2 side-wall fabrics (or one fabric used twice), each at least 71″ x 6″
- Low-loft cotton batting for the quilted top, 25″ x 25″
- 1 batting strip for side wall, about 70″ x 4 1/2″
- Extra batting layers or foam for the base insert
- 1 foam circle about 21″ diameter, or
- 2 to 4 layers of batting cut into 21″ circles
- Polyester fiberfill for the raised sides
- Coordinating thread
- Rotary cutter, ruler, cutting mat
- Pins or clips
- Sewing machine
- Hand-sewing needle
- Large plate, bowl, or homemade cardboard template for drawing circles
Design Inspirations – Digitally Modified Images. Texture and color may vary from the actual product.
Cutting List
Patchwork top
- 25 squares at 5 1/2″ x 5 1/2″
Bed body
- 1 quilted top circle at 23″ diameter
- 1 bottom circle at 23″ diameter
- 1 outer side strip at 70 1/8″ x 5 1/2″
- 1 inner side strip at 70 1/8″ x 5 1/2″
- 1 batting strip for side wall at 70″ x 4 1/2″
- 1 base insert at about 21″ diameter
Assembly at a Glance
- Piece a vibrant patchwork panel.
- Quilt the panel and cut a round top.
- Cut the bottom circle and side strips.
- Build the raised side ring.
- Attach the ring to the top and bottom.
- Insert base padding and stuff the sides.
- Close the opening and finish neatly.
Step-by-Step Guide
Step 1: Choose the color palette and plan the layout
Pick bright quilting cottons in a lively mix such as coral, turquoise, sunny yellow, grass green, cherry red, cobalt, and white or cream for balance. Lay out the 25 squares in a 5 x 5 grid so the colors feel evenly distributed.
At this stage, avoid placing too many similar tones next to one another. A round bed looks especially attractive when the patchwork has contrast throughout, because the circle crops the edges and draws attention to the center.
Step 2: Sew the squares into rows
Sew the squares into 5 rows of 5 squares each using a 1/4″ seam allowance. Press the seams in alternating directions from row to row so they nest neatly when joined.
Each row will measure:
- 5 x 5 1/2″ = 27 1/2″
- Minus 4 seams x 1/2″ total taken up per seam = 2″
- So each row finishes at 25 1/2″ long
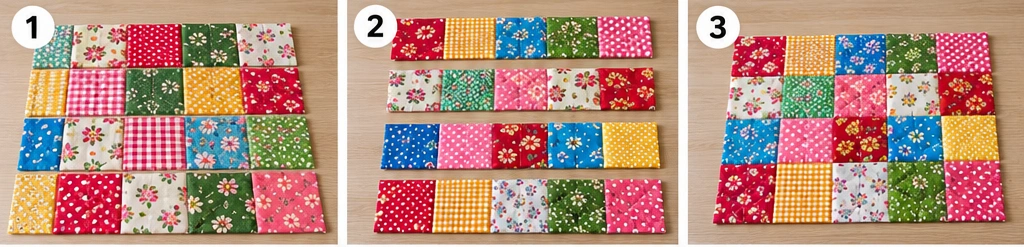
Step 3: Join the rows into one patchwork panel
Sew the 5 rows together in order, matching intersections carefully. Press the full panel flat.
The completed patchwork panel should measure about 25 1/2″ x 25 1/2″, which gives enough room to cut a 23″ circle later.
Step 4: Make the quilt sandwich for the top
Layer the patchwork panel right side up over the batting and backing fabric. The backing should be at least the same size as the patchwork panel; slightly larger is even better.
Smooth all three layers well and baste with pins or spray baste. Because the panel will be cut into a circle later, make sure the entire center area is flat and secure before quilting.
Step 5: Quilt the top panel
Quilt the panel using straight-line quilting, diagonal crosshatching, or stitching close to the patchwork seams. Lines spaced about 1 1/2″ to 2 1/2″ apart work well for a soft but stable bed top.
This is a useful place for simple quilting rather than dense quilting. A cat bed should stay cushioned, so the quilted top needs structure without becoming stiff.
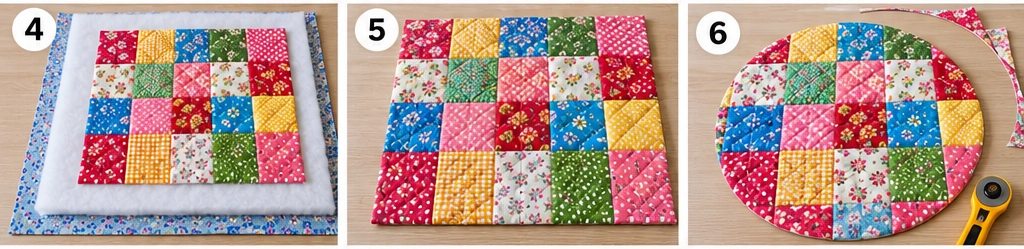
Step 6: Cut the top circle
From the quilted patchwork panel, cut 1 circle measuring 23″ in diameter. This size is intentional: with a 1/2″ seam allowance all around, the sewn seamline diameter becomes about 22″.
A cardboard template or a large round object makes this much easier. Mark the circle first, then cut carefully.
Step 7: Cut the bottom circle
Cut 1 bottom circle at 23″ diameter from the bottom fabric. If you want extra stability, you can also add a light layer of batting behind it, but keep it less bulky than the quilted top.
If the bed will sit on smooth tile or wood floors, a grippy fabric or canvas-like cotton on the underside is a practical choice.
Step 8: Prepare the base insert
Cut or assemble the base insert to about 21″ in diameter. You can use:
- 1 round foam insert, about 1″ thick, or
- 2 to 4 layers of batting stacked together
Cut the insert slightly smaller than the finished bed so it slides in smoothly and doesn’t strain the seams.
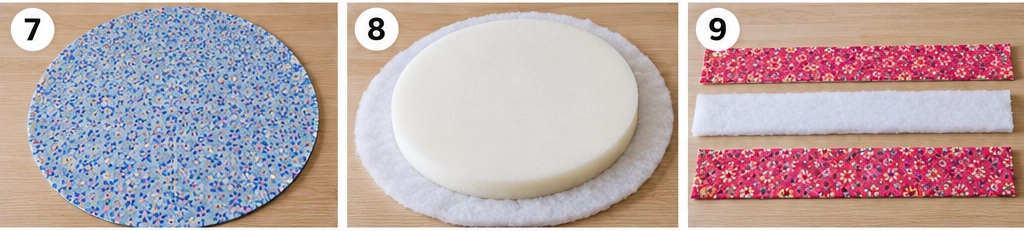
Step 9: Cut the side strips and check the measurements
Cut:
- 1 outer side strip at 70 1/8″ x 5 1/2″
- 1 inner side strip at 70 1/8″ x 5 1/2″
This length matches the bed’s circle at the seamline. A 23″ cut circle becomes about 22″ at the seamline, and the circumference of a 22″ circle is approximately:
22 x 3.14 = 69.08″
After sewing the short ends of the strip with a 1/2″ seam allowance, the finished ring is about 69 1/8″, which is a good practical match.
Step 10: Sew the outer side strip into a ring
Take the outer side strip and sew the short ends together with a 1/2″ seam allowance. Press the seam open.
You now have one continuous fabric ring that will form the outside of the raised side.
Step 11: Sew the inner side strip into a ring
Repeat the same step with the inner side strip, again using a 1/2″ seam allowance. Press the seam open.
Now you have:
- 1 outer ring
- 1 inner ring
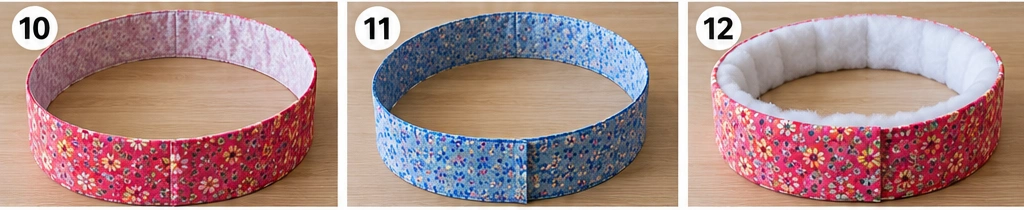
Step 12: Add batting to the outer side wall and join the top edge
Center the 70″ x 4 1/2″ batting strip on the wrong side of the outer ring and baste it lightly in place. Then place the outer ring and inner ring right sides together and sew them together along one long edge using a 1/2″ seam allowance.
Turn the joined ring right side out and press the sewn edge. This becomes the finished top edge of the raised side wall.
Step 13: Mark quarter points
Fold the top circle, bottom circle, and side ring in half and then in quarters, marking the quarter points with pins or clips.
This small preparation step makes circular assembly much more accurate and prevents bunching or stretching as you sew around the curves.
Step 14: Attach the outer side wall to the quilted top
With the quilted top circle right side up, pin or clip the raw lower edge of the outer side wall to the top circle, right sides together. Match the quarter points first, then distribute the rest evenly.
Sew all the way around using a 1/2″ seam allowance. Clip the seam allowance lightly in a few places if needed so the curve relaxes smoothly.
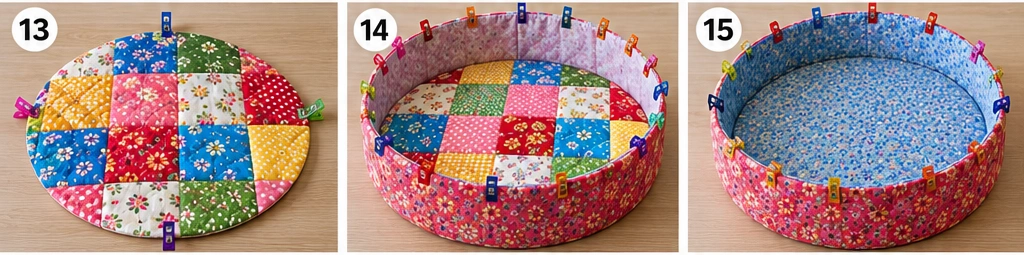
Step 15: Attach the inner side wall to the bottom circle
Pin the raw lower edge of the inner side wall to the bottom circle, right sides together. Sew around with a 1/2″ seam allowance, but leave an opening of about 8″ for turning, stuffing, and inserting the base pad.
This step encloses the bed shape and creates the chamber that will hold the raised padded sides.
Step 16: Turn the bed right side out
Turn the entire bed through the opening in the bottom seam. Use your hands to smooth the circular base and shape the raised side wall.
At this point, the bed should already resemble a soft round nest, with the top edge of the side wall neatly finished and standing up gently.
Step 17: Insert the base pad and stuff the raised sides
Slide the 21″ base insert into the center of the bed and position it flat. Then stuff the side wall evenly with polyester fiberfill, working it all the way around the ring.
Add the filling gradually. The goal is a rounded, supportive wall about 4″ high, firm enough to hold its shape but still soft enough for a cat to lean against comfortably.
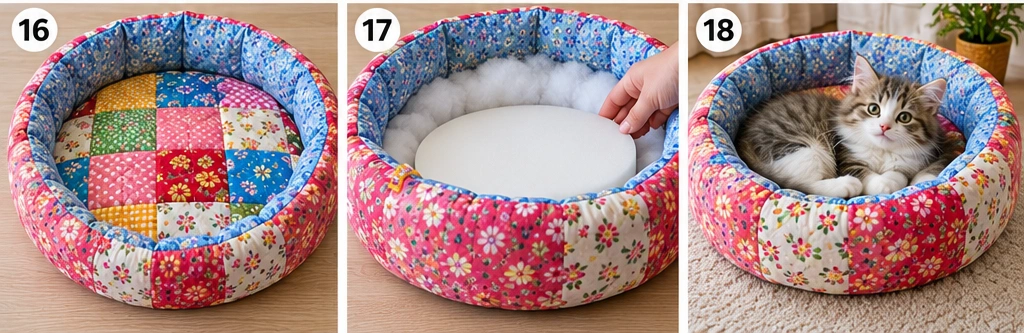
Step 18: Close the opening and finish the bed
Fold in the raw edges of the opening and close it with a ladder stitch by hand, or machine stitch it very close to the edge if preferred. Pat and shape the bed one final time so the filling is even and the circle sits balanced.
If you want a slightly more tailored look, topstitch around the base seam about 1/8″ from the edge. This helps the side wall sit neatly and adds durability.
Finishing Notes
- Bright patchwork gives this style its charm, especially in playful homes or holiday décor.
- A round cat bed often suits cats that like to curl tightly, which is why this shape has remained a favorite in pet bedding.
- For easier washing, use prewashed cottons and avoid overly thick foam if you want the bed to fit more easily into a machine-wash routine.
- For a softer version, use layered batting in the base instead of foam and slightly lighter stuffing in the sides.
Other Design Inspirations – Digitally Modified Images. Texture and color may vary from the actual product.
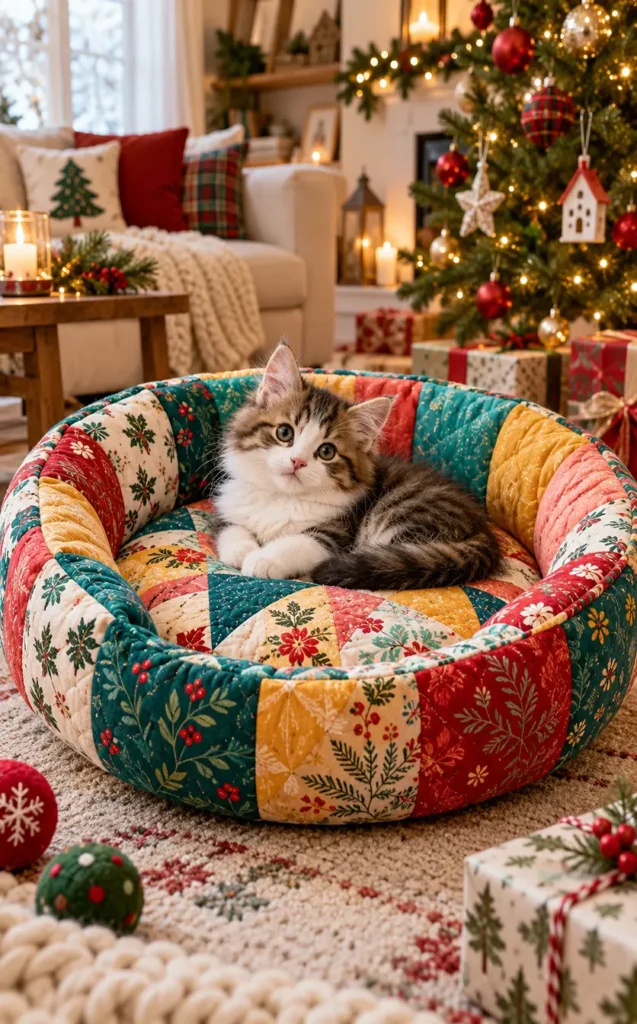


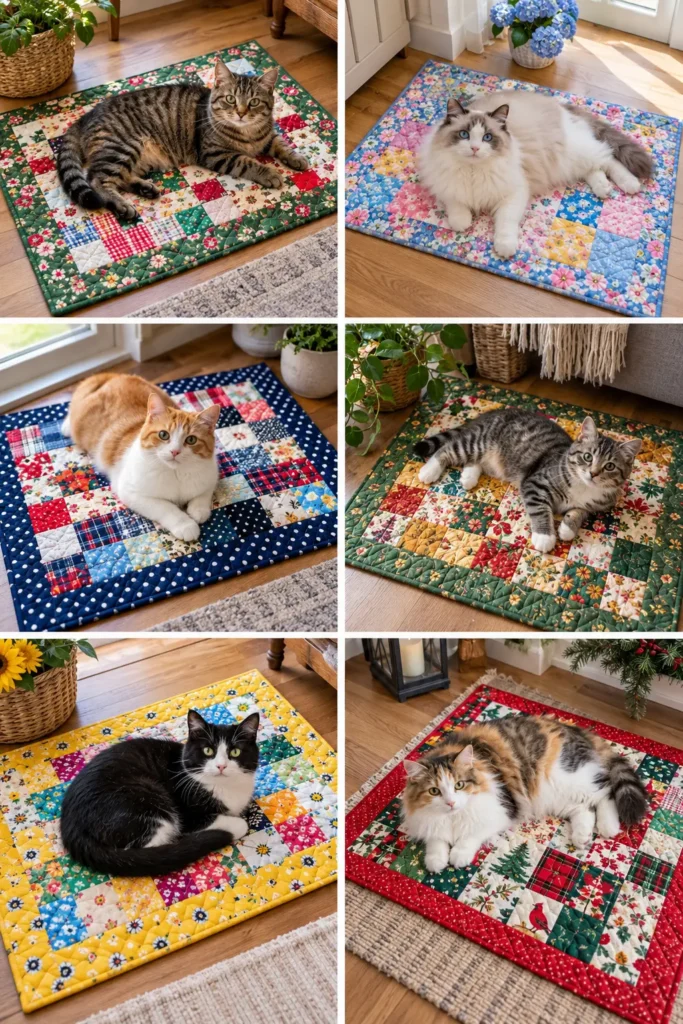
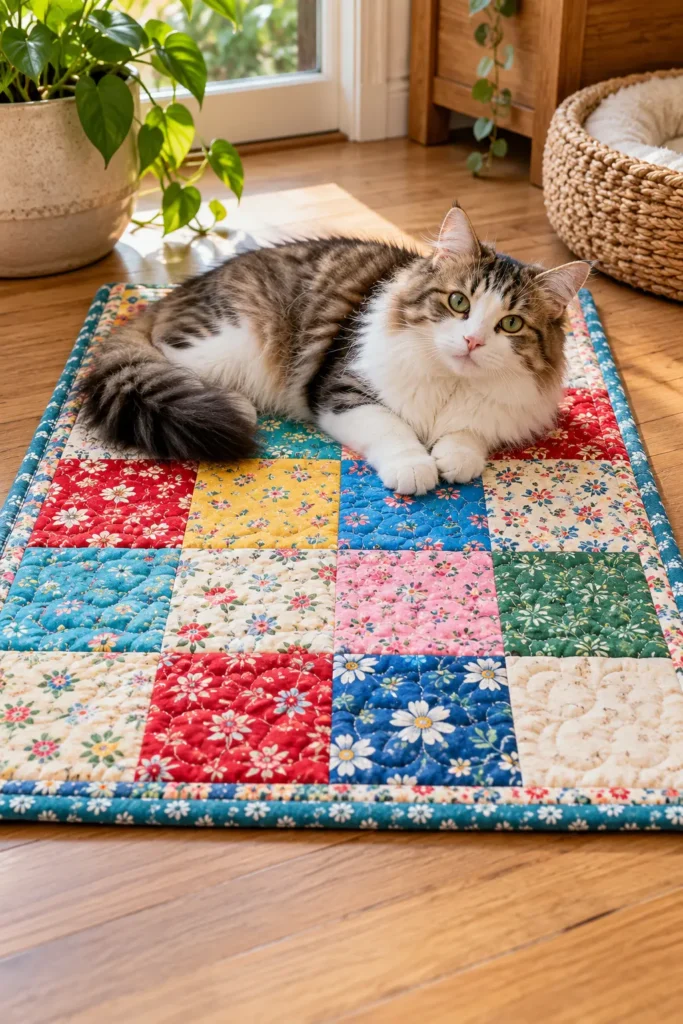
3. Scrappy Quilted Cat Mat Using Leftover Fabric
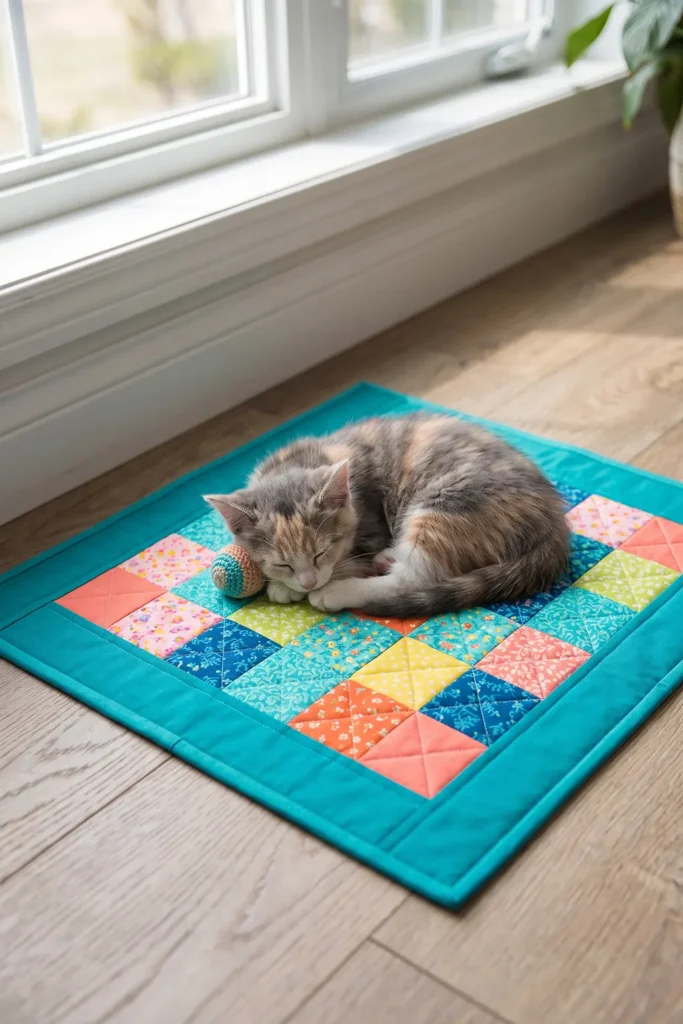
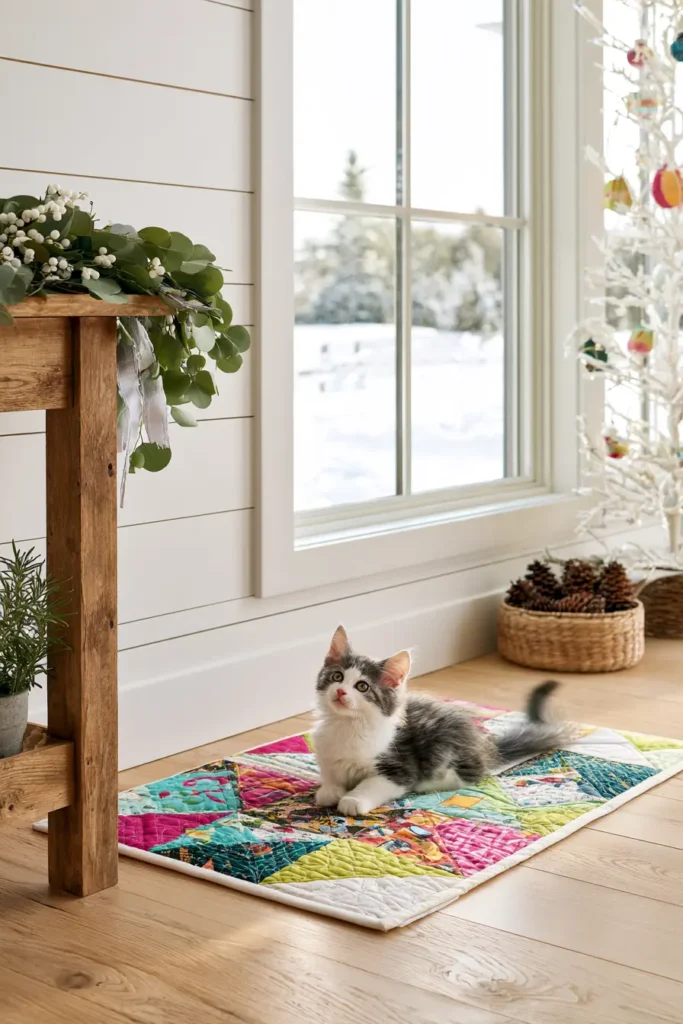
A scrappy quilted cat mat is one of the most practical and satisfying small quilt projects to sew. It turns leftover fabric into something cheerful and useful, with a soft padded surface that works beautifully on a sofa, a chair, a bench, or a favorite sunny floor spot. This version keeps the construction simple and realistic while letting the vibrant color mix do most of the visual work.
Scrap quilts have a long history in quilting because they made good use of every usable piece of fabric. That same idea suits pet projects perfectly. A cat mat does not need large yardage, so it is an ideal place to combine bright offcuts, favorite prints, and contrasting colors into a lively patchwork design.
Project Details
- Finished size: approximately 20″ x 24″
- Skill level: beginner-friendly
- Style: scrappy patchwork with a border
- Seam allowance: 1/4″ throughout unless noted otherwise
Materials
- Assorted leftover quilting cotton scraps in vibrant colors
- Backing fabric: 24″ x 28″
- Batting: 24″ x 28″
- Border fabric: 1/3 yard
- Binding fabric: 1/3 yard
- Coordinating thread
- Rotary cutter, ruler, and mat
- Pins or clips
- Sewing machine
- Iron and pressing surface
Design Inspirations – Digitally Modified Images. Texture and color may vary from the actual product.
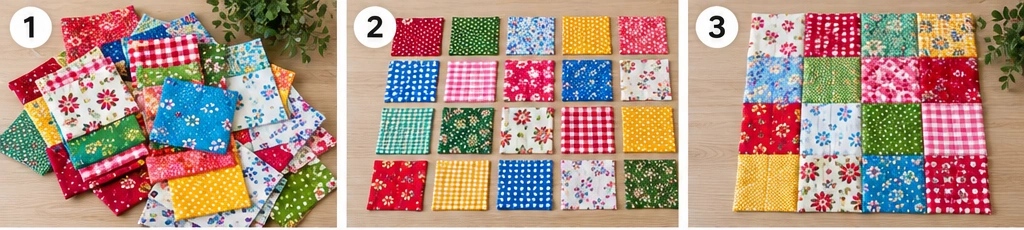
Cutting List
Patchwork Center
- Cut 20 squares at 4 1/2″ x 4 1/2″
These will be arranged in 4 columns x 5 rows.
Borders
- Cut 2 side borders at 2 1/2″ x 20 1/2″
- Cut 2 top and bottom borders at 2 1/2″ x 20 1/2″
Binding
- Cut 3 strips at 2 1/4″ x width of fabric
Join them end to end for binding length.
Finished Size Math
- Each 4 1/2″ square finishes at 4″
- A layout of 4 across x 5 down finishes at 16″ x 20″
- Adding 2″ finished borders all around brings the mat to 20″ x 24″
Assembly at a Glance
- Trim and arrange the scraps.
- Sew the patchwork center.
- Add borders.
- Make the quilt sandwich.
- Quilt the mat.
- Trim and bind.
- Finish and shape the mat.
Step-by-Step Guide
Step 1: Choose the leftover fabrics and plan the color mix
Gather a lively assortment of quilting cotton scraps. Aim for a mix of light, medium, and dark values, plus a few bold prints to keep the mat visually interesting. Bright combinations such as turquoise, coral, yellow, red, lime, cobalt, pink, and white work especially well for this style.
Because this is a scrappy project, the charm comes from variety. Even traditional scrap quilts often looked more balanced when a few colors repeated across the layout, so try to echo some colors more than once.
Step 2: Cut the patchwork squares
Trim 20 squares at 4 1/2″ x 4 1/2″. Accuracy matters here because even a small mat looks better when the seams line up cleanly.
If your leftover pieces are smaller, combine scraps first into slightly larger units and then trim them down to the full square size.
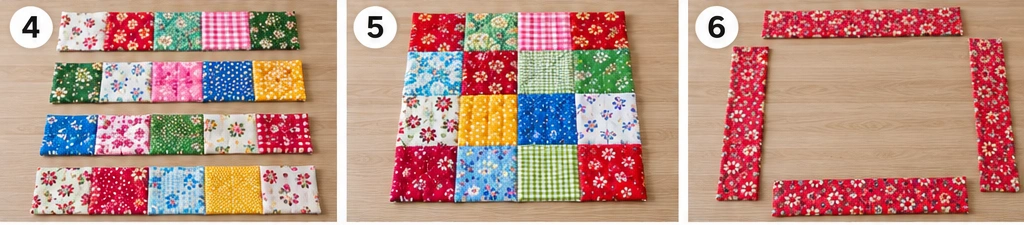
Step 3: Lay out the patchwork design
Arrange the 20 squares in 4 columns and 5 rows. Spread strong colors around the layout so one section does not become too dark or too busy.
This stage is worth taking slowly. A well-balanced scrap quilt top often looks spontaneous, but it usually benefits from a little editing before sewing begins.
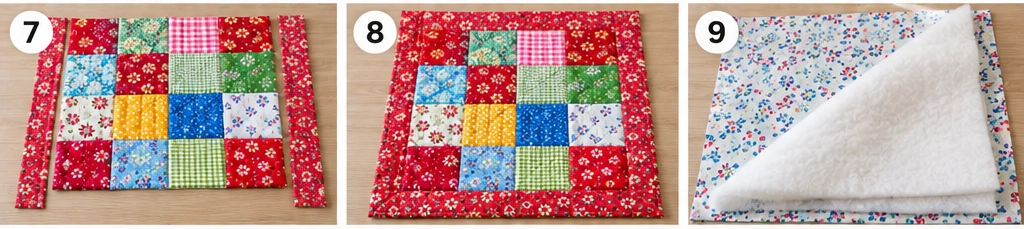
Step 4: Sew the squares into rows
Sew the squares into 5 rows of 4 squares each, using a 1/4″ seam allowance. Press the seams in alternating directions from one row to the next.
Each row should measure approximately 16 1/2″ x 4 1/2″ before the rows are joined.
Step 5: Join the rows into one patchwork panel
Sew the 5 rows together in order, matching the seams carefully. Press the full panel flat.
The unfinished patchwork center should now measure approximately 16 1/2″ x 20 1/2″, which will finish at 16″ x 20″.
Step 6: Cut the border strips
From the border fabric, cut:
- 2 side borders at 2 1/2″ x 20 1/2″
- 2 top and bottom borders at 2 1/2″ x 20 1/2″
The border acts like a picture frame. On a scrappy design, it gives the eye a place to rest and helps the colorful center look more polished.
Step 7: Add the side borders
Sew one border strip to each long side of the patchwork center. Press the seams toward the border.
After adding the side borders, the panel should measure approximately 20 1/2″ x 20 1/2″.
Step 8: Add the top and bottom borders
Sew the remaining two border strips to the top and bottom edges. Press the seams toward the border.
The finished quilt top should now measure approximately 20 1/2″ x 24 1/2″, which will finish at 20″ x 24″ after quilting and binding.
Step 9: Prepare the backing and batting
Cut the batting and backing to about 24″ x 28″. This gives you a little extra on all sides for quilting shift and trimming later.
A slightly oversized backing is standard practice in quilting and makes the sandwich easier to manage.
Step 10: Make the quilt sandwich
Layer the quilt in this order:
- Backing, right side down
- Batting
- Patchwork top, right side up
Smooth all the layers carefully so there are no puckers. Pin-baste or spray-baste the layers securely.
Step 11: Check the alignment before quilting
Before sewing the quilting lines, double-check that the top is centered on the batting and backing and that all layers lie flat. This quick check helps prevent shifting and keeps the finished mat square.
For a small project like this, a little care now saves a lot of cleanup later.
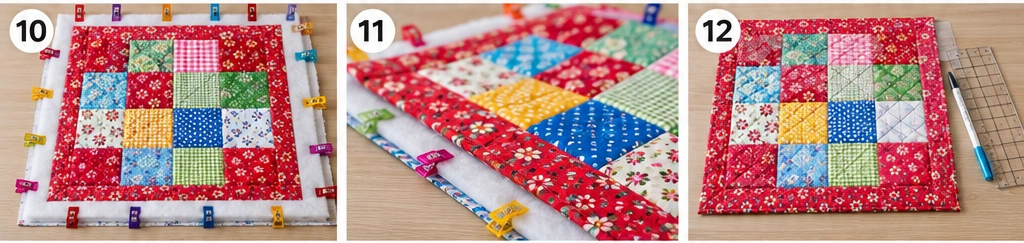
Step 12: Mark or plan the quilting lines
Choose a simple quilting design that keeps the mat soft and flexible. Good options include:
- Straight-line quilting 1″ to 1 1/2″ apart
- Stitching close to the seams
- A diagonal grid across the full mat
For a cat mat, the quilting should stabilize the layers without making the surface stiff.
Step 13: Quilt the patchwork center
Begin quilting near the middle and work outward. Use your chosen quilting pattern across the center first, then continue into the borders.
If you are using straight lines, sew slowly and evenly so the quilted texture looks neat and intentional.
Step 14: Quilt the border area fully
Continue quilting until the entire mat is evenly secured. The border can be quilted with straight parallel lines or simple echo stitching around the patchwork frame.
This step gives the mat a finished look and also improves durability, especially if it will be washed regularly.
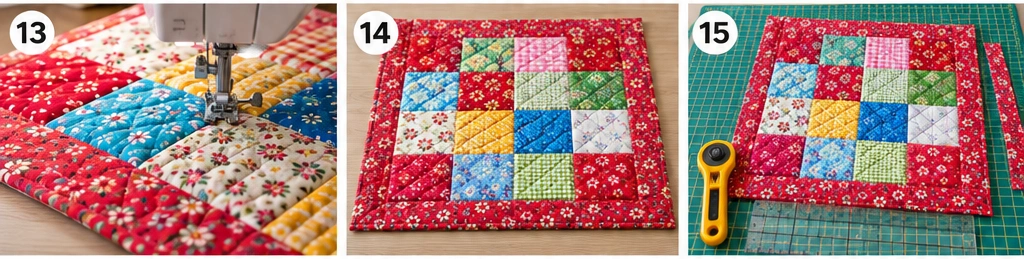
Step 15: Trim the quilted mat to final size
Trim the quilted piece to 20 1/2″ x 24 1/2″, making sure the edges are straight and the corners are square.
This trimmed size is correct for applying the binding and finishing the mat at 20″ x 24″.
Step 16: Prepare the binding
Sew the 3 binding strips at 2 1/4″ wide end to end with diagonal seams if preferred. Press the seams open, then fold the long strip in half lengthwise with wrong sides together and press.
You should have enough binding for the full perimeter:
- Perimeter of the mat = 20 + 20 + 24 + 24 = 88″
- Add extra for corners and joining = about 96″
- Three width-of-fabric strips are usually plenty
Step 17: Attach the binding to the front
Sew the binding to the front of the mat with raw edges aligned, using a 1/4″ seam allowance. Miter the corners neatly as you go.
Join the ends cleanly, then fold the binding over to the back.
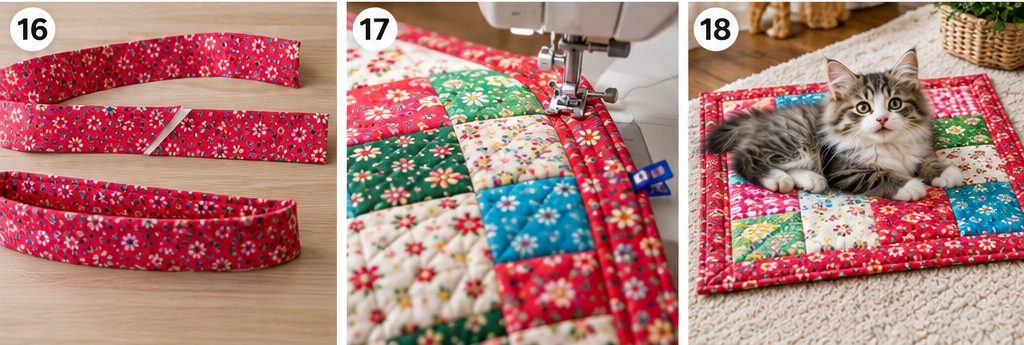
Step 18: Finish the binding and complete the mat
Hand-stitch or machine-stitch the binding to the back of the mat. Give the finished mat a final press and smooth it flat.
The completed mat should feel lightly padded, flexible, and sturdy, with a crisp border framing the bright scrappy center. It is a simple project, but one that shows off color beautifully and makes excellent use of leftover fabric.
Other Design Inspirations – Digitally Modified Images. Texture and color may vary from the actual product.
4. Jelly Roll Quilted Cat Bed for Quick and Easy Sewing
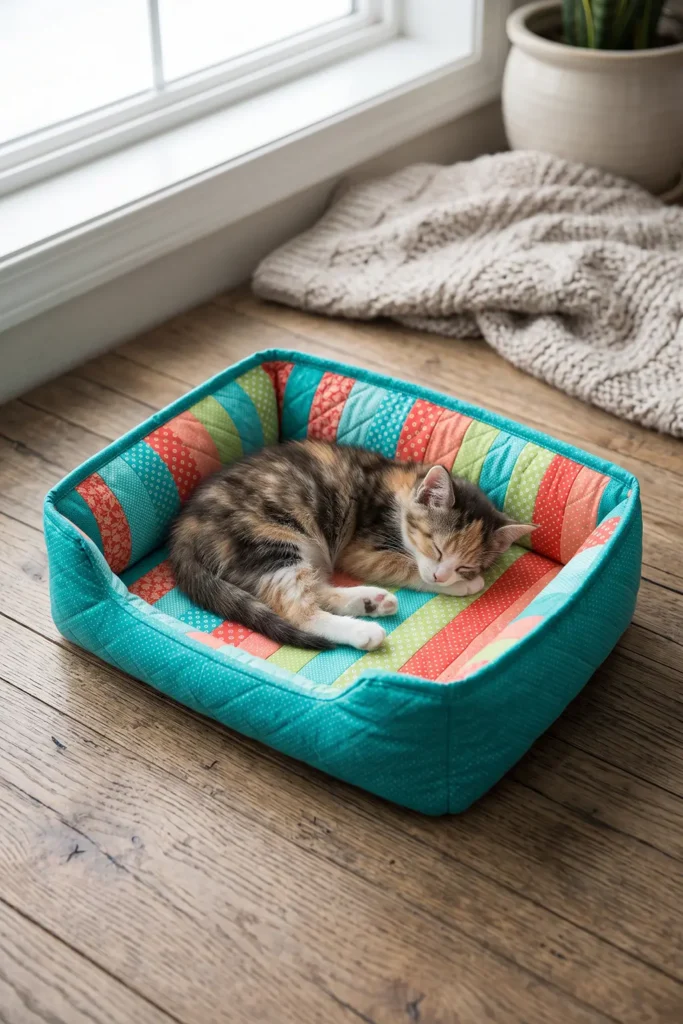
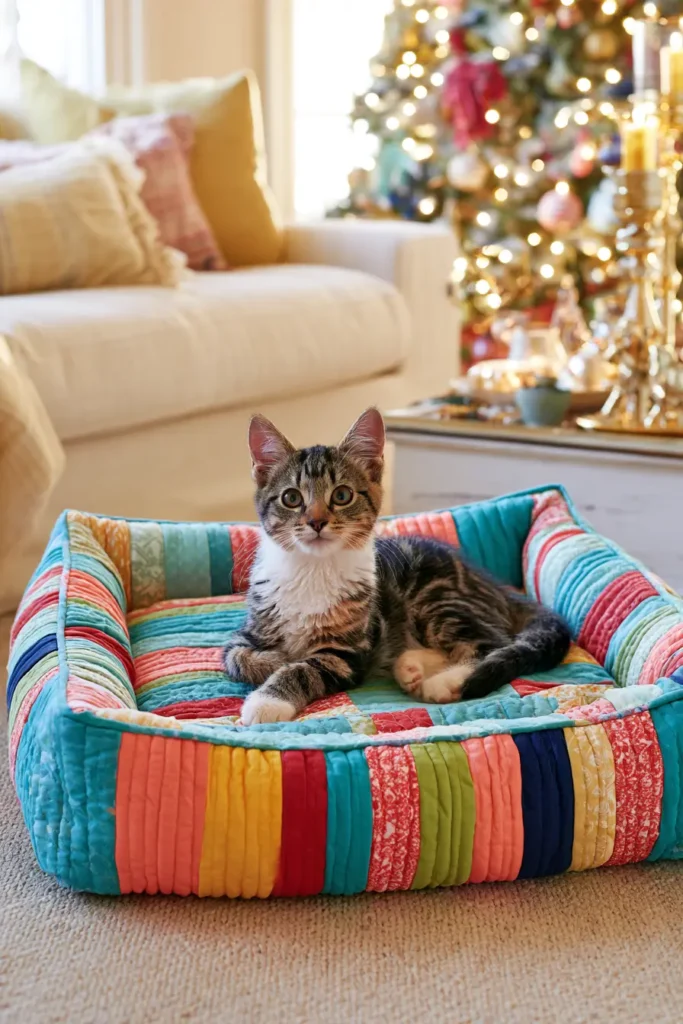
A jelly roll quilted cat bed is a cheerful project that comes together faster than many traditional patchwork beds, thanks to the ready-cut strip format. The long fabric strips create a lively, colorful surface with very little cutting, while the finished bed still has the soft structure and cozy feel that makes a cat bed inviting for everyday naps.
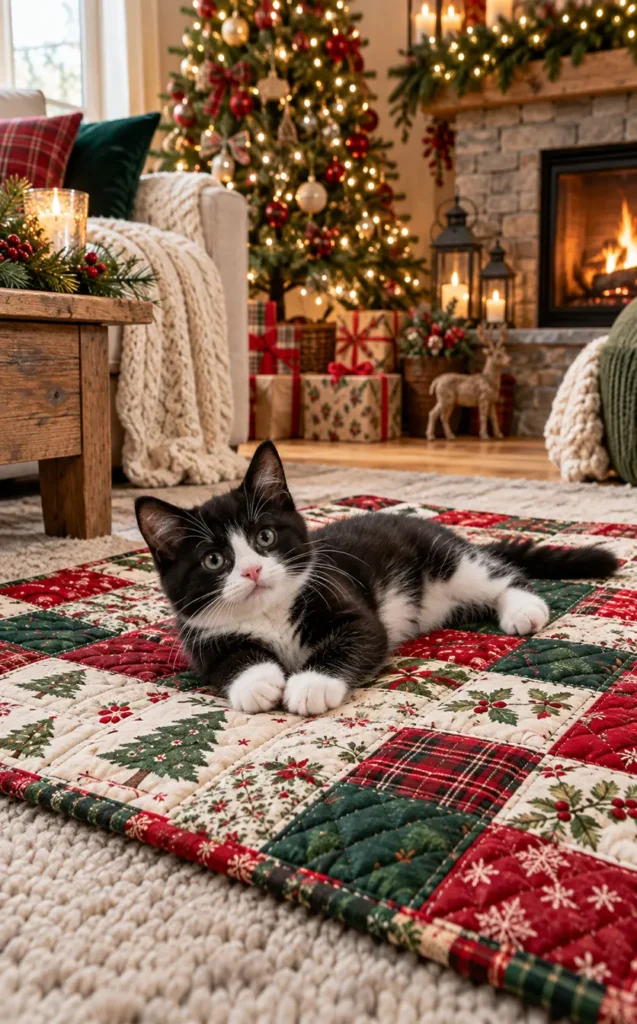
Jelly rolls became especially popular in quilting because they simplify fabric coordination and speed up piecing. A standard jelly roll strip is 2 1/2 inches wide, which makes it ideal for quick patchwork panels, borders, and smaller home projects like this one. For this version, the bed has a quilted rectangular base, softly padded raised sides, and a bright, vibrant look that suits playful interiors and festive seasonal styling.
Project Details
- Finished bed size: approximately 18″ x 22″
- Finished side height: approximately 4″
- Skill level: confident beginner
- Main piecing method: jelly roll strip piecing
- Seam allowances:
- 1/4″ for piecing the jelly roll top
- 1/2″ for bed construction unless noted otherwise
Design Inspirations – Digitally Modified Images. Texture and color may vary from the actual product.

Materials
- 10 jelly roll strips for the quilted top
- each strip is 2 1/2″ wide
- 3 additional jelly roll strips for binding, or equivalent binding fabric
- 1 1/4 yards coordinating cotton for:
- side walls
- inner lining
- bottom panel
- top-panel backing if needed
- 1 piece batting for the top panel, about 21″ x 25″
- 1 side-wall batting strip, about 84″ x 4 1/2″
- Base insert, either:
- foam at 17″ x 21″, about 1″ thick, or
- 2 to 4 layers of batting cut to 17 1/2″ x 21 1/2″
- Polyester fiberfill for stuffing the raised sides
- Coordinating thread
- Rotary cutter, ruler, and cutting mat
- Sewing clips or pins
- Sewing machine
- Iron and pressing surface
- Hand-sewing needle for closing the opening, if preferred
Cutting List
From the jelly roll strips
- Cut 10 strips at 2 1/2″ x 23″ for the bed top
- Set aside 3 full jelly roll strips for binding, or cut binding from yardage
From coordinating fabric
- 1 bottom panel at 19″ x 23″
- 1 outer side band at 84 1/2″ x 5 1/2″
- 1 lining side band at 84 1/2″ x 5 1/2″
- 1 backing piece for the quilted top, about 21″ x 25″ if quilting the top separately
From batting
- 1 batting piece for top panel, about 21″ x 25″
- 1 side-wall batting strip at 84″ x 4 1/2″
Size Math
- The quilted top and bottom are cut at 19″ x 23″
- Using a 1/2″ seam allowance when attaching the walls reduces the visible interior base to about 18″ x 22″
- The perimeter of the cut base is:
19 + 19 + 23 + 23 = 84″
That is why the side bands are cut to 84 1/2″ long. After joining the short ends with a 1/2″ seam allowance, each loop becomes 84″, which matches the base perimeter.
Assembly at a Glance
- Piece the jelly roll top.
- Quilt and trim the top panel.
- Cut the bottom and side bands.
- Make the side-wall ring.
- Attach the ring to the top and bottom.
- Turn, pad, and stuff the bed.
- Close the opening and finish neatly.
Step-by-Step Guide
Step 1: Choose the jelly roll strips and plan the color flow
Pick 10 jelly roll strips in a vibrant, cheerful combination. Good color mixes for this project include turquoise, red, golden yellow, coral, lime, royal blue, fuchsia, orange, and white-based prints for contrast.
Lay the strips side by side and shuffle them until the color balance feels lively but even. Alternating bold prints with calmer prints usually gives the top a more polished look.

Step 2: Cut the top strips to length
Trim the 10 jelly roll strips to 23″ long. This length lets you sew a simple strip-pieced panel, which you’ll later trim to the finished top size.
Keep the strips stacked in order once you are happy with the arrangement.
Step 3: Sew the strips into pairs
Sew the strips together in pairs along the long edges using a 1/4″ seam allowance. Press the seams to one side.
Working in smaller groups first helps keep the long strip set from stretching or shifting too much.

Step 4: Join the pairs into a full strip-set panel
Continue joining the pairs until all 10 strips form one full panel. Press carefully.
The math works like this:
- 10 strips x 2 1/2″ = 25″ total cut width
- 9 seams x 1/2″ total lost per seam = 4 1/2″
- 25″ – 4 1/2″ = 20 1/2″
So the finished strip-set panel should measure about 20 1/2″ x 23″ before trimming.
Step 5: Prepare the quilt sandwich for the top panel
Layer the quilted top section in this order:
- Backing fabric, right side down
- Batting
- Jelly roll strip panel, right side up
Use a backing and batting piece of about 21″ x 25″ so there is extra room around the edges for quilting shift. Smooth the layers flat and baste well.

Step 6: Quilt the jelly roll top
Quilt the top with simple straight lines, either:
- stitching in the ditch between the strips, or
- sewing extra quilting lines every 1″ to 2″
Because this is a cat bed rather than a wall quilt, the quilting should secure the layers while keeping the center soft and comfortable.
Step 7: Trim the quilted top to final cut size
After quilting, trim the top panel to 19″ x 23″.
This trimmed panel is the correct cut size for an 18″ x 22″ finished sleeping area once the side walls are attached with 1/2″ seams.

Step 8: Cut the bottom panel and side bands
From the coordinating fabric, cut:
- 1 bottom panel at 19″ x 23″
- 1 outer side band at 84 1/2″ x 5 1/2″
- 1 lining side band at 84 1/2″ x 5 1/2″
Also cut the side-wall batting strip at 84″ x 4 1/2″.
These dimensions create a soft rectangular bed with low, supportive sides.
Step 9: Sew the outer side band into a loop
Take the outer side band and sew the short ends together using a 1/2″ seam allowance. Press the seam open.
After joining, the loop should measure about 84″ around, which matches the perimeter of the base.

Step 10: Sew the lining side band into a loop
Repeat the same step with the lining side band, again sewing the short ends together with a 1/2″ seam allowance. Press the seam open.
Now you should have:
- 1 outer side loop
- 1 lining side loop
Step 11: Add batting to the outer side loop
Center the 84″ x 4 1/2″ batting strip on the wrong side of the outer side loop. Baste it lightly in place if needed.
The batting should sit inside the wall area without extending into the seam allowances too much. This gives the sides gentle structure without making them bulky.

Step 12: Join the outer and lining loops along the top edge
Place the outer side loop and the lining side loop right sides together. Sew them together along one long edge with a 1/2″ seam allowance.
Turn the joined unit right side out and press the sewn edge. This becomes the finished upper rim of the bed wall.
Step 13: Mark quarter points on the top, bottom, and side wall
Fold the quilted top panel, the bottom panel, and the side-wall loop to find the centers of each side. Mark the quarter points with clips or pins.
This step makes the long band easier to distribute evenly around the rectangular shape and helps prevent twisting.

Step 14: Attach the outer side wall to the quilted top
With the quilted top panel right side up, pin or clip the raw lower edge of the outer side wall to the top panel, right sides together. Match the quarter points first, then ease the rest into place.
Sew all the way around using a 1/2″ seam allowance, pivoting neatly at the corners.
Step 15: Attach the lining side wall to the bottom panel
Sew the raw lower edge of the lining side wall to the bottom panel, right sides together, again using a 1/2″ seam allowance. Leave an opening of about 7″ to 8″ along one long side.
This opening is needed for turning the bed, inserting the base pad, and stuffing the walls.

Step 16: Turn the bed right side out and shape it
Turn the entire bed through the opening. Push out the corners gently and smooth the seams with your fingers.
At this point, the bed should already resemble a shallow rectangular nest, with the jelly roll top forming the visible sleeping surface and the side walls rising softly around it.
Step 17: Insert the base pad and stuff the raised sides
Slide the base insert into the center through the opening.
Use either:
- foam at 17″ x 21″, or
- batting layers at about 17 1/2″ x 21 1/2″
Once the base is in place, stuff the side walls evenly with polyester fiberfill. Carefully distribute the filling into the corners so the bed looks balanced and feels comfortably supported.

Step 18: Close the opening and finish the bed
Fold in the raw edges of the opening and stitch it closed by hand with a ladder stitch, or machine stitch close to the edge. Shape the bed one final time and smooth the filling.
If you want a more tailored finish, topstitch about 1/8″ from the lower wall seam around the outer edge. This helps the base sit flatter and gives the bed a crisp, finished outline.
Finishing Notes
- Jelly rolls are popular partly because the strips are already coordinated, which makes colorful projects much faster to plan.
- This bed design works especially well for cats that like soft boundaries around their sleeping space.
- For a firmer boutique-style result, use foam in the base. For a softer, more washable version, use layered batting instead.
- Prewashing bright fabrics can help reduce color transfer, especially with bold reds, blues, or saturated holiday tones.
Other Design Inspirations – Digitally Modified Images. Texture and color may vary from the actual product.



5. Flannel Quilted Cat Bed for Extra Soft Winter Warmth
A flannel quilted cat bed is a cozy cold-weather project with a softer, warmer hand than a standard quilting-cotton version. The brushed surface of flannel gives the bed an inviting feel, while the quilted structure helps it keep a neat shape. For this design, the bed has a padded rectangular base, softly raised sides, and a vibrant mix of cheerful flannel prints that brighten winter décor.
Flannel has long been associated with warmth and comfort in quilts, sleepwear, and nursery sewing. That same gentle softness makes it especially well suited to a pet bed. This version uses practical measurements, realistic construction, and a straightforward order of assembly so the project is easy to visualize and sew.
Project Details
- Finished bed size: approximately 20″ x 24″
- Finished side height: approximately 5″
- Skill level: confident beginner to intermediate
- Main fabrics: soft cotton flannel prints and solids
- Seam allowances:
- 1/4″ for patchwork piecing
- 1/2″ for bed construction unless otherwise noted
Materials
- Assorted vibrant flannel fabrics for the patchwork top
- Coordinating flannel or sturdy quilting cotton for the side walls and lining
- Backing or bottom fabric: 1 yard
- Border fabric: 1/2 yard
- Cotton batting for the top: about 24″ x 28″
- Extra batting or foam for the base insert
- Polyester fiberfill for stuffing the side walls
- Coordinating thread
- Walking foot or even-feed foot if available
- Rotary cutter, ruler, mat
- Pins or clips
- Sewing machine
- Hand-sewing needle
- Iron and pressing cloth
Design Inspirations – Digitally Modified Images. Texture and color may vary from the actual product.
Cutting List
Patchwork Top
- 20 flannel squares at 4 1/2″ x 4 1/2″
Arrange these in 4 columns x 5 rows.
Borders
- 2 side borders at 2 1/2″ x 20 1/2″
- 2 top and bottom borders at 2 1/2″ x 20 1/2″
Bed Body
- 1 bottom panel at 20 1/2″ x 24 1/2″
- 1 outer side band at 90 1/2″ x 6 1/2″
- 1 lining side band at 90 1/2″ x 6 1/2″
- 1 side-wall batting strip at 90″ x 5 1/2″
- 1 base insert at 19″ x 23″
Use either:- 1 foam insert about 1″ thick, or
- 3 to 4 layers of batting
Finished Size Math
- Each 4 1/2″ square finishes at 4″
- A 4 x 5 grid finishes at 16″ x 20″
- Adding 2″ finished borders all around brings the quilted top to 20″ x 24″
- The top and bottom are sewn at 20 1/2″ x 24 1/2″ cut size
- With 1/2″ seams, the visible sleeping base finishes at about 20″ x 24″
- The perimeter of the cut base is:
20 1/2 + 20 1/2 + 24 1/2 + 24 1/2 = 90″
so the side bands are cut to 90 1/2″ and sewn into 90″ loops
Assembly at a Glance
- Piece the flannel patchwork top.
- Add borders and quilt the top panel.
- Cut the bottom and side-wall pieces.
- Build the padded side-wall ring.
- Attach the walls to the top and bottom.
- Turn, insert the base pad, and stuff the sides.
- Close the opening and finish neatly.
Step-by-Step Guide
Step 1: Choose the flannel prints and plan the color layout
Select 20 flannel squares in a vibrant, winter-friendly palette. Good combinations include berry red, teal, mustard, emerald, cream, cobalt, coral, and plaid accents. Try to mix solids, subtle checks, and small-scale prints so the bed feels lively but not chaotic.
Flannel has a brushed surface, so it reads a little softer than crisp quilting cotton. Bright colors help keep the overall look cheerful rather than heavy.
Step 2: Cut the patchwork squares accurately
Cut 20 squares at 4 1/2″ x 4 1/2″. Because flannel can shift a little more than cotton, a sharp rotary cutter and accurate trimming make a noticeable difference.
Keep the cut edges clean and square. If a flannel print is especially loose-woven, handle it gently to reduce stretching.
Step 3: Lay out the patchwork in rows
Arrange the squares into 5 rows of 4 squares each. Spread similar colors apart so the bright tones are balanced across the mat.
This is the best time to adjust the placement. Scrap and patchwork quilts often look more polished when the eye moves naturally around the color layout.
Step 4: Sew the squares into rows
Sew the squares into rows with a 1/4″ seam allowance. Press the seams carefully, ideally with an up-and-down motion rather than heavy sliding, which can distort flannel.
Each row should measure about 16 1/2″ x 4 1/2″ unfinished.
Step 5: Join the rows into the patchwork center
Sew the 5 rows together, matching the seam intersections. Press the full center flat.
The unfinished patchwork center should now measure about 16 1/2″ x 20 1/2″, which becomes 16″ x 20″ finished.
Step 6: Cut and attach the side borders
Cut 2 side borders at 2 1/2″ x 20 1/2″. Sew one to each long side of the patchwork center and press the seams toward the border.
After this step, the piece should measure about 20 1/2″ x 20 1/2″.
Step 7: Cut and attach the top and bottom borders
Cut 2 top and bottom borders at 2 1/2″ x 20 1/2″. Sew them to the remaining two edges.
Your finished quilt top should now measure about 20 1/2″ x 24 1/2″ unfinished. This will become the visible upper sleeping surface of the bed.
Step 8: Build the quilt sandwich for the top
Layer the bed top as follows:
- Backing fabric, right side down
- Batting
- Flannel patchwork top, right side up
Use backing and batting slightly larger than the top, about 24″ x 28″, so quilting shift is not a problem. Baste the layers well.
Step 9: Quilt the top panel
Quilt the top with simple straight lines, either stitching near the seams or spacing lines about 1 1/2″ to 2″ apart. A walking foot helps here, especially with flannel and batting together.
Flannel has a cozy loft, so moderate quilting works better than very dense quilting. It keeps the top stable while preserving softness.
Step 10: Trim the quilted top and cut the bottom panel
Trim the quilted top to 20 1/2″ x 24 1/2″. Then cut the bottom panel to the same size: 20 1/2″ x 24 1/2″.
If you want extra wear resistance, the bottom can be quilting cotton, canvas-weight cotton, or another flannel layer backed with a light stabilizing layer.
Step 11: Cut the side bands and side-wall batting
Cut:
- 1 outer side band at 90 1/2″ x 6 1/2″
- 1 lining side band at 90 1/2″ x 6 1/2″
- 1 batting strip at 90″ x 5 1/2″
The extra 1″ in band height allows 1/2″ seam allowance at both top and bottom, giving a finished side height of about 5″.
Step 12: Sew the outer side band into a loop
Sew the short ends of the outer side band together with a 1/2″ seam allowance. Press the seam open.
The resulting loop should measure about 90″, matching the perimeter of the bed base.
Step 13: Sew the lining side band into a loop
Repeat the same step with the lining side band, again using a 1/2″ seam allowance. Press the seam open.
You now have the two loops needed to form the raised wall.
Step 14: Add batting to the outer side wall and join the top edge
Center the 90″ x 5 1/2″ batting strip on the wrong side of the outer side loop and baste it in place if needed. Place the outer loop and lining loop right sides together and sew them along one long edge using a 1/2″ seam allowance.
Turn the joined loop right side out and press the sewn edge. This forms the finished top rim of the bed wall.
Step 15: Attach the outer wall to the quilted top
With the quilted top right side up, pin or clip the raw lower edge of the outer wall to the top panel, right sides together. Match centers first, then distribute the wall evenly around the corners and sides.
Sew all the way around using a 1/2″ seam allowance, pivoting carefully at the corners.
Step 16: Attach the lining wall to the bottom panel
Pin the raw lower edge of the lining wall to the bottom panel, right sides together. Sew around with a 1/2″ seam allowance, leaving an opening of about 8″ along one side.
This opening will be used for turning the bed, inserting the base padding, and stuffing the walls.
Step 17: Turn the bed, insert the base pad, and stuff the sides
Turn the bed right side out through the opening. Push out the corners gently and smooth the seams. Insert the 19″ x 23″ base pad into the center.
Then stuff the side walls evenly with polyester fiberfill. Add enough filling to create softly rounded walls that stand up on their own without feeling stiff.
Step 18: Close the opening and finish the bed
Fold in the raw edges of the opening and close it by hand with a ladder stitch or by machine close to the edge. Shape the bed evenly and smooth the filling.
If desired, topstitch about 1/8″ from the lower wall seam around the outer perimeter for a slightly crisper finish and added stability.
Finishing Notes
- Flannel became a favorite in winter quilting because the brushed surface traps warmth more comfortably than many smooth woven fabrics.
- A bed like this works especially well in cooler months, when cats naturally seek out warmer, softer places to rest.
- Prewashing flannel is often helpful because it can shrink more than standard quilting cotton.
- If you want the bed to feel especially plush, use layered batting in the base along with slightly fuller stuffing in the walls.
Other Design Inspirations – Digitally Modified Images. Texture and color may vary from the actual product.
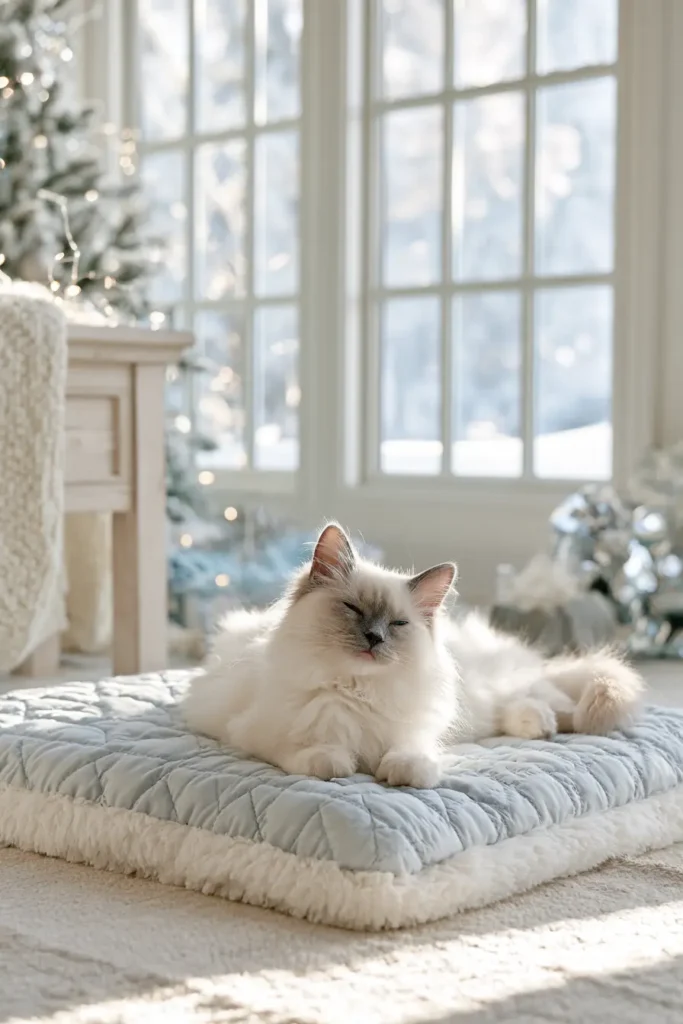
6. Modern Minimalist Scandi-Style Quilted Cat Sleeping Pads
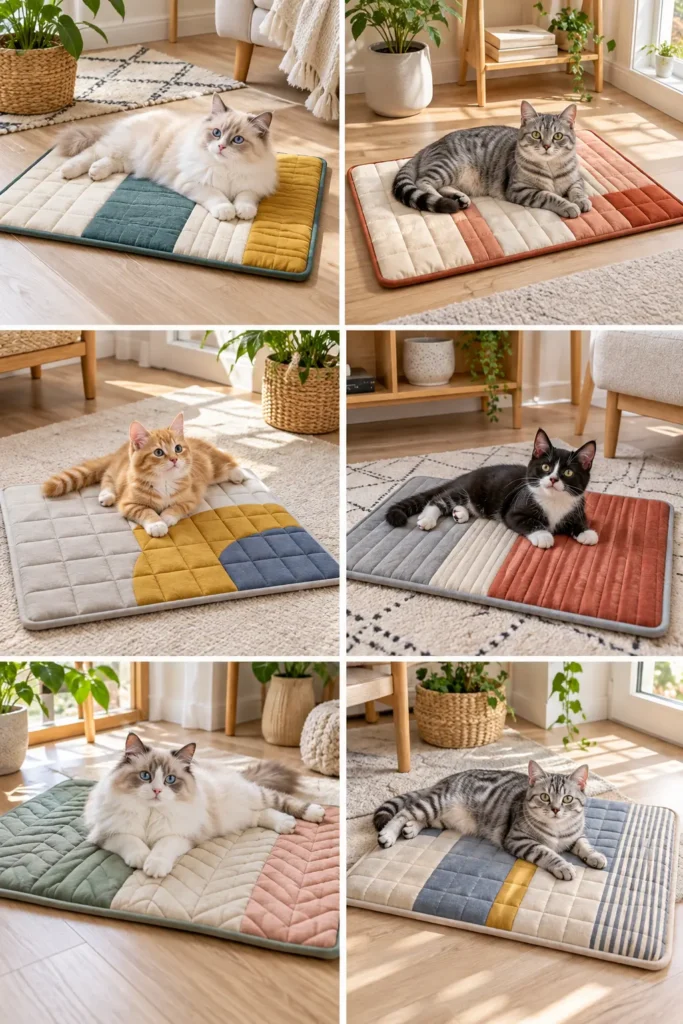
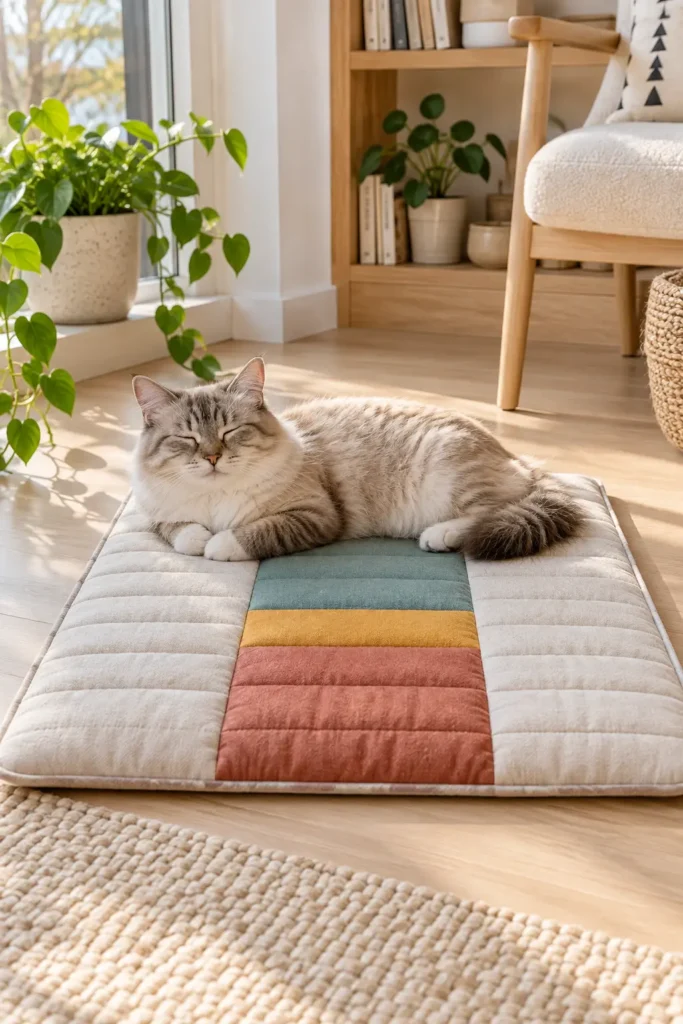
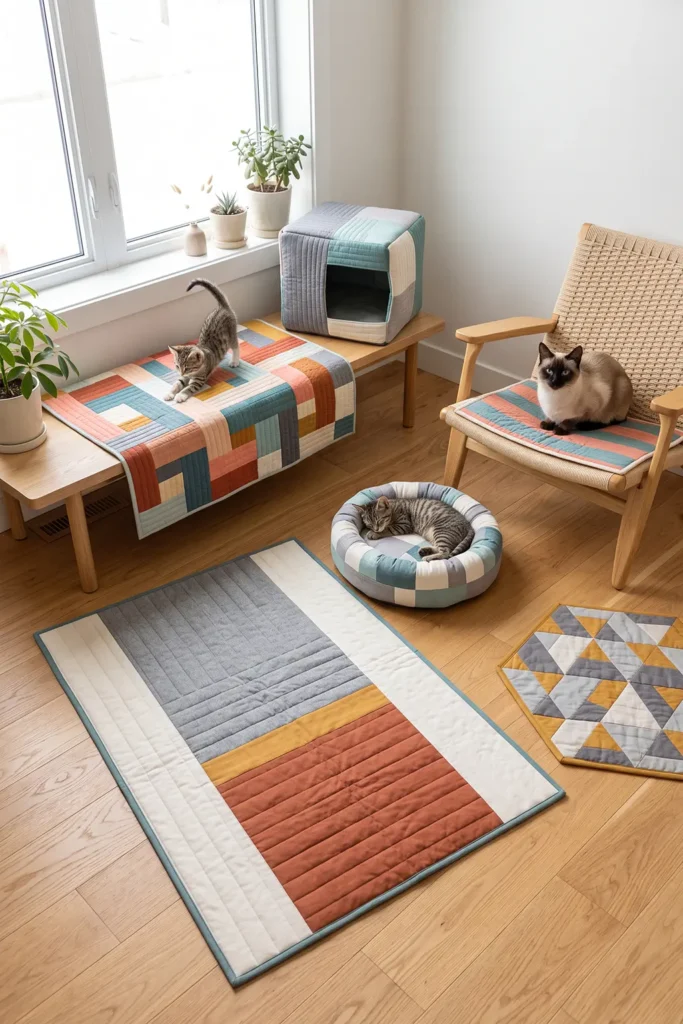
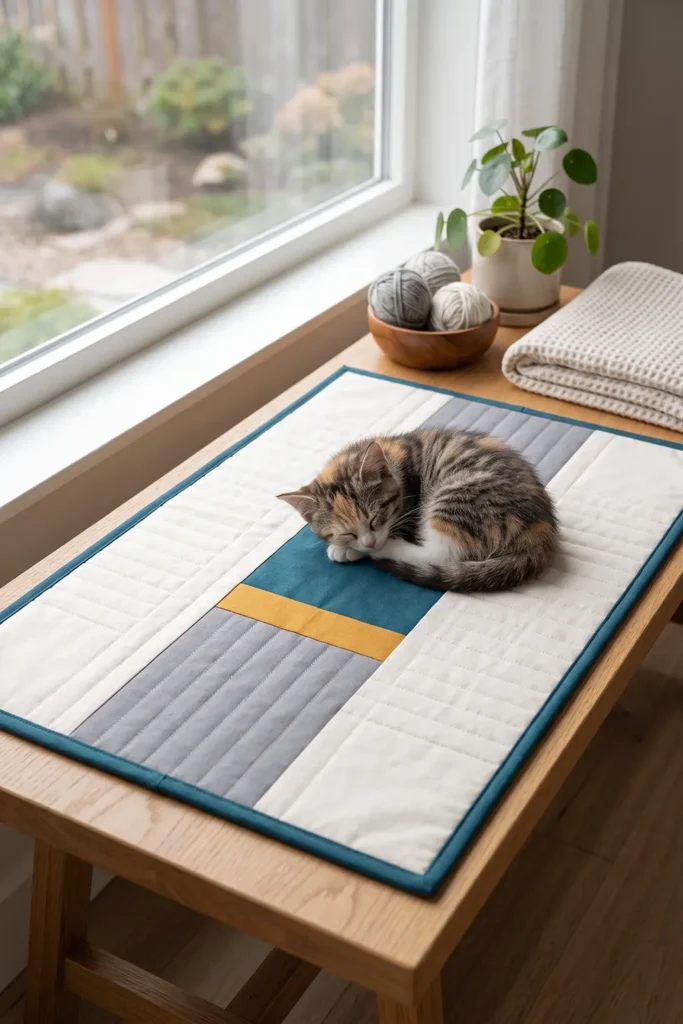
A modern minimalist Scandi-style quilted cat sleeping pad is a lovely project for anyone who wants something clean, practical, and quietly stylish. Unlike a puffier cat bed with bolstered sides, this version is low-profile and easy to move, making it ideal for a bench, a reading nook, the foot of a bed, or a sunny corner by the window. It also suits cats that prefer to stretch out rather than curl into a deep nest.
Scandinavian-inspired sewing projects often favor simple geometry, useful design, and a calm palette warmed up with a few cheerful accents. For this cat sleeping pad, that means a streamlined patchwork layout, crisp quilting lines, and a bright but controlled mix of color. Think soft ivory, warm gray, muted teal, ochre, rust, or coral used in clean blocks rather than busy prints. The result feels modern, cozy, and very livable.
Project Details
- Finished size: approximately 18″ x 24″
- Style: flat quilted sleeping pad
- Skill level: beginner-friendly
- Seam allowance: 1/4″ for piecing and binding
- Loft: light to medium
- Best fabric choice: quilting cotton, cotton-linen blend, or softly brushed cotton for the top
Materials
- Top fabrics:
- 2 side panels in a light neutral
- 1 center panel in a brighter accent color
- 1 narrow accent strip in a second vibrant color
- Backing fabric: about 22″ x 28″
- Batting: about 22″ x 28″
- Binding fabric: 3 strips at 2 1/4″ x width of fabric
- Coordinating thread
- Rotary cutter, quilting ruler, and cutting mat
- Pins or clips
- Sewing machine
- Iron and pressing surface
- Optional: non-slip backing fabric if the pad will be used on smooth floors
Design Inspirations – Digitally Modified Images. Texture and color may vary from the actual product.
Cutting Plan
For the quilt top, cut:
- 2 side panels at 5″ x 24 1/2″
- 1 center upper panel at 8″ x 9 1/2″
- 1 center accent strip at 2 1/2″ x 9 1/2″
- 1 center lower panel at 14″ x 9 1/2″
These center pieces are sewn together lengthwise to create one center strip.
Finished size math:
- Side panel width: 5″
- Center panel width after piecing: 9 1/2″
- Total width before piecing: 5 + 9 1/2 + 5 = 19 1/2″
- Minus two vertical seams: 1″ total
- Unfinished quilt top width: 18 1/2″
Height math for the center strip:
- 8″ + 2 1/2″ + 14″ = 24 1/2″
- Minus two horizontal seams: 1″ total
- Wait: each seam removes 1/2″ total, so two seams remove 1″ total
- That gives a finished center-strip height of 23 1/2″, which would be too short
So instead, use this corrected cutting plan for the center:
- 1 center upper panel at 8 1/2″ x 9 1/2″
- 1 center accent strip at 2 1/2″ x 9 1/2″
- 1 center lower panel at 14 1/2″ x 9 1/2″
Corrected height math:
- 8 1/2″ + 2 1/2″ + 14 1/2″ = 25 1/2″
- Minus two seams at 1/2″ total each = 1″
- Unfinished center strip height: 24 1/2″
That gives a full quilt top measuring 18 1/2″ x 24 1/2″, which finishes at approximately 18″ x 24″ after quilting and binding.
Assembly at a Glance
- Cut the modern color-block pieces.
- Piece the center strip.
- Sew the side panels to complete the top.
- Press and square the quilt top.
- Layer top, batting, and backing.
- Quilt with clean straight lines.
- Trim and bind.
- Finish the pad and shape it flat.
Step-by-Step Guide
Step 1: Choose a Scandi-inspired color palette
Select a simple palette with clean contrast and one or two bright accents. A good modern combination is warm white, soft gray, deep teal, and ochre. Another beautiful option is ivory, pale stone, rust, and muted coral.
Traditional Scandinavian interiors often rely on light base tones because long winters made brightness especially welcome indoors. Adding a single strong accent color keeps the design feeling cheerful without losing that calm, uncluttered look.

Step 2: Cut the two outer side panels
Cut 2 side panels at 5″ x 24 1/2″ from your light neutral fabric. These long panels create the clean minimalist framing effect that is typical of Scandinavian-inspired textile design.
Keeping the outer sections light helps the pad feel airy and modern, even when you use vibrant accents in the center.
Step 3: Cut the three center-strip pieces
Cut the following pieces:
- 1 center upper panel at 8 1/2″ x 9 1/2″
- 1 center accent strip at 2 1/2″ x 9 1/2″
- 1 center lower panel at 14 1/2″ x 9 1/2″
These pieces form a vertical center band with a simple color-block effect. The narrow accent strip adds visual interest without making the design busy.

Step 4: Sew the center upper panel to the accent strip
Place the 8 1/2″ x 9 1/2″ upper panel right sides together with the 2 1/2″ x 9 1/2″ accent strip. Sew along the 9 1/2″ edge using a 1/4″ seam allowance.
Press the seam toward the darker fabric if one fabric is clearly darker. This helps prevent the seam shadow from showing through lighter cloth.
Step 5: Sew the center lower panel to complete the center strip
Sew the 14 1/2″ x 9 1/2″ lower panel to the remaining long edge of the accent strip, again using a 1/4″ seam allowance. Press carefully.
Your completed center strip should now measure 9 1/2″ x 24 1/2″ unfinished.

Step 6: Attach the left side panel
Sew one 5″ x 24 1/2″ side panel to one long edge of the center strip using a 1/4″ seam allowance. Press the seam toward the side panel or open, depending on your preferred finish.
After this seam, the partial top should measure 14 1/4″ x 24 1/2″ unfinished.
Step 7: Attach the right side panel
Sew the remaining 5″ x 24 1/2″ side panel to the other long edge of the center strip with a 1/4″ seam allowance. Press neatly.
The completed quilt top should now measure 18 1/2″ x 24 1/2″ unfinished.

Step 8: Check and square the top
Lay the pieced top flat on your cutting mat and confirm the measurements. Trim only if necessary. The edges should be straight, and the center strip should run cleanly from top to bottom.
This is a small project, so even minor trimming can noticeably improve the final finish.
Step 9: Cut the backing and batting
Cut the backing and batting to approximately 22″ x 28″. This gives you enough extra all around for quilting shift and trimming later.
If the pad will be used on polished floors, this is a good stage to swap in a non-slip backing fabric or layer it behind the regular backing.

Step 10: Build the quilt sandwich
Layer the pieces in this order:
- Backing fabric, right side down
- Batting
- Pieced quilt top, right side up
Smooth each layer thoroughly to remove wrinkles. Pin-baste or spray-baste the layers so they stay aligned during quilting.
Step 11: Plan the quilting lines
For a modern minimalist look, choose clean straight quilting lines. Vertical or evenly spaced parallel lines suit this style especially well. Mark or visualize quilting lines about 1 1/2″ to 2″ apart.
Straight-line quilting echoes the simple geometry of Scandinavian décor and also helps the pad remain flat and practical.

Step 12: Quilt the center section first
Begin quilting near the center of the pad and work outward. Start by quilting along or near the seams of the center strip, then add parallel lines around it.
Working from the middle outward helps prevent puckers and keeps the small quilt sandwich stable.
Step 13: Quilt the outer side panels
Continue quilting across both outer panels, maintaining the same spacing so the pad looks intentional and balanced. Keep the lines straight and evenly distributed.
The goal is a lightly padded surface, not a stiff one, so there is no need for very dense quilting.

Step 14: Inspect the quilting and flatten the pad
Once quilting is complete, inspect both sides for tucks or missed areas. Smooth the pad flat and give it a light press if needed.
At this point, the stitched texture should be visible but subtle, reinforcing the minimalist design rather than overpowering it.
Step 15: Trim the quilted pad to final pre-binding size
Trim the quilted pad to 18 1/2″ x 24 1/2″. Make sure all four corners are square and the edges are clean.
This trimmed size is correct for applying binding and finishing at about 18″ x 24″.

Step 16: Prepare the binding
Cut 3 binding strips at 2 1/4″ x the width of the fabric and sew them together end to end. Press the seams open, then fold the full length in half, wrong sides together, and press again.
The finished perimeter of the pad is:
- 18 + 18 + 24 + 24 = 84″
So a binding length of around 92″ to 100″ gives you enough extra for joining and turning corners neatly.
Step 17: Sew the binding to the front
Align the raw edges of the folded binding with the raw edges of the quilted pad and sew using a 1/4″ seam allowance. Miter the corners as you go.
Keep the binding smooth and even. On a simple, modern piece like this, a neat edge makes a big difference to the finished look.
Step 18: Finish the binding and complete the sleeping pad
Fold the binding over to the back and hand-stitch or machine-stitch it in place. Give the finished sleeping pad one final press and smooth it flat.
The completed pad should feel softly cushioned, flexible, and tidy, with a clean geometric layout and a bright, modern Scandi mood. It is simple enough for everyday use, but polished enough to look intentional in a living space.
Finishing Notes
- For a slightly softer winter version, use a flannel backing instead of standard quilting cotton.
- For a more graphic look, substitute a bold mustard or rust accent strip against a pale base.
- For a fuller sleeping pad, you can use two layers of low-loft batting instead of one, though the pad will feel thicker and slightly less drapey.
- This project also works well as a portable travel mat for a cat carrier or a favorite chair.
Other Design Inspirations – Digitally Modified Images. Texture and color may vary from the actual product.

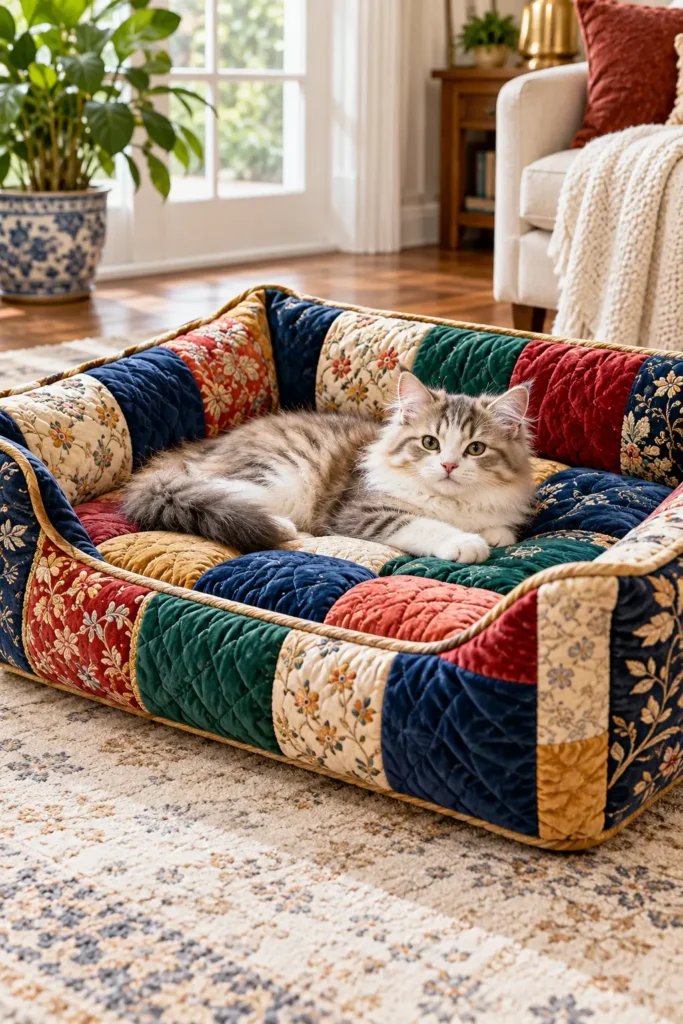
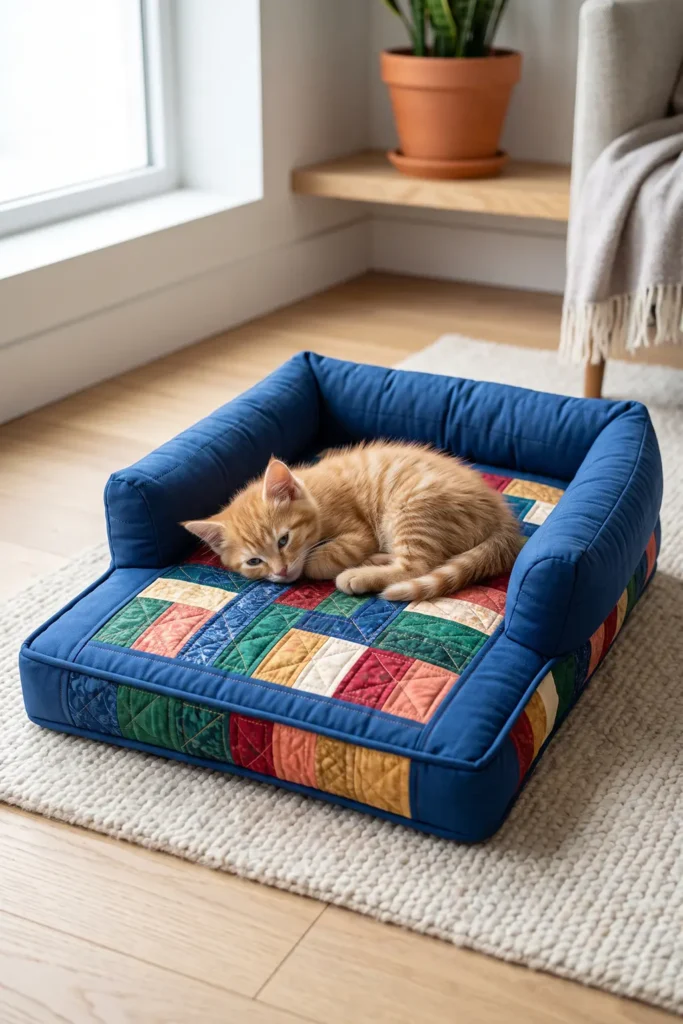
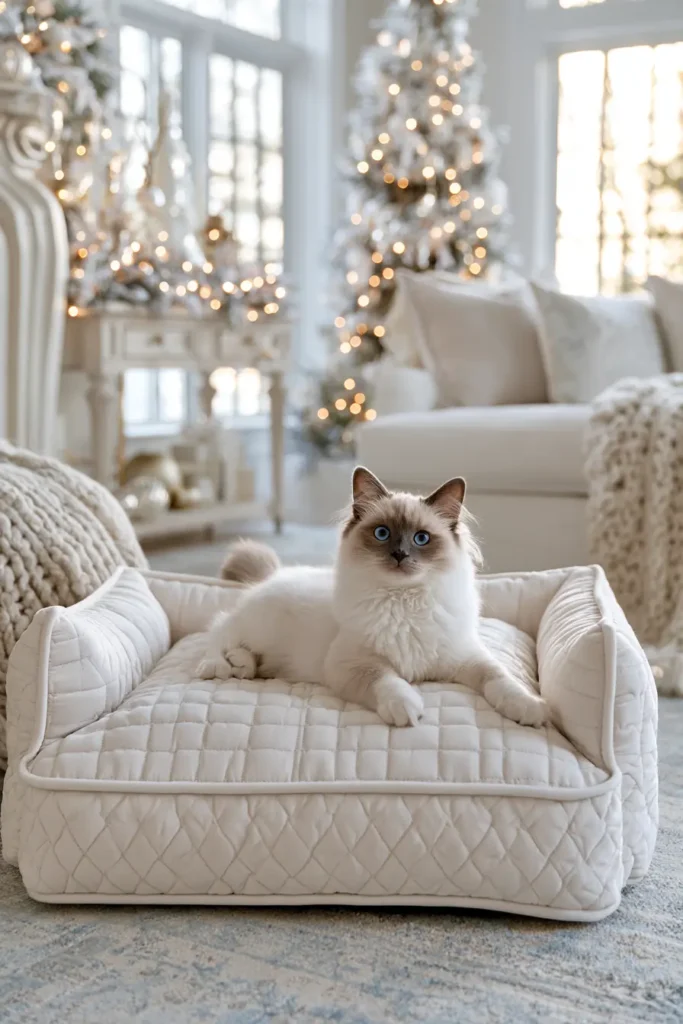
7. Luxury Quilted Cat Lounger Bed for Pampered Indoor Cats
A luxury quilted cat lounger bed is designed to feel a little more tailored and indulgent than a basic pet bed. It combines a generously padded sleeping base with softly structured raised sides, creating a comfortable resting place that feels supportive, plush, and visually polished. This version uses vibrant colors in a refined way, pairing jewel-toned patchwork with a smooth coordinated border and neatly finished walls.
Pet beds with a more upholstered, lounger-style shape have become popular because they look at home in a well-styled living space while still offering the coziness cats love. In quilting, that kind of project is especially satisfying because it blends practical sewing with decorative patchwork. The result is a handsome indoor cat bed with a quilted mattress-like base and softly cushioned walls.
Project Details
- Finished bed size: approximately 22″ x 28″
- Finished side height: approximately 5″
- Skill level: confident beginner to intermediate
- Style: quilted lounger bed with raised sides
- Seam allowances:
- 1/4″ for patchwork piecing
- 1/2″ for bed construction unless otherwise noted
Design Inspirations – Digitally Modified Images. Texture and color may vary from the actual product.

Materials
- Assorted quilting cottons in vibrant luxury-inspired tones
- sapphire blue
- emerald
- ruby
- warm gold
- coral
- ivory or cream
- Coordinating fabric for borders, side walls, and lining
- Backing or bottom fabric: about 1 1/4 yards
- Batting for quilted top: about 26″ x 32″
- Extra batting or foam for the base insert
- Polyester fiberfill for the side walls
- Coordinating thread
- Rotary cutter, ruler, and cutting mat
- Sewing machine
- Pins or clips
- Hand-sewing needle
- Iron and pressing surface
Cutting List
Patchwork Top
- 24 squares at 4 1/2″ x 4 1/2″
Arrange these in 4 columns x 6 rows.
Borders
- 2 side borders at 2 1/2″ x 24 1/2″
- 2 top and bottom borders at 2 1/2″ x 22 1/2″
Bed Body
- 1 quilted top panel at 22 1/2″ x 28 1/2″
- 1 bottom panel at 22 1/2″ x 28 1/2″
- 1 outer side band at 102 1/2″ x 6 1/2″
- 1 lining side band at 102 1/2″ x 6 1/2″
- 1 side-wall batting strip at 102″ x 5 1/2″
- 1 base insert at 21″ x 27″
Use either:- 1 foam insert about 1″ thick, or
- 3 to 4 layers of batting
Size Math
- Each 4 1/2″ square finishes at 4″
- A 4 x 6 layout finishes at 16″ x 24″
- Adding 2″ finished borders to the left and right adds 4″ total width
- Adding 2″ finished borders to the top and bottom adds 4″ total height
- Final quilt top size becomes 20″ x 28″ finished
To reach the intended 22″ x 28″ bed top, the patchwork needs one correction:
Instead of 4 columns x 6 rows, use 5 columns x 6 rows.
Corrected Patchwork Top
- 30 squares at 4 1/2″ x 4 1/2″
- Arrange in 5 columns x 6 rows
Corrected size math:
- 5 squares across = 20″ finished width
- 6 squares down = 24″ finished height
- Add 2″ finished borders to left and right = 24″ finished width
- Add 2″ finished borders to top and bottom = 28″ finished height
That gives a bed top slightly wider than needed, so we refine again for the actual target of 22″ x 28″:
Final Corrected Cutting Plan
Use:
- 20 squares at 4 1/2″ x 4 1/2″
- Arrange in 4 columns x 5 rows
- This finishes at 16″ x 20″
- Add 3″ finished side borders and 4″ finished top/bottom borders
So cut:
- 2 side borders at 3 1/2″ x 20 1/2″
- 2 top and bottom borders at 4 1/2″ x 22 1/2″
Now the math works:
- Center = 16″ x 20″ finished
- Add 3″ each side = 22″ finished width
- Add 4″ top and bottom = 28″ finished height
This is the cutting plan used below.
Final Cutting List
Patchwork Top
- 20 squares at 4 1/2″ x 4 1/2″
Arrange in 4 columns x 5 rows.
Borders
- 2 side borders at 3 1/2″ x 20 1/2″
- 2 top and bottom borders at 4 1/2″ x 22 1/2″
Bed Body
- 1 bottom panel at 22 1/2″ x 28 1/2″
- 1 outer side band at 102 1/2″ x 6 1/2″
- 1 lining side band at 102 1/2″ x 6 1/2″
- 1 side-wall batting strip at 102″ x 5 1/2″
- 1 base insert at 21″ x 27″
Perimeter check for the base:
- 22 1/2 + 22 1/2 + 28 1/2 + 28 1/2 = 102″
So side bands cut at 102 1/2″ will become 102″ loops after joining the short ends with 1/2″ seam allowances.
Assembly at a Glance
- Piece the colorful patchwork center.
- Add borders to create the quilted lounger top.
- Quilt the top panel.
- Cut the bottom and side-wall pieces.
- Build the padded side-wall ring.
- Attach the walls to the top and bottom.
- Turn, insert the base pad, and stuff the sides.
- Close the opening and shape the lounger.
Step-by-Step Guide
Step 1: Choose the fabric palette
Select vibrant fabrics that still feel rich and polished. Jewel tones such as emerald, sapphire, ruby, deep coral, marigold, and cream work especially well for a luxury-style cat bed. You can mix a few small prints with solids, but keep the overall look balanced so it feels elegant rather than busy.
Cats often gravitate toward soft, warm, enclosed spaces, so pairing a plush structure with rich color gives this bed both visual presence and practical comfort.

Step 2: Cut the patchwork squares
Cut 20 squares at 4 1/2″ x 4 1/2″. Accuracy matters because the patchwork center should lie flat before the borders are added.
These squares will form a 4 by 5 layout, which will finish at 16″ x 20″.
Step 3: Lay out the patchwork center
Arrange the squares in 4 columns and 5 rows. Distribute the stronger colors evenly so no one area becomes too dark or too light.
A patchwork layout usually looks more refined when one or two colors repeat throughout the design rather than appearing in only one place.

Step 4: Sew the squares into rows
Sew the squares into 5 rows of 4 squares each using a 1/4″ seam allowance. Press the seams in alternating directions from row to row so the intersections nest neatly.
Each row should measure approximately 16 1/2″ x 4 1/2″ unfinished.
Step 5: Join the rows into the patchwork center
Sew the 5 rows together in order, matching the seam intersections carefully. Press the completed patchwork center flat.
The unfinished center should now measure approximately 16 1/2″ x 20 1/2″, which becomes 16″ x 20″ finished.

Step 6: Cut and attach the side borders
Cut 2 side borders at 3 1/2″ x 20 1/2″. Sew one border to each long side of the patchwork center using a 1/4″ seam allowance. Press the seams toward the border.
After this step, the piece should measure approximately 22 1/2″ x 20 1/2″ unfinished.
Step 7: Cut and attach the top and bottom borders
Cut 2 top and bottom borders at 4 1/2″ x 22 1/2″. Sew them to the remaining edges with a 1/4″ seam allowance.
The finished quilt top should now measure approximately 22 1/2″ x 28 1/2″ unfinished, which will finish at 22″ x 28″.

Step 8: Prepare the quilt sandwich
Layer the bed top in this order:
- Backing fabric, right side down
- Batting
- Patchwork top, right side up
Use backing and batting pieces about 26″ x 32″ so you have extra room for quilting shift. Baste the layers securely.
Step 9: Quilt the top panel
Quilt the top using straight lines, gentle crosshatching, or quilting close to the seams. A spacing of about 1 1/2″ to 2″ works well, giving the top definition while keeping it cushioned.
For a more luxurious appearance, even simple quilting looks beautiful when the lines are consistent and well spaced.

Step 10: Trim the quilted top and cut the bottom panel
Trim the quilted top to 22 1/2″ x 28 1/2″. Then cut the bottom panel to the same size.
If desired, use a slightly sturdier fabric for the underside so the bed holds up well with regular use.
Step 11: Cut the side bands and the batting strip
Cut:
- 1 outer side band at 102 1/2″ x 6 1/2″
- 1 lining side band at 102 1/2″ x 6 1/2″
- 1 batting strip at 102″ x 5 1/2″
These dimensions create a finished side height of about 5″, since the 6 1/2″ cut height loses 1/2″ seam allowance at both the top and bottom.

Step 12: Sew the outer side band into a loop
Sew the short ends of the outer side band together with a 1/2″ seam allowance. Press the seam open.
The resulting loop should measure about 102″, matching the perimeter of the bed base.
Step 13: Sew the lining side band into a loop
Repeat the same process with the lining side band, again using a 1/2″ seam allowance. Press the seam open.
Now you have one outer ring and one inner ring for the raised side walls.

Step 14: Add batting to the outer wall and join the top edge
Center the 102″ x 5 1/2″ batting strip on the wrong side of the outer wall and baste it lightly in place if needed. Place the outer wall and lining wall right sides together and sew them along one long edge using a 1/2″ seam allowance.
Turn the wall unit right side out and press the sewn edge. This becomes the finished upper rim of the lounger bed.
Step 15: Attach the outer wall to the quilted top
With the quilted top right side up, pin or clip the raw lower edge of the outer wall to the quilted top, right sides together. Match the side-wall seam to the center of one short edge or place it where it will be least noticeable.
Sew all the way around using a 1/2″ seam allowance, pivoting carefully at the corners.

Step 16: Attach the lining wall to the bottom panel
Pin the raw lower edge of the lining wall to the bottom panel, right sides together. Sew around the full perimeter with a 1/2″ seam allowance, but leave an opening of about 8″ along one side.
Use this opening to turn the bed, insert the base pad, and stuff the sides.
Step 17: Turn the bed, insert the base pad, and stuff the walls
Turn the whole bed right side out through the opening. Push out the corners gently and smooth the seams with your hands. Insert the 21″ x 27″ base insert into the bottom.
Then stuff the raised sides evenly with polyester fiberfill. Add enough filling to create rounded, supportive walls that feel plush but not stiff.

Step 18: Close the opening and finish the lounger
Fold the raw edges of the opening inward and close it with a ladder stitch or machine stitch close to the edge. Shape the sides evenly and smooth the base insert so the bed sits flat.
If desired, topstitch about 1/8″ from the lower wall seam around the outer edge. This helps the lounger hold its shape and gives it a more tailored finish.
Finishing Notes
- A lounger bed feels especially polished when you pair the patchwork with calmer, coordinating side walls rather than all-over print.
- Foam in the base creates a more boutique look, while layered batting gives a softer, more washable result.
- Rich jewel tones are a natural fit for a luxury-style pet bed, but the same structure also works beautifully in softer neutrals.
- Small quilted pet beds are a practical way to use patchwork skills on a project that is decorative and useful at the same time.
Other Design Inspirations – Digitally Modified Images. Texture and color may vary from the actual product.



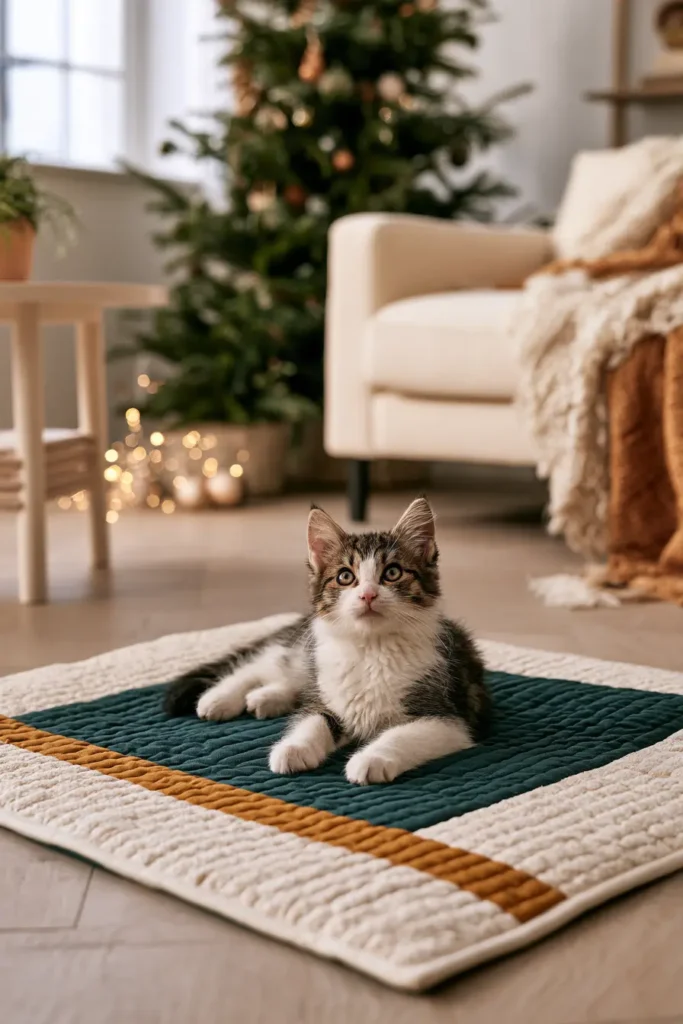
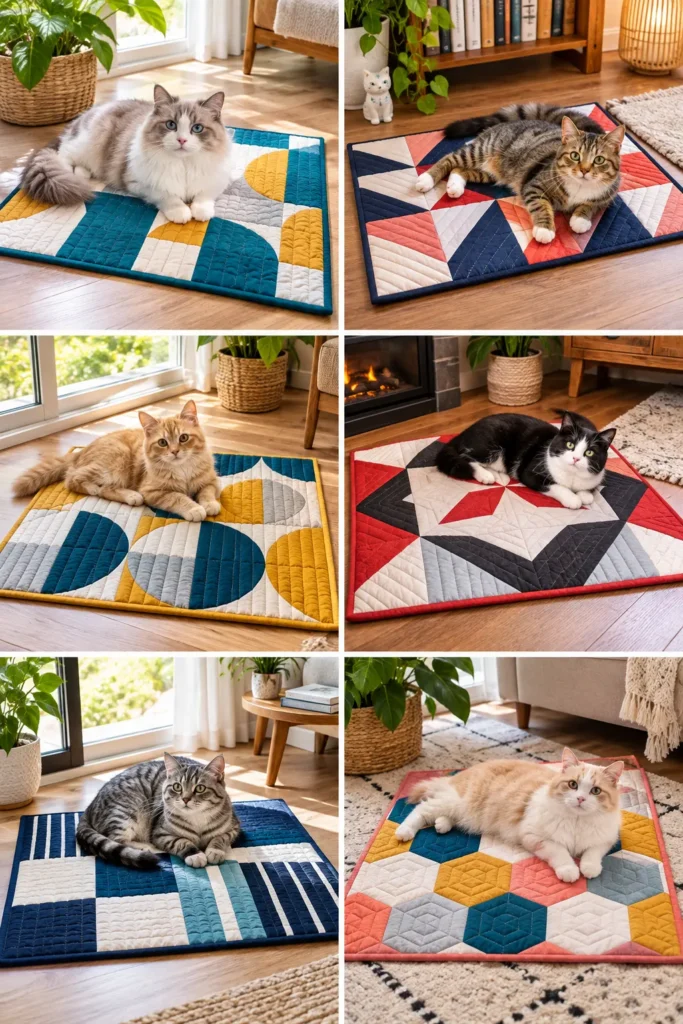
8. Modern Geometric Quilted Cat Mat for Stylish Home Décor
A modern geometric quilted cat mat is a simple, polished project that combines practical comfort with a clean, design-forward look. Unlike a puffed bed with raised sides, this style stays flat and flexible, making it easy to place on a sofa, bench, reading chair, sunny floor spot, or at the foot of a bed. It is especially useful for cats that like to stretch out while still enjoying a softly padded surface.
Geometric patchwork has always had a place in quilting, but in modern quilting it often appears in bolder, cleaner layouts with strong contrast and fewer fussy details. For this cat mat, half-square triangles create a crisp angular pattern, while vibrant solids and prints give the finished piece a lively, contemporary feel that still looks tidy in a stylish room.
Project Details
- Finished size: approximately 20″ x 24″
- Skill level: beginner to confident beginner
- Style: flat quilted mat with modern geometric patchwork
- Seam allowance: 1/4″ unless otherwise noted
- Best fabrics: quilting cotton, cotton-linen blend, or soft printed cotton
Materials
- 10 light fabric squares at 5″ x 5″
- 10 dark or accent fabric squares at 5″ x 5″
- Border fabric: 1/3 yard
- Backing fabric: 24″ x 28″
- Batting: 24″ x 28″
- Binding fabric: 3 strips at 2 1/4″ x width of fabric
- Coordinating thread
- Rotary cutter, ruler, and cutting mat
- Pins or clips
- Sewing machine
- Iron and pressing surface
Design Inspirations – Digitally Modified Images. Texture and color may vary from the actual product.
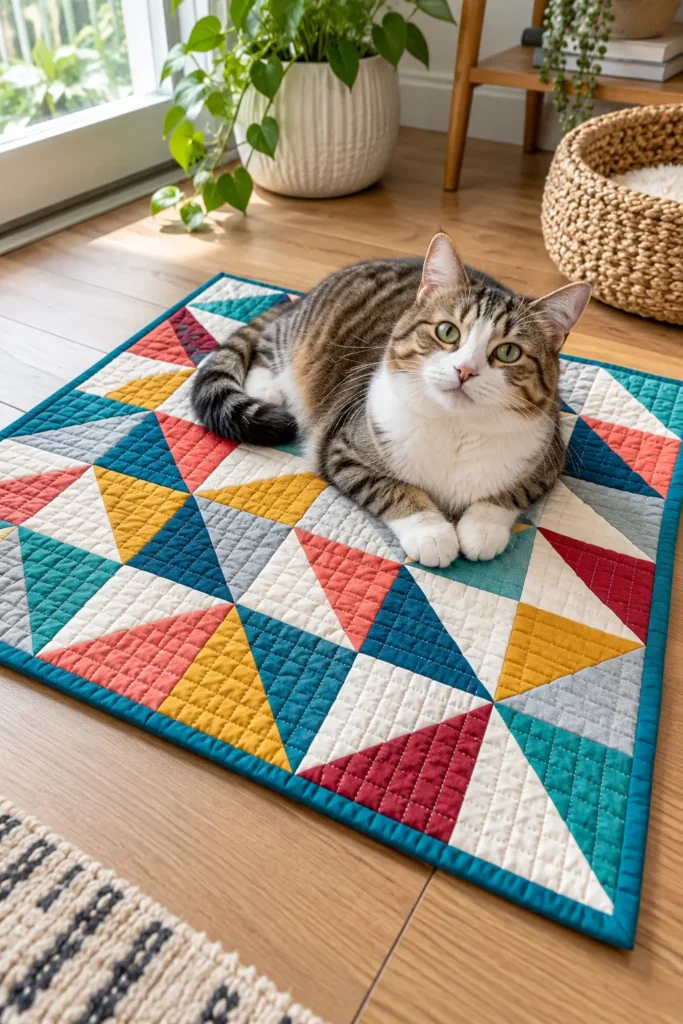
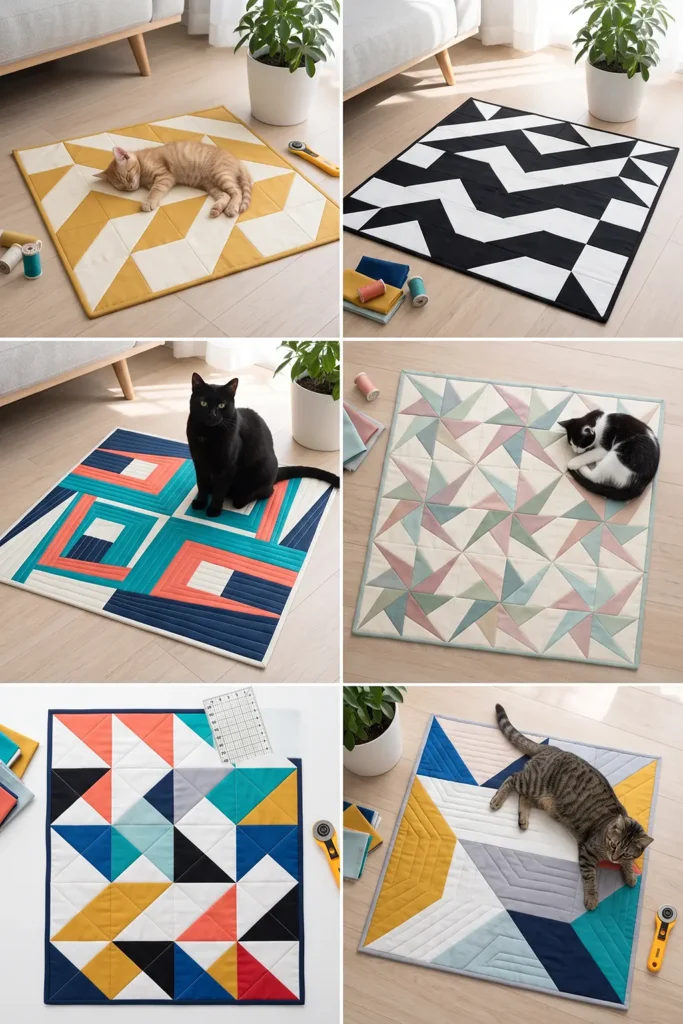
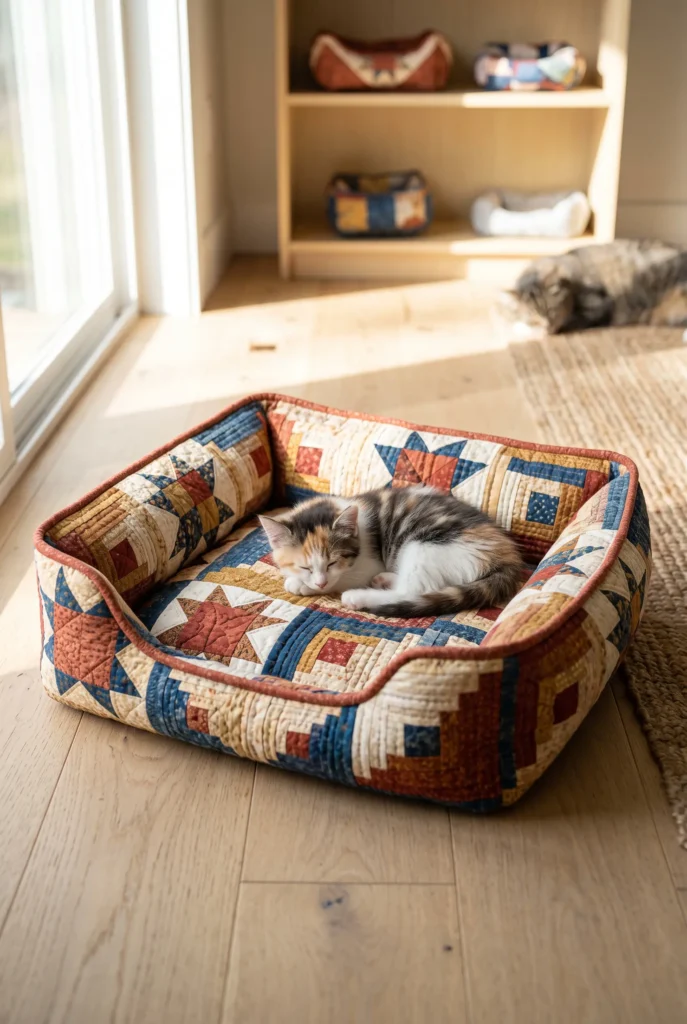
Suggested Color Palette
Use bright, modern colors with one or two grounding tones. For example:
- teal
- mustard
- coral
- cobalt
- cherry red
- white
- pale gray
- black or deep navy for contrast
This style works best when the shapes read clearly from a distance, so strong contrast between the paired fabrics is especially helpful.
Cutting List
For the geometric center
- 10 light squares at 5″ x 5″
- 10 dark or accent squares at 5″ x 5″
These will be paired to make 20 half-square triangle units, each trimmed to 4 1/2″ x 4 1/2″ unfinished.
For the borders
- 2 side borders at 2 1/2″ x 20 1/2″
- 2 top and bottom borders at 2 1/2″ x 20 1/2″
For finishing
- Backing: 24″ x 28″
- Batting: 24″ x 28″
- Binding: 3 strips at 2 1/4″ x width of fabric
Size Math
- Each half-square triangle unit finishes at 4″ x 4″
- A layout of 4 blocks across and 5 blocks down finishes at 16″ x 20″
- Add 2″ finished borders on all sides
- Final mat size becomes 20″ x 24″
Assembly at a Glance
- Make 20 half-square triangle units.
- Arrange them into a bold geometric layout.
- Sew the patchwork center.
- Add borders.
- Layer the quilt sandwich.
- Quilt the mat.
- Trim, bind, and finish.
Step-by-Step Guide
Step 1: Choose and pair the fabrics
Select 10 light squares and 10 dark or vivid accent squares, each measuring 5″ x 5″. Pair one light square with one darker or brighter square.
This contrast is what makes the geometric pattern stand out. A pairing such as white and teal, pale gray and coral, cream and mustard, or soft aqua and navy creates the modern angular look very effectively.

Step 2: Mark the diagonal sewing lines
On the wrong side of each light square, draw a diagonal line from one corner to the opposite corner using a pencil or washable fabric marker. This line will guide your cuts for the half-square triangle method.
This technique is widely used because it quickly produces two matching units and keeps cutting simple.
Step 3: Sew the paired squares
Place each light square right sides together with one dark or accent square. Sew 1/4″ away from the marked line on both sides of the line.
You should now have 10 sewn square pairs, each with two parallel seams.

Step 4: Cut the pairs apart
Cut each sewn pair directly on the marked diagonal line. Open the units and press them flat.
This gives you 20 half-square triangle units. Pressing toward the darker fabric usually helps the seam look neater from the front.
Step 5: Trim the half-square triangle units
Trim each unit to 4 1/2″ x 4 1/2″. Accurate trimming matters because even a small cat mat looks much sharper when the points and seams align properly.
Once trimmed, each unit will finish at 4″ square in the quilt top.

Step 6: Arrange the units in a geometric layout
Lay out the 20 units in 4 columns and 5 rows. Rotate the triangles to create a clean, modern pattern. A zigzag, pinwheel-inspired flow, or diagonal movement across the mat all work well.
Take a few minutes here to refine the layout. Modern geometric quilts often look effortless, but the best ones usually come from thoughtful placement.
Step 7: Sew the units into rows
Sew the blocks into 5 rows of 4 units each, using a 1/4″ seam allowance. Press the seams in alternating directions from row to row to help the intersections nest.
Each row should measure approximately 16 1/2″ x 4 1/2″ unfinished.

Step 8: Join the rows into the quilt center
Sew the 5 rows together carefully, matching seam intersections. Press the completed center flat.
The unfinished quilt center should now measure approximately 16 1/2″ x 20 1/2″, which will finish at 16″ x 20″.
Step 9: Cut the side borders
Cut 2 side borders at 2 1/2″ x 20 1/2″. These add a clean frame around the geometric center and help the bolder shapes feel polished rather than crowded.
For a very modern look, choose a solid border fabric rather than another busy print.

Step 10: Sew on the side borders
Attach one border strip to each long side of the quilt center using a 1/4″ seam allowance. Press the seams toward the border.
After this step, the top should measure approximately 20 1/2″ x 20 1/2″ unfinished.
Step 11: Cut and attach the top and bottom borders
Cut 2 top and bottom borders at 2 1/2″ x 20 1/2″. Sew them to the remaining two sides of the quilt top with a 1/4″ seam allowance.
Your completed top should now measure approximately 20 1/2″ x 24 1/2″ unfinished, which becomes 20″ x 24″ finished after binding.

Step 12: Cut the backing and batting
Cut the backing and batting to 24″ x 28″. This gives you extra room around all sides for quilting shift and trimming.
A little extra size is standard in quilting and makes the sandwich much easier to handle cleanly.
Step 13: Build the quilt sandwich
Layer the quilt in this order:
- Backing, right side down
- Batting
- Quilt top, right side up
Smooth the layers carefully and baste them with pins or spray baste. Make sure the top stays centered.

Step 14: Plan the quilting design
Choose a simple quilting design that complements the geometric patchwork. Straight-line quilting works especially well here. You can quilt:
- vertical lines
- diagonal lines
- a grid
- echo lines that follow the piecing
Lines spaced about 1 1/2″ to 2″ apart usually keep the mat stable without making it too stiff.
Step 15: Quilt the mat
Begin quilting near the center and work outward. Quilt across the patchwork center first, then continue through the borders so the whole mat feels visually connected.
This is where the mat gains its finished texture. On a modern design, neat quilting lines add a lot of the final style.

Step 16: Trim the quilted mat
Trim the finished quilted mat to 20 1/2″ x 24 1/2″, making sure all four corners are square.
This is the correct pre-binding size for a finished mat measuring approximately 20″ x 24″.
Step 17: Prepare and sew on the binding
Join the 3 binding strips at 2 1/4″ wide end to end. Press the seams open, then fold the full strip in half lengthwise with wrong sides together and press.
Sew the binding to the front of the mat using a 1/4″ seam allowance, mitering the corners neatly.
The finished perimeter is:
- 20 + 20 + 24 + 24 = 88″
So three width-of-fabric strips provide enough length with extra allowance for corners and joining.

Step 18: Finish the binding and complete the mat
Fold the binding to the back and hand-stitch or machine-stitch it in place. Give the mat a final press and smooth it flat.
The finished cat mat should feel lightly padded, easy to move, and visually crisp, with bold geometric shapes and vibrant color contrast that suit a stylish home beautifully.
Finishing Notes
- Half-square triangles are one of quilting’s most classic units, but when used in bold color-blocked layouts, they feel distinctly modern.
- If you want a slightly thicker mat, use two layers of low-loft batting instead of one.
- For extra practicality on smooth floors, consider a backing fabric with a bit more grip or place the mat over a rug.
- This design also works well as a small travel mat or a decorative pad for a cat perch.
Other Design Inspirations – Digitally Modified Images. Texture and color may vary from the actual product.
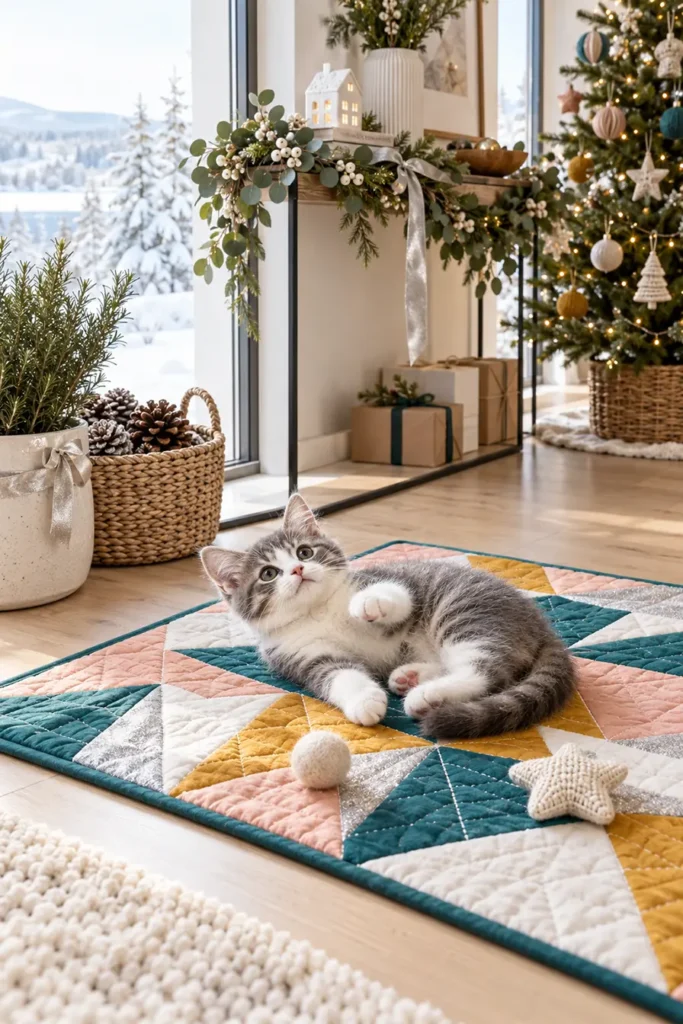

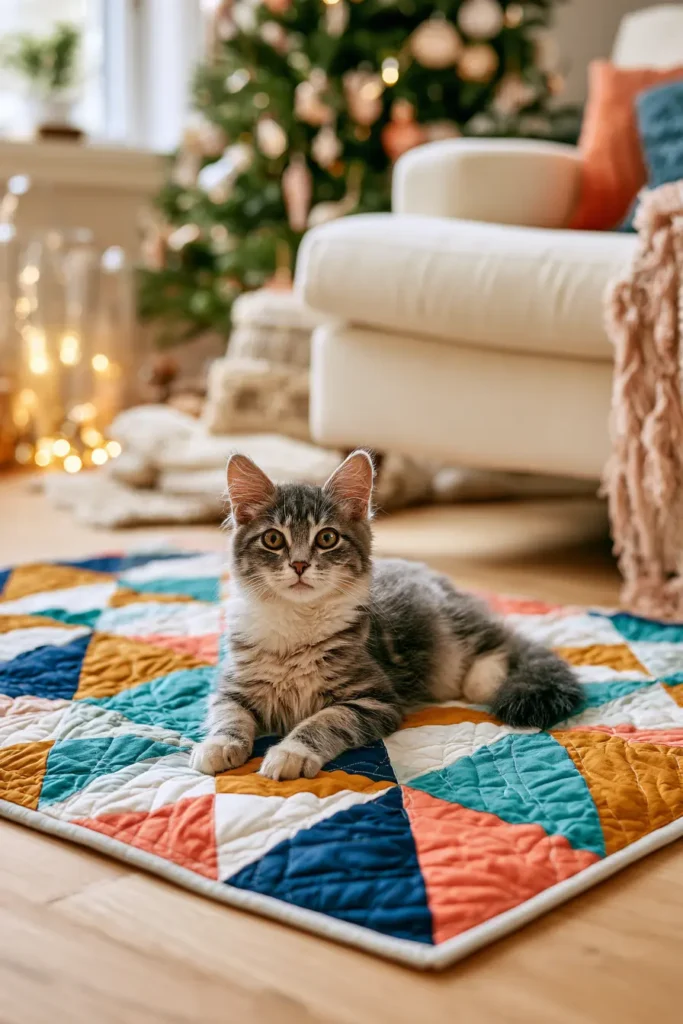
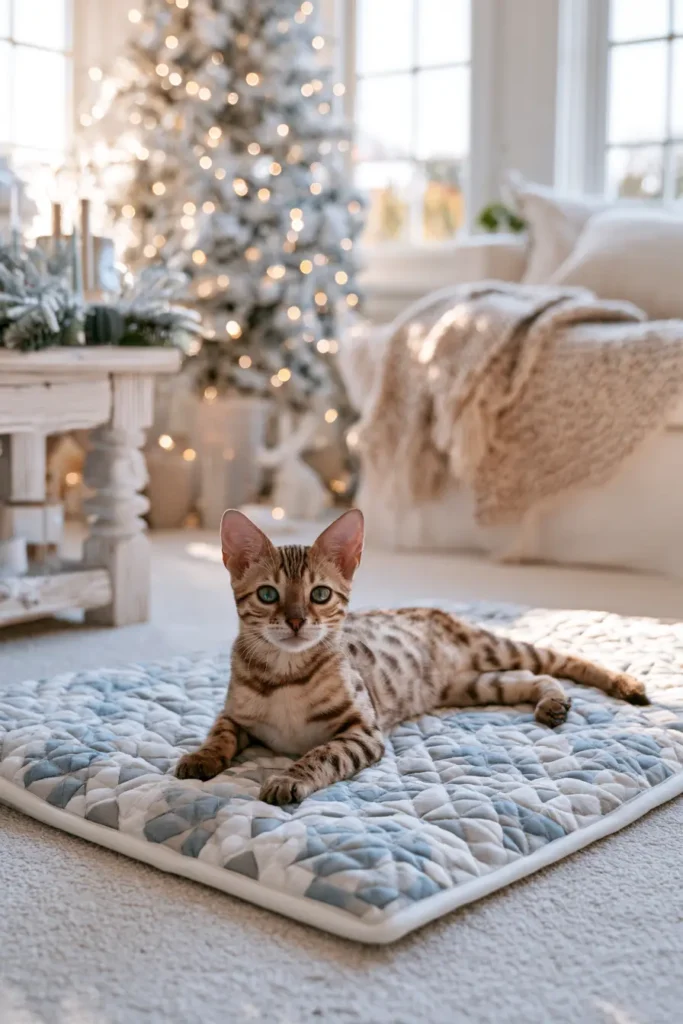
9. Farmhouse Plaid Quilted Cat Bed for Rustic Home Charm
A farmhouse plaid quilted cat bed brings together two things that suit each other beautifully: the soft comfort of a padded pet bed and the welcoming character of classic plaid patchwork. This version has a quilted rectangular base, gently raised sides, and a cheerful rustic palette that feels warm, practical, and right at home in a cozy living room.
Plaid has long been associated with country interiors, utility quilts, picnic blankets, and winter textiles, so it naturally lends itself to a handmade cat bed with old-fashioned charm. For this project, the look stays farmhouse-inspired, but the colors are kept lively and fresh, with vibrant reds, warm creams, deep greens, navy, mustard, and soft tan accents.
Project Details
- Finished bed size: approximately 20″ x 24″
- Finished side height: approximately 4 1/2″
- Skill level: confident beginner to intermediate
- Main style: plaid patchwork quilted bed with raised sides
- Seam allowances:
- 1/4″ for patchwork piecing
- 1/2″ for bed construction unless otherwise noted
Materials
- Assorted plaid, check, and coordinating quilting cottons or cotton flannels
- Coordinating fabric for borders, side walls, and lining
- Backing or bottom fabric: about 1 yard
- Batting for the quilted top: about 24″ x 28″
- Additional batting or foam for the base insert
- Polyester fiberfill for the side walls
- Coordinating thread
- Rotary cutter, ruler, and mat
- Sewing machine
- Pins or clips
- Hand-sewing needle
- Iron and pressing surface
Design Inspirations – Digitally Modified Images. Texture and color may vary from the actual product.

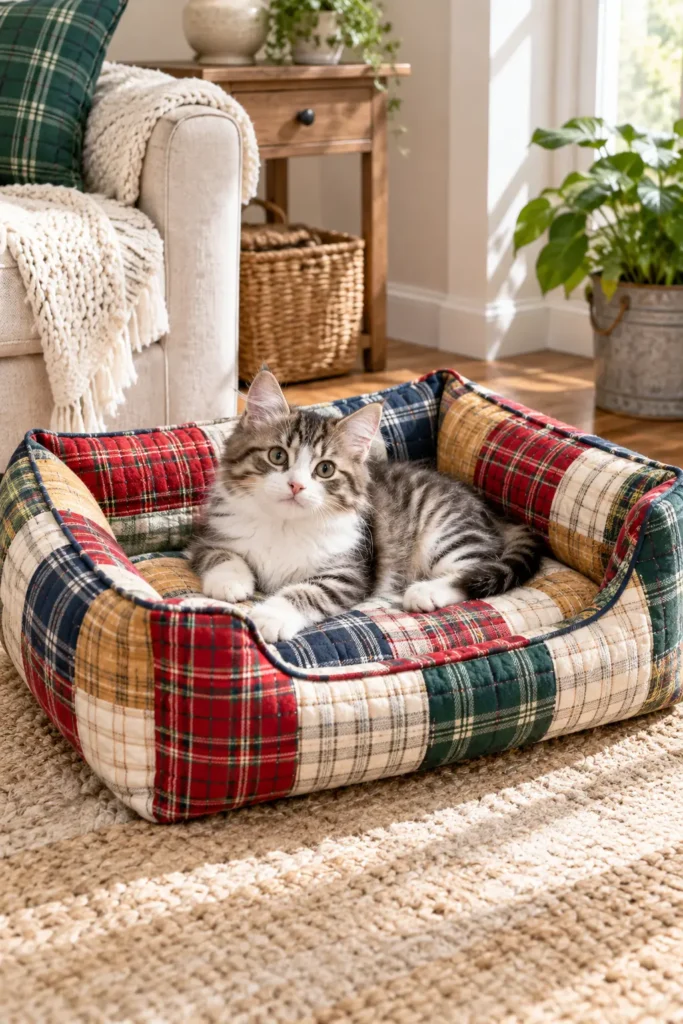
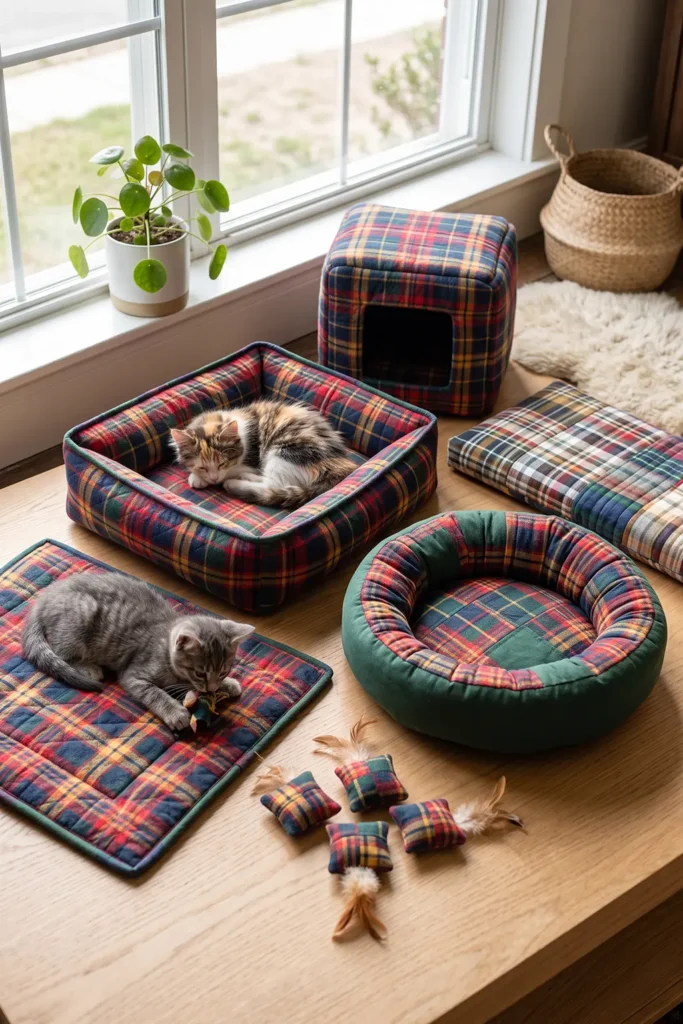
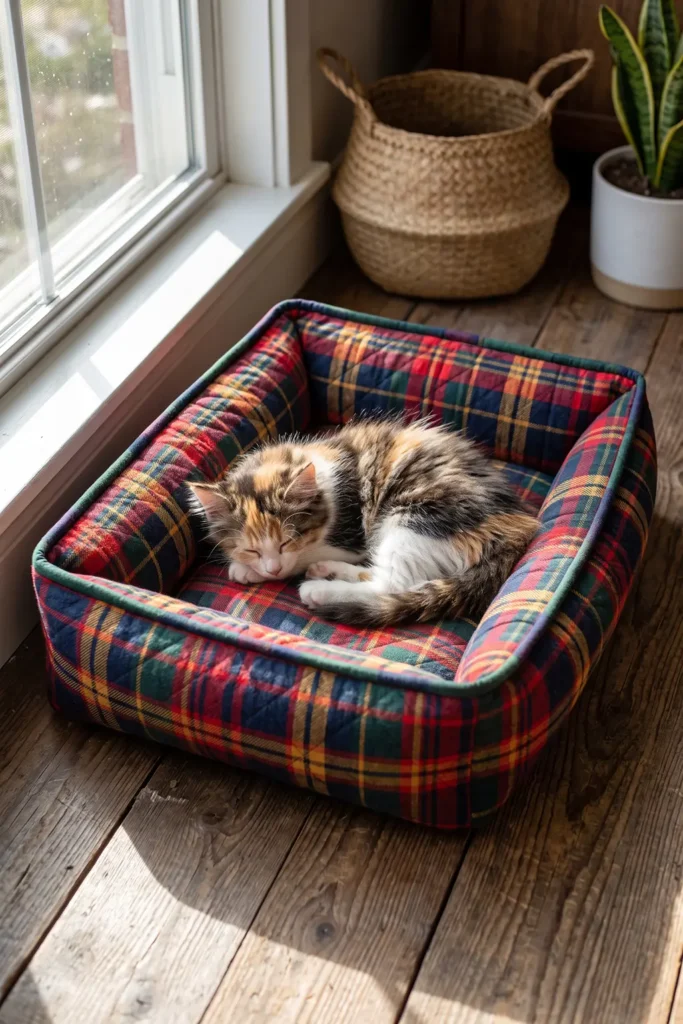
Cutting List
Patchwork Top
- 20 squares at 4 1/2″ x 4 1/2″
Arrange these in 4 columns x 5 rows.
Borders
- 2 side borders at 2 1/2″ x 20 1/2″
- 2 top and bottom borders at 2 1/2″ x 20 1/2″
Bed Body
- 1 quilted top panel at 20 1/2″ x 24 1/2″
- 1 bottom panel at 20 1/2″ x 24 1/2″
- 1 outer side band at 90 1/2″ x 5 1/2″
- 1 lining side band at 90 1/2″ x 5 1/2″
- 1 batting strip for side wall at 90″ x 4 1/2″
- 1 base insert at 19″ x 23″
Use either:
- 1 foam insert about 1″ thick, or
- 2 to 4 layers of batting cut to size
Finished Size Math
- Each 4 1/2″ square finishes at 4″
- A 4 x 5 layout finishes at 16″ x 20″
- Adding 2″ finished borders all around brings the top to 20″ x 24″
- The top and bottom are cut at 20 1/2″ x 24 1/2″
- With 1/2″ seam allowances, the bed finishes at about 20″ x 24″
- Base perimeter check:
20 1/2 + 20 1/2 + 24 1/2 + 24 1/2 = 90″
That is why the side bands are cut to 90 1/2″. After sewing the short ends together with 1/2″ seam allowances, each loop measures 90″, which matches the bed perimeter.
Assembly at a Glance
- Piece the plaid patchwork center.
- Add borders and quilt the top panel.
- Cut the bottom and side-wall pieces.
- Build the raised side-wall ring.
- Attach the wall ring to the top and bottom.
- Turn the bed, insert the base pad, and stuff the sides.
- Close the opening and shape the bed.
Step-by-Step Guide
Step 1: Choose the plaid palette
Select a lively farmhouse palette with a mix of plaid, check, and coordinating solids. A good combination might include red plaid, navy check, forest green, mustard, cream, and warm tan. Try to balance the bolder plaids with a few calmer prints or solids so the finished bed feels rustic but not overly busy.
Traditional plaid fabrics have deep roots in practical home textiles, which makes them especially fitting for a sturdy, everyday cat bed.

Step 2: Cut the patchwork squares
Cut 20 squares at 4 1/2″ x 4 1/2″. If some plaids have a directional stripe, take a moment to keep their orientation consistent where possible. That little detail gives the finished patchwork a neater look.
These squares will be arranged in 4 columns and 5 rows.
Step 3: Lay out the patchwork center
Arrange the squares in a 4 x 5 layout. Spread the strongest plaids across the design so one section does not become visually heavy. Alternate larger-scale plaids with smaller checks or solids to keep the composition balanced.
A good patchwork layout often looks effortless, but it usually benefits from a little adjustment before sewing begins.

Step 4: Sew the squares into rows
Sew the squares into 5 rows of 4 squares each using a 1/4″ seam allowance. Press the seams in alternating directions from row to row.
Each row should measure about 16 1/2″ x 4 1/2″ unfinished.
Step 5: Join the rows into the patchwork center
Sew the 5 rows together, matching seam intersections carefully. Press the finished panel flat.
The patchwork center should now measure approximately 16 1/2″ x 20 1/2″ unfinished, which becomes 16″ x 20″ finished.

Step 6: Cut and attach the side borders
Cut 2 side borders at 2 1/2″ x 20 1/2″. Sew one to each long side of the patchwork center using a 1/4″ seam allowance. Press the seams toward the border.
After adding these, the piece should measure about 20 1/2″ x 20 1/2″ unfinished.
Step 7: Cut and attach the top and bottom borders
Cut 2 top and bottom borders at 2 1/2″ x 20 1/2″. Sew them to the remaining two sides using a 1/4″ seam allowance.
Your completed quilt top should now measure approximately 20 1/2″ x 24 1/2″ unfinished, which will finish at 20″ x 24″.

Step 8: Prepare the quilt sandwich
Layer the quilted top in this order:
- Backing fabric, right side down
- Batting
- Plaid patchwork top, right side up
Use backing and batting slightly larger than the top, about 24″ x 28″, to allow for quilting shift. Smooth the layers well and baste securely.
Step 9: Quilt the top panel
Quilt the top with straight lines, a simple grid, or quilting close to the patchwork seams. Lines spaced about 1 1/2″ to 2″ apart work well for a pet bed because they stabilize the layers without making the base too stiff.
A plaid-inspired quilt top often looks especially good with straightforward quilting that echoes the geometry of the fabric.

Step 10: Trim the quilted top and cut the bottom panel
Trim the quilted top to 20 1/2″ x 24 1/2″. Then cut the bottom panel to the same size.
For extra durability, the bottom panel can be made from a sturdier cotton or a tightly woven print. If the bed will be used on smooth floors, a non-slip underside fabric is also practical.
Step 11: Cut the side bands and side-wall batting
Cut:
- 1 outer side band at 90 1/2″ x 5 1/2″
- 1 lining side band at 90 1/2″ x 5 1/2″
- 1 batting strip at 90″ x 4 1/2″
Because the band is cut at 5 1/2″ high and loses 1/2″ seam allowance at the top and bottom, the finished wall height will be about 4 1/2″.

Step 12: Sew the outer side band into a loop
Sew the short ends of the outer side band together using a 1/2″ seam allowance. Press the seam open.
The resulting loop should measure about 90″, matching the base perimeter.
Step 13: Sew the lining side band into a loop
Repeat the same step with the lining side band, again using a 1/2″ seam allowance. Press the seam open.
You now have one outer loop and one lining loop.

Step 14: Add batting to the outer wall and join the top edge
Center the 90″ x 4 1/2″ batting strip on the wrong side of the outer loop and baste it lightly in place if needed. Then place the outer loop and lining loop right sides together and sew them together along one long edge using a 1/2″ seam allowance.
Turn the joined wall unit right side out and press the sewn edge. This becomes the finished top rim of the bed.
Step 15: Attach the outer wall to the quilted top
With the quilted top right side up, pin or clip the raw lower edge of the outer wall to the top panel, right sides together. Match the side seam where it will be least noticeable, then distribute the rest evenly around the perimeter.
Sew all the way around using a 1/2″ seam allowance, pivoting carefully at the corners.

Step 16: Attach the lining wall to the bottom panel
Pin the raw lower edge of the lining wall to the bottom panel, right sides together. Sew with a 1/2″ seam allowance, leaving an opening of about 8″ along one side.
Use this opening to turn the bed, add the base insert, and stuff the walls.
Step 17: Turn the bed, insert the base pad, and stuff the sides
Turn the bed right side out through the opening. Gently push out the corners and smooth the seams with your hands. Insert the 19″ x 23″ base pad so it sits flat inside the bed.
Then stuff the side walls evenly with polyester fiberfill. Add enough to create softly rounded walls that feel supportive and cozy without becoming stiff.
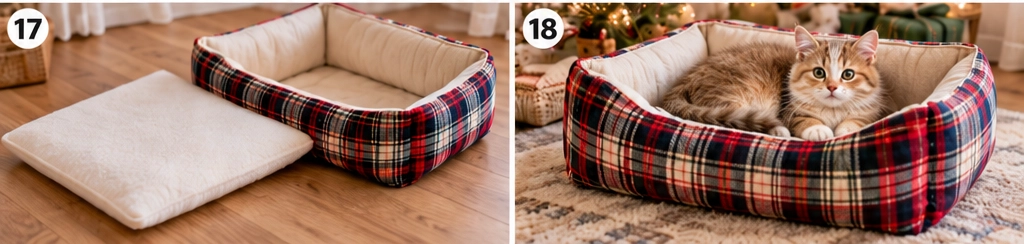
Step 18: Close the opening and finish the bed
Fold the raw edges of the opening inward and close it with a ladder stitch or machine stitch close to the edge. Shape the bed evenly and smooth the filling so the silhouette looks balanced.
If you want a slightly crisper finish, topstitch about 1/8″ from the lower wall seam around the outside edge. This helps the bed hold its shape and gives it a more tailored look.
Finishing Notes
- Plaid and check fabrics suit farmhouse sewing because they carry a familiar, durable, lived-in feeling.
- A bed like this works beautifully in cooler seasons, especially when paired with flannel plaids and warm room décor.
- Foam in the base creates a firmer, more structured bed, while layered batting gives a softer, more washable result.
- You can also adapt this construction with holiday plaids, neutral checks, or even denim-look prints.
Other Design Inspirations – Digitally Modified Images. Texture and color may vary from the actual product.


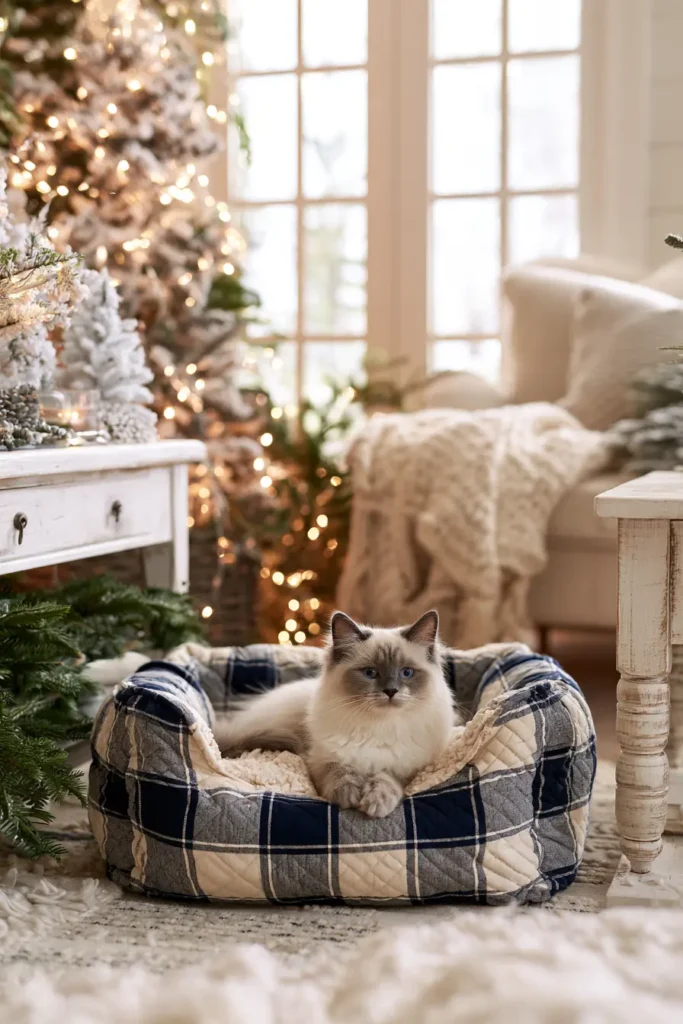

10. Portable Quilted Cat Travel Mat for Carriers and Road Trips
A portable quilted cat travel mat is one of the most practical small quilting projects you can make. It gives a cat a soft, familiar place to rest inside a carrier, on a seat, or in a temporary stop along the way, while still being light enough to fold or roll and carry easily. This version is designed as a flat, padded mat with cheerful patchwork, rounded corners, and simple fabric ties instead of bulky closures.
Travel mats are especially useful because cats often settle better when they can rest on a surface that already smells familiar. In quilting terms, this kind of project is also a smart use of smaller cuts and leftover fabric, since the finished mat is compact, washable, and quick to sew.
Project Details
- Finished size: approximately 18″ x 24″
- Style: flat quilted travel mat with tie straps
- Skill level: beginner to confident beginner
- Seam allowance: 1/4″ unless otherwise noted
- Padding level: light to medium, so it stays soft without becoming bulky
- Portability: rolls or folds easily for travel
Materials
- Assorted quilting cotton prints in vibrant colors
- 2 side border fabrics, or 1 border fabric used twice
- Backing fabric: 20″ x 26″
- Batting: 20″ x 26″
- Binding fabric: 3 strips at 2 1/4″ x width of fabric
- Fabric for tie straps: 2 strips at 2″ x 20″
- Coordinating thread
- Rotary cutter, ruler, and mat
- Pins or clips
- Sewing machine
- Iron and pressing surface
- Optional: a corner-rounding template or small bowl to trace curved corners
Design Inspirations – Digitally Modified Images. Texture and color may vary from the actual product.
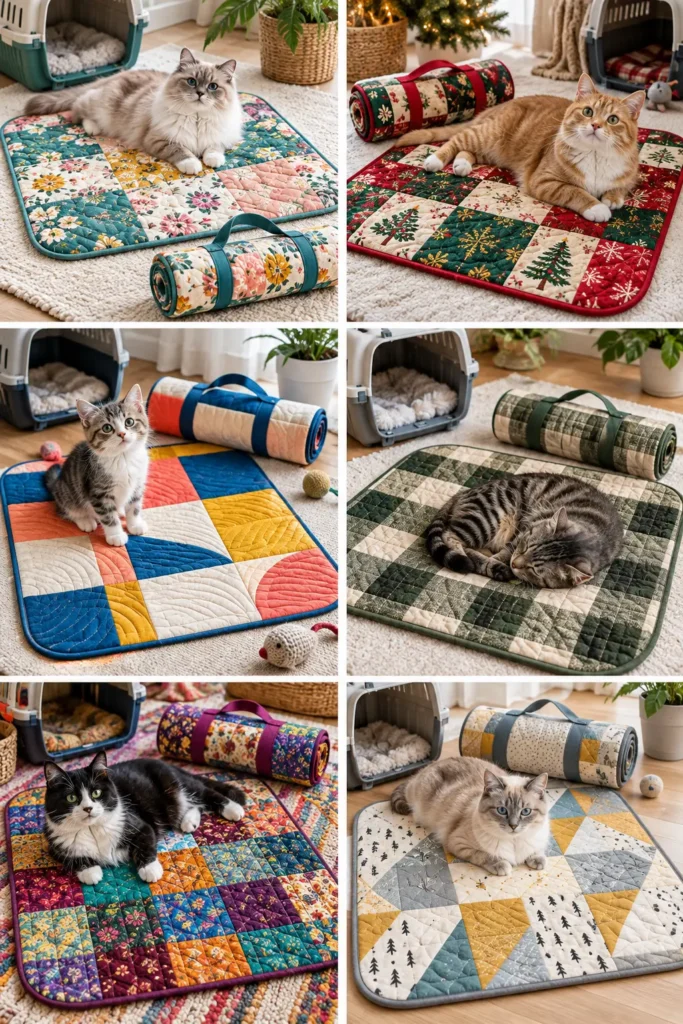
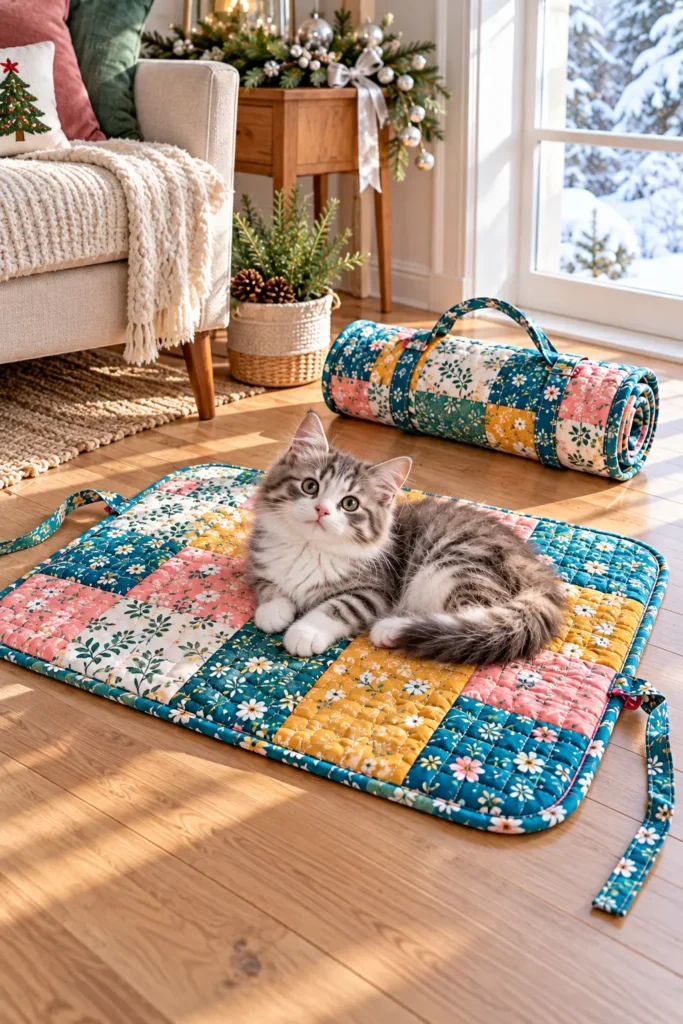
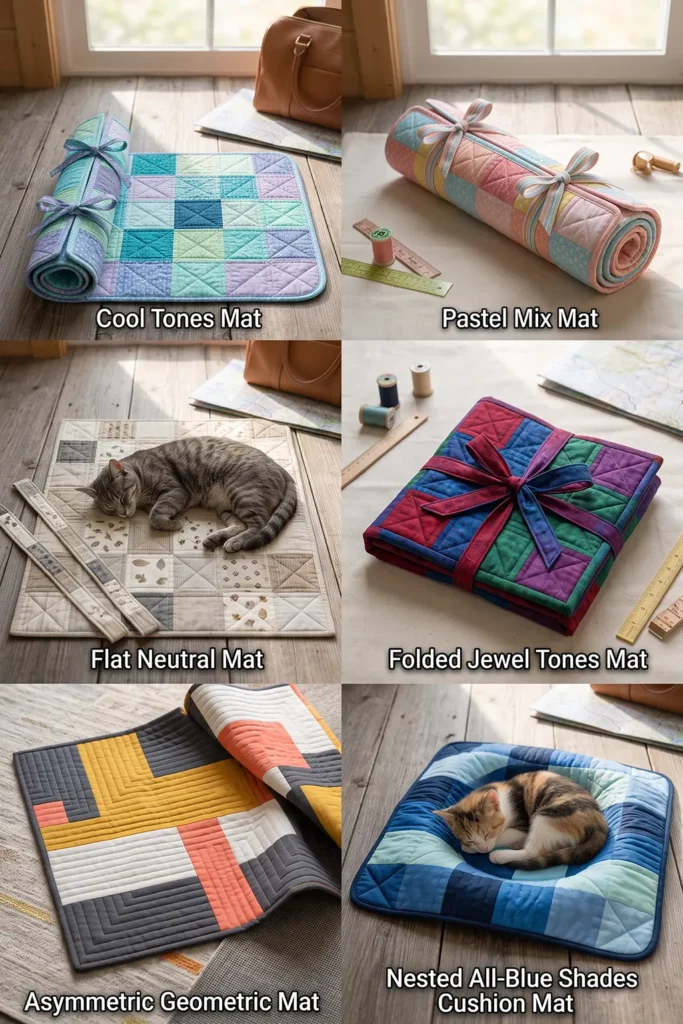
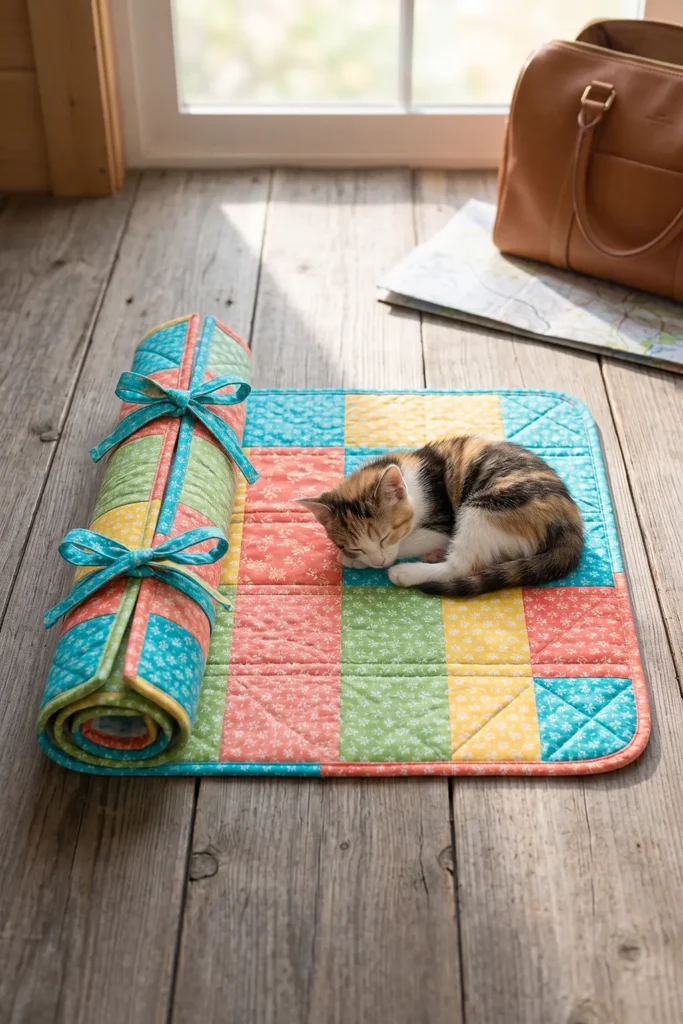
Cutting List
Patchwork Center
- 12 rectangles at 4 1/2″ x 6 1/2″
Arrange them in 3 columns x 4 rows.
Side Borders
- 2 side borders at 3 1/4″ x 24 1/2″
Ties
- 2 tie strips at 2″ x 20″
Finishing
- Backing: 20″ x 26″
- Batting: 20″ x 26″
- Binding: 3 strips at 2 1/4″ x width of fabric
Size Math
The patchwork center is designed to finish at 12 1/2″ x 24 1/2″ before borders:
- 3 rectangles across: 3 × 4 1/2″ = 13 1/2″
- Subtract 2 seams at 1/2″ total each = 1″
- Finished row width before quilting = 12 1/2″
For the height:
- 4 rectangles down: 4 × 6 1/2″ = 26″
- Subtract 3 seams at 1/2″ total each = 1 1/2″
- Finished center height before quilting = 24 1/2″
After adding the two side borders:
- 12 1/2″ + 3 1/4″ + 3 1/4″ = 19″
- Subtract 2 seam joins at 1/2″ total each = 1″
- Quilt top width before trimming = 18″
So the quilt top comes to 18″ x 24 1/2″, and after quilting it is trimmed neatly to 18″ x 24″.
Assembly at a Glance
- Piece the patchwork center.
- Add the side borders.
- Make the tie straps.
- Layer the quilt sandwich.
- Quilt the mat.
- Trim and round the corners.
- Attach the ties and bind the edges.
- Finish the binding and shape the mat.
Step-by-Step Guide
Step 1: Choose the fabrics and color balance
Pick 12 bright patchwork fabrics in a lively mix. Good travel-mat colors include turquoise, coral, yellow, red, green, cobalt, and white or cream for balance. Try to mix a few small prints with a few calmer fabrics so the mat feels cheerful but not too busy.
Because this is a small quilt, the contrast matters. Repeating two or three colors across the layout usually makes the finished mat look more polished.

Step 2: Cut the patchwork rectangles
Cut 12 rectangles at 4 1/2″ x 6 1/2″. Accuracy is important because a compact project shows misalignment more quickly than a large quilt.
These rectangles will be arranged in 3 columns and 4 rows.
Step 3: Lay out the patchwork center
Arrange the rectangles in 4 rows of 3. Spread strong colors across the full layout rather than clustering them in one area.
This is the stage where the overall look takes shape. Many scrap-based quilts seem spontaneous, but a few minutes of adjusting the layout usually gives a much better result.

Step 4: Sew the rectangles into rows
Sew the pieces into 4 rows of 3 rectangles each, using a 1/4″ seam allowance. Press the seams in alternating directions from row to row.
Each row should measure approximately 12 1/2″ x 6 1/2″.
Step 5: Join the rows into the patchwork center
Sew the 4 rows together, matching the seams carefully. Press the full patchwork center flat.
At this point, the center panel should measure approximately 12 1/2″ x 24 1/2″.

Step 6: Cut and attach the side borders
Cut 2 side borders at 3 1/4″ x 24 1/2″. Sew one border to each long side of the patchwork center using a 1/4″ seam allowance. Press the seams toward the border.
Your quilt top should now measure approximately 18″ x 24 1/2″.
Step 7: Make the two travel ties
Take the 2 tie strips at 2″ x 20″. Fold each strip in half lengthwise and press a center crease. Open it, fold each long raw edge into the center crease, press, then fold in half again and topstitch along the long edge.
Each finished tie will be about 1/2″ wide and 20″ long. These ties let the mat be rolled or folded neatly for travel.

Step 8: Cut the backing and batting
Cut the backing and batting to 20″ x 26″. This gives you a little extra on all sides for quilting shift and final trimming.
A slightly oversized backing is standard quilting practice and makes the sandwich easier to manage.
Step 9: Build the quilt sandwich
Layer the mat as follows:
- Backing fabric, right side down
- Batting
- Quilt top, right side up
Center the top on the batting and backing. Smooth all layers carefully so there are no wrinkles or puckers.

Step 10: Baste the layers securely
Pin-baste or spray-baste the quilt sandwich so everything stays aligned during quilting. Because the mat is meant to travel, good basting helps it stay flat after repeated rolling or folding.
Take a moment to check that the patchwork remains centered before you begin quilting.
Step 11: Plan the quilting lines
Choose a simple quilting pattern that keeps the mat soft and flexible. Straight-line quilting works very well here. Lines spaced about 1 1/2″ to 2″ apart are enough to stabilize the layers without making the mat stiff.
If you want the mat to fold more easily, you can also plan two subtle fold-friendly quilting lines across the shorter width, spaced roughly 8″ apart along the 24″ length.

Step 12: Quilt from the center outward
Begin quilting near the middle of the mat and work outward. This reduces shifting and helps the finished piece stay flatter.
Quilt through the patchwork center first, then continue through the borders so the texture looks consistent across the whole mat.
Step 13: Add the optional fold-guide quilting lines
If you want the mat to fold into thirds more neatly, sew two extra quilting lines across the width of the mat at about 8″ and 16″ from one short end.
These are not hard fold seams, just gentle guide lines that help the mat bend more naturally during travel.

Step 14: Trim the quilted mat to final size
Trim the quilted mat to 18″ x 24″. Check that all edges are straight and the proportions remain even.
This trimming step is what brings the mat to its clean final size after quilting.
Step 15: Round the corners
Use a small bowl, curved ruler, or corner template to mark and trim a gentle curve on all four corners. Rounded corners wear well, look polished, and are especially nice on small portable quilted items.
Trim carefully so all four corners match.

Step 16: Position and baste the ties
Place the two finished ties on one long side of the mat, centered and spaced about 4″ apart. Align the raw ends of the ties with the raw edge of the mat so the ties point inward onto the quilt.
Baste them in place within the seam allowance. When the binding is sewn on, the tie ends will be caught securely in that seam.
Step 17: Prepare and sew on the binding
Join the 3 binding strips at 2 1/4″ wide end to end. Press the seams open, then fold the full strip in half lengthwise with wrong sides together and press.
Sew the binding to the front of the mat with a 1/4″ seam allowance, easing it smoothly around the rounded corners.
The finished perimeter is approximately:
- 18 + 18 + 24 + 24 = 84″
So three width-of-fabric strips provide more than enough binding.
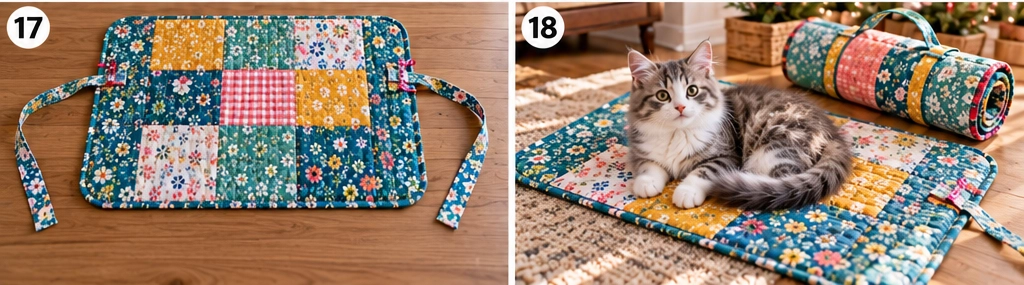
Step 18: Finish the binding and complete the travel mat
Fold the binding over to the back and hand-stitch or machine-stitch it in place. Give the mat a final press and test-roll or fold it gently with the ties wrapped around it.
The finished mat should feel soft, lightly padded, flexible, and easy to carry. It works well inside many cat carriers, on a chair, or as a familiar resting surface during road trips and travel stops.
Finishing Notes
- A lightly padded travel mat is usually more practical than a thick one because it fits carriers more easily.
- Rounded corners help reduce wear, especially when you roll the mat often.
- Straight-line quilting keeps the mat simple and durable without adding unnecessary bulk.
- Portable pet mats are especially useful because familiar scent and texture can help make temporary spaces feel calmer to a cat.
Other Design Inspirations – Digitally Modified Images. Texture and color may vary from the actual product.
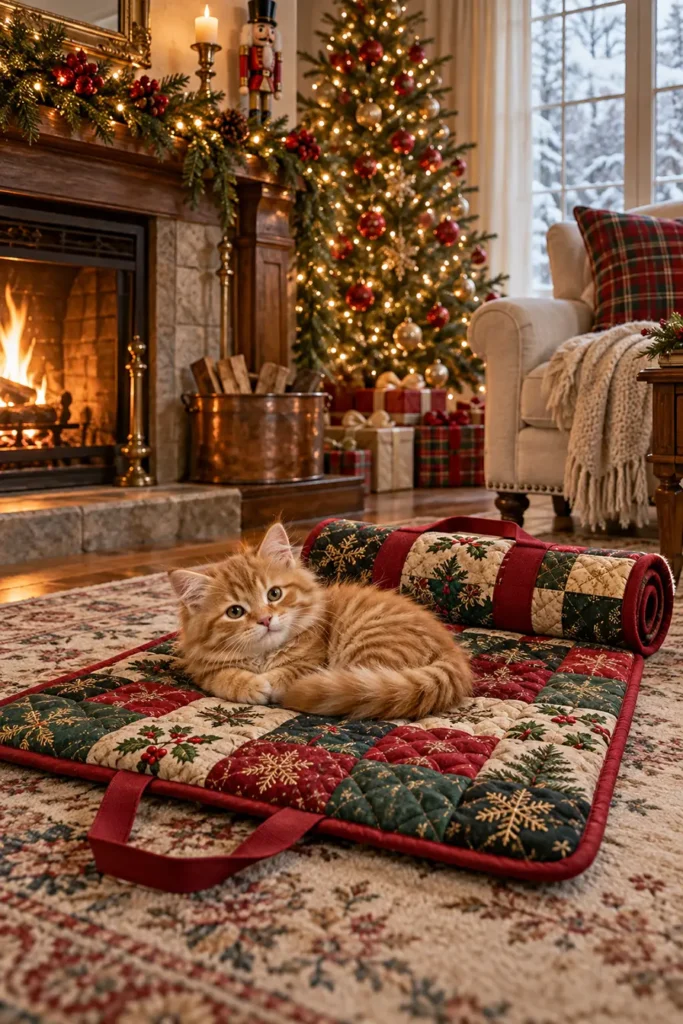
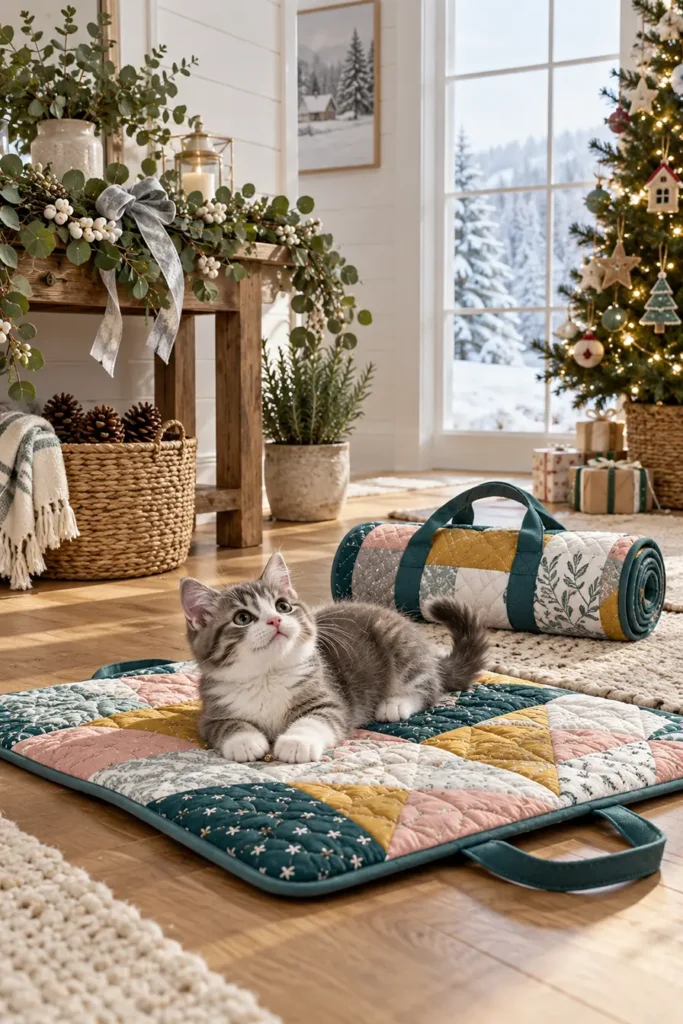

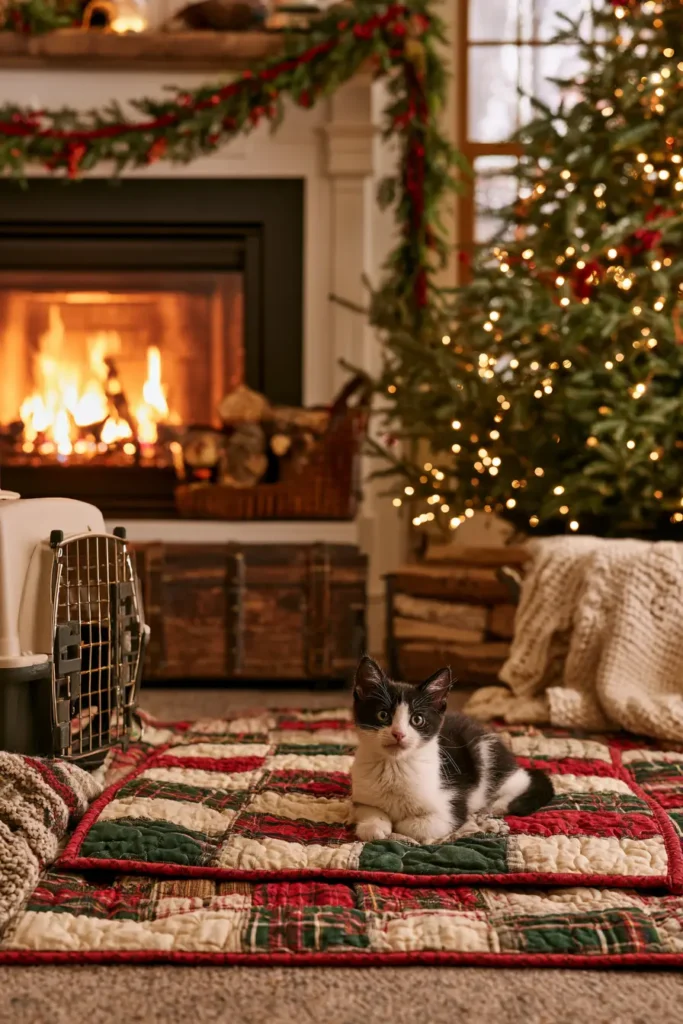
Conclusion
A cat that has a bed it actually uses is a small domestic victory, and most cat owners would happily spend a weekend sewing for it. The quilted version is better than the bought version for the same reason it’s better for dogs: you choose the size, the fabric, the softness, and the washability. The difference is that with a cat, the fabric’s texture and scent might matter even more than the construction. Make it soft, make it warm, wash the fabric first, and size it generously — and then accept that the cat may still prefer the windowsill for three weeks before conceding that the bed is acceptable.
The best Quilted Cat Bed and Mat Ideas start with honest observation of where and how your cat actually sleeps. A curler needs the round bed with raised sides. A sprawler needs the flat mat or the generous patchwork rectangle. A cat that sleeps pressed against warmth needs the flannel version. A cat that moves between rooms needs the portable travel mat. Once that decision is made, everything else is quilting — fabric, color, pattern, the same techniques you already know applied to something a great deal smaller than a quilt. The result is a bed that gets used, stays clean, and looks like it belongs in the room rather than like an afterthought from a pet shop shelf.

