
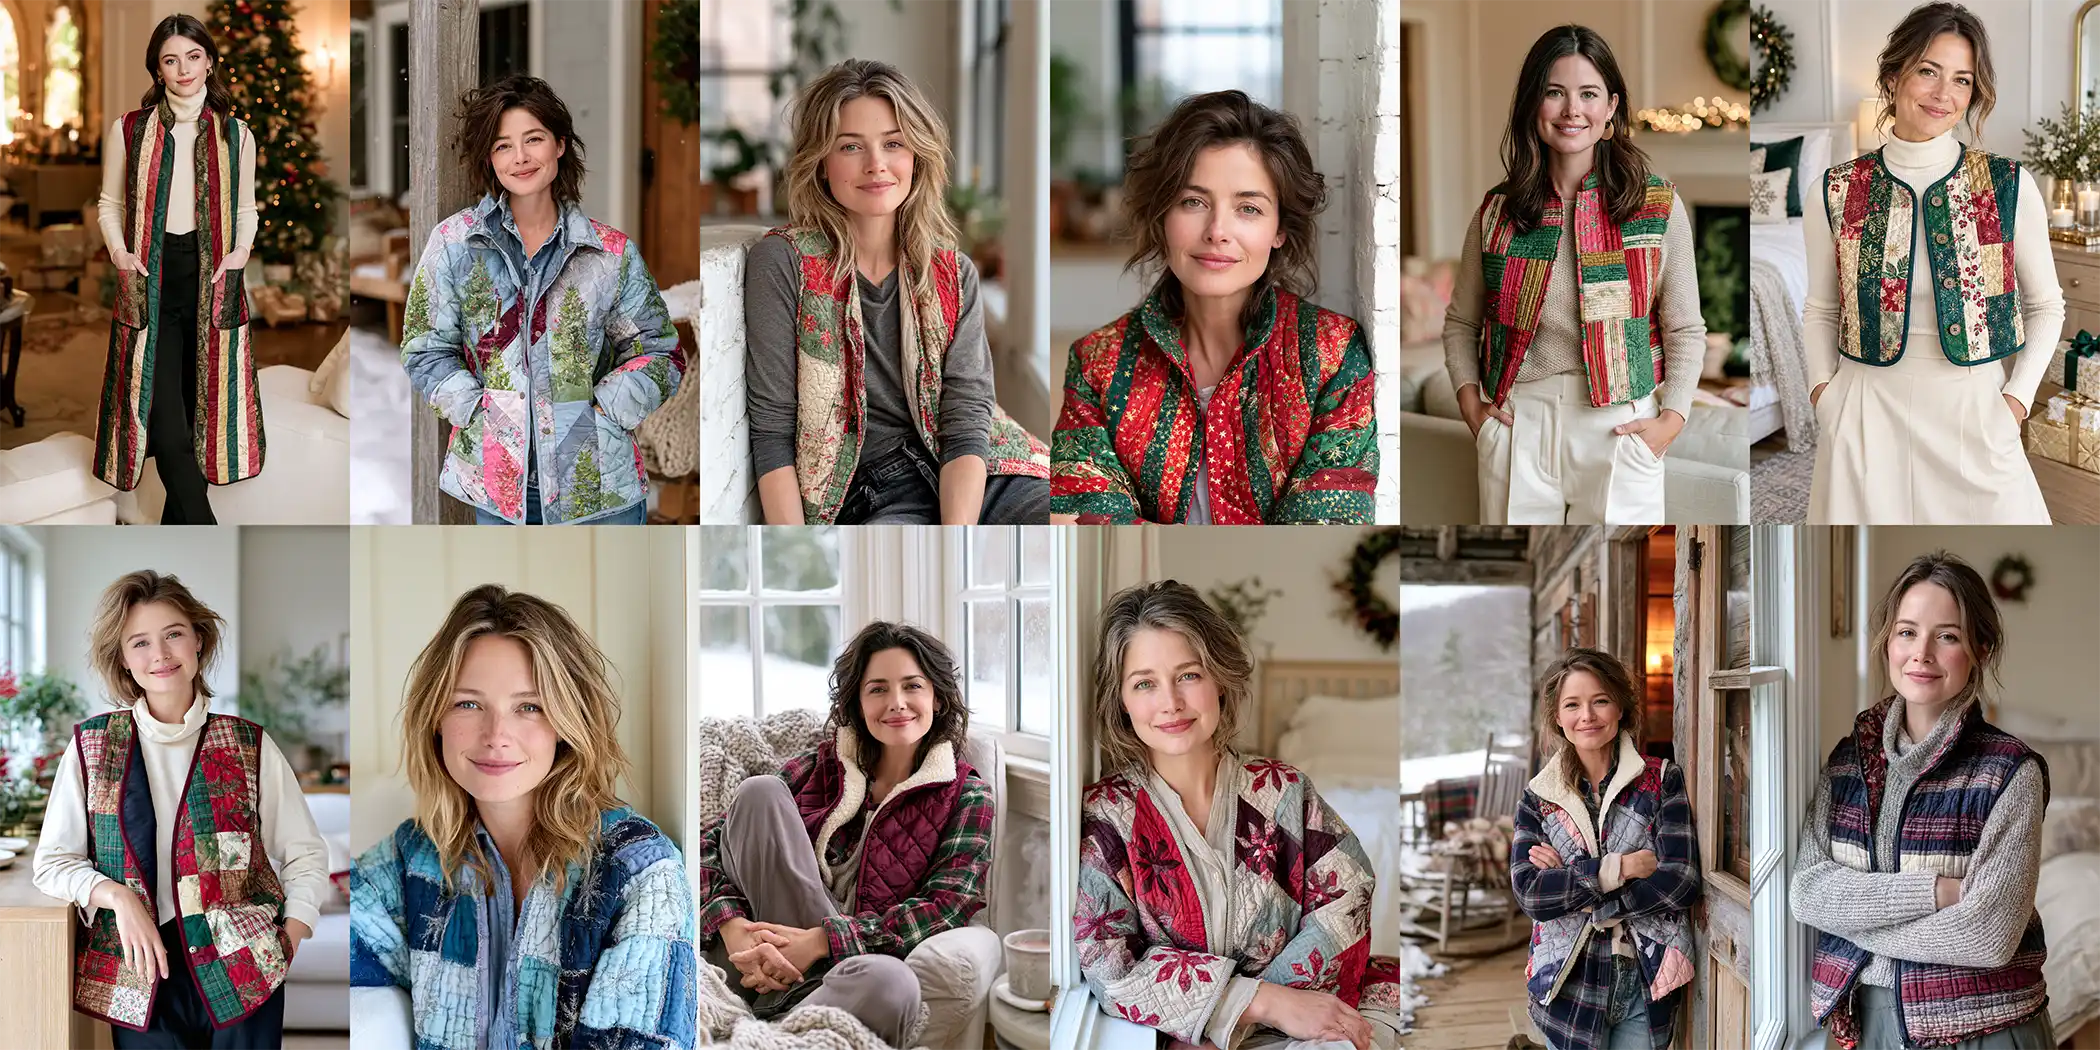
Christmas Quilted Jackets and Vests: 12 Festive Layering Ideas to Sew This Season
There’s a particular pleasure in wearing something you made, and never more so than at Christmas. Christmas Quilted Jackets and Vests are the festive answer to that – soft layered outerwear built from three layers of fabric: a quilted top, a warm batting middle, and a backing, stitched through to hold it all together. What makes them Christmassy is the cloth and the color: red-and-green patchwork, cozy holiday plaids, pieced trees and snowflakes, and the gold and silver that only really feel right for a few weeks a year. Thrown over a plain top for a family gathering or worn out to a carol service, a quilted layer brings warmth and handmade character to a season that runs on both.
Christmas Quilted Jackets and Vests Ideas
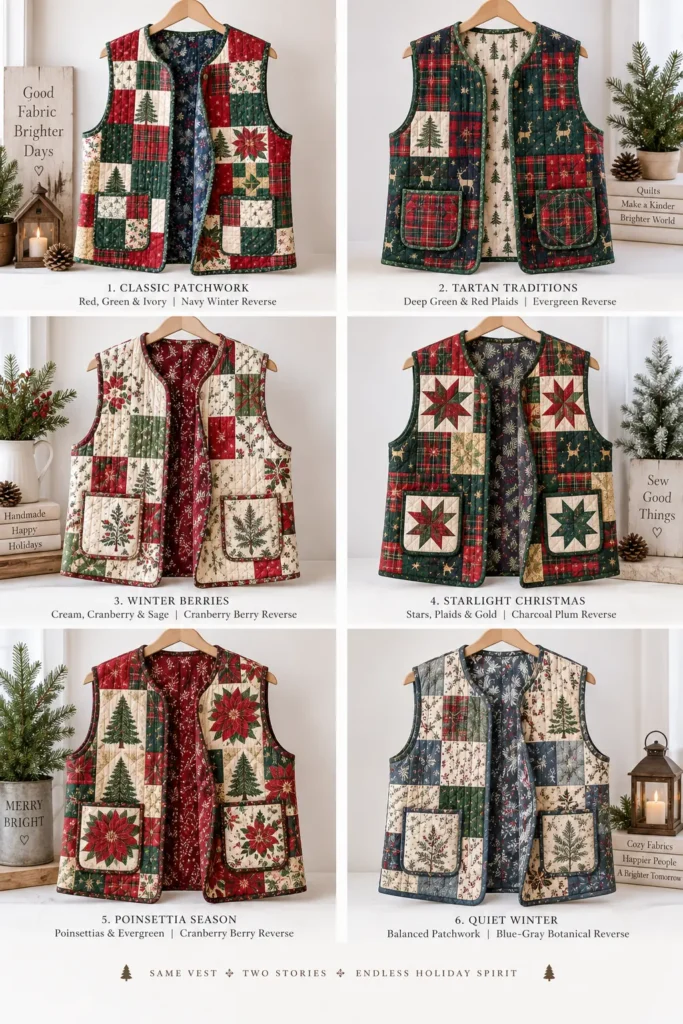
This collection of Christmas Quilted Jackets and Vests gathers twelve festive layers, spanning every silhouette and every kind of holiday. You’ll find a classic red-and-green patchwork jacket and a cozy plaid shacket for everyday December, a reversible vest that gives two looks from one piece, and playful pieced Christmas trees and snowflakes when you want the season unmistakable. For dressier occasions, there’s a gold and metallic vest, a frosty blue-and-silver jacket, and a longline duster for elegant evenings, alongside a cropped vest for party layering. As the calendar closes in, there’s a flannel-lined vest for real warmth, a colorful jelly roll vest, and a quilt-as-you-go jacket built for last-minute sewing.
Why Make a Christmas Quilted Jacket or Vest
A quilted layer is worth making because it solves the specific problem of December dressing: rooms that are too warm, doorsteps that are freezing, and a month of occasions where you’d rather look like you made an effort. The batting layer gives genuine warmth without the bulk of a coat, so it works indoors and out, and unlike a Christmas jumper it doesn’t shout – a pieced jacket reads as craft rather than costume.
What sets these apart from the bought equivalent is that you choose everything: the prints, the palette, the fit, and how festive to go. Most are built on simple boxy shapes with no darts and no complicated tailoring, so they’re achievable even if you’ve never sewn a garment, and several come together fast enough to finish inside a week. Best of all, a well-made quilted jacket comes out every December for years – the kind of thing that becomes part of a family’s Christmas rather than a one-season novelty.
See also: Jelly Roll Quilted Jackets and Vests – Farmhouse Quilt Jackets & Vests – Sashiko Quilt Jackets and Vests – Fall Quilted Jacket and Vest – Nakshi Kantha Jackets and Vests
Tips for Choosing Fabrics and Colors
The most important rule is to use low-loft batting. Bed-quilt loft is far too puffy to wear; for a garment, use thin cotton batting, or even cotton flannel as the middle layer, for warmth and gentle texture without bulk. Keep the quilting lines reasonably widely spaced so the fabric still drapes rather than standing stiff, and prewash any flannel since it shrinks noticeably more than quilting cotton.
On color, Christmas gives you more range than people expect: traditional red and green is timeless and unmistakable; plaid and flannel bring rustic warmth; gold, cream, and metallics feel elegant and dressy; and blue, silver, and white give a frosty Scandinavian look that stays wearable through January and February. If you’d like the piece to last beyond December, lean toward those last two – they read as winter rather than Christmas. Whatever you choose, scale matters: small and medium prints work far better in garment-sized pieces than large festive motifs, which get chopped up by the seams and lost. Contrasting binding is the easiest way to give any piece a polished, finished edge.
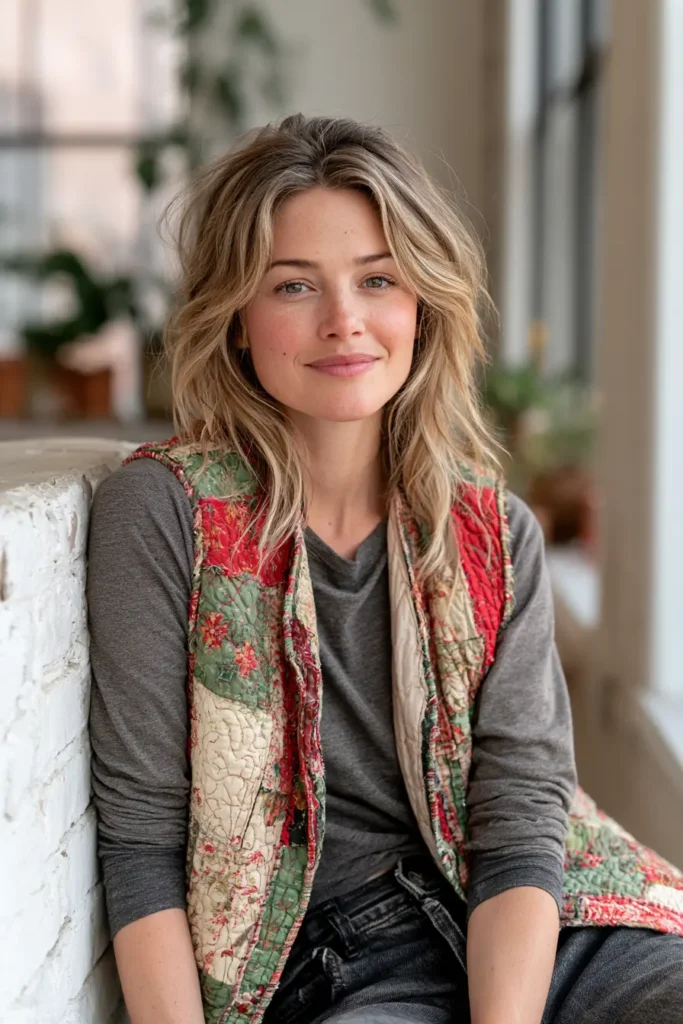
1. Classic Red and Green Patchwork Quilted Jacket for Festive Holiday Style
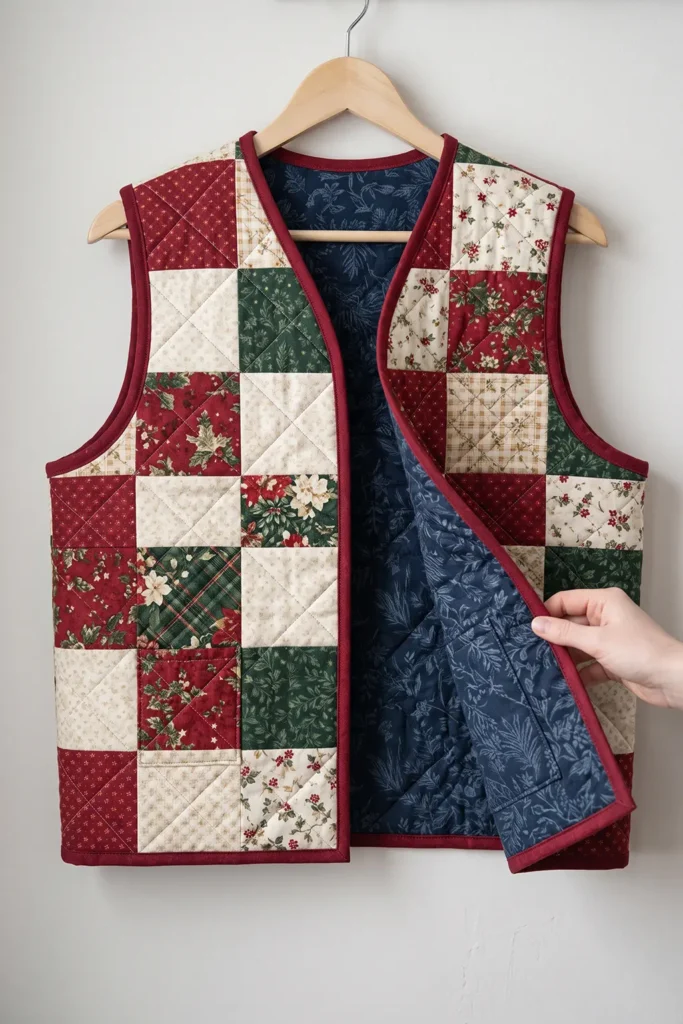
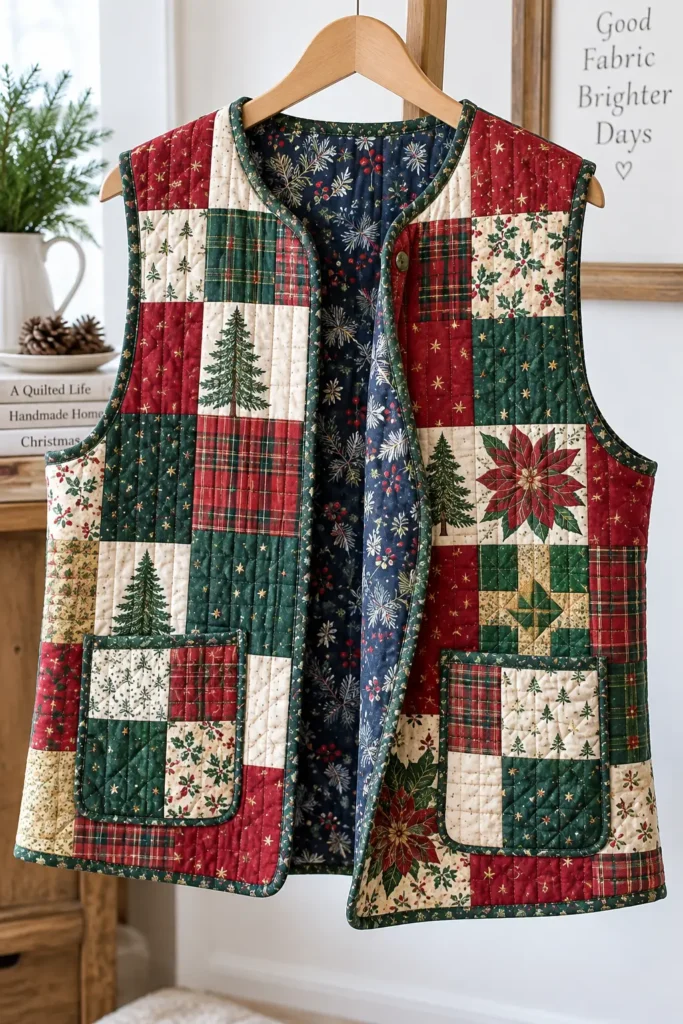
A red-and-green patchwork jacket is Christmas made wearable – scores of small squares in cranberry, pine, cherry, and cream pieced into panels, quilted, and cut into a soft boxy coat. It’s the piece that gets pulled on for the market, the school concert, the drive to relatives, and every year afterward. Unlike a novelty jumper, it reads as craft rather than costume, which is exactly why it survives past one season.
Getting that distinction right is the whole art of this jacket, and it comes down to two decisions made before you sew a stitch.
The Red-and-Green Problem
Here’s the thing nobody warns you about: red and green are usually the same value.
They look completely different in color – they’re opposites on the color wheel – but photograph a cranberry print next to a pine green one, convert it to black and white, and you’ll very often find two identical mid-grays. In a patchwork jacket made only of reds and greens, adjacent squares blur into one another and the piecing disappears into a muddled mass. All that careful cutting, invisible.
The fix is a third value. Include a generous proportion of cream, ivory, or pale gold squares – roughly a third of the total – scattered throughout. Those pale squares separate the reds from the greens, give the eye somewhere to rest, and make every other fabric look better beside them. It’s the same principle that makes traditional Christmas quilts work, and it’s what turns a muddy jacket into a crisp one.
Test it before you buy: lay your fabrics out, photograph them, and convert the image to black and white. You want a clear mix of lights, mediums, and darks, not a field of matching grays.
Design Inspirations – Digitally Modified Images. Texture and color may vary from the actual product.


Craft, Not Costume
The second decision is print choice, and it separates a jacket you’ll wear for years from one you wear once.
Keep prints small. Each finished square is only 4½ inches, so a large-scale print shows as a fragment – half a reindeer, a corner of a wreath – and reads as visual noise. Small prints, tone-on-tones, ditsy florals, dots, and geometrics all hold up at this scale.
Go abstract rather than literal. Prints covered in Santa faces or cartoon snowmen read as costume the moment you put them on. Plaids, stars, small florals, dots, and simple geometrics in a Christmas palette read as a handmade jacket – festive without announcing itself. A couple of literal prints scattered among thirty abstract ones is charming; thirty literal prints is a Christmas jumper with sleeves.
A Little History: The Quilt Coat
Turning patchwork into outerwear is an old idea with a recent revival. For generations, quilters occasionally cut up worn but beloved quilts to make wearable keepsakes, and in the last several years “quilt coats” have become one of the most recognizable pieces in handmade fashion.
The appeal is easy to understand. A quilt lives on a bed; a coat goes out into the world. And the construction here follows the same logic quilters have always used – piece the cloth first, then cut the garment from it, exactly as you’d cut a dress from any other yardage.
How It’s Built
The order matters, and it’s the opposite of what most people expect:
- Piece patchwork panels slightly larger than each jacket pattern piece
- Quilt those panels with batting and lining
- Cut the jacket pieces from the quilted panels
- Sew the garment and bind every seam
You’re making your own quilted fabric, then treating it exactly like bought yardage.
Finished Garment
- Style: relaxed boxy chore-coat shape, hip length, dropped shoulders, patch pockets, button front
- Length: about 28-30 inches from shoulder to hem
- Patchwork squares: 5 inches cut, 4½ inches finished
- Patch pockets: cut 7 × 8 inches, finishing about 6 × 6½ inches
- Buttons: 5 down the front
- Skill level: confident beginner
- Core techniques: patchwork piecing, making quilted yardage, garment cutting, bound seams
Materials Needed
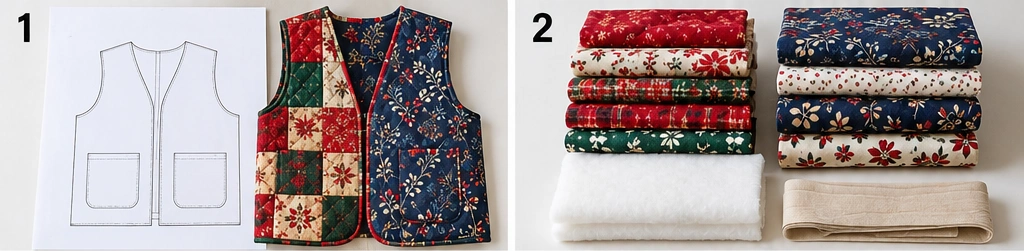
- 1 Christmas layer cake (42 squares at 10 inches) – cut each into four 5-inch squares for 168 squares. An average adult jacket needs roughly 165, so that’s only three spare – fine for a smaller size, but tight if you’re making a large one, working with directional prints, or want room to reject a few squares at the layout stage. Treat 165 as a planning figure and count your actual pattern pieces before relying on a single bundle. Check the bundle actually contains a good proportion of cream and pale prints; many Christmas bundles are all reds and greens, in which case supplement with about ¾ yard of cream. Alternatively, cut 5-inch squares from about 3 yards of assorted fabric
- Middle layer: 2½ yards of low-loft cotton batting, or cotton flannel for even less bulk
- Lining: 2½ yards of soft cotton or flannel – a single festive print here is a lovely surprise at the cuffs
- Binding: ¾ yard for interior seams and outer edges, in a solid cranberry or deep green
- Buttons: 5 (wood, horn, or antique brass)
- Thread: neutral cotton for piecing, plus a 90/14 needle for the quilted layers
- Walking foot, rotary cutter, cutting mat, quilting ruler, pins or clips, iron
- A collarless, dartless, button-front boxy jacket pattern with a genuine front overlap for buttonholes and dropped or simple sleeves (see Step 1 – patterns with collars, facings, plackets, or open fronts need construction steps this tutorial doesn’t cover)
Beginner tip: use low-loft batting. Bed-quilt loft is far too puffy to wear comfortably, and it’s the single commonest mistake in a first quilted garment. If in doubt, use cotton flannel as the middle layer instead – it gives warmth and softness with almost no bulk.
Choosing Your Colors
A festive palette with enough range to stay crisp:
- Reds: cranberry, cherry, brick, deep wine
- Greens: pine, holly, forest, sage
- Lights (about a third): cream, ivory, warm white, pale gold
- Optional accents: antique gold, soft grey, a touch of black for graphic punch
Mix prints, plaids, dots, and near-solids freely within those groups. What matters is the proportion of lights – too few and the jacket muddies, too many and it loses its richness. A third is about right.
If you’d like the jacket to be wearable beyond December, lean the greens toward pine and sage and the reds toward cranberry and wine rather than bright cherry. Those deeper shades read as winter rather than strictly Christmas.
Cutting Measurements
- Squares: cut 5 × 5 inches. You’ll need roughly 165 for an average adult jacket – more for a larger size, fewer for a small
- Panels to piece: enough patchwork for the two fronts, one back, and two sleeves, each piece 2-3 inches larger all around than its pattern piece
- Batting and lining: cut each 1-2 inches larger on every side than its patchwork panel. Quilting draws the layers up, and having excess to trim away afterward is far safer than discovering you’re short at an edge
- Patch pockets: two at 7 × 8 inches. The top edge is folded down twice (½ inch each), and the sides and bottom once, which finishes them at about 6 × 6½ inches
- Binding: cut 2 to 2½-inch strips – about 6-7 yards in total for interior seams plus all outer edges
Step-by-Step Guide
Step 1 – Choose a suitable pattern. This matters more than it sounds, because the steps below assume a particular kind of jacket. Look for one that is:
- Collarless, with a simple round or shallow V neckline – these instructions bind the neckline rather than attaching a collar
- Button-front with a genuine overlap at center front, wide enough to take buttonholes
- Dartless, with minimal shaping
- Dropped-shoulder or with a very simple sleeve
A plain unstructured chore-style jacket is ideal. Avoid patterns with a collar, front facings, or a separate placket – they need construction steps this tutorial doesn’t cover. An open-front haori won’t work either, since it has no overlap to button. Lay out the pattern pieces and note roughly how large each panel needs to be.

Step 2 – Sort and value-test your fabrics. Divide your prints into reds, greens, and lights. Photograph the three piles together and convert the photo to black and white. If the reds and greens read as the same gray, that’s fine – but it confirms you need those light squares doing the separating. Check you have enough pale prints for about a third of the total, and buy more cream if not.
Step 3 – Cut your squares. If you’re using a layer cake, cut each 10-inch square into four 5-inch squares – 168 in total. If cutting from yardage, cut 5-inch squares until you have around 165. Keep them in one large mixed pile.

Step 4 – Lay out the back panel. On a table or floor, arrange squares in a grid a little larger than your back pattern piece. Let the pattern piece decide the grid, not the other way round – lay it on the table and add squares until you have at least 2-3 inches spare all around. For many adult sizes, that’s roughly 7 squares across × 8 down, but check yours rather than assuming. Spread the lights evenly throughout rather than clustering them, and avoid putting two identical prints side by side. Step back and check the balance before sewing.
Step 5 – Piece the back panel. Sew the squares into rows with a ¼-inch seam, pressing the seams of odd rows one way and even rows the other so they nest. Join the rows, pinning at each junction. Press the finished panel well.

Step 6 – Piece the remaining four panels. Repeat for the two fronts and two sleeves, each 2-3 inches larger all around than its pattern piece. Keep the color balance consistent across all five panels so the finished jacket reads as one garment rather than five separate quilts.
Step 7 – Quilt each panel. Cut batting (or flannel) and lining 1-2 inches larger on every side than each patchwork panel – quilting pulls the layers up slightly, and the extra gives you something to trim rather than leaving you short. Layer patchwork, batting, and lining, baste, then quilt with straight lines or a diagonal grid spaced about 2 inches apart. Trim the excess batting and lining level with the patchwork after you quilt each panel. Keep the quilting light – a densely quilted panel becomes stiff and uncomfortable to wear. You now have five pieces of quilted yardage.

Step 8 – Cut the jacket pieces, watching seam placement. Lay the pattern on each quilted panel and cut the back, two fronts, and two sleeves. Where you can, shift the pattern an inch or two so that thick patchwork seam intersections don’t land on the shoulder seam, the armhole curve, or the buttonhole line – those spots get genuinely difficult to sew through. A small shift costs nothing and saves a lot of struggle.
Step 9 – Make the patch pockets. Fold each pocket’s top edge down twice, about ½ inch each fold, and stitch. Trim a small diagonal off each bottom corner to reduce bulk, then press the sides and bottom under by ½ inch.

Step 10 – Attach the pockets. Topstitch a pocket to each front, about 3 inches below the underarm and 2 inches in from the front edge, stitching ⅛ inch from the folded edge. Reinforce the top corners with a small bar tack – pocket corners take the most strain on any jacket.
Step 11 – Sew and bind the shoulder seams. With right sides together and a ½-inch seam, join the fronts to the back at the shoulders.
Now bind that seam straight away, while the jacket is still flat and easy to handle. Keep the two seam allowances together rather than pressing them open, encase the raw edges in binding, and press the finished bound seam to one side. On thick quilted fabric, this is far simpler than pressing open and binding each allowance separately, and it makes a neat, flat finish.

Step 12 – Set the sleeves. Attach each sleeve to its armhole with a ½-inch seam. A dropped-shoulder pattern makes this straightforward; the flatter the curve, the easier it is through quilted fabric.
Step 13 – Bind the armhole seams. Bind these the same way – allowances together, encased, pressed toward the sleeve. Doing it now, while the side seams are still open and the jacket lies flat, is much easier than wrestling binding around a closed armhole later.

Step 14 – Sew the side and underarm seams. Sew from the cuff end, down the underarm, and along the side seam in one continuous line, ½-inch seam. Try the jacket on now to check the fit and sleeve length before you finish anything else.
Step 15 – Bind the side and underarm seams. Encase these allowances too, so every interior seam in the jacket is finished. This is the classic quilt-coat detail: it tames the bulk, stops the patchwork seams from fraying, and makes the inside as tidy as the outside – which matters, because a jacket’s seams show every time it moves.

Step 16 – Bind the body edges. Working in one continuous line, bind up one front edge, around the neckline, down the other front edge, and along the hem. That perimeter is a single closed path, so you can bind it in one pass with the fewest possible joins.
Step 17 – Bind each cuff separately. The cuffs are separate closed loops and can’t be part of that same run, so bind each one on its own, joining the binding where the ends meet. Two short pieces, done individually.

Step 18 – Mark and add the buttons. Put the jacket on, overlap the fronts as they’ll sit when fastened, and mark the button positions on the jacket itself with pins or removable chalk. Take it off and refine the marks before cutting any buttonholes. Marking while wearing it beats measuring off the pattern, because spacing depends on your size and how the jacket actually sits. Five buttons is usual for a hip-length coat, roughly 4 inches apart, but let the fit decide. One thing to hold to whatever your spacing: put a button at the fullest part of the bust, because that’s where a button front gapes. Make the buttonholes, then sew on matching buttons.
Step 19 – Press and finish. Give the jacket a good press. If you’d like it softer and more lived-in, wash gently on cold with a color catcher – Christmas reds bleed notoriously – and tumble dry low. The quilting will crinkle slightly into that perfect worn-in feel.

Assembly at a Glance
- Choose a collarless, dartless, button-front pattern with a real front overlap and dropped shoulders.
- Sort into reds, greens, lights; grayscale-test and confirm a third are light.
- Cut about 165 squares at 5 inches (count your pattern pieces first).
- Lay out the back panel, letting the pattern piece set the grid plus 2-3 inches all round.
- Piece it in rows (¼-inch seams), pressing rows opposite.
- Piece the two fronts and two sleeves, 2-3 inches oversized.
- Layer each panel with batting and lining; quilt about 2 inches apart.
- Cut jacket pieces, keeping thick seams off shoulders, armholes, and buttonholes.
- Fold and press the 7 × 8-inch patch pockets (top folded twice).
- Topstitch pockets on; bar-tack the corners.
- Sew shoulder seams; bind them with allowances together.
- Set the sleeves.
- Bind the armhole seams while the jacket is still flat.
- Sew underarm and side seams; try it on.
- Bind the side and underarm seams.
- Bind the body perimeter – fronts, neckline, hem – in one continuous line.
- Bind each cuff separately.
- Mark buttons on yourself; add 5 buttonholes with one at the bust point.
- Press, and wash with a color catcher if you want it softer.
Beginner Tips for Success
- Include about a third light squares. Red and green alone are usually the same value and will muddy.
- Grayscale-test your fabrics before buying – color hides the problem, black and white shows it.
- Keep prints small. A 4½-inch finished square chops a large print into an unreadable fragment.
- Choose abstract over literal. Plaids, dots, and small florals in festive colors read as craft; cartoon Santas read as costume.
- Use low-loft batting or flannel; bed-quilt loft is unwearable in a garment.
- Piece panels 2-3 inches larger than each pattern piece so you can cut cleanly.
- Keep the quilting light – about 2 inches apart – so the jacket drapes.
- Position the pattern to keep bulky seam intersections off shoulders, armholes, and buttonholes.
- Bind each seam as you sew it, while the jacket is still flat – binding a closed armhole is far harder.
- Keep seam allowances together and bind them as one; don’t press open and bind separately.
- The body perimeter binds continuously, but each cuff is a separate loop.
- Use a color catcher in the first wash. Christmas reds bleed heavily.
Styling It & Gift Ideas
A red-and-green patchwork jacket is a statement layer, so keep everything under it plain – a cream or black top, dark jeans, boots. Roll the cuffs to show the lining, and let the jacket be the whole outfit’s personality. Because the palette is warm and traditional, it sits happily against denim, cream, and camel, and it photographs beautifully against a tree or greenery.
Its one-of-a-kind character makes it a memorable gift:
- A Christmas gift that clearly took real time, because it did
- A memory jacket pieced from meaningful fabrics – an old tablecloth, a grandmother’s stash, scraps from other gifts you’ve sewn
- A gift for someone who loves the season and wears their enthusiasm
- A matching pair in different palettes for two sisters or a couple
If you’re sewing it for someone else, choose a boxy generous fit – patchwork jackets are meant to be roomy, and a relaxed shape is far more forgiving to size for another person.
Final Thoughts
A classic red and green patchwork quilted jacket takes everything warm about a Christmas quilt and lets you wear it out into the world. The sewing is straightforward – piece your panels, quilt them, cut the garment, bind the seams – but the difference between a jacket you love and one you never wear is made before the machine is even threaded. Include enough light squares to separate your reds from your greens, keep the prints small and abstract, and use thin batting so it actually drapes. Get those three right and you’ll have a festive coat that comes out every December for the next twenty years.
Other Design Inspirations – Digitally Modified Images. Texture and color may vary from the actual product.


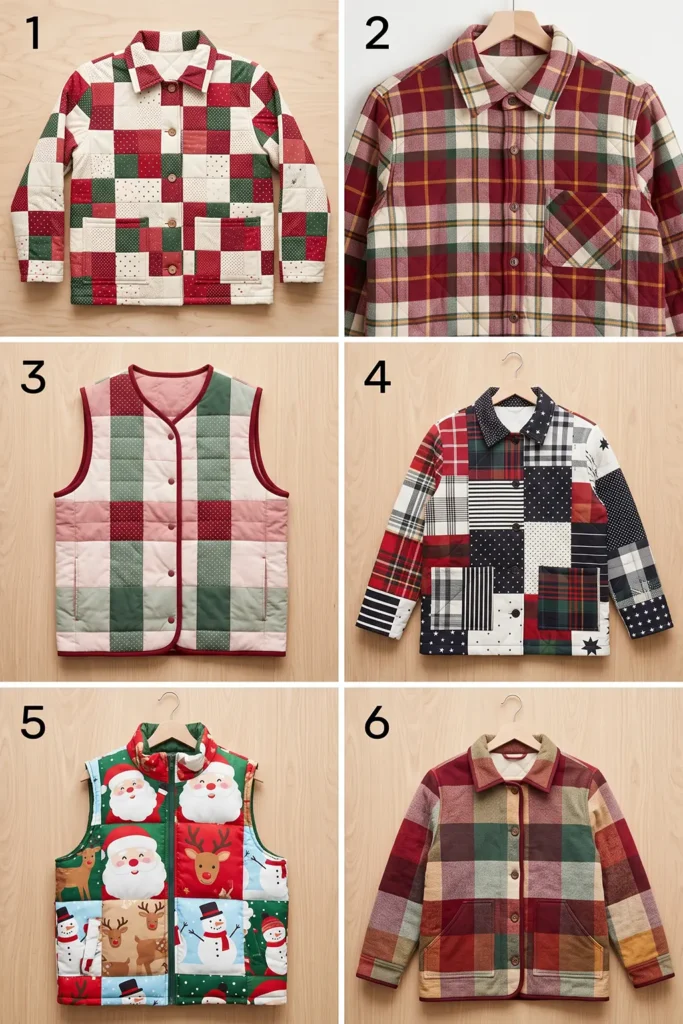
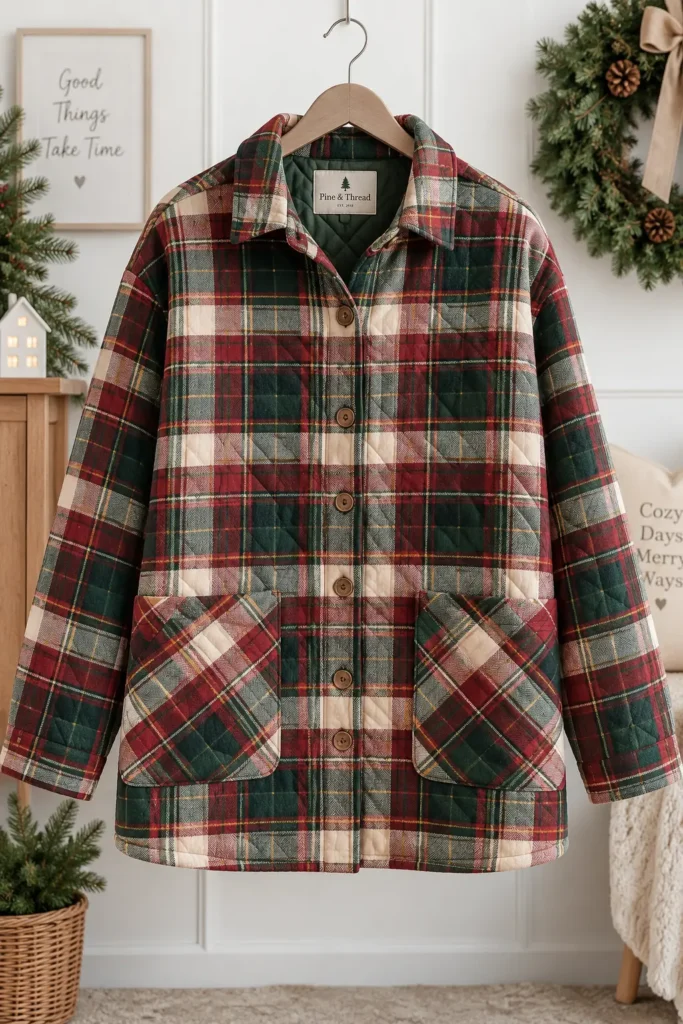
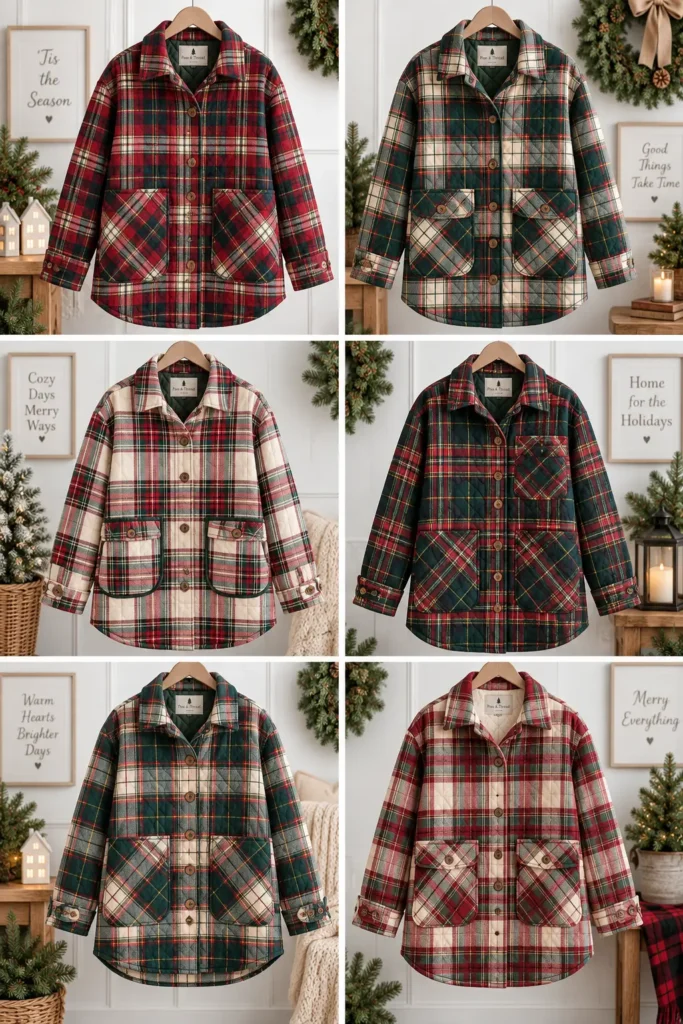
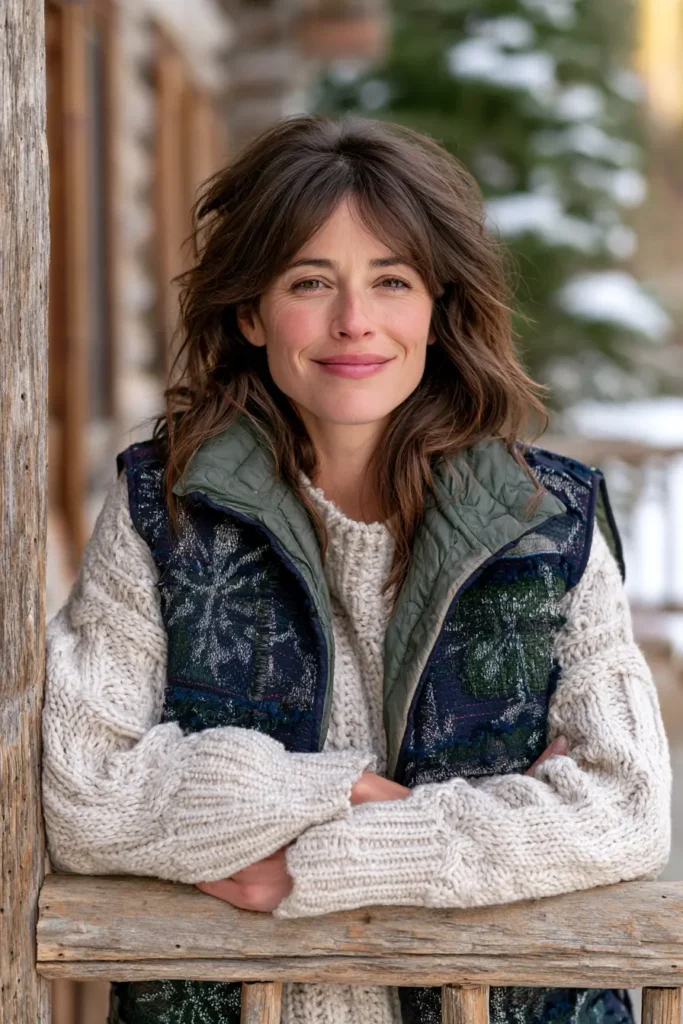
2. Plaid Quilted Christmas Shacket for Cozy Holiday Layering
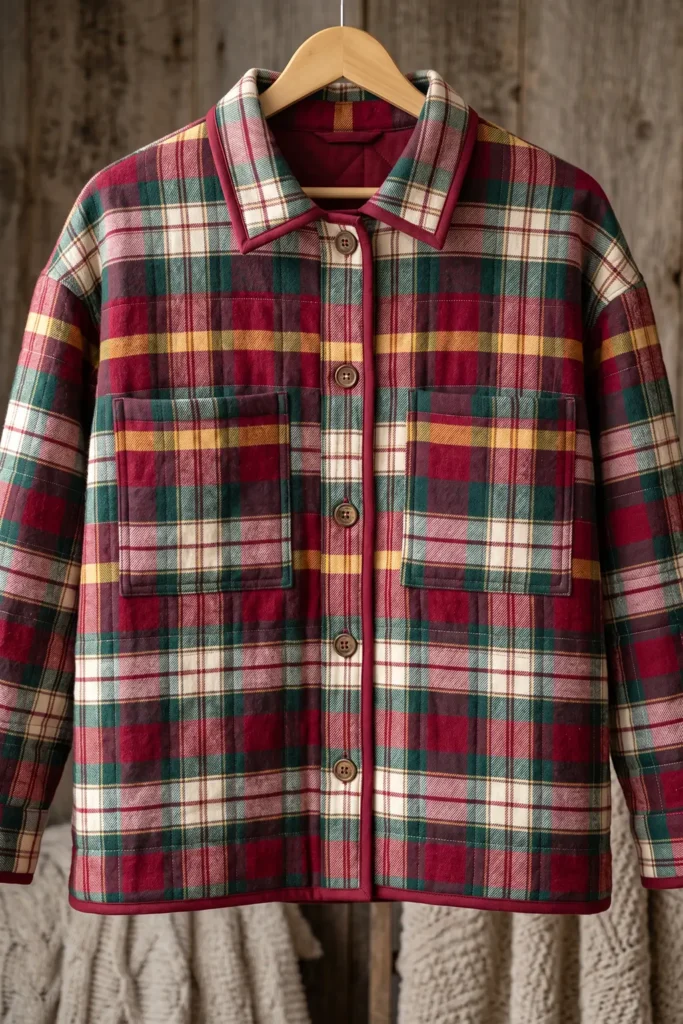
A plaid quilted shacket sits in the sweet spot between a shirt and a winter coat – roomy enough to layer over a sweater, soft enough to wear indoors, and substantial enough to take the chill off a December walk. Made in cranberry, pine, cream, and flashes of warm gold, it feels unmistakably festive without becoming a novelty Christmas garment.
The sewing looks more complicated than it is. The basic method is to make quilted fabric first, cut the garment from that fabric second, and assemble the shacket last. What needs more attention than usual is the plaid itself. A crooked horizontal stripe across the center front or two pockets sitting at different levels will catch the eye long before anyone notices perfect quilting.
The Plaid-Matching Problem
Plaid is wonderfully forgiving about tiny quilting imperfections and surprisingly unforgiving about cutting.
If the dominant horizontal stripe sits 1 inch higher on one front than the other, the mismatch becomes obvious as soon as the jacket is buttoned. The same thing happens with patch pockets: a beautifully sewn pocket can look crooked simply because its plaid doesn’t line up with the body underneath.
The solution is not to match every single line everywhere. On a soft quilted garment, that would waste enormous amounts of fabric and make the project unnecessarily difficult.
Concentrate on four places:
- Center front
- The lower hem
- The two patch pockets
- The strongest horizontal stripe across the chest
Let the sleeves and curved armholes fall naturally. Perfect matching at every curved seam isn’t realistic and isn’t necessary.
One more useful habit: identify one unmistakable horizontal line in the plaid – perhaps a gold stripe running through the cranberry ground – and use that as your reference line on every major pattern piece.
Design Inspirations – Digitally Modified Images. Texture and color may vary from the actual product.
Warmth Without Bulk
A shacket needs warmth, but it still needs to bend at the elbows, hang from the shoulders, and close comfortably at the front.
Use low-loft cotton batting, bamboo-blend batting, or cotton flannel as the middle layer.
Avoid thick high-loft polyester batting intended for puffy bed quilts. Once that loft is trapped inside shoulder seams, armholes, collar seams, and front edges, the jacket becomes stiff rather than cozy.
Quilting density matters too. Lines about 2-2½ inches apart are usually enough to stabilize the layers while preserving drape, as long as the spacing meets the batting manufacturer’s requirements.
The goal is a soft insulated overshirt, not a wearable mattress.
A Little History: Why “Shacket”?
“Shacket” is simply a blend of shirt and jacket, but the garment itself is older than the nickname.
Heavy overshirts, wool work shirts, and shirt-shaped jackets have been worn for generations because they solve a practical layering problem: they’re easier and less structured than a coat but warmer than an ordinary shirt.
The modern quilted version takes that familiar overshirt shape and builds insulation directly into the fabric. In that sense, it combines two long traditions – practical workwear and quilt making – in one garment.
How It’s Built
The order matters:
- Choose a simple shacket pattern designed for a roomy quilted fabric
- Prewash and prepare the plaid
- Make oversized quilted panels
- Cut the garment pieces from the quilted panels, matching the important plaid lines
- Make and attach the pockets
- Sew the shoulders
- Make and attach the collar
- Set the sleeves while the garment is flat
- Sew the side and underarm seams
- Bind the exposed interior seams and outer edges
- Add the buttonholes and buttons
You’re creating your own quilted plaid yardage and then treating it as garment fabric.
Finished Garment
- Style: relaxed boxy shirt-jacket
- Length: approximately 29-31 inches from shoulder to hem
- Fit: roomy enough for a light sweater underneath
- Shoulder: dropped or gently extended
- Collar: simple one-piece shirt or convertible collar without a separate collar stand
- Front: buttoned with a genuine overlap
- Pockets: two oversized patch pockets
- Pocket pieces: cut 8 × 9 inches, finishing approximately 7 × 7½ inches
- Buttons: approximately 6, depending on garment length and size
- Quilting: approximately 2-2½ inches apart
- Skill level: confident beginner
- Core techniques: plaid matching, making quilted yardage, garment cutting, simple collar construction, bound seams
Materials Needed
- Plaid outer fabric: use the yardage required by your jacket pattern plus about 20-25% extra for plaid matching. For many average-size, hip-length shackets, around 3¼ yards of 44-45-inch-wide plaid flannel is a realistic starting figure; larger sizes or large plaid repeats may need 3¾-4¼ yards
- Middle layer: about 2½ yards of low-loft batting if approximately 45 inches wide, or equivalent yardage from wider batting
- Lining: approximately 2¾ yards of cotton, cotton lawn, chambray, or lightweight flannel
- Binding: approximately 1 yard of coordinating quilting cotton, cut into 2-2½-inch strips; the actual amount depends on size and pattern
- Lightweight interfacing: about ¼ yard for the collar if your pattern calls for it
- Buttons: approximately 6, around ¾-1 inch diameter
- Thread: neutral or coordinating thread
- Needle: 90/14 universal or quilting needle
- Walking foot
- Rotary cutter
- Cutting mat
- Quilting ruler
- Pins or clips
- Iron
- A boxy, dartless button-front shacket pattern with dropped shoulders, patch pockets, and a simple one-piece collar without a separate collar stand
Beginner tip: choose the pattern before buying fabric. Plaid matching uses more yardage than an ordinary layout, and a large 4-inch plaid repeat can consume considerably more fabric than a small 1-inch check.
Choosing Your Colors
For festive plaid that still feels wearable after Christmas:
- Reds: cranberry, burgundy, brick, wine
- Greens: pine, forest, deep emerald
- Lights: cream, ivory, oatmeal
- Bright accents: warm gold, saffron
- Optional dark notes: navy or charcoal
A particularly rich combination is:
cranberry + pine + cream + warm gold + narrow navy lines
That gives you Christmas color without relying on novelty prints.
For a brighter version:
ruby + emerald + cobalt + cream + gold
For something softer:
cranberry + sage + blush + ivory + camel
If you want the shacket to stay useful well beyond December, choose a plaid that reads primarily as winter rather than explicitly Christmas. Cranberry and pine accomplish that better than bright Santa red and grass green.
Cutting Measurements
Exact body pieces must come from your chosen pattern, because sleeve length, chest width, and armhole shape change by size.
For planning:
- Body length: approximately 29-31 inches
- Quilted panels: prepare each at least 2-3 inches larger on every side than the corresponding pattern piece
- Two front panels: oversized enough for each complete front plus plaid-matching adjustment
- Back panel: oversized by 2-3 inches all around
- Sleeve panels: two oversized panels
- Batting: cut 1-2 inches larger on every side than each outer plaid panel
- Lining: cut 1-2 inches larger on every side than each outer plaid panel
- Patch-pocket quilted panels: prepare two pieces at least 9 × 10 inches, then trim each finished pocket piece to 8 × 9 inches after quilting
- Finished pocket: approximately 7 × 7½ inches
- Binding: cut strips 2-2½ inches wide, joining them diagonally into the lengths needed for interior seams, cuffs, front edges, and hem
Don’t cut the actual garment shapes before quilting. Quilting draws the layers inward slightly, and that movement can ruin an otherwise accurate pattern piece.
Step-by-Step Guide
Step 1 – Choose a suitable shacket pattern. The instructions below assume a specific kind of garment. Look for:
- A boxy, dartless body
- A real button-front overlap
- Dropped shoulders or a simple shallow sleeve cap
- A simple one-piece collar or convertible collar
- No separate collar stand
- No complicated front facing
- Patch pockets rather than welt pockets
- Straight or gently curved hem
Avoid tailored jackets with princess seams, two-piece sleeves, thick facings, lapels, or structured collars. They need construction methods that aren’t covered here.
Check the finished garment measurements, not only the pattern size. Aim for roughly 4-6 inches of total chest ease if you want to wear a sweater underneath.
Step 2 – Prewash the plaid fabric. If you’re using cotton flannel, wash and dry it before cutting. Flannel can shrink considerably, and you don’t want the outer layer shrinking around already-quilted batting and lining after the jacket is finished.
Prewash the lining too if it’s washable.
Don’t prewash the batting unless its manufacturer specifically recommends it.
Press the plaid gently after washing.
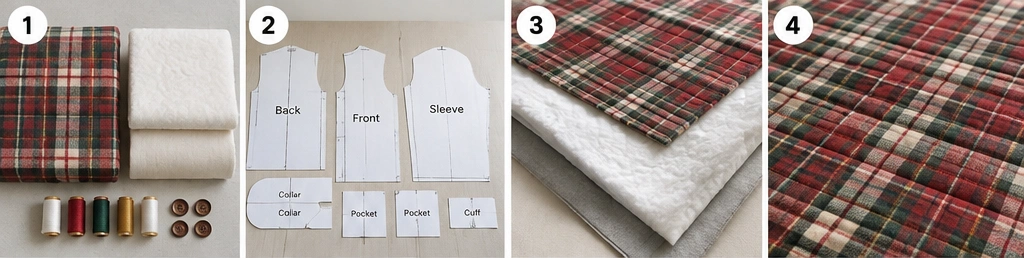
Step 3 – Find the plaid repeat. Lay the fabric flat and identify one dominant horizontal line and one dominant vertical line.
Measure how far it is before the same arrangement repeats.
A small plaid might repeat every 1-2 inches; a bold tartan-like plaid may repeat every 3-5 inches or more.
Mark your dominant horizontal reference stripe with a pin or a tiny removable chalk mark.
Use this line to keep the two jacket fronts visually level.
Step 4 – Plan the plaid before cutting anything. Temporarily lay the front pattern pieces over the fabric.
Position the dominant horizontal stripe at the same point on both fronts – for example, exactly 6 inches below the underarm.
Check where the center-front edges will meet when buttoned.
If the plaid is symmetrical, mirror the left and right fronts around center front. If it’s asymmetrical, decide whether you want mirror matching or continuous matching and stay consistent.
Take a photograph of the placement before moving anything.
Step 5 – Cut oversized outer panels. Don’t cut the garment shapes yet.
Instead, cut one plaid panel for each major piece:
- Back
- Left front
- Right front
- Left sleeve
- Right sleeve
Each panel should extend approximately 2-3 inches beyond the pattern piece on every side.
Keep the same horizontal plaid reference line at equivalent heights on both front panels.
If the plaid has an obvious direction, mark the top of every panel.
Step 6 – Prepare the pocket panels. Find two matching sections of plaid for the pockets.
The easiest method is to lay the pocket pattern area directly over the corresponding front and identify the section of plaid underneath it.
Cut two outer pocket panels at least:
9 × 10 inches
Cut batting and lining slightly larger.
You’ll quilt first and trim the pocket pieces to 8 × 9 inches afterward.
Matching the pocket plaid at this stage is one of the details that makes a handmade shacket look professionally planned.
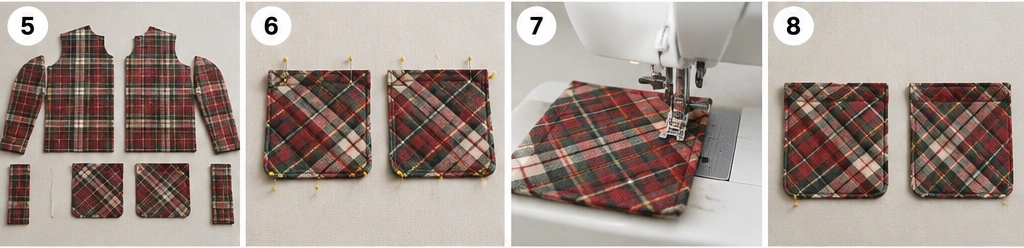
Step 7 – Layer the five main quilted panels. For each outer plaid panel, cut batting and lining 1-2 inches larger on every side.
Layer:
- Lining, wrong side up
- Batting
- Plaid outer fabric, right side up
Smooth carefully.
Baste each panel with pins, thread, or your preferred temporary basting method.
Repeat for both pocket panels.
Step 8 – Quilt the panels. A simple quilting grid suits plaid beautifully because the printed lines already give you visual guides.
Quilt approximately 2-2½ inches apart, or follow selected horizontal and vertical lines in the plaid.
Start near the center and work outward.
Keep the quilting light enough that the finished panel can still bend easily.
Most importantly, check the batting manufacturer’s maximum quilting distance. If it requires closer quilting than 2½ inches, follow the batting instructions.
Once quilted, trim the batting and lining level with the outer plaid edges.
You now have quilted yardage.
Step 9 – Cut the back and fronts from the quilted panels. Lay the pattern pieces over the quilted yardage.
Start with the two fronts.
Line up your dominant plaid stripe so it sits at exactly the same height on both pieces.
Check the center fronts before cutting.
Then cut the back.
Where possible, align one obvious horizontal stripe across the back at approximately the same height as the fronts. Perfect matching at the side seams is pleasant but not essential; matching the two fronts matters much more.
Step 10 – Cut the sleeves and collar pieces. Cut both sleeves from their quilted panels.
Try to place the dominant horizontal stripe at approximately the same level on both sleeves.
Don’t chase perfect plaid matching around the armhole curve – it wastes fabric and usually disappears visually once the garment is worn.
Cut the collar from unquilted outer fabric rather than the quilted yardage. Cut the undercollar from matching outer fabric or lining, according to your pattern.
If interfacing is required, use a lightweight version. A thick quilted collar becomes uncomfortable very quickly.
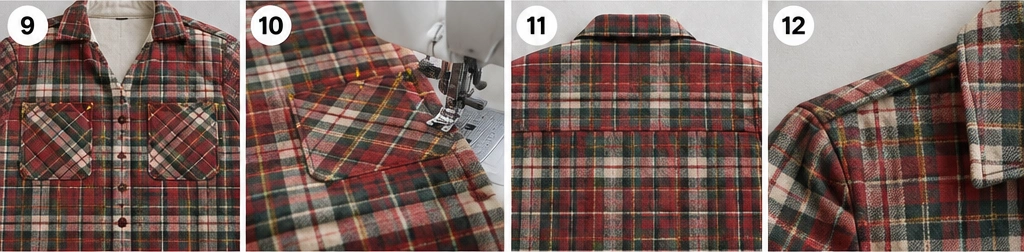
Step 11 – Trim and finish the patch pockets. Trim the quilted pocket panels to:
8 × 9 inches
Fold the top edge toward the wrong side twice:
½ inch + ½ inch
Stitch it securely.
Trim a tiny diagonal from the two lower corners to reduce bulk.
Fold the sides and bottom under:
½ inch
The finished pocket should measure approximately:
7 inches wide × 7½ inches high
Step 12 – Position and attach the pockets. Place one pocket on each front.
A useful starting position is:
- Pocket top approximately 3 inches below the underarm
- Inner pocket edge approximately 2½-3 inches from the finished center-front edge
But try the pattern piece against your body before deciding. Pocket placement should move with size.
Shift each pocket slightly until its dominant plaid lines match the plaid underneath as closely as practical.
Topstitch approximately ⅛ inch from the folded edge around the sides and bottom.
Add a short bar tack at both top corners.
Step 13 – Sew and bind the shoulder seams. Place the fronts and back right sides together.
Sew the shoulders using the seam allowance specified by your pattern; for a quilted garment, ½ inch is a practical choice if the pattern allows it.
Keep both seam allowances together.
Trim slightly only if excessively bulky.
Encase the raw allowances in binding and press the finished bound seam toward the back.
Binding quilted garment seams keeps loose batting fibers contained and gives the inside the finished appearance associated with quilt coats.
Step 14 – Make and attach the collar. Sew the outer collar and undercollar right sides together around the outer edges, leaving the neckline edge open.
Grade the seam allowances, clip the corners carefully, turn right side out, and press.
Topstitch approximately ⅛ inch from the edge if desired.
Match the collar’s center back to the jacket’s center-back neckline.
Pin the collar around the neckline according to the pattern markings.
Sew with the pattern’s seam allowance.
Bind the exposed neckline seam on the inside, keeping the allowances together.
The collar should remain noticeably softer and thinner than the quilted body.
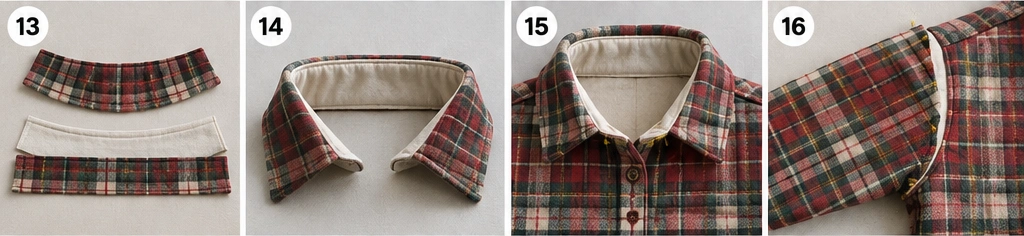
Step 15 – Set the sleeves while the garment is flat. With the shoulder seams complete and side seams still open, pin each sleeve into its armhole.
A dropped-shoulder pattern usually has a fairly shallow sleeve curve, which is much easier to sew through quilted fabric.
Match:
- Sleeve center to shoulder seam
- Front and back notches
- Underarm points
Sew with the pattern seam allowance, usually around ½ inch for this type of quilted garment.
Bind the armhole seam immediately while everything is still flat.
Press the bound seam toward the sleeve.
Step 16 – Sew and bind the side and underarm seams. Fold the shacket right sides together.
Starting at the cuff, sew continuously:
cuff → underarm → side seam → hem
using a ½-inch seam or the seam allowance specified by the pattern.
Repeat on the second side.
Try the shacket on now.
Check:
- Chest ease
- Sleeve length
- Hem length
- Pocket placement
- Front overlap
Make any adjustments before binding these seams.
Once the fit is right, bind each underarm-and-side seam with the allowances held together.
Step 17 – Finish the cuffs and body perimeter. Bind each cuff separately.
For the body, begin at one lower front corner and bind:
up one front edge → around the neckline/front collar transition as required by the pattern → down the opposite front → around the hem
If your pattern’s collar construction interrupts that route, stop and restart neatly where necessary rather than forcing binding through an awkward junction.
Use plenty of clips around curves.
Keep the binding smooth but don’t stretch it along straight edges.
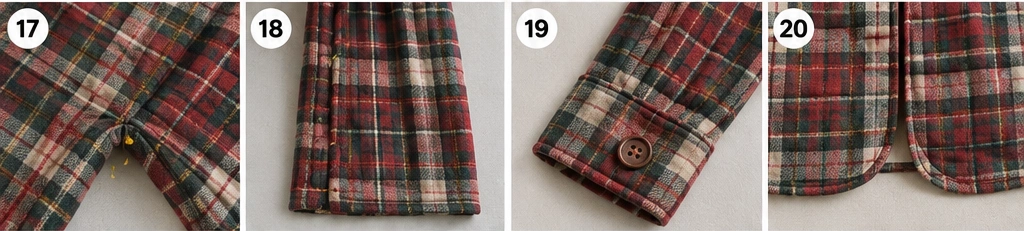
Step 18 – Mark the buttonholes and buttons. Put the shacket on over the kind of layer you expect to wear beneath it.
Overlap the fronts naturally.
Mark the button positions directly on the garment.
For a 29-31-inch shacket, about 6 buttons usually works well, spaced about 3¾-4¼ inches apart, but actual spacing depends on size and pattern.
Make sure one button sits at or very close to the fullest part of the bust. That’s the point most likely to gape.
Check that no bulky quilting intersection sits exactly beneath a buttonhole.
Make the buttonholes first.
Then overlap the fronts, mark through each finished buttonhole, and sew the buttons in exactly those positions.
Step 19 – Press and finish. Give the finished shacket a careful final press.
Don’t crush the batting with excessive pressure or heat.
Check:
- Buttons
- Pocket corners
- Binding joins
- Underarm seams
- Collar points
- Loose threads
If you’d like a softer, slightly crinkled quilt-coat finish, wash gently according to the outer fabric, lining, and batting instructions.
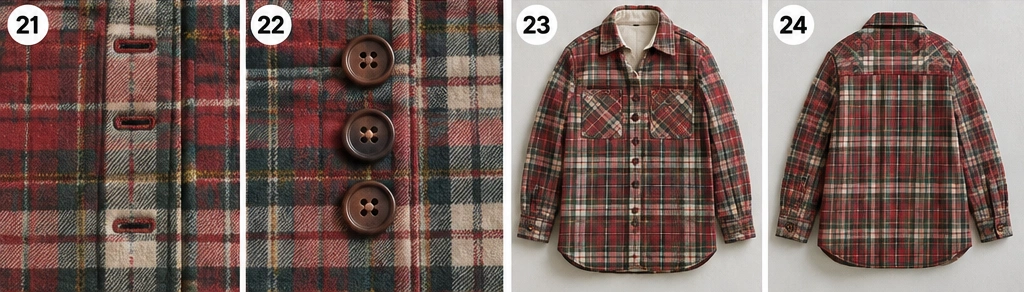
Use a color catcher for the first wash, especially with cranberry, burgundy, and dark green fabrics.
Tumble dry low if all three layers allow it, or air dry if your batting or fabric requires gentler treatment.
Assembly at a Glance
- Choose a boxy, dartless button-front shacket pattern with dropped shoulders and a simple one-piece collar.
- Buy the pattern yardage plus roughly 20-25% extra for plaid matching.
- Prewash the plaid outer fabric and lining.
- Identify the horizontal plaid repeat and choose one reference stripe.
- Plan both fronts so the strongest stripe sits at the same height.
- Cut back, fronts, and sleeves as oversized panels, 2-3 inches larger than the pattern pieces.
- Prepare two oversized 9 × 10-inch pocket panels.
- Layer every panel with low-loft batting and lining.
- Quilt approximately 2-2½ inches apart, or closer if the batting requires it.
- Cut the two fronts first, matching the plaid at center front.
- Cut the back and sleeves from the remaining quilted panels.
- Cut the collar from unquilted fabric to keep it flexible.
- Trim pockets to 8 × 9 inches; fold top twice and sides/bottom once.
- Match and topstitch the pockets; bar-tack the top corners.
- Sew and bind the shoulder seams.
- Make the collar, attach it, and bind the neckline seam.
- Set the sleeves while the garment is still flat; bind the armhole seams.
- Sew underarm and side seams continuously; try the shacket on.
- Bind the underarm and side seams.
- Bind both cuffs and finish the front edges and hem.
- Mark approximately 6 buttons while wearing the garment, including one at the bust.
- Make buttonholes and attach the buttons.
- Press, inspect, and wash with a color catcher if desired.
Beginner Tips for Success
- Buy extra plaid. Pattern matching nearly always uses more fabric than an ordinary layout.
- Match the center fronts first. That’s the area people notice immediately.
- Don’t obsess over every seam. Perfect matching at sleeve curves isn’t necessary.
- Pick one obvious horizontal reference stripe and use it consistently.
- Prewash flannel before cutting; its first-wash shrinkage can be substantial.
- Use low-loft batting or flannel as the middle layer.
- Quilt panels before cutting the final garment shapes.
- Leave each quilting panel 2-3 inches larger than its pattern piece.
- Keep quilting relatively open so the shacket still drapes.
- Cut the collar from unquilted fabric to avoid excessive bulk around the neck.
- Match the pocket plaid to the jacket fronts before topstitching.
- Add bar tacks to the pocket corners.
- Keep seam allowances together and bind them as one unit rather than trying to press thick quilted allowances open.
- Bind armholes before closing the side seams. It’s dramatically easier while the garment lies flat.
- Use clips rather than forcing pins through very bulky areas.
- Shift the pattern slightly if a thick quilting intersection lands directly under a buttonhole.
- Put one button at the fullest bust point to reduce gaping.
- Use a 90/14 needle and change it if skipped stitches begin.
- Clean lint from the bobbin area regularly when sewing brushed flannel.
- Use a color catcher in the first wash; saturated holiday reds are particularly prone to bleeding.
Styling It & Gift Ideas
A plaid quilted Christmas shacket already carries plenty of pattern, so what you wear underneath can stay simple.
Try it over:
- A cream turtleneck and dark denim
- A black sweater and straight-leg jeans
- An oatmeal knit dress and boots
- A white tee with corduroy trousers
- A fine-gauge sweater with black leggings for casual layering
Roll the sleeves once to expose the lining if you’ve chosen a contrasting fabric. A gold, striped, or tiny floral lining can add just enough surprise without competing with the plaid exterior.
Cranberry, pine, cream, and gold work beautifully with denim, camel, chocolate brown, black, and ivory, so the shacket can continue well beyond Christmas.
Its warmth and handmade character also make it a memorable gift:
- A Christmas gift for someone who loves cozy winter layers
- A mother-daughter pair made from coordinating plaids
- A memory shacket using pieces of meaningful flannel shirts
- A holiday travel jacket roomy enough for long drives and cold airports
- A winter birthday gift that doesn’t feel limited to December
If you’re sewing it as a gift, choose a relaxed silhouette with generous ease. A boxy shacket is far more forgiving to size for someone else than a fitted jacket.
Final Thoughts
A plaid quilted Christmas shacket works because the festive feeling comes from color, texture, and pattern rather than novelty details. Cranberry and pine immediately suggest the season, cream keeps the plaid bright, and a little gold adds warmth – but the finished garment still reads as a proper winter layer rather than a costume.
The construction itself is manageable: prewash the plaid, make oversized quilted panels, cut the garment after quilting, match the center fronts and pockets, assemble the shacket, and bind the bulky seams as you go.
The detail worth spending time on is the plaid placement. Match the strongest horizontal lines across the two fronts, keep the pockets aligned with the body underneath, use thin batting so the jacket actually drapes, and don’t waste fabric chasing perfect matching around every curve. Get those decisions right and you’ll have a warm, vibrant quilted shacket that feels festive in December and completely wearable for the rest of winter.
Other Design Inspirations – Digitally Modified Images. Texture and color may vary from the actual product.


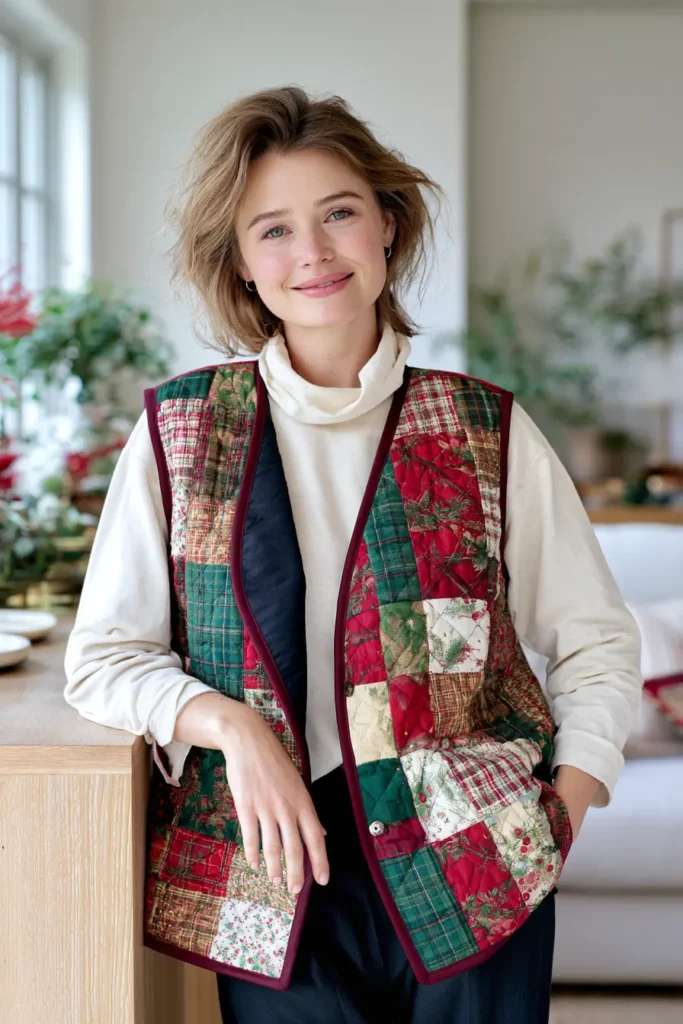
3. Reversible Christmas Quilted Vest for Two Festive Looks
A reversible quilted vest earns its place in a holiday wardrobe twice over. One side can be lively and unmistakably festive – cranberry, pine, ivory, and warm gold patchwork – while the other can be quieter and more polished in deep navy, cranberry, silver, and cream. Turn it inside out, and it becomes a genuinely different layer rather than simply the same vest with a lining showing.
The trick is to treat both faces as finished fabric from the beginning. No hidden lining side can hide rough seam allowances. The quilting needs to look intentional from both directions, the seams must have no exposed raw edges, and the binding has to complement both palettes.
For a first reversible quilted garment, a collarless, open-front vest with a simple boxy shape is ideal. With no sleeves, collar, facings, zipper, or button placket to complicate the construction, you can concentrate on the reversible finish itself.
The Reversible-Garment Problem
A normal quilted vest is relatively forgiving. The exterior gets all the attention, while the lining hides the batting and seam allowances.
A reversible vest gives you nowhere to hide.
If an ordinary seam is sewn right sides together and left unfinished, it may be safely inside when Side A faces outward – but turn the vest around and that same seam becomes visible on Side B.
The solution here is to use flat-felled shoulder and side seams. One seam allowance is trimmed, the wider allowance wraps around it, and the whole seam is stitched flat. No raw edge remains exposed, and both faces look intentionally constructed.
Around the:
- Neckline
- Center fronts
- Hem
- Armholes
use double-fold binding. The binding becomes part of the design and gives both sides a crisp edge.
Design Inspirations – Digitally Modified Images. Texture and color may vary from the actual product.
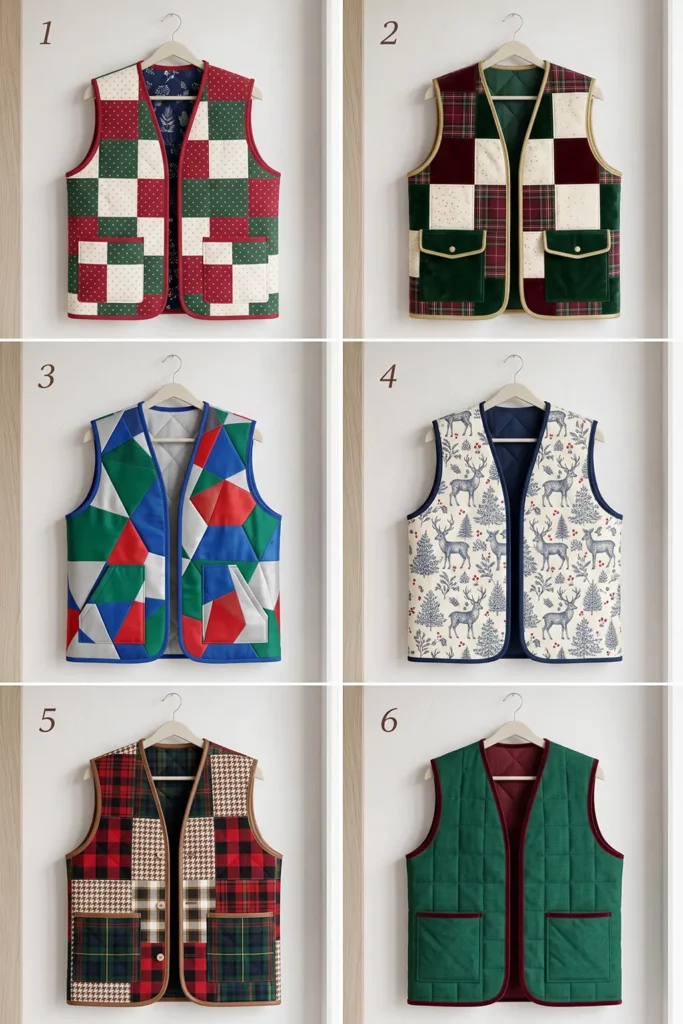
Making the Two Sides Feel Genuinely Different
Reversibility is more interesting when the two sides aren’t simply color variations of the same idea.
For this vest:
Side A – Christmas Patchwork
- Cranberry
- Pine green
- Emerald
- Ivory
- Warm gold
- Small plaids, stars, dots, and near-solids
Side B – Winter Botanical
- Deep navy
- Cranberry
- Soft ivory
- Muted silver
- Small evergreen or berry print, or a sophisticated near-solid
Side A reads as festive handmade patchwork.
Side B feels more like an elegant winter vest that can stay in rotation after Christmas.
A glimpse of the opposite fabric along the opening or inside a turned edge becomes a deliberate detail rather than something to conceal.
A Little History: Reversible Clothing
Reversible clothing is much older than the modern quilted vest. Garments designed to be worn on either face have appeared repeatedly wherever fabric was expensive, travel wardrobes needed to work harder, or one garment needed to serve both decorative and practical purposes.
The idea fits quilting particularly well. Quilters already think about two surfaces – quilt top and backing – and quilting physically connects those surfaces into one textile.
A reversible vest simply asks both surfaces to be equally beautiful.
How It’s Built
The construction order is:
- Choose a simple collarless vest pattern
- Piece oversized patchwork panels for Side A
- Cut oversized whole-cloth panels for Side B
- Sandwich both fabrics around low-loft batting
- Quilt the three layers together
- Cut the actual vest pieces from the finished quilted panels
- Add matching reversible pockets
- Join shoulders with flat-felled seams
- Join sides with flat-felled seams
- Bind the armholes
- Bind the neckline, fronts, and hem
- Press and finish
You’re essentially making double-faced quilted yardage first, then turning it into a garment.
Finished Garment
- Style: relaxed open-front reversible quilted vest
- Shape: straight, boxy, lightly oversized
- Length: approximately 24-26 inches from shoulder to hem
- Ease: approximately 4-6 inches total chest ease
- Patchwork squares on Side A: 5 inches cut, 4½ inches finished
- Patch pockets: cut approximately 7 × 8 inches, finishing around 6 × 6½ inches
- Armholes: comfortably roomy for layering over a sweater
- Closure: open front for easiest true reversibility
- Skill level: confident beginner
- Core techniques: patchwork piecing, reversible quilting, garment cutting, flat-felled seams, edge binding
Materials Needed
For an average adult vest:
- Approximately 90 5-inch patchwork squares for Side A, depending on your actual pattern size
- Or use 24 layer-cake squares at 10 × 10 inches, each quartered into four 5-inch squares, giving 96 squares
- Side B: approximately 1¾-2 yards of 44-45-inch-wide quilting cotton or lightweight flannel
- Low-loft batting: approximately 1¾-2 yards, depending on batting width and vest size
- Binding: approximately ¾ yard of coordinating quilting cotton
- Optional extra fabric for reversible pockets
- Neutral or coordinating thread
- 90/14 needle
- Walking foot
- Rotary cutter
- Cutting mat
- Quilting ruler
- Pins or clips
- Iron
- A collarless, dartless, open-front vest pattern with simple shoulders, straight side seams, and no facings
Choose a pattern with at least ⅝-inch seam allowances at shoulders and sides if possible. That extra width makes flat-felled seams easier to construct through quilted layers.
Beginner tip: Avoid starting with a pattern that includes princess seams, bust darts, a collar, curved front facings, or a zipper. You can make those features reversible, but they require substantially more complicated construction.
Choosing Your Colors
For Side A, use a vibrant Christmas palette:
- Cranberry red
- Ruby
- Pine green
- Emerald
- Ivory
- Warm gold
Aim for approximately:
- One-third reds
- One-third greens
- One-third lights and golds
The light fabrics keep red and green from visually merging.
For Side B:
- Deep navy
- Cranberry
- Soft ivory
- Muted silver
A navy ground with small cranberry berries, pale evergreen branches, or a restrained winter botanical works beautifully.
Other two-sided combinations:
Side A: emerald, ruby, cream, gold
Side B: charcoal, plum, ivory, silver
Side A: bright red, pine, white, gold
Side B: cobalt, cranberry, pale gray
Side A: cranberry, sage, blush, cream
Side B: deep plum, ivory, muted rose
Because the binding appears from both directions, choose a color that works with both faces. Cranberry, deep navy, dark green, or antique gold are especially useful.
Cutting Measurements
Use exact garment dimensions from your chosen pattern.
For planning:
- Vest length: approximately 24-26 inches
- Back patchwork panel: at least 2-3 inches larger on every side than the back pattern piece
- Two front patchwork panels: each at least 2-3 inches larger on every side than its pattern piece
- Side B panels: match the oversized dimensions of the Side A panels
- Batting: cut 1-2 inches larger on every side than the corresponding Side A panel
- Patchwork squares: 5 × 5 inches
- Finished patchwork squares: approximately 4½ × 4½ inches
- Pocket quilt sandwiches: at least 8 × 9 inches before final trimming
- Pocket pieces after quilting: 7 × 8 inches
- Binding strips: approximately 2¼-2½ inches wide, cut on the bias for armholes and curved neckline sections
- Shoulder and side seam allowance: preferably ⅝ inch for flat-felled finishing
Don’t cut the finished vest shapes until after quilting. Quilting can shrink each panel slightly, and cutting first risks ending up with undersized garment pieces.
Step-by-Step Guide
Step 1 – Choose the Right Vest Pattern
Look for a pattern that is:
- Collarless
- Dartless
- Open-front
- Straight or gently shaped
- Sleeveless
- Free from facings
- Free from a zipper or button placket
- Designed with uncomplicated side seams
A simple boxy layering vest is ideal.
Check the finished garment measurements, not just the pattern size.
For comfortable layering over a thin sweater, aim for approximately:
4-6 inches total chest ease
For example, someone with a 40-inch bust would usually be comfortable in a vest finishing around:
44-46 inches at the chest
depending on the style.
Step 2 – Check the Pattern Seam Allowances
Flat-felled seams need enough fabric to wrap one seam allowance around the other.
Ideally, shoulders and sides should have:
⅝-inch seam allowances
If your pattern uses only ¼ inch or ⅜ inch, add additional seam allowance before cutting.
Leave all outer edges – armholes, neckline, fronts, and hem – as specified by the pattern because those will eventually be bound.
Step 3 – Sort the Side A Fabrics
Divide your Christmas fabrics into:
- Reds
- Greens
- Lights/golds
Before cutting, take a photograph and convert it to black and white.
You should see obvious light, medium, and dark fabrics.
If nearly everything turns into the same middle gray, add more ivory, cream, pale gold, or very dark pine.
This matters because red and green frequently have surprisingly similar value even when their colors appear dramatically different.
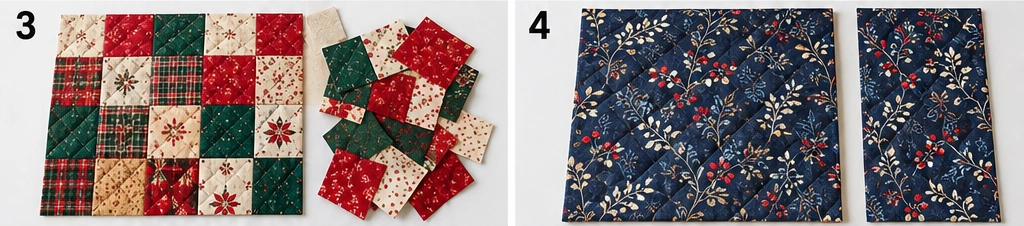
Step 4 – Cut the Patchwork Squares
Cut approximately:
90 squares at 5 × 5 inches
for an average vest.
If you’re using layer-cake squares, cut each:
10 × 10-inch square
into:
four 5 × 5-inch squares
Twenty-four layer-cake squares give:
96 smaller squares
which provides a little layout flexibility.
Keep the squares sorted loosely by color family.
Step 5 – Plan the Back Panel
Place the back pattern piece on your work surface.
Build a patchwork grid underneath it until the patchwork extends at least:
2-3 inches beyond the pattern piece on every side
For many adult sizes, something around:
6 squares across × 7 squares down
may be enough, but don’t rely on that number without checking your actual pattern.
Distribute red, green, and light squares evenly.
Avoid placing identical prints directly beside one another.
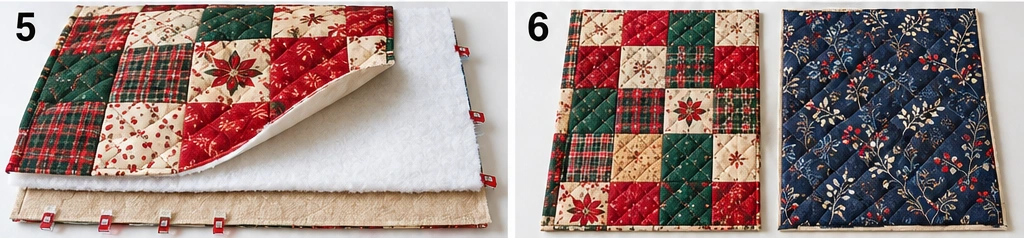
Step 6 – Piece the Back Panel
Sew the squares into rows using:
¼-inch seams
Press the seams of alternate rows in opposite directions.
Join the rows, nesting the seams where possible.
Press the completed panel flat.
Don’t stretch the outer edges.
Step 7 – Piece the Two Front Panels
Repeat the same process for the left and right fronts.
Each front panel should extend:
2-3 inches beyond its pattern piece
on all sides.
Keep the color balance similar to the back.
Because the vest is open-front, the inner edges of the two front panels will be especially visible. Avoid placing several very dark squares along one front and mostly light squares along the other unless that asymmetry is intentional.
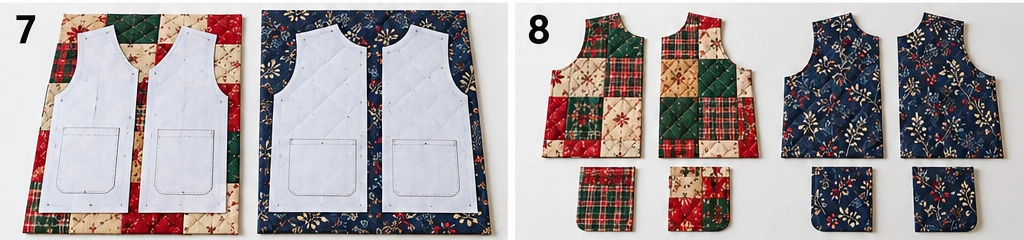
Step 8 – Prepare Side B
Cut three pieces of your Side B fabric:
- One oversized back panel
- Two oversized front panels
Each should be roughly the same dimensions as its Side A patchwork counterpart.
If Side B has a directional botanical print, mark the top of every panel.
Check that the design runs upward consistently.
Step 9 – Cut the Batting
Cut one batting layer for each of the three body panels.
Each batting piece should extend approximately:
1-2 inches beyond the patchwork panel
on every side.
Use low-loft cotton, bamboo-blend, or lightweight cotton/poly batting.
Avoid thick high-loft batting. Two attractive sides won’t help if the finished vest is too stiff to wear.
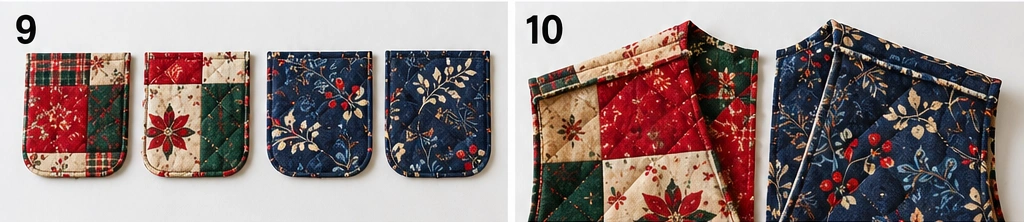
Step 10 – Layer the Reversible Panels
For each panel, layer:
- Side B fabric, right side down
- Batting
- Side A patchwork, right side up
Both attractive surfaces should face outward.
Smooth everything carefully.
Baste thoroughly.
Repeat for:
- Back
- Left front
- Right front
You now have three reversible quilt sandwiches.
Step 11 – Quilt the Panels
Quilt each panel through all three layers.
Good choices include:
- Straight vertical lines
- Diagonal grid
- Gentle crosshatching
- Stitching approximately ¼ inch beside selected patchwork seams
Keep quilting approximately:
2 inches apart
unless your batting requires closer spacing.
Check the batting packaging first; its maximum quilting distance overrides any general recommendation.
Use a walking foot to keep the two fabric faces from shifting independently.
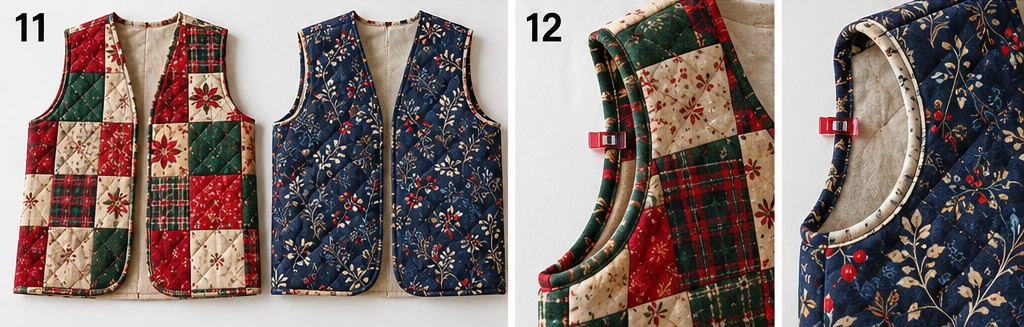
Step 12 – Check Both Faces
After quilting each panel, turn it over.
Side B should lie smooth without:
- Tucks
- Pleats
- Large wrinkles
- Distorted motifs
If you find a significant tuck, correct it now.
Once the garment pieces are cut, fixing quilting becomes much harder.
Trim excess batting and backing only enough to make the panel manageable. Don’t trim the panel down to the pattern yet.
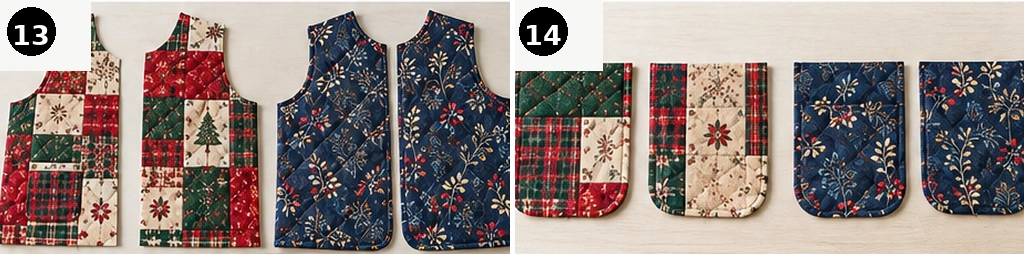
Step 13 – Cut the Vest Pieces
Place the pattern pieces on the quilted panels.
Cut:
- 1 back
- 2 fronts
Because both sides are wearable, pay attention to pattern placement on both faces before making the final cut.
If possible, shift a pattern piece slightly so thick patchwork seam intersections don’t sit directly at:
- Shoulder endpoints
- Underarm curves
- Side-seam junctions
That makes later construction much easier.
Step 14 – Prepare the Reversible Pockets
Make two quilt sandwiches slightly larger than:
8 × 9 inches
using:
- Side A fabric
- Thin batting
- Side B fabric
Quilt them lightly.
Trim each finished pocket piece to:
7 × 8 inches
Bind the top edge with coordinating binding.
Fold or trim the lower corners slightly if you prefer a softer shape.
Because each pocket is reversible too, both faces should look intentional.
Step 15 – Mark Pocket Placement
Place the pockets on Side A first.
A practical starting point is:
- Pocket top about 3 inches below the armhole
- Inner pocket edge approximately 2½-3 inches from the front opening
Adjust according to body size and vest proportions.
Carefully mark the placement on both front pieces.
Now transfer those exact positions to Side B.
The pockets on both faces need to occupy the same footprint; otherwise, attachment stitching from one side can appear randomly on the other.
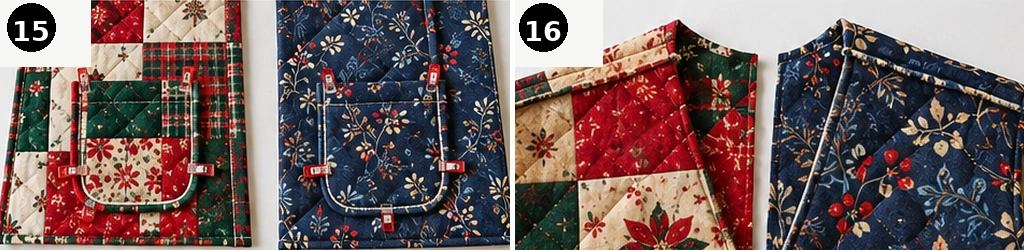
Step 16 – Attach the Side A Pockets
Place each pocket Side A outward on the corresponding Side A vest front.
Topstitch around:
- Side
- Bottom
- Other side
approximately:
⅛ inch from the edge
Leave the top open.
Reinforce both upper corners with short bar tacks.
The stitching will appear on Side B, which is why the pocket positions must match precisely.
Step 17 – Attach the Side B Pockets
Turn the fronts over.
Position each Side B pocket directly over the stitching outline from Side A.
Its edges should align with the pocket on the opposite face.
Topstitch the side and bottom edges.
Again, leave the top open.
You now have usable patch pockets on both faces of each vest front, occupying the same position.
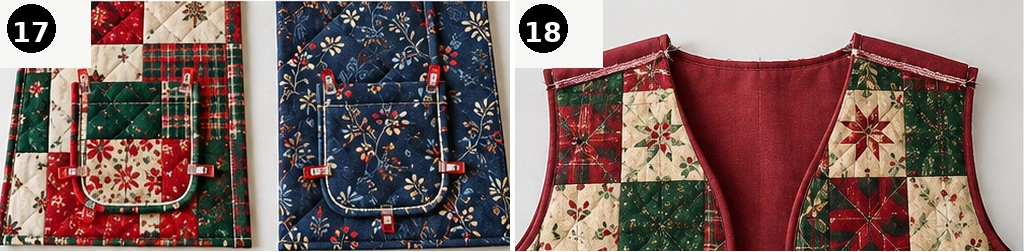
Step 18 – Sew the Shoulder Seams
Place the front and back pieces together in the orientation your pattern requires.
Sew both shoulders using:
⅝-inch seams
Use clips rather than forcing heavy pins through bulky quilted intersections.
Before finishing, try the vest on and confirm the neckline and shoulder width feel comfortable.
Step 19 – Flat-Fell the Shoulder Seams
Work one shoulder at a time.
Trim one seam allowance to approximately:
¼ inch
Leave the other approximately:
⅝ inch
Wrap the wider allowance over the trimmed allowance.
Fold its raw edge under.
Press carefully.
Topstitch the folded edge flat through the garment.
The finished shoulder now has:
- No exposed raw edge
- A tidy seam from Side A
- A clean topstitched seam from Side B
Repeat on the second shoulder.
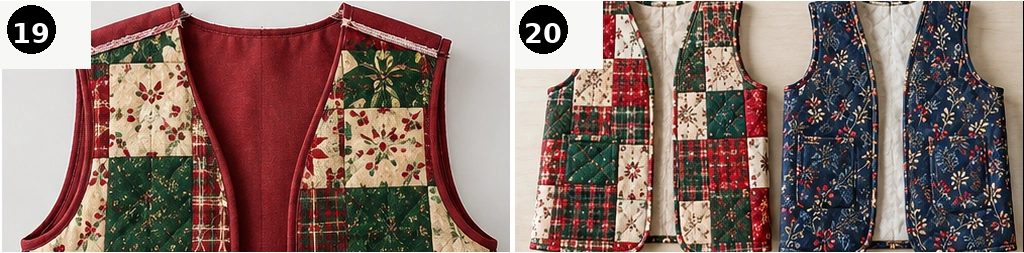
Step 20 – Sew the Side Seams
Place the garment pieces together at the side seams.
Sew from the bottom of the armhole to the hem using:
⅝-inch seam allowances
Before finishing them, try the vest on over a sweater.
Check:
- Chest ease
- Armhole comfort
- Hip ease
- Overall length
- Front hang
Make any fit adjustment now.
Step 21 – Flat-Fell the Side Seams
Trim one allowance to:
¼ inch
Wrap the remaining wider allowance over it.
Fold the raw edge under and topstitch flat.
Repeat on the opposite side.
All structural seams are now enclosed without needing a conventional lining.
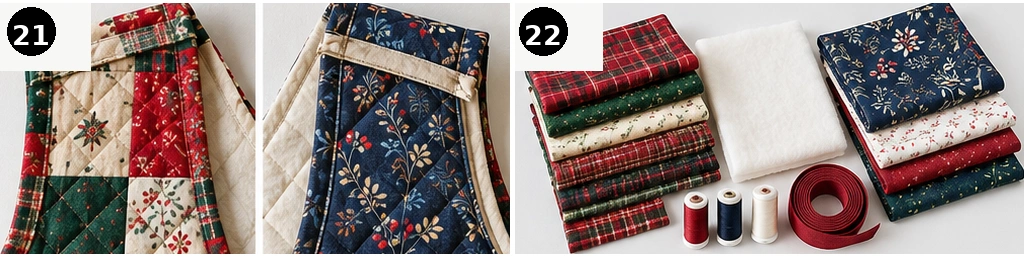
Assembly
At this stage the vest body is complete.
You should have:
- One quilted back
- Two quilted fronts
- Flat-felled shoulder seams
- Flat-felled side seams
- Two pockets visible from Side A
- Two corresponding pockets visible from Side B
Only the raw outer edges remain unfinished:
- Two armholes
- Neckline
- Two center fronts
- Hem
Binding these edges is what completes the reversible construction.
Step 22 – Measure and Prepare the Binding
Cut bias strips approximately:
2¼-2½ inches wide
Join them with diagonal seams.
Press the joining seams open.
You’ll need enough binding for:
- Left armhole
- Right armhole
- Entire body perimeter
The body perimeter includes:
one lower front → center front → neckline → opposite center front → hem → back to starting point
Prepare more binding than your exact measurement. Having an extra yard of finished binding is much easier than stopping 6 inches short.
Step 23 – Bind the First Armhole
Because the armhole is curved, bias binding is strongly recommended.
Start near the underarm.
Leave several inches loose.
Apply the binding evenly around the armhole without stretching the vest itself.
Join the binding ends neatly.
Wrap the binding around the raw edge so approximately the same amount shows on Side A and Side B.
Topstitch carefully.
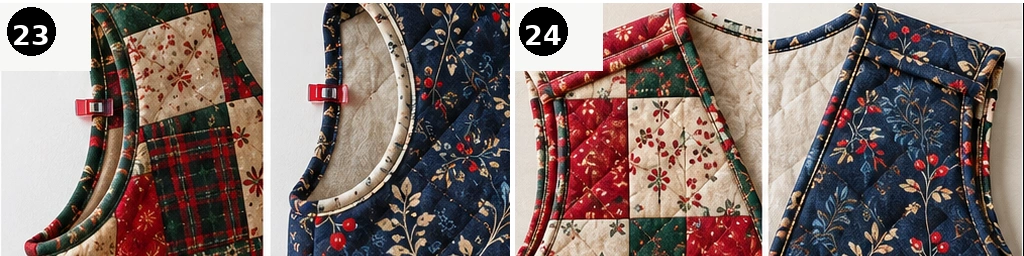
Step 24 – Bind the Second Armhole
Repeat the process.
Before finishing, compare both armholes.
The visible binding width should look similar on each side.
A neat armhole finish matters because the binding becomes highly visible whenever the vest is reversed.
Step 25 – Bind the Entire Outer Perimeter
Beginning near one lower-front area, bind continuously around:
- Front opening
- Neckline
- Opposite front
- Hem
Keep gentle tension around curves but don’t stretch straight edges.
At the bottom corners, form neat miters or softly rounded corners according to the pattern shape.
Wrap the binding evenly to the opposite face and topstitch.
Check both sides as you go.
This is one of those jobs where sewing five inches and checking is much safer than sewing five feet and discovering the binding missed the underside.
Step 26 – Topstitch and Reinforce
Topstitch around the finished edges if the binding method hasn’t already created a complete line of stitching.
Pay particular attention to:
- Lower front corners
- Pocket corners
- Underarms
- Shoulder seam ends
These receive the most handling.
Trim all loose threads.
Step 27 – Press and Finish
Press the finished vest gently from both faces.
Avoid crushing the batting.
Try it:
- Side A outward
- Side B outward
Check that:
- Both fronts hang evenly
- The neckline lies flat
- Neither armhole flips outward
- The hem is balanced
- Pockets work from both faces
- Flat-felled seams sit comfortably
If you’d like a softer quilted texture, wash according to the fabric and batting instructions.
Use a color catcher in the first wash because cranberry and other saturated reds can bleed.
The quilting should develop a gentle crinkle, giving both sides a softer handmade finish.
Assembly at a Glance
- Choose a collarless, dartless, open-front vest with simple side seams.
- Confirm approximately 4-6 inches of chest ease.
- Use ⅝-inch shoulder and side seam allowances for flat-felling.
- Sort Side A fabrics into reds, greens, and lights.
- Cut approximately 90 squares at 5 inches.
- Piece an oversized back patchwork panel.
- Piece two oversized front panels.
- Cut matching oversized Side B panels.
- Cut low-loft batting 1-2 inches larger than each panel.
- Layer Side B + batting + Side A.
- Quilt all three panels approximately 2 inches apart.
- Inspect both faces for tucks.
- Cut the final back and two front pattern pieces.
- Make two reversible 7 × 8-inch pocket pieces.
- Mark identical pocket positions on both faces.
- Attach Side A pockets.
- Align and attach Side B pockets directly opposite.
- Sew shoulders with ⅝-inch seams.
- Flat-fell the shoulder seams.
- Sew the side seams.
- Check fit.
- Flat-fell the side seams.
- Cut 2¼-2½-inch bias binding.
- Bind each armhole separately.
- Bind fronts, neckline, and hem around the outer perimeter.
- Reinforce high-stress points.
- Press and check the fit from both sides.
Beginner Tips for Success
- Choose a very simple vest pattern. Reversibility provides enough technical interest without a complicated garment pattern.
- Make the two faces genuinely different so reversing the vest feels worthwhile.
- Use low-loft batting; thick batting makes flat-felled seams difficult and uncomfortable.
- Piece patchwork panels 2-3 inches oversized.
- Quilt first and cut the garment second.
- Check the reverse face after quilting every panel.
- Avoid positioning bulky patchwork intersections at shoulder and underarm points.
- Use ⅝-inch structural seam allowances so you have enough fabric to flat-fell them.
- Trim only one seam allowance when flat-felling.
- Use a walking foot for quilting.
- Make pocket placement identical on both faces.
- Reinforce pocket corners with bar tacks.
- Use bias-cut binding around armholes and neckline curves.
- Choose binding that works with both palettes.
- Frequently check the underside while binding.
- Don’t over-quilt; a wearable vest needs flexibility.
- Try the garment on before flat-felling the side seams.
- Press rather than aggressively ironing quilted fabric.
- Use a 90/14 needle through quilted layers.
- Use a color catcher in the first wash.
Styling It & Gift Ideas
Side A is the obvious December statement:
cranberry + pine + ivory + gold patchwork
Wear it with:
- Cream turtleneck
- Dark jeans
- Black trousers
- Camel corduroy
- Simple boots
Then reverse it.
The deep navy, cranberry, ivory, and silver side feels quieter and can work with:
- White shirt
- Gray knitwear
- Navy trousers
- Denim
- Black leggings
A narrow glimpse of the hidden patchwork at the front edge can be especially attractive when Side B is worn outward.
Because it offers two genuinely different looks, this vest also makes a memorable gift:
- A Christmas gift for someone who loves handmade clothing
- A mother-and-daughter pair with related but different palettes
- A memory vest using meaningful scraps on one side and a calm whole-cloth reverse
- A holiday travel layer because one garment creates two outfits
- A winter birthday gift with the quieter side designed for January and February
For a gift, choose a relaxed fit. A sleeveless boxy garment is much more forgiving to size than a fitted jacket.
Final Thoughts
A reversible Christmas quilted vest asks a little more from every finishing decision because both sides matter, but the basic construction remains surprisingly approachable.
Piece the festive side oversized. Pair it with a completely different reverse fabric. Sandwich both around thin batting, quilt first, and cut the garment pieces only after the textile is stable. Flat-felled shoulders and side seams remove exposed raw edges, while bias binding finishes the armholes, neckline, fronts, and hem cleanly from either direction.
The strongest version doesn’t look like a vest with a decorative lining. It feels like two complete garments sharing the same quilting – vibrant cranberry, pine, ivory, and gold patchwork for Christmas gatherings on one side, elegant navy and cranberry winter styling on the other.
Get the batting weight, seam finishing, and binding right, and either face can confidently be the outside.
Other Design Inspirations – Digitally Modified Images. Texture and color may vary from the actual product.
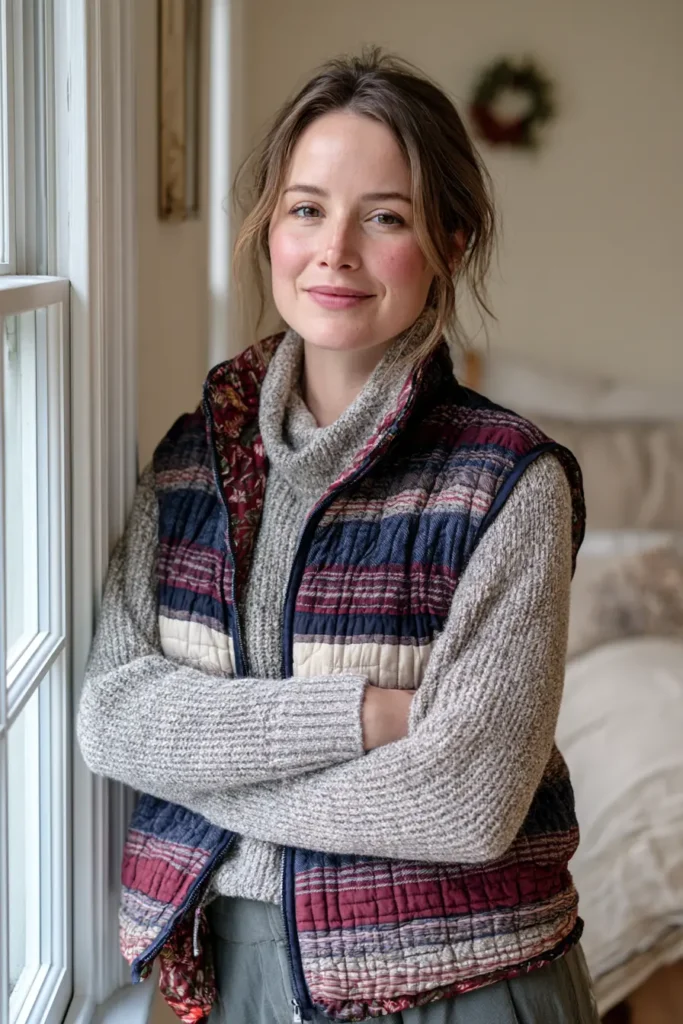
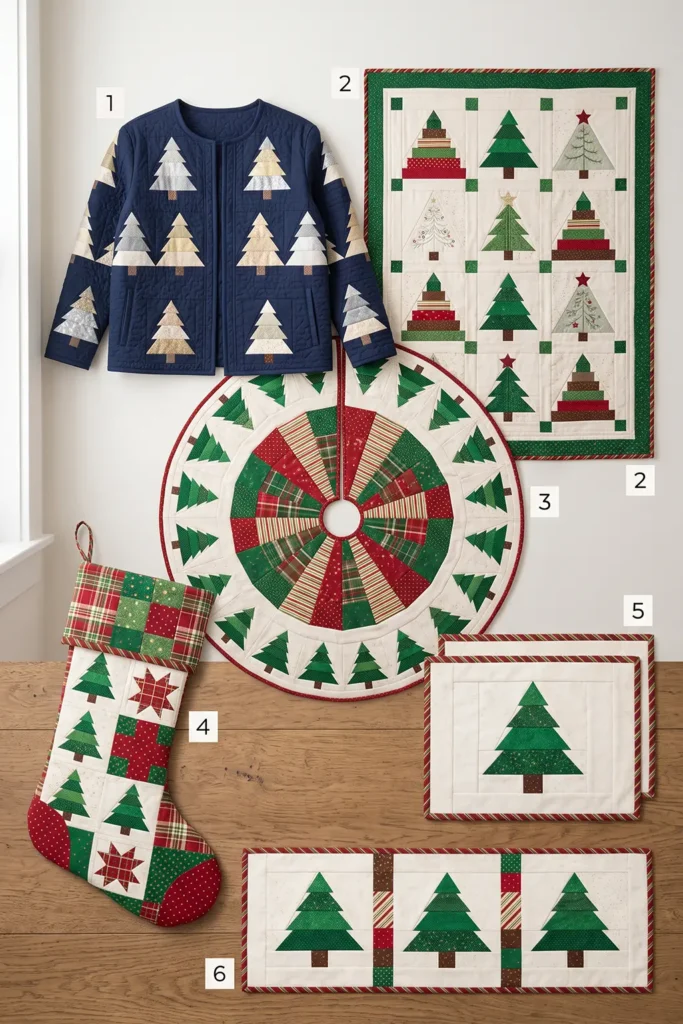
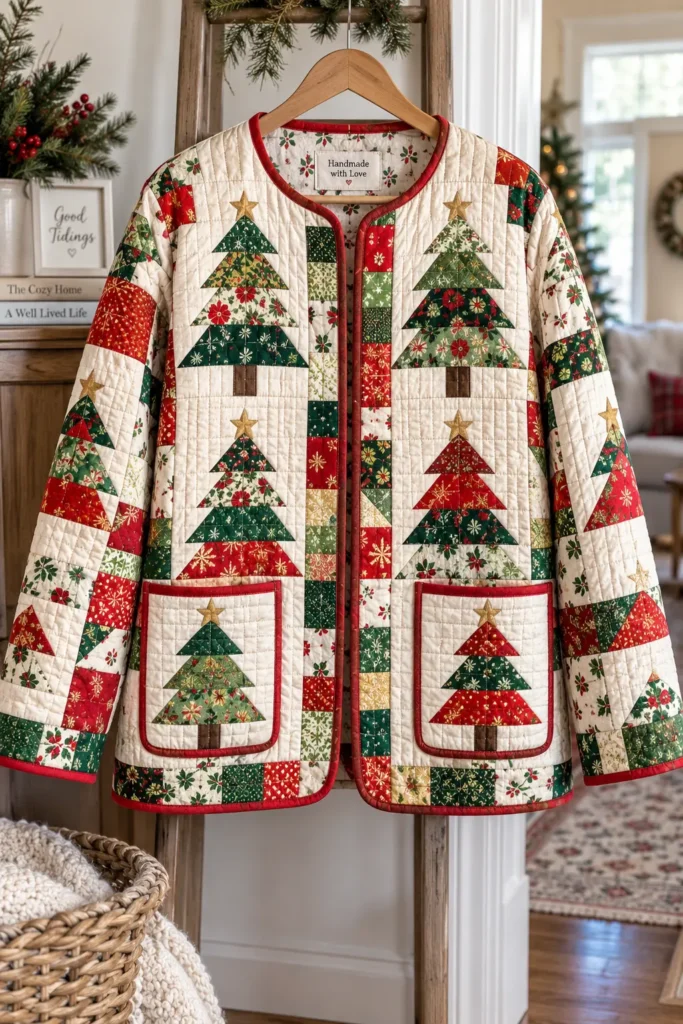
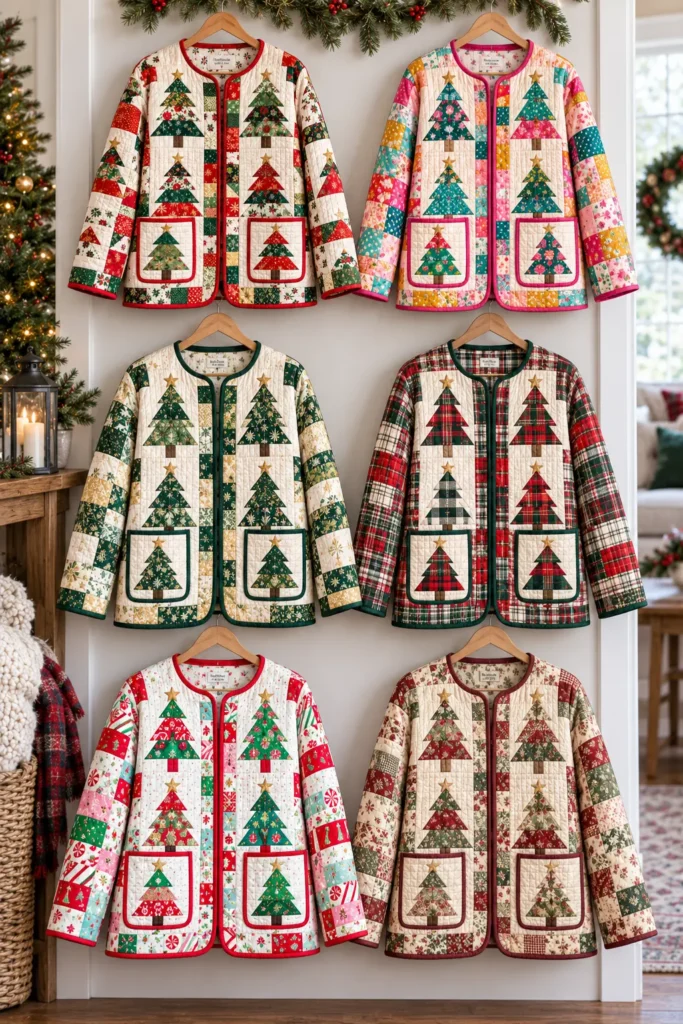
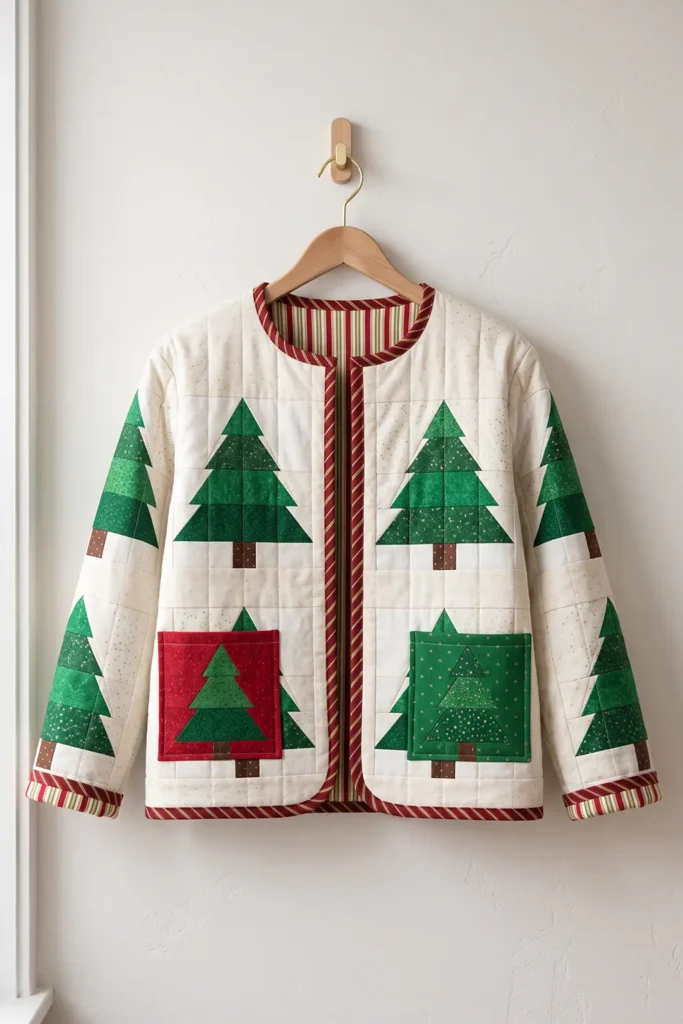
4. Christmas Tree Patchwork Quilted Jacket for Playful Holiday Wear
A Christmas tree patchwork quilted jacket is one of those holiday sewing projects that feels cheerful the moment the first blocks start coming together. The tree shape is instantly recognizable, the color palette can be as classic or as playful as you like, and the finished jacket works as real seasonal outerwear rather than décor that only sits on display. With a simple boxy silhouette and bright patchwork panels, this design turns festive fabric into something cozy, wearable, and full of personality.
This version uses a collarless, boxy quilted jacket with a relaxed fit, a softly structured shape, and patchwork Christmas tree panels placed across the fronts and back. The construction is straightforward: piece the outer panels first, quilt them with batting, cut the jacket pieces from the quilted fabric, then assemble the outer shell, add the lining, and finish the edges with binding. The steps below are written so they follow in a clear order and make practical sewing sense from start to finish.
Why This Idea Is Worth Making
This idea is worth making because it gives you a holiday jacket that feels playful without being costume-like. You can use bright reds, greens, golds, pinks, and creams for a festive look, but the finished garment is still cozy and practical enough to wear to gatherings, holiday shopping, winter brunches, or casual family visits.
It is also a great way to use smaller cuts of quilting cotton. Christmas tree motifs are naturally suited to patchwork because they are geometric, easy to recognize, and easy to scale up or down. Even a few feature blocks can make the whole jacket feel special.
Design Inspirations – Digitally Modified Images. Texture and color may vary from the actual product.
Interesting Backstory
Christmas tree motifs have stayed popular in quilting for a simple reason: they are visually strong and structurally easy to piece. The triangle-based silhouette reads clearly from a distance, which makes it ideal for quilts, pillows, table runners, and wearable patchwork. Long before novelty holiday prints became common, quilters often suggested seasonal themes through shape and color alone, and the Christmas tree block became one of the most enduring examples.
The evergreen tree itself also carries a winter meaning that works beautifully in textiles. Because evergreen branches keep their color through the cold season, they came to symbolize endurance, warmth, celebration, and life in the middle of winter. That makes them especially fitting for a cozy quilted jacket.
Finished Size
The sample jacket described here is a relaxed women’s medium-to-large fit with these approximate finished measurements:
- Bust: 46 inches
- Finished length: 25 inches
- Shoulder width: about 18 inches
- Sleeve length from shoulder seam: 22 inches
- Hip/sweep: 48 inches
This fit works well over a thin sweater or knit top. If you are using a different pattern size, keep the construction method the same and adjust only the panel sizes and pattern pieces.
Materials Needed
For one jacket in the sample size, you will need:
- A simple collarless quilted jacket pattern with a boxy shape, front opening, separate sleeves, and no complex collar or lapel
- Assorted quilting cottons in vibrant holiday shades for the outer patchwork
- reds, cranberries, cherry, ruby
- emerald, pine, bright green
- gold, mustard, cream, white
- optional pink or aqua accents for a more playful palette
- about 1½ yards total across multiple fabrics
- Background fabric for tree blocks and filler areas — about 1 yard
- Lining fabric — about 2 yards
- Low-loft cotton or cotton-blend batting — about 2 yards
- Binding fabric — about ¾ yard
- Optional pocket fabric if you want contrast patch pockets
- Coordinating thread
- Rotary cutter, ruler, and cutting mat
- Sewing machine with walking foot helpful for quilting
- Pins or clips
- Iron and pressing surface
Suggested Color Palette
For a classic playful holiday look, try:
- Tree fabrics: emerald, pine, lime, and bright green
- Accent fabrics: cranberry red, cherry red, gold, cream, white
- Backgrounds: soft ivory, pale gray, or warm white
- Lining: candy-stripe print, tiny star print, or a cheerful red floral
For a second, brighter version, you could use:
- Tree fabrics: teal, magenta, coral, bright aqua
- Accent fabrics: mustard, blush, berry, ivory
- Backgrounds: soft cream or pale pink
Step-by-Step Guide
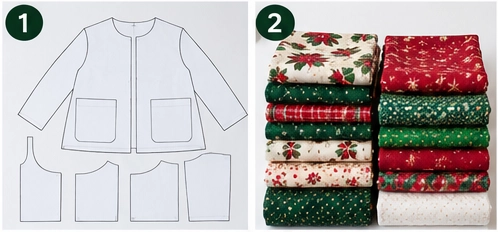
Step 1: Choose and Prepare the Jacket Pattern
Use a simple collarless jacket pattern with:
- a front opening
- a straight or slightly boxy shape
- separate sleeves
- enough ease to layer over a knit top
A relaxed pattern is best because quilted garments are slightly thicker than ordinary fabric jackets.
Check the finished measurements before cutting. For the sample size, aim for:
- 46-inch bust
- 25-inch body length
- 22-inch sleeve length
If your pattern includes facings, you can still use it, but a bound-edge finish is often easier and cleaner for quilted garments.
Step 2: Make the Christmas Tree Blocks
Piece 8 Christmas tree blocks, each finishing at about 8 inches square.
A practical layout is:
- 4 blocks for the back
- 2 blocks for the left front
- 2 blocks for the right front
You can use any straightforward pieced tree block you like, but keep all 8 blocks the same finished size so panel assembly stays simple.
For a beginner-friendly approach, use a tree block built from:
- a triangle or stacked triangle tree shape
- a small brown trunk rectangle
- a pale background
The exact internal piecing can vary, but once finished, each block should measure:
- 8½ inches square unfinished
- 8 inches square finished
Press all blocks flat before moving on.
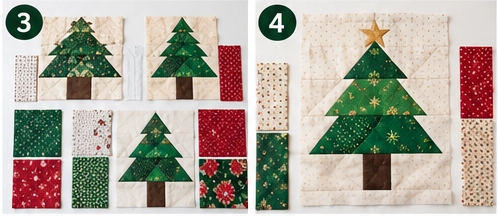
Step 3: Build the Outer Jacket Panels
Now turn the tree blocks into oversized jacket panels.
Arrange the blocks like this:
- Back panel: 4 tree blocks in a 2 × 2 layout
- Left front panel: 2 tree blocks stacked vertically
- Right front panel: 2 tree blocks stacked vertically
Then add patchwork strips, borders, or filler sections around them so you end up with these approximate oversized panel sizes:
- Back outer panel: 26 × 28 inches
- Each front outer panel: 15 × 28 inches
- Each sleeve panel: 20 × 24 inches
The sleeve panels can be made from:
- strip patchwork
- simple squares
- low-volume patchwork
- or a coordinated all-over print if you want the tree panels to remain the main feature
These panels should be larger than the final pattern pieces. That extra room lets you quilt first and trim accurately later.
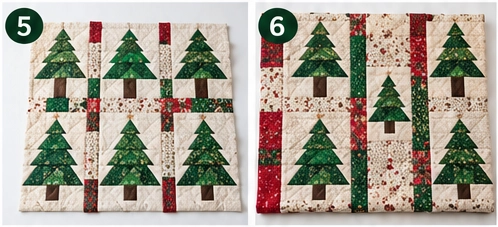
Step 4: Quilt the Outer Panels
Layer each outer panel with batting.
If you want extra stability, you can place a lightweight backing or muslin layer behind the batting while quilting, but the essential structure is:
- patchwork outer panel
- batting
Quilt each panel using a simple design such as:
- straight vertical lines
- straight horizontal lines
- a diagonal grid
- lines following the panel seams
A good spacing for wearable quilting is about:
- 1½ to 2 inches apart
That gives structure without making the jacket too stiff.
Quilt the:
- back panel
- 2 front panels
- 2 sleeve panels
After quilting, press lightly and square the panels.
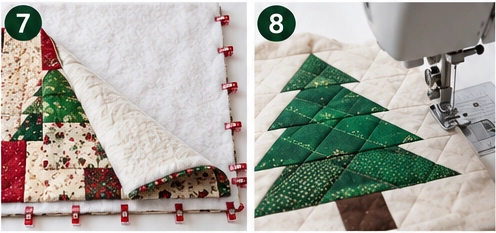
Step 5: Cut the Outer Jacket Pieces
Using your pattern, cut the quilted outer pieces from the finished panels.
You will usually need:
- 1 back
- 2 fronts
- 2 sleeves
If your pattern includes patch pockets, cut them now too. A useful finished pocket size for this style is about:
- 6½ × 7½ inches finished
or
- 7 × 8 inches finished
depending on the scale of the jacket.
Because the outer panels were quilted first, the pattern pieces should now cut cleanly and stay stable.
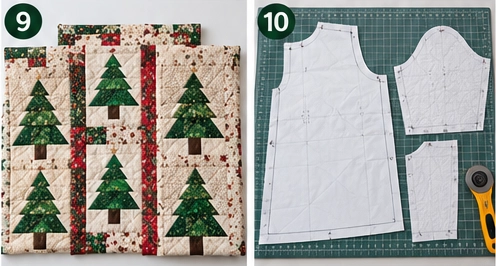
Step 6: Cut the Lining Pieces
Using the same pattern pieces, cut the lining fabric:
- 1 back lining
- 2 front linings
- 2 sleeve linings
If your pattern needs ease pleats or slight adjustments in the lining, follow them here.
The lining does not need patchwork. In fact, a simpler lining makes the project easier and keeps the focus on the outer jacket.
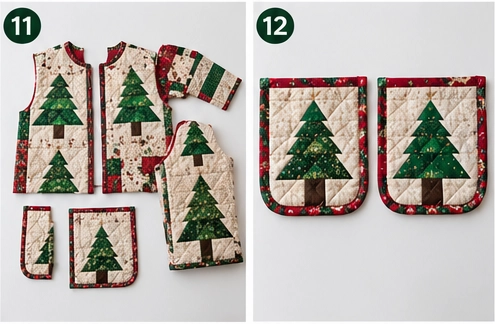
Step 7: Sew the Outer Jacket Shell
Sew the quilted outer shell in this order:
- Join the fronts to the back at the shoulder seams
- Attach the sleeves flat to the armholes
- Sew the side seams and sleeve seams in one continuous line from sleeve cuff to jacket hem
This order works well for simple quilted jackets because it reduces bulk and is easier to control.
Press the seam allowances open or to one side, depending on what your pattern recommends. If the seams feel bulky, trim and grade them carefully.
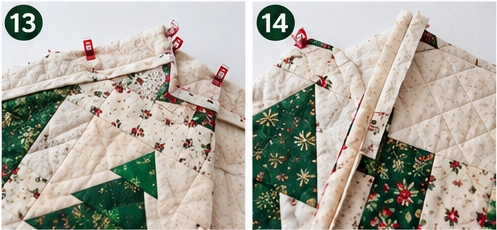
Step 8: Make and Attach the Pockets
If you want patch pockets, make them before finishing the lining assembly.
A good pocket size for this jacket is:
- cut 7½ × 8½ inches
- finish at about 6½ × 7½ inches
Place them on the outer fronts approximately:
- 2½ to 3 inches above the hem
- 2½ inches in from the front edge
Topstitch them securely.
You can use:
- matching tree-block fabric
- a bright contrast fabric
- or a coordinated holiday print
Patch pockets fit the playful spirit of this jacket especially well.
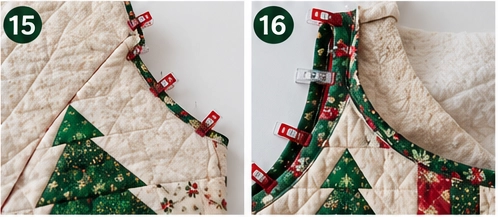
Step 9: Sew the Lining Shell
Sew the lining in the same order as the outer shell:
- Join the shoulder seams
- Attach the sleeves flat
- Sew the side seams and sleeve seams
You should now have:
- one completed quilted outer jacket shell
- one completed lining jacket shell
Give both a light press.
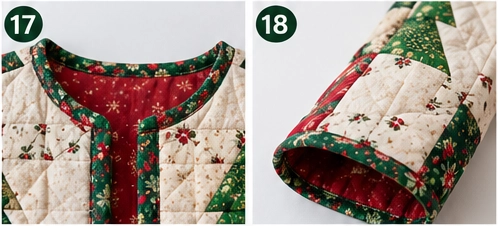
Step 10: Assembly
Place the lining inside the outer shell, with wrong sides together, so the quilted outer fabric is facing out and the lining becomes the inside of the jacket.
Match:
- neckline
- front edges
- hem
- sleeve edges
Baste the lining and outer shell together around all raw edges using a narrow seam allowance, about:
- ⅛ inch
At this stage, the jacket should already look like a complete garment, just with unfinished edges.
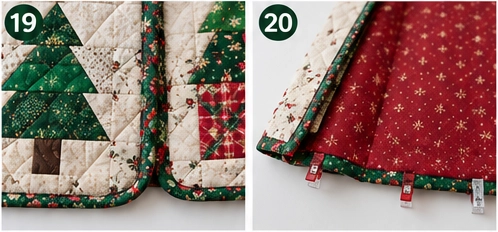
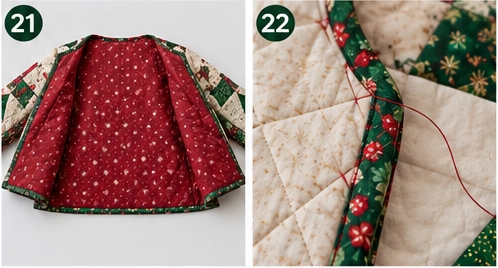
Step 11: Bind the Jacket Edges
Cut binding strips 2½ inches wide and join them end to end.
Use the binding to finish:
- the front opening
- neckline
- bottom hem
- sleeve cuffs
You can bind the entire outer edge in sections or in longer continuous runs, depending on your preference.
A deep red, dark green, gold, or striped binding works especially well for this design.
Apply the binding carefully so it wraps both the quilted outer layer and the lining cleanly. This is what gives the jacket its neat finished edge.
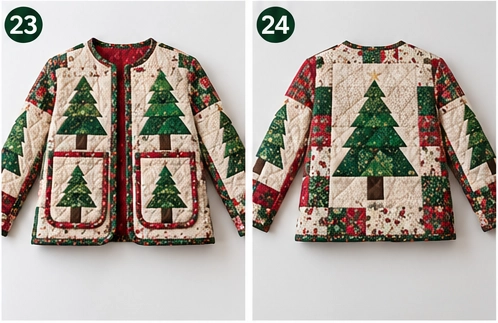
Step 12: Final Pressing and Fit Check
Give the finished jacket a careful final press and try it on.
Check that:
- the front edges hang evenly
- the sleeves feel comfortable
- the bust and shoulders have enough ease
- the hem sits level
- the pockets are balanced
Trim any loose threads and give the binding edges a final press. The jacket is now ready to wear.
Assembly at a Glance
- Choose a simple collarless jacket pattern.
- Piece 8 Christmas tree blocks at 8 inches finished.
- Build oversized quilted outer panels:
- back 26 × 28 inches
- fronts 15 × 28 inches each
- sleeves 20 × 24 inches each
- Quilt all outer panels with batting.
- Cut the outer jacket pieces.
- Cut the lining pieces.
- Sew the outer shell.
- Add patch pockets if desired.
- Sew the lining shell.
- Place the lining inside the outer shell, wrong sides together.
- Baste around all raw edges.
- Bind the front, neckline, hem, and sleeve cuffs.
- Press and check the fit.
Helpful Sewing Notes
- Keep the tree blocks consistent in size so the panel layout stays tidy.
- Quilt before cutting the jacket pieces. That gives a cleaner shape and more accurate sizing.
- Do not over-quilt; very dense quilting can make the jacket stiff.
- If your pattern has very curved sleeve caps or complex details, simplify where possible.
- A low-loft batting is best. High-loft batting usually makes garments bulky.
- For an even more playful finish, use a novelty holiday lining.
Other Design Inspirations – Digitally Modified Images. Texture and color may vary from the actual product.

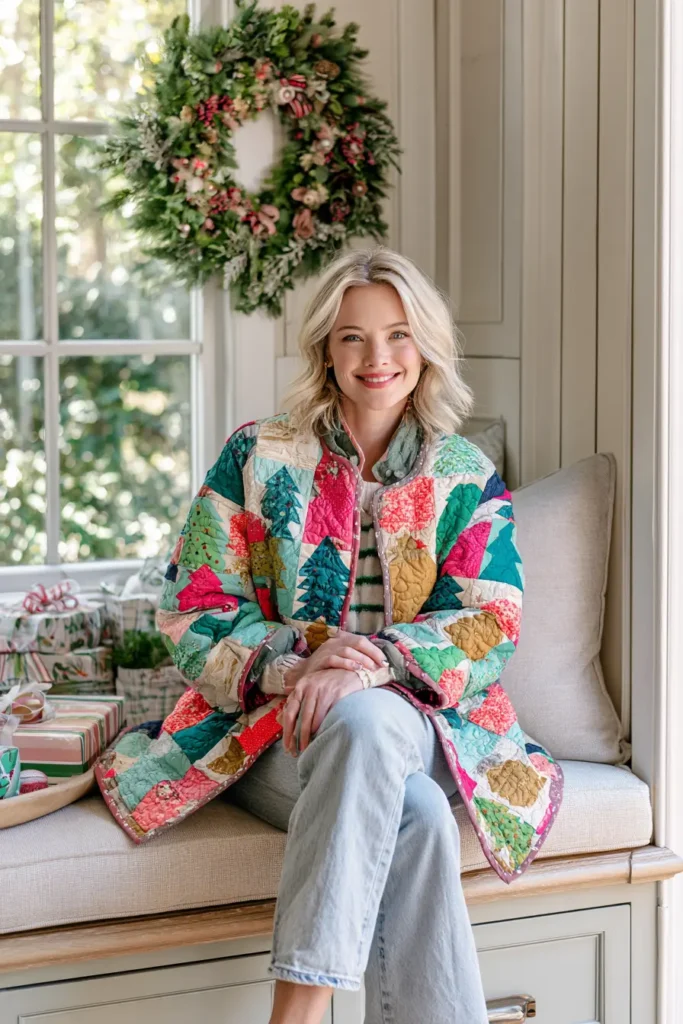

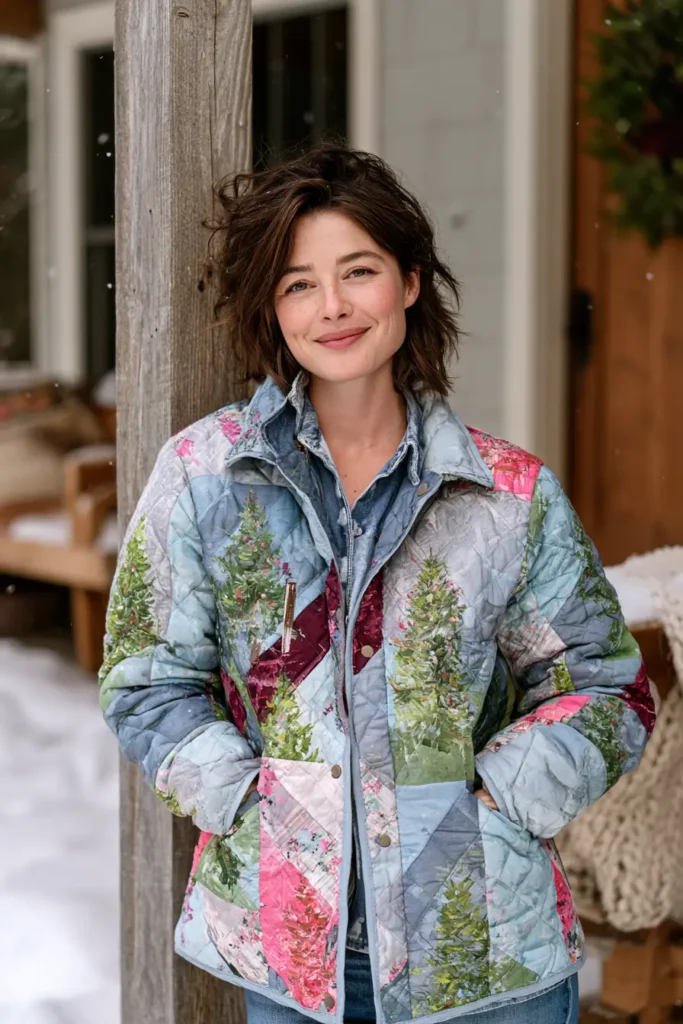
5. Snowflake Quilted Jacket for Elegant Winter Style
A snowflake quilted jacket takes a familiar winter motif and turns it into something much more refined than a novelty Christmas coat. Large geometric snowflakes in icy white and silver can float across deep cobalt, sapphire, turquoise, and midnight-blue patchwork, while small touches of cranberry or plum keep the palette warm enough for the holidays.
The key is scale. Tiny snowflakes disappear once the fabric is quilted, cut into garment pieces, and viewed from several feet away. Bold motifs approximately 6½-7 inches across are large enough to remain recognizable on a jacket without overwhelming the wearer.
For this version, snowflakes are appliquéd to selected patchwork squares before the jacket panels are quilted. The remaining squares provide breathing room, and the sleeves use simpler color-gradient patchwork so the garment feels coordinated rather than covered in identical motifs.
The Snowflake Scale Problem
A snowflake can contain dozens of tiny points and branches on paper, but wearable patchwork needs a simplified design.
Overly intricate motifs create three problems:
- Narrow points are difficult to appliqué cleanly.
- Dense stitching makes quilted fabric stiff.
- Tiny details disappear from normal viewing distance.
For an elegant jacket, use a simplified six-point snowflake approximately 6½-7 inches across on a 9-inch patchwork square.
Keep individual branches at least:
⅜-½ inch wide
at their narrowest points.
That gives the motif enough structure to survive handling, quilting, washing, and garment wear.
Design Inspirations – Digitally Modified Images. Texture and color may vary from the actual product.
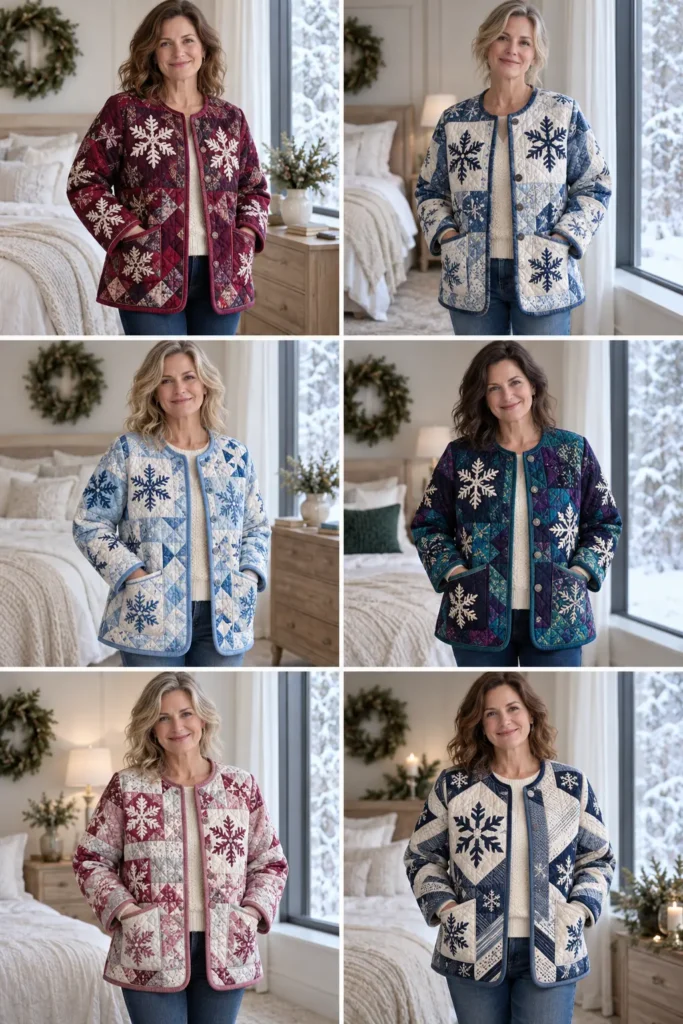
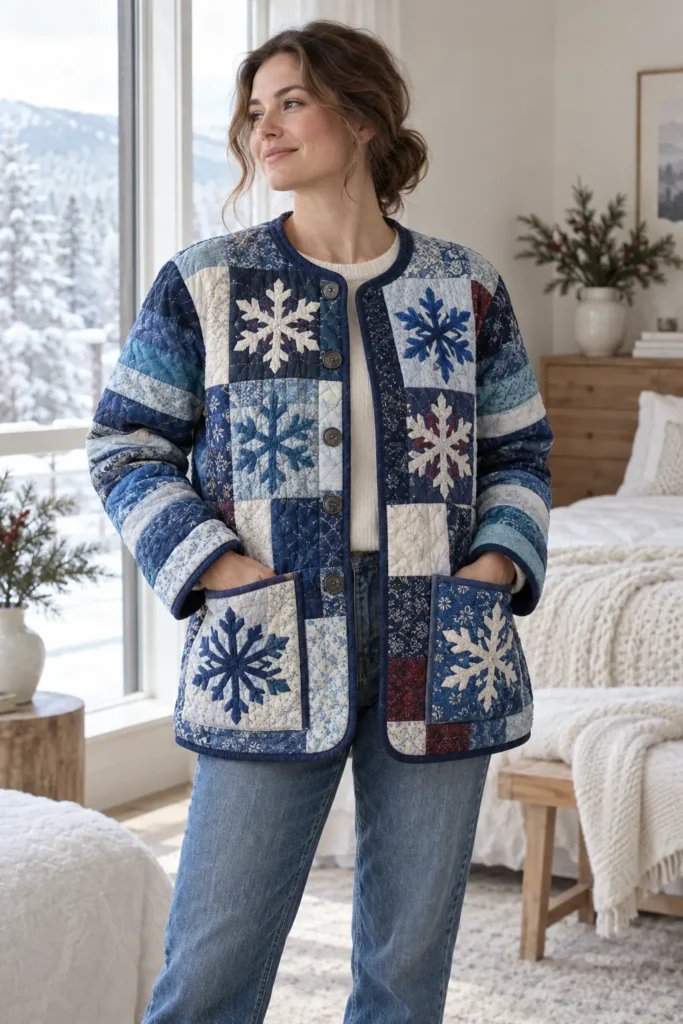
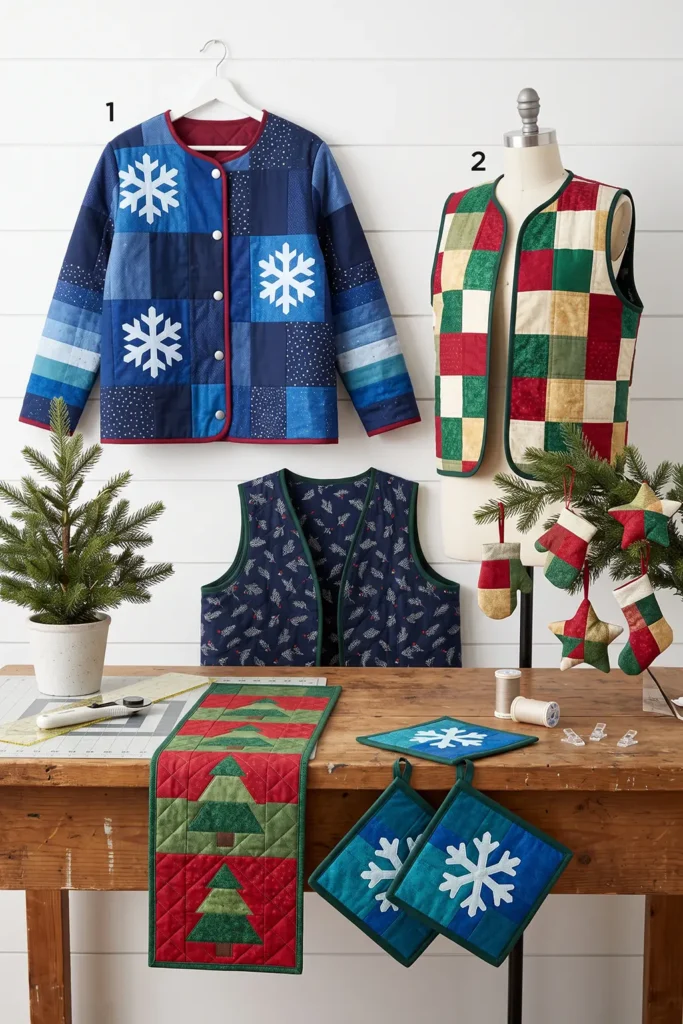
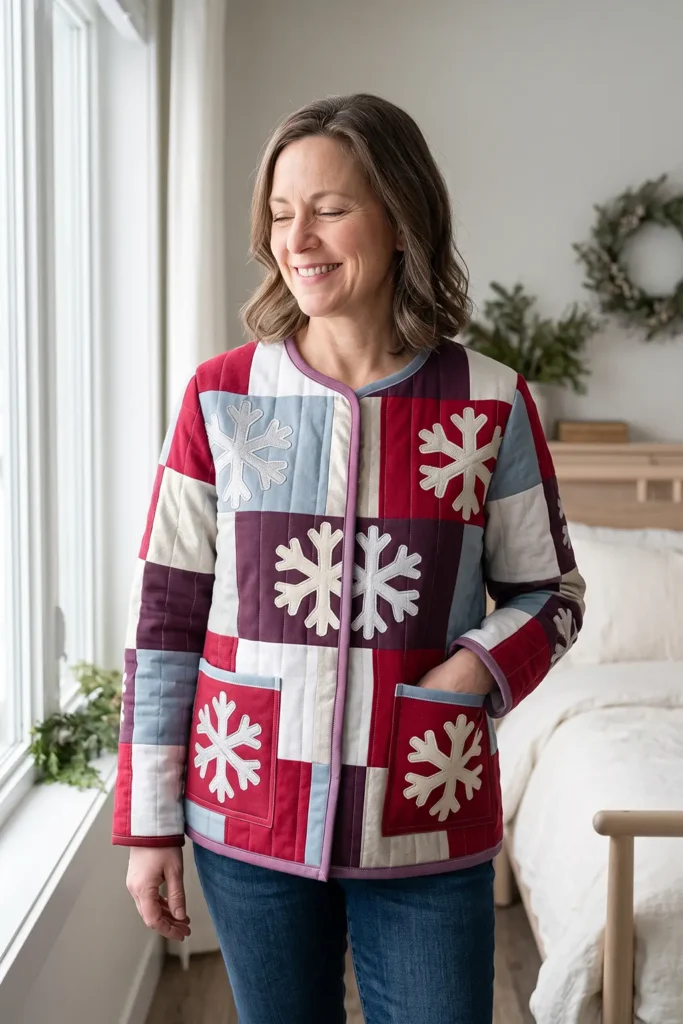
Why Six Points Matter
Natural snow crystals develop with sixfold symmetry because of the molecular structure of ice.
That doesn’t mean every snowflake looks identical – temperature and humidity influence how the branches grow – but six-sided geometry is one of the features that immediately makes a stylized snowflake read correctly.
For quilting, that symmetry is useful. A bold six-point motif looks balanced on square blocks and gives you strong geometry without requiring complicated piecing.
Elegant Winter, Not Novelty Christmas
The easiest way to keep a snowflake jacket sophisticated is to let the motif provide the seasonal message while the fabrics stay relatively refined.
Use:
- Solids
- Tone-on-tones
- Tiny stars
- Subtle metallic prints
- Small geometrics
- Quiet winter botanicals
Avoid filling every block with snowmen, Santas, candy canes, and other literal Christmas prints.
A cobalt-and-ivory jacket with a few silver details can be worn throughout winter, not just during Christmas week.
How It’s Built
The construction order is:
- Choose a simple collarless jacket pattern
- Cut oversized body patchwork squares
- Appliqué large snowflakes to selected squares
- Piece oversized back and front panels
- Piece coordinating sleeve panels
- Layer each panel with low-loft batting and lining
- Quilt all five panels
- Cut the final garment pieces from the quilted yardage
- Make and attach patch pockets
- Sew and bind the shoulder seams
- Set and bind the sleeves
- Sew and bind the side and underarm seams
- Bind the outer jacket edges
- Add buttonholes and buttons
- Press and finish
You’re making finished quilted cloth first, then constructing the jacket from it.
Finished Garment
- Style: relaxed collarless quilted jacket
- Shape: boxy chore-coat silhouette
- Length: approximately 28-30 inches
- Fit: enough ease to layer over a knit top or lightweight sweater
- Body patchwork squares: 9 inches cut, approximately 8½ inches finished in the pieced panels
- Snowflake motifs: approximately 6½-7 inches across
- Sleeves: coordinated strip-pieced gradient
- Patch pockets: cut 7 × 8 inches, finishing approximately 6 × 6½ inches
- Front: buttoned
- Buttons: approximately 5
- Skill level: confident beginner
- Core techniques: patchwork, fusible appliqué, quilting oversized panels, garment cutting, bound seams
Materials Needed
For an average adult jacket:
- Approximately 3 yards total assorted outer fabrics in cobalt, sapphire, turquoise, navy, ivory, silver, and optional cranberry accents
- ½-¾ yard ivory or pale silver fabric for snowflake appliqués
- Approximately ½ yard fusible web, following the manufacturer’s directions
- 2½ yards low-loft cotton or cotton-blend batting
- 2½ yards soft cotton, lawn, or lightweight flannel lining
- ¾-1 yard binding fabric
- 5 buttons, approximately ¾-1 inch diameter
- Neutral or coordinating thread
- Appliqué thread if you want contrasting edge stitching
- 90/14 needle
- Walking foot
- Rotary cutter
- Quilting ruler
- Cutting mat
- Pins or clips
- Iron
- A collarless, dartless, button-front boxy jacket pattern with dropped shoulders or a simple sleeve shape
Beginner tip: choose low-loft batting. The snowflake appliqué and patchwork already add structure; thick batting makes shoulder seams, armholes, and buttonholes unnecessarily bulky.
Choosing Your Colors
For the main jacket:
- Deep colors: midnight navy, cobalt, sapphire
- Medium colors: turquoise, icy blue
- Lights: ivory, winter white, pale silver
- Festive accents: cranberry or plum
- Optional metallic detail: muted silver or soft champagne
A particularly effective sequence is:
midnight navy + cobalt + turquoise + icy blue + ivory + silver
with just a few:
cranberry accents
The snowflakes should usually be among the lightest fabrics so they remain visible against the jacket.
Other combinations:
Jewel Winter: sapphire, emerald, plum, ivory, silver
Frosted Berry: cranberry, raspberry, dusty blue, ivory, silver
Modern Nordic: navy, sky blue, white, charcoal
Bright Winter: teal, cobalt, magenta, pale aqua, cream
Cutting Measurements
Exact garment pieces come from your chosen pattern.
For the patchwork yardage:
- Body squares: cut 9 × 9 inches
- Allow roughly 28 body squares for an average jacket layout, though your actual pattern determines the final requirement
- Snowflake blocks: use approximately 10-12 of those squares for feature motifs
- Snowflakes: approximately 6½-7 inches across
- Back panel: approximately 3 squares across × 4 down, giving an oversized panel around 26 × 34½ inches
- Each front panel: approximately 2 squares across × 4 down, giving an oversized panel around 17½ × 34½ inches
- Sleeve quilted panels: approximately 20 × 25-26 inches each, or at least 2-3 inches larger than your sleeve pattern piece on every side
- Batting and lining: cut 1-2 inches larger on every side than each outer panel
- Pocket quilt sandwich: at least 8 × 9 inches
- Pocket after quilting: trim to 7 × 8 inches
- Binding strips: approximately 2-2½ inches wide
- Structural garment seams: approximately ½ inch, unless your chosen pattern specifies otherwise
Always place your actual pattern pieces over the planned panels before sewing. Pattern size, jacket ease, and sleeve style affect how much quilted yardage you need.
Step-by-Step Guide
Step 1 – Choose the Jacket Pattern
Use a pattern with:
- Collarless neckline
- Button-front overlap
- Dartless body
- Straight or gently shaped sides
- Dropped or uncomplicated sleeves
- Patch pockets
- Minimal facings
A chore-jacket silhouette works especially well.
Avoid:
- Lapels
- Tailored collars
- Princess seams
- Two-piece sleeves
- Heavy facings
- Complicated plackets
Those features add bulk and require construction methods beyond this tutorial.
Step 2 – Check the Finished Measurements
Before cutting fabric, check the pattern’s finished garment measurements.
For a winter layering jacket, aim for approximately:
4-6 inches of total bust ease
If the wearer has a 40-inch bust, for example, a finished jacket circumference around:
44-46 inches
usually gives comfortable room for a light sweater.
Check sleeve length and jacket length too.
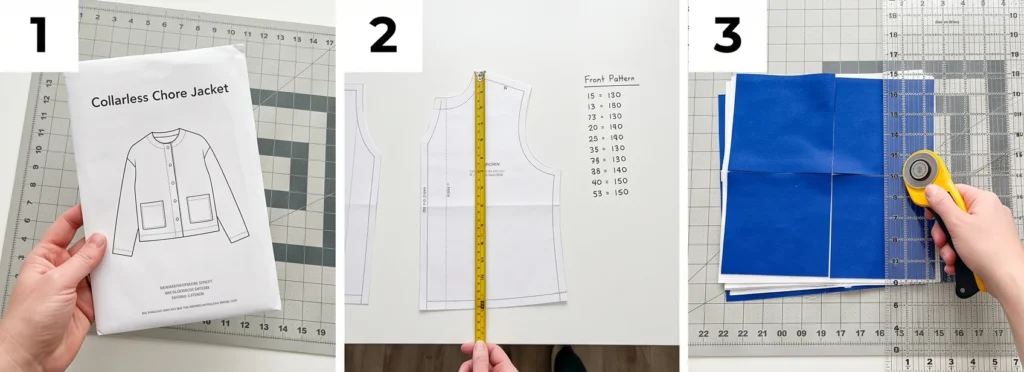
Step 3 – Cut the Body Squares
Cut approximately:
28 squares at 9 × 9 inches
from your winter palette.
Divide them loosely among:
- Navy/cobalt
- Sapphire/turquoise
- Icy blue
- Ivory/silver
- A few cranberry accents
You may need more or fewer depending on your pattern size.
Before proceeding, place the jacket pattern pieces over a rough grid of squares to confirm you have enough coverage.
Step 4 – Choose the Snowflake Blocks
Select approximately:
10-12 squares
for snowflake motifs.
Choose mostly darker or medium backgrounds such as:
- Navy
- Cobalt
- Sapphire
- Teal
That gives the pale snowflakes enough contrast.
Don’t put a snowflake on every block. Empty and low-volume squares give the eye somewhere to rest.
Step 5 – Make the Snowflake Template
Fold a piece of paper to establish sixfold symmetry, or draw a simplified six-point motif.
The finished motif should measure approximately:
6½-7 inches across
Keep narrow branches at least:
⅜-½ inch wide
Avoid extremely delicate points.
Trace the snowflake onto the paper side of your fusible web.
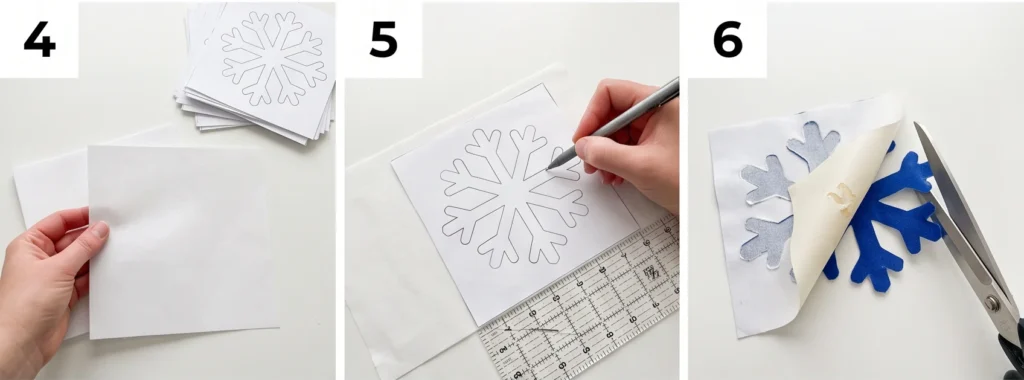
Step 6 – Fuse and Cut the Snowflakes
Following the fusible-web manufacturer’s instructions, fuse the traced shapes to the wrong side of the snowflake fabric.
Let everything cool.
Cut out each snowflake carefully.
Peel away the paper backing.
Center each motif on its chosen:
9-inch background square
leaving approximately:
1 inch or more
around the design.
Fuse in place according to the product instructions.
Step 7 – Appliqué the Snowflake Edges
Stitch around every snowflake.
Good choices include:
- Narrow zigzag
- Blanket stitch
- Small straight stitch approximately ⅛ inch inside the edge
Use matching thread for a refined appearance or metallic-looking thread designed for sewing if you want subtle sparkle.
Do not use decorative thread that your machine cannot handle reliably through later quilting layers.
Step 8 – Plan the Back Panel
Arrange:
3 squares across × 4 squares down
for the back panel.
A useful distribution is:
- 4-5 snowflake squares
- Remaining squares as complementary patchwork
Spread the motifs rather than stacking them directly above one another.
Place the back pattern piece over the arrangement.
Confirm that the patchwork extends at least:
2-3 inches beyond the pattern piece on every side
before sewing.
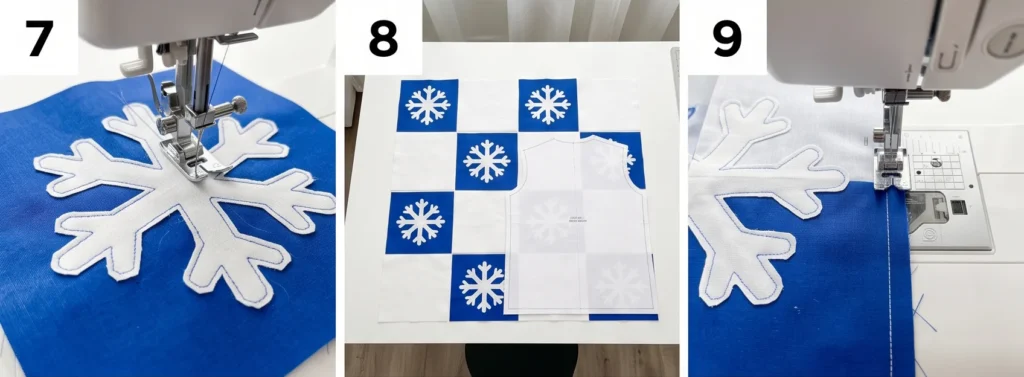
Step 9 – Piece the Back Panel
Sew the squares into rows using:
¼-inch seams
Press odd rows in one direction and even rows in the opposite direction.
Join the rows, nesting the intersections.
The resulting 3 × 4 panel should measure approximately:
26 × 34½ inches
before quilting.
Press carefully.
Step 10 – Plan the Front Panels
For each front, begin with approximately:
2 squares across × 4 squares down
giving an oversized panel around:
17½ × 34½ inches
before quilting.
Use approximately:
2-3 snowflake blocks per front
depending on your design.
Keep the motifs away from the center-front buttonhole line where possible. A thick appliqué branch directly beneath a buttonhole makes sewing unnecessarily difficult.
Lay the pattern pieces over the panel plan before sewing.
Step 11 – Piece the Front Panels
Sew each front panel using:
¼-inch patchwork seams
Press carefully.
Keep the overall snowflake placement visually balanced between the two fronts without making them perfectly symmetrical.
A little asymmetry usually looks more natural in wearable patchwork.
Step 12 – Piece the Sleeve Panels
To keep the jacket elegant rather than overly busy, use strip patchwork for the sleeves.
For each sleeve, piece an oversized rectangle approximately:
20 × 25-26 inches
from horizontal or vertical color bands.
A simple progression might be:
navy → cobalt → turquoise → icy blue → ivory → cranberry accent
Use strips approximately:
3½-4½ inches wide
and vary them slightly if you want a less rigid appearance.
Check that each finished sleeve panel remains at least:
2-3 inches larger on every side
than the sleeve pattern piece.
Step 13 – Prepare the Quilt Sandwiches
For each of the five panels:
- Back
- Left front
- Right front
- Left sleeve
- Right sleeve
cut batting and lining approximately:
1-2 inches larger on every side
than the outer panel.
Layer:
- Lining, wrong side up
- Batting
- Patchwork, right side up
Smooth carefully.
Baste thoroughly.
Step 14 – Quilt the Panels
Quilt all five panels.
Around the snowflake blocks, use a combination of:
- Outline quilting approximately ¼ inch outside the snowflake
- Straight-line quilting through the background
- Light diagonal grid
On the remaining patchwork, lines about:
1½-2 inches apart
usually provide enough structure without making the jacket stiff.
Check your batting packaging first; its maximum quilting distance overrides this recommendation.
Quilt from the center outward.
Step 15 – Inspect and Square the Panels
Check each quilted panel from both sides.
Look for:
- Tucks
- Wrinkles
- Distortion
- Loose appliqué points
- Broken quilting stitches
Correct problems now.
Trim the batting and lining level with the outer panel.
Don’t cut the garment shapes yet until the panels are fully stable.
Step 16 – Cut the Final Jacket Pieces
Place the jacket pattern over the quilted panels.
Cut:
- 1 back
- 2 fronts
- 2 sleeves
Shift the pattern slightly where necessary so:
- Large snowflakes remain recognizable
- Thick patchwork intersections avoid shoulder endpoints
- Heavy seams avoid the armhole curve
- Appliqué edges avoid buttonholes
This is one of the main advantages of quilting oversized panels before cutting.
Step 17 – Make the Patch Pockets
Prepare two quilt sandwiches at least:
8 × 9 inches
Quilt them lightly.
Trim each to:
7 × 8 inches
Fold the top edge down twice:
½ inch + ½ inch
and stitch.
Trim a tiny diagonal from each lower corner to reduce bulk.
Press the sides and bottom under approximately:
½ inch
The pocket should finish around:
6 × 6½ inches
depending on your folds.
Step 18 – Attach the Pockets
Try the front pieces against your body or compare them with the pattern placement markings.
A practical starting position is:
- Pocket top approximately 3 inches below the underarm
- Inner edge approximately 2-3 inches from the finished front opening
Pin.
Topstitch approximately:
⅛ inch from the folded edge
along both sides and the bottom.
Add bar tacks at the upper corners.
Step 19 – Sew the Shoulder Seams
Place the fronts and back right sides together.
Sew the shoulders using:
½-inch seams
unless your pattern specifies another allowance.
Because the layers are quilted, use clips where seams become bulky.
Step 20 – Bind the Shoulder Seams
Keep both seam allowances together.
Encase them in binding rather than pressing them open.
Stitch the binding securely and press the finished seam toward the back.
This prevents exposed batting and gives the inside a clean quilt-coat finish.
Step 21 – Set the Sleeves
With the side seams still open, pin each sleeve into its armhole.
Match:
- Sleeve center
- Shoulder seam
- Front and back notches
- Underarm points
Sew using the pattern seam allowance, typically around:
½ inch
for this type of jacket.
A dropped shoulder makes this considerably easier.
Step 22 – Bind the Armhole Seams
While the garment still lies relatively flat, bind each armhole seam.
Keep both seam allowances together inside the binding.
Press the bound allowance toward the sleeve.
Doing this now is much easier than binding a closed circular armhole after sewing the side seams.
Step 23 – Sew the Underarm and Side Seams
Fold the jacket right sides together.
Beginning at the cuff, sew continuously:
cuff → underarm → jacket side → hem
Use:
½-inch seams
or your pattern’s specified allowance.
Repeat on the second side.
Try the jacket on before finishing those seams.
Check:
- Bust ease
- Sleeve length
- Arm movement
- Jacket length
- Pocket position
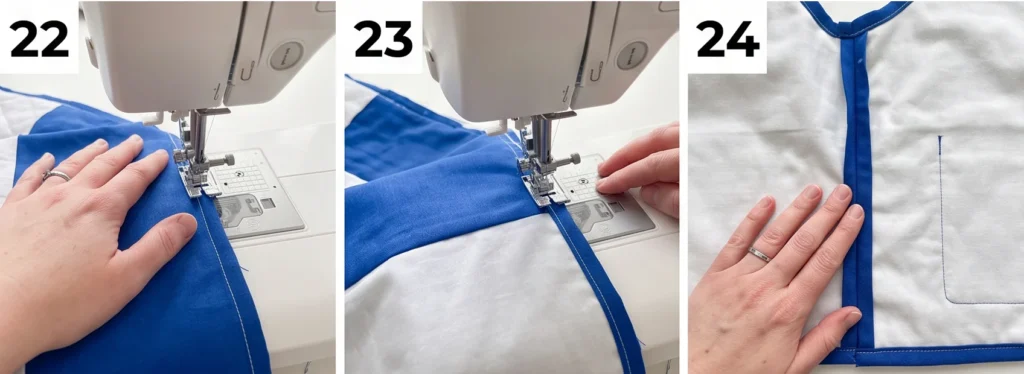
Step 24 – Bind the Side and Underarm Seams
Once you’re satisfied with the fit, keep each pair of seam allowances together and bind them.
This protects the raw quilted layers and makes the interior look intentional.
Press the seams toward the back if they naturally want to lie that way.
Step 25 – Bind the Body Perimeter
Prepare enough binding to finish:
- One front
- Neckline
- Opposite front
- Hem
For a collarless design, these edges can usually be treated as one continuous perimeter.
Start away from a corner.
Apply the binding evenly.
Miter or gently round the lower front corners according to the jacket shape.
Step 26 – Bind the Cuffs
Bind each cuff separately.
Because each cuff is a closed loop, join the binding ends neatly where they meet.
Make sure both cuffs finish at the same length.
Step 27 – Mark the Buttons
Put on the jacket over a typical winter layer.
Overlap the fronts naturally.
Mark approximately:
5 button positions
For a 28-30-inch jacket, spacing around:
4 inches
is a reasonable starting point, but actual placement depends on the pattern and body size.
Place one button near the fullest bust point to reduce gaping.
Step 28 – Make the Buttonholes
Check every marked location before stitching.
If a buttonhole lands on:
- Thick patchwork intersection
- Heavy appliqué edge
- Dense quilting line
move it slightly if possible.
Stabilize the area if necessary.
Make all buttonholes according to your machine instructions.
Step 29 – Attach the Buttons
Close the jacket accurately.
Mark each button position through its corresponding buttonhole.
Sew the buttons securely.
Use a small thread shank if the buttons need room to sit comfortably over the quilted thickness.
Step 30 – Press and Finish
Give the jacket a gentle final press.
Check:
- Binding
- Pockets
- Snowflake appliqué edges
- Armholes
- Underarms
- Buttonholes
- Buttons
- Loose threads
If you’d like the quilted surface slightly softer, wash gently according to your fabrics and batting.
Use a color catcher during the first wash, especially if you’ve used cranberry or other saturated winter colors.
Assembly at a Glance
- Choose a collarless, dartless button-front jacket pattern.
- Check for approximately 4-6 inches of bust ease.
- Cut about 28 squares at 9 inches.
- Select 10-12 blocks for snowflake motifs.
- Make simplified 6½-7-inch snowflakes.
- Fuse and appliqué them to selected squares.
- Piece the back approximately 3 × 4 squares.
- Piece each front approximately 2 × 4 squares.
- Make two oversized strip-pieced sleeve panels.
- Cut batting and lining 1-2 inches larger than every panel.
- Layer and baste five quilt sandwiches.
- Quilt approximately 1½-2 inches apart, respecting batting instructions.
- Inspect the panels.
- Cut the final back, fronts, and sleeves from the quilted yardage.
- Make two 7 × 8-inch quilted pockets.
- Attach the pockets and reinforce the upper corners.
- Sew the shoulder seams.
- Bind the shoulder seams.
- Set the sleeves while the jacket is flat.
- Bind the armhole seams.
- Sew underarm and side seams.
- Try the jacket on.
- Bind the underarm and side seams.
- Bind the front edges, neckline, and hem.
- Bind each cuff separately.
- Mark approximately 5 buttons while wearing the jacket.
- Make buttonholes.
- Attach buttons.
- Press and inspect.
- Wash gently with a color catcher if desired.
Beginner Tips for Success
- Use large simplified snowflakes rather than delicate intricate ones.
- Keep motif branches at least ⅜-½ inch wide.
- Don’t place a snowflake on every block.
- Use strong light-dark contrast so snowflakes remain visible.
- Quilt the panels before cutting the garment.
- Make every panel 2-3 inches larger than its pattern piece.
- Use low-loft batting for comfortable drape.
- Keep quilting relatively open unless your batting requires closer spacing.
- Use a walking foot when quilting.
- Position the pattern carefully so important snowflakes aren’t cut awkwardly.
- Keep bulky patchwork intersections away from shoulders and armholes when possible.
- Avoid placing appliqué directly under buttonholes.
- Bar-tack pocket corners.
- Bind structural seams as you sew them.
- Bind armholes while the side seams are still open.
- Use clips around thick quilted intersections.
- Check fit before binding side seams.
- Mark buttons while wearing the garment.
- Use a 90/14 needle through quilted layers.
- Use a color catcher when washing strong blues and reds.
Styling It & Gift Ideas
A cobalt-and-ivory snowflake jacket already makes a statement, so keep the rest of the outfit quiet:
- Ivory turtleneck
- Dark denim
- Black trousers
- Charcoal knit dress
- Simple leather or suede boots
The icy palette also looks especially good with:
- Silver jewelry
- Cream scarves
- Gray wool
- Dark navy
- Camel
For a stronger Christmas look, use cranberry accessories.
For an all-winter look, leave the cranberry out and keep the palette entirely blue, white, and silver.
This jacket also makes a memorable:
- Christmas gift
- Winter birthday gift
- Mother-daughter jacket pair
- Holiday travel layer
- Special winter-market jacket
- Memory jacket using meaningful blue-and-white fabrics
Because the silhouette is relaxed, it is more forgiving to sew as a gift than a closely fitted coat.
Final Thoughts
A Snowflake Quilted Jacket works best when you treat the motif as elegant winter geometry rather than novelty decoration.
Make the snowflakes large enough to read clearly, simplify the branches so they’re easy to appliqué, and give them plenty of calm background around them. Deep cobalt, sapphire, turquoise, ivory, and silver create the frosted winter mood, while a few cranberry accents quietly bring the jacket into Christmas territory.
The construction remains approachable: piece oversized panels, add the snowflakes, quilt the panels, cut the garment afterward, and bind the bulky structural seams as you assemble it.
The finished jacket has all the warmth and texture of a quilt, but the large six-point motifs and cool saturated palette give it a cleaner, more polished winter character.
Other Design Inspirations – Digitally Modified Images. Texture and color may vary from the actual product.
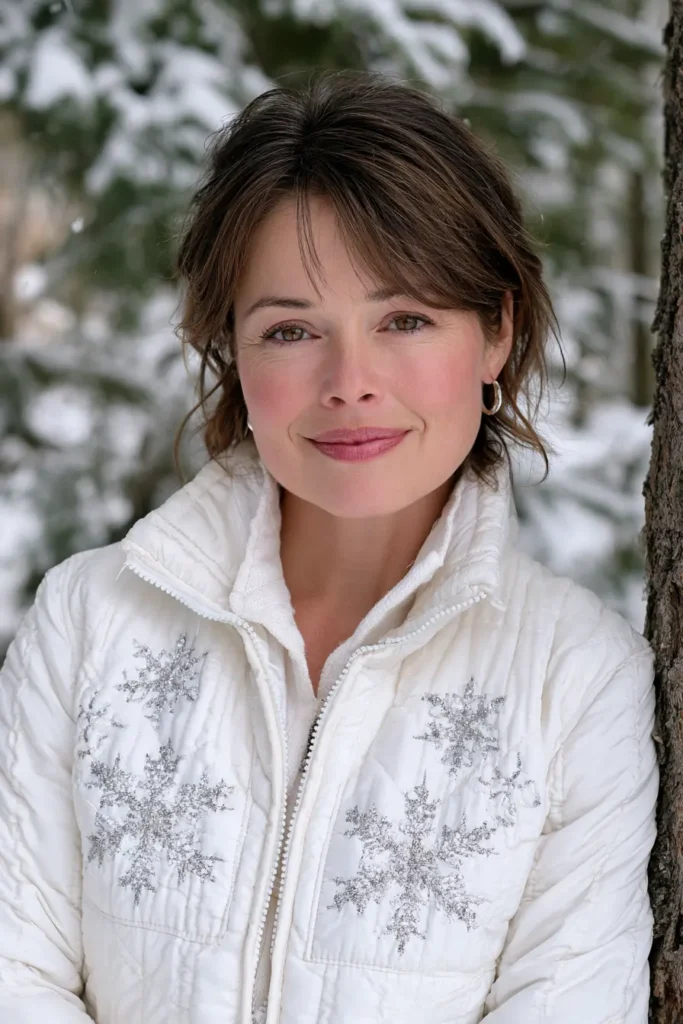
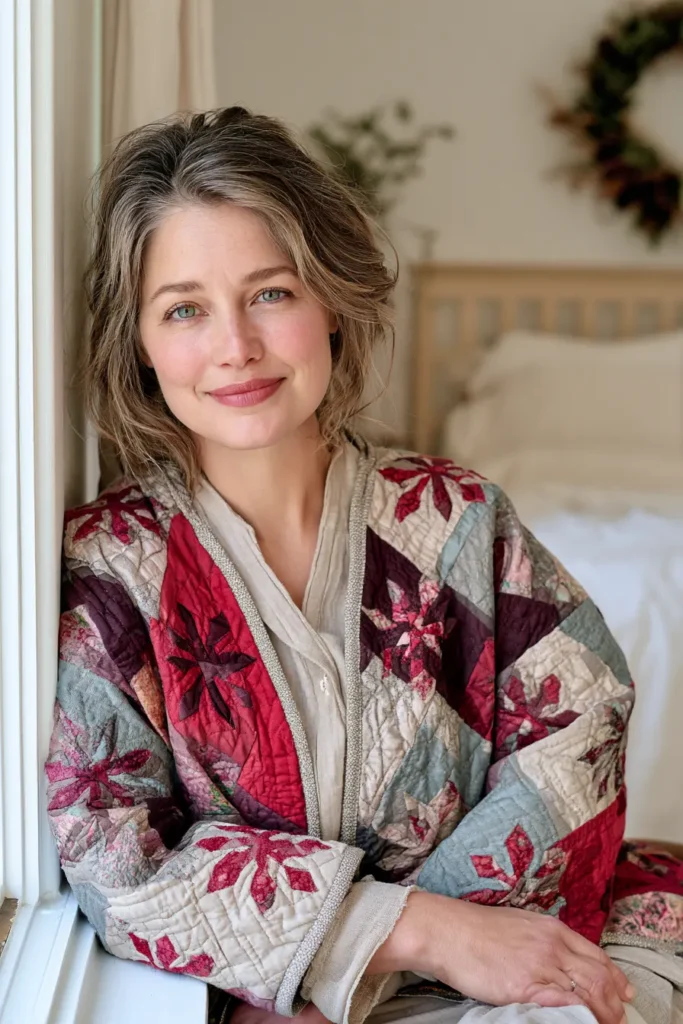
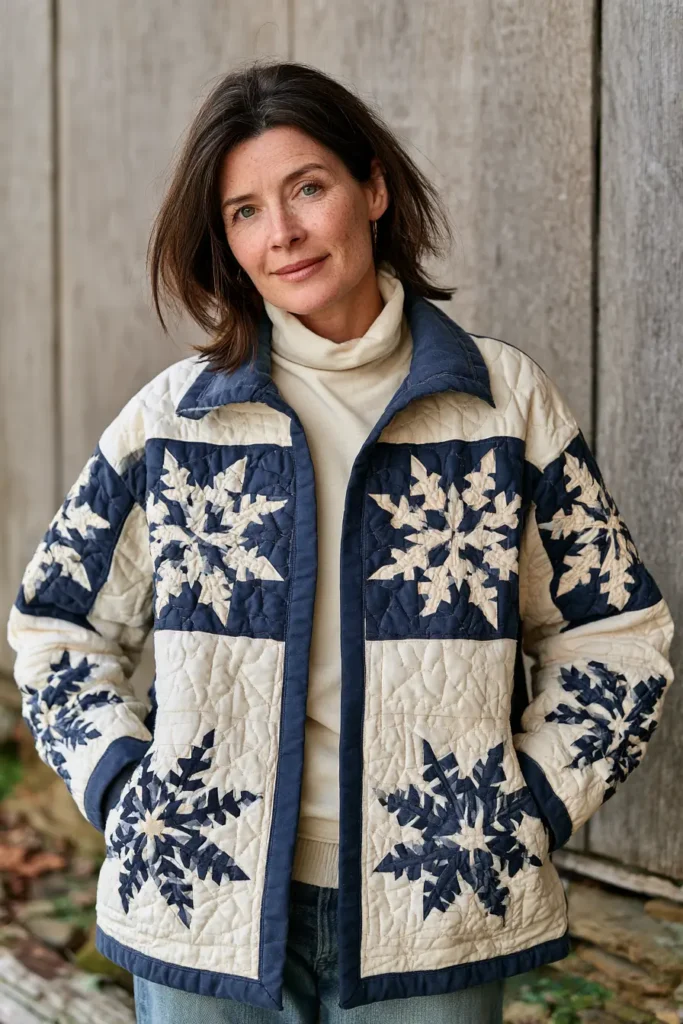
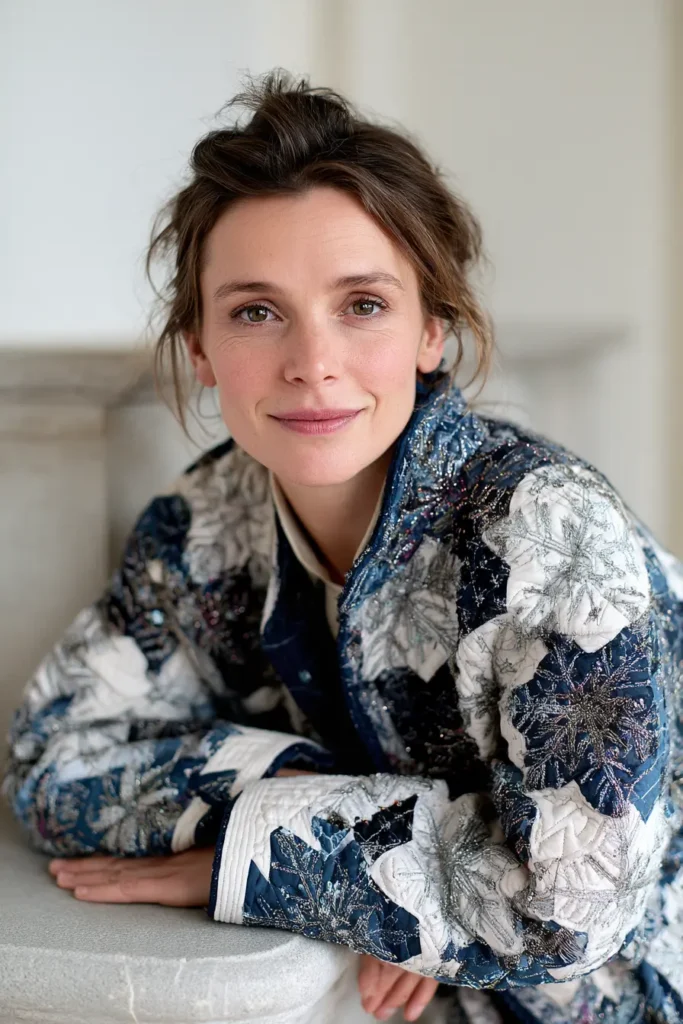
6. Gold and Metallic Quilted Vest for Elegant Christmas Evenings
What It Is
A gold and metallic quilted vest is a festive layering piece that brings the warmth of a quilt into evening holiday dressing. Instead of reading casual or rustic, this version leans elegant through a refined palette of gold, champagne, ivory, pale bronze, and soft metallic accents, all stitched into a wearable vest with clean edges and graceful drape. Worn over a black turtleneck, a cream blouse, or a slim knit dress, it gives you the texture of patchwork and the glow of holiday fabric without feeling costume-like.
There is also a long tradition behind metallic-looking textiles in dressmaking. Gold fabrics, brocades, and metallic threads have been used for centuries in ceremonial and festive clothing because they catch candlelight and evening light beautifully. For a modern quilted vest, metallic quilting cottons or subtle shimmer prints are much easier to sew than stiff lamé, while still giving that same elegant holiday sparkle.
Finished Size
This sample vest is designed as a relaxed women’s medium, with approximate finished measurements of:
- Bust: 42 inches
- Hip: 44 inches
- Center back length: 26 inches
- Shoulder width: 15 inches
- Neckline: shallow V-neck
- Style: collarless, open-front, bound-edge quilted vest
You can scale the pattern up or down, but these measurements make a practical reference point for planning your quilted panels.
Design Inspirations – Digitally Modified Images. Texture and color may vary from the actual product.
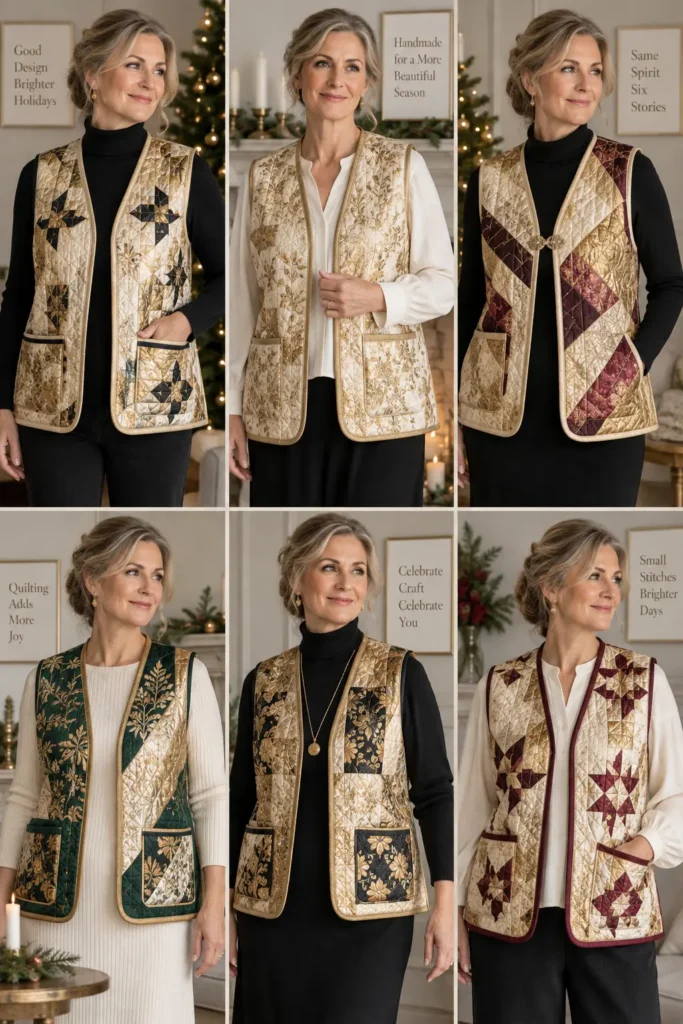
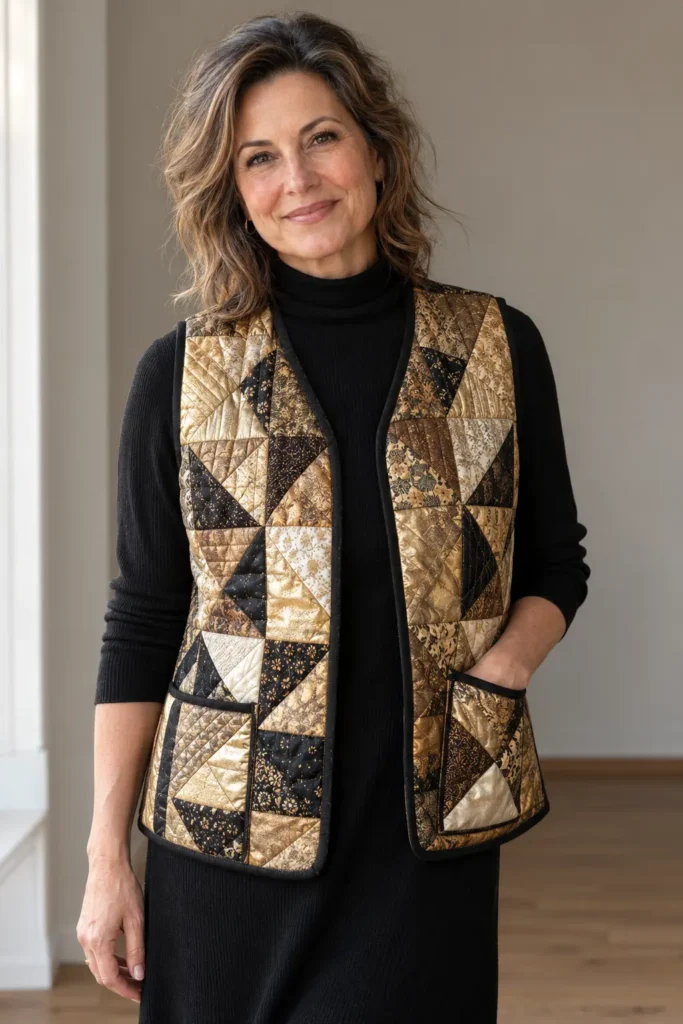
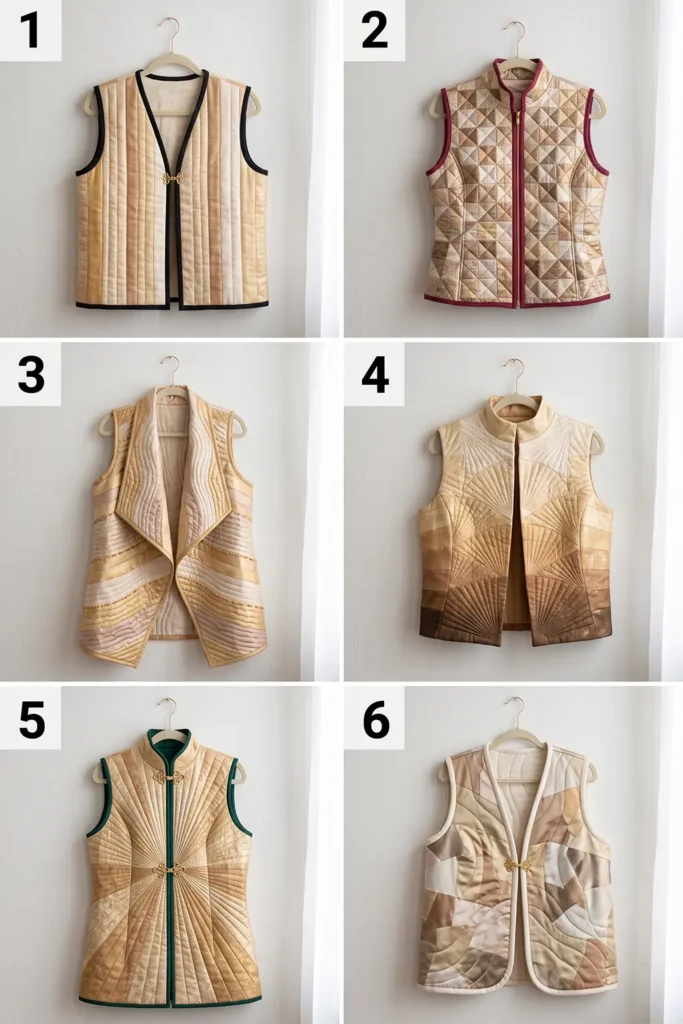
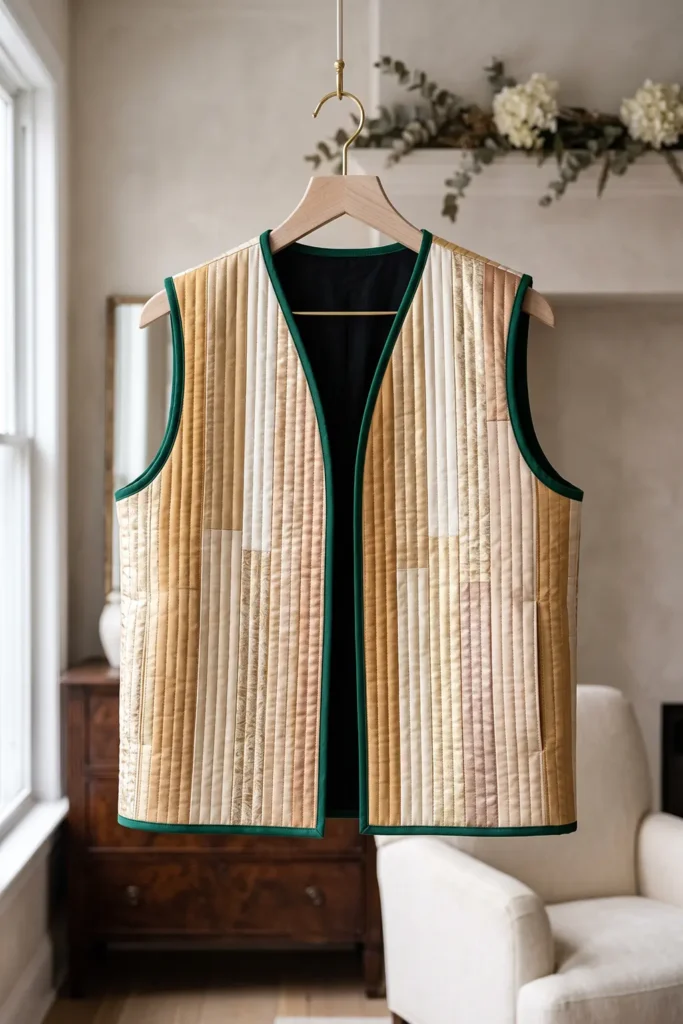
Materials Needed
- Outer fabric: 1 1/2 to 1 3/4 yards total in assorted quilting cottons or lightweight cotton sateens in gold, champagne, ivory, pale bronze, metallic gold print, and a small amount of deep accent fabric such as black, cranberry, emerald, or plum
- Lining fabric: 1 1/4 yards in a smooth cotton or cotton lawn
- Batting: 1 1/4 yards low-loft cotton or cotton-blend batting
- Binding fabric: 1/2 yard for bound edges and armholes
- Thread: neutral gold, cream, or light taupe for piecing; coordinating quilting thread
- Optional: 1 decorative clasp, hook-and-eye, or brooch if you want a closure
- Rotary cutter and ruler
- Cutting mat
- Sewing machine
- Walking foot for quilting
- Pins or clips
- Iron and ironing board
- Vest pattern or a traced simple vest template
Fabric and Color Plan
To keep the vest elegant rather than flashy, use mostly soft luminous tones and only a few higher-contrast accents.
A balanced palette might include:
- 4 strips in warm gold
- 4 strips in champagne
- 3 strips in ivory or winter white
- 3 strips in pale bronze or tan metallic
- 2 strips in subtle metallic print
- 1 to 2 strips in a rich accent color like deep emerald, cranberry, or black
That contrast helps the gold tones stand out and gives the vest more depth.
Assembly at a Glance
- Choose or trace a simple collarless vest pattern.
- Piece strip sets in a gold-and-metallic palette.
- Build oversized front and back quilted panels.
- Layer the panels with batting and lining.
- Quilt the panels with evenly spaced lines.
- Cut the vest pieces from the quilted panels.
- Sew the shoulder seams and side seams.
- Bind the armholes.
- Bind the front edges, neckline, and hem in one continuous finish.
- Add an optional clasp and give the vest a final press.
Cutting Guide
For the patchwork outer layer, cut:
- 17 strips measuring 2 1/2 inches x WOF (width of fabric) in your assorted gold, ivory, metallic, and accent fabrics
Join these strips into larger patchwork panels.
For the vest panels, aim to create:
- 1 back panel approximately 22 inches x 30 inches
- 2 front panels approximately 14 inches x 30 inches each
These are intentionally oversized so you can quilt first and then cut your final pattern pieces accurately.
Cut batting and lining slightly larger than each panel:
- Back batting and lining: 24 inches x 32 inches
- Front batting and lining: 16 inches x 32 inches each
For binding:
- Cut 2 1/4-inch-wide bias strips totaling about 220 inches in length
This gives you enough to finish the armholes and the outer edges of the vest.
Step-by-Step Guide
Step 1 – Choose a Simple Vest Pattern
Choose a collarless, open-front vest pattern with a shallow V-neck or gently rounded neckline, simple shoulders, straight side seams, and minimal shaping.
Avoid patterns with:
- Lapels
- Princess seams
- Complicated facings
- Zippers
- Structured collars
For this version, aim for a relaxed finished fit of approximately:
- Bust: 42 inches
- Hip: 44 inches
- Center-back length: 26 inches
If using a commercial pattern, follow its size chart and finished garment measurements rather than forcing these exact dimensions.
The finished vest should have enough ease to layer comfortably over a blouse, fine sweater, or knit dress.
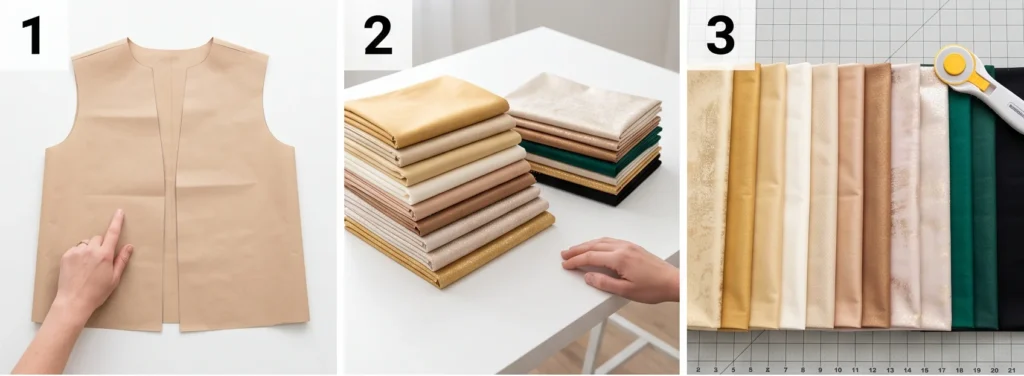
Step 2 – Prewash and Prepare the Fabrics
Prewash all washable quilting cottons, cotton sateens, lining fabrics, and binding fabrics before cutting.
Metallic quilting cottons can behave differently depending on the manufacturer, so check the care instructions first. Some metallic finishes are best washed gently and pressed from the wrong side.
Do not aggressively press metallic surfaces directly with a very hot iron.
After washing, press the fabrics flat and square the cut edges before measuring strips.
Step 3 – Plan the Gold and Metallic Palette
Arrange your fabrics before cutting.
A balanced palette might contain:
- Warm gold
- Champagne
- Ivory
- Pale bronze
- Soft metallic gold
- A small amount of deep plum, emerald, cranberry, or black
Keep approximately two-thirds of the vest in light-to-medium luminous tones and use the darkest accent sparingly.
This prevents the metallic patchwork from becoming visually heavy.
Take a photograph of the fabrics together and check whether one metallic print dominates the rest. If it does, use fewer strips of that fabric.
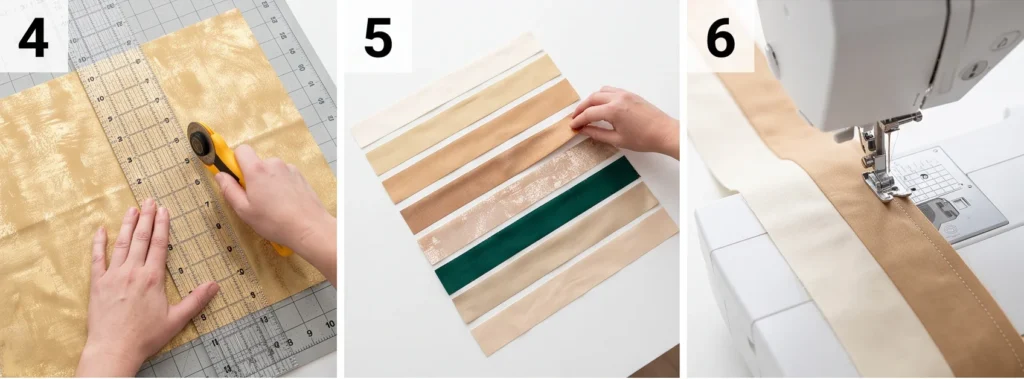
Step 4 – Cut the Patchwork Strips
Cut approximately 17 strips, each:
2½ inches × width of fabric
Distribute them across your color palette.
For example:
- 4 warm gold strips
- 4 champagne strips
- 3 ivory strips
- 3 pale bronze strips
- 2 metallic-print strips
- 1 deep accent strip
You can adjust the exact number by color, but keep the total around 17 strips.
Use a sharp rotary cutter so metallic-coated fabrics don’t snag at the edges.
Step 5 – Arrange the First Strip Set
Lay several strips beside one another before sewing.
Avoid placing all metallic fabrics together.
A good sequence might be:
ivory → gold → champagne → bronze → metallic print → gold → plum accent → champagne
The aim is to distribute shine rather than creating one highly reflective area.
Once you’re satisfied with the sequence, photograph it for reference.
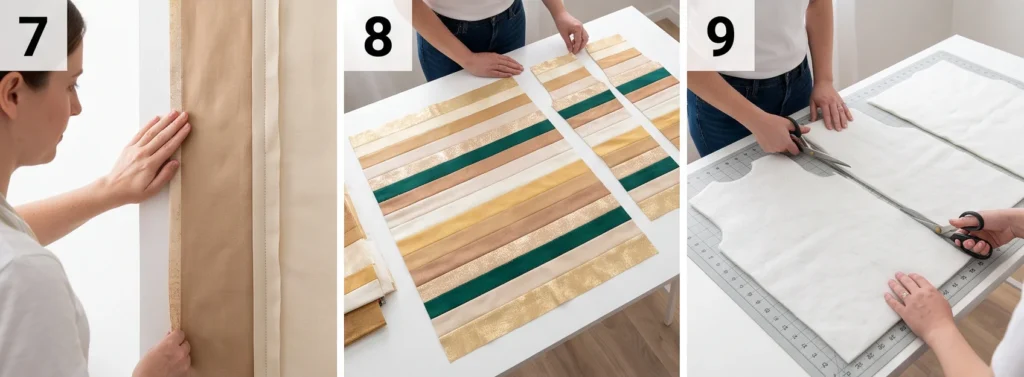
Step 6 – Sew the Strips Together
Place the first two strips right sides together.
Sew along the long edge using an accurate:
¼-inch seam allowance
Add the next strip and continue until the panel reaches the required width.
When sewing long strip seams, alternate the direction you sew each seam:
- Sew one seam top to bottom
- Sew the next bottom to top
This helps prevent the patchwork panel from bowing.
Step 7 – Press the Patchwork Carefully
Press the seams after every few strips.
Press seam allowances toward the darker fabric where practical.
For metallic fabrics:
- Press primarily from the wrong side
- Use moderate heat
- Use a pressing cloth if needed
- Avoid holding the iron in one place for too long
The completed patchwork needs to lie flat before quilting.
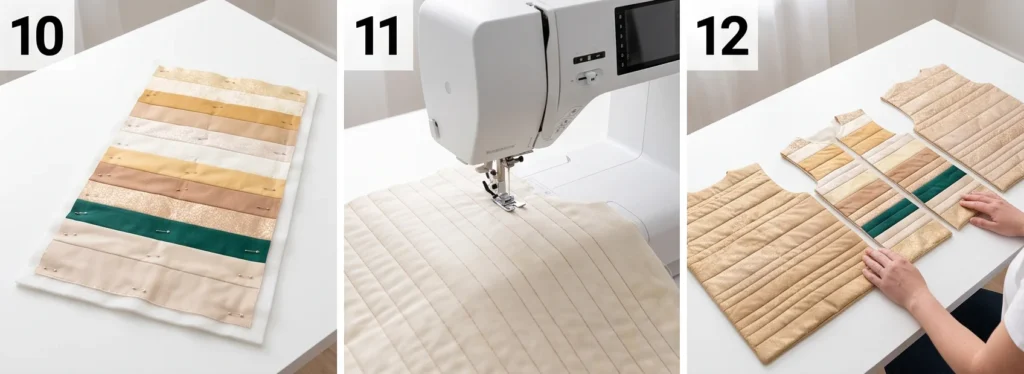
Step 8 – Build the Oversized Vest Panels
Piece enough strip-patched fabric to create:
- 1 back outer panel: approximately 22 × 30 inches
- 2 front outer panels: approximately 14 × 30 inches each
These measurements are deliberately oversized.
Lay your actual vest pattern pieces over the completed panels before proceeding.
Make sure each patchwork panel extends approximately:
2-3 inches beyond the corresponding pattern piece on every side
If your size requires larger panels, add more strips now.
Do not cut the finished vest shapes yet.
Step 9 – Prepare the Batting and Lining
For the back, cut:
- Batting approximately 24 × 32 inches
- Lining approximately 24 × 32 inches
For each front, cut:
- Batting approximately 16 × 32 inches
- Lining approximately 16 × 32 inches
The batting and lining should extend at least:
1 inch beyond the patchwork panel on every side
Use low-loft cotton or cotton-blend batting.
Avoid thick batting. The goal is soft structure and warmth, not puffiness.
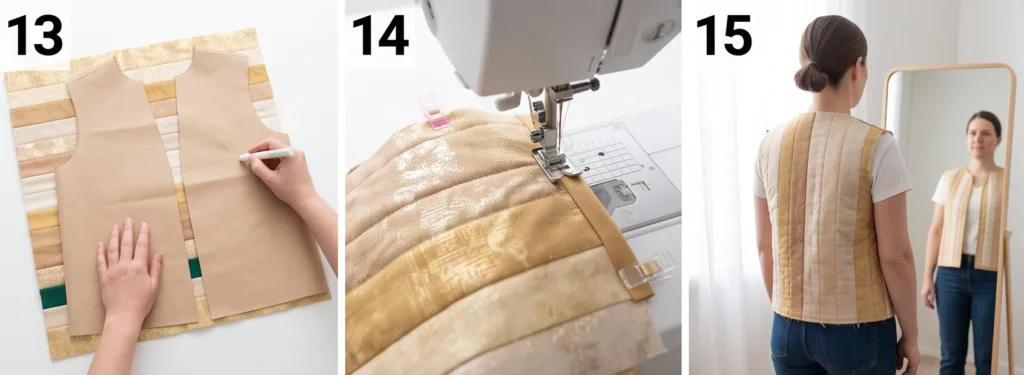
Step 10 – Layer and Baste the Panels
For each panel, layer:
- Lining fabric, wrong side up
- Batting
- Patchwork outer panel, right side up
Smooth the layers from the center outward.
Baste thoroughly with:
- Safety pins
- Thread basting
- Or your preferred temporary basting method
Check the lining side before quilting to make sure there are no folds underneath.
Step 11 – Quilt the Three Panels
Quilt the:
- Back panel
- Left front panel
- Right front panel
Straight-line quilting works especially well with metallic strip patchwork.
Good options include:
- Vertical lines approximately 1-1½ inches apart
- Lines following selected strip seams
- A diamond grid approximately 2 × 2 inches
Always check the batting manufacturer’s maximum quilting distance first.
Start near the center of each panel and work outward.
Keep the quilting relatively open so the finished vest remains flexible and comfortable.
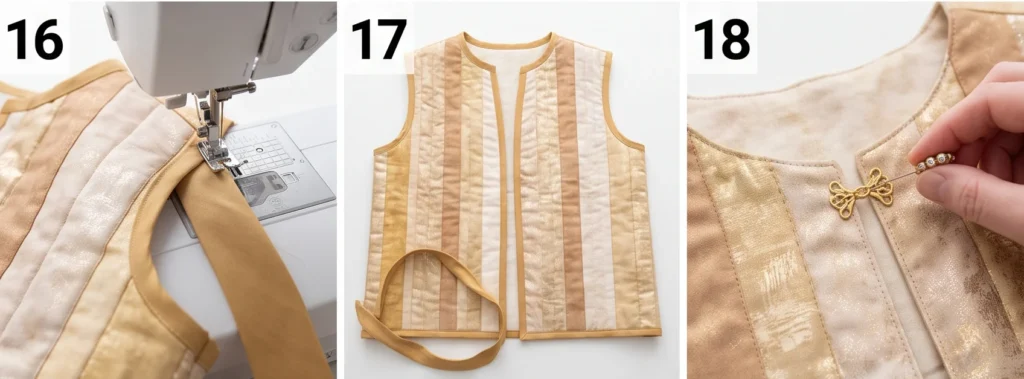
Step 12 – Square and Inspect the Quilted Panels
After quilting, place each panel flat.
Check:
- Outer patchwork
- Lining
- Corners
- Quilting tension
- Metallic fabric surfaces
Make sure there are no:
- Tucks
- Loose quilting lines
- Stretched edges
- Distorted strips
Trim away excess batting and lining so they are level with the patchwork panel.
Do not trim to the final garment shape yet.
Step 13 – Cut the Final Vest Pieces
Position your vest pattern pieces over the quilted panels.
Cut:
- 1 quilted back
- 2 mirror-image quilted fronts
Shift the pattern slightly if needed so important metallic strips land attractively.
Try to avoid placing thick patchwork seam intersections directly at:
- Shoulder endpoints
- Neckline curves
- Underarm points
Those areas already contain garment seams and benefit from less bulk.
Transfer all pattern markings before removing the paper pattern.
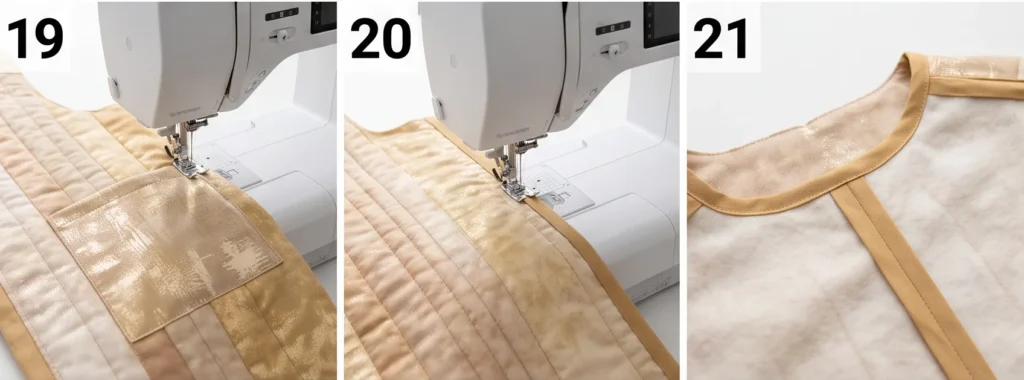
Step 14 – Sew and Finish the Shoulder Seams
Place each front against the back with right sides together.
Match the shoulder edges.
Sew using:
½-inch seam allowances
unless your chosen pattern specifies something different.
Because the fabric is quilted, grade bulky seam allowances if needed.
For a neat interior, encase each shoulder seam allowance in binding rather than leaving batting exposed.
Keep the two seam allowances together, bind them as one unit, and press the finished seam toward the back.
Step 15 – Sew and Finish the Side Seams
With right sides together, match the front and back at each side.
Pin or clip carefully.
Sew using:
½-inch seams
from the lower armhole to the hem.
Before finishing the seams, try the vest on.
Check:
- Bust ease
- Hip ease
- Armhole comfort
- Hem level
- Front hang
Make any fit adjustment now.
Once the fit is correct, bind or otherwise neatly finish each side seam so no batting remains exposed.
Step 16 – Bind Both Armholes
Cut bias binding approximately:
2¼ inches wide
Bias binding is preferable here because it follows the armhole curves more smoothly than straight-grain binding.
Apply one binding strip around each armhole separately.
Sew the binding to the edge using approximately:
¼-inch seam allowance
Wrap it around the raw edge and secure it neatly on the inside.
Check that:
- The armhole remains smooth
- The binding does not pull
- Both armholes look symmetrical
Press gently.
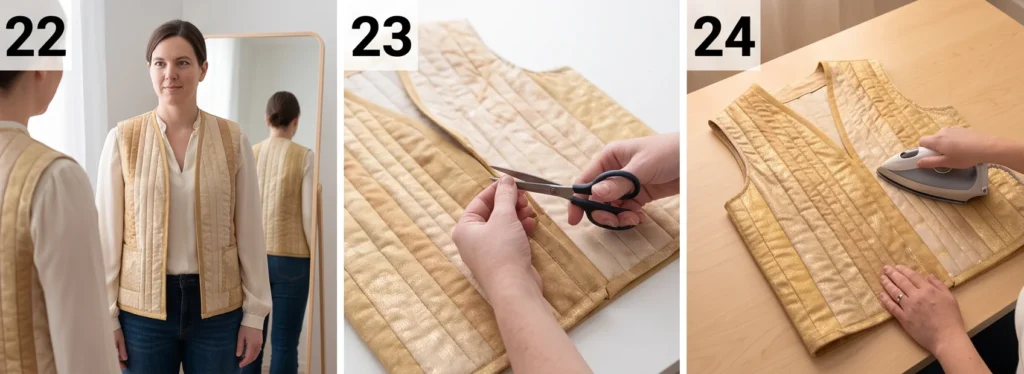
Step 17 – Bind the Fronts, Neckline, and Hem
Prepare a long length of binding.
Starting near one lower front corner, work continuously around:
lower front → center front → neckline → opposite center front → hem
A continuous bound perimeter gives the vest a clean, polished finish.
For a subtle look, choose:
- Champagne
- Ivory
- Soft gold
For stronger definition, try:
- Plum
- Emerald
- Deep cranberry
- Black
Gently ease the binding around the neckline.
Do not stretch the straight front and hem edges.
At the lower corners, form neat miters or softly rounded bound corners according to your vest pattern.
Step 18 – Add the Optional Closure and Finish
The vest can remain open-front, which suits its elegant evening character particularly well.
If desired, add one closure near the upper bust or waist:
- Decorative hook-and-eye
- Jeweled clasp
- Frog closure
- Small hidden snap
- Decorative brooch
Put the vest on before marking the closure so it sits naturally rather than pulling the fronts out of alignment.
Finish by checking:
- Binding
- Shoulder seams
- Side seams
- Armholes
- Hem
- Quilting
- Metallic fabric surfaces
- Loose threads
Give the vest a gentle final press from the wrong side or through a pressing cloth.
The finished vest should measure approximately:
- 42 inches at the bust
- 44 inches at the hip
- 26 inches long
for the sample size, with variations according to the chosen pattern.
The finished fabric should feel softly structured rather than stiff, with the gold and metallic patchwork catching the light subtly as the vest moves.
Extra Tips for a Better Finish
Use Metallic Prints, Not Heavy Costume Fabrics
Metallic quilting cottons, shimmer prints, and subtle gold thread details are much easier to handle than stiff foil fabrics or slippery brocades. They also quilt better and feel more wearable.
Keep the Batting Thin
A low-loft batting gives you shape without making the vest bulky. Since this is meant for elegant Christmas evenings, the silhouette should feel polished, not puffy.
Let the Binding Do Some of the Styling
If your patchwork is already visually rich, a clean gold or ivory binding will keep the design refined. If your patchwork is soft and tonal, a darker binding can frame it beautifully.
Pair It Simply
This kind of vest looks best when the rest of the outfit is calm:
- black turtleneck and trousers
- ivory knit dress
- satin blouse and straight-leg pants
- dark jeans and heeled boots for a more casual holiday dinner look
Other Design Inspirations – Digitally Modified Images. Texture and color may vary from the actual product.
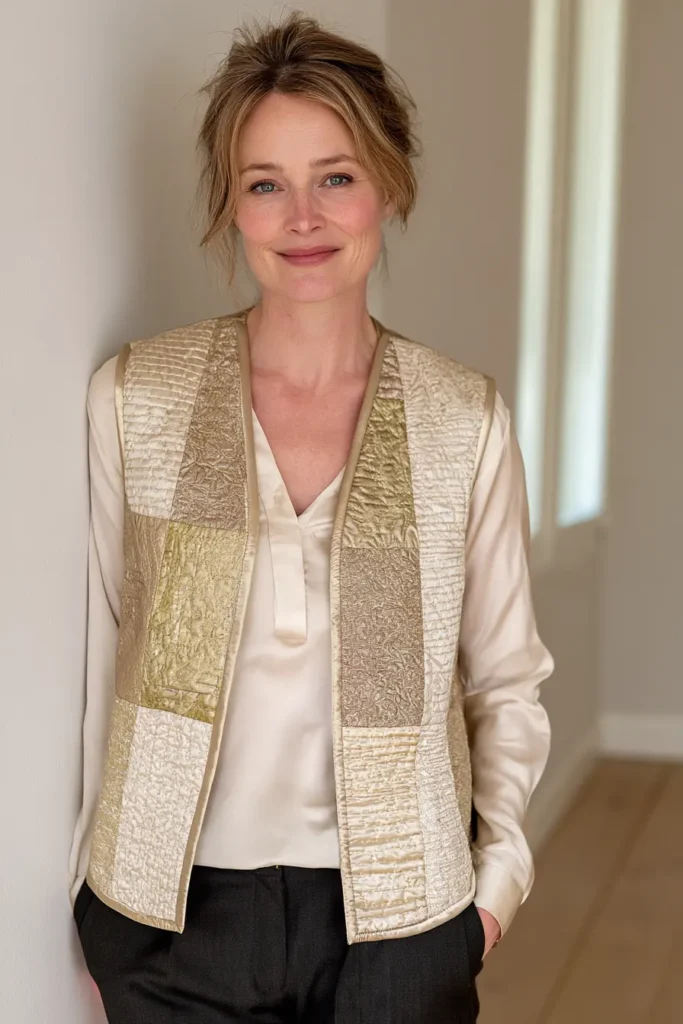
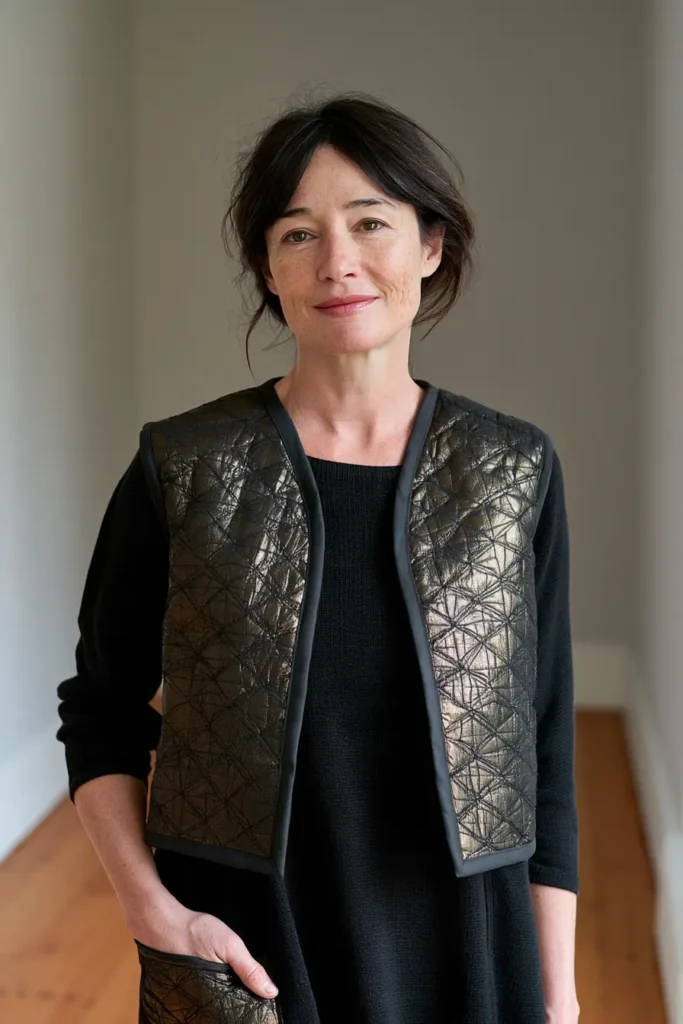
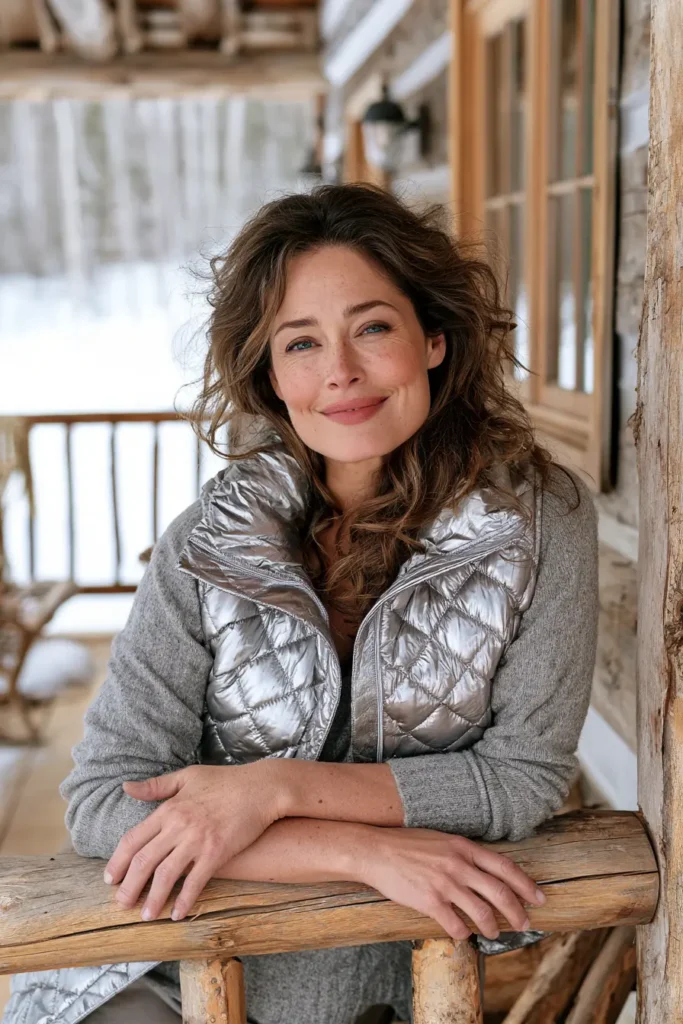
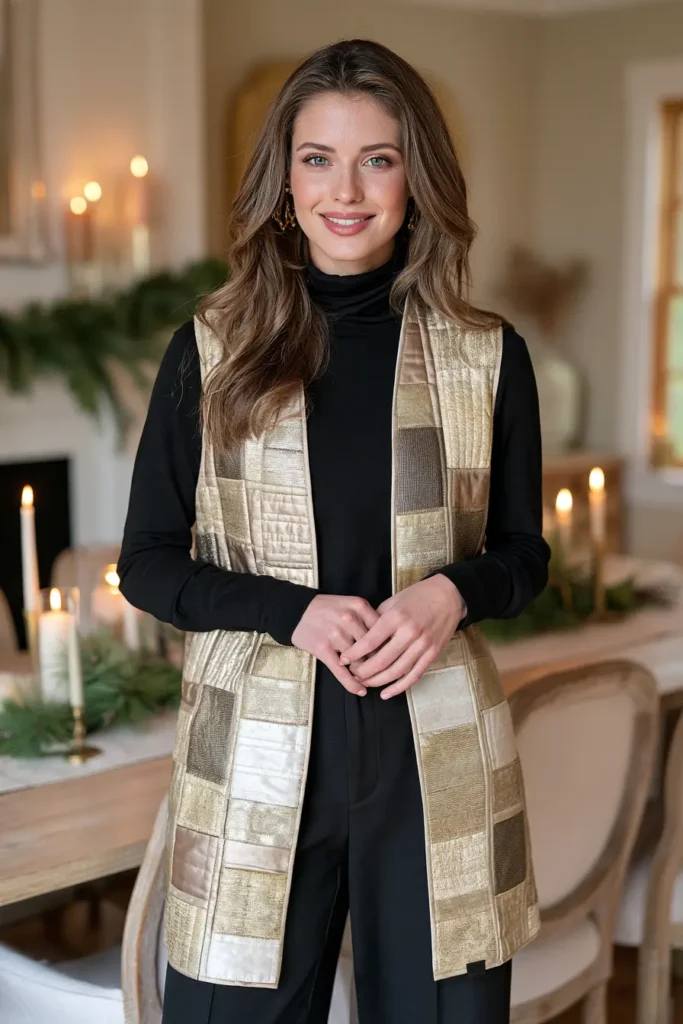
7. Winter Blue and Silver Quilted Jacket for Frosty Festive Charm
A winter blue and silver quilted jacket captures the colder side of Christmas – deep evening blues, frosted aqua, silvery gray, pearl white, and the shimmer of winter light. Instead of relying on novelty holiday prints, the color palette creates the seasonal feeling, which makes the finished jacket wearable throughout December and well into January and February.
This version uses long 2½-inch strips to create five oversized patchwork panels. Each panel is layered with low-loft batting and its final lining before quilting, so the reverse is already clean and finished. The quilted panels are then cut into garment pieces and assembled like a traditional quilt coat, with every structural seam bound to contain the batting and keep the inside neat.
The result is a softly structured, vibrant winter jacket rather than a stiff quilt shaped like a coat.
The Blue-and-Silver Balance
A blue-and-silver palette can go wrong in two opposite directions.
Too much navy and cobalt can make the jacket feel dark and heavy.
Too much pale blue, white, and metallic fabric can wash out the patchwork until individual rails disappear.
The solution is a deliberate value range:
- Deep navy and cobalt for depth
- Sapphire and medium blue for the middle
- Turquoise and icy aqua for brightness
- Silver gray for transition
- Pearl white and small metallic accents for highlights
The lightest fabrics don’t need to dominate. A few carefully spaced pale or shimmering rails will make the darker blues look richer.
Metallic fabric should work like jewelry: small highlights rather than the entire outfit.
Design Inspirations – Digitally Modified Images. Texture and color may vary from the actual product.
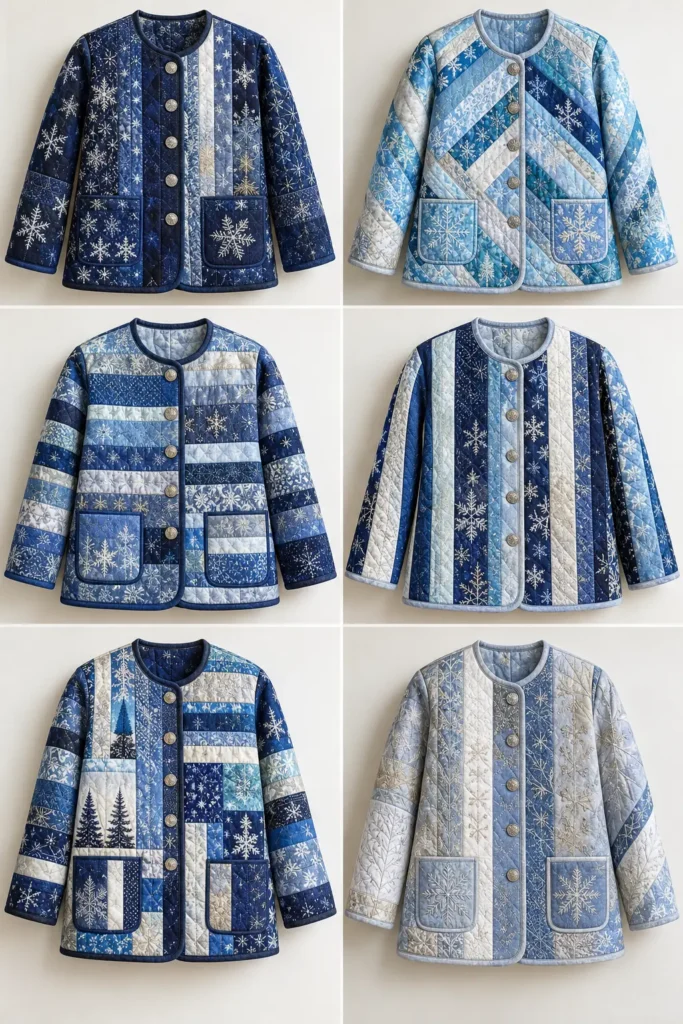
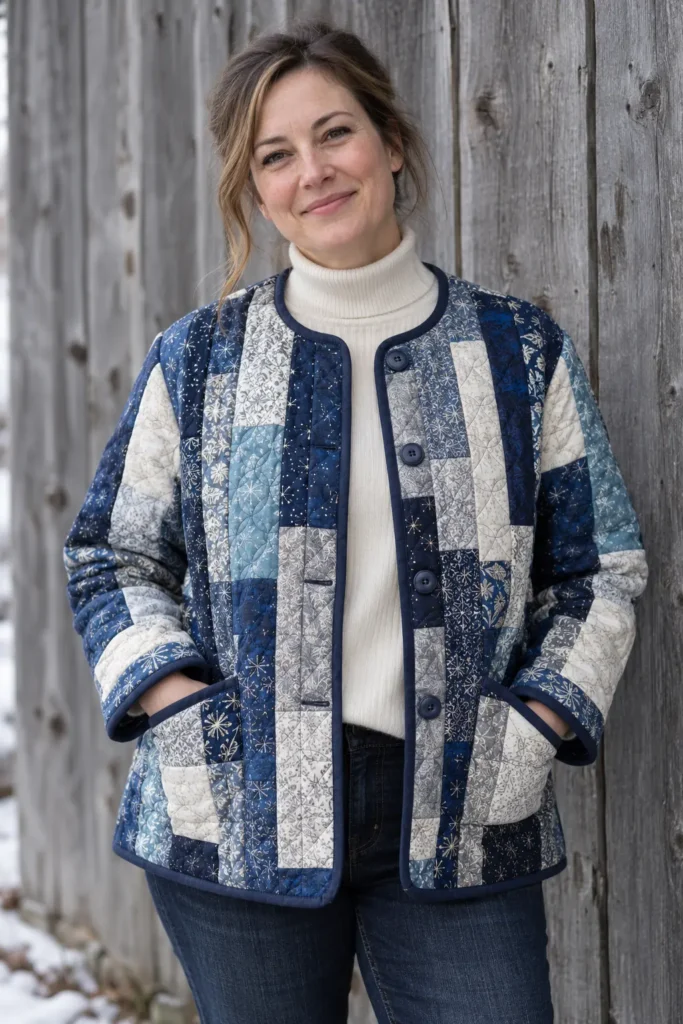
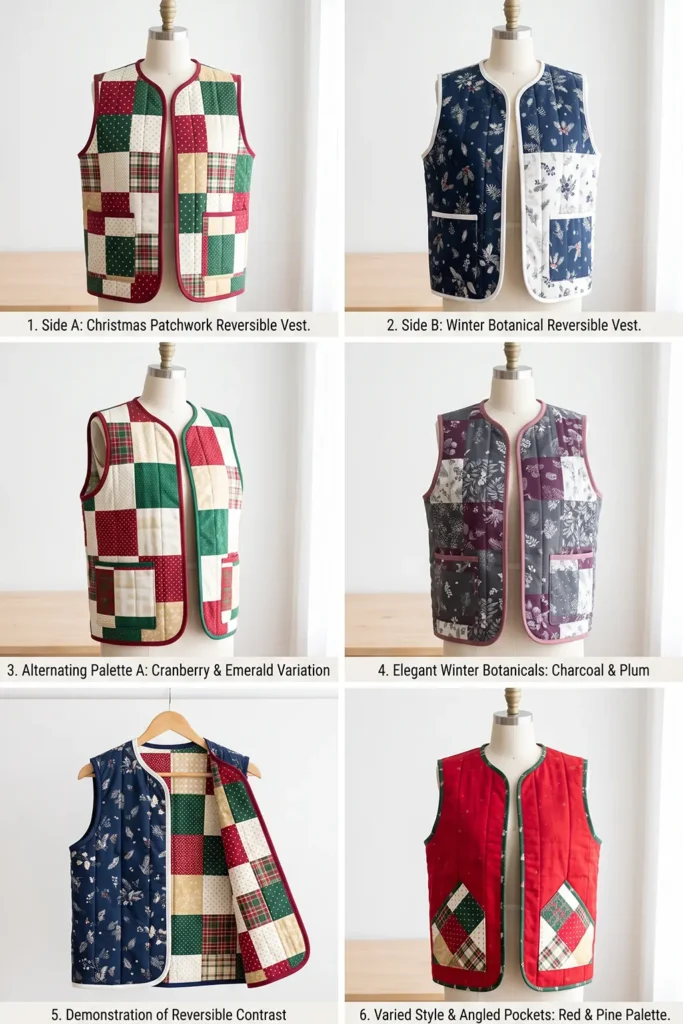
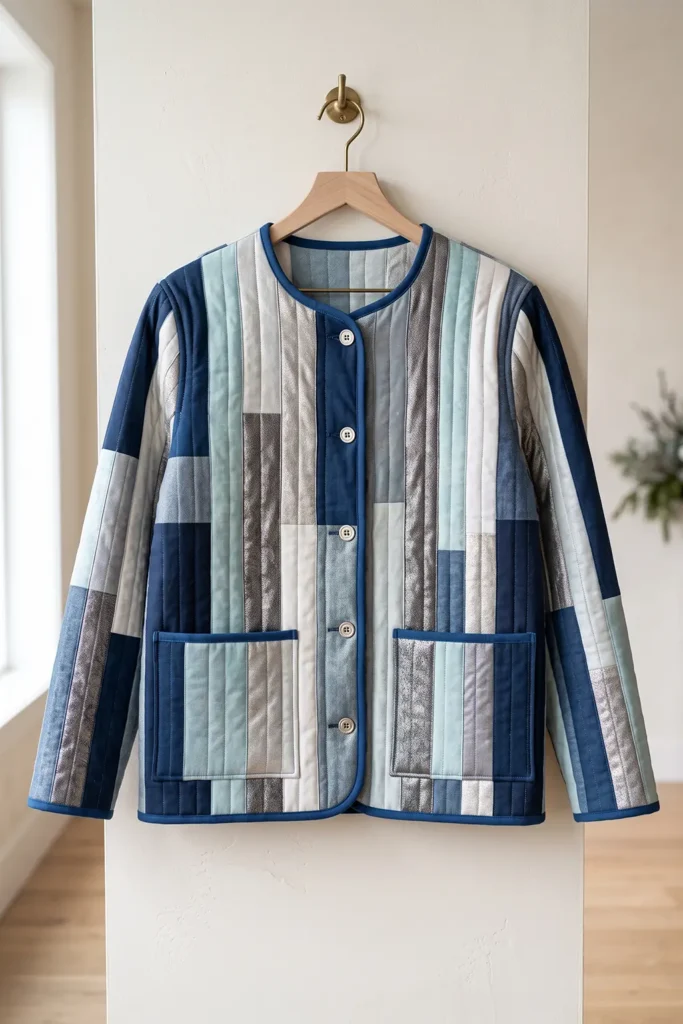
Metallic Fabric Without the Stiffness
Modern metallic quilting cotton usually works far better in a quilt coat than lamé, foil fabric, or heavily coated fashion fabric.
Choose:
- Metallic quilting cotton
- Cotton sateen with subtle shimmer
- Silver-printed cotton
- Tone-on-tone stars
- Frosted geometrics
Avoid stiff metallic fabric that creases sharply or feels scratchy. The jacket needs to bend at the shoulders, elbows, and front opening.
Always test the metallic fabric with an iron before using it throughout the jacket. Some printed finishes tolerate ordinary cotton settings; others prefer moderate heat and a pressing cloth.
How It’s Built
The construction order is:
- Choose a simple collarless jacket pattern
- Check the finished measurements and ease
- Prewash the washable fabrics
- Cut 54 full-width strips at 2½ inches
- Piece the oversized back panel
- Piece both oversized front panels
- Piece both oversized sleeve panels
- Press, measure, and square all five panels
- Layer each panel with batting and its final lining
- Quilt all five panels
- Cut the final garment pieces from the quilted yardage
- Sew and bind the shoulder seams
- Set the sleeves and bind the armholes
- Sew the underarm and side seams and check the fit
- Bind the underarm and side seams
- Bind the body perimeter
- Bind the cuffs and add the buttonholes and buttons
- Press and finish
There is no separate lining shell to bag into the coat. The lining is incorporated into the quilting from the beginning.
Finished Garment
- Style: relaxed collarless quilted jacket
- Shape: softly boxy, hip length
- Length: approximately 28-30 inches
- Fit: approximately 4-6 inches total bust ease
- Sleeves: full length, slightly relaxed
- Front: true button-front overlap
- Buttons: approximately 5
- Outer fabric: strip-pieced winter blues and silver
- Quilting: approximately 2 inches apart, or closer if required by the batting
- Skill level: confident beginner
- Core techniques: strip piecing, quilted yardage, garment cutting, bound seams, buttonholes
For example, someone with a 40-inch bust would generally be comfortable in a jacket finishing around:
44-46 inches at the bust
depending on the intended layering and pattern style.
Materials Needed
For an average adult jacket:
- About 4 yards total of assorted 44-45-inch-wide quilting cotton for the outer patchwork, enough to cut at least 54 full-width 2½-inch strips after preparation
- Within those 4 yards, include a small amount of metallic or silver-print cotton if desired
- Lining: approximately 3½ yards of 44-45-inch-wide soft cotton, cotton lawn, chambray, or lightweight flannel for the sample oversized panels
- Low-loft batting: approximately 2 yards of 90-inch-wide batting, or about 3 yards if the batting is only around 45 inches wide
- Binding: approximately ¾-1 yard of quilting cotton
- Buttons: approximately 5, around ¾-1 inch diameter
- Neutral piecing thread
- Coordinating quilting thread
- 90/14 needle
- Walking foot
- Rotary cutter
- Sharp blade
- Quilting ruler
- Cutting mat
- Pins or clips
- Iron
- Pressing cloth for metallic fabrics if needed
- A collarless, dartless, button-front jacket pattern with a genuine center-front overlap and dropped or uncomplicated sleeves
Beginner tip: don’t substitute high-loft bed-quilt batting. Low loft is what allows the finished jacket to bend and drape like clothing.
Choosing Your Colors
The 54-strip cutting plan can be divided like this:
- 16 strips: navy and cobalt
- 14 strips: sapphire and medium winter blue
- 11 strips: turquoise and icy aqua
- 8 strips: silver gray
- 5 strips: pearl white and subtle metallic accents
Total:
54 strips
This roughly creates:
- 30% deep blue
- 26% medium blue
- 20% aqua
- 15% silver gray
- 9% pearl/metallic highlights
Good individual shades include:
- Midnight navy
- Royal cobalt
- Sapphire
- Cerulean
- Peacock blue
- Turquoise
- Frosted aqua
- Steel gray
- Pewter
- Pearl white
- Muted silver
For a slightly more festive version, include a few narrow accents of:
- Cranberry
- Deep plum
- Champagne silver
Keep those accents sparse so the overall jacket still reads as blue and silver.
Cutting Measurements
The five patchwork panels use 53 strips. The 54th strip is intentional cutting insurance.
Back Panel
Use:
13 strips at 2½ inches × WOF
After twelve ¼-inch seams:
13 × 2½ – 12 × ½ = 26½ inches
So the panel finishes approximately:
26½ inches wide × usable strip length
After piecing and pressing, trim the working panel to approximately:
26½ × 32 inches
provided that still gives at least 2-3 inches beyond your actual back pattern piece.
Front Panels
Use:
9 strips per front
Nine joined strips finish:
9 × 2½ – 8 × ½ = 18½ inches
Prepare:
- Left front: approximately 18½ × 32 inches
- Right front: approximately 18½ × 32 inches
Each should extend at least:
2-3 inches beyond its pattern piece
on all sides.
Sleeve Panels
Use:
11 strips per sleeve
Eleven joined strips finish:
11 × 2½ – 10 × ½ = 22½ inches
Prepare:
- Left sleeve panel: approximately 22½ × 28 inches
- Right sleeve panel: approximately 22½ × 28 inches
Again, check the actual sleeve pattern before trimming.
Strip Total
- Back: 13
- Front 1: 9
- Front 2: 9
- Sleeve 1: 11
- Sleeve 2: 11
Total used:
53 strips
Prepare:
54 strips
so you have one spare in case of a cutting flaw, short usable strip, or color adjustment.
Batting and Lining
Cut each batting and lining piece roughly:
1-2 inches larger on every side
than its corresponding patchwork panel.
Don’t cut the final garment shapes before quilting.
Binding
Cut binding strips:
2-2½ inches wide
You’ll need enough joined binding for:
- Both shoulder seams
- Both armhole seams
- Both sleeve-underarm-side seams
- Two cuffs
- The complete body perimeter
A generous continuous supply is better than trying to calculate to the last inch.
Step-by-Step Guide
Step 1 – Choose the Right Jacket Pattern
Use a simple jacket pattern with:
- Collarless neckline
- True button-front overlap
- Dartless body
- Straight or gently shaped sides
- Dropped shoulder or simple sleeve cap
- Minimal internal structure
Avoid:
- Tailored lapels
- Two-piece sleeves
- Princess seams
- Heavy facings
- Separate button plackets
- Complicated collars
The instructions below finish the outer edges with binding, so a pattern designed around elaborate facings is not a good match.
Step 2 – Check the Finished Measurements and Ease
Measure the wearer or use your own body measurements.
Check:
- Bust
- Hip
- Shoulder
- Sleeve length
- Desired finished jacket length
Compare those measurements with the pattern’s finished garment measurements.
Aim for approximately:
4-6 inches total bust ease
for comfortable winter layering.
Lay out the major pattern pieces and estimate how large each quilted panel needs to be before cutting fabric.
Step 3 – Prewash and Prepare the Fabrics
Prewash all washable:
- Outer quilting cotton
- Lining fabric
- Binding fabric
Using the method you expect to use for the finished jacket.
Dry completely.
Press the cotton fabrics flat.
For metallic fabrics, test the iron temperature on a scrap first. Use a pressing cloth if required.
Prepare the batting according to its manufacturer.
Do not automatically wash loose batting unless the manufacturer specifically allows it. If first-wash shrinkage concerns you, choose a preshrunk or low-shrink batting designed for quilting.
Step 4 – Cut the 54 Outer Strips
Cut:
54 strips at 2½ inches × width of fabric
Use the corrected color distribution:
- 16 navy/cobalt
- 14 sapphire/medium blue
- 11 turquoise/icy aqua
- 8 silver gray
- 5 pearl/metallic
Remove the selvages.
Your usable strips will usually be roughly:
40-42 inches long
depending on the fabric.
Keep the metallic fabrics distributed among ordinary cotton strips rather than grouping them all together.
Step 5 – Piece the Back Panel
Choose:
13 strips
for the back.
Arrange them in a balanced sequence.
For example:
navy → icy aqua → sapphire → silver → cobalt → turquoise → pearl → navy → sapphire → metallic silver → cobalt → aqua → navy
Sew the strips together along their long edges using:
¼-inch seams
Alternate sewing direction:
- First seam from top to bottom
- Next seam from bottom to top
Continue alternating.
This reduces bowing.
Press carefully after every few seams.
The completed back panel should measure approximately:
26½ inches wide
Trim its length to about:
32 inches
only after confirming this still leaves 2-3 inches beyond your actual pattern piece.
Step 6 – Piece the Two Front Panels
Choose:
9 strips for each front
Arrange each palette so the two fronts coordinate without being exact mirror images.
Sew with:
¼-inch seams
again alternating your stitching direction on successive long seams.
Each panel should measure approximately:
18½ inches wide
after piecing.
Trim each working front panel to about:
32 inches long
provided your pattern fits comfortably inside with extra room around it.
Keep a few lighter rails near the neckline or upper front if you want brightness around the face.
Step 7 – Piece the Two Sleeve Panels
Use:
11 strips per sleeve
Sew them together with:
¼-inch seams
Each finished panel should be approximately:
22½ inches wide
Trim the working length to around:
28 inches
if your actual sleeve pattern fits with at least 2-3 inches of excess.
For visual continuity, repeat two or three colors from the fronts in each sleeve rather than designing the sleeves as unrelated patchwork.
Step 8 – Press, Measure, and Square the Five Panels
Lay all five panels flat:
- Back
- Left front
- Right front
- Left sleeve
- Right sleeve
Check for bowing.
Measure the width at:
- Top
- Middle
- Bottom
If the difference is significant, identify whether stretched seams or inaccurate seam allowances caused it.
Press gently rather than pulling the fabric back into shape.
Square the panels only enough to create straight workable edges.
Place the pattern pieces over them one final time.
Confirm you still have:
2-3 inches of excess around every piece
where practical.
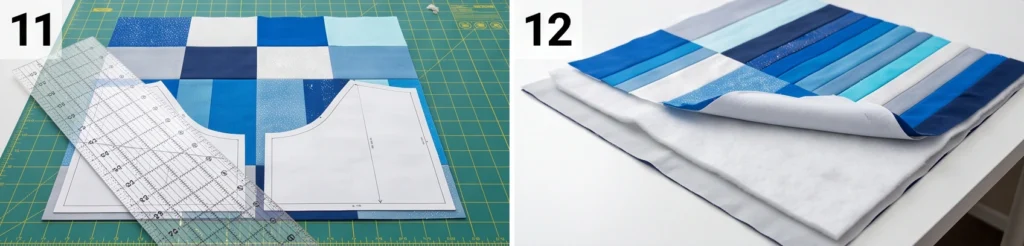
Step 9 – Layer the Five Quilt Sandwiches
Cut lining and low-loft batting for every panel approximately:
1-2 inches larger on every side
than the patchwork.
For each panel, layer:
- Lining – right side down
- Low-loft batting
- Patchwork – right side up
This is the final lining, not temporary backing.
Smooth from the center outward.
Check the reverse carefully for wrinkles.
Baste thoroughly using:
- Safety pins
- Thread basting
- Or another method suitable for your materials
Repeat for all five panels.
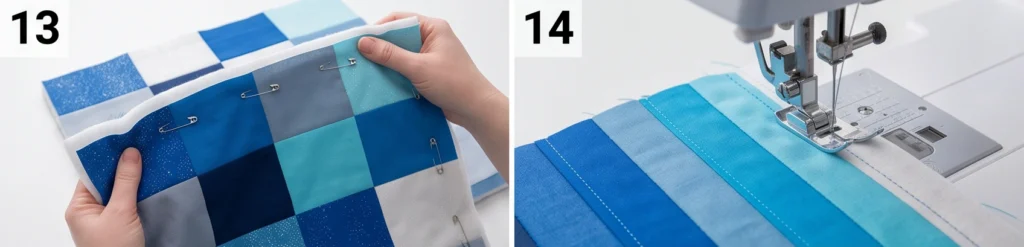
Step 10 – Quilt All Five Panels
Use a walking foot.
Straight-line quilting suits the strip-pieced design particularly well.
Quilt approximately:
2 inches apart
for a soft wearable finish.
You can:
- Quilt parallel to the strips
- Quilt across the strips
- Use a restrained diagonal grid
But first check the batting label.
If it requires quilting closer than 2 inches, follow the manufacturer’s requirement.
Begin near the center and work outward to reduce distortion.
After quilting, check both sides for:
- Tucks
- Wrinkles
- Skipped stitches
- Loose lines
- Distorted metallic fabric
Correct any problem now.
Step 11 – Cut the Final Garment Pieces
Lay the pattern over the quilted panels.
Cut:
- 1 back
- 2 fronts
- 2 sleeves
Before cutting each piece, shift the pattern slightly if that helps keep bulky strip intersections away from:
- Shoulder endpoints
- Armhole curves
- Underarm junctions
- Center-front buttonholes
Check Side B – the lining – too. Both surfaces should remain smooth after cutting.
Transfer all:
- Notches
- Center points
- Button placement references
using removable marking tools.
Step 12 – Sew and Bind the Shoulder Seams
Place the two fronts right sides together with the back.
Sew the shoulder seams using:
½-inch seam allowances
or the allowance specified by your pattern if it is compatible with the construction.
Keep the two raw seam allowances together rather than pressing them open.
Encase them in binding.
Stitch securely.
Press the finished bound allowances toward the back.
Binding them now keeps exposed batting completely contained.
Step 13 – Set the Sleeves and Bind the Armholes
Keep the side seams open.
Pin each sleeve into its armhole.
Match:
- Shoulder seam
- Sleeve center
- Front notch
- Back notch
- Underarm marks
Sew using approximately:
½-inch seam allowance
or your pattern’s specified allowance.
Now bind the armhole seam while the garment is still open and easy to handle.
Keep both allowances together inside the binding.
Press the finished seam toward the sleeve.
Repeat for the second sleeve.
Step 14 – Sew the Underarm and Side Seams
Fold the jacket right sides together.
Starting at the cuff, sew continuously:
cuff → underarm → side → hem
Use approximately:
½-inch seam allowance
unless the pattern specifies otherwise.
Repeat on the other side.
Before finishing those seams, try the jacket on.
Check:
- Bust ease
- Hip ease
- Shoulder comfort
- Sleeve movement
- Sleeve length
- Body length
- Front overlap
Make fitting adjustments now.
Once the seams are bound, alterations become more tedious.
Step 15 – Bind the Underarm and Side Seams
After confirming the fit, bind both continuous:
cuff-to-underarm-to-side
seam allowances.
Keep the allowances together and encase them as one unit.
This is much cleaner through quilted layers than pressing bulky seams open.
Press the finished bound seams gently toward the back where they naturally want to sit.
Check the underarms for uncomfortable lumps before proceeding.
Assembly
At this stage, the jacket is fully assembled structurally.
You should now have:
- Quilted back
- Two quilted fronts
- Two quilted sleeves
- Bound shoulders
- Bound armholes
- Bound underarm/side seams
- Finished lining already quilted into every piece
The only unfinished edges are:
- Front openings
- Neckline
- Hem
- Cuffs
Finishing these with binding completes the quilt-coat construction.
Step 16 – Bind the Body Perimeter
Prepare enough joined binding to travel continuously around:
one lower front → up the front → around the neckline → down the opposite front → across the hem
Start somewhere away from a lower corner.
Apply the binding evenly.
At curves:
- Use clips
- Work slowly
- Don’t stretch the jacket edge
At lower front corners, form clean miters or gently rounded corners depending on the pattern.
Wrap the binding to the lining side and stitch securely.
Check frequently that the underside has been caught.
Step 17 – Bind the Cuffs and Add Buttons
Bind each cuff separately.
The cuffs are closed loops, so join each binding strip neatly where the ends meet.
Check that both sleeve lengths match before final stitching.
Next, put the jacket on over a typical winter layer.
Overlap the center fronts naturally.
Mark approximately:
5 button positions
For a 28-30-inch jacket, around:
4 inches apart
is a useful starting point, but let the actual garment determine the spacing.
Make sure:
- One button sits near the fullest bust point
- No buttonhole falls directly over a very bulky patchwork seam intersection
Make the buttonholes.
Close the fronts accurately.
Mark the corresponding button positions through the completed buttonholes.
Sew the buttons securely.
Step 18 – Final Press and Finish
Inspect the entire jacket.
Check:
- Shoulder binding
- Armholes
- Underarm binding
- Side seams
- Front binding
- Neckline
- Hem
- Cuffs
- Buttonholes
- Buttons
- Quilting
- Metallic surfaces
- Loose threads
Give the jacket a gentle final press.
Use moderate heat and a pressing cloth over metallic prints if needed.
Don’t flatten the batting aggressively.
If you want the soft, slightly crinkled quilt-coat appearance, wash the jacket only according to the care instructions shared by:
- Outer fabrics
- Batting
- Lining
Use a color catcher for the first wash because intense blues can release dye.
After finishing, the jacket should feel:
softly structured, flexible, warmly quilted, and comfortable enough to layer
rather than rigid.
Assembly at a Glance
- Choose a simple collarless button-front jacket pattern.
- Check finished size and allow approximately 4-6 inches of bust ease.
- Prewash outer and lining fabrics; prepare batting according to its manufacturer.
- Cut 54 strips at 2½ inches × WOF.
- Piece back from 13 strips → about 26½ inches wide.
- Piece each front from 9 strips → about 18½ inches wide.
- Piece each sleeve from 11 strips → about 22½ inches wide.
- Press and square all five oversized panels.
- Layer each panel lining + batting + patchwork.
- Quilt approximately 2 inches apart, or closer if required.
- Cut the final back, fronts, and sleeves.
- Sew and bind shoulder seams.
- Set sleeves and bind armhole seams while flat.
- Sew cuff-to-underarm-to-side seams; try on.
- Bind the underarm and side seams.
- Bind the fronts, neckline, and hem.
- Bind each cuff; mark and add approximately 5 buttons.
- Press, inspect, and finish.
Beginner Tips for Success
- Start with a simple garment pattern, not a tailored coat.
- Buy approximately 4 yards of assorted outer fabrics, not 2 yards.
- Cut 54 strips, even though the planned panels use 53.
- Keep one spare strip for insurance.
- Alternate long seam sewing directions to reduce bowing.
- Check panel widths before quilting.
- Use low-loft batting.
- Quilt the lining into the panels from the beginning.
- Don’t quilt directly onto loose bare batting.
- Keep quilting around 2 inches apart for drape, unless the batting requires closer spacing.
- Use a walking foot.
- Check the lining side repeatedly while quilting.
- Quilt first and cut the garment afterward.
- Shift pattern pieces away from bulky seam intersections.
- Bind the shoulders immediately after sewing.
- Bind the armholes before closing the side seams.
- Try the jacket on before binding the side seams.
- Keep paired seam allowances together and bind them as one unit.
- Test metallic fabrics before pressing.
- Limit metallic accents so the jacket stays flexible.
- Mark buttons while actually wearing the jacket.
- Put one button near the fullest bust point.
- Use a 90/14 needle for the quilted layers.
- Use a color catcher in the first wash.
Styling It & Gift Ideas
The blue-and-silver patchwork is already visually rich, so simple layers work best underneath:
- Ivory turtleneck
- Cream sweater
- White shirt
- Charcoal knit
- Dark denim
- Black trousers
- Navy dress
Silver jewelry naturally complements the palette.
For more Christmas color, add:
- Cranberry scarf
- Deep plum gloves
- Burgundy boots or bag
For a purely winter look, stay with:
- Ivory
- Gray
- Navy
- Camel
- Black
The jacket also makes a memorable:
- Christmas gift
- Winter birthday gift
- Holiday travel jacket
- Special winter-market layer
- Mother-daughter jacket pair
- January and February cold-weather coat
Because the festive feeling comes from the icy palette rather than obvious Christmas motifs, it doesn’t suddenly feel out of place on December 26.
Final Thoughts
A Winter Blue and Silver Quilted Jacket works best when the construction is as carefully balanced as its color palette.
The corrected version needs considerably more outer fabric than a first glance suggests: 54 full-width 2½-inch strips, or approximately 4 yards of assorted 44-45-inch quilting cotton, provide realistic coverage for the five oversized panels without depending on awkward scrap piecing.
Quilting the outer patchwork, batting, and final lining together solves another major construction problem. No loose batting drags over the sewing machine, no separate lining shell bags into already-quilted sleeves, and no risk of the lining shifting independently after the garment is finished.
Keep the quilting about 2 inches apart, use low-loft batting, bind the structural seams as you sew, and let metallic silver appear in highlights rather than dominating the jacket.
The result is the intended one: a soft, wearable quilt coat with vibrant frosty color, subtle shimmer, and enough drape to feel like clothing rather than bedding.
Other Design Inspirations – Digitally Modified Images. Texture and color may vary from the actual product.
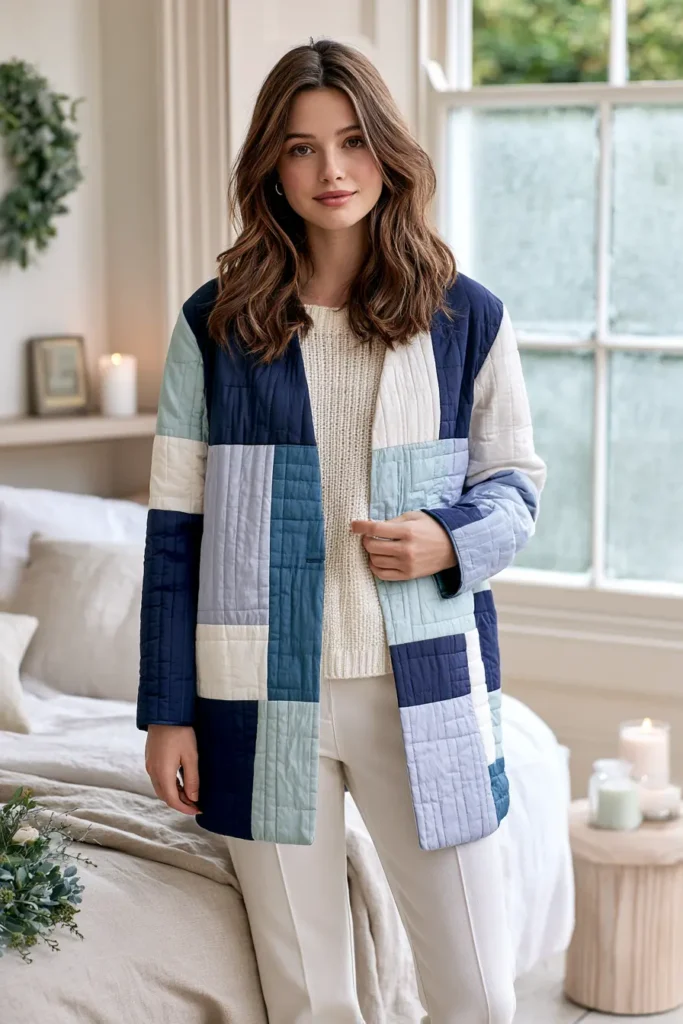
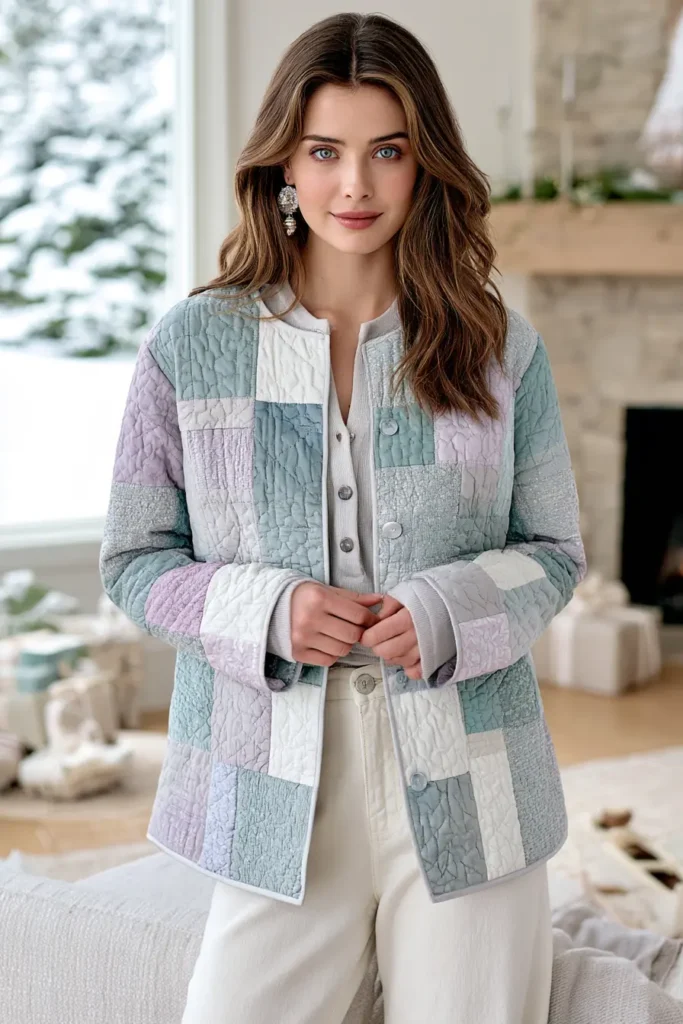
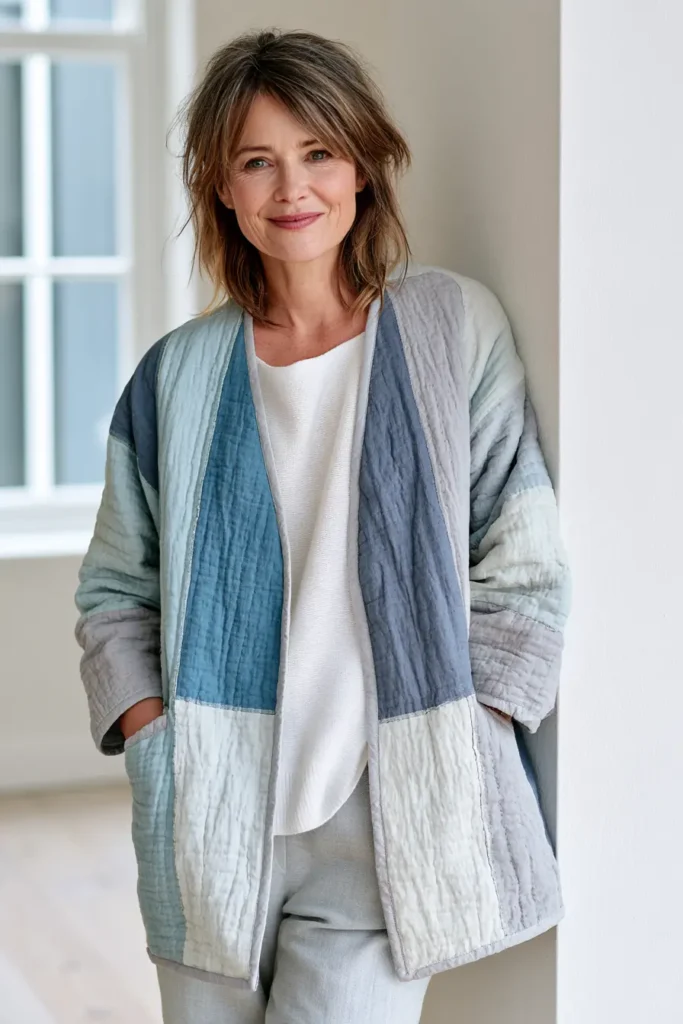
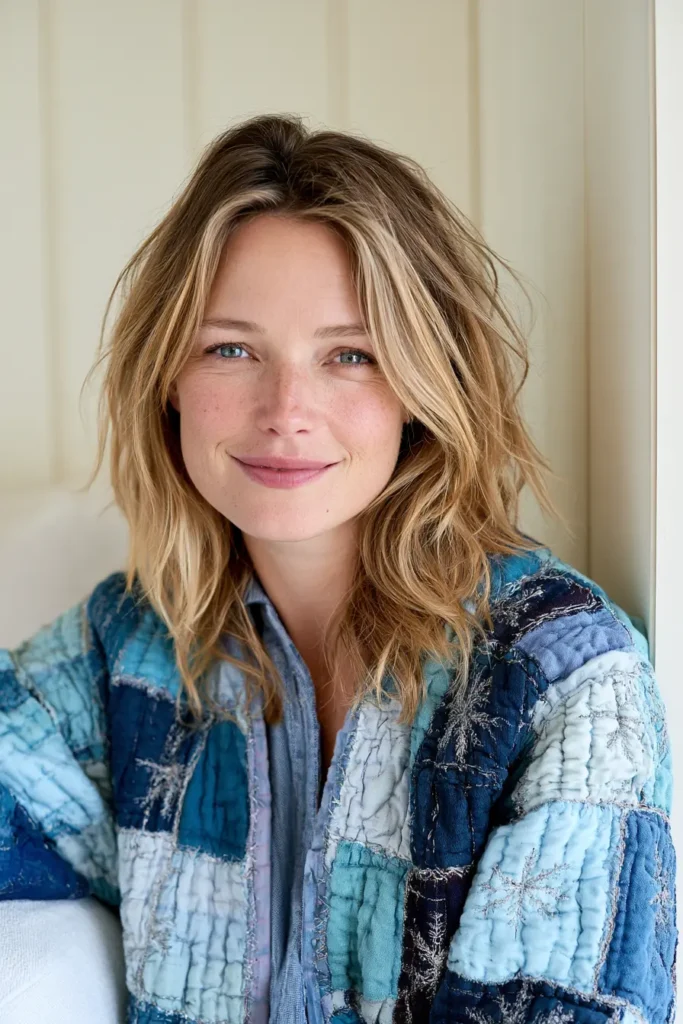
8. Cropped Quilted Vest for Holiday Party Layering
A cropped quilted vest is one of the easiest festive layers to wear when you want warmth without the bulk of a full jacket. The shorter length sits neatly over dresses, turtlenecks, fitted tops, and wide-leg trousers, so it feels dressed up enough for holiday dinners, parties, and winter gatherings while still being practical to sew at home.
For this version, the look is bright and celebratory, with a vibrant patchwork palette of cranberry red, emerald, holly green, berry pink, gold, and soft ivory. Quilted vests have a long history as useful layering pieces, but a cropped version gives them a fresher, more fashion-forward feel. In holiday sewing, that shorter silhouette is especially helpful because it lets the festive patchwork shine without overwhelming the outfit underneath.
Why This Idea Is Worth Making
This cropped quilted vest is worth making because it gives you a wearable holiday piece that feels special but still simple enough for a confident beginner. Compared with a full quilted jacket, there are no sleeves to set, less bulk to manage, and fewer fitting issues, yet the finished project still looks polished and impressive.
It is also a practical scrap-friendly project. You can combine multiple festive fabrics in one garment, play with color placement, and create something that works for parties, family dinners, Christmas markets, and everyday winter layering. The cropped shape also makes the vest easier to style with skirts, jeans, dresses, or high-waisted trousers.
Design Inspirations – Digitally Modified Images. Texture and color may vary from the actual product.
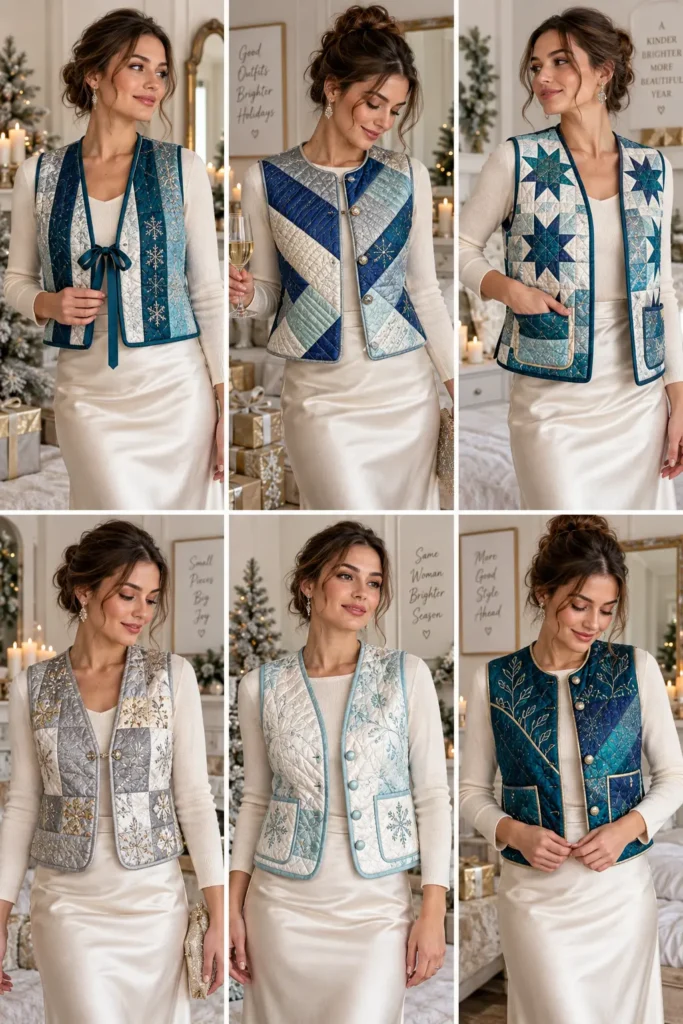
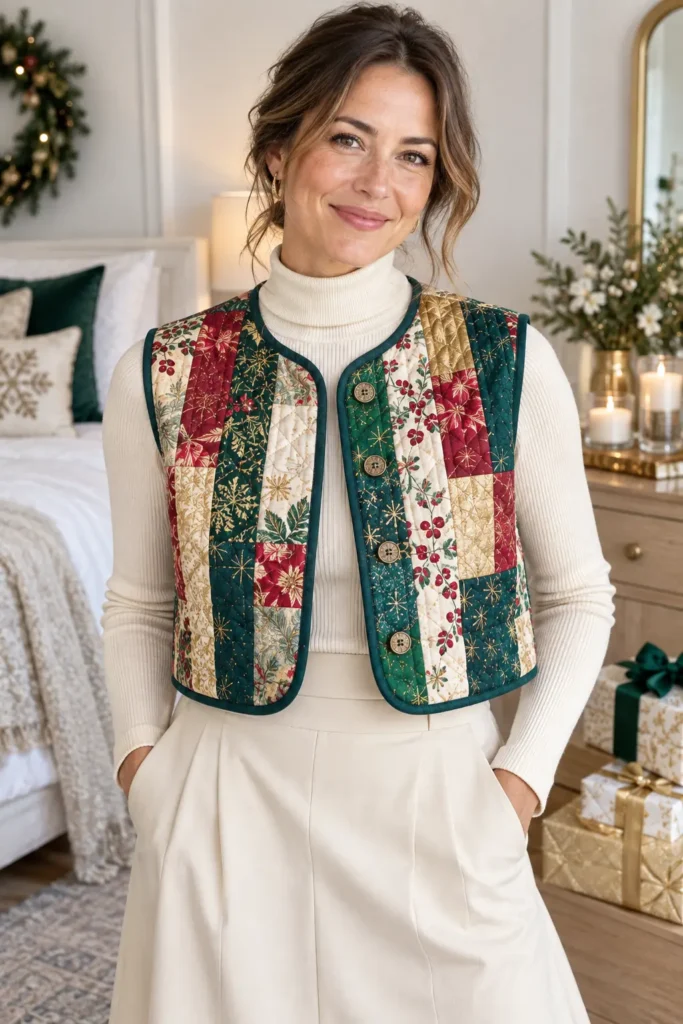
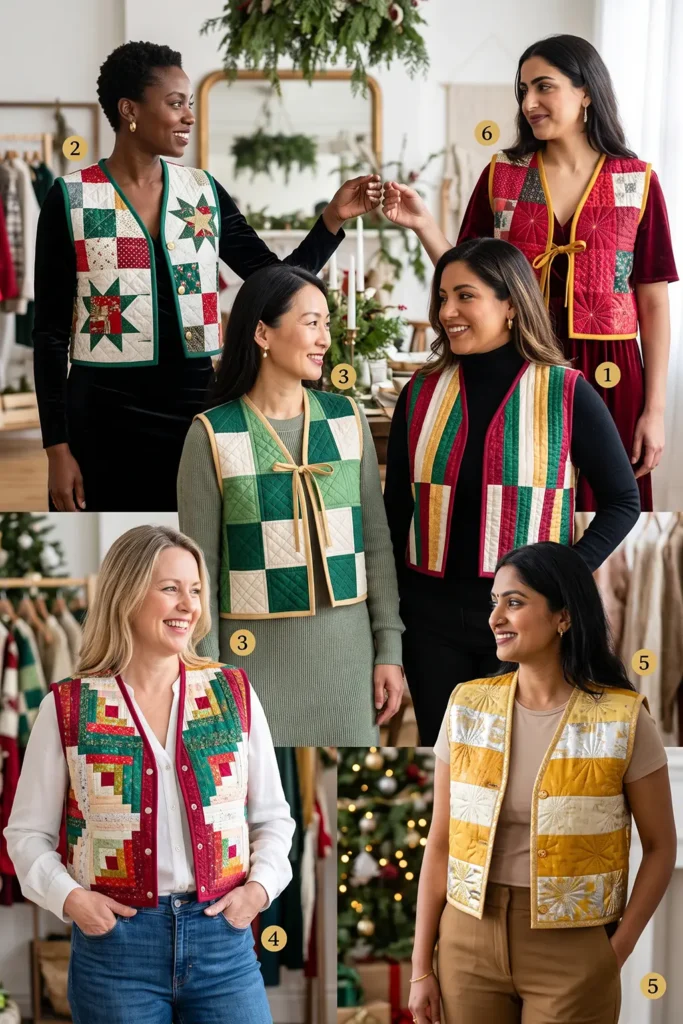
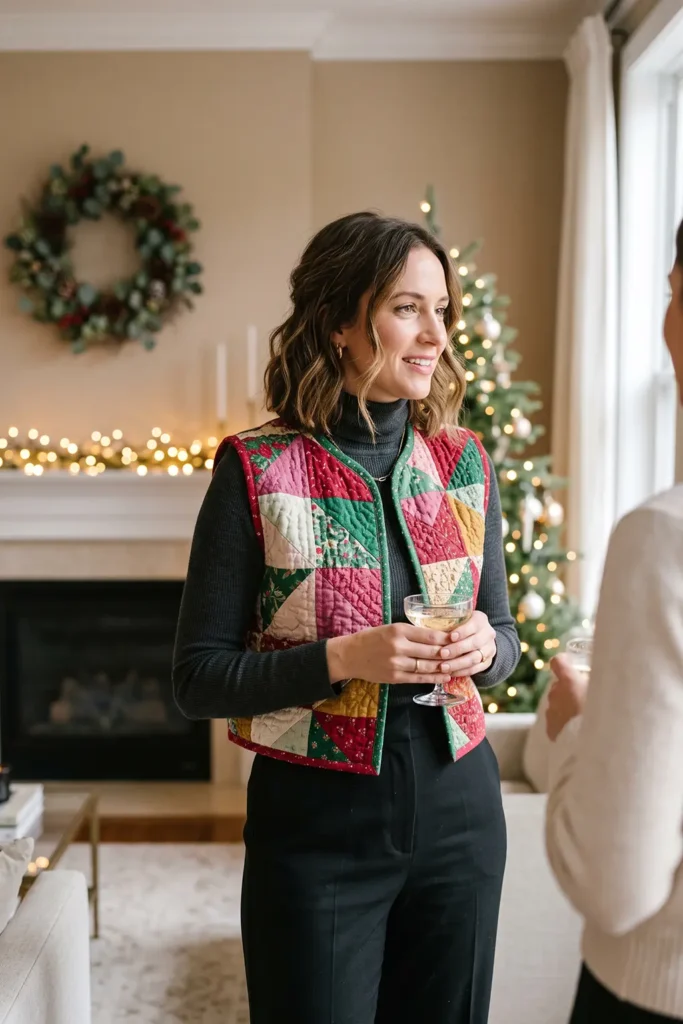
Materials Needed
For one women’s cropped quilted vest in an easy relaxed fit:
- Outer patchwork fabric: about 2 yards total of assorted quilting cottons, enough to cut 24 strips at 2 1/2″ × width of fabric
- Suggested colors: cranberry red, emerald green, holly green, berry pink, mustard gold, soft ivory, and a small amount of metallic gold print if desired
- Lining fabric: 1 yard of quilting cotton, cotton lawn, or lightweight cotton voile
- Low-loft cotton batting: 1 yard of 90″ wide batting or 1 1/2 yards of narrower batting
- Binding fabric: 5/8 yard, or enough for about 220″ of 2 1/4″ wide binding
- Buttons or snaps: 3 to 4
- Coordinating all-purpose thread
- Quilting thread if desired
- Rotary cutter, ruler, and cutting mat
- Pins or clips
- Walking foot
- Iron and pressing surface
- Vest pattern, or a simple collarless cropped vest template
Finished Size
The sample vest is designed as a relaxed women’s cropped vest with the following approximate finished measurements:
- Finished bust: 44″
- Finished length from shoulder: 20 1/2″
- Finished shoulder width: about 15 1/2″
- Armhole depth: about 9 1/2″
- Hem circumference: about 44″
This gives an easy fit for layering over a fitted knit top, blouse, or lightweight sweater. If you prefer a roomier fit, choose a larger pattern size or add width before cutting the quilted panels.
Color Plan
A lively holiday vest looks best when the darks, mediums, lights, and accent prints feel balanced. A good 24-strip distribution is:
- 6 strips in reds and berry tones
- 6 strips in emerald and holly greens
- 4 strips in gold and mustard tones
- 4 strips in ivory or cream
- 4 strips in supporting prints, such as pink-red florals, tiny stars, or subtle metallic prints
That balance keeps the vest festive and bright without turning too dark or too busy.
Cutting Plan
You will piece three oversized outer panels before quilting and cutting the actual vest shape.
Back Panel
Use 10 strips.
- Finished width after sewing: about 21″
- Working height: about 24″
Left Front Panel
Use 6 strips.
- Finished width after sewing: about 13″
- Working height: about 24″
Right Front Panel
Use 6 strips.
- Finished width after sewing: about 13″
- Working height: about 24″
Total Strip Count
- Back: 10 strips
- Left front: 6 strips
- Right front: 6 strips
Total used: 22 strips
Cut 24 strips so you have 2 spare strips for color adjustment, recutting, or replacing a print that looks out of place.
Step-by-Step Guide
Step 1 – Choose a Simple Vest Pattern
Pick a collarless cropped vest pattern with:
- Straight front opening
- Slightly relaxed fit
- Minimal shaping
- Front and back only, without complicated facings
- Optional button or snap closure
Avoid patterns with shawl collars, very deep curves, or bulky welt pockets if this is your first quilted garment.

Step 2 – Check the Finished Measurements
Before cutting fabric, check the finished measurements of the pattern or template. Make sure the vest will allow light layering.
A useful target for a cropped holiday vest is:
- 4″ to 6″ of ease at the bust
- A length of about 20″ to 21″
- A hem that ends near the high hip or slightly above it
This keeps the silhouette neat and party-friendly rather than long and heavy.
Step 3 – Prewash and Prepare the Fabrics
Prewash the outer cotton fabrics and lining if you plan to wash the finished vest later. Dry and press them well.
If one of your fabrics contains metallic print, test it with the iron first using a scrap. Some holiday prints handle regular cotton heat well, but others prefer slightly lower heat and a pressing cloth.

Step 4 – Cut the Outer Strips
Cut 24 strips at 2 1/2″ × width of fabric.
Separate them into groups for:
- Back panel
- Left front panel
- Right front panel
- Spare strips for balance or replacement
Trim away the selvages so your strips lie flat and consistent.
Step 5 – Arrange and Sew the Back Panel
Choose 10 strips for the back panel and arrange them in a pleasing order.
A good sequence might be:
cranberry → ivory → emerald → gold → berry print → holly green → ivory → red floral → mustard → emerald
Sew the strips together along the long edges using a 1/4″ seam allowance. Press the seams consistently to one side or press them open if you prefer a flatter panel.
The finished back panel should measure about 21″ wide.

Step 6 – Arrange and Sew the Left Front Panel
Choose 6 strips for the left front panel.
Sew them together in the same way with 1/4″ seams. Aim for a balanced mix of bright and light values so the front does not become too dark.
The finished left front panel should measure about 13″ wide.
Step 7 – Arrange and Sew the Right Front Panel
Choose 6 strips for the right front panel.
You can mirror the left front loosely, but it does not have to be identical. It is often nicer if the two fronts coordinate rather than match exactly.
The finished right front panel should also measure about 13″ wide.

Step 8 – Press and Square the Three Patchwork Panels
Press the back and front panels flat. Check that the edges are straight and the widths are consistent.
Trim each panel to a clean working rectangle:
- Back: about 21″ × 24″
- Left front: about 13″ × 24″
- Right front: about 13″ × 24″
Always confirm that these dimensions are still slightly larger than your vest pattern pieces.
Step 9 – Cut the Batting and Lining Panels
Cut batting and lining slightly larger than each patchwork panel.
Cut:
- 1 batting piece for the back: about 23″ × 26″
- 2 batting pieces for the fronts: about 15″ × 26″
- 1 lining piece for the back: about 23″ × 26″
- 2 lining pieces for the fronts: about 15″ × 26″
That extra margin helps prevent shrinkage from leaving the quilt sandwich too small after quilting.

Step 10 – Build the Three Quilt Sandwiches
For each panel, layer:
- Lining, wrong side up
- Batting
- Patchwork panel, right side up
Smooth all layers carefully. Pin baste or clip securely across the entire panel so nothing shifts during quilting.
Step 11 – Quilt the Panels
Quilt each panel in straight lines. For a soft wearable drape, place the quilting lines about 1 3/4″ to 2″ apart.
You can quilt:
- Vertically, following the strip direction
- Diagonally, for a more dynamic look
- In a soft crosshatch if you want more texture
For this vest, vertical quilting works especially well because it visually lengthens the cropped silhouette.

Step 12 – Cut the Final Vest Pieces
Place the vest pattern pieces on the quilted panels and cut:
- 1 back
- 1 left front
- 1 right front
Be mindful of where the brightest strips land. Try to keep very light or metallic strips near the upper front or neckline if you want a more festive glow near the face.
Mark the shoulder points, side seam notches, and closure placement before removing the pattern.
Step 13 – Sew the Shoulder Seams
Place the fronts right sides together with the back and sew both shoulder seams using a 1/2″ seam allowance, or the seam allowance required by your pattern.
Press gently so the quilted layers stay smooth and not overly flattened.

Step 14 – Bind the Shoulder Seams
Cut short lengths of binding and bind both shoulder seam allowances. This encloses the raw edges and keeps the inside neat and durable.
Because the batting is already inside the quilted panels, bound seams are often the cleanest and most reliable finish for a vest like this.
Step 15 – Sew the Side Seams
With right sides together, sew the side seams from the lower edge of the armhole down to the hem using a 1/2″ seam allowance.
Before going further, try the vest on. Check:
- Bust ease
- Armhole comfort
- Cropped length
- Hem position
If you need minor adjustments, this is the easiest point to make them.

Step 16 – Bind the Side Seams and Armholes
Once the fit looks right, bind the side seam allowances.
Then bind both armholes using continuous bias or straight-grain binding. Work slowly around the curve so the binding lies flat and smooth. This step makes a big visual difference because neat armholes give the vest a polished ready-to-wear look.
Assembly
At this point, the basic vest structure is complete. You should now have:
- A quilted back
- Two quilted front panels
- Sewn and bound shoulder seams
- Sewn and bound side seams
- Bound armholes
Only the outer perimeter remains unfinished:
- Front edges
- Neckline
- Hem
These are completed next, followed by the closures.
Step 17 – Bind the Front Edges, Neckline, and Hem
Join enough binding to go around the entire outer edge of the vest.
Start at one lower front edge and continue around:
- Up the front
- Around the neckline
- Down the opposite front
- Across the hem
Use care around corners so they stay crisp and even. A 2 1/4″ wide binding strip usually gives enough coverage for quilted layers without feeling bulky.
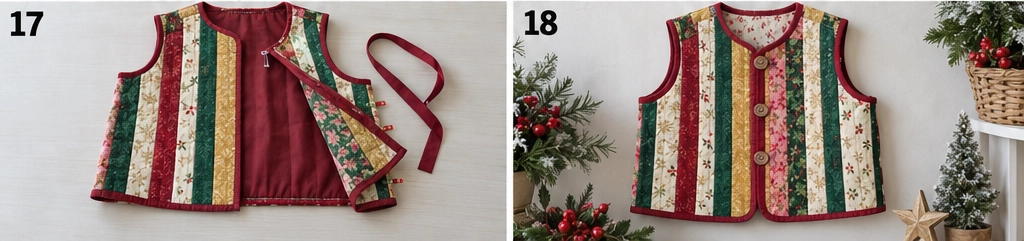
Step 18 – Add Closures and Give the Vest a Final Press
Mark and sew 3 or 4 buttons, snaps, or hook-and-loop closures along the front opening.
A good placement for 3 buttons is:
- 1 button about 2 1/2″ below the neckline
- 1 near the bust line
- 1 about 3″ to 4″ above the hem
After attaching the closures, give the vest a final careful press. Trim loose threads and check that all binding edges are securely stitched.
Assembly at a Glance
- Choose a simple cropped vest pattern
- Check the finished measurements
- Prewash and press the fabrics
- Cut 24 strips at 2 1/2″ × WOF
- Sew the 10-strip back panel
- Sew the 6-strip left front panel
- Sew the 6-strip right front panel
- Press and square all three patchwork panels
- Cut batting and lining slightly oversized
- Build the quilt sandwiches
- Quilt the panels 1 3/4″ to 2″ apart
- Cut the final vest pieces
- Sew the shoulder seams
- Bind the shoulder seams
- Sew the side seams
- Bind the side seams and armholes
- Bind the front edges, neckline, and hem
- Add closures and final press
Styling Notes
A cropped holiday vest looks especially good over:
- A slim black turtleneck
- A white blouse with wide-leg trousers
- A knit dress
- A velvet top
- A fitted long-sleeve tee with jeans
Because the vest is cropped, it naturally works well for party layering. It adds color and warmth without covering too much of the outfit underneath.
Other Design Inspirations – Digitally Modified Images. Texture and color may vary from the actual product.
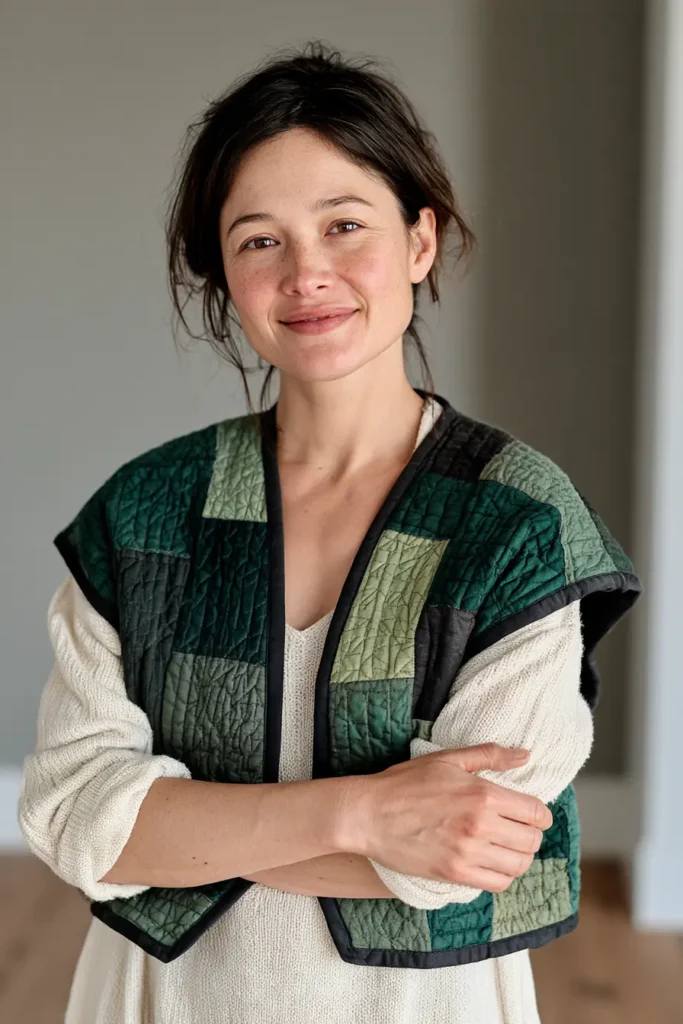
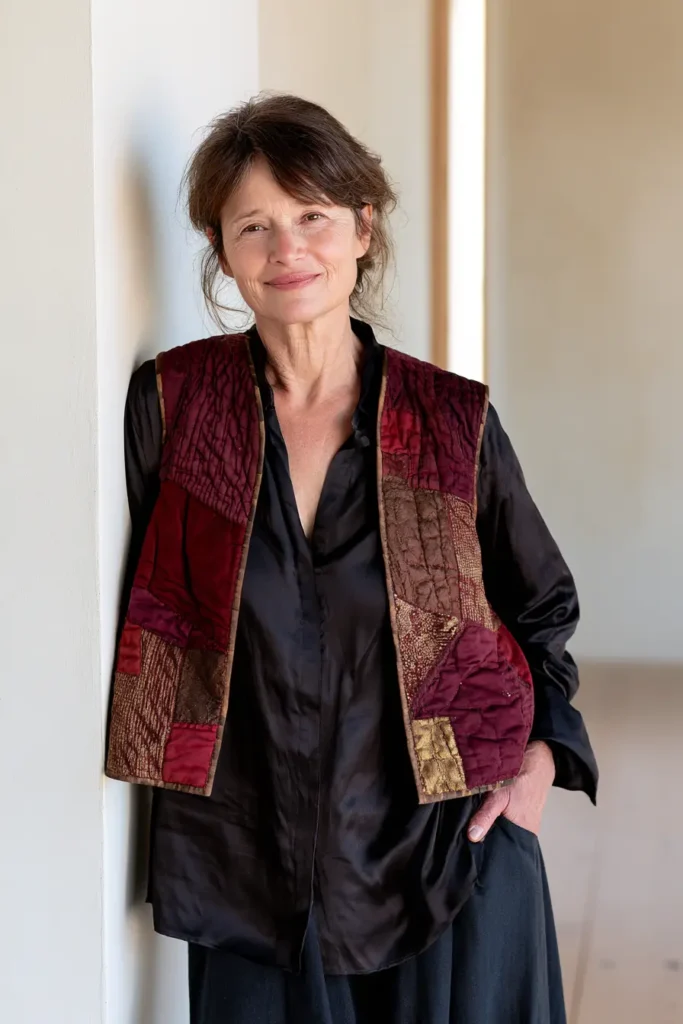
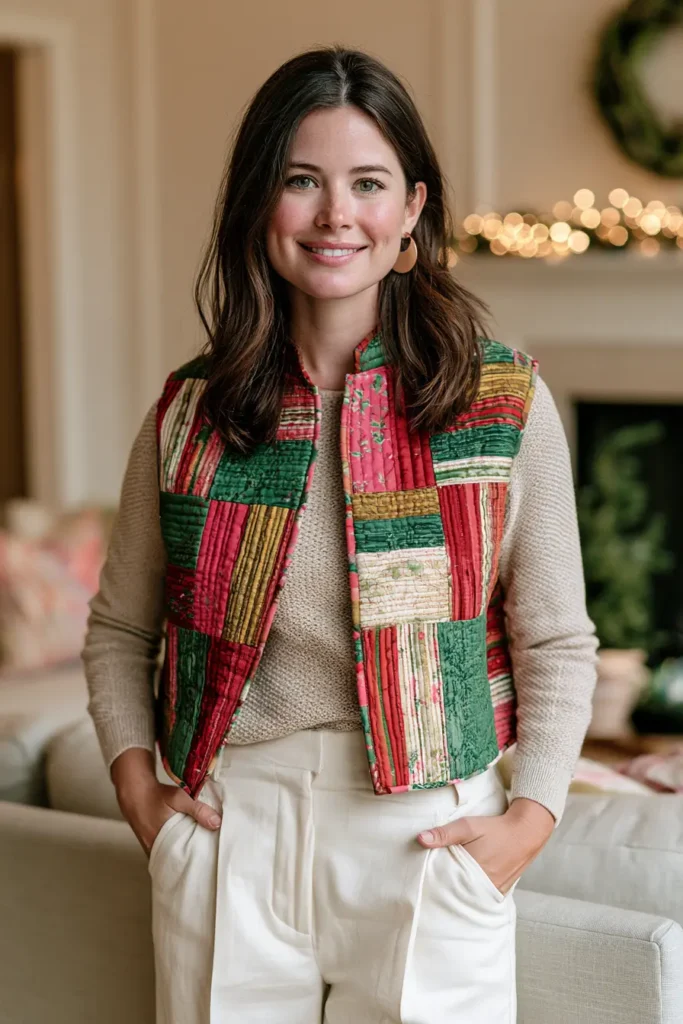
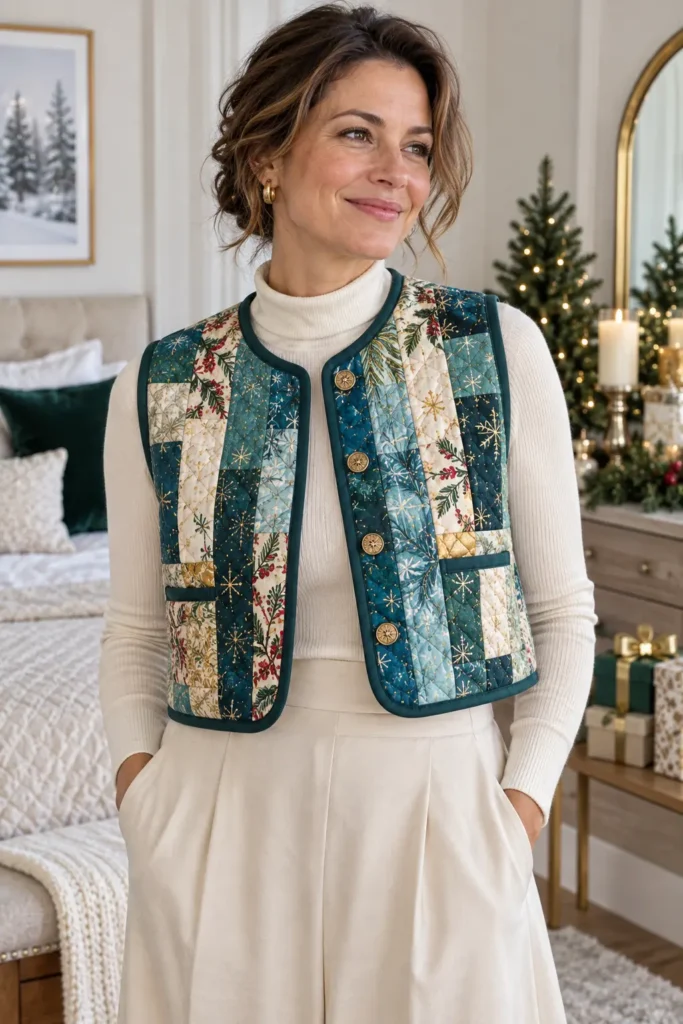
9. Flannel-Lined Quilted Christmas Vest for Extra Cozy Warmth
A quilted Christmas vest gives you nearly all the cozy texture of a quilt coat without the weight and bulk of full sleeves. Add a soft flannel lining, and it becomes an especially useful winter layer: warm enough for a chilly house, Christmas market, school concert, or outdoor gathering, but easy to wear over a sweater without feeling restrictive.
For this version, the patchwork is deliberately bright rather than muted. Think ruby red, cranberry, holly green, emerald, peacock teal, warm gold, berry pink, and crisp cream. Those lighter cream and gold patches are important because they stop the saturated reds and greens from blending into one heavy block of color.
The construction follows the same principle used for a quilt coat: first make quilted fabric, then cut the garment from it. That approach keeps the patchwork balanced across the vest and makes assembly surprisingly straightforward.
Why This Idea Is Worth Making
A sleeveless quilted vest is a particularly practical first step into quilted garment making.
You get to practice piecing, quilting, garment cutting, bound seams, pockets, and edge binding, but you avoid the most difficult part of many quilt coats: setting and finishing bulky sleeves.
The flannel lining also changes how the vest feels. Regular quilting cotton makes a crisp, light lining, while flannel adds softness and warmth without requiring very thick batting. That means you can keep the middle layer thin and still end up with a genuinely cozy garment.
Another advantage is versatility. A Christmas palette can be festive without relying on novelty prints. Small stars, checks, florals, dots, stripes, plaids, and tone-on-tone designs in rich seasonal colors create a vest that feels handmade and celebratory rather than costume-like.
Design Inspirations – Digitally Modified Images. Texture and color may vary from the actual product.
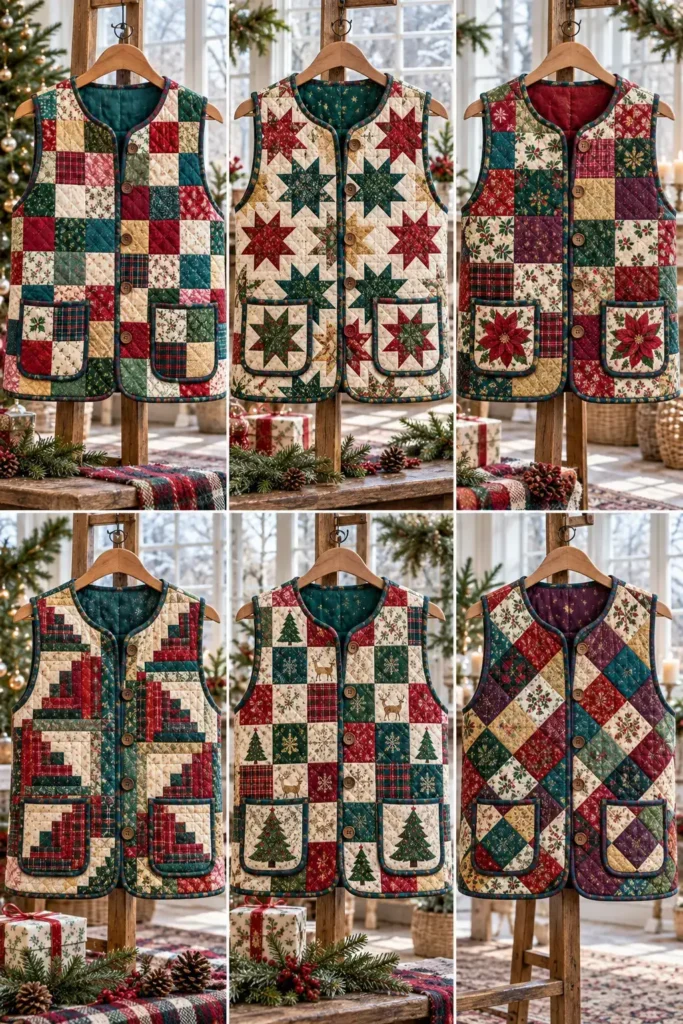
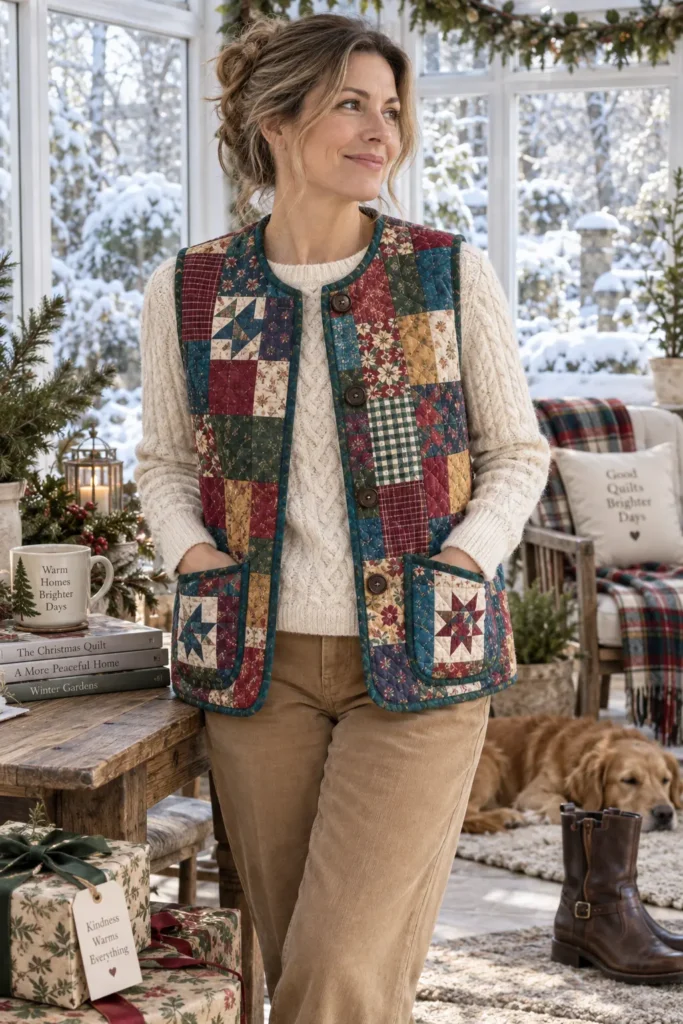
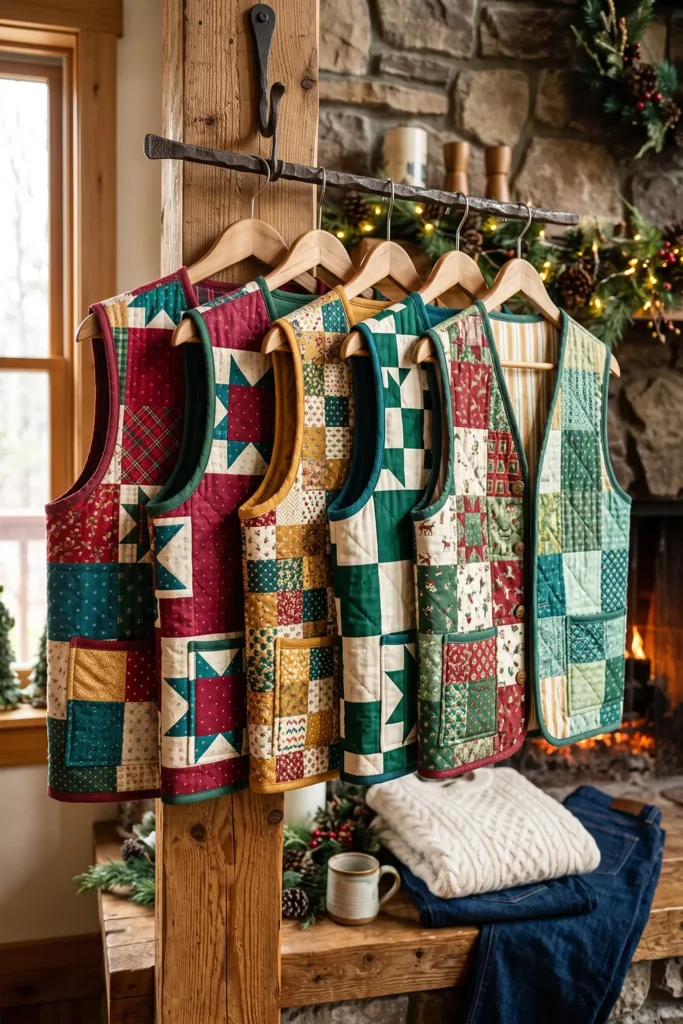
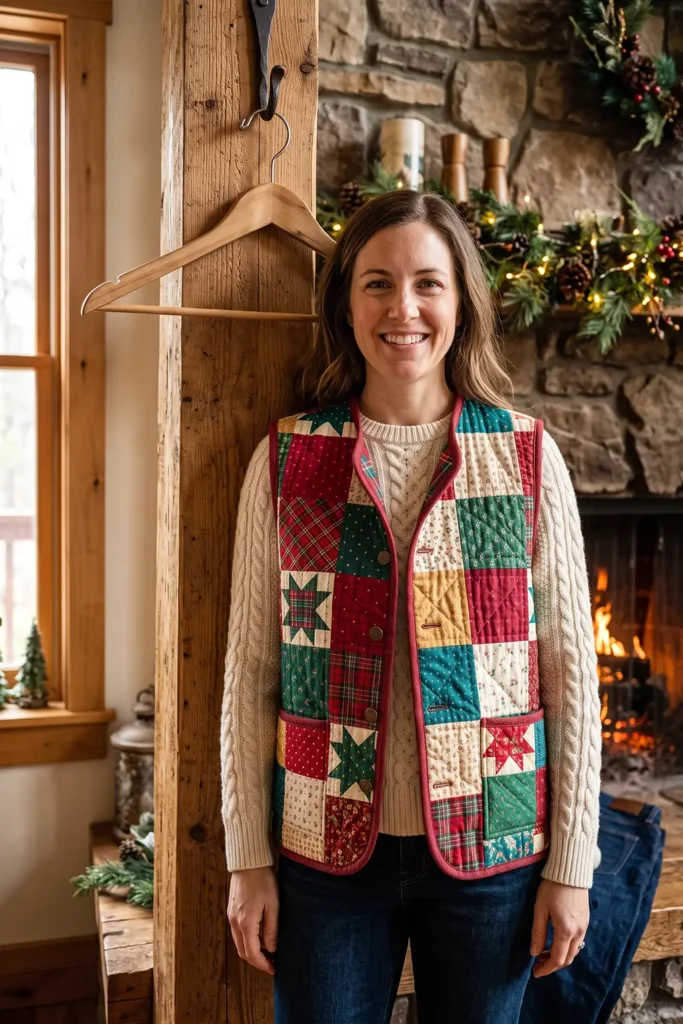
A Little Background: From Quilts to Wearable Layers
Quilted clothing is much older than the modern quilt-coat trend. Padded and quilted garments have been used for warmth in many cultures for centuries, while patchwork garments have long offered a practical way to turn smaller pieces of valuable cloth into useful clothing.
Today’s handmade quilted vests combine those traditions with modern patchwork quilting. Instead of constructing the garment from ordinary yardage, you make your own fabric first: pieced top, thin batting, and lining.
Once quilted, those panels can be treated almost like heavy fabric.
That construction order is important.
How It’s Built
The vest is assembled in five main stages:
- Piece oversized patchwork panels for the back and two fronts.
- Make an additional small patchwork panel for the pockets.
- Quilt each panel with low-loft batting and flannel backing.
- Cut the actual vest pieces from the finished quilted yardage.
- Sew the shoulders and sides, bind the internal seams, then bind the armholes and outer perimeter.
This tutorial uses 4½-inch cut squares, which finish at 4 inches after piecing with ¼-inch seam allowances.
For an average adult medium vest, a practical starting layout is:
- Back panel: 7 squares across × 8 squares down
- Each front panel: approximately 4 squares across × 8 squares down
That creates a back panel roughly 28 × 32 inches finished and two front panels roughly 16 × 32 inches finished.
Those measurements are intentionally larger than the eventual garment pieces. Always place your actual pattern over the planned grid before sewing; larger sizes may need another column or row.
Finished Garment
The sample proportions are intended for a relaxed adult medium vest:
- Style: collarless, button-front quilted vest
- Fit: relaxed with approximately 4–5 inches of wearing ease
- Finished chest: approximately 42 inches, depending on pattern
- Finished length: approximately 26 inches from shoulder to hem
- Outer squares: 4½ inches cut, 4 inches finished
- Pockets: approximately 7 × 8½ inches
- Closure: 4 buttons
- Garment seam allowance: ½ inch
- Patchwork seam allowance: ¼ inch
- Skill level: confident beginner
- Core techniques: patchwork piecing, quilting, garment cutting, bound seams, bias binding, patch pockets, buttonholes
Use your chosen vest pattern for the final fit rather than relying only on these sample dimensions.
Materials Needed
For an average adult medium vest:
- 9 fat quarters of quilting cotton for the patchwork outer layer; nine fat quarters can yield up to about 144 squares measuring 4½ × 4½ inches
- Add a tenth or eleventh fat quarter for larger sizes or if you want more freedom when arranging colors
- 2 yards low-loft cotton or bamboo batting, approximately 45 inches wide
- 2 yards soft cotton flannel for the lining
- ¾ yard coordinating cotton for bias binding
- 4 buttons, approximately ⅞–1 inch in diameter
- Neutral cotton piecing thread
- Coordinating construction and topstitching thread
- Walking foot
- Rotary cutter
- Cutting mat
- Quilting ruler
- Fabric clips or pins
- Removable fabric marker
- 90/14 sewing-machine needle for quilting and garment construction
- A simple collarless, sleeveless, button-front vest pattern with a genuine front overlap
Avoid patterns with lapels, collars, separate front facings, darts, welt pockets, or complicated shaping unless you’re comfortable adapting garment instructions.
A simple boxy vest is ideal.
Choosing Your Colors
For a vibrant Christmas vest, divide the palette into four groups.
Reds
- Ruby
- Cranberry
- Scarlet
- Wine
- Raspberry
Greens and cool accents
- Emerald
- Holly green
- Pine
- Peacock teal
- Deep turquoise
Bright accents
- Warm gold
- Berry pink
- Small touches of coral or jewel-toned purple
Lights
- Cream
- Ivory
- Warm white
- Pale gold
Aim for approximately 25–30 percent light-value squares.
Those cream and pale-gold patches give the stronger Christmas colors room to breathe. Without them, saturated red, emerald, teal, and cranberry fabrics can begin to visually merge.
Keep most prints fairly small. A finished 4-inch square does not show a large motif well. Tiny stars, berries, dots, stripes, checks, small florals, miniature plaids, and tone-on-tone designs work beautifully.
For the flannel lining, either continue the color story with a red-and-emerald plaid or use one strong solid such as cranberry, teal, or deep forest green.
Cutting Measurements
For the sample medium vest:
- Patchwork squares: cut approximately 130–144 squares at 4½ × 4½ inches
- Back panel: target approximately 28 × 32 inches finished
- Front panels: target approximately 16 × 32 inches finished each
- Pocket patchwork panel: at least 18 × 11 inches
- Finished pocket pieces: cut two approximately 7 × 8½ inches
- Batting: cut approximately 1½ inches larger on every side than each pieced panel
- Flannel lining: also cut approximately 1½ inches larger on every side
- Armhole binding: cut 2-inch true-bias strips
- Outer-edge binding: cut 2¼-inch true-bias strips
- Prepare approximately 5–6 yards of joined binding in total
The panel sizes are planning measurements, not substitutes for fitting. Before sewing a grid, place the corresponding pattern piece over the proposed dimensions and confirm that there is at least 2 inches of spare quilted fabric around every edge.
Step-by-Step Guide
Step 1 — Choose the Vest Pattern and Confirm the Size
Choose a straightforward collarless vest pattern with:
- A true button-front overlap
- No collar
- No front facing
- No darts if possible
- Simple armhole shaping
- A relaxed or slightly boxy fit
Select the size using the pattern’s finished garment measurements, not only the printed size number.
For a winter layering vest, aim for approximately 4–5 inches of positive ease through the chest.
For example, someone with a 37–38-inch bust will usually be comfortable in a vest finishing around 42 inches at the chest.
If the back pattern piece is designed to be cut on a fold, trace it onto paper and mirror it so you have a complete full-width back template. Cutting a thick quilted panel on a fold can distort the edges.
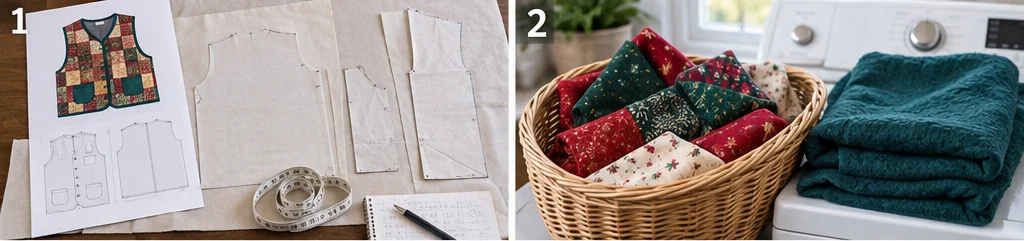
Step 2 — Prewash the Cotton and Flannel
Prewash and dry both the quilting cotton and the flannel before cutting.
This is particularly important with flannel because it can shrink more noticeably than quilting cotton.
If one layer shrinks significantly after the garment is finished while another does not, the vest can twist or pucker unevenly.
Press the fabric smooth before cutting.
For the batting, follow the manufacturer’s instructions. If you want a deliberately crinkled quilted finish, you can leave cotton batting unwashed. If dimensional stability matters more, use a pre-shrunk batting.
Step 3 — Plan the Patchwork and Check the Panel Sizes
Lay the full back pattern piece on your cutting surface.
Build a rough grid of 4½-inch paper squares or fabric squares around it.
For many medium sizes, a 7 × 8-square back layout works well.
After piecing, that becomes approximately:
- 7 × 4 inches = 28 inches wide
- 8 × 4 inches = 32 inches long
Do the same for the fronts.
A typical medium front fits comfortably within a 4 × 8-square panel, finishing around 16 × 32 inches, but your pattern controls the final answer.
Make sure every pattern piece has at least 2 inches of extra patchwork around it.
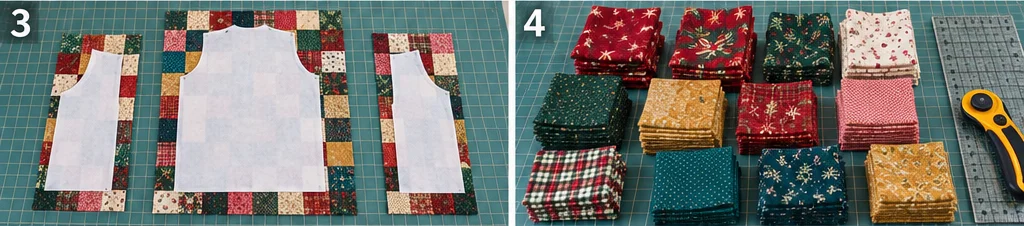
Step 4 — Cut the Patchwork Squares
Cut the outer cotton into 4½ × 4½-inch squares.
Nine fat quarters can theoretically produce about 144 squares, although prints, trimming, directional motifs, and cutting errors may reduce the usable number slightly.
Aim for approximately:
- 30–35 red squares
- 30–35 green or teal squares
- 25–30 cream or pale-gold squares
- The remainder in jewel-tone accent colors
Keep the squares in color groups while cutting, then mix them before layout.
Step 5 — Lay Out the Back Panel
Arrange 7 squares across × 8 squares down, or enlarge the grid if required by your pattern.
Distribute the cream and pale-gold squares throughout instead of putting them together in one area.
Avoid creating obvious red-only and green-only zones.
Try not to place identical fabrics directly beside one another.
Once you’re satisfied, place the back template over the arrangement again and confirm that the neckline, shoulders, armholes, side seams, and hem all remain safely inside the patchwork.
Photograph the layout before moving anything.
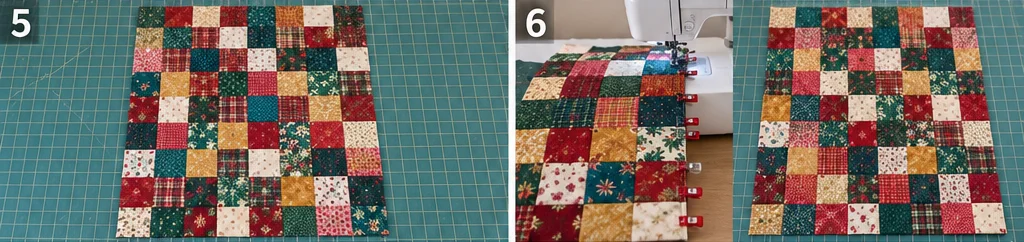
Step 6 — Piece the Back Panel
Sew the squares into horizontal rows with ¼-inch seam allowances.
Press the seam allowances in Row 1 toward the right.
Press Row 2 toward the left.
Continue alternating directions.
This lets the seams nest when the rows are joined and makes the square intersections easier to match.
Join the rows with ¼-inch seams.
Press the completed back panel flat.
Measure it again. A 7 × 8 layout should finish at approximately 28 × 32 inches.
Step 7 — Piece the Front and Pocket Panels
Lay out the two fronts separately so their color distribution feels related without being perfectly mirrored.
For a typical medium vest, each front may use a 4 × 8-square grid, finishing at approximately 16 × 32 inches.
Before stitching, place the corresponding front pattern piece over each grid.
Pay particular attention to the center-front overlap. Do not accidentally treat the visible front edge as a seam line.
Piece both panels using the same ¼-inch seam allowance and alternating pressing method.
Then piece a small additional patchwork section at least 18 × 11 inches for the two pockets.
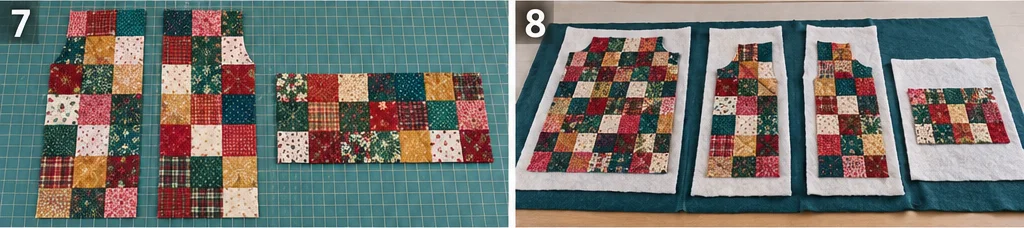
Step 8 — Make the Quilt Sandwiches
Cut batting and flannel approximately 1½ inches larger on every side than each patchwork panel.
For every panel, layer:
- Flannel lining, wrong side up
- Low-loft batting
- Patchwork, right side up
Smooth the layers carefully from the center outward.
Baste with safety pins or temporary basting spray, following the product instructions.
Repeat for:
- Back
- Left front
- Right front
- Pocket panel
Step 9 — Quilt All Four Panels
Quilt the layers together before cutting the garment pieces.
A simple diagonal grid looks especially good over square patchwork.
Space the quilting approximately 2–2½ inches apart.
You can also quilt:
- Through the center of each patchwork square
- Along one diagonal through each square
- In widely spaced vertical and horizontal lines
Avoid extremely dense quilting. Dense quilting can make a wearable garment stiff.
Use a walking foot and a 90/14 needle, and work from the center of each panel toward the edges whenever practical.
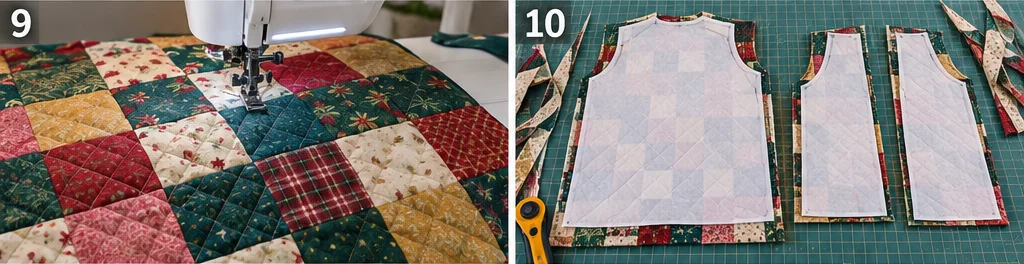
Step 10 — Trim and Cut the Vest Pieces
Once quilting is complete, trim away the excess batting and flannel so the edges are even with the patchwork.
Place the vest templates over the quilted panels.
Before cutting, look underneath the pattern edges and check where the thick patchwork seam intersections fall.
Whenever possible, shift the template slightly so bulky intersections do not sit directly on:
- Shoulder seams
- Side seams
- Armhole curves
- Buttonhole positions
Trace and cut:
- 1 full back
- 2 fronts
Transfer all pattern markings with removable chalk or another suitable marker.
Step 11 — Cut the Quilted Patch Pockets
From the small quilted pocket panel, cut two rectangles approximately 7 × 8½ inches.
Place them side by side before cutting and choose sections with strong but slightly different color arrangements.
The finished pockets will stay close to these dimensions because you’ll bind the edges instead of folding them under.
Check that both pockets are the same size.
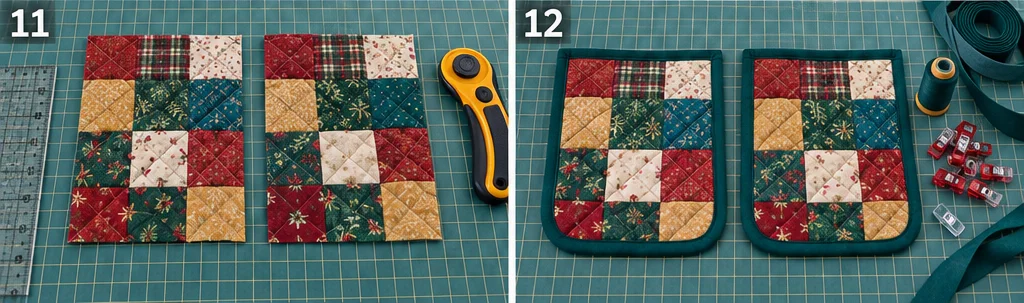
Step 12 — Bind the Pocket Edges
Use coordinating 2-inch bias strips to bind all four sides of each pocket.
Sew the binding to the pocket front with approximately a ¼-inch seam.
Wrap it over the raw edge to the flannel side.
Turn the remaining raw binding edge under and topstitch securely.
At the corners, make clean miters rather than stacking folds on top of one another.
Press each finished pocket flat.
Step 13 — Position and Attach the Pockets
Lay the front vest pieces flat.
A useful starting position is:
- Pocket top approximately 3½–4 inches below the underarm
- Inner pocket edge approximately 2¼–2½ inches from the finished front edge
Adjust slightly for the wearer’s height and hand position.
Pin or clip each pocket in place.
Topstitch along the sides and bottom approximately ⅛ inch inside the pocket binding.
Leave the top completely open.
Add a short reinforcing bar tack at each upper corner.
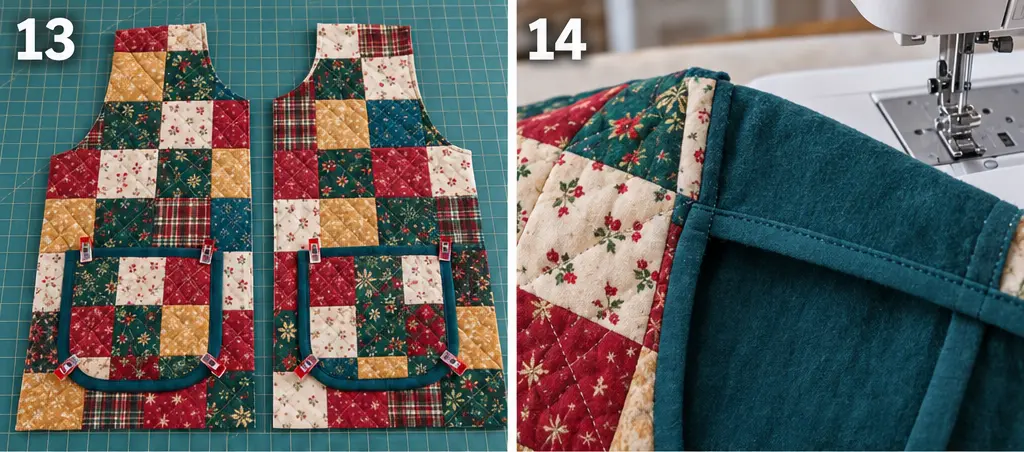
Step 14 — Sew and Bind the Shoulder Seams
Place each front against the back with outer patchwork sides together.
Match the shoulder edges.
Sew each shoulder using a ½-inch seam allowance.
Do not press the seam allowances open.
Keep both allowances together and trim only if necessary to make them even.
Encase them together with binding and press the finished bound seam toward the back.
This produces a much cleaner interior than attempting to turn thick quilted seam allowances separately.
Step 15 — Sew and Bind the Side Seams
Match the front and back side seams with patchwork sides facing.
Sew each side with a ½-inch seam allowance.
Before binding, try the vest on.
Check:
- Chest ease
- Armhole comfort
- Hem position
- Front overlap
- Pocket placement
Make any fit adjustments now.
Once satisfied, keep the two side-seam allowances together and bind each seam neatly.
Press the bound allowances toward the back.
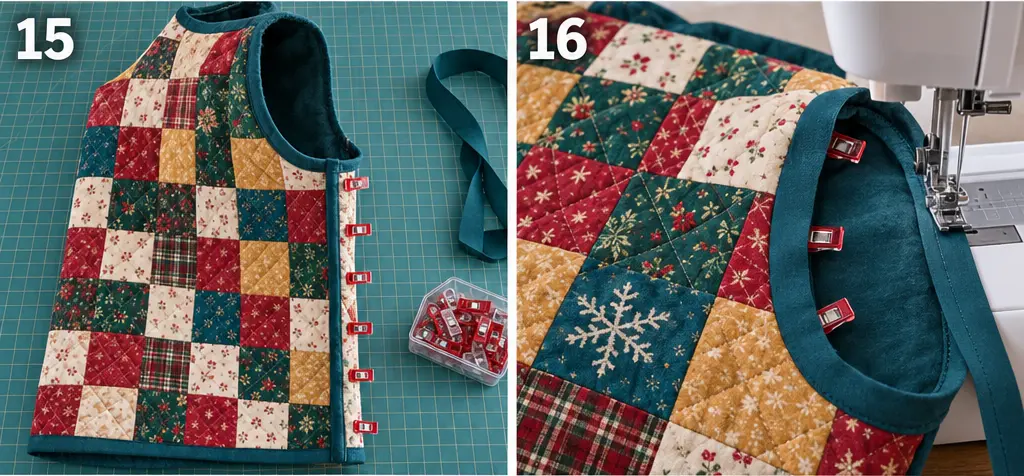
Step 16 — Bind Both Armholes
Measure each armhole circumference.
Join enough 2-inch true-bias strips to go around one armhole plus at least 2 inches extra.
With the right side of the binding against the patchwork side of the vest, sew around the armhole with approximately a ¼-inch seam allowance.
Join the binding ends neatly.
Wrap the binding over the raw quilted edge to the flannel side.
Turn the raw edge under and stitch it in place from the inside, or stitch in the ditch from the outside while catching the folded edge underneath.
Repeat for the second armhole.
Aim for an even finished binding width of approximately ½ inch.
Step 17 — Bind the Fronts, Neckline, and Hem
Use 2¼-inch true-bias binding for the outer perimeter.
The front edges, neckline, opposite front, and hem form one continuous outer path.
Starting near the lower back hem, work around:
- Hem
- Lower front corner
- First front edge
- Neckline
- Opposite front edge
- Second lower front corner
- Remaining hem
Miter the two lower front corners carefully.
Join the binding ends with a diagonal seam to reduce bulk.
Wrap the binding around the raw quilted edge and finish it on the flannel side.
Check that both front edges remain the same length and that the vest hangs evenly before final topstitching.
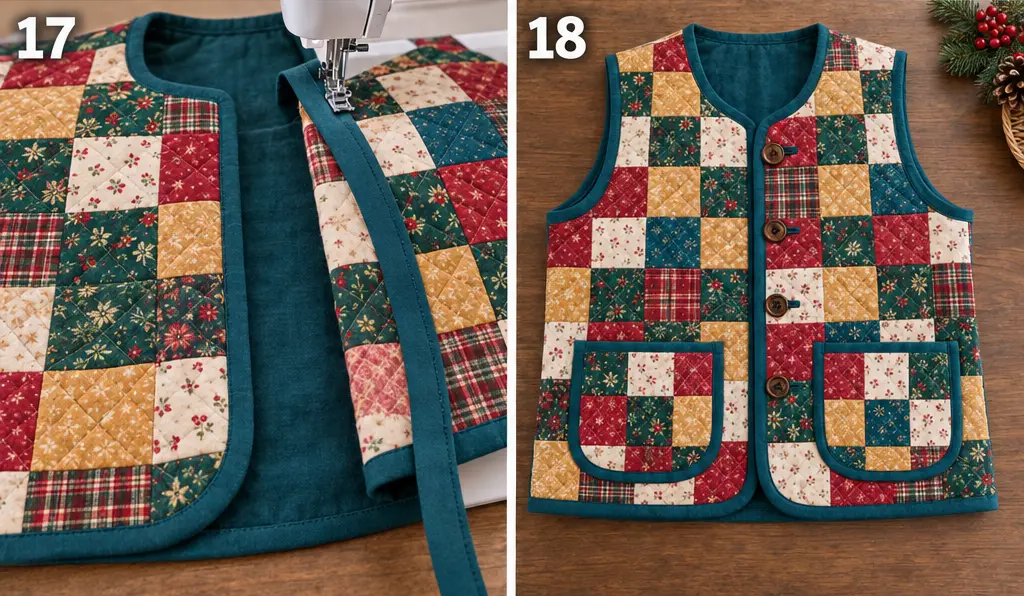
Step 18 — Add the Buttons, Buttonholes, and Final Finish
Put the vest on over the type of clothing you’ll normally wear underneath it.
Overlap the fronts naturally.
Mark four button positions.
For a 26-inch vest, spacing of approximately 3½–4 inches usually looks balanced.
Place one button close to the fullest part of the bust so the front does not gape.
Keep buttonholes far enough from the bound edge that the stitching sits securely in the quilted front extension.
A buttonhole should normally be approximately ⅛ inch longer than the button’s widest diameter, although test one first on a leftover quilted scrap.
Sew the buttonholes and carefully open them.
Overlap the vest, mark the corresponding button positions, and sew the four buttons securely.
Trim loose threads.
Press lightly without crushing the batting.
If you’d like the vest to develop a softer quilted texture, wash it gently in cold water and dry according to your fabric and batting instructions. A color catcher is useful for the first wash when using strong reds and jewel tones.
Your flannel-lined Christmas vest is finished.
Assembly at a Glance
- Choose a simple collarless button-front vest pattern with about 4–5 inches of ease.
- Prewash the quilting cotton and flannel.
- Check the pattern against proposed 4-inch finished-square grids.
- Cut approximately 130–144 squares at 4½ inches.
- Lay out the back, using roughly a 7 × 8 grid for a medium.
- Piece the back with ¼-inch seams.
- Piece both fronts and the extra pocket panel.
- Layer patchwork, low-loft batting, and flannel.
- Quilt approximately 2–2½ inches apart.
- Trim the panels and cut the back and two fronts.
- Cut two 7 × 8½-inch quilted pockets.
- Bind all pocket edges.
- Topstitch the pockets to the fronts.
- Sew and bind the ½-inch shoulder seams.
- Sew and bind the ½-inch side seams.
- Bind both armholes with 2-inch bias strips.
- Bind the entire outer perimeter with 2¼-inch bias binding.
- Add four buttons and buttonholes, then finish and press.
Beginner Tips for Success
- Use low-loft batting. The flannel already adds warmth, so thick batting is unnecessary.
- Prewash your flannel. Its shrinkage can be greater than that of quilting cotton.
- Keep approximately 25–30 percent of the patchwork light-valued so vibrant reds, greens, and teals stay visually distinct.
- Test every proposed panel size by placing the actual garment template over it.
- Give yourself at least 2 inches of extra patchwork around every garment piece before quilting.
- Quilt first and cut the garment second.
- Keep quilting lines around 2–2½ inches apart so the vest remains flexible.
- Avoid placing bulky four-square intersections directly on the armhole or shoulder seam.
- Use true bias binding around the armholes and neckline because it needs to curve smoothly.
- Bind the internal shoulder and side seam allowances together instead of trying to press thick quilted seams open.
- Test the buttonhole on a quilted scrap before cutting into the vest.
- When using saturated Christmas reds, wash with a color catcher the first time.
Styling It & Gift Ideas
A vibrant quilted Christmas vest works best over simple layers.
Try it with:
- A cream turtleneck and dark jeans
- A forest-green sweater with black trousers
- A white shirt and denim
- A berry-red knit with neutral trousers
- A long-sleeved black dress
- A chunky cream sweater with boots
Because the vest is sleeveless, it also layers comfortably beneath a larger winter coat.
For a slightly more sophisticated Christmas look, let emerald, cranberry, teal, and gold dominate instead of relying only on bright red and grass green.
It can also make a particularly thoughtful handmade gift.
Choose the wearer’s favorite colors and use Christmas prints sparingly among more versatile plaids, stars, dots, stripes, and florals. That way the vest still feels festive but is wearable throughout winter.
A matching pair in related palettes could also work beautifully for sisters, a parent and adult child, or close friends.
Final Thoughts
A flannel-lined Christmas quilted vest gives you warmth, bright holiday color, and handmade patchwork without the bulk of a full quilted coat.
The most important construction decision is to make oversized quilted panels before cutting the garment pieces. That gives you room to position the pattern intelligently, avoid bulky seam intersections, and keep the color distribution balanced.
Use thin batting, soft prewashed flannel, enough cream or gold to separate the richer colors, and widely spaced quilting so the finished vest remains flexible.
The result is a practical winter layer with the comfort of a quilt, the softness of flannel, and enough ruby, emerald, teal, gold, and cranberry color to feel unmistakably festive.
Other Design Inspirations – Digitally Modified Images. Texture and color may vary from the actual product.
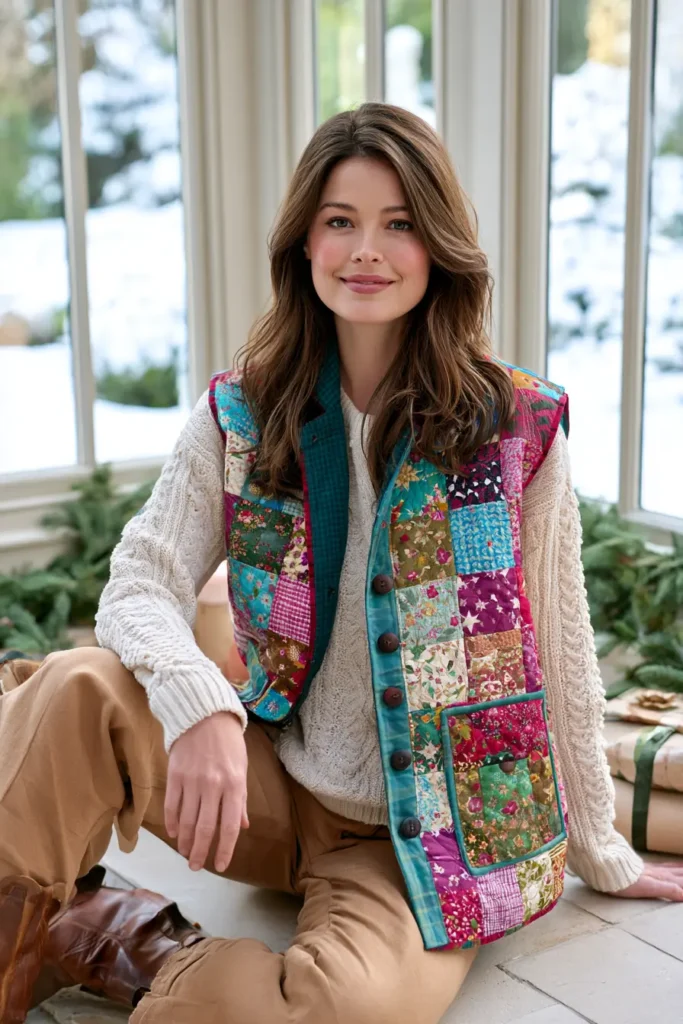
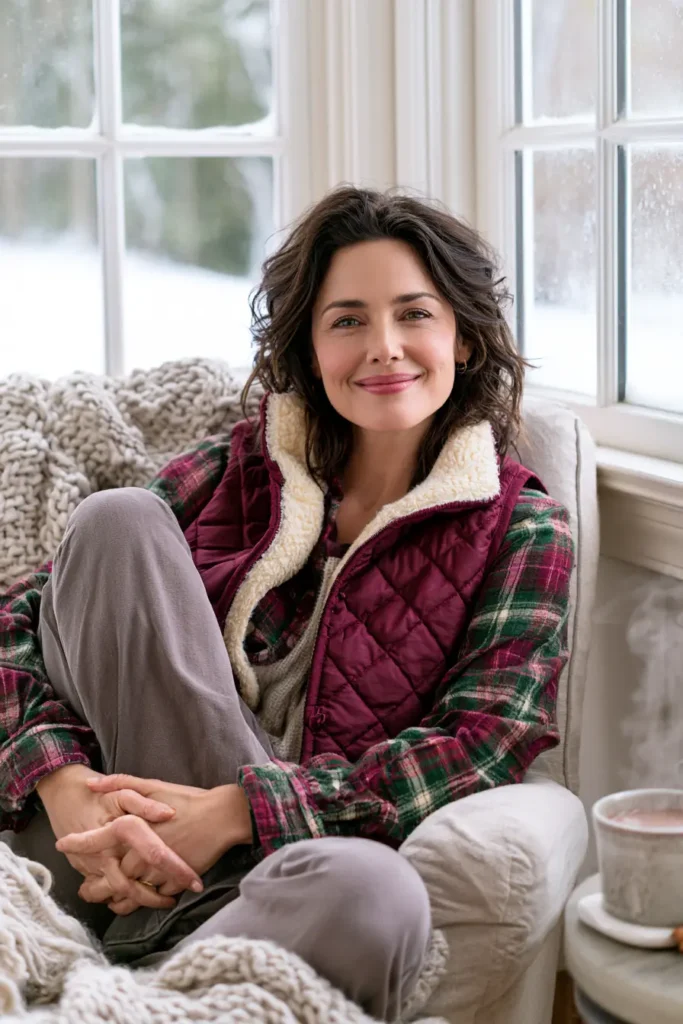
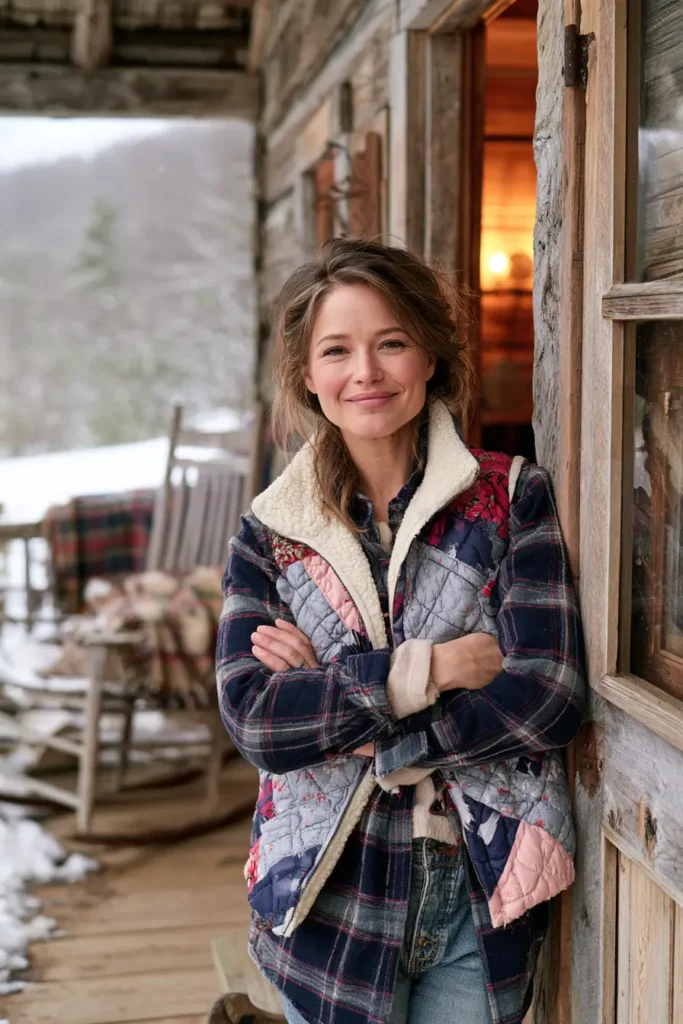
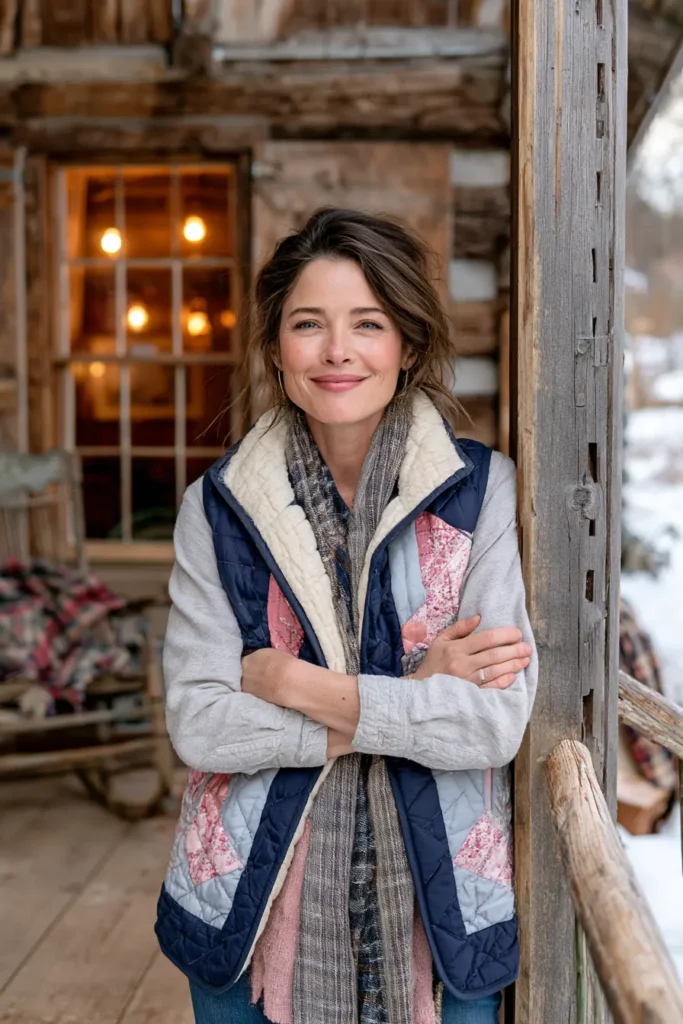
10. Quick Quilt-As-You-Go Christmas Jacket for Last-Minute Sewing
When time is short but you still want something handmade, a quilt-as-you-go Christmas jacket is one of the smartest festive projects to sew. Instead of piecing a full patchwork top first and quilting it later, you build the quilted fabric panel by panel as you sew. That saves time, reduces handling, and makes the whole process feel much more manageable.
For this jacket, bright Christmas color works especially well. Think cranberry red, cherry, emerald, pine, turquoise, hot pink, golden yellow, and cream. The key is not using only red and green. A strong third value such as cream or pale gold keeps the strips looking crisp and lively instead of blending into a single dark mass.
The finished shape here is a simple collarless boxy jacket with dropped shoulders, patch pockets, full sleeves, and bound edges. It is fast, practical, festive, and far more wearable than a novelty holiday sweater.
Why This Idea Is Worth Making
Quilt-as-you-go construction is especially useful for garments because it keeps each section small while you work. You do not have to wrestle a large quilt sandwich under the machine. Each panel is built in a controlled way, then cut into the garment pieces.
That is one reason quilt-as-you-go has remained popular for years. It began as a practical quilting method for people working in sections, and it adapts beautifully to jackets, vests, and coats.
This version is also ideal for last-minute holiday sewing because the strip piecing is forgiving. Small mismatches disappear into the scrappy look, and the repeated strip construction goes quickly once the first panel is underway.
Design Inspirations – Digitally Modified Images. Texture and color may vary from the actual product.
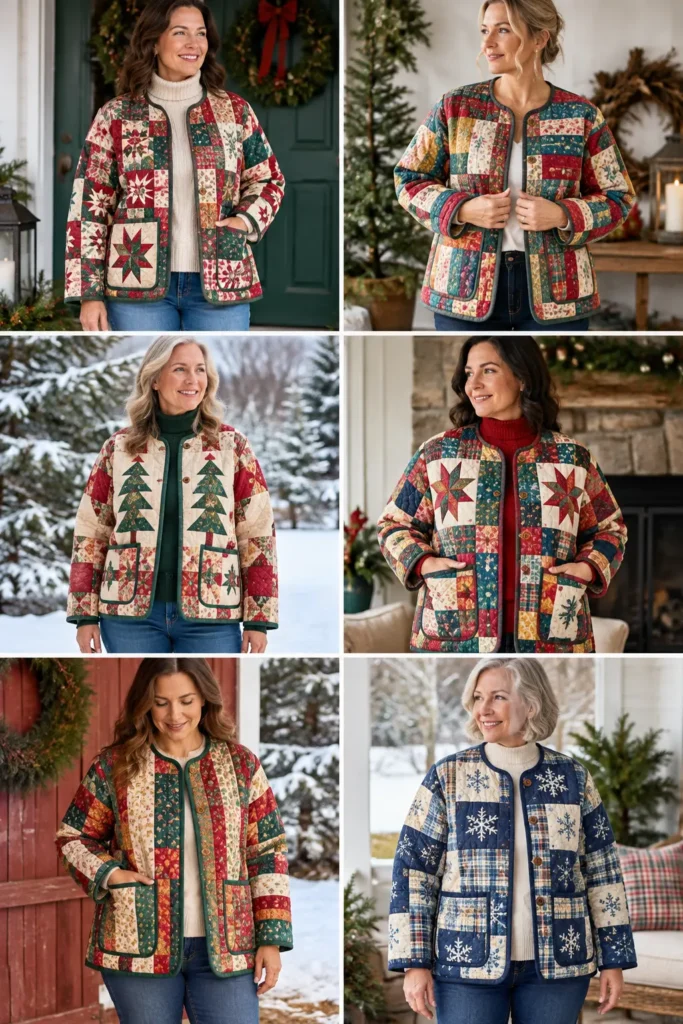
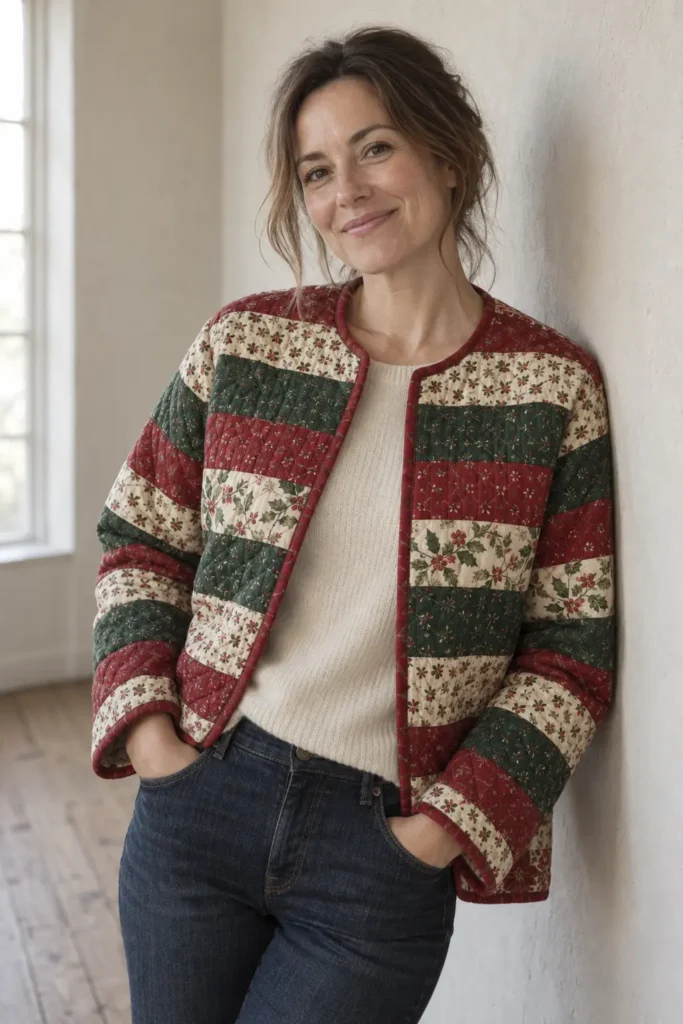
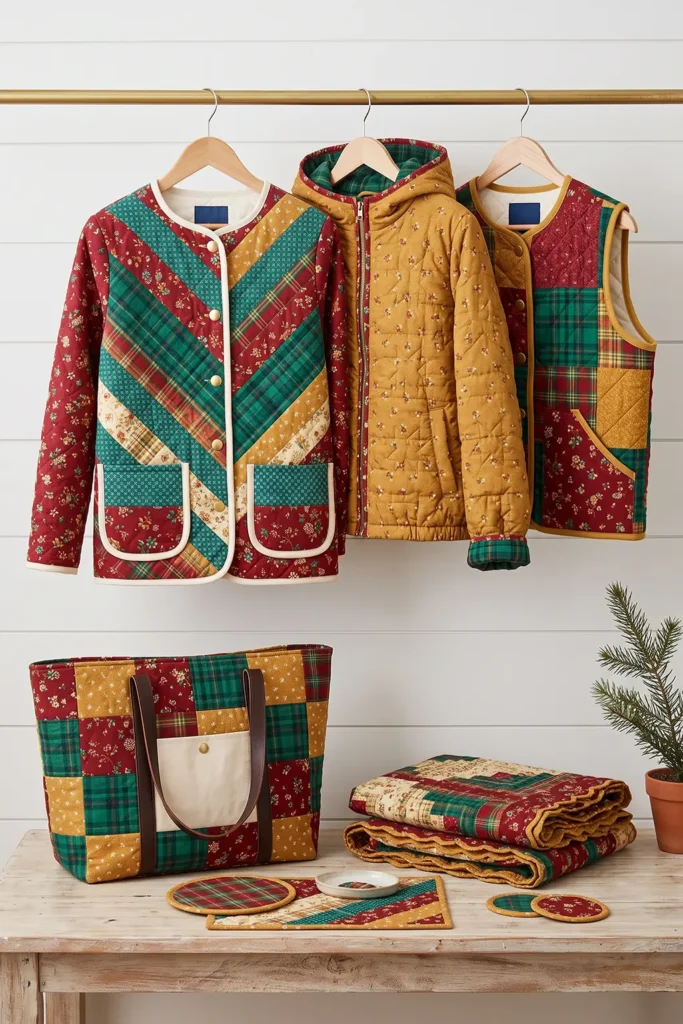
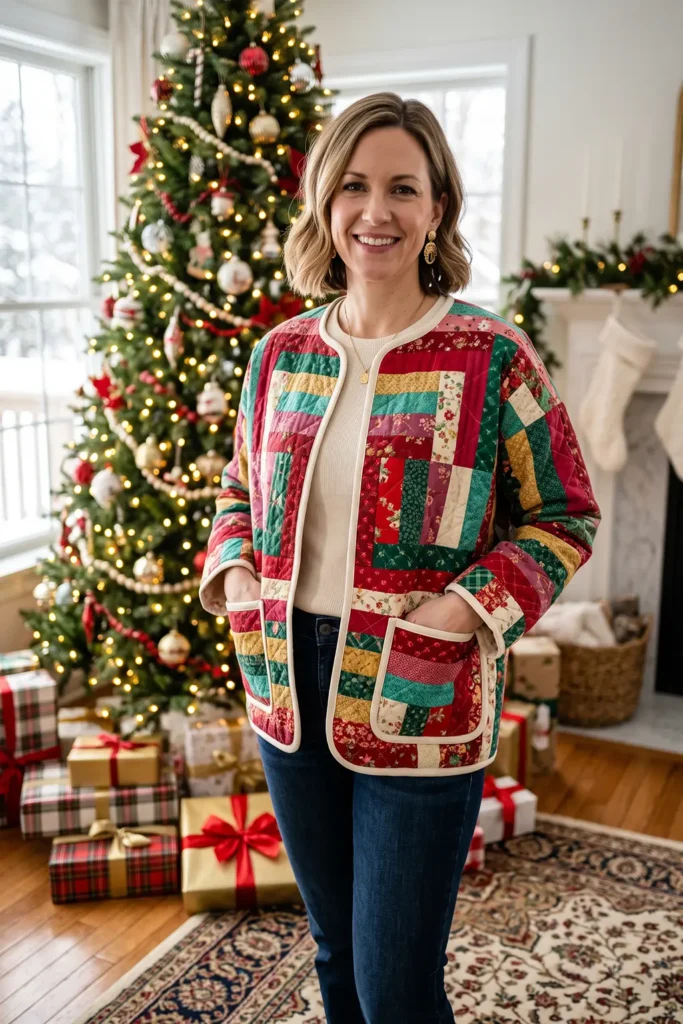
A Little Background on Quilt-as-You-Go
Traditional quilts are usually pieced first, layered second, and quilted last. Quilt-as-you-go turns that order into something more efficient by combining piecing and quilting while the fabric is still in sections.
For garments, that can be a real advantage. It means the outer shell becomes a finished quilted fabric as you build it, and once the panels are done, the jacket construction is similar to sewing with thick pre-quilted yardage.
How It’s Built
This jacket is made in the following order:
- Choose a simple jacket pattern.
- Cut backing and batting foundations for the back, fronts, sleeves, and pockets.
- Build the quilted panels strip by strip using the quilt-as-you-go method.
- Trim and cut the actual garment pieces from those finished quilted panels.
- Sew the jacket together.
- Bind the internal seams.
- Bind the outer edges and cuffs.
- Add the front closure.
The method is fast because the quilting happens during piecing rather than afterward.
Finished Garment
This sample jacket is planned around an average adult medium:
- Style: relaxed boxy collarless jacket
- Length: approximately 27–28 inches from shoulder to hem
- Finished chest: approximately 45–46 inches
- Sleeve style: simple dropped shoulder
- Outer piecing: 2½-inch strips, finishing at about 2 inches visible
- Patch pockets: about 7 × 8 inches finished
- Front closure: 5 large sew-on snaps
- Garment seam allowance: ½ inch
- Strip-piecing seam allowance: ¼ inch
- Skill level: confident beginner
- Core techniques: quilt-as-you-go strip piecing, garment cutting, bound seams, bias binding
A roomy collarless pattern is best. Complicated collars, facings, darts, and tailored sleeve heads slow the process down and work against the “quick” nature of this project.
Materials Needed
For an average adult medium jacket:
- 1 Christmas jelly roll (40 strips at 2½ × 42 inches) plus 12–15 extra strips cut from coordinating fabric, or about 3½ yards total quilting cotton cut into 2½-inch-wide strips
- Try to keep about one-third of the strips light or medium-light in value
- 2¾ yards low-loft cotton batting
- 2¾ yards flannel or quilting cotton backing/lining
- 1 yard quilting cotton for binding
- 5 large sew-on snaps
- Neutral piecing thread
- Coordinating topstitching thread
- Rotary cutter
- Cutting mat
- Quilting ruler
- Fabric clips or pins
- Walking foot
- 90/14 sewing needle
- Removable fabric marker
- A simple collarless, dropped-shoulder, front-opening jacket pattern
If you want the quickest result, choose a pattern without a collar, cuffs, facings, or a separate waistband.
Choosing Your Colors
For a bright, festive look, divide your strips into four groups:
Reds and pinks
- Cranberry
- Cherry red
- Raspberry
- Berry pink
Greens and cool tones
- Emerald
- Pine
- Holly green
- Turquoise
- Teal
Warm accents
- Gold
- Mustard
- Warm coral
- Bright magenta
Lights
- Cream
- Ivory
- Pale gold
- Soft warm white
Try to keep roughly 25–35 percent of the strips in lighter shades.
That is what keeps the jacket looking lively and patchwork-rich rather than dark and muddy. Small prints, dots, tiny stars, checks, plaids, tone-on-tones, and little florals all work well. Very large novelty prints tend to get lost in 2-inch strip segments.
Cutting Measurements
These are practical planning sizes for a medium jacket:
- Back foundation: cut 1 batting piece and 1 lining/backing piece at 31 × 33 inches
- Front foundations: cut 2 batting pieces and 2 lining/backing pieces at 19 × 33 inches
- Sleeve foundations: cut 2 batting pieces and 2 lining/backing pieces at 22 × 27 inches
- Pocket foundation: cut 1 batting piece and 1 lining/backing piece at 16 × 10 inches
- Outer strips: cut or use pre-cut strips 2½ inches wide
- Pocket pieces after quilting: cut 2 at 7½ × 8½ inches, finishing about 7 × 8 inches
- Binding strips: cut 2¼-inch-wide bias strips, joining to make about 9–10 yards total
These panel sizes are intentionally oversized. Do not reduce them unless your pattern pieces are definitely smaller. You want room to shift the pattern while cutting.
Step-by-Step Guide
Step 1 — Choose a Simple Jacket Pattern
Pick a collarless jacket pattern with:
- A front opening
- Minimal shaping
- Dropped shoulders
- Straight or gently shaped side seams
- Simple two-piece or one-piece sleeves
- A hip-length or slightly cropped silhouette
A finished chest around 45–46 inches is comfortable for layering over a sweater. Trace the pattern if needed and make a full back template instead of relying on a fold. That makes cutting from bulky quilted panels much easier and more accurate.

Step 2 — Prewash and Press the Fabrics
Prewash the quilting cotton and the flannel or lining fabric, then dry and press them.
This step matters because Christmas reds and greens can release extra dye, and flannel can shrink more than quilting cotton. If the layers shrink unevenly after the jacket is finished, the garment can twist slightly.
Low-loft batting usually does not need prewashing, but check the manufacturer’s instructions.
Step 3 — Cut the Batting and Backing Foundations
Cut the following rectangles:
- 1 back batting at 31 × 33 inches
- 1 back backing at 31 × 33 inches
- 2 front battings at 19 × 33 inches
- 2 front backings at 19 × 33 inches
- 2 sleeve battings at 22 × 27 inches
- 2 sleeve backings at 22 × 27 inches
- 1 pocket batting at 16 × 10 inches
- 1 pocket backing at 16 × 10 inches
Keep each pair stacked together so you do not mix up sizes while sewing.

Step 4 — Sort the Strips and Plan the Color Flow
Lay out your strips and divide them into lights, reds, greens, and accent colors.
Because this is a quick jacket, it helps to plan a loose rhythm rather than a rigid repeating pattern. A good rule is:
- Never place too many dark reds or dark greens together
- Separate intense colors with cream or pale gold
- Scatter the bright accents evenly
This kind of scrappy balance is part of what makes many vintage utility quilts and quilted garments feel so lively.
Step 5 — Build the Back Panel with Quilt-as-You-Go Piecing
Place the backing right side down, then the batting on top.
Take your first strip and place it right side up across the foundation, roughly near the center. Add the second strip right sides together along one long edge of the first strip.
Sew through all layers with a ¼-inch seam allowance.
Flip the new strip open and finger-press or gently press it flat. Then add a third strip to the opposite side of the center strip.
Continue working outward, alternating sides, until the entire 31 × 33-inch foundation is covered.

Step 6 — Finish the Back Panel and Stabilize It
Once the back foundation is covered, check for any areas near the outer edges that need an additional strip.
Trim away any overhanging strip ends so the panel is tidy, but do not cut it down to the final pattern shape yet.
To stabilize the panel further, stitch in the ditch along a few key seams or add a few vertical quilting lines about 4–5 inches apart. Because the strips finish at roughly 2 inches wide, the panel is already well secured, so only light extra quilting is needed.
Step 7 — Make the Two Front Panels
Repeat the same quilt-as-you-go method for the two front foundations, each measuring 19 × 33 inches.
Again, begin near the center and build outward. Keep the color balance related to the back panel so the finished jacket feels cohesive.
Each front should include a fair number of lights near the middle and upper body. That helps the front of the garment look bright rather than heavy.

Step 8 — Make the Sleeve Panels
Build the two sleeve panels on the 22 × 27-inch foundations in the same way.
A slightly more directional strip look works well on sleeves. Keep the colors balanced, but do not worry if the strip order differs from the body. Sleeves often look best when they coordinate rather than match exactly.
If you are using shorter leftover strips, piece them together before attaching them to the panel. Stagger those joins so they do not all fall in one line.
Step 9 — Make the Pocket Panel
Use the 16 × 10-inch foundation to make a small quilted pocket panel.
Keep the strips cheerful and well balanced. Because pockets sit prominently on the fronts, they look best when at least one or two lighter strips are included in each pocket area.
Once complete, lightly press the pocket panel flat.

Step 10 — Square the Finished Panels
Place each completed panel on the cutting surface and trim it to a clean rectangle:
- Back panel to about 30½ × 32½ inches
- Front panels to about 18½ × 32½ inches each
- Sleeve panels to about 21½ × 26½ inches each
- Pocket panel to about 15½ × 9½ inches
These measurements preserve a little working room while cleaning the edges. Squaring now makes pattern placement and cutting more accurate.
Step 11 — Cut the Jacket Pieces
Place the pattern pieces on the quilted panels.
Cut:
- 1 back
- 2 fronts
- 2 sleeves
As you position the templates, try to avoid putting very bulky strip intersections directly on:
- Shoulder seams
- Underarm seams
- The front closure area
- The deepest curve of the armhole
Shift the pattern slightly if necessary. That small adjustment makes later sewing much easier.

Step 12 — Cut and Finish the Pockets
From the pocket panel, cut 2 pocket pieces at 7½ × 8½ inches.
Bind the top edge of each pocket first using a strip of 2¼-inch bias binding. Then fold the remaining raw side and bottom edges to the wrong side by ¼ inch, then again by ¼ inch, and press.
That gives you neat finished pockets that still sit flat without becoming bulky.
Step 13 — Attach the Pockets to the Fronts
Place the pockets on the front jacket pieces.
A good starting placement is:
- Top of pocket about 3½ inches below the underarm
- Inner pocket edge about 2½ inches from the front edge
Pin or clip in place. Topstitch around the two sides and bottom, about ⅛ inch from the folded edge. Reinforce the upper corners with a short bar tack.
Check that both pockets sit at the same height before permanently stitching the second one.

Step 14 — Sew and Bind the Shoulder Seams
Place the fronts and back right sides together and sew the shoulder seams with a ½-inch seam allowance.
Because the layers are quilted, do not press the seam allowances open. Keep them together and bind the raw edges as one unit using bias binding.
Press the finished bound seam allowances toward the back.
This seam treatment is one of the most useful tricks in quilted garment making. It looks tidy and avoids the awkward bulk of trying to finish each seam allowance separately.
Step 15 — Attach the Sleeves While the Jacket Is Still Flat
With the jacket body still open, sew each sleeve to its armhole using a ½-inch seam allowance.
A dropped-shoulder shape makes this much easier than a highly curved fitted sleeve.
Once each sleeve is attached, bind the armhole seam allowances together and press them toward the sleeve. It is much easier to bind them now, while the jacket is still flat, than after the side seams are closed.

Step 16 — Sew the Side and Underarm Seams
Fold the jacket right sides together and match the sleeve seam and underarm points carefully.
Sew from the cuff edge down the sleeve, through the underarm, and all the way to the jacket hem in one continuous seam on each side, using a ½-inch seam allowance.
Try the jacket on before finishing the seam allowances. Check:
- Sleeve length
- Body length
- Front overlap
- General fit
If needed, make small adjustments now.
Step 17 — Bind the Side Seams, Front Edges, Neckline, Hem, and Cuffs
First, bind the side and underarm seam allowances together, pressing them toward the back.
Next, bind the outer edges.
You can bind the right front edge, neckline, left front edge, and hem in one long continuous run. Then bind each cuff separately.
Use 2¼-inch bias binding and keep the finished width even. Miter the lower front corners neatly so the jacket hangs cleanly.
This step gives the jacket its polished finished look.
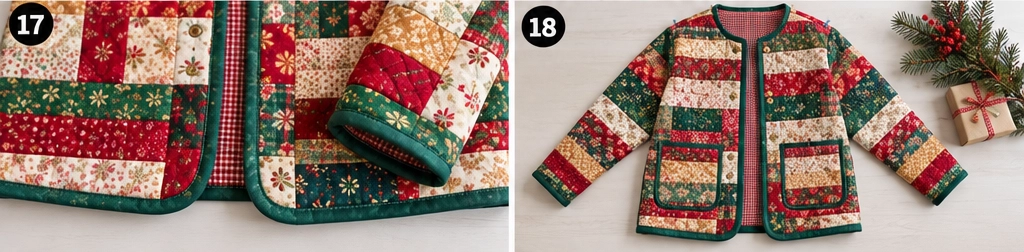
Step 18 — Add the Front Closures and Final Finish
Mark 5 snap positions down the front.
For a jacket around 27–28 inches long, spacing them about 4½ inches apart usually works well, beginning a few inches below the neckline and ending above the hem.
Sew the snaps securely in place. For a decorative effect, you can sew large buttons on the outside and use hidden snaps underneath, but plain snaps are the quickest option.
Trim loose threads, press the jacket carefully, and steam lightly if needed. For a softer, crinkled finish, wash gently with a color catcher in the machine, following your fabric and batting care instructions.
Assembly at a Glance
- Choose a simple collarless dropped-shoulder jacket pattern.
- Prewash and press the cottons and lining.
- Cut oversized batting and backing foundations.
- Sort the strips and balance the colors.
- Build the back panel with quilt-as-you-go strip piecing.
- Stabilize and finish the back panel.
- Build the two front panels.
- Build the two sleeve panels.
- Build the pocket panel.
- Square the quilted panels.
- Cut the back, fronts, and sleeves.
- Cut and finish the two pockets.
- Attach the pockets to the fronts.
- Sew and bind the shoulder seams.
- Attach the sleeves flat and bind the armhole seams.
- Sew the side and underarm seams.
- Bind the remaining internal seams, then bind the outer edges and cuffs.
- Add the front snaps and give the jacket a final press.
Beginner Tips for Success
- Choose a simple pattern. The quicker the project, the more valuable simple construction becomes.
- Keep at least one-quarter to one-third of the strips light in value.
- Use low-loft batting so the jacket drapes comfortably.
- Start with the back panel first. It helps you establish the strip rhythm for the rest of the jacket.
- Do not cut the garment pieces until all the quilt-as-you-go panels are complete.
- Avoid placing thick seam clusters at the shoulder, underarm, and front closure.
- Bind seam allowances together, not separately.
- Sew the sleeves in while the body is still flat.
- Use snaps instead of buttonholes if speed is the priority.
- Wash with a color catcher if you used strong reds, pinks, or deep greens.
Styling It & Gift Ideas
A bright quilt-as-you-go Christmas jacket looks best when the rest of the outfit is simple.
Try it with:
- A cream turtleneck and dark jeans
- A black knit dress and ankle boots
- A fine-gauge red sweater with neutral trousers
- A forest-green top with straight-leg denim
- A plain white tee layered under the jacket for a more casual look
Because the jacket is colorful and handmade, it also makes a memorable gift. It works especially well for someone who loves festive clothing but still wants something soft, practical, and wearable beyond one holiday party.
If you want the jacket to feel less overtly seasonal, lean more heavily on cranberry, pine, teal, gold, and cream rather than bright novelty Christmas prints.
Final Thoughts
A quick quilt-as-you-go Christmas jacket is one of the most satisfying ways to turn festive fabric into a wearable layer without committing to a slow, complicated quilt coat.
The construction is practical: build the quilted panels first, cut the jacket pieces second, and finish the seams with binding for a neat interior. Keep the colors bright, include enough lights to separate the richer shades, and use a simple pattern that lets the patchwork do the talking.
The result is warm, cheerful, and genuinely useful — exactly the kind of handmade Christmas layer that can be sewn in a short window and worn for many winters to come.
Other Design Inspirations – Digitally Modified Images. Texture and color may vary from the actual product.
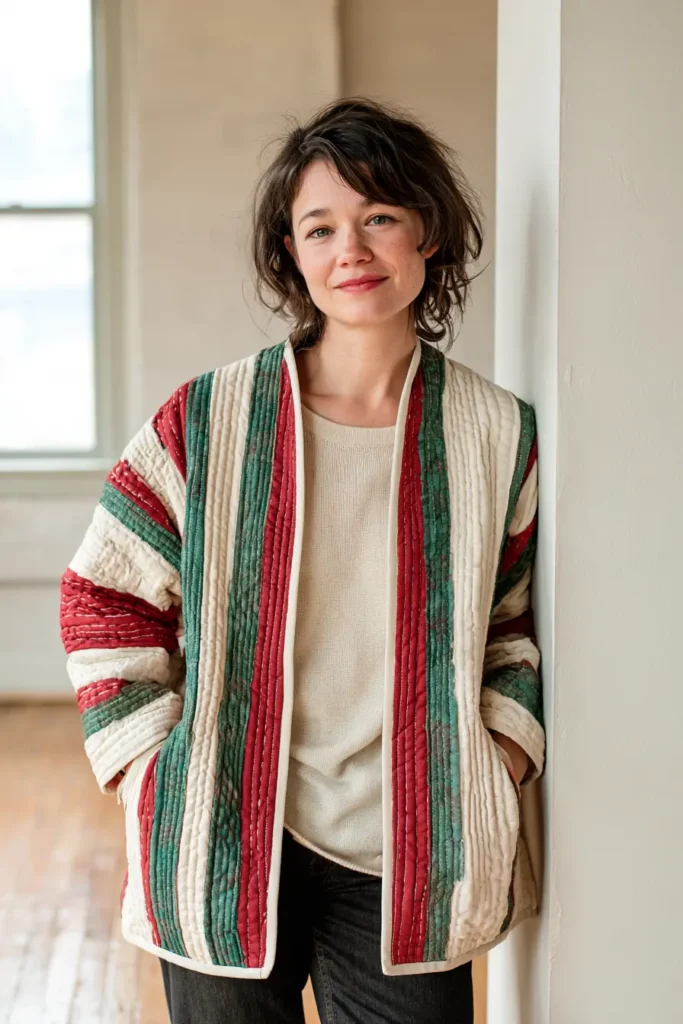
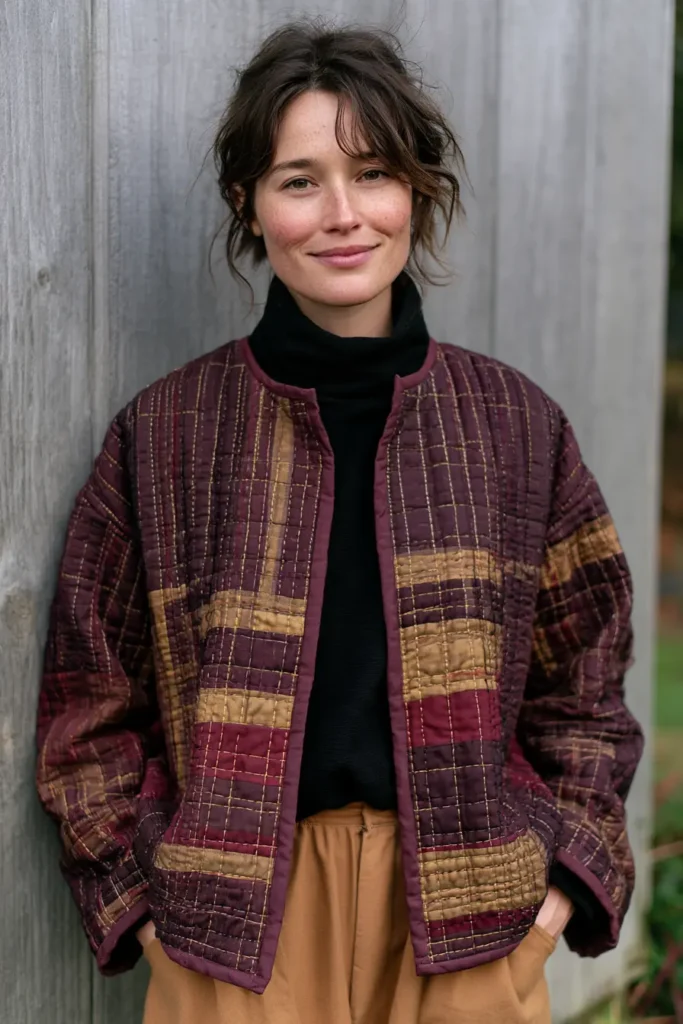
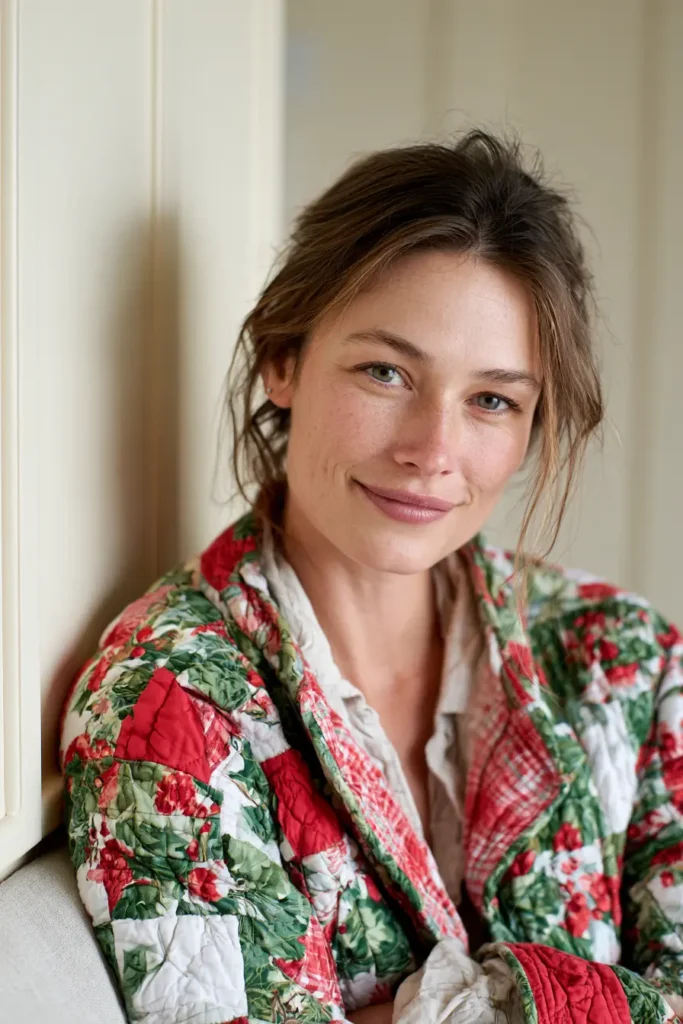

11. Jelly Roll Christmas Quilted Vest for Quick Colorful Layering
A jelly roll vest is one of the fastest ways to turn Christmas fabric into something wearable. Because the strips are already cut to 2½ inches wide, much of the prep work is done for you before sewing even begins. That makes this kind of project especially appealing during the holiday season, when quick gifts and last-minute festive sewing suddenly move to the top of the list.
For a Christmas version, vibrant color is what brings the vest to life. Cranberry red, cherry, holly green, emerald, turquoise, berry pink, golden yellow, and cream all work beautifully together. The lighter strips matter more than people expect. Without enough cream, pale gold, or warm white, strong reds and greens can visually collapse into one darker mass.
A jelly roll vest also has a nice place in quilting history. The term “jelly roll” became widely popular through pre-cut strip bundles, but strip-pieced quilts themselves are much older. Long before branded pre-cuts, quilters stitched narrow strips together to use scraps efficiently and to create lively bands of color. This vest follows the same practical spirit, then turns the finished quilted fabric into a simple garment.
What Makes a Jelly Roll Vest Work
The easiest and cleanest way to sew this vest is to:
- Piece oversized strip panels.
- Quilt those panels with batting and lining.
- Cut the vest pieces from the quilted yardage.
- Sew the vest and finish the edges with binding.
That order matters. If you cut the garment pieces first and then try to piece them, it becomes much harder to keep the stripes balanced and the edges stable.
The other big decision is print scale. Since each visible strip finishes at about 2 inches wide, small prints nearly always work best. Tiny stars, dots, checks, berries, florals, plaids, and tone-on-tones read clearly at that width. Large Santa motifs or big scenic prints usually get chopped into fragments and lose their impact.
Design Inspirations – Digitally Modified Images. Texture and color may vary from the actual product.
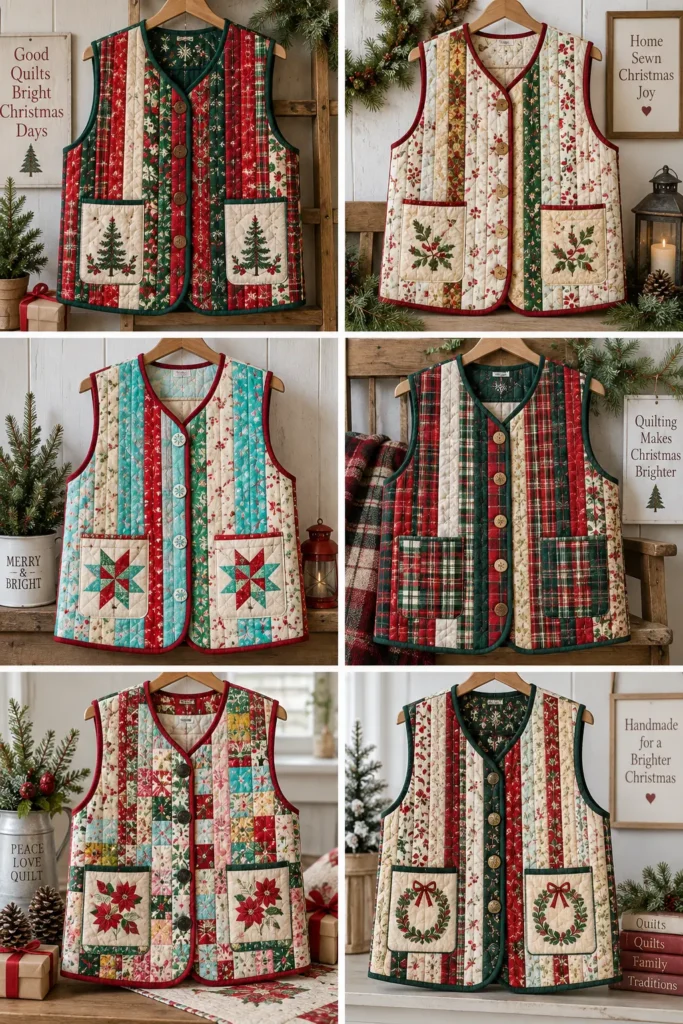
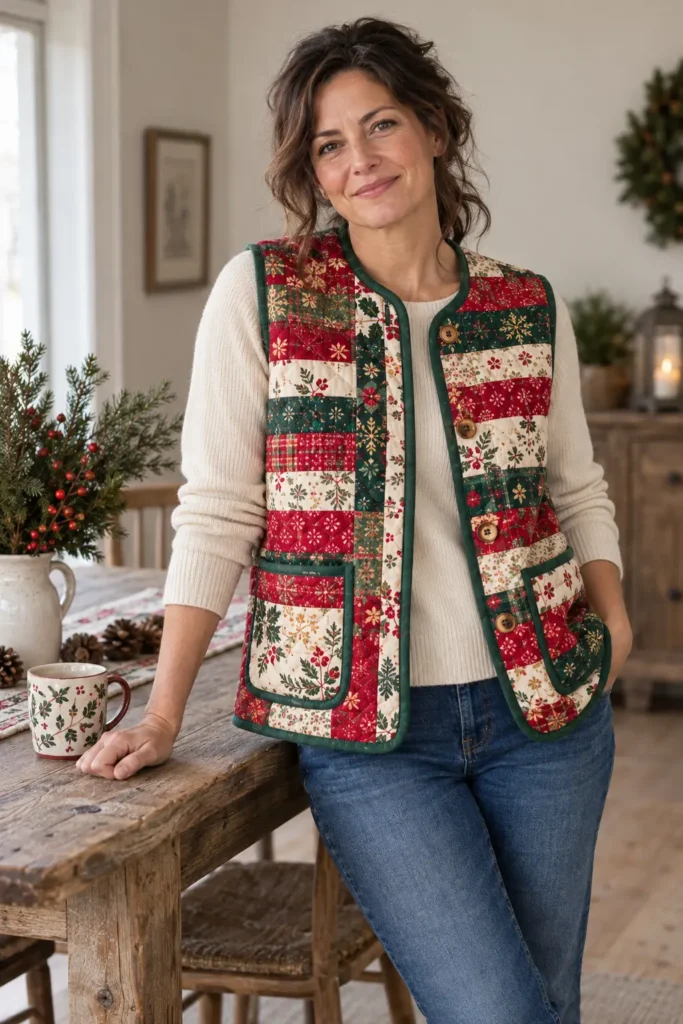
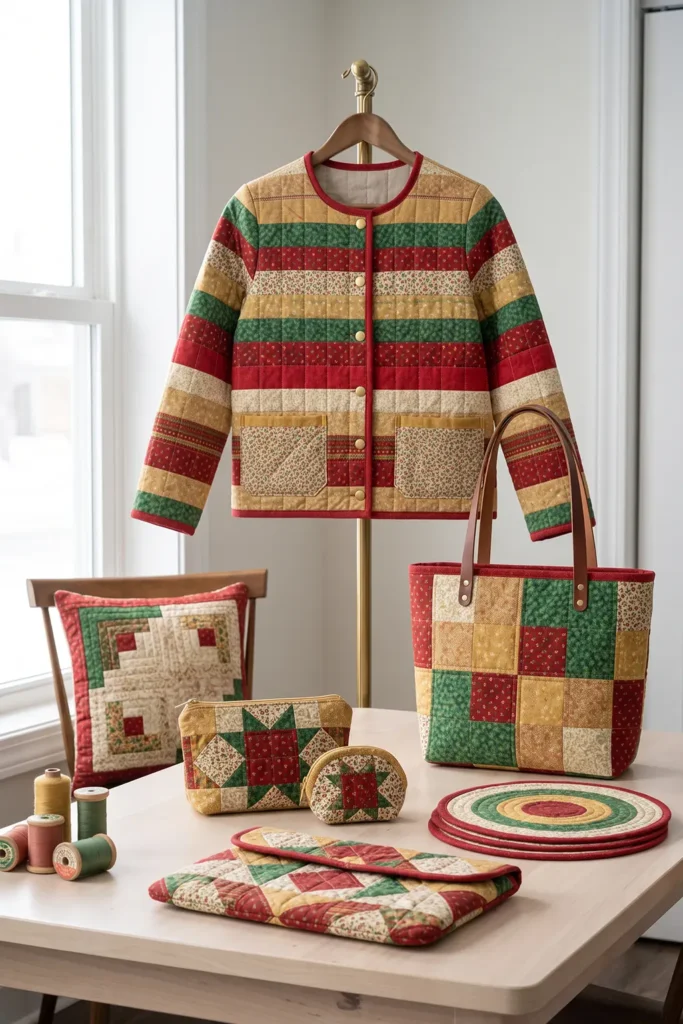
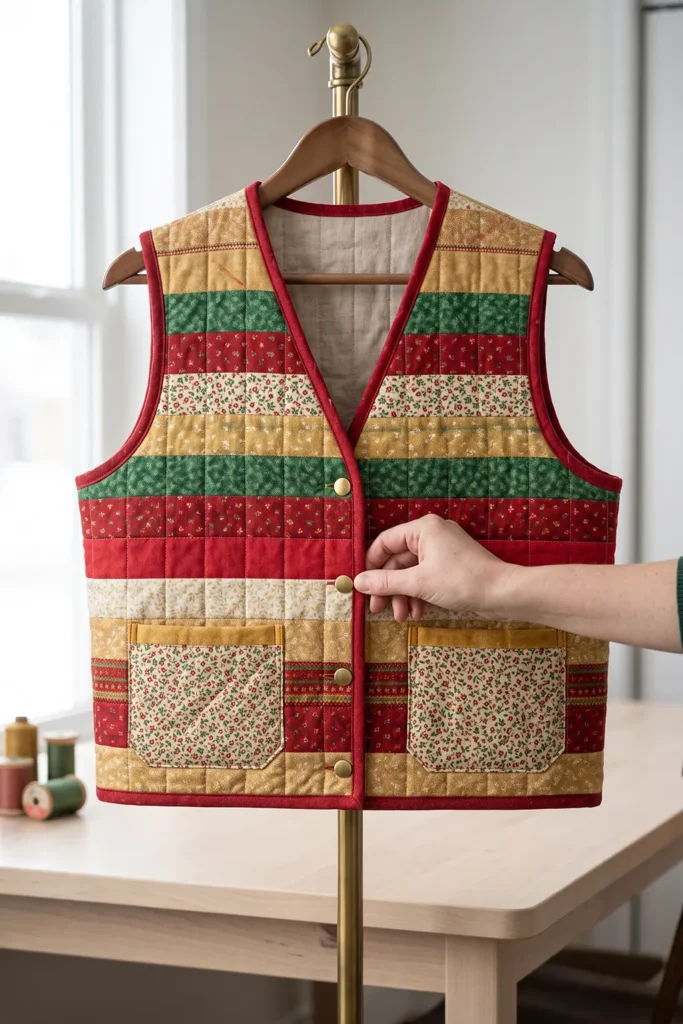
How It’s Built
This vest is based on a simple collarless, button-front shape with a relaxed fit and patch pockets. The body is made from long strip-pieced panels cut slightly larger than the pattern pieces.
For an average adult medium, a practical starting panel plan is:
- Back panel: 13 strips, each 30 inches long
- Left front panel: 7 strips, each 30 inches long
- Right front panel: 7 strips, each 30 inches long
With ¼-inch seam allowances, each strip finishes at about 2 inches wide, so those panels finish at approximately:
- Back: 26 × 30 inches
- Each front: 14 × 30 inches
That is enough for a relaxed medium vest if you are using a simple sleeveless pattern. Always place your actual pattern pieces over the planned panel sizes before sewing, and increase the strip count if needed.
Finished Garment
The sample proportions in this tutorial are intended for a relaxed adult medium:
- Style: collarless Christmas quilted vest
- Fit: relaxed, easy layering fit
- Finished chest: approximately 42–44 inches
- Finished length: approximately 25–26 inches
- Strip width: 2½ inches cut, about 2 inches finished
- Pockets: two patch pockets, finishing about 6½ × 7½ inches
- Front closure: 4 buttons
- Garment seam allowance: ½ inch
- Patchwork seam allowance: ¼ inch
- Skill level: confident beginner
- Core techniques: strip piecing, quilting panels, garment cutting, bound seams, edge binding, patch pockets
Materials Needed
For an average adult medium vest:
- 1 Christmas jelly roll (typically 40 strips measuring 2½ × 42 inches)
- Low-loft cotton batting: about 1¾–2 yards
- Lining fabric: about 1¾–2 yards of cotton or soft flannel
- Binding fabric: about ⅝–¾ yard
- Buttons: 4, about ⅞ to 1 inch wide
- Coordinating all-purpose sewing thread
- Rotary cutter
- Cutting mat
- Quilting ruler
- Walking foot
- Pins or clips
- Removable fabric marker
- 90/14 sewing-machine needle
- A simple sleeveless vest pattern that is:
- collarless
- dartless or nearly dartless
- button-front with a real overlap
- simple enough to finish with binding rather than facings
Choosing Your Colors
A vibrant Christmas palette looks best when the strips are divided into clear value groups.
Rich reds and pinks
- cranberry
- cherry red
- raspberry
- berry pink
Greens and cool tones
- holly green
- emerald
- pine
- turquoise
- teal
Warm accents
- gold
- mustard
- coral
- warm magenta
Lights
- cream
- ivory
- pale gold
- warm white
Try to keep about 25–30 percent of the strips in the light group. That is what keeps the overall patchwork crisp.
For a more wearable look, use mostly small prints and near-solids rather than too many novelty fabrics. A few tiny holiday stars or berry prints are lovely. Too many large themed prints can make the vest feel costume-like.
Cutting Measurements
For the sample medium vest:
- Back panel: piece 13 strips, each cut to 30 inches long
- Front panels: piece 7 strips for each front, each cut to 30 inches long
- Pocket panel: piece at least 5 strips, each about 12 inches long
- Batting for back: cut about 28 × 32 inches
- Lining for back: cut about 28 × 32 inches
- Batting for each front: cut about 16 × 32 inches
- Lining for each front: cut about 16 × 32 inches
- Batting for pocket panel: cut about 12 × 14 inches
- Lining for pocket panel: cut about 12 × 14 inches
- Pocket pieces: cut 2 at 7½ × 8½ inches
- Binding strips: cut 2¼-inch-wide bias strips, joining enough to make about 6 yards total
These measurements are intended to create quilted panels that are slightly larger than the final garment pieces. That extra margin matters because quilting can draw fabric in a little.
Step-by-Step Guide
Step 1 — Choose the Vest Pattern
Choose a collarless, sleeveless, button-front vest pattern with a genuine front overlap and a relaxed shape.
A boxy or gently shaped vest works best. Avoid collars, front facings, deep darts, or complicated princess seams, because this tutorial is designed around a simple bound-edge finish.
Check the finished chest measurement on the pattern. For winter layering, a vest finishing around 42–44 inches at the chest is comfortable for many average medium sizes.

Step 2 — Prewash and Press the Fabrics
Prewash the lining fabric and any additional yardage you plan to use for binding.
Jelly roll strips are often not prewashed. Many sewists use them as they are, but if you know the fabric brand tends to bleed heavily, especially in strong reds or deep greens, test one strip first.
Press the lining and binding fabric smooth before cutting. If using flannel for the lining, prewashing is especially important because it can shrink more than quilting cotton.
Step 3 — Sort the Jelly Roll Strips by Color and Value
Lay out the strips and divide them into:
- reds and pinks
- greens and cool tones
- warm accents
- lights
Count the light strips. For a vest this size, you want roughly 8–10 light strips or the equivalent, depending on how many are used in the body and pockets.
This is also the moment to remove any print that feels too large or too dull for the overall look.

Step 4 — Cut the Strips for the Panels
Cut:
- 13 strips to 30 inches for the back panel
- 14 strips to 30 inches for the two front panels
- 5 strips to 12 inches for the pocket panel
If you prefer, the pocket pieces can come from the 12-inch offcuts left after trimming the body strips down from 42 inches.
Keep the back strips, front strips, and pocket strips in separate piles so the layouts do not get mixed up.
Step 5 — Lay Out the Back Panel
Arrange the 13 back strips in an order that balances the colors from side to side.
Avoid putting too many dark reds or dark greens together. Break them up with cream, pale gold, or a bright accent strip.
A vest back is a large visible area, so the strip order matters. Step back and look at the layout from a short distance before sewing. You want the color to feel lively, not clumped.

Step 6 — Piece the Back Panel
Sew the 13 back strips together lengthwise with ¼-inch seam allowances.
Press the seams all in one direction, or press them open if you prefer less bulk. After piecing, the back panel should measure about 26 × 30 inches finished.
Check the size against your full back pattern piece. You should still have a little extra around the shape.
Step 7 — Lay Out and Piece the Front Panels
Arrange 7 strips for the left front and 7 strips for the right front.
It usually looks best if the fronts relate to each other without being exact mirror images. Keep the color distribution fairly even, especially around the upper chest and near the center front.
Sew each front panel with ¼-inch seam allowances. Each front should finish at about 14 × 30 inches.

Step 8 — Piece the Pocket Panel
Piece the 5 shorter strips together with ¼-inch seam allowances to create a small rectangle for the patch pockets.
This panel should finish at about 10 × 12 inches, which is large enough to cut two pockets.
Using a small strip-pieced pocket panel helps the pockets visually tie back to the vest body rather than looking like an afterthought.
Step 9 — Layer the Panels with Batting and Lining
Cut batting and lining slightly larger than each strip-pieced panel.
Layer each set as follows:
- lining, wrong side up
- batting
- strip-pieced panel, right side up
Smooth the layers carefully and pin or baste them.
Prepare the back panel, both front panels, and the pocket panel this way.

Step 10 — Quilt the Panels
Quilt each layered panel with straight lines.
The simplest option is to stitch in the ditch along every strip seam, which gives you quilting lines about 2 inches apart. If you want slightly more texture, you can add another line centered within every second or third strip.
Quilt the back first, then the fronts, then the pocket panel.
This creates stable quilted fabric without making the vest stiff.
Step 11 — Trim the Panels and Cut the Vest Pieces
Once all panels are quilted, trim away the extra batting and lining so the edges are even.
Place the pattern pieces on the quilted panels and cut:
- 1 full back
- 2 fronts
When placing the pieces, try not to land a bulky seam exactly on the buttonhole line, the shoulder seam, or the deepest armhole curve if you can avoid it.
Transfer any important notches and markings.

Step 12 — Cut and Prepare the Pockets
Cut 2 pocket pieces at 7½ × 8½ inches from the quilted pocket panel.
Fold the top edge of each pocket to the wrong side by ½ inch, then another ½ inch, and stitch.
Fold the two side edges and bottom edge under by ½ inch and press.
This gives you pockets that finish at about 6½ × 7½ inches.
Step 13 — Attach the Pockets
Place one pocket on each front.
A practical placement is:
- pocket top about 3½ inches below the armhole
- inner pocket edge about 2 inches from the finished front edge
Pin or clip them in place, then topstitch around the sides and bottom about ⅛ inch from the folded edge.
Reinforce the top corners with a short bar tack or an extra line of stitching.

Step 14 — Sew and Bind the Shoulder Seams
Place the front pieces and back piece right sides together and sew the shoulder seams with a ½-inch seam allowance.
Trim any obvious batting bulk if needed, but do not trim too aggressively.
Finish those shoulder seam allowances by binding them together with bias binding. Press the bound seams toward the back.
At this point, the vest should begin to take shape clearly.
Step 15 — Sew and Bind the Side Seams
Sew the side seams with a ½-inch seam allowance.
Before finishing them, try the vest on and check:
- chest ease
- armhole comfort
- length
- pocket height
- front overlap
If everything looks right, bind the side seam allowances together and press them toward the back.

Step 16 — Bind the Armholes
Bind each armhole separately using 2¼-inch bias binding.
Sew the binding to the armhole edge with a ¼-inch seam allowance, wrap it over the raw edge, turn the remaining edge under, and stitch it down neatly.
Because the armhole is curved, bias binding works much better than straight-grain binding here.
Step 17 — Bind the Fronts, Neckline, and Hem
Starting at one lower front corner, bind around the entire outer edge of the vest in one continuous run:
- up one front
- around the neckline
- down the other front
- across the hem
Miter the lower front corners carefully so they lie flat.
This step gives the vest its clean finished outline.
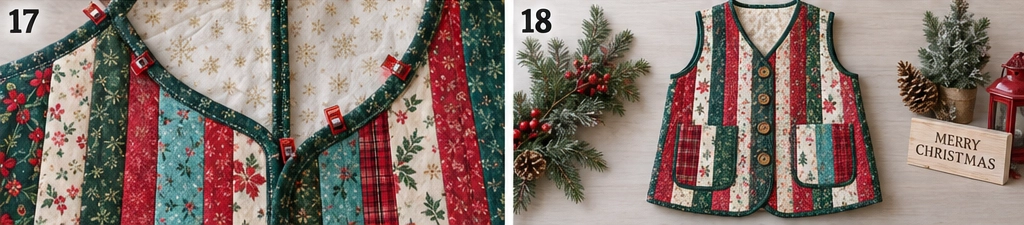
Step 18 — Add the Buttons and Finish the Vest
Try the vest on and mark the button positions while wearing it or while it is laid flat and overlapped correctly.
For a vest around 25–26 inches long, 4 buttons spaced roughly 3½–4 inches apart usually look balanced.
Sew the buttonholes on one front and the buttons on the other. Then give the vest a final press.
If you want the fabric to soften slightly, wash gently with a color catcher the first time, especially if the palette includes strong reds and dark greens.
Assembly at a Glance
- Choose a simple collarless vest pattern.
- Prewash and press the lining and supporting fabrics.
- Sort the jelly roll strips by color and value.
- Cut strips for the back, fronts, and pocket panel.
- Lay out the back strip order.
- Piece the back panel.
- Lay out and piece the two front panels.
- Piece the pocket panel.
- Layer the panels with batting and lining.
- Quilt the panels by stitching in the ditch.
- Trim the panels and cut the garment pieces.
- Cut and prepare the two pockets.
- Attach the pockets to the fronts.
- Sew and bind the shoulder seams.
- Sew and bind the side seams.
- Bind the armholes.
- Bind the fronts, neckline, and hem.
- Add buttonholes, buttons, and a final press.
Beginner Tips for Success
- Keep about a quarter to a third of the strips light in value.
- Small prints work better than large motifs on 2-inch finished strips.
- Use low-loft batting so the vest stays flexible and wearable.
- Always quilt the panels before cutting the vest pieces.
- Give yourself a little extra panel size before cutting, because quilting can pull fabric in.
- Bias binding is worth the effort around the armholes and neckline.
- Test one buttonhole on a scrap of quilted fabric before sewing the real ones.
- If the vest will be worn over bulky sweaters, size up or choose extra ease.
- Use a walking foot to help the quilted layers feed evenly.
- Strong Christmas reds can bleed, so a color catcher is a smart precaution in the first wash.
Styling It & Gift Ideas
A jelly roll Christmas vest is lively enough to stand on its own, so the easiest styling approach is to pair it with simple basics:
- a cream turtleneck and dark jeans
- a black knit top and trousers
- a red sweater and straight-leg denim
- a white button-up shirt with corduroy pants
- a simple long-sleeved dress and boots
It also makes a lovely handmade gift. Because the construction is quicker than a full jacket, it is especially well suited to holiday sewing for sisters, daughters, friends, or anyone who enjoys festive clothing with a practical side.
Final Thoughts
A jelly roll Christmas quilted vest is one of those projects that feels cheerful from the first strip to the final button. The pre-cut strips speed things up, the color variation keeps the patchwork lively, and the simple construction makes it approachable even if garment quilting is new to you.
The keys to success are straightforward: use a simple pattern, keep the strip panels slightly oversized before cutting, include enough light strips to brighten the palette, and finish the edges neatly with binding. Do that, and you will have a colorful holiday layer that is quick to sew and easy to wear.
Other Design Inspirations – Digitally Modified Images. Texture and color may vary from the actual product.
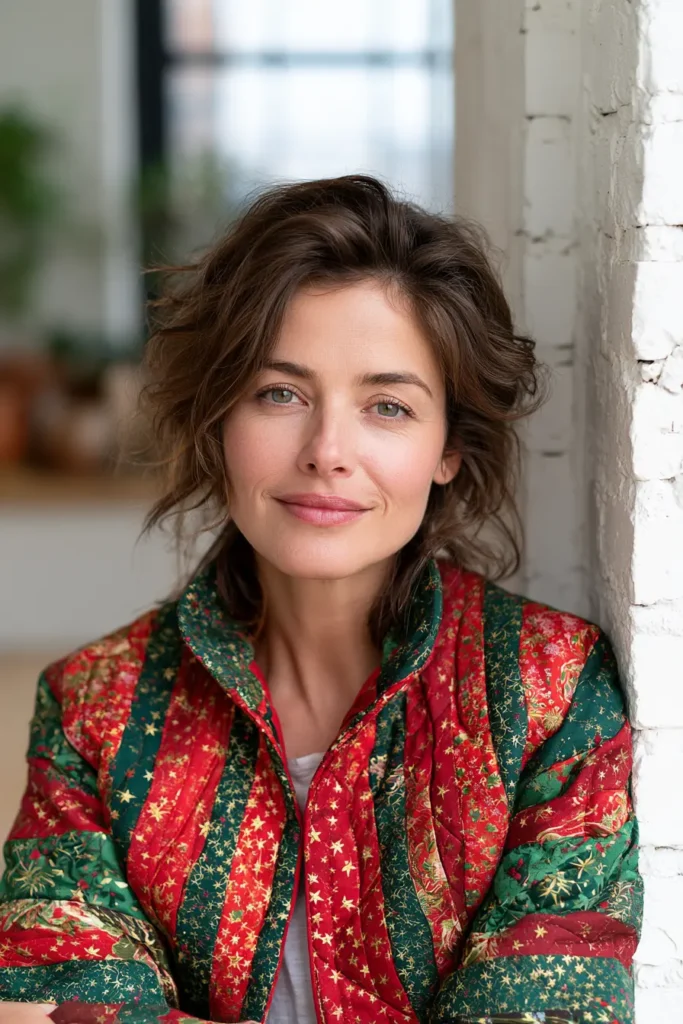
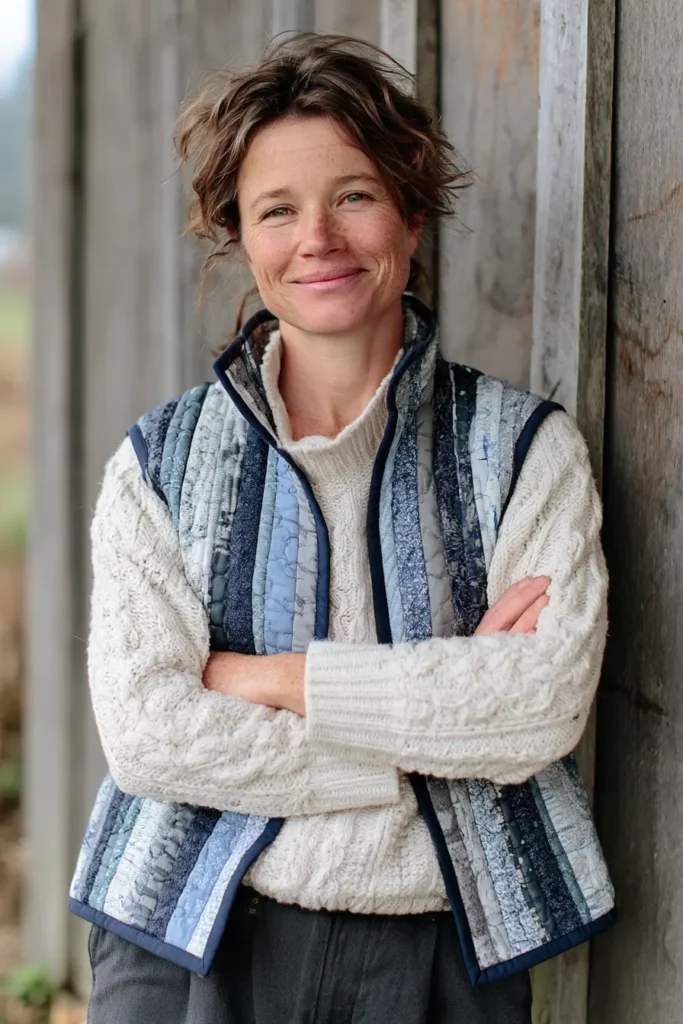
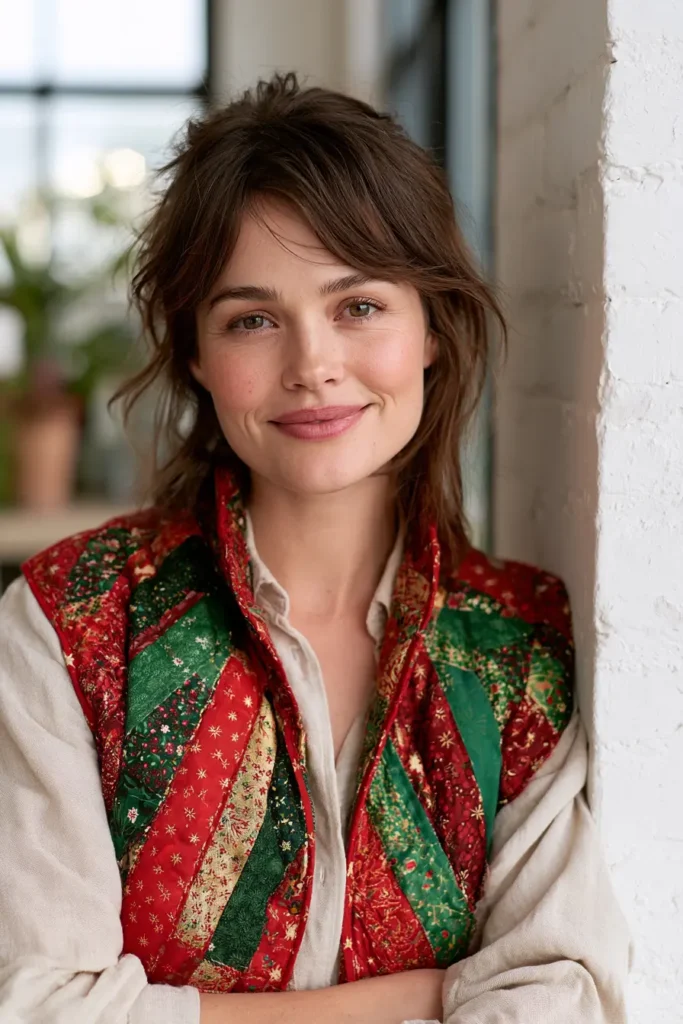
12. Longline Christmas Quilted Duster Vest for Chic Seasonal Layering
A longline quilted duster vest brings a more elegant silhouette to Christmas sewing. Instead of reading as a casual throw-on layer, it creates a long vertical line that feels polished, dramatic, and surprisingly versatile over sweaters, dresses, or simple winter basics. In a festive palette, it becomes a statement piece without needing complicated tailoring.
For this version, the patchwork is built from broad vertical strips rather than small squares. That choice makes sense for two reasons. First, it is faster to sew, which matters on a long garment. Second, vertical piecing flatters the duster shape and helps the colors flow from shoulder to hem.
Use vibrant holiday shades such as cranberry, ruby, emerald, pine, teal, sapphire, berry pink, antique gold, and cream. The light strips are especially important because they separate the darker reds and greens and keep the finished garment looking crisp rather than muddy.
A Little Background: Why It’s Called a Duster
The word duster originally referred to a long, lightweight over-garment worn to protect clothing from road dust. Over time, the name stayed, but the style shifted into fashion. Today, a duster vest usually means a long, open-front sleeveless layer that adds movement and vertical shape.
That older practical idea actually suits quilted garments very well. A long vest is easy to wear indoors or outdoors, adds warmth without full sleeves, and shows off the quilted fabric beautifully.
Design Inspirations – Digitally Modified Images. Texture and color may vary from the actual product.
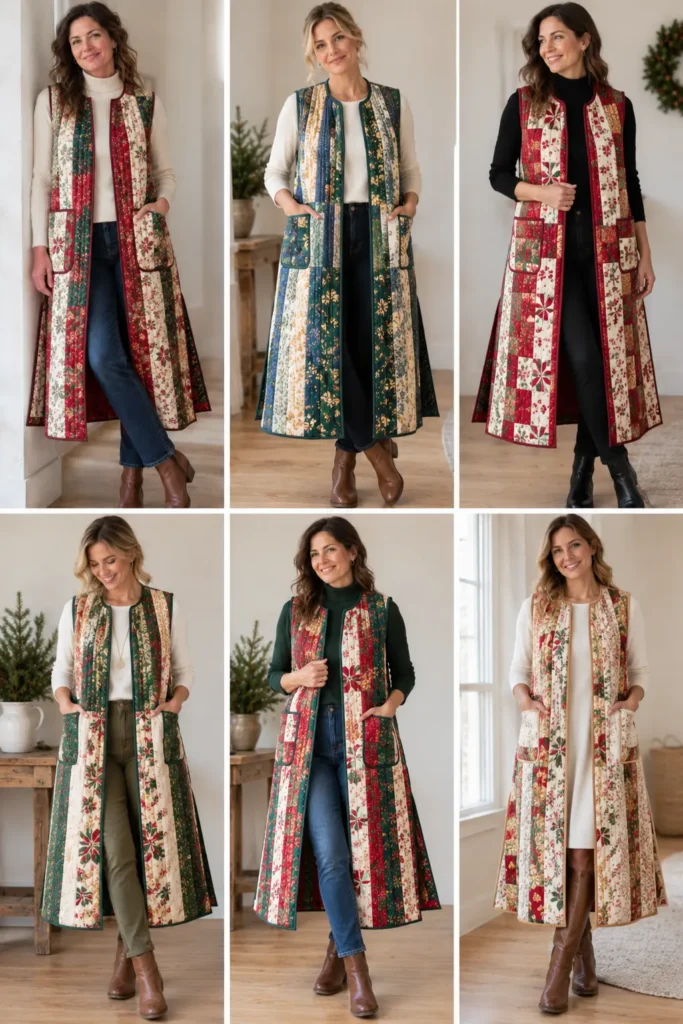
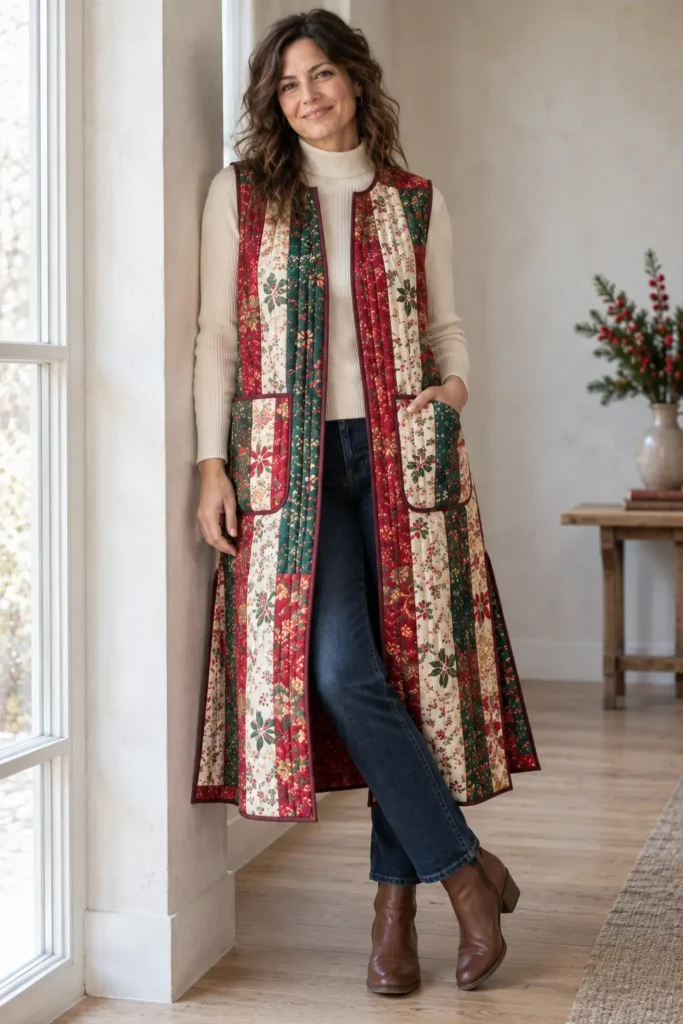
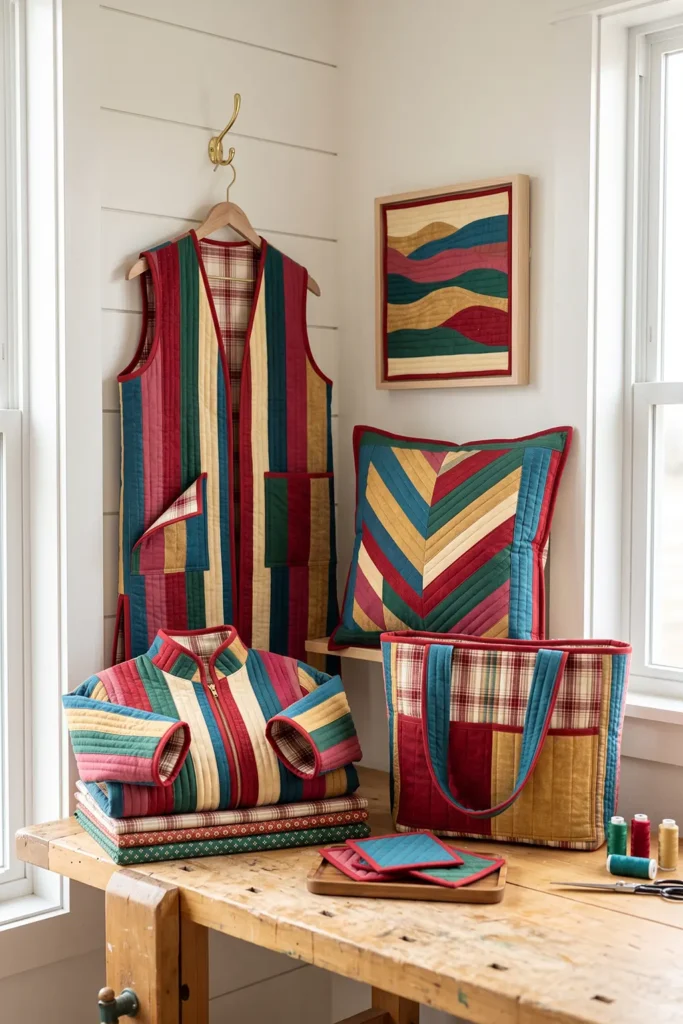
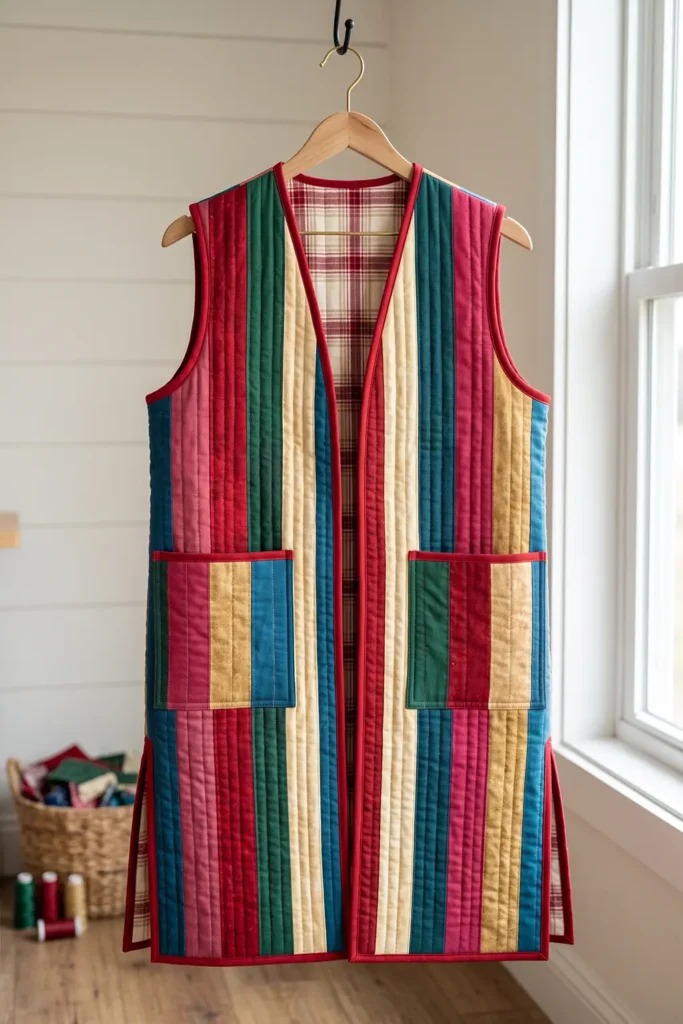
What Makes This Version Work
This project works best with a simple construction sequence:
- Piece oversized vertical strip panels.
- Quilt those panels with low-loft batting and lining.
- Cut the garment pieces from the finished quilted panels.
- Assemble the vest.
- Bind the armholes and outer edges neatly.
That order is important. It is much easier to balance the color, keep the panels flat, and control the final silhouette when the quilted yardage is made first and cut second.
Finished Garment
The sample proportions here are planned for a relaxed adult medium:
- Style: longline open-front duster vest
- Fit: relaxed, straight silhouette
- Finished chest: approximately 44–46 inches
- Finished length: approximately 43–45 inches
- Outer piecing: 5-inch cut strips, finishing about 4½ inches wide
- Patch pockets: two, finishing about 7 × 9 inches
- Side slits: approximately 10 inches
- Garment seam allowance: ½ inch
- Patchwork seam allowance: ¼ inch
- Skill level: confident beginner
- Core techniques: strip piecing, quilting panels, garment cutting, patch pockets, bound edges, bound seams
Materials Needed
For an average adult medium longline vest:
- Assorted quilting cottons: about 3¼–3½ yards total, or enough to cut 14–16 strips at 5 × 46 inches
- Keep around one-quarter to one-third of the strips in lighter shades
- Low-loft cotton batting: about 2½ yards
- Lining fabric: about 2½ yards of quilting cotton or lightweight brushed cotton
- Binding fabric: about ¾–1 yard
- Coordinating all-purpose thread
- Rotary cutter
- Cutting mat
- Quilting ruler
- Walking foot
- Pins or clips
- Fabric marker
- 90/14 sewing-machine needle
- A simple long sleeveless vest or duster-vest pattern that is:
- collarless
- open front
- fairly straight through the body
- easy to finish with binding rather than facings
Choosing Your Colors
For a vibrant Christmas duster vest, divide the strips into four value groups:
Deep reds and pinks
- cranberry
- ruby
- cherry
- berry pink
Greens and cool tones
- emerald
- pine
- teal
- sapphire blue-green
Warm accents
- antique gold
- mustard
- coral
- warm magenta
Lights
- cream
- ivory
- pale gold
- warm white
Try to keep about 25–30 percent of the total in the light group. Those pale strips create contrast and let the richer shades stand out.
Small prints, subtle plaids, dots, stars, berries, and tone-on-tones work well here. Large novelty prints are usually less effective on long narrow panels because only fragments may show.
Cutting Measurements
For the sample medium vest, plan the panels as follows:
- Back outer panel: piece 6 strips at 5 × 46 inches
- Left front outer panel: piece 4 strips at 5 × 46 inches
- Right front outer panel: piece 4 strips at 5 × 46 inches
- Pocket outer panel: piece 3 strips at 5 × 12 inches
- Back batting: cut about 30 × 48 inches
- Back lining: cut about 30 × 48 inches
- Each front batting: cut about 20 × 48 inches
- Each front lining: cut about 20 × 48 inches
- Pocket batting: cut about 12 × 12 inches
- Pocket lining: cut about 12 × 12 inches
- Pocket pieces after quilting: cut 2 at 8 × 10 inches, finishing about 7 × 9 inches
- Binding strips: cut 2¼-inch-wide bias strips, joining enough for about 7–8 yards
These panel sizes are intentionally larger than the final garment pieces so you can position the pattern more accurately after quilting.
Step-by-Step Guide
Step 1 — Choose the Duster Vest Pattern
Choose a collarless open-front longline vest pattern with a straight or gently shaped silhouette.
A finished chest of around 44–46 inches works well for an easy layering fit in an average medium. Look for a finished length of about 43–45 inches if you want a classic longline look that falls below the knee on many wearers.
Avoid collars, front facings, deep darts, or complicated princess seams. This method is designed around a simple bound-edge finish.
Step 2 — Prewash and Press the Fabrics
Prewash the quilting cottons, lining, and binding fabric.
This helps prevent uneven shrinkage later, especially if some reds or greens release extra dye. Press everything smooth before cutting.
If you are using lightweight brushed cotton instead of quilting cotton for the lining, prewashing is especially important because it may shrink more.
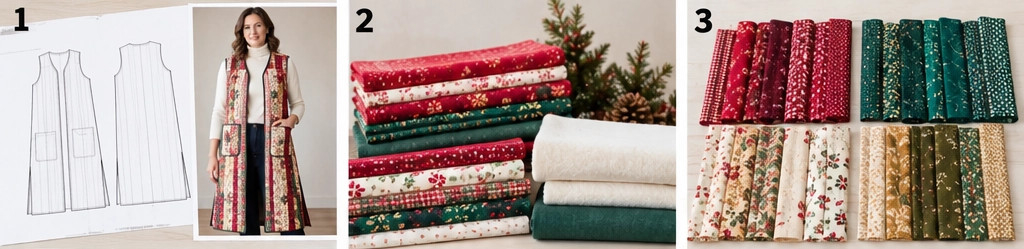
Step 3 — Check the Pattern Against the Planned Panel Sizes
Before cutting strips, place the pattern pieces on paper or directly measure them.
For this layout, the pieced panels will finish approximately:
- Back: 6 strips × 4½ inches = 27 inches wide, by about 46 inches long
- Each front: 4 strips × 4½ inches = 18 inches wide, by about 46 inches long
Make sure those panel sizes leave at least 1–2 inches of extra fabric around the garment pieces. If your size is larger or your pattern is wider through the hem, add one more strip where needed.
Step 4 — Cut the Outer Strips
Cut:
- 6 strips at 5 × 46 inches for the back
- 8 strips at 5 × 46 inches for the two fronts
- 3 strips at 5 × 12 inches for the pocket panel
If your fabric pieces are shorter, piece them carefully before panel assembly and stagger the joins so they do not all fall at the same height.
Keep the back strips, front strips, and pocket strips grouped separately.
Step 5 — Lay Out and Piece the Back Panel
Arrange the 6 back strips in a balanced order.
Try not to put too many dark reds and dark greens next to one another. Break them up with cream, pale gold, or a brighter accent strip. Because this is a long vest, the strip order is highly visible.
Sew the strips together lengthwise with ¼-inch seam allowances. Press the seams to one side or press them open if you want slightly less bulk.
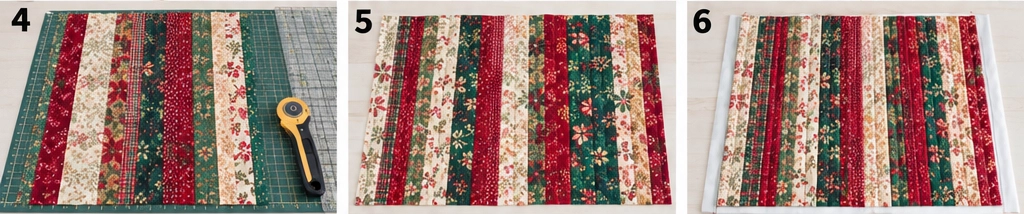
Step 6 — Lay Out and Piece the Front Panels
Arrange 4 strips for the left front and 4 strips for the right front.
The fronts should look related without becoming exact mirror images. It often looks best if one front begins with a lighter strip near the face while the other echoes that lightness lower down.
Sew each front panel with ¼-inch seam allowances. Press the seams neatly.
Step 7 — Piece the Pocket Panel
Sew the 3 short strips together with ¼-inch seam allowances to create a small outer panel for the pockets.
The finished pocket panel should measure about 12 × 13 inches, which gives enough room to cut two pocket pieces.
A pieced pocket panel helps the pockets belong to the garment instead of looking separate.
Step 8 — Cut the Batting and Lining Panels
Cut the batting and lining rectangles:
- Back: 30 × 48 inches
- Two fronts: 20 × 48 inches each
- Pocket panel: 12 × 12 inches
These sizes give a little extra margin for quilting and trimming.
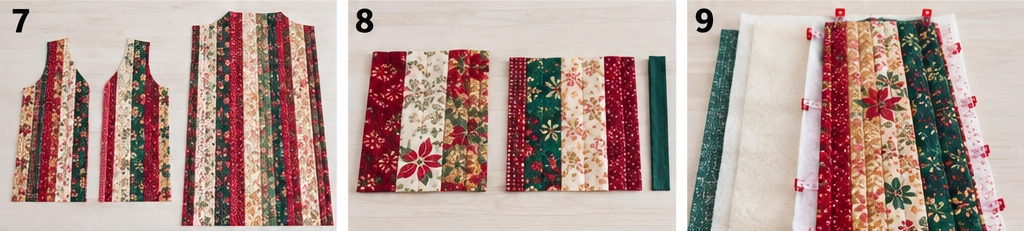
Step 9 — Layer and Baste the Back Panel
Make a quilt sandwich for the back panel:
- lining, wrong side up
- batting
- pieced back panel, right side up
Smooth the layers carefully from the center outward. Pin-baste or use temporary basting spray.
Keeping the layers flat here helps prevent ripples later.
Step 10 — Layer and Baste the Front and Pocket Panels
Repeat the same layering process for both front panels and the pocket panel.
Check that each pieced outer panel fully covers the batting and lining before quilting begins.
Step 11 — Quilt All the Panels
Quilt the back, fronts, and pocket panel with straight lines.
The easiest and most effective choice is to stitch in the ditch along every strip seam, then add one extra line down the center of every second strip if you want more texture.
That leaves quilting lines roughly 2¼ inches apart in the sections with extra stitching, which is close enough to secure the batting without making the vest stiff.
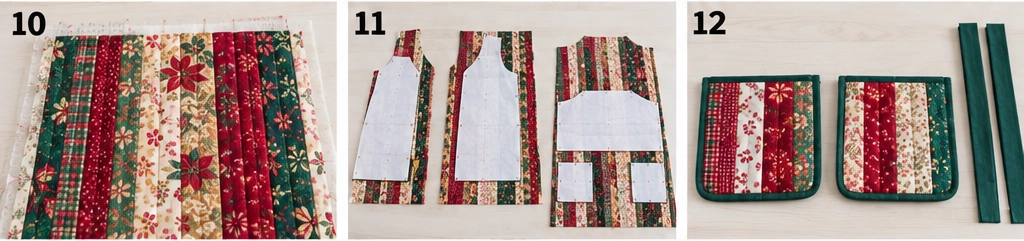
Step 12 — Trim the Panels and Cut the Vest Pieces
Trim away any excess batting and lining so the panel edges are even.
Place the back and front pattern pieces on the quilted panels and cut:
- 1 back
- 2 fronts
Shift the pattern slightly if needed so thick seam lines do not land exactly on the shoulder seam or deepest armhole curve.
Transfer any necessary pattern markings, including the side-slit placement if your pattern includes it.
Step 13 — Cut and Prepare the Pockets
Cut 2 pocket pieces at 8 × 10 inches from the quilted pocket panel.
Fold the top edge of each pocket to the wrong side by ½ inch, then another ½ inch, and stitch it down.
Fold the remaining side and bottom edges under by ½ inch and press. The pockets should finish at about 7 × 9 inches.
Step 14 — Attach the Pockets to the Fronts
Place the pockets on the front pieces.
For a longline vest, a practical placement is:
- pocket top about 14–16 inches below the shoulder
- inner pocket edge about 2½ inches from the front edge
- lower pocket edge high enough to stay above the side-slit start
Pin in place and topstitch around the sides and bottom about ⅛ inch from the folded edge. Reinforce the upper corners.
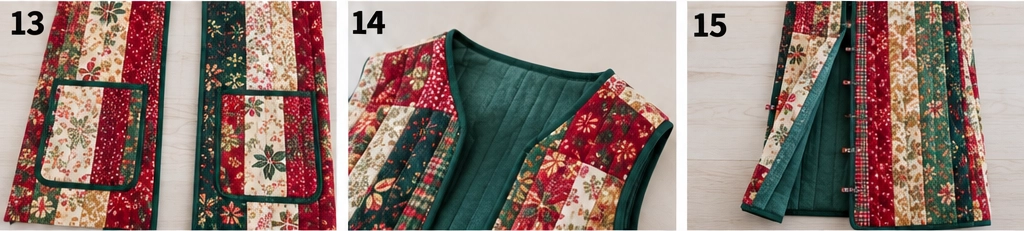
Step 15 — Sew and Bind the Shoulder Seams
Place the fronts and back right sides together and sew the shoulder seams with a ½-inch seam allowance.
Finish those seam allowances by binding them together with bias binding, then press them toward the back.
This gives a cleaner inside finish than trying to overlock or zigzag through thick quilted layers.
Step 16 — Sew the Side Seams and Leave the Slits Open
Sew the side seams with a ½-inch seam allowance, starting at the armhole and stopping 10 inches above the hem to create the side slits.
Try the vest on before finishing the seam allowances. Check the length, slit height, chest ease, and pocket placement.
Once satisfied, bind the stitched side-seam allowances together and press them toward the back. Leave the raw edges of the slit sections unbound for now; they will be enclosed when the outer perimeter is bound.
Step 17 — Bind the Armholes
Bind each armhole separately using 2¼-inch bias binding.
Sew the binding to the armhole edge with a ¼-inch seam allowance, wrap it around the raw edge, turn the remaining edge under, and stitch it neatly in place.
Bias binding is especially useful here because it curves smoothly around the armhole without puckering.
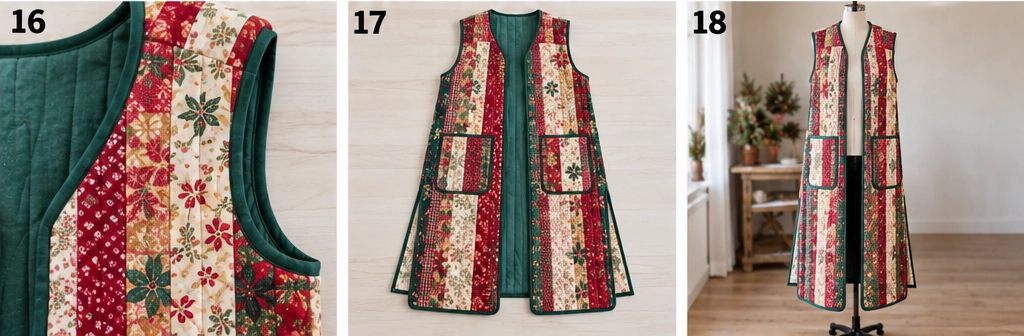
Step 18 — Bind the Outer Perimeter and Give the Vest Its Final Finish
Bind the entire remaining outer edge in one continuous run if possible:
- up one side-slit edge
- around that front hem area
- up the front opening
- around the neckline
- down the opposite front
- around the hem
- and up the second slit edge
Miter the lower front corners carefully so they lie flat.
Once the binding is complete, trim loose threads and give the vest a final press. If desired, wash gently with a color catcher the first time, especially if the palette includes strong reds and deep greens.
Assembly at a Glance
- Choose a simple longline open-front vest pattern.
- Prewash and press the fabrics.
- Confirm that the pattern fits within the planned panel sizes.
- Cut the outer strips.
- Piece the back panel.
- Piece the two front panels.
- Piece the pocket panel.
- Cut the batting and lining.
- Layer and baste the back panel.
- Layer and baste the fronts and pocket panel.
- Quilt all the panels.
- Trim the panels and cut the garment pieces.
- Cut and prepare the pockets.
- Attach the pockets to the fronts.
- Sew and bind the shoulder seams.
- Sew the side seams, leaving 10-inch side slits.
- Bind the armholes.
- Bind the outer perimeter and give the vest a final press.
Beginner Tips for Success
- Keep about 25–30 percent of the strips light in value.
- Vertical strips flatter a longline garment and are faster to sew than small patchwork blocks.
- Use low-loft batting so the duster vest stays flexible and wearable.
- Make the quilted panels first and cut the garment second.
- Leave enough extra panel size for shifting the pattern after quilting.
- Keep the pocket bottoms above the side-slit opening.
- Bind internal seam allowances together rather than separately.
- Use bias binding for curved armholes and a smoother finish.
- Try the vest on before final edge binding.
- Use a color catcher in the first wash if you used strong reds, magentas, or dark greens.
Styling It & Gift Ideas
A longline Christmas quilted duster vest looks especially good over simple, smooth layers that let the color and length stand out.
Try it with:
- a black fitted top and slim trousers
- a cream turtleneck with dark jeans
- a long-sleeved knit dress and tall boots
- a fine-gauge red sweater with neutral pants
- a white shirt and straight-leg denim
The long open front gives it a more elegant feel than a shorter vest, so it can move from casual daywear to a festive gathering quite easily.
It also makes a thoughtful handmade gift for someone who likes bold color but wants something more refined than a novelty holiday top.
Final Thoughts
A longline Christmas quilted duster vest combines the warmth and texture of quilting with a sleek, dramatic silhouette that feels easy to wear and easy to style.
The keys are simple: use strong vertical piecing, keep enough light colors in the mix, make the quilted panels before cutting, and finish the edges neatly with binding. With those choices in place, the result is festive, chic, and practical enough to wear long after the season’s busiest days.
Other Design Inspirations – Digitally Modified Images. Texture and color may vary from the actual product.
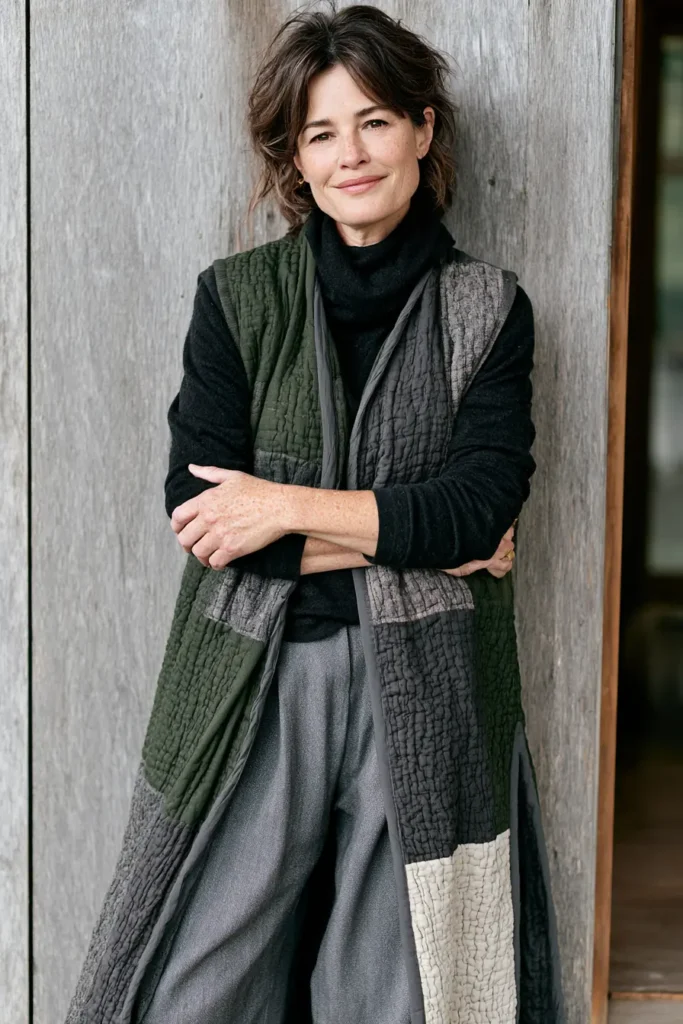
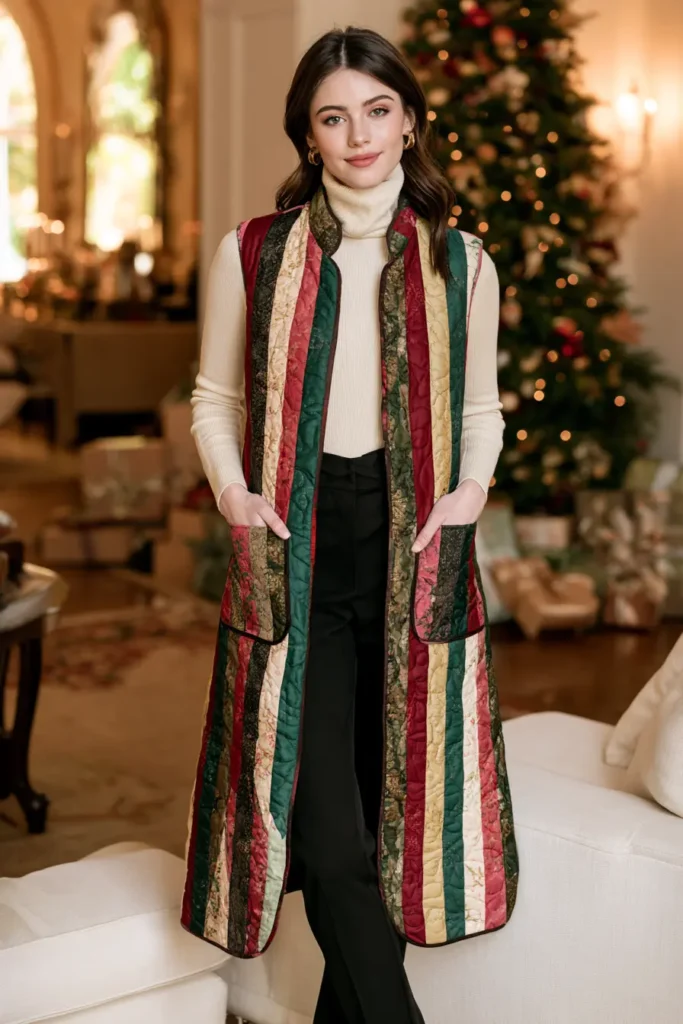
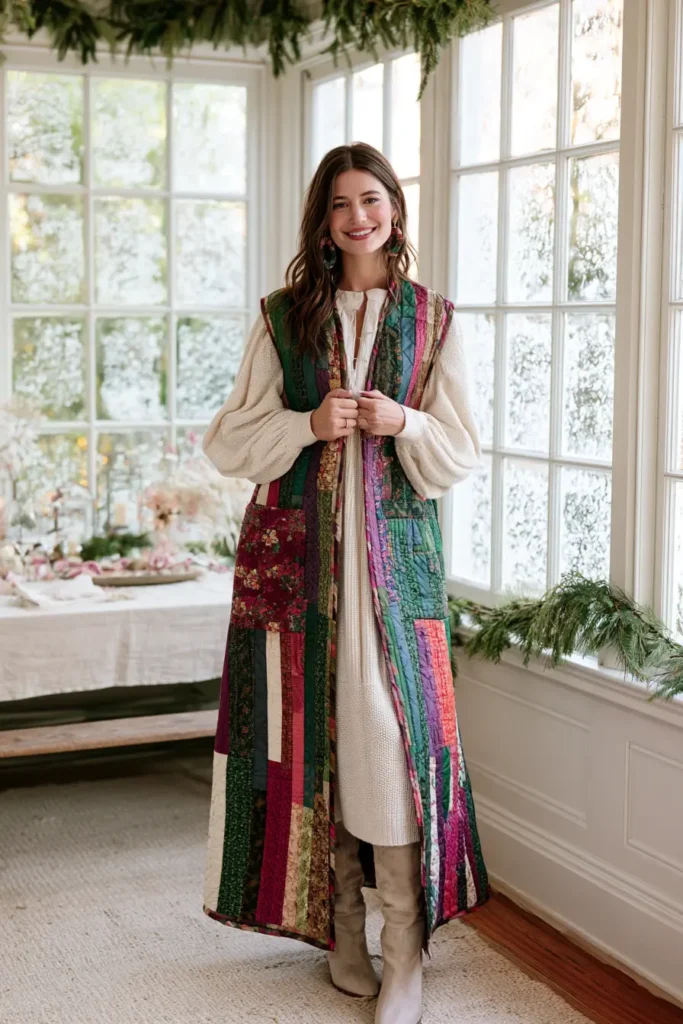
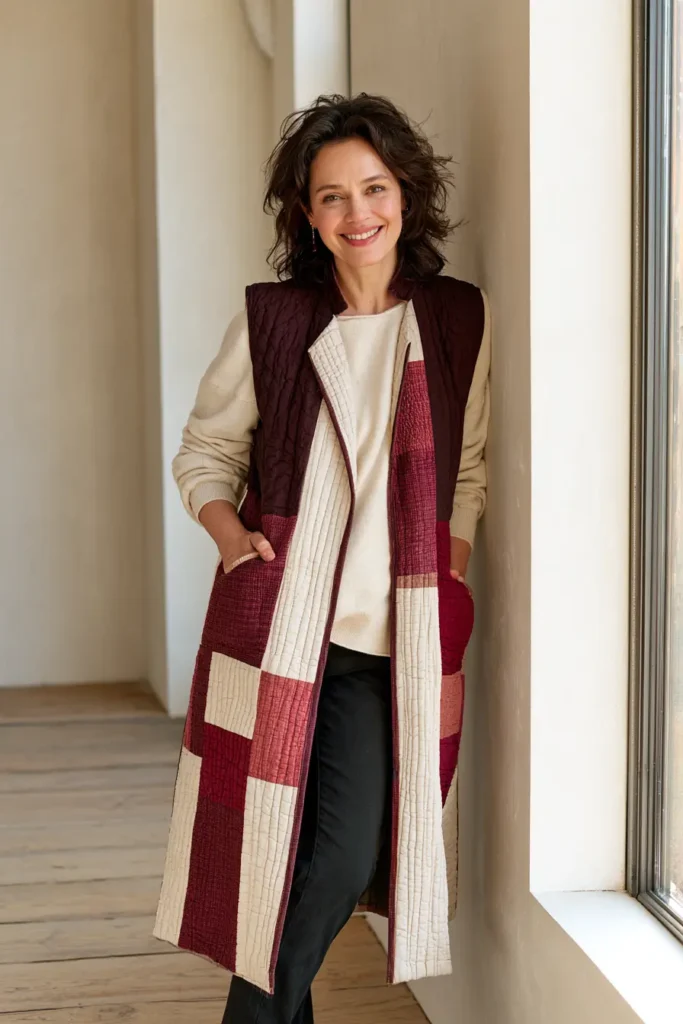
Conclusion
The real appeal of a handmade Christmas layer is how much you use it. These aren’t pieces that hang in a wardrobe waiting for one party – they’re what you pull on for the school concert, the market, the drive to relatives, and the quiet morning after. A quilted jacket only improves with wearing, softening and crinkling into something that feels more yours each season, and because you made it, it fits your life and your colors exactly.
The best Christmas Quilted Jackets and vests match how you actually spend December. Choose the red-and-green patchwork, plaid shacket, or pieced tree jacket if you love the season unmistakably; the gold metallic vest, blue-and-silver jacket, or longline duster when the occasion calls for something elegant; and the cropped vest for layering at parties. A reversible vest quietly does the work of two: a flannel-lined one handles the genuinely cold days, and the quilt-as-you-go jacket or jelly roll vest will still get finished when there are only a couple of weeks left. Whichever you pick, one handmade quilted layer is all it takes to make the whole season feel a little warmer and much more personal.

