
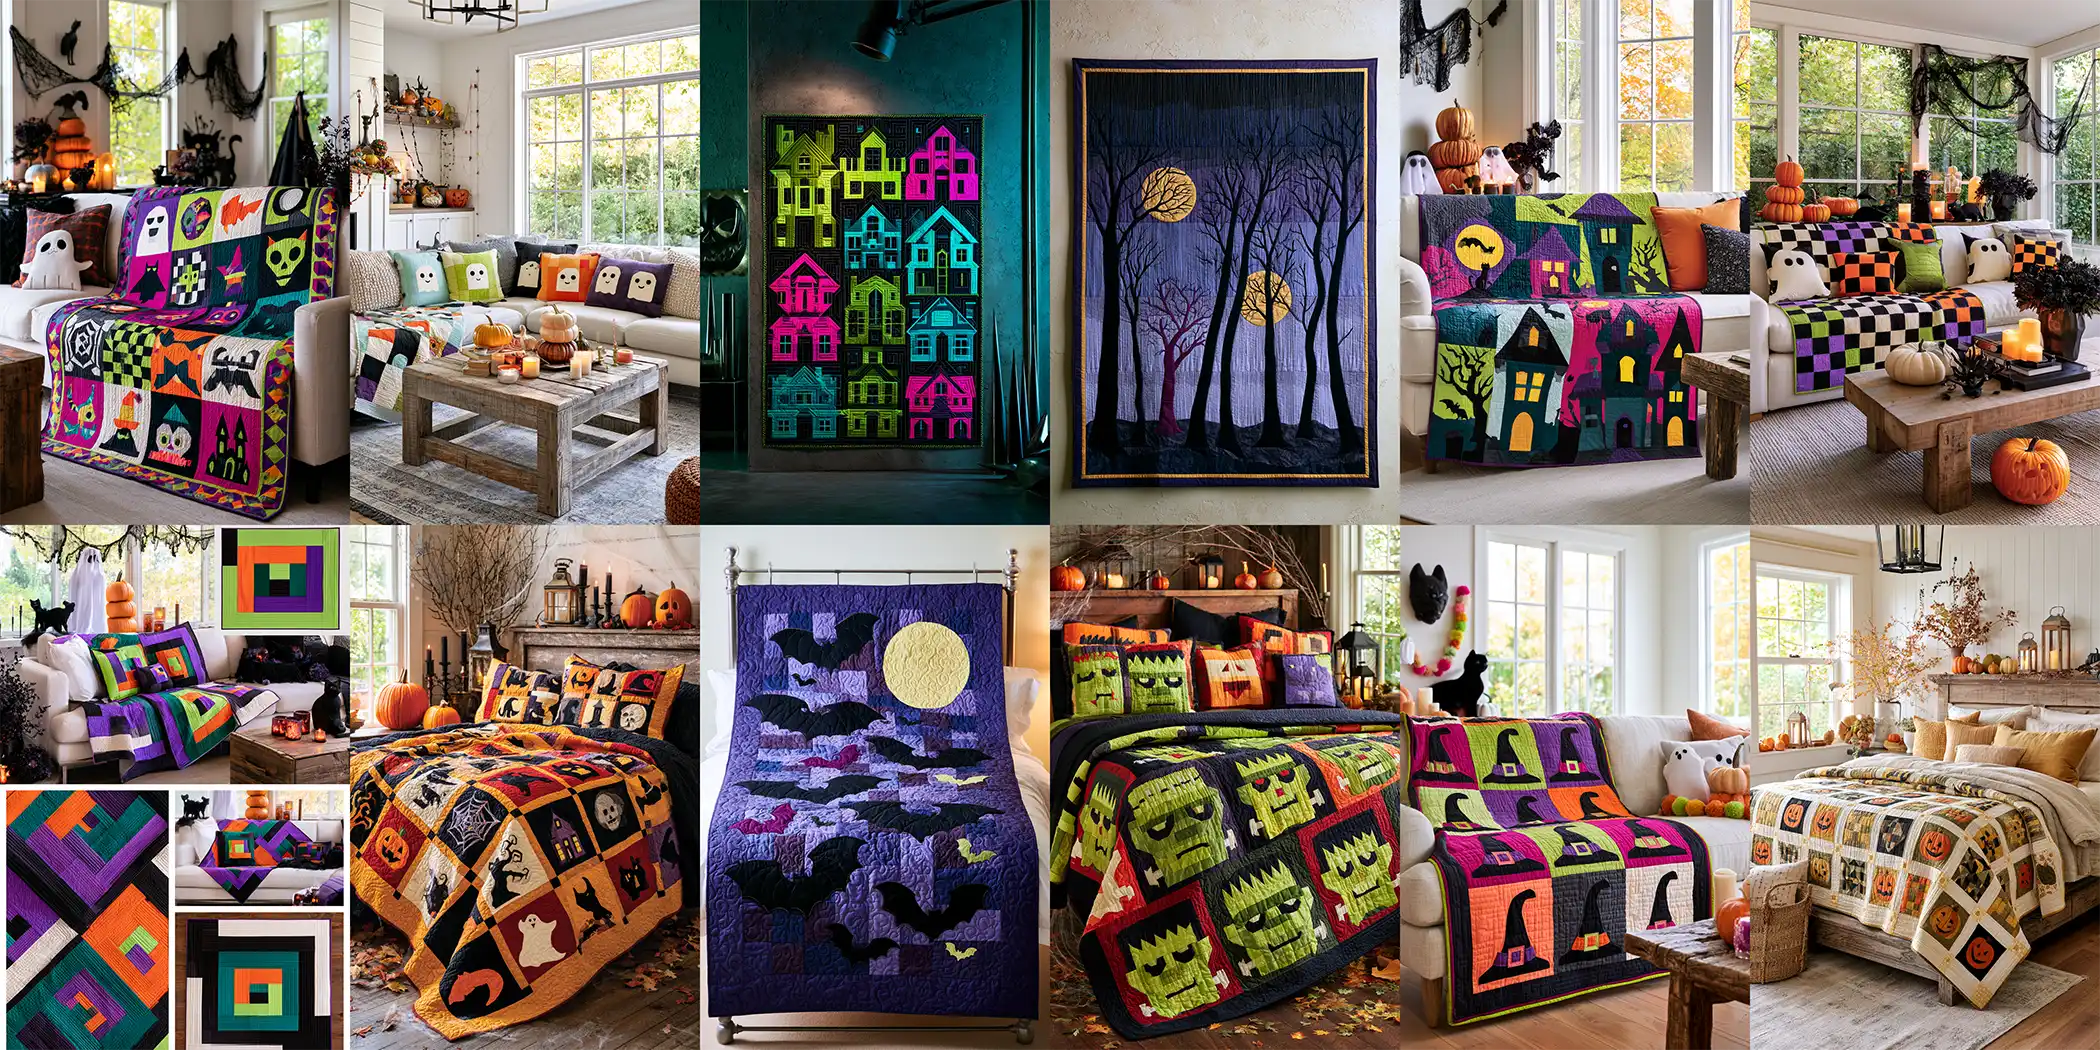
Halloween Quilt Pattern Ideas: 15 Spooky Blocks & Layouts for Every Skill Level
Seasonal quilts occupy an odd position in the craft. A wedding quilt gets used daily for thirty years; a Halloween quilt comes out of the closet in late September and goes back in around Thanksgiving. That math makes people hesitate, and it shouldn’t — the Halloween quilt pattern ideas collected here are built around blocks that earn their storage space, either by being fast enough that the time investment stays proportional or by working in palettes that carry through the whole autumn rather than one night.
A Halloween quilt pattern, at its most basic, is a repeating unit of pieced or appliquéd fabric — a block — arranged across a quilt top in a layout. What makes a block Halloween is usually one of two things: an iconographic shape (a pumpkin, a bat, a witch hat) or a color relationship (orange against black, gold against violet) that the eye reads as seasonal before it identifies any specific image.
Halloween Quilt Pattern Ideas
The fifteen blocks and layouts below are organized roughly by construction method rather than difficulty, because that’s what actually determines whether a pattern suits you. Pieced blocks — jack-o’-lanterns, candy corn, checkerboards, log cabins — are built entirely from straight seams and rotary-cut shapes, which means they’re accurate, fast, and forgiving of fabric choice. Appliqué blocks—ghosts, cats, bats, haunted houses—layer a cut shape onto a background, handling curves and silhouettes that piecing can’t reach.
Foundation paper piecing, used here for the spider web, sews fabric onto a printed paper template and produces sharp points that would be nearly impossible freehand. A few entries are layouts rather than blocks: arrangements like sampler grids or row-by-row designs that organize whatever blocks you’ve made into a finished top. Each section covers what the block involves, roughly what skill it asks for, and how it behaves at different sizes.
Why Make a Halloween Quilt Pattern?
Halloween blocks are unusually good practice material, and that’s the honest argument for making one. A pumpkin block teaches half-square triangles. A ghost block teaches appliqué edge-finishing. A spider web teaches paper piecing. Because the finished object is decorative rather than functional, the stakes are low—nobody scrutinizes the points on a wall hanging the way they’d scrutinize a bed quilt —which makes seasonal projects an ideal place to try a technique for the first time.
There’s also a scale advantage: Halloween quilts are frequently made as table runners, wall hangings, and throws rather than full beds, so a complete finished project takes days rather than months. That completion loop — start, finish, hang it up, see it — is worth more to a developing quilter than a half-finished king-size top sitting in a closet. Practically, the orange-black-violet palette is the most scrap-friendly combination in quilting, because those colors rarely fit into other projects and tend to accumulate.
Tips for Choosing Fabrics
The most common mistake in Halloween quilting is reaching for black as the default background. Black absorbs light, flattens orange, and makes every block look printed rather than sewn. Deep violet, midnight teal, indigo, and charcoal all read as “night” while holding enough tonal variation to let the quilting stitches show — which matters, because on a seasonal quilt the quilting is often the most interesting surface.
For the warm side of the palette, choose a saturated pumpkin or marigold rather than a dusty terracotta; muted oranges disappear against dark grounds under indoor light. Tonal prints and batiks outperform flat solids on appliqué shapes, giving a pumpkin or a moon internal dimension without extra piecing. Scale matters too: large-scale novelty prints get chopped into unrecognizable fragments in patchwork, so save them for backings, borders, or whole-cloth panels where they stay intact.
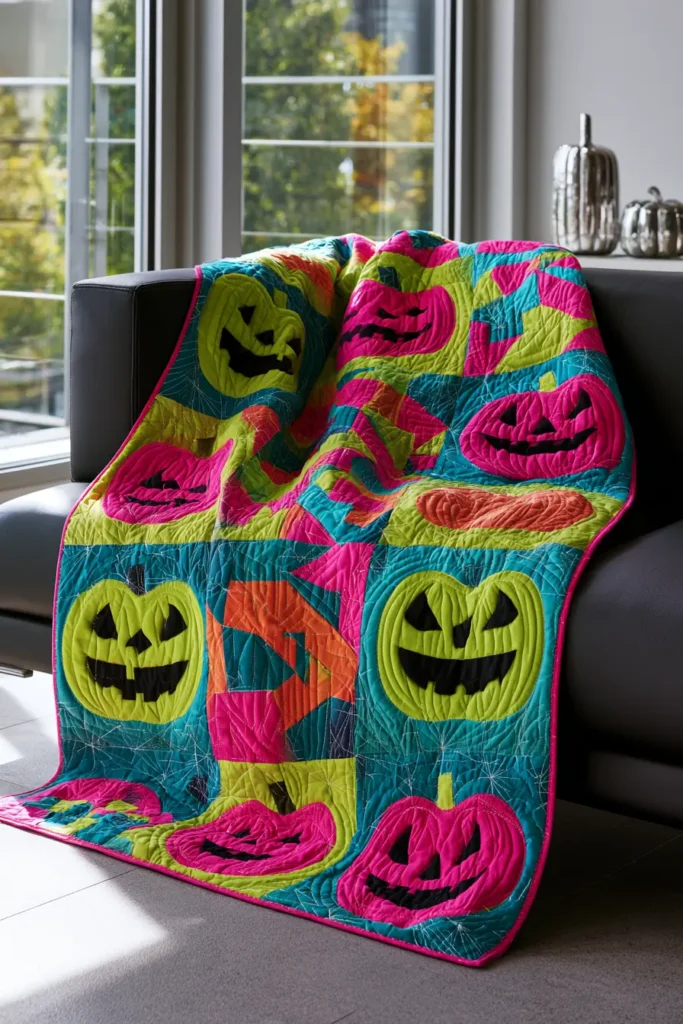
Prewash saturated oranges, blacks, and purples together before cutting — that combination is the most bleed-prone in the standard cotton range, and a single wash after quilting can ruin a finished top. Finally, buy one acid lime, gold, or hot magenta accent even if it feels wrong; every design in this collection improves with a third color that isn’t traditionally Halloween.
See also: Halloween Porch Decor Ideas – Fun and Kid-Friendly Monster Mash – Haunted Patio Halloween Ideas – Chic and Eerie Sophisticated Halloween Patio
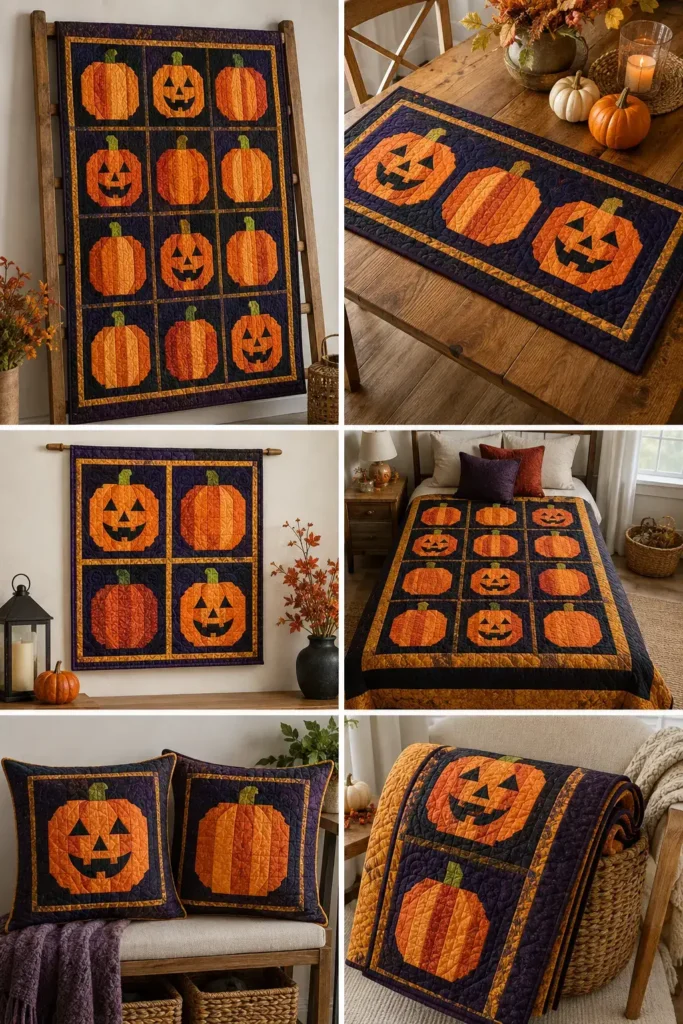
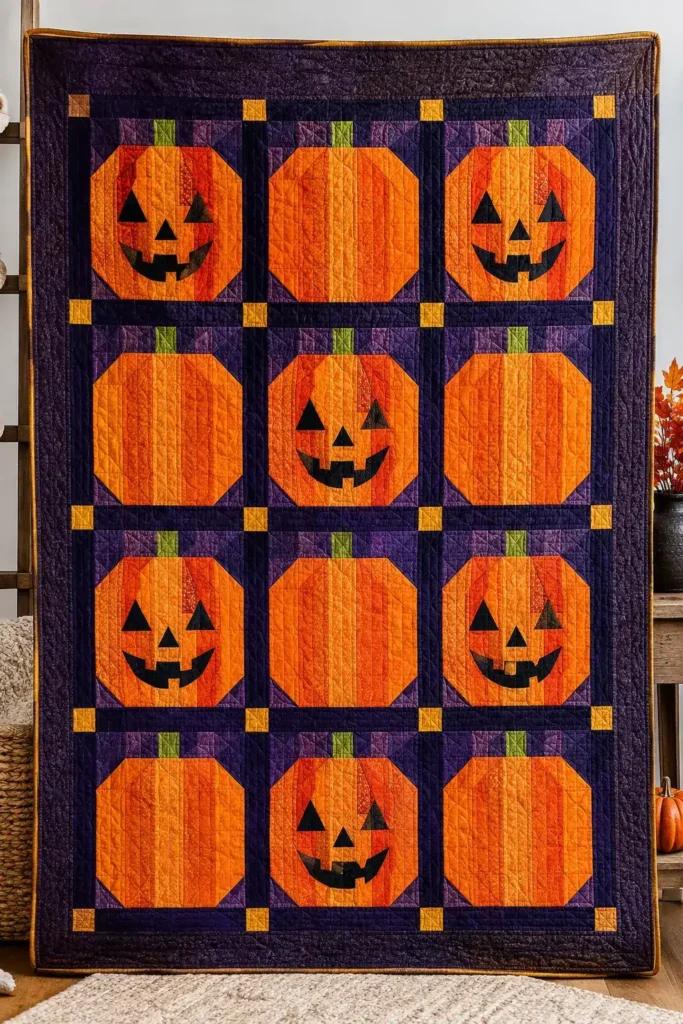
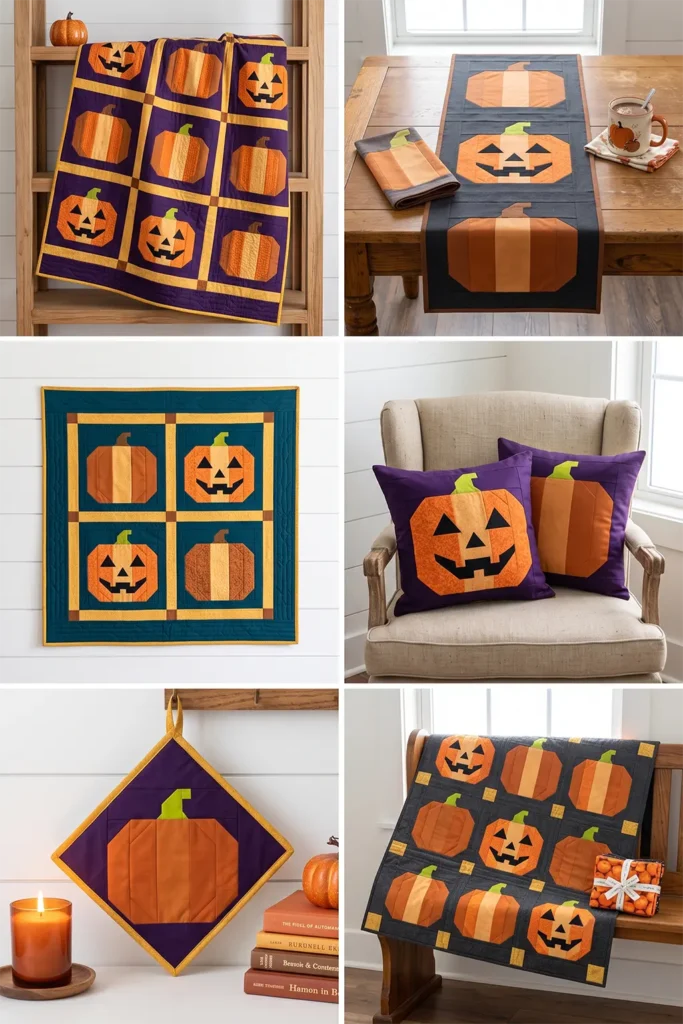
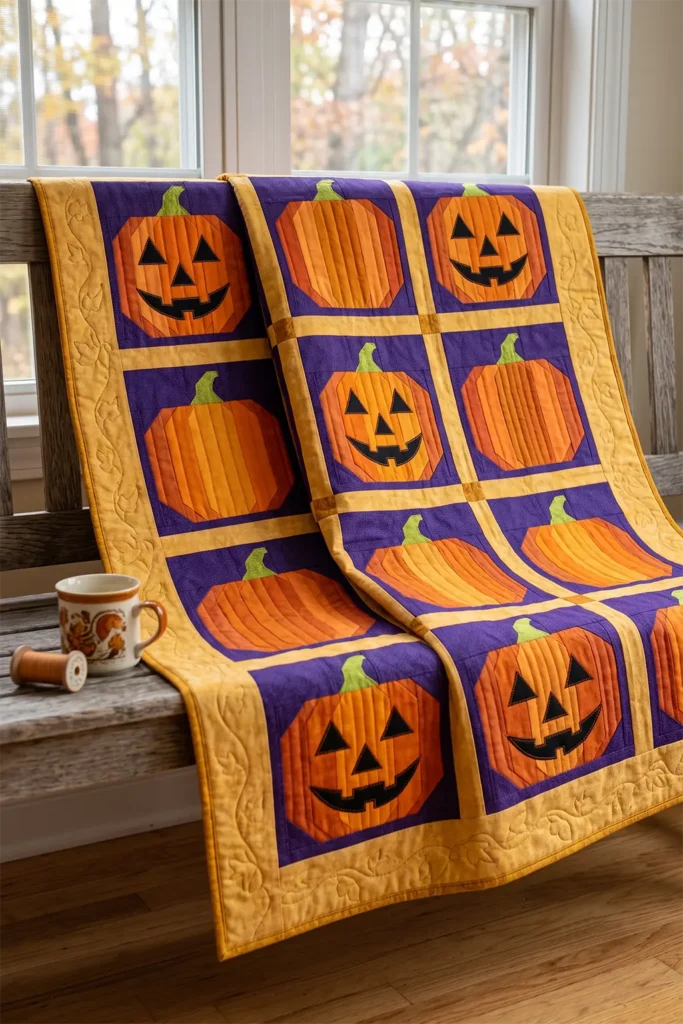
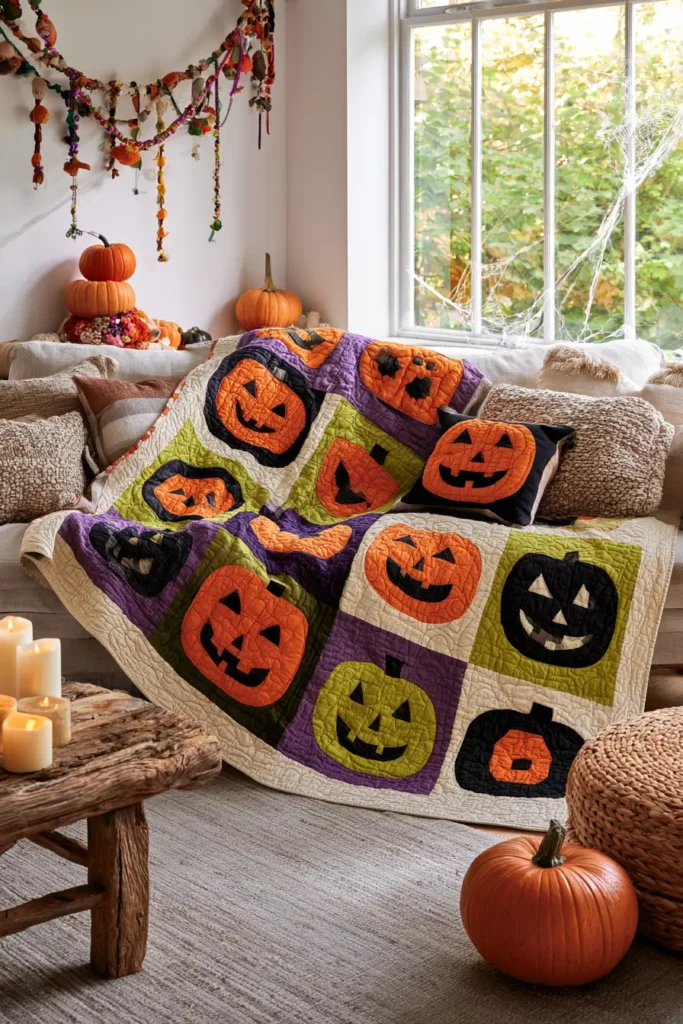
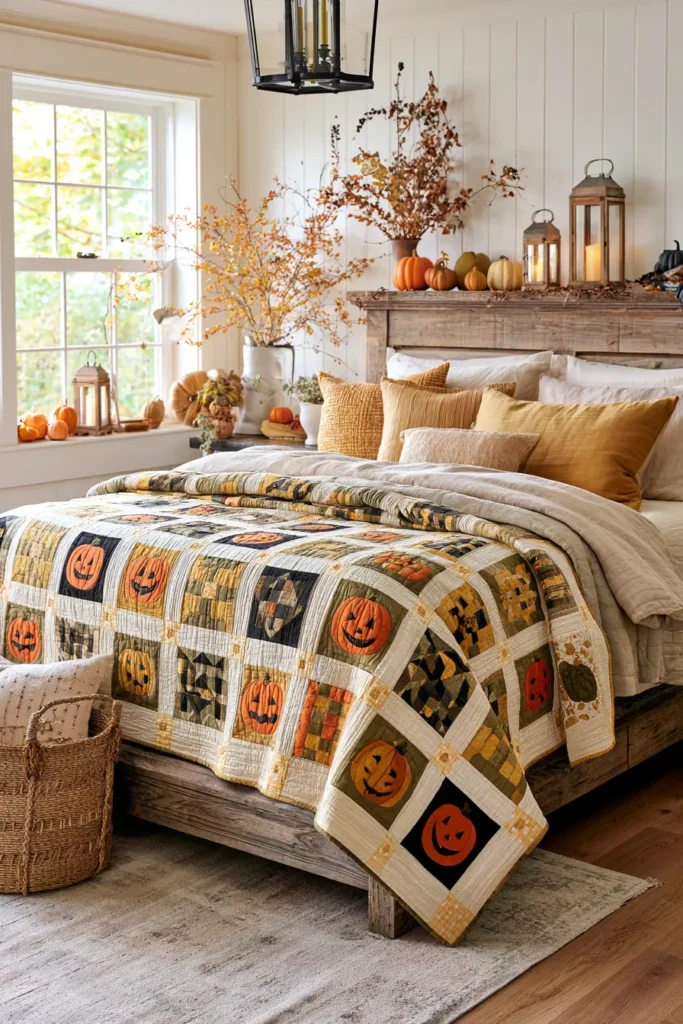
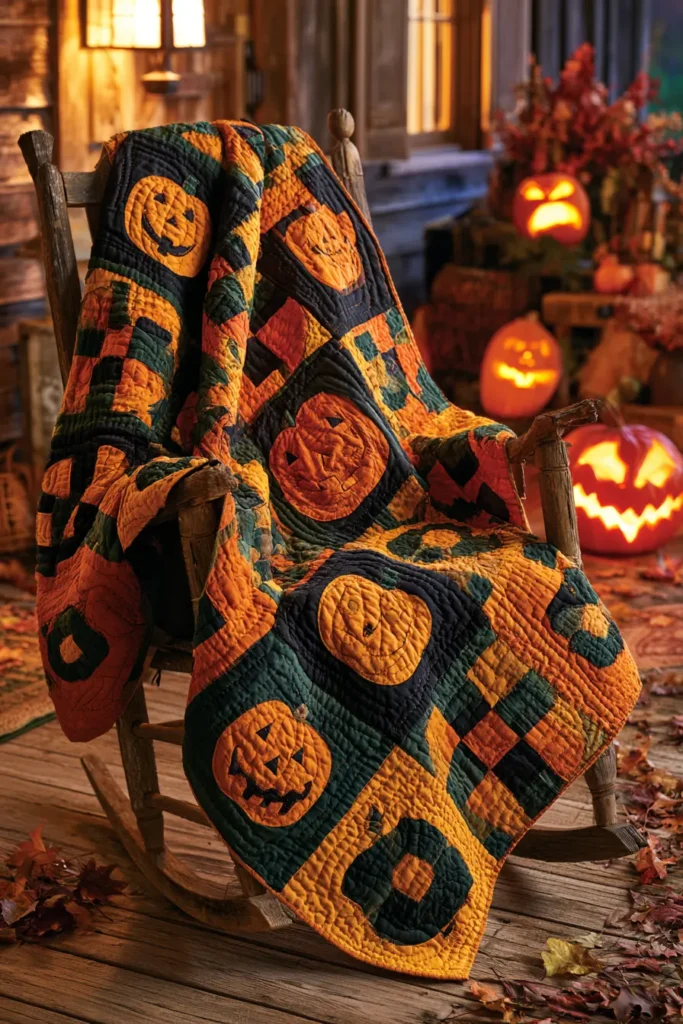
1. Classic Jack-o’-Lantern and Pumpkin Patch Quilt Blocks
The pumpkin is one of the three sisters of Indigenous North American agriculture — planted alongside corn and beans, cultivated for at least five thousand years before European contact, and valued largely for its flesh and seeds rather than its appearance. The decorative pumpkin arrived late. What quilters draw today is a specific cultivar profile: the round, deeply ribbed, orange field pumpkin, which is actually a poor-eating variety bred for looks. That ribbing is the useful part for piecing, because the vertical segments translate directly into strip-pieced columns.
This block is built as a pieced pumpkin body with half-square triangle corners, which is faster and lies considerably flatter than an appliquéd circle. The finished block measures 12″ square, and the layout instructions cover a 48″ × 60″ pumpkin patch throw using twelve blocks.
Design Inspirations – Digitally Modified Images. Texture and color may vary from the actual product.
Materials (for a 48″ × 60″ throw)
- Orange cottons — 1 1/4 yards total, in three to five shades from marigold through burnt pumpkin (a range beats a single orange)
- Background fabric — 2 yards in deep violet, midnight teal, or charcoal
- Stem fabric — 1/4 yard in acid green or warm brown
- Face fabric — fat quarter in true black (for the jack-o’-lantern blocks)
- Sashing and border — 1 yard in gold or a second dark
- Backing — 3 1/4 yards
- Batting — 56″ × 68″
- Binding — 1/2 yard for six 2 1/2″ × WOF strips
- Paper-backed fusible web — 1/2 yard, for the faces
- 50wt thread in orange, background color, and black
Step 1 — Cut the Block Pieces
Per 12″ finished block (12 1/2″ unfinished):
Pumpkin body — five vertical strips, cut at:
- Two side strips at 2 1/2″ × 8 1/2″
- Two inner strips at 2 1/2″ × 8 1/2″
- One center strip at 2 1/2″ × 8 1/2″
Use a different orange for each strip. That variation is what creates the ribbed look without any curved piecing.
Corner units — four background squares at 3″ × 3″ and four orange squares at 3″ × 3″ for half-square triangles.
Background side strips — two at 2″ × 8 1/2″.
Top and bottom background — one at 12 1/2″ × 2 1/2″ and one at 12 1/2″ × 2 1/2″.
Stem — one rectangle at 2″ × 3″.
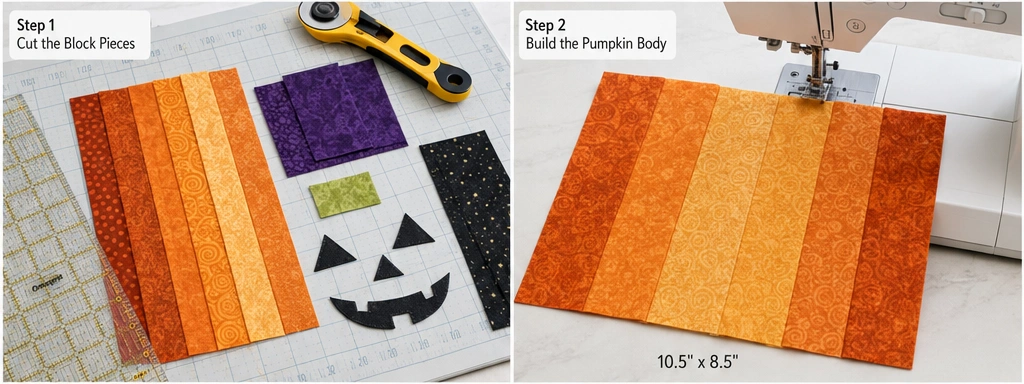
Step 2 — Build the Pumpkin Body
Sew the five 2 1/2″ × 8 1/2″ orange strips together lengthwise at 1/4″, arranging the oranges so no two adjacent strips are the same shade. Press seams in one direction — this reduces bulk and lets the vertical seams sit crisply.
The pieced body now measures 10 1/2″ × 8 1/2″ raw.
Tip: Arrange the strips darkest at the outer edges, lightest in the center. That value gradient reads as curvature, and it’s the single cheapest way to make a flat pieced pumpkin look round.
Step 3 — Make the Corner Half-Square Triangles
Pair each 3″ background square with a 3″ orange square, right sides together. Draw a diagonal line corner to corner on the lighter square, sew 1/4″ on each side of the line, cut on the line, and press open.
You’ll get eight HSTs from four pairs; you need four. Trim each to exactly 2 1/2″ square.
These become the pumpkin’s rounded shoulders — attach them to the four corners of the pieced body with the background triangle facing outward. Sewing the HST corners rather than cutting curves is what makes this block accessible to a beginner while still reading as round.
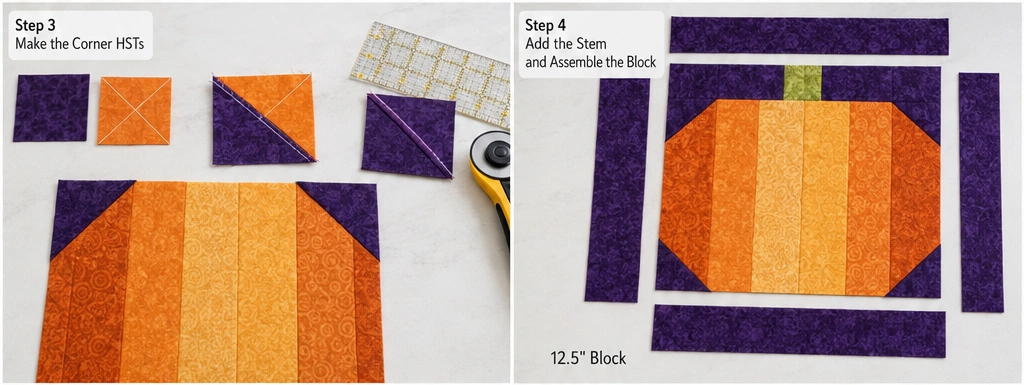
Step 4 — Add the Stem and Assemble the Block
Sew the 2″ × 3″ stem rectangle to a background piece so it sits centered above the pumpkin body, then attach that unit to the top of the pumpkin.
Add the 2″ × 8 1/2″ background side strips to the left and right edges, then the 12 1/2″ × 2 1/2″ background strips to the top and bottom.
Square the finished block to exactly 12 1/2″ × 12 1/2″.
For a slight lean, offset the stem 1/2″ to one side rather than centering it. Real pumpkin stems are rarely vertical, and a tilted stem is one of those details that reads as intentional rather than sloppy.
Step 5 — Add Jack-o’-Lantern Faces
Not every block needs a face — a pumpkin patch layout works best with roughly a third of the blocks carved and the rest plain.
Cut face pieces from black using fusible web:
- Two triangular eyes at 1 1/2″ per side
- One triangular nose at 1″ per side
- One grin roughly 4″ wide with two or three tooth notches
Reverse asymmetrical shapes before tracing onto the paper side of the fusible web. Fuse to the black fabric, cut, peel, and position on the pieced pumpkin body. Fuse with a hot dry iron, 8–10 seconds per section, then stitch every edge with a narrow zigzag (1.5mm width, 1.0mm length) in black.
Optional glow detail: back each face opening with a gold or acid yellow scrap and cut the black slightly smaller, leaving a 1/8″ rim of yellow visible around each shape. It reads as candlelight from across a room.
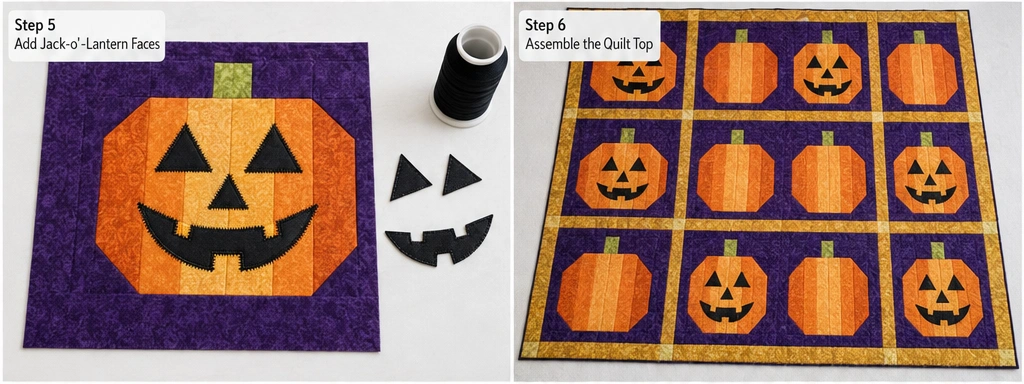
Step 6 — Assembly: Setting the Quilt Top
Twelve blocks in a 3 across × 4 down grid with 2″ finished sashing:
- Cut sashing strips — nine at 2 1/2″ × 12 1/2″ (vertical, between blocks) and three at 2 1/2″ × 40 1/2″ (horizontal, between rows).
- Cut cornerstones — six at 2 1/2″ × 2 1/2″ in a contrasting gold, if you want sashing intersections to pop.
- Sew each row: block, vertical sashing, block, vertical sashing, block. Press seams toward the sashing.
- Build the horizontal sashing rows: cornerstone, sashing, cornerstone, sashing, cornerstone — matching the row width.
- Join rows alternating block rows and sashing rows. Pin at every seam intersection; sashing seams that don’t line up are the most visible flaw in a sashed quilt.
- Add borders — cut four strips at 4 1/2″ wide, sew sides first, then top and bottom.
Finished top measures approximately 48″ × 60″.
Layout tip: Arrange the blocks on a design wall or floor before sewing and scatter the carved faces rather than clustering them. Vary the orange values across the grid too — a quilt where every pumpkin is the same intensity looks mechanical.
Step 7 — Baste and Quilt
Layer backing, batting, and top; spray-baste or pin-baste every 4″.
Quilting suggestions:
- Vertical lines following the pumpkin strip seams, extending into the background — unifies the whole top and reinforces the ribbing
- Echo quilting around each pumpkin at 1/2″ intervals, with dense stipple in the background
- A loose vine or leaf motif in the sashing, tying the patch together
Leave the faces unquilted so they sit forward.
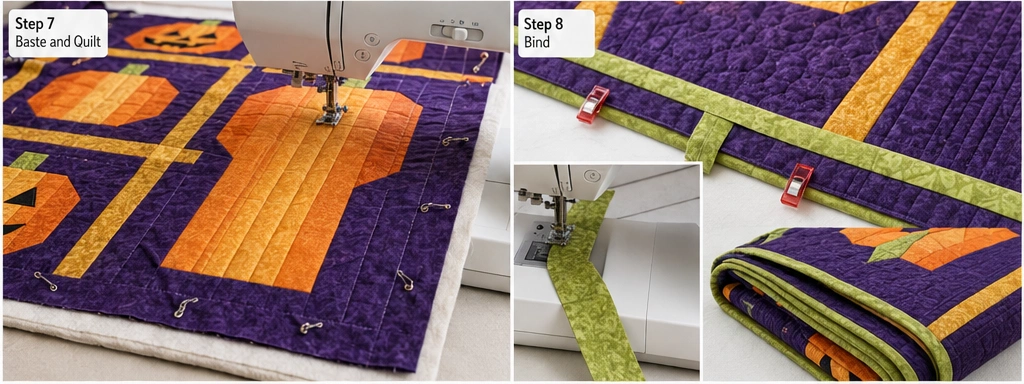
Step 8 — Bind
Cut six 2 1/2″ × WOF strips, join with diagonal seams, press in half lengthwise. Sew to the quilt front at 1/4″, mitering corners, then fold to the back and finish by hand or machine.
Gold binding frames a violet-background quilt and picks up any candlelight detail in the faces. Acid green picks up the stems and is the livelier choice.
Color Notes
Use three to five oranges minimum across the quilt. A pumpkin patch with a single orange looks printed; one with marigold, pumpkin, rust, and coral looks grown. Batiks and tonal prints work especially well because the mottling within a single strip adds dimension.
Avoid a black background. Deep violet is the strongest partner for orange — it’s the near-complement, so both colors intensify. Midnight teal runs a close second and skews the whole quilt slightly cooler and more modern.
For the stems, acid green rather than brown. Botanically, brown is more accurate for a cured pumpkin, but acid green against orange and violet is what keeps the quilt bright, and the green reads as freshly picked rather than sitting on a porch since September.
Sizing Variations
| Layout | Blocks | Finished Size |
|---|---|---|
| Table runner | 3 in a row | 16″ × 44″ |
| Wall hanging | 4 (2×2) | 32″ × 32″ |
| Throw | 12 (3×4) | 48″ × 60″ |
| Twin | 24 (4×6) | 62″ × 88″ |
Gift Ideas That Pair With This Quilt
If you’re giving the finished throw, or wrapping smaller items in a matching table runner:
- A folded throw with a mug and cocoa set — the standard cozy-gift pairing, and it works
- Matching pumpkin block pillow covers, made from two spare blocks
- A baking bundle: pie plate, pumpkin spice blend, and a rolling pin
- A fat quarter bundle in coordinating oranges for a quilting friend
- A fall candle and a book, tucked into a folded runner
- Table linens — a matching runner plus napkins in the background fabric
- A pumpkin block mini quilt as a gift tag or wall piece on its own
Other Design Inspirations – Digitally Modified Images. Texture and color may vary from the actual product.
2. Cute Ghost Appliqué Quilt Blocks for Beginners
Appliqué predates patchwork by a considerable margin. The earliest surviving example is a ceremonial Egyptian funeral canopy dated around 980 BCE, layered with cut gazelle-hide shapes stitched onto a linen ground — the technique existed for roughly three thousand years before the pieced quilt blocks most people picture. Broderie perse, the eighteenth-century practice of cutting printed motifs from expensive imported chintz and restitching them onto cheaper cloth, is the direct ancestor of the fusible appliqué used here.
The ghost is the shape to learn on. It has no sharp points, no inner corners, and no straight edges that reveal a wobble — every failure mode that punishes a beginner in appliqué is simply absent. A slightly irregular ghost still looks like a ghost.
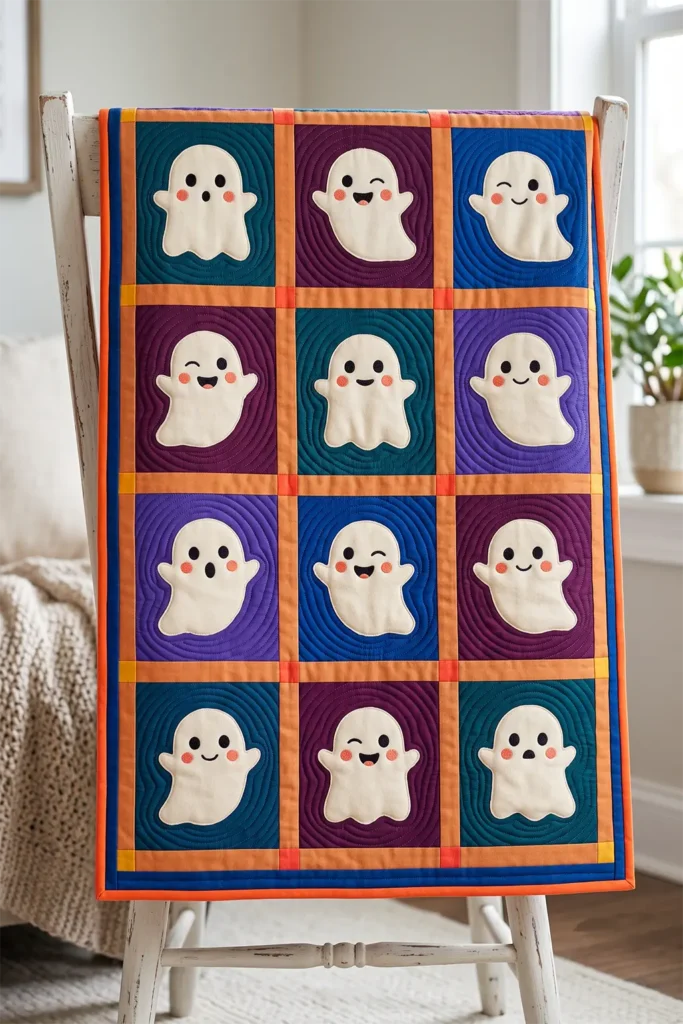
The finished block measures 12″ square. Layout instructions below cover a 48″ × 60″ throw using twelve blocks.
Design Inspirations – Digitally Modified Images. Texture and color may vary from the actual product.
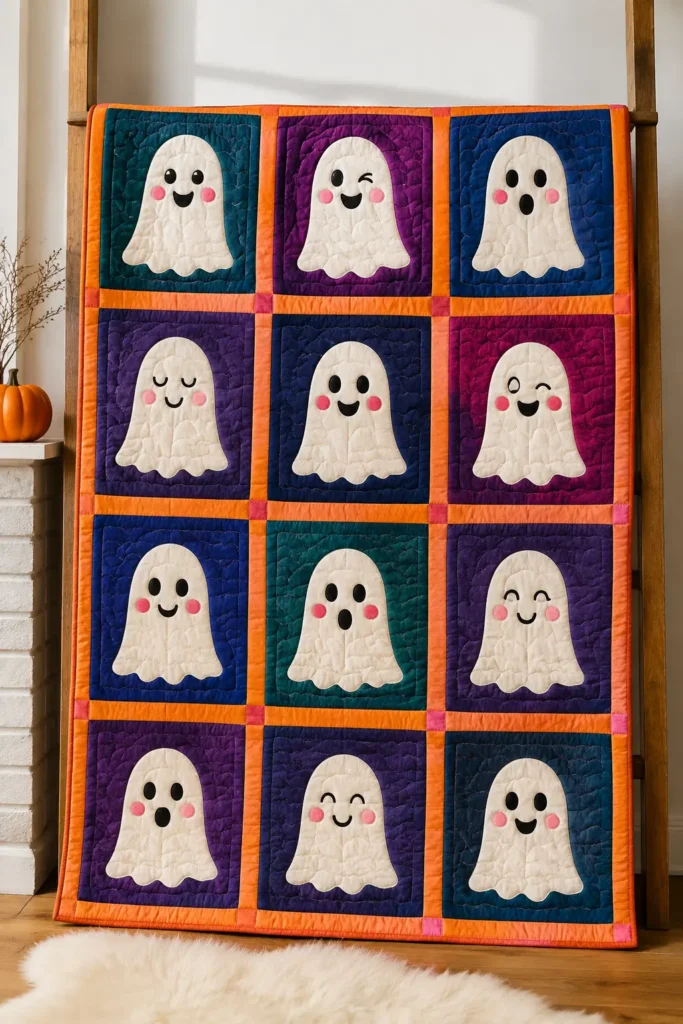
Materials (for a 48″ × 60″ throw)
- Background fabrics — 2 yards total in deep teal, plum, cobalt, and violet (four fat quarters plus yardage, or 1/2 yard each)
- Ghost fabric — 1 yard in warm cream or off-white
- Face fabric — fat quarter in true black
- Accent scraps — coral or hot pink, for blush cheeks
- Sashing — 3/4 yard in tangerine or gold
- Border — 3/4 yard
- Backing — 3 1/4 yards
- Batting — 56″ × 68″
- Binding — 1/2 yard for six 2 1/2″ × WOF strips
- Paper-backed fusible web — 1 1/2 yards
- 50wt thread in cream, black, and background colors
Step 1 — Cut the Background Squares
Cut twelve background squares at 12 1/2″ × 12 1/2″.
Use three or four different background colors across the twelve blocks rather than one. A quilt of identical backgrounds looks like printed yardage; varied backgrounds look composed, and it costs nothing extra.
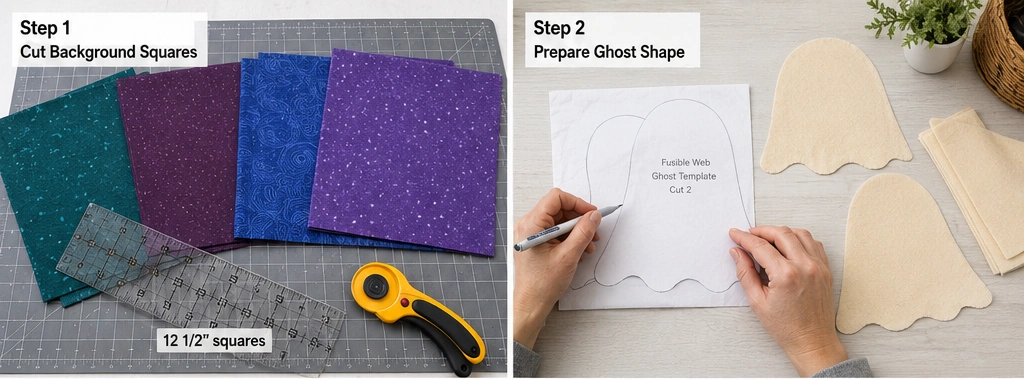
Step 2 — Draw and Prepare the Ghost Shape
Draw a ghost at roughly 8″ tall × 6″ wide: a rounded dome for the head and shoulders, tapering slightly toward the base, finishing in a wavy bottom edge of three or four shallow lobes.
Keep the lobes shallow — no deeper than about 3/4″. Deep scallops read as flame rather than fabric drape, and they’re harder to stitch cleanly.
Trace the shape onto the paper side of the fusible web twelve times. Because the ghost is roughly symmetrical, reversing isn’t critical here — one of several reasons it’s the right beginner shape.
Fuse the web to the wrong side of the cream fabric following the manufacturer’s instructions, cut out on the traced lines, and peel the paper backing.
Tip: Cut one ghost from scrap first and audition the face placement with pins before committing to twelve. Eyes set wide and low read cute; the same eyes set high and close together read startled. Identical shape, entirely different character — and you’ll want to know which one you’re making before you fuse a dozen.
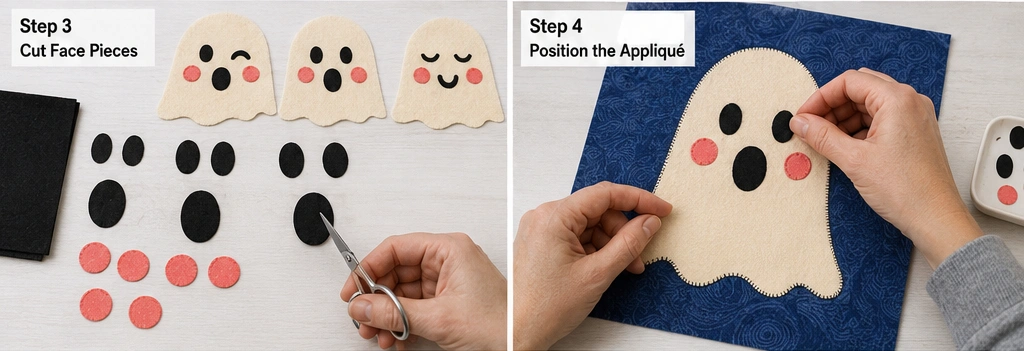
Step 3 — Cut the Face Pieces
Per ghost, cut from black:
- Two oval eyes at roughly 3/4″ tall × 5/8″ wide
- One open oval mouth at roughly 1″ wide × 3/4″ tall
Optional, from coral: two circles at 3/4″ diameter for cheeks.
Vary the expressions across the twelve blocks. A few with closed curved-line eyes, one or two with a wide surprised mouth, one winking. Twelve identical ghosts is a missed opportunity — variation is what makes a sampler-style layout worth looking at up close.
Step 4 — Fuse the Appliqué
Center each ghost on its background square, roughly 2 1/4″ up from the bottom raw edge. Leave at least 1 1/4″ clear of all edges so nothing gets caught in the seam allowance during assembly.
Fuse with a hot dry iron, holding 8–10 seconds per section without sliding the iron. Position the face pieces, then fuse those.
Work through all twelve in one ironing session — setup and teardown is most of the time cost.
Step 5 — Stitch the Appliqué Edges
Three options, in order of durability:
- Blanket stitch in cream thread — traditional, keeps a soft cloth-like edge, and it’s the most forgiving of slight wobbles
- Narrow zigzag (1.5mm width, 1.0mm length) — most secure, fastest
- Straight stitch 1/8″ inside the edge — softest look, though the raw edge will fray gently with washing (some quilters want exactly this)
For a beginner, blanket stitch is the recommendation. Its irregularity is part of the look, which means small inconsistencies read as handmade rather than as errors.
Stitch the ghost body first, then the face pieces on top.
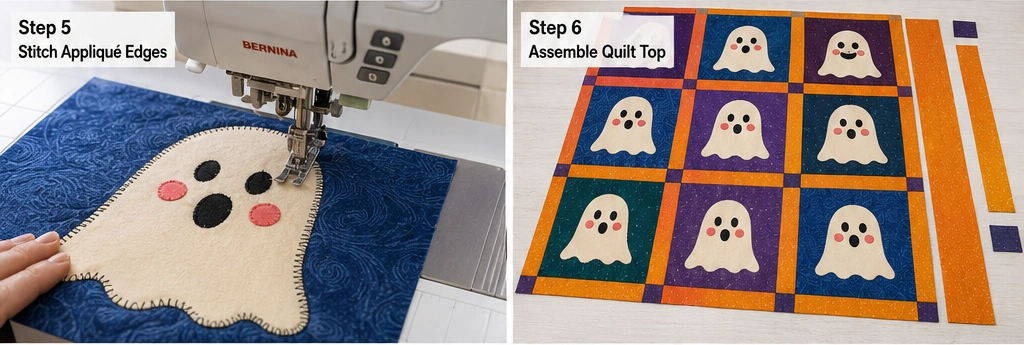
Step 6 — Assembly: Setting the Quilt Top
Twelve blocks in a 3 across × 4 down grid with 2″ finished sashing:
- Cut vertical sashing — nine strips at 2 1/2″ × 12 1/2″.
- Cut horizontal sashing — three strips at 2 1/2″ × 40 1/2″.
- Cut cornerstones — six at 2 1/2″ × 2 1/2″ in a contrasting color.
- Sew each block row: block, sashing, block, sashing, block. Press seams toward the sashing.
- Build the sashing rows: cornerstone, sashing strip, cornerstone, sashing strip, cornerstone.
- Join alternating rows. Pin at every intersection — misaligned sashing seams are the most visible flaw in this layout.
- Add borders — four strips cut at 4 1/2″ wide; sides first, then top and bottom.
Finished top: approximately 48″ × 60″.
Layout note: arrange all twelve blocks on a floor or design wall first, and distribute the background colors so no two adjacent blocks match. Scatter the expressions too — cluster the wide-eyed ones and half the quilt goes flat.
Step 7 — Baste and Quilt
Layer backing, batting, and top; baste every 4″.
Quilt the background densely and the ghosts not at all. That contrast makes each ghost puff forward and appear to float, and it’s the entire visual payoff of this design.
- Concentric echo rings radiating outward from each ghost at 1/2″ intervals — strongest option
- Horizontal wavy lines at 1/2″, flowing around the shapes
- Tight stipple in matching thread
Quilt the sashing with a simple straight line down its center, or leave it unquilted for contrast.
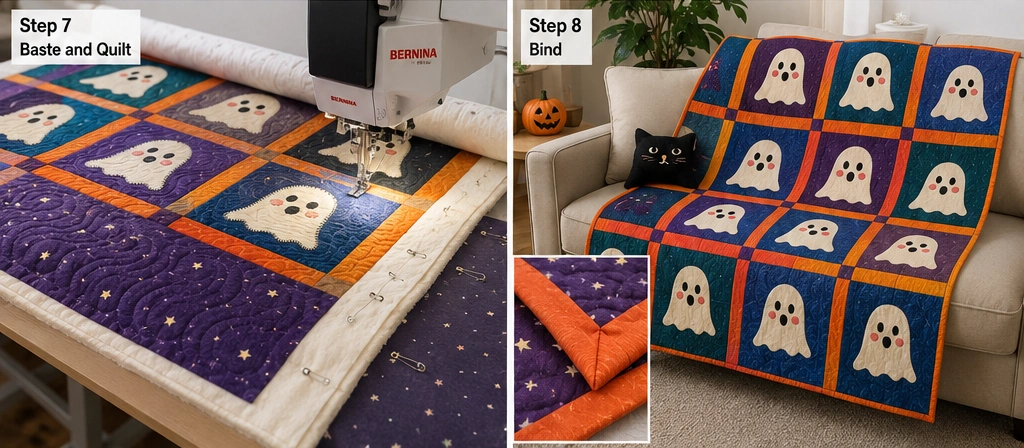
Step 8 — Bind
Cut six 2 1/2″ × WOF strips, join with diagonal seams, fold in half lengthwise and press. Sew to the quilt front at 1/4″, mitering corners, then fold to the back and finish by hand or machine.
Tangerine or hot coral binding is the move here. Against teal and plum backgrounds it pulls the whole quilt bright and keeps the ghosts from reading as somber.
Color Notes
Cute ghosts fail when the palette goes gothic. White on black is horror-movie; white on teal, plum, cobalt, or violet is children’s-book, and that’s the register this design wants.
Use warm cream rather than optical white for the ghost bodies. Pure white reads as a paper cutout against saturated cotton; cream reads as cloth.
Coral or magenta accents — cheeks, binding, cornerstones — are what tip the quilt from spooky to charming. It’s a small amount of fabric doing a disproportionate amount of work.
For a variation worth trying, make two or three ghosts in pale mint or blush pink instead of cream. The shape stays instantly readable, and the unexpected color is what makes the quilt memorable rather than expected.
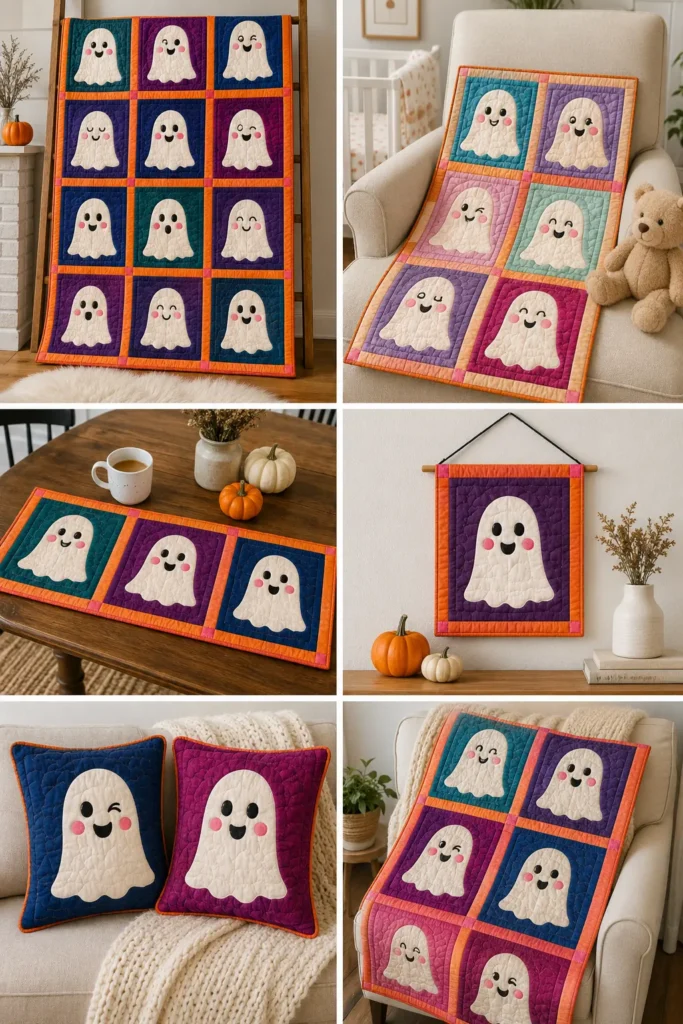
Sizing Variations
| Layout | Blocks | Finished Size |
|---|---|---|
| Mini / wall hanging | 1 | 16″ × 16″ |
| Table runner | 3 in a row | 16″ × 44″ |
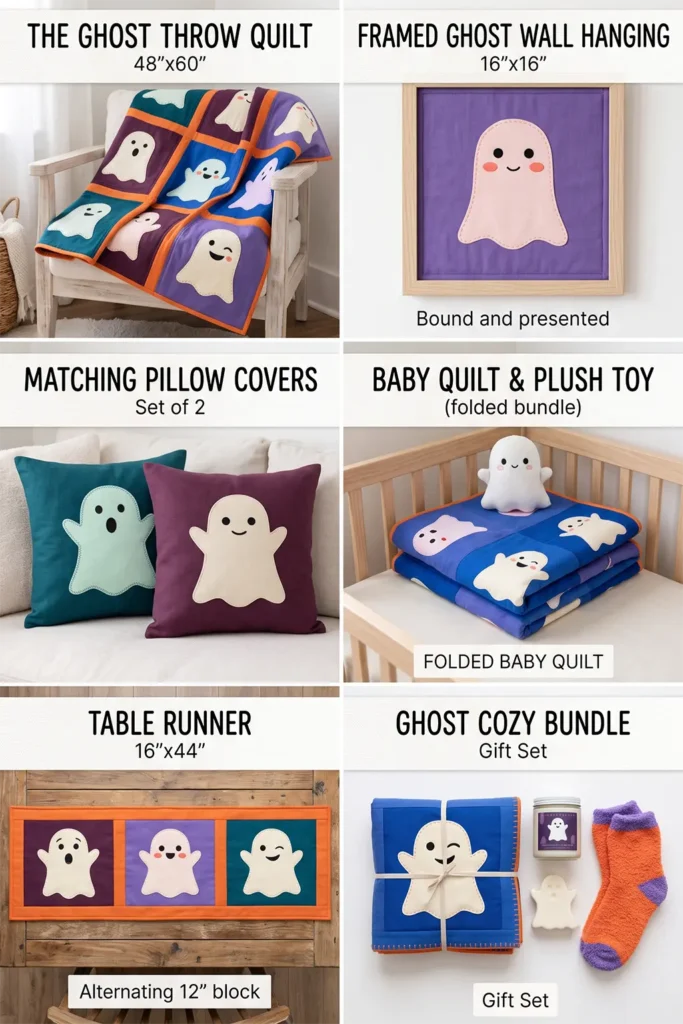
| Baby quilt | 6 (2×3) | 32″ × 46″ |
| Throw | 12 (3×4) | 48″ × 60″ |
| Twin | 24 (4×6) | 62″ × 88″ |
Gift Ideas That Pair With This Quilt
- A folded baby-size ghost quilt with a plush toy — the six-block version is exactly the right scale
- Matching ghost pillow covers made from two spare blocks
- A cocoa and marshmallow set with a mug, wrapped in a folded runner
- A picture book bundle for a child, tucked inside the folded quilt
- A fat quarter bundle in coordinating brights for a quilting friend
- Bath and cozy set — candle, soap, and chunky socks in a matching mini quilt
- A single ghost block mini quilt, bound as a standalone wall piece
Other Design Inspirations – Digitally Modified Images. Texture and color may vary from the actual product.
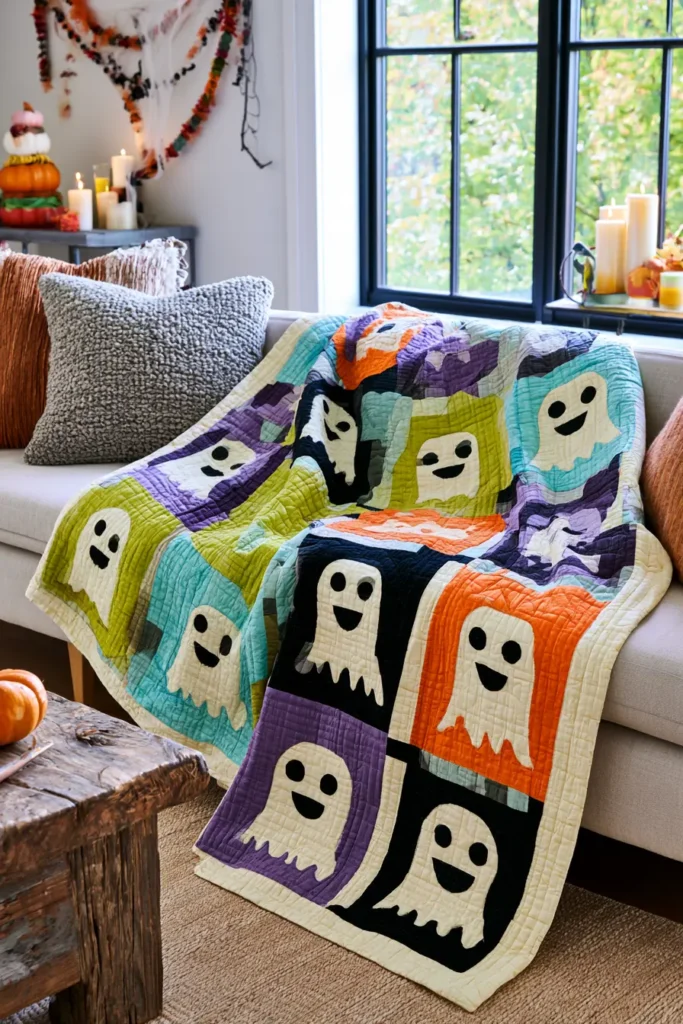
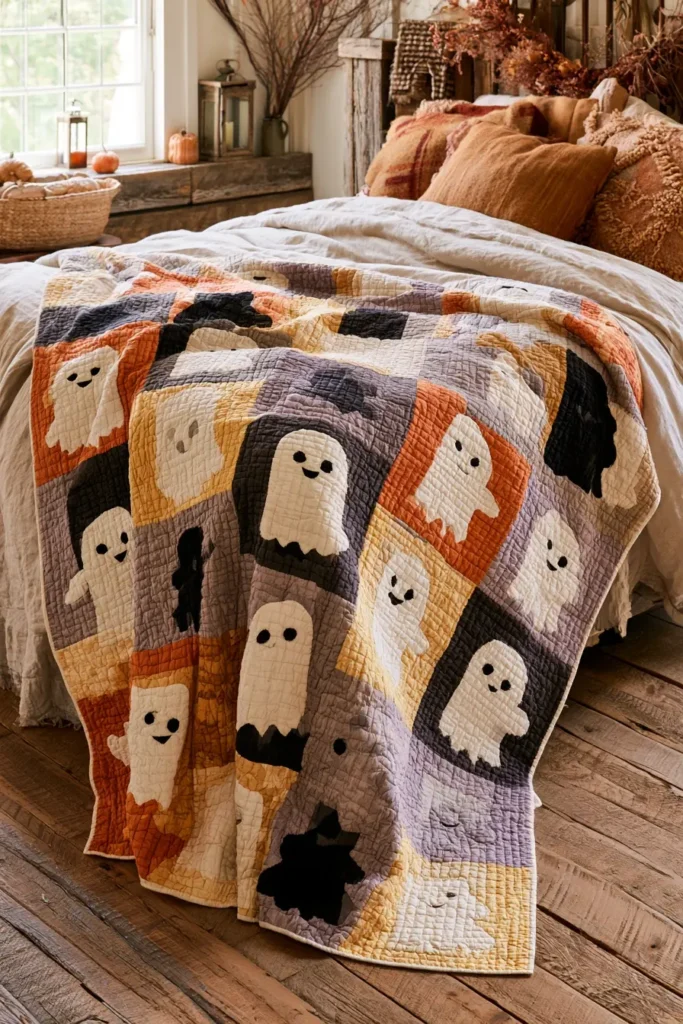
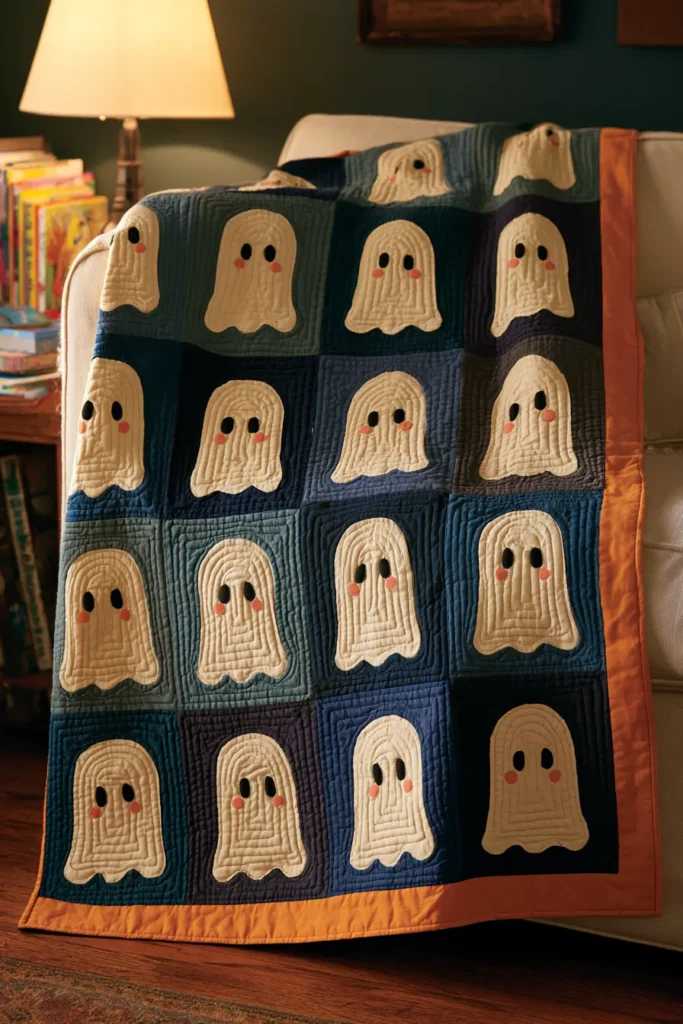
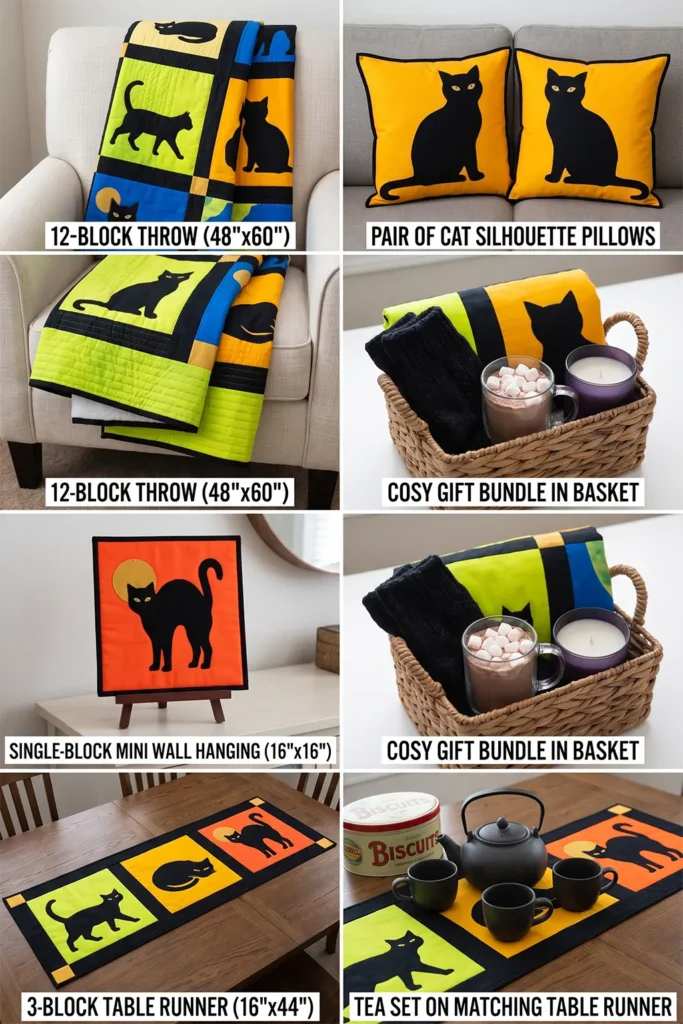
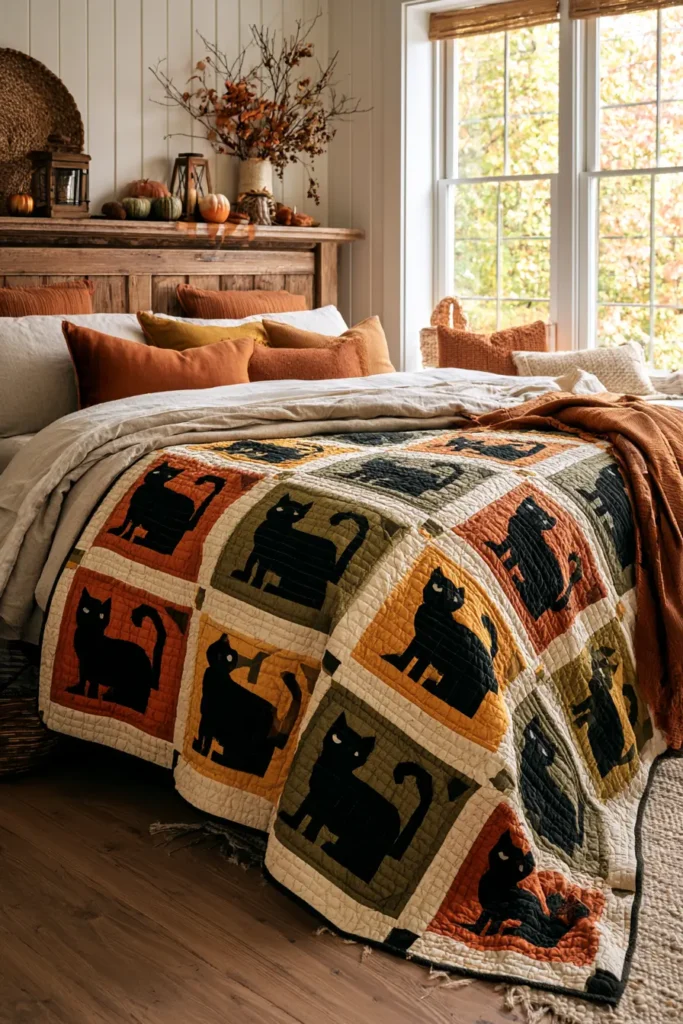
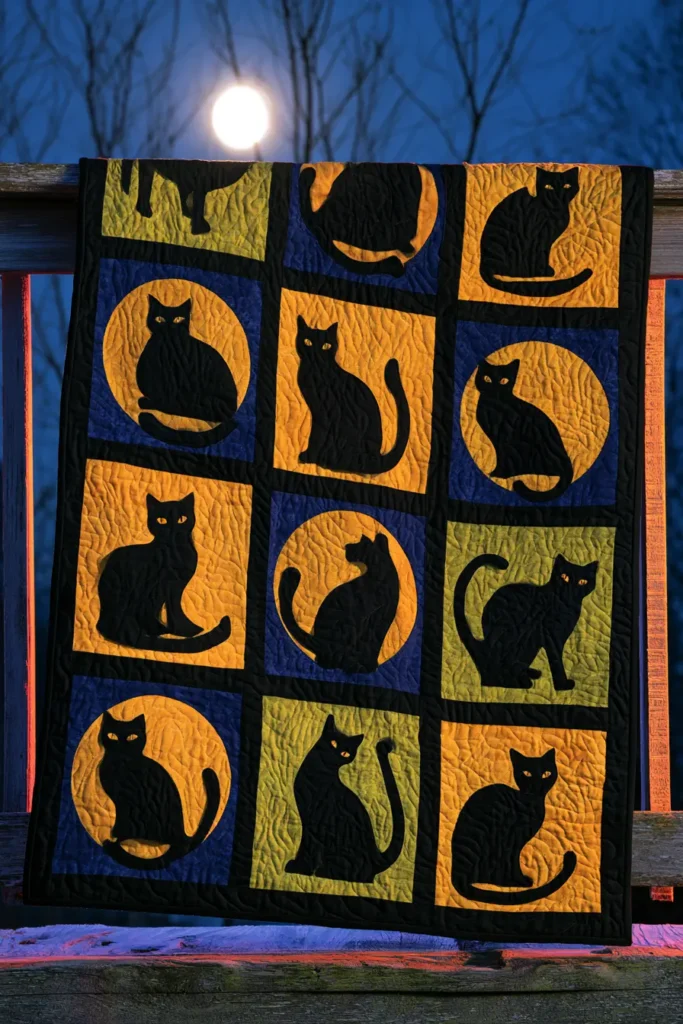
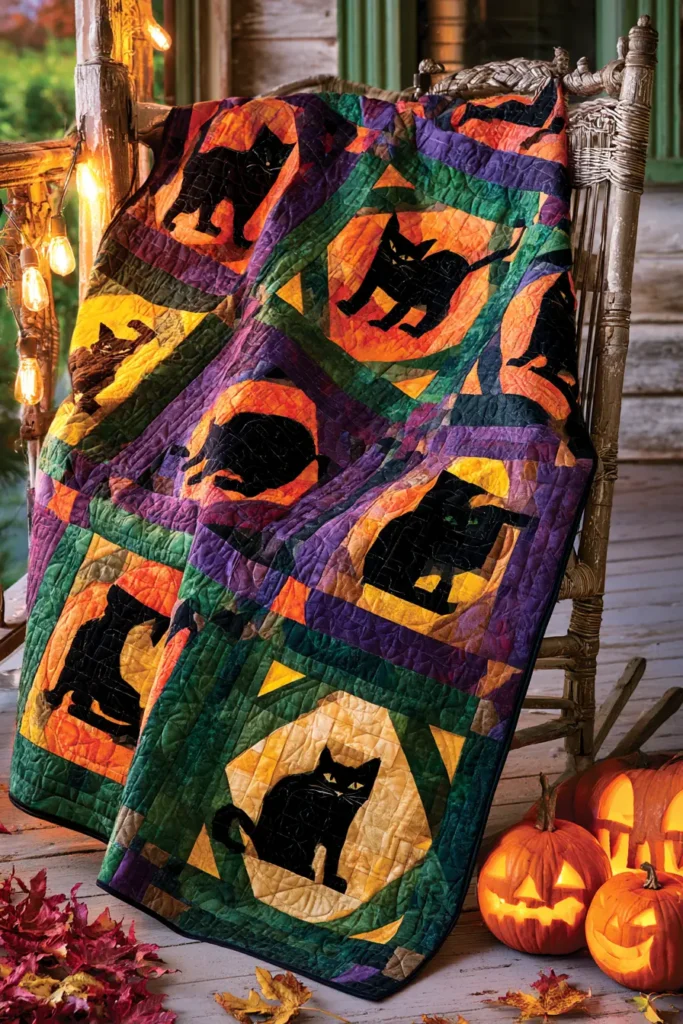
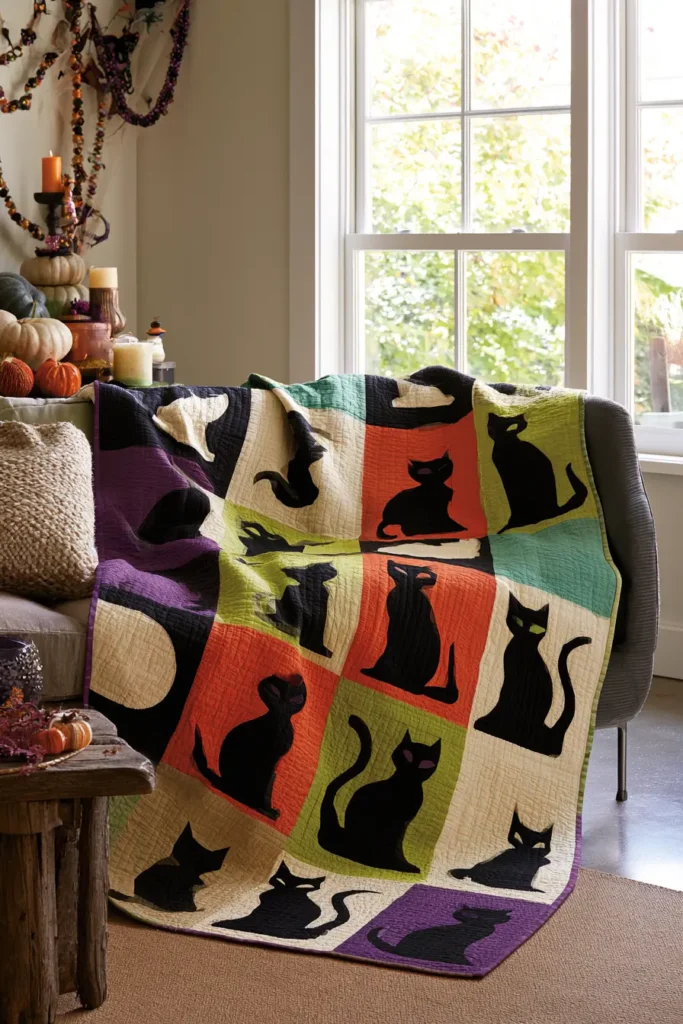
3. Black Cat Silhouette Quilt Block Designs
The silhouette takes its name from Étienne de Silhouette, an eighteenth-century French finance minister whose austerity measures were so unpopular that his name became shorthand for anything done cheaply. Cut-paper profile portraits were the budget alternative to a painted miniature, so people called them silhouettes as an insult. The technique long predates the joke, but the name stuck — and it’s a fitting origin for a quilt block, because a silhouette is genuinely the most economical way to render a recognizable animal in fabric. No shading, no interior detail, no piecing. One shape, one outline.
Black cats are especially suited to it. The all-over dark coat means a real black cat is essentially a silhouette in low light, which is why the folkloric version is always shown in profile: arched back, upright tail, ears in sharp relief.
The finished block measures 12″ square, with layout instructions below for a 48″ × 60″ throw using twelve blocks.
Design Inspirations – Digitally Modified Images. Texture and color may vary from the actual product.
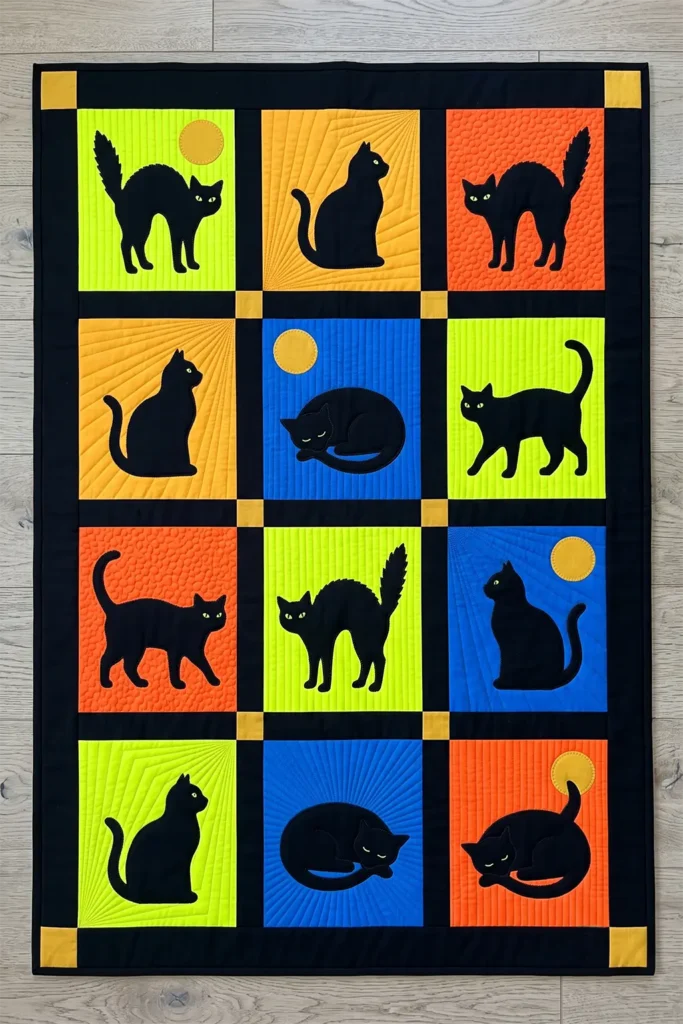
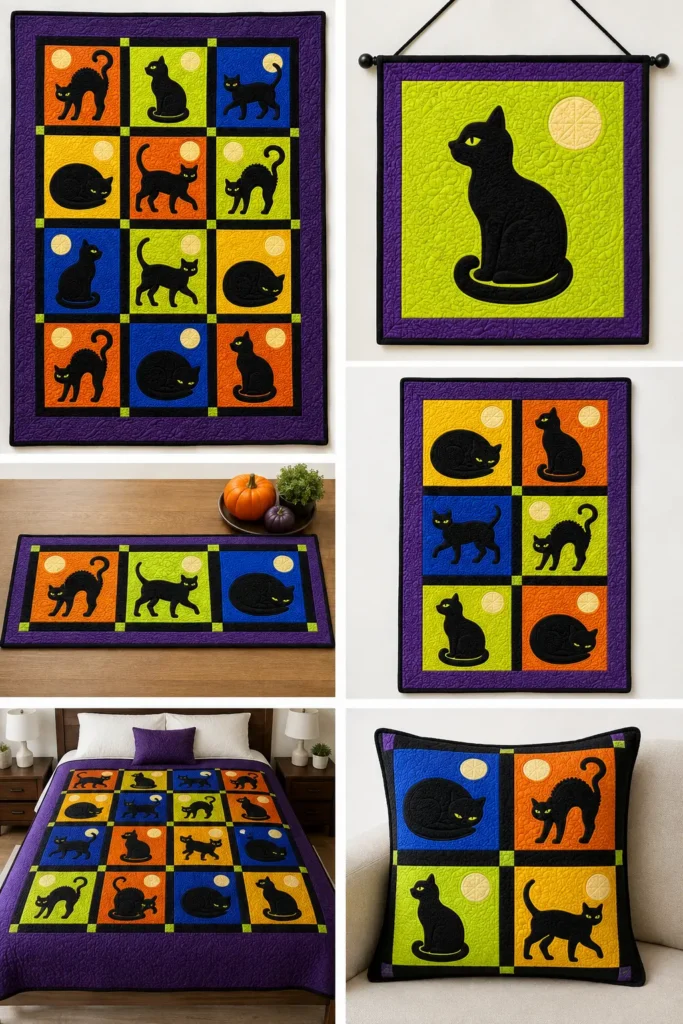
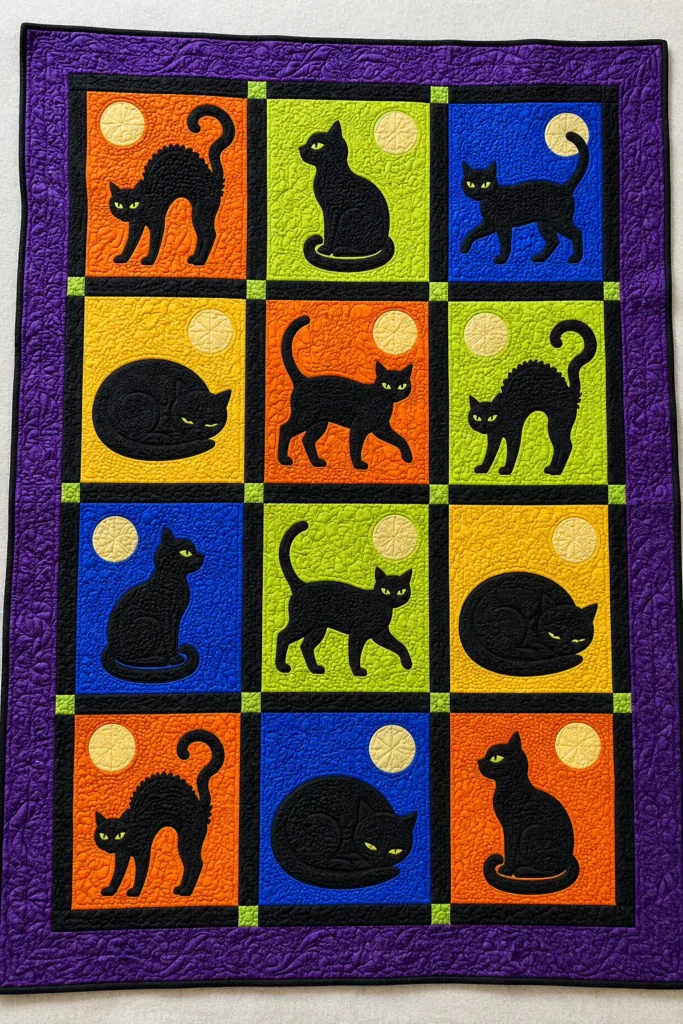
Materials (for a 48″ × 60″ throw)
- Background fabrics — 2 yards total in electric chartreuse, marigold, hot tangerine, and cobalt (varied across blocks)
- Cat fabric — 1 yard in true black solid (not a print — prints muddy a silhouette and undermine the whole effect)
- Eye fabric — small scraps in acid green and gold
- Sashing — 3/4 yard in black or deep violet
- Border — 3/4 yard
- Backing — 3 1/4 yards
- Batting — 56″ × 68″
- Binding — 1/2 yard for six 2 1/2″ × WOF strips
- Paper-backed fusible web — 1 1/2 yards
- 50wt thread in black; 40wt bright thread for background quilting
Step 1 — Cut the Background Squares
Cut twelve background squares at 12 1/2″ × 12 1/2″.
Vary the backgrounds across three or four bright colors. This block depends entirely on value contrast, so the one thing every background must have in common is brightness — a muted or dusty background kills the effect completely.
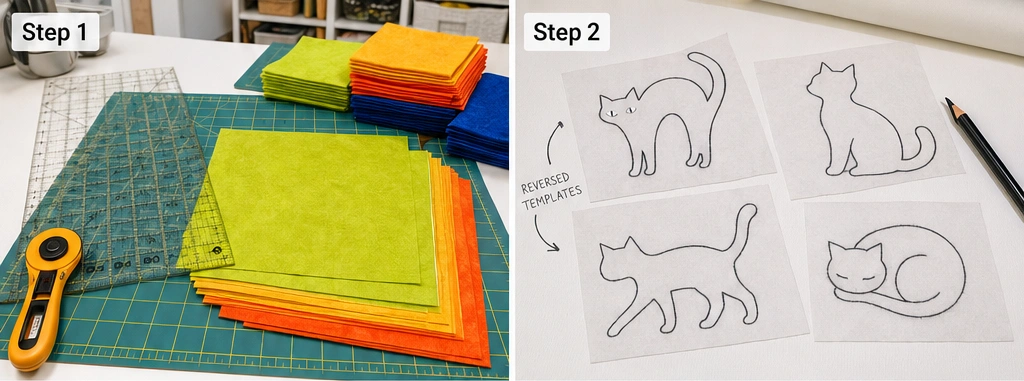
Step 2 — Draw the Four Cat Poses
A quilt of twelve identical cats is static. Draw four poses and repeat each three times:
| Pose | Dimensions | Notes |
|---|---|---|
| Arched back | 8″ tall × 7″ wide | The classic Halloween pose — spine curved high, tail in a question-mark curve |
| Seated profile | 8 1/2″ tall × 4″ wide | Tail curled around the front paws |
| Walking | 5″ tall × 8″ wide | Tail raised straight, one front paw lifted |
| Curled sleeping | 4 1/2″ tall × 7″ wide | A closed oval — easiest of the four |
Reverse every shape before tracing onto the paper side of the fusible web. An asymmetrical cat facing the wrong direction is the single most common error in this block, and it’s unfixable after fusing.
Step 3 — Cut the Shapes
Trace all twelve cats onto the fusible web’s paper side, fuse to the wrong side of the black cotton, and cut precisely on the traced lines. Precision matters more here than on any other appliqué in this collection — a silhouette is its outline, and a wobbly edge has nowhere to hide.
Tip: Cut every tail at least 5/8″ wide at its narrowest point, even where the drawing suggests thinner. Thin appliqué tails fray, lift at the edges, and are miserable to stitch around. The visual difference at quilt-viewing distance is essentially zero; the durability difference is substantial.
Cut two almond-shaped eyes per cat at roughly 1/2″ long, from acid green or gold.
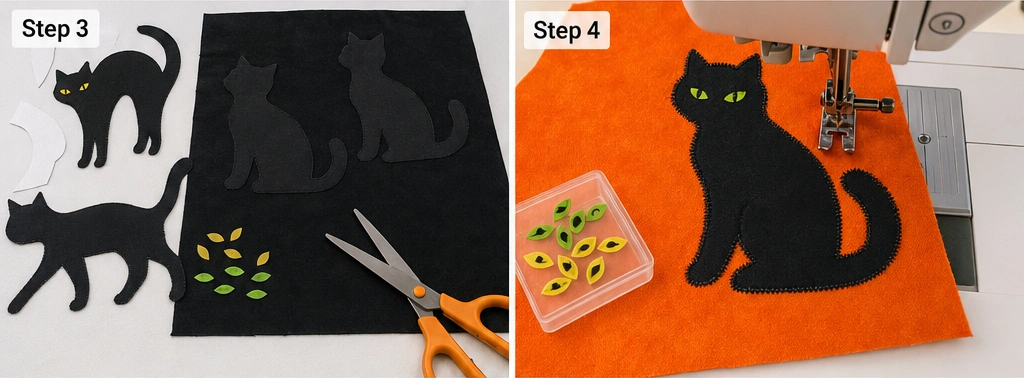
Step 4 — Fuse and Stitch
Center each cat on its background square, leaving at least 1 1/4″ clear of all raw edges so nothing gets caught in the seam allowance.
Fuse with a hot, dry iron, 8–10 seconds per section, without sliding.
Stitch the outline with a narrow zigzag in black thread (1.5mm width, 1.0mm length). This is the right choice for silhouettes specifically —black thread on black fabric vanishes, keeping the outline razor-sharp. Blanket stitch works, but it reads as a visible decorative border, which softens the hard-edge quality this design depends on.
Fuse and stitch the eyes last, with matching thread. Two small bright marks against solid black are what animate the whole shape — it’s the difference between a cat and a cat-shaped hole.
Step 5 — Optional: Add Moons
On three or four blocks, appliqué a 3 1/2″ gold or cream circle in an upper corner before quilting. Stitch with a gold blanket stitch.
Distribute these across the layout rather than clustering them, and let a cat’s ear or tail overlap the moon’s edge on at least one block — overlap creates depth instantly.
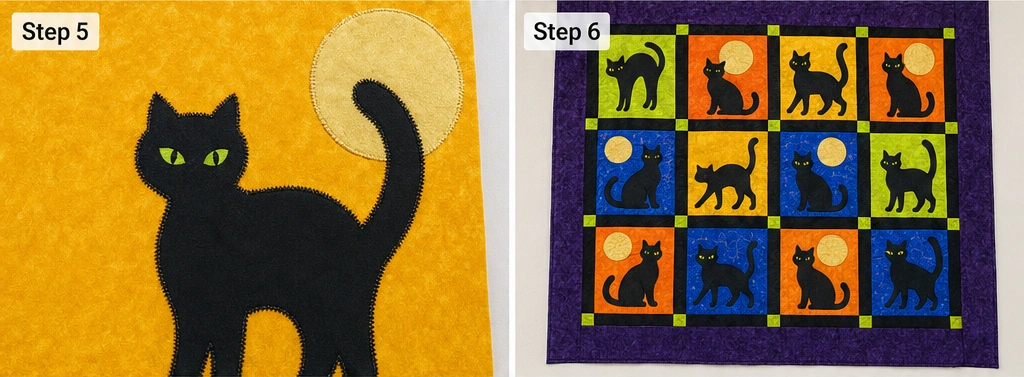
Step 6 — Assembly: Setting the Quilt Top
Twelve blocks in a 3 across × 4 down grid with 2″ finished sashing:
- Cut vertical sashing — nine strips at 2 1/2″ × 12 1/2″.
- Cut horizontal sashing — three strips at 2 1/2″ × 40 1/2″.
- Cut cornerstones — six at 2 1/2″ × 2 1/2″ in gold or acid green.
- Sew each block row: block, sashing, block, sashing, block. Press seams toward the sashing.
- Build sashing rows: cornerstone, strip, cornerstone, strip, cornerstone.
- Join alternating rows, pinning at every intersection. Misaligned sashing seams are the most visible flaw in this layout.
- Add borders — four strips cut at 4 1/2″ wide; sides first, then top and bottom.
Finished top: approximately 48″ × 60″.
Layout note: arrange all twelve on a design wall first and vary the direction the cats face. Rows of cats all facing left look like a printed border; alternating direction — and turning one or two to face out of the quilt — reads as composition. Distribute the background colors so no two adjacent blocks match.
Step 7 — Baste and Quilt
Layer backing, batting, and top; baste every 4″.
Quilt the background heavily and leave the cats entirely unquilted. On a silhouette this matters more than on any other design here — dense background quilting compresses the ground and makes the flat black shape stand physically proud of the surface. That trompe-l’œil lift is the whole payoff.
- Straight vertical lines at 3/8″ across each block — cleanest and most graphic
- Radiating lines from the moon position outward
- Tight stipple in matching thread
Use a bright 40wt thread for the background quilting — visible stitching on chartreuse or cobalt reads as a deliberate design element.
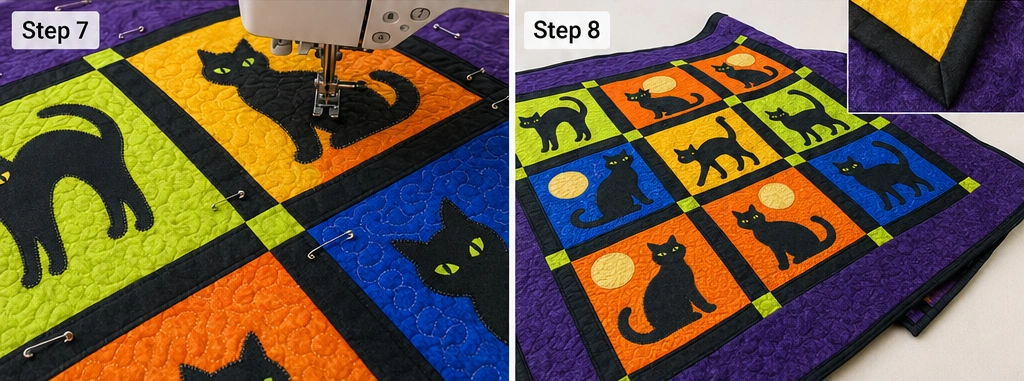
Step 8 — Bind
Cut six 2 1/2″ × WOF strips, join with diagonal seams, press in half lengthwise. Sew to the front at 1/4″, mitering corners, then fold to the back and finish.
Black binding frames the quilt like a hard border and echoes the silhouettes. Deep violet does the same job with a little more life in it. Avoid binding in one of the background brights — it competes.
Color Notes
This is the one design in the collection where background brightness is non-negotiable. Electric chartreuse is the strongest single option and photographs exceptionally well. Marigold, hot tangerine, and cobalt all work.
Avoid orange-on-black. It’s the expected Halloween pairing and it makes the cat read as a generic decal rather than a designed image. It also has less value contrast than chartreuse, which flattens the silhouette.
Ombré or gradient backgrounds are the highest-value upgrade available on this block. A chartreuse fading to deep teal at the top suggests dusk behind the cat without a single extra appliqué piece, and it costs nothing but fabric selection.
Sizing Variations
| Layout | Blocks | Finished Size |
|---|---|---|
| Mini / wall hanging | 1 | 16″ × 16″ |
| Table runner | 3 in a row | 16″ × 44″ |
| Baby quilt | 6 (2×3) | 32″ × 46″ |
| Throw | 12 (3×4) | 48″ × 60″ |
| Twin | 24 (4×6) | 62″ × 88″ |
Gift Ideas That Pair With This Quilt
- A folded throw with a cat-themed bundle — enamel pins, a mug, and a book
- Matching cat silhouette pillow covers from two spare blocks
- A single-block mini quilt, bound as a standalone wall piece — the strongest small gift in this collection
- Tea and biscuit set wrapped in a matching table runner
- A fat quarter bundle in coordinating brights for a quilting friend
- A cozy set: chunky socks, cocoa, and a candle, tucked into the folded quilt
- Cat gift bundle for an actual cat owner — toys, treats, and the mini quilt as a cat mat
Other Design Inspirations – Digitally Modified Images. Texture and color may vary from the actual product.
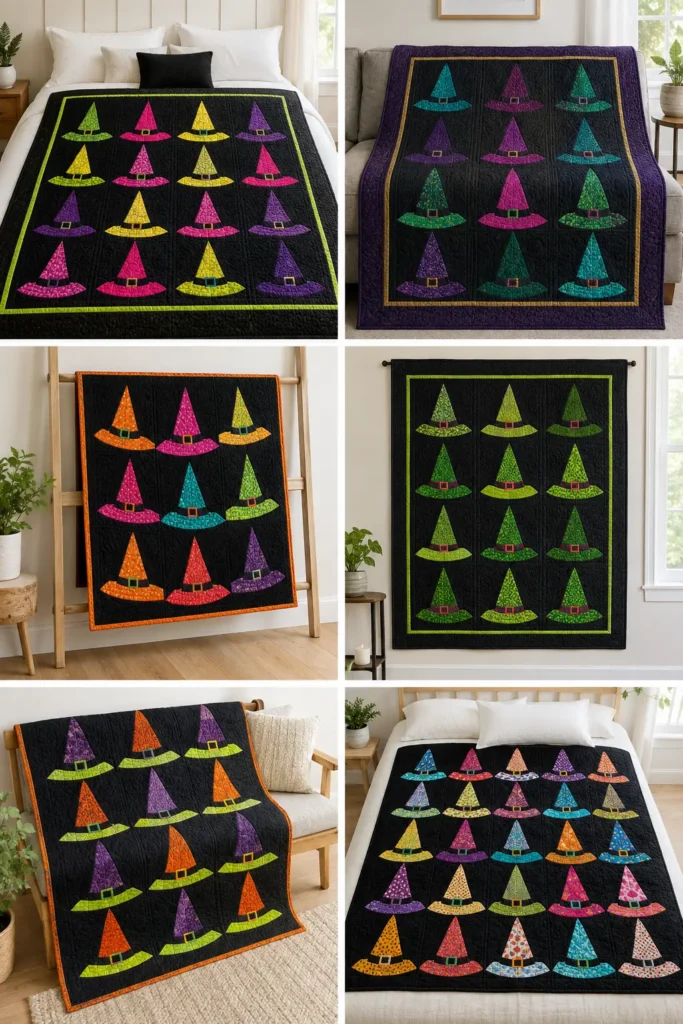
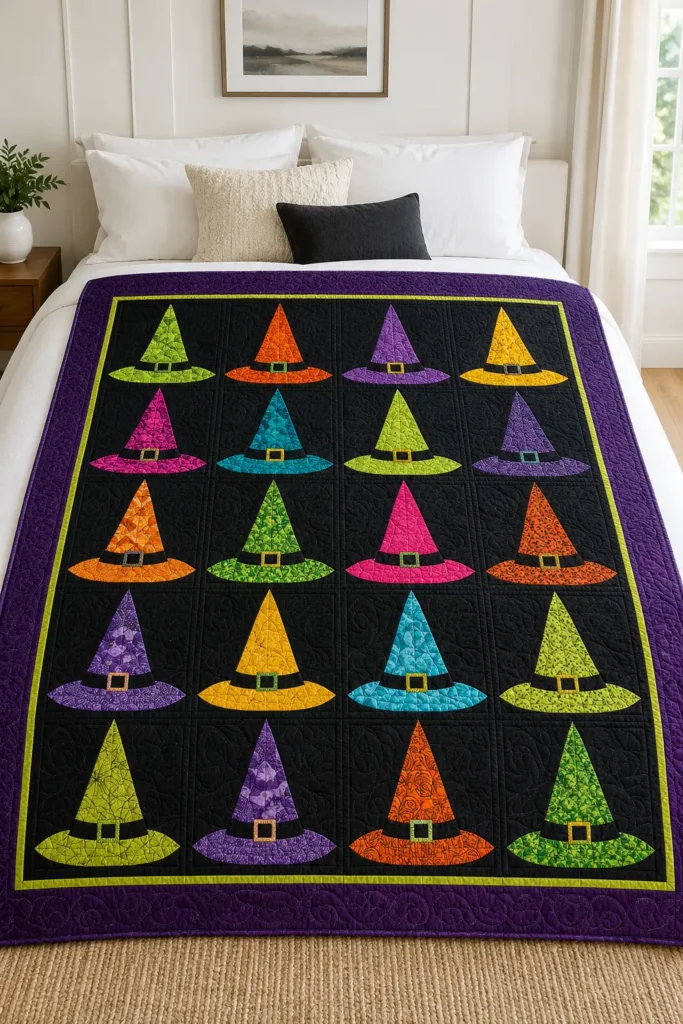
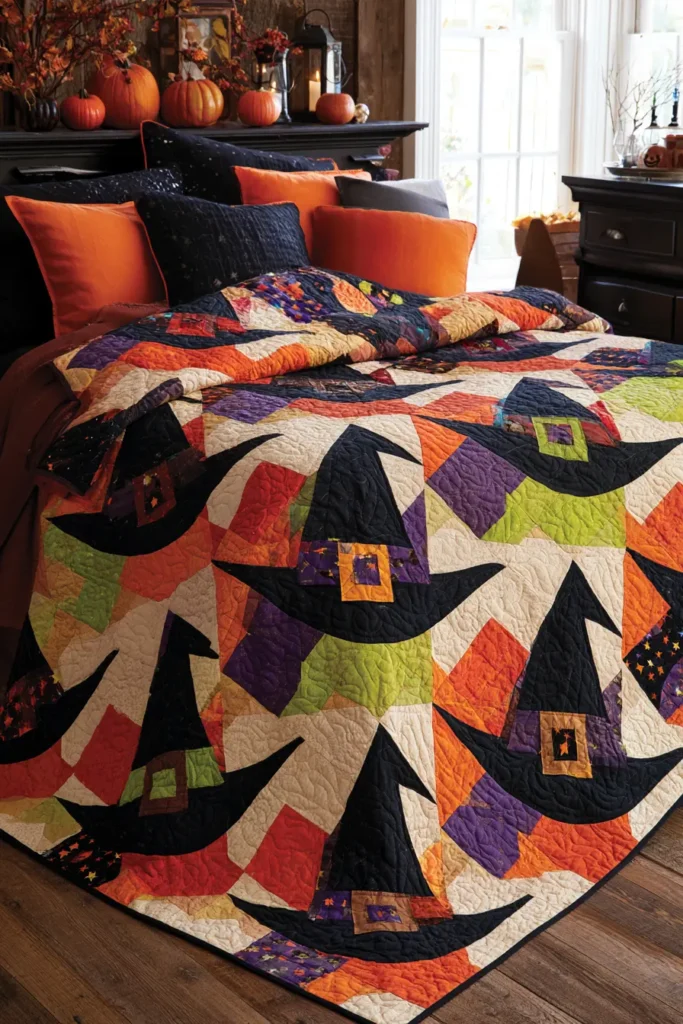
4. Witch Hat Quilt Block Patterns for Spooky Charm
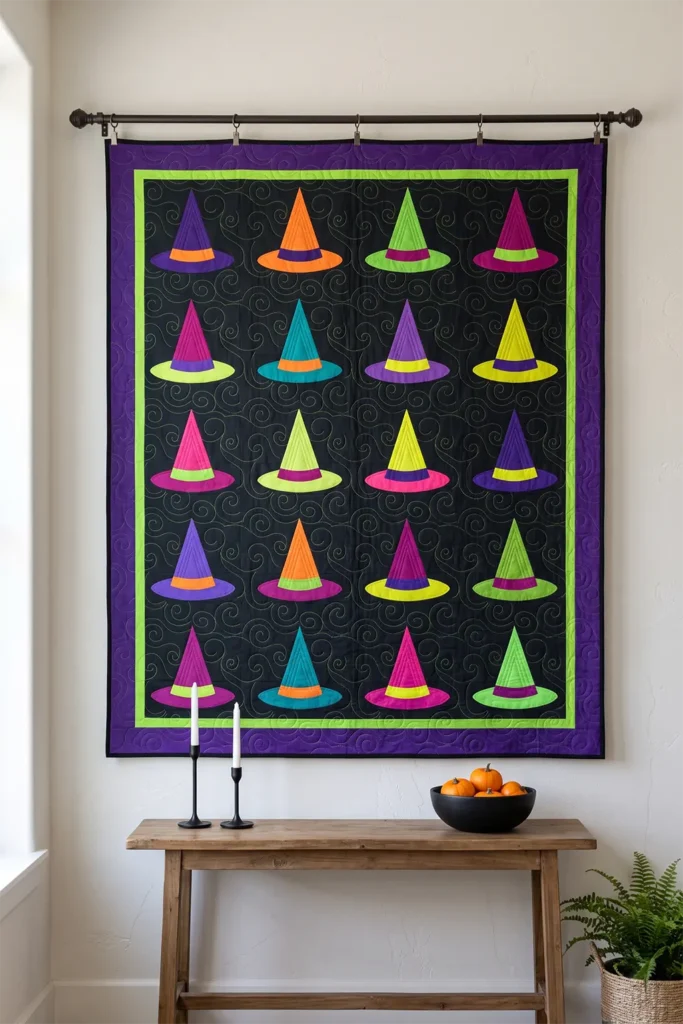
A witch hat quilt block is one of the most recognizable Halloween motifs you can piece, and one of the easiest to draft accurately. The shape breaks down into three simple parts — a pointed cone, a wide brim, and background — which means the whole block is built from straight seams and stitch-and-flip corners, with no curves, no templates, and no set-in pieces.
For a vibrant Halloween palette, skip the expected orange-and-black pairing and build the hats from deep purple, tangerine orange, lime green, magenta, teal, chartreuse, and acid yellow against a black or charcoal background. Saturated jewel and neon tones read far better against black than muted autumn colors do, and they give the finished quilt a playful, carnival feel rather than a gloomy one. A scattered mix of hat colors across the layout makes each block feel individual, as though a crowd of witches has left their hats behind.
Why This Design Works
The block’s structure does the work. Because the cone is built with the stitch-and-flip method — a background rectangle laid over a hat square, sewn on a marked diagonal, then trimmed and pressed open — you never handle a bias edge. Everything is cut and sewn on the straight grain, which means the block will not stretch out of shape as you assemble it.
The wide brim is what makes the silhouette read as a witch hat rather than a tree or a party hat. A brim that spans the full block width, wider than the cone base by a clear margin, is the single detail that identifies the shape instantly at a distance. That matters for a quilt, because a Halloween quilt is usually seen across a room.
Setting the hats against a black or charcoal background rather than a light one turns the negative space into night sky, which is why the bright hat colors carry so well. It also hides the seam intersections, so slight imperfections in the piecing simply disappear.
Skills you build here are foundational: accurate ¼-inch seams, the stitch-and-flip corner technique, managing a point at a seam line, straight-set block layout, and adding borders squarely.
Design Inspirations – Digitally Modified Images. Texture and color may vary from the actual product.
A Note on the Pointed Hat
The tall pointed hat is so tightly bound to witches now that it feels ancient, but the association is surprisingly recent.
Witches in medieval and early modern European art were rarely shown in pointed hats at all. They appear bare-headed, hooded, or in ordinary headwear of the period. The conical hat becomes standard only in the nineteenth century, cemented by illustrated children’s books and Victorian print culture, and then fixed permanently in the popular imagination by early twentieth-century illustration and stage design.
The most credible explanation for where the shape came from is the capotain — a tall, stiff, narrow-brimmed hat fashionable in England and the Low Countries roughly between 1590 and 1640, and closely associated with Puritan dress. As fashion moved on, the capotain lingered in rural areas and among older women, and by the time illustrators reached for a costume that signaled “old-fashioned country woman,” the pointed hat was already sitting there. The demographic most often accused of witchcraft and the demographic still wearing outdated hats overlapped considerably.
You may also encounter the popular story that the witch’s hat comes from alewives — women who brewed and sold ale, said to have worn tall pointed hats to stand out in crowded markets, kept cats to control mice in the grain, and hung a broom outside the door as a sign. It is a wonderful story, and it circulates widely online. It is also largely unsupported by primary evidence, and most textile and social historians treat it as modern folklore rather than documented history. Worth knowing both, and worth knowing which one holds up.
Finished Size
This guide makes a 12-inch finished witch hat block, and a throw-sized quilt from twenty of them.
Block measurements:
- Finished block: 12 x 12 inches
- Unfinished block: 12½ x 12½ inches
- Cone: 8 inches tall, 8 inches wide at the base
- Brim: 2 inches tall, spanning the full 12-inch width
- Background below the brim: 2 inches
Quilt measurements:
- Blocks: 20, set 4 across by 5 down
- Block field: 48 x 60 inches
- Inner border: 2 inches finished
- Outer border: 4 inches finished
- Finished quilt: about 60 x 72 inches
For a table runner, make 3 blocks in a row for a 12 x 36-inch field, add a 3-inch border, and finish at about 18 x 42 inches.
Materials Needed
For a 60 x 72-inch witch hat throw quilt, gather:
- Background fabric: 3 yards in black, charcoal, or deep midnight
- Hat fabrics: 20 fat quarters, or scraps, in vibrant Halloween colors
- Brim fabrics: included in the fat quarters, or ⅔ yard total if using one fabric
- Inner border: ⅓ yard in lime green or acid yellow
- Outer border: 1¼ yards in deep purple or black
- Binding: ⅝ yard
- Backing: 4 yards, or 2 yards of 108-inch wide backing
- Batting: 68 x 80 inches
- Thread: grey or charcoal for piecing, plus a contrast for quilting
- Rotary cutter and cutting mat
- Quilting ruler and a 12½-inch square ruler if you have one
- Fabric marker or a sharp pencil
- Sewing clips or pins
- Iron and ironing board
Beginner tip: buy fat quarters rather than yardage for the hats. Each hat uses well under a fat quarter, so twenty fat quarters gives you enough leftovers for a matching pillow or table runner.
Vibrant Halloween Palette
A bold, high-contrast run could include:
- Deep purple
- Tangerine orange
- Lime green
- Magenta
- Teal
- Chartreuse
- Acid yellow
- Hot pink
- Electric violet
- Poison green
Against a black or charcoal background, all ten of these hold their brightness. Against a cream or grey background, they will look chalky, which is why the background choice matters more than any individual hat color.
Vary the brim fabric from the cone on at least half the blocks — a magenta cone with a lime brim, or a teal cone with an orange brim. Matching every brim to its cone makes the quilt read as flat; mixing them creates the scattered, individual look the design is built around.
Cutting Measurements
For each block, cut:
- Hat cone: one square, 8½ x 8½ inches
- Cone background: two rectangles, 4½ x 8½ inches
- Side background: two rectangles, 2½ x 8½ inches
- Brim: one rectangle, 2½ x 12½ inches
- Lower background: one rectangle, 2½ x 12½ inches
For 20 blocks, cut in total:
- 20 hat cone squares at 8½ x 8½ inches, in mixed colors
- 40 cone background rectangles at 4½ x 8½ inches
- 40 side background rectangles at 2½ x 8½ inches
- 20 brim rectangles at 2½ x 12½ inches, in mixed colors
- 20 lower background rectangles at 2½ x 12½ inches
For borders and binding, cut:
- Inner border: 6 strips at 2½ inches x width of fabric
- Outer border: 7 strips at 4½ inches x width of fabric
- Binding: 7 strips at 2½ inches x width of fabric
Use a ¼-inch seam allowance throughout.
Step-by-Step Guide
Step 1: Cut the Block Pieces
Cut all pieces for one test block before cutting the full twenty. Piecing a single block first will confirm your seam allowance is accurate and save you from recutting nineteen sets.
Keep the background pieces sorted by size. The 4½ x 8½-inch rectangles and the 2½ x 8½-inch rectangles are easy to confuse once they are stacked.
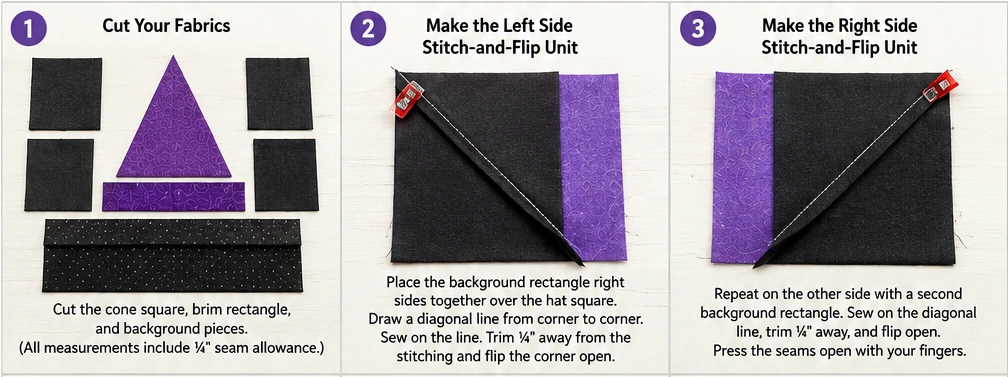
Step 2: Mark the Cone Diagonals
Take one 4½ x 8½-inch background rectangle. Place it right sides together on the 8½-inch hat square, aligned along the left edge and the top and bottom edges.
Mark a diagonal line from the top center point of the hat square down to the bottom left corner of the background rectangle. A sharp pencil or a fine chalk marker works better than a thick fabric pen here — the accuracy of this line is what sets the angle of the cone.
Repeat with the second background rectangle on the right edge, marking from the top center point down to the bottom right corner.
Step 3: Sew and Trim the Cone
Sew directly on each marked line, not beside it.
Before trimming, fold the background rectangle open and check that its edges align with the hat square. If it does, trim the excess ¼ inch outside the seam line and press the background open.
Repeat for the second side. The finished unit should measure 8½ x 8½ inches and show a clean triangular cone with the point at the top center.
The apex of the cone will sit ¼ inch below the raw edge once the block is assembled. That is correct — the point is not meant to touch the edge, or it would be cut off by the next seam.
Step 4: Add the Side Backgrounds
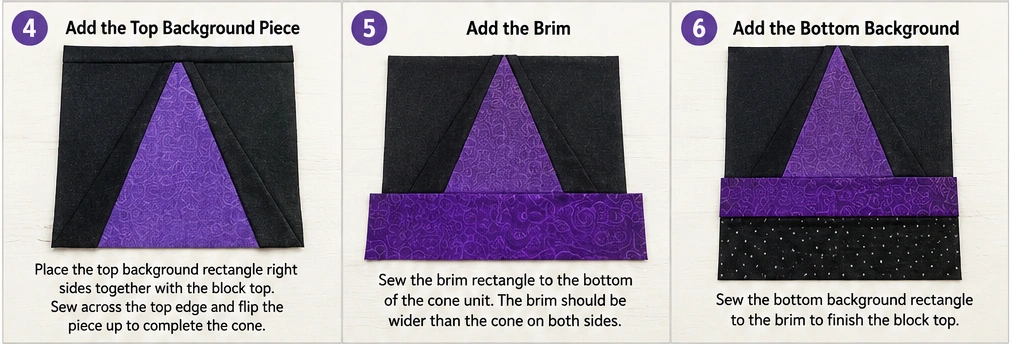
Sew a 2½ x 8½-inch background rectangle to the left side of the cone unit and another to the right side.
Press seams toward the background.
The unit should now measure 12½ x 8½ inches.
Step 5: Add the Brim and Lower Background
Sew the 2½ x 12½-inch brim rectangle to the bottom of the cone unit. Press toward the brim.
Sew the 2½ x 12½-inch lower background rectangle to the bottom of the brim. Press toward the background.
The completed block should measure 12½ x 12½ inches unfinished. Measure it now. If it is off by more than ⅛ inch, check your seam allowance before piecing the remaining nineteen.
Step 6: Make the Remaining Blocks
Piece the remaining 19 blocks, varying the cone and brim color combinations across the set.
Work in batches by step rather than completing one block at a time — marking all forty diagonals, then sewing all forty, then trimming all forty, is considerably faster than repeating the full sequence twenty times.
Step 7: Lay Out the Quilt Top
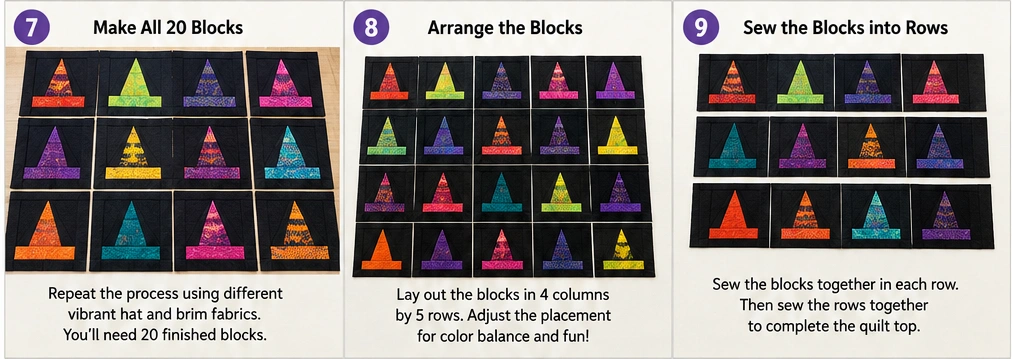
Arrange the 20 blocks 4 across by 5 down on a bed, floor, or design wall.
Distribute the hat colors so no two blocks with the same cone color sit next to each other or directly above and below. Scatter the brightest colors — acid yellow, lime, hot pink — evenly across the whole field rather than clustering them.
Photograph the layout before sewing. Twenty blocks are easy to reassemble in the wrong order.
Step 8: Join the Blocks into Rows
Sew the blocks into five rows of four, using a ¼-inch seam allowance.
Press the seams in alternating directions from row to row — row one to the left, row two to the right, and so on. This is what lets the seams nest when you join the rows, and it is the difference between block corners that line up and block corners that do not.
Step 9: Join the Rows
Sew the five rows together, nesting the seams at every block intersection.
Press the row seams open to reduce bulk. The block field should now measure 48½ x 60½ inches unfinished.
Step 10: Add the Inner Border
Join the 2½-inch inner border strips end to end.
Measure the quilt top through the center, not along the edges — edges stretch and will give you a false measurement. Cut two side borders to that length, pin at the ends and center, and sew.
Measure again through the center horizontally, cut the top and bottom borders, and sew.
Press toward the border.
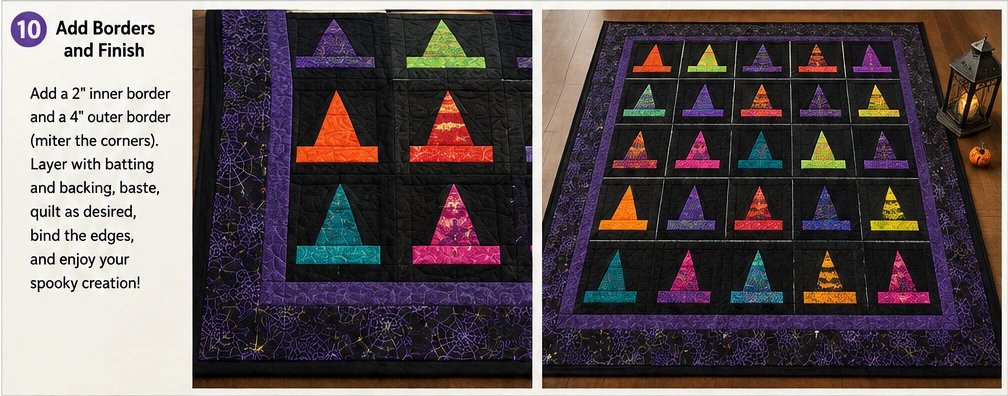
Step 11: Add the Outer Border
Join the 4½-inch outer border strips end to end and repeat the same measure-through-the-center process for the sides, then the top and bottom.
Press toward the outer border. The finished top should measure about 60½ x 72½ inches.
Step 12: Layer, Quilt, and Bind
Layer the backing wrong side up, batting, then the quilt top right side up. Baste with pins or spray.
Quilt as you like. Simple options that suit this design:
- Straight lines ½ inch inside each cone edge, echoing the triangle
- An allover swirl or loop across the background to suggest wind
- Straight-line grid at 2-inch spacing across the whole quilt
Use a contrast thread on the background — lime or orange stitching on black reads beautifully and turns the quilting itself into a design element.
Trim the edges square, then bind with 2½-inch strips, joining them on the bias and finishing by hand or machine.
Assembly at a Glance
- Cut — cut one test block first, then all pieces for twenty
- Build the cone — mark diagonals, sew on the line, trim ¼ inch out, press open
- Complete the block — add side backgrounds, then brim, then lower background, to 12½ inches
- Lay out — set blocks 4 across by 5 down, scatter the colors, photograph the arrangement
- Join — sew rows with alternating pressing, then join rows with nested seams
- Border and finish — inner border, outer border, then layer, quilt, and bind
Vibrant Halloween Color Combination Ideas
For a neon night quilt, use lime, acid yellow, hot pink, and electric violet hats on a true black background with a lime inner border.
For a jewel witch quilt, use deep purple, teal, magenta, and emerald hats on charcoal with a gold inner border and purple outer border.
For a carnival quilt, use tangerine, magenta, teal, and chartreuse hats with mismatched brims on black, bordered in tangerine.
For a poison green quilt, use every shade of green from chartreuse to deep forest on black, with a single magenta brim on each hat.
For a classic-with-a-twist quilt, use orange and purple hats only, but give every hat a lime green brim and band.
For a scrappy witch quilt, use twenty completely different bright fabrics with no repeats, unified by a single black background and black binding.
Beginner Tips for Success
Piece one test block before cutting all twenty. A seam allowance running a hair wide will cost you a full ½ inch across the block, and you want to know that before the cutting is done.
Mark the diagonal with a sharp pencil, not a thick pen. The line width itself changes the angle of the cone.
Sew on the marked line, not beside it. Sewing beside the line — a habit from half-square triangle methods — will throw the cone off center.
Check the flip before you trim. Once the excess is cut away, there is no correcting a misaligned corner.
Press seams in alternating directions row to row. This single habit is what makes twenty blocks line up.
Measure borders through the center of the quilt. Measuring along the edge is the most common cause of wavy borders.
Use contrast quilting thread on a black background. It is one of the few places where the quilting stitch becomes a visible design feature rather than a structural one.
Styling Tip
A vibrant witch hat quilt works best where the black background can do its job — draped over the arm of a pale sofa, layered at the foot of a bed with plain white bedding, or hung as a wall quilt against a light wall. Keep the surrounding decor simple; the quilt carries enough color on its own.
For a seasonal vignette, pair it with plain black or clear glass candlesticks, a bowl of small pumpkins in a single color, and nothing patterned. The scattered brights in the quilt read best against calm surroundings.
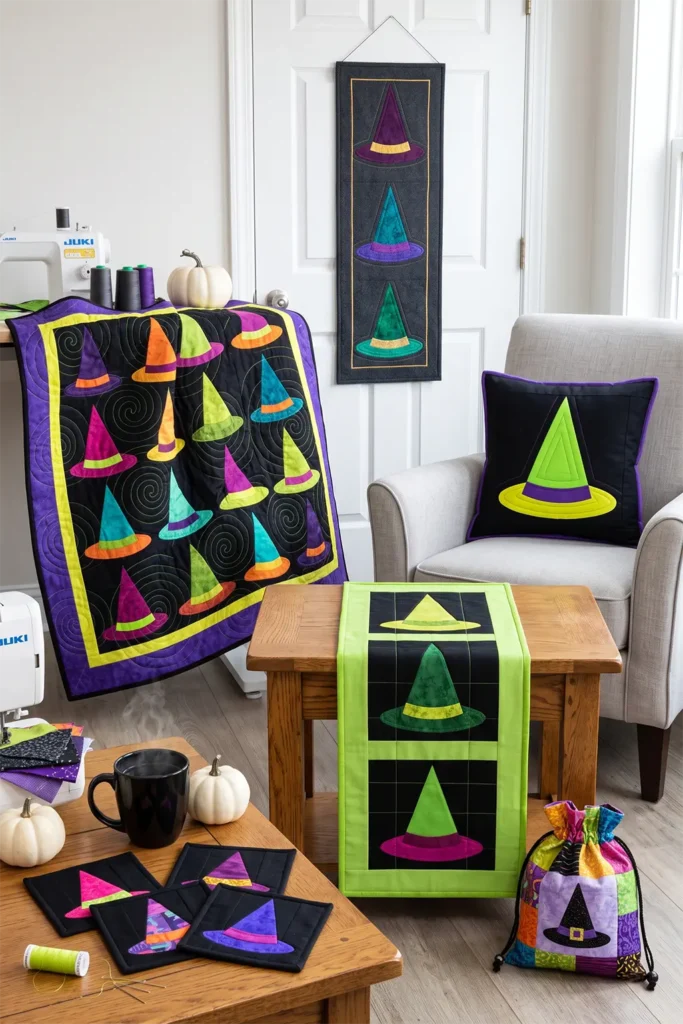
Gift Pairings
A finished witch hat quilt makes a substantial gift, and these smaller handmade items build it into a set using leftover fat quarter fabric:
- A single witch hat block finished as a 12-inch cushion cover
- A three-block table runner in matching brights
- A pieced trick-or-treat drawstring bag from cone offcuts
- A set of witch hat mug rugs, one block cut into quarters
- A hanging door banner with three hats stacked vertically
- A pieced oven mitt and pot holder pair in lime and black
- A small zip pouch using one cone unit as the front panel
Other Design Inspirations – Digitally Modified Images. Texture and color may vary from the actual product.
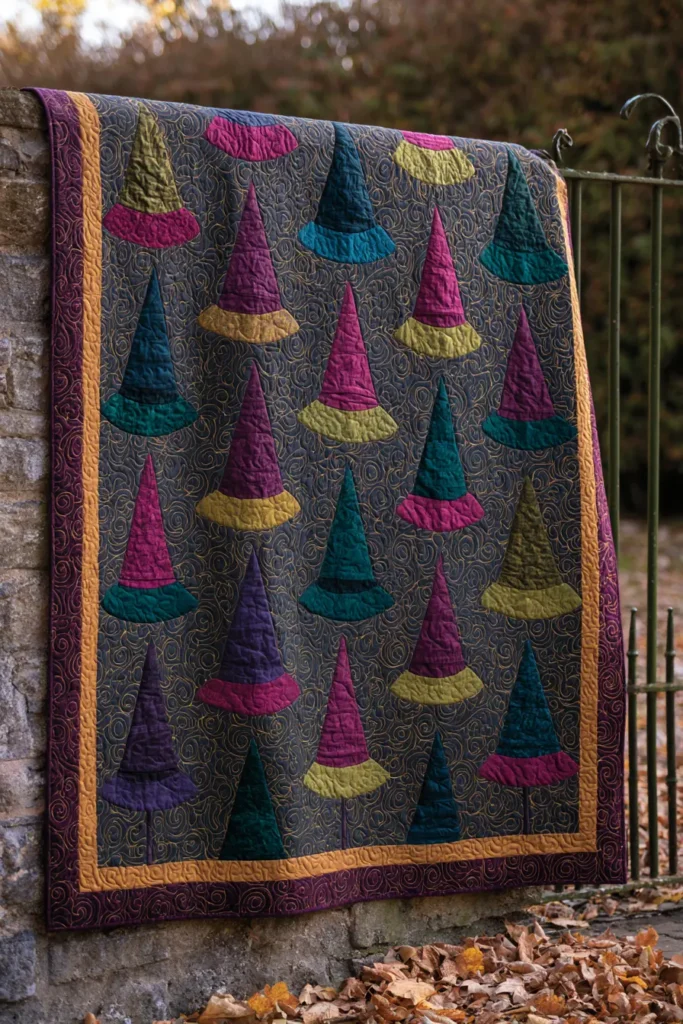
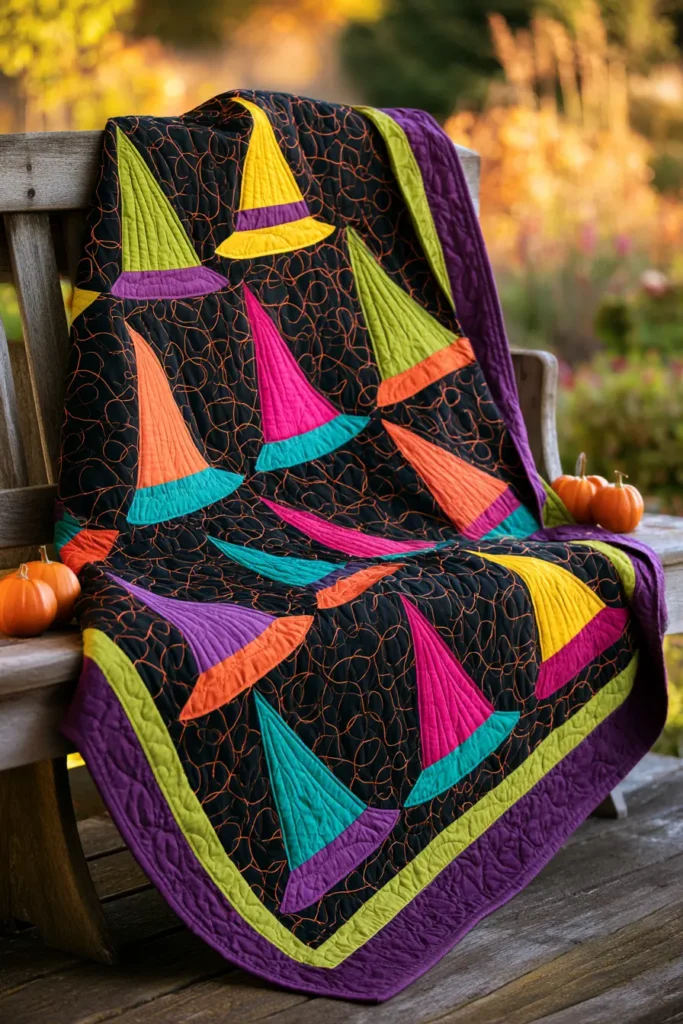
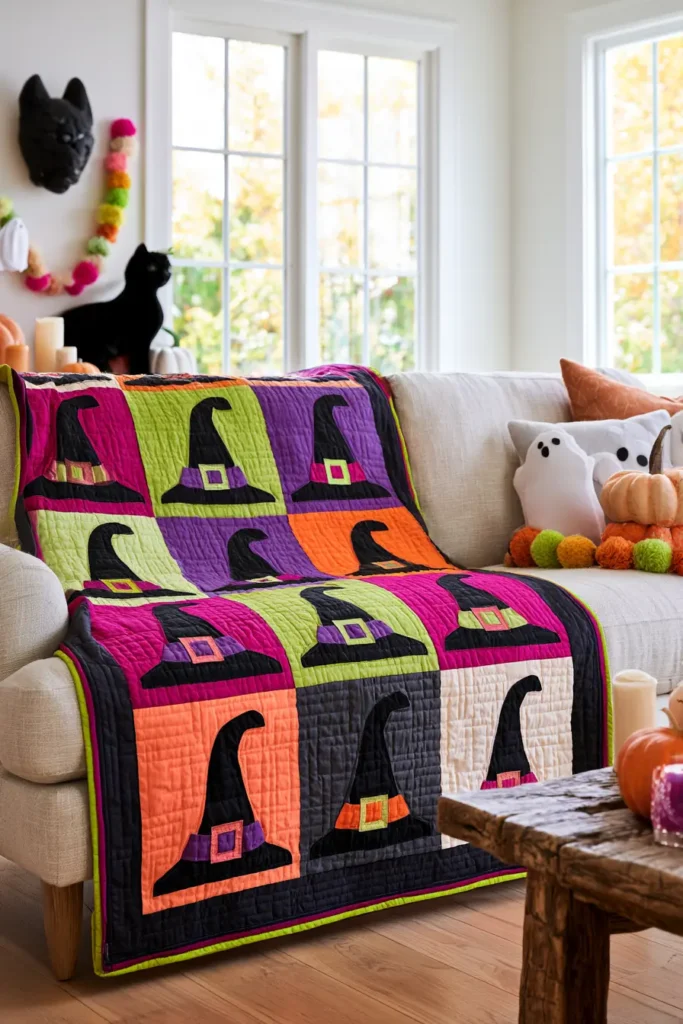
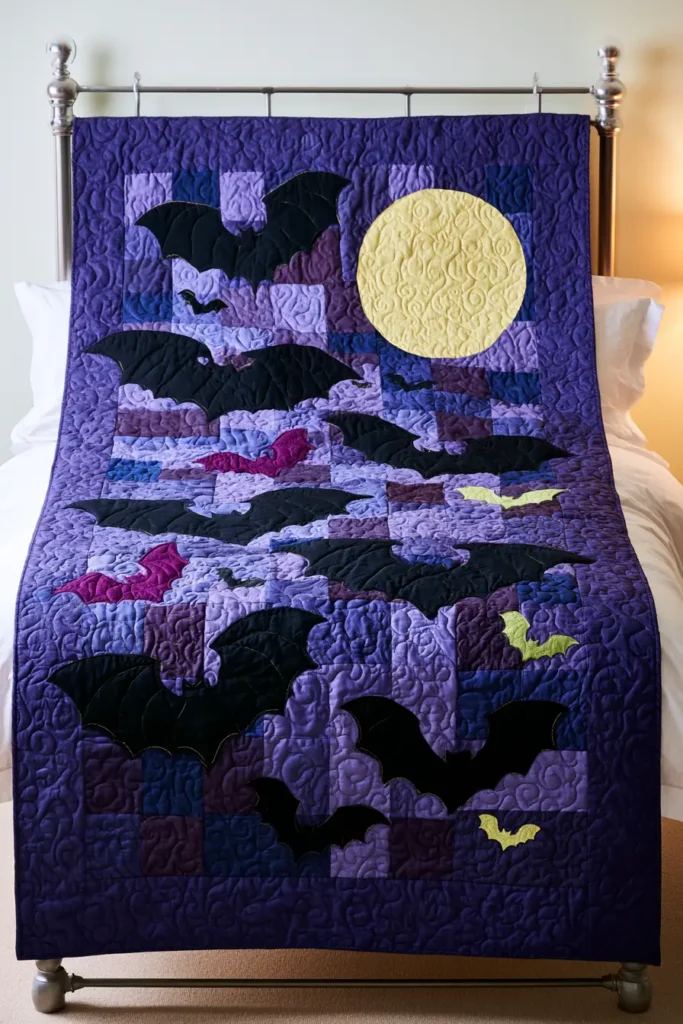
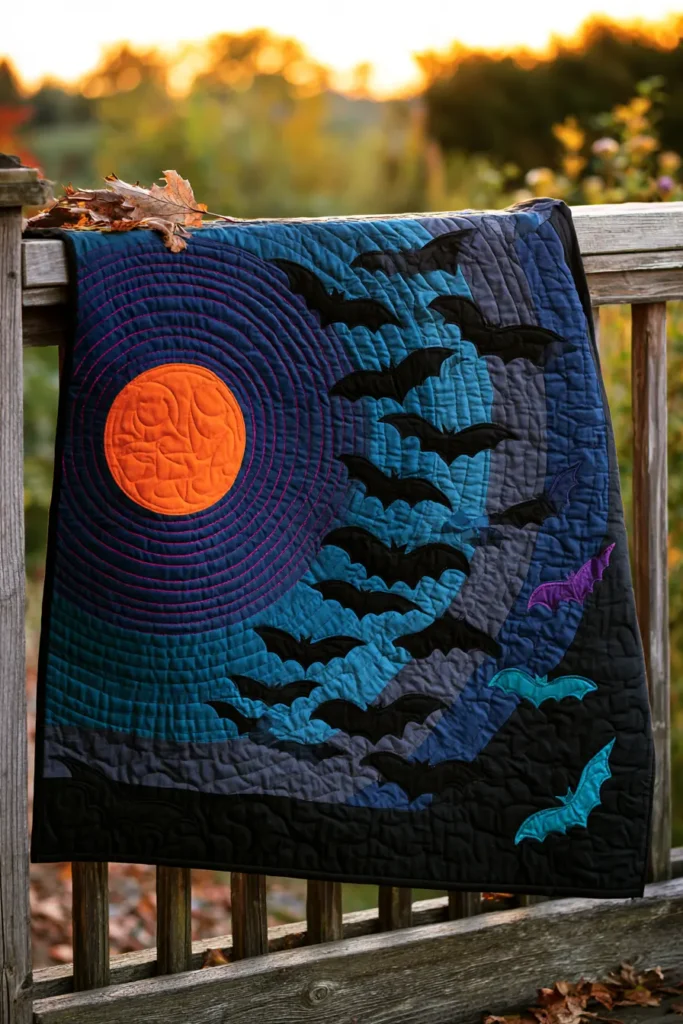
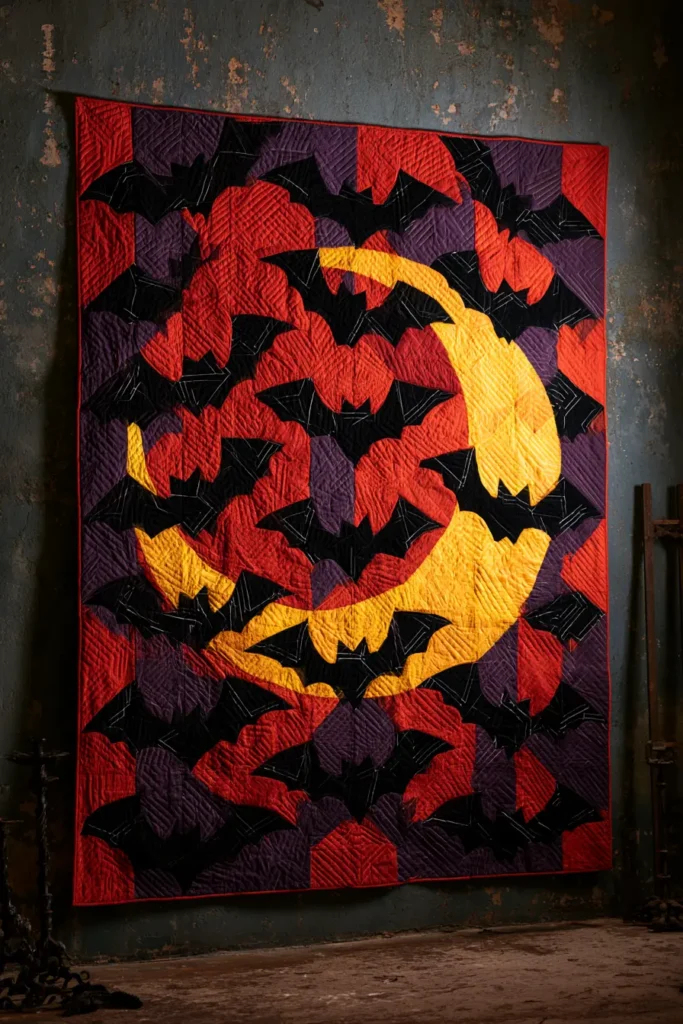
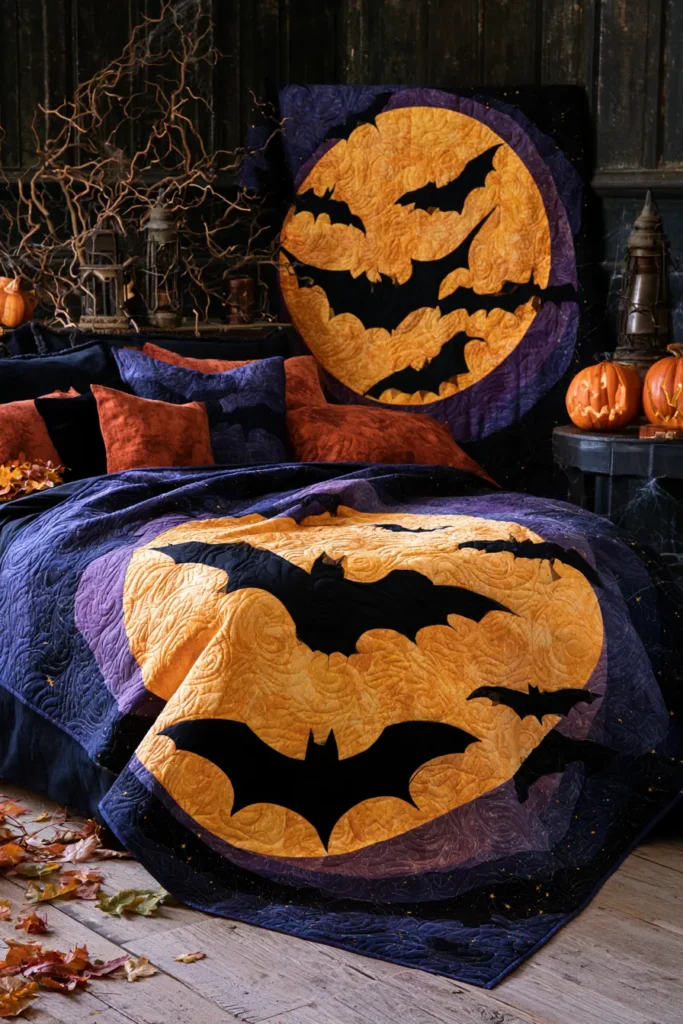
5. Bat and Moon Appliqué Quilt Layouts
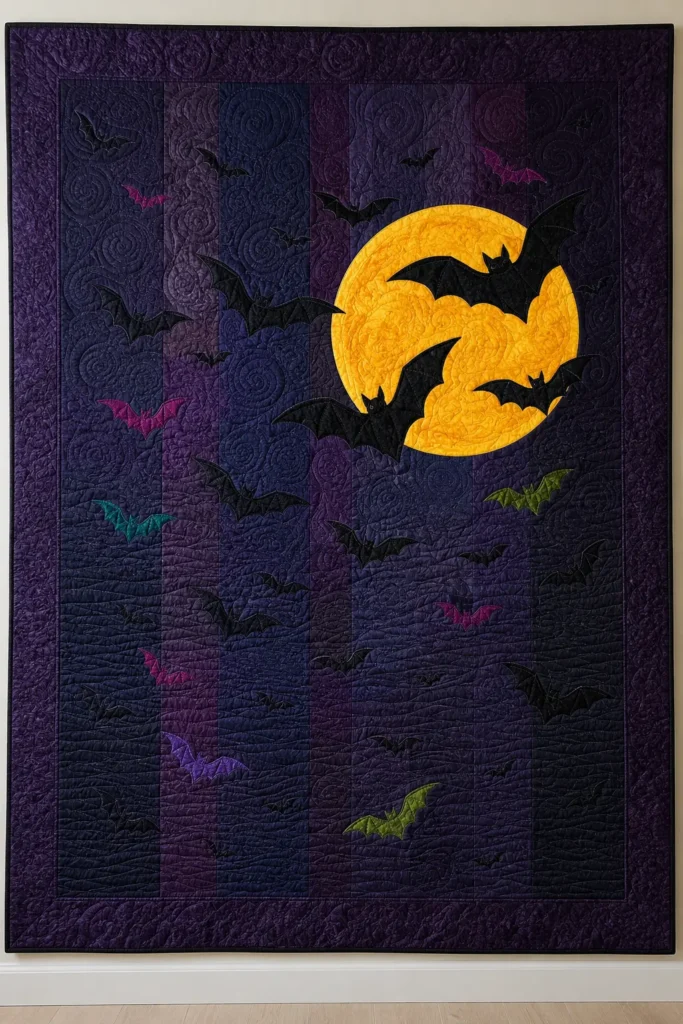
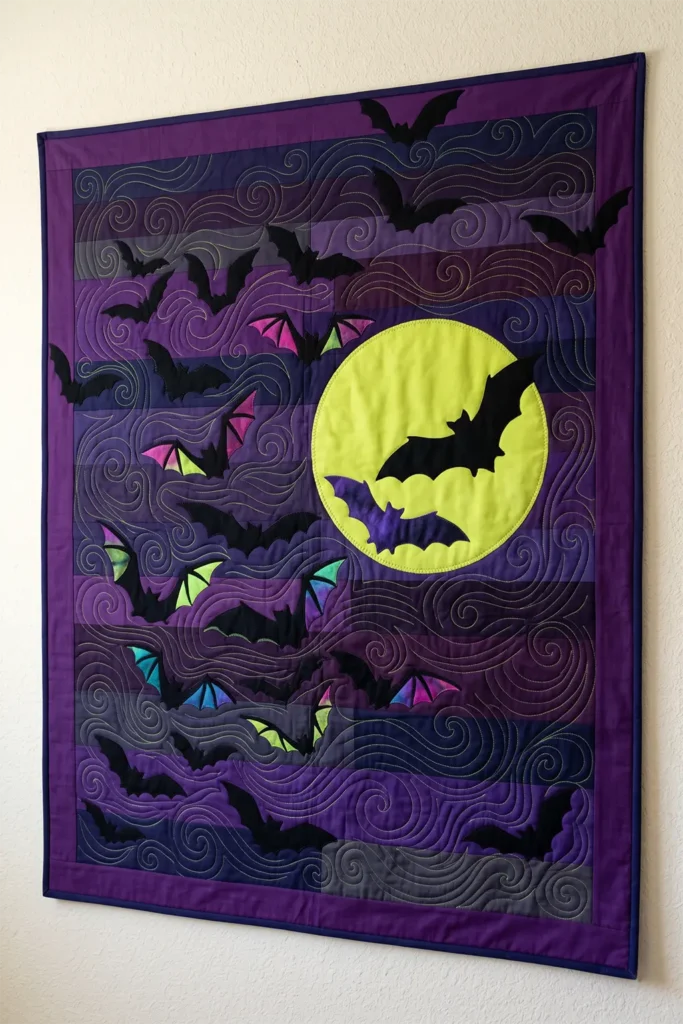
A bat and moon appliqué quilt trades the neat grid of pieced blocks for something looser and more atmospheric. Instead of repeating one block twenty times, you build a single continuous night sky across the whole top — one large moon anchoring the composition, with bats scattered outward in a scale that shrinks as they move away from it. The result reads as a scene rather than a pattern, and it is far easier to make than it looks, because appliqué shapes do not need to fit a grid.
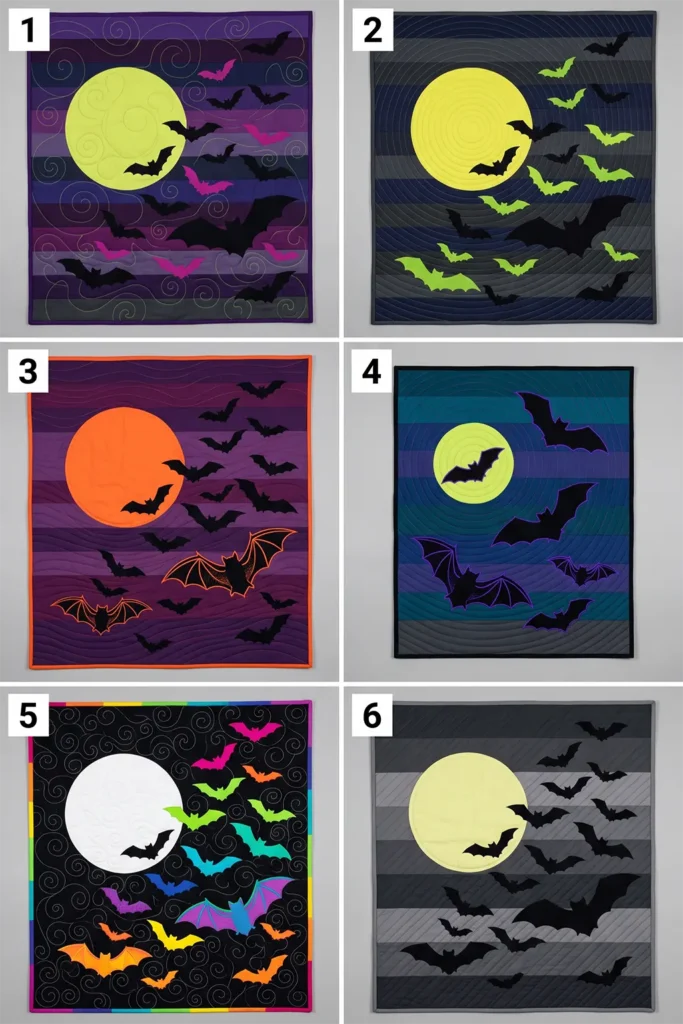
For a vibrant take on a dark theme, build the sky from deep purple, midnight indigo, aubergine, and charcoal rather than flat black, and make the moon acid yellow, chartreuse, or hot orange instead of cream. Then push it further: give a handful of bats magenta, lime green, teal, or electric violet wings against the dark sky. The scene stays genuinely eerie — bats in silhouette, a heavy moon, a shrinking scatter — while the color keeps it vivid rather than muddy.
Why This Design Works
Appliqué solves a problem that piecing cannot. A bat has thin wing points, deep concave curves between the wings and body, and a shape that is wider than it is tall — all of which are difficult or impossible to piece accurately, and all of which appliqué handles without any trouble at all. The same is true of a circle. A pieced circle needs curved seams and precise easing; a fused appliqué circle needs a traced line and a rotary cutter.
The scale gradient is what makes the layout scary rather than cute. Bats of a single size arranged evenly read as a repeating motif. Bats that start large near the moon and shrink toward the edges read as depth — as a colony moving away from you into the distance. That perceptual shift costs nothing extra to piece, and it is the single decision that separates this quilt from a novelty print.
Building the sky from pieced backgrounds in several dark tones rather than one solid adds the last piece. A single black background is flat; four related darks create visible depth behind the shapes, which is what makes the moon appear to sit in the sky rather than on top of it.
Skills you build here are the appliqué fundamentals: fusible web preparation, reversing templates, raw-edge finishing, dense background quilting, and composing an asymmetric layout on a large surface.
Design Inspirations – Digitally Modified Images. Texture and color may vary from the actual product.
A Note on Bats and the Moon
Bats acquired their Halloween association through something entirely practical. Large autumn bonfires — the ones lit at Samhain and at harvest festivals across Britain and Ireland — attracted swarms of insects, and insects attracted bats. Anyone standing at a bonfire on an October night would have seen bats circling overhead in numbers. The link between bats, fire, and the turning of the year was observational long before it was symbolic.
The vampire association is much later and comes from a naming accident. European folklore had blood-drinking revenants for centuries with no connection to bats at all. When naturalists encountered genuinely blood-feeding bats in South America in the eighteenth century, they named them after the folklore — vampire bats, not the other way around. Bram Stoker’s Dracula in 1897 then borrowed the name back, and the two fused permanently in popular imagination.
The full moon in the background is a modern illustrative convention rather than anything observed. Bats are in fact somewhat less active on bright moonlit nights, a well-documented behavior called lunar phobia — the extra light makes them more visible to owls and other predators, so many species reduce foraging when the moon is full. The image of bats streaming across a full moon is beautiful, atmospheric, and biologically backward.
Worth knowing when you place your moon: you are working in the language of illustration, not observation, and that is exactly the right choice for a quilt.
Finished Size
This guide makes a throw-sized appliqué quilt with a single large moon and a scattered bat colony.
Quilt measurements:
- Background field: 48 x 60 inches
- Border: 3 inches finished
- Finished quilt: about 54 x 66 inches
Appliqué element sizes:
- Moon: 16 inches in diameter, placed off-center
- Large bats: 4 of them, about 9 inches wingtip to wingtip
- Medium bats: 8 of them, about 6 inches wingtip to wingtip
- Small bats: 12 of them, about 4 inches wingtip to wingtip
- Tiny bats: 8 of them, about 2½ inches wingtip to wingtip
Total: 32 bats in four sizes.
For a wall hanging, use a 24 x 30-inch background, a 10-inch moon, and 14 bats across three sizes. Finish at about 30 x 36 inches.
Materials Needed
For a 54 x 66-inch bat and moon appliqué throw, gather:
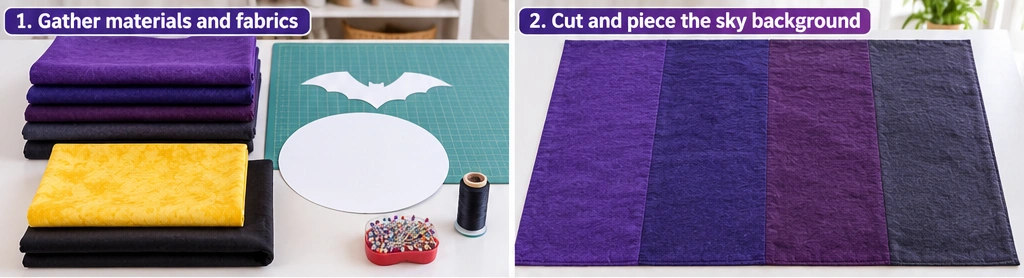
- Sky fabrics: 1 yard each of deep purple, midnight indigo, aubergine, and charcoal
- Moon fabric: ½ yard in acid yellow, chartreuse, or hot orange
- Bat fabrics: ¾ yard total in black, plus fat eighths of magenta, lime green, teal, and electric violet
- Border fabric: ¾ yard in deep purple or black
- Binding: ⅝ yard
- Backing: 3½ yards
- Batting: 62 x 74 inches
- Paper-backed fusible web: 3 yards, lightweight
- Thread: black and charcoal for appliqué stitching, plus contrast for quilting
- Rotary cutter and cutting mat
- Small sharp scissors for cutting appliqué curves
- Quilting ruler
- Pencil and tracing paper
- Non-stick pressing sheet or parchment paper
- Iron and ironing board
Beginner tip: choose the lightest-weight fusible web you can find. Heavy fusible makes 32 appliqué shapes stiff enough that the finished quilt will not drape, and on a throw quilt that matters more than it would on a wall hanging.
Vibrant Night Palette
A rich, saturated night could include:
Sky:
- Deep purple
- Midnight indigo
- Aubergine
- Charcoal
Moon: 5. Acid yellow 6. Chartreuse 7. Hot orange
Bats: 8. True black 9. Magenta 10. Lime green 11. Teal 12. Electric violet
Keep the four sky fabrics close in value so the background reads as one continuous sky with subtle variation, not as patchwork. The contrast should come from the moon and the bats, not from the sky itself.
For the bats, keep roughly three-quarters in black and scatter the colored ones. A quilt with all colored bats loses the menace; a few bright wings among a black colony reads as something caught in the moonlight.
Cutting Measurements
Background — pieced sky:
Cut from each of the four sky fabrics in varied widths to build a subtly pieced background:
- Cut strips between 6 and 12 inches wide by 48 inches long
- You need enough strips to total 60½ inches across when joined
- Vary the widths deliberately so the joins do not fall into a rhythm
Alternatively, cut a single 48½ x 60½-inch background from one fabric for a simpler version.
Moon:
- One circle, 16 inches in diameter, cut from fused fabric
Bats — cut from fused fabric using the template sizes below:
- 4 large at 9 inches wide x 5 inches tall
- 8 medium at 6 inches wide x 3⅓ inches tall
- 12 small at 4 inches wide x 2¼ inches tall
- 8 tiny at 2½ inches wide x 1⅜ inches tall
Borders and binding:
- Border: 6 strips at 3½ inches x width of fabric
- Binding: 7 strips at 2½ inches x width of fabric
Use a ¼-inch seam allowance throughout.
Step-by-Step Guide
Step 1: Draft the Bat Template
Draw one bat at the large size — 9 inches wide by 5 inches tall — on paper.
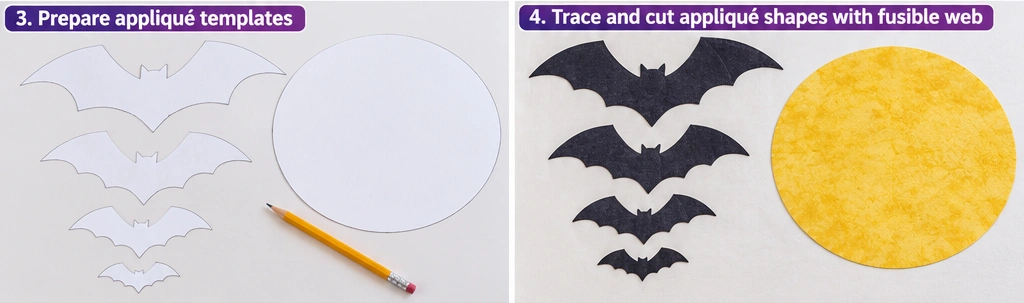
Build it from three parts so the shape stays recognizable: a small rounded body about 1½ inches wide, two pointed ears at the top, and wings that extend outward with two scallops along each lower wing edge ending in a sharp point at the tip.
The two details that make a bat read as a bat rather than a bird: the wings must be wider than the body is tall by a large margin, and the lower wing edge must be scalloped, not smooth. Get those right, and the silhouette is unmistakable.
Photocopy or trace the template at 67%, 44%, and 28% to produce the medium, small, and tiny sizes.
Step 2: Piece the Sky Background
Join your sky strips along the long edges with a ¼-inch seam allowance, mixing the four dark fabrics in irregular widths.
Press seams open so the background stays flat under the appliqué.
Trim the finished background to 48½ x 60½ inches.
If you are using a single background fabric, simply cut it to size and skip to Step 3.
Step 3: Prepare the Fusible Shapes
Trace all 32 bats and the moon onto the paper side of the fusible web.
Reverse the bat template before tracing. Fusible appliqué produces a mirror image of whatever you trace, and a bat is asymmetric enough that this matters. A moon circle does not need to be reversed.
Cut roughly around each traced shape, leaving about ¼ inch of margin. For the moon and the large bats, cut out the center of the fusible web as well, leaving a ½-inch ring around the outline — this keeps the large shapes soft and prevents a stiff patch in the middle of the quilt.
Fuse each shape to the wrong side of its fabric, following the manufacturer’s heat and timing instructions.
Step 4: Cut Out the Appliqué Shapes
Cut each shape out exactly on the traced line using small, sharp scissors.
Cut the concave curves between the wing scallops slowly. These are the points where a rushed cut is most visible in the finished quilt, and where the difference between a bat and a blob is decided.
Leave the paper backing on until you are ready to place each shape.
Step 5: Compose the Layout
Lay the background flat on a bed, floor, or large table.
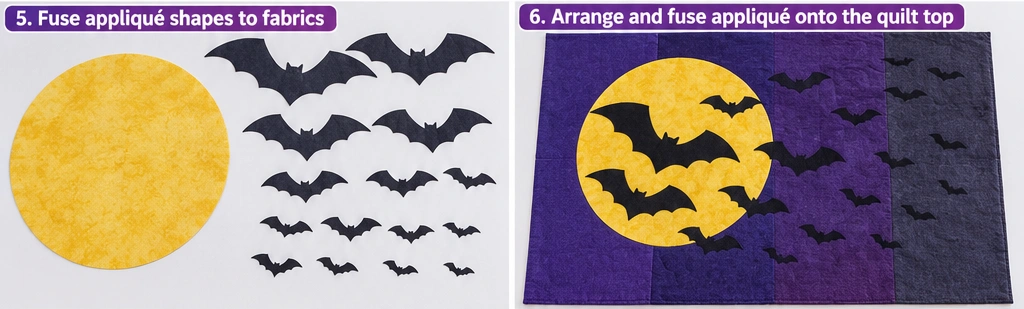
Place the moon first, positioned off-center — roughly one third in from the right edge and one third down from the top. An off-center moon creates a more dynamic composition than a centered one, and it gives the bats somewhere to fly from.
Then place the bats in a scale gradient: the four large bats nearest the moon, medium bats in the middle distance, small bats further out, and the tiny bats toward the edges and corners.
Angle them. A colony in flight does not fly in formation — tilt each bat differently, let a few overlap the moon, let one or two run partly off the edge of the quilt top where the border will crop them. That crop is what makes the scene feel larger than the quilt.
Photograph the layout before fusing anything. Once a shape is fused, it does not come off, and 33 pieces cannot be reconstructed from memory.
Step 6: Fuse the Shapes
Peel the paper backing from each shape and fuse it in place, working from the moon outward.
Use a non-stick pressing sheet or parchment paper over the top to protect your iron — stray fusible web on an iron plate is difficult to remove and easy to transfer onto the next quilt.
Press; do not slide the iron. Sliding shifts the shape before the adhesive sets, and thin wing points move most easily.
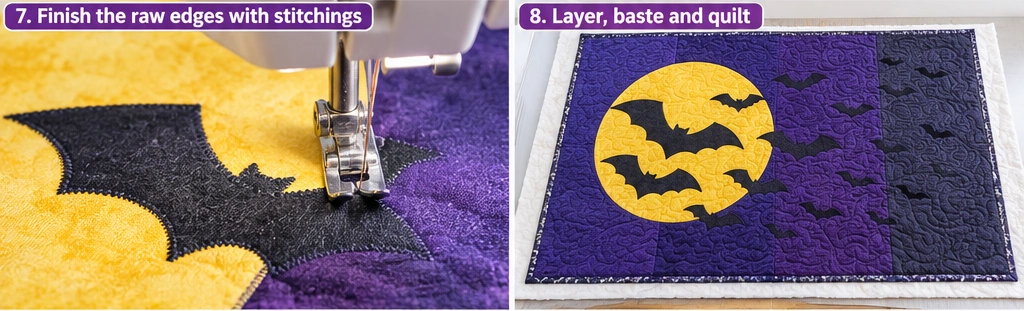
Step 7: Stitch the Appliqué Edges
Fused edges will not survive washing on their own, so every shape needs stitching down.
Choose one finish and use it throughout:
- Blanket stitch in black thread — the most traditional look, and it defines each shape clearly
- Narrow zigzag — fast and durable, good for the smaller bats
- Straight stitch ⅛ inch inside the edge — the most modern look, and it lets the raw edge fray slightly for texture
Whichever you choose, stitch the moon in a thread matching the moon rather than the sky. A contrasting outline around the moon makes it look pasted on.
Work the tiny bats last, once your hand is used to the curves.
Step 8: Add the Border
Join the 3½-inch border strips end to end.
Measure the quilt top through the center rather than along the edges, cut two side borders to that length, pin at the ends and center, and sew.
Measure again through the center horizontally, cut the top and bottom borders, and sew.
Press toward the border. The finished top should measure about 54½ x 66½ inches.
Step 9: Layer and Baste
Layer the backing wrong side up, batting, then the quilt top right side up.
Baste thoroughly with pins or spray. An appliqué top has areas of very different thickness — fused shapes versus bare background — and generous basting is what stops the layers from shifting between them.
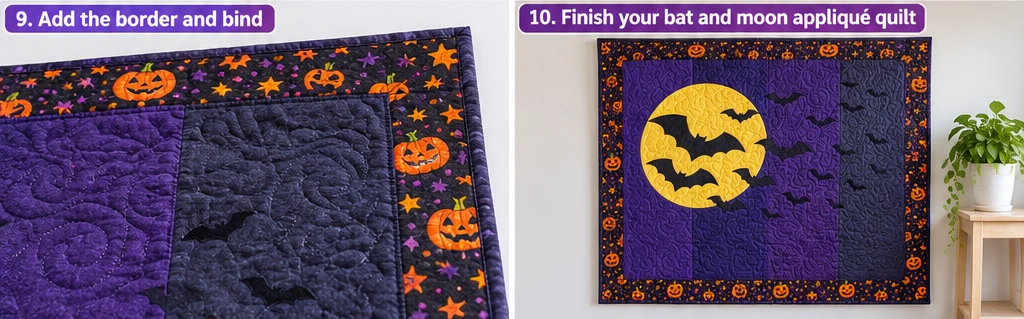
Step 10: Quilt the Background
Quilt the background densely, and the appliqué shapes lightly. That contrast is what makes the bats and moon stand slightly proud of the sky.
Options that suit this design:
- All-over swirls or wind lines across the sky, stopping and starting around each shape
- Concentric rings radiating from the moon, echoing outward across the whole quilt
- Straight diagonal lines at 1½-inch spacing behind the shapes only
Quilt around each bat rather than across it. Stitching over the wings flattens them and loses the silhouette.
Consider a contrast thread — chartreuse or magenta on a deep purple sky turns the quilting into a visible design layer.
Step 11: Bind and Finish
Trim the quilt square.
Bind with 2½-inch strips joined on the bias, in deep purple, black, or a single bright that appears in the bats.
Stitch the binding down by hand or machine, add a hanging sleeve if the quilt will go on a wall, and add a label.
Assembly at a Glance
- Draft and prepare — draw the bat template, photocopy at four sizes, trace all shapes reversed onto fusible web
- Build the sky — piece the dark background strips and trim to 48½ x 60½ inches
- Cut — fuse shapes to fabric, cut on the line, cut out fusible centers on the large pieces
- Compose — place the moon off-center, scatter bats in a shrinking scale gradient, photograph before fusing
- Fuse and stitch — press from the moon outward, then stitch every edge
- Finish — add the border, layer, quilt the background densely, and bind
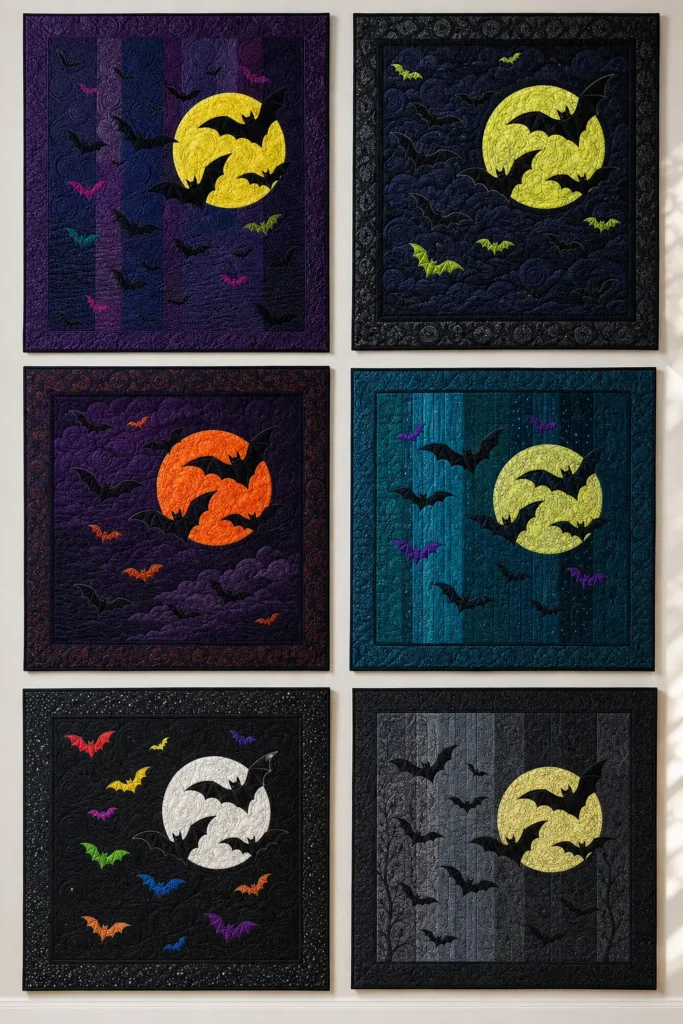
Vibrant Night Combination Ideas
For a purple night quilt, use a pieced sky in four purples with a chartreuse moon, black bats, and three magenta bats scattered near the edge.
For a poison moon quilt, use midnight indigo and charcoal sky with an acid yellow moon and bats in black and lime green.
For a blood moon quilt, use aubergine and deep purple sky with a hot orange moon, black bats, and orange-lined wings on the large ones.
For a teal night quilt, use deep teal, indigo, and a charcoal sky with a chartreuse moon and black bats, with electric violet accents.
For a high-contrast quilt, use a single true black sky, a bright white moon, and bats in a full rainbow of brights.
For a subtle scary quilt, use four charcoals and greys with a pale acid yellow moon and all-black bats — the least colorful option, and the most genuinely unsettling.
Beginner Tips for Success
Reverse the bat template before tracing. Fusible appliqué mirrors everything, and 32 backward bats is a discovery you want to make on paper.
Cut the fusible centers out of the large shapes. A solid fused 16-inch moon creates a stiff plate in the middle of a quilt that is meant to drape.
Photograph the layout before fusing. Fusible web is permanent, and there is no recovering a 33-piece composition from memory.
Press, never slide. Sliding the iron shifts thin wing points before the adhesive sets.
Use lightweight fusible. Heavy fusible is the main reason appliqué quilts end up stiff.
Quilt around the shapes, not over them. Stitching across the wings flattens the silhouette you worked to cut accurately.
Let a bat or two run off the edge. A cropped shape at the border is what makes the scene read as bigger than the quilt.
Styling Tip
A bat and moon quilt is a scene, not a pattern, which means it works best where the whole composition is visible at once — hung on a wall, spread flat across the foot of a bed, or draped over a chair back so the moon stays in view.
Keep the surroundings plain. A dark quilt with a bright moon needs a light wall or pale bedding behind it, and no competing pattern nearby. For a seasonal display, a single row of plain candlesticks or one bowl of dark plums beneath it is enough. Anything more and the scene stops reading.
Gift Pairings
Leftover fabric and spare templates make an easy matching set:
- A single large bat appliquéd onto a 16-inch cushion cover
- A small moon and three bats on a drawstring trick-or-treat bag
- A mini wall hanging at 18 x 24 inches using one moon and seven bats
- A set of bat appliqué napkins or a table runner in matching darks
- A zip pouch with one medium bat on the front panel
- A hanging door banner with three bats in shrinking scale
- Bat appliqué tea towels in black on chartreuse
Other Design Inspirations – Digitally Modified Images. Texture and color may vary from the actual product.
6. Spider Web Quilt Blocks with Foundation Paper Piecing
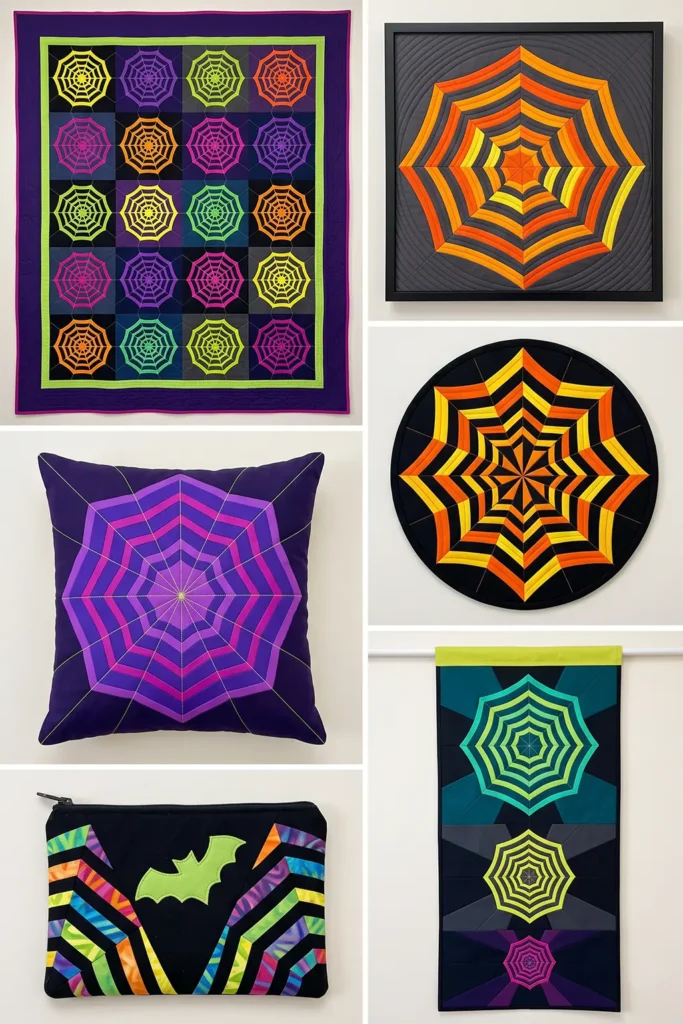
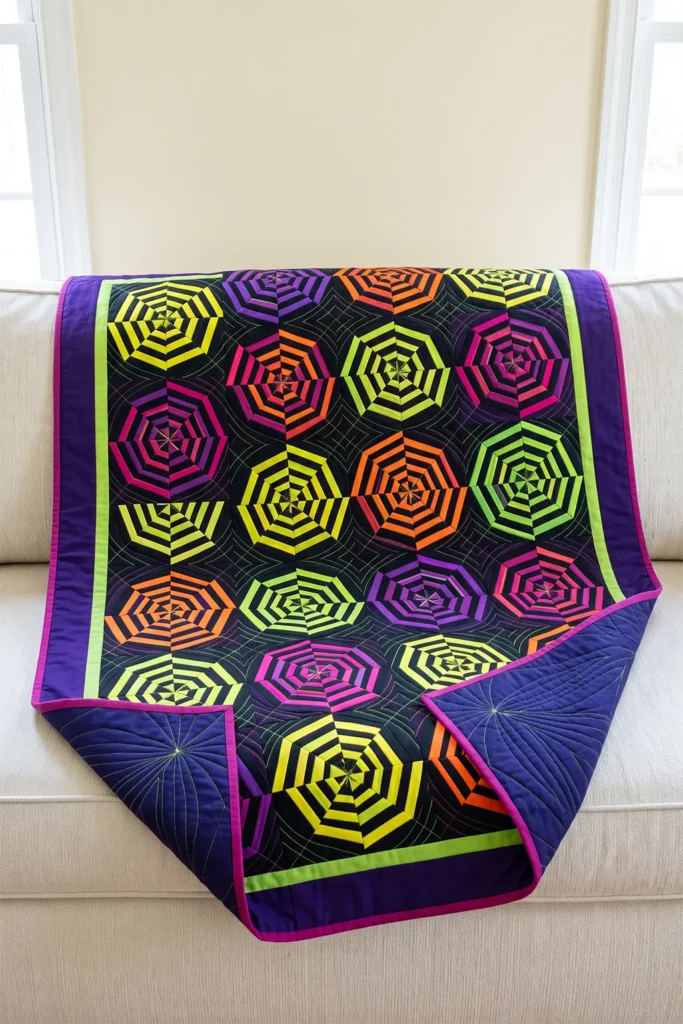
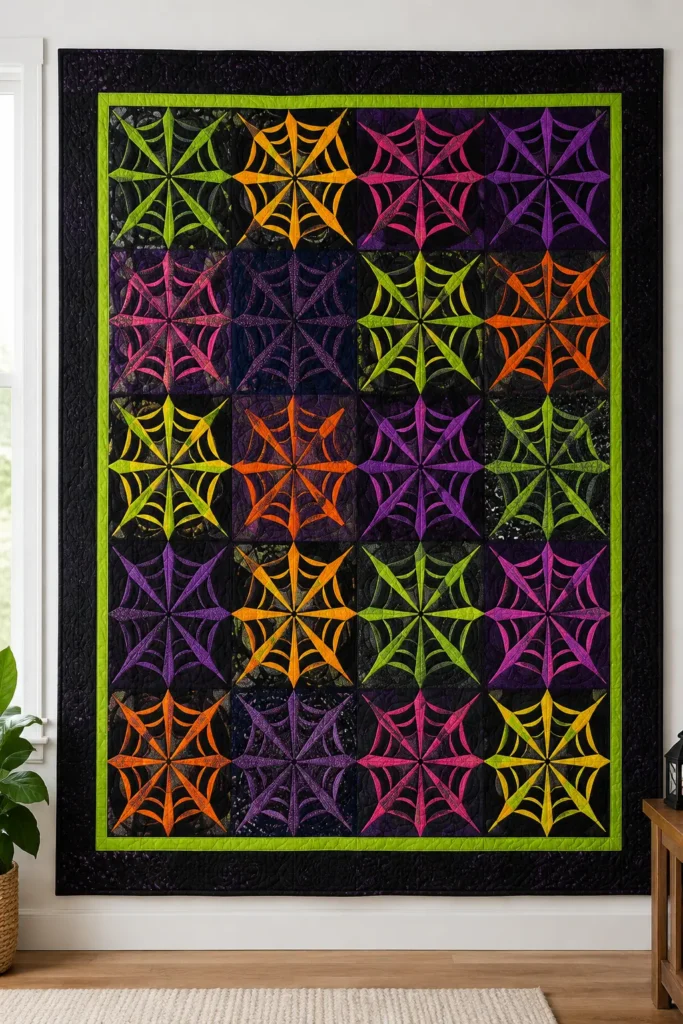
A spider web quilt block is where foundation paper piecing earns its reputation. The design is built from eight narrow wedges radiating from a center point, each wedge holding four or five strips that get progressively wider as they move outward — and every one of those seams sits on the bias. Pieced conventionally, the block would stretch, wobble, and refuse to lie flat. Stitched onto paper, it comes out crisp every time, with all eight center points meeting exactly.
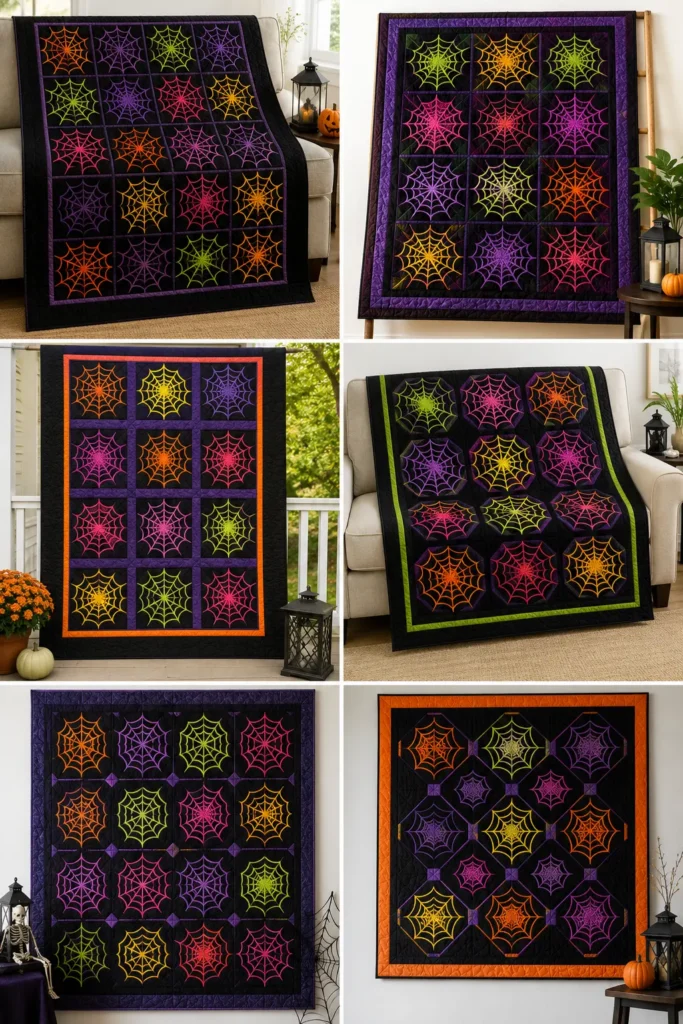
For a vibrant Halloween palette, build the webs from acid yellow, lime green, chartreuse, hot orange, magenta, and electric violet radiating outward against black or deep purple wedge backgrounds. The bright strips against dark backgrounds make the web appear to glow, which is far more striking than the usual white web on black. Vary the color from block to block so the finished quilt reads as a scatter of different webs rather than one repeated motif.
Why This Design Works
The block only works because of the paper. Foundation piecing reverses the usual order—you sew the printed lines of a paper pattern onto fabric underneath, so the paper controls accuracy rather than your cutting and pressing. Every one of the sixteen bias seams in a spider web block is held perfectly stable by the foundation until the moment you tear it away.
The wedge structure is what creates the web illusion. Eight identical wedges arranged in a circle produce concentric rings where the strip seams align across the wedge joins, and those rings read as the spiraling capture threads of a real web. The narrow point of each wedge meeting at the center reads as the radial anchor lines. Neither effect requires you to draw a web — the geometry produces it.
The progressive strip widths matter more than they look. Strips that widen as they move outward mimic the way a real orb web’s spiral spacing increases toward the edge. Uniform strips produce a target, not a web.
The skills you build here form the foundation of the core set: sewing on a printed line, positioning fabric blind on the reverse, trimming to the ¼-inch line, managing bias without stretching, and joining eight wedges to a single point.
Design Inspirations – Digitally Modified Images. Texture and color may vary from the actual product.
A Note on Webs and Spiders
The orb web you are about to piece is built in a specific order, and knowing it changes how you place your strips. A spider first lays the radial spokes — the strong, dry structural lines running from the center outward. Only then does it spiral inward, laying the capture spiral, which is the sticky part. The radials are not sticky at all, which is how the spider walks its own web without getting caught.
The block mirrors that construction exactly: the wedge seams are your radials, and the strips crossing them are your spiral.
Spiders reached Halloween through the same route as bats and moths — they were simply present. Empty houses, cellars, and barns accumulate webs, and abandoned buildings were already the setting for autumn ghost stories long before Halloween decoration existed. A web became visual shorthand for a place nobody had entered in a long time.
There is also a genuinely old textile connection. Spider silk has been used as thread in isolated cases for centuries — most famously in a set of golden textiles woven in Madagascar from the silk of golden orb-weaver spiders, which required over a million spiders to produce a single large piece. Silk is collected from each spider and the spider released, since the animals are cannibalistic and cannot be farmed in the way silkworms are. That is why spider silk, despite being stronger by weight than steel, has never become a commercial fiber.
Finished Size
This guide makes a 12-inch finished spider web block, and a throw-sized quilt from twenty of them.
Block measurements:
- Finished block: 12 x 12 inches
- Unfinished block: 12½ x 12½ inches
- Wedges per block: 8
- Strips per wedge: 5, widening from center to outer edge
- Center point: all 8 wedge points meet at the exact block center
Quilt measurements:
- Blocks: 20, set 4 across by 5 down
- Block field: 48 x 60 inches
- Inner border: 2 inches finished
- Outer border: 4 inches finished
- Finished quilt: about 60 x 72 inches
For a wall hanging, make 4 blocks in a 2 x 2 layout for a 24 x 24-inch field, add a 3-inch border, and finish at about 30 x 30 inches.
Materials Needed
For a 60 x 72-inch spider web throw, gather:
- Foundation paper: 160 printed wedge templates — newsprint, tracing paper, or purpose-made foundation paper
- Web strip fabrics: 2½ yards total in acid yellow, lime, chartreuse, hot orange, magenta, and electric violet
- Wedge background fabric: 2½ yards in black, charcoal, or deep purple
- Inner border: ⅓ yard in lime green
- Outer border: 1¼ yards in black or deep purple
- Binding: ⅝ yard
- Backing: 4 yards
- Batting: 68 x 80 inches
- Thread: grey or charcoal, plus contrast for quilting
- Sewing machine needles: 90/14 — a larger needle perforates the paper more cleanly
- Add-a-Quarter ruler or any ruler with a ¼-inch lip
- Rotary cutter and cutting mat
- Small scissors and a seam ripper
- Iron and ironing board — dry, no steam
- Stiletto or a wooden skewer for holding strips flat
Beginner tip: shorten your machine’s stitch length to 1.5mm before you start. The tighter perforation makes the paper tear away cleanly at the end, which is the difference between a satisfying finish and forty minutes with a seam ripper.
Vibrant Web Palette
A glowing web against darkness could include:
Web strips:
- Acid yellow
- Lime green
- Chartreuse
- Hot orange
- Magenta
- Electric violet
Wedge backgrounds: 7. True black 8. Charcoal 9. Deep purple 10. Midnight indigo
Within a single block, run the web strips from brightest at the center to deeper at the outer edge, or reverse it. Either direction works, but choose one and keep it consistent within each block — mixing directions inside one web breaks the radiating effect.
Across the quilt, vary which color leads. A quilt of twenty blocks where each web has its own dominant color reads as a colony of webs rather than a repeat.
Cutting Measurements
Foundation templates:
Draw or print a wedge template with these measurements. Each wedge is a triangle:
- Height from point to outer edge: 8½ inches, including seam allowance
- Width at the outer edge: 6½ inches, including seam allowance
- Point angle: 45 degrees
Divide the wedge into five sections across its height with lines perpendicular to the centre axis, spaced at roughly 1 inch, 1¼ inches, 1½ inches, 1¾ inches, and 2 inches from point to outer edge. Number the sections 1 through 5 starting at the point.
Print or trace 160 templates — 8 per block for 20 blocks.
Fabric strips — cut generously, since foundation piecing trims as you go:
- Section 1 strips: 2 inches wide
- Section 2 strips: 2¼ inches wide
- Section 3 strips: 2½ inches wide
- Section 4 strips: 2¾ inches wide
- Section 5 strips: 3 inches wide
Cut strips across the width of fabric and crosscut into lengths of about 7 inches as you go.
Borders and binding:
- Inner border: 6 strips at 2½ inches x width of fabric
- Outer border: 7 strips at 4½ inches x width of fabric
- Binding: 7 strips at 2½ inches x width of fabric
Use a ¼-inch seam allowance for joining wedges, blocks, and borders.
Step-by-Step Guide
Step 1: Prepare the Foundations
Print or trace 160 wedge templates onto lightweight paper.
Lightweight paper tears away far more easily than copy paper. Newsprint, tracing paper, or purpose-made foundation paper all work — standard printer paper will do the job but will fight you at the end.
Cut each template out roughly, leaving about ½ inch beyond the outer line on all sides. Do not trim to the line yet.
Set your machine to a 1.5mm stitch length and fit a 90/14 needle.
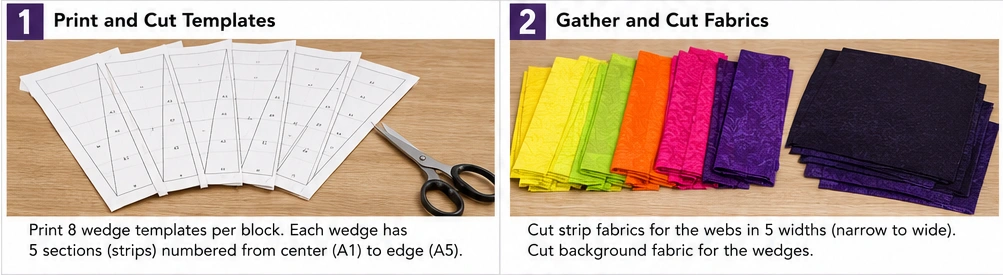
Step 2: Place the First Strip
Turn the template printed side down and place your section 1 fabric right side up on the blank side, covering section 1 with at least ¼ inch extending past every line of that section.
Hold it up to a window or a light to check coverage. Beginners most often get this step wrong, and the error only becomes visible after the seam is sewn.
Pin or glue-baste in place.
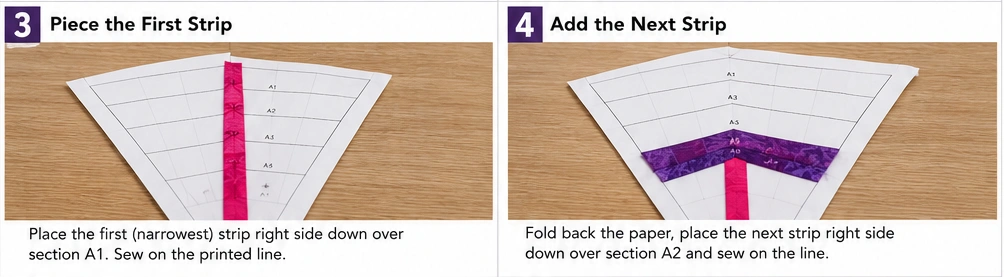
Step 3: Add the Second Strip
Place the section 2 strip right sides together against the section 1 fabric, aligned along the line dividing sections 1 and 2, with the strip lying toward the wedge point.
Flip the template over to the printed side and sew directly on the line between sections 1 and 2, extending the stitching about ¼ inch past each end of the line.
Flip back, open the section 2 strip outward, and press with a dry iron. Steam will curl the paper and distort the seam.
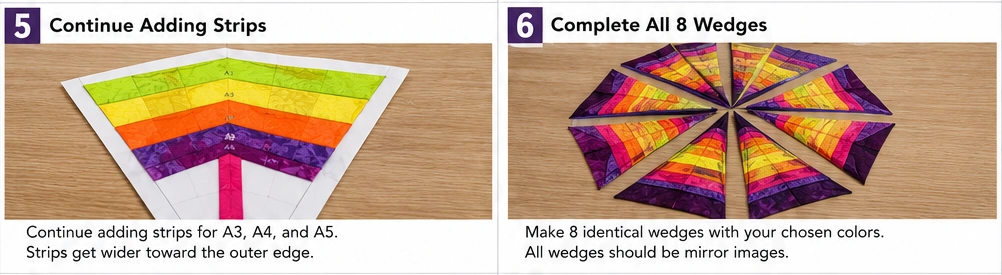
Step 4: Trim and Continue
Fold the paper back along the next printed line and use an Add-a-Quarter ruler to trim the fabric to exactly ¼ inch beyond the fold.
That trim is what makes the next strip align correctly. Skipping it is the most common cause of a wedge that will not press flat.
Repeat Steps 3 and 4 for sections 3, 4, and 5, working outward from the point.
Step 5: Trim the Wedge to Size
Once all five sections are pieced, trim the wedge along the outer solid line of the template — this line already includes the ¼-inch seam allowance.
Use a rotary cutter and ruler for straight, accurate edges. The wedge should now measure 8½ inches from point to outer edge.
Leave the paper in place. It comes out after the block is assembled.
Repeat until you have 8 wedges for the first block.
Step 6: Join the Wedges into Half-Blocks
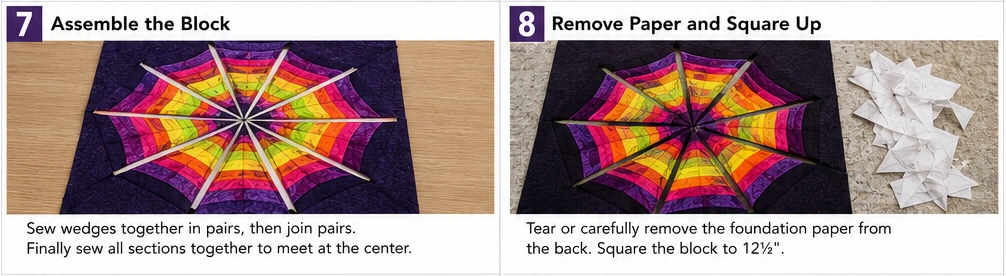
Sew wedges together in pairs along their long edges with a ¼-inch seam allowance, matching the strip seams across the join.
Pin at every strip seam intersection. This produces the concentric rings that make the web read—if the rings break at the wedge joins, the illusion collapses.
Join the pairs into two half-blocks of four wedges each. Press seams open to reduce bulk at the center.
Step 7: Join the Half-Blocks
Pin the two half-blocks together along the long straight edge, matching the center point precisely and every strip seam along the way.
Sew with a ¼-inch seam allowance.
Open and check the center. All eight wedge points should meet at a single point. If they do not, unpick the last seam and re-pin — the center is the first thing anyone looks at.
Press the final seam open and fan the center seam allowances so they lie flat rather than stacking.
Step 8: Remove the Paper
Tear the paper away from the back of the block, starting at the outer edges and working toward the center.
Use tweezers or the point of a seam ripper for the small pieces trapped in the center seam allowances. A 1.5mm stitch length makes this fast; a longer stitch makes it tedious.
The block should measure 12½ x 12½ inches unfinished. Measure it before making the other nineteen.
Step 9: Make the Remaining Blocks
Piece the remaining 19 blocks, varying the dominant web color from block to block.
Work in batches by stage rather than block by block — piecing all the section 1 and 2 seams across many wedges before moving on is considerably faster than completing one full wedge at a time.
Step 10: Lay Out and Join the Quilt Top
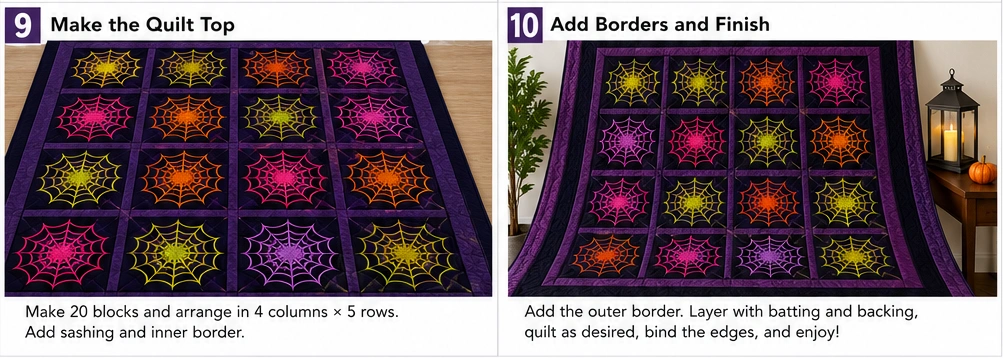
Arrange the 20 blocks 4 across by 5 down.
Distribute the dominant web colors so no two blocks sharing a lead color sit adjacent. Photograph the layout before sewing.
Sew blocks into five rows of four, pressing row seams in alternating directions so they nest. Join the rows, pressing those seams open.
The block field should measure 48½ x 60½ inches unfinished.
Step 11: Add the Borders
Join the 2½-inch inner border strips end to end. Measure the quilt top through the center — never along the edges — cut the two side borders to that length, pin at the ends and center, and sew. Repeat for the top and bottom.
Join the 4½-inch outer border strips and repeat the same process.
Press toward each border. The finished top should measure about 60½ x 72½ inches.
Step 12: Layer, Quilt, and Bind
Layer the backing wrong side up, batting, then the quilt top right side up. Baste with pins or spray.
Quilting options that suit this design:
- Straight lines radiating from each block center, extending the web’s own geometry
- Concentric arcs following the strip seams around each web
- All-over swirls across the whole quilt to contrast with the rigid block geometry
A contrast thread — chartreuse or magenta on a black background — turns the quilting into a visible design layer. On a spider web quilt, radiating stitch lines read as the radials themselves.
Trim square, then bind with 2½-inch strips joined on the bias.
Assembly at a Glance
- Prepare — print 160 wedge templates, set a 1.5mm stitch, fit a 90/14 needle
- Piece the wedges — place section 1, add strips outward, trimming ¼ inch at every fold
- Trim — cut each wedge on the outer template line, leaving the paper in
- Assemble the block — join wedges into pairs, then halves, then one block, matching strip seams
- Remove the paper — tear away from the edges inward, then measure the block at 12½ inches
- Finish — lay out 20 blocks, join rows with nested seams, add borders, quilt and bind
Vibrant Web Combination Ideas
For a glowing web quilt, use acid yellow and lime strips brightest at the center, fading to deep green, all on true black wedges.
For a poison web quilt, use chartreuse and lime on deep purple wedges with a lime inner border.
For a carnival web quilt, give each of the twenty blocks a different dominant color, all on black, bound in magenta.
For a fire web quilt, use hot orange, tangerine, and acid yellow on charcoal wedges with a black outer border.
For a violet web quilt, use electric violet and magenta on midnight indigo with a chartreuse inner border for contrast.
For a two-color quilt, use only acid yellow strips on black wedges across all twenty blocks — the most graphic option, and the most striking from across a room.
Beginner Tips for Success
Shorten the stitch length to 1.5mm before you start. The tight perforation is what lets the paper tear away cleanly instead of shredding.
Check fabric coverage against a light before every seam. A strip that does not cover its section will only reveal the problem after it is sewn, and the fix means unpicking through paper.
Trim ¼ inch at every fold. This is not optional, and skipping it is the single most common reason a foundation-pieced wedge will not lie flat.
Press with a dry iron. Steam curls the paper and distorts the seam you just sewed.
Pin at every strip seam when joining wedges. The concentric rings are the whole effect, and they break at the joins if you do not pin.
Leave the paper in until the block is fully assembled. It is holding sixteen bias seams stable, and removing it early undoes the reason you used it.
Check the center after joining the halves. Eight points meeting cleanly is what makes the block, and it is worth one unpick to get right.
Styling Tip
A spider web quilt is graphic and high contrast, so it needs plain surroundings — a pale sofa, white bedding, or a light wall. Hung flat, the radiating geometry reads best from a distance, which makes it a strong wall quilt as well as a throw.
For a seasonal display, keep everything else in a single dark tone: plain black candlesticks, a clear glass vase with bare branches, no competing pattern. The webs already provide all the visual complexity the room needs.
Gift Pairings
Leftover wedges and strips build a matching set easily:
- A single web block as a 12-inch cushion cover
- A four-block wall hanging at 30 x 30 inches
- Eight leftover wedges joined into a round table topper
- A pieced zip pouch using two wedges as the front panel
- A set of web block mug rugs from spare wedges
- A trick-or-treat drawstring bag with one web block on the front
- An Add-a-Quarter ruler — the tool that makes foundation piecing click, and the best gift for anyone starting out
Other Design Inspirations – Digitally Modified Images. Texture and color may vary from the actual product.
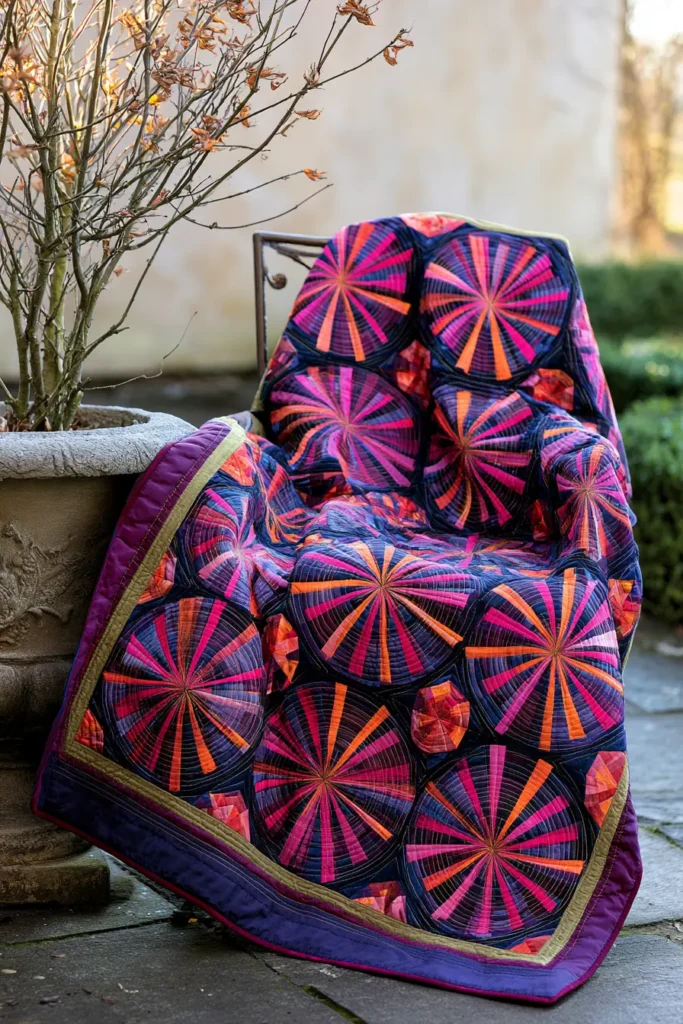
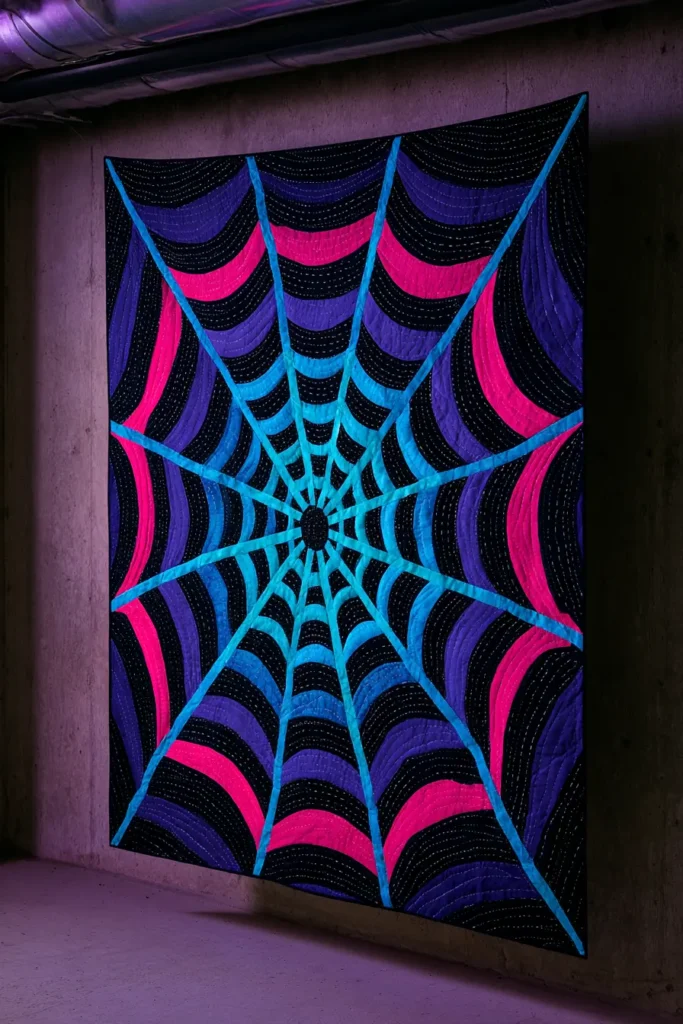
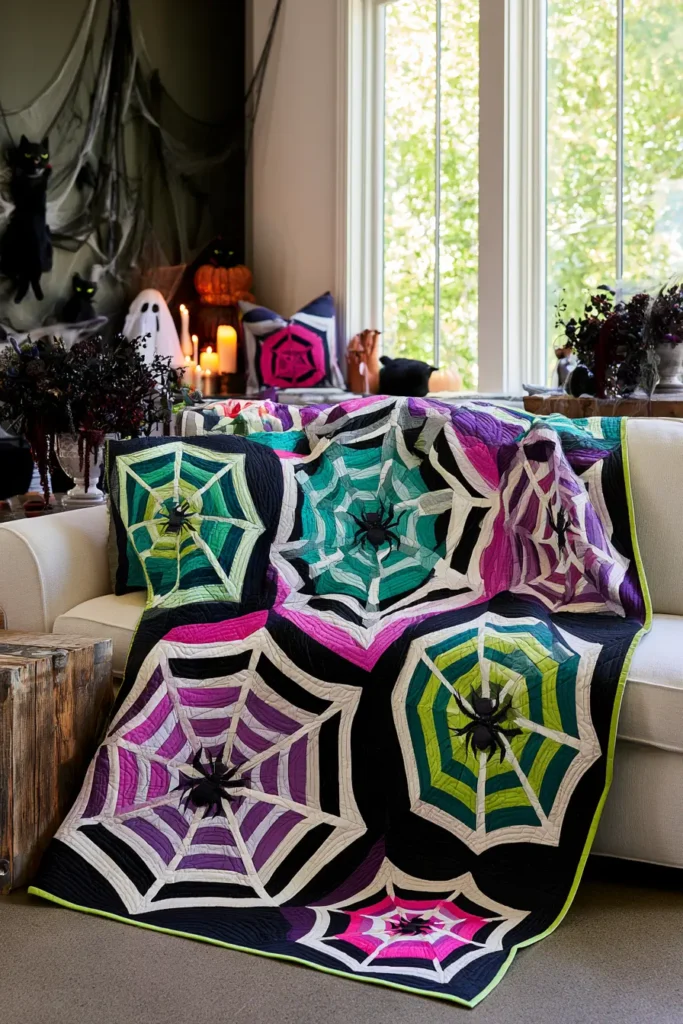
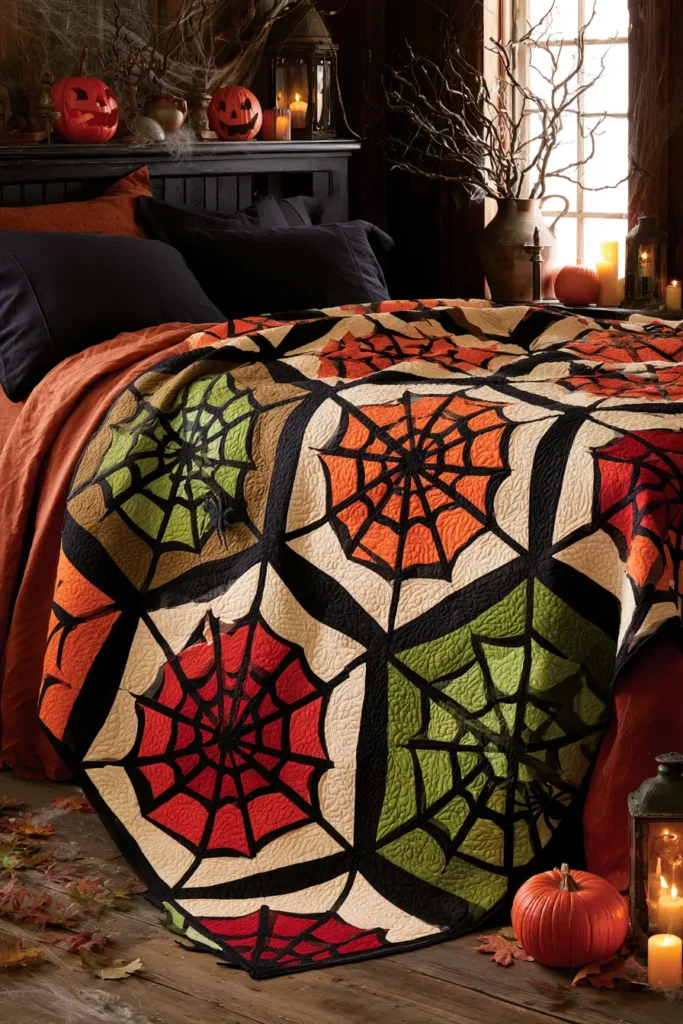
7. Candy Corn Half-Square Triangle Quilt Patterns
Candy corn is the one Halloween motif built from a shape quilters already make by the hundred. The candy’s three stacked bands — white tip, orange middle, yellow base — reduce to a triangle with two horizontal divisions, which means the whole design can be built from half-square triangles and simple strip units with no curves, no templates, and no appliqué.
For a vibrant version that pushes past the expected orange-and-yellow, keep the candy corn tips bright white but build the bands from hot orange, tangerine, acid yellow, chartreuse, magenta, lime green, and electric violet. Then set every candy against a true black or deep purple background. The traditional colorway is cheerful; a scattered field of magenta and lime candy corn against black is genuinely unsettling — sweets that look wrong, which is a more effective kind of scary than gore.
Why This Design Works
The half-square triangle is the most-made unit in quilting, and this design uses it in the position where it does the most work: forming the angled sides of each candy. Because HSTs are made two at a time from a pair of squares, a quilt of twenty candy corn blocks produces the forty triangle units you need in twenty sewing passes rather than forty.
Stacking the bands in strip units rather than piecing each band separately is what keeps the block fast. You sew three long strips together once, crosscut them into segments, and every segment is an identical band stack — the same logic that makes jelly roll quilts quick, applied to a shape that looks far more complex than it is.
The tapered silhouette is the detail that makes it read as candy corn rather than a triangle. The white tip must be narrower than the base by a clear margin, and the bands must be unequal in height — a thin white tip, a deeper orange middle, and a deepest yellow base. Equal bands produce a striped triangle; unequal bands produce candy corn.
Skills you build here are foundational and highly transferable: accurate HST construction, trimming units to size, strip-set crosscutting, and straight-set block assembly.
Design Inspirations – Digitally Modified Images. Texture and color may vary from the actual product.
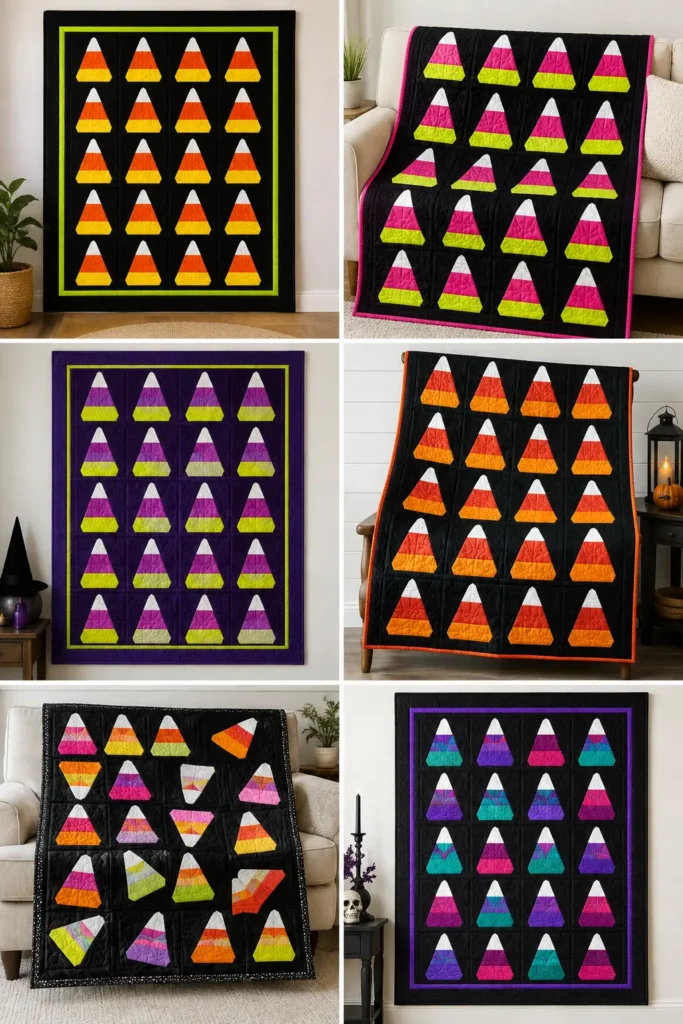
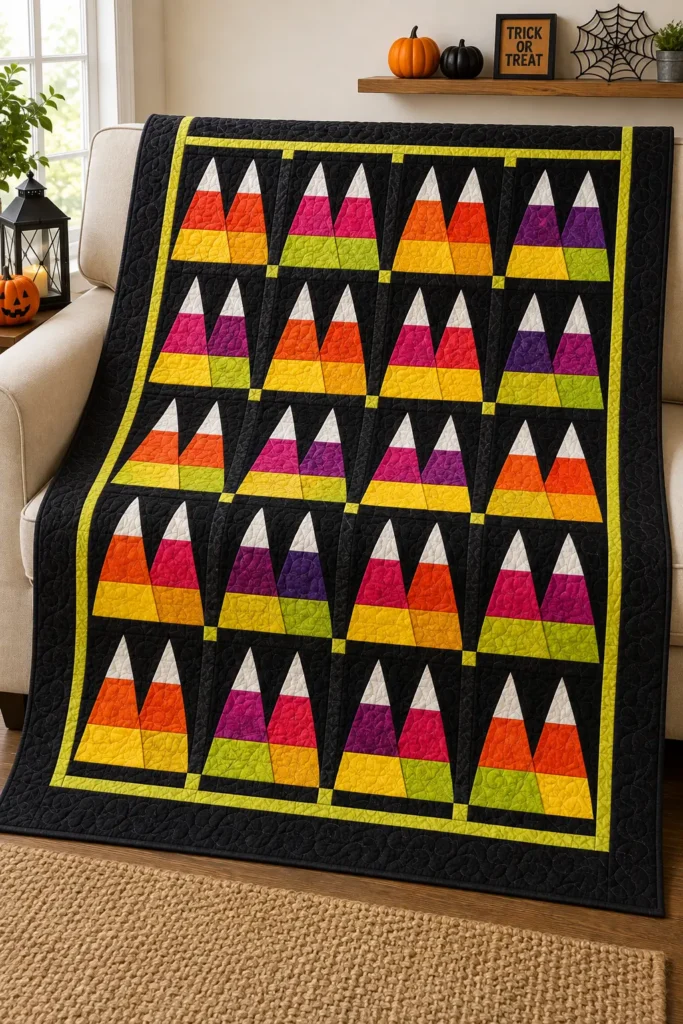
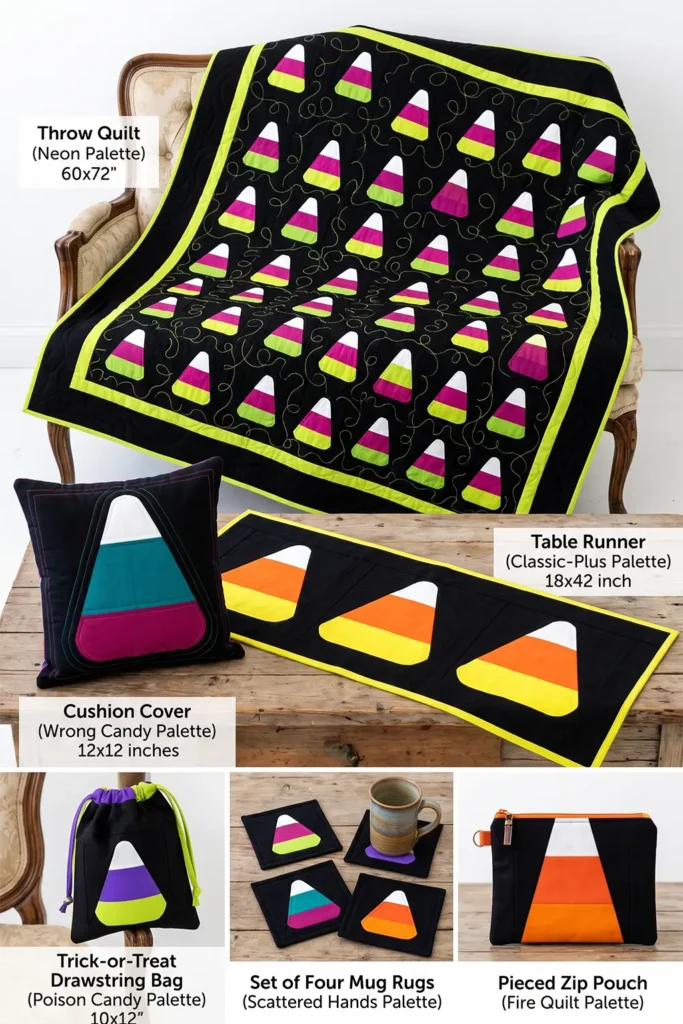
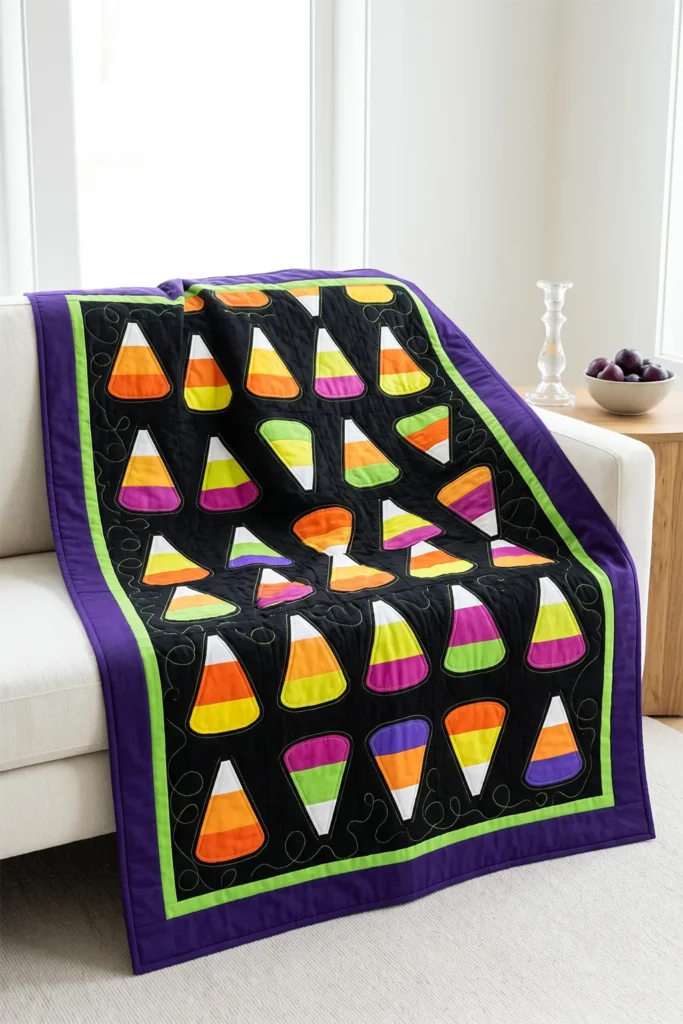
A Note on Candy Corn
Candy corn was invented in the 1880s by a confectioner at the Wunderlee Candy Company in Philadelphia, and it was made for farmers rather than for Halloween. The three-band tricolor design mimicked a kernel of corn, and it was sold year-round as part of a range of agricultural-themed candies — turnips, chestnuts, and clover were all made the same way. At the time, roughly half the American workforce was agricultural, so corn was a straightforwardly commercial motif rather than a seasonal one.
The manufacturing method explains the shape. Each color was cooked separately and poured by hand into kernel-shaped molds in three passes — white first, then orange, then yellow. A worker carrying a bucket weighing over 45 pounds walked the rows of molds, pouring one band at a time, which is why the bands are unequal: the pour was judged by eye. The process was called running corn, and it changed remarkably little for decades.
The Halloween association arrived much later, in the 1950s, when trick-or-treating became widespread, and manufacturers needed cheap, individually wrapped, shelf-stable sweets. Candy corn was already in production, already looked seasonal, and already survived a warm October in a paper bag. It was adopted rather than designed for the holiday.
Worth knowing when you place your bands: the unequal band heights you are copying are a fossil of a hand-pouring process, not a design decision.
Finished Size
This guide makes a 12-inch finished candy corn block containing two candies, and a throw-sized quilt from twenty blocks.
Block measurements:
- Finished block: 12 x 12 inches
- Unfinished block: 12½ x 12½ inches
- Candies per block: 2, set side by side
- Each candy: 6 inches wide x 12 inches tall, finished
- White tip band: 2 inches finished
- Orange middle band: 4 inches finished
- Yellow base band: 6 inches finished
Quilt measurements:
- Blocks: 20, set 4 across by 5 down
- Block field: 48 x 60 inches
- Inner border: 2 inches finished
- Outer border: 4 inches finished
- Finished quilt: about 60 x 72 inches
For a table runner, make 3 blocks in a row for a 12 x 36-inch field, add a 3-inch border, and finish at about 18 x 42 inches.
Materials Needed
For a 60 x 72-inch candy corn throw, gather:
- Background fabric: 3 yards in true black, charcoal, or deep purple
- Tip fabric: ¾ yard in bright white or cream
- Middle band fabrics: 1¼ yards total in hot orange, tangerine, magenta, and electric violet
- Base band fabrics: 1¾ yards total in acid yellow, chartreuse, and lime green
- Inner border: ⅓ yard in acid yellow or lime
- Outer border: 1¼ yards in black or deep purple
- Binding: ⅝ yard
- Backing: 4 yards
- Batting: 68 x 80 inches
- Thread: grey or charcoal for piecing, plus contrast for quilting
- Rotary cutter and cutting mat
- Quilting ruler, plus a 6½-inch square ruler for trimming HSTs
- Fabric marker or a sharp pencil
- Sewing clips or pins
- Iron and ironing board
Beginner tip: buy a square ruler with a marked diagonal line. Trimming forty HSTs to exact size is the step that determines whether your blocks finish at 12½ inches, and a square ruler makes it fast instead of fiddly.
Vibrant Candy Palette
A bright, slightly wrong candy run could include:
Tips:
- Bright white
Middle bands: 2. Hot orange 3. Tangerine 4. Magenta 5. Electric violet
Base bands: 6. Acid yellow 7. Chartreuse 8. Lime green
Background: 9. True black 10. Deep purple
Keep every tip white. That single constant is what identifies the shape as candy corn no matter how far the other bands stray from the original — a magenta and lime candy with a white tip still reads unmistakably.
Mix band combinations across the quilt so no two adjacent candies share a color pair. A field of forty candies in eight different combinations reads as a scattered handful; forty identical candies reads as wallpaper.
Cutting Measurements
For each candy, cut:
- White tip: one strip, 2½ x 6½ inches
- Middle band: one strip, 4½ x 6½ inches
- Base band: one strip, 6½ x 6½ inches
- Background for the tip taper: two squares, 2½ x 2½ inches
- Background for the sides: two squares, 4½ x 4½ inches
For 40 candies (20 blocks), cut in total:
- 40 white strips at 2½ x 6½ inches
- 40 middle band strips at 4½ x 6½ inches, in mixed colours
- 40 base band strips at 6½ x 6½ inches, in mixed colours
- 80 background squares at 2½ x 2½ inches
- 80 background squares at 4½ x 4½ inches
Borders and binding:
- Inner border: 6 strips at 2½ inches x width of fabric
- Outer border: 7 strips at 4½ inches x width of fabric
- Binding: 7 strips at 2½ inches x width of fabric
Use a ¼-inch seam allowance throughout.
Step-by-Step Guide
Step 1: Cut One Test Candy
Cut all the pieces for a single candy before cutting the full forty.
Piecing one candy first confirms your seam allowance is accurate. A seam running a hair wide costs you ¼ inch across a 12-inch block, and finding that out after cutting eighty background squares is an expensive lesson.
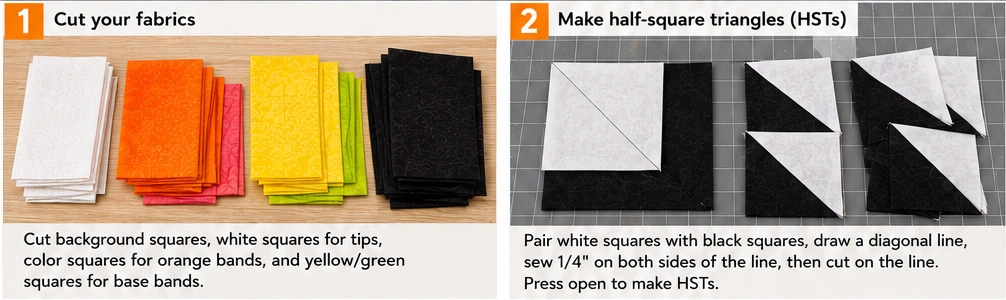
Step 2: Build the Band Stack
Sew the white 2½ x 6½-inch strip to the top of the middle band 4½ x 6½-inch strip, right sides together, with a ¼-inch seam allowance.
Sew the base band 6½ x 6½-inch square to the bottom of the middle band.
Press seams toward the darker fabric — or open, if you prefer less bulk.
The band stack should now measure 6½ inches wide x 12½ inches tall. Measure it. This is the unit every other measurement depends on.
Step 3: Mark the Taper Squares
Take the two 2½-inch background squares and draw a diagonal line corner to corner on the wrong side of each.
Do the same on the two 4½-inch background squares.
Use a sharp pencil rather than a thick fabric pen. The line width itself shifts the angle of the taper, and on a shape this graphic, the difference shows.
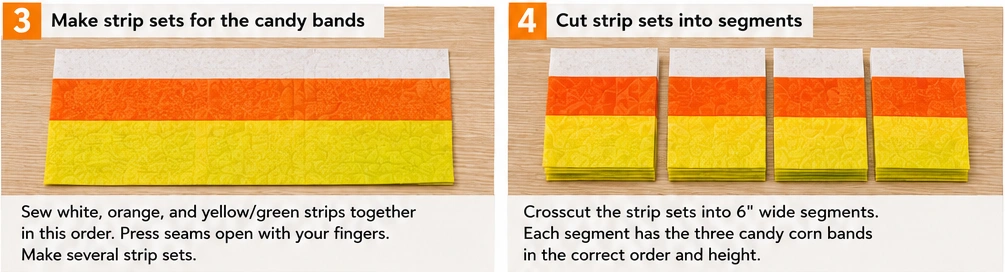
Step 4: Sew the Tip Taper
Place a marked 2½-inch background square right sides together on the top left corner of the band stack, aligned with the corner edges.
Sew directly on the marked line, not beside it.
Before trimming, fold the square open and check that its edges align with the band stack corner. If they do, trim the excess ¼ inch outside the seam line and press the background open.
Repeat on the top right corner with the second 2½-inch square.
The white tip is now tapered on both sides.
Step 5: Sew the Side Tapers
Place a marked 4½-inch background square right sides together on the lower left side of the band stack, positioned so the diagonal runs from the outer edge inward toward the base.
Sew on the marked line, check the flip, trim ¼ inch outside the seam, and press open.
Repeat on the lower right side.
The candy should now show a clear tapered silhouette — narrow white tip at the top, widening through the middle band, widest at the base. The unit should measure 6½ x 12½ inches.
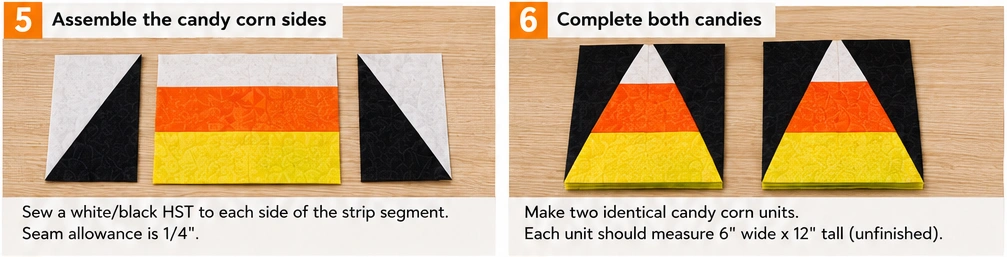
Step 6: Make the Remaining Candies
Piece the remaining 39 candies, varying the middle and base band color pairings across the set.
Work in batches by step rather than completing one candy at a time. Marking all 160 diagonals, then sewing all 160, then trimming all 160, is considerably faster than repeating the sequence forty times.
Step 7: Assemble the Blocks
Sew two candies side by side with a ¼-inch seam allowance to make one block.
Alternate the orientation of the candies for variety — some blocks with both candies pointing up, some with one inverted so the tips face opposite directions. Inverted candies scattered through the quilt break the rhythm and make the field feel spilled rather than arranged.
Each block should measure 12½ x 12½ inches unfinished. Measure the first one before assembling the other nineteen.
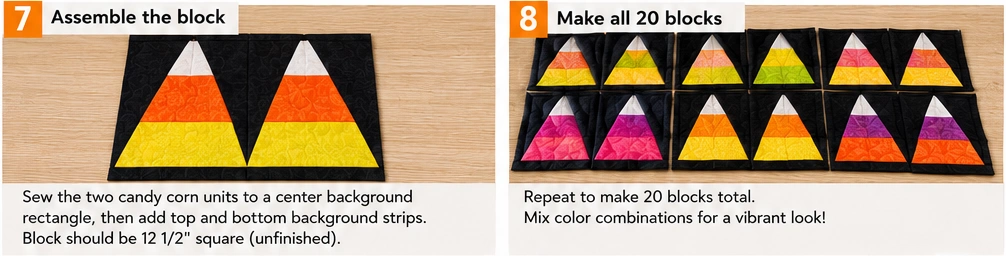
Step 8: Lay Out the Quilt Top
Arrange the 20 blocks 4 across by 5 down on a bed, floor, or design wall.
Distribute the band color combinations so no two adjacent candies share a pairing, and scatter the inverted blocks evenly rather than clustering them.
Photograph the layout before sewing. Twenty blocks are easy to reassemble in the wrong order.
Step 9: Join the Blocks into Rows
Sew the blocks into five rows of four with a ¼-inch seam allowance.
Press row seams in alternating directions — row one left, row two right, and so on. This is what lets the seams nest when you join the rows, and it is the difference between block corners that line up and block corners that do not.
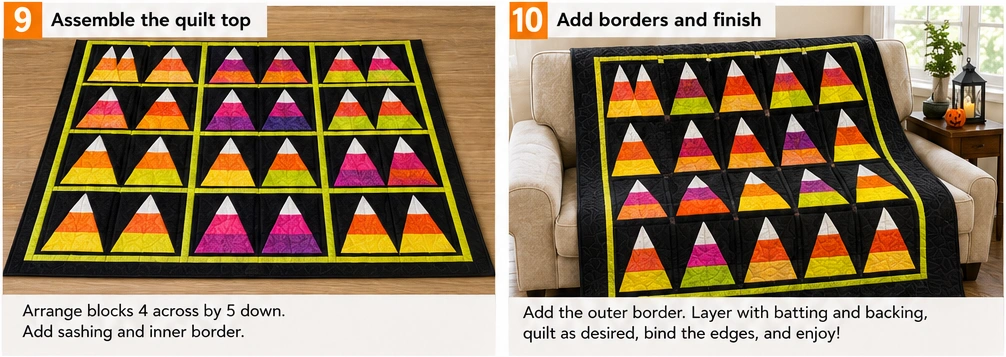
Step 10: Join the Rows
Sew the five rows together, nesting the seams at every block intersection.
Press the row seams open to reduce bulk. The block field should now measure 48½ x 60½ inches unfinished.
Step 11: Add the Borders
Join the 2½-inch inner border strips end to end.
Measure the quilt top through the center, not along the edges — edges stretch and give a false measurement, and that is the single most common cause of wavy borders. Cut two side borders to that length, pin at the ends and center, and sew.
Measure again through the center horizontally, cut the top and bottom borders, and sew.
Join the 4½-inch outer border strips and repeat the same process.
Press toward each border. The finished top should measure about 60½ x 72½ inches.
Step 12: Layer, Quilt, and Bind
Layer the backing wrong side up, batting, then the quilt top right side up. Baste with pins or spray.
Quilting options that suit this design:
- Straight lines echoing each band, following the horizontal divisions across the whole quilt
- Outline quilting ¼ inch inside each candy silhouette, with dense background fill around them
- Allover swirls or loops to soften the geometry
Use a contrast thread on the black background — acid yellow or lime stitching turns the quilting into a visible design layer, and dense background quilting makes each candy stand slightly proud.
Trim square, then bind with 2½-inch strips joined on the bias.
Assembly at a Glance
- Cut — cut one test candy, confirm the seam allowance, then cut for forty
- Band stack — sew white, middle, and base strips into a 6½ x 12½-inch unit
- Taper — mark diagonals on the background squares, sew on the line, trim ¼ inch out, press open
- Block — join two candies side by side to 12½ inches, inverting some for variety
- Lay out and join — set blocks 4 across by 5 down, sew rows with alternating pressing, nest and join
- Finish — add inner and outer borders measuring through the center, then quilt and bind
Vibrant Candy Corn Combination Ideas
For a neon candy quilt, use white tips with magenta middles and lime bases on true black, bordered in lime.
For a poison candy quilt, use white tips with electric violet middles and chartreuse bases on deep purple.
For a classic-plus quilt, keep hot orange and acid yellow but set every candy on black instead of cream — the traditional colorway made graphic.
For a scattered handful quilt, give all forty candies a different middle-and-base pairing, unified only by white tips and a black background.
For a fire quilt, use white tips with hot orange middles and tangerine bases on charcoal, bordered in black.
For a wrong candy quilt, use white tips with teal middles and magenta bases on black — the least appetizing combination, and the most genuinely unsettling.
Beginner Tips for Success
Piece one test candy before cutting all forty. A seam allowance running slightly wide compounds across every unit, and you want to catch it before the cutting is done.
Mark diagonals with a sharp pencil. The width of the line itself changes the angle of the taper.
Sew on the marked line, not beside it. Sewing beside the line is a habit carried over from some HST methods, and here it throws the taper off.
Check the flip before you trim. Once the excess is cut, there is no correcting a misaligned corner.
Keep every tip white. It is the one constant that lets the other colors go as strange as you like while the shape stays readable.
Press row seams in alternating directions. This single habit is what makes twenty blocks line up.
Measure borders through the center of the quilt. Measuring along the edge is what produces wavy borders.
Styling Tip
A candy corn quilt is bold and graphic, so it wants a plain setting — a pale sofa, white bedding, or a light wall. The black background does the heavy lifting, and anything patterned nearby will fight it.
For a seasonal display, keep the surroundings to a single dark tone: plain black or clear glass candlesticks, one bowl of small dark plums, no competing pattern. A quilt with forty bright candies on it is already carrying the whole room.
Gift Pairings
Leftover band strips and background squares build a matching set easily:
- A single candy corn on a 12-inch cushion cover
- A three-block table runner in matching brights
- A trick-or-treat drawstring bag with one candy on the front panel
- A set of candy corn mug rugs, one candy each
- A pieced zip pouch using a band stack as the front
- A hanging door banner with three candies stacked vertically
- Candy corn oven mitts and pot holders in black and acid yellow
Other Design Inspirations – Digitally Modified Images. Texture and color may vary from the actual product.
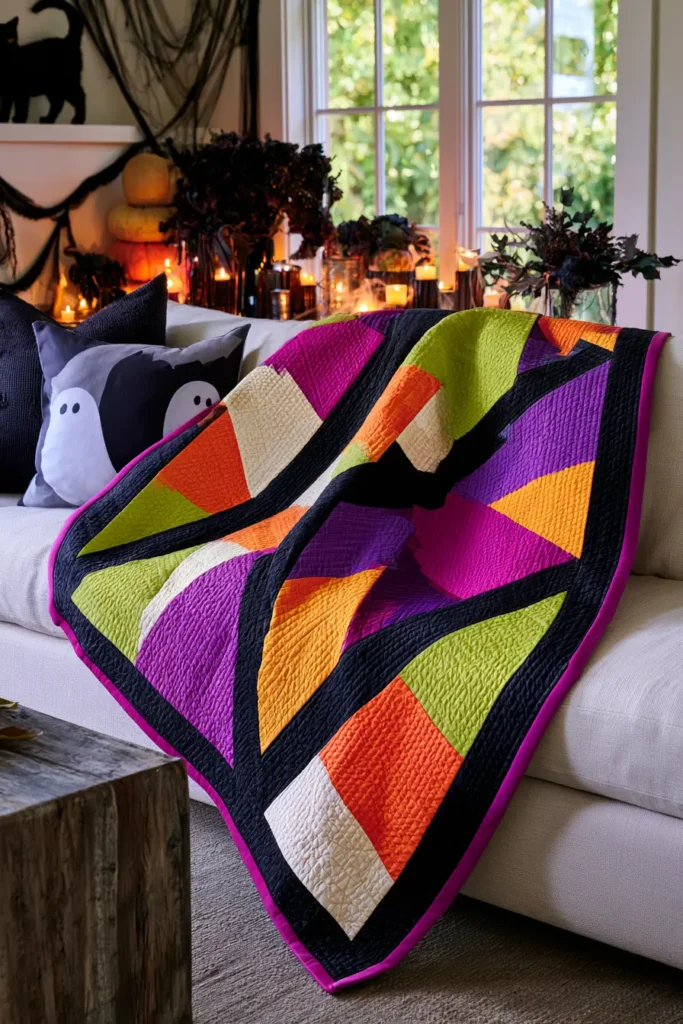
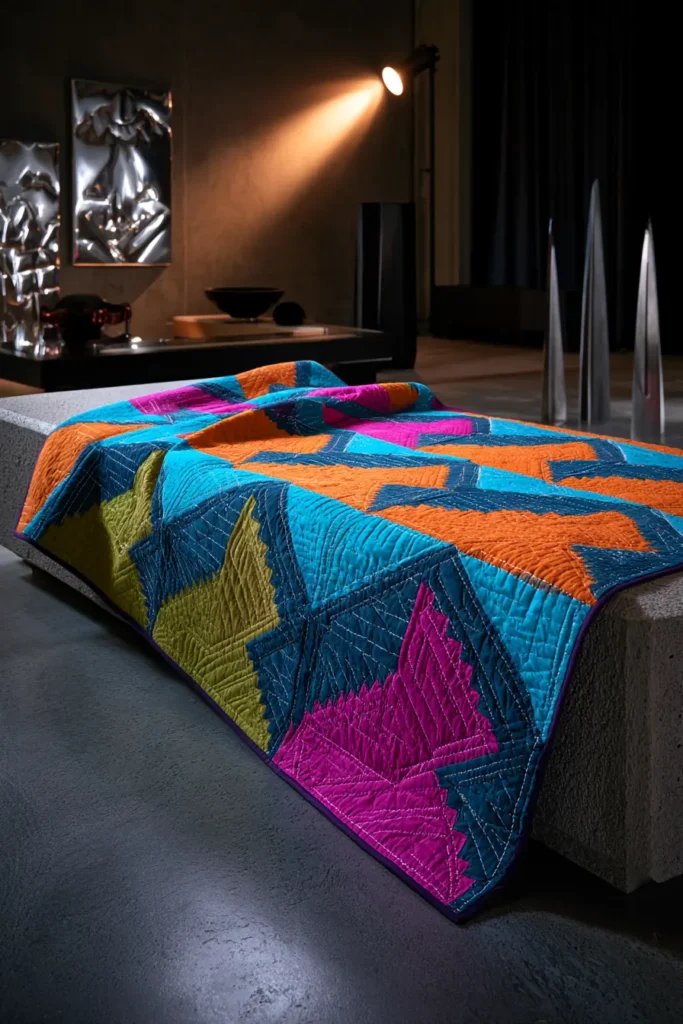
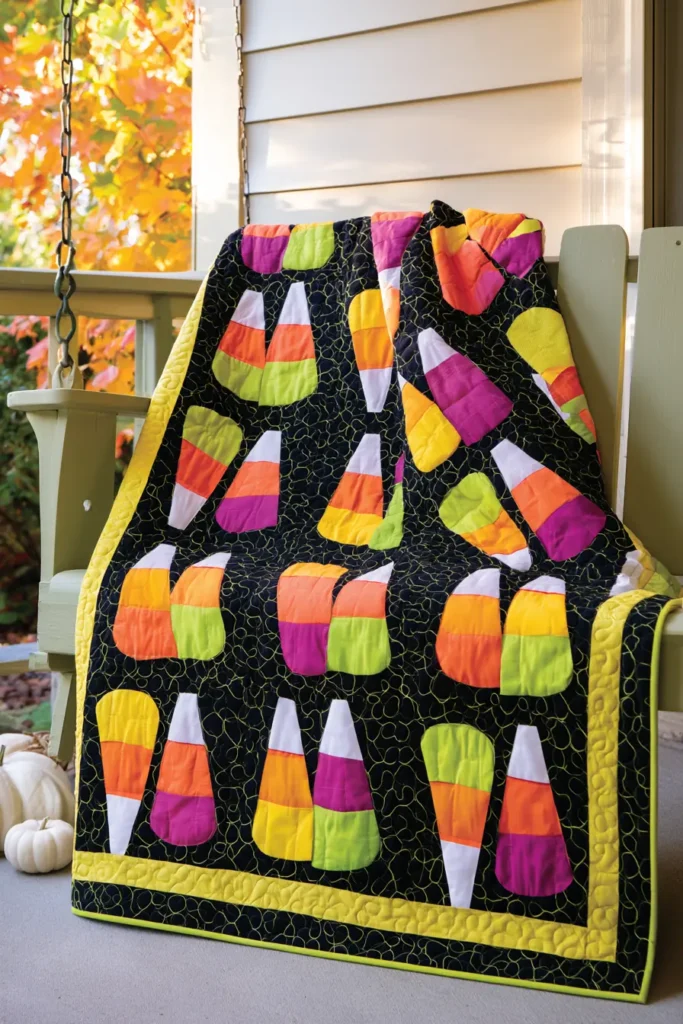
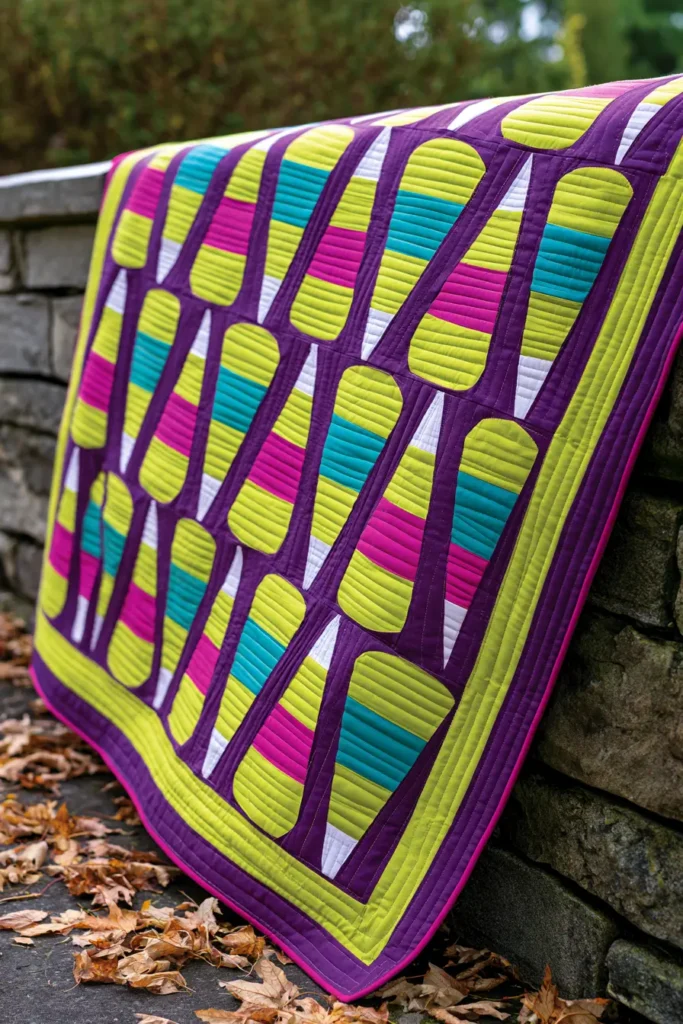
8. Haunted House Quilt Block Layouts
A haunted house quilt block is the most architectural design in this collection, and the one where the layout matters as much as the piecing. The house itself breaks down into simple rectangles and stitch-and-flip roof corners — walls, a peaked roof, a door, and lit windows. What turns twenty of them into something genuinely unsettling is how you arrange them: not in a neat grid, but staggered and tilted, at three different sizes, so the finished quilt reads as a crooked street rather than a row of cottages.
For a vibrant take, build the houses from deep purple, aubergine, charcoal, and midnight indigo — dark but not flat — and light every window in acid yellow, chartreuse, or hot orange. Then add a handful of houses in magenta, teal, or electric violet scattered through the street. The lit windows against dark walls are the whole effect: a house with three glowing windows and one dark one reads as occupied, and that is far more disquieting than a house that is simply dark.
Why This Design Works
The unsettling quality comes from the layout, not the motif. A grid of identical houses reads as a village sampler. Houses at three different sizes, staggered so their baselines do not align, and tilted a few degrees off vertical, read as a place where something is wrong — the same trick used in stage design and illustration, where slightly-off geometry registers as threat before the viewer can name why.
Tilt is the key detail, and it is easier than it looks. You do not piece a tilted house. You piece it square, then trim the block at a slight angle and add background wedges to square it back up. That method — sometimes called wonky or improv trimming — lets every house lean differently while every block still finishes at exactly the same size.
The lit-window pattern does the rest. Windows are small stitch-and-flip squares, and varying how many are lit on each house creates the sense of individual occupancy. One house entirely dark among nineteen lit ones is the single most effective element in the whole quilt.
Skills you build here: rectangle-based block drafting, stitch-and-flip roof angles, small-unit window piecing, angled trimming, and constructing an asymmetric multi-size layout that still assembles into straight rows.
Design Inspirations – Digitally Modified Images. Texture and color may vary from the actual product.
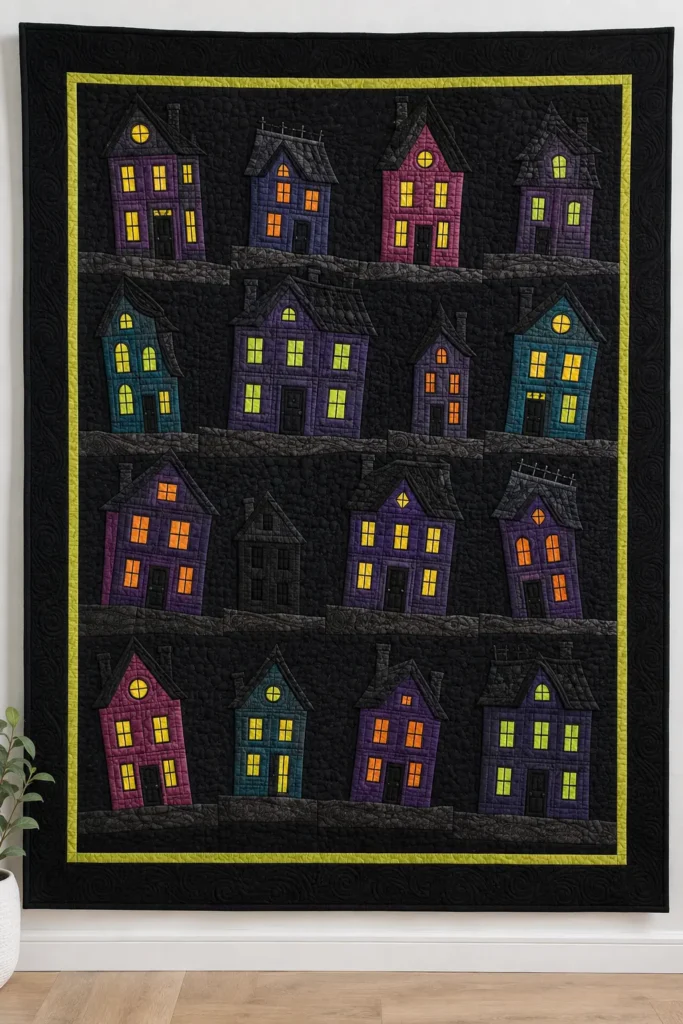
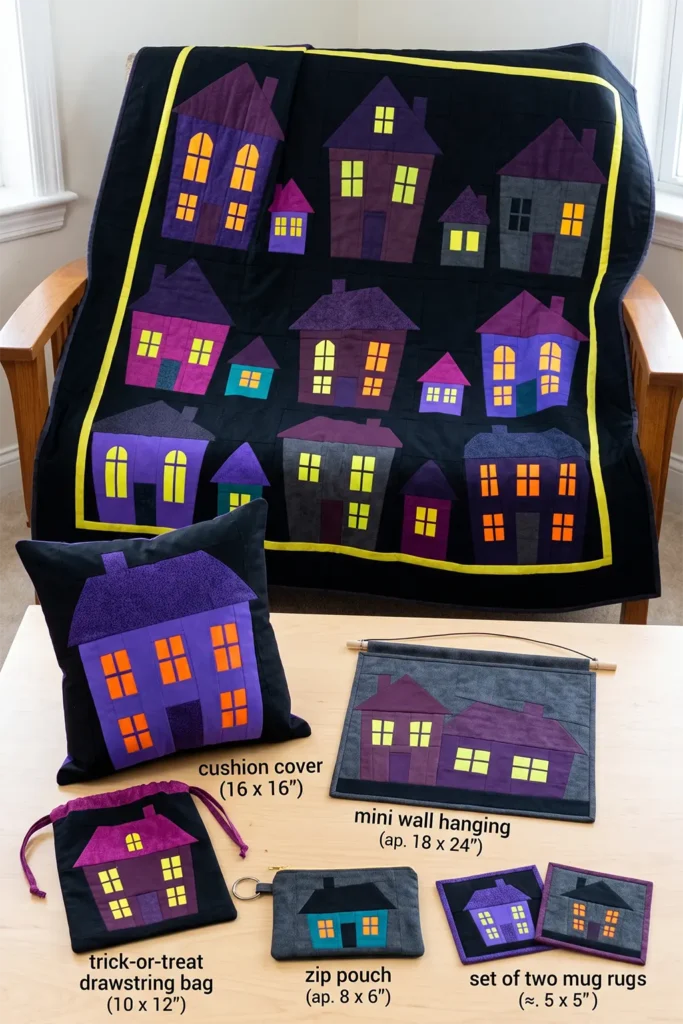
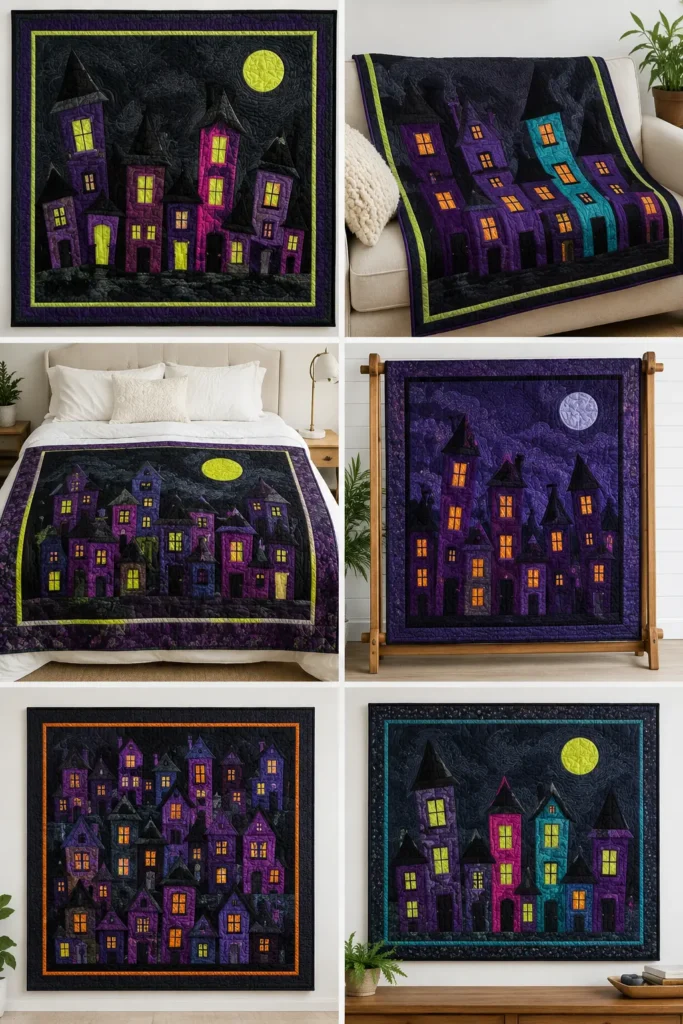
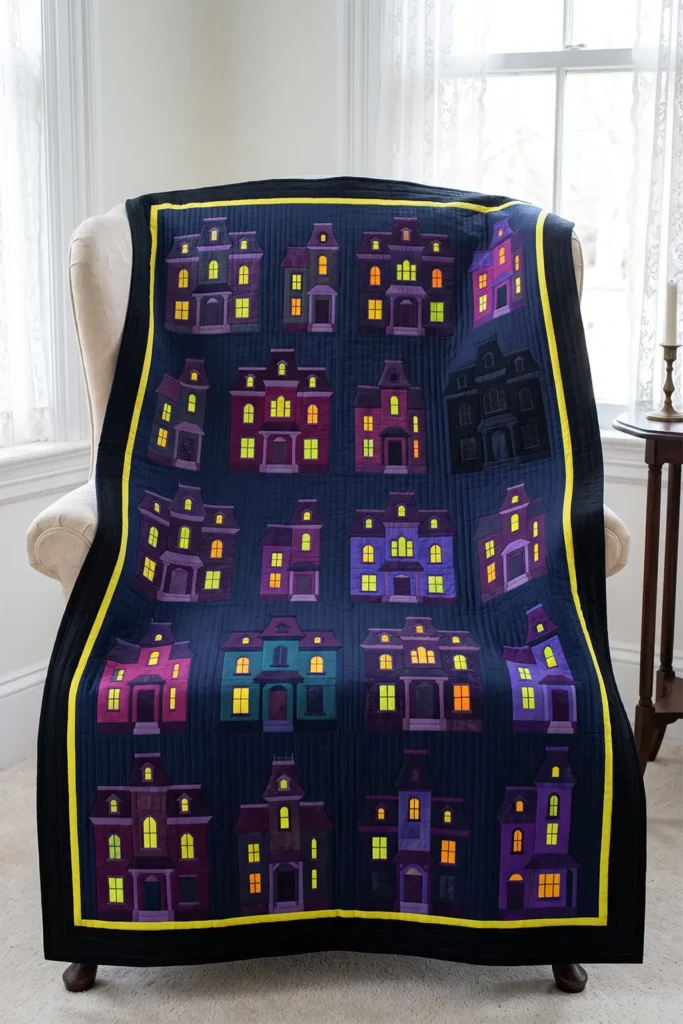
A Note on the Haunted House
The haunted house as a visual type is remarkably specific, and it comes from one architectural style falling out of fashion at exactly the wrong moment.
Second Empire and Queen Anne houses — steep mansard roofs, towers, deep porches, elaborate trim — were built across America in the 1860s to 1890s as symbols of new wealth. They were expensive to heat, expensive to maintain, and went out of style abruptly. By the 1930s, many stood empty and decaying in towns that had moved on, and the Depression made restoring them impossible. An entire generation grew up with a shared image of the large, dark, ornate, abandoned house on the edge of town.
Illustrators fixed the type permanently. Charles Addams began drawing the Addams family mansion for The New Yorker in 1938 — a Second Empire pile with a mansard roof and a tower — and Edward Hopper’s House by the Railroad of 1925, another Second Empire house standing isolated, is widely cited as the visual source for the Bates house in Psycho. Neither artist invented the association; both drew a building type that was already sitting empty in every American town.
That is why the silhouette you are about to piece works: steep roof, tall narrow proportions, and a lit window are enough. The shape is doing cultural work that has been underway for a century.
Finished Size
This guide makes haunted house blocks at three sizes for a staggered street layout, and a throw-sized quilt from twenty of them.
Block sizes:
- Large houses: 5 blocks, finishing 12 x 12 inches
- Medium houses: 8 blocks, finishing 12 x 8 inches
- Small houses: 7 blocks, finishing 12 x 6 inches
All three share a 12-inch width, which is what allows a staggered layout to assemble into straight rows.
Large house proportions (12 x 12 finished):
- Roof: 4 inches tall
- Walls: 6 inches tall x 8 inches wide
- Sky on either side of the house: 2 inches
- Ground below: 2 inches
- Windows: two at 2 x 2 inches, one at 1½ x 2 inches
- Door: 2 x 3 inches
Quilt measurements:
- Rows: 5 rows of 4 blocks, mixing sizes within each row
- Block field: 48 x 60 inches
- Inner border: 2 inches finished
- Outer border: 4 inches finished
- Finished quilt: about 60 x 72 inches
For a wall hanging, make 6 blocks in two rows for a 24 x 20-inch field, add a 3-inch border, and finish at about 30 x 26 inches.
Materials Needed
For a 60 x 72-inch haunted house throw, gather:
- Sky fabric: 2½ yards in true black, charcoal, or midnight indigo
- House wall fabrics: 1¾ yards total in deep purple, aubergine, charcoal, midnight indigo, plus fat eighths of magenta, teal, and electric violet
- Roof fabrics: ¾ yard in black or a darker shade than the walls
- Window fabrics: ⅓ yard total in acid yellow, chartreuse, and hot orange
- Door fabrics: ¼ yard in dark tones
- Ground fabric: ½ yard in charcoal or deep purple
- Inner border: ⅓ yard in acid yellow
- Outer border: 1¼ yards in black
- Binding: ⅝ yard
- Backing: 4 yards
- Batting: 68 x 80 inches
- Thread: charcoal for piecing, plus contrast for quilting
- Rotary cutter and cutting mat
- Quilting ruler and a 12½-inch square ruler
- Fabric marker or a sharp pencil
- Sewing clips or pins
- Iron and ironing board
Beginner tip: choose roof fabric darker than the wall fabric on every house. If the roof is lighter, the silhouette flattens and the house stops reading as a house from across the room.
Vibrant Haunted Palette
A dark street with lit windows could include:
Sky and ground:
- True black
- Charcoal
- Midnight indigo
Walls: 4. Deep purple 5. Aubergine 6. Magenta 7. Teal 8. Electric violet
Windows: 9. Acid yellow 10. Chartreuse 11. Hot orange
Keep the sky consistent across the whole quilt — one fabric, or two very close in value. A varied sky competes with the houses and the street stops reading as a single scene.
Every window should be bright. There is no such thing as a subtly lit window in this design, and a muted yellow will simply look like a beige square.
Leave one house completely dark — no lit windows at all. It is the single most effective decision in the quilt.
Cutting Measurements
For one large house (12 x 12 finished), cut:
- Walls: one rectangle, 8½ x 6½ inches
- Roof: one rectangle, 8½ x 4½ inches
- Roof sky corners: two squares, 2½ x 2½ inches
- Side sky: two rectangles, 2½ x 10½ inches
- Ground: one rectangle, 12½ x 2½ inches
- Windows: two squares at 2½ x 2½ inches, one rectangle at 2 x 2½ inches
- Door: one rectangle, 2½ x 3½ inches
For one medium house (12 x 8 finished), cut:
- Walls: one rectangle, 7½ x 4½ inches
- Roof: one rectangle, 7½ x 3½ inches
- Roof sky corners: two squares, 2 x 2 inches
- Side sky: two rectangles, 3 x 6½ inches
- Ground: one rectangle, 12½ x 2½ inches
- Windows: two squares at 2 x 2 inches
- Door: one rectangle, 2 x 2½ inches
For one small house (12 x 6 finished), cut:
- Walls: one rectangle, 6½ x 3 inches
- Roof: one rectangle, 6½ x 2½ inches
- Roof sky corners: two squares, 1½ x 1½ inches
- Side sky: two rectangles, 3½ x 5 inches
- Ground: one rectangle, 12½ x 2 inches
- Windows: two squares at 1½ x 1½ inches
For 20 blocks total: cut pieces for 5 large, 8 medium, and 7 small houses.
Borders and binding:
- Inner border: 6 strips at 2½ inches x width of fabric
- Outer border: 7 strips at 4½ inches x width of fabric
- Binding: 7 strips at 2½ inches x width of fabric
Use a ¼-inch seam allowance throughout.
Step-by-Step Guide
Step 1: Piece One Test House
Cut and piece a single large house before cutting the full twenty.
The house is built from nested units, so a seam allowance running slightly wide compounds through the walls, then the roof, then the sky. Confirming the measurement on one block first saves recutting nineteen sets.
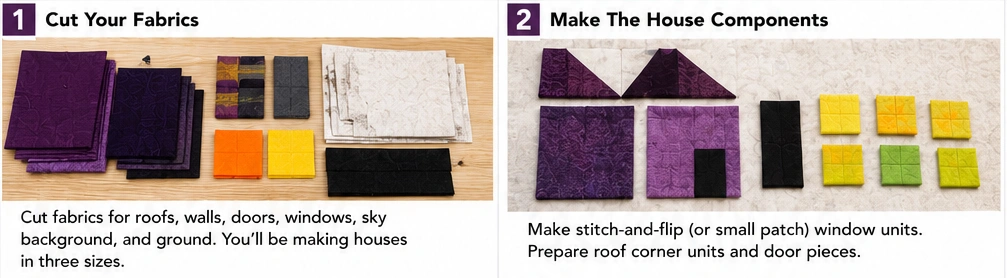
Step 2: Add the Windows and Door
Place each window square on the wall rectangle where you want it, right sides together, and appliqué or stitch-and-flip it into place.
The simplest method: mark the window position on the wall, place the window square right sides together on that spot, sew around all four sides ¼ inch from the edge, then cut away the wall fabric behind it and press the window through. For a faster version, simply topstitch the window squares on with the raw edges turned under.
Place the door at the bottom center of the wall using the same method.
Vary the lit-window count from house to house — some with two lit and one dark, some with all lit, and one house with none lit at all.
Step 3: Build the Roof Peak
Take the roof rectangle and the two matching sky corner squares.
Draw a diagonal line corner to corner on the wrong side of each sky square.
Place one square right sides together on the top left corner of the roof rectangle, sew directly on the marked line, check that the flip aligns before trimming, then trim ¼ inch outside the seam and press the sky open.
Repeat on the top right corner.
The roof now has a clean peak. It should still measure the same as the wall rectangle in width.
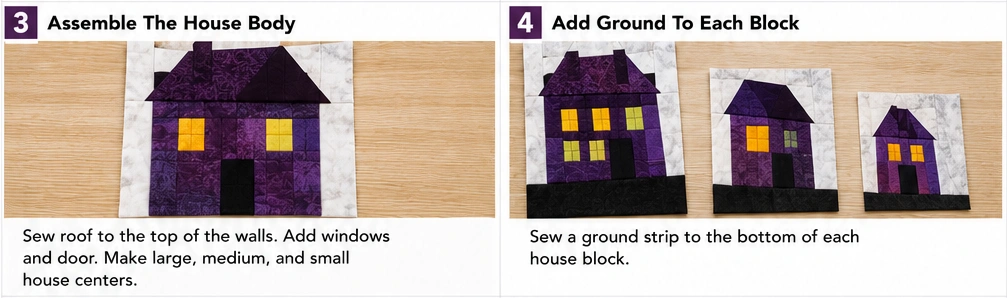
Step 4: Join the Roof to the Walls
Sew the roof unit to the top of the wall unit with a ¼-inch seam allowance.
Press toward the walls.
For a large house, the unit should now measure 8½ x 10½ inches.
Step 5: Add the Sky and Ground
Sew a side sky rectangle to the left and right of the house unit. Press toward the sky.
Sew the ground rectangle to the bottom. Press toward the ground.
The block should now measure 12½ x 12½ inches for a large house, 12½ x 8½ inches for a medium, and 12½ x 6½ inches for a small.
Measure before moving on.
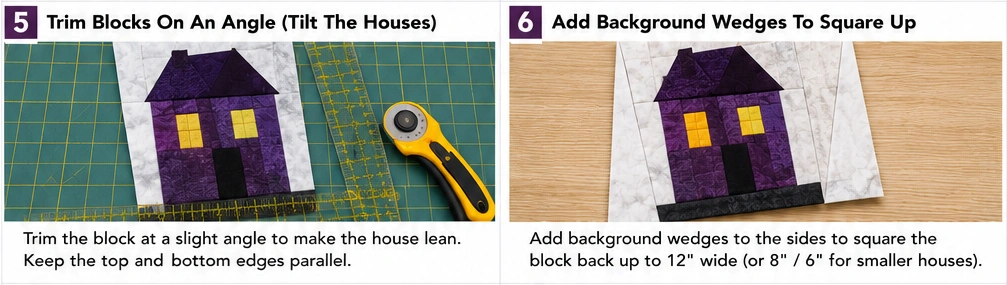
Step 6: Tilt the Houses
This is the step that makes the quilt unsettling rather than charming.
Choose about twelve of the twenty blocks to tilt. Leave the rest upright — a street where everything leans reads as a mistake; a street where most things lean reads as wrong.
For each block you are tilting, lay a ruler across it at a 2 to 5 degree angle and trim one edge. Then cut a wedge of sky fabric to fill the gap, sew it on, and trim the block back to its original size.
Vary the direction. Some houses should lean left, some right, and the angles should not match.
Work in small angles. Beyond about 5 degrees, the house stops looking sinister and starts looking like a piecing error.
Step 7: Make the Remaining Blocks
Piece the rest: 5 large, 8 medium, and 7 small houses.
Vary wall colors across the set, and scatter the magenta, teal, and electric violet houses among the purples and charcoals rather than grouping them.
Keep every roof darker than its walls.
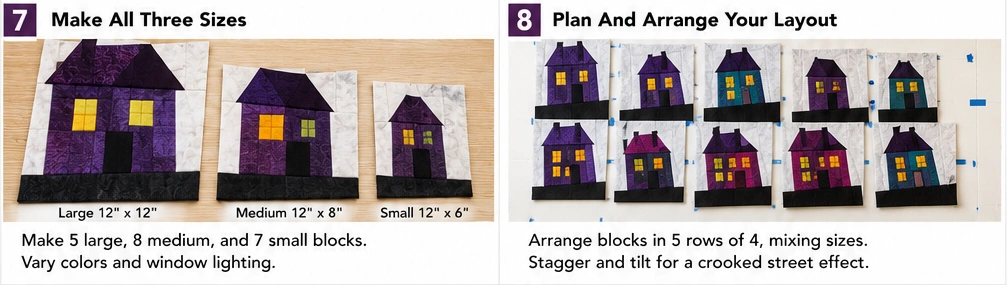
Step 8: Compose the Street
Lay all 20 blocks out and build five rows, mixing block heights within each row so the rooflines stagger.
Because every block is 12½ inches wide, any combination of heights will join into a row. Aim for each row to total about 12 inches of finished height by combining sizes — for instance, one large house alone, or a medium and a small stacked, or two smalls stacked with a strip of sky.
Stagger the tall houses across the quilt rather than lining them up. The eye should never find a straight roofline running across the whole width.
Photograph the layout before sewing. Twenty blocks at three sizes are impossible to reassemble from memory.
Step 9: Join the Blocks into Rows
Where two shorter blocks stack to fill one row position, sew them together vertically first.
Then sew the four positions in each row together side by side with a ¼-inch seam allowance.
Press row seams in alternating directions so they nest when the rows are joined.
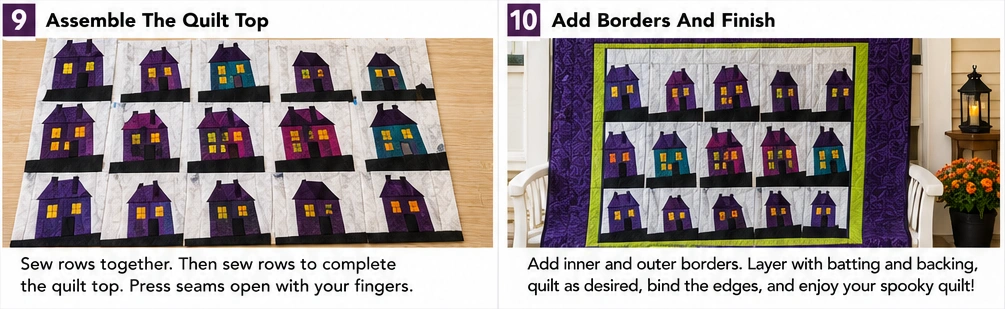
Step 10: Join the Rows
Sew the five rows together, nesting the seams at every vertical join.
Press the row seams open to reduce bulk. The block field should now measure 48½ x 60½ inches unfinished.
Step 11: Add the Borders
Join the 2½-inch inner border strips end to end.
Measure the quilt top through the center, never along the edges. Cut two side borders to that length, pin at the ends and center, and sew. Measure again horizontally through the center for the top and bottom.
Join the 4½-inch outer border strips and repeat.
Press toward each border. The finished top should measure about 60½ x 72½ inches.
Step 12: Layer, Quilt, and Bind
Layer the backing wrong side up, batting, then the quilt top right side up. Baste with pins or spray.
Quilting options that suit this design:
- Dense straight-line fill across the sky, with the houses left unquilted so they stand proud
- Vertical rain lines running the full height of the quilt through sky and houses alike
- Outline quilting ¼ inch inside each house silhouette with swirls in the sky between
Leave the lit windows unquilted. Stitching across them flattens the glow, and the windows are the whole point.
A contrast thread in chartreuse or acid yellow across a black sky turns the quilting into a visible design layer.
Trim square, then bind with 2½-inch strips joined on the bias.
Assembly at a Glance
- Test — piece one large house first and confirm the block measures 12½ inches
- Build the house — add windows and door to the walls, then stitch-and-flip the roof peak
- Frame it — add side sky and ground to bring each block to full width
- Tilt — angle-trim about twelve blocks by 2 to 5 degrees and square them back up with sky wedges
- Compose — stack shorter blocks to fill row positions, stagger the rooflines, photograph the layout
- Finish — join rows with nested seams, add borders measuring through the center, quilt and bind
Vibrant Haunted Street Combination Ideas
For a purple street quilt, use deep purple and aubergine houses with acid yellow windows on a true black sky.
For a poison street quilt, use charcoal and midnight indigo houses with chartreuse windows, bordered in lime.
For a carnival street quilt, use magenta, teal, and electric violet houses with hot orange windows on black.
For a midnight street quilt, use every house in a different dark tone with all windows in the same acid yellow — the unity comes from the light, not the walls.
For a fire street quilt, use charcoal houses with hot orange and tangerine windows on midnight indigo, bordered in black.
For a one-lamp-left quilt, make every house dark except one, whose windows blaze in acid yellow — the least colorful option and by far the most unsettling.
Beginner Tips for Success
Piece one test house before cutting twenty. The nested units compound any seam allowance error, and you want to find it early.
Keep every roof darker than its walls. A light roof flattens the silhouette, and the house stops reading from a distance.
Tilt only about twelve of the twenty blocks. Everything leaning reads as a mistake; most things leaning reads as wrong.
Keep tilt angles under 5 degrees. Beyond that, it looks like bad piecing rather than deliberate menace.
Leave one house completely dark. It is the single most effective decision in the whole quilt.
Stagger the tall houses. If a straight roofline runs across the full width, the street collapses back into a grid.
Leave the lit windows unquilted. Stitching across them flattens the glow.
Styling Tip
A haunted house quilt is a scene, so it works best where the whole street is visible at once — hung flat on a wall, spread across the foot of a bed, or laid over a table. Folded over a chair arm, it loses the composition entirely.
Keep the surroundings plain and light. A dark quilt with glowing windows needs a pale wall or white bedding behind it to read. For a seasonal display, a single row of plain candles beneath it echoes the lit windows without competing — anything patterned nearby and the street stops reading as a street.
Gift Pairings
Leftover house units and sky fabric make an easy matching set:
- A single large house on a 12-inch cushion cover
- A three-house wall hanging at 18 x 24 inches
- A trick-or-treat drawstring bag with one small house on the front
- A table runner with five small houses in a row
- A zip pouch using one medium house as the front panel
- A hanging door banner with three houses stacked, windows lit
- A set of house block mug rugs, one small house each
Other Design Inspirations – Digitally Modified Images. Texture and color may vary from the actual product.
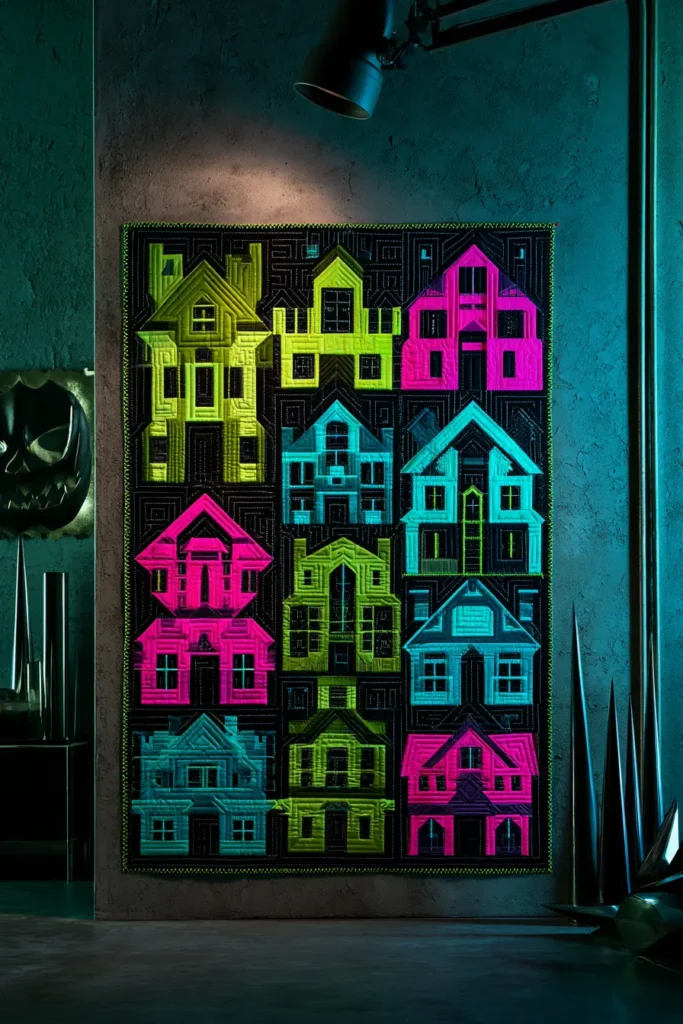
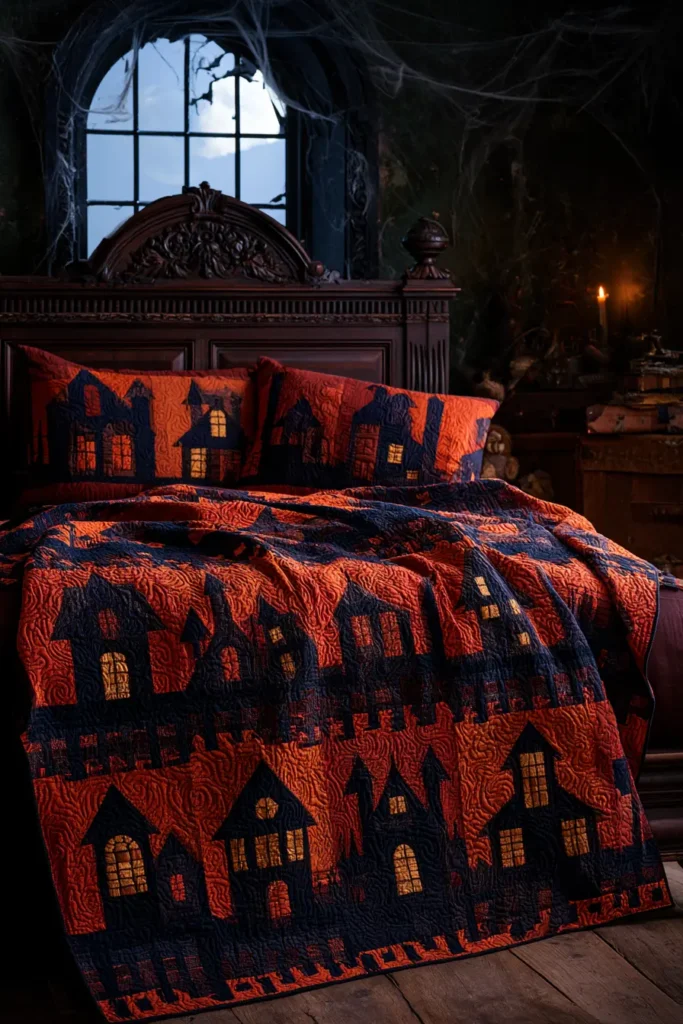
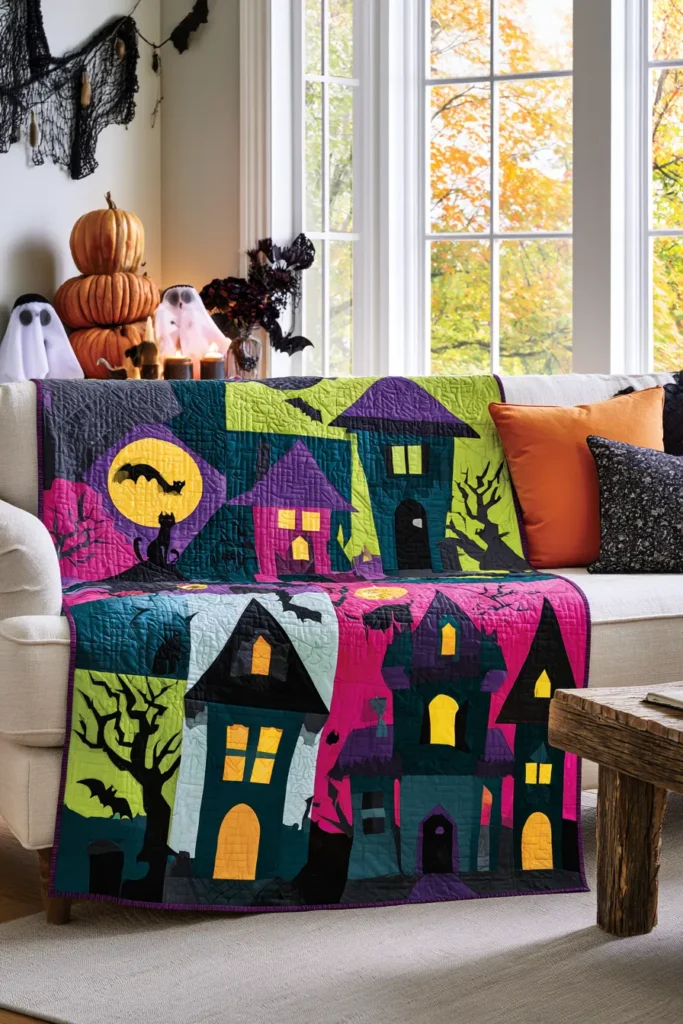
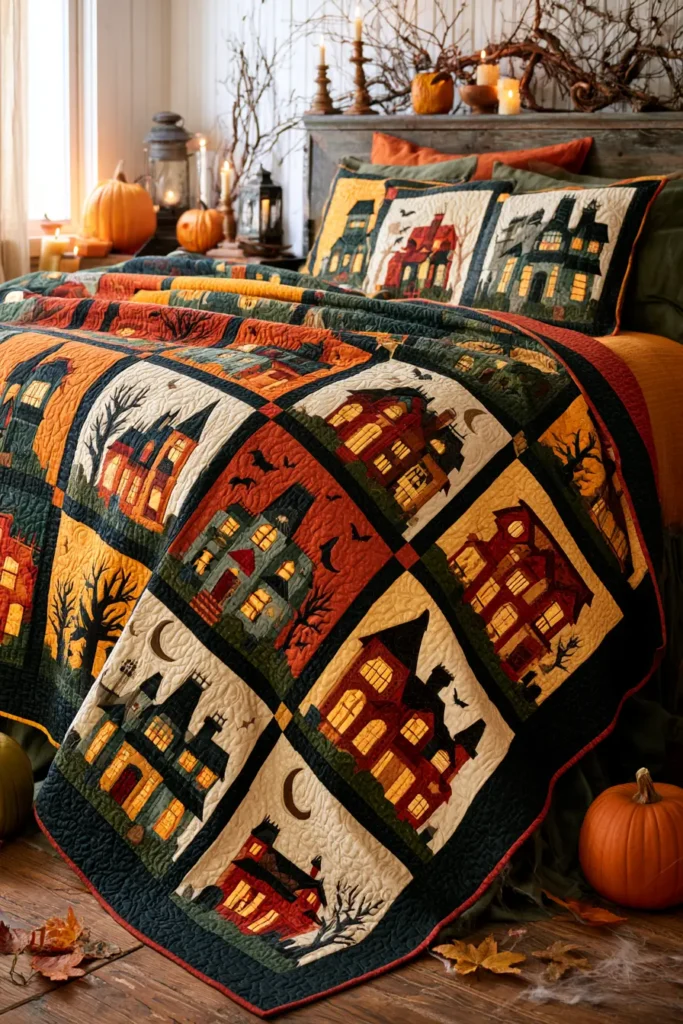
9. Spooky Tree and Full Moon Silhouette Quilt Blocks
A spooky tree and full moon block is the most atmospheric design in this collection, and it works on a single principle: a bare tree silhouette is frightening in exact proportion to how thin its branches are. A thick, chunky tree reads as folk art. A tree with branches tapering to genuine points, splitting and re-splitting until they vanish against the sky, reads as something reaching. That difference is entirely a matter of technique, and it is why this design uses appliqué rather than piecing — no seam allowance can produce a branch a quarter of an inch wide.
For a vibrant version, skip the flat black sky. Build the background from deep purple, aubergine, midnight indigo, and charcoal in a subtle gradient, and make the moon acid yellow, chartreuse, or hot orange so it burns rather than glows. Keep the trees true black for maximum silhouette. Then, on two or three blocks only, use a magenta or electric violet tree — a color that should not be there, which is far more unsettling in a field of black trees than another black tree would be.
Why This Design Works
Silhouette is a subtractive effect. The tree carries no detail at all — no bark, no texture, no interior shading — so every bit of its character has to come from the outline. That is why branch taper matters more than any other decision in the block, and why the number of branch splits matters almost as much. A tree that splits twice reads as a diagram; a tree that splits four or five times reads as real.
Setting the moon behind the tree rather than beside it is the second decision that makes the block work. Branches crossing the moon’s face break the circle into fragments, and a fragmented circle registers as depth — the tree is in front, the moon is far away. A moon placed in a clear sky next to a tree stays flat, and the block becomes two shapes sharing a square.
Building the sky as a subtle gradient from lighter at the horizon to darker at the top is what makes it read as evening rather than as a black square. That gradient costs nothing beyond cutting four dark fabrics instead of one.
Skills you build here: fusible appliqué on fine shapes, cutting narrow points without losing them, reversing asymmetric templates, layered appliqué ordering, and dense background quilting around delicate edges.
Design Inspirations – Digitally Modified Images. Texture and color may vary from the actual product.
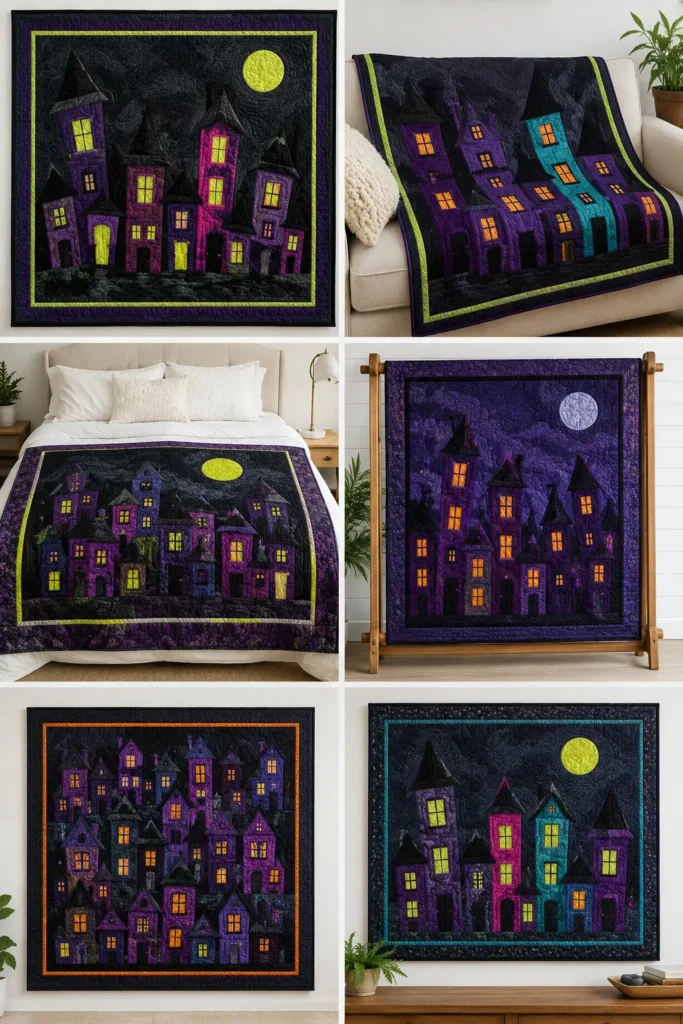
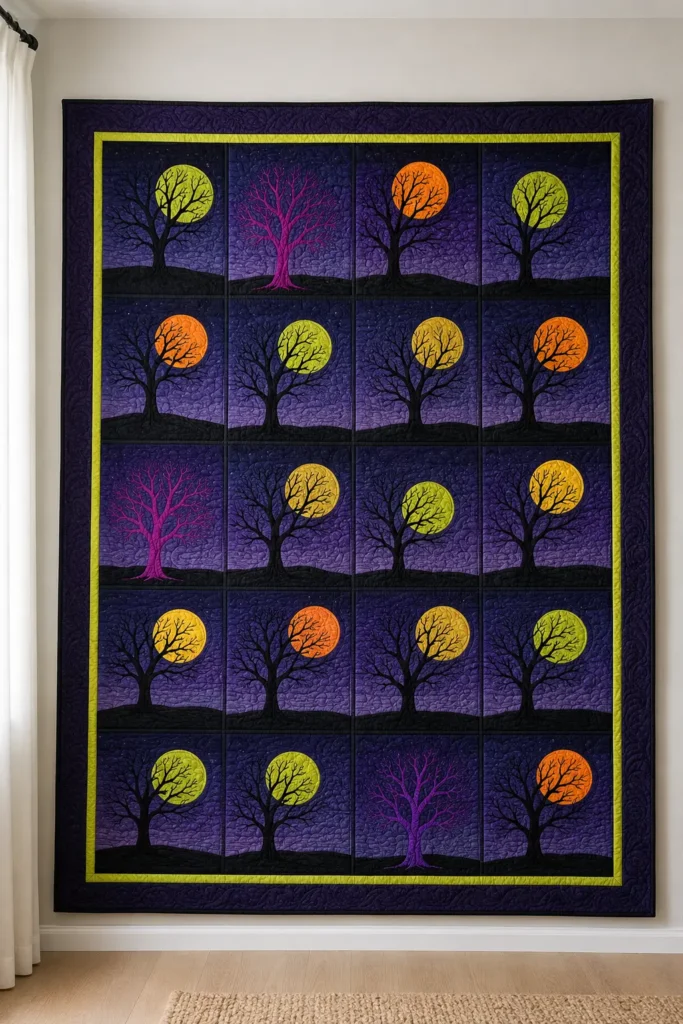
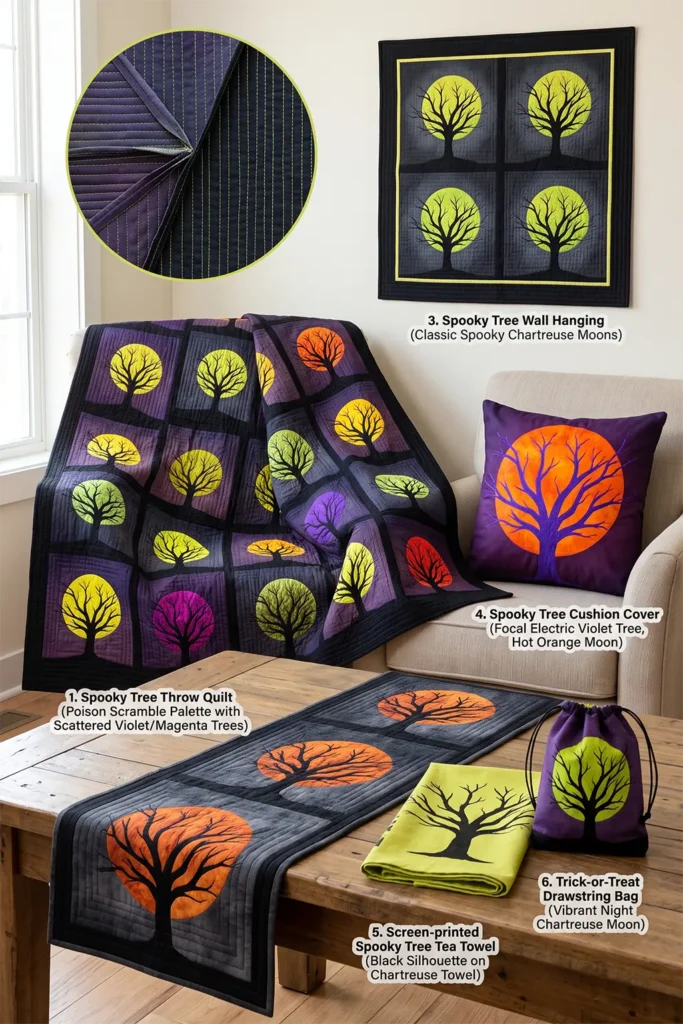
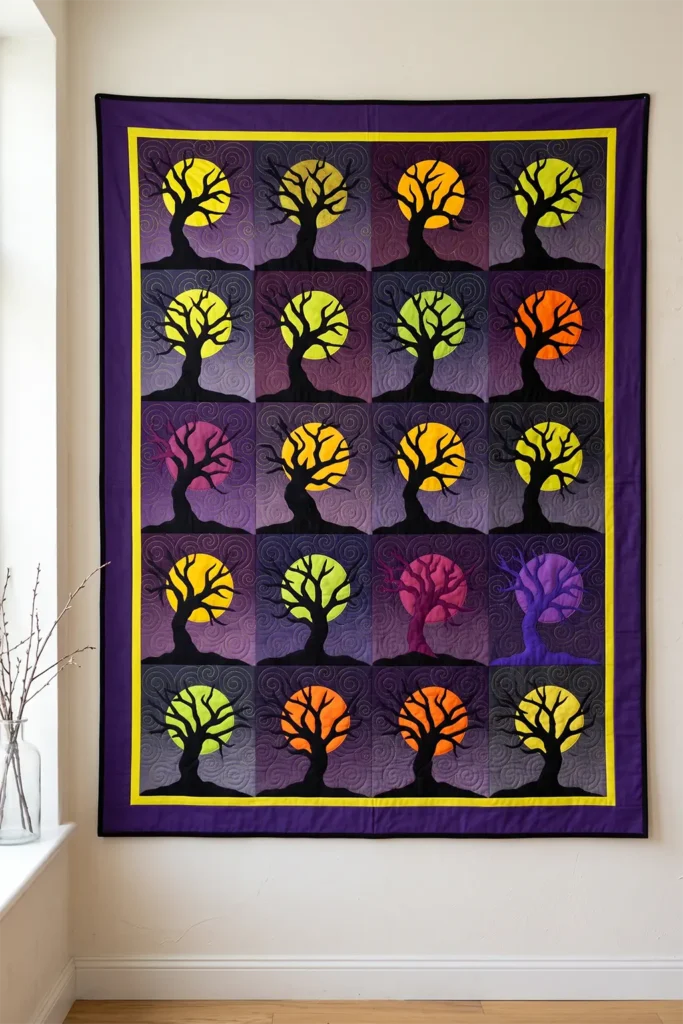
A Note on Bare Trees and the Moon
The bare tree became a horror fixture through the same route as the haunted house — it was simply what late autumn looked like in the places where the stories were told.
Northern European folklore is dense with tree associations, but the ones that survived into Halloween imagery are specific. The hawthorn was widely held to be a fairy tree, and cutting one down invited serious misfortune; solitary hawthorns still stand in the middle of Irish fields for that reason. The rowan was planted by doorways as protection against witches. The oak, ash, and thorn together were said to mark places where the boundary between worlds thinned.
What all these trees share visually is a gnarled, twisted growth habit — hawthorn in particular grows in dramatic wind-shaped contortions in exposed places. The horror-tree silhouette is not invented. It is a fairly accurate portrait of an old hawthorn on an exposed hillside in November.
The full moon behind it is a later illustrative convention. Samhain and the other cross-quarter festivals were fixed to solar dates, not lunar ones, so there was never a reliable full moon at Halloween. The pairing comes from nineteenth-century illustration, where a full moon was simply the most economical way to light a night scene in black-and-white print — you needed a light source behind the subject to produce a silhouette at all.
That is worth knowing when you place your moon: it is there for the same reason your quilt needs it, which is that a silhouette requires something bright behind it.
Finished Size
This guide makes a 12-inch finished tree and moon block, and a throw-sized quilt from twenty of them.
Block measurements:
- Finished block: 12 x 12 inches
- Unfinished block: 12½ x 12½ inches
- Moon: 6 inches diameter, placed off-center
- Tree height: 10 inches from ground line to highest branch tip
- Trunk width at base: 1¼ inches, tapering to ⅜ inch below the first split
- Finest branch tips: about ⅛ inch wide
- Ground line: 1½ inches from the block bottom
Quilt measurements:
- Blocks: 20, set 4 across by 5 down
- Block field: 48 x 60 inches
- Inner border: 2 inches finished
- Outer border: 4 inches finished
- Finished quilt: about 60 x 72 inches
For a wall hanging, make 4 blocks in a 2 x 2 layout for a 24 x 24-inch field, add a 3-inch border, and finish at about 30 x 30 inches.
Materials Needed
For a 60 x 72-inch tree and moon throw, gather:
- Sky fabrics: ¾ yard each of deep purple, aubergine, midnight indigo, and charcoal
- Moon fabric: ⅔ yard in acid yellow, chartreuse, or hot orange
- Tree fabric: 1½ yards in true black, plus fat eighths of magenta and electric violet
- Ground fabric: ½ yard in charcoal or black
- Inner border: ⅓ yard in acid yellow
- Outer border: 1¼ yards in deep purple or black
- Binding: ⅝ yard
- Backing: 4 yards
- Batting: 68 x 80 inches
- Paper-backed fusible web: 3½ yards, lightweight
- Thread: black for appliqué stitching, plus contrast for quilting
- Small sharp embroidery scissors — essential for branch tips
- Rotary cutter and cutting mat
- Quilting ruler
- Pencil and tracing paper
- Non-stick pressing sheet or parchment paper
- Tweezers for positioning fine branches
- Iron and ironing board
Beginner tip: the scissors matter more than any other tool here. Cutting a ⅛-inch branch tip with general-purpose fabric shears is close to impossible; small, sharp embroidery scissors with fine points make it straightforward.
Vibrant Night Palette
A burning moon over a dark sky could include:
Sky:
- Deep purple
- Aubergine
- Midnight indigo
- Charcoal
Moon: 5. Acid yellow 6. Chartreuse 7. Hot orange
Trees: 8. True black 9. Magenta 10. Electric violet
Keep the four sky fabrics close in value. The gradient should be felt rather than seen — if the sky bands are obvious, the block reads as patchwork and the scene collapses.
Vary the moon color across the quilt. Twenty blocks with an acid yellow moon read as a repeat; a mix of yellow, chartreuse, and orange moons reads as twenty different nights.
Make two or three trees magenta or electric violet, scattered among the black ones. Do not make more — the effect depends on them being outnumbered.
Cutting Measurements
Sky background — pieced gradient, per block:
- Top band: 12½ x 4 inches in the darkest fabric
- Upper middle band: 12½ x 4 inches
- Lower middle band: 12½ x 3½ inches
- Bottom band: 12½ x 3 inches in the lightest fabric
Join along the long edges with a ¼-inch seam allowance and press seams open. The pieced background should measure 12½ x 13 inches; trim to 12½ x 12½ inches.
For a simpler version, cut a single 12½ x 12½-inch sky square.
Appliqué pieces, per block:
- Moon: one circle, 6 inches in diameter, from fused fabric
- Tree: one silhouette, 10 inches tall x 7 inches wide at the widest branch spread, from fused fabric
- Ground: one strip, 12½ x 2 inches, fused, with an irregular upper edge
For 20 blocks: 20 moons, 20 trees, 20 ground strips, and 80 sky bands.
Borders and binding:
- Inner border: 6 strips at 2½ inches x width of fabric
- Outer border: 7 strips at 4½ inches x width of fabric
- Binding: 7 strips at 2½ inches x width of fabric
Step-by-Step Guide
Step 1: Draft the Tree Template
Draw one tree at 10 inches tall x 7 inches wide on paper.
Build it from the base upward:
- Trunk: 1¼ inches wide at the ground, tapering to ⅜ inch at about 3 inches up
- First split: two main limbs at roughly 3 inches from the base
- Second split: each limb divides again at about 5 inches
- Third and fourth splits: each branch divides again at 7 and 8½ inches
- Tips: final branch tips about ⅛ inch wide, ending in genuine points
Aim for 12 to 16 visible branch tips. Fewer reads as a diagram; more becomes impossible to cut cleanly.
Make the tree asymmetric. One side should carry more weight than the other, and one limb should reach noticeably further. A symmetrical tree looks planted; an asymmetric one looks weathered.
Trace two or three different tree variations so your twenty blocks are not identical.
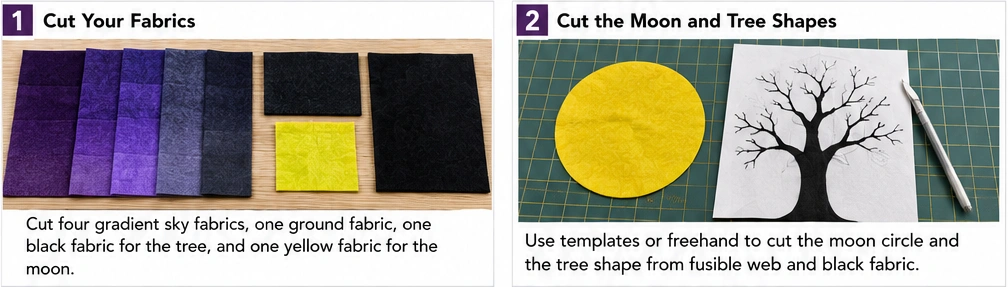
Step 2: Piece the Sky Backgrounds
Join the four sky bands per block along the long edges, running from darkest at the top to lightest at the bottom.
Press seams open so the background stays flat under the appliqué.
Trim each to 12½ x 12½ inches. Make 20.
Step 3: Prepare the Fusible Shapes
Trace the tree, moon, and ground shapes onto the paper side of the fusible web.
Reverse the tree template before tracing. Fusible appliqué mirrors everything, and an asymmetric tree traced the wrong way will lean the wrong direction on every block.
Cut roughly around each shape, leaving about ¼ inch of margin.
For the moon only, cut out the center of the fusible web, leaving a ½-inch ring around the outline. This keeps the 6-inch circle soft. Do not do this on the tree — the branches need fusible right to their tips or they will lift.
Fuse each shape to the wrong side of its fabric.
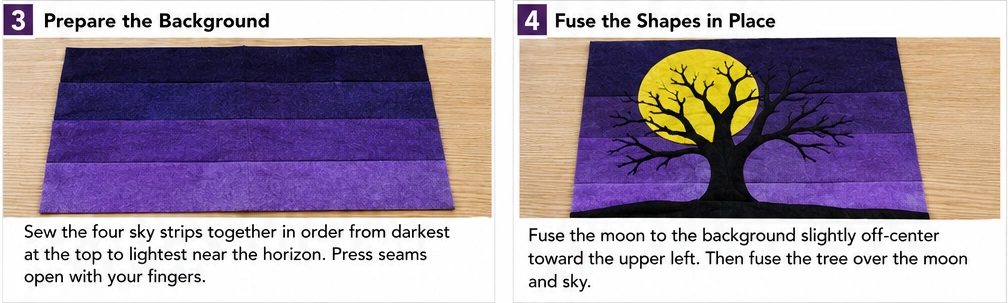
Step 4: Cut the Tree Silhouettes
This step supports the whole block.
Using small sharp embroidery scissors, cut each tree out exactly on the traced line.
Work from the trunk outward toward the branch tips. Cut the deep V between two branches by approaching from each side rather than trying to turn the scissors at the point — turning at the base of a V is what snips a branch off.
Do not rush the tips. A branch that ends bluntly instead of in a point will read as a stump, and one blunt tip is visible across the whole quilt.
Leave the paper backing on until you place each tree.
Step 5: Cut the Moons and Ground Strips
Cut the moon circles on the line with a rotary cutter or scissors.
Cut the ground strips with an irregular, slightly uneven upper edge — small rises and dips rather than a ruled line. A straight ground line reads as a floor; an uneven one reads as earth.
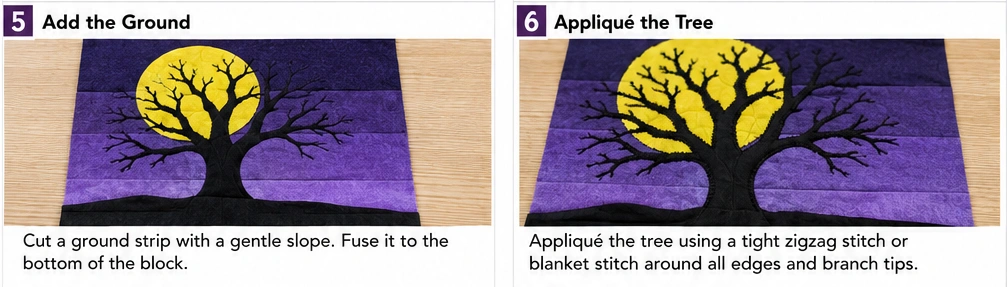
Step 6: Fuse in Layers
Order matters here. Fuse in this sequence:
- Ground strip along the bottom of the sky background
- Moon, positioned off-center — roughly one third in from one side and one third down from the top
- Tree, positioned so its branches cross the moon’s face
That overlap is the point of the block. Position the tree so at least three or four branches break across the moon, fragmenting the circle. A tree standing clear of the moon loses the depth entirely.
Peel the paper and press each layer with a non-stick pressing sheet over the top.
Press, do not slide. Sliding the iron shifts fine branch tips before the adhesive sets, and a displaced tip cannot be repositioned once fused.
Use tweezers to settle any branch that lifts before pressing.
Step 7: Stitch the Appliqué Edges
Fused edges will not survive washing, so every shape needs stitching.
For the tree, a narrow zigzag or a straight stitch just inside the edge works best — blanket stitch is too heavy for ⅛-inch branches and will visibly thicken them.
Use black thread on the tree so the stitching disappears into the silhouette.
For the moon, stitch in a thread matching the moon, not the sky. A contrasting outline makes the moon look pasted on.
Stitch the ground strip with a straight stitch along its irregular upper edge only.
Take the fine branches slowly, pivoting with the needle down.
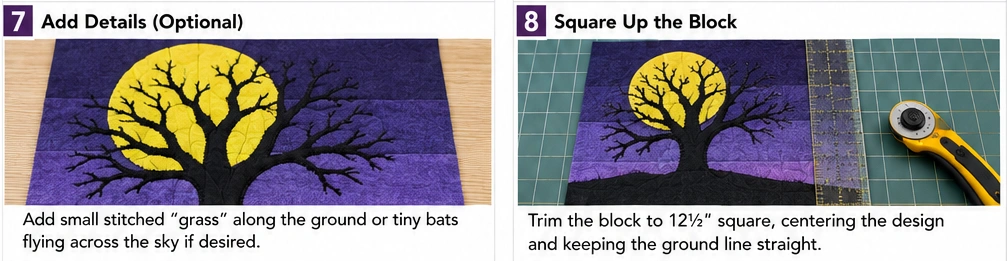
Step 8: Make the Remaining Blocks
Complete all 20 blocks, rotating between your two or three tree variations and mixing moon colors.
Make two or three trees in magenta or electric violet and set them aside for scattered placement in the layout.
Step 9: Lay Out and Join the Quilt Top
Arrange the 20 blocks 4 across by 5 down.
Vary the direction the trees lean—some left, some right—and scatter the colored trees so no two sit adjacent. Distribute the moon colors evenly.
Photograph the layout before sewing.
Sew blocks into five rows of four, pressing row seams in alternating directions so they nest. Join the rows and press those seams open.
The block field should measure 48½ x 60½ inches unfinished.
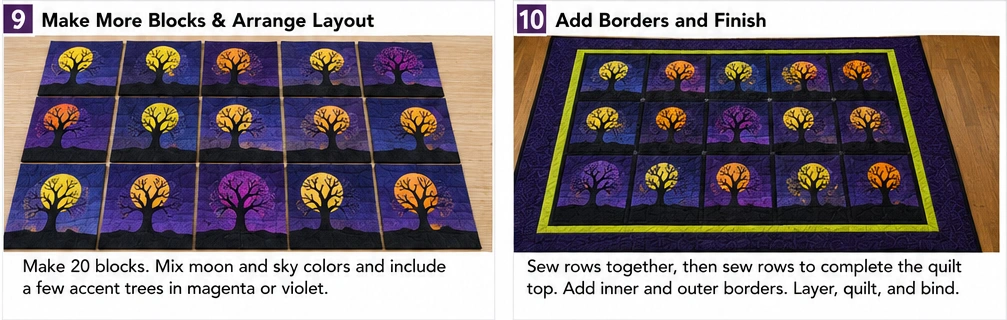
Step 10: Add the Borders
Join the 2½-inch inner border strips end to end.
Measure the quilt top through the center, never along the edges. Cut two side borders to that length, pin at the ends and center, and sew. Measure again horizontally for the top and bottom.
Join the 4½-inch outer border strips and repeat.
Press toward each border. The finished top should measure about 60½ x 72½ inches.
Step 11: Layer and Quilt
Layer the backing wrong side up, batting, then the quilt top right side up. Baste thoroughly — appliqué tops have areas of very different thickness, and the layers shift between them.
Quilt the sky densely and leave the trees and moons unquilted. That contrast makes the silhouettes stand slightly proud of the background, which is exactly what a silhouette needs.
Options that suit this design:
- Vertical rain lines at 1-inch spacing across the sky, stopping at each shape
- Wind lines curving horizontally across the whole quilt
- Concentric rings radiating from each moon
Quilt around each tree, never across it. Stitching over the branches flattens the shape you spent so long cutting.
A contrast thread — chartreuse or magenta on a deep purple sky — turns the quilting into a visible design layer.
Step 12: Bind and Finish
Trim the quilt square.
Bind with 2½-inch strips joined on the bias, in black, deep purple, or a single bright pulled from the moons.
Add a hanging sleeve if the quilt will go on a wall, and add a label.
Assembly at a Glance
- Draft — draw two or three tree variations at 10 inches with 12 to 16 tapered branch tips
- Build the sky — piece four dark bands per block into a subtle gradient, trim to 12½ inches
- Prepare and cut — trace all shapes reversed onto fusible web, cut trees with fine embroidery scissors
- Fuse in order — ground, then moon, then tree with branches crossing the moon’s face
- Stitch — narrow zigzag on the trees in black, matching thread on the moons
- Finish — join rows with nested seams, add borders, quilt the sky densely, and bind
Vibrant Night Combination Ideas
For a purple night quilt, use a four-purple sky gradient with chartreuse moons and black trees, bordered in acid yellow.
For a burning moon quilt, use midnight indigo and charcoal skies with hot orange moons and black trees, bordered in black.
For a poison night quilt, use aubergine and deep purple skies with acid yellow moons, black trees, and three electric violet trees scattered through.
For a teal night quilt, use deep teal, indigo, and charcoal skies with chartreuse moons and black trees, bordered in magenta.
For a twenty nights quilt, give every block a different moon colour across yellow, chartreuse, and orange, unified by a single sky gradient and all-black trees.
For a one wrong tree quilt, make nineteen trees black and one magenta, with identical moons throughout — the least colorful option and the most quietly disturbing.
Beginner Tips for Success
Buy small sharp embroidery scissors. Cutting a ⅛-inch branch tip with general shears is the difference between a tree and a shrub.
Reverse the tree template before tracing. Fusible mirrors everything, and twenty backward trees is a discovery best made on paper.
Cut deep Vs from both sides. Turning the scissors at the base of a V is what snips branches off.
Leave the fusible whole on the trees. Cutting out the center works for a 6-inch moon but will let fine branches lift.
Press, never slide. A displaced branch tip cannot be repositioned once fused.
Overlap the tree across the moon. Breaking the circle with branches creates depth — a tree standing clear of the moon reads flat.
Leave trees and moons unquilted. Stitching across a silhouette flattens it.
Styling Tip
A tree and moon quilt reads best from a distance, where the silhouettes resolve, and the sky gradient becomes visible. Hang it flat on a pale wall, or spread it across the foot of a bed against white bedding. Folded over a chair arm it loses the composition.
Keep everything around it plain. Bare branches in a plain vase echo the quilt without competing; anything patterned nearby and the silhouettes stop reading. For a seasonal display, a single candle beneath it doing the work the moon does in the quilt is enough.
Gift Pairings
Leftover tree templates and sky fabric build a matching set easily:
- A single tree and moon block as a 12-inch cushion cover
- A four-block wall hanging at 30 x 30 inches
- A trick-or-treat drawstring bag with one small tree on the front
- A table runner with three blocks in a row
- A zip pouch with a moon and two branches on the front panel
- A pair of small sharp embroidery scissors — the tool that makes fine appliqué possible, and the best gift for anyone starting out
- A set of tree silhouette tea towels in black on chartreuse
Other Design Inspirations – Digitally Modified Images. Texture and color may vary from the actual product.
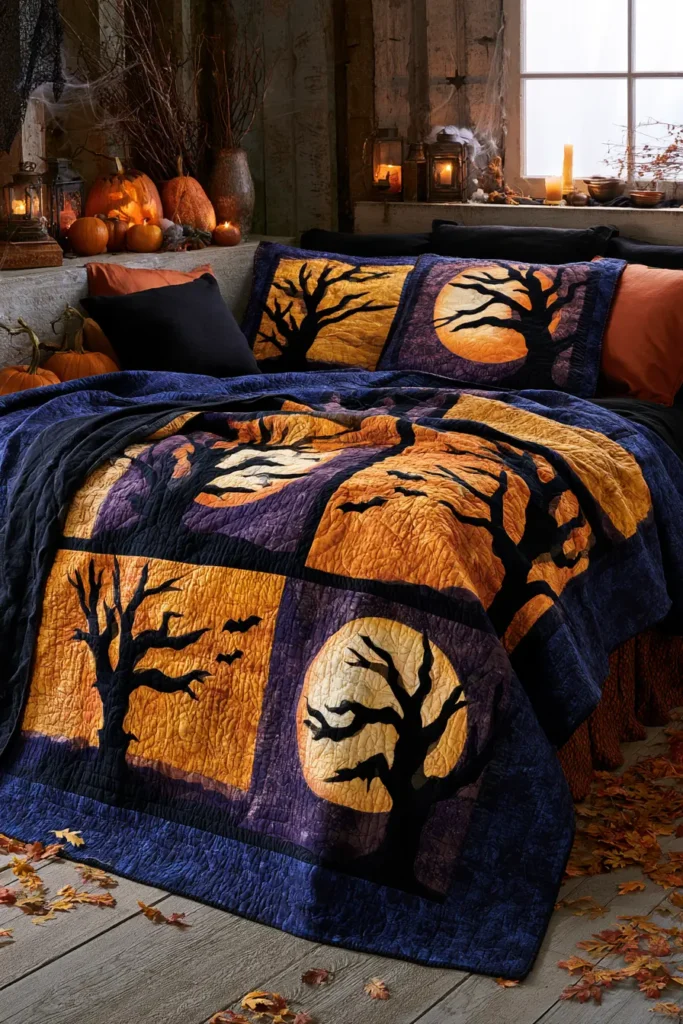
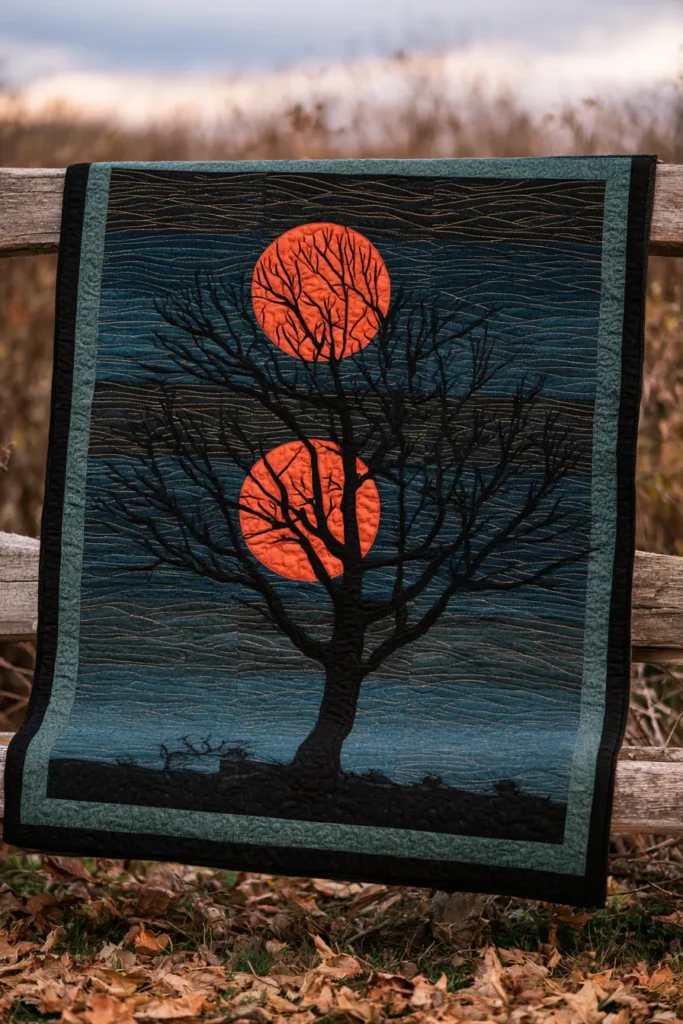
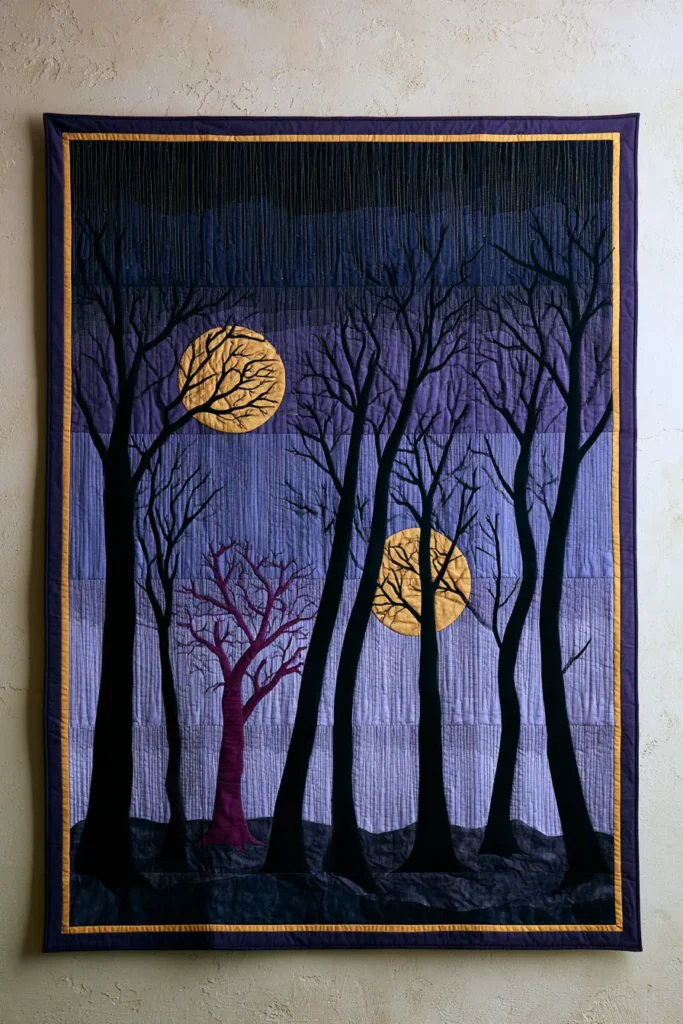
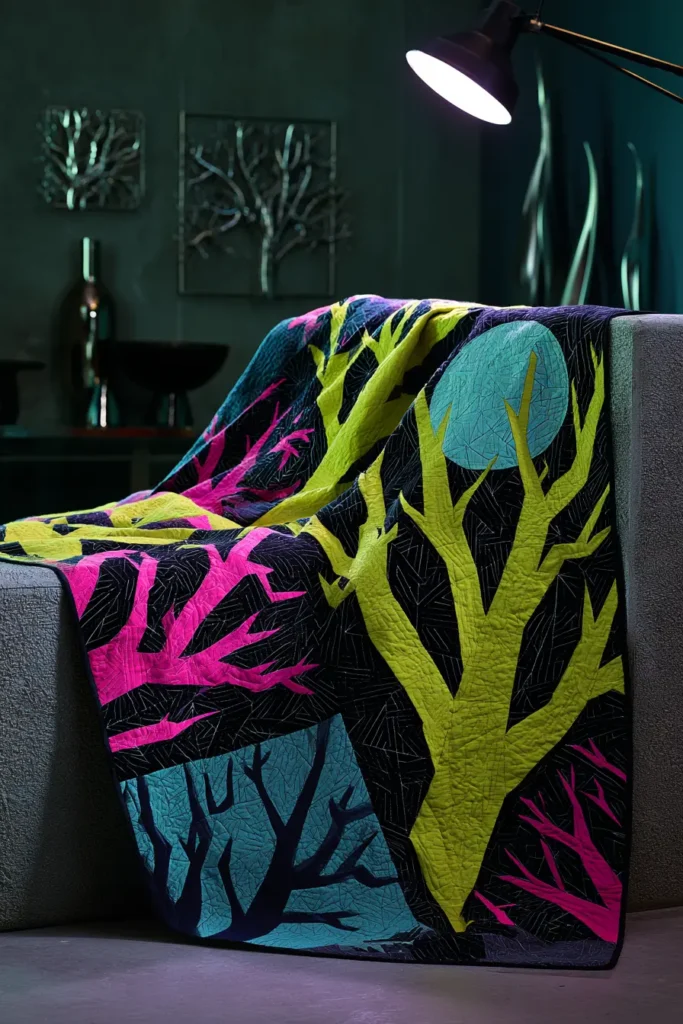
10. Modern Geometric Skull Quilt Patterns
A modern geometric skull block reduces the most detailed shape in Halloween imagery down to flat planes and hard edges. There is no curved piecing, no appliqué, and no shading — the skull is built from a grid of squares and half-square triangles, faceted like a low-polygon render, and every seam is straight. What makes it work is that the human brain recognizes a skull from almost nothing: two dark voids, a triangular gap, and a horizontal band of teeth are enough. Everything beyond that is decoration.
For a vibrant version, build the skulls from acid yellow, chartreuse, hot orange, magenta, electric violet, and teal, faceted so adjacent planes shift color like light hitting a cut surface. Keep the eye sockets, nasal cavity, and tooth gaps in true black against a deep purple or black background. Bright faceted bone with black voids is more unsettling than a plain white skull — it looks like something lit from an angle it should not be lit from.
Why This Design Works
The faceting does two jobs at once. Visually, splitting the cranium into planes of shifting color suggests a three-dimensional form on a flat surface, the same way low-polygon 3D rendering does — the brain reads the color breaks as light and shade. Technically, those planes are what let a curved object be pieced from straight seams. The dome of a cranium is a curve; a dome made of eight flat facets is eight straight lines.
The voids do the recognition work. Eye sockets, nasal cavity, and tooth gaps must be true black and clearly separated from each other. Every other detail can be abstracted to the point of near-abstraction, and the skull will still read, but blur the voids together and it becomes a mask.
Working on a grid is what keeps the whole thing achievable. The block is drafted on a 2-inch grid, so every unit is a 2½-inch square or a 2½-inch half-square triangle. That means the entire skull is built from two unit types repeated, which is very fast in batches and forgiving of small errors, since a grid absorbs what a freehand shape would expose.
Skills you build here: HST construction at volume, grid-based block drafting, unit-by-unit assembly, and reading a piecing map — the skill that unlocks almost every complex modern quilt pattern.
Design Inspirations – Digitally Modified Images. Texture and color may vary from the actual product.
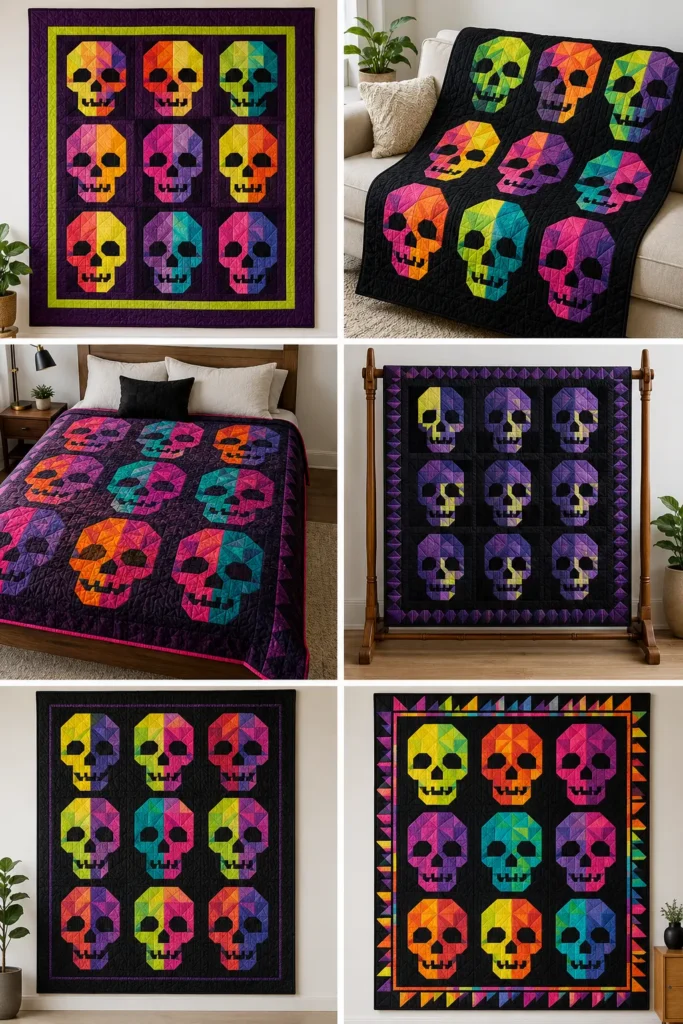
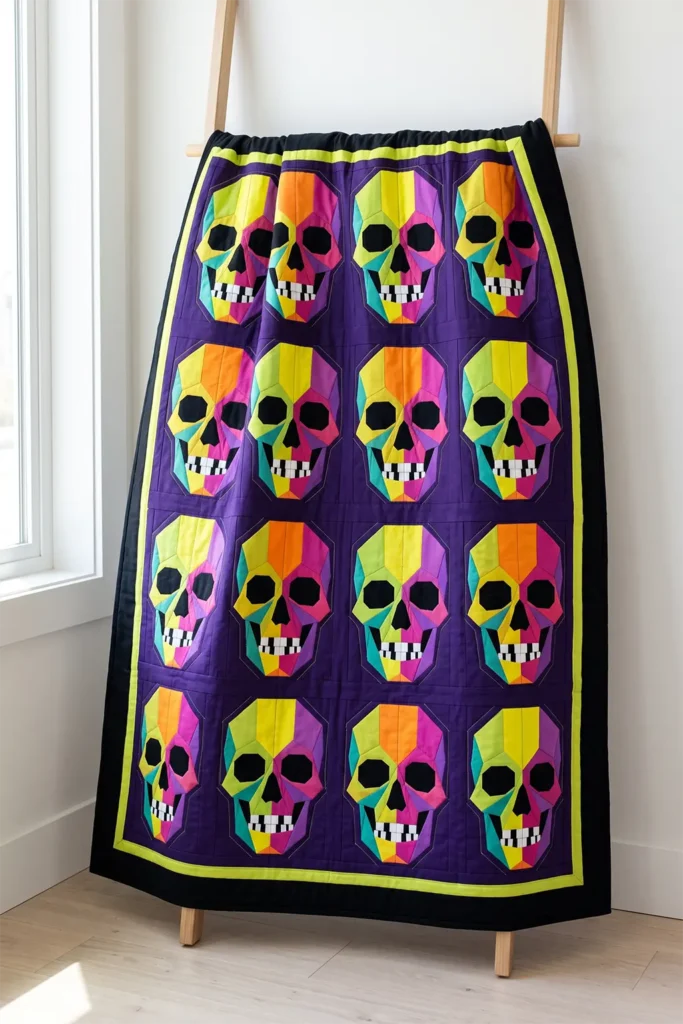
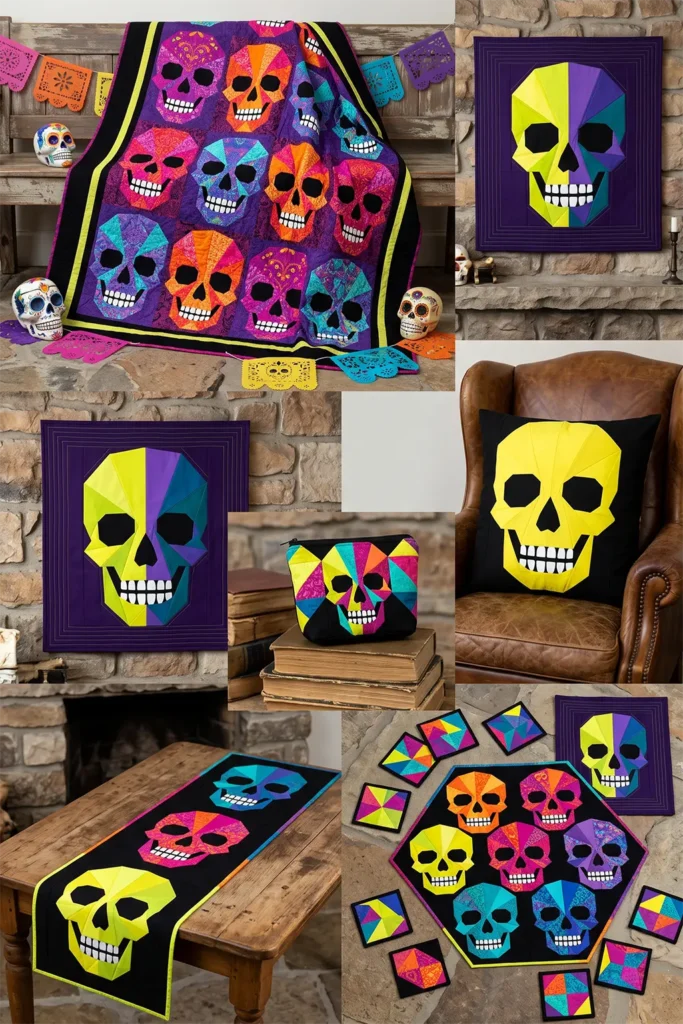
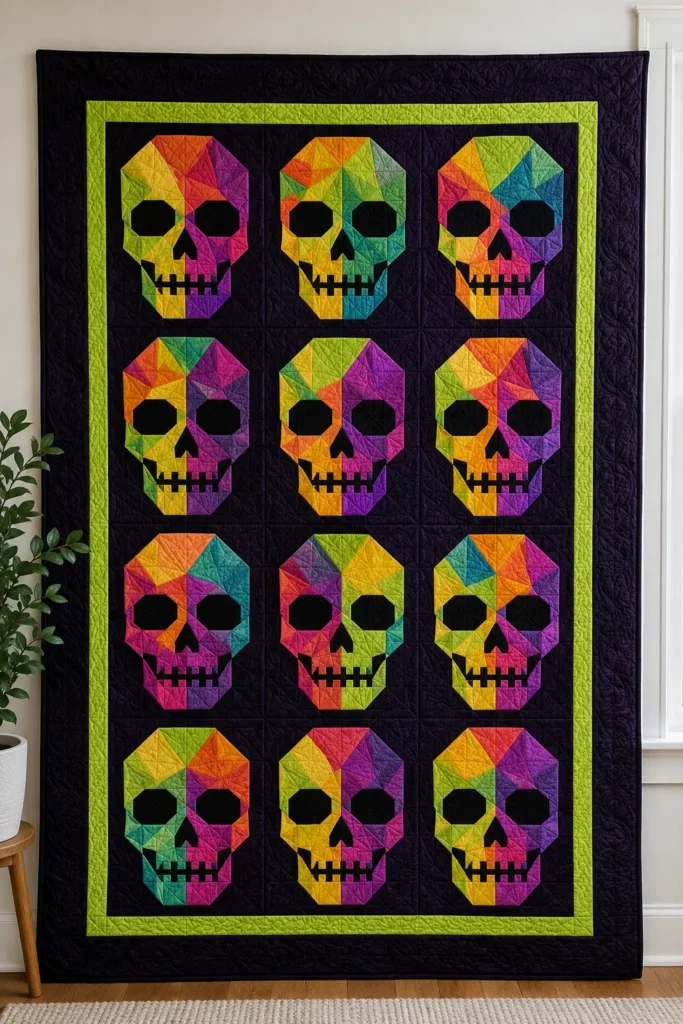
A Note on Skulls in Design
The skull as a decorative motif is far older than horror, and it carried a specific meaning for centuries before it carried menace.
Memento mori — Latin for “remember you must die” — was a formal artistic tradition across Europe from the medieval period through the seventeenth century. Skulls appeared in portraits, on rings, on tomb carvings, and in still-life paintings, and the message was not threatening but instructive: time is short, so spend it well. A Dutch vanitas still life would set a skull beside fresh flowers, a burning candle, and a watch, all making the same point.
The version most relevant to a bright faceted quilt is the calavera of Mexican tradition. José Guadalupe Posada, working as a printmaker in the late nineteenth and early twentieth centuries, produced satirical engravings of skeletons in fashionable dress — most famously La Calavera Catrina, a skeleton in an elaborate feathered hat, made to mock Mexicans who affected European airs. Posada’s skulls were political cartoons, not horror. The bright, decorated sugar skulls associated with Día de los Muertos carry the same spirit: skulls that are celebratory, personalized, and deliberately not frightening.
That history is worth knowing when you choose your palette. A bright, patterned, celebratory skull is not a modern invention or a softening of a scary image. It is arguably the older tradition, and the plain menacing skull is the outlier.
Finished Size
This guide makes a 16-inch finished geometric skull block, and a throw-sized quilt from twelve of them.
Block measurements:
- Finished block: 16 x 16 inches
- Unfinished block: 16½ x 16½ inches
- Grid: 8 units across x 8 units down, each unit 2 inches finished
- Cranium: 6 units wide x 4 units tall
- Eye sockets: 2 units each, set 1 unit apart
- Nasal cavity: 1 unit, centered below the eyes
- Jaw and teeth band: 4 units wide x 2 units tall
- Background: fills the remaining grid positions
Quilt measurements:
- Blocks: 12, set 3 across by 4 down
- Block field: 48 x 64 inches
- Inner border: 2 inches finished
- Outer border: 3 inches finished
- Finished quilt: about 58 x 74 inches
For a wall hanging, make one block, add a 4-inch border, and finish at about 24 x 24 inches.
Materials Needed
For a 58 x 74-inch geometric skull throw, gather:
- Background fabric: 3 yards in deep purple, true black, or charcoal
- Skull facet fabrics: 2½ yards total across acid yellow, chartreuse, hot orange, magenta, electric violet, and teal
- Void fabric: ¾ yard in true black for sockets, nasal cavity, and tooth gaps
- Tooth fabric: ¼ yard in bright white or acid yellow
- Inner border: ⅓ yard in chartreuse
- Outer border: 1 yard in black or deep purple
- Binding: ⅝ yard
- Backing: 4 yards
- Batting: 66 x 82 inches
- Thread: charcoal for piecing, plus contrast for quilting
- Rotary cutter and cutting mat
- Quilting ruler and a 2½-inch square ruler for trimming HSTs
- Fabric marker or a sharp pencil
- Design wall, or a large flat surface
- Sewing clips or pins
- Iron and ironing board
Beginner tip: draw your piecing map on graph paper before cutting anything. An 8 x 8 grid means 64 units per block, and knowing exactly which unit goes where — and which of them are HSTs — turns a confusing project into an assembly line.
Vibrant Faceted Palette
A skull lit from a strange angle could include:
Facets:
- Acid yellow
- Chartreuse
- Hot orange
- Magenta
- Electric violet
- Teal
Voids: 7. True black
Teeth: 8. Bright white
Background: 9. Deep purple 10. True black
Arrange the facet colors so adjacent planes contrast clearly. The faceted effect depends on visible color breaks at every facet edge — two similar colors side by side merge into one plane, and the dimensionality collapses.
Run a loose light-to-dark direction across the cranium, as though a light source sits to one side. Acid yellow and chartreuse on one side, magenta and electric violet on the other, with orange and teal in between. That directional logic is what makes the faceting read as lighting rather than as random color blocking.
Keep every void true black with no variation. The voids are the recognition anchors and must not compete.
Cutting Measurements
Every unit finishes at 2 inches, so all squares are cut at 2½ inches, and all HSTs are trimmed to 2½ inches.
Per block — plain squares, cut 2½ x 2½ inches:
- Facet squares: about 22, in mixed bright colors
- Void squares: 6 in true black — 4 for the eye sockets, 1 for the nasal cavity, 1 spare for a tooth gap
- Tooth squares: 4 in bright white
- Background squares: about 20 in deep purple or black
Per block — half-square triangles:
You need about 24 HSTs per block for the cranium curve, jaw angles, and nasal triangle.
To make HSTs two at a time:
- Cut two squares at 3 x 3 inches, one in each fabric
- Draw a diagonal line on the wrong side of the lighter square
- Place right sides together and sew ¼ inch on both sides of the marked line
- Cut apart on the marked line and press open
- Trim each unit to exactly 2½ x 2½ inches
For 12 blocks, you need roughly 288 HSTs, made from 144 pairs of 3-inch squares.
Borders and binding:
- Inner border: 6 strips at 2½ inches x width of fabric
- Outer border: 7 strips at 3½ inches x width of fabric
- Binding: 7 strips at 2½ inches x width of fabric
Use a ¼-inch seam allowance throughout.
Step-by-Step Guide
Step 1: Draw the Piecing Map
On graph paper, draw an 8 x 8 grid and sketch the skull inside it.
Place the elements at these grid positions, counting from the top left:
- Cranium: rows 2 to 5, columns 2 to 7
- Cranium corners: HSTs at the four corners of the cranium to round the dome
- Eye sockets: rows 3 to 4, at columns 2–3 and columns 6–7
- Nasal cavity: row 5, column 4, with HSTs on either side forming a triangle
- Jaw: rows 6 to 7, columns 3 to 6
- Teeth: row 6, columns 3 to 6, alternating white squares and black gaps
- Background: every remaining position
Mark each grid position as either a plain square or an HST, and note which direction each HST points. This map is what you will piece from, and it is worth twenty minutes now.
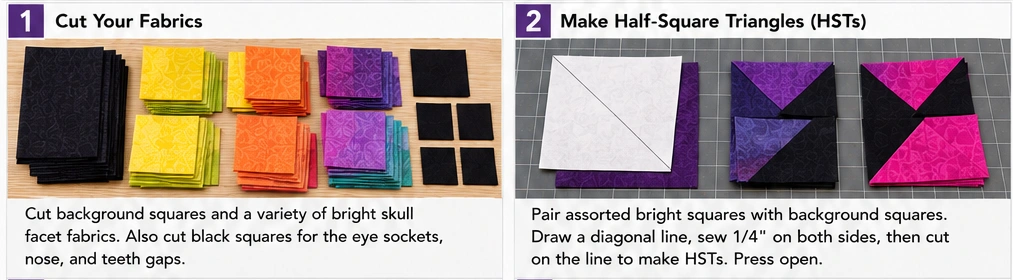
Step 2: Cut All the Units
Cut the plain squares at 2½ x 2½ inches and the HST starter squares at 3 x 3 inches.
Sort them into labeled piles by function — facets, voids, teeth, background — so you are not searching mid-assembly.
Cut for one test block before cutting all twelve.
Step 3: Make the Half-Square Triangles
Pair your 3-inch squares, mark a diagonal on the wrong side of the lighter one, and sew ¼ inch on both sides of the line.
Cut apart on the marked line and press seams open to reduce bulk.
Trim every HST to exactly 2½ x 2½ inches using a square ruler with a marked diagonal. Align the ruler’s diagonal on the seam before trimming.
This trimming step is not optional. Untrimmed HSTs vary by a sixteenth or more, and across 64 units per block that variation compounds into a block that will not square up.
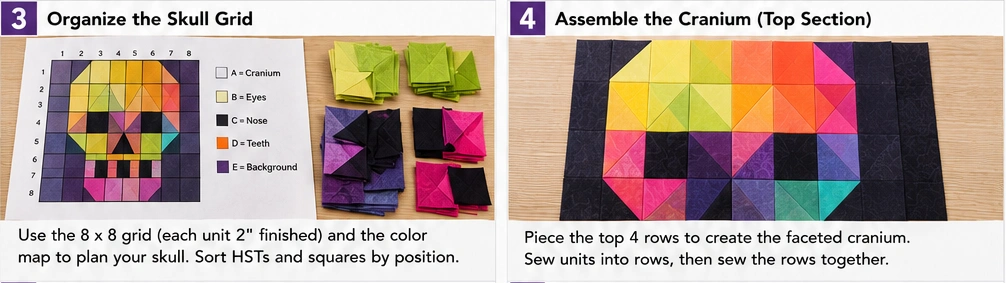
Step 4: Build the Cranium Rows
Lay out rows 2 through 5 following your map.
The cranium’s rounded top comes from HSTs at the outer corners of rows 2 and 3, angling background fabric in to cut the square corners off. The dome is an illusion produced by four angled cuts.
Sew each row together with a ¼-inch seam allowance, pressing seams in alternating directions row to row.
Check the eye sockets read as two clearly separate black voids with one facet unit between them. If they merge, the skull will not read.
Step 5: Build the Nasal Triangle
Row 5 holds the nasal cavity: one black square at the center, with HSTs pointing inward on either side to form a downward triangle.
The nasal shape is the detail most often gotten wrong. It should read as an inverted triangle, wider at the top than the bottom, sitting centrally between and below the eye sockets.
Sew the row, then check the triangle against your map before continuing.
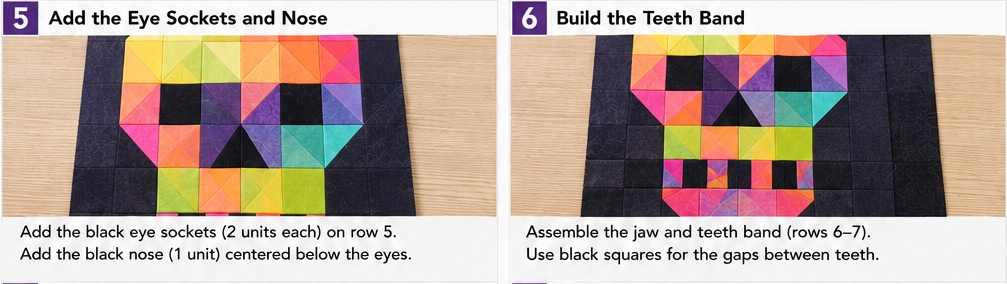
Step 6: Build the Jaw and Teeth Band
Row 6 alternates white tooth squares and narrow black gaps.
The simplest approach: piece a strip set of white and black 2½-inch squares, then use it across the jaw width. For finer teeth, sew a strip of white with narrow black strips between and crosscut to 2½ inches.
Row 7 carries the lower jaw in facet colors, with HSTs at the outer corners angling background in to taper the jaw inward.
That taper matters — a jaw as wide as the cranium reads as a box. It should narrow noticeably.
Step 7: Assemble the Block
Sew the eight rows together in order, nesting the seams at every unit intersection.
Press row seams open to manage bulk. With 64 units in a block, there is a lot of seam allowance, and open pressing keeps the block flat.
The finished block should measure 16½ x 16½ inches unfinished. Measure it now, before making the other eleven.
If it is off by more than ⅛ inch, the cause is almost always untrimmed HSTs rather than seam allowance.
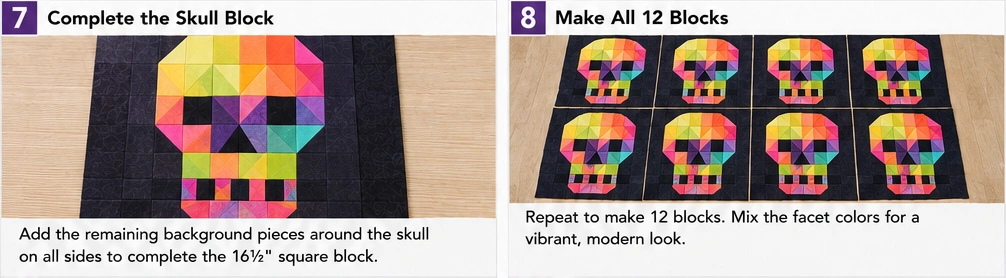
Step 8: Make the Remaining Blocks
Piece the remaining 11 blocks, varying the facet color arrangement in each so no two skulls are lit the same way.
Work in batches by stage — make all the HSTs for all twelve blocks first, then all the rows. Batching is what makes a 768-unit quilt manageable.
Step 9: Lay Out and Join the Quilt Top
Arrange the 12 blocks 3 across by 4 down.
Distribute the dominant facet colors so no two adjacent blocks share a lead color. Photograph the layout before sewing.
Sew blocks into four rows of three, pressing row seams in alternating directions. Join the rows and press those seams open.
The block field should measure 48½ x 64½ inches unfinished.
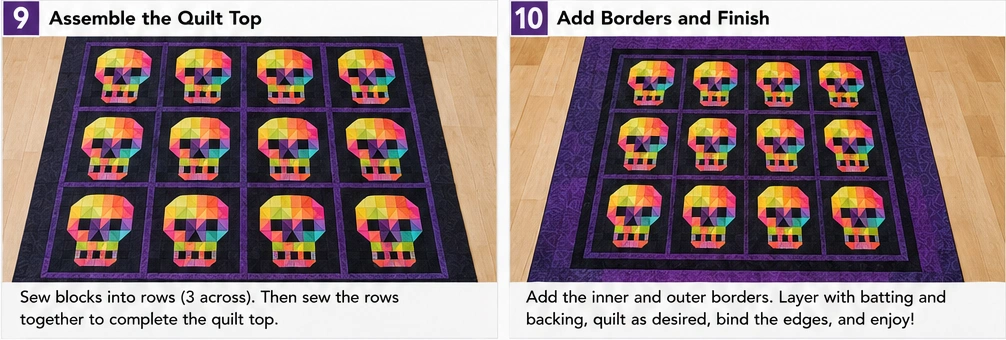
Step 10: Add the Borders
Join the 2½-inch inner border strips end to end.
Measure the quilt top through the center, never along the edges. Cut two side borders to that length, pin at the ends and center, and sew. Measure again horizontally for the top and bottom.
Join the 3½-inch outer border strips and repeat.
Press toward each border. The finished top should measure about 58½ x 74½ inches.
Step 11: Layer and Quilt
Layer the backing wrong side up, batting, then the quilt top right side up. Baste with pins or spray.
Quilting options that suit this design:
- Straight lines following the facet edges, extending each plane’s geometry outward into the background
- Dense grid quilting at 1-inch spacing across the background with the skulls left unquilted
- Radiating lines from each skull outward to the block edges
Leave the voids unquilted. Stitching across an eye socket softens the edge that makes the skull read.
A contrast thread — chartreuse on deep purple — turns the quilting into a visible design layer and reinforces the faceted geometry.
Step 12: Bind and Finish
Trim the quilt square.
Bind with 2½-inch strips joined on the bias, in black, deep purple, or a single bright pulled from the facets.
Add a hanging sleeve if the quilt will go on a wall, and add a label.
Assembly at a Glance
- Map — draw an 8 x 8 grid on graph paper and mark every unit as square or HST
- Cut and build units — cut squares at 2½ inches, make HSTs from 3-inch pairs, trim every HST to 2½ inches
- Piece rows — cranium with corner HSTs, nasal triangle, teeth band, tapered jaw
- Assemble — join eight rows with nested seams, pressing open, to 16½ inches
- Lay out — set 12 blocks 3 across by 4 down, vary the facet lighting, photograph
- Finish — join rows, add borders measuring through the center, quilt the background densely, and bind
Vibrant Geometric Skull Combination Ideas
For a neon skull quilt, use acid yellow, chartreuse, and lime facets with black voids on a true black background.
For a calavera quilt, use magenta, hot orange, teal, and electric violet facets in a bright celebratory mix, bordered in chartreuse.
For a lit-from-the-left quilt, run acid yellow and chartreuse down the left of every skull, fading to electric violet and deep teal on the right, on deep purple.
For a twelve-lights quilt, give each of the twelve skulls a different dominant facet color, unified by black voids and one background fabric.
For a two-color quilt, use only acid yellow and black — facets in yellow, voids and background in black. The most graphic option, and the strongest from across a room.
For a cold skull quilt, use teal, electric violet, and deep blue facets with white teeth on charcoal — the least warm option, and the most clinical.
Beginner Tips for Success
Draw the piecing map first. Sixty-four units per block is unmanageable without one, and twenty minutes on graph paper saves hours of confusion.
Trim every HST to 2½ inches. Untrimmed HSTs are the single most common reason a grid block will not square up.
Keep the voids true black with no variation. They are the recognition anchors, and any patterning in them weakens the whole skull.
Make sure the eye sockets stay separate. One facet unit between them is the minimum; merged sockets read as a mask.
Taper the jaw. A jaw as wide as the cranium reads as a box rather than a skull.
Contrast adjacent facets. Similar colors side by side merge into one plane, and the dimensionality is lost.
Batch the work by stage. Making 288 HSTs in one session is far faster than making 24 at a time, twelve times over.
Styling Tip
A geometric skull quilt is graphic and modern, so it suits a plain contemporary setting — a pale sofa, white bedding, a light wall. It reads best flat and at a distance, where the facets resolve into dimension, which makes it a strong wall quilt as well as a throw.
Keep the surroundings unpatterned and let the quilt hold the room. For a seasonal display, plain black or clear glass objects work; anything ornate competes with the geometry. Unlike most Halloween quilts, this one does not look out of place in January, which is worth considering when you choose where to hang it.
Gift Pairings
Leftover units and HSTs build a matching set easily:
- A single skull block as a 16-inch cushion cover
- A 2½-inch square trimming ruler — the tool that makes grid piecing accurate, and the best gift for anyone starting out
- A mini skull wall hanging at 24 x 24 inches from one block plus borders
- A pieced zip pouch using leftover HSTs in a faceted arrangement
- A table runner with three skull blocks in a row
- A set of HST mug rugs from spare trimmed units
- A trick-or-treat drawstring bag with a small faceted skull on the front
Other Design Inspirations – Digitally Modified Images. Texture and color may vary from the actual product.
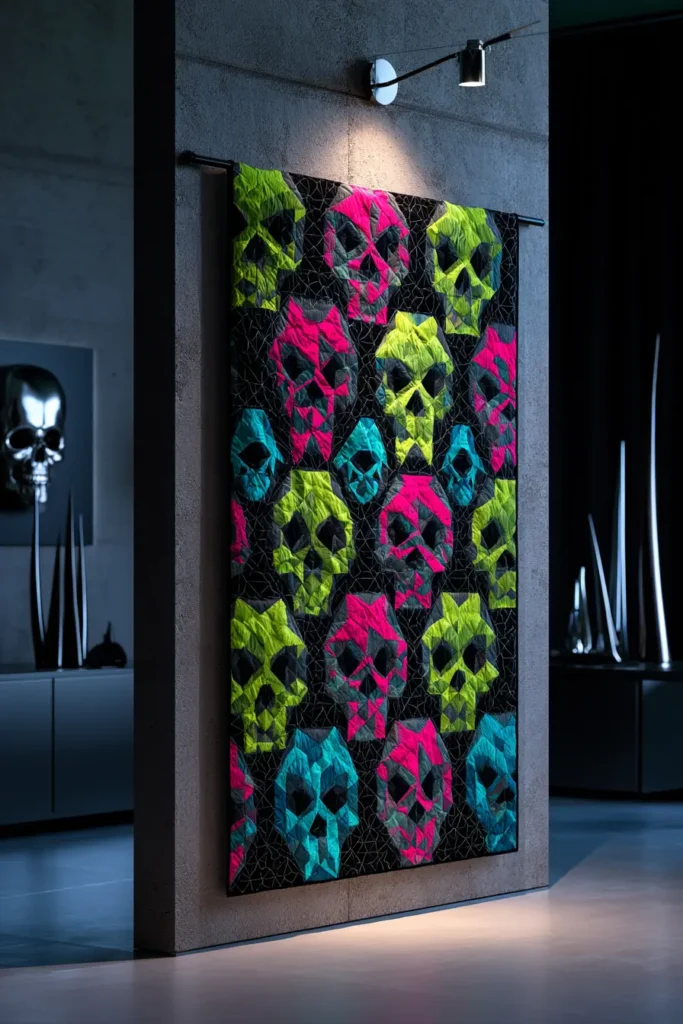
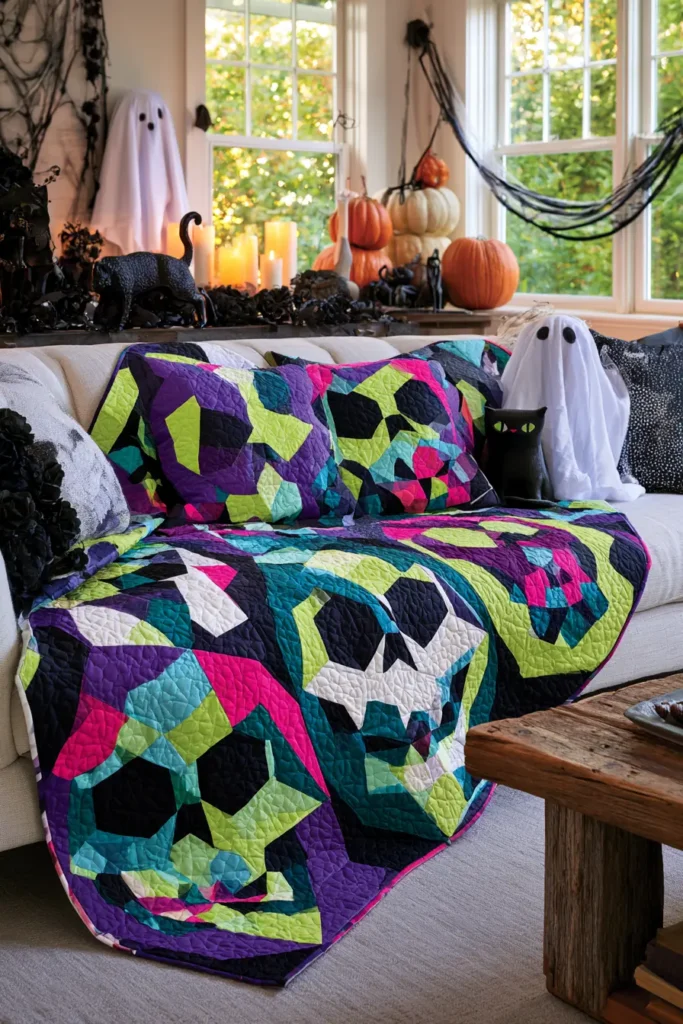
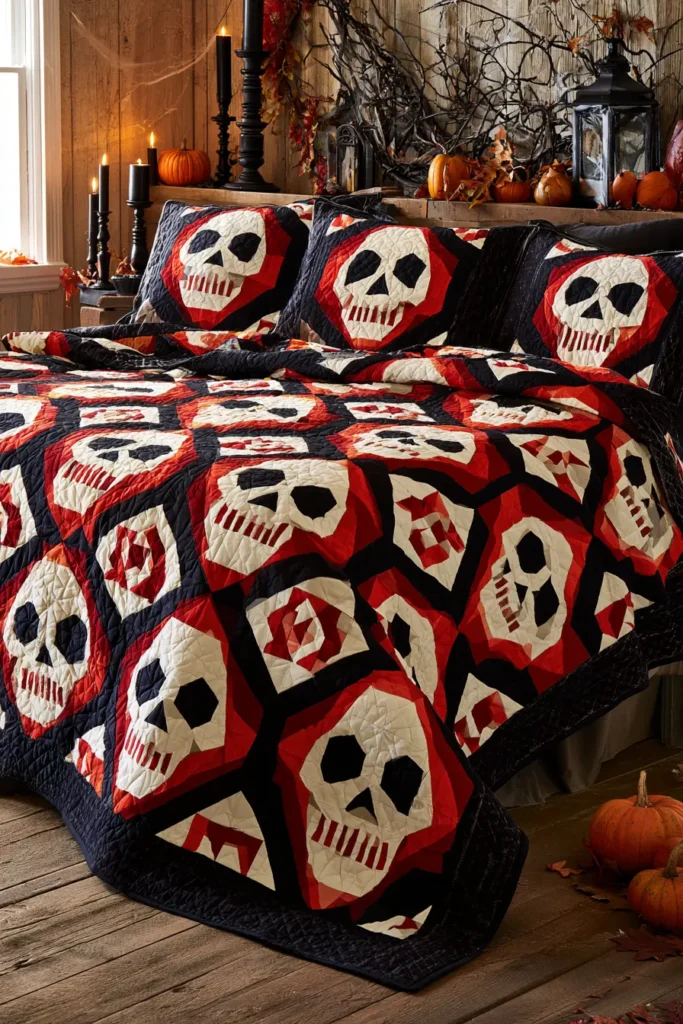
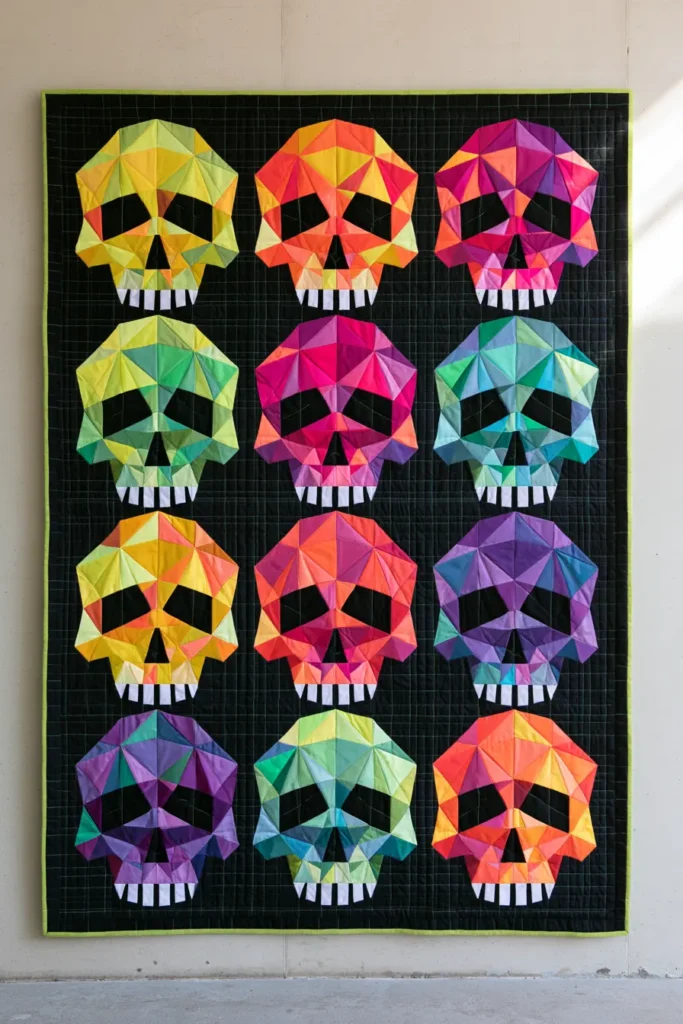
11. Frankenstein and Monster Face Quilt Blocks
A monster face block is the most character-driven design in this collection, and the one where small changes produce completely different results. The face is built on a grid of squares and rectangles — a broad head, heavy brow, mismatched eyes, and a stitched mouth — and shifting a single unit changes the expression entirely. Raise one eye by one grid position, and the monster looks confused; drop the brow by half a unit, and it looks furious. That sensitivity is what makes a quilt of twelve monster faces work: every one of them can be a different creature.
For a vibrant palette, skip the expected mossy green. Build the faces from acid green, chartreuse, teal, electric violet, magenta, and hot orange, with true black for the brow, mouth line, and stitching, and bright white or acid yellow for the eyes. A field of twelve monsters in six different skin colors against deep purple or black reads as a gallery of creatures rather than one repeated cartoon—and mismatched, brightly colored faces are considerably stranger than a row of identical green ones.
Why This Design Works
The block is built entirely from rectangles, which is unusual for a face and is exactly why it succeeds. A realistic face needs curves; a monster face needs asymmetry, and asymmetry is easy to piece. Every unnerving quality in this block — the mismatched eyes, the uneven brow, the off-center mouth — comes from deliberately breaking the grid rather than from difficult sewing.
The heavy horizontal brow is the single most important element. A dark bar running the full width of the face above the eyes creates the deep-set, shadowed look that reads as menace. Without it, the same arrangement of eyes and mouth reads as a friendly cartoon. The brow is doing all the emotional work.
Mismatched eyes do the rest. Making one eye larger than the other, or setting one a grid position higher, is what pushes the face from cartoon into unsettling. Symmetry reads as designed; asymmetry reads as wrong, and wrong is the goal.
The stitched mouth is where the appliqué comes in — a single line of heavy black hand stitching across the lower face, with visible cross-stitches. It is the only non-pieced element in the block; it takes about ten minutes, and it instantly identifies the creature.
Skills you build here: rectangle-based block drafting, grid-breaking for expression, unit assembly at scale, and decorative hand stitching over a pieced surface.
Design Inspirations – Digitally Modified Images. Texture and color may vary from the actual product.
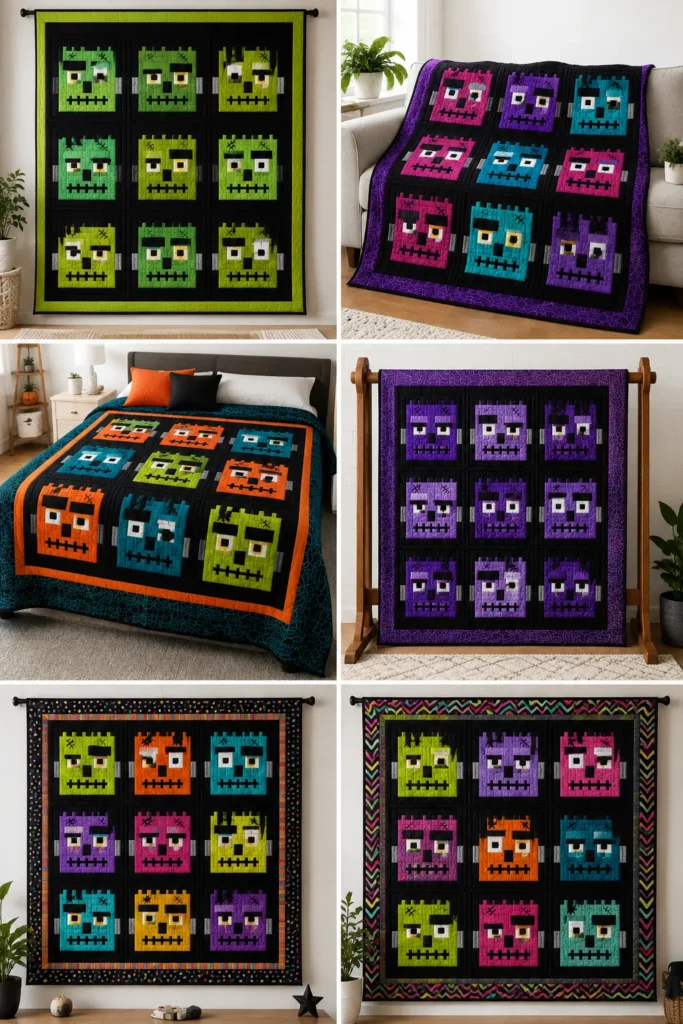
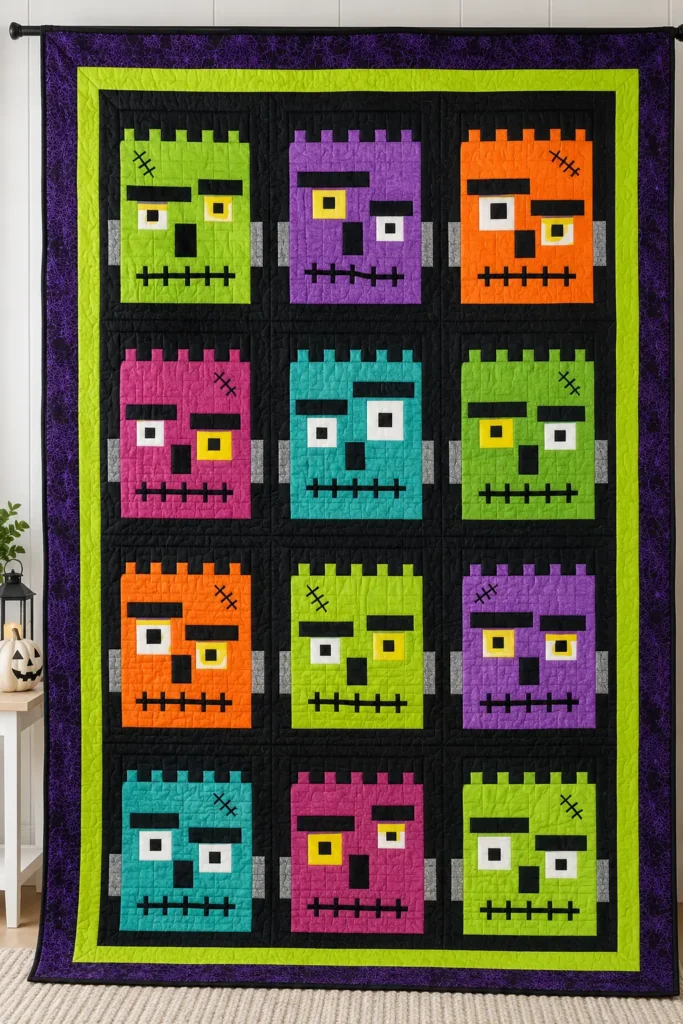
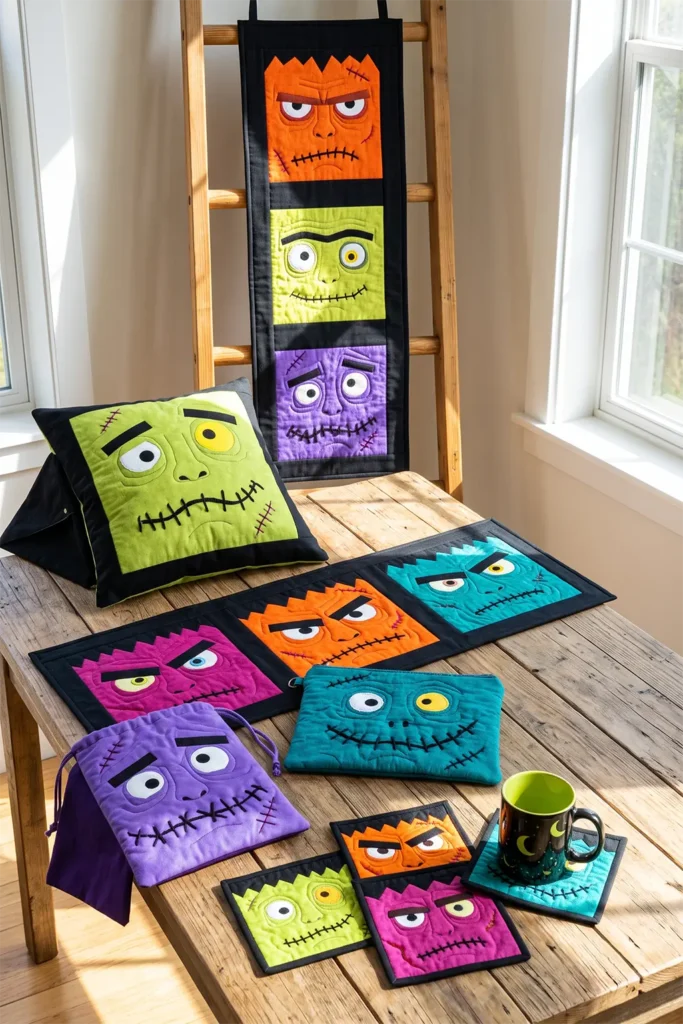
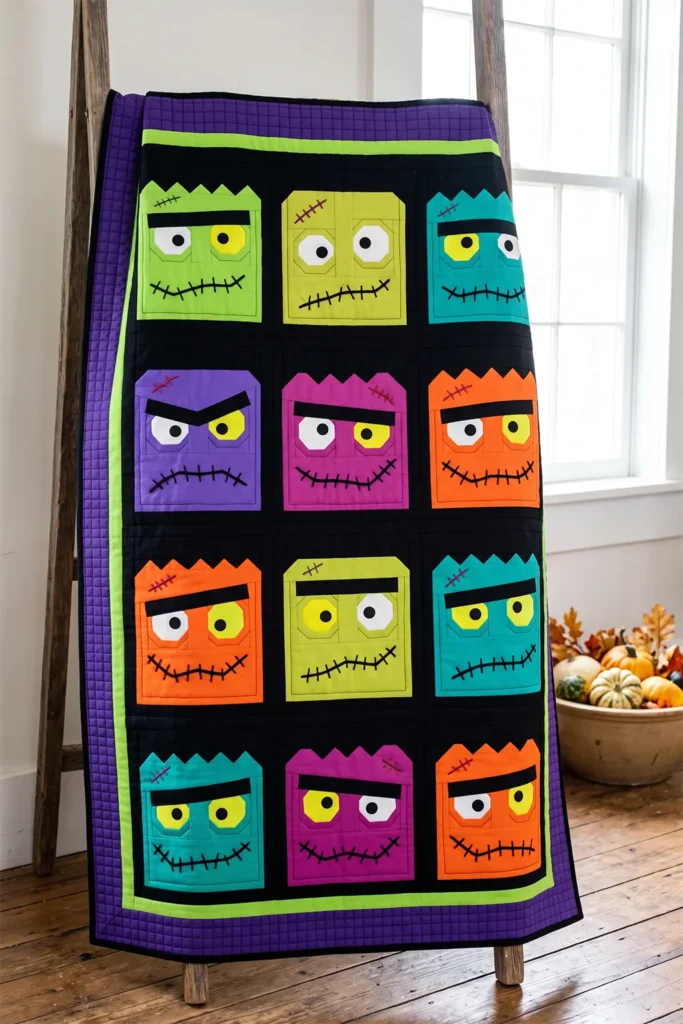
A Note on the Monster
Mary Shelley wrote Frankenstein in 1818, and the creature she described looks almost nothing like the one everyone pictures. Her version has translucent yellow skin stretched over visible muscle, flowing black hair, pearly white teeth, watery pale eyes, and black lips. He is eight feet tall, and he is explicitly described as fast, agile, and articulate — he learns to read, quotes Milton, and argues his case at length. There is no flat head, no green skin, no bolts, and no lumbering walk anywhere in the book.
The familiar look was created in 1931 by Jack Pierce, the makeup artist at Universal Studios, for Boris Karloff. Pierce reasoned that a surgeon working without finesse would cut the top of the skull off flat, drop the brain in, and clamp it shut — hence the flat head and the scar across the forehead. The neck bolts were designed as electrodes, not bolts: terminals for conducting current into the body. Pierce spent months on the design, and Universal has held trademark claims on that specific makeup ever since, which is why so many Halloween products use a green square-headed monster that is deliberately just different enough.
The novel itself was famously born from a competition. In the summer of 1816 — the “year without a summer,” when the eruption of Mount Tambora had filled the atmosphere with ash and kept Europe cold and dark — Mary Shelley, Percy Shelley, Lord Byron, and John Polidori were trapped indoors at a villa on Lake Geneva and challenged each other to write ghost stories. Shelley was eighteen. Polidori’s contribution, The Vampyre, effectively invented the modern literary vampire. Two of the most durable monsters in Western culture came out of the same rained-out holiday.
Worth knowing when you design your monster: the version you are piecing is a costume design from 1931, not a character from 1818, and you have complete freedom to invent your own.
Finished Size
This guide makes a 14-inch finished monster face block, and a throw-sized quilt from twelve of them.
Block measurements:
- Finished block: 14 x 14 inches
- Unfinished block: 14½ x 14½ inches
- Grid: 7 units across x 7 units down, each unit 2 inches finished
- Face: 5 units wide x 5 units tall
- Brow bar: 5 units wide x 1 unit tall
- Eyes: 1 unit each, with one enlarged to 1 x 1½ units
- Mouth line: hand-stitched across 4 units
- Hair or head top: 1 unit tall across the face width
- Background: fills the remaining grid positions
Quilt measurements:
- Blocks: 12, set 3 across by 4 down
- Block field: 42 x 56 inches
- Sashing: 2 inches finished between blocks
- Inner border: 2 inches finished
- Outer border: 4 inches finished
- Finished quilt: about 58 x 74 inches
For a wall hanging, make 4 blocks in a 2 x 2 layout with sashing, add a 3-inch border, and finish at about 36 x 36 inches.
Materials Needed
For a 58 x 74-inch monster face throw, gather:
- Background fabric: 2 yards in deep purple, true black, or charcoal
- Face fabrics: 2 yards total across acid green, chartreuse, teal, electric violet, magenta, and hot orange
- Brow and detail fabric: ¾ yard in true black
- Eye fabrics: ⅓ yard in bright white and acid yellow
- Hair fabric: ½ yard in true black
- Sashing: ¾ yard in black
- Inner border: ⅓ yard in acid green
- Outer border: 1¼ yards in deep purple or black
- Binding: ⅝ yard
- Backing: 4 yards
- Batting: 66 x 82 inches
- Perle cotton no. 5 in true black, for the stitched mouth and scars
- Embroidery needle with an eye large enough for perle cotton
- Thread: charcoal for piecing, plus contrast for quilting
- Rotary cutter and cutting mat
- Quilting ruler
- Fabric marker or a sharp pencil
- Sewing clips or pins
- Iron and ironing board
Beginner tip: use perle cotton no. 5 rather than embroidery floss for the mouth. Floss separates and flattens; perle cotton stays round and sits on the surface, which is exactly the crude, heavy-handed look the stitched mouth needs.
Vibrant Monster Palette
A gallery of wrong-coloured creatures could include:
Faces:
- Acid green
- Chartreuse
- Teal
- Electric violet
- Magenta
- Hot orange
Brow, hair, mouth: 7. True black
Eyes: 8. Bright white 9. Acid yellow
Background and sashing: 10. Deep purple 11. True black
Give each of the twelve monsters a different face color, cycling through the six with two of each. The variation is what turns a repeated block into a cast of characters.
Keep every brow, mouth, and hair unit true black across all twelve. That constant is what holds the quilt together while the faces vary wildly — vary the black and the whole thing fragments.
Mix the eye colors within faces as well as between them. A monster with one white eye and one acid yellow eye is markedly more unsettling than one with two matching eyes, and it costs nothing.
Cutting Measurements
Every unit finishes at 2 inches, so plain squares are cut at 2½ x 2½ inches.
Per block, cut:
- Face squares: 15 at 2½ x 2½ inches in one face colour
- Brow bar: one rectangle, 10½ x 2½ inches, in true black
- Hair strip: one rectangle, 10½ x 2½ inches, in true black
- Eye squares: one at 2½ x 2½ inches in white; one at 2½ x 3 inches in acid yellow for the mismatched eye
- Eye backing squares: two at 2½ x 2½ inches in the face color, for behind the eyes
- Side background: two rectangles, 2½ x 12½ inches
- Top background: one rectangle, 14½ x 2½ inches
- Bottom background: one rectangle, 14½ x 2½ inches
For 12 blocks: cut the above twelve times, varying the face color each time.
Sashing, borders, and binding:
- Sashing strips: 17 at 2½ x 14½ inches, plus 3 long strips at 2½ inches x width of fabric for the horizontal runs
- Inner border: 6 strips at 2½ inches x width of fabric
- Outer border: 7 strips at 4½ inches x width of fabric
- Binding: 7 strips at 2½ inches x width of fabric
Use a ¼-inch seam allowance throughout.
Step-by-Step Guide
Step 1: Sketch the Face Map
On graph paper, draw a 7 x 7 grid and place the elements:
- Row 1: background across the full width
- Row 2: hair strip across the face width, background either side
- Row 3: brow bar across the face width in true black
- Row 4: eyes — one white square on the left, one taller acid yellow rectangle on the right, face color between and around
- Row 5: face color across the full face width
- Row 6: face color, with the mouth position marked for later stitching
- Row 7: background across the full width
Mark which eye sits higher, and by how much. This is where the character comes from, and it should differ in every block.
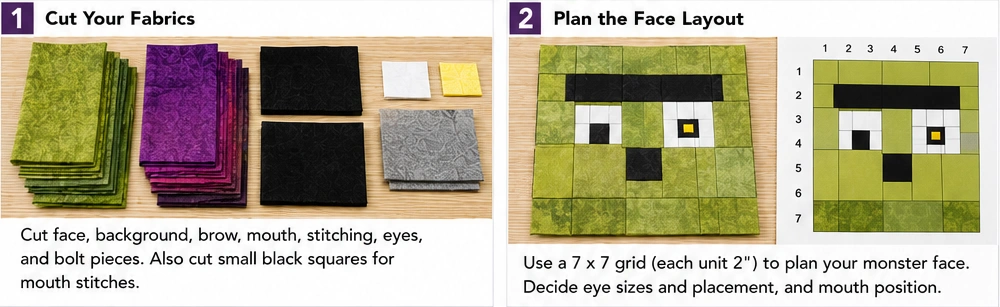
Step 2: Cut One Test Block
Cut all pieces for a single face before cutting the full twelve.
Piecing one block first confirms your seam allowance and lets you check that the brow, eyes, and mouth positions read the way you intended.
Step 3: Build the Eye Row
This is the row that determines the monster’s expression.
Sew the white eye square into the face row on the left, and the taller acid yellow eye rectangle on the right, with face-color squares between and on either side.
To set one eye higher, add a narrow face-color strip — about 1 x 2½ inches — beneath the lower eye before joining the row. The mismatch should be visible but not extreme; roughly half a unit is right.
Press seams toward the face fabric so the eyes stay crisp.
Step 4: Add the Brow Bar
Sew the 10½ x 2½-inch black brow bar directly above the eye row.
Press toward the brow.
Check the result before continuing. The brow should sit immediately above the eyes with no face fabric between them — that direct contact is what creates the deep-set look. A gap between brow and eyes loses the entire effect.
Step 5: Add the Hair and Lower Face
Sew the 10½ x 2½-inch black hair strip above the brow bar.
Below the eye row, sew two rows of face-color squares to complete the lower face.
The face unit should now measure 10½ x 10½ inches.
Step 6: Add the Background
Sew a 2½ x 12½-inch background rectangle to the left and right of the face unit. Press toward the background.
Sew the 14½ x 2½-inch background rectangles to the top and bottom.
The block should measure 14½ x 14½ inches unfinished. Measure it before making the other eleven.
Step 7: Stitch the Mouth and Scars
Mark the mouth line across the lower face — a horizontal line about 8 inches long, positioned two-thirds of the way down the face and slightly off-center.
Using perle cotton no. 5 and a running stitch, work the mouth line with stitches about ⅜ inch long.
Then work 6 to 8 short cross-stitches perpendicular to the line, spaced unevenly along it, to read as sutures. Uneven spacing matters — evenly spaced stitches look decorative, unevenly spaced ones look crude, which is the point.
Add a short vertical scar on the forehead or cheek with three or four cross-stitches, varying the position from block to block.
Keep the stitching deliberately rough. Neat embroidery undermines the whole design.
Step 8: Make the Remaining Blocks
Piece the remaining 11 blocks, changing the face color each time and varying:
- Which eye is higher, and by how much
- Which eye is larger
- Eye color pairing — two white, two yellow, or one of each
- Mouth position — some more off-center than others
- Scar placement
The goal is twelve individuals, not twelve copies. No two blocks should share the same combination.
Step 9: Lay Out the Quilt Top
Arrange the 12 blocks 3 across by 4 down with 2½-inch sashing strips between them.
Sashing matters on this design more than on the others in this collection. Without it, adjacent faces read as one continuous crowd and the individual expressions are lost. Black sashing frames each monster like a portrait.
Distribute the face colors so no two adjacent blocks share one. Photograph the layout before sewing.
Step 10: Assemble with Sashing
Sew a 2½ x 14½-inch sashing strip between the blocks in each row, and at each row end.
Join the four rows with long horizontal sashing strips cut to the row width.
Press all seams toward the sashing. The block field with sashing should measure about 48½ x 64½ inches unfinished.
Step 11: Add the Borders
Join the 2½-inch inner border strips end to end.
Measure the quilt top through the center, never along the edges. Cut two side borders to that length, pin at the ends and center, and sew. Measure again horizontally for the top and bottom.
Join the 4½-inch outer border strips and repeat.
Press toward each border. The finished top should measure about 58½ x 74½ inches.
Step 12: Layer, Quilt, and Bind
Layer the backing wrong side up, batting, then the quilt top right side up. Baste with pins or spray.
Quilting options that suit this design:
- Outline quilting ¼ inch inside each face, with dense grid fill in the background and sashing
- Straight lines running the full width through faces and background alike
- All-over loops across the whole quilt for a softer finish
Quilt around the stitched mouths, not across them. Machine stitching over hand-worked perle cotton flattens it and loses the raised, crude quality you built.
Leave the eyes unquilted so they stay flat and bright.
Trim square, then bind with 2½-inch strips joined on the bias.
Assembly at a Glance
- Map — sketch a 7 x 7 grid and mark which eye sits higher and which is larger
- Build the eye row — piece the mismatched eyes with a narrow strip to offset one
- Stack the face — brow bar directly above the eyes, hair above that, face squares below
- Frame — add side, top, and bottom background to bring the block to 14½ inches
- Stitch — work the mouth and sutures in perle cotton with deliberately uneven spacing
- Finish — assemble with black sashing between blocks, add borders, quilt and bind
Vibrant Monster Combination Ideas
For a neon monster quilt, use acid green, chartreuse, and lime faces with white eyes on true black with black sashing.
For a carnival monster quilt, use magenta, hot orange, teal, and electric violet faces with acid yellow eyes, sashed in black.
For a twelve creatures quilt, give every block a different face color with a different eye pairing, unified only by black brows and black sashing.
For a cold monster quilt, use teal, electric violet, and deep blue faces with white eyes on charcoal, bordered in acid green.
For a classic-plus quilt, keep every face acid green but vary the eye colors, mouth positions, and scars — the unity makes the individual differences read louder.
For a one wrong monster quilt, make eleven faces acid green and one magenta, placed off-center in the layout.
Beginner Tips for Success
Sketch the face map before cutting. The expression comes from unit placement, and it is much easier to move a square on paper than to unpick it.
Put the brow directly above the eyes with no gap. That contact is what creates the deep-set, shadowed look, and a gap turns the monster into a cartoon.
Mismatch the eyes deliberately. Half a unit of offset is right — symmetry reads as designed, and design is not what you want here.
Use perle cotton no. 5, not embroidery floss. Floss flattens and separates; perle cotton stays round and crude on the surface.
Space the stitches unevenly. Even spacing looks decorative; uneven spacing looks like something was closed up in a hurry.
Use sashing between blocks. Without it, adjacent faces merge into a crowd, and every individual expression is lost.
Quilt around the stitched mouths, never across them.
Styling Tip
A monster face quilt is playful and graphic, and it works best where each face can be seen clearly — hung flat, spread across a bed, or laid over a table. The black sashing does the framing, so the surroundings should stay plain and light.
This is the most child-friendly design in the collection, which makes it a strong choice for a bunk room or a family sofa through October. For a seasonal display, keep everything else in a single dark tone and let the twelve faces do the work — a bowl of small pumpkins in one color, nothing patterned.
Gift Pairings
Leftover face squares and perle cotton build a matching set easily:
- A single monster face on a 14-inch cushion cover
- A trick-or-treat drawstring bag with one monster on the front panel
- A skein set of perle cotton no. 5 in black, white, and acid green
- A table runner with three monsters in a row, sashed in black
- A zip pouch with a stitched mouth and mismatched eyes on the front
- A set of monster face mug rugs, one per creature
- A hanging door banner with three stacked monster faces
Other Design Inspirations – Digitally Modified Images. Texture and color may vary from the actual product.
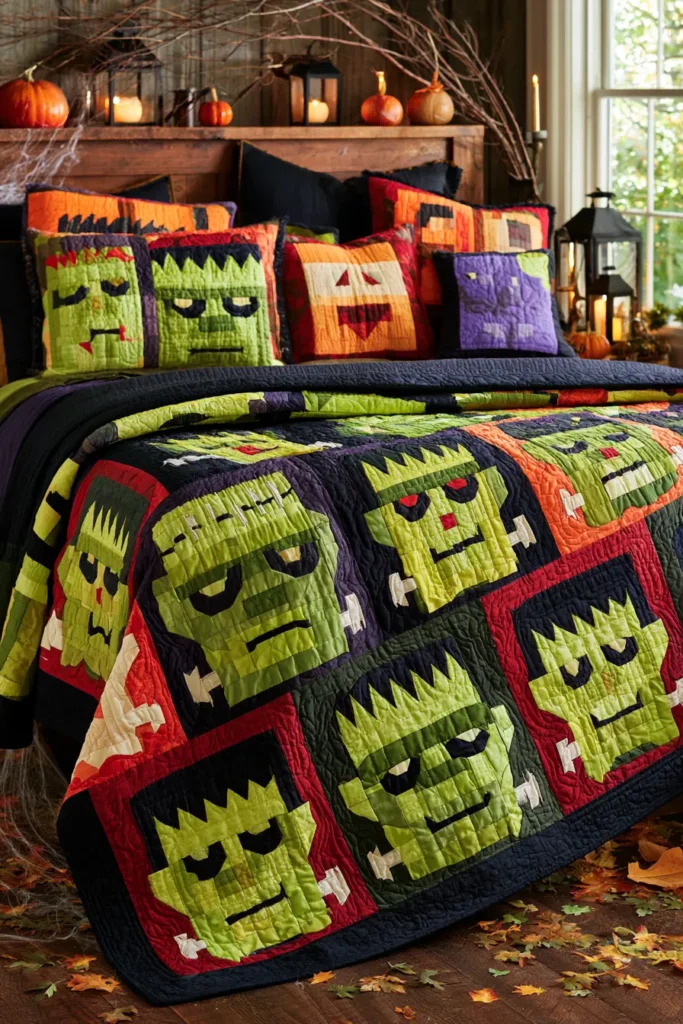
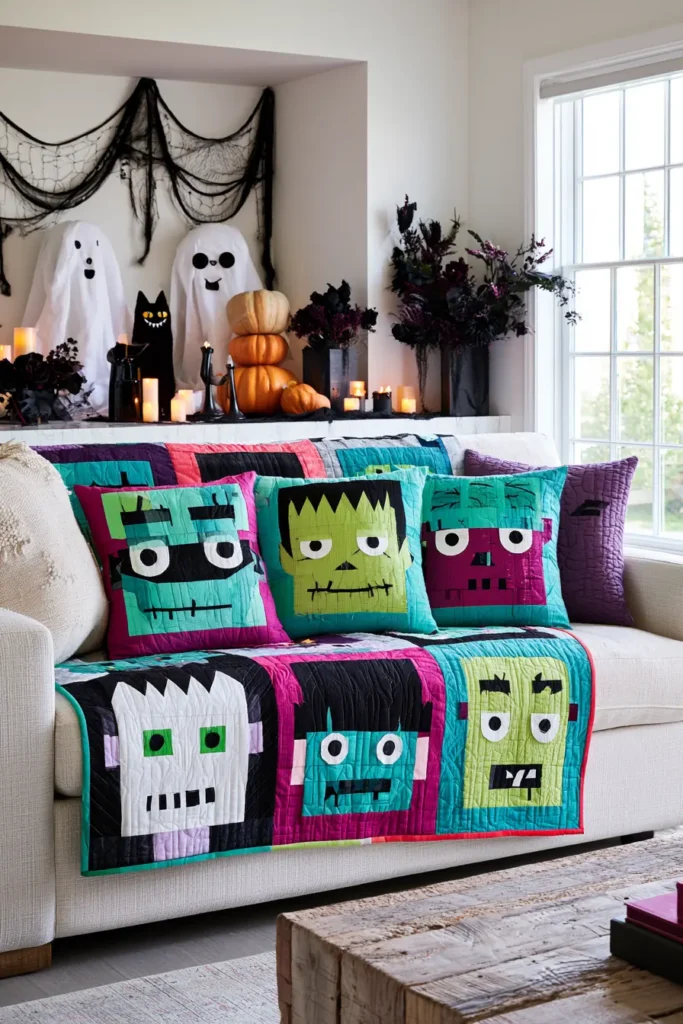
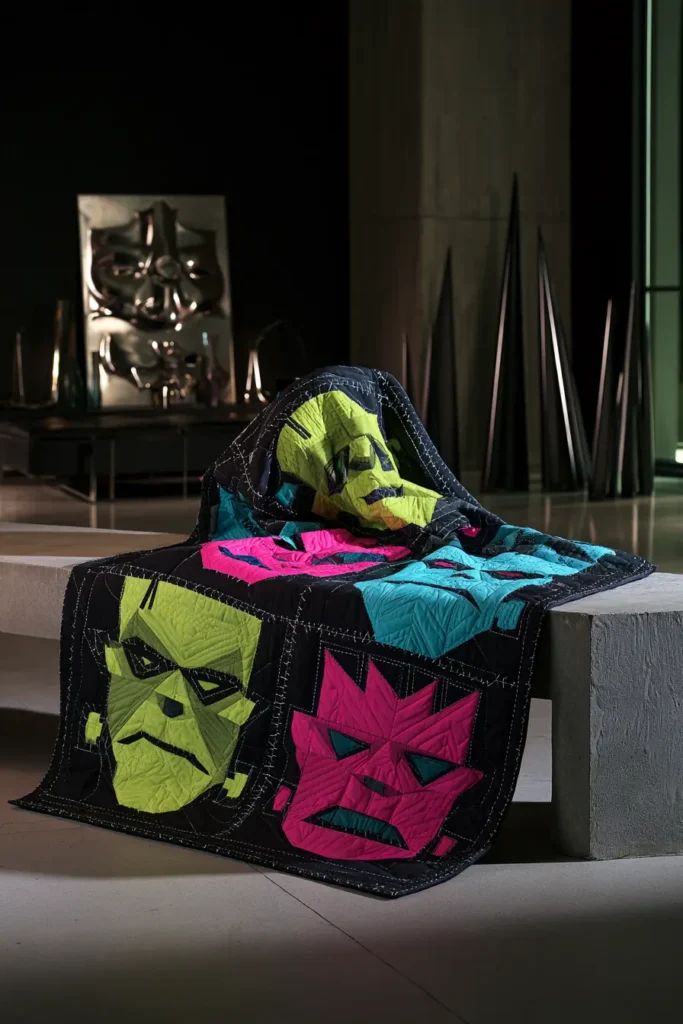
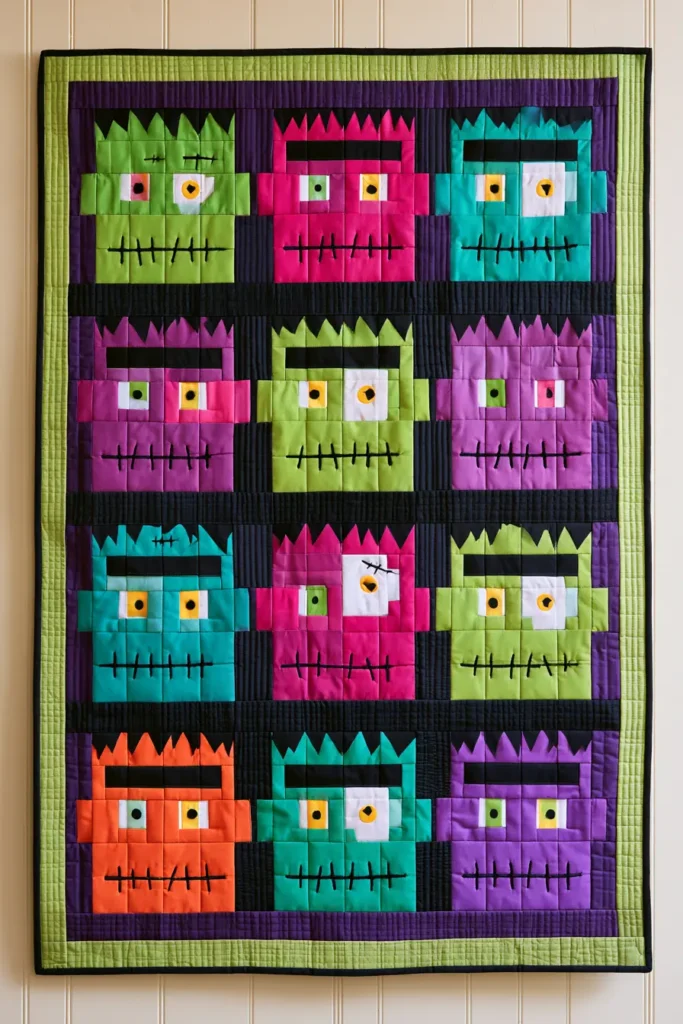
12. Orange and Black Checkerboard Quilt Layouts
A checkerboard is the simplest thing you can piece and the hardest thing to make interesting. Twenty rows of alternating squares is a beginner’s first quilt — and it is also, done right, one of the most genuinely disquieting layouts in this collection. The difference is entirely in what you do to the grid. A perfect checkerboard is orderly and calm. A checkerboard that starts perfect at one edge and breaks down as it crosses the quilt — squares shifting out of alignment, the scale changing, the pattern buckling — is unsettling in a way no monster face can match, because the eye expects order and keeps not finding it.
For a vibrant palette, keep the structure orange and black but push the orange far past pumpkin: hot orange, tangerine, acid yellow, chartreuse, magenta, and electric violet alternating against true black. Twenty different “orange” squares across a quilt read as a checkerboard from across the room and as something much stranger up close. The black stays absolutely constant — it is the grid, and the grid must not waver even while the pattern collapses.
Why This Design Works
Checkerboards work differently on the brain than pictorial blocks. A skull or a bat is recognized in one glance and then understood. A checkerboard is scanned — the eye runs along the rows checking the alternation — and a break in that alternation registers as an error before it registers as a design. That delay is where the unease lives.
Three distortions produce it, and this guide uses all three:
Scale shift. Squares start at 4 inches on one side of the quilt and reduce to 2 inches on the other. The transition is gradual enough that no single row looks wrong, but the whole quilt feels like it is receding.
Offset drift. Rows begin perfectly aligned and progressively shift sideways by a fraction of a square, so the vertical columns bend rather than run straight.
Broken cells. A handful of squares are split diagonally or quartered, breaking the two-color rule in isolated spots. Fewer than fifteen across the whole quilt is right — enough to catch the eye, not enough to become the pattern.
None of these require any new technique. Every unit is still a square, and every seam is still straight.
Skills you build here: strip-set construction and crosscutting, working at multiple scales in one quilt, controlled improvisation within a grid, and managing rows that no longer share a common measurement.
Design Inspirations – Digitally Modified Images. Texture and color may vary from the actual product.
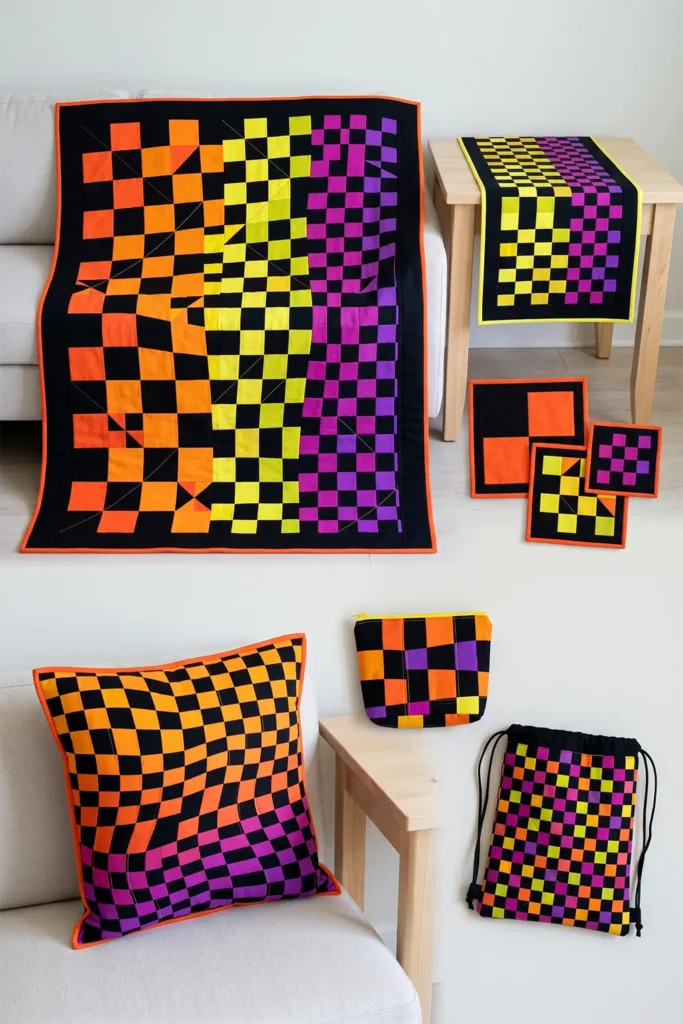
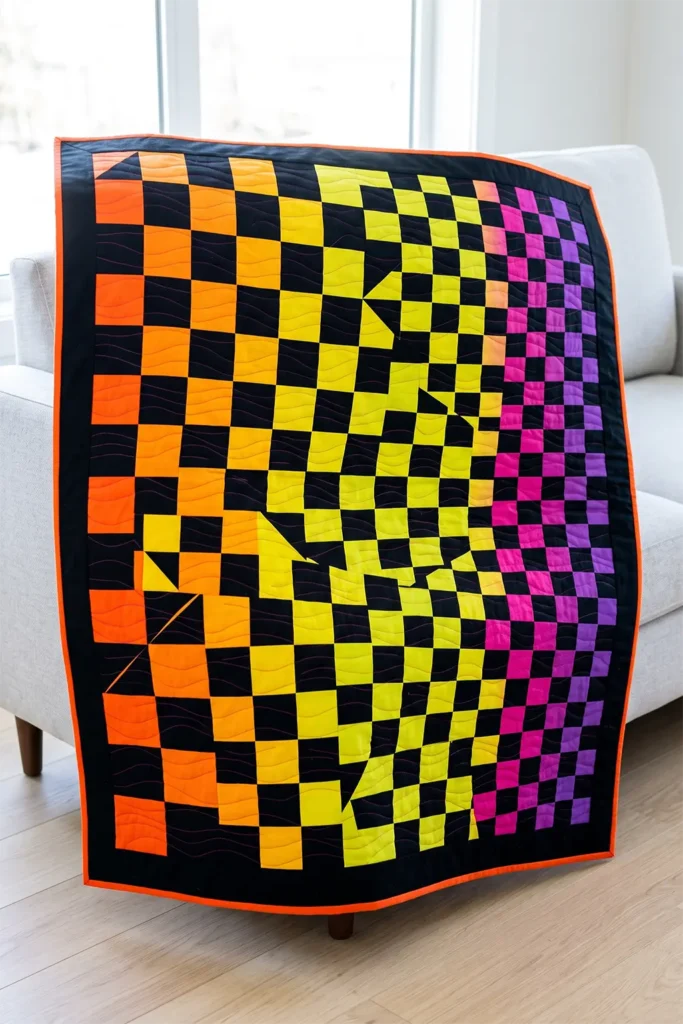
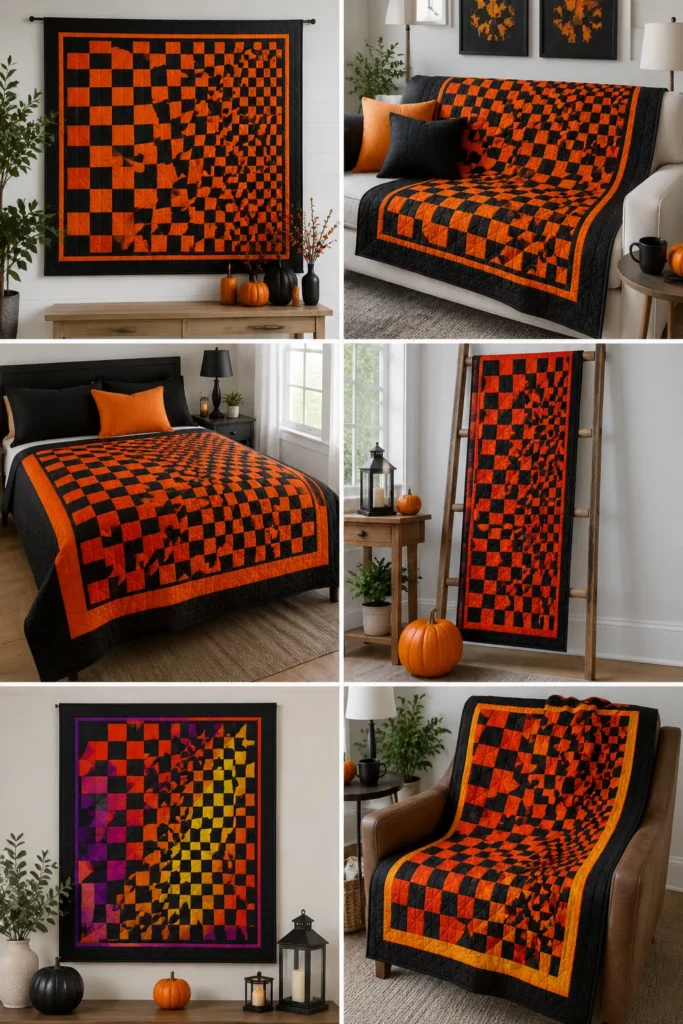
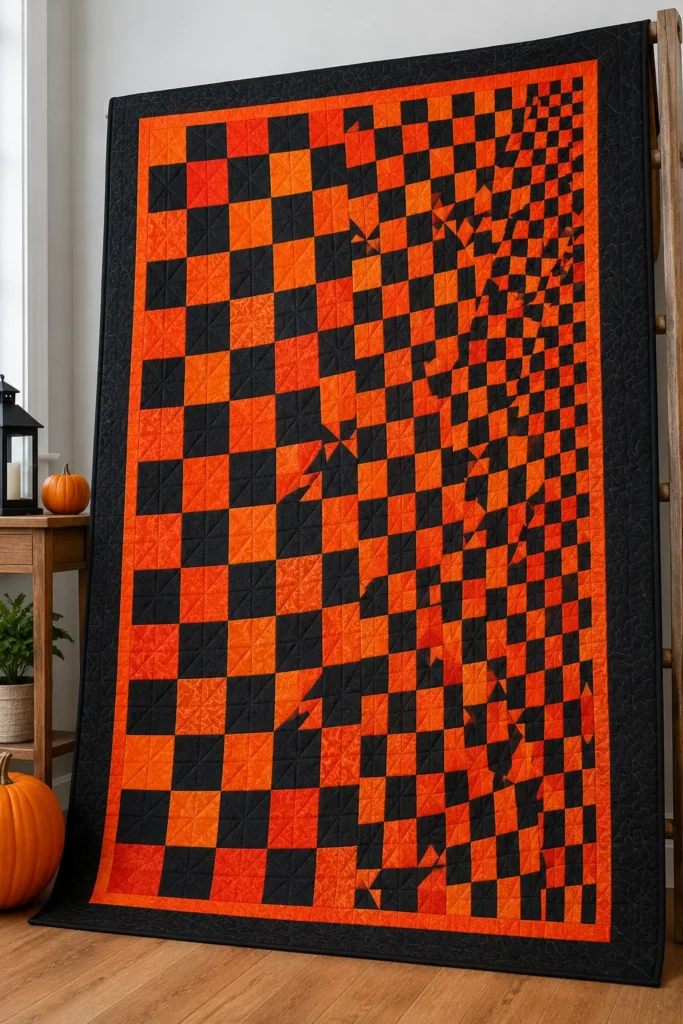
A Note on the Checkerboard
The checkerboard is one of the oldest patterns in human decoration, and its unsettling quality in Western imagery comes from a specific place.
Alternating light-dark squares appear on Egyptian tomb walls, Roman mosaic floors, and medieval heraldry — where the pattern is called checky — long before they appear on a game board. In heraldry the checkerboard often signaled a treasury or exchequer role. The English word exchequer, and by extension the Chancellor of the Exchequer, comes directly from the checkered cloth that medieval accountants laid across a table to count money in columns. The pattern was a calculating tool.
The eerie association is more recent and largely theatrical. Checkerboard floors were a fixture of Masonic lodge rooms, where the black-and-white pavement represented the duality of light and dark, good and ill. That imagery moved into stage magic, then into film — the checkered floor became visual shorthand for a place where reality is negotiable, from The Shining to Twin Peaks to countless music videos. A pattern that means “orderly accounting” in one context means “something is wrong here” in another, purely through repetition in film.
The orange-and-black color pairing is separate and much newer. It comes from the harvest season itself — orange from pumpkins, squash, and turning leaves; black from the lengthening nights — and was standardized commercially in the early twentieth century, when American manufacturers standardized Halloween decorations. Before that, Halloween imagery in Britain and Ireland used no particular color scheme.
Finished Size
This guide makes a distorted checkerboard throw built from three square sizes.
Square sizes and zones:
- Large zone: 4-inch finished squares, occupying the left third of the quilt
- Medium zone: 3-inch finished squares, occupying the center third
- Small zone: 2-inch finished squares, occupying the right third
Quilt measurements:
- Large zone: 5 columns x 15 rows of 4-inch squares — 20 x 60 inches
- Medium zone: 6 columns x 20 rows of 3-inch squares — 18 x 60 inches
- Small zone: 8 columns x 30 rows of 2-inch squares — 16 x 60 inches
- Total field: 54 x 60 inches
- Border: 3 inches finished
- Finished quilt: about 60 x 66 inches
Broken cells: 12 to 15 total, scattered across all three zones.
For a table runner, use only the medium and small zones, each at 12 rows, and finish at about 18 x 42 inches.
Materials Needed
For a 60 x 66-inch distorted checkerboard, gather:
- Black fabric: 3 yards — buy this as one continuous piece so the black never varies
- Bright fabrics: 2½ yards total across hot orange, tangerine, acid yellow, chartreuse, magenta, and electric violet
- Border fabric: 1 yard in true black
- Binding: ⅝ yard in hot orange or acid yellow
- Backing: 4 yards
- Batting: 68 x 74 inches
- Thread: charcoal for piecing, plus contrast for quilting
- Rotary cutter and cutting mat
- Quilting ruler, at least 24 inches
- Sewing clips or pins
- Iron and ironing board
Beginner tip: buy the black as a single cut rather than assembling it from scraps. Black fabrics vary far more than they appear on the bolt — some lean blue, some lean brown — and in a quilt where black is the constant, that variation is the one thing that will look like a mistake rather than a design choice.
Vibrant Checkerboard Palette
A checkerboard that should not be this color could include:
Brights:
- Hot orange
- Tangerine
- Acid yellow
- Chartreuse
- Magenta
- Electric violet
Constant: 7. True black
Distribute the six brights so they shift gradually across the quilt rather than scattering randomly. Hot orange and tangerine dominate the large zone, acid yellow and chartreuse take the center, magenta and electric violet fill the small zone. That progression makes the color drift feel connected to the scale shift, and the whole quilt reads as one continuous distortion rather than three separate panels.
Keep the black absolutely uniform. It is the structural element, and every distortion in the quilt is measured against it.
Cutting Measurements
Everything is cut as strips and crosscut, which is far faster than cutting individual squares.
Large zone — 4-inch finished squares:
- Cut strips at 4½ inches x width of fabric
- Black: 8 strips
- Brights: 8 strips total, mostly hot orange and tangerine
- Crosscut into 4½-inch squares: about 38 black, 37 bright
Medium zone — 3-inch finished squares:
- Cut strips at 3½ inches x width of fabric
- Black: 9 strips
- Brights: 9 strips total, mostly acid yellow and chartreuse
- Crosscut into 3½-inch squares: about 60 black, 60 bright
Small zone — 2-inch finished squares:
- Cut strips at 2½ inches x width of fabric
- Black: 12 strips
- Brights: 12 strips total, mostly magenta and electric violet
- Crosscut into 2½-inch squares: about 120 black, 120 bright
Broken cells — cut extra:
- 15 squares in each size, in assorted brights, to be cut diagonally or quartered
Border and binding:
- Border: 7 strips at 3½ inches x width of fabric
- Binding: 7 strips at 2½ inches x width of fabric
Use a ¼-inch seam allowance throughout.
Step-by-Step Guide
Step 1: Build the Strip Sets
Rather than sewing squares individually, sew paired strips and crosscut them.
For the large zone, sew one 4½-inch black strip to one 4½-inch bright strip along the long edge. Press seams toward the black.
Crosscut that strip set at 4½-inch intervals. Each cut gives you a two-square unit — one black, one bright — already joined.
Repeat for the medium zone at 3½ inches and the small zone at 2½ inches.
This method is roughly four times faster than piecing squares one at a time, and considerably more accurate.
Step 2: Check Your Seam Allowance
Measure one two-square unit from the large zone. It should be 4½ x 8½ inches.
If it is short, your seam allowance is running wide. Correct it now — an error here compounds across every one of the 435 squares in this quilt.
Step 3: Build the Large Zone Rows
Join the two square units end to end to form rows.
Each large-zone row needs 5 squares across, which means two and a half units — so alternate between rows that start with black and rows that start with a bright, and cut a unit in half where needed.
Make 15 rows. Press row seams in alternating directions so they nest.
Step 4: Introduce the Offset Drift
This is where the distortion begins.
Starting at row 4, shift each row sideways by ¼ inch relative to the row above, cumulatively. By row 15 the drift totals 3 inches.
To do this, trim a sliver from the leading edge of each row and add a matching sliver of the opposite color to the trailing edge. The row length stays constant at 20½ inches; only the alignment moves.
Work slowly and measure each row after trimming. The drift should be almost invisible row to row and unmistakable across the full zone.
Step 5: Build the Medium and Small Zones
Repeat Steps 3 and 4 for the medium zone: 6 squares across, 20 rows, each row measuring 18½ inches, with a cumulative drift of ⅛ inch per row starting at row 5.
Then the small zone: 8 squares across, 30 rows, each row measuring 16½ inches, with a cumulative drift of 1/16 inch per row starting at row 6.
The drift gets finer as the squares get smaller. That proportional relationship is what keeps the distortion from feeling like three unrelated effects rather than one continuous one.
Step 6: Make the Broken Cells
Take your extra squares and break them in three ways:
- Diagonal split: cut a square corner to corner and rejoin with a black triangle, so one cell is half bright and half black
- Quartered: cut a square into four smaller squares and rejoin in a mini-checkerboard
- Wrong color: simply place a bright square where a black one belongs
Make 12-15 in total, distributed across all three zones.
Fewer is better. The broken cells work because they are exceptions — twenty of them and the eye stops registering them as breaks.
Step 7: Insert the Broken Cells
Unpick the seams around a chosen square in a finished row, remove it, and sew the broken cell in its place.
Place them unevenly. Three in the large zone, five in the medium, and six or seven in the small is roughly right, and they should never form a line or a cluster.
Put one broken cell very close to a corner, where the eye lands first and least expects it.
Step 8: Join the Zone Panels
Join the 15 large-zone rows into a panel measuring 20½ x 60½ inches.
Join the 20 medium-zone rows into a panel measuring 18½ x 60½ inches.
Join the 30 small-zone rows into a panel measuring 16½ x 60½ inches.
Press all row seams open. With this many seams, open pressing is what keeps the panels flat.
Measure each panel. All three must be exactly 60½ inches tall or the vertical joins will not work.
Step 9: Join the Three Zones
Sew the large zone to the medium zone, and the medium to the small, along the long edges.
The scale change at each join will be abrupt, and that is intentional. Do not add sashing or a divider strip between zones — the hard transition is what makes the quilt read as a single grid under stress rather than three separate quilts.
The field should now measure 54½ x 60½ inches.
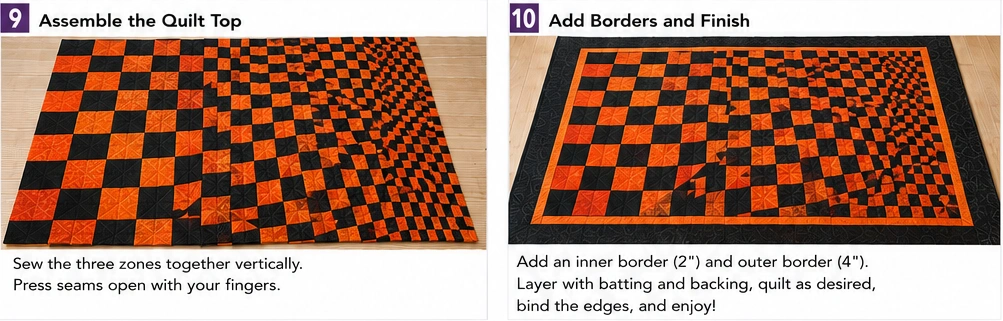
Step 10: Add the Border
Join the 3½-inch black border strips end to end.
Measure the quilt top through the center, never along the edges. Cut two side borders to that length, pin at the ends and center, and sew. Measure again horizontally for the top and bottom.
A plain black border is the right choice here. Anything patterned competes with a quilt that is already doing something complicated, and the black frame makes the distortion inside it read more clearly.
Press toward the border. The finished top should measure about 60½ x 66½ inches.
Step 11: Layer and Quilt
Layer the backing wrong side up, batting, then the quilt top right side up. Baste well.
Quilting options that suit this design:
- Straight lines following the grid, which emphasizes exactly where the grid stops being straight
- An allover curved or wavy design, which contrasts against the geometry and softens it
- Dense straight lines in one zone and open quilting in another, adding a third layer of distortion
Use a contrast thread — acid yellow or magenta stitching across both black and bright squares turns the quilting into a continuous element that ignores the grid entirely.
Step 12: Bind and Finish
Trim the quilt square.
Bind with 2½-inch strips joined on the bias in hot orange or acid yellow. A bright binding on a mostly-black border frames the whole quilt and picks up the interior color.
Add a hanging sleeve if the quilt will go on a wall, and add a label.
Assembly at a Glance
- Strip set — sew paired black and bright strips, crosscut into two-square units at three scales
- Rows — join units into rows, 15 large, 20 medium, 30 small
- Drift — shift each row sideways cumulatively, finer as the squares get smaller
- Break — make 12 to 15 broken cells and insert them unevenly across all three zones
- Join — assemble each zone panel to exactly 60½ inches tall, then join the three zones with no divider
- Finish — add a plain black border measuring through the center, quilt, and bind in a bright
Vibrant Checkerboard Combination Ideas
For a classic-plus quilt, use six shades of orange from tangerine to deep rust against black — recognizably traditional until you look closely.
For a neon checkerboard, use acid yellow, chartreuse, and lime against black with an acid yellow binding.
For a carnival checkerboard, use magenta, hot orange, teal, and electric violet in equal measure against black.
For a gradient quilt, run hot orange in the large zone through acid yellow in the center to electric violet in the small zone, so color and scale shift together.
For a two-color quilt, use only hot orange and black across all three zones — the distortions carry the whole design, with no color help at all.
For a one wrong square quilt, make a perfect checkerboard with no drift and no scale change, and break exactly one cell near the center. The least elaborate option, and the one people will stare at longest.
Beginner Tips for Success
Buy the black as one continuous cut. Black fabrics vary more than they look, and inconsistency in the constant element is the one thing that reads as a mistake.
Check your first two-square unit before making the rest. An error here multiplies across 435 squares.
Use strip sets, not individual squares. It is four times faster and more accurate.
Keep the drift small per row. A quarter inch is plenty in the large zone — the effect comes from accumulation, not from any single row.
Measure every zone panel to exactly 60½ inches tall. The three panels must match, or the vertical joins will pull.
Make fewer broken cells than you think you need. Twelve reads as unsettling; twenty-five reads as a scrap quilt.
Skip the divider strips between zones. The abrupt change in scale is the effect.
Styling Tip
A distorted checkerboard is graphic and demanding, so it needs a plain setting — a pale sofa, white bedding, or a light wall with nothing else on it. It rewards distance: from across a room the distortions resolve into a single wave, and up close they read as individual errors.
For a seasonal display, keep everything else absolutely simple. Plain black or clear glass, a single bright object echoing the binding color, and no other pattern anywhere nearby. This is also the most year-round design in the collection — a two-color version in orange and black stays graphic long after October, and a version in any other two colors is simply a modern quilt.
Gift Pairings
Leftover strip sets and squares make a matching set with almost no extra work:
- A checkerboard cushion cover at 18 inches from leftover two-square units
- A table runner using the small-zone squares with one broken cell
- A trick-or-treat drawstring bag in mini checkerboard
- A set of checkerboard mug rugs at three different scales
- A pieced zip pouch from leftover strip sets
- A hanging door banner in a narrow checkerboard column
- A 24-inch quilting ruler — the tool that makes long straight cuts accurate, and the best gift for anyone piecing at scale
Other Design Inspirations – Digitally Modified Images. Texture and color may vary from the actual product.
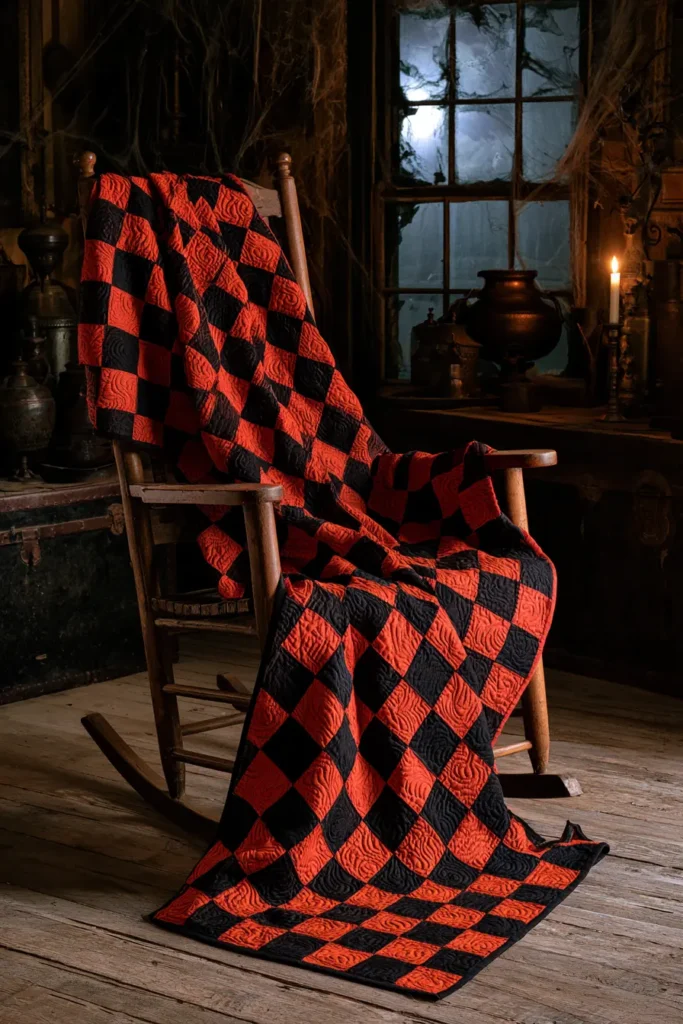
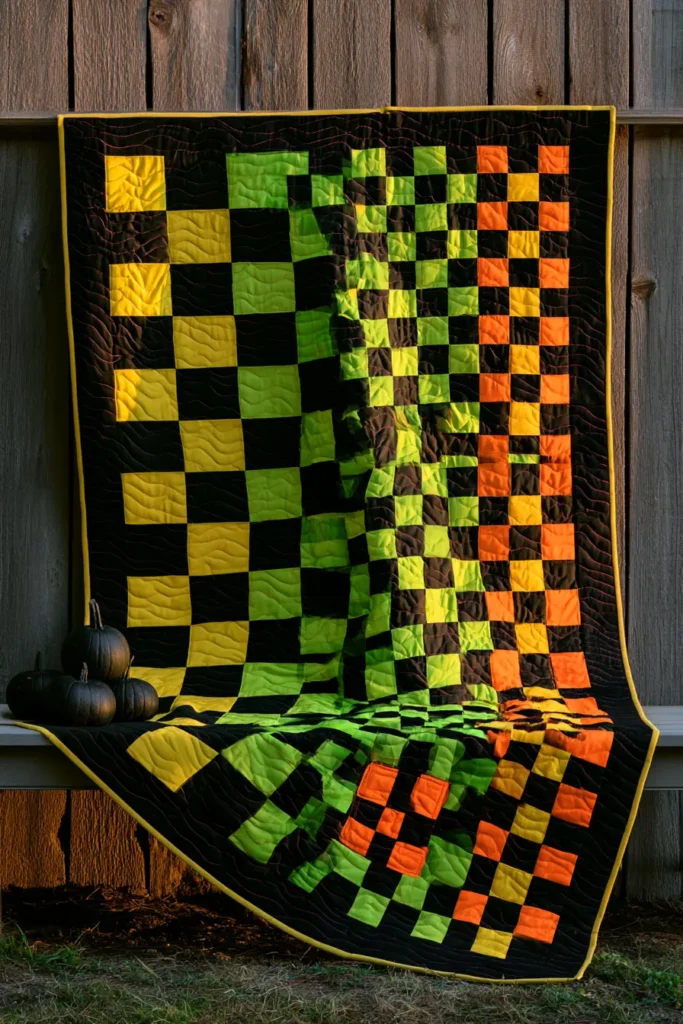
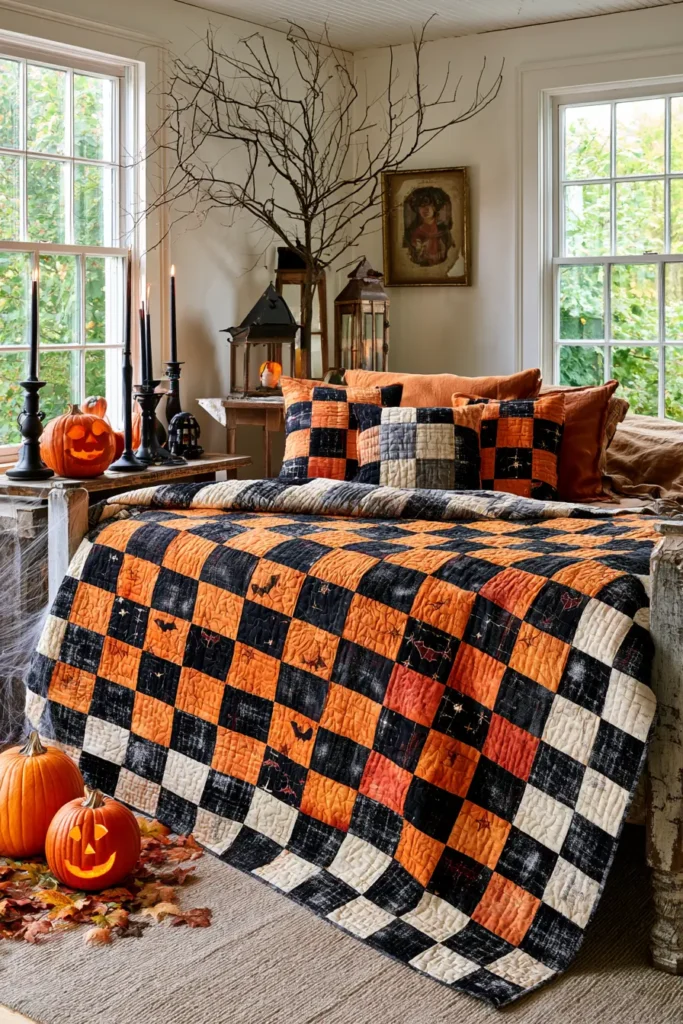
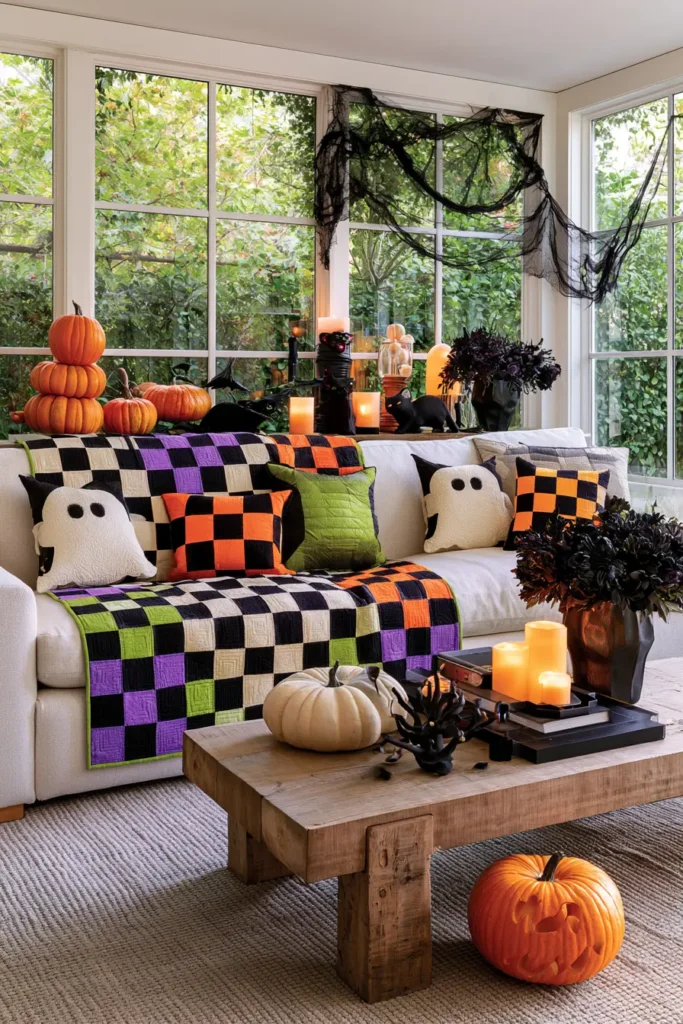
13. Halloween Log Cabin Quilt Block Variations
The Log Cabin is the most rearrangeable block in quilting. Every block is identical — a center square with strips added in rounds, light on one half, dark on the other — and yet twenty of them produce completely different quilts depending only on which way each block is turned. That property is what makes it the right block for a Halloween quilt with genuine menace: you can piece a set of cheerful bright blocks and then rotate them into a layout that looks like something opening up.
For a vibrant palette, run the light half in acid yellow, chartreuse, hot orange, and tangerine, and the dark half in true black, deep purple, aubergine, and midnight indigo. Keep every center square hot orange or acid yellow — the traditional glowing hearth, and the element that makes a swirling layout read as fire seen from a distance. Push two or three blocks off-palette with magenta or electric violet centers scattered through the quilt.
Why This Design Works
The Log Cabin’s split personality is built into its construction. Because strips are added in rounds and you assign light fabrics to two adjacent sides and dark to the other two, every finished block has a clean diagonal division running corner to corner. The block is essentially a pair of two-color triangles wearing a disguise.
That diagonal is what the layouts exploit. Rotate a block 90 degrees and its light half points somewhere new. Arrange twenty blocks so their diagonals agree, and you get a strong directional pattern. Arrange them so the diagonals radiate outward from a center point, and you get concentric rings. Arrange them so the diagonals almost agree but not quite, and the quilt looks like it is coming apart — which is the variation this guide builds toward.
The three classic settings each produce a different effect, and this section covers all three:
Straight Furrows — all blocks turned the same way, producing diagonal light-dark bands running corner to corner.
Barn Raising — blocks rotated in concentric rings, producing a diamond radiating from the center. This is the layout that reads as something opening.
Streak of Lightning — blocks alternating in a zigzag, producing jagged vertical bands.
Skills you build here: strip piecing in rounds, maintaining a square block through many seams, controlling light-dark value assignment, and — most importantly — the layout thinking that turns identical blocks into completely different quilts.
Design Inspirations – Digitally Modified Images. Texture and color may vary from the actual product.
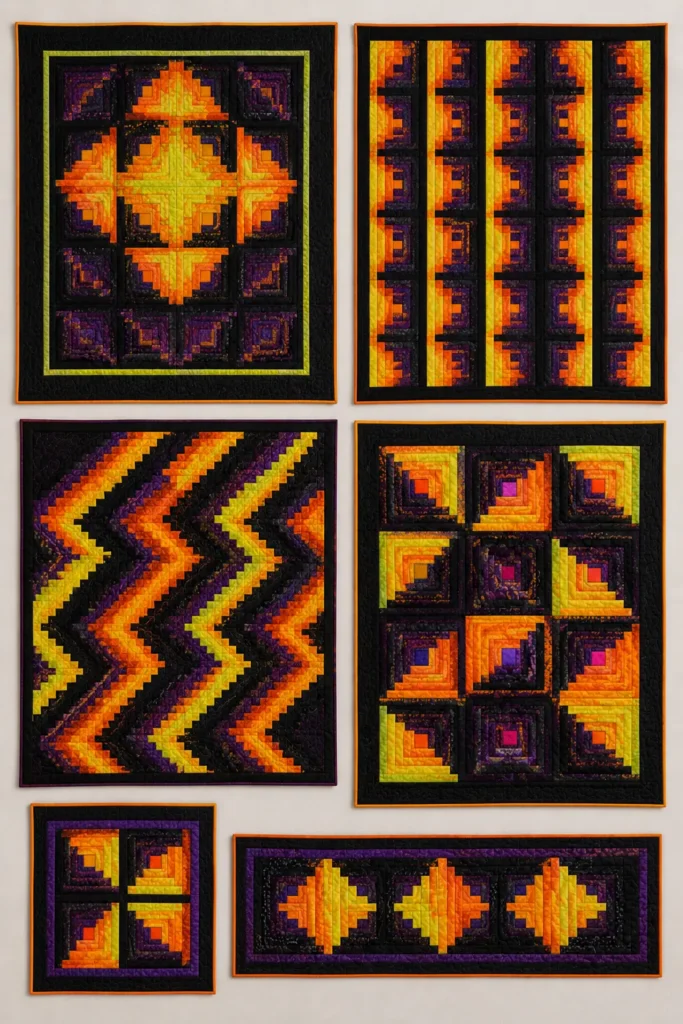
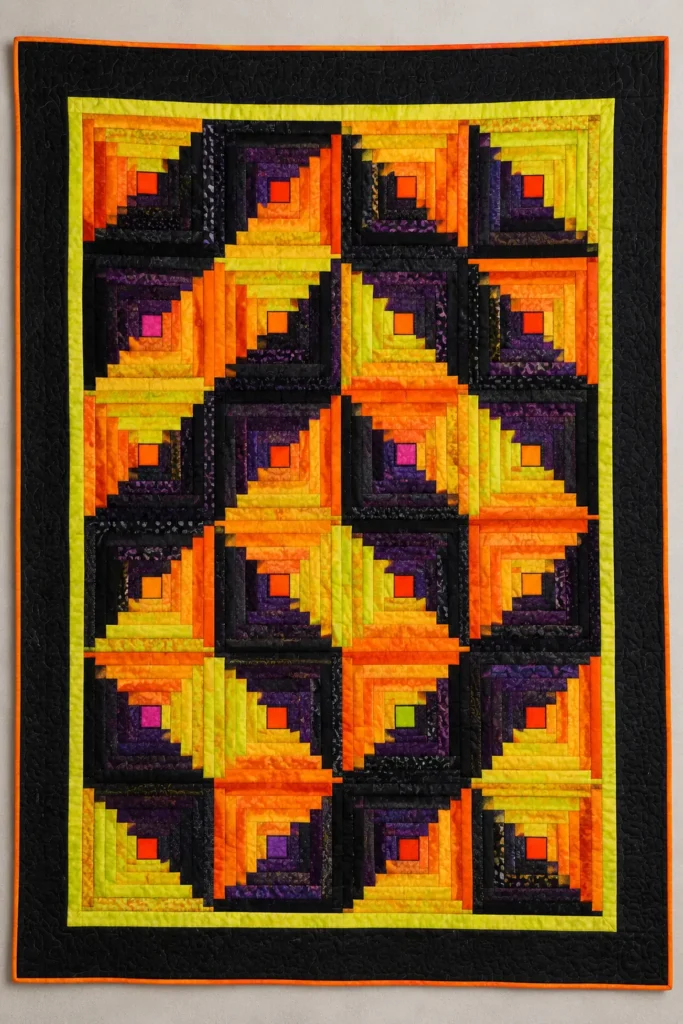
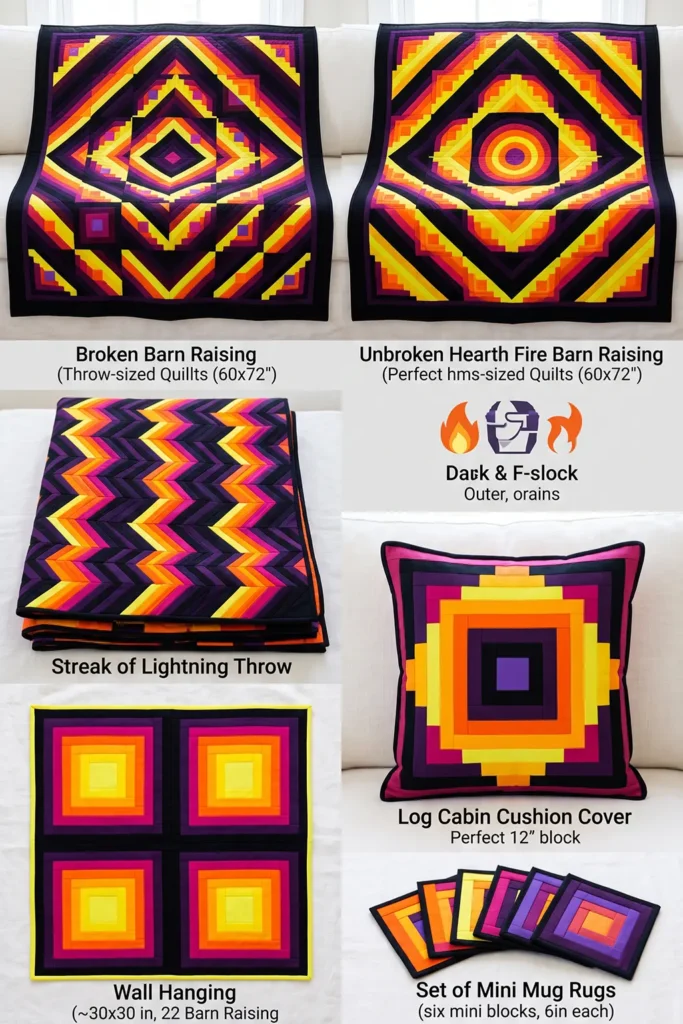
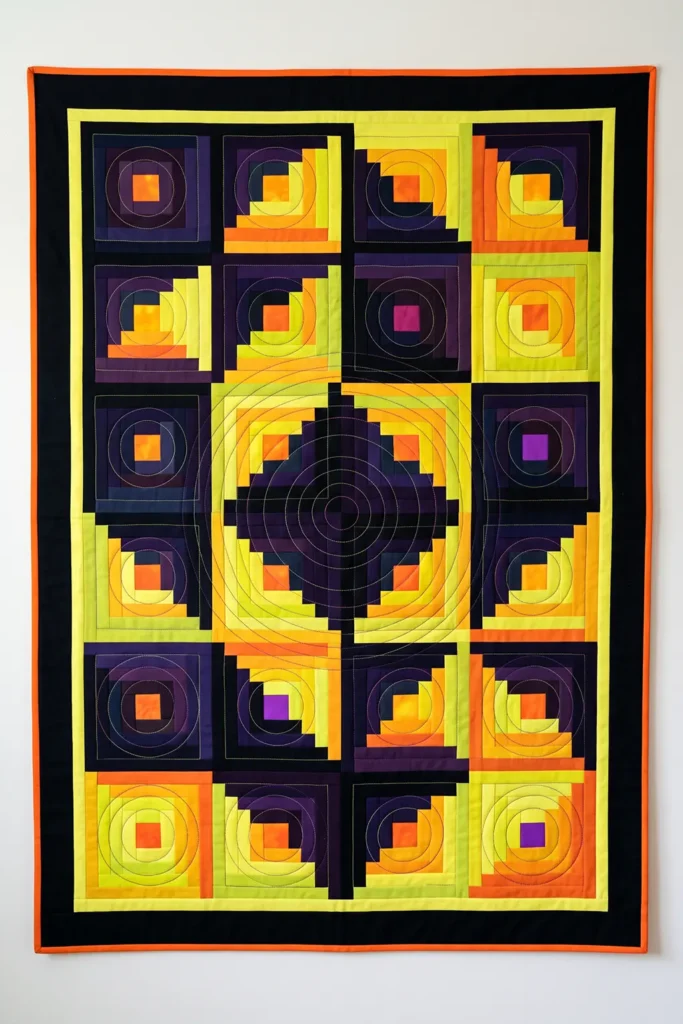
A Note on the Log Cabin
The Log Cabin is one of the most heavily storied blocks in American quilting, and the stories are worth separating from what is actually documented.
The block appears in American quilts from roughly the 1860s onward and quickly became widespread. The commonly repeated explanation is that it commemorates frontier cabins, with the red or yellow center square representing the hearth fire and the light and dark sides representing the sunlit and shadowed walls of a room. That reading is at least contemporary with the block’s popularity and appears in period sources.
Two other stories circulate constantly and are much weaker. The first is that a black center square signaled a station on the Underground Railroad, and that Log Cabin quilts were hung on fences as coded messages. This claim originates almost entirely from a single 1999 book and has been examined and rejected by most quilt historians — no period documentation supports it, and the enslaved people who escaped and later wrote or testified about their routes never mentioned quilt codes. The second is that the block was Abraham Lincoln’s campaign emblem, which conflates the block with the log cabin imagery genuinely used in the 1840 Harrison campaign.
What is well documented is more interesting anyway. Similar strip-around-a-center constructions appear in Egyptian mummy wrappings and in British and Irish textiles long before American quilting, and the form seems to have arisen independently in several places for the same practical reason: it uses narrow scraps of any length and requires no matched points.
That is worth knowing when you piece it. You are working in a form that exists because it wastes nothing.
Finished Size
This guide makes a 12-inch finished Log Cabin block and a throw-sized quilt from twenty of them.
Block measurements:
- Finished block: 12 x 12 inches
- Unfinished block: 12½ x 12½ inches
- Center square: 2½ inches finished
- Strip width: 1½ inches finished
- Rounds: 4 complete rounds of strips
- Strips per block: 16 — 8 light, 8 dark
Quilt measurements:
- Blocks: 20, set 4 across by 5 down
- Block field: 48 x 60 inches
- Inner border: 2 inches finished
- Outer border: 4 inches finished
- Finished quilt: about 60 x 72 inches
For a wall hanging, make 4 blocks in a Barn Raising 2 x 2 layout, add a 3-inch border, and finish at about 30 x 30 inches.
Materials Needed
For a 60 x 72-inch Halloween Log Cabin throw, gather:
- Light strip fabrics: 2 yards total across acid yellow, chartreuse, hot orange, and tangerine
- Dark strip fabrics: 2 yards total across true black, deep purple, aubergine, and midnight indigo
- Center squares: ⅓ yard in hot orange and acid yellow, plus scraps of magenta and electric violet
- Inner border: ⅓ yard in acid yellow
- Outer border: 1¼ yards in true black
- Binding: ⅝ yard in hot orange
- Backing: 4 yards
- Batting: 68 x 80 inches
- Thread: charcoal for piecing, plus contrast for quilting
- Rotary cutter and cutting mat
- Quilting ruler and a 12½-inch square ruler
- Design wall or a large flat surface
- Sewing clips or pins
- Iron and ironing board
Beginner tip: sort your fabrics into two piles — lights and darks — before you cut anything, and check them by squinting rather than by color. A mid-tone orange that reads as light next to black will read as dark next to acid yellow, and value is the only thing this block cares about.
Vibrant Halloween Palette
A hearth burning in the dark could include:
Lights:
- Acid yellow
- Chartreuse
- Hot orange
- Tangerine
Darks: 5. True black 6. Deep purple 7. Aubergine 8. Midnight indigo
Centers: 9. Hot orange 10. Acid yellow 11. Magenta — 2 blocks only 12. Electric violet — 1 block only
The value gap between your lights and darks needs to be wide and unambiguous. Log Cabin layouts only work if every block’s diagonal division is instantly readable from across the room — if a viewer has to squint to tell which half is which, no layout will produce a pattern.
Vary the specific fabrics within each pile freely. Twenty blocks using four lights and four darks in different combinations reads far richer than twenty identical blocks, and the layout still holds because value is doing the structural work.
Cutting Measurements
All strips are cut to 2 inches wide, then finished at 1½ inches.
Per block, cut:
- Center: one square, 3 x 3 inches
- Round 1: two light strips at 2 x 3 inches and 2 x 4½ inches; two dark strips at 2 x 4½ inches and 2 x 6 inches
- Round 2: two light strips at 2 x 6 inches and 2 x 7½ inches; two dark strips at 2 x 7½ inches and 2 x 9 inches
- Round 3: two light strips at 2 x 9 inches and 2 x 10½ inches; two dark strips at 2 x 10½ inches and 2 x 12 inches
- Round 4: two light strips at 2 x 12 inches and 2 x 13½ inches; two dark strips at 2 x 13½ inches and 2 x 12½ inches
Faster alternative: cut long 2-inch strips across the width of fabric and trim each one to length as you sew it on. This is how most quilters piece Log Cabins, and it removes the need to cut sixteen different lengths in advance.
For 20 blocks:
- Light strips: about 30 strips at 2 inches x width of fabric
- Dark strips: about 30 strips at 2 inches x width of fabric
- Centers: 20 squares at 3 x 3 inches
Borders and binding:
- Inner border: 6 strips at 2½ inches x width of fabric
- Outer border: 7 strips at 4½ inches x width of fabric
- Binding: 7 strips at 2½ inches x width of fabric
Use a ¼-inch seam allowance throughout.
Step-by-Step Guide
Step 1: Establish the Light and Dark Sides
Before sewing anything, decide the block’s orientation and keep it consistent for all twenty blocks.
The standard arrangement: light strips on the top and right sides, dark strips on the bottom and left sides. The diagonal division then runs from the lower-right corner to the upper-left corner.
Every block must follow the same rule. If some blocks are built light-on-the-left and others light-on-the-right, no layout will produce a coherent pattern — the rotations will fight each other.
Pin a note to your machine if it helps. This is the single most common Log Cabin error.
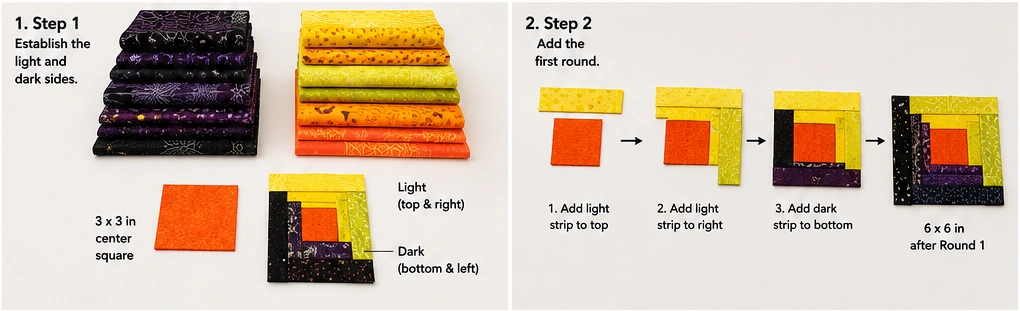
Step 2: Add the First Round
Start with the 3-inch center square.
Sew a light strip to the top of the center, trim it flush, and press away from the center.
Rotate the block a quarter turn counterclockwise. Sew a light strip to the new top edge, trim flush, press away.
Rotate again. Sew a dark strip, trim, press.
Rotate once more. Sew the second dark strip, trim, press.
Round 1 is complete. The unit should measure 6 x 6 inches.
Always press away from the center. Pressing toward the center piles every seam allowance into the middle of the block, and by round 4 that becomes a lump you cannot flatten.
Step 3: Add Rounds 2, 3, and 4
Repeat the same rotation sequence for each round — two lights, then two darks, always adding to the same edge after each quarter turn.
After each round, measure:
- After round 2: 9 x 9 inches
- After round 3: 12 x 12 inches
- After round 4: 12½ x 12½ inches, which is your unfinished block size
Trim the finished block square using a 12½-inch square ruler, keeping the center square centered.
If the block is consistently coming out small, your seam allowance is running wide — with sixteen seams per block, even a tiny error compounds badly.
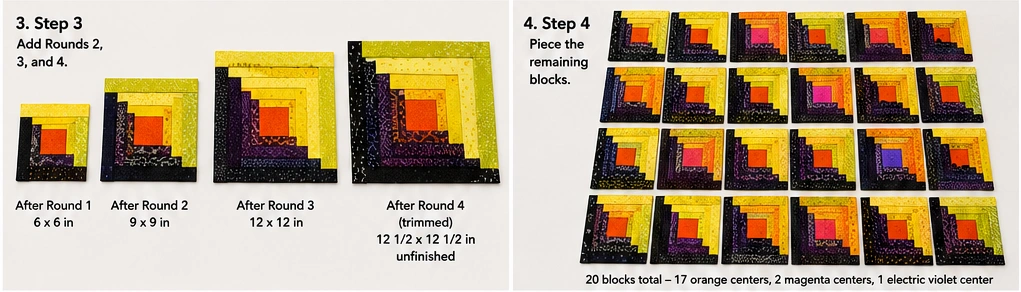
Step 4: Piece the Remaining Blocks
Make all 20 blocks, varying which specific lights and darks appear in each.
Give 17 blocks a hot orange or acid yellow center, 2 blocks a magenta center, and 1 block an electric violet center.
Work in rounds across all blocks rather than completing them one at a time — adding round 1 to twenty blocks, then round 2 to twenty blocks, is considerably faster.
Step 5: Try the Three Layouts
Lay all 20 blocks out 4 across by 5 down and photograph each of the three settings before committing.
Straight Furrows: turn every block the same way. Light and dark form continuous diagonal bands running corner to corner. Calm, orderly, and the least unsettling.
Barn Raising: rotate blocks so the dark halves form concentric diamonds radiating from the center. Because your centers are orange, this reads as something glowing at the middle with darkness opening outward. This is the layout that produces menace.
Streak of Lightning: alternate block rotation in pairs so the light-dark boundary zigzags vertically down the quilt. Jagged and restless.
Photograph all three. The blocks are identical, so this costs nothing but time, and the difference between them is dramatic.
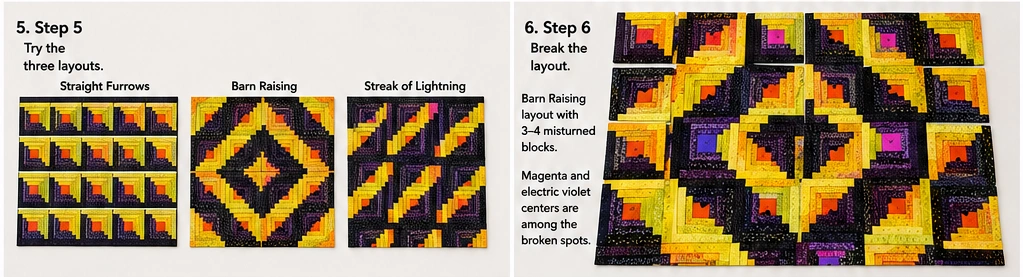
Step 6: Break the Layout
Whichever setting you choose, rotate three or four blocks the wrong way and scatter them unevenly.
In a Barn Raising, three misturned blocks make the concentric rings fail to close. The eye follows the diamond outward and finds the pattern broken in three places, which is far more unsettling than a layout that was never orderly to begin with.
Place your magenta and electric violet center blocks among the misturned ones. A block that is wrong in two ways at once — wrong rotation and wrong center — is the one people will keep coming back to.
Do not exceed four. Five or more and the layout stops reading as broken and starts reading as random.
Step 7: Join the Blocks into Rows
Once the layout is settled and photographed, sew the blocks into five rows of four with a ¼-inch seam allowance.
Press row seams in alternating directions so they nest when the rows are joined.
Work directly from your photograph. Twenty rotated blocks are extremely easy to reassemble in the wrong orientation, and a single block turned wrong by accident is indistinguishable from your deliberate breaks — which defeats the purpose of placing them carefully.
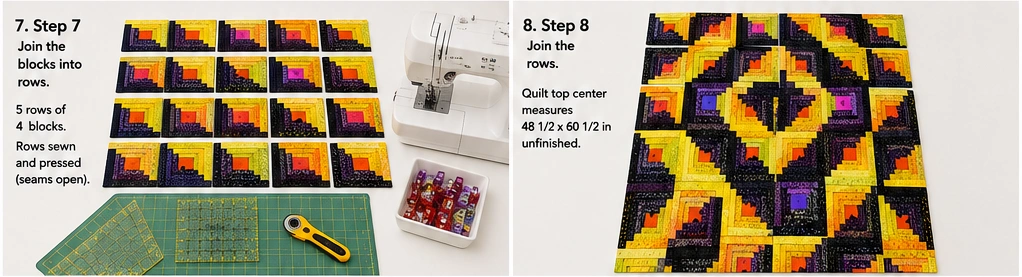
Step 8: Join the Rows
Sew the five rows together, nesting seams at every block intersection.
Press row seams open to reduce bulk. Log Cabin blocks have a lot of seam allowance, and open pressing keeps the top flat.
The block field should measure 48½ x 60½ inches unfinished.
Step 9: Add the Inner Border
Join the 2½-inch inner border strips end to end.
Measure the quilt top through the center, never along the edges. Cut two side borders to that length, pin at the ends and center, and sew.
Measure again horizontally through the center, cut the top and bottom borders, and sew.
Press toward the border.
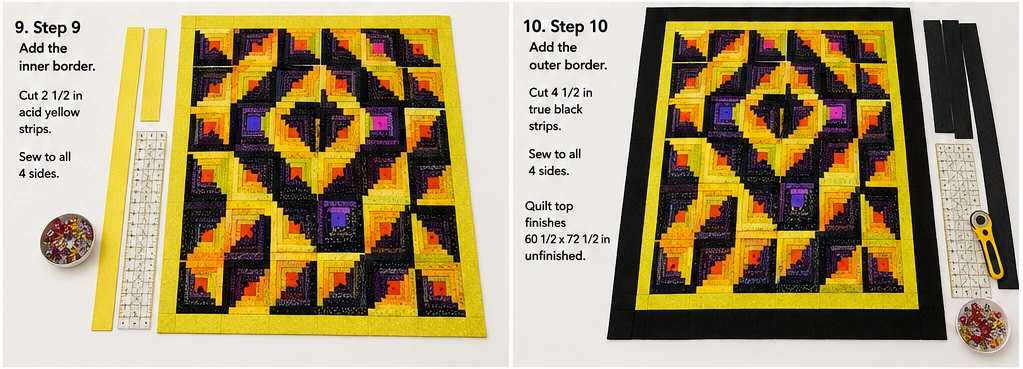
Step 10: Add the Outer Border
Join the 4½-inch outer border strips end to end and repeat the same measure-through-the-center process.
Press toward the outer border. The finished top should measure about 60½ x 72½ inches.
A black outer border frames a Log Cabin layout better than anything else — it contains the diagonal energy and makes the interior pattern read more sharply.
Step 11: Layer and Quilt
Layer the backing wrong side up, batting, then the quilt top right side up. Baste with pins or spray.
Quilting options that suit this design:
- Straight lines following the strip seams, reinforcing the concentric structure of each block
- Diagonal lines across the whole quilt, cutting against the block geometry
- Concentric spirals from each center square, echoing the hearth
Using a contrasting thread — acid yellow across the dark halves and deep purple across the light halves, changing thread as you cross the diagonal — is striking and not much extra work.
Step 12: Bind and Finish
Trim the quilt square.
Bind with 2½-inch strips joined on the bias in hot orange. A bright binding against a black border pulls the center-square color out to the edge of the quilt.
Add a hanging sleeve if the quilt will go on a wall, and add a label.
Assembly at a Glance
- Set the rule — lights on top and right, darks on bottom and left, identical for all twenty blocks
- Build in rounds — center square, then four rounds of two lights and two darks, pressing away from the center
- Measure and trim — 6 inches after round 1, 9 after round 2, 12 after round 3, trim to 12½ inches
- Test layouts — photograph Straight Furrows, Barn Raising, and Streak of Lightning before choosing
- Break it — misturn three or four blocks and scatter the odd-colored centers among them
- Finish — join rows with nested seams, add inner and outer borders, quilt and bind
Vibrant Log Cabin Combination Ideas
For a hearth fire quilt, use acid yellow and hot orange lights against true black and deep purple darks, all centers hot orange, set in Barn Raising.
For a poison-cabin quilt, use chartreuse and lime lights against aubergine and midnight indigo darks, with acid yellow centers.
For a carnival cabin quilt, use hot orange, magenta, and tangerine lights against black and deep purple darks, in Streak of Lightning.
For a furrows quilt, use acid yellow lights and black darks only, set in Straight Furrows with a single misturned block near one corner.
For a twenty-hearths quilt, give each block a different center color across orange, yellow, magenta, and violet, unified by identical lights and darks.
For a one-cold-hearth quilt, make nineteen centers hot orange and one center true black, placed slightly off-center in a Barn Raising setting. The least colorful option, and by a distance the most disquieting.
Beginner Tips for Success
Fix the light-dark rule before you start and never break it. Blocks built to opposite rules will not rotate into a coherent layout, and it is not correctable without unpicking.
Sort fabrics by value, not by color. A mid-tone reads differently depending on what sits beside it, and value is the only thing the layout responds to.
Press away from the center every time. Pressing inward builds an unflattenable lump by round 4.
Measure after every round. Sixteen seams per block means small errors compound fast, and catching it at round 2 is far cheaper than at round 4.
Photograph all three layouts before choosing. The blocks are identical, and the settings are dramatically different — it costs nothing but time.
Break the layout with no more than four blocks. Beyond that, it reads as random rather than wrong.
Work from your layout photograph when sewing rows. An accidentally rotated block is indistinguishable from a deliberate one.
Styling Tip
A Log Cabin quilt in a Barn Raising setting reads best from a distance and hung flat, where the concentric diamonds resolve, and the broken blocks become visible one at a time. On a bed, fold it so the center of the pattern stays in view rather than draping over the edge.
Keep the surroundings plain and light — the diagonal energy in this layout competes with any nearby patterning. For a seasonal display, a single cluster of orange candles beneath it echoes the center squares without adding pattern. In a two-color version, this is also the most year-round design in the collection; Log Cabin has never gone out of fashion, and nothing about the layout is inherently seasonal.
Gift Pairings
Leftover strips and spare blocks build a matching set easily:
- A single Log Cabin block as a 12-inch cushion cover
- A four-block Barn Raising wall hanging at 30 x 30 inches
- A table runner with three blocks in Straight Furrows
- A pieced zip pouch using one small Log Cabin block as the front panel
- A 12½-inch square trimming ruler — the tool that keeps Log Cabin blocks square, and the best gift for anyone starting out
- A set of mini Log Cabin mug rugs at 6 inches
- A trick-or-treat drawstring bag with a single glowing-center block on the front
Other Design Inspirations – Digitally Modified Images. Texture and color may vary from the actual product.
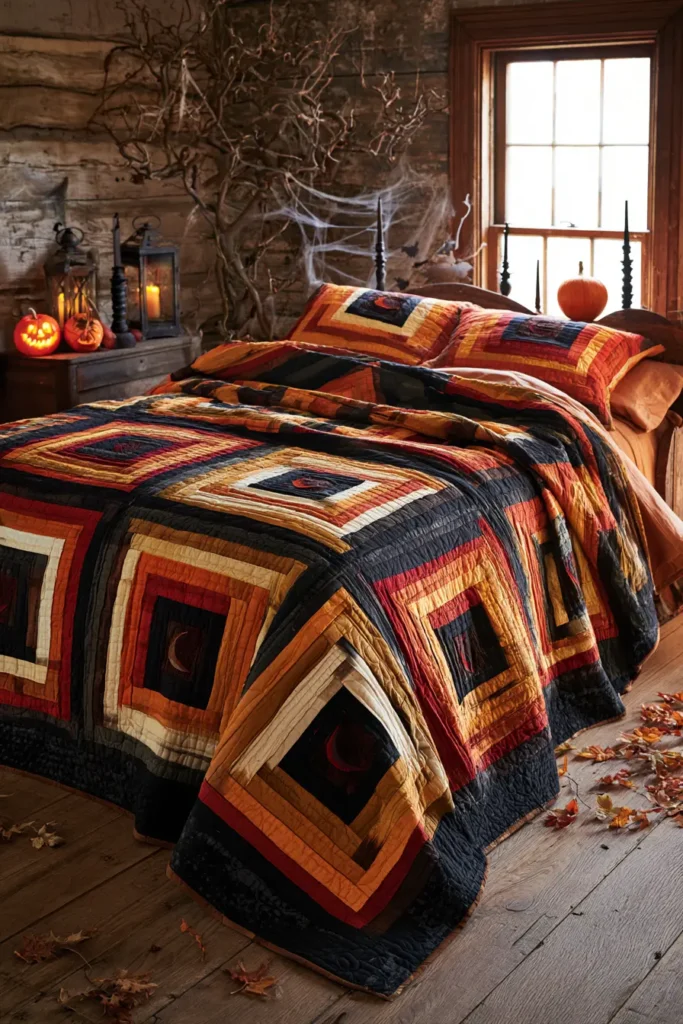
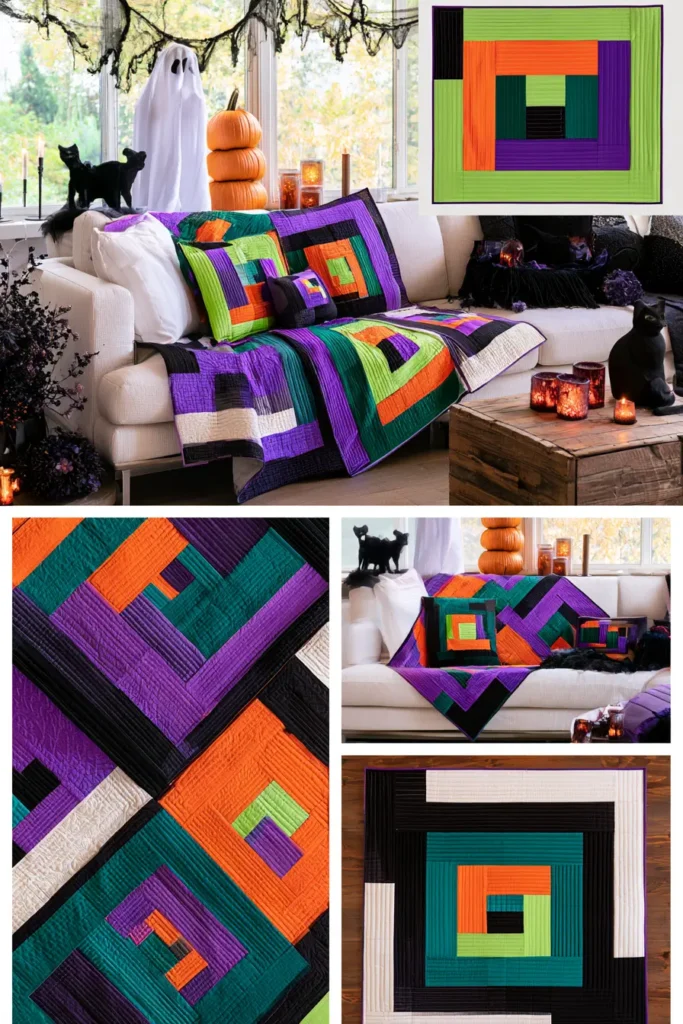
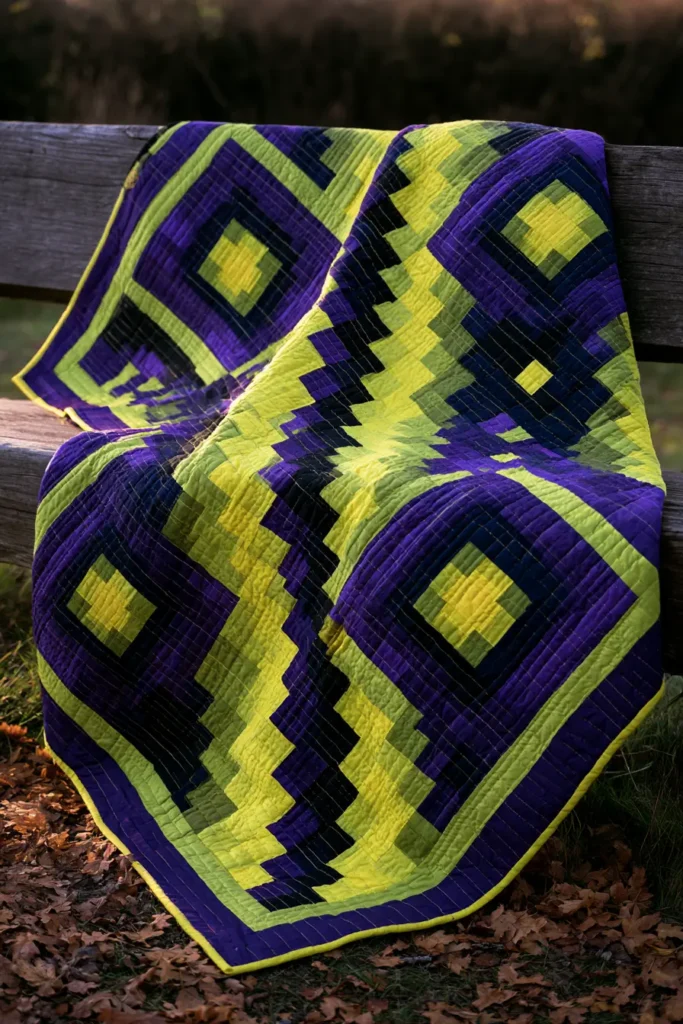
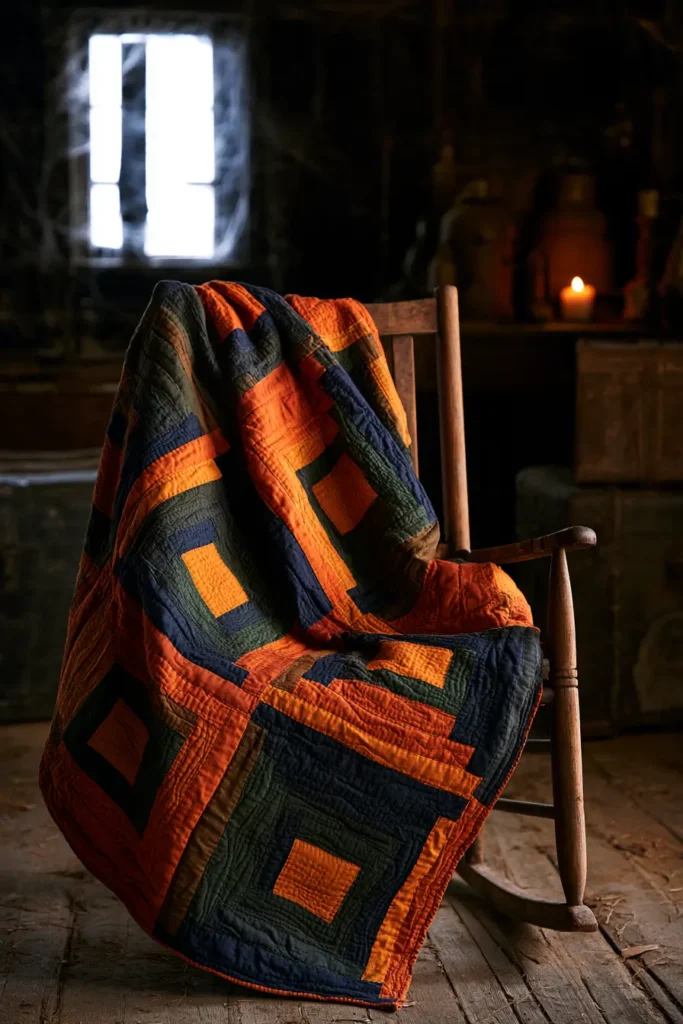
14. Quick Charm Pack and Jelly Roll Halloween Quilt Patterns
Pre-cuts exist to remove the slowest part of quilting, and in the second week of October that matters more than any other consideration. A charm pack is forty-two 5-inch squares, a jelly roll is forty 2½-inch strips, and both arrive already cut, already coordinated, and already square. Skip the cutting mat entirely, and a throw-sized Halloween quilt goes from a project to a weekend.
The catch is that speed usually costs atmosphere. A charm square quilt assembled straight from the pack is cheerful and flat — it reads as fabric, not as a design. This guide covers three fast layouts and the one decision that makes each of them genuinely unsettling instead of merely quick: a black sashing grid that turns the bright squares into things glimpsed through a lattice, rather than a field of pretty patchwork.
For a vibrant palette, use a Halloween charm pack or build your own from hot orange, tangerine, acid yellow, chartreuse, magenta, electric violet, and teal, cut with true black as the constant. The brights should be genuinely bright — pastels disappear against black, and the whole effect depends on the squares glowing out of the grid.
Why This Design Works
The black grid does the work. Bright squares floating on a light background read as confetti. The same squares, set into a heavy black lattice, read as windows — small illuminated openings in something solid — and the eye starts to treat the black as foreground rather than background. That inversion is the entire trick, and it costs one extra fabric and about forty minutes.
Charm squares suit this better than any other pre-cut because they are already the right scale. At 5 inches, a square is large enough to read as an opening and small enough that a throw-sized quilt contains sixty-three of them, which is enough repetition for the lattice to establish itself.
The jelly roll variations work on a related principle. Narrow strips at 2½ inches read as bars rather than shapes, and a quilt of alternating bright and black strips reads as a fence or a grate. Neither is a picture of anything, which is why both continue to work after the seasonal association wears off.
Design Inspirations – Digitally Modified Images. Texture and color may vary from the actual product.
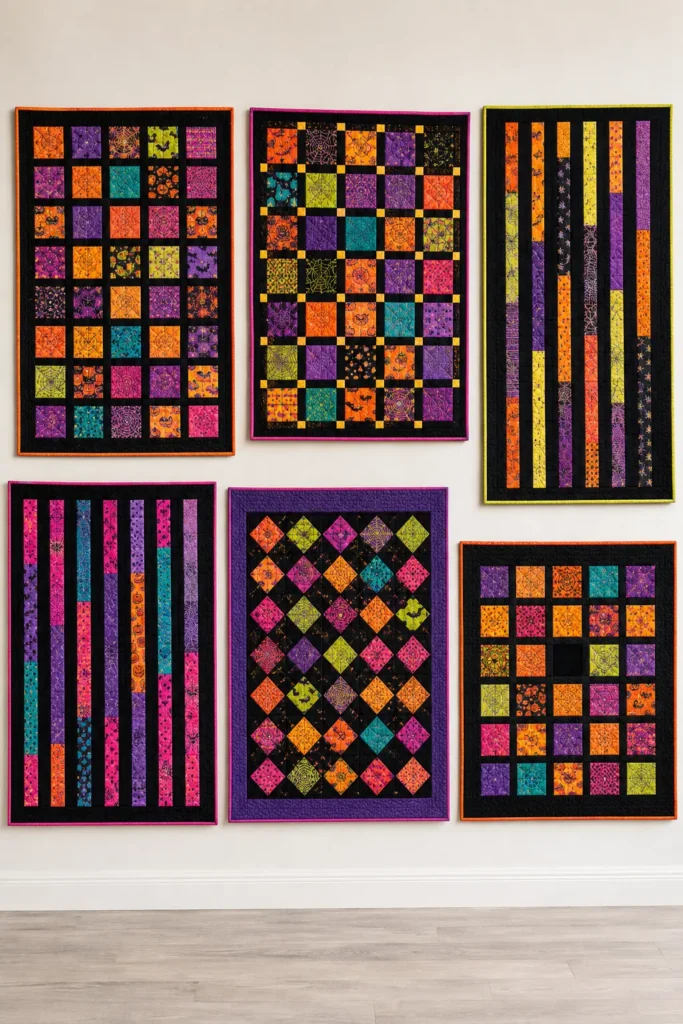
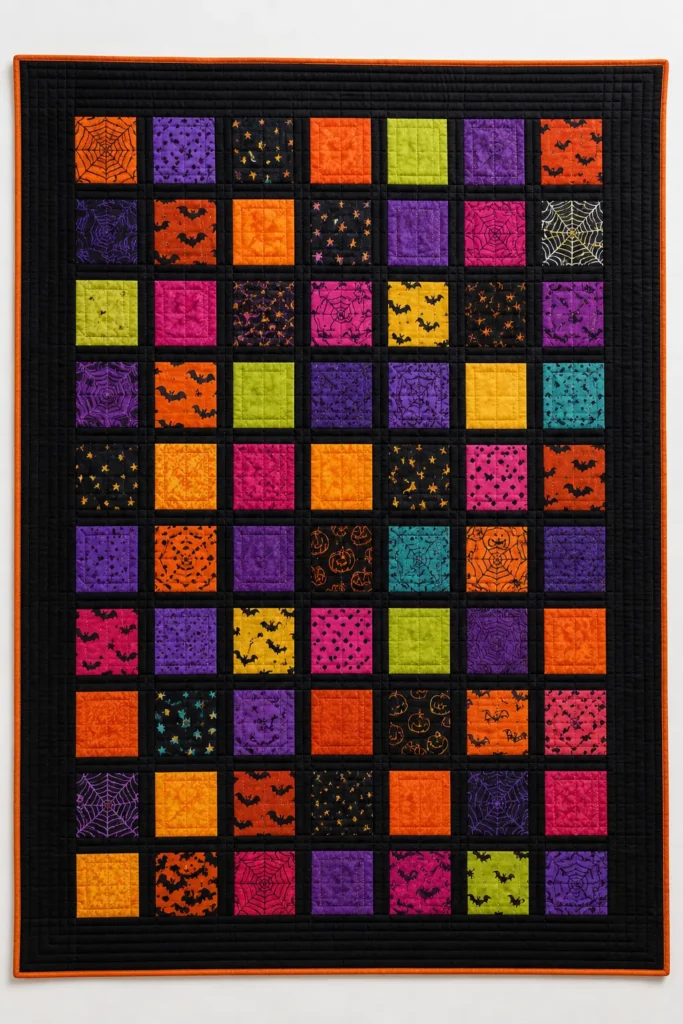
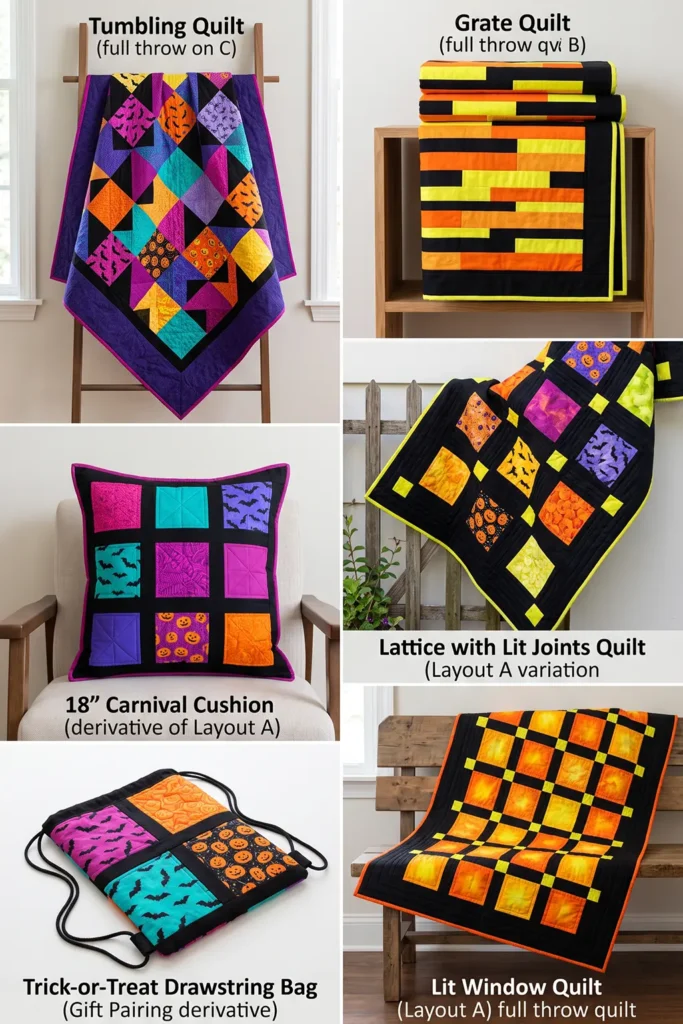
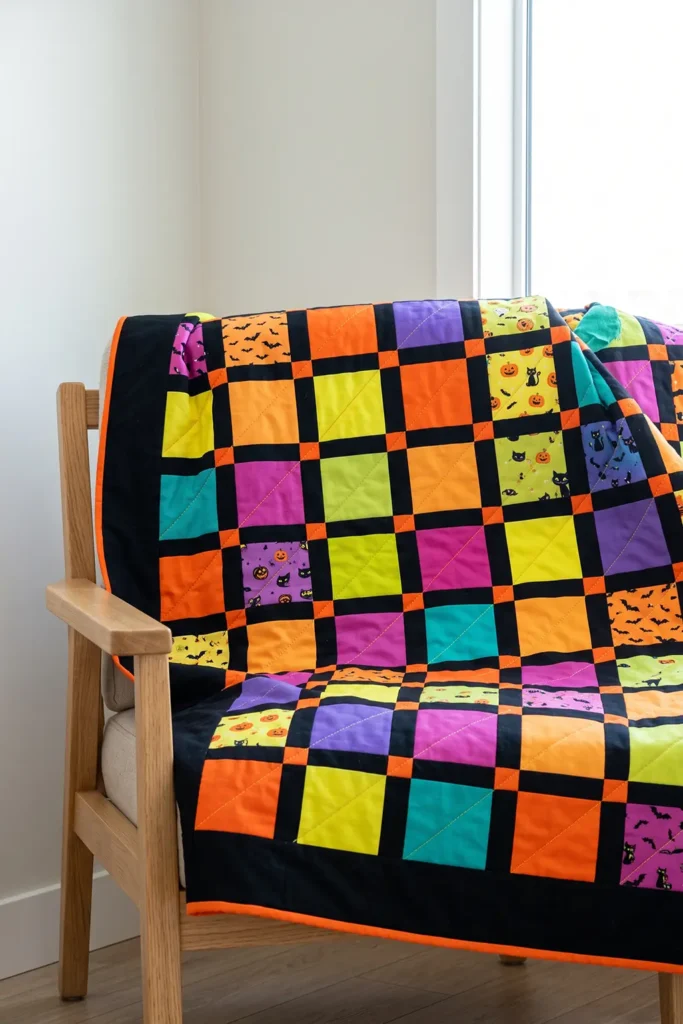
The three layouts in this guide run from fastest to slowest:
Layout A — Charm Square Lattice. 63 charm squares in a black sashing grid. Roughly four hours to a finished top.
Layout B — Jelly Roll Bars. Alternating bright and black strips, full length, with a stagger break. Roughly three hours.
Layout C — Charm Square Tumble. Charm squares set on point in a black field. Roughly six hours, and the most striking of the three.
Skills you build here: sashing construction with cornerstones, strip-set assembly, setting blocks on point, and — most transferable — using a single constant fabric to unify uncoordinated brights.
A Note on Pre-Cuts
Pre-cut fabric bundles are much newer than most quilters assume. Moda introduced the Jelly Roll in 2006, followed quickly by Charm Packs, Layer Cakes, and Honey Buns, and the entire category is barely twenty years old. The naming convention was deliberately domestic and edible, and it worked well enough that the terms are now used generically across the industry regardless of manufacturer.
The sizes were not arbitrary. Two and a half inches was chosen because it ends at 2 inches, which cleanly divides into almost every traditional block size — 4, 8, 12, and 16 inches all work. Five inches finishes at 4½ and pairs naturally with the 2½-inch strip, so a charm square and two jelly roll strips make a tidy unit. The system was designed to interlock.
What pre-cuts changed most is who quilts. Rotary cutting accurately is the highest barrier for a beginner, and it is the step where most first quilts go wrong — a sixteenth of an inch of drift across forty squares becomes a top that will not lie flat. Removing that step allowed many people to make a successful first quilt, and the traditional apprenticeship of ruining several before getting one right largely disappeared.
The one thing worth knowing: pre-cuts have a pinked edge, and the measurement is taken from peak to peak. That means the usable square is very slightly smaller than the stated size, which is why patterns written for pre-cuts often specify a scant ¼-inch seam.
Finished Size
Layout A — Charm Square Lattice
- Charm squares: 63, at 5 inches, finishing 4½ inches
- Sashing: 1½ inches finished, in black
- Grid: 7 across x 9 down
- Field: 43½ x 55½ inches
- Border: 4 inches finished
- Finished quilt: about 52 x 64 inches
Layout B — Jelly Roll Bars
- Strips: 40, at 2½ inches, finishing 2 inches
- Arrangement: alternating bright and black, running the full quilt length
- Field: 48 x 60 inches
- Border: 3 inches finished
- Finished quilt: about 54 x 66 inches
Layout C — Charm Square Tumble
- Charm squares: 42, set on point
- Setting triangles: cut from black yardage
- Field: 45 x 58 inches
- Border: 4 inches finished
- Finished quilt: about 54 x 66 inches
Materials Needed
For Layout A — Charm Square Lattice:
- Charm packs: 2, or 63 squares at 5 x 5 inches in Halloween brights
- Sashing and cornerstones: 1½ yards in true black
- Border: 1 yard in true black
- Binding: ⅝ yard in hot orange
- Backing: 3½ yards
- Batting: 60 x 72 inches
For Layout B — Jelly Roll Bars:
- Jelly roll: 1, or 20 strips at 2½ inches in Halloween brights
- Black strips: 20 at 2½ inches x width of fabric
- Border: ¾ yard in true black
- Binding: ⅝ yard in acid yellow
- Backing: 3½ yards
- Batting: 62 x 74 inches
For Layout C — Charm Square Tumble:
- Charm pack: 1, or 42 squares at 5 x 5 inches
- Setting and corner triangles: 2 yards in true black
- Border: 1 yard in deep purple
- Binding: ⅝ yard in magenta
- Backing: 3½ yards
- Batting: 62 x 74 inches
For all three:
- Thread: charcoal for piecing, plus contrast for quilting
- Rotary cutter and cutting mat
- Quilting ruler
- Sewing clips or pins
- Iron and ironing board
Beginner tip: buy two charm packs for Layout A rather than one. A single pack gives 42 squares and the lattice needs 63, and matching a second pack after the first is opened is harder than it sounds — dye lots vary, and Halloween lines sell out by mid-October.
Vibrant Pre-Cut Palette
If you are building your own pack rather than buying one:
Brights:
- Hot orange
- Tangerine
- Acid yellow
- Chartreuse
- Magenta
- Electric violet
- Teal
Constant: 8. True black
Avoid anything that reads as muted or dusty. Pre-cut Halloween lines often include grays, creams, and dusty oranges intended to soften the palette — those squares vanish against a black grid, leaving holes in the lattice where the eye expects light. Pull them out and use them on the backing.
If your pack contains printed novelty fabrics — bats, pumpkins, cats — mix them freely with solids. Against a heavy black grid, the difference between a print and a solid matters much less than the difference between bright and dull.
Cutting Measurements
Layout A — Charm Square Lattice
From black yardage, cut:
- Vertical sashing: 54 strips at 2 x 5 inches
- Horizontal sashing: 56 strips at 2 x 5 inches
- Cornerstones: 48 squares at 2 x 2 inches
- Border: 6 strips at 4½ inches x width of fabric
Layout B — Jelly Roll Bars
- Bright strips: 20, used at full width of fabric
- Black strips: 20 at 2½ inches x width of fabric
- Border: 6 strips at 3½ inches x width of fabric
Layout C — Charm Square Tumble
From black yardage, cut:
- Setting triangles: 5 squares at 7¾ x 7¾ inches, each cut twice diagonally to yield 4 triangles
- Corner triangles: 2 squares at 4⅛ x 4⅛ inches, each cut once diagonally
- Alternate squares: 30 at 5 x 5 inches
- Border: 6 strips at 4½ inches x width of fabric
Use a scant ¼-inch seam allowance with pre-cuts, since the pinked edges make the usable measurement slightly under the stated size.
Step-by-Step Guide
Step 1: Sort the Squares by Brightness
Before sewing anything, spread the charm squares out and remove any squares that read as muted, gray, or dusty.
Squint at the pile from a few feet away. Anything that recedes rather than glows should come out. On a black grid, a dull square is a hole.
Sort what remains into rough color families so you can distribute them evenly rather than clustering.
This takes ten minutes and is the highest-value step in the whole project.
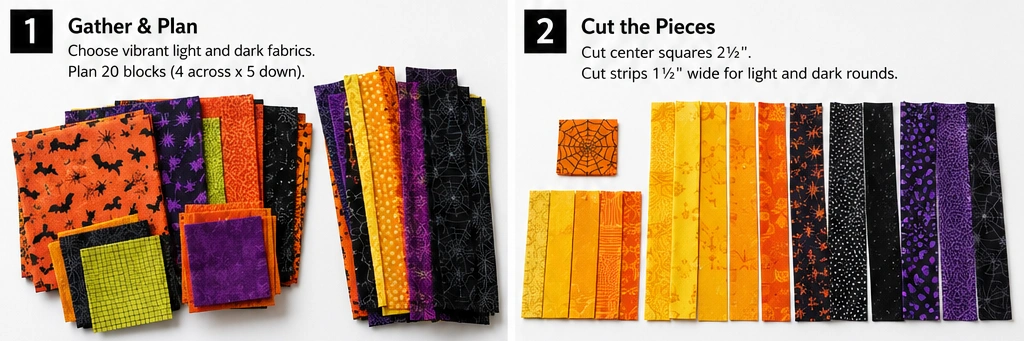
Step 2: Build the First Sashed Row — Layout A
Sew a 2 x 5-inch black sashing strip to the right edge of a charm square, then another charm square, then sashing, continuing across.
Each row needs 7 charm squares and 6 vertical sashing strips between them, plus one at each end.
Press all seams toward the black sashing. This is what makes the seams nest at the cornerstones later, and it also keeps the black looking crisp rather than shadowed by a bright seam allowance showing through.
Each finished row should measure 43½ x 5 inches.
Make 9 rows.
Step 3: Build the Horizontal Sashing Rows — Layout A
Between each row of charm squares sits a horizontal sashing row: alternating 2 x 5-inch black strips and 2 x 2-inch cornerstones.
For a plain lattice, cut the cornerstones from black as well — the grid then reads as continuous.
For a brighter version, cut the cornerstones from acid yellow or hot orange. The grid then reads as a lattice with lit joints, which is more striking and slightly less menacing.
Each sashing row needs 7 sashing strips and 8 cornerstones, measuring 43½ x 2 inches.
Make 10 rows — one above each charm row and one below the last.
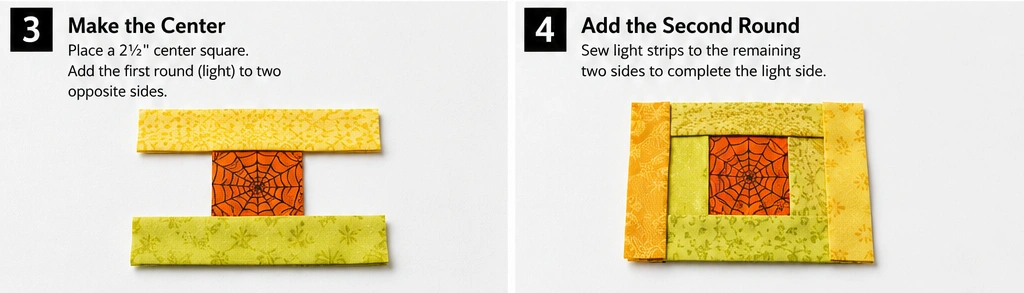
Step 4: Assemble the Lattice — Layout A
Join the rows in order: sashing row, charm row, sashing row, charm row, and so on, ending with a sashing row.
Nest the seams at every cornerstone. Because all the charm-row seams press toward the black, they will nest naturally against the sashing rows.
The field should measure 43½ x 55½ inches unfinished.
Step 5: Build the Jelly Roll Bars — Layout B
Sew a bright strip to a black strip along the long edge. Press toward the black.
Repeat with all 20 pairs.
Join the pairs side by side into a full quilt top, keeping the bright-black alternation consistent.
The break: after every fourth pair, offset the next pair by 6 inches vertically, then trim the top and bottom flush at the end. That single stagger stops the quilt from reading as a plain striped throw and makes the bars look like something misaligned.
The field should measure 48½ x 60½ inches.
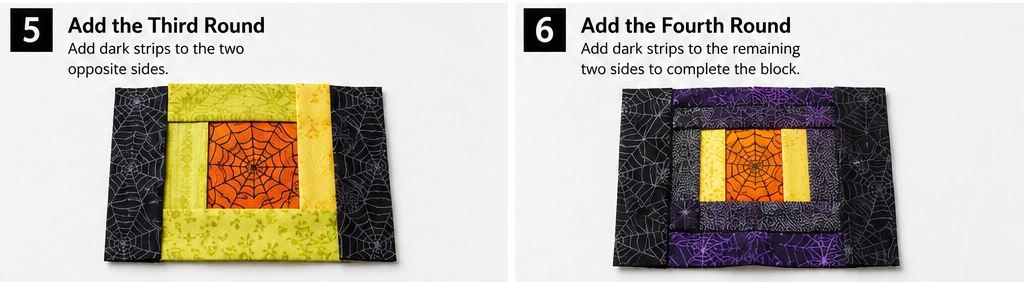
Step 6: Set the Squares on Point — Layout C
Arrange the charm squares and black alternate squares in a checkerboard, rotated 45 degrees so they sit as diamonds.
Fill the edges with the setting triangles, and the four corners with the corner triangles.
Work in diagonal rows rather than horizontal ones — this is how on-point quilts are always assembled, and trying to sew straight rows will not work.
Sew each diagonal row, pressing seams toward the black, then join the rows.
The bias edges around the outside will stretch easily. Handle them gently and avoid pressing along the outer edge until the border is on.
The field should measure about 45½ x 58½ inches.
Step 7: Square the Field
Whichever layout you built, lay the field flat and check that the corners are square and the edges are straight.
For Layouts A and B, trim any small variation flush.
For Layout C, the outer edges are on the bias and will have grown slightly — trim to a straight line, taking care not to stretch as you cut.
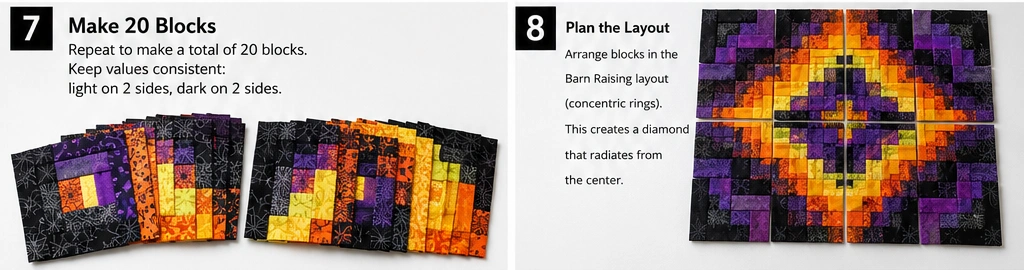
Step 8: Add the Border
Join the border strips end to end.
Measure the quilt top through the center, never along the edges. Cut two side borders to that length, pin at the ends and center, and sew.
Measure again horizontally through the center, cut the top and bottom borders, and sew.
Press toward the border.
A black border on Layouts A and B extends the grid to the quilt’s edge. On Layout C, a deep purple border separates the black setting triangles from the binding, preventing the outer edge from disappearing.
Step 9: Layer and Baste
Layer the backing wrong side up, batting, then the quilt top right side up.
Baste with pins or spray. Pre-cut quilts have a very regular seam distribution, which makes them easier to baste evenly than most quilts.
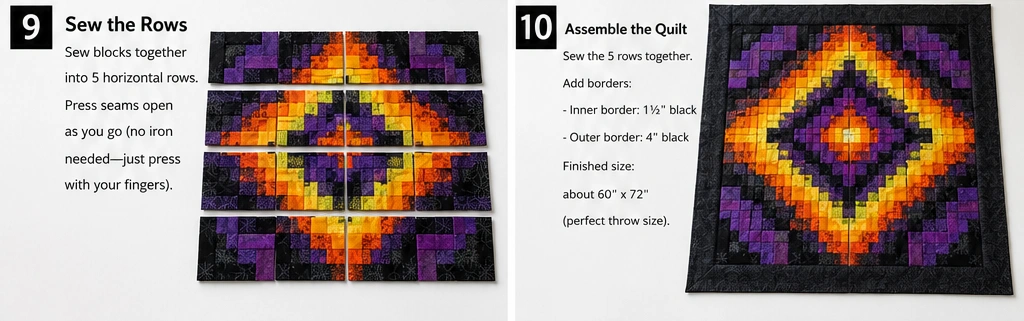
Step 10: Quilt
Fast options that suit a fast quilt:
- Straight lines down each sashing strip — quick, reinforces the lattice, and requires no marking
- An allover loop or swirl on a walking foot or free motion
- Diagonal lines at 3-inch spacing across the whole quilt, cutting against the grid
A contrast thread — acid yellow across black, or black across the brights — turns the quilting into a visible design layer without adding time.
For the fastest possible finish, stitch in the ditch along every sashing seam. It takes under two hours on a throw and looks deliberate.
Step 11: Bind
Trim the quilt square.
Bind with 2½-inch strips joined on the bias. A bright binding — hot orange, acid yellow, or magenta — against a black border pulls the interior color out to the very edge and finishes the quilt sharply.
For speed, machine-bind: stitch the binding to the back first, fold to the front, and topstitch down.
Step 12: Label and Finish
Add a hanging sleeve if the quilt will go on a wall, and add a fabric label.
On a quilt made in a hurry, the label is the thing most often skipped and most regretted later.
Assembly at a Glance
- Sort — pull every muted or dusty square out of the pack before starting
- Build rows — charm squares with black sashing between, pressing every seam toward the black
- Add sashing rows — alternating strips and cornerstones, nesting at every joint
- Assemble — join rows in order to a field of 43½ x 55½ inches
- Border — measure through the center, add black borders on all four sides
- Finish — baste, quilt in the ditch or allover, and machine-bind in a bright
Vibrant Pre-Cut Combination Ideas
For a lit window quilt, use hot orange and acid yellow charm squares in a black lattice with black cornerstones.
For a lattice with a lit-joints quilt, use the same brights, but cut the cornerstones in acid yellow so the grid glows at every intersection.
For a carnival quilt, use magenta, teal, electric violet, and hot orange squares with a black grid and magenta binding.
For a grate quilt, use Layout B with only two bright colors — hot orange and acid yellow — alternating with black bars.
For a tumbling quilt, use Layout C with charm squares in every bright available against black setting triangles and a deep purple border.
For a one-dark window quilt, build any layout and replace a single charm square with a black one, positioned slightly off-center. The fastest possible way to make a quick quilt unsettling.
Beginner Tips for Success
Pull the muted squares before you start. On a black grid, a dusty square is a hole in the lattice, and no amount of good piecing will fix it.
Buy two charm packs for Layout A. Sixty-three squares means one pack will not cover it, and matching a second later is unreliable.
Use a scant ¼-inch seam with pre-cuts. Pinked edges are measured peak-to-peak, so the usable fabric is fractionally under the stated size.
Press every seam toward the black. It makes the seams nest at the cornerstones and keeps bright seam allowances from shadowing through.
Handle Layout C’s outer edges gently. Those are bias edges, and they will stretch if you press along them before the border is on.
Measure borders through the center. Measuring along the edge is the fastest way to get wavy borders on an otherwise quick quilt.
Machine-bind if you are working to a deadline. It takes a fraction of the time and looks entirely intentional.
Styling Tip
A lattice quilt is graphic and reads best flat — hung on a pale wall, or spread across a bed where the whole grid stays visible. Folded over a chair arm, the lattice breaks up, and the effect is lost.
Keep the surroundings plain. A black grid full of bright squares is already busy, and anything patterned nearby will fight it. For a seasonal display, a single row of plain candles or one bowl of dark plums is enough.
Of the three layouts, the jelly roll bars version is the most year-round — narrow alternating stripes in any two colors read as a modern quilt long after October, so it is worth considering the palette with that in mind if you want the quilt out for more than four weeks.
Gift Pairings
Leftover squares and strips make a matching set with almost no extra effort:
- A nine-square lattice cushion cover at 18 inches
- A trick-or-treat drawstring bag from four charm squares and black sashing
- A table runner using one row of the lattice layout
- A set of charm square mug rugs, one square each with a black border
- A pieced zip pouch from leftover jelly roll strips
- A charm pack in a coordinating line — the easiest gift for any quilter, and always used
- A hanging door banner from three sashed squares in a vertical column
Other Design Inspirations – Digitally Modified Images. Texture and color may vary from the actual product.
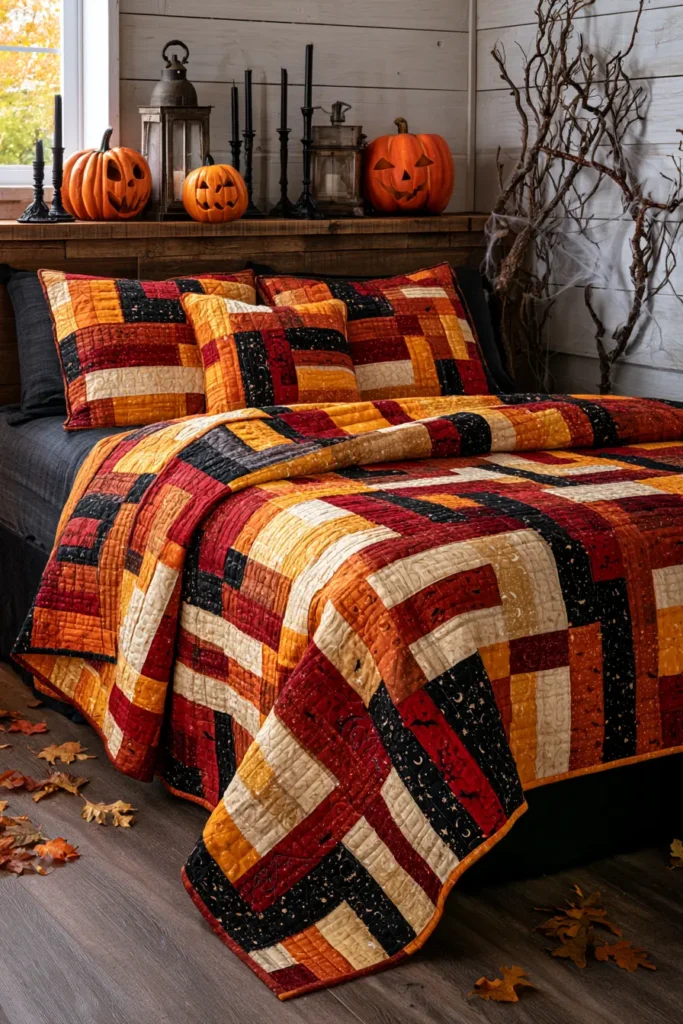
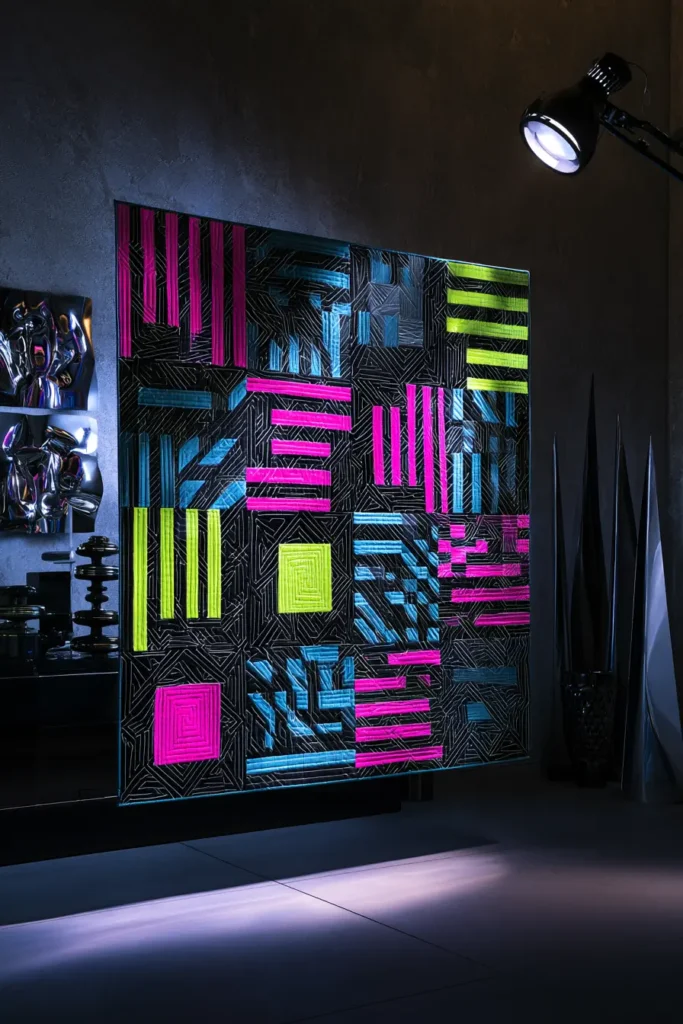
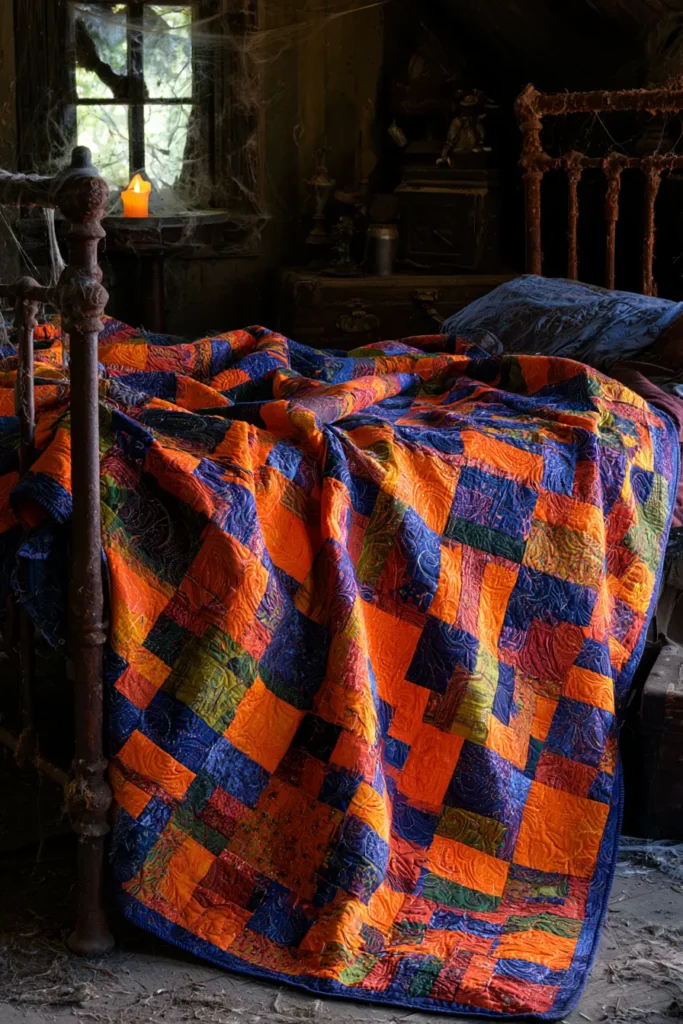
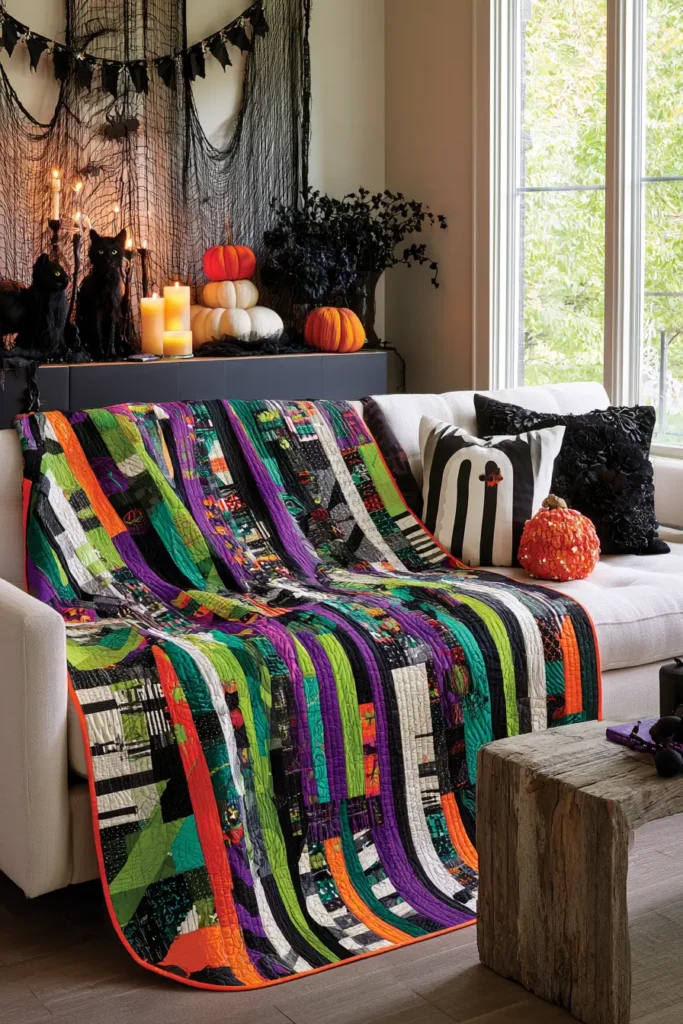
15. Halloween Sampler Quilt Layouts for Every Skill Level
A sampler quilt is the only project in this collection that uses every other block on the page. Instead of repeating one design twenty times, you make one of each — witch hats, spider webs, bats, skulls, monsters, houses — and the challenge shifts entirely from piecing to arrangement. Twelve unrelated blocks in a grid look like a page from a pattern book. The same twelve blocks in a considered layout look like a single quilt, and that difference is the whole skill of this section.
It is also the most forgiving format for mixed ability. Every block finishes at the same size, so a beginner’s slightly wobbly candy corn and an intermediate quilter’s precise spider web sit side by side without either one looking wrong. A sampler absorbs variation in a way a repeating quilt never does.
For a vibrant palette, unify everything with true black as the constant background and let the blocks themselves run through hot orange, acid yellow, chartreuse, magenta, electric violet, and teal. The black is what turns twelve different designs into one quilt — and the scary comes from the layout itself, which this guide builds asymmetrically so the eye never settles.
Why This Design Works
A sampler fails in one specific way: it reads as a collection rather than a composition. Twelve blocks of equal weight, evenly spaced in a neat grid, give the eye nowhere to go and nothing to prioritize. Every block competes with every other one, and the quilt looks like a display case.
Three decisions fix it, and all three are layout decisions rather than piecing ones.
A constant background. Every block, regardless of its design, uses the same true black background fabric. Nothing else unifies a sampler as effectively — not a shared palette, not a shared block size. The eye reads the black as continuous space and the blocks as things sitting in it.
Unequal block sizes. Rather than twelve 12-inch blocks, this layout uses one 24-inch anchor block, four 12-inch blocks, and eight 6-inch blocks. That hierarchy tells the eye where to look first, and the descending scale creates the same receding effect as in the bat-and-moon layout.
Off-center placement. The anchor block sits off-center, and the smaller blocks cluster unevenly around it. A centered anchor is stable and calm; an off-center anchor with an uneven scatter is not, and that instability is where the unease comes from.
Skills you build here: modular layout planning, resizing blocks up and down without redrafting them, sashing to unequal grids, and composing a quilt where no two units match — which is the hardest layout problem in quilting and the most transferable.
Design Inspirations – Digitally Modified Images. Texture and color may vary from the actual product.
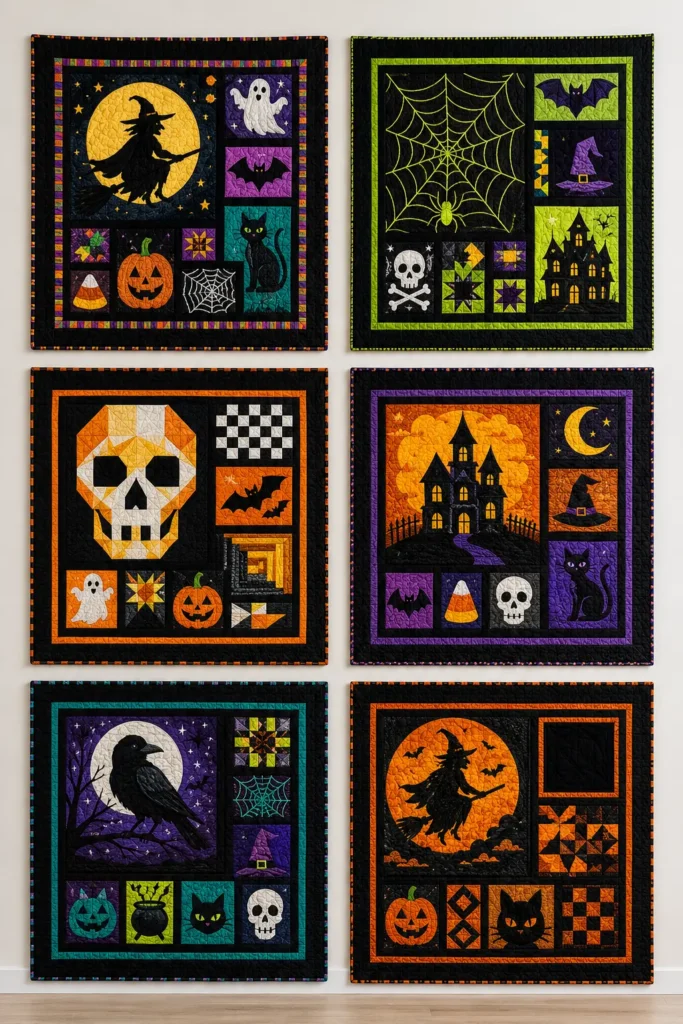
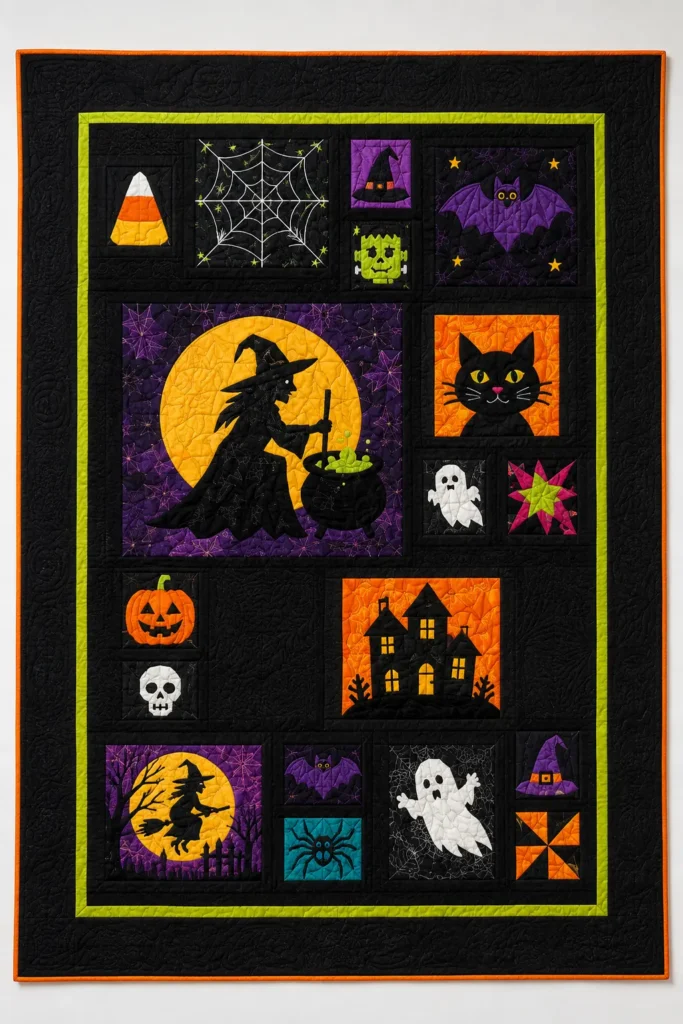
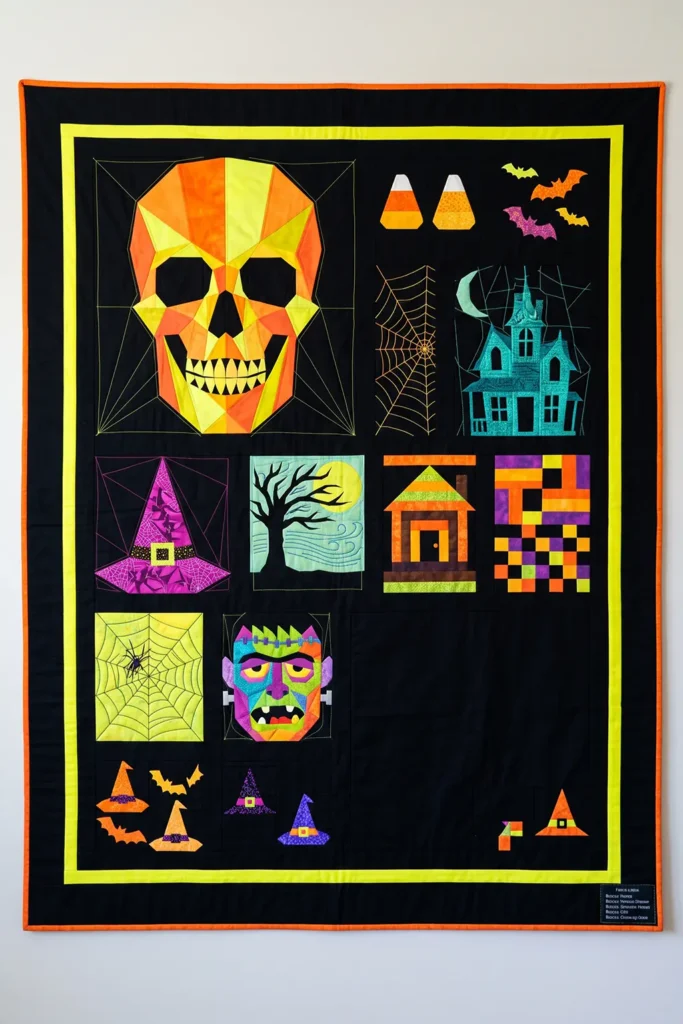
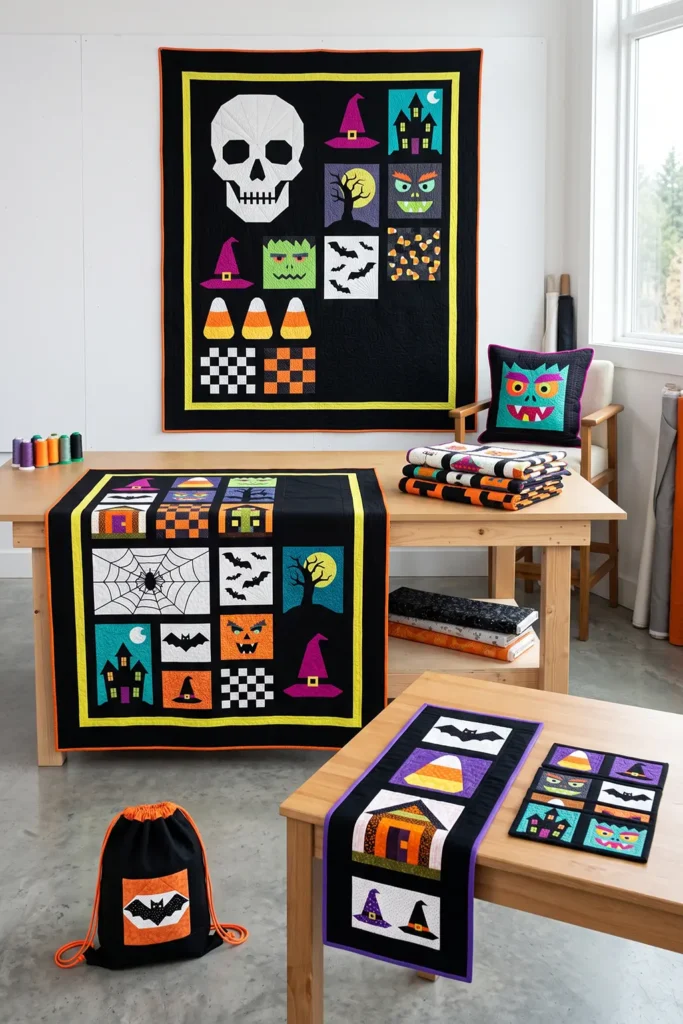
A Note on Sampler Quilts
The sampler has a longer and more practical history than its modern “block of the month” reputation suggests.
Before printed patterns were widely available, a sampler was a reference document. A quilter would piece one example of each block she knew and keep the finished quilt as a record — literally a sample book in cloth. She didn’t choose blocks for how they looked together; she chose them because she could make them. Many surviving nineteenth-century American samplers are visually chaotic for exactly that reason, and they were never intended as unified designs.
The related friendship quilt, or album quilt, tradition worked differently. Each block was made by a different person, often signed in ink or embroidery, and the quilt was assembled and given to someone leaving a community — a minister moving on, a family heading west. Baltimore Album quilts of the 1840s and 1850s are the most elaborate surviving examples, with intricate appliqué blocks contributed by different makers and combined into a single top. The variation between blocks was the point, not a problem to solve.
The modern sampler inverts that entirely. Where a historic sampler recorded difference, a contemporary one works to disguise it — matched sizes, controlled palettes, consistent backgrounds, all in service of making twelve different blocks look like one deliberate quilt.
Worth knowing when you plan your layout: you are working against the grain of the format’s own history, and the tools for doing it are all in the arrangement rather than the piecing.
Finished Size
This guide makes an asymmetric sampler throw from thirteen blocks at three sizes.
Block sizes:
- Anchor block: 1 at 24 x 24 inches finished
- Medium blocks: 4 at 12 x 12 inches finished
- Small blocks: 8 at 6 x 6 inches finished
Layout structure:
- Sashing: 2 inches finished, in true black
- Field: 48 x 60 inches
- Inner border: 2 inches finished
- Outer border: 4 inches finished
- Finished quilt: about 60 x 72 inches
Suggested block assignments by skill level:
- Anchor (24 inches): geometric skull, or a single large spider web
- Medium (12 inches): witch hat, haunted house, tree and moon, monster face
- Small (6 inches): candy corn, bats, log cabin, checkerboard, small witch hats
For a wall hanging, use one 12-inch anchor, two 6-inch blocks, and four 3-inch blocks, finishing at about 30 x 30 inches.
Materials Needed
For a 60 x 72-inch asymmetric sampler, gather:
- Background fabric: 3 yards in true black — buy as one continuous cut
- Block fabrics: 2½ yards total across hot orange, tangerine, acid yellow, chartreuse, magenta, electric violet, and teal
- Detail fabrics: ½ yard in bright white for eyes, teeth, and moons
- Sashing: 1¼ yards in true black
- Inner border: ⅓ yard in acid yellow
- Outer border: 1¼ yards in true black
- Binding: ⅝ yard in hot orange
- Backing: 4 yards
- Batting: 68 x 80 inches
- Lightweight fusible web: 1 yard, for any appliqué blocks
- Perle cotton no. 5 in black, if including a monster face block
- Thread: charcoal for piecing, plus contrast for quilting
- Rotary cutter and cutting mat
- Quilting ruler, plus square rulers at 6½, 12½, and 24½ inches if available
- Design wall or a large flat surface
- Sewing clips or pins
- Iron and ironing board
Beginner tip: buy the black background as one continuous cut. With thirteen different blocks all relying on the same background to unify them, any variation between black fabrics will show — and it will read as a mistake rather than a design choice, because the whole layout depends on that black being uniform.
Vibrant Sampler Palette
A unified field of different creatures could include:
Blocks:
- Hot orange
- Tangerine
- Acid yellow
- Chartreuse
- Magenta
- Electric violet
- Teal
Details: 8. Bright white
Constant: 9. True black
Give each block a dominant color and let the others appear as accents. A witch hat block led by magenta, a skull led by acid yellow, a haunted house led by teal — that assignment is what keeps thirteen blocks from turning into a single busy field.
Distribute the dominant colors so that no two adjacent blocks share one. This matters far more in a sampler than in a repeating quilt, because the blocks are already different in every other way and color is the only thing you control across all of them.
Keep the black absolutely uniform in every block, every sashing strip, and the outer border.
Cutting Measurements
Piece the blocks individually, following their own instructions. What follows is the sashing and framing that assembles them.
Sashing — cut from black:
- Around the anchor block: 2 strips at 2½ x 24½ inches, 2 strips at 2½ x 28½ inches
- Between medium blocks: 6 strips at 2½ x 12½ inches
- Between small blocks: 10 strips at 2½ x 6½ inches
- Column joins: 3 long strips at 2½ inches x width of fabric, joined to length as needed
- Row joins: 3 long strips at 2½ inches x width of fabric
Resizing background — if a block finishes small:
- Cut black strips at 2 inches wide and add to any block that comes up short, then trim to exact size. This is how a sampler absorbs variation, and it is entirely invisible against a black sashing grid.
Borders and binding:
- Inner border: 6 strips at 2½ inches x width of fabric
- Outer border: 7 strips at 4½ inches x width of fabric
- Binding: 7 strips at 2½ inches x width of fabric
Use a ¼-inch seam allowance throughout.
Step-by-Step Guide
Step 1: Choose Blocks by Skill Level
Pick thirteen blocks and assign them by difficulty rather than by preference.
Put your hardest block in the anchor position. A 24-inch block gives a complex design room to read, and it is the block people will look at first. A geometric skull or a single large spider web both work well at that scale.
Put your simplest blocks in the 6-inch positions. Candy corn, small bats, log cabin, and checkerboard all reduce cleanly and are forgiving at small scale.
Avoid putting fine appliqué in a 6-inch block. A tree silhouette with ⅛-inch branches at 12 inches becomes 1/16-inch branches at 6 inches, which is not cuttable. Detail-heavy appliqué belongs at 12 inches or larger.
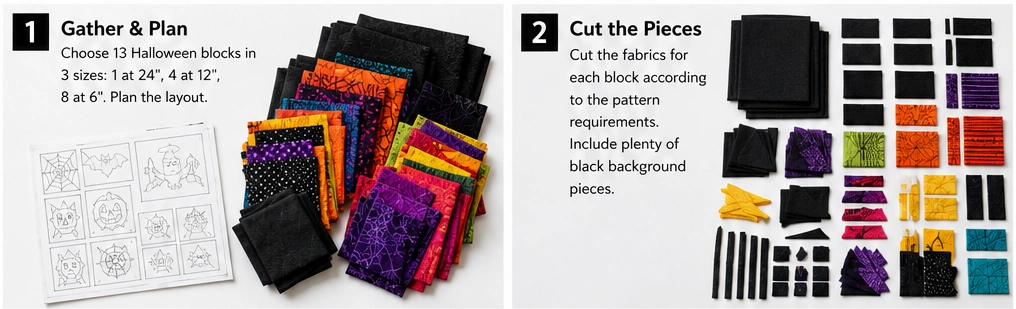
Step 2: Resize the Blocks
Most blocks in this collection are drafted on a grid, so resizing is arithmetic, not redrafting.
To convert a 12-inch block to 24 inches, double every measurement in the cutting list, including the seam allowances — a 2½-inch square becomes 4½ inches, since you double the 2-inch finished size and add ½ inch back.
To convert a 12-inch block to 6 inches, halve the finished size of every unit and add ½ inch. A 2½-inch square in the original becomes 1½ inches.
Test one unit before cutting a whole block at a new size. Halving and doubling seam allowances is where the arithmetic most often goes wrong.
Step 3: Piece All Thirteen Blocks
Make each block according to its instructions, using the same black background throughout.
Measure each finished block against its target size:
- Anchor: 24½ x 24½ inches
- Medium: 12½ x 12½ inches
- Small: 6½ x 6½ inches
Don’t worry if a block comes up slightly small — that is what Step 4 is for.
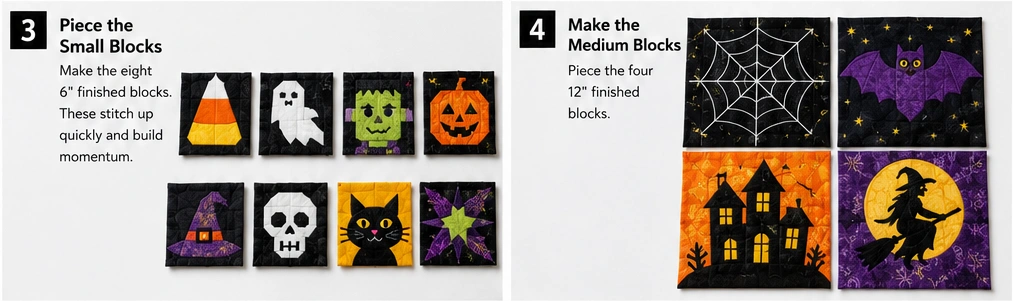
Step 4: Correct Any Undersized Blocks
For any block that finished short, add a strip of black background to one or two edges and trim back to the exact target size.
Because the sashing is also black, the correction is invisible. A block that finished at 12⅛ inches gets a black strip and comes back to 12½ inches, and nobody will ever find it.
This is the single most useful technique in sampler construction, and it is why a sampler is the right format for mixed skill levels.
Step 5: Plan the Asymmetric Layout
Lay everything out on a design wall or floor.
Place the 24-inch anchor block off-center — roughly one third in from the left edge and one third down from the top is a good starting point.
Cluster the four 12-inch blocks unevenly around it: two together on one side, one alone, one tucked into a corner.
Scatter the eight 6-inch blocks in the remaining space, grouping some in pairs and leaving others isolated.
The goal is for the eye to land on the anchor, then travel outward and keep finding blocks where it didn’t expect them. Leave one area of the quilt noticeably emptier than the rest — a patch of plain black with no blocks in it. That empty space makes the arrangement read as deliberate rather than poor planning.
Photograph the layout before sewing anything.
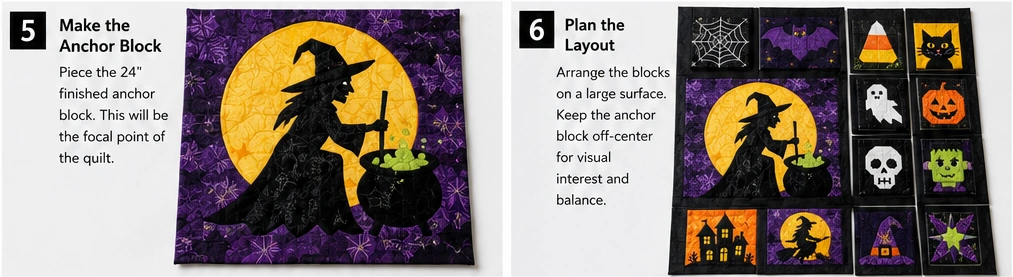
Step 6: Build the Modular Sections
You can’t sew an asymmetric layout in straight rows. Instead, build it in modules — rectangular sections that each contain several blocks and can then be joined to each other.
Work out which blocks group into rectangles. For example:
- Four 6-inch blocks with sashing form a 14½-inch square
- Two 12-inch blocks with sashing form a 12½ x 26½-inch rectangle
- The anchor block plus sashing forms a 28½-inch square
Sew each module completely before joining them.
Note each module’s finished size as you go. The modules must combine into a field of exactly 48½ x 60½ inches.
Step 7: Add Sashing Within Modules
Within each module, sew 2½-inch black sashing strips between blocks.
Press seams toward the sashing so they nest when you join modules.
Because the sashing and the block backgrounds are the same black, the sashing will visually disappear, and the blocks will appear to float in a continuous field. That is exactly the effect you want.
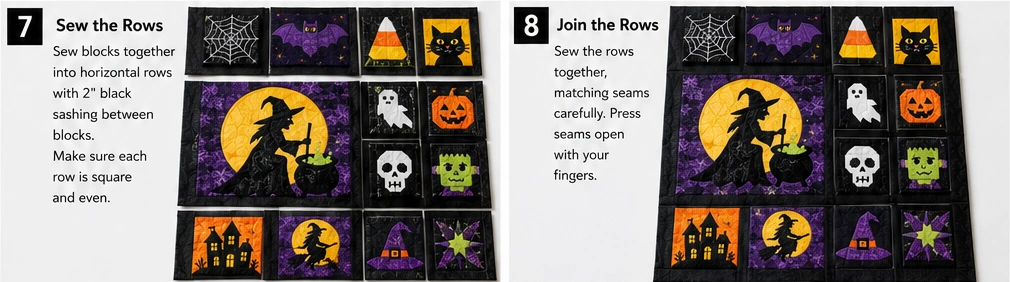
Step 8: Join the Modules
Join modules with 2½-inch sashing strips between them, working from the largest module outward.
Measure as you go. A module that is ⅛ inch off will not show on its own but will refuse to join cleanly to its neighbor, and the error compounds across the quilt.
Where a module does not quite fill its space, add a black filler strip cut to the exact gap. Against a black field this is invisible, and it is a normal part of asymmetric construction rather than a workaround.
The field should measure 48½ x 60½ inches.
Step 9: Add the Inner Border
Join the 2½-inch acid yellow inner border strips end to end.
Measure the quilt top through the center, never along the edges. Cut two side borders to that length, pin at the ends and center, and sew. Measure again horizontally for the top and bottom.
Press toward the border.
A bright inner border matters more on a sampler than on any other layout. It draws a hard line around a busy, uneven interior and tells the eye where the composition ends.
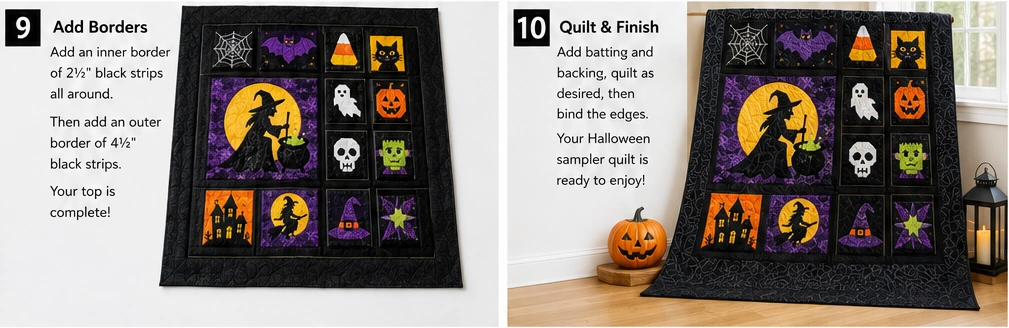
Step 10: Add the Outer Border
Join the 4½-inch black outer border strips end to end and repeat the same measure-through-the-center process.
Press toward the outer border. The finished top should measure about 60½ x 72½ inches.
Step 11: Layer and Quilt
Layer the backing wrong side up, batting, then the quilt top right side up. Baste thoroughly — a sampler has wildly uneven seam density between a 24-inch pieced anchor and an area of plain black, and the layers will shift between them.
Quilting options that suit this design:
- Quilt each block differently, matching the quilting to the block — radiating lines on the spider web, dense fill around the skull, wind lines behind the tree
- An allover design across everything, which unifies aggressively and is much faster
- Dense fill in the empty black areas with the blocks left lightly quilted, so the blocks stand proud
The first option is the most rewarding and the slowest. The third is the best compromise, and it makes the empty area you built in Step 5 read as intentional.
Use a contrast thread — acid yellow on black turns the quilting into a visible design layer across the whole quilt.
Step 12: Bind and Finish
Trim the quilt square.
Bind with 2½-inch strips joined on the bias in hot orange. A bright binding against a black outer border closes the quilt sharply.
Add a hanging sleeve, and add a label listing the blocks — on a sampler, the label is genuinely useful documentation rather than a formality.
Assembly at a Glance
- Choose — assign the hardest block to the 24-inch anchor and the simplest to the 6-inch positions
- Resize — double or halve finished unit sizes and add ½ inch back for seam allowances
- Piece and correct — make all thirteen blocks on the same black background, adding black strips to any that finish short
- Compose — place the anchor off-center, cluster the rest unevenly, leave one area deliberately empty, photograph
- Build modules — sew blocks into rectangular sections with sashing, then join the modules with filler strips as needed
- Finish — bright inner border, black outer border, quilt with dense fill in the empty areas, and bind in a bright
Vibrant Sampler Combination Ideas
For a glowing sampler, use acid yellow and chartreuse as the dominant colors across all thirteen blocks on black, with an acid yellow inner border.
For a carnival sampler, give every block a different dominant color across all seven brights, unified only by the black background.
For a two-color sampler, use hot orange and black only across every block — the layout carries the whole quilt with no color variation at all.
For a cold sampler, use teal, electric violet, and chartreuse only, with white details, on true black.
For a skill-progression sampler, arrange the blocks so difficulty increases from one corner to the opposite one, with the simplest at the top left and the anchor at the bottom right.
For a one-empty-frame sampler, leave one 12-inch position plain black with sashing around it, as though a block has been removed. The least elaborate option, and the one people will ask about.
Beginner Tips for Success
Use one continuous cut of black for every block. It is the only thing unifying thirteen different designs, and variation in it will read as an error.
Put the hardest block at 24 inches. Complex designs need room, and simple designs shrink better than complex ones.
Never put fine appliqué in a 6-inch block. Halving a 12-inch tree gives you branches too fine to cut.
Fix undersized blocks with black strips. Against black sashing, the correction is undetectable, and this is what lets mixed skill levels work in one quilt.
Build in modules, not rows. You can’t sew an asymmetric layout in straight rows, and trying will not work.
Leave one area deliberately empty. Empty space reads as composition; a fully packed layout reads as a display case.
Add a bright inner border. A busy uneven interior needs a hard edge to contain it.
Styling Tip
An asymmetric sampler is a composition, so it needs to be seen whole — hung flat on a pale wall, or spread across a bed with the anchor block still in view. Folded over a chair, the arrangement disappears entirely and you are left with a few random blocks.
Keep the surroundings completely plain. This quilt contains thirteen different designs and can carry a room on its own. For a seasonal display, a single dark object beneath it is enough.
Of everything in this collection, the sampler is the quilt most worth documenting. Photograph it flat and keep a note of which block sits where — it is a record of what you could make in a particular year, which is exactly what a sampler was for in the first place.
Gift Pairings
Spare blocks and leftover background build a matching set with no extra planning:
- Any single leftover block as a cushion cover, sized to the block
- A four-block mini sampler wall hanging at 30 x 30 inches
- A trick-or-treat drawstring bag using one 6-inch block on the front
- A table runner with three 6-inch blocks sashed in black
- A set of 6-inch block mug rugs, one per design
- A set of square trimming rulers at 6½ and 12½ inches — the tools that keep a sampler consistent, and the best gift for anyone attempting one
- A hanging door banner with three small blocks in a vertical column
Design Inspirations – Digitally Modified Images. Texture and color may vary from the actual product.
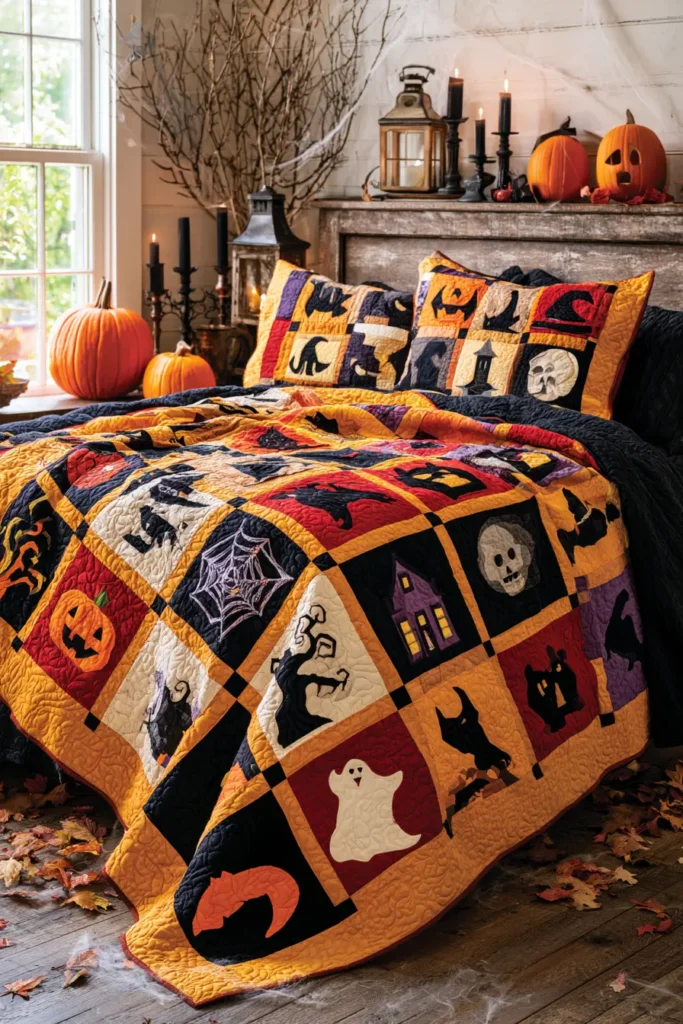
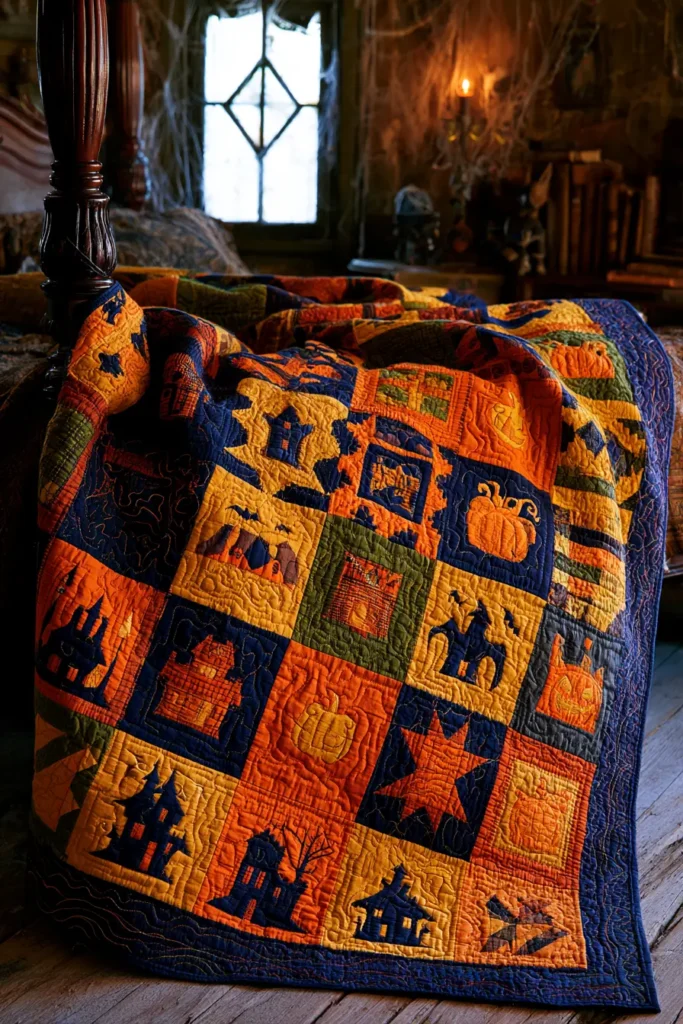
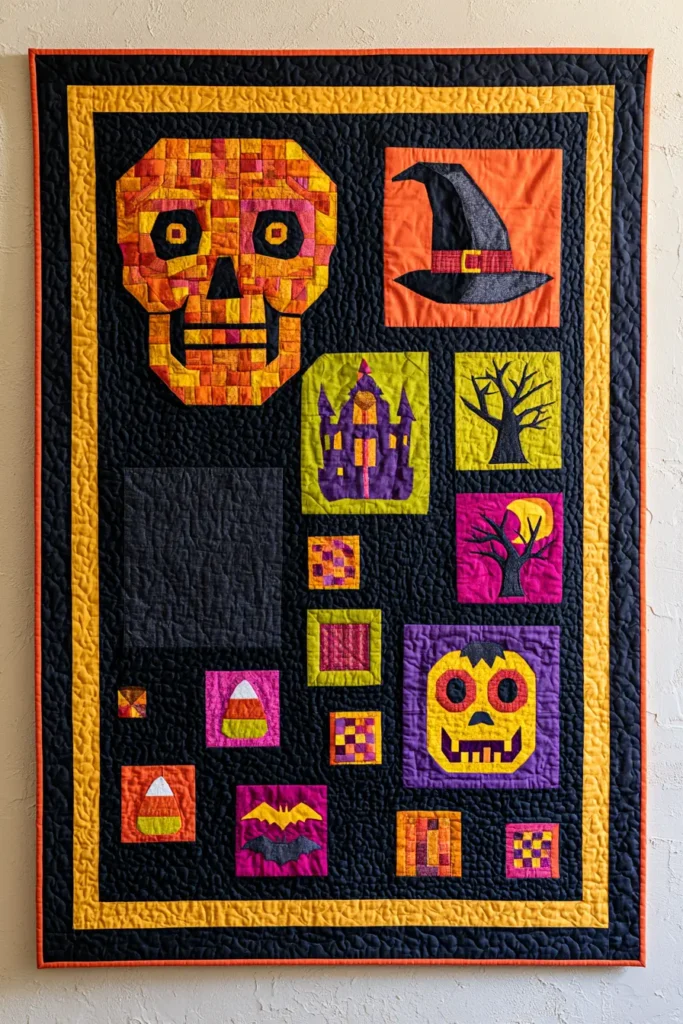
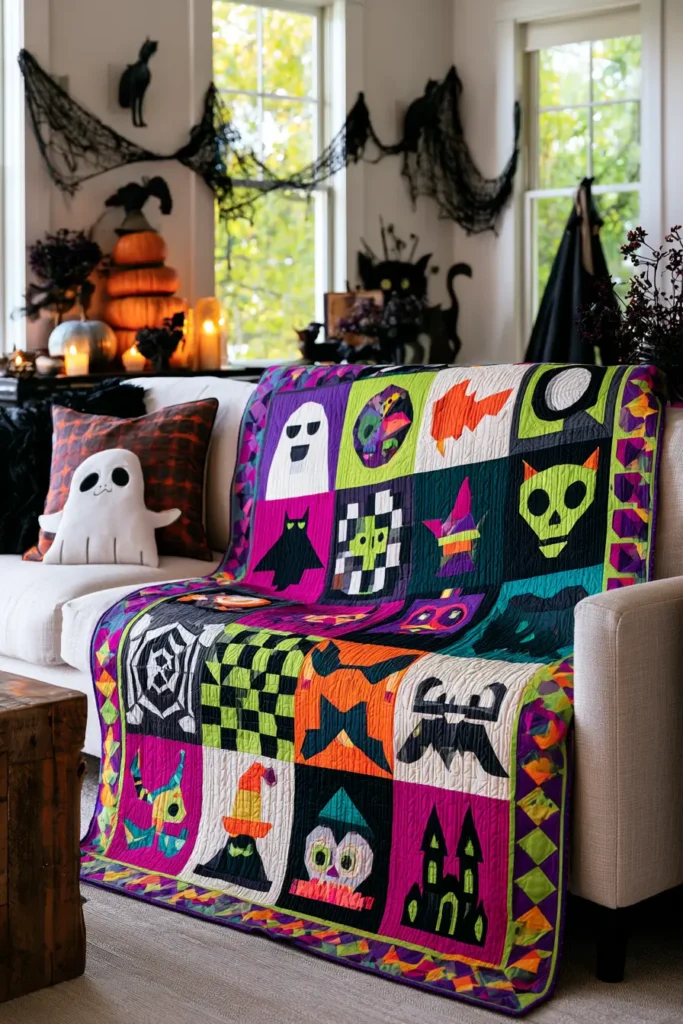
Conclusion
Fifteen blocks are deliberately more than any one quilt needs, and the point is selection, not completion. If you’re new to quilting, start with the pieced options — checkerboard layouts, candy corn half-square triangles, and Halloween log cabin variations are all straight seams and rotary cuts, and they produce finished quilts that look considerably more complicated than they were.
If you’ve got some experience and want a technique to grow into, the appliqué blocks (ghost, black cat, bat and moon) teach edge-finishing skills that transfer to every future project, and the foundation-pieced spider web produces points sharp enough to be genuinely satisfying. The sampler layout at the end exists specifically for people who want to try several — it’s the traditional structure for exactly this problem, and it turns a collection of unrelated blocks into a coherent quilt.
Whichever direction you go, keep the finished scale realistic for the season. A table runner or a 40″ wall hanging gets made, hung, and enjoyed; a queen-size Halloween top started in mid-October generally becomes a November project, then a next-year project. Start small, finish it, and let the collection build across seasons — one block a year makes a sampler in a decade, and that’s a genuinely appealing way to accumulate a quilt. The blocks won’t go anywhere, and the palette will be waiting in the scrap bin.

