
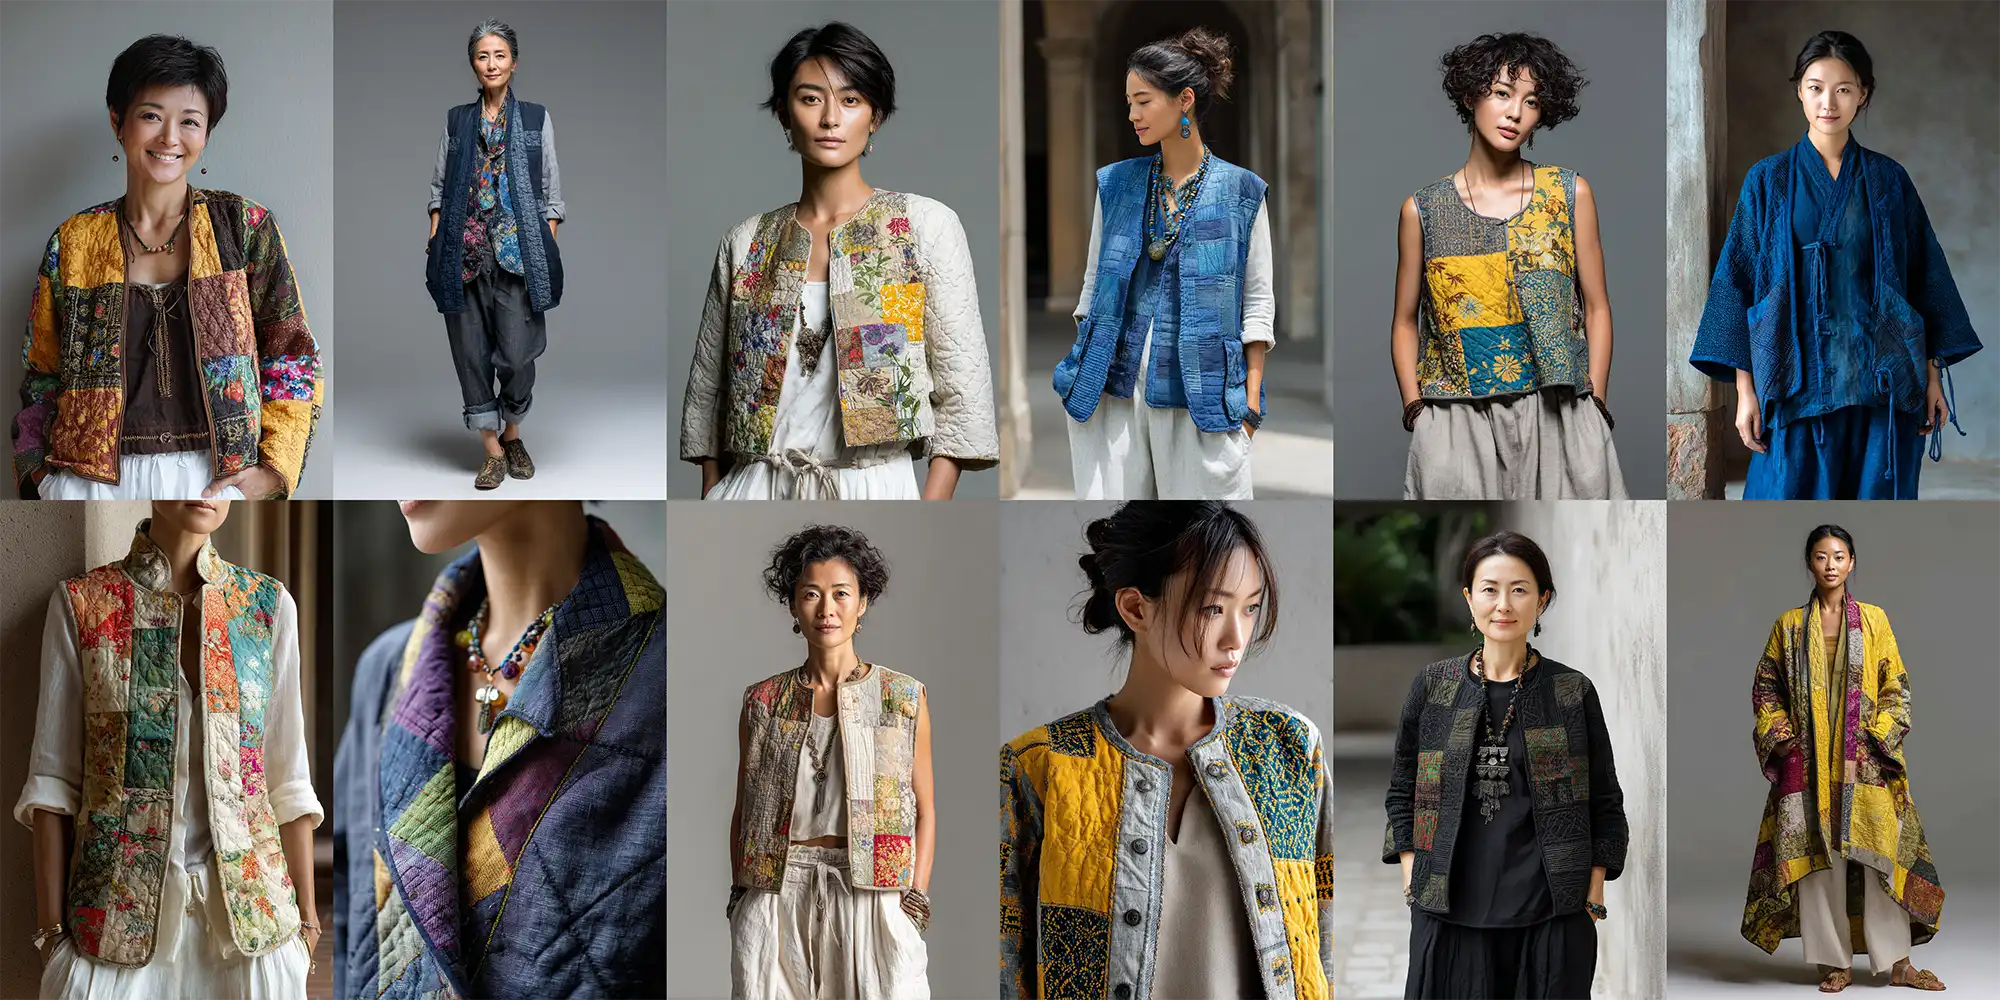
6 Elegant Japanese Quilt Jackets, Vests & Tops Ideas for Stylish Layering
Japanese Quilted Clothing: Old Logic, New Relevance
Quilted clothing is not a recent invention. People have been wearing padded and quilted layers for centuries – practical workwear, house coats, winter wraps made from repurposed fabric. What feels new is how visible this category has become in contemporary fashion, driven partly by the sustainable clothing movement, partly by a broader interest in artisanal and slow-made textiles, and partly by the simple fact that people are paying more attention to what their clothes are made of and how long they last.
Japanese quilted clothing interests me for a specific reason: it never felt trend-driven in the first place. Even the most contemporary Japanese quilted jacket seems connected to something older and more considered – and that quality is exactly what makes it relevant now, when a lot of fashion feels deliberately disconnected from any tradition at all.
Where These Garments Come From
The direct ancestors of modern Japanese quilted outerwear are practical, unpretentious objects. The hanten is a short padded jacket, traditionally worn at home for warmth – not a fashion garment, but a functional one made with care. The chanchanko is a quilted sleeveless vest, used for comfort and layering in everyday domestic life. Neither was designed for a runway. Both were designed to be worn regularly, washed, repaired, and worn again – the same logic that makes contemporary versions of these garments so well-suited to everyday use.
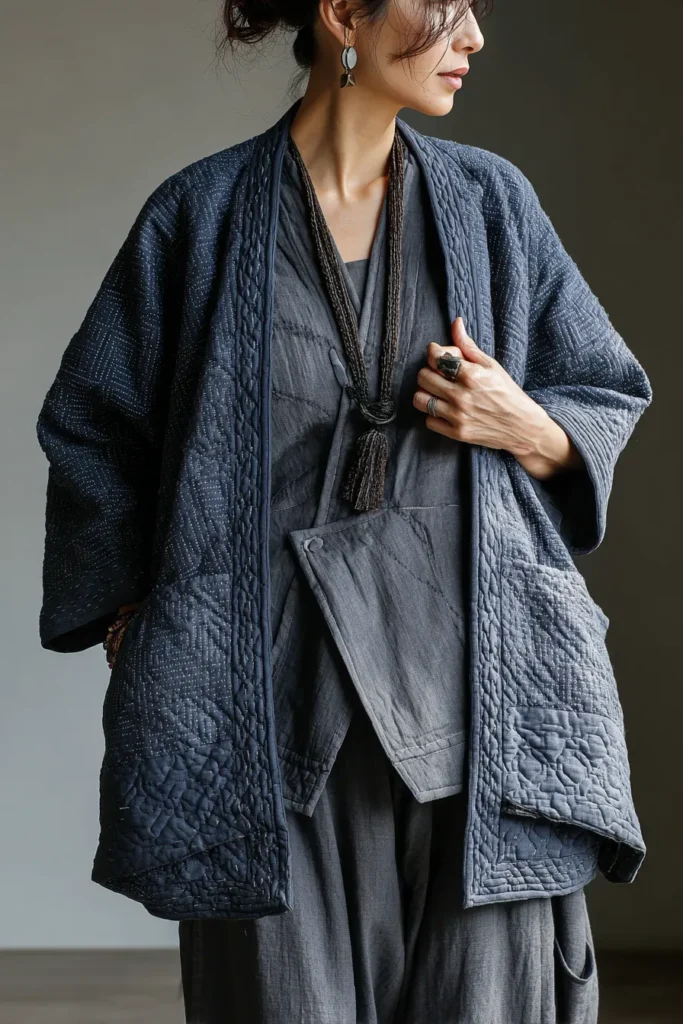
What distinguishes Japanese quilted outerwear from Western padded jackets is the restraint in the making. Clean silhouettes with soft structure rather than rigid construction. Subtle surface stitching – often sashiko, with its rhythmic geometric patterns – that adds texture without decoration for its own sake. Indigo dyeing that fades gradually and beautifully rather than wearing out. Boro-style patchwork that treats visible repair as character rather than damage. These are techniques that improve a garment over time, offering a fundamentally different relationship with clothing than most contemporary fashion does.
Japanese Quilt Jackets, Vests & Tops
Why Six Ideas Rather Than Twenty
This is a smaller collection than most guides on this site, and deliberately so. Japanese quilted clothing done well is specific – the silhouette, the fabric weight, and the stitching technique all need to work together for the piece to have the quality of restraint that defines the aesthetic. Six ideas that each do something distinct are more useful than twenty variations on the same basic concept.
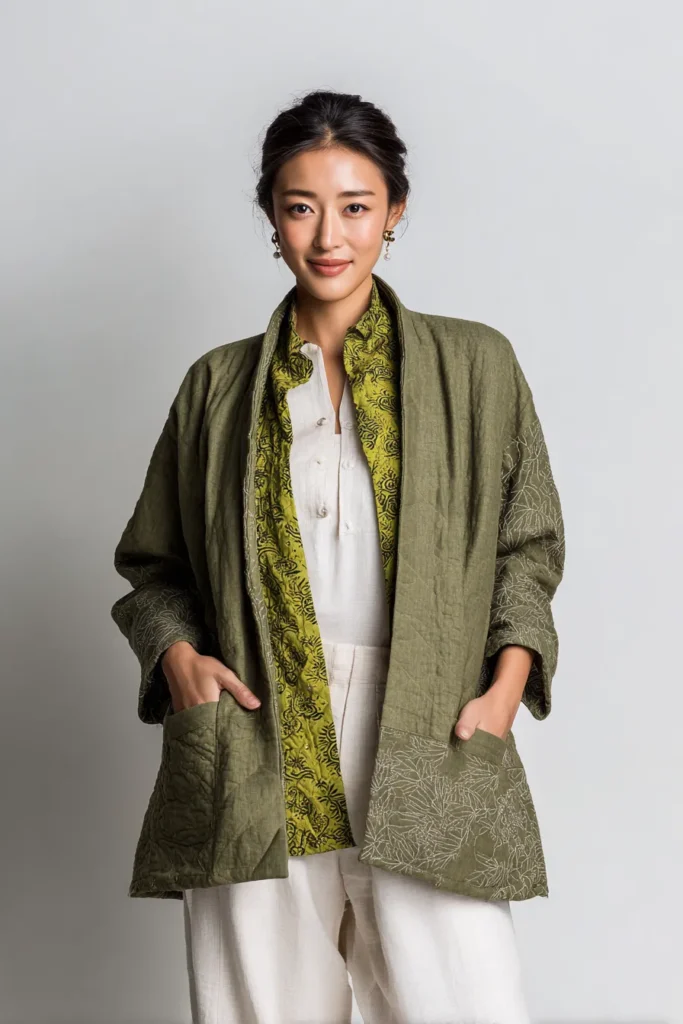
What connects all six is wearability. A quilted sashiko jacket adds warmth without the bulk of heavier outerwear. An indigo vest changes an outfit while remaining completely understated. Patchwork tops, when made with restraint, bring texture and visual interest without overwhelming whatever they are worn with. These pieces layer naturally over plain shirts, relaxed trousers, and simple dresses — the quilting adds depth, the neutral palette keeps everything grounded.
They also age in the right direction. The stitching softens, the indigo develops, and the fabric takes on the particular quality of something that has been genuinely used.
See also: Nakshi Kantha accessories — jackets, vests & bags · Japanese quilt patterns · Japanese patchwork ideas
Recommended Supplies
“As an Amazon Associate, I earn from qualifying purchases.“
1. Minimalist Sashiko Stitched Japanese Quilt Jackets for Everyday Elegance
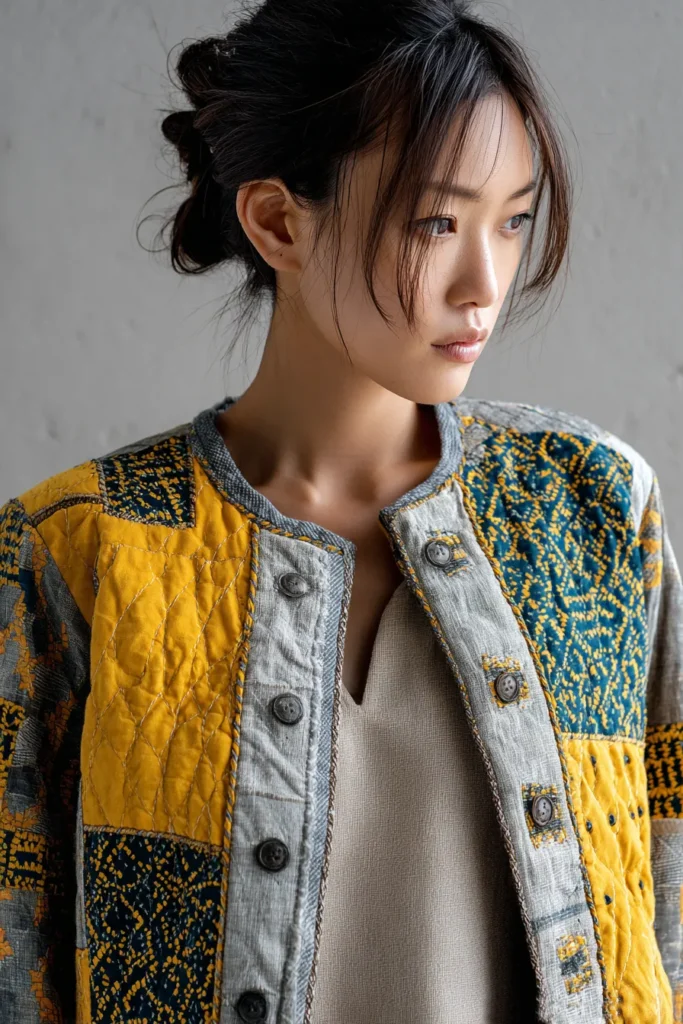
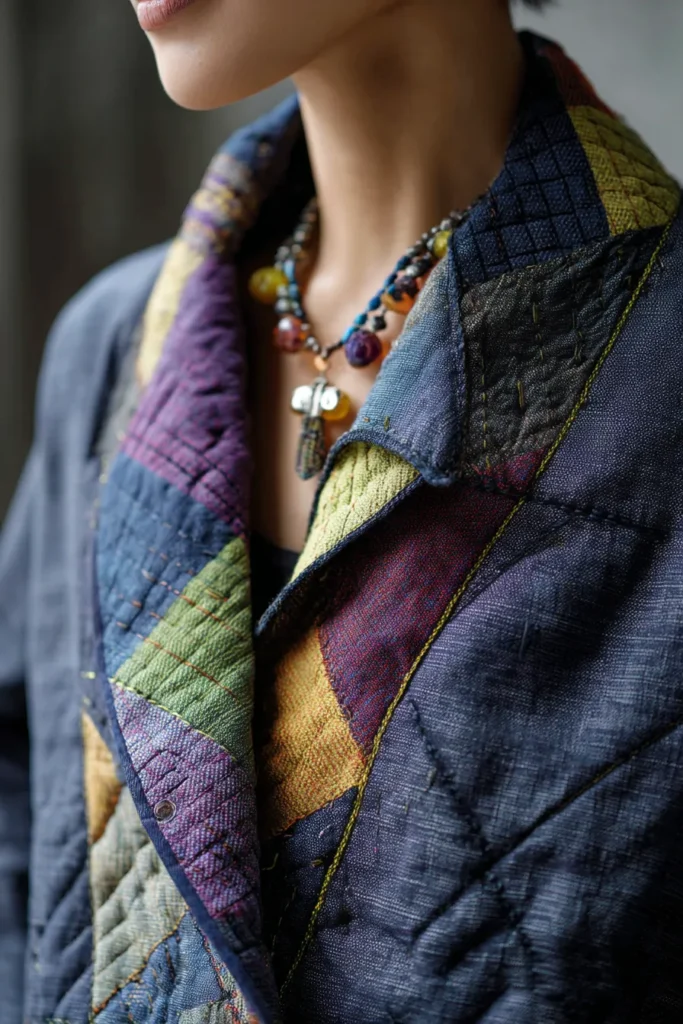
A Guide to Making Minimalist Sashiko Stitched Japanese Quilt Jackets for Everyday Elegance
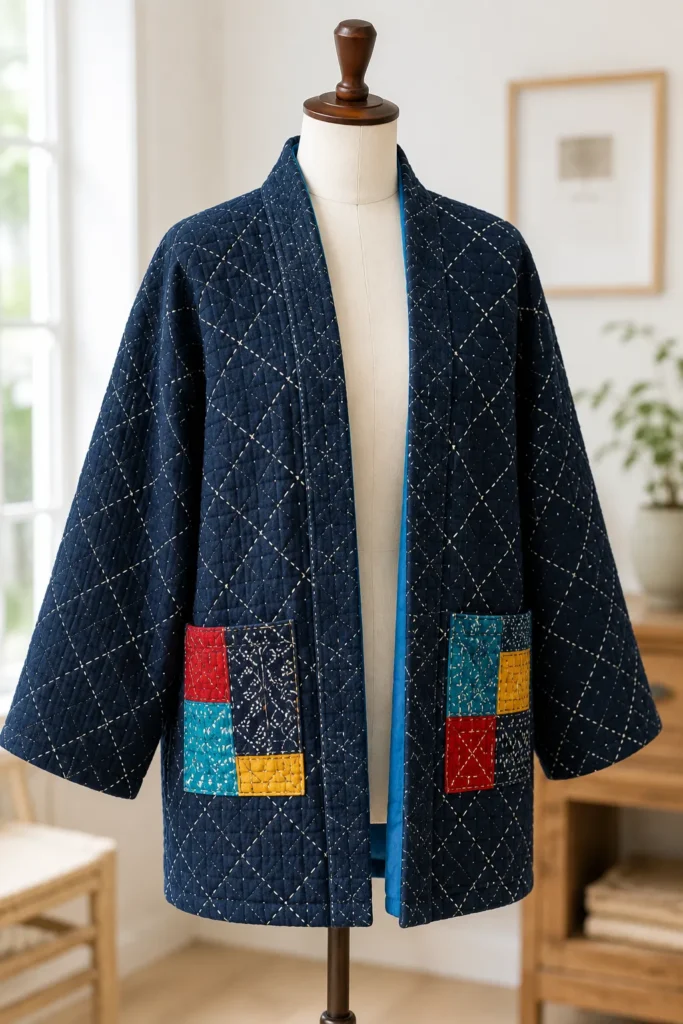
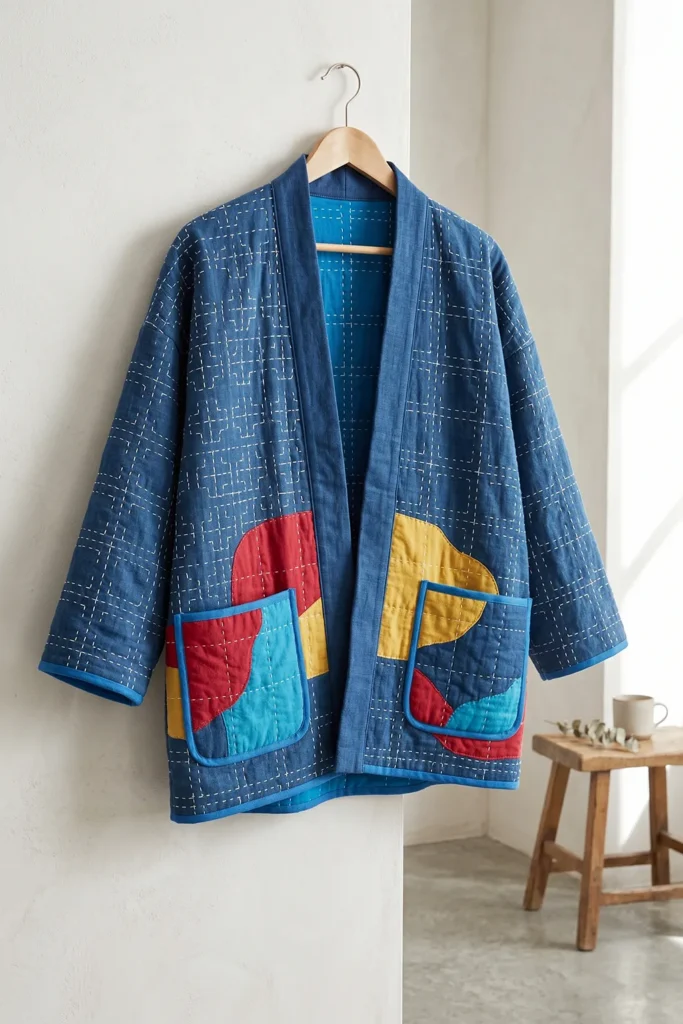
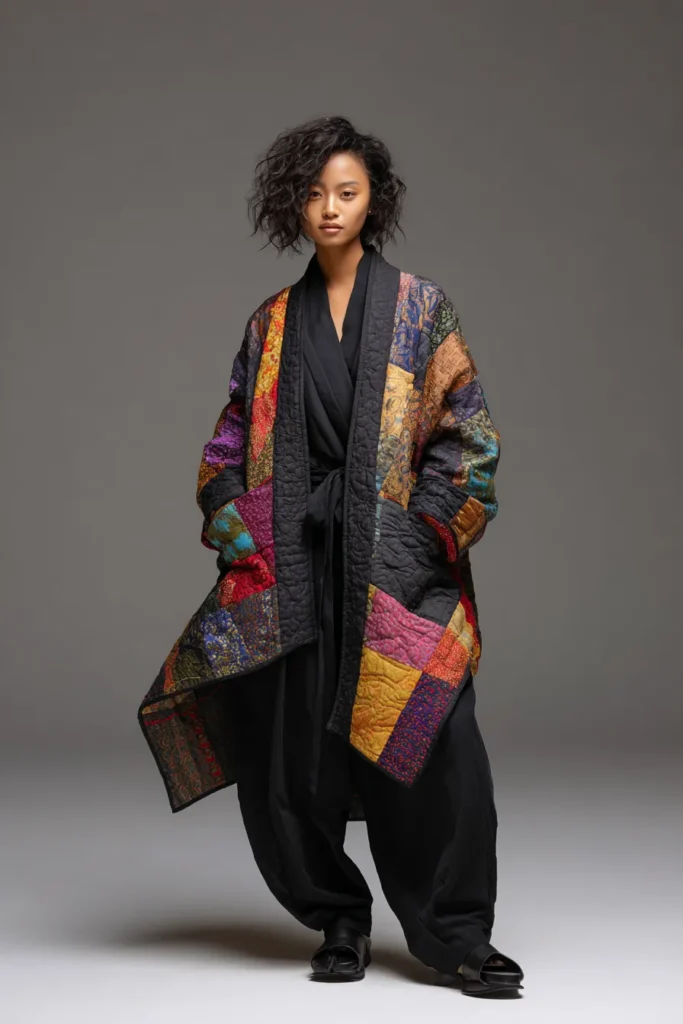
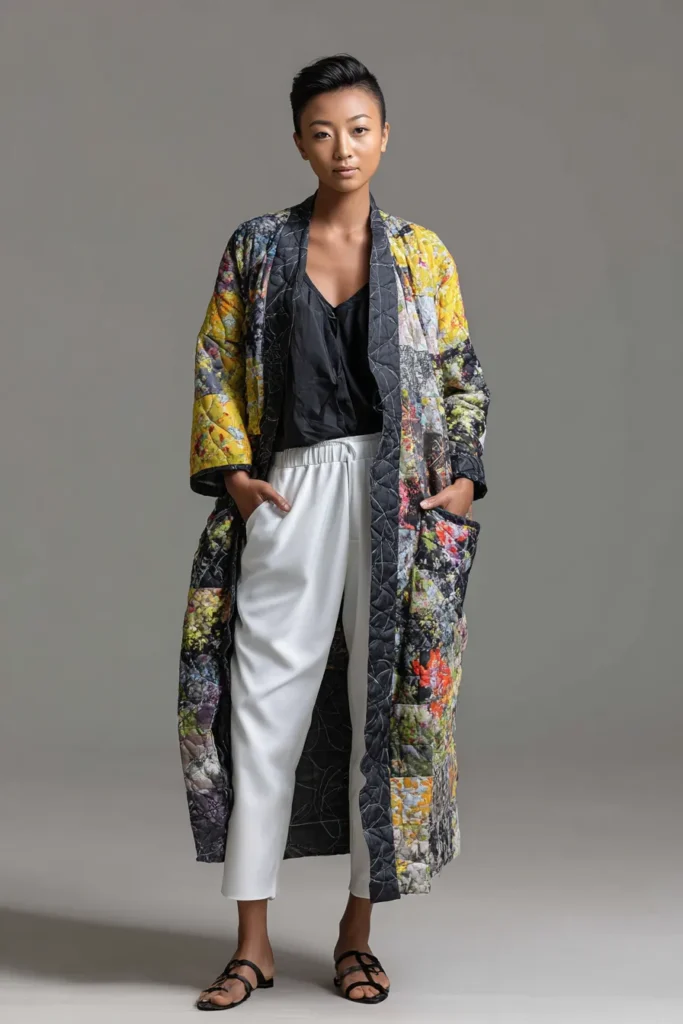
The transition between seasons requires a garment that offers adaptable warmth without the suffocating bulk of a winter coat. The Minimalist Sashiko Stitched Japanese Quilt Jacket beautifully answers this call. By blending the clean, sweeping lines of a traditional Japanese Haori (a hip-length kimono-style jacket) with the rhythmic, textural beauty of Sashiko embroidery, this piece transcends basic outerwear. When rendered in a breathtaking, vibrant color palette, it becomes an incredibly chic, wearable masterpiece of soft architecture.
The Heritage of Sashiko (And Why I Made It)
Curating this specific pattern for comfydwell.com was born from the practical, daily demands of overseeing a bustling property. Moving constantly between indoor management spaces and the breezy, open air of the resort and children’s park requires a layering piece that cuts the wind while remaining highly breathable. I needed a jacket that projected creative authority and elegance, yet was tough enough to withstand an active, hands-on lifestyle.
Historically, Sashiko (meaning “little stabs”) was a rural Japanese technique used to mend and reinforce workwear, making the fabric thicker and warmer. To honor this resourceful heritage while injecting a massive dose of modern joy, I decided to pair the minimalist white running stitches with vibrant, deliberate Japanese patchwork (inspired by the Boro tradition). By applying vivid patches of Crimson and Turquoise across a deep Indigo background and securing them with meticulous Sashiko stitching, the jacket transforms from a simple utility piece into an upscale, highly textural fashion statement.
Focus on Usability, Comfort, and Elegance
- Usability: If you are wondering why this idea is worth making, it comes down to its unmatched, multi-season versatility. The boxy, drop-shoulder silhouette features wide sleeves that effortlessly slide over chunky knit sweaters in the fall or simple cotton tees in the spring, making it a highly usable, everyday staple that never feels restrictive.
- Comfort: By layering premium linen-cotton blends with a breathable inner core, this jacket naturally wicks away moisture and regulates your body heat. The dense Sashiko stitching softens the structured fabric over time, allowing the jacket to mold beautifully to the unique slope of your shoulders.
- Elegance: True everyday elegance relies on deliberate contrast. The minimalist, geometric grids of the white Sashiko thread against the explosively vibrant patches of Japanese Patchwork create a look that is both deeply historic and fiercely contemporary. It instantly elevates a basic outfit into a curated, boutique ensemble.
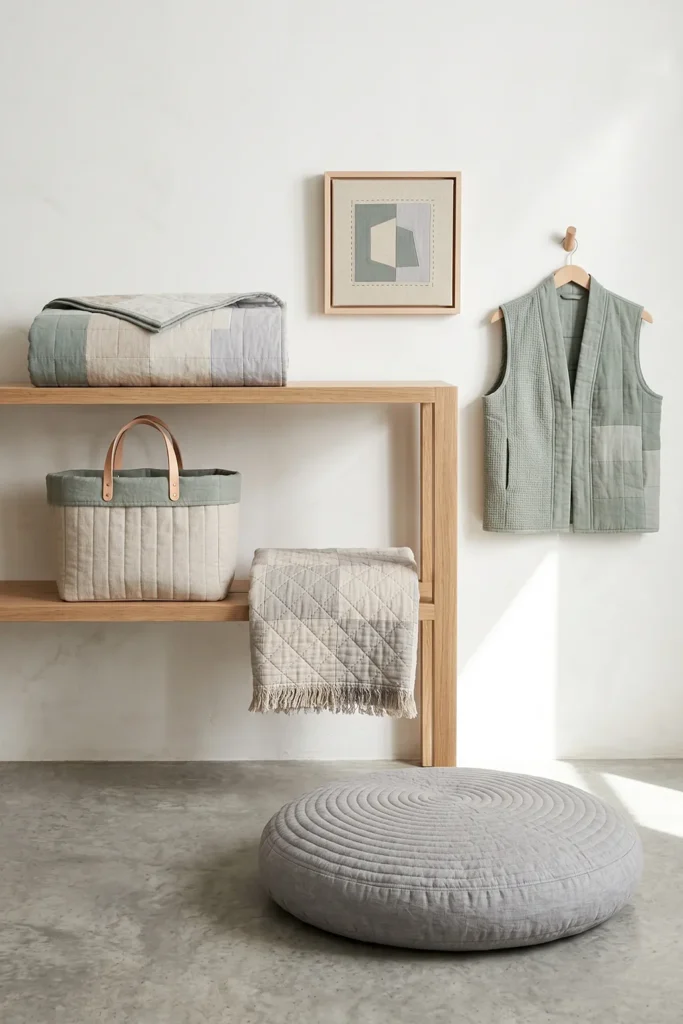
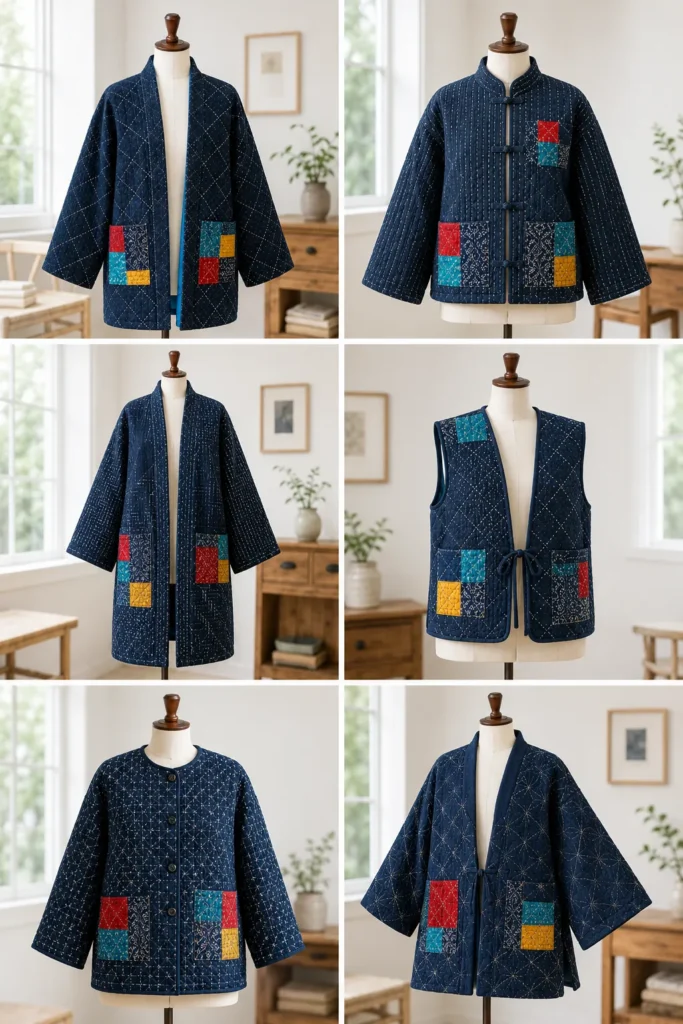
Measurements & Materials Needed
Finished Jacket Size: One-Size-Fits-Most (Modern relaxed Haori fit). Approx. 30″ length from shoulder to hem. Finished Style: An open-front, drop-shoulder quilted jacket featuring a banded collar, deep patch pockets, and vibrant Japanese patchwork detailing.
Materials Needed:
- Fabric for the Outer Shell and Lining: 5 yards total of medium-weight linen or cotton-linen blend.
- Outer Shell: 2.5 yards of a deep, grounding solid (e.g., Rich Indigo Blue).
- Lining: 2.5 yards of a contrasting solid (e.g., Vibrant Azure).
- Patchwork Scraps: A collection of 100% cotton scraps in highly saturated colors (e.g., Vivid Crimson, Sunburst Yellow, and Bright Turquoise) for the Japanese Patchwork elements.
- Core Stabilizer: 2.5 yards of lightweight, 100% cotton flannel (provides the perfect drape without stiff bulk).
- Thread: * 50-weight cotton thread for machine piecing.
- 2 to 3 skeins of traditional white Sashiko thread (or Size 8 Pearl Cotton).
- Binding (For Collar and Front Band): Cut from your Indigo fabric (approx. 5″ wide x 65″ long).
- Tools: A rotary cutter, a 6″ x 24″ acrylic ruler, curved safety pins, a water-soluble fabric marker, a Sashiko needle, and a leather thimble.
Step-by-Step Guide: The Vibrant Sashiko Jacket
Step 1: Drafting and Cutting the Garment Canvas
Because Sashiko stitching draws the fabric slightly inward, cut your panels generously. Cut 3 identical layers (Azure Lining, Flannel Core, Indigo Outer) for the following:
- One Back Panel: 28″ wide x 32″ tall.
- Two Front Panels: 14″ wide x 32″ tall each.
- Two Sleeves: 22″ wide x 18″ long each.
- Two Pockets: 9″ x 9″ squares.
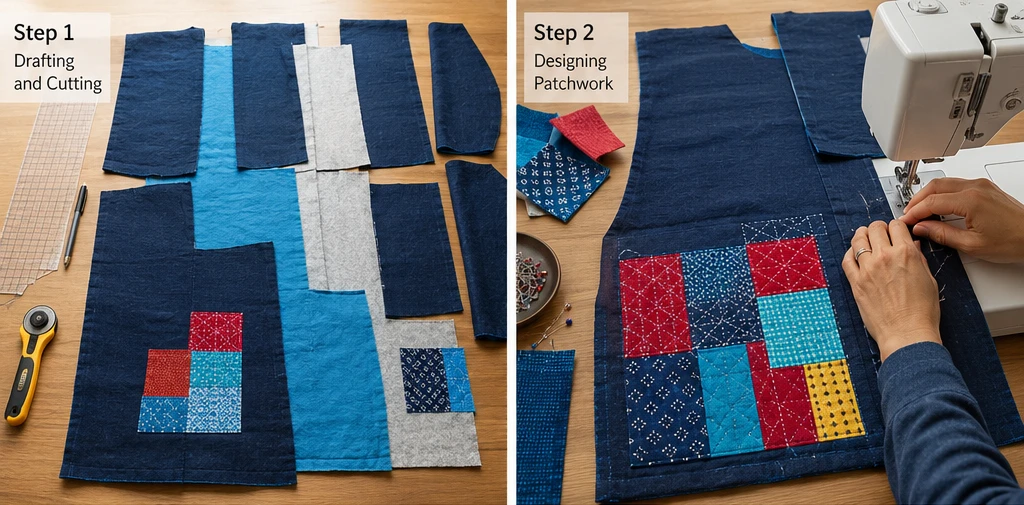
Step 2: Designing the Japanese Patch Work
Before basting the layers, lay out your Indigo outer panels. Take your vibrant Crimson, Turquoise, and Sunburst Yellow fabric scraps and arrange them beautifully near the bottom hem of the back panel and on the pockets. This Japanese patchwork should look organic but deliberate. Pin the raw-edged patches directly onto the Indigo outer fabric, and use a simple machine stitch around their edges to temporarily secure them.
Step 3: Basting the Breathable Layers
Meticulously stack your three layers for each garment piece: Azure Lining (face down), Flannel Core (middle), and Indigo Outer (face up) with its vibrant patches. Smooth out all wrinkles. Pin the layers together densely with curved safety pins, spacing each pin every 3 inches to prevent the linen from shifting during hand-stitching.
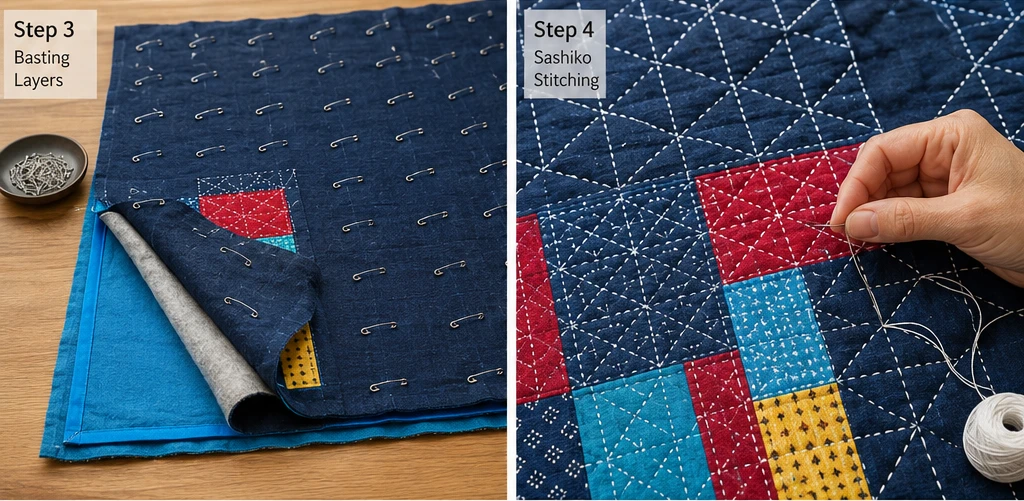
Step 4: The Meditative Sashiko Stitching
Using your water-soluble marker and an acrylic ruler, draw a subtle geometric grid (like traditional Jujizashi or cross-stitch, or simple vertical lines) across your pinned panels. Thread your long Sashiko needle with the white thread. Using a running stitch where the surface stitch is slightly longer than the space between stitches, hand-quilt directly over your drawn lines. When you reach your vibrant patches, stitch straight through them! The Sashiko thread will permanently bind the Japanese Patchwork to the jacket, creating an incredible, unified texture.
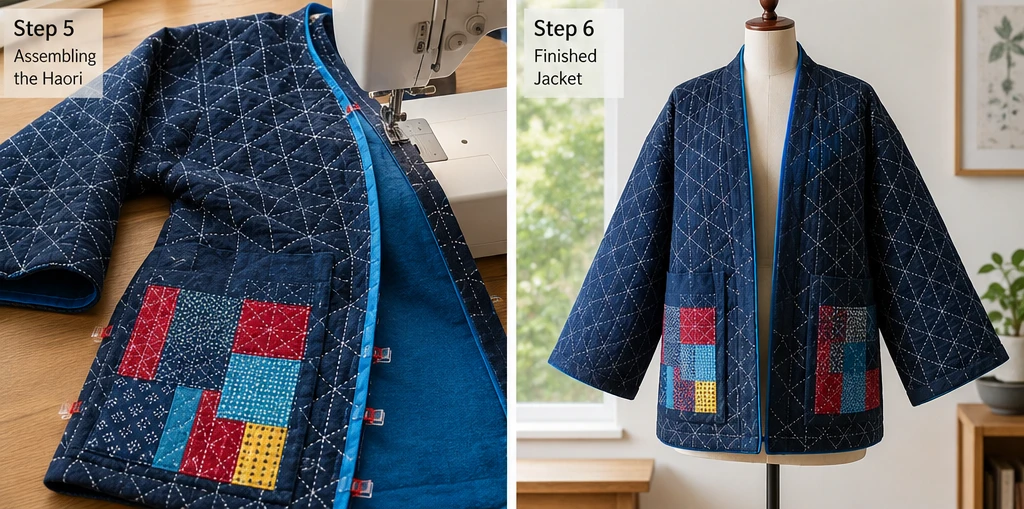
Step 5: Assembly Section (Constructing the Haori)
We will use enclosed, flat-felled, or bias-bound internal seams to ensure the inside of the jacket is as pristine as the outside.
- Shoulders: Place the Front Panels right sides together with the Back Panel at the top shoulder seams. Machine-sew a 1/2-inch seam.
- Sleeves: Open the jacket flat. Find the top-center of your quilted sleeve and pin it to the shoulder seam, right-sides together. Sew the sleeve into place. Repeat for the other side.
- Side Seams: Fold the jacket right sides together. Pin from the bottom hem, up the side, through the armpit, and down to the end of the sleeve. Sew this continuous seam on both sides.
- Internal Polish: Encase all raw internal seam allowances inside an Azure bias tape and topstitch them down.
Step 6: Attaching Pockets, Collar Band, and Finishing
- Pockets: Bind the top edges of your quilted patch pockets. Position them on the front panels at a comfortable height and topstitch the sides and bottoms securely.
- The Haori Collar Band: Take your long 5″ x 65″ Indigo collar strip. Fold it in half lengthwise and press. Pin the raw edges of this strip to the raw edges of the jacket’s front opening and neckline, right-sides together. Sew with a 1/2-inch seam. Fold the band over to the inside, encasing the raw edge, and expertly hand-stitch it down to create a crisp, structured front band.
- Hems: Finally, finish the raw edges of the sleeve cuffs and the bottom hem by binding them with bias tape or turning them inward twice and topstitching. Soak the jacket briefly in cold water to dissolve your marker lines, and let it air dry.
More Recommended Supplies
“As an Amazon Associate, I earn from qualifying purchases.“
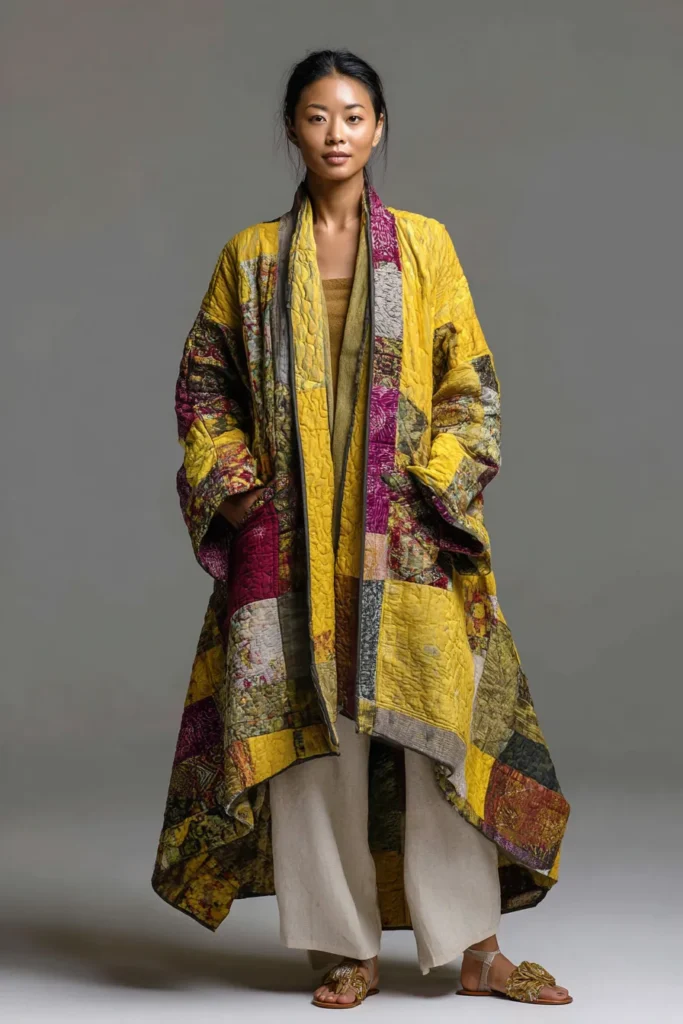
2. Longline Asymmetrical Quilted Kimono Jackets for Layered Style
Longline Asymmetrical Quilted Kimono Jacket – Step-by-Step Guide
Why I made it
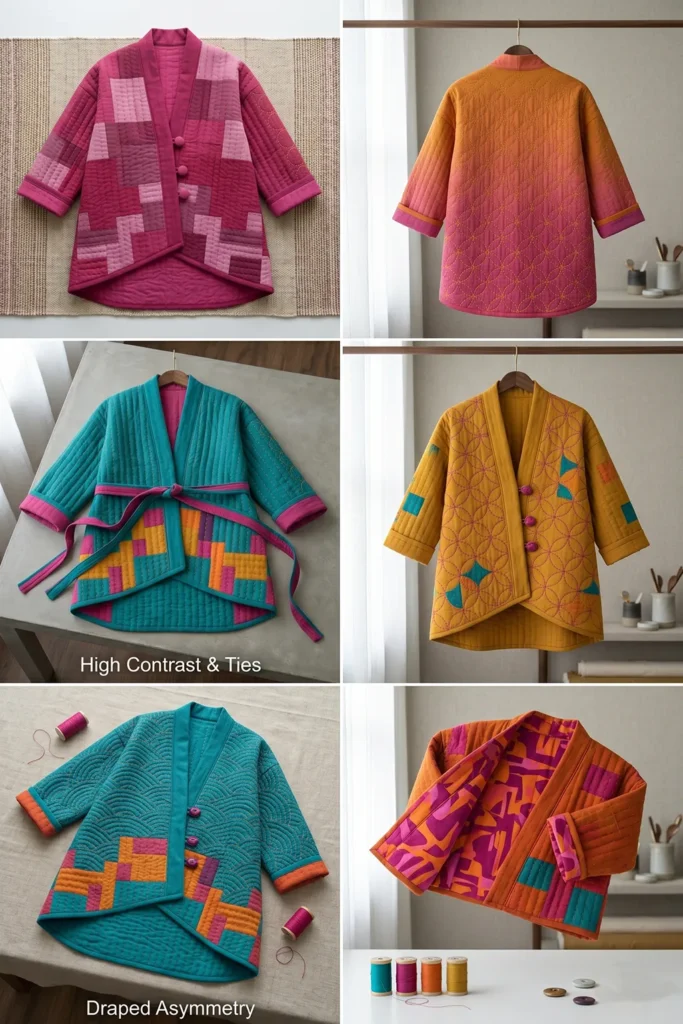
I wanted a jacket that feels like a warm hug but looks like art. Inspired by traditional Japanese kimono silhouettes and the bold geometry of sashiko quilting, I designed this longline asymmetrical kimono jacket. The backstory: during a trip to Tokyo, I saw a vintage boro jacket with mismatched patches and fell in love with its raw elegance. Back home, I combined that memory with a desire for vibrant, modern colors – fuchsia, mustard, teal – to create a piece that celebrates Japanese quilting while feeling fresh and joyful.
Why this idea is worth making
This jacket is a wardrobe transformer. Its longline cut and asymmetrical closure make it incredibly flattering on all body types. The quilting adds cozy insulation without bulk, and the vibrant palette turns heads. You can wear it over a simple tee and jeans, or as a statement piece over a dress. It’s also a sustainable way to use up quilt batting and colorful fabric scraps. Plus, handmade Japanese-style clothing has a timeless, artisanal quality that fast fashion can never replicate.
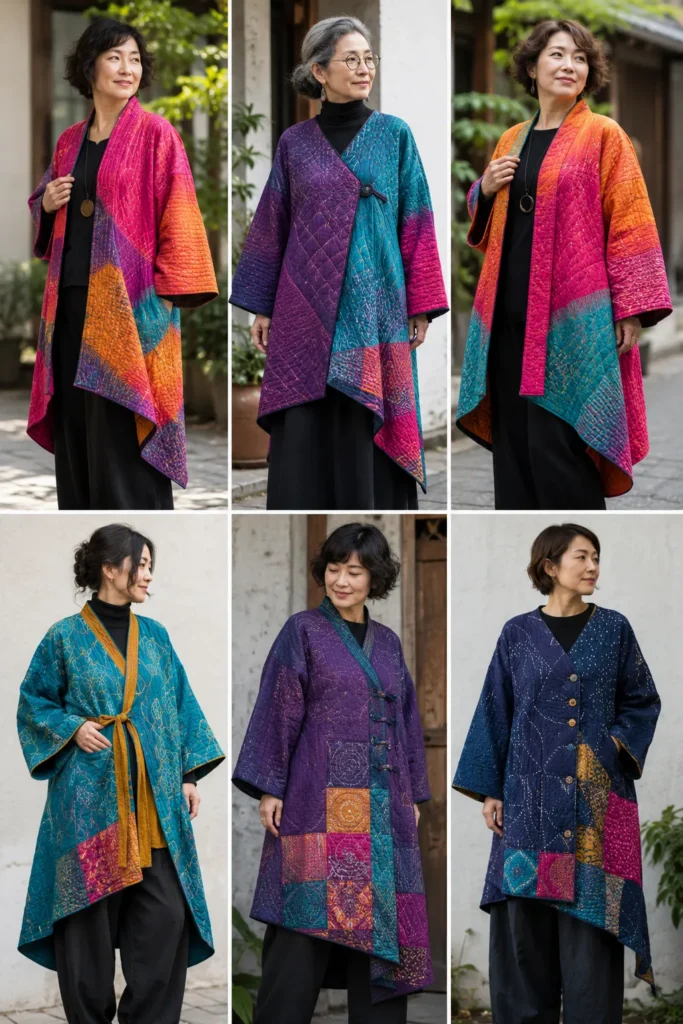
Historically, Japanese kimonos and haori were passed down through generations, often updated and repaired using beautiful scraps. I designed this longline jacket to honor that tradition. By incorporating deliberate, highly structured Japanese patchwork along the dramatic, sweeping hemline, the garment becomes a canvas for resourcefulness. To guarantee the jacket popped brilliantly in our lifestyle photography, I bypassed neutral tones entirely. A base of Deep Amethyst Purple, dramatically punctuated by Japanese Patchwork blocks in Electric Tangerine and Luminous Teal, ensures the jacket is a vibrant, show-stopping focal point.
Focus on Usability, Comfort, and Elegance
- Usability: If you are wondering why this idea is worth making, it comes down to its dramatic, transformative power over a basic wardrobe. A longline asymmetrical jacket is exceptionally usable because it instantly elevates a simple t-shirt and jeans or a basic black dress into a curated, high-fashion ensemble. The deep, quilted pockets easily hold a phone and keys while keeping your hands free.
- Comfort: While the length is dramatic, the garment remains incredibly comfortable. Utilizing a lightweight 100% cotton outer shell paired with a breathable flannel core provides exactly the right amount of transitional warmth without the suffocating, heavy drape of a winter wool coat.
- Elegance: The sweeping diagonal cut of the asymmetrical hem naturally draws the eye downward, creating a sleek, elongating optical illusion. The sharp contrast between the Brilliant Teal and Tangerine patchwork and the Amethyst background creates an aura of unapologetic, bespoke elegance that commands any room you enter.
Materials & Measurements (for size M/L, fits chest 38–42″)
| Item | Quantity | Measurements / Notes |
|---|---|---|
| Outer fabric (cotton/linen blend, vibrant colors) | 2.5 yards | 45″ wide – e.g., fuchsia, turquoise, orange |
| Lining fabric (soft cotton or rayon) | 2.5 yards | 45″ wide – coordinating solid |
| Quilt batting (cotton or bamboo) | 2.5 yards | Low loft, 45″ wide |
| Contrast fabric for sashiko accents (optional) | 0.5 yard | High contrast – e.g., mustard yellow |
| Thread (heavy-duty for quilting, matching) | 1 spool each | Scissors, rotary cutter, ruler, pins, sewing machine, and iron |
| Scissors, rotary cutter, ruler, pins, sewing machine, iron | – | – |
Final finished measurements of the jacket (approx.)
- Length from shoulder to hem: 36″
- Width (across chest, unbuttoned): 24″ (fits up to 48″ hip)
- Sleeve length from shoulder: 22″
- Sleeve opening width: 14″ (flowing kimono sleeve)
Step-by-Step Instructions (6 steps + Assembly)
Step 1: Cut the pattern pieces
Because it’s a kimono jacket, there are no shoulder seams – the body and sleeves are one continuous shape.
Cut from outer fabric, batting, and lining (all same dimensions):
- Back piece: 30″ wide × 36″ long
- Two front pieces (asymmetrical):
- Left front: 20″ wide × 36″ long
- Right front: 12″ wide × 36″ long
- Two sleeves (rectangles): 18″ wide × 22″ long each
Note: Add ½″ seam allowance to all edges.
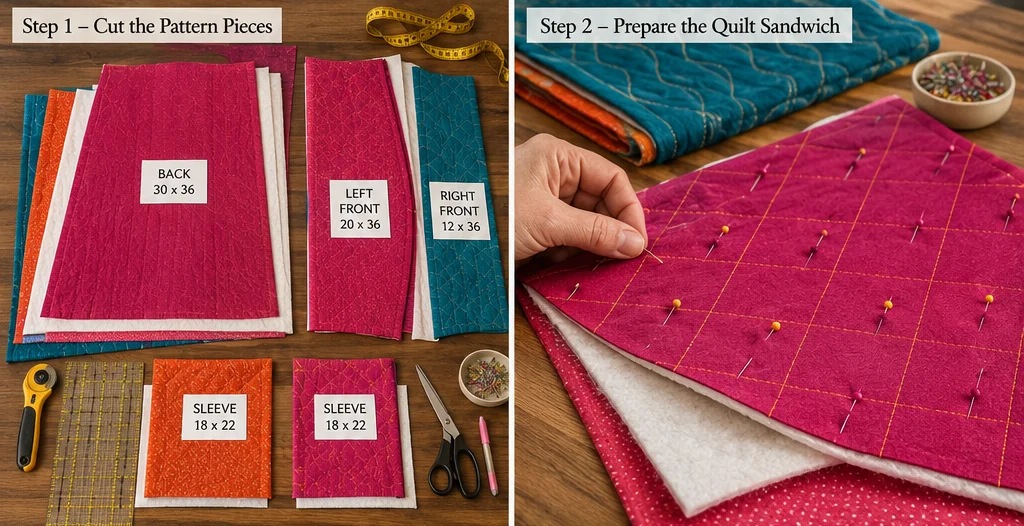
Step 2: Prepare the quilt “sandwich”
For each piece (back, left front, right front, two sleeves), layer:
- Outer fabric (right side down)
- Batting
- Lining (right side up)
Pin generously. Mark a simple quilting grid (e.g., 2″ diamond or vertical wavy lines) on the outer fabric.
Step 3: Quilt each piece
Using a walking foot, stitch along the marked lines. For a Japanese feel, use contrasting thread (e.g., bright orange on fuchsia). Quilt all pieces separately. Trim excess batting and lining flush with outer fabric edges.
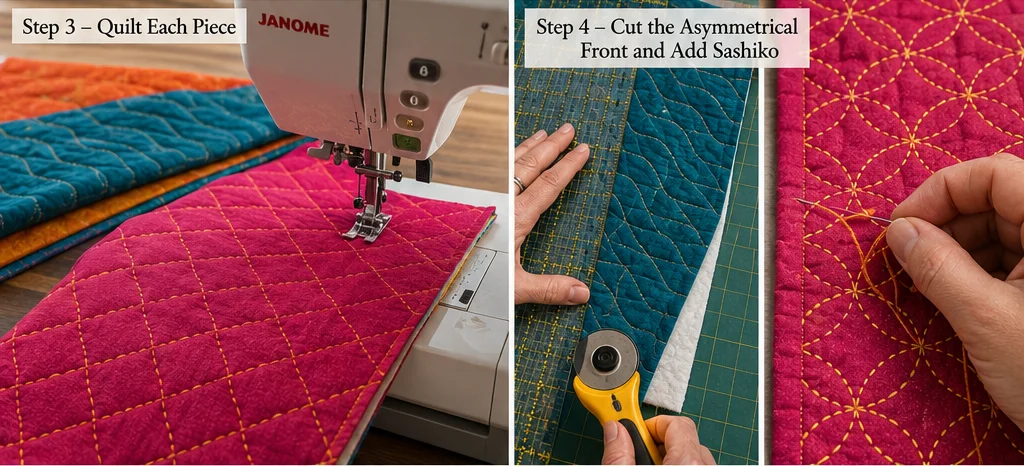
Step 4: Cut the asymmetrical front and add an optional sashiko
On the right front piece, trim the inner edge at a 30° angle so the hem is 12″ at the top and 8″ at the bottom (creating the asymmetrical overlap).
For sashiko: draw a simple interlocking circle or wave pattern on the left front and sleeves. Hand-stitch with pearl cotton, using large, even running stitches.
Step 5: Assemble the jacket body
- Join shoulders: Place the back and front pieces right sides together. Sew from the armhole edge to the neck edge (use a ½″ seam). Press open.
- Attach sleeves: With right sides together, match the short edge of each sleeve rectangle to the armhole opening. Sew, then press the seam open.
- Sleeve & side seams: Fold jacket so sleeve and body are aligned. Sew from the sleeve hem down to the body hem in one continuous line. Repeat for the other side.
- At this point, you have a tube-like kimono shape.
Step 6: Finish the hems and add closure
- Hem the sleeves: fold raw edge ½″ twice, press, stitch.
- Hem the bottom of the jacket: same double-fold hem.
- Neckline: fold a ½″ binding tape or use bias tape to encase the raw neck edge.
- Asymmetrical closure: Sew 3 large fabric-covered buttons or toggle buttons along the right front edge, and make corresponding loops on the left front edge (or use extra-long fabric ties that wrap around).
Assembly Section – Putting it all together (recap sequence)
- Cut all fabric, batting, and lining.
- Layer and quilt each piece separately.
- Add hand embroidery (sashiko) to desired pieces.
- Trim right front asymmetrically.
- Sew shoulder seams.
- Attach sleeves to armholes.
- Sew side + sleeve seams.
- Hem sleeves, bottom, and neckline.
- Attach closure (buttons + loops or ties).
- Press the entire jacket. Wear with joy!
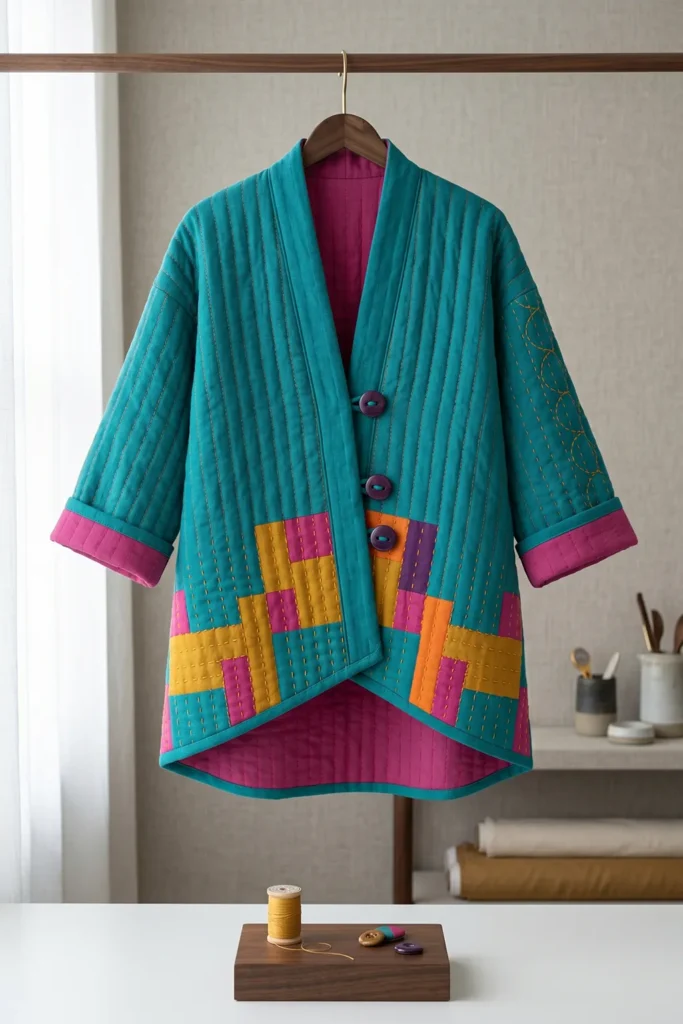
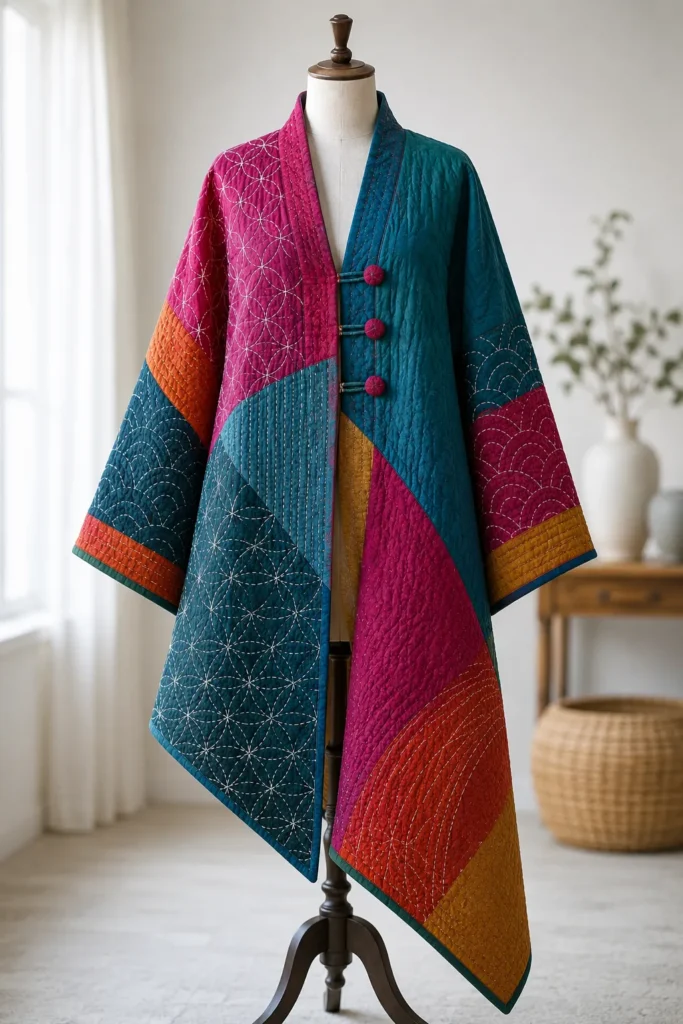
Finishing touches & styling tips
- Vibrant colors: Use a multi-color palette – for example, the left front in deep turquoise with mustard sashiko, the right front in fuchsia, the back in a gradient of orange and pink.
- Wear it: Over a simple black turtleneck and wide-leg pants for a dramatic pop of color. Or belted at the waist over a dress.
- Care: Hand wash in cold water, lay flat to dry. The quilting will soften beautifully over time.
This jacket is more than clothing – it’s a piece of wearable art that carries the spirit of Japanese craftsmanship and your own colorful creativity. Happy quilting!
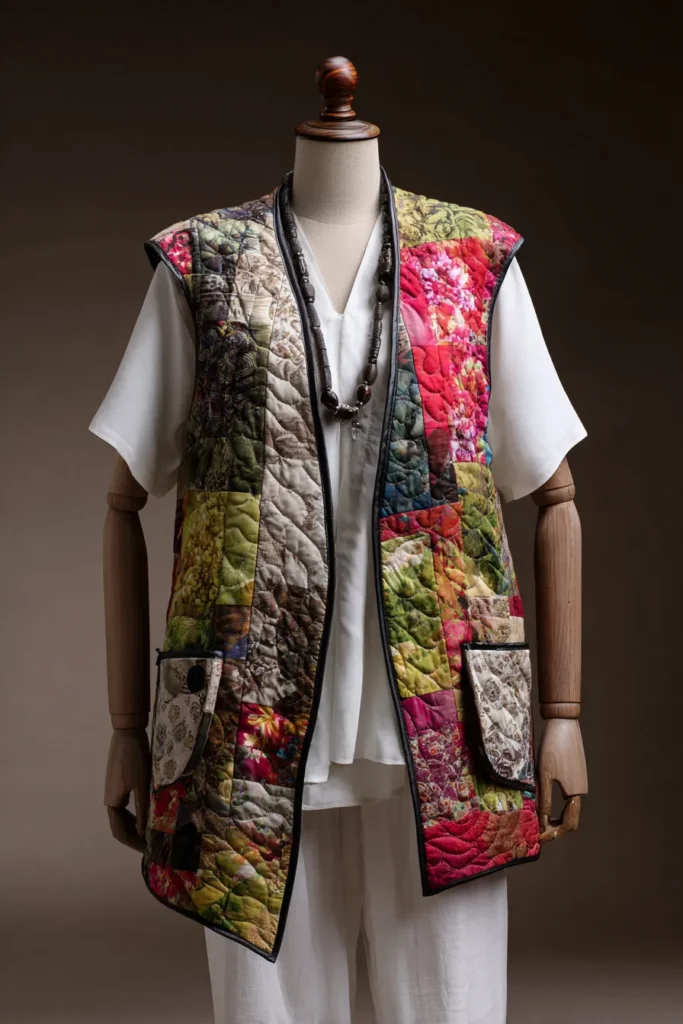
3. Reversible Indigo Japanese Quilt Vests for Versatile Sophistication
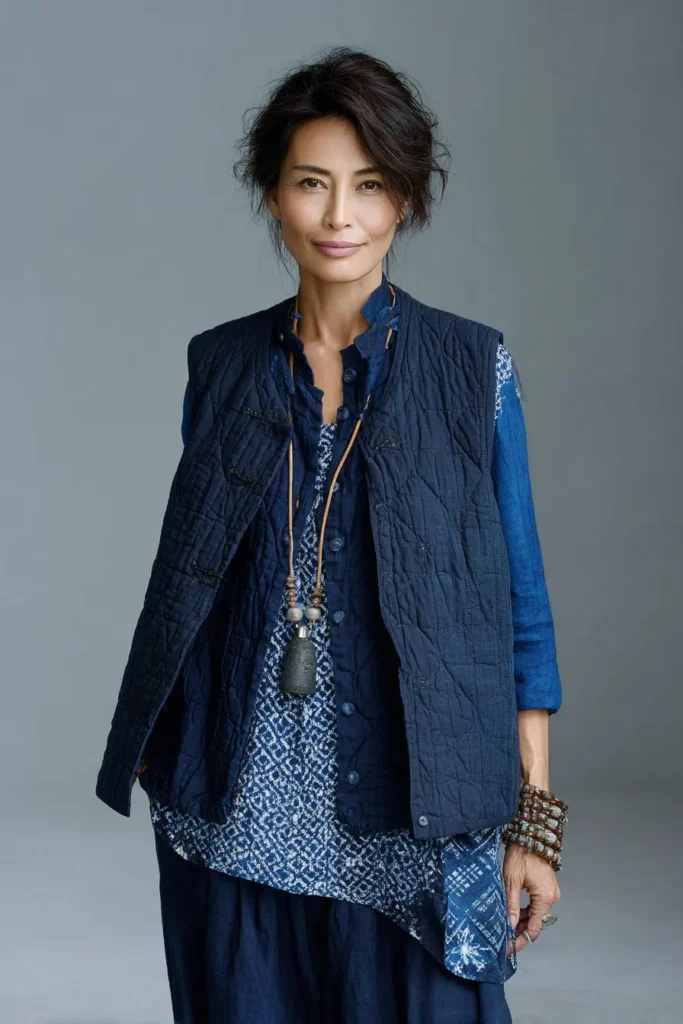
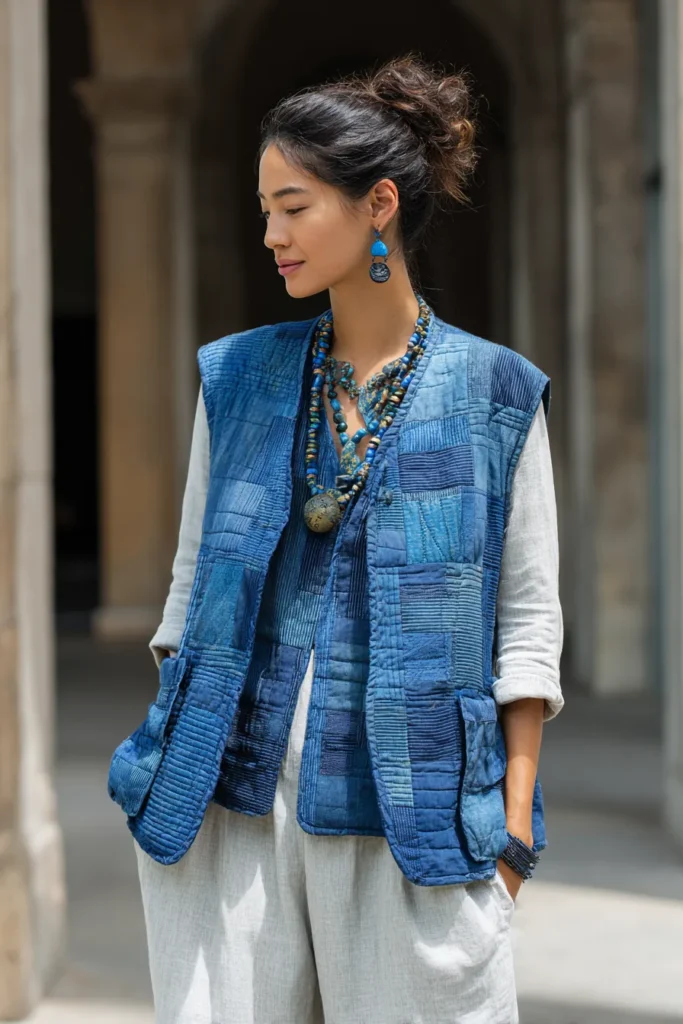
A Guide to Making Reversible Indigo Japanese Quilt Vests for Versatile Sophistication
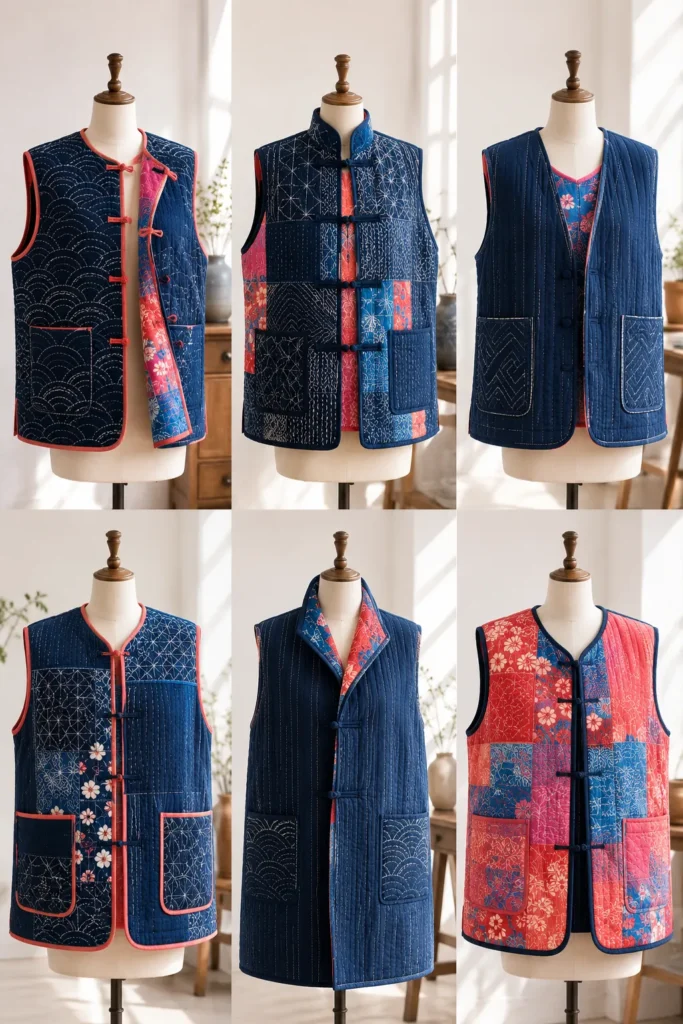
Layering is the cornerstone of a functional, stylish wardrobe, but finding garments that adapt to shifting environments without adding restrictive bulk is an ongoing challenge. The Reversible Indigo Japanese Quilt Vest is a masterclass in functional tailoring. By removing the sleeves of a traditional Haori and engineering the piece to be fully reversible, you create a dynamic garment that offers the deep, historic grounding of indigo on one side, and a breathtaking, explosive canvas of vibrant color on the other.
Why this idea is worth making
A reversible vest gives you two garments in one – ideal for travel, small wardrobes, or anyone who loves options. The Japanese quilted construction provides light insulation without bulk, making it perfect for spring, fall, or air-conditioned summer days. The indigo side is calm, sophisticated, and pairs with anything; the vibrant reverse side lets you express playful energy. Hand-stitched sashiko accents on both sides add texture and artisanal value. Plus, making a reversible garment teaches precision finishing (no raw edges visible), which elevates your sewing skills. This vest works equally well over a crisp white shirt, a chunky sweater, or a simple tee.
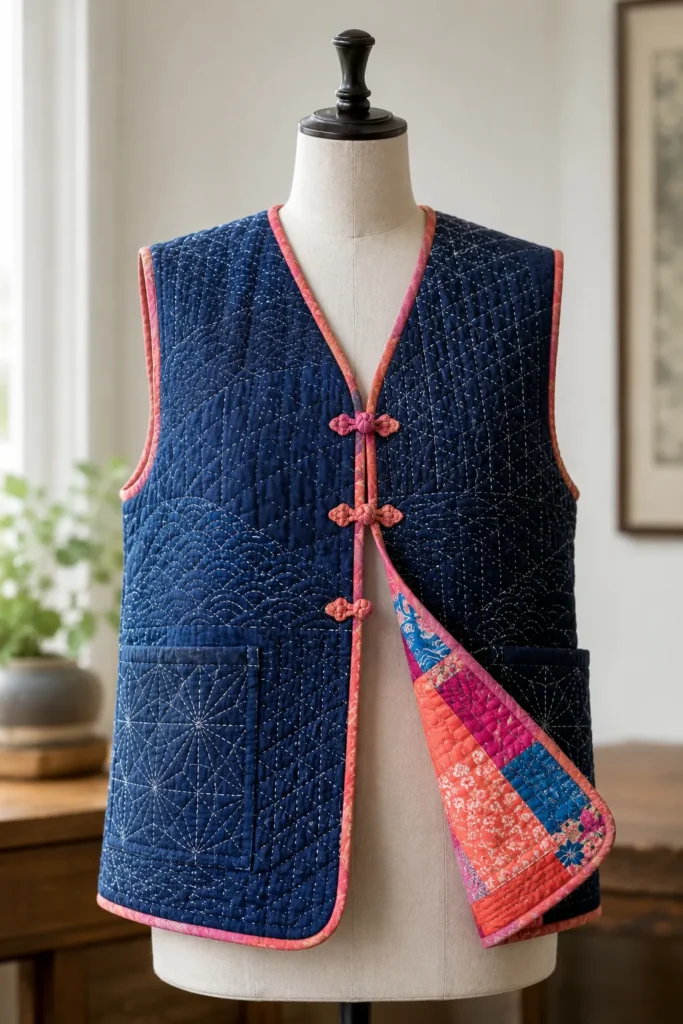
Historically, quilted vests (Chanchanako) were worn in Japan to keep the body’s core warm while leaving the arms completely free for work. I engineered this reversible vest to modernize that brilliant utility. I needed a piece that could look sharp and understated during a professional meeting, but easily flip to a vibrant, energetic aesthetic when styling a space or engaging with resort guests. By pairing a classic Deep Indigo face with a reverse side featuring luminous Japanese Patchwork in Radiant Coral and Electric Azure, the vest acts as a functional mood board.
Focus on Usability, Comfort, and Elegance
- Usability: If you are wondering why this idea is worth making, it comes down to sheer closet efficiency and styling power. You are effectively sewing two entirely distinct, bespoke garments in one sitting. The sleeveless design provides full mobility, while deep, reinforced pockets on both sides keep your phone, keys, and notebooks always accessible.
- Comfort: By utilizing a 100% natural linen-cotton blend and a low-loft cotton core, the vest regulates core temperature flawlessly. It breathes naturally, preventing you from overheating during an active afternoon, while the quilted texture provides a deeply comforting, weighted embrace around your shoulders.
- Elegance: The power of this design lies in its alter-ego aesthetics. The deep Indigo side offers a sleek, minimalist elegance that grounds a busy outfit. Flip it inside out, and the Radiant Coral and Electric Azure geometric patchwork delivers a massive, unapologetic burst of bespoke runway energy, ensuring you always look meticulously curated.
Materials & Measurements (for size M/L – fits chest 36–42″)
| Item | Quantity | Measurements / Notes |
|---|---|---|
| Side A: Indigo cotton or linen | 1 yard | 45″ wide – deep natural indigo |
| Side B: Vibrant contrasting fabric | 1 yard | 45″ wide – fuchsia, tangerine, or lime green |
| Quilt batting (cotton or bamboo) | 1 yard | Low loft, 45″ wide |
| Thread for quilting | 1 spool each | Matching indigo + matching vibrant |
| Pearl cotton for sashiko | 1 skein each | White (for indigo side) and indigo (for vibrant side) |
| Buttons or toggles (optional closure) | 3 | Contrasting wooden or fabric-covered |
Finished vest measurements (approx.)
- Length from shoulder to hem: 24″
- Width across chest (armhole to armhole): 21″
- Armhole depth: 9″
- Neck drop (front): 4″
- Neck drop (back): 1″
Step-by-Step Instructions (6 steps + Assembly)
Step 1: Create the pattern
On large paper, draw a simple vest shape with no side seams (cut as one piece for front/back? For reversibility, you need two identical vest shapes – a front and a back. But since it’s reversible, the easiest method is to make the vest as a single-layer quilted “fabric”, then cut. I’ll give that method.)
Cut two rectangles from paper (for front and back):
- Back piece: 22″ wide × 24″ long
- Front piece (left+right as one continuous piece): 22″ wide × 24″ long – but you’ll later cut a V-neck opening.
For simplicity, we’ll quilt large rectangles, then shape the vest.
Actually, better: cut the vest shape from paper first.
Paper vest template:
- Back: width 21″ at chest, length 24″, with a 1″ deep curve at neck (center back).
- Front: same width, length 24″, but with a V-neck: from shoulders down 4″ at the center front.
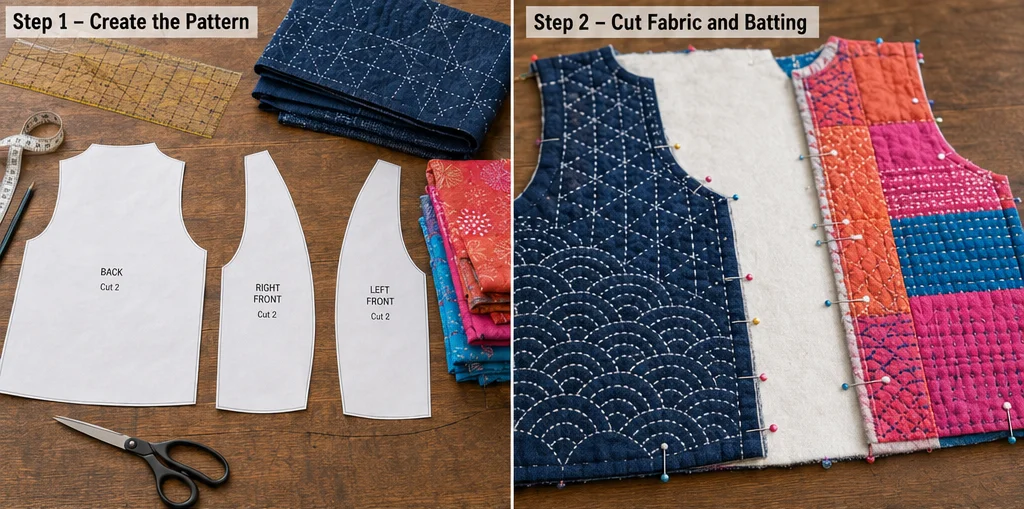
Step 2: Cut fabric and batting
Using the paper template, cut from indigo fabric (side A) and vibrant fabric (side B), and batting – all identical vest shapes.
You will have 3 layers: indigo (right side up), batting, vibrant (right side down) – but this is for a single quilted vest that is reversible. Actually, for a reversible vest, you need two separate quilted layers – one with indigo on top, one with vibrant on top – then join them. I’ll do the simpler method: make a single quilted “fabric” sandwich with indigo on one side and vibrant on the other, then quilt, then cut to shape. That works because both sides are outer.
So:
- Indigo layer (right side out)
- Batting
- Vibrant layer (right side out)
Pin all three layers together.
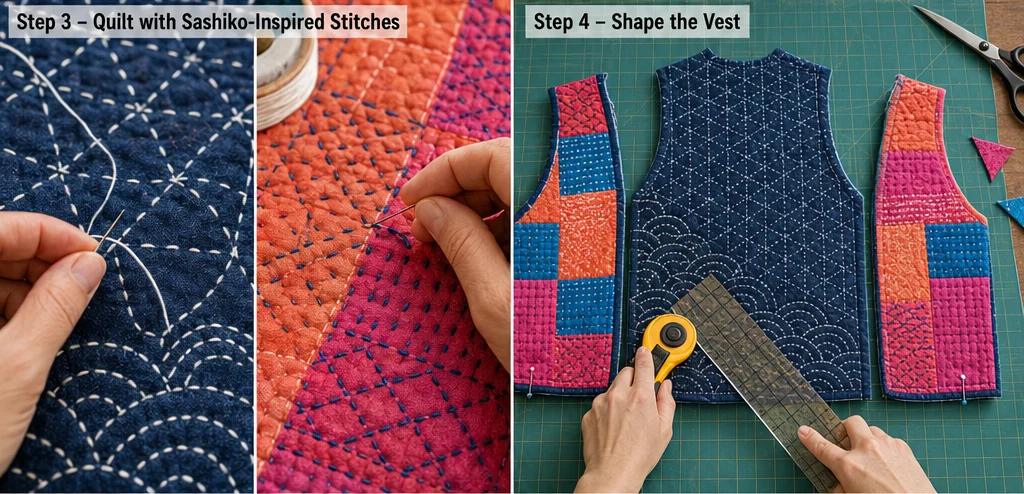
Step 3: Quilt with sashiko-inspired stitches
Mark a grid or freehand wave lines on both sides using chalk. On the indigo side, use white pearl cotton to stitch prominent running stitches in a pattern (e.g., vertical wavy lines 2″ apart). On the vibrant side, use indigo thread to stitch a contrasting pattern (e.g., diagonal crosses).
Stitch through all three layers using a long hand stitch or a sewing machine with a walking foot. The stitching will appear on both sides, so plan a design that looks good from either side.
Step 4: Shape the vest
After quilting the large rectangle (approx. 24″ × 28″ – enough for front and back), you will cut two pieces: one back and one front.
- Back piece: Use the template to cut one.
- Front piece: cut as a single piece that wraps around. But for a vest that opens in front, you need two separate front pieces. Let’s simplify: cut the quilted fabric into three pieces – back, left front, right front.
Use the paper pattern to cut these pieces, ignoring the neckline for now.
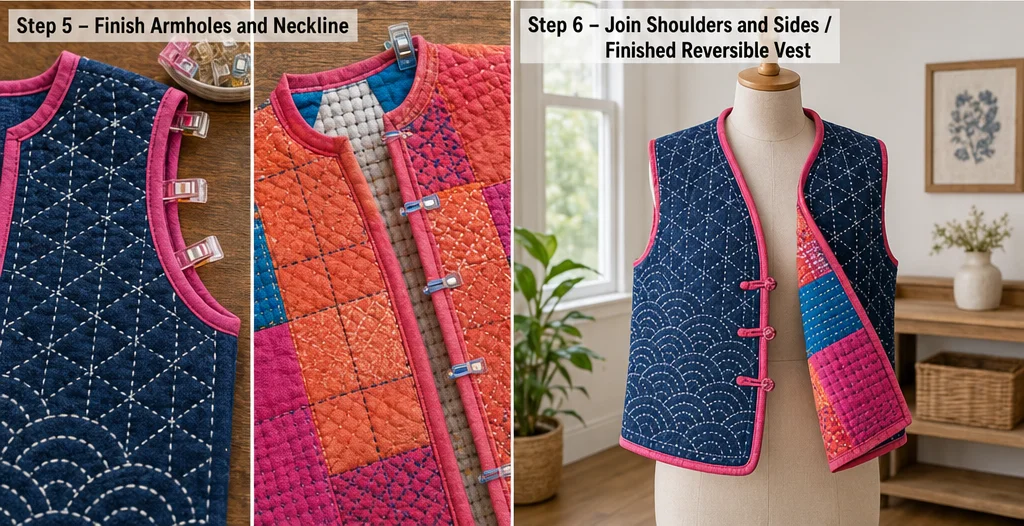
Step 5: Finish the armholes and neckline (reversible finish)
For a reversible vest, all raw edges must be enclosed.
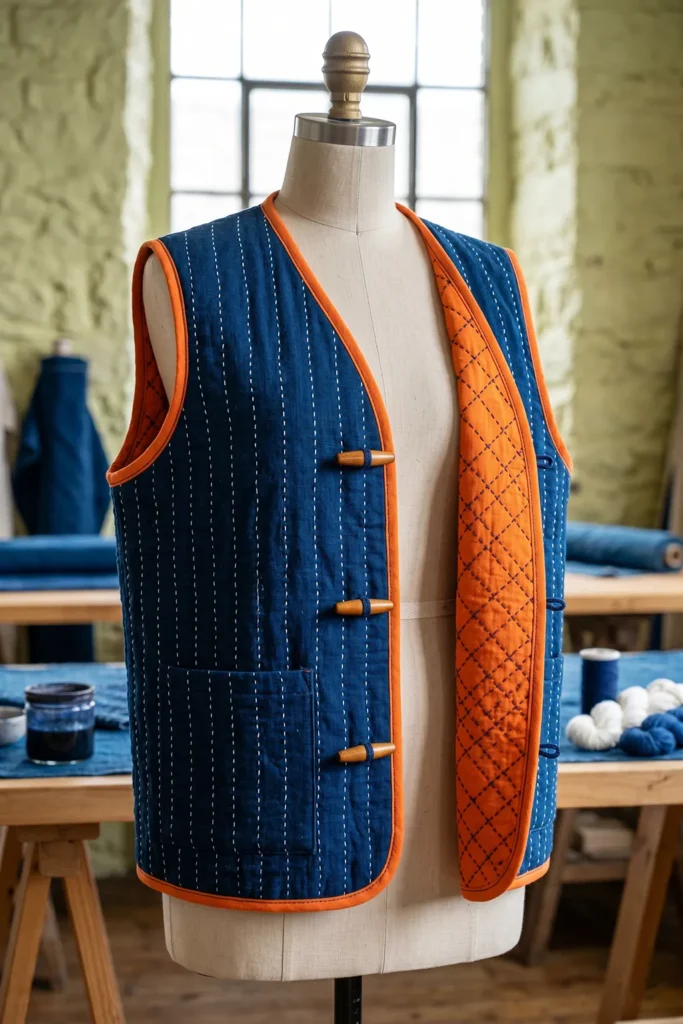
Armholes: cut bias binding from a contrasting solid fabric (e.g., bright orange) – 1.5″ wide, double fold. Sew binding around each armhole, turning to the inside and topstitching. This binding will be visible from both sides, so choose a fun color.
Neckline: similarly bind the V-neck and back neck with the same bias binding.
Bottom hem: fold up ½″ then another ½″ and topstitch – but because it’s reversible, better to use a separate strip of binding or do a faced hem.
Simpler reversible hem: cut a 2″-wide strip of indigo fabric, sew it to the bottom edge, flip it inside, then topstitch through all layers.
Step 6: Join shoulders and sides (reversible assembly)
This is the tricky part of reversible garments. The classic method:
- Place the back and front pieces right sides together (both indigo sides facing each other). Sew shoulder seams (½″). Press open.
- Then sew the side seams from the underarm to the hem.
- Because the vest is reversible, you will have raw seam allowances on the inside. To enclose them, use French seams or bind them with bias tape. For simplicity: after sewing shoulder seams, press open, then cover each raw edge with a strip of coordinating bias tape, folded over and stitched down. Do the same for side seams.
Assembly Section (recap sequence)
- Quilt the large sandwich (indigo + batting + vibrant) into one reversible fabric.
- Cut the quilted fabric into back, left front, and right front pieces.
- Bind armholes with colorful double-fold bias tape.
- Bind neckline (V-neck front and curved back).
- Sew shoulder seams (right sides together), then finish raw edges with bias tape.
- Sew side seams, then finish with bias tape.
- Hem the bottom with a faced hem or binding.
- Add closure (optional): sew three small loops on the right front edge and three buttons on the left front edge – use indigo or wooden buttons.
- Press gently.
- Wear with the indigo side outward for sophisticated calm, or flip to the vibrant side for a bold pop of color.
Finishing notes & styling tips
- Vibrant color choices: For the reverse side, try brilliant fuchsia (pink), tangerine orange, or neon yellow. They contrast beautifully with deep indigo.
- Sashiko patterns: Use simple geometric patterns – running stitches in vertical lines, interlocking circles (asanoha), or waves (seigaiha).
- Wear it: Over a neutral turtleneck for a refined look, or over a printed dress to let the vest be the anchor. Reversible means you can change your look from morning coffee to dinner out without changing clothes.
- Care: Handwash cold, line-dry. Indigo may bleed initially, so wash separately. The vibrant side will stay bright.
This reversible vest is a celebration of Japanese textile heritage and playful modern design. It makes a wonderful gift and an heirloom piece you’ll reach for again and again. Enjoy the two-faced magic!
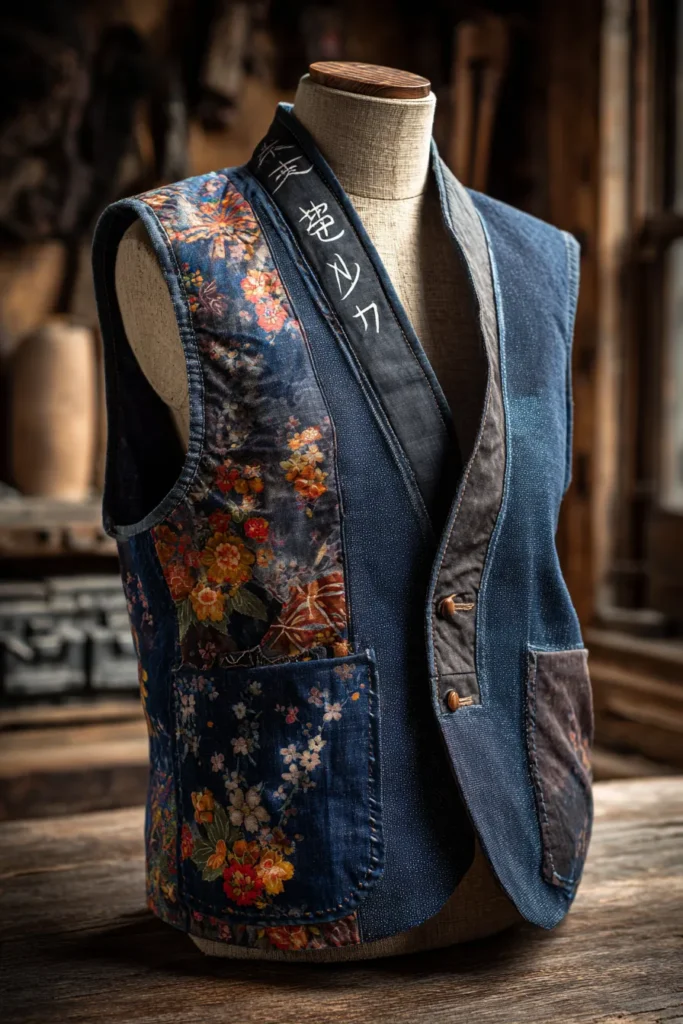
4. Tailored Japanese Quilt Vests for Effortless Transitional Style
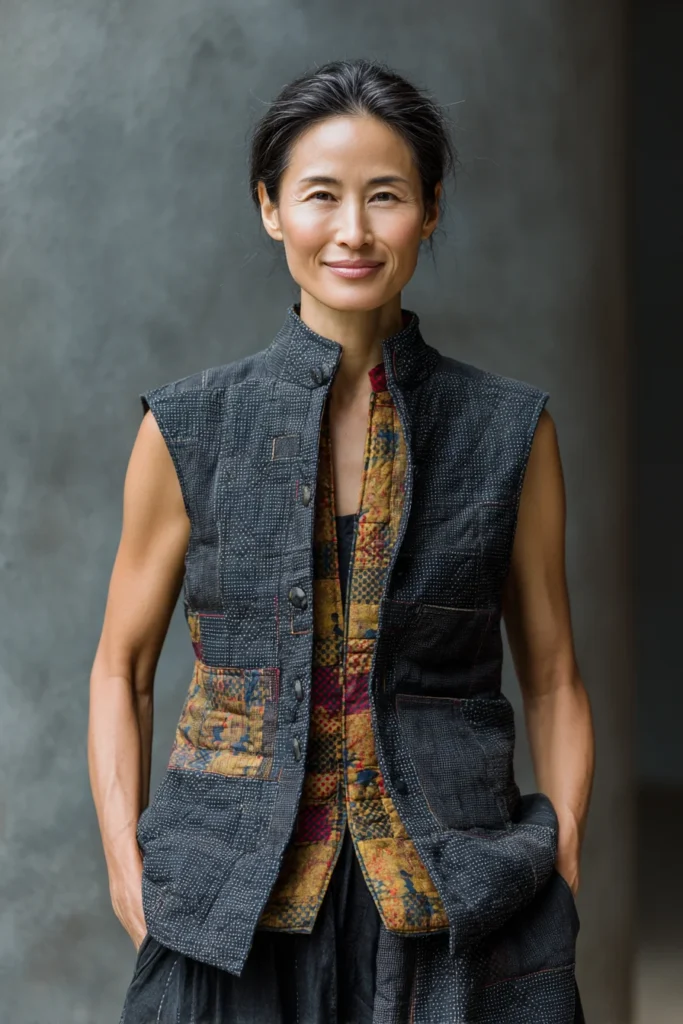
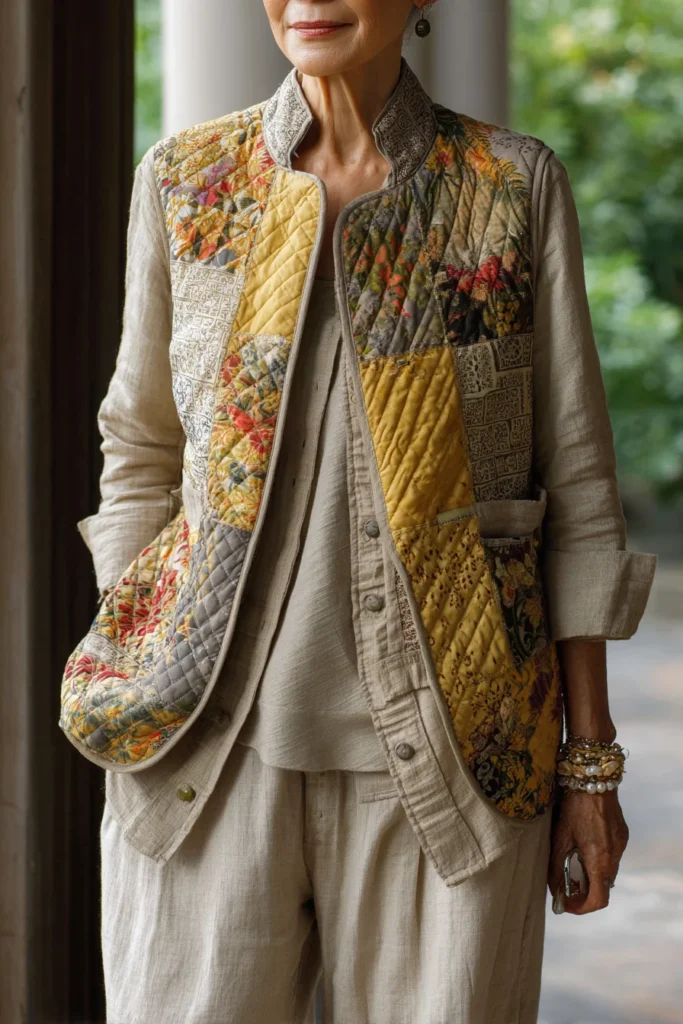
A Guide to Making Tailored Japanese Quilt Vests for Effortless Transitional Style
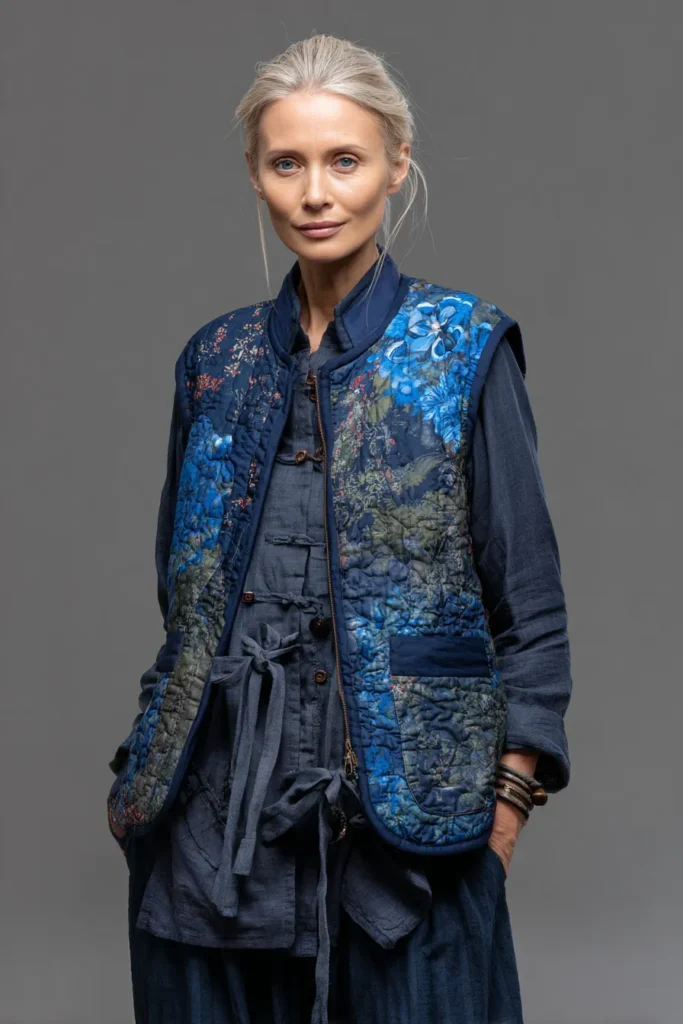
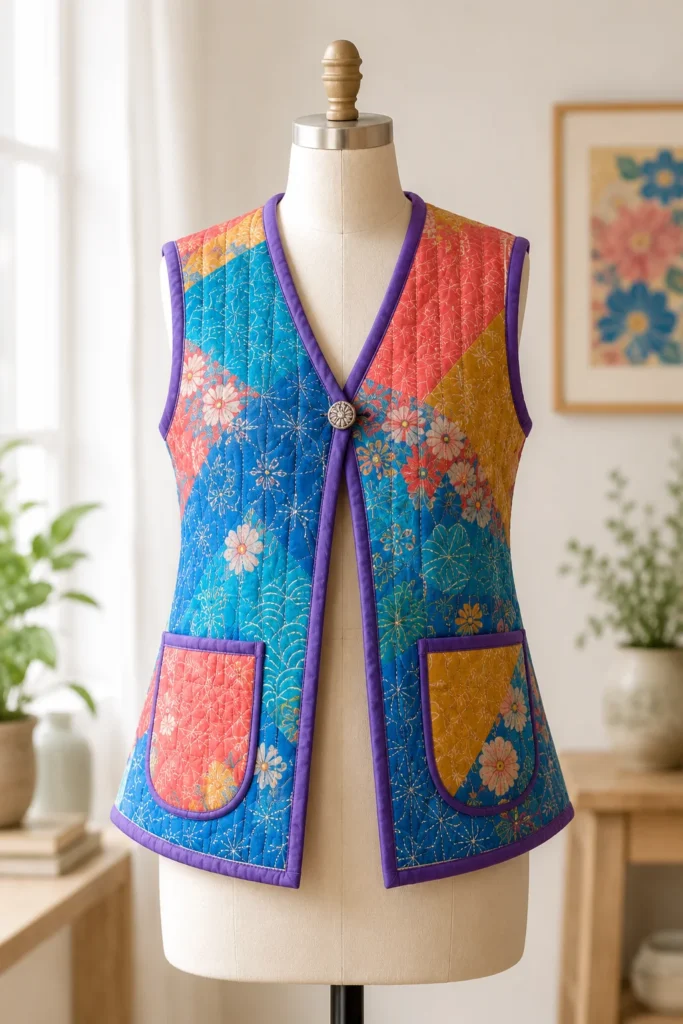
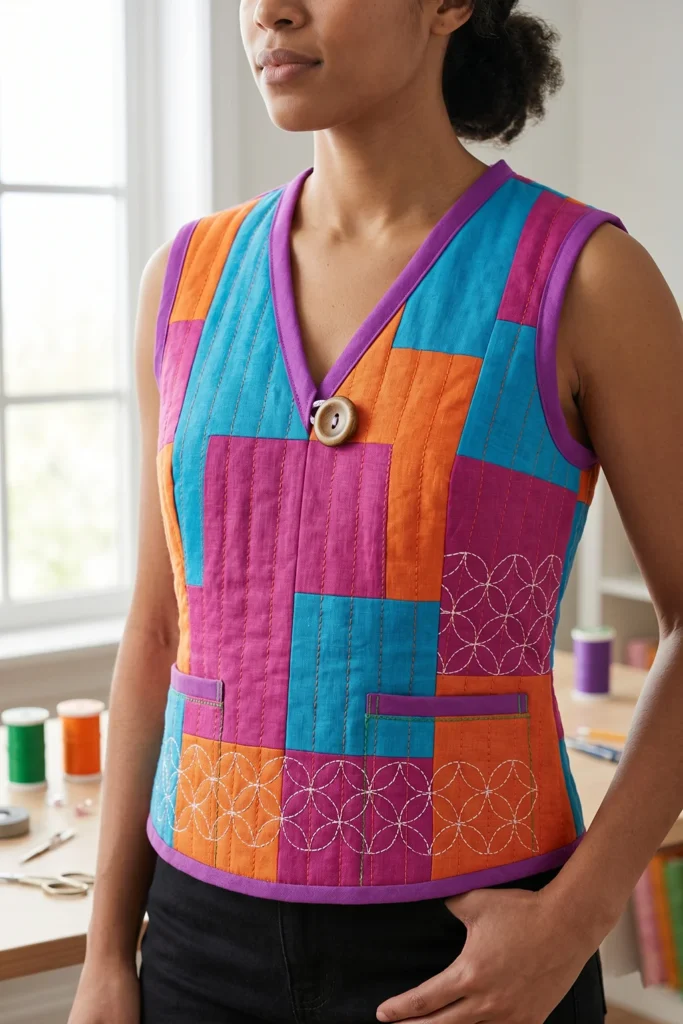
While relaxed, draped silhouettes are undeniably comfortable, certain occasions call for a garment with a bit more architectural rigor. The Tailored Japanese Quilt Vest brings the historic artistry of Japanese textiles into the realm of structured, professional menswear and womenswear. By combining the textural depth of quilted cotton with sharp, intentional tailoring—like front darts and a crisp button closure—this vest transforms from a simple layering piece into a vibrant, commanding centerpiece of transitional style.
The Heritage of the Pattern (And Why I Made It)
Curating the digital encyclopedia of interior and textile design for comfydwell.com means I am always on the hunt for that perfect intersection of heritage art and modern utility. The inspiration for this specific piece came directly from the operational demands of running the resort. I needed a garment that looked sharp and authoritative enough for morning vendor meetings or greeting new guests at the front desk, but remained rugged and mobile enough for walking the grounds of the children’s park in the afternoon.
Historically, Japanese workwear was heavily quilted for warmth, but formal garments like the Kamishimo (a traditional samurai vest) were prized for their sharp, structured shoulders and tailored lines. I engineered this vest to fuse those two concepts. To ensure the piece didn’t feel overly stiff or traditional, I injected an explosively vibrant color palette. By setting a structured geometric patchwork of Radiant Ruby and Saffron Yellow against a crisp, deep Midnight Navy canvas, the vest acts as a brilliant, tailored shield. It offers the bespoke elegance of a suit vest with the breathable comfort of a handmade quilt.
Focus on Usability, Comfort, and Elegance
- Usability: If you are wondering why this idea is worth making, it is because a tailored quilt vest is the ultimate transitional wardrobe multiplier. It is incredibly usable because it slides flawlessly over a crisp white button-down shirt for a professional setting, yet looks equally striking thrown over a casual long-sleeve tee. The tailored fit ensures it never looks bulky under a heavier winter coat when temperatures drop.
- Comfort: Standard suit vests are often lined with synthetic polyester, which traps heat and sweat. By utilizing 100% natural cotton for the shell, lining, and the low-loft batting, this vest actively regulates your core temperature. The soft quilting allows the structured garment to move dynamically with your body rather than restricting it.
- Elegance: The vest’s elegance lies in its sharp tailoring. By incorporating front darts and a structured V-neck button closure, the vest closely follows the natural lines of the torso. The restricted, vibrant burst of the Ruby and Saffron patchwork against the Midnight Navy ensures the garment looks meticulously curated and unapologetically high-end.
Why this idea is worth making
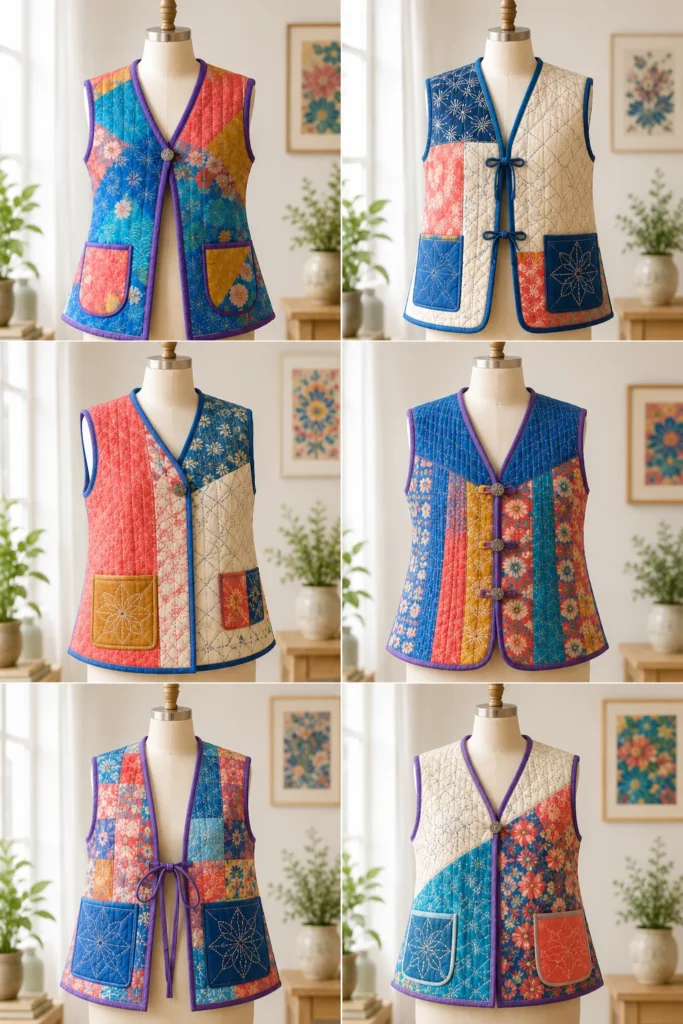
A tailored quilt vest is the ultimate transitional piece. It adds warmth without bulk, works over dresses, shirts, or sweaters, and allows you to show off intricate quilting. The tailored fit (darted at bust and shaped at side seams) makes it far more flattering than a boxy vest. Plus, you can use up colorful fabric scraps – think cherry-blossom pinks, golden yellows, electric blues – to create a one-of-a-kind garment. Once you master this pattern, you can make vests for every season: lightweight cotton for summer evenings, wool for winter. And the pockets! Everyone loves pockets.
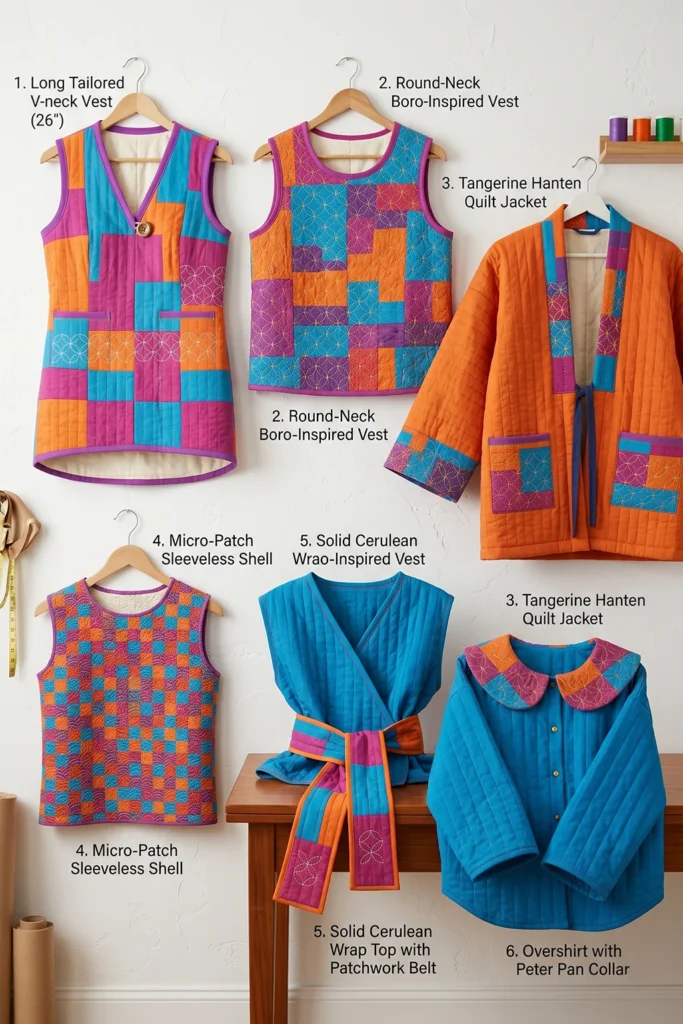
Materials & Measurements (for women’s size M – fits chest 36–38″)
| Item | Quantity | Measurements / Notes |
|---|---|---|
| Outer fabric: vibrant cotton/linen blend | 1.5 yards | 45″ wide – mix of solids or small prints (fuchsia, tangerine, turquoise) |
| Lining fabric: soft cotton or cupro | 1.5 yards | 45″ wide – coordinating solid (e.g., pale peach or cream) |
| Quilt batting (cotton, low loft) | 1.5 yards | 45″ wide |
| Thread for quilting | 1 spool | Contrasting (e.g., bright orange or lime green) |
| Pearl cotton for sashiko (optional) | 1 skein | White or gold |
| Buttons (closing – optional) | 1 | Large, decorative – e.g., wooden or glass |
| Seam binding (for armhole and hem finishing) | 2 yards | Double-fold bias tape, 1″ wide, in contrasting color |
Finished vest measurements (approx.)
- Length (from shoulder to hem): 22″ (cropped vest style) or 26″ (longer version)
- Bust (full circumference): 38″ (with ease)
- Waist (full circumference): 36″ (slightly A-line)
- Armhole depth: 8″
Step-by-Step Instructions (6 steps + Assembly)
Step 1: Create the tailored vest pattern
Draw on paper (or adapt a simple vest pattern):
Back piece:
- Center back length: 22″
- Width at shoulders: 14″
- Width at hem: 18″ (A-line)
- Armhole curve: from the shoulder edge down 8″ then curve inward to the side seam.
Front piece (two symmetrical halves):
- Length: same as back, 22″
- Shoulder width: 14″
- Bust width: 10″ per side (total 20″)
- Waist dart: 1″ deep, 3″ from armhole, starting 4″ below armhole.
- V-neck depth: 6″ from the shoulder at the center front.
Add ½″ seam allowance on all edges.
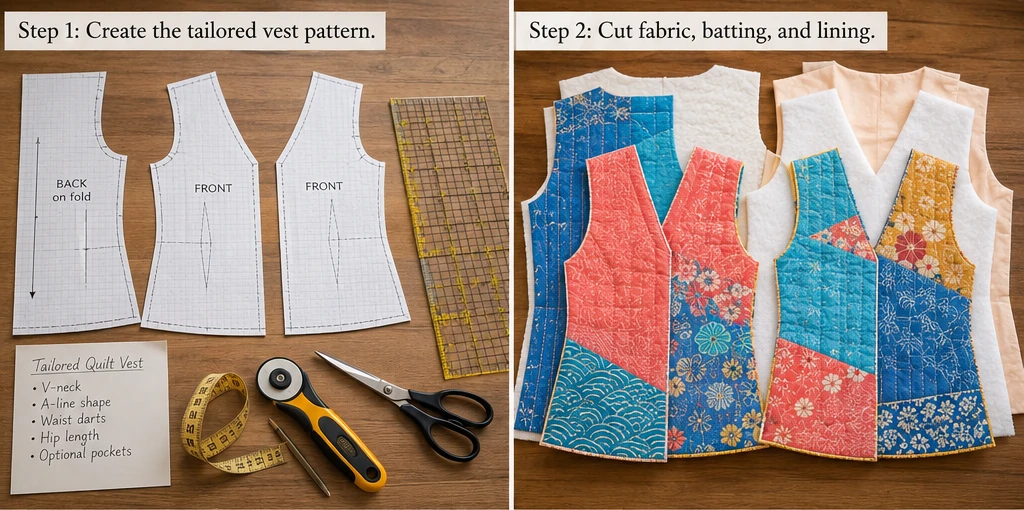
Step 2: Cut fabric, batting, and lining
From outer fabric (vibrant), batting, and lining – cut:
- 1 back piece (on fold)
- 2 front pieces (mirror images)
Note: You will quilt each piece separately before sewing the vest together. So cut outer, batting, and lining for each piece.
Step 3: Quilt each piece (add Japanese flair)
Layer for each pattern piece: outer (right side down), batting, lining (right side up). Pin.
Mark a quilting design on the outer fabric. For a tailored vest, straight vertical lines (1.5″ apart) or a subtle diamond grid look elegant. Use a walking foot and contrasting thread (e.g., electric orange on fuchsia fabric).
Optional sashiko: After machine quilting, add hand-sashiko stitches in white pearl cotton along the quilting lines or in geometric motifs (e.g., interlocking circles on the back).
After quilting, trim excess batting and lining flush with outer fabric edges.
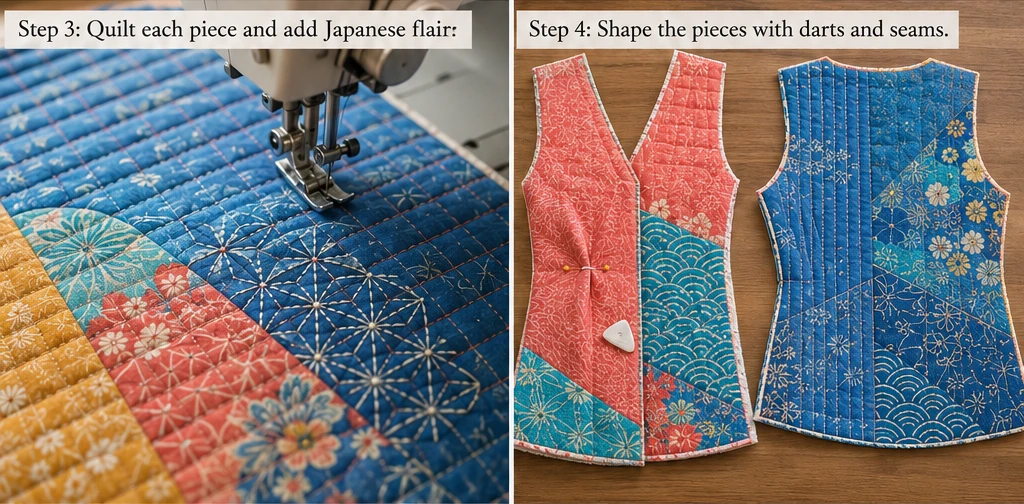
Step 4: Shape the pieces with darts and seams
On each front piece, fold and sew the waist dart on the lining side (since the garment will be lined, the dart will be hidden). Press the dart toward the side seam.
On the back piece, no darts needed – the A-line shape gives fit.
Step 5: Sew the tailored shell
With right sides together (outer fabric facing outer fabric):
- Sew shoulder seams (½″). Press open.
- Sew side seams from armhole to hem (½″). Press open.
- Now you have a vest-shaped shell.
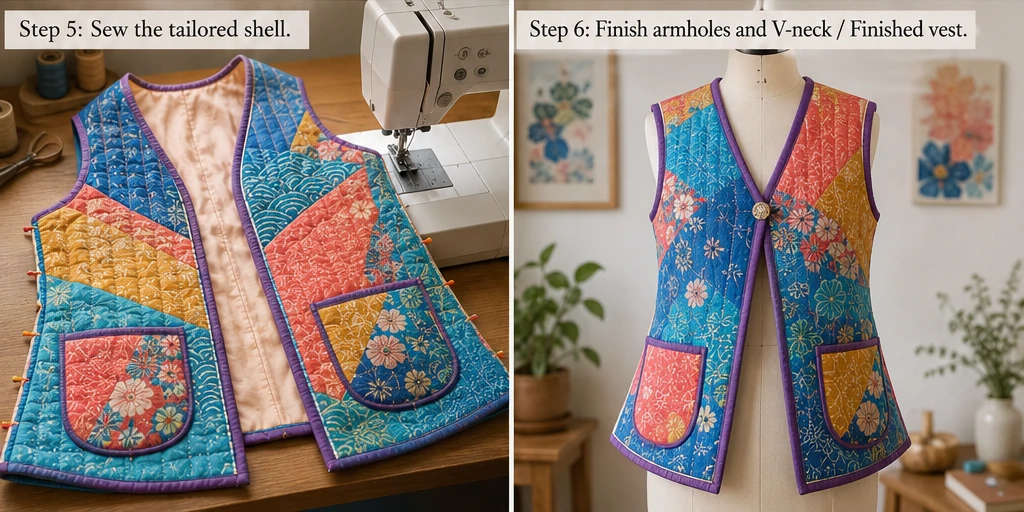
Step 6: Finish armholes and V-neck with bias binding (reversible-look)
Because the vest is unlined (actually, it is lined by the quilting sandwich, but the raw edges of the sandwich need finishing), use colorful double-fold bias tape to bind the armholes and neckline.
- Open bias tape, place the right side of the tape to the right side of the vest along the armhole edge, and sew in the crease.
- Fold tape to the inside, press, and topstitch close to the edge.
- Repeat for both armholes and for the V-neck.
- Tip: At the V point, miter the binding by folding carefully.
Assembly Section recap:
- Cut outer, batting, and lining for the back and two fronts.
- Quilt each piece (machine or hand).
- Sew darts on fronts.
- Sew shoulder seams.
- Sew side seams.
- Bind armholes and neckline.
- Hem bottom: fold up ½″ then another ½″, topstitch, OR bind with bias tape for a color pop.
- Add pockets (optional – see below).
- Attach a single button and a loop at the top of the V-neck for a closure.
- Press and wear.
Assembly – Optional pockets (highly recommended)
Cut two pocket pieces from vibrant fabric (6″ wide × 7″ tall). Finish the top edge with bias tape. Place on the front pieces at hip level (about 3″ from the side seam, 2″ from the hem). Sew around three sides, leaving the top open.
Finishing notes & styling tips
- Vibrant color palette example: Outer fabric – patchwork of cerulean blue, coral pink, and mustard yellow. Lining – soft peach. Quilting thread – emerald green. Bias binding – vivid purple.
- Wear it: This tailored vest looks stunning over a simple white blouse and dark jeans, or over a printed dress. It’s perfect for office-to-evening transitions.
- Care: Machine wash cold, gentle, dry flat. The quilting will crinkle beautifully.
This vest embodies the best of Japanese-inspired tailoring: functional, artistic, and joyful. Make it in your favorite colors and enjoy effortless style all year round.
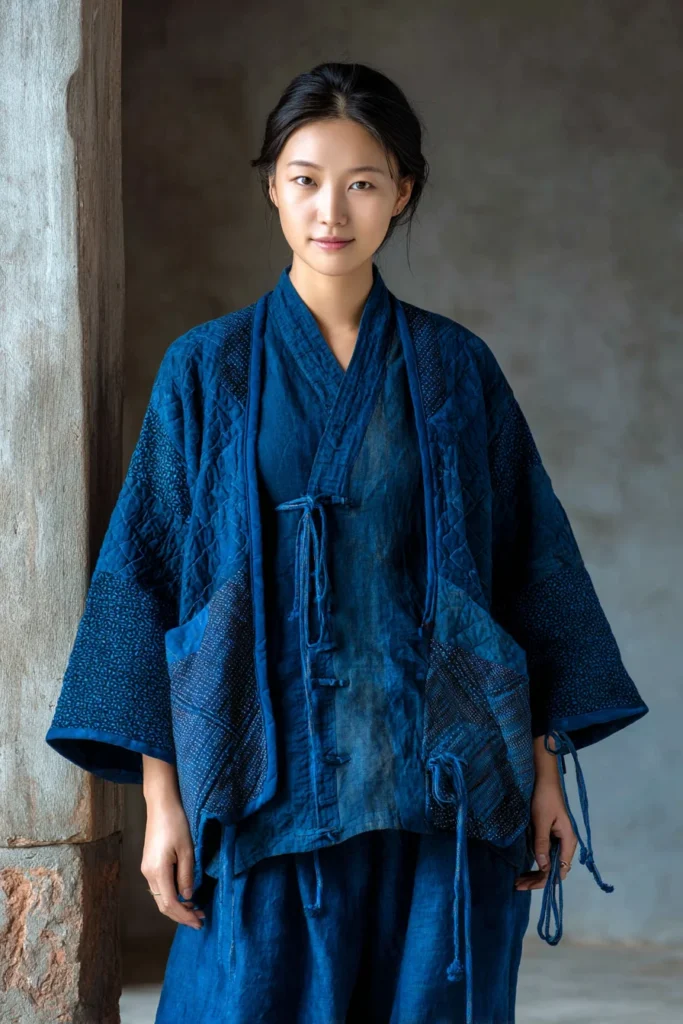
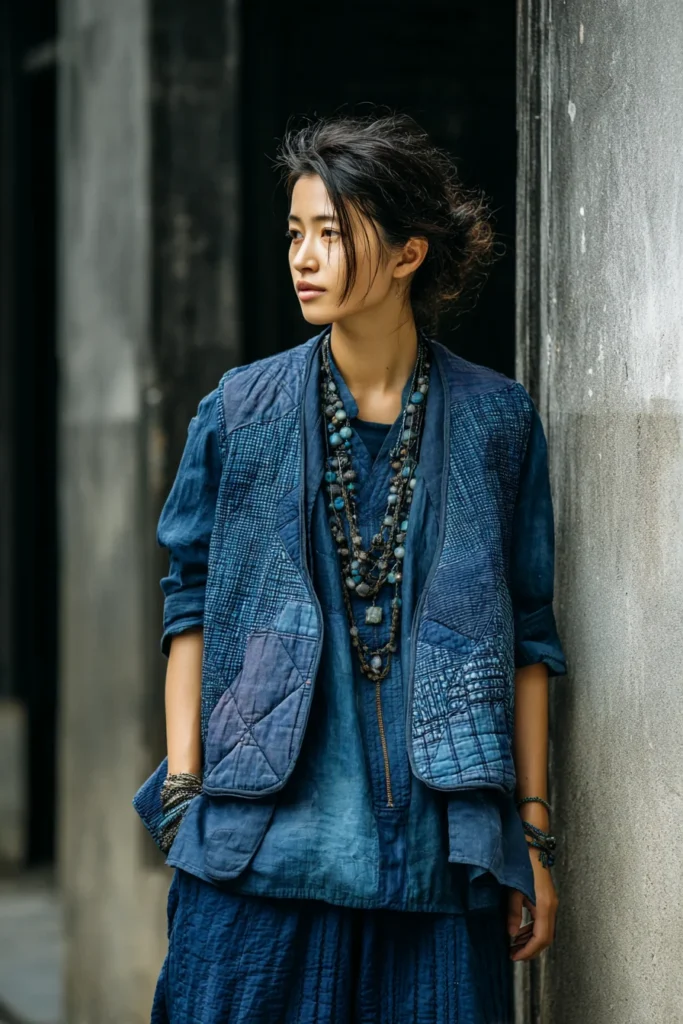
5. Stylish Indigo Dyed Quilted Tops for Chic and Comfortable Layering
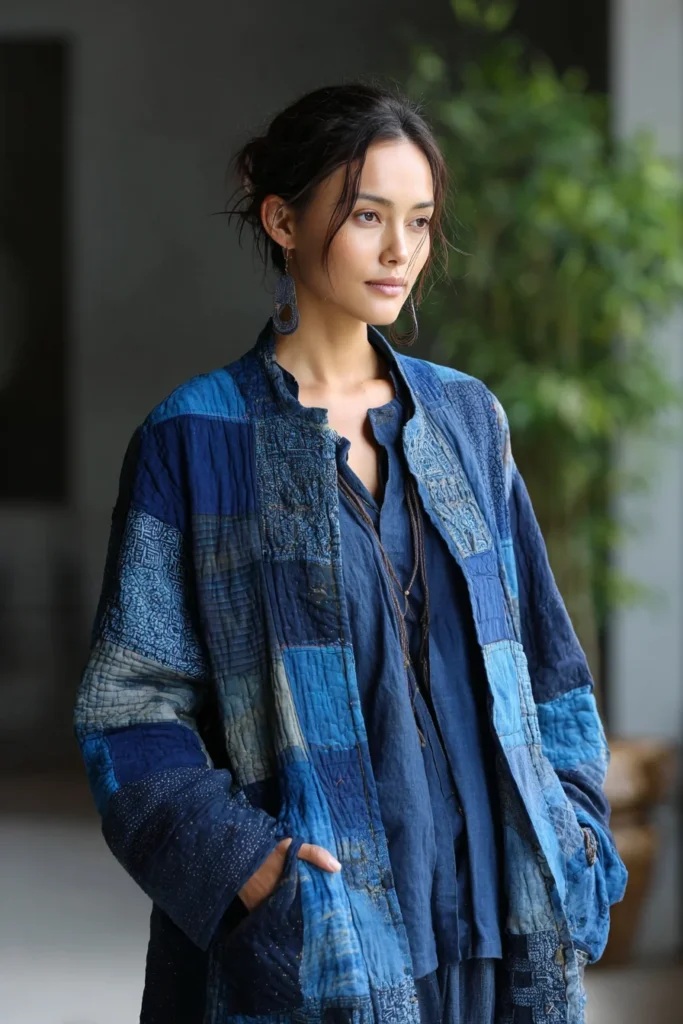
A Guide to Making Stylish Indigo Dyed Quilted Tops for Chic and Comfortable Layering
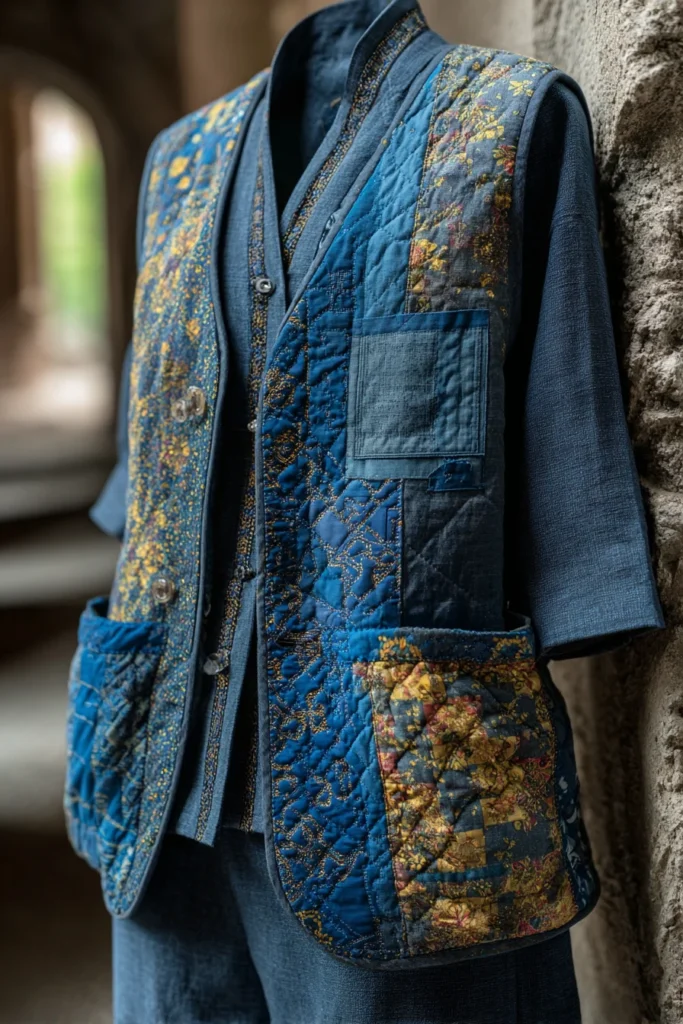
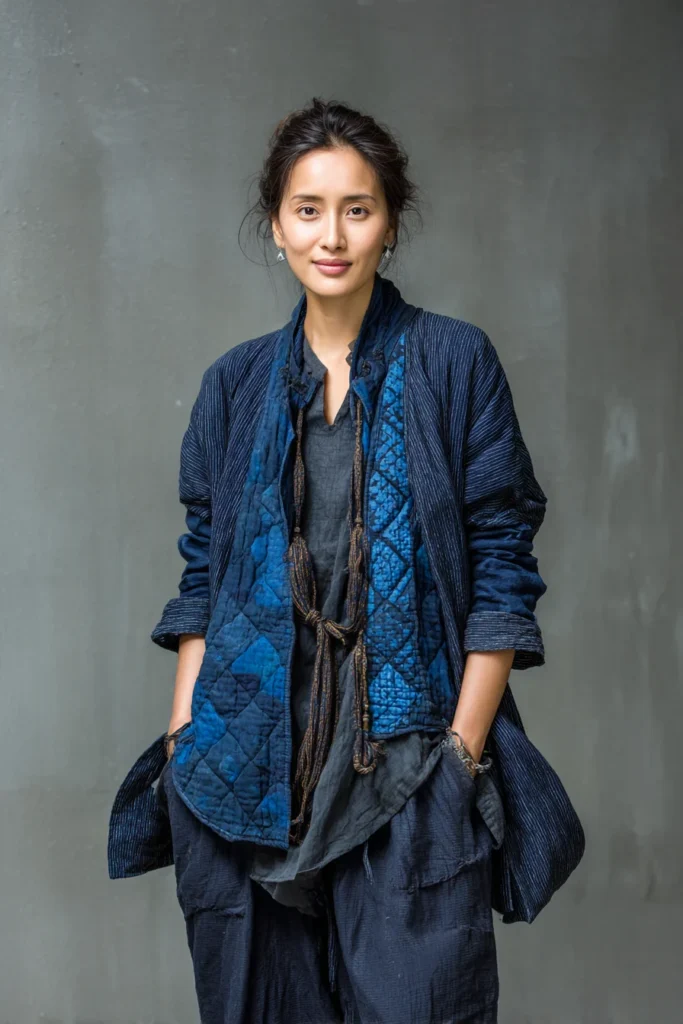
Finding the perfect top that bridges the gap between structured outerwear and a casual indoor blouse is a perennial styling challenge. The Stylish Indigo Dyed Quilted Top perfectly occupies this space. By taking the boxy, elegant drape of traditional Japanese tops and reinforcing it with a lightweight quilted structure, you create a piece that is visually arresting, deeply comfortable, and incredibly chic. When infused with striking, unexpected bursts of color, this top transforms from a simple garment into a highly curated piece of wearable architecture.
The Heritage of Indigo (And Why I Made It)
Indigo has a language all its own. The deepest blue holds centuries of tradition in its folds—from the fermented vats of Tokushima Prefecture to the rural villages where women dyed every thread by hand. What is now a luxurious finish was once a necessity for farmers and fishermen, prized because indigo’s natural compounds act as insect repellents and antibacterial agents. To wear indigo, especially in the layered form of a quilted top, is to wear an old friendship with nature.
My first encounter with aizome (the Japanese art of living indigo dyeing) felt almost spiritual. I was in a small workshop outside Kyoto, watching an artisan repeatedly dip white cotton into a murky green vat. As the cloth emerged and oxidized in the air, it transformed—from yellow to chartreuse to the profound, eternal blue that would only grow richer with time. I bought a length of that hand-dyed yardage and carried it home like a treasure. But for two years, it sat in my fabric cupboard, too precious to cut, waiting for the right project.
The backstory: traditional Japanese sashiko—the simple running stitch—was born from necessity, used to reinforce worn garments and quilt layers for warmth. But what began as mending evolved into art. Every line of stitching carries intention. Every indigo garment carries memory. When I finally unfolded that fabric and began drafting my own quilted top pattern, I was threading together not just cloth and fiber, but also an old, quiet connection with my cultural heritage that I wanted to bring into a modern silhouette.
Why This Idea Is Worth Making
An indigo-dyed quilted top is a wardrobe alchemist. It takes the ancient, heavy calm of natural indigo and wraps it around you with cozy, lightweight structure—and in vibrant variations, it defies the usual restraint of Japanese design to sing with personality. Layering doesn’t get more chic: throw it on over a simple tee, let it peek out from under a coat in winter, or wear it open like a light jacket on cool evenings.
The quilted construction gives just enough warmth without bulk, making it a year-round staple. Because you control the fabric—from deep traditional navy to electric cobalt or even indigo blended with bold contrasting tones—you end up with something unique. It’s also a brilliant scrap-buster: leftover bits of indigo-dyed cotton, patchworked together, become a story more interesting than any single piece. And the hand-stitching? Visible, proud, meditative. It invites you to slow down, to embrace wabi-sabi (the beauty of imperfection), and to own a garment that has no equivalent in any store.
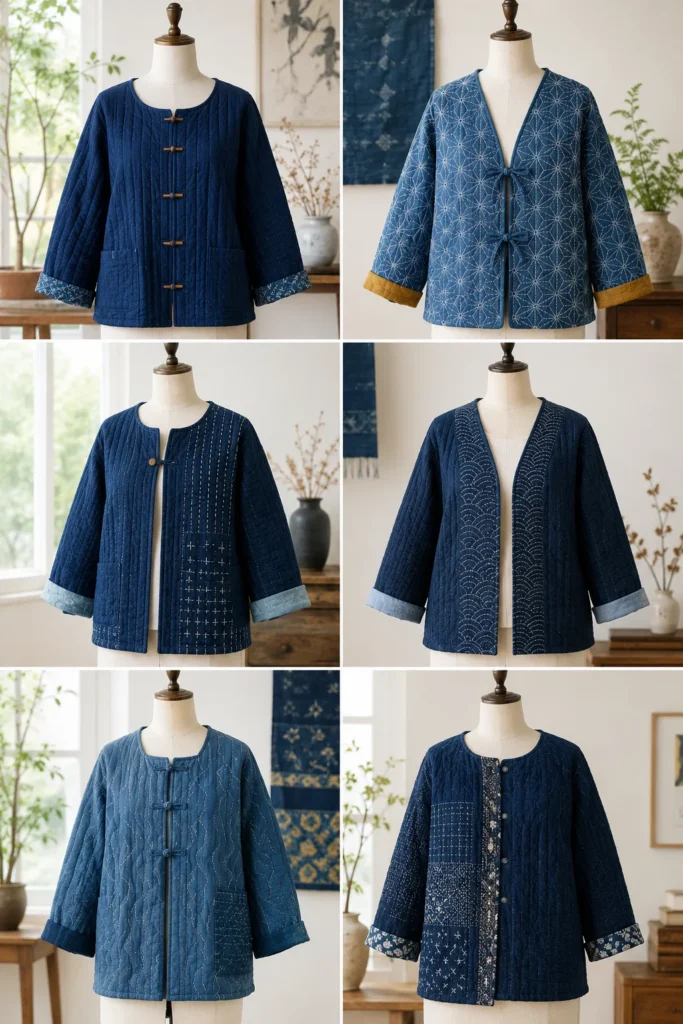
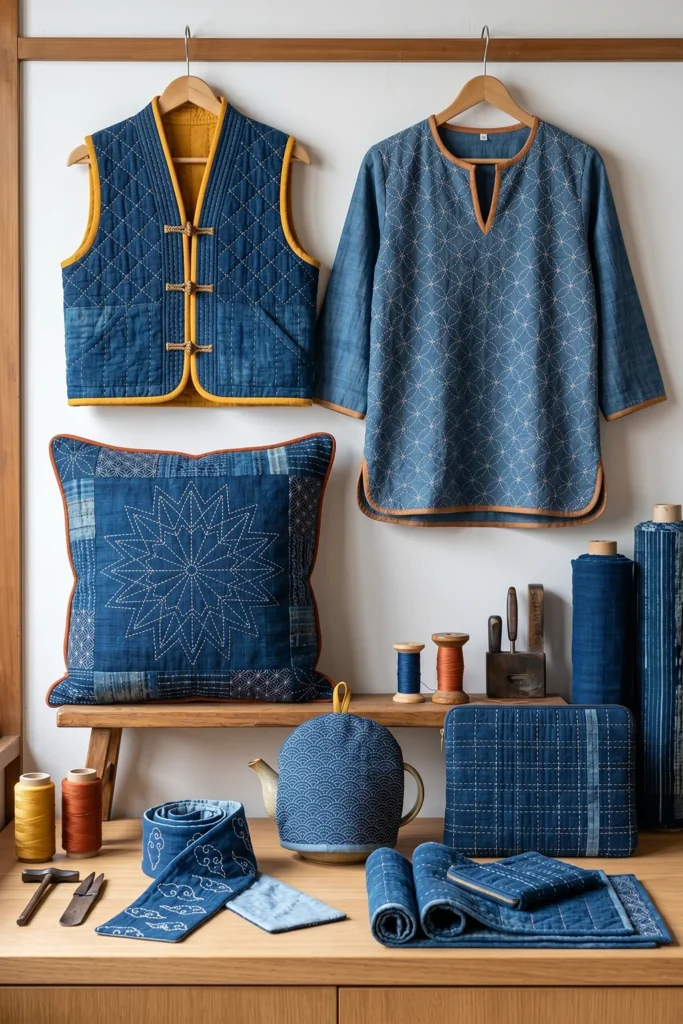
Materials & Measurements (for a relaxed-fit top, women’s S/M, or men’s small)
| Item | Quantity | Measurements / Notes |
|---|---|---|
| Outer fabric – indigo-dyed cotton or linen blend (or vibrant alternatives like Japanese yukata cotton in coral, mustard, or emerald) | 1.5–2 yards | 44–45″ wide. You can seam together smaller scraps for a boro-inspired look. |
| Inner lining – lightweight cotton (can be a contrasting color for reversibility) | 1.5–2 yards | 44–45″ wide |
| Quilt batting – low loft cotton or bamboo | 1.5–2 yards | 44–45″ wide |
| Thread for quilting – contrasting (eg, white or gold for dark indigo, or deep blue for light indigo) | 1 spool | or 2 spools if you want a different color on the bobbin |
| Sashiko thread (optional but recommended) | 1–2 skeins | Traditional heavy-weight cotton thread |
| Snaps, buttons, or a fabric tie – for closure | 4–6 (or 1 long strip) | Wooden toggles, contrasting fabric loops, or a wide matching belt |
Finished garment measurements (approx.)
- Chest (full circumference): 42–44″ (allows for easy layering)
- Length from shoulder to hem: 26–28″
- Sleeve (from shoulder seam to cuff): 18–20″ (generous, boxy shape)
Step-by-Step Instructions (7 steps + Assembly)
✂️ Step 1: Prepare Your Indigo or Vibrant Fabric
If you’re dyeing your own cotton or linen, pre-wash the yardage to remove any sizing. Prepare a natural indigo vat according to the kit’s instructions (traditional fermentation or pre-reduced is fine). For a simple shibori pattern, try itajime (folding and clamping) or arashi (pole wrapping). Want something easier? Use the shibori technique of folding the fabric and binding it tightly with rubber bands or string to create unique resist patterns. Submerge the fabric for 2–3 minutes, then remove and allow it to oxidize (it will turn from yellow to green to blue). Repeat until you reach your desired depth. Rinse, wash, and dry.
Alternatively, skip the dyeing and buy pre-dyed Japanese cotton – look for slub weaves, kasuri patterns, or even bright, non-traditional tones (like deep fuchsia or tangerine) if you want a modern twist.
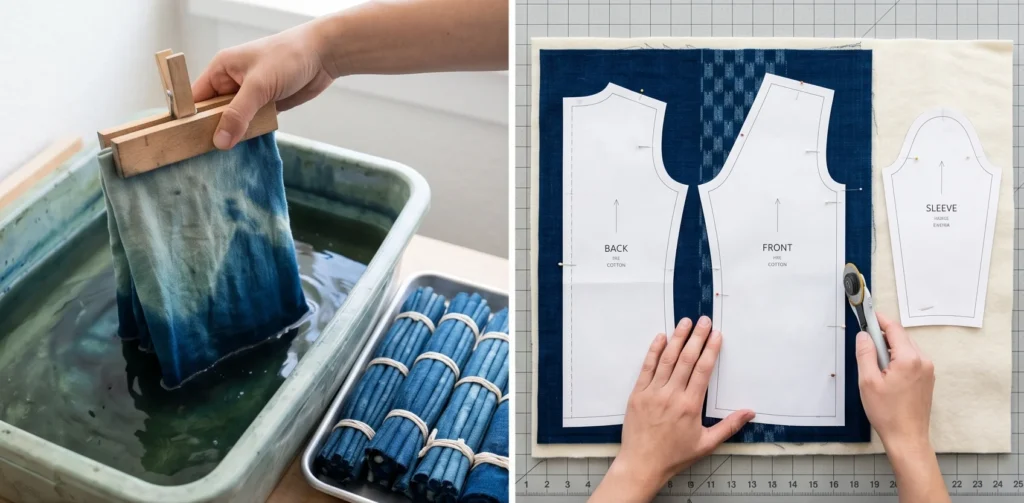
✂️ Step 2: Cut the Pattern Pieces
Use a simple kimono-style block – this is a classic Japanese straight-line silhouette that works beautifully with quilting.
From outer fabric, batting, and lining, cut:
| Piece | Dimensions |
|---|---|
| Back | 1 rectangle: 24″ wide × 30″ long (on fold) |
| Front panels | 2 rectangles: each 14″ wide × 30″ long |
| Sleeves | 2 rectangles: each 16″ wide × 20″ long |
Add ½″ seam allowance around all edges.
For the neckline, decide now: a shallow V or a simple scoop? Mark the curve on your fabric after cutting.
✂️ Step 3: Quilt the Fabric – Layer & Stitch
For each piece (back, two fronts, two sleeves), layer: outer fabric (right side down) + batting + lining (right side up).
Baste the layers together with pins or spray adhesive. Now, quilt across the piece using a walking foot on your machine – or quilt it by hand with sashiko if you have time and patience.
Suggested quilting designs:
- Straight vertical lines 1½″ apart (clean, modern)
- A gentle diamond grid (traditional and elegant)
- Freehand wavy lines (organic, relaxed)
For the stitching, use contrasting thread: white or gold on dark indigo creates dramatic emphasis.
💡 Optional: After machine quilting, add a single row of hand sashiko along the hem or collar using heavy cotton thread. It adds that unmistakable Japanese handcraft feel.
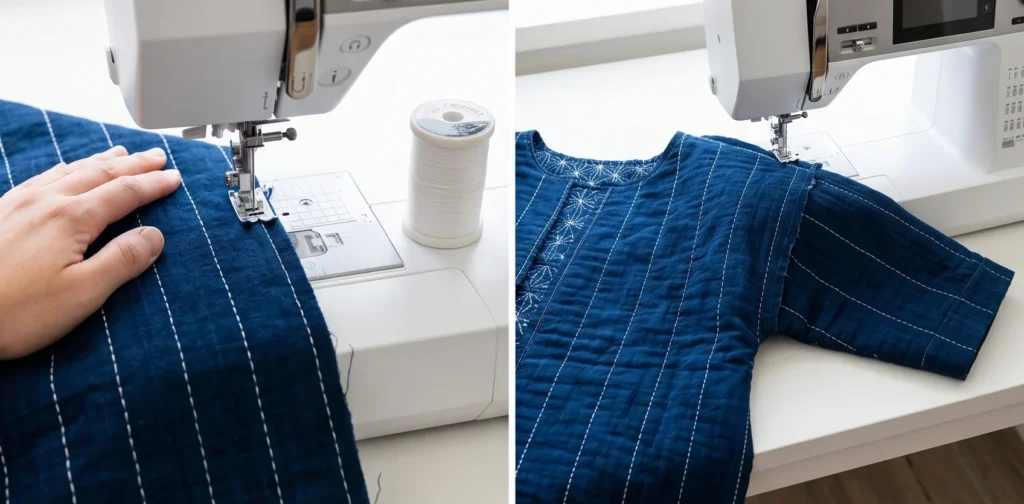
✂️ Step 4: Sew the Body & Sleeves
Assembly Sequence:
- Shoulder seams – With right sides together (outer fabric touching outer fabric), stitch the front panels to the back at the shoulders. Press the seams open.
- Attach the sleeves – With right sides together, sew the top edge of each sleeve rectangle to the armhole opening of the body. The sleeve width will give you a dropped shoulder, kimono-like drape.
- Sleeve & side seams – Fold the garment so the sleeve underarm meets the body side seam. Sew from the sleeve hem down to the bottom hem in one continuous line. Repeat for the other side. You now have a basic tunic shape.
✂️ Step 5: Finish Neckline & Hems
For a polished look, finish all raw edges.
- Neckline – Use 1″-wide bias tape (cut on the bias from your lining or a contrasting solid) to bind the neckline. Fold the tape over the raw edge, pin, and topstitch.
- Sleeve hems – Fold up ½″ toward the inside, then another ½″, and stitch close to the folded edge.
- Bottom hem – Same double-fold hem as the sleeves.
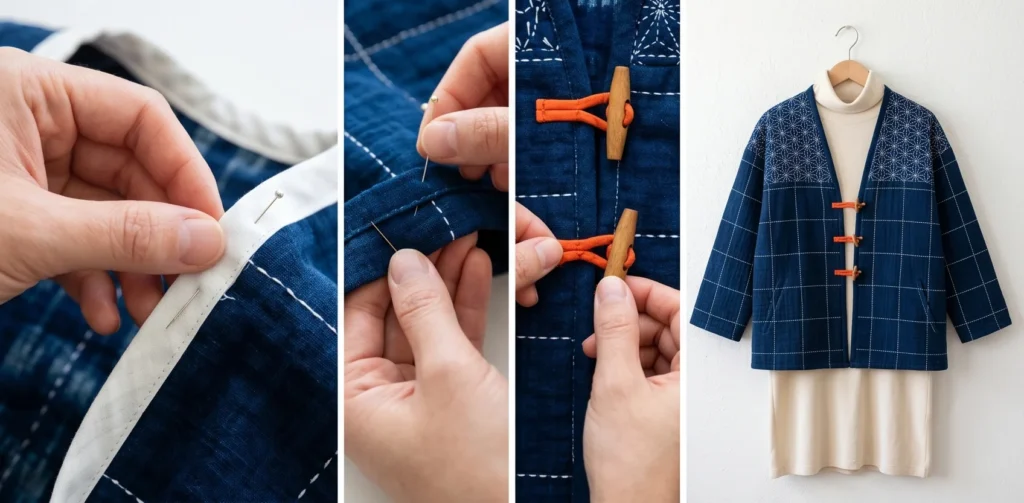
✂️ Step 6: Add Closure & Accents
You have several options:
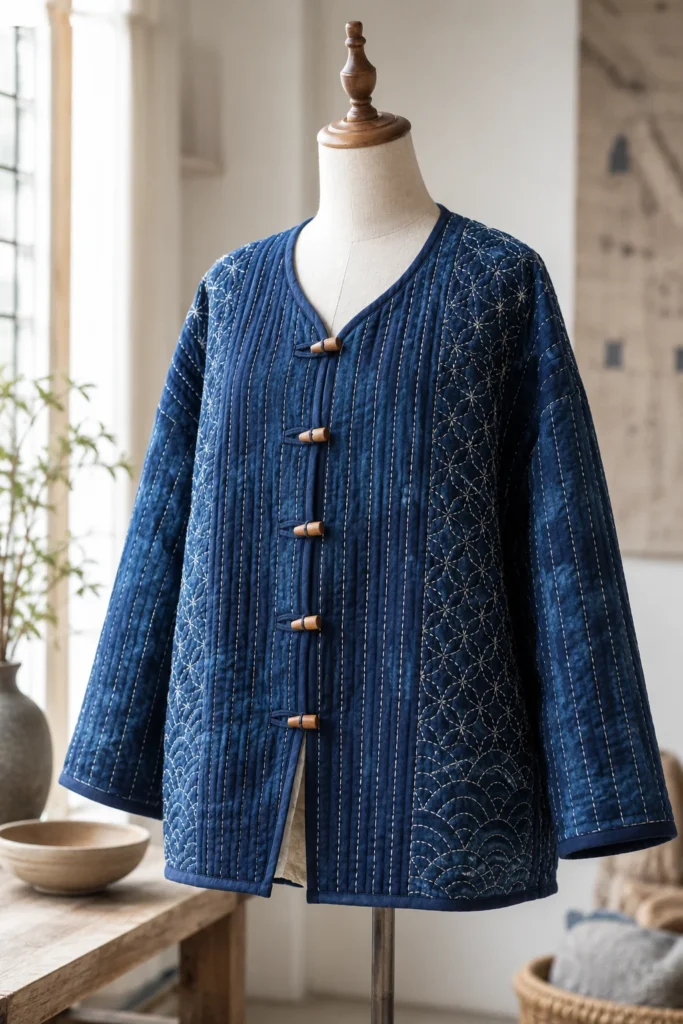
- Wooden toggles & thread loops – Sew 4–6 small loops of knotting cord along the right front edge, and attach matching wooden buttons or toggles to the left front. This looks very Japanese.
- Hidden snaps – If you prefer a cleaner front, sew small snaps on the inside, then cover them with a line of running stitch for a decorative detail.
- Fabric tie – cut a long strip of remaining indigo (2″ wide by 24″ long), fold it in half lengthwise, sew, and turn it right side out. Sew it inside the waistline (side seam) so you can wrap and tie the front.
Decorative sashiko touch: After the garment is assembled, add a simple pattern (such as asanoha – hemp leaf – or seigaiha – ocean waves) to the back yoke or along one front panel, using contrasting thread. This breaks up the solid blue and draws the eye.
✂️ Step 7: Final Press & Wear
Press all seams flat. Give the entire top a gentle steam to settle the quilting. It will already feel soft; after a few washes, the indigo will fade in the most beautiful, personalized way (that’s the appeal of living dye!).
Assembly Section At a Glance
- Prepare/dye your fabric.
- Cut pieces (back, fronts, sleeves) from outer, batting, and lining.
- Quilt each piece (machine or hand).
- Sew shoulder seams.
- Attach sleeves.
- Sew side/sleeve seams.
- Bind neckline; hem sleeves and bottom.
- Add closure (toggles, snaps, or ties).
- (Option) Decorative hand sashiko.
- Final press.
Vibrant Color Variations
While deep indigo is classic, don’t be afraid to experiment. Imagine:
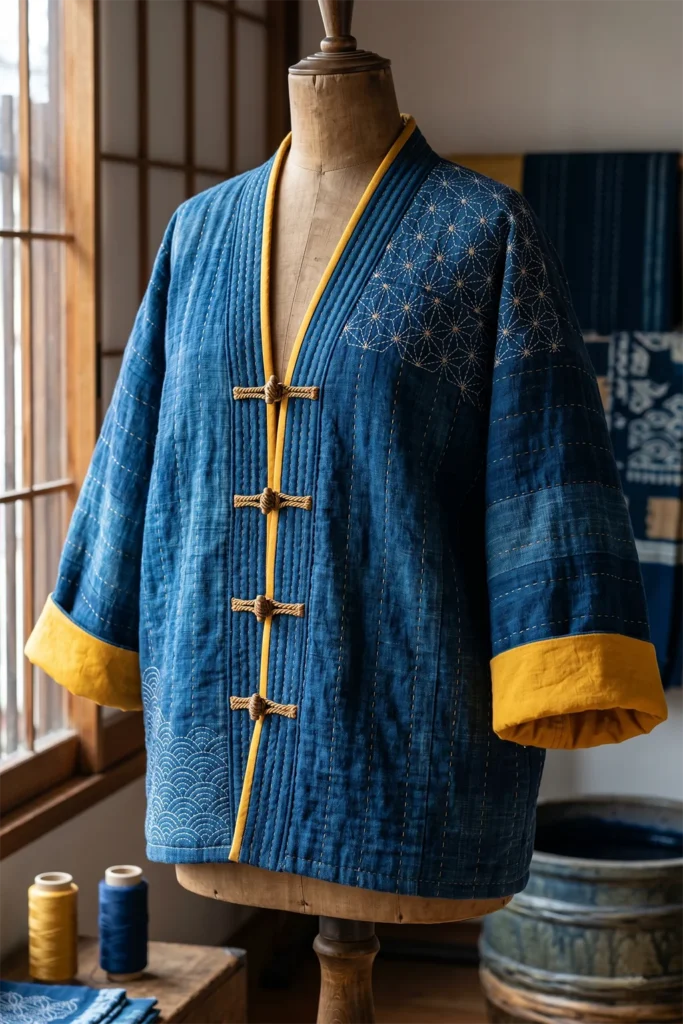
- Indigo & saffron – a deep blue front, with the lining and cuffs in glowing golden yellow.
- Coral & charcoal – a blend of Japanese yukata cotton in soft coral juxtaposed with a dark grey quilting thread.
- Emerald & white sashiko – a vivid green base with bold, wide running stitches in bright white.
These tops work equally well in non-indigo, vibrant palettes. The pattern remains the same; the mood changes entirely.
Finishing Notes & Styling Tips
- Wear it layered over a cream turtleneck, a striped tee, or even a simple tunic dress. Because the top is quilted, it acts as both a garment and a light cover.
- Gift idea – very few handcrafted gifts feel as personal and treasured as a quilted top. Pair it with a matching drawstring bag for a complete set.
- Care – machine wash cold, gentle cycle, with a pH-neutral detergent. Line dry in the shade to preserve indigo depth. The more you wear it, the better it gets. Indigo wants to age.
This top is more than sewing; it’s storytelling. You stitch warmth and art into a garment that carries the weight of tradition and your own fresh ingenuity. Happy quilting—and may you wear your creation in good health, in every vibrant shade of blue (and beyond).
6. Cropped Patchwork Quilted Tops with Traditional Japanese Motifs
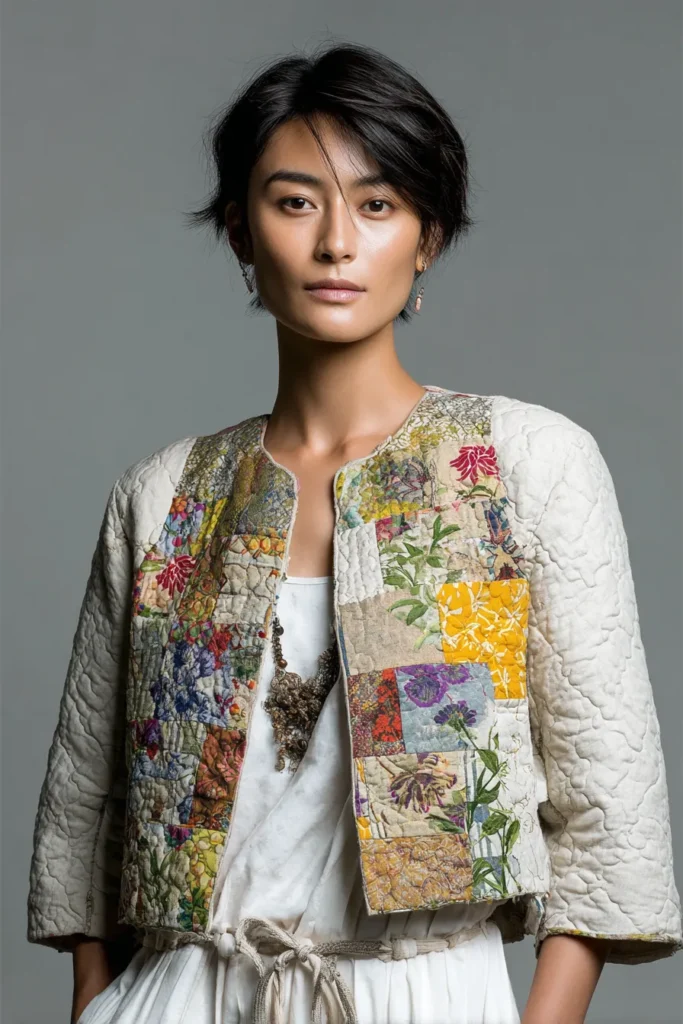
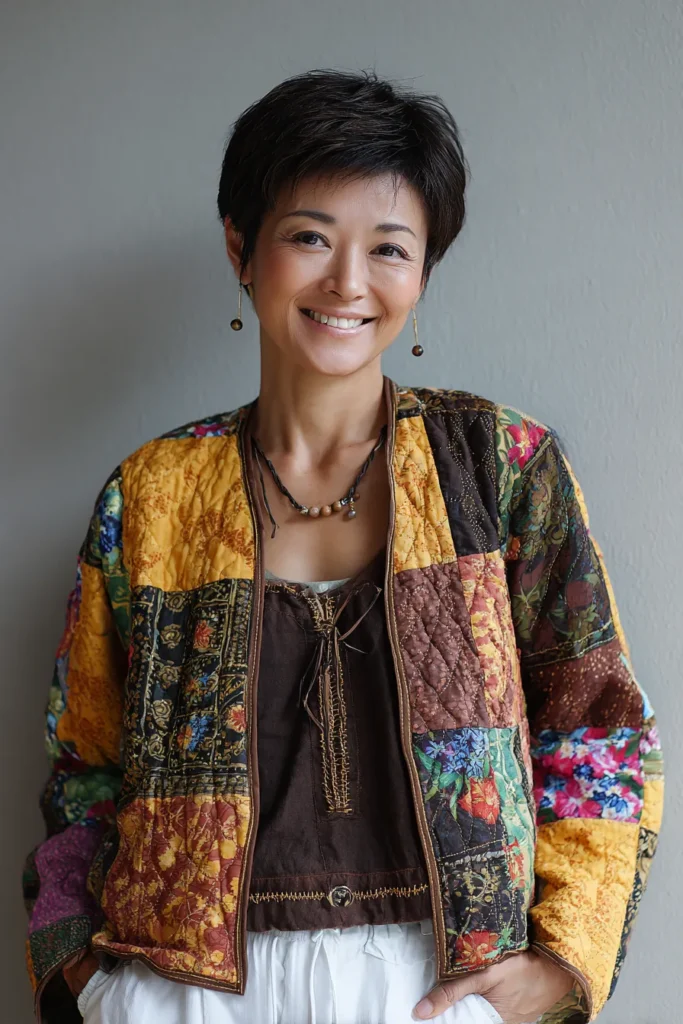
A Guide to Making Cropped Patchwork Quilted Tops with Traditional Japanese Motifs
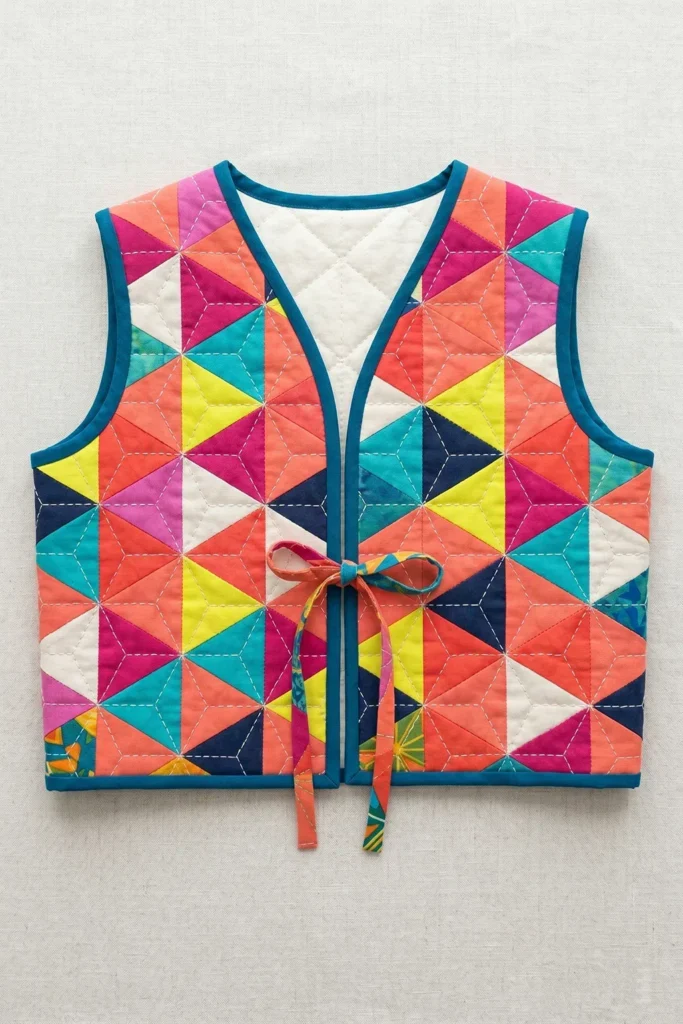
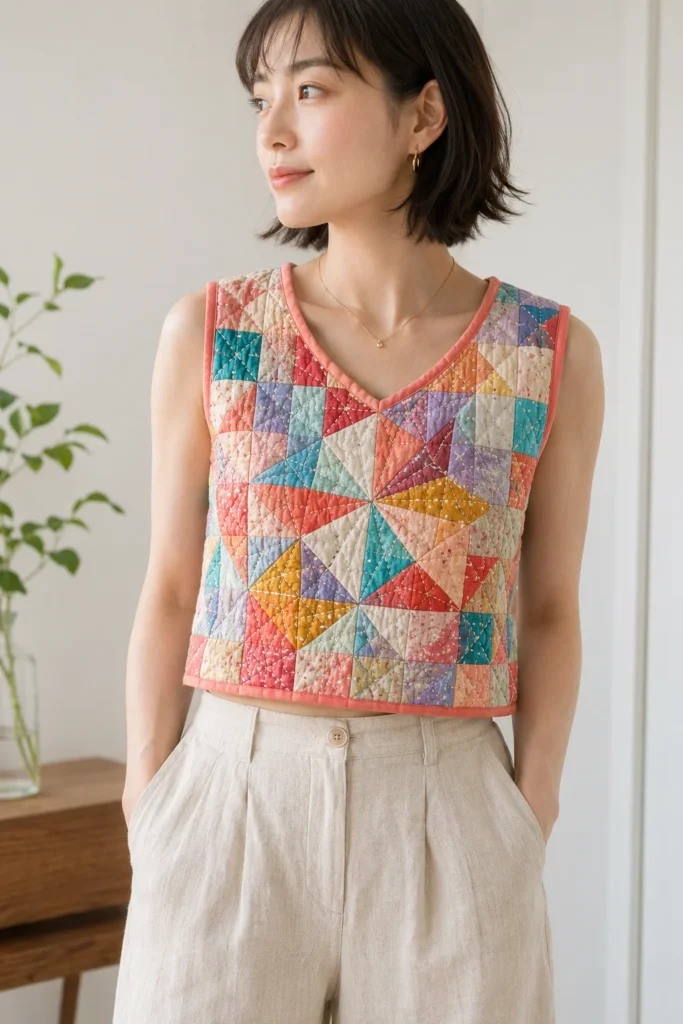
The modern wardrobe thrives on proportions. While oversized, draped jackets offer sweeping drama, high-waisted trousers and skirts demand a different architectural balance. The Cropped Patchwork Quilted Top delivers exactly that. By merging the boxy, unrestrictive silhouette of a traditional Japanese summer top with meticulously pieced patchwork featuring ancient motifs, you create a garment that is simultaneously deeply historical and effortlessly modern. When executed in a brilliantly saturated color palette, it becomes the ultimate transitional statement piece.
The Heritage of the Motifs (And Why I Conceptualized It)
The first time I saw a traditional Japanese noragi – a farmer’s jacket made from indigo-dyed patchwork – I understood that mending could be beautiful. Those garments, stitched from scraps of old fabric, were born not from fashion but from profound necessity. Mottainai – the Japanese spirit of respecting materials – meant that every scrap was precious. What began as functional repair evolved into boro, a textured, layered art form that tells stories of poverty, resilience, and creativity.
Years later, while living in a small apartment with a cramped sewing corner, I found myself drowning in fabric scraps. Tiny triangles, leftover strips from other projects, offcuts from quilt bindings. I wanted to honor that mottainai principle. I also wanted a top that felt playful – something cropped, light, and unexpected.
That’s when I remembered the asanoha (hemp leaf) motif, a traditional Japanese geometric pattern believed to ward off evil and promote growth. I began arranging my scraps into that six‑pointed star shape, and the first cropped patchwork top was born. I wore it to a summer festival, and a stranger stopped me to ask where I’d bought it. “I made it from scraps,” I said, and her surprise became my joy.
Why This Idea Is Worth Making
A cropped patchwork top is the ultimate expression of creative freedom. You don’t need yards of expensive fabric – just a box of scraps, a weekend, and a love for color. The cropped length is universally flattering: it hits right at the natural waist, pairing perfectly with high‑waisted pants, long skirts, or layered over a dress. The patchwork, especially when you incorporate traditional Japanese motifs like asanoha, seigaiha (waves), or shippō (seven treasures of Buddha), becomes a walking art piece. No two tops will ever be the same. Plus, it’s a brilliant way to use up every last bit of your favorite vibrant prints – fuchsia, electric yellow, turquoise, coral. This top is a celebration of color, heritage, and zero waste.
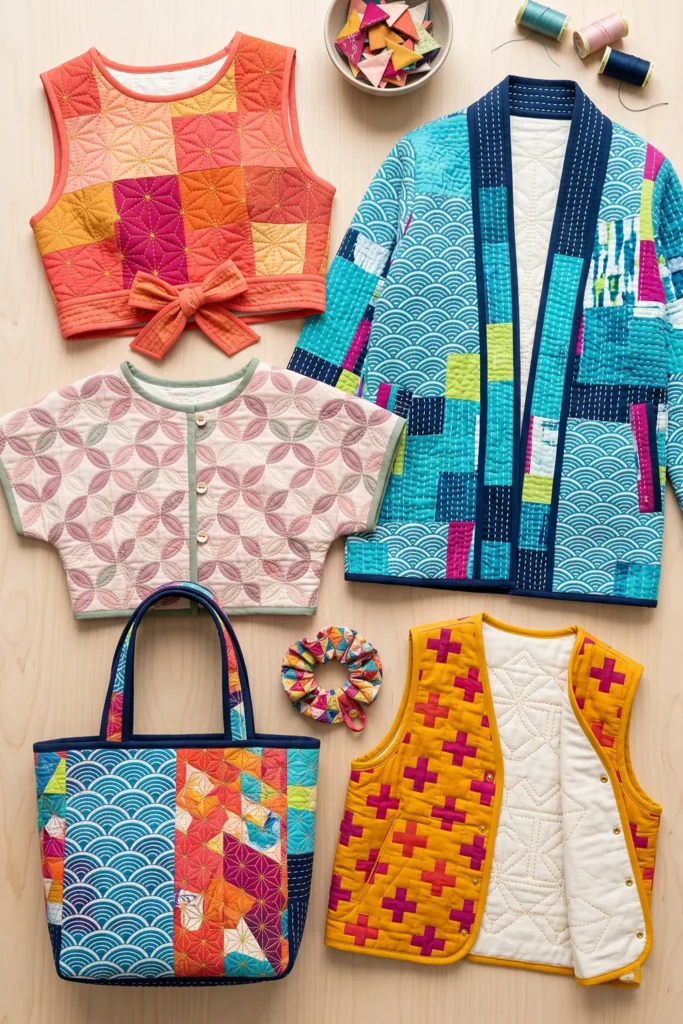
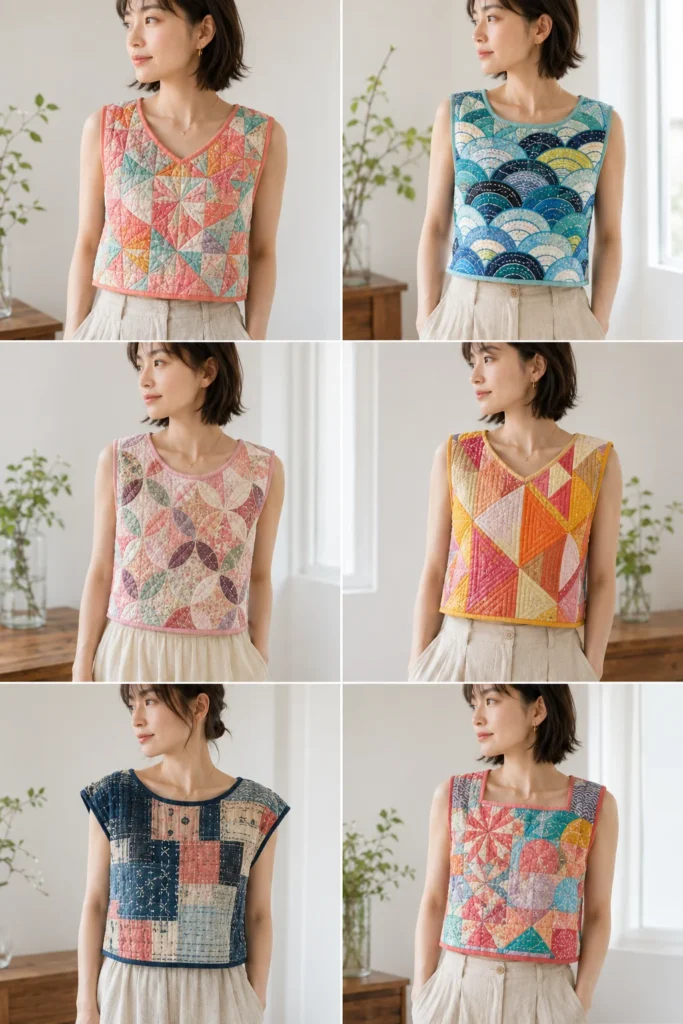
Materials & Measurements (for a cropped top, size S/M – chest approx. 38–40″ finished)
| Item | Quantity | Notes |
|---|---|---|
| Assorted cotton/linen scraps | roughly 1–1.5 sq yd total | Vibrant colors + one unifying neutral (e.g., off‑white or light grey) |
| Lining fabric | 1 yard | Soft cotton or rayon – can also be patchworked |
| Quilt batting (low loft) | 1 yard | Cotton or bamboo |
| Thread for piecing | 1 spool | Neutral (cream or grey) |
| Sashiko thread (contrasting) | 1–2 skeins | White, gold, or a bright accent color |
| Bias tape (1″ wide) | 2 yards | For binding neckline and armholes |
| Snaps or a fabric tie (optional) | – | For front closure |
Finished top dimensions (approx.)
- Length from shoulder to hem: 18″ (cropped)
- Width across chest (underarm to underarm): 20″ (40″ circumference)
- Sleeve: none (sleeveless) – or you can add short kimono sleeves; this guide is sleeveless for simplicity.
Step-by-Step Instructions (8 steps + Assembly)
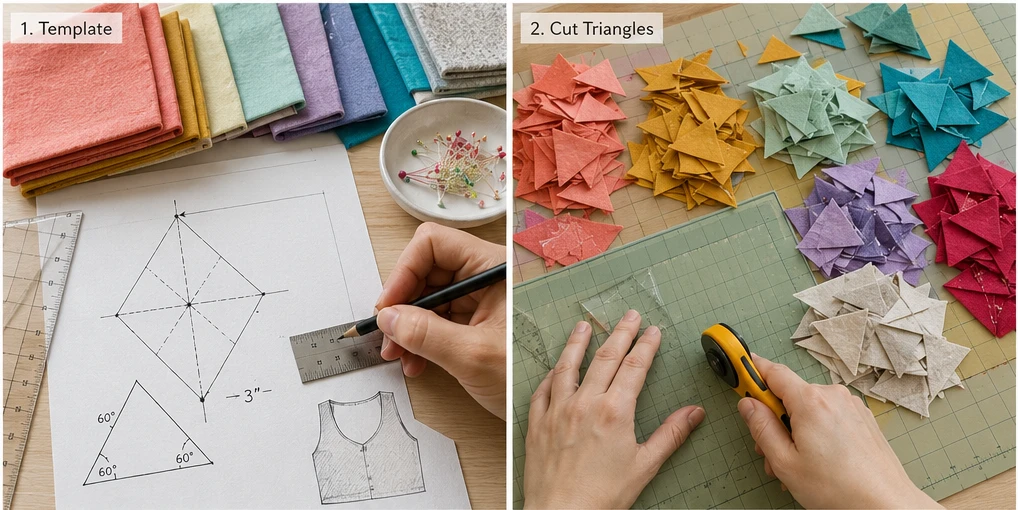
Step 1: Choose Your Motif & Draw a Template
We’ll use the asanoha (hemp leaf) motif because it’s recognizable but forgiving. Each asanoha is built from equilateral triangles arranged into a six‑pointed star.
- Draw a 3″ diamond, then divide it into two equilateral triangles. That’s your basic building block.
- You will need 6 triangles per complete asanoha. For a cropped top front, plan 4–6 asanoha motifs.
Step 2: Cut Your Vibrant Scraps into Triangles
Using a 60° triangle ruler or a paper template, cut hundreds of triangles from your colorful scraps. Keep them organized by color family. For a harmonious look, choose a dominant color (e.g., coral) and several accent colors (mustard, mint, lavender). Also cut triangles from your neutral fabric – these will act as the background.
Step 3: Piece the Asanoha Blocks
Sew six triangles together to form one asanoha motif:
- Arrange three triangles with their points meeting in the center (forming half a star).
- Add the other three triangles rotated 180° to complete the six‑pointed star.
- Press seams open.
- Repeat to make enough asanoha blocks to cover the front of your top (and optionally the back). You may also place single triangles or diamonds between motifs for a scrappy, boro feel.
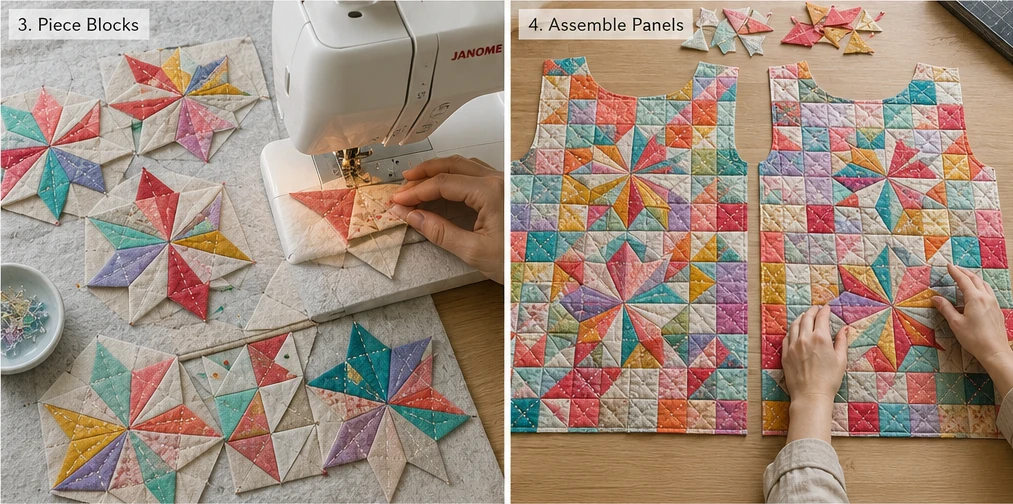
Step 4: Cut and Assemble the Patchwork Fabric
Lay out your asanoha blocks on a large table. Fill the gaps with smaller triangles or squares to create a rectangular piece roughly 22″ wide by 20″ tall (enough for the front). For the back, you can make another patchwork rectangle, or use a single contrasting fabric (a coordinating vibrant print).
Sew all pieces together into two solid panels: Front panel and Back panel. Press well.
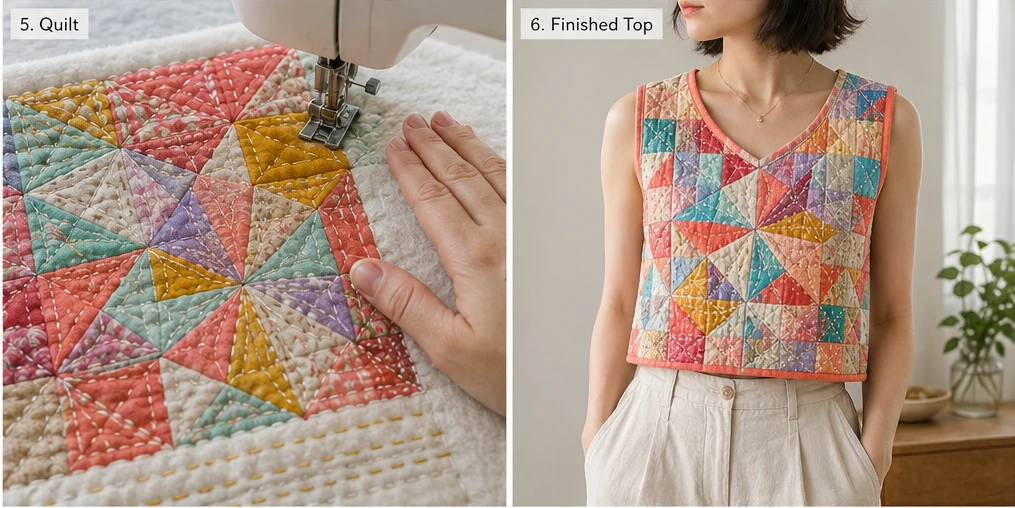
Step 5: Quilt the Panels
Layer each panel: Patchwork (right side up) + Batting + Lining (right side down). Pin basting or spray baste.
Quilt along the seam lines of the patchwork (stitch in the ditch) or add a decorative grid. For a Japanese feel, use sashiko thread to hand‑stitch a second line ¼″ away from each seam – this creates visible, proud stitching that highlights the patchwork.
Tip: Use a contrasting thread like bright white or gold to make the quilting pop.
Step 6: Cut the Top Shape
On your quilted front and back panels, draw a simple cropped top shape:
- Shoulder width: 14″
- Armhole curve: from shoulder edge down 7″, then curve inward to meet a side seam at 19″ below shoulder.
- Neckline: shallow V or scoop (center front down 6″).
- Bottom hem: straight at 18″ from shoulder (cropped).
Cut both panels to this shape, adding ½″ seam allowance.
Step 7: Sew the Shoulder and Side Seams
With right sides together (patchwork facing patchwork):
- Sew shoulder seams (½″). Press open.
- Sew side seams from underarm to hem (½″). Press open.
Step 8: Finish the Edges & Add Closure
Neckline and armholes: Use 1″ wide bias tape (choose a bright contrasting color) to bind all raw edges. Fold tape over the edge, pin, and topstitch. At the V point of the neckline, miter the binding by folding it sharply.
Hem: Fold the bottom edge up ½″ twice and topstitch, or use bias tape for a pop of color.
Closure (optional): Sew small thread loops on the right front edge and attach matching buttons to the left front, or sew a fabric tie at the waist.
Assembly Section Recap:
- Cut triangles → piece asanoha blocks.
- Assemble front and back patchwork panels.
- Layer with batting + lining and quilt.
- Cut the top shape.
- Sew shoulder and side seams.
- Bind neckline and armholes.
- Hem bottom.
- Add closure.
Vibrant Color Palettes & Traditional Motif Variations
| Palette | Main Color | Accents | Suggested Motif |
|---|---|---|---|
| Summer Fire | Coral | Gold, tangerine, deep pink | Asanoha (hemp leaf) |
| Ocean Breeze | Turquoise | Navy, white, lime green | Seigaiha (wave) |
| Cherry Blossom | Blush pink | Cream, mauve, sage | Shippō (interlocking circles) |
| Sunrise | Golden yellow | Orange, magenta, rust | Kakure (hidden) cross |
If you want to use a different motif:
- Seigaiha: overlapping circles (use a circle template and piece curved seams – more advanced).
- Shippō: four interlocking circles forming a flower (use foundation paper piecing).
Finishing Notes & Styling Tips
- Wear it: Tucked into high‑waisted wide‑leg pants, over a simple linen dress, or as a layering piece under an open jacket. The cropped length creates a playful proportion.
- Gift idea: Make a matching patchwork tote bag or scrunchie from the same scraps.
- Care: Hand wash in cold water, lay flat to dry. The quilting will soften, and the colors will stay vivid.
This top is a testament to the beauty of making do with what you have. Every triangle carries a memory of a past project, and the finished garment becomes a wearable diary of color and craft. Stitch it with joy, wear it with pride, and let every person who asks “Where did you get that?” hear you answer: I made it; it’s my own.
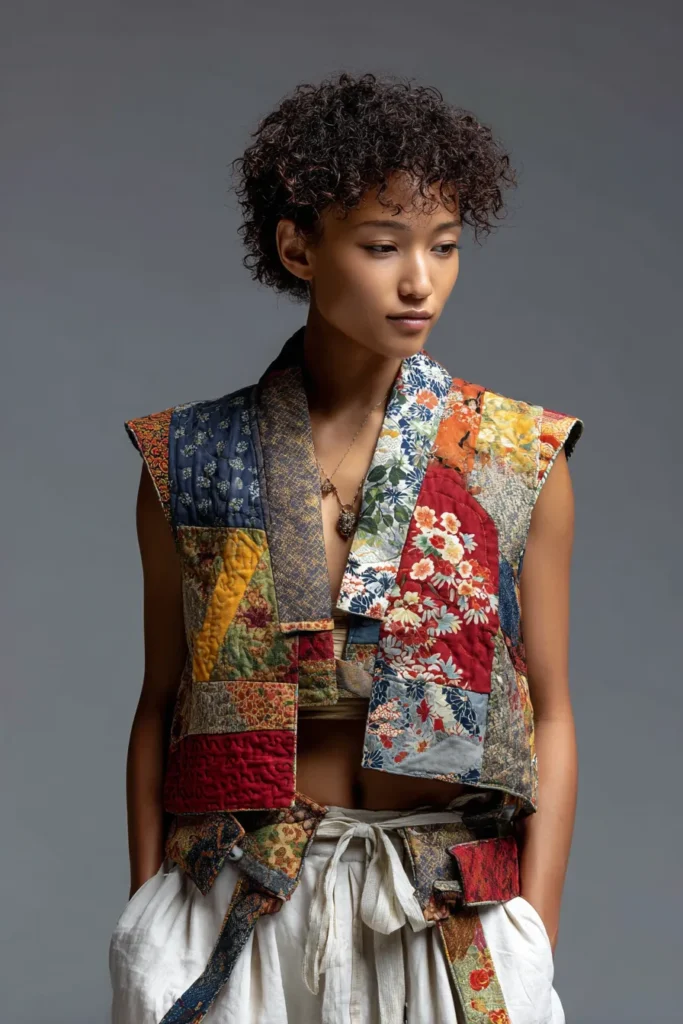
Conclusion
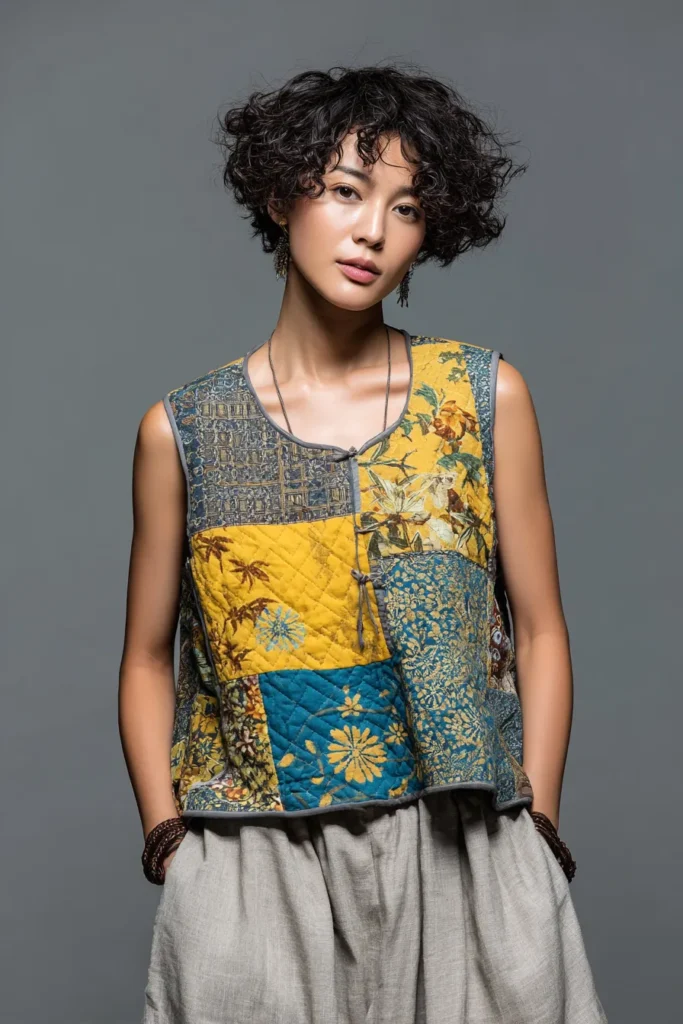
What makes Japanese quilted clothing so appealing is its quiet confidence. These pieces don’t rely on loud branding or fast-changing trends—they stand out through texture, craftsmanship, and thoughtful construction.
A sashiko jacket, an indigo quilted vest, or a patchwork top can completely shift the feel of an outfit while still remaining comfortable and easy to wear. That balance between practicality and artistry is what gives these garments their lasting appeal.
For me, that’s the real beauty of Japanese quilted fashion: it feels lived-in, personal, and timeless all at once. Even the simplest piece carries a sense of care behind it—and that’s something you notice more the longer you wear it.

