
Boro Quilt Ideas: 13 Sustainable Designs Using Visible Mending and Layered Patches
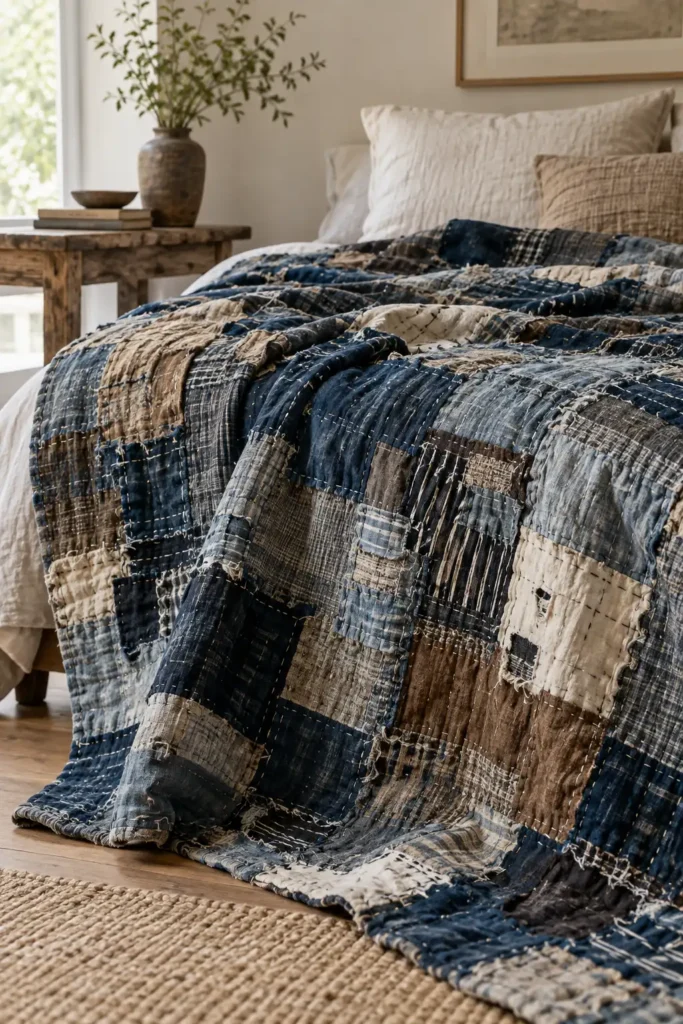
Boro Quilt Ideas draw on one of the most quietly compelling traditions in textile history: the Japanese practice of preserving worn cloth through repeated patching, layering, and reinforcing rather than discarding it. The word boro translates roughly as “rags” or “tattered,” but the textiles it describes are neither ragged in spirit nor random in effect. Over decades — sometimes generations — cloth was built up through overlapping repairs, with each new layer of fabric stitched down to strengthen what lay beneath.
The result is something richly textured, deeply individual, and visually unlike anything produced by deliberate design. The thirteen ideas gathered here range from heavy denim and canvas compositions to quiet natural linen arrangements, from traditional indigo tones to contemporary mixed-scrap interpretations, with the common thread being visible mending treated as both structure and surface.
Boro Quilt Ideas
Across these Boro Quilt Ideas, you’ll find a wide range of approaches to a shared principle: worn, reclaimed, and repeatedly repaired fabric is the material, not a last resort. Some of these quilts are built almost entirely from old jeans, workwear, and industrial fabrics, with patches layered until the ground cloth is heavily reinforced and the surface reads like a map of use.
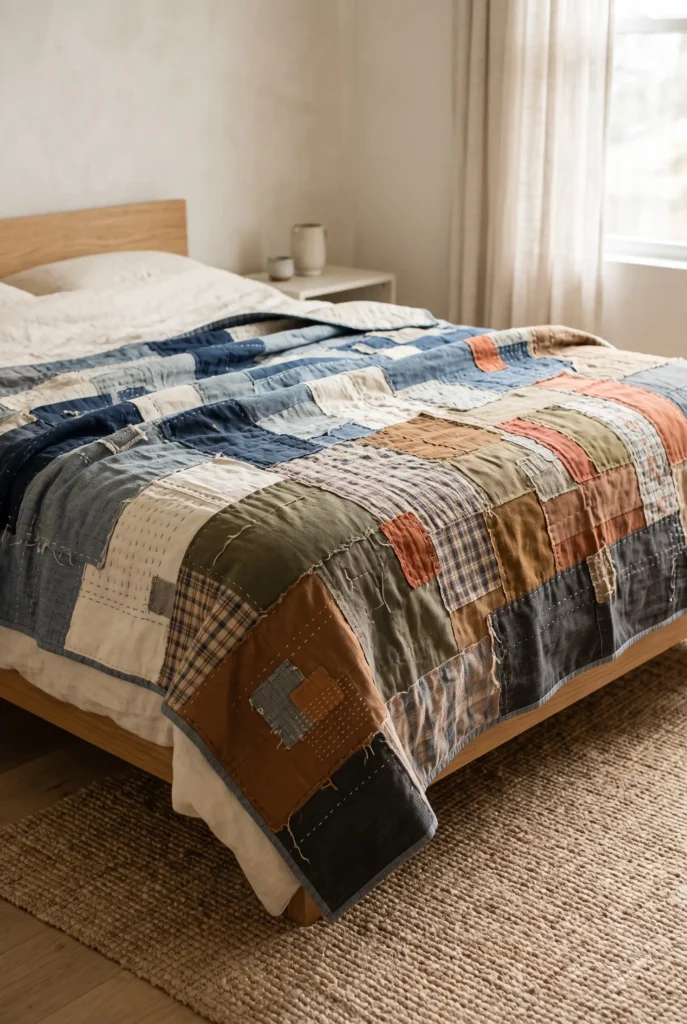
Others take a more considered contemporary approach — sparse patching on neutral linen, earth-toned reclaimed cotton arranged with deliberate visual breathing room, or colorful mixed scraps composed with an eye for organic movement rather than formal structure. Several lean into the faded, aged quality of reclaimed cloth as a design element in itself, while the more modern interpretations translate the layered-patch logic into a fresh context without trying to replicate the centuries-old originals.
See also: Sashiko Quilt Pattern Ideas, Elegant Japanese Quilt Ideas, Japanese Patchwork Quilt Ideas, Japanese Quilted Bag Ideas, and Elegant Japanese Quilt Jackets and Vests
Why Make This Type of Quilt
A boro-inspired quilt is one of the few quilt types where the less pristine the fabric, the better it often works. That makes it the natural destination for materials that don’t belong anywhere else — old shirts with worn collars, jeans no longer worth mending, canvas bags past their useful life, household linens with stains or small tears. Using those materials isn’t a compromise; it’s the whole point.
The construction is also more forgiving than most quilting, because the aesthetic allows — and often rewards — irregularity. Patches don’t need to be cut square, edges don’t need to be perfectly aligned, and visible stitching through multiple layers is a feature, not evidence of error. For quilters who find formal patchwork constraining, or who simply have a substantial collection of worn textiles they’re reluctant to discard, a boro-inspired approach offers a genuinely useful and satisfying framework.
What Makes These Designs Different
Boro is associated with a specific Japanese textile tradition — the practice of repairing, reinforcing, patching, and repeatedly reusing worn cloth that was too valuable to discard, particularly in rural and working-class households through the eighteenth and nineteenth centuries. It is not a quilting technique in the conventional sense, and it is not the same as Sashiko, which refers specifically to the running-stitch patterns historically used for reinforcement and now widely practiced as a form of decorative embroidery.
In boro textiles, the primary construction is layered patching — pieces of cloth sewn over worn or torn areas to extend the life of the ground fabric — and visible running stitches, where present, serve structural reinforcement first. The designs in this article are boro-inspired rather than documentary reproductions of historical examples. They take the layered-patch logic, the preference for reclaimed or worn cloth, and the acceptance of visible mending as a design characteristic, and apply them to contemporary quilt-making with a range of fabrics and intentions that historical boro textiles didn’t share.
Tips for Choosing Fabrics
The most important factor in a boro-inspired quilt is weight compatibility. Layering a heavy canvas patch over lightweight cotton lawn creates thickness at every edge that’s uncomfortable to stitch through and hard to quilt evenly. As a general rule, keep fabrics within one or two weight categories of each other — medium-weight quilting cotton, chambray, shirting, and light denim work well together, while heavy denim and canvas pair more naturally with each other than with delicate fabrics. Reclaimed fabrics should be inspected for structural integrity before use: cloth that is genuinely deteriorating — thin at the fold lines, fragile at stress points, shedding fiber — will continue to deteriorate in the quilt and won’t hold a stitch reliably.
Wash everything before cutting, including new fabrics used alongside reclaimed ones, since mixing prewashed and unwashed material leads to uneven shrinkage. Raw edges, fraying, and worn surfaces are all acceptable in this aesthetic, but they behave differently over time depending on the weave and fiber content — linen frays more dramatically than cotton, denim ravels in wider threads, and flannel pills under handling. Factor those behaviors into placement decisions rather than treating all reclaimed fabric as interchangeable.
Color and Fabric Planning
Traditional boro textiles are strongly associated with indigo — the deep blue-and-faded tones of repeatedly dyed and washed cotton that characterized much of the cloth available in historical Japanese rural contexts. But the designs in this article span a much wider range, and each has different color-planning considerations. The indigo and linen compositions call for restraint — faded tones, natural undyed ground cloth, very little contrast, with the texture of the layered patches doing more visual work than color variation. The earth-toned workwear quilts (olive, rust, brown, worn canvas) benefit from some tonal variation within the palette so the layers read separately rather than blending into one flat surface.
The contemporary colorful versions — mixed scraps, reclaimed prints, vintage checks — need a compositional logic to prevent them from reading as simply random: distributing one or two colors throughout rather than grouping them by shade, and using a consistent patch scale across different print types, will give an apparently spontaneous layout an underlying coherence. For any of these designs, faded, prewashed, and aged-looking fabrics tend to integrate more successfully with genuinely reclaimed cloth than new fabrics used straight from the bolt, which can look out of place even if their color is right.
Common Mistakes to Avoid When Sewing
The most specific mistake in a boro-inspired quilt is using genuinely deteriorating cloth in load-bearing positions. A patch placed over a weak area of ground cloth is fine — that’s what patching is for. But using cloth that’s thin along a fold, splitting at a seam line, or shedding threads under light handling as the ground fabric of the whole quilt means the quilt will fail at that point over time, taking the patches with it. Inspect reclaimed fabrics carefully before committing them to the base layer.
A related problem is creating too much bulk in localized areas — stacking three or four patches directly on top of each other in one spot creates a raised, stiff section that’s difficult to quilt through and uncomfortable against the body. Spread the layering so no area accumulates more than two or three layers of significant weight.
On the design side, the most common failure is an irregular layout that looks unintentional rather than considered — a scatter of patches with no visual rhythm, poor spacing, or no sense of where the eye should move. Irregularity and asymmetry are both intentional characteristics of boro aesthetics, but even organic arrangements need enough internal logic for the viewer to read them as decisions. Finally, cutting all patches into perfectly even squares or rectangles works against the aesthetic’s character — if the intention is a contemporary interpretation, even proportions are fine, but if the intention is a more traditional-feeling composition, varying patch shapes and sizes read far more authentically.
Branded and Trademarked Fabrics, Logos, and Graphics
The fabric examples and design descriptions in this article use generic reclaimed textiles, plain weaves, and non-specific prints. Workwear, denim, plaid shirting, linen, and cotton described here refer to general fabric types rather than to garments, brands, or products from any specific manufacturer, label, or company. When old clothing is used as source material in a boro-inspired quilt, readers should know that garments with prominent branded logos, licensed characters, or trademarked insignia belong to their respective rights holders, and that using such imagery in quilts made for sale or publication may raise intellectual property considerations. The designs here avoid referencing or featuring any such material.
1. Upcycled Denim Boro Quilt with Old Jeans, Workwear, and Layered Visible Repairs
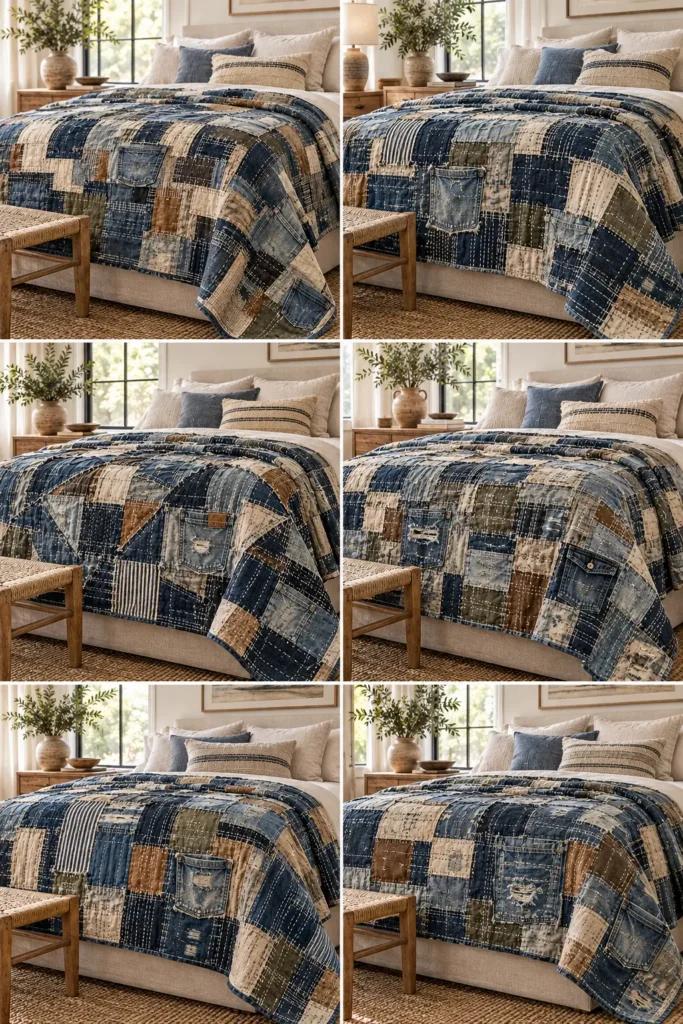
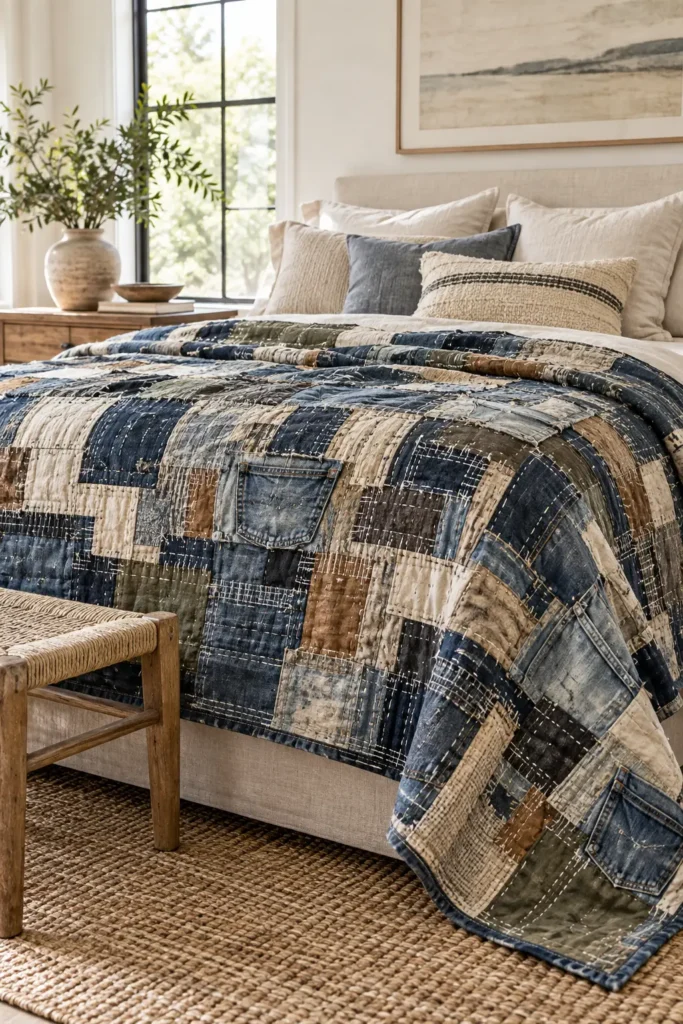
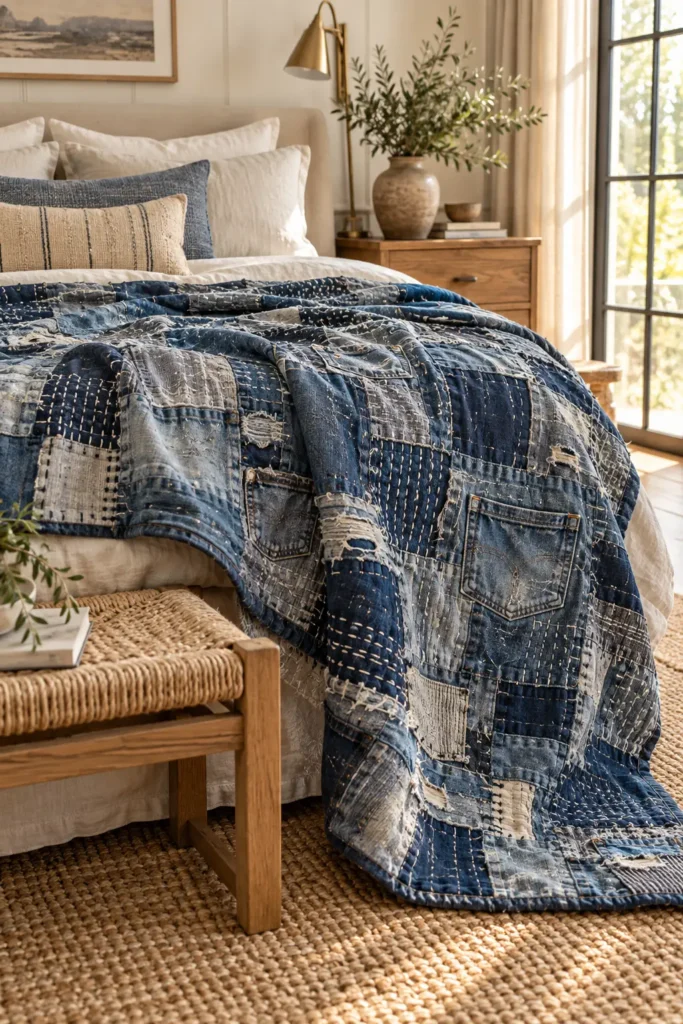
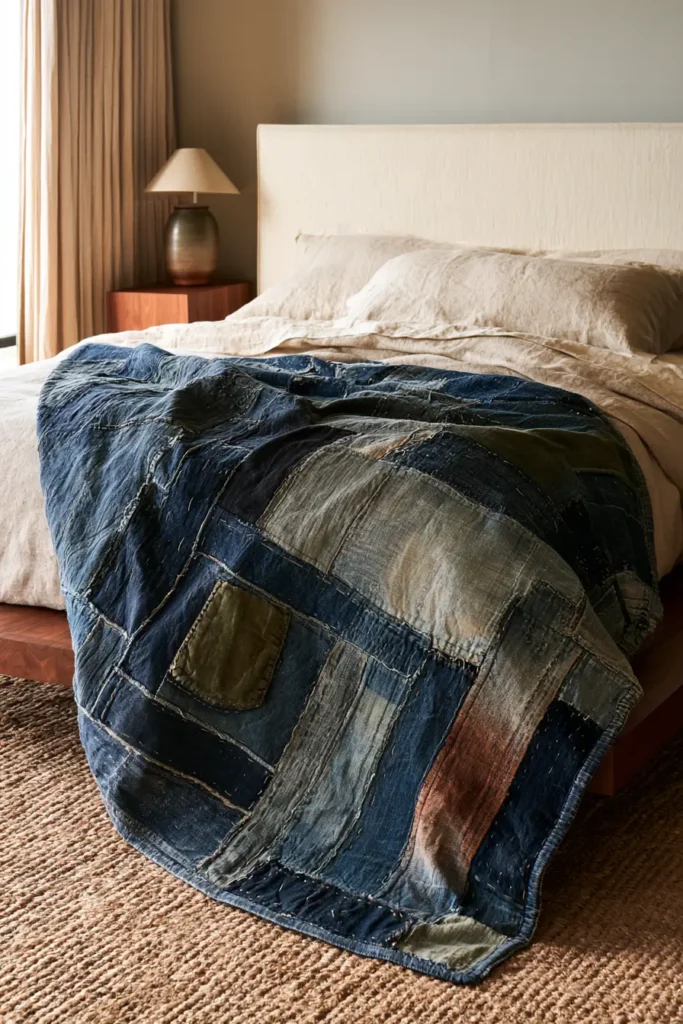
An upcycled denim Boro quilt turns worn jeans, work shirts, canvas trousers, faded cotton, and previously repaired cloth into a surface where age and use become part of the design. Instead of hiding frayed edges, faded knees, old seam lines, and uneven color, this style puts them on display. Irregular patches overlap across a supporting foundation, and visible rows of stitching hold the layers together while adding another level of texture. The result should feel collected and repaired over time rather than assembled from perfectly matched new fabric.
The visual language comes from Japanese Boro traditions of preserving and repeatedly repairing cloth so it could remain useful for as long as possible. Contemporary Boro-inspired quilting often emphasizes the beautiful surface created by those layers of wear and repair. It is related visually to sashiko because running stitches can appear in both, but the two should not be treated as interchangeable. In this quilt, the focus is reuse, layering, reinforcement, weathered cloth, and visible mending. Denim works especially well because different washes naturally create the deep-to-pale blue range associated with aged workwear, while softer cottons keep the finished quilt from becoming too stiff or heavy.
What Makes This Boro Quilt Different
A conventional scrap quilt usually depends on clearly defined blocks, repeated shapes, or a recognizable piecing pattern. A Boro-inspired quilt can still use a hidden structural grid, but the finished surface should not look rigidly gridded.
Here, 30 foundation blocks make the construction manageable, but each block is covered with differently sized pieces of reclaimed fabric. Once the blocks are joined, extra patches and repeated stitching visually soften the boundaries.
The most successful areas often contain a mixture of:
- large faded denim sections;
- narrow strips;
- small repair patches;
- old pocket sections;
- chambray;
- worn twill;
- frayed cotton;
- previous repairs;
- visible garment seams;
- quiet areas with relatively little patching.
That last point matters. If every inch contains five layers of fabric and dense stitching, the surface becomes visually noisy and physically heavy. Boro character comes from contrast between repaired and less-repaired areas, not from maximum patch density everywhere.
Choosing the Right Reclaimed Fabrics
Old jeans are the obvious starting point, but using nothing except heavyweight denim can produce a quilt that is difficult to sew, quilt, wash, and comfortably use.
A better mixture is approximately:
- 50-60% denim
- 25-35% lighter workwear cottons
- 10-20% accent or contrasting textiles
Good reclaimed fabrics include:
- jeans;
- denim shirts;
- chambray shirts;
- cotton work shirts;
- lightweight canvas;
- cotton twill;
- chore jackets;
- worn utility trousers;
- sturdy cotton dresses or skirts;
- cotton ticking;
- softened cotton duck.
Avoid stretchy jeans with a high elastane content when possible. A little stretch is manageable on a stable foundation, but heavily elastic denim can distort while stitching.
Also avoid fabrics weakened to the point that they tear with very little pressure. A beautifully faded knee is useful; a knee that disintegrates when handled is not.
Design Inspirations – Digitally Modified Images. Texture and color may vary from the actual product.
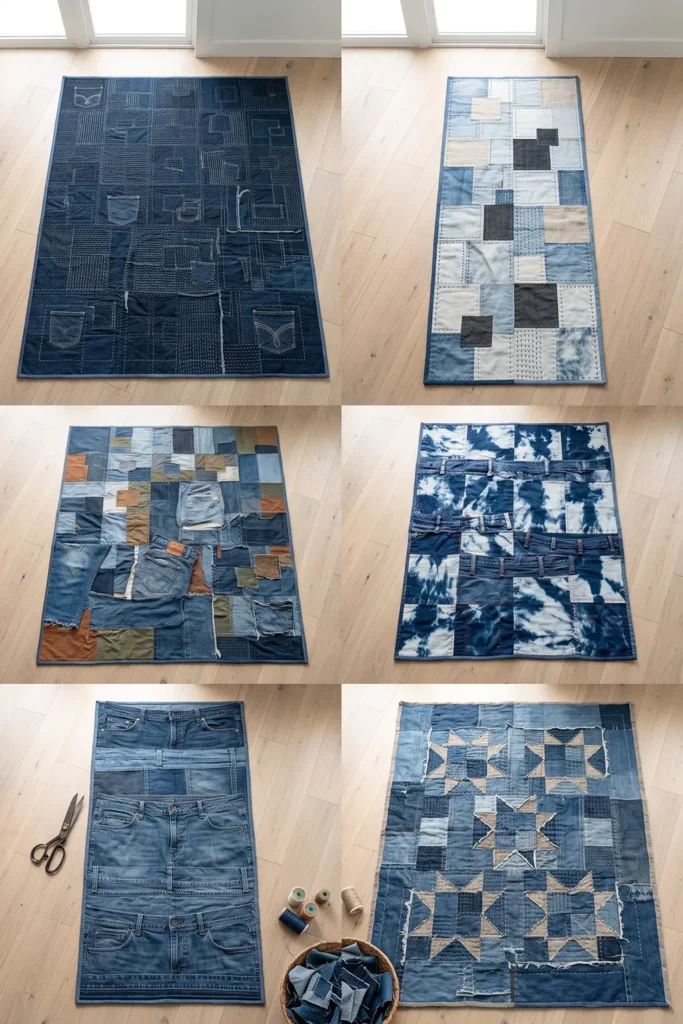
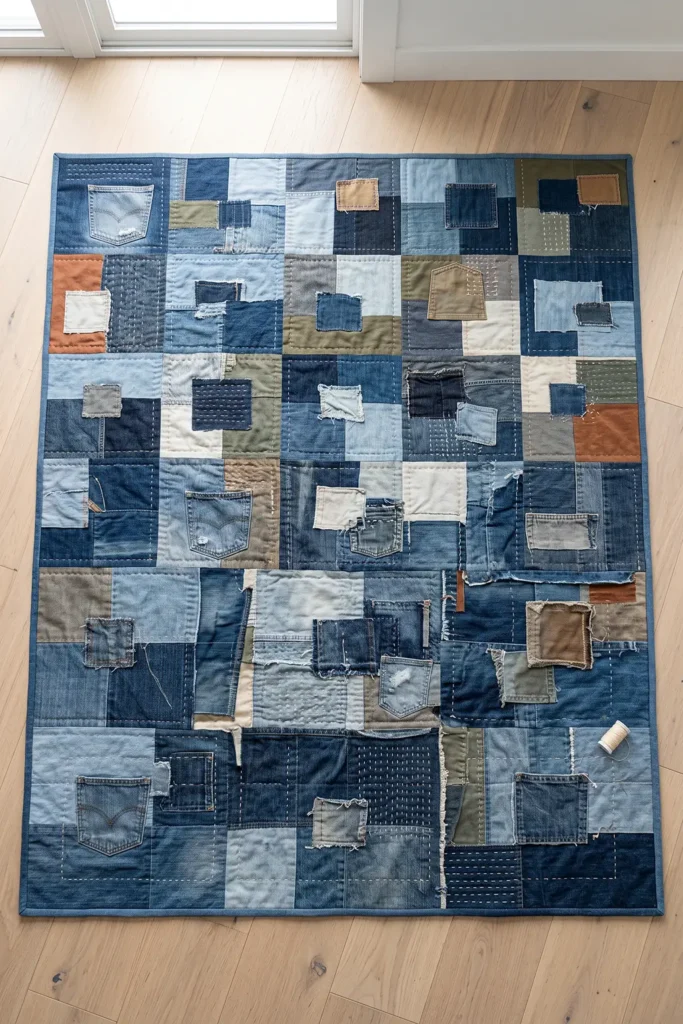
Preserve the Best Parts of Old Garments
Before cutting old clothing into simple rectangles, look closely at the garment.
Some of the best Boro details may already be present:
- faded thigh areas;
- worn knees;
- old patch repairs;
- flat-felled seams;
- pocket edges;
- hems;
- bartacks;
- softened creases;
- color differences where pockets once covered the fabric.
These details make the finished quilt feel genuinely reclaimed.
Metal rivets, heavy zippers, snaps, buckles, and thick waistband sections are usually better removed unless they can sit safely away from quilting lines.
Choosing Colors
A denim Boro quilt does not need to be entirely blue.
Start with a strong indigo family:
- deep indigo;
- dark navy;
- medium denim blue;
- faded blue;
- pale stonewashed blue;
- blue-grey;
- washed black.
Then add restrained workwear colors such as:
- olive;
- khaki;
- tobacco brown;
- rust;
- charcoal;
- warm grey;
- cream;
- natural canvas.
A useful balance is roughly:
- 30% dark
- 40% medium
- 30% light
This does not have to be exact, but including enough pale and mid-value fabrics prevents the darkest denim from merging into one heavy visual mass.
Photograph your fabric pile and temporarily convert the image to black and white. If nearly everything becomes the same grey value, introduce more lights and darks.
Patch Scale and Placement
Use a mixture of large, medium, and small pieces.
Useful patch sizes include:
- 3 × 5 inches;
- 4 × 6 inches;
- 5 × 7 inches;
- 6 × 8 inches;
- 2½ × 8-inch strips;
- 2½ × 10-inch strips;
- irregular pieces roughly 3-8 inches across.
Do not cut everything to these exact sizes. They are starting points.
Most patches should overlap adjoining fabric by approximately ½-1 inch.
Try to avoid placing several thick jean seams directly on top of one another. When a bulky garment seam is visually interesting, use it as a feature and surround it with thinner cloth.
Visible Stitching
Visible running stitches are one of the strongest visual features of the quilt.
Good thread colors include:
- cream;
- warm white;
- faded blue;
- navy;
- rust;
- mustard;
- charcoal.
Stitches do not need to be microscopically even. Slight variation supports the repaired aesthetic, but wildly inconsistent spacing can look accidental rather than handmade.
Aim for running stitches approximately ¼-⅜ inch long when hand stitching.
Some areas can use closely spaced parallel rows, while others need only edge stitching and a few reinforcement lines.
Finished Quilt Size
The finished quilt measures approximately:
60 × 72 inches
It uses 30 foundation blocks arranged:
5 blocks across × 6 blocks down
Each foundation block begins at:
12½ × 12½ inches unfinished
After joining blocks with ¼-inch seam allowances, each contributes:
12 × 12 inches finished
So:
5 × 12 = 60 inches
and:
6 × 12 = 72 inches
This produces a generous throw quilt suitable for a sofa, reading chair, or the foot of a bed.
Materials Needed
- About 3½ yards of sturdy cotton, chambray, lightweight denim, or mixed neutral fabric for the foundations
- About 4-5 yards equivalent of reclaimed denim and workwear scraps
- Old jeans, work shirts, denim jackets, utility trousers, canvas, and other suitable reclaimed cotton clothing
- 68 × 80-inch piece of low-loft cotton or cotton/bamboo batting
- About 4½ yards backing fabric, assuming 42-44-inch quilting cotton
- ½ yard binding fabric
- Strong cotton or cotton/polyester construction thread
- Contrasting cotton or sashiko-style thread for visible stitching
- Size 90/14 or 100/16 sewing-machine needles
- Hand-stitching needles
- Thimble if hand-stitching through denim
- Walking foot
- Rotary cutter
- Cutting mat
- Quilting ruler
- Fabric scissors
- Clips or sturdy pins
- Safety pins or preferred basting supplies
Low-loft batting is important. High-loft batting combined with overlapping denim can make the quilt unnecessarily bulky.
Cutting Measurements
Cut:
- 30 foundation squares at 12½ × 12½ inches
- varied reclaimed patches approximately 3-8 inches
- strips approximately 2½-3 inches wide where useful
- backing and batting at approximately 68 × 80 inches
For binding, cut seven strips at 2½ inches × width of fabric from standard-width quilting cotton. Seven strips provide enough length for the approximately 264-inch perimeter, plus joining and finishing allowance.
Step-by-Step Guide
Step 1 — Sort the reclaimed garments.
Separate the clothing into heavyweight denim, medium-weight denim, lightweight cotton, canvas, twill, and accent fabrics. Set aside the most visually interesting worn areas before cutting. Check every garment for stains, weakened fabric, stretch, hardware, and damaged sections that may not withstand further use.

Step 2 — Wash and prepare everything.
Wash the reclaimed clothing before construction so remaining shrinkage occurs before the quilt is assembled. Remove zippers, snaps, large metal rivets, elastic waistbands, and bulky hardware from areas you plan to use. Keep pockets, repaired knees, seam lines, and faded sections that can become design features.
Step 3 — Cut the foundation squares.
Cut 30 squares measuring 12½ × 12½ inches from stable cotton, chambray, or lightweight denim. A medium-weight foundation is ideal because it supports multiple patches without adding unnecessary bulk.

Step 4 — Cut the reclaimed patches.
Cut a varied collection of rectangles, strips, squares, and irregular patches. Keep most pieces between approximately 3 and 8 inches. Include some longer strips and a few larger faded sections. Leave naturally worn edges where the cloth is still structurally sound.
Step 5 — Sort the patches by value and weight.
Create loose piles of dark, medium, and light fabrics, then separate especially thick pieces from thinner ones. This makes it easier to distribute both color and physical weight. Try to avoid concentrating all heavyweight denim in one area of the quilt.

Step 6 — Plan the first foundation block.
Place several patches over one 12½-inch foundation square. Let neighboring pieces overlap by approximately ½-1 inch. Cover most of the foundation, but leave small areas visible where they enhance the composition. Place larger patches first, then smaller repair pieces.
Step 7 — Stitch the first patch layer.
Anchor the main patches with visible running stitches or controlled machine stitching. When hand stitching, stitches around ¼-⅜ inch long work well. Stitch near patch edges, and add selected internal rows through larger pieces to prevent shifting.

Step 8 — Add secondary repair patches.
Layer smaller pieces over selected seams, worn areas, or visually plain sections. These patch-on-patch repairs create depth and help the surface look repeatedly mended rather than simply appliquéd once. Keep most locations to two or three layers.
Step 9 — Complete all 30 Boro blocks.
Repeat the process across all foundation squares. Vary the patch sizes, stitch direction, color concentration, and amount of repair work. Include some calmer blocks so the heavily repaired blocks stand out.

Step 10 — Square the finished blocks.
Visible stitching and uneven fabric layers can pull a foundation slightly out of shape. Use a quilting ruler to trim every completed unit carefully back to 12½ × 12½ inches. Keep important stitching and feature seams away from the trimmed edges whenever possible.
Step 11 — Arrange the blocks five across by six down.
Lay all 30 blocks out before sewing. Spread deep indigo, pale blue, charcoal, cream, olive, and rust throughout the layout. Rotate blocks where necessary so strong seams do not unintentionally create long straight lines across the entire quilt.

Step 12 — Sew the blocks into rows.
Using a ¼-inch seam allowance, join five blocks to create each row. Make six rows in total. Press seam allowances in one direction on Row 1, the opposite direction on Row 2, and continue alternating. This helps intersections nest when the rows are joined.
Each completed row should measure approximately 60½ × 12½ inches unfinished.
Step 13 — Join the six rows.
Carefully pin or clip the row intersections, then sew with a ¼-inch seam allowance. The assembled top should measure about 60½ × 72½ inches unfinished. After you enclose the outer edge in binding, the finished quilt will be approximately 60 × 72 inches.

Step 14 — Add a few bridging repairs if needed.
Inspect the completed top. If the foundation-block boundaries look too obvious, add a few lightweight patches that visually cross selected seams. Hand-stitch these patches securely, but don’t cover every block boundary. A few strategic overlaps are enough to make the hidden grid less apparent.
Step 15 — Prepare the backing and batting.
Piece the backing if necessary so it measures at least 68 × 80 inches. Cut batting to approximately the same size. This leaves about four inches of extra material on each side of the 60 × 72-inch quilt top, giving enough margin for basting and quilting.

Step 16 — Baste and quilt the layers.
Place the backing wrong side up, the batting over it, and the quilt top right side up. Smooth without stretching. Baste thoroughly. Quilt with simple lines approximately 3-4 inches apart, occasionally following patch edges and occasionally crossing them. Avoid repeatedly quilting directly through the thickest multi-layer denim intersections.
Step 17 — Trim and prepare the binding.
After quilting, square the quilt carefully and trim excess batting and backing even with the quilt top. Join the seven 2½-inch binding strips with diagonal seams and press the long strip in half lengthwise, wrong sides together.
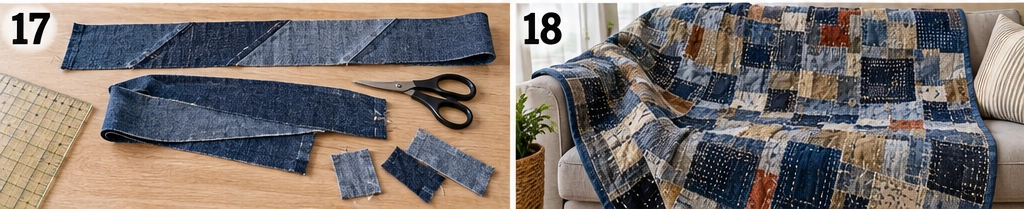
Step 18 — Bind, inspect, and finish.
Attach the binding with a ¼-inch seam, mitering the corners. Fold it over the raw edge and finish by hand or machine. Inspect every patch and reinforce any edge that lifts more than intended. If desired, wash the completed quilt gently in cool water and dry according to the most delicate fabric used. Washing softens the layered textiles and encourages the repaired surface to settle naturally.
Assembly at a Glance
- Sort reclaimed jeans and workwear.
- Wash fabrics and remove unwanted hardware.
- Cut 30 foundation squares at 12½ inches.
- Cut varied reclaimed patches.
- Sort by color value and fabric weight.
- Arrange the first patch layer.
- Stitch the main patches.
- Add secondary repair patches.
- Complete all 30 blocks.
- Square each block to 12½ inches.
- Arrange five across by six down.
- Join blocks into six rows.
- Join the rows.
- Add a few bridging repairs if useful.
- Prepare backing and batting.
- Baste and quilt.
- Trim and prepare binding.
- Bind and reinforce the finished quilt.
Helpful Note
When using an old jean seam as a feature, trim away unnecessary fabric hidden behind it before adding more patches. A visible seam adds wonderful texture, but several stacked denim seam allowances can create a hard ridge that is difficult to stitch through and uncomfortable in a finished quilt.
Beginner Tips and Common Mistakes
Do not use only heavyweight jeans.
Combining heavy denim with chambray, shirting cotton, lighter twill, and worn work shirts produces a softer and more manageable quilt.
Keep the irregularity intentional.
Boro-inspired patching should look organic, but that does not mean random placement without thought. Balance large and small patches, dark and light areas, repaired and quieter sections.
Avoid excessive layering.
Most areas only need one patch layer over the foundation. Save two- or three-layer repairs for selected focal areas.
Check color value as well as color.
Five different shades of blue can still have nearly identical value. Include enough pale blue, cream, charcoal, and dark indigo to create visual depth.
Square every block after stitching.
Even a stable foundation can distort slightly after repeated rows of hand stitching.
Do not put your bulkiest areas at block intersections.
Four seam allowances already meet there. Thick pocket corners or stacked jean hems can make those points unnecessarily difficult to sew and quilt.
Keep quilting relatively open.
The visible repair stitching already adds significant texture. Dense machine quilting can make reclaimed denim feel stiff.
Allow real wear to remain visible.
Faded knees, softened edges, previous repairs, and washed-out seam marks make the quilt more interesting than artificially distressed fabric.
Do not treat Boro as simply another embroidery style.
The stitching matters, but the essential visual story is the repeated reuse, reinforcement, layering, repair, and conservation of cloth.
Expect the quilt to change with use.
A reclaimed Boro quilt often softens and becomes more integrated after washing and handling. Small changes in frayed edges and surface texture are part of its evolving character, not defects.
Other Design Inspirations – Digitally Modified Images. Texture and color may vary from the actual product.
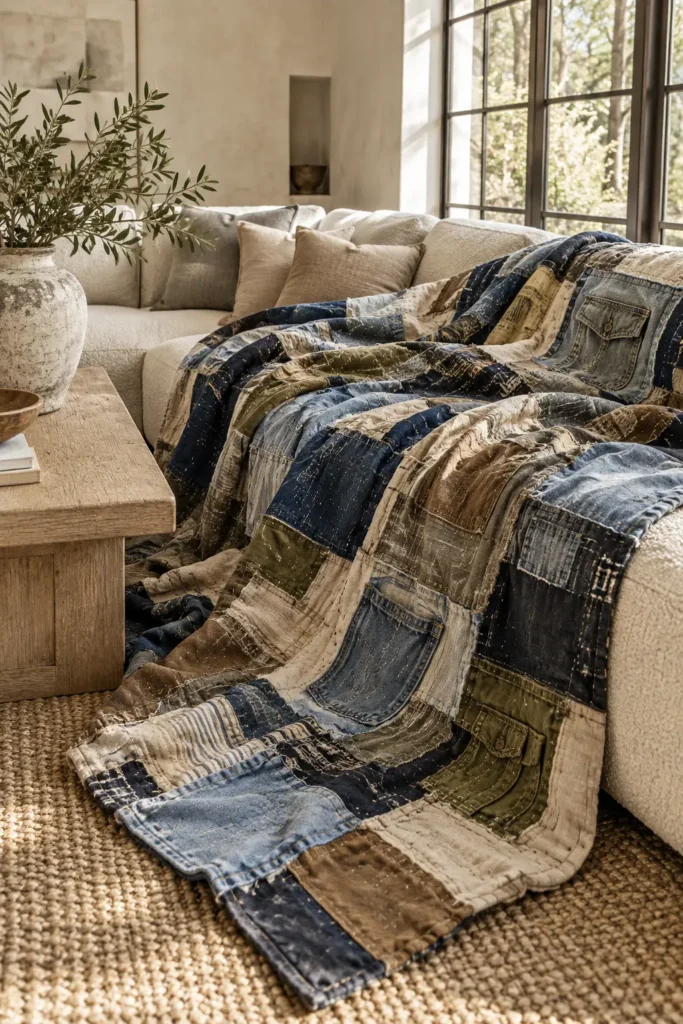

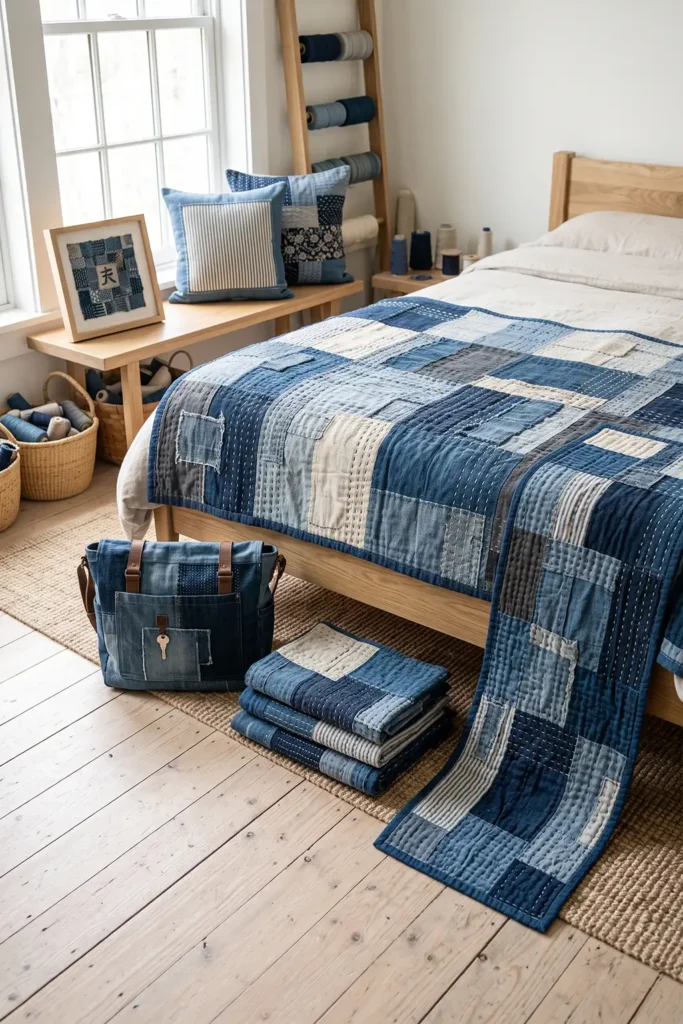
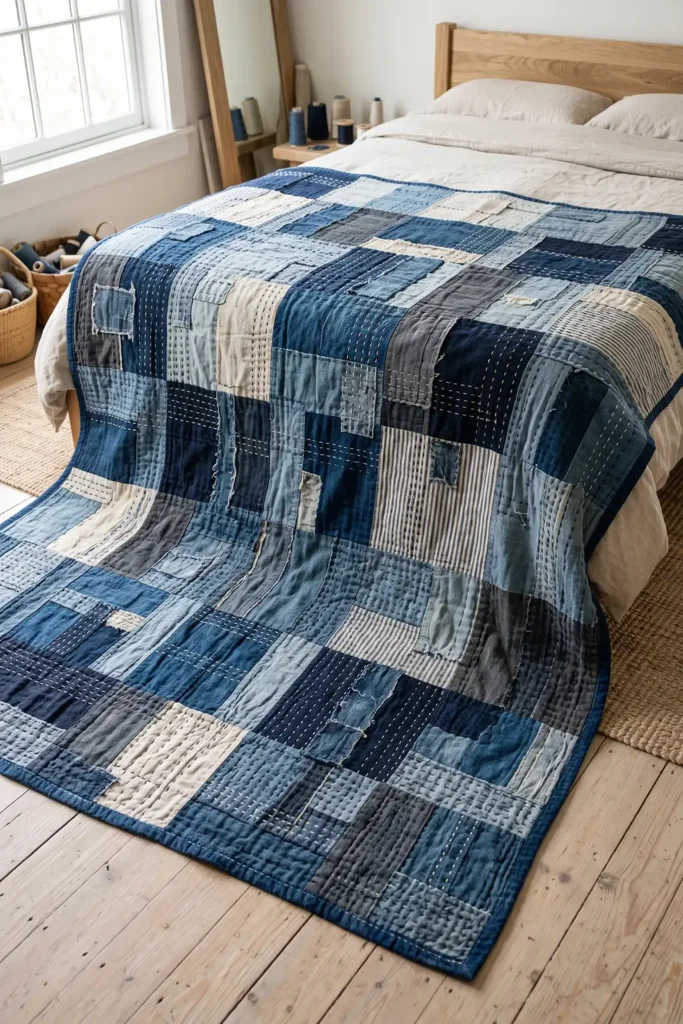
2. Layered Indigo Boro Quilt with Overlapping Patches, Faded Cotton, and Repeated Mending
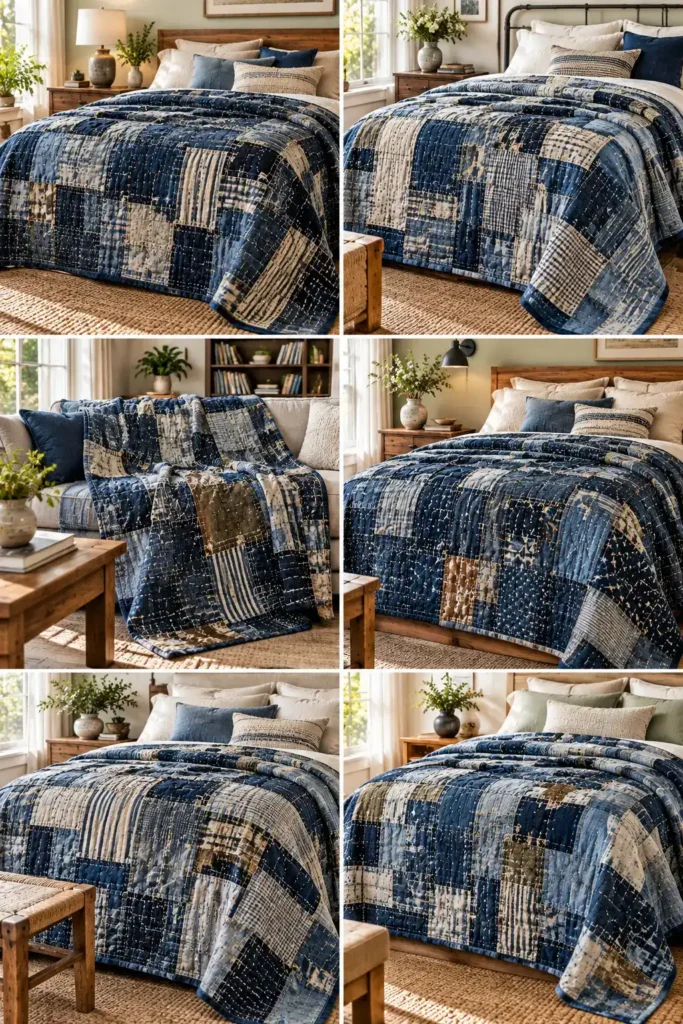
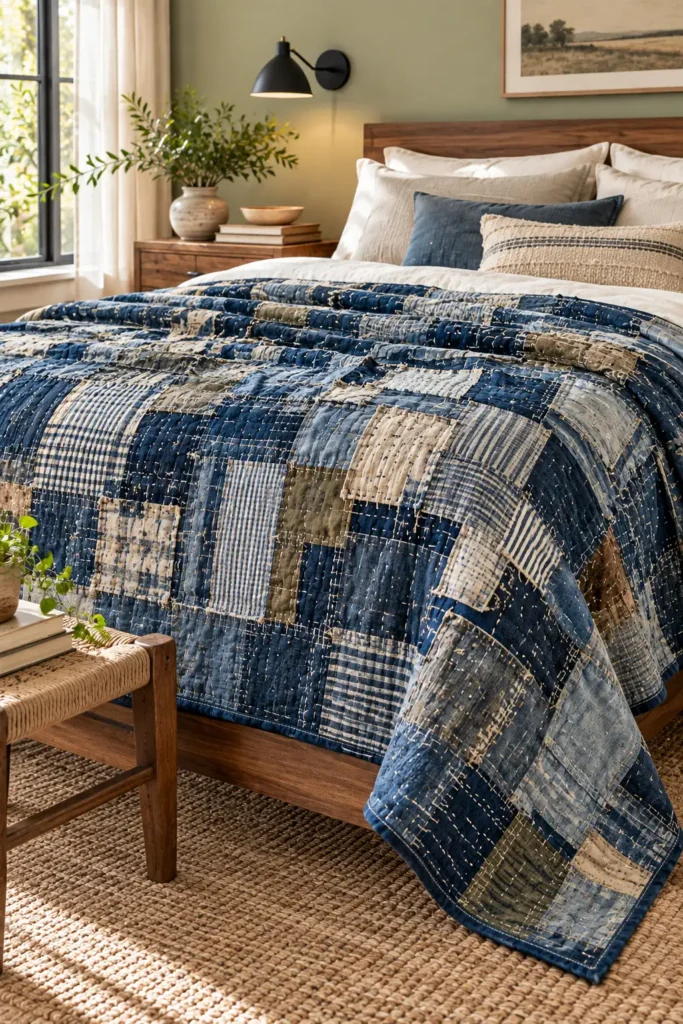
A layered indigo Boro quilt is defined less by a conventional block pattern and more by the accumulated look of cloth that has been repaired again and again. Deep indigo, faded navy, washed denim blue, weathered grey, and pale blue cotton overlap in irregular shapes, while visible rows of stitching secure each repair and gradually unify the surface. The strongest examples do not look newly assembled from perfectly coordinated yardage; they look softened, repaired, reinforced, and altered over time.
That visual language comes from Japanese Boro traditions of extending the useful life of cloth through repeated patching and reinforcement. In a contemporary Boro-inspired quilt, the aim is not to imitate age artificially but to build a layered textile that celebrates reuse, durability, and visible repair. Faded cotton is especially useful because it keeps the quilt lighter than an all-denim version while allowing a wide indigo range. Repeated mending should appear intentional but not rigid, with some areas carrying several repair layers and others remaining comparatively quiet.
Choosing Indigo Fabrics and Building Color Depth
A convincing indigo quilt needs more than one shade of blue. If every fabric is the same medium navy, the layered patchwork can disappear into a flat surface.
Build the palette with several values:
- deep indigo
- midnight navy
- medium denim blue
- faded workwear blue
- blue-grey
- washed slate
- pale indigo
- soft chambray
- weathered cream
- muted charcoal
A useful balance is approximately:
- 25-30% dark indigo and navy
- 40-45% medium blues
- 20-25% pale blue, blue-grey, or cream
- 5-10% charcoal or muted neutral accents
The lighter fabrics are especially important because they separate darker patches and reveal the shape of the repairs.
Choosing Fabrics
Good choices include:
- faded cotton shirts
- chambray
- lightweight denim
- cotton workwear
- cotton twill
- old indigo-dyed cloth
- worn utility shirts
- softened canvas
- blue striped cotton
- ticking
- sturdy vintage-style shirting
Avoid using only heavyweight denim. Too many dense layers can make the finished quilt stiff and difficult to wash.
For this design, favor medium and lightweight woven cottons, then use heavier denim selectively for focal patches.
Fabric with visible wear can be especially useful:
- softened fold lines
- faded cuffs
- pale knees
- repaired tears
- old pocket outlines
- seam shadows
- uneven indigo fading
These features give the quilt a natural sense of history.
Design Inspirations – Digitally Modified Images. Texture and color may vary from the actual product.
Patch Shape and Layering
Avoid cutting every patch into identical squares.
Use a mixture of:
- rectangles
- narrow strips
- broad horizontal pieces
- long vertical patches
- small repair tabs
- irregular shapes
Useful starting sizes include:
- 3 × 5 inches
- 4 × 6 inches
- 5 × 8 inches
- 6 × 9 inches
- 2½ × 8-inch strips
- 3 × 10-inch strips
Most patches should overlap neighboring pieces by about ½-1 inch.
Repeated repairs can be built by placing a smaller patch over an earlier one, but avoid stacking too many heavy fabrics in one location. Two or three visible layers are usually enough to create depth without producing a hard lump.
Stitching Style
Visible running stitches should look functional as well as decorative.
Good thread colors include:
- cream
- off-white
- pale blue
- navy
- charcoal
- muted grey
Stitches around ¼-⅜ inch long work well for hand stitching.
Use varied stitch arrangements:
- parallel rows
- crossed rows
- short reinforcement lines
- irregular grids
- edge stitching
- patches surrounded by repeated running stitches
Do not cover every area with the same stitch pattern. Variation is important.
Finished Quilt Size
This quilt finishes at approximately:
60 × 72 inches
It uses 30 foundation blocks, arranged:
5 blocks across × 6 blocks down
Each block is:
- 12½ × 12½ inches unfinished
- 12 × 12 inches finished
The foundation blocks provide hidden structure while the overlapping indigo patches make the finished quilt appear more organically assembled.
Materials Needed
- Approximately 3½ yards lightweight to medium-weight cotton for foundation blocks
- Approximately 4-5 yards equivalent of reclaimed indigo, faded blue, chambray, denim, and workwear fabrics
- 68 × 80-inch low-loft cotton or cotton/bamboo batting
- Approximately 4½ yards backing fabric
- ½ yard binding fabric
- Strong cotton or cotton/polyester construction thread
- Visible-mending thread in cream, pale blue, navy, or charcoal
- Hand-stitching needles
- Size 90/14 sewing-machine needles
- Walking foot
- Rotary cutter
- cutting mat
- quilting ruler
- fabric scissors
- pins or clips
- safety pins or preferred basting method
- optional thimble
Cutting Measurements
Cut:
- 30 foundation squares at 12½ × 12½ inches
- varied patches approximately 3-9 inches
- narrow repair strips approximately 2½-3 inches wide
- batting and backing approximately 68 × 80 inches
The finished dimensions are calculated as follows:
5 × 12 inches = 60 inches wide
6 × 12 inches = 72 inches long
Use a ¼-inch seam allowance when joining the foundation blocks.
Step-by-Step Guide
Step 1 — Sort the indigo fabrics.
Separate fabrics into dark, medium, and light values. Also divide heavyweight denim from lightweight cotton and chambray. Check reclaimed cloth for weak areas, stains, stretch, or damage that could compromise the quilt.

Step 2 — Wash and prepare the cloth.
Prewash all reclaimed fabrics. Remove metal hardware, bulky waistbands, heavy zippers, snaps, and other pieces that could interfere with quilting. Preserve faded areas, old repairs, seam shadows, and useful garment details.
Step 3 — Cut the foundation blocks.
Cut 30 squares at 12½ × 12½ inches from stable lightweight or medium-weight cotton. These squares will support the patchwork and prevent distortion.

Step 4 — Cut varied indigo patches.
Cut a mixture of rectangular, strip-like, square, and irregular pieces. Keep most patches between approximately 3 and 9 inches. Do not standardize every patch.
Step 5 — Sort patches by value and weight.
Make separate groups of dark indigo, medium blue, faded blue, pale blue, charcoal, and cream. Keep especially thick pieces in a separate pile so you can distribute them rather than cluster them.

Step 6 — Lay out the first foundation block.
Place several patches over one 12½-inch square. Start with larger pieces, then fill gaps with smaller ones. Allow overlaps of approximately ½-1 inch. Leave small areas of the foundation visible if they improve the composition.
Step 7 — Stitch the main patch layer.
Secure the larger patches first with running stitches or simple machine stitching. Hand stitches around ¼-⅜ inch long create a strong visual rhythm without overwhelming the fabric.

Step 8 — Add a second layer of repairs.
Place smaller patches over selected seams, worn areas, or visually quiet sections. Use these patch-on-patch repairs sparingly so the layered areas feel meaningful rather than uniformly dense.
Step 9 — Add repeated mending stitches.
Reinforce selected areas with extra lines of visible stitching. Use parallel rows, short crossing lines, or irregular grids. Keep the stitch patterns varied from block to block.

Step 10 — Complete all 30 blocks.
Repeat the layering and stitching process across every foundation square. Vary patch coverage, fabric value, and stitching density so some blocks feel heavily repaired while others remain quieter.
Step 11 — Square the blocks.
Trim each completed block carefully back to 12½ × 12½ inches. Patchwork and repeated hand stitching can distort the foundation slightly, so this step is essential for accurate assembly.

Step 12 — Arrange five blocks across by six down.
Lay out all 30 blocks. Spread dark, medium, and light indigo evenly. Rotate blocks to prevent strong seams or repeated patch shapes from forming distracting lines across the quilt.
Step 13 — Sew the blocks into rows.
Join five blocks at a time using a ¼-inch seam allowance. Create six rows. Press Row 1 seams in one direction and Row 2 seams in the opposite direction, continuing this alternating pattern.
Each row should measure approximately 60½ × 12½ inches unfinished.

Step 14 — Join the six rows.
Match the block intersections carefully and sew the rows together with ¼-inch seams. The assembled top should measure about 60½ × 72½ inches unfinished.
Step 15 — Add selected bridging patches.
If the block boundaries remain visually obvious, apply a few lightweight patches across selected seams. Hand-stitch them securely. Avoid covering every block boundary; the goal is simply to soften the underlying grid.

Step 16 — Prepare, baste, and quilt the layers.
Cut backing and batting to approximately 68 × 80 inches. Layer backing, batting, and quilt top, then baste securely. Quilt with simple lines approximately 3-4 inches apart, avoiding the thickest patch intersections.
Step 17 — Trim and prepare the binding.
Square the quilt after quilting and trim the backing and batting even with the top. Cut seven 2½-inch binding strips, join them with diagonal seams, and press the finished strip in half lengthwise.
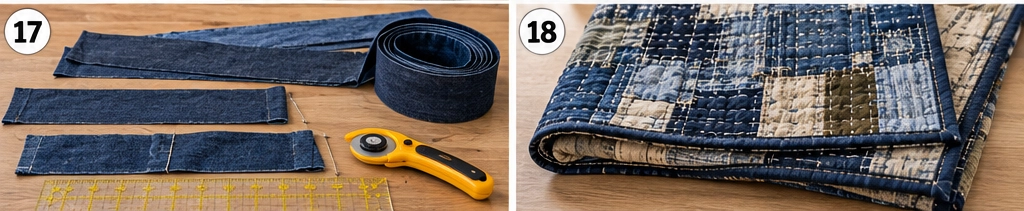
Step 18 — Bind and finish.
Attach the binding with a ¼-inch seam, miter the corners, and finish the folded edge by hand or machine. Inspect the quilt for loose patch edges and reinforce them if necessary. A gentle wash can soften the fabric further and help the repaired layers settle together naturally.
Assembly at a Glance
- Sort indigo fabrics by value and weight.
- Wash and prepare reclaimed cloth.
- Cut 30 foundation blocks.
- Cut varied repair patches.
- Separate patches by shade and thickness.
- Arrange the first patch layer.
- Stitch the main patches.
- Add second-layer repairs.
- Add repeated mending stitches.
- Complete all 30 blocks.
- Square to 12½ inches.
- Arrange five across by six down.
- Sew blocks into rows.
- Join the rows.
- Add selected bridging repairs.
- Baste and quilt.
- Trim and prepare binding.
- Bind and finish.
Helpful Note
When several layers meet, trim away hidden fabric that contributes bulk but adds no visible texture. Boro-inspired layering should look rich on the surface without making the quilt unnecessarily stiff.
Beginner Tips and Common Mistakes
Use more than one indigo value.
A quilt made entirely from medium blue can look flat. Include pale blue, deep navy, and occasional cream or charcoal.
Keep heavyweight denim limited.
Use it as a feature rather than the dominant fabric.
Do not make every patch the same size.
Varied proportions are essential to the repaired character.
Avoid over-layering.
Repeated mending does not mean every section needs three or four fabric layers.
Let some foundation remain visible.
Small quiet areas make the repaired sections more noticeable.
Square after stitching.
Repeated hand stitching can subtly distort the block.
Keep thick patch stacks away from block intersections.
Four seam allowances already meet there.
Use restrained quilting.
The visible repair stitches already provide surface texture, so dense machine quilting is unnecessary.
Do not make the surface too perfect.
Slight irregularity in patch placement and stitch spacing supports the handmade character.
Preserve genuine fading.
Uneven indigo wear, seam shadows, pale edges, and old repair marks add more authenticity than artificially distressed new cloth.
Think of the quilt as a repaired textile first and decorative patchwork second.
Repeated layering, reinforcement, reuse, and cloth conservation give the design its character.
Other Design Inspirations – Digitally Modified Images. Texture and color may vary from the actual product.
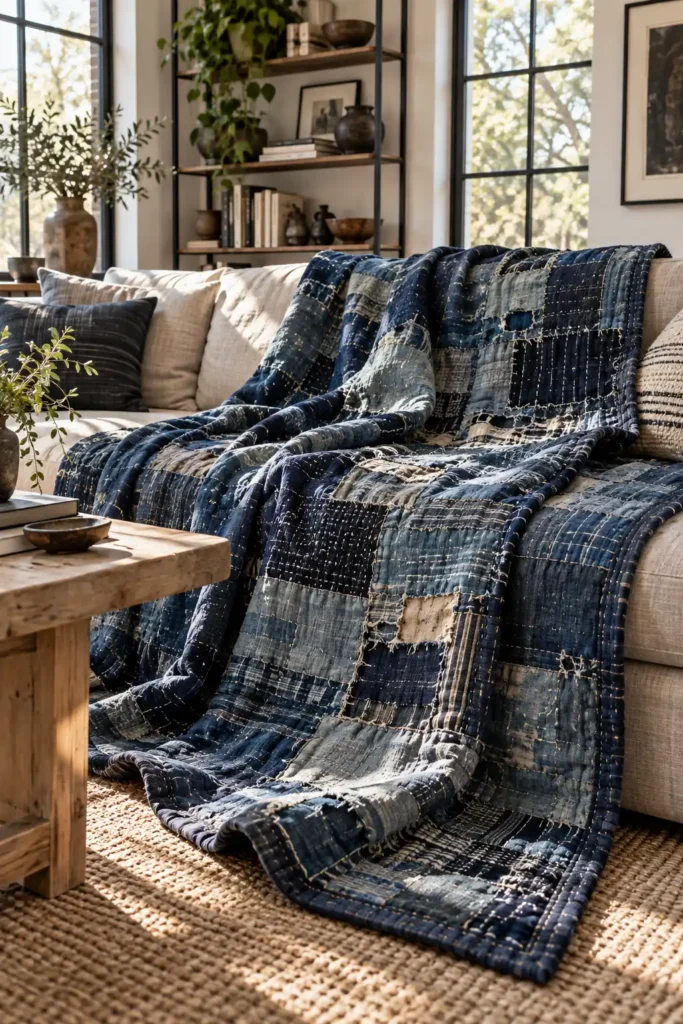
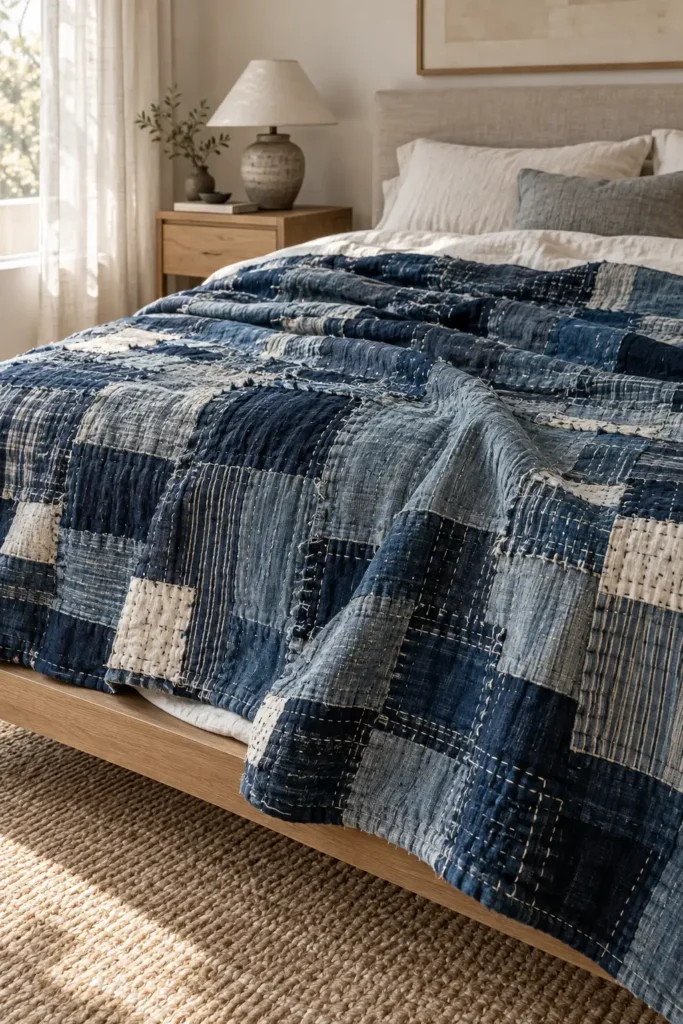
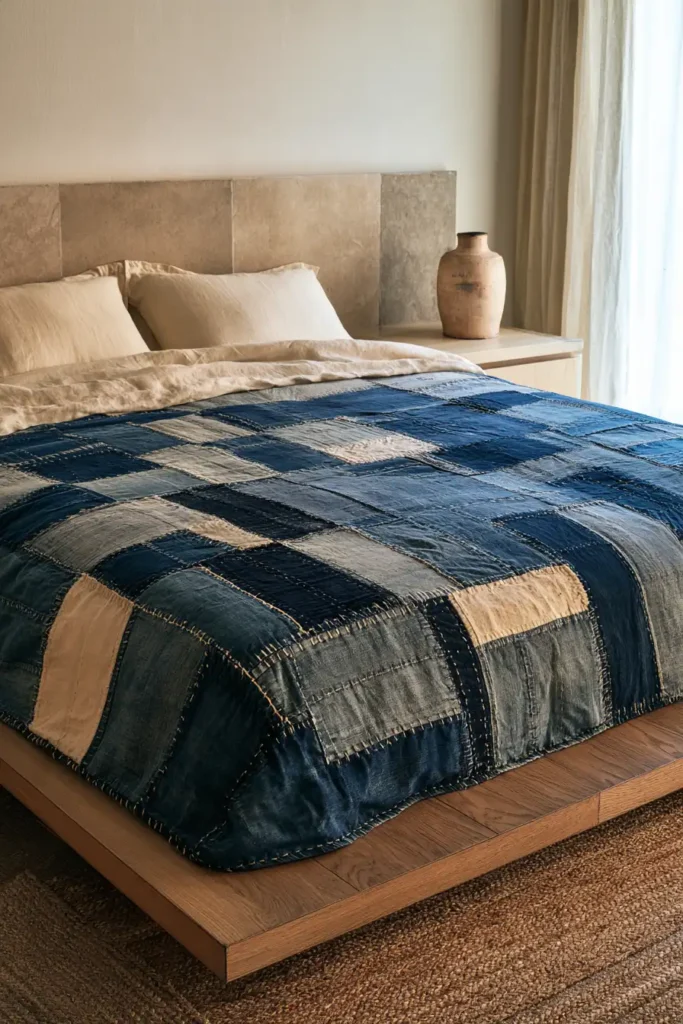
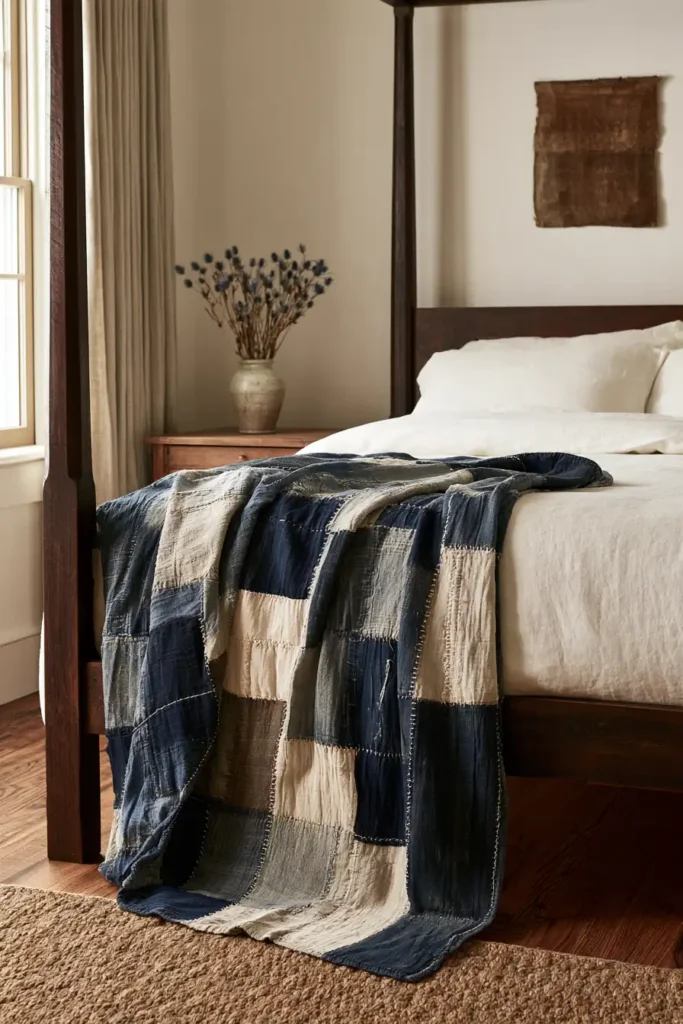
3. Heavily Repaired Vintage-Style Boro Quilt with Patch-on-Patch Aged Textile Layers
Design Inspirations – Digitally Modified Images. Texture and color may vary from the actual product.
Other Design Inspirations – Digitally Modified Images. Texture and color may vary from the actual product.
4. Reclaimed Workwear Boro Quilt with Denim, Canvas, and Reinforced Utility Fabric Patches
Design Inspirations – Digitally Modified Images. Texture and color may vary from the actual product.
Other Design Inspirations – Digitally Modified Images. Texture and color may vary from the actual product.
5. Earth-Toned Boro Quilt with Olive, Rust, Brown, and Weathered Workwear Fabrics
Design Inspirations – Digitally Modified Images. Texture and color may vary from the actual product.
Other Design Inspirations – Digitally Modified Images. Texture and color may vary from the actual product.
6. Faded Indigo and Natural Linen Boro Quilt with Raw-Edge Visible Mending
Design Inspirations – Digitally Modified Images. Texture and color may vary from the actual product.
Other Design Inspirations – Digitally Modified Images. Texture and color may vary from the actual product.
7. Colorful Contemporary Boro-Inspired Quilt with Mixed Scraps and Organic Patch Placement
Design Inspirations – Digitally Modified Images. Texture and color may vary from the actual product.
Other Design Inspirations – Digitally Modified Images. Texture and color may vary from the actual product.
8. Sustainable Scrap-Busting Boro Quilt with Repurposed Household Textiles and Worn Fabrics
Design Inspirations – Digitally Modified Images. Texture and color may vary from the actual product.
Other Design Inspirations – Digitally Modified Images. Texture and color may vary from the actual product.
9. Mixed Denim and Plaid Boro Quilt with Overlapping Patches with Vintage Checks and Worn Blue Jeans
Design Inspirations – Digitally Modified Images. Texture and color may vary from the actual product.
Other Design Inspirations – Digitally Modified Images. Texture and color may vary from the actual product.
10. Modern Minimalist Boro-Inspired Quilt with Sparse Patches and Mended Negative Space
Design Inspirations – Digitally Modified Images. Texture and color may vary from the actual product.
Other Design Inspirations – Digitally Modified Images. Texture and color may vary from the actual product.
11. Vintage Print Boro-Inspired Quilt with Faded Checks, Reclaimed Prints, and Irregular Repair Layers
Design Inspirations – Digitally Modified Images. Texture and color may vary from the actual product.
Other Design Inspirations – Digitally Modified Images. Texture and color may vary from the actual product.
12. Reclaimed Shirt Boro Quilt with Plaid, Checks, Stripes, and Irregular Overlapping Patchwork
Design Inspirations – Digitally Modified Images. Texture and color may vary from the actual product.
Other Design Inspirations – Digitally Modified Images. Texture and color may vary from the actual product.
13. Natural Linen and Neutral Boro Quilt with Cream, Charcoal, and Earthy Reclaimed Fabrics
Design Inspirations – Digitally Modified Images. Texture and color may vary from the actual product.
Other Design Inspirations – Digitally Modified Images. Texture and color may vary from the actual product.
Conclusion
The thirteen designs in this article cover a wide range of boro-inspired approaches — from the heavily layered denim and workwear compositions that sit closest to the historical tradition, to the more spare and considered modern interpretations using neutral linen, scant patching, and deliberate negative space. What holds them together is a shared commitment to working with what’s already worn, faded, or repaired rather than treating those qualities as flaws to be hidden. The Boro Quilt Ideas gathered here demonstrate how a practice rooted in necessity produces results that are visually richer and more individual than most planned fabric combinations could achieve.
The best starting point for any of these designs is an honest inventory of the reclaimed cloth you actually have, rather than a shopping list. The fabrics that have already lived — the jeans worn thin at the knees, the shirt faded from years of washing, the canvas bag retired from use — are the materials these quilts are built for. Whether the result is a dense, heavily patched denim composition or a restrained linen arrangement with a few visible running stitches, the finished quilt’s character will come more from the cloth itself than from the pattern.

