
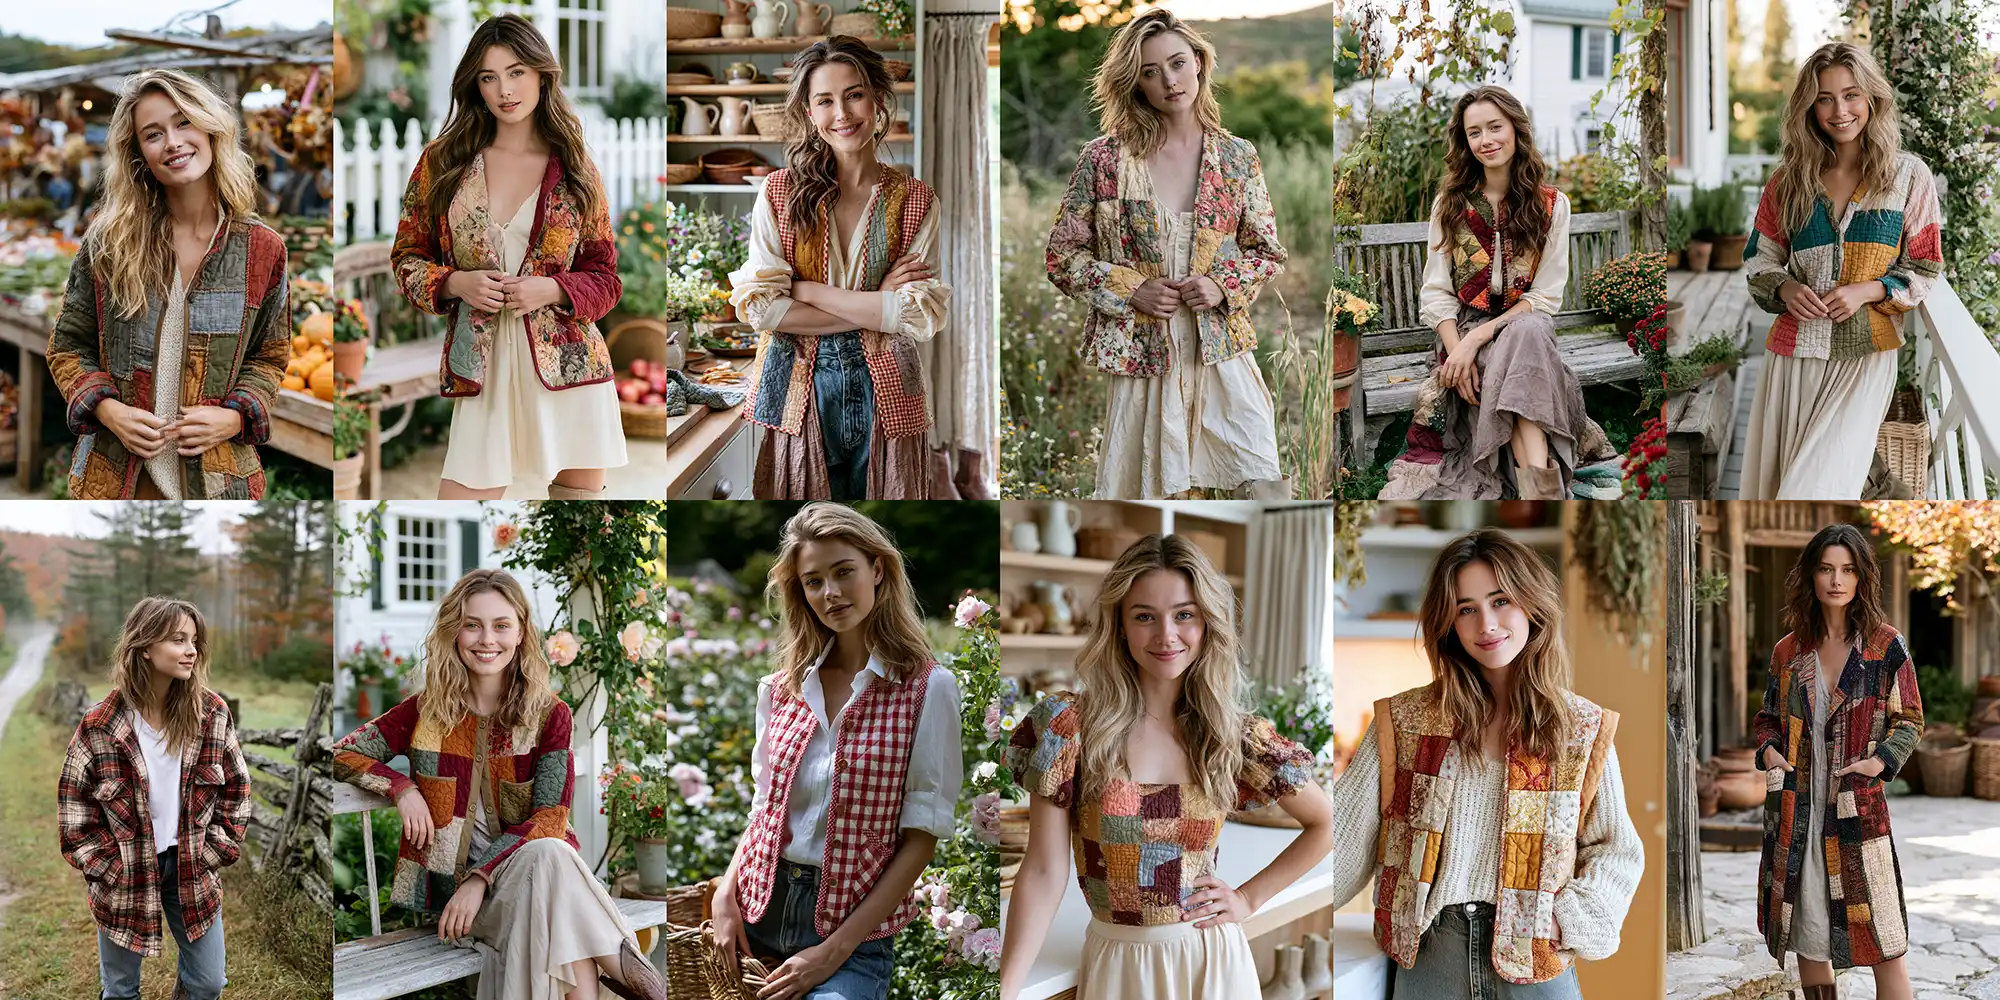
Farmhouse Quilt Jackets & Vests: 12 Cozy & Elegant Layering Ideas for Rustic Style
There’s a particular kind of comfort that comes from wearing something quilted — the weight of it, the softness, the way layered fabric holds warmth without feeling heavy. Growing up in Dhaka, I watched my family work with cloth the way other people work with clay, stitching together scraps into Nakshi Kantha throws that carried both function and memory. That heritage is exactly why farmhouse quilted apparel speaks to me: it takes the humble patchwork tradition and turns it into something you can pull on before heading out into a crisp morning. This roundup gathers twelve cozy, elegant layering ideas — jackets, vests, and tops — that blend rustic character with a refined, modern-country sensibility.
Farmhouse Quilt Jackets & Vests
Farmhouse Quilt Jackets & Vests are wearable takes on the classic quilt: garments built from padded, stitched fabric — often patchwork or diamond-quilted — in the soft, muted palettes and homespun prints that define farmhouse style. Think warm oatmeal neutrals, faded florals, gingham, and buffalo check, sewn into barn jackets, cropped vests, longline dusters, and button-front tops. What makes them special is their versatility: they’re structured enough to feel polished over a simple tee or dress, yet cozy enough to become your everyday layer through fall and winter. Whether you sew your own from a vintage quilt or style a ready-made piece, these twelve ideas below show just how elegant rustic layering can be.
See also: Stylish Boho Quilt Jackets and Vests – Stylish Jelly Roll Quilted Jackets and Vests – Scandinavian Quilted Jackets and Vests – Japanese Quilt Jackets, Vests – Elegant Nakshi Kantha Accessories
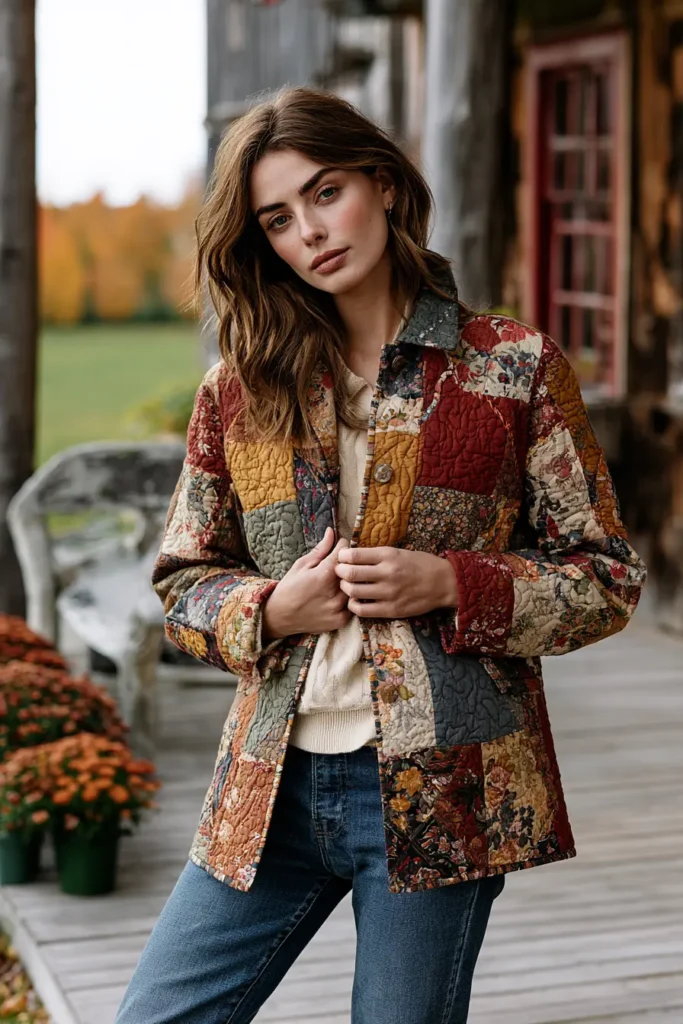
1. Classic Patchwork Quilted Jacket in Warm Farmhouse Tones
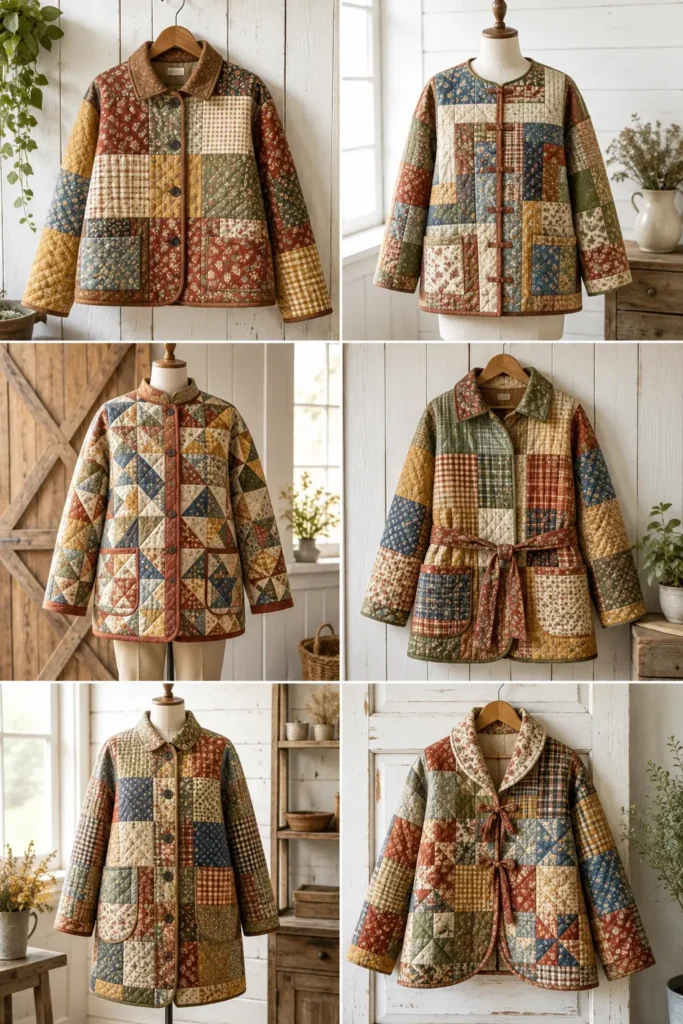
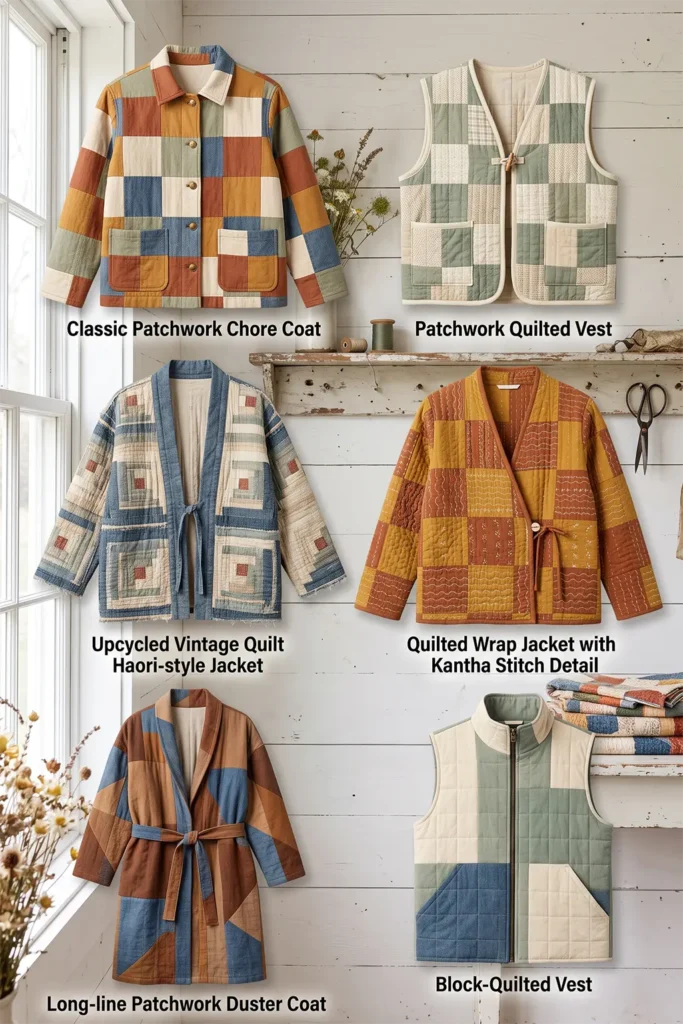
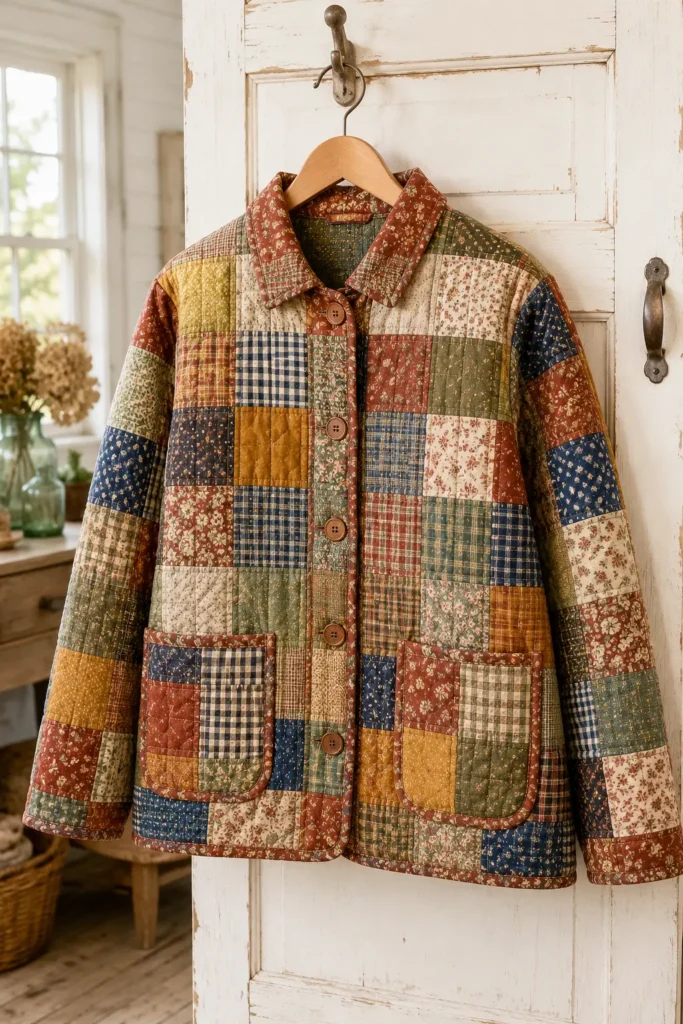
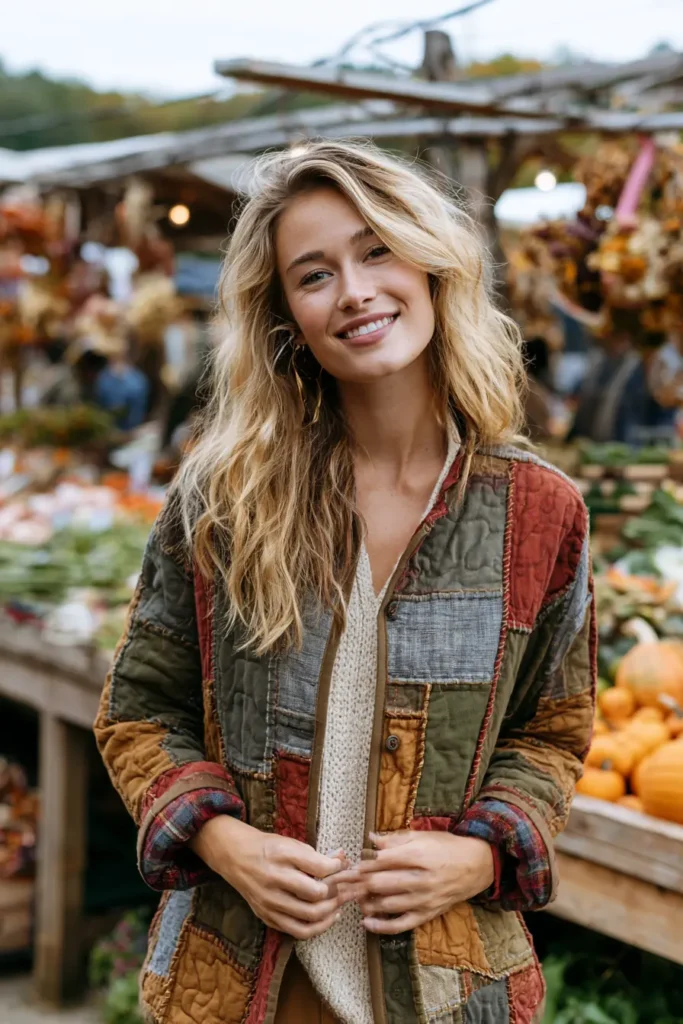
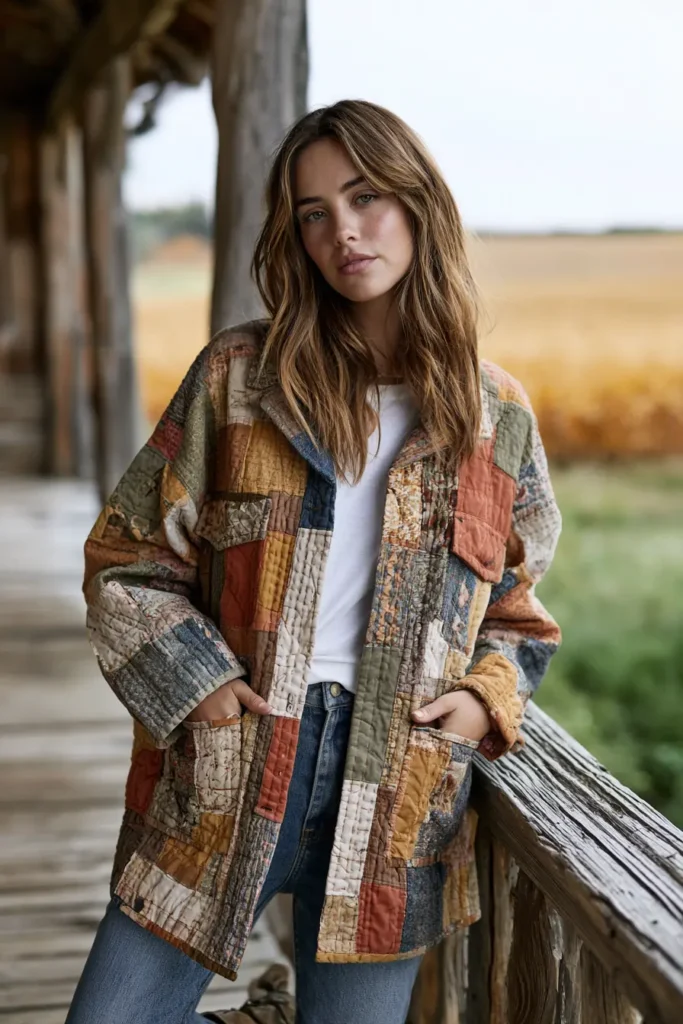
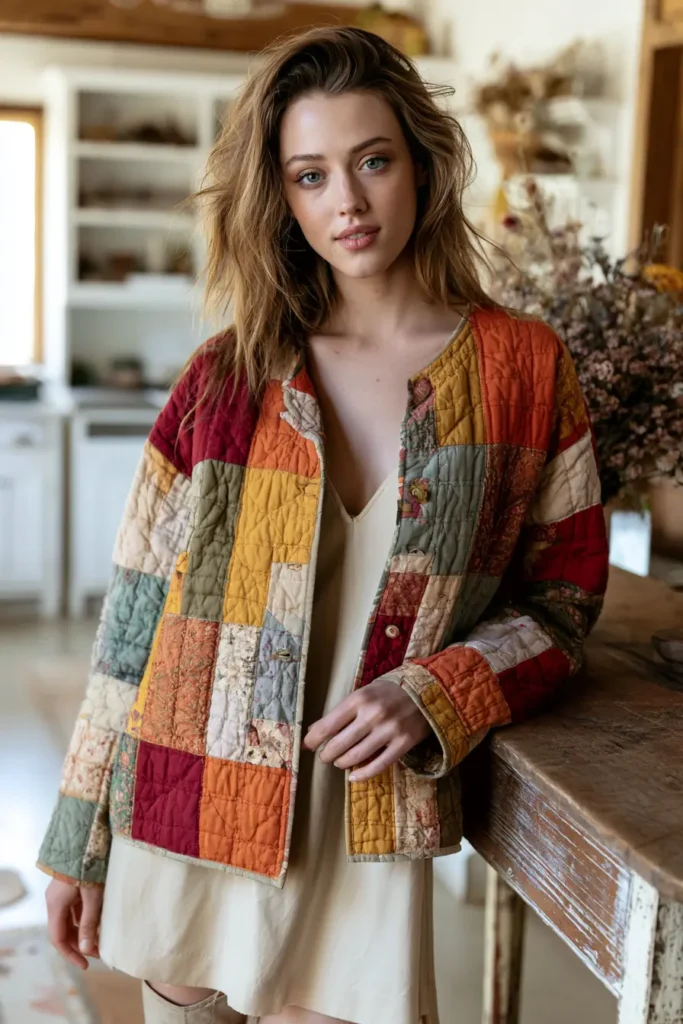
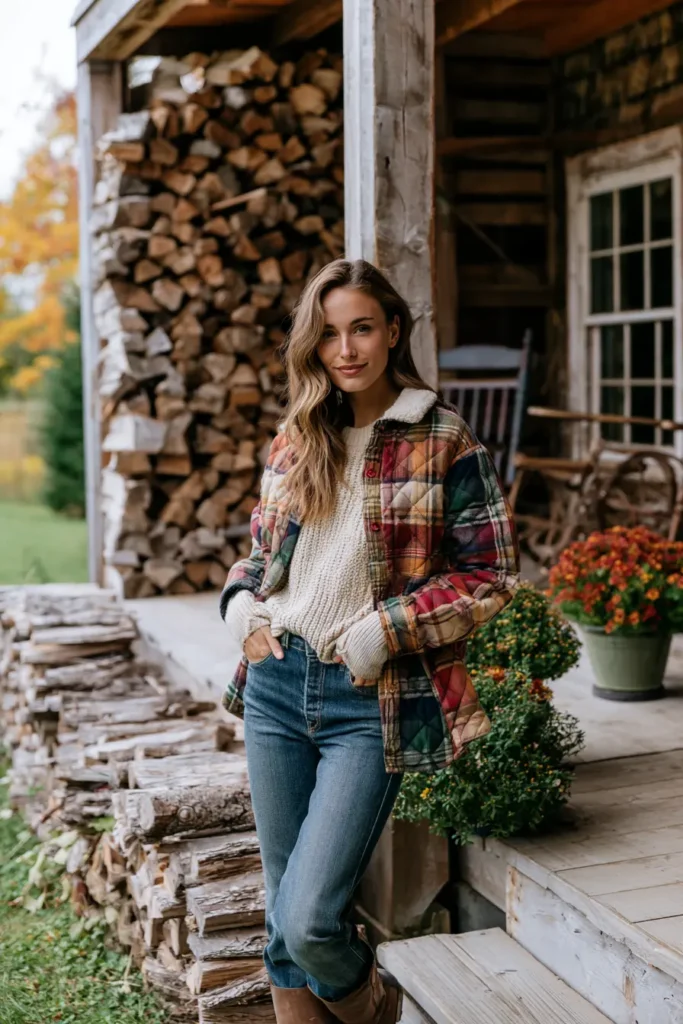
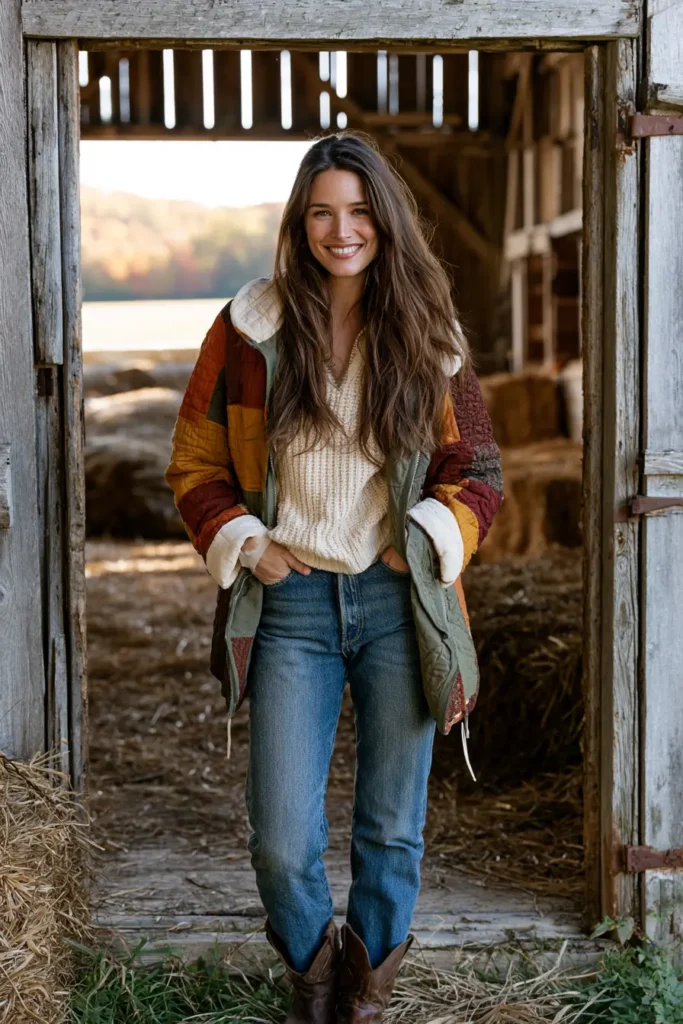
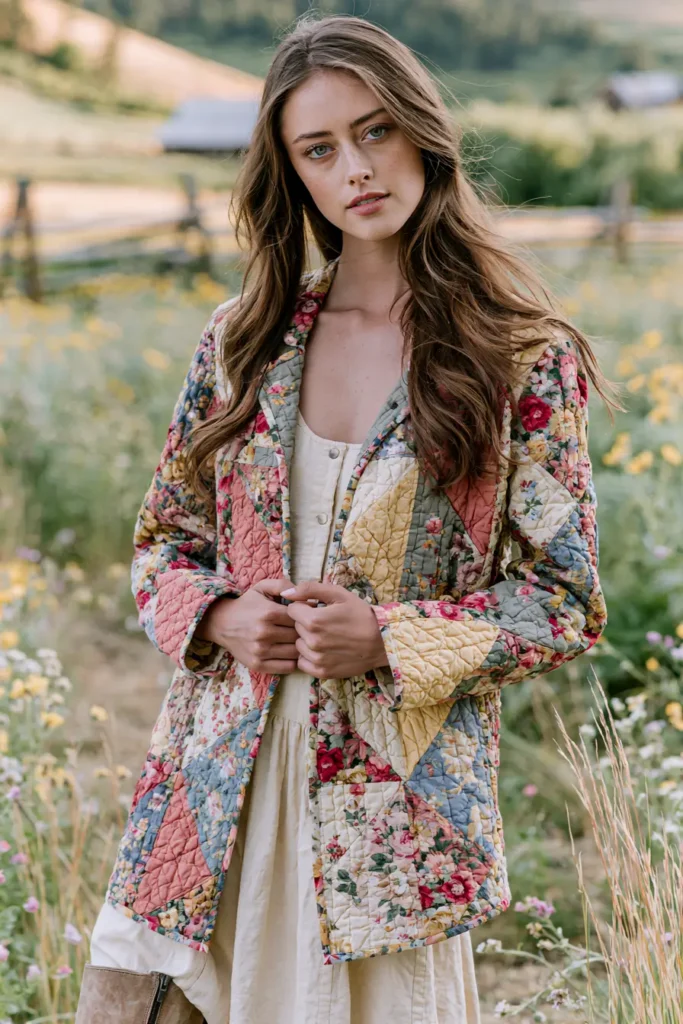
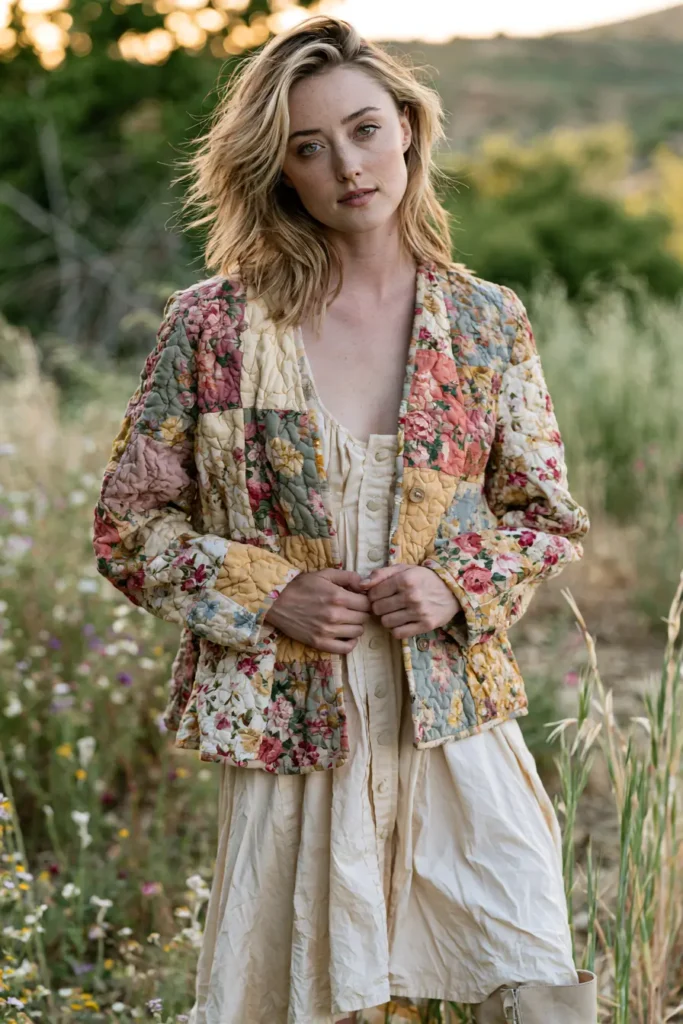
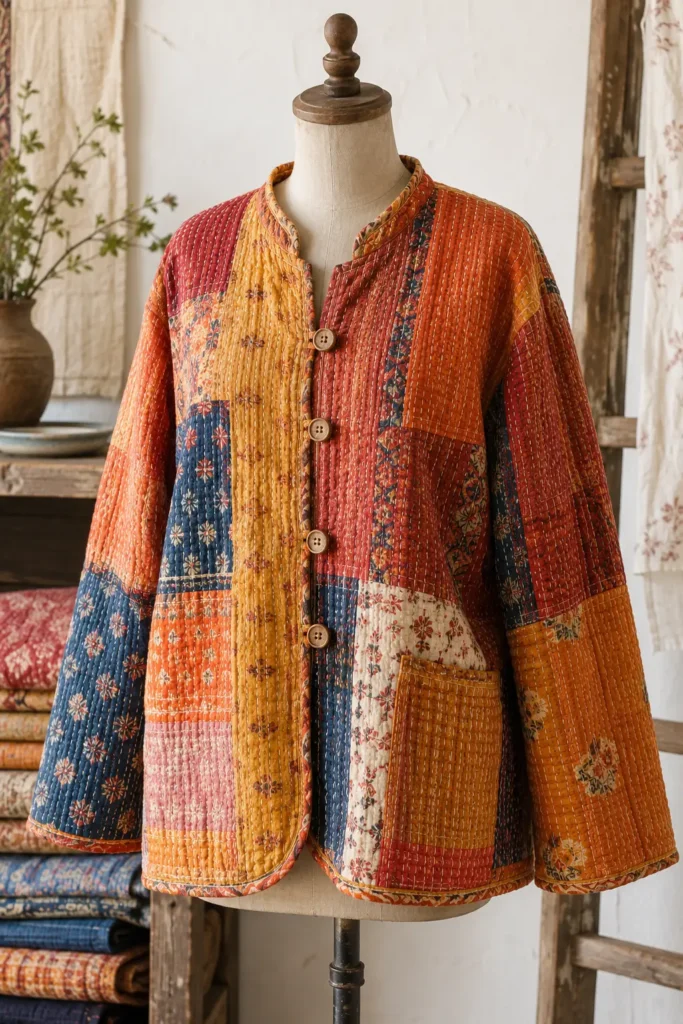
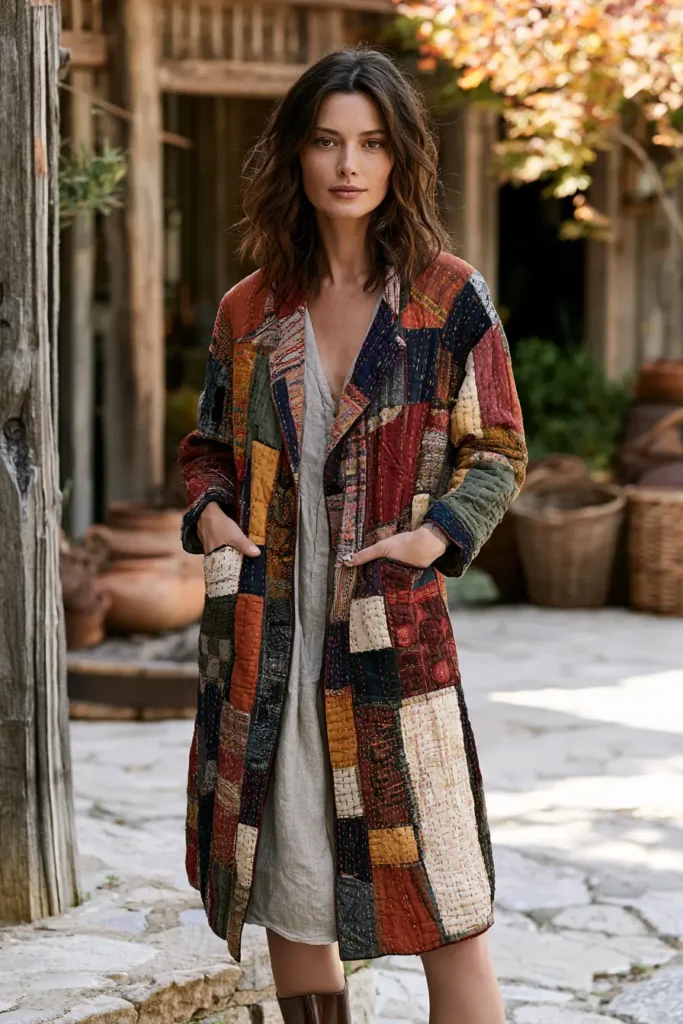
A patchwork quilted jacket is where cozy quilting meets everyday fashion — a wearable version of the quilt you love draped on the bed. Built from warm farmhouse tones (rust, mustard, sage, cream, and denim blue) pieced into a soft quilted fabric, it’s the layering piece that makes an ordinary outfit feel handmade and characterful. Part barn coat, part heirloom quilt, it’s the kind of jacket people stop you to ask about, and it carries all the rustic warmth of a farmhouse right onto your shoulders. Thrown over jeans and boots or a simple dress, it turns getting dressed into a little celebration of craft.
These “quilt coats” have become a genuine movement in the sewing world, growing out of the tradition of turning worn but beloved quilts into wearable keepsakes. There’s something deeply appealing about it: a quilt that might have sat folded in a cupboard gets a whole second life as a garment you actually use. Whether you piece fresh patchwork or upcycle an old quilt, the result is the same — a soft, warm, one-of-a-kind jacket that no store can sell you.
Why I Made It
I made this because a quilted jacket is the most joyful way to wear the work you love. I adore making quilts, but a quilt lives on a bed; a jacket lives out in the world, on walks and errands and coffee runs, carrying its handmade warmth everywhere you go. There’s a particular thrill in someone admiring your coat and realizing you made it — quilt and all.
It also sits right at the heart of my own background. Coming from generations of hand-stitching in my family, raised around the Nakshi Kantha tradition — where layered, running-stitched cloth was always made into things to be worn and used, not just displayed — a quilted jacket feels like the most natural idea in the world. Kantha itself became shawls and wraps as often as blankets. Turning patchwork into a garment isn’t a modern novelty to me; it’s one of the oldest and warmest ideas in textile making.
Why This Idea Is Worth Making
This idea is worth making because it turns quilting skill into a wearable, everyday piece with enormous personality — and it’s more achievable than it looks. You can piece your own patchwork panels or shortcut the whole thing by upcycling a thrifted quilt, and a simple boxy jacket pattern keeps the garment construction beginner-friendly. The finished coat is warm, rustic, and completely unique, works over almost any outfit, and becomes an instant signature piece. It’s the project that takes your quilting off the bed and out the door.
Two Ways to Make It
Choose your path before you start:
- Piece your own patchwork (full control): sew farmhouse-tone squares into patchwork panels, quilt them with batting and a lining, then cut your jacket pieces from that fabric. More work, but every color is yours.
- Upcycle a quilt (fast, classic quilt-coat method): start with a thrifted or worn quilt that’s already pieced and quilted, and cut your jacket pieces straight from it. Far quicker — the quilting is done — and beautifully sustainable. (Use a quilt that’s damaged or unloved, never an heirloom someone treasures.)
This guide covers piecing your own; the upcycle path simply skips Steps 1–3 and starts by cutting the pattern from the existing quilt.
Finished Garment
- Style: relaxed, boxy chore-coat / barn-jacket shape, hip-length
- Sizes: use a commercial jacket pattern in your size (see below); the boxy fit is forgiving
- Skill level: confident beginner (simple garment; the patchwork is the fun part)
- Core techniques: patchwork piecing, quilting yardage, garment cutting, bound seams, closures
Materials Needed
- A simple boxy jacket pattern — a chore coat, haori, or barn-jacket style with minimal shaping (no darts, drop shoulders). Many free and indie “quilt coat” patterns exist
- Patchwork fabrics: about 2½–3 yards total of farmhouse-tone cottons — rust, mustard, sage, cream, denim blue, warm brown
- Batting: low-loft cotton, about 2½ yards (low-loft is essential — a garment can’t be as puffy as a bed quilt)
- Lining fabric: 2½ yards of soft cotton or flannel (this becomes the inside of the jacket)
- Binding: ¾ yard for finishing the interior seams and edges (bias or straight-cut)
- Closures: buttons, a hook-and-eye, or a tie belt
- Thread, walking foot, rotary cutter, cutting mat, ruler, pins, iron, sewing machine
Beginner tip: pick a pattern with no darts and dropped shoulders — a boxy shape is far easier to cut from quilted fabric than a fitted one, and it suits the rustic look perfectly.
Choosing Your Colors
Warm farmhouse tones are the heart of this jacket — think a sun-faded barn and a harvest table:
- Rust and brick for warmth and depth
- Mustard and gold for a farmhouse pop
- Sage and olive green for a grounded, natural note
- Cream and oatmeal to lighten and rest the eye
- Denim and chambray blue for that classic workwear feel
- Warm brown to anchor it all
Mix prints, ginghams, small plaids, and solids for a scrappy, collected look. A jacket flatters most when one or two colors dominate, and the rest support them — so let rust and mustard lead, say, with the others as accents.
The Fabric: Making Your Patchwork Yardage
Before cutting a jacket, you make quilted fabric to cut it from:
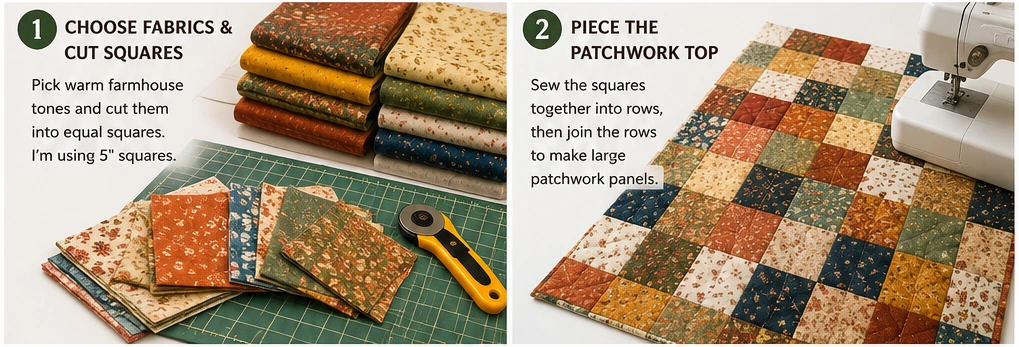
- Piece your farmhouse-tone squares (a simple 5-inch cut square grid works beautifully) into panels a bit larger than each jacket pattern piece
- You’ll need enough patchwork for the back, two fronts, two sleeves, plus a little extra
- Then quilt each panel — patchwork top, batting, lining — before cutting the garment shapes
Cutting Measurements
- Patchwork squares: cut 5 × 5 inches, enough to piece panels covering all your pattern pieces (roughly 120–150 squares for an average jacket, depending on size)
- Panels to quilt: piece and quilt panels sized at least 2 inches larger all around than each pattern piece, so you can cut cleanly
- Batting and lining: cut to match each panel
- Binding: cut 2 to 2½-inch strips, enough to bind all interior seams and the outer edges (several yards total)
Step-by-Step Guide
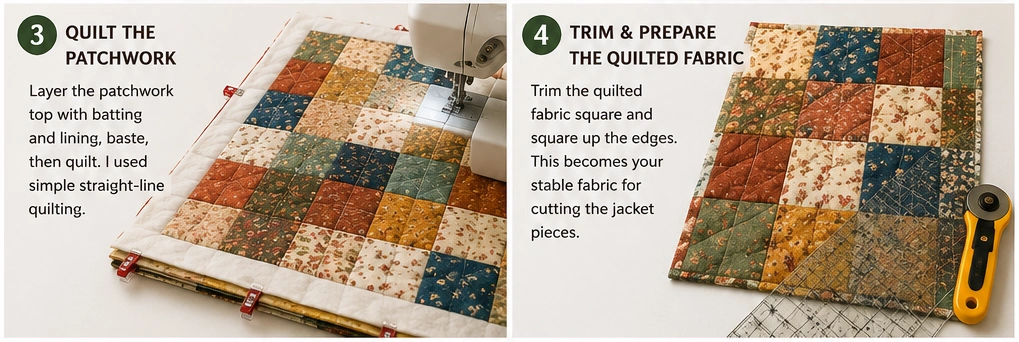
Step 1 — Piece your patchwork panels. Sew 5-inch farmhouse-tone squares into panels using a ¼-inch seam, pressing seams as you go. Make each panel about 2 inches larger all around than the jacket pattern piece it’ll become. Press well.
Step 2 — Quilt the panels. Layer each patchwork panel with batting and lining, then quilt — straight lines, a diagonal grid, or stitch-in-the-ditch. Use low-loft batting so the fabric stays flexible enough to wear. This gives you quilted “yardage.”
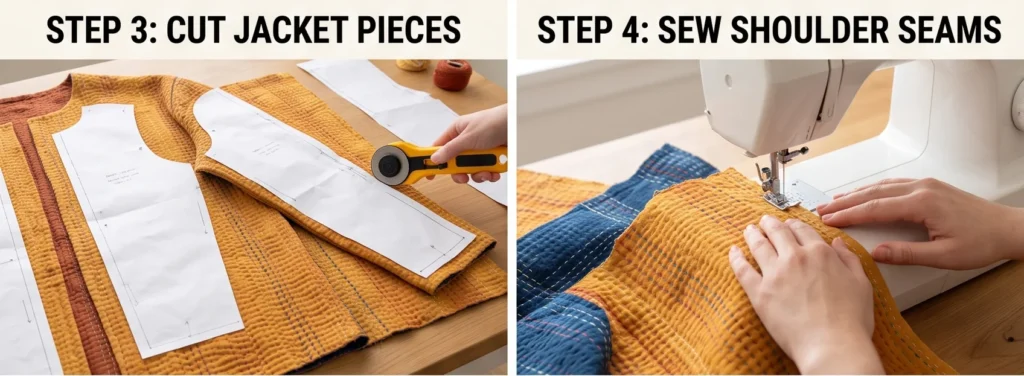
Step 3 — Cut the jacket pieces. Lay your jacket pattern on the quilted panels and cut out the back, two fronts, and two sleeves (plus collar/pockets if your pattern has them). Cut carefully — quilted fabric is thick, so a rotary cutter and a fresh blade help.
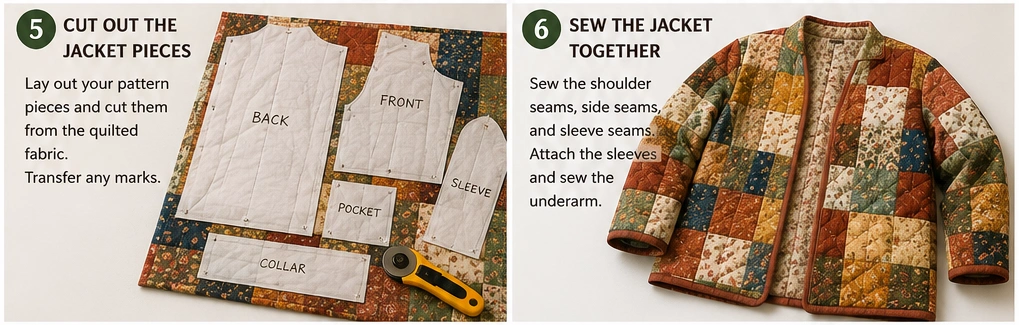
Step 4 — Sew the shoulder and side seams. With right sides together and a ½-inch seam, sew the shoulder seams, then set in or drop-attach the sleeves, then sew the side and underarm seams. Quilted fabric is bulky, so press seams open and go slowly. (Bound seams — see Step 6 — handle the bulk beautifully.)
Step 5 — Attach the sleeves and check the fit. Try the jacket on inside-out to check fit before finishing. The boxy shape should hang loose and comfortable; trim seam allowances if they feel bulky.
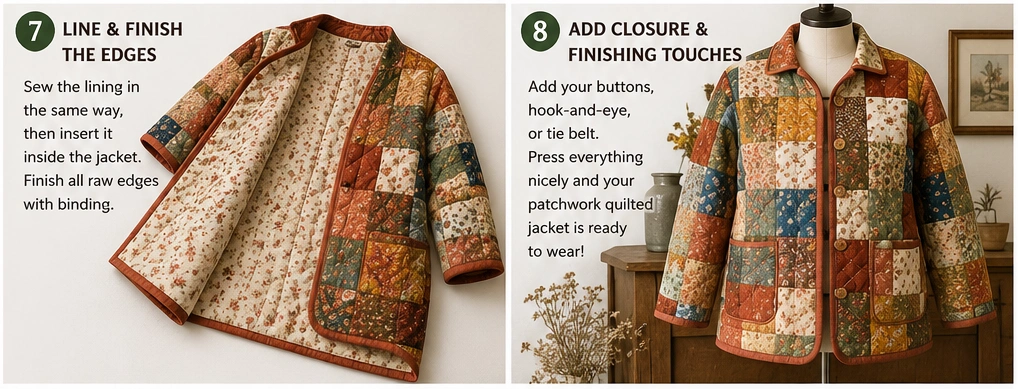
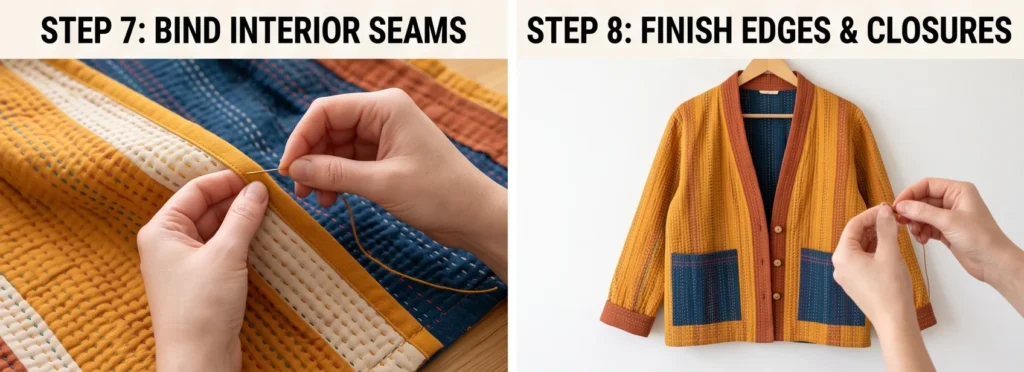
Step 6 — Bind the interior seams. This is the classic quilt-coat finish: encase each raw interior seam allowance in binding, so the inside is as tidy and beautiful as the outside (a jacket’s seams show when it moves). Bind the armhole and side seams especially — it’s what makes the jacket look professionally made.
Step 7 — Finish the outer edges. Bind the entire outer edge — front opening, hem, neckline, and cuffs — with your binding strips, folding it over the raw edges and stitching down. This frames the jacket and finishes it without a separate facing.
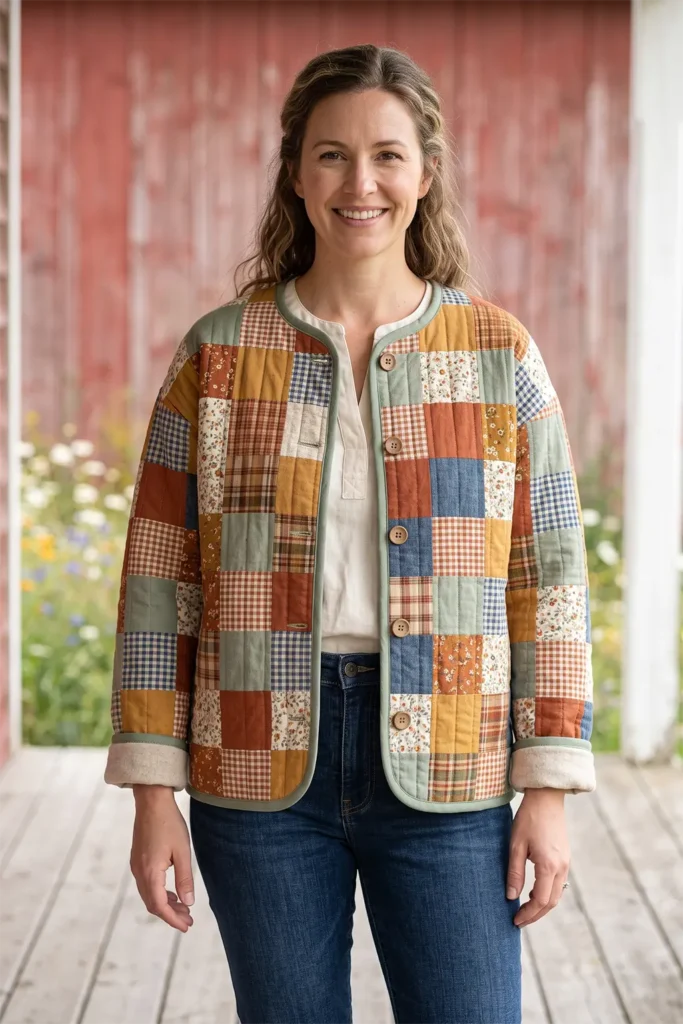
Step 8 — Add the closures. Sew on buttons and make buttonholes, add a hook-and-eye, or attach a tie belt — whatever suits your pattern and style. Space buttons evenly down the front (typically 4–5 for a hip-length coat).
Step 9 — Press and wear. Give the finished jacket a gentle press, then throw it on. If you’d like it softer and more lived-in, a gentle wash and low tumble will crinkle the quilting into that perfect worn-in feel.
Assembly at a Glance
- Piece 5-inch squares into panels 2 inches larger than each pattern piece.
- Quilt each panel (patchwork, low-loft batting, lining).
- Cut the jacket pieces — back, two fronts, two sleeves — from the quilted panels.
- Sew shoulder seams, set sleeves, sew side/underarm seams (½-inch, pressed open).
- Try on inside-out and check the fit; trim bulk.
- Bind all interior seam allowances for a tidy inside.
- Bind the outer edges — opening, hem, neckline, cuffs.
- Add buttons, a hook-and-eye, or a tie belt.
- Press, and optionally wash for a soft, lived-in finish.
Beginner Tips for Success
- Use a boxy, dartless pattern — fitted garments are hard to cut from quilted fabric.
- Choose low-loft batting; bed-quilt loft is far too puffy to wear comfortably.
- Bind your seams — it tames the bulk and makes the inside beautiful, which matters in a jacket.
- Let one or two colors dominate the patchwork so the jacket reads intentional, not chaotic.
- Short on time? Upcycle a damaged thrifted quilt and skip straight to cutting the pattern.
Styling It
A patchwork quilted jacket is a statement layer, so keep the rest simple and let it lead — a white tee and jeans, a plain knit, or a solid dress. Boots and a leather bag lean it rustic; sneakers make it modern. Because the farmhouse tones are warm and earthy, it pairs beautifully with denim, cream, and camel. Roll the cuffs to show the lining, and let the jacket be the whole outfit’s personality.
Final Thoughts
A classic patchwork quilted jacket takes everything cozy about a quilt and lets you wear it out into the world. Built from warm farmhouse tones and finished with bound seams inside and out, it’s a garment with real heritage — the same old, warm idea of turning layered, stitched cloth into something to wear that runs through textile traditions everywhere. Piece it fresh or upcycle a forgotten quilt, and you’ll end up with a jacket that’s rustic, elegant, and entirely your own — the coziest layering piece in your closet.
Other Design Inspirations – Digitally Modified
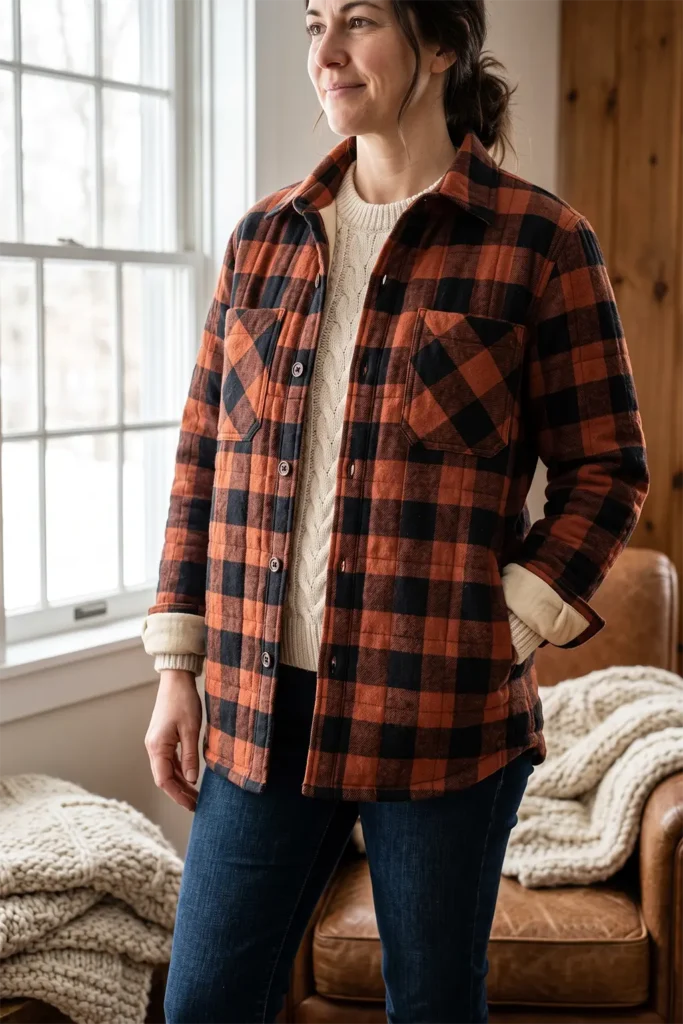
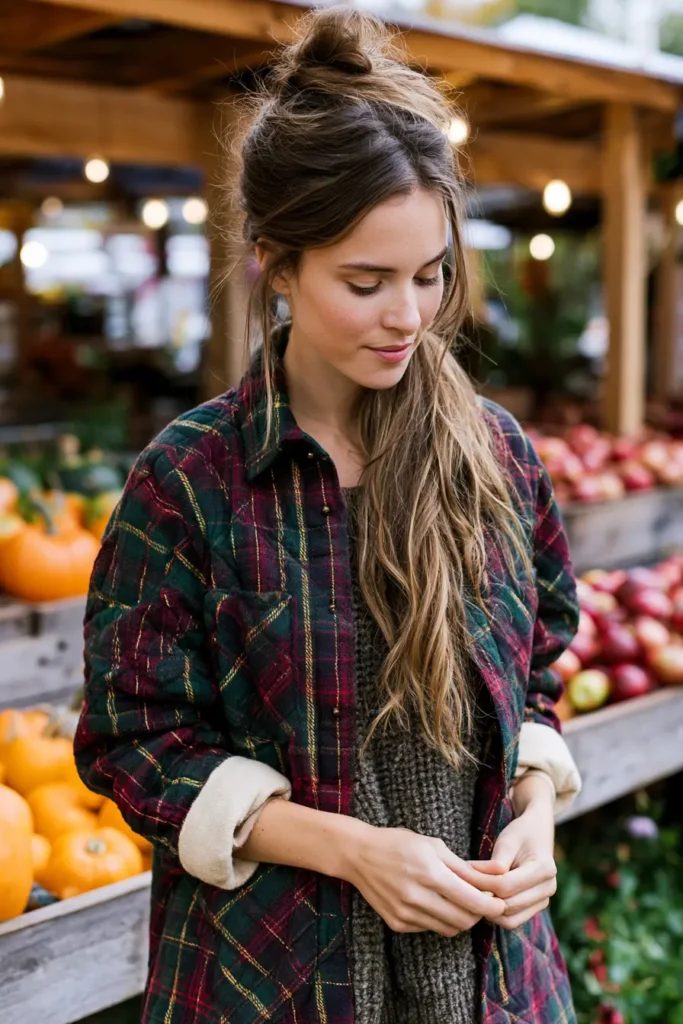
2. Plaid Quilted Shacket for Rustic Farmhouse Warmth
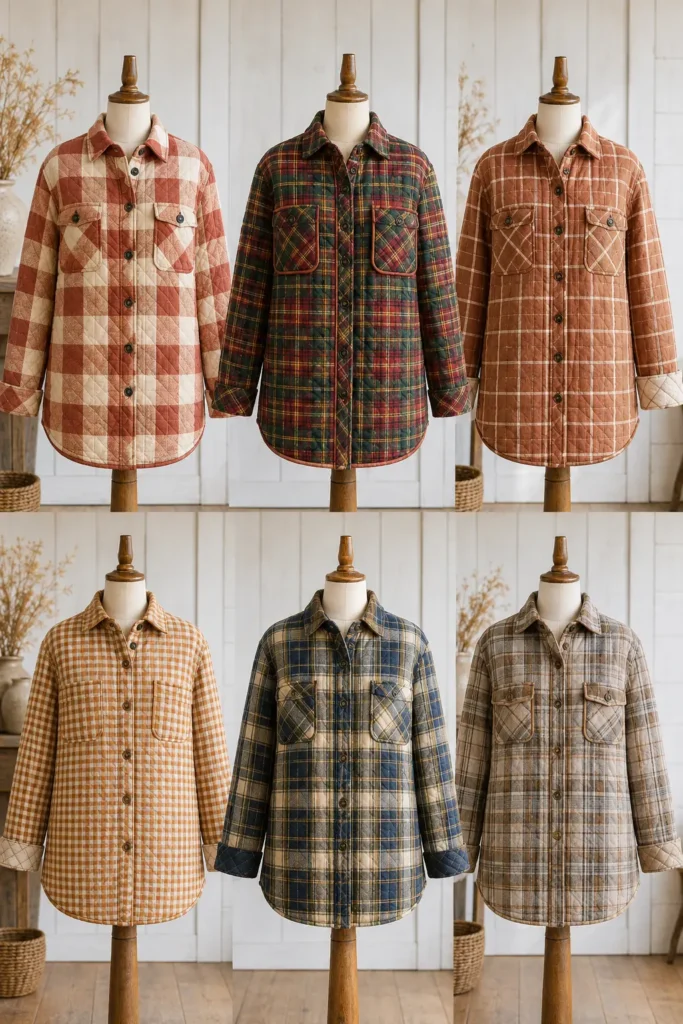
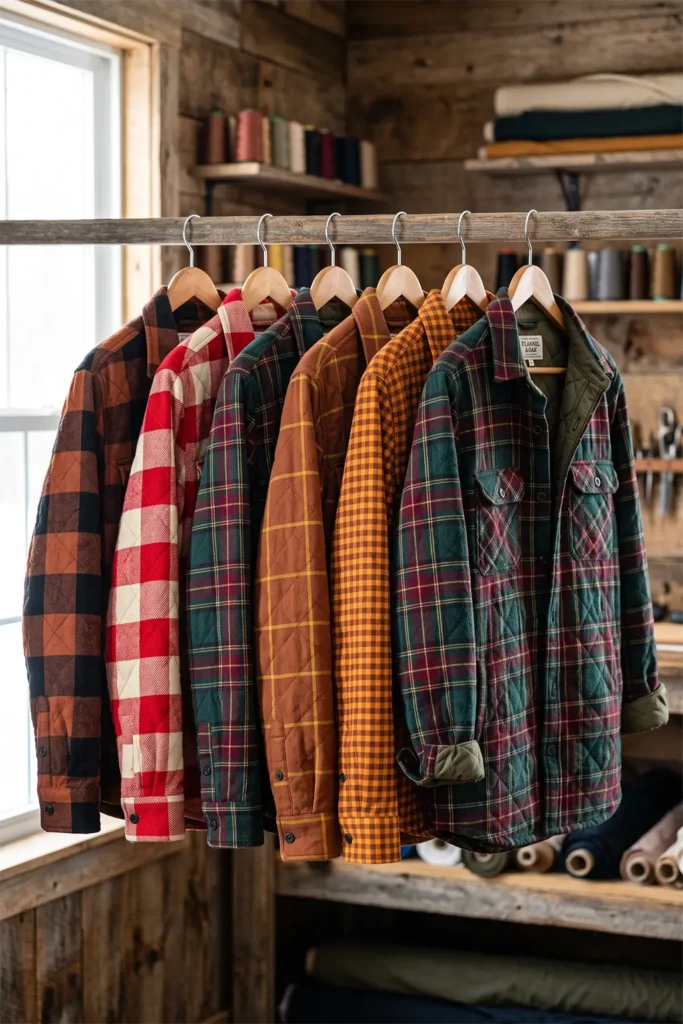
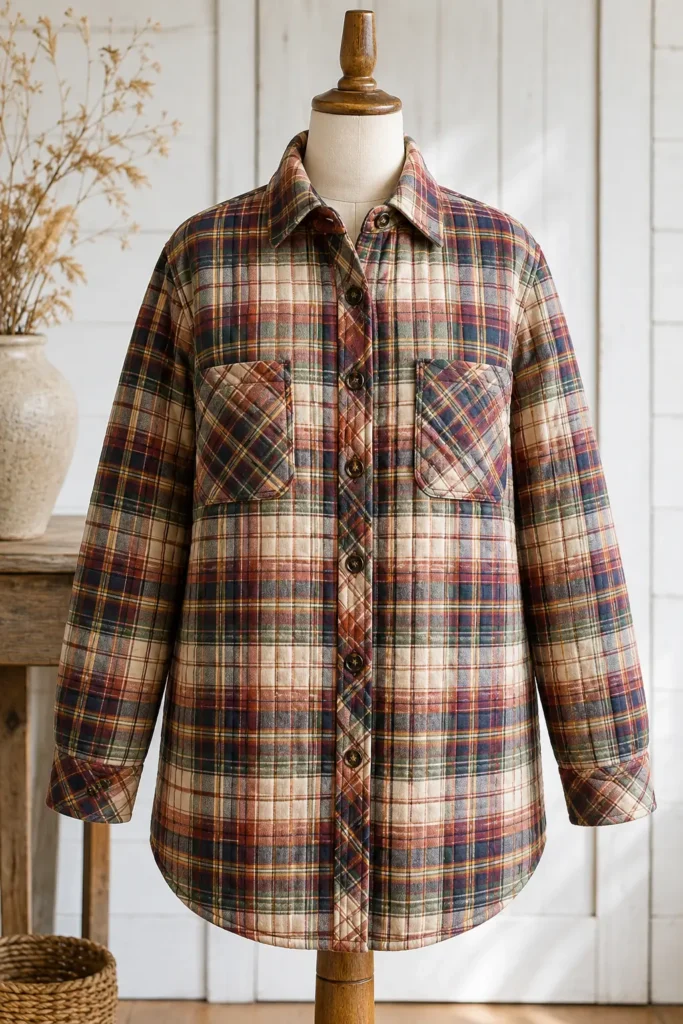
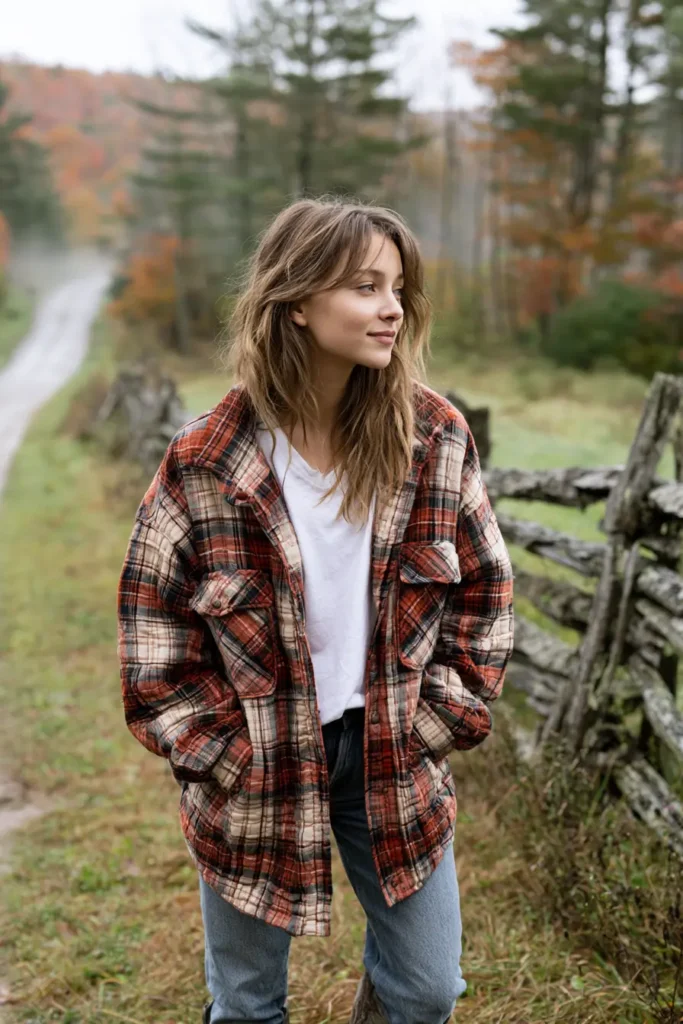
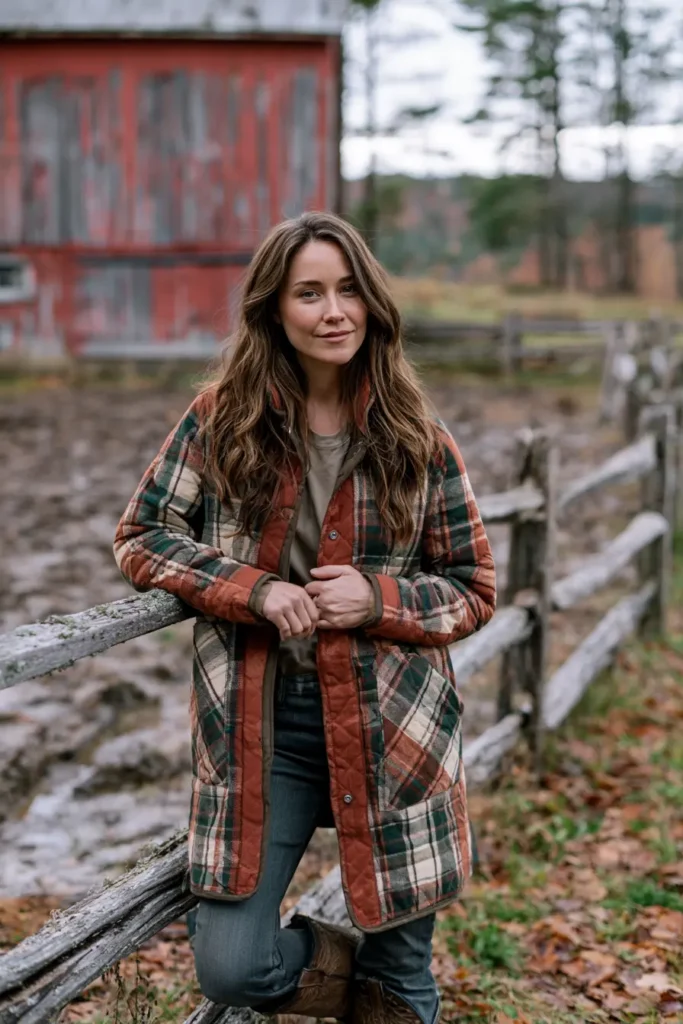
The shacket — half shirt, half jacket — has become the go-to layer for exactly the weather fall throws at us, and a quilted plaid shacket is that idea at its coziest. Worn open like an oversized shirt or buttoned up like a light jacket, it has the relaxed, throw-it-on ease of flannel with the warmth of a quilted layer built in. Made in classic farmhouse plaid — buffalo check, tartan, or a warm windowpane in rust, forest green, gold, and cream — it’s the piece that carries you from a crisp morning to a cool evening without a thought. It’s rustic, practical, and endlessly wearable: the flannel shirt’s cozier, quilted cousin.
Unlike a patchwork coat pieced from squares, a shacket is cut from whole plaid yardage and shaped like a real shirt — collar, button placket, chest pockets, cuffed sleeves — which gives it that familiar, easygoing flannel-shirt look. Quilting the plaid before you cut adds body and warmth while keeping the soft, casual drape a shacket needs. The result reads as effortless even though it’s entirely handmade, which is the whole appeal.
Why I Made It
I made this because the shacket is the layer I actually reach for all autumn — that perfect in-between weight for when a coat is too much and a shirt is too little. Quilting a plaid one gives it real warmth without bulk, and there’s something deeply satisfying about a garment that looks like a favorite flannel shirt but hugs you like a quilt. It’s the most everyday wearable in this collection, and everyday is where I want my handmade pieces to live.
There’s a nice thread back to tradition, too. Coming from generations of hand-stitching in my family, raised around the Nakshi Kantha tradition — where layered, running-stitched cloth was constantly made into practical wearable things — a quilted shirt-jacket feels like the most natural garment in the world. A warm, stitched layer you button on and forget about, made to be worn hard and often: that’s the oldest idea in cozy dressing, just wearing a plaid this time.
Why This Idea Is Worth Making
This idea is worth making because it’s the most wearable, most practical layer you can quilt — a genuine everyday piece rather than a statement one. The shirt-jacket shape is familiar and forgiving, quilting whole plaid yardage is simpler than piecing patchwork, and the finished shacket suits jeans, dresses, or leggings with equal ease. It bridges the seasons perfectly, worn open or closed, and the plaid keeps it timelessly rustic. It’s the handmade layer you’ll wear more than anything else you make.
Two Ways to Make It
- Quilt your own plaid yardage (recommended): quilt whole plaid flannel with batting and a lining, then cut your shacket pieces from that quilted fabric. Clean, controlled, and the classic method.
- Use a pre-quilted plaid fabric (shortcut): some shops sell double-sided pre-quilted plaid by the yard — skip the quilting step and cut straight from it.
This guide covers quilting your own.
Finished Garment
- Style: relaxed shirt-jacket (shacket) with a collar, front button placket, two chest pockets, and cuffed sleeves; hip-length
- Sizes: use a commercial shirt or shacket pattern in your size, sized up slightly for layering
- Skill level: confident beginner to intermediate (a few shirt details, but forgiving)
- Core techniques: quilting yardage, plaid matching, collar and placket, patch pockets, cuffs
Materials Needed
- A shirt-jacket / shacket pattern — an oversized shirt or chore-shirt pattern with a collar, button front, and chest pockets
- Plaid flannel: about 3 yards of a warm farmhouse plaid (buy extra for plaid matching — see below)
- Batting: low-loft cotton, about 2½ yards (low-loft keeps the shacket soft and shirt-like, not puffy)
- Lining: 2½ yards of soft cotton or flannel
- Buttons: 7–8 for the front placket, plus 2 for cuffs
- Interfacing: a little, for the collar and placket
- Thread, walking foot, rotary cutter, cutting mat, ruler, pins, iron, sewing machine
Beginner tip: buy about 20% extra plaid — you’ll want it both to match the plaid across seams and because flannel shrinks. Prewash the flannel before quilting so the finished shacket keeps its shape.
Choosing Your Colors
Classic farmhouse plaids are the natural choice, and the check scale sets the mood:
- Buffalo check in rust-and-black or red-and-cream — bold and iconic
- Rich tartan in forest green, burgundy, and gold — layered and warm
- Warm windowpane in cinnamon or mustard — softer and more refined
- Small gingham in pumpkin or amber — cheerful and casual
Pick one plaid for the whole shacket (whole-yardage garments look best in a single plaid), and choose a lining that complements it — a cream flannel, or a contrasting small plaid for a fun cuff-and-collar reveal.
The Fabric: Quilting Your Plaid Yardage
Before cutting the shirt, make quilted plaid fabric:
- Layer whole plaid flannel, low-loft batting, and lining, and quilt it — quilting along the plaid lines looks intentional and keeps everything square
- Quilt yardage large enough for all pieces: back, two fronts, two sleeves, collar, cuffs, and two pockets
- Keep the quilting simple (following the plaid grid) so the shacket stays soft and shirt-like
Cutting Measurements & Plaid Matching
- Cut every piece on the straight grain, following the plaid lines so checks run true — a shacket with crooked plaid looks off immediately
- Match the plaid across the front opening and pockets: cut the two front pieces as mirror images, and cut pockets so their plaid lines up with the fabric behind them (this small step is what separates a homemade look from a polished one)
- Cut the back, two fronts, two sleeves, collar, two cuffs, and two chest pockets from your quilted yardage
- Binding (optional): 2½-inch strips to bind interior seams for a tidy inside
Step-by-Step Guide
Step 1 — Prewash and quilt the plaid. Prewash and dry the plaid flannel, then layer it with low-loft batting and lining and quilt along the plaid lines to make your quilted yardage.
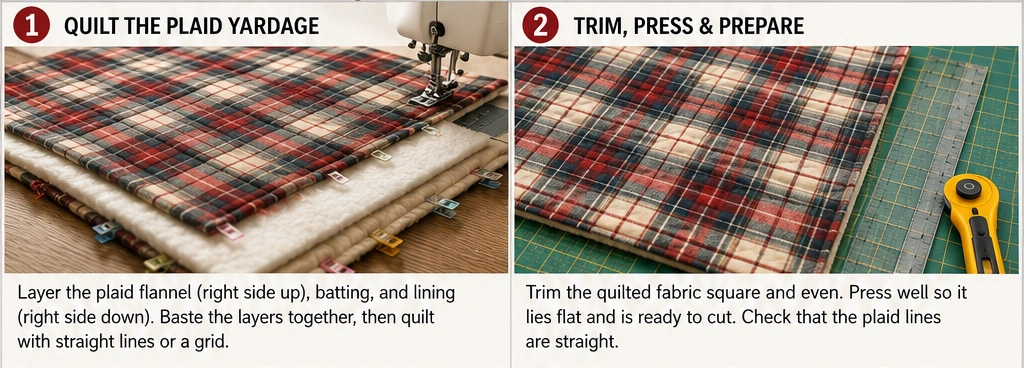
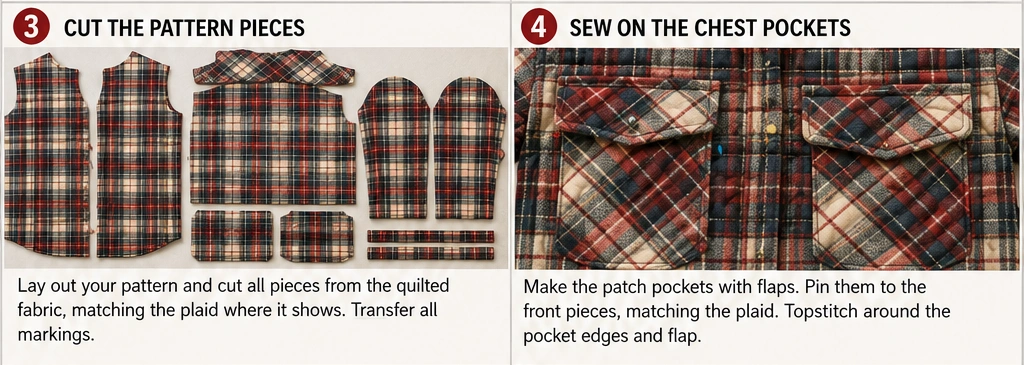
Step 2 — Cut the pieces, matching plaid. Lay the pattern on the quilted fabric with all pieces on the straight grain, cutting the fronts as mirror images and matching the plaid across the opening and pockets. Cut back, fronts, sleeves, collar, cuffs, and pockets.
Step 3 — Attach the chest pockets. Fold and press the pocket edges, position them on the fronts so their plaid lines up with the fabric beneath, and topstitch them down. Matched-plaid pockets are a small detail with a big payoff.
Step 4 — Sew the shoulder seams. With right sides together and a ½-inch seam, join the fronts to the back at the shoulders. Press seams open; quilted fabric is bulky, so go slowly.
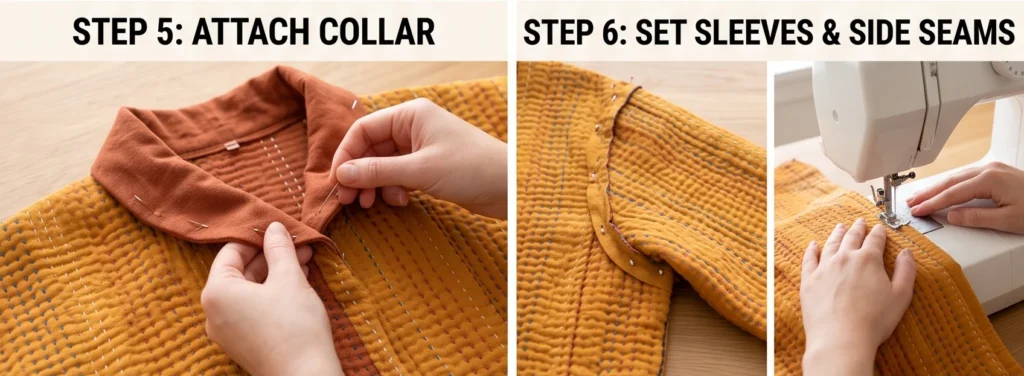
Step 5 — Add the collar. Interface and assemble the collar, then attach it around the neckline following your pattern. The collar is what gives a shacket its shirt-jacket character, so take your time here.
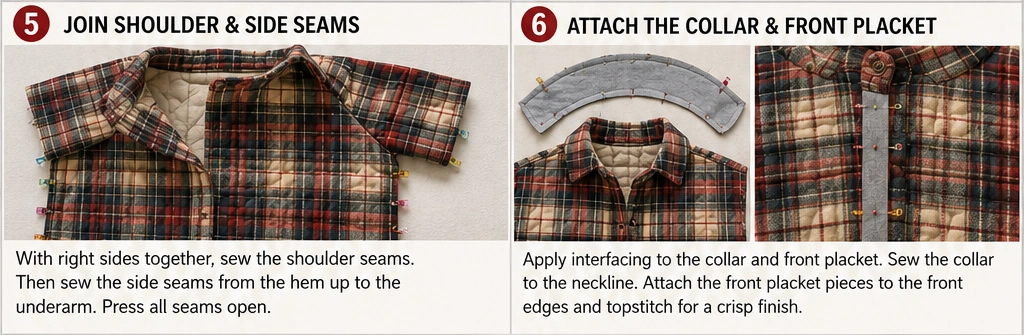
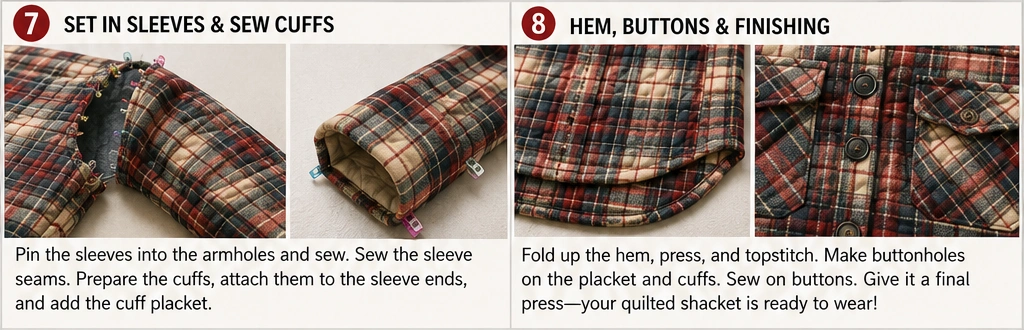
Step 6 — Set the sleeves and sew the side seams. Attach the sleeves (a dropped-shoulder pattern makes this easy), then sew the underarm and side seams in one continuous line with a ½-inch seam. Try it on to check the fit and sleeve length.
Step 7 — Add the cuffs. Attach a cuff to each sleeve end, folding and finishing so the sleeve can be worn down or rolled. Add a button and buttonhole to each cuff.
Step 8 — Finish the front placket and hem. Fold and topstitch the front edges into plackets (interface for stability), hem the bottom edge, then make buttonholes and sew on the 7–8 front buttons, evenly spaced. Bind the interior seams if you’d like a tidy inside.
Step 9 — Press and wear. Give the shacket a good press. A gentle wash and low tumble will soften the flannel and crinkle the quilting into that perfect worn-in, reach-for-it-daily feel.
Assembly at a Glance
- Prewash the plaid; quilt it (along the plaid lines) with low-loft batting and lining.
- Cut all pieces on grain, matching plaid across fronts and pockets.
- Topstitch the matched-plaid chest pockets onto the fronts.
- Sew shoulder seams (½-inch, pressed open).
- Assemble and attach the collar.
- Set the sleeves; sew side/underarm seams; check fit.
- Attach the cuffs with buttons.
- Finish the front plackets, hem, buttonholes, and 7–8 buttons; bind interior seams.
- Press, then wash and tumble low for a soft, worn-in finish.
Beginner Tips for Success
- Prewash the flannel and use low-loft batting — a shacket should feel like a warm shirt, not a puffy coat.
- Cut everything on the straight grain and match the plaid across the front and pockets; crooked plaid is the giveaway of a rushed make.
- Choose a dropped-shoulder pattern — it’s the easiest sleeve to set in quilted fabric.
- Quilt along the plaid lines so the quilting looks intentional and keeps pieces square.
- Buy 20% extra plaid for matching and shrinkage.
Styling It
A quilted plaid shacket is made to be worn open and easy — over a white tee and jeans, a plain knit, or even a simple dress with boots. Roll the cuffs to show the lining, leave it unbuttoned for a relaxed layer, or belt it for shape. Because plaid is inherently rustic and warm, it pairs naturally with denim, cream, and camel, and it slides straight into any farmhouse or casual wardrobe. It’s the layer you’ll grab on the way out the door all season.
Final Thoughts
A plaid quilted shacket is rustic farmhouse warmth you’ll actually wear every day. Shaped like a beloved flannel shirt but quilted for real coziness, it carries the oldest idea in comfortable dressing — a warm, stitched layer made to be lived in — into the most practical piece in your closet. Cut it from a single classic plaid, match the checks with a little care, and you’ll end up with the handmade layer that never quite makes it back onto the hanger.
Other Design Inspirations – Digitally Modified
3. Reversible Quilted Barn Jacket with Rustic Charm
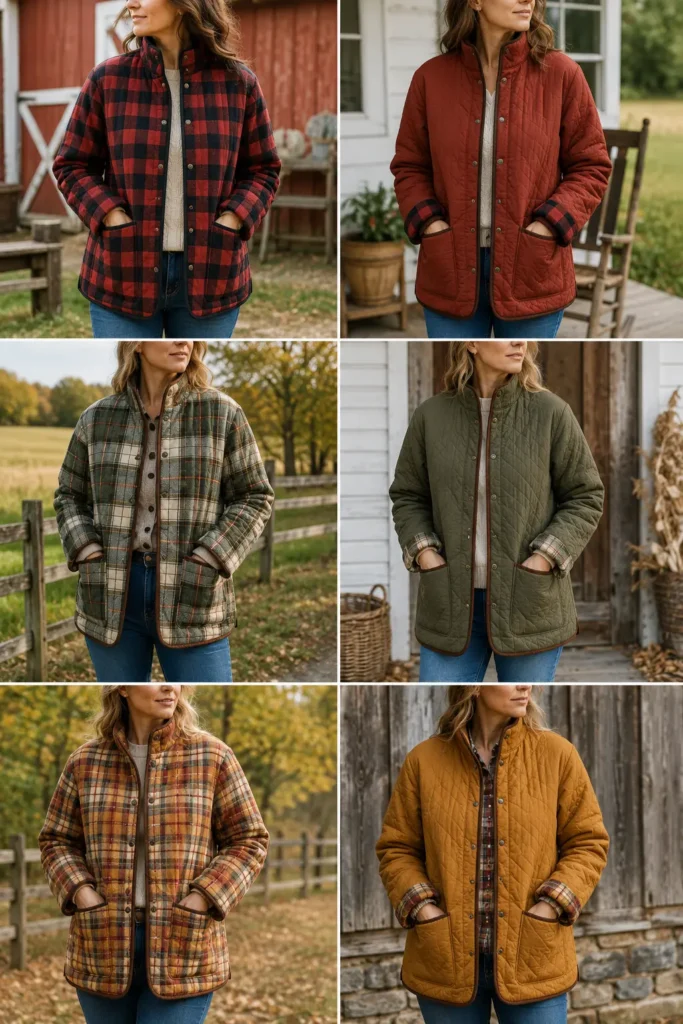
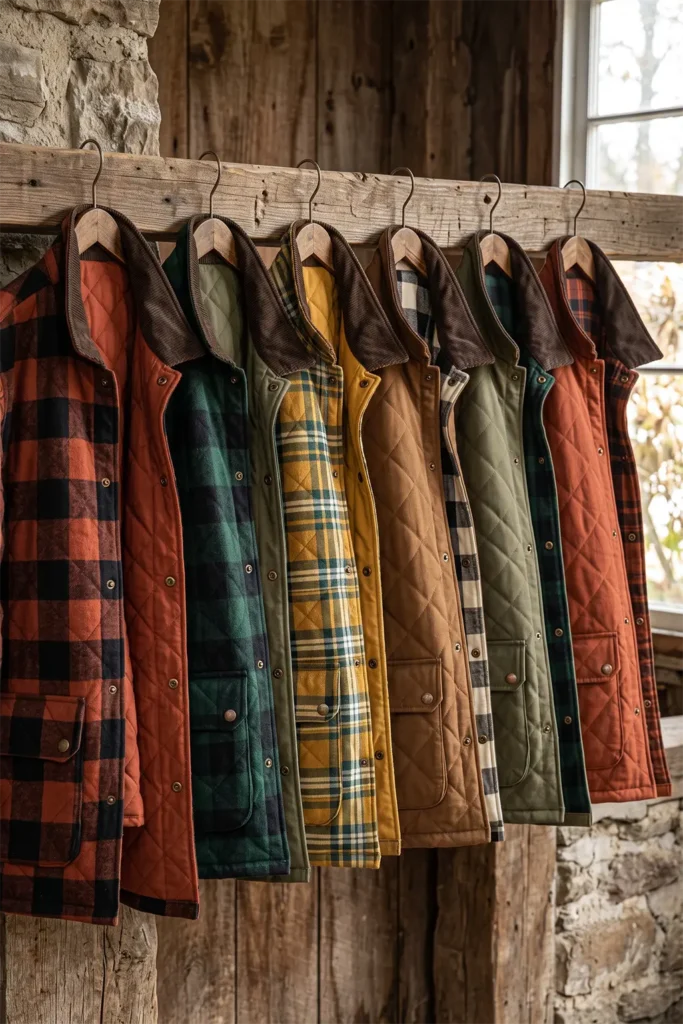
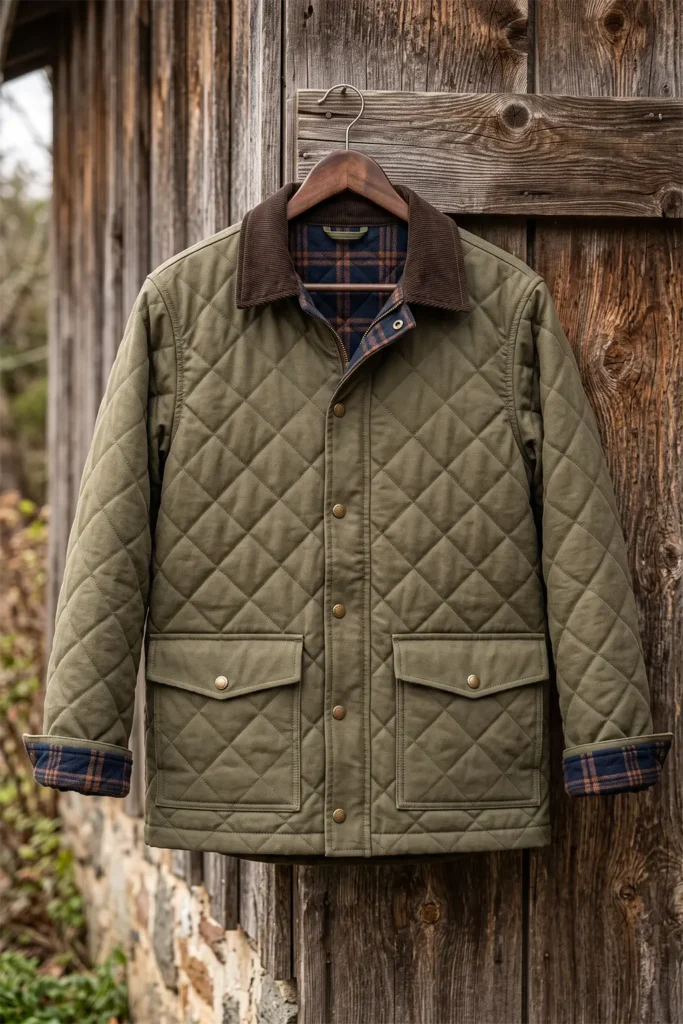
The barn jacket is workwear made handsome — a sturdy, functional coat with a stand collar, deep patch pockets, and a snap front, built for chores and cold mornings but rugged-elegant enough for anywhere. Make it quilted and reversible, and you get the most versatile rustic layer in the closet: one jacket, two complete looks. Flip from a warm plaid side to a solid rust or corduroy-look side, and the whole outfit changes. Structured, practical, and endlessly adaptable, a reversible quilted barn jacket carries genuine farmhouse charm on both faces — the kind of piece that looks like it has real work to do, and does it in style.
What makes it reversible is a smarter build than a standard lined jacket: instead of a pretty outside and a plain lining, you make two finished outer faces with the batting hidden between them, so there’s no wrong side at all. Both faces are the front. It takes a little planning to make both sides work and to finish every edge cleanly, but the reward is two jackets in one — the ultimate expression of the barn coat’s make-do, waste-nothing spirit.
Why I Made It
I made this because a barn jacket is honest, hardworking clothing, and making it reversible doubles everything good about it. Autumn weather and autumn plans are unpredictable — a muddy morning walk, a tidier afternoon in town — and a jacket that flips from rugged plaid to a clean solid meets both without a second coat. There’s real satisfaction in a garment that adapts to your day instead of the other way around.
It also speaks to how I was raised to think about cloth. Coming from generations of hand-stitching in my family, in the Nakshi Kantha tradition — where layered cloth was always made beautiful and useful on both faces, nothing hidden and nothing wasted — a reversible jacket feels completely natural. The best textiles never had an ugly side to conceal. A barn coat you can wear either way out is just that old, thrifty wisdom turned into outerwear.
Why This Idea Is Worth Making
This idea is worth making because it delivers two jackets, two looks, and true everyday versatility from a single sturdy, timeless silhouette. The barn-jacket shape is structured but beginner-friendly (boxy, functional, forgiving), and the reversible build is a wonderful way to pair two fabrics you love — rugged plaid on one side, a warm solid on the other. Because it flips, it restyles an outfit in seconds and earns its place through the whole season. Rustic, practical, and adaptable, it’s the hardest-working handmade layer you can make.
The Reversible Difference
A reversible jacket is built differently from the start:
- Two outer fabrics, no lining. Each face is the other’s “lining,” so both must be fabrics you’re happy to show.
- The batting hides between them. Quilt each face-fabric to the batting, or sandwich the batting as you construct.
- Every seam must be enclosed. With no hidden inside, raw seams can’t show — you’ll bind them or use a technique that turns them inward.
- Snaps, not buttonholes. Snaps (or a belt) work cleanly on a reversible jacket; buttonholes would show awkwardly on the reverse. This is the key closure choice.
- The collar and pockets work both ways. A stand collar reads well flipped either direction, and patch pockets can be added to each face.
Finished Garment
- Style: structured barn jacket — stand collar, snap front, two large patch pockets per side, hip-to-thigh length
- Sizes: use a commercial barn-coat or chore-coat pattern, sized up slightly for layering
- Skill level: intermediate (reversible finishing takes care, but the shape is simple)
- Core techniques: quilting two faces, reversible construction, enclosed seams, snap closures, patch pockets
Materials Needed
- Face-one fabric: about 2¾ yards of a rugged plaid flannel or cotton
- Face-two fabric: about 2¾ yards of a contrasting solid — warm rust, olive, or a corduroy-look cotton
- Batting: low-loft cotton, about 2½ yards (structured but still wearable)
- Binding: ¾ yard for enclosing seams and finishing edges, in a tone that suits both faces
- Snaps: heavy-duty snap set, 5–6 for the front (plus a snap tool), or a tie belt
- Thread, walking foot, rotary cutter, cutting mat, ruler, pins, iron, sewing machine
Beginner tip: choose two face fabrics of similar weight so the jacket hangs evenly whichever way you wear it, and pick a binding and thread that flatter both — the same stitching and edges show on both sides.
Choosing Your Colors
Two coordinated rustic faces, tied together by a shared tone:
Face one (rugged plaid):
- Buffalo check or tartan in rust, forest green, gold, and cream
Face two (warm solid):
- A rich solid or textured cotton in rust, olive, mustard, or warm brown — corduroy-look fabric adds great barn-coat character
Bridge the two with a shared color — a rust that’s bright in the plaid and deep in the solid — so flipping feels intentional. Bind the edges in a neutral (brown, tan) that suits both faces.
The Fabric: Quilting Both Faces
- Quilt face-one fabric to the batting (plaid top, batting) and, separately or together, prepare face-two so the batting ends up sandwiched between the two outer fabrics
- Quilt along simple lines — a diagonal grid or straight rows — that look good on both faces
- Prepare quilted fabric large enough for the back, two fronts, two sleeves, collar, and pockets, for each face
Cutting Measurements
- Cut every piece on the straight grain (follow the plaid lines on face one)
- Cut the back, two fronts, two sleeves, and stand collar from the quilted fabric
- Patch pockets: cut two large pockets (about 7 × 8 inches finished) for each face you want them on
- Binding: cut 2 to 2½-inch strips, several yards, to enclose all seams and edges
Step-by-Step Guide
Step 1 — Prewash and quilt both faces. Prewash the fabrics (especially flannel), then quilt each face fabric with the batting between them, following simple lines that suit both sides.
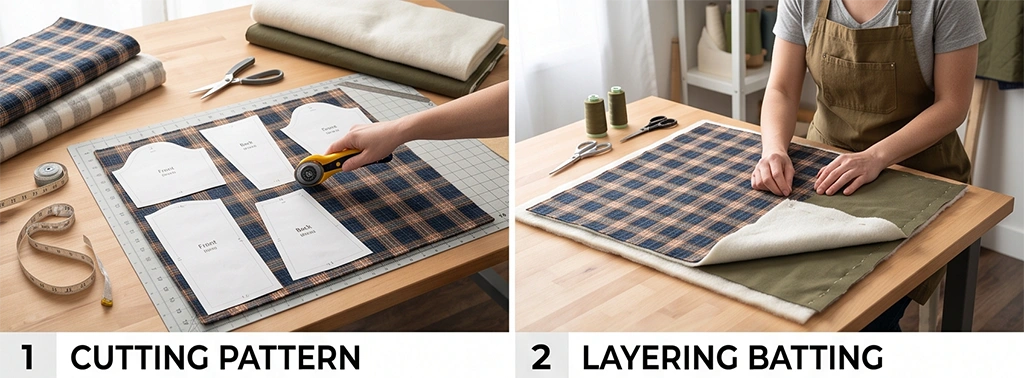
Step 2 — Cut the pieces. Cut the back, two fronts, two sleeves, and collar on the straight grain. Cut patch pockets for each face. Keep everything squared, matching plaid on face one where seams meet.
Step 3 — Add the patch pockets. Bind the top edge of each patch pocket, then topstitch the pockets onto the fronts of each face (you can put pockets on both faces, or just the plaid side). Big, functional pockets are pure barn-jacket character.
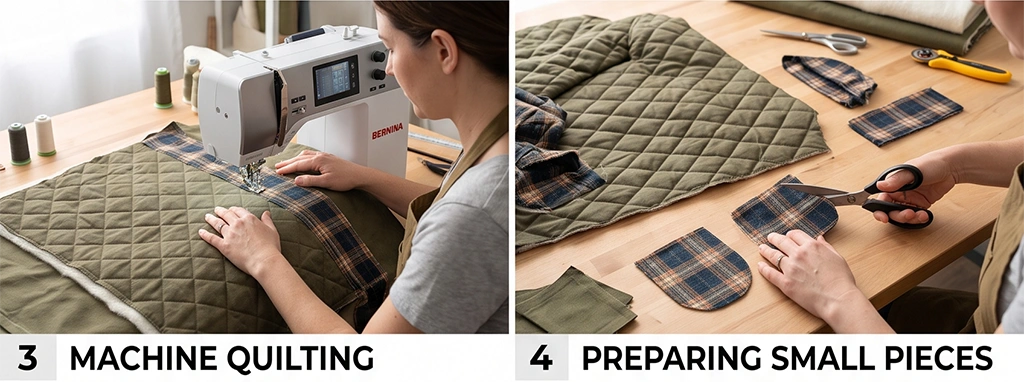
Step 4 — Sew the shoulder seams (enclosed). Join fronts to back at the shoulders. Because there’s no hidden inside, bind the seam allowance or sew so the raw edge is enclosed. Press flat and go slowly through the bulk.
Step 5 — Attach the stand collar. Assemble the stand collar so it’s finished on both faces, then attach it around the neckline, encasing the raw neckline edge inside the collar. A stand collar flips cleanly whichever way you wear the jacket.
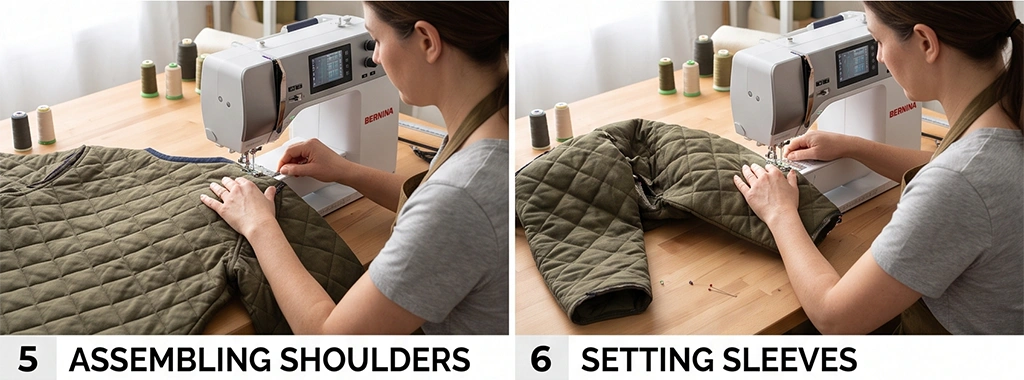
Step 6 — Set the sleeves and sew the sides. Attach the sleeves (dropped shoulders are easiest), then sew the underarm and side seams in one line, binding or enclosing each seam allowance. Try it on to check fit and sleeve length.
Step 7 — Bind all remaining edges. Bind the front opening, hem, and cuffs so both faces are clean and framed. This binding is the finish — done well, it makes the jacket look tailored from either side.
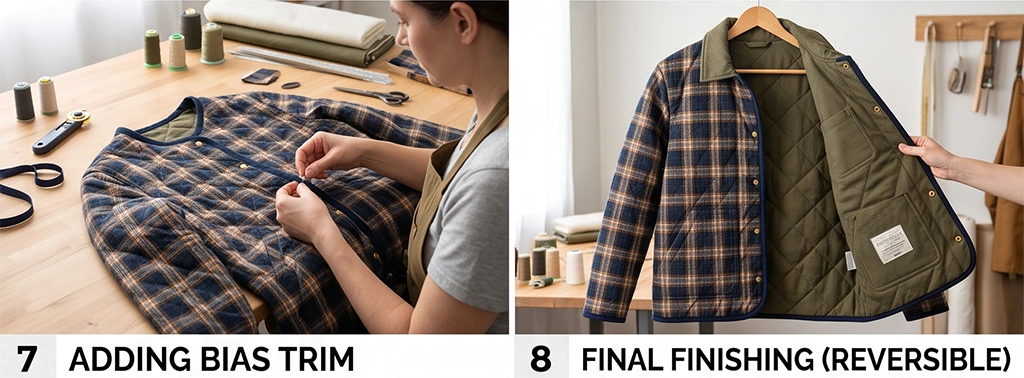
Step 8 — Add the snap closures. Install 5–6 heavy-duty snaps evenly down the front (snaps read cleanly on both faces, unlike buttonholes). Space them evenly, and reinforce with an extra scrap of fabric behind each for strength. A tie belt is a lovely reversible alternative or addition.
Step 9 — Press and flip. Give the finished jacket a good press, then try it both ways — plaid out for a rugged look, solid out for a cleaner one. A gentle wash and low tumble softens it into that broken-in barn-coat feel.
Assembly at a Glance
- Prewash and quilt both face fabrics with the batting between them.
- Cut back, fronts, sleeves, collar, and patch pockets on grain.
- Bind pocket tops; topstitch pockets onto the fronts.
- Sew shoulder seams, binding/enclosing the allowances.
- Assemble and attach the two-sided stand collar.
- Set sleeves; sew side/underarm seams, enclosing each; check fit.
- Bind the front opening, hem, and cuffs.
- Install 5–6 heavy-duty snaps (reinforced) — no buttonholes.
- Press, then wash and tumble low for a broken-in finish.
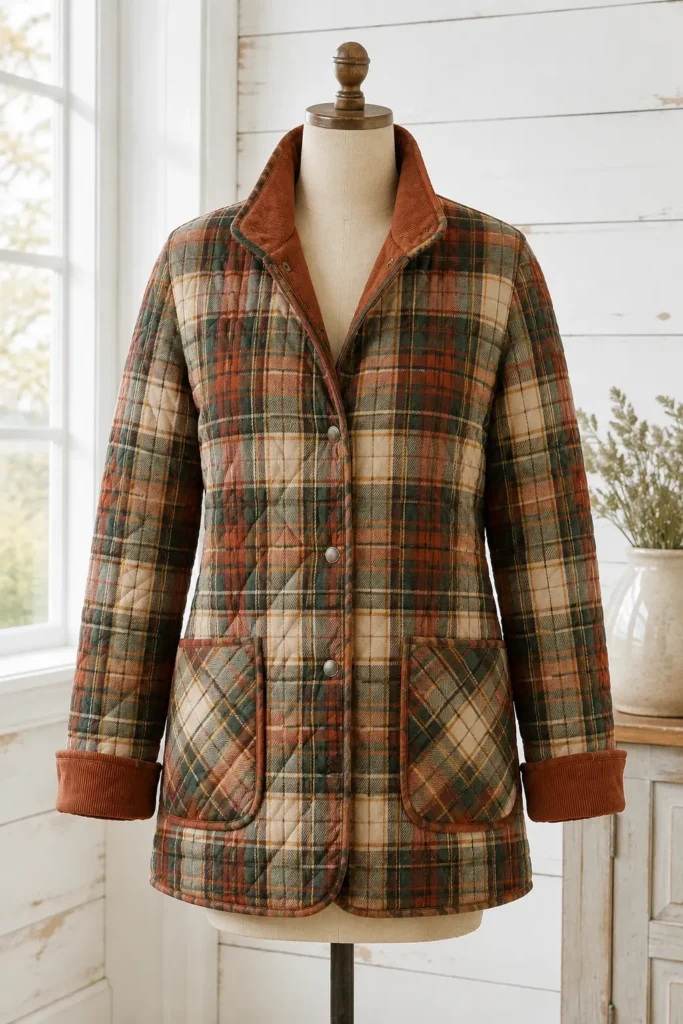
Beginner Tips for Success
- Use two face fabrics of similar weight so it hangs either way evenly.
- Enclose or bind every seam — with no lining, no raw edge can show.
- Choose snaps, not buttonholes; buttonholes look wrong on the reverse.
- Pick binding and thread that flatter both faces, since both show.
- Reinforce snaps with a fabric scrap behind each — a barn jacket gets real use.
- Use low-loft batting for a structured but still wearable coat.
Styling It
Wear the plaid side out for rugged, workwear-inspired days — over a tee, with jeans and boots — and flip to the solid side for a cleaner, more put-together look with knits or a dress. Keep an accent (a scarf, a bag) in each side’s palette so a flip genuinely restyles the outfit. The barn jacket’s structured shape and big pockets suit country and casual wardrobes alike, and its reversibility means it quietly does the work of two coats. Roll the cuffs to reveal the opposite face for a subtle hint of what’s underneath.
Final Thoughts
A reversible quilted barn jacket is rustic charm doubled — one sturdy, handsome silhouette that flips from rugged plaid to a warm solid and back. Built with the batting hidden between two finished faces and every seam enclosed, it wastes nothing and hides nothing, in the honest, hardworking spirit of the barn coat itself. Two jackets in one, structured and adaptable and cozy on both sides, it’s the most versatile handmade layer you’ll own — and the one that’s always ready for whatever the day turns into.
Other Design Inspirations – Digitally Modified
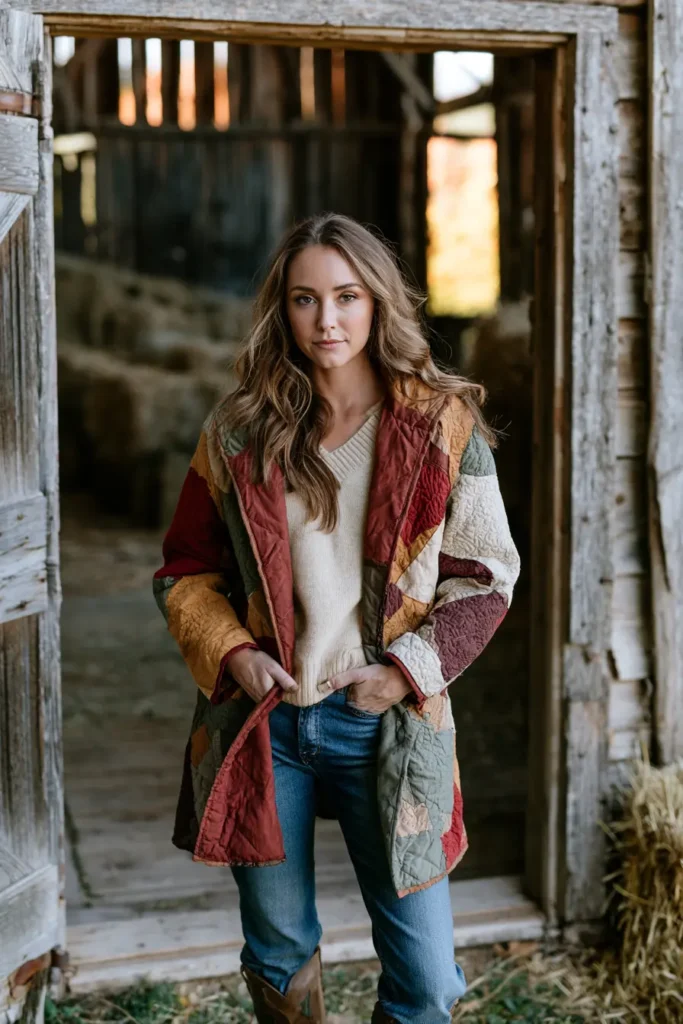
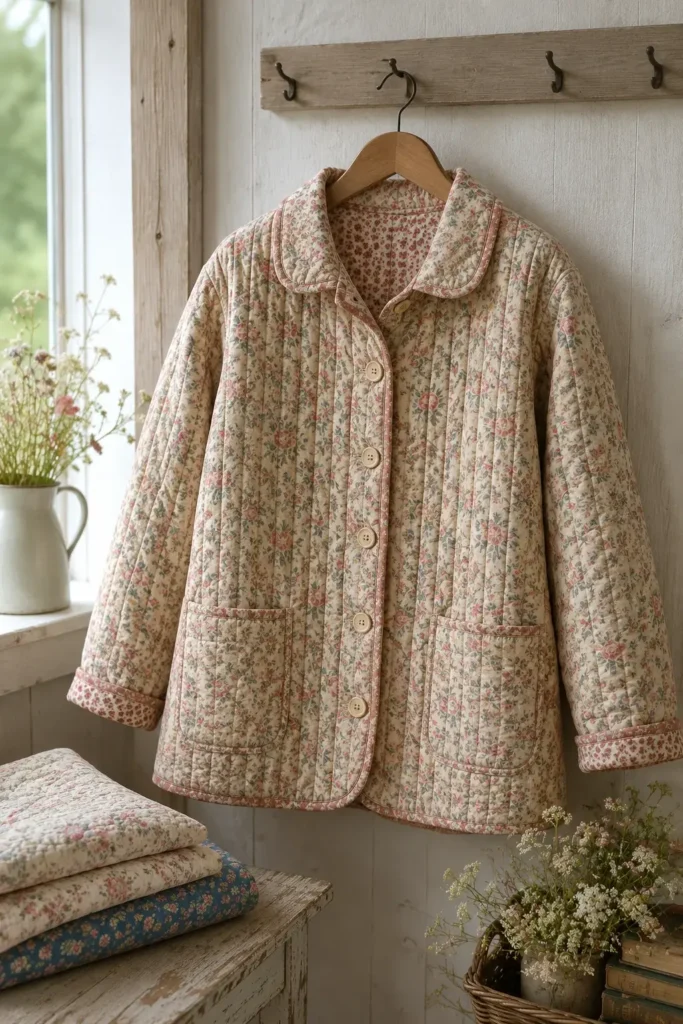
4. Floral Prairie Quilt Jacket for Soft Vintage Style
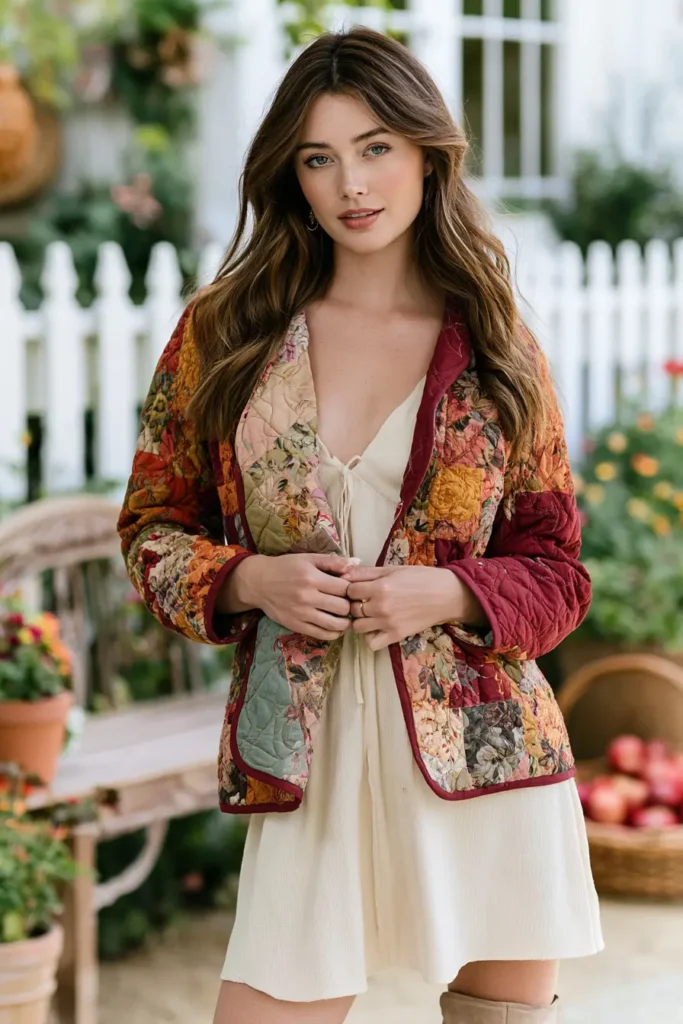
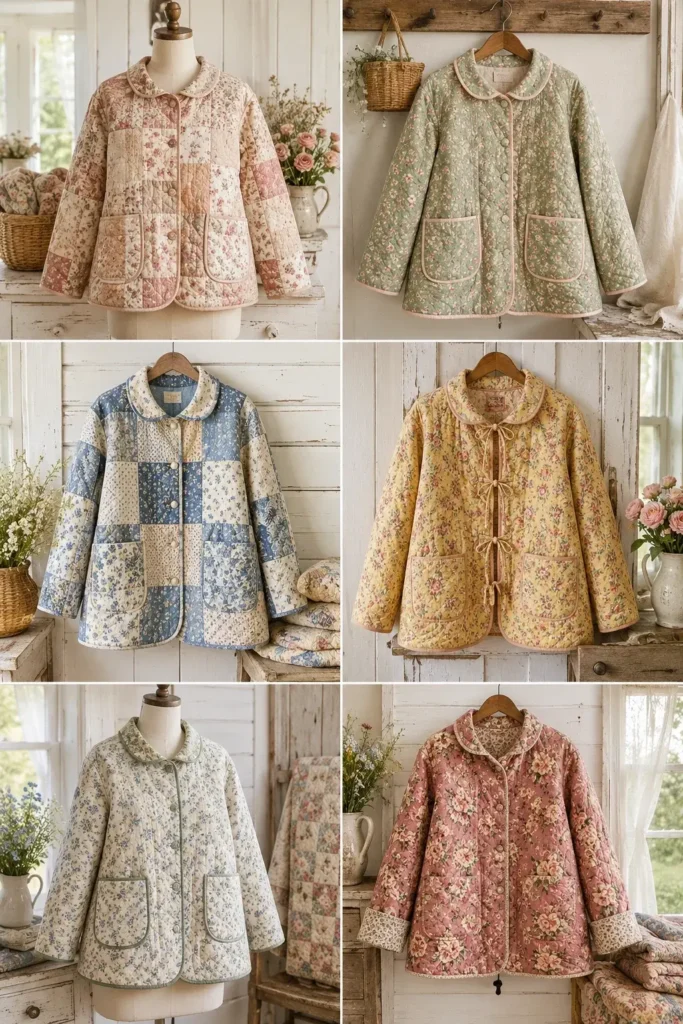
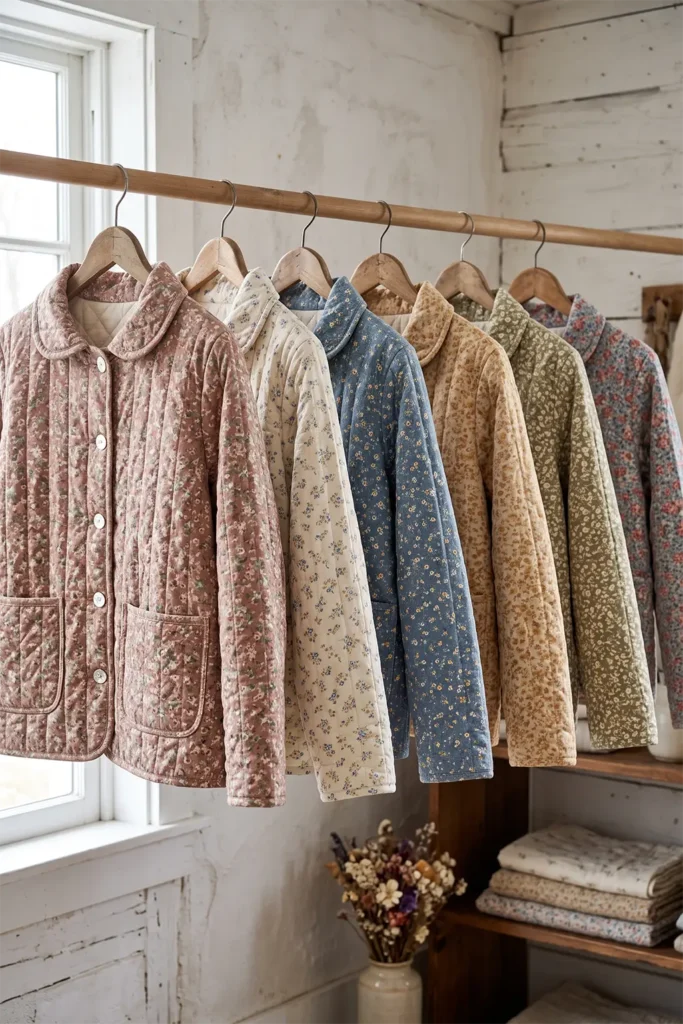
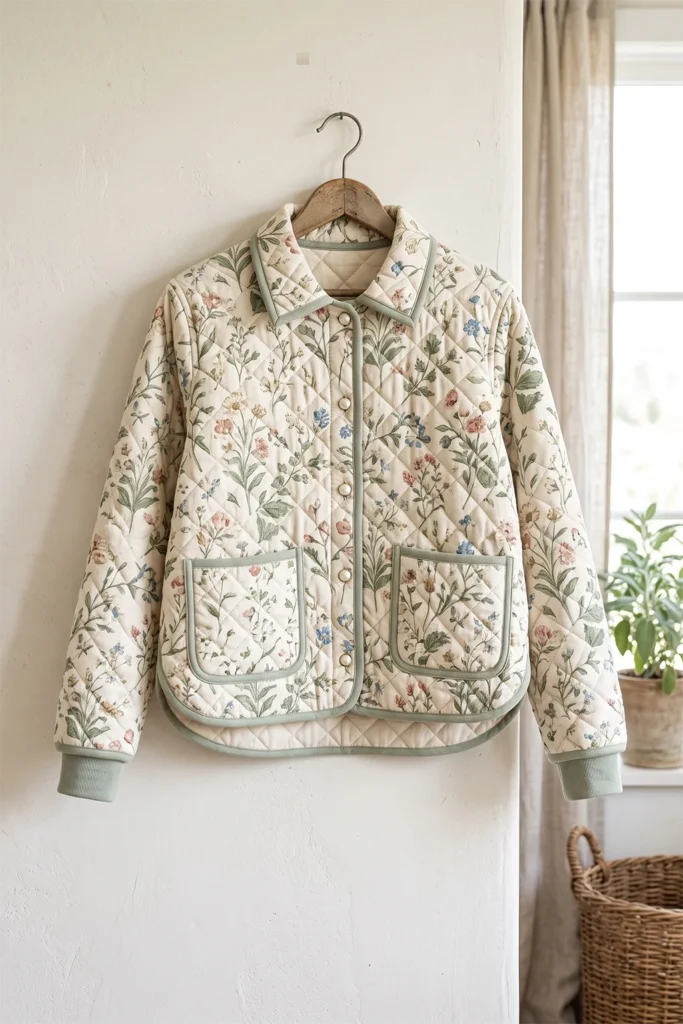
Not every farmhouse layer is rugged plaid and buffalo check. The floral prairie quilt jacket is the softer, more romantic side of rustic style — a quilted jacket cut from small-scale floral cottons in the gentle spirit of a vintage prairie dress. Think calico blooms and feedsack-style prints in dusty rose, soft sage, buttery cream, and faded denim blue, pieced or cut into a quilted layer with a relaxed, feminine ease. Worn over a linen dress or a simple knit, it brings cottagecore charm and heirloom softness to an outfit, the kind of jacket that looks like it was found in a grandmother’s cedar chest and loved ever since.
Where a barn jacket is all structure, a prairie jacket is all softness — a slightly longer, gently relaxed shape with a soft collar or rounded neckline, made to drape rather than stand. The floral prints do the talking, so the silhouette stays simple and the mood stays sweet. It’s the piece that turns quilted warmth into something tender and nostalgic.
The Story Behind the Prairie Floral
The soft floral cottons at the heart of this jacket carry real history. In nineteenth-century America, calico — inexpensive small-print cotton — was the everyday fabric of prairie life, sewn into the dresses, aprons, and quilts of frontier homes. Later, during the Depression, flour, sugar, and feed came in printed cotton sacks, and thrifty women turned those “feedsack” prints into clothing and quilts, choosing groceries by which pretty print they wanted next. Those small, sweet florals became the visual language of American country style, and they’re exactly the prints that give a prairie jacket its vintage soul.
There’s a lovely fact behind the fabric, too: the tradition of turning cloth destined for something practical into something beautiful to wear runs through textile cultures everywhere. In the Nakshi Kantha tradition of my own family’s background, layered everyday cloth was hand-stitched into wearable wraps and shawls in just the same spirit — humble fabric, made lovely, made to wear. A floral prairie jacket sits happily in that long, worldwide lineage of soft, thrifty, beautiful cloth.
Why This Idea Is Worth Making
This idea is worth making because it brings a soft, romantic, vintage alternative to the rugged farmhouse look — proof that quilted layers can be tender as well as tough. The floral cottons make it feel like a true heirloom, the relaxed prairie shape is beginner-friendly and forgiving, and the finished jacket pairs beautifully with dresses, linens, and knits for an effortless cottagecore look. It’s the gentlest, most nostalgic piece in this collection, and a lovely way to use small-scale florals you can’t resist.
Finished Garment
- Style: relaxed prairie jacket — soft or rounded collar, slightly longer length, gently loose fit, optional patch pockets
- Sizes: use a commercial relaxed jacket or duster pattern in your size, sized for easy layering
- Skill level: confident beginner (simple soft shape; the fabric is the star)
- Core techniques: quilting floral yardage, garment cutting, bound seams and edges, soft closures
Materials Needed
- Floral fabrics: about 2¾–3 yards total of small-scale floral cottons — calico, feedsack-style, or ditsy prints in soft vintage tones
- Batting: low-loft cotton, about 2½ yards (low-loft keeps the jacket soft and drapey)
- Lining: 2½ yards of soft cotton — a coordinating floral or a solid cream
- Binding: ¾ yard, in a solid that picks up one floral color, or a contrasting ditsy print
- Closures: covered buttons, mother-of-pearl buttons, or fabric ties — soft, vintage-appropriate fastenings
- Thread, walking foot, rotary cutter, cutting mat, ruler, pins, iron, sewing machine
Beginner tip: keep the florals small in scale. Large, bold flowers can overwhelm a jacket and lose the vintage feel; ditsy, closely spaced prints read as authentic prairie calico.
Choosing Your Colors
Soft, faded, and pretty is the goal — the palette of a sun-washed prairie dress:
- Dusty rose and blush for the romantic base
- Soft sage and eucalyptus green for a gentle, grounded note
- Buttery cream and ecru to lighten
- Faded denim and cornflower blue for that vintage-country touch
- Warm honey and pale gold for a hint of harvest
Mix two or three coordinating florals for a patchwork prairie look, or use a single sweet floral throughout for a cleaner vintage feel. Keep everything soft and slightly faded — nothing too bright or saturated, so the jacket reads antique and tender.
The Fabric: Quilting Your Floral Yardage
- Quilt whole floral cotton (or pieced floral patchwork) with low-loft batting and a soft lining
- Quilt gently — straight diagonal lines or a soft grid — so the jacket stays drapey rather than stiff
- Prepare quilted yardage large enough for the back, two fronts, two sleeves, collar, and any pockets
Cutting Measurements
- If piecing florals: cut 5-inch squares and join into panels a bit larger than each pattern piece
- Cut the garment pieces: back, two fronts, two sleeves, and a soft or rounded collar, all on the straight grain
- Patch pockets (optional): two at about 6 × 6 inches finished
- Binding: cut 2 to 2½-inch strips, several yards, for interior seams and outer edges
Step-by-Step Guide
Step 1 — Prepare and quilt the floral fabric. Quilt your floral cotton (whole or pieced) with low-loft batting and a soft lining, using gentle quilting lines so the fabric stays soft. Press well.
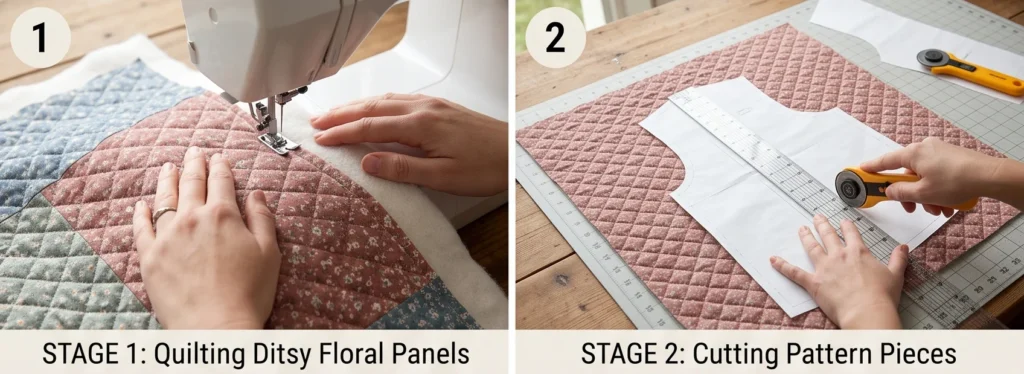
Step 2 — Cut the jacket pieces. Lay the pattern on the quilted floral fabric and cut the back, two fronts, two sleeves, and collar on the straight grain. Cut optional pockets. Make sure any directional florals run the right way up.
Step 3 — Add the pockets (optional). Bind or fold the pocket top edges, position them softly on the fronts, and topstitch them down. Rounded pocket corners suit the gentle prairie look.
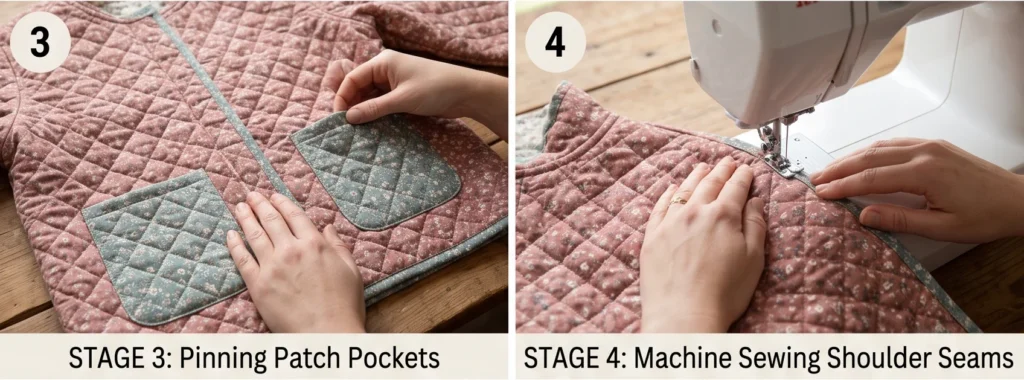
Step 4 — Sew the shoulder seams. With right sides together and a ½-inch seam, join fronts to back at the shoulders. Press seams open and move slowly through the quilted bulk.
Step 5 — Attach the collar. Assemble the soft or rounded collar and attach it around the neckline. A gently rounded, drapey collar gives the jacket its tender, vintage character — avoid anything stiff or structured.
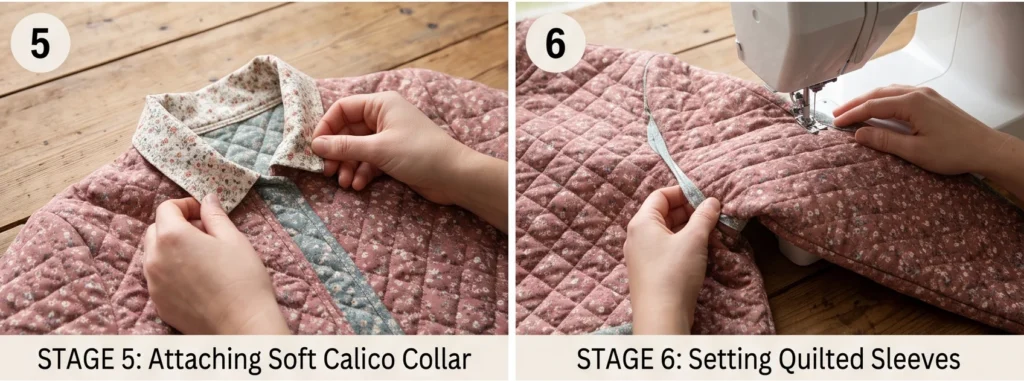
Step 6 — Set the sleeves and sew the sides. Attach the sleeves (a relaxed, dropped shoulder keeps it soft), then sew the underarm and side seams in one line with a ½-inch seam. Try it on to check the easy, draping fit.
Step 7 — Bind the interior seams. Encase the raw interior seam allowances in binding so the inside is as pretty as the outside — especially lovely if you use a contrasting ditsy print for the binding, glimpsed when the jacket moves.
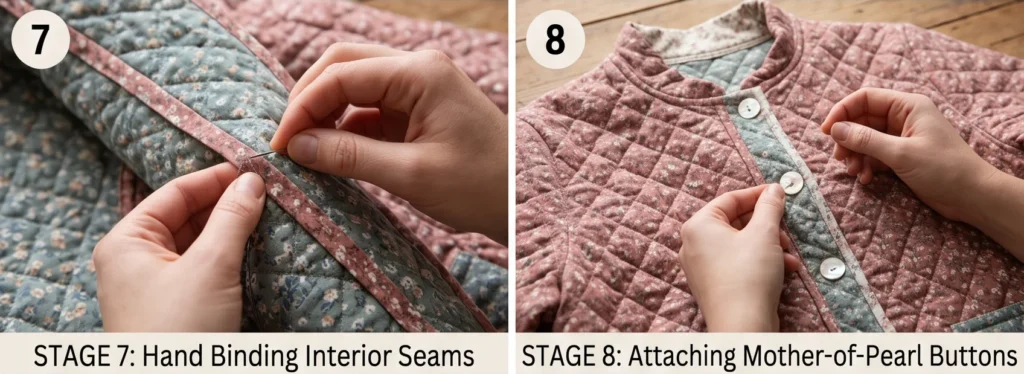
Step 8 — Finish the edges and add closures. Bind the front opening, hem, neckline, and cuffs. Then add soft closures — covered or mother-of-pearl buttons, or delicate fabric ties — spacing buttons gently down the front, or leaving it open to drape.
Step 9 — Press and soften. Give the jacket a gentle press, then wash and tumble low if you’d like an even softer, more vintage, lived-in feel. The florals will fade just slightly into perfect prairie softness.
Assembly at a Glance
- Quilt floral fabric (whole or pieced) with low-loft batting and a soft lining.
- Cut back, fronts, sleeves, and collar on grain (mind directional florals).
- Add optional rounded patch pockets.
- Sew shoulder seams (½-inch, pressed open).
- Assemble and attach the soft/rounded collar.
- Set the sleeves; sew side/underarm seams; check the easy fit.
- Bind the interior seams (a ditsy contrast print is lovely here).
- Bind the outer edges; add soft buttons or fabric ties.
- Press, then wash and tumble low for a faded, vintage softness.
Beginner Tips for Success
- Keep florals small in scale — ditsy calico prints read as authentic vintage prairie.
- Use low-loft batting and soft quilting lines so the jacket drapes rather than stands.
- Choose a relaxed, dropped-shoulder pattern for that gentle prairie ease.
- Bind seams in a contrasting ditsy print for a sweet surprise inside.
- Keep the palette soft and faded — nothing too bright, so it reads antique and tender.
Styling It
A floral prairie jacket is made for soft, romantic pairings — over a linen dress, a cream knit, or a simple tee and jeans for a cottagecore-meets-casual look. Let it drape open, or tie it loosely at the front. Because the florals are soft and faded, it pairs beautifully with cream, denim, and natural linen, and with delicate accessories — a straw bag, simple boots, a ribbon in the hair. Keep everything else gentle and let the sweet prints carry the outfit’s whole mood.
Final Thoughts
A floral prairie quilt jacket is soft vintage style you can wrap around yourself — quilted warmth in the tender spirit of a calico prairie dress. Drawing on the sweet, thrifty tradition of feedsack florals and frontier calico, it turns small-scale blooms into a gentle, romantic layer that feels like a cherished heirloom. Cut it soft, keep the prints ditsy and faded, and you’ll have the most nostalgic, cottagecore-lovely piece in your closet — rustic warmth with a romantic heart.
Other Design Inspirations – Digitally Modified
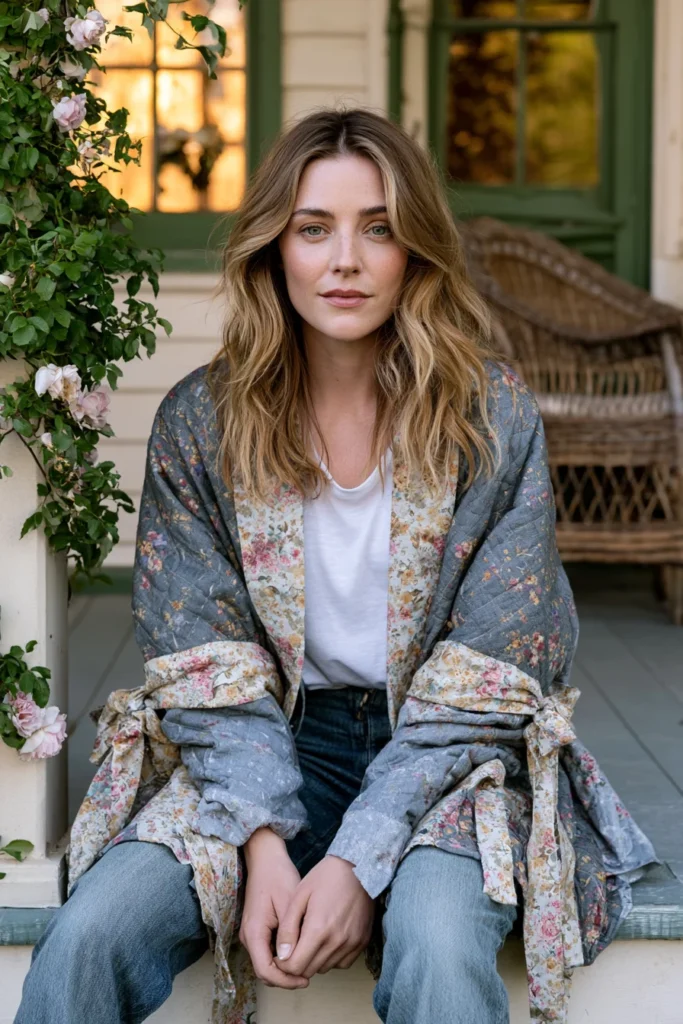
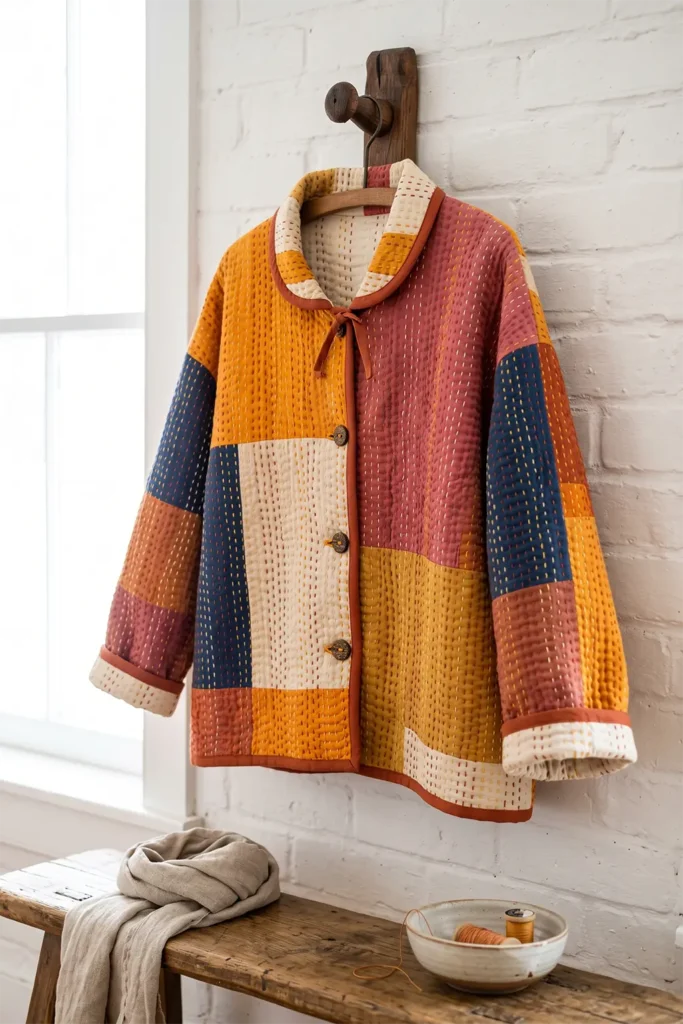
5. Hand-Stitched Kantha Quilt Jacket with Heirloom Character
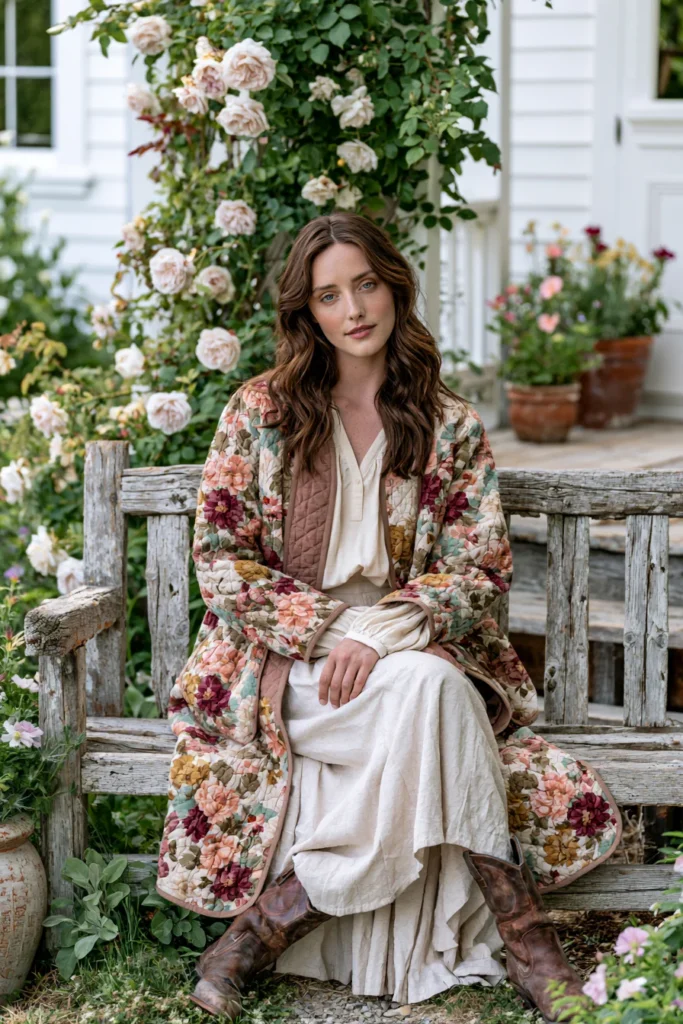
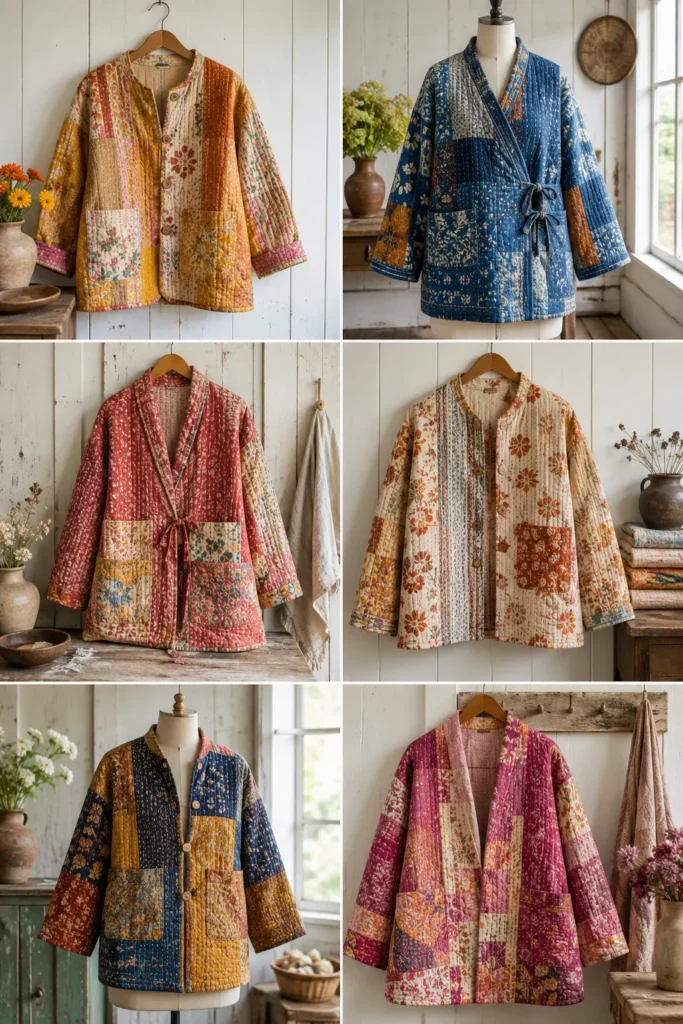
A hand-stitched kantha quilt jacket is farmhouse layering with a soul. Kantha is a centuries-old South Asian tradition of layering lengths of soft, often repurposed cloth and holding them together with rows of simple running stitch — the same humble stitch, worked entirely by hand, that gives kantha its gentle rippled texture and quiet, heirloom warmth. Made into a jacket, that texture becomes something you can wear: soft, lightweight, richly colored, and utterly one of a kind. Where machine-quilted jackets are crisp and uniform, a kantha jacket is alive with the small irregularities of the hand — every stitch slightly its own, the whole surface breathing like something made slowly and with love.
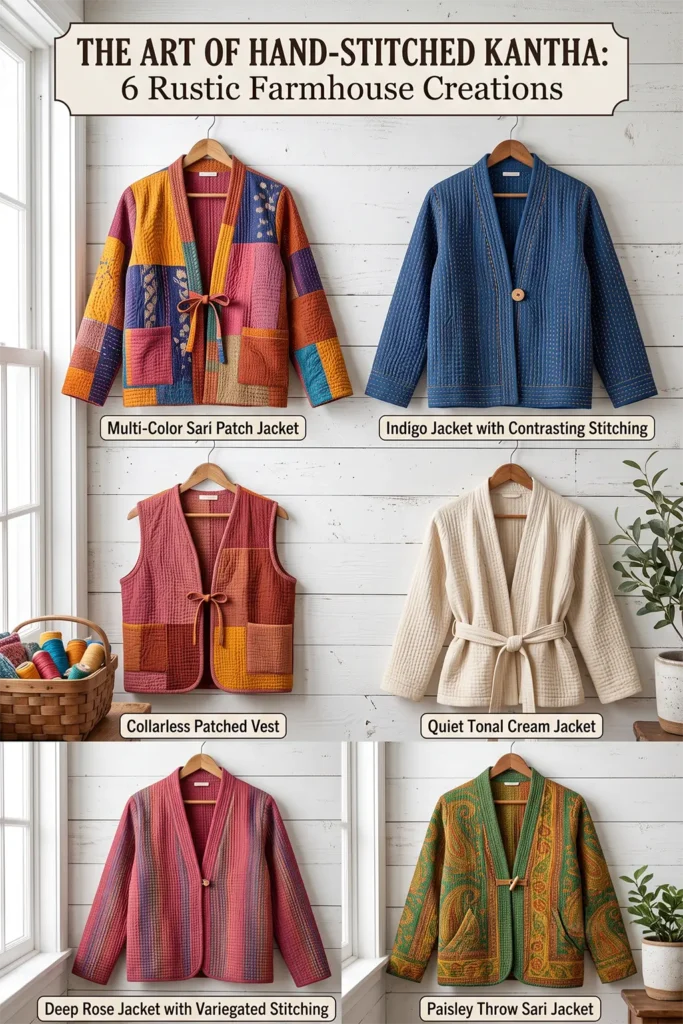
In warm, vibrant tones — marigold, indigo, rust, deep rose, and saffron — a kantha jacket brings a soft, global, artisanal note to rustic style. It layers beautifully over the plainest outfit and instantly reads as special, precisely because it is: no two are alike, and each one carries the mark of the hours it took to stitch.
The Kantha Tradition
Kantha comes from the Bengal region of South Asia, where for generations women layered worn saris and soft cotton cloth and stitched them together with running stitch to make quilts, wraps, and shawls — turning old, beloved fabric into new, useful, beautiful things. It’s one of the world’s great traditions of thrift and artistry combined: nothing wasted, everything made lovely. The characteristic kantha stitch is just a straight running stitch worked in rows, but massed across a whole cloth it creates a soft, wavy, textured surface unlike any machine quilting.
This is the tradition of my own family’s background, and it shapes how I understand every quilted thing: that layered, hand-stitched cloth was always meant to be worn and used, made from what you had, and made beautiful by the patient rhythm of the stitch. A kantha jacket isn’t a novelty — it’s one of the oldest ideas in textile making, and turning it into a farmhouse layer simply carries that living heritage forward. (Genuine vintage kantha throws, made from repurposed saris, are widely sold and make wonderful, authentic material for a jacket — an heirloom textile given a second life as something to wear.)
Why This Idea Is Worth Making
This idea is worth making because it produces a genuinely soulful, heirloom-quality jacket with a depth of character no machine-made layer can match. Hand stitching is slow, but it’s meditative and deeply rewarding, and it requires almost no equipment — needle, thread, and cloth. You can stitch your own kantha fabric or repurpose a vintage kantha throw, and the finished jacket is lightweight, soft, richly colorful, and completely unique. It’s the most personal, artisanal piece in this collection — the one that carries a story in every stitch.
Finished Garment
- Style: relaxed, unstructured jacket — soft collar or collarless, easy fit, lightweight drape
- Sizes: use a simple boxy or kimono-style jacket pattern; kantha suits soft, unstructured shapes best
- Skill level: confident beginner (hand stitching is simple; it just takes time)
- Core techniques: layering cloth, hand running-stitch (kantha), garment cutting, bound seams
Materials Needed
- Cloth layers: 2–3 layers of soft cotton — lightweight quilting cotton, cotton voile, or repurposed cotton (soft, worn cotton is ideal and traditional). About 3 yards per layer, or one vintage kantha throw to cut from directly
- Sashiko or embroidery thread / pearl cotton: in vibrant colors — the visible hand stitching is part of the beauty
- Long hand-sewing or sashiko needles
- Binding: ½ yard for finishing seams and edges
- Closures: fabric ties, wooden buttons, or a wrap-and-tie belt (soft, unstructured fastenings suit kantha)
- Thread for construction, rotary cutter or scissors, cutting mat, ruler, pins, iron
- (Optional: a thin cotton batting layer, though traditional kantha uses only cloth layers)
Beginner tip: soft, slightly worn cotton makes the best kantha — it’s easier to hand-stitch through and gives that authentic, gently rippled texture. Repurposing old cotton fabric or a vintage kantha throw is both traditional and beautiful.
Choosing Your Colors
Kantha loves warm, vibrant, layered color — this is the place to be bold:
- Marigold and saffron for glowing warmth
- Deep indigo and denim blue for classic contrast
- Rust and terracotta for earthy richness
- Deep rose and magenta for a soft pop
- Turmeric gold and ochre for that harvest note
- Cream or natural as a grounding base layer
The cloth can be a single rich color, coordinating prints, or patched-together pieces (very traditional), and the stitching thread is its own color decision — contrasting thread makes the kantha rows sing, while tonal thread keeps it subtle. Vibrant thread on a rich base is the most beautiful, most authentic choice.
Making Kantha Fabric: The Hand Stitch
Before cutting a jacket, you make kantha cloth by hand:
- Layer 2–3 pieces of cloth smoothly, largest area you’ll need for your pattern pieces
- Baste the layers so they don’t shift
- Stitch rows of running stitch across the whole cloth — even, simple straight stitches (about ¼ inch long), in rows roughly ⅜–½ inch apart. Traditional kantha runs the stitching in straight lines or gentle waves across the whole surface
- The massed rows draw the layers together into that soft, textured, rippled kantha fabric
This is the slow, meditative heart of the project. Stitch enough kantha fabric for the back, two fronts, and two sleeves.
Cutting Measurements
- Cut the garment pieces — back, two fronts, two sleeves, and collar if using — from your hand-stitched kantha fabric, on the straight grain
- If using a vintage kantha throw, lay the pattern pieces to use the throw’s most beautiful areas
- Binding: cut 2 to 2½-inch strips, several yards, to bind interior seams and edges
Step-by-Step Guide
Step 1 — Layer and baste the cloth. Smooth 2–3 layers of soft cotton together and baste them so they won’t shift while you stitch. Work on a flat surface for even layers.
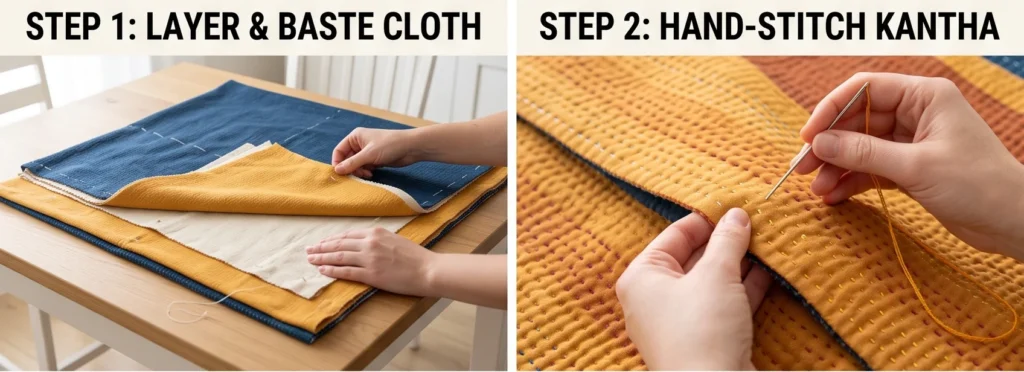
Step 2 — Hand-stitch the kantha. With vibrant thread and a long needle, stitch rows of running stitch across the whole cloth — even stitches about ¼ inch long, in rows about ⅜–½ inch apart. Keep the rhythm relaxed; slight irregularity is the beauty of kantha. Continue until you have enough textured fabric for all pattern pieces. (To shortcut, cut from a ready-made vintage kantha throw instead.)
Step 3 — Cut the jacket pieces. Lay your simple jacket pattern on the kantha fabric and cut the back, two fronts, two sleeves, and collar on the straight grain, choosing the loveliest areas of stitching for the most visible parts.
Step 4 — Sew the shoulder seams. With right sides together and a ½-inch seam, join fronts to back at the shoulders. Kantha is soft and easy to sew; press seams open.
Step 5 — Add the collar (or finish the neckline). Attach a soft collar, or simply bind the neckline for a clean collarless look — kantha suits both. A soft, drapey finish keeps the jacket unstructured and authentic.
Step 6 — Set the sleeves and sew the sides. Attach the sleeves (a kimono or dropped-shoulder cut is easiest and most in keeping), then sew the underarm and side seams with a ½-inch seam. Try it on for the relaxed fit.
Step 7 — Bind the interior seams. Encase the raw seam allowances in binding so the inside is as beautiful as the outside — fitting for a garment where both faces of the cloth are handmade. A vibrant contrast binding is lovely here.
Step 8 — Finish the edges and add closures. Bind the front opening, hem, neckline, and cuffs with your binding strips. Then add soft closures — fabric ties, wooden buttons, or a wrap belt — keeping everything unstructured and easy.
Step 9 — Press gently and wear. Give the jacket a light press (or skip it, to keep the soft rippled texture). Kantha only grows softer and more beautiful with wear and gentle washing, deepening its heirloom character over time.
Assembly at a Glance
- Layer and baste 2–3 pieces of soft cotton.
- Hand-stitch rows of kantha running stitch across the whole cloth (¼-inch stitches, rows ⅜–½ inch apart).
- Cut back, fronts, sleeves, and collar from the kantha fabric on the grain.
- Sew shoulder seams (½-inch, pressed open).
- Add a soft collar or bind the neckline collarless.
- Set the sleeves; sew side/underarm seams; check the easy fit.
- Bind the interior seams (a vibrant contrast is lovely).
- Bind the outer edges; add fabric ties, wooden buttons, or a wrap belt.
- Press gently (or not); wear, and let it soften into an heirloom.
Beginner Tips for Success
- Use soft, slightly worn cotton — it hand-stitches easily and gives authentic kantha texture.
- Embrace slight irregularity in the stitching; the hand-made unevenness is the beauty.
- Choose a simple boxy or kimono pattern — kantha suits soft, unstructured shapes.
- Let the stitching thread be a real color choice; vibrant thread on a rich base is the most striking.
- Short on time? Cut your jacket from a vintage kantha throw — traditional, sustainable, and gorgeous.
Styling It
A kantha jacket is a soft, artisanal statement, so let it lead over simple clothes — a plain tee and jeans, a linen dress, an all-black outfit that lets the vibrant stitching glow. Its global, handmade character mixes beautifully with natural materials, earthy jewelry, and relaxed silhouettes. Wear it open to show the rippled texture, or tie it softly at the waist. Because the color and stitch do so much, keep everything else quiet and let the jacket be the story.
Final Thoughts
A hand-stitched kantha quilt jacket is heirloom character you can wear — layered cloth and patient running stitch drawn from one of the world’s oldest and most beautiful textile traditions. Soft, vibrant, and utterly unique, it carries the living heritage of kantha into a farmhouse layer with real soul, every stitch a small mark of the hours and the hands that made it. Stitch your own or give a vintage kantha throw a second life as something to wear, and you’ll own the most personal, storied piece in your closet.
Other Design Inspirations – Digitally Modified
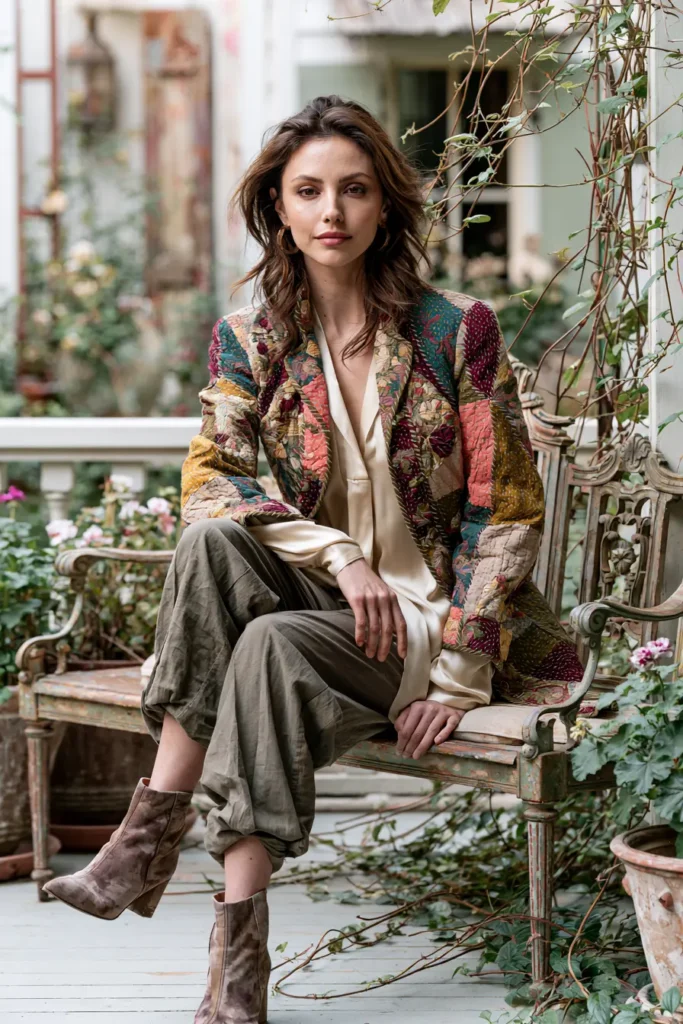
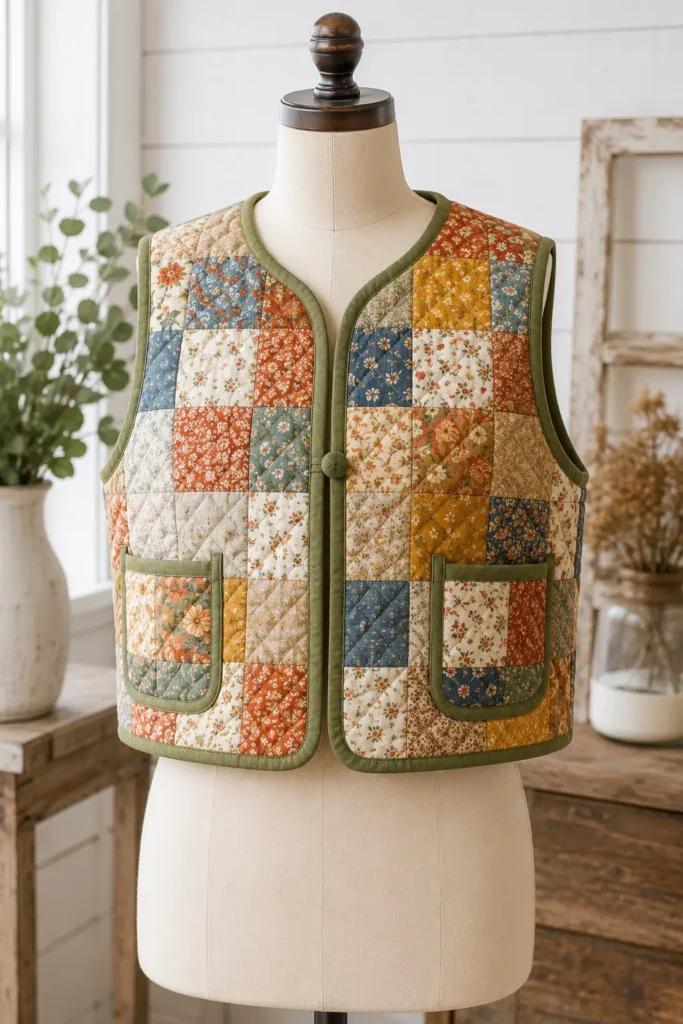
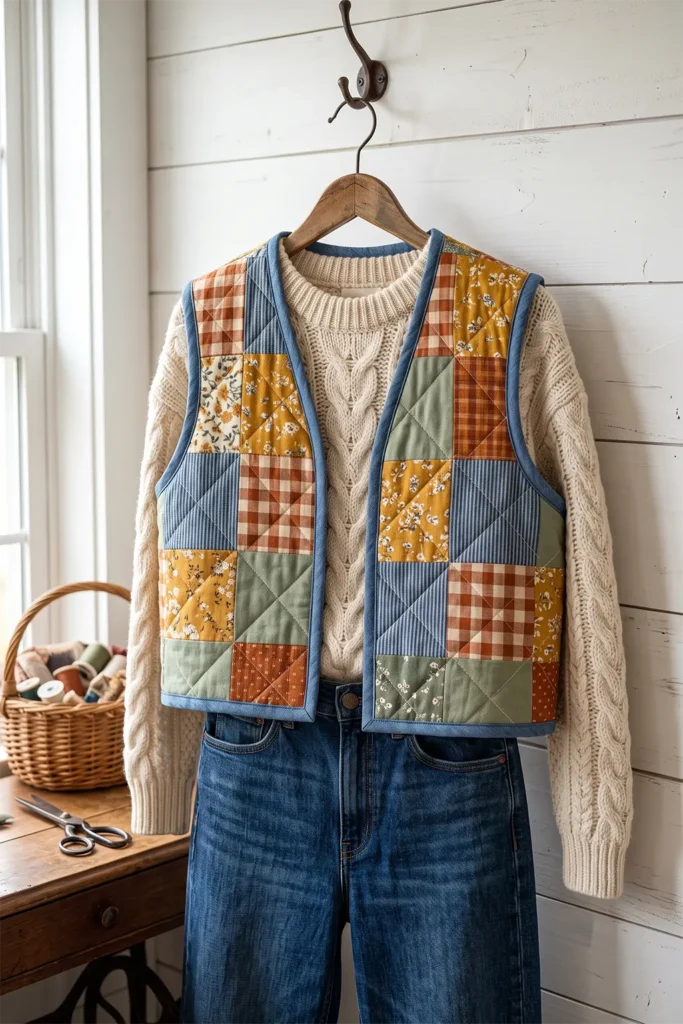
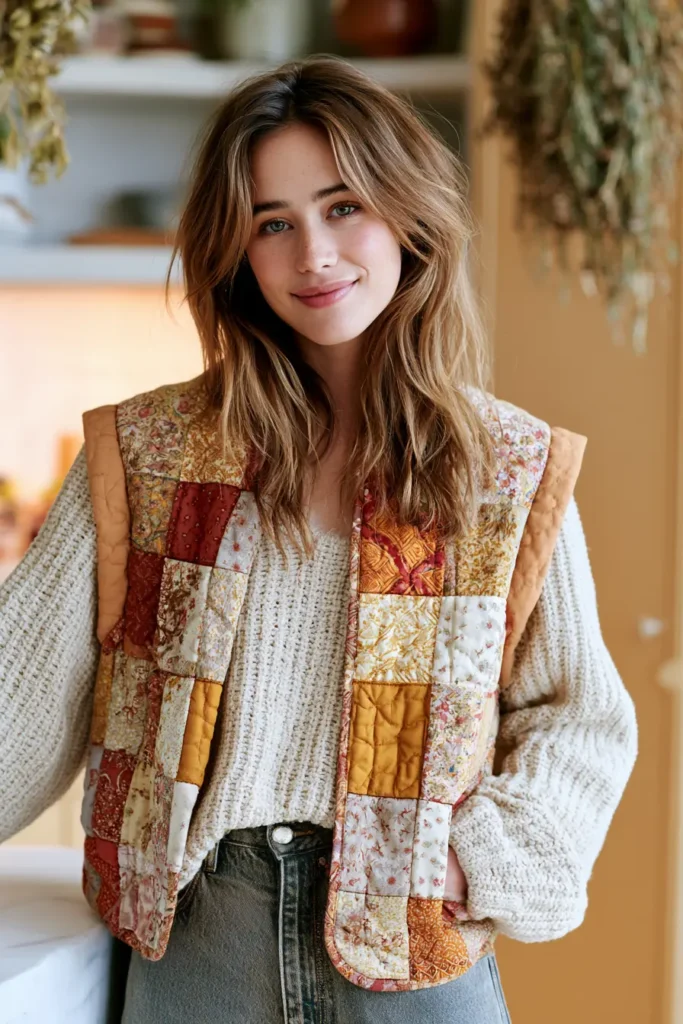
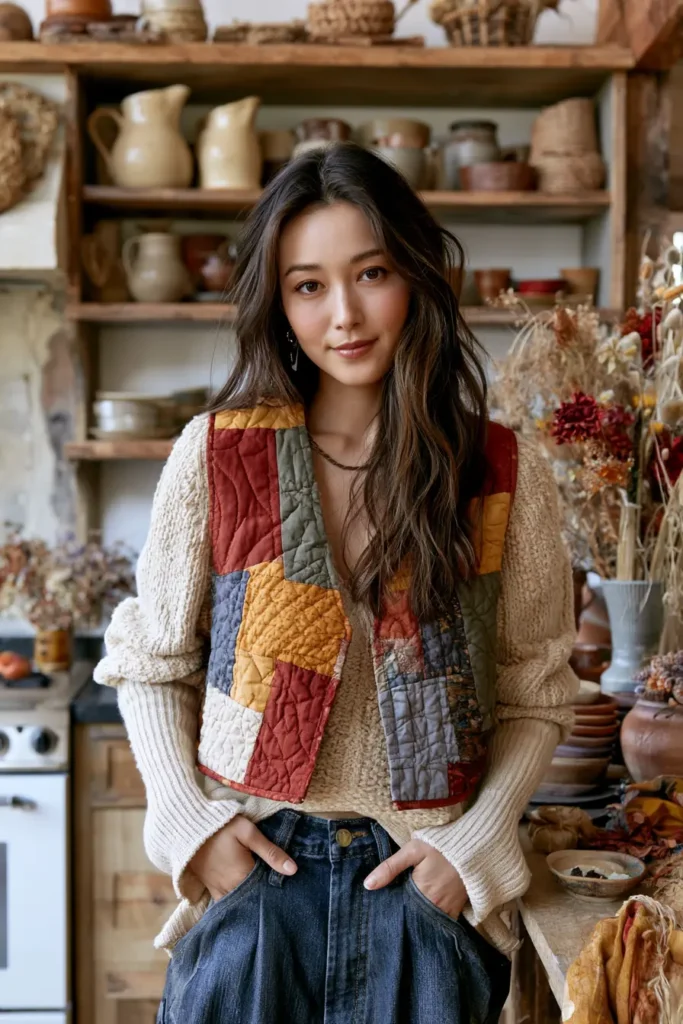
6. Cozy Cropped Quilt Vest for Easy Layering
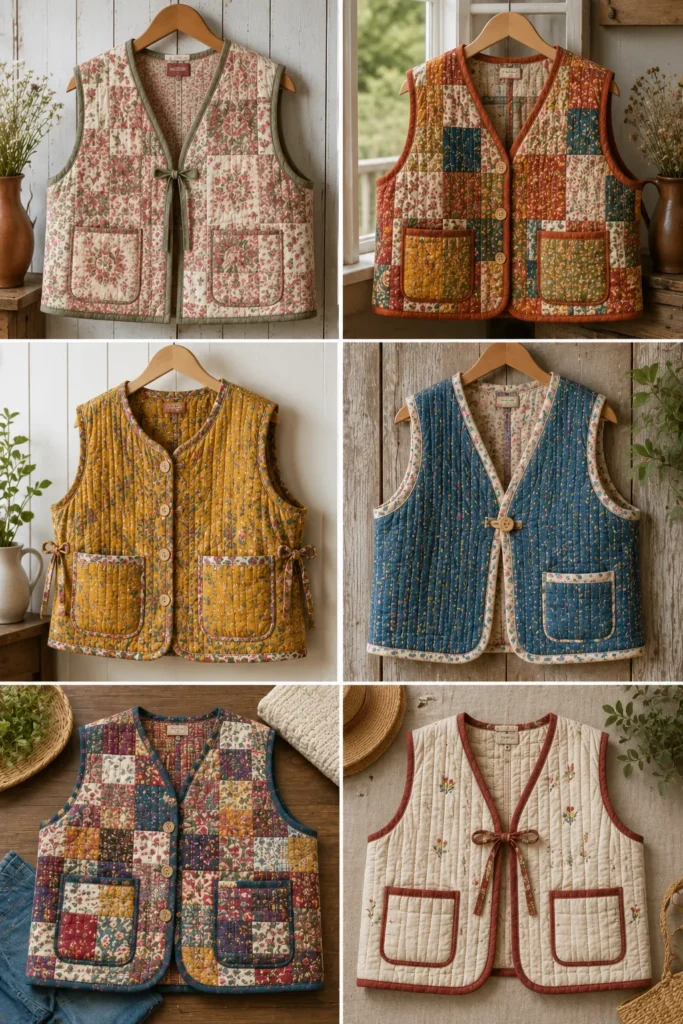
Sometimes the most useful layer is the one that leaves your arms free. A cozy cropped quilt vest is the easy, throw-it-on piece that adds warmth and handmade character without the bulk of sleeves — perfect for that in-between weather when a jacket is too much but you still want a cozy layer. Cut short and boxy, it sits neatly at the waist over a sweater, a flannel shirt, or a long-sleeve tee, adding a hit of quilted texture and vibrant farmhouse color exactly where you want it. It’s the most versatile, most beginner-friendly wearable in this collection: quick to make, endlessly layerable, and flattering over almost anything.
Because there are no sleeves to set or fit, a vest is genuinely the easiest quilted garment to sew — which makes it the perfect first wearable project. The whole craft comes down to a clean silhouette and neatly finished armholes, and once you’ve made one, you’ll want it in every color.
The Quilted Vest Through History
The quilted vest — or waistcoat — has a surprisingly long and practical history. Long before central heating, quilted and padded waistcoats were worn across Europe and Asia as an under-layer for warmth, the batting trapping heat close to the core while leaving the arms free to work. Quilted sleeveless layers show up everywhere from medieval padded garments to traditional Asian cotton vests, prized for exactly the reason we love them now: they warm the body’s center without restricting movement.
That practical wisdom runs through many textile traditions. In the Nakshi Kantha tradition of my own family’s background, layered hand-stitched cloth was made into all manner of wearable pieces, valued for being warm, light, and easy to move in. A cropped quilt vest carries that same old, sensible idea — core warmth, free arms, handmade beauty — into a modern, easy-layering piece.
Why This Idea Is Worth Making
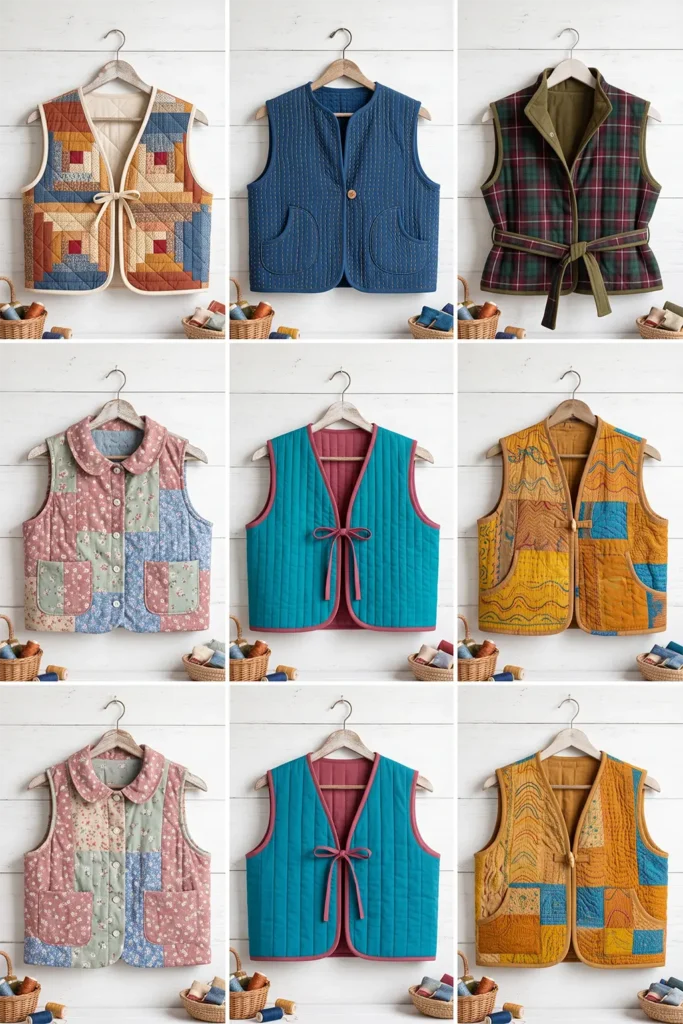
This idea is worth making because it’s the easiest, fastest, and most wearable quilted garment here — no sleeves to fit, no complicated shaping, just a clean cozy layer you’ll reach for constantly. The cropped length flatters and layers beautifully over sweaters and shirts, the quilted texture adds instant handmade character, and vibrant farmhouse color makes it a cheerful wardrobe staple. It’s the ideal first quilted-garment project and a brilliant way to use up patchwork scraps or a favorite fabric. Quick, forgiving, and endlessly useful.
Finished Garment
- Style: cropped, boxy vest — sits at or just below the waist, open front or single closure, clean bound armholes
- Sizes: use a simple cropped vest pattern, or shorten a boxy jacket pattern and omit the sleeves
- Skill level: beginner — the easiest quilted garment in this collection
- Core techniques: quilting yardage or patchwork, garment cutting, armhole binding, edge finishing
Materials Needed
- Outer fabric: about 1½ yards of patchwork or a warm farmhouse print/solid (a vest uses far less fabric than a jacket)
- Batting: low-loft cotton, about 1¼ yards
- Lining: 1½ yards of soft cotton or flannel
- Binding: ½ yard for the armholes and edges — this is the key finishing element, so choose a color you love
- Closure (optional): one or two buttons, a single snap, or a tie — or leave it open
- Thread, walking foot, rotary cutter, cutting mat, ruler, pins, iron, sewing machine
Beginner tip: the armhole binding is the whole finish on a vest, so cut it on the bias (diagonal) if you can — bias binding stretches smoothly around the curved armhole, where straight-cut binding can pucker.
Choosing Your Colors
A cropped vest is small, so it’s the perfect place for a bold, vibrant hit of color:
- Rust and pumpkin for warm farmhouse energy
- Mustard and gold for a cheerful pop
- Sage and olive for a grounded, earthy note
- Denim and chambray blue for classic workwear ease
- Deep rose or teal for an unexpected, vibrant twist
- Cream and oatmeal to keep it soft and neutral
Because a vest uses little fabric, it’s an ideal scrap-buster — a scrappy patchwork of many farmhouse colors looks wonderful, or a single bold fabric keeps it clean. Let the armhole binding be a contrasting pop for a designer detail.
The Fabric: Quilting Your Vest Panels
- Quilt your outer fabric (patchwork or whole) with low-loft batting and a soft lining
- Quilt simply — straight lines or a diagonal grid — keeping it soft enough to layer comfortably
- Prepare enough quilted fabric for the back and two fronts (that’s all a vest needs — no sleeves!)
Cutting Measurements
- If piecing: cut 5-inch squares and join into panels for the back and fronts
- Cut the vest pieces: one back and two fronts, on the straight grain, from your quilted fabric
- Patch pockets (optional): two at about 5 × 5 inches finished
- Binding: cut 2 to 2½-inch strips — bias-cut for the armholes — enough for the armholes plus all outer edges
Step-by-Step Guide
Step 1 — Quilt the fabric. Quilt your patchwork or outer fabric with low-loft batting and lining, using simple quilting lines. Press well. You only need enough for a back and two fronts.
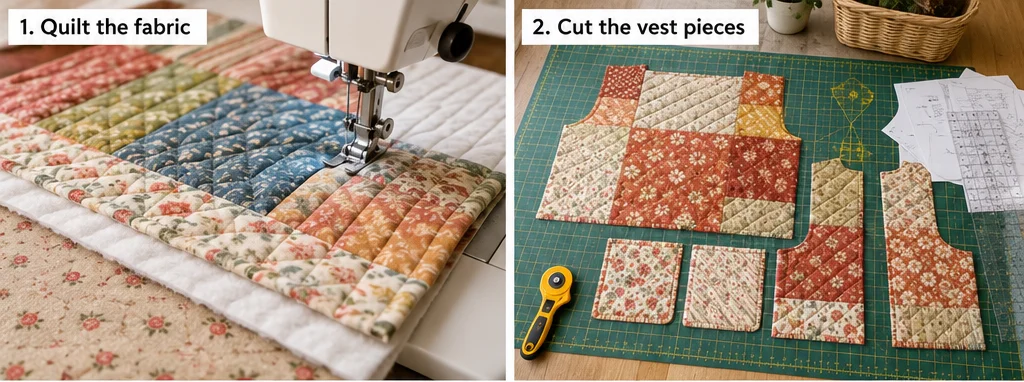
Step 2 — Cut the vest pieces. Lay your cropped vest pattern on the quilted fabric and cut one back and two fronts on the straight grain. Cut optional pockets. A cropped vest hits at or just below the waist, so check the length against your torso.
Step 3 — Add pockets (optional). Bind or fold the pocket top edges, position them on the fronts, and topstitch them down. On a cropped vest, place pockets a little higher than you would on a jacket so they don’t run off the short hem.
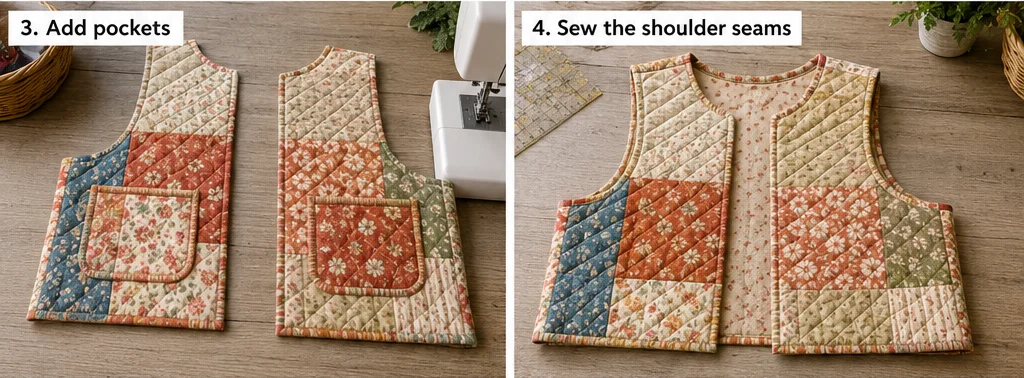
Step 4 — Sew the shoulder seams. With right sides together and a ½-inch seam, join the fronts to the back at the shoulders. Press seams open.
Step 5 — Sew the side seams. Sew the side seams with a ½-inch seam, leaving clean, even armhole openings at the top of each side. Try it on to check the fit and cropped length before finishing.
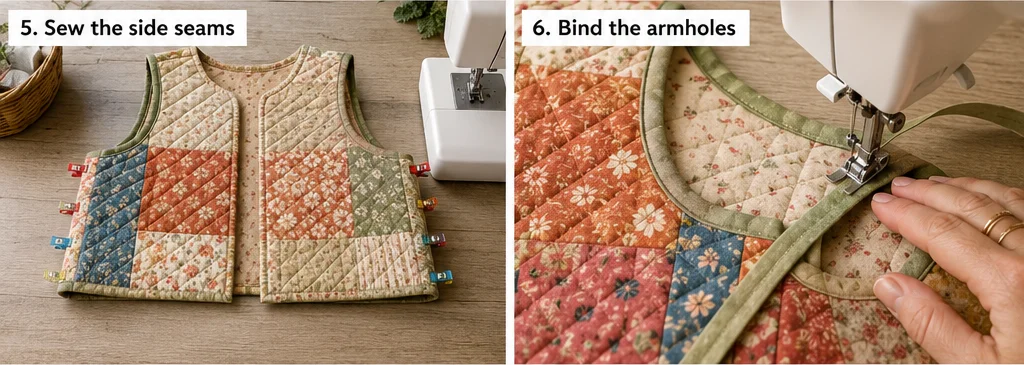
Step 6 — Bind the armholes. This is the defining step of a vest. Using bias-cut binding, encase each raw armhole edge, easing the binding smoothly around the curve. Take your time — neat, pucker-free armholes are what make a vest look professionally finished, since there’s no sleeve to hide them.
Step 7 — Bind the outer edges. Bind the front opening, neckline, and hem with your binding strips, folding over the raw edges and stitching down. A continuous bound edge frames the vest cleanly and finishes it without facings.
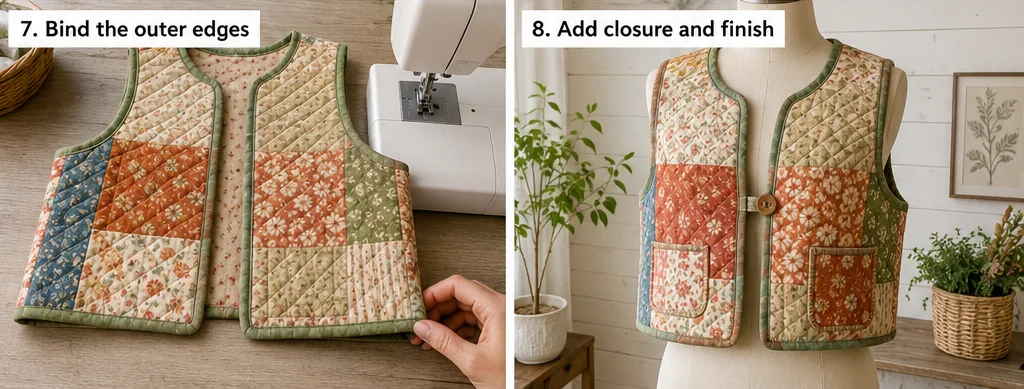
Step 8 — Add a closure (optional). Add a single button, a snap, or a tie at the front if you like, or leave it open to layer freely. One well-placed closure at the waist or chest is plenty for a cropped vest.
Step 9 — Press and layer. Give the vest a gentle press, then layer it up. A gentle wash and low tumble will soften it into a cozy, lived-in favorite.
Assembly at a Glance
- Quilt outer fabric (patchwork or whole) with low-loft batting and lining.
- Cut one back and two fronts on grain (plus optional pockets).
- Add pockets, placed a little high for the cropped hem.
- Sew shoulder seams (½-inch, pressed open).
- Sew side seams, leaving clean armhole openings; check the cropped fit.
- Bind the armholes with bias binding, easing around the curve.
- Bind the front opening, neckline, and hem.
- Add a single button, snap, or tie — or leave open.
- Press, then wash and tumble low for a soft, lived-in finish.
Beginner Tips for Success
- Cut armhole binding on the bias so it eases smoothly around the curve without puckering.
- Use low-loft batting so the vest layers comfortably under or over other pieces.
- Place pockets a touch higher than on a jacket, so they suit the cropped hem.
- Make the armhole binding a contrasting color for a designer pop — it’s the vest’s signature detail.
- A vest is the perfect scrap-buster and the easiest first quilted garment — start here if you’re new.
Styling It
A cropped quilt vest is all about easy layering — throw it over a chunky knit, a flannel shirt, or a long-sleeve tee, and pair with jeans or cords. The cropped length looks especially good over higher-waisted bottoms, and left open it adds cozy texture without bulk. Because it’s small and colorful, it can be your outfit’s bright spot, so keep the layers beneath it simple. Add boots and you’ve got the easiest farmhouse layered look there is.
Final Thoughts
A cozy cropped quilt vest is easy layering at its best — warm through the core, free at the arms, and quick enough to be your very first quilted garment. It carries the old, sensible wisdom of the quilted waistcoat, warmth without restriction, into a cheerful, vibrant, endlessly wearable piece. Bind those armholes neatly, pick a color you love, and you’ll have the cozy layer you reach for on every in-between day.
Other Design Inspirations – Digitally Modified
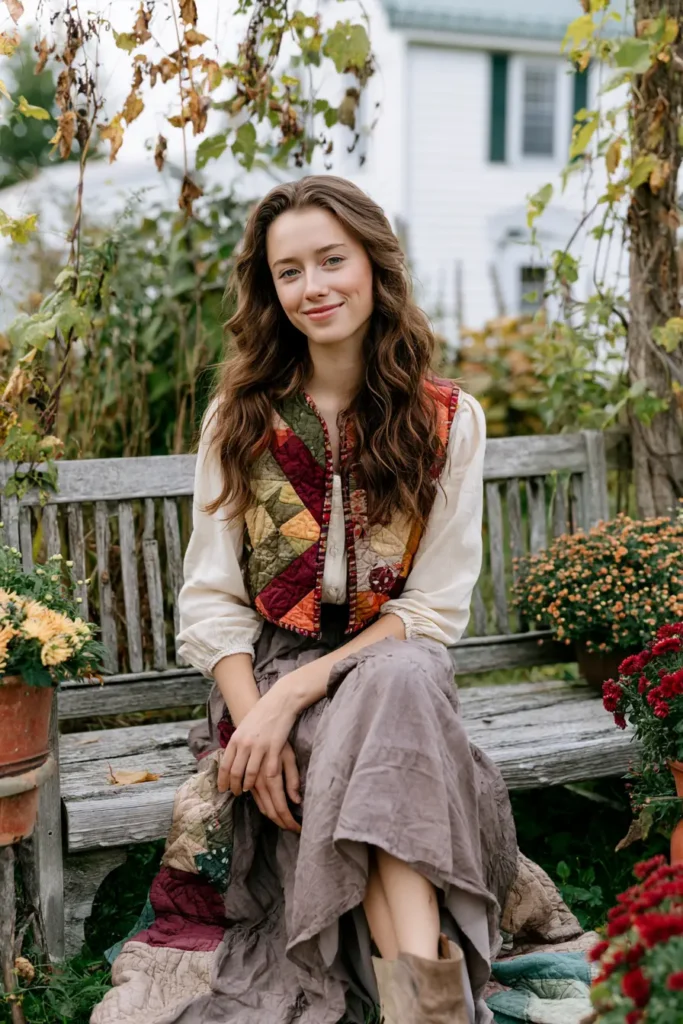
7. Longline Quilted Duster Vest for Effortless Layering
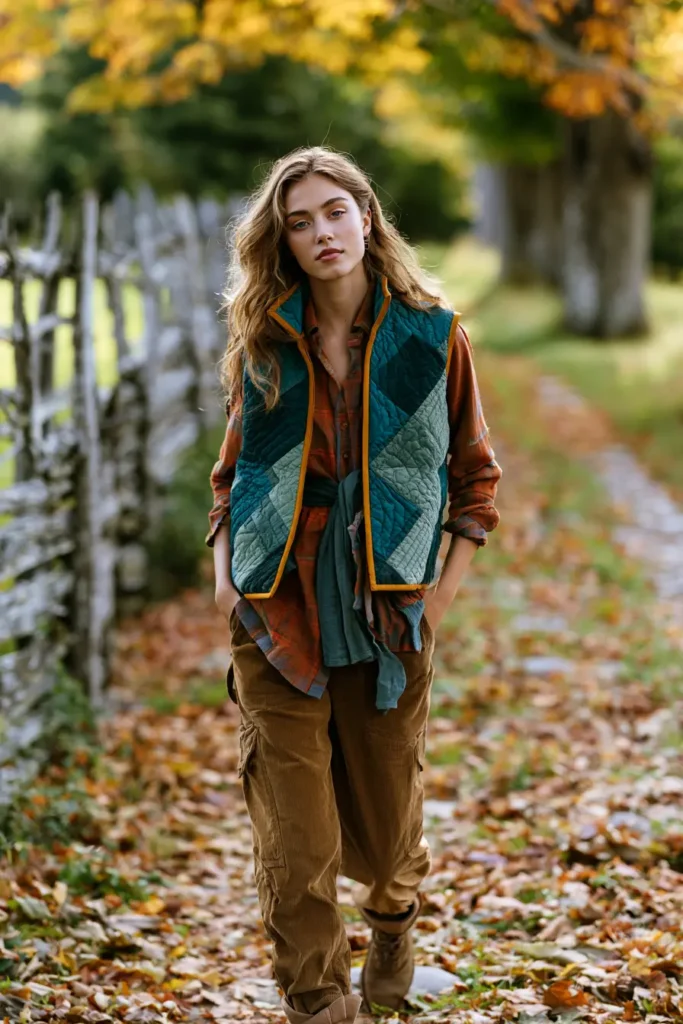
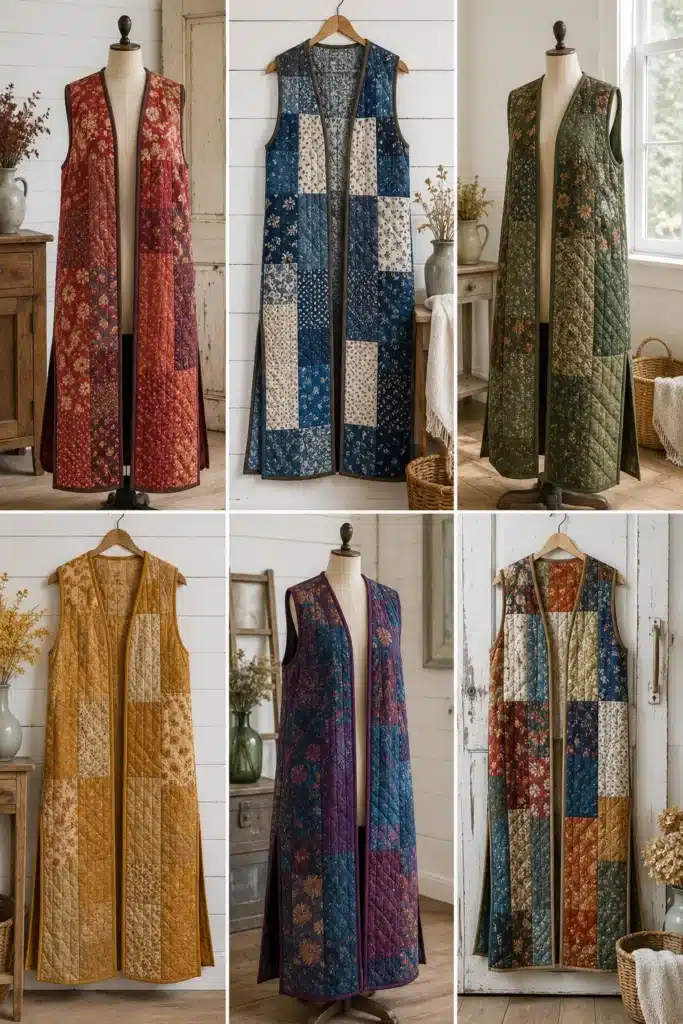
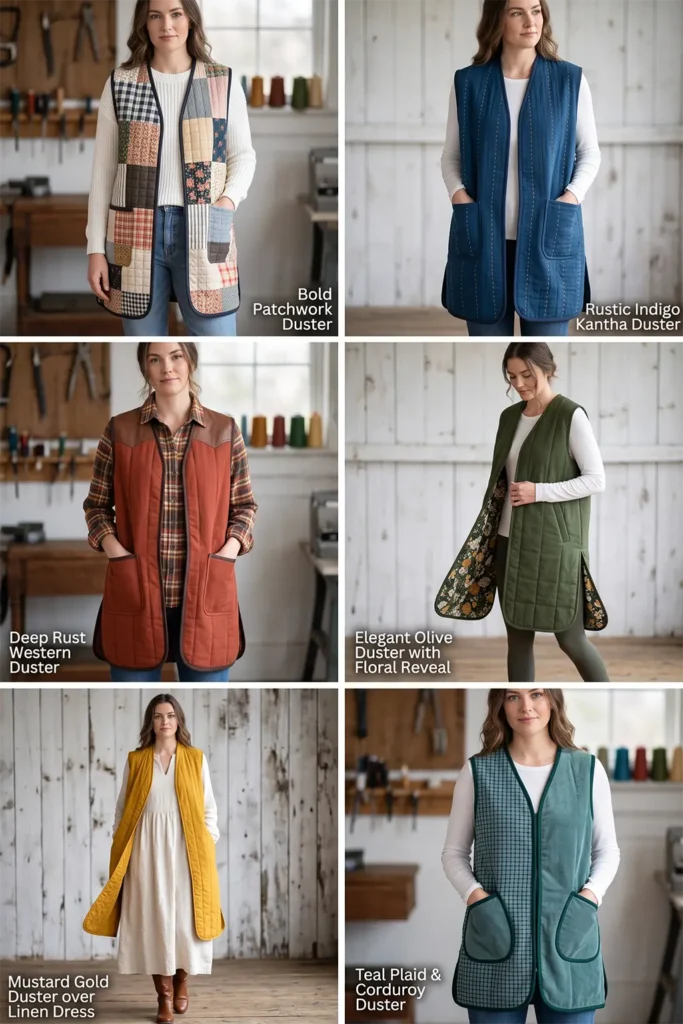
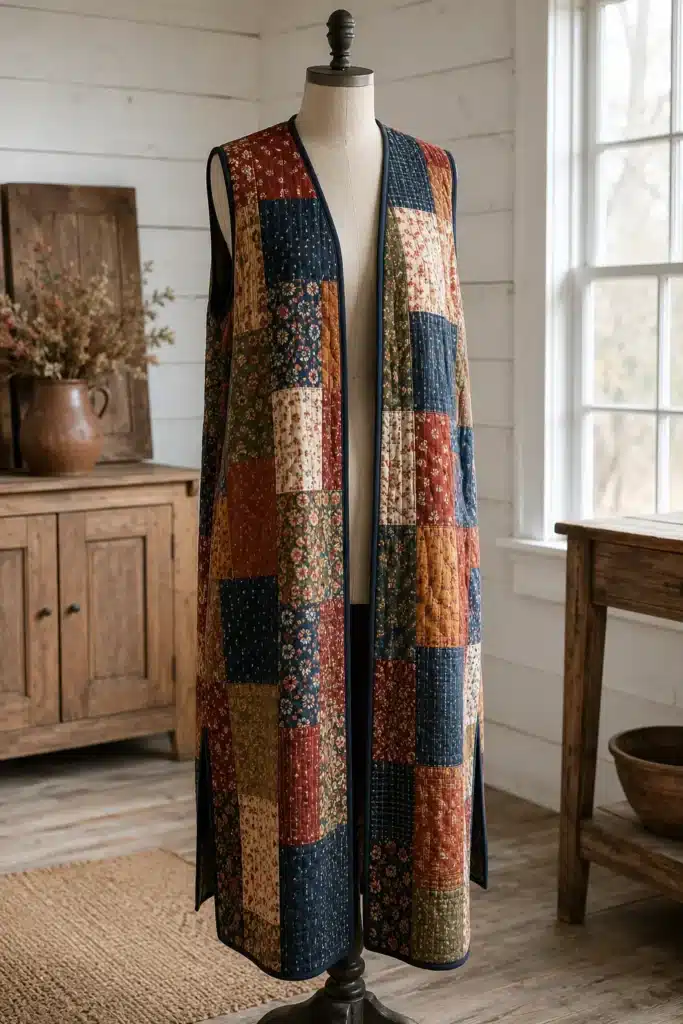
Where a cropped vest is snappy and casual, a longline duster vest is pure drama — a sleeveless layer that falls to mid-calf or below the knee, creating one long, uninterrupted vertical line. Thrown open over jeans and a knit, it drapes and moves as you walk, adding instant elegance and cozy quilted warmth without a single sleeve. In rich farmhouse colors — deep rust, indigo, olive, or a bold patchwork — it’s the piece that turns a simple outfit into a look. Effortless is exactly the right word: you put almost nothing on, and suddenly everything reads intentional.
Length is what makes a duster vest special, and it’s also what makes it a different sew from a cropped one. Everything about the build serves the drape: a lighter hand, a softer quilting plan, and side slits so you can actually walk. Get those right and the vest flows beautifully; get them wrong and it hangs like a board. That balance is the whole craft here.
The Duster’s Rustic Roots
The duster has a genuinely Western pedigree. In the nineteenth-century American West, riders and ranch hands wore long, loose coats — “dusters” — to keep trail dust off their clothes on horseback, cut extra long to cover the legs and often split at the back for riding. Those coats became one of the most recognizable silhouettes in Western dress, prized for being loose, protective, and unfussy.
The modern duster vest keeps the drama and drops the sleeves, but the spirit is the same: a long, easy, hardworking layer that moves with you. It’s a natural fit for farmhouse style, carrying real rustic heritage in its shape. And the idea of a long, layered, hand-stitched outer wrap is hardly unique to the West — in the Nakshi Kantha tradition of my own family’s background, layered running-stitched cloth was made into long wraps and shawls worn exactly this way, loose over everything, warm and easy to move in.
Why This Idea Is Worth Making
This idea is worth making because it delivers maximum style impact for remarkably little construction — no sleeves, no fitting, just a long, elegant silhouette that does all the work. The vertical line is universally flattering and instantly elevates jeans and a tee, while the quilted layer keeps you genuinely warm. It’s also a wonderful showcase for a bold fabric or a striking patchwork, since the long panels give the pattern room to be seen. Easy to sew, dramatic to wear, and endlessly layerable — it’s the highest style-to-effort ratio in this collection.
Finished Garment
- Style: sleeveless longline duster — falls to mid-calf or below the knee, open front (no closure), side slits, bound armholes and edges
- Sizes: use a duster or long vest pattern, or lengthen a simple vest pattern; a relaxed, straight cut works best
- Skill level: beginner (simple shape; length is the only new consideration)
- Core techniques: quilting long panels, drape control, side slits, bias-bound armholes and edges
Materials Needed
- Outer fabric: about 3½ yards (a duster needs real length — measure from your shoulder to your desired hem and buy accordingly)
- Batting: low-loft cotton, about 3 yards — this matters more here than anywhere else; loft kills drape
- Lining: 3½ yards of soft cotton, flannel, or even a lightweight rayon for extra flow
- Binding: ¾ yard, cut on the bias for the armholes and ideally the full outer edge
- Thread, walking foot, rotary cutter, cutting mat, long ruler, pins, iron, sewing machine
Beginner tip: a duster lives or dies on drape. Choose lighter-weight fabrics, low-loft batting, and sparser quilting than you’d use on a jacket — the softer the finished panel, the more beautifully it falls and swings as you walk.
Choosing Your Colors
Long panels give color and pattern real room to shine — this is the place for something bold:
- Deep rust or brick for warm, dramatic richness
- Indigo and denim blue for classic rustic ease
- Olive and forest green for a grounded, earthy line
- Mustard gold for a striking, cheerful statement
- Deep teal or plum for an unexpected, vibrant twist
- Bold patchwork in mixed farmhouse tones, which reads beautifully across the long panels
A single rich color makes the silhouette the star; patchwork makes the fabric the star. Either works — just pick a contrasting bias binding to trace that long edge and define the shape.
The Fabric: Quilting for Drape
- Quilt your outer fabric with low-loft batting and a soft lining
- Quilt sparsely — widely spaced straight lines or a large open grid. Dense quilting stiffens a panel, and stiffness is a duster’s enemy
- Prepare quilted panels long enough for the back and two fronts at full duster length, plus a little extra
Cutting Measurements
- Length: this is measured from your shoulder down, not from the waist, which is why the number looks so much bigger than a standard vest (a hip-length vest is only about 28 inches). Hold a tape at your shoulder and let it fall to where you want the hem. On an average 5’5″ frame that’s roughly:
- Below the hip: 34–36 inches
- Knee-length: 40–42 inches
- Mid-calf (classic duster): 45–48 inches
- Cut the pieces: one back and two fronts, on the straight grain, at full length
- Side slits: plan slits of about 12–16 inches up from the hem on each side seam
- Binding: cut 2 to 2½-inch bias strips — you’ll need several yards for the long edges and armholes
Step-by-Step Guide
Step 1 — Quilt the long panels. Quilt your outer fabric with low-loft batting and lining, using widely spaced quilting lines to preserve drape. Work carefully — long panels take patience to keep smooth and square.
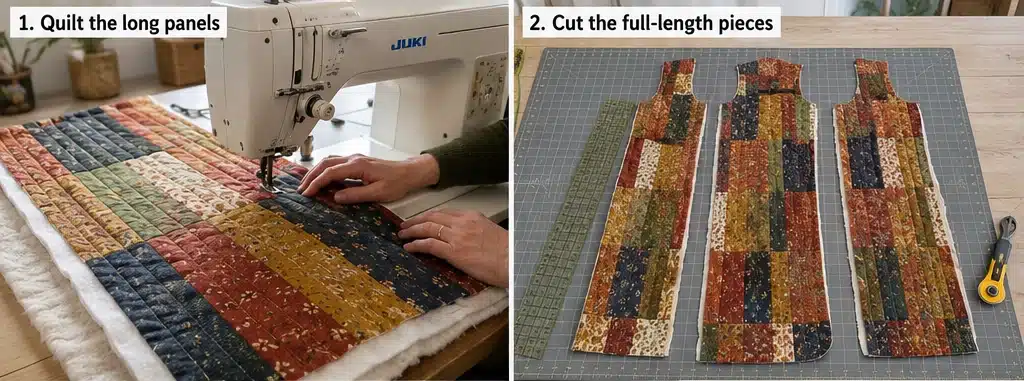
Step 2 — Cut the pieces at full length. Using your shoulder-to-hem measurement (45–48 inches for a classic mid-calf duster on an average frame), cut one back and two fronts on the straight grain. Use a long ruler and check that the panels stay square; length exaggerates any wobble.
Step 3 — Sew the shoulder seams. With right sides together and a ½-inch seam, join the fronts to the back at the shoulders. Press seams open.
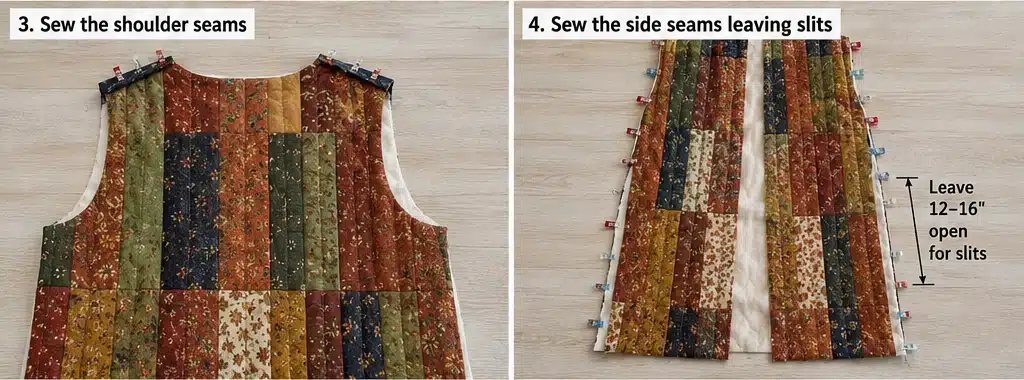
Step 4 — Sew the side seams, leaving slits. Sew each side seam with a ½-inch seam, but stop 12–16 inches above the hem to leave a walking slit. Backstitch firmly at the stopping point — that’s a stress spot. These slits are essential; without them, a long vest binds your stride.
Step 5 — Check the length and hang. Try it on and look at how it falls. Now is the moment to trim the hem if it’s too long or uneven, and to check the drape — if it feels stiff, you can add a little more give by keeping the hem finish light.
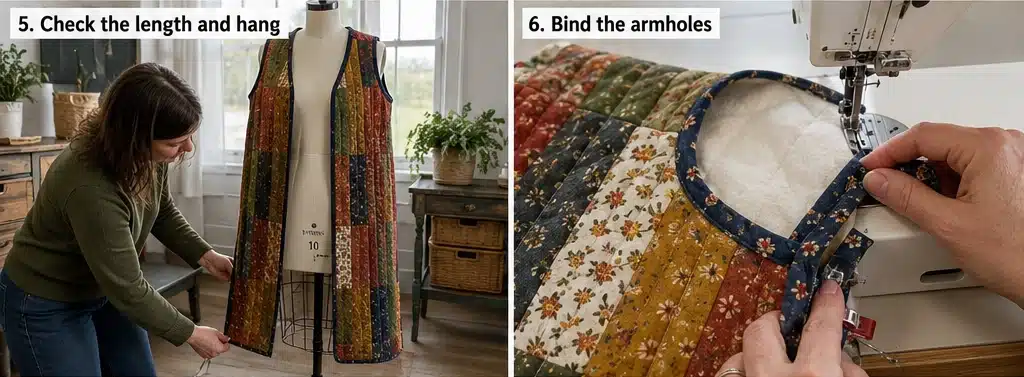
Step 6 — Bind the armholes. Using bias binding, encase each armhole edge, easing smoothly around the curve. As with any vest, neat armholes are the mark of a well-made piece.
Step 7 — Bind the long outer edge. Bind continuously up one front edge, around the neckline, and down the other front — one long, unbroken line. This is the vest’s defining detail, so take your time keeping it even. A contrasting binding here beautifully traces the silhouette.
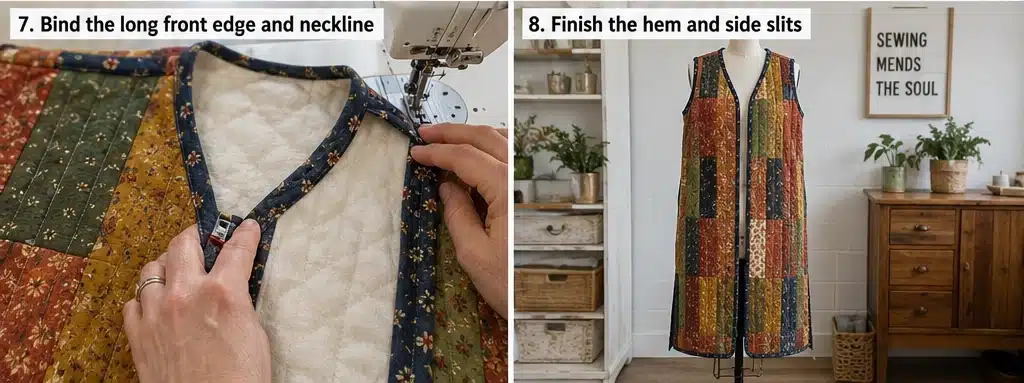
Step 8 — Finish the hem and slits. Bind the hem and the edges of the side slits, so every opening is cleanly finished. Reinforce the top of each slit with a few extra stitches or a small bar tack.
Step 9 — Press and let it hang. Press gently, then hang the finished duster for a day before wearing — a long quilted garment settles into its drape beautifully once it’s had time to hang out.
Assembly at a Glance
- Quilt outer fabric with low-loft batting and lining, using sparse quilting lines.
- Cut one back and two fronts at full shoulder-to-hem length (45–48 inches for mid-calf) on grain.
- Sew shoulder seams (½-inch, pressed open).
- Sew side seams, stopping 12–16 inches above the hem for slits; backstitch.
- Try on; trim and true the hem.
- Bias-bind the armholes, easing the curve.
- Bind the long front edges and neckline in one continuous line.
- Bind the hem and slit edges; reinforce slit tops.
- Press and hang overnight so it settles into its drape.
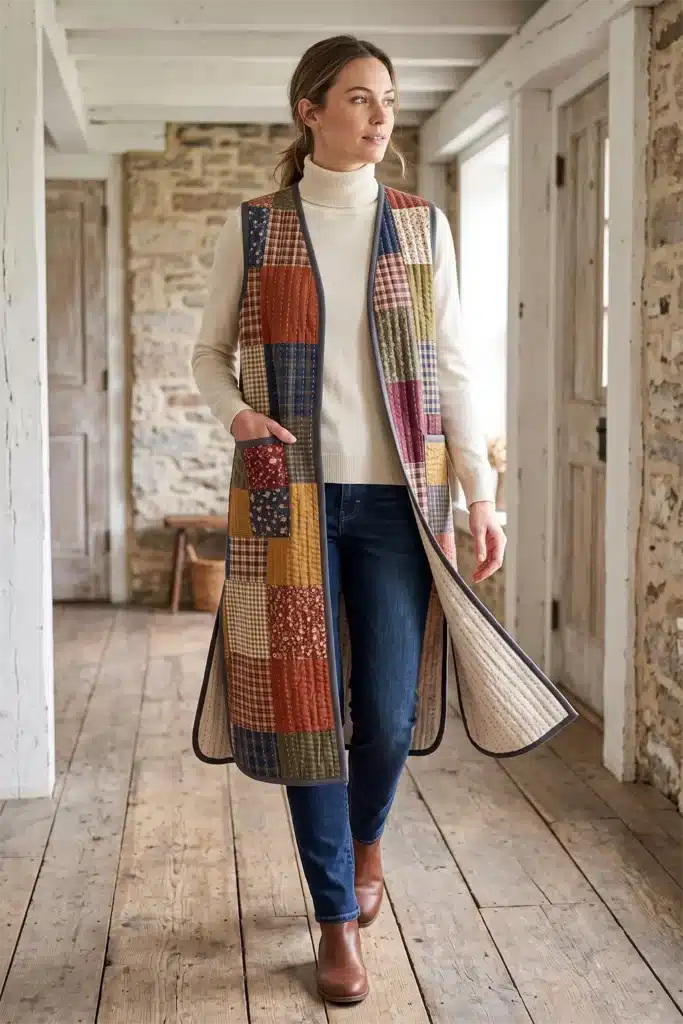
Beginner Tips for Success
- Prioritize drape over loft — low-loft batting and sparse quilting are non-negotiable for a long vest.
- Don’t skip the side slits; without them, a duster restricts your stride.
- Reinforce the top of each slit — it takes stress every time you walk.
- Cut and check on a long ruler; length magnifies any crookedness.
- Use a contrasting bias binding on the long front edge to trace and define the silhouette.
- Hang it for a day before wearing to let the drape settle.
Styling It
A duster vest is the ultimate effortless layer — throw it open over a fitted tee and jeans, a knit and leggings, or a simple dress, and let the long vertical line do everything. Keep what’s underneath close-fitting so the silhouette stays clean, add boots, and you’re done. Because it’s long and open, it flatters every shape and instantly makes a casual outfit look considered. On cooler days, layer it over a long-sleeve top or even a light jacket — dusters are made for stacking.
Final Thoughts
A longline quilted duster vest is effortless layering with real presence — a long, flowing, sleeveless layer that carries the rustic heritage of the Old West duster into a modern, cozy piece. Built light and quilted sparsely so it drapes and swings, and split at the sides so you can actually walk, it turns the simplest outfit into something with shape and intention. Minimal sewing, maximum impact: it’s the easiest way to look like you tried.
Other Design Inspirations – Digitally Modified
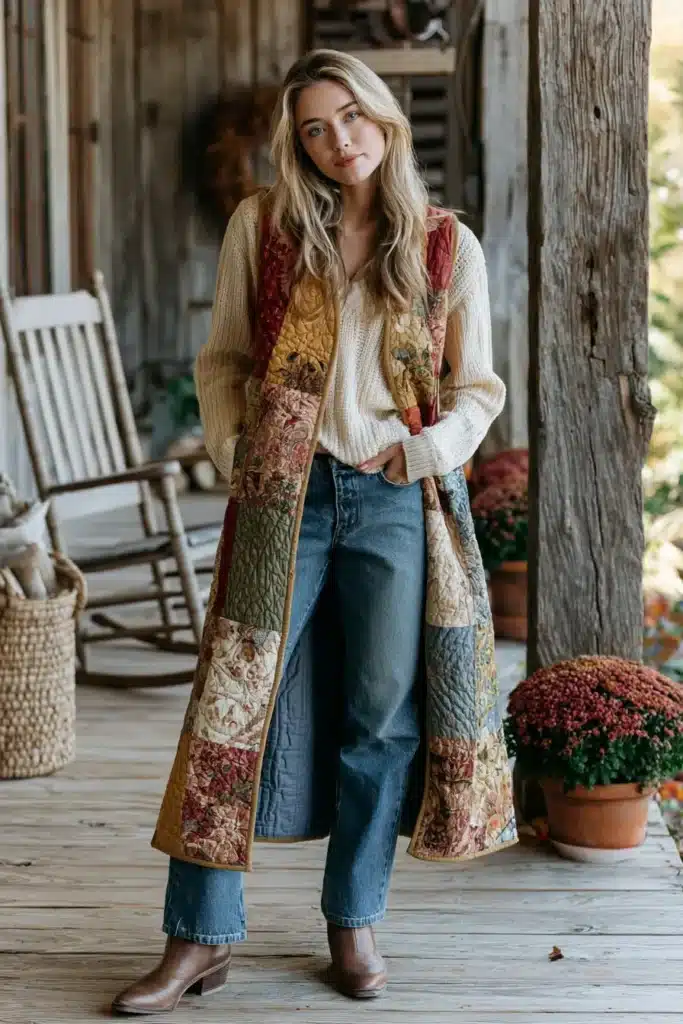
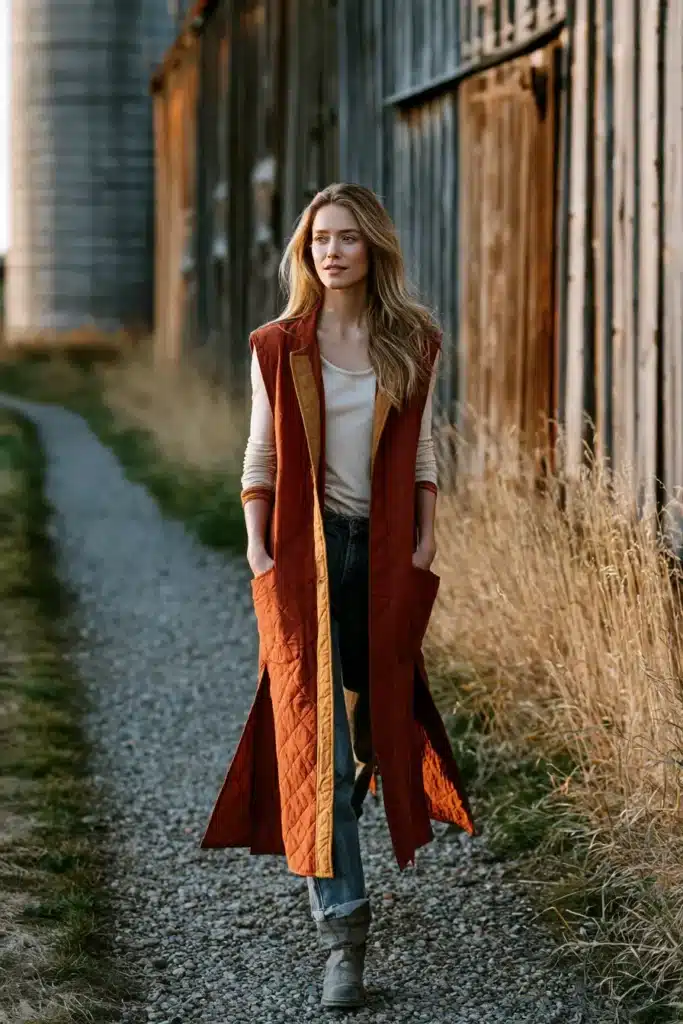
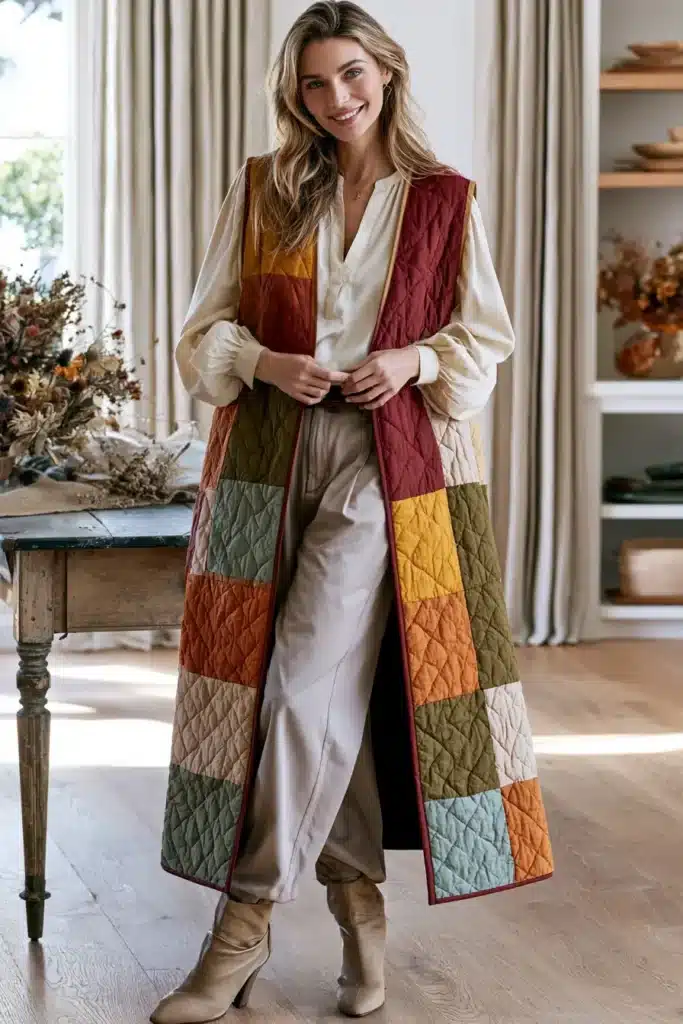
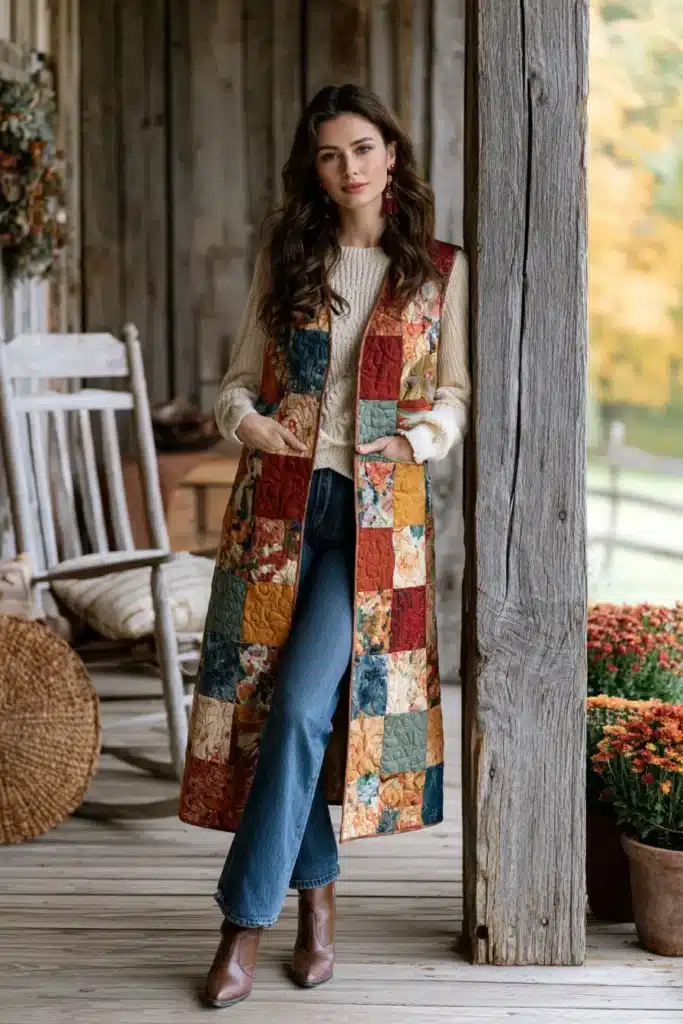
8. Neutral Linen-Blend Quilted Vest for Everyday Elegance
Not every quilted layer needs to shout rustic. A neutral linen-blend quilted vest is the refined, grown-up member of this collection — clean-lined, softly structured, and cut in a palette of warm oatmeal, flax, stone, and sand. Linen brings something no cotton quite matches: a subtle slubbed texture, a beautiful natural drape, and a quiet luminosity that makes even the plainest color look expensive. Quilted into a simple hip-length vest, it becomes the layer you can wear absolutely anywhere — over a shirt for work, over a tee on the weekend, over a dress in the evening — and it looks considered every single time.
The magic of linen is that it improves with use. Where most fabrics wear out, linen wears in, softening with every wash until it drapes like something you’ve owned for years. Add the gentle texture of quilting and you get a vest with real everyday elegance: understated, tactile, and endlessly versatile.
A Note on Linen: The World’s Oldest Cloth
Linen has a genuinely ancient pedigree. Woven from flax, it’s one of the oldest textiles known to humanity — flax fibers have been found at archaeological sites dating back tens of thousands of years, and linen was so prized in ancient Egypt that it was used for the finest garments and for wrapping the dead. It has stayed in constant use ever since for good reason: it’s strong, breathable, naturally temperature-regulating, and it grows softer and more beautiful the longer you keep it.
That quality of improving with age is why linen suits an heirloom-minded maker so well. In the weaving traditions of my own family’s background — including Jamdani, where the quality of a fine woven cloth is judged by its hand and its drape as much as its pattern — cloth was always valued for how it aged, not just how it looked new. A linen-blend vest is very much in that spirit: a piece designed to get better the more you wear it.
Why This Idea Is Worth Making
This idea is worth making because it produces the most versatile, wearable-anywhere piece in this collection — a quilted layer refined enough for work and easy enough for weekends. Linen-blend gives you all of linen’s texture, breathability, and beautiful drape with far more stability and less extreme wrinkling than pure linen, so it’s forgiving to sew. The neutral palette goes with everything you own, the vest shape is beginner-friendly, and the finished piece only improves with washing. It’s understated, elegant, and genuinely useful — the quilted garment you’ll wear most.
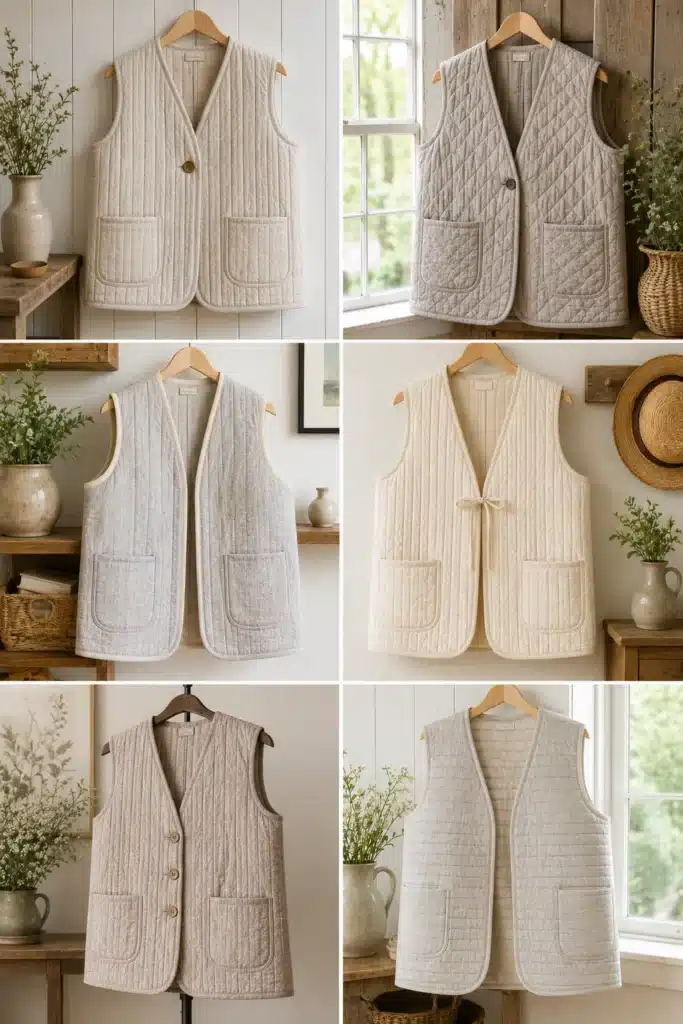
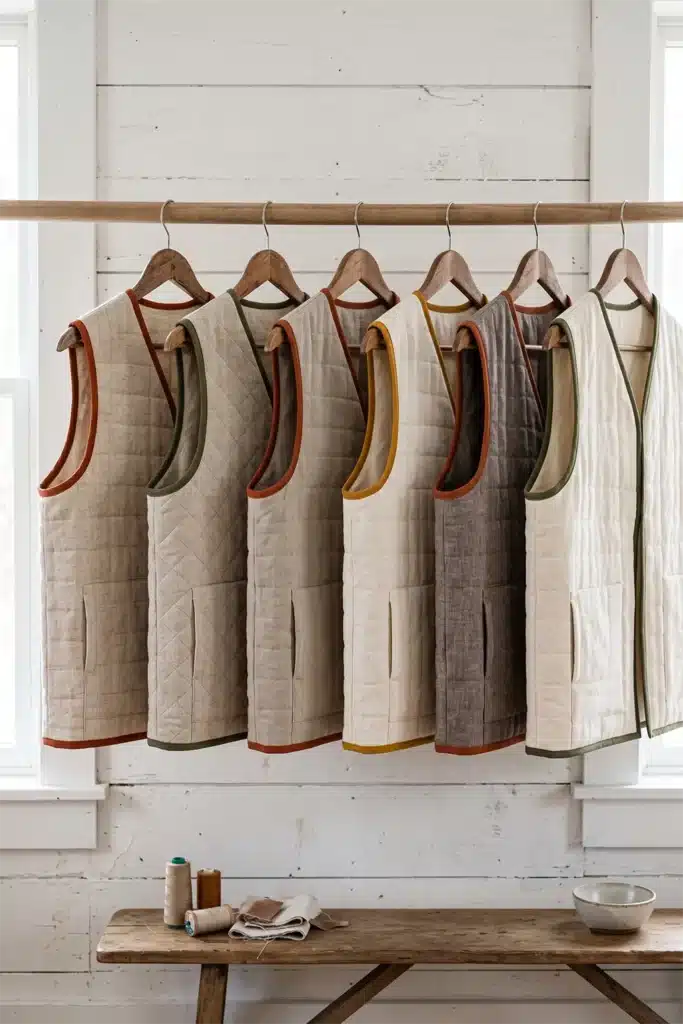
Finished Garment
- Style: clean, softly tailored vest — hip-length or just below, straight cut, open front or single closure, bound armholes
- Length: about 26–30 inches from shoulder to hem, depending on height and how low you like it
- Sizes: use a simple straight vest pattern; a slightly relaxed, uncluttered shape suits linen best
- Skill level: confident beginner (simple shape; linen just needs a little know-how)
- Core techniques: working with linen-blend, quilting for drape, bias-bound armholes, refined edge finishing
Materials Needed
- Outer fabric: about 1¾ yards of linen-cotton blend (a 55/45 or 50/50 blend gives linen’s texture with cotton’s stability). Buy 20% extra — linen shrinks
- Batting: low-loft cotton, about 1½ yards (keeps the vest soft and drapey, never puffy)
- Lining: 1¾ yards of soft cotton, cotton voile, or a second lighter linen-blend
- Binding: ½ yard, cut on the bias, for armholes and edges
- Closure (optional): one wooden or horn button, a hidden snap, or a fabric tie — keep it minimal
- Thread: good-quality cotton, plus a size 80/12 universal needle and a slightly longer stitch length
- Walking foot, rotary cutter, cutting mat, ruler, pins, iron with steam
Beginner tip: always prewash linen-blend — twice, ideally — before you cut. Linen shrinks noticeably (pure linen can lose up to 10%), and prewashing both prevents a surprise after the first wash and starts the softening process early.
Working With Linen-Blend: Four Things to Know
Linen behaves differently from quilting cotton, and a little knowledge makes it easy:
- It shrinks. Prewash and dry before cutting, and buy extra yardage. A blend shrinks less than pure linen, but it still shrinks.
- It frays. Linen’s loose weave frays readily, so finish every seam — bound seams are perfect here and look beautiful.
- It wrinkles — on purpose. Soft creasing is linen’s signature, not a flaw. Don’t fight it; a linen vest is meant to look relaxed and lived-in.
- It shifts when cut. The loose weave can move under the ruler, so cut on a flat surface, use a fresh blade, and press well before cutting.
Steam is your friend throughout — linen presses beautifully with steam and holds a crisp fold.
Choosing Your Colors
Neutral doesn’t mean flat. A good linen palette is warm, layered, and quietly luminous:
- Oatmeal and flax — the classic natural linen tone
- Warm sand and stone for gentle depth
- Soft clay and putty for a touch of warmth
- Ecru and cream for the lightest, most elegant version
- Deep taupe or espresso for a richer, more dramatic neutral
- One optional accent: if you want a hit of color, put it in the binding — a rust, olive, or ochre edge against oatmeal linen is stunning and keeps the vest neutral overall
Keep the palette warm rather than cool-grey, so the vest reads soft and inviting instead of stark.
The Fabric: Quilting for Soft Structure
- Quilt your prewashed linen-blend with low-loft batting and a soft lining
- Use simple, moderately spaced quilting — straight lines or a wide diagonal grid — so the vest keeps linen’s natural drape rather than becoming board-like
- Prepare quilted fabric for the back and two fronts enough
Cutting Measurements
- Length: cut to your shoulder-to-hem measurement, about 26–30 inches for a hip-length vest (measure on yourself and add 2 inches for trimming)
- Cut the pieces: one back and two fronts, on the straight grain, from your quilted fabric
- Optional welt or patch pockets: two at about 5 × 5½ inches finished, kept clean and simple
- Binding: cut 2 to 2½-inch bias strips, enough for both armholes plus the full outer edge
Step-by-Step Guide
Step 1 — Prewash and press the linen. Wash and dry the linen-blend (twice if you can), then press well with steam. This is the step that saves your vest from shrinking out of shape later.
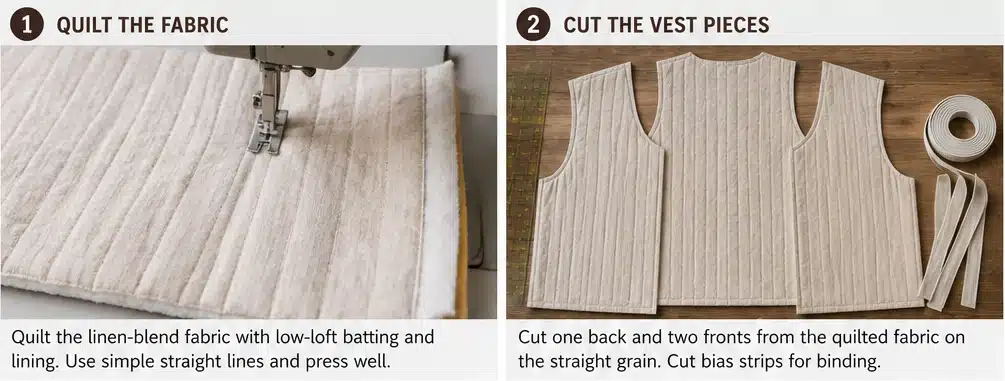
Step 2 — Quilt the panels. Layer the linen with low-loft batting and lining, and quilt with simple, moderately spaced lines. Keep the quilting light enough that the linen still drapes — that soft fall is why you chose it.
Step 3 — Cut the vest pieces. Cut one back and two fronts on the straight grain, working on a flat surface with a fresh blade, since linen shifts. Cut to your 26–30 inch length plus trimming allowance.
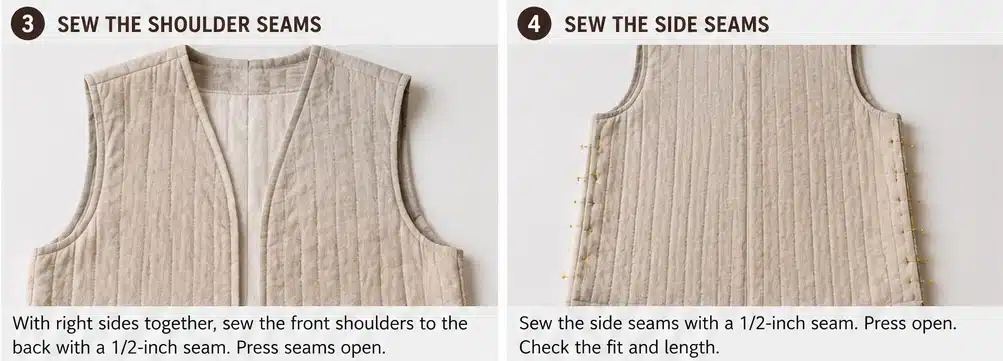
Step 4 — Sew the shoulder seams. With right sides together and a ½-inch seam, join the fronts to the back at the shoulders. Use a slightly longer stitch length and press seams open with steam.
Step 5 — Sew the side seams and finish them. Sew the side seams with a ½-inch seam, leaving clean armhole openings. Because linen frays, finish every seam allowance — bind them for the most beautiful result. Try the vest on to check the fit and length.
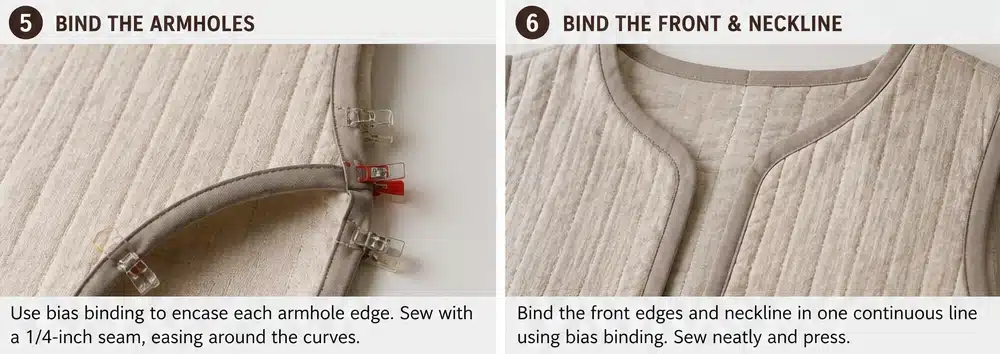
Step 6 — Bind the armholes. Using bias binding, encase each armhole edge, easing it smoothly around the curve. On a refined vest like this, crisp, even armholes are what deliver the elegant finish.
Step 7 — Bind the outer edge. Bind continuously up one front edge, around the neckline, and down the other, then along the hem — one clean, unbroken line. This is where a contrast binding (rust, olive, ochre) can add a beautiful quiet accent.
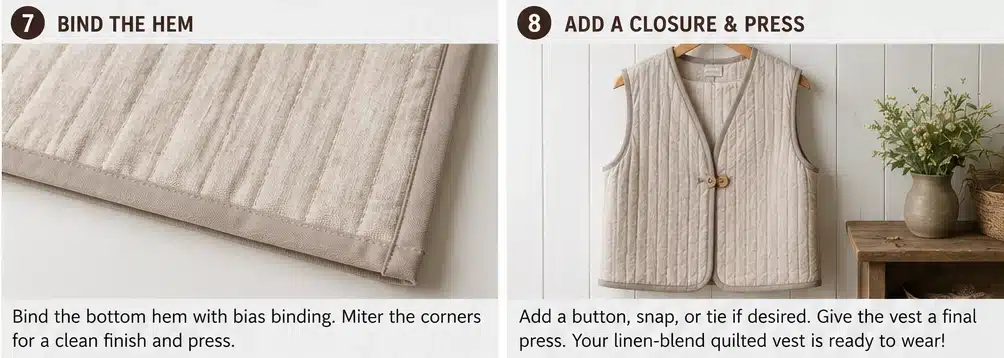
Step 8 — Add pockets and a closure (optional). Add simple patch pockets if you’d like, and one discreet closure — a single wooden button, a hidden snap, or a soft tie. Restraint is what keeps this vest elegant, so don’t over-detail it.
Step 9 — Press and wear. Steam-press the finished vest. Linen looks its best slightly relaxed, so don’t chase perfection — and know that every wash from here will make it softer and more beautiful.
Assembly at a Glance
- Prewash and dry the linen-blend (twice), then press with steam.
- Quilt the linen with low-loft batting and lining, using moderately spaced lines.
- Cut one back and two fronts on grain, 26–30 inches long.
- Sew shoulder seams (½-inch, longer stitch, pressed open).
- Sew side seams; finish/bind all allowances — linen frays.
- Bias-bind the armholes, easing the curve.
- Bind the front edges, neckline, and hem in one clean line (contrast optional).
- Add optional simple pockets and one discreet closure.
- Steam-press; expect it to soften with every wash.
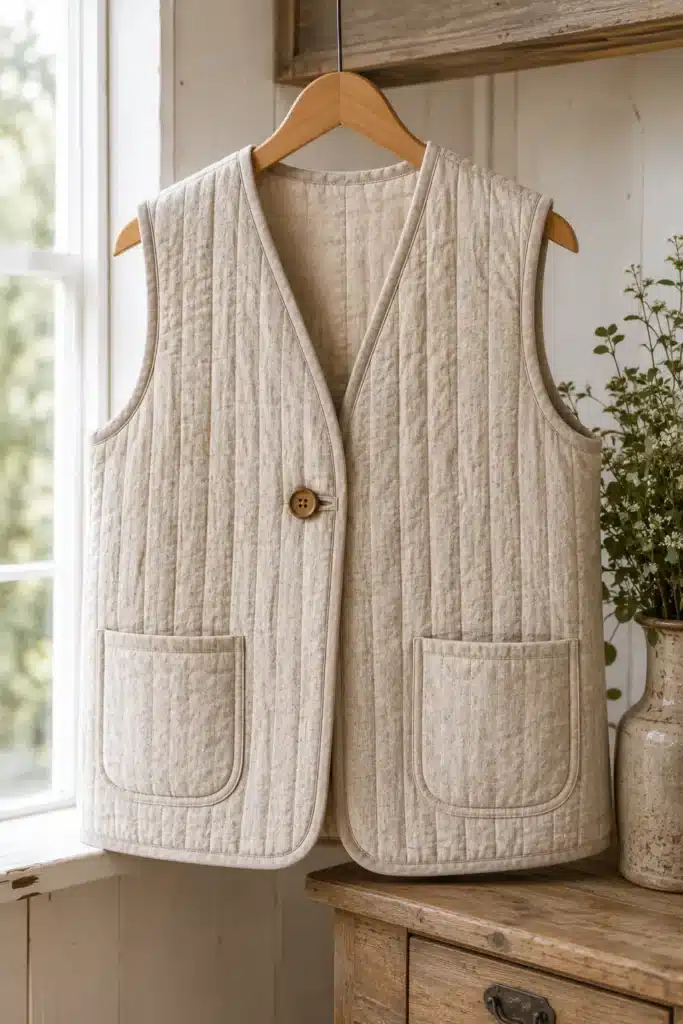
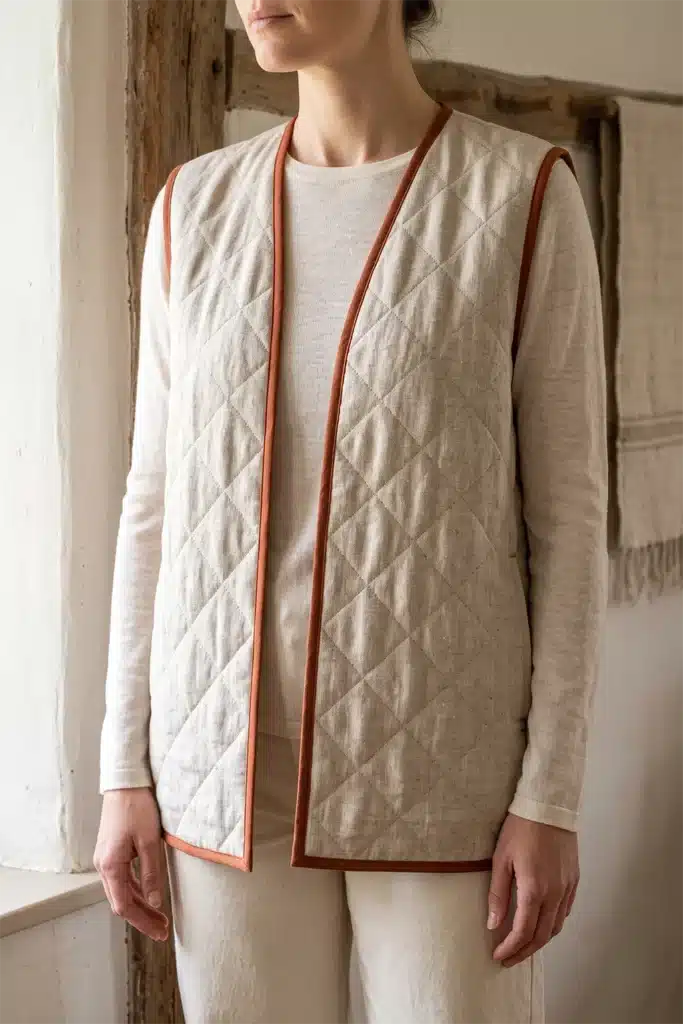
Beginner Tips for Success
- Prewash twice and buy 20% extra — linen shrinks more than you expect.
- Finish every seam; linen frays readily, and bound seams look beautiful on a refined piece.
- Use low-loft batting and light quilting so the linen keeps its natural drape.
- Cut on a flat surface with a fresh blade — the loose weave shifts easily.
- Embrace the wrinkles; soft creasing is linen’s signature, not a mistake.
- Put any color you want in the binding, so the vest stays neutral but gains an accent.
Styling It
A neutral linen vest is the ultimate go-anywhere layer. Wear it over a crisp white shirt with tailored trousers for work, over a striped tee and jeans on the weekend, or over a simple linen dress in warmer weather. Because the palette is warm and neutral, it pairs with everything — denim, black, cream, camel — and its clean lines keep the look polished. Add simple leather sandals or loafers and understated jewelry; the vest’s quiet texture is the detail, so nothing else needs to work hard.
Final Thoughts
A neutral linen-blend quilted vest is everyday elegance in its truest form — understated, beautifully textured, and endlessly wearable. Made from the world’s oldest cloth, it carries linen’s great gift of getting softer and lovelier the longer you own it, so the vest you make this year will be your favorite in five. Prewash it well, quilt it lightly, bind it cleanly, and you’ll have the quiet, elegant layer that quietly goes with absolutely everything.
Other Design Inspirations – Digitally Modified
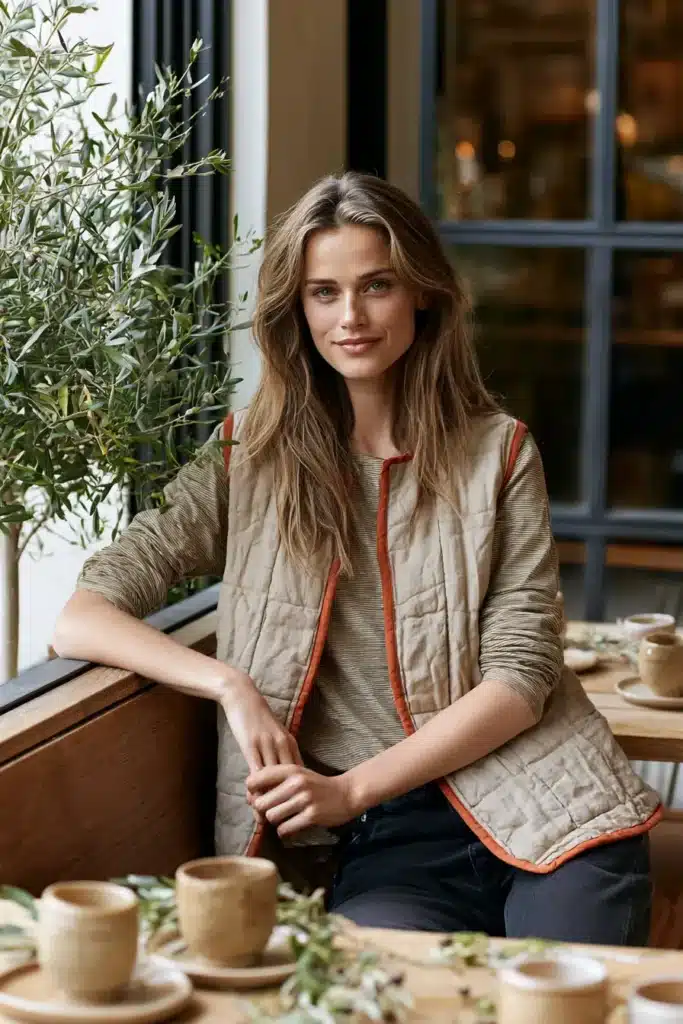
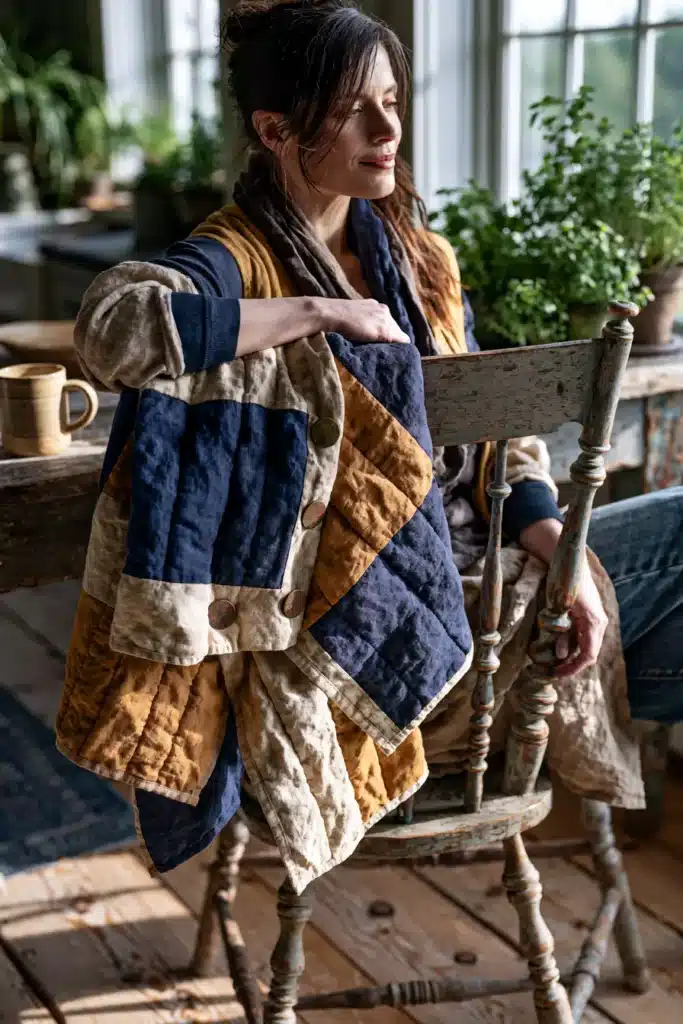
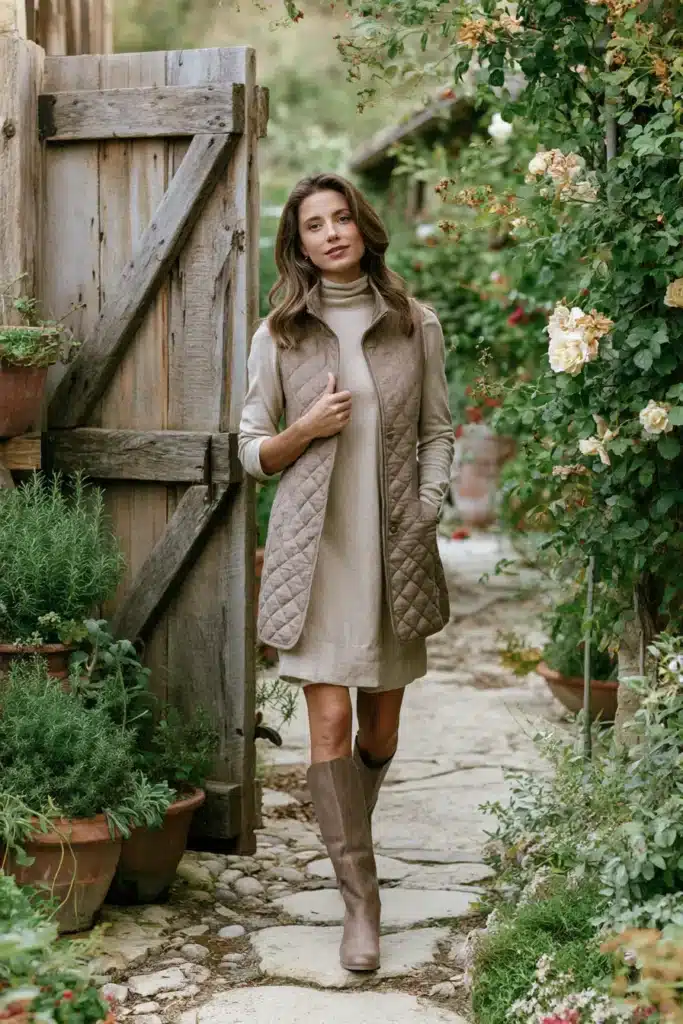
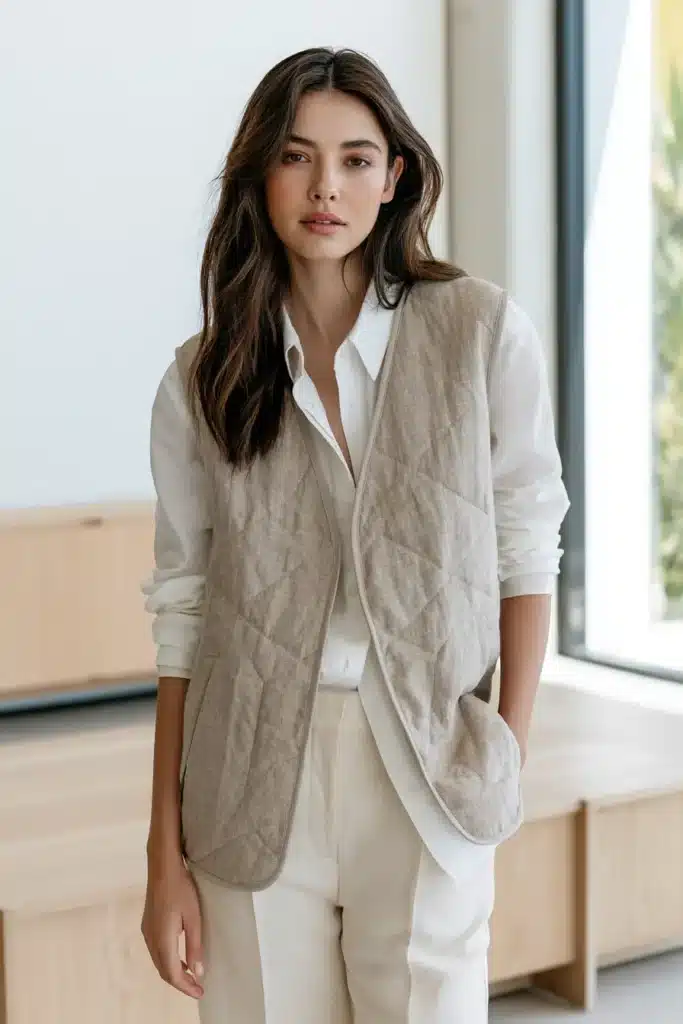
9. Gingham Quilted Vest with Country Cottage Appeal
Few fabrics say “country cottage” faster than gingham. That crisp little woven check — in cherry red, cornflower blue, sage green, or buttercup yellow against white — carries instant picnic-blanket, kitchen-window, sun-through-the-curtains charm. Quilted into a soft hip-length vest, it becomes the sweetest, most cheerful layer in this collection: fresh, nostalgic, and endlessly wearable over a white shirt or a simple dress. It’s the piece that makes an outfit look like a summer afternoon in the garden, even in November.
Gingham also happens to be a quilter’s dream fabric, for a reason that’s easy to miss: the check is a perfectly regular woven grid, which means the fabric comes with its own built-in guidelines. You can cut along it, quilt along it, and match seams by it, all without marking a single line. That hidden practicality is what makes a gingham vest so satisfying to sew.
Where Gingham Comes From
Gingham has traveled further than its wholesome image suggests. The name most likely comes from the Malay word genggang, meaning “striped” — because the original fabric, brought to Europe by Dutch traders in the seventeenth century from Southeast Asia, was striped, not checked. It was only later, when the cotton mills of Manchester began producing it in the eighteenth and nineteenth centuries, that gingham took on the even two-color check we know today.
From there it became one of the most beloved fabrics in the world — the cloth of country dresses, kitchen curtains, picnic blankets, and schoolhouse pinafores across Europe and America. There’s a nice link to woven-cloth traditions everywhere in that story: gingham’s beauty comes not from a printed pattern but from the weaving itself, dyed yarns crossed to make the check. In the weaving traditions of my own family’s background, that same principle holds — the pattern lives in the structure of the cloth, not on its surface, which is exactly why gingham looks equally good on both sides.
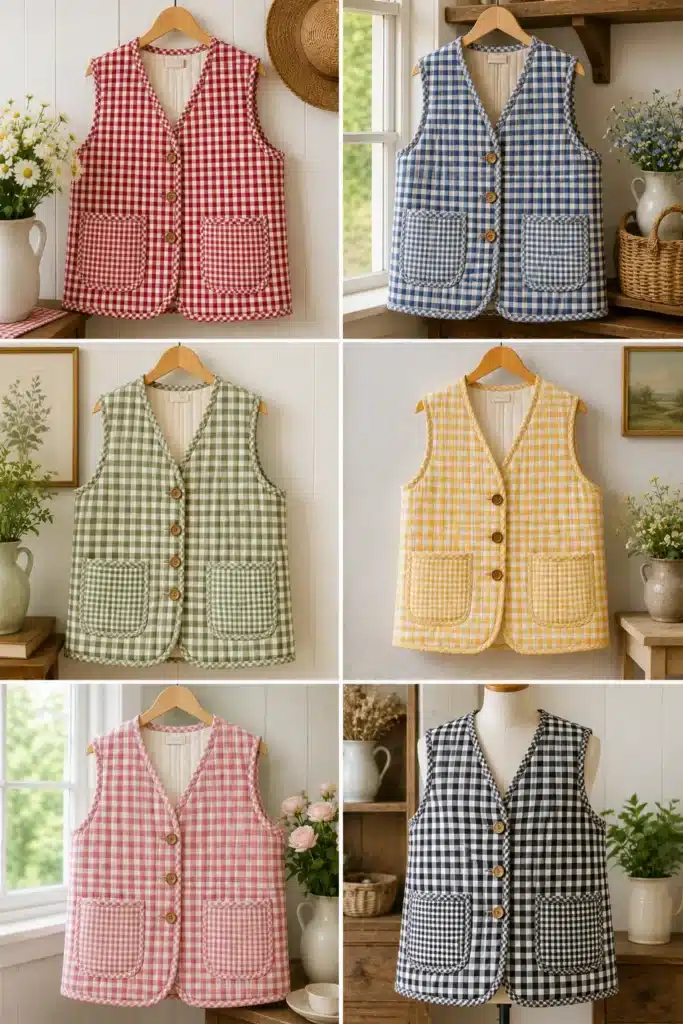
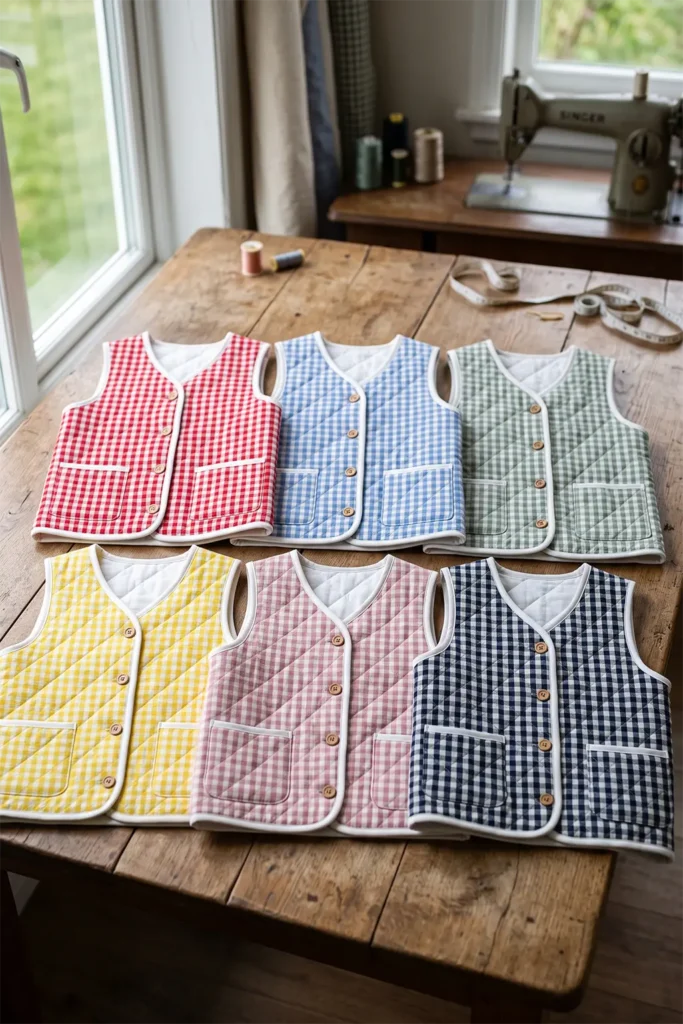
Why This Idea Is Worth Making
This idea is worth making because gingham delivers maximum charm with minimum difficulty. The woven grid does half the work for you — cutting straight, quilting evenly, and matching seams all become nearly automatic — so it’s a wonderfully forgiving project. The vest shape is beginner-friendly, gingham is inexpensive and widely available in gorgeous colors, and because the check is woven rather than printed, it looks lovely on both faces. The finished vest is cheerful, fresh, and full of country-cottage character, and it layers over almost anything in your wardrobe.
The Gingham Grid: Your Built-In Guide
This is the trick that makes a gingham vest so pleasant to sew:
- Cut along the check. Follow a line of the gingham grid when cutting, and your pieces are automatically on the straight grain — no marking needed.
- Quilt along the check. Stitch down the check lines (every square, or every second or third square) for perfectly even quilting with zero marking. It looks intentional and crisp.
- Match by the check. The regular grid makes matching seams far easier than plaid, since every square is identical — just line up the same point on both pieces.
- Cut binding on the bias. This is the classic country trick: bias-cut gingham turns the check diagonal, which looks completely different from the straight check and makes a beautiful contrast edge. It also eases smoothly around armhole curves.
Choosing Your Colors
Gingham comes in wonderfully vibrant colors, and mixing check scales is the classic cottage move:
- Cherry red and white — the most iconic, cheerful country gingham
- Cornflower and sky blue — fresh, calm, and endlessly pretty
- Sage or grass green — garden-fresh and grounded
- Buttercup yellow — sunny and joyful
- Dusty pink or rose — soft and romantic
- Black or navy and white — a crisper, more modern take
Mix your scales: a large check for the vest body, a small check for the binding and pockets (or vice versa). Two scales of the same color read as beautifully coordinated; two different colors — say a red body with a blue small-check binding — feel joyfully cottage-y. Adding a plain white or cream lining keeps it fresh.
Finished Garment
- Style: soft, relaxed hip-length vest — gently A-line or straight, open front or wooden buttons, patch pockets, bound armholes
- Length: about 26–28 inches from shoulder to hem
- Sizes: use a simple relaxed vest pattern; a soft, uncluttered shape suits gingham best
- Skill level: beginner — the grid makes everything easier
- Core techniques: grid-guided cutting and quilting, bias-cut gingham binding, armhole finishing
Materials Needed
- Outer fabric: about 1¾ yards of gingham (cotton or a cotton blend) in your main check scale
- Contrast gingham: ½ yard in a smaller (or larger) check, for binding and pockets
- Batting: low-loft cotton, about 1½ yards
- Lining: 1¾ yards of soft white, cream, or a coordinating small gingham
- Buttons (optional): 2–3 wooden or mother-of-pearl buttons
- Thread, walking foot, rotary cutter, cutting mat, ruler, pins, iron
- Prewash everything — gingham is usually cotton and will shrink
Beginner tip: prewash and press the gingham before cutting, and check that the check runs square to the fabric’s grain. Occasionally a gingham is printed or finished slightly askew — if the check doesn’t line up with the grain, follow the check rather than the grain, since a crooked-looking check is far more noticeable than a slightly off-grain cut.
Cutting Measurements
- Cut along the check lines for automatically straight, on-grain pieces
- Cut the pieces: one back and two fronts, at your 26–28 inch length plus 2 inches for trimming
- Patch pockets: two at about 5 × 5½ inches finished, in the contrast check
- Binding: cut 2 to 2½-inch strips on the bias from the contrast gingham — you’ll need several yards for both armholes and all outer edges
Step-by-Step Guide
Step 1 — Prewash and press. Wash, dry, and press both ginghams and the lining. Check that the woven check runs square before you cut anything.
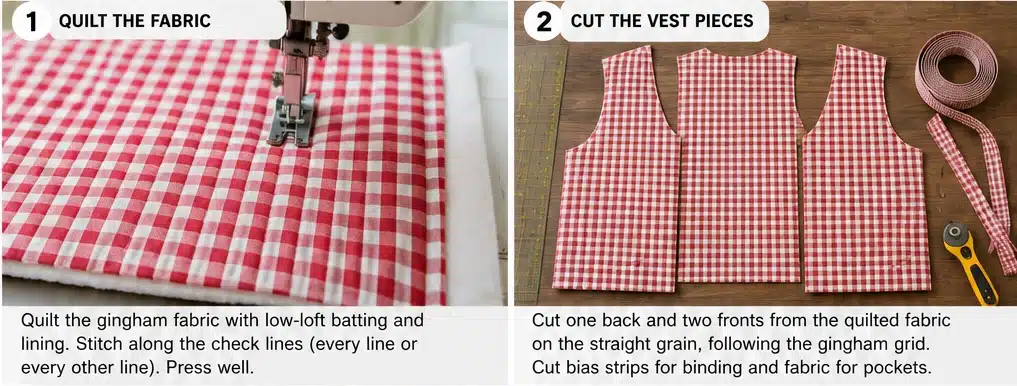
Step 2 — Quilt along the check. Layer the gingham with low-loft batting and lining, then quilt following the check lines — down every second or third square, both directions, for a clean grid. No marking required, and the result is perfectly even.
Step 3 — Cut the vest pieces. Cut one back and two fronts, following a check line so everything sits on grain. Cut to your 26–28 inch length plus trimming allowance.
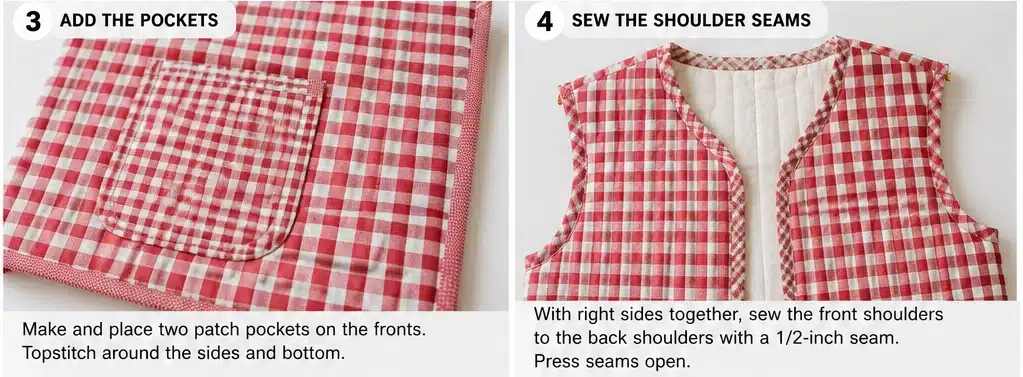
Step 4 — Make and attach the pockets. Cut two contrast-check pockets, bind or fold their top edges, and topstitch them to the fronts — lining up the pocket’s check with the check behind it, or deliberately turning the pocket on the bias for a sweet diagonal detail.
Step 5 — Sew the shoulder seams. With right sides together and a ½-inch seam, join the fronts to the back at the shoulders, matching the check across the seam. Press seams open.
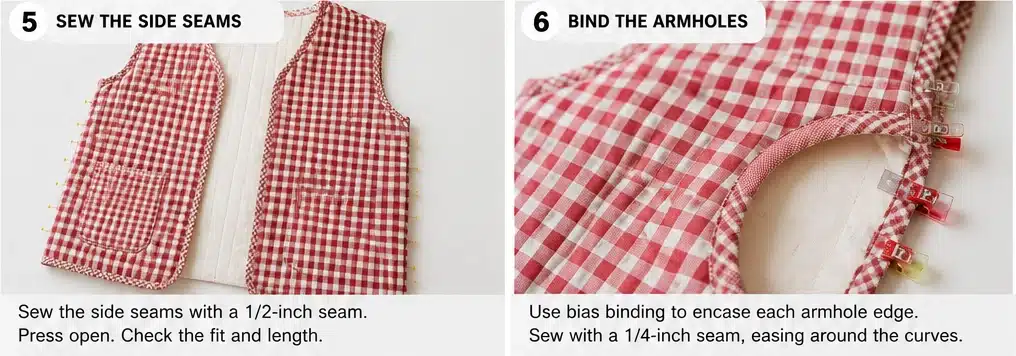
Step 6 — Sew the side seams. Sew the side seams with a ½-inch seam, again matching the check, and leave clean armhole openings. Try the vest on to check fit and length.
Step 7 — Bias-bind the armholes. Using your bias-cut contrast gingham, bind each armhole, easing smoothly around the curve. The diagonal check against the straight check is the vest’s prettiest detail.
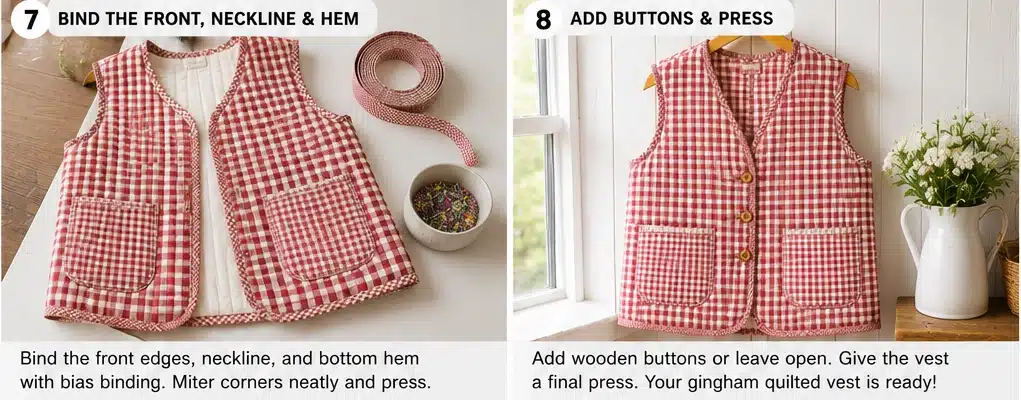
Step 8 — Bind the outer edges. Bind continuously up one front, around the neckline, down the other front, and along the hem, all in the bias contrast gingham. This diagonal edge frames the whole vest beautifully.
Step 9 — Add buttons and press. Sew on 2–3 wooden or mother-of-pearl buttons with buttonholes, or leave the vest open. Press well — gingham loves a crisp press — and it’s ready to wear.
Assembly at a Glance
- Prewash and press both ginghams; check the grid runs square.
- Quilt along the check lines (every 2nd–3rd square) with low-loft batting and lining.
- Cut one back and two fronts by following a check line, 26–28 inches long.
- Add contrast-check patch pockets (straight or on the bias).
- Sew shoulder seams (½-inch), matching the check; press open.
- Sew side seams, matching the check; leave armhole openings.
- Bias-bind the armholes in contrast gingham.
- Bias-bind the front edges, neckline, and hem.
- Add 2–3 wooden buttons; press crisply.
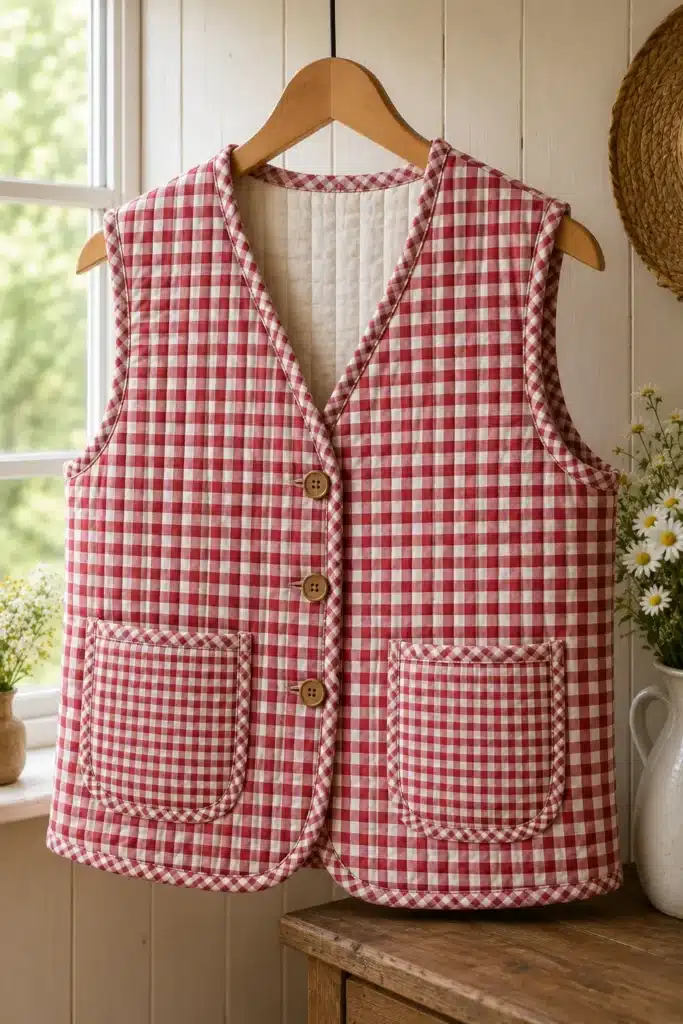
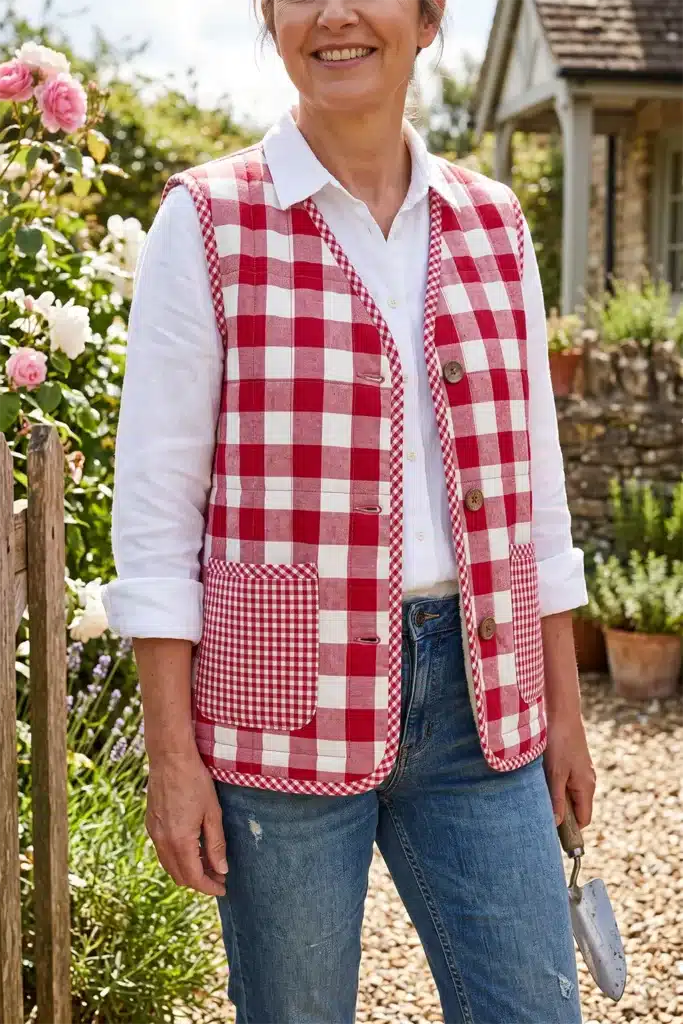
Beginner Tips for Success
- Let the grid work for you — cut, quilt, and match by the check, and skip marking entirely.
- Cut binding on the bias so the check turns diagonal; it’s prettier and eases around curves.
- Mix check scales — large on the body, small on the binding and pockets — for classic cottage charm.
- Prewash: gingham is cotton and will shrink.
- If the woven check runs slightly off-grain, follow the check, not the grain — the eye notices a crooked check instantly.
Styling It
A gingham vest is fresh, sweet, and easy to wear — layer it over a crisp white shirt with jeans, over a plain tee with denim shorts in warm weather, or over a simple linen dress for full cottage charm. Because the check is bold but the colors are cheerful, keep everything underneath plain and let the gingham shine. Add simple sandals or canvas sneakers, a straw bag, maybe a ribbon or a wicker basket if you’re leaning fully into the cottage look. It’s the layer that makes an ordinary outfit feel like a countryside afternoon.
Final Thoughts
A gingham quilted vest is country cottage appeal at its most charming — and its most practical. The woven check that gives it all that picnic-blanket cheer also gives you a built-in grid for cutting, quilting, and matching, which makes it one of the friendliest projects a beginner can pick up. Mix your check scales, bind it on the bias for that pretty diagonal edge, and you’ll have a bright, fresh, thoroughly cheerful layer with a history stretching from Southeast Asian looms to the cottage kitchen.
Other Design Inspirations – Digitally Modified
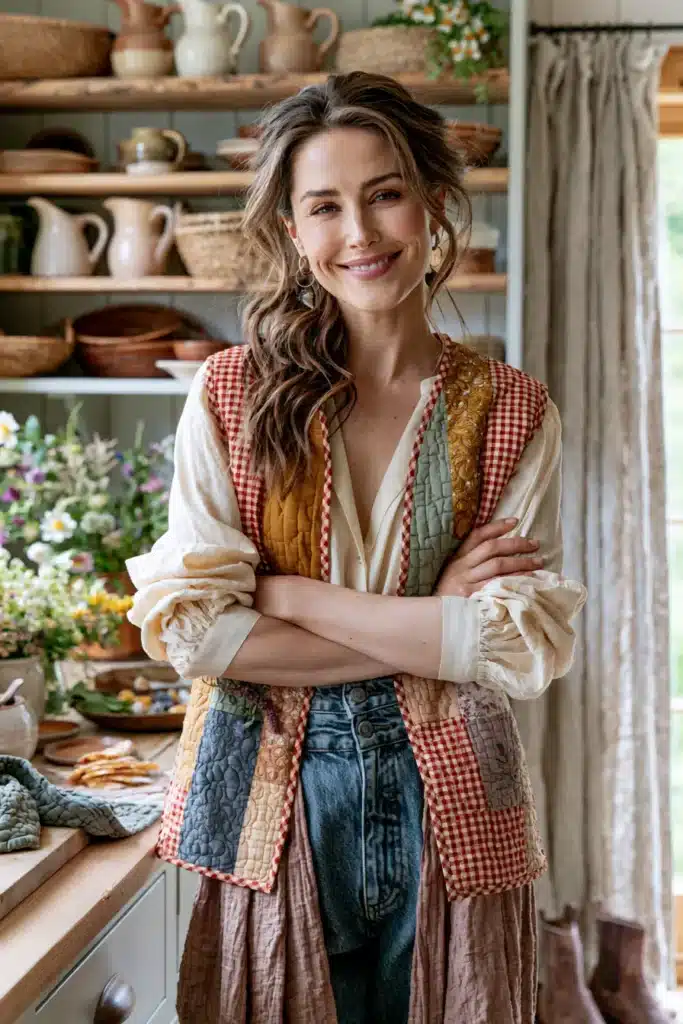
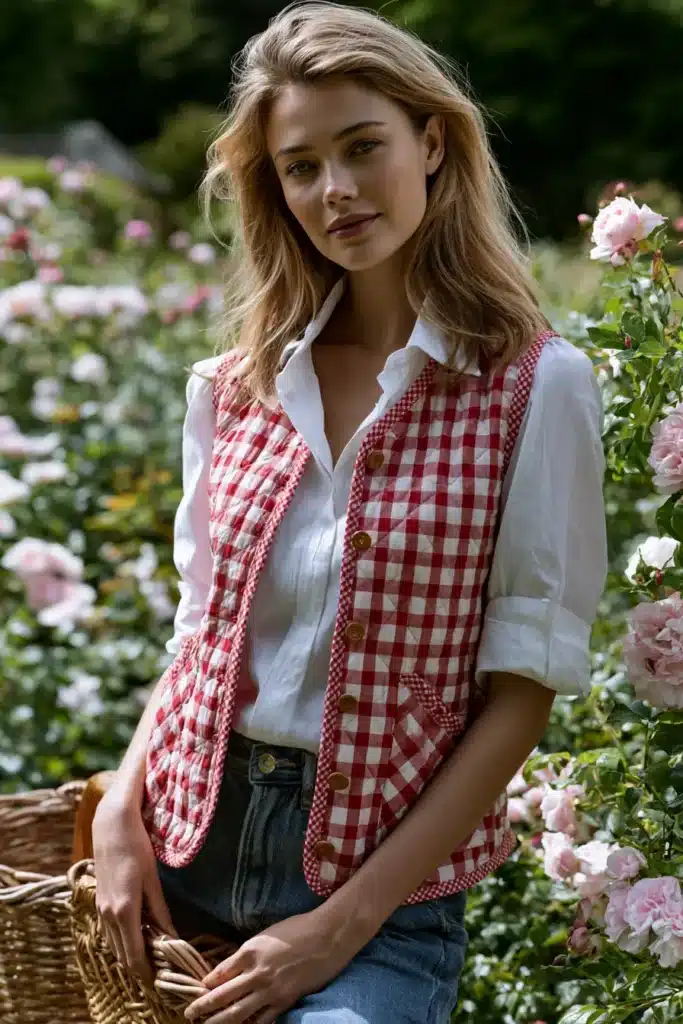
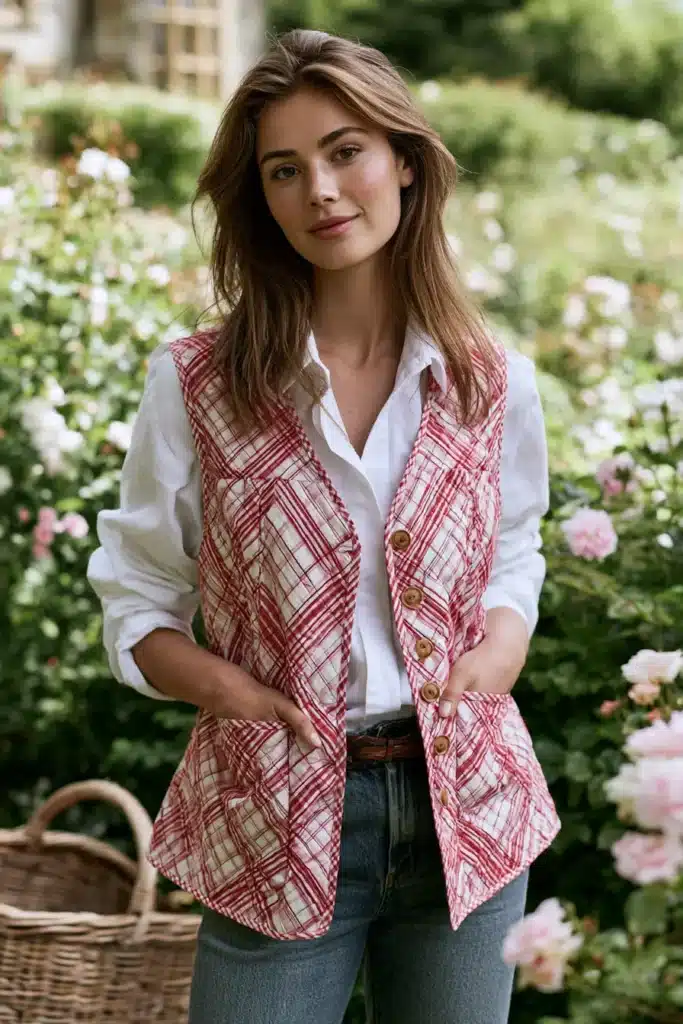
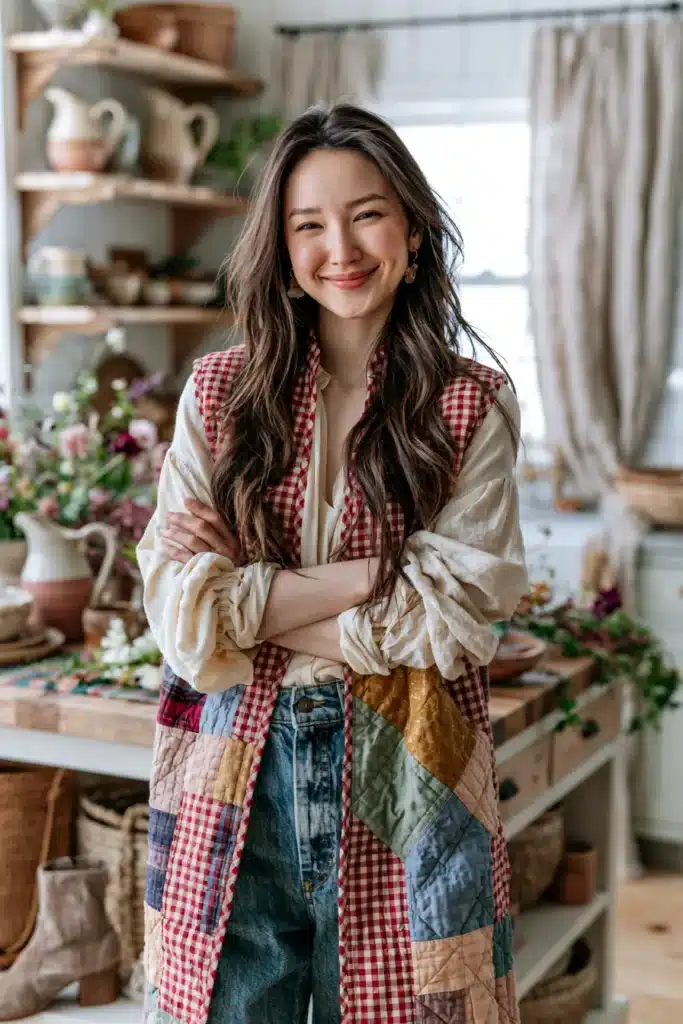
10. Soft Quilted Henley Top for Casual Farmhouse Layering
Most quilted garments are outer layers — things you throw over an outfit. A soft quilted henley is different: it’s a top, worn as the outfit itself, with the cozy texture of quilting built right in. Collarless, with a short button placket at the neck and relaxed long sleeves, it has all the easy, worn-in comfort of a favorite henley shirt plus the gentle warmth and quiet structure of a lightly quilted fabric. In warm farmhouse colors — rust, mustard, sage, or faded denim blue — it’s the piece you pull on over jeans on a cool morning and never want to take off.
The trick to a good quilted henley is restraint. Because it sits close to the body rather than over a sweater, everything has to be lighter than you’d use for a jacket: the thinnest batting, the softest lining, and the sparsest quilting. Done right, it feels like a substantial, beautifully textured shirt. Done too heavily, it feels like wearing a bed quilt. That balance is the whole craft here.
The Henley’s Sporting Origins
The henley shirt takes its name from a very specific place: Henley-on-Thames, the English town famous for the Henley Royal Regatta. In the nineteenth century, this collarless, button-placket pullover was the traditional shirt of English rowing crews, chosen because it was comfortable, unrestrictive, and easy to move in — everything a rower needed. From the riverbank it slipped into workwear, then into everyday casual dress, and it’s been a wardrobe staple ever since.
That’s a useful clue for making one: the henley was designed for ease of movement, and any version you sew should honor that. It’s also a nice reminder that the humblest, most practical garments often have the longest lives — the same principle behind the layered, hand-stitched everyday cloth in traditions like Nakshi Kantha, which my own family’s background comes from. Comfortable, hardworking, made to be lived in.
Why This Idea Is Worth Making
This idea is worth making because it takes quilting somewhere it rarely goes — into an actual top you wear as your main layer. It’s cozier than a shirt, lighter than a jacket, and perfect for that in-between weather when you want warmth without bulk. The henley’s short placket is a genuinely useful technique to learn, the relaxed shape is forgiving, and the finished top pairs with jeans, cords, or leggings for the easiest farmhouse-casual look there is. It’s also a great showcase for one beautiful fabric, since the design is all about simplicity.
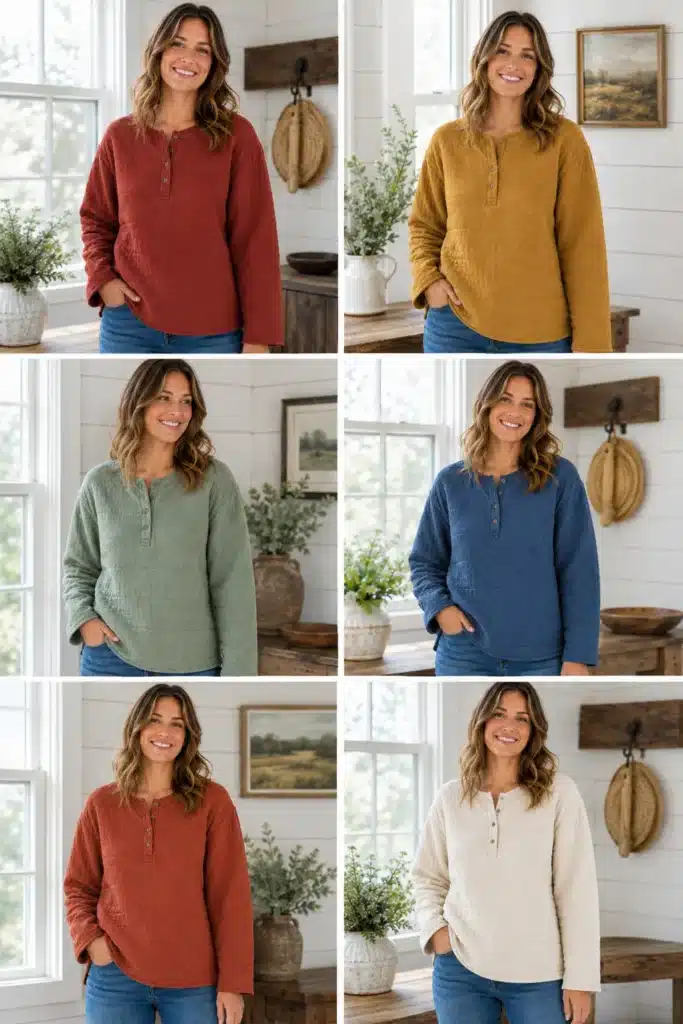
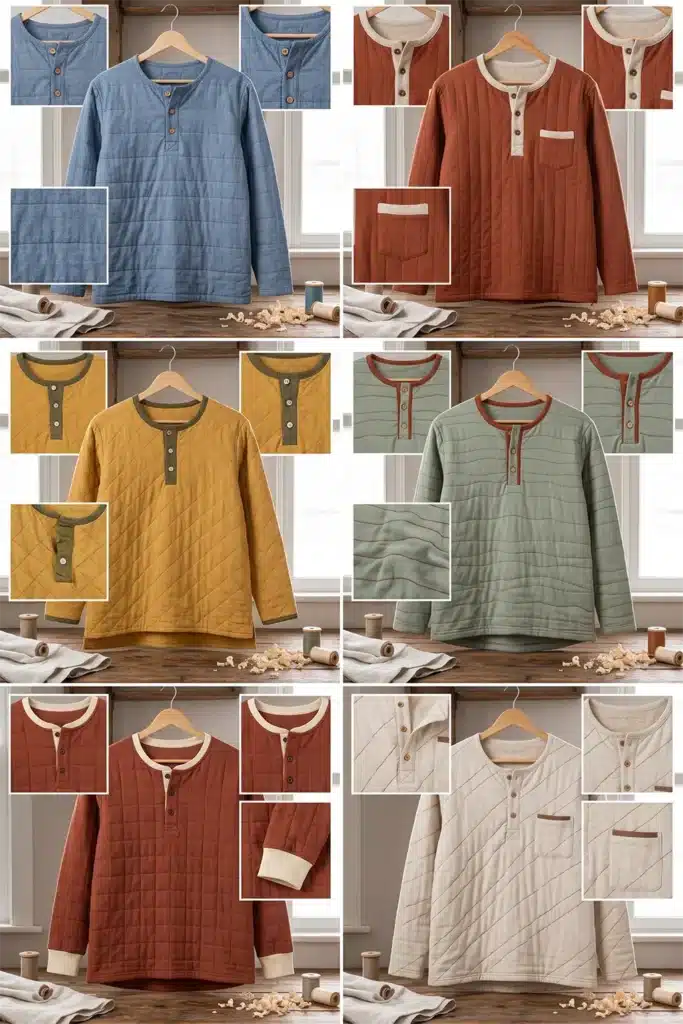
The Pullover Problem (and How to Solve It)
This is the single most important thing to understand before you start. Quilted fabric has no stretch at all, so unlike a knit henley, this top can’t simply stretch over your head. Three rules make it work:
- Choose a relaxed, boxy pattern with generous ease. Don’t use a fitted knit henley pattern — pick a woven pullover or boxy top pattern designed for non-stretch fabric.
- Make the placket long enough. A knit henley’s placket can be short because the fabric gives; yours can’t. Cut a placket of at least 8–9 inches so the neck opening genuinely widens when unbuttoned.
- Check the head opening before finishing. Once the shoulder seams are sewn and the placket is open, try pulling it over your head. Fix it now, not after the neckline is bound.
Get these right and it’s an easy sew. Skip them and you’ll make a beautiful top you can’t put on.
Finished Garment
- Style: relaxed pullover henley — collarless, short front button placket, long sleeves, boxy fit
- Length: about 25–27 inches from shoulder to hem (hip-length)
- Placket: about 8–9 inches long, 1¼ inches wide finished, with 3–4 buttons
- Sizes: use a woven boxy pullover or henley pattern drafted for non-stretch fabric
- Skill level: confident beginner (the placket is the one new skill)
- Core techniques: ultra-light quilting, placket construction, pullover ease, bound neckline
Materials Needed
- Outer fabric: about 2 yards of soft cotton, chambray, lightweight linen-blend, or brushed cotton
- Batting: the thinnest cotton batting you can find, or cotton flannel as your middle layer — flannel is the better choice here, giving warmth and texture without any puff
- Lining: 2 yards of very soft cotton, cotton voile, or lightweight flannel — this sits against your skin, so prioritize softness
- Interfacing: a small piece of lightweight interfacing for the placket
- Buttons: 3–4 small buttons (wood, horn, or mother-of-pearl)
- Binding: ¼ yard for the neckline, cut on the bias
- Thread, walking foot, rotary cutter, cutting mat, ruler, pins, iron, sewing machine
Beginner tip: skip batting entirely and use flannel as the middle layer. It gives you gentle warmth and lovely quilted texture with far less bulk than even low-loft batting — exactly what a wearable top needs.
Choosing Your Colors
A henley is a simple canvas, so let one good color do the work:
- Warm rust or brick — the classic cozy farmhouse tone
- Mustard gold — cheerful and unexpected
- Sage or olive green — earthy and easy to wear
- Faded denim or chambray blue — the most workwear-authentic choice
- Deep terracotta or clay — rich and warm
- Oatmeal or cream — soft and neutral, letting the texture show
A single solid or subtle chambray suits a henley best; save patchwork for outer layers. If you want a detail, make the placket or neckline binding a contrasting color — a small, sharp accent against a solid body looks fantastic.
The Fabric: Quilting Light
- Layer your outer fabric, flannel or ultra-thin batting, and a very soft lining
- Quilt sparsely — widely spaced straight lines, roughly 1½–2 inches apart, or a wide diagonal grid
- Denser quilting stiffens the fabric; for a top you want it to stay soft and move with you
- Prepare enough quilted fabric for the front, back, and two sleeves
Cutting Measurements
- Front, back, and two sleeves: cut from your quilted fabric on the straight grain, to your pattern
- Length: about 25–27 inches shoulder to hem, plus 2 inches for trimming
- Placket pieces: two strips at about 2¾ × 10 inches (finishing at 1¼ × 8–9 inches), plus lightweight interfacing
- Neckline binding: 1½-inch bias strips, enough to go around the neckline plus a few inches
Step-by-Step Guide
Step 1 — Quilt the fabric lightly. Layer outer fabric, flannel (or thinnest batting), and soft lining, then quilt with widely spaced lines about 1½–2 inches apart. Keep it soft — you should be able to drape the finished panel easily over your hand.
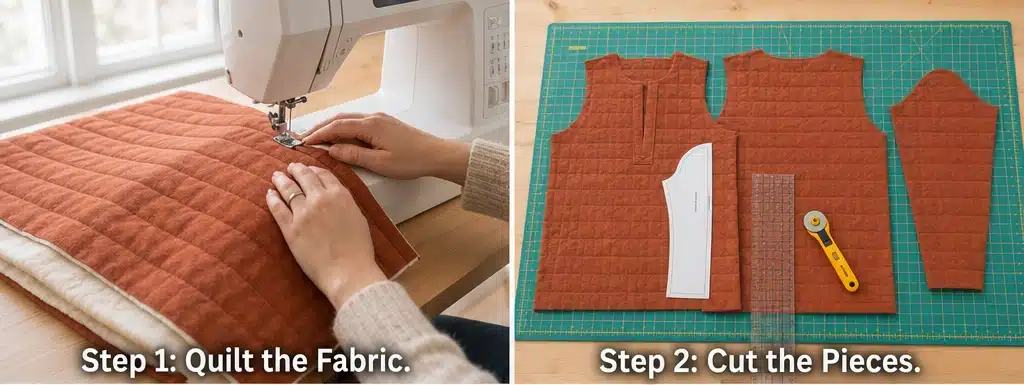
Step 2 — Cut the pieces. Cut the front, back, and two sleeves on the straight grain, at your 25–27 inch length. Mark the placket opening on the front: a slit down the center front, about 8–9 inches from the neckline.
Step 3 — Build the placket. Interface the two placket strips and press them in half lengthwise. Cut the marked slit down the center front, then attach the placket strips on either side, one overlapping the other at the bottom in the classic henley box. Topstitch neatly — this is the top’s focal detail, so take your time.
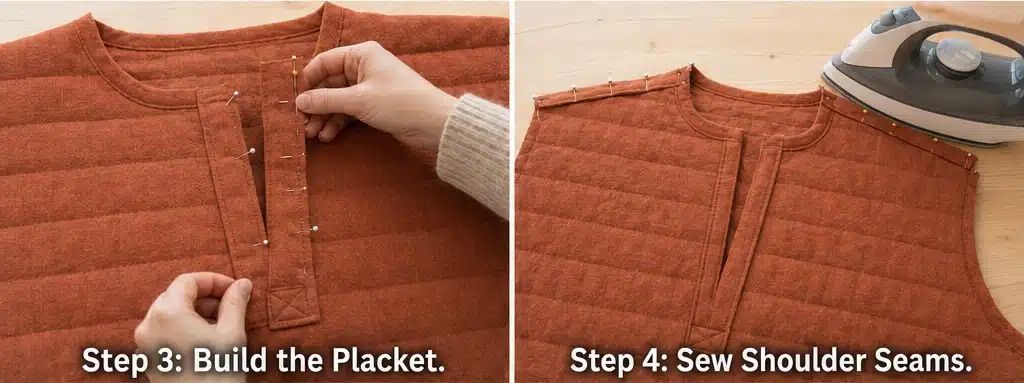
Step 4 — Sew the shoulder seams. With right sides together and a ½-inch seam, join front to back at the shoulders. Press seams open to keep bulk down.
Step 5 — TEST the head opening. With the placket open, pull the top over your head before you finish the neckline. If it’s tight, lengthen the placket slit now. This one check saves the whole project.
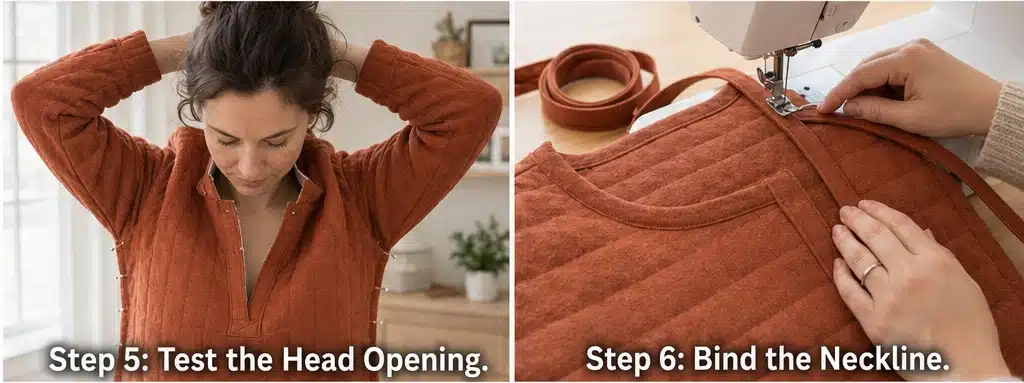
Step 6 — Bind the neckline. Using bias binding, finish the neckline cleanly, working neatly around the top of the placket. A contrasting binding here looks sharp against a solid body.
Step 7 — Set the sleeves and sew the sides. Attach the sleeves (a dropped shoulder is easiest and suits the relaxed fit), then sew the underarm and side seams in one continuous line with a ½-inch seam. Finish or bind the seam allowances so the inside stays comfortable against skin.
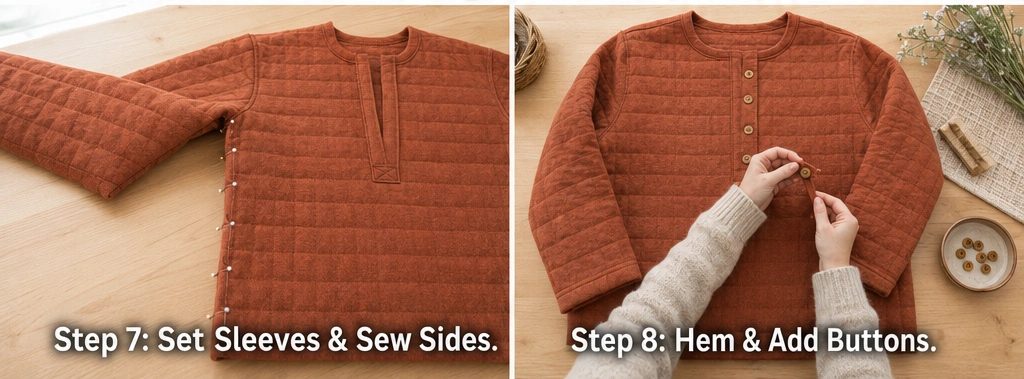
Step 8 — Hem the sleeves and body. Turn and stitch the cuffs and the bottom hem, or bind them for a cleaner finish on quilted fabric. Keep hems narrow so they don’t add stiffness.
Step 9 — Add the buttons and press. Make 3–4 buttonholes down the placket and sew on your buttons, evenly spaced. Press gently, then wear it — a wash and low tumble will soften it beautifully.
Assembly at a Glance
- Quilt outer fabric + flannel/thin batting + soft lining with lines 1½–2 inches apart.
- Cut front, back, and two sleeves; mark an 8–9 inch center-front placket slit.
- Interface and build the placket; topstitch the classic henley box.
- Sew shoulder seams (½-inch, pressed open).
- Test the head opening with the placket open — lengthen the slit if tight.
- Bias-bind the neckline around the placket top.
- Set sleeves; sew side/underarm seams; finish allowances for comfort.
- Hem or bind the cuffs and bottom hem, keeping them narrow.
- Add 3–4 buttonholes and buttons; press and wear.
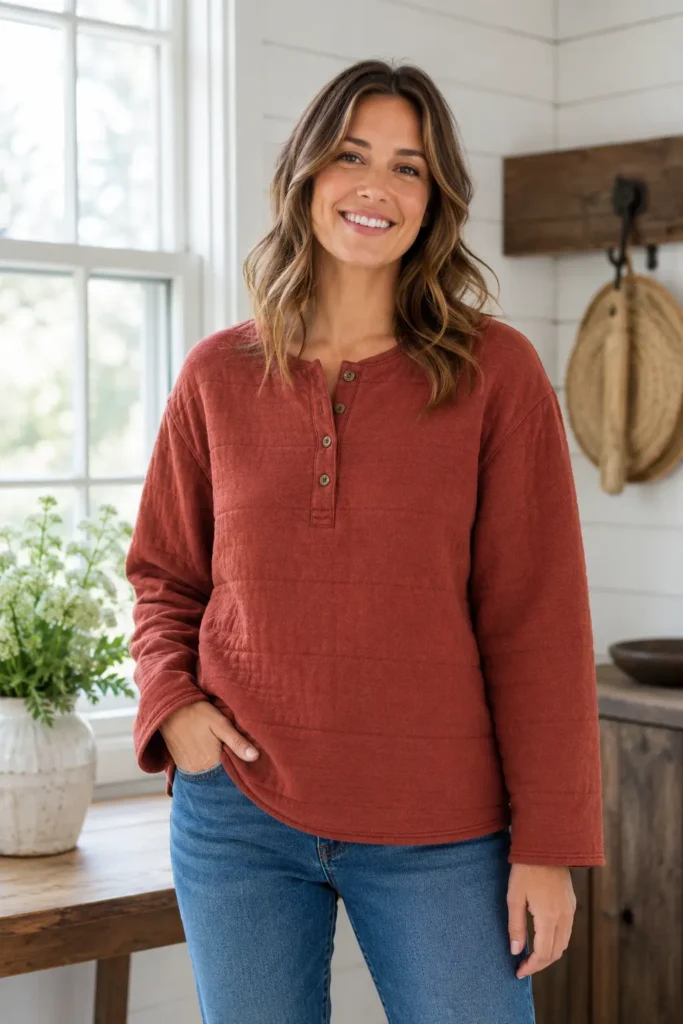
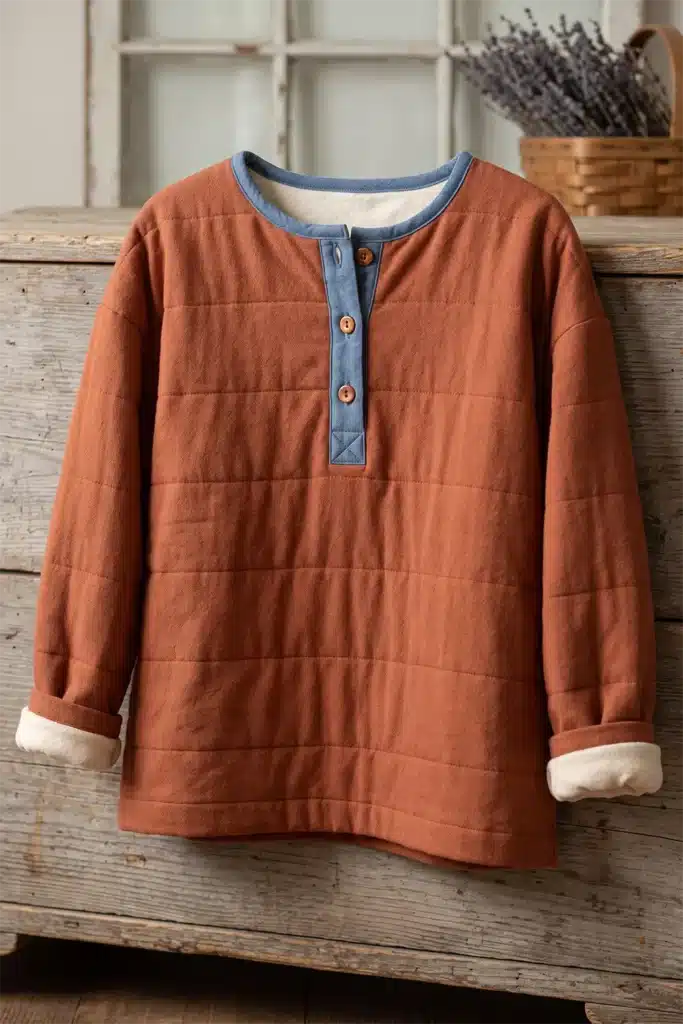
Beginner Tips for Success
- Use flannel instead of batting — warmth and texture without the puff, which is essential in a top.
- Quilt sparsely (1½–2 inches apart); dense quilting makes a top stiff and jacket-like.
- Choose a boxy woven pattern, never a fitted knit henley pattern — quilted fabric has no stretch.
- Make the placket 8–9 inches and test the head opening before finishing the neckline.
- Finish interior seams; this sits against your skin, so comfort inside matters as much as looks outside.
Styling It
A quilted henley is the easiest farmhouse-casual piece there is — wear it with jeans and boots, tuck it loosely into cords, or layer it under a vest or open jacket when it’s colder. Roll the sleeves and leave the top button or two undone for that classic relaxed henley look. Because it’s a single solid color with lovely texture, it works as a quiet base for anything else you’re wearing, or stands alone as the whole outfit with good boots and simple jewelry.
Final Thoughts
A soft quilted henley top brings quilting out of the outerwear pile and into your everyday wardrobe — a genuinely wearable top with cozy texture built right in. Descended from the collarless shirts of nineteenth-century English rowing crews, it was always meant to be comfortable and easy to move in, and a lightly quilted version honors that beautifully. Keep the batting thin, the quilting sparse, and the placket long, and you’ll have the softest, most reached-for handmade piece in your closet.
Other Design Inspirations – Digitally Modified
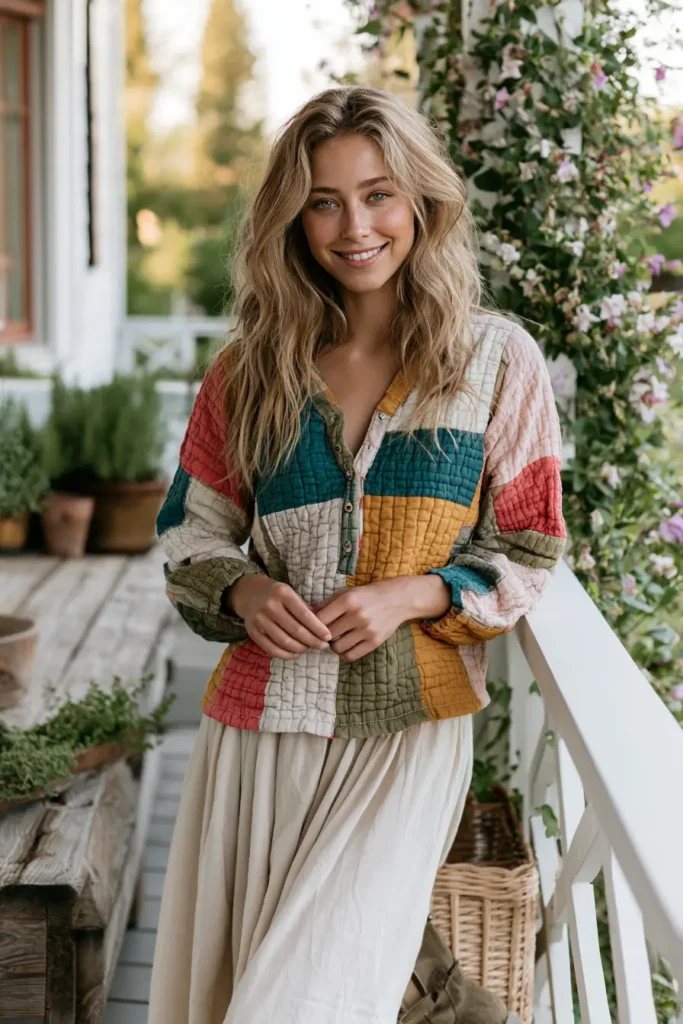
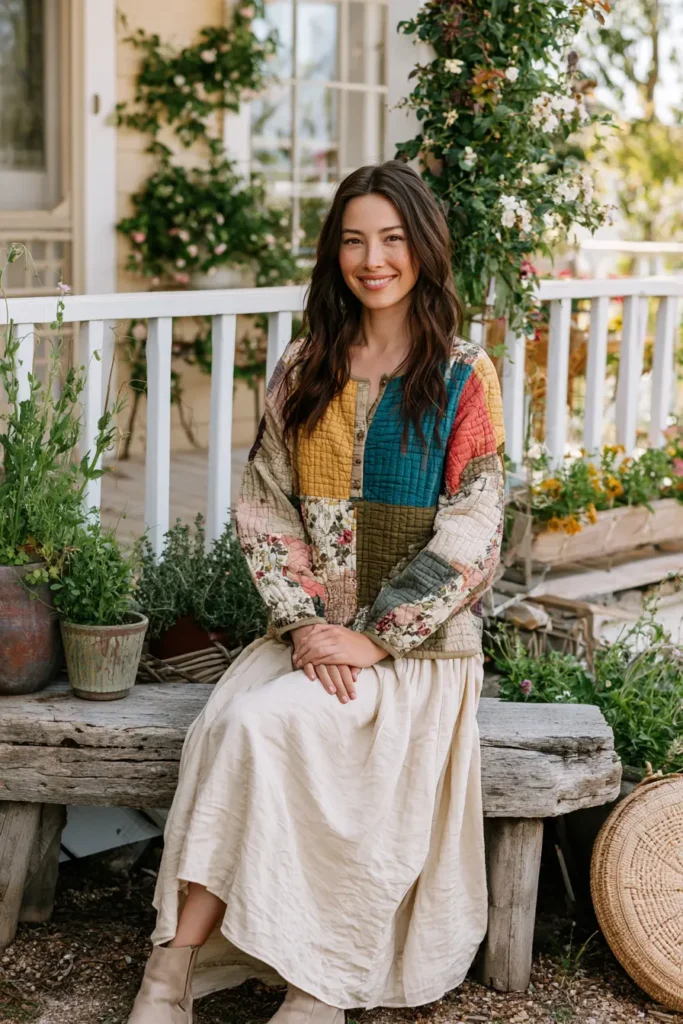

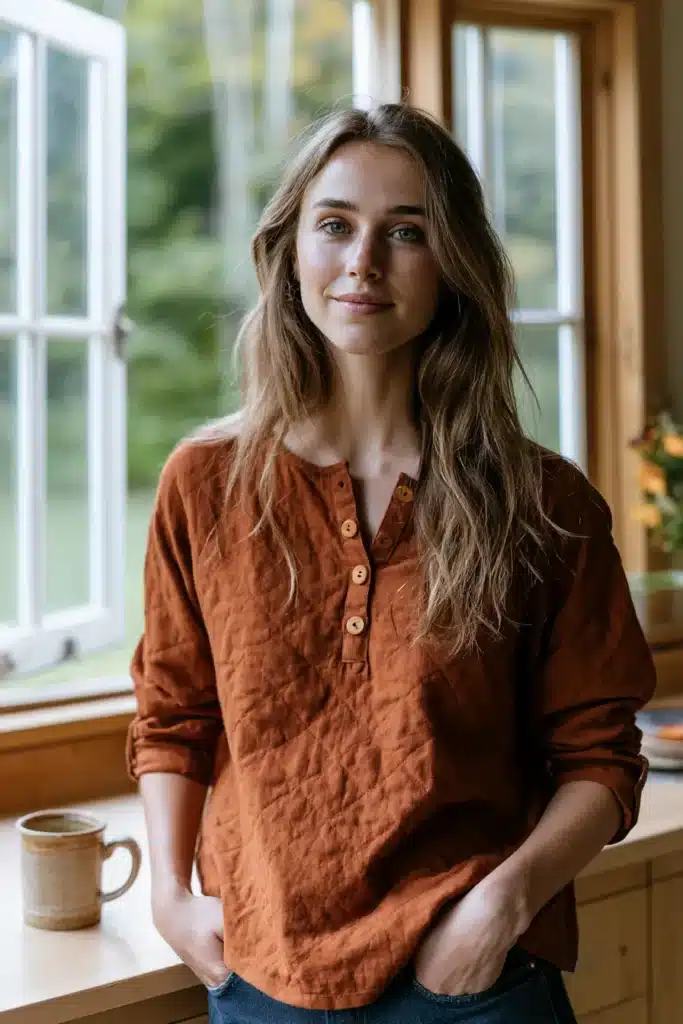
11. Vintage-Inspired Button-Front Quilt Top with Patch Pockets
A button-front quilt top is the most useful thing in this entire collection, because it’s really two garments in one. Buttoned up, it’s a soft, substantial shirt with cozy quilted texture. Left open over a tee, it’s a light jacket. Cut in a vintage-inspired shape — slightly boxy, hip-length, with a neat front band and generous patch pockets — it has the honest, hardworking look of a 1940s utility shirt, and it goes with absolutely everything. In warm faded colors like rust, mustard, sage, and chambray, it’s the piece that makes jeans look intentional.
Because it opens all the way down the front, it’s also far more forgiving to sew than a pullover: no wrestling it over your head, no ease calculations, no fitting anxiety. The craft here lives in two details — a crisp front band with well-spaced buttonholes, and patch pockets applied cleanly. Get those right and the whole top looks properly made.
Why Patch Pockets Are the Vintage Detail
There’s a good reason patch pockets appear on nearly every vintage workwear and utility garment: they’re the most economical pocket there is. A patch pocket is simply a shaped piece of fabric applied on top of the garment — nothing is cut away, no facings or pocket bags are needed, and it uses the smallest possible amount of cloth. Set-in and welt pockets, by comparison, require extra fabric hidden inside and far more construction.
That economy mattered enormously in the 1940s. Under wartime rationing, Britain’s “Make Do and Mend” campaign taught women to repair, remake, and stretch every scrap of cloth, and the government’s Utility Clothing scheme regulated exactly how much fabric a garment could use — limiting details like pleats, cuffs, and pocket types. Patch pockets survived and flourished because they were frugal. What began as a wartime necessity became a defining look of vintage workwear, and it’s exactly why a button-front top with big patch pockets reads as authentically old-fashioned today.
That spirit of thrift-as-design is familiar in textile traditions worldwide — including the Nakshi Kantha tradition of my own family’s background, where nothing was wasted and everyday cloth was remade into something better. A quilted utility top sits happily in that lineage.
Why This Idea Is Worth Making
This idea is worth making because it’s the most versatile and most forgiving quilted garment here. The full front opening removes every fitting worry, so it’s a genuinely easy sew, and the finished top does double duty as both a shirt and a light layer. You’ll learn two skills worth having — front bands with proper buttonhole spacing, and clean patch pockets — and end up with a piece that suits jeans, cords, or a skirt, buttoned or open, all year round. Practical, vintage-charming, and endlessly wearable.
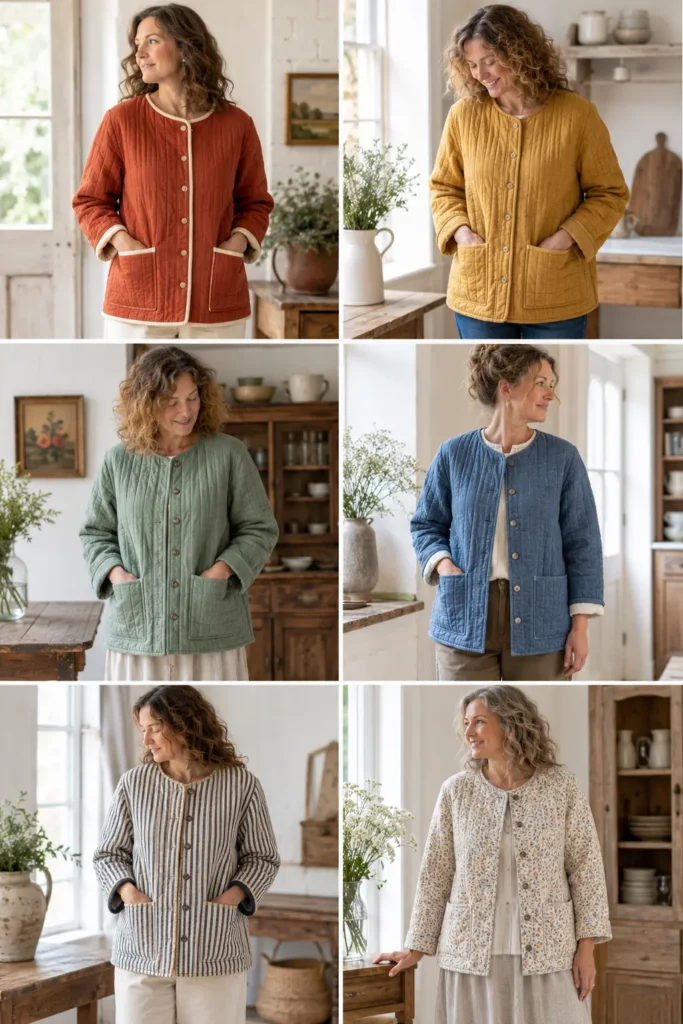
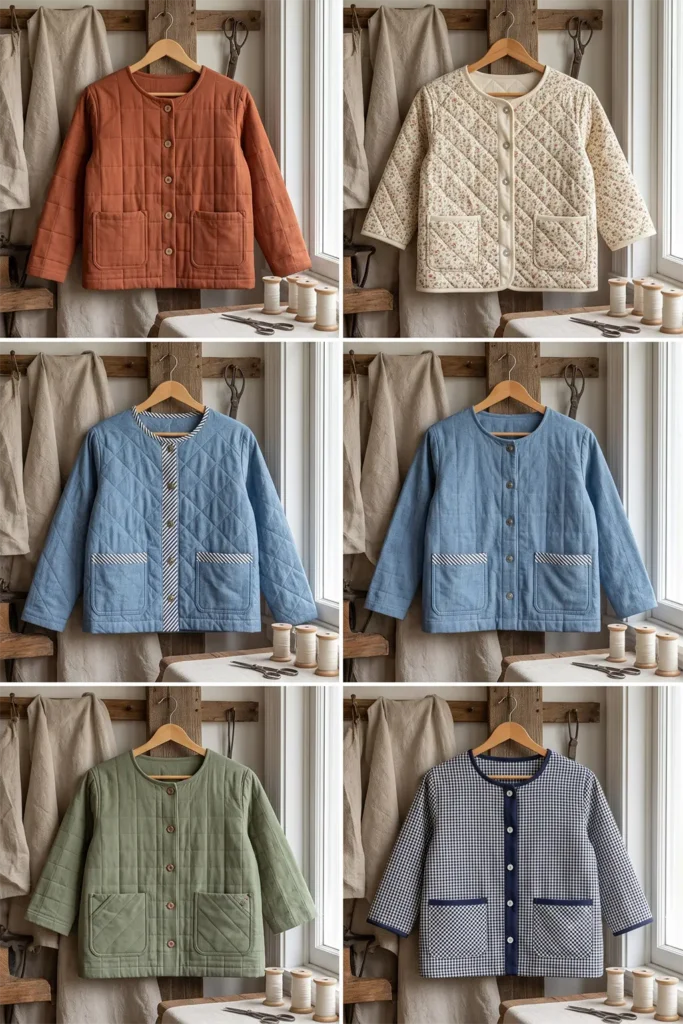
Finished Garment
- Style: relaxed, slightly boxy button-front top — collarless or with a small soft collar, hip-length, two large patch pockets, long or three-quarter sleeves
- Length: about 26–28 inches from shoulder to hem
- Front bands: 1½ inches wide finished, with 6–7 buttons
- Patch pockets: about 5½ × 6 inches finished
- Sizes: use a simple woven button-front shirt or utility-top pattern
- Skill level: confident beginner
- Core techniques: light quilting, front bands, buttonhole spacing, patch pockets
Materials Needed
- Outer fabric: about 2¼ yards of soft cotton, chambray, ticking stripe, small vintage floral, or a warm solid
- Middle layer: cotton flannel (recommended) or the thinnest cotton batting — this is a top, so bulk is the enemy
- Lining: 2¼ yards of soft cotton or voile
- Interfacing: lightweight woven interfacing for the front bands and pocket tops
- Buttons: 6–7 small buttons (wood, horn, or mother-of-pearl for a vintage look)
- Binding: ¼ yard for the neckline, cut on the bias
- Thread, walking foot, rotary cutter, cutting mat, ruler, pins, iron, sewing machine
Beginner tip: use flannel as the middle layer rather than batting. A top needs to drape and move; flannel gives warmth and quilted texture without any puff.
Choosing Your Colors
Vintage-inspired means warm and slightly faded rather than bright and new:
- Rust and brick — the classic worn-workwear tone
- Mustard and ochre — cheerful and authentically forties
- Sage and olive — utility-green and easy to wear
- Faded chambray blue — the most workwear-true option
- Ticking stripe in navy or brown on cream — beautifully vintage
- Small vintage florals or a fine gingham for a softer take
Solids and stripes read most authentically utilitarian; a small floral leans sweeter and more cottage. For a lovely period detail, make the pockets or front bands a contrasting fabric — a solid band against a striped body looks wonderfully old-fashioned.
The Fabric: Quilting Light
- Layer outer fabric, flannel or thin batting, and a soft lining
- Quilt sparsely — straight lines about 1½–2 inches apart, or a wide diagonal grid
- Keep it soft enough that the panel drapes easily over your hand
- Prepare enough for the two fronts, back, two sleeves, front bands, and pockets
Cutting Measurements
- Fronts, back, sleeves: cut on the straight grain to your pattern, 26–28 inches long plus 2 inches for trimming
- Front bands: two strips at 3½ × 29 inches (finishing 1½ inches wide), plus interfacing
- Patch pockets: two at 6½ × 8 inches (finishing about 5½ × 6 inches, allowing for hems)
- Neckline binding: 1½-inch bias strips
How to Make a Clean Patch Pocket
Patch pockets look simple, but in quilted fabric the corners get bulky fast. This order solves it:
- Interface and hem the top edge first. Fold the top edge down twice (about ½ inch each fold) and stitch. Always do this before the sides, or the top corners won’t sit flat.
- Trim the corner bulk. Clip a small diagonal off each bottom corner of the seam allowance to reduce thickness before folding.
- Fold and press the sides and bottom under by ½ inch, pressing hard with steam so the shape holds.
- Position and pin. Place pockets about 3 inches down from the underarm and 2 inches in from the front band — hold the top up against yourself to check they land somewhere useful.
- Topstitch on, ⅛ inch from the folded edge, and reinforce the top corners with a small backstitched triangle or a bar tack. Pocket corners take the most stress, and this is what stops them pulling away.
Step-by-Step Guide
Step 1 — Quilt the fabric lightly. Layer outer fabric, flannel, and soft lining, and quilt with lines 1½–2 inches apart. Press well.
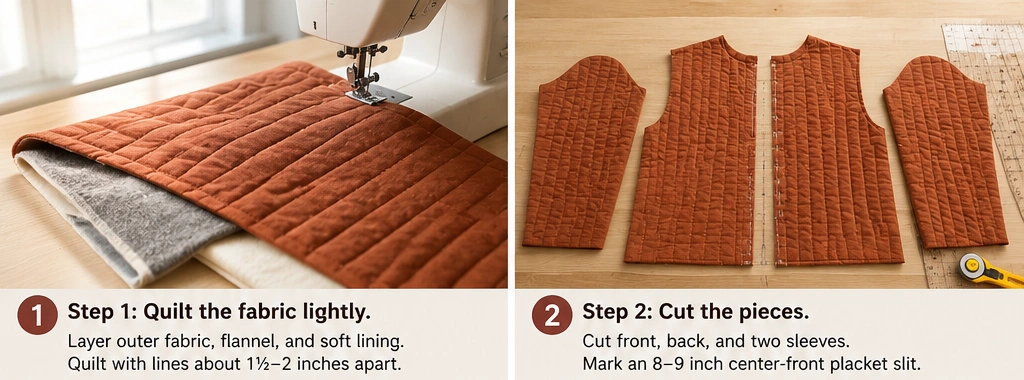
Step 2 — Cut all the pieces. Cut two fronts, one back, two sleeves, two front bands, and two pockets on the straight grain, to your 26–28 inch length.
Step 3 — Make and attach the patch pockets. Following the pocket method above, hem the tops, fold and press the edges, then topstitch the pockets to the fronts with reinforced top corners.
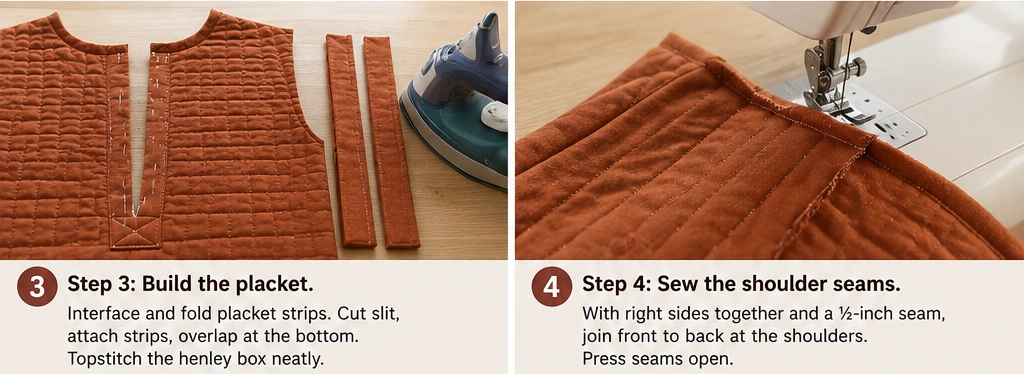
Step 4 — Attach the front bands. Interface each band and press it in half lengthwise. Sew a band to each front edge, right sides together, then fold it to the inside and topstitch down, enclosing the raw edge. Crisp, even bands are what make the top look properly tailored.
Step 5 — Sew the shoulder seams. With right sides together and a ½-inch seam, join fronts to back at the shoulders. Press seams open to reduce bulk.
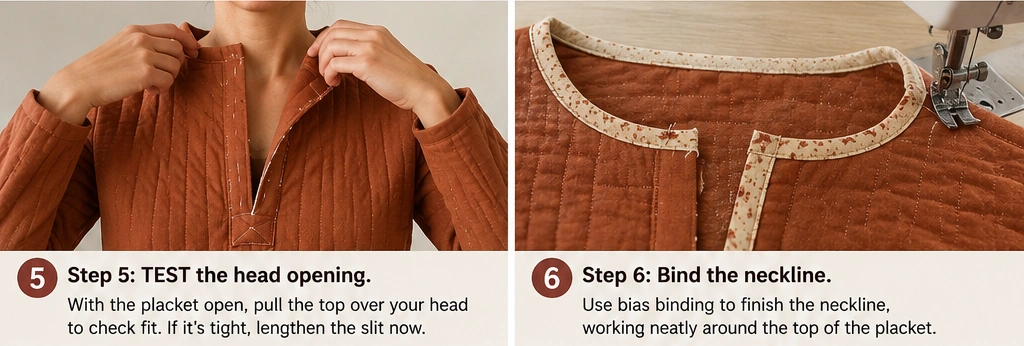
Step 6 — Finish the neckline. Bind the neckline with bias binding, working neatly across the tops of the front bands — or attach a small soft collar if your pattern includes one.
Step 7 — Set the sleeves and sew the sides. Attach the sleeves (a dropped shoulder is easiest), then sew the underarm and side seams in one line with a ½-inch seam. Finish or bind the seam allowances so the inside is comfortable.
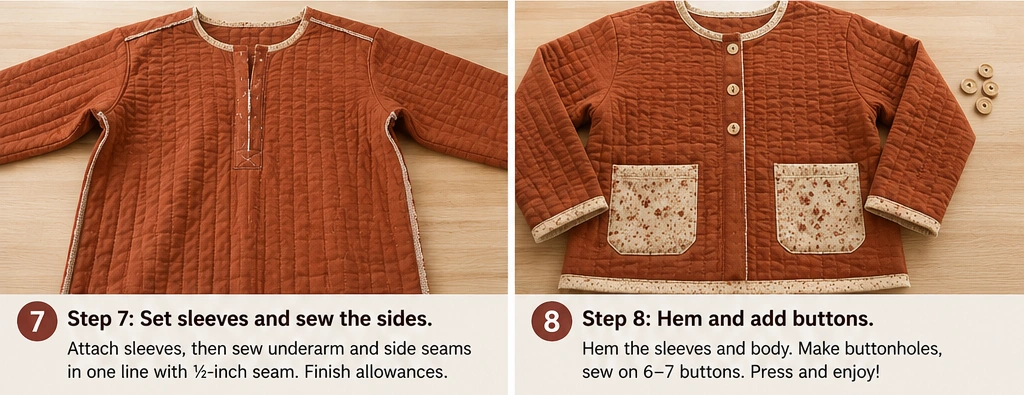
Step 8 — Space and sew the buttonholes. Mark 6–7 buttonholes evenly down the right band (for women’s wear), roughly 3½–4 inches apart. One important rule: place a button at the fullest part of the bust — that’s where a button-front top gapes, and a button there prevents it. Sew the buttonholes, then the buttons to match.
Step 9 — Hem and press. Hem the sleeves and the bottom edge (or bind them for a cleaner finish on quilted fabric), then press. A gentle wash and low tumble gives it that soft, worn-in vintage feel.
Assembly at a Glance
- Quilt outer fabric + flannel + soft lining, lines 1½–2 inches apart.
- Cut two fronts, back, two sleeves, two 3½ × 29-inch bands, two 6½ × 8-inch pockets.
- Hem pocket tops first, trim corner bulk, fold, topstitch on with reinforced corners.
- Interface, attach, and topstitch the front bands.
- Sew shoulder seams (½-inch, pressed open).
- Bias-bind the neckline across the band tops.
- Set sleeves; sew side/underarm seams; finish allowances.
- Mark 6–7 buttonholes ~3½–4 inches apart, with one at the bust point; add buttons.
- Hem or bind sleeves and hem; press, then wash for a worn-in finish.
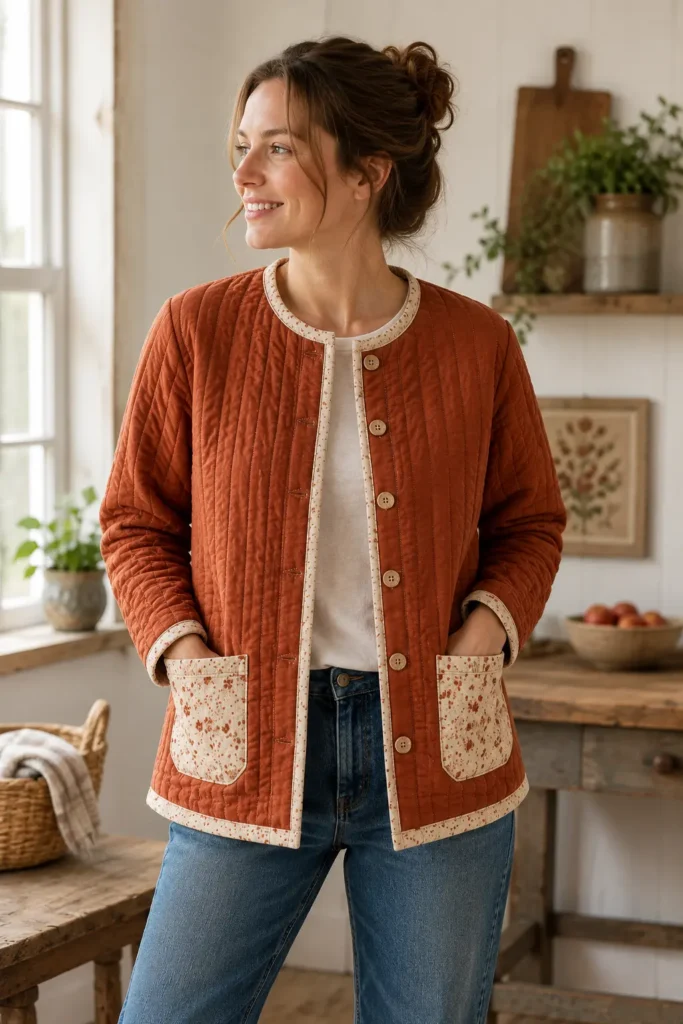
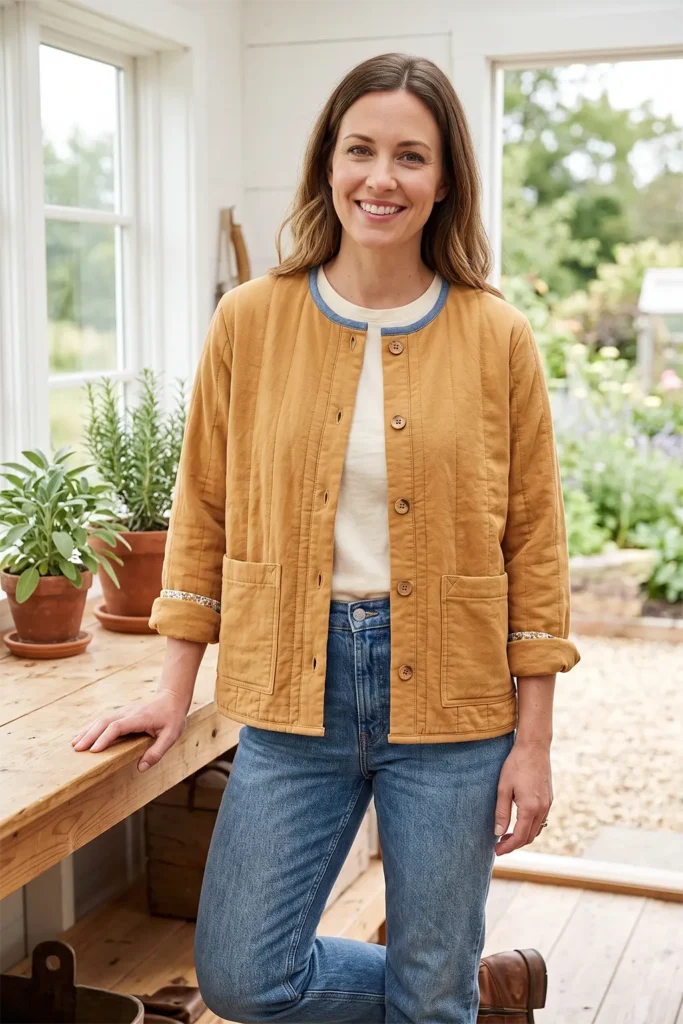
Beginner Tips for Success
- Use flannel instead of batting — a top must drape, not puff.
- Hem the pocket top edge before folding the sides, or the corners won’t lie flat.
- Reinforce pocket corners; they take the most wear of anything on the garment.
- Interface the front bands so buttonholes stay crisp and don’t stretch out.
- Always put a button at the bust point — it’s the single best fix for front gaping.
- Contrasting bands or pockets are a lovely, authentic vintage detail.
Styling It
This top is a genuine wardrobe workhorse. Button it up and tuck it into high-waisted jeans for a neat vintage look, or leave it open over a plain tee as a light jacket. Roll the sleeves, add boots or loafers, and let the pockets do their thing — a top with real pockets is quietly wonderful. Because the colors are warm and faded, it pairs easily with denim, cream, and khaki, and the vintage utility shape looks equally right in a garden, a workshop, or a café.
Final Thoughts
A vintage-inspired button-front quilt top with patch pockets is the most versatile handmade piece you can own — a soft quilted shirt that doubles as a light jacket, with the honest look of 1940s utility wear. Those generous patch pockets carry real history: born of wartime thrift, when every inch of cloth counted, and kept ever since because they’re practical and they look wonderful. Quilt it lightly, band it crisply, and reinforce those pocket corners, and you’ll reach for it constantly.
Other Design Inspirations – Digitally Modified
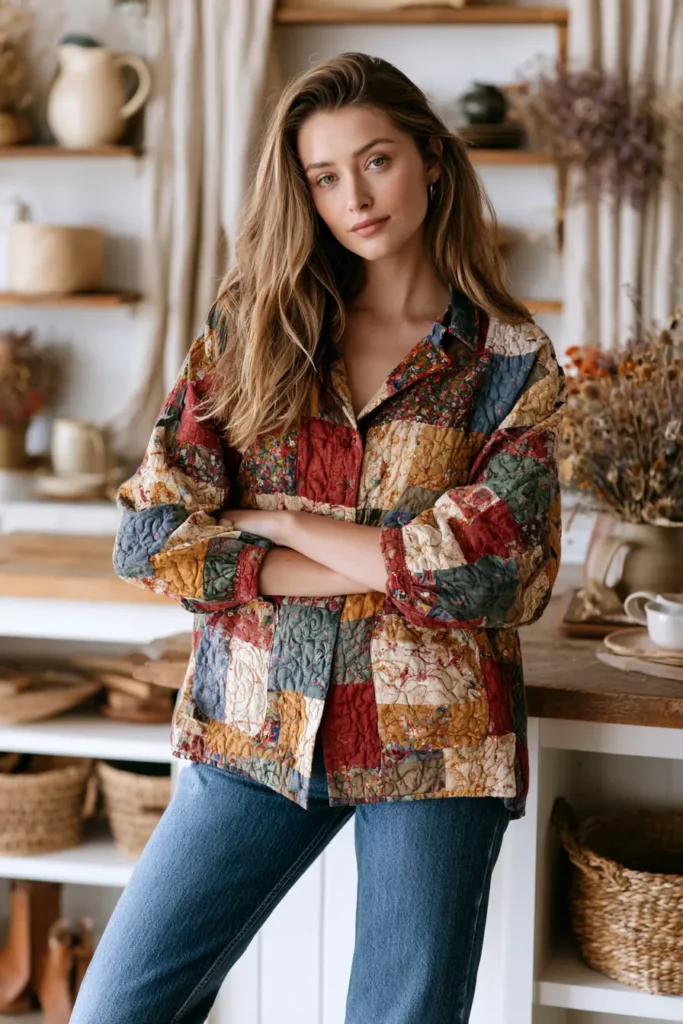
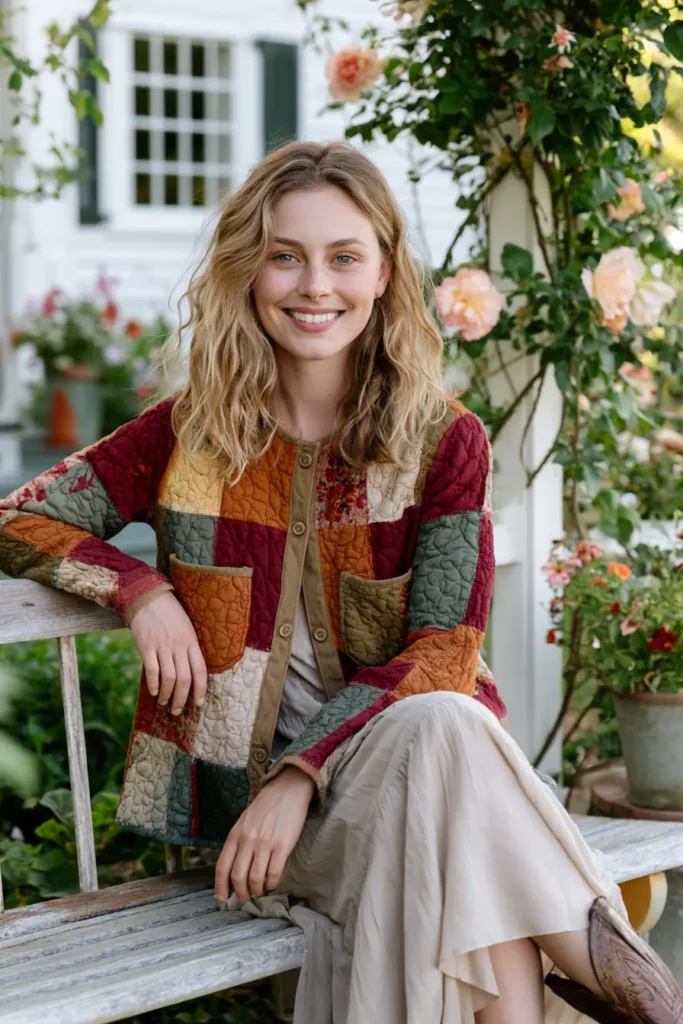
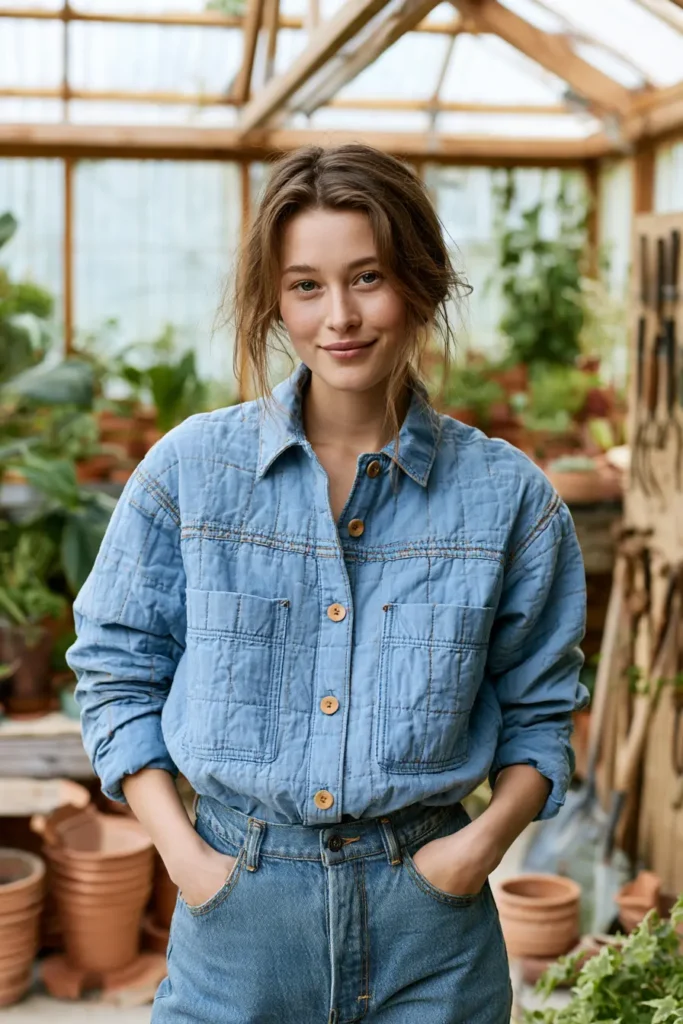
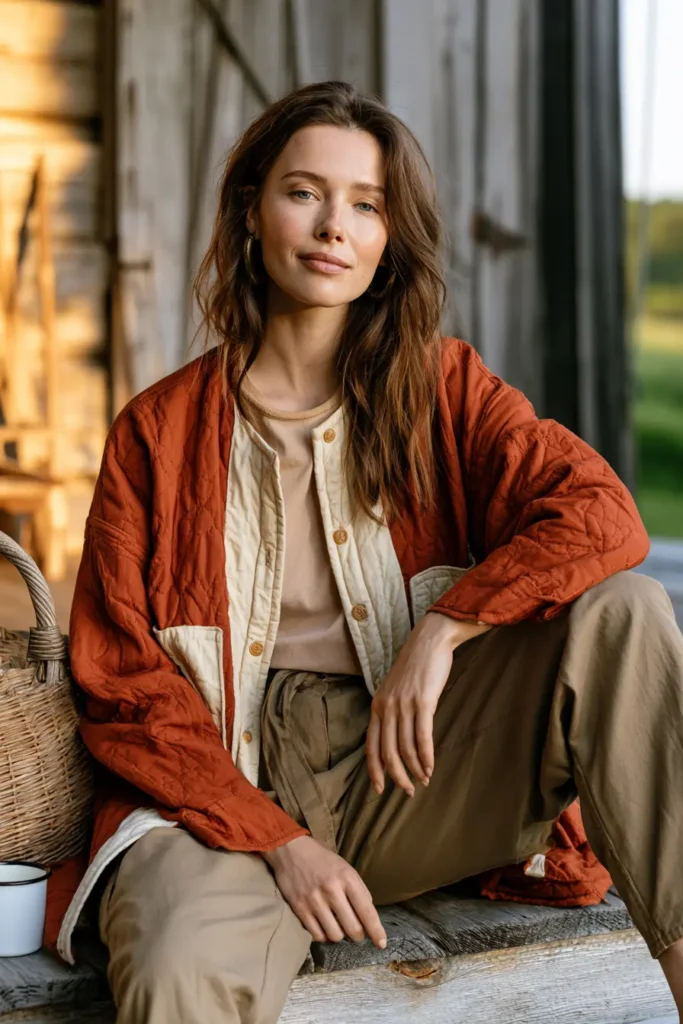
12. Flutter Sleeve Patchwork Quilt Top for Feminine Farmhouse Elegance
This is the softest, prettiest piece in the collection — a quilted patchwork top with sleeves that float. A flutter sleeve is a short, flared sleeve that falls loosely from the shoulder without a cuff or a seam beneath the arm, catching the air as you move. Paired with a lightly quilted patchwork bodice in soft, sunlit colors — dusty rose, sage, buttercup, and cream — it turns quilting into something genuinely feminine and elegant. Where every other piece here is cozy and grounded, this one has movement and grace: farmhouse charm with a romantic, garden-party softness.
It’s also the piece that requires the most thoughtful construction, for one specific reason. A flutter sleeve only works if the fabric falls, and quilted fabric — three layers held together by stitching — doesn’t fall, it holds its shape. The solution is beautifully simple, and it’s what makes this top possible.
The Flutter Sleeve Problem (and Its Elegant Solution)
Quilt the sleeve and it won’t flutter. It will stand out stiffly from the shoulder like a little wing, which is exactly the opposite of what you want.
The solution: don’t quilt the sleeves at all. Make the bodice from your quilted patchwork, and cut the flutter sleeves from a single, unquilted layer of soft fabric — cotton lawn, voile, or a lightweight cotton. The contrast is the whole design: a substantial, textured, quilted body with light, drifting sleeves. It looks intentional and sophisticated; it solves the drape problem completely, and it’s far easier to sew.
Two more things make the sleeves float properly:
- Cut them on the bias. Fabric cut on the diagonal drapes far more fluidly than fabric cut on the straight grain. This is the single biggest difference between a sleeve that hangs and a sleeve that flows.
- Hem them narrowly. A wide, heavy hem weighs the edge down and kills the movement. A narrow rolled or double-turned hem of about ¼ inch keeps the edge light.
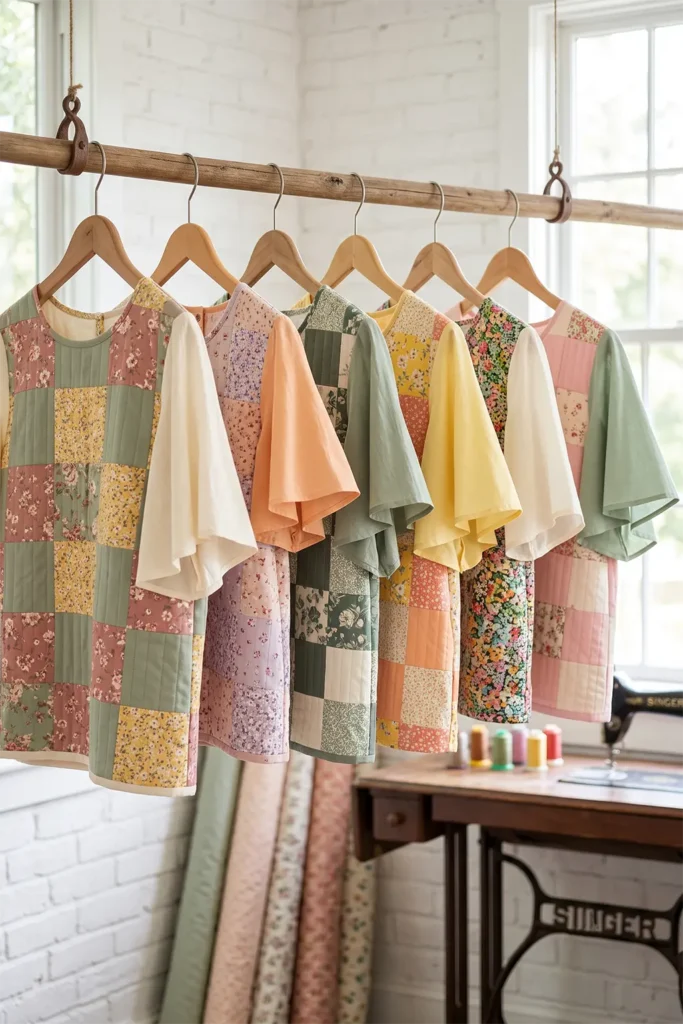
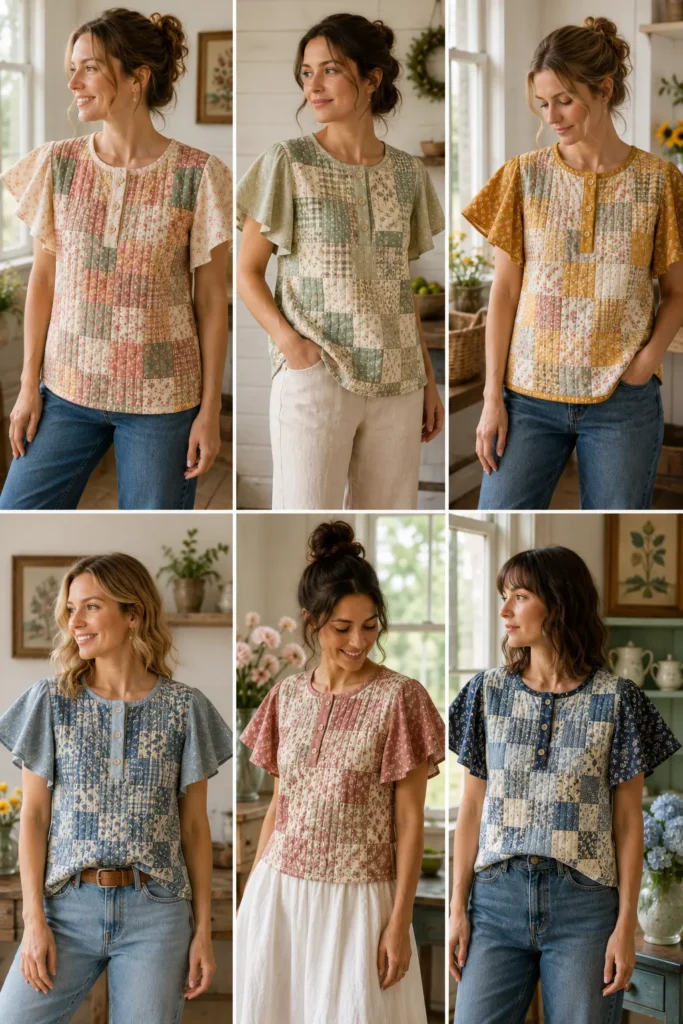
A Little History: Why Bias Cutting Matters
The flutter sleeve came into its own in the 1930s, and that’s no coincidence — it was the great age of bias-cut dressmaking. The French couturier Madeleine Vionnet had pioneered cutting fabric on the diagonal grain, discovering that woven cloth cut this way drapes, clings, and flows in a way straight-grain fabric never can. Her technique transformed dressmaking, and the soft, fluid sleeves and skirts of thirties fashion — including the flutter sleeve — grew directly out of it.
So when you cut your flutter sleeves on the bias, you’re using a genuine couture trick nearly a century old. There’s a lovely echo of it in the weaving traditions of my own family’s background too: in fine muslin weaving like Jamdani, cloth was always judged as much by its hand and its drape — how it moved, how it fell — as by its pattern. How fabric behaves has always been part of the artistry.
Why This Idea Is Worth Making
This idea is worth making because it proves quilted clothing can be delicate and elegant, not just cozy and rugged. The mix of textures — structured quilted patchwork against airy, drifting sleeves — is genuinely beautiful and looks far more designed than it is to sew. It’s also a wonderful use for small, precious scraps, since the patchwork bodice uses little pieces. And because the sleeves are unquilted, the top stays light enough to wear in warmer weather, making it the most seasonally flexible piece here. Feminine, graceful, and unexpectedly easy.
Finished Garment
- Style: relaxed quilted patchwork bodice with short unquilted flutter sleeves, gently boxy, hip-length or slightly cropped
- Length: about 23–26 inches from shoulder to hem
- Flutter sleeve: about 7–9 inches deep at the longest point
- Closure: a back button placket, side zip, or a generously sized neckline — see the note below
- Skill level: confident beginner
- Core techniques: small-scale patchwork, light quilting, bias-cut flutter sleeves, narrow hemming
A note on getting it on: since this is a pullover with no front opening, the neckline must be wide enough to go over your head in non-stretch fabric — or add a short back button placket or side zip. Check this before you finish the neckline.
Materials Needed
- Patchwork fabrics: about 1½ yards total in scraps of soft cottons — small florals, ditsy prints, and coordinating solids
- Middle layer: cotton flannel (recommended) or the thinnest batting — for gentle texture without bulk
- Lining: 1½ yards of soft cotton or voile for the bodice
- Sleeve fabric: ¾ yard of a lightweight, drapey cotton — lawn, voile, or fine cotton (this must be soft, not stiff)
- Binding: ¼ yard for the neckline, cut on the bias
- Buttons: 2–3 small buttons if using a back placket
- Thread, walking foot, rotary cutter, cutting mat, ruler, pins, iron, sewing machine
Beginner tip: choose the lightest fabric you can find for the sleeves. Cotton lawn or voile flutters beautifully; quilting cotton is often too stiff and will hang rather than float.
Choosing Your Colors
Soft, sunlit, and gently vibrant — the palette of a summer garden:
- Dusty rose and blush for romance
- Sage and eucalyptus green for a fresh, grounded note
- Buttercup and pale gold for warmth and cheer
- Soft coral or apricot for a lively pop
- Lavender and pale lilac for something dreamier
- Cream and ecru to lighten the patchwork and rest the eye
Keep the patchwork prints small in scale so the bodice reads delicate rather than busy, and choose a sleeve fabric that picks up one color from the patchwork — a plain cream, blush, or sage sleeve lets the pieced bodice shine.
Cutting Measurements
Patchwork bodice:
- Cut 3-inch squares (finishing at 2½ inches) — small pieces suit a delicate top
- Piece into panels large enough for the front and back bodice pieces
- Quilt the panels with flannel and lining, using sparse lines about 1½–2 inches apart
Flutter sleeves (cut on the bias):
- Draft each sleeve as a segment of a circle: the inner curved edge matches your armhole measurement, and the outer curved edge is much longer — that extra length is what creates the flutter
- A depth of 7–9 inches from inner to outer edge gives a pretty, generous flutter
- Cut both sleeves on the bias from your lightweight fabric
Other:
- Neckline binding: 1½-inch bias strips
- Back placket (if using): two strips at about 2½ × 8 inches
Step-by-Step Guide
Step 1 — Piece the patchwork panels. Sew 3-inch squares into panels with a ¼-inch seam, pressing as you go. Make panels large enough for the front and back bodice pieces plus a little extra.
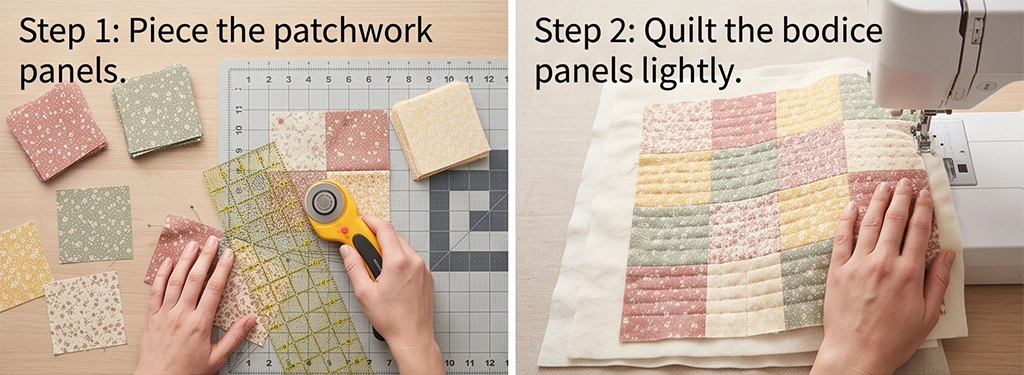
Step 2 — Quilt the bodice panels lightly. Layer the patchwork with flannel and soft lining, and quilt sparsely — lines 1½–2 inches apart. Keep it soft; this top should drape, not stand.
Step 3 — Cut the bodice pieces. Cut the front and back bodice from your quilted patchwork on the straight grain, to your 23–26 inch length. Do not cut sleeves from this fabric.
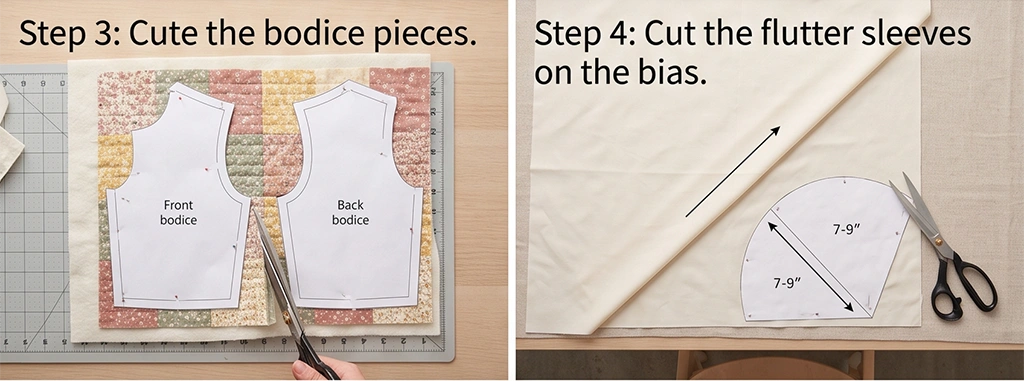
Step 4 — Cut the flutter sleeves on the bias. From your lightweight sleeve fabric, cut two circle-segment sleeves on the bias, with an inner edge matching the armhole and a 7–9 inch depth. The longer outer edge is what will ripple.
Step 5 — Narrow-hem the sleeve edges. Hem the outer curved edge of each sleeve with a narrow ¼-inch rolled or double-turned hem. Take your time on the curve — a light, even hem is essential, because a heavy one won’t flutter.
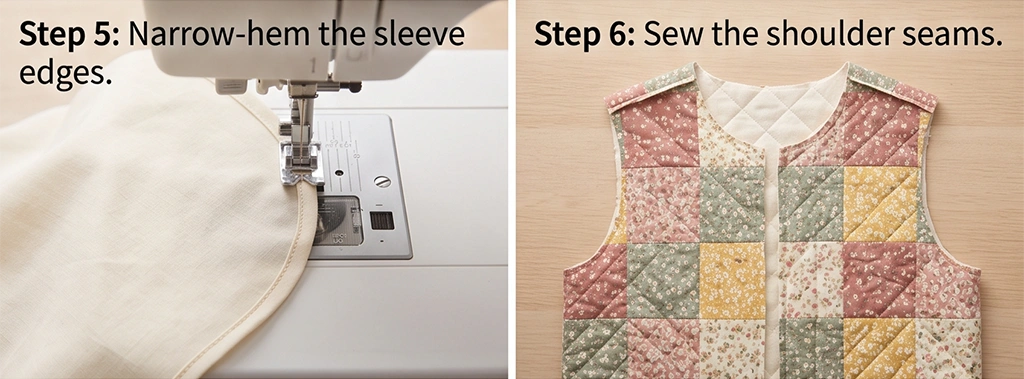
Step 6 — Sew the shoulder seams. Join the front and back bodice at the shoulders with a ½-inch seam, and press open.
Step 7 — Attach the flutter sleeves. Pin each sleeve’s inner curved edge into the armhole, right sides together, easing it smoothly around the curve, and stitch. Finish or bind the seam allowance so it’s soft against the arm. The sleeve should now fall freely — no underarm seam.
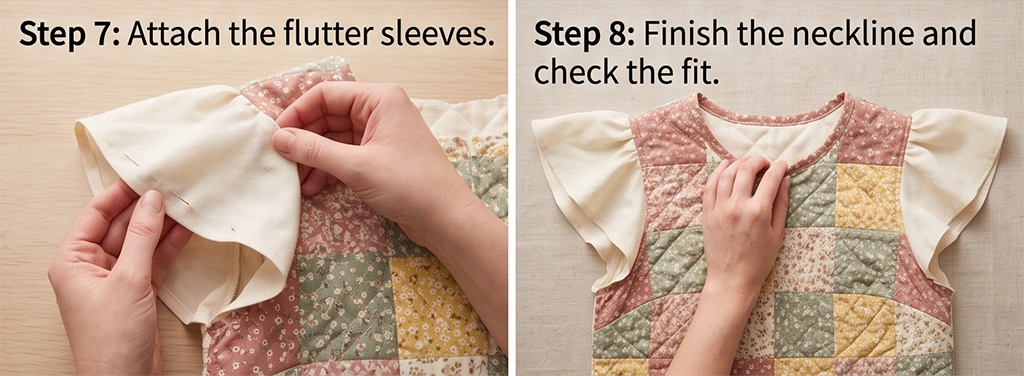
Step 8 — Finish the neckline and check the fit. Bind the neckline with bias binding, or attach your back placket first if using one. Before finishing, try the top over your head — the neckline must open enough for non-stretch fabric.
Step 9 — Sew the side seams and hem. Sew the side seams from the underarm down with a ½-inch seam, finishing the allowances. Hem or bind the bottom edge, then press gently — pressing the sleeves lightly keeps their soft ripple.
Assembly at a Glance
- Piece 3-inch squares into bodice panels (¼-inch seams).
- Quilt the panels with flannel and lining, lines 1½–2 inches apart.
- Cut front and back bodice, 23–26 inches long — no sleeves from this fabric.
- Cut two circle-segment flutter sleeves on the bias, 7–9 inches deep, from lightweight fabric.
- Narrow-hem (¼ inch) the outer curved sleeve edges.
- Sew shoulder seams (½-inch, pressed open).
- Set the flutter sleeves into the armholes; finish allowances softly.
- Add a back placket if needed; bind the neckline — test it over your head first.
- Sew side seams; hem or bind the bottom; press lightly.
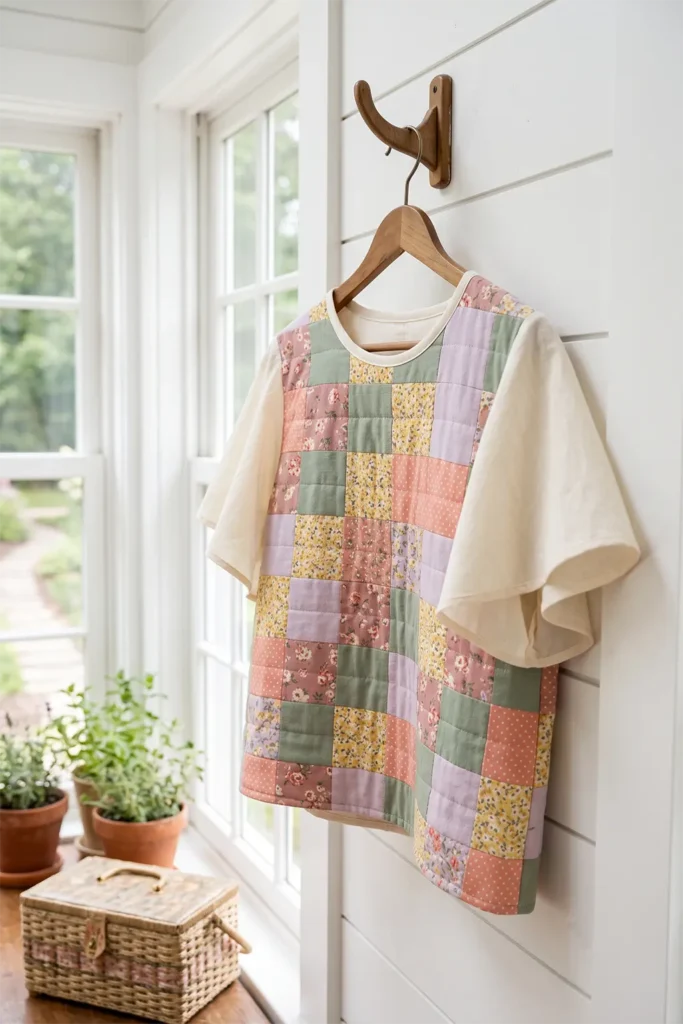
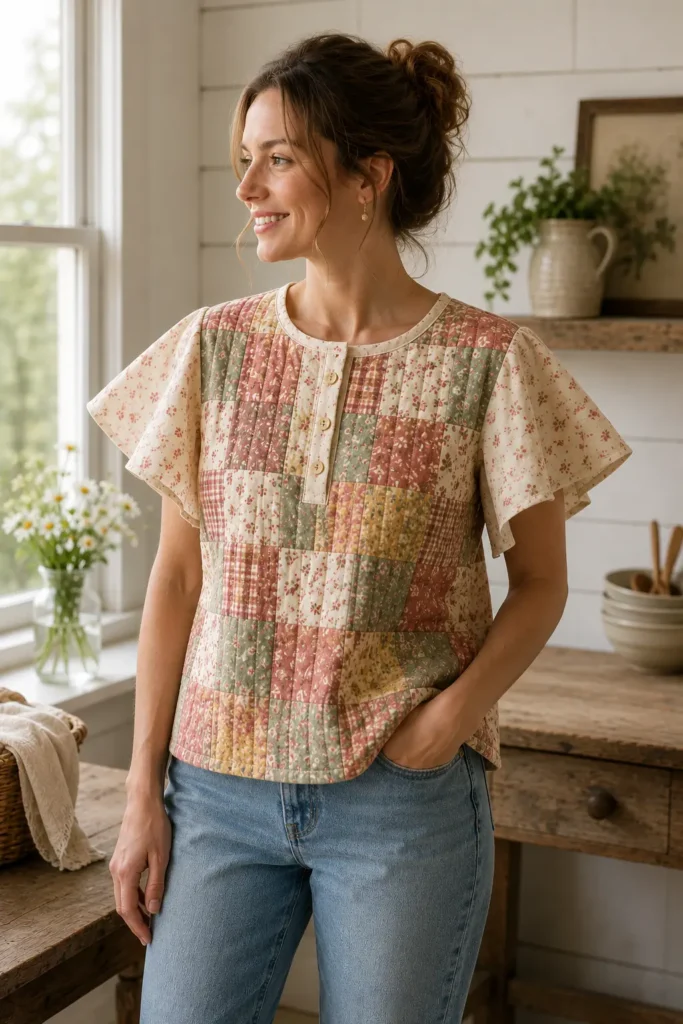
Beginner Tips for Success
- Never quilt the flutter sleeves — a single light layer is what lets them float.
- Cut sleeves on the bias; it’s the biggest single factor in how well they drape.
- Use the lightest fabric you can for the sleeves — lawn or voile, not quilting cotton.
- Keep the sleeve hem narrow (¼ inch); a heavy hem weighs down the flutter.
- Keep patchwork prints small in scale so the bodice stays delicate.
- Check the neckline goes over your head before you finish it — quilted fabric has no stretch.
Styling It
This top is made for softness, so pair it accordingly — with a floaty skirt, wide-leg linen trousers, or simply well-fitting jeans to balance the volume of the sleeves. Because the bodice is patterned and the sleeves are moving, keep everything else quiet: bare shoulders of color, delicate jewelry, simple sandals. It’s lovely for warm-weather gatherings, garden lunches, and any moment when you want handmade elegance rather than cozy practicality.
Final Thoughts
A flutter sleeve patchwork quilt top is proof that quilted clothing can be delicate, graceful, and thoroughly feminine. The secret is the contrast — a softly quilted patchwork bodice against light, bias-cut sleeves that drift with every movement, borrowing a couture trick nearly a century old. Keep the sleeves unquilted, the hems narrow, and the prints small, and you’ll have the prettiest, most elegant piece in your handmade wardrobe — and a beautiful note to end a whole collection of layering ideas on.
Other Design Inspirations – Digitally Modified
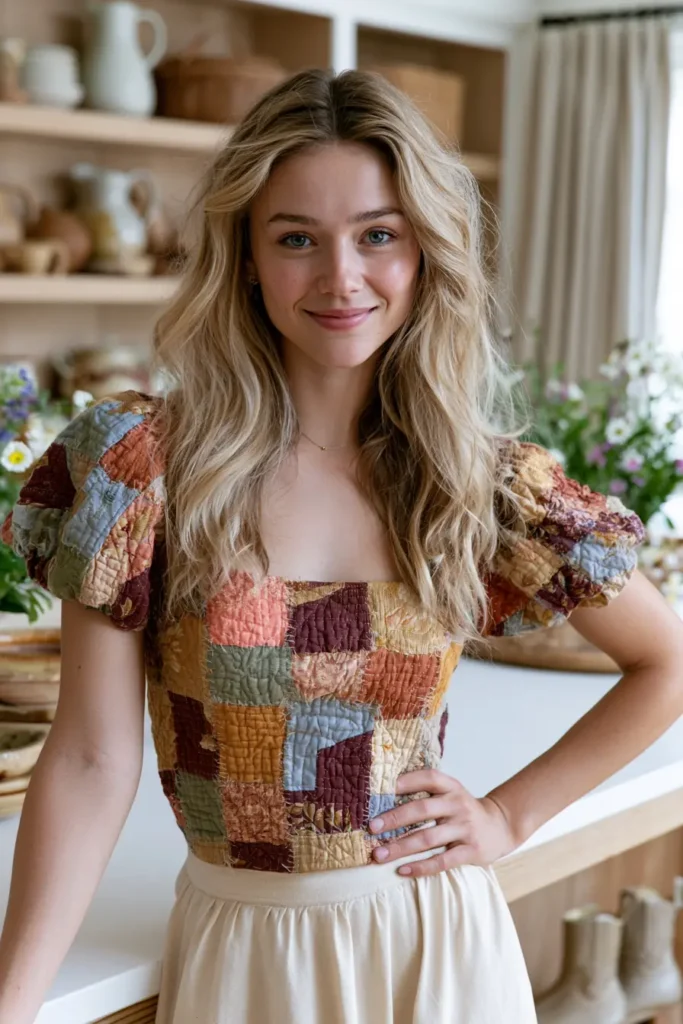
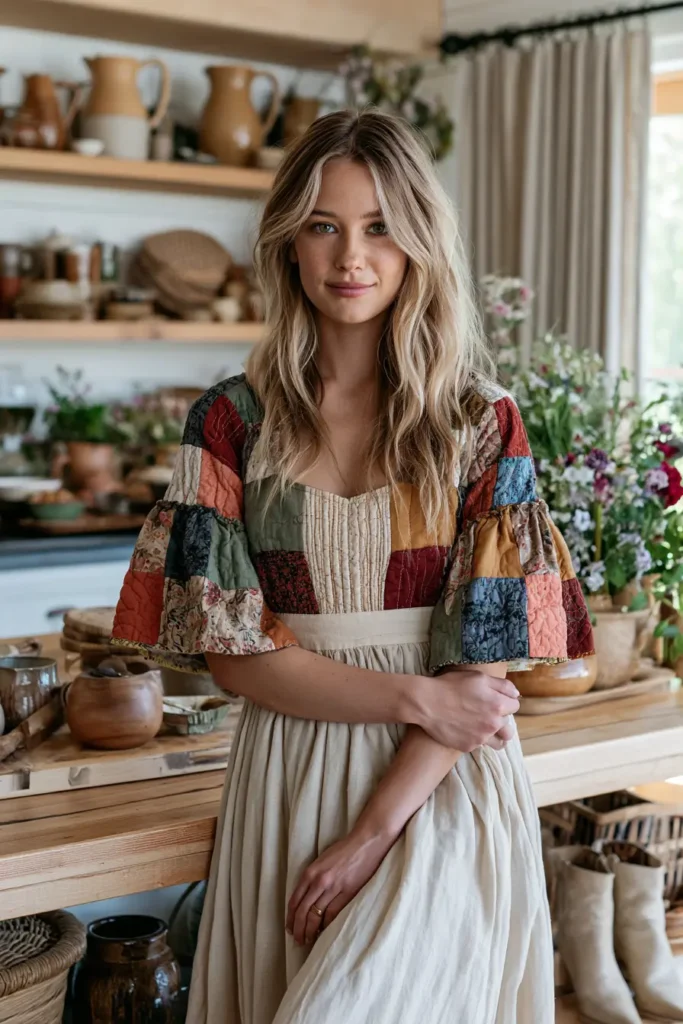
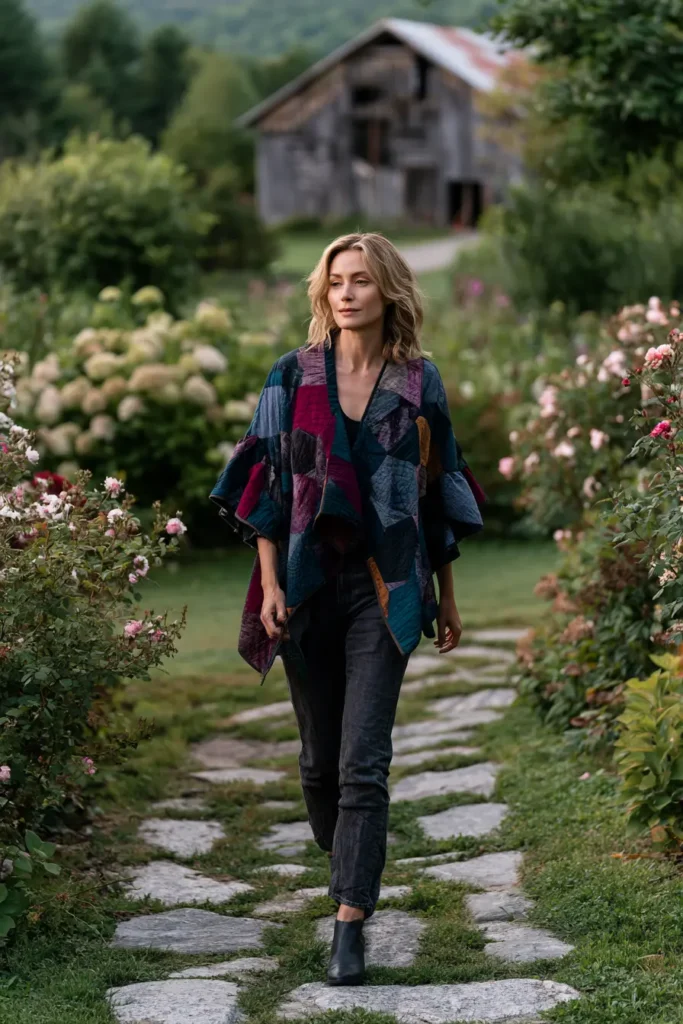
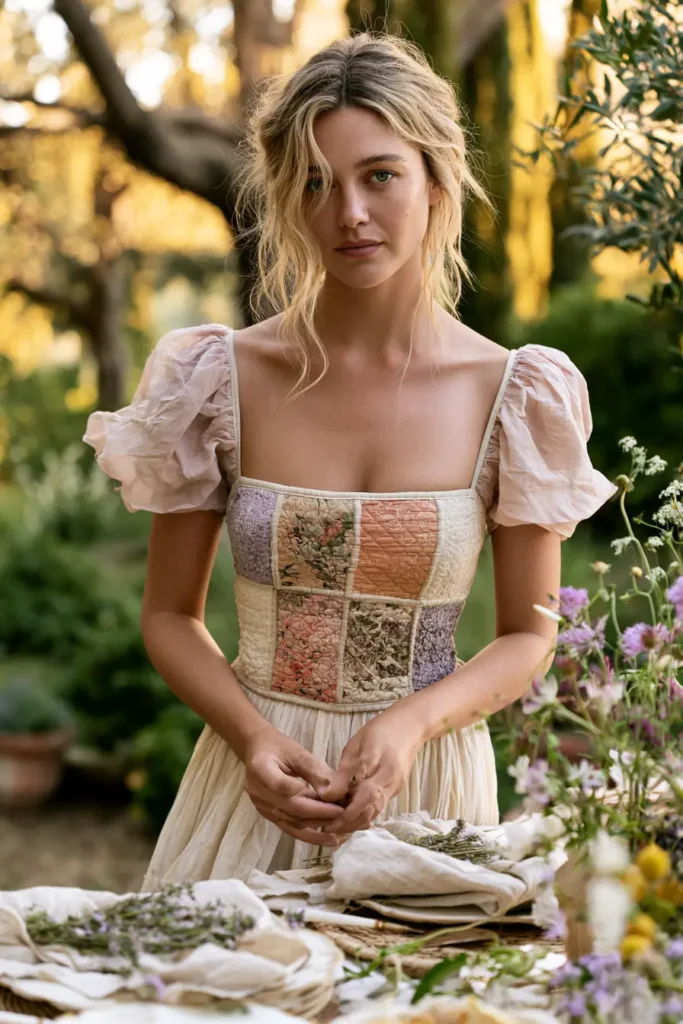
Conclusion
From a classic patchwork jacket in warm farmhouse tones to a flutter-sleeve quilted top with feminine charm, these twelve pieces prove that quilted clothing is far more than a passing trend — it’s a bridge between craft heritage and contemporary style. Each silhouette offers something a little different: the barn jacket for practical warmth, the longline duster vest for effortless drama, the Kantha jacket for genuine heirloom character. The beauty of building a wardrobe around quilted layers is how naturally they mix and match, letting you dress them up or down depending on the day.
Farmhouse Quilt Jackets & Vests
Farmhouse Quilt Jackets & Vests reward you for slowing down and appreciating the details — the hand-guided stitching, the thoughtful color pairings, the way a well-made vest can anchor an entire outfit. If you’re drawn to the sewing side, start with a simple cropped vest or a reversible barn jacket before working up to a full patchwork coat; if you’d rather style than stitch, lean into neutral tones and let texture do the talking. However you wear them, these cozy, elegant layers bring a quiet warmth to your closet that feels both timeless and personal. I hope this collection inspires your next rustic layering look.

