
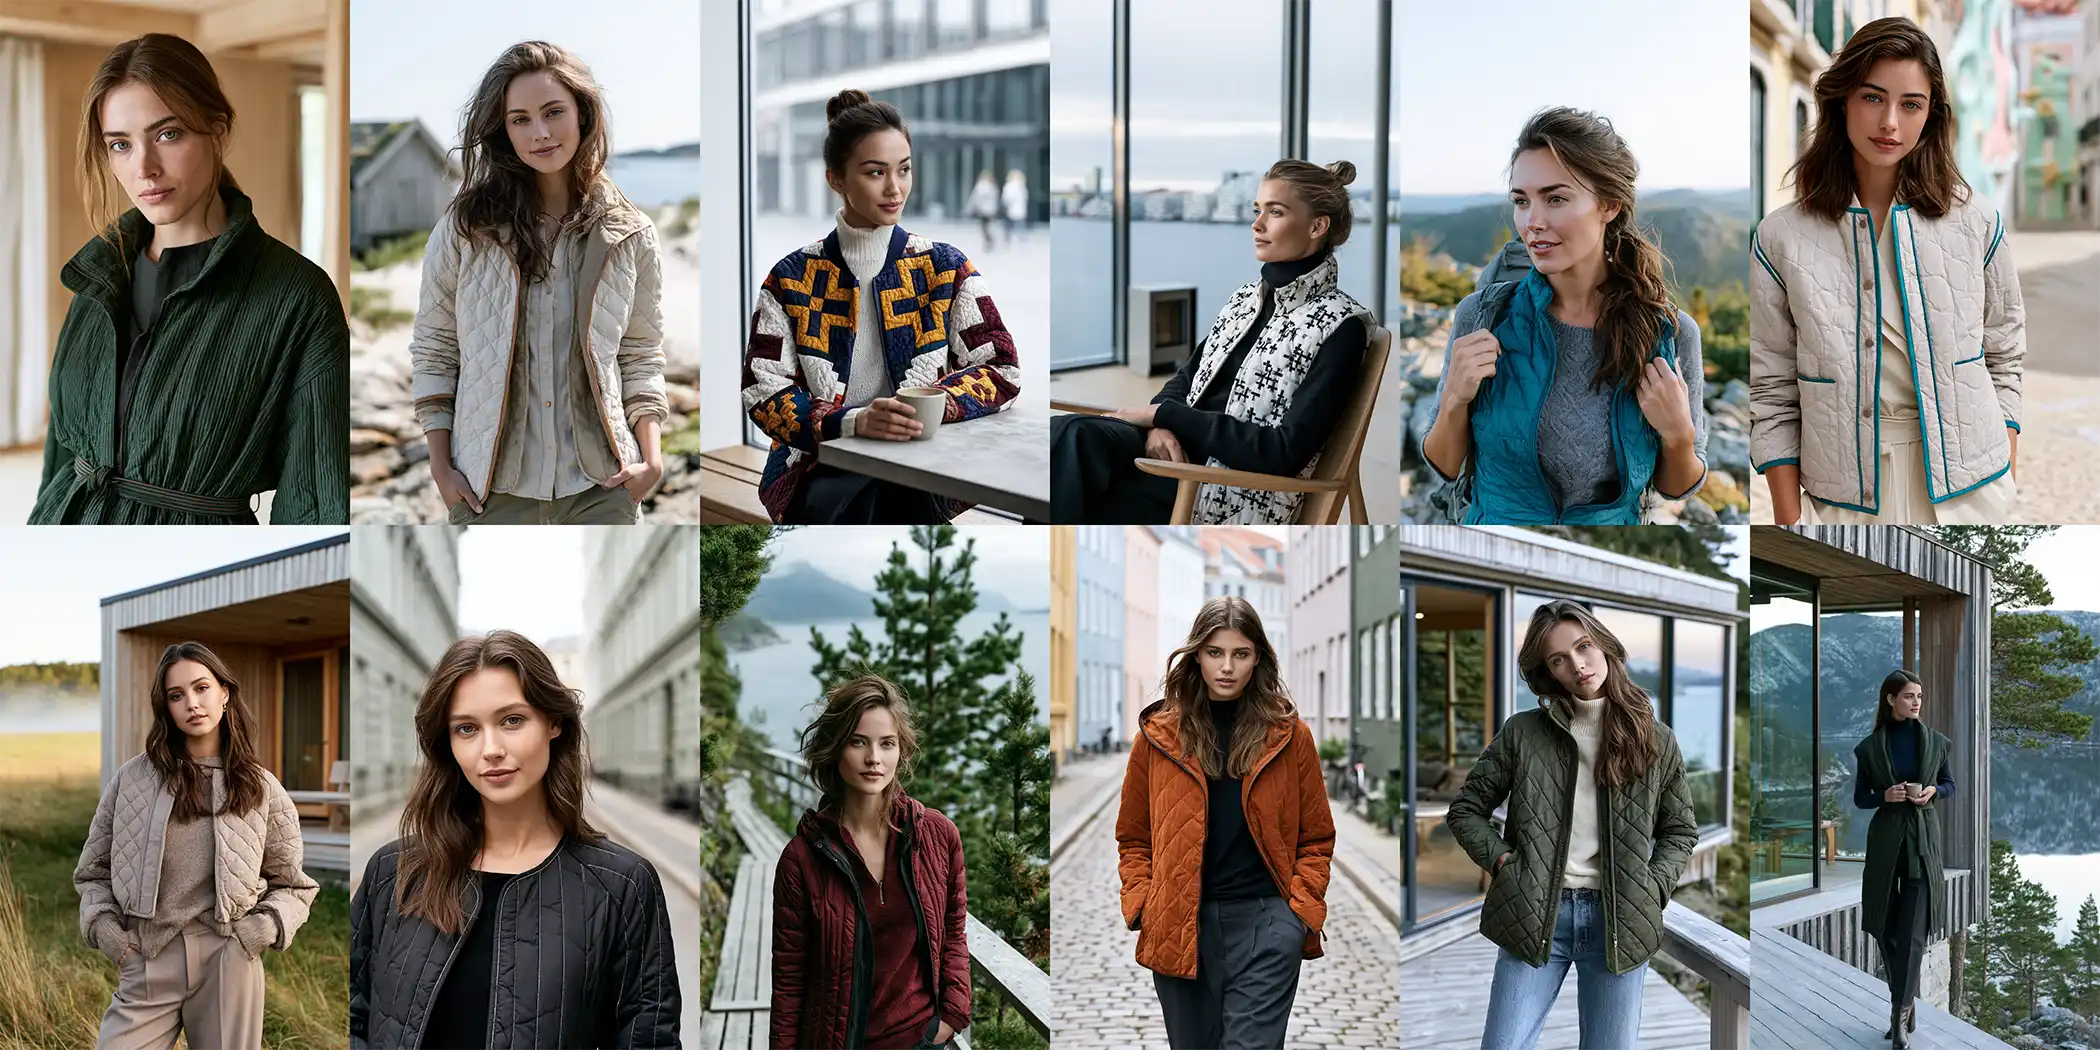
15 Scandinavian Quilted Jackets and Vests Ideas for Effortless Nordic Elegance
Scandinavian Quilted Jackets are some of the most satisfying pieces you can make at home, and once you understand why, it’s hard to stop at just one. At their heart, they’re simple constructions — quilted panels, clean seams, relaxed silhouettes — which makes them surprisingly approachable even if you’ve only sewn a few garments before.
But that simplicity is exactly what gives them their Nordic character: there’s nowhere to hide a fussy detail, so the focus stays on good proportions, soft texture, and a quiet, considered finish. When you sew your own, you control all of it — the weight of the fabric, the muted palette, the drape across the shoulders — and you end up with a layering piece that fits your life far better than anything off a rack.
What makes Scandinavian quilted jackets such a rewarding sewing project is that the “Scandi” philosophy favors restraint over complexity. A collarless boxy jacket, a reversible two-tone layer, a belted wrap, a channel-quilted vest — each one teaches a slightly different technique, but none of them asks for advanced tailoring. I find that especially meaningful because I grew up in Dhaka watching artisans build beauty out of patient, repetitive hand-stitching — Nakshi Kantha quilts made from layered cloth and simple running stitches.
That heritage taught me that the value in a quilted garment lives in the making: the rhythm of the stitches, the texture that builds up layer by layer, the small imperfections that prove a human hand was here. Scandinavian quilting carries that same spirit, just dressed in calmer colors and cleaner lines.
This collection walks you through 15 different jackets and vests, each a distinct project rather than a color swap of the last. You’ll move from minimalist, collarless shapes to longline coats, from diamond and channel quilting techniques to reversible, packable builds, from cozy hooded vests to tailored, belted wraps. Some are quick weekend makes; others are pieces you’ll want to take your time with. Whatever your skill level and whatever mood you’re after — minimalist, luxe, vibrant, or relaxed — there’s a project here worth threading a needle for.
See also: Scandinavian Quilt Pattern – Boho Quilt Jackets – Japanese Quilt Jackets – Nakshi Kantha Accessories Jacket
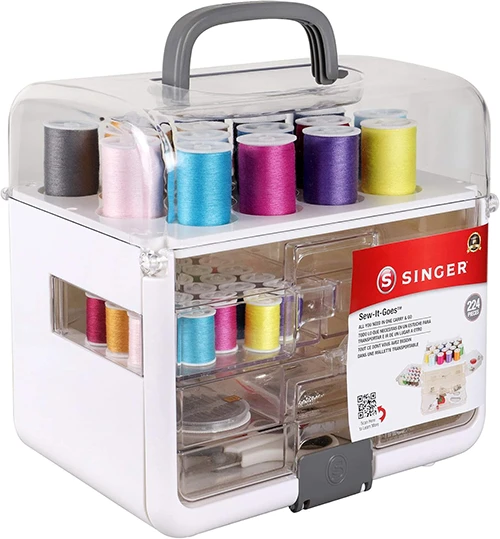
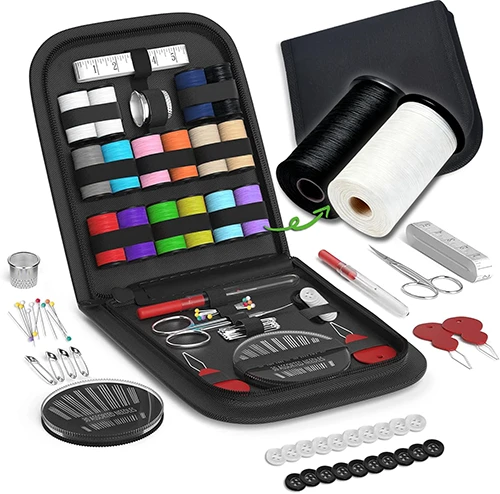
Helpful Sewing Kits for New Quilters
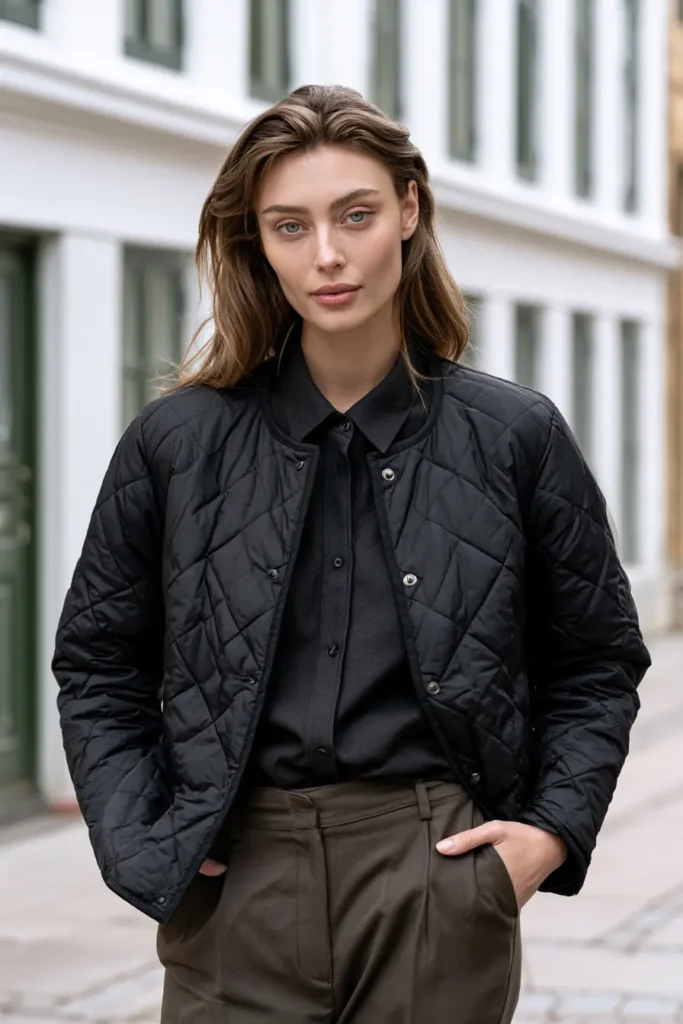
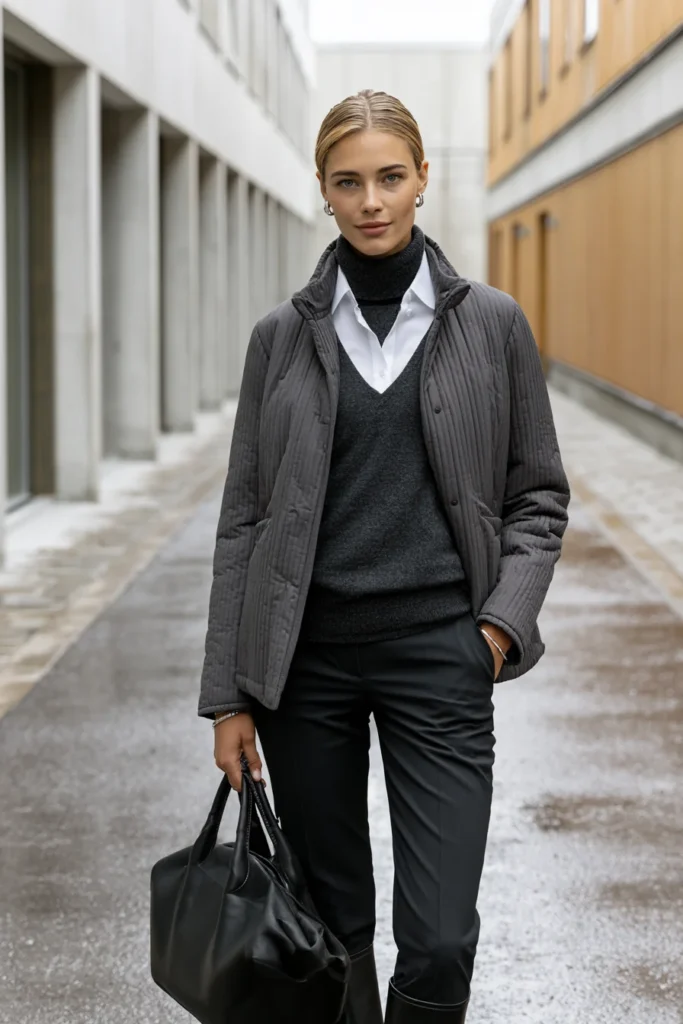
1. Collarless Minimalist Quilted Jacket for Clean Everyday Nordic Style
A Guide to Making a Minimalist Black Quilted Jacket for Timeless Nordic Elegance
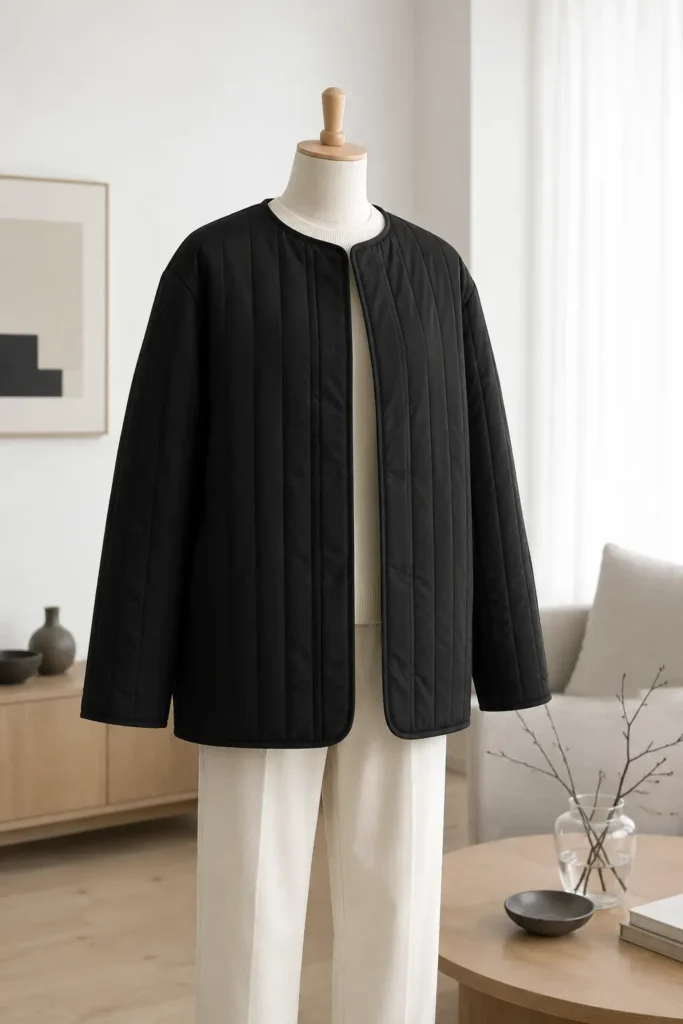
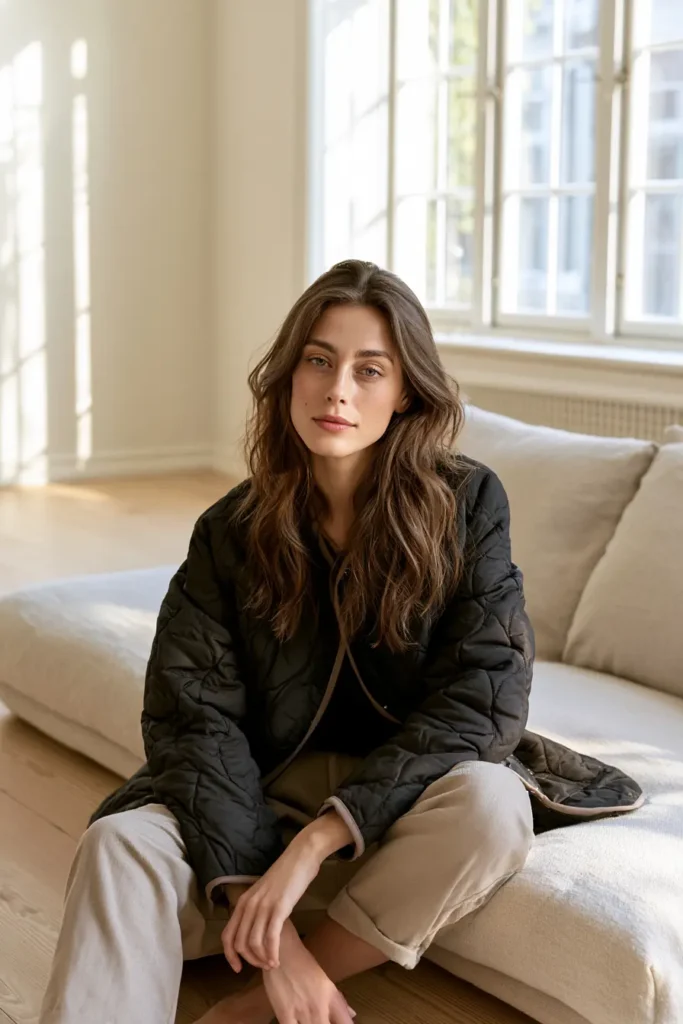
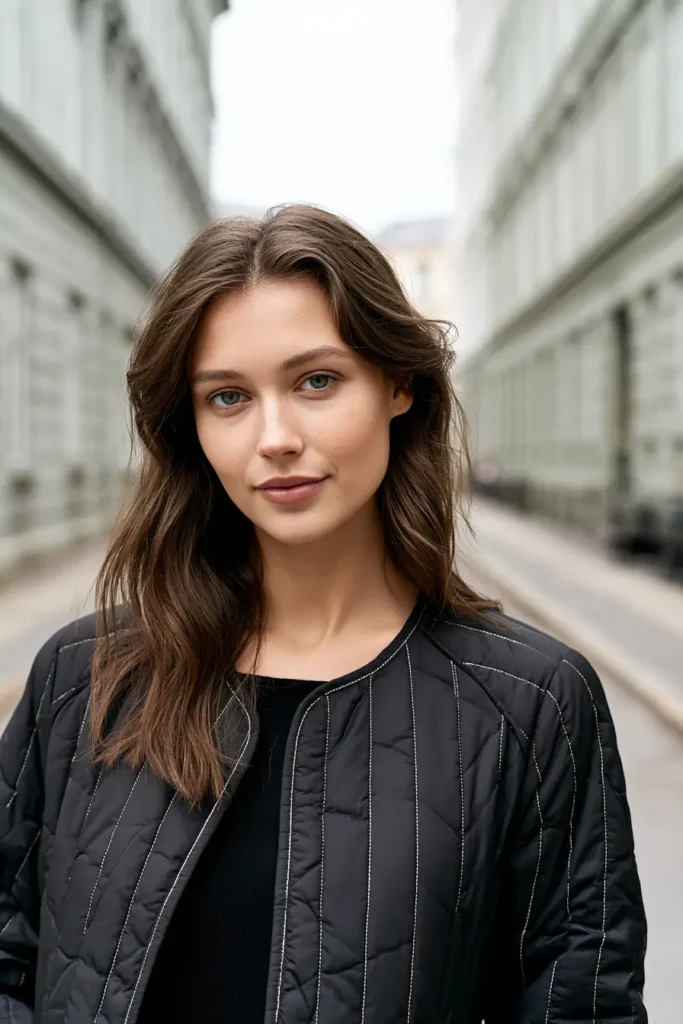
A Minimalist Black Quilted Jacket is a clean, collarless outer layer made from softly quilted fabric in a single deep black tone, with straight quilting lines, a relaxed straight-cut body, and almost no decorative detail. It is the kind of piece that looks expensive precisely because it does so little — no prints, no hardware on display, no fuss. The beauty lives in the proportions, the even quilting, and the matte softness of a good black fabric.
I came up with this idea because black is the hardest color to get right and the most rewarding when you do. A vibrant patchwork jacket forgives a wobbly seam; a minimalist black one shows everything. That challenge is exactly why making one teaches you more about clean garment sewing than almost any other project, and why the finished jacket becomes the layer you reach for endlessly — over jeans, over knitwear, over a dress on a cool evening.
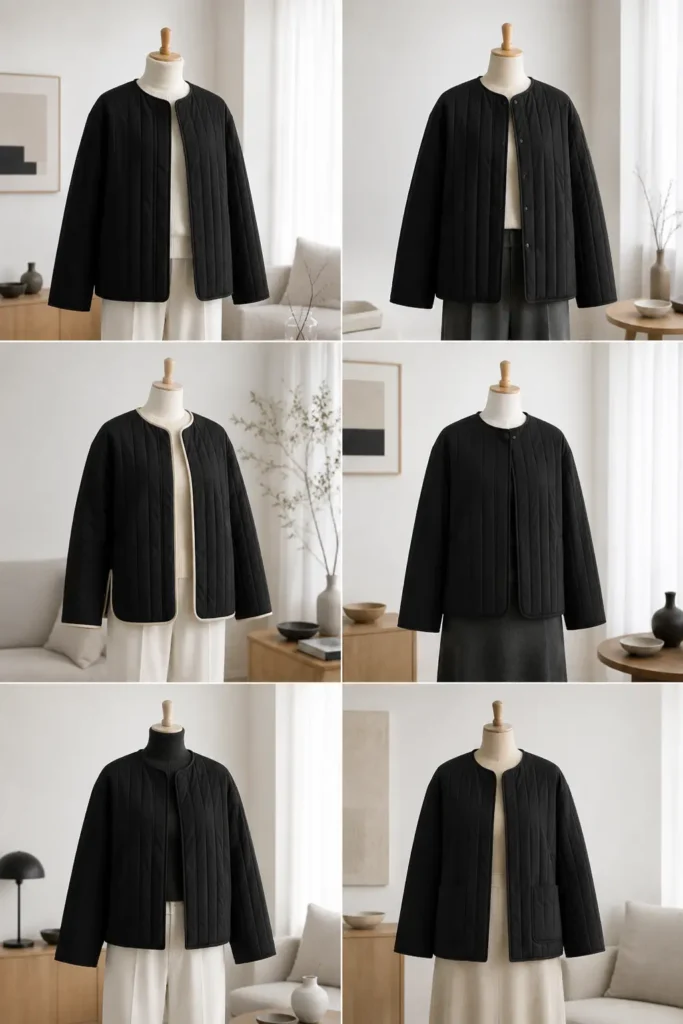
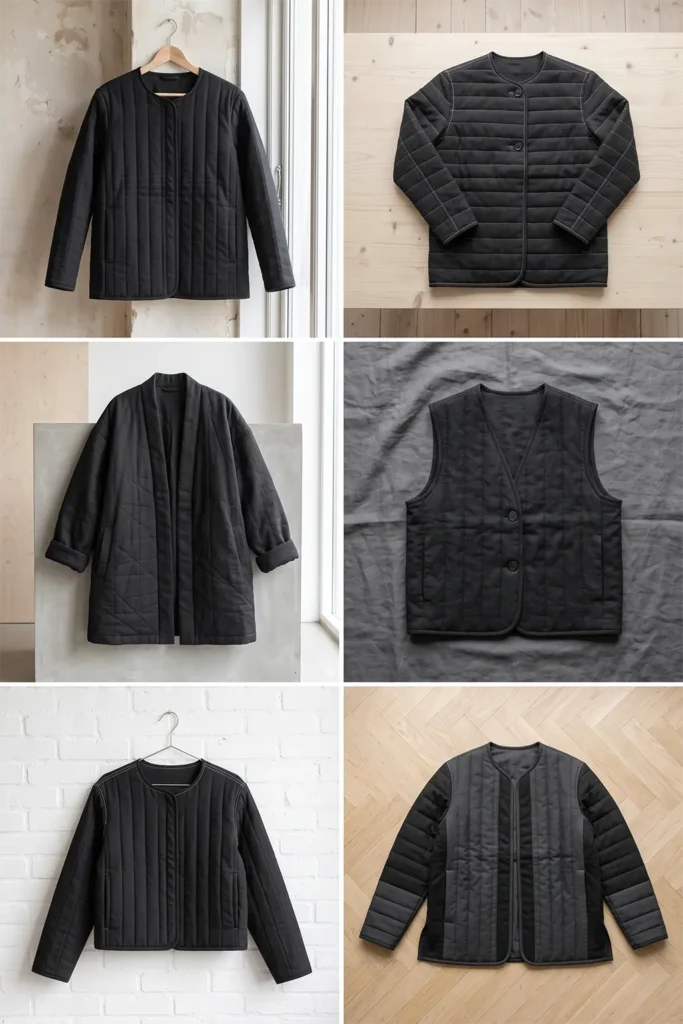
Why This Idea Is Worth Making
Why this idea is worth making: it is the definition of a wardrobe workhorse. A black quilted jacket goes with everything, hides nothing, and never dates. Sewing it yourself means you control the one thing store-bought black jackets get wrong — the weight. You can make it light enough to layer under a coat or substantial enough to stand alone, and you can choose a true matte black instead of the slightly shiny synthetics that fill the shops. It is also a forgiving first step into minimalist garment sewing, because the straight lines and single color mean there are no prints to match and no patchwork to align.
Suggested Finished Measurements
For a relaxed medium-size jacket that hits at the high hip:
- Finished length: 26–28 inches
- Finished chest width: 22–24 inches across
- Shoulder width: 17–18 inches
- Sleeve length from shoulder: 23–24 inches
- Sleeve width: 15–16 inches
- Armhole depth: 10–11 inches
- Seam allowance: ½ inch
For an oversized look, add 2 inches to the body and sleeve widths.
Materials Needed
- Black quilted fabric, or black cotton/linen-blend shell plus thin batting and black lining: 2½ to 3 yards
- Black lining fabric, if quilting your own: 2½ yards
- Thin cotton batting: 2½ yards
- Black bias binding: 5 to 6 yards (or charcoal for a subtle tonal edge)
- Black thread, plus optional bone-white or slate-grey thread for visible topstitching
- 3–4 concealed snaps or one matte-black button, optional
- Rotary cutter or fabric scissors
- Measuring tape
- Fabric chalk (use white or silver chalk so it shows on black)
- Pins or sewing clips
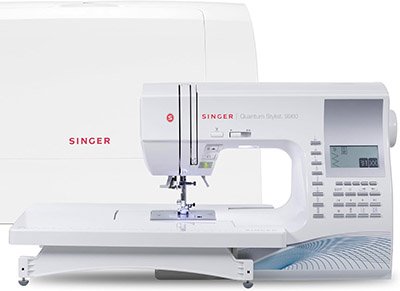
- Walking foot for your sewing machine, recommended for even quilting
- Iron
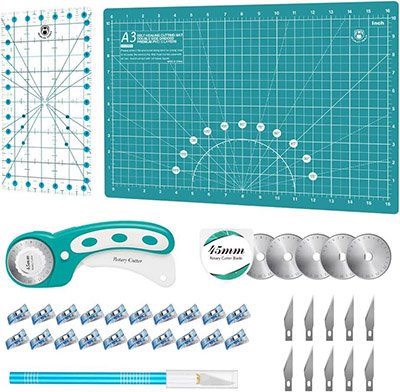
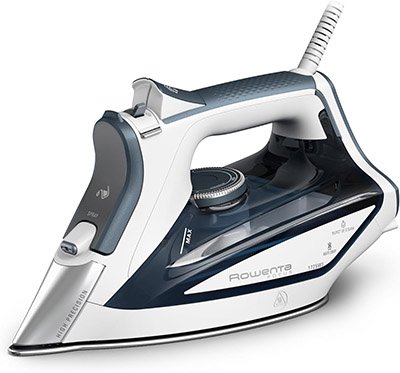
Tools for Cutting, Pressing, and Sewing
Step-by-Step Guide
Step 1: Choose Your Black Fabric and Accent Tone
Start with the right black. A matte cotton-linen blend or brushed twill reads as far more elegant than a shiny synthetic. If you want the smallest hint of warmth, choose an accent thread in bone white, soft slate grey, or charcoal for the topstitching. This single restrained accent is the only “color” decision in the whole jacket, and it is what keeps the piece from feeling flat.
For a tonal, almost invisible finish, keep the topstitching black on black. For a subtle Scandi graphic touch, go bone white.
Step 2: Make the Quilted Fabric (or Skip if Pre-Quilted)
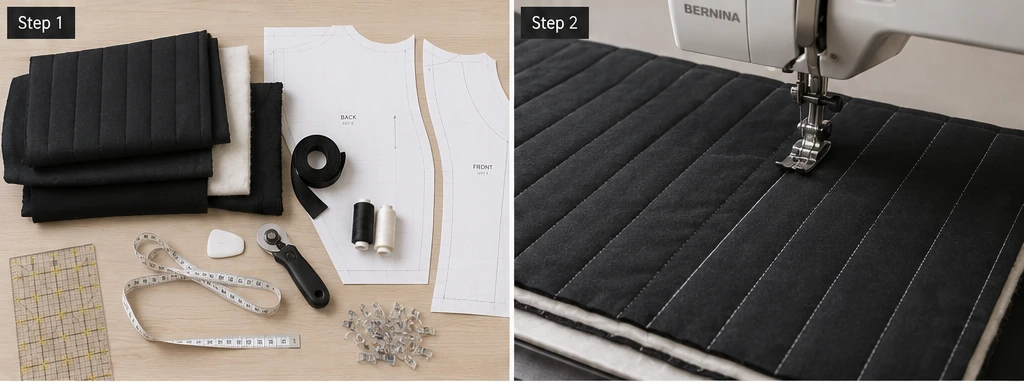
If you are quilting your own, layer the black shell, thin batting, and black lining. Smooth the layers and pin generously. Quilt straight vertical lines spaced about 1½ to 2 inches apart using a walking foot. Keep the lines genuinely straight — on black, any wobble shows. Mark guidelines first with white chalk and a ruler.
If using ready-made quilted fabric, you can skip straight to cutting.
Step 3: Cut the Back Panel
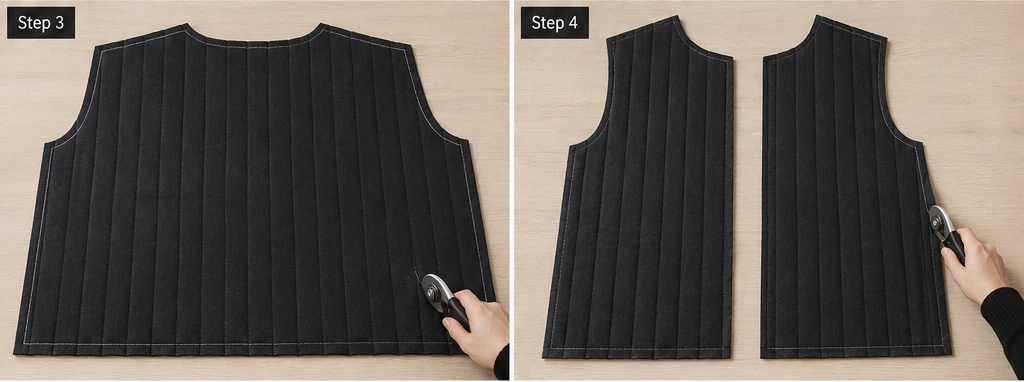
Cut one back panel about 24 inches wide × 28 inches long. Cut a shallow back neckline about 7 inches wide × 1½ inches deep. Keep the hem straight and clean — a minimalist jacket relies on crisp, simple edges.
Step 4: Cut the Front Panels
Cut two front panels, each about 13 inches wide × 28 inches long, matching the back length. Shape the front neckline with a gentle curve from the shoulder down about 5–6 inches along the center front. For a collarless look, keep the neckline clean and rounded rather than notched.
Step 5: Cut the Sleeves
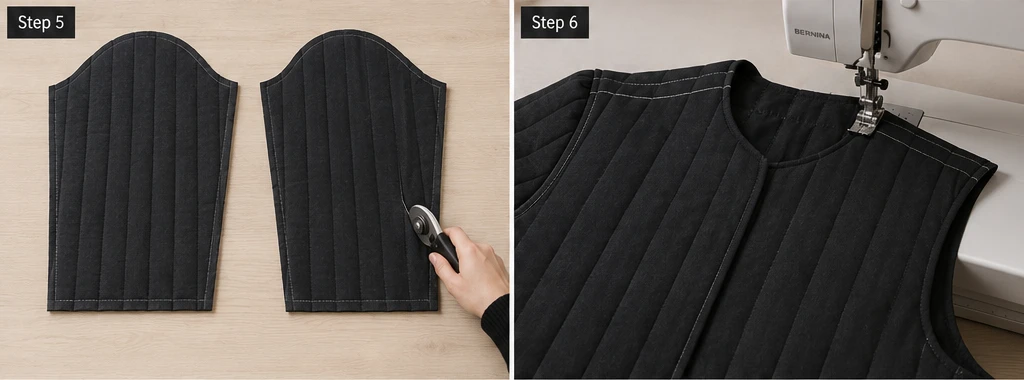
Cut two sleeves about 17 inches wide × 24 inches long. For a slightly cropped, modern sleeve, shorten to 22 inches. Keep the sleeve width consistent rather than tapered — a straight, easy sleeve suits the relaxed Nordic silhouette.
Step 6: Sew the Shoulder Seams
Place the front panels on the back panel, right sides together. Match the shoulder edges and sew with a ½ inch seam allowance. Because quilted black fabric can be bulky, press the seam toward the back and topstitch it down with your chosen accent thread. This is your first chance to let the bone-white or slate topstitching show.
Step 7: Attach the Sleeves
Open the jacket flat, right side up. Center each sleeve along the shoulder seam, right sides together, pin or clip carefully, and sew with a ½ inch seam allowance. Take the armhole curve slowly so the sleeve sits smoothly — clean armholes are what separate a refined jacket from a homemade-looking one.
Step 8: Sew the Side and Sleeve Seams
Fold the jacket right sides together. Match the sleeve edges, underarms, and side seams. Sew in one continuous line from the cuff down to the underarm and along the side. For ease of movement and a softer drape, leave 6–8 inches open at the lower side seams to create discreet side slits.
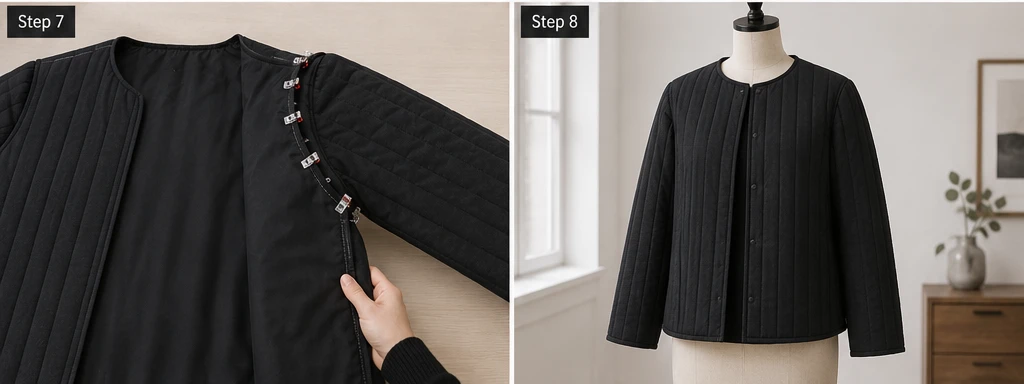
Step 9: Finish the Edges with Tonal Binding
Bind the neckline, front opening, hem, cuffs, and side slits with black or charcoal bias binding. On a minimalist jacket the binding should disappear into the fabric, framing the shape without announcing itself. Topstitch the binding down evenly — this is the most visible stitching on the jacket, so keep it parallel and clean.
Step 10: Add a Minimal Closure (Optional)
For a true minimalist finish, install 3–4 concealed snaps behind the front opening so the jacket closes without any visible hardware. If you prefer a single focal point, add one matte-black button at the chest. Or leave it completely open — an open-front black quilted jacket is the most effortless option of all.
Assembly Section
Once the shoulders, sleeves, and side seams are sewn, try the jacket on before binding. Check that the shoulders sit cleanly, the sleeves move freely, and the front edges hang straight and even — on black, an uneven hem is glaring, so trim carefully here. When the fit is right, bind all raw edges, then topstitch along the shoulder seams, front opening, and hem for a sharp, finished line. Add the closure last so you can position the snaps or button exactly where the jacket naturally falls closed. Give the whole jacket a final press, since crisp edges are what make a minimalist piece look intentional rather than plain.
Interesting Backstory
Black has a particular history in Nordic design, where long dark winters made deep, practical tones a natural part of everyday dressing, and where the broader Scandinavian design philosophy of “less, but better” turned restraint into a mark of quality rather than poverty of imagination. There is an interesting contrast with the textile world I grew up in: in Dhaka, the Nakshi Kantha quilts I watched artisans make were often joyfully colorful, telling stories through bright running stitches across reclaimed cloth. Making a disciplined black jacket draws on the same patient hand-stitched tradition, just channeled toward stillness instead of story — proof that the craft of quilting can speak in a whisper as easily as in full color.
Personal Styling Touch
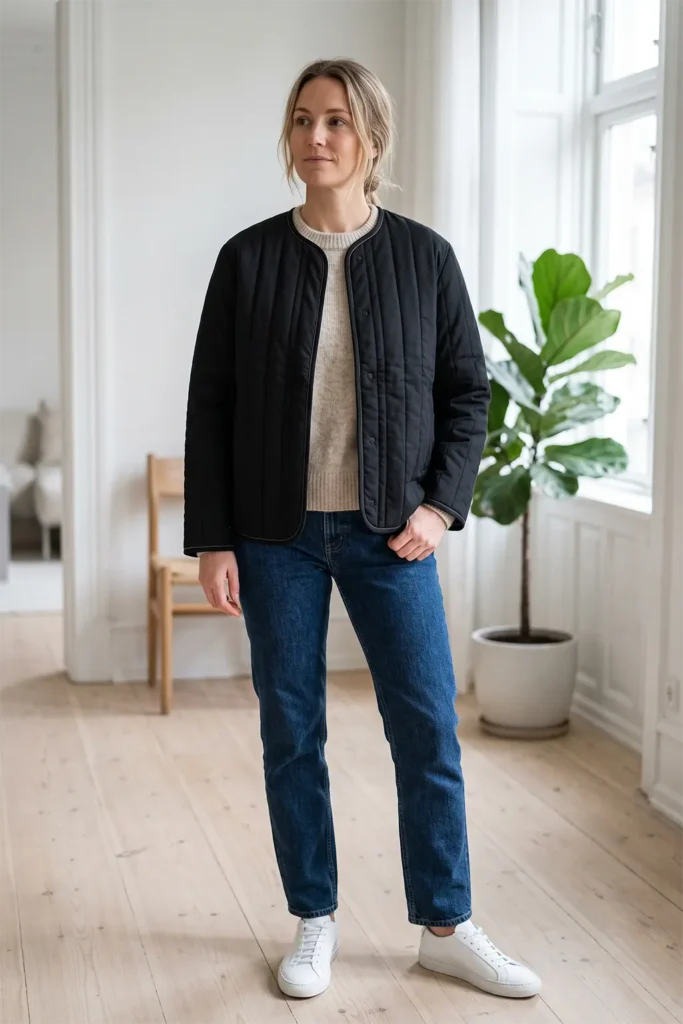
My favorite version of this jacket uses a soft matte-black brushed cotton with bone-white topstitching running in clean vertical lines, and concealed snaps so nothing interrupts the surface. The single off-white stitch detail is the whole personality of the piece — restrained, deliberate, and quietly beautiful. It is the kind of jacket I would keep on a hook by the door, knowing it works over almost anything without a second thought.
Final Styling Idea
Wear this minimalist black quilted jacket over a charcoal or cream knit with straight-leg jeans and white leather sneakers for an easy everyday look. For something more polished, layer it over a black turtleneck and tailored trousers with ankle boots. For a softer, relaxing weekend feel, throw it open over a bone-white tee and grey lounge trousers.
Keep the palette tight — black, charcoal, slate grey, bone white, and soft cream — and the jacket carries that effortless, timeless Nordic elegance every time.
Other Design Inspirations – Digitally Modified
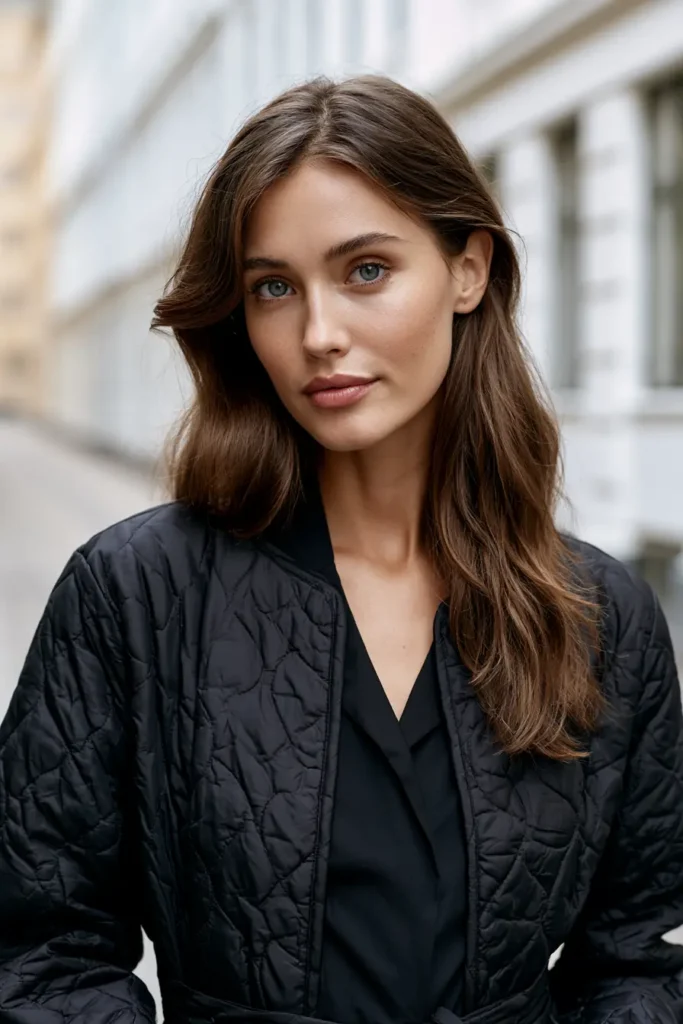
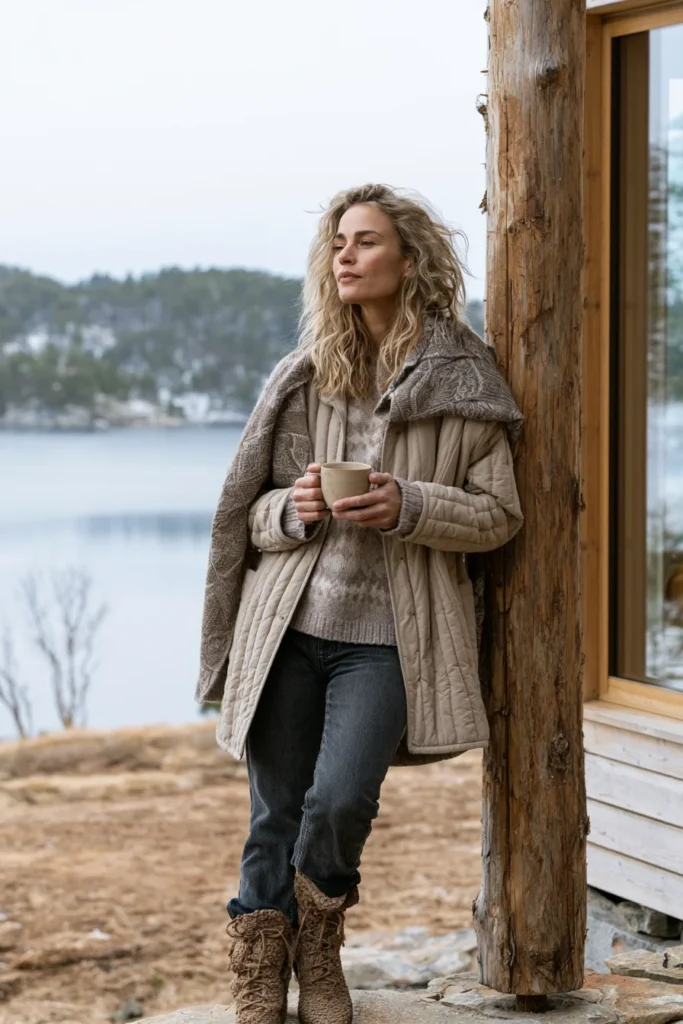
2. Reversible Two-Tone Quilted Jacket for Versatile Scandi Dressing
A Guide to Making a Reversible Two-Tone Quilted Jacket for Versatile Scandi Dressing
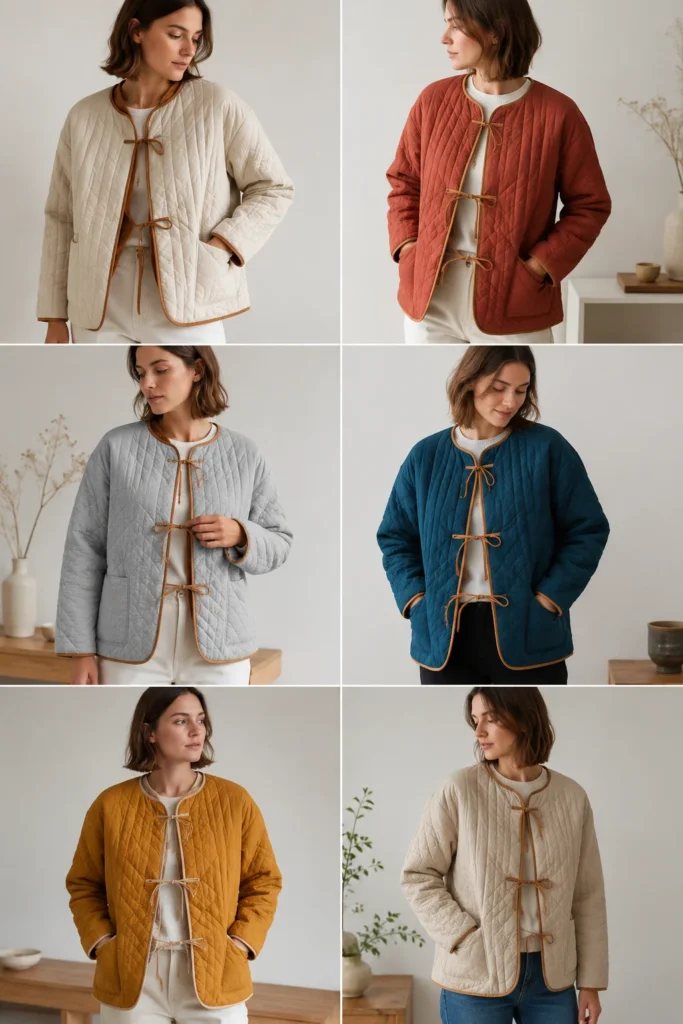
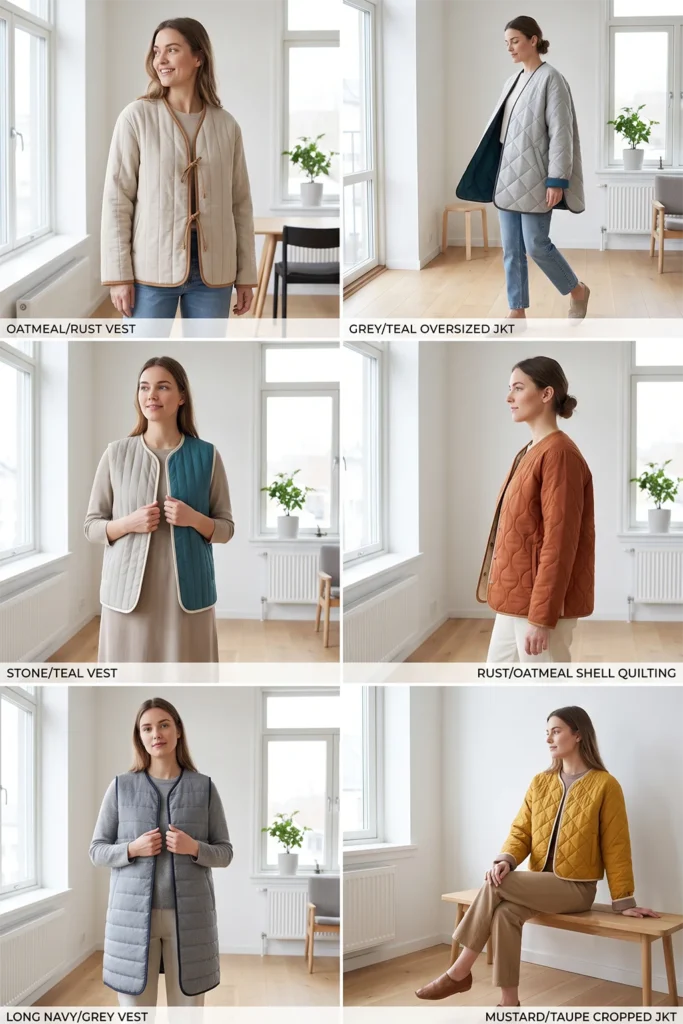
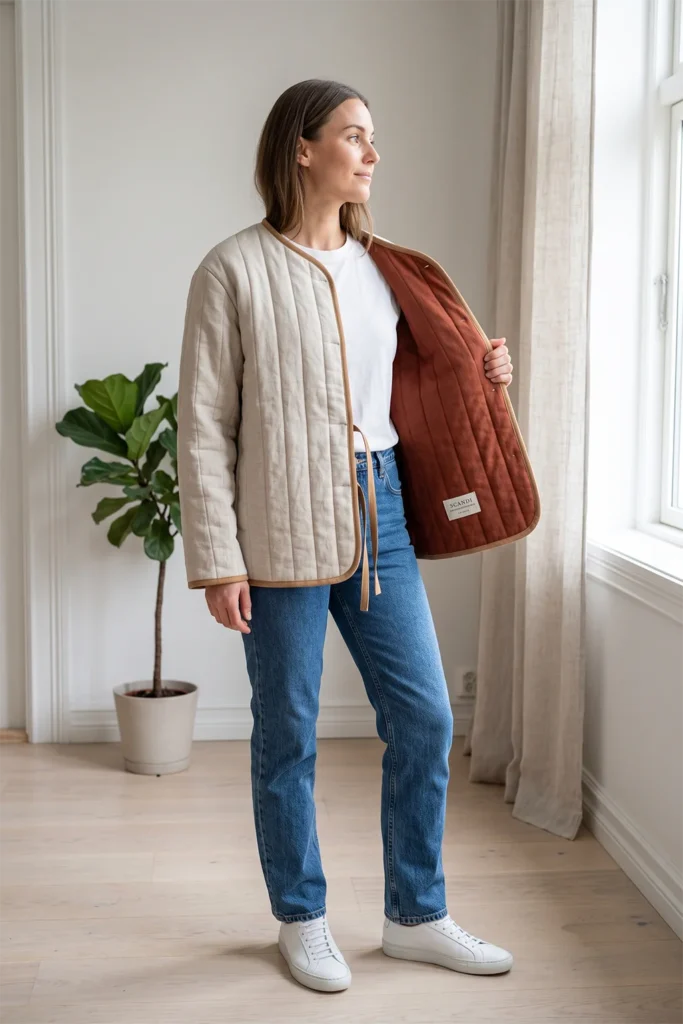
A Reversible Two-Tone Quilted Jacket is a double-faced layer built so both sides are fully wearable, each in a different color, giving you two distinct jackets in one. One face might be a calm oatmeal or soft grey, the other a richer rust, ochre, or deep teal — flip it depending on your mood, your outfit, or the day. Because both sides are shown, the construction is a little more thoughtful than that of a standard lined jacket: there are no raw seams hiding, and every edge is finished to look intentional from either side.
I came up with this idea because reversibility is the most Scandinavian thing a garment can do — it is quietly practical, it earns its place in a small wardrobe, and it gives you maximum use from a single piece. One jacket, two looks, zero waste. That efficiency-meets-elegance balance is the heart of Nordic dressing, and a two-tone reversible jacket delivers it better than almost anything else you can sew.
Why This Idea Is Worth Making
Why this idea is worth making: it doubles your wardrobe with one project. A reversible jacket means a single make covers two color stories — a muted neutral side for understated days and a warmer, richer side when you want a little presence. It is ideal for travel and capsule wardrobes, since one packed jacket behaves like two. Sewing it yourself also lets you pair colors that actually work together rather than settling for whatever a shop decided, and the double-faced construction teaches you a genuinely useful skill: finishing a garment so cleanly that it has no “wrong” side at all.
Suggested Finished Measurements
For a relaxed medium-size jacket that hits at the hip:
- Finished length: 26–28 inches
- Finished chest width: 23–25 inches across
- Shoulder width: 17–18 inches
- Sleeve length from shoulder: 23–24 inches
- Sleeve width: 15–16 inches
- Armhole depth: 10–11 inches
- Seam allowance: ½ inch
For an oversized fit, add 2 inches to the body and sleeve widths.
Batting, Measuring, Marking, and Clipping Supplies for Quilts
“As an Amazon Associate, I earn from qualifying purchases.“
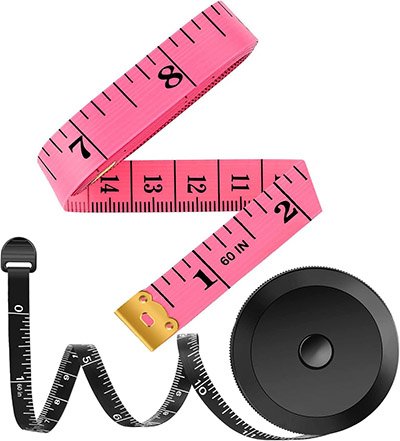
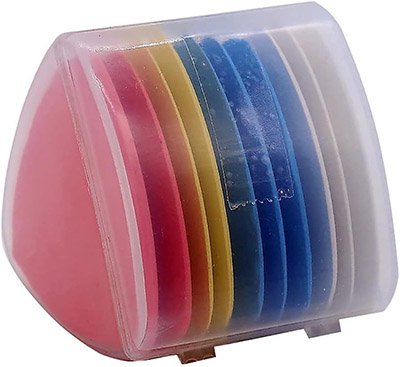
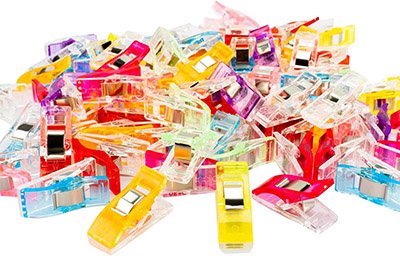
Materials Needed
- Fabric for Side A (muted tone — oatmeal, soft grey, or bone): 2½ to 3 yards
- Fabric for Side B (richer tone — rust, ochre, deep teal, or mustard): 2½ to 3 yards
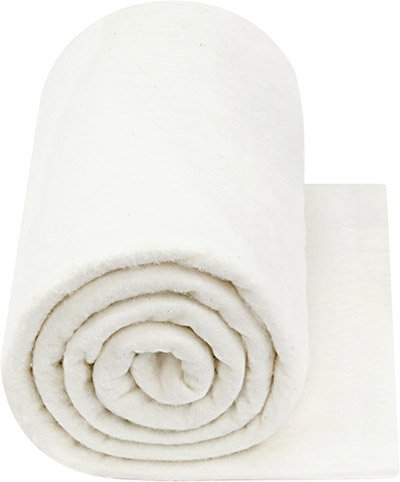
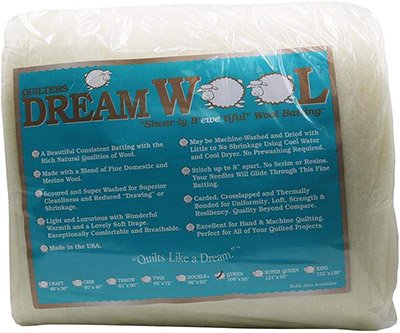
- Thin cotton batting (keep it slim so the jacket stays reversible-friendly): 2½ yards
- Bias binding in a color that bridges both sides (camel, charcoal, or cream): 5 to 6 yards
- Thread to suit both fabrics
- Fabric clips (better than pins for thick double-faced layers)
- Rotary cutter or fabric scissors
- Measuring tape
- Fabric chalk
- Walking foot, recommended
- Iron
Step-by-Step Guide
Step 1: Choose Your Two-Tone Color Pairing
Pick one muted side and one richer accent side. Strong Scandi pairings include oatmeal with rust, soft grey with deep teal, bone with ochre, or stone with mustard. The trick is to keep one side quiet so the jacket always has a “calm” option, while the second side brings warmth and energy. Both colors should be ones you would happily wear on their own.
For the binding, choose a third color that flatters both — camel, charcoal, or cream all bridge a neutral and a warm tone nicely.
Step 2: Build the Two-Faced Quilted Fabric
Layer Side A fabric, thin batting, and Side B fabric together, with the two right sides facing outward and the batting sandwiched between. Smooth and clip thoroughly. Quilt straight lines or a soft diamond pattern spaced about 1½ to 2 inches apart. Because both faces show, choose a thread that looks good on both colors, or use a bobbin thread matched to Side B and a top thread matched to Side A.
Keep the batting thin — a slim quilt sandwich is what keeps the finished jacket flexible enough to flip and wear comfortably either way.
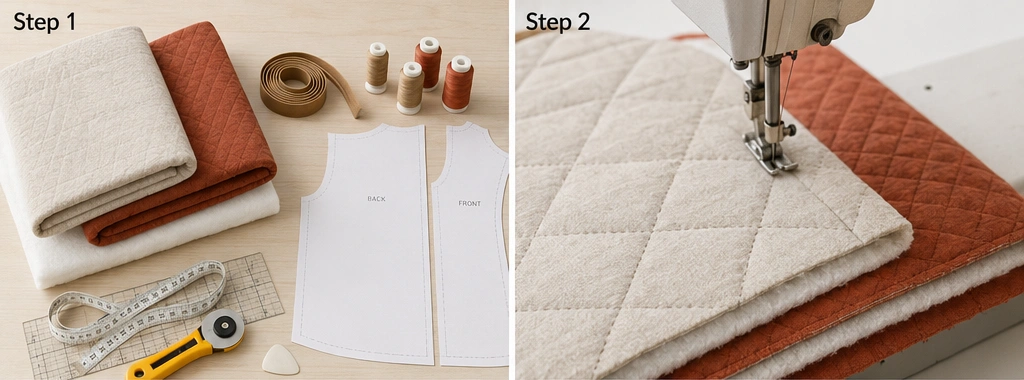
Step 3: Cut the Back Panel
From your quilted two-faced fabric, cut one back panel about 25 inches wide × 28 inches long. Cut a shallow back neckline about 7 inches wide × 1½ inches deep. Mark which side is A and which is B with a removable chalk note so you stay oriented as you build.
Step 4: Cut the Front Panels
Cut two front panels, each about 13 inches wide × 28 inches long, matching the back length. Shape the front neckline with a gentle curve from the shoulder down about 5–6 inches. Keep the front edges straight and clean so they hang evenly when worn open from either side.
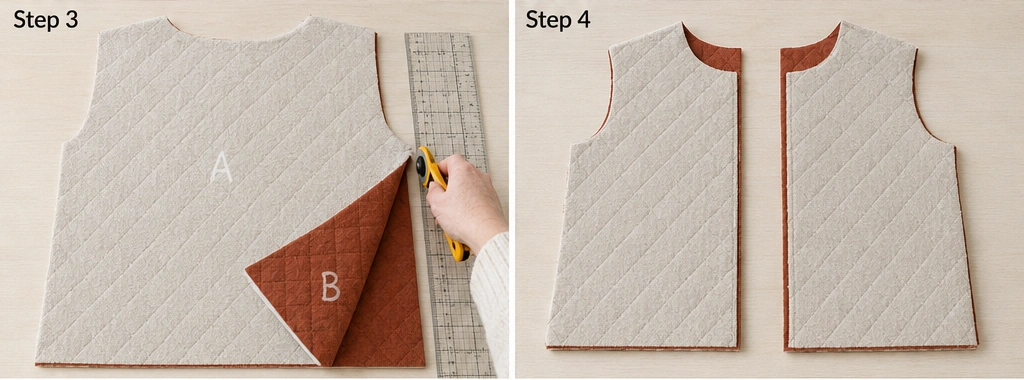
Step 5: Cut the Sleeves
Cut two sleeves about 17 inches wide × 24 inches long. Keep the sleeve a straight, easy shape rather than tapered. Double-check that all your pieces are cut with the same side facing up, so Side A is consistently Side A across the whole jacket.
Step 6: Join Seams with Enclosed or Bound Finishes
This is the key reversible step: every seam must be clean on both sides. Sew the shoulder seams with right sides of Side A together, then finish the seam allowances with bias binding so no raw edge shows on Side B — this is called a bound (or Hong Kong) seam. Repeat for all structural seams. It takes a little longer than a standard seam, but it is what makes the jacket truly two-sided.
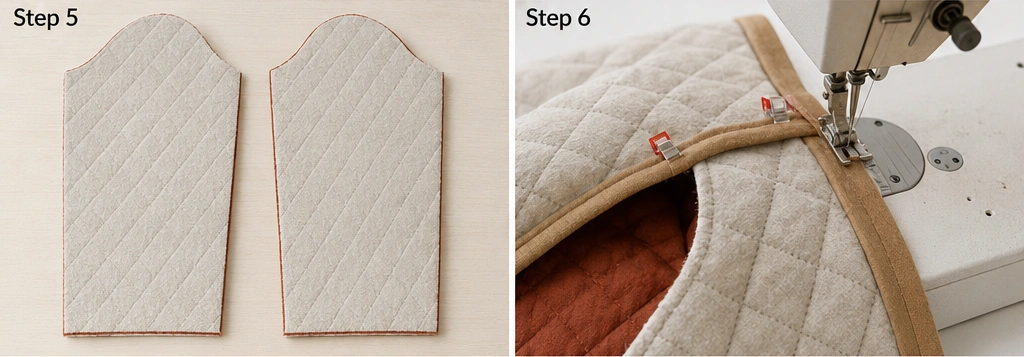
Step 7: Attach the Sleeves with Bound Seams
Center each sleeve along the shoulder seam and sew with a ½ inch seam allowance, then bind the armhole seam allowance just as you did the shoulders. Work the curve slowly and clip the binding so it lies flat around the armhole. Clean, bound armholes are the detail that sells the “no wrong side” effect.
Step 8: Sew and Bind the Side and Sleeve Seams
Fold the jacket and sew from cuff to underarm to side hem in one line, then bind that seam allowance. Leave 6–8 inches open at the lower side seams for side slits, and finish those slit edges with binding too. Every edge a viewer could see from either side should now be enclosed.
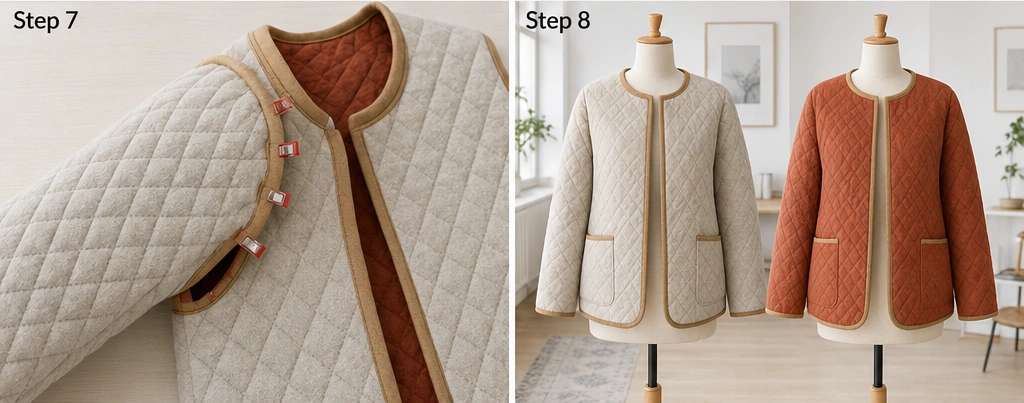
Step 9: Finish All Outer Edges with Binding
Bind the neckline, front opening, hem, and cuffs with your bridging-color bias binding. On a reversible jacket the binding does double duty — it finishes the edge and frames both faces at once, so topstitch it down evenly and slowly. This continuous bound edge is the visual signature of a well-made reversible piece.
Step 10: Add a Reversible Closure
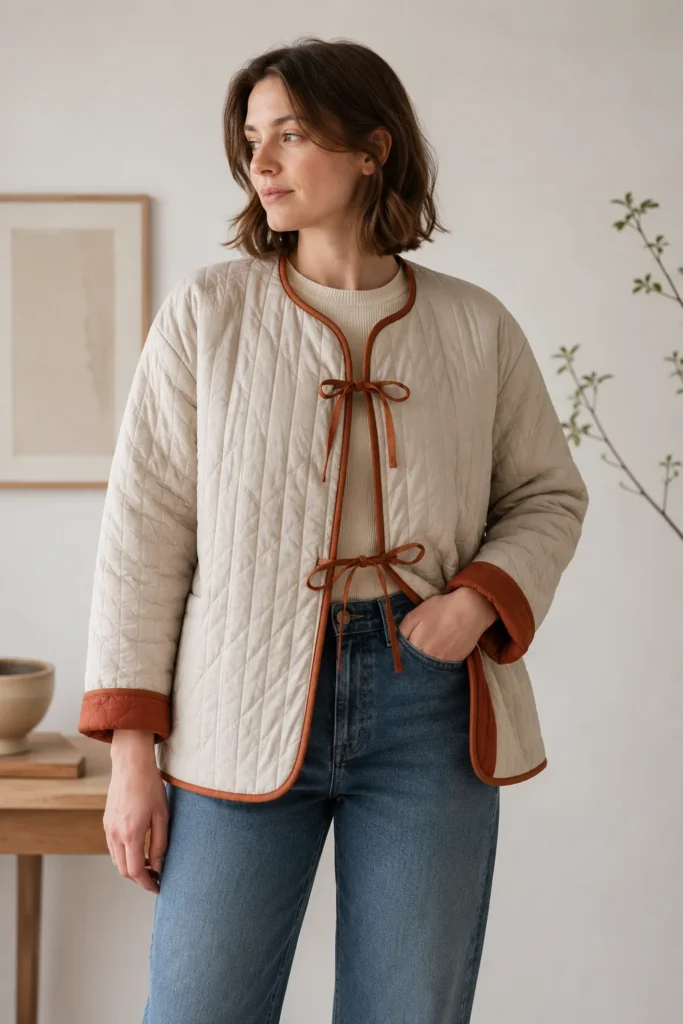
Standard buttons have a wrong side, so for a true reversible jacket use fabric ties (sew one to each front edge, finished on both faces) or double-sided snaps designed to look clean from either direction. Or leave it open — an open-front reversible jacket is the simplest and most versatile option, letting you show whichever side you choose with no closure interrupting the line.
Assembly Section
Once all seams are sewn and bound, try the jacket on both ways before final pressing. Check that the shoulders sit cleanly, the front edges hang even, and — crucially — that both faces look equally finished, with no binding twisting or raw edge peeking through. Trim and re-bind anything that looks off, since on a reversible piece a flaw shows from one side or the other. When everything is clean, give the jacket a thorough press from both sides, add your ties or snaps last, and confirm the closure works neatly whichever way you wear it.
Interesting Backstory
Reversible and double-faced textiles have a long, practical history across many cultures — fabric was valuable, so cloth that could be used on both sides earned its keep. There is a lovely connection to the Nakshi Kantha tradition I grew up around in Dhaka: Kantha is stitched with simple running stitches that pass through every layer, which means the pattern naturally appears on both faces of the cloth. Those quilts were quietly reversible long before reversible became a fashion idea. Building a two-tone Scandi jacket draws on that same logic — a garment with no hidden side, made to be useful from every angle, just dressed here in cool Nordic restraint on one face and warm color on the other.
Personal Styling Touch
My favorite version pairs a soft oatmeal side with a deep rust reverse, bound all around in warm camel, and closed with two simple fabric ties at the front. On grey, quiet days I wear the oatmeal out; when an outfit needs lifting, I flip to the rust. The camel binding ties both worlds together, so it never looks like two unrelated jackets — just one thoughtful piece with two moods.
Final Styling Idea
Wear the muted side out over a white tee, straight jeans, and clean sneakers for an understated everyday look. Flip to the warm rust or teal side over a cream knit and wide-leg trousers when you want the outfit to carry a little more color and confidence. For travel, this is the one jacket to pack — it covers a quiet daytime look and a richer evening one without taking up a second slot in your bag.
Keep the two palettes intentional — a muted neutral on one side, a warm Nordic accent on the other, bridged by a single binding color — and the jacket delivers genuinely versatile Scandi dressing every time.
Other Design Inspirations – Digitally Modified
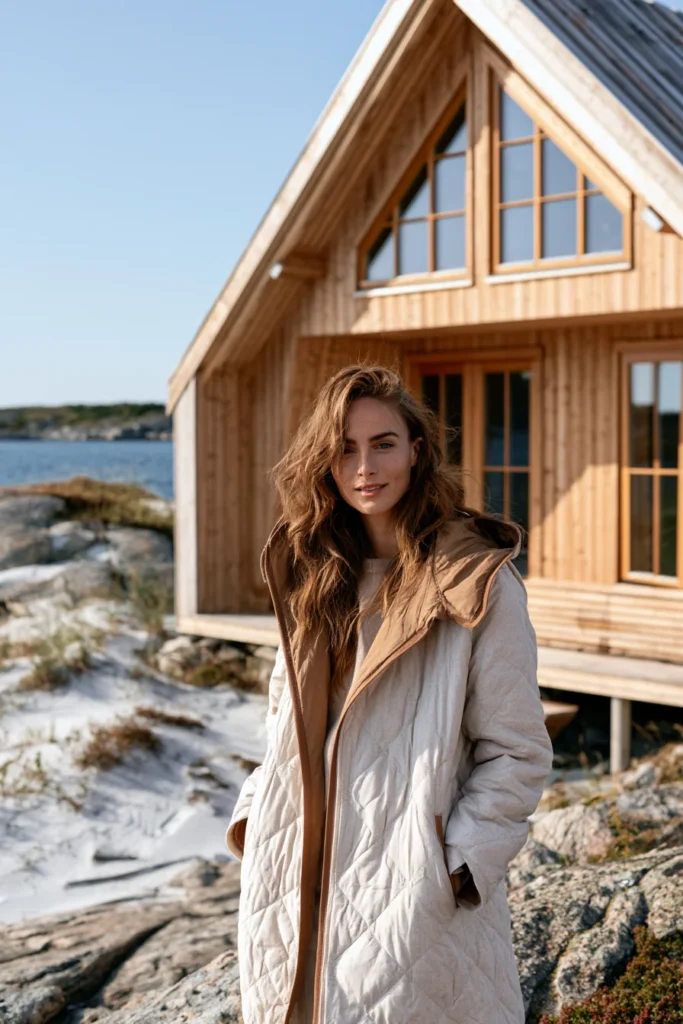
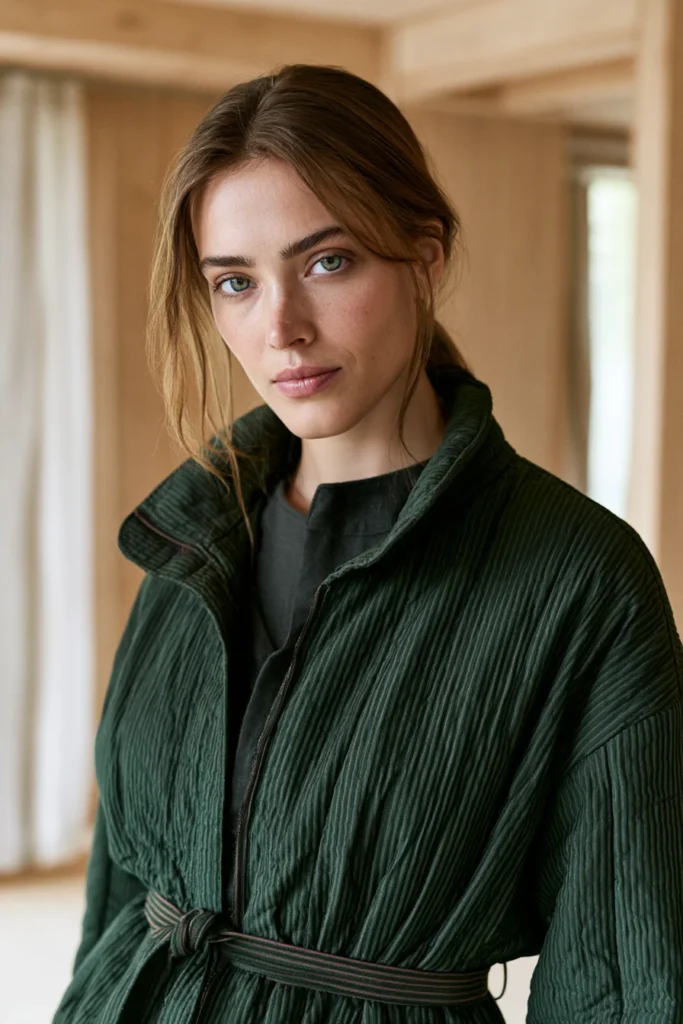
3. Longline Quilted Coat for Elegant Cold-Weather Layering
A Guide to Making a Longline Quilted Coat for Elegant Cold-Weather Layering
A Longline Quilted Coat is a knee-length or below-the-knee quilted layer built for real warmth and a long, elegant line. Where a short jacket is about ease, a longline coat is about presence and coverage — it falls in a clean column from shoulder to hem, drapes over heavier knitwear, and carries you through the coldest stretch of the year while still looking considered. The length is the whole point: it does the quiet, statuesque thing that defines Nordic winter dressing.
I came up with this idea because the longer you make a quilted piece, the more it has to earn its proportions — and getting those proportions right is deeply satisfying. A longline coat is also the most genuinely useful cold-weather garment in this collection. It is the one you reach for when the temperature actually drops, layered over a sweater on a grey winter walk, and the deep color keeps it from feeling heavy or severe.
Why This Idea Is Worth Making
Why this idea is worth making: it is the warmest, most practical piece you can sew here, and the most quietly dramatic. The extra length means extra warmth across the hips and thighs, real coverage in cold wind, and an elegant column silhouette that flatters almost everyone. Making it yourself lets you choose a length that actually suits your height — store-bought longline coats are notoriously hit-or-miss in terms of proportion — and a rich, wearable color you genuinely love, rather than the endless black and grey on the rails. It also teaches you to handle a larger quilted panel cleanly, which is a real step up in skill.
Suggested Finished Measurements
For a relaxed medium-size coat hitting just below the knee:
- Finished length: 44–48 inches (adjust to your height)
- Finished chest width: 24–26 inches across
- Shoulder width: 17–18 inches
- Sleeve length from shoulder: 24–25 inches
- Sleeve width: 16–17 inches
- Armhole depth: 11–12 inches
- Seam allowance: ½ inch
For an oversized cocoon shape, add 2–3 inches to the body and sleeve widths.
Materials Needed
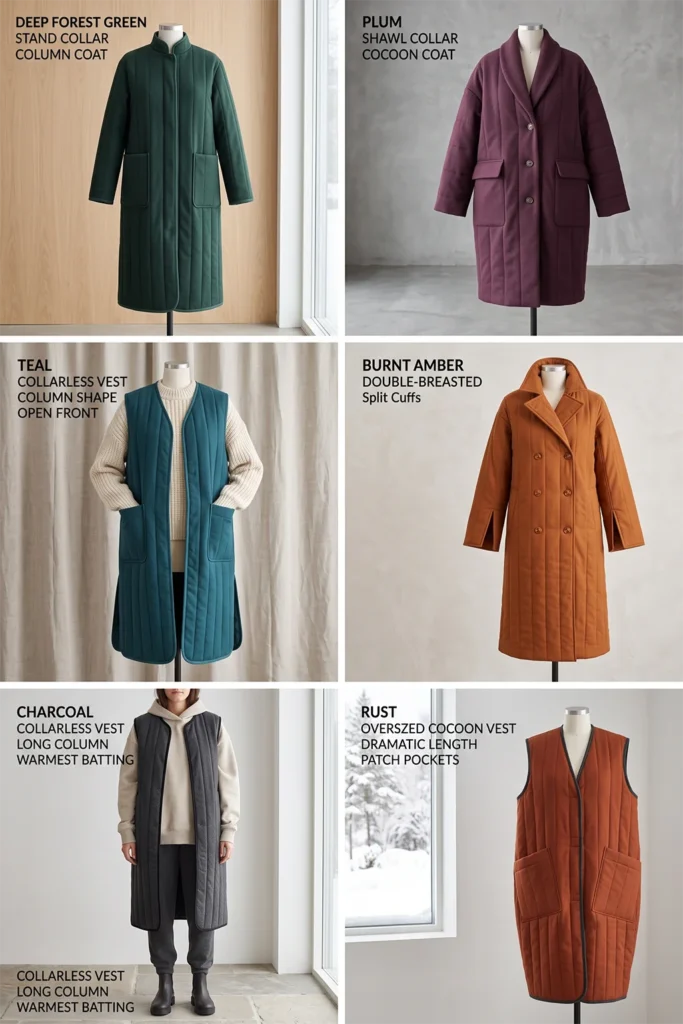
- Quilted fabric in a rich tone (deep forest, plum, burnt amber, or teal): 4 to 4½ yards (more length needs more fabric)
- Lining fabric, if quilting your own: 4 yards
- Cotton or wool batting for extra warmth: 4 yards
- Bias binding in a tonal or subtly contrasting color: 7 to 8 yards
- Matching thread
- 4–5 buttons, large snaps, or a concealed zip
- Rotary cutter or fabric scissors
- Measuring tape
- Fabric chalk
- Fabric clips
- Walking foot, strongly recommended for long quilting lines
- Iron
Step-by-Step Guide
Step 1: Choose a Rich, Wearable Color
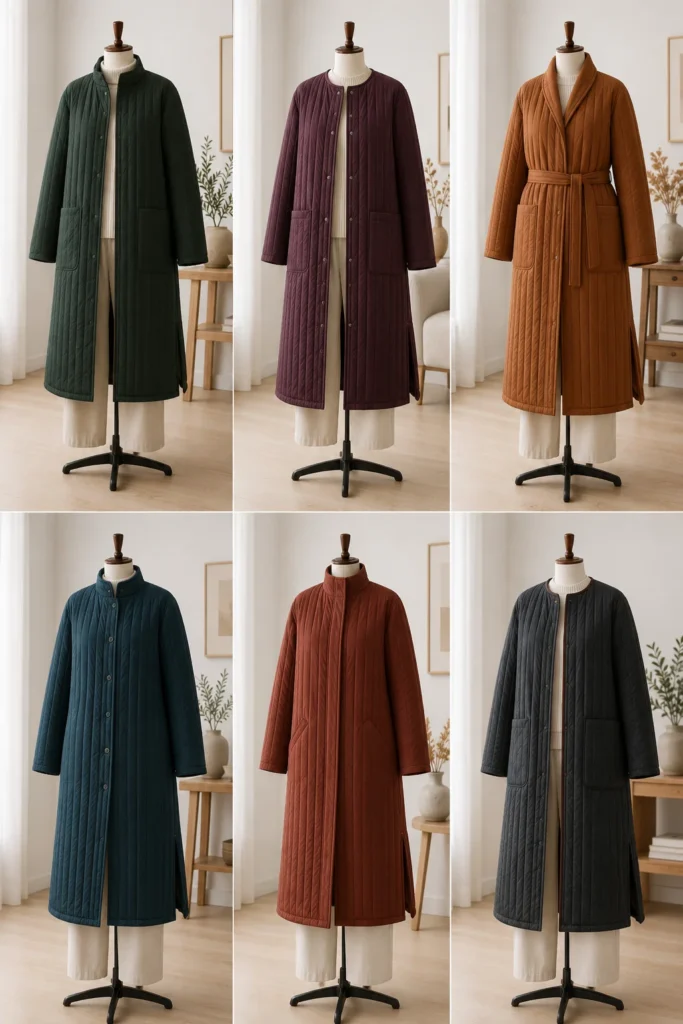
A longline coat is a big block of color, so choose a tone with depth that still works as a neutral in your wardrobe. Strong options include deep forest green, plum, burnt amber, rust, or dark teal — colors vibrant enough to feel intentional but grounded enough to wear with everything. For warmth without heaviness, choose a wool-blend batting and a matte shell fabric.
Keep the binding tonal (a slightly deeper shade of the same color) so the long edges read as one clean line.
Step 2: Make the Quilted Fabric in Long Panels
Because the coat is long, plan your quilting in full-length panels. Layer shell, batting, and lining, smooth thoroughly, and clip often — long panels shift easily. Quilt straight vertical lines spaced about 2 inches apart, working from the center outward to prevent bunching. A walking foot is almost essential here; long quilting lines magnify any uneven feed.
Quilt slightly more fabric than you think you need, so you have a clean margin when cutting the long panels.
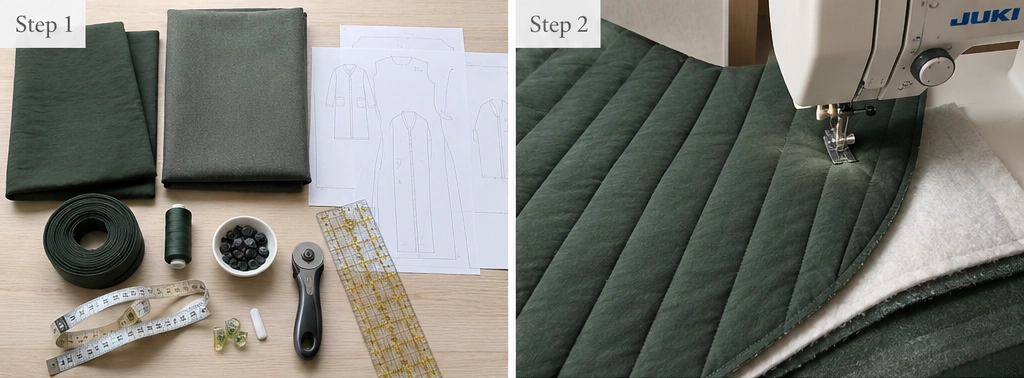
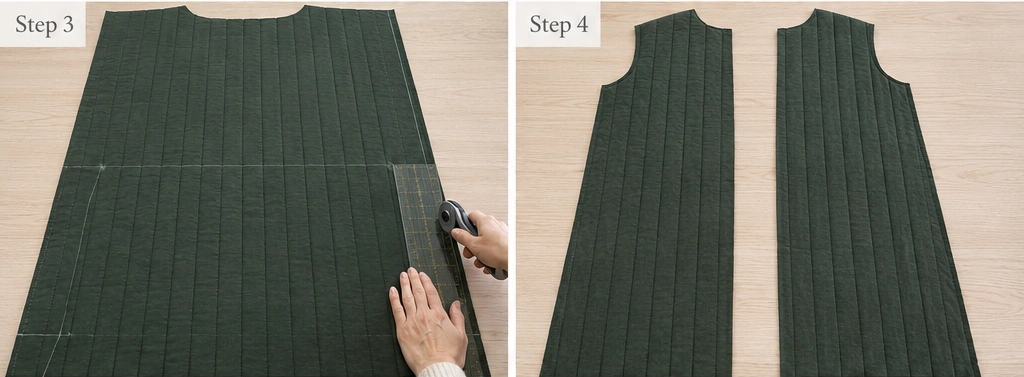
Step 3: Cut the Back Panel
Cut one back panel about 26 inches wide × 48 inches long (adjust length to your height). Cut a shallow back neckline about 7 inches wide × 1½ inches deep. Keep the side edges straight, or angle them out very slightly toward the hem for a subtle A-line sweep.
Step 4: Cut the Front Panels
Cut two front panels, each about 14 inches wide by 48 inches long, to match the back. Shape the front neckline with a gentle curve from the shoulder down about 5–6 inches. If you want a collar later, keep the neckline clean now and add it during finishing.
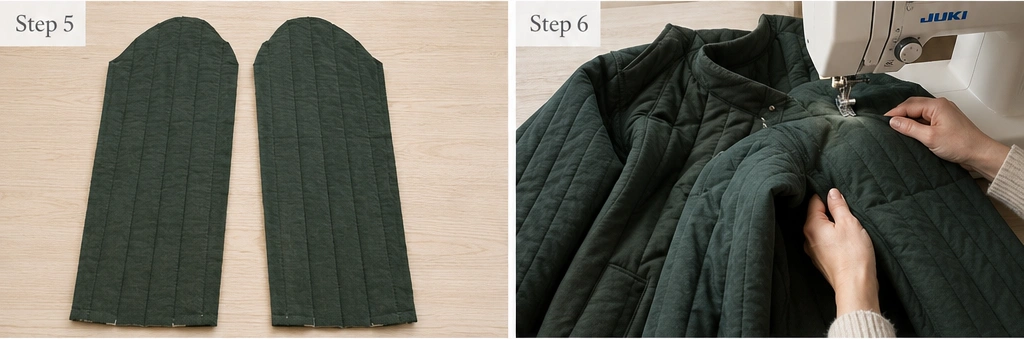
Step 5: Cut the Sleeves
Cut two sleeves about 18 inches wide × 25 inches long. Longline coats suit a slightly longer, fuller sleeve that covers the wrist in cold weather. Keep the shape straight or very gently tapered toward the cuff.
Step 6: Sew the Shoulder Seams
Place the front panels on the back, right sides together, match the shoulders, and sew with a ½ inch seam allowance. Quilted coat fabric is bulky, so press the seam toward the back and topstitch it flat. Sturdy, flat shoulder seams matter more here because they carry the weight of a long, heavier garment.
Step 7: Attach the Sleeves
Open the coat flat, center each sleeve at the shoulder seam, clip carefully, and sew with a ½ inch seam allowance. Work the curve slowly. With a heavy coat, take extra care that both armholes are even — uneven armholes throw off the whole long line.
Step 8: Sew the Side and Sleeve Seams
Fold the coat right sides together and sew from the cuff to the underarm to the hem in one continuous line. For a long coat, leave 10–12 inches open at the lower side seams as generous side slits — these let you walk and sit comfortably and stop the long hem from feeling restrictive.
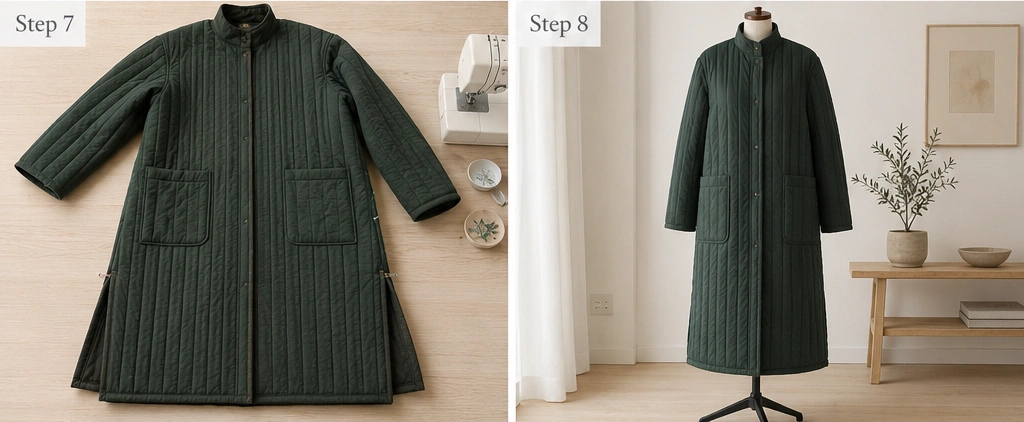
Step 9: Add Pockets and a Collar (Optional but Recommended)
A longline coat really benefits from pockets. Cut two pocket pieces about 8 inches wide × 9 inches tall, finish the top edge, fold the rest under by ½ inch, and topstitch them to the front panels about 28–30 inches down from the shoulder, where your hands naturally rest. If you want a collar, cut a simple stand or shawl collar piece, quilt it to match, and attach it at the neckline before binding.
Step 10: Finish the Edges and Add the Closure
Bind the neckline, front opening, hem, cuffs, side slits, and pocket tops with bias binding. Then add your closure — 4–5 buttons or large snaps spaced evenly down the front, or a concealed zip for a sleeker look. On a long coat, space closures so the front stays closed cleanly without gaping across the chest or pulling at the hip.
Assembly Section
With all seams sewn, try the coat on over a sweater — the layer you’ll actually wear it with — before finishing. Check the length against your height, confirm the shoulders carry the weight cleanly, and make sure the front hangs in a straight column without pulling. Trim the hem level (easy to get wrong on a long garment, so measure from the floor). Once the fit is right, attach pockets and collar, bind all edges, then install the closure last. Give the coat a full press, working the long seams flat, and hang it overnight so the quilted panels settle into their final drape.
Interesting Backstory
The long quilted coat has deep roots in cold-climate dressing across the world — quilted layers were among the earliest and most effective ways to trap warmth long before technical insulation existed.
In the Nordic countries, where winter is long and daylight short, practical warmth and understated elegance were never in conflict; a good coat simply had to do both. I find a quiet kinship here with the layered-cloth quilting traditions I grew up around in Dhaka, where stitching multiple layers of fabric together was a centuries-old way to make something warm and lasting from simple materials. A longline quilted coat is the same ancient idea — layers stitched together, made to keep the body warm — carried into a clean, modern Scandinavian silhouette.
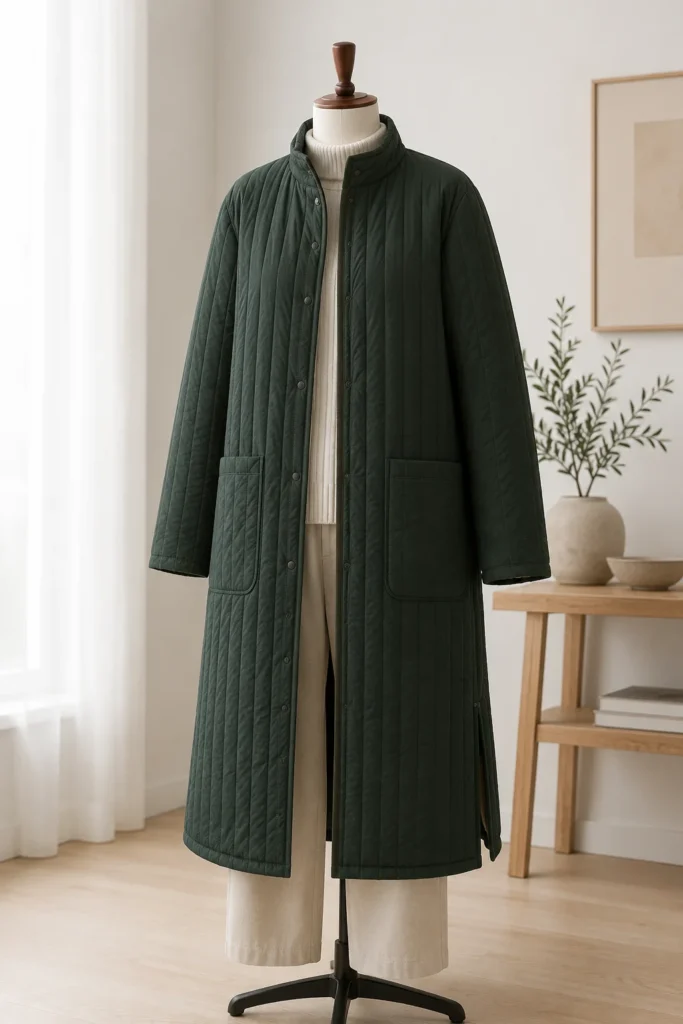
Personal Styling Touch
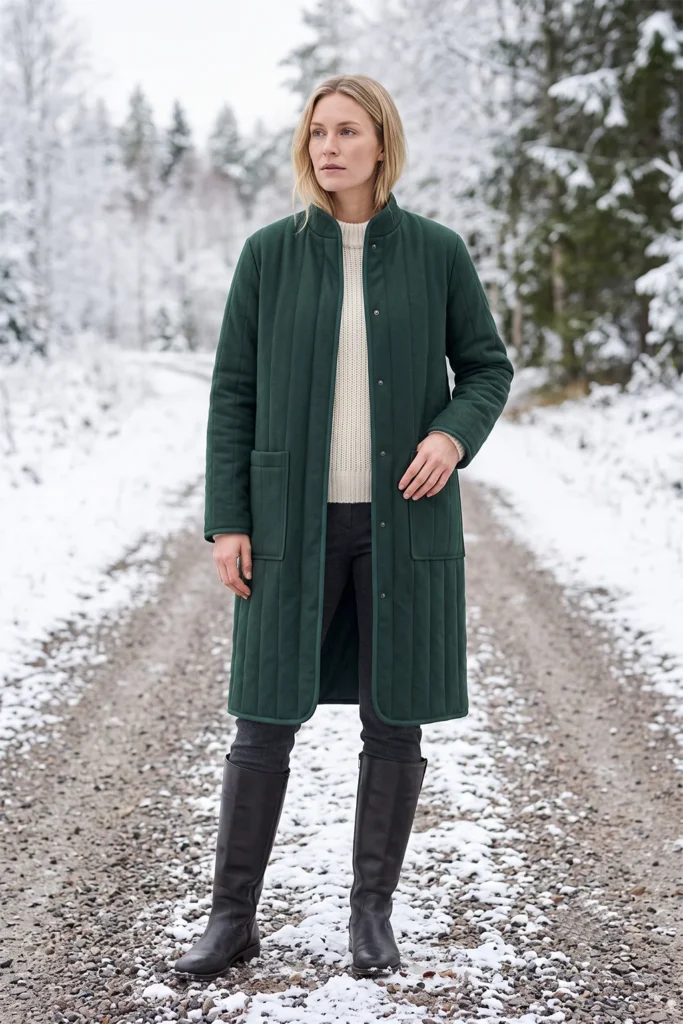
My favorite version is a deep forest-green wool-blend quilt, bound in a slightly darker green so the edges disappear into a single clean line, with deep patch pockets and a simple stand collar. It falls just below the knee and closes with concealed snaps for an uninterrupted front. Worn open over a cream sweater on a cold walk, it has exactly the kind of quiet, statuesque presence I want from a winter coat — warm, elegant, and never fussy.
Final Styling Idea
Wear this longline quilted coat open over a chunky cream or oatmeal knit with slim trousers tucked into tall boots for an elegant cold-weather look. For deeper cold, close it fully over layered knitwear and add a wool scarf in a tone that picks up the coat’s color. For a softer, relaxing weekend version, throw it over loungewear and ankle boots for a quick coffee run.
Keep the palette rich but grounded — deep forest, plum, burnt amber, teal, paired with cream, oatmeal, and charcoal — and the coat delivers elegant, genuinely warm cold-weather layering all winter long.
Other Design Inspirations – Digitally Modified
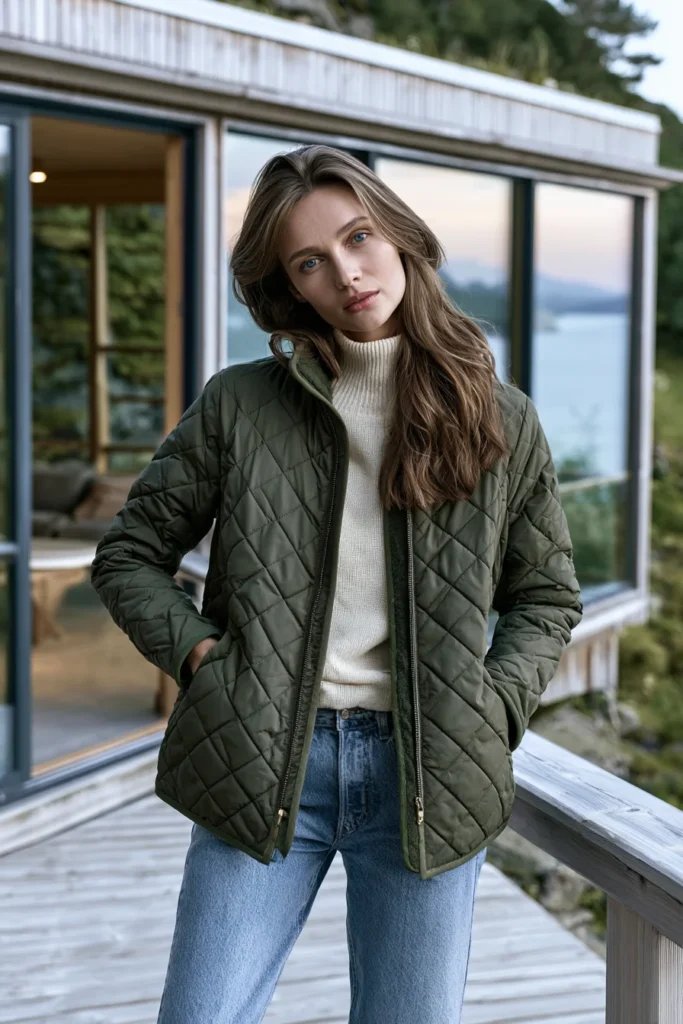
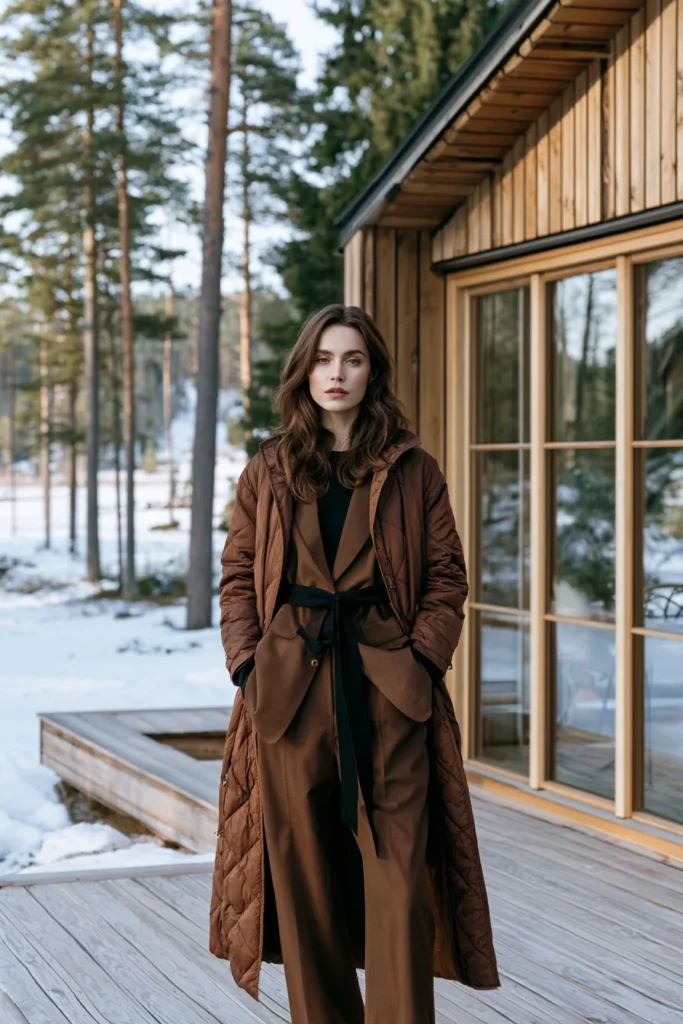
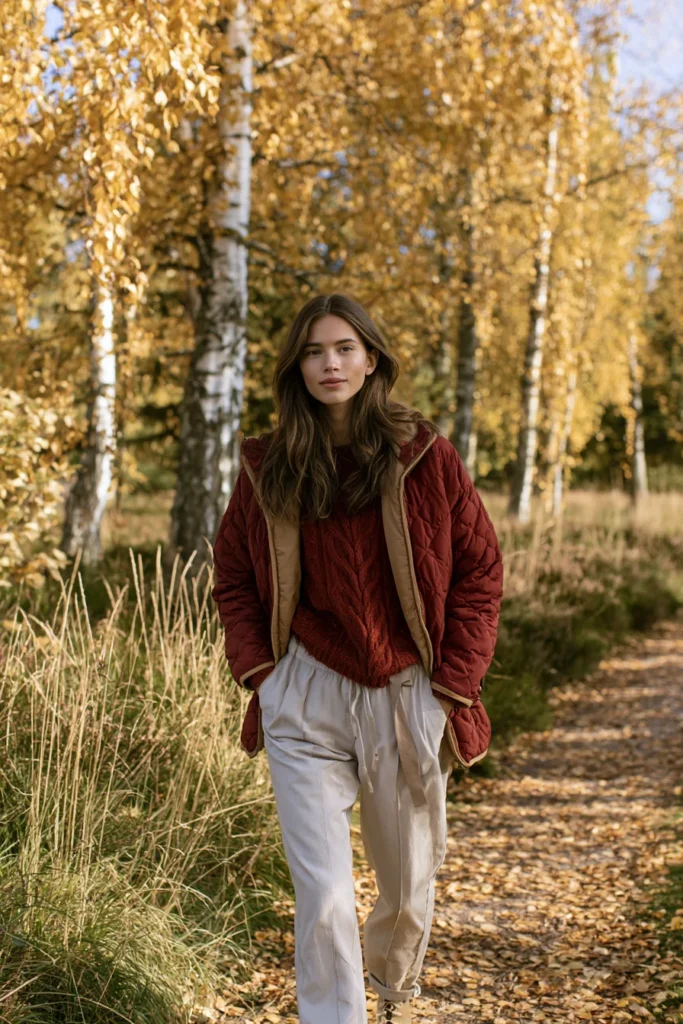
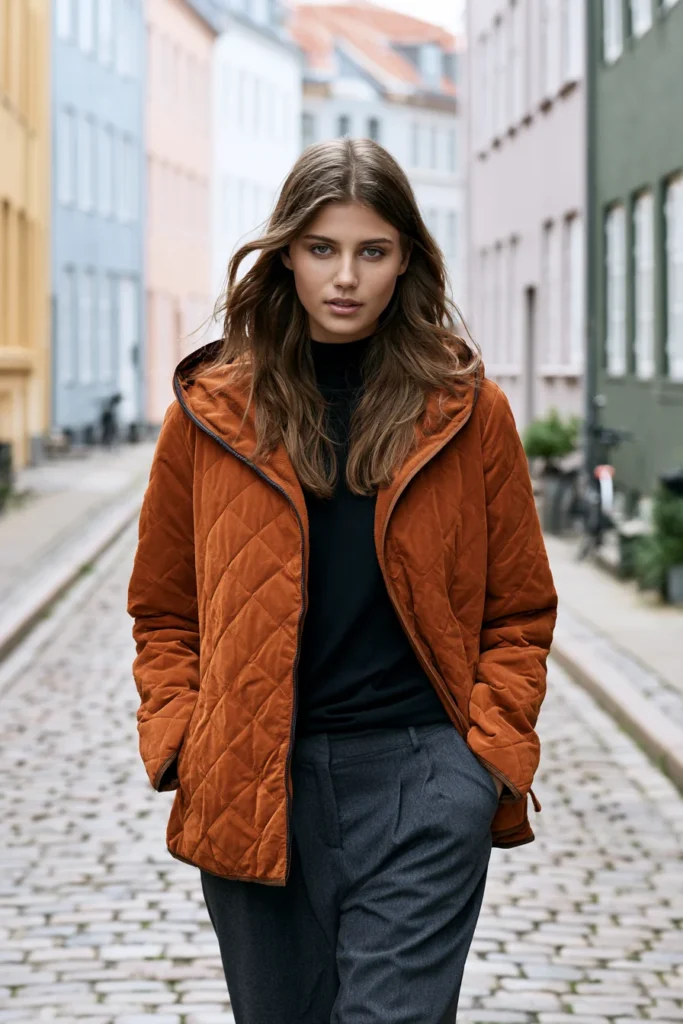
4. Cropped Boxy Quilted Jacket for a Modern Minimalist Silhouette
A Guide to Making a Cropped Boxy Quilted Jacket for a Modern Minimalist Silhouette
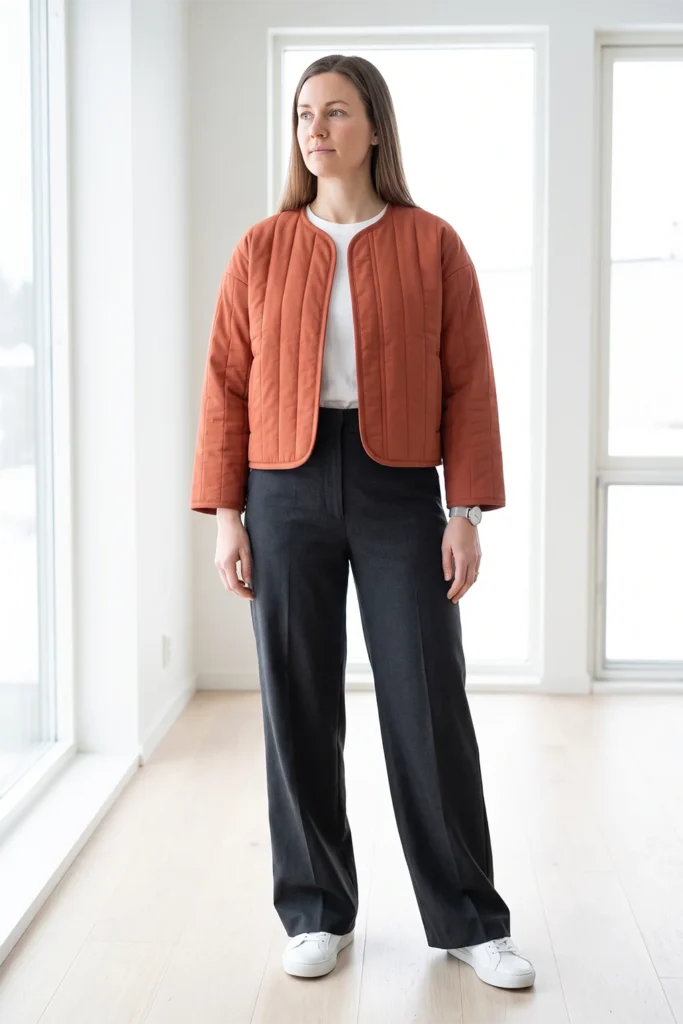
A Cropped Boxy Quilted Jacket is a short, square-cut quilted layer that sits at or just above the waist, with a straight, architectural shape and clean, unfussy lines. Where the longline coat is about coverage, this is about proportion — a deliberately boxy cut that looks modern and graphic, especially worn over high-waisted trousers or a midi skirt. It is minimalism with a bit of attitude: simple construction, strong shape, and ideally a single clear color doing all the talking.
I came up with this idea because the boxy crop is one of the most current silhouettes in modern dressing, and it is genuinely beginner-friendly to sew — straight lines, no shaping, no tricky curves. That combination of easy construction and high-fashion shape makes it one of the most rewarding projects in this collection. A clean cropped jacket in one confident color reads as intentional and contemporary, which is exactly the modern Nordic look we’re after.
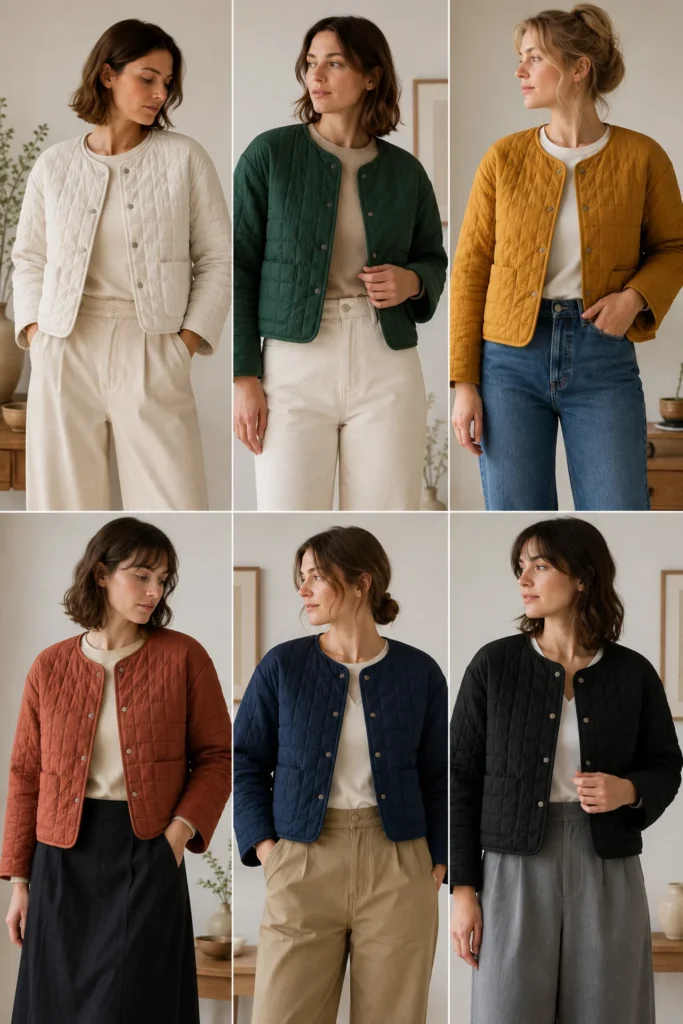
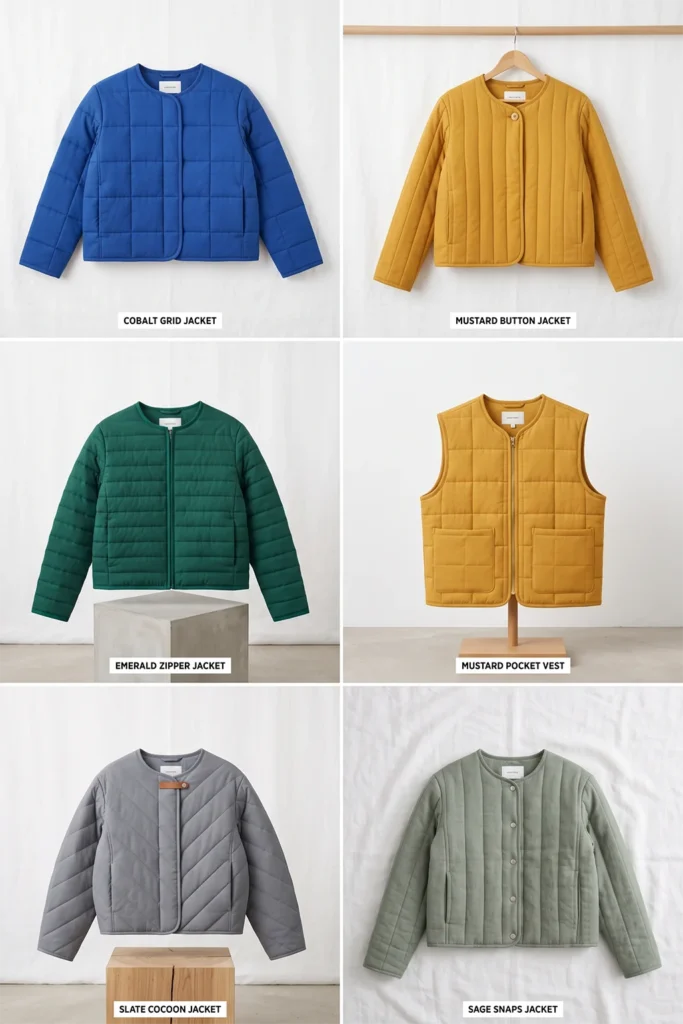
Why This Idea Is Worth Making
Why this idea is worth making: it delivers a high-fashion silhouette from the simplest possible construction. The boxy cut means no darts, no tapering, no fitted shaping — just clean straight panels — so it sews up quickly and forgivingly, while still looking sharp and modern. The cropped length is flattering over high-waisted pieces and instantly updates a basic outfit. Sewing it yourself lets you pick one bold, clean color that you’d struggle to find on the rails, and get the crop length exactly right for your proportions, which is the difference between “current” and “awkward.”
Suggested Finished Measurements
For a relaxed medium-sized boxy crop hitting at the waist:
- Finished length: 20–22 inches
- Finished chest width: 24–26 inches across (boxy = wider than fitted)
- Shoulder width: 18–19 inches (slightly dropped)
- Sleeve length from dropped shoulder: 21–22 inches
- Sleeve width: 16–17 inches
- Armhole depth: 11–12 inches (deeper for the boxy drop)
- Seam allowance: ½ inch
For an even boxier, cocoon crop, add 1–2 inches to the body width.
Materials Needed
- Quilted fabric in one clean, confident color (cobalt, mustard, terracotta, or deep green): 2 to 2½ yards
- Lining fabric, if quilting your own: 2 yards
- Thin cotton batting: 2 yards
- Bias binding, tonal or matching: 4½ to 5 yards
- Matching thread
- 2–3 concealed snaps or buttons, optional
- Rotary cutter or fabric scissors
- Measuring tape
- Fabric chalk
- Fabric clips
- Walking foot, recommended
- Iron
Step-by-Step Guide
Step 1: Choose One Confident Color
The boxy crop is a small canvas, so let a single clean color be the whole statement. Strong minimalist-but-vibrant choices include cobalt blue, warm mustard, terracotta, or deep emerald — one saturated tone, used simply, reads as modern and intentional. Avoid mixing colors here; the power of this jacket is its graphic, single-block simplicity.
Keep the binding tonal so the clean shape isn’t broken up by a contrasting edge.
Step 2: Make the Quilted Fabric
Layer shell, thin batting, and lining, smooth, and clip. Quilt straight lines spaced about 1½ to 2 inches apart, or a simple grid for a more architectural surface. Because the jacket is small and graphic, the quilting pattern is quite visible, so keep your lines crisp and evenly spaced. A walking foot helps keep them parallel.
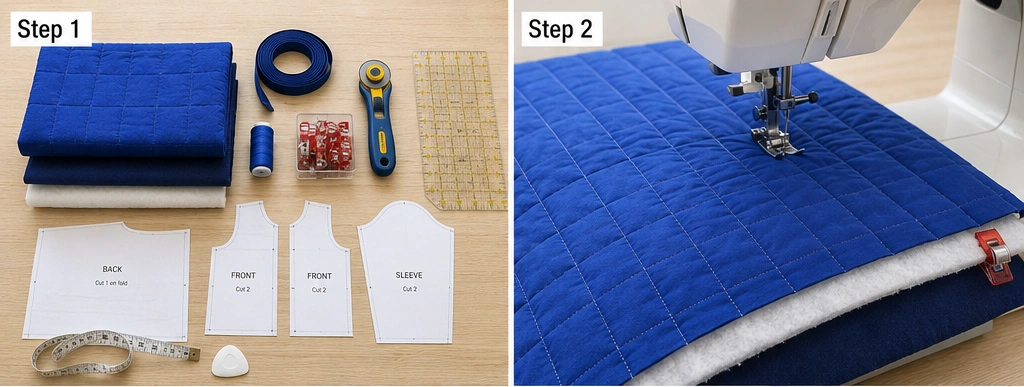
Step 3: Cut the Back Panel
Cut one back panel about 26 inches wide × 22 inches long — note it is wider than it is long, which is what creates the boxy proportion. Cut a shallow back neckline about 7 inches wide × 1½ inches deep. Keep the hem dead straight; the clean horizontal hem is central to the boxy look.
Step 4: Cut the Front Panels
Cut two front panels, each about 14 inches wide × 22 inches long, matching the back length. Shape the front neckline with a gentle curve from the shoulder down about 5 inches. Keep the center front edges straight and parallel so the boxy front hangs square.
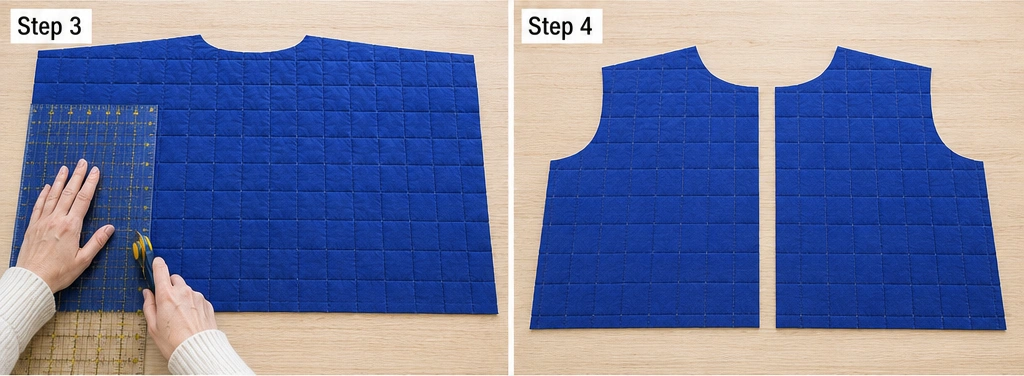
Step 5: Cut the Sleeves
Cut two sleeves about 18 inches wide × 22 inches long. The boxy jacket suits a slightly dropped shoulder and a straight, roomy sleeve — keep it untapered for the relaxed, architectural feel. For a cropped sleeve, shorten to 20 inches for a bracelet length.
Step 6: Sew the Shoulder Seams
Place the front panels on the back, right sides together, match the shoulders, and sew with a ½ inch seam allowance. Press toward the back and topstitch flat. Because the shoulder is slightly dropped, the seam will sit a little onto the upper arm — that is intentional and gives the boxy silhouette its relaxed line.
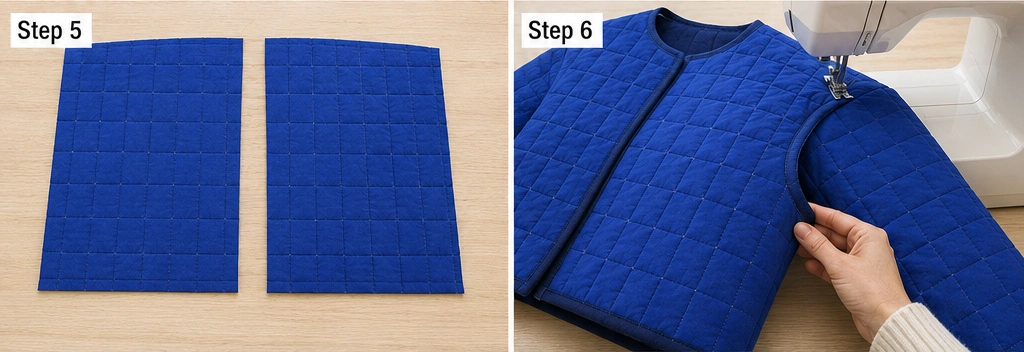
Step 7: Attach the Sleeves
Open the jacket flat, center each sleeve at the (dropped) shoulder seam, clip, and sew with a ½ inch seam allowance. The deeper armhole and dropped shoulder make this easier than a fitted set-in sleeve — the sleeve attaches almost straight across, which suits beginners well.
Step 8: Sew the Side and Sleeve Seams
Fold the jacket right sides together and sew from the cuff to the underarm to the hem in one line. Keep the side seams straight so the body stays boxy rather than tapering in at the waist. For a touch of ease, you can leave 2–3 inches open at the lower side seams, though a fully closed straight hem also looks clean and graphic here.
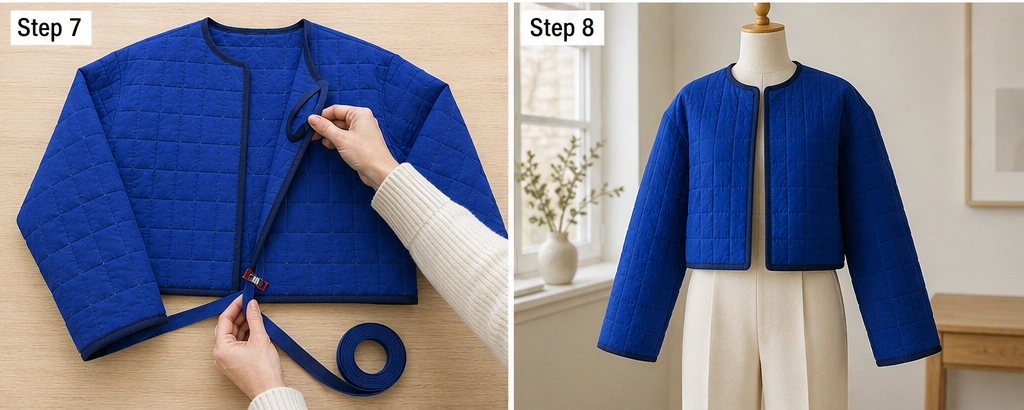
Step 9: Finish the Edges with Tonal Binding
Bind the neckline, front opening, hem, and cuffs with matching or tonal bias binding. On a boxy jacket the binding traces a clean rectangle, so keep it even and crisp — wobbly binding undermines the architectural shape. Topstitch slowly and parallel to the edge.
Step 10: Add a Minimal Closure (Optional)
Keep any closure as quiet as the rest of the jacket. Two or three concealed snaps behind the front edge let it close without visible hardware, preserving the clean block of color. A single button at the chest is the maximum decoration this jacket wants — or leave it open, which suits the modern boxy look perfectly.
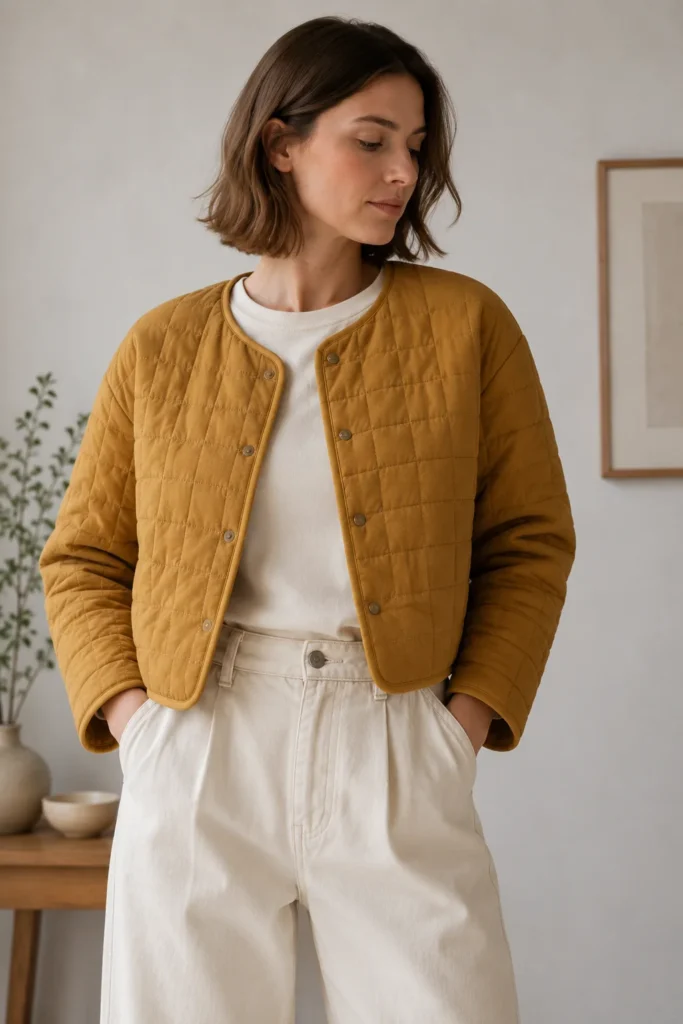
Assembly Section
Once the seams are sewn, try the jacket on over a high-waisted piece — trousers or a skirt — since that’s how the crop is meant to be worn, and the proportion only makes sense in context. Check that the hem sits at or just above your waistband, the shoulders drop cleanly, and the body stays square rather than pulling in. Trim the hem perfectly level, since a crisp horizontal line is everything on a boxy crop. Bind all edges, add the optional closure last, and press thoroughly — sharp, pressed edges are what give this simple shape its modern, intentional finish.
Interesting Backstory
The boxy, cropped silhouette has roots in functional workwear and traditional short jackets across many cultures, where a square cut simply used fabric efficiently and allowed free movement. Modern Scandinavian design rediscovered the appeal of that honest, geometric shape — clean lines, no excess, form following function — and turned it into something quietly fashionable. There is a nice echo of the quilting traditions I grew up around in Dhaka, where garments were often built from simple straight panels of layered, stitched cloth rather than complex tailoring; beauty came from the texture and the stitching, not from elaborate shaping. This cropped jacket works the same way — a simple geometric form, made special by clean quilting and one confident color.
Personal Styling Touch
My favorite version is a clean cobalt-blue quilt with a simple grid stitch, bound tonally in the same blue, and closed with two hidden snaps so the front stays a smooth block of color. Worn open over a white tee and high-waisted cream trousers, it does exactly what I want — one bright, graphic shape against a quiet outfit. The single strong color carries the whole look, which is minimalism working at its most confident.
Final Styling Idea
Wear this cropped, boxy quilted jacket over a white tee, with high-waisted trousers and loafers, for a clean, modern everyday look. For a sharper outfit, pair it with a midi skirt and ankle boots so the crop highlights the waistline. For a relaxed weekend version, throw it over a fitted knit and pair it with straight jeans and white sneakers.
Keep the rest of the outfit quiet so the single color leads — one confident tone like cobalt, mustard, or terracotta, against cream, white, charcoal, or stone — and the jacket delivers that modern minimalist silhouette every time.
Other Design Inspirations – Digitally Modified
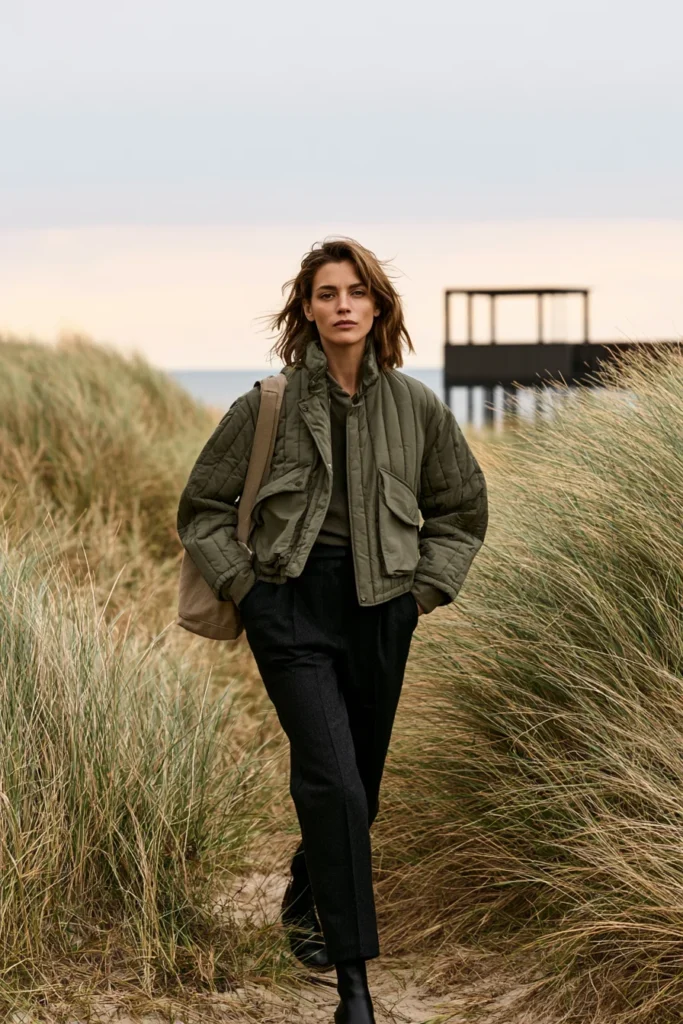
5. Belted Wrap Quilted Jacket for Polished, Tailored Elegance
A Guide to Making a Belted Wrap Quilted Jacket for Polished, Tailored Elegance
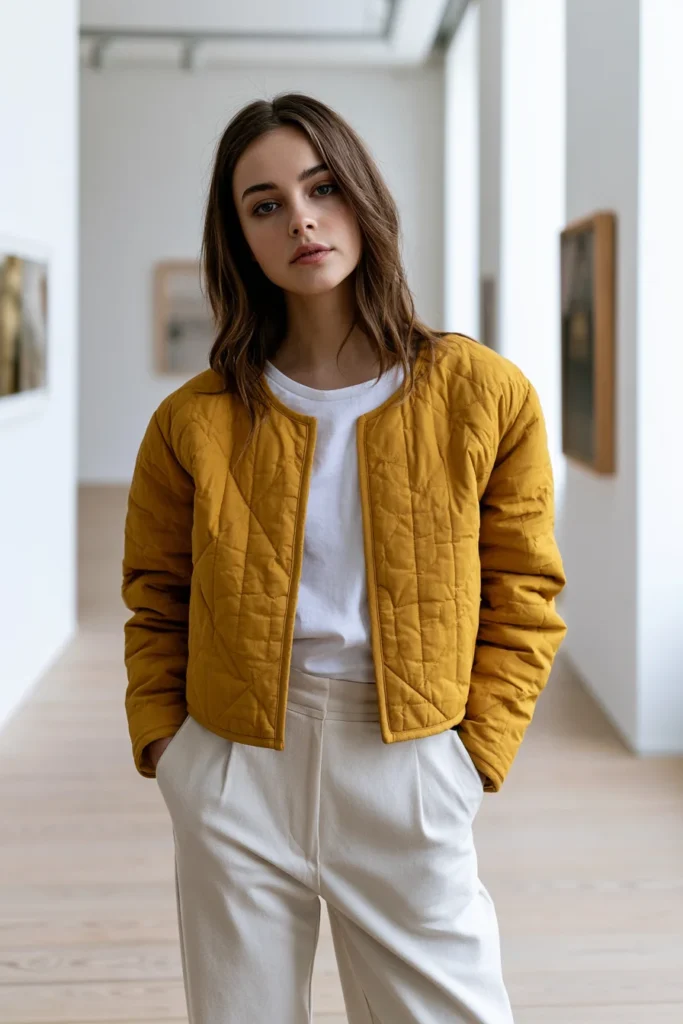
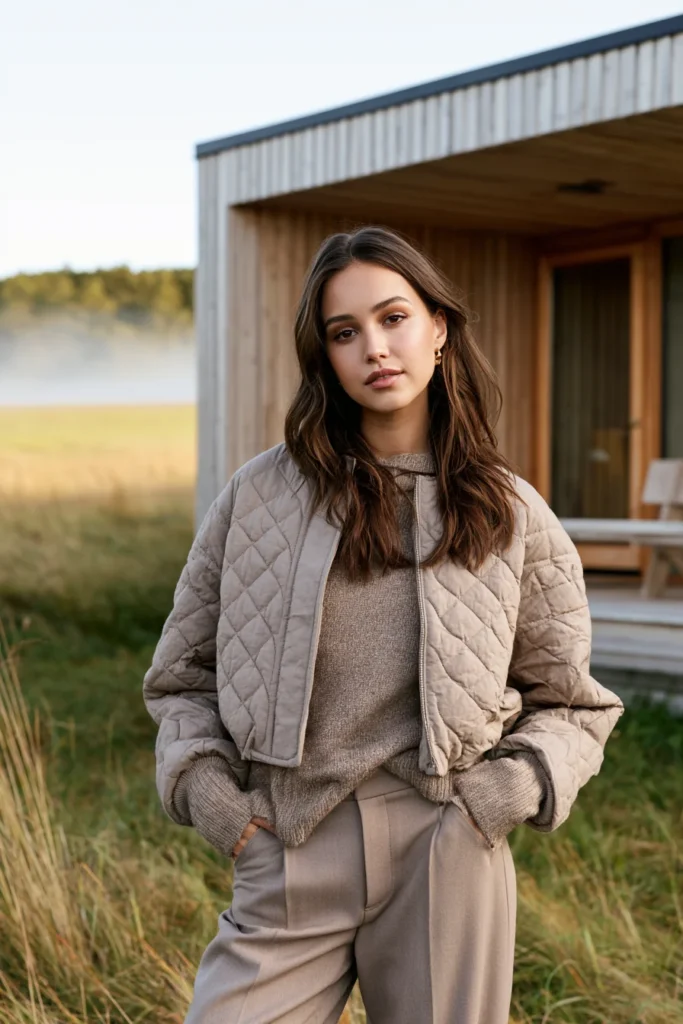
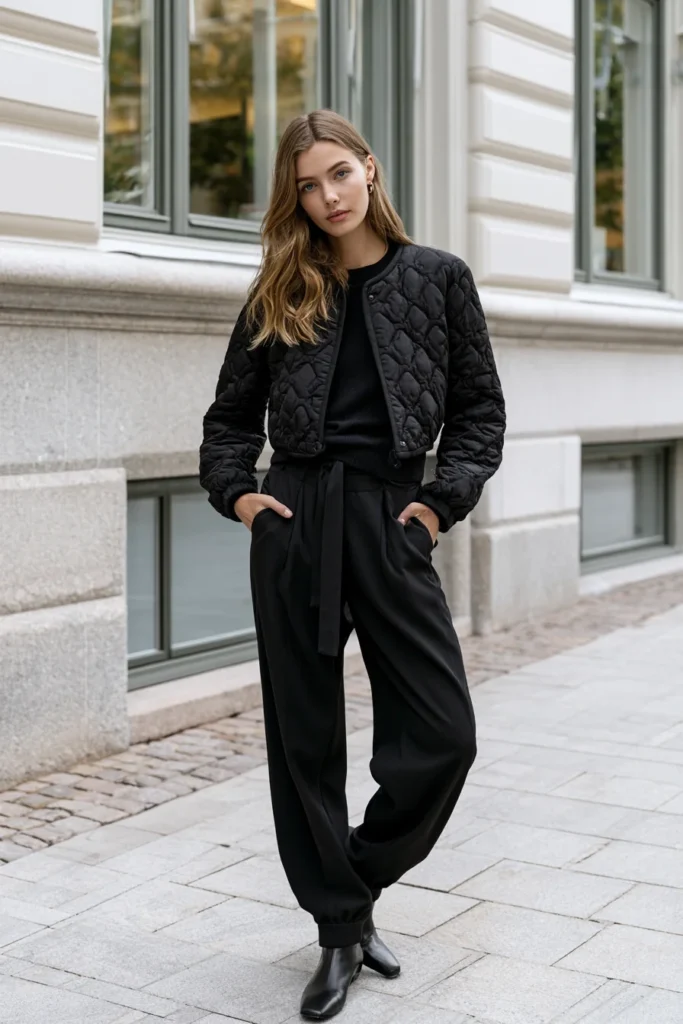
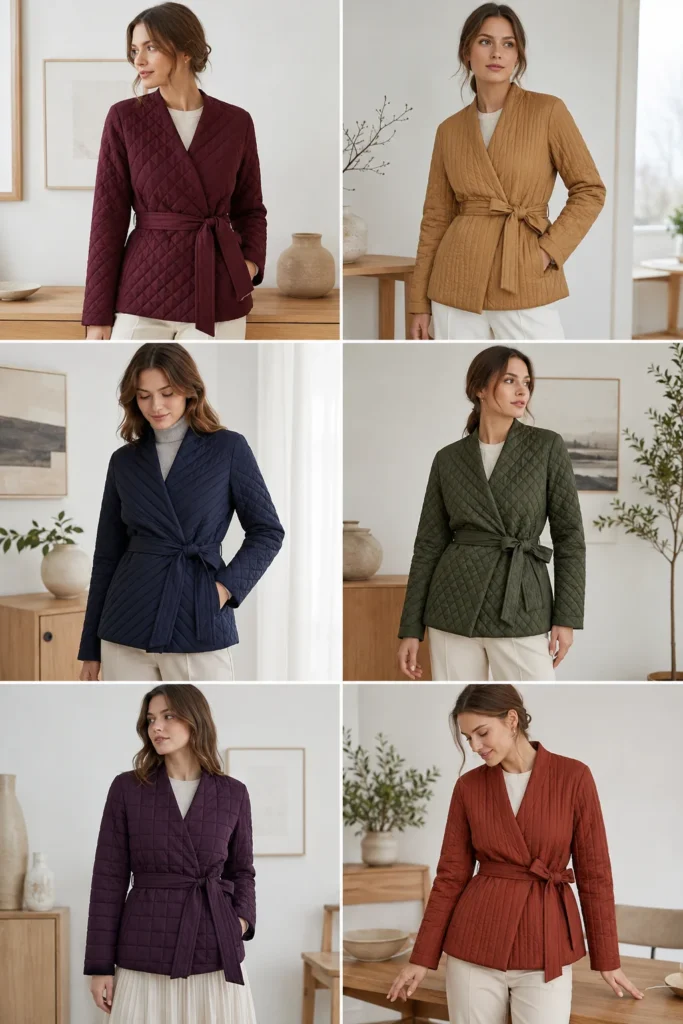
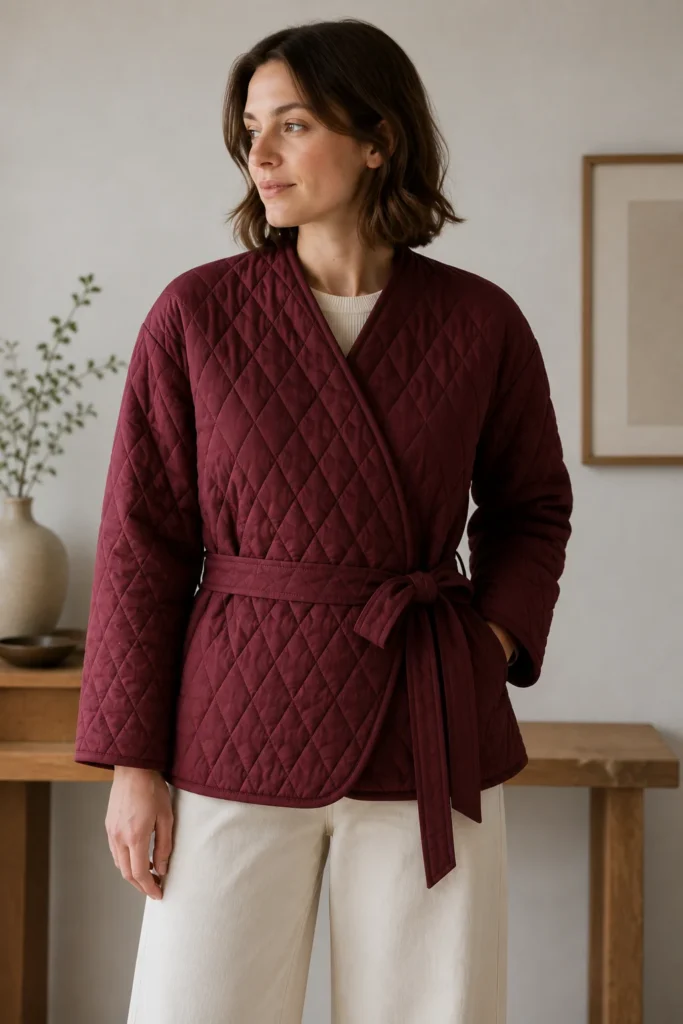
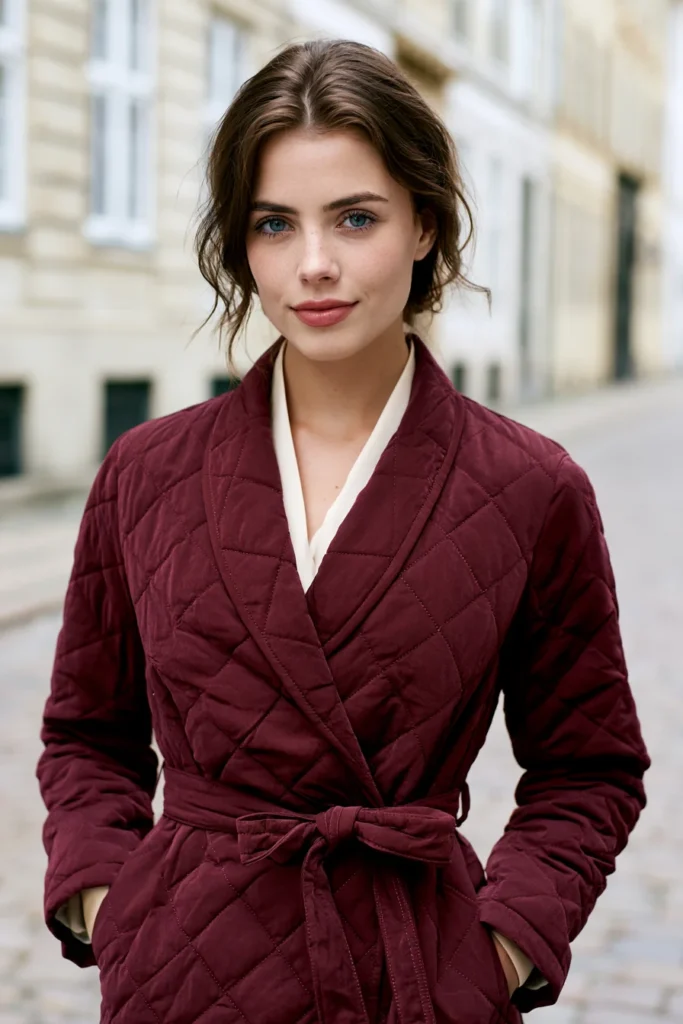
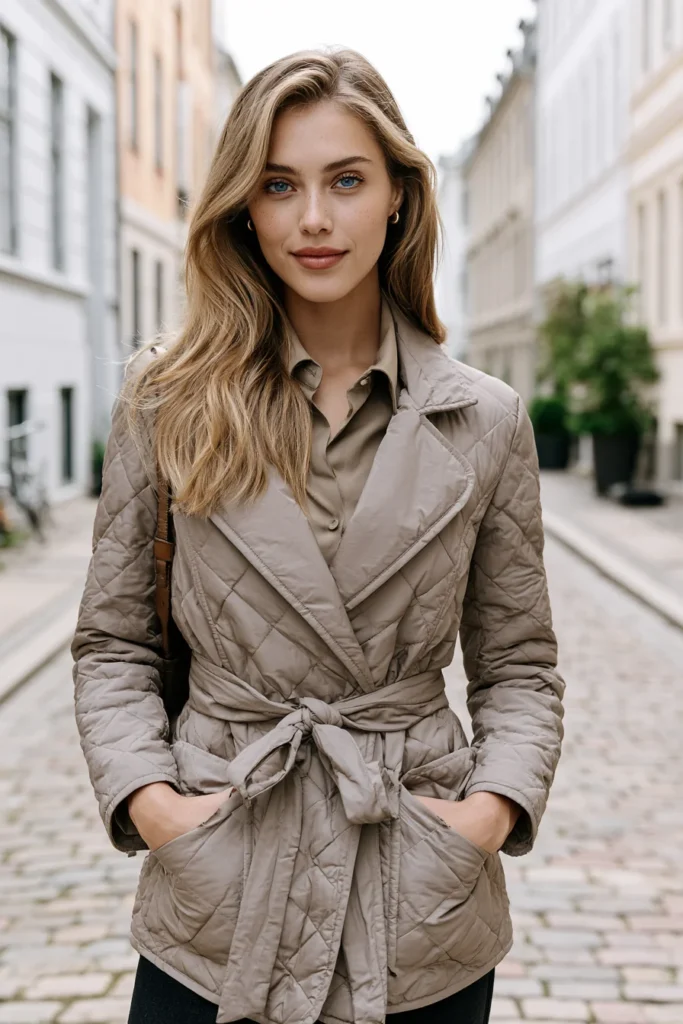
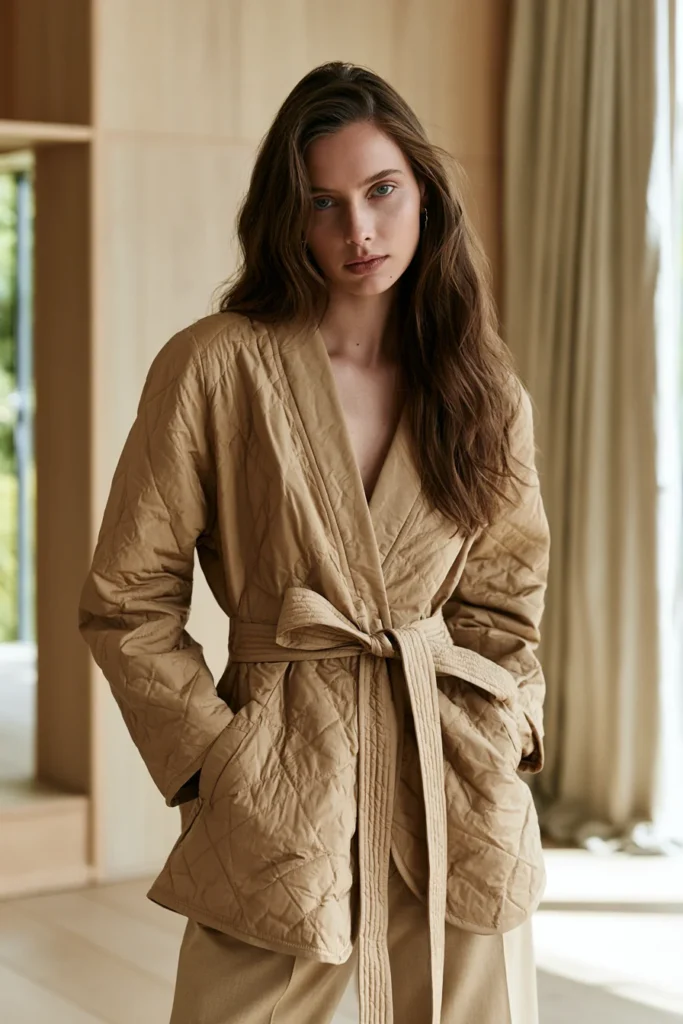
A Belted Wrap Quilted Jacket is a collarless quilted layer with no buttons or zips, closed instead by wrapping the front panels and cinching a self-fabric tie belt at the waist. That single belt does something the other jackets in this collection don’t — it creates a defined waist, turning a soft quilted shape into something genuinely tailored and elegant. It is the most grown-up, polished piece here: robe-like in its ease, but pulled together and refined in the way it sits on the body.
I came up with this idea because a belt is the simplest way to add shape to a quilted garment without having to learn complex tailoring. There are no darts to fit, no closures to align — just a wrap front and a tie — yet the finished jacket looks far more considered than its construction suggests. That high-elegance, low-difficulty ratio is exactly why this one is so satisfying to make, and why it earns a place when you want quilted comfort that still looks dressed.
Why This Idea Is Worth Making
Why this idea is worth making: it gives you a tailored, waist-defining silhouette without the difficulty of real tailoring. The wrap-and-belt closure means no buttonholes, no zip insertion, and no precise fitting — yet the result reads as polished and intentional, easily the dressiest option in this collection. A self-tie belt also makes the jacket adjustable, so it flatters across a range of layering thicknesses and body shapes. Sewing it yourself lets you choose a rich, sophisticated color and get the wrap depth and belt length exactly right, which is what separates an elegant wrap from a sloppy one.
Suggested Finished Measurements
For a relaxed medium-size wrap jacket hitting at the hip:
- Finished length: 28–30 inches
- Finished chest width: 24–26 inches across (extra width for the wrap overlap)
- Shoulder width: 17–18 inches
- Sleeve length from shoulder: 23–24 inches
- Sleeve width: 15–16 inches
- Armhole depth: 10–11 inches
- Belt: 70–75 inches long × 3 inches wide (long enough to wrap and tie)
- Belt loops: 2 inches each
- Seam allowance: ½ inch
For a more enveloping wrap, add 2–3 inches to each front panel width.
Materials Needed
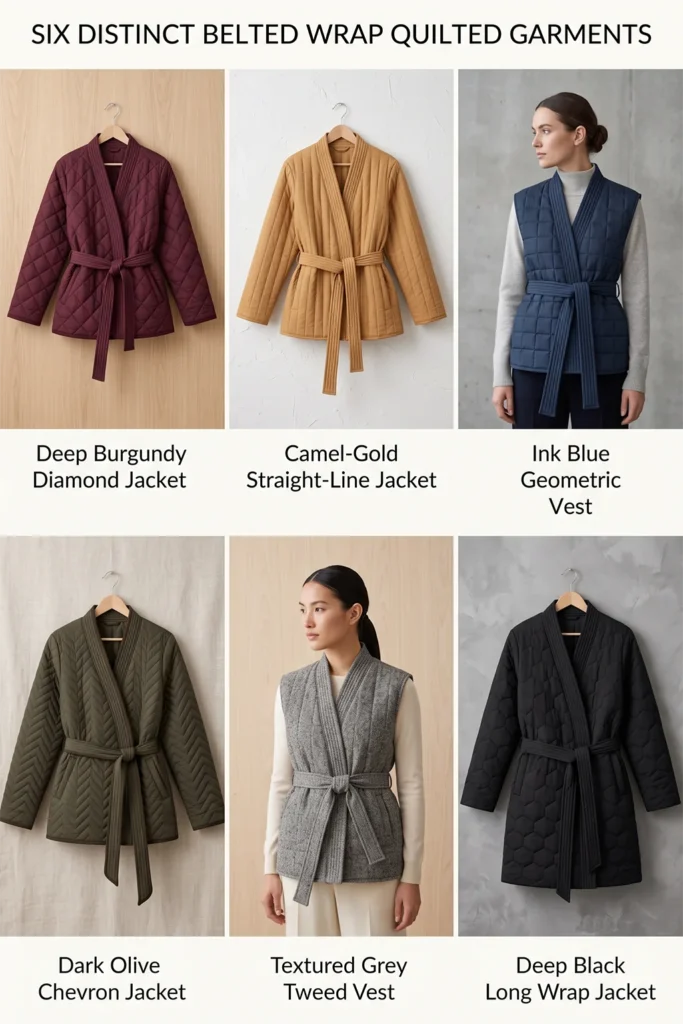
- Quilted fabric in a rich, sophisticated tone (deep burgundy, camel-gold, ink blue, or olive): 3 to 3½ yards (extra for the belt)
- Lining fabric, if quilting your own: 3 yards
- Thin-to-medium cotton batting: 3 yards
- Bias binding, tonal: 6 to 7 yards
- Matching thread
- Rotary cutter or fabric scissors
- Measuring tape
- Fabric chalk
- Fabric clips
- Walking foot, recommended
- Iron
Step-by-Step Guide
Step 1: Choose a Rich, Sophisticated Color
A wrap jacket is the dressiest piece here, so choose a color with depth and polish. Strong choices include deep burgundy, camel-gold, ink blue, or dark olive — saturated, grown-up tones that look tailored rather than casual. The belt is cut from the same fabric, so the whole jacket reads as one elegant block of color.
Keep the binding tonal so the wrap edges and belt stay clean and uninterrupted.
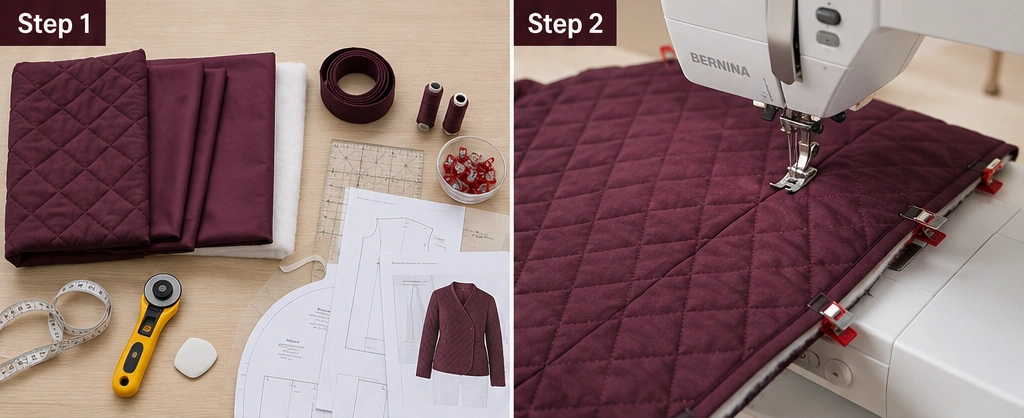
Step 2: Make the Quilted Fabric
Layer shell, batting, and lining, smooth, and clip. Quilt straight lines or a soft diamond pattern spaced about 1½ to 2 inches apart. Keep the batting on the thinner side of medium — a wrap jacket needs to fold and cinch at the waist without becoming bulky, so avoid heavy padding around the midsection.
Quilt enough extra fabric to cut the belt and loops from the same yardage for a perfect match.
Step 3: Cut the Back Panel
Cut one back panel about 26 inches wide × 30 inches long. Cut a shallow back neckline about 7 inches wide × 1½ inches deep. Keep the side edges straight; the belt will create the waist shaping, so the panels themselves stay simple and straight-cut.
Step 4: Cut the Wrap Front Panels
This is the key step. Cut two front panels wider than usual — each about 17 inches wide × 30 inches long — so they overlap generously across the body when wrapped. Shape the neckline into a long diagonal: start at the shoulder and angle down toward the opposite hip, so the panels cross in a deep V. This diagonal wrap line is what gives the jacket its elegant, robe-like front.
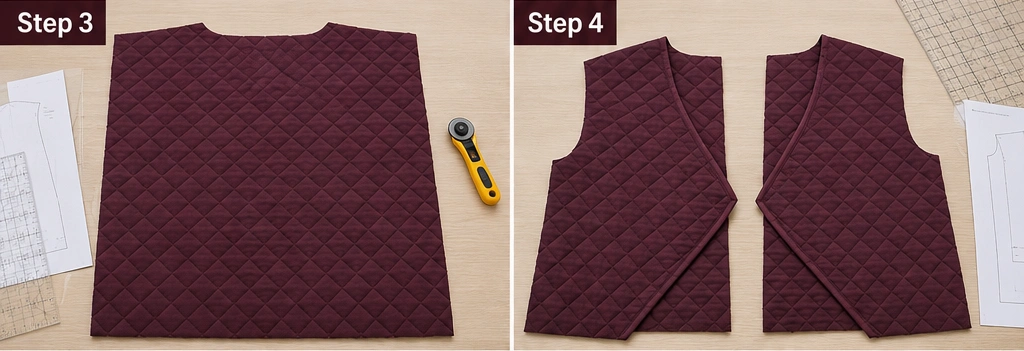
Step 5: Cut the Sleeves
Cut two sleeves about 17 inches wide × 24 inches long. Keep them straight and easy. A wrap jacket suits a clean, slightly fitted sleeve that balances the soft volume of the wrapped body.
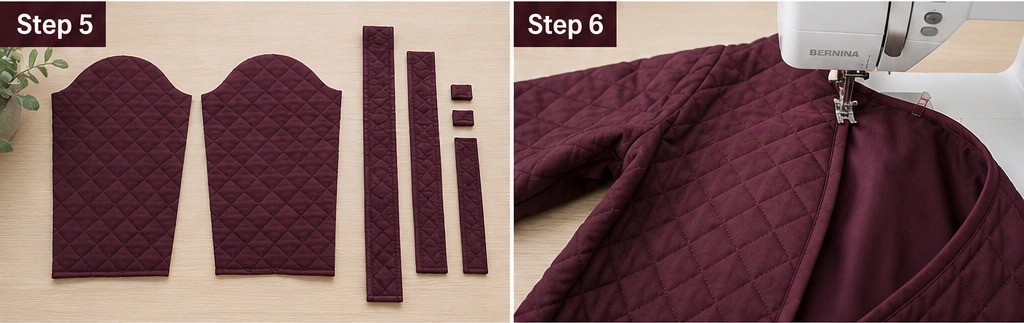
Step 6: Cut the Belt and Loops
Cut the belt to about 75 inches long × 6 inches wide (it folds in half to a finished width of 3 inches), piecing lengths together if needed. Cut two belt loops about 3 inches × 2 inches. Fold the belt lengthwise right sides together, sew the long edge and one end, turn it right side out, press flat, and topstitch. Clean, crisp belt construction matters — the belt is the focal point of the whole jacket.
Step 7: Sew the Shoulder and Sleeve Seams
Place the wrap front panels on the back, right sides together, match the shoulders, and sew with a ½ inch seam allowance. Press toward the back and topstitch. Then attach each sleeve at the shoulder seam and sew with a ½ inch seam allowance, working the armhole curve slowly. Press and topstitch the armhole seams flat.
Step 8: Sew the Side Seams and Attach Belt Loops
Fold the jacket right sides together and sew from the cuff to the underarm to the hem in one continuous line. Before finishing, position the two belt loops at the side seams at your natural waist (about 16–17 inches down from the shoulder) and stitch them securely top and bottom — they must hold the belt firmly, so reinforce with backstitching.
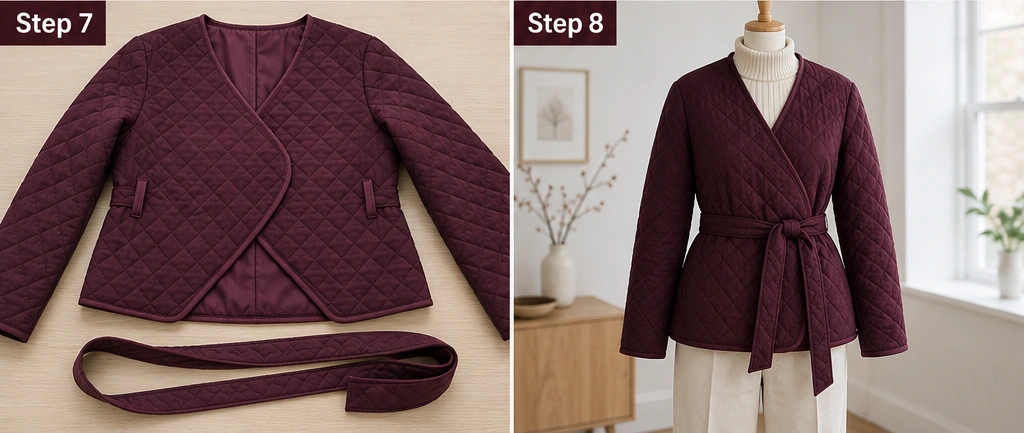
Step 9: Finish All Edges with Binding
Bind the neckline, the full diagonal wrap front, the hem, cuffs, and any side slits with tonal bias binding. The long diagonal front edge is the most visible line on the jacket, so bind it slowly and evenly — a clean wrap edge is what makes this piece look tailored rather than thrown together.
Step 10: Add an Inner Tie (Recommended)
A wrap jacket holds its shape best with an inner anchor tie. Sew a short fabric tie to the inside of the underneath front panel and a corresponding tie at the side seam, so the inner layer ties closed first before you wrap and belt the outer panel. This prevents the wrap from gaping and keeps the front sitting all day smoothly — the small detail that separates an elegant wrap from a fussy one.
Assembly Section
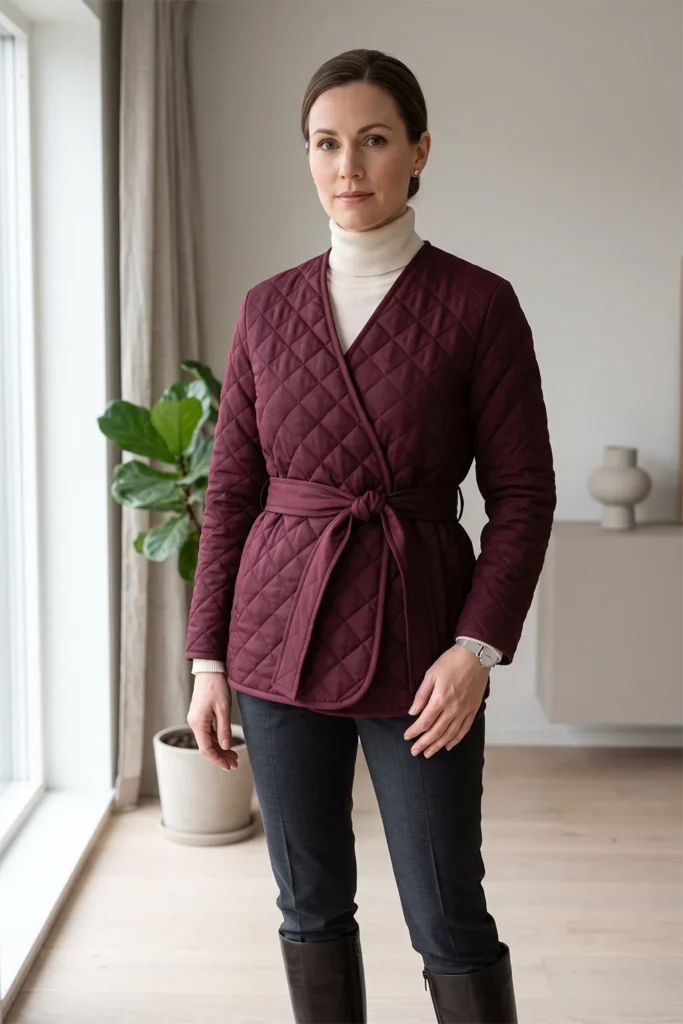
Once the seams, loops, and belt are done, try the jacket on and practice the wrap: tie the inner panel first, fold the outer panel across, thread the belt through the loops, and cinch at the natural waist. Check that the wrap front lies flat without gaping, the belt sits at the narrowest part of your waist, and the diagonal edges fall cleanly.
Adjust the inner tie position if the front pulls. When the wrap sits right, bind all edges, give the whole jacket and the belt a thorough press so every line is crisp, and tie the belt in a soft knot or bow to finish — the press and the clean belt are what give this piece its polished, tailored elegance.
Interesting Backstory
The wrap-and-tie closure is one of the oldest and most universal ways to fasten a garment, found across countless cultures long before buttons and zips became common — a simple sash could shape and close a robe with elegance and ease. There is a direct line to the textile world I grew up in: in and around Dhaka, draped and wrapped garments secured with a tie or sash were everyday dress, and the beauty came from how the cloth fell and folded rather than from rigid tailoring. A belted wrap quilted jacket carries that same wisdom — let the fabric wrap and the belt shape — into a structured Nordic silhouette, proving you don’t need complex construction to achieve genuine elegance.
Personal Styling Touch
My favorite version is a deep burgundy quilt with a soft diamond stitch, bound tonally, with a generous self-tie belt and a hidden inner anchor tie so the wrap never gapes. Cinched at the waist over a fine cream knit, it looks genuinely tailored — the defined waist does all the work, turning a soft quilted layer into something I’d happily wear to dinner. It is the piece in this collection that proves quilted can also mean dressed-up.
Final Styling Idea
Wear this belted wrap quilted jacket over a fine-knit sweater with slim trousers and heeled boots for a polished, elegant look. For something softer, wrap it over a midi dress and let the belt define the waist. For a relaxed yet pulled-together weekend version, belt it over a fitted top and straight-leg jeans with loafers.
Keep the palette rich and grown-up — deep burgundy, camel-gold, ink blue, or olive, paired with cream, stone, and charcoal — and the belt does the rest, delivering that polished, tailored elegance every time.
Other Design Inspirations – Digitally Modified
6. Open-Front Quilted Vest for Relaxed Hygge Layering
A Guide to Making an Open-Front Quilted Vest for Relaxed Hygge Layering
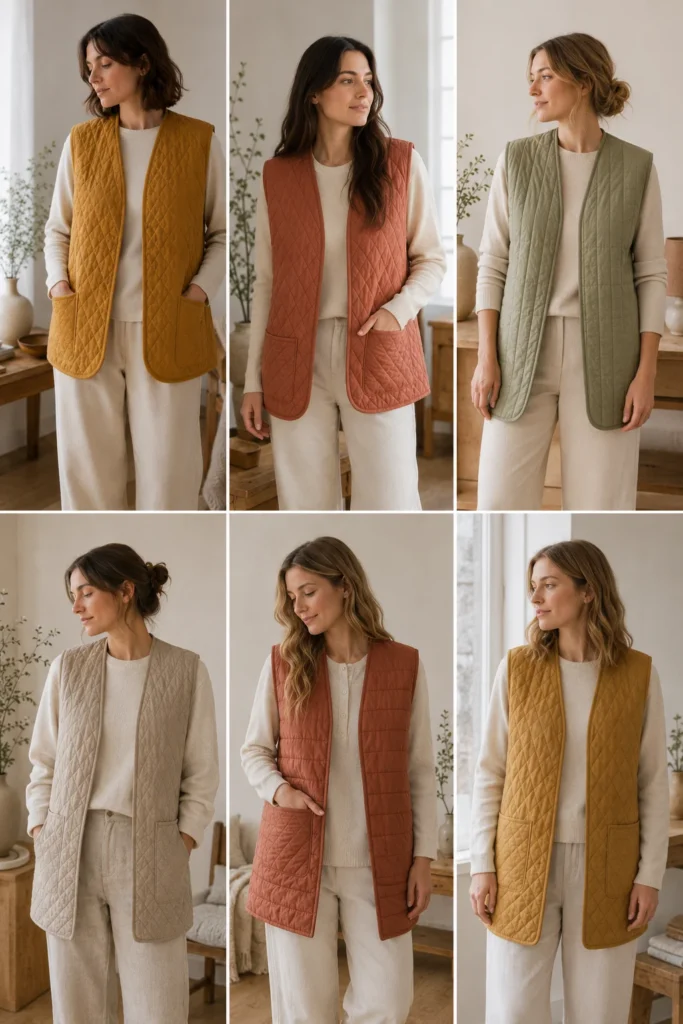
An Open-Front Quilted Vest is a soft, sleeveless quilted layer with no closure — just two front panels that hang open over whatever you’re wearing. It is the easiest, coziest piece in this entire collection: no sleeves to set, no buttons or zips to fit, just a warm quilted body you throw on for an extra layer of comfort. This is hygge made wearable — the soft, content warmth of being wrapped up at home, in a piece relaxed enough to wear all day.
I came up with this idea because sometimes you want the warmth of a quilt across your core without the commitment of a full jacket — over a long-sleeve tee on a cool morning, over a knit while you work, thrown on for a slow weekend at home. It is also the perfect first project for anyone new to garment sewing: the simplest construction here, genuinely achievable in an afternoon, and immediately useful. Comfort and ease, with nothing fussy in the way.
Why This Idea Is Worth Making
Why this idea is worth making: it is the simplest, most comforting, and most beginner-friendly project in the collection. With no sleeves and no closures, the construction is about as easy as garment sewing gets, which makes it an ideal first make or a quick weekend project. Yet it is genuinely useful — a quilted vest adds real core warmth while leaving your arms free to move, perfect for layering at home, running errands, or relaxing on a cool evening. Sewing it yourself lets you choose a soft, cozy color and the exact length that feels right, turning a simple shape into your most-reached-for comfort layer.
Suggested Finished Measurements
For a relaxed medium-size vest hitting at the hip:
- Finished length: 26–28 inches
- Finished chest width: 22–24 inches across
- Shoulder width: 14–15 inches
- Armhole depth: 9–10 inches
- Front opening: open, no closure
- Seam allowance: ½ inch
For a longer, more enveloping vest, add 3–4 inches to the length.
Materials Needed
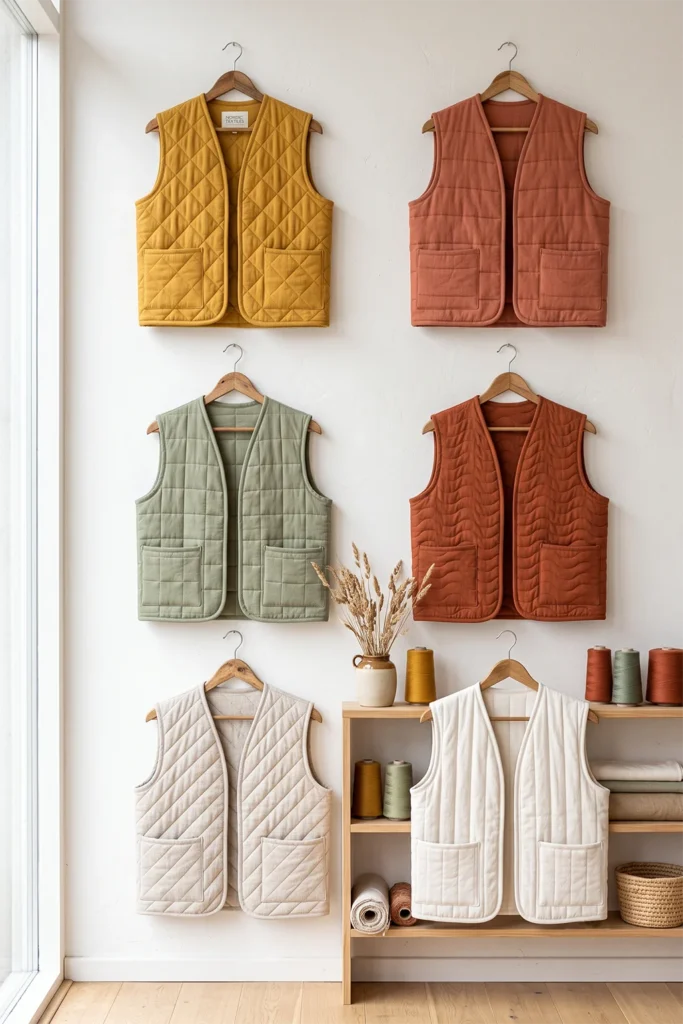
- Quilted fabric in a soft, warm tone (mustard, terracotta, warm sage, or oatmeal): 1½ to 2 yards
- Lining fabric, if quilting your own: 1½ yards
- Cotton batting (a touch loftier here for cozy warmth): 1½ yards
- Bias binding, tonal or gently contrasting: 4 to 4½ yards
- Matching thread
- Rotary cutter or fabric scissors
- Measuring tape
- Fabric chalk
- Fabric clips
- Walking foot, recommended
- Iron
Step-by-Step Guide
Step 1: Choose a Soft, Cozy Color
Hygge is about warmth and comfort, so choose a color that feels inviting. Soft warm tones work best — mustard, terracotta, warm sage green, rust, or oatmeal. These read as cozy and relaxed rather than sharp, and they pair beautifully with the neutral knits you’ll layer underneath. A slightly heathered or melange fabric adds to the soft, comforting feel.
Keep the binding tonal, or pick a gently deeper shade of the same color for a soft, low-contrast edge.
Step 2: Make the Quilted Fabric
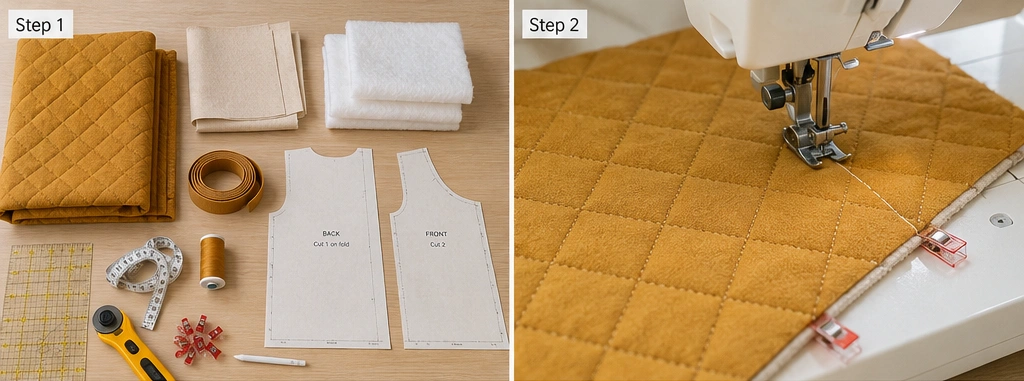
Layer shell, batting, and lining, smooth, and clip. Quilt straight lines or a soft diamond pattern spaced about 1½ to 2 inches apart. Because this is a cozy piece, you can use slightly loftier batting than the jackets — a little more softness and warmth across the body is exactly what you want here. Keep the quilting lines relaxed and even.
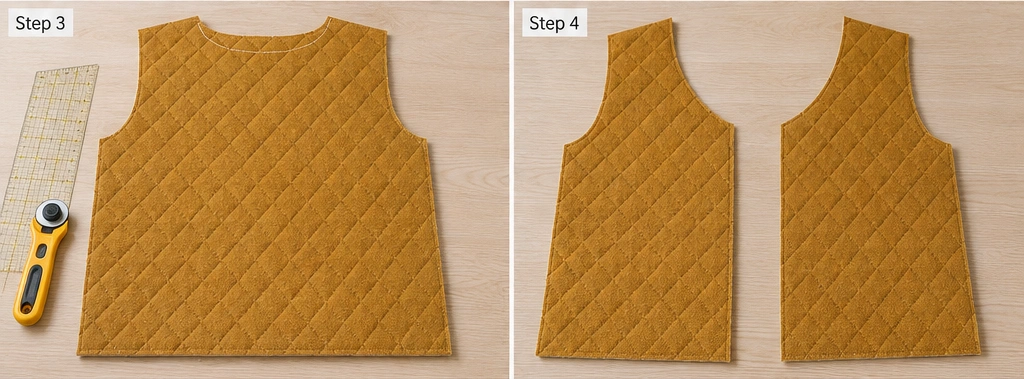
Step 3: Cut the Back Panel
Cut one back panel about 24 inches wide × 28 inches long. Cut a shallow back neckline about 7 inches wide × 1½ inches deep. Keep the hem straight, or round the bottom front corners slightly for a softer, more relaxed shape.
Step 4: Cut the Front Panels
Cut two front panels, each about 13 inches wide × 28 inches long, matching the back length. Shape the front neckline with a gentle curve from the shoulder down about 7–8 inches along the center front — a slightly deeper neckline keeps the open vest feeling relaxed and easy rather than tight at the chest.
Step 5: Cut the Armholes
Lay the front panels over the back at the shoulders to check the armhole shape, then cut a gentle armhole curve about 9–10 inches deep on each side. Keep the armholes roomy enough to layer comfortably over long-sleeve tees and knits without pulling.
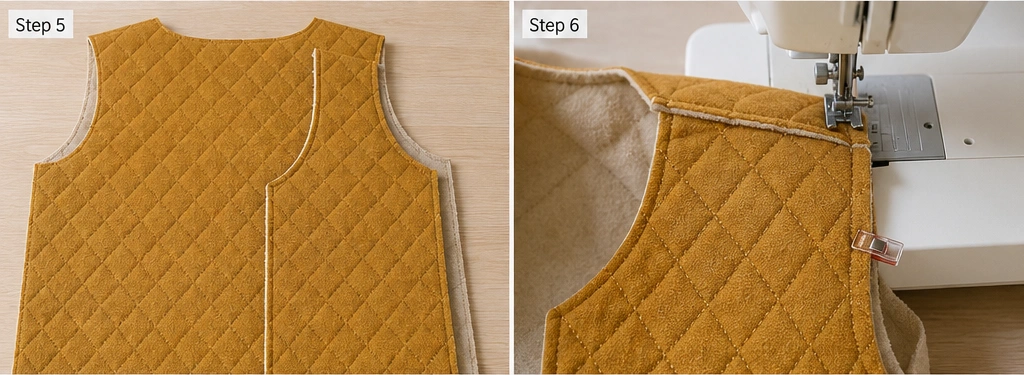
Step 6: Sew the Shoulder Seams
Place the front panels on the back, right sides together, match the shoulders, and sew with a ½ inch seam allowance. Press toward the back and topstitch flat. With only shoulder and side seams to sew, this vest comes together remarkably quickly — clean shoulder seams are most of the construction done.
Step 7: Sew the Side Seams
With right sides together, match the side seams and sew from the lower armhole down to the hem using a ½ inch seam allowance. For easier movement and a relaxed drape, leave 3–4 inches open at the lower side seams to create small side slits. That’s the body of the vest essentially finished.
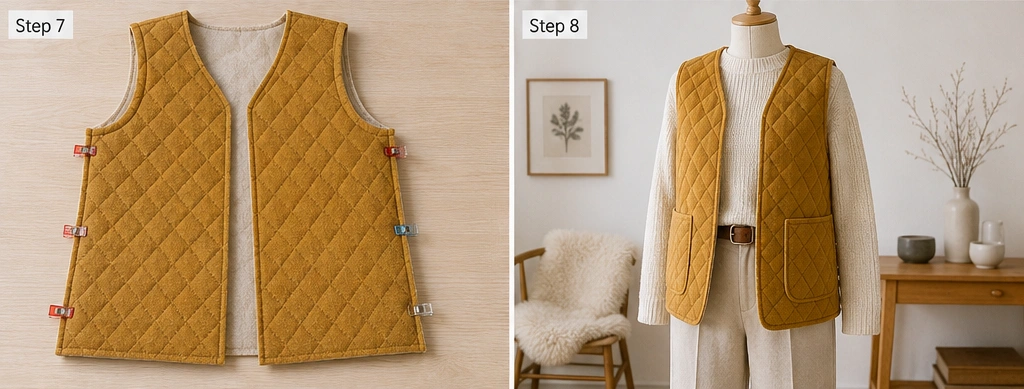
Step 8: Finish the Armholes
Bind the armholes with bias binding, easing the binding smoothly around the curve and clipping as needed so it lies flat. Clean, comfortable armhole edges matter on a vest since they’re close to the body and visible — take your time easing the binding around the curve.
Step 9: Finish the Neckline, Front, and Hem
Bind the neckline, the full front opening, and the hem in one continuous clean line, plus any side slits. On an open vest the front edges are the most visible feature, so keep the binding even and topstitch it down slowly. This continuous bound edge frames the open front and gives the simple vest a finished, intentional look.
Step 10: Add Optional Patch Pockets
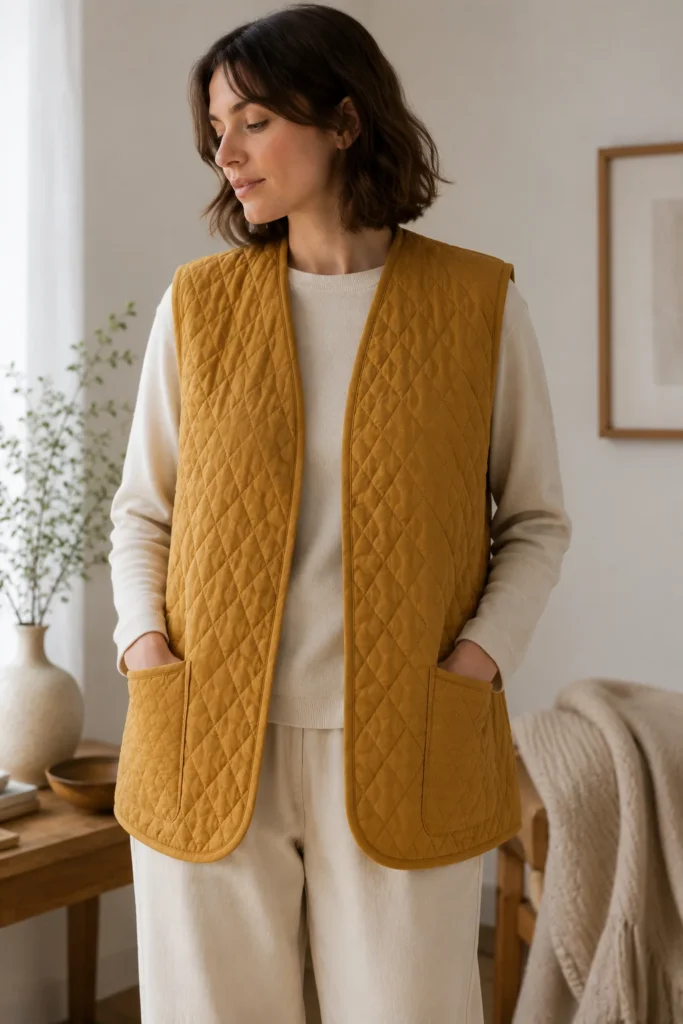
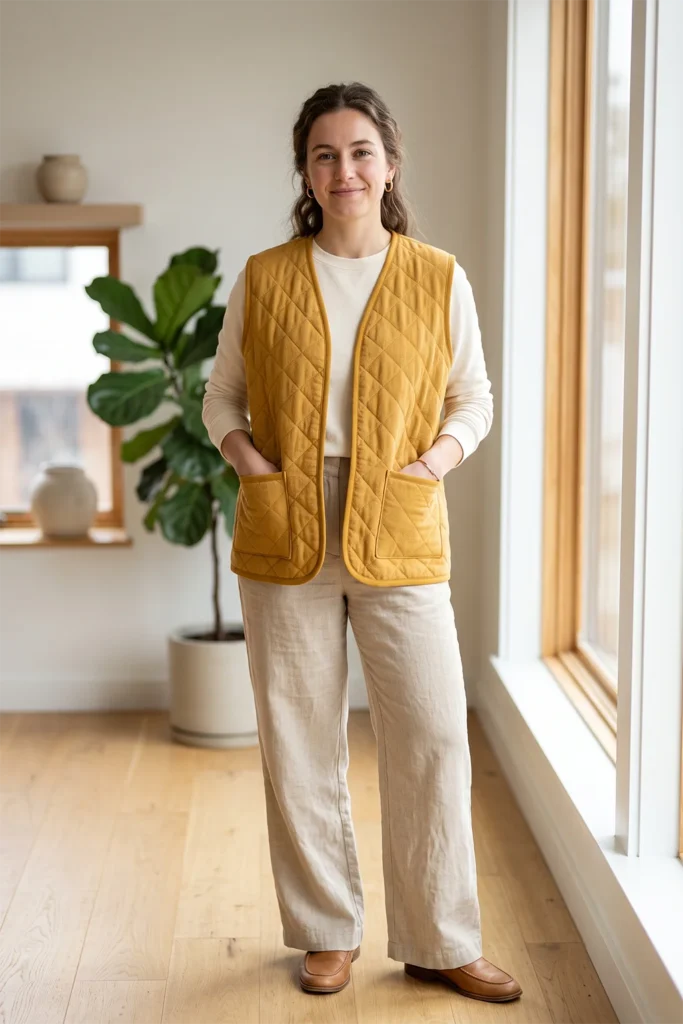
For extra cozy practicality, add two patch pockets. Cut two pieces about 7 inches wide × 8 inches tall, fold the top edge under and stitch, fold the remaining edges under by ½ inch, and topstitch them to the lower front panels about 3 inches above the hem where your hands naturally rest. Pockets make the vest feel even more like a comforting, hands-in-pockets hygge layer.
Assembly Section
Because this is the simplest piece in the collection, assembly is quick — but a careful finish still makes all the difference. Once the shoulder and side seams are sewn, try the vest on over a knit (the way you’ll actually wear it) and check that the armholes feel roomy, the front hangs evenly, and the length sits where you want it. Trim the hem level and round the front corners if you like a softer line. Bind the armholes first, then the neckline, front, and hem in one continuous pass, then add pockets last. Give the vest a soft press — not too crisp, since a gently relaxed finish suits the cozy hygge feel better than sharp edges.
Interesting Backstory
The quilted vest has a long, practical history as a core-warming layer — across many cold-climate cultures, a sleeveless padded layer kept the body’s core warm while leaving the arms free for work, making it one of the most useful garments a person could own.
The Danish concept of hygge — that feeling of cozy, content well-being — gave this humble piece a whole new meaning: not just practical warmth, but the simple comfort of being wrapped up and at ease. It connects nicely to the quilting traditions I grew up around in Dhaka, where layered, stitched cloth was always about creating warmth and comfort from simple materials. An open-front quilted vest is that idea distilled to its gentlest form — soft warmth across the core, nothing more complicated than that.
Personal Styling Touch
My favorite version is a soft mustard quilt with a gentle diamond stitch and slightly lofty batting for extra cozy warmth, bound tonally, with two deep patch pockets for hands-in-pockets comfort. I keep it draped over a chair and throw it on over a long-sleeve tee whenever the house cools down. It is the least “designed” piece I make and somehow the one I wear most — pure, easy, everyday comfort.
Final Styling Idea
Wear this open-front quilted vest over a long-sleeve tee or fine knit with relaxed trousers and wool socks for a cozy at-home hygge look. For going out, layer it over a turtleneck with straight jeans and ankle boots. For the softest version of all, throw it over loungewear on a slow weekend morning with a hot drink in hand.
Keep the palette soft and warm — mustard, terracotta, warm sage, rust, oatmeal, paired with cream and soft grey — and the vest delivers exactly that relaxed, comforting hygge layering it’s made for.
Other Design Inspirations – Digitally Modified
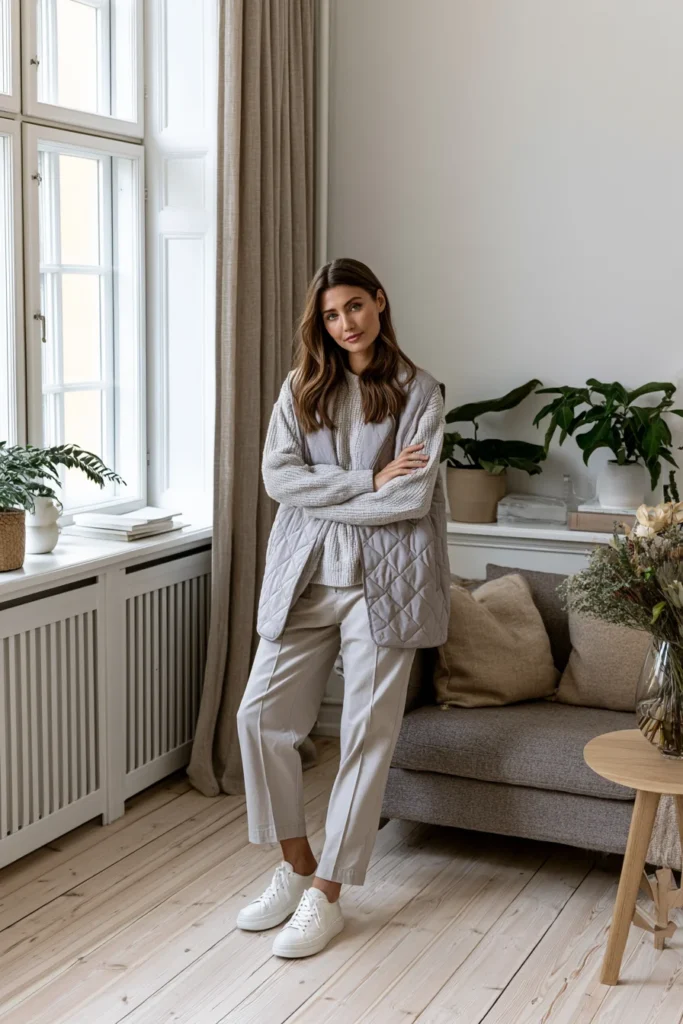
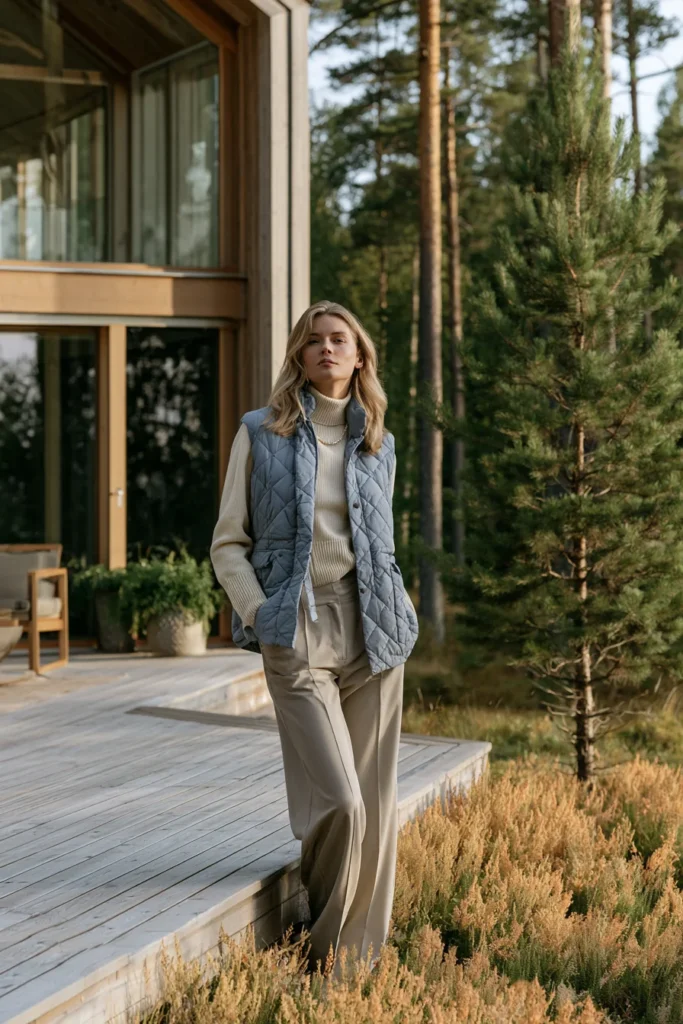
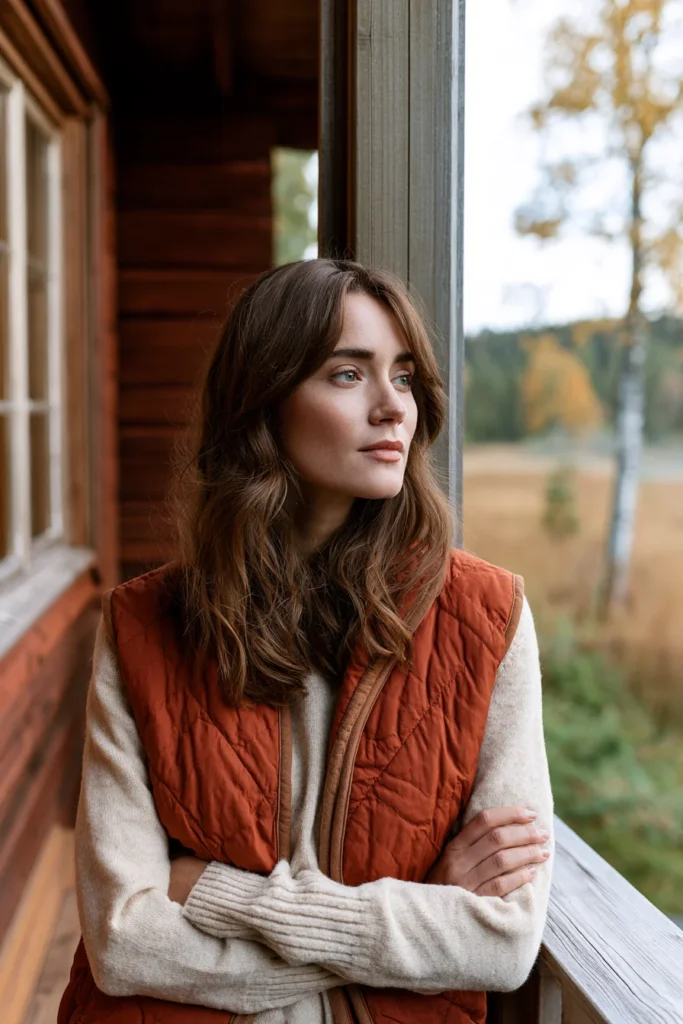
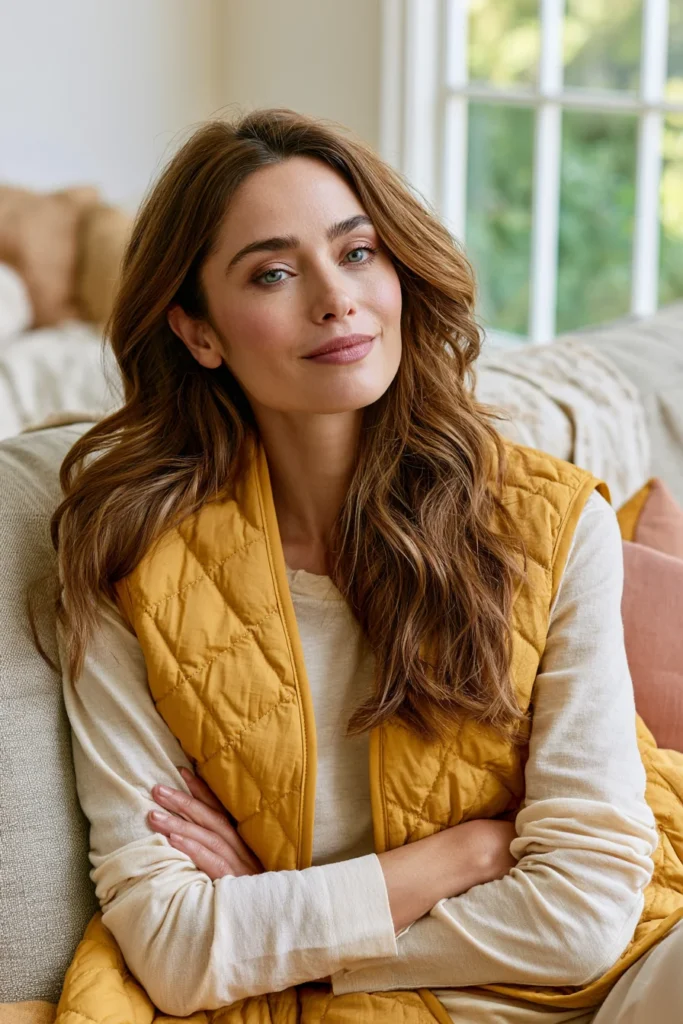
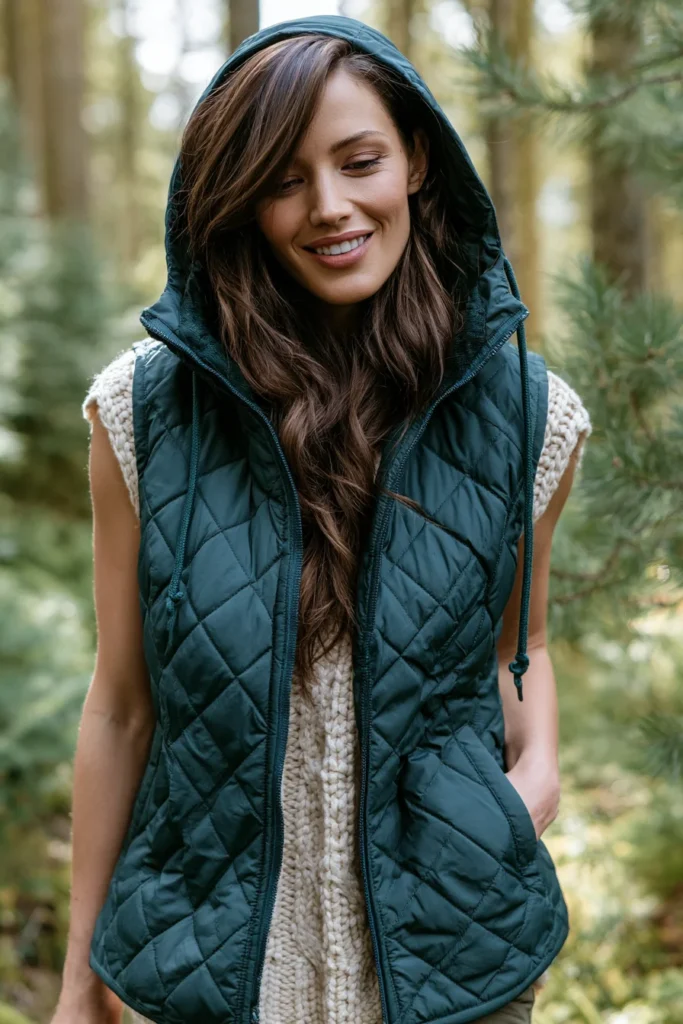
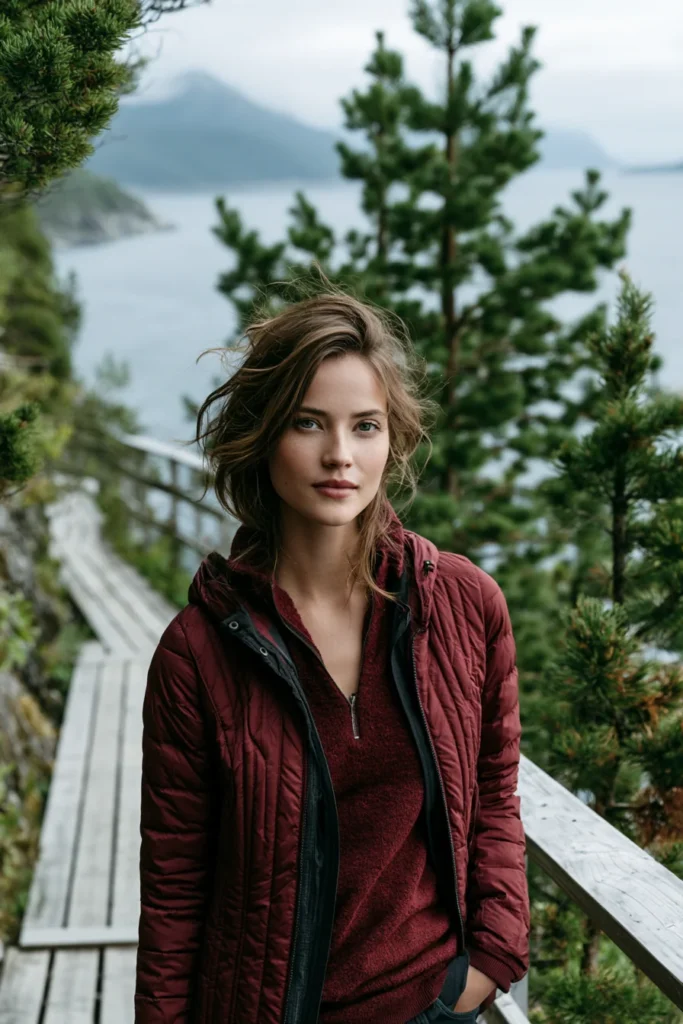
7. Hooded Quilted Vest for Cozy Outdoor Nordic Comfort
A Guide to Making a Hooded Quilted Vest for Cozy Outdoor Nordic Comfort
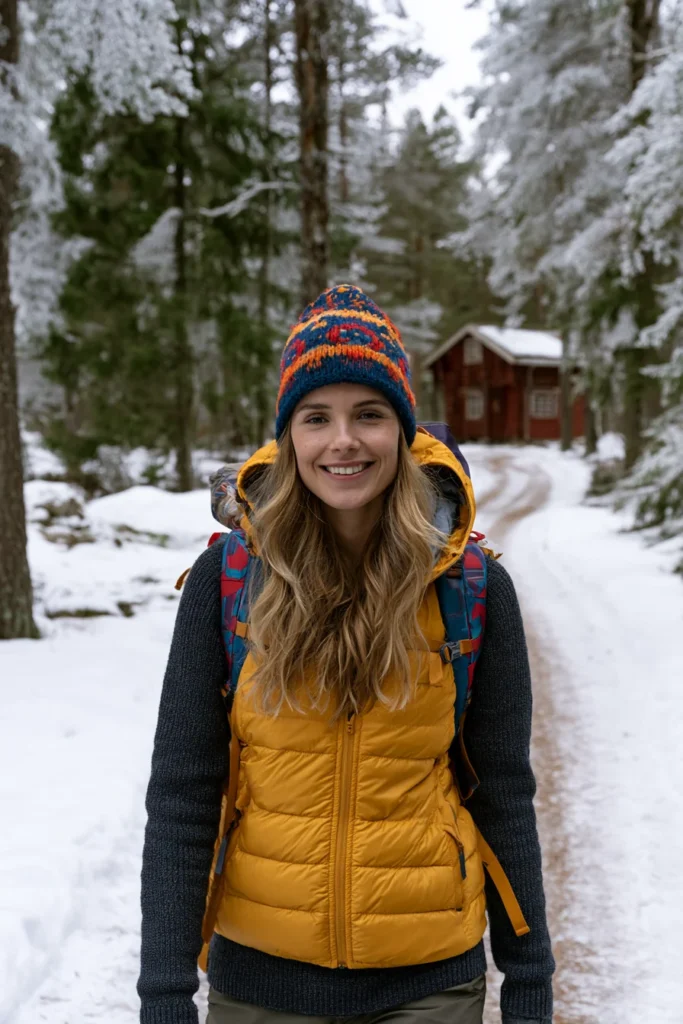
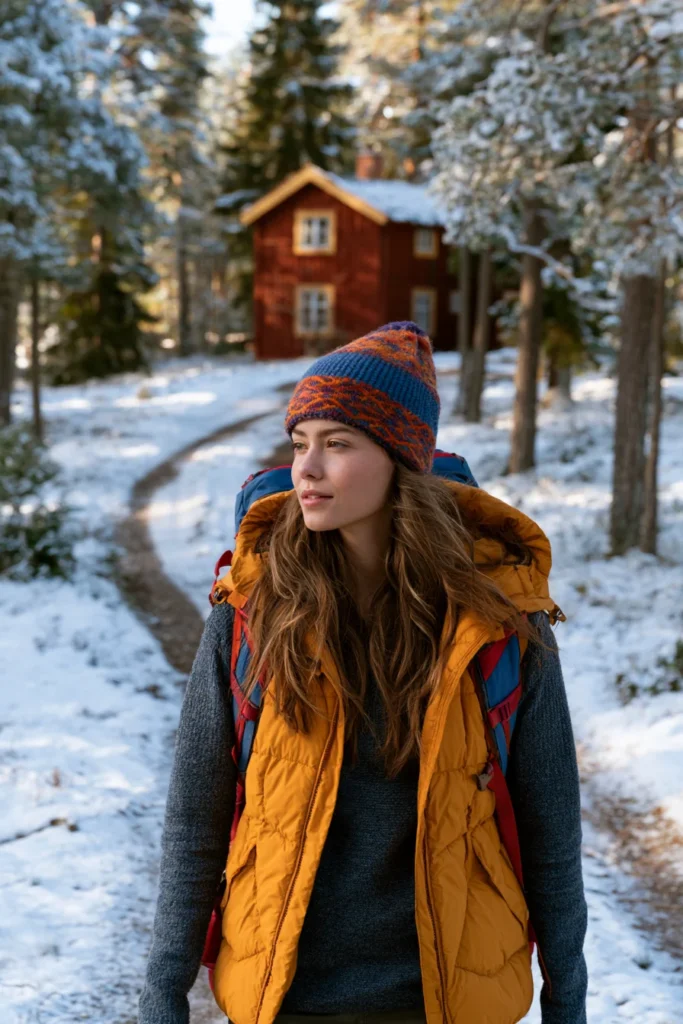
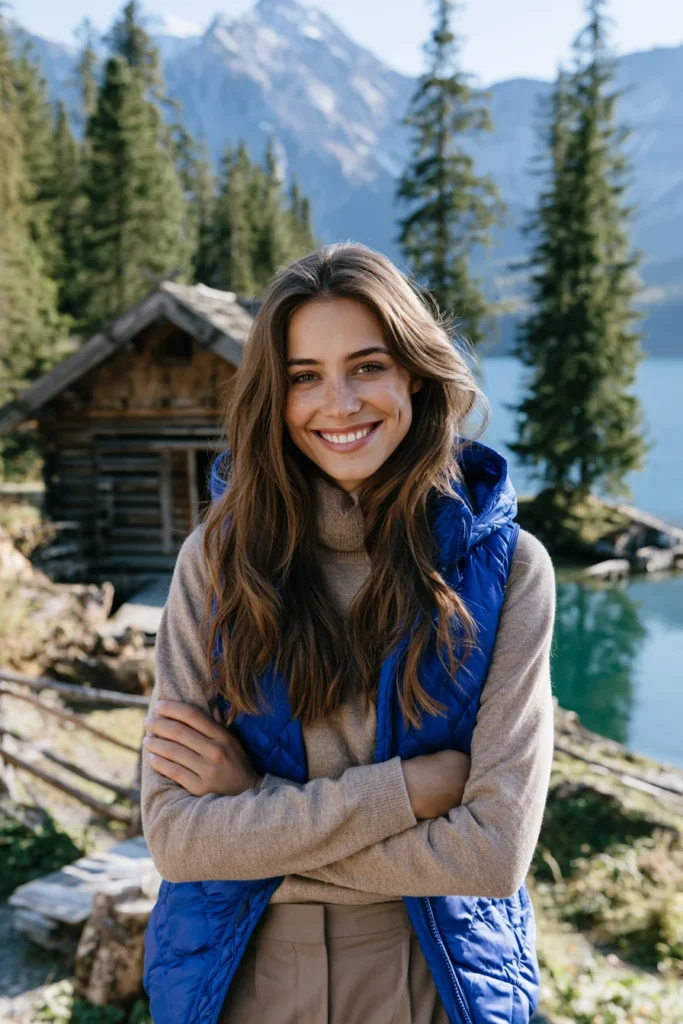
A Hooded Quilted Vest is a sleeveless quilted layer with an attached hood, built for warmth and practicality outdoors. It combines the core-warming comfort of a vest with the head-and-neck protection of a hood, making it the most weather-ready piece in this collection. Where the open-front vest is about indoor coziness, this one is made to step outside — over a knit for a cold walk, layered under a shell on a hike, or thrown on for chilly mornings in the garden. It is Nordic outdoor living in a single practical, cozy layer.
I came up with this idea because a hood transforms a vest from a home layer into genuine outdoor gear. That extra warmth around the neck and head makes a surprising difference in cold Nordic air, and adding a hood is a very achievable next step up in skill from a plain vest. The result is the piece I reach for when I’m heading outside but don’t want full sleeves — practical, warm, and still relaxed enough to feel comfortable all day.
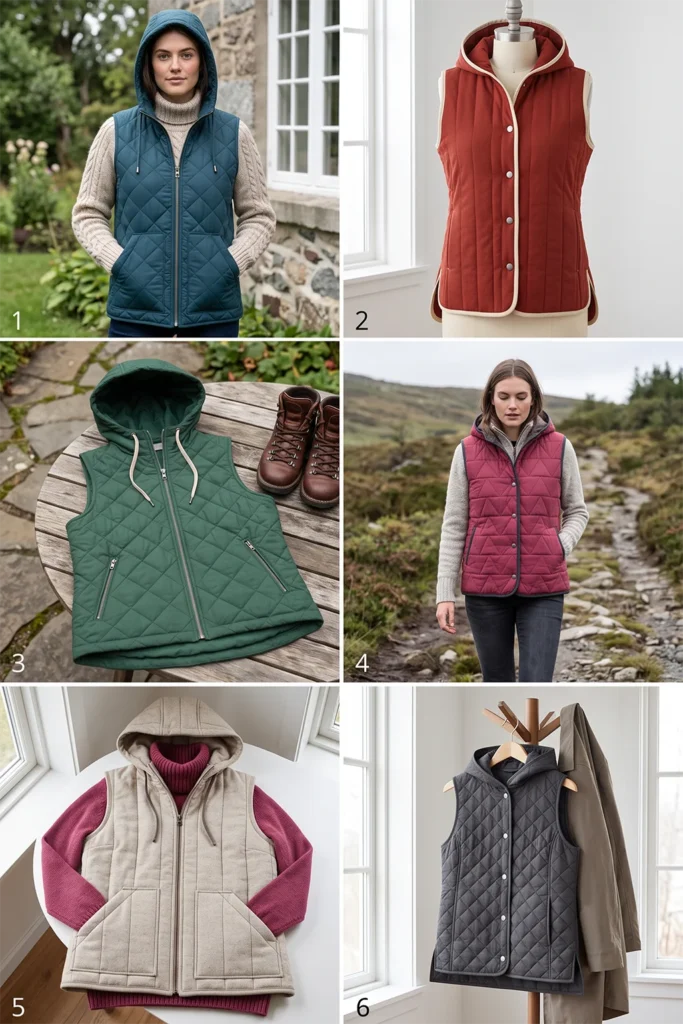
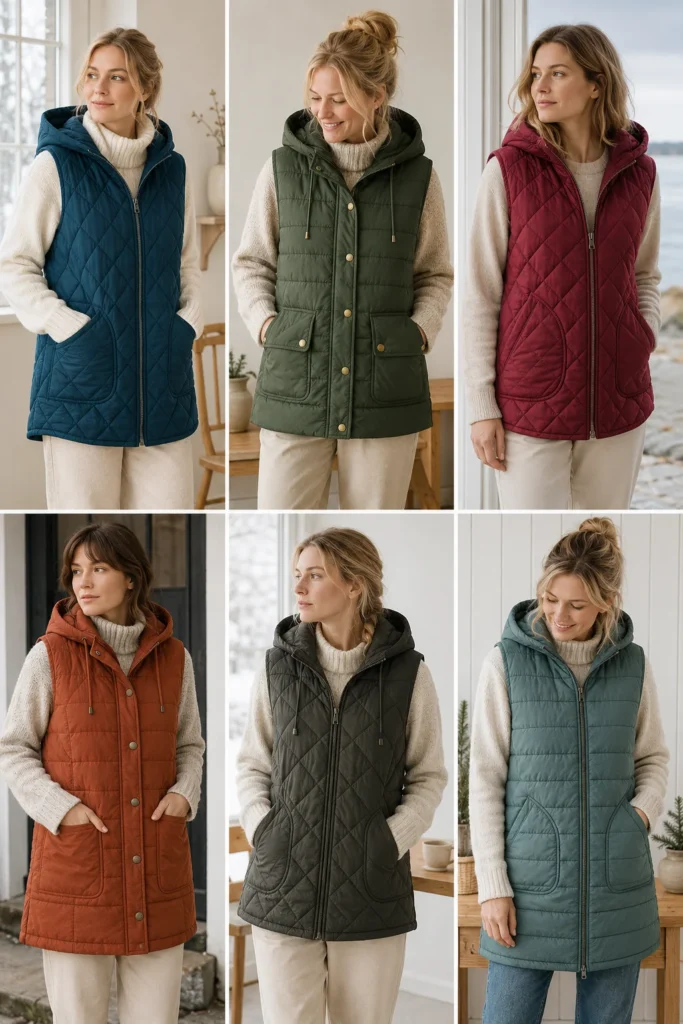
Why This Idea Is Worth Making
Why this idea is worth making: it bridges cozy comfort and real outdoor function. The vest keeps your core warm while leaving your arms free for movement — ideal for walking, hiking, gardening, or layering under a larger coat — and the hood adds crucial warmth around the head and neck in cold or windy weather. Making it yourself lets you draft a hood that actually fits (store-bought hoods are often too shallow or too floppy), choose a fresh outdoor color, and add practical touches like a drawstring or deep pockets. It also teaches you to construct and attach a hood cleanly, a genuinely useful garment-sewing skill.
Suggested Finished Measurements
For a relaxed medium-sized hooded vest hitting at the hip:
- Finished length: 26–28 inches
- Finished chest width: 23–25 inches across
- Shoulder width: 14–15 inches
- Armhole depth: 9–10 inches
- Hood height: 13–14 inches
- Hood width: 10–11 inches at the face opening
- Front opening: zip or snaps
- Seam allowance: ½ inch
For a roomier layering fit over thick knits, add 2 inches to the body width.
Materials Needed
- Quilted fabric in a fresh outdoor tone (deep teal, forest green, berry, or rust): 2 to 2½ yards
- Lining fabric, if quilting your own: 2 yards
- Cotton or wool batting for warmth: 2 yards
- Bias binding, tonal: 5 to 5½ yards
- A separating zip (24–26 inches) or 5–6 large snaps
- Optional drawstring cord and two cord stops for the hood
- Matching thread
- Rotary cutter or fabric scissors
- Measuring tape
- Fabric chalk
- Fabric clips
- Walking foot, recommended
- Iron
Step-by-Step Guide
Step 1: Choose a Fresh Outdoor Color
Since this vest is meant to be worn outdoors, choose a color with fresh, active energy that also hides the signs of outdoor wear. Strong choices include deep teal, forest green, berry red, or rust — rich, outdoorsy tones that feel weather-ready and pair well with the neutral base layers you’ll wear underneath. A slightly textured or matte fabric suits the practical, outdoor purpose.
Keep the binding tonal so the practical details stay clean and the color leads.
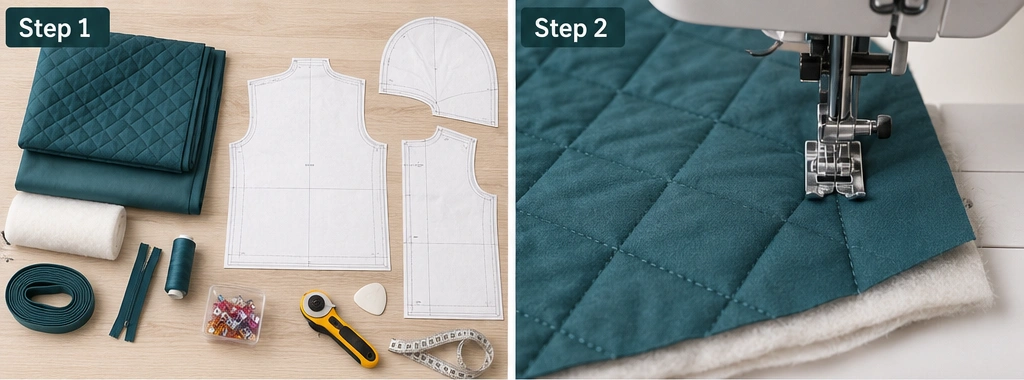
Step 2: Make the Quilted Fabric
Layer shell, batting, and lining, smooth, and clip. Quilt straight lines or a diamond pattern spaced about 1½ to 2 inches apart. Use a warmer batting here since this is a cold-weather outdoor piece — wool or a mid-loft cotton batting adds real warmth. Quilt enough extra fabric to cut the hood pieces from the same yardage.
Step 3: Cut the Back and Front Panels
Cut one back panel about 25 inches wide × 28 inches long, with a shallow back neckline 7 inches wide × 1½ inches deep. Cut two front panels, each about 13 inches wide × 28 inches long, shaping the front neckline with a gentle curve from the shoulder down about 6 inches. Keep the center front edges straight so a zip or snap placket sits cleanly.
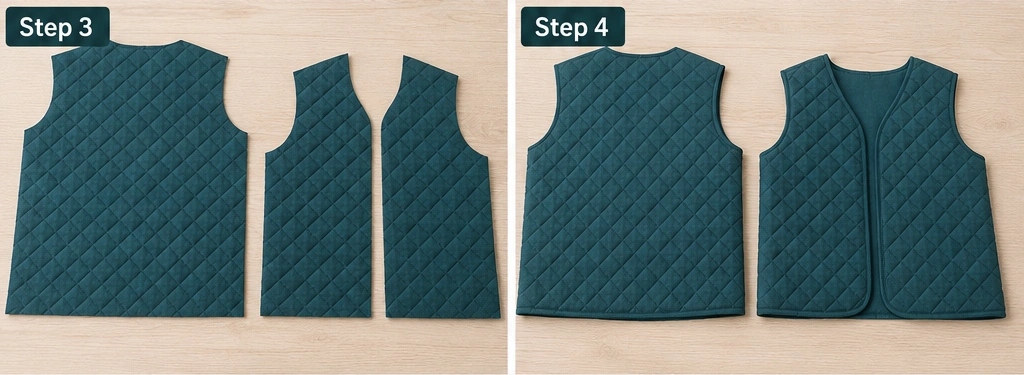
Step 4: Cut the Armholes
Lay the front panels over the back at the shoulders and cut a gentle armhole curve about 9–10 inches deep on each side. Keep the armholes roomy enough to layer over knits and long-sleeve base layers, since this vest is worn over other warm pieces outdoors.
Step 5: Cut the Hood Pieces
Cut two hood pieces, each about 13–14 inches tall × 11 inches wide, shaped like a gentle curved right angle: the straight bottom edge attaches to the neckline, the curved back edge forms the shape of the hood, and the straight front edge frames the face. Cut them as mirror images so they form a symmetrical hood when joined. Getting the hood pieces right is the one new skill in this project, so measure and mark carefully.
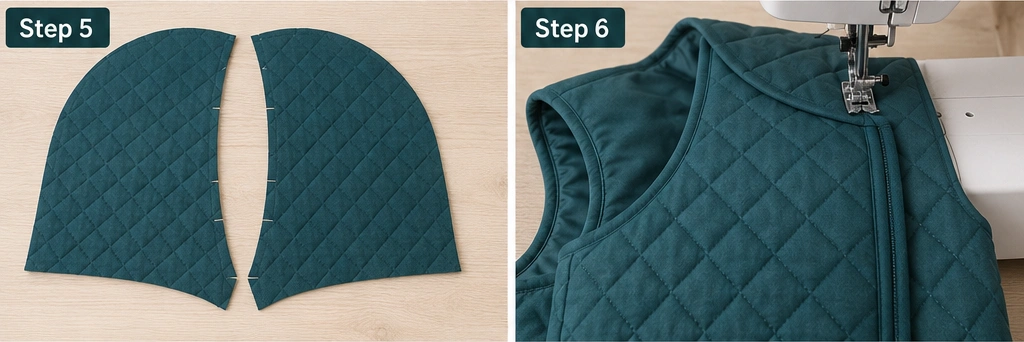
Step 6: Sew the Shoulder and Side Seams
Place the front panels on the back, right sides together, match the shoulders, and sew with a ½ inch seam allowance. Press toward the back and topstitch. Then sew the side seams from the lower armhole to the hem, leaving 3–4 inches open at the lower side seams for movement. This gives you the vest body, ready for the hood.
Step 7: Construct the Hood
Place the two hood pieces right sides together and sew along the curved back edge with a ½ inch seam allowance. Press the seam open or to one side and topstitch. Then bind or hem the front face-opening edge of the hood — this edge frames your face, so finish it cleanly. If adding a drawstring, create a channel along this front edge and thread the cord through with a cord stop at each end.
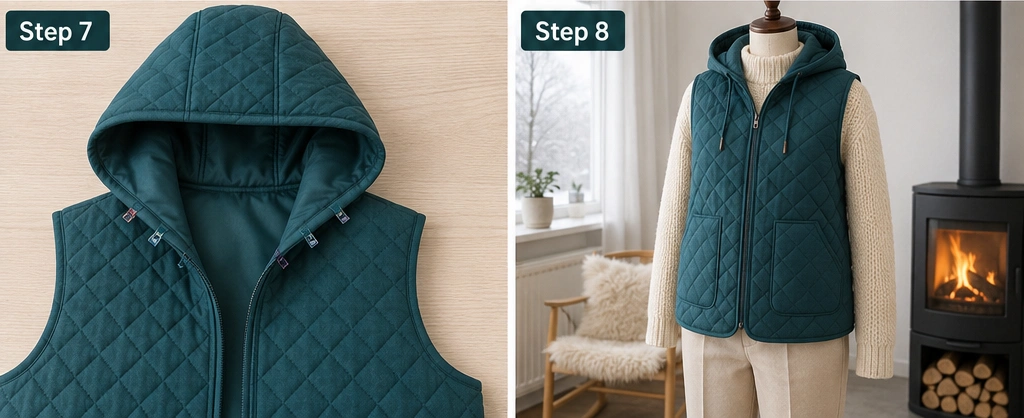
Step 8: Attach the Hood to the Neckline
With the vest right side out and the hood right side out, pin the raw bottom edge of the hood around the neckline, matching centers and easing to fit, then sew with a ½ inch seam allowance. Bind the neckline seam allowance so the inside stays clean and comfortable against the neck. A well-attached hood that sits up properly is what makes this vest feel like real outdoor gear.
Step 9: Finish the Armholes and Hem
Bind the armholes, easing the binding smoothly around each curve, then bind the hem and side slits. Clean armhole and hem edges keep the vest comfortable during active outdoor movement and help the quilted layers wear well over time.
Step 10: Install the Front Closure
Add a separating zip down the front for the most practical, weather-ready finish — pin it carefully so both sides align, and topstitch it in evenly. Alternatively, install 5–6 large snaps for an easier no-zip closure. A secure front closure matters here since this vest is meant to keep out cold and wind outdoors, unlike the open indoor vest.
Assembly Section
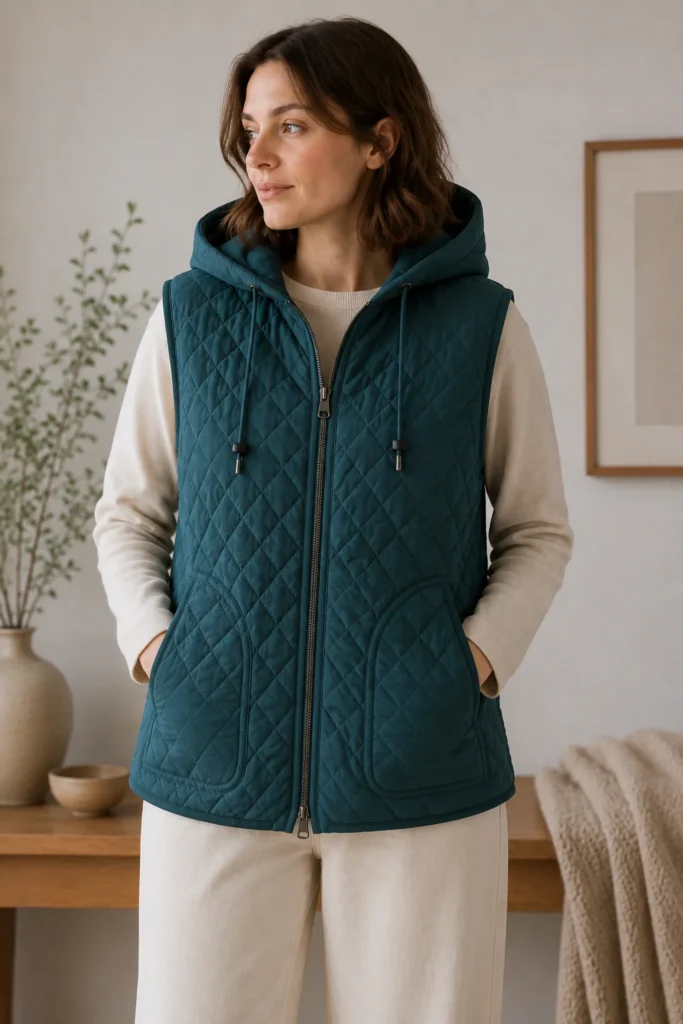
Once the body, hood, and closure are done, try the vest on over the layers you’ll actually wear outside — a knit or base layer — and check the fit. Confirm the armholes are roomy enough over sleeves, the hood sits up around the neck without collapsing, and the front closes cleanly without gaping. Adjust the hood drawstring so it frames the face well. When everything fits, bind any remaining edges, secure the zip or snaps, and reinforce the hood-to-neckline seam with a second row of topstitching for durability, since the hood takes strain in use. Give the vest a press, keeping the hood softly shaped rather than flattened.
Interesting Backstory
The hood is one of humankind’s oldest and most practical garment features — for thousands of years, people in cold and wet climates attached hoods to cloaks and tunics because protecting the head and neck is one of the most effective ways to stay warm outdoors.
In the Nordic countries, where outdoor life continues right through a long, cold winter, practical warm layers like the hooded vest are simply part of everyday living, worn for walks, work, and time in nature. It connects to the quilting traditions I grew up around in Dhaka in the most fundamental way: layered, stitched cloth has always been about making warmth from simple materials. A hooded quilted vest takes that ancient idea and shapes it for Nordic outdoor comfort — core warmth, neck protection, and the freedom to move.
Personal Styling Touch
My favorite version is a deep teal quilt with a mid-loft wool batting for real warmth, an attached drawstring hood that actually sits up around the neck, and a sturdy separating zip with deep hand-warmer pockets. I reach for it constantly on cold walks — warm across the core, hood up against the wind, arms free. It is the most practical thing I make, and proof that cozy and functional aren’t opposites.
Final Styling Idea
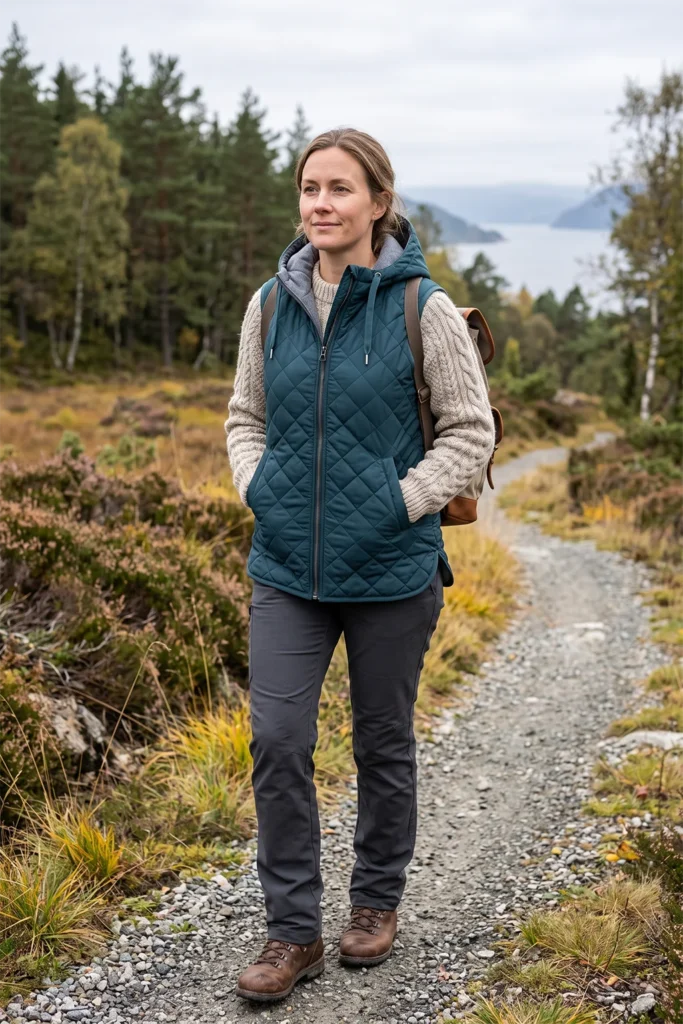
Wear this hooded quilted vest over a chunky knit, with straight trousers and walking boots, for a cozy, Nordic-inspired outdoor look. For active days, layer it over a fleece or base layer with leggings and trail shoes. On the coldest days, wear it under a larger unlined coat for an extra-warm core layer, with the hood tucked or up as needed.
Keep the palette fresh and outdoorsy — deep teal, forest green, berry, rust, paired with charcoal, oatmeal, and cream — and the vest delivers exactly that cozy, weather-ready outdoor comfort it’s built for.
Other Design Inspirations – Digitally Modified
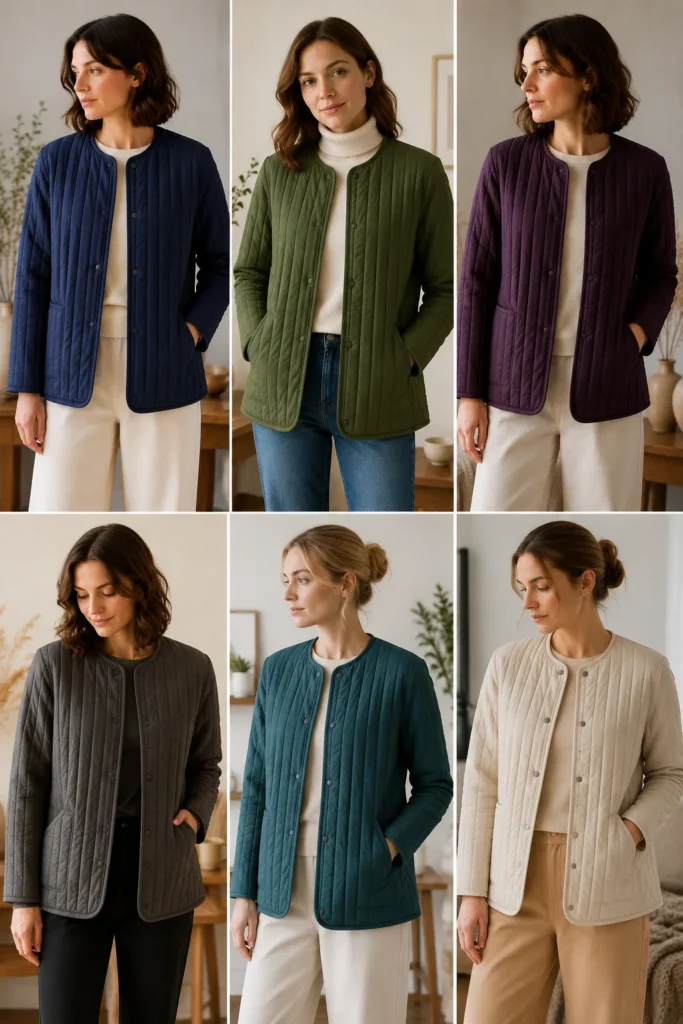
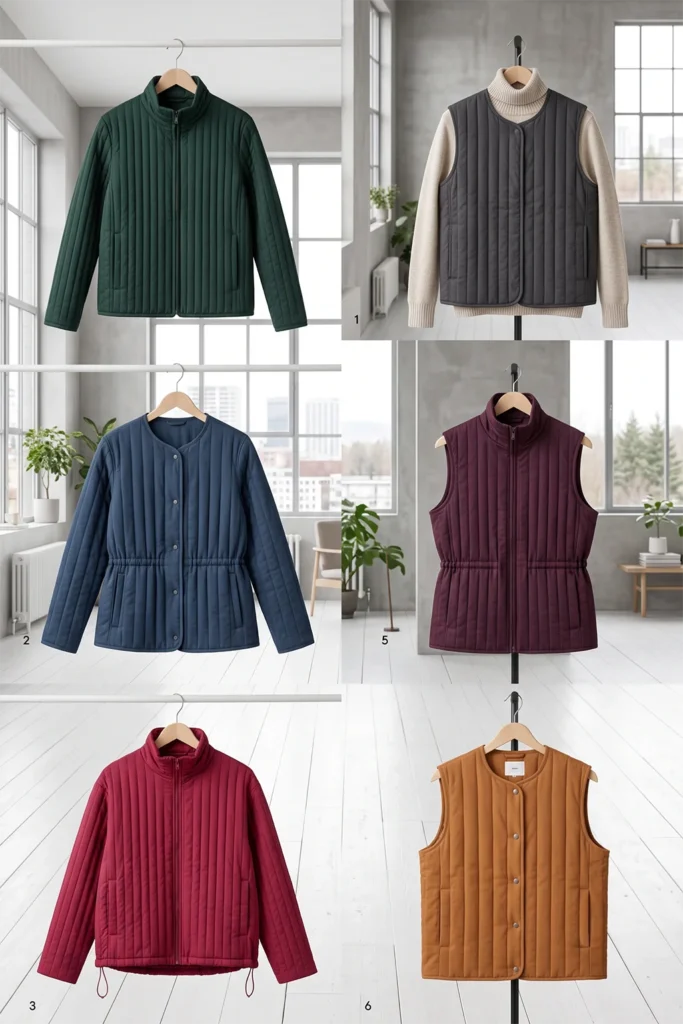
8. Channel-Quilted Jacket for Subtle Vertical Texture and Sleek Lines
A Guide to Making a Channel-Quilted Jacket for Subtle Vertical Texture and Sleek Lines
A Channel-Quilted Jacket is a jacket quilted in evenly spaced vertical lines — “channels” — rather than a diamond or grid pattern, so the whole surface reads as a series of soft, elongated ribs running top to bottom. Those vertical lines do something quietly flattering: they draw the eye up and down, lengthening the silhouette and giving the jacket a sleek, streamlined look. It is minimalism through texture rather than color — the quilting itself is the design, so a single clean tone lets those channels do all the work.
I came up with this idea because the direction of your quilting completely changes a garment’s character, and vertical channels are the most elegant, elongating choice of all. It is also a wonderful lesson in precision: getting those parallel lines perfectly straight and evenly spaced is deeply satisfying, and the payoff is a jacket that looks refined and considered. When the texture is the whole point, doing it cleanly is what makes the piece.
Why This Idea Is Worth Making
Why this idea is worth making: it proves that quilting direction alone can create an elegant, elongating silhouette. Vertical channels visually lengthen the body, making this one of the most flattering shapes in the collection, and the sleek ribbed texture reads as quietly sophisticated rather than casual. Because the quilting is the entire design, there’s no piecing or color-matching to worry about — just clean parallel lines — which makes it a focused, meditative sew. Making it yourself lets you control the channel spacing (narrow for a refined rib, wider for a softer look) and choose a single rich tone that catches the light beautifully along each channel.
Suggested Finished Measurements
For a relaxed medium-size jacket hitting at the hip:
- Finished length: 26–28 inches
- Finished chest width: 23–24 inches across
- Shoulder width: 17–18 inches
- Sleeve length from shoulder: 23–24 inches
- Sleeve width: 15–16 inches
- Armhole depth: 10–11 inches
- Channel spacing: 1 to 1½ inches apart (narrower = sleeker)
- Seam allowance: ½ inch
For an oversized fit, add 2 inches to the body and sleeve widths.
Materials Needed
- Shell fabric in a sleek saturated tone (ink blue, deep plum, bottle green, or charcoal): 2½ to 3 yards
- Lining fabric: 2½ yards
- Thin-to-medium batting (thinner batting gives crisper channels): 2½ yards
- Bias binding, tonal: 5 to 6 yards
- Matching thread
- 3–4 concealed snaps, buttons, or a concealed zip
- Rotary cutter or fabric scissors
- Long quilting ruler (essential for straight channels)
- Measuring tape
- Fabric chalk or a fabric-safe marking pen
- Fabric clips
- Walking foot (essential for even channels)
- Iron
Step-by-Step Guide
Step 1: Choose a Sleek, Saturated Color
Because the channels are the design, choose one clean, rich color that catches light along each raised rib. Strong choices include ink blue, deep plum, bottle green, or charcoal — saturated tones with enough depth that the subtle shadows between channels show as gentle vertical texture. A shell fabric with a slight sheen (like fine sateen or smooth cotton twill) emphasizes the channel effect; a fully matte fabric keeps it more understated.
Keep the binding tonal so nothing interrupts the clean vertical flow.
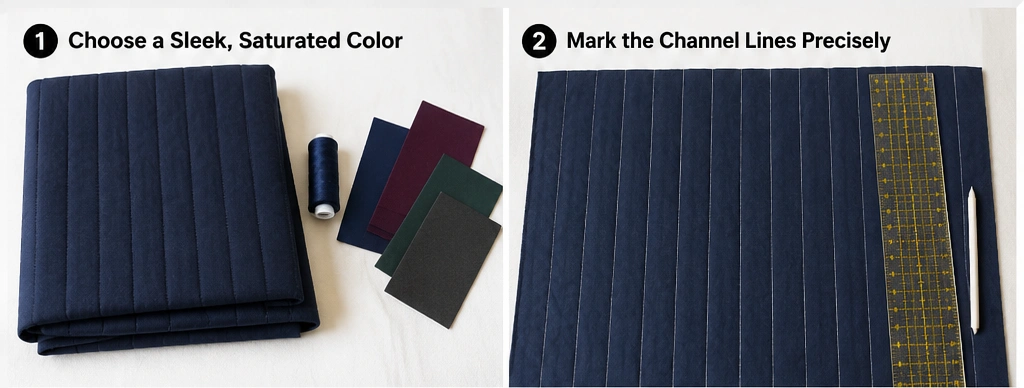
Step 2: Mark the Channel Lines Precisely
This is the make-or-break step. Before quilting, mark your vertical channel lines on the shell fabric using a long quilting ruler and chalk or a fabric-safe pen. Space them evenly — 1 to 1½ inches apart — and keep them truly parallel and perfectly vertical. Mark the whole panel before you sew; on channel quilting, any drift in the lines shows immediately, so accuracy here is everything.
Measure from a single straight reference edge each time rather than from the previous line, so small errors don’t accumulate.
Step 3: Quilt the Channels
Layer shell, thin batting, and lining, smooth thoroughly, and clip often. Using a walking foot, quilt along your marked lines from top to bottom, always sewing in the same direction (top to bottom for every line) so the fabric feeds evenly and the channels stay straight and untwisted. Sew slowly and let the walking foot do the work. Thinner batting gives crisper, sleeker channels; a touch more loft gives a softer rib.
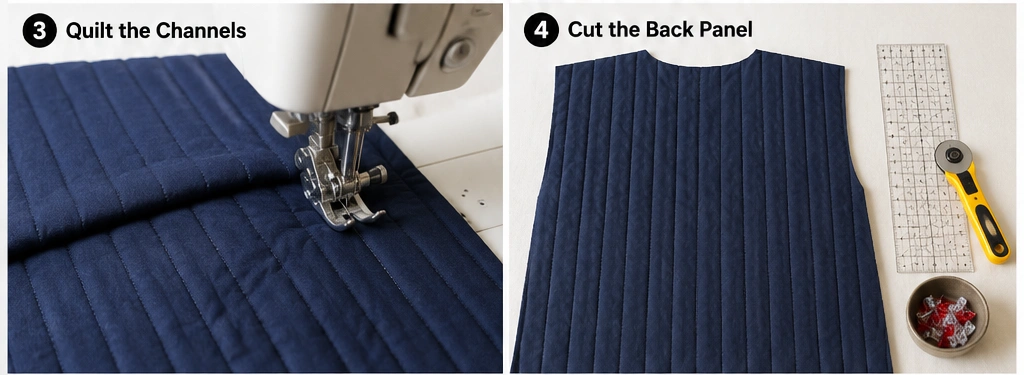
Step 4: Cut the Back Panel
Once your fabric is channel-quilted, cut one back panel about 24 inches wide × 28 inches long, keeping the channels running perfectly vertical (parallel to the center back). Cut a shallow back neckline about 7 inches wide × 1½ inches deep. Aligning the channels dead vertical on every piece is what keeps the elongating effect consistent.
Step 5: Cut the Front Panels
Cut two front panels, each about 13 inches wide × 28 inches long, again keeping the channels vertical and matching their spacing to the back so the lines appear continuous around the body. Shape the front neckline with a gentle curve from the shoulder down about 5–6 inches.
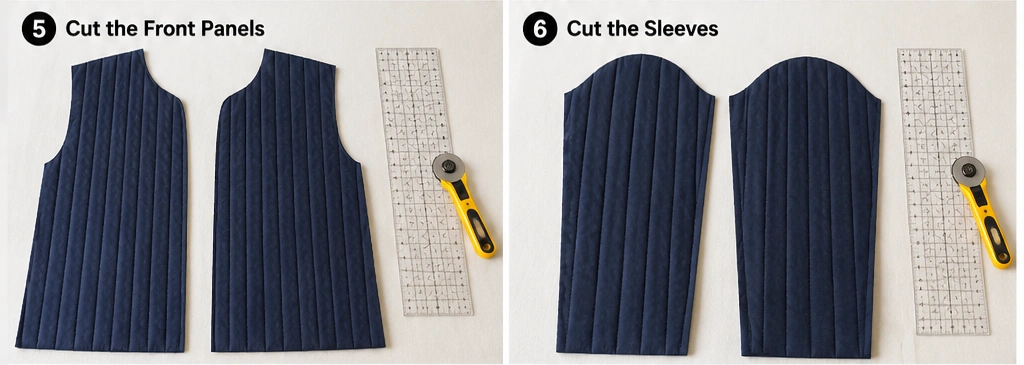
Step 6: Cut the Sleeves
Cut two sleeves about 17 inches wide × 24 inches long, with the channels running vertically down the sleeves to create a continuous elongating line from shoulder to cuff. Keep the sleeve straight or very gently tapered so the vertical channels stay visually clean.
Step 7: Sew the Shoulder Seams
Place the front panels on the back, right sides together, match the shoulders, and sew with a ½ inch seam allowance. Try to align the channel lines across the shoulder seam so they flow naturally from front to back. Press toward the back and topstitch flat.
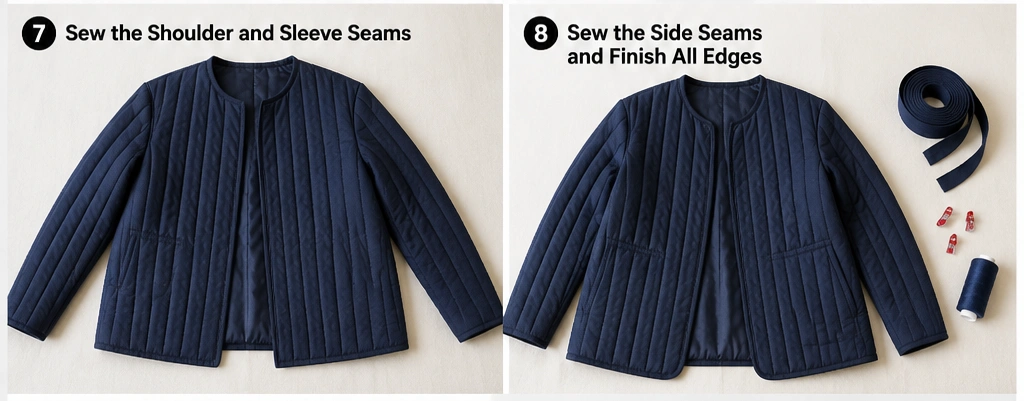
Step 8: Attach the Sleeves and Sew Side Seams
Center each sleeve at the shoulder seam, clip, and sew with a ½ inch seam allowance, keeping the sleeve channels vertical. Then fold the jacket right sides together and sew from the cuff to the underarm to the hem in one continuous line. Leave 6–8 inches open at the lower side seams for discreet side slits. Match the channel lines at the side seams as closely as possible for a seamless wraparound effect.
Step 9: Finish the Edges with Tonal Binding
Bind the neckline, front opening, hem, cuffs, and side slits with tonal bias binding. The horizontal binding at the hem and cuffs creates a clean frame that contrasts nicely with the vertical channels — a subtle, deliberate detail. Keep the binding even and topstitch it down slowly.
Step 10: Add a Minimal Closure
Keep the closure invisible so it doesn’t break the vertical lines. Install 3–4 concealed snaps behind the front edge, or a concealed zip set into the front seam so it disappears into a channel. Avoid visible buttons here — anything that interrupts the clean vertical flow works against the whole sleek, elongating effect this jacket is built around.
Assembly Section
Because the channels are the entire design, assembly is about protecting their clean vertical flow. Once the seams are sewn, try the jacket on and check that the channels run truly vertical everywhere — down the fronts, the back, and the sleeves — with no twisting or drift, and that the lines roughly align across the shoulder and side seams. Confirm the fit, then trim the hem to a perfectly level hem so the horizontal hem contrasts crisply with the vertical channels. Bind all edges, install the concealed closure, and press carefully between the channels rather than flattening them, so the subtle ribbed texture stays lifted. A final light press along the seams sets the sleek finish.
Interesting Backstory
Channel quilting is one of the oldest quilting techniques, valued for centuries because parallel lines of stitching are the simplest, most efficient way to hold layers of fabric and padding together evenly — you see it in historical quilted underarmour, petticoats, and warm linings across many cultures.
What began as pure function turned out to be quietly beautiful: those even vertical lines create rhythm, texture, and an elongating flow. It connects to the running-stitch traditions I grew up around in Dhaka, where rows of simple parallel stitching held layered cloth together and, in doing so, created the surface texture that made the finished piece lovely. A channel-quilted jacket honors that idea directly — the most basic quilting line, done with care, becomes the entire elegant design.
Personal Styling Touch
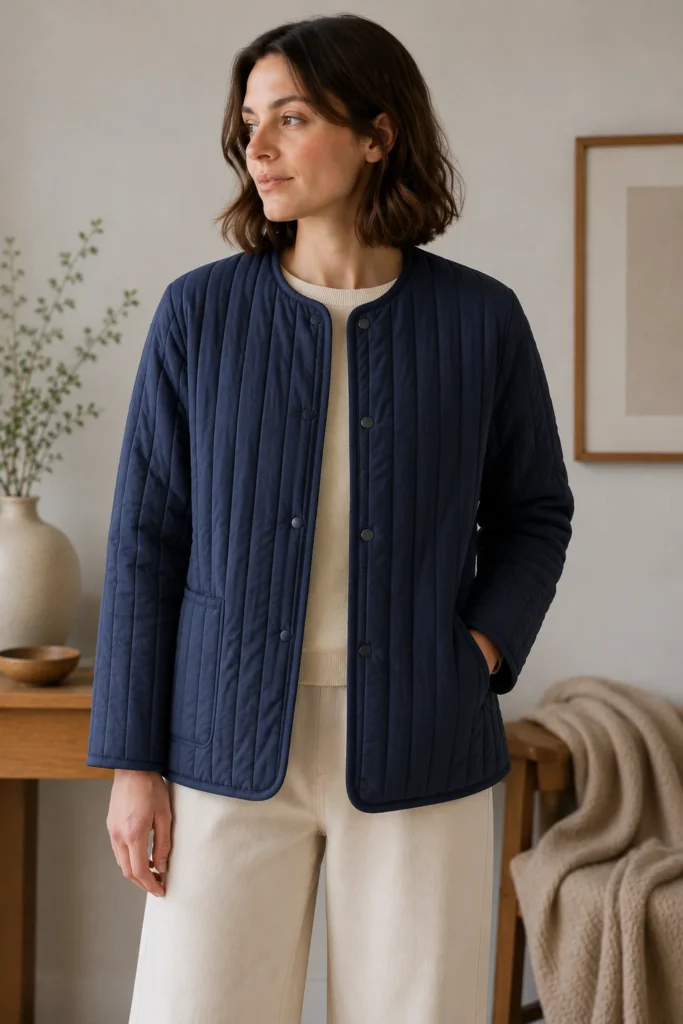
My favorite version is an ink-blue fine cotton twill with narrow channels just over an inch apart, quilted over thin batting so the ribs stay crisp and sleek, bound tonally, and closed with hidden snaps. The vertical lines genuinely lengthen the silhouette, and the slight sheen of the twill catches the light down each channel. It is understated to the point that people don’t immediately clock why it looks so refined — the texture is doing quiet, elegant work.
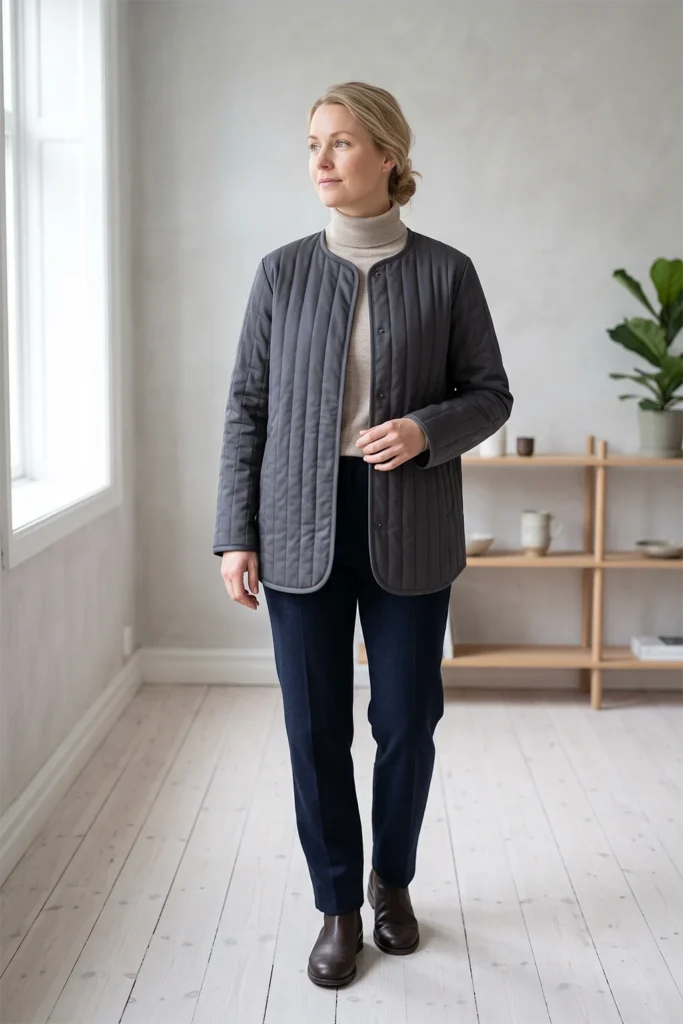
Final Styling Idea
Wear this channel-quilted jacket over a fine-knit, with straight trousers and boots, for a sleek, elongated everyday look. For something dressier, layer it over a silky top and tailored trousers so the subtle sheen and vertical lines read as quietly elegant. For a relaxed version, wear it open over a fitted tee and slim jeans, letting the channels do the styling work.
Keep the palette clean and singular — one saturated tone like ink blue, deep plum, or bottle green — against cream, grey, or charcoal — and the vertical channels deliver a subtle texture and a sleek, elongating line every time.
Other Design Inspirations – Digitally Modified
9. Monochrome Plus-Sign Quilted Vest for Striking Scandi Contrast
A Guide to Making a Monochrome Plus-Sign Quilted Vest for Striking Scandi Contrast
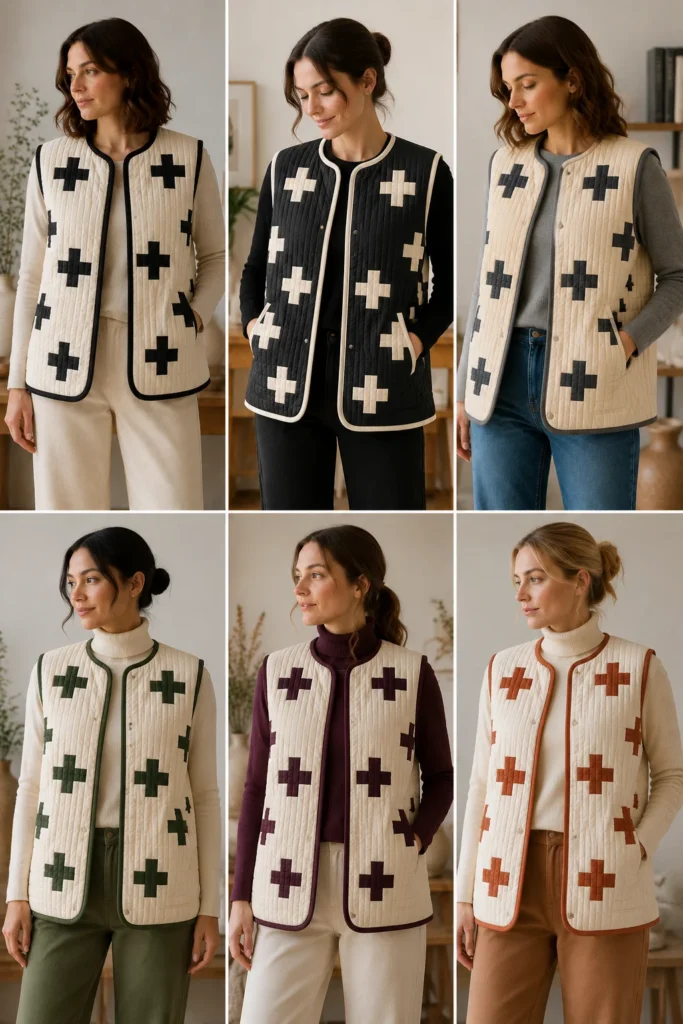
A Monochrome Plus-Sign Quilted Vest is a pieced, sleeveless quilted layer decorated with the Nordic plus (or cross) motif — bold charcoal-black plus signs set against a clean cream ground. Unlike the other vests in this collection, this one is patchwork: the plus shapes are cut and sewn into the fabric before quilting, so the design is built into the cloth itself rather than printed on. That black-on-cream contrast is graphic, confident, and unmistakably Scandinavian — a piece of Nordic textile art you wear.
I came up with this idea because the plus-sign motif is one of the most iconic and beloved graphics in Scandinavian design, and it translates beautifully from quilt to garment. It is also the most rewarding kind of sewing — real piecing, where you assemble a design block by block and watch the pattern emerge. This vest turns a proven, much-loved Nordic quilt motif into something you can actually wear, which is exactly the bridge between home textiles and fashion that makes it special.
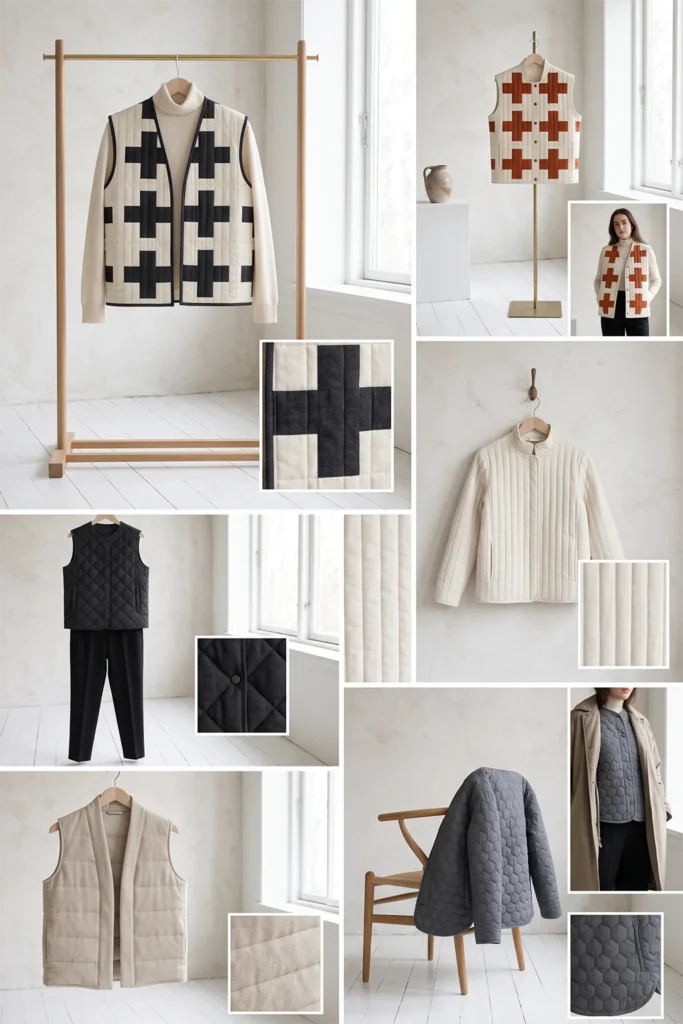
Why This Idea Is Worth Making
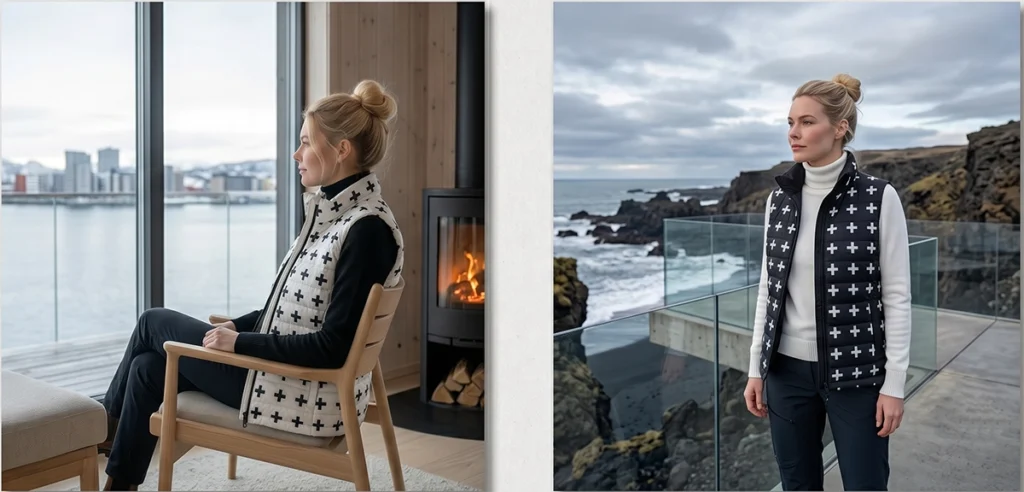
Why this idea is worth making: it turns an iconic Scandinavian quilt motif into a striking, wearable statement piece. The bold monochrome contrast means this single vest does more visual work than almost anything else in your wardrobe — worn over the plainest cream or black outfit, the plus-sign graphic carries the entire look. It is also a genuine step up in skill: you’ll learn to piece and align patchwork blocks cleanly, which is the foundation of all quilt-making. Sewing it yourself lets you place the plus signs exactly where you want them for the best visual balance, something no mass-produced garment offers.
Suggested Finished Measurements
For a relaxed medium-size vest hitting at the hip:
- Finished length: 26–28 inches
- Finished chest width: 23–24 inches across
- Shoulder width: 14–15 inches
- Armhole depth: 9–10 inches
- Plus-sign block size: 5–6 inches square finished
- Plus-sign arm width: about ⅓ of the block (roughly 2 inches on a 6-inch block)
- Front opening: open or snaps
- Seam allowance: ¼ inch for piecing, ½ inch for garment seams
For a bolder graphic, use fewer, larger plus blocks; for a busier pattern, use more, smaller ones.
Materials Needed
- Cream fabric for the ground: 1½ to 2 yards
- Charcoal-black fabric for the plus signs (and optional binding): 1 yard
- Lining fabric: 1½ yards
- Thin-to-medium cotton batting: 1½ yards
- Bias binding in charcoal (for contrast) or cream (for tonal): 4 to 4½ yards
- Matching thread in both cream and charcoal
- Rotary cutter, quilting ruler, and cutting mat (essential for accurate piecing)
- Measuring tape
- Fabric chalk
- Fabric clips and pins
- Walking foot, recommended
- Iron (you’ll press constantly during piecing)
Step-by-Step Guide
Step 1: Choose Your Monochrome Contrast
The power of this vest is high contrast, so choose a clean, crisp pairing: soft cream or bone against true charcoal-black is the classic Scandi combination and the one that photographs best. For a slightly softer look, pair cream with deep slate-grey instead of black. Use a matte cotton or linen-blend for both colors so the contrast stays graphic rather than shiny.
If you’d rather go bold with color (see the variation note at the end), swap the charcoal for a single saturated tone like rust or deep teal on cream — but the monochrome version is the proven showstopper.
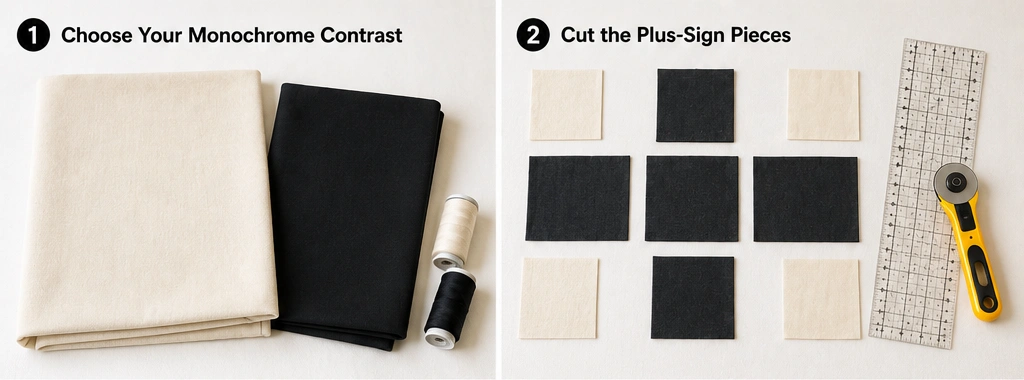
Step 2: Cut the Plus-Sign Pieces
The cleanest way to build a plus block is to piece it from five squares or to build it as a cross overlaid on a ground square. For a 6-inch finished block using the five-piece method: cut charcoal into one center square and four arm rectangles, and cut cream for the four corner squares. Cut enough for however many plus blocks you want — a balanced layout might use 6–9 plus blocks scattered across the vest. Accurate cutting is everything in piecing, so use a rotary cutter and ruler and cut precisely.
Step 3: Piece the Plus Blocks
Assemble each plus block using a ¼-inch seam allowance (the standard for patchwork). Sew the charcoal center to the charcoal arms, add the cream corners, and press each seam as you go — pressing between steps is what keeps patchwork crisp and flat. Aim for sharp, clean intersections where the plus arms meet the corners. Make all your plus blocks before moving on.
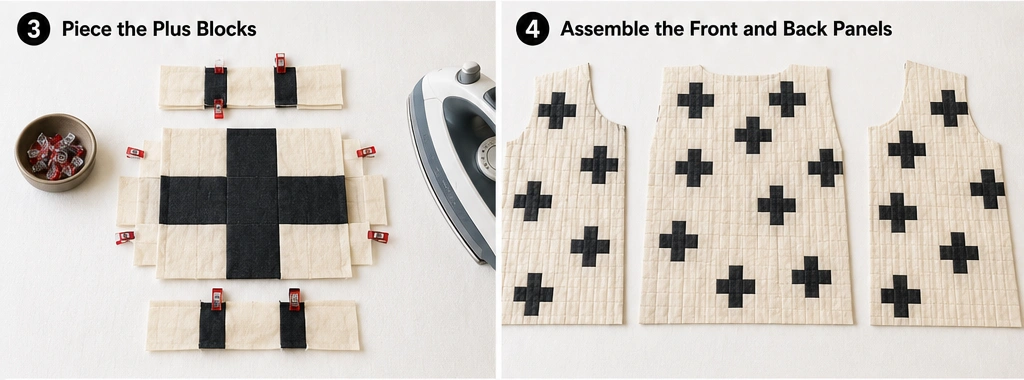
Step 4: Assemble the Front and Back Panels
Lay out your plus blocks alongside plain cream filler squares/rectangles to build the full front and back panels, arranging the plus signs in a balanced, slightly asymmetric scatter (like your favorite Nordic quilts) rather than a rigid grid. Sew the blocks and fillers together in rows, then join the rows, pressing as you go. Build one back panel and two front panels this way.
Step 5: Quilt the Pieced Panels
Layer each pieced panel with batting and lining, smooth, and clip. Quilt straight lines or a simple grid spaced about 1½ to 2 inches apart. Keep the quilting simple and geometric so it complements the plus-sign piecing rather than competing with it — echoing the block edges or quilting in clean straight lines both work well. Quilt all three panels.
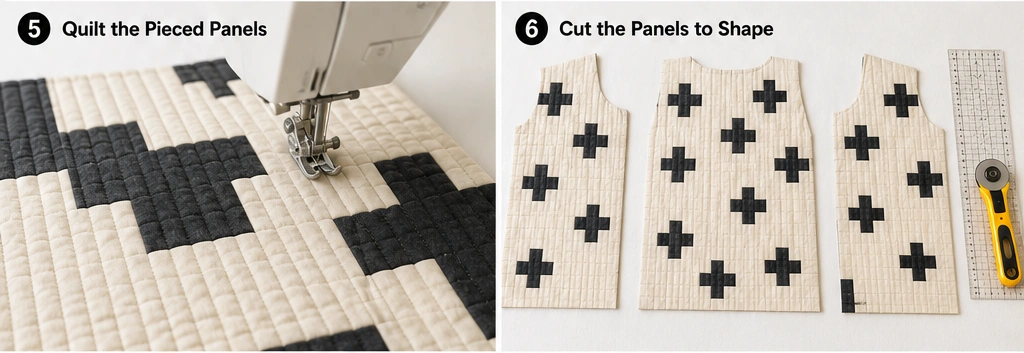
Step 6: Cut the Panels to Shape
Once quilted, trim the panels to your vest pieces: back about 24 inches wide × 28 inches long, two fronts each about 13 inches wide × 28 inches long. Cut a shallow back neckline (7 inches × 1½ inches) and shape the front necklines with a gentle curve down about 7 inches. Position your pieces on the panels so the plus signs sit where you want them — check placement before cutting, since a well-placed plus at the chest or hip makes the whole vest.
Step 7: Cut and Shape the Armholes
Lay the front panels over the back at the shoulders and cut a gentle armhole curve about 9–10 inches deep on each side, keeping them roomy for layering over knits. Make sure the armhole curves don’t cut awkwardly through a plus block — another reason to confirm block placement before cutting.
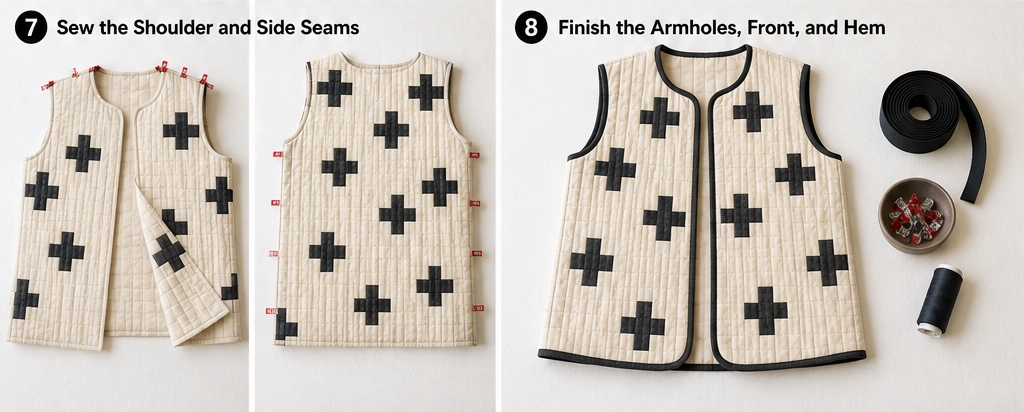
Step 8: Sew the Shoulder and Side Seams
Place the front panels on the back, right sides together, match the shoulders, and sew with a ½ inch seam allowance. Press toward the back and topstitch. Then sew the side seams from the lower armhole to the hem, leaving 3–4 inches open at the bottom for side slits. Try to keep the cream grounds aligned across the seams so the pattern flows around the body.
Step 9: Finish the Armholes, Neckline, Front, and Hem
Bind the armholes first, easing the binding around each curve. Then bind the neckline, front opening, hem, and side slits. Here you have a design choice: charcoal binding frames the whole vest in a bold outline that echoes the plus signs, while cream binding keeps the edges quiet so the plus motif stands alone. Both look great — charcoal is punchier, cream is softer.
Step 10: Add an Optional Closure
For a clean look, leave the vest open so the full plus-sign pattern stays visible across the front. If you prefer it to close, add 3–4 concealed snaps behind the front edge so the graphic isn’t interrupted by visible buttons. Keep any closure minimal — the plus signs are the star, and nothing should compete with them.
Assembly Section
Piecing makes this the most involved vest in the collection, so assembly rewards patience. Before cutting the quilted panels to shape, lay them out and photograph the plus-sign placement — it’s much easier to judge balance in a photo, and you want a strong plus at eye-catching points like the chest and lower front.
Once the shoulder and side seams are sewn, try the vest on and check that the pattern flows sensibly around the body and the armholes sit cleanly. Bind the edges in your chosen contrast, add optional snaps, and give the whole vest a thorough press — crisp, flat piecing is what makes the plus signs read as sharp graphic shapes rather than soft blobs. Press seams open where bulk allows so the intersections stay clean.
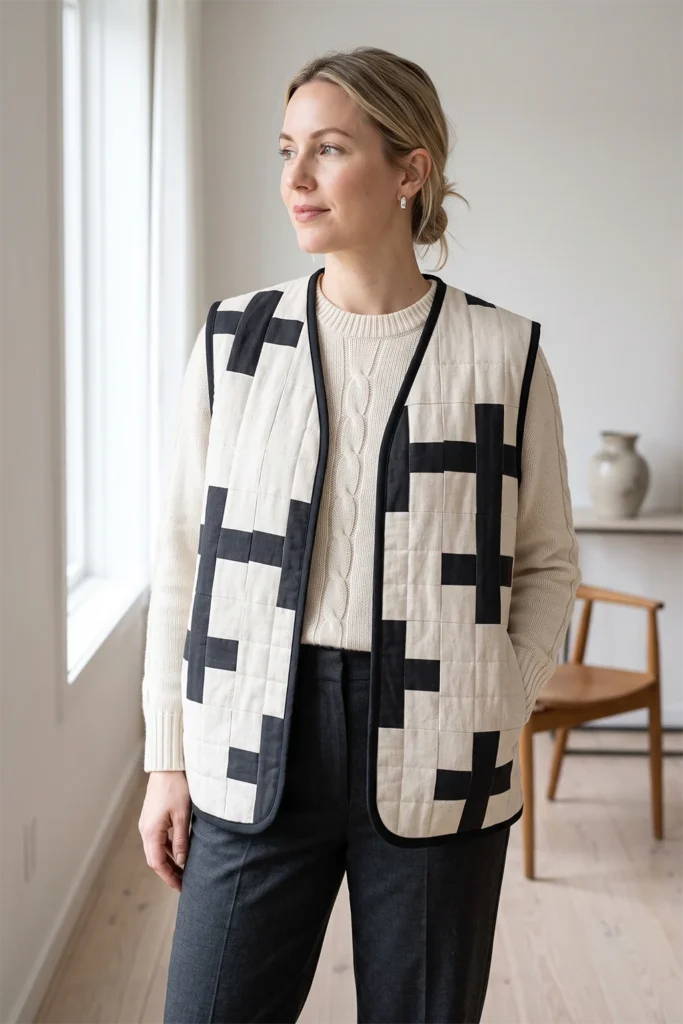
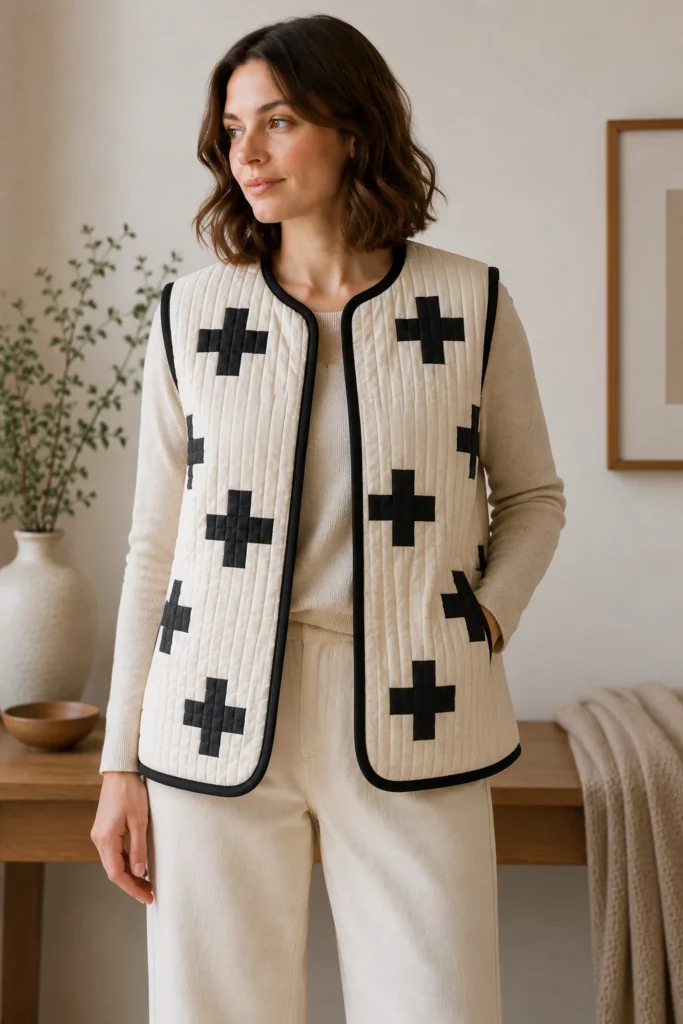
Interesting Backstory
The plus-or-cross motif is one of the oldest and most universal symbols in textile design, and in Scandinavian craft it became a beloved graphic staple — clean, balanced, and endlessly repeatable — appearing across Nordic quilts, weavings, and folk textiles as a symbol of simplicity and order.
There’s a natural kinship with the patchwork traditions I grew up around in Dhaka, where Nakshi Kantha and other pieced textiles built beauty from arranged blocks of cloth and simple repeated motifs. Both traditions share the same quiet truth: a single simple shape, repeated and balanced with care, becomes something striking. This vest carries that plus-sign motif — proven beautiful on the wall and the bed — onto the body, where its bold monochrome contrast feels fresh and unmistakably Scandinavian.
Personal Styling Touch
My favorite version keeps it strictly cream-and-charcoal, with about seven plus blocks scattered slightly off-grid across the front and back, quilted in clean straight lines and bound in charcoal to outline the whole shape. Worn open over an all-cream or all-black outfit, it looks like wearable Nordic art — the plus signs do everything, and the rest of the outfit just gets out of their way. It’s the piece people ask about the most.
Final Styling Idea
Wear this monochrome plus-sign quilted vest over a plain cream knit or crisp white shirt with black trousers to let the graphic lead the whole look. For a bolder monochrome statement, pair it with an all-black outfit so the cream ground pops. For a softer everyday version, layer it over an oatmeal tee with straight jeans and white sneakers.
Keep the outfit deliberately plain — cream, black, charcoal, and white only — and let the plus-sign contrast be the entire statement, delivering that striking Scandi graphic every time.
Optional bold colorway: if you’d rather bring in vibrant color, keep the cream ground and swap the charcoal plus signs for a single saturated tone — rust, deep teal, mustard, or berry — for a warmer, more playful take that still honors the graphic plus-sign layout.
Other Design Inspirations – Digitally Modified
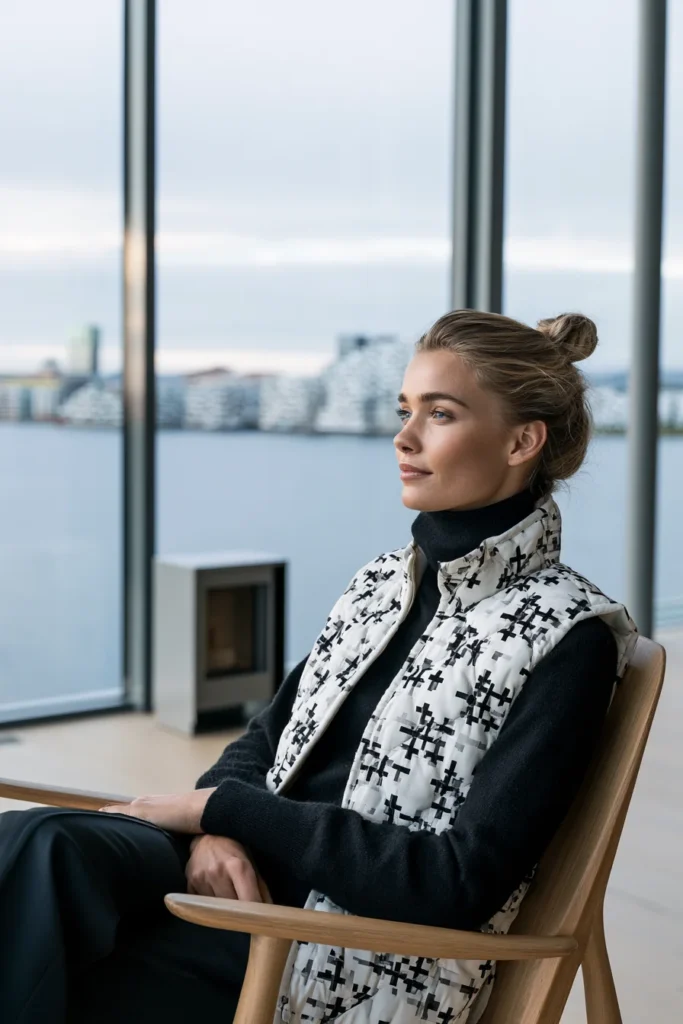
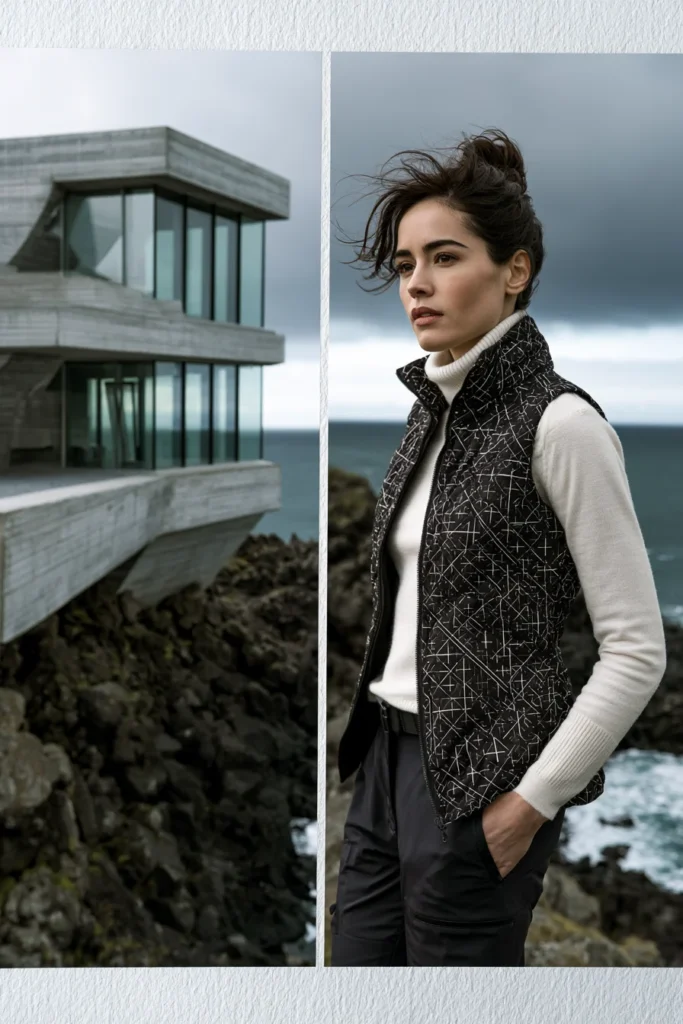
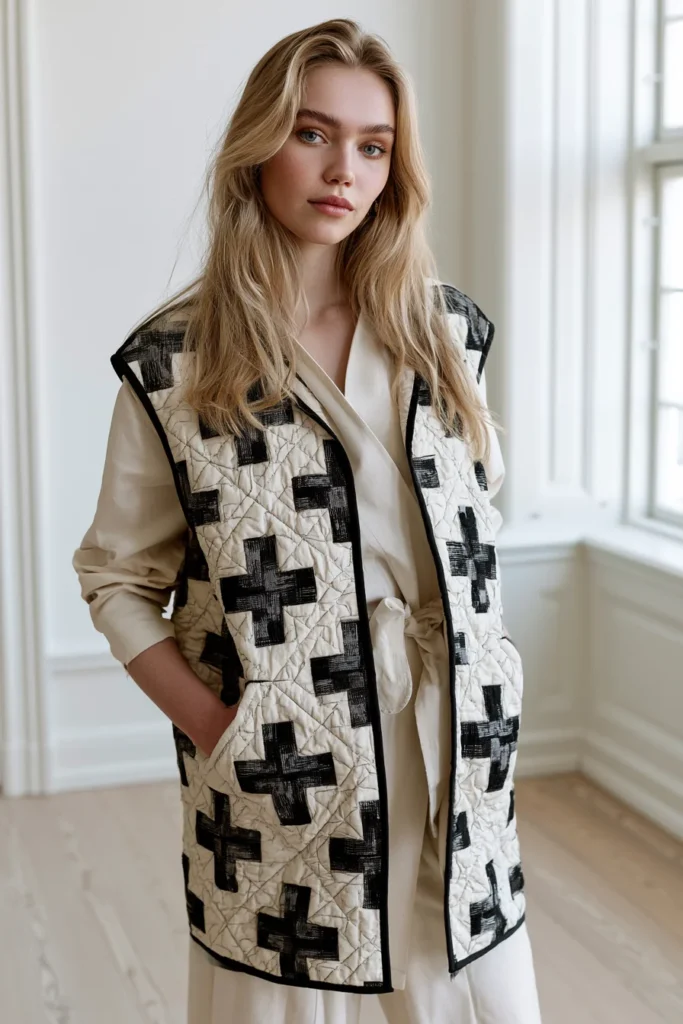
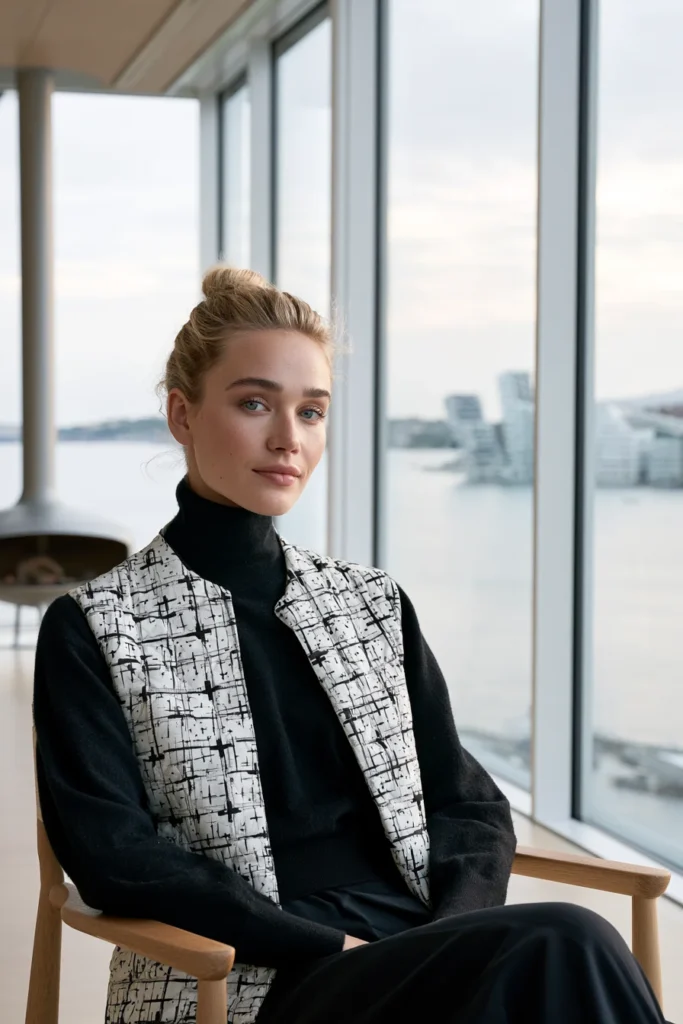
10. Nordic Cross Patchwork Quilted Jacket for Bold Graphic Style
A Guide to Making a Nordic Cross Patchwork Quilted Jacket for Bold Graphic Style
A Nordic Cross Patchwork Quilted Jacket is a fully pieced quilted jacket built around the Scandinavian cross (plus) motif, worked in a warm, earthy multi-tone palette — golden mustard, rust-brown, cream, tan, and charcoal — rather than a single flat color. It is the boldest, most graphic piece in this collection: a wearable version of the classic Nordic cross quilt, where each plus sign is cut and pieced from a different warm tone so the whole jacket reads as a rich, glowing patchwork. This is quilt-as-outerwear at its most confident.
I came up with this idea because the warm, multicolored cross quilt is one of the most striking elements in Scandinavian textile design, and turning it into a jacket felt inevitable. It is the piece where all the piecing skills come together — multiple plus blocks in multiple colors, arranged across a full jacket with sleeves — and the payoff is spectacular. Where a single-color jacket whispers, this one speaks: it is warm, graphic, and genuinely joyful to wear.
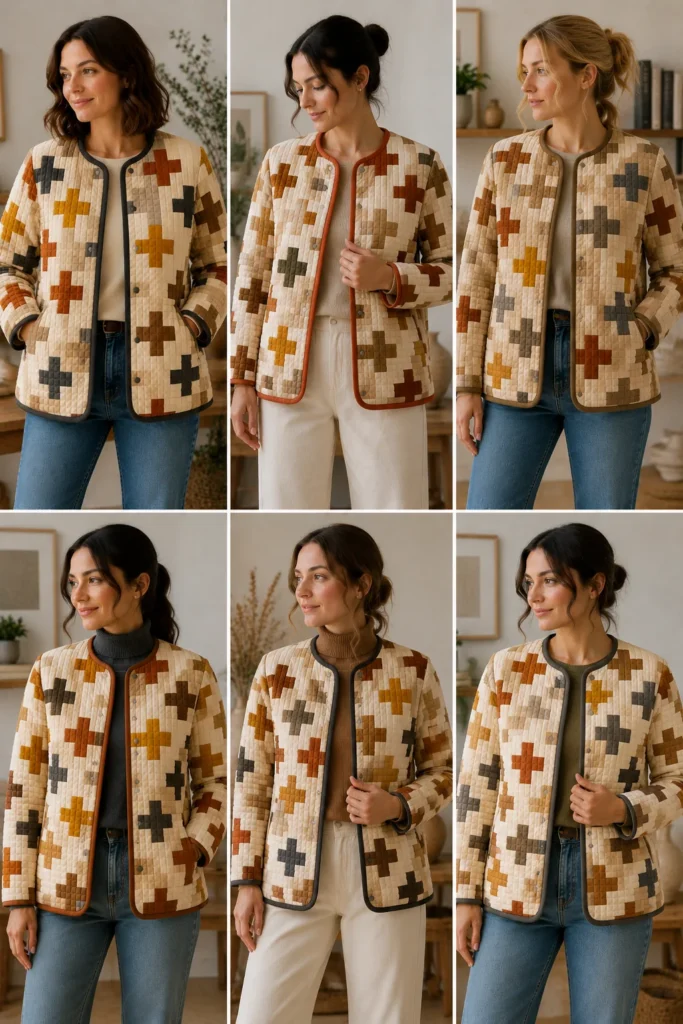
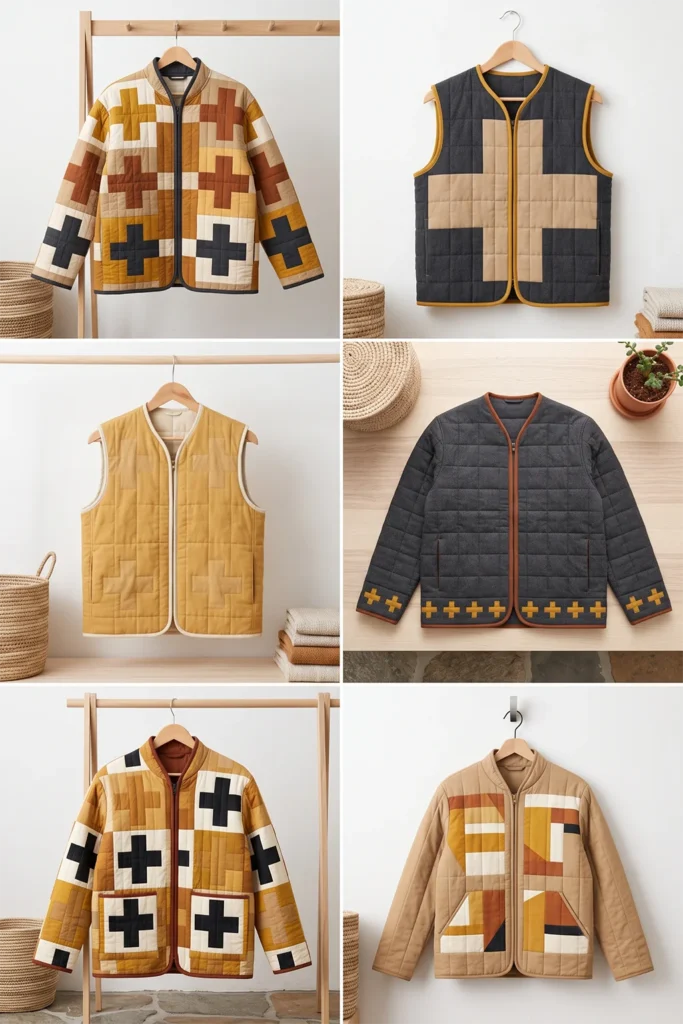
Why This Idea Is Worth Making
Why this idea is worth making: it is the showpiece of the whole collection — a bold, warm, graphic jacket that turns an iconic Nordic quilt into wearable art. The multi-tone cross patchwork means it works as a complete outfit on its own; thrown over the plainest jeans and tee, it carries the entire look with color and craft. It is also the ultimate piecing project, consolidating every patchwork skill into one rewarding make. Sewing it yourself lets you choose and arrange the warm tones exactly to your taste and place each cross for the best balance across the body and sleeves — a level of design control no shop garment can match.
Suggested Finished Measurements
For a relaxed medium-size jacket hitting at the hip:
- Finished length: 26–28 inches
- Finished chest width: 23–25 inches across
- Shoulder width: 17–18 inches
- Sleeve length from shoulder: 23–24 inches
- Sleeve width: 15–16 inches
- Armhole depth: 10–11 inches
- Plus-sign block size: 5–6 inches square finished
- Seam allowance: ¼ inch for piecing, ½ inch for garment seams
For an oversized fit, add 2 inches to the body and sleeve widths.
Materials Needed
- Cream and tan fabrics for the ground: 2 to 2½ yards total
- An assortment of warm-tone fabrics for the crosses (golden mustard, rust-brown, ochre, charcoal, warm grey): fat quarters or ½ yard of each
- Lining fabric: 2½ yards
- Thin-to-medium cotton batting: 2½ yards
- Bias binding in charcoal or deep rust: 5 to 6 yards
- Matching thread in neutral plus warm tones
- Rotary cutter, quilting ruler, and cutting mat (essential)
- Measuring tape
- Fabric chalk
- Fabric clips and pins
- Walking foot, recommended
- Iron (constant pressing during piecing)
Step-by-Step Guide
Step 1: Choose Your Warm Earthy Palette
This jacket lives and dies by its palette, so build a warm, harmonious spread of tones. Pull from golden mustard, rust-brown, ochre, tan, cream, warm grey, and charcoal — the exact family in the classic Nordic cross quilt. The trick is variety within warmth: several distinct tones that still feel like they belong together. Lay your fabrics side by side before cutting to check they read as one warm family rather than a clash.
Use cream and tan as the “ground” tones, and richer mustard, rust, and charcoal for the crosses, so the plus signs pop against calmer backgrounds.
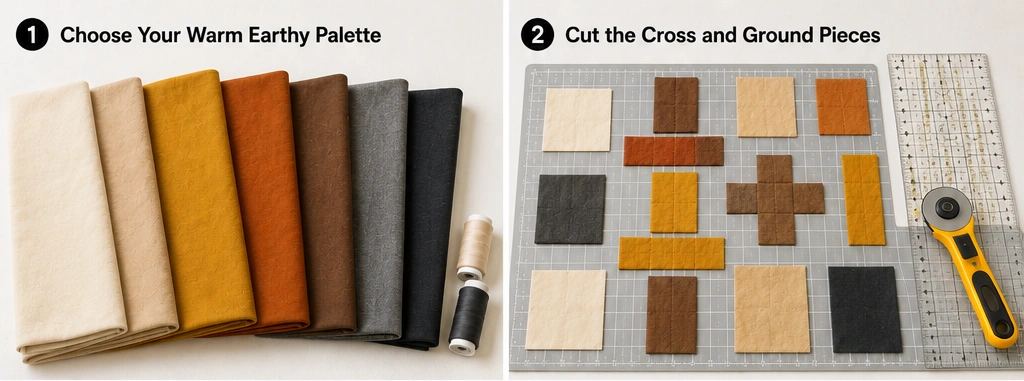
Step 2: Cut the Cross and Ground Pieces
Using the five-piece method for each plus block (center + four arms in a cross color, four corners in a ground color), cut enough for a generous scatter of crosses across the jacket — for a full jacket with sleeves, plan on 12–16 plus blocks in mixed colors. Cut precisely with a rotary cutter and ruler; in multi-color piecing, accuracy keeps every intersection sharp. Keep your cut pieces sorted by color in small piles.
Step 3: Piece the Cross Blocks
Assemble each plus block with a ¼-inch seam allowance, mixing the colors so no two adjacent crosses are identical. Sew center to arms, add the ground corners, and press after every seam. Make crosses in a range of the warm tones — some mustard, some rust, some charcoal — so the finished jacket has rich color variation. Build all your blocks before assembling panels.
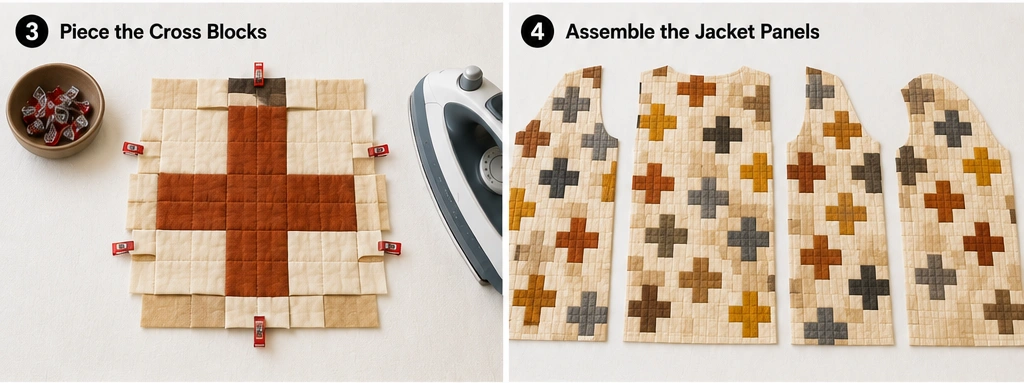
Step 4: Assemble the Jacket Panels
Lay out the plus blocks with plain cream and tan filler pieces to build the back panel, two front panels, and two sleeve panels. Arrange the crosses in a balanced but slightly irregular scatter across all pieces — including the sleeves, so the pattern flows onto the arms — mixing the colors evenly so no one tone clusters. Sew blocks and fillers into rows, join the rows, and press as you go. This layout stage is where the jacket’s whole look is decided, so take your time arranging.
Step 5: Quilt the Pieced Panels
Layer each pieced panel with batting and lining, smooth, and clip. Quilt in clean, straight lines or a simple grid about 1½ to 2 inches apart — keep the quilting geometric and understated so it supports the busy cross patchwork rather than fighting it. Quilt all five panels (back, two fronts, two sleeves).
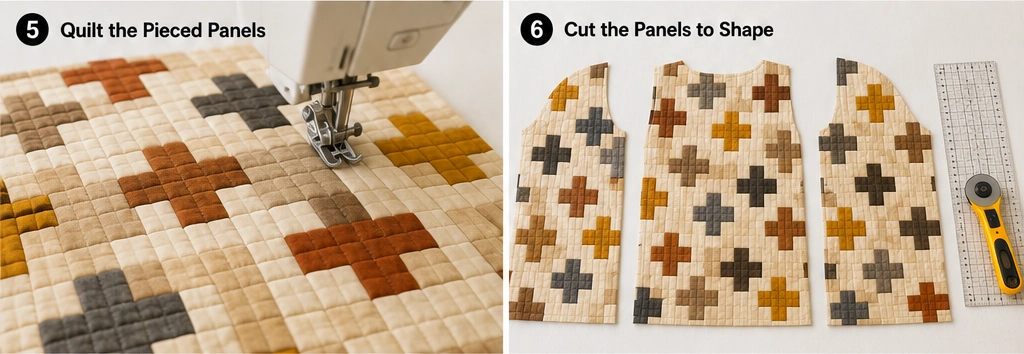
Step 6: Cut the Panels to Shape
Trim the quilted panels to the jacket pieces: back about 24 inches wide × 28 inches long, two fronts each about 13 inches wide × 28 inches long, two sleeves each about 17 inches wide × 24 inches long. Cut the back neckline (7 inches × 1½ inches) and shape the front necklines down about 5–6 inches. Check cross placement before cutting so a strong plus lands well at the chest, and the sleeve crosses sit nicely.
Step 7: Sew the Shoulder Seams
Place the front panels on the back, right sides together, match the shoulders, and sew with a ½ inch seam allowance. Press toward the back and topstitch. Try to keep the ground tones flowing sensibly across the shoulder so the patchwork feels continuous over the seam.
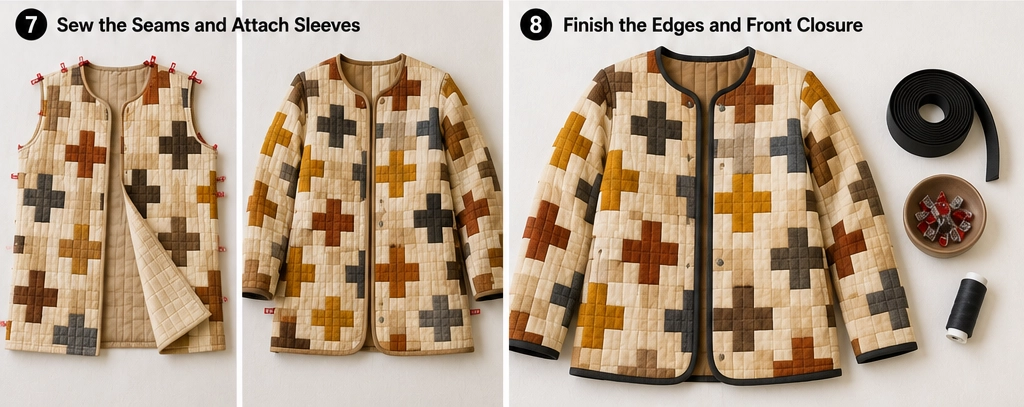
Step 8: Attach the Sleeves
Center each piece of the sleeve at the shoulder seam, clip carefully, and sew with a ½-inch seam allowance, working the armhole curve slowly. Having the cross motif continue onto the sleeves makes this jacket feel like a complete, all-over graphic piece rather than a patterned front with plain sleeves. Press and topstitch the armhole seams.
Step 9: Sew the Side and Sleeve Seams
Fold the jacket right sides together and sew from the cuff to the underarm to the hem in one continuous line. Leave 6–8 inches open at the lower side seams for side slits. Try to keep the ground tones aligned across the side seams so the pattern wraps the body coherently.
Step 10: Finish the Edges and Add a Closure
Bind the neckline, front opening, hem, cuffs, and side slits with charcoal or deep-rust bias binding — a dark binding outlines the whole jacket and frames the warm patchwork beautifully, echoing the way the Odense quilt’s blocks are contained. For closure, use concealed snaps or a few buttons in a tone that blends in, or leave it open so the full cross pattern shows. Keep the closure quiet; the patchwork is the whole show.
Assembly Section
This is the most involved make in the collection, so treat assembly as a design stage rather than just construction. Before cutting any quilted panel to shape, lay all five panels out together in jacket formation and photograph them — check that the warm tones are evenly distributed, no single color clumps, and strong crosses land at flattering points (chest, hip, mid-sleeve). Adjust blocks before cutting.
Once shoulders, sleeves, and side seams are sewn, try the jacket on and confirm the pattern flows around the body and onto the arms. Bind everything in a dark contrast, add the quiet closure, and give the jacket a thorough press with plenty of steam — flat, crisp piecing is what makes the crosses read as bold graphic shapes. Press piecing seams open where bulk allows to keep intersections sharp.
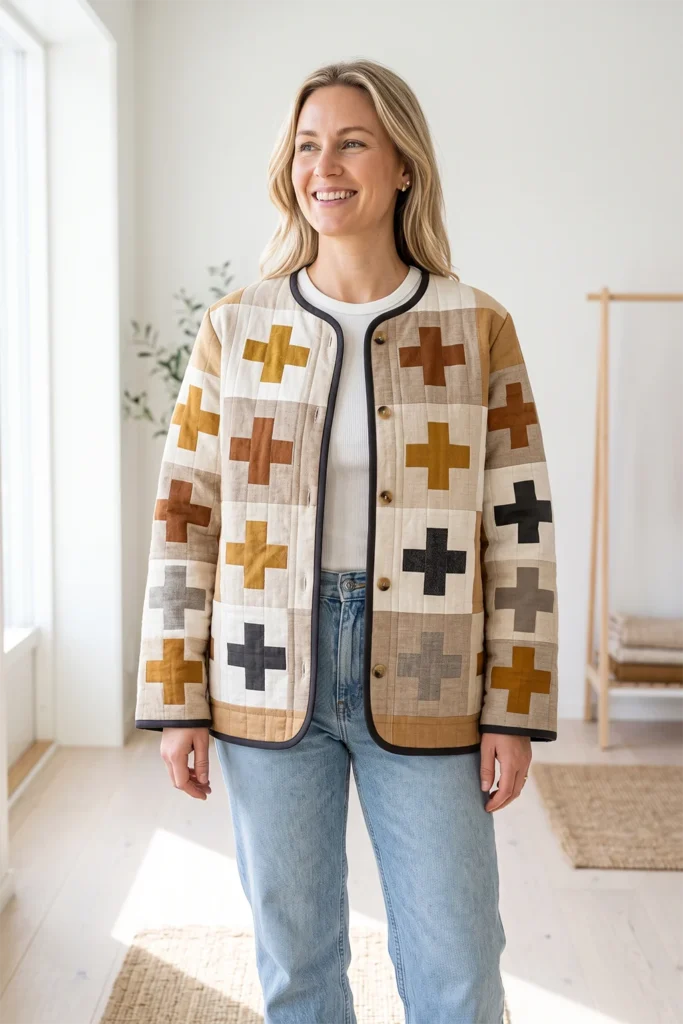
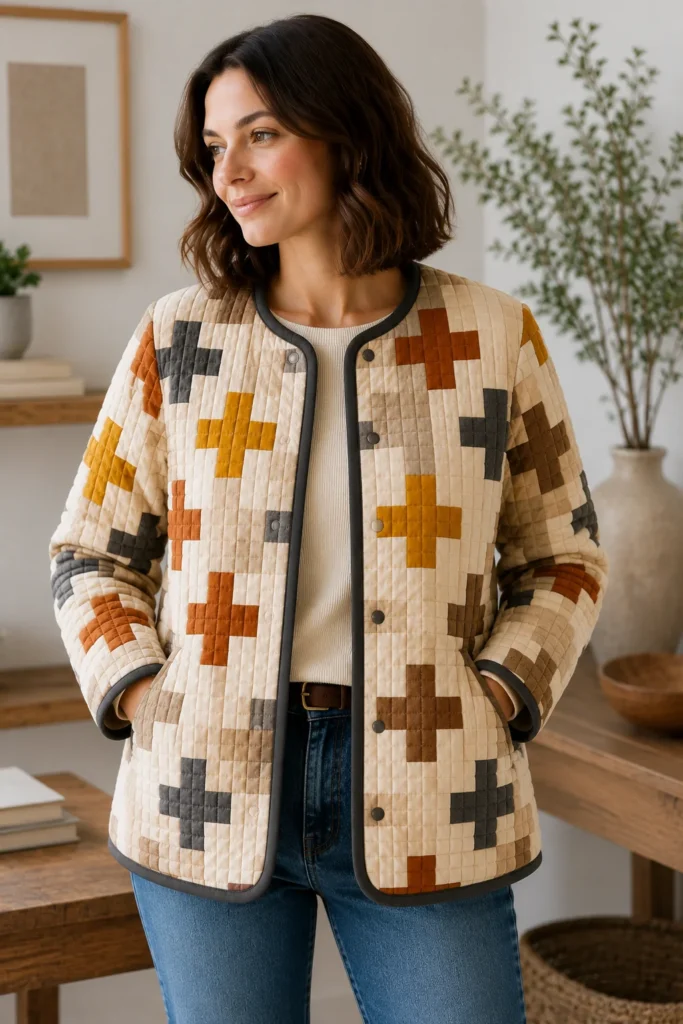
Interesting Backstory
The multi-color Nordic cross quilt sits at the heart of Scandinavian textile tradition — the plus motif, worked in warm earth tones, has decorated Nordic homes for generations because it balances bold graphic impact with the calm of a natural, grounded palette.
That combination of boldness and warmth is very close to the patchwork world I grew up around in Dhaka, where Nakshi Kantha and other pieced textiles assembled scraps of colored cloth into rich, glowing designs, each block placed with care to build a harmonious whole. Both traditions treat patchwork as a way to make something warm and beautiful from arranged pieces of color. This jacket brings that heritage together — the Nordic cross, in a warm multi-tone palette, pieced with the same patience that quilt-makers have always used — and turns a treasured home textile into a bold graphic thing to wear.
Personal Styling Touch
My favorite version scatters about fourteen crosses in mustard, rust, ochre, and charcoal across cream and tan grounds, with the pattern running right down the sleeves, all bound in dark charcoal so the whole jacket has a clean outlined frame. Worn open over a plain cream tee and jeans, it needs absolutely nothing else — it’s warm, glowing, and graphic all at once. It’s the boldest thing I make and the one that turns the most heads.
Final Styling Idea
Wear this Nordic cross patchwork jacket over the plainest possible base — a cream or white tee and straight jeans — and let the warm crosses be the entire outfit. For an elevated look, pair it with a fine black knit and tailored trousers so the earthy patchwork glows against dark neutrals. For a relaxed autumn version, layer it over an oatmeal knit with cord trousers and boots.
Keep everything else quiet and let the warm palette lead — mustard, rust, ochre, tan, cream, and charcoal, against plain cream, white, or black basics — and the Nordic cross patchwork delivers bold graphic style every time.
Other Design Inspirations – Digitally Modified
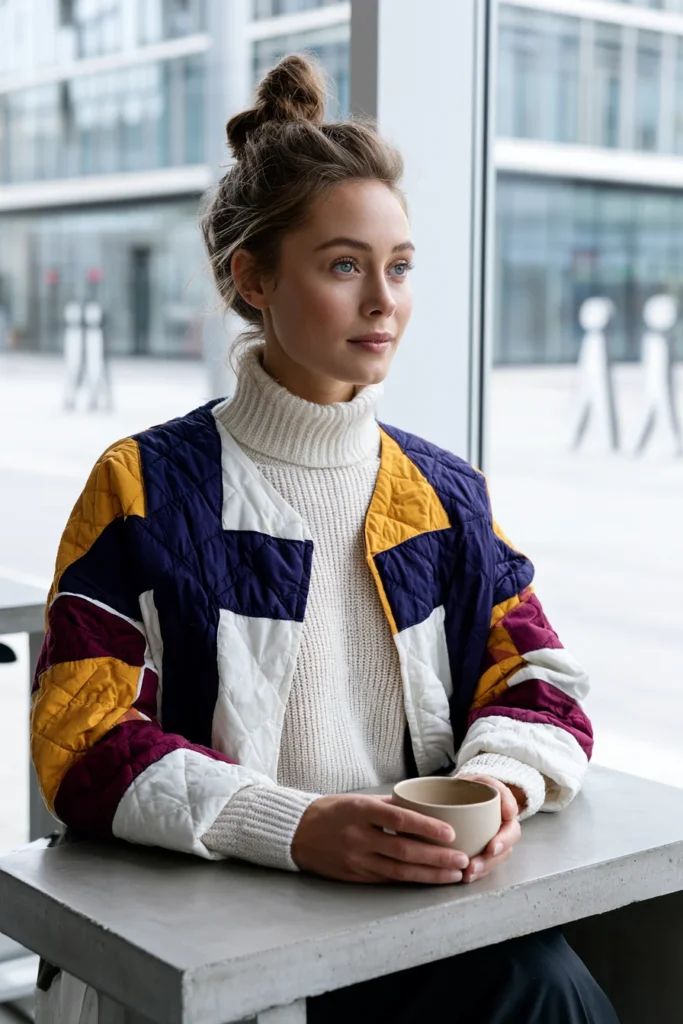
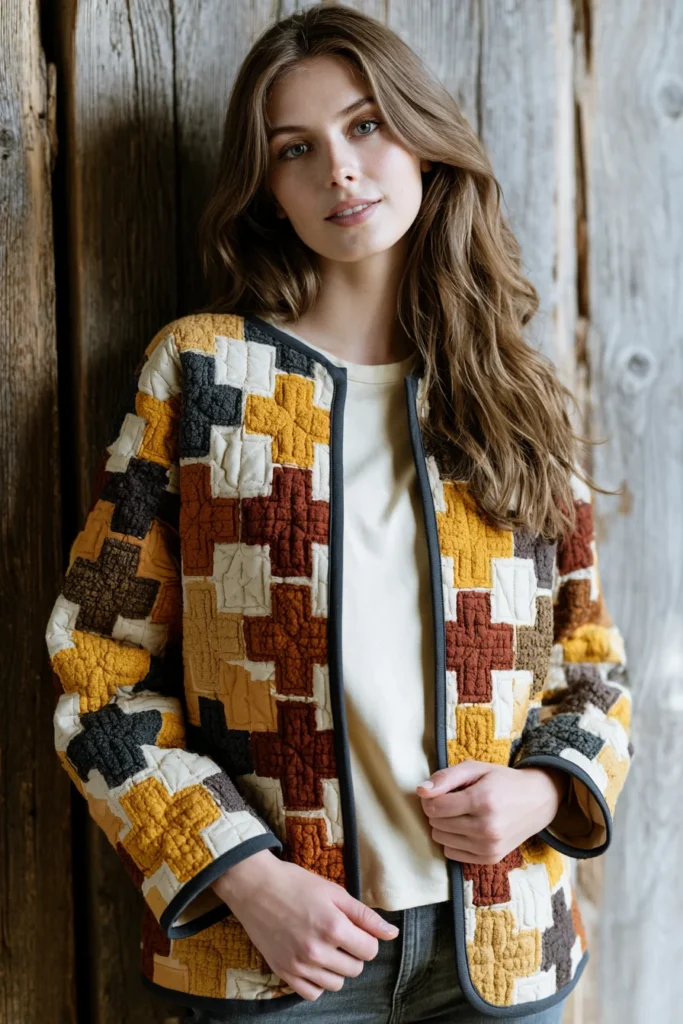
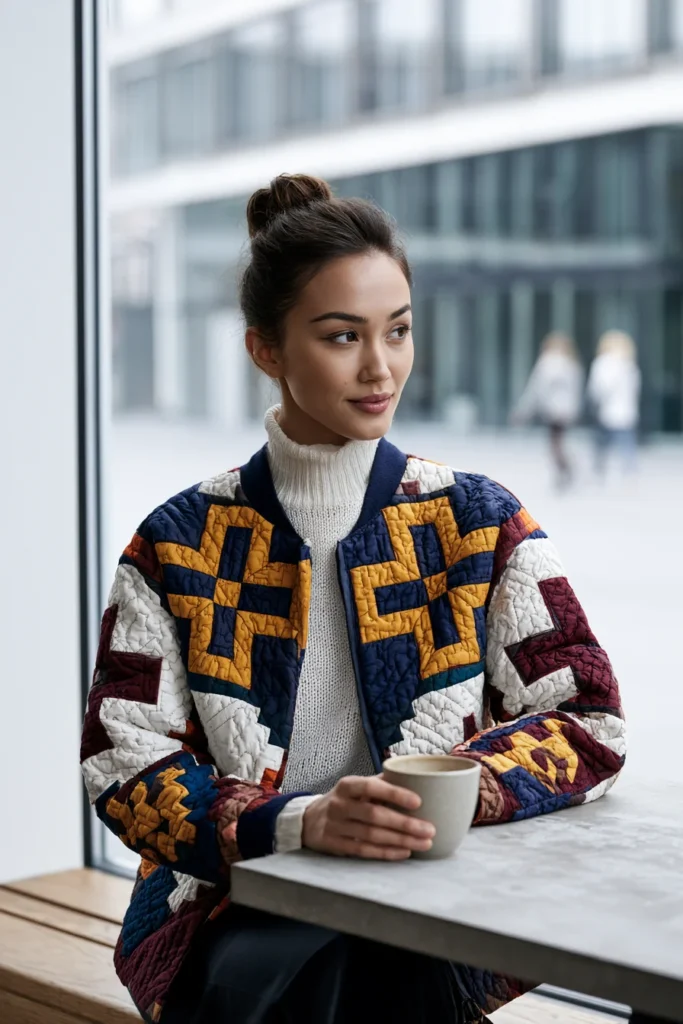
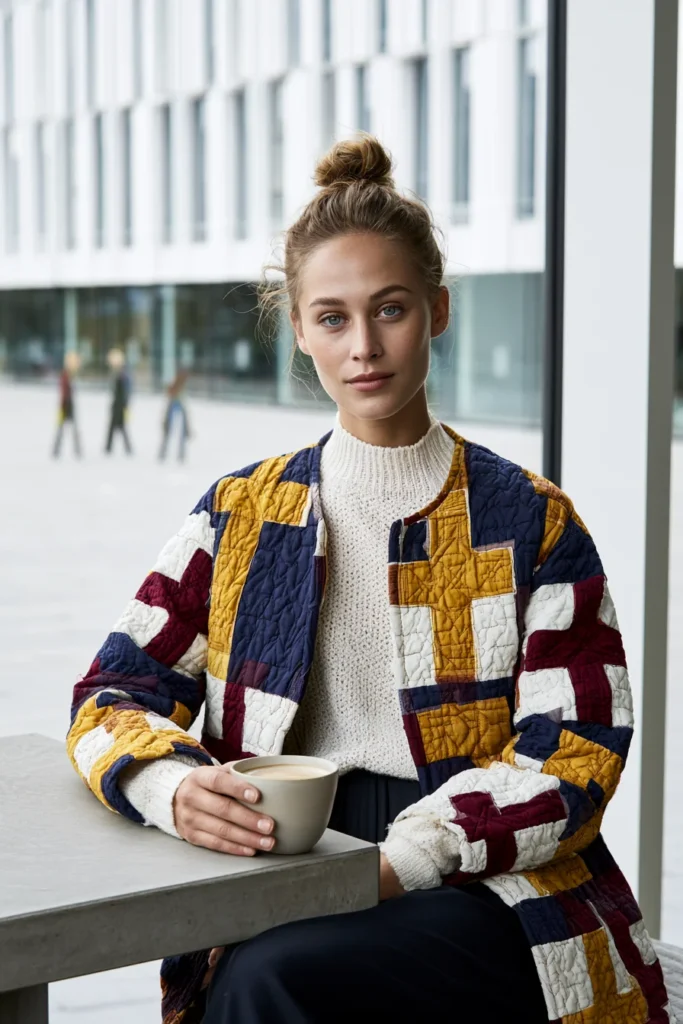
11. Wool-Blend Quilted Jacket for Premium Cozy Warmth
A Guide to Making a Wool-Blend Quilted Jacket for Premium Cozy Warmth
A Wool-Blend Quilted Jacket is a quilted jacket made with a wool or wool-blend shell and wool batting, giving it a warmth, weight, and tactile richness that cotton simply can’t match. This is the luxury piece of the collection — the fabric does the talking. Where a cotton quilt feels light and casual, wool-blend feels substantial, soft, and quietly expensive, with a subtle depth of color and a cozy heft that makes it the jacket you reach for on the coldest, most demanding days. It is premium warmth you can feel.
I came up with this idea because the material you choose changes everything, and working with a good wool-blend teaches you how much a fabric upgrade can elevate a simple design. The same clean silhouette that reads as casual in cotton reads as refined and luxurious in wool. It is also the warmest fabric choice here, which makes this the jacket that genuinely earns its place in a cold-climate wardrobe — cozy, elegant, and built to last for years.
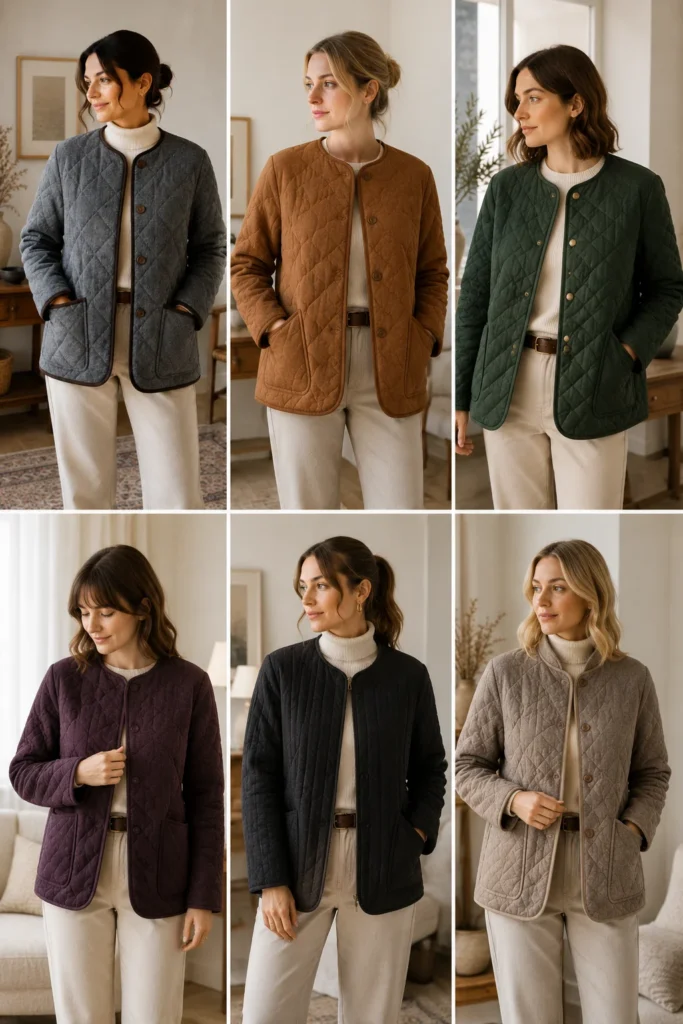
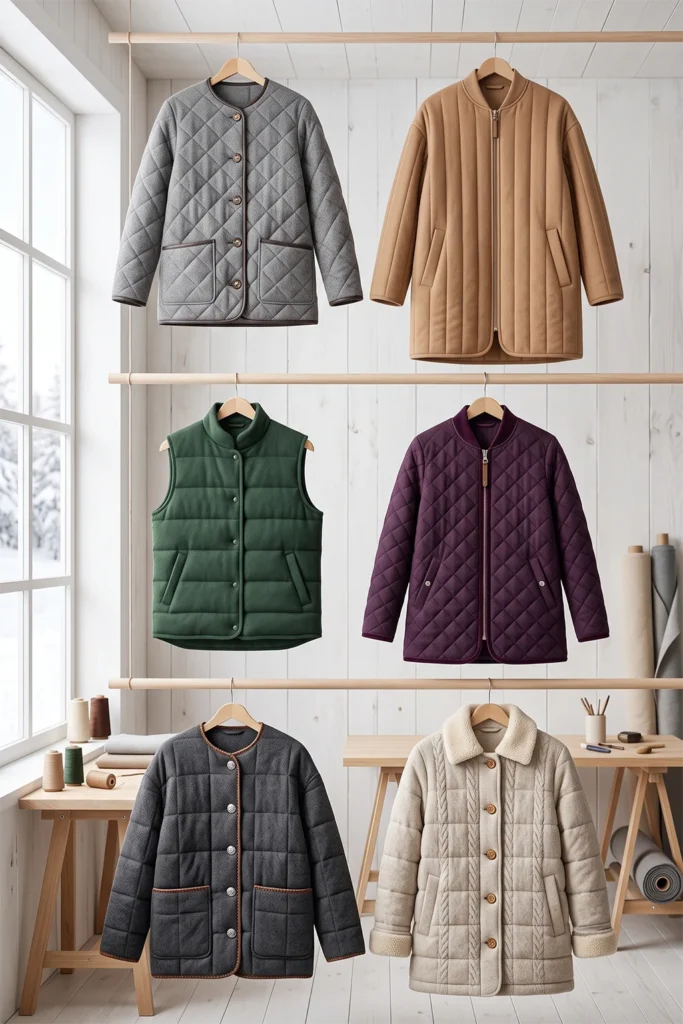
Why This Idea Is Worth Making
Why this idea is worth making: it is the most luxurious and genuinely warm piece in the collection, and it teaches you to handle premium fabric. Wool-blend gives real insulation, a beautiful drape, and a rich depth of color that cheaper synthetics never achieve, so even a simple shape looks and feels high-end. Making it yourself is also a major saving — a comparable wool quilted jacket in a shop costs a great deal, while sewing your own puts that quality within reach. You’ll learn to manage the extra weight and bulk of wool cleanly, a skill that lifts all your future outerwear projects.
Suggested Finished Measurements
For a relaxed medium-size jacket hitting at the hip:
- Finished length: 26–28 inches
- Finished chest width: 24–26 inches across (a touch roomier for warm layering underneath)
- Shoulder width: 17–18 inches
- Sleeve length from shoulder: 24–25 inches
- Sleeve width: 16–17 inches
- Armhole depth: 11–12 inches
- Seam allowance: ½ inch
For an oversized cocoon fit, add 2–3 inches to the body and sleeve widths.
Materials Needed
- Wool or wool-blend shell fabric in a rich tone (heather grey, deep camel, forest, or aubergine): 3 to 3½ yards
- Lining fabric (a smooth cotton or satin lining helps the jacket slide over knits): 3 yards
- Wool batting for premium warmth: 3 yards
- Bias binding, tonal (or a leather-look binding for a premium edge): 6 to 7 yards
- Strong matching thread
- 4–5 buttons, large snaps, or a sturdy zip
- Rotary cutter or sharp fabric shears (wool is dense)
- Measuring tape
- Fabric chalk or tailor’s chalk
- Fabric clips (pins can struggle with wool bulk)
- Walking foot (essential for thick wool layers)
- Iron with steam, plus a pressing cloth (to protect the wool)
Step-by-Step Guide
Step 1: Choose a Rich, Premium Wool Tone
Wool holds color with a depth that makes rich tones look especially luxurious, so choose a color with warmth and sophistication: heather grey, deep camel, forest green, aubergine, or charcoal. A subtle heather or melange wool reads as even more premium than a flat solid. Feel the fabric before committing — a soft-handed wool-blend with a little drape will make a far nicer jacket than a stiff, scratchy one.
Keep the binding tonal, or use a fine leather-look binding for a genuinely high-end edge.
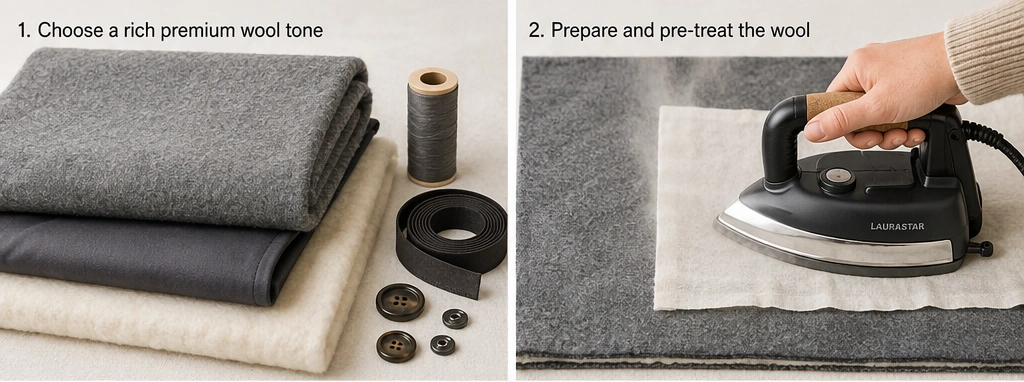
Step 2: Prepare and Pre-Treat the Wool
Wool can shrink, so pre-treat your fabric before cutting — either have it dry-cleaned or gently steam it thoroughly to pre-shrink. Press it flat with a pressing cloth so you never put a hot iron directly on the wool. Taking this step first protects all your work; skipping it risks a jacket that shrinks or distorts after its first clean.
Step 3: Make the Quilted Fabric
Layer the wool shell, wool batting, and lining, smooth carefully, and clip generously (wool bulk resists pins). Quilt straight lines or a soft diamond spaced about 2 to 2½ inches apart — slightly wider spacing suits the thicker wool and keeps it from becoming stiff. Use a walking foot and sew slowly; thick wool layers feed unevenly otherwise. Quilt enough fabric for all pieces plus margin.
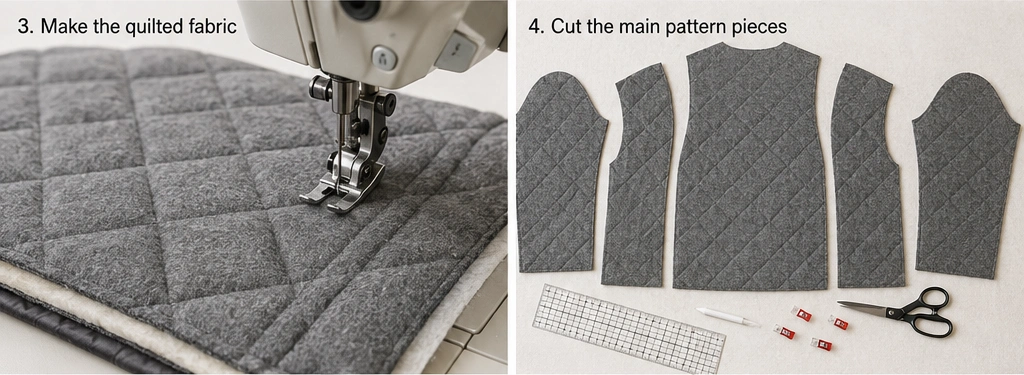
Step 4: Cut the Back Panel
Cut one back panel about 26 inches wide × 28 inches long using sharp shears or a rotary cutter, since dense wool dulls blades. Cut a shallow back neckline about 7 inches wide × 1½ inches deep. Mark with tailor’s chalk, which shows clearly on wool.
Step 5: Cut the Front Panels
Cut two front panels, each about 14 inches wide × 28 inches long, matching the back length. Shape the front neckline with a gentle curve from the shoulder down about 5–6 inches. Cut cleanly in single layers if the wool is very thick, for accuracy.
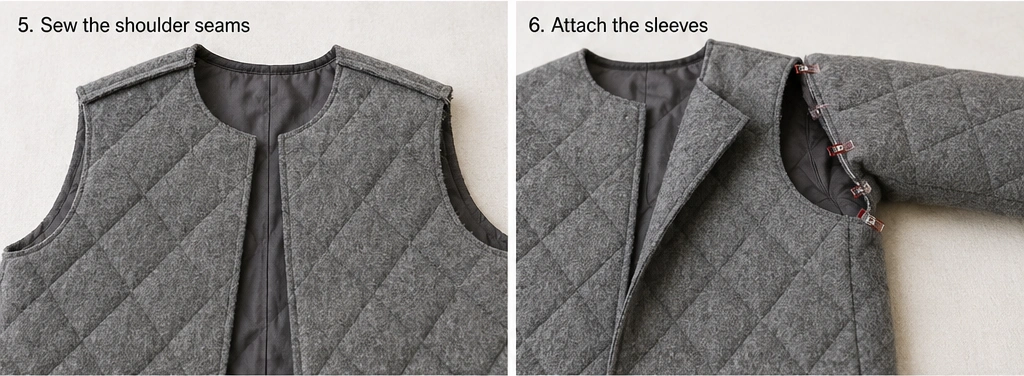
Step 6: Cut the Sleeves
Cut two sleeves about 18 inches wide × 25 inches long. Wool jackets suit a slightly longer, fuller sleeve for warmth and drape. Keep the shape straight or gently tapered.
Step 7: Sew the Seams (Managing Bulk)
Place the front panels on the back, right sides together, match the shoulders, and sew with a ½ inch seam allowance. With wool, bulk is the challenge: press every seam open with steam and a pressing cloth, and consider grading the seam allowances (trimming one layer narrower) to reduce thickness. Then attach the sleeves at the shoulder seams and sew with a ½ inch seam allowance, easing the curve slowly. Grade and press these seams too.
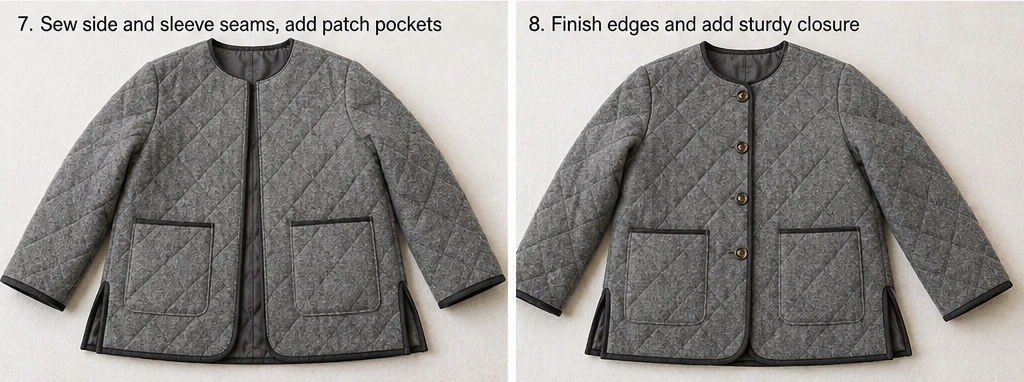
Step 8: Sew the Side and Sleeve Seams
Fold the jacket right sides together and sew from cuff to underarm to hem in one continuous line. Leave 8–10 inches open at the lower side seams for generous side slits, which help a heavier wool jacket move and drape well. Grade and press these seams open under a pressing cloth.
Step 9: Add Pockets and Finish the Edges
Wool jackets benefit from proper pockets — cut two pieces about 8 inches wide × 9 inches tall, finish, and topstitch them to the fronts about 28 inches down where hands rest. Then bind the neckline, front opening, hem, cuffs, side slits, and pocket tops. A leather-look binding gives a premium finish that pairs beautifully with wool; tonal fabric binding keeps it soft and classic.
Step 10: Add a Sturdy Closure
Wool has weight, so choose a robust closure: 4–5 solid buttons or large snaps spaced evenly, or a sturdy zip. Reinforce button and snap points with a small square of interfacing or extra fabric behind them so the weight of the jacket doesn’t strain the closures over time. Space them so the front closes cleanly across the chest without gaping.
Assembly Section
Working with wool means bulk management is the whole game, so assembly is about clean, flat seams. As you sew, press every seam open with steam and a pressing cloth, and grade the seam allowances to keep the jacket from becoming stiff and thick at the seams.
Try the jacket on over a sweater — the layer you’ll wear it with — and check that the roomier fit accommodates knitwear, the shoulders carry the weight cleanly, and the front closes without strain. Reinforce all closure points. Once bound and closed, give the jacket a final thorough steam press under a cloth and hang it on a sturdy hanger overnight so the wool settles into its drape. A good hanger matters — wool holds its shape and shouldn’t be folded away creased.
Interesting Backstory
Wool has been the premier cold-weather fabric for millennia, prized across every cold climate for a simple reason: it insulates even when damp, breathes naturally, and holds warmth like almost nothing else. In the Nordic countries, wool has always been central to survival and to craft — knitted, woven, and quilted into the garments that made long winters livable, and valued as much for its quality as its function.
It connects to the layered-textile traditions I grew up around in Dhaka in the shared understanding that the material carries the garment: choosing good cloth and treating it with care is the foundation of anything beautiful and lasting. A wool-blend quilted jacket honors that principle directly — start with a premium natural fabric, work it patiently, and you end up with a warm, luxurious piece built to last for years.
Personal Styling Touch
My favorite version is a heather-grey wool-blend quilted over wool batting with wide, soft diamond quilting, bound in a fine dark leather-look trim, with deep patch pockets and sturdy horn-look buttons. It has real weight and warmth — the kind you feel settle onto your shoulders — and the heather tone gives it a depth that looks expensive. It’s the jacket I reach for on genuinely cold days, and it feels like a piece that will still look good in ten years.
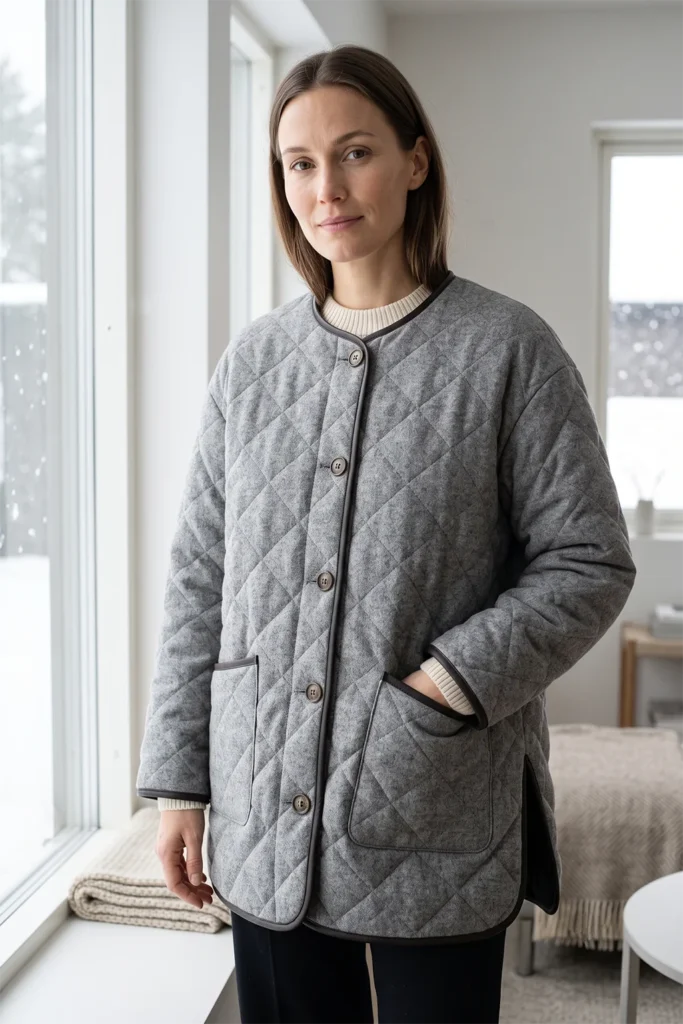
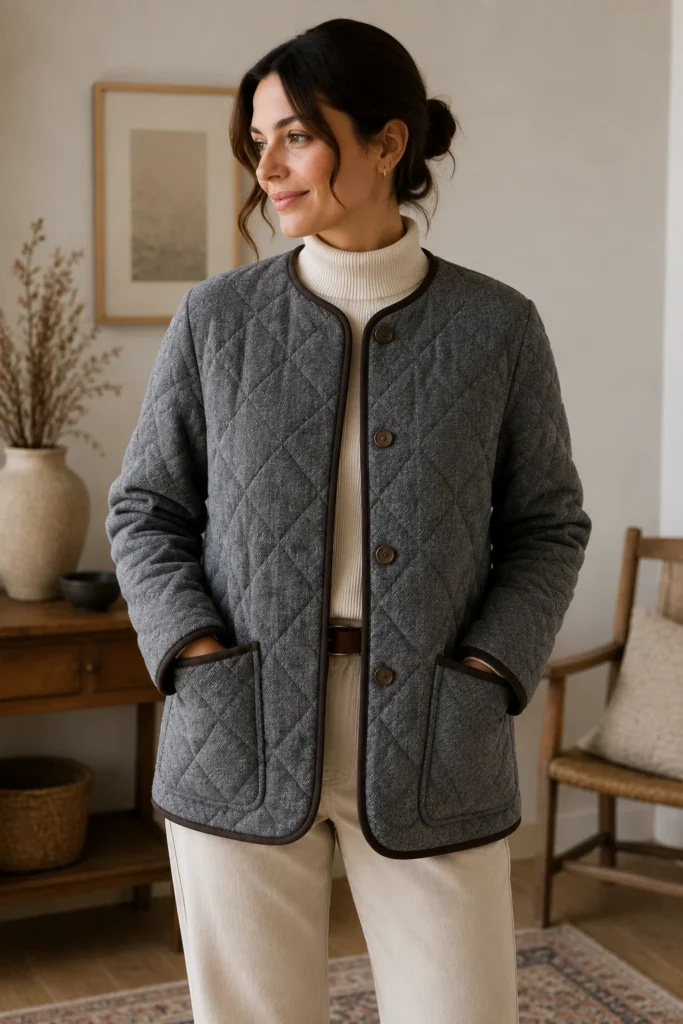
Final Styling Idea
Wear this wool-blend quilted jacket over a fine merino knit with wool trousers and leather boots for a premium cold-weather look. For something more relaxed, layer it over a chunky sweater and straight jeans with ankle boots. For an elevated evening version, wear it over a roll-neck and tailored trousers, letting the rich wool tone and quality finish carry the outfit.
Keep the palette rich and grounded — heather grey, deep camel, forest, aubergine, paired with cream, charcoal, and soft brown leather — and the wool-blend delivers that premium, cozy warmth you can feel every time you put it on.
Other Design Inspirations – Digitally Modified
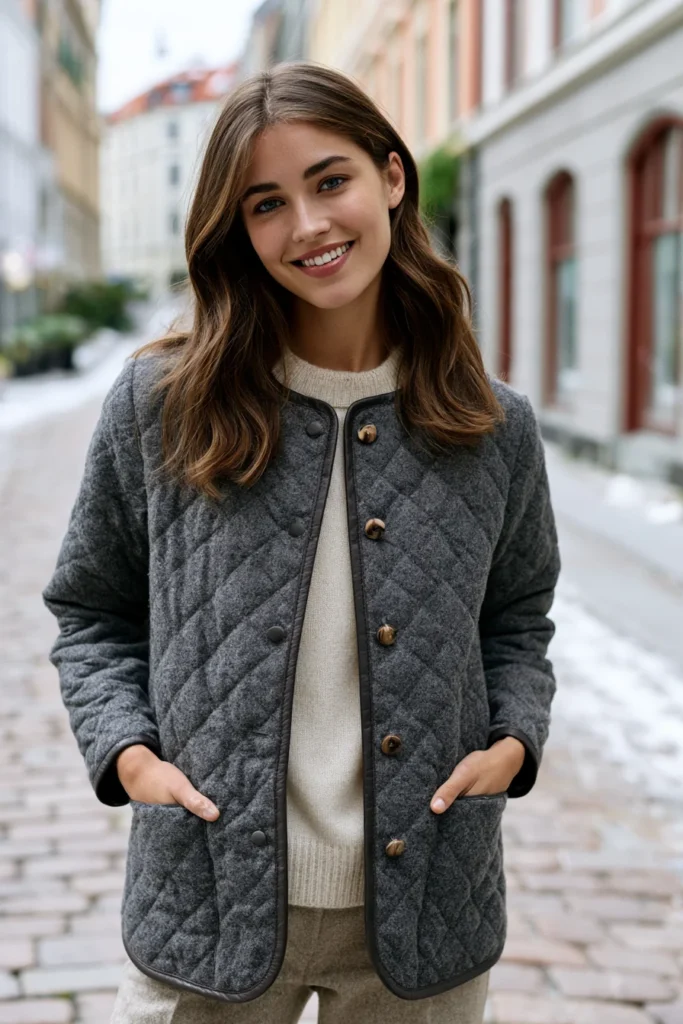
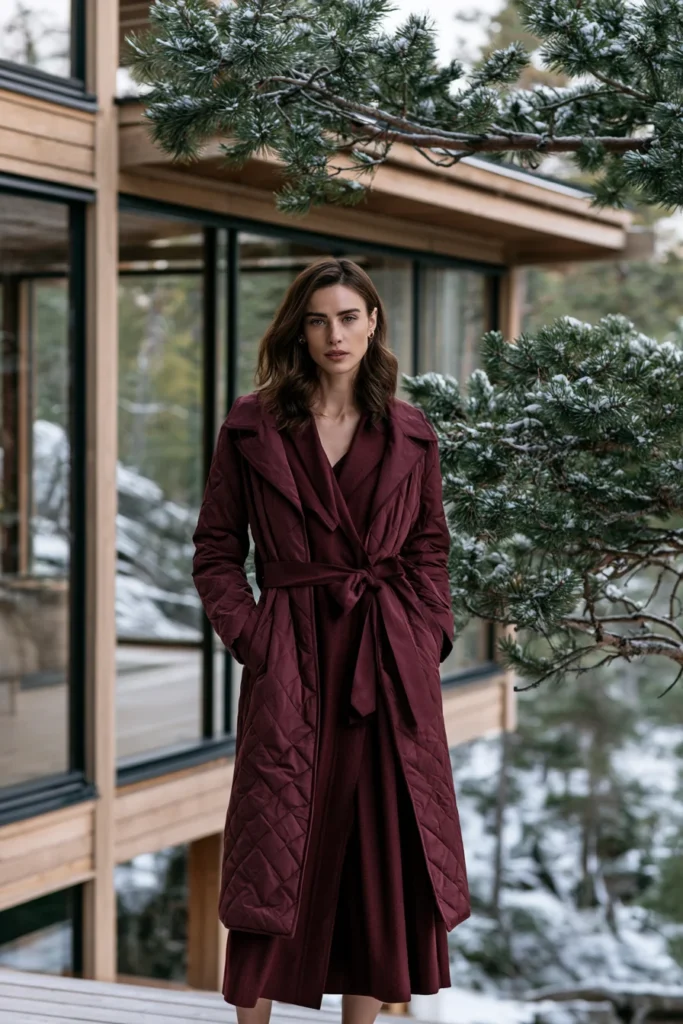
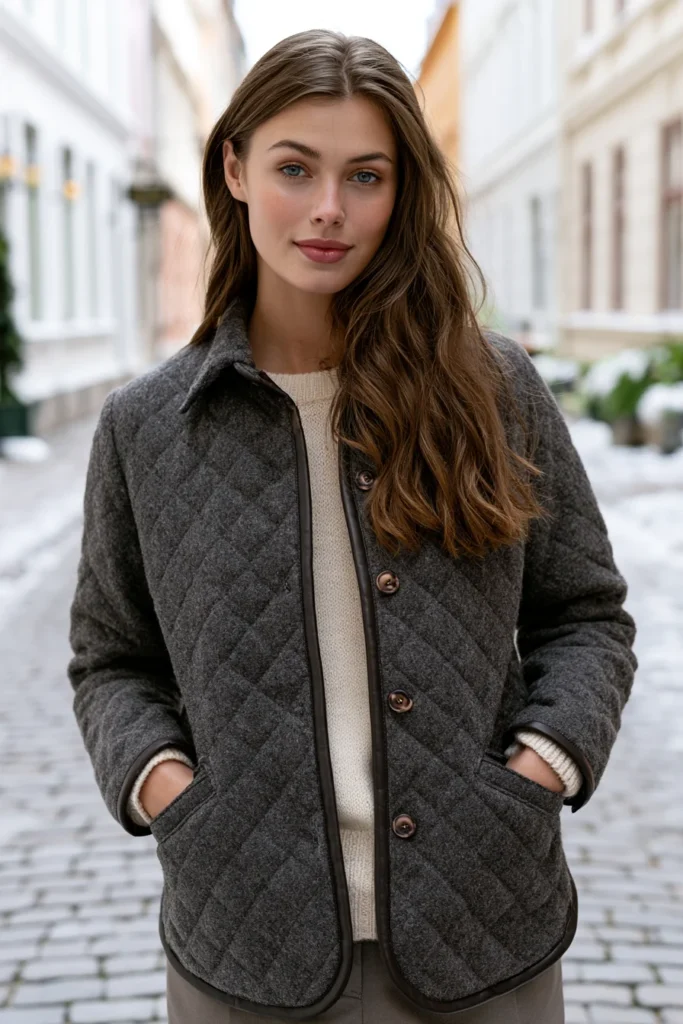
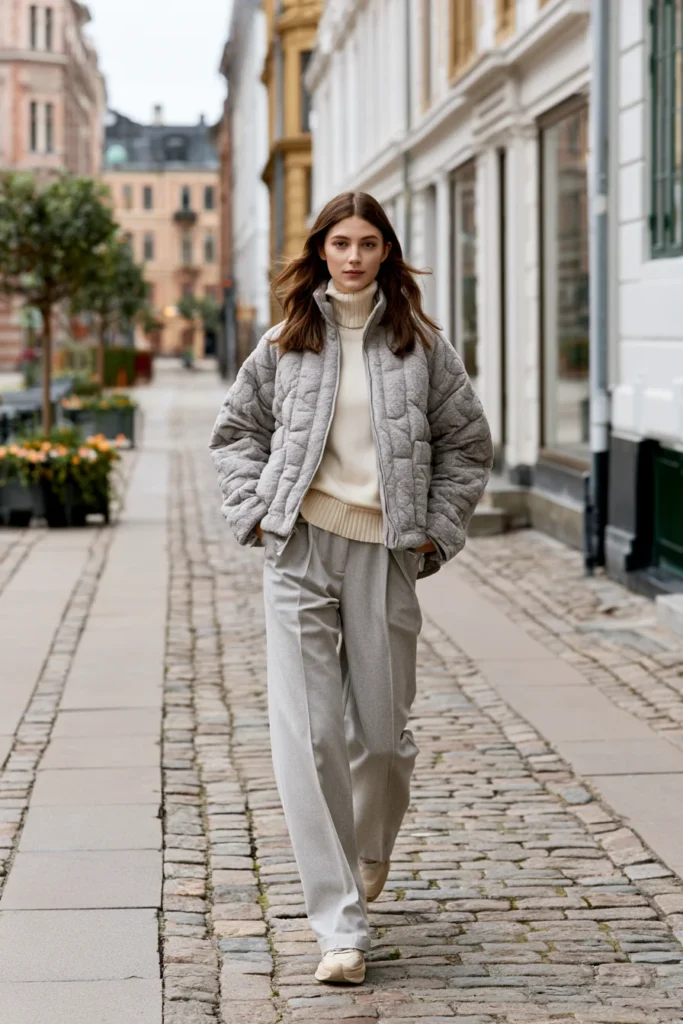
12. Lightweight Packable Quilted Vest for Effortless Travel Style
A Guide to Making a Lightweight, Packable Quilted Vest for Effortless Travel Style
A Lightweight Packable Quilted Vest is a slim, sleeveless quilted layer made from featherweight materials so it folds down small — often packing into its own pocket — for easy travel. This is the most practical, go-anywhere piece in the collection: barely-there warmth that weighs almost nothing, crushes into a corner of your bag, and springs back ready to wear. Where the wool jacket is about substance, this vest is about the opposite — minimal weight, maximum convenience, and a cheerful pop of color that lifts any travel outfit.
I came up with this idea because the best travel clothing does a lot while asking for almost nothing — no weight, no bulk, no fuss — and a packable vest is the perfect expression of that. It is also a genuinely clever little sewing project: making something fold into its own pocket is a satisfying puzzle, and the lightweight materials sew up quickly. The result is the layer I never travel without: warmth on a plane or a cool evening, packed away to nothing when I don’t need it.
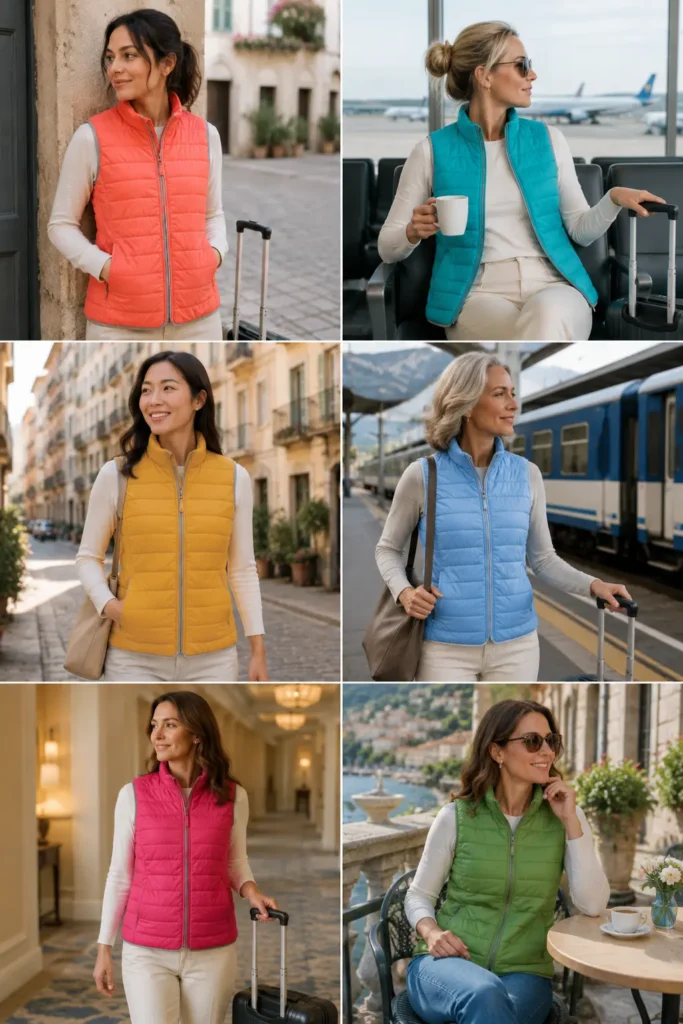
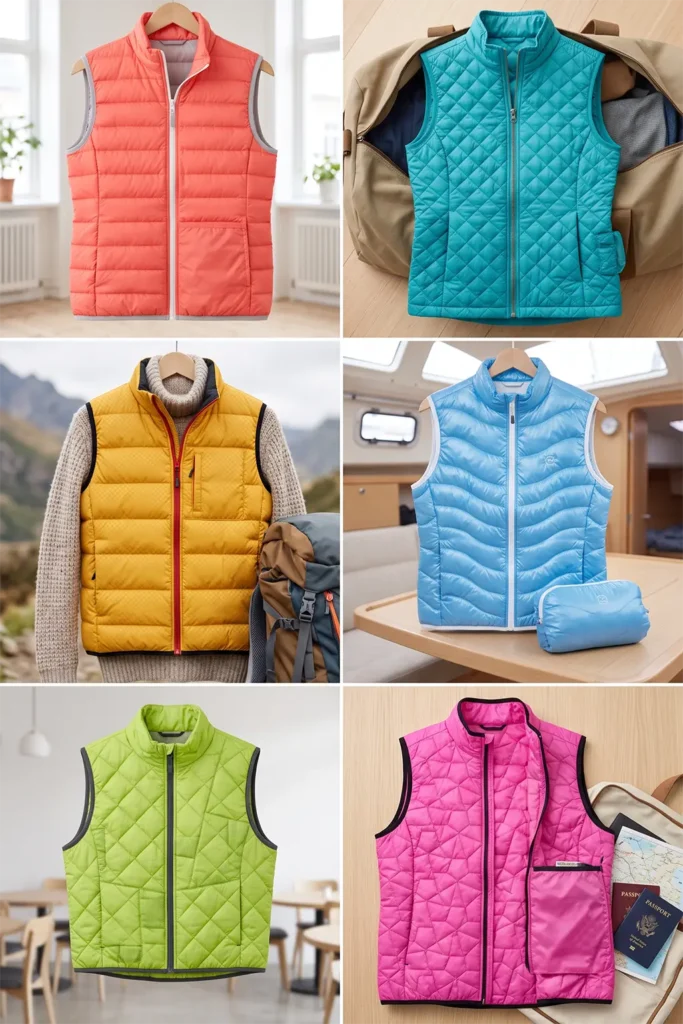
Why This Idea Is Worth Making
Why this idea is worth making: it is the ultimate practical travel layer — light, compact, and endlessly useful. A packable vest gives you core warmth for flights, cool mornings, and unpredictable weather, then folds into its own pocket to take up almost no space in your bag. Making it yourself lets you choose lightweight materials that actually pack down (many shop versions are bulkier than they claim), add the self-packing pocket, and pick a bright, cheerful color that’s easy to spot and lifts a simple travel outfit. It’s also a quick, rewarding sew that teaches you to work with fine, slippery fabrics.
Suggested Finished Measurements
For a relaxed medium-size vest hitting at the high hip:
- Finished length: 24–26 inches
- Finished chest width: 22–23 inches across
- Shoulder width: 13–14 inches
- Armhole depth: 9–10 inches
- Packing pocket: 7 inches wide × 8 inches tall (doubles as a hand pocket)
- Front opening: lightweight zip
- Seam allowance: ½ inch
For a slimmer, even more packable fit, reduce the body width by 1 inch.
Materials Needed
- Lightweight quilted fabric, or fine ripstop/nylon shell plus thin low-loft batting and lightweight lining: 1½ yards
- Thin low-loft batting (the lighter the better for packability): 1½ yards
- Lightweight lining fabric: 1½ yards
- Lightweight bias binding or fold-over elastic: 4 yards
- A lightweight separating zip (22–24 inches)
- Matching thread
- Fine microtex sewing needle (for slippery lightweight fabric)
- Rotary cutter or fabric scissors
- Measuring tape
- Fabric chalk
- Fabric clips (pins can leave holes in ripstop)
- Walking foot, helpful
- Iron (low heat — lightweight synthetics scorch easily)
Step-by-Step Guide
Step 1: Choose a Bright, Cheerful Color
Travel gear benefits from a lively, easy-to-spot color that lifts a simple outfit and is easy to find in a packed bag. Bright, happy tones work beautifully here — coral, bright teal, sunny mustard, or clear sky blue. These read as fresh and energetic, perfect for travel photos and for adding a lift to the neutral basics most of us travel in. A fine ripstop or lightweight quilted nylon in a bright color also has a subtle sheen that suits the sporty-practical feel.
Keep the binding tonal or matching so the vest stays clean and light.
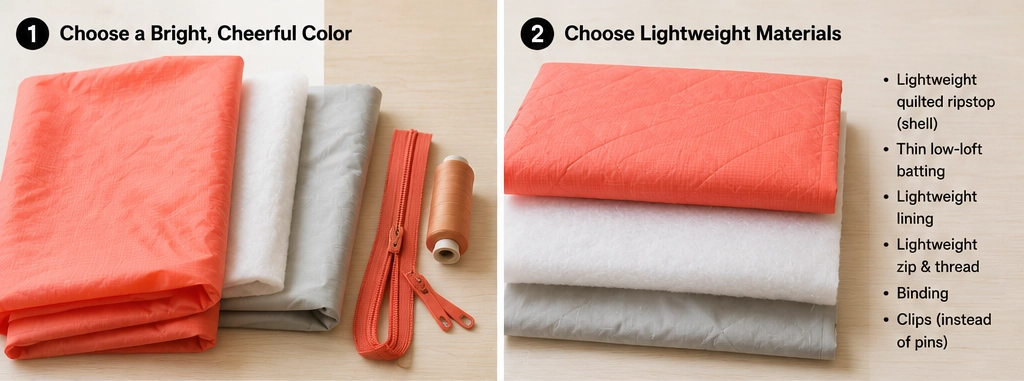
Step 2: Choose Lightweight Materials
Packability comes entirely from your materials, so choose the lightest options: a fine ripstop or lightweight quilted nylon shell, the thinnest low-loft batting you can find, and a lightweight lining. Avoid anything heavy or dense — every bit of weight and loft works against the fold-down-small goal. Handle these fabrics gently and use clips rather than pins to avoid leaving holes.
Step 3: Make the Lightweight Quilted Fabric
If quilting your own, layer the light shell, thin low-loft batting, and lightweight lining, clip carefully, and quilt straight lines or a fine grid spaced about 2 inches apart. Use a fine microtex needle and sew slowly, since lightweight fabrics shift and pucker easily. Keep the quilting light and simple — dense quilting adds stiffness that hurts packability.
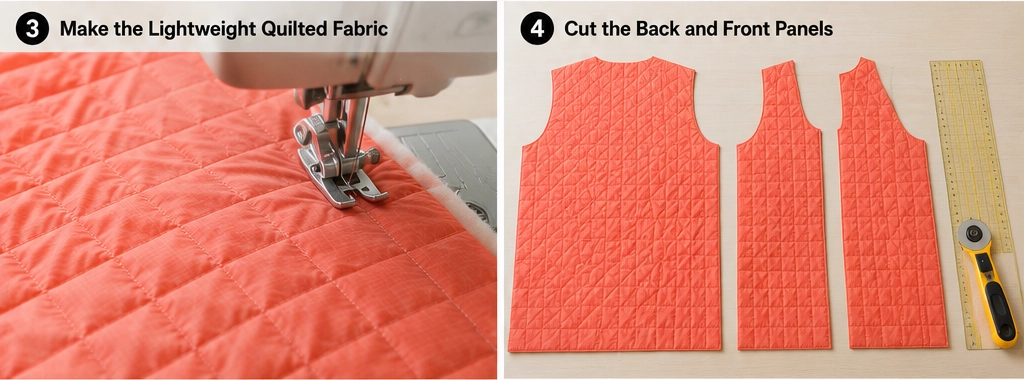
Step 4: Cut the Back and Front Panels
Cut one back panel about 23 inches wide × 26 inches long, with a shallow back neckline 7 inches wide × 1½ inches deep. Cut two front panels, each about 12 inches wide × 26 inches long, shaping the front neckline with a gentle curve down about 6 inches. Keep the center front edges straight for a clean zip insertion.
Step 5: Cut the Armholes
Lay the front panels over the back at the shoulders and cut a gentle armhole curve about 9–10 inches deep on each side. Keep the armholes trim but comfortable — a slimmer armhole suits the streamlined travel look and reduces bulk.
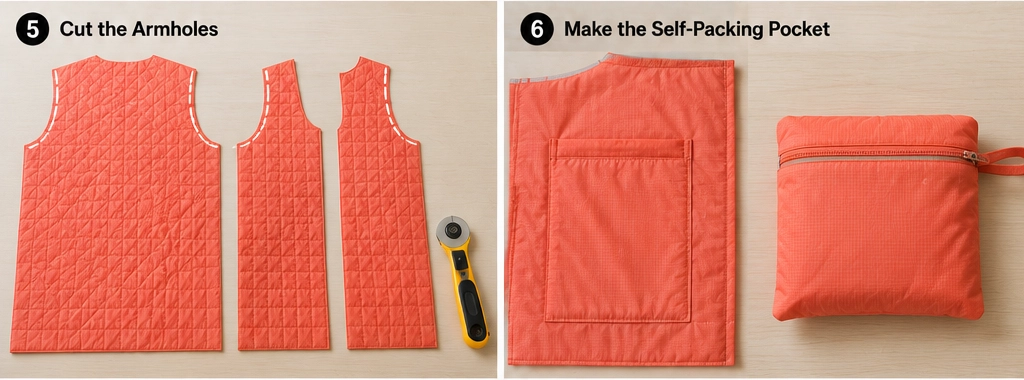
Step 6: Make the Self-Packing Pocket
This is the clever part. Cut a pocket about 8 inches wide × 9 inches tall from the lightweight fabric, finish its top edge with a small hem or binding, and topstitch it onto the inside of one front panel (or the outside as a hand pocket) around three sides, leaving the top open. This pocket will later hold the entire folded vest — reinforce its seams well, since it takes strain when packed.
Step 7: Sew the Shoulder and Side Seams
Place the front panels on the back, right sides together, match the shoulders, and sew with a ½ inch seam allowance using a fine needle. Press seams gently with a low iron. Then sew the side seams from the lower armhole to the hem. Keep seam allowances trim to reduce bulk. This lightweight vest comes together fast with so few seams.
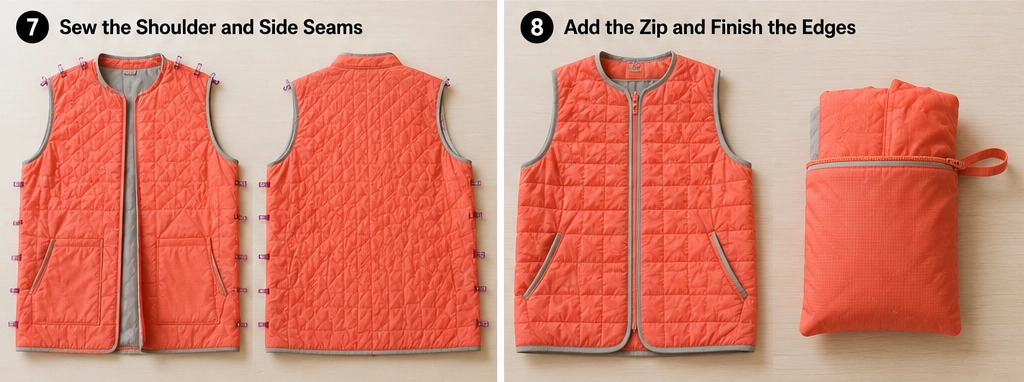
Step 8: Finish the Armholes and Edges
Bind the armholes with lightweight binding or fold-over elastic, easing around the curves. Then bind the neckline and hem. Lightweight binding or fold-over elastic keeps the edges soft and flexible so they don’t add stiffness that fights packability — avoid heavy binding here.
Step 9: Install the Lightweight Zip
Pin (or clip) the lightweight separating zip down the front opening, carefully aligning both sides, and topstitch it in with a fine needle, sewing slowly through the light layers. A zip is the best closure for a travel vest — secure, compact, and quick. Choose a lightweight zip so it doesn’t add weight or interfere with folding.
Step 10: Test the Pack-Down
Fold the finished vest and tuck it into its self-packing pocket: fold the sides in, roll or fold down toward the pocket, then turn the pocket inside out around the bundle so the vest disappears inside it. Adjust if needed — if it won’t fit, your batting is likely too lofty. A vest that packs neatly into its own pocket is the whole point, so refine until it does.
Assembly Section
With lightweight fabrics, gentle handling is the key to assembly. Use clips, not pins, a fine microtex needle, and a low iron with light pressure so you don’t scorch or pucker the synthetics. Once the seams, pocket, and zip are done, try the vest on and check that it’s trim but comfortable, the armholes don’t dig, and the zip runs smoothly. Then do the real test: fold it into its own pocket and confirm it packs down small and springs back without permanent creasing. If it’s too bulky, the fix is almost always lighter batting or less dense quilting. Keep the whole vest light, soft, and flexible — that’s what makes it travel-perfect.
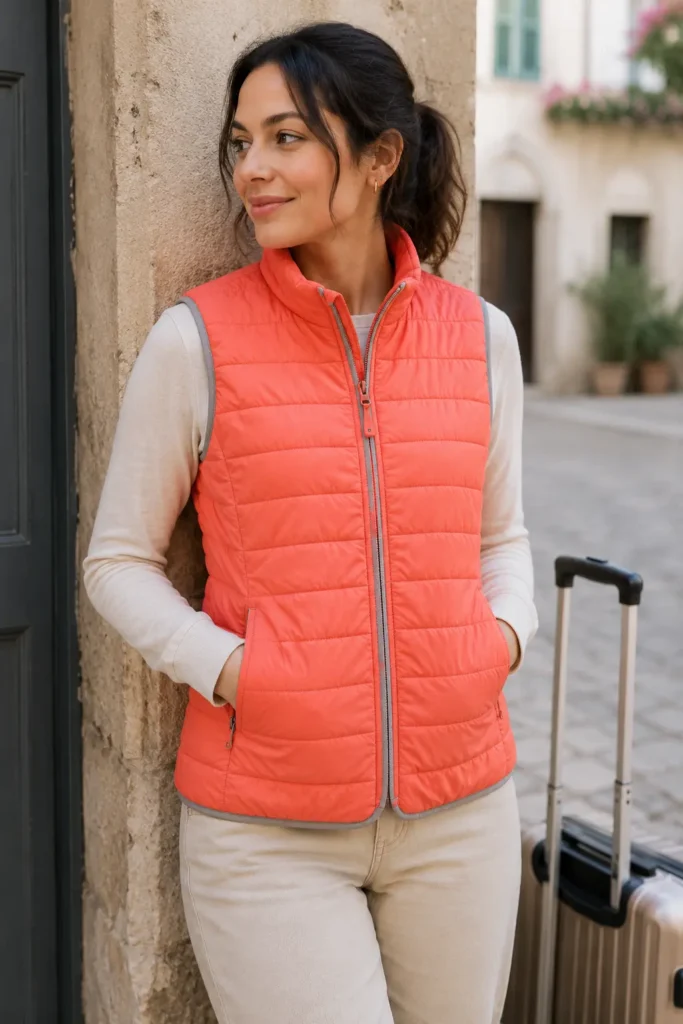
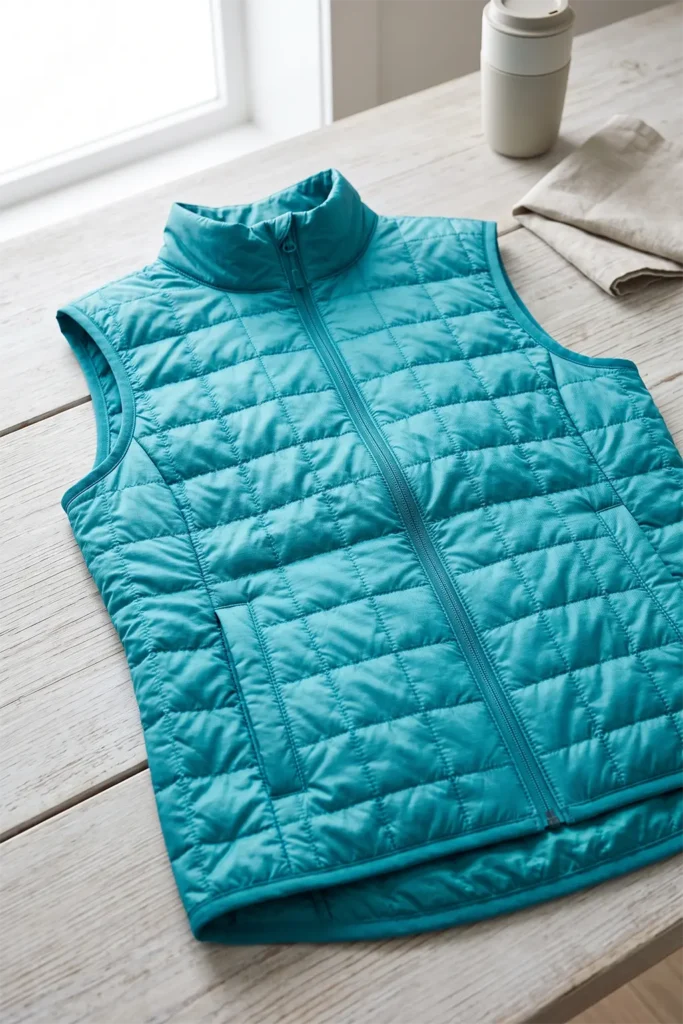
Interesting Backstory
Packable, ultralight garments are a relatively modern idea, born from advances in lightweight synthetic fabrics and driven by travelers, hikers, and anyone who needed warmth without weight — the genius is in getting the most function from the least material. That philosophy sits surprisingly close to the Scandinavian design values running through this whole collection: practicality, efficiency, and quiet cleverness, with nothing wasted. It also echoes something from the textile world I grew up around in Dhaka, where fine, lightweight cottons like the muslins the region was historically famous for showed that cloth could be feather-light and still beautiful and useful. A packable quilted vest carries that same appreciation for lightness — minimal material, maximum usefulness — in a fresh, travel-ready form.
Personal Styling Touch
My favorite version is a bright coral lightweight quilted nylon with fine grid quilting over the thinnest batting, bound in tonal fold-over elastic, with a smooth lightweight zip and a self-packing pocket that swallows the whole vest into a neat little bundle. It weighs almost nothing, adds a cheerful pop to the neutral clothes I travel in, and lives permanently in my carry-on. It’s the least glamorous thing I make and quite possibly the most used.
Final Styling Idea
Wear this packable quilted vest over a long-sleeve travel tee with comfortable trousers and sneakers for an easy, warm travel look. Layer it under a rain shell for extra warmth in transit, or over a light knit for cool evenings exploring. For a put-together travel-day outfit, pair the bright vest with all-neutral basics so the color does the lifting.
Keep the base neutral and let the vest bring the color — coral, bright teal, mustard, or sky blue, over cream, grey, navy, and black travel basics — and it delivers effortless, practical travel style while packing away to almost nothing.
Other Design Inspirations – Digitally Modified
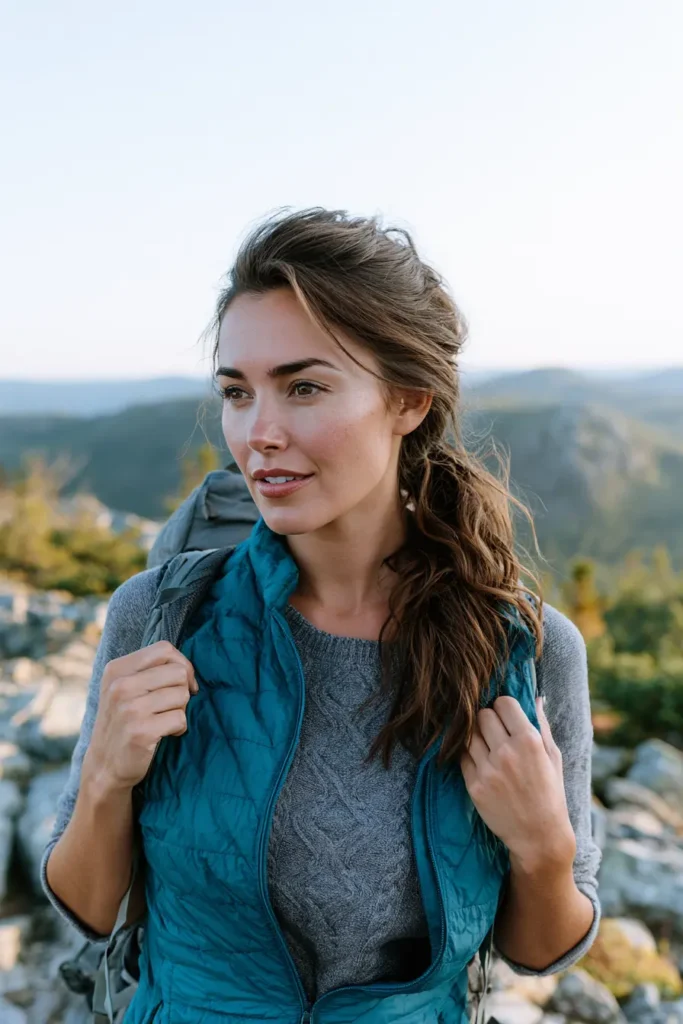
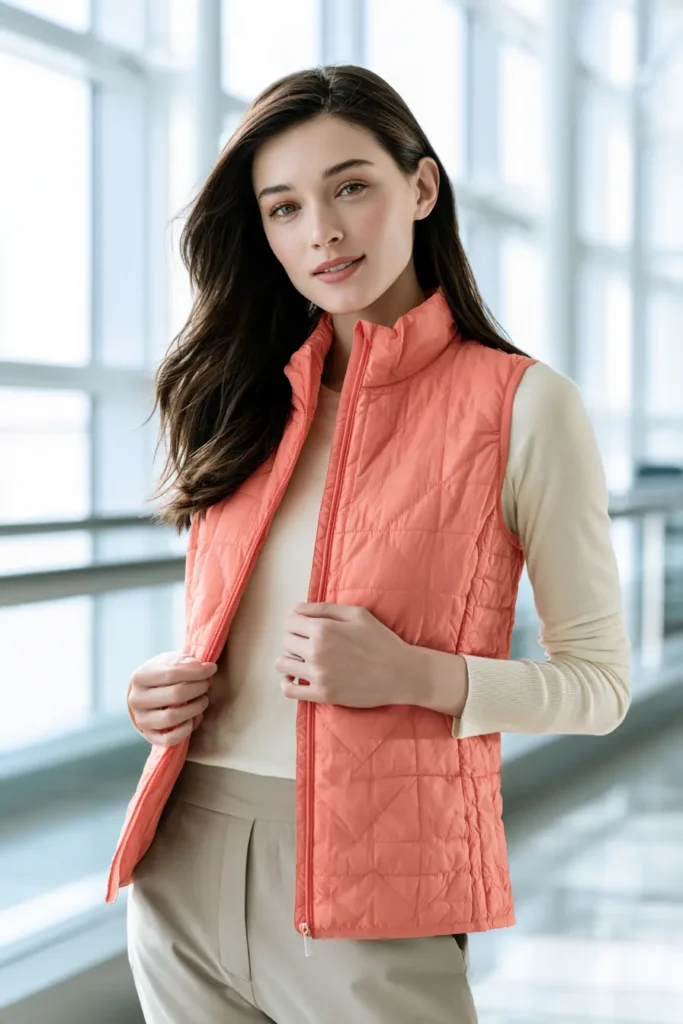
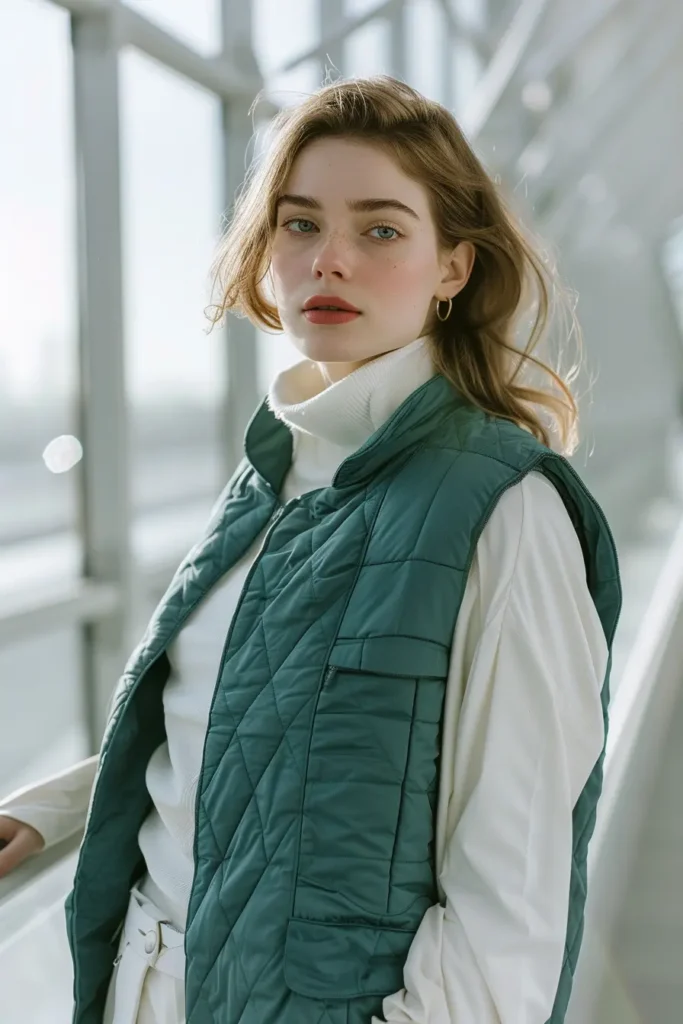
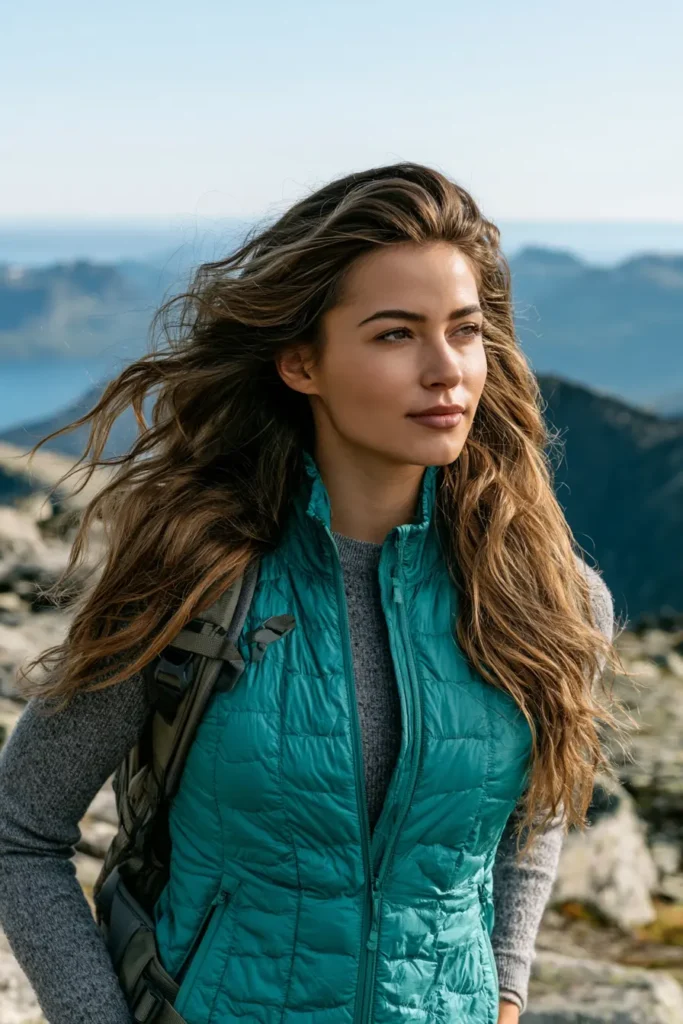
13. Stand-Collar Quilted Jacket for a Sleek Utilitarian Finish
A Guide to Making a Stand-Collar Quilted Jacket for a Sleek Utilitarian Finish
A Stand-Collar Quilted Jacket is a quilted jacket finished with a structured stand-up collar — a band that rises cleanly at the neck rather than folding down like a lapel. That single collar detail changes the whole character of the jacket: it looks sharp, modern, and purposeful, with a functional, slightly technical edge. Paired with a clean zip front and a clean color, the stand collar gives this piece a utilitarian finish — the look of considered workwear, warm at the neck and streamlined in silhouette.
I came up with this idea because the collar is where a jacket declares its personality, and a stand collar is the most modern and functional choice. It frames the face cleanly, adds real warmth around the neck, and gives even a simple quilted body a crisp, architectural finish. It is also a great skill to learn — drafting and attaching a stand collar cleanly is a genuinely useful technique that lifts your outerwear from homemade to sharp.
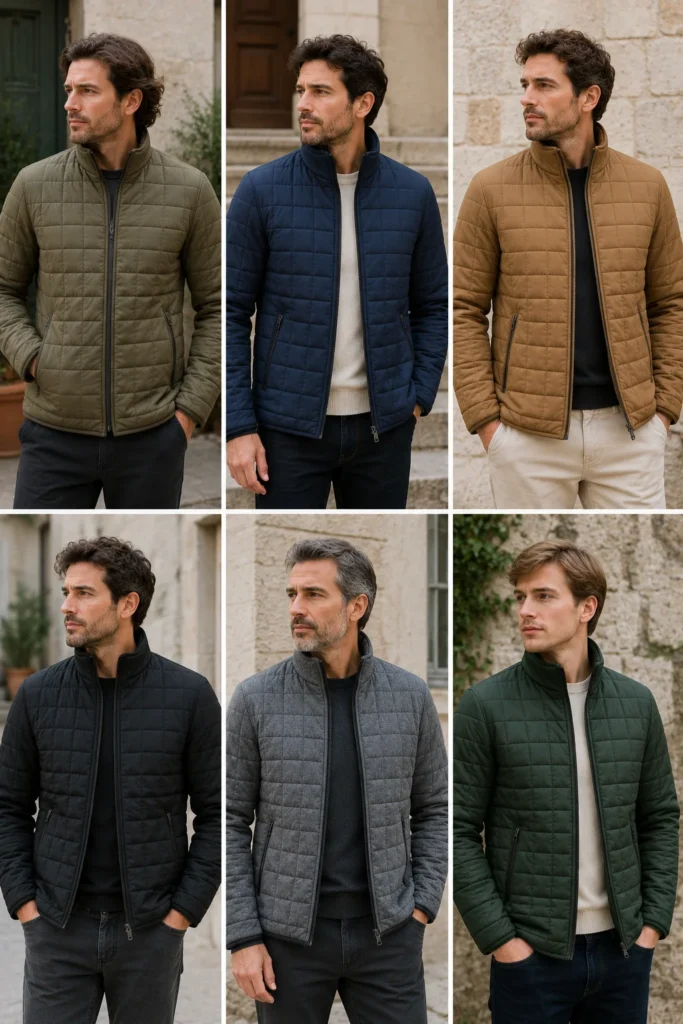
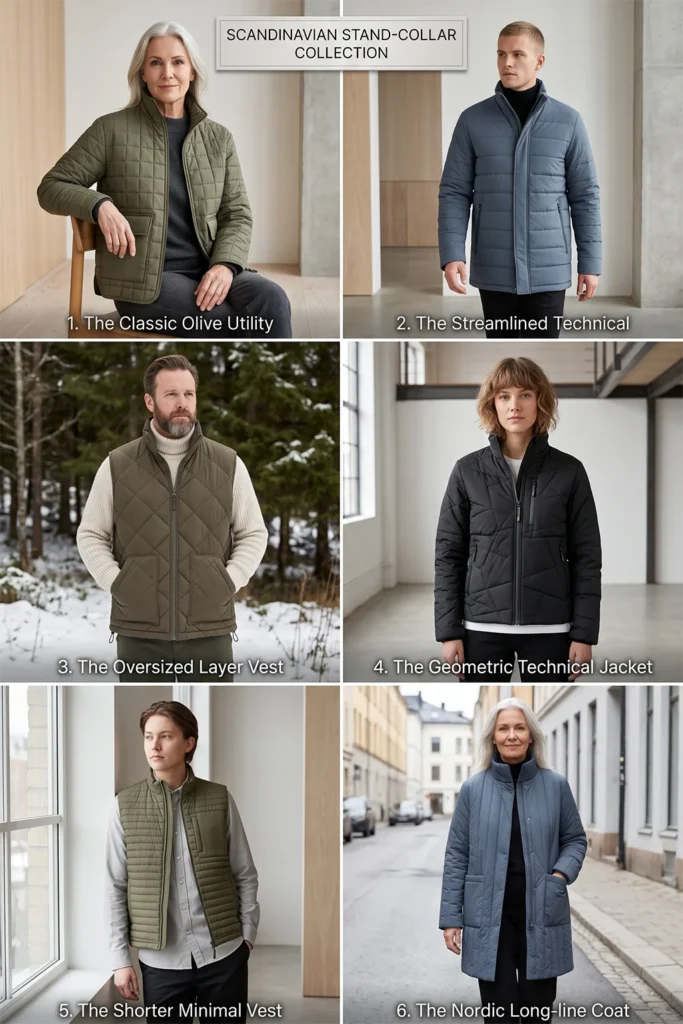
Why This Idea Is Worth Making
Why this idea is worth making: it delivers a sharp, modern, utilitarian look in a single well-made collar. A stand collar adds warmth at the neck, frames the face, and gives the whole jacket a purposeful, slightly technical edge that reads as contemporary and considered. It pairs perfectly with a clean zip front for a streamlined, functional silhouette. Making it yourself lets you get the collar height exactly right — tall enough to be striking, comfortable enough to wear zipped — and choose a clean utility color that no fast-fashion version quite nails. You’ll also learn to draft and set a stand collar, a skill that upgrades every future jacket.
Suggested Finished Measurements
For a relaxed medium-size jacket hitting at the hip:
- Finished length: 26–28 inches
- Finished chest width: 23–24 inches across
- Shoulder width: 17–18 inches
- Sleeve length from shoulder: 23–24 inches
- Sleeve width: 15–16 inches
- Armhole depth: 10–11 inches
- Stand collar height: 2½ to 3 inches
- Collar length: to match your neckline measurement
- Front opening: zip
- Seam allowance: ½ inch
For an oversized fit, add 2 inches to the body and sleeve widths.
Materials Needed
- Quilted fabric in a clean utility tone (olive, slate blue, deep khaki, or black): 2½ to 3 yards
- Lining fabric: 2½ yards
- Thin-to-medium batting: 2½ yards
- Lightweight interfacing (to give the collar structure): ½ yard
- Bias binding, tonal: 5 to 6 yards
- A sturdy separating zip (24–26 inches)
- Matching thread
- Rotary cutter or fabric scissors
- Measuring tape
- Fabric chalk
- Fabric clips
- Walking foot, recommended
- Iron
Step-by-Step Guide
Step 1: Choose a Clean Utility Color
The utilitarian look calls for a clean, purposeful color with a slightly technical, workwear feel. Strong choices include olive green, slate blue, deep khaki, or black — functional tones that look sharp and modern rather than decorative. A matte fabric suits the utility aesthetic best; avoid sheen here, which reads as dressy rather than functional.
Keep the binding and zip tonal so the jacket stays clean and streamlined.
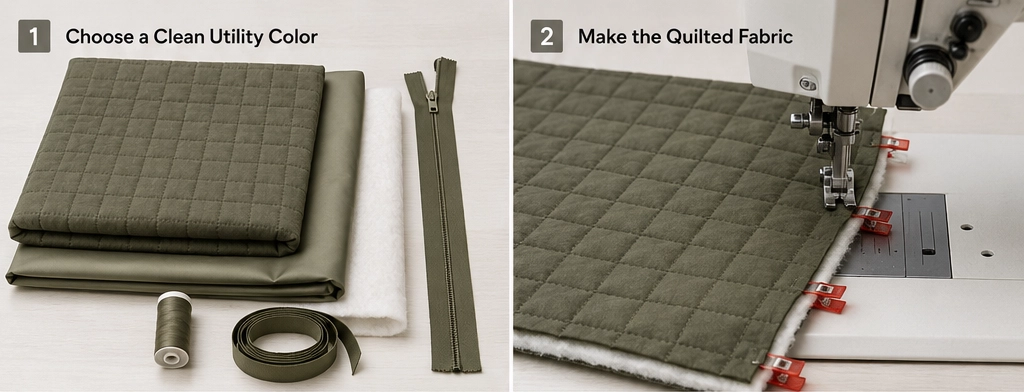
Step 2: Make the Quilted Fabric
Layer shell, batting, and lining, smooth, and clip. Quilt straight lines or a fine grid spaced about 1½ to 2 inches apart — a crisp, orderly quilting pattern suits the utilitarian look. Quilt enough fabric for all pieces, including the collar. Keep the batting on the thinner side so the collar can stand cleanly without being too bulky to fold at the neck.
Step 3: Cut the Back and Front Panels
Cut one back panel about 24 inches wide × 28 inches long, with a shallow back neckline 7 inches wide × 1½ inches deep. Cut two front panels, each about 13 inches wide × 28 inches long, shaping the front neckline with a gentle curve down about 5 inches. Keep the center-front edges straight and true for a clean zip-and-collar join.
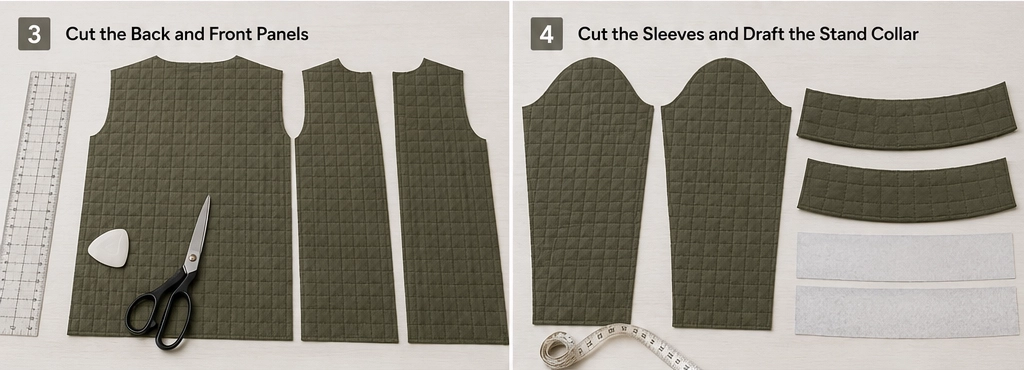
Step 4: Cut the Sleeves
Cut two sleeves about 17 inches wide × 24 inches long. A slightly fitted, straight-sleeve suit suits the sleek, utilitarian line — avoid too much volume, which softens the sharp look. Keep the shape clean and straight.
Step 5: Draft and Cut the Stand Collar
Measure your finished neckline (around the back neck and both front necklines). Cut two collar pieces (outer and inner), each that neckline length × 5½–6 inches tall (this folds to a finished 2½–3 inch stand plus seam allowances). Cut a piece of lightweight interfacing the same size to give the collar its crisp structure. The collar is the star of this jacket, so measure and cut it precisely.
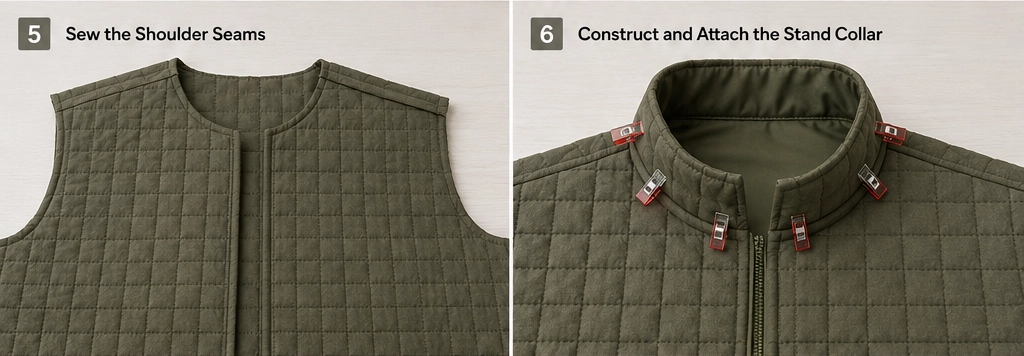
Step 6: Sew the Shoulder Seams
Place the front panels on the back, right sides together, match the shoulders, and sew with a ½ inch seam allowance. Press toward the back and topstitch. Clean shoulder seams matter here because the collar attaches around the neckline they form, and any unevenness shows at the collar.
Step 7: Construct and Attach the Stand Collar
Apply interfacing to the outer collar piece for structure. Place the two collar pieces right sides together, sew along the top edge and short ends, turn right side out, and press crisply. Then pin the collar’s raw edge around the jacket neckline, right sides together, matching centers, and sew with a ½ inch seam allowance. Bind or enclose the neckline seam so the inside is clean against the neck. A crisp, upright collar that stands cleanly is what defines this whole jacket.
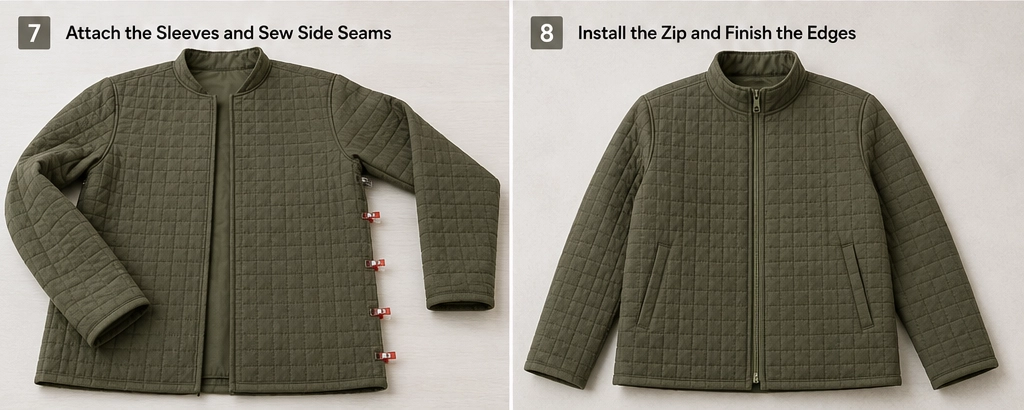
Step 8: Attach the Sleeves and Sew Side Seams
Center each sleeve at the shoulder seam, clip, and sew with a ½ inch seam allowance, easing the curve. Then fold the jacket right sides together and sew from the cuff to the underarm to the hem in one line. Leave 6–8 inches open at the lower side seams for side slits. Press and topstitch the seams for a clean, structured finish.
Step 9: Install the Zip
Pin the sturdy separating zip down the front opening, aligning both sides carefully so the collar edges meet neatly at the top when zipped. Topstitch it in evenly. A clean zip that runs smoothly right up into the base of the stand collar is central to the utilitarian look — take care that the collar closes cleanly at the throat.
Step 10: Finish the Edges and Add Utility Details
Bind the hem, cuffs, and side slits with tonal binding. For an extra utilitarian character, add functional details: flat-patch or zip pockets on the front, a small drawcord at the hem, or clean topstitched seams throughout. Keep any details purposeful and functional-looking rather than decorative — that restraint is what keeps the jacket reading as sleek utility rather than a fashion costume.
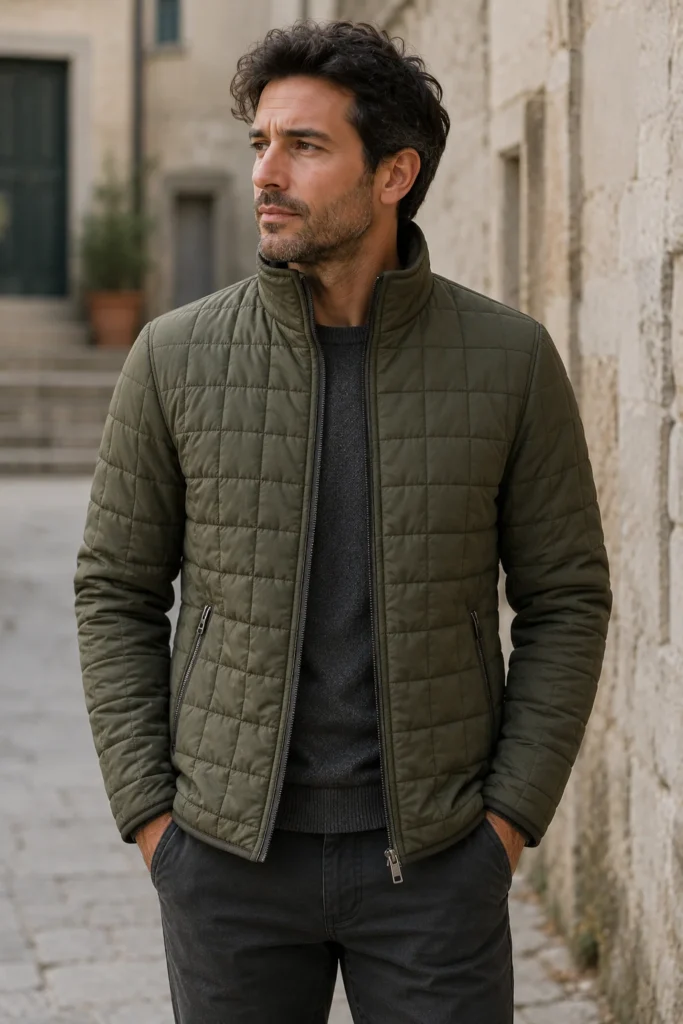
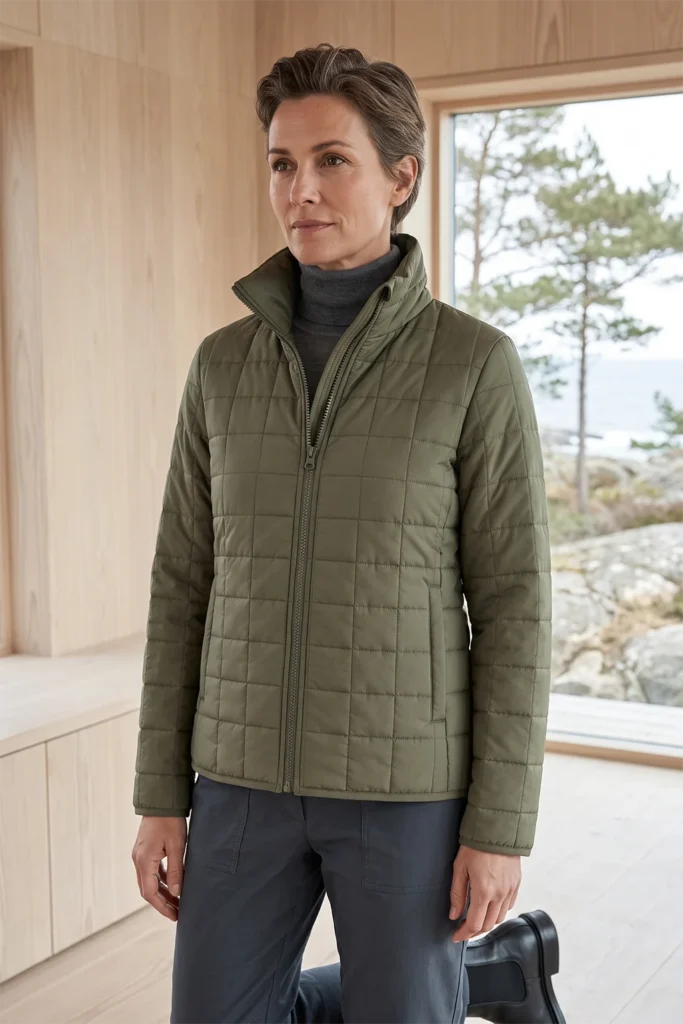
Assembly Section
The collar is the make-or-break element, so assembly centers on getting it crisp and upright. Interface the outer collar well, press it sharply, and check that it stands cleanly before final attachment. Once the collar, sleeves, side seams, and zip are done, try the jacket on and confirm the collar sits comfortably at the neck when zipped (not too tight, not gaping), the zip runs smoothly to the collar top, and the overall line stays sleek and streamlined. Add utility pockets and any drawcord, bind the remaining edges, and press everything sharply — crisp pressing and clean topstitching are what give this jacket its purposeful, structured finish. A slightly firmer press than the cozier pieces suits the utilitarian look.
Interesting Backstory
The stand collar has deep roots in functional and military clothing, where a collar that rises to protect the neck served a clear practical purpose — warmth and protection against wind and weather — long before it became a style statement. That honest, function-first origin is exactly why the stand collar reads as utilitarian today; it carries the DNA of workwear and technical gear.
This connects to the Scandinavian design values threaded through this whole collection: form following function, nothing decorative for its own sake, beauty emerging from purpose. It also echoes the practical spirit of the textile traditions I grew up around in Dhaka, where garments were shaped first by what they needed to do. A stand-collar quilted jacket honors that lineage — a functional, cleanly made collar becomes a sharp, modern design feature.
Personal Styling Touch
My favorite version is a matte olive-green quilt with a crisp fine grid, a well-interfaced 3-inch stand collar that rises cleanly at the neck, a smooth tonal zip running right up to the throat, and two flat zip pockets on the front. Zipped all the way up on a windy day, the collar frames the face and blocks the chill — it looks purposeful and sharp, like considered gear rather than decoration. It’s the jacket that makes a plain outfit look intentional and modern.
Final Styling Idea
Wear this stand-collar quilted jacket over a fine knit with slim trousers and clean boots for a sharp, modern utilitarian look, collar up. For an everyday version, layer it over a tee and straight-leg jeans, then pair with sneakers. For a monochrome utility statement, match the jacket to dark trousers so the whole look reads as one clean, purposeful line.
Keep the palette clean and functional — olive, slate blue, deep khaki, or black, against grey, cream, and dark neutrals — and the stand collar delivers that sleek, utilitarian finish every time, warm at the neck and sharp in silhouette.
Other Design Inspirations – Digitally Modified
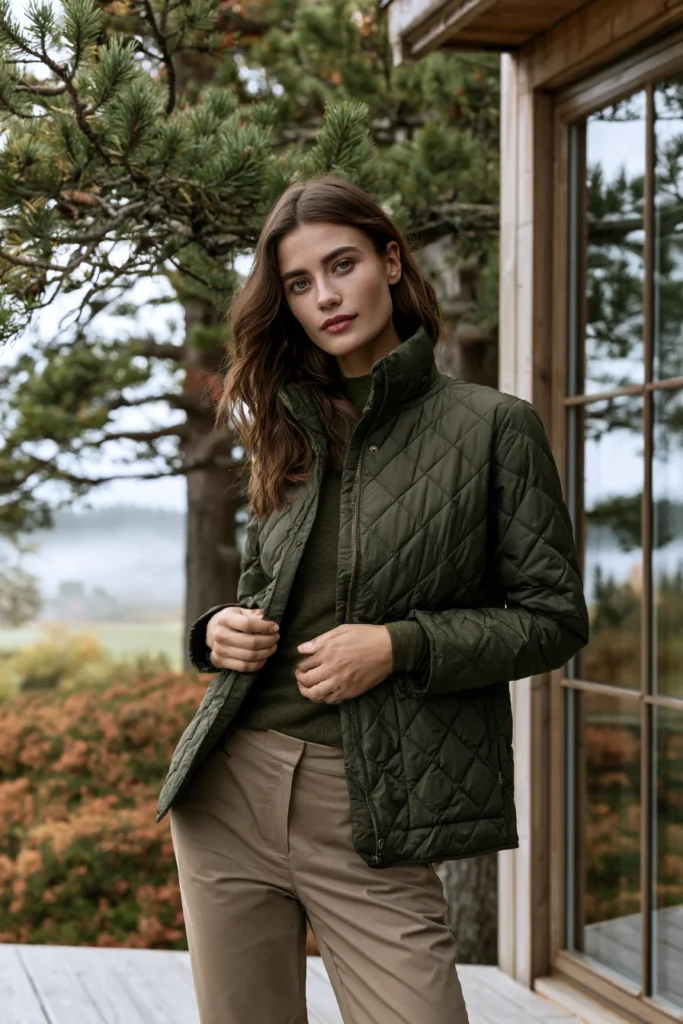
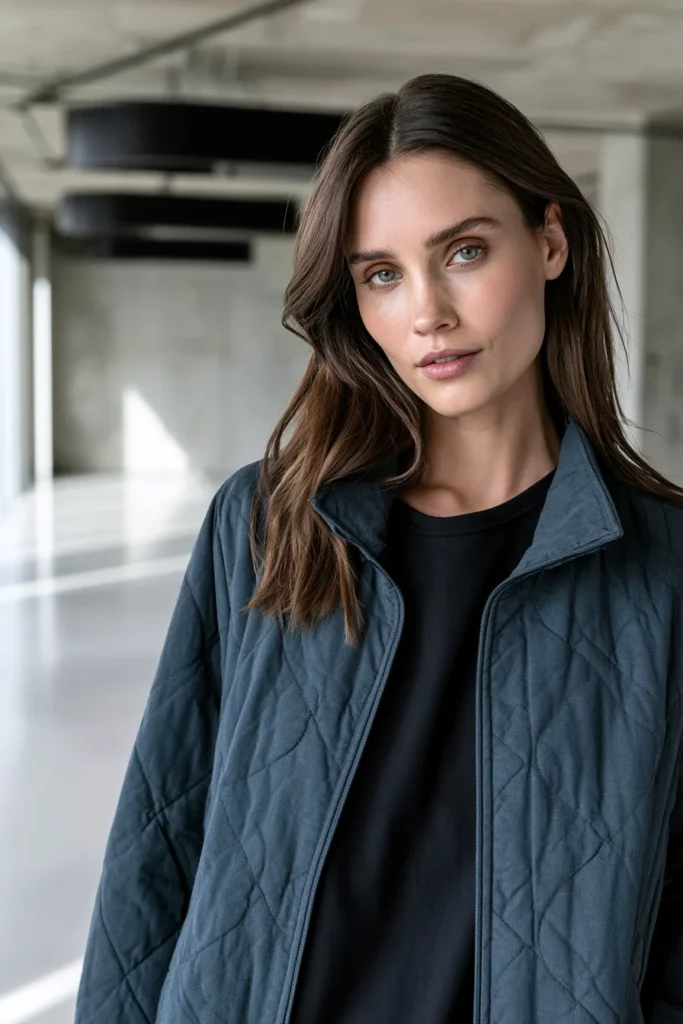
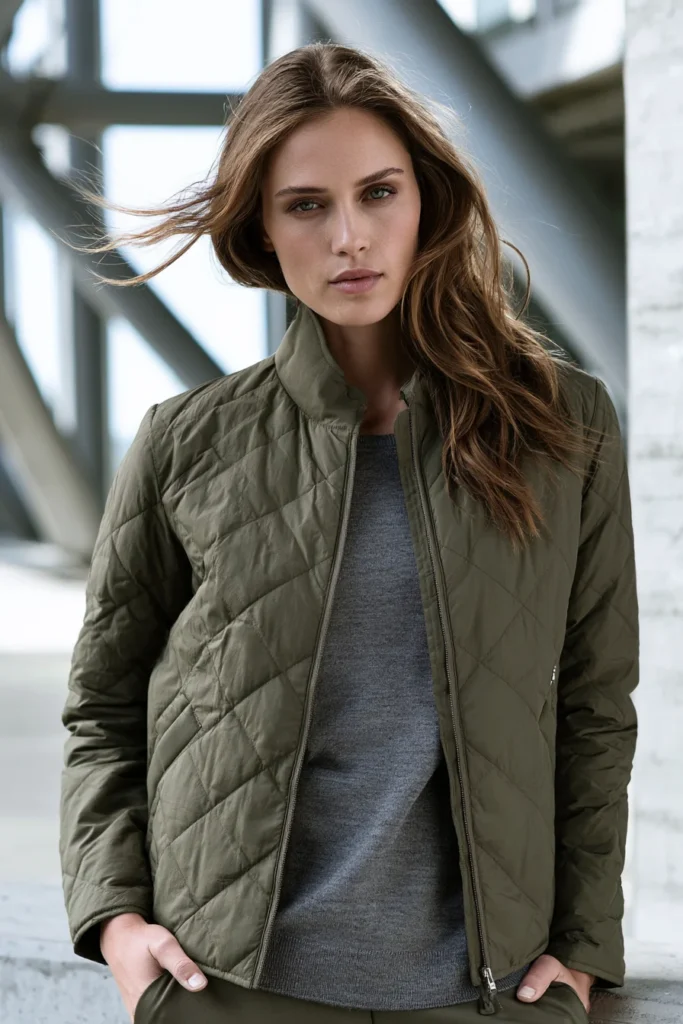
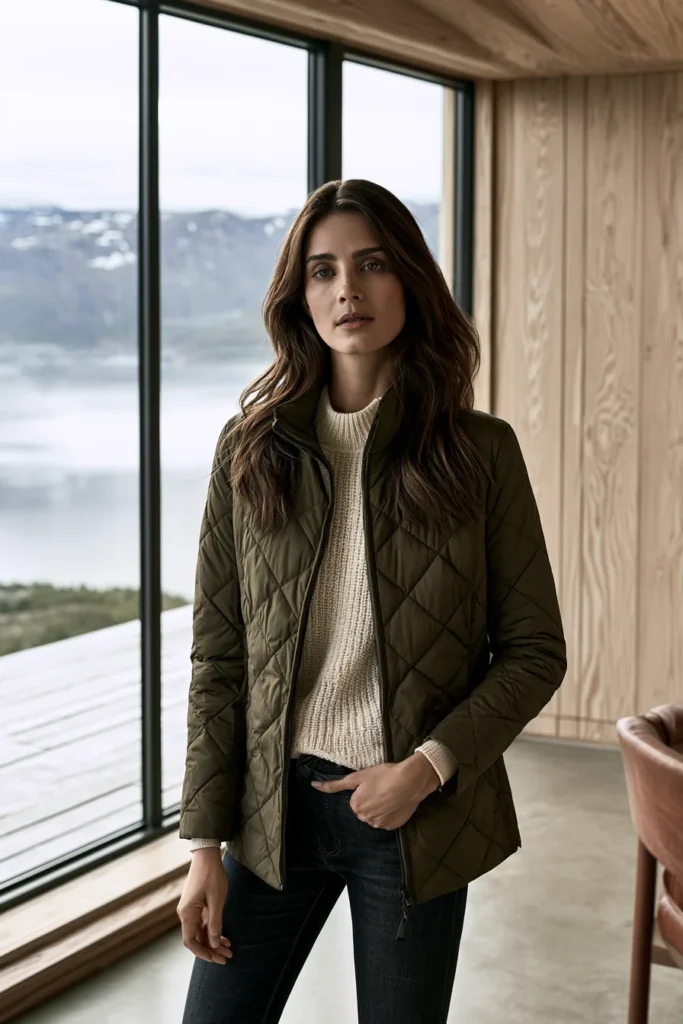
14. Shawl-Collar Quilted Wrap Vest for Soft Relaxing Elegance
A Guide to Making a Shawl-Collar Quilted Wrap Vest for Soft Relaxing Elegance
A Shawl-Collar Quilted Wrap Vest is a sleeveless quilted layer with a soft, continuous shawl collar that rolls smoothly around the neck and down the front, wrapped and tied at the waist. Where a stand collar is sharp and structured, a shawl collar is the opposite — soft, rounded, and enveloping, like the collar of a favorite robe. This is the most soothing, relaxing piece in the collection: a wrap vest you sink into, elegant in its simplicity and gentle in every line. It is quiet luxury at its most comfortable.
I came up with this idea because there is a particular kind of elegance that comes from softness rather than structure — the ease of a piece that wraps you gently and asks nothing of you. A shawl collar delivers exactly that: it frames the neck in a soft, continuous curve that feels calming and looks quietly refined. It is also a lovely sewing lesson in creating a smooth, rolled collar, and the wrap-and-tie closure keeps it simple. The result is the vest I put on to unwind — soft, warm, and effortlessly elegant.
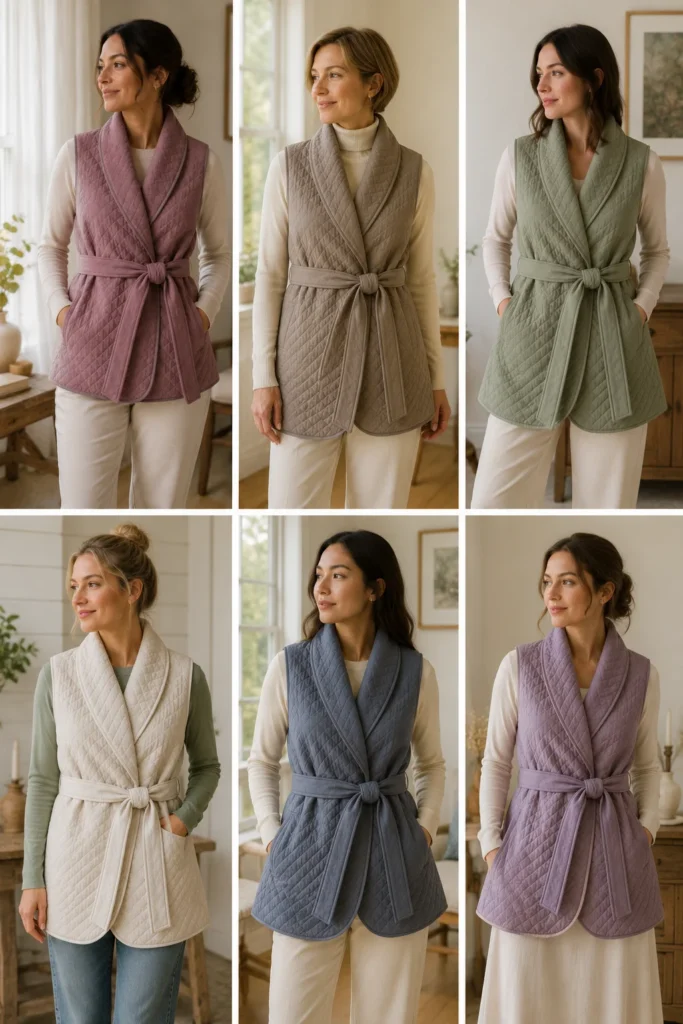
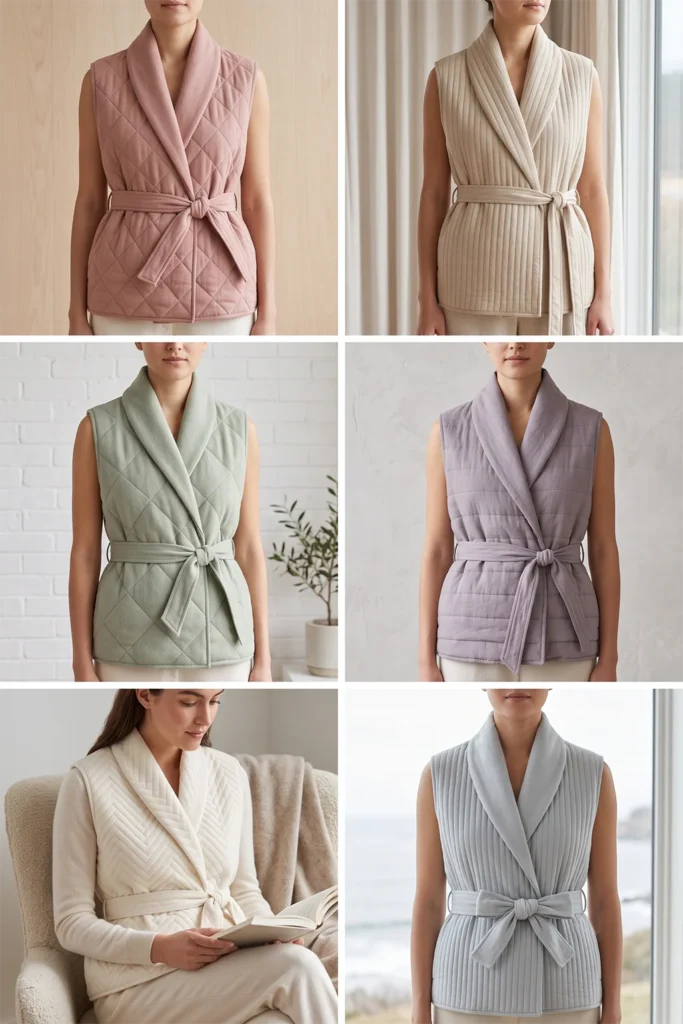
Why This Idea Is Worth Making
Why this idea is worth making: it is the softest, most soothing, quietly elegant piece in the collection — a wrap vest that feels like comfort and looks like understated luxury. The shawl collar’s smooth, continuous curve frames the neck beautifully and gives the vest a relaxed, robe-like grace, while the wrap-and-tie closure means no fiddly buttons or zips. Making it yourself lets you get the collar roll soft and generous, choose a gentle, calming color, and set the wrap depth exactly right. It also teaches you to construct a smooth shawl collar — a technique that brings soft elegance to future pieces.
Suggested Finished Measurements
For a relaxed medium-size wrap vest hitting at the hip:
- Finished length: 27–29 inches
- Finished chest width: 23–25 inches across (extra for the wrap overlap)
- Shoulder width: 14–15 inches
- Armhole depth: 9–10 inches
- Shawl collar width: 4–5 inches at its widest
- Belt/tie: 65–70 inches long × 2½ inches wide
- Seam allowance: ½ inch
For a more enveloping wrap, add 2 inches to each front panel width.
Materials Needed
- Quilted fabric in a soft, calming tone (dusty rose, warm oatmeal, soft sage, or muted lavender-grey): 2½ to 3 yards (extra for the collar and tie)
- Lining fabric: 2½ yards
- Soft cotton or bamboo batting (a soft-handed batting suits the relaxing feel): 2½ yards
- Bias binding, tonal: 5 yards
- Matching thread
- Rotary cutter or fabric scissors
- Measuring tape
- Fabric chalk
- Fabric clips
- Walking foot, recommended
- Iron
Step-by-Step Guide
Step 1: Choose a Soft, Calming Color
The whole feeling of this vest is soft and relaxing, so choose a gentle, soothing tone. Beautiful choices include dusty rose, warm oatmeal, soft sage green, or muted lavender-grey — quiet, calming colors with a spa-like serenity that suits the enveloping shawl collar. Choose a soft-handed fabric with a little drape; the softer the fabric, the more the collar rolls gracefully and the more relaxing the vest feels.
Keep the binding tonal so nothing interrupts the soft, continuous lines.
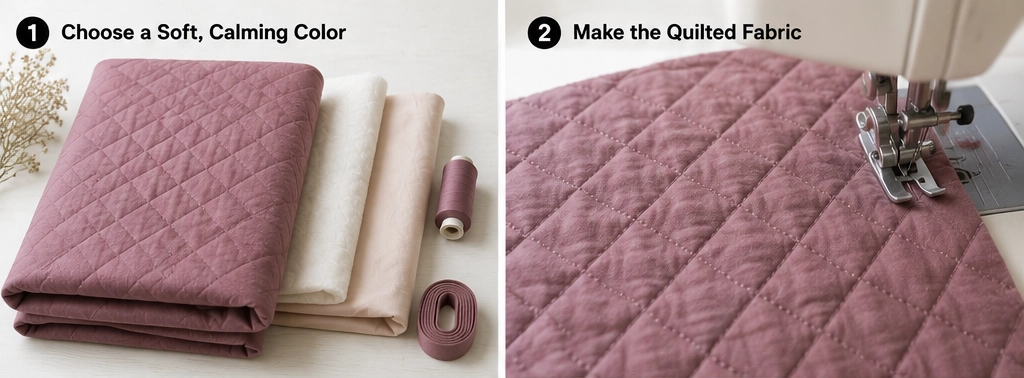
Step 2: Make the Quilted Fabric
Layer shell, soft batting, and lining, smooth, and clip. Quilt straight lines or a soft diamond spaced about 1½ to 2 inches apart. Use a soft-handed batting (cotton or bamboo) with a little loft for a gentle, comforting feel, and keep the quilting relaxed rather than tight so the fabric stays supple and the collar can roll softly. Quilt extra for the collar and tie.
Step 3: Cut the Back Panel
Cut one back panel about 25 inches wide × 29 inches long. Cut a shallow back neckline about 7 inches wide × 1½ inches deep. Keep the shape simple and the lines soft — round the bottom front corners slightly for a gentle, relaxed hem if you like.
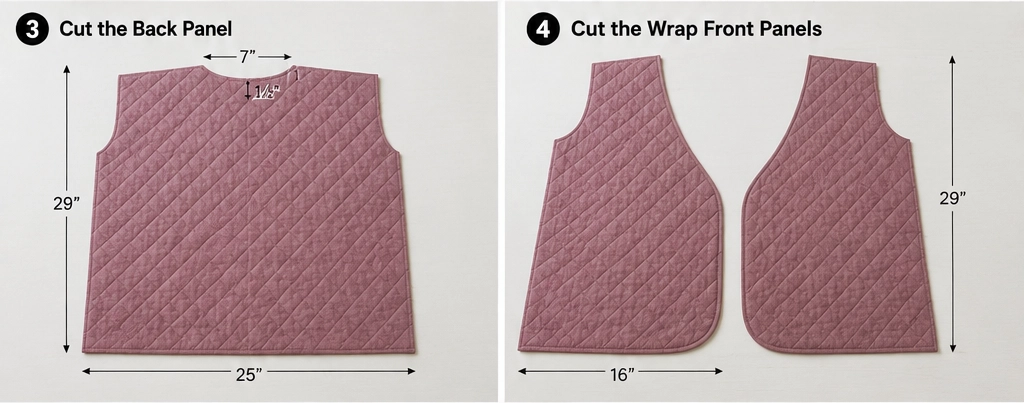
Step 4: Cut the Wrap Front Panels
Cut two front panels wider than usual — each about 16 inches wide × 29 inches long — so they overlap generously when wrapped. Shape the neckline as a long, soft diagonal from the shoulder down toward the opposite hip, but keep the curve gentle and rounded (not sharp), since this edge is where the shawl collar will attach and roll. The soft diagonal is what lets the collar flow smoothly into the wrap.
Step 5: Cut the Shawl Collar
Cut a long collar strip about 4–5 inches wide, long enough to run from the center-back neck down one front diagonal to the hem — then double it for both sides (or cut two mirrored pieces joined at the center back). The collar should be generous enough to roll softly. Cut it on a gentle curve to match the neckline-and-front edge it will follow. A smooth, generously cut collar is what gives this vest its soft, enveloping character.
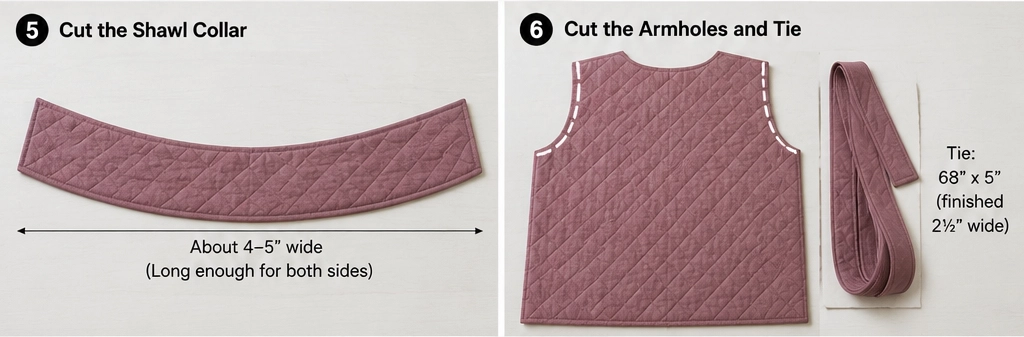
Step 6: Cut the Armholes and Tie
Lay the front panels over the back at the shoulders, and cut a gentle armhole curve about 9–10 inches deep on each side to keep them roomy and comfortable. Then cut the tie about 68 inches long × 5 inches wide (folds to 2½ inches), piecing if needed. Fold the tie lengthwise right sides together, sew, turn, press, and topstitch for a soft, clean belt.
Step 7: Sew the Shoulder and Side Seams
Place the front panels on the back, right sides together, match the shoulders, and sew with a ½ inch seam allowance. Press toward the back and topstitch. Then sew the side seams from the lower armhole to the hem, leaving 3–4 inches open at the bottom for side slits. This gives you the vest body, ready for the soft collar.
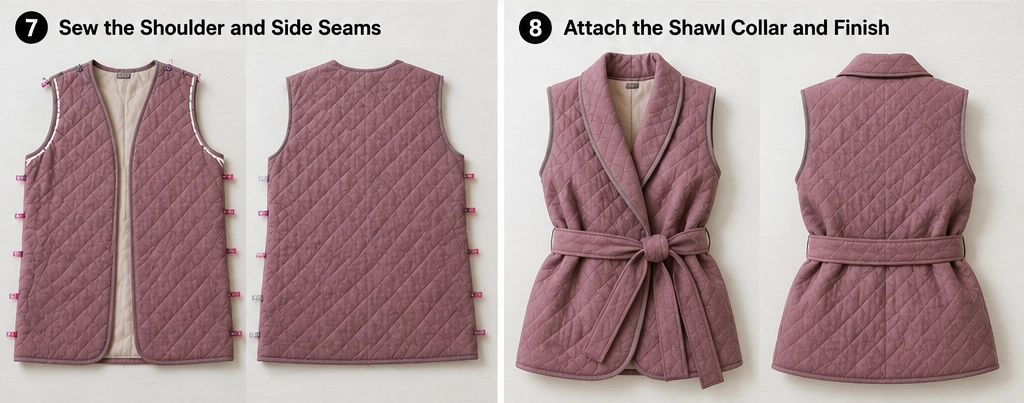
Step 8: Attach the Shawl Collar
This is the defining step. Pin the shawl collar around the neckline and down both front diagonals, right sides together, easing it smoothly around the curves so it will roll softly when turned. Sew with a ½ inch seam allowance, then understitch or topstitch the seam so the collar rolls to the outside and lies smoothly. Press it into a soft roll rather than a sharp fold — the gentle, rounded roll is the whole point of a shawl collar.
Step 9: Finish the Armholes and Edges
Bind the armholes first, easing the binding gently around each curve. Then bind the hem, the outer edge of the collar (if not already enclosed), and the side slits. Keep all the edges soft and smooth — avoid anything crisp or sharp, since the relaxing elegance comes from gentle, rounded lines throughout.
Step 10: Add the Wrap Tie and Inner Anchor
Attach belt loops at the side seams at the natural waist, or simply let the tie wrap around. Add a short inner anchor tie (one on the underside of the front panel, one at the side seam) so the inner layer ties closed before you wrap and tie the outer panel — this keeps the wrap sitting smoothly. To wear, tie the inner anchor, wrap the front, and tie the soft belt at the waist in a relaxed knot or bow.
Assembly Section
The soft shawl collar is the heart of this vest, so assembly is about coaxing everything into gentle, rounded lines. Take special care to ease the collar smoothly around the neckline curves and press it into a soft roll — never a hard crease. Once the collar, seams, and tie are done, try the vest on and practice the wrap: tie the inner anchor, fold the outer panel across, and tie the soft belt at the waist.
Check that the collar rolls gracefully around the neck, the wrap lies smoothly without gaping, and the whole vest feels soft and enveloping. Give it a gentle press — soft, not sharp — so every line stays relaxed and rounded. The finished vest should feel like something you sink into.
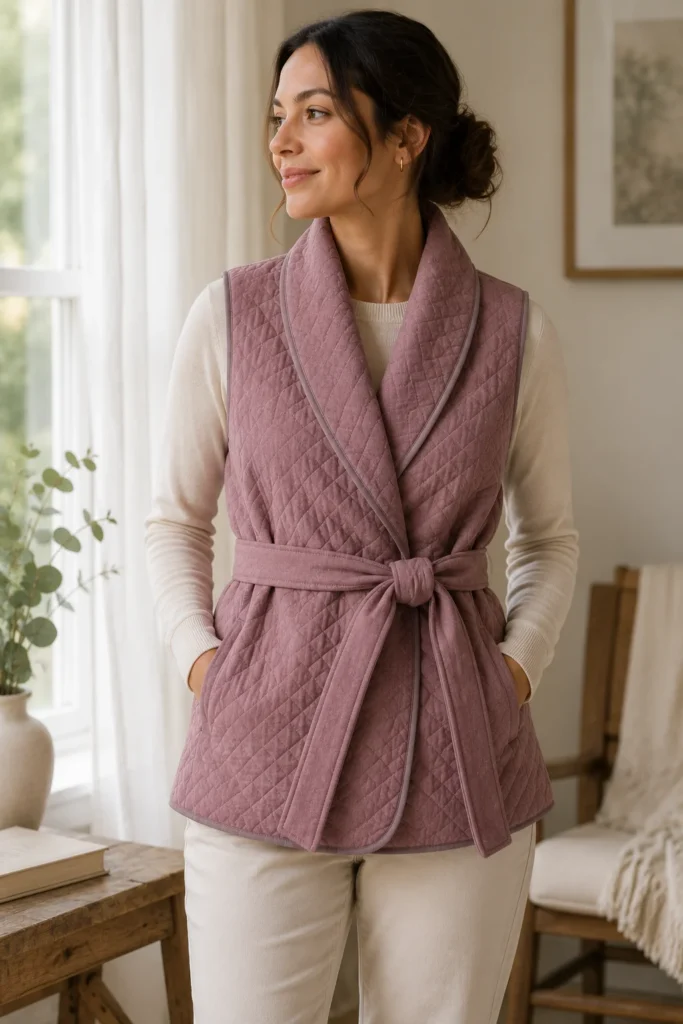
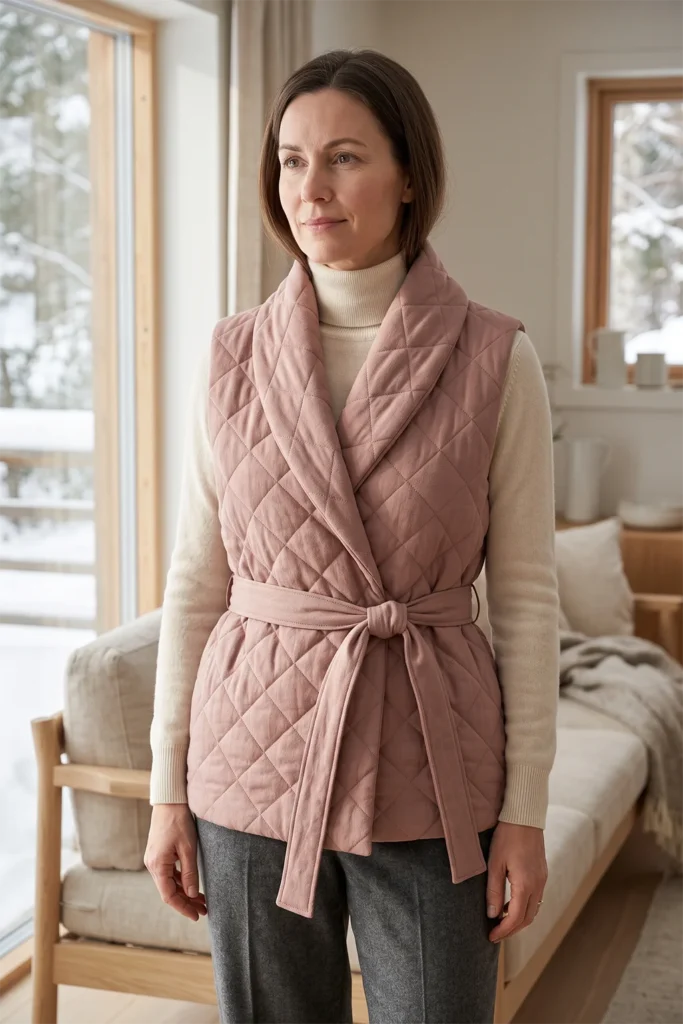
Interesting Backstory
The shawl collar takes its name and its shape from the shawl — one of the oldest and most universal garments, a simple length of cloth wrapped around the shoulders for warmth and comfort across countless cultures. Building that soft, wrapping shape into a collar brought the shawl’s gentle, enveloping comfort into a structured garment, which is why a shawl collar always feels soothing and relaxed.
There is a lovely connection to the draped-textile traditions I grew up around in Dhaka, where wrapped and draped cloth was everyday elegance, and grace came from how softly fabric folded around the body rather than from rigid tailoring. A shawl-collar quilted wrap vest carries that same soft wisdom — a gently wrapping collar, a wrapped body, comfort and elegance in every rounded line.
Personal Styling Touch
My favorite version is a soft dusty-rose quilt over a supple bamboo batting, with a generous shawl collar that rolls softly around the neck, bound tonally, and a soft self-tie belt. Wrapped and tied over a fine knit at the end of the day, it feels like putting on calm — soft, warm, and quietly elegant all at once. It is the piece I reach for to unwind, the one that proves elegance and total comfort can be one and the same.
Final Styling Idea
Wear this shawl-collar quilted wrap vest over a fine-knit or silky top with soft trousers for relaxed, elegant loungewear that leaves the house. For a soothing at-home look, wrap it over loungewear, then pair it with wool socks and a hot drink. For a quietly elegant outing, layer it over a slip dress and let the soft collar and wrap do the styling.
Keep the palette soft and calming — dusty rose, warm oatmeal, soft sage, muted lavender-grey, paired with cream and soft neutrals — and the shawl collar delivers that soft, relaxing elegance every time, like something gentle you wrap yourself in.
Other Design Inspirations – Digitally Modified
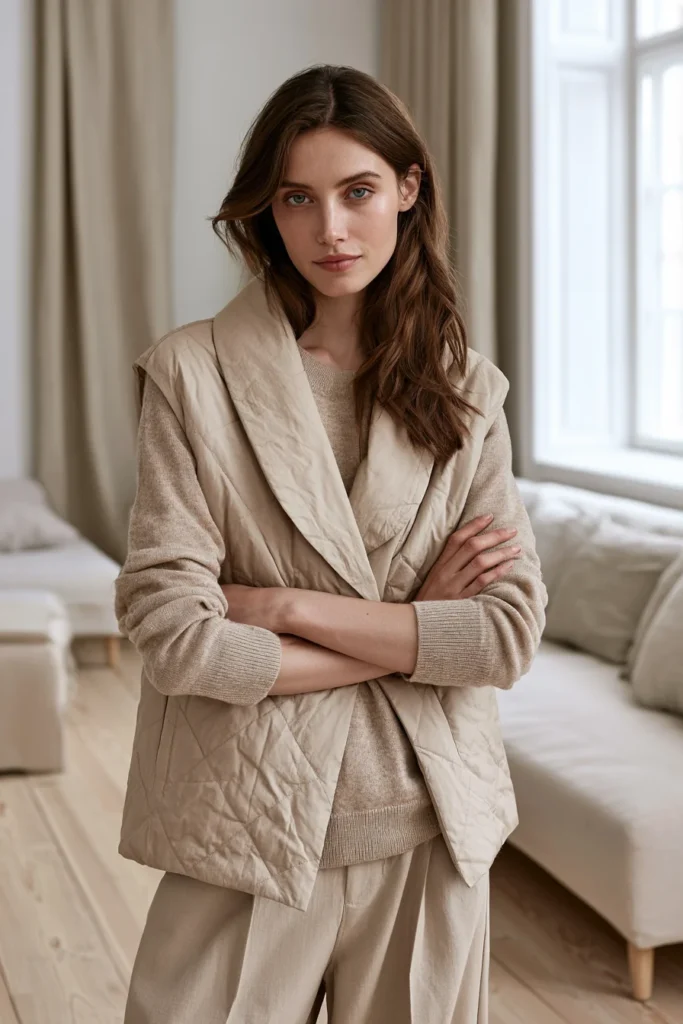
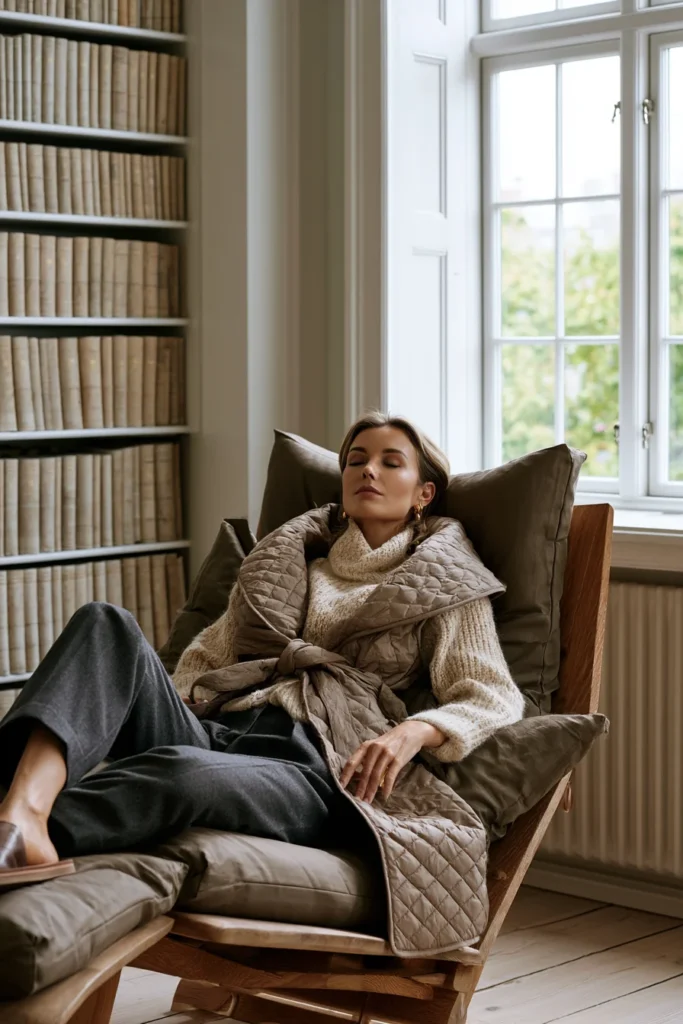
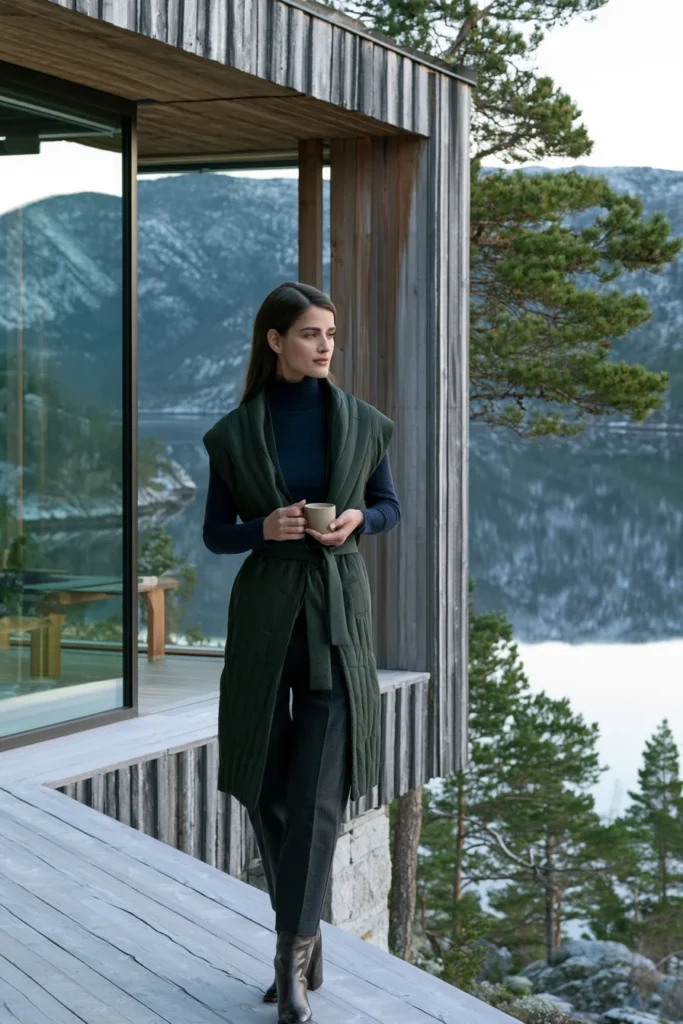
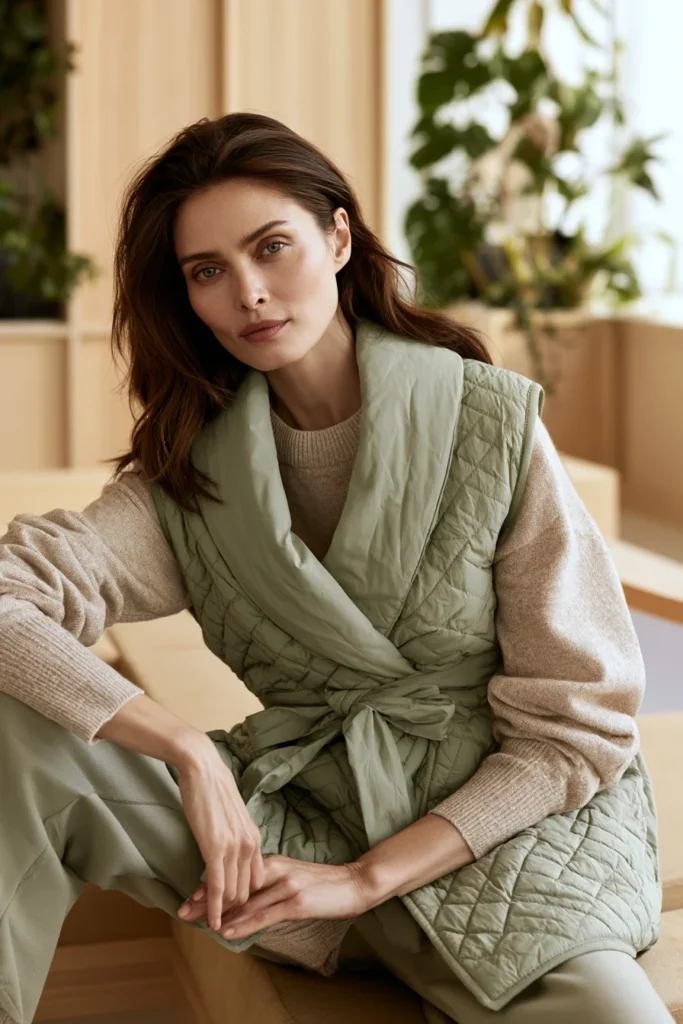
15. Contrast-Bound Quilted Jacket with Bold Piping for Playful Nordic Charm
A Guide to Making a Contrast-Bound Quilted Jacket with Bold Piping for Playful Nordic Charm
A Contrast-Bound Quilted Jacket with Bold Piping is a quilted jacket where the edges do the talking — a calm base fabric outlined in bright, contrasting binding, with bold piping tracing the seams and openings. Throughout this collection the binding has mostly stayed tonal and quiet; here it steps into the spotlight. A soft cream or oatmeal body framed in cheerful coral, teal, or mustard binding and piping turns a simple quilted shape into something joyful and graphic — playful Nordic charm, where a pop of color at every edge makes the whole jacket smile.
I came up with this idea because the finishing details are where a maker can have the most fun, and contrast binding and piping are the most playful details of all. A bold outline draws every line of the jacket in color, celebrating the construction itself rather than hiding it. It is also a wonderful skill to master — clean contrast binding and neat piping are what make handmade pieces look crisp and professional. This jacket is the cheerful, charming note the collection ends on, proving that a little color in the right place changes everything.
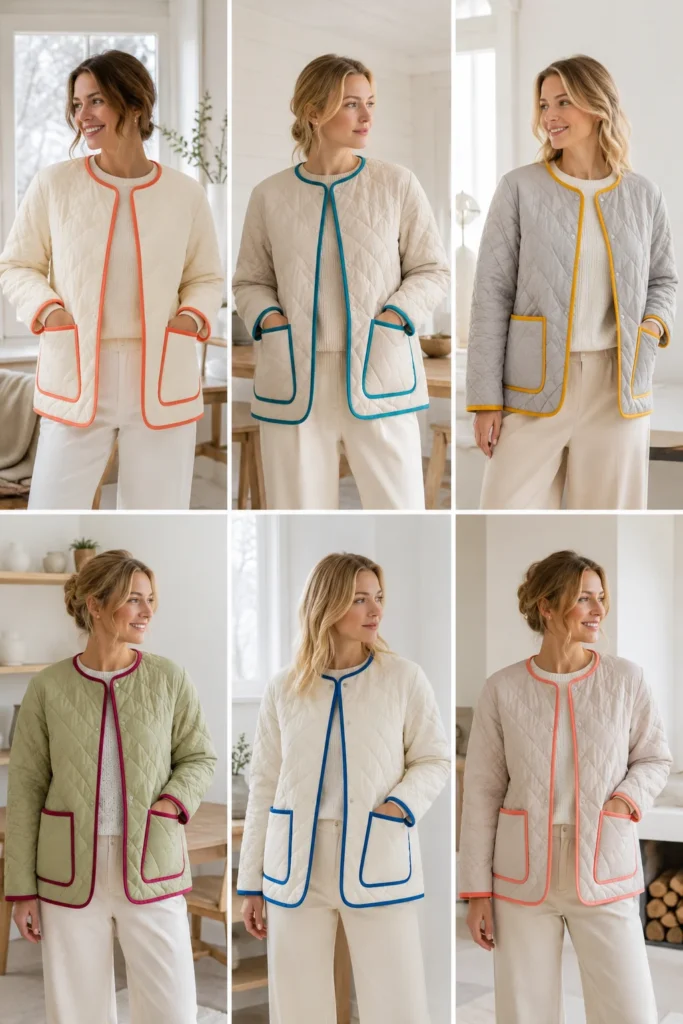
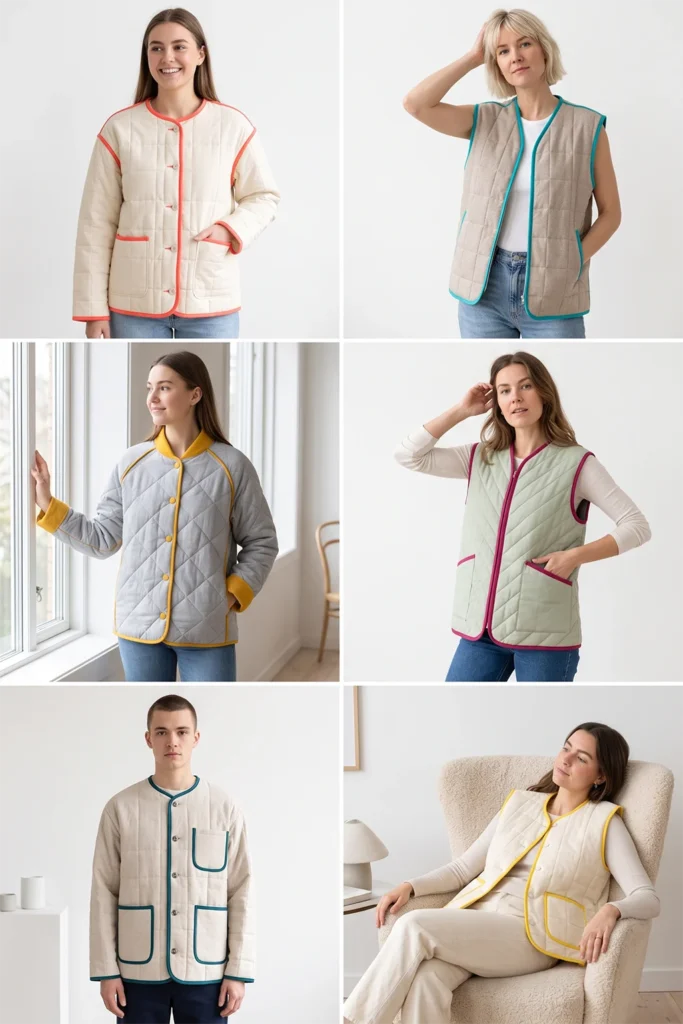
Why This Idea Is Worth Making
Why this idea is worth making: it turns simple finishing details into the jacket’s whole personality — playful, cheerful, and graphic. Bold contrast binding and piping outline every edge and seam in bright color, transforming a calm base into something joyful, all through technique rather than expensive fabric. It is also the best possible way to master binding and piping, skills that make every future project look crisp and polished. Making it yourself lets you choose exactly which bright color pops against your calm base and where the piping traces — a level of playful, personal detail no shop jacket offers.
Suggested Finished Measurements
For a relaxed medium-size jacket hitting at the hip:
- Finished length: 26–28 inches
- Finished chest width: 23–24 inches across
- Shoulder width: 17–18 inches
- Sleeve length from shoulder: 23–24 inches
- Sleeve width: 15–16 inches
- Armhole depth: 10–11 inches
- Contrast binding width: ½ inch finished (bold enough to read as an outline)
- Piping: ¼ inch finished
- Seam allowance: ½ inch
For an oversized fit, add 2 inches to the body and sleeve widths.
Materials Needed
- Quilted fabric in a calm base tone (cream, oatmeal, soft grey, or pale sage): 2½ to 3 yards
- Lining fabric: 2½ yards
- Thin-to-medium batting: 2½ yards
- Contrast binding fabric in a bold tone (coral, teal, mustard, or bright berry): 1 to 1½ yards (enough for binding plus piping)
- Piping cord: 6 to 7 yards
- Matching thread (plus thread in the contrast color)
- Piping foot or zipper foot (for sewing close to the piping cord)
- Rotary cutter or fabric scissors
- Measuring tape
- Fabric chalk
- Fabric clips
- Walking foot, recommended
- Iron
Step-by-Step Guide
Step 1: Choose Your Calm Base and Bold Contrast
The magic here is contrast, so pick a calm, neutral base and one bold, cheerful color to outline it. Lovely pairings include cream base with coral binding, oatmeal with bright teal, soft grey with sunny mustard, or pale sage with berry. The base stays quiet so the bold edges pop — one bright contrast color is more charming and graphic than several. Choose a base and a contrast that make you smile side by side.
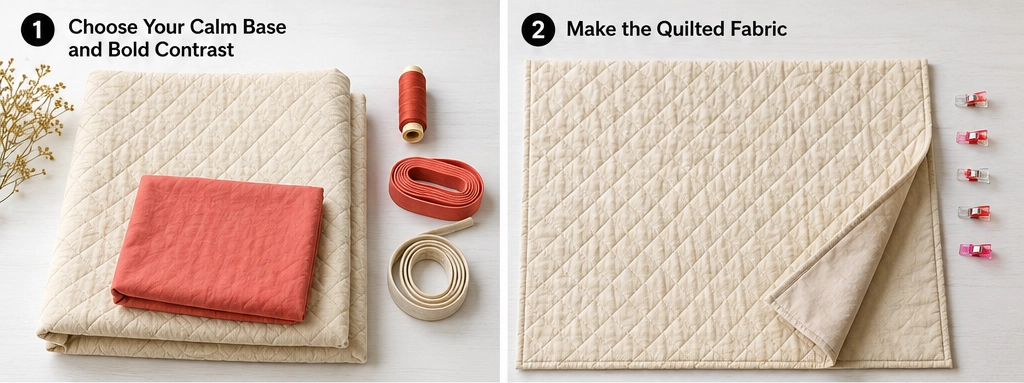
Step 2: Make the Quilted Fabric
Layer the calm base shell, batting, and lining, smooth, and clip. Quilt straight lines or a simple diamond spaced about 1½ to 2 inches apart. Keep the quilting simple and the base calm, since the bold binding and piping will provide all the visual interest — a busy quilting pattern would compete with the contrast edges. Quilt enough fabric for all pieces.
Step 3: Cut the Jacket Panels
Cut one back panel about 24 inches wide × 28 inches long (back neckline 7 inches × 1½ inches), two front panels each about 13 inches wide × 28 inches long (front neckline curved down about 5–6 inches), and two sleeves each about 17 inches wide × 24 inches long. Keep all edges clean and true, since each will be outlined in bold, and any wobble will show.
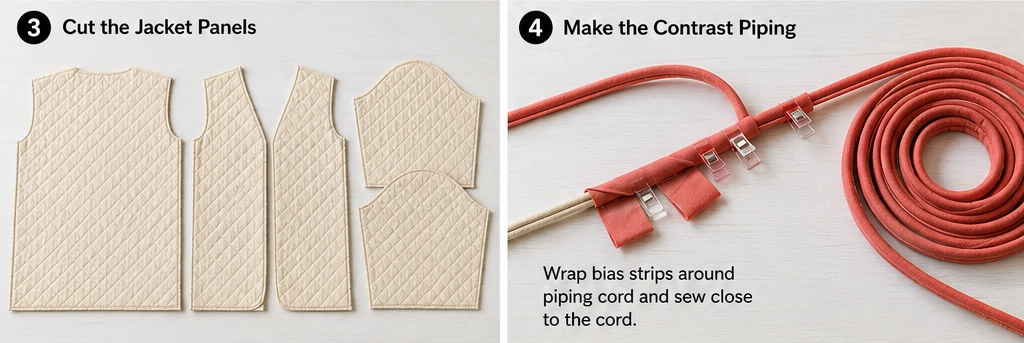
Step 4: Make the Contrast Piping
Cut bias strips from your bold contrast fabric about 1½ inches wide, join them into long lengths, and wrap them around the piping cord, sewing close to the cord with a piping or zipper foot to encase it. Make enough piping to trace the seams and openings you want to highlight. Neat, evenly encased piping is what gives the jacket its crisp, professional pop — take your time here.
Step 5: Insert Piping into the Shoulder Seams
Sandwich the contrast piping between the front and back panels at the shoulder seams, raw edges aligned, and sew with a piping foot so the stitching sits right against the cord. When pressed, a bright line of piping will trace each shoulder seam. This is where the playful effect begins — the seams themselves become bold colored lines.
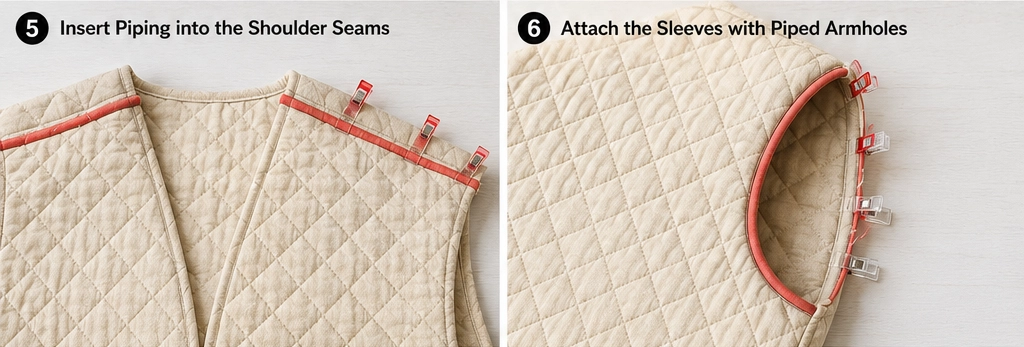
Step 6: Attach the Sleeves with Piped Armholes
Insert piping around the armhole as you attach each sleeve: sandwich the piping between sleeve and body, aligned at the seam, and sew with a piping foot. A bright piped line tracing each armhole frames the sleeve in color and is one of the jacket’s most charming details. Ease the piping smoothly around the curve.
Step 7: Sew the Side and Sleeve Seams
Fold the jacket right sides together and sew from the cuff to the underarm to the hem in one continuous line, inserting piping into these seams as well if you want the color to trace all the way down. Leave 6–8 inches open at the lower side seams for side slits, which you’ll bind in a contrasting color. Press all piped seams so the color lines sit crisp and proud.
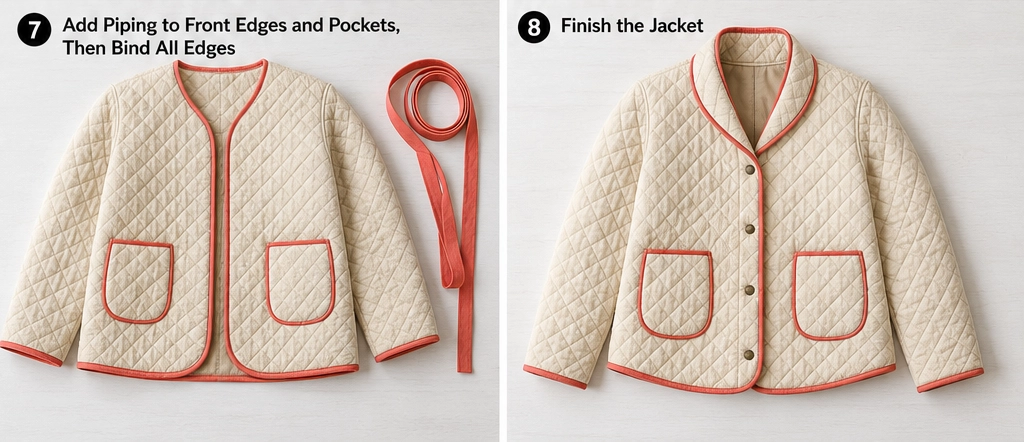
Step 8: Bind All Openings in Bold Contrast
Now the star technique: bind the neckline, front opening, hem, cuffs, and side slits with your bold contrast binding, cut a touch wider (½ inch finished) so it reads clearly as a bright outline. Work slowly and evenly — clean, consistent contrast binding is what makes the jacket look crisp and joyful rather than messy. Topstitch it down neatly; this binding is the most visible feature of the whole jacket.
Step 9: Add Contrast Details (Optional)
For extra playful charm, echo the contrast color in small details: bold contrast patch pockets bound to match, a contrast loop-and-button closure, or a bright topstitched line. Keep these purposeful and balanced so the jacket stays charming rather than busy — a few well-placed contrast touches complete the cheerful, coordinated look.
Step 10: Add a Closure
Finish with a closure that fits the playful spirit: a few bold contrast-covered buttons, a contrast loop-and-toggle, or a tonal zip if you’d rather keep the focus on the piped and bound edges. Space buttons evenly so the front closes cleanly. A cheerful contrast button is a lovely final pop; a quiet zip lets the outlined edges stay the whole show.
Assembly Section
Piping and binding are precision details, so assembly rewards patience and a steady hand. Use a piping foot to sew right against each cord so the piping sits crisp, and press every piped seam so the color lines stand out cleanly. When binding, keep the width perfectly even all the way around — consistency is what separates charming contrast binding from a wobbly edge.
Once everything is piped, bound, and closed, try the jacket on and check that every bright line is clean and even: the piped seams should trace crisply, the bound edges should frame the jacket in a consistent bold outline, and the contrast details should feel balanced. Give the jacket a thorough press, working the piping and binding sharp, so all those cheerful colored lines look deliberate and professional.
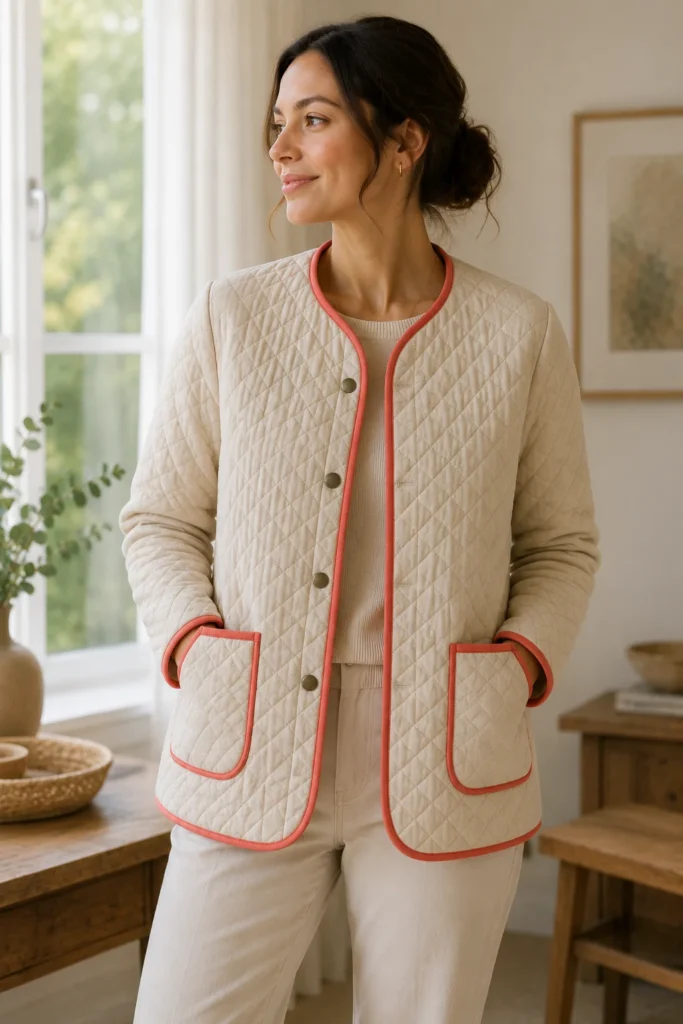
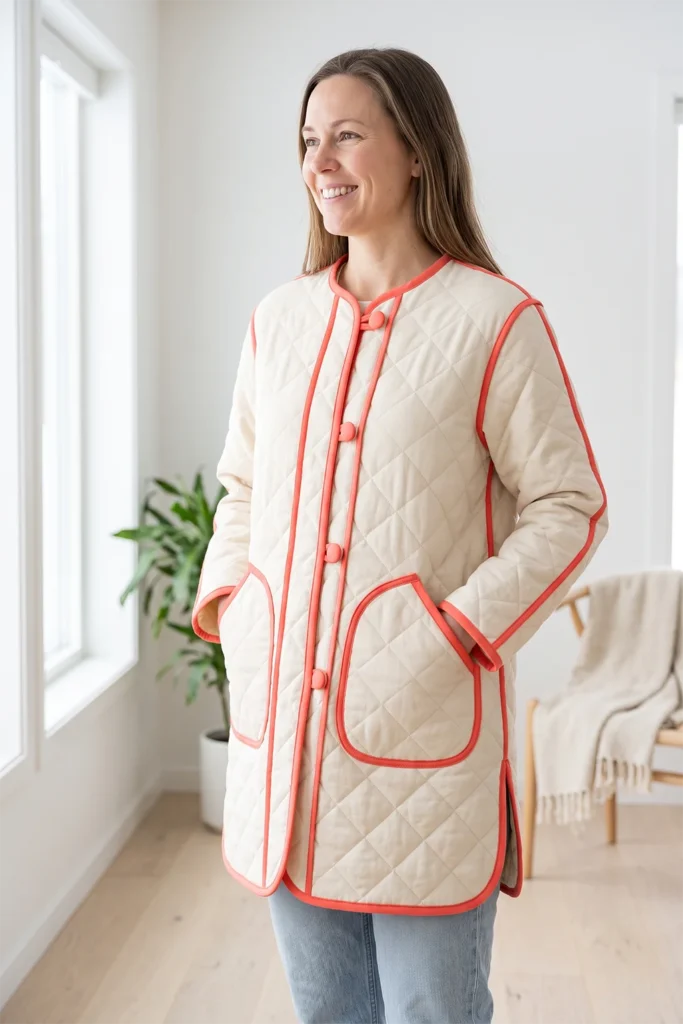
Interesting Backstory
Contrast binding and piping have a long history in garment-making, used across many folk and traditional costumes precisely because outlining a garment’s edges in a bright color is a joyful, celebratory way to finish it — you see it in embroidered folk jackets, piped uniforms, and decorated festival dress around the world. Scandinavian folk textiles share this love of a bright edge or trim against a calmer ground, a small pop of color that signals care and cheer.
It connects warmly to the textile traditions I grew up around in Dhaka, where borders and edges were often where the boldest color and finest work went — the frame of a piece treated as lovingly as its center. This jacket celebrates that shared instinct: outline a calm, well-made quilted shape in a bright, contrasting color, and the finishing details become the whole of the charming personality.
Personal Styling Touch
My favorite version is a soft cream quilt outlined entirely in bright coral — coral piping tracing every seam and armhole, coral binding framing all the edges, and a couple of coral-covered buttons to finish. Against the calm cream base, those bright coral lines make the whole jacket cheerful and graphic, like a drawing come to life. It’s the piece that makes people smile when they see it, and the perfect proof that the details are where the joy lives. A fitting note to end the collection on.
Final Styling Idea
Wear this contrast-bound quilted jacket over a plain white or cream outfit so the bright outlined edges pop as the whole statement. For a coordinated look, echo the contrast color elsewhere — a coral scarf, teal shoes, mustard bag — to tie the cheerful palette together. For an easy everyday version, throw it over a simple tee and jeans and let the bold binding do all the work.
Keep the base and outfit calm and let the bright edges lead — a cream, oatmeal, grey, or sage base outlined in bold coral, teal, mustard, or berry — and the contrast binding and piping deliver that playful Nordic charm every time, proving the finishing details can be the whole joyful point.
Other Design Inspirations – Digitally Modified
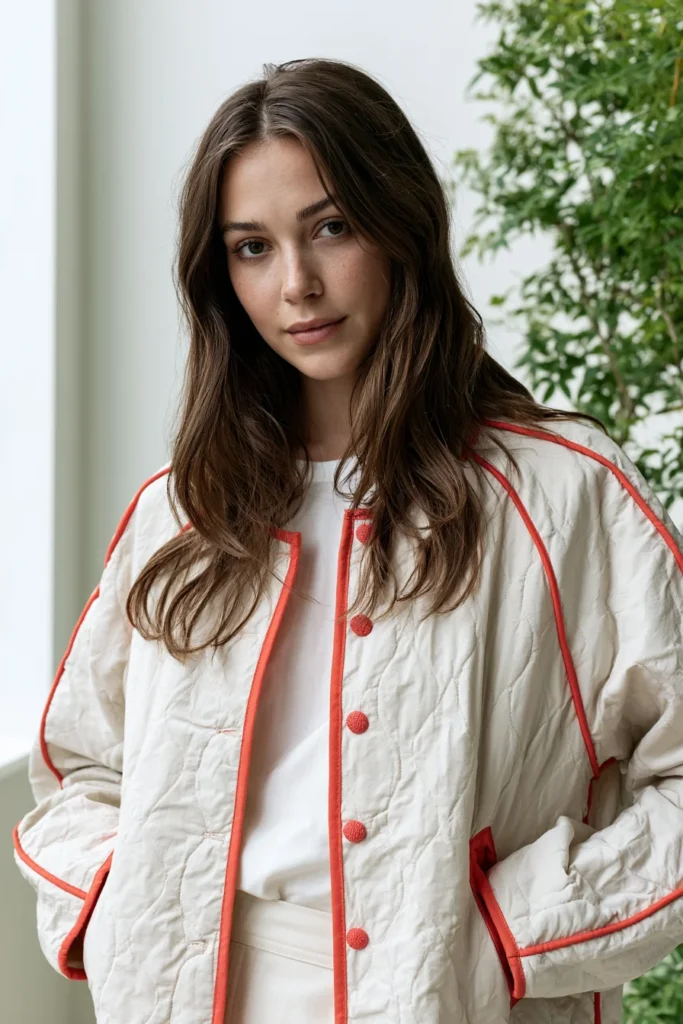
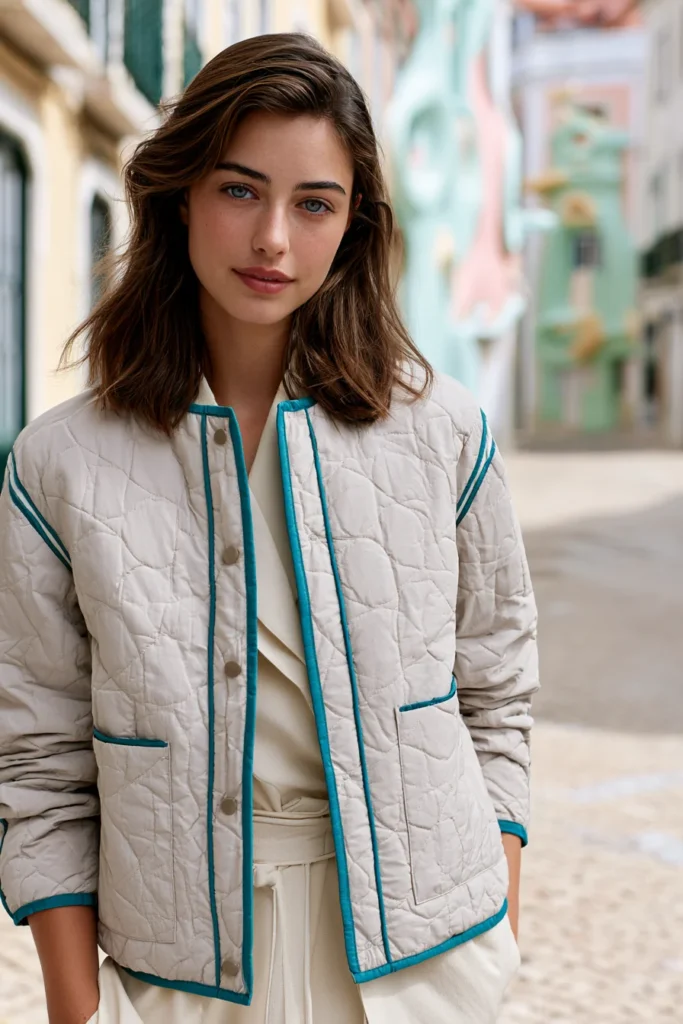
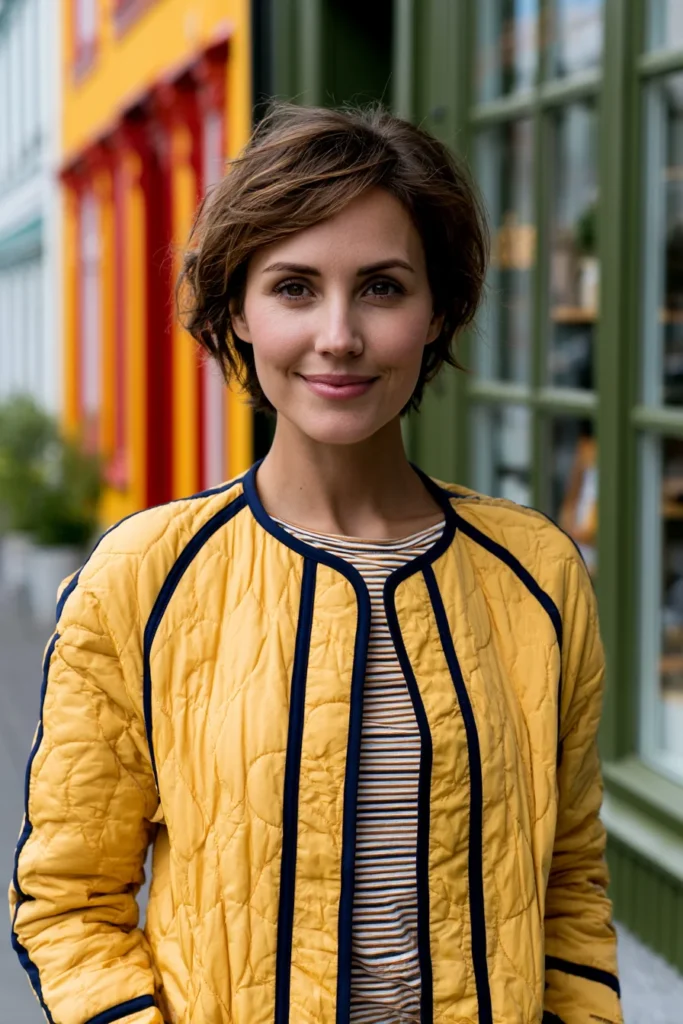
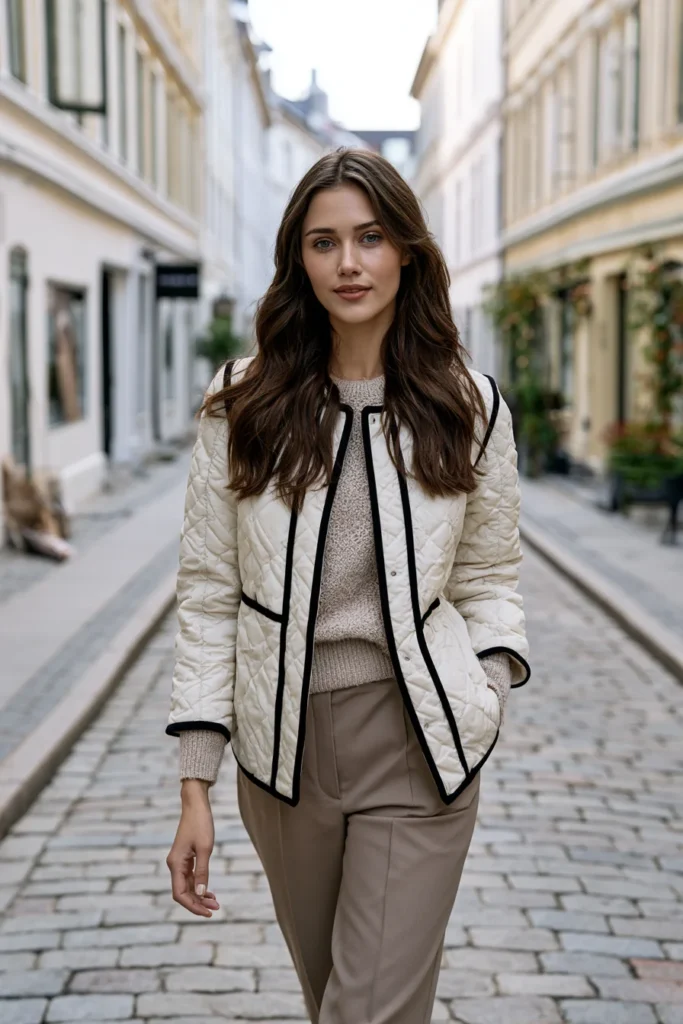
Conclusion
Fifteen projects is a lot of ground to cover, but that’s the point: by working through these Scandinavian quilted jackets and vests, you don’t just end up with a wardrobe of handmade layers — you build real skills along the way. Each construction teaches something the next one builds on, whether it’s mastering clean reversible seams, getting your channel quilting perfectly straight, or learning to handle thicker wool-blend fabric without bulk. Start with one of the simpler collarless or open-front pieces if you’re newer to garment sewing, and work your way toward the belted wraps and pieced color-block designs as your confidence grows.
What I hope you take from this collection is that a handmade quilted jacket carries something a store-bought one never can. When you choose the fabric, set the proportions, and stitch every seam yourself, the finished piece holds your time and intention in a way mass-produced outerwear simply doesn’t. It’s the same truth I learned watching Kantha makers in Dhaka turn worn cloth into something treasured — the making is what gives the garment its soul, and that soul is exactly what makes it feel so good to wear.
So pick the project that speaks to you, gather your fabric and a little patience, and start stitching. There’s no rush to make all fifteen, and no single “right” one to begin with. Choose the silhouette and mood that fit how you actually live — minimalist, cozy, tailored, or playful — and you’ll find that the quilted jacket you make with your own hands becomes the one you reach for again and again.

