
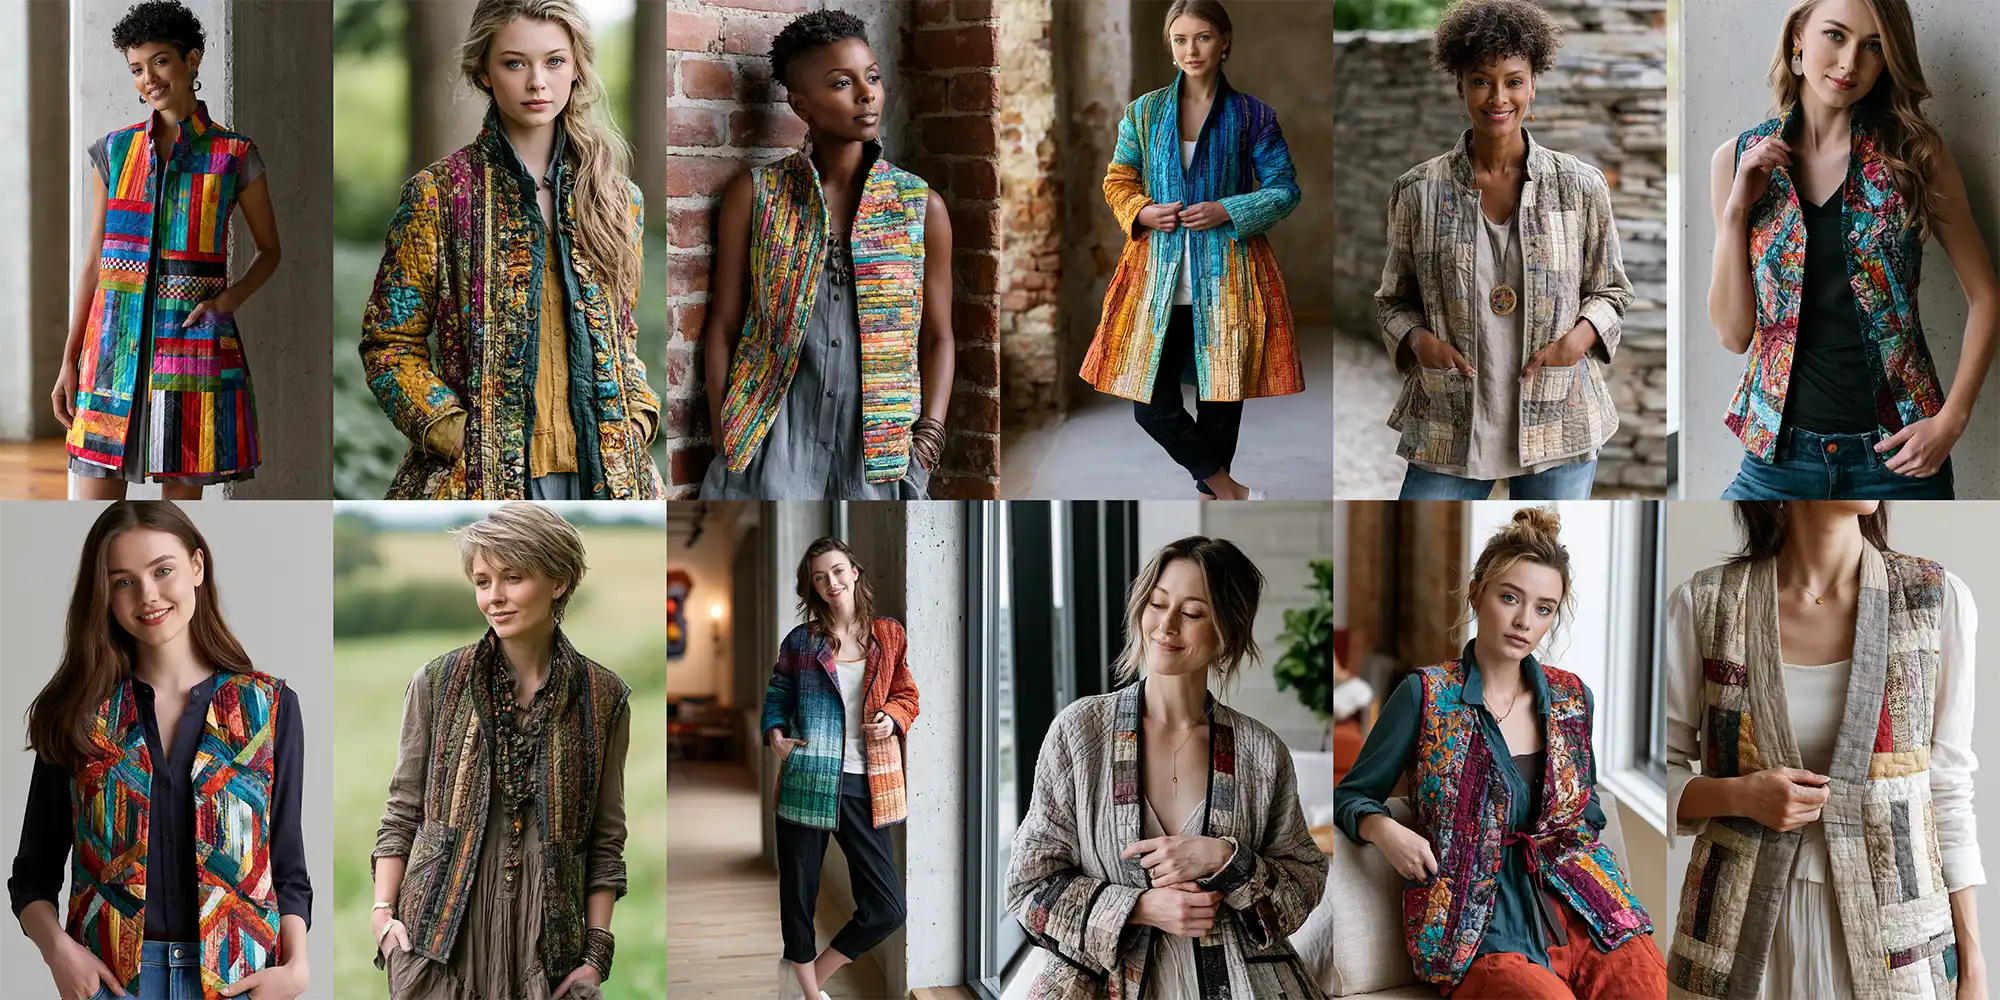
11 Effortlessly Elegant: Stylish Jelly Roll Quilted Jackets and Vests for Cozy Comfort
Jelly Roll Quilted Jackets sit at an interesting intersection that the mainstream fashion industry has largely ignored and that the quilting community has quietly explored for years. The quilted chore coat and barn jacket trend that has moved through fashion retail over the past several seasons — padded, structured, visually textured outerwear — is something quilters have been making from their own fabric stashes long before it appeared in boutique windows. The jelly roll version takes that instinct and applies the pre-cut strip logic that makes jelly roll quilts so appealing: coordinated colors, consistent strip widths, and a construction method that produces a visually dynamic textile without the fabric-audition process that slows most garment-making projects.
What jelly roll construction does for a jacket or vest specifically is worth understanding before getting into the designs. The 2.5-inch pre-cut strips, sewn together and layered with batting, create a textile with more visual depth and directional interest than standard quilted fabric. The linear pattern follows the body’s movement rather than sitting as a static surface texture, which is why jelly roll outerwear photographs well and wears even better. The multiple layers built into strip-pieced construction also produce natural insulation without the bulk of heavy outer fabrics, making these garments genuinely functional across a wider temperature range than their lightweight appearance suggests.
The community around jelly roll garments has grown considerably in quilting circles and DIY fashion spaces, driven partly by the sustainability appeal — pre-cut bundles reduce fabric waste significantly compared to yardage cutting — and partly by the current fashion moment, which is unusually receptive to visible handcraft and textile heritage in clothing. A jelly roll jacket does not look like fast fashion because it is not built like fast fashion. The construction is visible in the finished garment, and that visibility is increasingly valued rather than hidden.
I find this category compelling for the same reason I find jelly roll quilts compelling: the pace of making matches the quality of the result. These seven ideas show what that construction logic produces across different silhouettes and styling directions.
See also: Jelly Roll Quilt Pattern – Farmhouse Quilt Jackets & Vests
Some of the Best Jelly Roll Fabrics for These Quilt Patterns
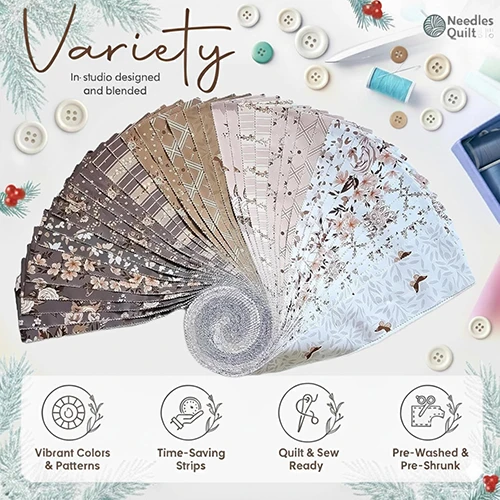
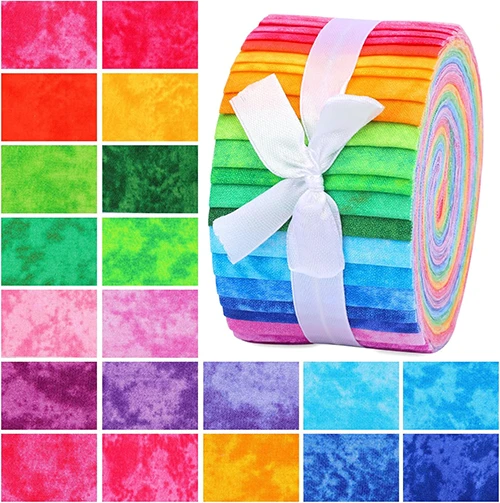
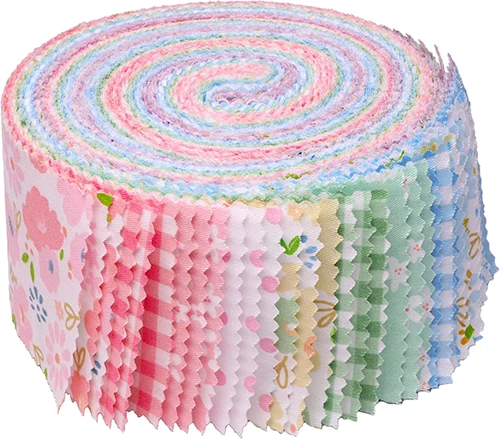
Jelly Roll Quilted Jackets and Vests
What Jelly Roll Construction Does for Outerwear
Strip-pieced fabric has properties that standard quilted panels do not — directional movement, color progression built into the construction, and a surface that reads differently at different scales. These seven designs use those properties deliberately rather than incidentally.
See also: 20 Jelly Roll Quilt Pattern Ideas · Jelly Roll tote bag ideas · Japanese quilted jackets and vests · Boho Quilt Jackets, and Vests
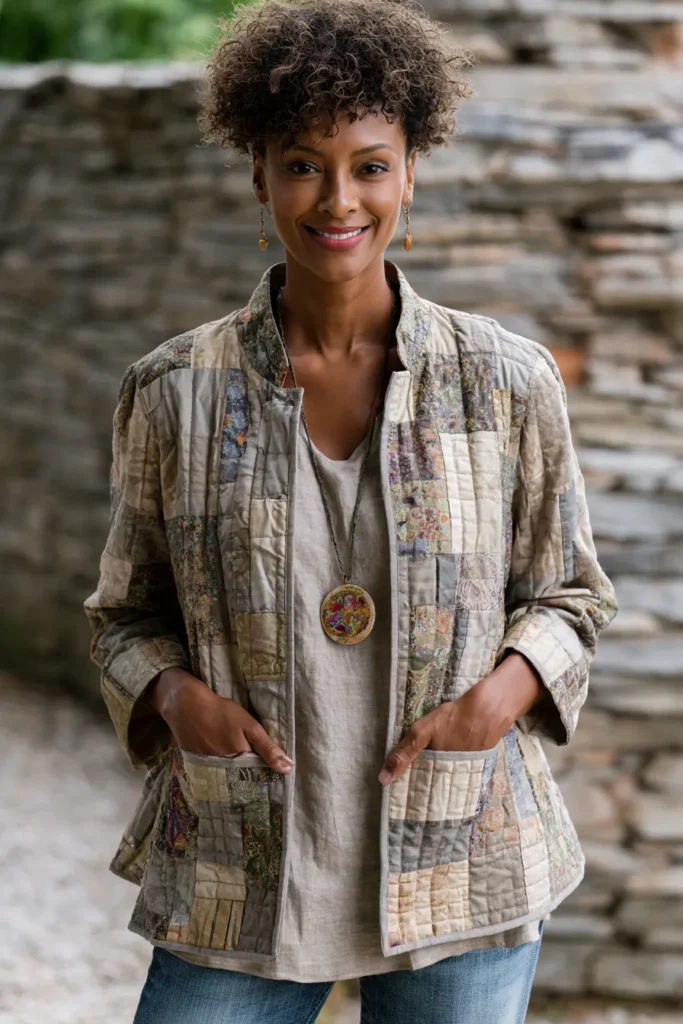
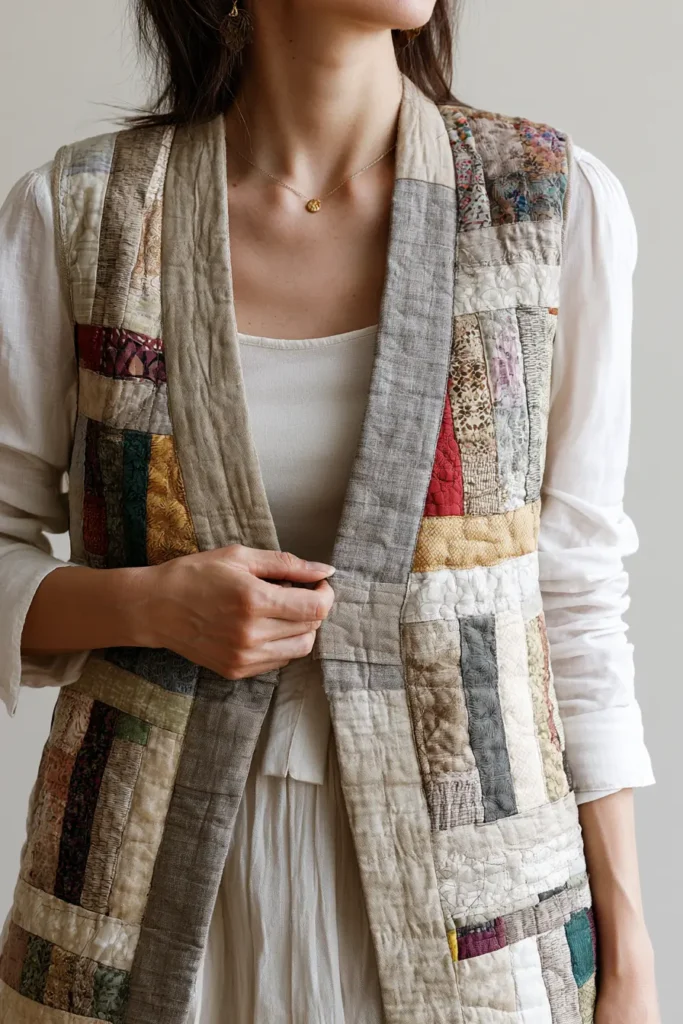
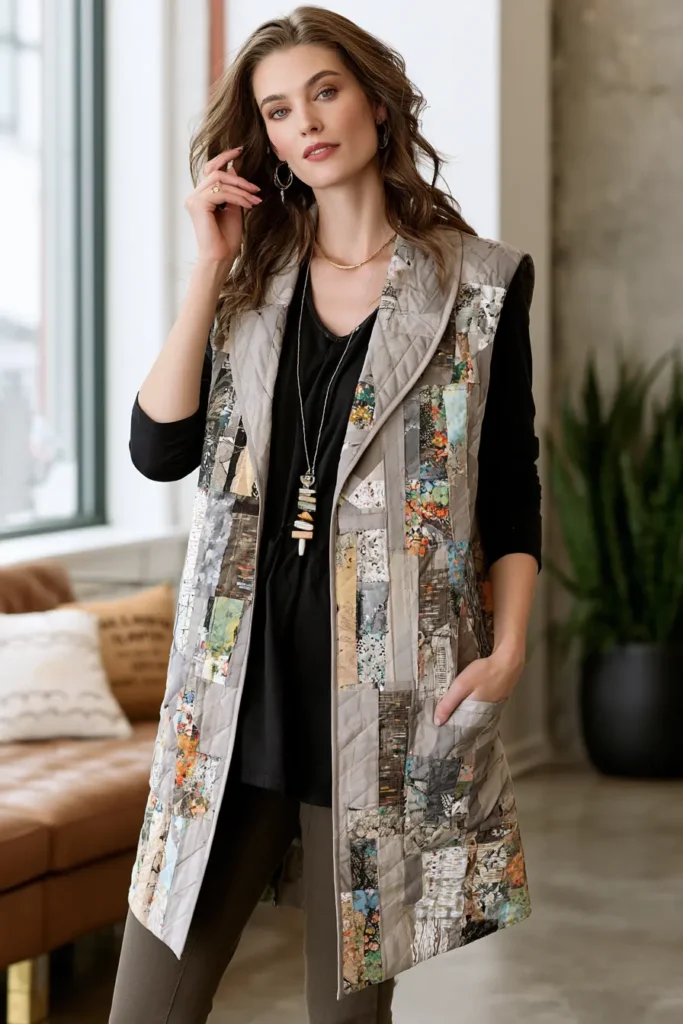
1. Chic Neutral Tone Jelly Roll Quilted Jackets for Minimalist Everyday Elegance
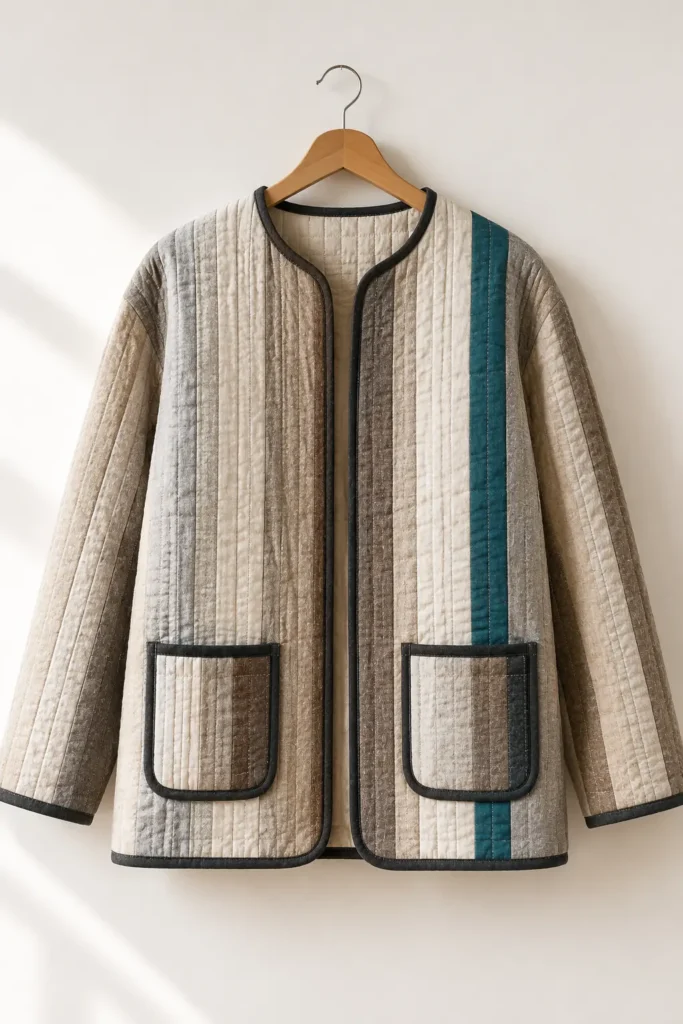
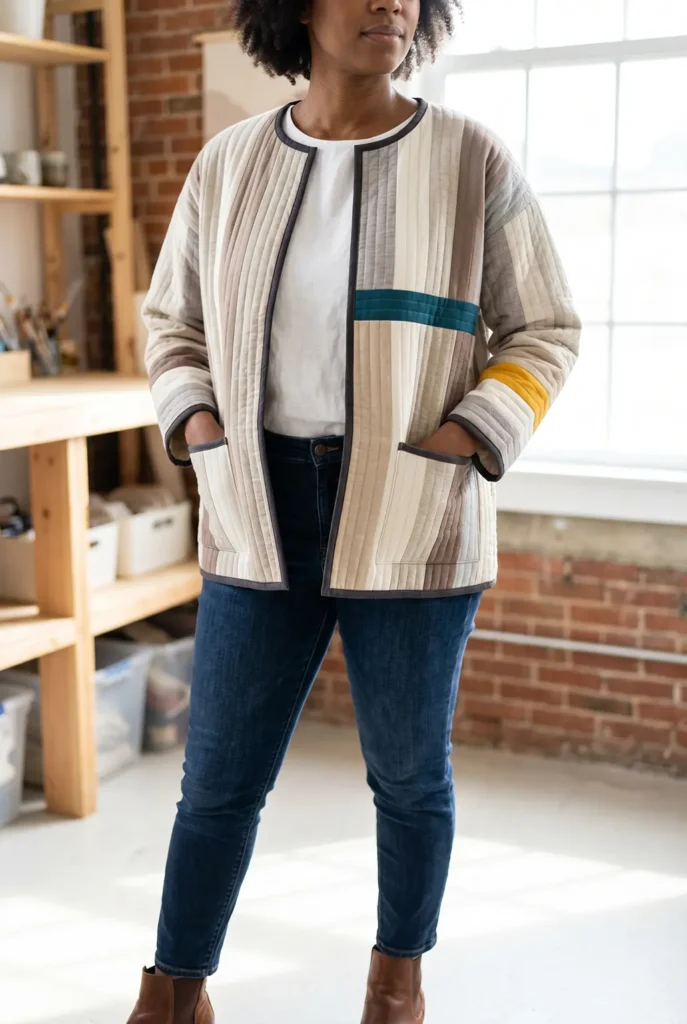
A chic, neutral-toned jelly-roll quilted jacket is a beautiful way to turn soft fabric strips into a wearable quilt with modern, minimalist style. Jelly roll strips are usually 2½ inches wide, which makes them perfect for creating clean striped panels, subtle patchwork, and cozy quilted texture without complicated cutting.
For an elegant everyday look, use calming neutrals such as ivory, oatmeal, linen beige, warm taupe, greige, cocoa, soft gray, charcoal, and black. To keep the jacket from feeling flat, add one or two vibrant accent strips in deep teal, emerald green, saffron yellow, ruby red, cobalt blue, coral, or plum. The result is a cozy layer that feels handmade, stylish, and easy to wear.
Why I Made It
I made this jacket because I wanted the comfort of a quilt in a piece I could wear every day. A full quilt is wonderful at home, but a quilted jacket lets you carry that warmth into errands, coffee dates, creative workdays, and cool evening walks.
The backstory behind this idea comes from the long tradition of turning quilts and quilted textiles into practical garments. Quilted jackets have become especially loved because they combine utility with personality. A neutral jelly roll version feels more polished and minimalist, while the subtle striping keeps the garment interesting up close.
Why This Idea Is Worth Making
This idea is worth making because it gives you a wearable quilt that is practical, stylish, and deeply personal. It is easier than sewing a fully tailored coat, especially if you start with a simple boxy jacket shape, but it still teaches useful skills like strip piecing, quilting, binding, garment assembly, and finishing seams.
It is also a wonderful way to use a jelly roll in a fresh way. Instead of making a traditional throw quilt, you create a cozy everyday garment that can be styled with jeans, linen trousers, dresses, boots, or simple basics.
Finished Size
This beginner-friendly guide makes a relaxed, boxy quilted jacket.
Sample finished measurements for a loose medium size:
- Finished chest: about 44 inches
- Finished length: about 24 inches from shoulder to hem
- Sleeve length: about 20 inches from the shoulder seam
- Arm opening: about 9 inches deep
- Front opening: no zipper or buttons for the simplest version
To adjust sizing, measure a loose jacket you already like and use it as a guide. Add 3 to 5 inches of ease around the chest so the quilted jacket fits comfortably over clothing.
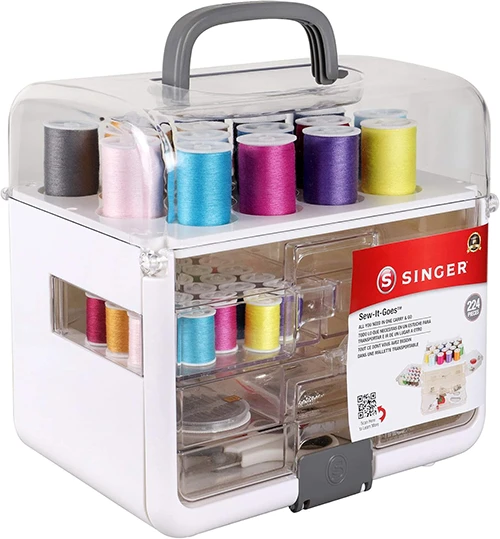
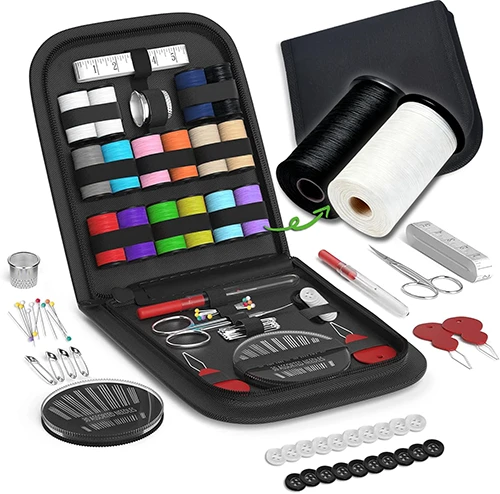
Helpful Sewing Kits for New Quilters
Materials Needed
For one simple quilted jacket, gather:
- One jelly roll or 24 to 30 strips: 2½ inches x width of fabric
- Backing fabric for quilted panels: 2½ to 3 yards
- Lightweight cotton batting: 2½ to 3 yards
- Bias binding or binding fabric: ¾ to 1 yard
- Thread: ivory, taupe, gray, charcoal, or coordinating neutral
- Optional accent strips: teal, saffron, emerald, plum, ruby, coral, or cobalt
- Simple jacket pattern or loose jacket to trace
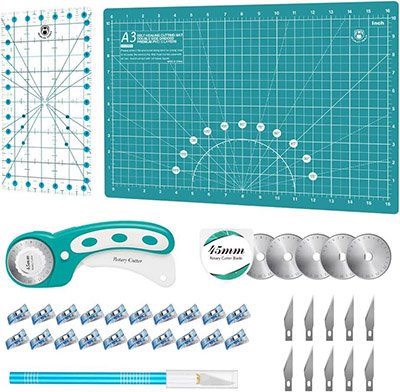
- Rotary cutter and cutting mat
- Quilting ruler
- Pins or sewing clips
- Sewing machine
- Iron and ironing board
- Fabric marker or tailor’s chalk
Beginner tip: Choose lightweight cotton batting. Thick batting can make the jacket bulky and stiff.
Chic Neutral Palette
A polished minimalist palette could include:
- Ivory
- Cream
- Oatmeal
- Sand beige
- Warm taupe
- Greige
- Cocoa
- Soft gray
- Charcoal
- Accent: deep teal, emerald, saffron, ruby, coral, cobalt, or plum
For the most wearable result, keep about 80 percent of the jacket neutral and use the accent colors in small, intentional places such as sleeve cuffs, front bands, pocket tops, or one striking strip across the back.
Cutting Measurements
These measurements create quilted panels large enough to cut a simple jacket.
From jelly roll strips, prepare:
- Back panel strip set: about 28 x 30 inches
- Two front panel strip sets: each about 16 x 28 inches
- Two sleeve panel strip sets: each about 18 x 24 inches
- Optional pocket pieces: two rectangles about 7 x 8 inches
From backing fabric, cut:
- Back backing: 30 x 32 inches
- Two front backings: 18 x 30 inches each
- Two sleeve backings: 20 x 26 inches each
- Pocket backings: two pieces 8 x 9 inches each
From batting, cut:
- Back batting: 30 x 32 inches
- Two front battings: 18 x 30 inches each
- Two sleeve battings: 20 x 26 inches each
- Pocket batting: two pieces 8 x 9 inches each
For binding, cut:
- Binding strips: 2½ inches wide
- You will need enough for the neckline, front opening, hem, sleeve cuffs, and optional pocket edges
Use a ¼-inch seam allowance for strip piecing and a ½-inch seam allowance for jacket construction unless your pattern says otherwise.
Step-by-Step Guide
Step 1: Choose the Jacket Shape and Size
Start with a simple boxy jacket pattern, a kimono-style jacket pattern, or a loose jacket you already own. Avoid fitted seams for your first version because quilted fabric has less drape than regular garment fabric.
Trace or choose pattern pieces for:
- Back body
- Left front
- Right front
- Two sleeves
- Optional pockets
Add extra ease if needed. Quilted fabric feels thicker, so a relaxed shape is more comfortable.
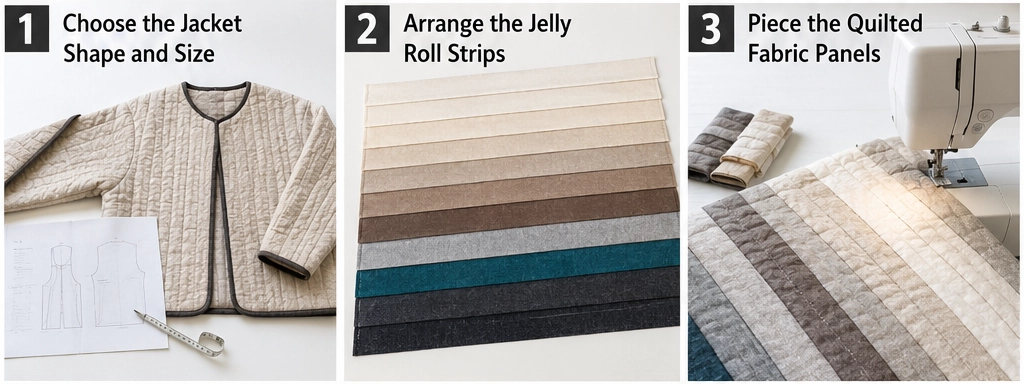
Step 2: Arrange the Jelly Roll Strips
Lay out your jelly roll strips in a soft neutral order. For a minimalist look, move from light to dark: ivory, oatmeal, beige, taupe, greige, cocoa, gray, and charcoal.
Add one vibrant accent strip where you want the eye to land. A single deep teal strip across the back or a saffron strip near the cuff can make the jacket feel modern without becoming too busy.
Step 3: Piece the Quilted Fabric Panels
Sew jelly roll strips together lengthwise using a ¼-inch seam allowance until you create panels larger than your pattern pieces.
Make separate strip-pieced panels for:
- Back
- Two fronts
- Two sleeves
- Optional pockets
Press seams open or to one side. Trim each panel neatly, but keep it slightly larger than the final pattern piece, as quilting can shrink the fabric slightly.
Step 4: Layer the Quilt Sandwiches
For each jacket section, layer:
- Backing fabric wrong side up
- Batting in the middle
- Jelly roll panel right side up
Smooth each layer carefully and pin or baste well.
This creates mini quilt sandwiches that will become the jacket pieces.
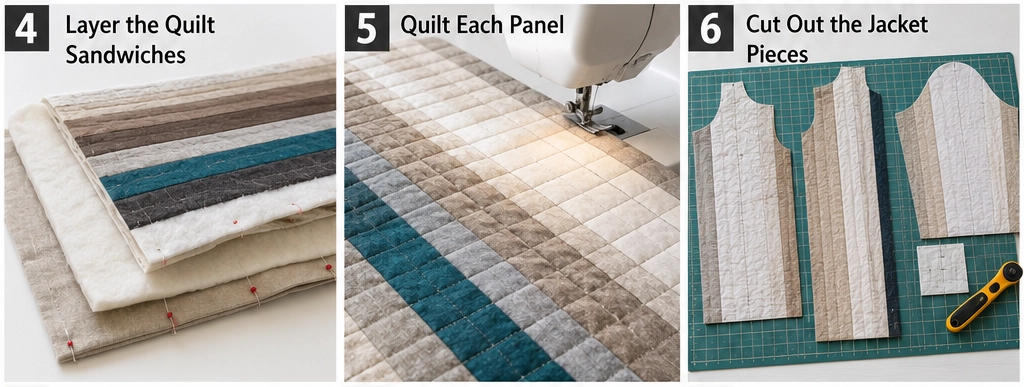
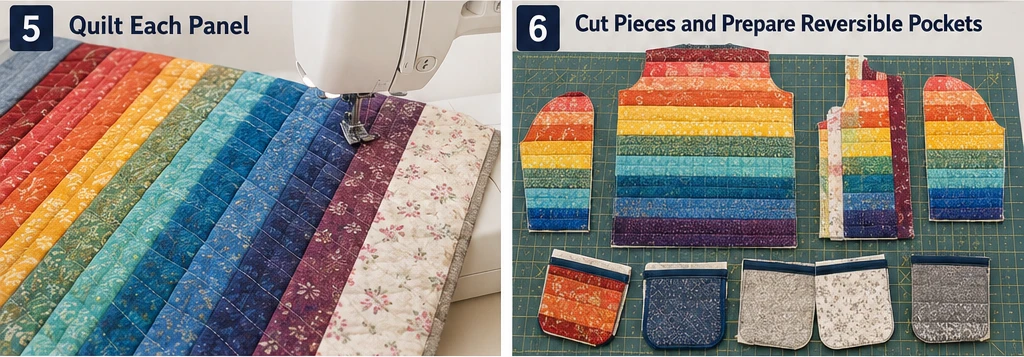
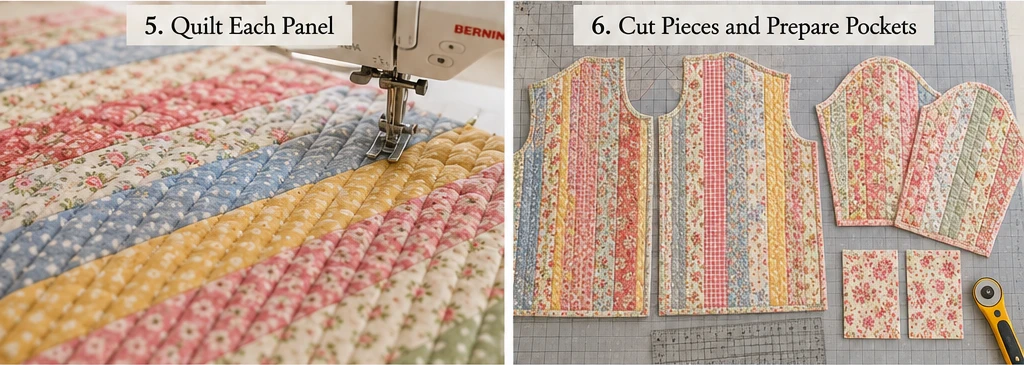
Step 5: Quilt Each Panel
Quilt each panel before cutting the final pattern pieces. This is easier than trying to quilt after the jacket is assembled.
For a clean beginner-friendly look, stitch straight lines ¼ inch away from each jelly roll seam. You can also add diagonal quilting lines spaced 1½ to 2 inches apart for a more modern texture.
Keep quilting simple so the jacket stays soft and wearable.
Step 6: Cut Out the Jacket Pieces
Place your jacket pattern pieces on the quilted panels and cut:
- 1 back piece
- 2 front pieces
- 2 sleeves
- 2 pockets, optional
Pay attention to the stripe direction. Vertical stripes make the jacket look longer and cleaner, while horizontal stripes feel more quilt-like and relaxed.
For a polished minimalist look, use a vertical or slightly diagonal strip direction on the body.
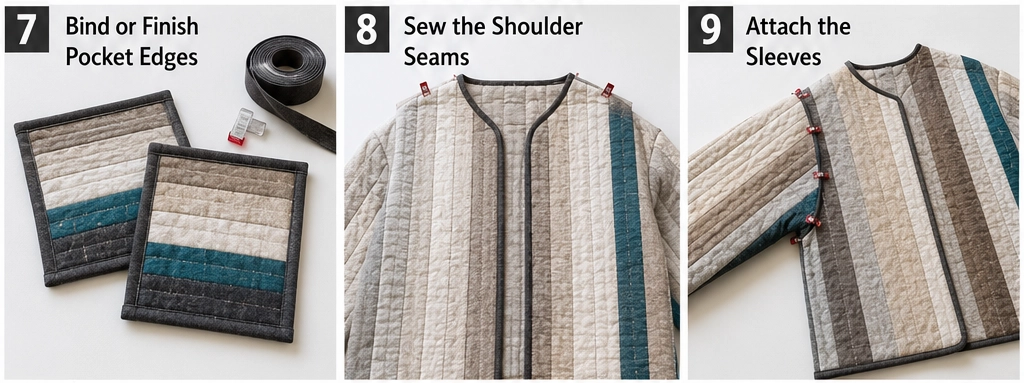
Step 7: Bind or Finish Pocket Edges
If adding pockets, bind the top edge of each pocket with 2½-inch binding or fold the top edge under and topstitch.
Place pockets on the lower front pieces, about 3 inches above the hem and 2½ inches from the side edge. Stitch around the sides and bottom, leaving the top open.
Reinforce the top corners with a small backstitch.
Step 8: Sew the Shoulder Seams
Place the front pieces right sides together with the back piece at the shoulders. Sew shoulder seams using a ½-inch seam allowance.
Press the seams gently. If the seams feel bulky, grade the batting slightly or bind the raw seam for a cleaner inside finish.
Step 9: Attach the Sleeves
With the jacket body open flat, pin one sleeve to one armhole, right sides together. Match the sleeve center to the shoulder seam.
Sew slowly using a ½-inch seam allowance. Repeat with the second sleeve.
Because the pieces are quilted, use clips if pins struggle to hold the layers.
Step 10: Sew the Side and Sleeve Seams
Fold the jacket right sides together, matching sleeve edges and side seams.
Sew from the sleeve cuff down to the underarm, then along the side seam in one continuous line. Repeat on the other side.
Try on the jacket carefully before finishing the raw edges. If the underarm feels tight, reduce the bulk or slightly deepen the armhole on your next version.
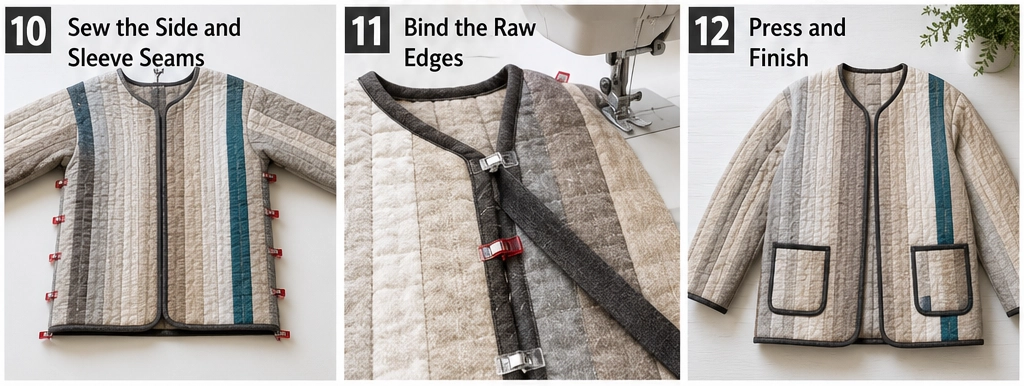
Step 11: Bind the Raw Edges
Bind the front opening, neckline, hem, and sleeve cuffs with 2½-inch binding strips.
For a clean finish, sew the binding to the outside first, then fold it to the inside and stitch it down by hand or machine.
A binding in charcoal, cocoa, deep teal, saffron, plum, or black frames the jacket beautifully.
Step 12: Press and Finish
Give the jacket a gentle final press. Use steam lightly and avoid flattening the quilted texture too much.
Check for loose threads, reinforce pocket corners, and add a small label if desired.
For the simplest closure, leave the jacket open. If you want a closure, add one large button, a tie belt, or two small fabric ties at the front.
Assembly at a Glance
- Choose a simple, relaxed jacket pattern or trace a loose jacket.
- Select neutral jelly roll strips and one or two vibrant accents.
- Piece oversized strip panels for the back, fronts, sleeves, and pockets.
- Layer each panel with batting and backing.
- Quilt each panel with straight lines.
- Cut final jacket pieces from the quilted panels.
- Add and bind optional pockets.
- Sew shoulder seams.
- Attach sleeves to the open jacket body.
- Sew sleeve and side seams.
- Bind neckline, front opening, hem, and cuffs.
- Press gently and add optional closure details.
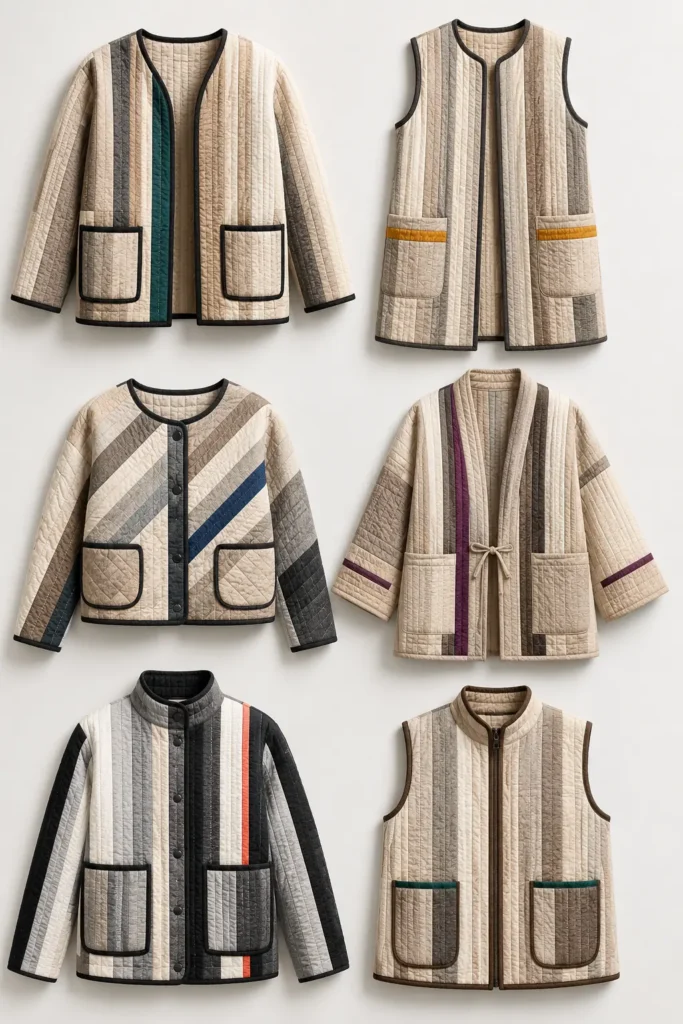
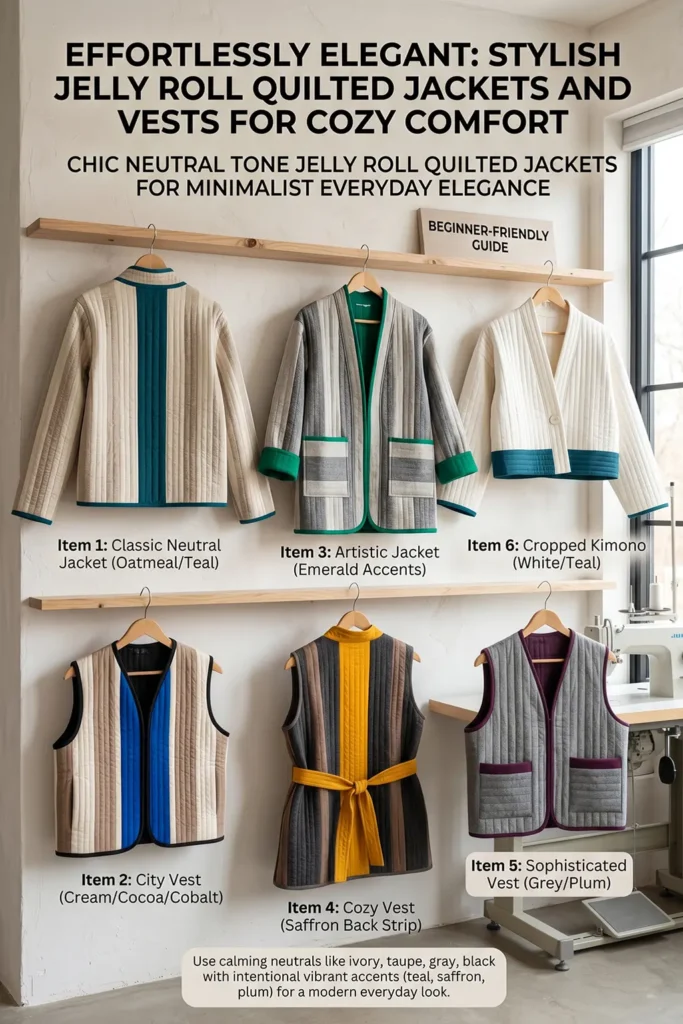
Neutral and Vibrant Color Combination Ideas
For a soft minimalist jacket, use ivory, oatmeal, beige, taupe, greige, and charcoal with a broad teal accent.
For a warm everyday jacket, use cream, sand, cocoa, caramel, warm gray, and black, with a saffron-yellow strip.
For a modern city jacket, use white, slate gray, charcoal, black, and taupe with a cobalt blue accent.
For a refined, artistic jacket, use beige linen, soft gray, espresso, ivory, and plum, with a small ruby-red detail.
For a brighter minimalist look, use cream, taupe, charcoal, emerald, coral, and mustard gold, keeping the bright colors limited to the cuffs or pockets.
Beginner Tips for Success
Use a loose jacket shape for your first quilted garment. Fitted patterns are harder to work with because quilted fabric is thicker and less flexible.
Quilt the panels before cutting the garment pieces. This keeps the construction manageable and beginner-friendly.
Choose lightweight batting. Heavy batting can make the jacket too warm, bulky, or stiff.
Use clips instead of pins for thick layers. Clips hold quilted fabric more securely.
Finish raw seams with binding if you want the inside to look neat. A quilted jacket often looks more polished when the seams are clean inside and out.
Try the jacket on before binding the hem and cuffs. This lets you adjust sleeve length or body length first.
Styling Tip
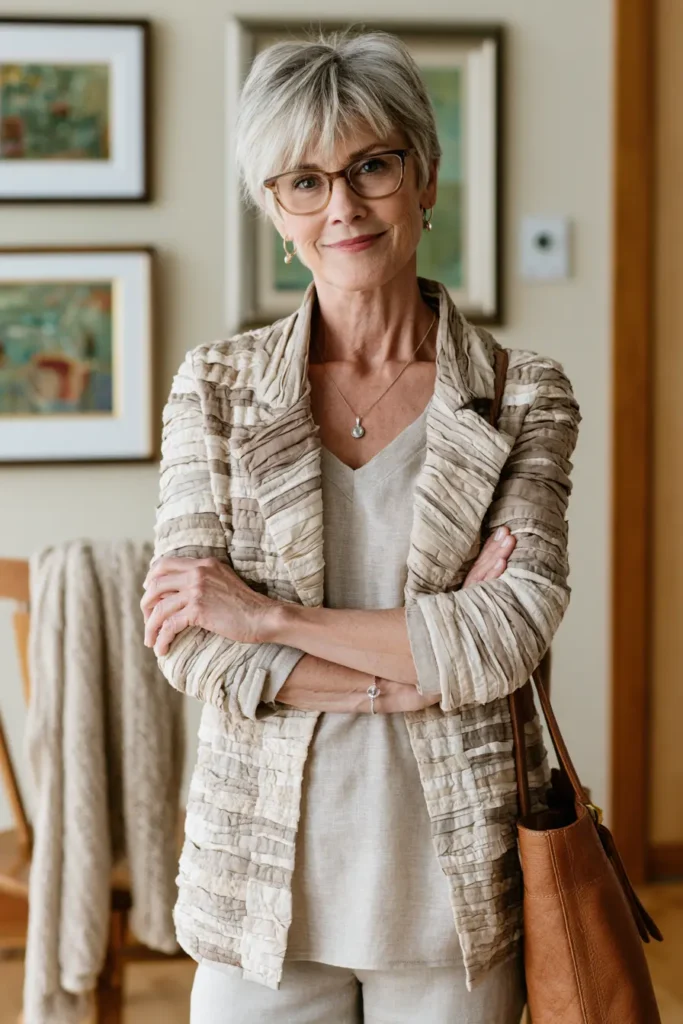
Wear the finished neutral jelly roll quilted jacket with black trousers, denim, linen pants, a simple dress, or a monochrome outfit. The neutral striping keeps it elegant, while a flash of teal, saffron, emerald, cobalt, ruby, coral, or plum adds personality. It is cozy enough for everyday comfort but polished enough to feel intentional and stylish.
Other Design Inspirations – Digitally Modified
Tools for Cutting, Pressing, and Sewing
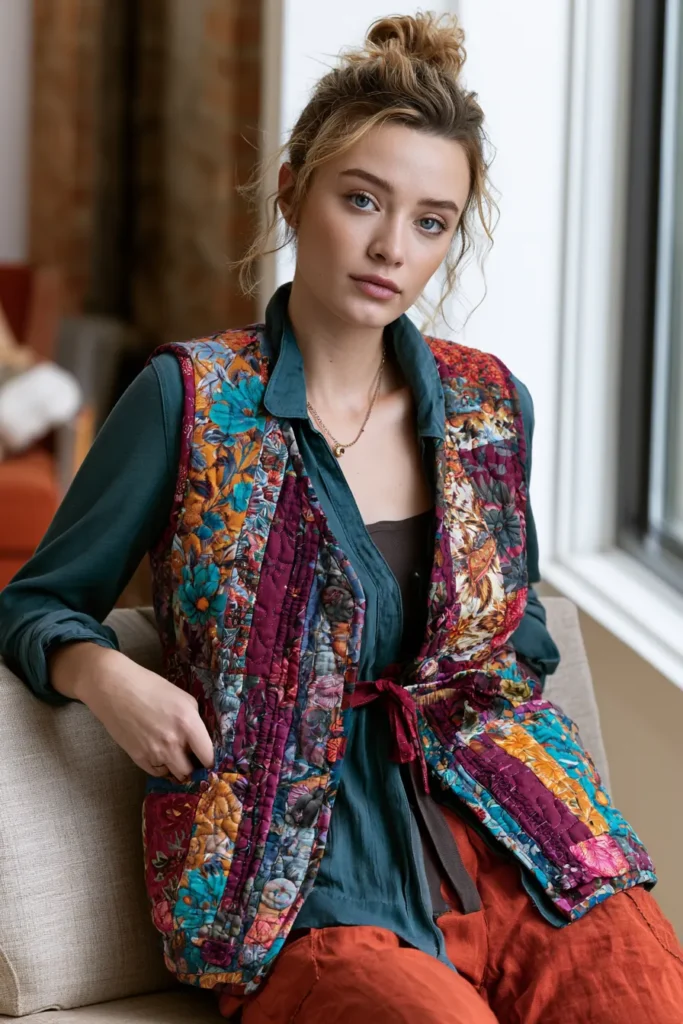
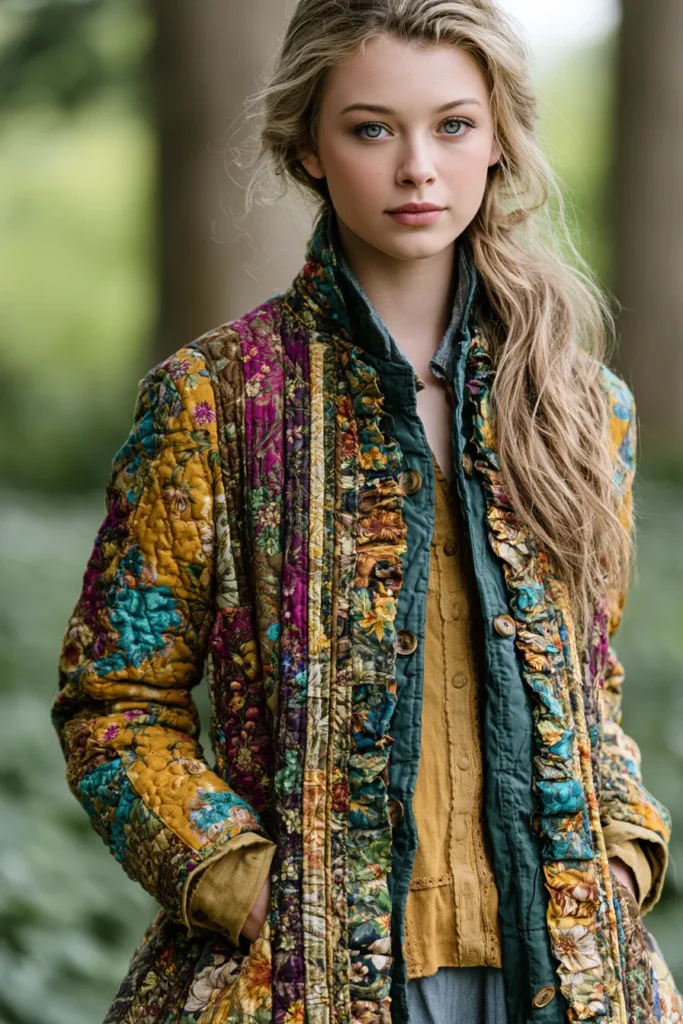
2. Bold Ombre Jelly Roll Quilt Jackets for Stylish Statement Outerwear
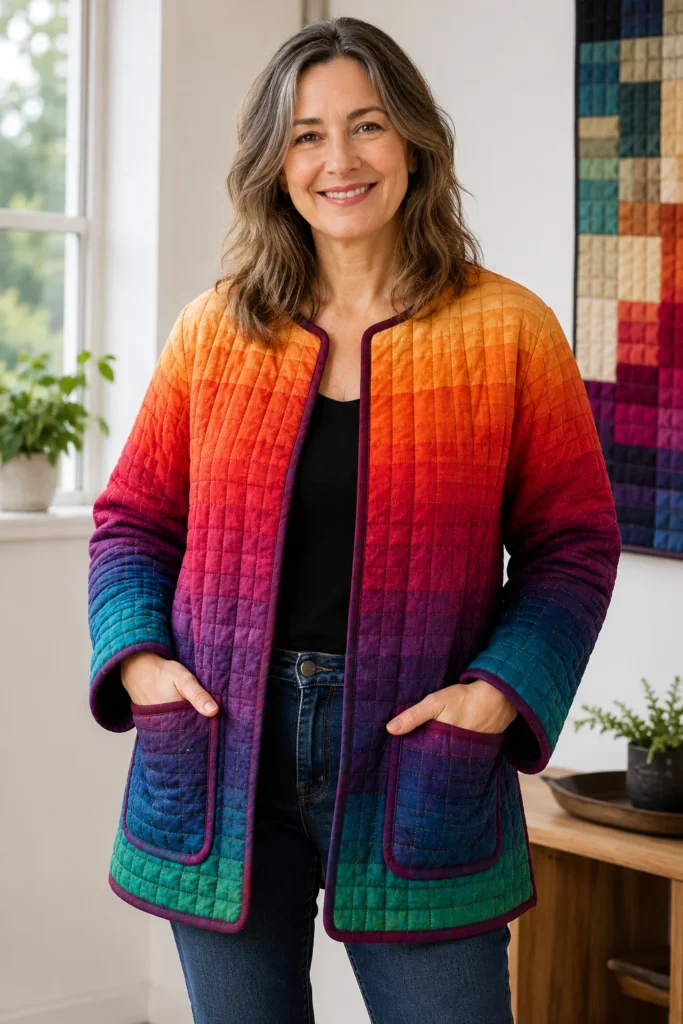
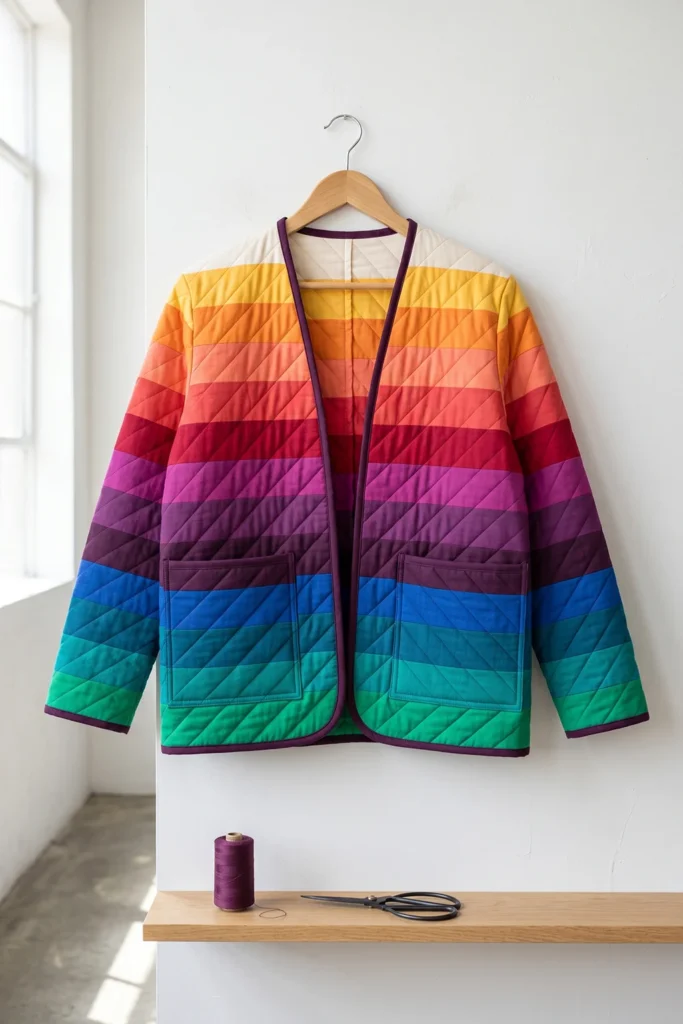
A bold ombre jelly roll quilt jacket is a wearable quilt with movement, color, and personality. Instead of using one flat fabric, this jacket is built from 2½-inch jelly roll strips arranged from light to dark or from one color family into another. The result is a cozy statement layer that looks artistic but still feels practical for everyday wear.
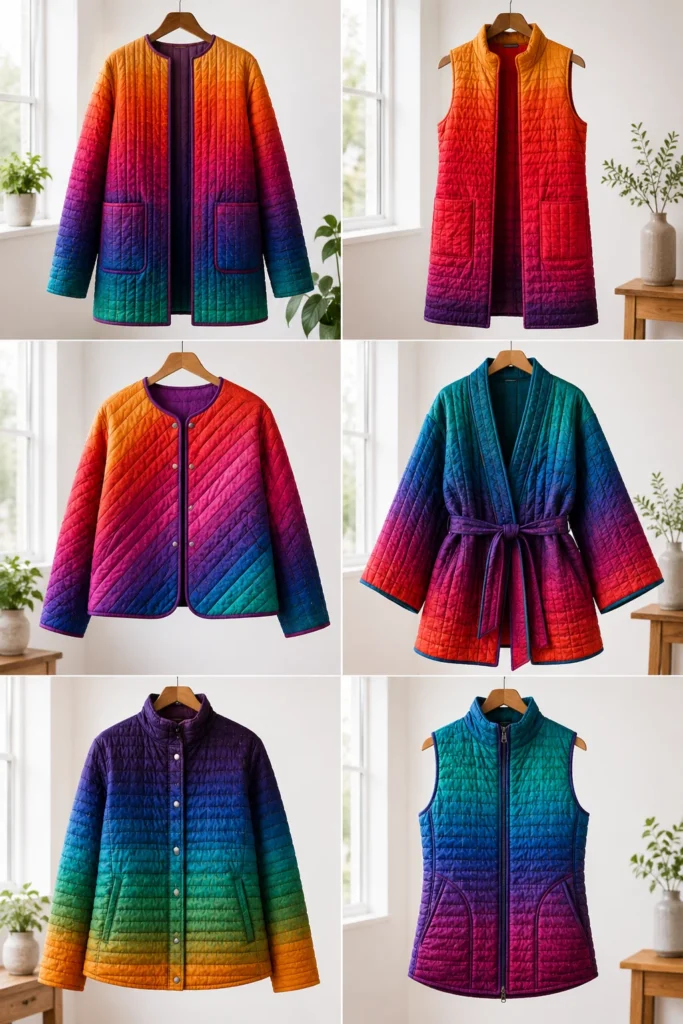
For a vibrant statement jacket, use a color flow such as ruby red, coral, tangerine, saffron yellow, emerald green, teal, turquoise, cobalt blue, violet, and deep plum. The ombre layout makes the jacket feel intentional and modern, while the quilted texture adds warmth and softness.
Why I Made It
I made this jacket because I wanted outerwear that felt as expressive as a quilt but as wearable as a favorite cardigan. A jelly roll ombre layout is perfect for that because the strips naturally create rhythm across the body, sleeves, and pockets.
The backstory behind this idea comes from the long tradition of quilted garments. Quilted jackets have been used for warmth and practicality for generations, but modern makers have turned them into creative fashion pieces. A bold ombre jelly roll version brings that tradition into a fresh, colorful, statement-making style.
Why This Idea Is Worth Making
This idea is worth making because it turns simple strip piecing into a dramatic wearable piece. It looks impressive, but the construction can stay beginner-friendly if you use a loose jacket shape and quilt the panels before cutting the garment pieces.
It is also a wonderful way to use a jelly roll creatively. Instead of making a traditional throw quilt, you create a jacket that can be worn with denim, dresses, boots, sneakers, or simple basics. Every strip becomes part of the color story.
Finished Size
This beginner-friendly guide makes a relaxed, boxy quilted jacket.
Sample finished measurements for a loose medium size:
- Finished chest: about 44 inches
- Finished length: about 24 inches from shoulder to hem
- Sleeve length: about 20 inches from the shoulder seam
- Armhole depth: about 9 inches
- Front opening: open-front style, no zipper or buttons for the simplest version
To adjust the size, measure a loose jacket you already like. Add 3 to 5 inches of ease around the chest, as quilted fabric is thicker than regular garment fabric.
Materials Needed
For one simple ombre quilted jacket, gather:
- One jelly roll or 26 to 32 strips: 2½ inches x width of fabric
- Backing fabric: 2½ to 3 yards
- Lightweight cotton batting: 2½ to 3 yards
- Binding fabric: ¾ to 1 yard
- Thread: ivory, gray, teal, coral, plum, or coordinating color
- Simple boxy jacket pattern or loose jacket to trace
- Rotary cutter and cutting mat
- Quilting ruler
- Pins or sewing clips
- Sewing machine
- Iron and ironing board
- Fabric marker or tailor’s chalk
Beginner tip: Use lightweight batting so the jacket stays flexible and comfortable. Thick batting can make sleeves stiff and bulky.
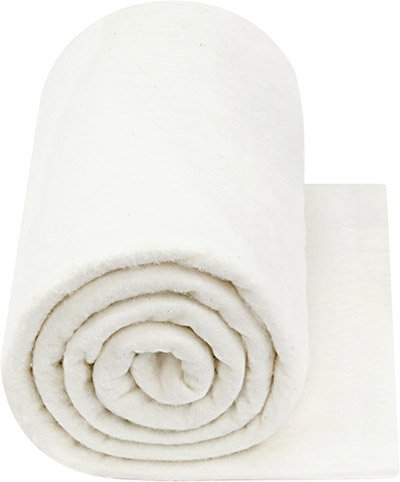
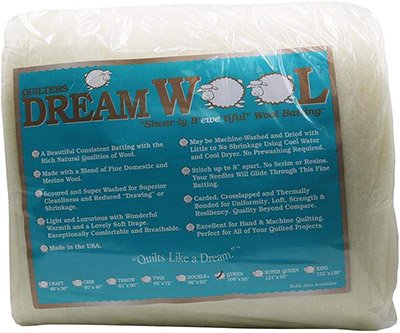
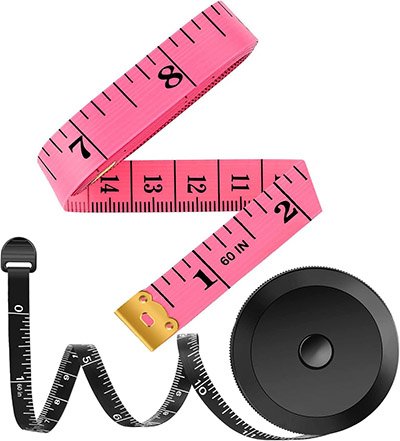
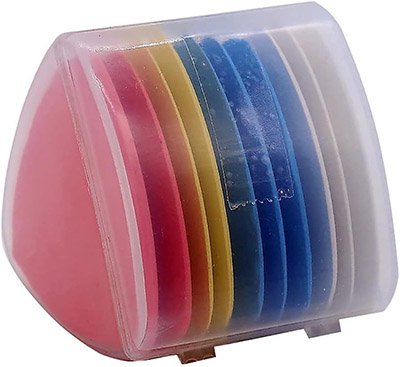
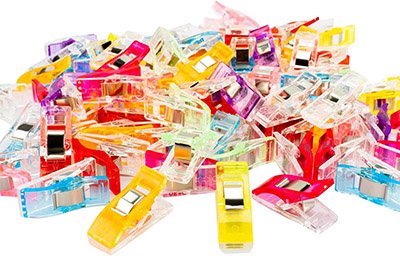
Batting, Measuring, Marking, and Clipping Supplies for Quilts
“As an Amazon Associate, I earn from qualifying purchases.“
Bold Ombre Color Palette
A vibrant ombre sequence could include:
- Ivory
- Saffron yellow
- Tangerine orange
- Coral
- Ruby red
- Magenta
- Violet
- Deep plum
- Cobalt blue
- Teal
- Emerald green
For a more wearable version, use mostly coral, ruby, plum, teal, and navy, then add saffron or emerald as small accents on cuffs, pockets, or binding.
Cutting Measurements
These measurements create quilted panels large enough to cut a relaxed jacket.
From jelly roll strips, prepare:
- Back panel strip set: about 30 x 32 inches
- Left front panel strip set: about 18 x 30 inches
- Right front panel strip set: about 18 x 30 inches
- Two sleeve panel strip sets: each about 20 x 26 inches
- Optional pocket pieces: two rectangles about 7 x 8 inches
From backing fabric, cut:
- Back backing: 32 x 34 inches
- Two front backings: 20 x 32 inches each
- Two sleeve backings: 22 x 28 inches each
- Two pocket backings: 8 x 9 inches each
From batting, cut:
- Back batting: 32 x 34 inches
- Two front battings: 20 x 32 inches each
- Two sleeve battings: 22 x 28 inches each
- Two pocket battings: 8 x 9 inches each
For binding, cut:
- Binding strips: 2½ inches wide
- You will need enough for the front opening, neckline, hem, sleeve cuffs, and optional pocket tops
Use a ¼-inch seam allowance for strip piecing and a ½-inch seam allowance for jacket construction unless your pattern says otherwise.
Step-by-Step Guide
Step 1: Choose a Simple Jacket Shape
Start with a loose, boxy jacket pattern or trace a relaxed jacket you already own. A simple open-front shape is best for beginners because it avoids zippers, button plackets, collars, and fitted shaping.
Look for pattern pieces for:
- Back body
- Left front
- Right front
- Two sleeves
- Optional patch pockets
Quilted fabric has more body than regular fabric, so avoid tight sleeves or fitted waist seams for your first version.
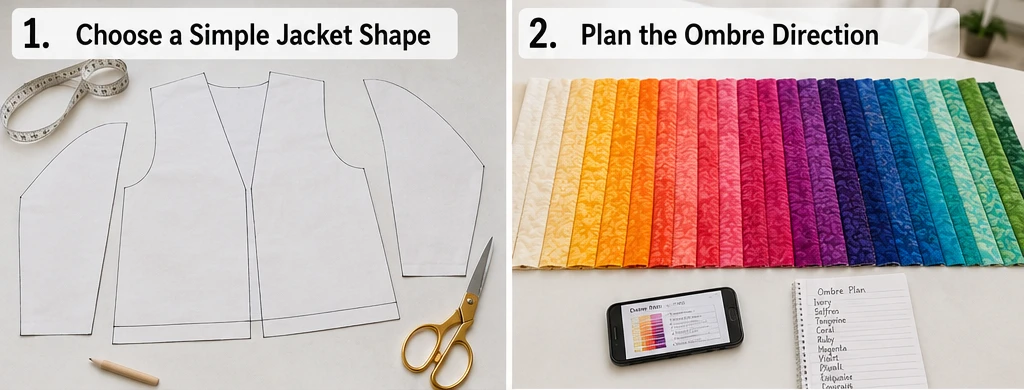
Step 2: Plan the Ombre Direction
Decide how the color will move across the jacket. For a dramatic statement, let the ombre flow from light at the shoulders to dark at the hem. For a more artistic look, let the colors move from warm on one side to cool on the other.
A strong layout idea is:
- Back: saffron and coral at the top, ruby and plum in the center, teal and emerald near the hem
- Fronts: one side warmer, one side cooler
- Sleeves: matching ombre from shoulder to cuff
- Binding: deep plum, teal, charcoal, or ruby
Take a photo of the strip order before sewing.
Step 3: Piece the Jelly Roll Panels
Sew jelly roll strips together lengthwise using a ¼-inch seam allowance until each panel is larger than the pattern piece you need.
Make separate strip-pieced panels for:
- Back
- Left front
- Right front
- Two sleeves
- Optional pockets
Press seams open or to one side. Keep the strip order consistent if you want the ombre to flow smoothly.
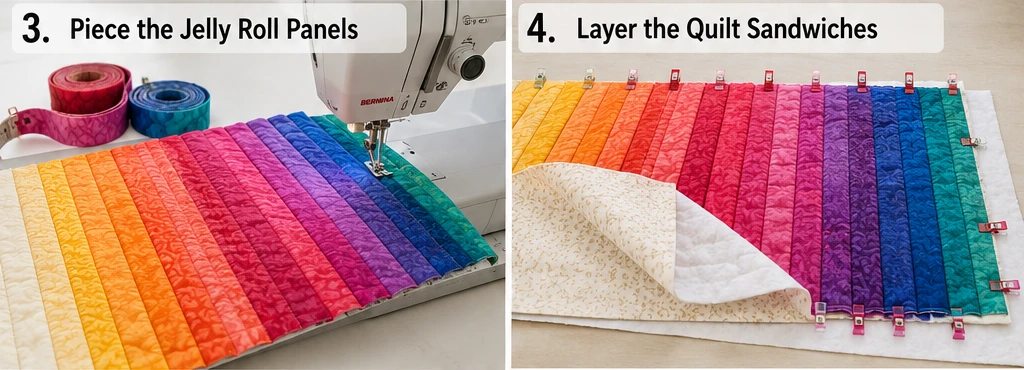
Step 4: Layer the Quilt Sandwiches
For each jacket section, layer:
- Backing fabric wrong side up
- Lightweight batting in the middle
- Jelly roll strip panel right side up
Smooth each layer carefully and baste with pins or spray.
This method creates quilted fabric panels before garment assembly, which is much easier than quilting the jacket after it is sewn.
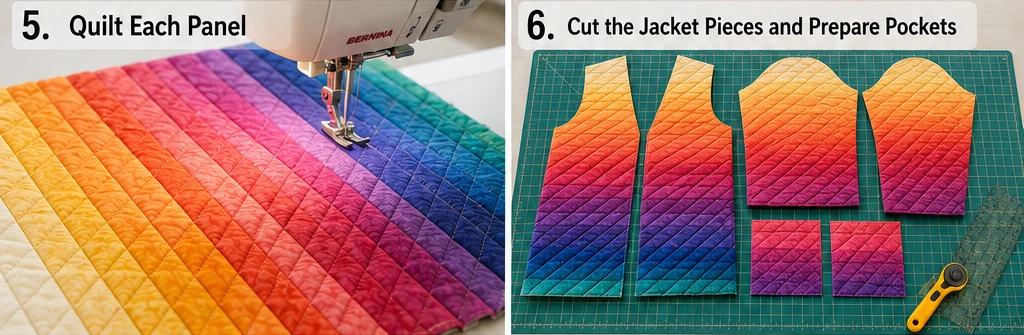
Step 5: Quilt Each Panel
Quilt each panel with beginner-friendly straight lines. Stitch ¼ inch away from each jelly roll seam for a clean channel-quilted finish.
For a bolder fashion look, add diagonal quilting lines spaced 1½ to 2 inches apart. Diagonal quilting gives the ombre movement and helps the jacket feel more modern.
Do not quilt too densely. Softer quilting makes the jacket easier to wear.
Step 6: Cut Out the Jacket Pieces
Place your jacket pattern pieces on the quilted panels and cut:
- 1 back piece
- 2 front pieces
- 2 sleeves
- 2 optional pockets
Pay attention to color placement before cutting. Check that the brightest colors land where you want them. For example, place coral or saffron near the upper body for glow, and plum or teal near the hem for depth.
Step 7: Prepare and Attach the Pockets
If adding pockets, cut two quilted rectangles about 7 x 8 inches. Bind or fold the top edge and topstitch it.
Place each pocket on the lower front pieces, about 3 inches above the hem and 2½ inches from the side edge.
Stitch around the sides and bottom of each pocket. Reinforce the top corners with a few backstitches.
Step 8: Sew the Shoulder Seams
Place the front pieces right sides together with the back piece at the shoulders. Sew the shoulder seams using a ½-inch seam allowance.
Press gently. If the seams feel bulky, trim only the batting layer slightly inside the seam allowance, being careful not to cut through the stitching.
Step 9: Attach the Sleeves
Open the jacket body flat. Match the center of one sleeve cap to the shoulder seam, right sides together.
Pin or clip the sleeve into the armhole and sew slowly using a ½-inch seam allowance. Repeat with the second sleeve.
Use clips if the quilted layers are too thick for pins.
Step 10: Sew the Side and Sleeve Seams
Fold the jacket right sides together, matching the sleeve edges and side seams.
Sew from the sleeve cuff to the underarm, then down the side seam in one continuous line. Repeat on the other side.
Try the jacket on carefully before finishing the edges. Check the sleeve length, body length, and underarm comfort.
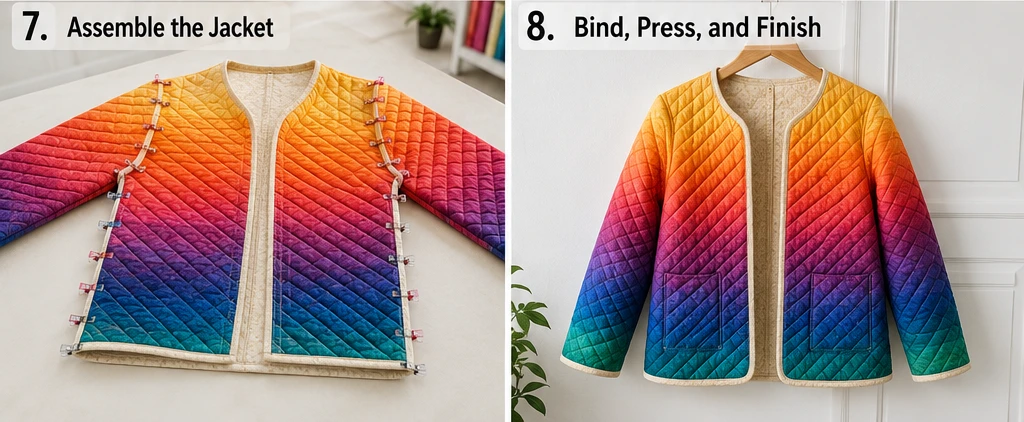
Step 11: Bind the Front Opening, Hem, and Cuffs
Use 2½-inch binding strips to finish the raw edges. Bind the neckline and front opening first, then the hem, then the sleeve cuffs.
A binding in deep plum, teal, ruby, charcoal, navy, or emerald frames the ombre beautifully.
For a beginner-friendly finish, sew the binding to the outside first, fold it to the inside, and stitch it down by machine or hand.
Step 12: Finish and Press
Give the jacket a gentle final press. Avoid flattening the quilting too much.
Trim loose threads, reinforce pocket corners, and add a label if desired. Leave the jacket open for an easy cardigan-style fit, or add one large button, fabric ties, or a snap at the neckline.
Assembly at a Glance
- Choose a loose boxy jacket pattern or trace a relaxed jacket.
- Select 26 to 32 jelly roll strips in a bold ombre sequence.
- Plan the color direction across the back, fronts, sleeves, and pockets.
- Piece oversized jelly roll panels for each jacket section.
- Layer each panel with backing and lightweight batting.
- Quilt each panel with straight or diagonal lines.
- Cut jacket pieces from the quilted panels.
- Attach optional patch pockets.
- Sew shoulder seams.
- Attach sleeves.
- Sew sleeve and side seams.
- Bind the neckline, front opening, hem, and cuffs.
- Press gently and add optional closure details.
Bold Ombre Color Combination Ideas
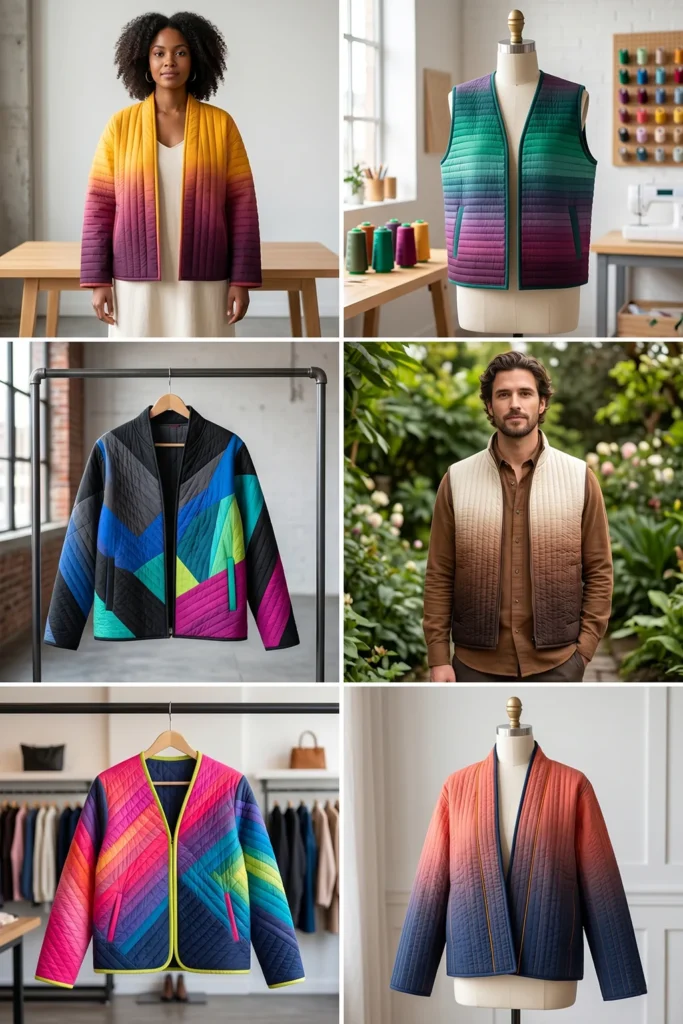
For a sunset statement jacket, use saffron, tangerine, coral, ruby, magenta, and plum.
For a jewel-tone jacket, use emerald, teal, turquoise, cobalt, sapphire, violet, and deep plum.
For a dramatic modern jacket, use black, charcoal, cobalt, teal, lime, magenta, and white.
For a warm artistic jacket, use cream, peach, coral, ruby, burgundy, plum, and espresso.
For a bright, creative jacket, use hot pink, orange, yellow, aqua, emerald, violet, and navy.
Beginner Tips for Success
Use a relaxed jacket shape. Quilted fabric needs more room than regular garment fabric.
Quilt the panels before cutting. This makes the project easier to manage and helps keep the jacket pieces stable.
Choose lightweight batting. The jacket should feel cozy, not stiff.
Use clips for thick seams. Clips hold quilted layers better than pins.
Keep the quilting simple. Straight lines and diagonal lines are stylish and beginner-friendly.
Try on the jacket before binding the hem and cuffs. This lets you adjust the length before the final finish.
Use darker binding if the ombre is very bright. It frames the color and makes the jacket look polished.
Styling Tip
Wear the finished ombre jelly roll quilt jacket with a black dress, wide-leg denim, linen trousers, boots, sneakers, or a simple monochrome outfit. The bold color flow becomes the statement piece, while the quilted texture keeps the look cozy and handmade. Add a scarf, bag, or earrings in teal, ruby, saffron, cobalt, plum, or emerald to echo the jacket’s colors.
Other Design Inspirations – Digitally Modified
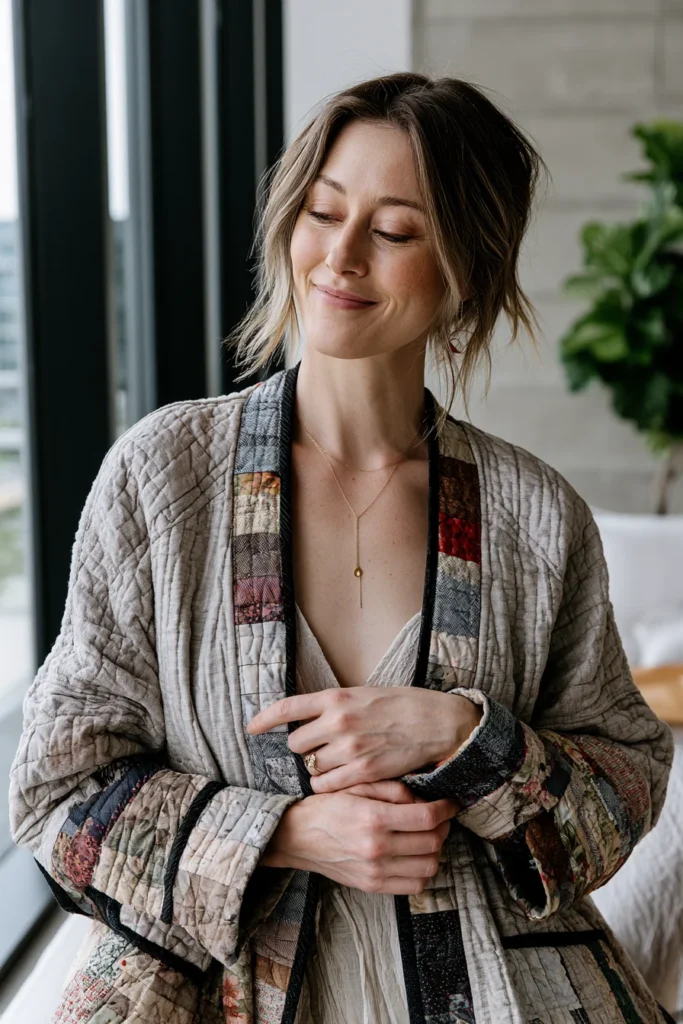
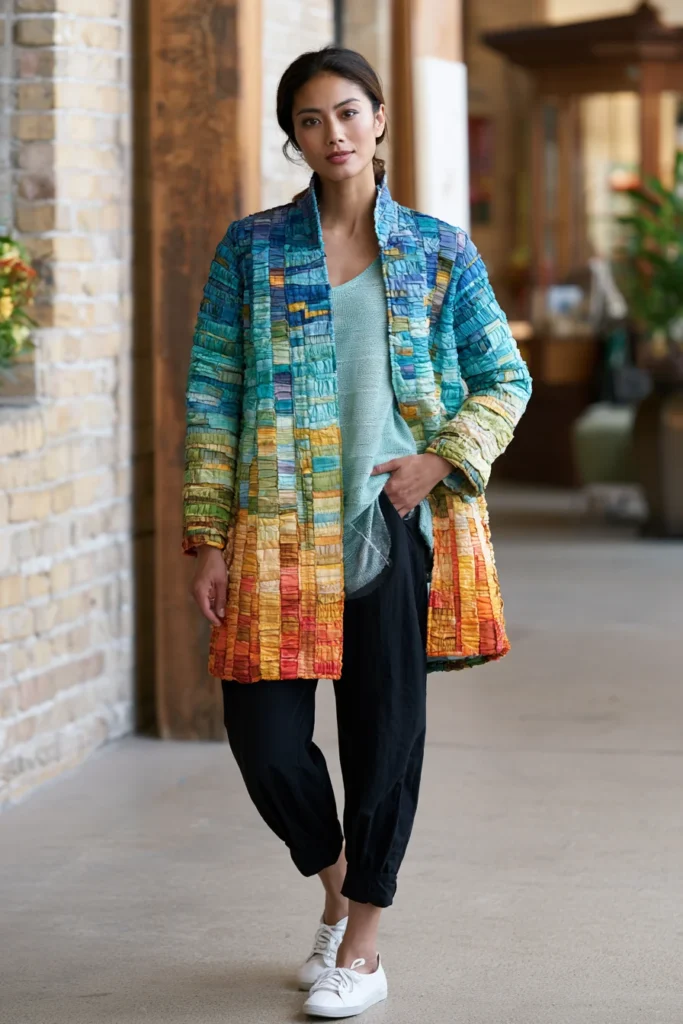
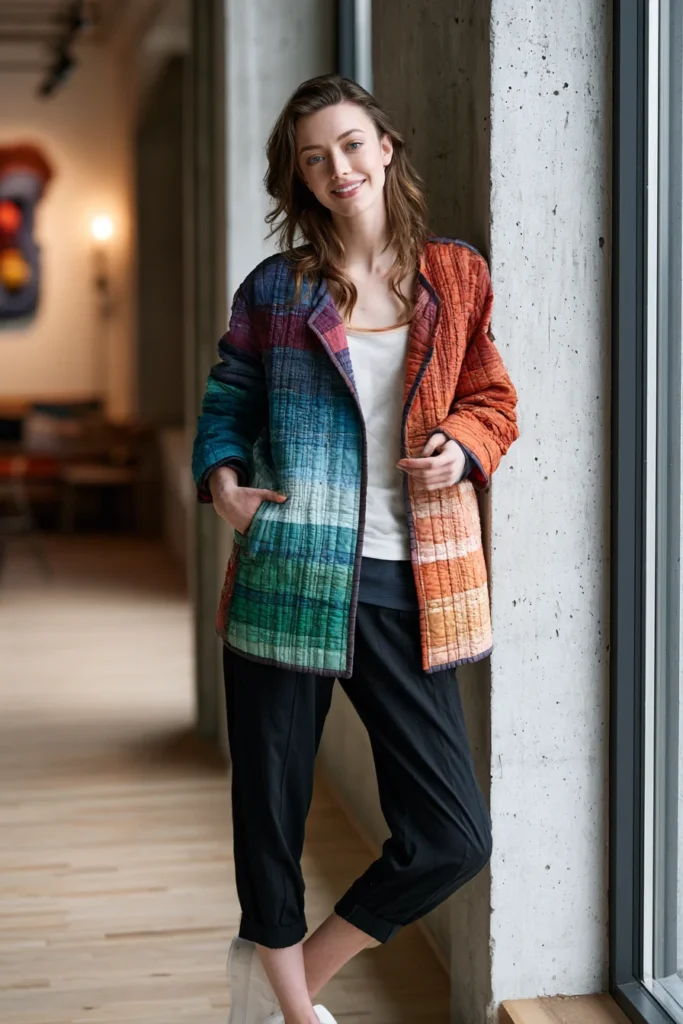
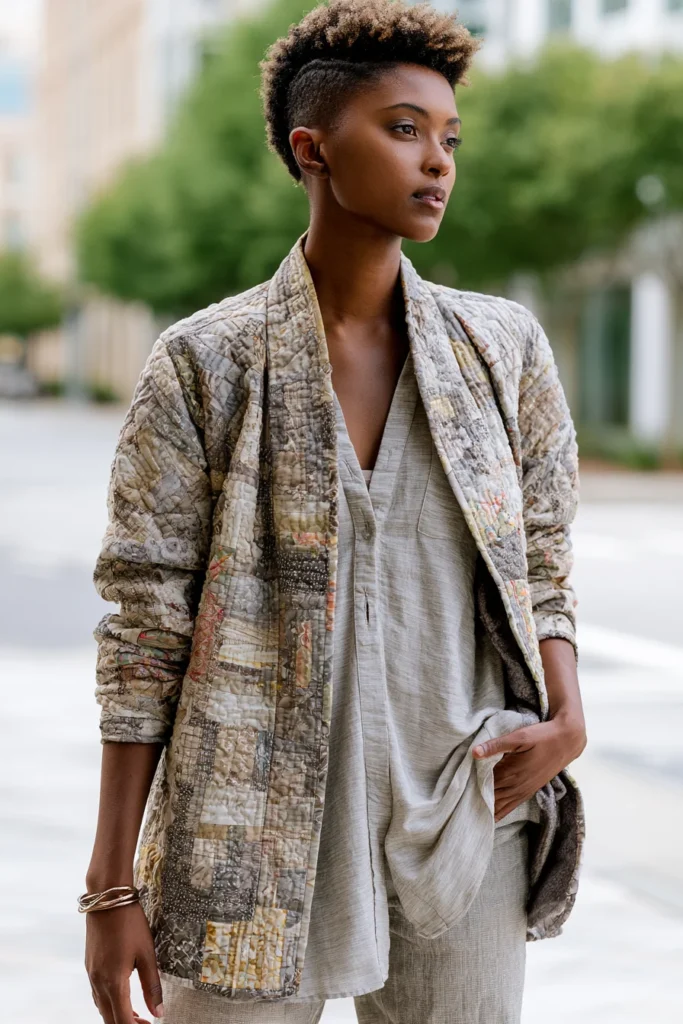
3. Reversible Jelly Roll Quilt Jacket Ideas for Versatile Outfits
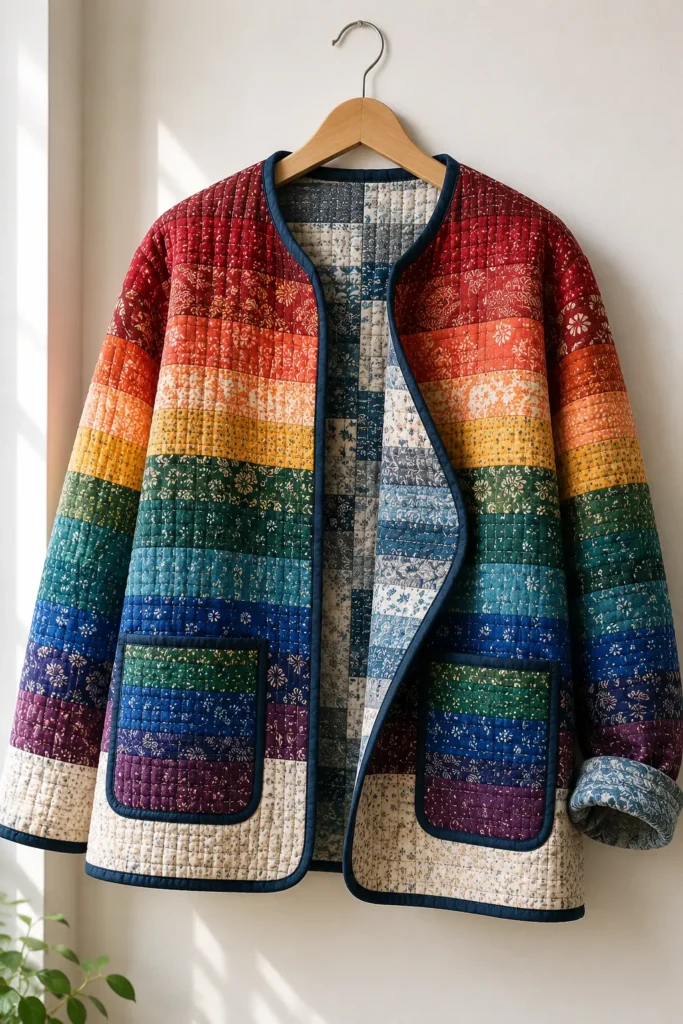
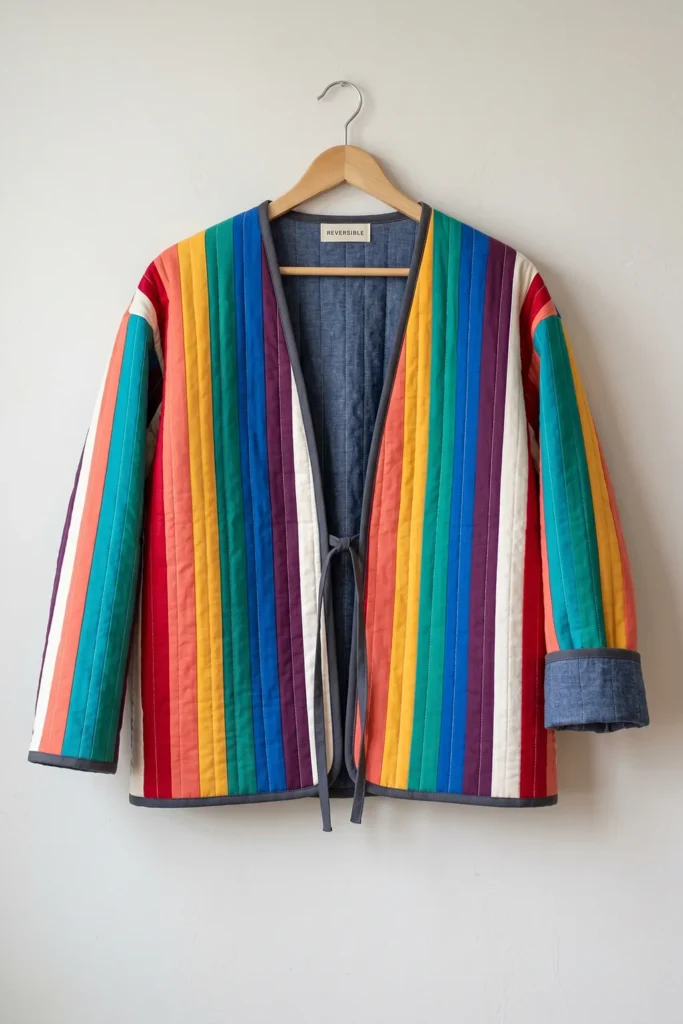
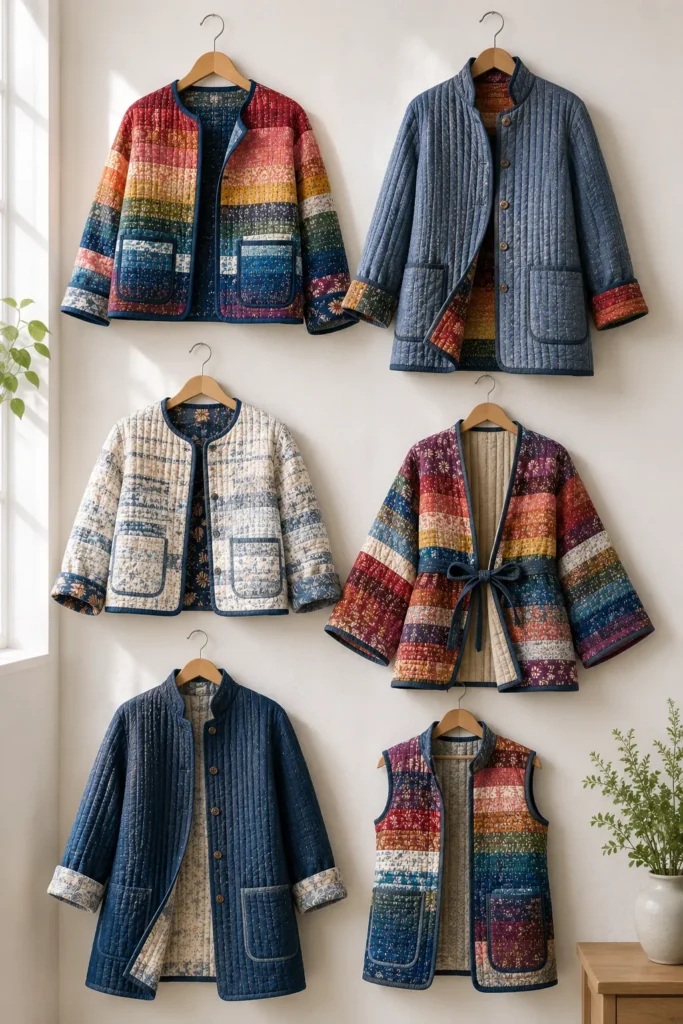
A reversible jelly roll quilt jacket is a cozy, creative garment that gives you two wearable looks in one. One side can show off bold jelly roll strip piecing, while the reverse side can feature a calmer solid, floral, chambray, linen-look cotton, or coordinated patchwork. It is practical, stylish, and perfect for anyone who loves versatile handmade clothing.
For a vibrant reversible design, try one side in ruby red, coral, saffron yellow, teal, emerald green, cobalt blue, plum, and ivory, then make the reverse side more wearable with navy, charcoal, denim blue, cream, taupe, or soft gray. The result is a jacket that can feel artistic one day and understated the next.
Why I Made It
I made this jacket because I wanted a quilted layer that could shift with my outfit. Some days I want a bold handmade statement, and other days I want something quieter and more neutral. A reversible jacket solves that beautifully.
The backstory behind this idea comes from the practical history of quilted garments. Quilted clothing has long been loved for warmth, reuse, and durability. A reversible version takes that usefulness even further because both sides are finished and wearable. It feels like making one jacket but getting two personalities.
Why This Idea Is Worth Making
This idea is worth making because it gives you more styling options from one project. You can wear the colorful jelly roll side with simple basics, then turn the jacket inside out for a calmer everyday look. It also teaches valuable sewing skills: strip piecing, quilting, garment shaping, clean seam finishing, binding, and planning both the inside and outside of a garment.
It is especially satisfying because a reversible jacket looks polished inside and out. There is no hidden “wrong side,” which makes the finished piece feel intentional and high-quality.
Finished Size
This beginner-friendly guide makes a relaxed, boxy, reversible quilted jacket.
Sample finished measurements for a loose medium size:
- Finished chest: about 44 inches
- Finished length: about 24 inches from shoulder to hem
- Sleeve length: about 20 inches from the shoulder seam
- Armhole depth: about 9 inches
- Front style: open-front jacket, easiest for beginners
- Closure: optional ties, snaps, or one large button loop
To adjust the size, measure a loose jacket you already like. Add 3 to 5 inches of ease around the chest because quilted fabric is thicker than regular garment fabric.
Materials Needed
For one reversible quilted jacket, gather:
- One jelly roll or 26 to 32 strips: 2½ inches x width of fabric
- Reverse-side fabric: 2½ to 3 yards, such as cotton, chambray, linen-look cotton, flannel, or coordinated patchwork
- Lightweight cotton batting: 2½ to 3 yards
- Binding fabric: ¾ to 1 yard
- Thread: ivory, navy, charcoal, teal, coral, or coordinating color
- Simple boxy jacket pattern or loose jacket to trace
- Optional pocket fabric: scraps or extra jelly roll strips
- Optional ties or snaps
- Rotary cutter and cutting mat
- Quilting ruler
- Pins or sewing clips
- Sewing machine
- Iron and ironing board
- Fabric marker or tailor’s chalk
Beginner tip: Use lightweight batting and avoid heavy backing fabrics. Since both sides need to be wearable, thick layers can make the jacket stiff.
Reversible Color Palette
A beautiful two-sided palette could include:
Statement side:
- Ruby red
- Coral
- Saffron yellow
- Emerald green
- Teal
- Cobalt blue
- Plum
- Ivory
Quiet reverse side:
- Navy
- Soft gray
- Taupe
- Denim blue
- Cream
- Charcoal
For the binding, choose a color that works with both sides, such as charcoal, navy, deep teal, plum, cocoa, or ivory.
Cutting Measurements
These measurements create quilted panels large enough to cut a simple jacket.
From jelly roll strips, prepare:
- Back strip-pieced panel: about 30 x 32 inches
- Left front strip-pieced panel: about 18 x 30 inches
- Right front strip-pieced panel: about 18 x 30 inches
- Two sleeve strip-pieced panels: each about 20 x 26 inches
- Optional pocket panels: two pieces about 7 x 8 inches
From the reverse side of the fabric, cut:
- Back reverse panel: 32 x 34 inches
- Two front reverse panels: 20 x 32 inches each
- Two sleeve reverse panels: 22 x 28 inches each
- Optional pocket reverse pieces: two pieces 8 x 9 inches each
From batting, cut:
- Back batting: 32 x 34 inches
- Two front battings: 20 x 32 inches each
- Two sleeve battings: 22 x 28 inches each
- Two pocket battings: 8 x 9 inches each
For binding, cut:
- Binding strips: 2½ inches wide
- Prepare enough to bind the front opening, neckline, hem, sleeve cuffs, and any exposed seam edges if needed
Use a ¼-inch seam allowance for jelly roll strip piecing and a ½-inch seam allowance for jacket construction unless your pattern says otherwise.
Step-by-Step Guide
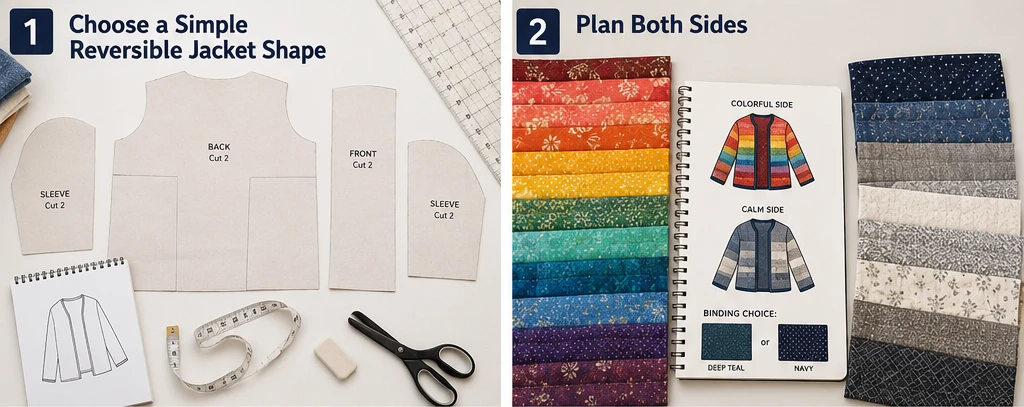
Step 1: Choose a Simple Reversible Jacket Shape
Start with a loose, open-front jacket pattern or trace a relaxed jacket you already own. A boxy shape is best for beginners because it does not require darts, collars, zippers, or fitted curves.
Choose pattern pieces for:
- Back body
- Left front
- Right front
- Two sleeves
- Optional patch pockets
Keep the design simple so the reversible finish feels manageable.
Step 2: Plan Both Sides Before Cutting
Decide which side will be the statement side and which side will be the calmer reverse.
For example, make the jelly roll side colorful with ruby, coral, saffron, teal, cobalt, emerald, and plum, then use navy chambray or soft gray cotton for the reverse side.
Also, choose a binding that works on both sides. Deep teal, charcoal, navy, or plum usually frames both bright and neutral fabrics well.
Step 3: Piece the Jelly Roll Panels
Sew jelly roll strips together lengthwise using a ¼-inch seam allowance until each panel is larger than the jacket pattern piece you need.
Make separate strip-pieced panels for:
- Back
- Left front
- Right front
- Two sleeves
- Optional pockets
Press seams open or to one side. Keep the strip direction consistent for a clean, modern look.
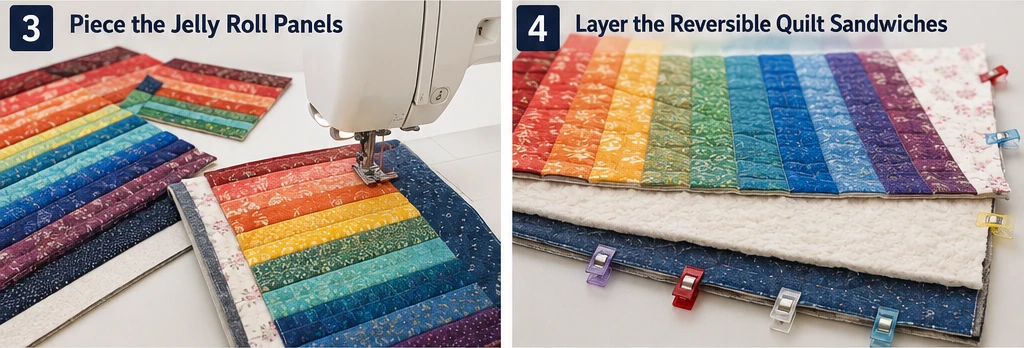
Step 4: Layer the Reversible Quilt Sandwiches
For each jacket section, layer:
- Reverse-side fabric wrong side up
- Lightweight batting in the middle
- Jelly roll panel right side up
Smooth and baste each section well.
This method creates quilted fabric that is already finished on both sides, which is the key to making the jacket reversible.
Step 5: Quilt Each Panel
Quilt each panel with simple straight lines. Stitch ¼ inch away from each jelly roll seam for a clean channel-quilted look.
You can also quilt diagonal lines spaced 1½ to 2 inches apart for a more modern texture.
Remember that the quilting will show on both sides, so choose a thread color that looks good on the jelly roll side and the reverse side.
Step 6: Cut Out the Jacket Pieces
Place your pattern pieces on the quilted panels and cut:
- 1 back piece
- 2 front pieces
- 2 sleeves
- 2 optional pockets
Before cutting, check the reverse side too. Since the jacket is reversible, both sides should look neat and intentional.
Step 7: Prepare Reversible Pockets
For reversible pockets, make two simple patch pockets from quilted scraps, each about 7 x 8 inches.
Bind the top edge of each pocket with 2½-inch binding. Then place pockets on the jelly roll side, the reverse side, or both.
If you want the jacket to be truly reversible, consider adding pockets only to one side or making separate pockets on both sides before final assembly.
Step 8: Sew the Shoulder Seams
Place the front pieces right sides together with the back piece at the shoulders. Sew shoulder seams using a ½-inch seam allowance.
Because the seams may be visible when reversed, finish them neatly. You can bind the seam allowances with narrow binding, press them open and topstitch, or cover them with bias tape.
Step 9: Attach the Sleeves
Open the jacket body flat. Match the center of one sleeve to the shoulder seam, right sides together.
Pin or clip the sleeve into the armhole, then sew with a ½-inch seam allowance. Repeat for the second sleeve.
Finish the armhole seams neatly with binding or bias tape so both sides look clean.
Step 10: Sew the Side and Sleeve Seams
Fold the jacket right sides together, matching the sleeve edges and side seams.
Sew from the sleeve cuff to the underarm and down the side seam in one continuous line. Repeat on the other side.
Finish these seams carefully because they may be visible when the jacket is worn reversed. Bound seams give the cleanest reversible look.
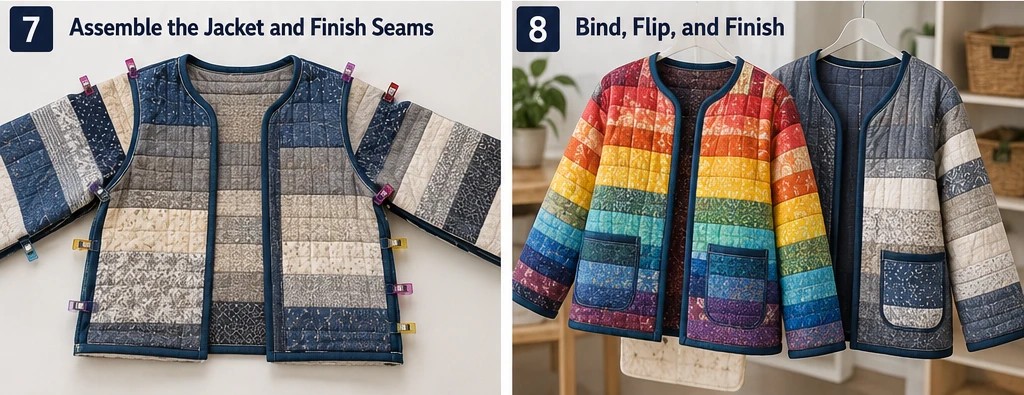
Step 11: Bind the Outer Edges
Bind the neckline, front opening, hem, and sleeve cuffs with 2½-inch binding strips.
For a reversible jacket, binding is especially useful because it finishes both sides at once. Sew the binding to one side, fold it over the raw edge, and stitch it down neatly on the opposite side.
Choose binding in charcoal, navy, deep teal, plum, ivory, or cocoa for a polished frame.
Step 12: Add Optional Reversible Closures
For the simplest version, leave the jacket open.
For a closure, add fabric ties at the front edge, one large button with a loop, or sew-on snaps. If using snaps, make sure they look neat from both sides.
Avoid bulky closures on a first reversible jacket, as both sides need to remain comfortable and attractive.
Step 13: Press and Finish
Give the jacket a gentle final press. Avoid flattening the quilting too much.
Trim loose threads, check both sides for neatness, and try the jacket on both ways. Make small adjustments before wearing.
Assembly at a Glance
- Choose a loose open-front jacket pattern.
- Plan a colorful jelly roll side and a calmer reverse side.
- Piece oversized jelly roll panels for the back, fronts, sleeves, and pockets.
- Layer each panel with reverse fabric and lightweight batting.
- Quilt each panel with straight or diagonal lines.
- Cut the final jacket pieces from the quilted panels.
- Prepare optional reversible pockets.
- Sew shoulder seams and finish them neatly.
- Attach sleeves and bind or finish armhole seams.
- Sew side and sleeve seams.
- Bind the neckline, front opening, hem, and cuffs.
- Add optional reversible ties, snaps, or button loops.
- Press gently and check both sides of the wearable.
Reversible Color Combination Ideas
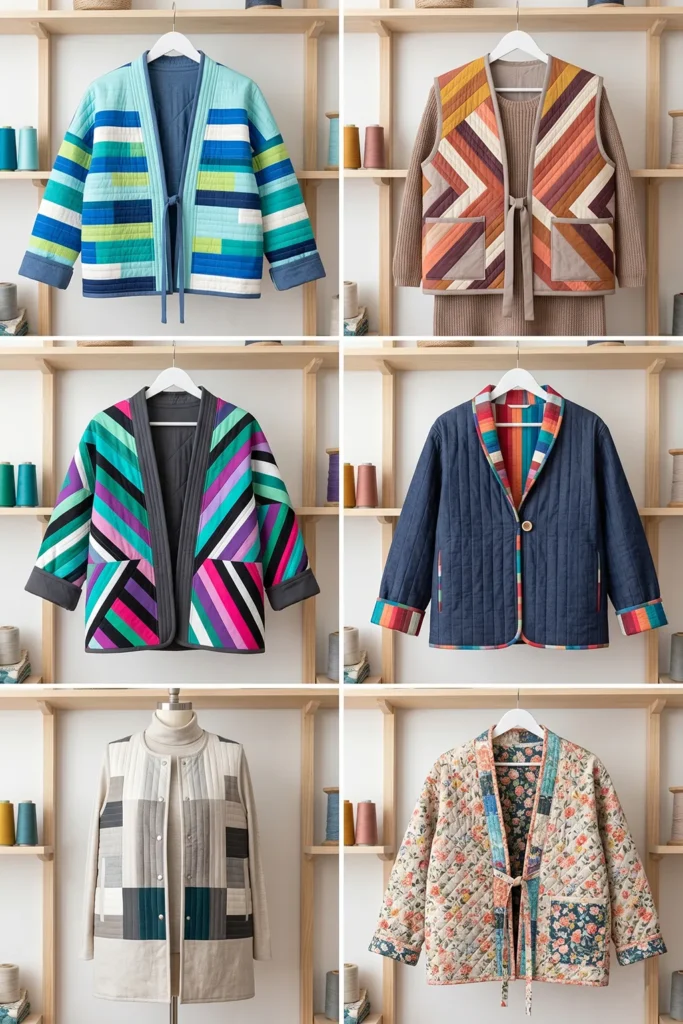
For a bold-to-calm jacket, use ruby, coral, saffron, teal, cobalt, and plum on one side with navy chambray on the reverse.
For a modern artistic jacket, use emerald, turquoise, violet, hot pink, black, and white on one side with charcoal gray on the reverse.
For a warm everyday jacket, use mustard, rust, coral, cream, cocoa, and plum on one side with soft taupe on the reverse.
For a coastal-creative jacket, use aqua, cobalt, teal, lime, white, and navy on one side, with denim blue on the reverse.
For a refined minimalist jacket, use ivory, gray, taupe, charcoal, and deep teal on one side with black or oatmeal on the reverse.
Beginner Tips for Success
Keep the jacket shape simple. A reversible garment is already more detailed than a regular jacket, so avoid complicated collars or closures.
Use lightweight batting. Thick batting makes reversible seams bulky and uncomfortable.
Choose a reverse fabric that looks good with the quilting thread. The quilting will show on both sides.
Finish inside seams neatly with binding or bias tape. This is what makes the jacket truly reversible.
Use clips instead of pins for thick quilted layers. Clips hold the pieces more securely.
Try the jacket on before binding the cuffs and hem. This lets you adjust sleeve and body length before the final finish.
Styling Tip
Wear the colorful jelly roll side with simple outfits like black jeans, a white tee, denim, or a plain dress. Flip to the calmer reverse side for workdays, travel, or minimalist outfits. A reversible jacket in teal, ruby, saffron, cobalt, plum, navy, charcoal, or ivory gives you two distinct looks while keeping the cozy comfort of a handmade quilt.
Other Design Inspirations – Digitally Modified
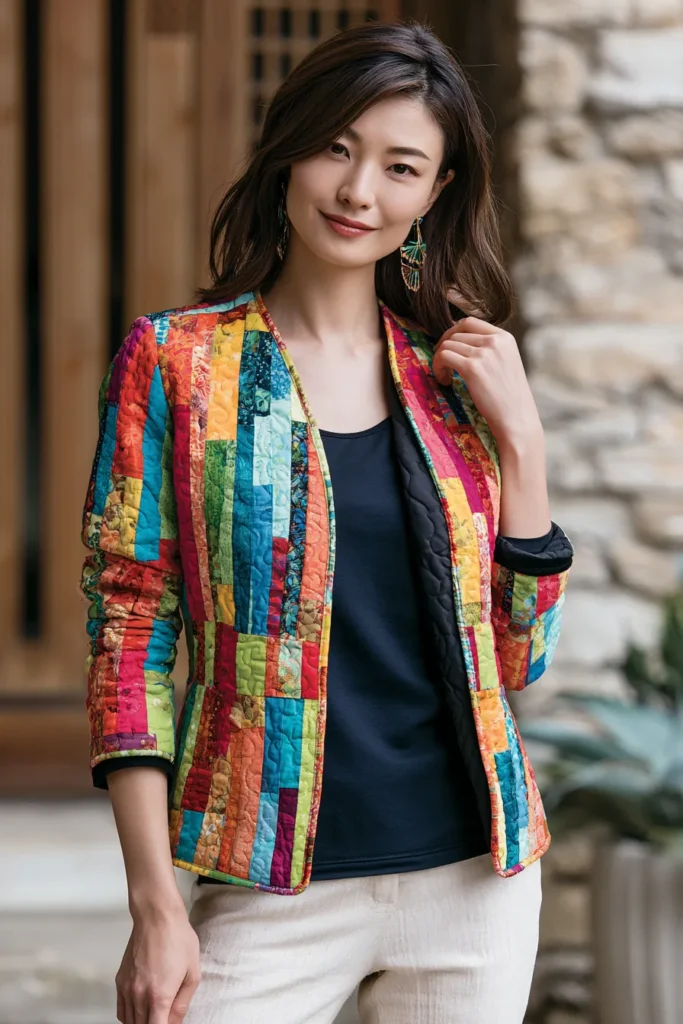
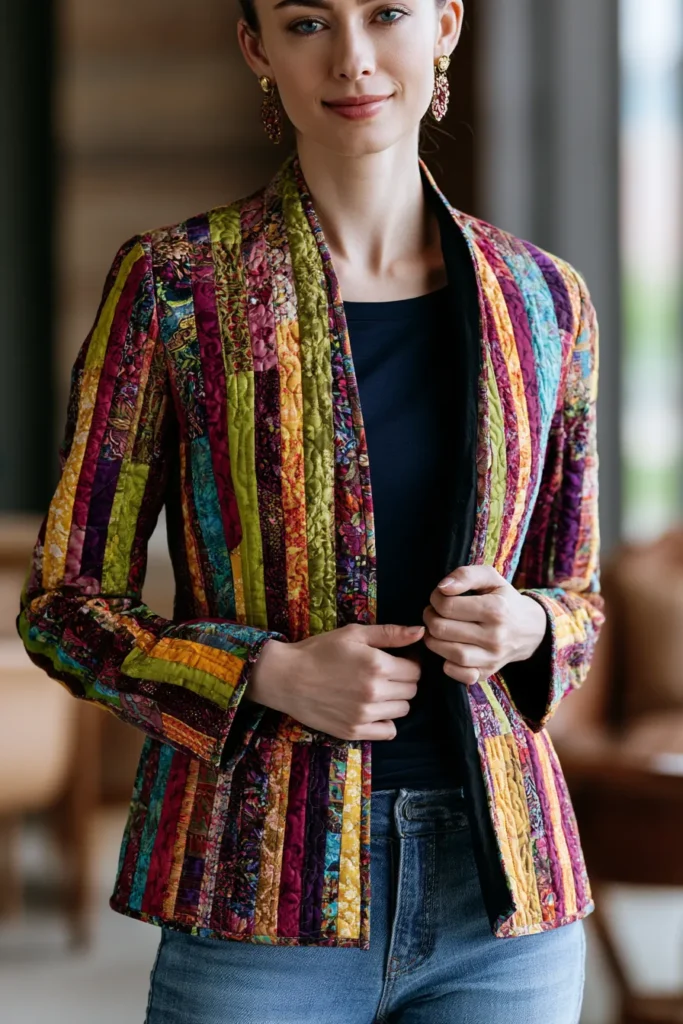
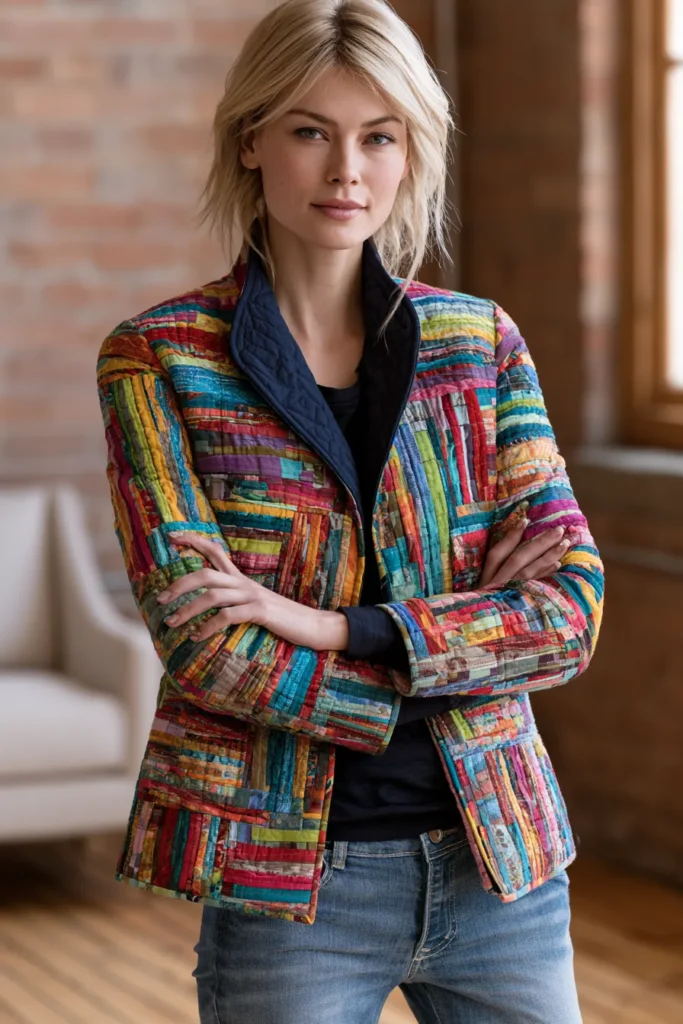
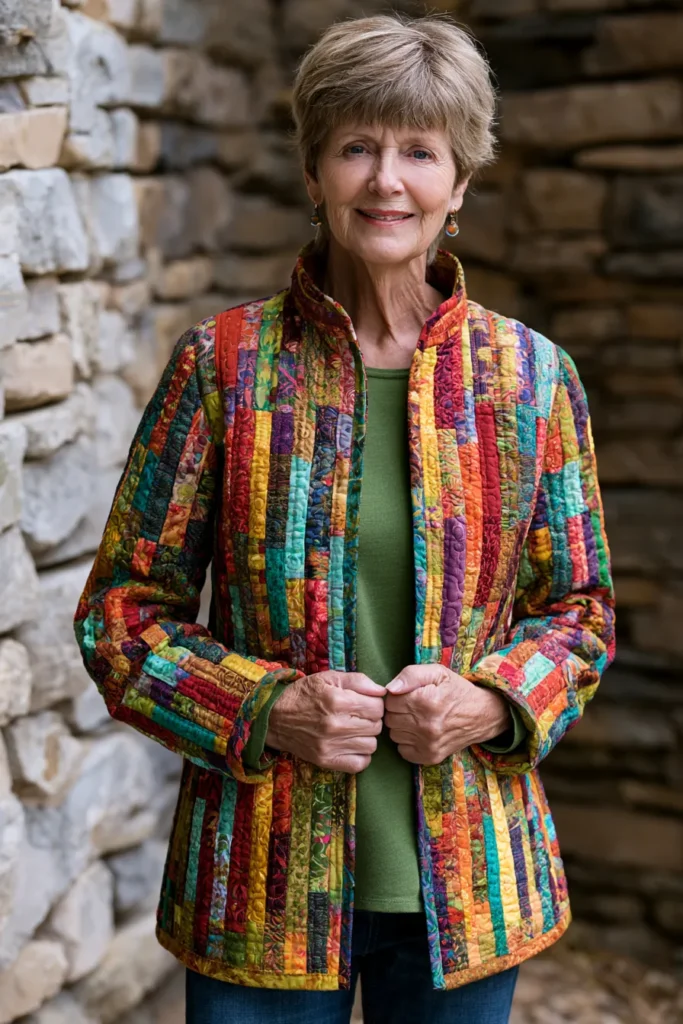
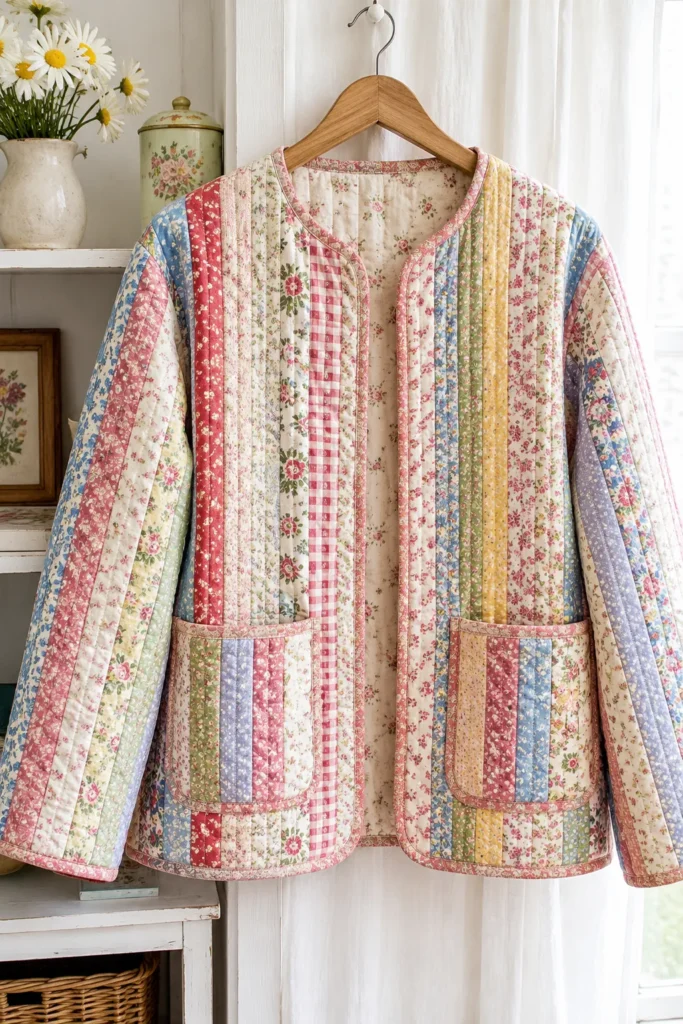
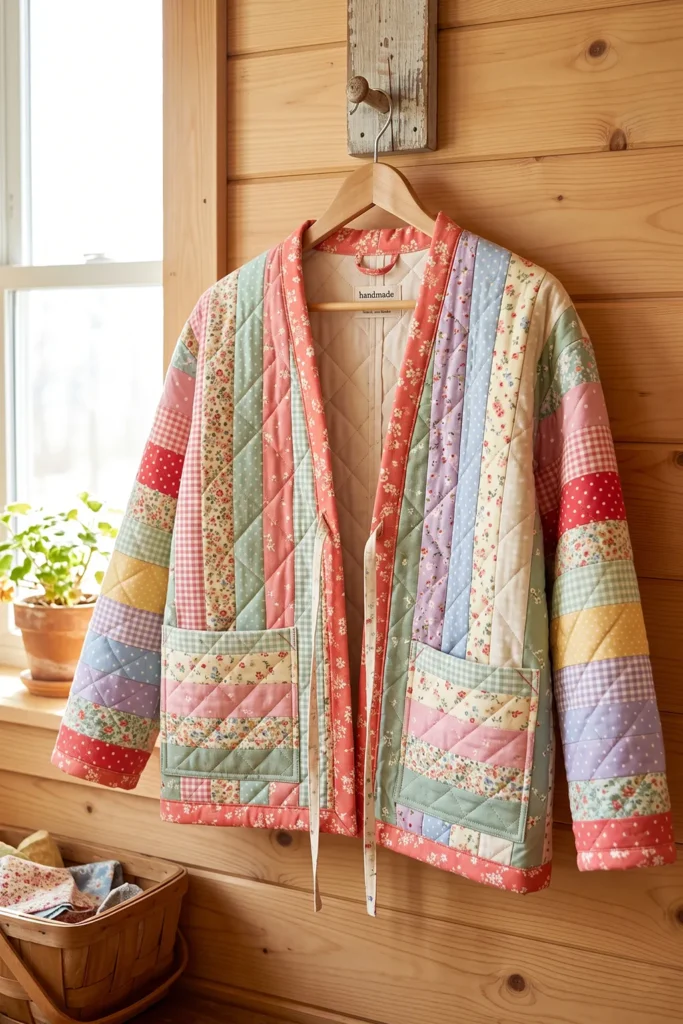
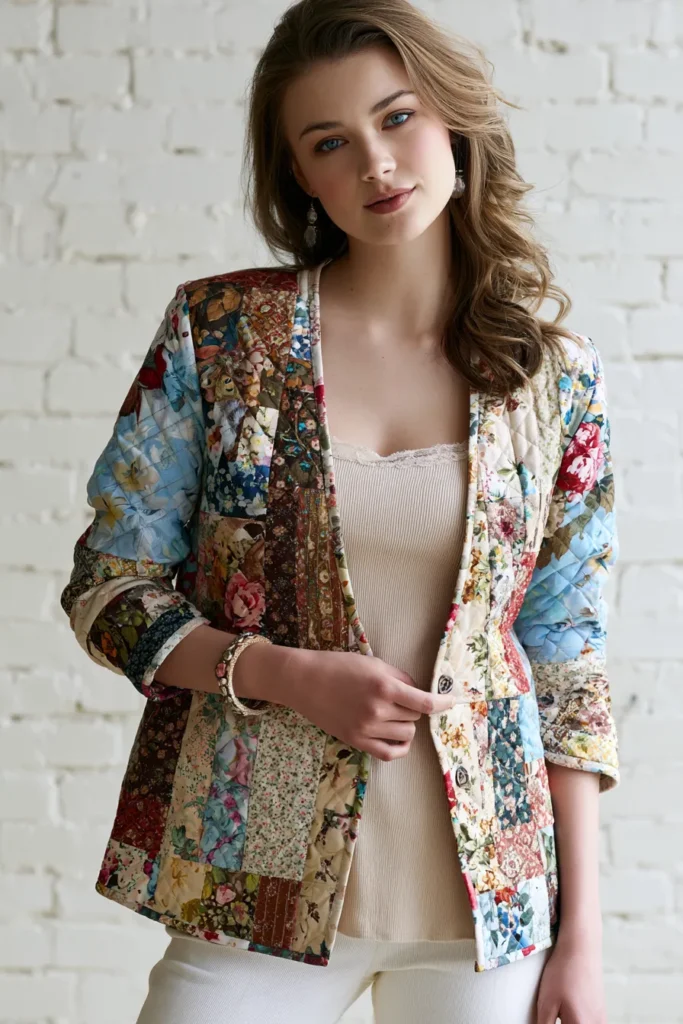
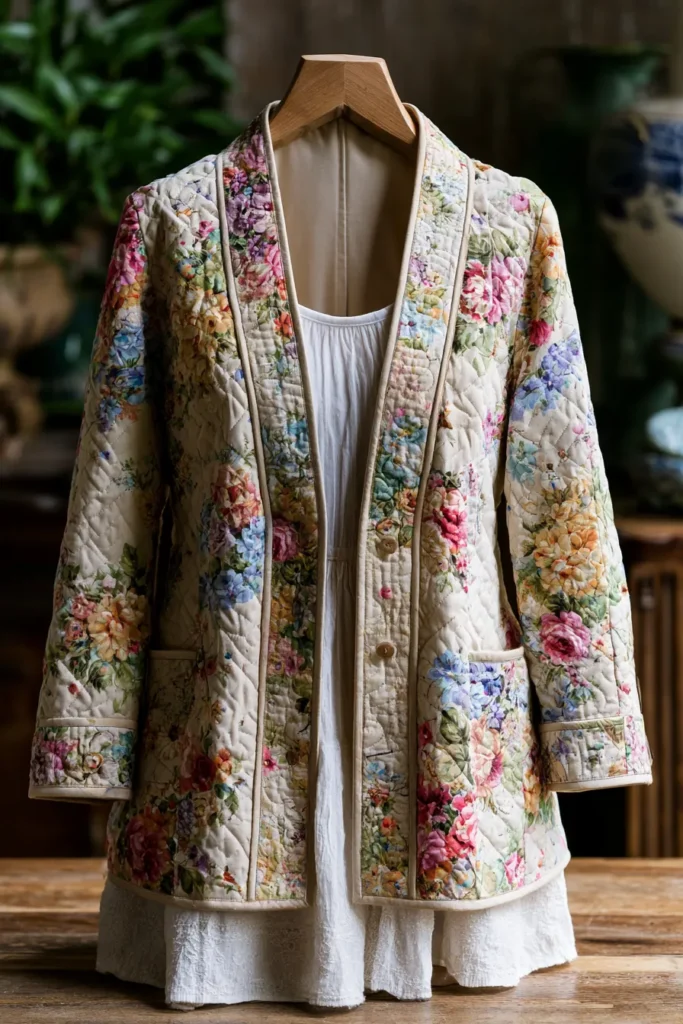
4. Vintage-Inspired Floral Jelly Roll Quilted Jackets for Timeless Comfort
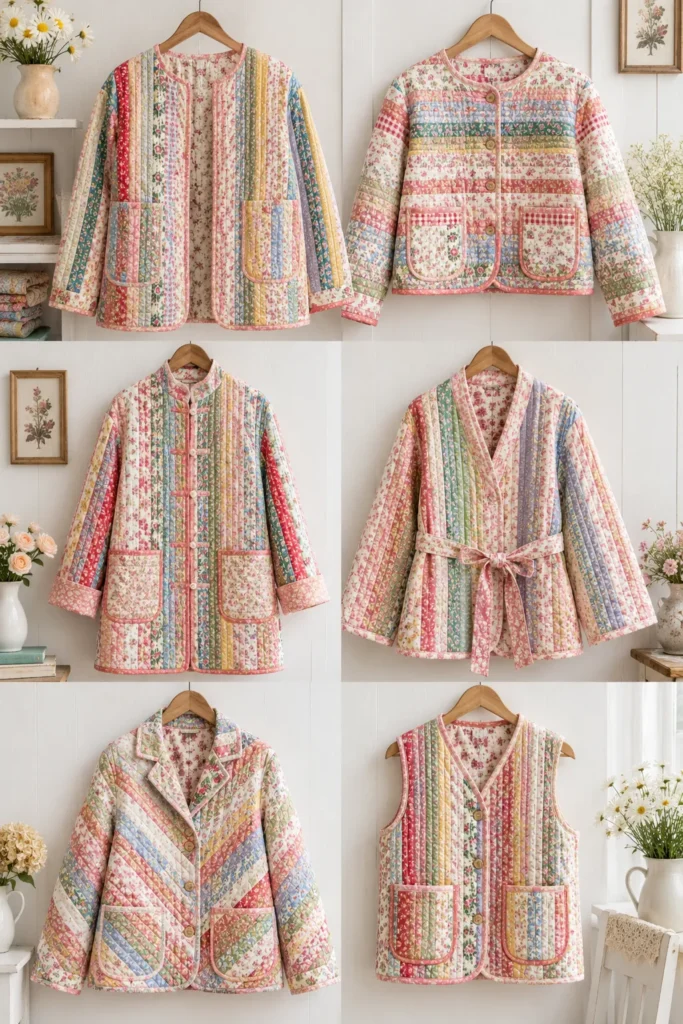
A vintage-inspired floral jelly roll quilted jacket is a cozy wearable quilt with soft color, nostalgic charm, and everyday comfort. Jelly roll strips are usually 2½ inches wide, which makes them perfect for creating pretty striped or patchwork panels without complicated cutting. When you choose floral fabrics, tiny calico prints, gingham, dots, and soft solids, the finished jacket feels like a treasured quilt reimagined as stylish outerwear.
For a vibrant vintage palette, use rose pink, cherry red, butter yellow, mint green, sky blue, lavender, coral, ivory, sage, and warm cream. These colors keep the jacket cheerful and feminine while still feeling timeless.
Why I Made It
I made this jacket because I wanted something that felt like a favorite vintage quilt but could be worn out of the house. A quilted jacket has a wonderful mix of usefulness and sentiment: it keeps you warm, adds personality to simple outfits, and carries the feeling of handmade comfort wherever you go.
The backstory behind this design comes from the tradition of repurposing quilts and fabric scraps into practical garments. Many vintage quilts were made from leftover dress fabrics, feed sacks, shirting scraps, and beloved household textiles. A floral jelly roll jacket honors that make-do-and-make-beautiful spirit while giving it a fresh, wearable shape.
Why This Idea Is Worth Making
This idea is worth making because it turns a simple jelly roll into a cozy statement jacket that feels personal, practical, and beautiful. It is easier than making a tailored coat because the shape can stay relaxed and boxy, but it still teaches valuable skills: strip piecing, quilting panels, garment cutting, pocket making, binding, and finishing bulky seams.
It is also a wonderful project if you love vintage style but want something useful for everyday wear. The jacket can be layered over dresses, denim, linen trousers, skirts, or simple basics.
Finished Size
This guide makes a relaxed, boxy quilted jacket.
Sample finished measurements for a loose medium size:
- Finished chest: about 44 inches
- Finished length: about 24 inches from shoulder to hem
- Sleeve length: about 20 inches from the shoulder seam
- Armhole depth: about 9 inches
- Front style: open-front jacket
- Closure: optional fabric ties, one button loop, or small snaps
To adjust the size, measure a loose jacket you already like. Add 3 to 5 inches of ease around the chest, as quilted fabric is thicker than regular garment fabric.
Materials Needed
For one vintage floral quilted jacket, gather:
- One floral jelly roll or 26 to 32 strips: 2½ inches x width of fabric
- Backing fabric: 2½ to 3 yards
- Lightweight cotton batting: 2½ to 3 yards
- Binding fabric: ¾ to 1 yard
- Thread: ivory, soft pink, pale blue, tan, or coordinating color
- Simple boxy jacket pattern or loose jacket to trace
- Optional pocket fabric: scraps or extra jelly roll strips
- Optional closure: fabric ties, one button, or snaps
- Rotary cutter and cutting mat
- Quilting ruler
- Pins or sewing clips
- Sewing machine
- Iron and ironing board
- Fabric marker or tailor’s chalk
Beginner tip: Choose lightweight cotton batting. Thick batting can make the jacket stiff, bulky, and harder to sew.
Vintage Floral Color Palette
A charming vintage palette could include:
- Ivory floral
- Soft rose pink
- Cherry red
- Butter yellow
- Mint green
- Sky blue
- Lavender
- Sage green
- Coral
- Warm cream
For a slightly bolder look, add raspberry, turquoise, apple green, or deep plum as accent strips on the cuffs, pockets, or binding.
Cutting Measurements
These measurements create quilted panels large enough to cut a relaxed jacket.
From jelly roll strips, prepare:
- Back strip-pieced panel: about 30 x 32 inches
- Left front strip-pieced panel: about 18 x 30 inches
- Right front strip-pieced panel: about 18 x 30 inches
- Two sleeve strip-pieced panels: each about 20 x 26 inches
- Optional pocket panels: two rectangles about 7 x 8 inches
From backing fabric, cut:
- Back backing: 32 x 34 inches
- Two front backings: 20 x 32 inches each
- Two sleeve backings: 22 x 28 inches each
- Two pocket backings: 8 x 9 inches each
From batting, cut:
- Back batting: 32 x 34 inches
- Two front battings: 20 x 32 inches each
- Two sleeve battings: 22 x 28 inches each
- Two pocket battings: 8 x 9 inches each
For binding, cut:
- Binding strips: 2½ inches wide
- Prepare enough for the neckline, front opening, hem, sleeve cuffs, and pocket tops
Use a ¼-inch seam allowance for jelly roll strip piecing and a ½-inch seam allowance for jacket construction unless your pattern says otherwise.
Step-by-Step Guide
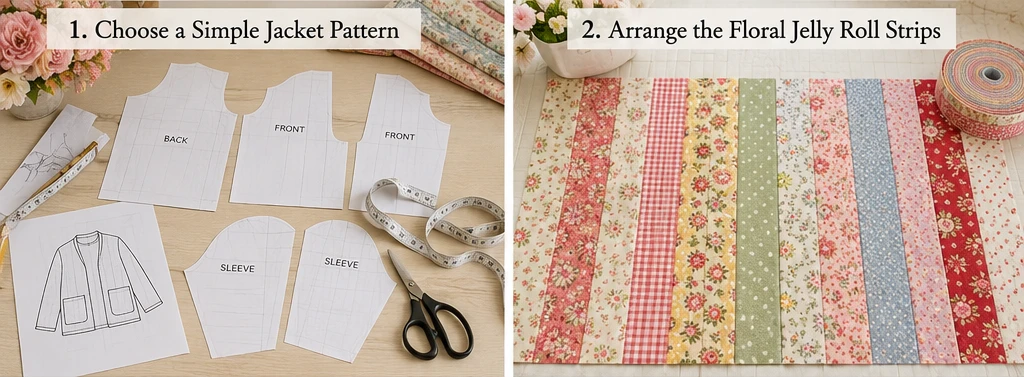
Step 1: Choose a Simple Jacket Pattern
Start with a loose, boxy jacket pattern or trace a relaxed jacket you already own. For a beginner-friendly version, choose an open-front shape without a collar, zipper, or fitted waist.
Look for pattern pieces for:
- Back body
- Left front
- Right front
- Two sleeves
- Optional patch pockets
A simple shape lets the floral quilted fabric become the main feature.
Step 2: Arrange the Floral Jelly Roll Strips
Lay out your jelly roll strips before sewing. Mix larger florals with tiny prints, gingham, dots, and soft solids.
A pretty order is ivory floral, rose pink, butter yellow, mint, cherry red, sky blue, lavender, coral, and sage. Repeat this color rhythm across the back, fronts, and sleeves.
For a vintage look, avoid placing all the bold prints together. Scatter them evenly so the jacket feels collected and balanced.
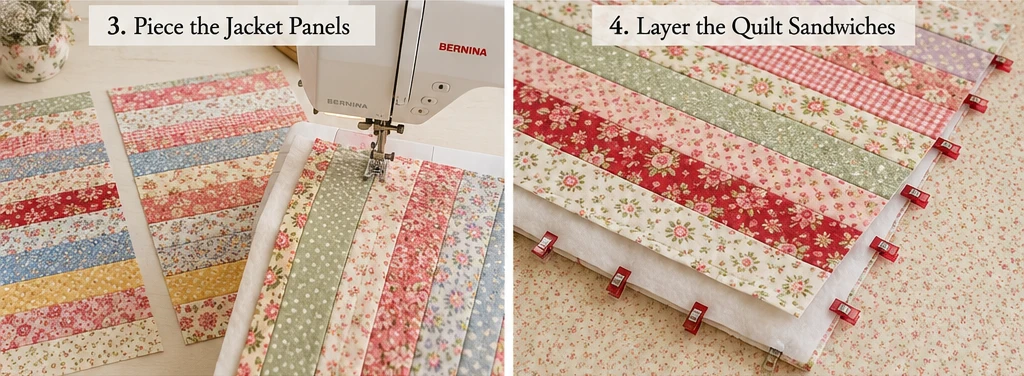
Step 3: Piece the Jacket Panels
Sew jelly roll strips together lengthwise using a ¼-inch seam allowance until each panel is larger than your jacket pattern piece.
Make separate strip-pieced panels for:
- Back
- Left front
- Right front
- Two sleeves
- Optional pockets
Press seams open or to one side. Keep each panel slightly oversized because quilting can shrink it a little.
Step 4: Layer the Quilt Sandwiches
For each jacket section, layer:
- Backing fabric wrong side up
- Lightweight batting in the middle
- Floral jelly roll panel right side up
Smooth each layer carefully and baste with pins or spray.
This creates separate quilted panels, which are much easier to manage than quilting the jacket after it is sewn.
Step 5: Quilt Each Panel
Quilt each panel with simple straight lines. Stitch ¼ inch away from each jelly roll seam for a clean channel-quilted look.
For a softer vintage feel, quilt gentle diagonal lines spaced 1½ to 2 inches apart. Use ivory, pale pink, or soft blue thread so the quilting blends into the floral fabrics.
Avoid dense quilting if you want the jacket to stay soft and comfortable.
Step 6: Cut Out the Jacket Pieces
Place the jacket pattern pieces on the quilted panels and cut:
- 1 back piece
- 2 front pieces
- 2 sleeves
- 2 optional pockets
Check the floral placement before cutting. Try to place favorite florals where they will be visible, such as the upper back, front panels, sleeve cuffs, or pockets.
Step 7: Prepare and Attach the Pockets
If adding pockets, cut two quilted rectangles about 7 x 8 inches. Bind the top edge of each pocket with 2½-inch binding, or fold the top edge under and topstitch.
Place each pocket on a front piece, about 3 inches above the hem and 2½ inches from the side edge.
Stitch around the sides and bottom of each pocket, leaving the top open. Reinforce the pocket corners with a few backstitches.
Step 8: Sew the Shoulder Seams
Place the front pieces right sides together with the back piece at the shoulders. Sew the shoulder seams using a ½-inch seam allowance.
Press gently from the fabric side. If the seam feels bulky, trim only the batting layer slightly inside the seam allowance.
Step 9: Attach the Sleeves
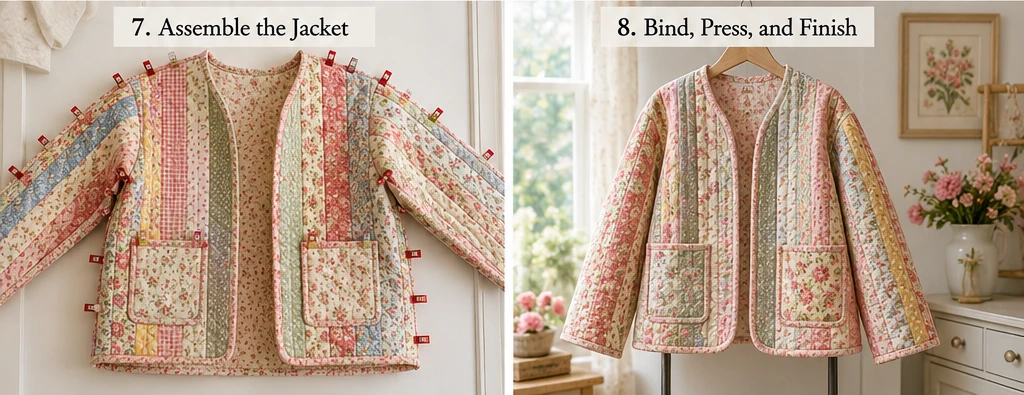
Open the jacket body flat. Match the center of one sleeve to the shoulder seam, right sides together.
Pin or clip the sleeve into the armhole and sew slowly using a ½-inch seam allowance. Repeat with the second sleeve.
Clips are especially helpful because quilted fabric can be thick.
Step 10: Sew the Side and Sleeve Seams
Fold the jacket right sides together, matching sleeve edges and side seams.
Sew from the sleeve cuff to the underarm, then down the side seam in one continuous line. Repeat on the other side.
Try on the jacket before finishing the raw edges. Check sleeve length, body length, and underarm comfort.
Step 11: Bind the Raw Edges
Use 2½-inch binding strips to finish the neckline, front opening, hem, and sleeve cuffs.
For a vintage floral jacket, pretty binding choices include cherry red, sage green, soft blue, coral, ivory, or raspberry.
Sew the binding to the outside first, fold it to the inside, and stitch it down by machine or hand.
Step 12: Add Optional Closure Details
For the simplest jacket, leave the front open.
For a more finished look, add:
- Two fabric ties at the front
- One large vintage-style button with a loop
- Small sew-on snaps
- A narrow waist tie made from leftover jelly roll strips
Keep closures simple so the jacket remains comfortable and beginner-friendly.
Step 13: Press and Finish
Give the jacket a gentle final press. Avoid flattening the quilted texture too much.
Trim loose threads, reinforce pocket corners if needed, and add a handmade label. Try the jacket on with a few outfits to see how the colors work.
Assembly at a Glance
- Choose a loose open-front jacket pattern.
- Select 26 to 32 floral jelly roll strips in vintage colors.
- Arrange strips in a balanced floral color order.
- Piece oversized panels for the back, fronts, sleeves, and pockets.
- Layer each panel with backing fabric and lightweight batting.
- Quilt each panel with straight or diagonal lines.
- Cut the final jacket pieces from the quilted panels.
- Bind and attach optional patch pockets.
- Sew the shoulder seams.
- Attach the sleeves.
- Sew the side and sleeve seams.
- Bind the neckline, front opening, hem, and cuffs.
- Add optional ties, snaps, or a button loop.
Vintage Floral Color Combination Ideas
For a cheerful cottage jacket, use cherry red, butter yellow, mint green, sky blue, ivory, and rose pink.
For a soft romantic jacket, use blush pink, lavender, cream, sage green, peach, and pale blue.
For a retro garden-party look, use coral, turquoise, raspberry, apple green, yellow, and white.
For a cozy heirloom-inspired jacket, use dusty rose, faded blue, warm cream, taupe, sage, and cocoa.
For a brighter statement version, use hot pink, aqua, lemon yellow, emerald, coral, and plum with small floral prints.
Beginner Tips for Success
Use a relaxed pattern for your first quilted jacket. Quilted fabric needs room to move.
Quilt the panels before cutting the garment pieces. This makes the construction easier and keeps the pieces stable.
Choose lightweight batting. It gives warmth without making the jacket stiff.
Scatter bold floral prints evenly. This keeps the jacket balanced instead of being visually heavy on one side.
Use clips for thick seams. They hold quilted layers more securely than pins.
Try on before binding the cuffs and hem. This lets you adjust sleeve length or body length first.
Styling Tip
Wear the finished floral jelly roll quilted jacket with denim, linen pants, a simple dress, boots, clogs, or a plain tee. The vintage florals add warmth and charm, while vibrant accents like cherry red, coral, turquoise, butter yellow, mint, raspberry, or plum keep the jacket feeling fresh rather than old-fashioned.
Other Design Inspirations – Digitally Modified
5. Elegant Tailored Jelly Roll Quilted Vests for Versatile Wardrobe Styling
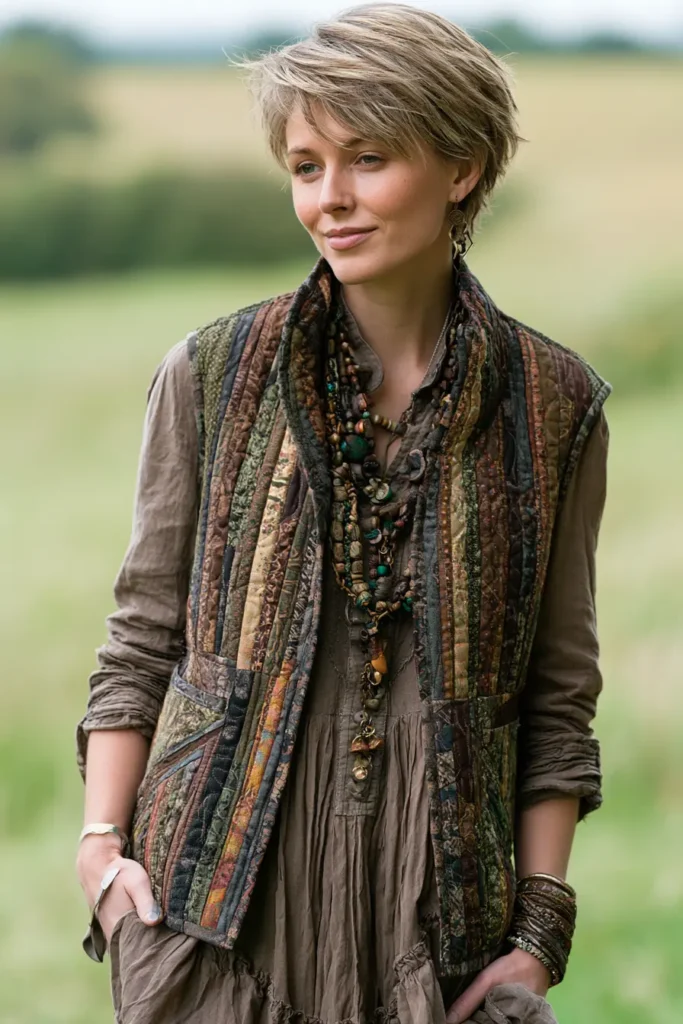
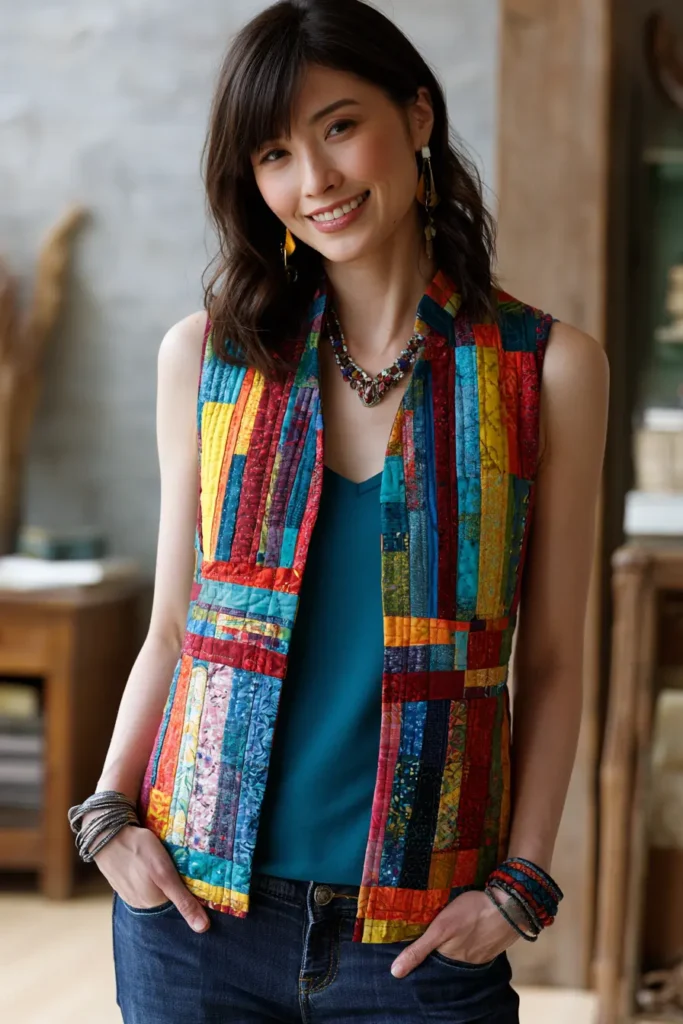
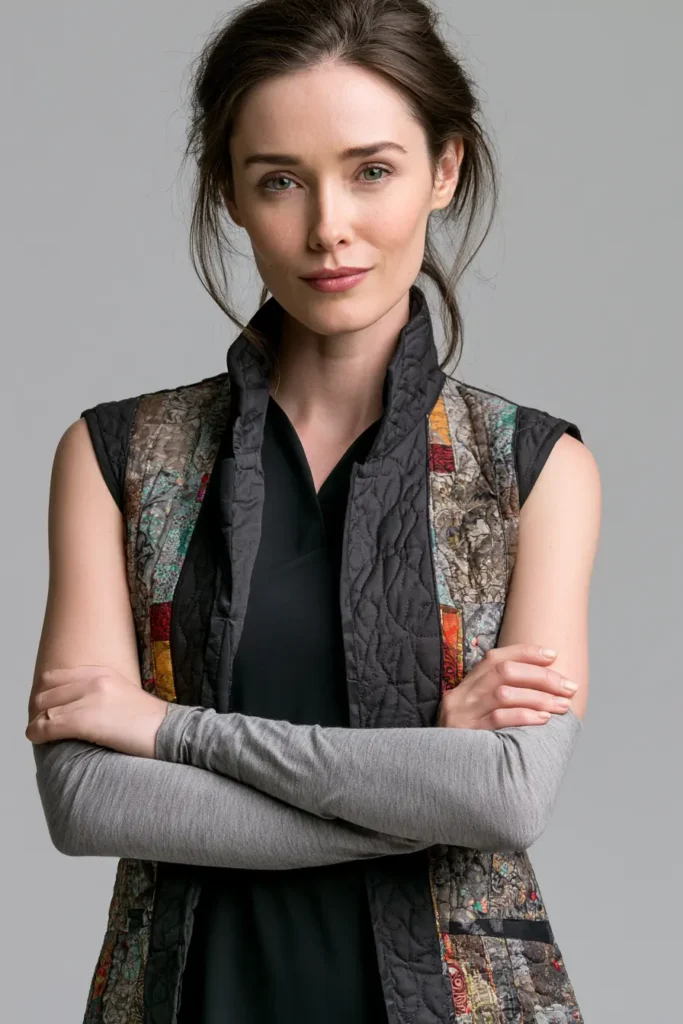
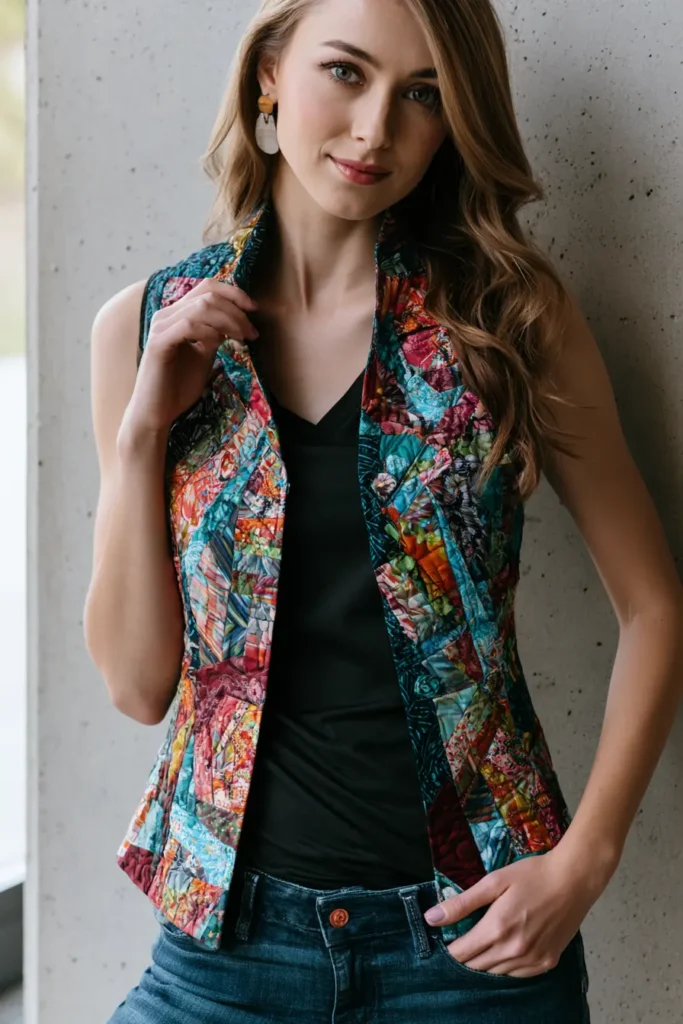
An elegant, tailored quilted-jelly-roll vest is a polished way to wear quilted texture without the bulk of a full jacket. It gives you the warmth and charm of a handmade quilt, but in a sleek sleeveless layer that can be styled over shirts, dresses, turtlenecks, blouses, or lightweight sweaters.
Jelly roll strips are usually 2½ inches wide, making them ideal for creating clean vertical panels, subtle patchwork, or bold accent bands. For a versatile wardrobe piece, use refined neutrals such as ivory, taupe, sand, cocoa, charcoal, black, navy, and soft gray, then add vibrant accents like emerald green, ruby red, sapphire blue, deep teal, plum, coral, or mustard gold.
Why I Made It
I made this vest because I wanted a quilted garment that felt elegant enough for everyday outfits but still cozy and handmade. A quilted jacket can sometimes feel too warm or bulky, but a vest gives just the right amount of comfort while leaving the arms free.
The backstory behind this design comes from the practical beauty of quilted clothing. Quilted vests have long been loved for layering because they warm the core without restricting movement. A jelly roll version adds a creative patchwork twist, making the vest feel personal, stylish, and useful.
Why This Idea Is Worth Making
This idea is worth making because it turns simple strip piecing into a wearable wardrobe staple. It is less intimidating than a quilted jacket because there are no sleeves to attach, yet it still teaches valuable skills such as panel piecing, quilting, garment cutting, binding, pocket placement, and edge finishing.
It is also highly versatile. You can make one in quiet neutrals for minimalist styling, jewel tones for artistic outfits, or soft vintage florals for a romantic layered look.
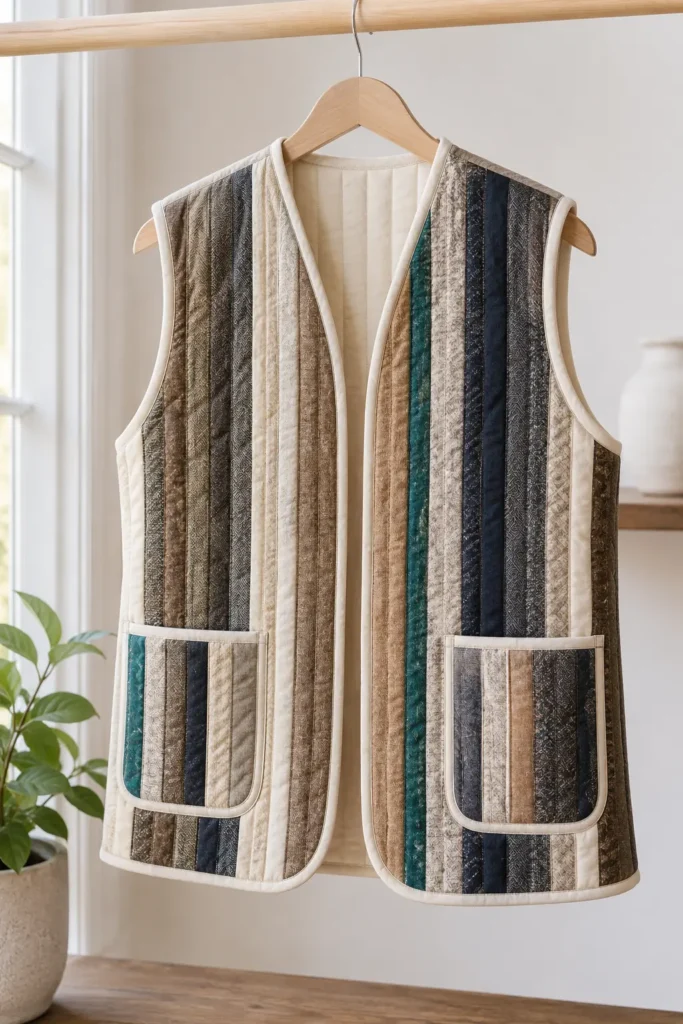
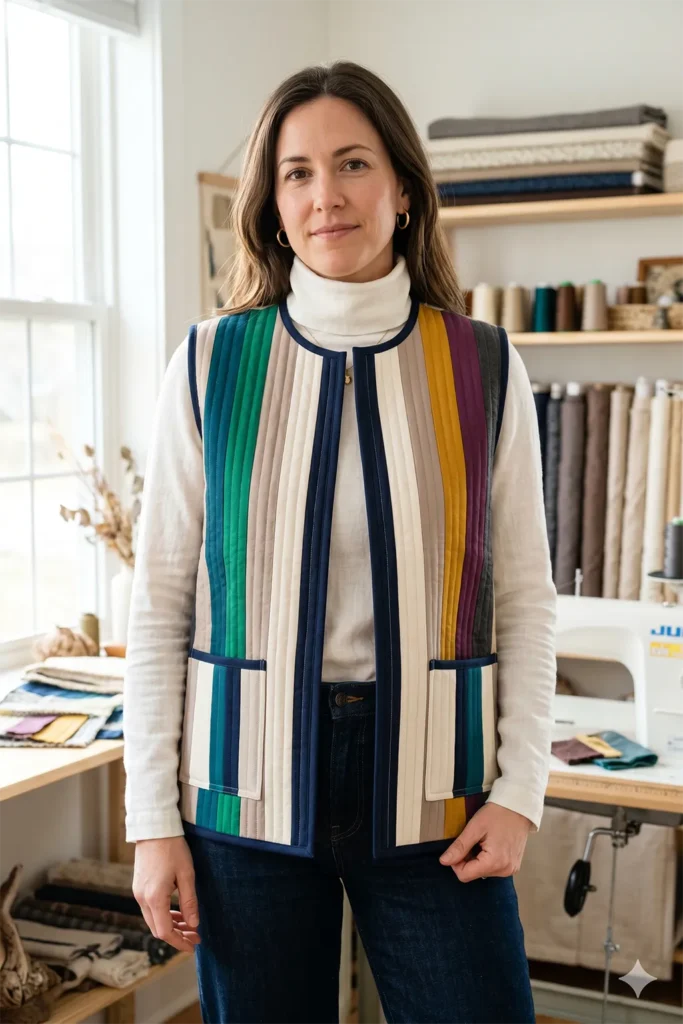
Finished Size
This guide makes a relaxed but tailored quilted vest.
Sample finished measurements for a loose medium size:
- Finished chest: about 42 to 44 inches
- Finished length: about 23 to 24 inches from the shoulder to the hem
- Shoulder width: about 14 to 15 inches
- Armhole depth: about 9 inches
- Front opening: open-front style
- Closure: optional ties, snaps, button loop, or toggle
To adjust the size, measure a vest you already like. Add 2 to 4 inches of ease around the chest because quilted fabric is thicker than regular garment fabric.
Materials Needed
For one tailored quilted vest, gather:
- One jelly roll or 18 to 24 strips: 2½ inches x width of fabric
- Backing fabric: 1½ to 2 yards
- Lightweight cotton batting: 1½ to 2 yards
- Binding fabric: ½ to ¾ yard
- Thread: ivory, taupe, charcoal, navy, teal, or coordinating color
- Simple vest pattern or sleeveless jacket pattern
- Optional pocket fabric: scraps or extra jelly roll strips
- Optional closure: ties, snaps, toggles, or one statement button
- Rotary cutter and cutting mat
- Quilting ruler
- Pins or sewing clips
- Sewing machine
- Iron and ironing board
- Fabric marker or tailor’s chalk
Beginner tip: Use lightweight batting. A vest needs structure, but it should still bend and move comfortably with your body.
Elegant Color Palette
A polished, tailored palette could include:
- Ivory
- Sand beige
- Warm taupe
- Cocoa brown
- Charcoal
- Black
- Navy
- Deep teal
- Emerald green
- Mustard gold
For a more dramatic version, add ruby red, sapphire blue, coral, or plum in one or two statement strips.
Cutting Measurements
These measurements create quilted panels large enough to cut a simple vest.
From jelly roll strips, prepare:
- Back strip-pieced panel: about 28 x 30 inches
- Left front strip-pieced panel: about 16 x 28 inches
- Right front strip-pieced panel: about 16 x 28 inches
- Optional pocket panels: two rectangles about 7 x 8 inches
From backing fabric, cut:
- Back backing: 30 x 32 inches
- Two front backings: 18 x 30 inches each
- Two pocket backings: 8 x 9 inches each
From batting, cut:
- Back batting: 30 x 32 inches
- Two front battings: 18 x 30 inches each
- Two pocket battings: 8 x 9 inches each
For binding, cut:
- Binding strips: 2½ inches wide
- Prepare enough for the neckline, front opening, hem, armholes, and pocket tops
Use a ¼-inch seam allowance for jelly roll piecing and a ½-inch seam allowance for vest construction unless your pattern says otherwise.
Step-by-Step Guide
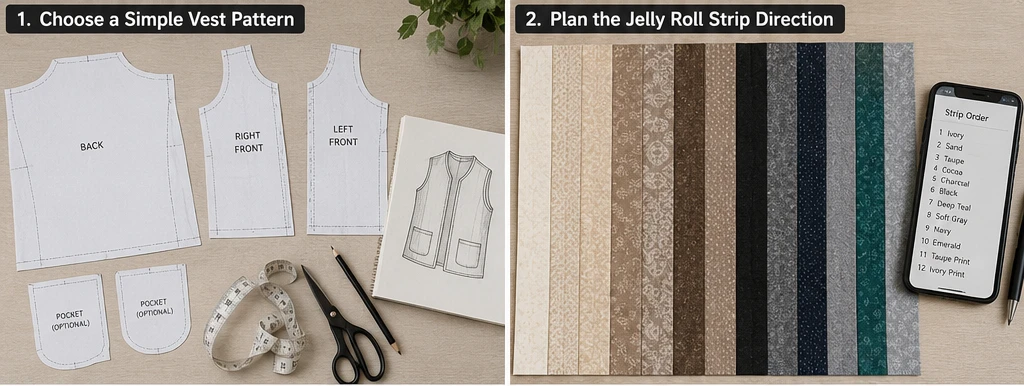
Step 1: Choose a Simple Vest Pattern
Start with a basic vest pattern, a sleeveless jacket pattern, or by tracing a vest you already own. For a beginner-friendly version, choose a design with:
- A simple back piece
- Two front pieces
- No collar
- No zipper
- No fitted darts
- Open-front styling
A slightly boxy shape is best because quilted fabric has more body than regular garment fabric.
Step 2: Plan the Jelly Roll Strip Direction
Decide whether you want the strips to run vertically, horizontally, or diagonally.
For the most tailored look, use vertical strips on the fronts and back. Vertical lines make the vest look longer and cleaner. For a modern accent, place one bold strip in emerald, ruby, sapphire, teal, or mustard near the center front or pocket area.
Take a photo of your strip order before sewing.
Step 3: Piece the Vest Panels
Sew jelly roll strips together lengthwise using a ¼-inch seam allowance until each panel is larger than your vest pattern piece.
Make separate strip-pieced panels for:
- Back
- Left front
- Right front
- Optional pockets
Press seams open or to one side. Keep the panels slightly oversized because quilting can shrink the fabric a little.
Step 4: Layer the Quilt Sandwiches
For each vest section, layer:
- Backing fabric wrong side up
- Lightweight batting in the middle
- Jelly roll strip panel right side up
Smooth each layer carefully and baste with pins or spray.
This creates quilted fabric panels before garment assembly, which keeps the project manageable.
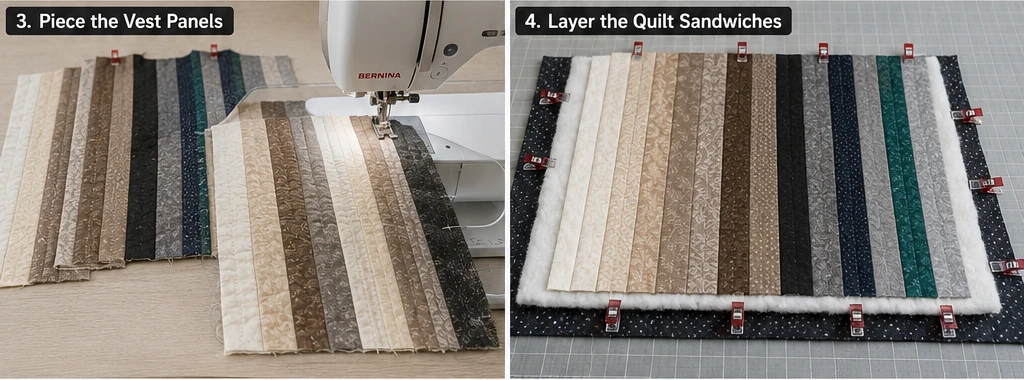
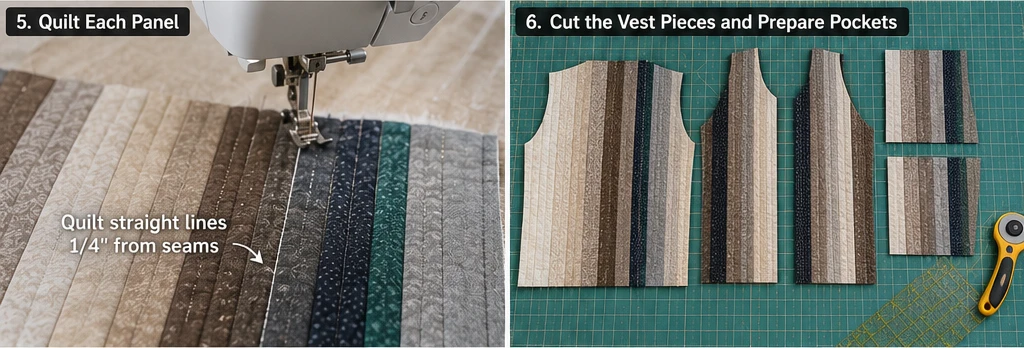
Step 5: Quilt Each Panel
Quilt each panel with simple straight lines. Stitch ¼ inch away from each jelly roll seam for a clean channel-quilted finish.
For a slightly dressier look, add diagonal quilting lines spaced 1½ to 2 inches apart. Use thread that blends with the fabrics for a refined finish, or choose gold, teal, or plum thread for subtle contrast.
Step 6: Cut Out the Vest Pieces
Place your vest pattern pieces on the quilted panels and cut:
- 1 back piece
- 2 front pieces
- 2 optional pockets
Check the color placement before cutting. Try to place your favorite accent strips where they will be visible, such as near the front opening, lower pockets, or upper back.
Step 7: Prepare and Attach the Pockets
If adding pockets, cut two quilted rectangles about 7 x 8 inches. Bind the top edge of each pocket with 2½-inch binding, or fold the top edge under and topstitch.
Place each pocket on a front piece, about 3 inches above the hem and 2½ inches from the side edge. Stitch around the sides and bottom, leaving the top open.
Reinforce the top corners with a few backstitches.
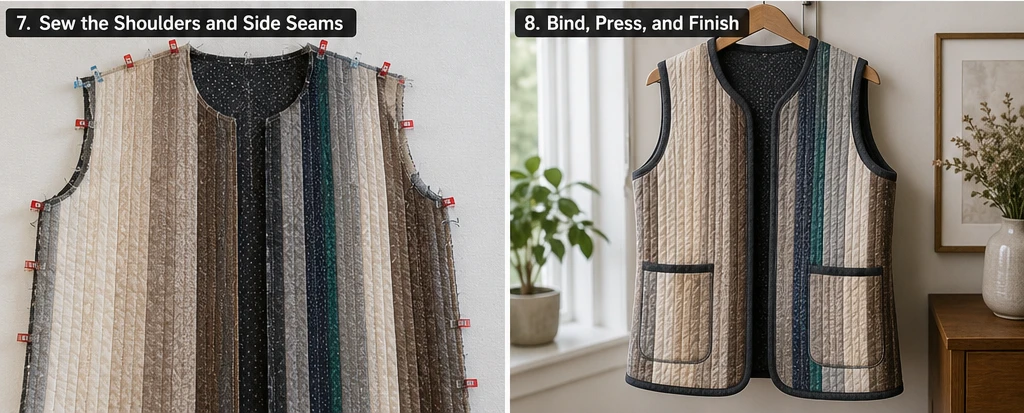
Step 8: Sew the Shoulder Seams
Place the front pieces right sides together with the back piece at the shoulders. Sew the shoulder seams using a ½-inch seam allowance.
Press gently. If the seam feels bulky, trim only the batting layer slightly inside the seam allowance.
For a cleaner inside finish, cover the shoulder seams with bias binding.
Step 9: Sew the Side Seams
Place the vest right sides together, matching front and back side seams.
Sew each side seam from the armhole down to the hem using a ½-inch seam allowance. Press seams open if possible.
Try on the vest before finishing the edges. Check the chest, armholes, and length. If needed, slightly deepen the armhole or trim the hem before binding.
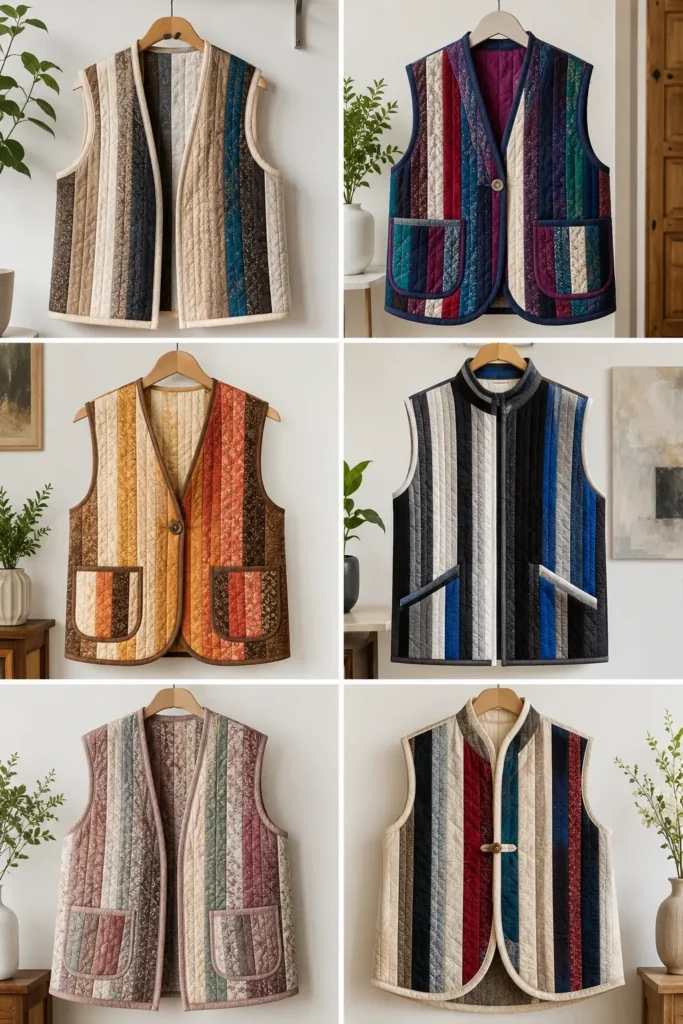
Step 10: Bind the Armholes
Bind each armhole with 2½-inch binding. Sew the binding to one side, fold it around the raw edge, and stitch it down neatly.
Because armholes are curved, work slowly and avoid pulling the binding too tight. A smooth armhole finish makes the vest look more tailored.
Step 11: Bind the Neckline, Front Opening, and Hem
Use one continuous binding strip if possible to finish the neckline and front opening. Then bind the hem separately.
Good binding colors include charcoal, navy, black, deep teal, cocoa, plum, or ivory. A darker binding frames the vest and makes it look polished.
Step 12: Add Optional Closure Details
For the easiest version, leave the vest open.
For a more finished look, add:
- Two fabric ties at the front
- One button and a loop near the chest
- Small snaps
- Toggle closures
- A narrow belt made from leftover jelly roll strips
Keep closures simple so the vest remains comfortable and easy to layer.
Step 13: Press and Finish
Give the vest a gentle final press. Avoid flattening the quilted texture too much.
Trim loose threads, reinforce pocket corners, and add a small handmade label if desired. Try styling the vest with several outfits to see how the colors work.
Assembly at a Glance
- Choose a simple vest or sleeveless jacket pattern.
- Select 18 to 24 jelly roll strips in neutrals and vibrant accents.
- Plan vertical, horizontal, or diagonal strip direction.
- Piece oversized panels for the back, fronts, and pockets.
- Layer each panel with backing fabric and lightweight batting.
- Quilt each panel with straight or diagonal lines.
- Cut final vest pieces from the quilted panels.
- Prepare and attach optional patch pockets.
- Sew shoulder seams.
- Sew side seams.
- Bind the armholes.
- Bind the neckline, front opening, and hem.
- Add optional ties, snaps, button loop, or toggle closure.
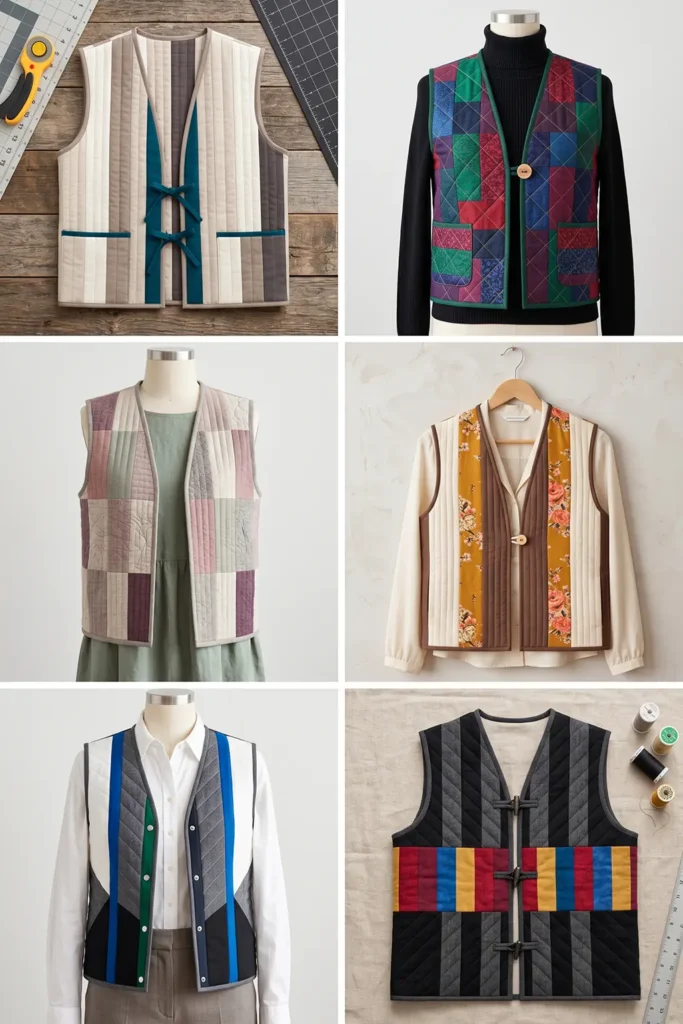
Elegant Color Combination Ideas
For a minimalist tailored vest, use ivory, taupe, sand, cocoa, charcoal, and black with a deep teal accent.
For a jewel-tone wardrobe piece, use emerald, sapphire, plum, ruby, navy, and ivory.
For a warm, polished vest, use cream, caramel, mustard gold, cocoa, coral, and espresso.
For a modern city vest, use white, black, charcoal, cobalt blue, emerald, and silver gray.
For a soft artistic vest, use dusty rose, sage, oatmeal, plum, warm gray, and ivory.
Beginner Tips for Success
Choose a loose vest pattern for your first version. Quilted fabric needs more room than regular fabric.
Quilt the panels before cutting the vest pieces. This keeps the fabric stable and easier to sew.
Use lightweight batting so the vest feels comfortable instead of stiff.
Make the armholes slightly roomy. Quilted fabric can feel bulky under the arms if the armhole is too tight.
Use clips for thick layers. They hold quilted fabric better than pins.
Try on before binding. This lets you adjust the length and armhole shape before the final finish.
Keep closures simple. The quilted texture and jelly roll strips already give the vest plenty of visual interest.
Styling Tip
Wear the finished, tailored jelly roll quilted vest over a crisp shirt, fitted tee, turtleneck, linen dress, or slim sweater. Pair it with denim, tailored trousers, boots, loafers, or clogs. A palette with emerald, ruby, sapphire, teal, mustard, plum, ivory, and charcoal makes the vest feel versatile, polished, and full of handmade personality.
Other Design Inspirations – Digitally Modified
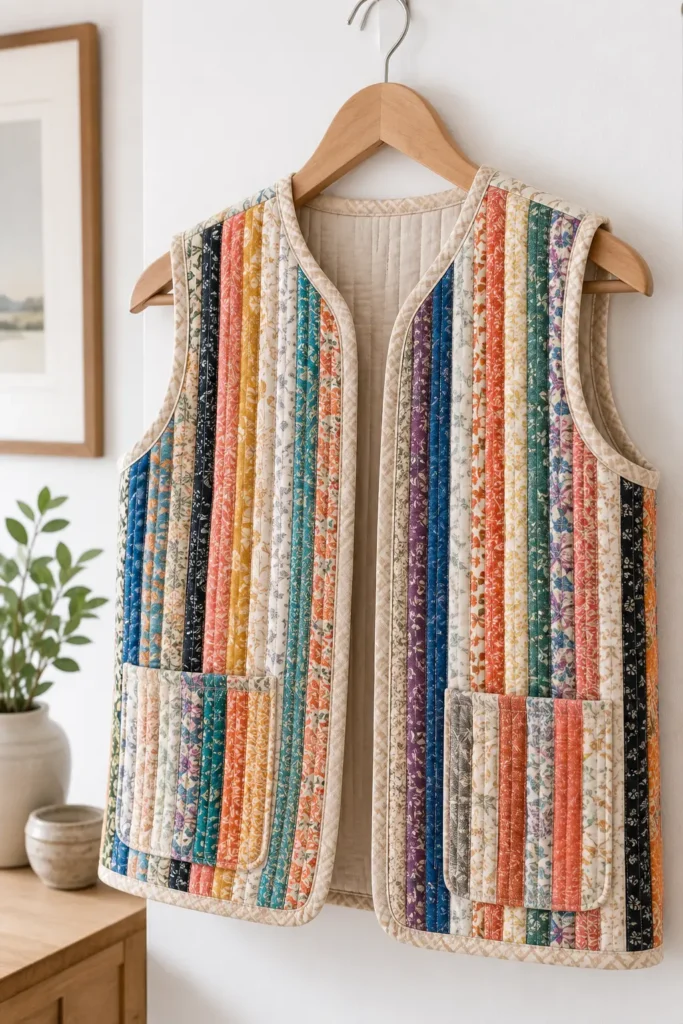
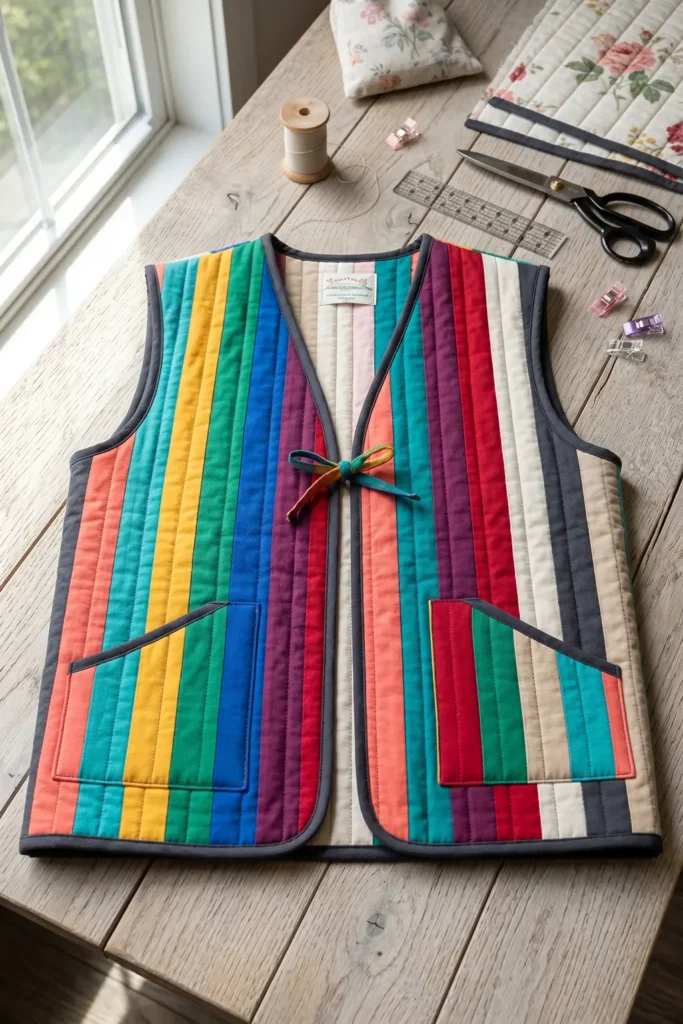
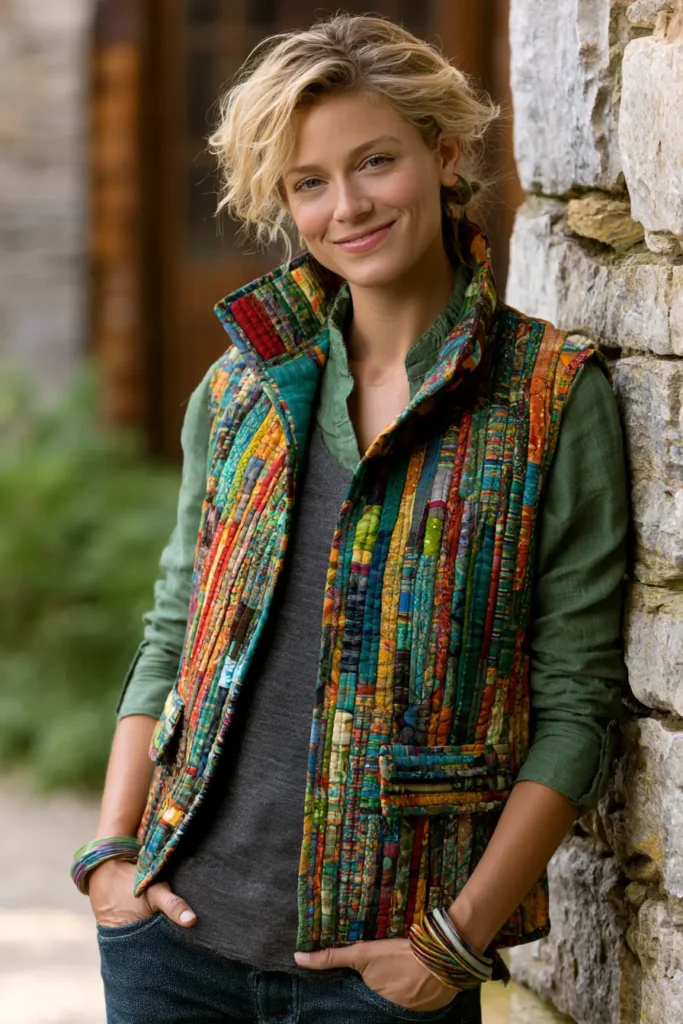
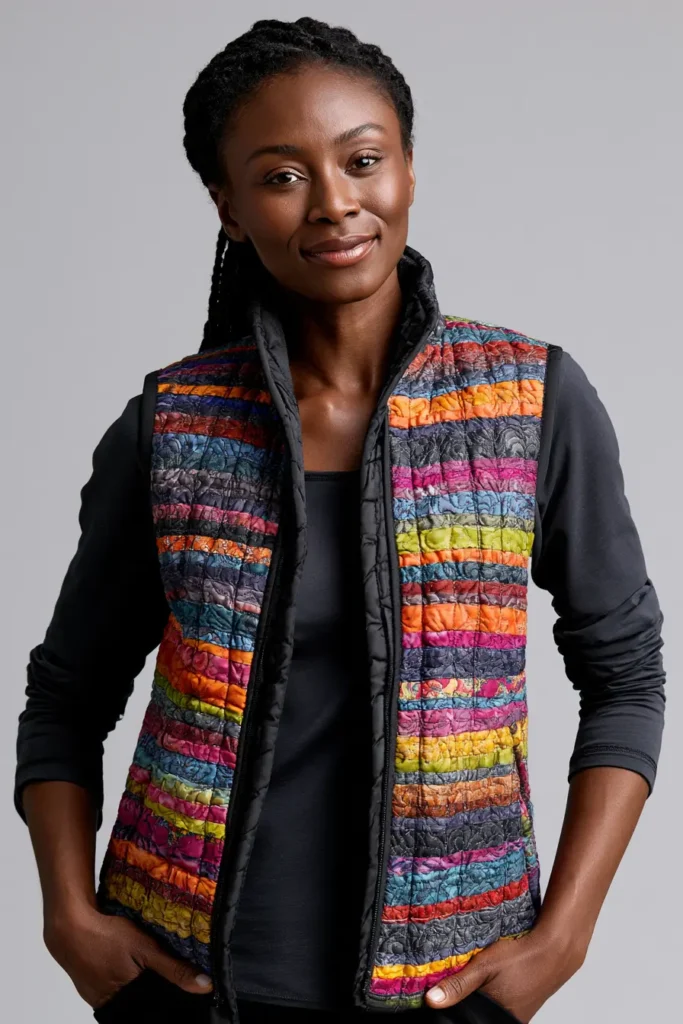
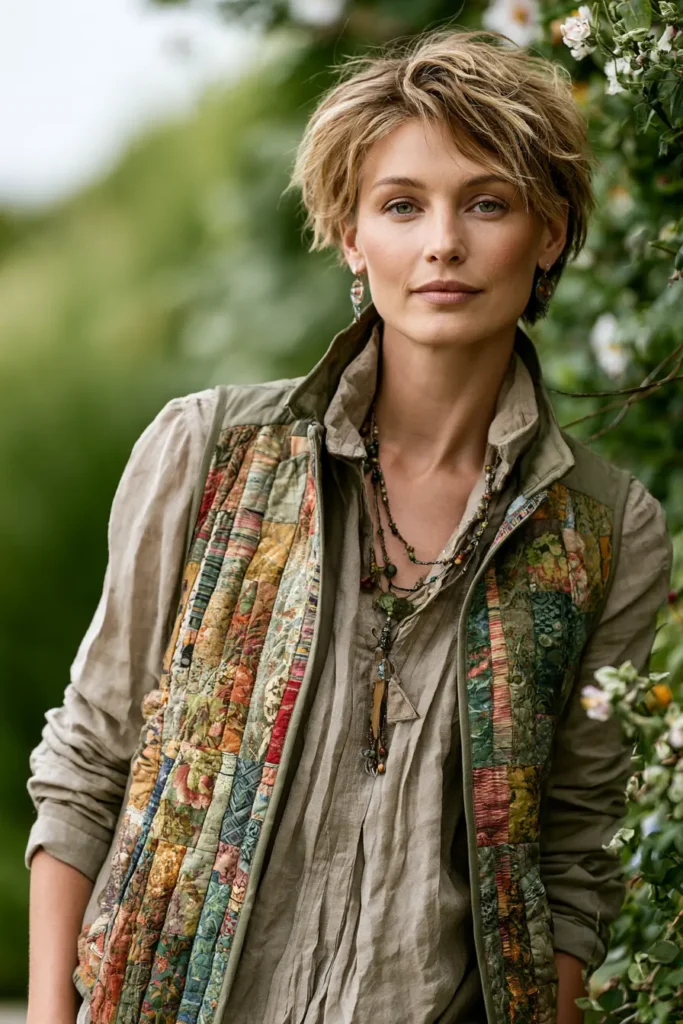
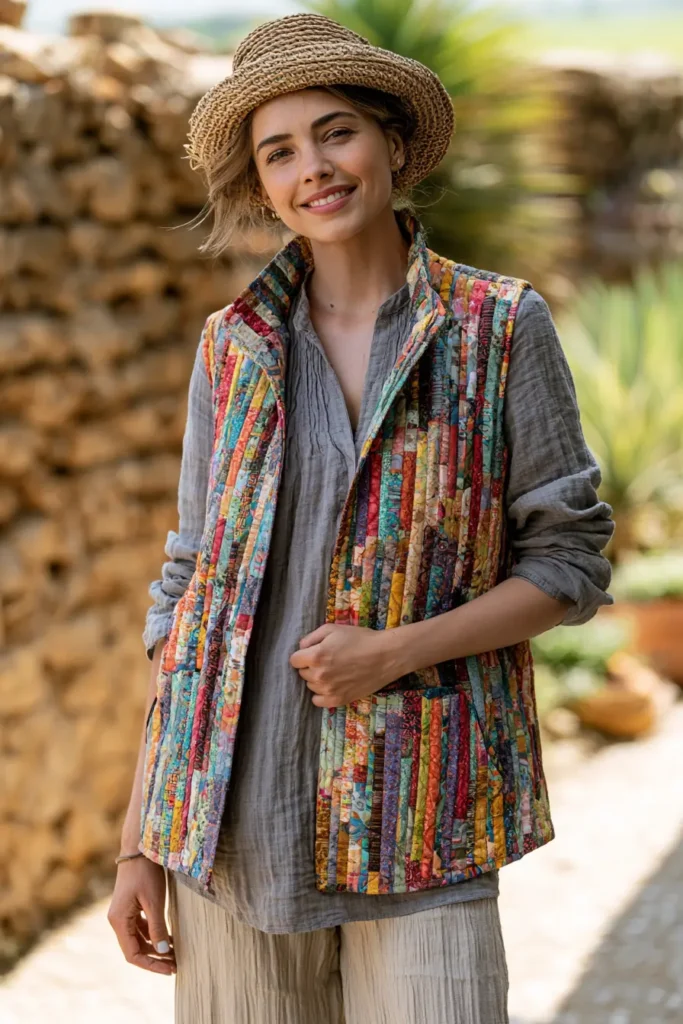
6. Lightweight Jelly Roll Quilted Vests for Transitional Cozy Comfort
A lightweight jelly roll quilted vest is the perfect handmade layer for those in-between seasons when a jacket feels too warm but a shirt alone is not quite enough. It gives you cozy quilted texture without bulky sleeves, making it easy to wear over tees, blouses, thin sweaters, dresses, or long-sleeve tops.
Jelly roll strips are usually 2½ inches wide, so they are ideal for creating soft striped panels, subtle patchwork, or cheerful color bands. For a vibrant but wearable look, try colors like coral, teal, saffron yellow, emerald green, cobalt blue, plum, ruby red, ivory, sand, and charcoal. The finished vest feels light, practical, and stylish enough for everyday layering.
Why I Made It
I made this vest because I wanted a quilted layer that could move easily between seasons. A full quilted jacket is wonderfully cozy, but sometimes I only need warmth through the body while keeping my arms free. This vest gives that comfortable quilt feeling without feeling heavy or restrictive.
The backstory behind this idea comes from the practical nature of quilted clothing. Quilted garments have always been useful because they trap warmth while staying soft and flexible. A jelly roll version makes the process more colorful and approachable, especially for beginners who want to try wearable quilting without having to sew sleeves.
Why This Idea Is Worth Making
This idea is worth making because it is easier than a quilted jacket but just as useful for everyday styling. There are no sleeves to set in, which makes the construction more beginner-friendly, and the lightweight batting keeps the vest comfortable for transitional weather.
It is also a smart way to turn a jelly roll into something wearable. Instead of making another blanket, you create a practical wardrobe piece that can be layered, styled, washed, and worn again and again.
Finished Size
This guide makes a relaxed, lightweight quilted vest.
Sample finished measurements for a loose medium size:
- Finished chest: about 42 to 44 inches
- Finished length: about 23 to 24 inches from the shoulder to the hem
- Shoulder width: about 14 to 15 inches
- Armhole depth: about 9 inches
- Front style: open-front vest
- Closure: optional ties, snaps, button loop, or no closure
To adjust the size, measure a vest you already like. Add about 2 to 4 inches of ease around the chest so the quilted vest layers comfortably over clothing.
Materials Needed
For one lightweight jelly roll quilted vest, gather:
- 18 to 24 jelly roll strips: 2½ inches x width of fabric
- Backing fabric: 1½ to 2 yards
- Lightweight cotton batting or flannel: 1½ to 2 yards
- Binding fabric: ½ to ¾ yard
- Thread: ivory, taupe, charcoal, teal, coral, or coordinating color
- Simple vest pattern or sleeveless jacket pattern
- Optional pocket fabric: scraps or extra jelly roll strips
- Optional closure: fabric ties, snaps, toggles, or one button loop
- Rotary cutter and cutting mat
- Quilting ruler
- Pins or sewing clips
- Sewing machine
- Iron and ironing board
- Fabric marker or tailor’s chalk
Beginner tip: For the lightest vest, use flannel instead of batting as the middle layer. For more warmth, use thin cotton batting.
Lightweight Color Palette
A fresh transitional palette could include:
- Ivory
- Sand beige
- Warm taupe
- Coral
- Saffron yellow
- Teal
- Emerald green
- Cobalt blue
- Plum
- Charcoal
For a softer everyday vest, use mostly neutrals and add one or two bright accents. For a more expressive vest, let the colorful strips run through the whole garment.
Cutting Measurements
These measurements create quilted panels large enough to cut a simple vest.
From jelly roll strips, prepare:
- Back strip-pieced panel: about 28 x 30 inches
- Left front strip-pieced panel: about 16 x 28 inches
- Right front strip-pieced panel: about 16 x 28 inches
- Optional pocket panels: two rectangles about 7 x 8 inches
From backing fabric, cut:
- Back backing: 30 x 32 inches
- Two front backings: 18 x 30 inches each
- Two pocket backings: 8 x 9 inches each
From lightweight batting or flannel, cut:
- Back middle layer: 30 x 32 inches
- Two front middle layers: 18 x 30 inches each
- Two pocket middle layers: 8 x 9 inches each
For binding, cut:
- Binding strips: 2½ inches wide
- Prepare enough for the neckline, front opening, hem, armholes, and pocket tops
Use a ¼-inch seam allowance for jelly roll piecing and a ½-inch seam allowance for vest construction unless your pattern says otherwise.
Step-by-Step Guide
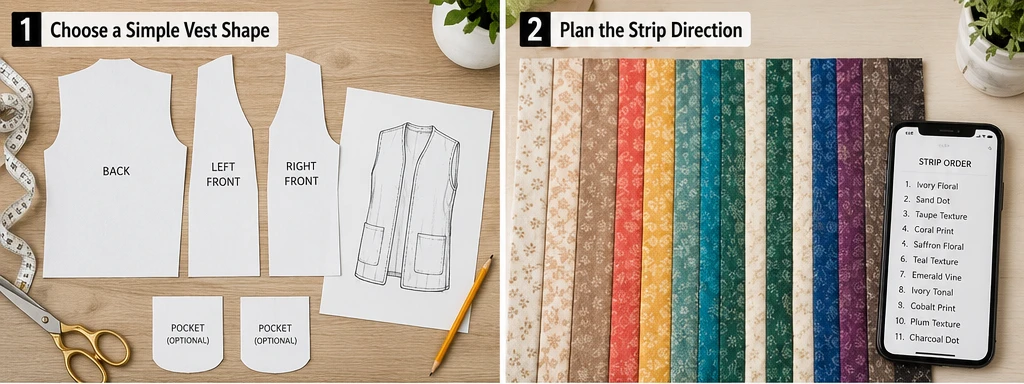
Step 1: Choose a Simple Vest Shape
Start with a basic vest pattern, sleeveless jacket pattern, or a vest you already own and like. A beginner-friendly vest should have a simple back, two front pieces, no collar, and an open front.
Avoid fitted darts, curved princess seams, or complicated closures for your first version. A relaxed shape will be easier to sew and more comfortable in quilted fabric.
Step 2: Plan the Strip Direction
Decide how you want the jelly roll strips to run. Vertical strips give the vest a clean, lengthening look. Horizontal strips feel more quilt-like and casual. Diagonal strips look modern but require more careful cutting.
For a lightweight everyday vest, vertical strips are the easiest and most flattering. Place vibrant colors like teal, coral, saffron, emerald, cobalt, or plum where you want the eye to land.
Step 3: Piece the Jelly Roll Panels
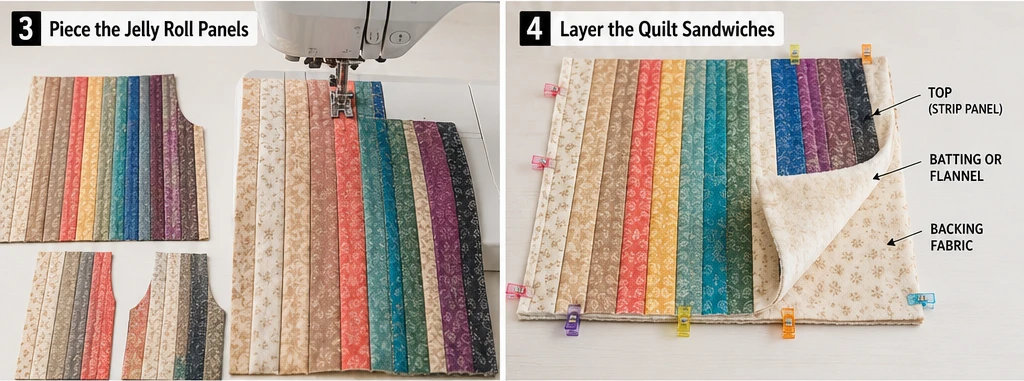
Sew jelly roll strips together lengthwise using a ¼-inch seam allowance until each panel is larger than your vest pattern piece.
Make separate panels for:
- Back
- Left front
- Right front
- Optional pockets
Press seams open or to one side. Keep each panel slightly oversized because quilting can shrink the fabric a little.
Step 4: Layer the Quilt Sandwiches
For each vest section, layer:
- Backing fabric wrong side up
- Lightweight batting or flannel in the middle
- Jelly roll strip panel right side up
Smooth each layer carefully and baste with pins or spray.
This creates soft quilted fabric panels before the vest pieces are cut.
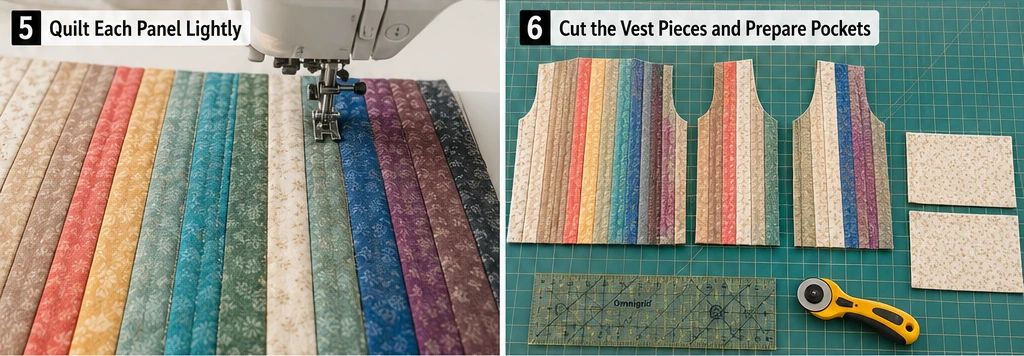
Step 5: Quilt Each Panel Lightly
Quilt each panel with simple straight lines. Stitch ¼ inch away from each jelly roll seam for a clean channel-quilted look.
To keep the vest lightweight and flexible, avoid dense quilting. If adding diagonal lines, space them about 2 inches apart so the vest still drapes comfortably.
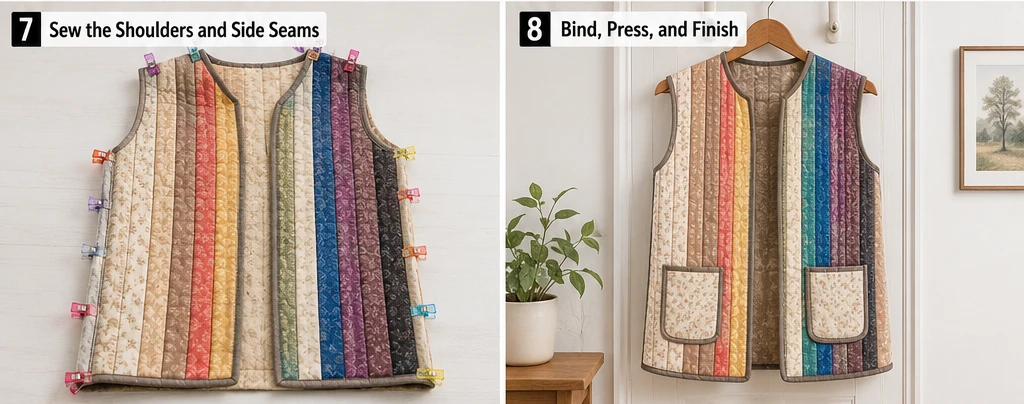
Step 6: Cut Out the Vest Pieces
Place your vest pattern pieces on the quilted panels and cut:
- 1 back piece
- 2 front pieces
- 2 optional pockets
Check color placement before cutting. Try to keep the brightest strips balanced across the front and back so the vest looks intentional.
Step 7: Make and Attach the Pockets
If adding pockets, cut two quilted rectangles about 7 x 8 inches. Bind the top edge of each pocket with 2½-inch binding, or fold and topstitch the top edge.
Place pockets on the lower front pieces, about 3 inches above the hem and 2½ inches from the side edge. Stitch around the sides and bottom, leaving the top open.
Reinforce the top corners with a few backstitches.
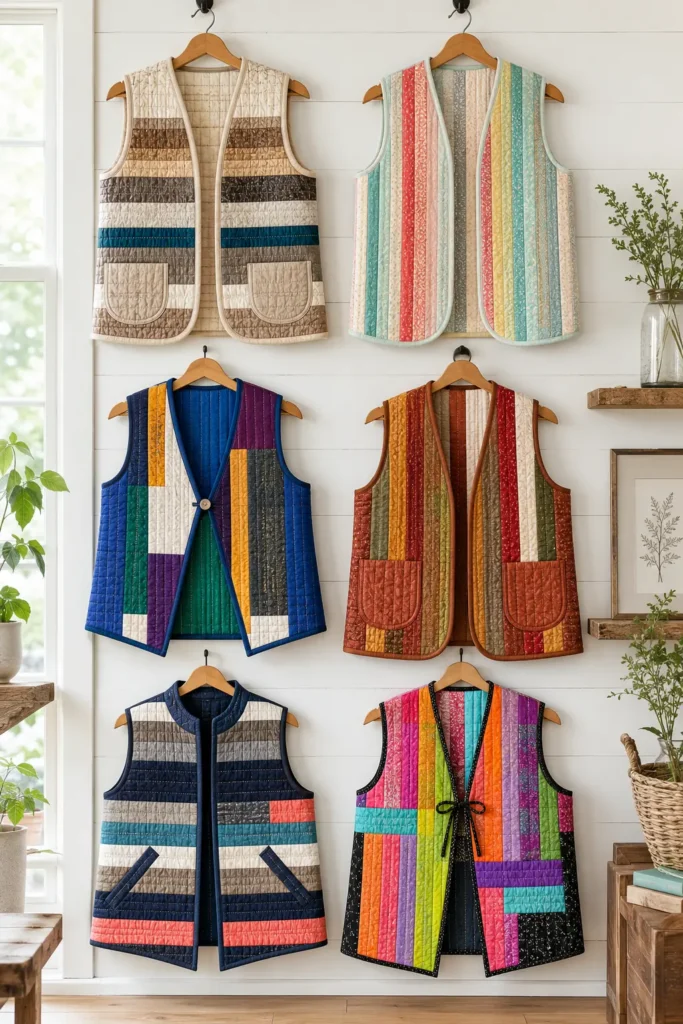
Step 8: Sew the Shoulder Seams
Place the front pieces right sides together with the back piece at the shoulders. Sew the shoulder seams using a ½-inch seam allowance.
Press gently. If the seams feel bulky, trim only the batting layer slightly inside the seam allowance.
For a neat interior, cover the shoulder seams with bias binding.
Step 9: Sew the Side Seams
Place the vest right sides together, matching the front and back side seams.
Sew each side seam from the armhole to the hem using a ½-inch seam allowance. Press the seams open if possible.
Try on the vest before binding. Check the fit at the chest, armholes, and length.
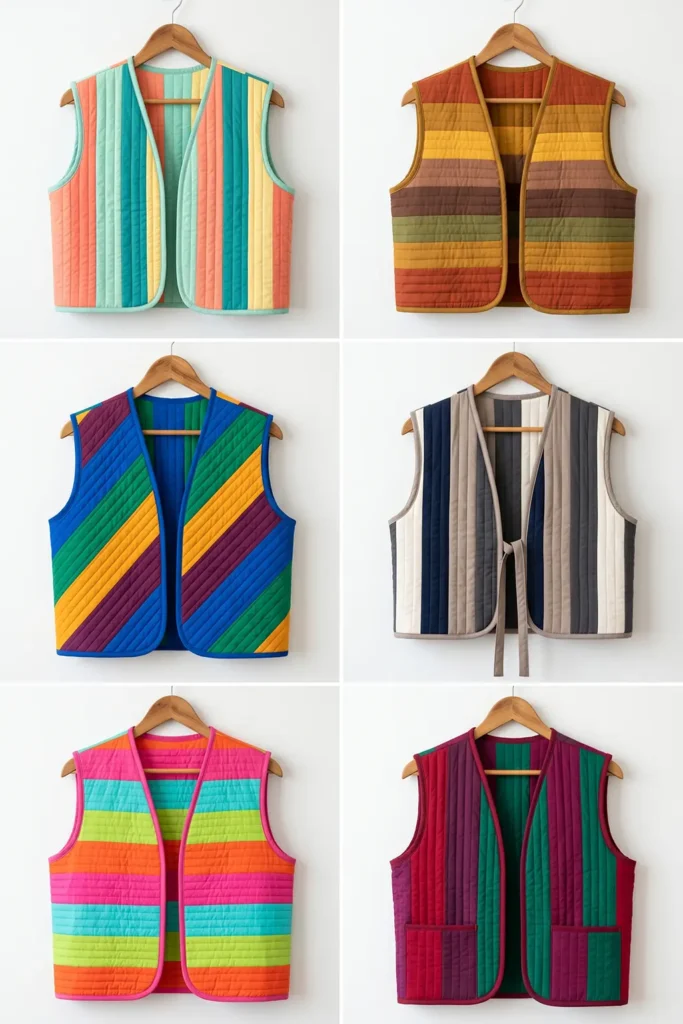
Step 10: Bind the Armholes
Bind each armhole with 2½-inch binding. Because armholes are curved, sew slowly and avoid stretching the binding.
A smooth armhole binding makes the vest more comfortable and gives it a polished finish.
Step 11: Bind the Neckline, Front Opening, and Hem
Bind the neckline and front opening, then bind the hem. You can use one continuous strip around the front and neckline if your pattern shape allows.
Good binding colors include charcoal, ivory, teal, plum, navy, coral, or deep green. A slightly darker binding helps frame the vest.
Step 12: Add Optional Closure Details
For the simplest lightweight vest, leave it open.
For a more finished look, add:
- Fabric ties
- One button and loop
- Small snaps
- Toggle closures
- A narrow belt from leftover jelly roll strips
Keep the closure light so the vest remains easy to layer.
Step 13: Press and Finish
Give the vest a gentle final press. Avoid flattening the quilting too much.
Trim loose threads, reinforce pocket corners, and add a small handmade label if desired. Try the vest over a few different outfits to see how it layers.
Assembly at a Glance
- Choose a simple vest or sleeveless jacket pattern.
- Select 18 to 24 jelly roll strips in lightweight, wearable colors.
- Plan the strip direction: vertical, horizontal, or diagonal.
- Piece oversized panels for the back, fronts, and pockets.
- Layer each panel with backing and lightweight batting or flannel.
- Quilt each panel lightly with straight lines.
- Cut the final vest pieces from the quilted panels.
- Make and attach optional patch pockets.
- Sew shoulder seams.
- Sew side seams.
- Bind the armholes.
- Bind the neckline, front opening, and hem.
- Add optional closure details and press gently.
Vibrant Color Combination Ideas
For a fresh spring vest, use ivory, coral, mint, teal, butter yellow, and soft gray.
For a bold transitional vest, use cobalt, emerald, saffron, plum, charcoal, and white.
For a warm autumn vest, use rust, mustard, cocoa, cream, ruby, and olive green.
For a modern everyday vest, use navy, taupe, charcoal, ivory, teal, and coral.
For a creative studio vest, use hot pink, orange, aqua, lime, violet, and black.
Beginner Tips for Success
Use flannel instead of batting for the lightest possible vest.
Choose a loose pattern. Quilted fabric needs more ease than regular garment fabric.
Quilt before cutting. This keeps the layers stable and makes the vest pieces easier to handle.
Avoid dense quilting. Lightweight vests should stay soft and flexible.
Try on before binding. This lets you adjust the armholes, hem, or side seams before finishing.
Use clips instead of pins when sewing quilted layers. Clips hold thickness more securely.
Styling Tip
Wear the lightweight quilted jelly-roll vest over a fitted tee, cotton blouse, linen dress, turtleneck, or thin sweater. Pair it with jeans, wide-leg trousers, skirts, boots, sneakers, or clogs. A palette with teal, coral, saffron, emerald, cobalt, plum, ruby, ivory, and charcoal gives the vest enough color to feel special while still working as an easy transitional layer.
Other Design Inspirations – Digitally Modified
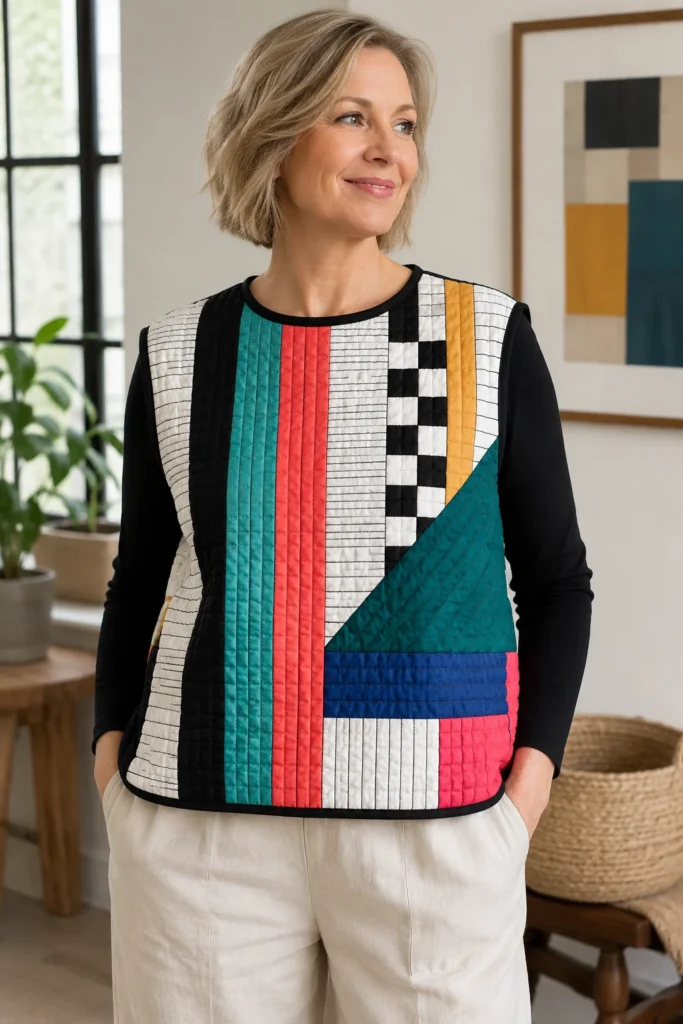
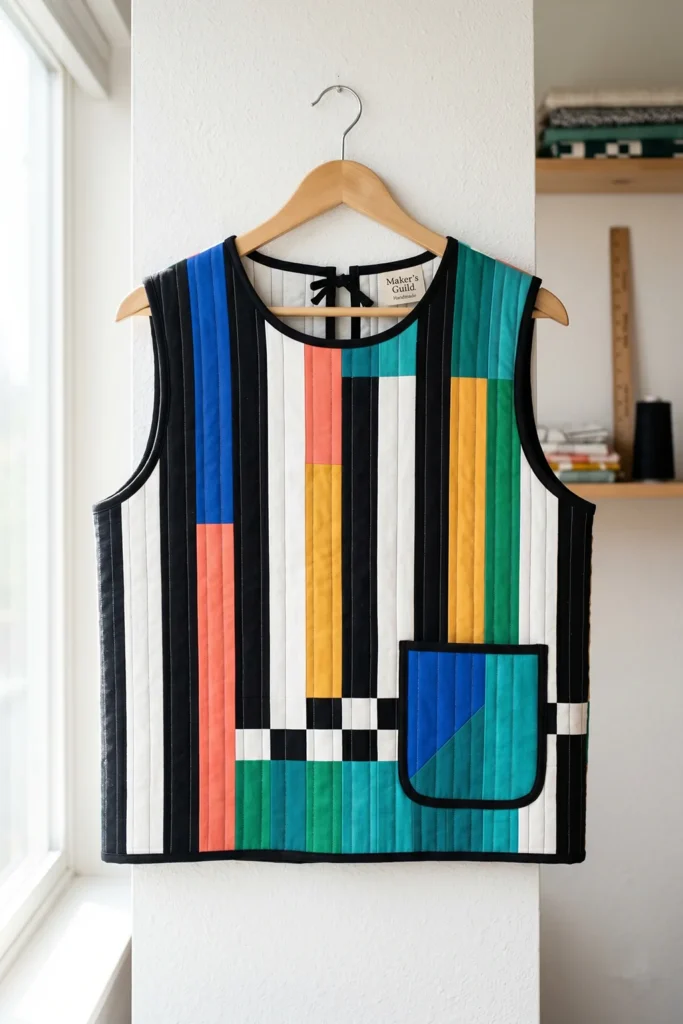
7. Modern Geometric Jelly Roll Quilted Tops for Unique Wearable Art
A modern geometric jelly roll quilted top is a creative way to turn simple fabric strips into a bold wearable art piece. Instead of making a traditional quilted jacket or vest, this design creates a sleeveless or short-sleeve quilted top with clean lines, colorful strip panels, and striking geometric accents.
Jelly roll strips are usually 2½ inches wide, which makes them perfect for building stripes, color blocks, checkerboard bands, angled panels, and modern patchwork. For a vibrant wearable-art look, use colors like cobalt blue, coral, saffron yellow, emerald green, teal, hot pink, violet, ruby red, black, charcoal, and crisp white.
The finished top feels artistic but still comfortable enough to wear over a fitted tee, thin turtleneck, simple dress, or lightweight shirt.
Why I Made It
I made this quilted top because I wanted a smaller wearable project that felt more expressive than a basic vest but less involved than a full quilted jacket. A geometric jelly roll layout gives the garment instant personality, and the sleeveless or cap-sleeve shape keeps it approachable for beginners.
The inspiration came from modern art quilts, where simple shapes can create strong visual movement. By using strips, squares, and angled quilting lines, the top becomes a soft textile canvas. It is cozy, wearable, and full of handmade character.
Why This Idea Is Worth Making
This idea is worth making because it lets you create a one-of-a-kind garment from beginner-friendly strip piecing. You do not need complicated tailoring to make it look special. The color placement, quilting lines, and geometric layout do most of the design work.
It is also a great project if you want to try wearable quilting without committing to sleeves, collars, zippers, or heavy shaping. You get the satisfaction of making a quilted garment, but the top stays light, flexible, and easy to style.
Finished Size
This guide makes a relaxed quilted top with a boxy fit.
Sample finished measurements for a loose medium size:
- Finished chest: about 42 to 44 inches
- Finished length: about 22 to 23 inches from the shoulder to the hem
- Shoulder width: about 14 to 15 inches
- Armhole depth: about 8½ to 9 inches
- Style: sleeveless or extended-shoulder top
- Closure: pullover style or open-back tie option for easier wearing
To adjust the size, measure a loose sleeveless top you already like. Add about 2 to 4 inches of ease around the chest because quilted fabric is thicker than regular garment fabric.
Materials Needed
For one modern geometric quilted top, gather:
- 18 to 24 jelly roll strips: 2½ inches x width of fabric
- Backing fabric: 1½ to 2 yards
- Lightweight cotton batting or flannel: 1½ to 2 yards
- Binding fabric: ½ to ¾ yard
- Thread: white, black, charcoal, teal, coral, or coordinating color
- Simple boxy top pattern, sleeveless vest pattern, or loose top to trace
- Optional pocket fabric: scraps or extra jelly roll strips
- Optional ties: leftover strips or binding
- Rotary cutter and cutting mat
- Quilting ruler
- Pins or sewing clips
- Sewing machine
- Iron and ironing board
- Fabric marker or tailor’s chalk
Beginner tip: Use flannel instead of batting if you want the lightest, softest version. Use thin cotton batting if you want more quilted structure.
Vibrant Geometric Palette
A bold wearable-art palette could include:
- Crisp white
- Black
- Charcoal
- Cobalt blue
- Teal
- Emerald green
- Saffron yellow
- Coral
- Hot pink
- Violet
For a more polished everyday version, use mostly black, white, charcoal, navy, and ivory, then add geometric accents in cobalt, emerald, saffron, coral, or magenta.
Cutting Measurements
These measurements create quilted panels large enough to cut a relaxed top.
From jelly roll strips, prepare:
- Front strip-pieced panel: about 26 x 28 inches
- Back strip-pieced panel: about 26 x 28 inches
- Optional side accent panels: two pieces about 6 x 20 inches
- Optional pocket panel: one rectangle about 7 x 8 inches
From backing fabric, cut:
- Front backing: 28 x 30 inches
- Back backing: 28 x 30 inches
- Side accent backing: two pieces 8 x 22 inches, optional
- Pocket backing: 8 x 9 inches, optional
From lightweight batting or flannel, cut:
- Front middle layer: 28 x 30 inches
- Back middle layer: 28 x 30 inches
- Side accent middle layers: two pieces 8 x 22 inches, optional
- Pocket middle layer: 8 x 9 inches, optional
For binding, cut:
- Binding strips: 2½ inches wide
- Prepare enough for the neckline, armholes, hem, and optional back opening
Use a ¼-inch seam allowance for jelly roll piecing and a ½-inch seam allowance for garment construction unless your pattern says otherwise.
Step-by-Step Guide
Step 1: Choose a Simple Top Shape
Start with a boxy sleeveless top pattern, a simple vest pattern, or a loose top you already own. For a beginner-friendly version, choose a shape with:
- A simple front piece
- A simple back piece
- No collar
- No zipper
- No darts
- No fitted waist
- Slightly roomy armholes
A relaxed shape works best because quilted fabric has more body than regular garment fabric.
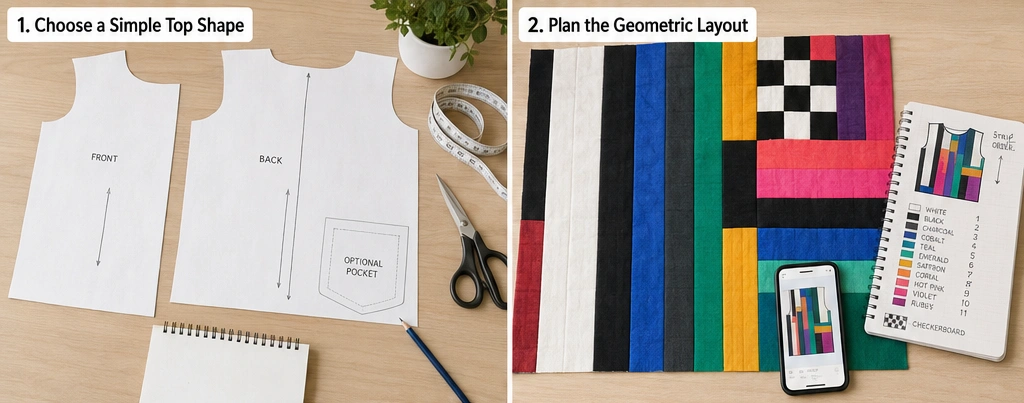
Step 2: Plan the Geometric Layout
Decide how you want the jelly roll strips to create the design. Good beginner-friendly options include:
- Vertical stripes for a clean, modern look
- Horizontal color bands for a quilt-like effect
- Checkerboard accents using small strip pieces
- One bold diagonal color band across the front
- Color blocking with dark neutrals and bright accents
For a strong wearable-art effect, try black-and-white stripes with cobalt, coral, saffron, teal, and emerald accents.
Step 3: Piece the Front Panel
Sew jelly roll strips together lengthwise using a ¼-inch seam allowance until the panel is larger than the front pattern piece.
For a geometric accent, insert a short checkerboard row or bold color block into the panel. You can make a checkerboard by cutting several jelly roll strips into 2½ x 2½-inch squares and sewing them into a row.
Press seams open or to one side. Keep the panel slightly oversized because quilting can shrink it.
Step 4: Piece the Back Panel
Make the back panel the same way, using either the same strip order or a calmer layout.
A nice option is to make the front bold and the back simpler. For example, use bright geometric accents on the front and a mostly charcoal, ivory, teal, and navy layout on the back.
Press well so the panel lies flat before quilting.
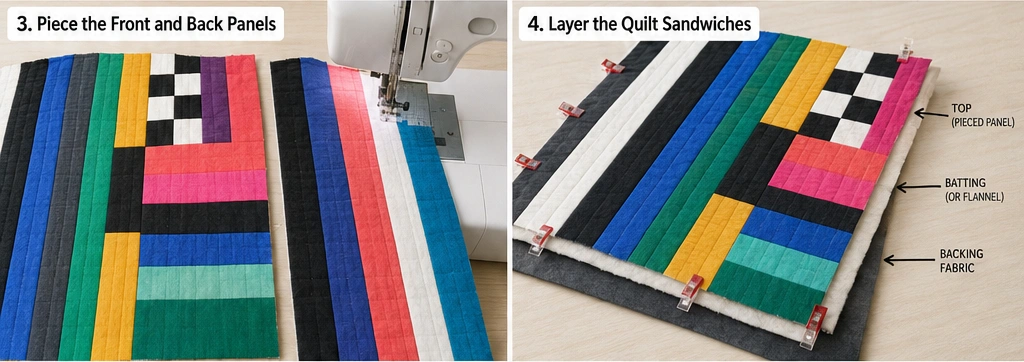
Step 5: Layer the Quilt Sandwiches
For each top section, layer:
- Backing fabric wrong side up
- Lightweight batting or flannel in the middle
- Jelly roll panel right side up
Smooth the layers carefully and baste with pins or spray.
This creates quilted fabric panels before garment cutting, which keeps the construction easier and more accurate.
Step 6: Quilt the Panels
Quilt each panel with simple straight lines. Stitch ¼ inch away from each jelly roll seam for a clean channel-quilted finish.
For a modern geometric look, add diagonal quilting lines spaced 1½ to 2 inches apart. You can also echo quilt around color-blocked areas to make them stand out.
Use a thread that supports the design. Black thread gives a graphic look, while ivory or gray thread feels softer.
Step 7: Cut Out the Top Pieces
Place your top pattern pieces on the quilted panels and cut:
- 1 front piece
- 1 back piece
- Optional side accent panels
- Optional pocket
Check the color placement before cutting. Put your favorite bright strips where they will be most visible, such as the center front, lower hem, shoulder area, or side panels.
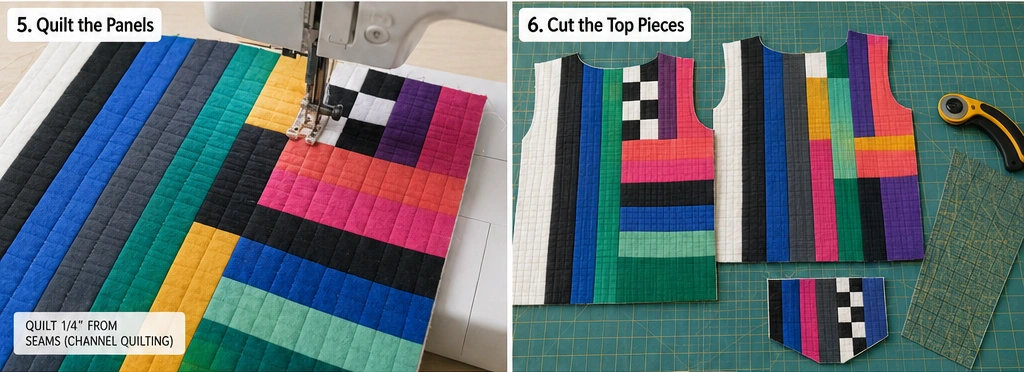
Step 8: Prepare the Neckline and Back Opening
For the easiest pullover version, make sure the neckline is wide enough to slip over your head comfortably.
If you prefer a smaller neckline, add a back opening. Cut a simple slit at the upper center back, about 5 to 6 inches long, then finish it later with binding and ties.
This keeps the top beginner-friendly without needing a zipper or button placket.
Step 9: Sew the Shoulder Seams
Place the front and back pieces right sides together at the shoulders. Sew the shoulder seams using a ½-inch seam allowance.
Press gently. If the seam feels bulky, trim only the batting layer slightly within the seam allowance.
For a neat finish, cover the shoulder seams with bias binding or topstitch them flat.
Step 10: Sew the Side Seams
Place the front and back right sides together, matching the side edges.
Sew each side seam using a ½-inch seam allowance. Try on the top before binding to check the fit.
If it feels too boxy, take in the side seams slightly. If the armholes feel tight, trim a small amount from the lower armhole curve before binding.
Step 11: Bind the Neckline and Armholes
Bind the neckline first with 2½-inch binding. Then bind each armhole.
Work slowly around curves, especially at the neckline. Avoid stretching the binding too much. A smooth binding makes the top look polished and comfortable.
If you added a back slit, bind around the slit edges and add small fabric ties at the top.
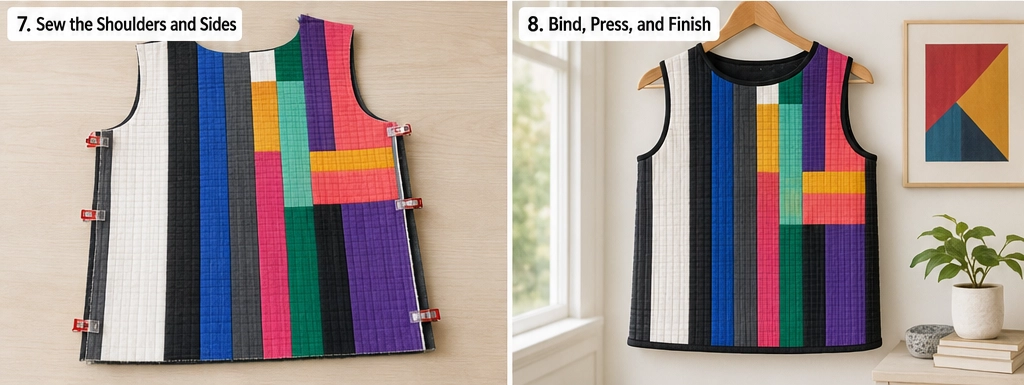
Step 12: Bind the Hem
Bind the bottom hem with 2½-inch binding, or turn the hem up ½ inch and topstitch if the quilted layer is not too bulky.
A bold binding color can frame the whole top. Try black, cobalt, teal, coral, saffron, plum, or emerald.
Step 13: Add Optional Pocket or Side Detail
If adding a pocket, cut a quilted rectangle about 7 x 8 inches. Bind the top edge, then stitch it to the lower front or side front.
For a more artistic look, add one small asymmetrical patch, color-block tab, or geometric appliqué shape. Keep it simple so the top stays wearable.
Step 14: Press and Finish
Give the top a gentle final press. Avoid flattening the quilting too much.
Trim loose threads, reinforce pocket corners, and add a handmade label if desired. Try the top over different base layers to see how it works in your wardrobe.
Assembly at a Glance
- Choose a simple boxy top or vest pattern.
- Select 18 to 24 jelly roll strips in modern geometric colors.
- Plan vertical stripes, color blocks, checkerboard accents, or diagonal bands.
- Piece oversized front and back panels.
- Layer each panel with backing and lightweight batting or flannel.
- Quilt the panels with straight or diagonal lines.
- Cut the final front and back pieces from the quilted panels.
- Add a back slit if the neckline needs more room.
- Sew shoulder seams.
- Sew side seams.
- Bind the neckline and armholes.
- Bind the hem.
- Add an optional pocket or geometric accent.
- Press gently and finish.
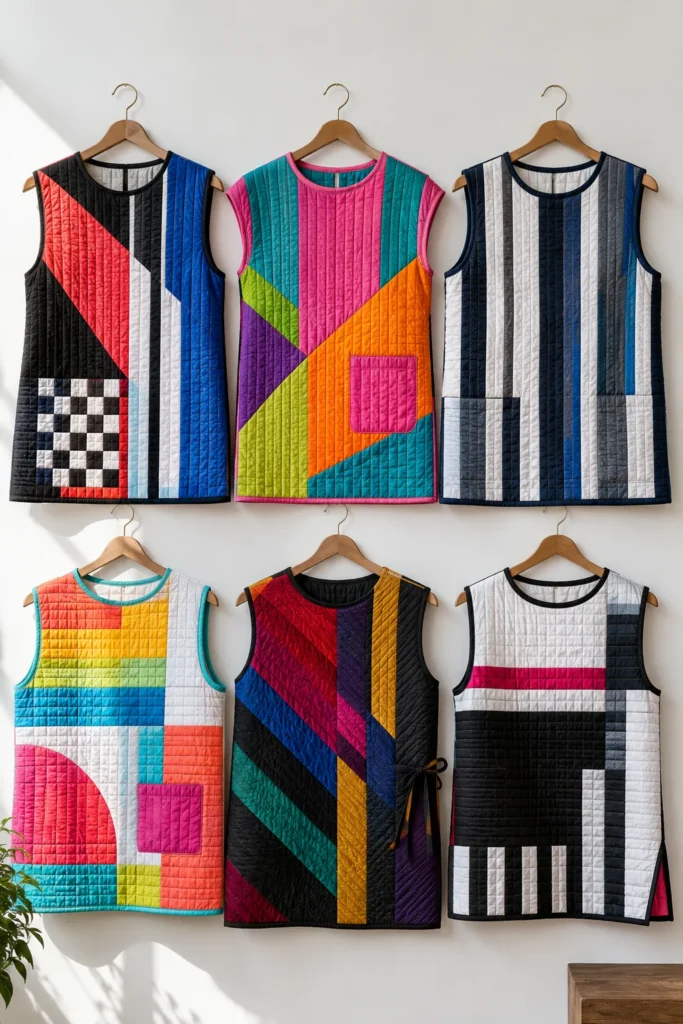
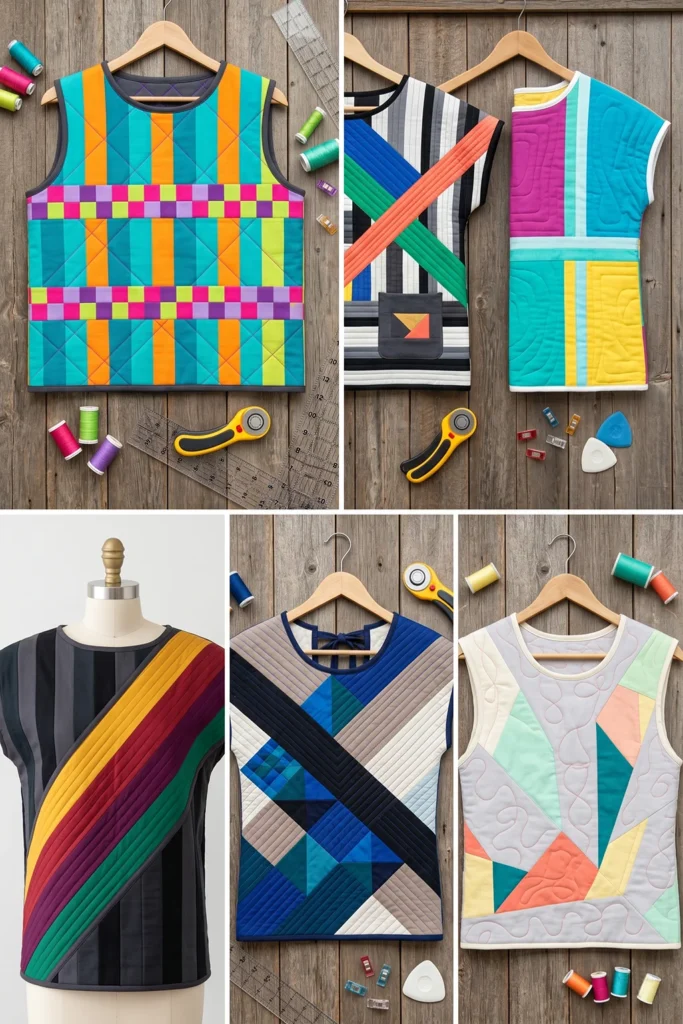
Modern Geometric Color Combination Ideas
For a bold gallery-inspired top, use black, white, cobalt blue, coral, saffron, and emerald green.
For a creative studio look, use teal, hot pink, orange, lime, violet, and charcoal.
For a polished modern outfit, use navy, ivory, taupe, black, sapphire, and deep teal.
For a bright summer art top, use turquoise, lemon yellow, coral, aqua, magenta, and white.
For a dramatic wearable-art piece, use charcoal, ruby, plum, cobalt, emerald, and gold.
Beginner Tips for Success
Use a loose top shape. Quilted fabric needs more room than regular clothing fabric.
Keep the top sleeveless for your first version. Avoiding sleeves makes the project much easier.
Use flannel as the middle layer if you want a lightweight garment.
Quilt the panels before cutting. This keeps the layers stable and easier to handle.
Try on before binding. This lets you adjust the side seams, armholes, neckline, and hem first.
Keep geometric accents simple. One checkerboard row, diagonal band, or color-block section can be enough.
Use clips instead of pins when sewing quilted layers. Clips hold thickness more securely.
Styling Tip
Wear the finished geometric jelly roll quilted top over a fitted long-sleeve tee, turtleneck, crisp shirt, linen dress, or simple black base layer. Pair it with denim, wide-leg trousers, a midi skirt, boots, sneakers, or clogs. A palette with cobalt, coral, saffron, emerald, teal, plum, ruby, black, and white makes the top feel like unique wearable art while still being easy to style.
Other Design Inspirations – Digitally Modified
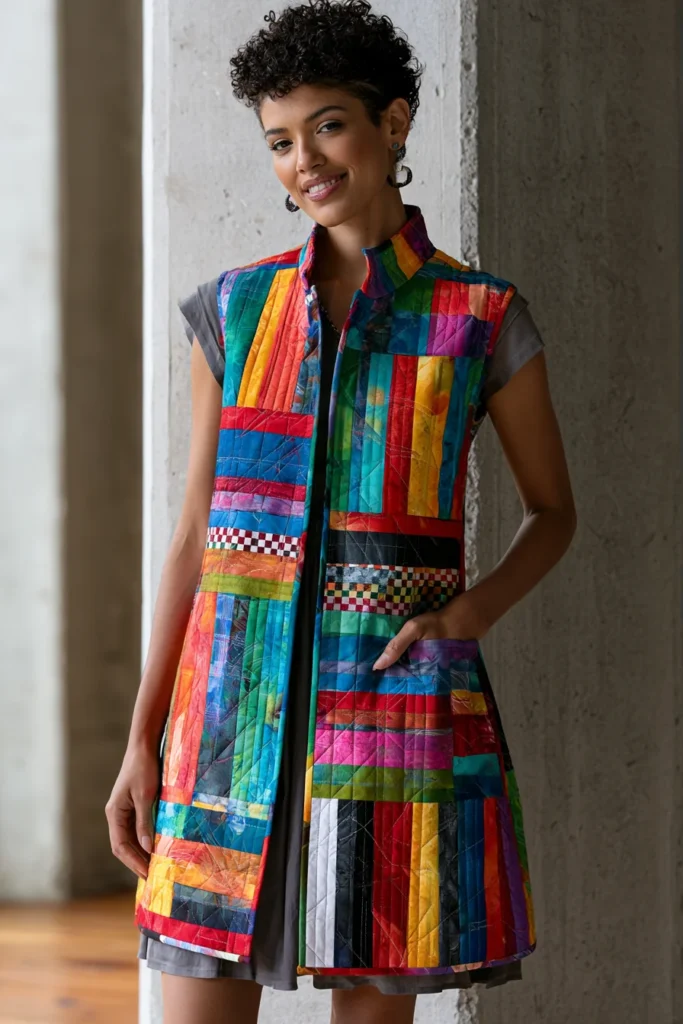
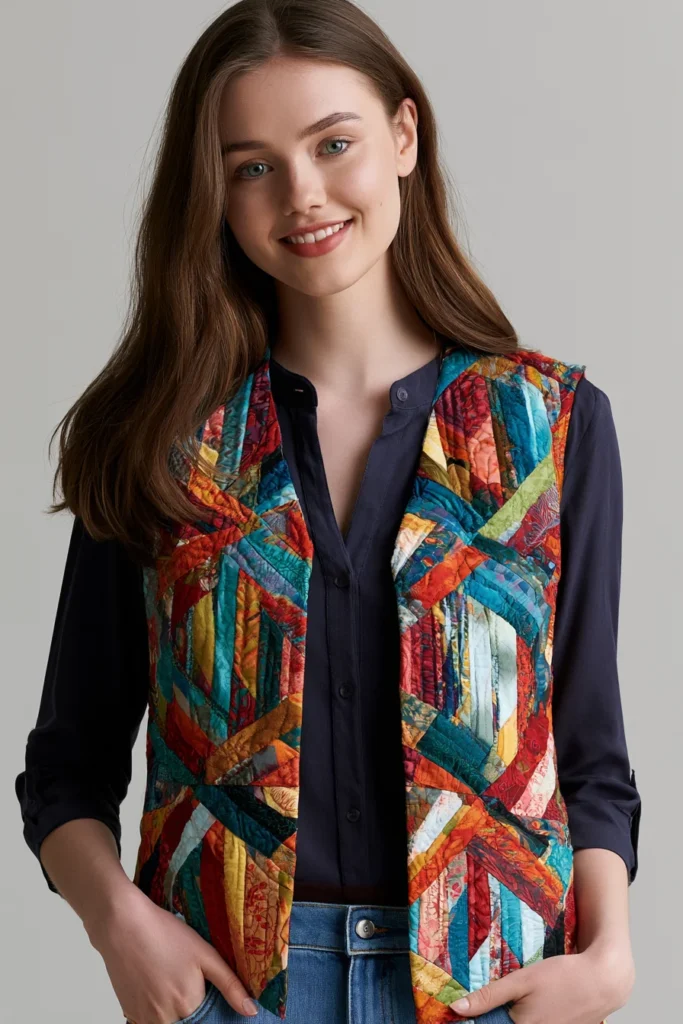
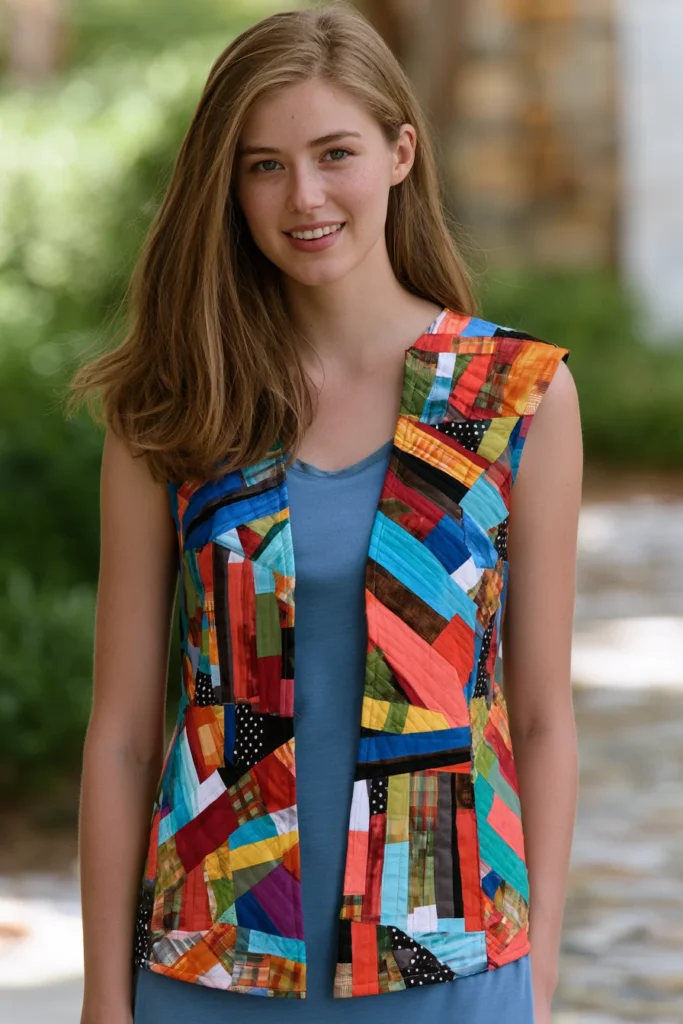
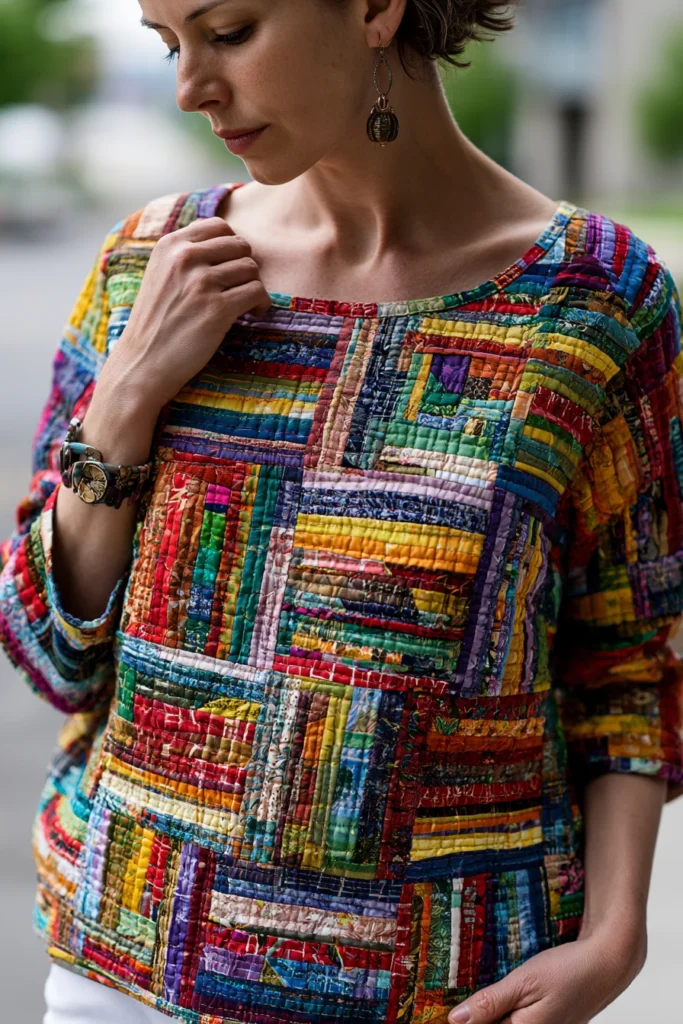
8. Bright Batik Jelly Roll Quilted Vests with Stand Collars and Patch Pockets
A bright batik jelly roll quilted vest brings together three things that make quilted outerwear work: saturated hand-dyed color, clean vertical strip construction, and a stand collar that gives the garment structure without the weight of sleeves. Batik jelly rolls are ideal for this because the dye variation within each strip creates depth that solid fabrics cannot match — every 2½-inch strip carries its own internal color movement, so a simple vertical layout reads as rich and complex rather than striped.
For a vibrant, wearable palette, use deep teal, turquoise, emerald green, magenta, ruby red, tangerine, saffron gold, cobalt blue, violet, and plum. Batik prints in these tones sit next to each other with strong contrast, which is what makes the strip construction readable from a distance. Add patch pockets in a contrasting strip direction and a stand collar in the boldest color of the run to frame the neckline.
Design Inspirations – Digitally Modified
Image caption for all gallery images: Digitally Modified Images. Texture and color may vary from the actual product.
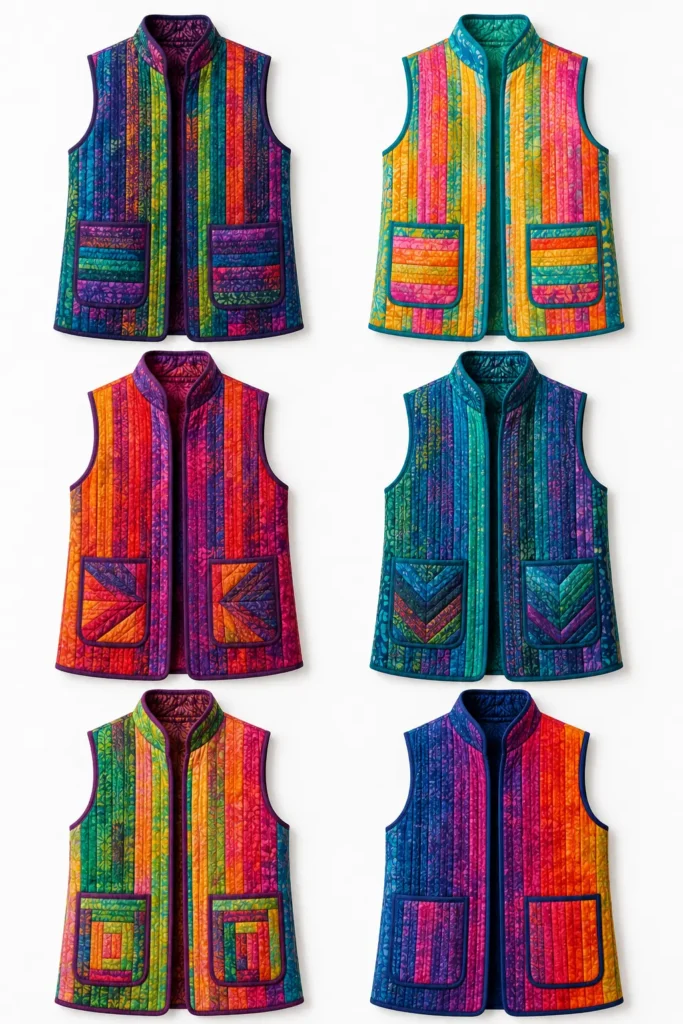
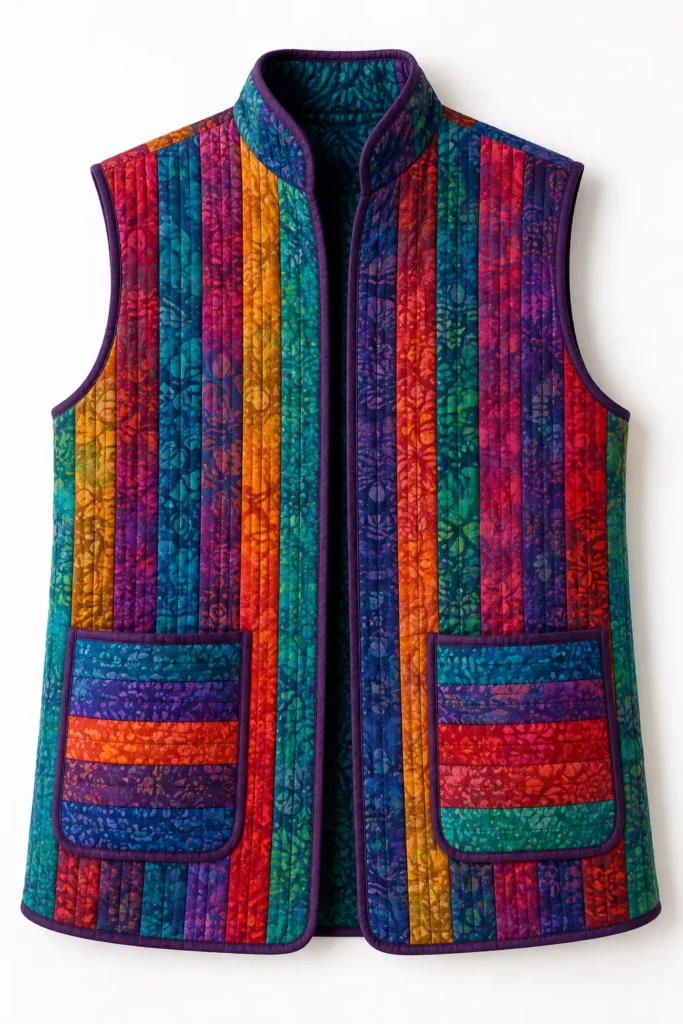
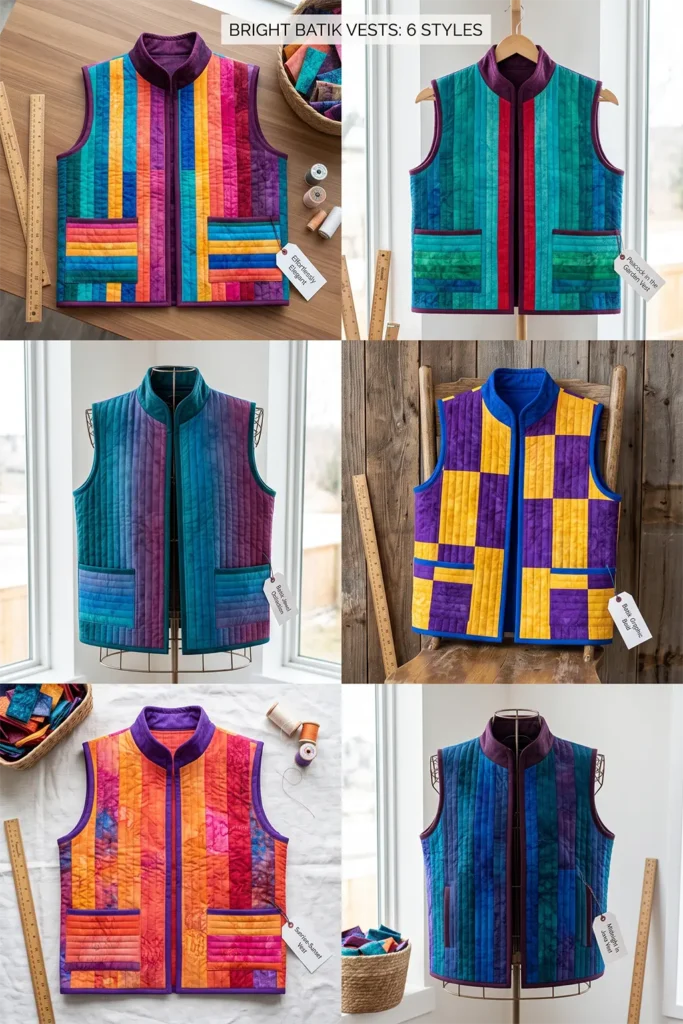
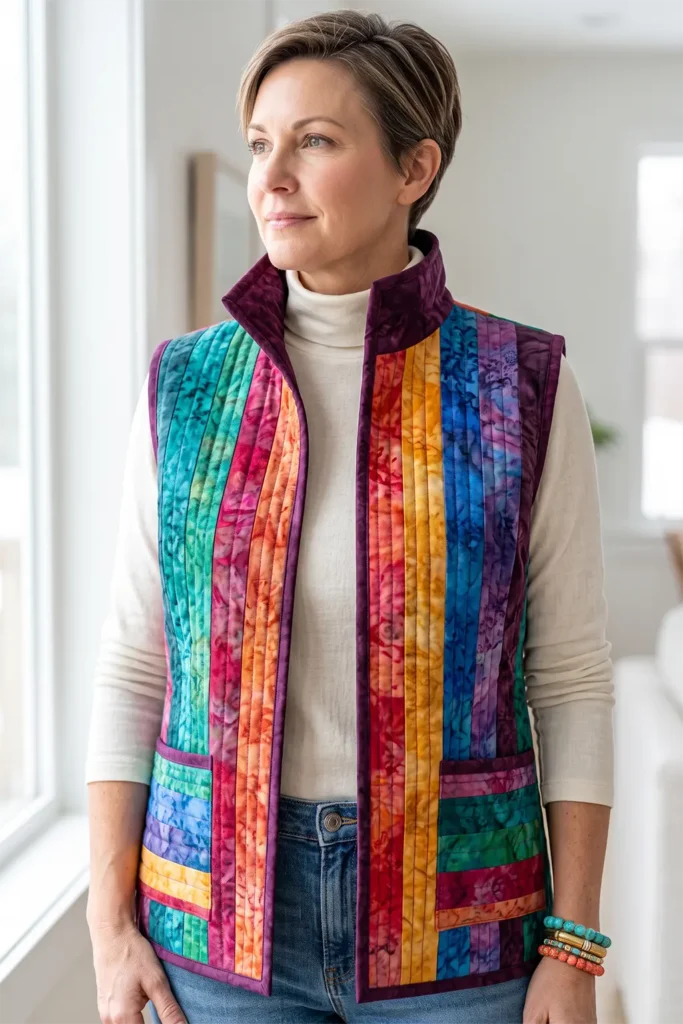
Why This Design Works
A stand collar changes how a quilted vest wears. A flat or collarless neckline lets a sleeveless garment sag at the shoulders, but a 2½ to 3-inch upright band holds the front opening in place and gives the whole piece a tailored line. On quilted fabric, that structure comes free — the batting already provides body, so the collar stands without heavy interfacing.
Batik fabric brings a practical advantage that matters more in garments than in quilts. Batiks are woven at a higher thread count than standard quilting cotton, typically around 200 threads per inch, compared with 60 to 70 for basic quilting cotton. That tighter weave frays far less at cut edges, holds a crisp pressed seam, and resists the stretching that plagues bias-cut garment pieces. For a vest with bound armholes and a curved neckline, that stability is worth the slightly firmer hand.
The project is also a genuine skill-builder without being intimidating. There are no sleeves to set, which removes the hardest step in quilted garment construction. What you learn instead is strip piecing, panel quilting, curved binding on armholes, patch pocket placement, and collar attachment — a stack of transferable techniques on a garment that comes together in a weekend.
A note on batik: the technique is wax-resist dyeing, developed to its highest form in Java, where it was recognized by UNESCO as intangible cultural heritage in 2009. Hot wax is applied to fabric in patterns, the cloth is dyed, and the waxed areas resist the color. Repeating the process across multiple dye baths builds the layered, mottled surface that gives commercial quilting batiks their characteristic depth. Modern quilting batiks are produced with stamped copper blocks called caps rather than the hand-drawn canting pen, which is why they are affordable enough to buy by the jelly roll.
Finished Size
This guide makes a relaxed, hip-length quilted vest with a stand collar.
Sample finished measurements for a loose medium:
- Finished chest: about 42 to 44 inches
- Finished length: about 24 inches from shoulder to hem
- Shoulder width: about 14 to 15 inches
- Armhole depth: about 9½ inches
- Collar height: about 2½ inches finished
- Patch pockets: about 7 x 8 inches finished
- Front style: open front, no closure required
To adjust, measure a vest you already wear and like. Add 2 to 4 inches of ease at the chest so the vest layers comfortably over a shirt or light sweater.
Materials Needed
For one bright batik quilted vest, gather:
- One batik jelly roll or 20 to 26 strips: 2½ inches x width of fabric
- Backing fabric: 1½ to 2 yards, in a coordinating batik or solid
- Lightweight cotton batting: 1½ to 2 yards
- Binding fabric: ½ to ¾ yard
- Collar interfacing: lightweight woven, about ¼ yard, optional
- Thread: teal, gold, magenta, or a coordinating mid-tone
- Simple vest pattern or a vest to trace
- Rotary cutter and cutting mat
- Quilting ruler
- Sewing clips
- Sewing machine with a walking foot
- Machine needles: 80/12 or 90/14 sharps
- Iron and ironing board
- Fabric marker or tailor’s chalk
Beginner tip: batik’s tight weave dulls needles faster than standard quilting cotton. Start with a fresh needle and change it partway through if the stitches begin to look uneven or the machine starts skipping.
Bright Batik Palette
A saturated batik run could include:
- Deep teal
- Turquoise
- Emerald green
- Saffron gold
- Tangerine
- Ruby red
- Magenta
- Violet
- Cobalt blue
- Plum
For the strongest visual result, alternate warm and cool strips rather than grouping them. A gold strip between teal and violet makes both neighbors read more intensely. Reserve the deepest color in the run — usually plum or deep teal — for the collar and binding, which frames the brighter strips and keeps the vest from looking scattered.
Cutting Measurements
These measurements create quilted panels large enough to cut a hip-length vest.
From jelly roll strips, prepare:
- Back strip-pieced panel: about 28 x 30 inches
- Left front strip-pieced panel: about 17 x 28 inches
- Right front strip-pieced panel: about 17 x 28 inches
- Two pocket panels: about 9 x 10 inches each
- Collar band: one strip-pieced piece about 4 x 22 inches
From backing fabric, cut:
- Back backing: 30 x 32 inches
- Two front backings: 19 x 30 inches each
- Two pocket backings: 10 x 11 inches each
- Collar backing: 4 x 22 inches
From batting, cut:
- Back batting: 30 x 32 inches
- Two front battings: 19 x 30 inches each
- Two pocket battings: 10 x 11 inches each
- Collar batting: 4 x 22 inches
For binding, cut:
- Binding strips: 2½ inches wide
- Prepare roughly 6 yards total for the armholes, front opening, hem, and pocket tops
Use a ¼-inch seam allowance for strip piecing and a ½-inch seam allowance for vest construction unless your pattern specifies otherwise.
Step-by-Step Guide
Step 1: Choose a Simple Vest Pattern
Start with a basic open-front vest pattern, a sleeveless jacket pattern, or trace a vest you already own. For this design, you want a plain back, two front pieces, no darts, and no closure.
If your pattern has a flat or notched neckline, you will replace it with a stand collar in Step 10—mark the neckline seam but do not add facing pieces.
Add ½ to 1 inch to the armhole depth. Quilted fabric is thicker than woven fabric and a standard armhole will feel tight under the arm.
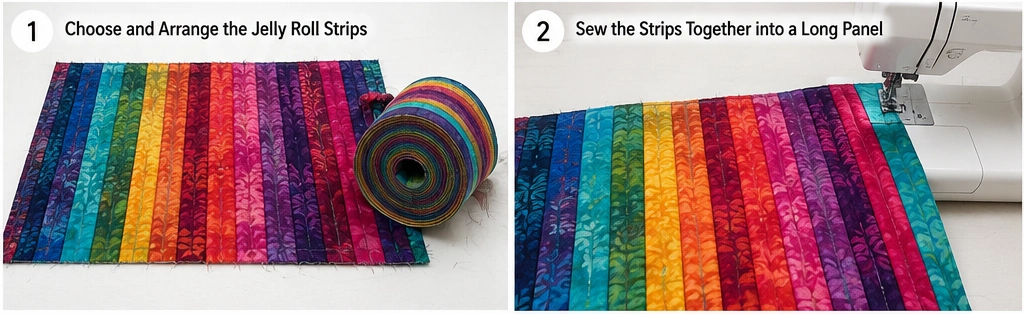
Step 2: Plan the Strip Layout
Lay your batik strips out in the order you intend to sew them, alternating warm and cool tones. Photograph the arrangement before you start — strip order is very easy to lose partway through piecing.
For the body panels, run strips vertically. Vertical strips lengthen the torso and make the batik dye variation read as texture rather than stripes.
For the pockets, plan the strips to run horizontally so they sit against the vertical body and stay visible.
Step 3: Piece the Body Panels
Sew strips together lengthwise with a ¼-inch seam allowance until each panel is larger than its pattern piece.
Piece separate panels for:
- Back — about 28 x 30 inches
- Left front — about 17 x 28 inches
- Right front — about 17 x 28 inches
Press seams open. On batik, open seams lie flatter than pressed-to-one-side seams because the fabric is denser, and flatter seams make the quilting step easier.
Keep each panel slightly oversized. Quilting draws the fabric in by roughly ½ to 1 inch across a panel this size.
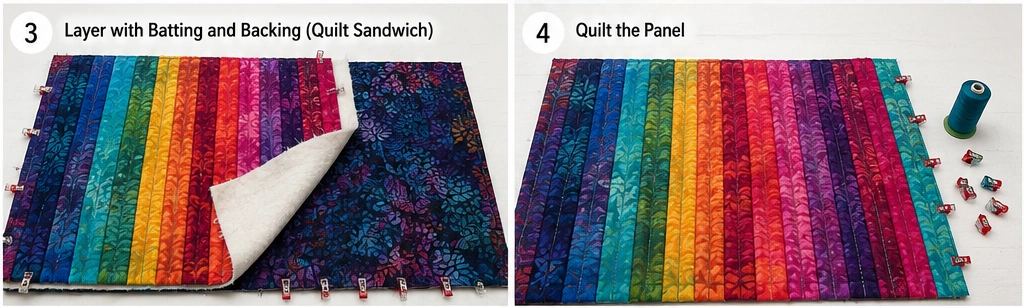
Step 4: Piece the Pocket and Collar Pieces
For each pocket, sew four strips together to make a panel about 9 x 10 inches, with strips running horizontally.
For the collar, sew two strips together lengthwise to make a band about 4 x 22 inches. Choose the two boldest colors in your run — the collar sits directly beneath the face and is the highest-contrast point on the garment.
Step 5: Layer the Quilt Sandwiches
For each piece — back, both fronts, both pockets, and the collar — layer in this order:
- Backing fabric, wrong side up
- Batting in the middle
- Strip-pieced panel, right side up
Smooth each layer and baste with pins, clips, or basting spray.
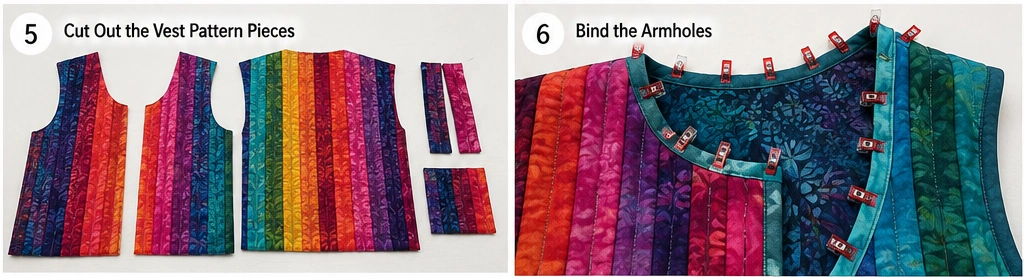
Step 6: Quilt Each Panel
Fit a walking foot and quilt each panel with straight lines. Stitch ¼ inch from each strip seam for a clean channel-quilted surface.
For the collar, quilt lightly — one line per strip is enough. Dense quilting will stiffen the band and prevent it from curving around the neck.
Keep body quilting to straight lines spaced no closer than 1½ inches. Batik plus batting plus dense quilting produces a vest that will not drape.
Step 7: Cut Out the Vest Pieces
Place your pattern pieces on the quilted panels and cut:
- 1 back
- 2 fronts
- 2 pockets, trimmed to 7½ x 8½ inches
- 1 collar band, trimmed to 3½ inches wide by your neckline measurement plus 1 inch
Check color placement before cutting. Position the brightest strips where they will be seen — across the upper chest and along the front opening.
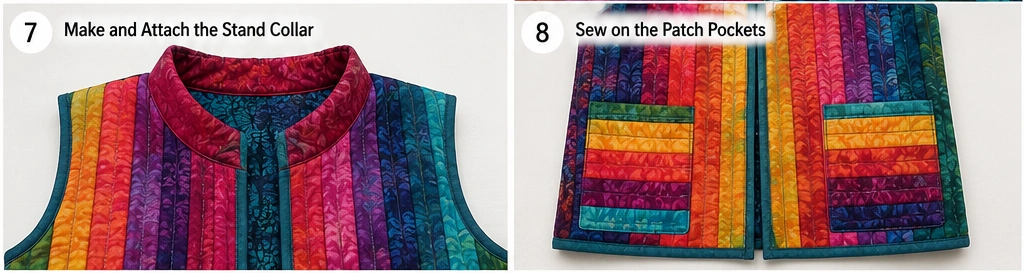
Step 8: Bind and Attach the Patch Pockets
Bind the top edge of each pocket with a 2½-inch binding strip, or fold the top edge under twice and topstitch.
Position each pocket on a front piece 3 inches above the hem and 2½ inches in from the side seam. Clip in place and check both pockets are level before stitching.
Topstitch around the sides and bottom, leaving the top open. Reinforce the upper corners with a small triangle of backstitching — patch pockets on quilted fabric take strain at exactly this point.
Step 9: Sew the Shoulder and Side Seams
Place the fronts against the back, right sides together at the shoulders. Sew with a ½-inch seam allowance.
Trim only the batting from inside the seam allowance to reduce bulk, taking care not to cut the stitching.
Sew the side seams from armhole to hem with a ½-inch seam allowance. Press open where possible, or cover the seam allowances with narrow bias binding for a clean interior.
Try the vest on before moving to the collar. Check chest ease, armhole depth, and length.
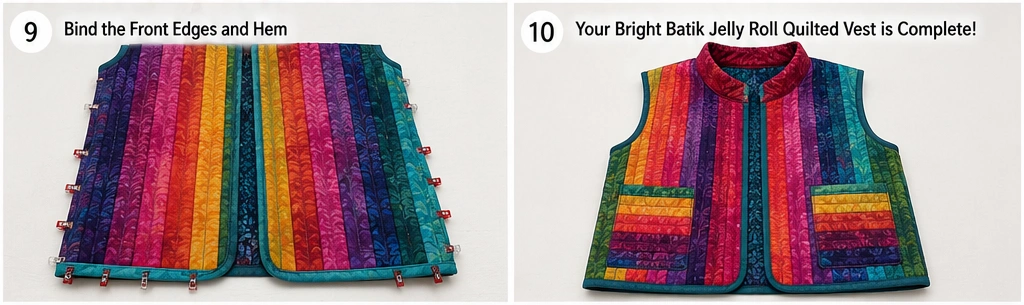
Step 10: Attach the Stand Collar
Measure your finished neckline along the seam line and trim the collar band to that length plus 1 inch for turn-under at each front edge.
Pin the collar to the neckline, right sides together, matching center back to center back. Sew with a ½-inch seam allowance, working slowly around the curve.
Fold the collar up, turn the raw upper edge under by ½ inch, and stitch it down on the inside by hand or machine. The finished band should stand 2½ inches high.
If the collar wants to collapse, trim more batting from the neckline seam allowance rather than adding interfacing — the bulk is almost always the problem, not a lack of stiffness.
Step 11: Bind the Armholes
Bind each armhole with a 2½-inch binding strip, joining the strip into a loop before applying it.
Work slowly around the curve and let the binding ease around the shape rather than pulling it taut. Stretched binding will cup the armhole and pull the vest out of shape at the shoulder.
Step 12: Bind the Front Opening and Hem
Bind the front opening in one continuous strip running from the hem, up the right front, around the base of the collar, and down the left front.
Bind the hem separately, folding the ends in neatly where they meet the front binding.
Use your deepest color — plum, deep teal, or violet — so the binding frames the bright strips.
Step 13: Press and Finish
Press gently with steam, keeping the iron light so the quilted texture stays lofted.
Trim threads, check that both pockets sit level, reinforce the pocket corners if needed, and add a fabric label inside the back neckline.
Assembly at a Glance
- Plan — choose the pattern, lay out the strip order, photograph it
- Piece — build oversized panels for back, fronts, pockets, and collar
- Quilt — layer each piece and quilt straight lines ¼ inch from the seams
- Cut — cut final pieces, checking color placement first
- Assemble — pockets, shoulder seams, side seams, then the stand collar
- Finish — bind armholes, front opening, and hem, then press
Bright Batik Color Combination Ideas
For a jewel-tone vest, use deep teal, emerald, sapphire, violet, magenta, and plum with a gold accent strip.
For a tropical batik vest, use turquoise, lime, saffron, tangerine, coral, and hot pink with deep teal binding.
For a sunset vest, use saffron, tangerine, ruby, magenta, plum, and violet with a cobalt strip near the collar.
For a peacock vest, use teal, turquoise, cobalt, emerald, and violet with a single ruby strip at the front opening.
For a garden vest, use emerald, apple green, saffron, coral, magenta, and turquoise with plum binding.
Beginner Tips for Success
Press seams open rather than to one side. Batik is dense enough that seams pressed to one side create noticeable ridges under the quilting.
Change your needle. Tight batik weave dulls needles quickly, and a dull needle on quilted layers produces skipped stitches and puckering.
Trim batting from every seam allowance. On a vest with a collar and bound armholes, bulk is the main enemy — removing batting from seams solves most fitting and shaping problems before they start.
Use clips, not pins. Quilted batik is too thick for pins to hold reliably.
Bind the armholes before the front opening. If the armhole binding pulls the vest out of shape, you can still adjust the front edge to compensate.
Try the vest on before the collar goes on. Once the collar is attached, the neckline is fixed.
Styling Tip
Wear a bright batik quilted vest over a plain solid — a green linen shirt, a grey tee, a cream turtleneck — and let the vest carry all the color. Pair with denim, dark trousers, or a simple neutral dress. The stand collar frames the face and works especially well with short hair or hair worn up. Stacked bracelets in turquoise, gold, or coral pick up the batik tones without competing.
Gift Pairings for the Pockets
The patch pockets are sized to hold small gifts, which makes the finished vest an easy centerpiece for a handmade gift set:
- A batik-print fabric key fob or wristlet made from leftover strips
- A small pair of folding embroidery scissors
- A pressed-tin or enamel needle case
- A zippered coin pouch pieced from the same jelly roll
- A set of stacking bangles in turquoise, gold, or coral
- A hand-stitched fabric bookmark from a single leftover strip
Other Design Inspirations – Digitally Modified
Image caption for all gallery images: Digitally Modified Images. Texture and color may vary from the actual product.
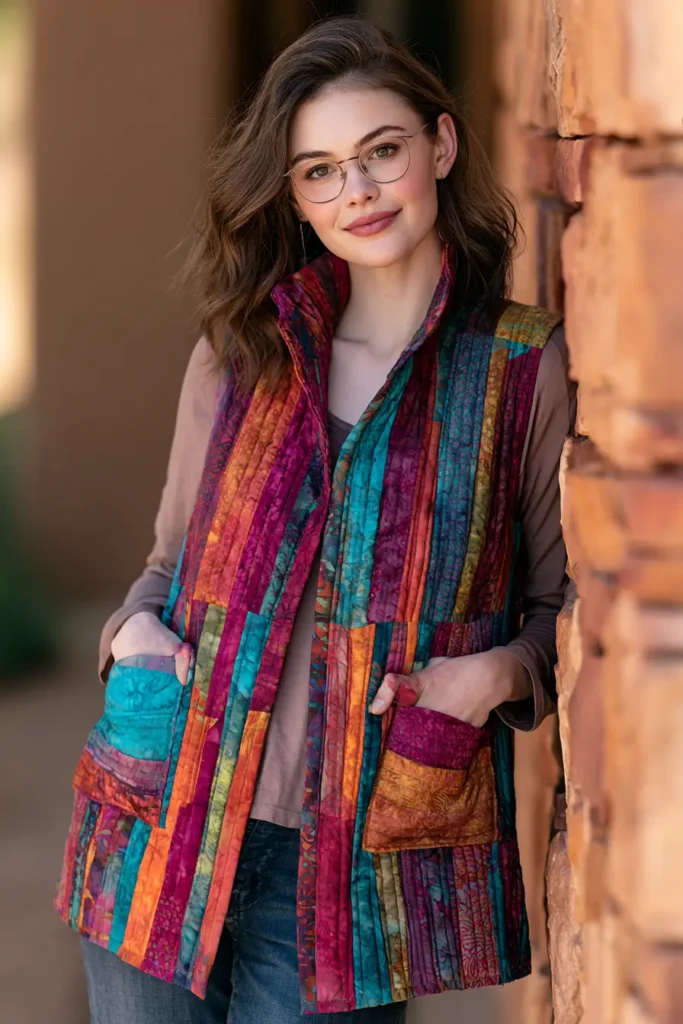
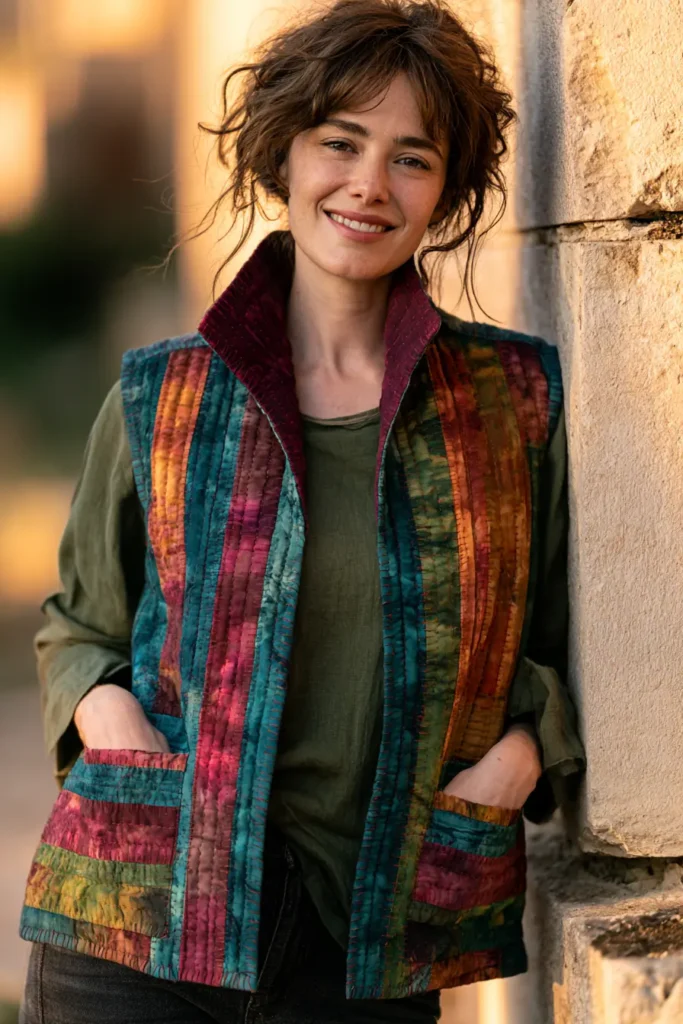
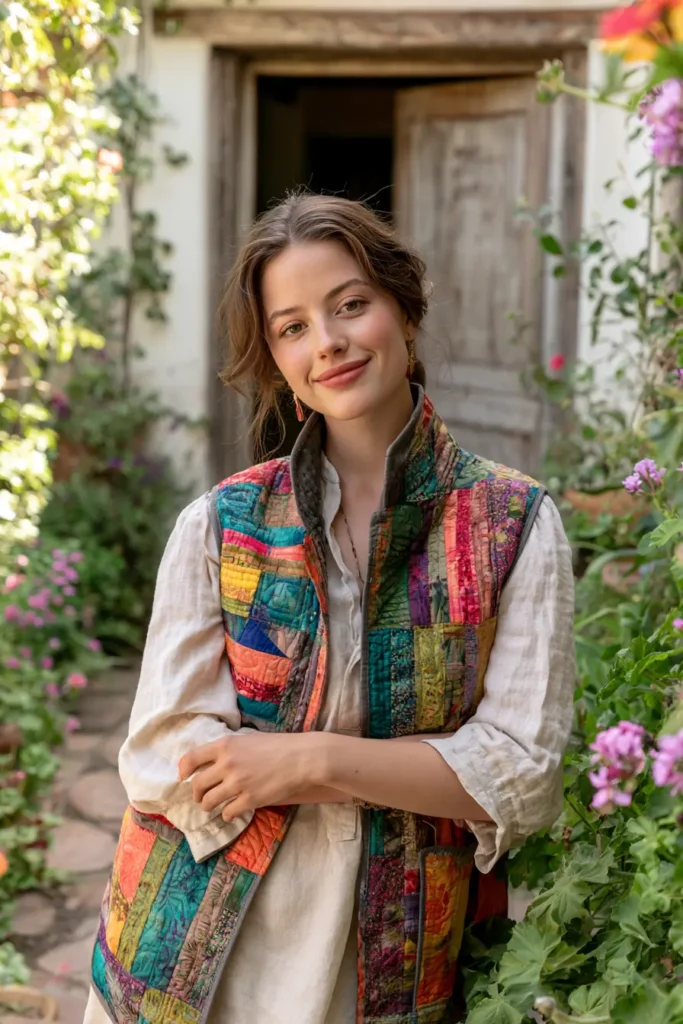
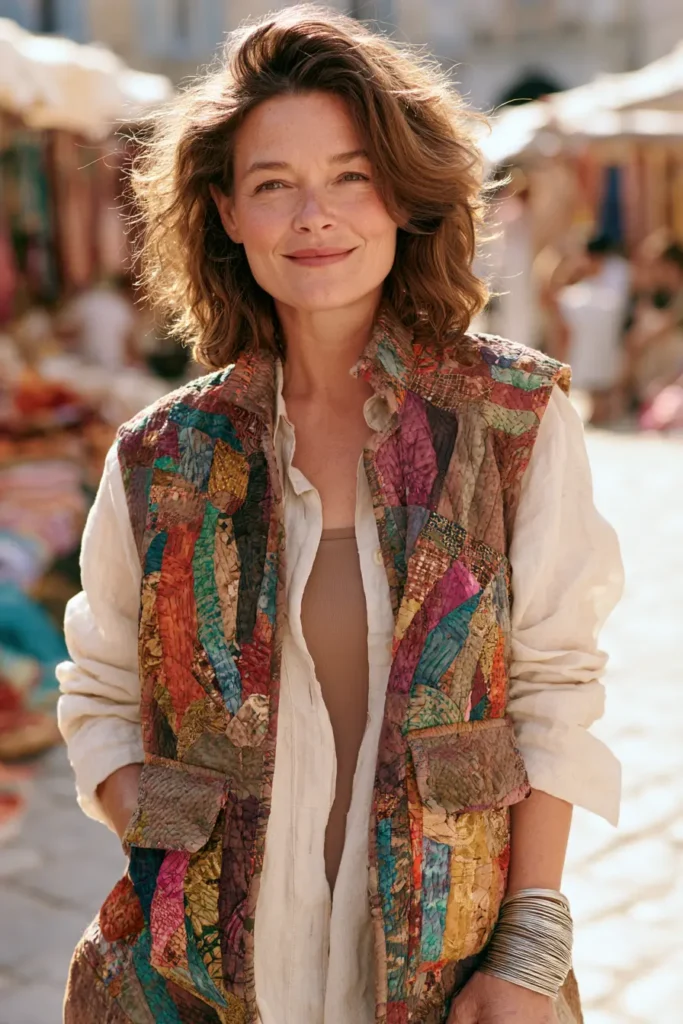
9. Earthy Boho Jelly Roll Quilted Vests for Relaxed Layering
An earthy boho jelly roll quilted vest works through depth rather than brightness. Where a bright batik vest announces itself across a room, this one draws you closer — muted olive, rust, and bronze strips layered over loose natural fabrics, with dense visible stitching doing the work that bold color does elsewhere. The strips still run vertically, and the construction stays simple, but a longer, softer silhouette turns it into a layering piece rather than a statement.
Jelly roll strips are 2½ inches wide, which suits this design well because the narrow strips read as texture instead of stripes once the palette is muted. For an earthy base, use olive green, moss, sage, rust, terracotta, bronze, ochre, faded indigo, charcoal, and warm oatmeal. Then bring the whole thing to life with vibrant accents — a strip of deep teal, copper, saffron gold, or burnt coral placed roughly every eighth position keeps the vest from going flat and stops the earth tones reading as drab.
Why This Design Works
The visual effect depends on low contrast between neighboring strips, which is a genuinely different design problem from the bright versions in this collection. When strips sit close in value, the eye stops reading individual pieces and starts reading the surface. That is what makes an earthy vest look hand-worn rather than pieced — and it is also why the quilting stitch matters far more here. With color doing less work, the stitch line becomes the primary detail on the garment.
The vibrant accent strips are load-bearing, not decorative. A vest built entirely from muted tones loses definition at a distance and photographs as a single brown mass. One saturated strip every eighth position gives the eye a landmark and makes the surrounding earth tones read as deliberate.
The longer length follows the same logic. At 26 to 28 inches, the vest falls past the hip and moves as you walk, which suits layering over dresses and wide trousers. That drape depends on using the lightest middle layer you can find — cotton flannel rather than batting, or the thinnest cotton batting available. Loft is the enemy of this silhouette.
Skills you build here go beyond the brighter designs: strip piecing with value control rather than color contrast, low-loft quilting, handling longer panels without distortion, binding an extended curved front edge, and visible hand quilting — the technique that most changes how a quilted garment reads.
Design Inspirations – Digitally Modified
Caption for all gallery images: Digitally Modified Images. Texture and color may vary from the actual product.
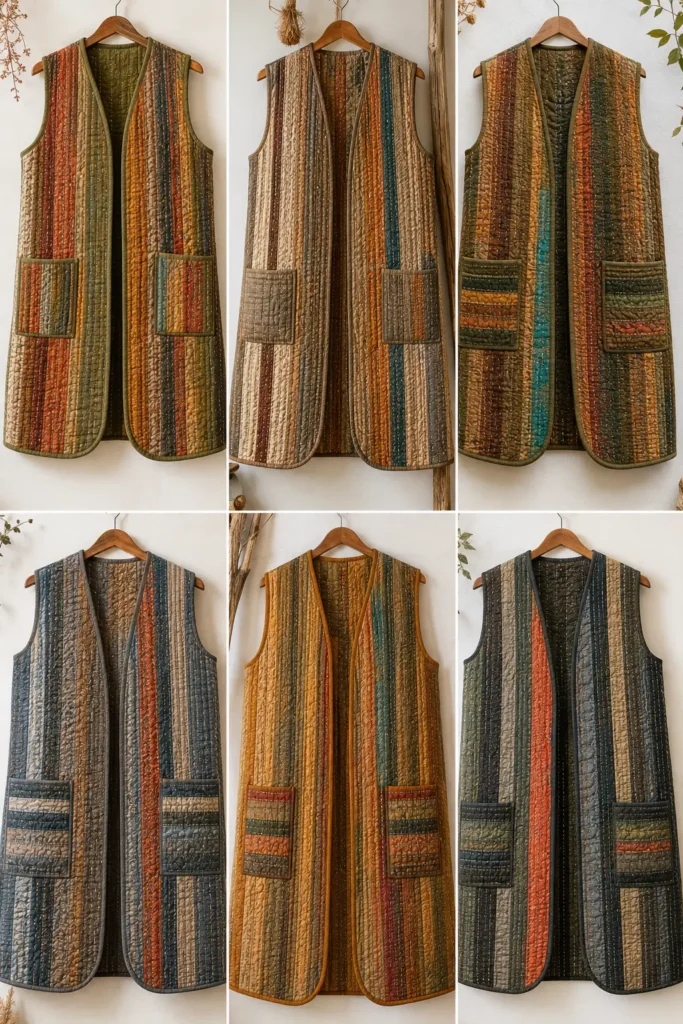
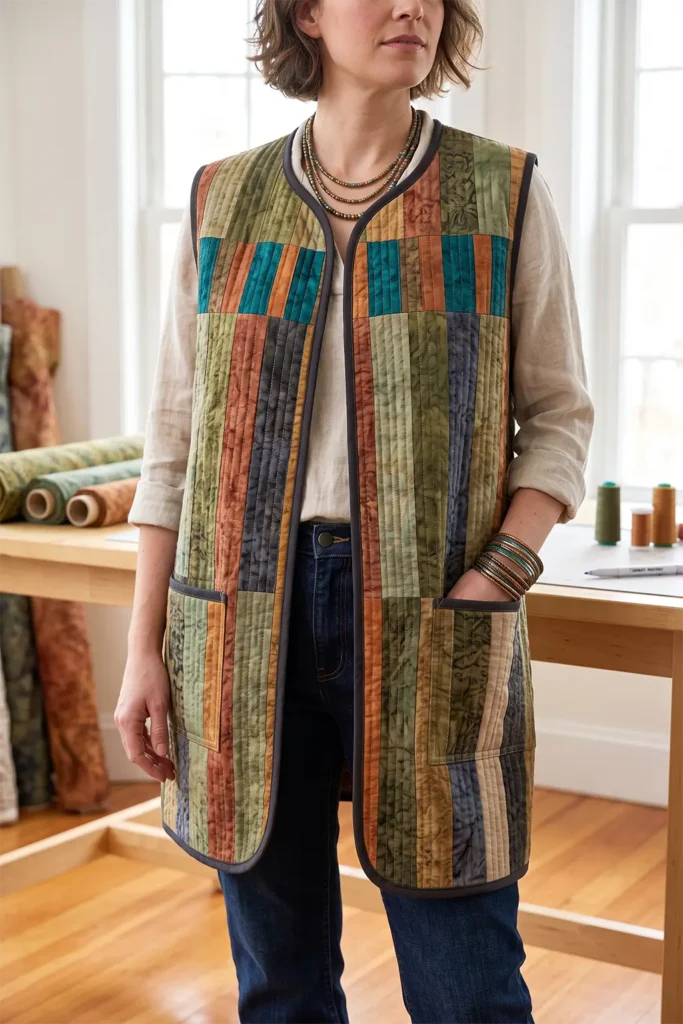
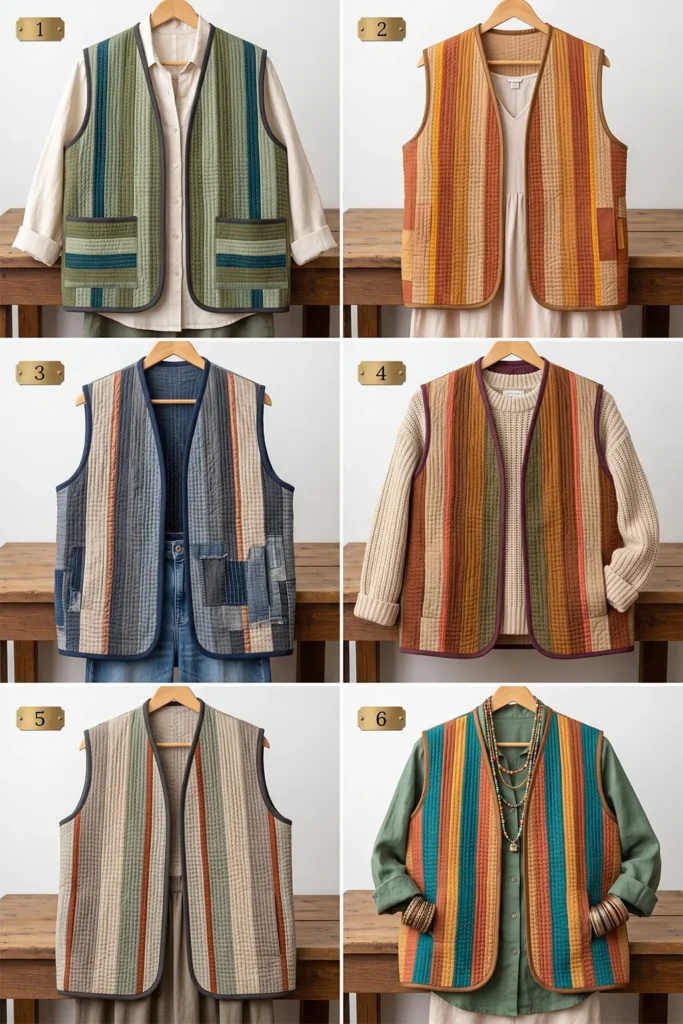
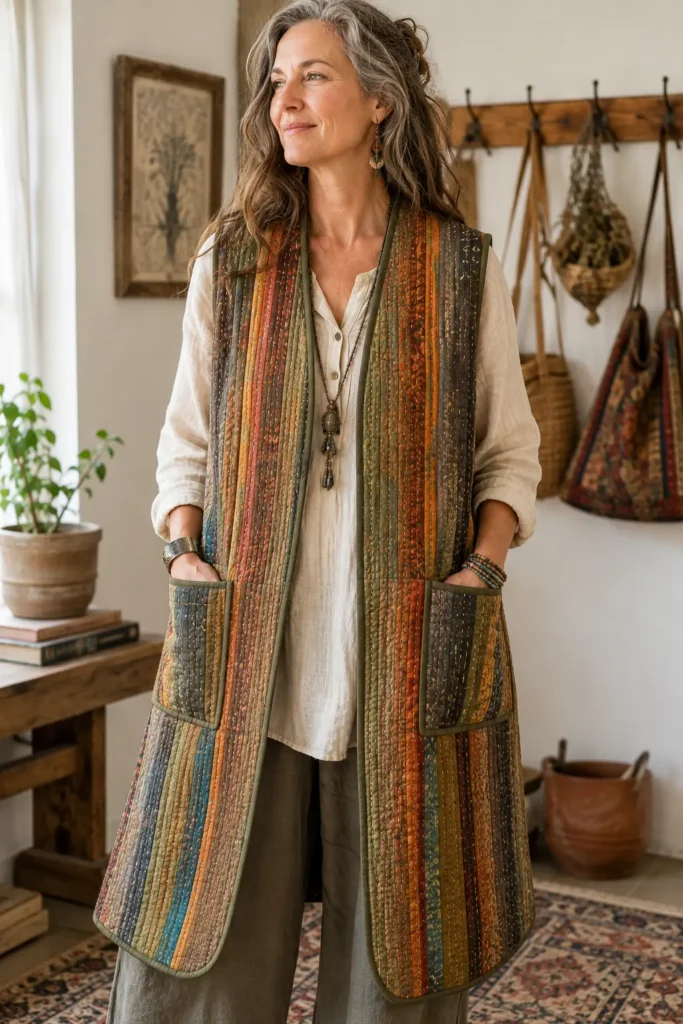
A Note on the Stitch
The dense running stitch that gives these vests their texture belongs to a family of hand-quilting traditions built around function rather than decoration.
In Bengal, Nakshi Kantha used exactly this running stitch to bind several worn cotton saris into one quilted cloth. The stitch was worked in close parallel rows across the entire surface, and the slight puckering it produced — the rippled texture that made the finished kantha soft and light — was a by-product of the technique, not an intended pattern. Thread was often pulled from the borders of the same old saris, which is why kantha stitching so often sits in tones close to the cloth itself.
In Japan, boro textiles were built by layering indigo scraps onto worn garments across generations, each patch stitched down with sashiko running stitch. The reinforcement was practical — it went where the cloth wore first, at the shoulders, knees, and seat.
Both traditions produce the visual quality that reads as boho today: a muted, layered surface where stitching is part of the design rather than hidden. The palette in this section is close to what naturally dyed, repeatedly washed cotton actually becomes over decades.
Finished Size
This guide makes a long, relaxed, open-front quilted vest with a soft drape.
Sample finished measurements for a loose medium:
- Finished chest: about 44 inches
- Finished length: about 27 inches from shoulder to hem
- Shoulder width: about 15 inches
- Armhole depth: about 10 inches
- Front style: open front, no collar, no closure
- Optional: two patch pockets at the hip
To adjust the size, measure a long cardigan you already wear and use that as your guide. Add 3 to 4 inches of ease at the chest so the vest layers comfortably over a shirt or light knit.
Materials Needed
For one earthy boho quilted vest, gather:
- One earth-tone jelly roll or 22 to 28 strips: 2½ inches x width of fabric
- Accent strips: 3 to 4 strips in deep teal, copper, saffron gold, or burnt coral
- Backing fabric: 2 to 2½ yards in oatmeal, olive, or faded indigo
- Cotton flannel or the thinnest cotton batting: 2 to 2½ yards
- Binding fabric: ¾ yard
- Thread: ecru, bronze, or ochre for visible quilting
- Perle cotton no. 8 if hand quilting, in ecru or ochre
- Long vest or cardigan pattern, or a cardigan to trace
- Rotary cutter and cutting mat
- Quilting ruler
- Sewing clips
- Sewing machine with a walking foot
- Hand quilting or sashiko needles, if stitching by hand
- Iron and ironing board
- Fabric marker or tailor’s chalk
Beginner tip: use flannel as the middle layer instead of batting. It gives the vest weight and softness without loft, and loft is exactly what would stop this silhouette from draping.
Earthy Boho Palette
A weathered, layered palette could include:
- Olive green
- Moss
- Sage
- Rust
- Terracotta
- Bronze
- Ochre
- Faded indigo
- Charcoal
- Warm oatmeal
Vibrant accents: deep teal, copper, saffron gold, burnt coral, or aged brass.
Keep the base value range narrow — neighboring strips should differ by only a shade or two. Then place one vibrant accent strip roughly every eighth position. That ratio is the balance point: enough color to give the surface life, not so much that the weathered effect breaks.
Avoid pure white, true black, and any fully saturated pastel. A single strip that is too clean or too bright will read as a mistake across the whole garment.
Cutting Measurements
These measurements create quilted panels large enough to cut a long vest.
From jelly roll strips, prepare:
- Back panel: about 30 x 34 inches
- Left front panel: about 17 x 32 inches
- Right front panel: about 17 x 32 inches
- Optional pocket panels: two pieces about 9 x 10 inches
From backing fabric, cut:
- Back backing: 32 x 36 inches
- Two front backings: 19 x 34 inches each
- Two pocket backings: 10 x 11 inches each
From flannel or thin batting, cut:
- Back middle layer: 32 x 36 inches
- Two front middle layers: 19 x 34 inches each
- Two pocket middle layers: 10 x 11 inches each
For binding, cut:
- Binding strips: 2½ inches wide, cut on the bias
- Prepare roughly 7 yards total for the armholes, neckline, front opening, hem, and pocket tops
Use a ¼-inch seam allowance for strip piecing and a ½-inch seam allowance for vest construction unless your pattern specifies otherwise.
Step-by-Step Guide
Step 1: Choose a Long Vest Pattern
Start with a long open-front vest pattern, a sleeveless cardigan pattern, or trace a long cardigan you already own.
You want a simple back, two front pieces, no collar, no darts, and no closure. The neckline should be a plain curve — binding will finish it.
Deepen the armhole by about 1 inch beyond your pattern. Quilted fabric is thicker than woven fabric, and this vest is meant to layer over other clothing.
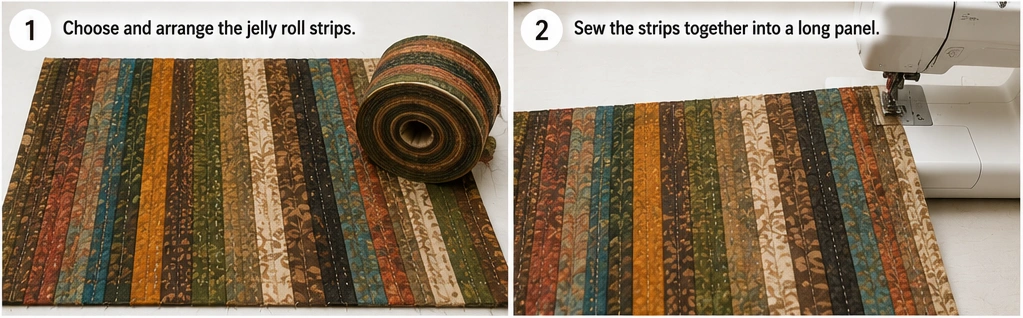
Step 2: Sort the Strips by Value
This is the step that decides whether the finished vest reads as earthy or muddy, and it is worth the time.
Lay your strips out and photograph them in black and white, or simply squint at them from across the room. You are looking for a narrow value range with no strip jumping forward — except the vibrant accents, which should stand out clearly.
Arrange the base strips so value shifts gradually across the panel rather than alternating light and dark. Then slot in your teal, copper, or saffron accents at roughly every eighth position.
Photograph the final layout before you sew. Strip order is very easy to lose partway through piecing.
Step 3: Piece the Body Panels
Sew strips together lengthwise with a ¼-inch seam allowance until each panel exceeds its pattern piece.
Piece separate panels for:
- Back — about 30 x 34 inches
- Left front — about 17 x 32 inches
- Right front — about 17 x 32 inches
Press all seams open. Open seams lie flatter than seams pressed to one side, and flat seams matter more here because the quilting is dense.
Keep each panel oversized by 1 to 2 inches. Dense quilting on a long panel draws the fabric in noticeably.
For a more weathered look, occasionally piece two shorter strip lengths end to end within a single row. The visible join reads as mended rather than careless, and it suits the style — it is also what the source traditions actually did with limited cloth.
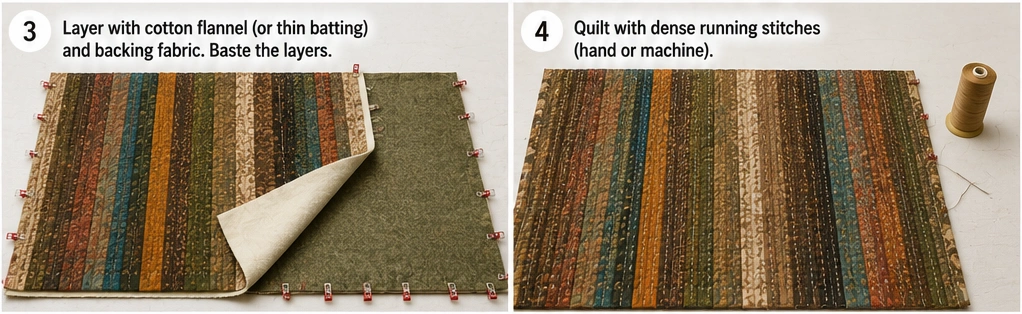
Step 4: Layer the Quilt Sandwiches
For each piece, layer in this order:
- Backing fabric, wrong side up
- Flannel or thin batting in the middle
- Strip-pieced panel, right side up
Baste generously with pins, clips, or basting spray. Flannel shifts more than batting under the needle, and a 34-inch panel distorts more easily than a short one.
Step 5: Quilt with Visible Stitching
This is the defining step for the style, and the one that separates this vest from every other design in the collection.
By machine: set a longer stitch length, around 3.5mm, and thread with ecru, bronze, or ochre. Quilt straight lines ½ inch apart running the length of the strips, crossing the seam lines rather than following them. The longer stitch and contrasting thread together mimic hand quilting closely enough to read as hand-worked at a glance.
By hand: use perle cotton no. 8 and work a running stitch about ¼ inch long with visible gaps, in rows spaced ½ to ¾ inch apart. Do not aim for perfectly even stitches — slight irregularity is exactly what produces a hand-worked surface, and it is what the kantha and sashiko traditions look like up close. Expect a full vest to take several evenings.
Either way, quilt densely. This is the one design in the collection where close quilting helps rather than hurts, because flannel has no loft to flatten and the dense stitching is what creates the soft rippled texture.
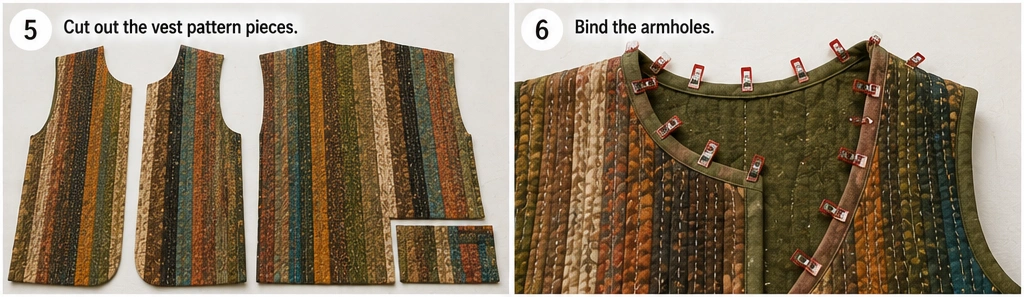
Step 6: Cut Out the Vest Pieces
Place your pattern pieces on the quilted panels and cut:
- 1 back piece
- 2 front pieces
- 2 optional pockets, trimmed to 7½ x 8½ inches
Check placement before cutting. Position the rust, bronze, and accent strips where they will show — across the upper chest and along the front edges, which are the areas visible when the vest hangs open.
Step 7: Bind and Attach the Pockets
Bind the top edge of each pocket with a 2½-inch binding strip, or fold the edge under twice and topstitch.
Position each pocket 4 inches above the hem and 2½ inches in from the side seam. That is lower than you would place a pocket on a hip-length vest, because this silhouette is longer and a higher pocket looks stranded.
Clip in place, check both pockets are level, then topstitch the sides and bottom. Reinforce the top corners with a small triangle of backstitching.
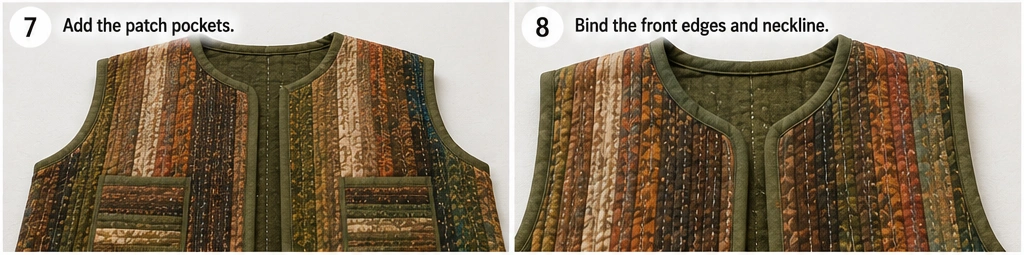
Step 8: Sew the Shoulder Seams
Place the fronts against the back at the shoulders, right sides together. Sew with a ½-inch seam allowance.
Trim only the flannel from inside the seam allowance to reduce bulk, taking care not to cut the stitching or the fabric layers.
Step 9: Sew the Side Seams
Sew each side seam from armhole to hem with a ½-inch seam allowance.
Press the seams open, or cover the seam allowances with narrow bias binding for a clean interior. That extra step is worth doing on this design — a long open vest swings as you walk and the inner edges are frequently visible.
Try the vest on before finishing any edges. Check the length and how it hangs from the shoulders.
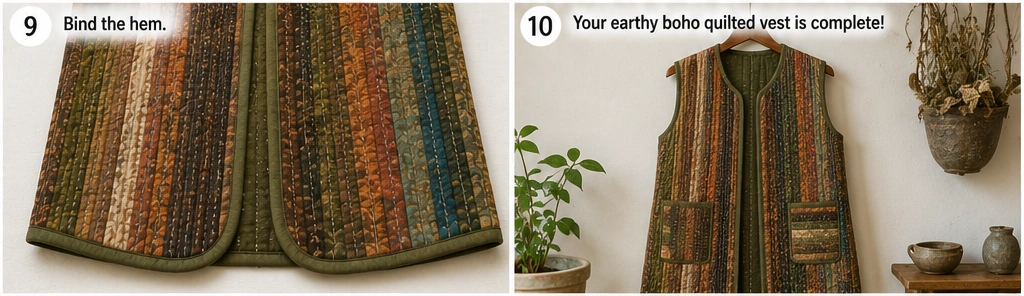
Step 10: Bind the Armholes
Bind each armhole with a 2½-inch bias strip joined into a loop.
Work slowly and let the binding ease around the curve rather than pulling it taut. Stretched binding cups the armhole and disturbs the drape that this entire design is built around.
Step 11: Bind the Neckline and Front Opening
Bind in one continuous run: from the hem, up the right front, around the back neckline, and down the left front.
This is a long stretch of binding, so join your strips on the bias and press those joins open. Straight-grain joins create visible bulges on a run this long, and they will not curve smoothly around the neckline.
Good binding colors are charcoal, faded indigo, bronze, or deep teal. A slightly darker binding frames the muted strips and gives the front edge definition.
Step 12: Bind the Hem
Bind the hem separately with a 2½-inch strip, folding the ends in neatly where they meet the front binding.
Check that both front edges hang level before you stitch the binding down.
Step 13: Press and Finish
Press very lightly, with the iron barely touching the surface. Over-pressing flattens the rippled texture that dense quilting on flannel produces — and that ripple is the finished surface, not a flaw.
Trim loose threads, check the front edges hang evenly, and add a fabric label at the back neckline.
Assembly at a Glance
- Plan — choose a long vest pattern, sort strips by value, place accents, photograph the layout
- Piece — build oversized panels for back, fronts, and pockets, pressing seams open
- Quilt — layer with flannel and quilt densely in visible ecru or bronze stitch
- Cut — cut final pieces with rust and accent strips toward the front edges
- Assemble — bind and attach pockets, then shoulder seams, then side seams
- Finish — bind armholes, neckline and front opening, then the hem, and press lightly
Earthy Boho Color Combination Ideas
For a field vest, use olive, moss, sage, oatmeal, and bronze with a deep teal accent and charcoal binding.
For a desert vest, use terracotta, rust, ochre, sand, and warm grey with a saffron gold accent and bronze binding.
For an indigo vest, use faded indigo, slate, charcoal, oatmeal, and moss with a copper accent and deep indigo binding.
For an autumn vest, use rust, ochre, olive, bronze, and oatmeal with a burnt coral accent and plum binding.
For a stone vest, use warm grey, sage, oatmeal, taupe, and faded indigo with a rust accent and charcoal binding.
For a brighter boho vest, keep the earthy base but double the accents — deep teal, copper, saffron, and burnt coral every fourth strip instead of every eighth, with bronze binding.
Beginner Tips for Success
Sort strips by value, not by color. This single decision determines whether the finished vest looks weathered or muddy, and no amount of good sewing will rescue a poorly valued layout.
Use flannel instead of batting. Loft works against this silhouette, and flannel gives weight without it.
Place vibrant accents deliberately. Every eighth strip is the balance point — fewer and the vest goes flat, more and the weathered effect breaks down.
Quilt densely and visibly. With low color contrast, the stitch line is the main surface texture.
Do not chase even hand stitches. Slight irregularity is what makes the surface look hand-worked rather than machine-made.
Cut and join binding on the bias. Straight-grain strips will not curve smoothly around a long front edge and a round neckline.
Press very lightly at the end. The soft ripple in the surface is the finished texture, not something to iron out.
Styling Tip
An earthy boho quilted vest layers over loose natural fabrics — a linen shirt with sleeves pushed up, a soft cotton dress, a chunky oatmeal knit. Keep the underlayer in a related muted tone rather than a sharp contrast; the vest works by depth, not by opposition.
The long open front suits wide trousers, a midi skirt, or straight denim. This style takes jewelry more generously than any other design in the collection: layered beaded necklaces, stacked bangles, and mixed metals all suit the palette in a way they would overwhelm a bright batik vest. Pick up the teal, copper, or saffron from your accent strips in a bracelet or necklace to tie the whole outfit together.
Gift Pairings for the Pockets
The patch pockets are sized to hold small gifts, which makes the finished vest an easy centrepiece for a handmade set:
- A hand-stitched needle book in indigo or olive cotton
- A perle cotton thread set in ecru, bronze, and ochre
- A kantha-stitched bookmark made from a single leftover strip
- A small pair of stork embroidery scissors
- A pieced fabric pouch from leftover earth-tone strips
- A set of hand-quilted coasters in matching muted tones
- A sashiko needle set with a leather thimble ring
Other Design Inspirations – Digitally Modified
Caption for all gallery images: Digitally Modified Images. Texture and color may vary from the actual product.
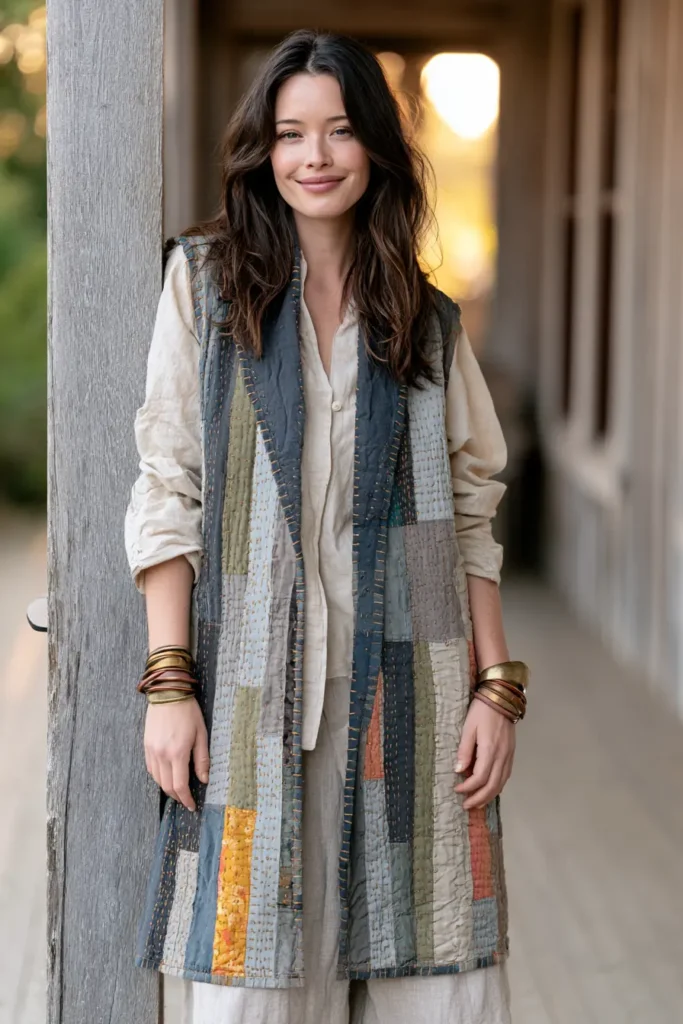
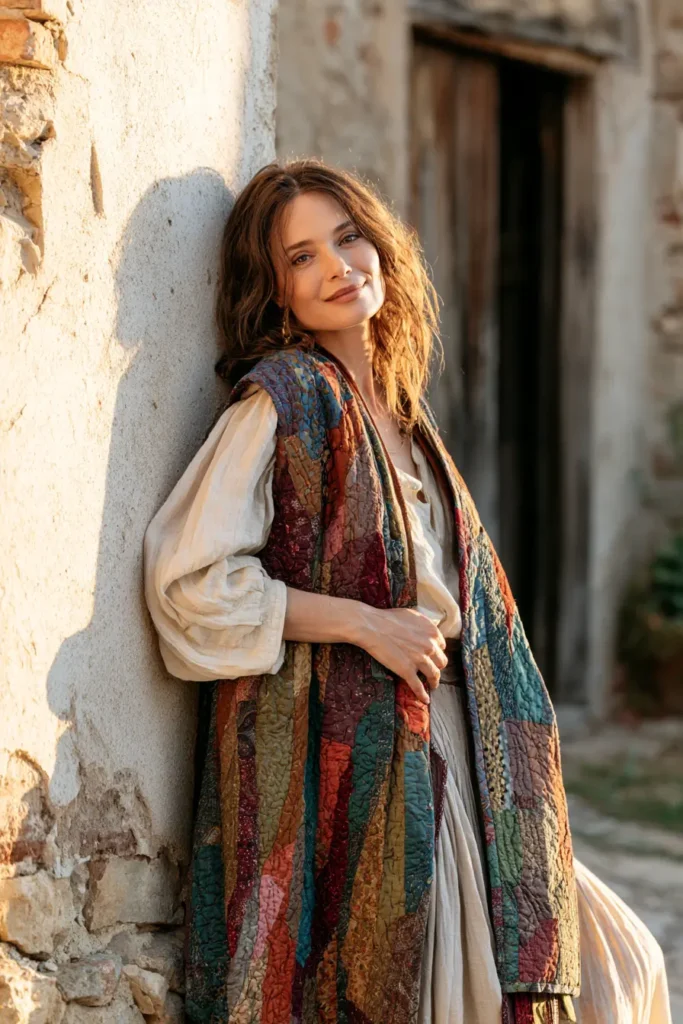
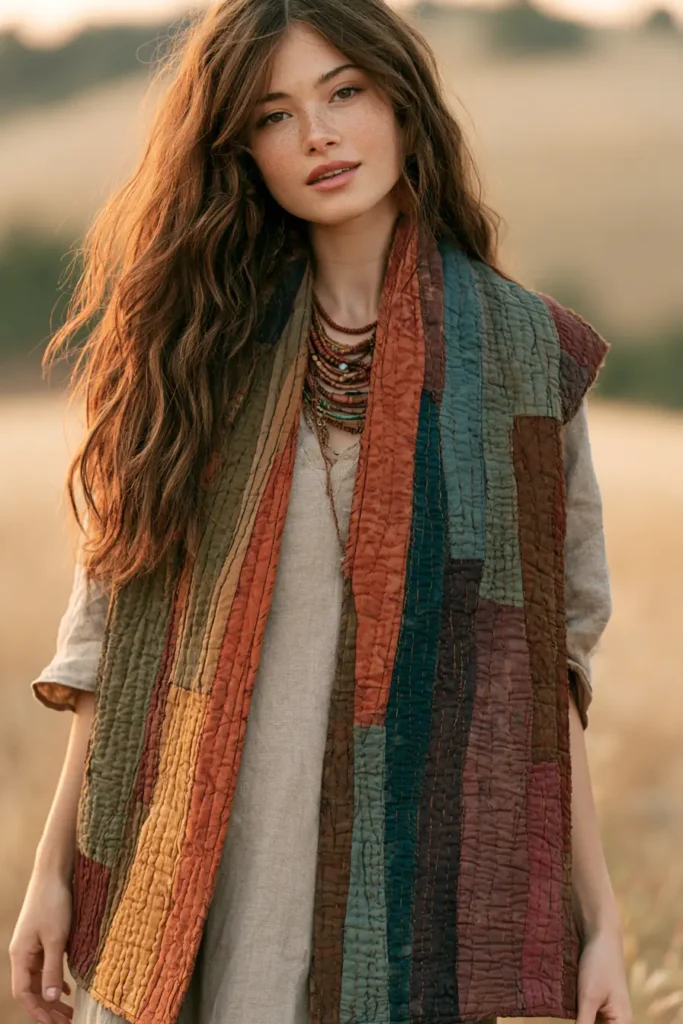
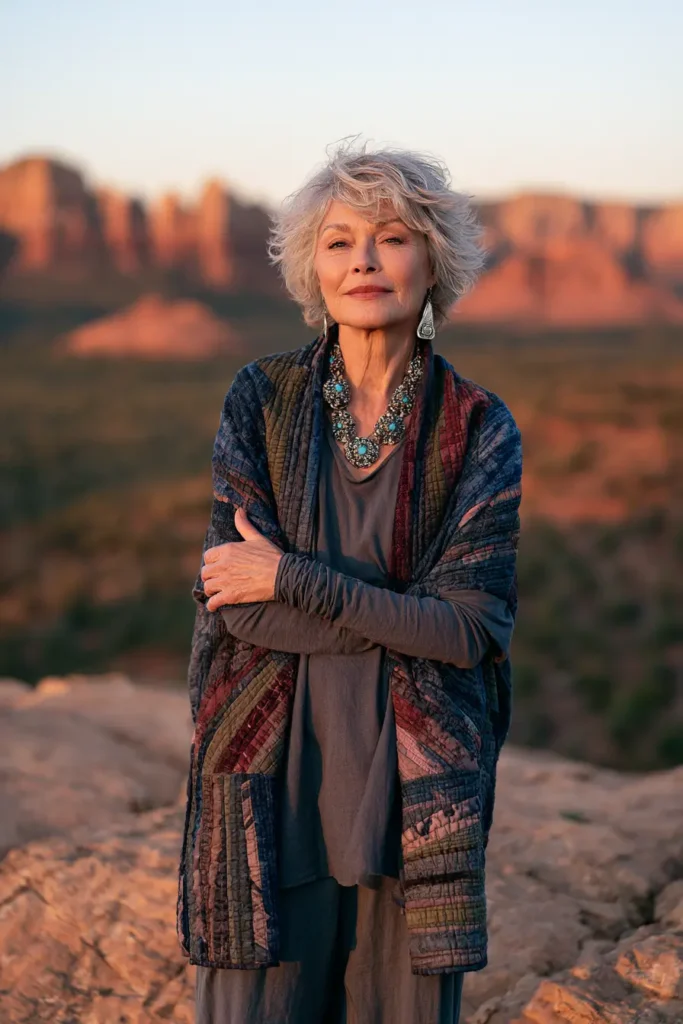
10. Easy Colorful Jelly Roll Quilted Jackets with a Soft Stand Collar
An easy colorful jelly roll quilted jacket is the most wearable form of quilting. Vertical strips running the full length of the body, a soft stand collar framing the face without stiffness, and a relaxed open front — nothing about the construction is complicated, and the color does all the work. Batik and bright print jelly rolls suit this design especially well, because the strips read clearly from a distance while the dye variation inside each strip keeps the surface interesting up close.
For a bright, cheerful palette, use turquoise, emerald green, saffron gold, tangerine, ruby red, magenta, violet, cobalt blue, deep teal, and warm coral. Let the colors scatter rather than progress — this is a full rainbow, not a gradient. A soft stand collar in one of the deeper tones frames the neckline, and the vertical strips carry the eye down the length of the jacket.
Why This Design Works
The vertical strip layout does more than decorate. Running strips from shoulder to hem creates an unbroken vertical line that lengthens the torso, which is why this construction flatters a wider range of body types than horizontal or diagonal layouts. It is also the simplest possible piecing: no matching seams, no blocks to square up, no directional planning beyond the color order.
A soft stand collar suits a jacket better than a structured one. Where a firm band fights the shoulder seam on a quilted garment, a softer collar folds slightly at the back of the neck and follows the body. On quilted fabric, you achieve this by leaving the interfacing out entirely and letting the batting supply all the structure — the result stands without looking rigid, which is exactly the difference between a handmade jacket and a stiff one.
The skills involved are the core garment-quilting set: strip piecing, panel quilting, setting a sleeve into a quilted armhole, attaching a collar to a curved neckline, and binding. Sleeves are the one genuinely new challenge over a vest, and a relaxed armhole makes them manageable on a first attempt.
Design Inspirations – Digitally Modified
Caption for all gallery images: Digitally Modified Images. Texture and color may vary from the actual product.
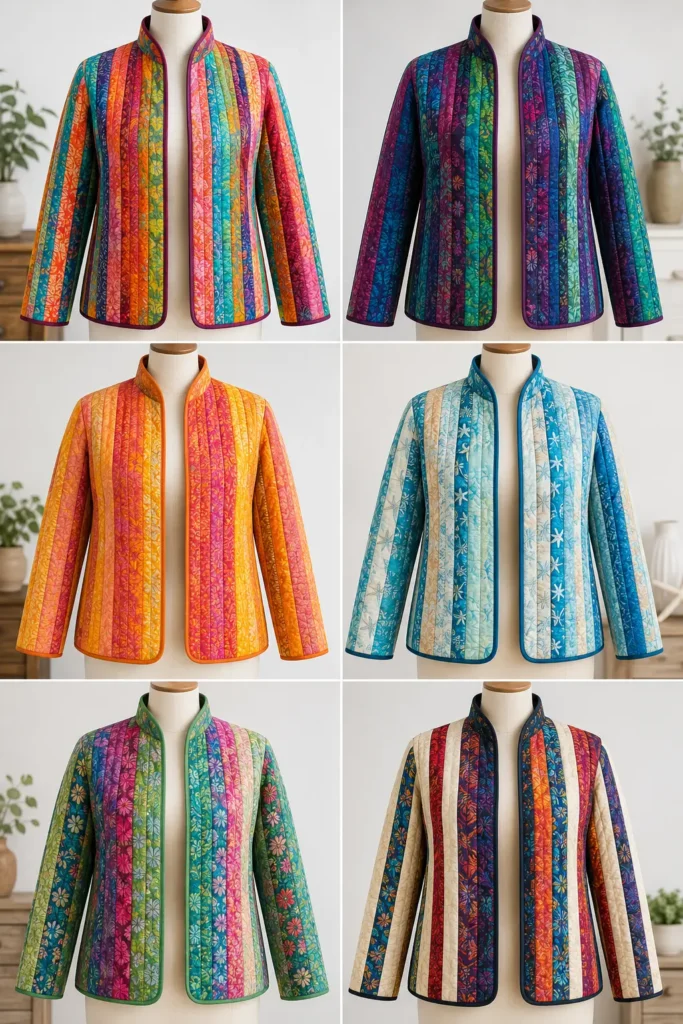
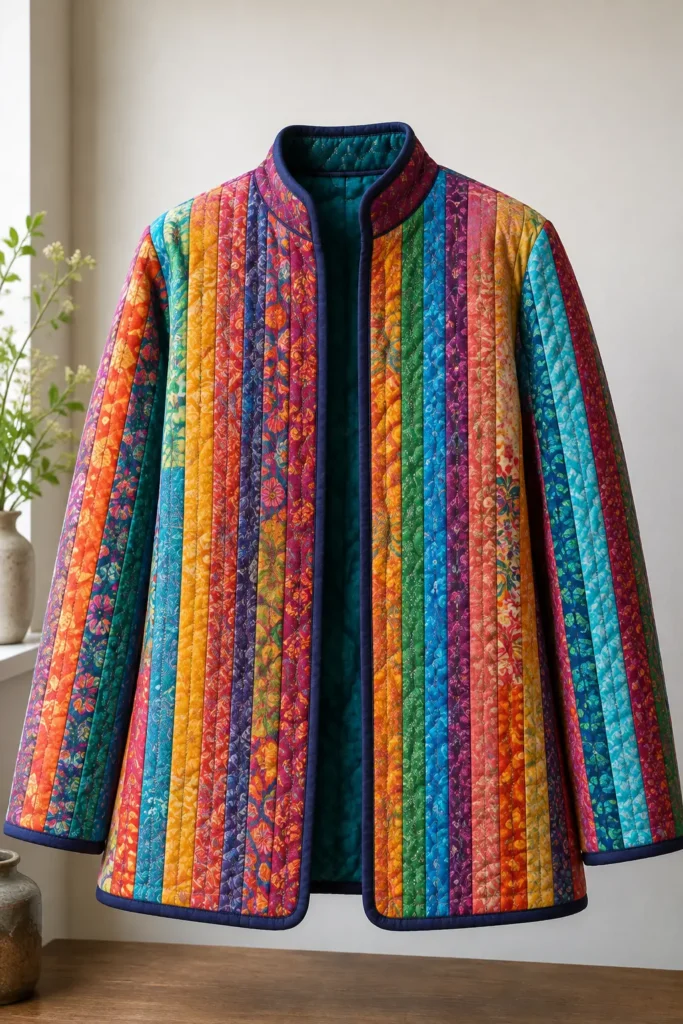
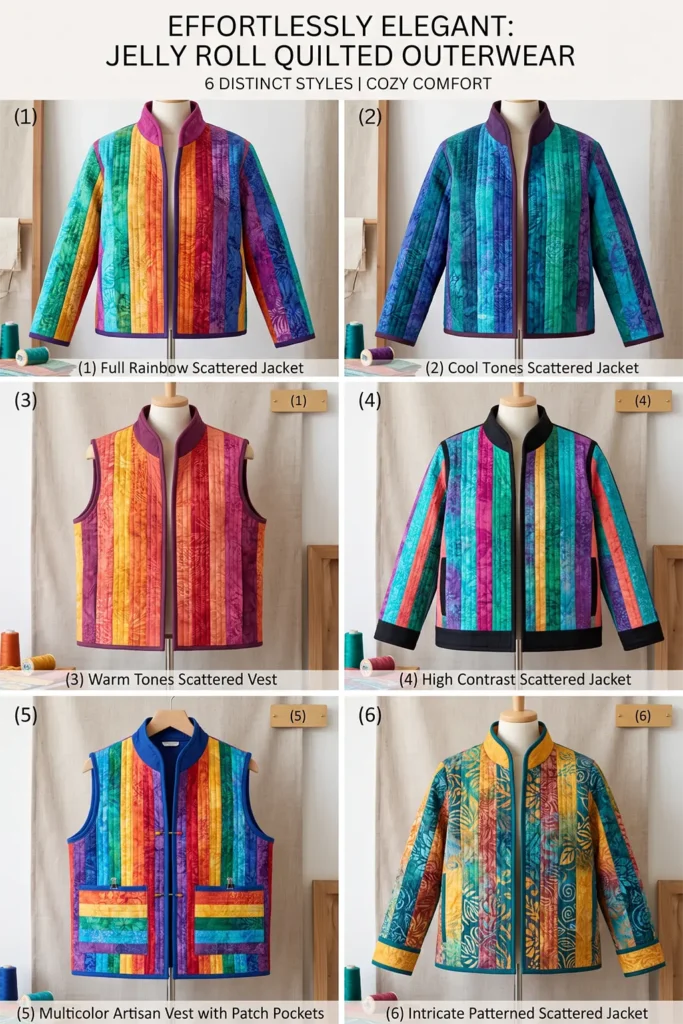
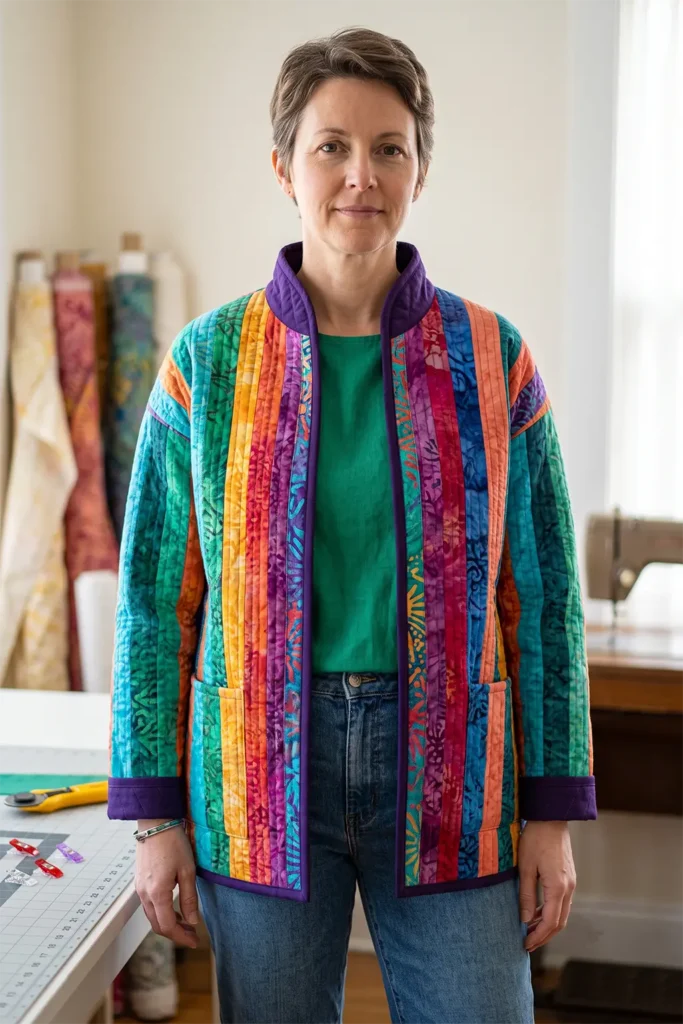
A Note on the Block and the Collar
Stacked vertical strips of equal width form a traditional quilt block known as Chinese Coins, also called Roman Stripe. The name comes from the resemblance to strings of coins laid side by side — a common way of storing and carrying currency before banknotes.
Nineteenth-century quilters used it as a scrap-management pattern because it accommodated fabric pieces of almost any length. It appears repeatedly in Amish quilting from the 1880s onward in a very consistent form: bright solid strips framed by wide, dark borders. That framing was the whole point. Amish quilters worked with saturated solids and used the dark border to contain them, which is precisely the role that binding plays on a jelly roll jacket. A bright strip field with a deep binding is a Chinese Coins quilt turned into a garment.
The stand collar has an equally practical history. It appears across workwear traditions worldwide — on chore coats, mechanics’ jackets, railway uniforms, and Asian work garments — for the same reason each time. A flat collar catches on machinery and snags under a load carried on the shoulder, while an upright band traps warmth at the throat without adding bulk across the shoulders. What reads as a design detail today started as a safety feature.
Finished Size
This guide makes a relaxed, hip-length quilted jacket with set-in sleeves and a soft stand collar.
Sample finished measurements for a loose medium:
- Finished chest: about 44 to 46 inches
- Finished length: about 26 inches from shoulder to hem
- Sleeve length: about 21 inches from the shoulder seam
- Armhole depth: about 10 inches
- Collar height: about 2 inches finished
- Front style: open front, no closure required
To adjust the size, measure a loose jacket you already wear and like. Add 4 to 6 inches of ease at the chest — more than you would allow for a vest, because sleeves restrict movement once quilted fabric is involved.
Materials Needed
For one colorful quilted jacket, gather:
- One jelly roll or 28 to 34 strips: 2½ inches x width of fabric
- Backing fabric: 2½ to 3 yards
- Lightweight cotton batting: 2½ to 3 yards
- Binding fabric: ¾ to 1 yard in a deep tone
- Thread: saffron gold, teal, or a mid-tone that disappears into most of the strips
- Simple boxy jacket pattern, or a loose jacket to trace
- Rotary cutter and cutting mat
- Quilting ruler
- Sewing clips
- Sewing machine with a walking foot
- Machine needles: 90/14
- Iron and ironing board
- Fabric marker or tailor’s chalk
Beginner tip: choose the lightest batting you can find. A quilted jacket with sleeves is considerably warmer than it looks, and heavy batting makes the underarm stiff enough to limit how far you can raise your arms.
Bright Multicolor Palette
A cheerful scattered run could include:
- Turquoise
- Emerald green
- Saffron gold
- Tangerine
- Ruby red
- Magenta
- Violet
- Cobalt blue
- Deep teal
- Warm coral
Alternate warm and cool strips throughout rather than grouping them by family — a gold strip between teal and violet makes both neighbors read more intensely. Then repeat each color every fourth or fifth position so the eye finds a rhythm. Fully random placement reads as chaotic; a loose repeat reads as designed.
Reserve deep teal, violet, or a true dark for the collar and binding. That dark frame is what holds a bright strip field together.
Cutting Measurements
These measurements create quilted panels large enough to cut a hip-length jacket with sleeves.
From jelly roll strips, prepare:
- Back panel: about 30 x 32 inches
- Left front panel: about 18 x 30 inches
- Right front panel: about 18 x 30 inches
- Two sleeve panels: about 21 x 26 inches each
- Collar band: one piece about 4 x 24 inches
From backing fabric, cut:
- Back backing: 32 x 34 inches
- Two front backings: 20 x 32 inches each
- Two sleeve backings: 23 x 28 inches each
- Collar backing: 4 x 24 inches
From batting, cut:
- Back batting: 32 x 34 inches
- Two front battings: 20 x 32 inches each
- Two sleeve battings: 23 x 28 inches each
- Collar batting: 4 x 24 inches
For binding, cut:
- Binding strips: 2½ inches wide
- Prepare roughly 7 yards total for the front opening, hem, cuffs, and collar edge
Use a ¼-inch seam allowance for strip piecing and a ½-inch seam allowance for jacket construction unless your pattern specifies otherwise.
Step-by-Step Guide
Step 1: Choose a Relaxed Jacket Pattern
Start with a boxy open-front jacket pattern, a kimono-style pattern, or trace a loose jacket you already own. Avoid darts, fitted waists, and inset pockets for a first version.
You need pattern pieces for the back, left front, right front, and two sleeves.
Deepen the armhole by ½ to 1 inch and widen the upper sleeve to match. A quilted sleeve needs more room at the bicep than a woven one, and an armhole that fits in cotton will feel tight once there is batting in it.
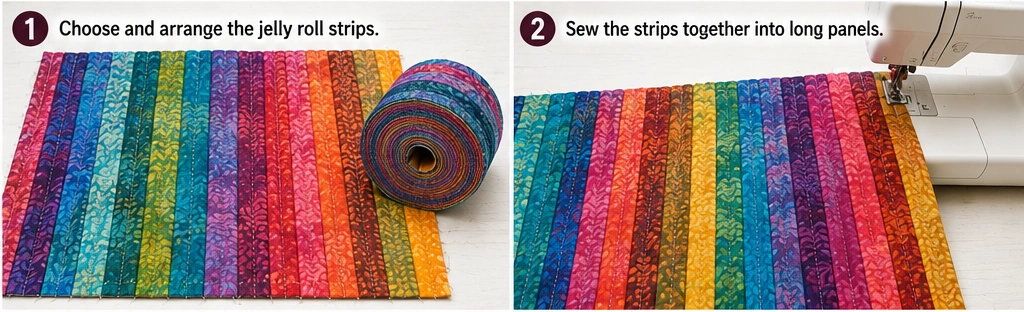
Step 2: Lay Out the Strip Order
Arrange your strips in a scattered warm-cool alternation, repeating each color every fourth or fifth position.
Plan for all body and sleeve strips to run vertically — shoulder to hem on the body, shoulder to cuff on the sleeves. Matching the direction across body and sleeve is what makes the finished jacket read as one continuous garment rather than separate pieces joined together.
Photograph the layout before you start sewing. Strip order is very easy to lose partway through piecing.
Step 3: Piece the Body Panels
Sew strips together lengthwise with a ¼-inch seam allowance until each panel exceeds its pattern piece.
Piece separate panels for:
- Back — about 30 x 32 inches
- Left front — about 18 x 30 inches
- Right front — about 18 x 30 inches
Press all seams open. With this many seams in a single panel, open pressing keeps the surface flat and reduces bulk considerably.
Keep panels oversized by 1 to 2 inches in each direction. Quilting draws them in.
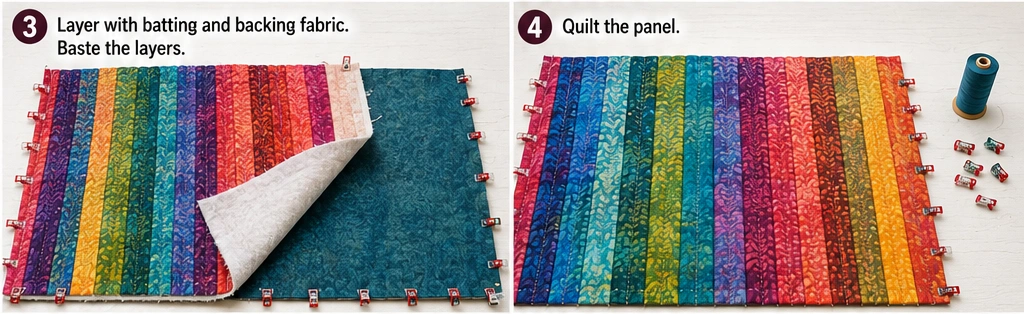
Step 4: Piece the Sleeve and Collar Panels
Piece two sleeve panels at about 21 x 26 inches each, with strips running the length of the sleeve.
For the collar, sew two strips together lengthwise to make a band about 4 x 24 inches. Choose colors that contrast with whatever will sit at the front neckline — the collar is the highest point on the garment and the closest to the face.
Step 5: Layer the Quilt Sandwiches
For each piece — back, both fronts, both sleeves, and the collar — layer in this order:
- Backing fabric, wrong side up
- Batting in the middle
- Strip-pieced panel, right side up
Smooth each layer and baste with pins, clips, or basting spray.
Quilting flat panels before cutting is far easier than quilting an assembled jacket, and on a home machine it is the only practical method.
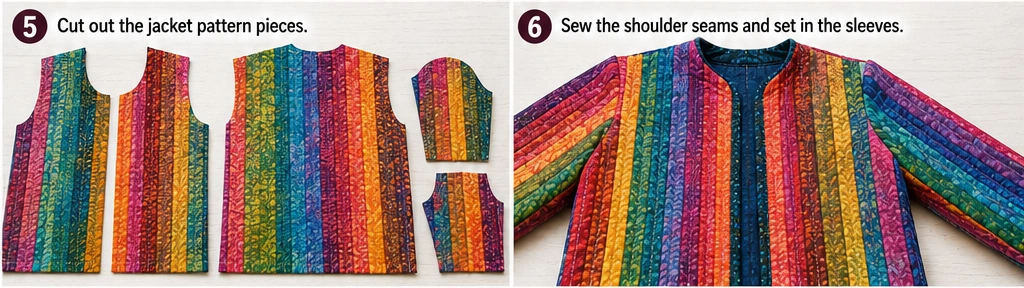
Step 6: Quilt Each Panel
Fit a walking foot. Quilt straight lines ¼ inch from each strip seam across the body panels.
Quilt the sleeve panels more lightly — space lines every 2 inches rather than every strip. Dense quilting at the elbow makes a jacket uncomfortable to wear for more than an hour, and this is the most common reason a beautiful quilted jacket ends up unworn.
Quilt the collar band with a single line down the center of each strip only. Anything denser will stiffen the band and stop it curving around the neck.
Step 7: Cut Out the Jacket Pieces
Place your pattern pieces on the quilted panels and cut:
- 1 back
- 2 fronts
- 2 sleeves
- 1 collar band, trimmed to 3 inches wide by your neckline measurement plus 1 inch
Check color placement before you cut. Position the brightest strips along the front opening, which is where they will be seen when the jacket is worn open.
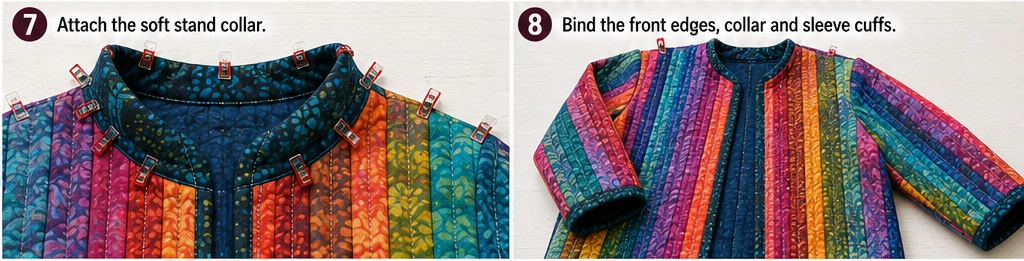
Step 8: Sew the Shoulder Seams
Place the fronts against the back at the shoulders, right sides together. Sew with a ½-inch seam allowance.
Trim only the batting from inside the seam allowance to reduce bulk. Do not trim the fabric layers.
Step 9: Set the Sleeves Flat
Open the jacket body out flat on your table. Match the center of each sleeve cap to the shoulder seam, right sides together, and clip along the armhole.
Sew slowly with a ½-inch seam allowance, easing the sleeve cap into the armhole. Quilted fabric will not gather the way woven fabric does, so distribute any excess evenly around the curve rather than concentrating it at the top of the cap.
Setting the sleeve while the jacket is flat is significantly easier than setting it into a closed armhole, and it is the single change that removes most of the difficulty from quilted sleeve construction.
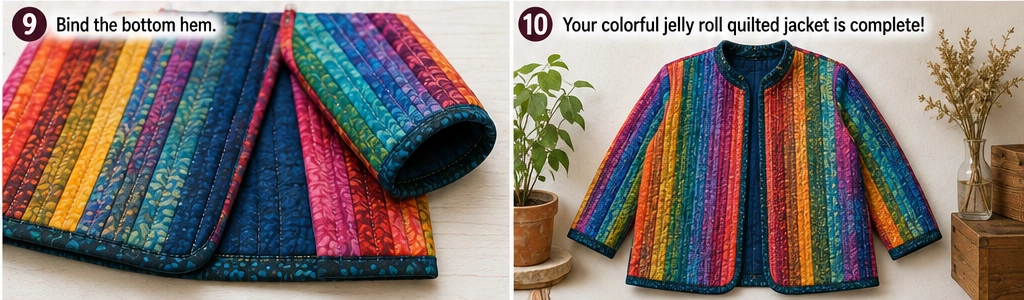
Step 10: Sew the Side and Sleeve Seams
Fold the jacket right sides together, matching the underarm points carefully.
Sew from the cuff down to the underarm and continue along the side seam in one continuous line. Repeat on the other side.
Clip into the seam allowance at the underarm curve so it lies flat, cutting no closer than ⅛ inch from the stitching. Without this clip, the seam pulls and creates a visible drag line across the chest.
Try the jacket on now. Check sleeve length, body length, and underarm comfort before finishing any edges.
Step 11: Attach the Soft Stand Collar
Measure your finished neckline along the seam line and trim the collar band to that length plus 1 inch for turn-under at each front edge.
Pin the collar to the neckline, right sides together, matching center back to center back. Sew with a ½-inch seam allowance, working slowly around the curve.
Fold the collar up, turn the raw upper edge under by ½ inch, and stitch it down on the inside by hand or machine. The finished band should stand about 2 inches — low enough to fold softly at the back of the neck rather than standing rigid.
Add no interfacing. The batting is the structure. If the collar feels stiff or refuses to sit, trim more batting from the neckline seam allowance rather than adding anything.
Step 12: Bind the Front Opening and Hem
Bind the front opening in one continuous strip running from the hem, up the right front, around the base of the collar, and down the left front.
Bind the hem separately, folding the ends in neatly where they meet the front binding.
Use your deepest color — deep teal, violet, or a true dark. This is the Amish framing principle at work: a dark border is what makes a bright field read as intentional.
Step 13: Bind the Cuffs
Bind each cuff with a 2½-inch strip joined into a loop before applying.
Check sleeve length before you bind. Binding adds nothing to the length, so what you measure now is what you get — and a quilted sleeve cannot be lengthened afterward.
Step 14: Press and Finish
Press gently with steam, keeping the iron light so the quilted texture stays lofted.
Trim threads, check that both cuffs sit at the same height, confirm the collar stands evenly across the back of the neck, and add a fabric label at the back neckline.
Assembly at a Glance
- Plan — choose a relaxed pattern, deepen the armhole, lay out the strip order, and photograph it
- Piece — build oversized panels for back, fronts, sleeves, and collar, pressing seams open
- Quilt — layer each piece and quilt straight lines, lighter on the sleeves, lightest on the collar
- Cut — cut final pieces with the brightest strips toward the front opening
- Assemble — shoulder seams, set the sleeves flat, then side and sleeve seams, then the collar
- Finish — bind the front opening, hem, and cuffs, then press
Bright Multicolor Combination Ideas
For a carnival jacket, use turquoise, magenta, saffron, tangerine, emerald, and violet with deep teal binding.
For a garden jacket, use emerald, apple green, coral, saffron, turquoise, and plum with a magenta collar and plum binding.
For a jewel jacket, use sapphire, emerald, ruby, amethyst, deep teal, and gold with near-black binding.
For a sunset jacket, use tangerine, saffron, coral, ruby, magenta, and violet with cobalt at the cuffs and collar.
For a coastal jacket, use turquoise, aqua, cobalt, deep teal, lime, and warm cream with navy binding.
For a high-contrast jacket, alternate bright strips with warm cream throughout, then bind in charcoal for maximum definition.
Beginner Tips for Success
Set the sleeves while the jacket is flat. This one change removes most of the difficulty from quilted sleeve construction.
Quilt the sleeves more lightly than the body. Dense quilting at the elbow is the main reason handmade quilted jackets go unworn.
Trim batting from every seam allowance. Bulk at the shoulder and underarm is what makes a quilted jacket feel stiff rather than cozy.
Clip the underarm curve. Skipping this creates a drag line across the chest that no amount of pressing will fix.
Check sleeve length before binding the cuffs. Quilted sleeves cannot be lengthened afterward.
Leave the interfacing out of the collar. Quilted fabric plus interfacing produces a band that will not bend.
Bind in your darkest color. A bright strip field needs a dark frame to hold it together.
Styling Tip
Wear a bright quilted jacket over a plain solid in one of its own colors — a green tee under a jacket with emerald strips ties the whole outfit together without effort. Pair with straight or wide-leg denim and simple shoes.
The stand collar frames the face particularly well with shorter hair or hair worn up, and the open front keeps the vertical line unbroken from shoulder to hem. Keep jewelry minimal and let the jacket carry the outfit — a single bracelet picking up one strip color is enough.
Gift Pairings for the Pockets
If you add optional patch pockets, they will hold small handmade gifts nicely:
- A strip-pieced eyeglasses case made from leftover jelly roll pieces
- A pair of folding thread snips with a bright handle
- A pieced luggage tag in matching fabrics
- A quilted phone sleeve in a coordinating strip run
- A zippered notions pouch from the same jelly roll
- A set of hand-stitched fabric coasters
- A small pincushion made from three leftover strips
Other Design Inspirations – Digitally Modified
Caption for all gallery images: Digitally Modified Images. Texture and color may vary from the actual product.
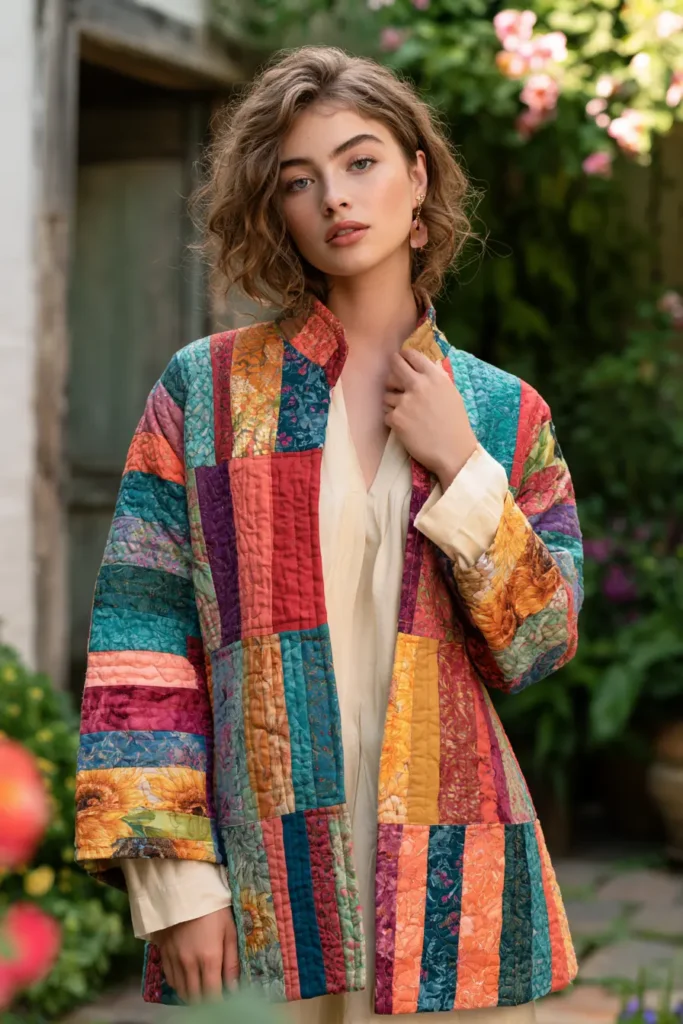
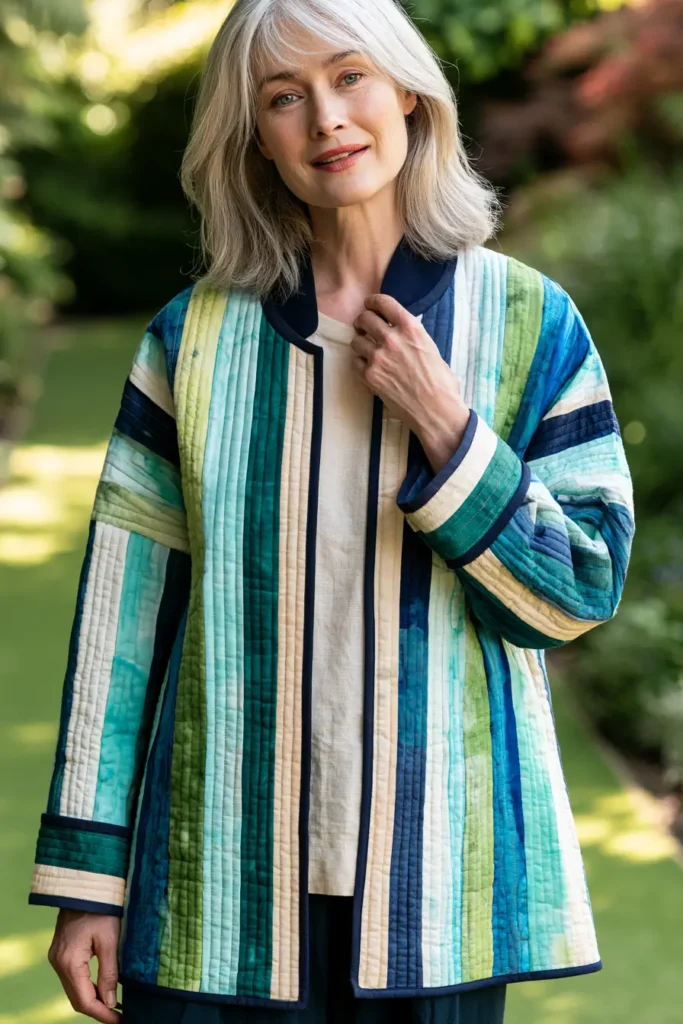
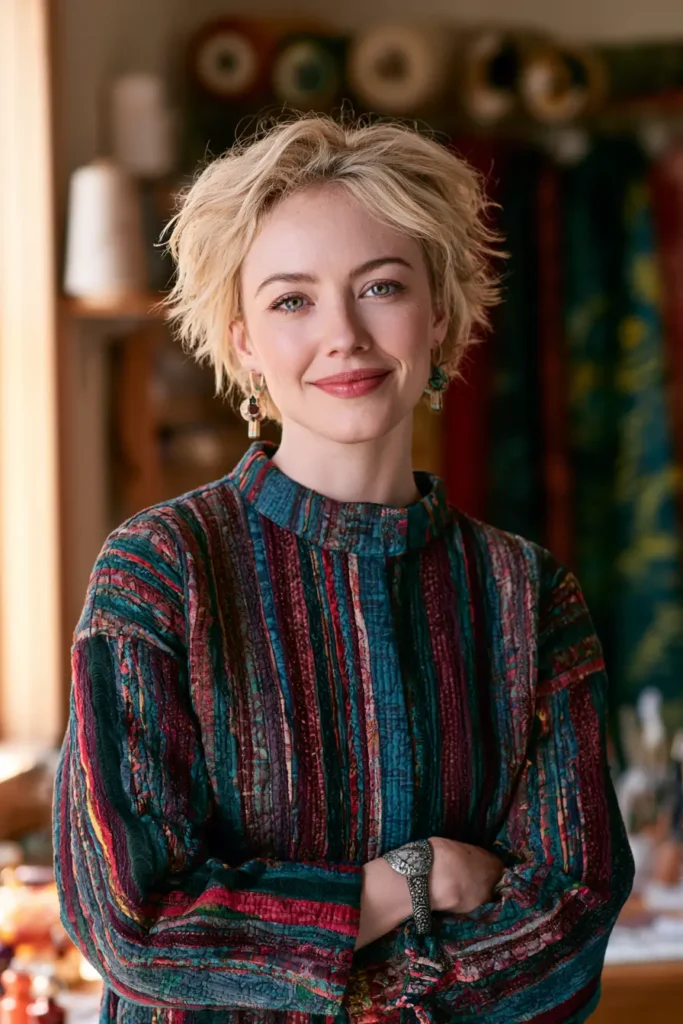
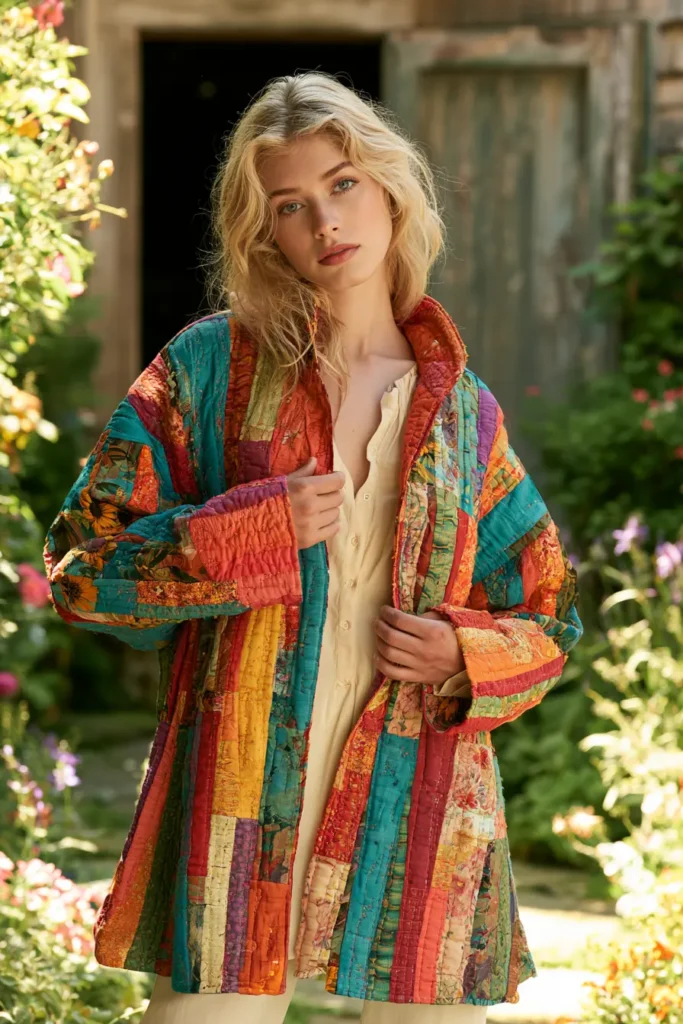
11. Scrappy Geometric Jelly Roll Quilted Jackets with Boxy Shapes and Patch Pockets
A scrappy geometric jelly roll quilted jacket is built differently from every other design in this collection. Instead of running strips the full length of a panel, the strips are cut into short segments and assembled into square blocks, with the strip direction rotating from one block to the next. The result is a dense, multi-directional surface that reads as an entire quilt condensed into a garment — and a boxy silhouette with generous patch pockets is exactly the right shape to carry it.
For a rich scrappy palette, use ruby red, tangerine, saffron gold, emerald green, apple green, turquoise, cobalt blue, violet, magenta, and warm cream. This design supports more colors than any other in the collection. Because the blocks break the surface into small units, a wide and varied palette reads as intentional rather than chaotic — the geometry does the organizing that a limited palette would otherwise have to do.
Why This Design Works
Rotating the strip direction between neighboring blocks is what creates the visual energy. When one block runs its strips vertically, and the block beside it runs horizontally, light catches the two surfaces differently, and the quilting lines cross at right angles across the seam. The effect is far more dynamic than any single-direction layout, and it costs nothing extra in materials.
Mixing two block sizes takes it further. A jacket built entirely from one block reads as a grid; alternating a plain four-strip block with a smaller pieced block breaks the grid up and produces the scattered geometry that gives the style its name.
The construction is also more economical than it looks. Full-length strip piecing wastes the ends of strips, while cutting strips into short segments uses nearly all of each one — which is why scrap-based block construction was standard in traditional quilting long before pre-cuts existed.
The boxy shape earns its place too. A dropped shoulder means the sleeve sews to a straight armhole edge while the jacket lies flat, removing the hardest step in quilted garment construction entirely. There is no sleeve cap to ease, no curve to clip. For a design that already demands accuracy in the piecing, taking the difficulty out of the assembly is a fair trade.
Skills you build here go beyond the other designs in this collection: block maths, crosscutting strip sets accurately, nesting seams where blocks meet, planning color across a pieced field rather than a linear run, and constructing a dropped-shoulder garment.
Design Inspirations – Digitally Modified
Caption for all gallery images: Digitally Modified Images. Texture and color may vary from the actual product.
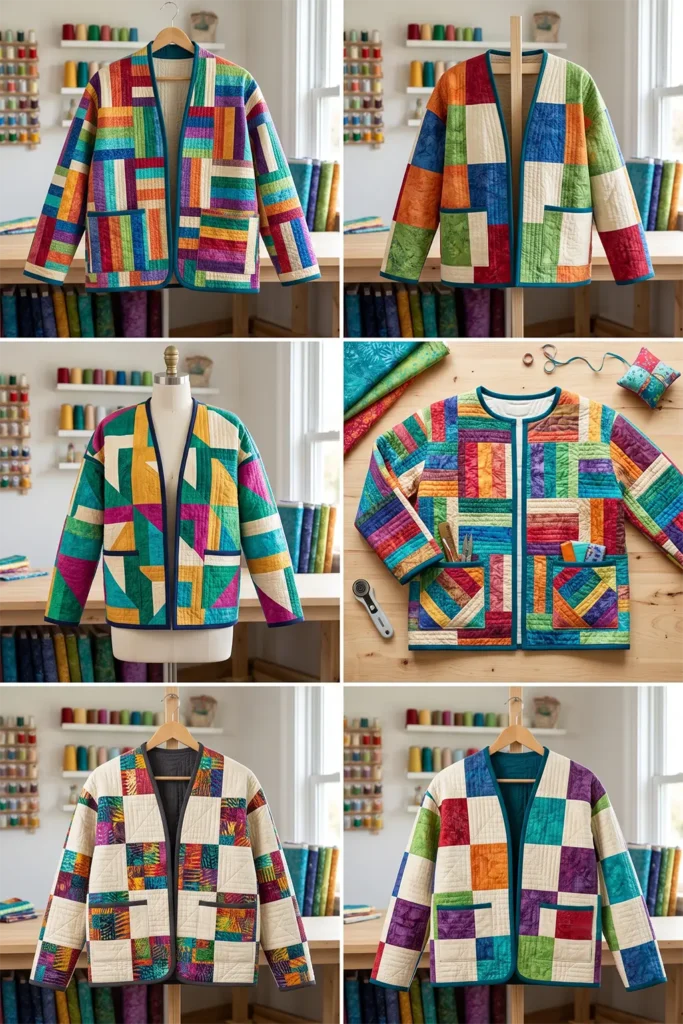
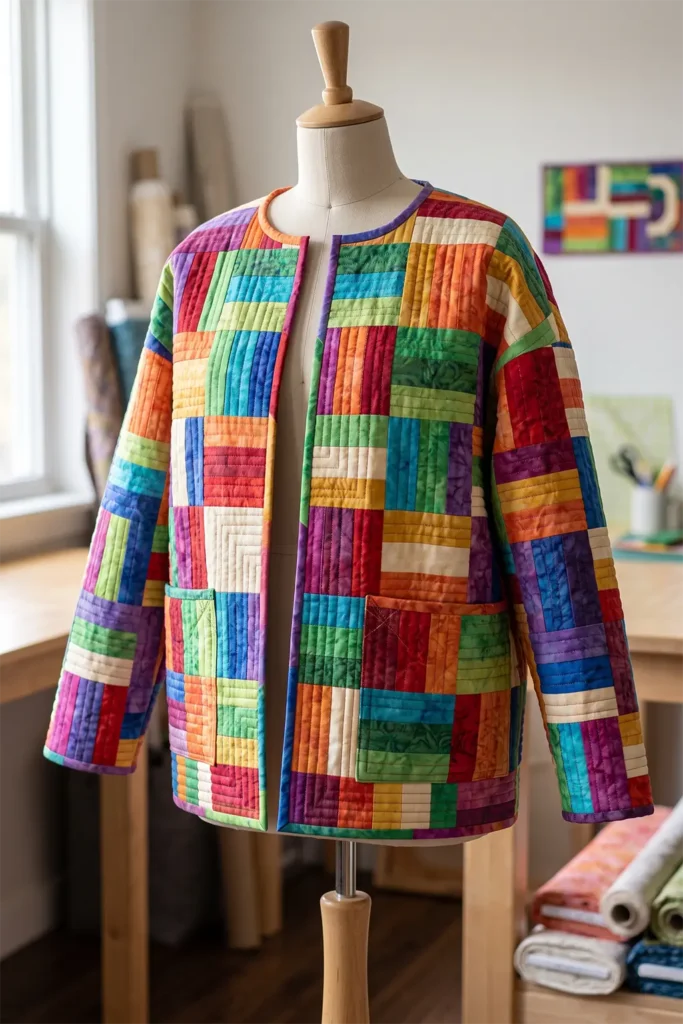
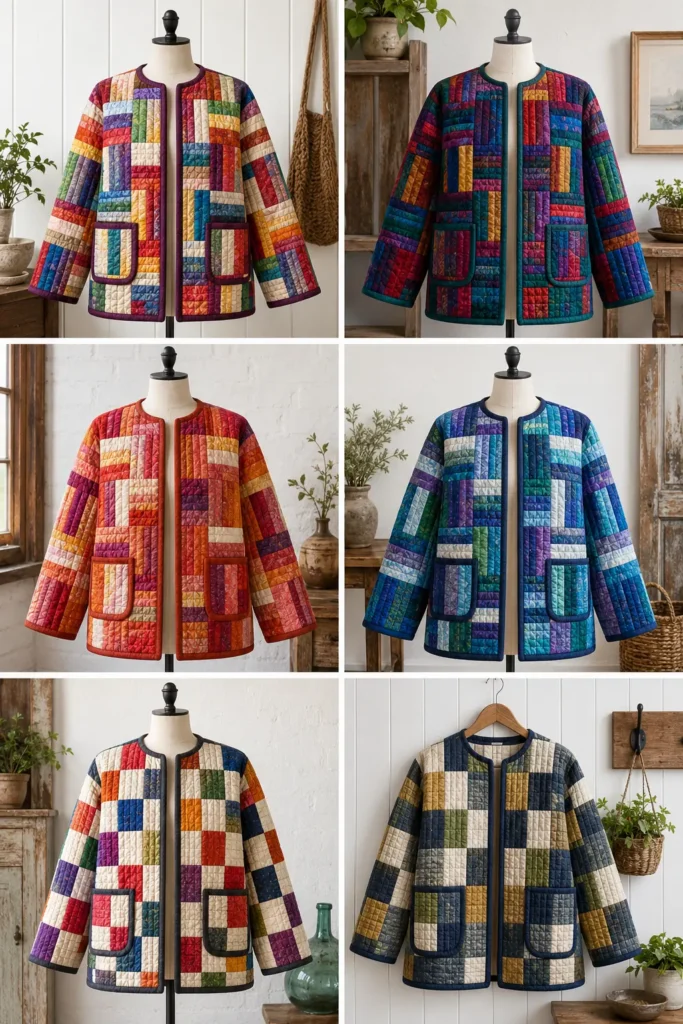
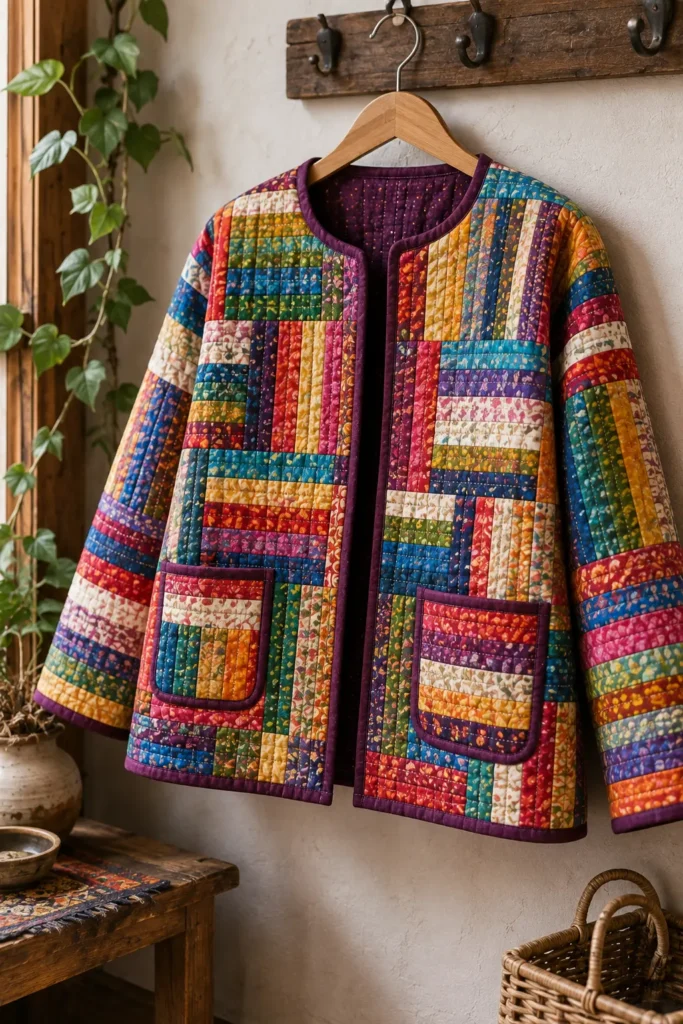
A Note on the Blocks
The rotating-square layout belongs to a family of scrap patterns with a long history.
Rail Fence — the four-strip block used here — takes its name from the split-rail zigzag fencing common across nineteenth-century American farmland. Rails were stacked in alternating directions to make a fence that stood without posts, and the block’s alternating strip direction produces exactly that zigzag when the blocks are laid out in rows.
Log Cabin, first widely documented in American quilts of the 1860s, works on the same rotational principle. The traditional block places a red or yellow center square representing the hearth fire, surrounded by strips added in rounds, with light fabrics on one side and dark on the other. Rotating those blocks generates the classic secondary patterns — Barn Raising, Straight Furrows, Streak of Lightning — from a single block design.
What both patterns share is the reason they survived: they consume scraps of almost any length, they require no matched points, and the layout does the design work. That combination made them the standard first pattern for beginning quilters for well over a century, and it is why this jacket is more forgiving to piece than its busy surface suggests.
Finished Size
This guide makes a boxy, hip-length quilted jacket with dropped shoulders, a plain round neckline, and two patch pockets.
Sample finished measurements for a loose medium:
- Finished chest: about 48 inches
- Finished length: about 24 inches from shoulder to hem
- Sleeve length: about 18 inches from the dropped shoulder seam
- Neckline: plain round, bias bound
- Patch pockets: about 7½ x 8 inches finished
- Front style: open front, no closure required
Blocks finish at 8 inches, so plan your length and width in 8-inch increments where you can. Every dimension that lands on a block boundary is one less block you have to cut through.
This silhouette is deliberately oversized — 6 to 8 inches of ease at the chest is correct for a boxy jacket, and less will make the dropped shoulder look like a mistake rather than a design choice.
Materials Needed
For one scrappy geometric quilted jacket, gather:
- One jelly roll or 36 strips: 2½ inches x width of fabric, in as many colors as possible
- Backing fabric: 2½ to 3 yards
- Lightweight cotton batting: 2½ to 3 yards
- Binding fabric: ¾ to 1 yard
- Thread: mid-tone gold or grey that works across every color
- Boxy jacket pattern with dropped shoulders
- Rotary cutter and cutting mat
- 8½-inch square quilting ruler
- Sewing clips
- Sewing machine with a walking foot
- Iron and ironing board
- Fabric marker or tailor’s chalk
Beginner tip: an 8½-inch square ruler makes this project dramatically faster and more accurate than a long rectangular ruler. It is the one tool worth buying specifically for block-based construction, and you will use it on every quilt afterward.
Scrappy Bright Palette
A full scrappy run could include:
- Ruby red
- Tangerine
- Saffron gold
- Emerald green
- Apple green
- Turquoise
- Cobalt blue
- Violet
- Magenta
- Warm cream
Use every color you have. The single rule that keeps a scrappy layout from reading as random: repeat a color every third block. That loose repetition gives the eye something to follow across a busy surface, and it is the entire difference between scrappy and chaotic.
Warm cream is worth including deliberately. Scattered cream blocks act as resting points and make the saturated colors read as brighter by comparison.
Cutting Measurements
This design uses block construction rather than full-length panels. Two block types are mixed across the jacket.
Block A — Rail Fence, 8 inches finished
- Sew four strips together lengthwise with a ¼-inch seam allowance. The strip set measures 8½ inches wide unfinished.
- Crosscut the strip set at 8½-inch intervals to produce 8½-inch squares.
- Each full-width strip set yields about 4 blocks.
- Make 5 strip sets using 20 strips for about 18 blocks.
Block B — Four-Patch Rail, 8 inches finished
- Sew two strips together lengthwise. The strip set measures 4½ inches wide unfinished.
- Crosscut at 4½-inch intervals to produce 4½-inch squares. Each strip set yields about 9 squares.
- Sew four squares into a 2 x 2 arrangement, rotating each one 90 degrees from its neighbor. The finished block measures 8½ inches unfinished.
- Make 8 strip sets using 16 strips for about 18 blocks.
Total: about 36 blocks, plus 2 spare blocks for the pockets.
Block layout by panel:
- Back: 4 blocks across x 3 down — about 32 x 24 inches finished
- Two fronts: 2 blocks across x 3 down each — about 16 x 24 inches finished
- Two sleeves: 2 blocks across x 3 down each — about 16 x 24 inches finished
- Two pockets: 1 block each
From backing fabric, cut:
- Back backing: 35 x 27 inches
- Two front backings: 19 x 27 inches each
- Two sleeve backings: 19 x 27 inches each
- Two pocket backings: 10 x 10 inches each
From batting, cut pieces the same size as the backing pieces.
For binding, cut:
- Binding strips: 2½ inches wide, with the neckline strip cut on the bias
- Prepare roughly 7 yards total for the neckline, front opening, hem, cuffs, and pocket tops
Step-by-Step Guide
Step 1: Choose a Boxy Dropped-Shoulder Pattern
Start with a boxy jacket pattern that has dropped shoulders, a plain round neckline, and a straight body. No collar, no darts, no shaping at the waist.
A dropped shoulder means the shoulder seam sits below the natural shoulder point and the armhole edge is straight rather than curved. That is what allows the sleeve to be sewn on flat.
Check that your pattern pieces fit within the block grid above. If you need a different width, change the block count rather than the block size — the 8-inch block is what makes all the maths work.
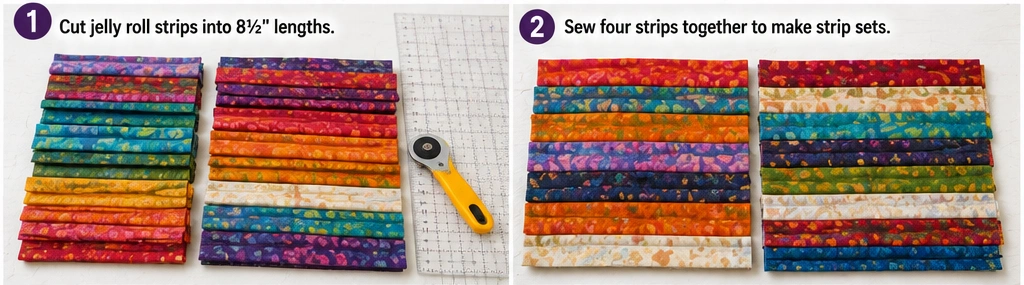
Step 2: Build the Block A Strip Sets
Sew four strips together lengthwise with a ¼-inch seam allowance. Press seams open.
Measure the finished strip set before making any more. It must be 8½ inches wide. If it comes out narrower, your seam allowance is running wide, and every block in the jacket will be affected. Adjust your needle position or seam guide and test again.
Once the measurement is confirmed, make 5 strip sets, varying the color combination in each.
Step 3: Build the Block B Strip Sets
Sew two strips together lengthwise with a ¼-inch seam allowance. Press seams open. The strip set should measure 4½ inches wide.
Make 8 strip sets in varied color pairings. Pair contrasting colors rather than similar ones — the small units need clear contrast to read at a distance.
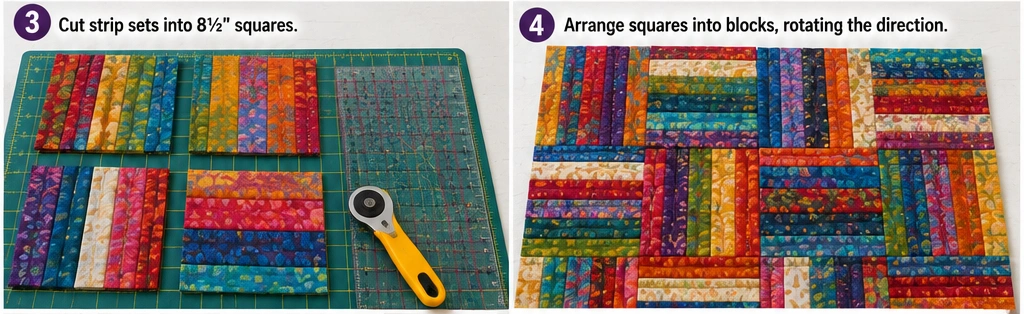
Step 4: Crosscut All the Blocks
Square up one end of each strip set before cutting.
For Block A, crosscut at 8½-inch intervals to make about 18 squares.
For Block B, crosscut at 4½-inch intervals to make about 72 small squares.
Check that each cut runs square to the strip seams. A block cut slightly off-square will not sit flat when joined to its neighbors, and the error compounds across a row.
Step 5: Assemble the Block B Units
Take four small squares and arrange them in a 2 x 2 layout, rotating each square 90 degrees from the one beside it so the strip directions alternate.
Sew the top pair together, then the bottom pair, pressing those seams in opposite directions. Join the two rows, nesting the center seam.
The finished block should measure 8½ inches square. Make about 18.
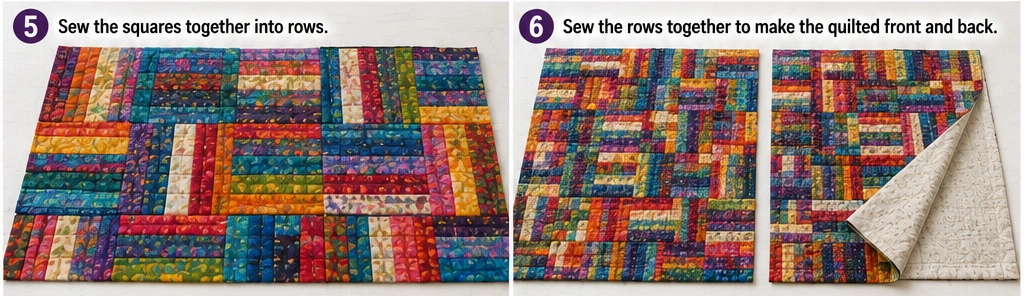
Step 6: Lay Out the Blocks
Arrange your blocks into panel layouts on a large flat surface — bed, floor, or design wall.
Mix Block A and Block B across each panel rather than grouping them. Rotate the Block A squares 90 degrees from their neighbors so strip direction alternates like a checkerboard.
Distribute colors so no two blocks sharing a dominant color sit side by side, and repeat each color roughly every third block. Scatter the cream blocks evenly.
Photograph the layout before you sew. Thirty-six blocks are impossible to reassemble from memory.
Step 7: Join the Blocks into Panels
Sew blocks into rows with a ¼-inch seam allowance, then join the rows into full panels.
Press the row seams in alternating directions so they nest where rows meet. This is the one place in the collection where pressing to one side beats pressing open — nesting seams is what makes 36 blocks line up accurately.
Where four blocks meet, the intersection will be bulky. Press it flat with steam and a firm hand before moving on.
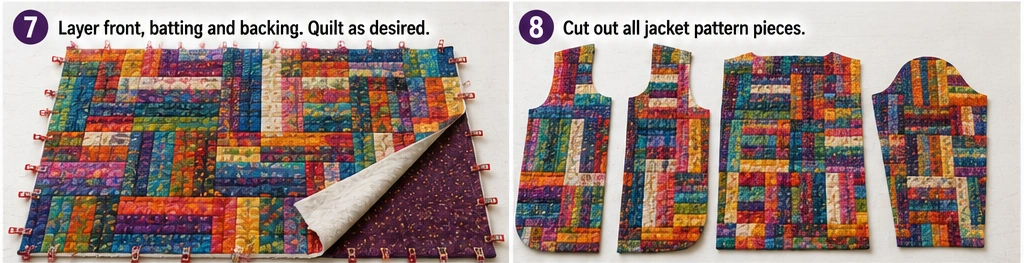
Step 8: Layer and Quilt the Panels
For each panel, layer backing wrong side up, batting in the middle, and the pieced panel right side up. Baste well — pieced panels carry more built-in stress than strip panels and shift more under the needle.
Quilt with a walking foot, following the strip direction within each block. Stitch ¼ inch from each strip seam, changing direction at every block boundary.
This involves more stopping and starting than the other designs, but quilting straight across block boundaries would flatten the multi-directional effect the whole design depends on.
For a faster alternative, quilt an X through each block corner to corner. It emphasizes the block grid and takes a fraction of the time.
Quilt the sleeve panels a little more lightly than the body so the elbow stays comfortable.
Step 9: Cut Out the Jacket Pieces
Place your pattern pieces on the quilted panels and cut 1 back, 2 fronts, and 2 sleeves.
Position the pattern pieces so block seams fall symmetrically where possible. A block seam running straight down the center back reads as deliberate; one sitting slightly off-center reads as an error.
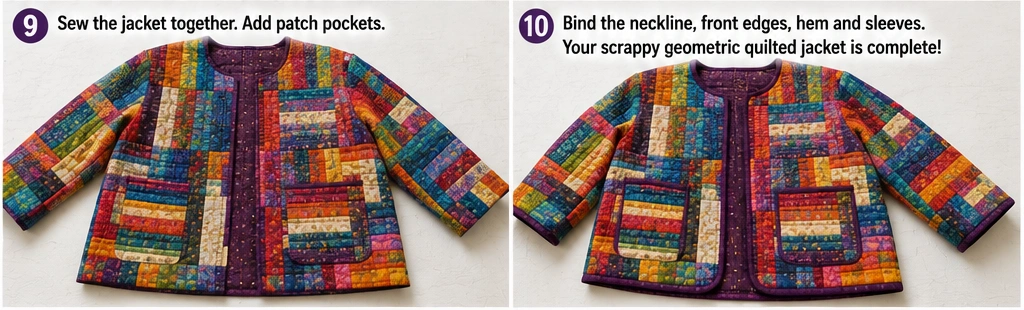
Step 10: Make and Attach the Patch Pockets
Take your two spare blocks. Layer each with backing and batting, quilt, and trim to 8½ x 9 inches.
Bind the top edge of each pocket with a 2½-inch strip, then turn the remaining three raw edges under by ½ inch and press.
Position each pocket 3½ inches above the hem and 3 inches in from the front edge. Clip in place and check both pockets sit level before stitching.
Topstitch the sides and bottom, leaving the top open. Reinforce the upper corners with a small triangle of backstitching — patch pockets on quilted fabric take the most strain at exactly this point.
Step 11: Sew the Shoulder Seams and Set the Sleeves Flat
Sew the fronts to the back at the shoulders with a ½-inch seam allowance. Trim only the batting from inside the seam allowance.
Open the jacket flat. Match the center of each sleeve to the shoulder seam, right sides together, and clip along the straight armhole edge.
Sew with a ½-inch seam allowance. Because the armhole is straight and the shoulder is dropped, there is nothing to ease — this is a plain straight seam.
Step 12: Sew the Side and Sleeve Seams
Fold the jacket right sides together, matching the underarm points and lining up block seams where they meet at the side.
Sew from the cuff down to the underarm and continue along the side seam in one continuous line. Repeat on the other side.
Try the jacket on. Check the sleeve length and body length before finishing any edges.
Step 13: Bind the Neckline, Front Opening, Hem, and Cuffs
Bind the round neckline first, using a 2½-inch strip cut on the bias. Bias binding is essential here — a straight-grain strip will not curve smoothly, and the neckline is the most visible binding on the garment.
Bind the front opening from hem to neckline on each side, then the hem, then each cuff.
Choose a binding color that already appears in the blocks. A color from the palette frames the scrappy field, while a new color adds one more thing competing for attention.
Step 14: Press and Finish
Press gently with steam, working carefully around the block intersections where the bulk sits.
Trim threads, check the block grid runs level across the front opening, confirm both pockets are square to the hem, and add a fabric label at the back neckline.
Assembly at a Glance
- Plan — choose a boxy dropped-shoulder pattern and confirm the block grid fits the pattern pieces
- Build — sew 5 Block A strip sets and 8 Block B strip sets, then crosscut and assemble about 36 blocks
- Lay out — mix both block types, rotate strip direction, distribute color, photograph the arrangement
- Join and quilt — sew blocks into panels with nested seams, layer, and quilt within each block
- Assemble — cut pieces, make and attach pockets, shoulders, sleeves flat, then side and sleeve seams
- Finish — bind the neckline on the bias, then front opening, hem, and cuffs, and press
Scrappy Geometric Color Combination Ideas
For a rainbow jacket, use every color in the jelly roll with warm cream blocks scattered throughout and near-black binding.
For a jewel scrappy jacket, use ruby, emerald, sapphire, amethyst, and saffron gold with deep teal binding.
For a warm scrappy jacket, use ruby, tangerine, saffron, coral, plum, and cream with rust binding.
For a cool scrappy jacket, use turquoise, cobalt, deep teal, violet, emerald, and cream with navy binding.
For a high-contrast jacket, alternate bright blocks with cream blocks in a strict checkerboard and bind in charcoal.
For a controlled scrappy jacket, use only five colors repeated across all 36 blocks — busy geometry with a disciplined palette, which reads as designed rather than improvised.
Beginner Tips for Success
Measure your first strip set before making the rest. If it is not 8½ inches wide, every block will be off, and nothing will line up. This is the make-or-break check in the whole project.
Buy or borrow an 8½-inch square ruler. It will save more time than any other tool on this project.
Press row seams in alternating directions. Nesting seams is what makes 36 blocks join accurately.
Photograph the layout before sewing. There is no recovering a 36-block arrangement from memory.
Repeat a color every third block. This is the rule that separates scrappy from random.
Use bias binding at the neckline. Straight-grain binding will not lie flat on that curve.
Reinforce the pocket corners. Quilted patch pockets carry weight and pull at the top corners first.
Styling Tip
A scrappy geometric jacket is a genuine statement piece, so keep everything underneath plain — a solid tee, a simple dress, straight denim in a single wash. Because the jacket carries so many colors, almost any solid works; pick one color from the blocks and wear it as the underlayer to tie the outfit together.
The boxy shape balances best over slim or straight trousers rather than wide ones. Skip patterned scarves and busy jewelry entirely, and let the pockets do the work your hands would otherwise be looking for. Simple shoes and a plain bag keep the focus where you built it.
Gift Pairings for the Pockets
The patch pockets are cut from full blocks, so they hold small gifts easily:
- A patchwork pincushion made from leftover block offcuts
- An 8½-inch square quilting ruler
- A scrappy pieced mug rug using spare blocks
- A folding thread snips with a bright handle
- A small pieced zip pouch built from the same two block types
- A set of quilt-block fridge magnets from leftover squares
- A rotary cutter blade refill pack
Other Design Inspirations – Digitally Modified
Caption for all gallery images: Digitally Modified Images. Texture and color may vary from the actual product.
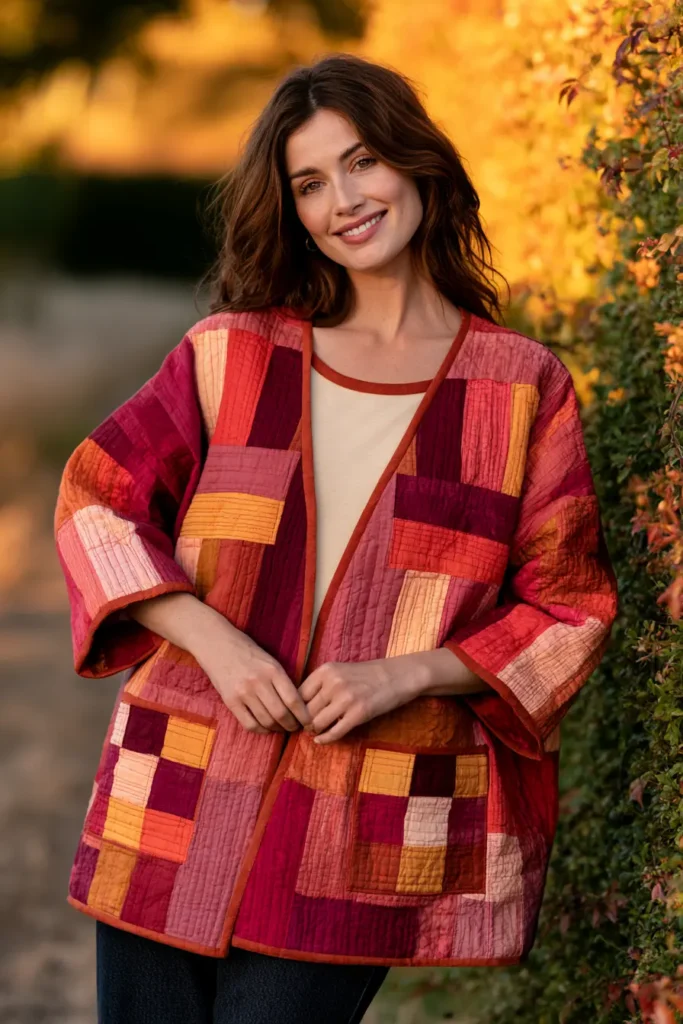
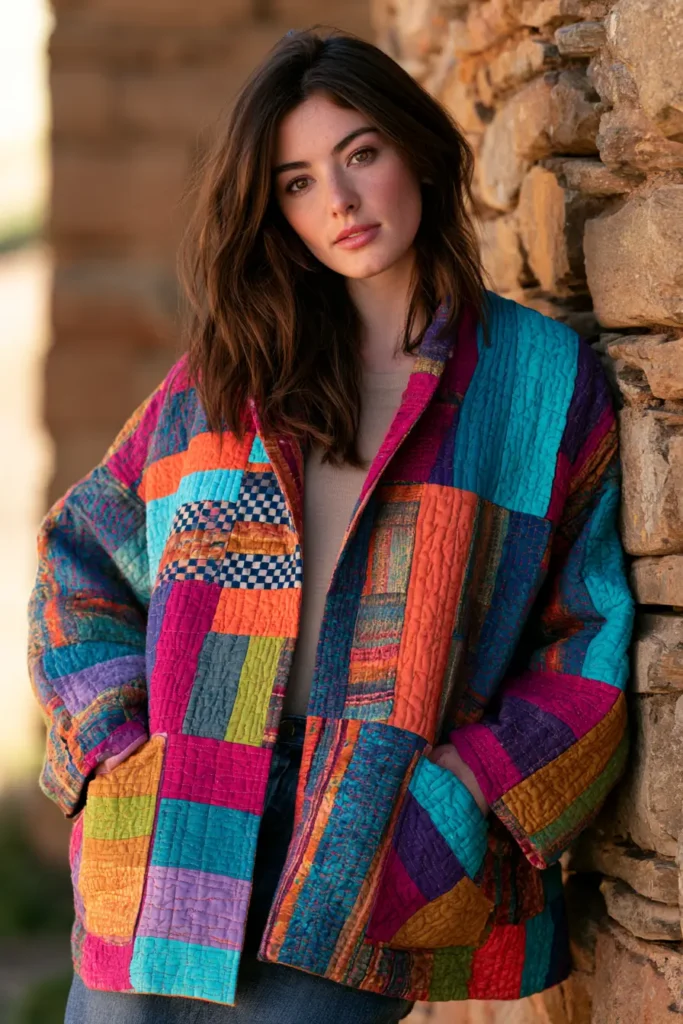
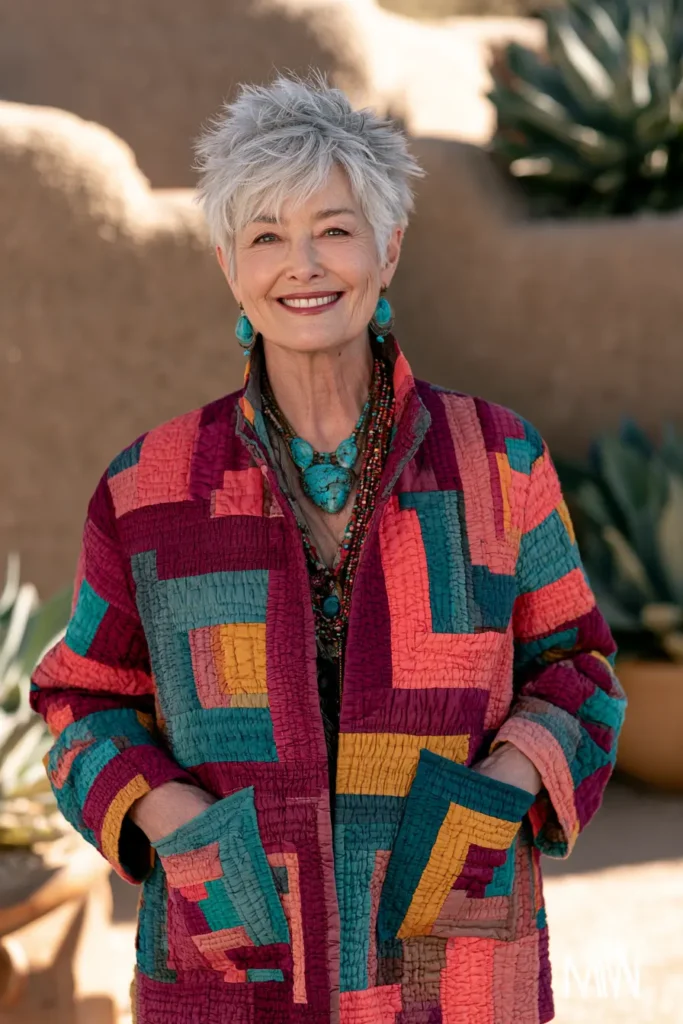
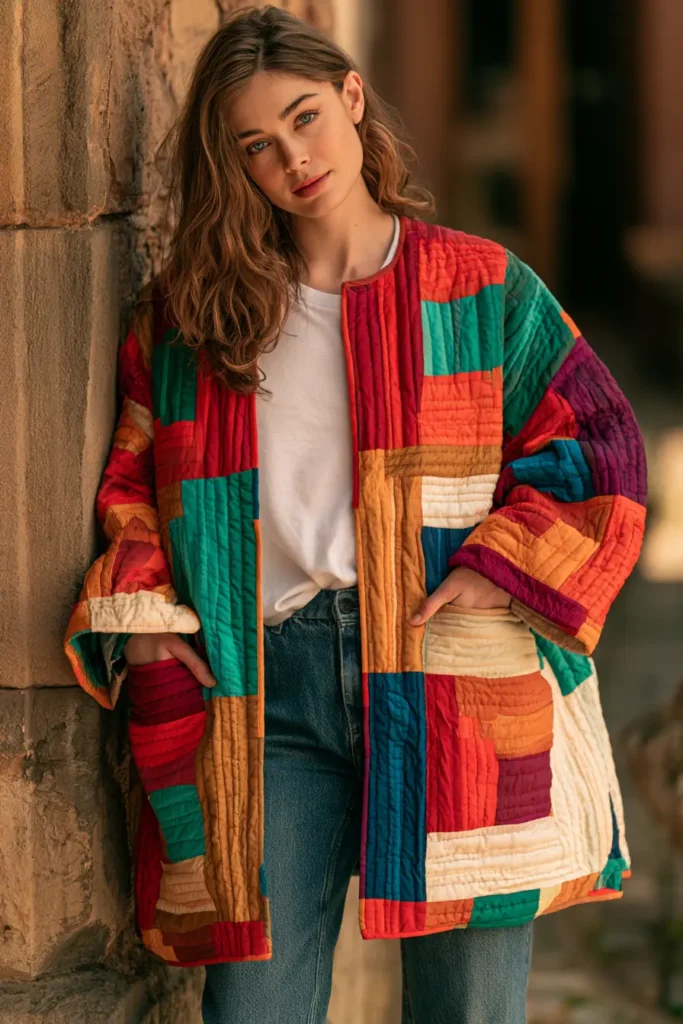
CONCLUSION
A jelly roll jacket or vest earns its place in a wardrobe the same way a good quilt earns its place in a room — by being used rather than saved. The construction is honest: the strips are visible, the layers are functional, and the color coordination is built into the fabric before the first seam is sewn.
These seven ideas are design directions rather than finished instructions — take the silhouette that fits your making confidence, choose a jelly roll bundle whose color story suits your wardrobe, and let the strip progression do the visual work. The result will look more considered than the construction time suggests, which is the particular satisfaction of jelly roll making applied to something you actually wear.

