
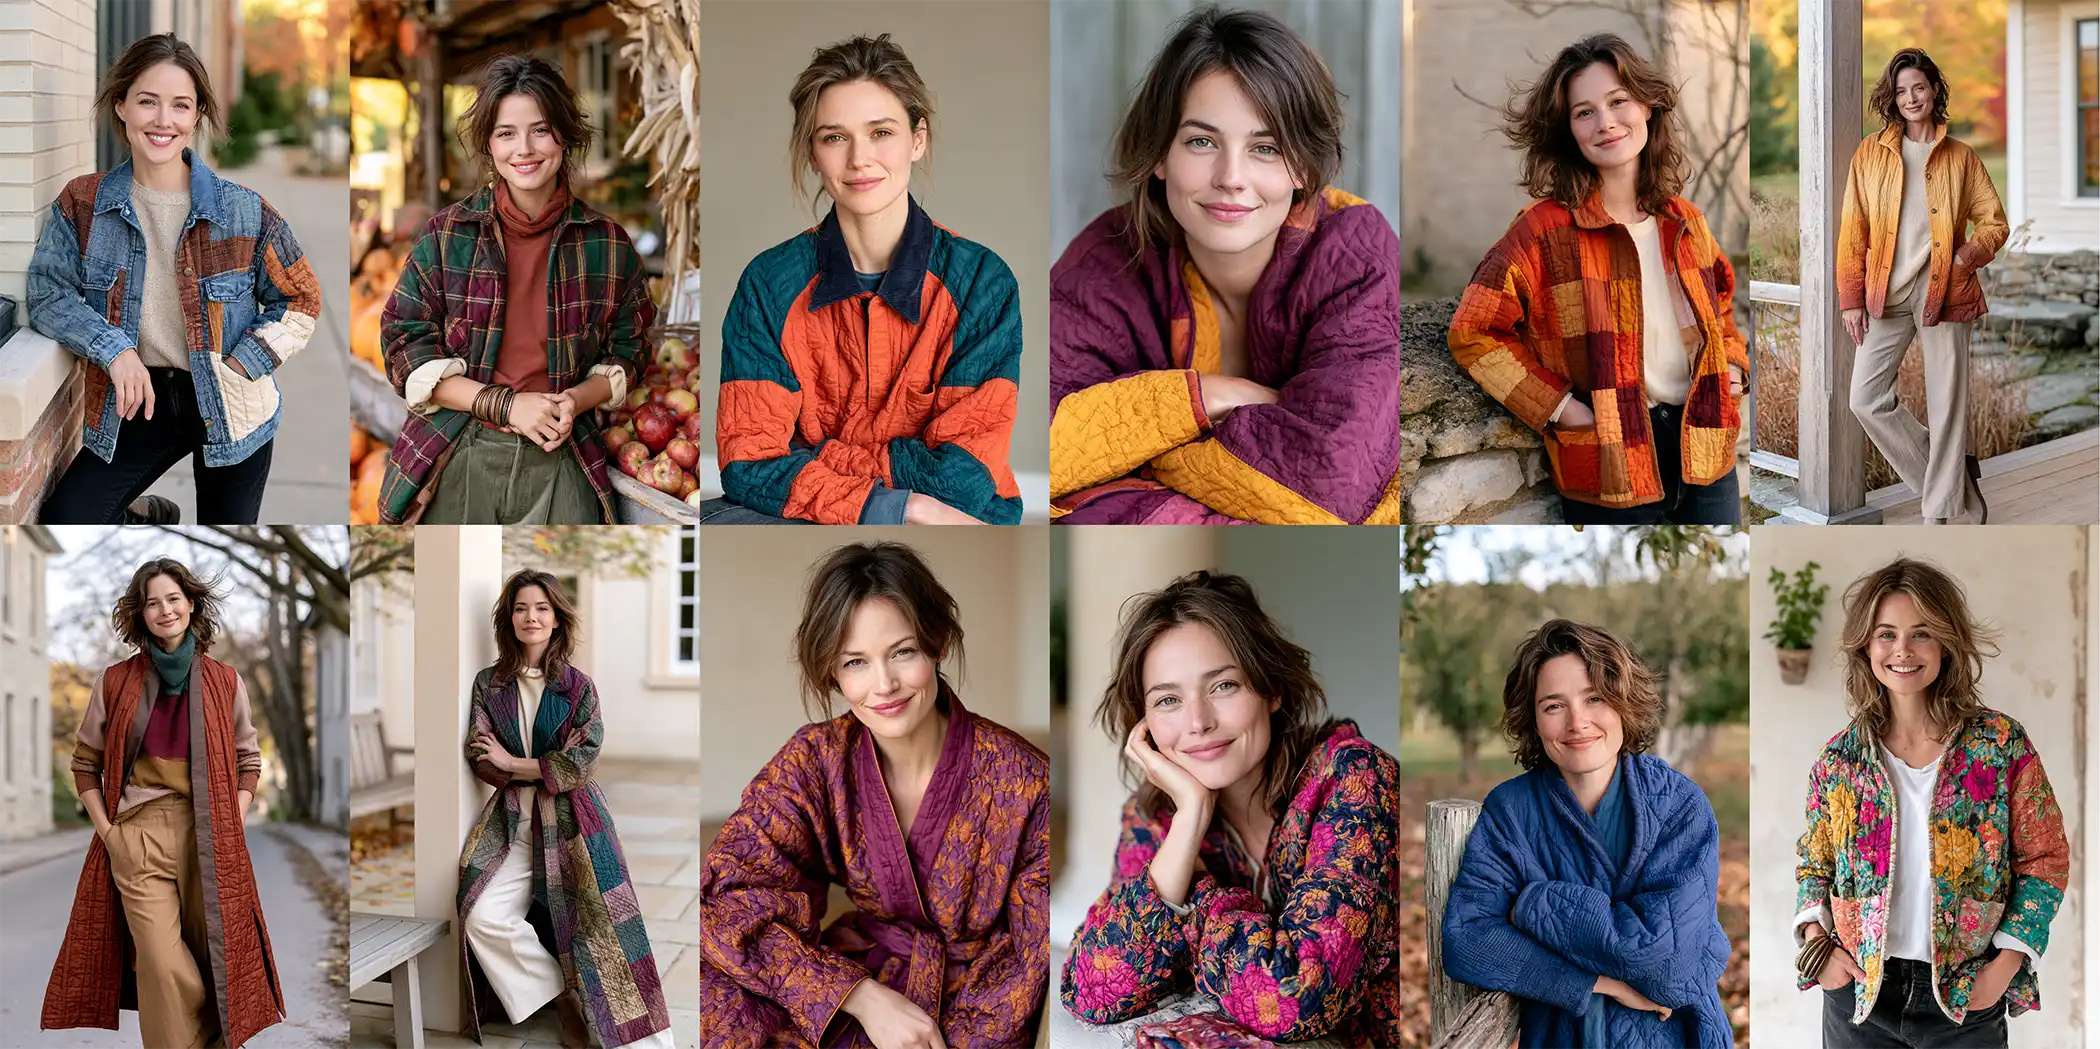
Fall Quilted Jacket and Vest Ideas: 12 Cozy Layers for Warm Autumn Style
There’s a particular kind of weather that autumn does better than any other season – too cool for a shirt, too mild for a coat – and that in-between is exactly where quilted layers shine. Fall Quilted Jacket and Vest Ideas are all about that sweet spot: soft, lightweight outerwear made from three layers of fabric (a top, a warm batting middle, and a backing) stitched through to hold it together. That quilting is what makes these pieces special. It traps warmth without bulk, adds beautiful texture, and turns a simple jacket or vest into something with real handmade character – cozy enough for a chilly morning, light enough to wear all day.
Fall Quilted Jacket and Vest Ideas
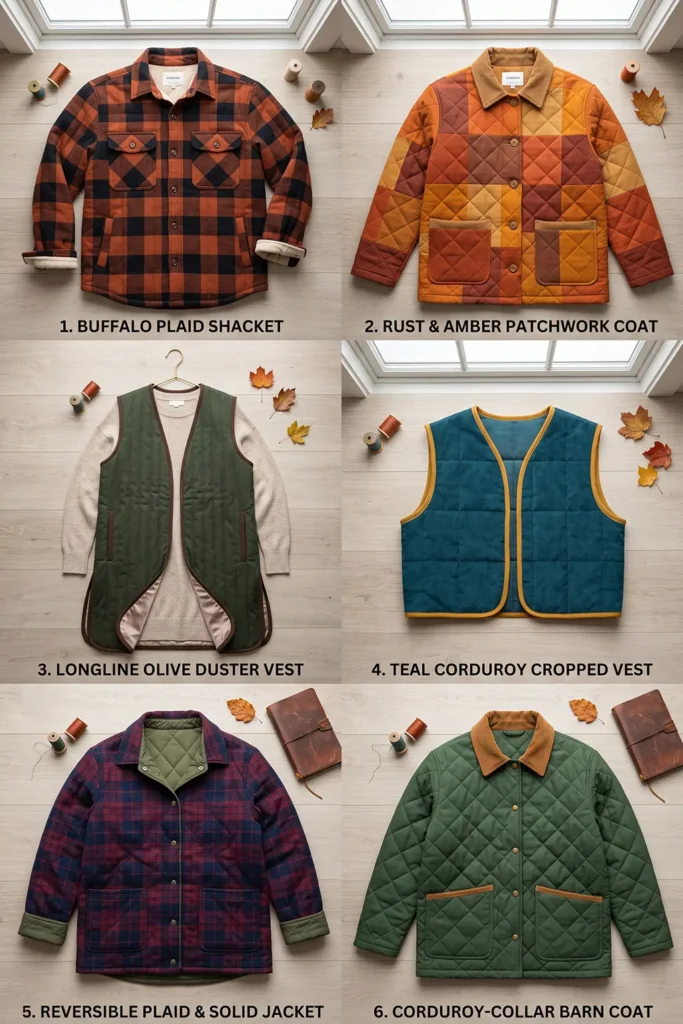
This collection of Fall Quilted Jacket and Vest Ideas gathers twelve ways to layer beautifully through the season, from casual everyday pieces to elegant statement layers. You’ll find cozy plaid shackets and corduroy-collar barn jackets, rich rust-and-amber patchwork, reversible two-in-one jackets, and a classic quilted denim jacket for easy street style. There are vests in every proportion – cropped for sweater weather, longline duster shapes for graceful layering, and a calm oatmeal neutral for understated days – plus softer, prettier options like a boho floral jacket, a flattering belted midi, and a golden ombre gradient. Whether you’re dressing for a crisp early-autumn afternoon or a properly cold November morning, a layer keeps you warm and stylish.
Why Make a Fall Quilted Jacket and Vest
Quilted layers are worth making because they solve autumn’s real dressing problem: you want warmth without heaviness, and personality without spending a fortune. What sets a quilted jacket apart from a puffer or a wool coat is the balance – the batting layer keeps you genuinely warm while staying soft and light enough to wear indoors, in the car, or all afternoon without overheating. Handmade versions go further still.
You choose the fabric, the colors, and the fit, so the piece suits your body and your wardrobe instead of the other way around, and the quilting itself becomes a design feature rather than just construction. Best of all, these are forgiving projects: most quilted jackets and vests use simple, boxy shapes with no darts and no fussy tailoring, which makes them wonderfully achievable even if you’ve never sewn a garment before. The result is outerwear nobody else has, made to be worn hard and loved for years.
See also: Sashiko Quilt Jackets and Vests – Farmhouse Quilt Jackets & Vests – Scandinavian Quilted Jackets – Jelly Roll Quilted Jackets and Vests – Japanese Quilt Jackets, Vests
Tips for Choosing Fabrics and Colors
The single most important rule is to use low-loft batting. Bed-quilt loft is far too puffy to wear comfortably – for garments, you want a thin cotton batting, or even cotton flannel as your middle layer, which gives warmth and gentle texture without bulk. For the outer fabric, mid-weight cottons, chambray, corduroy, denim, and linen-cotton blends all work beautifully; prewash everything, especially flannel and linen, since shrinkage will distort a finished garment.
Choose a soft lining, since it sits against your skin, and keep quilting lines fairly widely spaced so the fabric drapes rather than stands stiff. For color, autumn offers a gorgeous palette: warm rust, amber, mustard, and burnt orange for classic fall richness; deep burgundy, forest green, and jewel tones for later in the season; and oatmeal, camel, and soft cream when you want something quieter. Plaids, small florals, and corduroy add texture, and a contrasting binding is an easy way to give any piece a polished, designer finish.
1. Cozy Plaid Quilted Shacket for Crisp Autumn Days
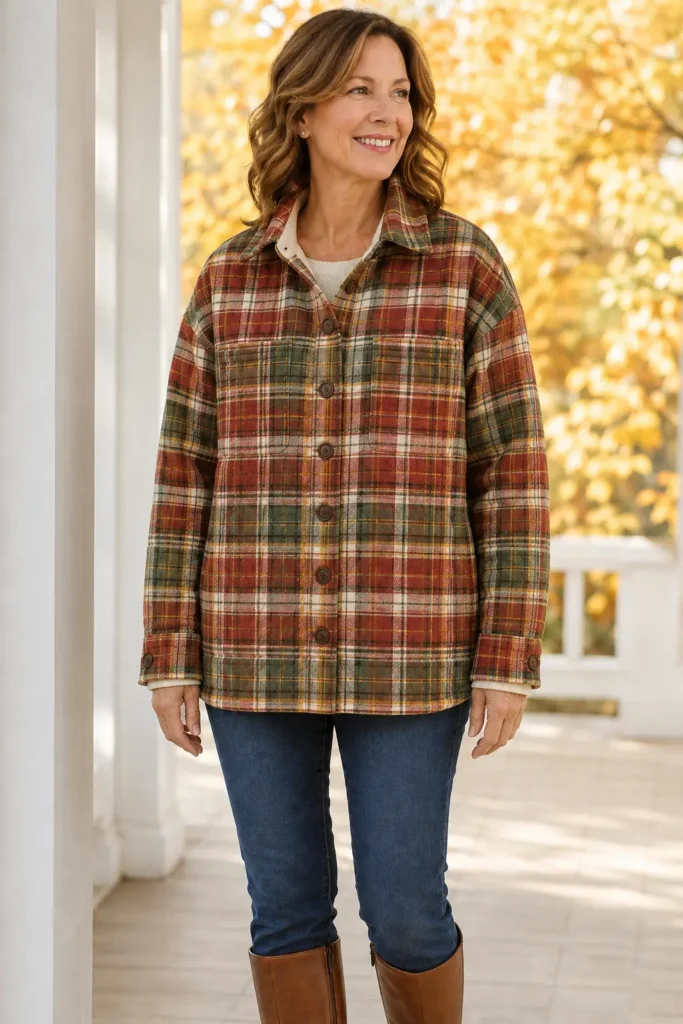
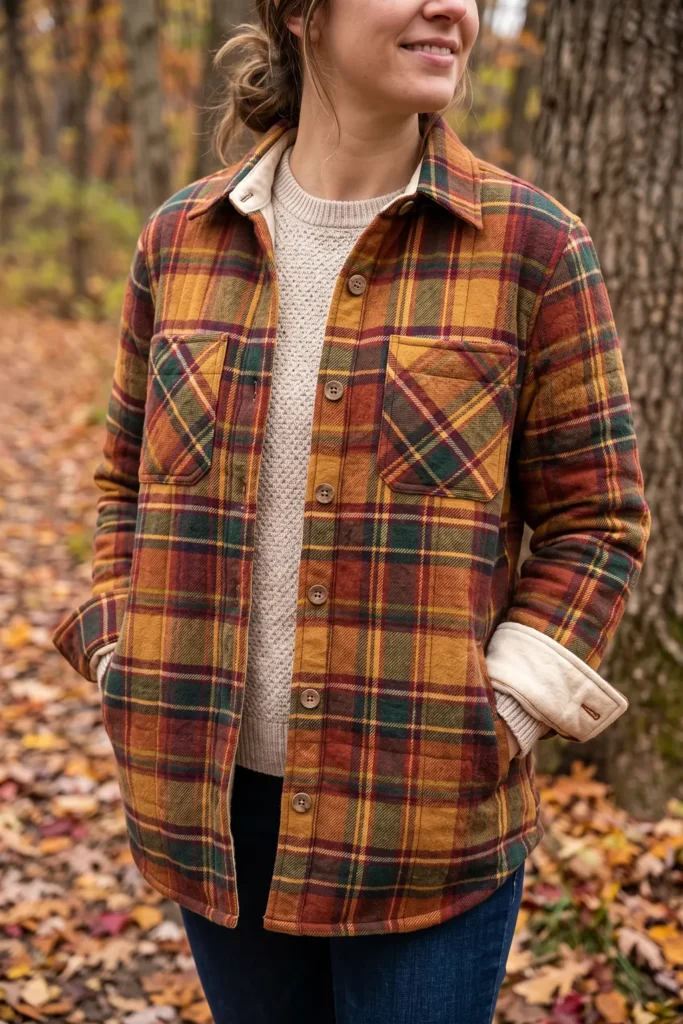
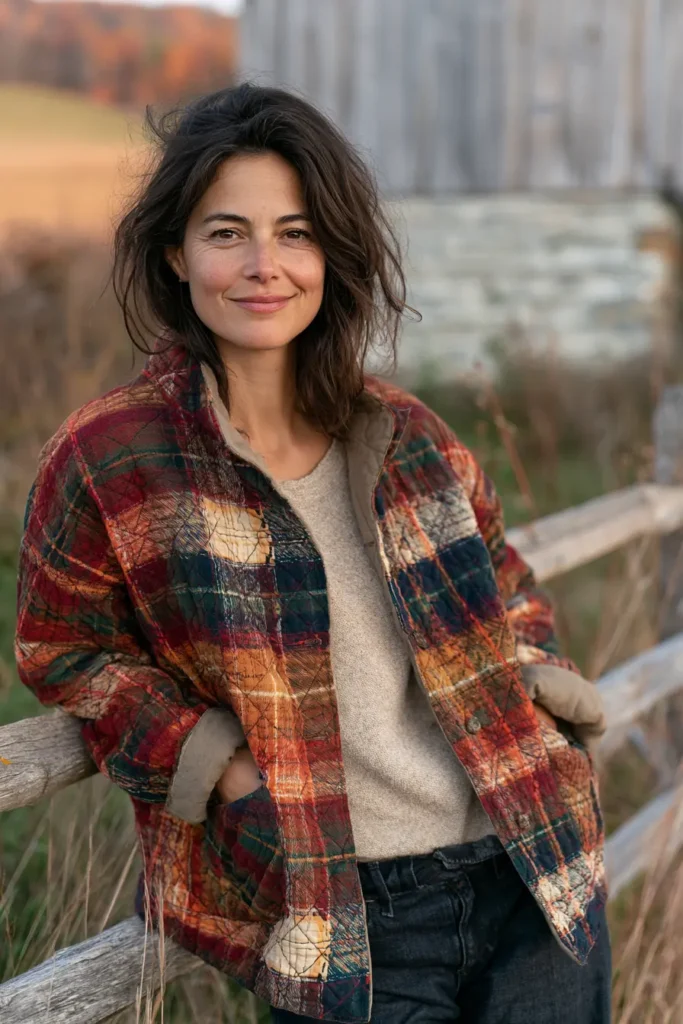
The shacket – half shirt, half jacket – is autumn’s most useful invention. It exists for exactly the weather fall keeps throwing at us: too cool for a shirt, too mild for a coat, and changeable by the hour. Make it in warm plaid with a light quilted layer inside, and you get the perfect crisp-morning piece – soft enough to wear open like an oversized shirt, warm enough to button up when the wind picks up. In rich autumn plaids of rust, gold, forest green, and burgundy, it’s the layer you’ll pull on over a tee, over a sweater, over almost anything, from the first cool morning in September right through to November.
What makes a shacket different from a jacket is its shirt DNA. It has a real collar, a button placket down the front, chest pockets, and cuffed sleeves, cut generously so it layers over other clothes. Quilting the plaid before you cut adds genuine warmth without bulk, so it keeps that easy, casual drape rather than turning into stiff outerwear. That balance – shirt shape, jacket warmth – is the whole appeal.
The Story Behind the Plaid
Plaid and autumn have a long, practical partnership. The woven checks we call tartan and plaid come from the wool traditions of Scotland and northern Europe, where people wove cloth in colored checks and wore it in heavy lengths for warmth against cold, damp weather. Those patterns crossed the Atlantic and became a staple of North American workwear – the lumberjack’s buffalo check, the farmer’s flannel shirt – because plaid flannel was cheap, warm, and hard-wearing. It has meant cold-weather practicality for centuries, which is exactly why it still reads as autumn the moment you see it.
The word “shacket” is much newer, but the garment isn’t: an overshirt worn as a light jacket is one of the oldest ideas in working clothes. And the instinct behind this project – layering cloth and stitching it through for warmth – runs through textile traditions everywhere, including the Nakshi Kantha tradition of my own family’s background, where layered, running-stitched cloth was made into practical, wearable warmth.
Design Inspirations – Digitally Modified Images. Texture and color may vary from the actual product.
What Makes It an Autumn-Weight Layer
A shacket has to thread a needle: warm enough to matter, light enough to wear all day indoors and out. Three choices get you there:
- Low-loft batting or flannel as the middle layer. Bed-quilt loft is far too puffy to wear. For a shacket, a thin cotton batting – or better, a layer of cotton flannel – gives warmth and soft texture with no bulk.
- Widely spaced quilting. Dense quilting stiffens fabric. Lines about 2 inches apart keep the shacket soft and shirt-like.
- Generous ease. This layers over a sweater, so cut it roomy. Size up from your usual shirt size, or choose a pattern with a relaxed, dropped-shoulder fit.
Finished Garment
- Style: relaxed shirt-jacket with collar, button placket, two chest pockets, cuffed sleeves
- Length: about 29-31 inches from shoulder to hem (hits at the high hip)
- Front bands: 1½ inches wide finished, with 7 buttons
- Chest pockets: about 5½ × 6 inches finished
- Cuffs: about 2½ inches deep, with one button each
- Skill level: confident beginner
- Core techniques: quilting yardage, plaid matching, collar and placket, patch pockets, cuffs
Materials Needed
- Plaid flannel or brushed cotton: 3½ yards (buy about 20% extra for plaid matching and shrinkage)
- Middle layer: 2¾ yards of low-loft cotton batting, or cotton flannel
- Lining: 2¾ yards of soft cotton or lightweight flannel
- Interfacing: ½ yard lightweight woven, for the collar, cuffs, and front bands
- Buttons: 9 total – 7 for the front placket, 2 for the cuffs (wood, horn, or matte metal suit autumn plaid)
- Binding (optional): ½ yard for finishing interior seams
- Thread: good-quality cotton, plus a 90/14 needle (quilted flannel is thick)
- Walking foot, rotary cutter, cutting mat, ruler, pins or clips, iron, sewing machine
- A relaxed shirt-jacket or shacket pattern in your size, sized up for layering
Beginner tip: prewash and dry the flannel twice before cutting. Flannel shrinks 3-5%, and a shacket that shrinks after its first wash will pull across the shoulders forever after.
Choosing Your Colors
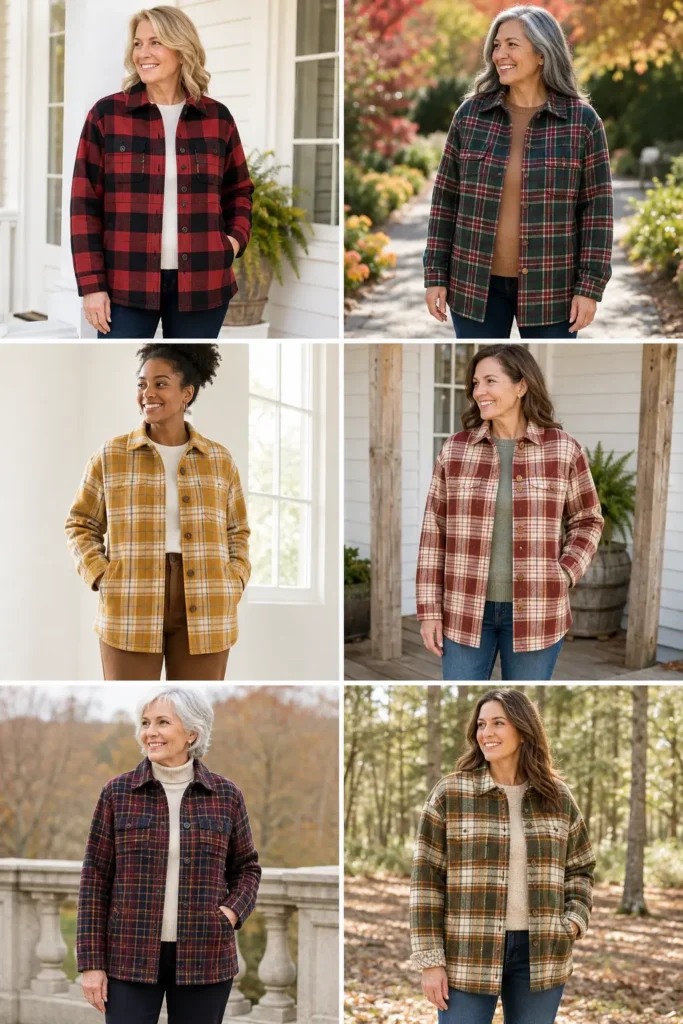
Autumn plaid is at its best when the palette is warm, and the check has some scale to it:
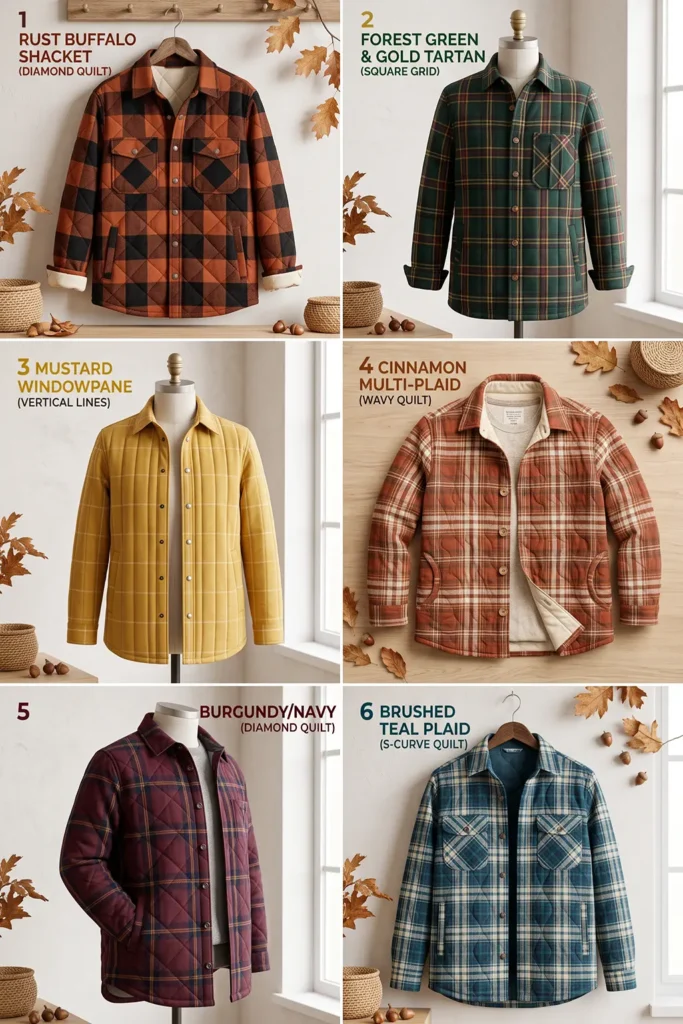
- Rust and black buffalo check – bold, iconic, unmistakably fall
- Forest green, burgundy, and gold tartan – rich and layered
- Mustard and cream windowpane – lighter and more modern
- Cinnamon, brick, and cream plaid – warm and softly rustic
- Deep burgundy with navy and amber – sophisticated for later autumn
Pick one plaid for the whole shacket (whole-yardage garments look best in a single check), and choose a lining that complements it – a cream flannel is classic, or use a contrasting small check for a fun reveal at the cuffs and collar.
Cutting Measurements
Cut all pieces on the straight grain, following the plaid lines:
- Two fronts, one back, two sleeves – to your pattern, at 29-31 inches finished length
- Collar: two pieces per your pattern, plus interfacing
- Front bands: two strips at 3½ × 32 inches (finishing 1½ inches wide), plus interfacing
- Cuffs: two strips at 6 × 11 inches (finishing 2½ inches deep), plus interfacing
- Chest pockets: two at 6½ × 7½ inches (finishing about 5½ × 6 inches)
- Binding (optional): 2½-inch strips for interior seams
Step-by-Step Guide
Step 1 – Prewash and press. Wash and dry the plaid flannel and lining twice, then press well. Check that the woven check runs square to the grain before you go further.
Step 2 – Layer the quilt sandwich. Spread the lining wrong side up, smooth the batting or flannel middle over it, then lay the plaid right side up on top. Smooth out every wrinkle from the center outward and pin or spray-baste generously.
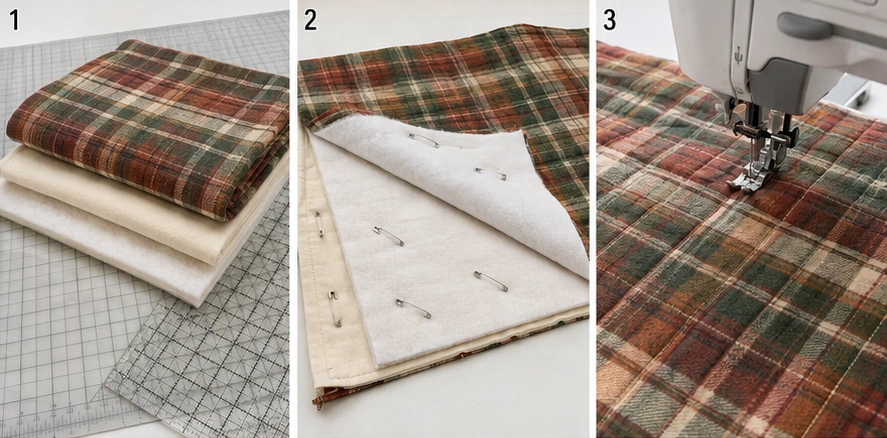
Step 3 – Quilt along the plaid lines. Using a walking foot, quilt straight lines about 2 inches apart, following the plaid’s own check lines in both directions. No marking needed – the plaid is your guide – and the quilting stays invisible and intentional. Work from the center out.
Step 4 – Cut the garment pieces, matching plaid. Lay your pattern on the quilted yardage with everything on the straight grain. Cut the two fronts as mirror images, so the plaid matches across the front opening. Cut the back, sleeves, collar, cuffs, and pockets.
Step 5 – Cut the pockets to match. Cut each chest pocket so its plaid will line up with the fabric behind it once placed. This one detail separates a polished shacket from a rushed one – hold the pocket over its spot and shift until the lines continue.
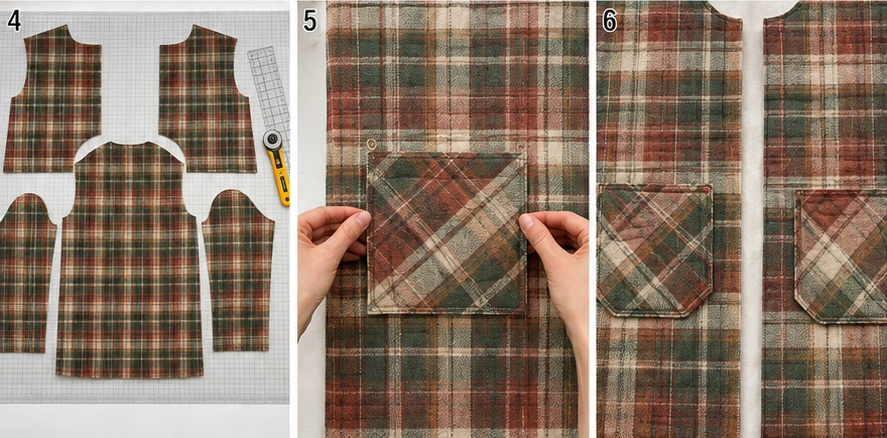
Step 6 – Make and attach the chest pockets. Fold the pocket top edge down twice (about ½ inch each fold) and stitch. Trim a small diagonal off the bottom corners to reduce bulk, then press the sides and bottom under by ½ inch. Position on each front and topstitch ⅛ inch from the edge, reinforcing the top corners with a small bar tack.
Step 7 – Sew the shoulder seams. With right sides together and a ½-inch seam, join fronts to back at the shoulders. Press seams open – quilted flannel is bulky, so press firmly with steam.
Step 8 – Assemble and attach the collar. Interface the collar pieces, sew them right sides together, trim the corners, turn, and press. Attach around the neckline following your pattern, encasing the raw edge. Take your time here; the collar is what gives a shacket its shirt-jacket character.
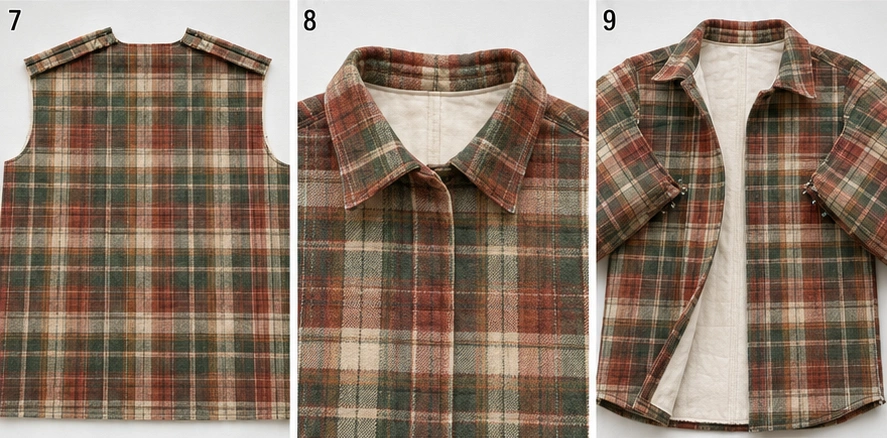
Step 9 – Set the sleeves. Attach each sleeve to its armhole with a ½-inch seam – a dropped-shoulder pattern makes this straightforward. Press the seam toward the sleeve.
Step 10 – Sew the side and underarm seams. Sew from the cuff end down the underarm and continue down the side seam in one continuous line, ½-inch seam. Try the shacket on over a sweater to check the fit and sleeve length before finishing.
Step 11 – Attach the cuffs. Interface each cuff strip, fold and press, then attach to the sleeve end, enclosing the raw edge. Topstitch neatly. The sleeve should now be wearable down or rolled.
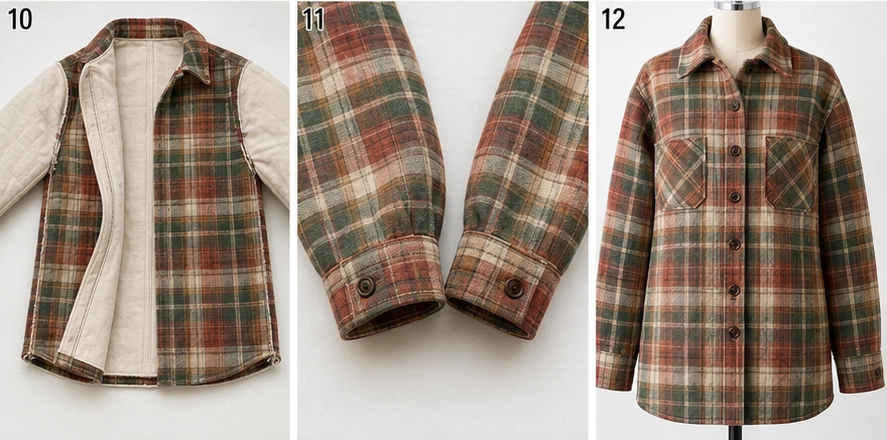
Step 12 – Finish the front bands. Interface each band, press in half lengthwise, sew to the front edge right sides together, then fold to the inside and topstitch down, enclosing the raw edge. Crisp, even bands are what make the whole garment look properly made.
Step 13 – Bind the interior seams and hem. Encase the raw interior seam allowances in binding so the inside is tidy (a shacket’s seams show when it moves), then hem the bottom edge with a narrow turned hem or bind it for a cleaner finish on quilted fabric.
Step 14 – Buttonholes, buttons, and press. Mark 7 buttonholes evenly down the front band, roughly 3½-4 inches apart, and one on each cuff. Remember to place a button at the fullest part of the bust – that’s where a button front gapes. Sew the buttonholes and buttons, press everything well, and wash gently on cold and tumble low if you’d like that soft, worn-in finish.
Assembly at a Glance
- Prewash and dry the flannel twice; press.
- Layer lining, batting/flannel middle, and plaid; baste.
- Quilt along the plaid lines, 2 inches apart.
- Cut all pieces on grain; fronts as mirror images.
- Cut pockets to match the plaid behind them.
- Hem pocket tops, fold, topstitch on, bar-tack the corners.
- Sew shoulder seams (½-inch, pressed open).
- Assemble and attach the interfaced collar.
- Set the sleeves.
- Sew underarm and side seams in one line; check fit over a sweater.
- Attach the interfaced cuffs.
- Attach and topstitch the front bands.
- Bind interior seams; hem the bottom edge.
- Add 7 front buttonholes (one at the bust point) and 2 cuff buttons; press.
Beginner Tips for Success
- Prewash flannel twice – shrinkage after the fact will ruin the fit permanently.
- Use low-loft batting or flannel as the middle; bed-quilt loft is unwearable in a garment.
- Quilt along the plaid lines about 2 inches apart – no marking, and it keeps the shacket soft.
- Cut the fronts as mirror images and match the pocket plaid; crooked checks give away a rushed make.
- Choose a dropped-shoulder pattern – by far the easiest sleeve to set in quilted fabric.
- Size up so it layers comfortably over a sweater.
- Put a button at the bust point to stop the front gaping.
Styling It & Gift Ideas
A plaid quilted shacket is made to be worn open and easy – over a white tee and jeans, a plain knit, or a simple dress with boots. Roll the cuffs to show the lining, leave it unbuttoned as a relaxed layer, or belt it for shape. Because plaid is inherently warm and rustic, it pairs naturally with denim, cream, camel, and corduroy, and slides straight into any autumn wardrobe.
It also makes a genuinely lovely gift, since a shacket suits almost everyone and gets worn constantly:
- A birthday or Christmas gift in the recipient’s favorite autumn plaid – warm, useful, and immediately wearable
- A teen or student gift, since the relaxed fit is forgiving and shackets are firmly in style
- A matching pair in different plaids for a couple or two sisters
- A first handmade garment gift – the boxy shape means the fit is generous and easy to get right for someone else
If you’re making it for someone, a slightly oversized fit is the safest choice – shackets are meant to be roomy.
Final Thoughts
A cozy plaid quilted shacket is the layer autumn was made for – warm enough for a crisp morning, light enough to keep on all day, and casual enough to throw over anything. It carries centuries of cold-weather plaid tradition in its checks and the easy comfort of a favorite flannel shirt in its shape, with just enough quilting to make it genuinely warm. Prewash your flannel, match those checks with a little care, and you’ll have the piece you reach for every single day from September to November.
Other Design Inspirations – Digitally Modified Images. Texture and color may vary from the actual product.
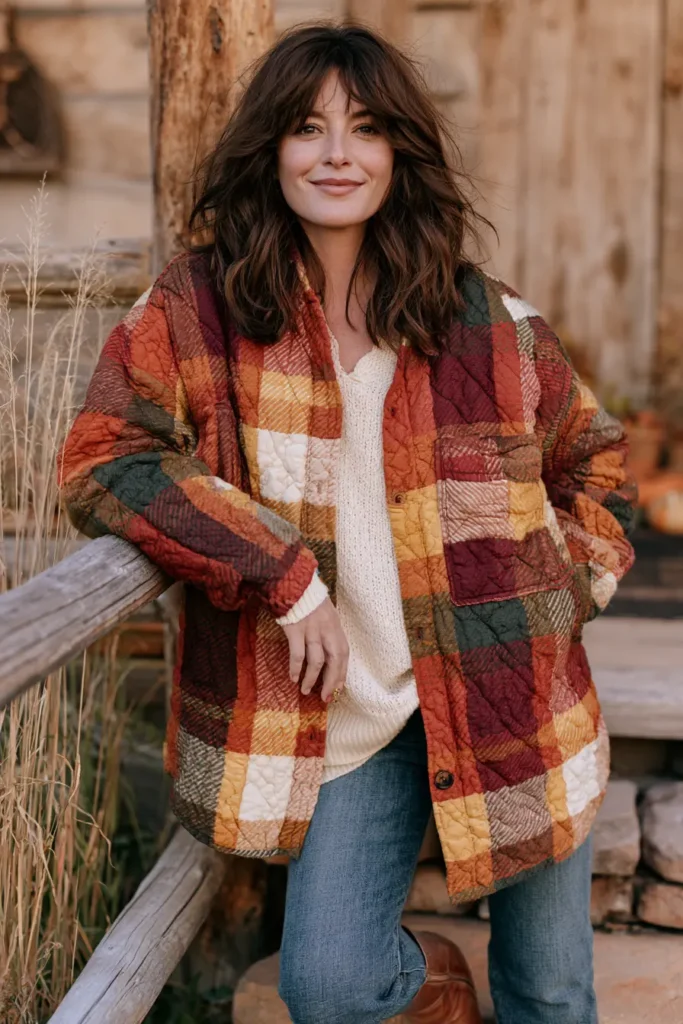
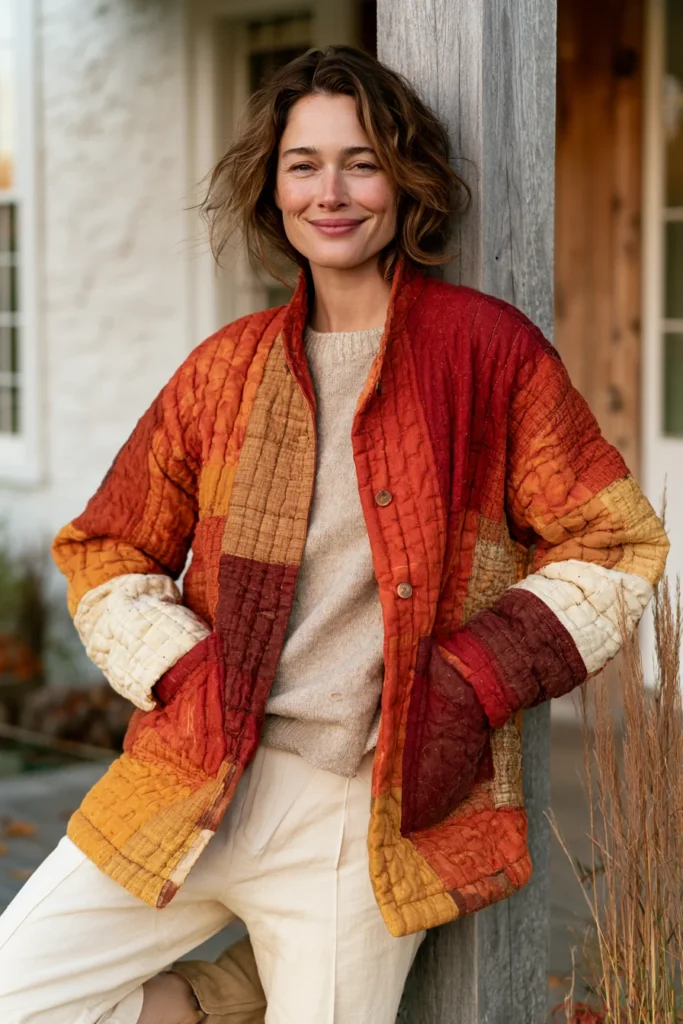
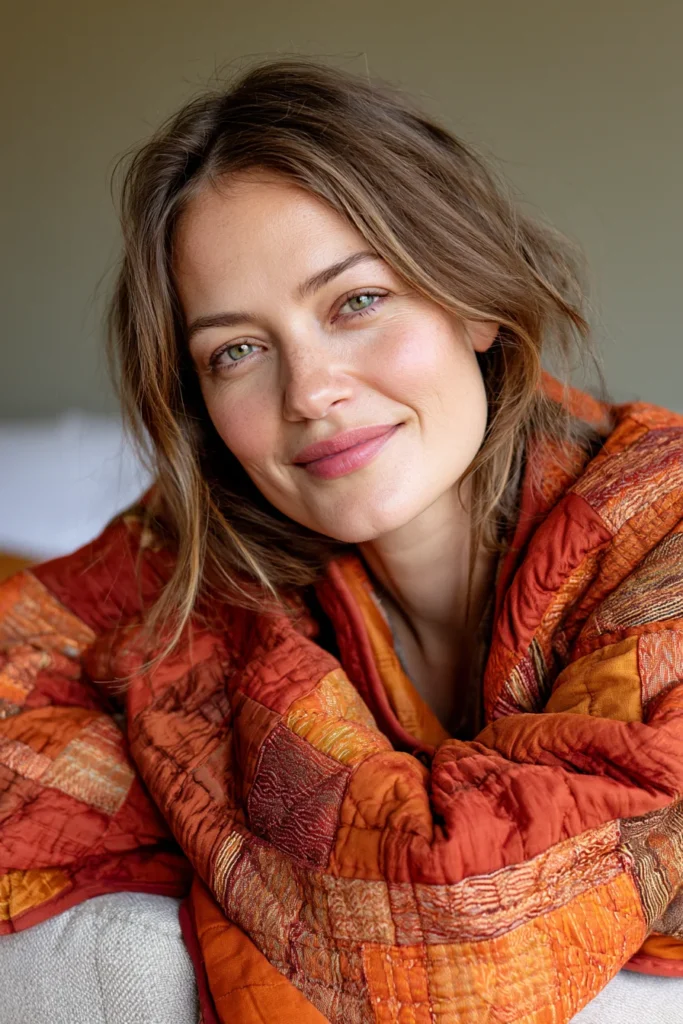
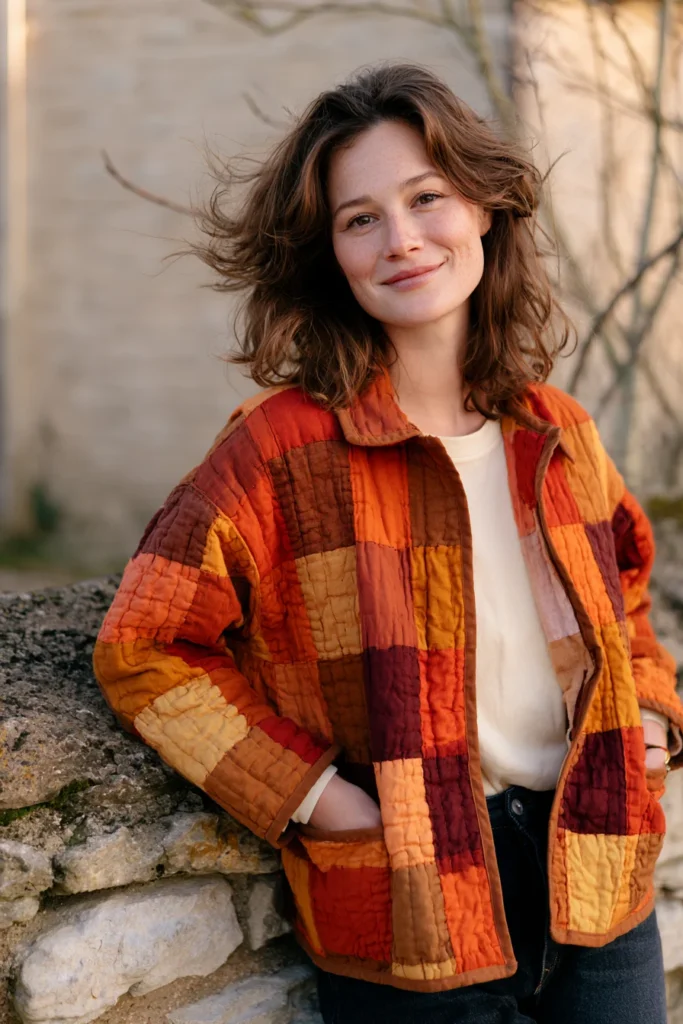
2. Rust and Amber Patchwork Quilted Jacket for Warm Fall Style
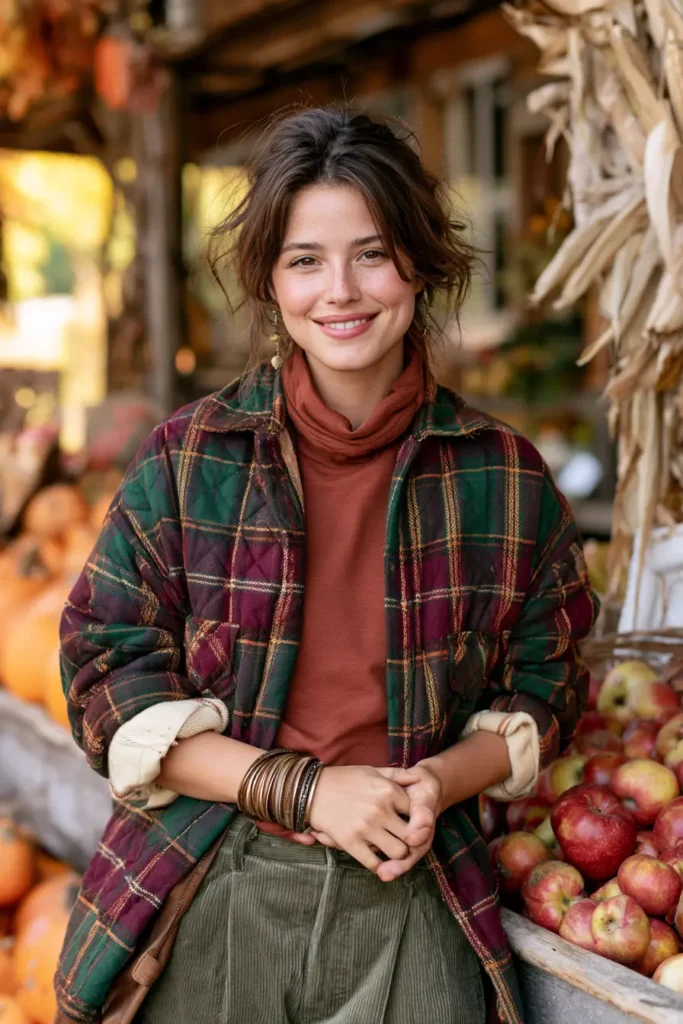
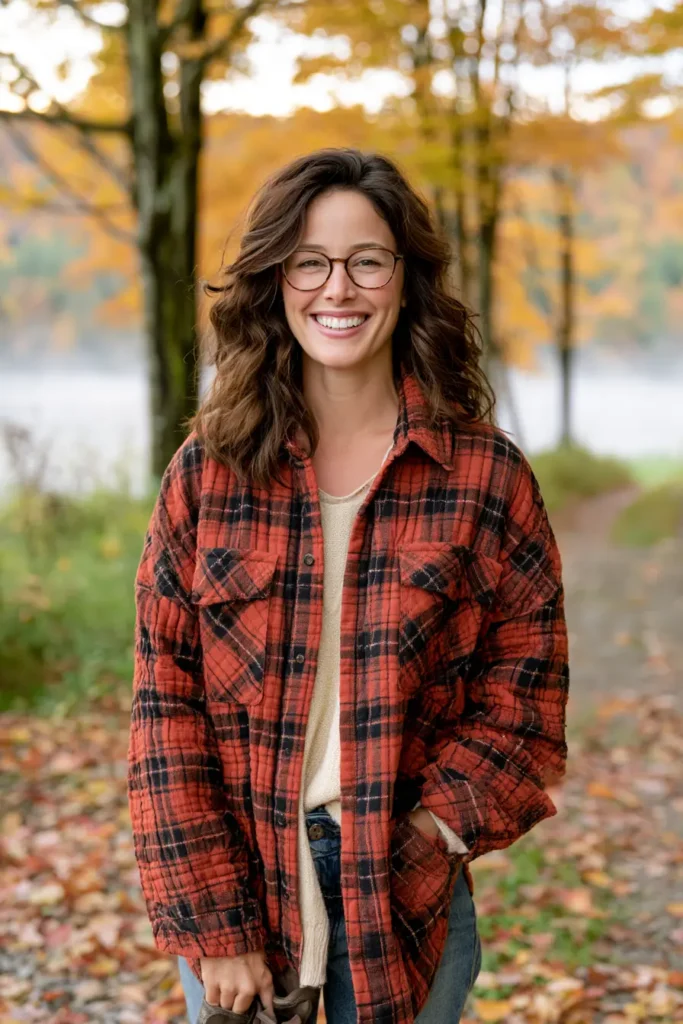
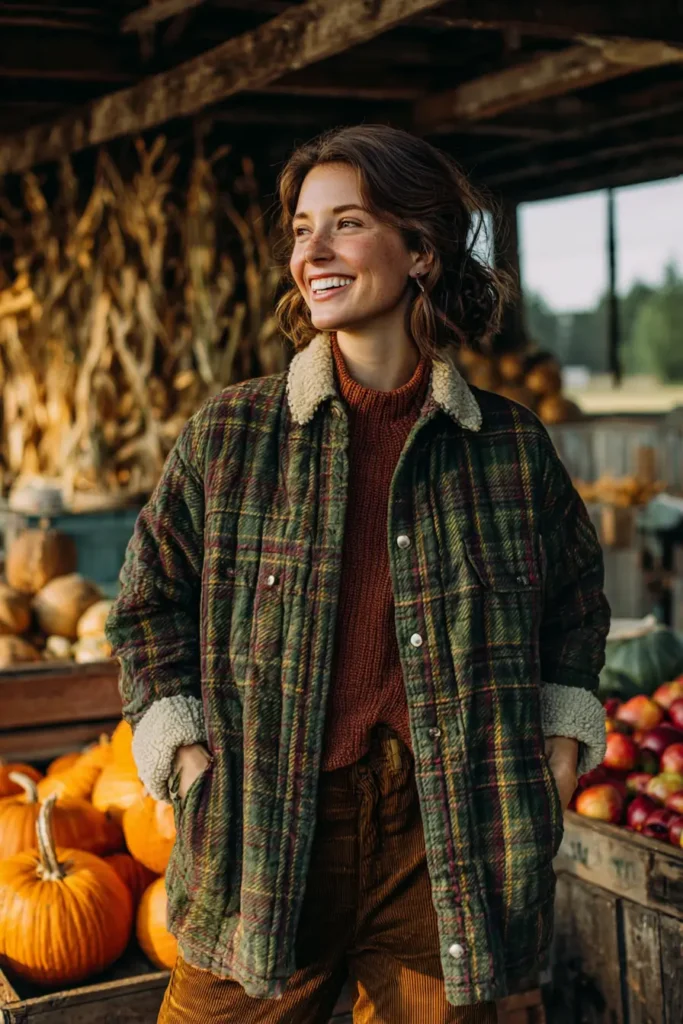
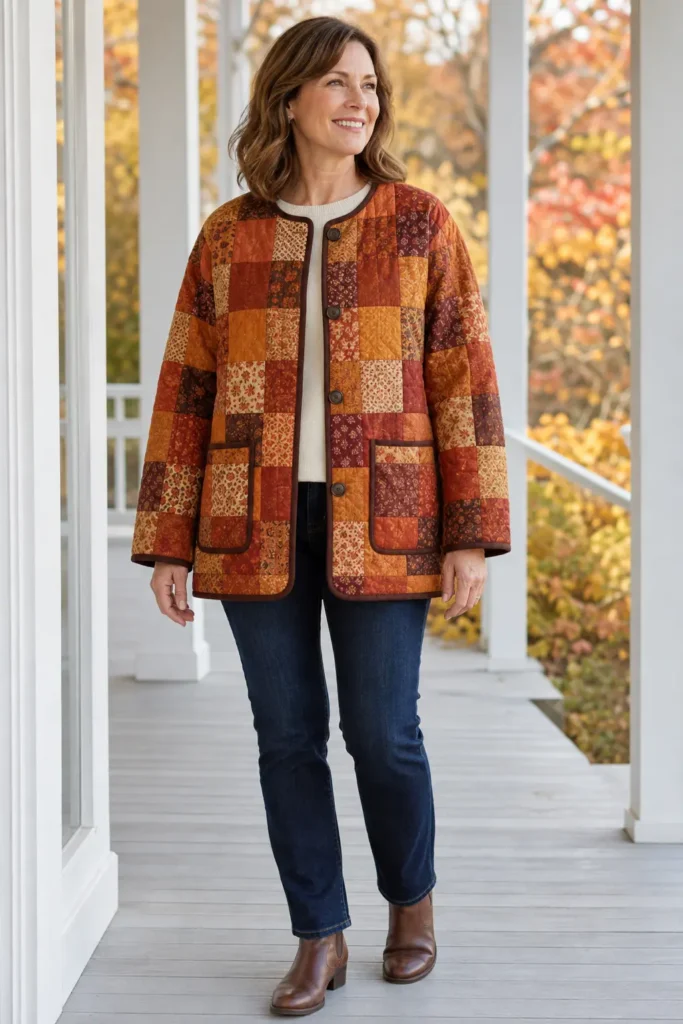
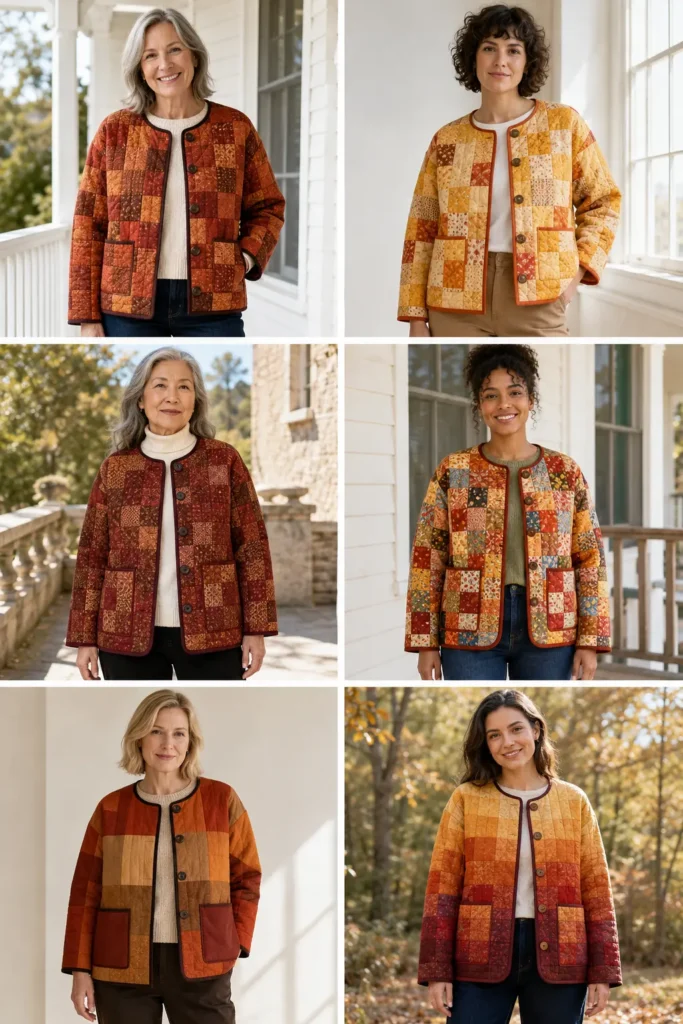
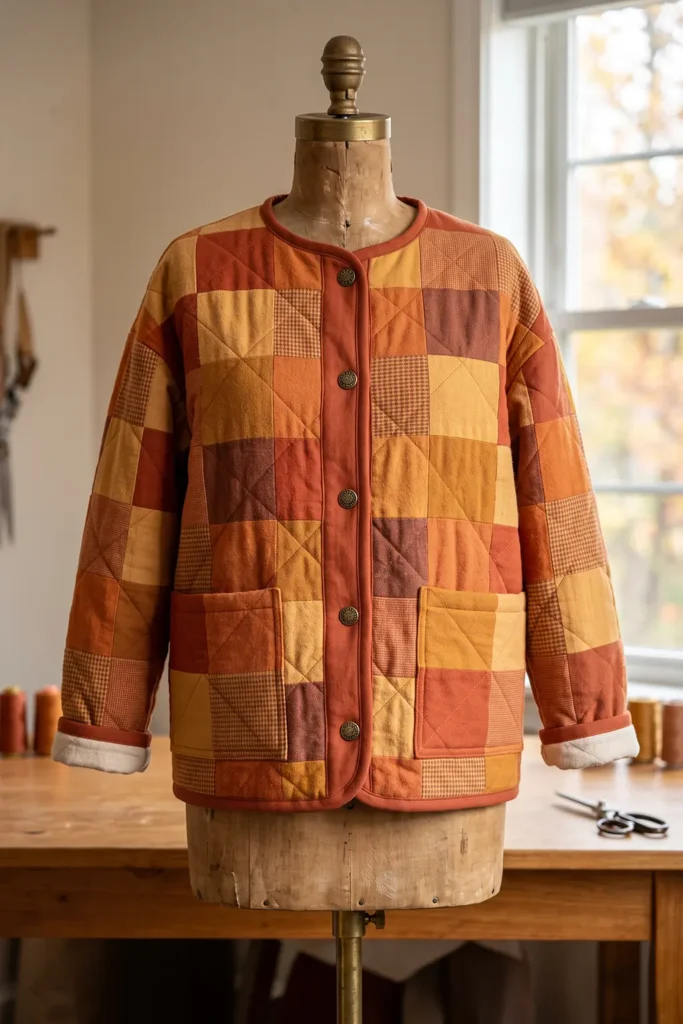
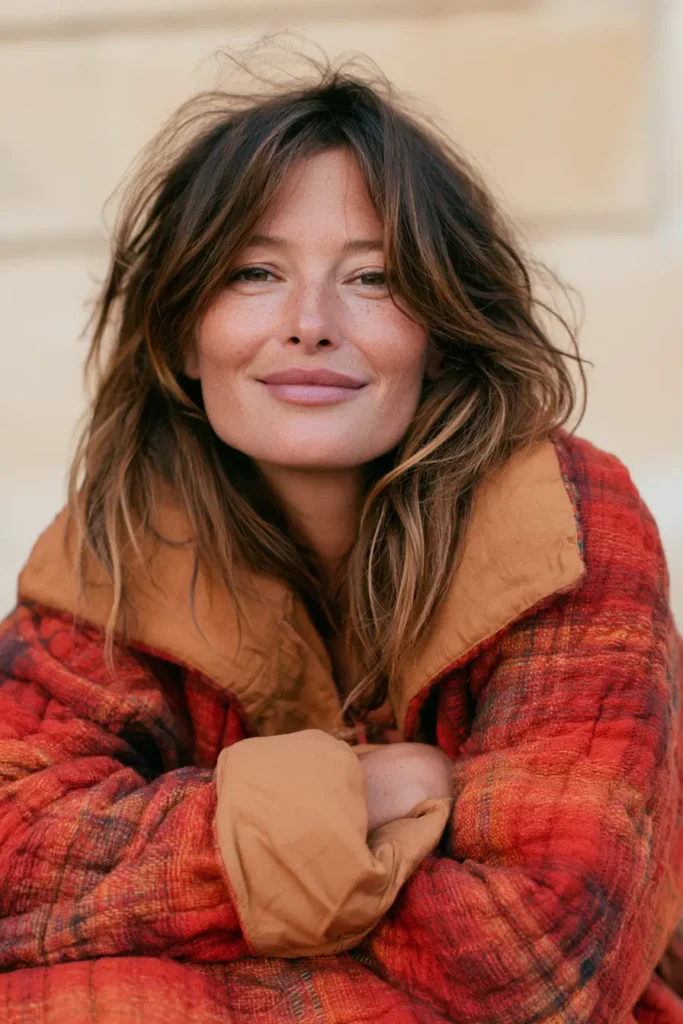
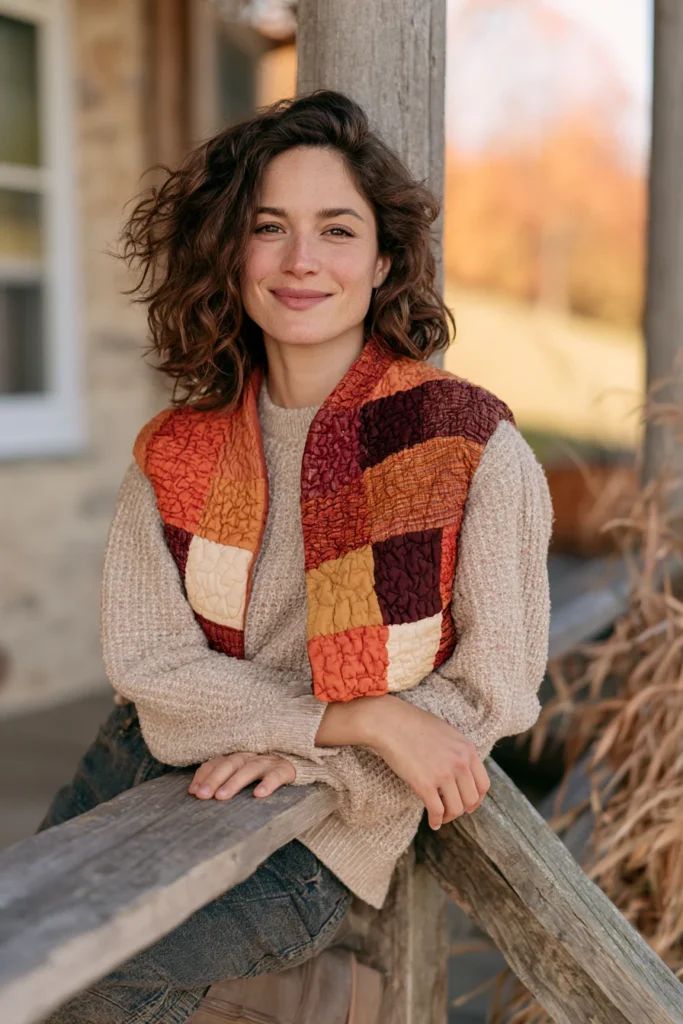
If one garment captures autumn completely, it’s a patchwork quilted jacket in rust and amber. Every square is a different warm tone – burnt orange, golden amber, brick, mustard, cinnamon, deep terracotta – pieced together into a jacket that looks like a whole season gathered onto one coat. Worn over jeans and boots, it’s rich, glowing, and impossible to walk past without someone asking about it. Where a plaid shacket is casual and everyday, this is the statement layer: warm in every sense, full of handmade character, and completely one of a kind because no two patchwork jackets are ever quite the same.
The construction is simpler than it looks. You’re not piecing a jacket – you’re making patchwork fabric first, quilting it, and then cutting your jacket pieces from that yardage as if it were any other cloth. That order is the whole trick, and once you understand it, a patchwork jacket becomes a very achievable project.
The Rise of the Quilt Coat
Patchwork jackets have a real story. For decades, quilters occasionally cut up worn but beloved quilts to make wearable keepsakes, but the idea exploded into a full movement in recent years, when “quilt coats” became one of the most recognizable pieces in handmade fashion. The appeal is easy to understand: a quilt that might sit folded in a cupboard gets a second life as something worn out in the world, and every coat carries the color story of the fabrics that built it.
That instinct – taking layered, pieced cloth and turning it into something to wear – is far older than the trend, though. In the Nakshi Kantha tradition of my own family’s background, layered running-stitched cloth was made into wraps and shawls as often as blankets. Wearable patchwork isn’t a modern novelty; it’s one of the oldest ideas in textile making, and the quilt coat is simply its newest form.
Design Inspirations – Digitally Modified Images. Texture and color may vary from the actual product.
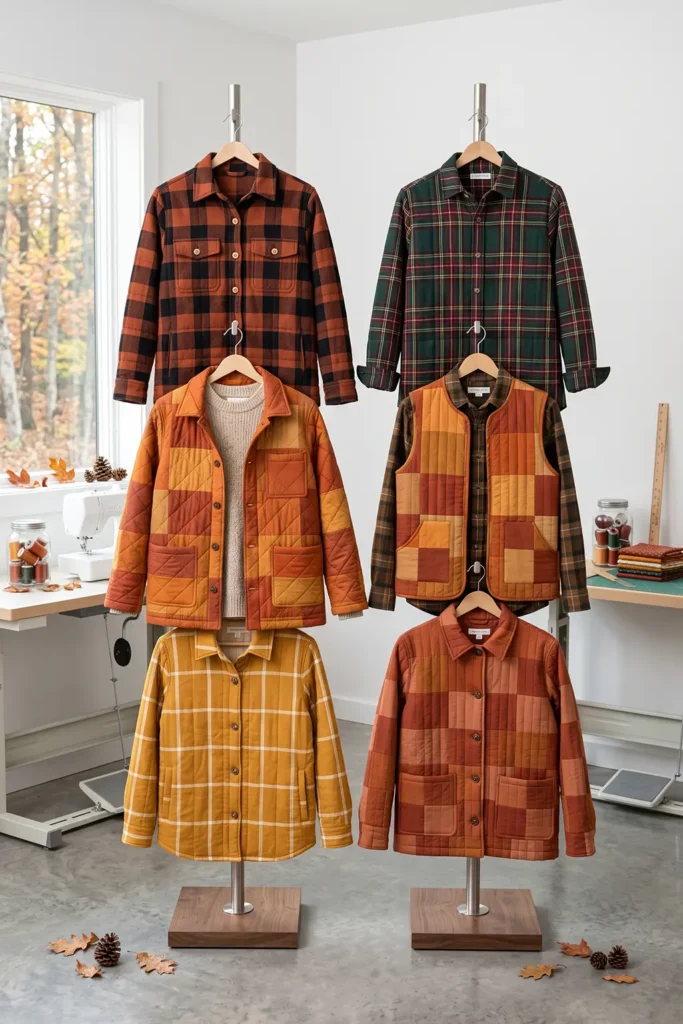
Planning the Warm Palette
A rust-and-amber jacket lives or dies on its color story, so plan it before you cut:
- Stay in one temperature. Every fabric should read warm. A single cool-toned square will stand out awkwardly against all that autumn heat.
- Vary the value. Mix light (butter, honey, pale gold), medium (pumpkin, amber, brick), and dark (deep rust, cinnamon, burgundy) so the patchwork has depth instead of blending into one flat orange.
- Vary the print scale. Combine large prints, small prints, and near-solids. A jacket where everything competes looks busy; a mix reads as designed.
- Let one tone dominate. Choose rust or amber as your lead color, roughly 40% of the squares, with the rest supporting. This is what makes a scrappy jacket look intentional.
Finished Garment
- Style: relaxed, boxy chore-coat shape, hip length, drop shoulders, patch pockets, button front
- Length: about 28-30 inches from shoulder to hem
- Patchwork squares: 5 inches cut, 4½ inches finished
- Patch pockets: about 6 × 6½ inches finished
- Buttons: 5 down the front
- Skill level: confident beginner
- Core techniques: patchwork piecing, making quilted yardage, garment cutting, bound seams
Materials Needed
- Patchwork fabrics: about 3 yards total across 8-12 warm cottons in rust, amber, gold, mustard, brick, cinnamon, and terracotta (fat quarters and scraps are ideal)
- Middle layer: 2¾ yards of low-loft cotton batting, or cotton flannel for less bulk
- Lining: 2¾ yards of soft cotton or flannel
- Binding: ¾ yard for interior seams and outer edges – a solid rust or deep brown frames the patchwork beautifully
- Buttons: 5 (wood, horn, or antique brass suit this palette)
- Thread: neutral cotton for piecing, plus a 90/14 needle for the quilted layers
- Walking foot, rotary cutter, cutting mat, quilting ruler, pins or clips, iron
- A boxy jacket pattern with no darts and dropped shoulders
Beginner tip: piece your panels 2-3 inches larger all around than each pattern piece. Patchwork shifts slightly as you sew, and that margin means you can lay the pattern down and cut cleanly instead of discovering you’re a half inch short.
Cutting Measurements
For the patchwork yardage:
- Squares: cut 5 × 5 inches – you’ll need roughly 150-180 squares for an average adult jacket, depending on size
- Panels to piece: enough for two fronts, one back, two sleeves, each 2-3 inches larger than the pattern piece
- Middle layer and lining: cut to match each panel
For the jacket:
- Patch pockets: two at 7 × 7½ inches (finishing about 6 × 6½ inches)
- Binding: cut 2½-inch strips – about 6-7 yards total for interior seams plus all outer edges
Step-by-Step Guide
Step 1 – Cut your squares. Cut 5-inch squares from all your warm fabrics, aiming for 150-180 total. Sort them loosely into lights, mediums, and darks so you can balance the layout later.
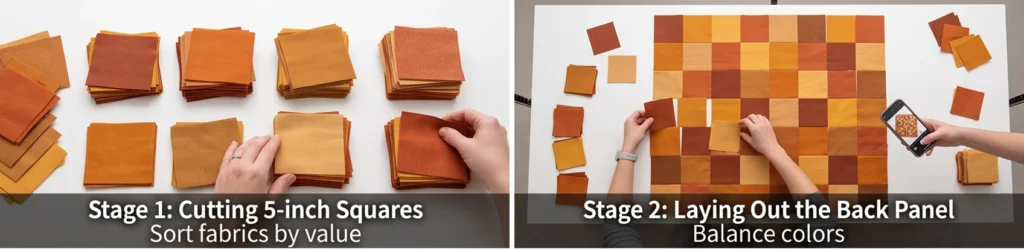
Step 2 – Lay out the first panel. Working on a table or floor, arrange squares in a grid slightly larger than your back pattern piece. Spread the lights and darks evenly, avoid putting two identical fabrics side by side, and check that your lead color appears throughout. Photograph the layout.
Step 3 – Piece the panel in rows. Sew each row of squares together with a ¼-inch seam. Press the seams of odd rows one way and even rows the other, so they nest. Join the rows, matching seams. Press the finished panel well.
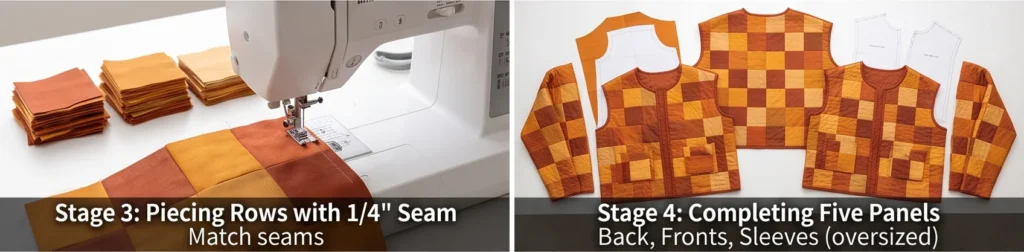
Step 4 – Piece the remaining panels. Repeat for the two fronts and two sleeves, keeping the color balance consistent across all pieces so the finished jacket reads as one garment rather than five separate quilts.
Step 5 – Layer each panel. Spread the lining wrong side up, smooth the batting or flannel over it, then the patchwork right side up. Smooth from the center outward and baste generously with pins or spray.
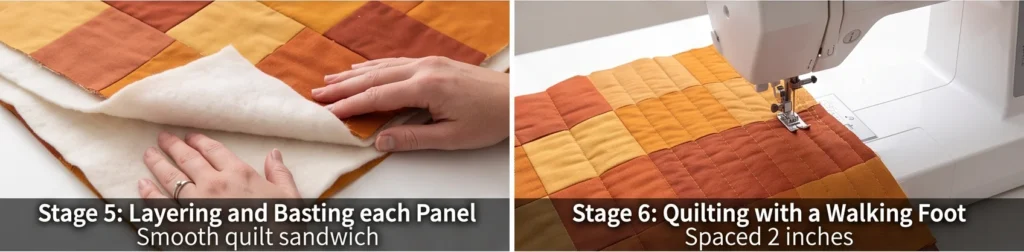
Step 6 – Quilt the panels. Using a walking foot, quilt straight lines or a diagonal grid, spaced about 2 inches apart. Keep the quilting light so the fabric still drapes – a stiff patchwork jacket is uncomfortable to wear. Quilt every panel before cutting anything.
Step 7 – Cut the jacket pieces, watching seam placement. Lay your pattern on each quilted panel and cut the fronts, back, and sleeves. Where you can, position the pattern so that thick patchwork seam intersections don’t land directly on the shoulder seam, the armhole curve, or the buttonhole line – those spots get bulky and difficult to sew through. Shifting the pattern an inch is often all it takes.
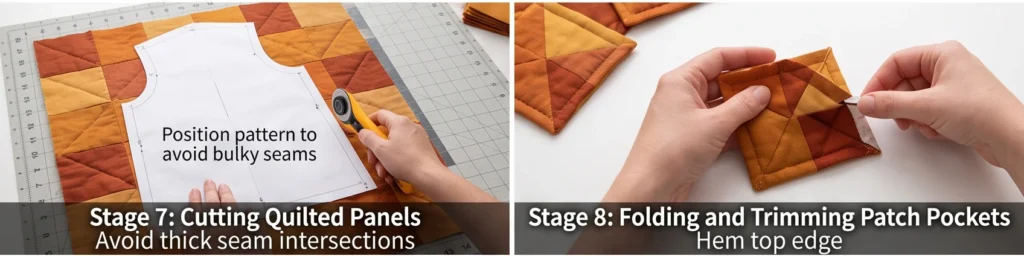
Step 8 – Make the patch pockets. Fold the pocket top edge down twice (about ½ inch each fold) and stitch. Trim a small diagonal off the two bottom corners to reduce bulk, then press the sides and bottom under by ½ inch.
Step 9 – Attach the pockets. Position one on each front, roughly 3 inches below the underarm and 2 inches in from the front edge, and topstitch ⅛ inch from the folded edge. Reinforce the top corners with a small bar tack – pocket corners take the most stress on any jacket.
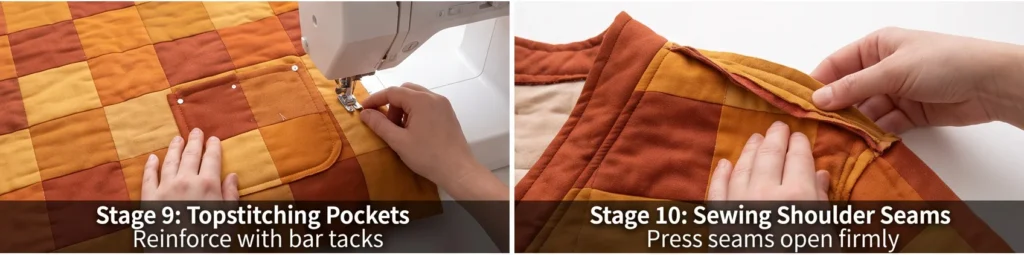
Step 10 – Sew the shoulder seams. With right sides together and a ½-inch seam, join the fronts to the back at the shoulders. Press the seams open and press firmly; quilted patchwork is thick.
Step 11 – Set the sleeves. Attach each sleeve to its armhole with a ½-inch seam. A dropped-shoulder pattern makes this straightforward – the flatter the curve, the easier it is through quilted fabric.
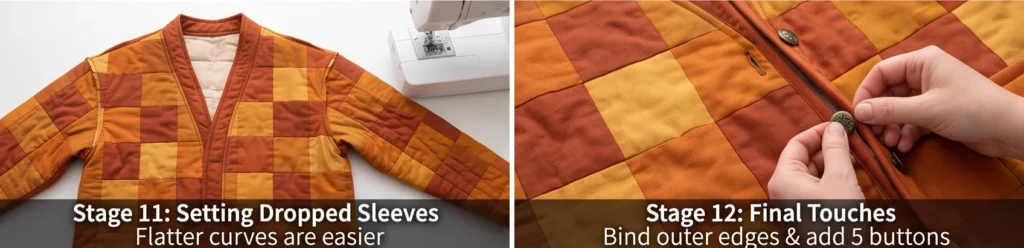
Step 12 – Sew the side and underarm seams. Sew from the cuff end, down the underarm, and continue along the side seam in one continuous line, ½-inch seam. Try the jacket on to check the fit and sleeve length before finishing anything.
Step 13 – Bind the interior seams. Encase every raw interior seam allowance in binding. This is the classic quilt-coat finish: it tames the bulk, stops the patchwork seams from fraying, and makes the inside as tidy as the outside – which matters, because a jacket’s seams show when it moves.
Step 14 – Bind the outer edges and add buttons. Bind the front opening, neckline, hem, and cuffs in one clean line, folding the binding over the raw edges and stitching down. Then mark 5 buttonholes evenly down the front, about 4 inches apart, with one at the fullest part of the bust to prevent gaping. Sew the buttonholes and buttons, give the jacket a press, and wash gently on cold with a color catcher if you’d like it softer.
Assembly at a Glance
- Cut 150-180 squares at 5 inches; sort by value.
- Lay out and photograph each panel, balancing lights and darks.
- Piece panels in rows (¼-inch seams), pressing rows opposite.
- Piece all five panels: two fronts, back, two sleeves – each 2-3 inches oversized.
- Layer each panel: lining, batting/flannel, patchwork; baste.
- Quilt each panel, lines about 2 inches apart.
- Cut jacket pieces, keeping thick seam intersections off shoulders, armholes, and the button line.
- Fold and press the patch pockets; trim corner bulk.
- Topstitch pockets on; bar-tack the top corners.
- Sew shoulder seams (½-inch, pressed open).
- Set the sleeves.
- Sew underarm and side seams in one line; check fit.
- Bind all interior seams.
- Bind the outer edges; add 5 buttonholes (one at the bust point) and buttons; press.
Beginner Tips for Success
- Piece panels 2-3 inches larger than each pattern piece so you can cut cleanly.
- Use low-loft batting or flannel in the middle – bed-quilt loft is unwearable.
- Quilt about 2 inches apart so the jacket drapes instead of standing stiff.
- Position the pattern to keep bulky seam intersections off shoulders, armholes, and buttonholes.
- Bind the interior seams – it’s what makes a quilt coat look professionally made.
- Let one warm tone dominate (about 40%) so the scrappy mix looks intentional.
- Choose a dartless, dropped-shoulder pattern; fitted shapes are difficult to cut from quilted fabric.
Styling It & Gift Ideas
A rust-and-amber patchwork jacket is a statement piece, so keep everything under it simple and let the colors lead – a white or cream tee, a black turtleneck, dark jeans, and boots. It looks wonderful with denim, camel, and cream, and because the palette is so warm, it flatters most skin tones. Roll the cuffs to reveal the lining, and wear it open so the full patchwork shows.
Its one-of-a-kind character makes it a memorable gift:
- A milestone gift – a big birthday or anniversary – where you want something that looks like it took real time, because it did
- A memory jacket pieced from meaningful fabrics: a loved one’s shirts, fabric from a family quilt, or scraps with a story
- A gift for someone who loves color and gets complimented on what they wear
- A housewarming or retirement gift in their favorite warm palette
If you’re sewing it for someone else, choose a boxy, generous fit – patchwork jackets are meant to be roomy, and a relaxed shape is far more forgiving to size for another person.
Final Thoughts
A rust and amber patchwork quilted jacket is autumn made wearable – a whole season’s palette pieced into one glowing, richly textured coat. Make the patchwork fabric first, quilt it lightly, cut it like any other cloth, and bind those seams well, and you’ll end up with a jacket that carries the warmth of the season and the mark of your own hands. It’s the piece people stop you to ask about, and the one you’ll reach for every crisp day until winter.
Other Design Inspirations – Digitally Modified Images. Texture and color may vary from the actual product.
3. Reversible Quilted Jacket in Plaid and Solid for Versatile Fall Style
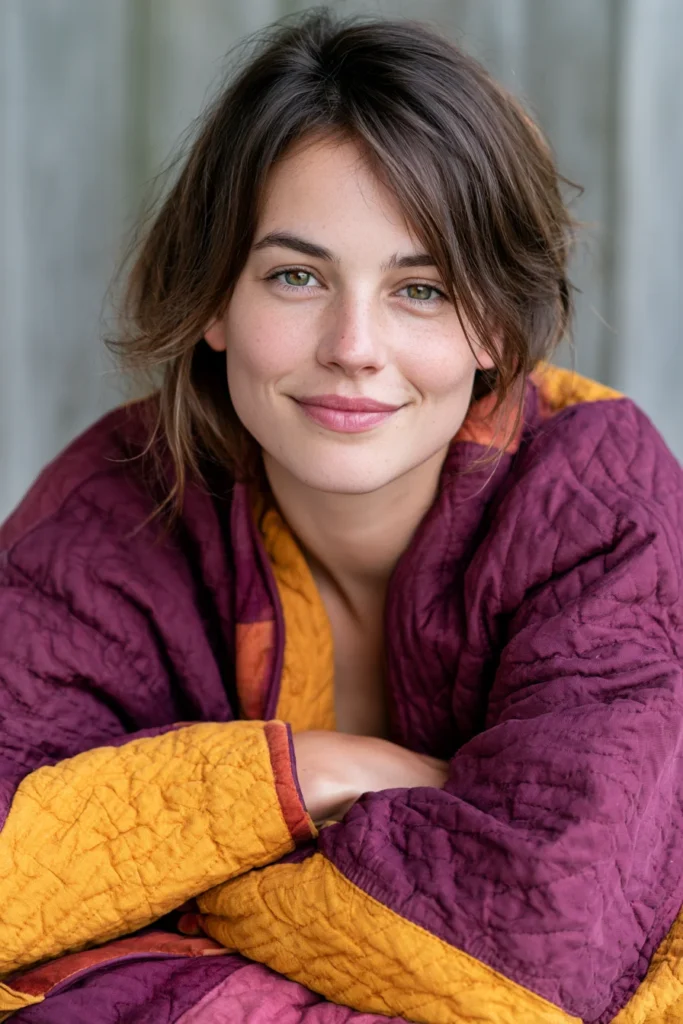
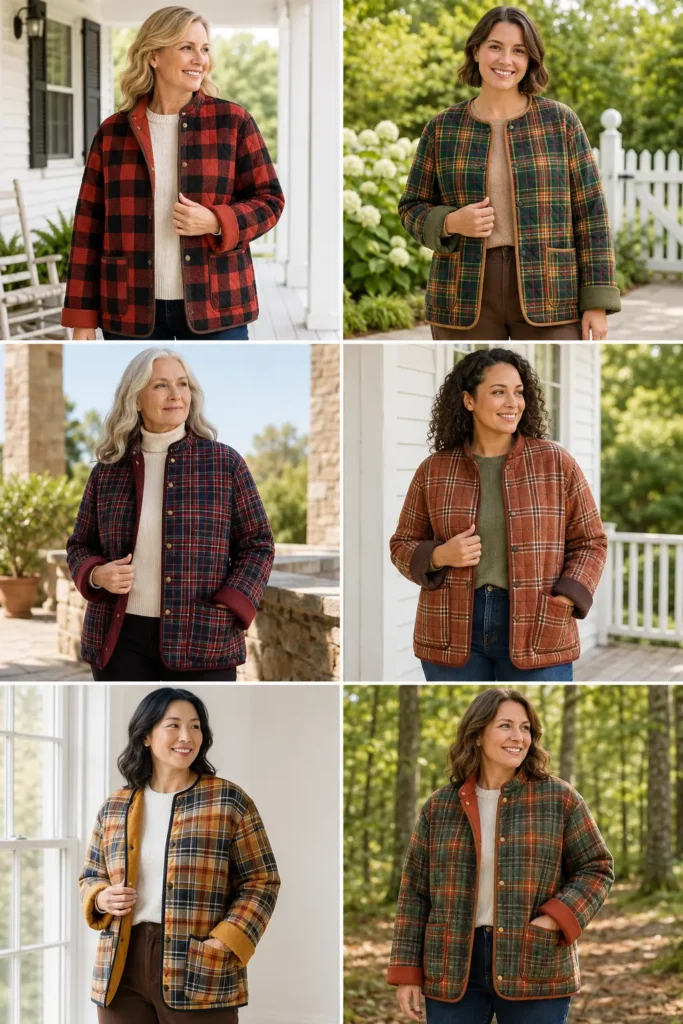
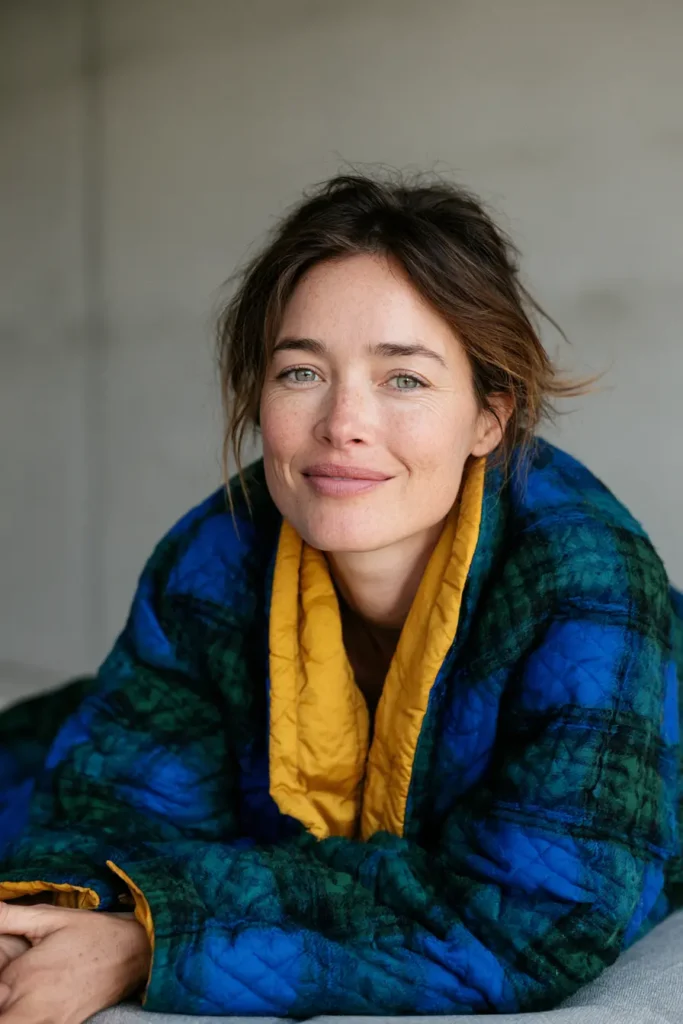
A reversible jacket is the most useful thing you can make for autumn, because it quietly does the work of two coats. One side is a bold plaid – rust and black buffalo check, or a rich gold-and-green tartan – for casual, rustic days. Flip it, and the other side is a clean warm solid in deep rust, olive, or mustard, ready for anything that calls for something simpler. Same jacket, same warmth, two completely different looks depending on the morning. For a season that swings from a muddy walk to a tidier afternoon in town, that flexibility is genuinely practical, and it means one project earns its place in your closet twice over.
What makes a jacket truly reversible is that it has no lining at all. Instead of a pretty outside and a plain inside, you build two finished faces with the batting hidden between them, so there is no wrong side anywhere. That changes how you approach almost every step – seams, pockets, and closures all have to look right from both directions – and once you understand those three problems, the sewing itself is straightforward.
Two Sides, One Jacket: What Changes
Every reversible decision comes down to the same question: will this look right from the other side?
- Every seam must be enclosed. With no lining to hide raw edges, seam allowances have to be bound or fully encased.
- Pockets go on both faces. A pocket on only one side leaves the other side plain – so add patch pockets to each face, positioned to sit in roughly the same place.
- Closures must work both ways. Snaps are the classic answer: they read cleanly from either side, where a buttonhole would show as an awkward slit on the reverse. A tie belt is the other good option.
- The collar has to be finished on both faces. A simple stand collar or a collarless bound neckline is much easier to make reversible than a shirt collar with a stand.
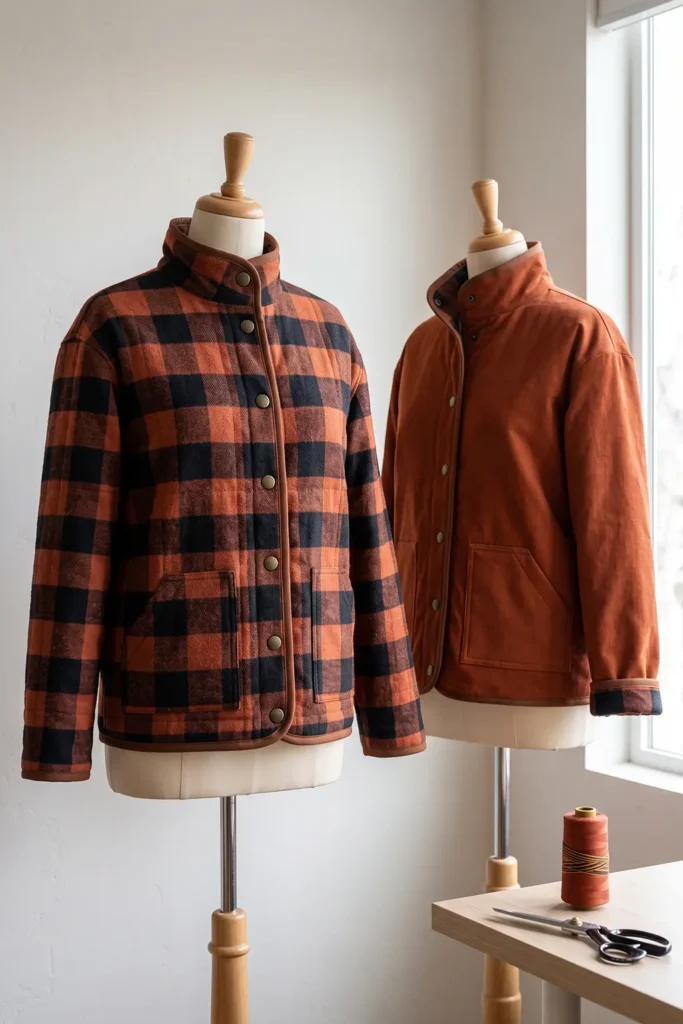
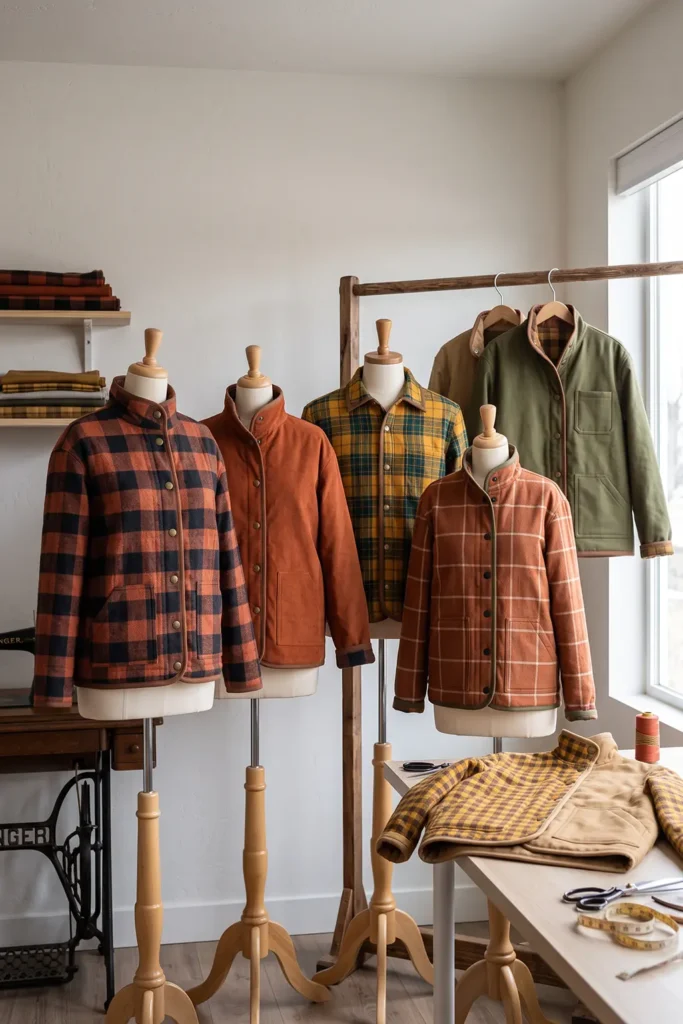
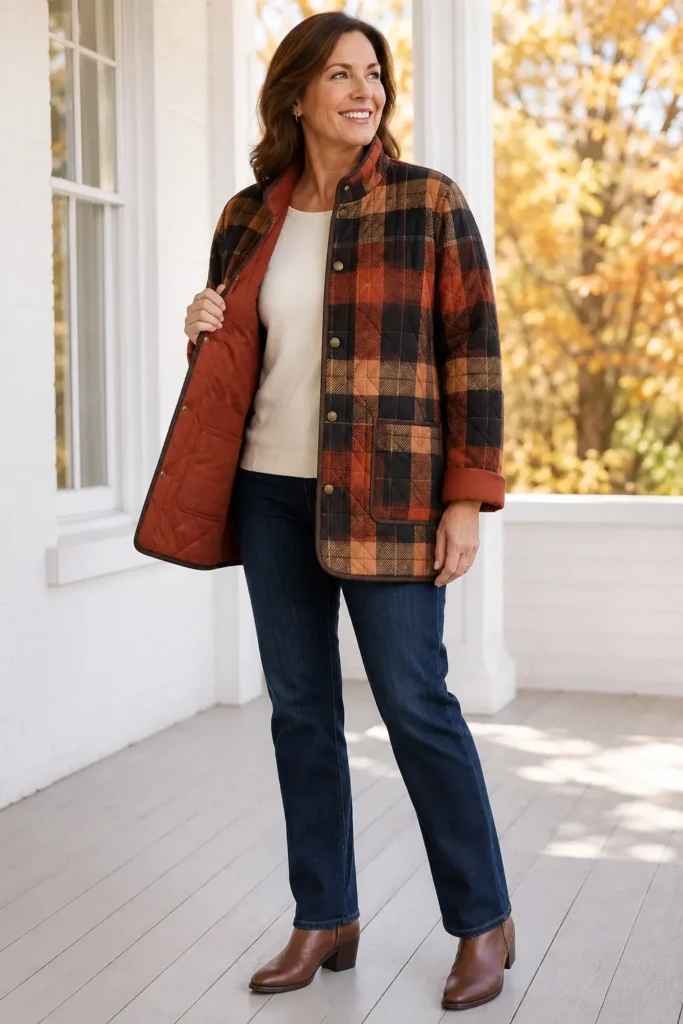
Design Inspirations – Digitally Modified Images. Texture and color may vary from the actual product.
A Note on Reversible Clothing
Reversible garments have a long, practical history rooted in thrift. Making cloth do double duty – wearable inside out, or beautiful on both faces so nothing is wasted – shows up across cultures and centuries, from reversible haori linings in Japan to two-faced woolen cloaks in Europe. It was never really about novelty; it was about getting the most out of expensive cloth.
That idea sits very close to how I think about textiles. In the Nakshi Kantha tradition of my own family’s background, layered cloth was stitched so that both faces were lovely and nothing was hidden or wasted. A reversible jacket is that same old thrift wisdom, turned into a modern piece of outerwear.
Choosing Your Two Sides
The two faces should feel related without matching – that is what makes flipping feel deliberate:
- Face one (plaid): rust and black buffalo check, gold and green tartan, burgundy and navy plaid, or cinnamon windowpane
- Face two (solid): a warm solid that picks up one color from the plaid – deep rust, olive, mustard, chocolate brown, or a corduroy-look cotton for extra texture
- The bridge: choose your solid from inside the plaid’s palette. If the plaid contains rust, make the solid rust. That shared color is what ties the two faces together.
- Binding: pick a neutral that flatters both – warm brown, tan, or black all work
Both fabrics should be a similar weight, or the jacket will hang unevenly depending on which way you wear it.
Finished Garment
- Style: relaxed boxy jacket, dropped shoulders, stand collar or bound neckline, patch pockets on both faces, snap front
- Length: about 28-30 inches from shoulder to hem
- Patch pockets: 6 × 6½ inches finished, two per face (four total)
- Closures: 5 heavy-duty snaps
- Skill level: intermediate – simple shapes, careful finishing
- Core techniques: two-shell reversible construction, enclosed seams, snap setting, binding
Materials Needed
- Plaid fabric: 2¾ yards (prewashed; buy 20% extra if it’s flannel, for shrinkage and plaid matching)
- Solid fabric: 2¾ yards in a coordinating warm tone
- Batting: 2½ yards low-loft cotton – essential, since a reversible jacket has two fabric layers plus batting and can get bulky fast
- Binding: ¾ yard for enclosing seams and finishing all outer edges
- Snaps: heavy-duty snap set, 5 for the front, plus a snap setting tool
- Thread: neutral cotton, plus a 90/14 needle
- Walking foot, rotary cutter, cutting mat, ruler, pins or clips, iron
- A boxy jacket pattern with no darts and dropped shoulders
Beginner tip: keep the batting low loft. You have two full fabric layers here rather than one plus a thin lining, so the jacket is naturally thicker than a standard quilted coat. Thin batting keeps it comfortable to wear.
Cutting Measurements
Cut one full set from each fabric – you’re essentially making two jackets that become one:
- From the plaid: two fronts, one back, two sleeves, collar (cut on the straight grain, following the plaid lines)
- From the solid: two fronts, one back, two sleeves, collar – identical pieces
- From the batting: two fronts, one back, two sleeves
- Patch pockets: four at 7 × 7½ inches (two per face)
- Binding: 2½-inch strips, about 6-7 yards total
Step-by-Step Guide
Step 1 – Prewash and press both fabrics. Wash and dry the plaid and the solid, twice if either is flannel, and press well. Confirm the plaid’s check runs square to the grain before cutting.
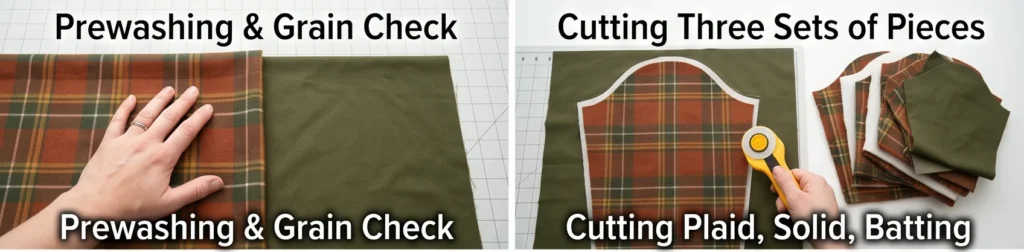
Step 2 – Cut all three sets of pieces. Cut a full set from the plaid, a matching set from the solid, and a set from the batting. Cut the plaid fronts as mirror images so the check matches across the opening.
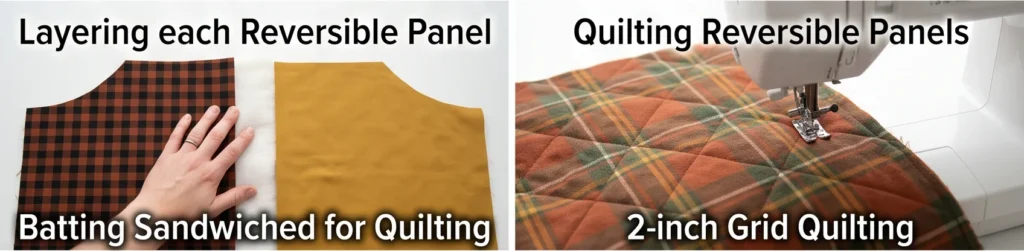
Step 3 – Layer and quilt each panel. For each garment piece, layer plaid (right side down), batting, then solid (right side up), so the batting is sandwiched between the two good faces. Baste, then quilt straight lines or a diagonal grid about 2 inches apart with a walking foot. You now have five reversible quilted panels.
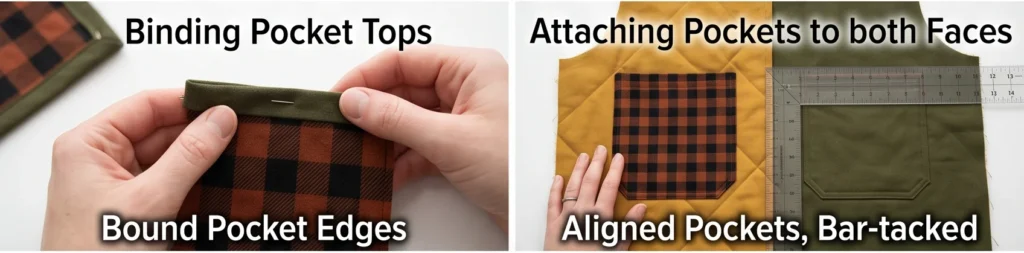
Step 4 – Make the four patch pockets. Fold and press each pocket’s edges under by ½ inch, then bind the top edge of each. Trim a small diagonal off the bottom corners first to reduce bulk.
Step 5 – Attach the pockets to both faces. Topstitch two pockets onto the plaid side of the fronts and two onto the solid side, positioning them about 3 inches below the underarm and 2 inches in from the front edge. Bar-tack the top corners. Because your stitching goes through everything, the pocket outline will show faintly on the reverse, so line the two faces’ pockets up in the same position, and the stitching reads as intentional.
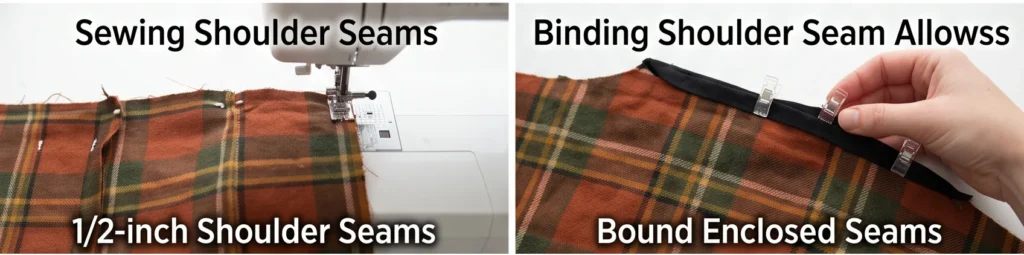
Step 6 – Sew the shoulder seams. With the plaid faces together and a ½-inch seam, join fronts to back at the shoulders. Press the seams open.
Step 7 – Bind the shoulder seam allowances. Encase each raw shoulder seam allowance in binding so it looks finished from the reverse. This is the step that separates a real reversible jacket from a jacket with a nice lining.
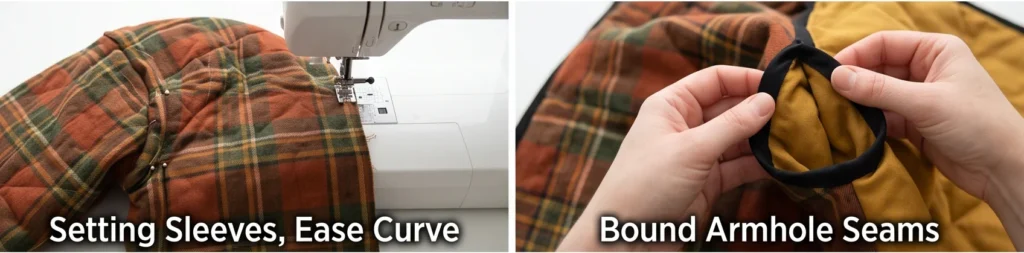
Step 8 – Set the sleeves. Attach each sleeve with a ½-inch seam, easing gently around the armhole. A dropped shoulder keeps this manageable through the thick layers.
Step 9 – Bind the armhole seam allowances. Bind each armhole seam the same way you did the shoulders. Take your time – these curves take a little easing, but they’re highly visible when you flip the jacket.
Step 10 – Sew and bind the side and underarm seams. Sew from the cuff, down the underarm, and along the side seam in one continuous line (½-inch seam), then bind the allowance. Try the jacket on at this point to check the fit and sleeve length.
Step 11 – Make the collar reversible. Assemble the stand collar from one plaid and one solid piece with the batting between, quilt it lightly, and attach it around the neckline so the raw neckline edge is fully encased inside the collar. (For a simpler route, skip the collar and bind the neckline for a clean collarless finish.)
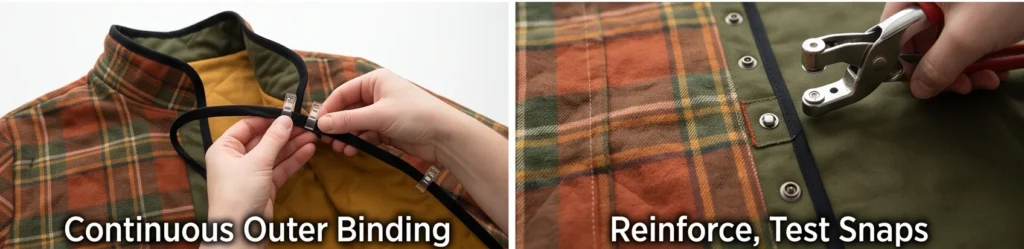
Step 12 – Bind the outer edges. Bind the front opening, hem, and cuffs in one continuous, even line. This binding is the jacket’s entire outer finish – done neatly, it frames both faces and makes the whole piece look tailored from either direction.
Step 13 – Set the snaps. Mark 5 snap positions evenly down the front, about 4 inches apart, with one at the fullest part of the bust to prevent gaping. Reinforce behind each with a small scrap of fabric, then set the snaps with your tool. Snaps are the right choice here because they look clean from both faces.
Step 14 – Press and test both ways. Give the finished jacket a good press, then wear it both ways in front of a mirror. Check that the binding lies flat, the pockets sit level, and the collar folds neatly whichever face is out. A gentle cold wash and low tumble will soften it into a comfortable, broken-in coat.
Assembly at a Glance
- Prewash and press both fabrics; check the plaid runs square.
- Cut a full set from plaid, from solid, and from batting; fronts as mirror images.
- Layer plaid, batting, solid for each panel; quilt about 2 inches apart.
- Fold, trim corners, and bind the tops of four patch pockets.
- Topstitch two pockets on each face, aligned; bar-tack the corners.
- Sew shoulder seams (½-inch, pressed open).
- Bind the shoulder seam allowances.
- Set the sleeves.
- Bind the armhole seam allowances.
- Sew and bind the underarm and side seams; check fit.
- Build and attach the reversible stand collar (or bind the neckline collarless).
- Bind the front opening, hem, and cuffs.
- Set 5 reinforced snaps (one at the bust point).
- Press, then check both faces hang and fold correctly.
Beginner Tips for Success
- Use low-loft batting – two full fabric layers make this jacket thicker than a standard quilted coat.
- Choose fabrics of similar weight so it hangs evenly whichever way you wear it.
- Bind every seam allowance; with no lining, no raw edge can hide.
- Use snaps, not buttonholes – a buttonhole looks wrong from the reverse.
- Put pockets on both faces, aligned, so the topstitching reads as intentional.
- Pull the solid color from inside the plaid’s palette so flipping feels deliberate.
- Reinforce behind each snap with a fabric scrap; snaps pull hard on quilted fabric.
Styling It & Gift Ideas
Wear the plaid side out for casual, rustic days – over a tee with jeans and boots – and flip to the solid for a cleaner, more put-together look with knits, trousers, or a dress. Roll the cuffs to reveal a hint of the opposite face, which is a lovely detail that quietly shows the jacket’s secret. Keeping one accent nearby in each side’s palette (a scarf, a bag) means a single flip genuinely restyles the whole outfit.
Its two-in-one practicality makes it an especially thoughtful gift:
- A travel gift – a reversible jacket is a packing dream, giving two looks from one item in a suitcase
- A student or commuter gift for someone who needs one layer to cover a lot of ground
- A milestone or holiday gift where the “two jackets in one” reveal is genuinely delightful to explain
- A college send-off gift in school colors on the solid side
If you’re making it for someone else, choose a boxy fit and pick the solid side in a color you know they wear constantly – that’s the face they’ll reach for most.
Final Thoughts
A reversible quilted jacket in plaid and solid is the most versatile layer you can sew for fall – two looks, two moods, one warm coat that adapts to whatever the day turns into. Built with the batting hidden between two finished faces, every seam bound and every closure chosen to read cleanly from both directions, it hides nothing and wastes nothing. Take your time with the binding, set those snaps well, and you’ll have a jacket that quietly does the work of two all season long.
Other Design Inspirations – Digitally Modified Images. Texture and color may vary from the actual product.
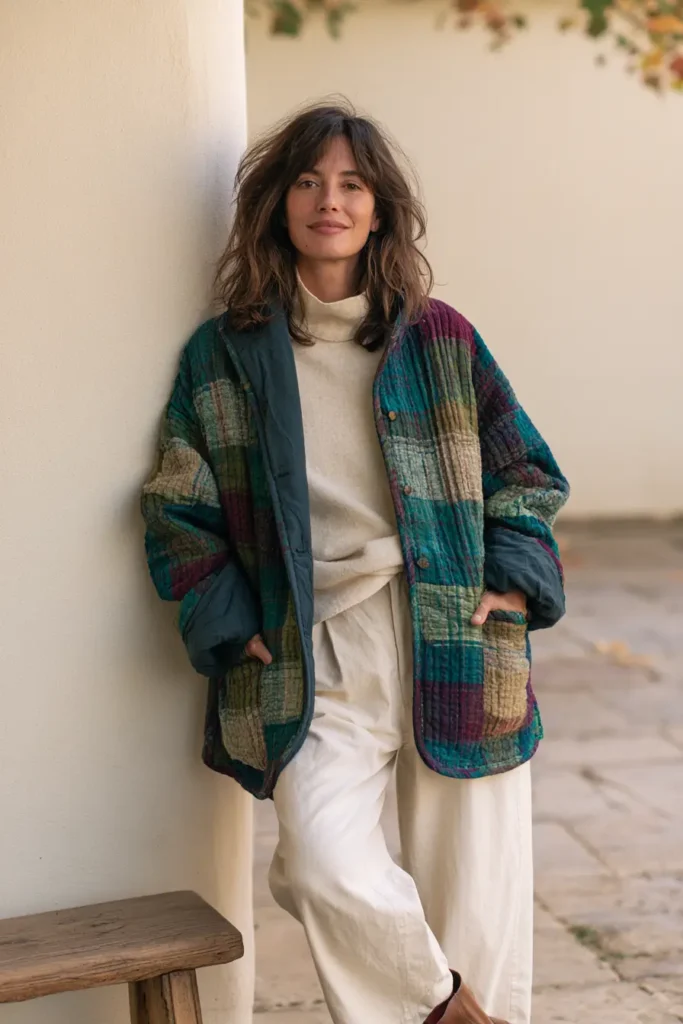
4. Cropped Quilted Vest for Chic Sweater-Weather Layering
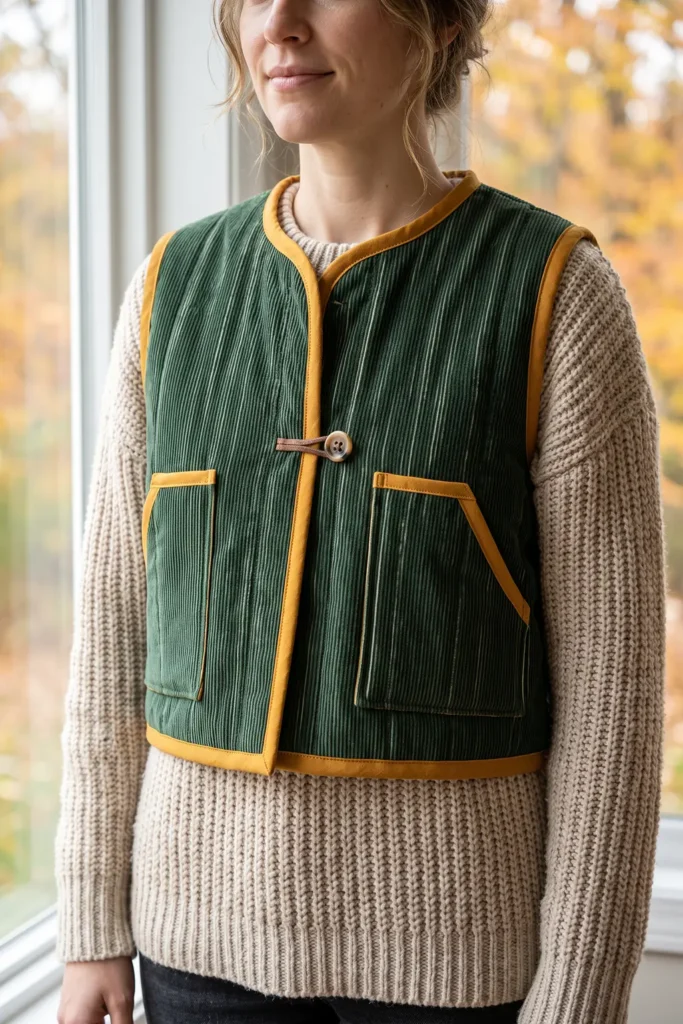
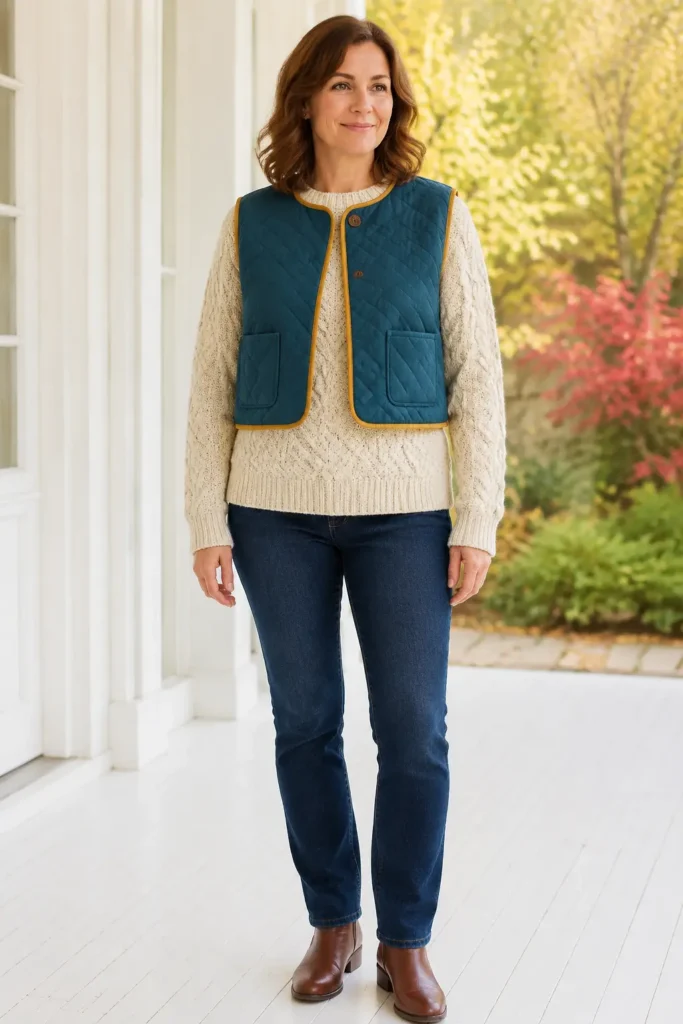
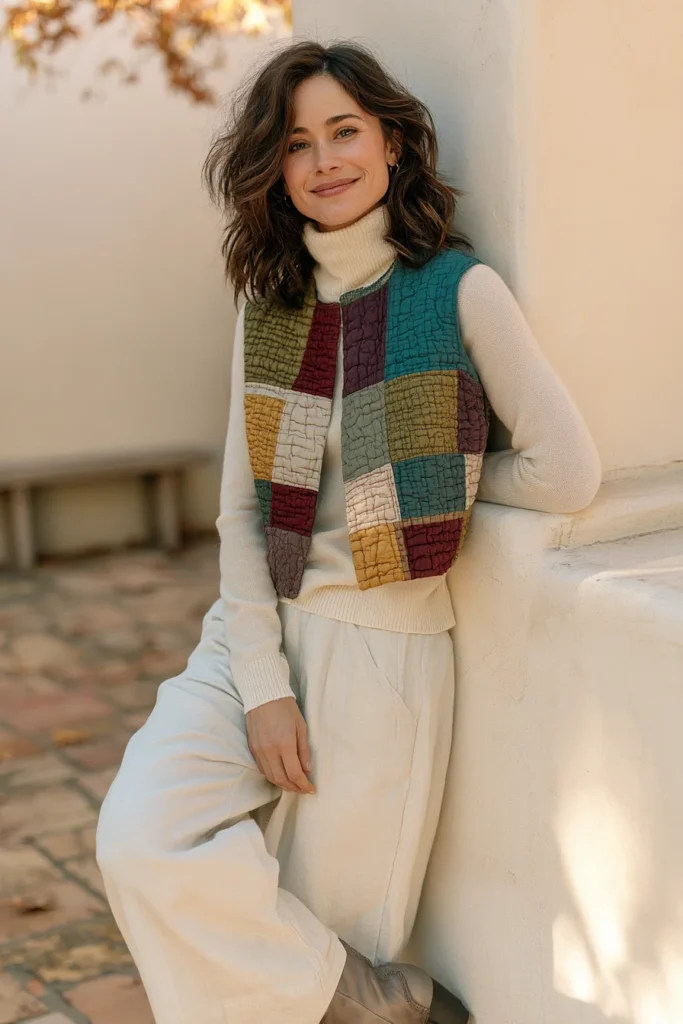
The cropped quilted vest is autumn’s cleverest styling trick. Worn over a chunky knit, it adds a hit of warmth and color right through the core while leaving your sweater sleeves free to do what they do best – and because it stops at the waist, it keeps the whole look sharp instead of swallowing you in bulk. In vibrant fall colors like pumpkin, mustard, teal, or deep berry, it turns a plain sweater-and-jeans outfit into something that looks genuinely put together. It’s also the fastest wearable project in this collection: no sleeves to set, no fitting to fuss over, just a clean shape and beautifully bound armholes.
Here’s the thing most patterns skip, though: a cropped vest that’s made to go over a sweater has to be cut differently from one worn over a t-shirt. Get that right and it layers like a dream. Get it wrong and the armholes bind, the shoulders pull, and it never quite sits properly. That fit adjustment is the real craft in this project, and it’s simple once you know it.
Cutting a Vest That Actually Fits Over a Sweater
Three adjustments make all the difference:
- Deepen and widen the armhole. A bulky sweater sleeve needs room. Cut the armhole about 1 to 1½ inches deeper and slightly wider than your usual vest pattern, so the sweater’s sleeve cap has somewhere to go.
- Add ease through the body. Go up one size, or add 1 inch to each side seam. A vest sized for a bare torso will strain over knitwear.
- Mind the shoulder width. A slightly wider shoulder sits better over a sweater’s shoulder seam. Even ½ inch helps.
The easiest way to check: put on the bulkiest sweater you plan to layer under it, and measure yourself over the sweater. Use those numbers, not your bare measurements.
Design Inspirations – Digitally Modified Images. Texture and color may vary from the actual product.
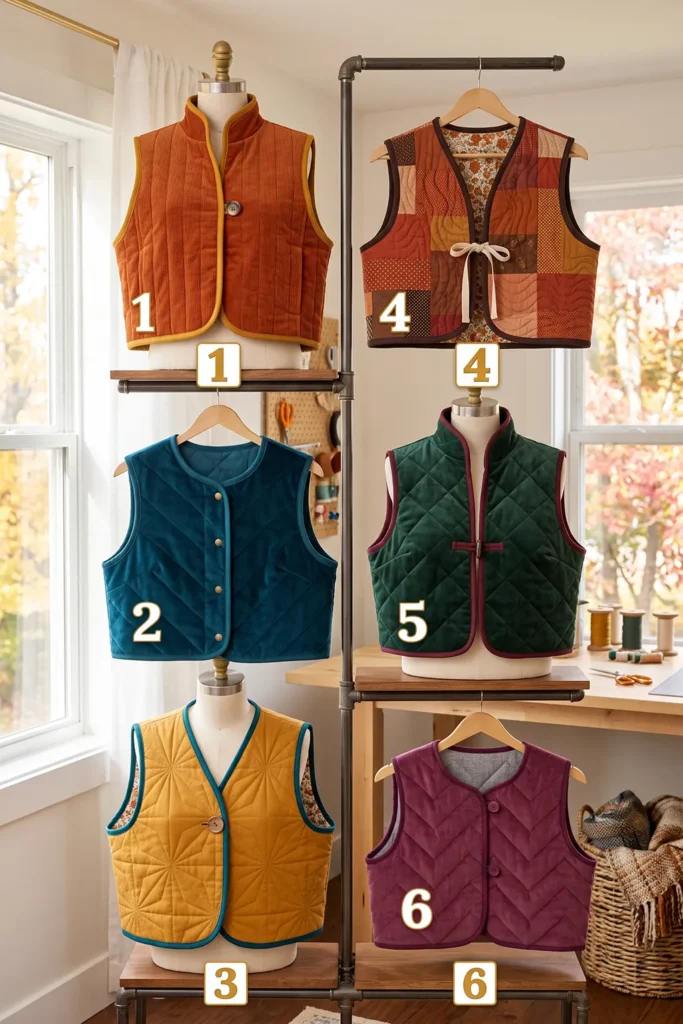
Getting the Crop Right
Proportion is what makes a cropped vest chic rather than accidental:
- Aim for the natural waist, or an inch or two above – roughly 22-24 inches from shoulder to hem on an average frame
- The sweater should extend below the vest by several inches. That contrast is the whole look; if they end at the same place, the outfit reads as one heavy block
- With high-waisted jeans, a slightly shorter crop looks especially good, since the vest hem and the waistband work together
Always try it on over your sweater before finishing the hem – it’s the one measurement worth checking on your own body.
A Little History: The Quilted Waistcoat
Sleeveless quilted layers have been keeping people warm for centuries. Long before central heating, padded and quilted waistcoats were worn across Europe and Asia as a warm under-layer, valued for exactly the reason we love them now: they warm the body’s core while leaving the arms completely free to work. Quilted sleeveless garments turn up everywhere from medieval padded doublets to traditional Asian cotton vests, and the logic never changed – core warmth, free movement, minimal bulk.
That practical wisdom runs through many textile traditions. In the Nakshi Kantha tradition of my own family’s background, layered hand-stitched cloth was made into wearable pieces prized for being warm, light, and easy to move in. A cropped quilted vest is that same old, sensible idea, cut for a modern wardrobe.
Finished Garment
- Style: cropped, boxy vest – open front or single closure, stand collar or bound neckline, bound armholes
- Length: about 22-24 inches from shoulder to hem (hits at or just above the natural waist)
- Armholes: cut 1-1½ inches deeper than standard, for sweater layering
- Patch pockets (optional): 5 × 5 inches finished, placed high
- Skill level: beginner – the fastest wearable here
- Core techniques: quilting yardage, layering-fit adjustments, bias-bound armholes, edge finishing
Materials Needed
- Outer fabric: 1½ yards of a vibrant cotton, corduroy, or patchwork you’ve pieced (a vest uses far less than a jacket)
- Middle layer: 1¼ yards of low-loft cotton batting, or cotton flannel
- Lining: 1½ yards of soft cotton or flannel
- Binding: ½ yard, cut on the bias – this is the vest’s main visible finish, so choose a color you love
- Closure (optional): one or two buttons, a single snap, or a tie
- Thread: neutral cotton, plus a 90/14 needle
- Walking foot, rotary cutter, cutting mat, ruler, pins or clips, iron
- A simple cropped vest pattern, or a boxy jacket pattern shortened with the sleeves omitted
Beginner tip: cut your armhole binding on the bias. Bias-cut strips stretch and ease smoothly around a curve, where straight-cut binding will pucker and fight you. On a sleeveless garment the armholes are the most visible finish you have, so this one detail matters more than anything else in the project.
Choosing Your Colors
A cropped vest is small, which makes it the perfect place for a bold color that would overwhelm a full coat:
- Pumpkin or burnt orange – classic autumn warmth
- Mustard gold – cheerful and unexpected
- Deep teal or forest green – rich and grounding against warm knitwear
- Berry or plum – sophisticated for later in the season
- Rust patchwork – a scrappy mix if you’re using leftover squares
- Corduroy in any of the above, for extra fall texture
Because it’s worn against a sweater, think about the pairing: a bold vest over a neutral cream or oatmeal knit is the easiest, most striking combination. And consider a contrasting binding – a mustard edge on a teal vest, for instance – since that binding frames the entire garment.
Cutting Measurements
- Front and back panels: cut to your pattern at 22-24 inches long, with 1 inch added to each side seam and armholes cut 1-1½ inches deeper
- Patch pockets (optional): two at 6 × 6 inches (finishing 5 × 5 inches)
- Binding: 2 to 2½-inch bias strips – about 3-4 yards total for both armholes plus the full outer edge
- Middle layer and lining: cut to match the panels
Step-by-Step Guide
Step 1 – Measure over your sweater. Put on the bulkiest sweater you plan to wear underneath and take your bust and shoulder measurements over it. Use these numbers to choose your size – this is the step that makes the whole vest work.
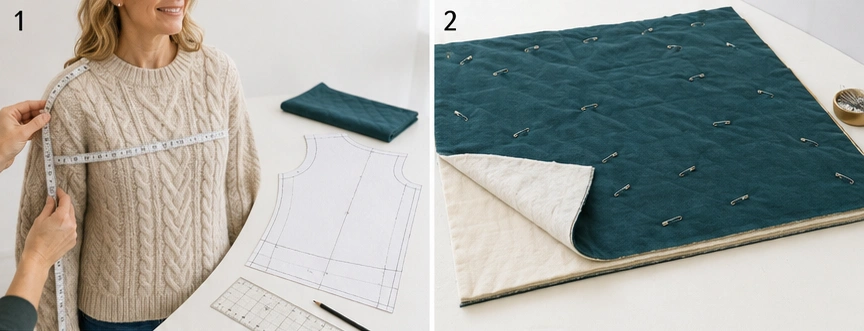
Step 2 – Adjust the pattern. Add 1 inch to each side seam, deepen the armhole by 1-1½ inches, widen the shoulder slightly, and shorten the length to 22-24 inches. Mark your changes clearly before cutting.
Step 3 – Layer the fabric. Spread the lining wrong side up, smooth the batting or flannel over it, then the outer fabric right side up. Smooth from the center outward and baste generously with pins or spray.
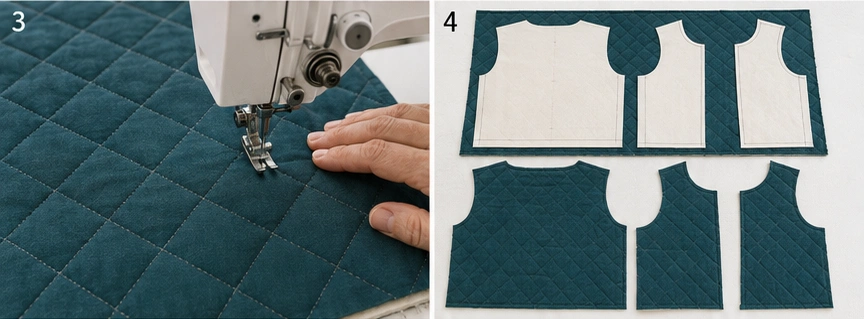
Step 4 – Quilt the panels. Using a walking foot, quilt straight lines or a diagonal grid about 2 inches apart. Keep the quilting light so the vest stays soft and layers comfortably rather than standing away from the body.
Step 5 – Cut the vest pieces. Cut one back and two fronts from the quilted fabric on the straight grain, using your adjusted pattern. That’s all a vest needs – no sleeves.
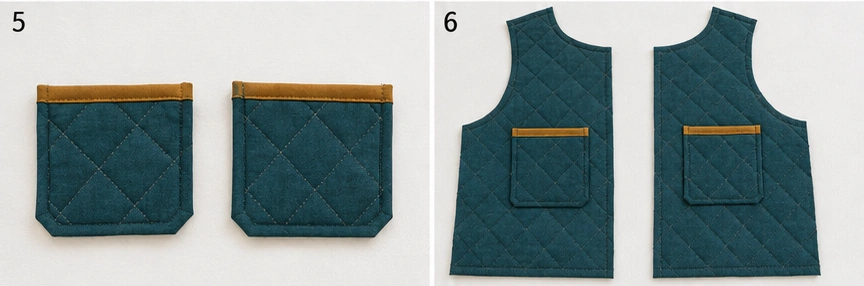
Step 6 – Make the patch pockets (optional). Fold and press each pocket’s edges under by ½ inch, trimming a small diagonal off the bottom corners first to reduce bulk. Bind or double-fold the top edges.
Step 7 – Attach the pockets high. Topstitch a pocket to each front, placing them higher than you would on a jacket – about 2 inches below the underarm – so they don’t run off the cropped hem. Bar-tack the top corners.
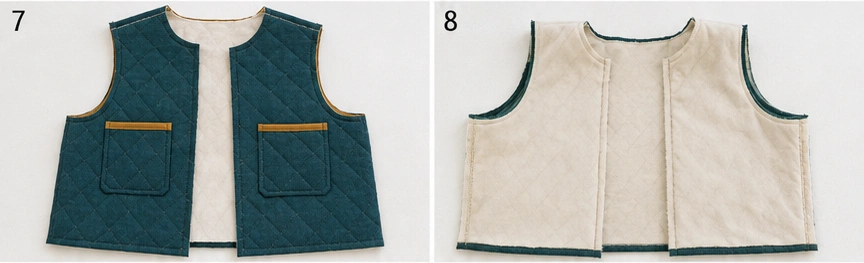
Step 8 – Sew the shoulder seams. With right sides together and a ½-inch seam, join the fronts to the back at the shoulders. Press the seams open to reduce bulk.
Step 9 – Sew the side seams. Sew each side seam with a ½-inch seam, stopping at the armhole opening. Press open.
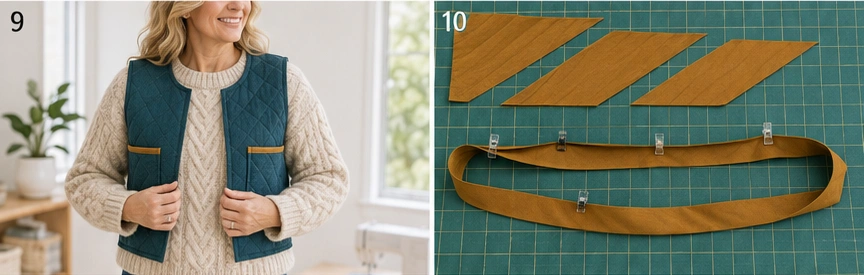
Step 10 – Try it on over your sweater. This is the moment to check everything: does the armhole clear the sweater sleeve comfortably? Does the hem hit where you want, with the sweater showing below? Adjust the side seams or trim the hem now, before you bind anything.
Step 11 – Prepare the bias binding. Cut 2 to 2½-inch strips on the bias, join them into one long strip, and press in half lengthwise. Having it all ready before you start binding makes the next steps far smoother.
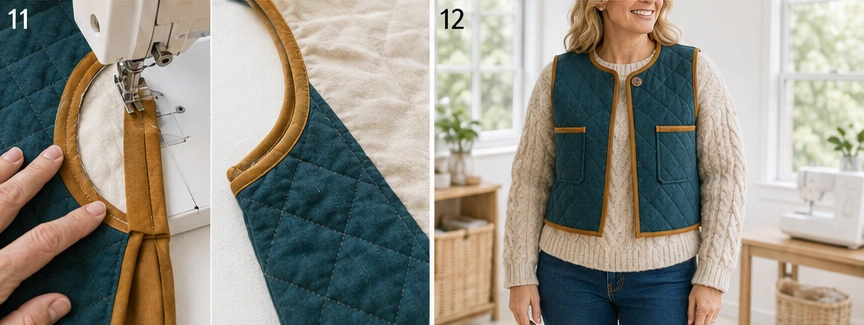
Step 12 – Bind the armholes. Working with the bias strip, encase each raw armhole edge, easing the binding gently around the curve without stretching it. Take your time here – neat, pucker-free armholes are the single mark of a well-made vest, since there’s no sleeve to hide them.
Step 13 – Bind the outer edge. Bind continuously up one front edge, around the neckline, down the other front, and along the hem – one unbroken line. Keep the width even; this binding frames the whole garment and is what the eye reads first.
Step 14 – Add a closure and press. Add a single button, snap, or tie at the front if you like, or leave it open to layer freely. Give the vest a good press, then wear it – a gentle cold wash and low tumble will soften it into a comfortable favorite.
Assembly at a Glance
- Measure yourself over your bulkiest sweater.
- Adjust the pattern: +1 inch per side seam, armhole 1-1½ inches deeper, length 22-24 inches.
- Layer lining, batting/flannel, outer fabric; baste.
- Quilt about 2 inches apart, keeping it soft.
- Cut one back and two fronts.
- Fold, trim, and finish the optional patch pockets.
- Topstitch pockets on high; bar-tack the corners.
- Sew shoulder seams (½-inch, pressed open).
- Sew side seams, leaving clean armhole openings.
- Try on over the sweater; adjust seams and hem now.
- Cut, join, and press bias binding.
- Bind the armholes, easing around the curve.
- Bind the front edges, neckline, and hem in one line.
- Add an optional closure; press and wear.
Beginner Tips for Success
- Measure over your sweater, not your bare torso – it changes the whole fit.
- Cut armholes 1-1½ inches deeper so a knit sleeve has room.
- Cut binding on the bias so it eases smoothly around the armhole curve.
- Use low-loft batting; a vest worn over knitwear gets bulky fast.
- Place pockets high so they suit the cropped hem.
- Make the binding a contrasting color – it’s the vest’s signature detail.
- Try it on before binding the hem; crop length is best judged on your own body.
Styling It & Gift Ideas
A cropped quilted vest is built for layering, so let the sweater do the softness and the vest do the color. Wear it over a chunky cream or oatmeal knit with high-waisted jeans and boots, and let a few inches of sweater show below the hem. It also works beautifully over a fine-knit turtleneck with wide-leg trousers for a sharper look, or over a flannel shirt for something more casual. Because it’s short and bright, it becomes the focal point of the outfit – so keep everything else simple.
Its small size and quick sew make it a great gift:
- A first handmade garment gift – the boxy shape is forgiving to size for someone else
- A holiday or birthday gift in a color they wear constantly
- A scrap-buster gift made from leftover patchwork, which makes it feel personal
- Several at once for sisters, friends, or teachers, since each uses so little fabric
If you’re sewing it for someone, size up slightly and mention it’s cut to go over a sweater – that’s the detail that will make them actually wear it.
Final Thoughts
A cropped quilted vest is chic sweater-weather layering at its simplest – core warmth, free arms, and a bright hit of color exactly where you want it. The secret isn’t complicated construction; it’s cutting it to actually fit over knitwear and binding those armholes cleanly. Measure over your sweater, keep the batting thin, choose a color you love, and you’ll have the easiest, most-worn layer in your autumn wardrobe.
Other Design Inspirations – Digitally Modified Images. Texture and color may vary from the actual product.
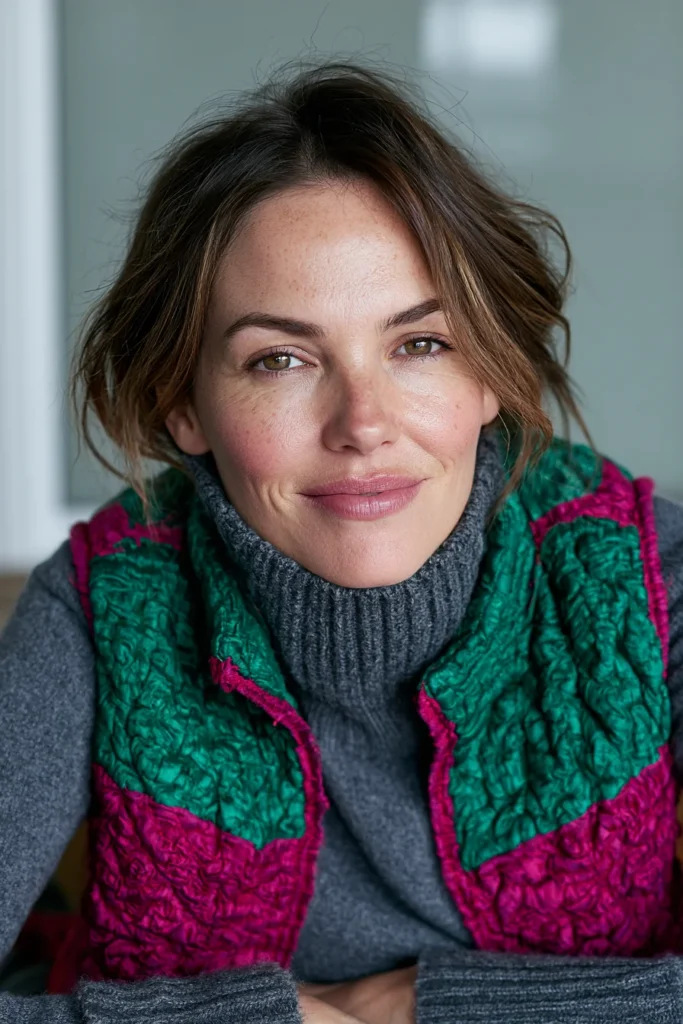
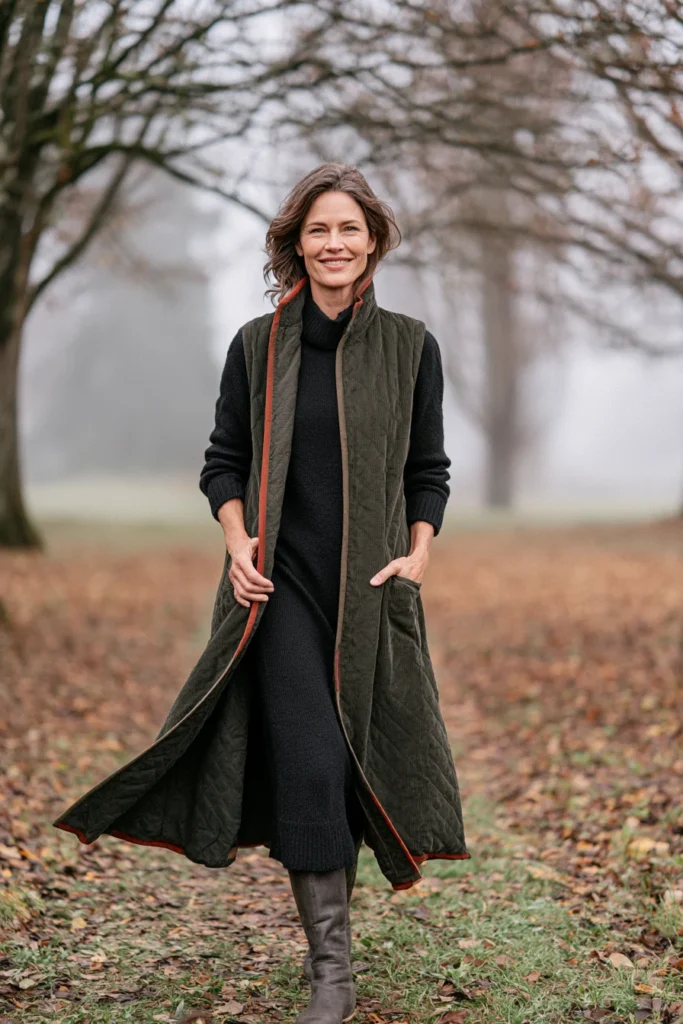
5. Longline Quilted Duster Vest for Elegant Fall Layers
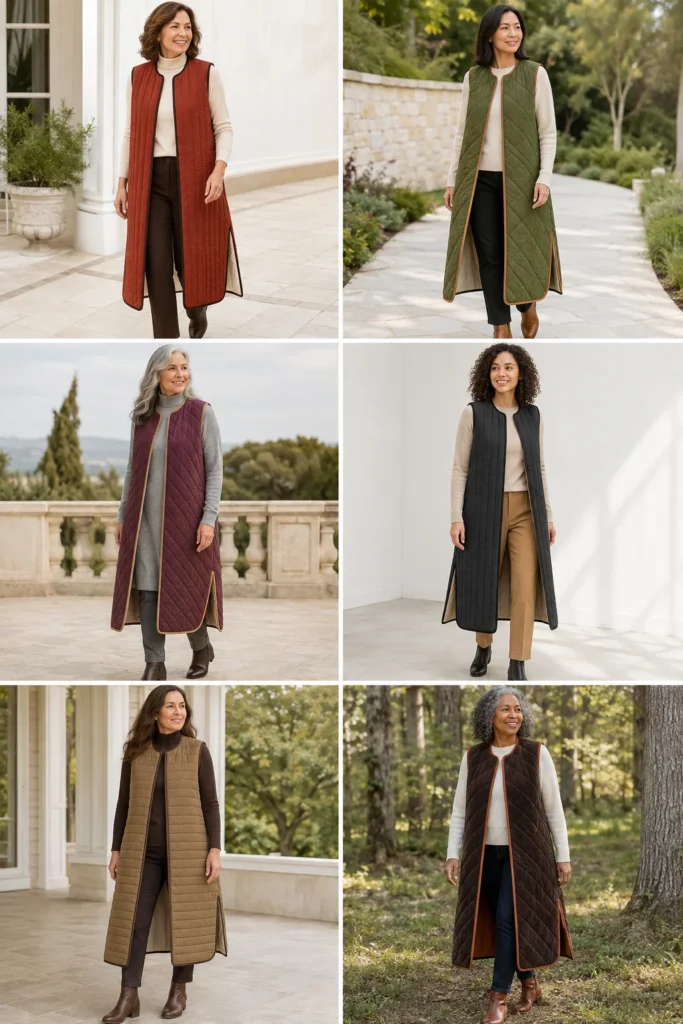
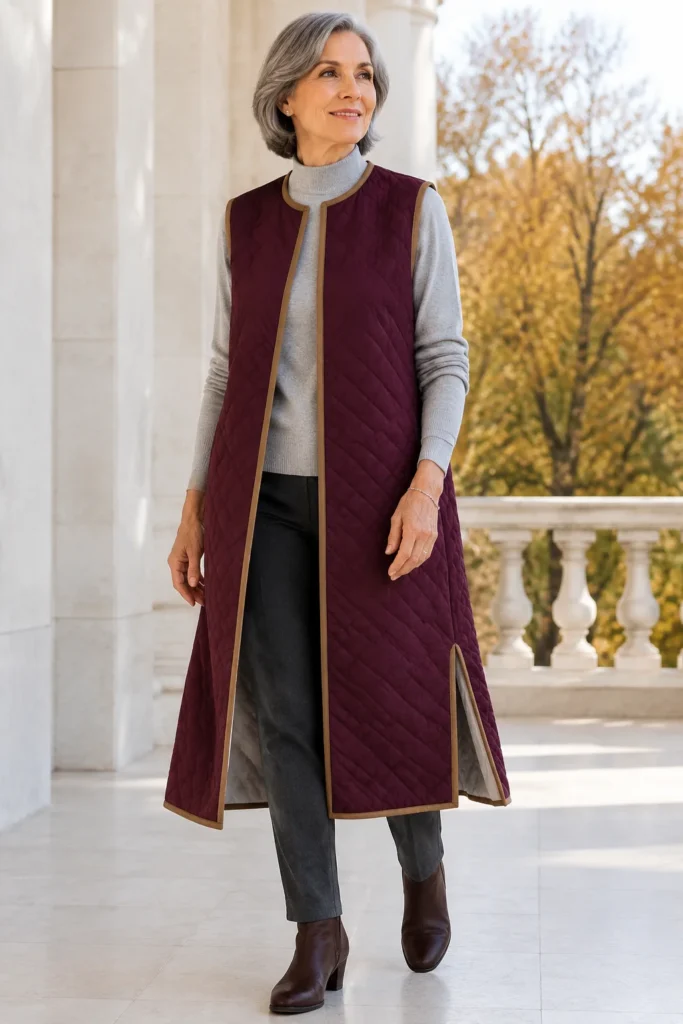
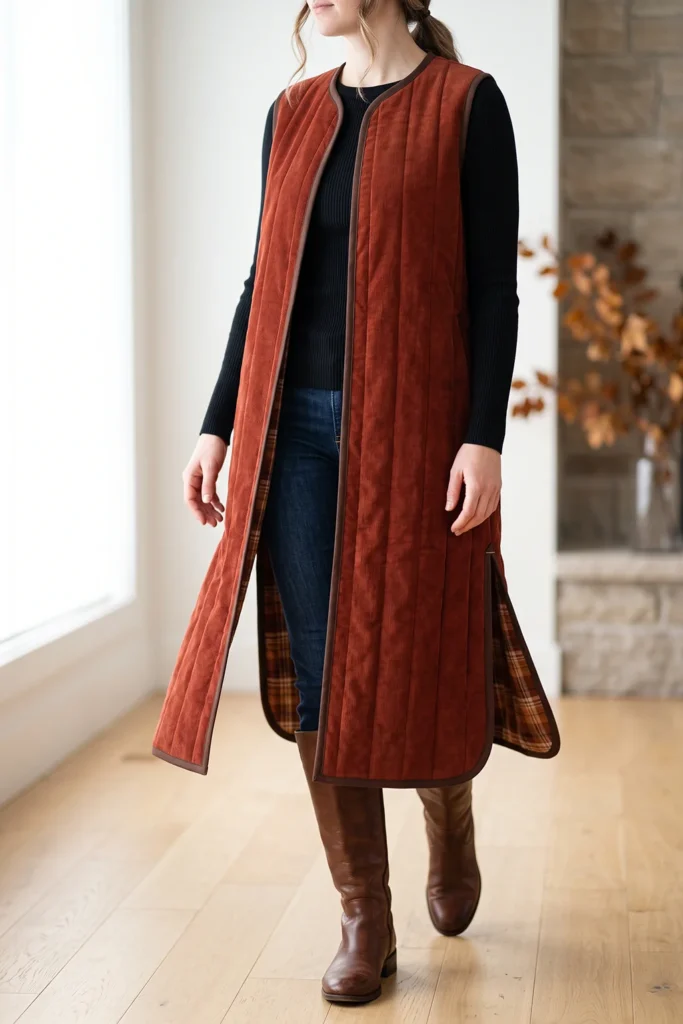
There’s nothing quite like a long vest for making an outfit look considered. The longline quilted duster falls to mid-calf in one uninterrupted vertical line, drifting open as you walk, adding warmth through the core while your arms stay free. Thrown over a fine knit and trousers, or a sweater dress and boots, it turns simple pieces into something that reads as genuinely elegant – the kind of layer that looks like it came from a boutique. In rich fall tones like deep rust, olive, plum, or a warm tonal neutral, it brings quiet sophistication to autumn dressing without a single fussy detail.
Length is what makes a duster beautiful, and it’s also what makes it a different sew from any shorter vest. Everything about the construction has to serve the drape: lighter fabrics, sparse quilting, and – the part most people don’t anticipate – real care keeping those long panels square. A 45-inch panel magnifies every small distortion in a way a 24-inch one simply doesn’t.
The Problem With Quilting Long Panels
Here’s the technical issue worth understanding before you start, because it’s the difference between a duster that hangs beautifully and one that twists.
When you quilt a long panel with a walking foot, the fabric creeps slightly in the direction you’re sewing. On a short panel, that shift is invisible. On a 45-inch duster panel, quilting every line top-to-bottom will gradually skew the whole piece, so by the last line your panel is no longer square – and a skewed panel hangs crooked no matter how carefully you sew the rest.
Two habits prevent it entirely:
- Quilt from the center outward, not from one edge to the other. Stitch a center line first, then work alternately to the left and right of it.
- Alternate your stitching direction. Sew one line downward, the next upward, and so on. The opposing creep cancels out.
Baste generously too – more than feels necessary. Long panels shift more than short ones, and pins every 4 inches are not excessive here.
Getting the Length Right
The number surprises people, because it’s measured from the shoulder down, not from the waist. A hip-length vest is only about 28 inches; a duster is far longer:
- Below the hip: 34-36 inches
- Knee-length: 40-42 inches
- Mid-calf (classic duster): 45-48 inches
Those are guides for an average 5’5″ frame – always hold a tape at your own shoulder and let it fall to where you want the hem, then add 2 inches for trimming. Height changes all of these.
Design Inspirations – Digitally Modified Images. Texture and color may vary from the actual product.
A Little History: The Duster
The duster earned its name honestly. In the nineteenth-century American West, riders and ranch hands wore long, loose coats to keep trail dust off their clothes on horseback – cut extra long to cover the legs, and often split at the back for the saddle. Those coats became one of the most recognizable silhouettes in Western dress, valued for being loose, protective, and unfussy.
The modern duster vest keeps the drama and drops the sleeves, but the spirit is the same: a long, easy layer that moves with you. And the idea of a long, layered outer wrap is hardly unique to the West – in the Nakshi Kantha tradition of my own family’s background, layered running-stitched cloth was made into long wraps and shawls worn exactly this way, loose over everything, warm and easy to move in.
Finished Garment
- Style: sleeveless longline duster – open front with no closure, side slits, bias-bound armholes and edges
- Length: 45-48 inches shoulder to hem for a classic mid-calf duster
- Side slits: 12-16 inches up from the hem
- Skill level: beginner – simple shape; length is the only new consideration
- Core techniques: quilting long panels without distortion, drape control, side slits, bias binding
Materials Needed
- Outer fabric: 3½ yards – measure from your shoulder to your desired hem and buy accordingly, adding for the back panel
- Middle layer: 3 yards of low-loft cotton batting – this matters more here than in any other project, since loft kills drape
- Lining: 3½ yards of soft cotton, flannel, or a lightweight rayon for extra flow
- Binding: ¾ yard, cut on the bias, for armholes and the full outer edge
- Thread: neutral cotton, plus a 90/14 needle
- Walking foot, rotary cutter, cutting mat, a long quilting ruler (24 inches or more), plenty of pins or basting spray, iron
- A duster or long vest pattern, or a simple vest pattern lengthened
Beginner tip: a duster lives or dies on drape. Choose lighter-weight fabrics, low-loft batting, and sparser quilting than you’d use on a jacket. The softer the finished panel, the more beautifully it falls and swings as you walk.
Choosing Your Colors
Long panels give color real room, and for an elegant duster, restraint reads as expensive:
- Deep rust or brick – warm, rich, and dramatic
- Olive or forest green – grounded and sophisticated
- Plum or burgundy – refined for later autumn
- Charcoal or espresso – the most modern, city-elegant option
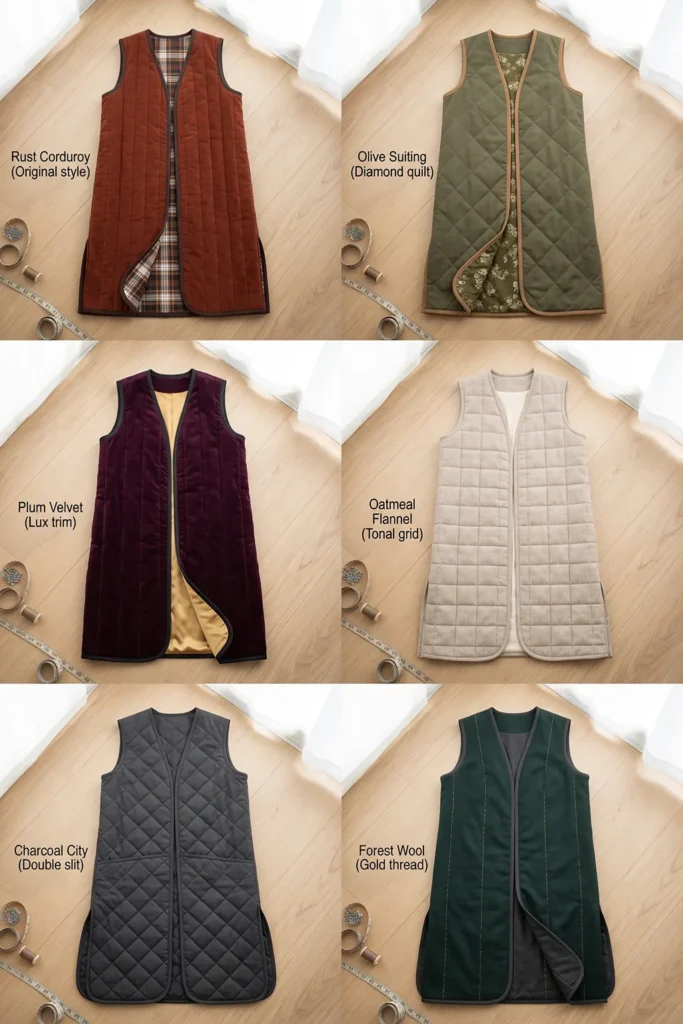
- Warm tonal neutral (camel, oatmeal, mushroom) – understated and endlessly wearable
- Corduroy in any of the above, for beautiful texture in a long silhouette
For elegance, a single solid or tonal fabric beats patchwork here – the uninterrupted vertical line is the whole point. Choose a contrasting bias binding to trace that long front edge and define the silhouette; a rust duster with a chocolate edge, for instance, looks quietly expensive.
Cutting Measurements
- Length: cut to your shoulder-to-hem measurement (45-48 inches for mid-calf), plus 2 inches for trimming
- Pieces: one back and two fronts, cut on the straight grain
- Side slits: plan 12-16 inches up from the hem on each side seam
- Binding: 2 to 2½-inch bias strips – you’ll need about 6-7 yards for the long edges plus both armholes
Step-by-Step Guide
Step 1 – Measure your length. Hold a tape at your shoulder and let it fall to where you want the hem. Note the number, add 2 inches, and use that as your cutting length. Don’t trust the pattern’s default – duster length is personal.
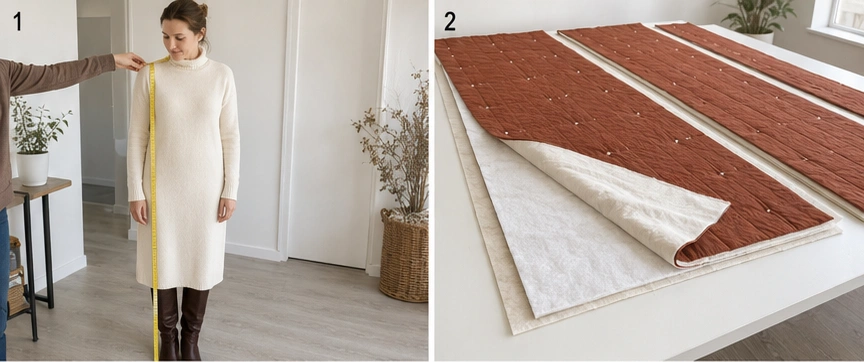
Step 2 – Layer the panels. For each piece, spread the lining wrong side up, smooth the low-loft batting over it, then the outer fabric right side up. Work on the largest flat surface you have; long panels need room.
Step 3 – Baste generously. Pin or spray-baste every 4 inches or so across the whole panel. This feels excessive and isn’t – long panels shift far more than short ones, and thorough basting is your insurance against distortion.
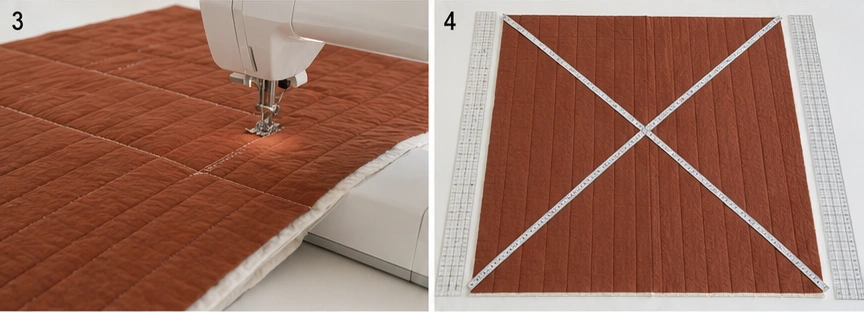
Step 4 – Quilt from the center outward. Stitch your first quilting line down the center of the panel, then work alternately to the left and right of it. Never start at one edge and work across.
Step 5 – Alternate your stitching direction. Sew one line downward, the next upward, alternating all the way out. This cancels the fabric creep that would otherwise skew a long panel. Keep the lines widely spaced – about 3 inches apart – so the duster stays soft and drapey.
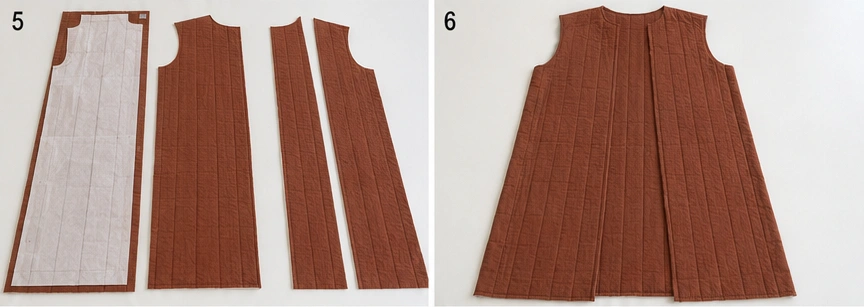
Step 6 – Check the panels are square. Lay each quilted panel flat and measure it corner to corner both ways. If the two diagonals match, it’s square. Small differences can be eased; large ones are worth re-quilting a panel to fix, because a skewed panel will hang crooked forever.
Step 7 – Cut the pieces at full length. Using your adjusted pattern and a long ruler, cut one back and two fronts on the straight grain. Length exaggerates any wobble in a cut, so take your time and check the grain as you go.
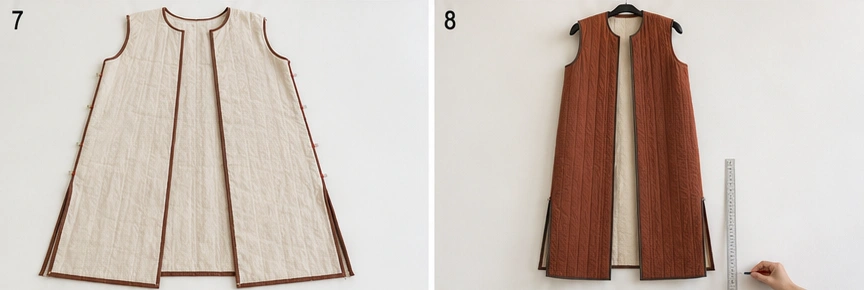
Step 8 – Sew the shoulder seams. With right sides together and a ½-inch seam, join the fronts to the back at the shoulders. Press the seams open.
Step 9 – Sew the side seams, leaving slits. Sew each side seam with a ½-inch seam, but stop 12-16 inches above the hem to leave a walking slit. Backstitch firmly at that stopping point – it’s a stress spot. These slits are essential; without them, a long vest binds your stride with every step.
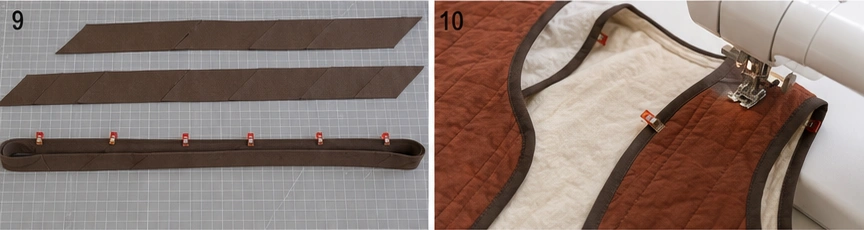
Step 10 – Hang it and check the drape. Put the duster on a hanger and leave it for a few hours, or try it on and look in a full-length mirror. Now is the moment to see how it falls, check the length, and trim the hem if it’s uneven or too long.
Step 11 – Prepare the bias binding. Cut 2 to 2½-inch strips on the bias, join them into one long continuous strip, and press in half lengthwise. You’ll need a lot of it, so having it ready before you start makes the binding steps go far more smoothly.
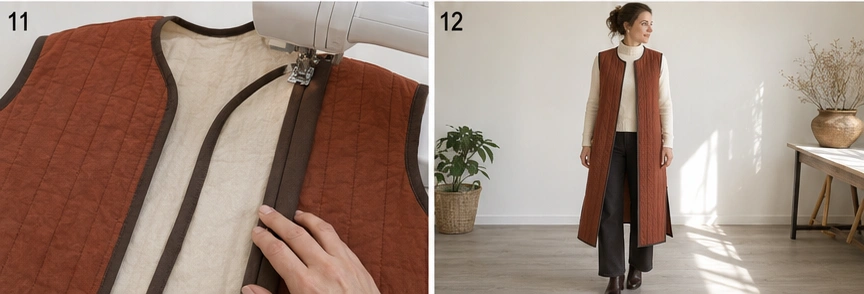
Step 12 – Bind the armholes. Encase each armhole edge with bias binding, easing it gently around the curve without stretching. As with any sleeveless garment, neat armholes are the mark of a well-made piece.
Step 13 – Bind the long front edges and neckline. Bind continuously up one front edge, around the neckline, and down the other front – one long, unbroken line. This is the duster’s defining detail. Work slowly and keep the binding width perfectly even; on a 45-inch edge, any wobble is highly visible.
Step 14 – Bind the hem and slits, then let it settle. Bind the hem and the edges of both side slits, reinforcing the top of each slit with a few extra stitches or a small bar tack. Press gently, then hang the finished duster for a day before wearing – a long quilted garment settles into its drape beautifully once it’s had time to hang out.
Assembly at a Glance
- Measure shoulder to hem (45-48 inches for mid-calf); add 2 inches.
- Layer lining, low-loft batting, and outer fabric for each panel.
- Baste every 4 inches – long panels shift.
- Quilt from the center outward, never edge to edge.
- Alternate stitching direction; space lines about 3 inches apart.
- Check panels are square by measuring both diagonals.
- Cut one back and two fronts on grain with a long ruler.
- Sew shoulder seams (½-inch, pressed open).
- Sew side seams, stopping 12-16 inches above the hem; backstitch.
- Hang and check the drape; trim the hem.
- Cut, join, and press bias binding (6-7 yards).
- Bind the armholes, easing the curves.
- Bind the front edges and neckline in one continuous line.
- Bind the hem and slits; reinforce slit tops; hang overnight.
Beginner Tips for Success
- Prioritize drape over loft – low-loft batting and sparse quilting are non-negotiable in a long vest.
- Quilt center outward, alternating direction, or the panel will skew.
- Baste far more than feels necessary; long panels shift.
- Don’t skip the side slits – without them, a duster restricts your stride.
- Reinforce the top of each slit; it takes stress every time you walk.
- Use a contrasting bias binding on the long front edge to define the silhouette.
- Hang it for a day before wearing so the drape settles.
Styling It & Gift Ideas
A duster vest is the ultimate effortless-elegant layer, and it works best when what’s underneath is close-fitting so the long vertical line stays clean. Wear it over a fine-knit turtleneck and slim or wide-leg trousers, over a sweater dress with tall boots, or over a simple tee and jeans to elevate the whole outfit instantly. Because it’s long and open, it flatters every shape – the unbroken vertical line is universally slimming. Keep jewelry simple and let the silhouette do the work.
Its elegance and one-size-forgiving shape make it a lovely gift:
- A milestone or holiday gift for someone who appreciates understated, elegant clothing
- A travel gift – a duster packs flat and instantly smartens a simple outfit on a trip
- A gift for a hard-to-size person, since the open front and boxy cut are far more forgiving than a fitted garment
- A work-wardrobe gift in charcoal, espresso, or camel for someone who dresses simply
If you’re making it for someone else, the open, unclosed front means you only need their approximate height rather than precise measurements – which makes it one of the safest handmade garments to gift.
Final Thoughts
A longline quilted duster vest is elegant fall layering at its most effortless – one long, flowing, sleeveless layer that turns simple clothes into a considered outfit. Built light and quilted sparsely so it drapes and swings, split at the sides so you can actually walk, and bound in one clean unbroken line, it carries the rustic heritage of the Old West duster into something quietly sophisticated. Mind those long panels as you quilt them, let it hang before you wear it, and you’ll have the most elegant layer in your autumn wardrobe.
Other Design Inspirations – Digitally Modified Images. Texture and color may vary from the actual product.
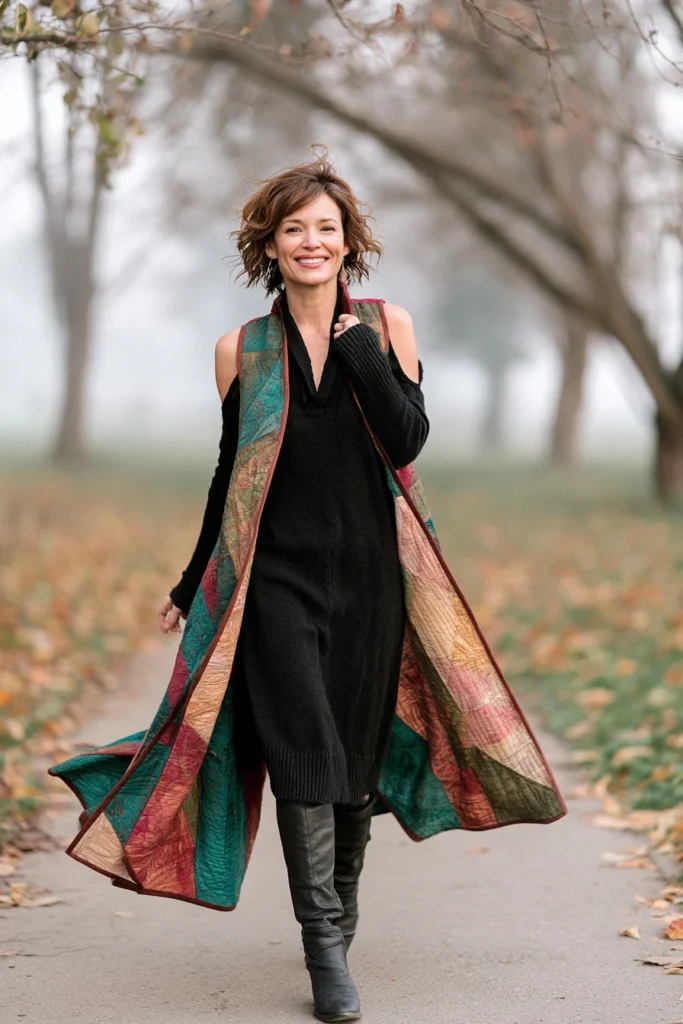
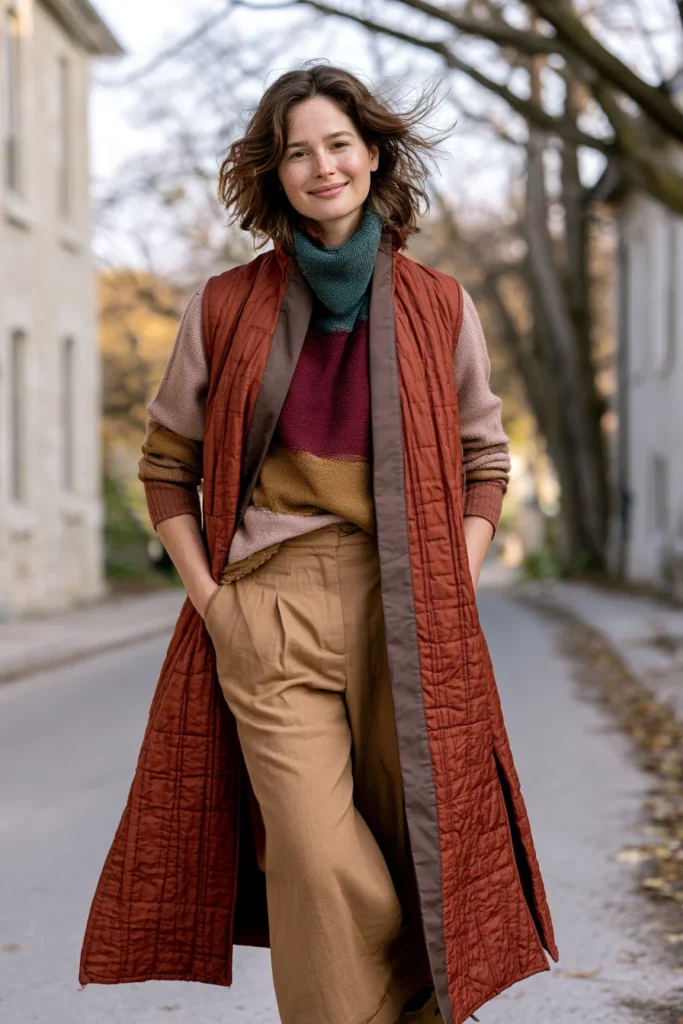
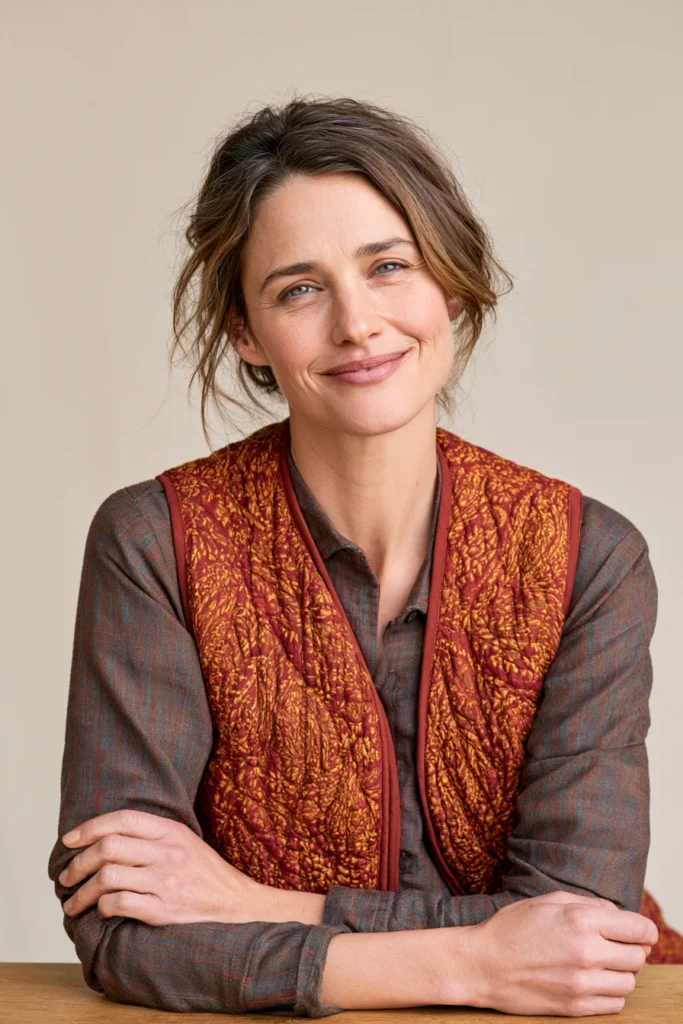
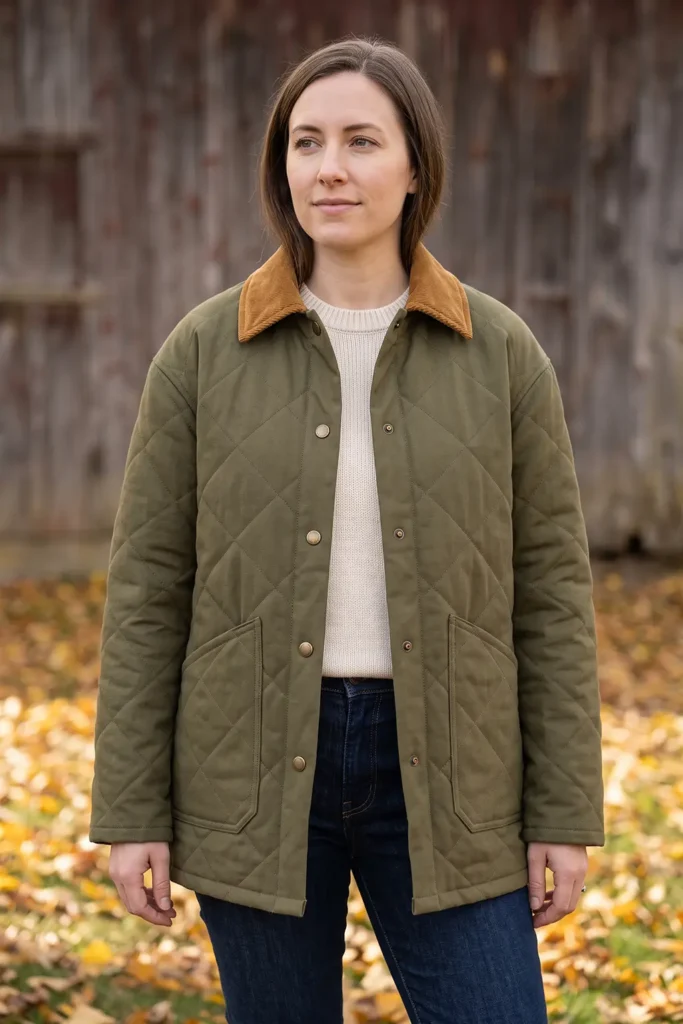
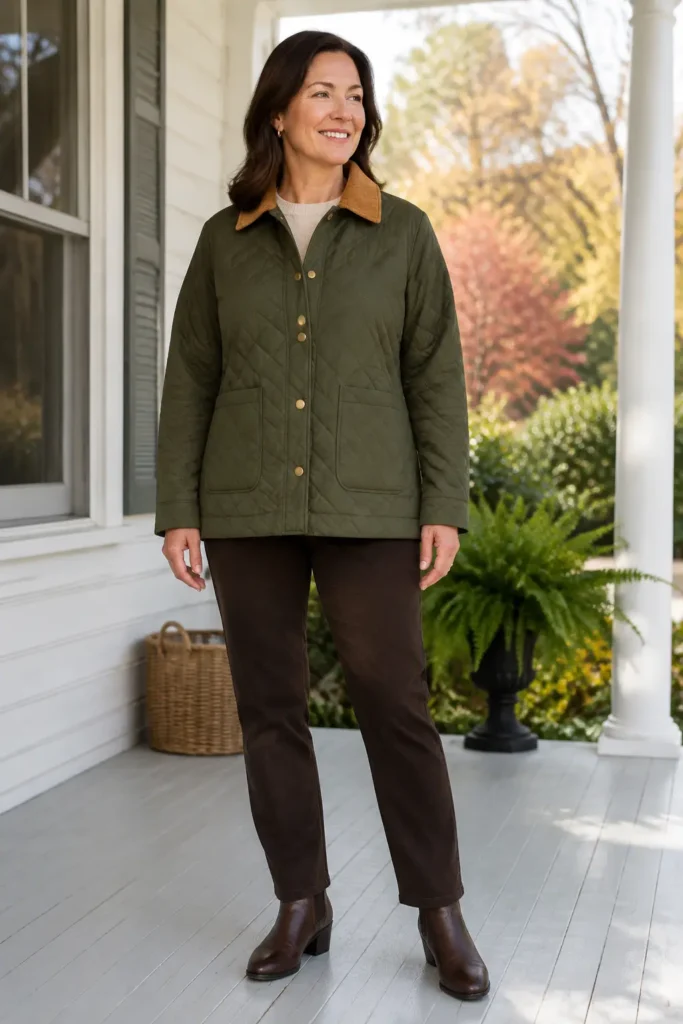
6. Corduroy-Collar Quilted Barn Jacket for Rich Autumn Texture
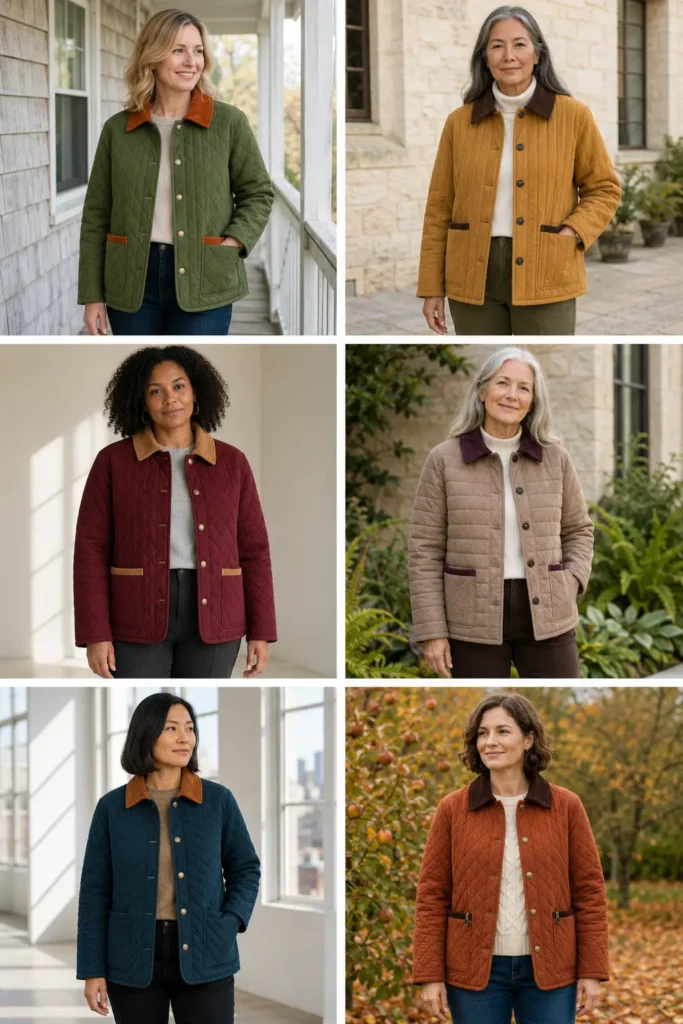
The barn jacket is workwear made handsome – a sturdy, practical coat with deep patch pockets, a straight boxy cut, and a snap or button front, built for chores and cold mornings but smart enough to wear anywhere. Add a contrasting corduroy collar and it becomes something richer: that band of soft, ribbed texture at the neck is the detail that turns a plain jacket into a proper autumn piece. In warm colors like olive, rust, or deep mustard with a caramel or chocolate corduroy collar, it has the kind of layered, tactile look that photographs beautifully and feels even better to wear.
That collar isn’t just decoration, either – it’s a genuine heritage detail with a practical origin, and it’s the one part of this project that needs a little know-how. Corduroy behaves differently from flat cotton, and once you understand why, it’s easy to handle.
Why Barn Jackets Have Corduroy Collars
The corduroy collar on a field or barn coat is a heritage detail borrowed from traditional English and American country jackets, and it exists for two good reasons. First, comfort: the outer shell of a working coat was often stiff waxed cotton or heavy canvas, which is unpleasant against the neck, so a strip of soft corduroy was used at the collar where the fabric touches skin. Second, warmth: corduroy’s ribbed pile traps air, so a collar turned up against a cold wind actually does something. What began as a purely practical choice became one of the most recognizable signatures in country outerwear.
Corduroy itself has a nice bit of disputed history. It’s often claimed the name comes from the French corde du roi, “cloth of the king” – a charming story, but one most textile historians consider a later folk etymology. The likelier origin is simply English: “cord” combined with duroy, the name of an old coarse woolen fabric. Either way, it’s been a hardwearing favorite for working clothes for centuries, and it has never looked more at home than in autumn.
Design Inspirations – Digitally Modified Images. Texture and color may vary from the actual product.
Working With Corduroy: Nap Is Everything
Corduroy has a nap – a pile that lies in one direction – and that single fact governs how you cut it:
- Cut every corduroy piece in the same nap direction. Run your hand along the fabric: one way feels smooth, the other rough. If you cut one collar piece with the nap up and the other down, they will look like two different colors when sewn together, even from the same cut of cloth.
- Nap up or nap down? Nap running up gives a deeper, richer color; nap running down looks slightly lighter and smoother, and wears with less pilling. Either is correct – just be consistent. For a collar, nap up gives you that lovely saturated look.
- Choose the right wale. Corduroy is measured in wales (ribs per inch). A mid-wale, roughly 8 to 11 wale, is ideal for a collar – the ribs are clearly visible for texture without being bulky. Fine pinwale (21 wale) reads almost flat; wide wale (under 6) is very chunky at a neckline.
- Corduroy sheds and shrinks. Prewash it, and expect lint – clean your machine as you go.
Finished Garment
- Style: boxy barn jacket – straight cut, dropped shoulders, contrasting corduroy collar, two large patch pockets, snap or button front
- Length: about 30-32 inches from shoulder to hem (slightly longer than a chore coat, hitting mid-hip)
- Collar: stand or fold-over collar, about 3 inches deep finished
- Patch pockets: 7 × 8 inches finished – barn jackets have generous pockets
- Closures: 5 snaps or buttons
- Skill level: confident beginner
- Core techniques: quilting yardage, corduroy nap handling, contrast collar, patch pockets, bound seams
Materials Needed
- Main fabric: 3 yards of mid-weight cotton, canvas, or twill in a warm solid
- Corduroy: ½ yard of 8-11 wale corduroy for the collar (and pocket trim, if you’d like to echo it)
- Middle layer: 2¾ yards of low-loft cotton batting, or cotton flannel
- Lining: 2¾ yards of soft cotton or flannel
- Interfacing: ¼ yard lightweight woven, for the collar
- Binding: ½ yard for finishing interior seams
- Closures: 5 heavy-duty snaps (plus setting tool) or 5 buttons
- Thread: neutral cotton, plus a 90/14 needle
- Walking foot, rotary cutter, cutting mat, ruler, pins or clips, iron
- A barn coat or chore coat pattern with dropped shoulders and no darts
Beginner tip: buy about 20% extra corduroy. Because every piece has to be cut in the same nap direction, you can’t nest pattern pieces efficiently the way you would on flat fabric – so a corduroy collar uses more yardage than the math suggests.
Choosing Your Colors
A barn jacket is all about warm, earthy, hardwearing color, with the collar providing contrast:
Main body:
- Olive or field green – the most authentic barn-coat color
- Deep rust or brick – rich and unmistakably autumn
- Warm mustard or ochre – bold and cheerful
- Chocolate or espresso brown – classic and grounding
- Deep teal – unexpected and very good with caramel corduroy
Corduroy collar:
- Caramel or tan against olive, teal, or brown
- Chocolate brown against rust, mustard, or ochre
- Deep rust against olive or espresso
The contrast should be clear enough to read as deliberate. A collar only a shade different from the body looks like a mistake; two or three shades apart looks designed.
Cutting Measurements
- Two fronts, one back, two sleeves: cut to your pattern at 30-32 inches finished length
- Collar: two corduroy pieces per your pattern (about 3 inches deep finished), cut in the same nap direction, plus interfacing
- Patch pockets: two at 8 × 9 inches (finishing 7 × 8 inches)
- Binding: 2½-inch strips, about 5-6 yards for interior seams
Step-by-Step Guide
Step 1 – Prewash everything. Wash and dry the main fabric, corduroy, and lining, then press. Corduroy shrinks and sheds heavily, so this step saves you a badly fitting collar later. Press corduroy face down on a towel so you don’t crush the pile.
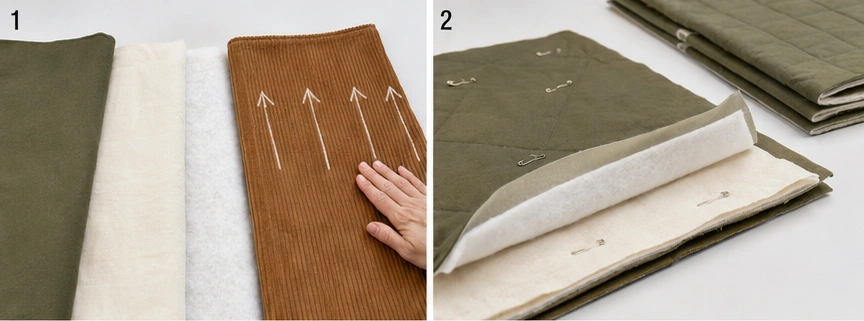
Step 2 – Mark the nap direction. Run your hand over the corduroy, decide which direction you want the nap to run, and mark that direction with chalk arrows on the wrong side. Every corduroy piece must follow those arrows.
Step 3 – Layer the main panels. For each garment piece, spread the lining wrong side up, smooth the batting or flannel over it, then the main fabric right side up. Smooth from the center outward and baste generously.
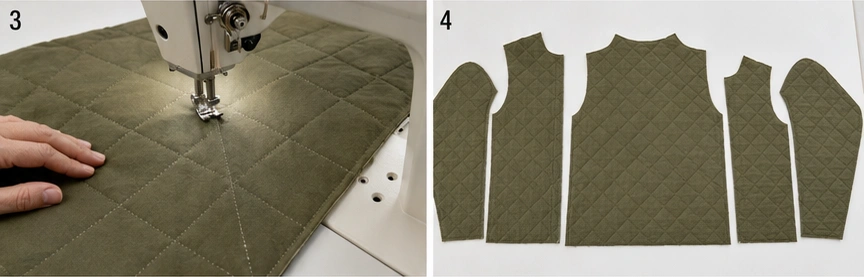
Step 4 – Quilt the panels. Using a walking foot, quilt straight lines or a diagonal grid about 2 inches apart, working from the center outward. Keep the quilting light so the jacket still moves comfortably.
Step 5 – Cut the main pieces. Cut two fronts, one back, and two sleeves from the quilted panels, on the straight grain.
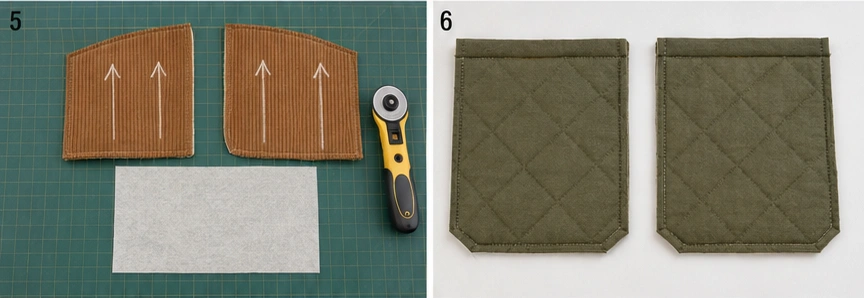
Step 6 – Cut the collar with the nap aligned. Cut both collar pieces from the corduroy, following your chalk arrows so both run the same direction. This is the most important cut in the project – mismatched nap will show as two different shades in the finished collar.
Step 7 – Make the patch pockets. Fold the pocket top edge down twice (about ½ inch each fold) and stitch. Trim a small diagonal off the bottom corners to reduce bulk, then press the sides and bottom under by ½ inch. Barn jacket pockets are generous – these should look like they can hold something.
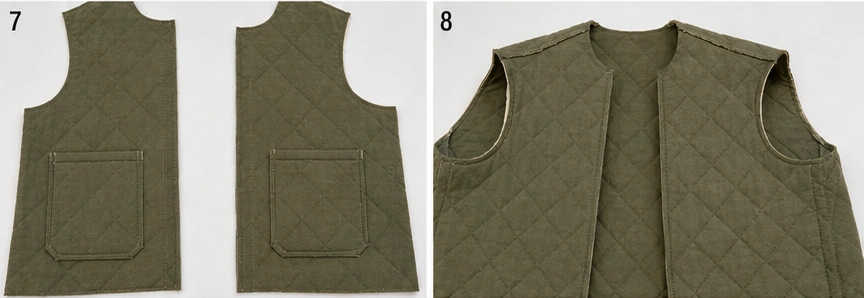
Step 8 – Attach the pockets. Position one on each front, about 4 inches below the underarm and 2 inches in from the front edge, and topstitch ⅛ inch from the folded edge. Bar-tack the top corners – on a barn jacket these pockets get real use, and the corners take all the strain.
Step 9 – Sew the shoulder seams. With right sides together and a ½-inch seam, join the fronts to the back at the shoulders. Press seams open and press firmly.
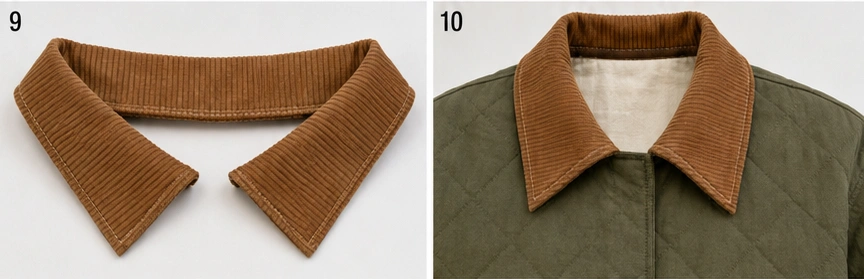
Step 10 – Build the corduroy collar. Interface one collar piece, place the two corduroy pieces right sides together, and sew around the outer edge with a ½-inch seam. Trim the corners, turn right side out, and press carefully – face down on a towel to protect the pile. Topstitch if your pattern calls for it.
Step 11 – Attach the collar. Pin the collar around the neckline, matching center points, and stitch, encasing the raw neckline edge. Go slowly through the layers; quilted fabric plus corduroy is thick, and a 90/14 needle earns its keep here.
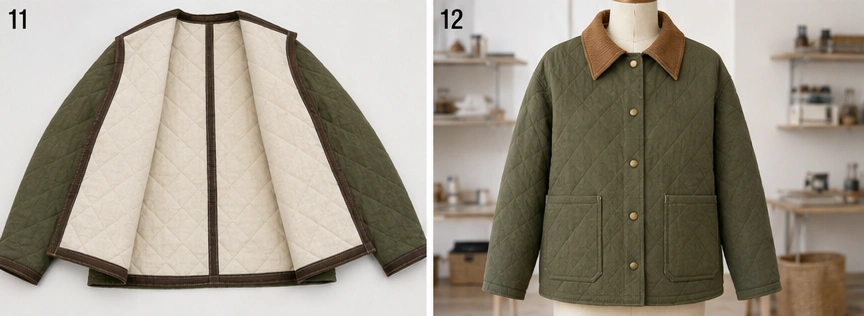
Step 12 – Set the sleeves and sew the sides. Attach each sleeve with a ½-inch seam, then sew from the cuff down the underarm and along the side seam in one continuous line. Try the jacket on to check fit and sleeve length.
Step 13 – Bind the interior seams and hem. Encase every raw interior seam allowance in binding so the inside is tidy and won’t fray, then hem the bottom edge and cuffs with a turned hem or bind them for a cleaner finish on quilted fabric.
Step 14 – Add closures and press. Mark 5 snap or buttonhole positions evenly down the front, about 4 inches apart, with one at the fullest part of the bust to prevent gaping. Reinforce behind each snap with a fabric scrap, set them with your tool (or sew buttonholes and buttons), then press the jacket – collar face down on a towel – and it’s ready to wear.
Assembly at a Glance
- Prewash everything; press corduroy face down on a towel.
- Mark nap direction with chalk arrows on the corduroy.
- Layer lining, batting/flannel, main fabric; baste.
- Quilt about 2 inches apart, center outward.
- Cut two fronts, back, and two sleeves on grain.
- Cut both collar pieces following the nap arrows.
- Fold, trim, and press the two large patch pockets.
- Topstitch pockets on; bar-tack the corners.
- Sew shoulder seams (½-inch, pressed open).
- Interface, sew, turn, and press the corduroy collar.
- Attach the collar, encasing the neckline edge.
- Set sleeves; sew underarm and side seams; check fit.
- Bind interior seams; hem the bottom and cuffs.
- Set 5 reinforced snaps (one at the bust point); press.
Beginner Tips for Success
- Cut all corduroy in one nap direction – mismatched nap looks like two different colors.
- Buy 20% extra corduroy, since one-direction cutting wastes fabric.
- Press corduroy face down on a towel so you don’t flatten the pile.
- Choose 8-11 wale corduroy for a collar – visible texture without bulk.
- Use a 90/14 needle; quilted fabric plus corduroy is thick at the neckline.
- Make the collar contrast two or three shades from the body, so it reads as deliberate.
- Bar-tack the pocket corners – barn jacket pockets get genuinely used.
Styling It & Gift Ideas
A barn jacket’s whole appeal is that it looks equally right on a muddy walk and in town, so wear it over a cream knit with jeans and boots, or over a flannel shirt for something more rugged. Turn the corduroy collar up when the wind picks up – that’s what it’s there for, and it looks great. The layered texture of quilted cotton against ribbed corduroy pairs naturally with denim, wool, and leather, and the earthy palette works with almost everything else in an autumn wardrobe.
Its practical, unisex-leaning appeal makes it a strong gift:
- A birthday or holiday gift for someone who’s outdoors a lot – it’s genuinely useful, not just decorative
- A gift for a gardener, dog walker, or weekend hiker, since the pockets and sturdy build get real use
- A matching pair in different colorways for a couple
- A hard-wearing everyday gift that looks better as it ages
If you’re sewing it for someone else, go slightly roomy – barn jackets are meant to layer over sweaters, and a generous fit is part of the look.
Final Thoughts
A corduroy-collar quilted barn jacket is rich autumn texture in its most wearable form – sturdy, practical, and quietly handsome, with that band of soft ribbed corduroy doing exactly the job it has done on country coats for generations. Mind the nap when you cut, choose a collar two or three shades from the body, and bar-tack those generous pockets, and you’ll have a jacket that looks better every season and never feels out of place, whether you’re crossing a field or a parking lot.
Other Design Inspirations – Digitally Modified Images. Texture and color may vary from the actual product.
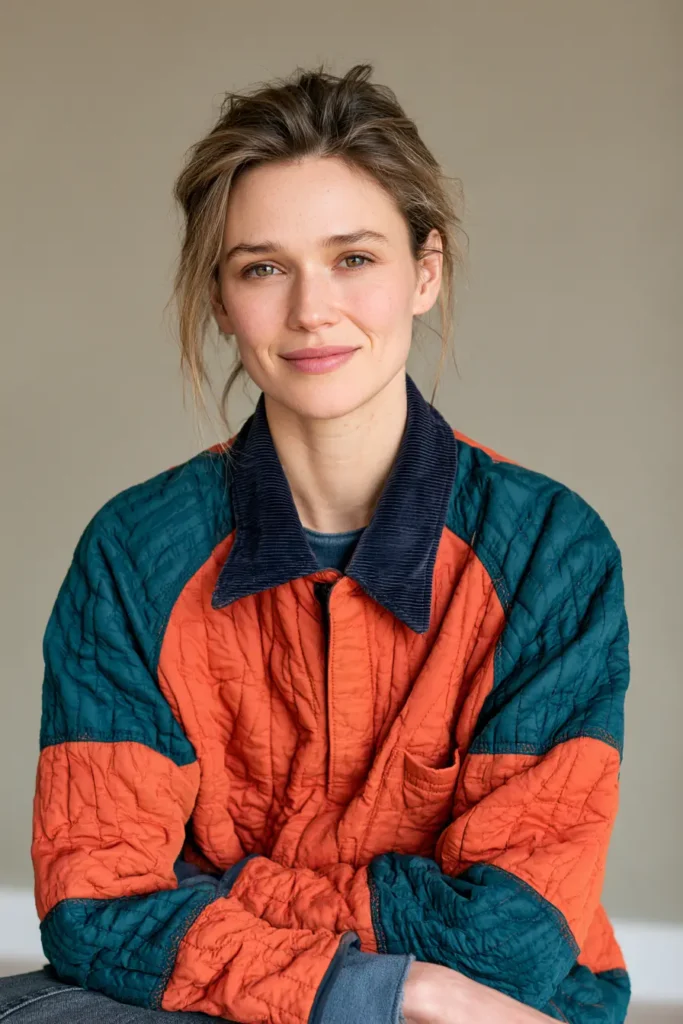
7. Boho Floral Quilted Jacket for a Pop of Autumn Color
When the days turn gray, a boho floral quilted jacket is the antidote. This is the piece that brings genuine color into autumn – big, blowsy blooms in marigold, magenta, teal, and burnt coral, mixed with paisleys and small geometrics, quilted into a relaxed jacket that feels artistic rather than fussy. Where a rustic plaid whispers, this one sings. Thrown over jeans and a plain tee, it does all the work of an outfit by itself, and it’s the kind of piece people remember you in.
Boho florals are bold and large-scale by nature, which introduces a design question no plain fabric ever does: where on your body does the print actually land? A large motif sitting in the wrong place can be unflattering or just look accidental. Thinking about placement before you cut is what separates a jacket that looks designed from one that looks like it happened – and it’s the real skill in this project.
Placing a Large-Scale Print
Once you’re working with big flowers, the fabric stops being neutral and starts making decisions for you. Three things to check before cutting:
- Watch the bust line. A single large bloom centered on each bust is the classic unfortunate placement. Lay the pattern piece over the fabric and look at where the biggest motifs fall; shift the pattern a few inches until they sit off-center or between.
- Balance the two fronts. They don’t have to mirror perfectly – boho is forgiving – but you don’t want a huge flower on one front and empty background on the other. Aim for roughly similar visual weight.
- Give the back a focal point. The back is your largest uninterrupted panel, so it’s the natural home for the boldest motif. Center something you love there.
Hold the fabric up against yourself in a mirror before you commit. Two minutes of looking saves a jacket.
Design Inspirations – Digitally Modified Images. Texture and color may vary from the actual product.
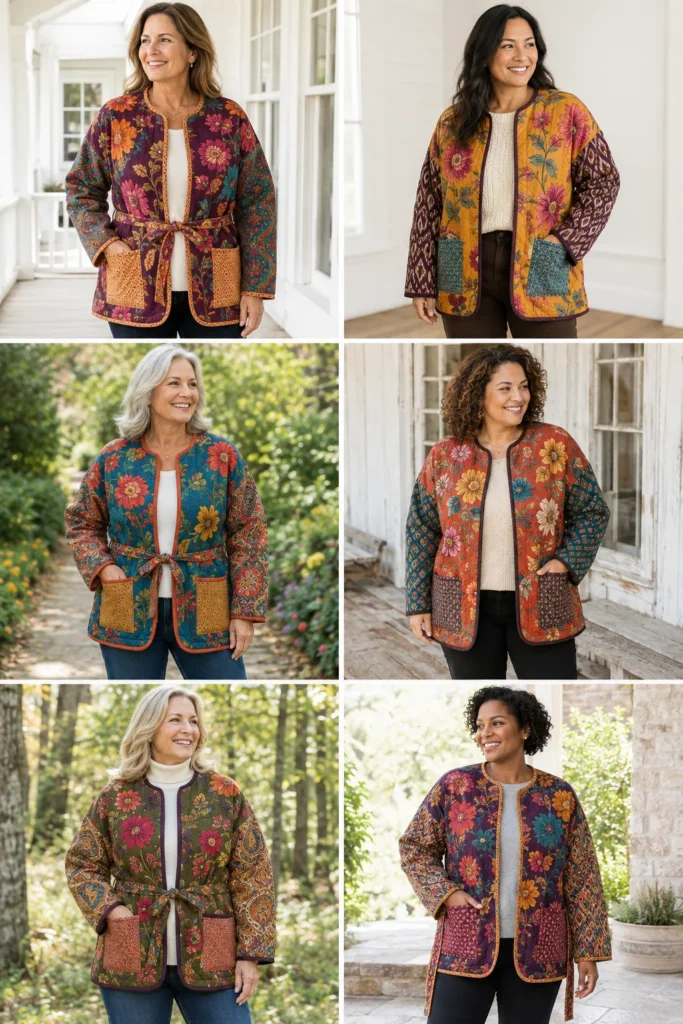
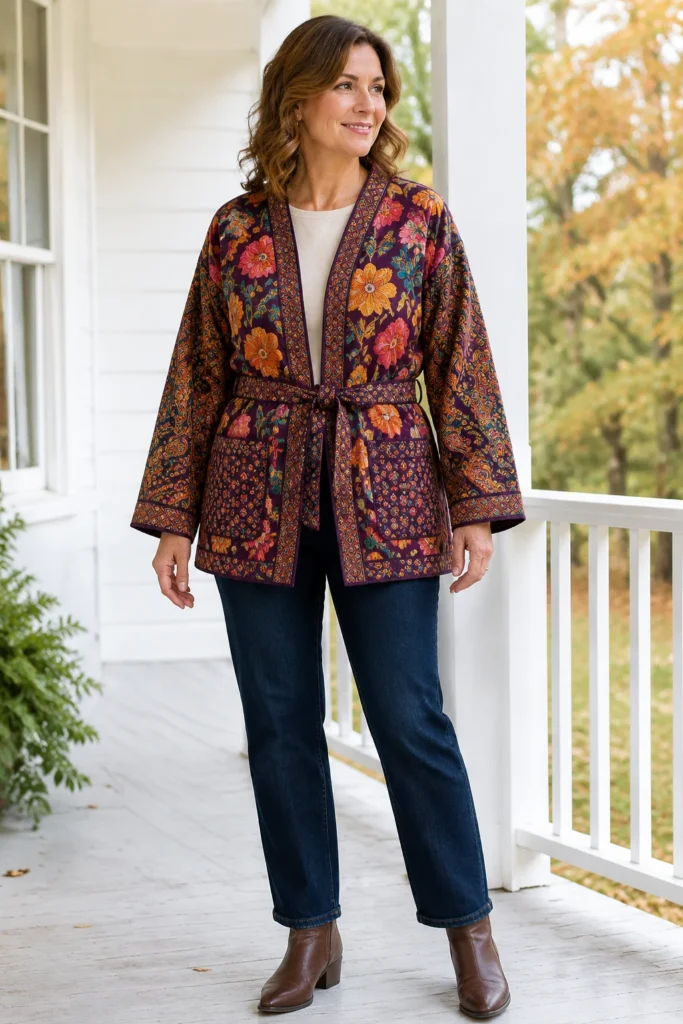
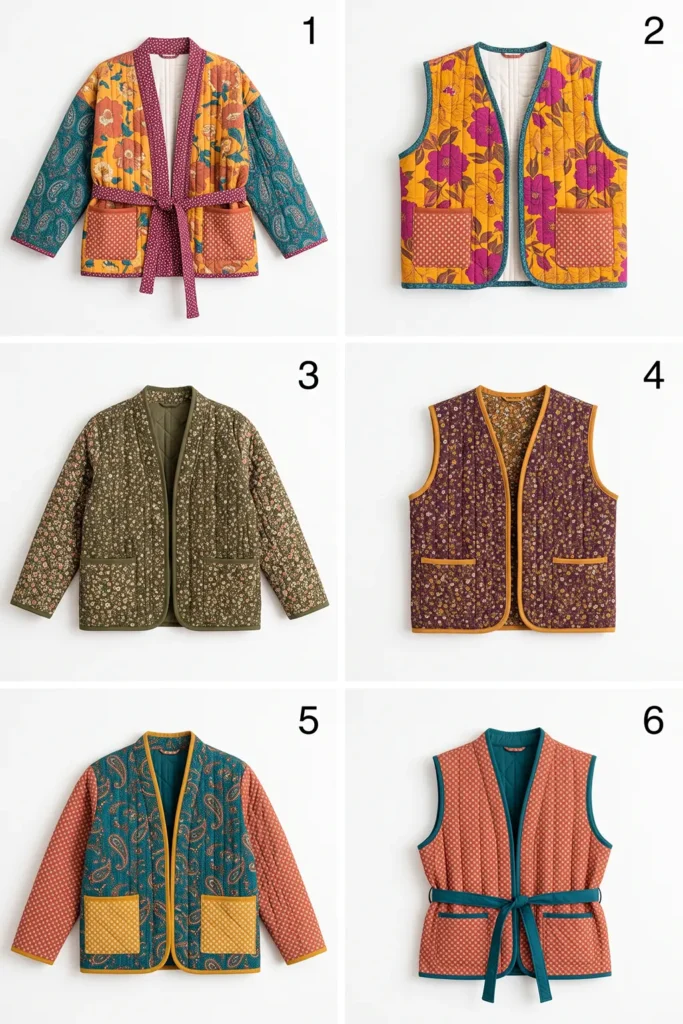
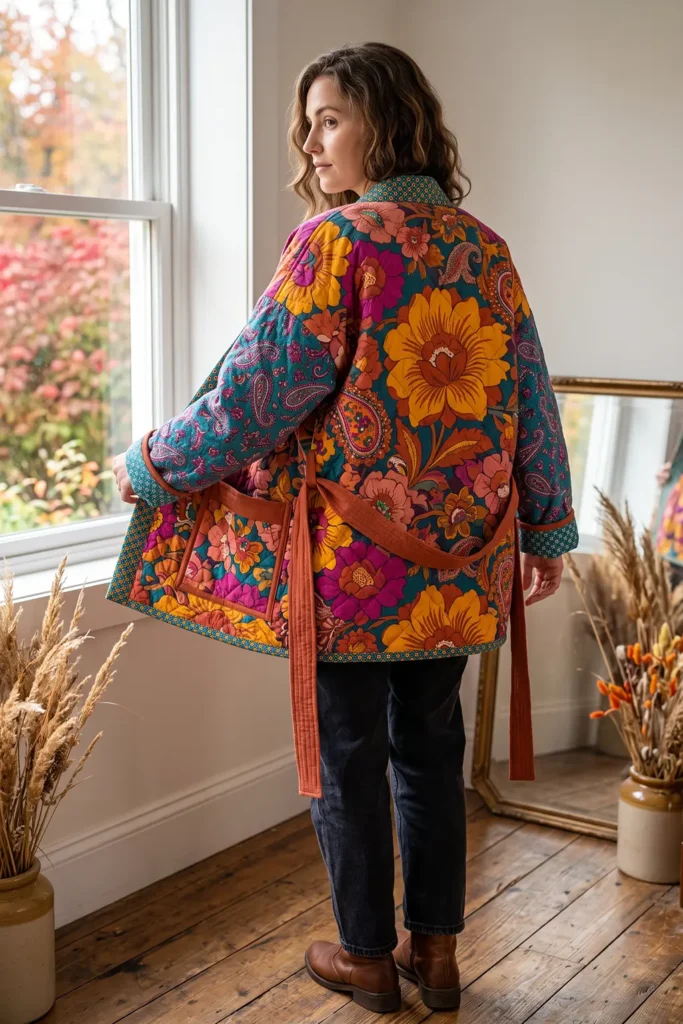
Mixing Prints the Boho Way
True boho style mixes prints rather than using just one, and there are only two rules that matter:
- Vary the scale. Pair one large-scale floral with a medium print and a small one. If every print is the same size, they compete and the eye has nowhere to rest.
- Share a palette. The prints can be wildly different in style – florals, paisleys, geometrics, ikats – as long as they share two or three colors. That common thread is what makes an eclectic mix read as intentional.
A common approach: use the boldest floral for the body, a medium print for the sleeves, and a small print or near-solid for the collar, cuffs, or binding.
(For a softer, quieter take on florals, small-scale ditsy prints give a completely different, more vintage feel – this jacket is deliberately the opposite: saturated, large, and unapologetic.)
A Little History: Where “Boho” Comes From
The word bohemian originally described the unconventional, artistic lifestyle associated with nineteenth-century writers and painters in Paris – people living outside conventional society, whose loose, colorful, mismatched dress became a visual signature of creative freedom. The look was revived in the 1960s and 70s, when travel and interest in global textiles brought richly patterned fabrics, embroidery, and mixed prints into Western fashion, and “boho” as we know it took shape.
That love of layering pattern on pattern is much older than any Western fashion movement, of course. Across South Asia and beyond – including the textile traditions of my own family’s background – mixing bold prints, rich color, and hand-worked stitching has always been ordinary rather than daring. A boho floral quilted jacket sits comfortably in that long, colorful lineage.
Finished Garment
- Style: relaxed boxy jacket, dropped shoulders, open front with an optional tie belt, patch pockets
- Length: about 28-30 inches from shoulder to hem
- Patch pockets: 6 × 6½ inches finished
- Closure: open front, or a fabric tie belt about 2½ × 60 inches
- Skill level: confident beginner
- Core techniques: print placement, mixing prints, quilting yardage, bound seams and edges
Materials Needed
- Large-scale floral: 2 yards for the body – the star fabric
- Medium print: 1 yard for the sleeves
- Small print or near-solid: ½ yard for pockets, binding accents, or a tie belt
- Middle layer: 2¾ yards of low-loft cotton batting, or cotton flannel
- Lining: 2¾ yards of soft cotton (a coordinating print here is a lovely surprise at the cuffs)
- Binding: ¾ yard for interior seams and outer edges
- Thread: neutral cotton, plus a 90/14 needle
- Walking foot, rotary cutter, cutting mat, ruler, pins or clips, iron
- A boxy jacket or kimono-style pattern with no darts and dropped shoulders
Beginner tip: buy extra of the large-scale floral – about ½ yard more than the pattern calls for. Print placement means you’ll be shifting pattern pieces around to catch the motifs where you want them, and that repositioning uses fabric you can’t get back.
Choosing Your Colors
Boho autumn is warm, saturated, and unafraid:
- Marigold and mustard – the anchor of a warm boho palette
- Magenta and deep pink – unexpected against autumn tones and gorgeous with gold
- Teal and peacock – the cool note that makes the warm colors glow
- Burnt coral and terracotta – rich and earthy
- Deep plum and aubergine – grounds the brights
- Olive and moss – the green that ties florals to autumn
The trick is a cool accent among warm tones: teal or magenta scattered through a marigold-and-terracotta jacket is what gives boho color its energy. All-warm reads rustic; one cool note makes it boho.
Cutting Measurements
- Body (large floral): two fronts and one back, cut to your pattern at 28-30 inches finished length, positioned for print placement
- Sleeves (medium print): two, cut to your pattern
- Patch pockets (small print): two at 7 × 7½ inches (finishing 6 × 6½ inches)
- Tie belt (optional): one strip at 3 × 60 inches
- Binding: 2½-inch strips, about 6 yards total
Step-by-Step Guide
Step 1 – Audition your prints together. Lay all three fabrics side by side. Check that the scales genuinely differ and that they share two or three colors. If two prints fight, swap one out now rather than after it’s quilted.
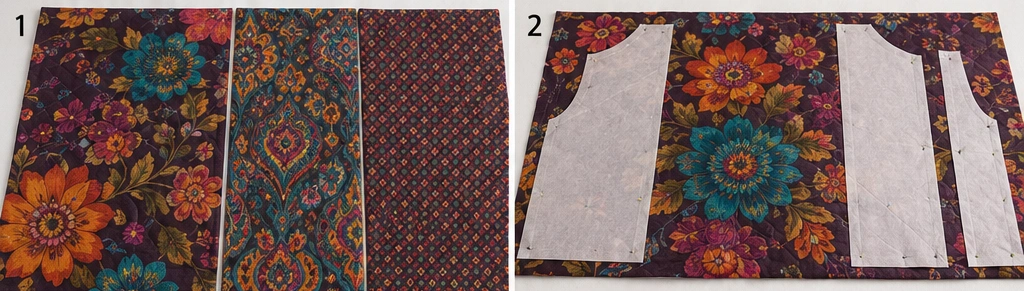
Step 2 – Plan the print placement. Lay your back pattern piece over the large floral and slide it around until a motif you love sits centered. Then position the two front pieces, checking where the biggest blooms fall across the bust and keeping the two fronts roughly balanced. Mark your placement with chalk or pins.
Step 3 – Layer the body panels. For the fronts and back, spread the lining wrong side up, smooth the batting or flannel over it, then the floral right side up in your planned position. Smooth from the center outward and baste generously.
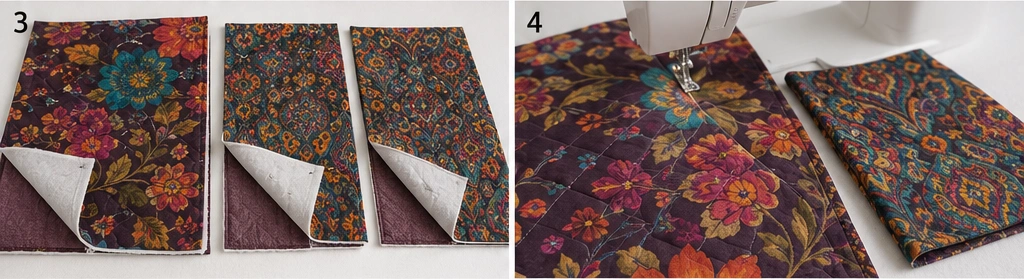
Step 4 – Layer the sleeve panels. Do the same with the medium print for the two sleeves.
Step 5 – Quilt all panels. Using a walking foot, quilt straight lines or a diagonal grid about 2 inches apart, working from the center outward. Keep it light and simple – with prints this busy, decorative quilting is lost anyway, and light quilting keeps the jacket soft and drapey.
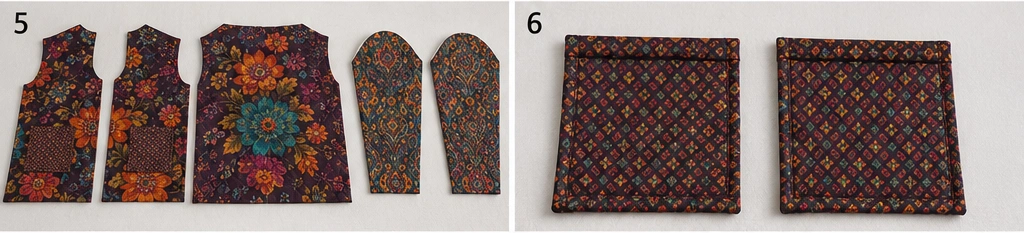
Step 6 – Cut the jacket pieces. Cut two fronts and one back from the floral panels, and two sleeves from the medium-print panels, following your marked placement. Check one last time in the mirror before the rotary cutter goes down.
Step 7 – Make the patch pockets. From the small print, fold each pocket’s top edge down twice (about ½ inch each) and stitch. Trim a small diagonal off the bottom corners, then press the sides and bottom under by ½ inch.
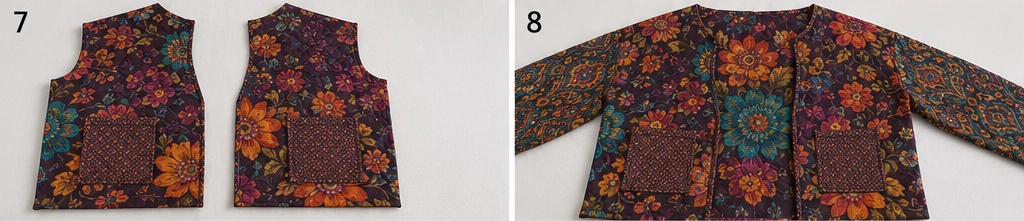
Step 8 – Attach the pockets. Topstitch a pocket to each front, about 3 inches below the underarm and 2 inches in from the front edge, ⅛ inch from the folded edge. Bar-tack the top corners. A small print here gives the eye a rest against the big florals.
Step 9 – Sew the shoulder seams. With right sides together and a ½-inch seam, join the fronts to the back at the shoulders. Press the seams open.

Step 10 – Set the sleeves. Attach each medium-print sleeve to its armhole with a ½-inch seam. A dropped shoulder makes this easy, and the print change at the shoulder line is a deliberate, attractive feature.
Step 11 – Sew the side and underarm seams. Sew from the cuff, down the underarm, and along the side seam in one continuous line (½-inch seam). Try the jacket on to check fit and sleeve length.
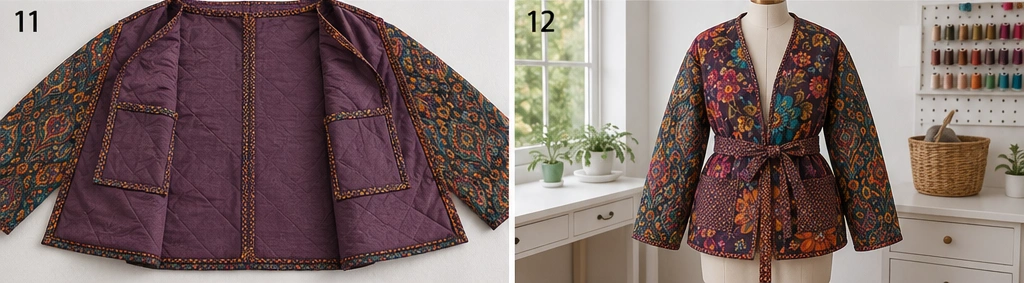
Step 12 – Bind the interior seams. Encase every raw interior seam allowance in binding. On a boho jacket, a contrasting binding inside is a genuinely lovely detail – it flashes when you move and when the cuffs are rolled.
Step 13 – Bind the outer edges. Bind the front opening, neckline, hem, and cuffs in one continuous line. Choose the binding deliberately: a small print or a solid picked from within the florals frames all that color and stops the jacket looking unfinished.
Step 14 – Make the tie belt and press. For the optional belt, fold the 3 × 60-inch strip in half lengthwise, right sides together, stitch along the long edge and one end, turn right side out, press, and close the open end. Give the jacket a good press, add the belt or leave it open, and wash gently on cold with a color catcher – saturated prints can bleed.
Assembly at a Glance
- Audition all three prints together: vary scale, share palette.
- Plan print placement – motif centered on the back, blooms off the bust line.
- Layer lining, batting/flannel, floral for the fronts and back; baste.
- Layer the medium print for the sleeves.
- Quilt all panels about 2 inches apart, center outward.
- Cut two fronts, back, and two sleeves following your placement marks.
- Fold, trim, and press small-print patch pockets.
- Topstitch pockets on; bar-tack the corners.
- Sew shoulder seams (½-inch, pressed open).
- Set the medium-print sleeves.
- Sew underarm and side seams in one line; check fit.
- Bind interior seams (contrast binding is a lovely touch).
- Bind the front opening, neckline, hem, and cuffs.
- Make the 3 × 60-inch tie belt; press and wash with a color catcher.
Beginner Tips for Success
- Plan print placement before cutting – check where large blooms land across the bust.
- Buy ½ yard extra of the large floral, since repositioning for placement uses fabric.
- When mixing prints, vary the scale and share a palette – those two rules do all the work.
- Include one cool accent (teal or magenta) among warm tones for real boho energy.
- Keep quilting simple; decorative stitching is lost on busy prints.
- Use a small print or solid for pockets and binding to give the eye somewhere to rest.
- Wash with a color catcher the first time; saturated prints bleed.
Styling It & Gift Ideas
This jacket is the whole outfit, so everything under it should be quiet – a plain white or black tee, a simple tank, dark jeans, or a solid dress. Boots or ankle boots ground it, and a few stacked bangles or a chunky ring lean into the boho spirit without competing. Wear it open so the full print shows, or tie the belt loosely for shape. Because the palette is warm with a cool accent, it works with denim, black, cream, and camel equally well.
Its bold, artistic character makes it a wonderful gift:
- A gift for someone who loves color and gets complimented on what they wear
- A creative or artistic friend’s birthday – this reads as wearable art
- A festival or travel gift, since boho layers pack well and work over almost anything
- A memory jacket using a meaningful print – a scarf, a sari, or fabric from a trip
If you’re making it for someone, choose their boldest color rather than a safe one. This isn’t a subtle jacket, and half-measures make it look uncertain.
Final Thoughts
A boho floral quilted jacket is the pop of color autumn needs – big blooms, mixed prints, and a warm saturated palette with just enough cool accent to make it sing. The construction is straightforward; the artistry is in placing those large motifs thoughtfully and mixing your prints so they complement rather than compete. Plan the placement, vary your scales, share a palette, and you’ll have a jacket that carries a whole outfit on its own and brings genuine joy to a gray day.
Other Design Inspirations – Digitally Modified Images. Texture and color may vary from the actual product.
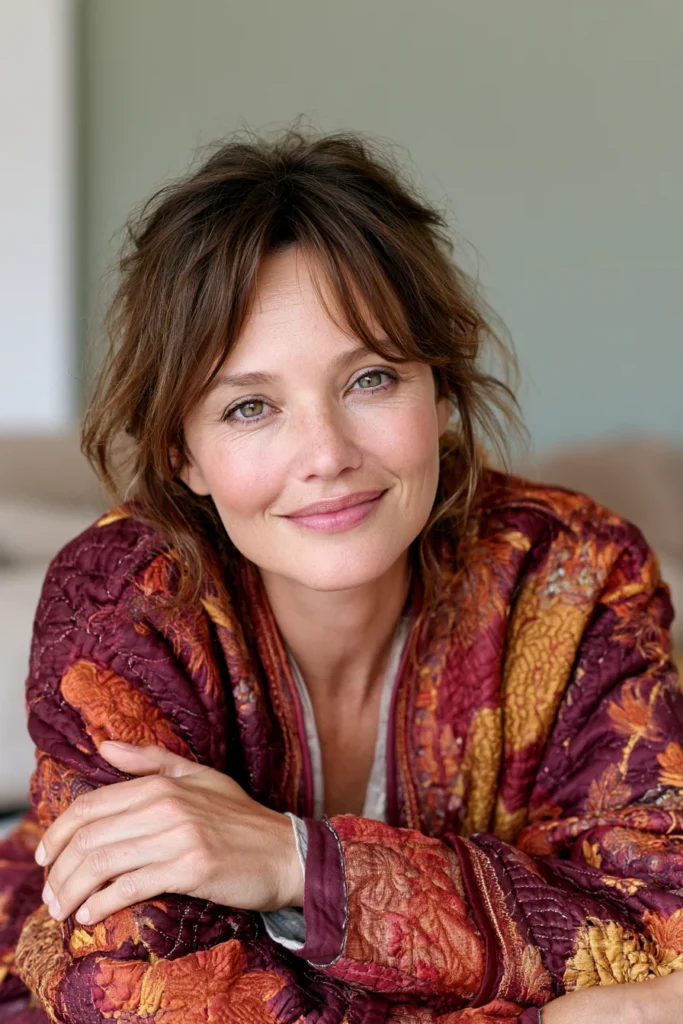
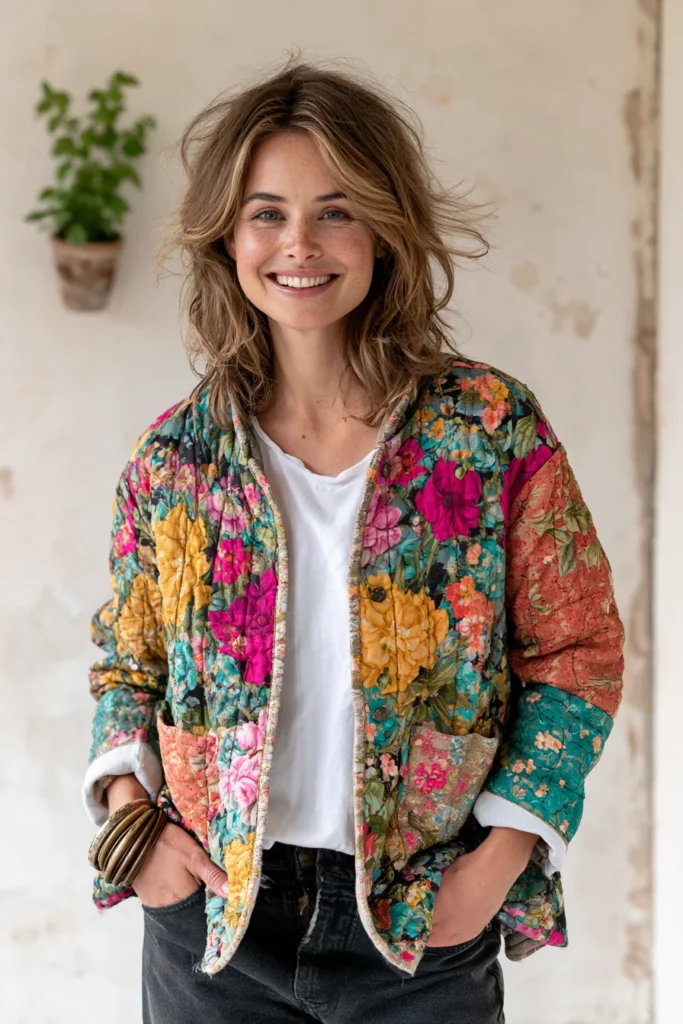
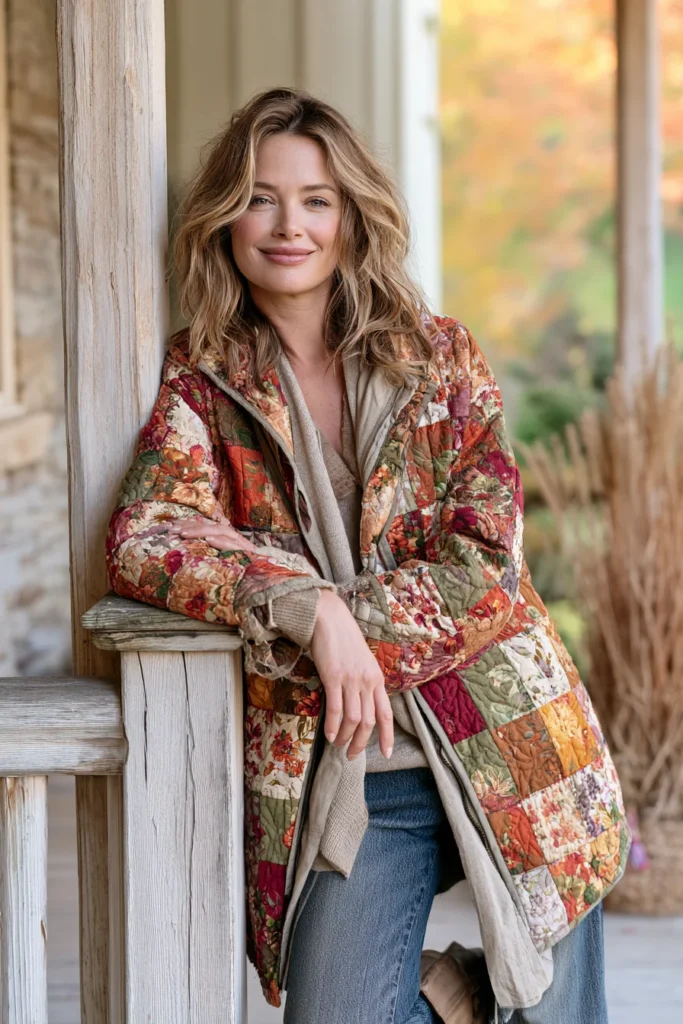
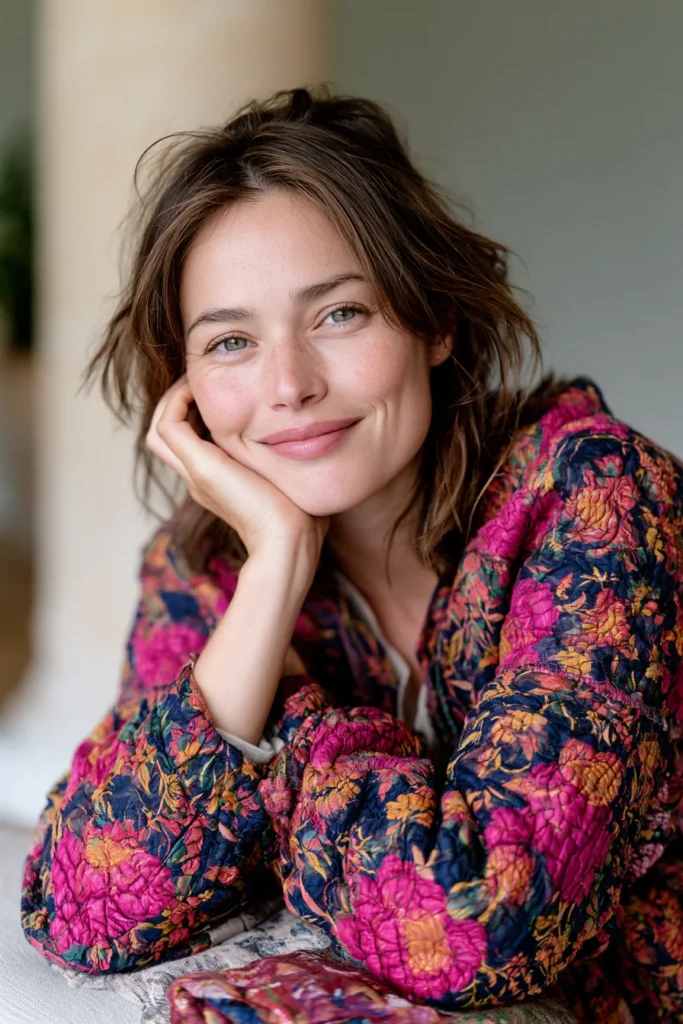
8. Belted Quilted Midi Jacket for a Flattering Feminine Silhouette
Most quilted jackets are boxy, and boxy has its charm – but sometimes you want shape. A belted quilted midi jacket is the answer: knee-length, softly A-line, and cinched at the waist with a self-fabric belt that creates a genuinely flattering silhouette. Worn open it drapes long and easy; belted, it defines the waist and turns a warm layer into something elegant. In rich autumn colors like deep rust, plum, olive, or burnt gold, it’s the piece that works over a dress for dinner and over jeans on a Saturday, and it looks far more designed than anything this simple has a right to.
Here’s the thing worth understanding before you start: this jacket gets its shape from a belt and gently shaped side seams, not from darts. Quilted fabric and darts don’t get along – a dart in three layers creates a thick, cone-shaped lump that never presses flat. The belt does the shaping work instead, which is both easier to sew and far more forgiving to fit.
How to Shape a Quilted Garment Without Darts
Three techniques give you a feminine silhouette without a single dart:
- Let the belt do the work. A belt cinched at the natural waist creates the shape. Everything above and below it can be cut generously, and the fabric will fold and drape around the cinch on its own.
- Shape the side seams gently. Take in about 1 inch at each side seam at the waist, tapering back out toward the hem. That’s enough to suggest a waist without fighting the fabric.
- Add a soft A-line flare. Add 2-3 inches to each side seam at the hem. That extra sweep is what makes the jacket drape beautifully when belted instead of bunching stiffly.
Together these do everything a dart would, with none of the bulk.
Finding the Right Belt Position
This is the detail that makes or breaks a belted jacket: the belt has to sit at your natural waist, which is not the middle of the jacket. The natural waist is the narrowest part of your torso, usually an inch or two above the navel.
Measure from your shoulder (at the base of your neck) straight down to your natural waist. On most adult frames this lands at about 15-17 inches. That measurement – not a guess, not the halfway point of the jacket – is where your belt loops go.
Get this wrong and the belt sits at the hip, which lengthens the torso and flattens the whole silhouette. Get it right and the jacket does exactly what you wanted it to.
Design Inspirations – Digitally Modified Images. Texture and color may vary from the actual product.
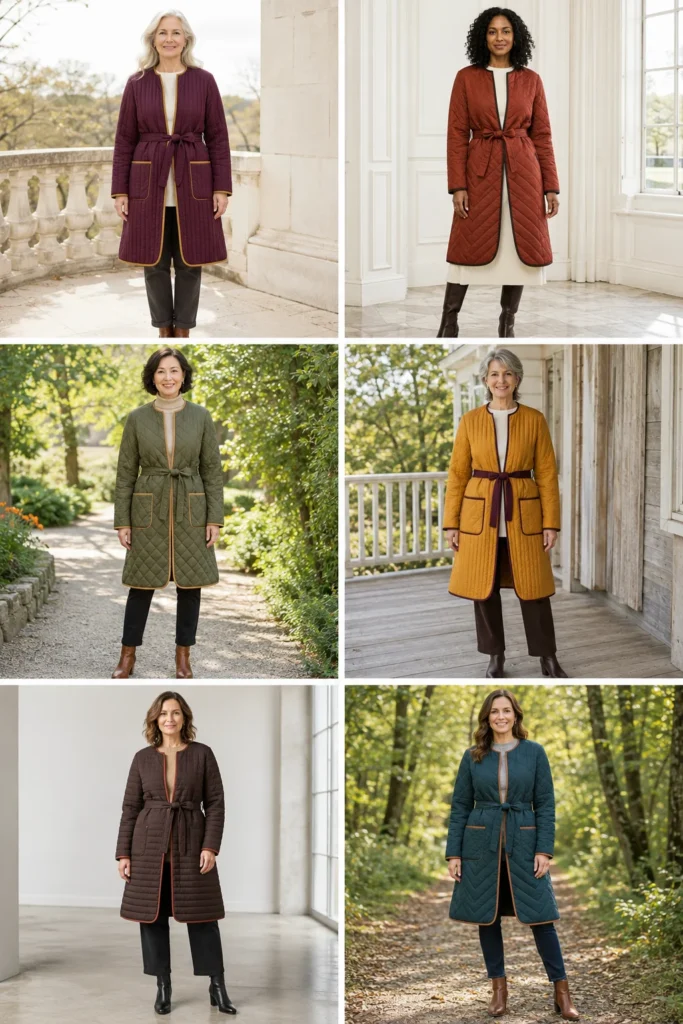
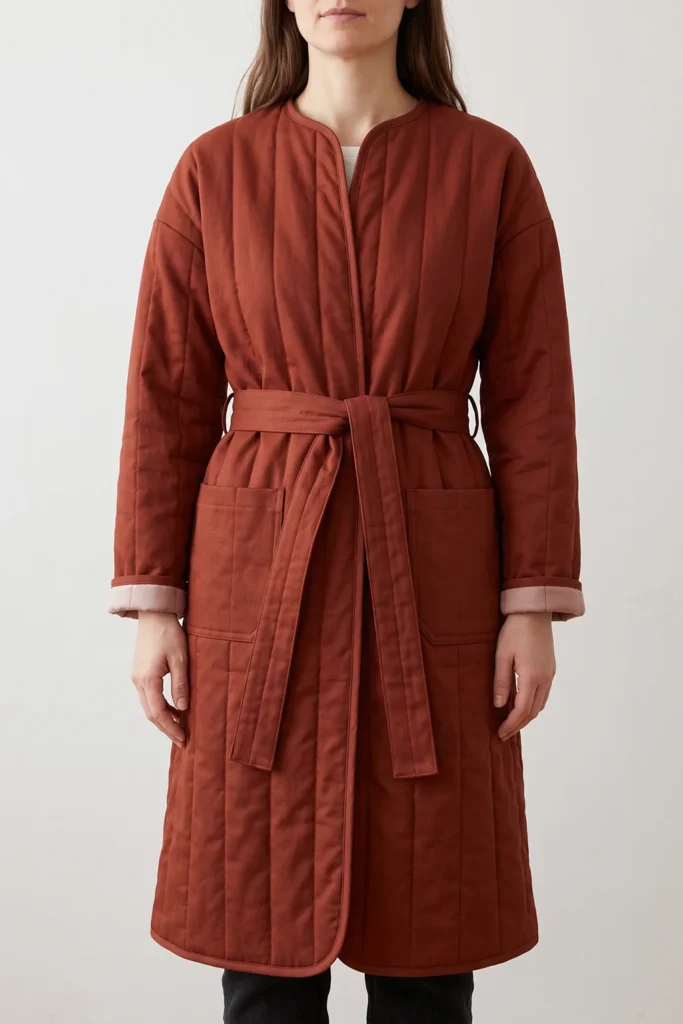
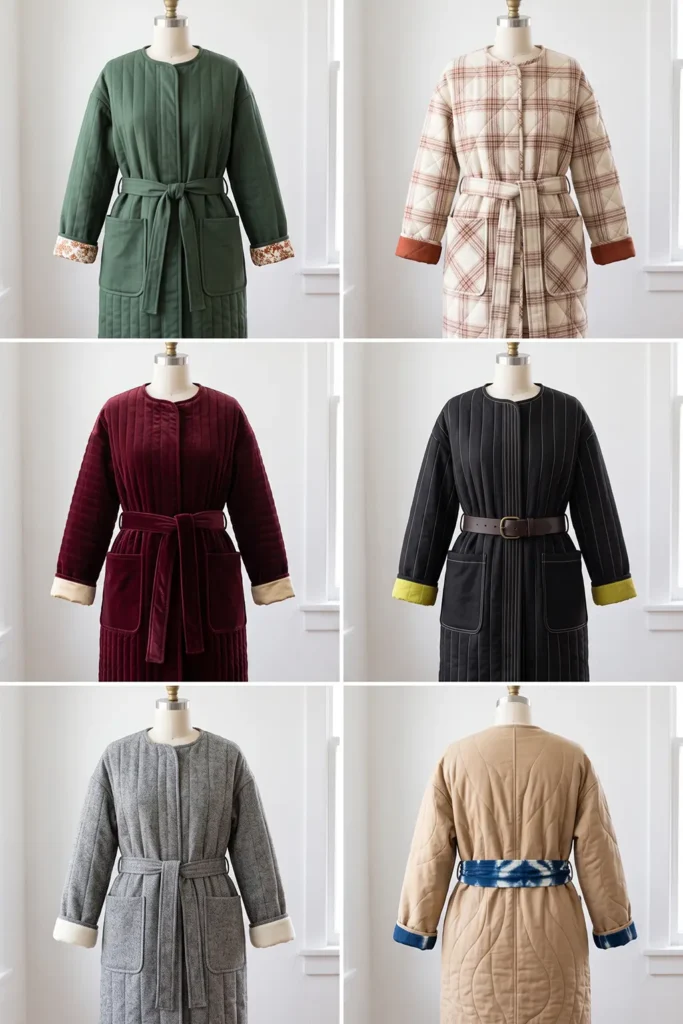
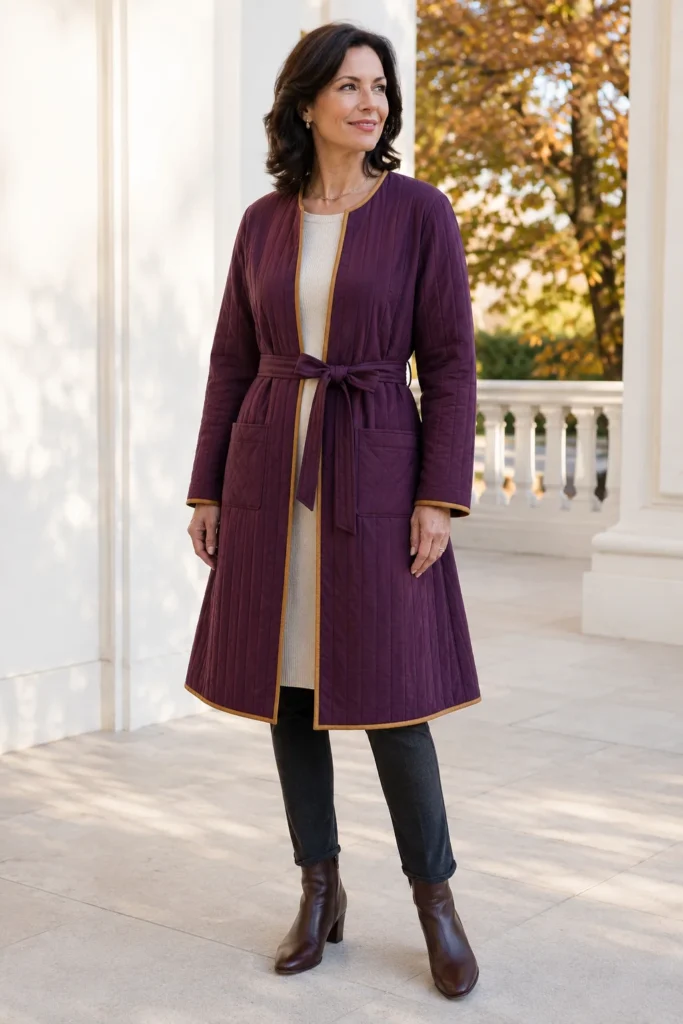
Getting the Midi Length Right
Remember that jacket length is measured from the shoulder down, not from the waist:
- Knee-length: about 38-40 inches on an average 5’5″ frame
- Just below the knee (classic midi): about 40-42 inches
Hold a tape at your shoulder and let it fall to where you want the hem, then add 2 inches for trimming. If you’re shorter or taller, these numbers shift – always measure on yourself.
A Little History: The Belted Coat
Belted outerwear has been a marker of shape and formality for well over a century. The trench coat, developed as military outerwear in the early twentieth century, made the self-fabric belt a standard feature of a coat, and it moved into civilian fashion afterward as a way to give an otherwise straight garment a defined waist. The wrap coat and the belted robe coat followed the same logic, and the silhouette has never really left – because it flatters almost everyone.
Interestingly, the belt-instead-of-tailoring approach is also one of the oldest ideas in clothing. Wrapped and sashed garments across many cultures – from robes to kimono to the layered wraps in the textile traditions of my own family’s background – achieve fit through wrapping and tying rather than cutting and darting. A belted quilted jacket sits squarely in that tradition: shape from the sash, not from the scissors.
Finished Garment
- Style: knee-length A-line jacket, dropped shoulders, no closure other than the belt, belt loops at the natural waist, optional patch pockets
- Length: 38-42 inches shoulder to hem
- Belt: 3½ × 65 inches cut, finishing about 1½ inches wide
- Belt loops: placed at your shoulder-to-waist measurement, usually 15-17 inches down
- Patch pockets (optional): 6 × 6½ inches finished, placed below the belt line
- Skill level: confident beginner
- Core techniques: shaping without darts, belt and belt loop construction, quilting yardage, bound edges
Materials Needed
- Outer fabric: 3¼ yards of a mid-weight cotton, sateen, or fine corduroy in a rich solid
- Middle layer: 2¾ yards of low-loft cotton batting, or cotton flannel
- Lining: 3¼ yards of soft cotton, or a lightweight rayon for extra drape
- Binding: ¾ yard for interior seams and outer edges
- Thread: neutral cotton, plus a 90/14 needle
- Walking foot, rotary cutter, cutting mat, a long ruler, pins or clips, iron
- A simple A-line or straight coat pattern, dartless, with dropped shoulders
Beginner tip: a belted jacket needs to drape and fold at the waist, so use low-loft batting and quilt sparsely – about 3 inches apart. Densely quilted fabric will not cinch; it will crease stiffly and sit away from the body, which defeats the entire silhouette.
Choosing Your Colors
A belted midi reads elegant, so a single rich solid does more for it than a busy print:
- Deep rust or brick – warm and dramatic
- Plum or wine – sophisticated for later autumn
- Olive or forest green – grounded and versatile
- Burnt gold or ochre – striking and unexpected in a long silhouette
- Chocolate or espresso – the most classic, coat-like option
- Deep teal – modern and flattering against warm skin tones
For a designer touch, make the belt in a contrasting color or a subtle print – a chocolate belt on a rust jacket, for instance, draws the eye straight to the waist, which is exactly where you want it. Contrasting binding on the front edge does the same job for the vertical line.
Cutting Measurements
- Two fronts, one back, two sleeves: cut to your pattern at 38-42 inches, with 1 inch taken in at each side seam at the waist and 2-3 inches added at each side seam at the hem
- Belt: one strip at 3½ × 65 inches (piece it if your fabric isn’t long enough; a seam at the back is invisible when worn)
- Belt loops: two strips at 2 × 4 inches
- Patch pockets (optional): two at 7 × 7½ inches
- Binding: 2½-inch strips, about 6-7 yards
Step-by-Step Guide
Step 1 – Take your two key measurements. Measure shoulder to natural waist (usually 15-17 inches) and shoulder to desired hem (38-42 inches). Write both down – the whole jacket depends on them.
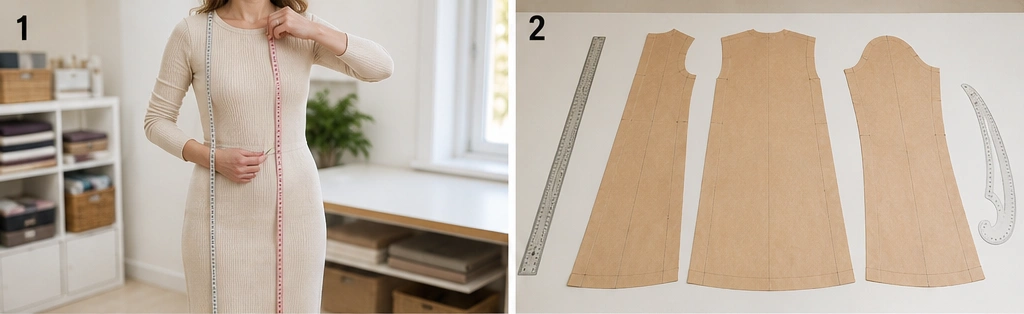
Step 2 – Adjust the pattern. Lengthen or shorten the pattern to your hem measurement, take in 1 inch at each side seam at the waist point, and add 2-3 inches to each side seam at the hem for the A-line sweep. Mark your natural waist point clearly on the side seams.
Step 3 – Layer the panels. For each piece, spread the lining wrong side up, smooth the low-loft batting over it, then the outer fabric right side up. Smooth from the center outward and baste generously – these are long panels.
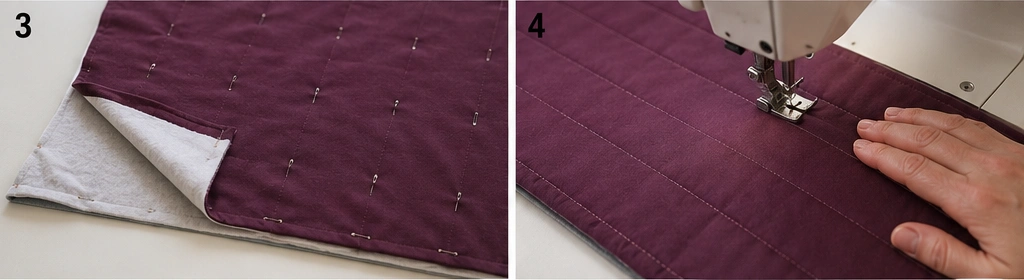
Step 4 – Quilt sparsely, center outward. Quilt straight lines about 3 inches apart, starting from the center of each panel and working outward, alternating your stitching direction so the long panels don’t skew. Sparse quilting is essential here; the fabric must stay soft enough to cinch.
Step 5 – Cut the jacket pieces. Using a long ruler, cut two fronts, one back, and two sleeves from the quilted panels, following your adjusted pattern. Transfer the natural-waist marks to the cut pieces.
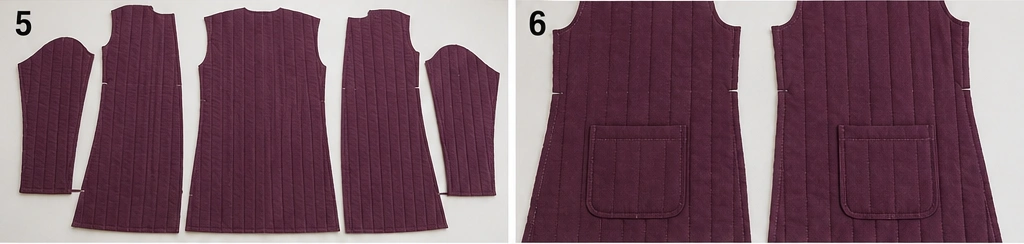
Step 6 – Make the patch pockets (optional). Fold each pocket’s top edge down twice and stitch, trim the bottom corners diagonally, then press the sides and bottom under by ½ inch.
Step 7 – Attach the pockets below the belt line. Topstitch a pocket to each front, positioning them below your marked waist point so the belt doesn’t cut across them. Bar-tack the top corners.
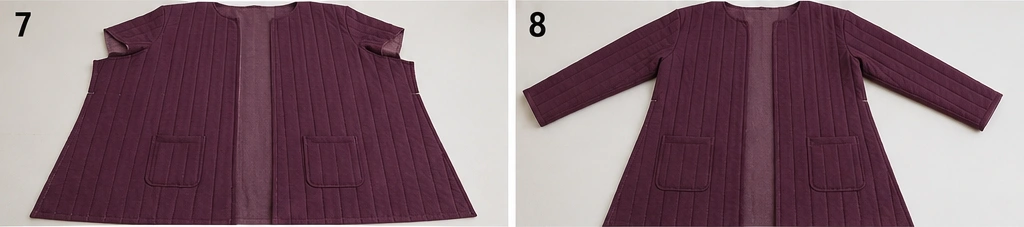
Step 8 – Sew the shoulder seams. With right sides together and a ½-inch seam, join the fronts to the back at the shoulders. Press the seams open.
Step 9 – Set the sleeves. Attach each sleeve to its armhole with a ½-inch seam. A dropped shoulder keeps this simple through the quilted layers.

Step 10 – Sew the shaped side seams. Sew from the cuff, down the underarm, and along the side seam in one continuous line, following your shaped curve – in at the waist, out toward the hem. Go slowly around the waist curve so it stays smooth rather than angular.
Step 11 – Make the belt. Fold the 3½ × 65-inch strip in half lengthwise, right sides together, and stitch along the long edge and one short end with a ½-inch seam. Turn right side out (a safety pin or turning tool helps on a strip this long), press flat, and close the open end. The finished belt should be about 1½ inches wide.
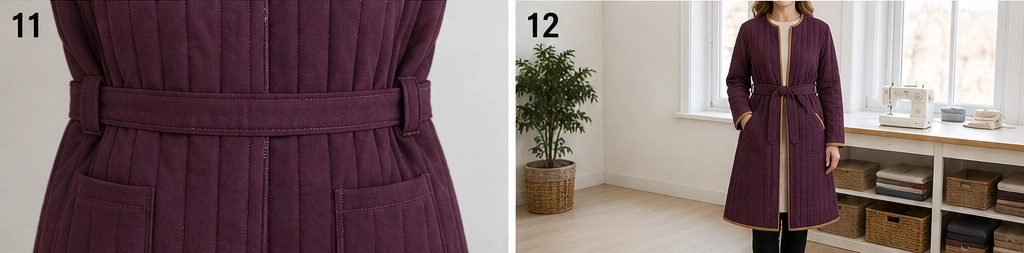
Step 12 – Make and attach the belt loops. Fold each 2 × 4-inch strip into a narrow loop, press, and topstitch the long edges. Attach one to each side seam exactly at your marked natural waist point, stitching the ends down securely. Leave the loop slightly loose so the belt slides through easily.
Step 13 – Bind the interior seams. Encase every raw interior seam allowance in binding so the inside is tidy – especially important on a jacket you’ll often wear open, where the front edges flip back as you move.
Step 14 – Bind the outer edges and press. Bind the front opening, neckline, hem, and cuffs in one continuous line. Press the jacket, thread the belt through the loops, and try it both ways – open for a long, easy line, belted for a defined waist. Adjust the loop position now if the belt isn’t sitting quite where you want it.
Assembly at a Glance
- Measure shoulder to natural waist (15-17 in) and shoulder to hem (38-42 in).
- Adjust pattern: -1 inch per side seam at the waist, +2-3 inches at the hem; mark the waist point.
- Layer lining, low-loft batting, outer fabric; baste well.
- Quilt 3 inches apart, center outward, alternating direction.
- Cut two fronts, back, two sleeves; transfer waist marks.
- Fold, trim, and press optional patch pockets.
- Topstitch pockets below the belt line; bar-tack corners.
- Sew shoulder seams (½-inch, pressed open).
- Set the sleeves.
- Sew the shaped side seams – in at the waist, out at the hem.
- Make the 3½ × 65-inch belt; turn and press.
- Make two belt loops; attach at the marked waist point.
- Bind all interior seams.
- Bind the outer edges; press, thread the belt, and check the fit.
Beginner Tips for Success
- No darts – quilted fabric can’t take them cleanly. The belt and shaped side seams do the shaping.
- Measure to your natural waist, not the middle of the jacket, for belt loop placement.
- Quilt sparsely (3 inches apart) so the fabric can actually cinch.
- Add a 2-3 inch A-line flare at each side hem so it drapes when belted.
- Place pockets below the belt line so the belt doesn’t cut across them.
- Make the belt in a contrasting color to draw the eye to the waist.
- Try it on before finalizing the loops; waist position is worth getting exactly right.
Styling It & Gift Ideas
The beauty of this jacket is that it’s really two garments. Worn open, it’s a long, easy layer over jeans and a knit, with the vertical line doing all the flattering work. Belted, it defines the waist and instantly reads as dressed-up – lovely over a sweater dress with boots, or over slim trousers and a fine knit for dinner. Keep what’s underneath simple so the silhouette leads, and let the belt be the focal point.
Its elegance and forgiving fit make it a lovely gift:
- A milestone or holiday gift for someone who dresses up a little – this reads as a real coat, not a craft project
- A gift for a hard-to-fit person, since the belt adjusts the shape rather than relying on precise measurements
- A work-wardrobe gift in plum, espresso, or olive for someone who wants one elegant layer
- A special-occasion gift in a rich sateen for something a little more glamorous
If you’re sewing it for someone else, the belt is your safety net – it accommodates a range of sizes far better than a fitted jacket would, so you only need their height and approximate size.
Final Thoughts
A belted quilted midi jacket proves that a warm layer doesn’t have to be shapeless. By skipping darts entirely and letting a self-fabric belt and gently shaped side seams create the silhouette, you get a genuinely flattering, feminine coat that’s far easier to sew than it looks. Quilt it sparsely so it cinches, place those belt loops at your true natural waist, and add a soft A-line sweep at the hem – and you’ll have an elegant autumn layer that works open or belted, over jeans or over a dress.
Other Design Inspirations – Digitally Modified Images. Texture and color may vary from the actual product.
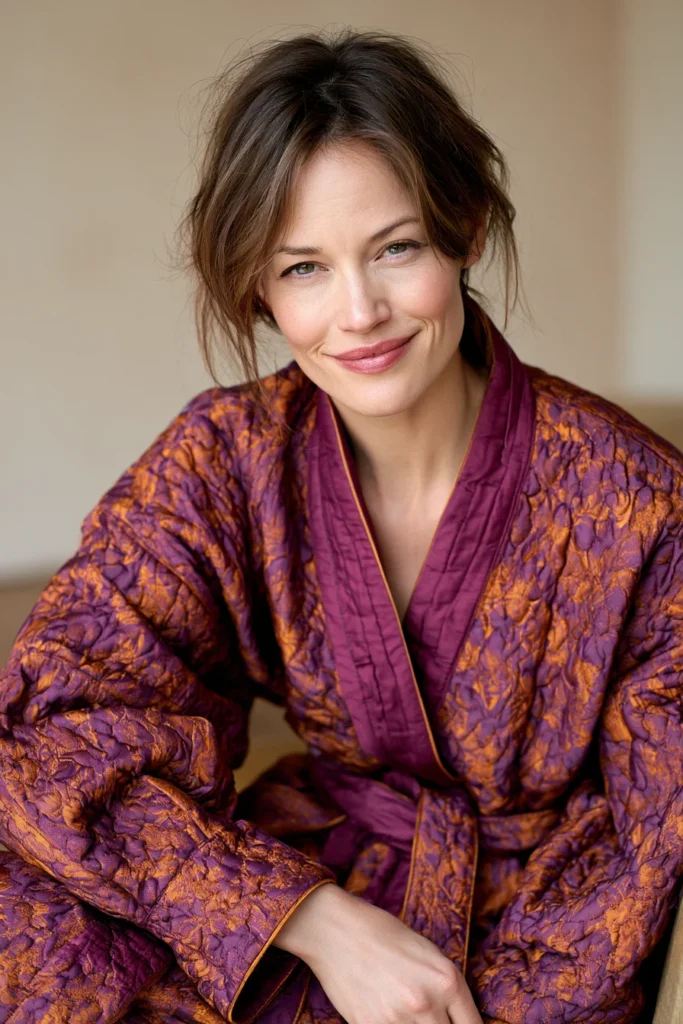
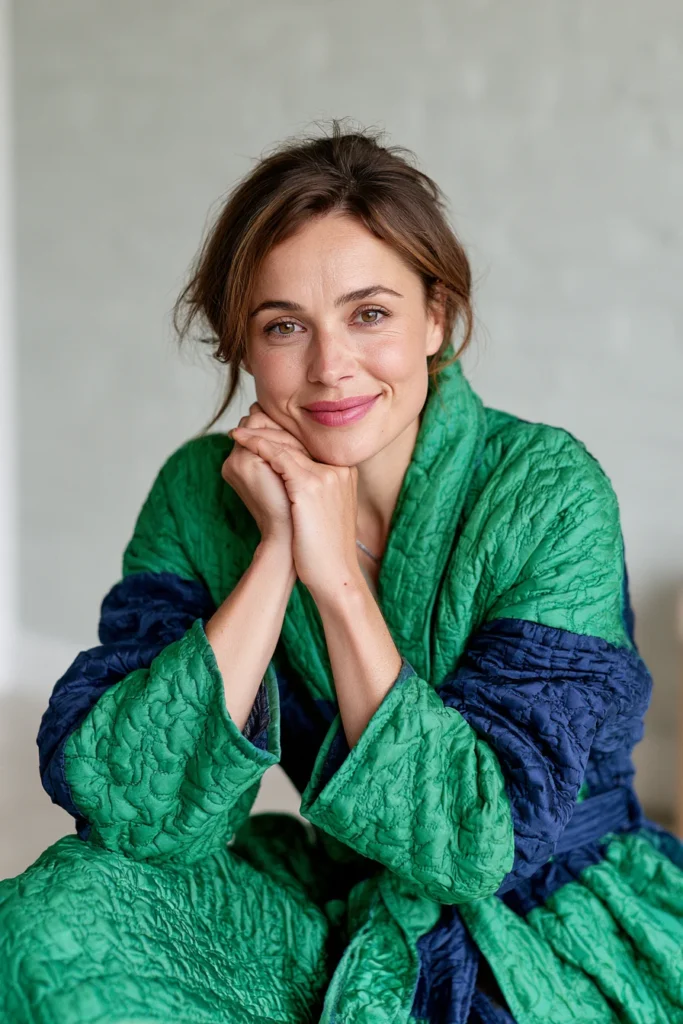
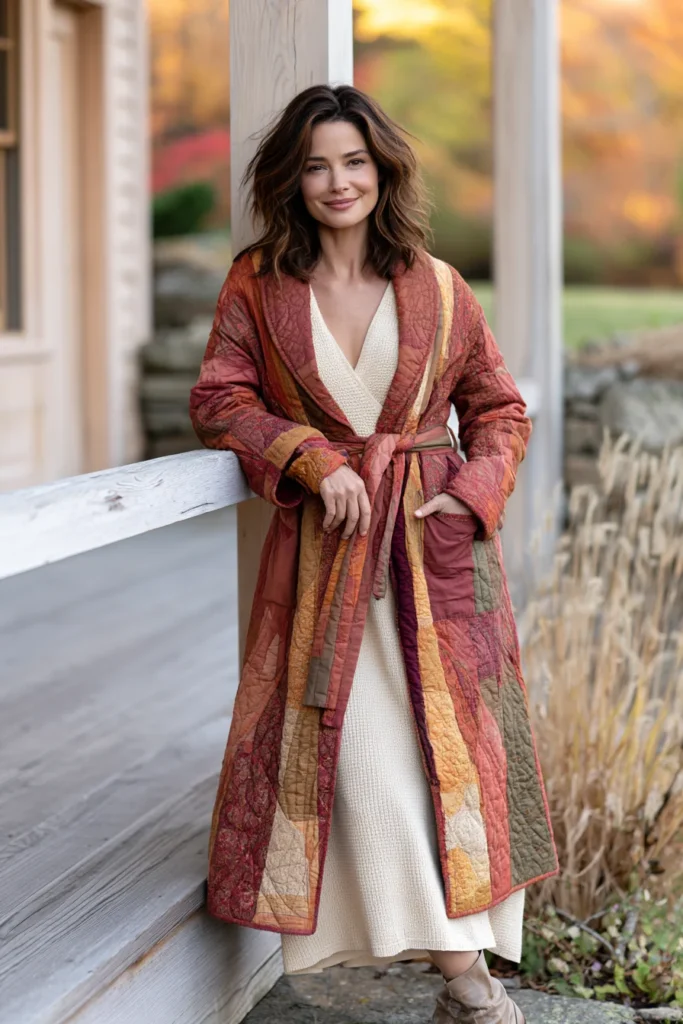
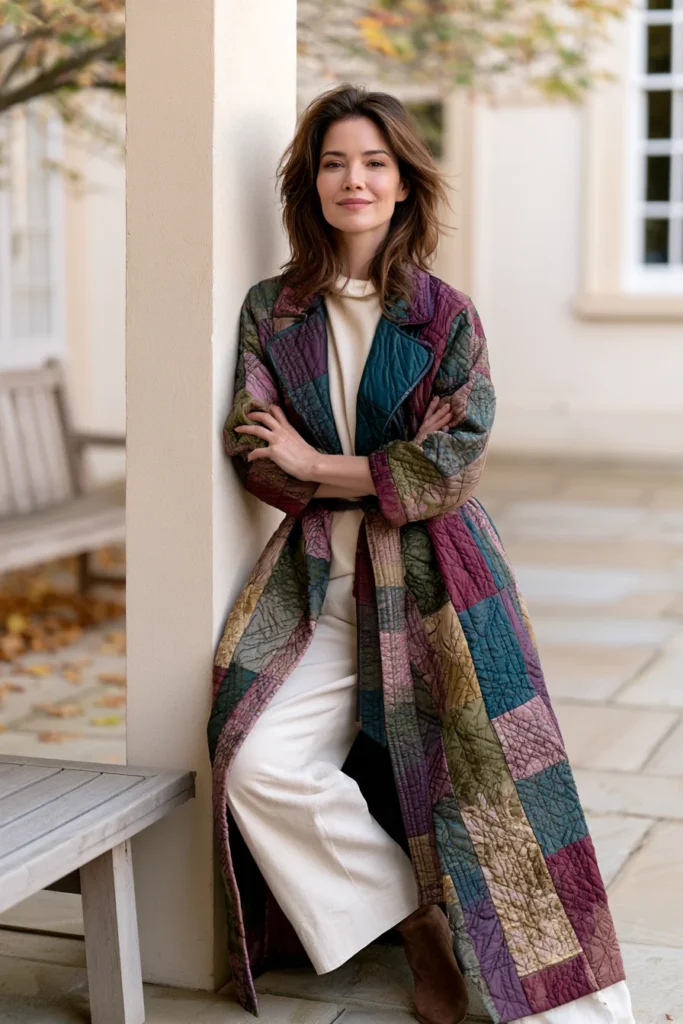
9. Quilted Denim Jacket for Casual Fall Street Style
The denim jacket is the most universally worn layer on earth, and quilting it turns a three-season staple into a genuinely warm autumn piece. A quilted denim jacket keeps everything good about the original – the boxy trucker shape, the chest pockets, the button front, that unbeatable go-with-anything quality – and adds a soft insulating layer that makes it work when the temperature actually drops. In classic indigo with contrast gold topstitching, or in vibrant colored denim like rust, mustard, or teal, it’s the easiest street-style layer you can own: throw it over anything, and the outfit works.
Denim is a wonderful fabric to sew, but it has its own rules. Choose the wrong weight and your machine will fight you; skip the topstitching and it won’t read as denim at all. Those two decisions shape the whole project, so they’re worth getting right before you start.
Working With Denim: Weight, Needles, and Thread
Choose a lighter denim than you think. Denim is sold by weight in ounces per square yard. A pair of stiff jeans is often 12-14 oz – far too heavy once you add batting and lining. For a quilted jacket, use 8-10 oz denim, which is mid-weight and supple. Three layers of that is already substantial; three layers of 14 oz will be unwearable and unsewable.
Use the right needle. A jeans/denim needle in size 90/14 or 100/16 has a sharp point and a strong shaft built to punch through thick layers without deflecting. A universal needle will skip stitches or snap on the seam intersections.
Topstitching is the signature. What makes a denim jacket look like a denim jacket is the heavy contrast topstitching – traditionally gold or orange. Use proper topstitch thread (also sold as jeans thread) in the needle with regular thread in the bobbin, and lengthen your stitch to about 3.0-3.5 mm. Short stitches in heavy thread look cramped; long stitches look confident and correct.
Manage the bulk. Where several seams meet, quilted denim gets very thick. Press hard with steam, and tap stubborn seam intersections flat with a wooden clapper or a small mallet before sewing across them. It genuinely helps.
Prewash and use a color catcher. Denim shrinks and bleeds, especially dark indigo.
Design Inspirations – Digitally Modified Images. Texture and color may vary from the actual product.
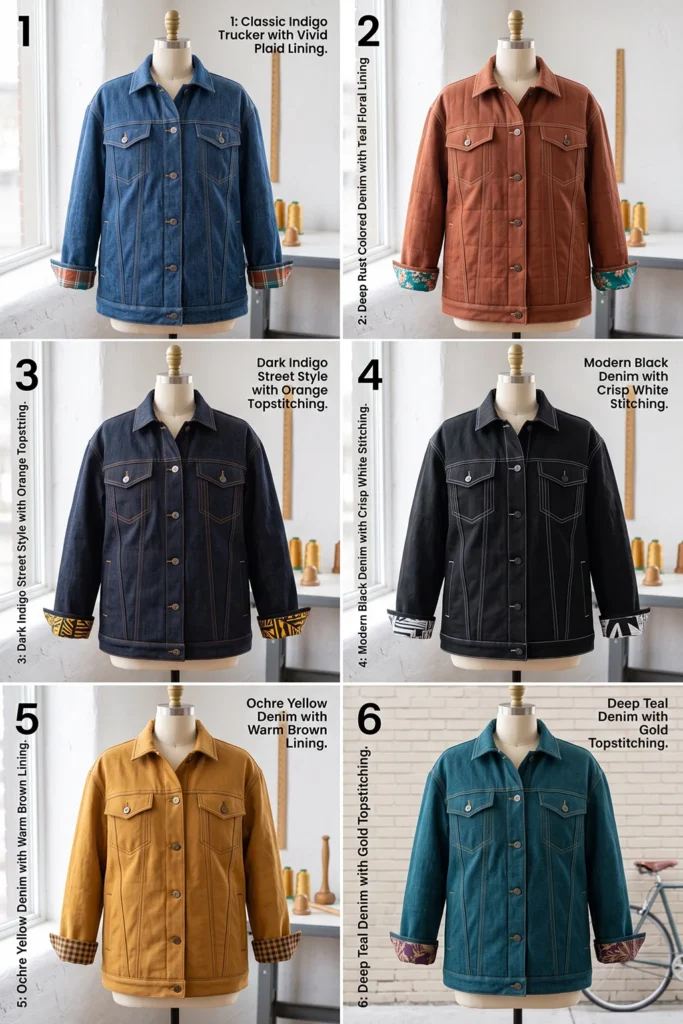
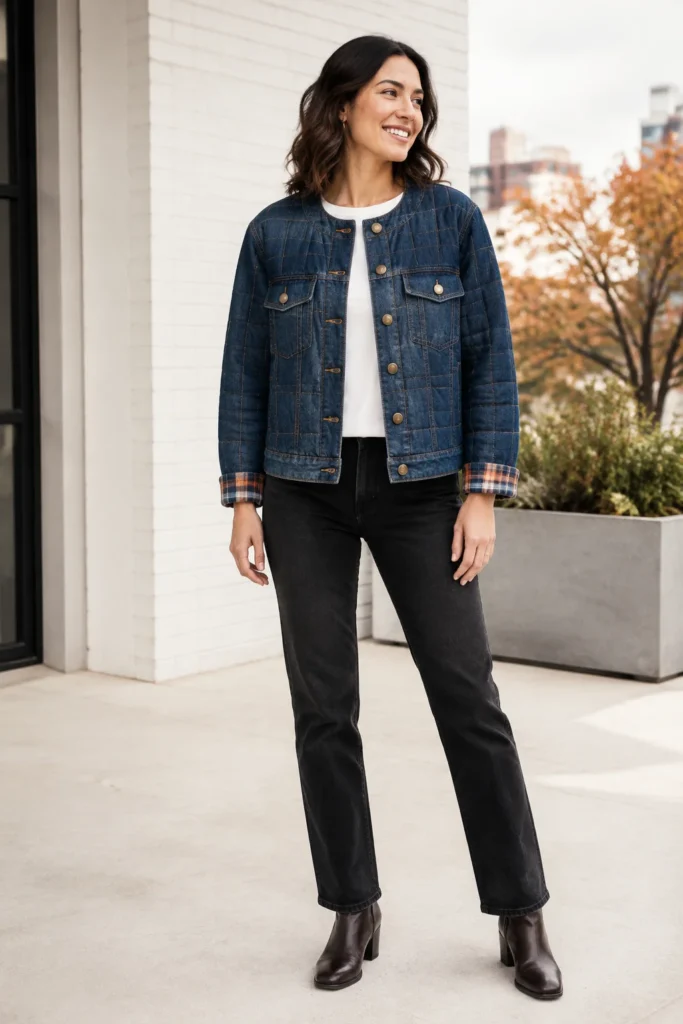
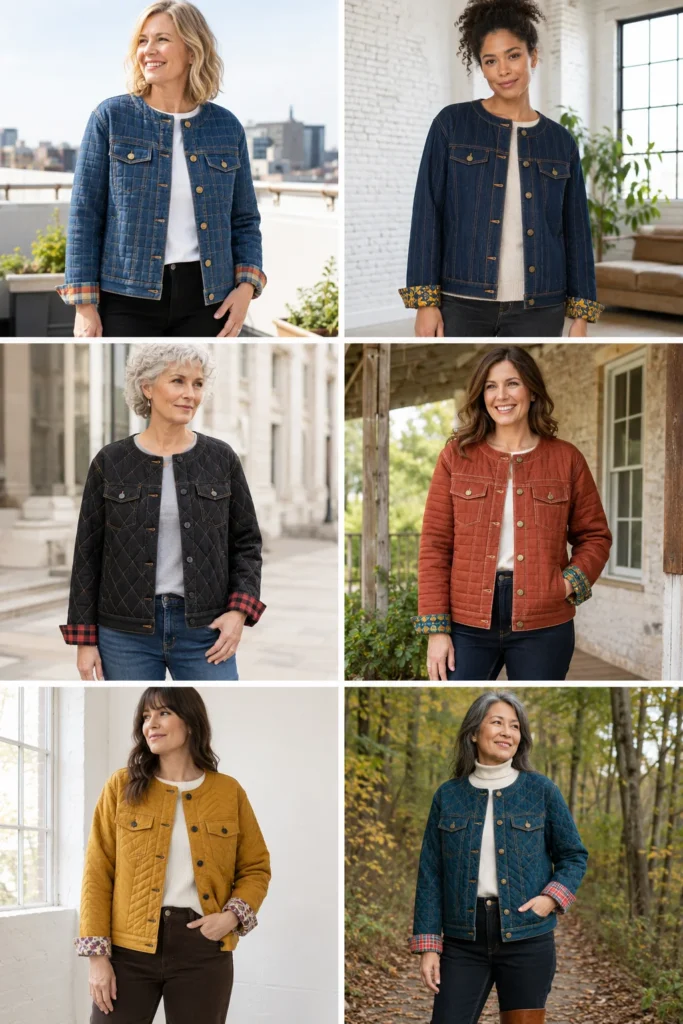
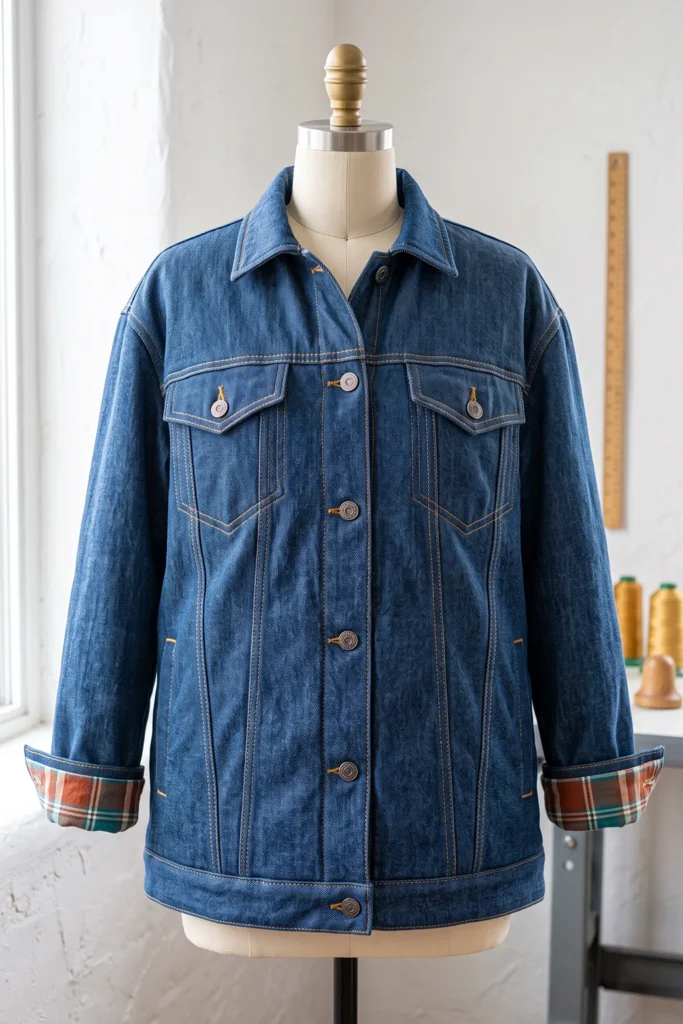
A Quicker Alternative: Quilt an Existing Jacket
If a full garment feels like a lot, there’s a popular shortcut: take a thrifted denim jacket and quilt panels into it – either by quilting fabric and stitching it to the inside as a lining, or by adding quilted patches to the outside. It’s faster, sustainable, and gives you the authentic worn-in denim look for very little money. Everything below covers making one from scratch, but the fabric and topstitching advice applies either way.
A Little History: The Trucker Jacket
The denim jacket has been around far longer than most people realize. Levi Strauss & Co. made a denim “blouse” for workers in the 1880s, and the design evolved through several generations before arriving at the Type III in 1962 – the pointed-flap chest pockets, the V-shaped front seams, the tapered fit – which became the trucker jacket we all recognize today. It moved from workwear to counterculture to complete wardrobe staple, and the silhouette has barely changed in sixty years, which is about the highest compliment a garment design can receive.
The fabric’s name has a nice story too. Denim is widely thought to come from serge de Nîmes, a sturdy twill from the French city of Nîmes, while jeans traces to Gênes, the French name for Genoa, where similar cotton cloth was made. Two European cities, one American icon.
Finished Garment
- Style: boxy trucker-inspired jacket – button front, two flap chest pockets, dropped shoulders, waist-length
- Length: about 24-26 inches from shoulder to hem (trucker jackets sit at the waist or high hip)
- Chest pockets: 5 × 5½ inches finished, with flaps
- Buttons: 6 down the front, plus 2 on the pocket flaps
- Skill level: confident beginner
- Core techniques: denim handling, contrast topstitching, quilting yardage, patch pockets with flaps
Materials Needed
- Denim: 2¾ yards of 8-10 oz denim (indigo, black, or a vibrant colored denim)
- Middle layer: 2½ yards of low-loft cotton batting, or cotton flannel
- Lining: 2½ yards of soft cotton – a bright print or plaid here is a great surprise
- Interfacing: ¼ yard lightweight woven, for the front bands and pocket flaps
- Topstitch thread: one spool in gold, orange, or a contrast color
- Regular thread: neutral, for construction and the bobbin
- Needles: jeans/denim needles, 90/14 and 100/16
- Buttons: 8 total (metal shank or jeans-style buttons suit denim)
- Binding: ½ yard for interior seams
- Walking foot, rotary cutter, cutting mat, ruler, clips (better than pins on denim), iron, wooden clapper or small mallet
- A boxy trucker or chore jacket pattern
Beginner tip: use clips instead of pins. Pins struggle through quilted denim and leave visible holes; quilting clips hold the layers firmly without fighting you.
Choosing Your Colors
Classic or vibrant – denim works both ways:
Classic:
- Mid-wash indigo with gold topstitching – the timeless combination
- Dark indigo with orange topstitching, for a sharper contrast
- Black denim with white or gold topstitching, for a modern look
Vibrant colored denim:
- Rust or brick denim with cream topstitching
- Mustard or ochre denim with chocolate topstitching
- Teal or forest green denim with gold topstitching
- Deep plum denim with tonal or gold topstitching
Whichever you choose, make the lining bright. A denim jacket lined in a vivid plaid, floral, or bold print is a genuinely delightful detail every time you roll the cuffs.
Cutting Measurements
- Two fronts, one back, two sleeves: cut to your pattern at 24-26 inches finished length
- Front bands: two strips at 3½ × 27 inches (finishing 1½ inches wide), plus interfacing
- Chest pockets: two at 6 × 6½ inches (finishing 5 × 5½ inches)
- Pocket flaps: four pieces at 6 × 2½ inches (two per flap), plus interfacing
- Cuffs: two strips at 6 × 11 inches (finishing about 2½ inches deep)
- Binding: 2½-inch strips, about 5 yards
Step-by-Step Guide
Step 1 – Prewash everything. Wash and dry the denim and lining with a color catcher, then press. Denim shrinks noticeably and dark indigo bleeds heavily – this step is not optional.
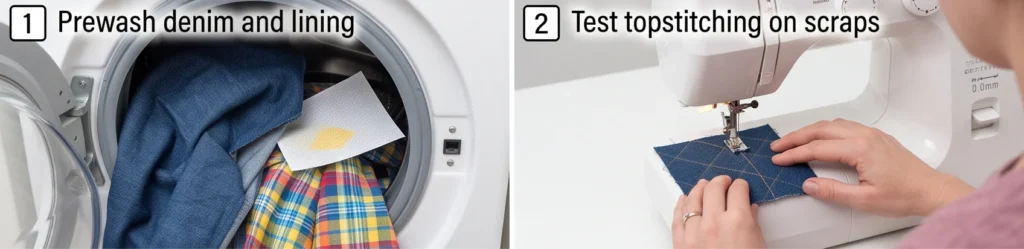
Step 2 – Test your stitch settings. Before touching the real fabric, make a small quilted denim sandwich from scraps and test your topstitching: jeans needle, topstitch thread in the needle, regular thread in the bobbin, stitch length 3.0-3.5 mm. Adjust tension until the stitch looks even and bold. Two minutes here saves a lot of unpicking.
Step 3 – Layer the panels. For each garment piece, spread the lining wrong side up, smooth the batting or flannel over it, then the denim right side up. Smooth from the center outward and baste with clips or spray.
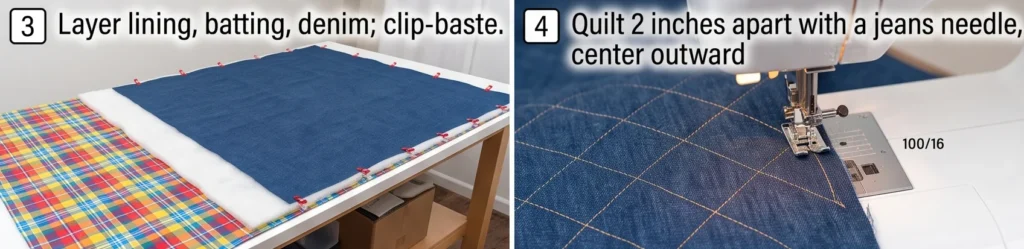
Step 4 – Quilt the panels. Using a walking foot and a 100/16 jeans needle, quilt straight lines or a diagonal grid about 2 inches apart, working from the center outward. Regular thread is fine for the quilting itself; save the topstitch thread for the visible detail work.
Step 5 – Cut the jacket pieces. Cut two fronts, one back, and two sleeves from the quilted panels, on the straight grain.
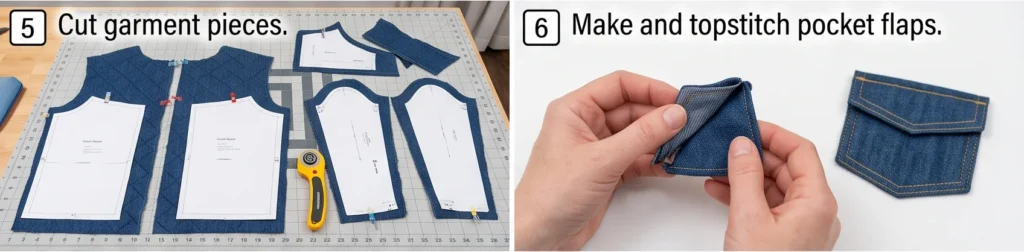
Step 6 – Make the pocket flaps. Interface one piece of each flap pair, sew the two pieces right sides together around three sides with a ½-inch seam, trim the corners, turn, and press. Topstitch around the finished edge in your contrast thread.
Step 7 – Make and attach the chest pockets. Fold each pocket’s top edge down twice and stitch, trim the bottom corners diagonally, press the sides and bottom under by ½ inch, then topstitch the pockets onto the fronts in contrast thread. Bar-tack the top corners.
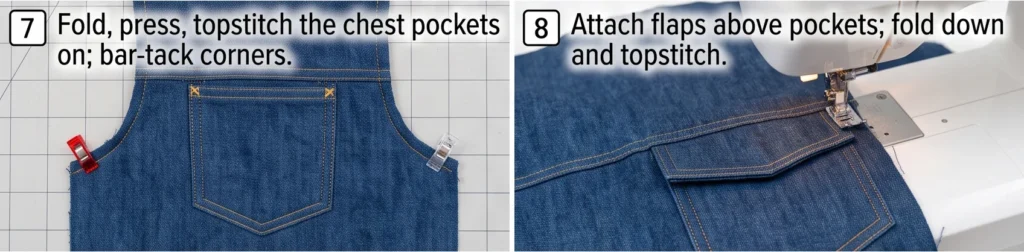
Step 8 – Attach the flaps above the pockets. Position each flap about ¼ inch above its pocket opening, stitch across the top, then fold the flap down and topstitch along the fold line so it lies flat. This double row of stitching is a classic trucker detail.
Step 9 – Sew the shoulder seams. With right sides together and a ½-inch seam, join the fronts to the back at the shoulders. Press seams open and tap them flat with a clapper or mallet.
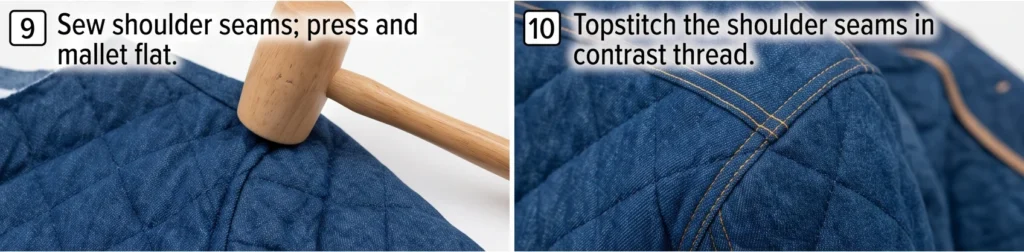
Step 10 – Topstitch the shoulder seams. Press the seam allowances to one side and topstitch through all layers about ¼ inch from the seam line in contrast thread. This is what gives a denim jacket its structured, authentic look – and it also flattens the bulk beautifully.
Step 11 – Set the sleeves and sew the sides. Attach each sleeve with a ½-inch seam, then sew from the cuff down the underarm and along the side seam in one continuous line. Try the jacket on to check fit and sleeve length.
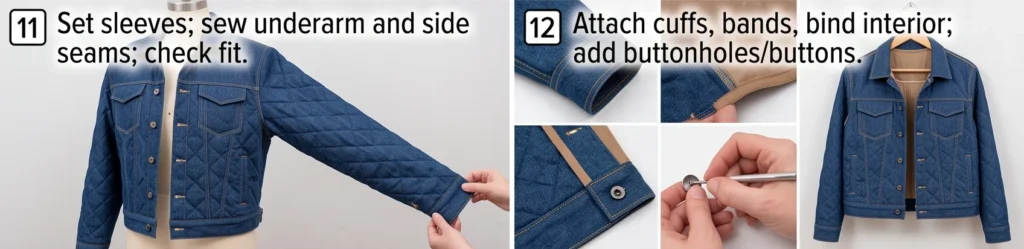
Step 12 – Attach the cuffs. Interface each cuff strip, fold and press, then attach to the sleeve end, enclosing the raw edge. Topstitch in contrast thread. The cuffs should turn back to show that bright lining.
Step 13 – Attach the front bands and bind the interior. Interface each band, press in half, sew to the front edge right sides together, fold to the inside, and topstitch down in contrast thread. Then bind all interior seam allowances and hem the bottom edge.
Step 14 – Buttonholes, buttons, and final press. Mark 6 buttonholes evenly down the front, about 3½ inches apart, with one at the fullest part of the bust to prevent gaping, plus one on each pocket flap. Sew the buttonholes, attach the buttons, and give everything a firm press. Wash gently on cold with a color catcher, and the jacket will soften into that perfect broken-in denim feel.
Assembly at a Glance
- Prewash denim and lining with a color catcher; press.
- Test topstitching on scraps: jeans needle, topstitch thread, 3.0-3.5 mm stitch.
- Layer lining, batting/flannel, denim; clip-baste.
- Quilt about 2 inches apart with a 100/16 jeans needle, center outward.
- Cut two fronts, back, and two sleeves.
- Make and topstitch two pocket flaps.
- Fold, press, and topstitch the chest pockets on; bar-tack corners.
- Attach flaps above the pockets; fold down and topstitch.
- Sew shoulder seams (½-inch); press and mallet flat.
- Topstitch the shoulder seams in contrast thread.
- Set sleeves; sew underarm and side seams; check fit.
- Attach and topstitch the cuffs.
- Attach front bands; bind interior seams; hem.
- Add 6 front buttonholes (one at the bust point) and flap buttons; press.
Beginner Tips for Success
- Use 8-10 oz denim, not heavy jeans weight – three layers add up fast.
- Fit a jeans/denim needle (90/14 or 100/16); universal needles skip and snap.
- Topstitch with proper topstitch thread at 3.0-3.5 mm – it’s what makes it read as denim.
- Use clips, not pins; pins struggle through quilted denim and leave marks.
- Tap thick seam intersections flat with a clapper or mallet before sewing across them.
- Choose a bright lining – it’s the best part of rolling the cuffs.
- Prewash with a color catcher; indigo bleeds heavily.
Styling It & Gift Ideas
A quilted denim jacket is the definition of easy – it goes over everything. Wear it over a hoodie or sweatshirt for proper street style, over a tee and jeans for the classic double-denim look (a different wash top and bottom keeps it sharp), or over a floral dress with boots for a softer contrast. Roll the cuffs to flash the lining, and let it stay unbuttoned most of the time. Because denim is a neutral, it works with literally any color you put under it.
Its universal appeal makes it one of the easiest gifts to give:
- A teen or young adult gift – denim jackets are always in style and always worn
- A birthday gift for someone hard to shop for, since a denim jacket suits almost every wardrobe
- A personalized gift with a lining in a fabric that means something to them
- An upcycled gift made from a thrifted jacket and quilted panels – sustainable and full of character
If you’re making it for someone else, go slightly roomy – trucker jackets are meant to layer over sweatshirts and knits, and the boxy cut is forgiving to size.
Final Thoughts
A quilted denim jacket takes the most reliable layer in any wardrobe and makes it genuinely warm enough for autumn. The construction is straightforward once you respect the fabric: choose a lighter denim, fit a jeans needle, and topstitch boldly in contrast thread, because that stitching is what makes a denim jacket look like a denim jacket. Line it in something bright, wear it over everything, and it’ll only look better as it fades and softens with the years.
Other Design Inspirations – Digitally Modified Images. Texture and color may vary from the actual product.
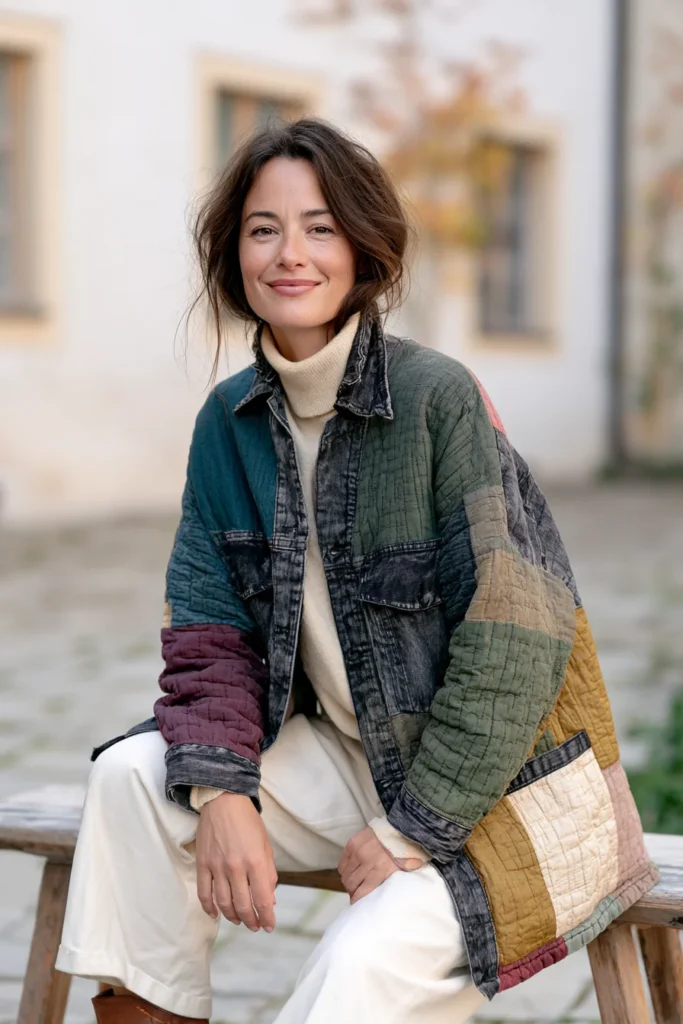
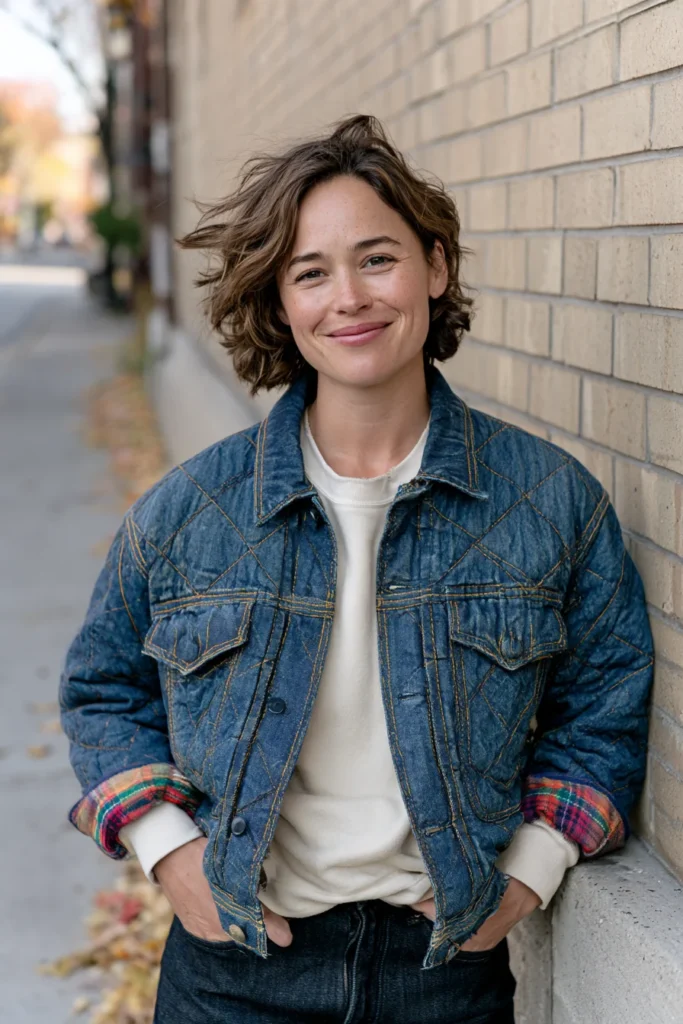
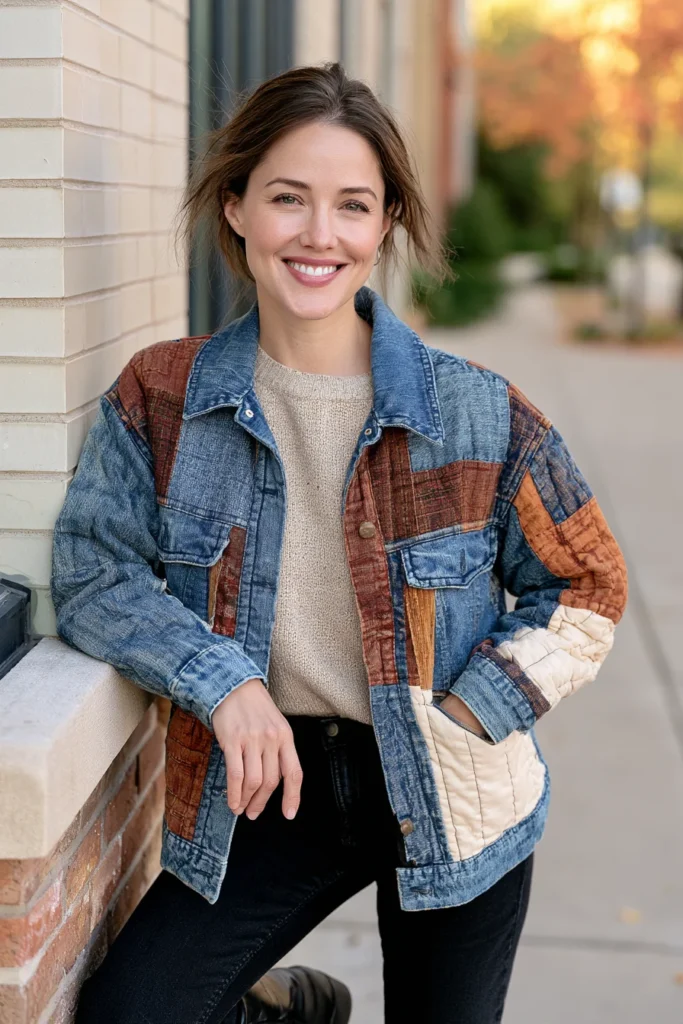
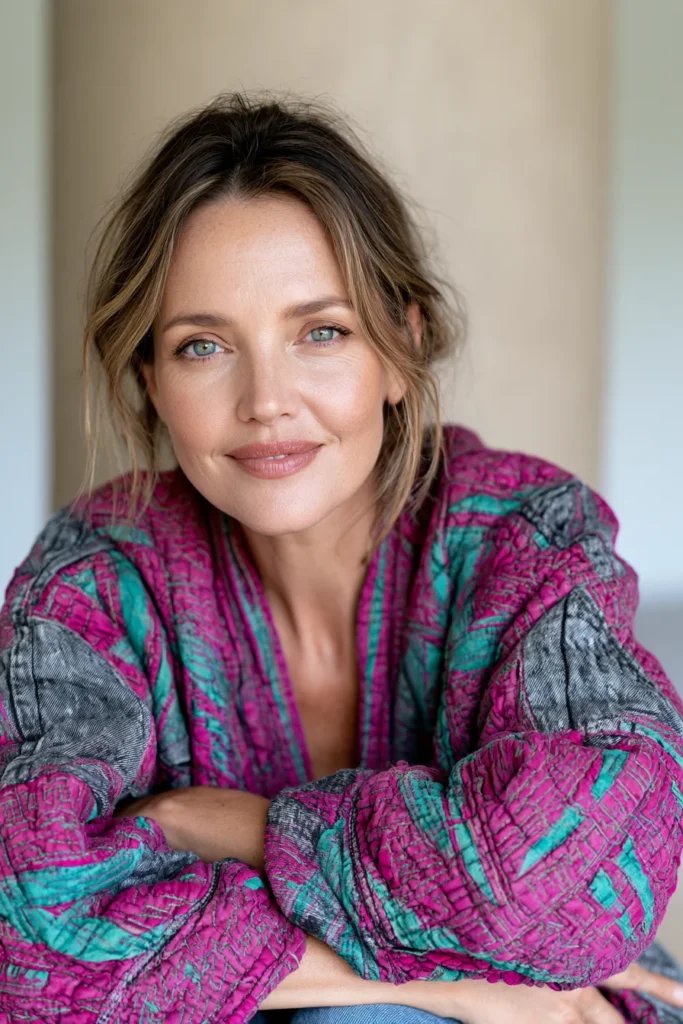
10. Ombre Quilted Jacket in Golden Harvest Tones
An ombre jacket is quilting at its most painterly. Instead of a print or a patchwork, the whole garment is built from horizontal strips that shift gradually through a single warm range – pale butter at the shoulders, deepening through honey, amber, and pumpkin, into rich rust at the hem. Worn, it looks like light moving down the body, and it turns the simplest boxy jacket into something genuinely striking. In golden harvest tones it’s autumn distilled: no leaves, no motifs, just the season’s exact colors flowing from one into the next.
The sewing is straightforward – straight strips, straight seams, no points to match. The artistry is entirely in the planning, and there’s one problem here that a flat quilt never has to solve: a jacket isn’t flat. Your gradient has to flow continuously across the front-to-back side seams and down the sleeves, which means planning it across the whole garment before you cut a single strip.
Planning a Gradient Across Garment Pieces
This is the part worth slowing down for, and it’s what separates a beautiful ombre jacket from one where the colors jump awkwardly at the seams.
- Go vertical, not horizontal. Run the gradient from light at the shoulders to dark at the hem. Horizontal strips only need to sit at the same height on the front and back pieces to line up at the side seams – which is easy. A side-to-side gradient has to match across every vertical seam, which is far harder and rarely worth the trouble.
- Map all your pieces together. Before cutting, lay your pattern pieces on the floor in their “as worn” arrangement: the back in the middle, the two fronts either side, the sleeves positioned at the shoulders. Now plan your color bands across that whole map, so the same shade lands at the same height everywhere.
- Match the sleeves to the shoulder. The sleeve should begin in the shade the body is at where the sleeve joins it, then continue deepening down the arm. Sleeves that restart the gradient from the palest color look disconnected.
- Check it in grayscale. Photograph your laid-out strips, convert the photo to black and white on your phone, and look at the flow. Grayscale strips away color and shows you value alone, revealing instantly where the gradient jumps or stalls. This trick never lies.
Design Inspirations – Digitally Modified Images. Texture and color may vary from the actual product.
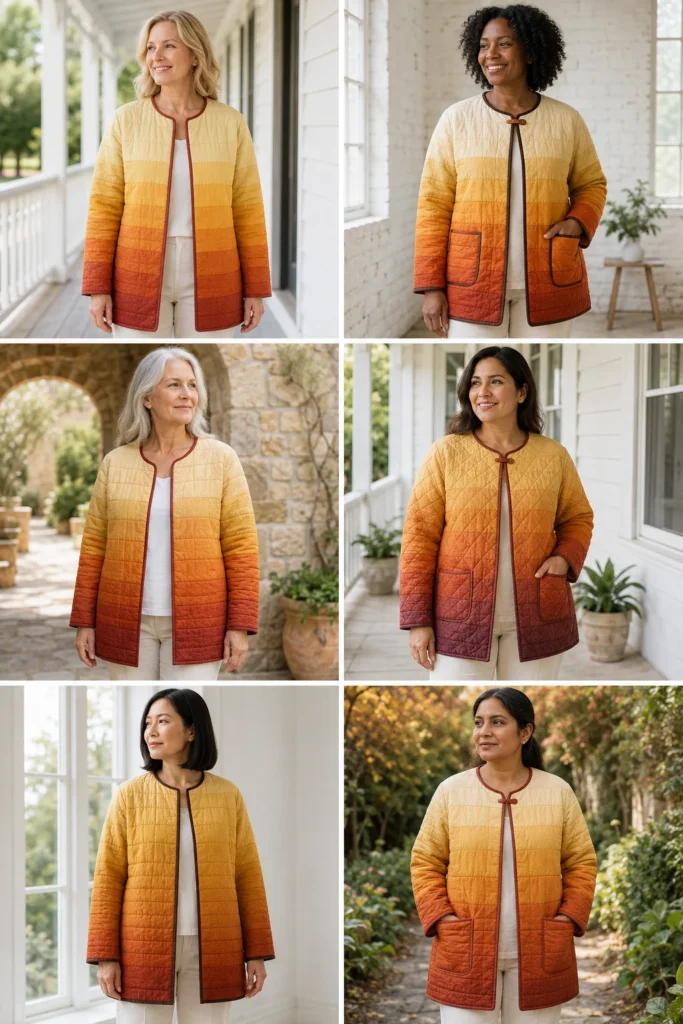
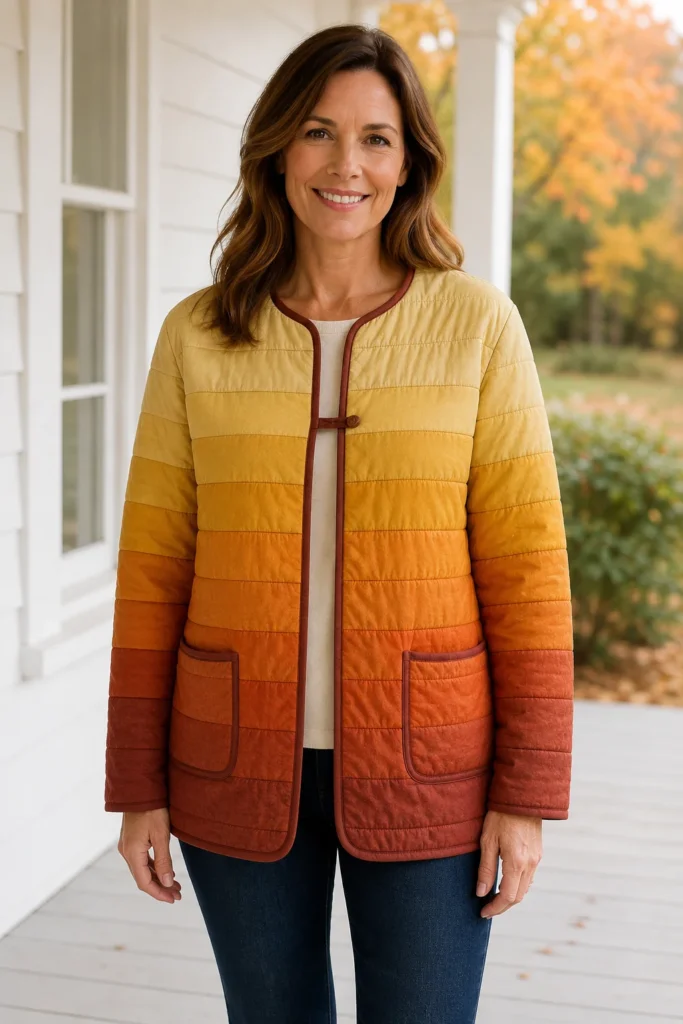
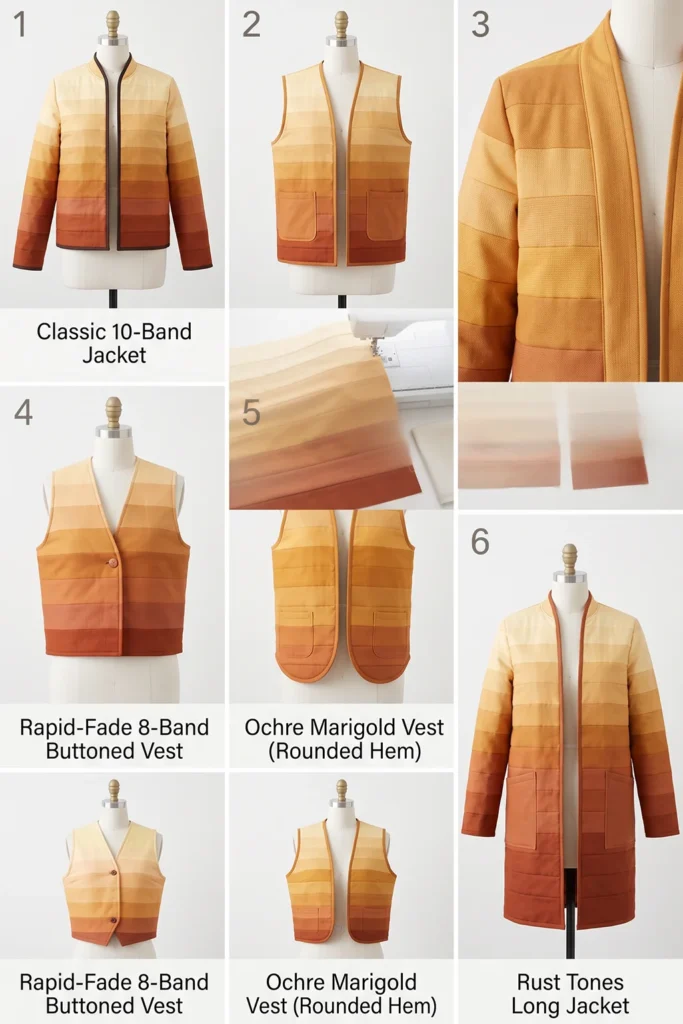
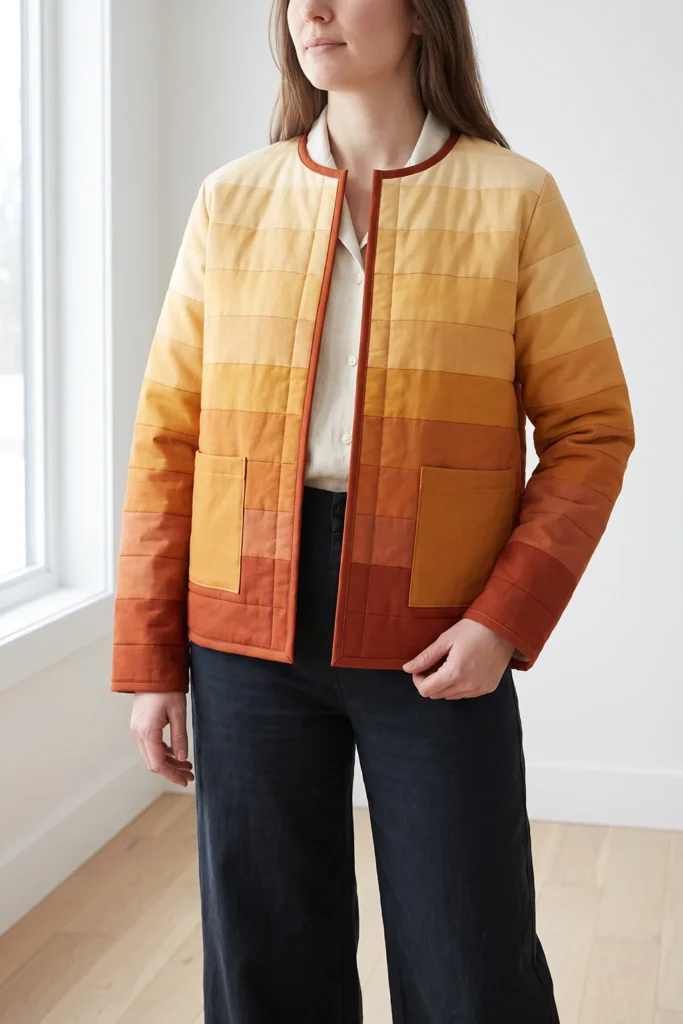
Choosing Fabrics That Step Evenly
A gradient is only as smooth as its most abrupt transition. Lay your fabrics in a row, squint at them, and check that each step feels about the same size as the last. If two neighbors look like the same shade, the gradient will stall there; if one jump looks bigger than the rest, that’s where the eye will snag.
You want 8-10 shades in a single warm family:
- Palest: butter, cream-gold, pale wheat
- Light: honey, soft gold
- Medium: amber, marigold, ochre
- Deep: pumpkin, burnt orange
- Darkest: rust, brick, deep terracotta
Solids and near-solid textures work best. Busy prints muddy the transitions and make the gradient harder to read.
A Little History: Ombre, and Autumn’s Own Gradient
The word ombre comes from the French ombré, meaning “shaded,” and the technique of grading color from light to dark is one of the oldest ideas in textile design – found in dip-dyed silks, hand-painted fans, gradient-dyed yarns, and graduated weaving across many cultures and centuries. It has always suggested a quiet luxury, because a smooth transition of color reads as considered and deliberate.
There’s something fitting about using it for an autumn jacket, too: a turning leaf is nature’s own ombre, shifting from green through gold into rust along its length. And in the weaving traditions of my own family’s background – Jamdani among them – the handling of tone and shade has always been read as carefully as any pattern. Color, graded well, is its own kind of design.
Finished Garment
- Style: relaxed boxy jacket, dropped shoulders, open front or a single closure, patch pockets optional
- Length: about 28-30 inches from shoulder to hem
- Strips: 3½ inches cut, 3 inches finished – about 9-10 bands down the body
- Skill level: confident beginner (simple sewing, careful planning)
- Core techniques: strip-piecing, gradient planning across pattern pieces, quilting yardage, bound edges
Materials Needed
- Gradient fabrics: ⅓ yard each of 8-10 shades running pale gold to deep rust (about 3 yards total)
- Middle layer: 2¾ yards of low-loft cotton batting, or cotton flannel
- Lining: 2¾ yards of soft cotton – a solid in one of the gradient tones looks beautifully cohesive
- Binding: ¾ yard, in the darkest shade of your gradient
- Thread: neutral cotton, plus a 90/14 needle
- Walking foot, rotary cutter, cutting mat, long ruler, pins or clips, iron, floor or design wall space
- A boxy jacket pattern, dartless with dropped shoulders
Beginner tip: buy a little extra of the middle shades. When you’re fine-tuning a gradient, the transitions in the middle are where you’ll want an extra strip or two to smooth a jump – the palest and darkest ends rarely need adjusting.
Cutting Measurements
- Strips: cut 3½ inches wide across the width of the fabric, in each of your 8-10 shades
- Panels to piece: enough for two fronts, one back, two sleeves, each about 2-3 inches larger than the pattern piece
- Patch pockets (optional): two at 7 × 7½ inches, cut from a single mid-tone
- Binding: 2½-inch strips, about 6 yards
- Middle layer and lining: cut to match each panel
Step-by-Step Guide
Step 1 – Map the garment on the floor. Lay your pattern pieces out in their “as worn” arrangement – back in the center, fronts either side, sleeves at the shoulders. This map is what you’ll plan the gradient across.
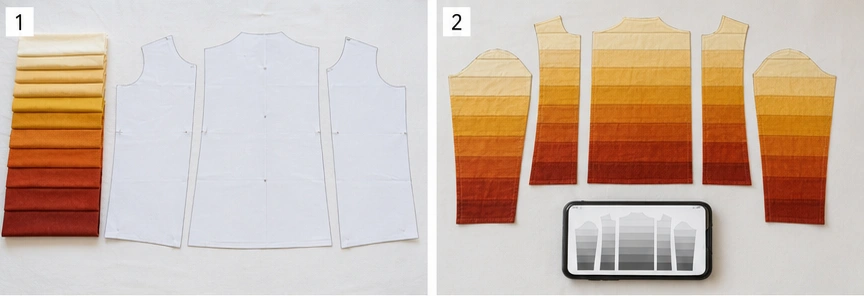
Step 2 – Arrange the gradient across the map. Place your fabrics in order from palest at the shoulder line to darkest at the hem, checking that the same shade sits at the same height on the fronts, the back, and where the sleeves join. Adjust until the flow looks smooth.
Step 3 – Check the layout in grayscale. Photograph the whole arrangement and convert the image to black and white. Look for any jump or stall in the value flow, and swap fabrics until the grayscale gradient is even. Do this now, not later.
Step 4 – Cut your strips. Cut 3½-inch-wide strips from each shade. Keep them stacked in gradient order so you don’t lose your sequence.
Step 5 – Piece the back panel. Sew the strips together in gradient order along their long edges with a ¼-inch seam, palest at the top. Press each seam downward as you go, which keeps the panel flat and the seams nesting later. Make the panel 2-3 inches larger than the back pattern piece.
Step 6 – Piece the two front panels. Repeat, making sure each shade sits at the same height as it does on the back panel. Measure from the top edge rather than counting strips – it’s more reliable.
Step 7 – Piece the sleeve panels. Begin each sleeve in the shade the body reaches at the shoulder, and continue deepening down the arm. This is what makes the gradient read as continuous rather than restarting.
Step 8 – Layer each panel. Spread the lining wrong side up, smooth the batting or flannel over it, then the pieced gradient panel right side up. Baste generously.
Step 9 – Quilt the panels. Quilt horizontal lines that follow the strips – either stitching in the ditch along the seams, or a line through the center of each strip. Following the gradient’s own lines emphasizes the horizontal flow and looks intentional. Keep it light, about 2 inches apart, working from the center outward.
Step 10 – Cut the jacket pieces. Lay the pattern on each quilted panel and cut, keeping the strips perfectly level – a tilted strip line is very visible on a gradient garment. Use a long ruler and check the horizontal alignment before every cut.
Step 11 – Sew the shoulder seams and check the flow. Join the fronts to the back at the shoulders with a ½-inch seam, press open, then hold the jacket up. This is your first look at the gradient working three-dimensionally – the side seams come next, so any mismatch is still fixable.
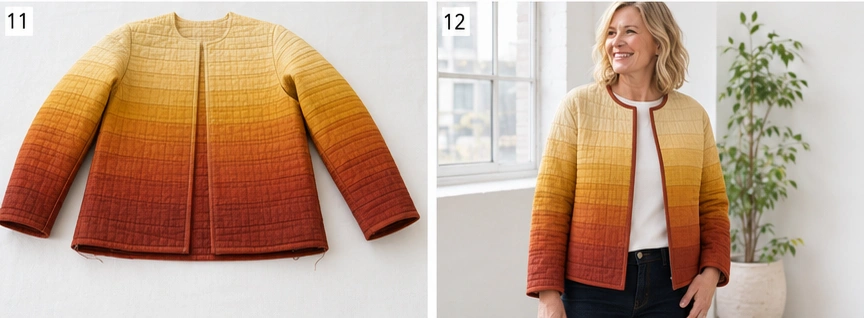
Step 12 – Set the sleeves and sew the sides. Attach each sleeve with a ½-inch seam, then sew from the cuff down the underarm and along the side seam in one continuous line, matching the strip lines at the side seams as you pin. Nest the seams at each strip junction so the bands line up cleanly across the body.
Step 13 – Bind the interior seams. Encase every raw interior seam allowance in binding. Strip-pieced panels have a lot of seams, so a tidy inside makes a real difference to how finished the jacket feels.
Step 14 – Bind the outer edges and press. Bind the front opening, neckline, hem, and cuffs, using your darkest shade so the binding anchors the gradient at the bottom and frames the whole piece. Give it a final press and wash gently on cold with a color catcher – deep rusts can bleed.
Assembly at a Glance
- Lay pattern pieces on the floor in their “as worn” arrangement.
- Arrange the gradient across the whole map, same shade at the same height.
- Check the layout in a black-and-white photo; smooth any jumps.
- Cut 3½-inch strips from each of 8-10 shades; keep them in order.
- Piece the back panel, palest at top, pressing seams downward.
- Piece both fronts, matching shade heights to the back.
- Piece sleeves, starting in the shoulder’s shade.
- Layer lining, batting/flannel, pieced panel; baste.
- Quilt horizontal lines following the strips, about 2 inches apart.
- Cut jacket pieces, keeping strip lines perfectly level.
- Sew shoulder seams; check the gradient in three dimensions.
- Set sleeves; sew side seams, matching strip lines.
- Bind all interior seams.
- Bind outer edges in the darkest shade; press and wash with a color catcher.
Beginner Tips for Success
- Run the gradient vertically (light shoulders to dark hem) – horizontal gradients are far harder to match at seams.
- Plan across all pattern pieces at once, not panel by panel.
- Measure shade positions from the top edge rather than counting strips.
- Start each sleeve in the shade the shoulder reaches, so the flow continues.
- Use the grayscale photo trick to check value flow before you cut.
- Keep strip lines perfectly level when cutting; a tilt is very visible on a gradient.
- Bind in the darkest shade to anchor the bottom of the gradient.
Styling It & Gift Ideas
An ombre jacket is a genuine statement, so everything underneath should stay quiet – a cream, camel, or black knit, and simple trousers or jeans. Because the gradient runs light at the top and dark at the bottom, it draws the eye upward toward the face, which is a quietly flattering effect. Keep jewelry simple, add boots, and let the color do everything. It looks especially good against neutral backgrounds, which is worth knowing if you photograph what you make.
Its painterly, one-of-a-kind quality makes it a memorable gift:
- A milestone gift for someone artistic – this reads as wearable art rather than a homemade garment
- A gift in their favorite color, graded from pale to deep, which feels genuinely personal
- A retirement or big-birthday gift where you want something impressive and clearly handmade
- A statement gift for someone who wears mostly neutrals and needs one piece that does all the work
If you’re making it for someone, choose their favorite color family and build the whole gradient inside it – a single-hue ombre in a color they love is far more wearable than a rainbow.
Final Thoughts
An ombre quilted jacket in golden harvest tones is autumn worn as pure color – butter through honey, amber, and pumpkin, into deep rust at the hem. The sewing asks nothing more than straight strips and straight seams; the beauty comes entirely from planning the gradient across the whole garment so it flows unbroken over every seam. Map your pieces before you cut, check the value in grayscale, keep those strip lines level, and you’ll have a jacket that looks like light moving down the body.
Other Design Inspirations – Digitally Modified Images. Texture and color may vary from the actual product.
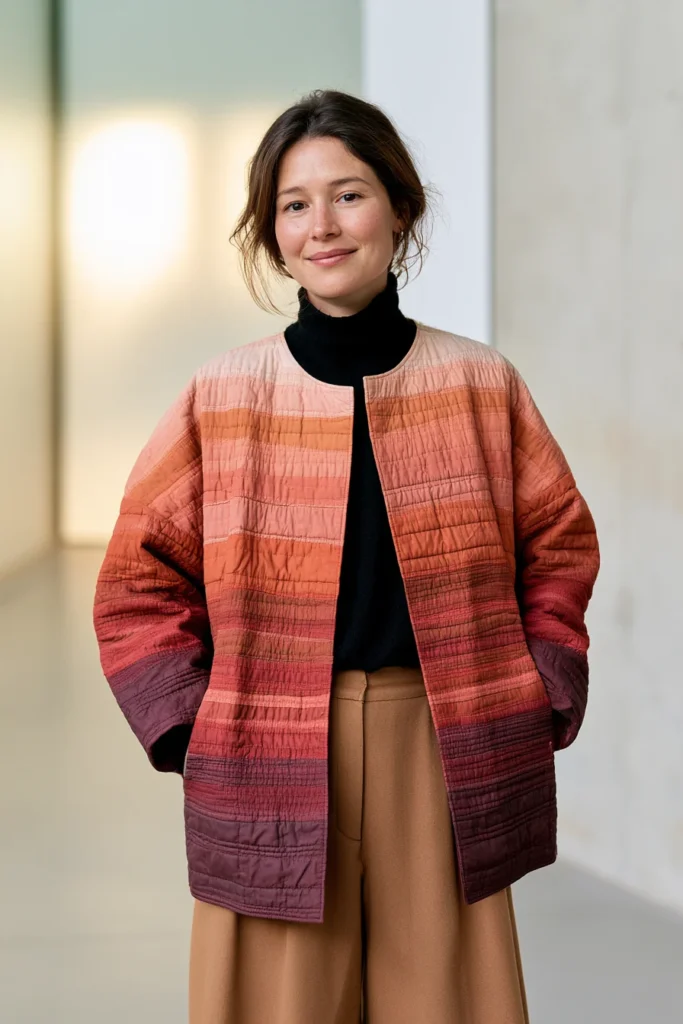
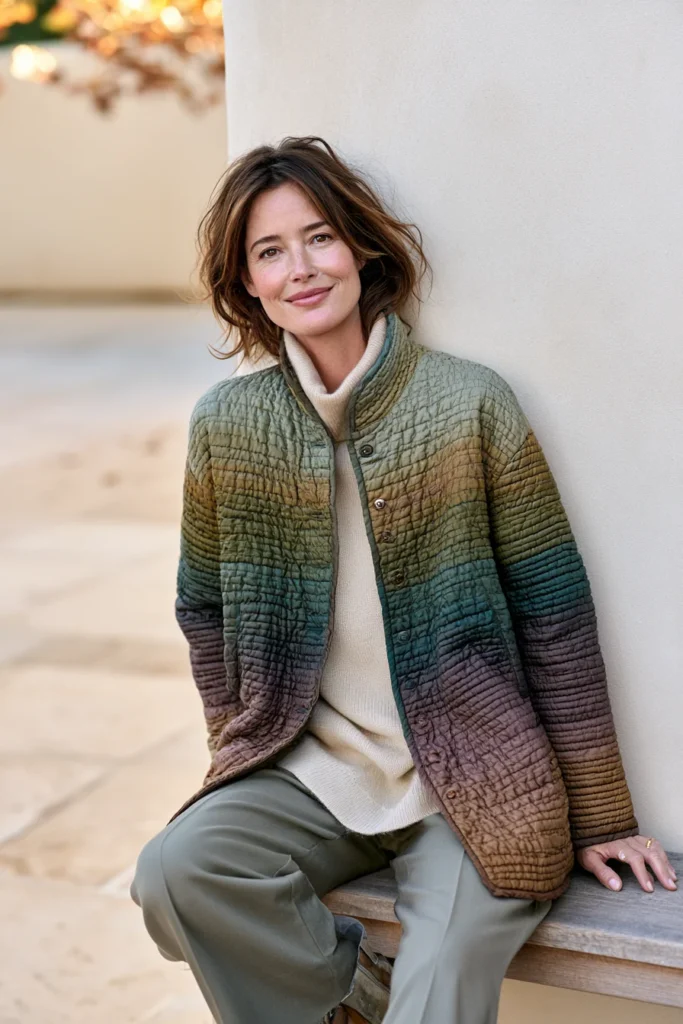
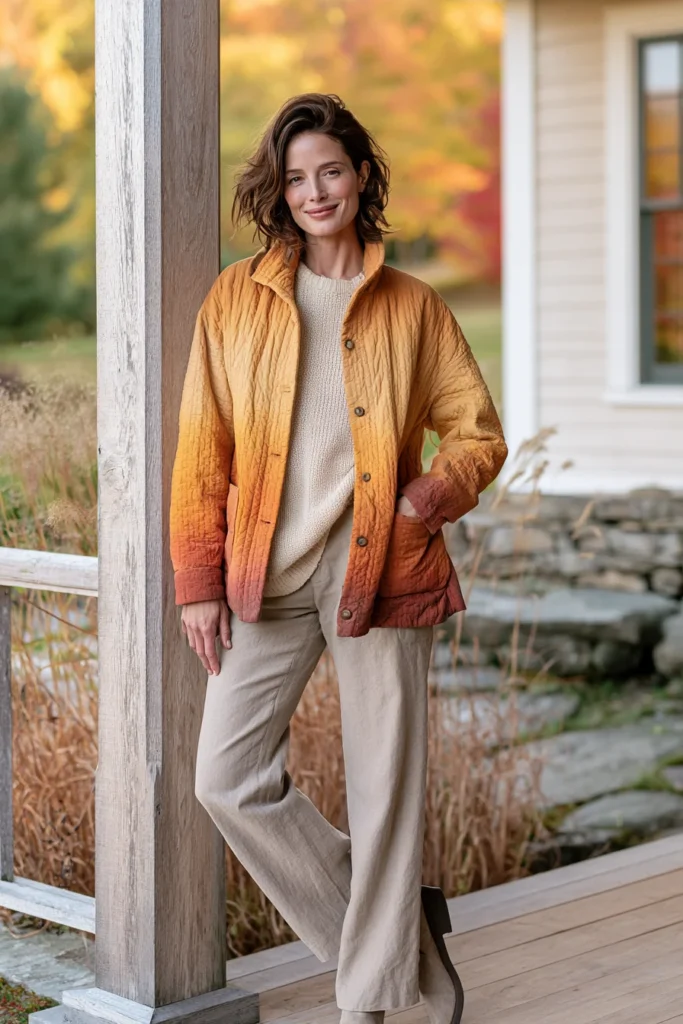
11. Lightweight Quilted Jacket for Transitional Early-Fall Weather
Early autumn has a specific problem: cool at eight in the morning, warm by one in the afternoon, cool again by six. A heavy coat is far too much, but a shirt isn’t enough. A lightweight quilted jacket is built precisely for that stretch of weeks – just enough warmth to take the edge off a chilly morning, light enough that you’ll happily keep it on all day or tie it around your waist when the sun comes out. In fresh, vibrant colors like coral, turquoise, marigold, or soft sage, it’s the piece that carries you from the last warm days into proper sweater weather.
The whole design brief here is restraint. Everything about this jacket is engineered to remove bulk while keeping just enough insulation to matter – and one of the choices involved is genuinely counterintuitive, which is worth understanding before you start.
How to Make a Quilted Jacket That Isn’t Warm
That sounds like an odd goal, but it’s exactly right for transitional weather. Three decisions get you there:
- Skip the batting altogether. For a truly lightweight jacket, use a single layer of cotton flannel as your middle layer instead of batting – or leave the middle out entirely and simply quilt the outer fabric to the lining. Two layers of cotton quilted together are surprisingly effective at cutting a breeze while staying light.
- Quilt densely, not sparsely. Here’s the counterintuitive part: warmth comes from trapped air, and quilting stitches compress the layers. Dense quilting flattens the fabric, reduces loft, and therefore makes the jacket cooler – while also creating gorgeous texture. Lines about 1 to 1½ inches apart give you a flat, softly textured fabric perfect for mild weather. Sparse quilting would leave more air and more warmth than you want here.
- Choose fabrics that breathe. Cotton lawn, chambray, double gauze, and linen-cotton blends all move air. Tightly woven synthetics trap heat and will make the jacket clammy on a warm afternoon.
Design Inspirations – Digitally Modified Images. Texture and color may vary from the actual product.
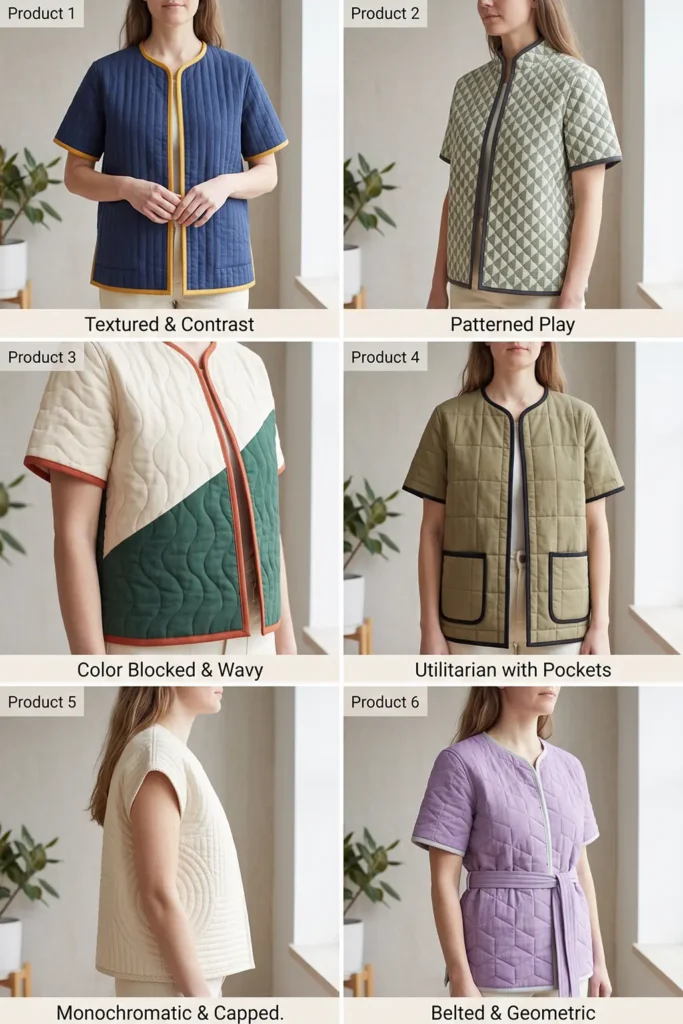
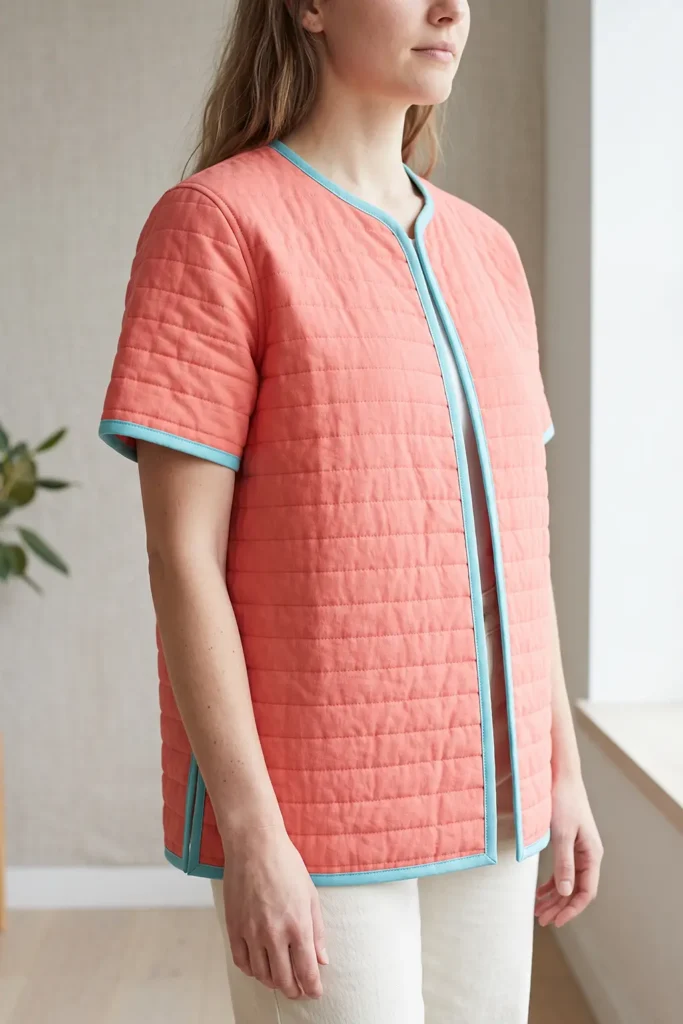
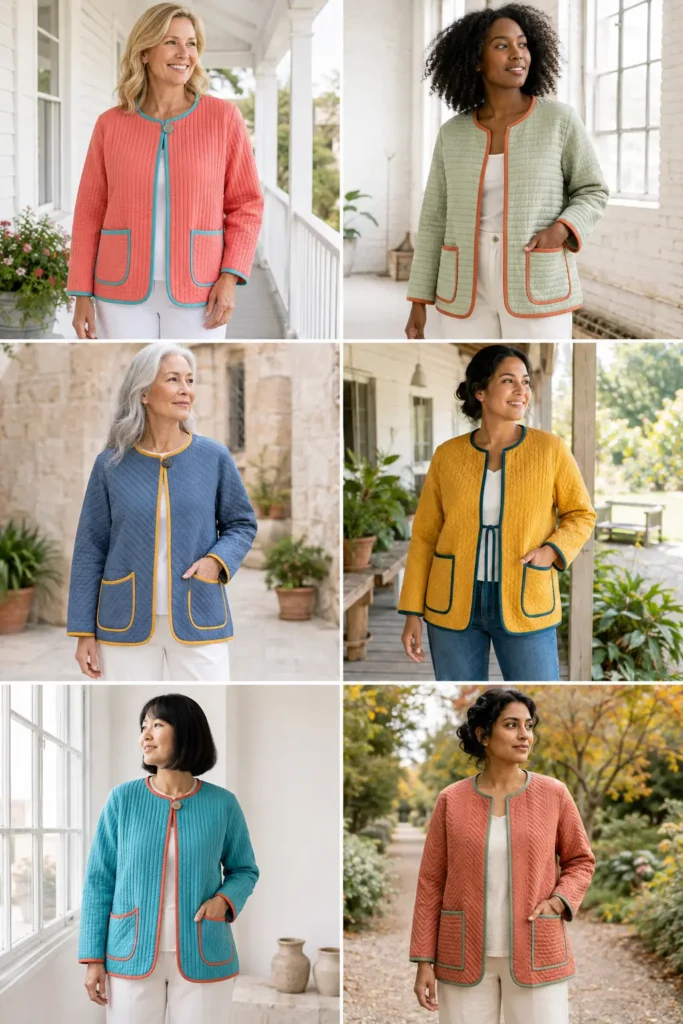
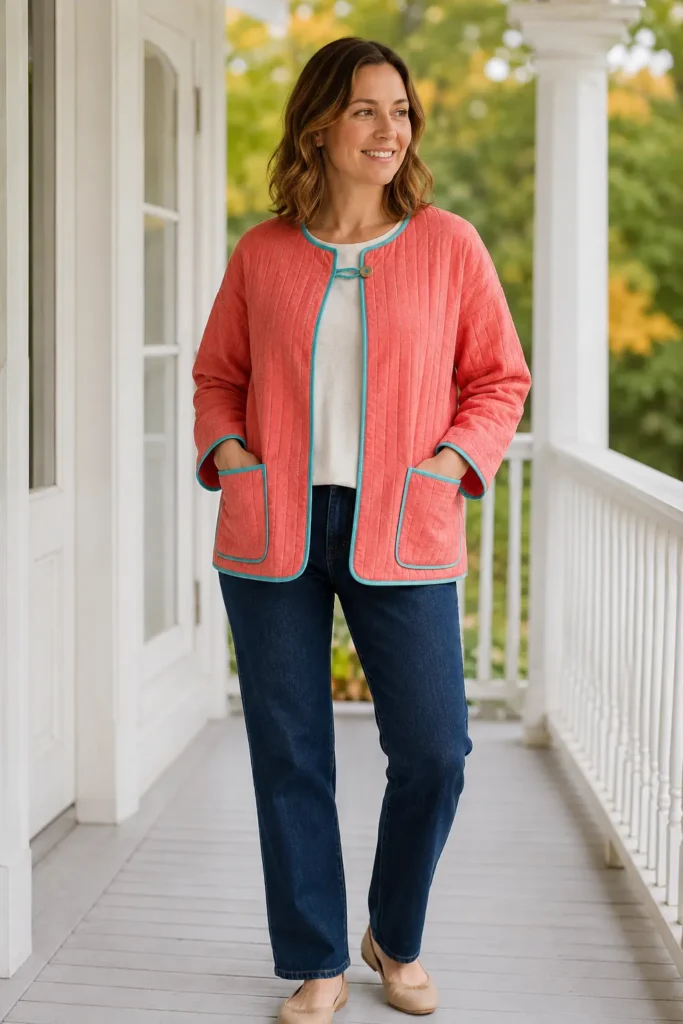
Design It to Be Carried
A transitional jacket gets taken off halfway through the day, so build that in:
- Keep it open-fronted or use a single closure. Fussy buttons are annoying when you’re pulling it on and off repeatedly.
- Keep it light enough to pack. A jacket you can roll into a tote or tie around your waist is one you’ll actually bring with you.
- Add real pockets. When you’re carrying a jacket rather than wearing it, you want somewhere to have stashed your keys and phone before you took it off.
A Little History: Light Layers, Dense Stitching
The principle behind this jacket is centuries old. In the Nakshi Kantha tradition of my own family’s background, quilts and wraps are made by layering several thin, soft cotton cloths – often worn saris – and holding them together with dense rows of hand running stitch. The results are famously light and supple, yet genuinely warm for mild weather, because thin layers plus close stitching produce a soft, breathable cloth rather than a bulky one.
That’s precisely the engineering at work here: thin layers, close quilting, natural fibers. Different continent, different machine, same very old idea about how to make cloth that keeps you comfortable without weighing you down.
Finished Garment
- Style: relaxed, unstructured jacket – open front or single button, dropped shoulders, patch pockets
- Length: about 26-28 inches from shoulder to hem
- Quilting lines: 1 to 1½ inches apart – deliberately dense
- Patch pockets: 6 × 6½ inches finished
- Skill level: beginner – the simplest jacket in this collection
- Core techniques: dense quilting, lightweight construction, bound edges
Materials Needed
- Outer fabric: 2½ yards of cotton lawn, chambray, double gauze, or linen-cotton blend
- Middle layer: 2½ yards of cotton flannel – or omit entirely for the lightest possible version
- Lining: 2½ yards of soft cotton or cotton voile
- Binding: ¾ yard for interior seams and outer edges
- Closure (optional): one button, or a fabric tie
- Thread: neutral cotton, 80/12 needle (thin layers don’t need a heavy needle)
- Walking foot, rotary cutter, cutting mat, ruler, pins or clips, iron
- A simple boxy or kimono-style jacket pattern, dartless
Beginner tip: if you’ve only ever quilted with batting, try the no-batting version first – outer fabric quilted straight to the lining. It sews beautifully, presses flat, drapes like a shirt, and is by far the most comfortable thing to wear on a mild day.
Choosing Your Colors
Early autumn is still bright, so this is the place for fresher, livelier colors than deep-autumn pieces:
- Coral and warm peach – cheerful and sunny
- Turquoise and teal – fresh, and lovely against early-fall greenery
- Marigold and soft gold – warm without being heavy
- Sage and eucalyptus green – the transitional color, bridging summer and autumn
- Terracotta and clay – earthy but still light
- Chambray blue – endlessly wearable and casual
For a modern touch, pair a fresh outer color with a contrasting binding – a coral jacket with turquoise binding, or sage with terracotta. On a simple, unstructured jacket, the binding is the main design detail, so make it count.
Cutting Measurements
- Two fronts, one back, two sleeves: cut to your pattern at 26-28 inches finished length
- Patch pockets: two at 7 × 7½ inches (finishing 6 × 6½ inches)
- Binding: 2 to 2½-inch strips, about 6 yards total
- Middle layer and lining: cut to match each panel
Step-by-Step Guide
Step 1 – Prewash and press. Wash and dry the outer fabric, flannel (if using), and lining, then press well. Lawn and double gauze in particular shrink noticeably.
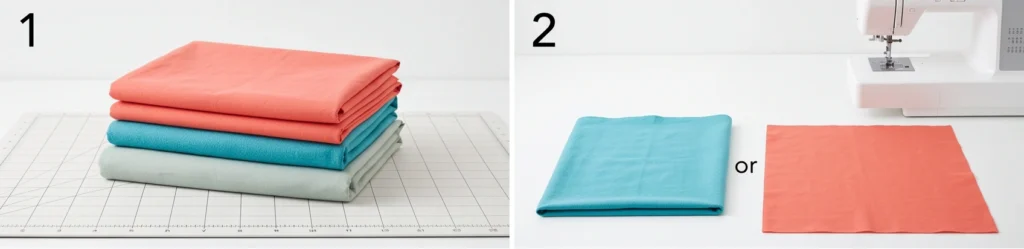
Step 2 – Decide on your middle layer. Choose flannel for a little more warmth, or skip the middle entirely for the lightest, most drapey result. Make this decision now, since it affects how the panels handle.
Step 3 – Layer the panels. Spread the lining wrong side up, add the flannel if using, then the outer fabric right side up. Smooth from the center outward. Thin fabrics shift easily, so baste generously with pins or spray.
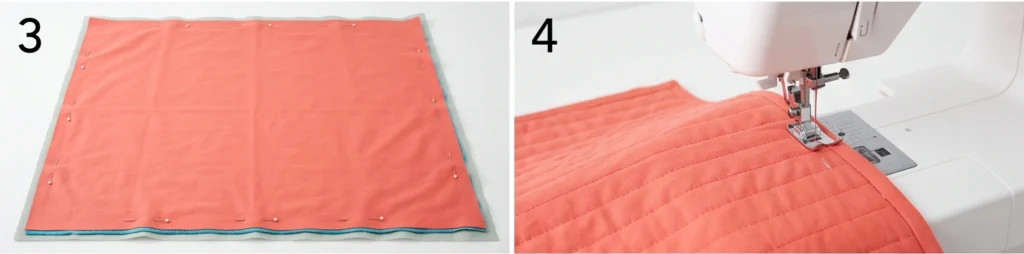
Step 4 – Quilt densely. Using a walking foot and an 80/12 needle, quilt straight lines 1 to 1½ inches apart, working from the center outward and alternating your stitching direction so the panels don’t skew. The close lines will give you a soft, flat, beautifully textured fabric.
Step 5 – Press the quilted panels flat. Give each panel a good press. One of the pleasures of a thin quilted fabric is how flat and crisp it presses, unlike a batting-filled panel.
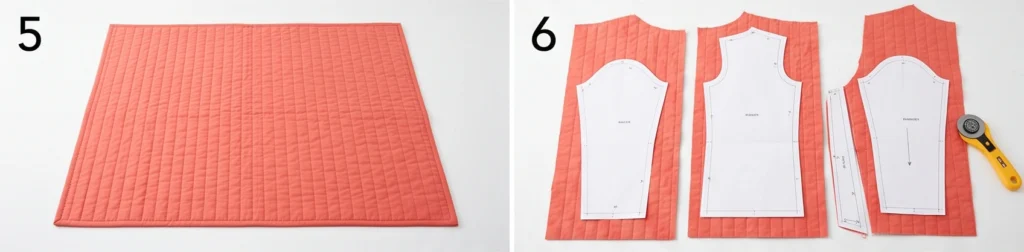
Step 6 – Cut the jacket pieces. Cut two fronts, one back, and two sleeves from the quilted panels, on the straight grain.
Step 7 – Make the patch pockets. Fold each pocket’s top edge down twice (about ½ inch each fold) and stitch. Trim a small diagonal off the bottom corners, then press the sides and bottom under by ½ inch.
Step 8 – Attach the pockets. Topstitch a pocket to each front, about 3 inches below the underarm and 2 inches in from the front edge, ⅛ inch from the folded edge. Bar-tack the top corners – these pockets will actually be used to carry things.
Step 9 – Sew the shoulder seams. With right sides together and a ½-inch seam, join the fronts to the back at the shoulders. Press the seams open – thin quilted fabric presses beautifully flat.
Step 10 – Set the sleeves. Attach each sleeve to its armhole with a ½-inch seam. With these light layers the sleeves ease in far more easily than they would in a batting-filled jacket.
Step 11 – Sew the side and underarm seams. Sew from the cuff, down the underarm, and along the side seam in one continuous line, ½-inch seam. Try the jacket on to check the fit and sleeve length.
Step 12 – Bind the interior seams. Encase each raw interior seam allowance in binding. On a light, unlined-feeling jacket the inside is often visible when you carry it over your arm, so a tidy finish matters more than usual.
Step 13 – Bind the outer edges. Bind the front opening, neckline, hem, and cuffs in one continuous line. Use a contrasting color if you like – on a simple jacket this binding is the whole design statement.
Step 14 – Add a closure and press. Add a single button or a fabric tie at the front if you want one, or leave it fully open for easy on-and-off. Press the finished jacket, then roll it up to check it packs down small – if it does, you’ve built exactly the right thing.
Assembly at a Glance
- Prewash and press all fabrics.
- Choose your middle layer: flannel, or none at all.
- Layer lining, optional flannel, outer fabric; baste well (thin fabrics shift).
- Quilt densely, 1-1½ inches apart, center outward, alternating direction.
- Press panels flat.
- Cut two fronts, back, and two sleeves.
- Fold, trim, and press the patch pockets.
- Topstitch pockets on; bar-tack the corners.
- Sew shoulder seams (½-inch, pressed open).
- Set the sleeves.
- Sew underarm and side seams; check fit.
- Bind all interior seams.
- Bind the front opening, neckline, hem, and cuffs.
- Add an optional single closure; press and test that it rolls up small.
Beginner Tips for Success
- Skip the batting – flannel or nothing at all is right for transitional weather.
- Quilt densely (1-1½ inches); close stitching flattens the fabric and keeps it cool while adding texture.
- Choose breathable natural fibers – lawn, chambray, double gauze, linen-cotton.
- Use an 80/12 needle; thin layers don’t need a heavy one.
- Baste generously – light fabrics shift far more than batting-filled ones.
- Keep the front open or single-closure for easy on and off.
- Make the binding contrast – it’s the main design detail on a simple jacket.
Styling It & Gift Ideas
This jacket is the definition of easy – throw it over a tee and jeans, a summer dress that’s hanging on into September, or a light knit and trousers. Because it’s unstructured and light, it drapes rather than holds a shape, which suits relaxed outfits best. Roll the cuffs, leave it open, and let the color do the work. It also layers under a heavier coat later in the season, which extends its usefulness well past its transitional window.
Its light, packable, easy-fit nature makes it a genuinely practical gift:
- A travel gift – it packs flat, weighs almost nothing, and works over anything on a trip
- An early-autumn birthday gift, arriving exactly when it’s most useful
- A gift for someone always cold in air conditioning, since it works indoors year-round
- A first handmade garment gift – the simplest construction here, and the boxy fit is forgiving
If you’re sewing it for someone else, this is the safest garment in the collection to size: unstructured, open-fronted, and forgiving, so approximate measurements are genuinely enough.
Final Thoughts
A lightweight quilted jacket is early autumn’s perfect answer – warm enough for a cool morning, cool enough for a warm afternoon, and light enough that you’ll actually carry it when you don’t need it. The trick is deliberately building less into it: skip the batting, quilt densely so the fabric stays flat and breathable, and choose fibers that move air. It’s the simplest jacket in this collection to make, and quite possibly the one you’ll wear most before the real cold arrives.
Other Design Inspirations – Digitally Modified Images. Texture and color may vary from the actual product.
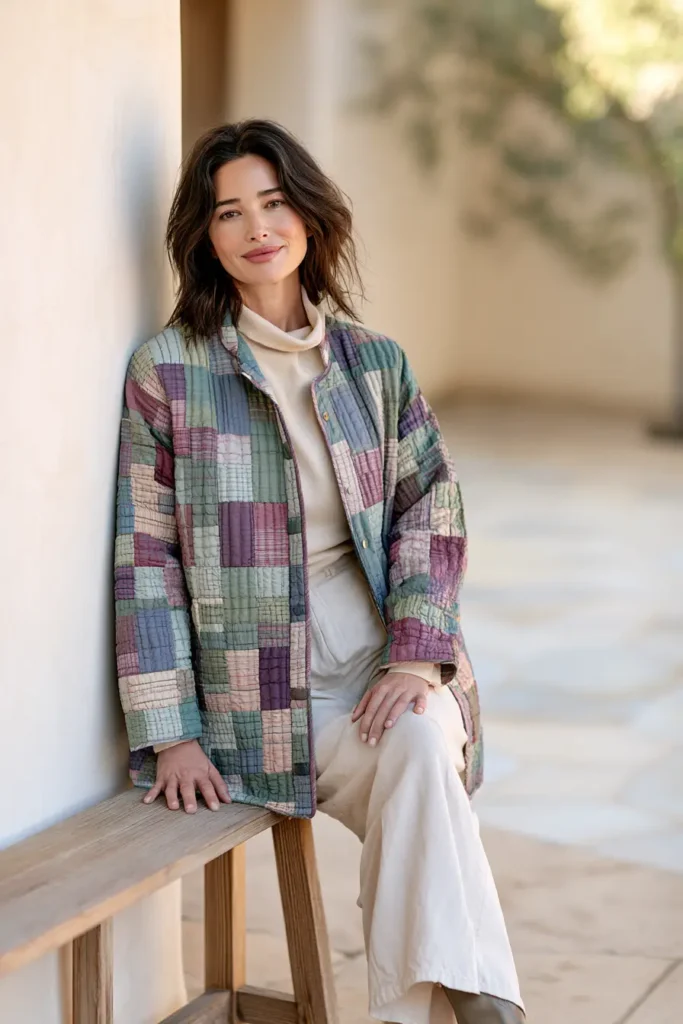
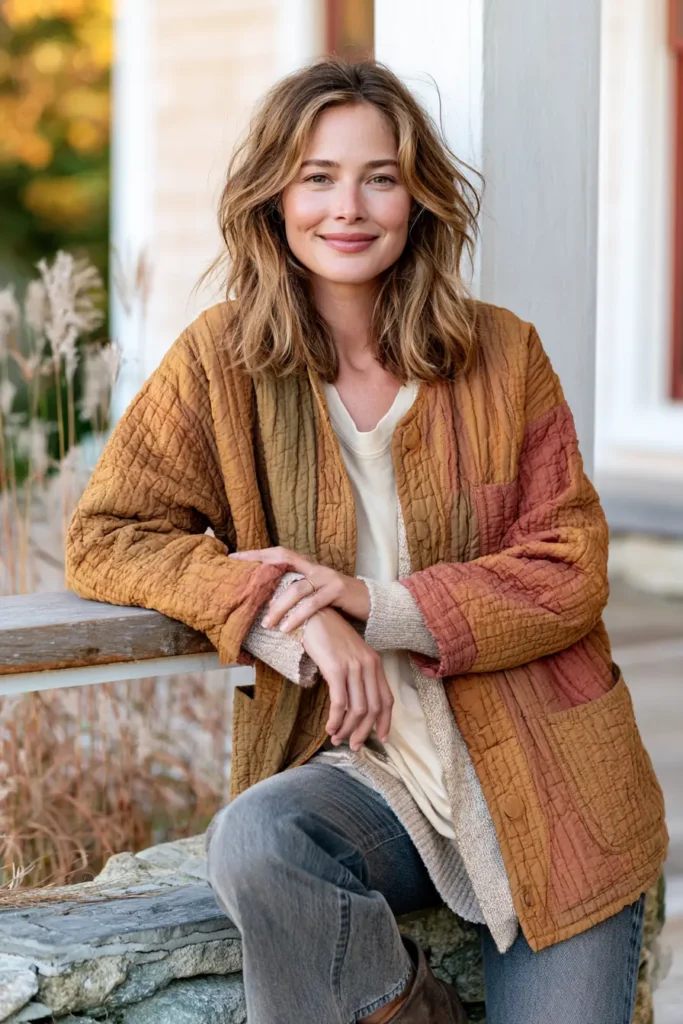
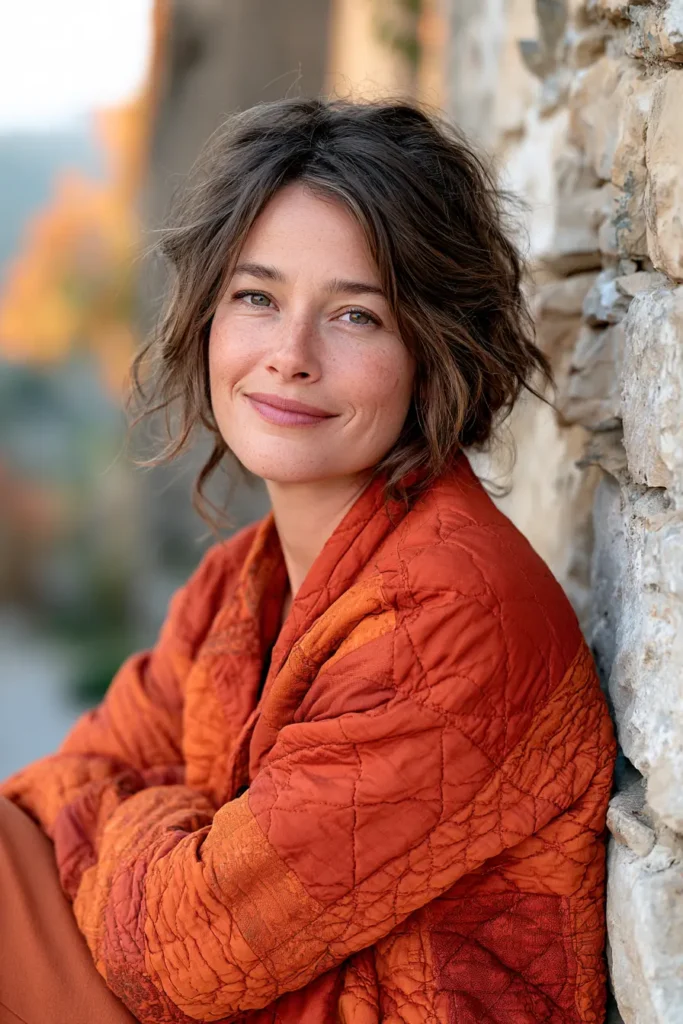
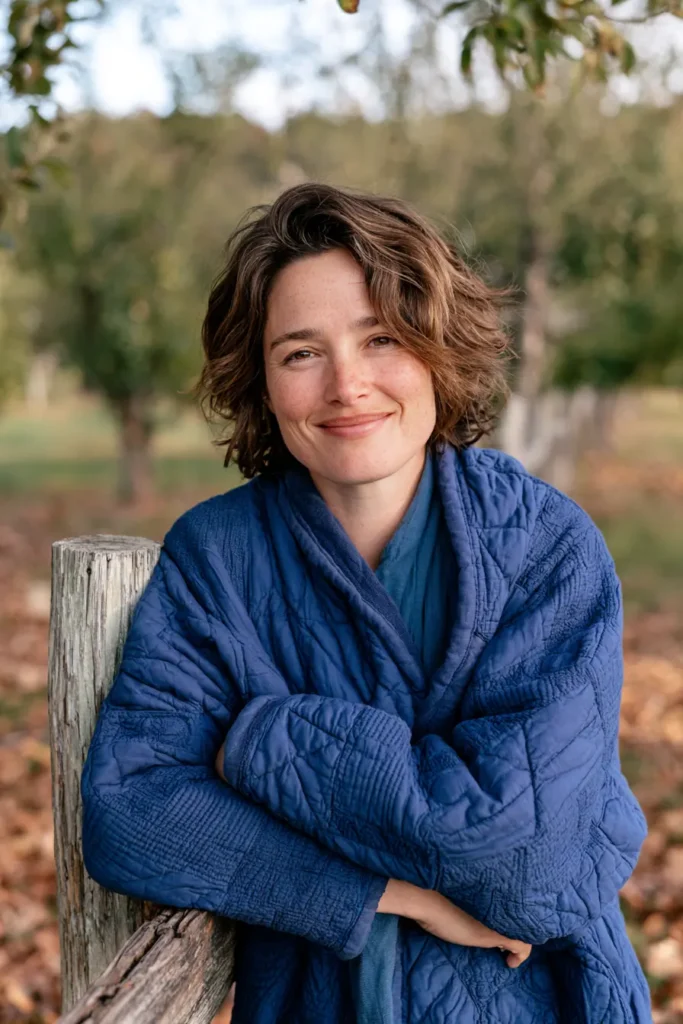
12. Neutral Oatmeal Quilted Vest for Understated Autumn Elegance
Not every autumn layer needs to announce the season. A neutral oatmeal quilted vest is the quiet one – soft cream, warm oatmeal, mushroom, and taupe, cut into a clean hip-length shape that goes with absolutely everything you own. It’s the piece you reach for when you want to look pulled together without thinking about it, and it works just as well over a white shirt for something smart as over a chunky knit on a Sunday. In a season full of rust and plaid, a calm neutral stands out precisely because it doesn’t try to.
Here’s what makes it interesting to sew, though. When you strip out color and pattern, something has to carry the design – and on a neutral vest, that something is the quilting itself. Those stitched lines stop being construction and become the entire decorative surface. Which means this is the one project in this collection where the quilting pattern deserves as much planning as the fabric.
Quilting as the Design
On a garment, quilting is seen at close range – far closer than a quilt on a bed – so the pattern genuinely reads. A few options, each giving a completely different character:
- Channel quilting: straight parallel lines, usually 1-2 inches apart. Clean, modern, and quietly slimming when run vertically.
- Matchstick quilting: very close parallel lines, about ¼-½ inch apart. Dense, luxurious, and beautifully textural – but stiffer, so use it on a smaller area or accept a more structured vest.
- Diamond grid: crossing diagonal lines, about 2 inches apart. Classic, and the most recognizably “quilted” look.
- Chevron or zigzag: angled lines meeting at the center front or back. More design-forward, and lovely on a plain fabric.
- Echo quilting: lines following the shape of the armhole or neckline outward. Soft, organic, and flattering.
Choose your thread deliberately. A thread one shade darker than the fabric makes the lines cast a soft shadow and read as texture. A perfectly matched tonal thread is subtler still. A contrasting thread turns the quilting into a bold graphic feature – which can look wonderful on a neutral vest, but it’s a different design decision entirely.
Balance density against drape. Denser quilting means more texture and more stiffness. For a vest that layers softly, 1½-2 inches is a good middle ground; save matchstick quilting for when you want structure.
Design Inspirations – Digitally Modified Images. Texture and color may vary from the actual product.
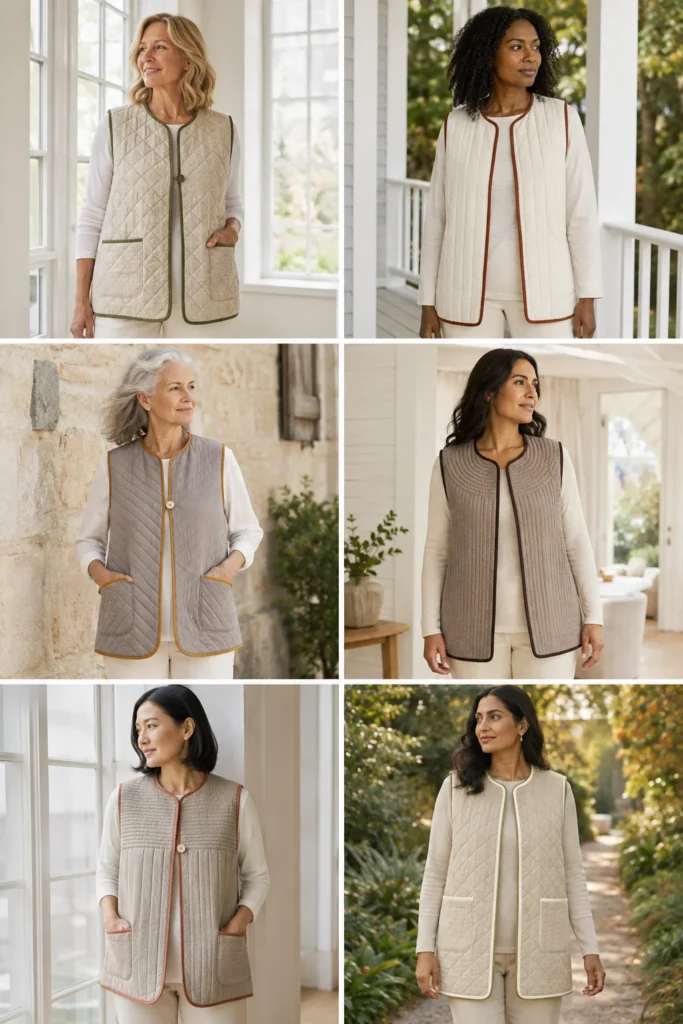
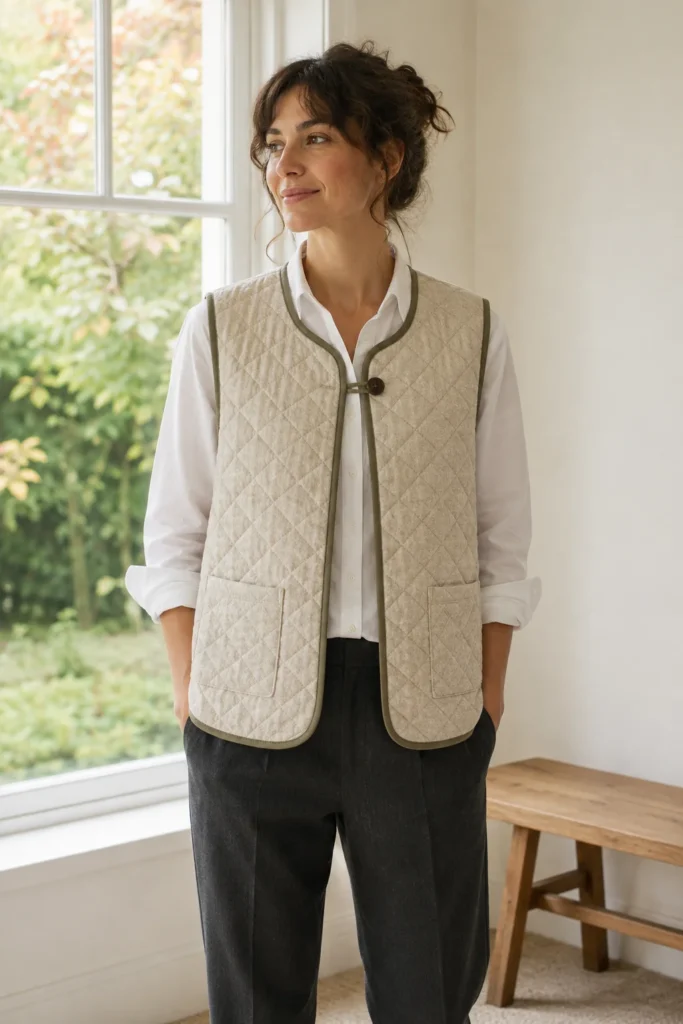
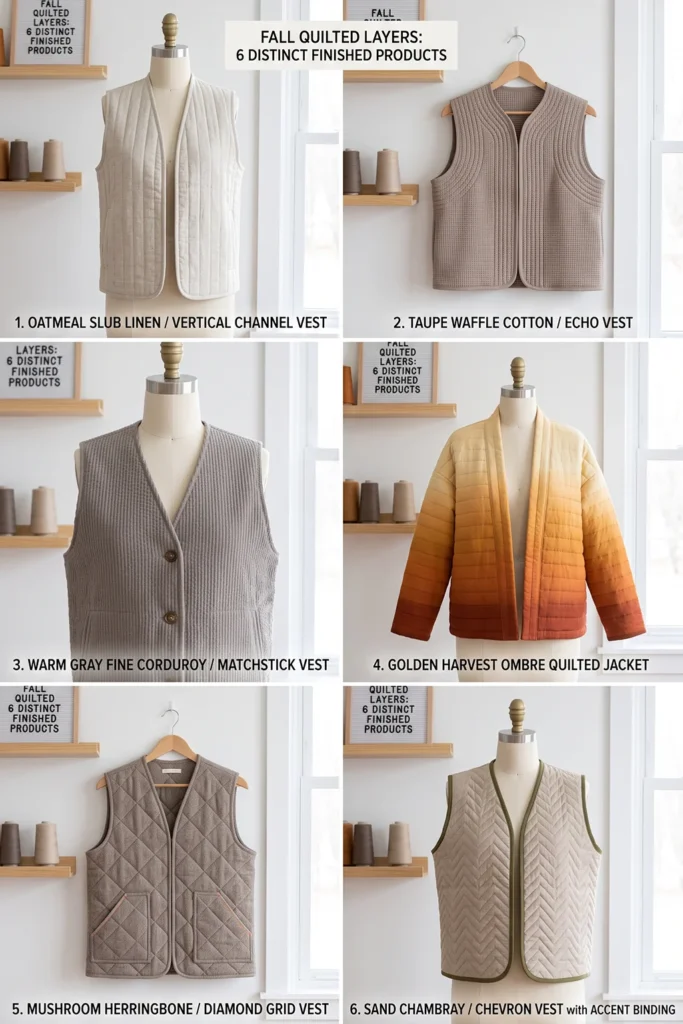
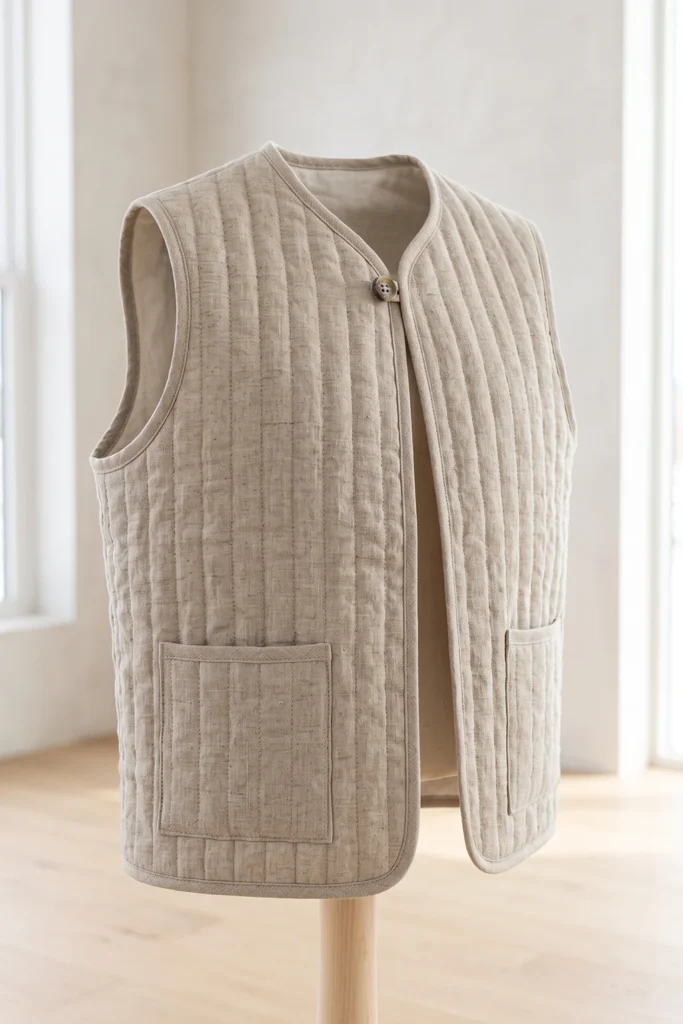
Let the Fabric Add What Color Doesn’t
With a neutral palette, texture does the work color usually would. Look for:
- Slub linen or linen-cotton – irregular, natural texture
- Cotton chambray – subtle woven depth
- Herringbone or twill weave – visible structure in a solid color
- Waffle or textured cotton – dimensional even before quilting
- Fine wale corduroy – soft ribbing that pairs beautifully with quilting
A flat, smooth quilting cotton in oatmeal will look exactly as plain as it sounds. A slub linen in the same shade looks expensive.
Building a Neutral Palette With Depth
“Neutral” doesn’t mean one color. A vest made entirely from one shade of oatmeal will look flat. Give it range:
- Cream and ivory – the lightest notes
- Oatmeal and warm greige – the soft middle
- Mushroom and taupe – gentle depth
- Sand and warm gray – the deepest neutrals
- One optional accent: if you want a touch of color, put it in the binding – a rust, olive, or ochre edge against oatmeal is striking and keeps the vest neutral overall
Keep everything warm rather than cool blue-gray, so the vest reads soft and inviting rather than cold. The whole palette should look like a handful of natural materials: wool, stone, sand, unbleached linen.
A Little History: The Quilted Waistcoat
Sleeveless quilted layers have kept people warm for centuries. Long before central heating, padded and quilted waistcoats were worn across Europe and Asia as a warm under-layer, valued for exactly the reason we still love them: they warm the body’s core while leaving the arms completely free. And in many of those traditions, the stitching pattern itself was the decoration – the quilting lines were the design, not an afterthought.
That’s very much how I was taught to see cloth. In the Nakshi Kantha tradition of my own family’s background, the running stitch does everything at once: it holds the layers, it creates the texture, and it is the beauty. A neutral quilted vest works on exactly that principle – let the stitch carry the meaning.
Finished Garment
- Style: clean hip-length vest – straight or gently A-line, open front or single closure, bias-bound armholes
- Length: about 26-28 inches from shoulder to hem
- Quilting: 1½-2 inches apart for a soft, layerable vest
- Patch pockets (optional): 5½ × 6 inches finished
- Skill level: confident beginner
- Core techniques: decorative quilting, bias-bound armholes, edge finishing
Materials Needed
- Outer fabric: 1¾ yards of a textured neutral – slub linen, linen-cotton, chambray, or herringbone
- Middle layer: 1½ yards of low-loft cotton batting (wool batting shows quilting texture beautifully, if you can find it)
- Lining: 1¾ yards of soft cotton or cotton voile
- Binding: ½ yard, cut on the bias – this is the vest’s main visible edge, so choose deliberately
- Quilting thread: a warm neutral, or one shade darker than the fabric for soft shadow
- Closure (optional): one horn, wood, or shell button
- Needle: 80/12 or 90/14 depending on your fabric
- Walking foot, rotary cutter, cutting mat, long ruler, chalk or a hera marker for marking quilting lines, pins, iron
- A simple straight or A-line vest pattern
Beginner tip: mark your quilting lines before you start. On a colorful jacket a slightly wavy quilting line disappears into the print; on a plain neutral it’s the first thing anyone sees. A hera marker (which creases rather than marks) or chalk and a long ruler will make the difference between “handmade” and “beautifully made.”
Cutting Measurements
- One back and two fronts: cut to your pattern at 26-28 inches finished length
- Patch pockets (optional): two at 6½ × 7 inches (finishing 5½ × 6 inches)
- Binding: 2 to 2½-inch bias strips, about 4 yards for both armholes plus the full outer edge
- Middle layer and lining: cut to match the panels
Step-by-Step Guide
Step 1 – Prewash and press. Wash and dry the outer fabric and lining, then press well. Linen in particular shrinks noticeably, and this is the moment to deal with it.
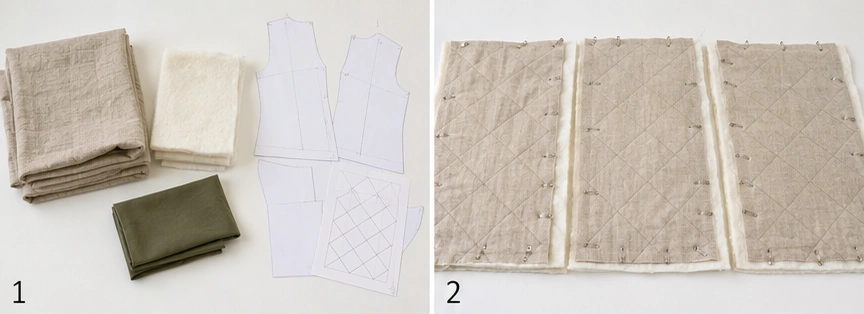
Step 2 – Choose your quilting pattern. Decide now: channel, diamond grid, chevron, echo, or matchstick. Sketch it roughly on paper against your pattern shape so you know where the lines will fall relative to the armholes and hem.
Step 3 – Layer the panels. Spread the lining wrong side up, smooth the batting over it, then the textured outer fabric right side up. Smooth from the center outward and baste generously.
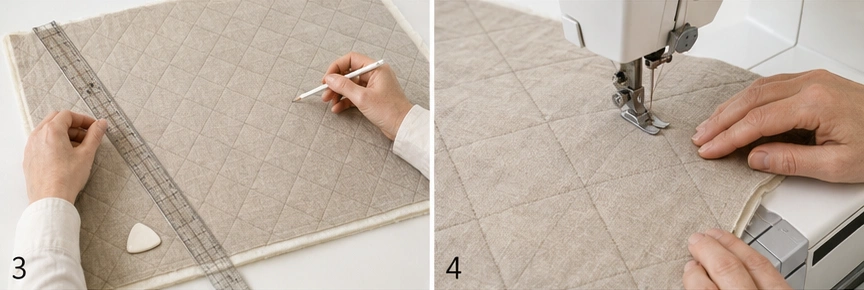
Step 4 – Mark your quilting lines. Using a hera marker or chalk and a long ruler, mark your chosen pattern across each panel. Take your time and check that the lines are genuinely parallel – on a plain fabric, a drifting line is obvious.
Step 5 – Quilt the panels. With a walking foot, stitch your marked lines, working from the center outward and alternating stitching direction so the panels don’t skew. Use thread a shade darker than the fabric if you want the lines to cast a soft shadow.
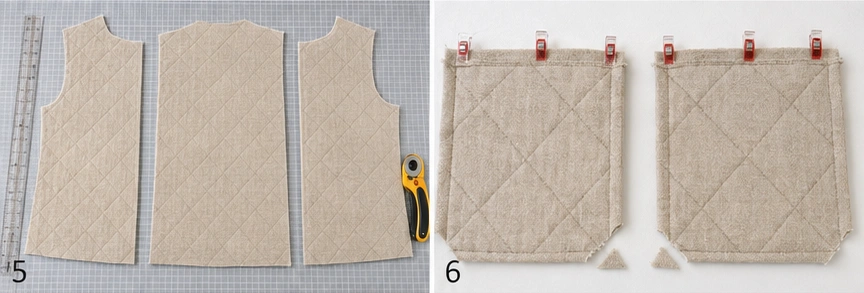
Step 6 – Press and admire. Give each panel a good press. This is the moment the vest’s whole design reveals itself – the texture you’ve created is the decoration.
Step 7 – Cut the vest pieces. Cut one back and two fronts from the quilted panels on the straight grain, keeping the quilting lines level and symmetrical between the two fronts. Mismatched line heights across the front opening are very noticeable on a plain vest.
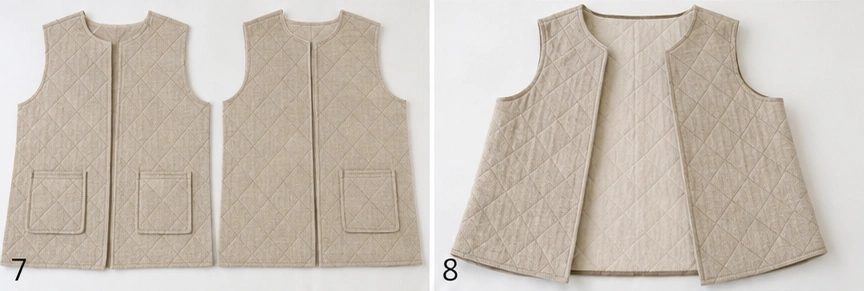
Step 8 – Make the patch pockets (optional). Fold each pocket’s top edge down twice and stitch, trim the bottom corners diagonally, then press the sides and bottom under by ½ inch. Consider leaving pockets off entirely – a truly minimal vest is cleaner without them.
Step 9 – Attach the pockets. If using, topstitch a pocket to each front, aligning them at the same height on both sides. Bar-tack the top corners.
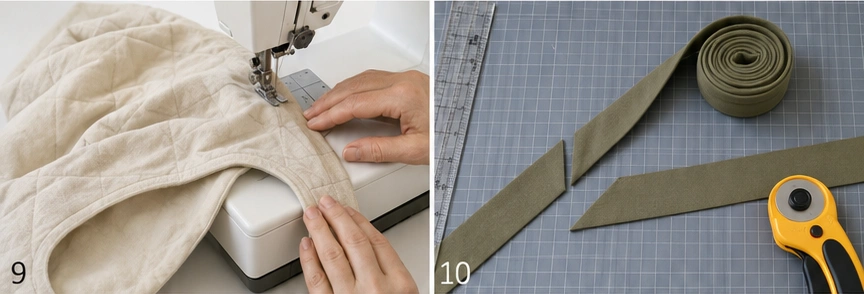
Step 10 – Sew the shoulder seams. With right sides together and a ½-inch seam, join the fronts to the back at the shoulders. Press the seams open.
Step 11 – Sew the side seams. Sew each side seam with a ½-inch seam, leaving clean armhole openings. Try the vest on to check the fit and length before finishing anything.
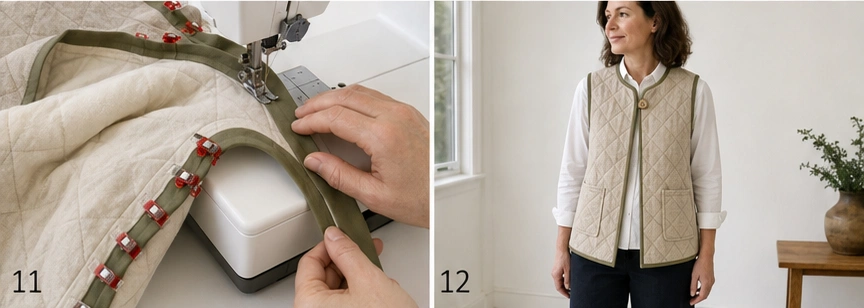
Step 12 – Prepare the bias binding. Cut 2 to 2½-inch strips on the bias, join them into one continuous strip, and press in half lengthwise. Bias binding eases smoothly around curves where straight-cut binding will pucker.
Step 13 – Bind the armholes. Encase each raw armhole edge, easing the binding gently around the curve without stretching it. On a minimal vest with no other detailing, the armholes are among the most visible finishes – neat, even binding is essential here.
Step 14 – Bind the outer edge and press. Bind continuously up one front edge, around the neckline, down the other front, and along the hem – one unbroken line. Add a single button if you like, or leave it open. Press well, and the vest is done.
Assembly at a Glance
- Prewash and press; linen shrinks.
- Choose and sketch your quilting pattern.
- Layer lining, batting, textured outer fabric; baste.
- Mark quilting lines with a hera marker or chalk and a long ruler.
- Quilt from the center outward, alternating direction; thread one shade darker.
- Press the panels flat.
- Cut one back and two fronts, keeping quilting lines level and symmetrical.
- Fold, trim, and press optional patch pockets.
- Attach pockets at matching heights; bar-tack corners.
- Sew shoulder seams (½-inch, pressed open).
- Sew side seams, leaving armhole openings; check fit.
- Cut, join, and press bias binding.
- Bind the armholes, easing around the curves.
- Bind the front edges, neckline, and hem; add an optional button; press.
Beginner Tips for Success
- Mark your quilting lines – wobbles hide in prints but never in plain neutrals.
- Choose a textured fabric; slub linen or herringbone gives what color otherwise would.
- Use thread one shade darker so the quilting casts a soft shadow.
- Keep quilting at 1½-2 inches for drape; matchstick density looks luxurious but stiffens the vest.
- Cut both fronts so the quilting lines sit at matching heights across the opening.
- Cut binding on the bias so armholes ease smoothly.
- Put any color you want in the binding, keeping the vest neutral overall.
Styling It & Gift Ideas
A neutral vest is the ultimate go-anywhere layer. Wear it over a crisp white shirt with tailored trousers for something polished, over a cream or camel knit with jeans on the weekend, or over an all-black outfit where the texture becomes the only detail. Because it’s tonal, it never competes with anything, which is precisely why it gets worn so often. Keep jewelry simple and let the quilting texture be the interest.
Its quiet versatility makes it one of the safest and most appreciated gifts:
- A gift for someone with a neutral or capsule wardrobe – it slots straight in
- A work-wardrobe gift, since it reads polished rather than crafty
- A gift for someone hard to buy for, because neutrals suit nearly everyone
- A “quiet luxury” gift in slub linen with a beautiful quilting pattern – it looks far more expensive than it costs to make
If you’re sewing it for someone else, neutrals are the safest possible color choice, and the open front means precise measurements matter far less than they would on a fitted piece.
Final Thoughts
A neutral oatmeal quilted vest is understated autumn elegance in its truest form – calm, tonal, and endlessly wearable. With the color stripped back, the quilting becomes the design, so choose your pattern thoughtfully, mark your lines properly, and let a textured linen do what a bright print would otherwise. It’s the layer that quietly goes with everything you own, and the one you’ll find yourself reaching for far more often than the bold pieces hanging beside it.
Other Design Inspirations – Digitally Modified Images. Texture and color may vary from the actual product.
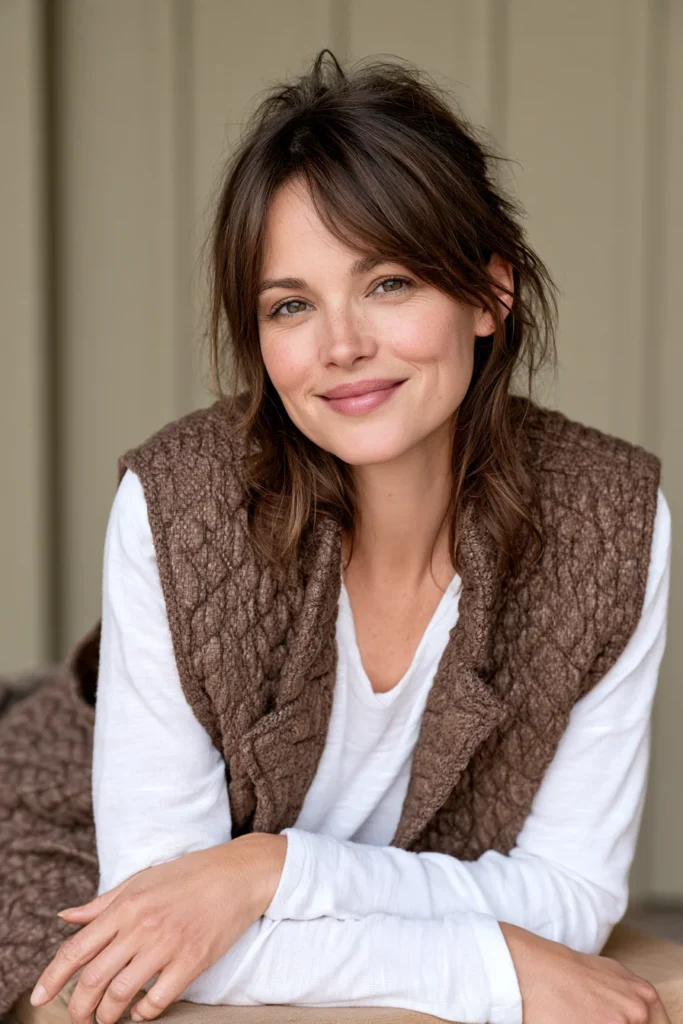
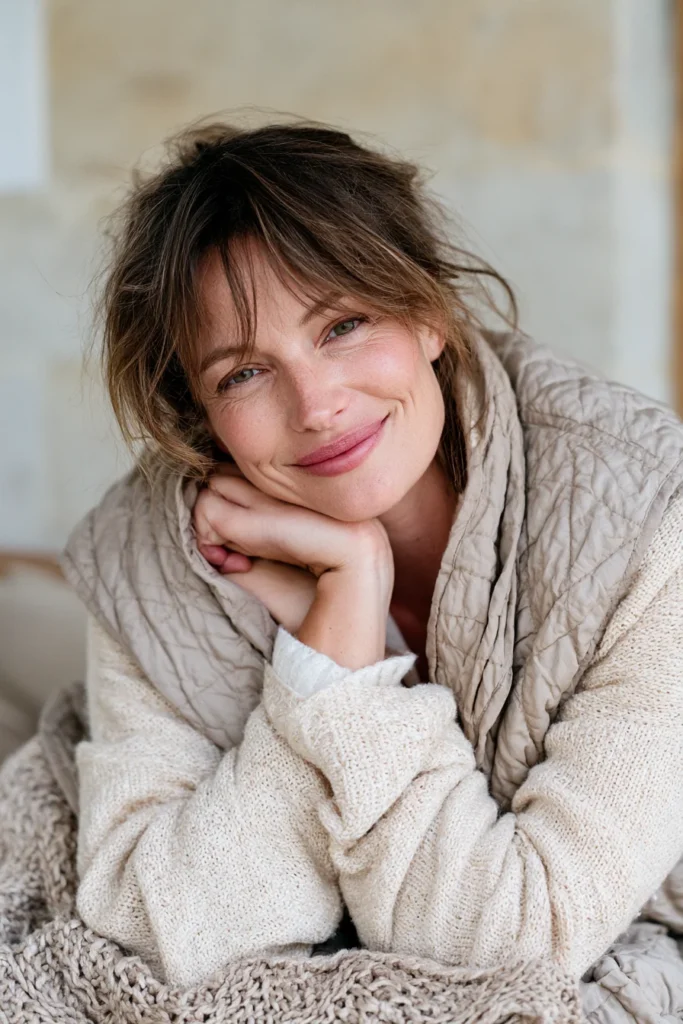
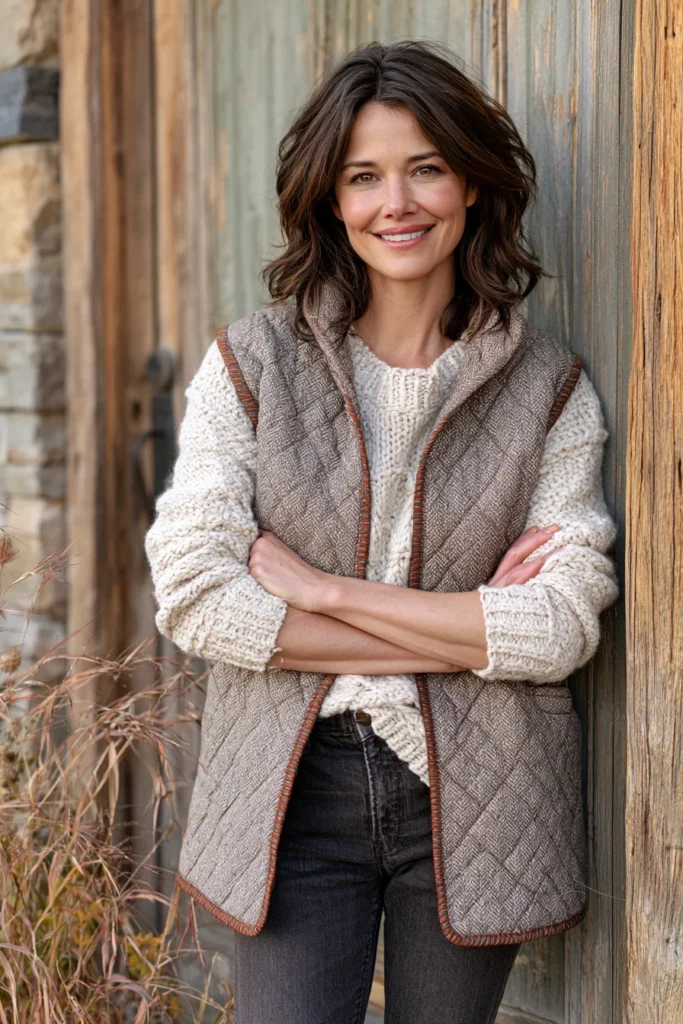
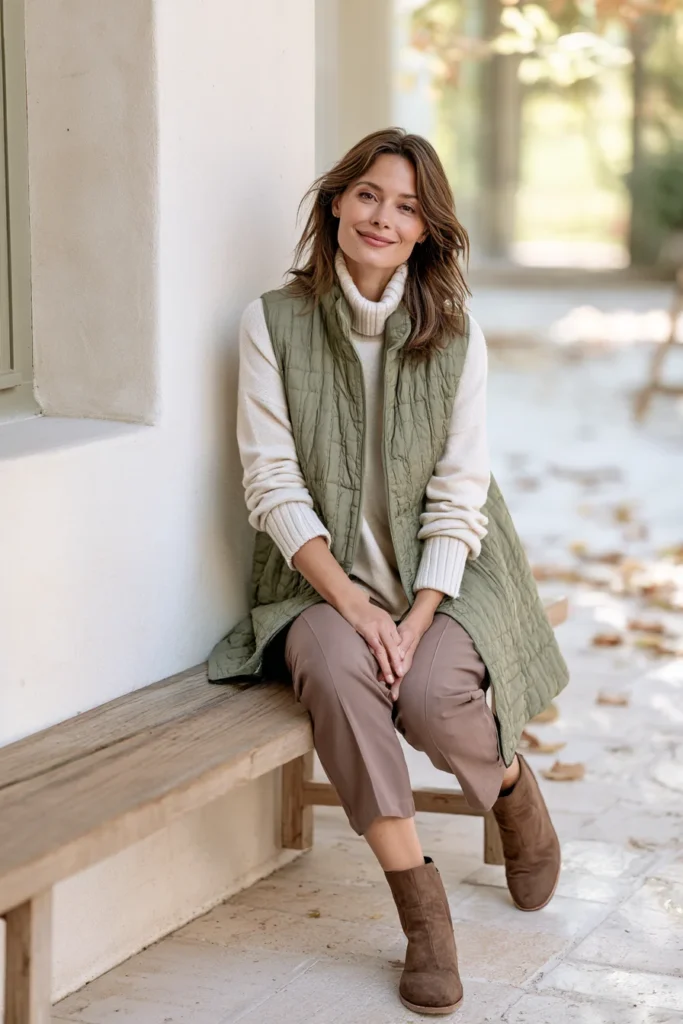
Conclusion
The real beauty of a quilted jacket or vest is how much use you’ll get from it. These aren’t pieces that sit in a closet waiting for a special occasion – they’re the layers you grab on the way out the door, wear to the market and the school run and the coffee shop, and reach for again the next morning. Quilted outerwear only improves with wearing, softening and crinkling into something that feels more yours with every wash, and because you made it, it fits your life and your colors exactly.
The best Fall Quilted Jackets and Vests Ideas match how you actually dress. Choose a plaid shacket, corduroy-collar barn jacket, or quilted denim jacket if you live in casual everyday layers; a cropped or oatmeal neutral vest for easy sweater-weather styling; a longline duster or belted midi when you want shape and elegance; and a floral, patchwork, or golden ombre piece when you want color to do the talking. A lightweight version carries you through early autumn, while a reversible jacket quietly does the work of two. Whichever you choose, one handmade quilted layer is all it takes to make the whole season feel warmer, easier, and a great deal more stylish.

