
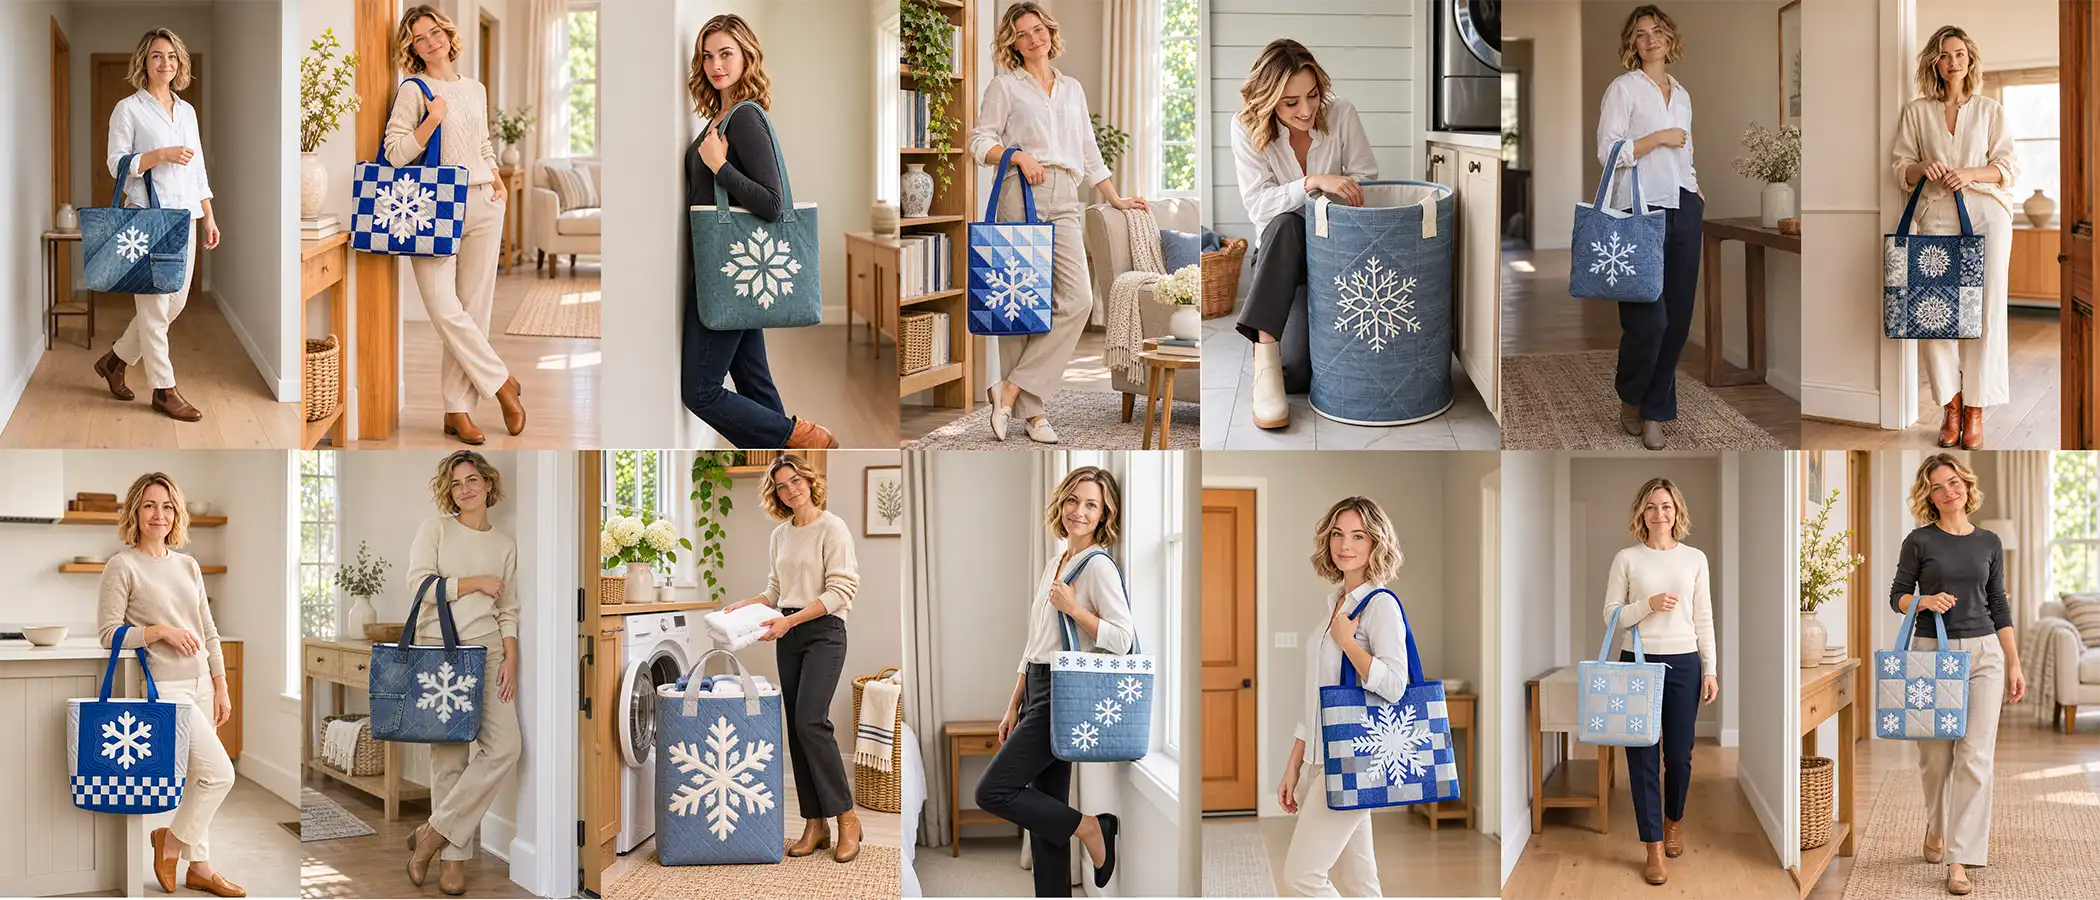
Snowflake Quilted Tote Bag Ideas with Appliqué in Blue, Silver, and White
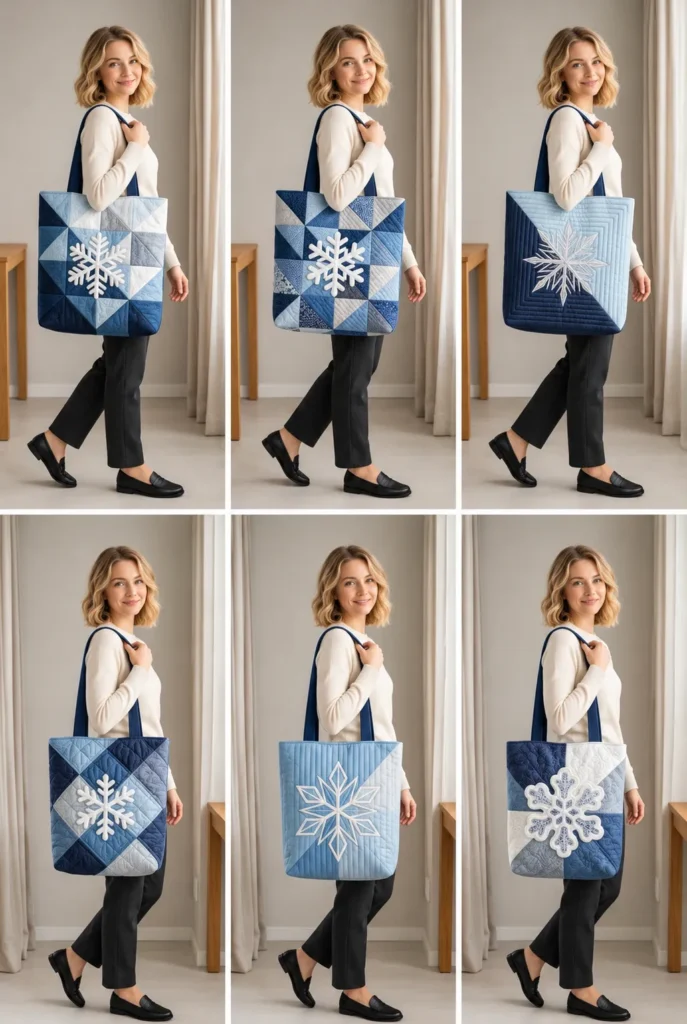
These Snowflake Quilted Tote Bag Ideas bring together two crafts that suit the colder months well: patchwork quilting and appliqué. Each bag in this collection starts with a quilted panel, pieced from squares, strips, or triangles or cut from a single fabric, and carries one or more six-armed snowflakes stitched on top.
A crisp white snowflake reads clearly against blue patchwork, and the blues here run from icy pale shades to deep sapphire and navy. Silver comes mostly from silver-gray cotton and silver metallic thread rather than shiny fabric, so it adds a cool sparkle without making the bags fussy to sew or carry. Quilting through the layers gives each panel body and texture, while stabilizers, interfacing, foam, or canvas interlining, plus a smooth lining, turn those decorated panels into bags that hold their shape through daily use.
Snowflake Quilted Tote Bag Ideas
The collection groups naturally by approach. Square-based patchwork includes a Nine Patch block and a checkerboard band, strip and frame designs include a classic Log Cabin and quarter-turned Rail Fence blocks, and triangle geometry shows up in a scrappy half-square triangle wash and a Flying Geese border. A few bags are led by fabric or construction rather than a block, such as a reversible linen tote and a laptop tote made from upcycled denim. The uses cover laundry, laptops, books, market and grocery trips, and everyday carrying, and each bag has its own size, shape, fabric, snowflake arrangement, and structure. Every design also comes with an illustrated 18-step sewing guide with calculated measurements for that bag.
See also: – Chic Jelly Roll Quilt Tote Bag – Elegant Boho Quilt Tote Bag – Jelly Roll Christmas Quilt Jacket and Vest – Japanese Quilted Bag – Chic Jelly Roll Quilt Tote Bag Ideas – Stylish Quilted Tote Bag
Why Make Snowflake Quilted Tote Bags?
A snowflake appliqué gives a tote something plain patchwork often lacks: a single clear focal point that reads from across a room or in a small photo. Pairing that motif with familiar quilt blocks lets you work Nine Patch, Log Cabin, or Flying Geese at a manageable scale, which makes a tote a practical way to try satin-stitch appliqué or a new block before committing to a full quilt.
The cool blue, silver, and white palette suggests winter without relying on holiday prints, so a finished bag stays in use from the first frost through the end of the season. Some designs also give worn jeans a second life; I grew up in Dhaka watching artisans layer reused cloth into Nakshi Kantha, and reclaimed denim carries some of that same respect for fabric that still has use in it. Reuse is not automatically sustainable, but it keeps good material working.
Each bag is also fitted to a job, from books to laundry to a laptop. Not every design is beginner-friendly, though: triangle points, padded compartments, reversible construction, and freestanding oversized totes need more planning than simple squares and strips.
What Makes These Designs Different?
Although every bag carries a white snowflake, the patchwork under it changes the look completely. The Nine Patch tote keeps its squares inside one bounded block, with five snowflakes forming an X, while the Checkerboard market tote runs small checks in a band below a solid panel that holds a single large snowflake. The Log Cabin and Flying Geese totes both frame a center snowflake, but one builds strips outward around it and the other circles it with a border of triangles flying clockwise. The Strip-Pieced and Rail Fence designs both start from strips, yet one runs them full height and the other turns short strip blocks a quarter turn for a woven look.
The scrappy half-square triangle book tote spreads a diagonal color wash across the whole face, whereas the Pinwheel sets one rotating block beside a plain panel. Paired uses differ too: the chambray laundry tote is upright and rectangular with one very large snowflake, while the denim Rail Fence tote is tall and round with several smaller ones. The Reversible and Wool Felt totes are led by construction and material rather than a block. Snowflake arrangements vary as well, from one large motif to three in graduated sizes, five in an X, or a vertical cascade of felt snowflakes, and each bag’s use sets its own size, depth, and structure.
Choosing Fabrics and Building a Blue, Silver, and White Palette
Quilting cotton is the baseline for most of these bags because it presses crisply, takes fusible web well, and holds satin stitch neatly. The other fabrics each behave differently: chambray is lighter than denim, linen brings visible texture but shrinks and frays readily at raw edges, upcycled denim is heavy and carries bulky original seams, canvas adds body, and wool or wool-blend felt is thicker and more durable than acrylic craft felt but needs spot cleaning. Silver comes mostly from silver-gray cotton and silver metallic thread, not metallic fabric.
Value contrast matters more than any single color choice, because a white snowflake needs a medium or dark ground to read; the Log Cabin tote sets its snowflake on a slate blue center, and the scrappy half-square triangle tote places it over the darkest corner. A dark ground can also shadow through white appliqué, so many quilters fuse a light interfacing to the white fabric first. Prewash everything, since dark blues and denim can bleed onto white snowflakes, linings, and binding, and allow extra fabric for lining, handles, gussets, padding, and the base.
Planning Tote Size, Shape, and Everyday Use
Each bag in this collection is sized for its job rather than cut from one standard pattern, so planning starts with what it will carry. Laundry totes need capacity, a broad opening, and enough support from canvas interlining and a firm base insert to stand upright when full. Laptop totes start from the device: as an approximate planning example, a compartment usually needs to be roughly an inch larger than the laptop in each direction, with foam padding and a supported base.
Book totes run taller, with a strong flat base and a gusset, and handles that can carry concentrated weight, while market and grocery totes need a wide opening and, for heavier loads, a boxed base with an insert.
Decide early whether handles will be carried by hand or over the shoulder, since a shoulder strap needs a longer drop. The reversible tote skips pockets and closures so either face can sit outward. Size and place each snowflake for its panel, keeping it clear of side seams, boxed corners, gussets, and the bulky center of a pieced block, and choose foam, interlining, interfacing, or batting according to how structured or soft the finished bag should be.
Appliqué, Quilting, Durable Details, and Common Mistakes
Most of these snowflakes are fused to their panels with paper-backed fusible web, then edged in satin stitch with a stabilizer behind the fabric; testing stitch width and density on a scrap first saves a lot of unpicking. The wool felt snowflakes are the exception, hand-sewn with blanket stitch because felt does not fray. Silver metallic thread usually sews more smoothly with a metallic or topstitch needle, a slower speed, and reduced top tension, as typical starting points.
Quilting then supports the motif: echo lines ripple out from a snowflake, ditch quilting keeps block seams crisp, and channel or crosshatch lines add texture, with denser quilting making a stiffer panel. Structural stitching does the real work, so reinforce handle ends with box-X stitching, along with the top edge, pocket corners, and the base, and keep bulk down at boxed corners, zipper ends, and old jeans seams.
The most common mistakes start at the appliqué. Satin stitch puckers or tunnels when the stabilizer is skipped, snowflake arms cut too thin fray or lift at their tips, and a white snowflake loses impact on a pale ground. Unwashed denim or dark blue cotton can bleed onto white snowflakes and linings, and a dark ground can shadow through white fabric. On the pieced designs, drifting seams cut off half-square triangle and Flying Geese points, and a snowflake placed on a Pinwheel center or too near a boxed corner gets lost in the bulk.
About the Design Inspiration Images and Sewing Guides
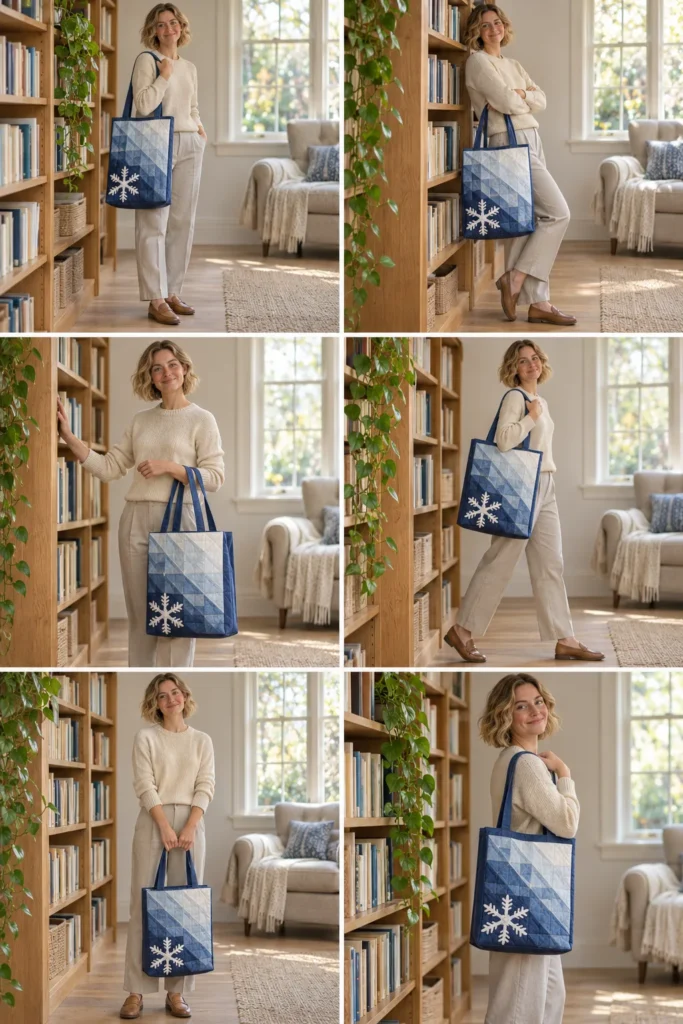
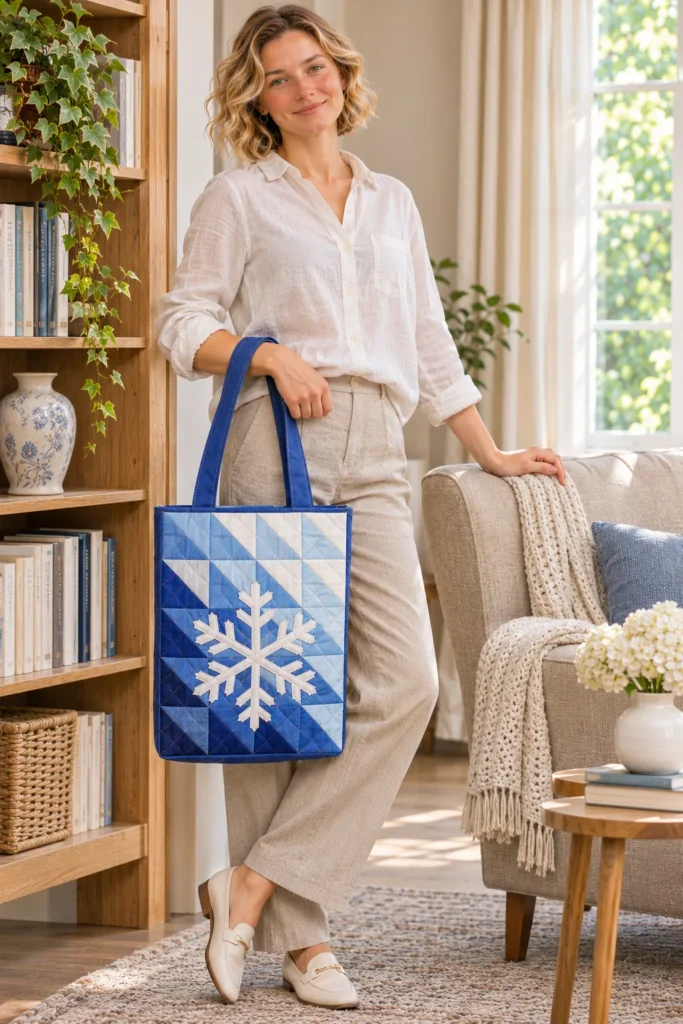
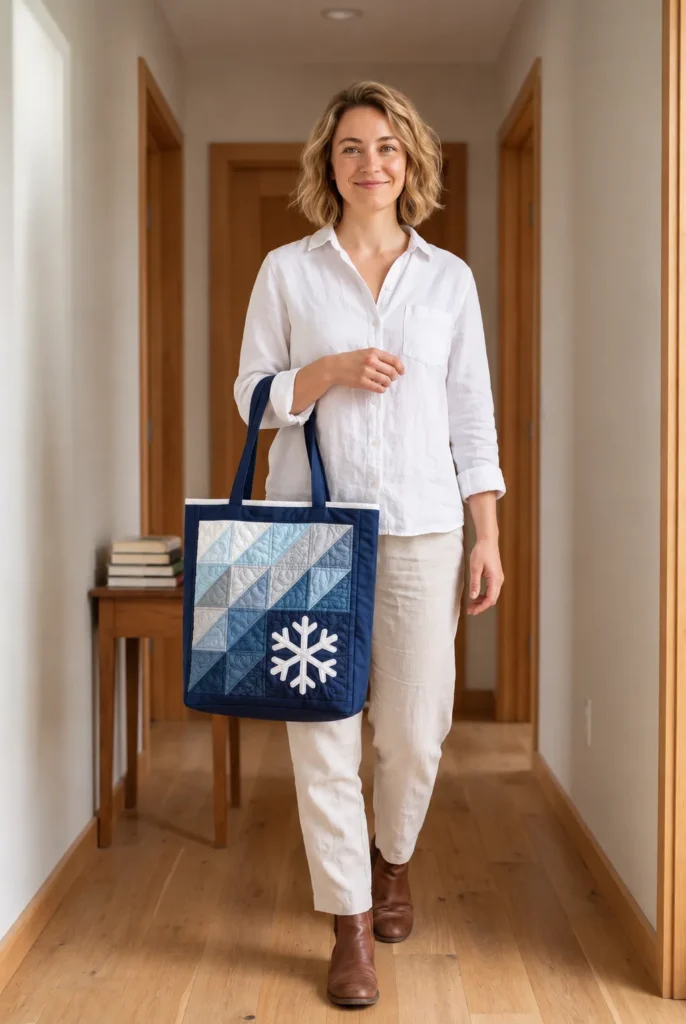
The images in this article illustrate design possibilities and may be AI-generated or digitally modified. Several designs draw on traditional quilt blocks such as Nine Patch, Log Cabin, and Flying Geese, but the images are not photographs of sewn or tested bags, and fine details such as snowflake shapes, stitch lines, and quilting may not match the written steps exactly. Each 18-step guide describes a proposed method with calculated measurements for that particular bag rather than a tested pattern. Treat the written steps as the authority, and check each bag’s own dimensions and seam allowances before you cut.
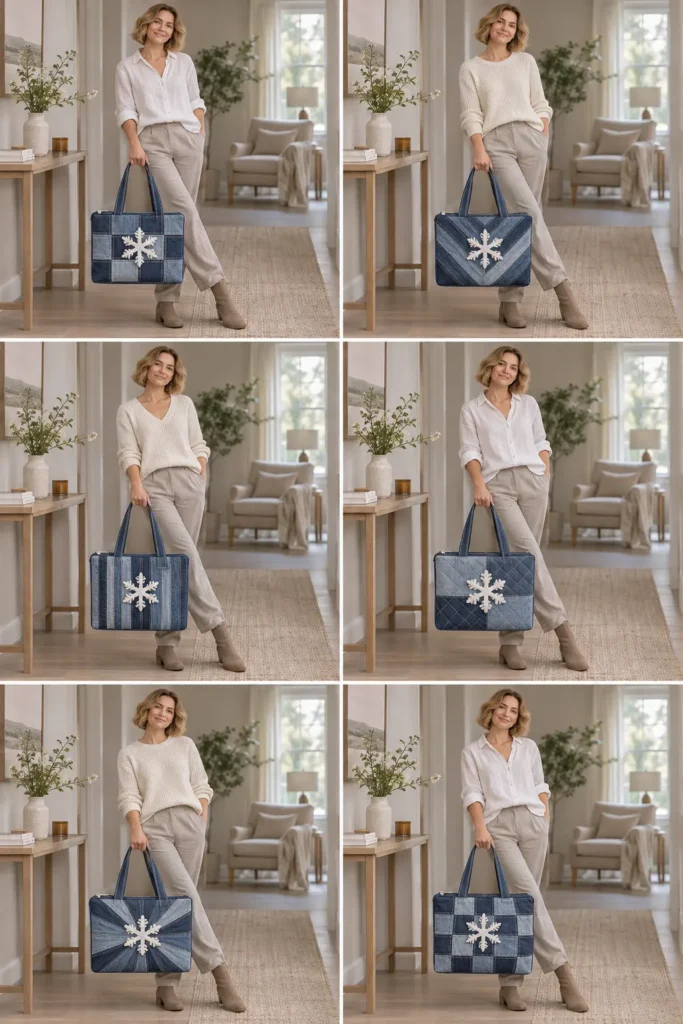
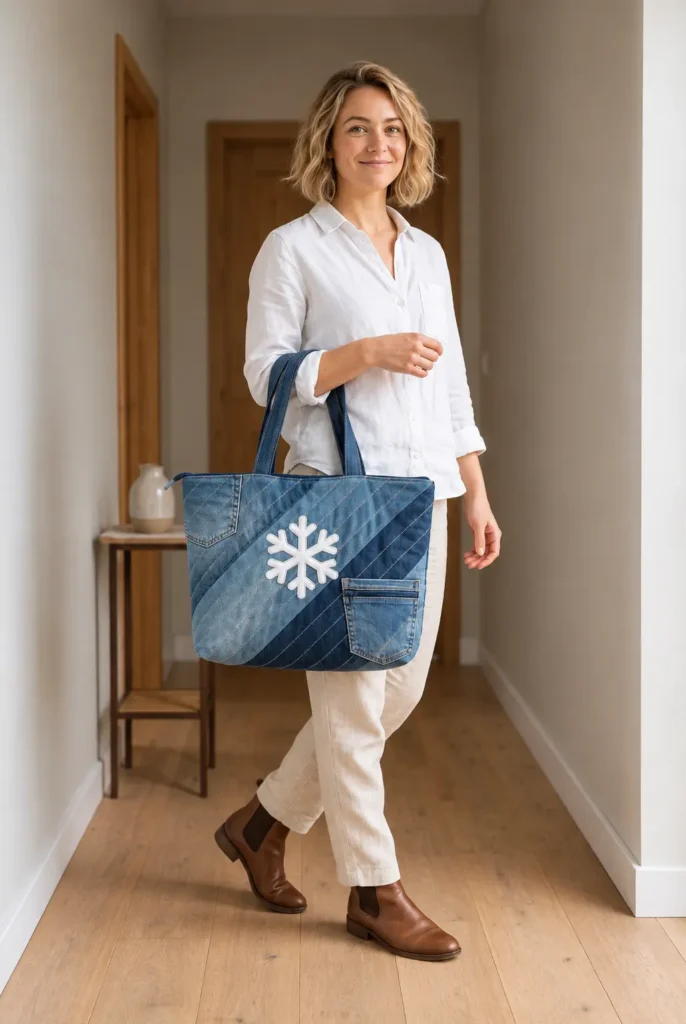
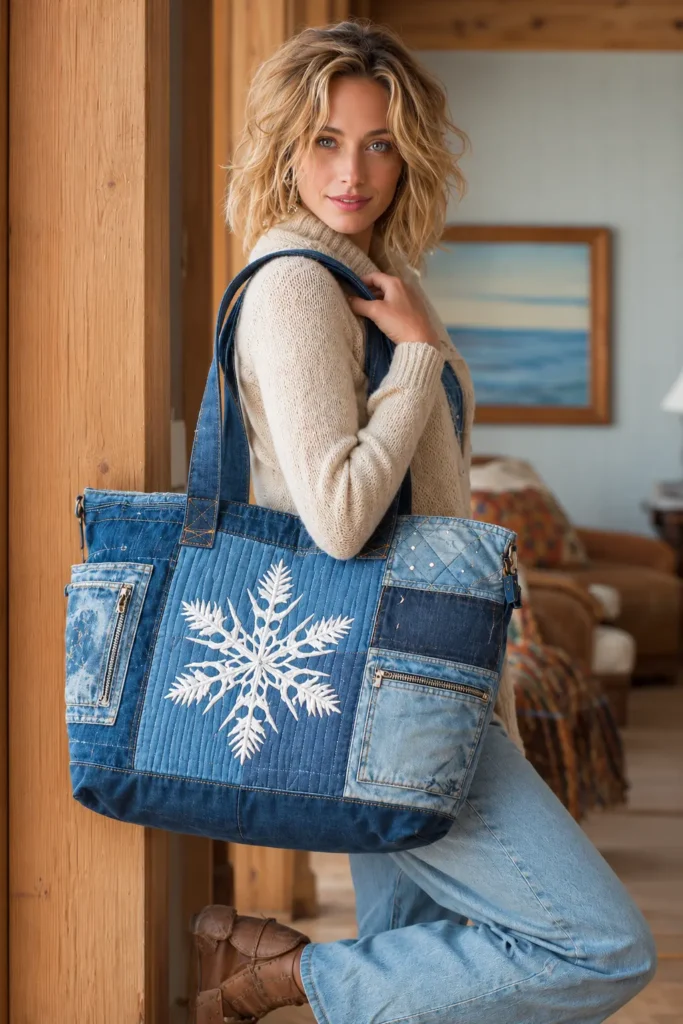
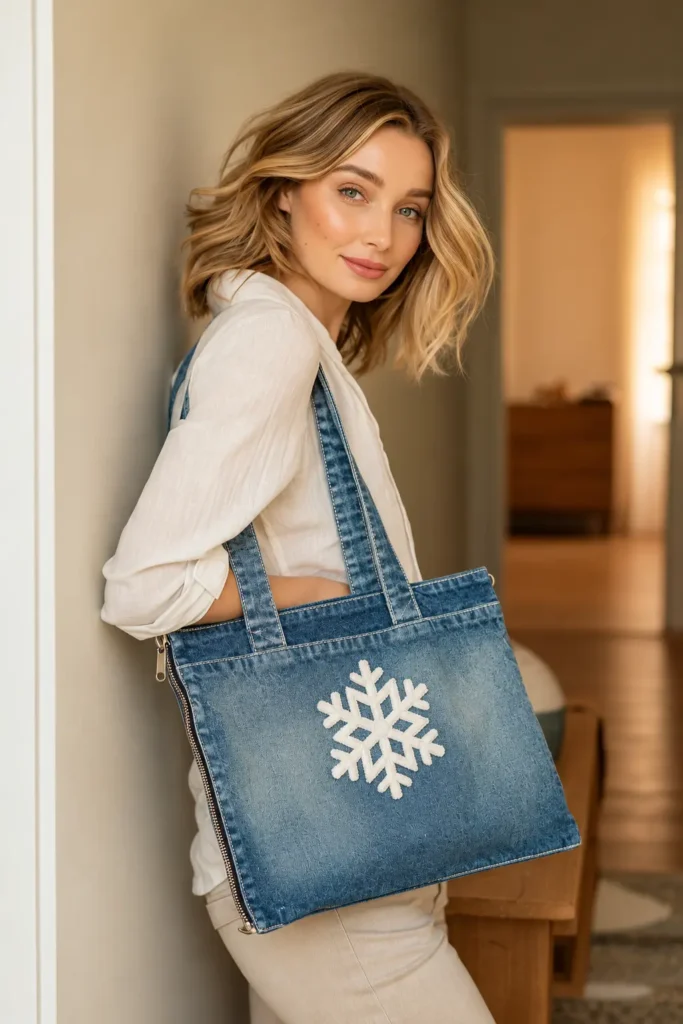
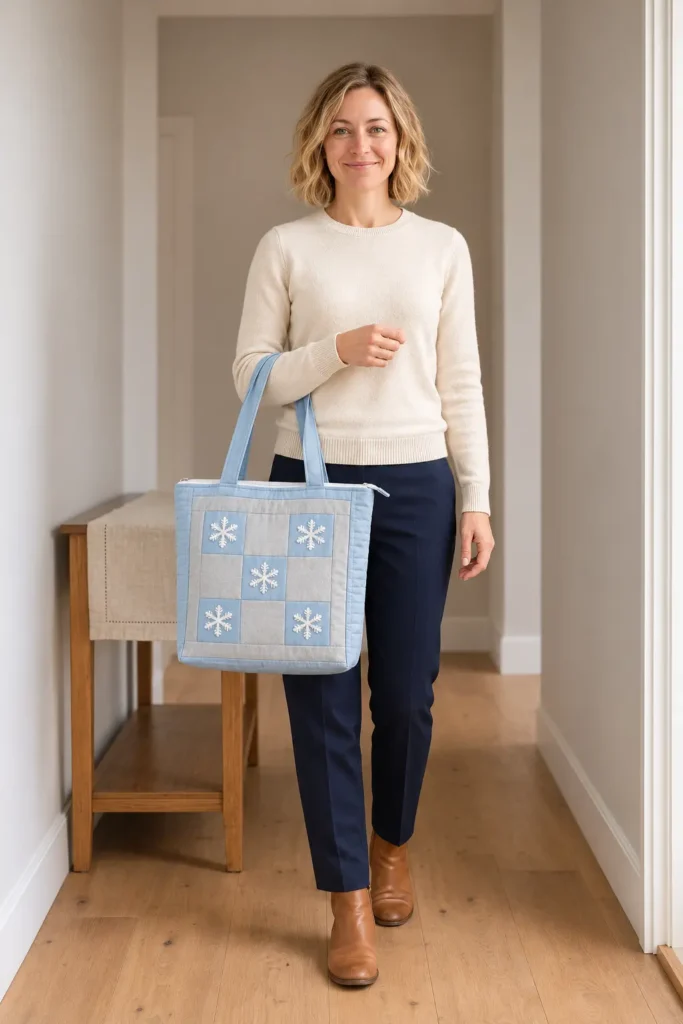
1. Zip-Top Snowflake Appliqué Laptop Tote in Upcycled Blue Denim
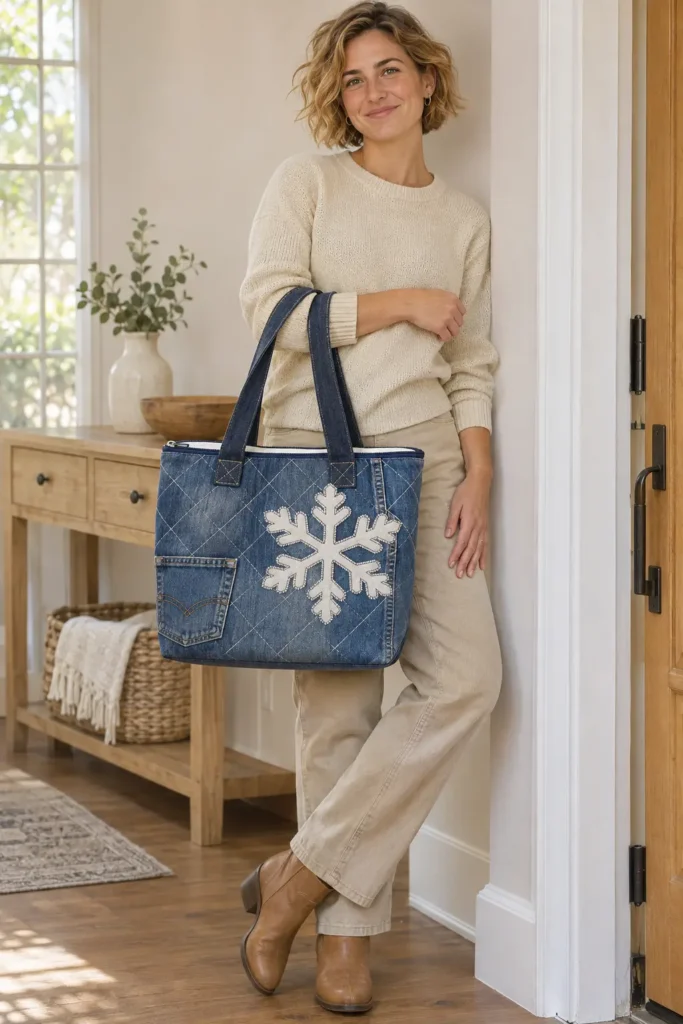
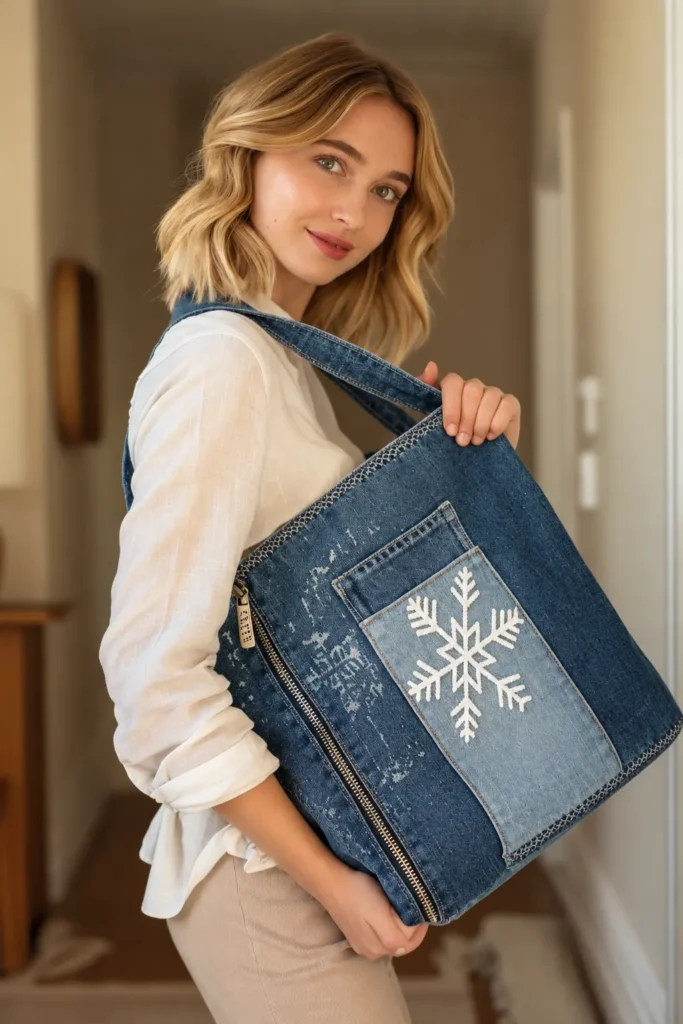
This laptop tote is built from two pairs of worn jeans, one medium wash and one dark wash. Each face is split into two tall panels, with the light and dark washes swapping sides between front and back. That way each side wall ends up all one wash. One white six-armed snowflake, about 7″ across, sits slightly off-center on the medium-wash front panel, its edges covered in a shimmering silver satin stitch.
On the dark panel beside it, a real jeans back pocket is stitched on near the lower corner, so the bag’s denim past stays visible. Diagonal quilting in silver-gray thread runs across both faces and stops just short of the snowflake, giving the denim a soft, padded texture.
The bag finishes about 21″ wide, 14″ tall, and 4″ deep, with a flat base 17″ long. That is wide enough for a padded sleeve that holds laptops up to about 14¼” × 10″, which covers most 15.6-inch models. Foam stabilizer quilted into the outer panel makes the bag stand up on its own and cushions what is inside. A full-width zipper closes the top. Two folded dark-denim handles with a drop of about 10″ are long enough to carry the bag on your shoulder. Inside, a smooth white lining with interfacing keeps the laptop compartment clean.
Design Inspirations – Digitally Modified Images. Texture and color may vary from the actual product.
Working with Upcycled Jeans
Jeans legs set the size of every denim piece in this bag. Each face panel is cut 15″ tall from a single opened leg, so one adult pair yields both panels in its wash. Open each leg along the inseam. The outseam usually runs down the middle of the opened leg and can stay as a vertical feature line, as long as it sits at least 1½” from any seam you sew. Rivets, thick waistband sections, and brand patches stay out of the pieces.
The base strip and the 28″-long handles come from new dark denim yardage, because few jeans legs have that much flat fabric. Wash and dry the jeans before cutting, even if they are already worn, so any remaining dye loosens before it can reach the white snowflake or lining.
Placing the Snowflake and the Pocket
The front face balances its two features across the panel seam. The snowflake fills the left, medium-wash panel, with about 1″ of clear denim between its arm tips and both the panel seam and the side wall. The jeans pocket sits low on the right, dark-wash panel, a little more than ¾” from the panel seam and from the side wall. A pocket with plain edges works best here. Skip pockets with brand tabs, rivets, or a recognizable trademark stitch design, or unpick the decorative stitching first.
Built Around a 15.6-Inch Laptop
The padded sleeve is 16″ × 11″. Its bottom sits right on the lining’s base line, so the laptop rests on the floor of the bag instead of hanging from the sleeve’s stitching. The base is 17″ long, which leaves room for the sleeve’s side seams inside the boxed corners. The zipper runs nearly the full width but stops 1″ inside each side seam, where fabric end tabs finish the zipper ends neatly. Measure your laptop before cutting. If it is larger than about 14¼” × 10″ × ¾”, the sleeve and the bag both need to grow, and you will have to work out new measurements.
Materials and Tools Needed
- One adult pair of medium-wash jeans and one of dark-wash jeans, washed and dried (the back pocket and zipper tabs come from the dark pair)
- ½ yd new dark denim, 56″ wide or wider, for the base strip and handles
- 1⅛ yd white quilting cotton for the lining, laptop sleeve, and snowflake
- 1 yd medium woven fusible interfacing (butt two pieces if yours is narrower than 22″)
- A 9″ × 9″ piece of lightweight woven fusible interfacing for the snowflake fabric
- A 9″ × 9″ piece of paper-backed fusible web
- A 10″ × 10″ piece of tear-away stabilizer
- 1 yd sew-in foam stabilizer (you need 22″ × 33″)
- ½ yd fusible fleece
- One #5 coil zipper, at least 18″ long
- Silver metallic thread; silver-gray quilting thread; all-purpose thread in dark blue and white; heavy-duty or denim thread if you like
- Needles: a 100/16 denim needle and a 90/14 metallic or topstitch needle
- Presser feet: a walking foot, a zipper foot, and an open-toe embroidery foot
- Rotary cutter, ruler, and mat; fabric clips; seam ripper; fabric marking pen
- Paper and paper scissors for the snowflake template
- Iron and press cloth
Finished Tote Bag Size
- Width: 21″ across the top, measured flat along the zipper seam
- Height: 14″ from the base seam to the top edge
- Depth: 4″
- Base: 17″ × 4″
- Handle drop: about 10″, measured from the top edge to the top of the handle loop (approximate)
- Laptop sleeve: 16″ × 11″, for laptops up to about 14¼” × 10″ × ¾”
- Zipper: 19″ including end tabs
Care: spot-clean or hand wash gently and air dry. Do not put the foam-structured bag in a dryer.
Cutting Measurements
| Piece | Quantity | Cut Size (W × H) | Purpose |
|---|---|---|---|
| Front left panel, medium-wash jeans | 1 | 11¾” × 15″ | Front face, carries the snowflake |
| Front right panel, dark-wash jeans | 1 | 10¾” × 15″ | Front face, carries the pocket |
| Back left panel, dark-wash jeans | 1 | 11¾” × 15″ | Back face |
| Back right panel, medium-wash jeans | 1 | 10¾” × 15″ | Back face |
| Base strip, new dark denim | 1 | 22″ × 5″ | Base |
| Handles, new dark denim | 2 | 6″ × 28″ | Folded handles |
| Zipper end tabs, dark denim scrap | 2 | 2″ × 3″ | Finish the zipper ends |
| Jeans back pocket | 1 | As unpicked, up to 6½” wide | Exterior pocket |
| Snowflake fabric, white quilting cotton | 1 | 9″ × 9″ | Snowflake appliqué |
| Lightweight woven fusible interfacing | 1 | 9″ × 9″ | Prevents shadow-through |
| Paper-backed fusible web | 1 | 9″ × 9″ | Fuses the snowflake |
| Tear-away stabilizer | 1 | 10″ × 10″ | Supports the satin stitch |
| Sew-in foam stabilizer | 1 | 22″ × 33″ | Outer panel structure |
| Lining, white quilting cotton | 1 | 22″ × 33″ | One-piece lining |
| Medium woven fusible interfacing | 1 | 22″ × 33″ | Lining body |
| Laptop sleeve, white quilting cotton | 2 | 17″ × 12″ | Padded sleeve |
| Fusible fleece | 2 | 16″ × 11″ | Sleeve padding |
| #5 coil zipper | 1 | Shortened to 17″ | Top closure |
Assembly at a Glance
- Cut and Sort the Fabrics
- Prepare the Snowflake Appliqué
- Piece the Front Face
- Piece the Back Face
- Join the Back Face, Base Strip, and Front Face
- Fuse and Satin-Stitch the Snowflake
- Layer and Quilt the Outer Panel
- Stitch the Jeans Pocket to the Front Face
- Trim the Outer Panel and Cut the Boxing Notches
- Make and Baste the Two Handles
- Make the Padded Laptop Sleeve
- Prepare the Lining
- Add the End Tabs to the Zipper
- Sew the Zipper Between the Outer and Lining at the Front Top Edge
- Sew the Zipper Between the Outer and Lining at the Back Top Edge
- Sew the Outer and Lining Side Seams, Leaving a Turning Gap
- Box the Outer and Lining Corners
- Turn Through the Gap, Close It, and Topstitch Beside the Zipper
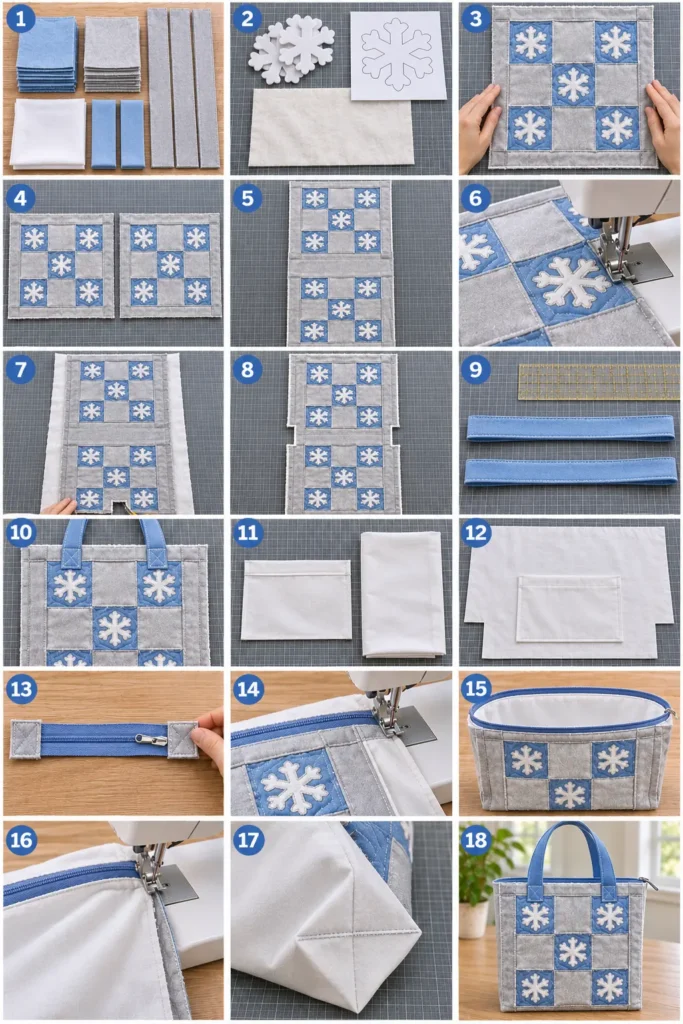
Step-by-Step Sewing Tutorial
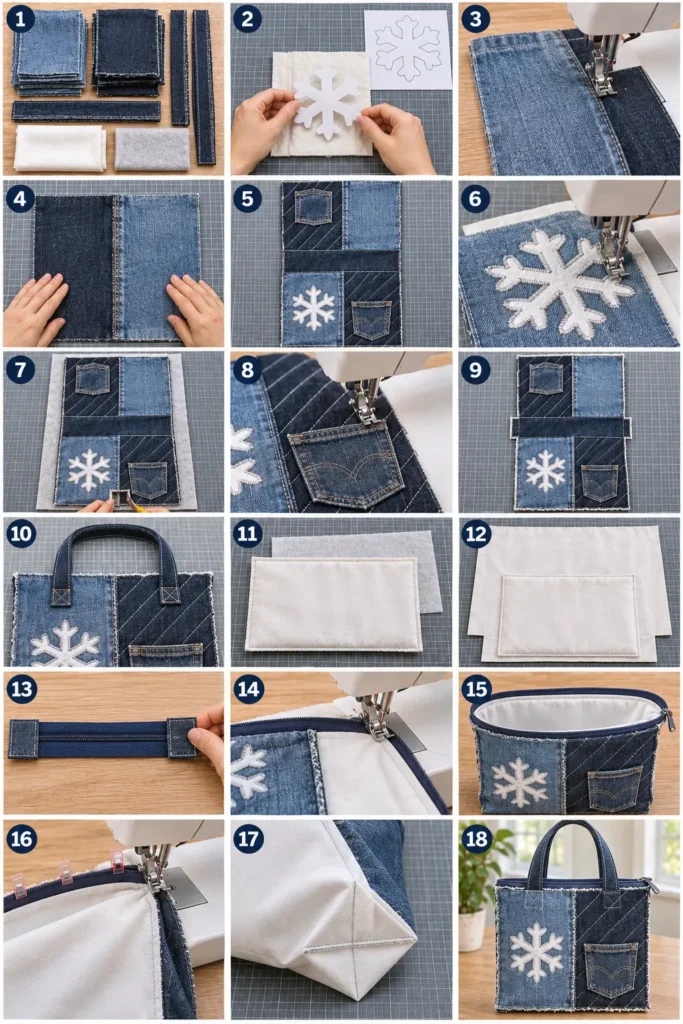
Step-by-Step Illustration – Digitally Created Image. Follow the written steps for measurements and details.
Step 1 – Cut and Sort the Fabrics
Prewash the white cotton, and make sure both pairs of jeans have been washed and dried. Open each jeans leg along the inseam and press it flat. From the medium-wash pair, cut the front left panel (11¾” × 15″) from one leg and the back right panel (10¾” × 15″) from the other. From the dark-wash pair, cut the back left panel (11¾” × 15″) and the front right panel (10¾” × 15″) the same way.
Keep any outseam running vertically and at least 1½” from every edge you will sew, and avoid rivets. With a seam ripper, unpick one plain back pocket whole from the dark jeans, keeping its folded edges intact, and cut two 2″ × 3″ zipper tabs from the dark scraps. From new dark denim, cut the base strip (22″ × 5″) and two handles (6″ × 28″). Cut the lining, foam, and lining interfacing at 22″ × 33″, the two sleeve pieces at 17″ × 12″, and the two fleece pieces at 16″ × 11″. Label the four denim panels.
Result: All pieces are cut and sorted into labeled stacks: four denim panels, the base strip, two handles, two tabs, the jeans pocket, foam, lining materials, and sleeve materials.
Step 2 – Prepare the Snowflake Appliqué
Fuse the 9″ lightweight interfacing to the wrong side of the 9″ white cotton square, then fuse the paper-backed web over the interfacing. Fold a 7″ paper circle in half, then into thirds, to make six 60-degree wedges. Cut a simple arm shape with arms at least ½” wide and no sharp, narrow inner points, then unfold it into a six-armed snowflake. Trace the template onto the web’s paper side and cut the snowflake out on the line. Leave the paper backing on.
Result: One white six-armed snowflake, 7″ across, backed with interfacing and fusible web, with its paper still attached.
Step 3 – Piece the Front Face
Place the front left panel (medium wash) and the front right panel (dark wash) right sides together along their 15″ edges. The medium panel’s 11¾” width goes on the left. Sew a ¼” seam with the denim needle, then press the seam open. Topstitch ⅛” on each side of the seam if you like the look of jeans topstitching.
Result: A front face 22″ × 15″, medium wash on the left and dark wash on the right.
Step 4 – Piece the Back Face
Join the back left panel (dark wash, 11¾” wide) and the back right panel (medium wash, 10¾” wide) right sides together along their 15″ edges with a ¼” seam. Press the seam open and topstitch to match the front.
Result: A back face 22″ × 15″, dark wash on the left and medium wash on the right, read as seen from behind the finished bag.
Step 5 – Join the Back Face, Base Strip, and Front Face
Turn the back face upside down so its top edge points away from the base strip. Sew its bottom edge to one long edge of the base strip, right sides together, with a ½” seam. Sew the bottom edge of the front face (right side up) to the other long edge of the strip the same way. Press both seams toward the base strip and topstitch them ¼” from the seam on the base side.
Result: One long outer panel, 22″ × 33″: the back face upside down, the dark base strip across the middle, and the front face upright.
Step 6 – Fuse and Satin-Stitch the Snowflake
On the front face, mark the snowflake’s center 7″ from the left raw edge and 7½” above the seam that joins the face to the base strip. Peel the paper off, center the snowflake on the mark, and fuse it under a press cloth. Pin tear-away stabilizer behind it. With the open-toe foot, the metallic or topstitch needle, silver metallic thread on top, and gray thread in the bobbin, satin-stitch around the snowflake’s edge. Use a stitch about 2.5-3 mm wide and very short, slow down, lower the top tension, and pivot with the needle down at every point. Test the settings on a denim scrap first. Tear the stabilizer away.
Result: The front face has one white six-armed snowflake edged in silver satin stitch, centered on the medium-wash panel.
Step 7 – Layer and Quilt the Outer Panel
Lay the foam flat and place the outer panel on top, right side up, with the raw edges even. Baste around all four edges ⅜” from the raw edge. With the walking foot and silver-gray thread, sew 45-degree diagonal lines 1½” apart across the whole panel. Start from a line drawn through the panel center. Stop each line ⅛” outside the satin stitch and backstitch, then pick up again on the other side of the snowflake.
Result: The outer panel is quilted to the foam with diagonal silver-gray lines, and the snowflake is left unquilted.
Step 8 – Stitch the Jeans Pocket to the Front Face
Place the jeans pocket right side up on the front face’s dark panel, centered 15½” from the left raw edge, with its bottom edge 1½” above the face-to-base seam. Pin or clip it. With the denim needle, edgestitch ⅛” from the pocket’s folded edges along both sides and the bottom, through the denim and foam. Leave the top edge open. Bar tack each top corner with a short, dense zigzag about ¼” long.
Result: The jeans pocket is stitched to the lower dark panel, open at the top, with both top corners bar-tacked.
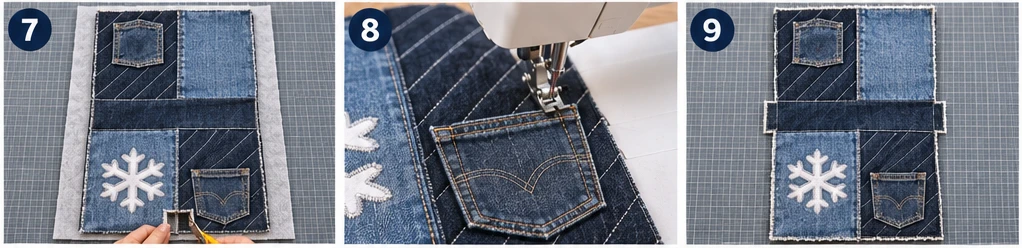
Step 9 – Trim the Outer Panel and Cut the Boxing Notches
Square the quilted panel to 22″ × 33″, trimming only foam or denim that has spread beyond the original raw edges. Find the center line across the base strip, 16½” from each end. At both side edges, cut out a notch 2″ deep from the raw edge and 3″ tall, running 1½” above and 1½” below the center line, through denim and foam.
Result: A trimmed 22″ × 33″ quilted outer panel with a 2″ × 3″ notch cut from the middle of each side edge.
Step 10 – Make and Baste the Two Handles
Fold each 6″ × 28″ handle strip in half lengthwise, wrong sides together, and press. Open it, fold both long raw edges to the center crease, refold, and press. Edgestitch both long edges ⅛” from the edge with the denim needle. On the outer panel’s right side, place one handle at the front top edge, raw ends even with the top raw edge, with the end centers 7½” and 14½” from the left raw edge. Let the loop hang down toward the base and keep it untwisted. Baste ⅜” from the edge. Repeat at the back top edge with the second handle.
Result: Two 1½”-wide denim handles basted to the right side of the outer panel’s two top edges, loops hanging down.
Step 11 – Make the Padded Laptop Sleeve
Fuse one 16″ × 11″ fleece piece centered on the wrong side of each 17″ × 12″ sleeve piece. Place the two pieces right sides together. Sew around all four edges at ½”, leaving a 5″ gap centered in one long edge (the bottom). Clip the corners, turn the sleeve right side out, push out the corners, and press. Topstitch the top long edge ¼” from the edge.
Result: A padded white sleeve, 16″ × 11″, with a topstitched top edge and an unstitched gap in the bottom edge.
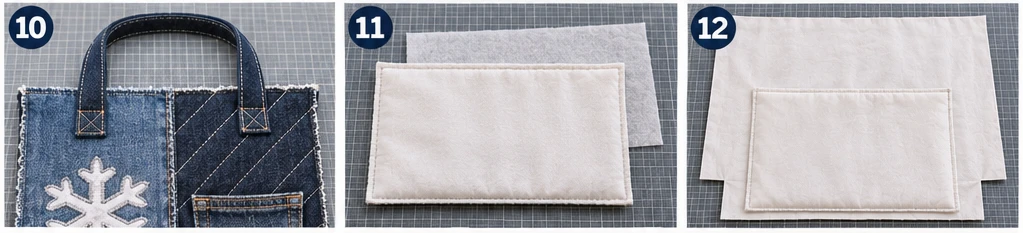
Step 12 – Prepare the Lining
Fuse the medium woven interfacing to the wrong side of the 22″ × 33″ lining. Cut the same 2″ × 3″ notches as the outer, centered on the lining’s center line. On the right side, mark the two base lines 2″ above and 2″ below the center line. On the half that will sit behind the outer back face, place the sleeve right side up and centered across the width (3″ from each raw side edge), with its bottom edge on the base line and its top edge facing the lining’s top raw edge. Edgestitch the sides and bottom ⅛” from the edges, closing the gap, and backtack at both top corners.
Result: A flat, interfaced, notched lining with the padded sleeve stitched on one half, open at the top.
Step 13 – Add the End Tabs to the Zipper
Shorten the zipper so 17″ of tape lies between the stop and the cut end. Bar tack across the coil just inside the cut, and leave the pull roughly in the middle. For each 2″ × 3″ tab, press both 2″ ends ½” to the wrong side, then fold the tab in half over one zipper end. Edgestitch across, and trim the tab even with the tape edges.
Result: A zipper with a denim tab at each end, measuring 19″ from tab end to tab end.
Step 14 – Sew the Zipper Between the Outer and Lining at the Front Top Edge
Lay the outer panel right side up with the handles basted down. Place the zipper face down along the front top edge, centered, with the tape edge even with the raw edge, so the tabs sit 1½” in from each raw side edge. Lay the lining face down on top with its matching top edge even, so outer and lining are right sides together with the zipper between them. Clip the layers. With the zipper foot and denim needle, sew ½” from the edge across the full width. Beyond the zipper tabs, the stitching joins outer and lining directly. Trim the foam from the seam allowance, fold the outer and lining back, and finger-press.
Result: The front top edge is joined: outer, zipper, and lining are sewn together, with the handle caught in the seam.
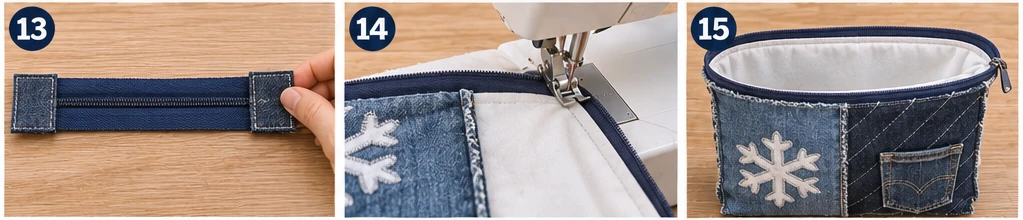
Step 15 – Sew the Zipper Between the Outer and Lining at the Back Top Edge
Bring the outer panel’s back top edge up to the unsewn zipper tape, right sides together, with the handle loop tucked toward the base. Bring the lining’s other top edge face down on top, so the zipper is sandwiched the same way as in Step 14. Center the tabs to match the front and sew ½” across the full width. Trim the foam from the allowance.
Result: The outer, zipper, and lining now form one continuous loop, joined at both top edges.
Step 16 – Sew the Outer and Lining Side Seams, Leaving a Turning Gap
Open the zipper about halfway. Rearrange the loop so the outer is folded right sides together at its base center line and the lining is folded right sides together at its base center line. Press the zipper seam allowances toward the lining and match the face-to-base seams and the top seams at each side. Sew each side edge at ½” in one pass, from the outer notch, across the top seam, down to the lining notch. On one lining side, leave an 8″ gap with at least 2″ of stitching above and below it. Trim the foam from the outer side seam allowances.
Result: Both side seams are sewn through outer and lining; the four notches and the 8″ lining gap remain open.
Step 17 – Box the Outer and Lining Corners
At each outer notch, pull the notch open and flatten it so the side seam lies directly on the base center line and the notch’s raw edges line up straight. Sew across at ½”, backstitching at both ends, and trim the foam from the allowance. Box both lining corners the same way.
Result: All four corners are boxed. The bag is complete but wrong side out, with a 4″-deep base and the gap still open.
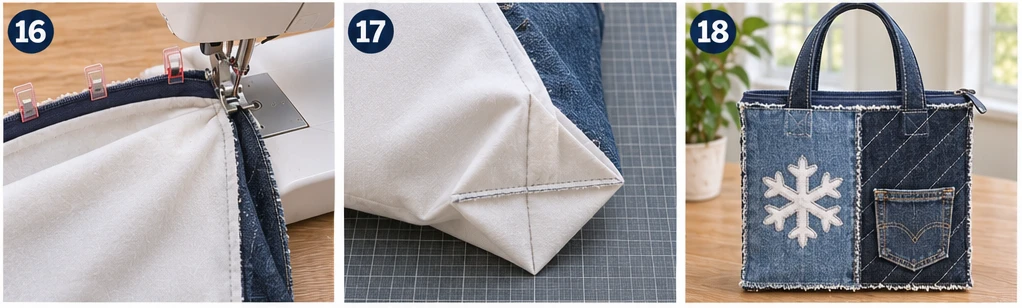
Step 18 – Turn Through the Gap, Close It, and Topstitch Beside the Zipper
Reach through the gap, pull the bag right side out through the open zipper, and push out the corners. Fold the gap’s raw edges in by ½” and edgestitch the gap closed. Push the lining down inside the outer and seat it into the boxed corners. On the outside, topstitch ¼” from the zipper seam along both top edges through outer, foam, and lining, sewing slowly over the handle ends.
Result: The finished laptop tote, 21″ wide, 14″ tall, and 4″ deep, with the snowflake and jeans pocket on the front, a closed zipper, upright denim handles, and the padded sleeve inside.
Troubleshooting This Denim Laptop Tote
- Satin stitch puckers or skips on denim. Keep the tear-away stabilizer in place until the stitching is done, slow down at the points, and use a fresh metallic or topstitch needle. If the stitch skips, lower the top tension a little more.
- Metallic thread shreds or breaks. Lower the top tension, slow down, and if your thread comes on a cone, let it feed from a separate thread stand.
- The machine stalls at the top seam over the handles. Use the 100/16 denim needle and a slightly longer stitch. Flatten the handle ends with a seam roller or a gentle tap of a hammer before sewing, and walk the needle over the thickest spot by hand.
- Dye stains on the white snowflake or lining. Rewash the jeans with a dye-catching sheet before cutting, and keep damp denim away from the white fabrics.
- The foam shifts during quilting. Baste the edges first and quilt outward from the center line with a walking foot.
- The jeans pocket corners pull away. Repeat the bar tacks, and check that the edgestitching caught the folded pocket edges all the way around.
- The laptop is a tight fit. Measure the laptop, including any case, before cutting. A sleeve needs about 1″ of width and 1″ of height beyond the laptop.
- Bulk where the side seams cross the top seam. Trim the foam close to every stitch line and press the zipper allowances toward the lining before sewing the side seams.
Design Inspiration and Tutorial Note: The images in this section may be AI-generated or digitally developed to show a design possibility. The sewing instructions are a proposed construction method with calculated measurements, not a physically tested pattern. Check each panel size against your jeans, your laptop, and your seam allowances before cutting.
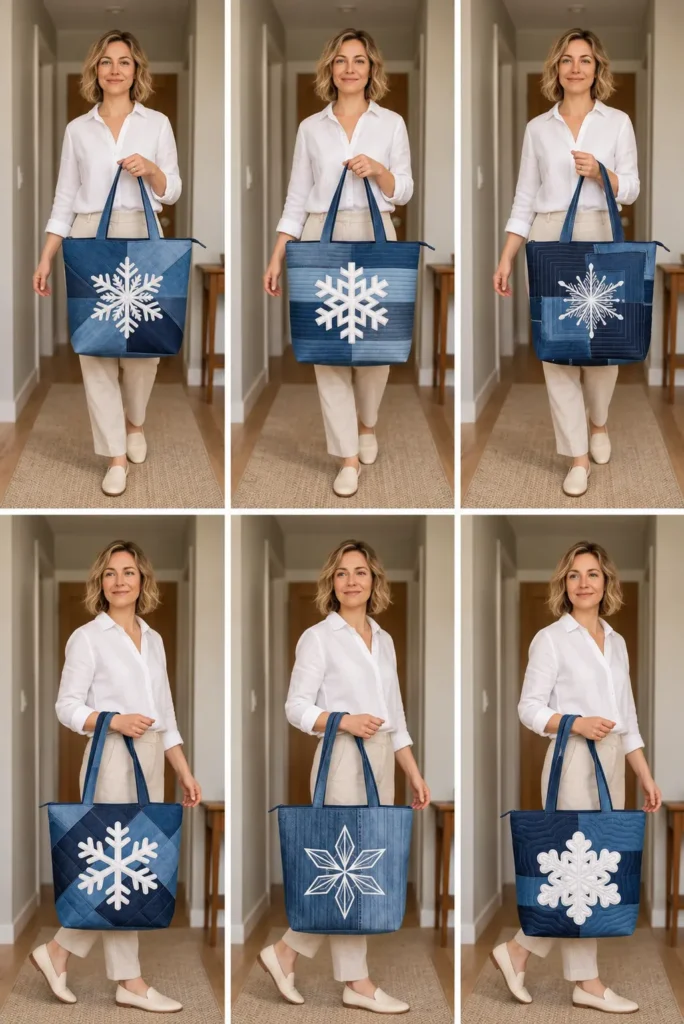
Other Design Inspirations – Digitally Modified Images. Texture and color may vary from the actual product.

2. Checkerboard Snowflake Appliqué Market Tote in Royal Blue and Silver
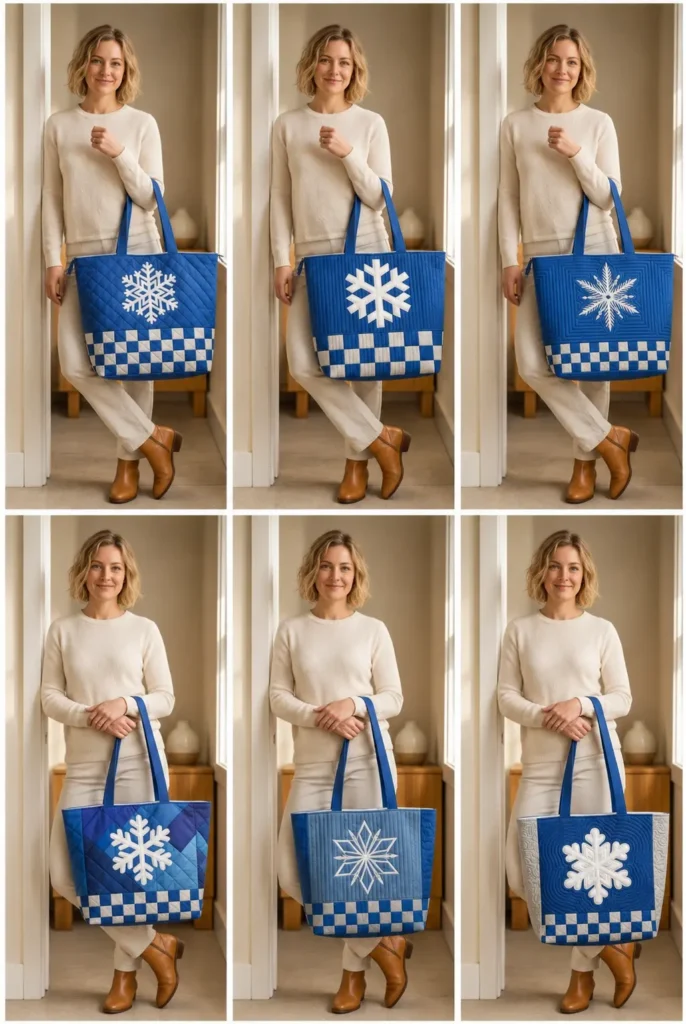
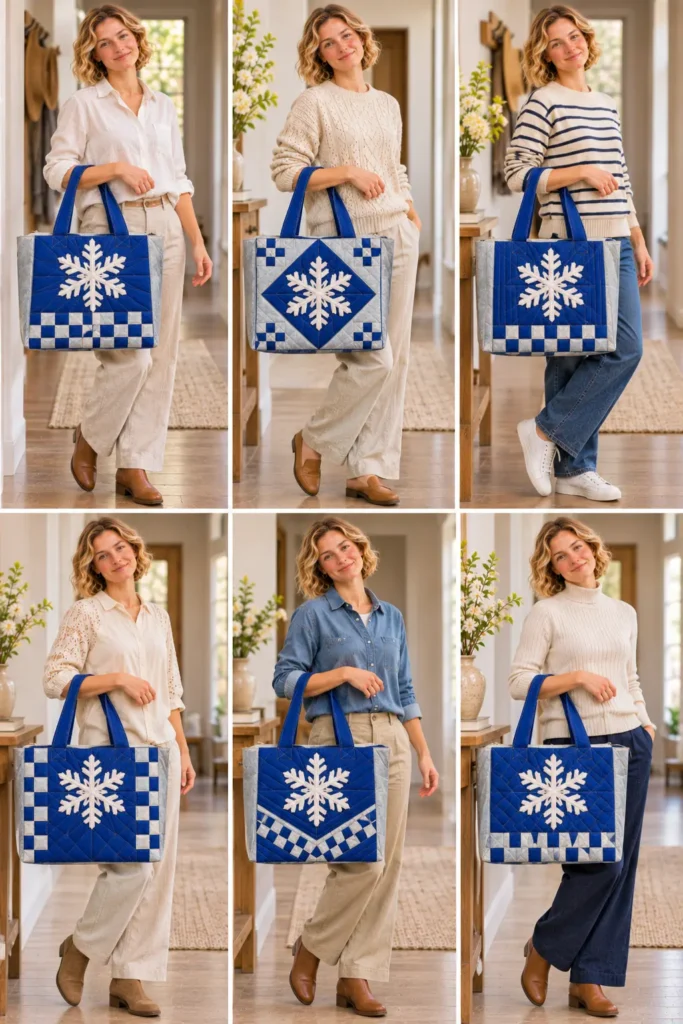
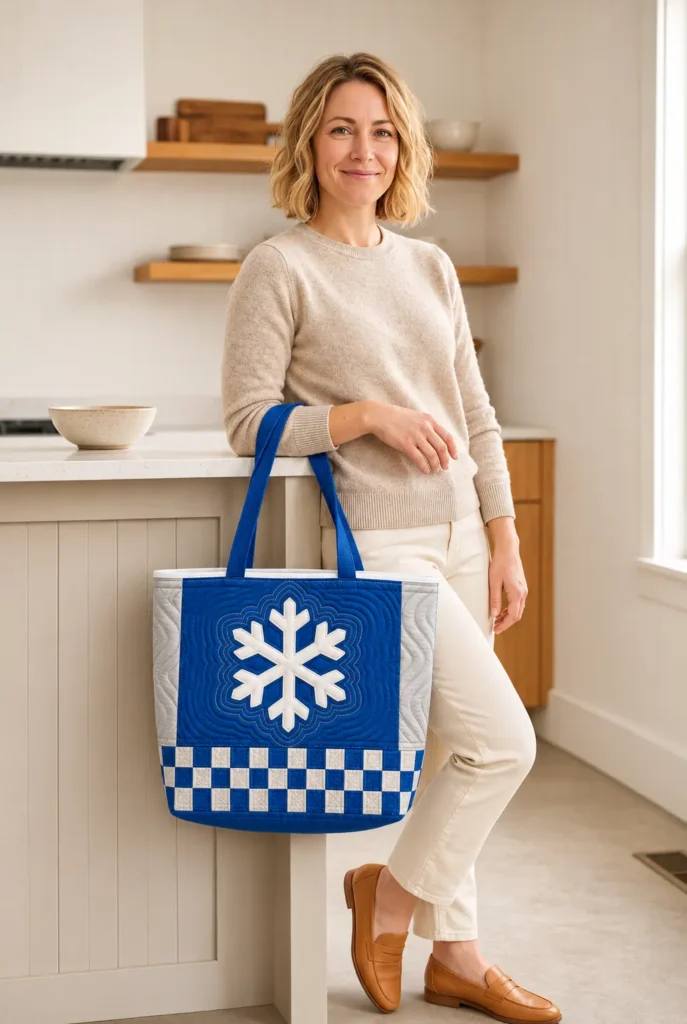
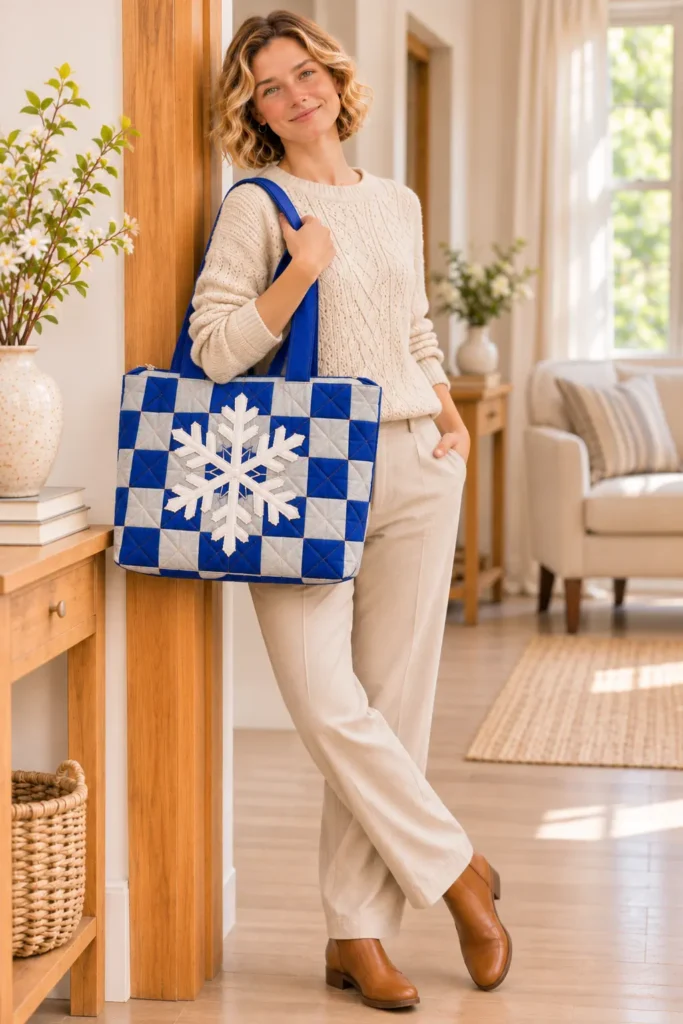
This grocery tote splits each face into two zones. Across the bottom runs a band of 2″ checks, alternating royal blue and silver-gray, three rows deep and six squares across, with royal blue in the lower-left corner. Above it is a solid royal blue panel that holds a single white six-armed snowflake about 7″ across, outlined in silver metallic satin stitch.
Placing the snowflake on solid fabric instead of on the checks keeps it crisp from across a room. The checks below give the bag its pattern without competing with the snowflake. Silver-gray strips on both sides of each face become the bag’s side walls, so from the front the tote reads as a royal blue rectangle framed in silver.
The bag finishes 18″ wide at the top, 15″ tall, and 6″ deep, with a flat 12″ × 6″ base. That is deep enough for a gallon of milk, a carton of eggs laid flat, and a few cans. A removable board in its own white fabric cover keeps the base flat under the weight. Two long royal blue cotton webbing straps, with a drop of about 11″, rest on the shoulder. Their ends run 2″ down between the outer bag and the lining and are locked with box-X stitching. Low-loft batting gives the quilted panels body. Inside, a white interfaced lining and a 9″ × 6″ slip pocket hold a phone, keys, or a shopping list.
Design Inspirations – Digitally Modified Images. Texture and color may vary from the actual product.
Why the Snowflake Sits Above the Checks
A checkerboard is busy by nature. A white snowflake set directly on it would break up into blue and silver fragments behind it. On this tote, the checks fill only the lower 6″ of the front, and the snowflake has a 12″ × 9″ solid royal blue panel to itself. It sits with 1″ of clear blue above and below it and 2½” on each side. One arm points straight up, so the arm tips stay well away from the straps where they attach near the top edge. The back face repeats the checks and the solid panel without a snowflake, so the bag looks finished from behind without repeating the main motif.
Royal Blue, Silver-Gray, and White
Two colors make the checkerboard, and both come back elsewhere: royal blue in the panel and straps, silver-gray in the side walls and the base. White appears only in the snowflake and the lining, which keeps the snowflake the brightest thing on the bag. Silver-gray quilting cotton reads as silver next to royal blue, and the metallic satin stitch around the snowflake adds the only real shine. Prewash both colors and the white cotton, because saturated royal blue can bleed onto white in the first wash.
Built for a Full Grocery Run
The 6″ depth and the 12″ base come from boxing the corners of one long panel, so the base is one continuous strip of silver-gray with no seam running across it. The removable base board stops heavy jars from bowing the bottom, and it slides out when the bag needs washing. The straps are cotton webbing, not folded fabric, because webbing stretches less under a full load. Each strap end extends 2″ down between the outer bag and the lining, where a box-X stitch through all the layers holds it.
Materials and Tools Needed
- ½ yd royal blue quilting cotton
- ¾ yd silver-gray quilting cotton
- 1¼ yd white quilting cotton (lining, pocket, board cover, and snowflake)
- 1⅛ yd muslin for the quilting backing
- One piece of low-loft cotton batting, at least 21″ × 39″, rated for quilting lines up to 10″ apart
- 1¼ yd medium woven fusible interfacing (44″ wide)
- A 9″ × 9″ piece of lightweight woven fusible interfacing for the snowflake fabric
- A 9″ × 9″ piece of paper-backed fusible web
- A 10″ × 10″ piece of tear-away stabilizer
- 2 yd royal blue 1½” cotton webbing
- One base board, 11¾” × 5¾”, cut from heavy template plastic or corrugated plastic
- Silver metallic thread, silver-gray quilting thread, and all-purpose thread in white and royal blue
- A 90/14 metallic or topstitch needle and a 90/14 universal needle
- An open-toe embroidery foot and a walking foot
- Rotary cutter, ruler, and mat; pins and clips; fabric marking pen
- Paper and paper scissors for the snowflake template
- A lighter or seam sealant for the webbing ends
- Iron and press cloth
Finished Tote Bag Size
- Width: 18″ across the top edge, measured flat
- Height: 15″ from the base seam to the top edge
- Depth: 6″
- Base: 12″ × 6″
- Strap drop: about 11″, measured from the top edge to the top of the strap loop (approximate)
- Interior slip pocket: 9″ × 6″
- Base board: 11¾” × 5¾”
Care: take out the base board, then spot-clean or hand wash gently and air dry.
Cutting Measurements
| Piece | Quantity | Cut Size (W × H) | Purpose |
|---|---|---|---|
| Side strips, silver-gray | 4 | 3¾” × 16″ | Side walls of both faces |
| Solid panels, royal blue | 2 | 12½” × 9¾” | Upper panel of both faces |
| Bottom-row squares, royal blue | 6 | 2½” × 2¾” | Bottom check row |
| Bottom-row squares, silver-gray | 6 | 2½” × 2¾” | Bottom check row |
| Squares, royal blue | 12 | 2½” × 2½” | Check rows 2 and 3 |
| Squares, silver-gray | 12 | 2½” × 2½” | Check rows 2 and 3 |
| Base strip, silver-gray | 1 | 19″ × 7″ | Base |
| Low-loft batting | 1 | 21″ × 39″ | Quilting layer |
| Muslin | 1 | 21″ × 39″ | Quilting backing |
| Snowflake fabric, white cotton | 1 | 9″ × 9″ | Snowflake appliqué |
| Lightweight woven fusible interfacing | 1 | 9″ × 9″ | Prevents shadow-through |
| Paper-backed fusible web | 1 | 9″ × 9″ | Fuses the snowflake |
| Tear-away stabilizer | 1 | 10″ × 10″ | Supports the satin stitch |
| Lining, white cotton | 1 | 19″ × 37″ | One-piece lining |
| Medium woven fusible interfacing | 1 | 19″ × 37″ | Lining body |
| Slip pocket, white cotton | 1 | 10″ × 13″ | Interior pocket |
| Straps, royal blue 1½” webbing | 2 | 32″ long | Shoulder straps |
| Base board | 1 | 11¾” × 5¾” | Flat base |
| Board cover, white cotton | 1 | 12¾” × 12½” | Covers the board |
Assembly at a Glance
- Cut and Sort the Fabrics
- Prepare the Snowflake Appliqué
- Piece the Front Face
- Piece the Back Face
- Join the Back Face, Base Strip, and Front Face
- Fuse and Satin-Stitch the Snowflake
- Layer and Quilt the Outer Panel
- Trim the Outer Panel and Cut the Boxing Notches
- Sew the Outer Side Seams
- Box the Outer Corners
- Make the Two Handles
- Prepare the Lining
- Sew the Lining Side Seams, Leaving a Turning Gap
- Box the Lining Corners
- Baste the Handles to the Outer Bag
- Sew the Outer Bag and Lining Together at the Top Edge
- Turn, Close the Gap, Topstitch, and Box-X the Straps
- Make the Base Insert Cover and Drop In the Board
Step-by-Step Sewing Tutorial
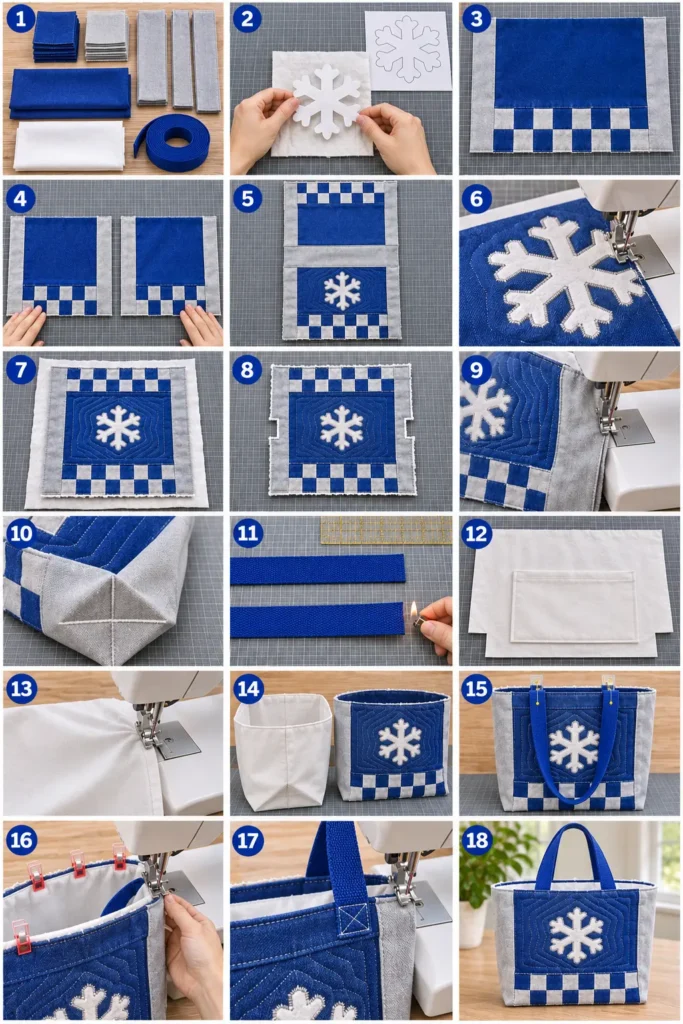
Step-by-Step Illustration – Digitally Created Image. Follow the written steps for measurements and details.
Step 1 – Cut and Sort the Fabrics
Prewash and press the royal blue, silver-gray, and white cottons. From a 2¾” strip of each color, cut six 2½” × 2¾” bottom-row squares. From a 2½” strip of each color, cut twelve 2½” squares. Cut two royal blue solid panels (12½” × 9¾”), four silver-gray side strips (3¾” × 16″), and the silver-gray base strip (19″ × 7″). Cut the white lining and the medium interfacing at 19″ × 37″, the slip pocket at 10″ × 13″, and the board cover at 12¾” × 12½”. Cut the batting and muslin at 21″ × 39″, and cut the webbing into two 32″ straps. Stack the squares by color and size so the slightly taller bottom-row squares stay separate.
Result: Every piece is cut and sorted, with the 2¾”-tall bottom-row squares in their own royal and silver-gray stacks.
Step 2 – Prepare the Snowflake Appliqué
Fuse the 9″ lightweight interfacing to the wrong side of the 9″ white square, then fuse the paper-backed web over it. Fold a 7″ paper circle in half, then into thirds, to make six 60-degree wedges. Cut a simple arm shape with arms at least ½” wide, then unfold it into a six-armed snowflake. Trace it onto the web’s paper side and cut it out on the line. Leave the paper backing on.
Result: One white six-armed snowflake, 7″ across, backed with interfacing and fusible web.
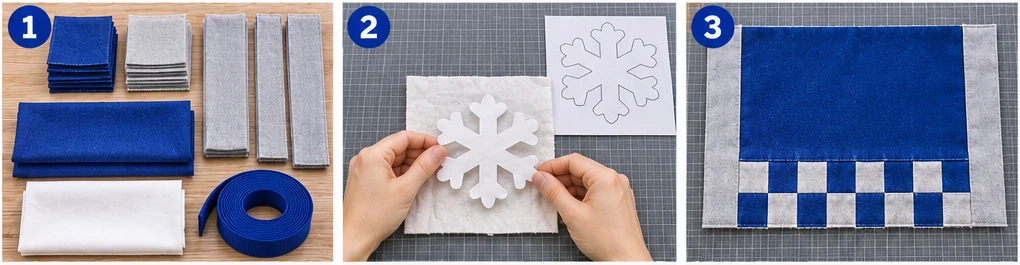
Step 3 – Piece the Front Face
Build the checkerboard with ¼” seams, right sides together, pressing each seam toward the royal blue square.
- Sew row 1 from the six 2½” × 2¾” squares in the order royal, silver, royal, silver, royal, silver, with the extra ¼” of height along the bottom.
- Sew row 2 from 2½” squares in the order silver, royal, silver, royal, silver, royal.
- Sew row 3 in the same order as row 1.
- Join the rows with row 1 at the bottom, nesting the opposing seams so the corners meet.
- Sew a royal blue panel to the top of row 3.
- Sew a silver-gray side strip to each side of the center column.
Result: A front face 19″ × 16″: a royal and silver checkerboard band at the bottom, a solid royal blue panel above it, and silver-gray strips on both sides.
Step 4 – Piece the Back Face
Repeat Step 3 with the remaining squares, the second royal blue panel, and the last two side strips. Keep royal blue in the lower-left corner as you look at the face.
Result: A second, identical face, 19″ × 16″, without a snowflake.
Step 5 – Join the Back Face, Base Strip, and Front Face
Turn the back face upside down so its royal panel points away from the base strip. Sew its bottom edge (the check row) to one long edge of the base strip, right sides together, with a ½” seam. Sew the front face’s check row to the other long edge the same way, with the front face upright. Press both seams toward the base strip.
Result: One long outer panel, 19″ × 37″: the back face upside down, the silver-gray base strip in the middle, and the front face upright.
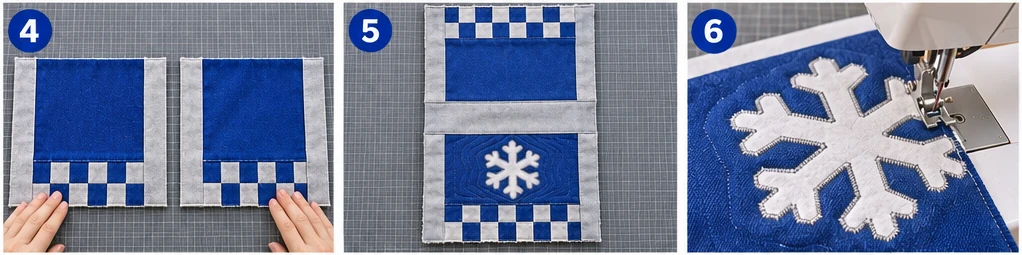
Step 6 – Fuse and Satin-Stitch the Snowflake
On the front face, mark the snowflake’s center 9½” from the left raw edge and 10½” above the base seam. That point sits in the middle of the royal blue panel. Peel the paper off, place the snowflake with one arm pointing straight up toward the top edge, and fuse it under a press cloth. Pin tear-away stabilizer behind the area. With the open-toe foot, the metallic or topstitch needle, silver metallic thread on top, and white or gray thread in the bobbin, satin-stitch around the edge. Use a stitch about 2.5-3 mm wide and very short, slow down, lower the top tension, and pivot with the needle down at every point. Tear the stabilizer away.
Result: The front’s royal blue panel carries one white six-armed snowflake edged in silver satin stitch, with one arm pointing up.
Step 7 – Layer and Quilt the Outer Panel
Lay the muslin flat, then the batting, then the outer panel right side up and centered, with 1″ of batting and muslin showing on every side. Baste with safety pins. With the walking foot and silver-gray thread, quilt in this order:
- In the ditch of the face-to-base seams and the side-strip seams.
- In the ditch along every row and column of the checkerboard on both faces.
- Around the edges of the back face’s solid panel.
- Two echo lines ½” and 1″ outside the snowflake’s satin stitch.
- Vertical lines 1″ apart down each side strip.
Trim the batting and muslin even with the panel’s raw edges.
Result: A quilted outer panel, 19″ × 37″, with the check grid, the strip seams, and the echo lines stitched through all three layers.
Step 8 – Trim the Outer Panel and Cut the Boxing Notches
Square the panel to 19″ × 37″. Find the base strip’s center line, 18½” from each end. At both side edges, cut out a notch 3″ deep from the raw edge and 5″ tall, running 2½” above and 2½” below the center line, through all three layers.
Result: A trimmed quilted panel with a 3″ × 5″ notch cut from the middle of each long side.
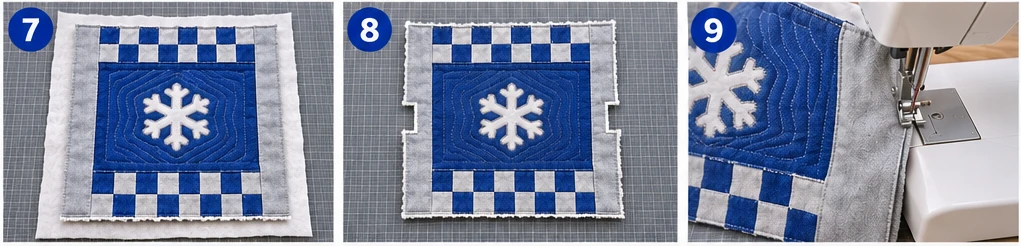
Step 9 – Sew the Outer Side Seams
Fold the panel in half at the base center line, right sides together, matching the face-to-base seams and the top edges. Sew each side seam at ½” from the top of the notch to the top edge, backstitching at both ends. Trim the batting and muslin out of the allowances close to the stitching, and press the seams open.
Result: The outer bag is a flat, wrong-side-out sack with both side seams sewn and the notches still open.
Step 10 – Box the Outer Corners
At one notch, pull the two raw edges apart and flatten the opening so the side seam sits directly on the base center line and the notch edges line up straight. Pin and sew across at ½”, backstitching at both ends. Trim the batting from the allowance. Repeat at the other corner.
Result: The outer bag has a 6″-deep boxed base and silver-gray side walls, and is still wrong side out.
Step 11 – Make the Two Handles
Check that both webbing straps are exactly 32″ long. Seal each cut end by passing it briefly near a flame or brushing on seam sealant, then let it cool. On each strap, mark a line 1½” from each end. The marks show where the strap meets the top raw edge when it is basted.
Result: Two royal blue webbing straps, 32″ long, with sealed ends and a placement mark 1½” from each end.
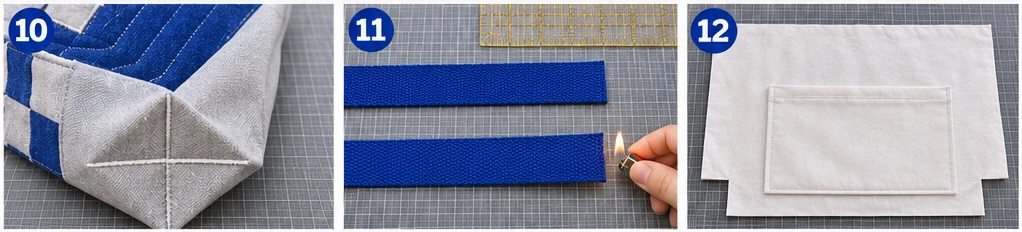
Step 12 – Prepare the Lining
Fuse the medium interfacing to the wrong side of the 19″ × 37″ lining, then cut the same 3″ × 5″ notches centered on the center line. Mark the base lines 3″ above and 3″ below the center line on the right side. To make the pocket, fold the 10″ × 13″ piece in half to 10″ × 6½”, right sides together. Sew both sides at ½”, turn it right side out, press, and press the bottom raw edges ½” inside.
Place it on one half of the lining, centered across the width (5″ from each raw side edge), with its bottom 3″ above the base line and its opening toward the top edge. Edgestitch the sides and bottom ⅛” from the edges, backtacking at both top corners.
Result: A flat, interfaced, notched lining with a 9″ × 6″ pocket stitched to one half.
Step 13 – Sew the Lining Side Seams, Leaving a Turning Gap
Fold the lining right sides together at its center line, matching the top edges. Sew each side seam at ½” from the notch to the top edge. On one side, leave a 7″ gap with at least 2″ of stitching above and below it, and backstitch at the gap ends. Press the seams open.
Result: A lining sack, wrong side out, with both side seams sewn, a 7″ gap in one, and the notches still open.
Step 14 – Box the Lining Corners
Flatten each lining notch so the side seam sits on the center line and the raw edges line up. Sew across at ½”, backstitching at both ends.
Result: A white lining shell with a 6″-deep boxed base, wrong side out, with the turning gap open.
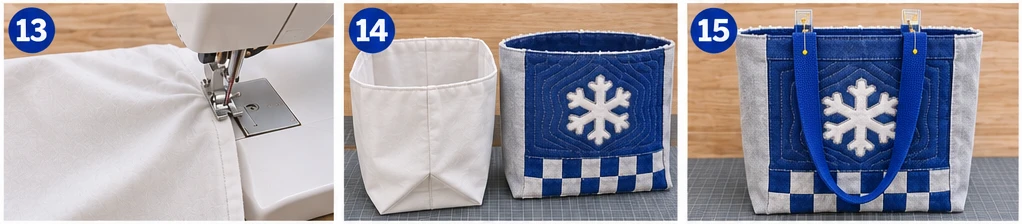
Step 15 – Baste the Handles to the Outer Bag
Turn the outer bag right side out. On the front face, place one strap with its ends 6½” and 12½” from the left side seam’s raw edge, measured along the top. Push each end 1½” past the top raw edge, so the placement mark sits right on the edge, and let the loop hang down over the snowflake panel without twisting. Baste ⅜” from the top raw edge. Repeat on the back face with the second strap, matching the positions.
Result: Both straps are basted to the right side of the outer bag, tails sticking 1½” above the top edge and loops hanging down.
Step 16 – Sew the Outer Bag and Lining Together at the Top Edge
Slip the outer bag (right side out, straps hanging down) inside the lining (wrong side out), so their right sides face each other. Match the side seams and top raw edges, keep the strap tails and loops tucked between the layers, and clip all around. Sew the top edge at ½”, going slowly over the webbing.
Result: The outer bag and lining are joined around the top edge, with the straps caught in the seam and the turning gap still open.
Step 17 – Turn, Close the Gap, Topstitch, and Box-X the Straps
Pull the bag right side out through the lining gap, then push out the corners. Fold the gap’s raw edges in by ½” and edgestitch it closed. Push the lining down into the outer bag, roll the top seam so it sits right on the edge, and topstitch ¼” from the top edge all the way around. At each of the four strap ends, stitch a box with an X through it, the width of the webbing and about 1¼” tall, starting just below the topstitching. This catches the outer bag, the strap tail, and the lining.
Result: The finished tote with straps standing up, a crisp topstitched edge, and four box-X reinforcements. The base board is not in yet.
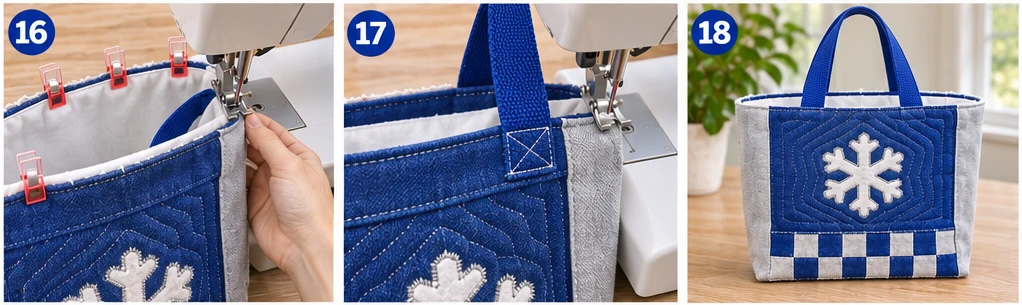
Step 18 – Make the Base Insert Cover and Drop In the Board
Fold the 12¾” × 12½” cover in half lengthwise, right sides together, to 12¾” × 6¼”. Sew the long raw edge and one short end at ½”, turn it right side out, and push out the corners. Slide the 11¾” × 5¾” board inside. Fold the open end’s raw edges in by ½” and edgestitch it closed. Set the covered board flat into the bottom of the tote.
Result: The finished checkerboard grocery tote, 18″ × 15″ × 6″, with a white snowflake on the front panel, a flat 12″ × 6″ base, and royal blue straps ready to carry.
Troubleshooting This Checkerboard Tote
- Check corners do not line up. Press each row’s seams in the opposite direction from the row next to it, so they nest, and pin at every intersection.
- The bottom row looks shorter than the others. The bottom-row squares are 2¾” tall because the base seam takes an extra ¼”. Mixing them with the 2½” squares puts the bottom row out of line.
- The snowflake looks gray or shadowed. Fuse the lightweight interfacing to the white fabric before the web. Without it, the royal blue can show through.
- Satin stitch tunnels or puckers on the royal panel. Use tear-away stabilizer, slow down at the points, and test the stitch width on a scrap of the same sandwich first.
- Metallic thread breaks. Lower the top tension, use a fresh metallic or topstitch needle, and sew at half speed.
- The straps rip loose under a heavy load. Check that each tail extends 2″ below the top edge inside the bag and that the box-X goes through all the layers.
- The bag sags at the base. Make sure the board sits flat in the bottom and is not bowed. Corrugated plastic holds up better than thin template plastic for heavy loads.
- Royal blue dye on the white lining. Prewash the royal blue with a dye-catching sheet before cutting.
Design Inspiration and Tutorial Note: The images in this section may be AI-generated or digitally developed to show a design possibility. The sewing instructions are a proposed construction method with calculated measurements, not a physically tested pattern. Check each panel size and seam allowance before cutting.
Other Design Inspirations – Digitally Modified Images. Texture and color may vary from the actual product.
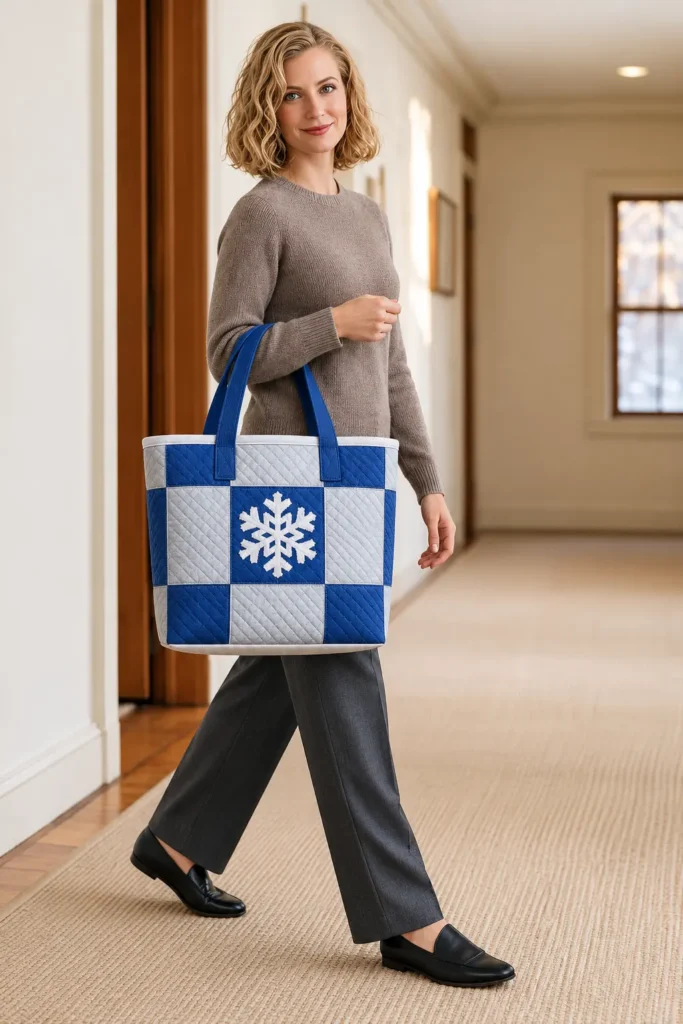

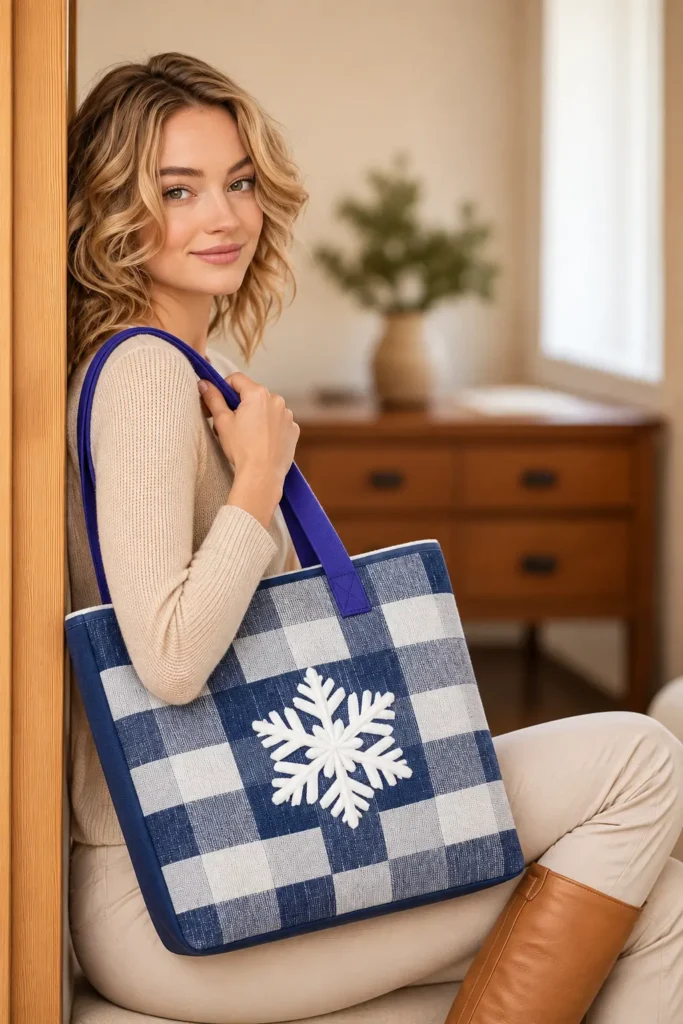
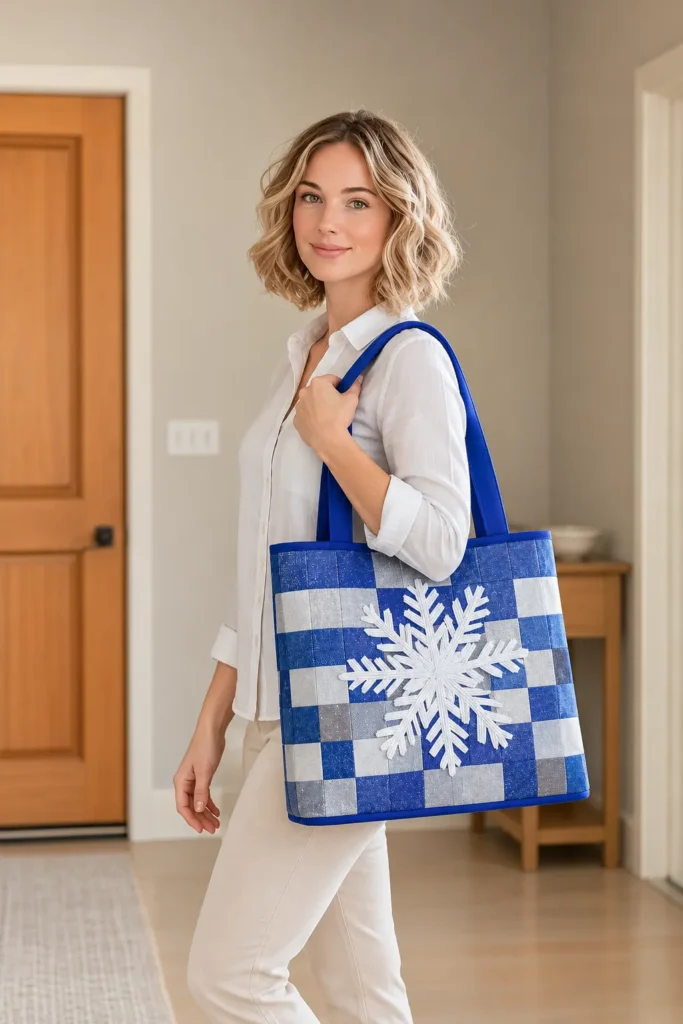
3. Nine Patch Snowflake Appliqué Everyday Tote in Powder Blue and Silver
The front of this everyday tote is built around a single 12″ Nine Patch block: nine 4″ squares in a three-by-three grid, with powder blue in the four corners and the center and silver-gray in the four squares between them. Each powder blue square carries a small white six-armed snowflake, about 3″ across, outlined in silver metallic satin stitch.
The five snowflakes form an X across the block. Silver-gray bands frame the block on all four sides, a 2″ band across the top, 2″ bands down each side, and a 1″ band at the bottom, so the block reads as a single framed square. The back repeats the same block and snowflakes, so the bag looks the same from either side.
The tote finishes 16″ wide, 15″ tall, and 3″ deep, with a shallow 13″ × 3″ base. That suits a wallet, a water bottle, a paperback, and a light sweater. A coil zipper with silver-gray end tabs closes the top. Two powder blue folded fabric handles, 1¼” wide with a drop of about 10″, rest comfortably on the shoulder. Low-loft batting in the outer panel and fusible fleece in the white lining give the bag a soft but defined shape. An interior slip pocket, 8″ × 5″, keeps keys and a phone from sinking to the bottom.
Design Inspirations – Digitally Modified Images. Texture and color may vary from the actual product.
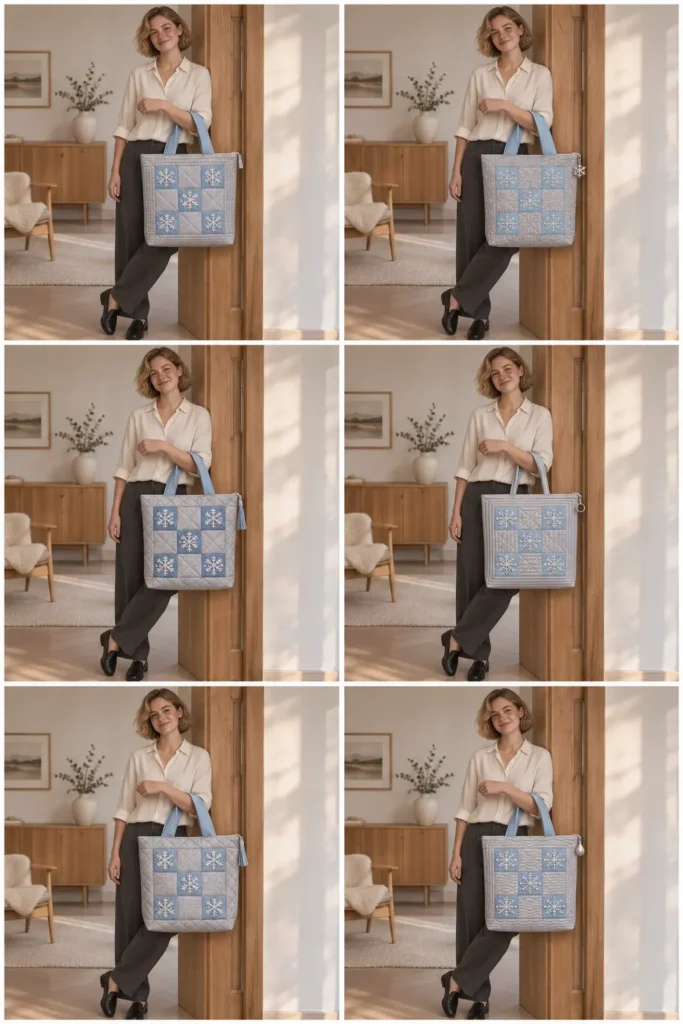
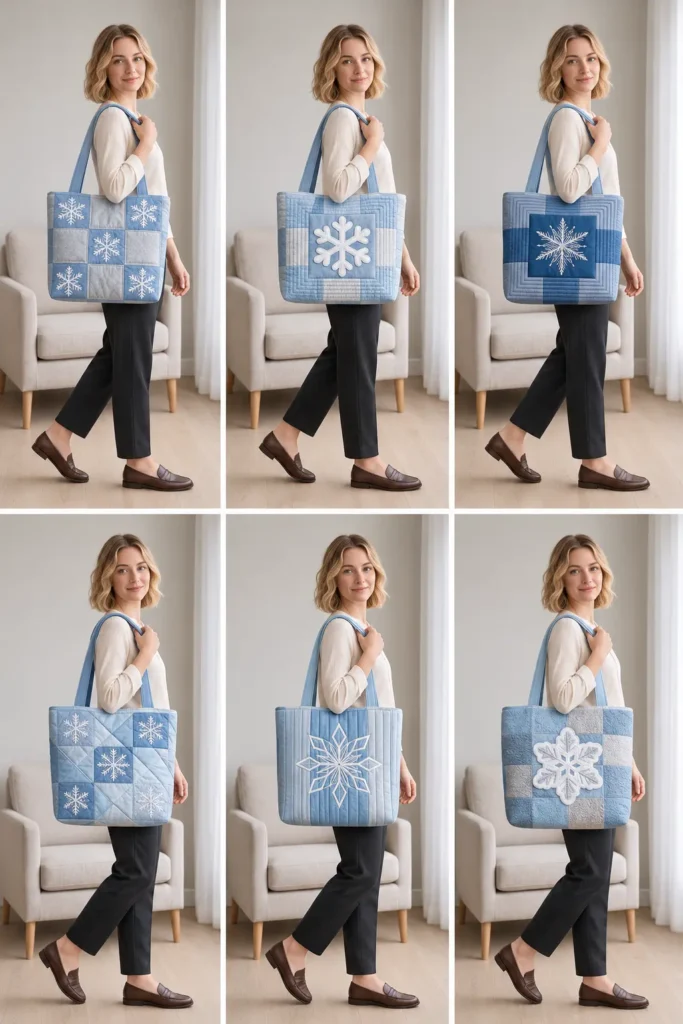
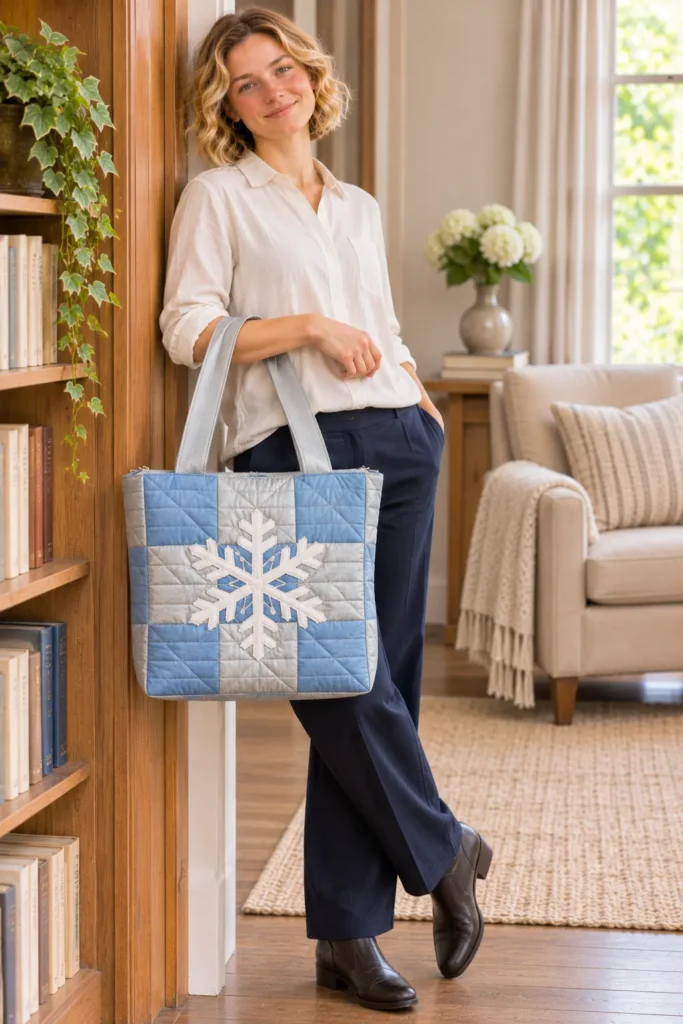
A Framed Block with Five Small Snowflakes
The Nine Patch is one of the simplest quilt blocks to piece, and here it works as a frame for the appliqué. The five powder blue squares are the only places snowflakes appear, so the X pattern comes straight from the block’s layout. The four silver-gray squares stay plain, which keeps the block from looking crowded. At 3″ across, each snowflake leaves ½” of powder blue around it on its 4″ square, enough space to set it apart from the seams. Because the block sits inside silver-gray bands, none of the snowflakes come anywhere near a side seam, a boxed corner, or the zipper.
Working with Pale Colors
Powder blue and silver-gray are both light colors, so the white snowflakes need extra care to stand out. The silver satin stitch draws a clear line around each one. Fusing lightweight interfacing to the white cotton before cutting also keeps it bright, because a single layer of white looks gray over blue. A white lining makes sense here, since a dark lining could show through the light outer fabrics at the top edge. Prewash all three colors, and keep the silver-gray from sitting damp against the white lining.
Small Snowflakes, Simple Shapes
A 3″ snowflake leaves little room for detail. Draft each one with six plain, chunky arms at least ⅜” wide and skip fine branches, so the satin stitch can cover the edges without piling up at the points. Cut all ten from one template so they match. The satin stitch takes the longest on this bag because there are ten snowflakes in all, but each one is only a few inches of stitching.
Materials and Tools Needed
- ⅝ yd powder blue quilting cotton
- ¾ yd silver-gray quilting cotton
- 1 yd white quilting cotton (lining, pocket, and snowflakes)
- 1 yd muslin for the quilting backing
- One piece of low-loft cotton batting, at least 19″ × 36″
- 1 yd fusible fleece
- A 12″ × 16″ piece of lightweight woven fusible interfacing for the snowflake fabric
- A 12″ × 16″ piece of paper-backed fusible web
- Two 14″ × 14″ pieces of tear-away stabilizer
- One #5 coil zipper, at least 12″ long
- Silver metallic thread, plus all-purpose thread in silver-gray and white
- A 90/14 metallic or topstitch needle and a 90/14 universal needle
- An open-toe embroidery foot, a walking foot, and a zipper foot
- Rotary cutter, ruler, and mat; pins and clips; fabric marking pen
- Paper and paper scissors for the snowflake template
- Iron and press cloth
Finished Tote Bag Size
- Width: 16″ across the top, measured flat along the zipper seam
- Height: 15″ from the base seam to the top edge
- Depth: 3″
- Base: 13″ × 3″
- Handle drop: about 10″, measured from the top edge to the top of the handle loop (approximate)
- Interior slip pocket: 8″ × 5″
- Zipper: 14″ including end tabs
Care: spot-clean or hand wash gently and air dry.
Cutting Measurements
| Piece | Quantity | Cut Size (W × H) | Purpose |
|---|---|---|---|
| Top bands, silver-gray | 2 | 17″ × 2¾” | Top of both faces |
| Bottom bands, silver-gray | 2 | 17″ × 1¾” | Bottom of both faces |
| Side bands, silver-gray | 4 | 2¾” × 12½” | Sides of both blocks |
| Squares, powder blue | 10 | 4½” × 4½” | Block corners and centers |
| Squares, silver-gray | 8 | 4½” × 4½” | Block middle squares |
| Base strip, silver-gray | 1 | 17″ × 4″ | Base |
| Low-loft batting | 1 | 19″ × 36″ | Quilting layer |
| Muslin | 1 | 19″ × 36″ | Quilting backing |
| Snowflake fabric, white cotton | 1 | 12″ × 16″ | Ten snowflake appliqués |
| Lightweight woven fusible interfacing | 1 | 12″ × 16″ | Prevents shadow-through |
| Paper-backed fusible web | 1 | 12″ × 16″ | Fuses the snowflakes |
| Tear-away stabilizer | 2 | 14″ × 14″ | Supports the satin stitch |
| Lining, white cotton | 1 | 17″ × 34″ | One-piece lining |
| Fusible fleece | 1 | 17″ × 34″ | Lining body |
| Slip pocket, white cotton | 1 | 9″ × 11″ | Interior pocket |
| Handles, powder blue | 2 | 5″ × 27″ | Folded handles |
| Zipper tabs, silver-gray | 2 | 2″ × 3″ | Finish the zipper ends |
| #5 coil zipper | 1 | Shortened to 12″ | Top closure |
Assembly at a Glance
- Cut and Sort the Fabrics
- Prepare the Snowflake Appliqué
- Piece the Front Face
- Piece the Back Face
- Join the Back Face, Base Strip, and Front Face
- Fuse and Satin-Stitch the Snowflake
- Layer and Quilt the Outer Panel
- Trim the Outer Panel and Cut the Boxing Notches
- Make the Two Handles
- Baste the Handles to the Outer Panel
- Make the Interior Slip Pocket
- Prepare the Lining
- Add the End Tabs to the Zipper
- Sew the Zipper Between the Outer and Lining at the Front Top Edge
- Sew the Zipper Between the Outer and Lining at the Back Top Edge
- Sew the Outer and Lining Side Seams, Leaving a Turning Gap
- Box the Outer and Lining Corners
- Turn Through the Gap, Close It, and Topstitch Beside the Zipper
Step-by-Step Sewing Tutorial
Step-by-Step Illustration – Digitally Created Image. Follow the written steps for measurements and details.
Step 1 – Cut and Sort the Fabrics
Prewash and press all three cottons. From powder blue, cut ten 4½” squares and two 5″ × 27″ handle strips. From silver-gray, cut eight 4½” squares, two top bands (17″ × 2¾”), two bottom bands (17″ × 1¾”), four side bands (2¾” × 12½”), the base strip (17″ × 4″), and two 2″ × 3″ zipper tabs. From white cotton, cut the lining (17″ × 34″), the pocket (9″ × 11″), and a 12″ × 16″ piece for the snowflakes. Cut the fusible fleece at 17″ × 34″ and the batting and muslin at 19″ × 36″. Sort the pieces into a front stack and a back stack, each with five powder blue squares, four silver-gray squares, one top band, one bottom band, and two side bands.
Result: All pieces are cut and sorted into a front set and a back set, with handles, base strip, tabs, lining, and quilting layers kept separate.
Step 2 – Prepare the Snowflake Appliqué
Fuse the lightweight interfacing to the wrong side of the 12″ × 16″ white cotton, then fuse the paper-backed web over it. Fold a 3″ paper circle in half, then into thirds, to make six 60-degree wedges. Cut a simple, chunky arm shape with arms at least ⅜” wide, then unfold it into a six-armed snowflake. Trace it ten times onto the web’s paper side, spacing the tracings about 1″ apart. Cut out all ten on the lines, and leave the paper on.
Result: Ten matching white six-armed snowflakes, each 3″ across, backed with interfacing and web.
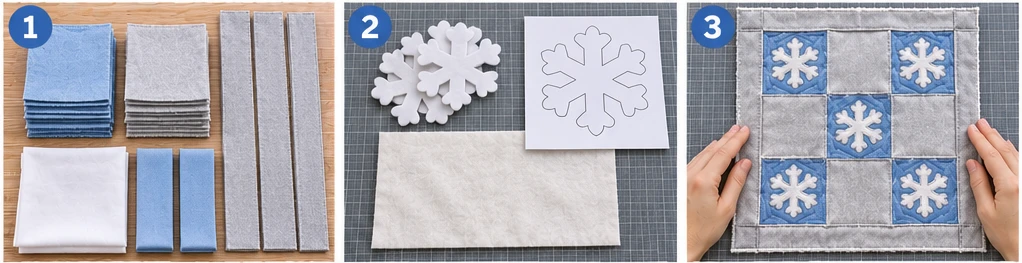
Step 3 – Piece the Front Face
Lay out the front set’s nine squares in a three-by-three grid: powder blue in the four corners and the center, silver-gray in the middle of each side. Sew with ¼” seams, right sides together:
- Sew each row of three squares, pressing the seams toward the powder blue squares.
- Join the rows, nesting the opposite-pressed seams, to make the 12½” block.
- Sew a side band to each side of the block.
- Sew the top band across the top and the bottom band across the bottom.
Result: A front face 17″ × 16″: one Nine Patch block with powder blue corners and center, framed by silver-gray bands, with the wider band at the top.
Step 4 – Piece the Back Face
Repeat Step 3 with the back set.
Result: A second, identical face, 17″ × 16″, with the 2″ band at its top and the 1″ band at its bottom.
Step 5 – Join the Back Face, Base Strip, and Front Face
Turn the back face upside down so its wide top band points away from the base strip. Sew its narrow bottom band to one long edge of the base strip, right sides together, with a ½” seam. Sew the front face’s bottom band to the other long edge the same way, with the front face upright. Press both seams toward the base strip.
Result: One long outer panel, 17″ × 34″: the back face upside down, the silver-gray base strip in the middle, and the front face upright.
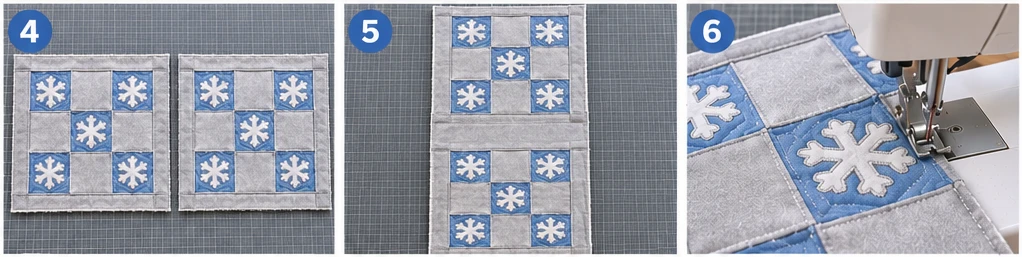
Step 6 – Fuse and Satin-Stitch the Snowflake
Peel the paper from the snowflakes and center one on each of the ten powder blue squares, five on the front block and five on the back. Fuse them under a press cloth. Pin a piece of tear-away stabilizer behind each block. With the open-toe foot, the metallic or topstitch needle, silver metallic thread on top, and white thread in the bobbin, satin-stitch around each snowflake. Use a stitch about 2.5 mm wide and very short, lower the top tension, slow down, and pivot with the needle down at every point and inner corner. Tear the stabilizer away.
Result: Both blocks carry five white six-armed snowflakes edged in silver satin stitch, forming an X across each block.
Step 7 – Layer and Quilt the Outer Panel
Lay the muslin flat, then the batting, then the outer panel right side up and centered, with 1″ of batting and muslin showing all around. Pin baste. With the walking foot and silver-gray thread, stitch in the ditch along the base seams, around every band, and along every seam between squares. Where a seam line would run into a snowflake, stop at the satin stitch and backstitch. Trim the batting and muslin even with the panel’s raw edges.
Result: A quilted outer panel, 17″ × 34″, with ditch quilting outlining every square and band.
Step 8 – Trim the Outer Panel and Cut the Boxing Notches
Square the panel to 17″ × 34″. Mark the base strip’s center line, 17″ from each end. At both side edges, cut out a notch 1½” deep from the raw edge and 2″ tall, running 1″ above and 1″ below the center line, through all three layers.
Result: A trimmed quilted panel with a 1½” × 2″ notch cut from the middle of each long side.
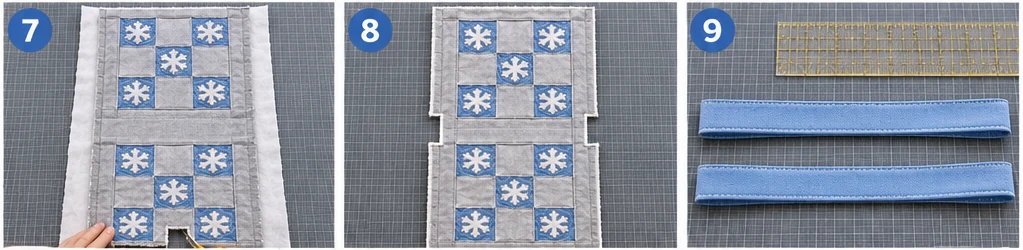
Step 9 – Make the Two Handles
Fold each 5″ × 27″ powder blue strip in half lengthwise, wrong sides together, and press. Open it, fold both long raw edges to the center crease, refold, and press. Edgestitch both long edges ⅛” from the edge.
Result: Two powder blue handles, 1¼” wide and 27″ long, with both edges stitched.
Step 10 – Baste the Handles to the Outer Panel
On the panel’s right side, place one handle at the front top edge with its raw ends even with the top raw edge, the end centers 5½” and 11½” from the left raw edge. Let the loop hang down over the block without twisting. Baste ⅜” from the edge. Repeat at the back top edge with the second handle, matching the positions.
Result: Both handles are basted to the right side of the outer panel’s top edges, loops hanging down toward the base.
Step 11 – Make the Interior Slip Pocket
Fold the 9″ × 11″ pocket piece in half crosswise, right sides together, to 9″ × 5½”, with the fold at the top. Sew both short sides at ½”. Turn it right side out, push out the corners, and press. Press the bottom raw edges ½” to the inside.
Result: A finished white pocket, 8″ × 5″, with a folded top edge and pressed-in bottom edges.
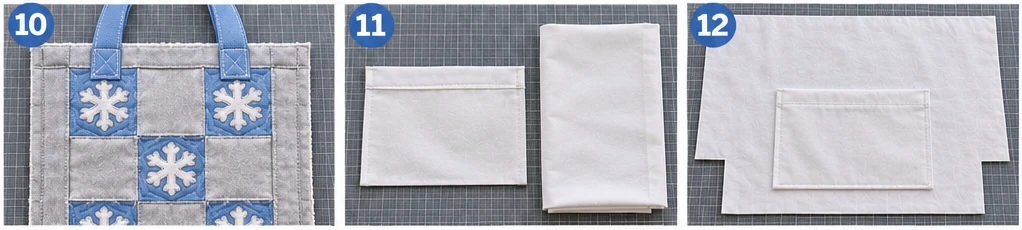
Step 12 – Prepare the Lining
Fuse the fleece to the wrong side of the 17″ × 34″ lining. Cut the same 1½” × 2″ notches, centered on the center line. Mark the base lines 1½” above and below the center line on the right side. On the half that will be joined to the front top edge, place the pocket right side up, centered across the width (4½” from each raw side edge), with its bottom edge 3″ above the base line and its fold toward the top edge. Edgestitch the sides and bottom ⅛” from the edges, backtacking at both top corners.
Result: A flat, fleece-backed, notched lining with the slip pocket stitched to one half.
Step 13 – Add the End Tabs to the Zipper
Shorten the zipper so 12″ of tape lies between the stop and the cut end, and bar tack across the coil just inside the cut. For each 2″ × 3″ tab, press both 2″ ends ½” to the wrong side, fold the tab in half over one zipper end, and edgestitch across. Trim the tabs even with the zipper tape.
Result: A zipper with a silver-gray tab at each end, measuring 14″ from tab end to tab end.
Step 14 – Sew the Zipper Between the Outer and Lining at the Front Top Edge
Lay the outer panel right side up with the handles basted down. Place the zipper face down along the front top edge, centered, with the tape edge even with the raw edge, so the tabs sit 1½” in from each raw side edge. Lay the lining face down on top with its pocket half’s top edge even, so outer and lining are right sides together with the zipper between them. Clip, then sew ½” from the edge across the full width with the zipper foot. Beyond the tabs, the seam joins outer and lining directly. Trim the batting and fleece from the allowance.
Result: The front top edges of the outer and lining are sewn to one side of the zipper, with the handle caught in the seam.
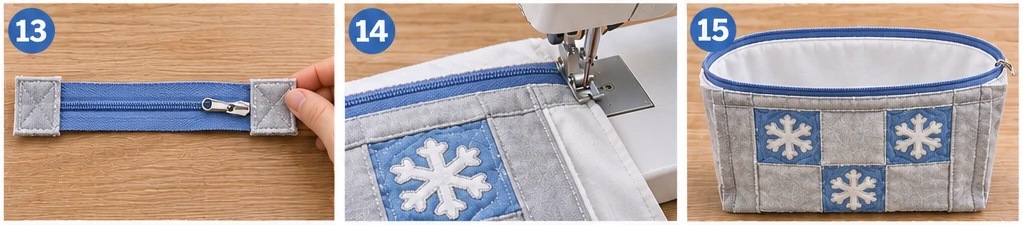
Step 15 – Sew the Zipper Between the Outer and Lining at the Back Top Edge
Bring the outer panel’s back top edge up to the zipper’s other tape, right sides together, tucking the handle loop toward the base. Bring the lining’s other top edge face down on top, so the zipper is sandwiched the same way. Center the tabs to match the front, sew ½” across the full width, and trim the batting and fleece from the allowance.
Result: Outer, zipper, and lining form one continuous loop, joined at both top edges.
Step 16 – Sew the Outer and Lining Side Seams, Leaving a Turning Gap
Open the zipper about halfway. Rearrange the loop so the outer is folded right sides together at its base center line, and the lining right sides together at its center line. Press the zipper seam allowances toward the lining, and match the base seams and top seams at each side. Sew each side edge at ½” in one pass, from the outer notch, across the top seam, to the lining notch. On one lining side, leave a 7″ gap with at least 2″ of stitching above and below it. Trim the batting and fleece from the side seam allowances.
Result: Both side seams are sewn through outer and lining, with the four notches and a 7″ lining gap left open.
Step 17 – Box the Outer and Lining Corners
At each outer notch, pull the edges apart and flatten the opening so the side seam lies on the base center line and the notch edges line up straight. Sew across at ½”, backstitching at both ends, and trim the batting from the allowance. Box both lining corners the same way.
Result: All four corners are boxed. The bag has a 3″-deep base and is still wrong side out, with the gap open.
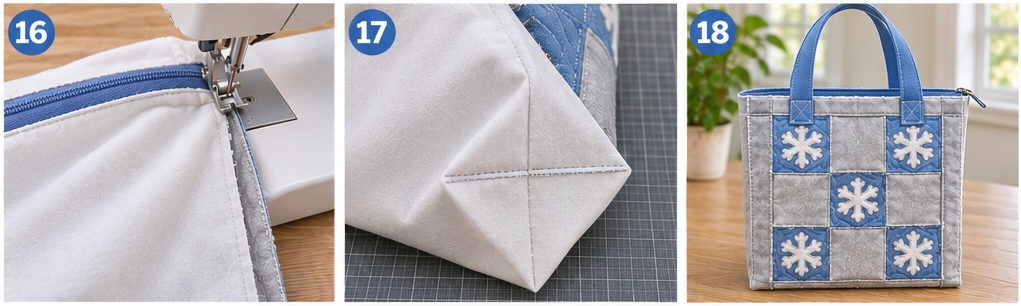
Step 18 – Turn Through the Gap, Close It, and Topstitch Beside the Zipper
Pull the bag right side out through the lining gap and the open zipper, then push out the corners. Fold the gap’s raw edges in by ½” and edgestitch the gap closed. Push the lining down into the outer bag, roll the top seams flat, and topstitch ¼” from the zipper seam along both top edges through all layers, sewing slowly over the handle ends.
Result: The finished Nine Patch tote, 16″ × 15″ × 3″, with five white snowflakes in an X on each face, a closed zipper, and powder blue handles standing up.
Troubleshooting This Nine Patch Tote
- Block corners do not meet. Press each row’s seams in the opposite direction from the next row so they nest, and pin at every intersection before sewing the rows together.
- The snowflakes look gray on powder blue. Fuse the lightweight interfacing to the white cotton before the web. Without it, the blue underneath dulls the white.
- Satin stitch piles up at the tiny points. Draft chunkier arms with blunter tips, and narrow the stitch to about 2 mm as you round each point.
- The fabric puckers around the snowflakes. Keep the stabilizer in place for all five snowflakes on a block, and tear it away only when all five are done.
- Metallic thread shreds after a few snowflakes. Change to a fresh metallic or topstitch needle, lower the top tension, and slow down.
- The zipper wanders off center. Mark the zipper’s center and the panel’s center, then match the two marks before clipping.
- The bag will not turn right side out. Open the zipper at least halfway before sewing the side seams in Step 16.
- The block looks crooked on the finished bag. Measure the side bands carefully. If one is wider than the other, the block shifts toward one side wall.
Design Inspiration and Tutorial Note: The images in this section may be AI-generated or digitally developed to show a design possibility. The sewing instructions are a proposed construction method with calculated measurements, not a physically tested pattern. Check each panel size and seam allowance before cutting.
Other Design Inspirations – Digitally Modified Images. Texture and color may vary from the actual product.
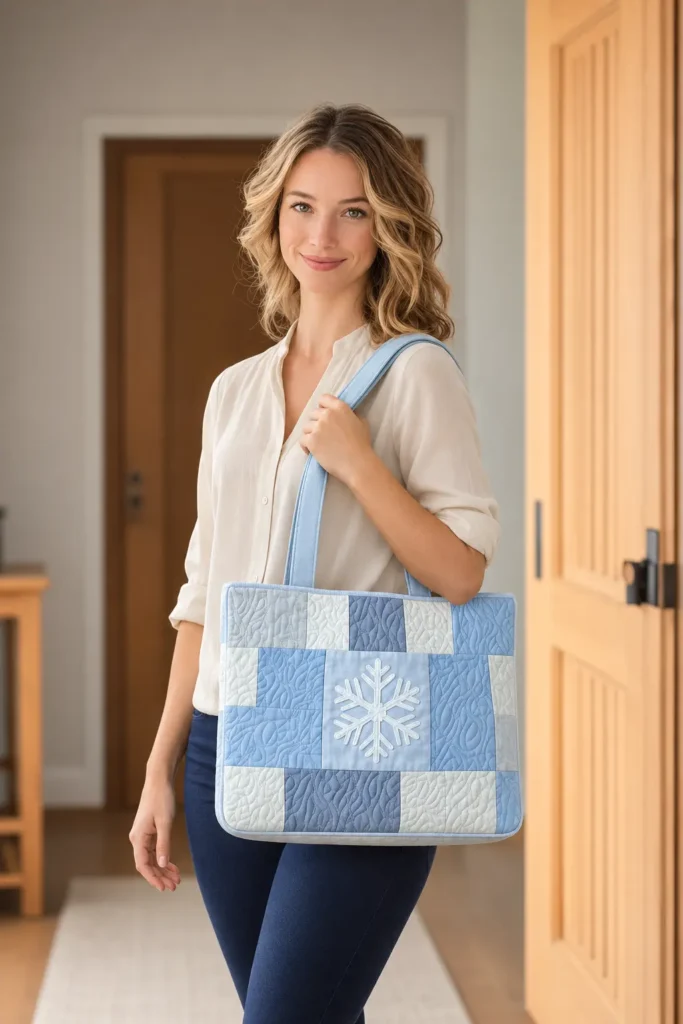
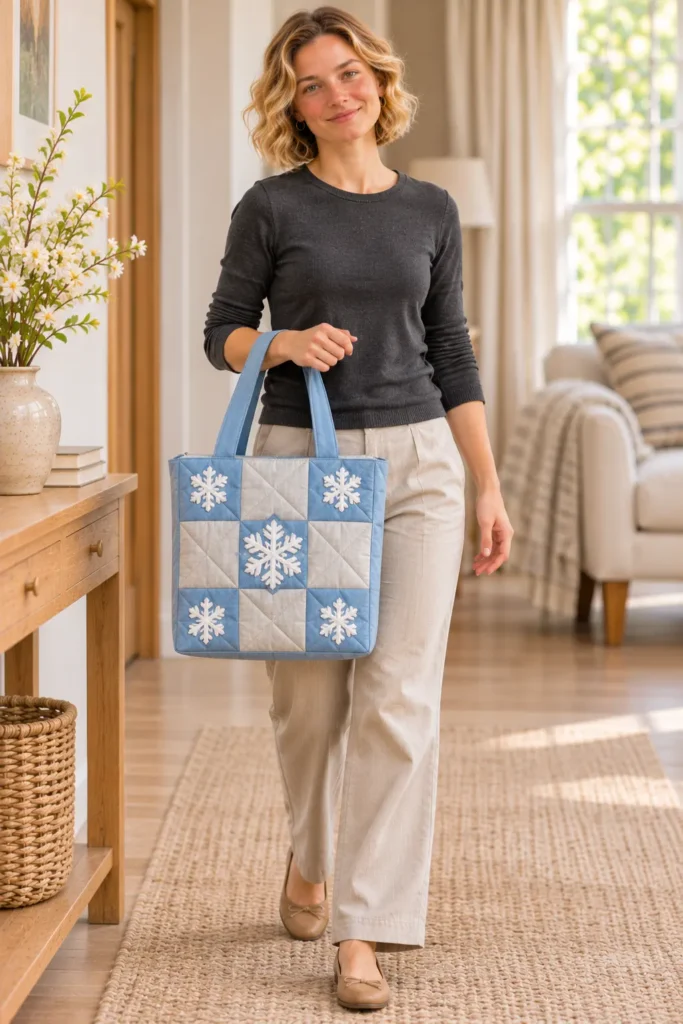
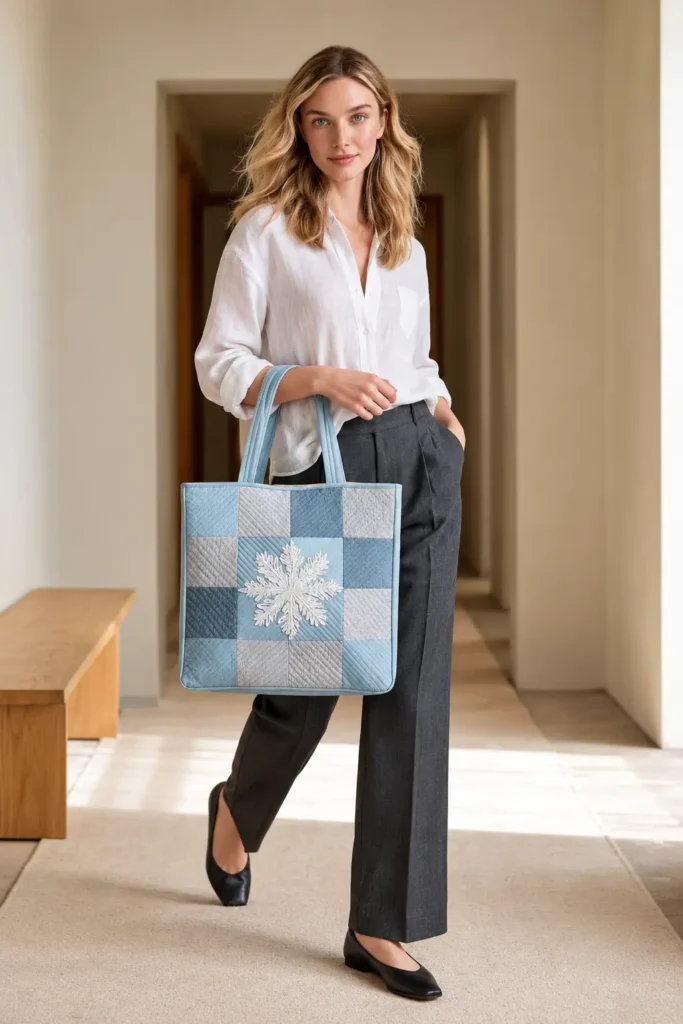
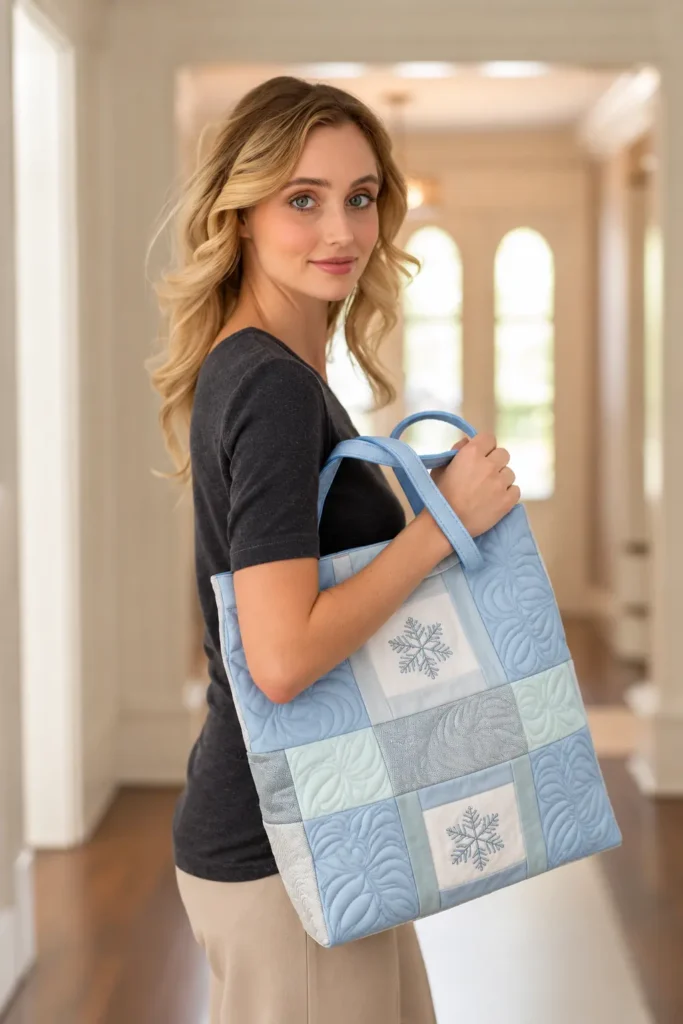
4. Half-Square Triangle Snowflake Appliqué Book Tote in Scrappy Blues
This book tote’s front is a grid of twelve 4″ half-square triangles, three across and four down. Each square is split on the diagonal into a darker and a lighter triangle. Five blues and whites move across the grid like a sunrise in reverse: deep indigo and denim blue at the lower left, silver-gray across the middle, icy blue and white at the upper right. Because the darker triangle always sits in the same corner of each square, the shading reads as one smooth diagonal sweep instead of a random scrap patchwork.
A single white six-armed snowflake, about 7″ across and outlined in silver metallic satin stitch, sits over the darkest corner, where it stands out most. A narrow deep indigo frame surrounds the grid and wraps around to form the bag’s side walls.
The tote finishes 15½” wide, 18″ tall, and 3½” deep, with a flat 12″ × 3½” base. That holds a row of hardcovers upright with room for a notebook. Heavyweight interfacing over the base keeps the bottom flat under the weight of books. Two deep indigo folded handles, interfaced for strength, have a drop of about 11″ for shoulder carry, and their ends are locked with box-X stitching inside the bag. A white interfaced lining, an 8″ × 5½” slip pocket, and a sew-in magnetic snap at the top finish the inside.
Design Inspirations – Digitally Modified Images. Texture and color may vary from the actual product.
How the Color Wash Is Built
The shading comes from pairing neighboring colors. Every half-square triangle combines two fabrics that sit next to each other on the scale from dark to light: deep indigo with denim blue, denim blue with silver-gray, silver-gray with icy blue, and icy blue with white. The pairings are placed in diagonal bands, so the darkest units fill the lower-left corner and the lightest the upper right. “Scrappy” here describes the look of many blues rather than random leftovers, so each pairing should stay consistent from unit to unit. Three pairs of 5″ squares per pairing make exactly the six units needed for both faces.
Why the Snowflake Goes Low and Left
A white snowflake disappears on white and icy blue but shows up clearly against deep indigo. Centered over the four darkest units in the lower-left corner, the snowflake gets the strongest contrast on the bag. Its arms cross several triangle seams, so it goes on after the face is fully pieced. Its edges still stay ½” clear of the side wall, so no arm wraps around the corner. The upper right of the bag stays plain, light, and open, which balances the heavier lower corner.
Built to Carry Books
Books are heavy for their size, so this tote is built from the bottom up. The base is a separate deep indigo strip with a piece of heavyweight interfacing cut to the exact 12″ × 3½” base size fused to the lining underneath, so it sits flat when loaded. The handles are 1¼” wide and interfaced, and each end runs 2″ down between the outer bag and the lining, where a box-X stitch holds it through every layer. The magnetic snap keeps the top from gaping open, so paperbacks are less likely to slide out.
Materials and Tools Needed
- 1 yd deep indigo quilting cotton
- ¼ yd each of denim blue, silver-gray, and icy blue quilting cotton
- 1¼ yd white quilting cotton (lining, pocket, three HST squares, and snowflake)
- 1¼ yd muslin for the quilting backing
- One piece of low-loft cotton batting, at least 18½” × 42½”
- 1¼ yd medium woven fusible interfacing (44″ wide)
- A 12″ × 3½” piece of heavyweight fusible interfacing for the base
- A 9″ × 9″ piece of lightweight woven fusible interfacing for the snowflake fabric
- A 9″ × 9″ piece of paper-backed fusible web
- A 10″ × 10″ piece of tear-away stabilizer
- One sew-in magnetic snap, about ¾”
- Silver metallic thread, plus all-purpose thread in silver-gray, deep indigo, and white
- A 90/14 metallic or topstitch needle and a 90/14 universal needle
- An open-toe embroidery foot and a walking foot
- A square ruler of at least 4½” for trimming the triangle units
- A hand-sewing needle for the snap
- Rotary cutter, ruler, and mat; pins and clips; fabric marking pen
- Paper and paper scissors for the snowflake template
- Iron and press cloth
Finished Tote Bag Size
- Width: 15½” across the top edge, measured flat
- Height: 18″ from the base seam to the top edge
- Depth: 3½”
- Base: 12″ × 3½”
- Handle drop: about 11″, measured from the top edge to the top of the handle loop (approximate)
- Interior slip pocket: 8″ × 5½”
Care: spot-clean or hand wash gently and air dry.
Cutting Measurements
| Piece | Quantity | Cut Size (W × H) | Purpose |
|---|---|---|---|
| Side frames, deep indigo | 4 | 2½” × 19″ | Side walls of both faces |
| Top frames, deep indigo | 2 | 12½” × 1¾” | Top of both grids |
| Bottom frames, deep indigo | 2 | 12½” × 1¾” | Bottom of both grids |
| HST squares, deep indigo | 3 | 5″ × 5″ | Pairing A |
| HST squares, denim blue | 6 | 5″ × 5″ | Pairings A and B |
| HST squares, silver-gray | 6 | 5″ × 5″ | Pairings B and C |
| HST squares, icy blue | 6 | 5″ × 5″ | Pairings C and D |
| HST squares, white | 3 | 5″ × 5″ | Pairing D |
| Base strip, deep indigo | 1 | 16½” × 4½” | Base |
| Low-loft batting | 1 | 18½” × 42½” | Quilting layer |
| Muslin | 1 | 18½” × 42½” | Quilting backing |
| Snowflake fabric, white cotton | 1 | 9″ × 9″ | Snowflake appliqué |
| Lightweight woven fusible interfacing | 1 | 9″ × 9″ | Prevents shadow-through |
| Paper-backed fusible web | 1 | 9″ × 9″ | Fuses the snowflake |
| Tear-away stabilizer | 1 | 10″ × 10″ | Supports the satin stitch |
| Lining, white cotton | 1 | 16½” × 40½” | One-piece lining |
| Medium woven fusible interfacing | 1 | 16½” × 40½” | Lining body |
| Heavyweight fusible interfacing | 1 | 12″ × 3½” | Base reinforcement |
| Slip pocket, white cotton | 1 | 9″ × 12″ | Interior pocket |
| Handles, deep indigo | 2 | 5″ × 31″ | Folded handles |
| Medium woven fusible interfacing | 2 | 2½” × 31″ | Handle stiffening |
| Medium woven fusible interfacing | 2 | 1½” × 1½” | Backs the snap halves |
| Sew-in magnetic snap | 1 set | About ¾” | Top closure |
Assembly at a Glance
- Cut and Sort the Fabrics
- Prepare the Snowflake Appliqué
- Make the Half-Square Triangle Units
- Piece Both Faces
- Join the Back Face, Base Strip, and Front Face
- Fuse and Satin-Stitch the Snowflake
- Layer the Outer Panel
- Quilt the Outer Panel
- Trim the Outer Panel and Cut the Boxing Notches
- Sew the Outer Side Seams
- Box the Outer Corners
- Make the Two Handles
- Prepare the Lining
- Sew the Lining Side Seams, Leaving a Turning Gap
- Box the Lining Corners
- Baste the Handles to the Outer Bag
- Sew the Outer Bag and Lining Together at the Top Edge
- Turn Through the Gap, Close It, and Topstitch
Step-by-Step Sewing Tutorial
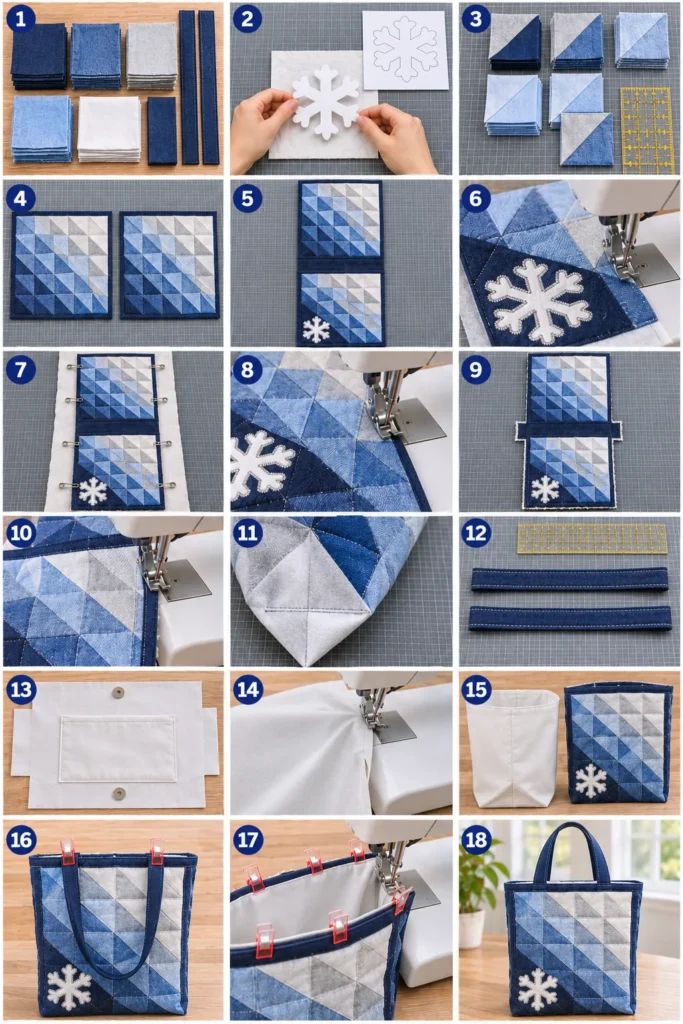
Step-by-Step Illustration – Digitally Created Image. Follow the written steps for measurements and details.
Step 1 – Cut and Sort the Fabrics
Prewash and press all five cottons. Cut 5″ squares: 3 deep indigo, 6 denim blue, 6 silver-gray, 6 icy blue, and 3 white. Pair them into four stacks of three pairs each: A (deep indigo with denim blue), B (denim blue with silver-gray), C (silver-gray with icy blue), and D (icy blue with white). From deep indigo, cut four side frames (2½” × 19″), four top and bottom frames (12½” × 1¾”), the base strip (16½” × 4½”), and two handle strips (5″ × 31″). Cut the lining and its medium interfacing at 16½” × 40½”, the heavyweight base interfacing at 12″ × 3½”, the pocket at 9″ × 12″, the handle interfacing at 2½” × 31″, and the batting and muslin at 18½” × 42½”.
Result: All pieces are cut, with the 5″ squares sorted into four labeled pairing stacks, A to D, of three pairs each.
Step 2 – Prepare the Snowflake Appliqué
Fuse the 9″ lightweight interfacing to the wrong side of the 9″ white square, then fuse the paper-backed web over it. Fold a 7″ paper circle in half, then into thirds, to make six 60-degree wedges. Cut a simple arm shape with arms at least ½” wide, then unfold it into a six-armed snowflake. Trace it onto the web’s paper side and cut it out on the line. Leave the paper on.
Result: One white six-armed snowflake, 7″ across, backed with interfacing and web.
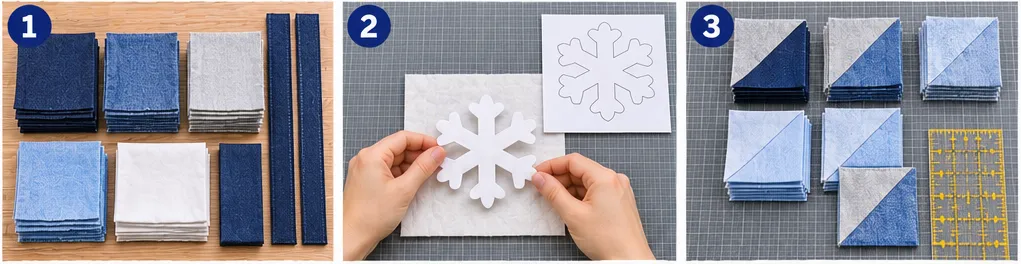
Step 3 – Make the Half-Square Triangle Units
For each pair, draw a diagonal line corner to corner on the wrong side of the lighter square. Place it right sides together with the darker square, sew ¼” on both sides of the line, and cut on the line. Press the seam toward the darker fabric. Trim each unit to 4½” square, keeping the diagonal running exactly corner to corner. Keep each pairing in its own stack.
Result: 24 trimmed half-square triangle units, each 4½” square: six each of pairings A, B, C, and D.
Step 4 – Piece Both Faces
For each face, lay out the units in a grid 3 across and 4 down. Turn every unit so its diagonal runs from upper-left to lower-right, with the darker triangle in the lower left. Place the pairings by column and row, counted from the lower left:
- A: column 1, rows 1-2; column 2, row 1
- B: column 1, row 3; column 2, row 2; column 3, row 1
- C: column 1, row 4; column 2, row 3; column 3, row 2
- D: column 2, row 4; column 3, rows 3-4
Sew the units into rows and the rows into a grid with ¼” seams, nesting the seams. Sew a 12½” frame to the top and to the bottom, then a 2½” × 19″ side frame to each side.
Result: Two identical faces, each 16½” × 19″: a triangle grid shading from deep indigo at the lower left to white at the upper right, framed in deep indigo.
Step 5 – Join the Back Face, Base Strip, and Front Face
Turn the back face upside down so its lightest corner sits at the far end. Sew its bottom frame to one long edge of the base strip, right sides together, at ½”. Sew the front face’s bottom frame to the other long edge the same way, with the front face upright. Press both seams toward the base strip.
Result: One long outer panel, 16½” × 40½”: the back face upside down, the deep indigo base strip in the middle, and the front face upright.
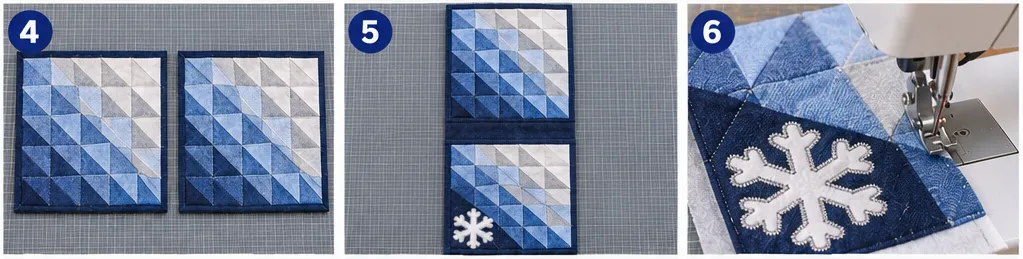
Step 6 – Fuse and Satin-Stitch the Snowflake
On the front face, mark the snowflake’s center 6¼” from the left raw edge and 5″ above the base seam. That point is where the four lower-left units meet. Peel the paper off, center the snowflake on the mark, and fuse it under a press cloth. Pin tear-away stabilizer behind it. With the open-toe foot, the metallic or topstitch needle, silver metallic thread on top, and white thread in the bobbin, satin-stitch around the edge with a stitch about 2.5-3 mm wide and very short. Lower the top tension, slow down, and pivot at every point. Tear the stabilizer away.
Result: A white six-armed snowflake edged in silver satin stitch sits over the darkest units at the lower left of the front face.
Step 7 – Layer the Outer Panel
Lay the muslin flat, smooth the batting on top, and center the outer panel right side up, with 1″ of batting and muslin showing on every side. Pin baste every 4″ through all three layers, keeping the pins away from the snowflake.
Result: A basted three-layer sandwich, 18½” × 42½”, ready to quilt.
Step 8 – Quilt the Outer Panel
With the walking foot and silver-gray thread, quilt in this order:
- In the ditch along both base seams and around the inner edge of each frame.
- A straight line ¼” from each side of every triangle’s diagonal seam.
- Where a line reaches the snowflake, stop at the satin stitch and backstitch, then pick up again on the other side.
Result: The sandwich is quilted, with paired lines tracing every diagonal and the frame and base outlined.
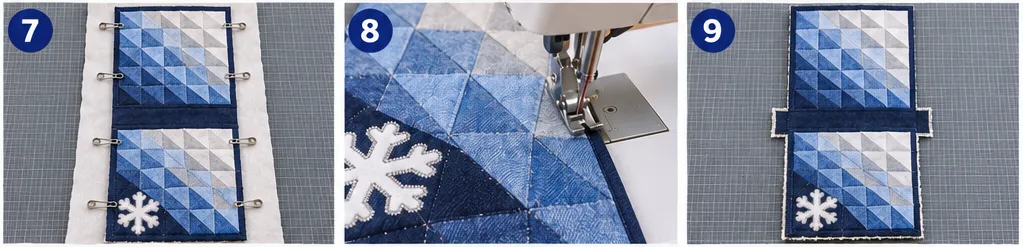
Step 9 – Trim the Outer Panel and Cut the Boxing Notches
Trim the batting and muslin even with the panel’s raw edges, squaring it to 16½” × 40½”. Mark the base strip’s center line, 20¼” from each end. At both side edges, cut out a notch 1¾” deep from the raw edge and 2½” tall, running 1¼” above and below the center line, through all layers.
Result: A trimmed quilted panel with a 1¾” × 2½” notch cut from the middle of each long side.
Step 10 – Sew the Outer Side Seams
Fold the panel right sides together at the base center line, matching the base seams, frame seams, and top edges. Sew each side seam at ½” from the notch to the top edge. Trim the batting and muslin out of the allowances and press the seams open.
Result: The outer bag is a flat, wrong-side-out sack with both side seams sewn and the notches open.
Step 11 – Box the Outer Corners
At each notch, pull the raw edges apart and flatten the opening so the side seam lines up on the base center line and the notch edges form a straight line. Sew across at ½”, backstitching, and trim the batting from the allowance.
Result: The outer shell has a 3½”-deep boxed base with deep indigo side walls, still wrong side out.
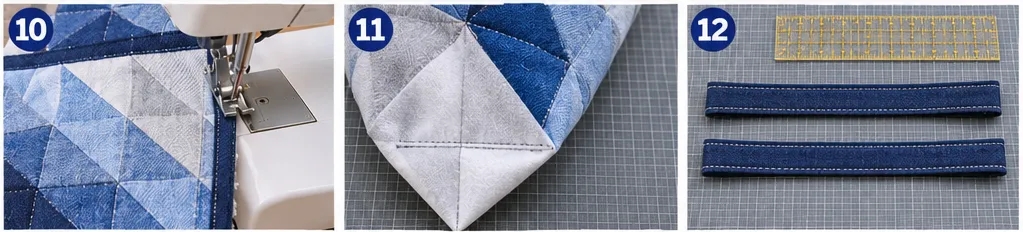
Step 12 – Make the Two Handles
Fuse a 2½” × 31″ interfacing strip to the center of the wrong side of each handle strip. Fold the strip in half lengthwise and press, open it, fold both raw edges to the center crease, refold, and press. Edgestitch both long edges ⅛” from the edge.
Result: Two interfaced deep indigo handles, 1¼” wide and 31″ long, with both edges stitched.
Step 13 – Prepare the Lining
Fuse the medium interfacing to the wrong side of the lining. Center the 12″ × 3½” heavyweight interfacing on the lining’s center line, 2¼” in from each side edge, and fuse it over the first layer. Cut the 1¾” × 2½” notches. Mark the base lines 1¾” above and below the center line.
On each half, mark top center 1¾” below the raw top edge. Fuse a 1½” interfacing square behind each mark and hand-stitch one snap half through its holes, with the two halves lined up to close.
On one half, center the pocket 4¼” from each raw side edge with its bottom 4″ above the base line. To make it, fold the 9″ × 12″ piece in half to 9″ × 6″ with the fold at the top and right sides together, sew both sides at ½”, turn, press, and press the bottom raw edges ½” under. Edgestitch the sides and bottom to the lining, backtacking at the top corners.
Result: A flat, interfaced, notched lining with a reinforced base area, both snap halves installed, and the pocket stitched in place.
Step 14 – Sew the Lining Side Seams, Leaving a Turning Gap
Fold the lining right sides together at the center line, matching the top edges and snap halves. Sew each side seam at ½” from the notch to the top. On one side, leave a 7″ gap with at least 2″ of stitching above and below it. Press the seams open.
Result: A white lining sack, wrong side out, with a 7″ gap in one side seam and the notches open.
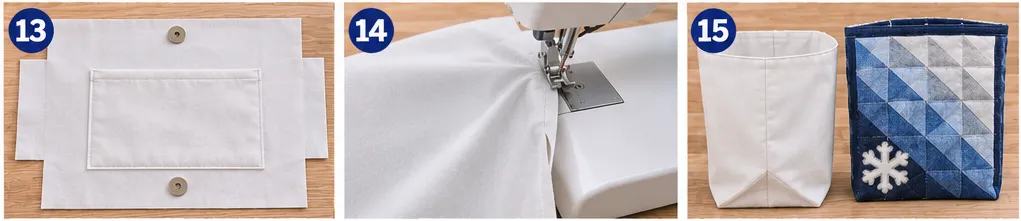
Step 15 – Box the Lining Corners
Flatten each lining notch so the side seam sits on the center line and the edges line up. Sew across at ½”, backstitching at both ends.
Result: A lining shell with a 3½”-deep boxed base and a reinforced bottom, wrong side out.
Step 16 – Baste the Handles to the Outer Bag
Turn the outer bag right side out. On the front, place one handle with its end centers 5¾” and 10¾” from the left side seam’s raw edge, each end extending 1½” above the top raw edge, and the loop hanging down without twisting. Baste ⅜” from the top raw edge. Repeat on the back with the second handle at the same positions.
Result: Both handles are basted to the right side of the outer bag, with 1½” tails above the top edge and loops hanging down.
Step 17 – Sew the Outer Bag and Lining Together at the Top Edge
Slip the outer bag (right side out, handles hanging down) inside the lining (wrong side out), so the right sides face. Match the side seams and top raw edges, tuck the handle tails and loops between the layers, and clip. Sew around the top edge at ½”.
Result: The outer bag and lining are joined around the top edge, with the handles caught in the seam and the turning gap still open.
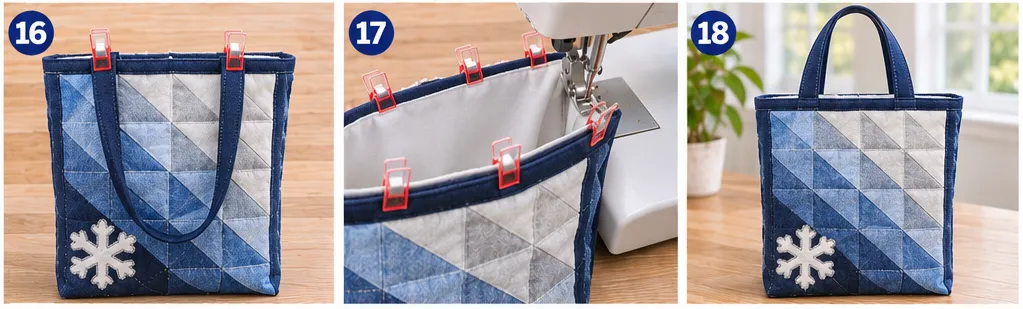
Step 18 – Turn Through the Gap, Close It, and Topstitch
Pull the bag right side out through the gap and push out the corners. Fold the gap edges in by ½” and edgestitch it closed. Push the lining into the outer bag, roll the top seam to the edge, and topstitch ¼” from the top all around. At each handle end, stitch a box with an X through it, 1¼” wide and 1¼” tall, starting just below the topstitching. This catches the outer bag, the handle tail, and the lining.
Result: The finished book tote, 15½” × 18″ × 3½”, with a diagonal blue color wash, a white snowflake low on the darkest corner, and deep indigo handles locked with box-X stitching.
Troubleshooting This Half-Square Triangle Tote
- Triangle points are cut off at the seams. Trim every unit to exactly 4½” with the diagonal running into both corners, and sew all piecing seams at a consistent ¼”.
- The color wash looks jumbled. Check that every unit is turned the same way, darker triangle in the lower left, before sewing the rows.
- The diagonal edges stretch. The diagonal is cut on the bias, so press the units without dragging the iron and pin at both ends of each seam.
- The snowflake looks gray over the dark corner. Fuse the lightweight interfacing to the white cotton before the web so the indigo cannot show through.
- Satin stitch puckers where it crosses triangle seams. Keep the stabilizer in place and slow down over the seam bumps. Press those seams flat before fusing.
- Metallic thread breaks. Lower the top tension, use a fresh metallic needle, and sew at half speed.
- The base sags when the bag is full. Make sure the heavyweight interfacing is fused fully and lines up with the base lines, so it ends up on the flat bottom.
- The snap does not line up. Mark both snap positions at the same height before sewing the lining side seams, and test the closure before Step 17.
Design Inspiration and Tutorial Note: The images in this section may be AI-generated or digitally developed to show a design possibility. The sewing instructions are a proposed construction method with calculated measurements, not a physically tested pattern. Check each panel size and seam allowance before cutting.
Other Design Inspirations – Digitally Modified Images. Texture and color may vary from the actual product.
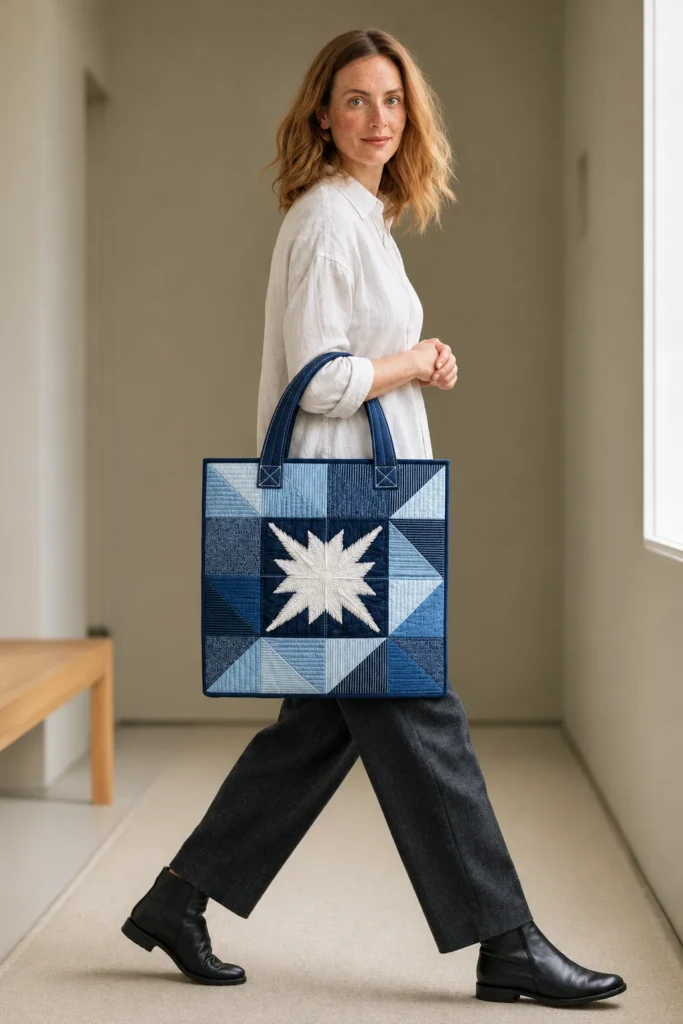

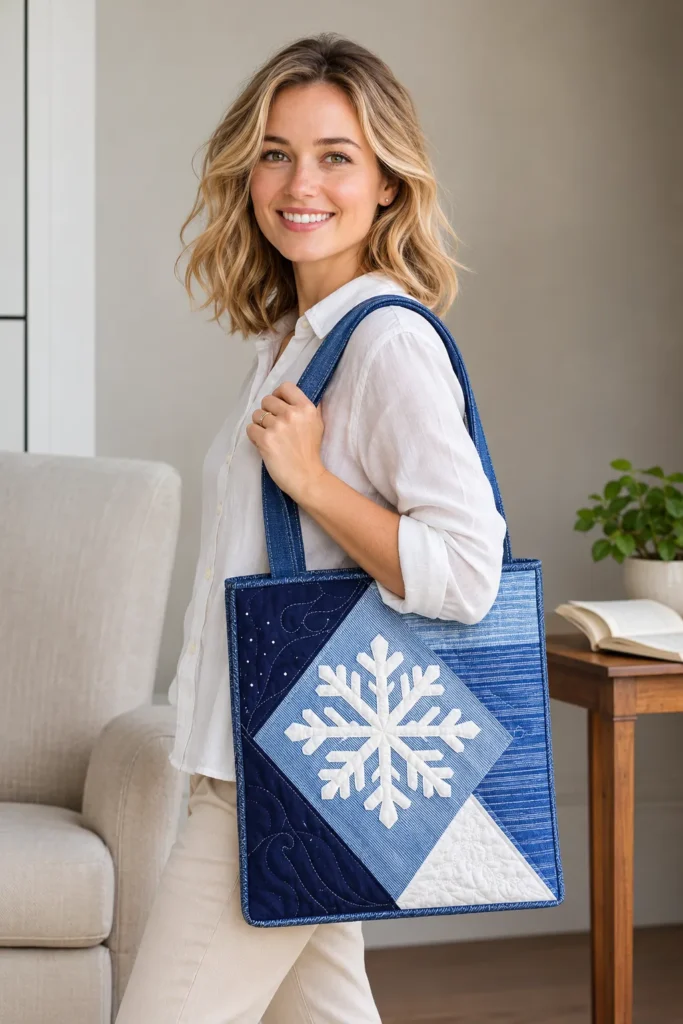
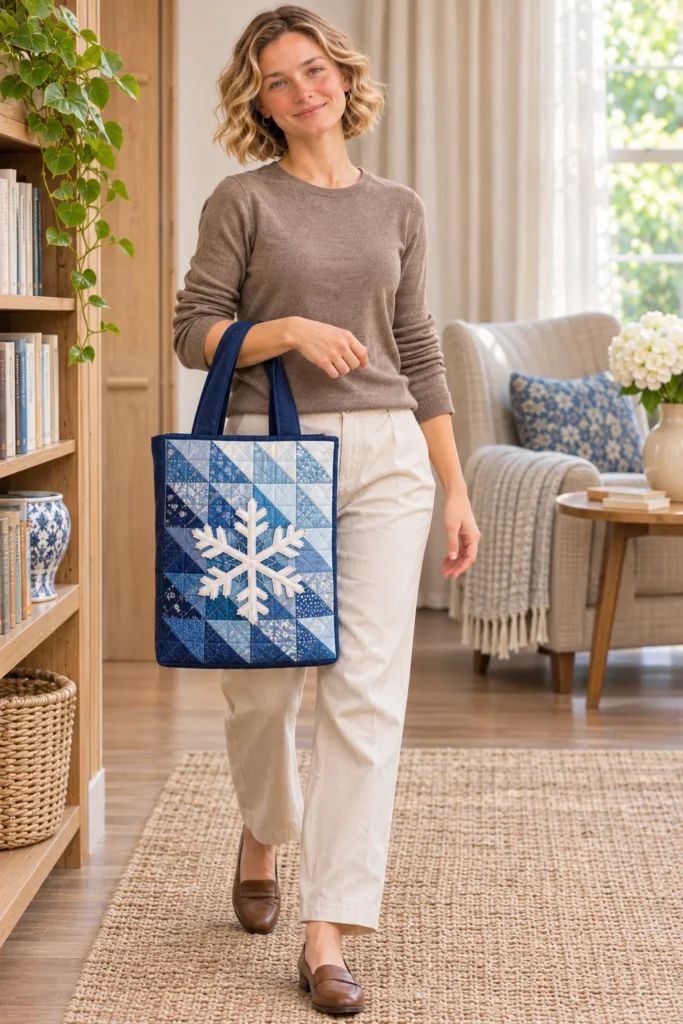
5. Reversible Snowflake Appliqué Everyday Tote in Blue Linen and White
This tote has two finished faces, so it can be carried either way out. With the linen side out, the body is dusty blue linen with its natural slubbed texture, quilted in horizontal lines 1″ apart. Three white six-armed snowflakes in graduated sizes, about 5″, 3½”, and 2½” across, climb diagonally across the front from the lower left to the upper right, each outlined in silver metallic satin stitch.
A 3½” band of white cotton runs around the top, carrying a row of small dusty blue linen snowflakes, so the bag looks as if it has a crisp white cuff. Turned inside out, the colors swap: a white cotton body with one 5″ blue linen snowflake on the front, and a dusty blue linen band at the top with small white snowflakes.
The tote finishes 18″ wide, 16″ tall, and 4″ deep, with a soft 14″ × 4″ base, sized for a daily load of wallet, water bottle, scarf, and a book. Lightweight fusible fleece on both sides gives the linen and cotton enough body to hold their shape while staying soft. The two handles are reversible too: each is made from one linen strip and one cotton strip, so the linen faces outward when the linen side is out and the cotton faces outward when the bag is turned.
With a drop of about 10″, they rest on the shoulder. There are no pockets, zippers, or snaps, because anything added to one side would end up on the inside of the other.
Design Inspirations – Digitally Modified Images. Texture and color may vary from the actual product.
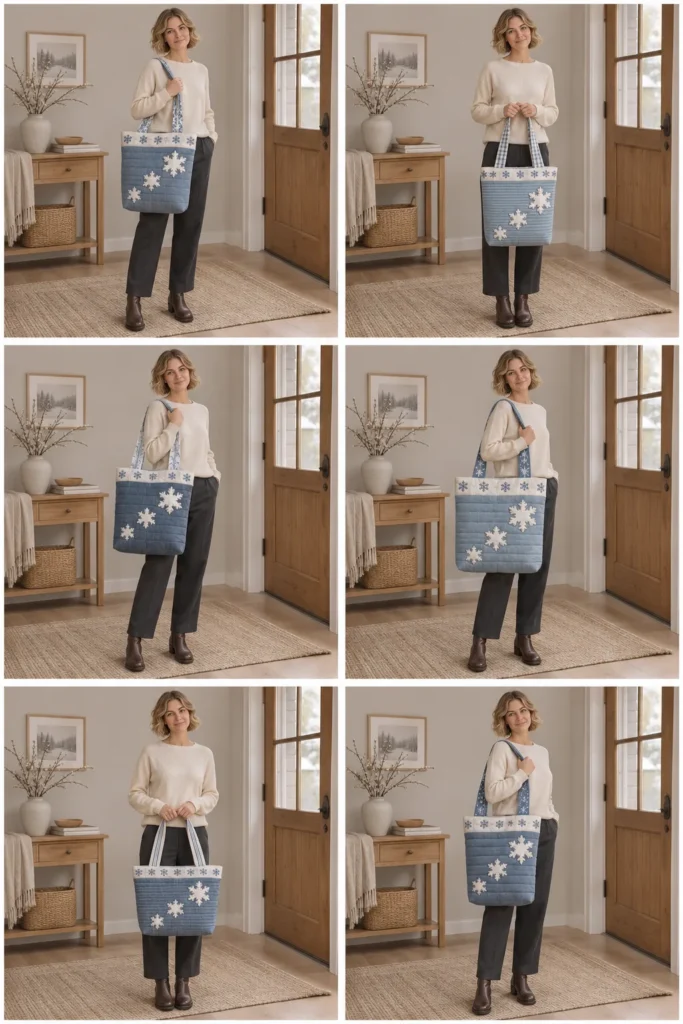
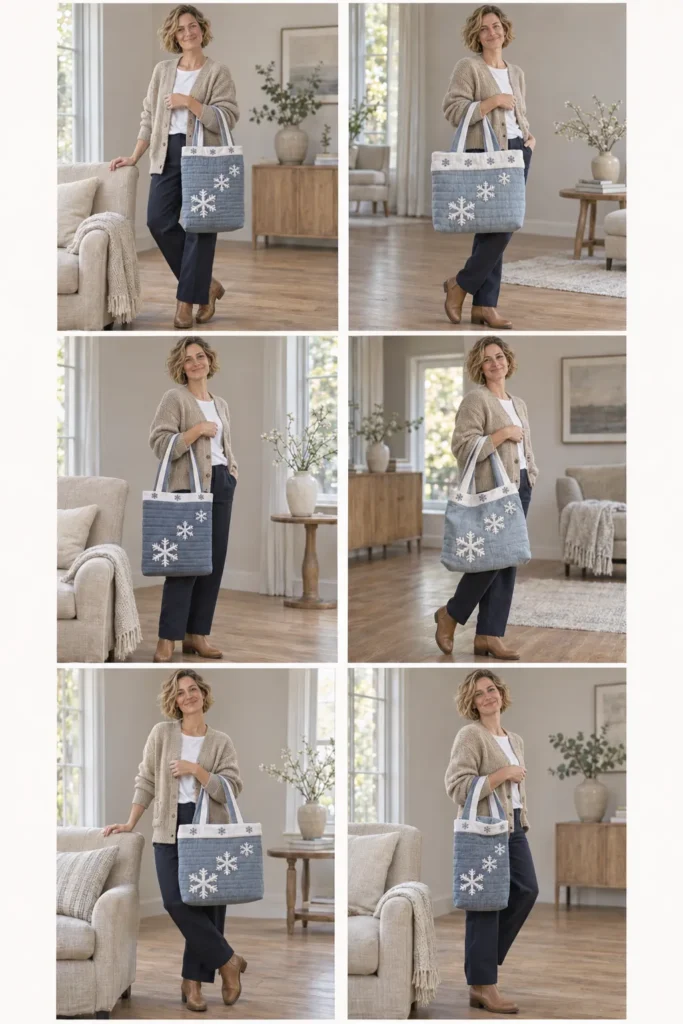
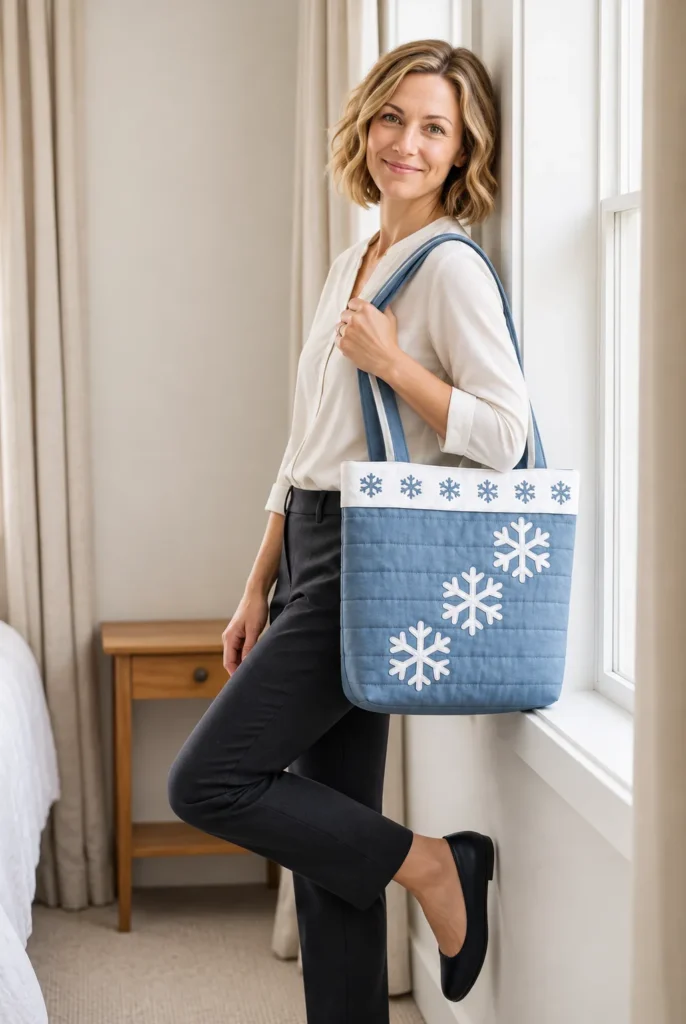
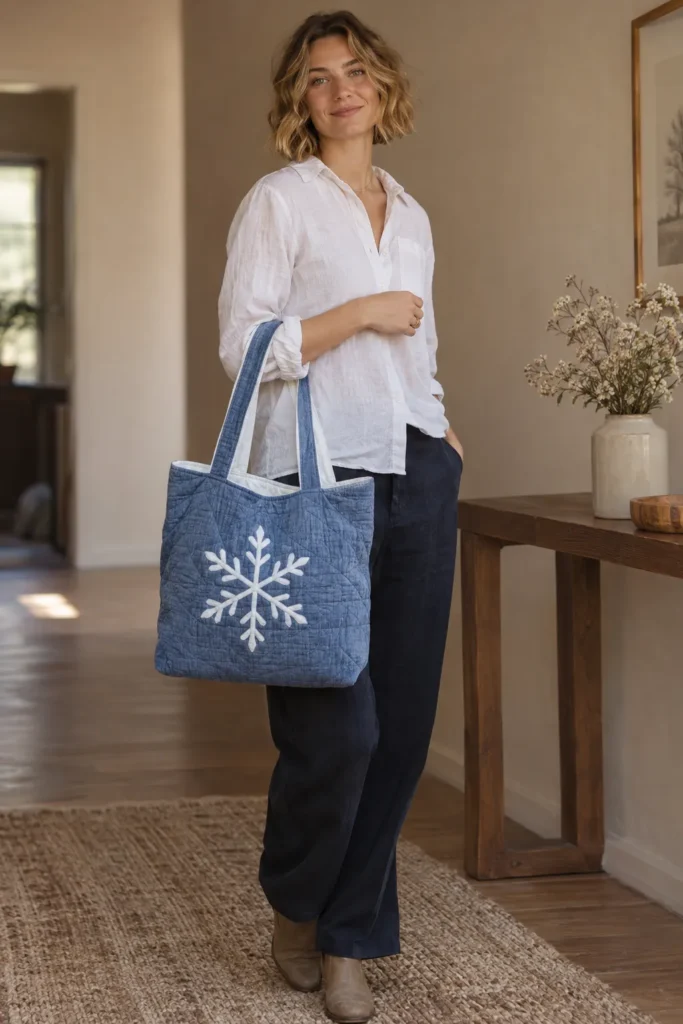
Two Bags in One
Each side is built as a complete shell: quilted, side-seamed, and boxed. The two shells are then joined only at the top edge. Neither side is a lining, so each side’s seams sit hidden between the two layers no matter which way the bag is carried. The top bands mirror each other: white with blue snowflakes on the linen side, linen with white snowflakes on the cotton side. The bag reads as a color-blocked design from either side. The small band snowflakes are six-armed, so they look the same right side up or upside down.
Placing the Snowflakes Around the Band
On the linen side, the three graduated snowflakes stay well below the band, so the white band and the diagonal of snowflakes never overlap. The band snowflakes sit in a single row, three on each face, each with ½” of clear fabric above and below it. The handles attach in the top seam between them, so nothing crowds the handle ends. On the cotton side, the 5″ linen snowflake sits centered low on the front. That leaves the white body mostly plain, which balances the busier linen side.
Working with Linen
Linen gives this tote its texture, but it frays quickly, shifts while cutting, and shrinks more than cotton. Prewash and dry it before cutting, and cut on a flat surface with a rotary cutter instead of shears. Fusible web holds the small linen snowflakes in place, and the satin stitch covers their raw edges completely, so fraying stops at the stitching. The fusible fleece fused to each whole shell also stabilizes the linen before quilting, so the channel lines stay straight.
Materials and Tools Needed
- 1 yd dusty blue linen, 54″ wide (52″ usable)
- 1¼ yd white quilting cotton
- 1¼ yd lightweight fusible fleece
- 1 yd lightweight woven fusible interfacing (snowflake fabric and handles)
- Paper-backed fusible web: one 12″ × 17″ piece and one 14″ × 10″ piece
- Tear-away stabilizer: one 14″ × 11″ piece, four 17″ × 4″ strips, and one 7″ × 7″ piece
- Silver metallic thread, plus all-purpose thread in silver-gray and white
- A 90/14 metallic or topstitch needle and a 90/14 universal needle
- An open-toe embroidery foot and a walking foot
- A hand-sewing needle for the ladder stitch
- A loop turner or large safety pin for turning the handles
- Rotary cutter, ruler, and mat; pins and clips; fabric marking pen
- Paper and paper scissors for the snowflake templates
- Iron and press cloth
Finished Tote Bag Size
- Width: 18″ across the top edge, measured flat
- Height: 16″ from the base line to the top edge, including the 3½” contrast band
- Depth: 4″
- Base: 14″ × 4″
- Handle drop: about 10″, measured from the top edge to the top of the handle loop (approximate)
Care: spot-clean or hand wash gently and air dry. Linen softens and may shrink slightly with washing.
Cutting Measurements
| Piece | Quantity | Cut Size (W × H) | Purpose |
|---|---|---|---|
| Side A body, dusty blue linen | 1 | 19″ × 29½” | Linen side body |
| Side A bands, white cotton | 2 | 19″ × 4¼” | Linen side top bands |
| Side B body, white cotton | 1 | 19″ × 29½” | Cotton side body |
| Side B bands, dusty blue linen | 2 | 19″ × 4¼” | Cotton side top bands |
| Lightweight fusible fleece | 2 | 19″ × 37″ | Body for each side |
| Snowflake fabric, white cotton | 1 | 12″ × 17″ | Nine white snowflakes |
| Lightweight woven fusible interfacing | 1 | 12″ × 17″ | Backs the white snowflakes |
| Fusible web | 1 | 12″ × 17″ | White snowflakes |
| Snowflake fabric, dusty blue linen | 1 | 14″ × 10″ | Seven linen snowflakes |
| Fusible web | 1 | 14″ × 10″ | Linen snowflakes |
| Tear-away stabilizer | 1 | 14″ × 11″ | Side A body snowflakes |
| Tear-away stabilizer | 4 | 17″ × 4″ | Band snowflakes |
| Tear-away stabilizer | 1 | 7″ × 7″ | Side B body snowflake |
| Handle strips, dusty blue linen | 2 | 2¼” × 27″ | Linen face of handles |
| Handle strips, white cotton | 2 | 2¼” × 27″ | Cotton face of handles |
| Lightweight woven fusible interfacing | 4 | 2¼” × 27″ | Handle stiffening |
Assembly at a Glance
- Cut and Sort the Fabrics
- Sew the Contrast Bands to Both Panels
- Prepare the Snowflake Appliqués
- Fuse and Satin-Stitch the Side A Snowflakes
- Fuse and Satin-Stitch the Side B Snowflakes
- Fuse the Fleece to Both Panels
- Quilt Side A
- Quilt Side B
- Trim Both Panels and Cut the Boxing Notches
- Sew the Side A Side Seams
- Box the Side A Corners
- Sew the Side B Side Seams, Leaving a Turning Gap
- Box the Side B Corners
- Make the Reversible Handles
- Baste the Handles to Side A
- Sew Side A and Side B Together at the Top Edge
- Turn Right Side Out and Close the Gap with a Ladder Stitch
- Topstitch the Top Edge
Step-by-Step Sewing Tutorial
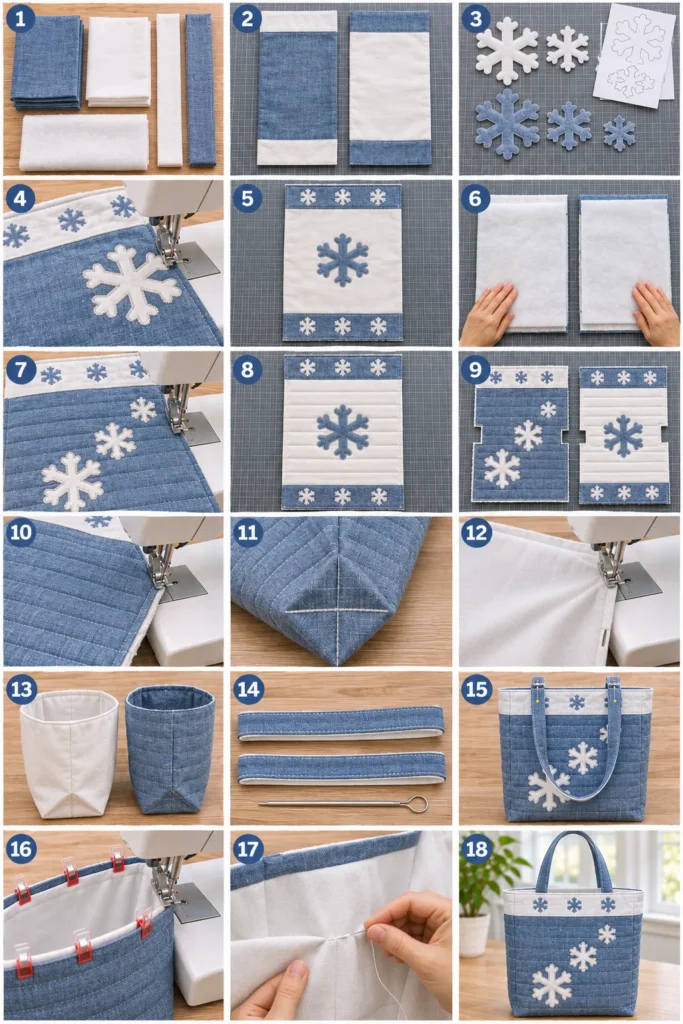
Step-by-Step Illustration – Digitally Created Image. Follow the written steps for measurements and details.
Step 1 – Cut and Sort the Fabrics
Prewash, dry, and press the linen and the white cotton. Cut the Side A body from linen and the Side B body from white cotton, each 19″ × 29½”. Cut two white cotton bands and two linen bands, each 19″ × 4¼”. Cut the two fleece pieces at 19″ × 37″, the handle strips at 2¼” × 27″ (two linen, two cotton), the matching handle interfacing, the 12″ × 17″ white snowflake piece with its interfacing, and the 14″ × 10″ linen snowflake piece. Stack Side A pieces (linen body, white bands) separately from Side B pieces (cotton body, linen bands).
Result: All pieces are cut and sorted into a Side A stack, a Side B stack, a snowflake stack, and a handle stack.
Step 2 – Sew the Contrast Bands to Both Panels
Place a white band right sides together with one 19″ end of the linen body and sew with a ¼” seam. Repeat at the other end. Do the same on the white cotton body with the two linen bands. Press the seams toward the bands.
Result: Two shells, each 19″ × 37″: a linen body with white bands at both ends, and a cotton body with linen bands at both ends.
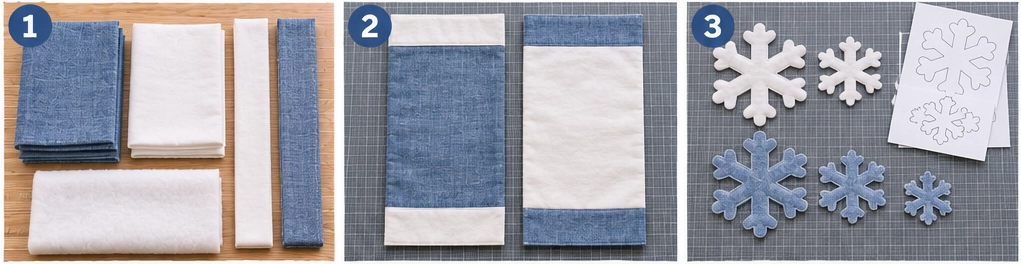
Step 3 – Prepare the Snowflake Appliqués
Fuse the lightweight interfacing to the wrong side of the 12″ × 17″ white cotton, then fuse web over it. Fuse web to the wrong side of the 14″ × 10″ linen. Make three paper templates by folding circles of 5″, 3½”, and 2½” into six 60-degree wedges, cutting simple arms (at least ½” wide on the 5″ snowflake and ⅜” on the smaller ones), and unfolding. From the white piece, trace and cut one 5″, one 3½”, and seven 2½” snowflakes. From the linen piece, trace and cut one 5″ and six 2½”. Leave the paper on.
Result: Nine white snowflakes (one large, one medium, seven small) and seven linen snowflakes (one large, six small), each backed with web.
Step 4 – Fuse and Satin-Stitch the Side A Snowflakes
On the Side A shell, mark the center line 18½” from each end and a base line 2″ from it toward the front end. On the front half, measured up from that base line and in from the left raw edge, fuse the white snowflakes at these centers:
- 5″ snowflake: 5½” in, 4″ up
- 3½” snowflake: 10¼” in, 7″ up
- 2½” snowflake: 14″ in, 9½” up
Then fuse the six small linen snowflakes in the white bands, three per band, centered 1¾” below each band’s raw top edge (y = 14¼”) at 5″, 9½”, and 14″ from the left raw edge. Pin stabilizer behind each area. Satin-stitch every snowflake with silver metallic thread on top, a stitch about 2.5-3 mm wide, lowered top tension, slow speed, and a pivot at every point. Tear the stabilizer away.
Result: Side A has three white snowflakes climbing the front linen and a row of three small blue snowflakes in each white band, all edged in silver.
Step 5 – Fuse and Satin-Stitch the Side B Snowflakes
Mark the center line and the front base line on the Side B shell the same way. Fuse the 5″ linen snowflake centered 9½” from the left raw edge and 6″ above the base line. Fuse the six small white snowflakes in the linen bands at the same band positions as Side A. Back each area with stabilizer, satin-stitch in silver, and tear the stabilizer away.
Result: Side B has one blue linen snowflake on the front of the white body and a row of three small white snowflakes in each linen band.
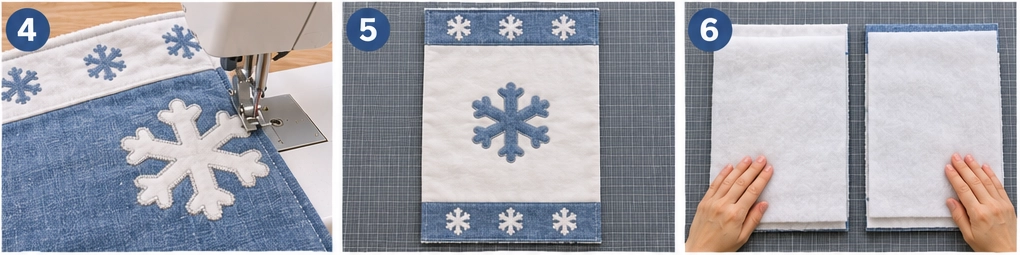
Step 6 – Fuse the Fleece to Both Panels
Lay each shell wrong side up. Place a 19″ × 37″ fleece piece on top, fusible side down, with the edges even, and fuse it in place with a press cloth. Work from the center outward and avoid pressing directly on the metallic stitching.
Result: Both shells are backed with fleece and slightly padded, ready to quilt.
Step 7 – Quilt Side A
With the walking foot and silver-gray thread, stitch in the ditch along both band seams. Then sew horizontal lines 1″ apart across the whole Side A shell, including the bands, starting from a line drawn through the center line. Where a line meets a snowflake, stop at the satin stitch, backstitch, and resume on the other side.
Result: Side A is quilted in horizontal channels 1″ apart, outlining the snowflakes and the bands.
Step 8 – Quilt Side B
Stitch in the ditch along both band seams on Side B. Then sew horizontal lines 1½” apart across the shell, stopping and restarting at each snowflake.
Result: Side B is quilted in wider horizontal lines that look different from Side A.
Step 9 – Trim Both Panels and Cut the Boxing Notches
Square each shell to 19″ × 37″. At both side edges of each shell, cut out a notch 2″ deep from the raw edge and 3″ tall, running 1½” above and below the center line.
Result: Two quilted shells, 19″ × 37″, each with a 2″ × 3″ notch cut from the middle of each long side.
Step 10 – Sew the Side A Side Seams
Fold the Side A shell right sides together at the center line, matching the band seams and top edges. Sew each side seam at ½” from the notch to the top edge. Trim the fleece out of the allowances and press the seams open.
Result: Side A is a wrong-side-out sack with both side seams sewn and the notches open.
Step 11 – Box the Side A Corners
Flatten each notch so the side seam lies on the center line and the notch edges line up. Sew across at ½”, backstitching, and trim the fleece from the allowance.
Result: The Side A shell has a 4″-deep boxed base and is wrong side out.
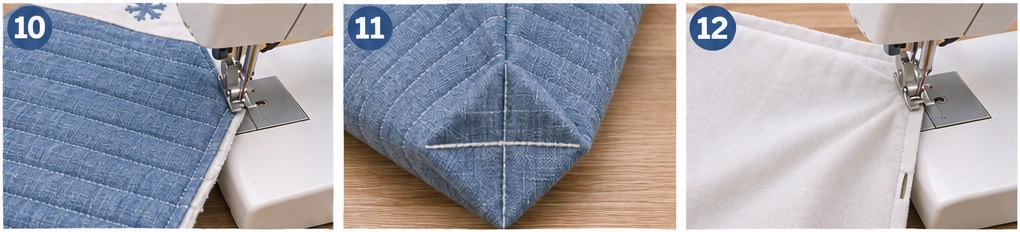
Step 12 – Sew the Side B Side Seams, Leaving a Turning Gap
Fold the Side B shell right sides together and sew both side seams at ½” from notch to top. On one side, leave an 8″ gap with at least 2″ of stitching above and below it. Trim the fleece from the allowances and press the seams open, pressing the gap’s edges ½” to the wrong side.
Result: Side B is a wrong-side-out sack with an 8″ gap in one side seam and the notches open.
Step 13 – Box the Side B Corners
Box both Side B corners exactly as in Step 11.
Result: The Side B shell has a 4″-deep boxed base and is wrong side out, with the gap still open.
Step 14 – Make the Reversible Handles
Fuse interfacing to the wrong side of all four handle strips. Pair one linen strip with one cotton strip, right sides together, and sew both long edges at ½”. Turn each tube right side out with a loop turner, roll the seams to the edges, press, and edgestitch both long edges ⅛” from the edge.
Result: Two flat handles, 1¼” wide and 27″ long, each linen on one face and white cotton on the other.
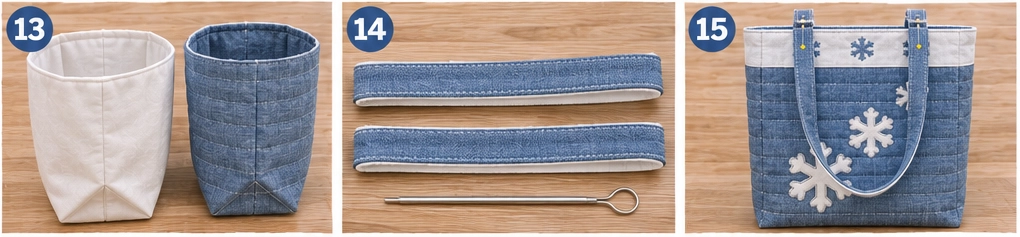
Step 15 – Baste the Handles to Side A
Turn the Side A shell right side out. On the front, place one handle with its raw ends even with the top raw edge, the end centers 6½” and 12½” from the left side seam’s raw edge, and the linen face down against the white band. Let the loop hang down without twisting. Baste ⅜” from the edge. Repeat on the back.
Result: Both handles are basted to the right side of Side A, linen faces down, loops hanging over the bands.
Step 16 – Sew Side A and Side B Together at the Top Edge
Slip Side A (right side out, handles hanging down) inside Side B (wrong side out), so the right sides face. Match the side seams and top raw edges, keep the handle loops tucked between the layers, and clip all around. Sew the top edge at ½”, then trim the fleece from the allowance.
Result: The two shells are joined at the top edge with the handles caught in the seam, and the Side B gap is still open.
Step 17 – Turn Right Side Out and Close the Gap with a Ladder Stitch
Reach through the 8″ gap, pull Side A through, and push out all four boxed corners. Bring the pressed edges of the gap together and close it by hand with a ladder stitch, taking small stitches into each folded edge so the seam disappears on Side B.
Result: The tote is right side out with the linen side showing and the gap invisibly closed.
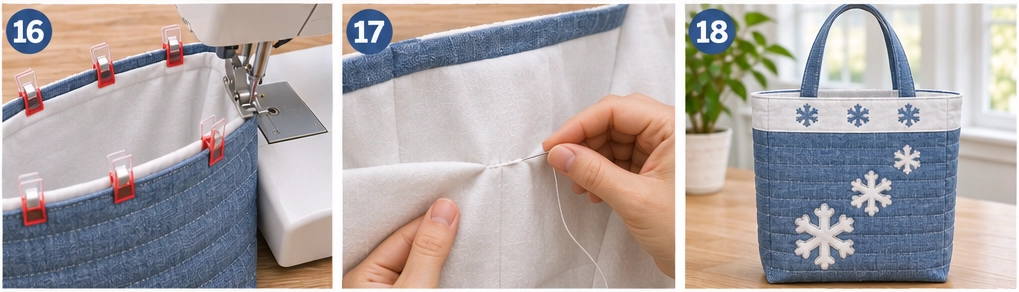
Step 18 – Topstitch the Top Edge
Push Side B down inside Side A and seat it in the corners. Roll the top seam right to the edge and topstitch ¼” from the edge all the way around in silver-gray thread, sewing slowly over the handle ends.
Result: The finished reversible tote, 18″ × 16″ × 4″: linen side out, with three white snowflakes on the front, a white top band of small blue snowflakes, and two-tone handles standing up.
Troubleshooting This Reversible Tote
- The linen frays while cutting and handling. Cut with a rotary cutter, handle the pieces as little as possible, and fuse the fleece soon after the appliqué is done.
- The band seams do not line up at the side seams. Pin the band seams together first when folding each shell, before sewing the side seams.
- The small band snowflakes look crowded at the top. Check that each is centered 1¾” below the raw top edge, which leaves ½” clear above it once the top seam is sewn.
- The white side shows gray patches behind the linen snowflakes. Fuse the web only to the snowflake area, and prewash the linen so loose dye cannot transfer.
- The two sides puff away from each other. Seat Side B fully into the boxed corners before topstitching, and topstitch evenly all the way around.
- The handles show the wrong fabric outward. Baste them linen face down against Side A. They flip when the bag is turned, so linen ends up facing out.
- The ladder-stitched gap is visible. Use white thread on the white cotton side and take each stitch just inside the fold.
- Metallic thread breaks on linen. Lower the top tension, slow down, and use a fresh metallic or topstitch needle.
Design Inspiration and Tutorial Note: The images in this section may be AI-generated or digitally developed to show a design possibility. The sewing instructions are a proposed construction method with calculated measurements, not a physically tested pattern. Check each panel size and seam allowance before cutting.
Other Design Inspirations – Digitally Modified Images. Texture and color may vary from the actual product.

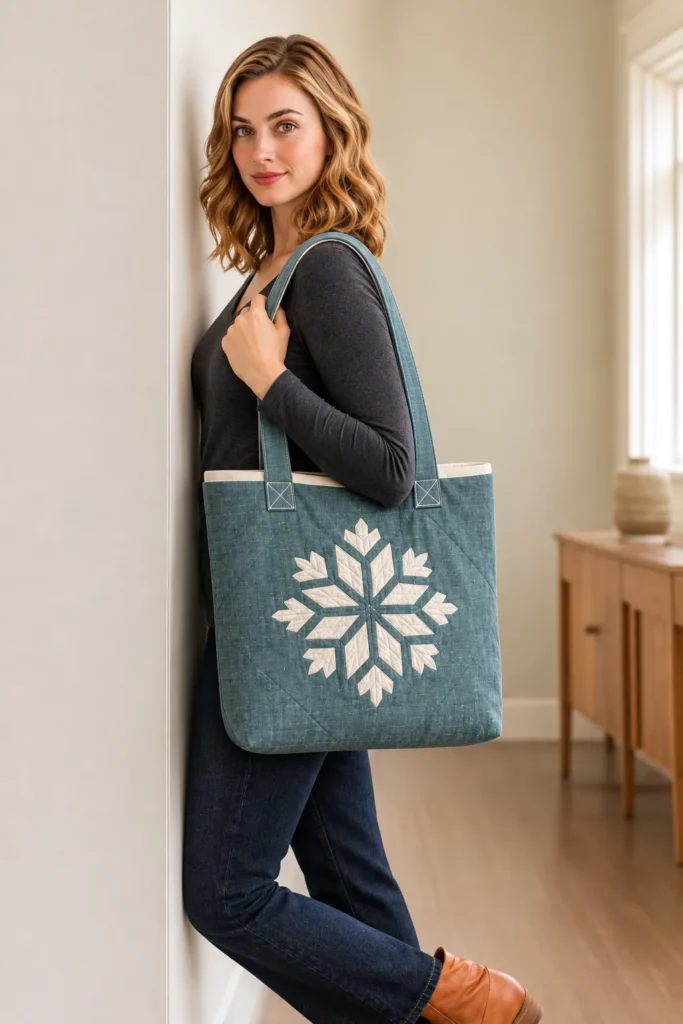
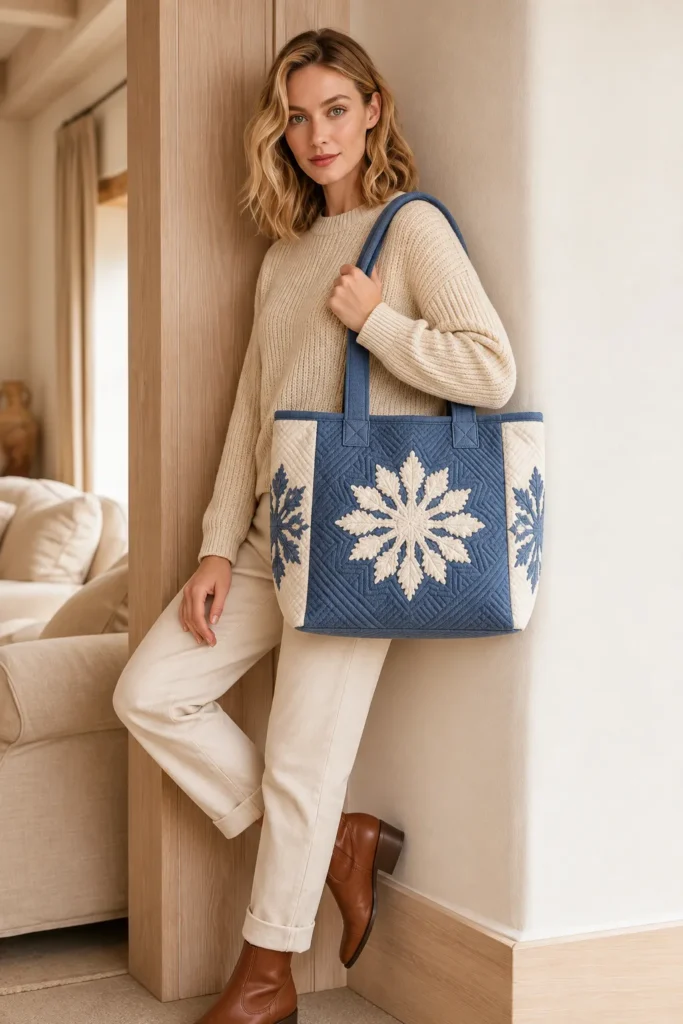
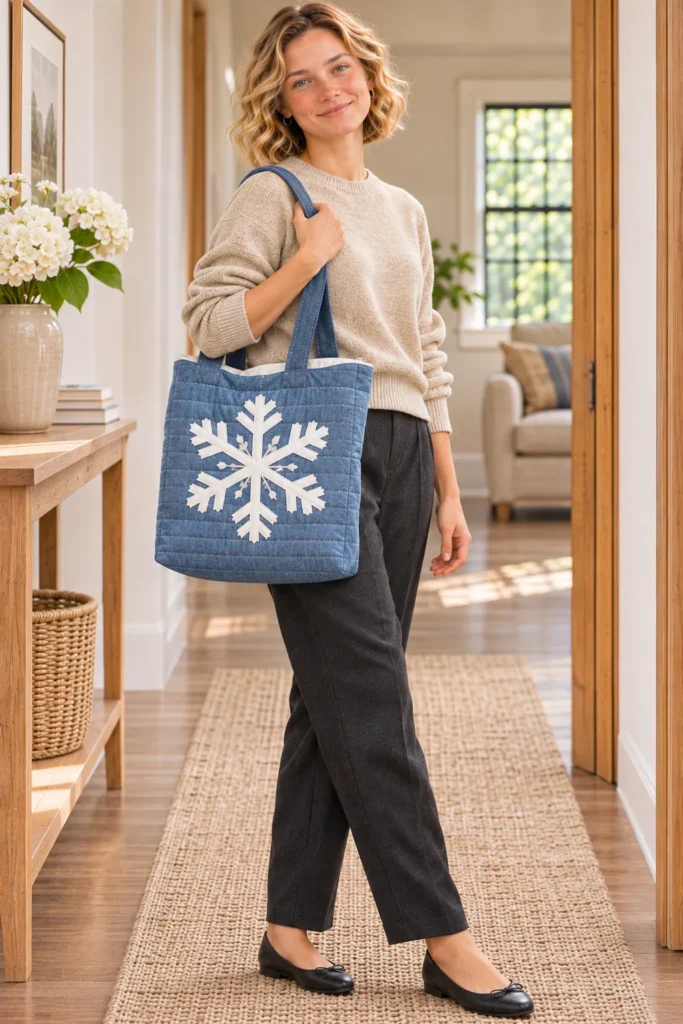
6. Oversized Snowflake Appliqué Laundry Tote in Chambray and White
This laundry tote keeps the surface simple so one large motif can carry the design. The outer is a single whole-cloth piece of soft chambray blue with no patchwork seams. One white cotton snowflake, 14 inches across, sits centered on the front face, with each of its six broad arms edged in silver metallic satin stitch. A diagonal crosshatch in silver-gray thread runs across the whole bag in a 2-inch grid and stops cleanly at the snowflake’s edge, so the snowflake stays smooth and slightly raised against the quilted texture around it.
At 30 inches wide, 22 inches tall, and 12 inches deep, this is the largest boxed bag in the collection. It is built to stand on the laundry room floor and hold a full load. Natural cotton canvas sits inside the quilted outer as an interlining, a white cotton duck lining goes in wrong sides together, and a removable board in a white duck cover keeps the 18 by 12 inch base flat. The top edge is finished with white double-fold binding instead of a turned seam. Two silver-gray heavy cotton webbing handles are stitched to the outside with box-X reinforcement, so a heavy basket of towels can be carried to the machine.
Design Inspirations – Digitally Modified Images. Texture and color may vary from the actual product.
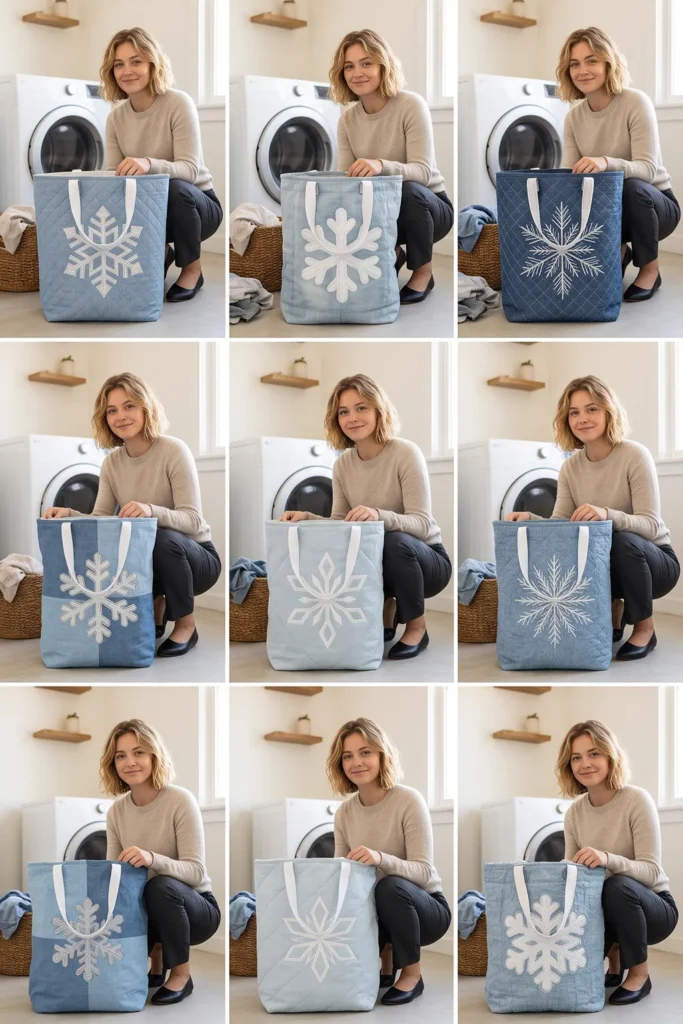
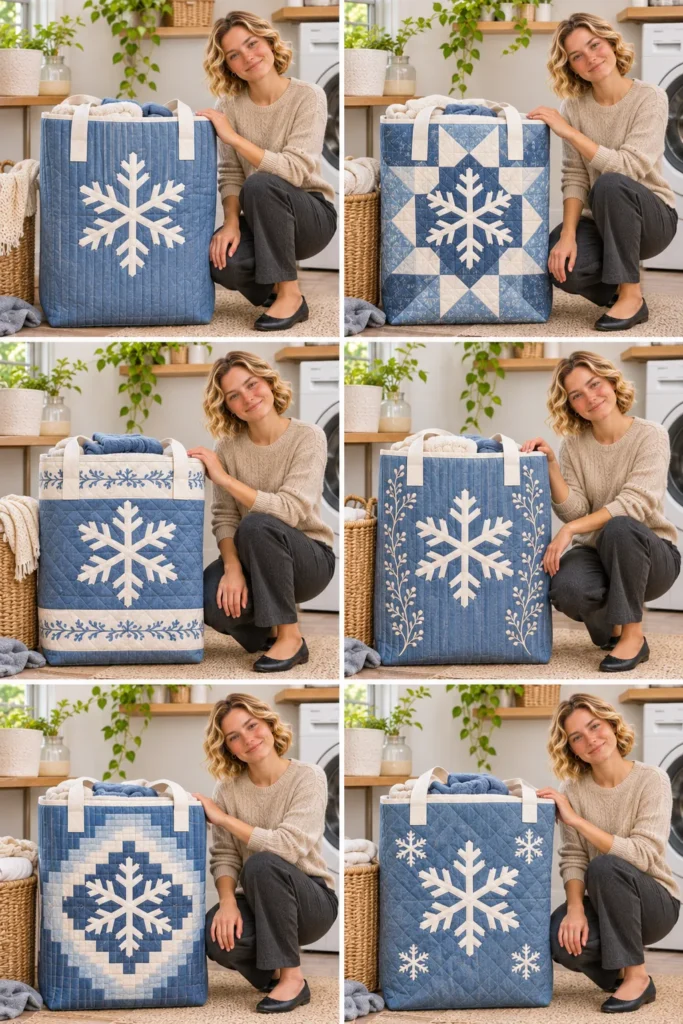
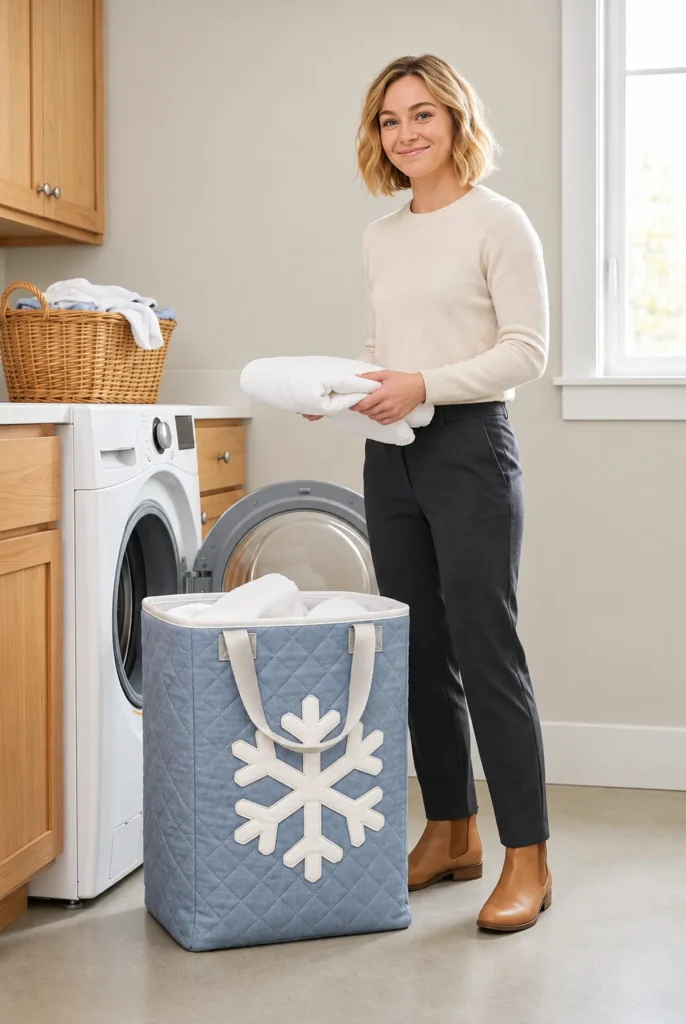
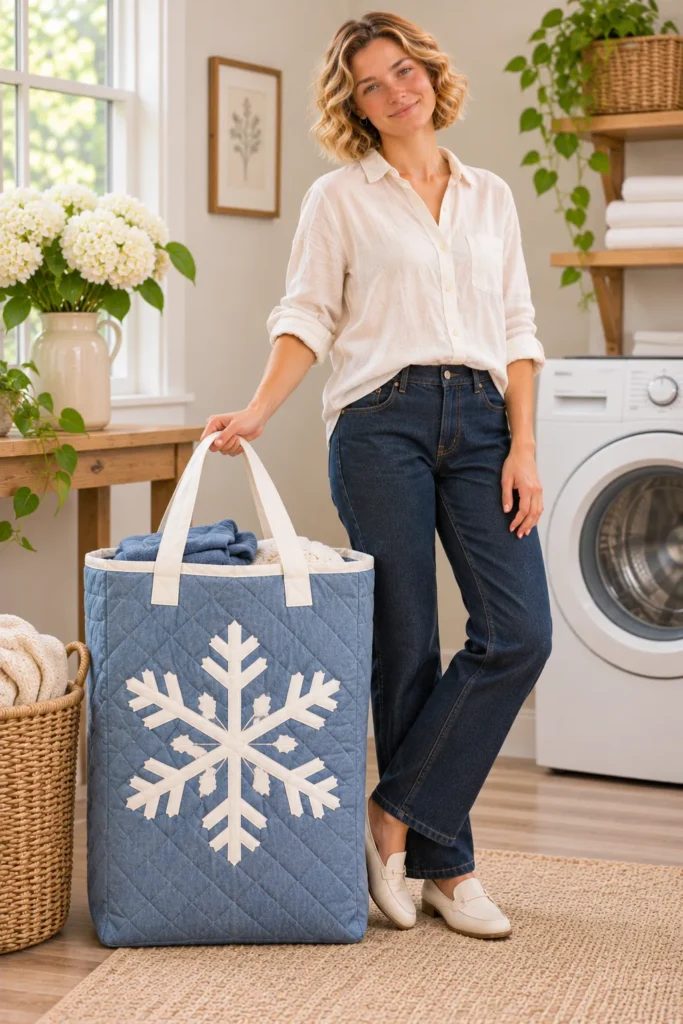
One Large Snowflake on a Whole-Cloth Field
Without piecing seams, the snowflake has nothing to compete with and nothing to straddle. It is placed with one arm pointing straight up, centered between the two front handles, with about 4 inches of plain chambray above and below it and roughly 3 inches between its side arm tips and the side-wall folds. At this scale the arms are drafted broad, about 1¼ inches wide, with blunt tips and slightly rounded inner corners. Broad arms satin-stitch smoothly, while thin points on a motif this large tend to lift after repeated loading and unloading. The crosshatch then works as a backdrop, a quiet diamond texture that frames the motif without crossing it.
Built to Stand Full on the Laundry Room Floor
Several features work together to keep the bag upright:
- Canvas interlining. The canvas quilted into the outer stiffens the walls.
- Crosshatch quilting. It locks the three outer layers together so the walls do not buckle when the bag is half full.
- Base board. The 17¾ by 11¾ inch board sits just inside the base and can be lifted out before washing.
- Bound top edge. Binding keeps the opening crisp without the bulk of a turned top seam through canvas and duck.
- External handles. Because the handles go on after the binding, they are stitched through every layer with a box and an X. That spreads the load across the bag wall instead of relying on a seam.
Chambray, Duck, and Canvas Choices
Chambray gives the soft, washed blue of denim at a lighter weight, which matters when the outer has to be quilted through canvas. White cotton duck makes a smooth, durable lining that stands up to damp towels and zippers on jeans. Prewash everything, including the webbing. Chambray can release blue dye, and you do not want it reaching the white snowflake, binding, or lining after the bag is finished. Lightweight interfacing behind the white snowflake fabric keeps the chambray from shadowing through.
Materials and Tools Needed
- 1¾ yd chambray, prewashed
- ⅝ yd white quilting cotton (snowflake and binding), prewashed
- 2 yd natural cotton canvas, 56″ usable width, prewashed
- 1¾ yd white cotton duck, 56″ usable width (lining and base insert cover), prewashed
- One crib-size low-loft cotton batting (45″ × 60″)
- 1¾ yd silver-gray 1½” heavy cotton webbing, prewashed
- ½ yd paper-backed fusible web
- ½ yd lightweight woven fusible interfacing
- ½ yd tear-away stabilizer
- One rigid board, 17¾” × 11¾” (heavy template plastic or corrugated plastic)
- Thread:
- silver metallic thread
- gray polyester bobbin thread
- silver-gray 40-wt quilting thread
- white all-purpose polyester thread
- heavy-duty silver-gray polyester thread
- Needles: metallic or topstitch needle (90/14); denim needle (100/16) for the heavy seams and handles; hand-sewing needle
- Presser feet: open-toe embroidery foot, walking foot
- Rotary cutter, long quilting ruler, and self-healing mat
- Removable fabric marker, paper for the snowflake template, fabric scissors, and small sharp appliqué scissors
- Curved safety pins or basting spray, and binding clips
- Iron and pressing cloth
Finished Tote Bag Size
- Width: 30″ flat across the top edge, measured fold to fold with the bag pressed flat.
- Height: 22″ from the base line to the top of the bound edge.
- Depth: 12″ across each side wall at the base.
- Base: 18″ × 12″.
- Faces: front and back are each 18″ wide; the side walls are 12″ wide. All four walls are 22″ tall.
- Handles: 24″ visible length each, ends 8″ apart center to center, approximate drop 8″. These are hand-carry handles for lifting the bag, not shoulder straps.
Cutting Measurements
| Piece | Quantity | Cut Size (W × H) | Purpose |
|---|---|---|---|
| Chambray outer panel | 1 | 31″ × 56″ | Whole-cloth outer |
| Low-loft cotton batting | 1 | 33″ × 58″ | Middle layer of the outer sandwich |
| Natural cotton canvas backing | 1 | 33″ × 58″ | Interlining that makes the bag stand |
| White cotton duck lining | 1 | 31″ × 56″ | One-piece lining |
| White quilting cotton snowflake square | 1 | 15″ × 15″ | Snowflake appliqué |
| Lightweight woven fusible interfacing | 1 | 15″ × 15″ | Prevents shadow-through |
| Paper-backed fusible web | 1 | 15″ × 15″ | Fuses the snowflake |
| Tear-away stabilizer | 1 | 16″ × 16″ | Supports the satin stitch |
| White quilting cotton binding strips | 2 | 2½” × 40″ | Double-fold top binding |
| Silver-gray 1½” heavy cotton webbing | 2 | 1½” × 30″ | External handles |
| White cotton duck base insert cover | 1 | 18¾” × 24½” | Removable board cover |
| Rigid board | 1 | 17¾” × 11¾” | Base insert |
Assembly at a Glance
- Cut and Sort the Fabrics
- Prepare the Snowflake Appliqué
- Fuse and Satin-Stitch the Snowflake
- Layer the Outer Panel with Batting and Canvas
- Quilt the Crosshatch Grid
- Trim the Outer Panel and Cut the Boxing Notches
- Sew the Outer Side Seams
- Box the Outer Corners
- Cut the Lining Notches and Sew the Lining Side Seams
- Box the Lining Corners
- Set the Lining Inside the Outer Bag and Baste the Top Edge
- Make the Binding
- Sew the Binding to the Top Edge
- Wrap and Stitch the Binding
- Seal and Fold the Webbing Handle Ends
- Stitch the Handles to the Bag with Box-X Reinforcement
- Make the Base Insert Cover
- Insert the Base Board and Stand the Bag Upright
Step-by-Step Sewing Tutorial
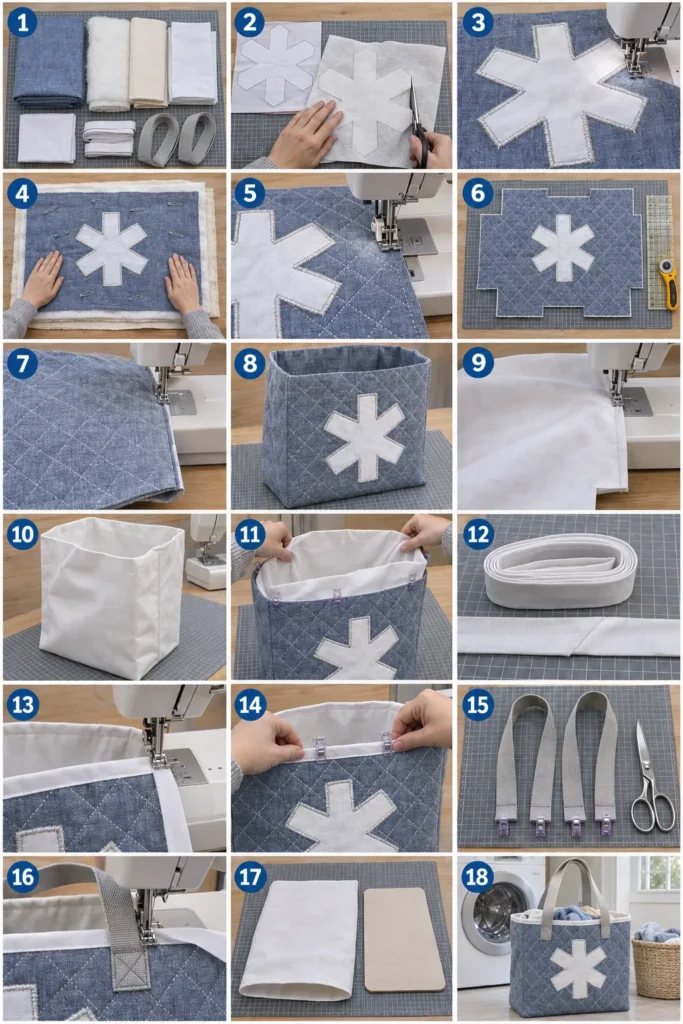
Step-by-Step Illustration – Digitally Created Image. Follow the written steps for measurements and details.
Step 1 – Cut and Sort the Fabrics
Prewash and press the chambray, white quilting cotton, canvas, duck, and webbing, then cut every piece in the cutting chart. Cut the chambray outer panel 31″ × 56″ with the 56″ side running along the length of the fabric. Cut the batting and canvas backing 33″ × 58″ each, and the duck lining 31″ × 56″.
Cut the base insert cover 18¾” × 24½” from the duck left beside the lining. From the white quilting cotton, cut the 15″ × 15″ snowflake square and two 2½” × 40″ binding strips. Cut the webbing into two 30″ lengths. Cut the interfacing and fusible web 15″ × 15″ and the stabilizer 16″ × 16″. Sort the pieces into four stacks: outer sandwich, lining and cover, appliqué, and binding and handles.
Result: every piece is cut to size and sorted into four labeled stacks, with nothing sewn yet.
Step 2 – Prepare the Snowflake Appliqué
Fuse the interfacing to the wrong side of the white snowflake square. Draw a 14″ circle on paper, fold it in half, then into thirds to make six 60-degree wedges, and cut a simple broad arm shape. Each arm should be about 1¼” wide and never narrower than ¾”, with blunt tips and rounded inner corners. Unfold the template, check that all six arms match, and trace it onto the paper side of the fusible web. Fuse the web to the interfaced side of the white square, cut on the traced line, and leave the paper backing on until placement.
Result: one six-armed white snowflake, 14″ across, backed with interfacing and fusible web, paper still attached.
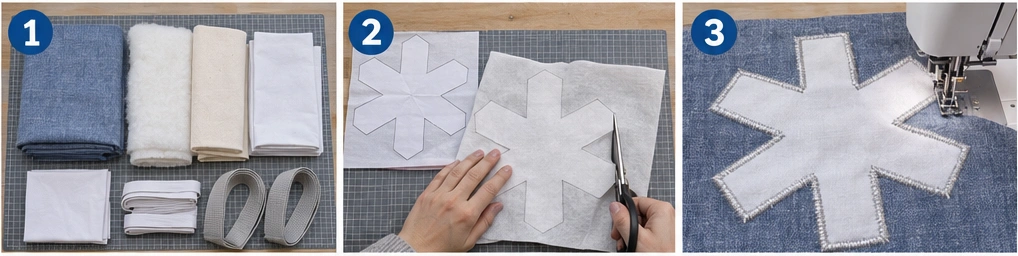
Step 3 – Fuse and Satin-Stitch the Snowflake
Lay the chambray outer panel right side up with one 31″ edge at the top; this end is the front face. Mark a vertical line 15½” from the left raw edge and a point on it 11″ below the top edge. That point is the snowflake’s center, 15″ from the finished side and 11″ above the base line.
- Peel the paper off the snowflake.
- Center the snowflake on the mark with one arm pointing straight up toward the top edge, and fuse it, following the web maker’s directions.
- Pin the stabilizer square behind the snowflake on the wrong side.
- Satin-stitch the raw edge with the open-toe foot: silver metallic thread on top and gray polyester in the bobbin, a stitch about 2.5-3 mm wide with a very short length, the 90/14 metallic needle, and reduced top tension. Test on a scrap first. Center the stitch on the raw edge and pivot with the needle down at every tip and inner corner.
- Tear the stabilizer away gently.
Result: the flat chambray panel has one white snowflake fused and satin-stitched in silver on the front face, with the stabilizer removed.
Step 4 – Layer the Outer Panel with Batting and Canvas
On a large table or the floor, lay the canvas backing flat. Center the batting on top, then the chambray right side up, so 1″ of batting and canvas shows on every side. Smooth each layer from the center outward. Baste with curved safety pins every 4″-5″, keeping pins off the snowflake, or use basting spray between the layers.
Result: a flat, basted three-layer sandwich, canvas on the bottom and chambray right side up on top, measuring 33″ × 58″ overall.
Step 5 – Quilt the Crosshatch Grid
With a removable marker and a long ruler, draw a 45-degree line through the snowflake’s center, then mark parallel lines 2″ apart across the whole panel. Mark a second set at the opposite 45-degree angle to make a 2″ diamond grid. Fit the walking foot and 40-wt silver-gray thread, and set a stitch length of about 3-3.5 mm. Quilt the center lines first, then work outward, removing pins as you reach them. Stop each line exactly at the edge of the satin stitch and start again on the other side. Pull those thread tails to the canvas side and knot them, so the quilting never crosses the snowflake.
Result: the sandwich is quilted with a silver-gray diagonal crosshatch in a 2″ grid that stops at the snowflake’s satin-stitched edge.
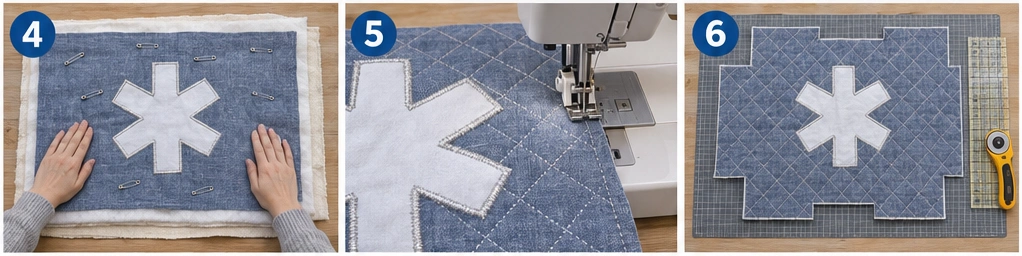
Step 6 – Trim the Outer Panel and Cut the Boxing Notches
Trim the batting and canvas even with the chambray’s raw edges, so the quilted panel measures 31″ × 56″. Mark the center line across the panel 28″ from each short edge. On both long edges, mark a notch 6″ wide (in from the raw edge) and 11″ tall (5½” above and 5½” below the center line). Cut both notches through all three layers.
Result: a trimmed 31″ × 56″ quilted outer panel with a 6″ × 11″ notch cut from the middle of each long edge.
Step 7 – Sew the Outer Side Seams
Fold the panel in half at the center line, right sides together, with the two 31″ top edges matching and the notches aligned. Clip the side edges. Using the walking foot and the 100/16 denim needle, sew each side at ½” from the top edge down to the notch, backstitching at both ends. Trim the batting and canvas out of the seam allowances close to the stitching, then press the seams open.
Result: the outer is folded wrong side out with both side seams sewn from the top edge to the notches, the top still open, and the notches still open.
Step 8 – Box the Outer Corners
At one notch, pull the layers apart and flatten the corner so the side seam lies directly on the folded base center line, raw edges aligned in one straight line. Clip, and sew across at ½”, backstitching at both ends. Repeat at the other notch. Trim the batting and canvas from both boxing seam allowances, then turn the outer right side out and push the corners out.
Result: the outer bag is boxed and turned right side out, standing 22″ tall on an 18″ × 12″ base, with the snowflake centered on the front face.
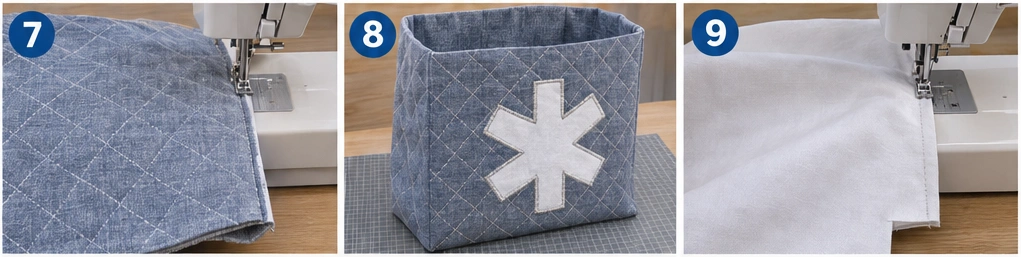
Step 9 – Cut the Lining Notches and Sew the Lining Side Seams
Lay the duck lining flat and mark its center line 28″ from each short edge. Cut the same 6″ × 11″ notch, centered on that line, from both long edges. Fold the lining in half at the center line, right sides together, top edges matching, and sew each side at ½” from the top edge to the notch. Press the seams open.
Result: the lining is wrong side out with both side seams sewn, the top and notches still open.
Step 10 – Box the Lining Corners
Flatten each lining notch so its side seam lies on the folded base center line, raw edges aligned, and sew across at ½”. Do not turn the lining.
Result: a boxed white duck lining, still wrong side out, the same 30″ × 22″ × 12″ shape as the outer.
Step 11 – Set the Lining Inside the Outer Bag and Baste the Top Edge
Keep the outer right side out and the lining wrong side out. Drop the lining inside the outer bag so the two are wrong sides together. Match the side seams, push the lining corners into the outer corners, and align the top raw edges all around. If you like, hand-tack each lining boxing seam allowance to the outer boxing seam allowance so the lining stays in place when the insert is lifted out. Clip the top edges every few inches and machine-baste them together at ¼”.
Result: a two-layer bag with the lining nested inside, wrong sides together, and the top raw edges basted at ¼”.
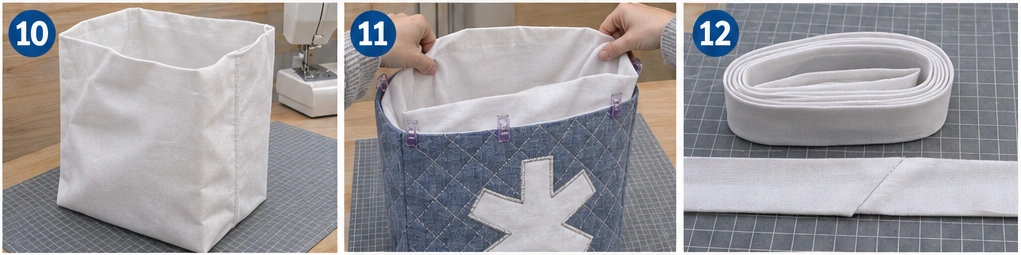
Step 12 – Make the Binding
Lay the two 2½” binding strips right sides together at a right angle and sew a diagonal seam. Trim the allowance to ¼” and press it open. Fold the joined strip in half lengthwise, wrong sides together, and press. Trim it to 70″ long, cutting one end at a 45-degree angle.
Result: one 70″ length of folded white double-fold binding, 1¼” wide.
Step 13 – Sew the Binding to the Top Edge
Slide the bag over the machine’s free arm with the outside facing up. Start in the middle of one side wall, about 3″ past a side seam. Lay the binding on the outside with its raw edges along the bag’s top raw edge and leave an 8″ tail. Sew at ⅜” through the binding, outer, and lining all the way around, stopping 10″ before the start. Join the two binding ends with a diagonal seam, trim, finger-press, and sew the last section.
Result: the binding is sewn to the outside of the top edge all the way around, its folded edge pointing away from the bag and not yet wrapped.
Step 14 – Wrap and Stitch the Binding
Press the binding up away from the bag. Wrap it over the top raw edge to the inside so its fold covers the stitching line by about ⅛”, and clip it in place. From the outside, stitch in the ditch of the binding seam, catching the folded edge on the inside as you go.
Result: the top edge is fully bound in white, the bag measures 22″ from the base line to the bound edge, and the handles are not yet attached.
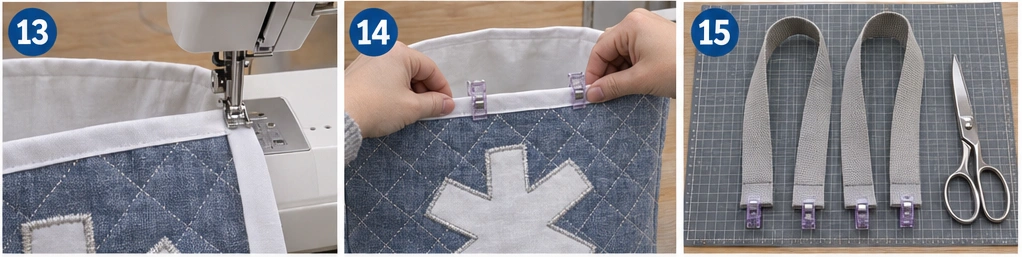
Step 15 – Seal and Fold the Webbing Handle Ends
Zigzag over each cut end of the two 30″ webbing lengths so the cotton cannot fray. Fold each end ½” to the back and clip it. On each handle, mark a line 3″ from each raw end; this mark aligns with the top of the bound edge. Lay the two handles side by side to confirm they match.
Result: two matching silver-gray handles, each with sealed ends folded under ½” and marks showing a 24″ visible length between them.
Step 16 – Stitch the Handles to the Bag with Box-X Reinforcement
On the front face, mark the handle centers 4″ either side of the face center, which is also 5″ in from each front corner. Place one end of a handle on the outside of the bag with its folded end against the wall, centered on a mark, and the 3″ line level with the top of the binding. The loop rises above the bag and 2½” of webbing overlaps the wall. Place the other end on the second mark without twisting the handle.
- Using the denim needle, heavy-duty thread, and a stitch length of about 3.5 mm, stitch a rectangle about 1¼” wide and 1¾” tall through the handle, outer, and lining. Its top sits just below the binding and its bottom ¼” above the folded end.
- Stitch an X inside the rectangle.
- Turn the hand wheel over the thickest spots.
Repeat on the back face so both handles mirror each other.
Result: both handles are stitched to the outside of the bag with box-X reinforcement, their loops rising about 8″ above the bound edge.
Step 17 – Make the Base Insert Cover
Fold the 18¾” × 24½” duck cover in half, right sides together, so it measures 18¾” × 12¼” with the fold along one 18¾” edge. Sew the long open edge and one short end at ½”, backstitching at both ends. Clip the corners, turn right side out, and press. Turn the open end’s raw edge ½” to the inside and press.
Result: a white duck sleeve open at one short end, with the end allowance pressed in and an inside size of 17¾” × 11¾”.
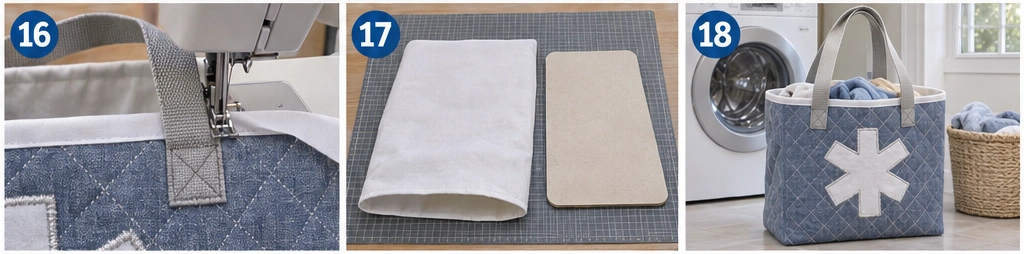
Step 18 – Insert the Base Board and Stand the Bag Upright
Slide the 17¾” × 11¾” board into the cover and push it firmly to the sewn end. Edgestitch the open end closed, keeping the needle just outside the board edge. If the board leaves no room for the presser foot, slipstitch the folded edges together by hand instead. Lower the covered board into the bag, smooth it flat on the base with its edges tucked into the boxed corners, and stand the tote upright on the floor.
Result: the finished laundry tote stands on its own, 30″ wide, 22″ tall, and 12″ deep, with a flat 18″ × 12″ base, a white bound top, two silver-gray external handles, and one silver-edged white snowflake on the chambray front.
Troubleshooting the Oversized Chambray Laundry Tote
- Satin stitch puckers around the large snowflake. The stabilizer is too light or shifted. Use a full 16″ square pinned flat, reduce the top tension, and stitch slowly around the long arm edges.
- Metallic thread shreds or breaks. Use a 90/14 metallic or topstitch needle, slow down, lower the top tension, and let the thread feed straight off the spool, using a thread stand if the spool sits horizontally.
- Chambray shows through the white snowflake. The interfacing step was skipped or used too light a product. Interfacing must be fused before the fusible web.
- The quilted panel came out short. A dense crosshatch can draw the panel in slightly. Measure after quilting and, before notching, cut the notches from the center line rather than from the ends so the base stays centered.
- The boxed corners are too bulky to sew. Trim the batting and canvas out of each side seam allowance before boxing, use a walking foot and a 100/16 needle, and sew the boxing seam slowly.
- The binding will not cover the stitching on the inside. The edge is thick. Baste the top firmly at ¼” so the layers do not spread, and wrap the binding snugly.
- The needle breaks during the box-X. Hand-walk the needle over the folded webbing end and the binding edge, lengthen the stitch, and never pull the bag through.
- The board is too snug in its cover. Duck takes up room. Sew the cover’s long seam at ⅜” for a little more ease, or sand the board edges slightly.
- The bag slumps when nearly empty. Make sure the canvas went into the sandwich, and that the board is seated fully in the base corners rather than resting on top of the boxing seams.
- Care. Lift out the base insert first, spot-clean or hand wash gently, and air dry. Keep the canvas-structured bag out of the dryer.
Design Inspiration and Tutorial Note: The images in this section may be AI-generated or digitally developed to show the design idea and the construction sequence. The instructions are a proposed construction method with calculated measurements, not a physically tested pattern. Check your panel sizes, quilting draw-in, and board fit before cutting the final pieces.
Other Design Inspirations – Digitally Modified Images. Texture and color may vary from the actual product.
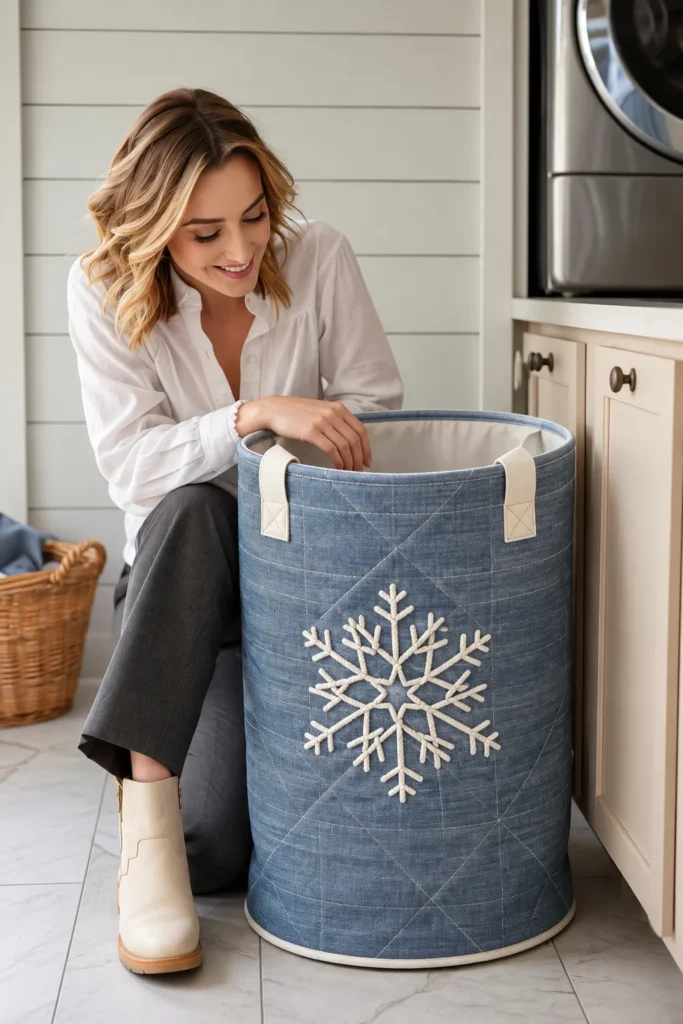
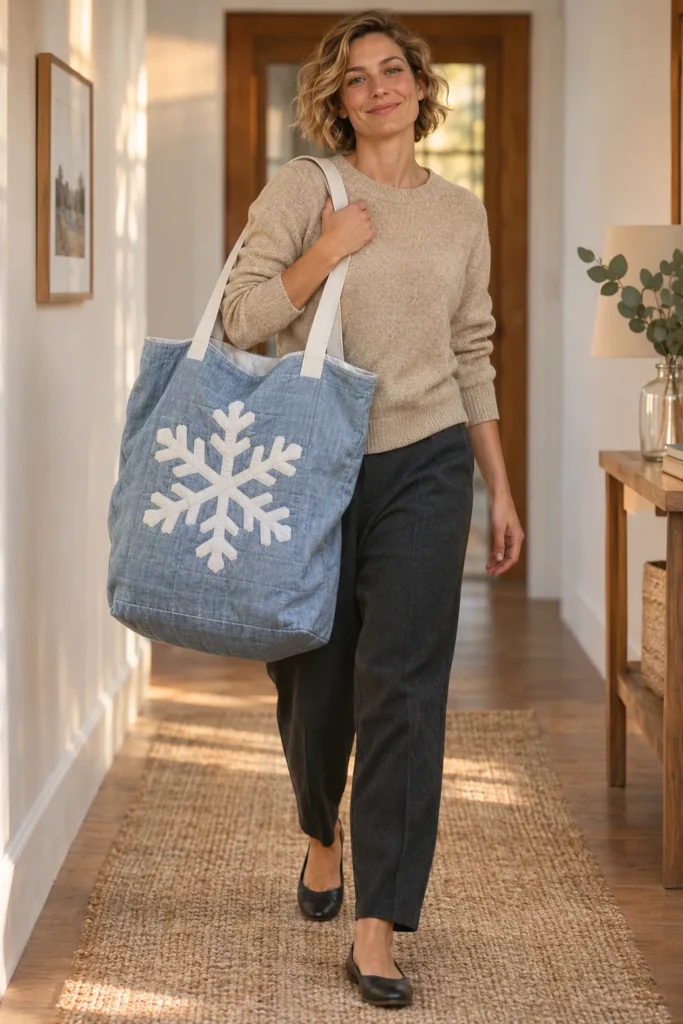
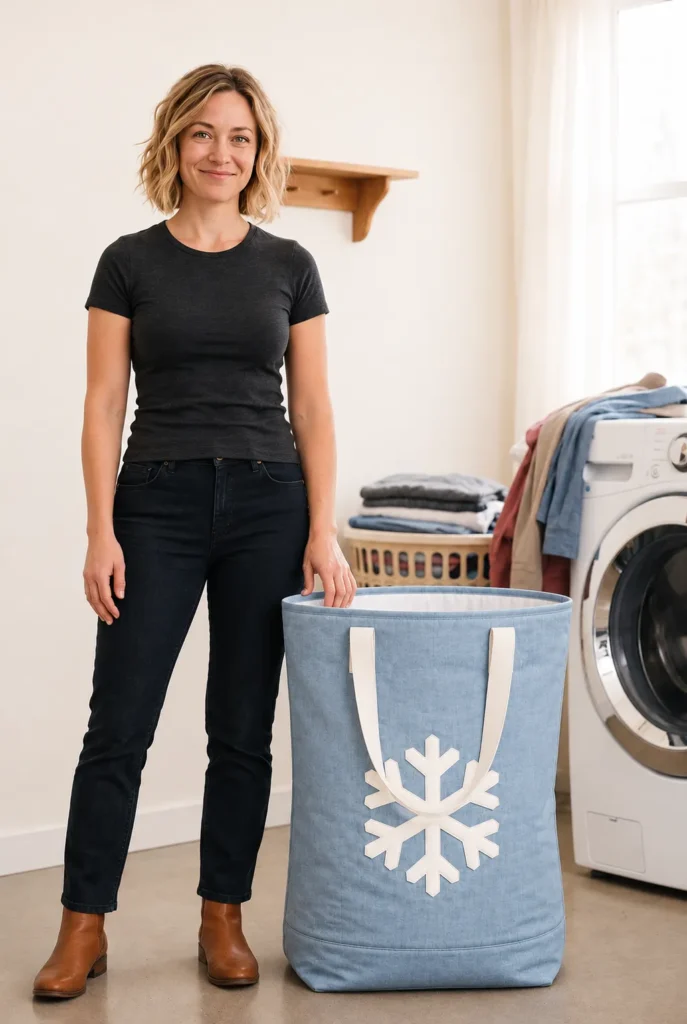
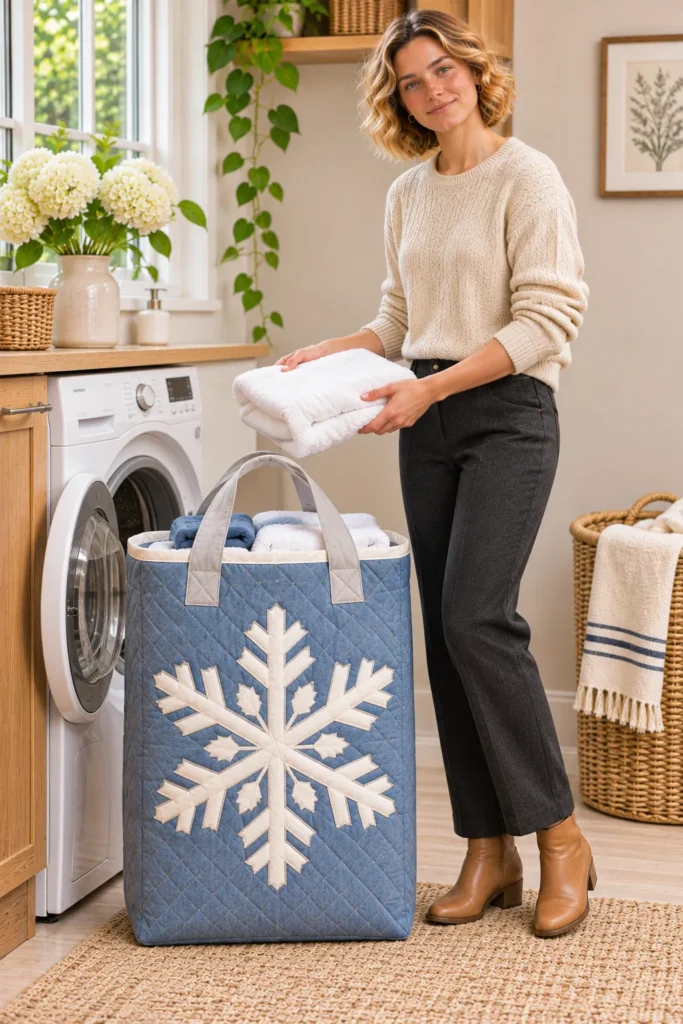
More to come …
7. Log Cabin Snowflake Appliqué Laptop Tote in Slate Blue and Silver
8. Flying Geese Snowflake Appliqué Everyday Tote in Sky Blue and White
9. Pinwheel Snowflake Appliqué Everyday Tote in Cornflower Blue and White
10. Oversized Rail Fence Snowflake Appliqué Laundry Tote in Mixed Denim
11. Strip-Pieced Snowflake Appliqué Market Tote in Navy and Silver
12. Wool Felt Snowflake Appliqué Book Tote in Sapphire and Silver
Final Thoughts on Snowflake Quilted Tote Bag Ideas
Across these designs, one six-armed motif takes on a different character depending on what surrounds it: framed by Log Cabin strips, floating above a band of checks, cascading in wool felt, or stitched onto reclaimed denim. The fabrics shape it too, since crisp cotton, textured linen, light chambray, heavy denim, and thick felt each carry appliqué in their own way. The range runs from traditional blocks through triangle geometry to reversible construction and upcycling, and the strongest results come from contrast, careful snowflake placement, quilting that supports the motif, and a silhouette that suits the bag’s job. That balance takes real planning, and some of these bags ask more of the maker than others.
When choosing a design, start with how the bag will be used and which techniques you already enjoy. Squares and strips are the gentlest place to begin, while triangle points, padded compartments, reversible construction, and freestanding oversized totes reward extra planning. Match stabilizer, interfacing, and quilting density to the shape you want, plan handles, base, closures, and lining before cutting, and follow each bag’s own measurements rather than borrowing them from another design. Before stitching the real snowflake, practice satin stitch on a scrap snowflake using the same fabric, fusible web, stabilizer, and thread, because that one test will tell you more about stitch width, tension, and corner pivots than any setting chart.

