
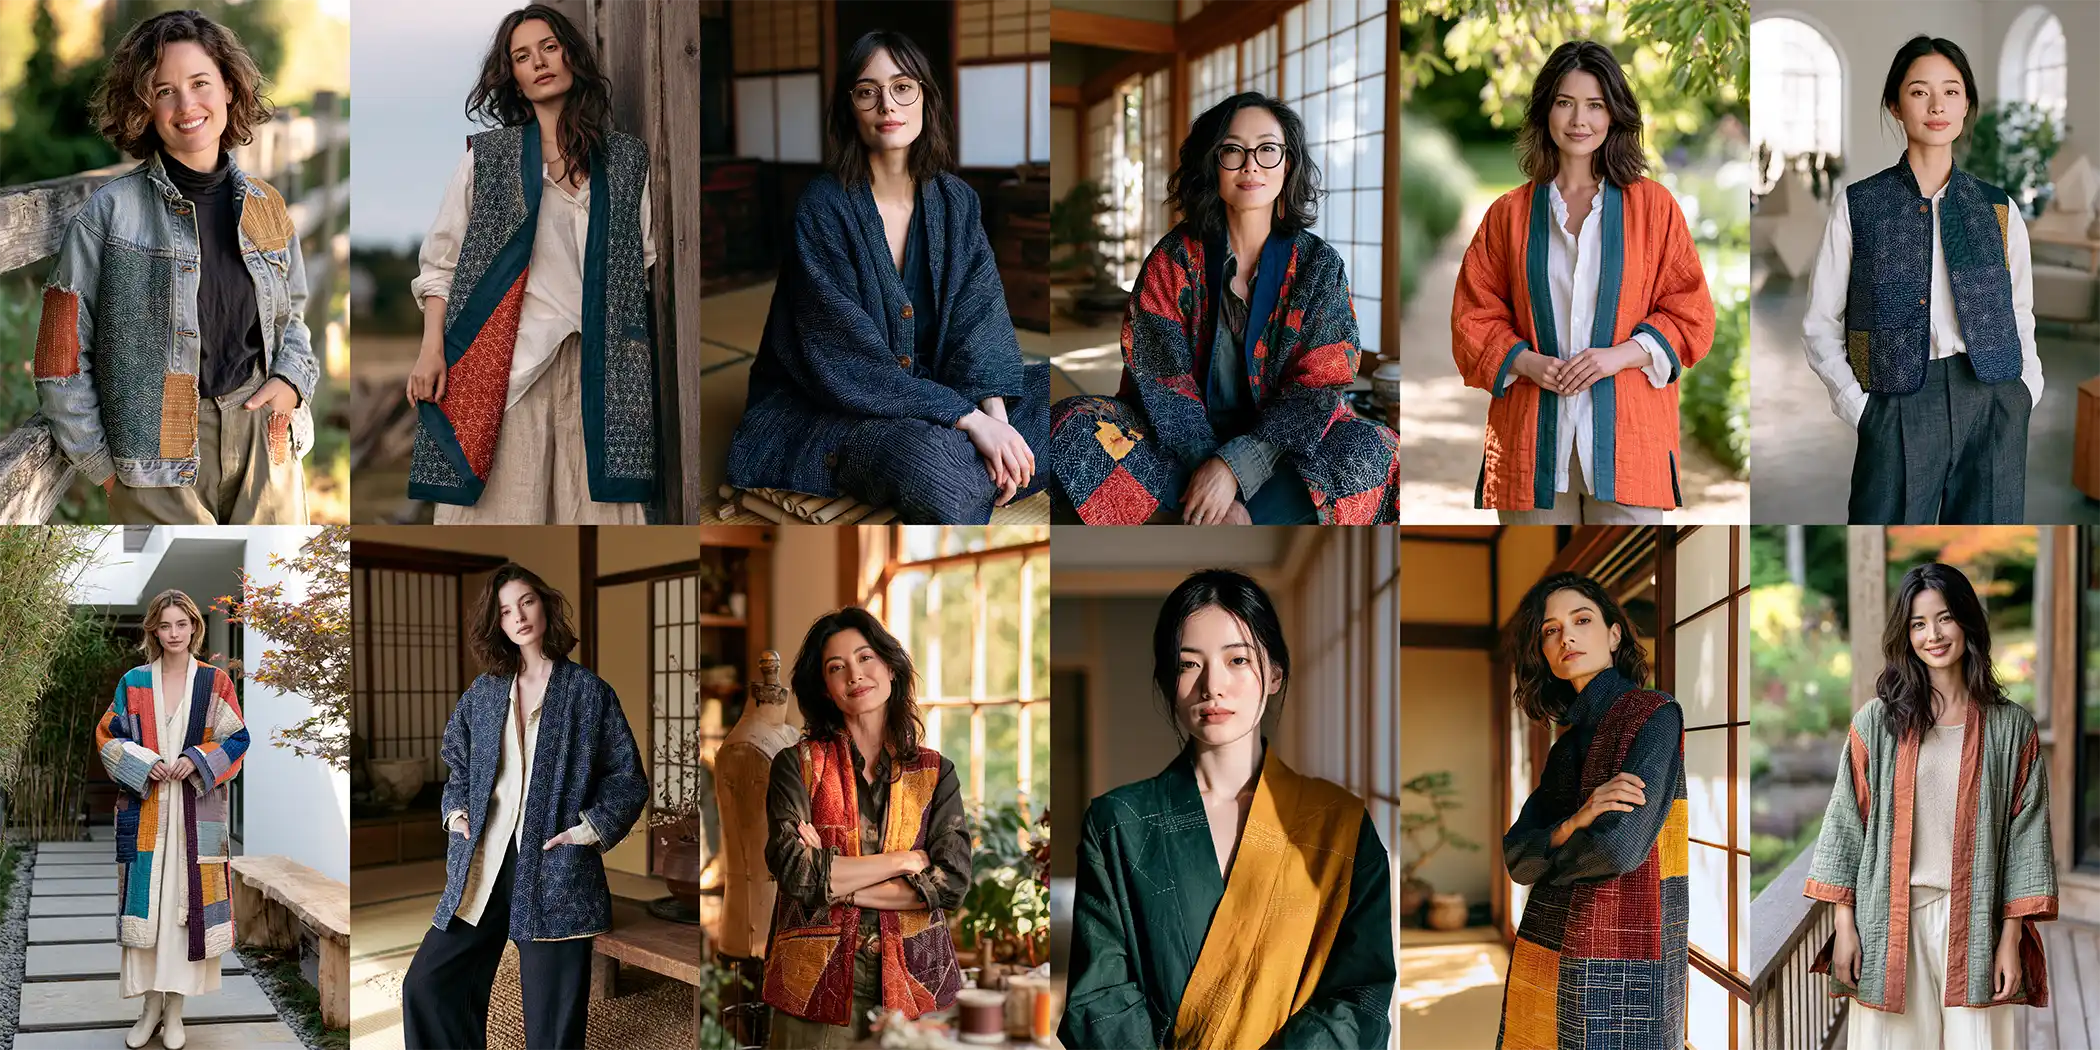
Sashiko Quilt Jackets and Vests: 12 Beautiful Japanese Hand-Stitched Layering Ideas
There’s a quiet magic to a hand-stitched garment, and few things capture it like sashiko. If you’re gathering Sashiko Quilt Jackets and Vests Ideas, you’re looking at one of the most beautiful meeting points of craft and wardrobe – wearable pieces layered and stitched by hand in a centuries-old Japanese tradition. Sashiko (literally “little stabs”) is a form of running-stitch embroidery from rural Japan, where rows of simple, even stitches were worked across layered cloth to make it warmer and stronger. Applied to a jacket or vest, those rhythmic stitched lines and geometric patterns turn a plain layer into something textured, soulful, and entirely one of a kind.
Sashiko Quilt Jackets and Vests Ideas
This collection of Sashiko Quilt Jackets and Vests Ideas gathers twelve beautiful ways to wear that hand-stitched tradition, from timeless classics to modern, everyday layers. You’ll find classic indigo jackets and boro-inspired patchwork coats, versatile reversible vests, elegant kimono and noragi silhouettes, cropped and longline shapes, and pieces showcasing authentic sashiko patterns like asanoha and hitomezashi. Some lean traditional and artful; others are minimalist and modern, made for transitional weather and everyday layering. Whether you’re an experienced stitcher or drawn to the meditative rhythm of sashiko for the first time, each idea offers a way to make a garment that’s genuinely yours – stitch by patient stitch.
Why Make Sashiko Quilt Jackets and Vests
Sashiko jackets and vests are worth making because they turn a simple layer into wearable art with real meaning and soul. What sets them apart is the hand stitching: unlike a machine-quilted jacket, a sashiko piece carries the gentle irregularity of the human hand, every row of running stitches slightly its own, creating a soft, rippled texture and quiet character no machine can replicate.
Sashiko is also deeply practical – the stitching that decorates the cloth is the same stitching that strengthens it, so these garments are as durable as they are beautiful, growing softer and lovelier with wear. And because sashiko needs little more than a needle, thread, and cloth, it’s a wonderfully accessible, meditative, and portable craft, whether you stitch a whole jacket by hand or add sashiko accents to a garment you sew. Each finished piece is unique, sustainable, and made to last – the very opposite of fast fashion.
Tips for Choosing Fabrics for Sashiko Jackets and Vests
The right fabric makes sashiko a joy to stitch. Traditionally, sashiko is worked on cotton or linen in a medium weight – sturdy enough to hold the stitches, soft enough to needle easily – and indigo blue is the classic, iconic choice, a nod to the deep-dyed cloth of rural Japan.
Look for tightly woven but not stiff fabrics; quilting cotton, cotton-linen blends, chambray, and lightweight denim all work beautifully. For the thread, use traditional sashiko thread or pearl cotton, which sits boldly on top of the cloth rather than sinking in – and this is where you can be vibrant, choosing a contrasting color (classic white on indigo, or bright thread on a rich base) to make your stitches sing. If you’re working boro-style, gather coordinating scraps and patches in a shared palette so the layered patchwork reads as intentional. And always choose a soft, slightly worn or prewashed cloth where you can – it’s easier on the hands and gives that authentic, gently textured sashiko finish.
See also: Sashiko Quilt Pattern Ideas, Elegant Japanese Quilt Ideas, Japanese Patchwork Quilt Ideas, Japanese Quilted Bag Ideas, and Elegant Japanese Quilt Jackets and Vests
1. Classic Indigo Sashiko Quilted Jacket for Timeless Style
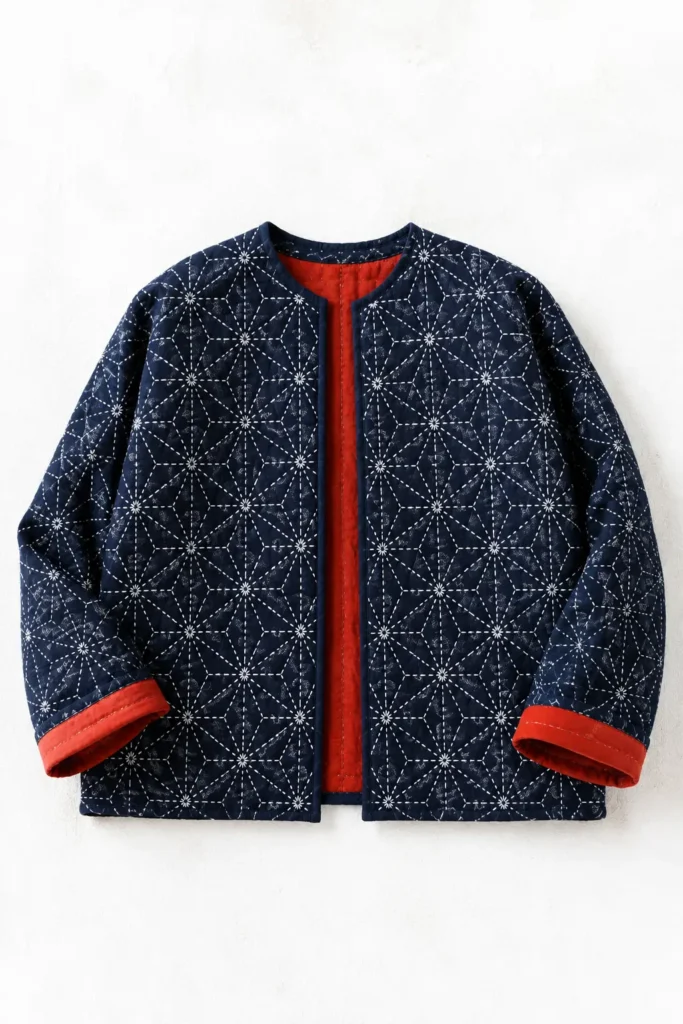
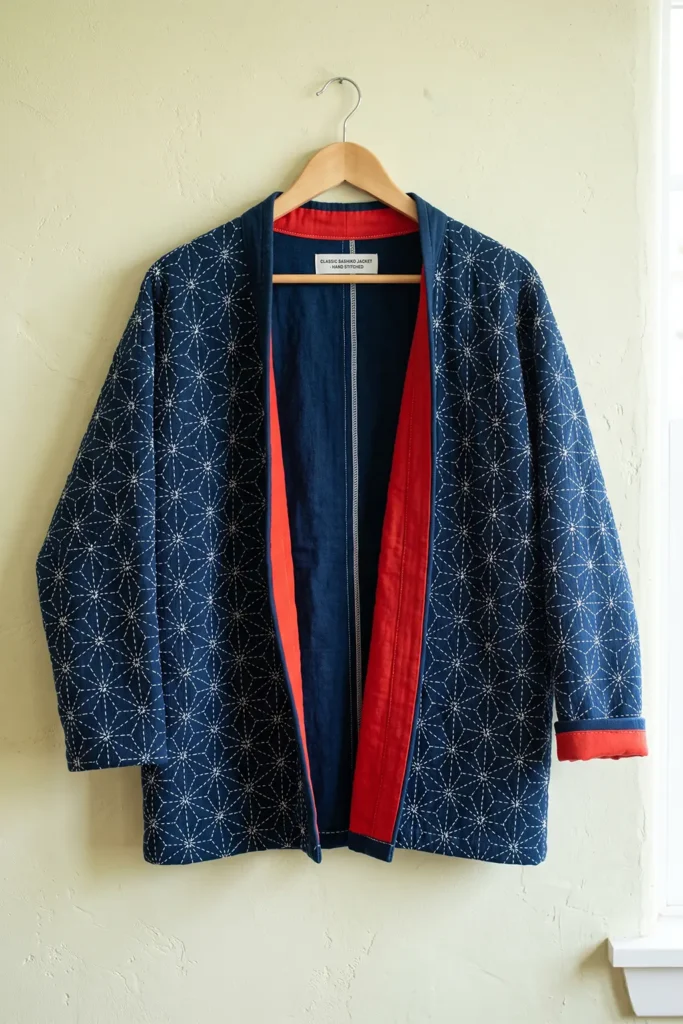
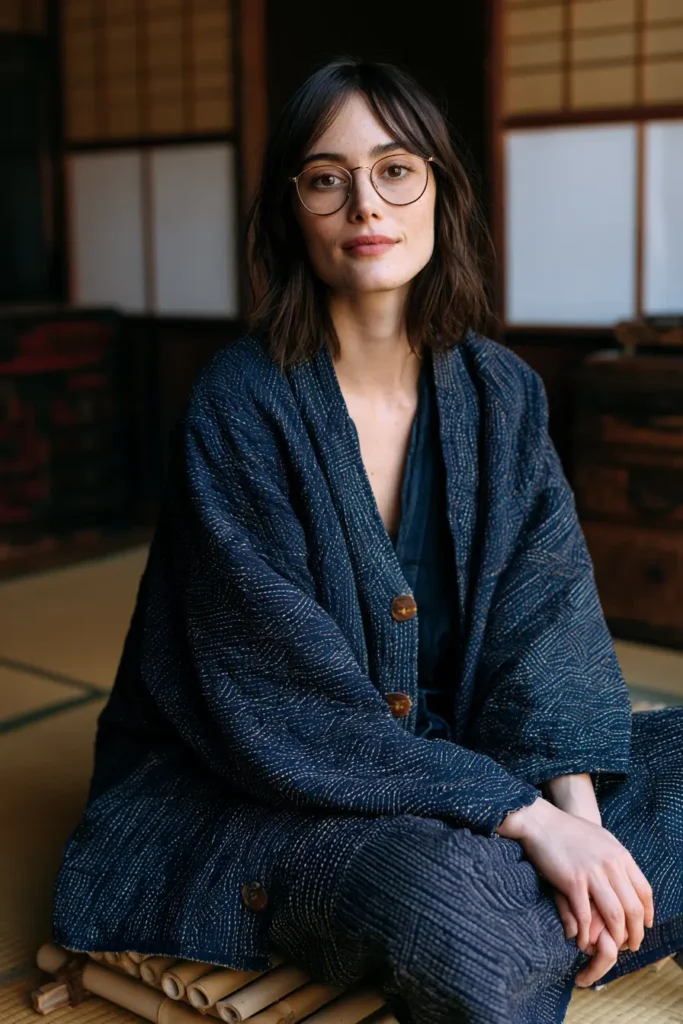
An indigo sashiko jacket is the most restrained garment in this collection and the one that rewards the closest looking. There is no patchwork, no piecing, and no color variation across the body — just deep indigo cotton, white cotton thread, and thousands of small running stitches worked into a geometric grid. All of the visual interest comes from the stitch itself, which is why sashiko has survived for three centuries as a technique while the garments it decorated changed completely.
The palette is deliberately narrow: deep indigo, midnight navy, and faded denim blue for the cloth, with bright white or natural ecru thread. Vibrancy here comes from contrast rather than from range — crisp white stitching on saturated indigo is far more striking than a multicolored garment, and the geometric patterns catch light differently as the wearer moves. For the lining and accents, this guide adds vermilion red, saffron gold, and deep teal, traditional companion colors in Japanese textiles that sit against indigo without softening it.
Why This Design Works
Sashiko stitching does two things at once, and both are structural rather than decorative. The running stitch binds layers of cloth together, and the stitch density adds significant strength and warmth to plain woven fabric. A sashiko-stitched panel is measurably tougher than the same cloth unstitched, which is the reason the technique existed at all.
That means the stitching is the quilting. There is no separate quilting step in this jacket, no batting, and no machine work on the surface — the sashiko rows hold the layers together, and the finished garment stays supple in a way a batting-filled quilted jacket never does. It drapes like a shirt and wears like a coat.
The geometric grid patterns suit a garment better than pictorial ones. Asanoha, the hemp leaf, and shippou, the seven treasures, are both built on repeating units that continue in every direction, so they can run across a shoulder seam or around a sleeve without needing to be centered or resolved. A motif with a top and bottom would fight the garment; a continuous grid moves with it.
Skills you build here: marking an accurate grid, working an even running stitch by hand, managing thread tension across long rows, and constructing an unlined or half-lined jacket with flat-felled or bound seams
Design Inspirations – Digitally Modified Images. Texture and color may vary from the actual product.
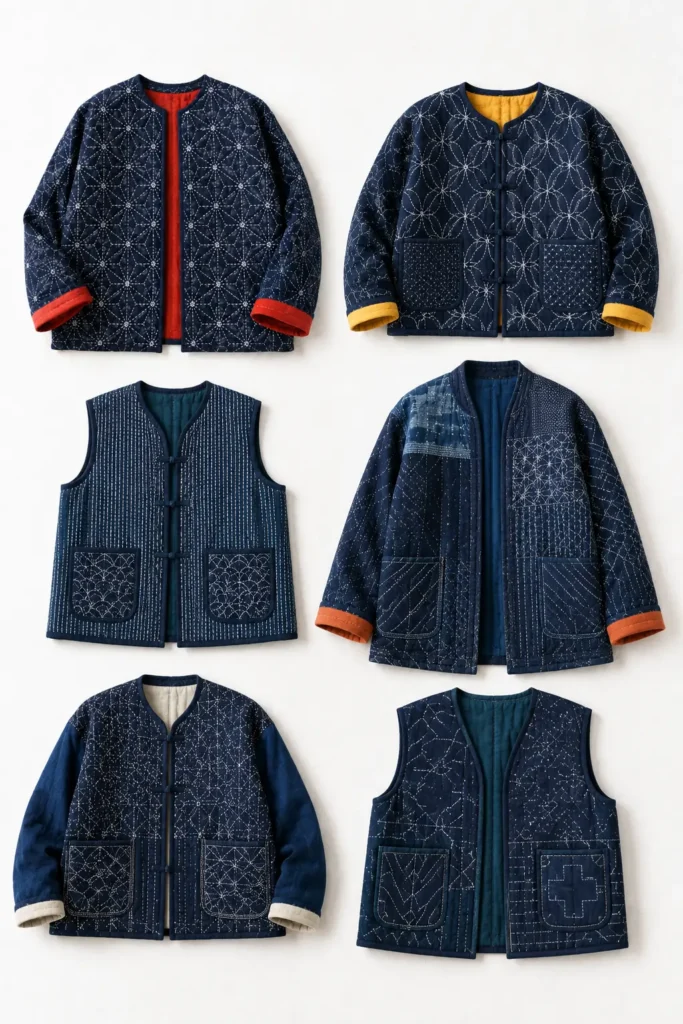
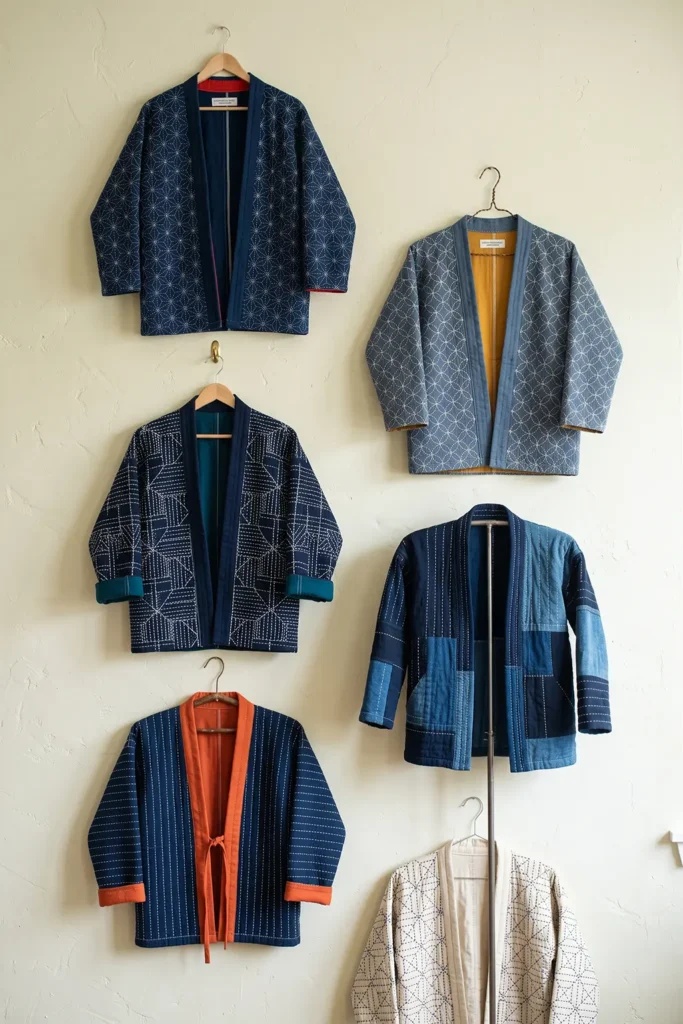
A Note on Sashiko
Sashiko — 刺し子, roughly “little stabs” — developed in rural northern Japan during the Edo period, from the early 1600s onward, and it was born from scarcity rather than ornament.
Cotton grew poorly in the cold northern provinces and had to be traded in from the south, which made it expensive. Compounding this, sumptuary laws during the Edo period restricted what rural and merchant-class people could wear. Farmers in regions like Tōhoku were in many cases prohibited from wearing cotton at all and restricted to hemp and other bast fibers, which are far less warm. Sashiko was the response: layering thin cloth and stitching it densely made a warmer, stronger garment from the material available, and worn areas could be patched and re-stitched indefinitely.
The white-on-indigo color scheme comes from the same constraints. Indigo was one of the few dyes available to commoners under those same restrictions, and it had practical advantages beyond color—indigo-dyed cloth was believed to repel insects and snakes, and it strengthens fiber slightly. Undyed cotton thread was simply what was left over.
Two regional traditions are worth knowing. Kogin-zashi, from Tsugaru in Aomori, uses counted stitches worked across odd numbers of threads to build dense diamond patterns. Hishizashi, from nearby Nanbu, counts across even numbers instead and produces different geometry as a result. Farming women developed both, and they passed pattern libraries between households rather than publishing them.
The related practice of boro — layering and re-stitching worn cloth across generations until a garment is more patch than original — was for a long time a mark of poverty that families were reluctant to display. Boro textiles are now held in museum collections and command high prices, which is a reversal worth pausing on.
Finished Size
This guide makes a relaxed, hip-length unlined jacket with dropped shoulders and full sashiko stitching.
Sample finished measurements for a loose medium:
- Finished chest: about 46 inches
- Finished length: about 27 inches from shoulder to hem
- Sleeve length: about 19 inches from the dropped shoulder seam
- Sleeve width at bicep: about 16 inches
- Cuff opening: about 11 inches
- Armhole depth: about 11 inches
- Front style: open front with a narrow band, no closure, or a single tie
- Collar: none — a bound or banded neckline
Sashiko grid measurements:
- Asanoha grid: 1-inch squares, producing hemp-leaf units about 2 inches across
- Shippou grid: 1½-inch circles overlapping by half
- Stitch length: about ⅛ inch, with gaps about half the stitch length
- Row spacing: determined by the pattern, typically ¼ to ½ inch
Add 6 to 8 inches of ease at the chest. This silhouette is meant to be oversized and to layer over other clothing.
Materials Needed
For one indigo sashiko jacket, gather:
- Main fabric: 3 yards of indigo cotton — a mid-weight sheeting, chambray, or lightweight denim at about 5 to 7 oz
- Backing or second layer: 3 yards of the same or a lighter indigo cotton
- Lining accent: ½ yard in vermilion red, saffron gold, or deep teal, for facings and inner bindings
- Sashiko thread: 6 to 8 skeins of white or ecru — traditional sashiko thread is a loosely twisted, matte cotton
- Sashiko needles: long, straight, with a large eye. A set of 3 to 5 in varied lengths
- Thimble: a Japanese palm thimble if you can find one, or a leather ring thimble
- Chalk marker or a water-soluble fabric pen
- Quilting ruler and a compass for marking circles
- Rotary cutter and cutting mat
- Sewing clips
- Sewing machine for garment construction
- Machine needles: 90/14
- Iron and ironing board
- Simple boxy jacket pattern with dropped shoulders
Beginner tip: buy proper sashiko thread rather than substituting embroidery floss or perle cotton. Sashiko thread is loosely twisted and matte, so it sits flat on the surface and covers well. Floss separates and shines; perle cotton is too round and creates a raised, ropey line that is not the intended look.
Vibrant Indigo Palette
A traditional but saturated range could include:
Cloth:
- Deep indigo
- Midnight navy
- Faded denim blue
- Slate indigo
Thread: 5. Bright white 6. Natural ecru
Accents — for facings, inner bindings, and ties: 7. Vermilion red 8. Saffron gold 9. Deep teal 10. Persimmon orange
Use one indigo for the whole jacket body and reserve the lighter blues for contrast panels if you want them — a single lighter panel across one shoulder or one sleeve is a traditional-looking touch and reads as a repair rather than a design feature, which suits the tradition.
Keep the accent colors inside the jacket: facing the front bands, binding the interior seams, and as a single narrow tie. Vermilion showing at a cuff turn-back is a detail that only appears when the wearer moves.
Cutting Measurements
Cut everything 1 inch larger than your pattern pieces in every direction. Dense sashiko stitching draws the cloth in noticeably — expect ½ to 1 inch of shrinkage across a large panel — and you will trim to the true pattern shape after stitching.
From main fabric, cut oversized:
- Back: one piece, about 26 x 30 inches
- Fronts: two pieces, about 16 x 30 inches each
- Sleeves: two pieces, about 19 x 22 inches each
From backing fabric, cut the same sizes:
- Back, two fronts, two sleeves
From accent fabric, cut:
- Front bands: two strips at 3½ x 30 inches
- Neckline binding: one bias strip at 2½ inches x neckline length plus 2 inches
- Cuff bindings: two strips at 2½ x 13 inches
- Optional tie: one strip at 2½ x 24 inches
For seam binding, cut:
- Bias strips at 1½ inches wide, about 4 yards total, from main or accent fabric
Use a ½-inch seam allowance for garment construction.
Step-by-Step Guide
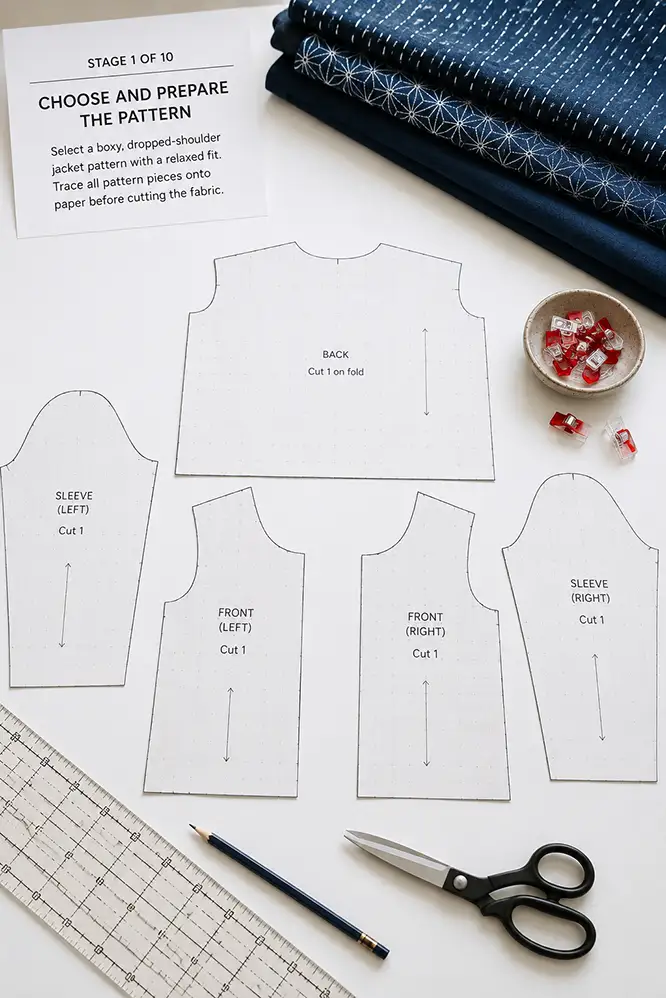
Step 1: Choose and Prepare the Pattern
Start with a boxy jacket pattern with dropped shoulders, a plain neckline, and a straight body. Avoid darts, set-in sleeves, collars, and pockets for a first sashiko jacket.
A dropped shoulder puts the shoulder seam below the natural shoulder point and gives a straight armhole edge, so the sleeve sews on flat. That matters more here than on other jackets — sashiko-stitched cloth has almost no give, and easing a sleeve cap into a curved armhole in stiffened fabric is genuinely difficult.
Trace your pattern pieces onto paper and set them aside. Don’t cut to them until Step 9.
Step 2: Prewash Everything
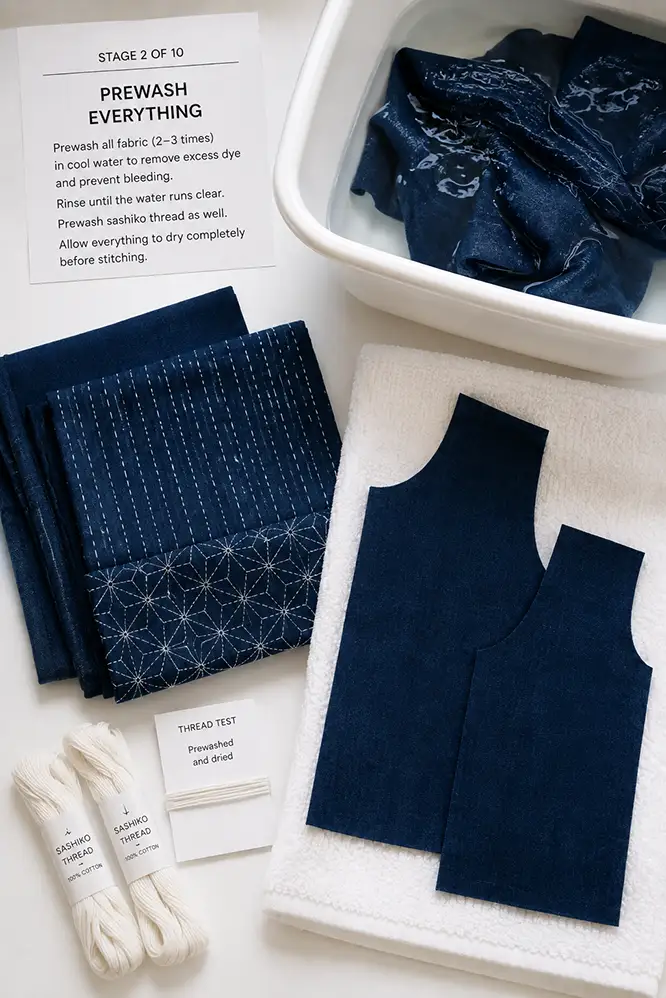
Wash and dry both the indigo fabric and a test length of sashiko thread before you begin.
Indigo cotton will bleed on its first several washes, and dense white stitching on unwashed indigo will pick up dye and turn blue-gray. Wash the fabric two or three times, alone, in cold water until the water runs mostly clear.
Do not skip this. It is the difference between white stitching and gray stitching, and you can’t fix it afterward.
Step 3: Mark the Grid
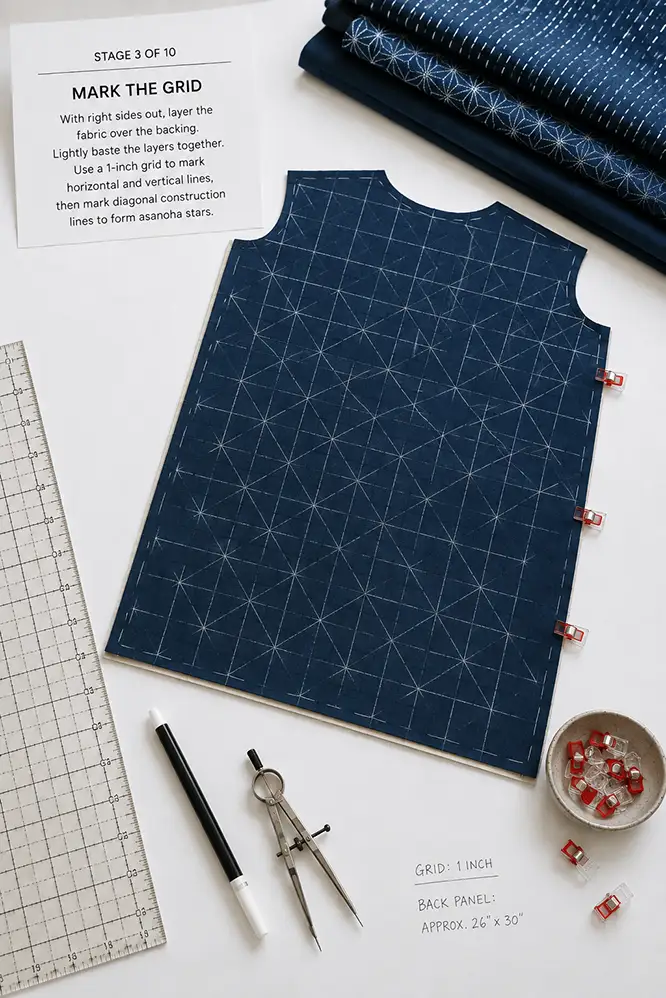
Layer the main fabric panel over the backing panel, both right sides out, and baste them together around the edges and across the middle.
Mark your grid on the main fabric surface with chalk or a water-soluble pen.
For asanoha (hemp leaf):
- Rule a grid of 1-inch squares across the whole panel
- Draw the diagonals in each square, both directions
- Then draw the shorter connecting lines that form the six-pointed leaf units, giving finished motifs about 2 inches across
For shippou (seven treasures):
- Set a compass to ¾-inch radius
- Mark circle centers on a 1½-inch grid
- Draw overlapping circles so each one crosses its four neighbors at their midpoints
Mark the entire panel before stitching. Marking as you go produces visible alignment drift across a large piece.
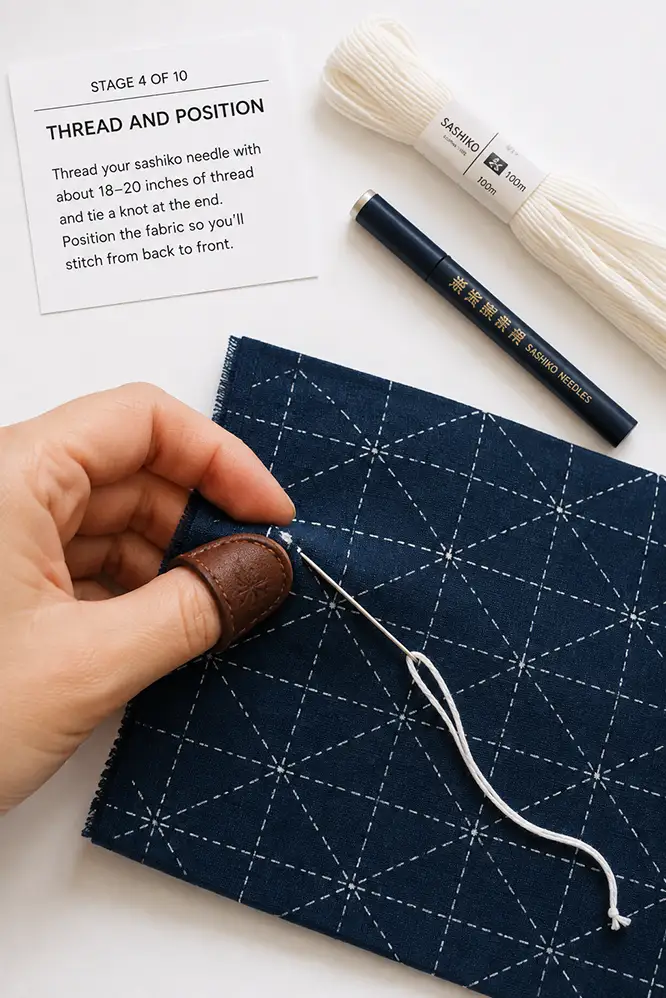
Step 4: Thread and Position
Cut sashiko thread to about 18 to 20 inches. Longer thread tangles and abrades as it passes repeatedly through cloth.
Thread a long sashiko needle and knot the end, or begin with a few small backstitches on the reverse if you prefer no knots.
Wear the thimble on your palm, not your fingertip. Japanese sashiko technique pushes the needle from the palm while the fingers hold and feed the cloth, which is what makes long stitch runs possible without fatigue.
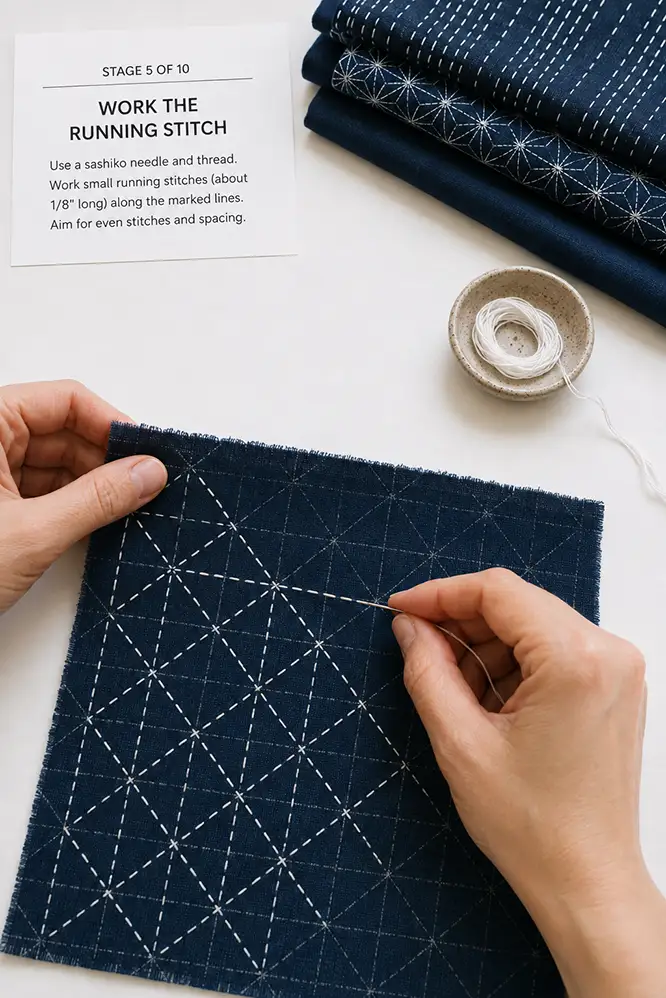
Step 5: Work the Running Stitch
Load several stitches onto the needle at once before pulling through — five to ten on a straight run. This is the core of sashiko technique and the reason it is faster than it looks.
Aim for stitches about ⅛ inch long with gaps about half that length, so the stitch reads as roughly two-thirds thread and one-third space.
Work complete lines across the panel rather than completing motifs one at a time. On asanoha, stitch every horizontal line first, then every vertical, then each diagonal direction. That sequence keeps tension even and the geometry accurate.
Do not pull the thread tight. Leave it just relaxed on the surface — sashiko is meant to sit softly, and pulled stitching puckers the cloth and stiffens the finished garment.
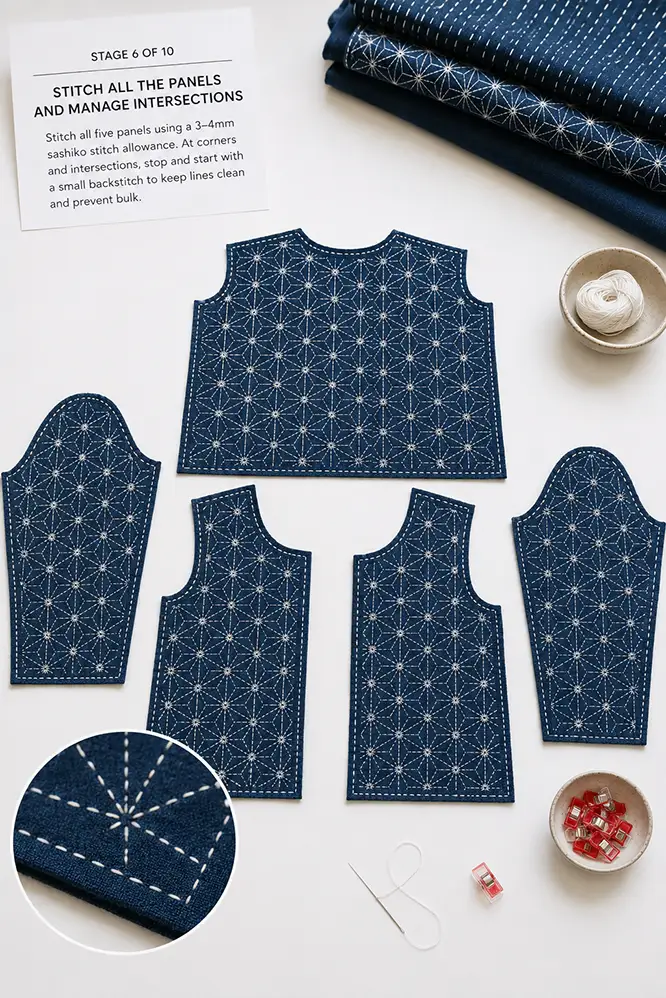
Step 6: Manage Corners and Intersections
Where lines cross, the stitches should not land on top of each other. Adjust your stitch placement slightly so intersections show a small gap.
At a sharp turn in a motif, put the needle down into the point and come up on the new line rather than carrying a stitch around the corner. This keeps the geometry crisp.
Where you must travel more than an inch between stitching areas, run the thread on the reverse rather than floating it across the surface.
Step 7: Stitch All the Panels
Work the back, both fronts, and both sleeves.
Expect this to take time. A back panel in dense asanoha is 15 to 25 hours of stitching for most people, and a full jacket runs 60 to 100 hours total. There is no fast version, and the pace is part of the practice.
Take breaks. Hand stitching for long stretches strains the hands and shoulders, and rushing produces visibly uneven work.
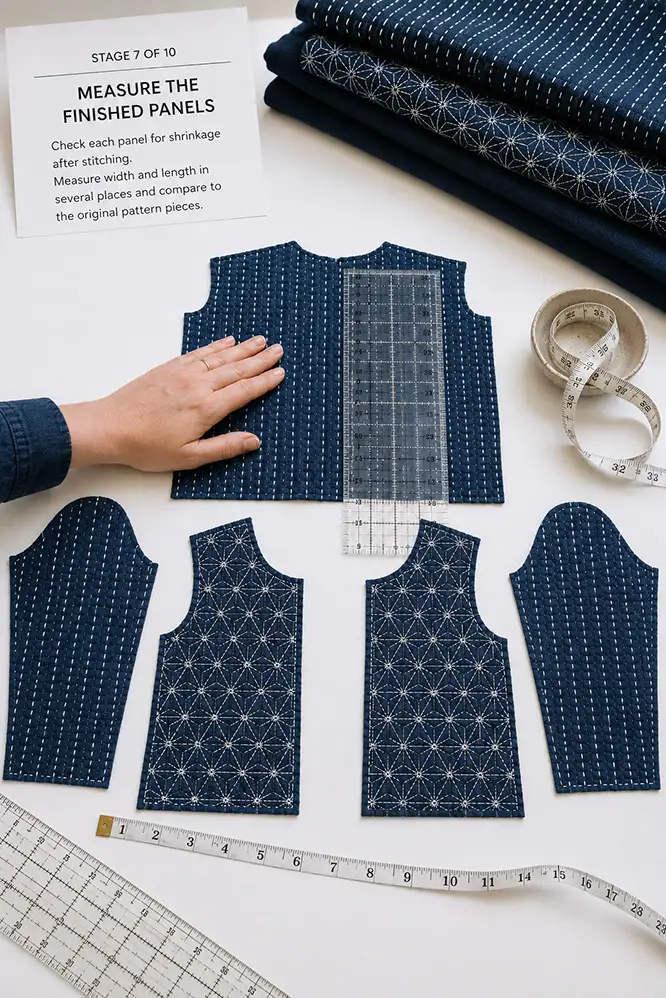
Step 8: Press and Measure the Panels
Gently press each finished panel from the reverse with a pressing cloth. Do not press hard on the stitching — flattening it removes the surface texture you spent the hours creating.
Measure each panel. You should find ½ to 1 inch of shrinkage across a large piece.
This is why you cut oversized. If a panel has come up too small even so, add a strip of indigo to one edge — in the sashiko tradition, a visible pieced addition is entirely appropriate and reads as part of the garment’s history.
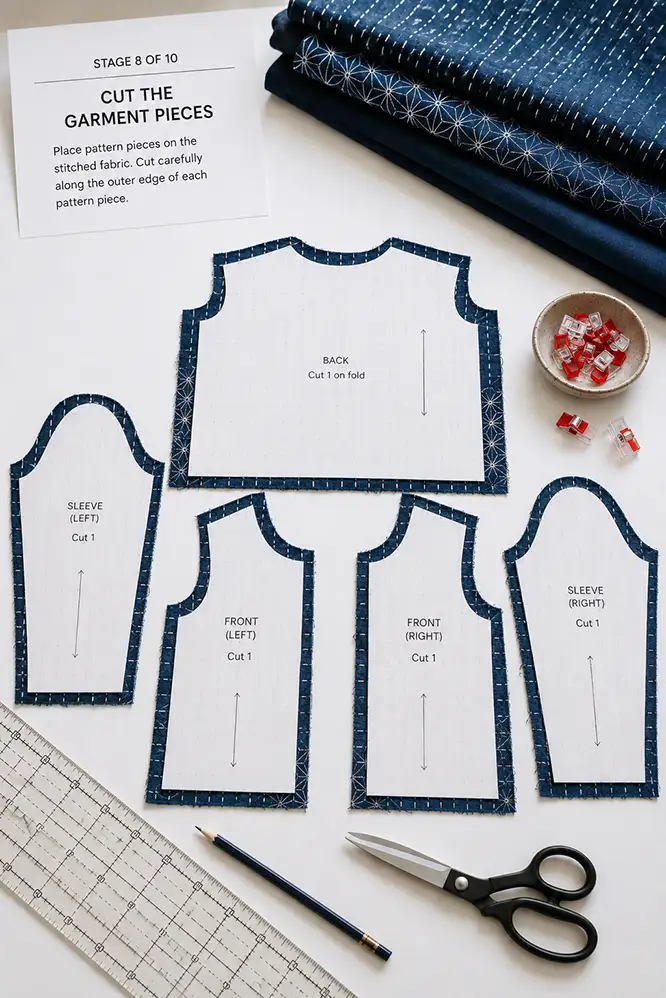
Step 9: Cut the Garment Pieces
Now place your pattern pieces on the stitched panels and cut.
Position each piece so the pattern repeat runs symmetrically where it will be seen — centered on the back, and matching across the two fronts.
Cut the back, both fronts, and both sleeves.
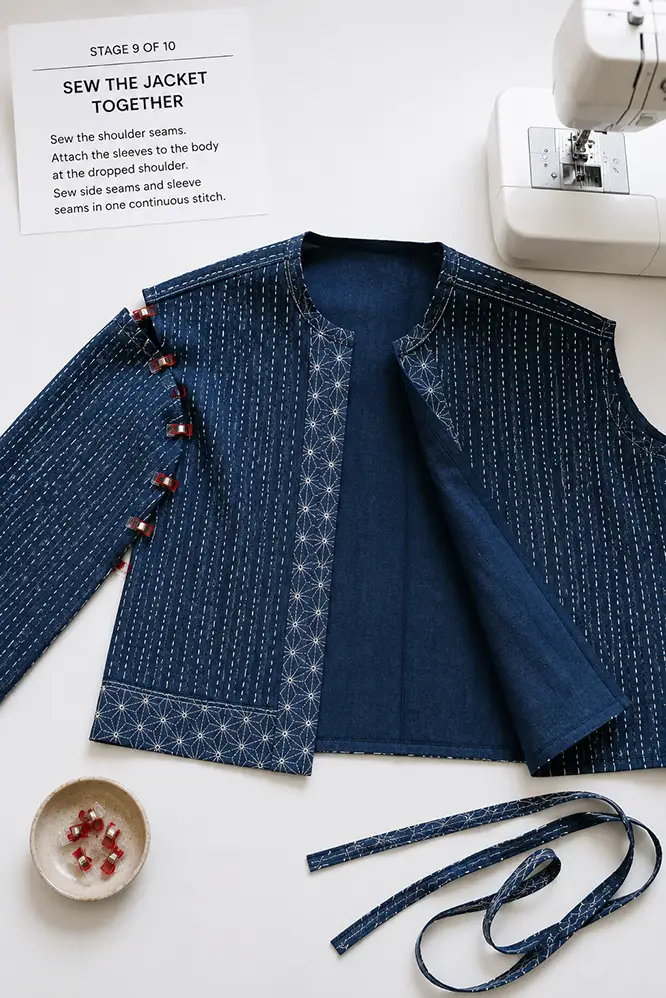
Step 10: Sew the Shoulder Seams
Sew the fronts to the back at the shoulders with a ½-inch seam allowance.
Because there is no batting, seams here are much less bulky than on a wadded quilted jacket. Press them open.
Bind the seam allowances with 1½-inch bias strips, or flat-fell them. An unlined jacket shows its interior whenever it moves, and finished seams are part of the garment rather than an optional refinement.
Step 11: Attach the Sleeves Flat
Open the jacket body out flat. Match the center of each sleeve to the shoulder seam and clip along the straight armhole edge.
Sew with a ½-inch seam allowance. Because the shoulder is dropped and the armhole edge is straight, this is a plain straight seam with nothing to ease.
Bind or flat-fell the armhole seam.
Step 12: Sew the Side and Sleeve Seams
Fold the jacket right sides together, matching underarm points.
Sew from the cuff to the underarm, then continue along the side seam in one continuous line. Repeat on the other side.
Bind these seams as well. Traditional Japanese garment construction often leaves a 4-inch opening at the lower underarm on both sides, which improves airflow and movement — worth including on a jacket meant to be worn in warm weather.
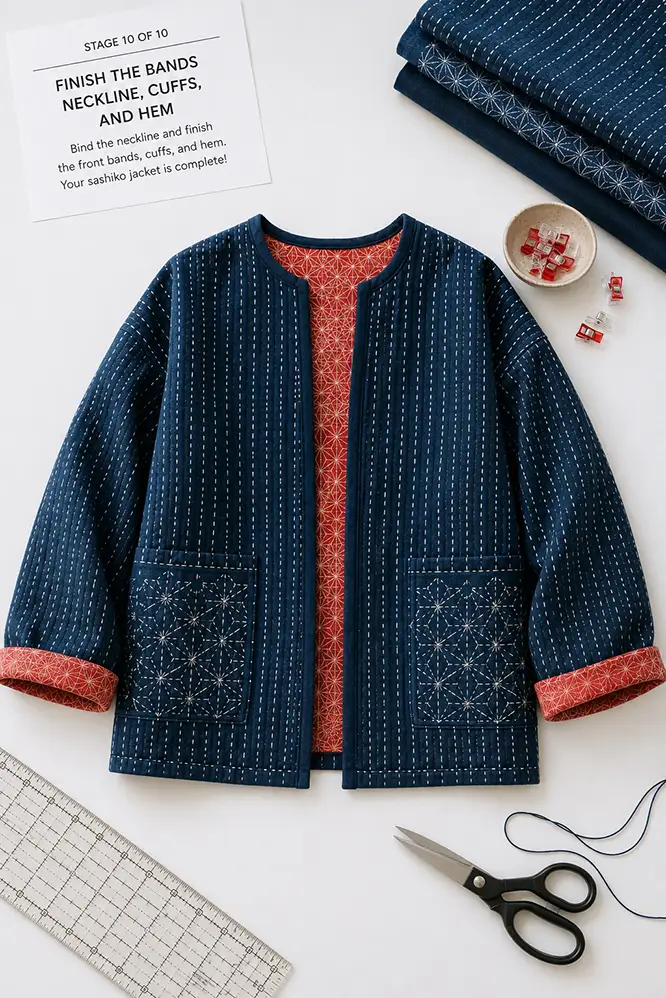
Step 13: Add the Front Bands and Neckline
Sew a 3½-inch accent strip to each front edge, right sides together, with a ½-inch seam allowance. Fold to the inside, turn the raw edge under, and stitch down.
The band should finish about 1½ inches wide on the outside, with the vermilion or saffron showing only on the inside face.
Bind the neckline with a 2½-inch bias strip in the same accent fabric, easing it around the curve.
If you want a closure, attach a single 2½ x 24-inch tie at the left front band, positioned at chest height.
Step 14: Finish the Cuffs and Hem
Bind each cuff with a 2½ x 13-inch accent strip joined into a loop.
Hem the jacket by turning under ½ inch twice and topstitching, or bind the hem to match the cuffs.
Remove any remaining chalk or water-soluble marks by spritzing with cold water and letting the jacket dry flat.
Press lightly, add a label at the inside back neck, and hang the jacket rather than folding it.
Assembly at a Glance
- Prepare — choose a dropped-shoulder pattern, prewash the indigo two or three times until it stops bleeding
- Mark — layer and baste the panels, then mark the full asanoha or shippou grid before any stitching
- Stitch — work complete lines across each panel with a palm thimble, loading several stitches per pass
- Measure — press gently and check for the expected ½ to 1 inch of shrinkage
- Cut — place pattern pieces on the stitched panels with the repeat centered, then cut
- Assemble — shoulders, sleeves flat, side and sleeve seams, binding every seam allowance
- Finish — accent front bands, bound neckline and cuffs, hem, then remove markings and press lightly
Indigo and Accent Combination Ideas
For a classic jacket, use deep indigo with bright white asanoha stitching and vermilion inner bands.
For a faded jacket, use slate indigo with ecru shippou stitching and saffron gold inner bands.
For a high-contrast jacket, use midnight navy with bright white stitching and deep teal accents.
For a boro-inspired jacket, use three different indigo shades pieced into the panels before stitching, with white stitching running across the joins as though mending them.
For a persimmon jacket, use deep indigo with white stitching and persimmon orange bands, cuffs, and tie.
For a reverse jacket, use natural undyed cotton cloth with indigo thread — the inversion of the tradition, and unexpectedly striking.
Beginner Tips for Success
Prewash the indigo two or three times. White thread on unwashed indigo turns gray, and you can’t undo it.
Buy proper sashiko thread. Floss shines and separates; perle cotton is too round. Sashiko thread is matte and loosely twisted for a reason.
Use a palm thimble and push from the palm. Fingertip pushing is what makes long stitching sessions painful.
Load several stitches on the needle before pulling through. This is the technique, not a shortcut.
Leave the thread relaxed. Pulled stitching puckers the cloth and stiffens the jacket.
Cut every panel an inch oversized. Dense stitching draws the cloth in by up to an inch, and you can’t stretch it back.
Mark the entire panel before you start. Marking as you go produces drift that is obvious in the finished garment.
Bind every seam. An unlined jacket constantly shows its interior.
Styling Tip
An indigo sashiko jacket is designed to be worn open over plain, natural fabrics — a white linen shirt, a gray tee, a cream knit, wide trousers or straight denim. Keep everything underneath solid and uncomplicated; the stitching is fine enough that any competing pattern erases it entirely.
The jacket reads differently at different distances, which is worth taking advantage of. From across a room, it is a plain indigo garment; up close, the geometry appears. That makes it a good choice for settings where you want understatement rather than impact.
Silver or oxidized metal jewelry suits indigo better than gold. If your jacket has vermilion or saffron facings, a single accessory in that color — a bag, a scarf tied at the wrist — connects the hidden detail to the outfit.
Hang it rather than folding it, and wash rarely, by hand, in cold water. Both the indigo and the stitching improve with age and gentle wear.
Gift Pairings for the Pockets
If you add patch pockets, or as a set alongside the finished jacket:
- A set of sashiko needles in varied lengths, in a fabric roll
- A Japanese palm thimble — hard to find and transformative to use
- A skein set of sashiko thread in white, ecru, and indigo
- A small sashiko-stitched coaster or mug rug from leftover cloth
- A hand-stitched needle book in indigo with a vermilion lining
- A boro-style pieced pouch using indigo scraps and visible white stitching
- A sashiko pattern stencil set for asanoha and shippou grids
Other Design Inspirations – Digitally Modified Images. Texture and color may vary from the actual product.
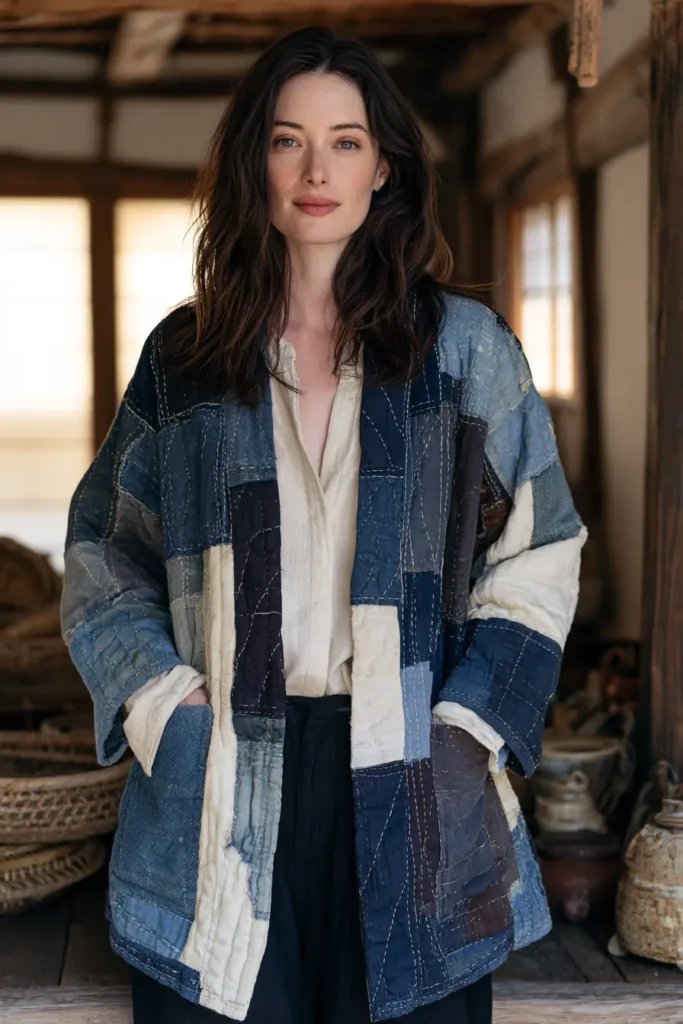
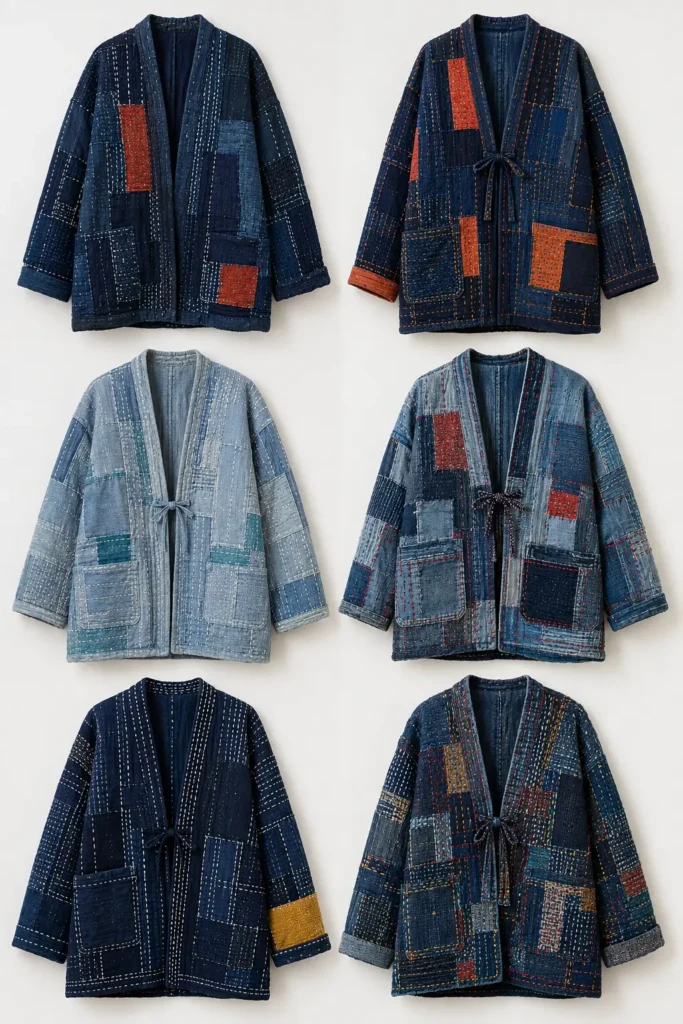
2. Boro-Inspired Patchwork Sashiko Jacket for Effortless Layering
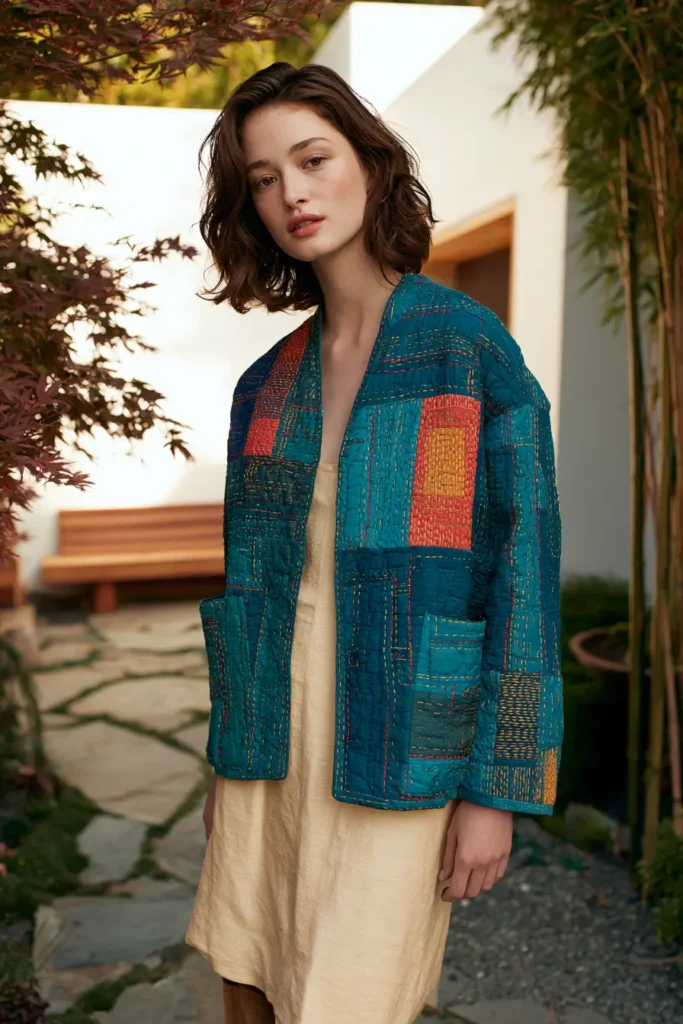
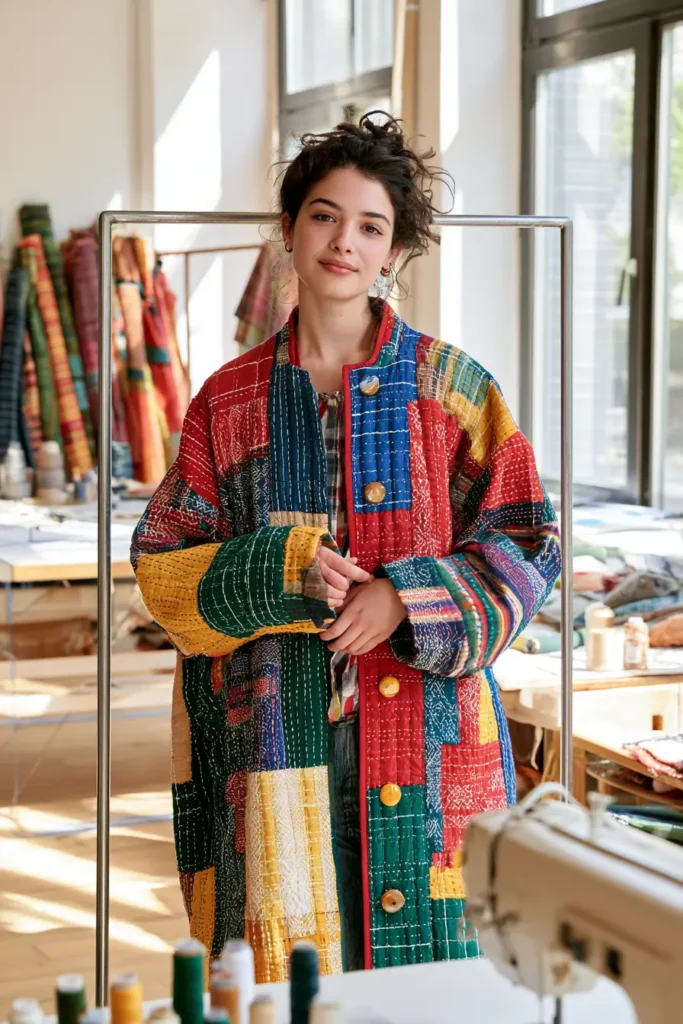
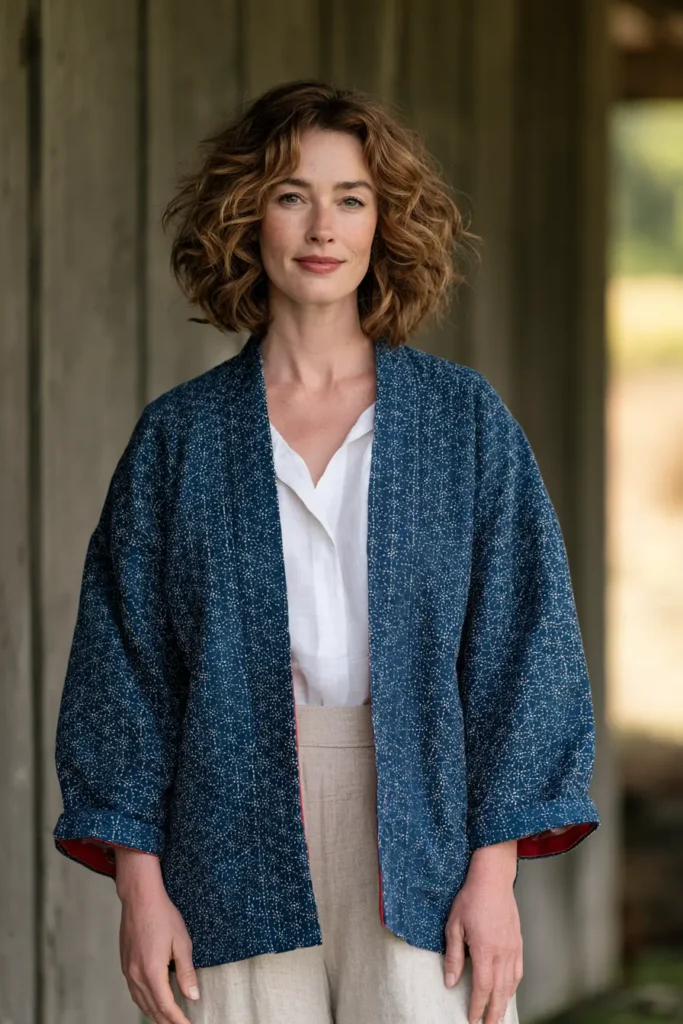
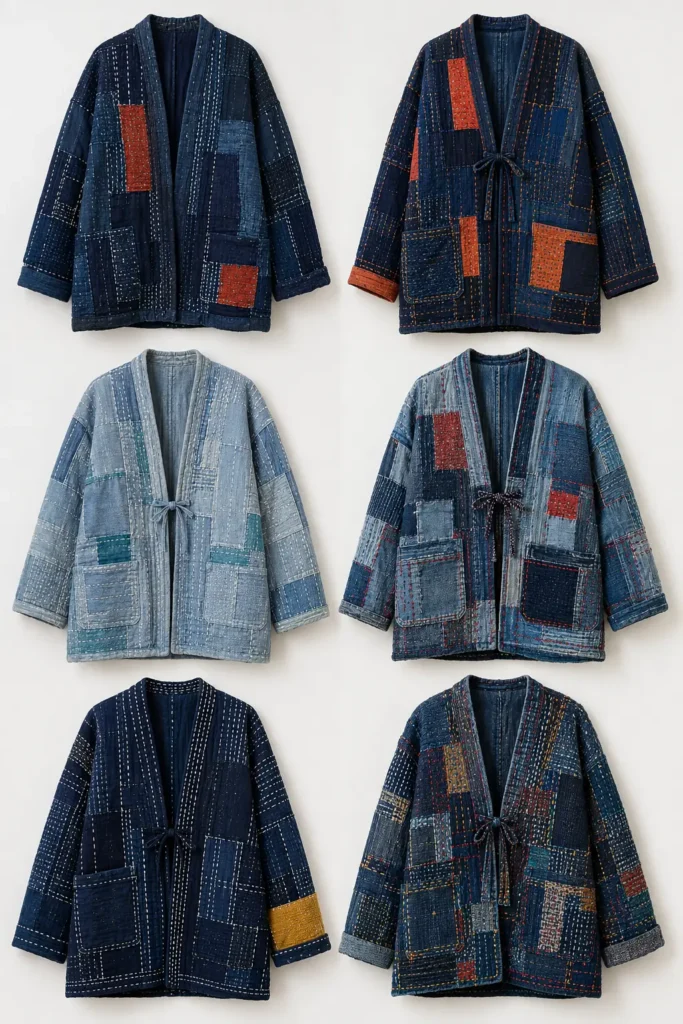
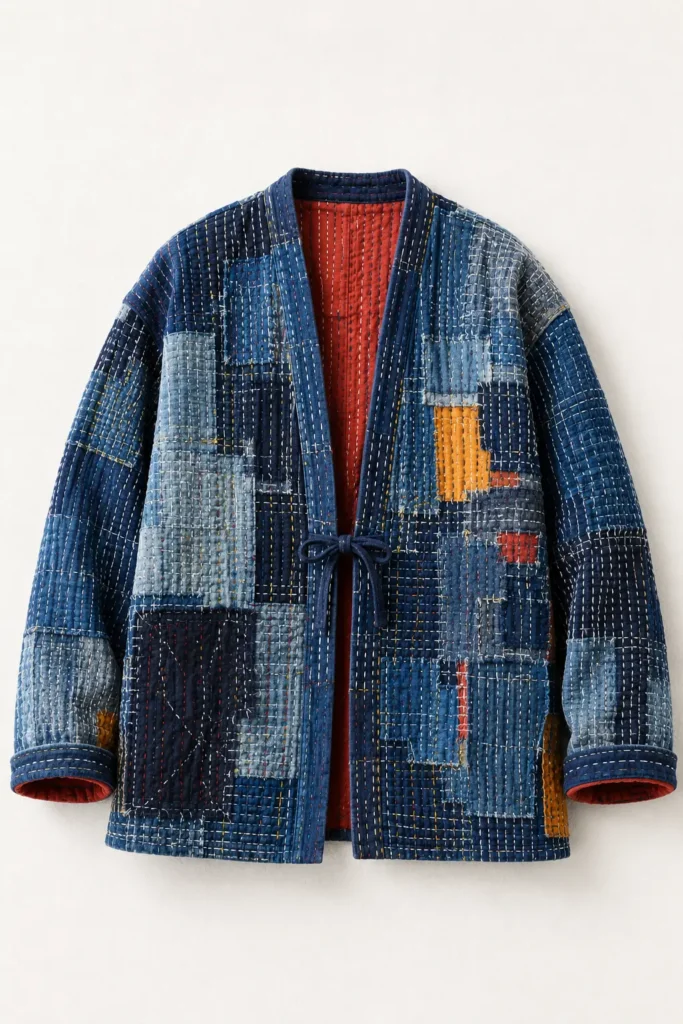
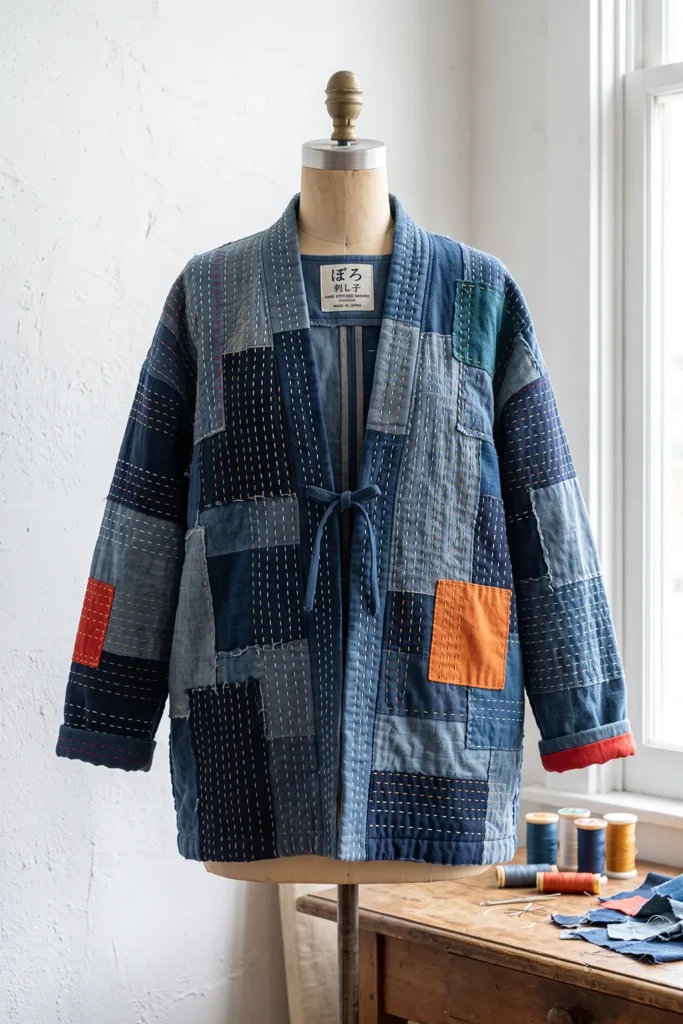
A boro-inspired jacket is built the opposite way round from every other garment in this collection. Instead of cutting clean panels and decorating them, you assemble a surface from irregular patches — overlapping, uneven, deliberately mismatched — and then stitch it together with rows of running stitch that cross every join. The seams are visible, the patches sit at different angles, and the stitching runs straight over the top. Nothing is hidden, and the finished jacket looks like it’s already lived a life.
The palette stays anchored in deep indigo, midnight navy, faded denim, slate blue, and washed chambray, because a boro surface needs a family of related tones rather than a scatter of unrelated ones. The vibrancy comes from what you put among them: patches of vermilion red, persimmon orange, saffron gold, and deep teal, placed sparingly, plus stitching in bright white, ecru, saffron, and vermilion thread. A field of blues with three burning-orange patches and gold stitching running across them is far more striking than an evenly colorful jacket, and it is closer to what genuine boro looks like — the bright pieces were whatever scrap happened to be available.
Why This Design Works
Boro construction removes the two things that make garment quilting difficult: accuracy and matching. Patches are supposed to be irregular. Joins are supposed to be visible. A patch that sits slightly crooked is not an error to unpick; it is the point. That makes this the most forgiving project in the collection despite looking like the most complex.
The stitching does the structural work. Rows of running stitch worked across the patches, rather than around them, bind every layer into one cloth, and the density turns a loose collage of scraps into a garment that holds together. This is not decoration applied to a finished panel — the stitching is what makes the panel exist.
Layering rather than piecing is the second key difference. Patches overlap and sit on top of a base cloth rather than being joined edge to edge, so there is no seam allowance arithmetic, no measuring, and no squaring up. You can add a patch at any point, including after the jacket is finished, which is exactly how the originals grew.
The visible mending logic also means the jacket is genuinely repairable. A worn elbow gets another patch and more stitching, and the garment improves rather than degrades.
Skills you build here: layered appliqué by hand, running stitch across uneven surfaces, working with mismatched fabric weights, controlled improvisation, and constructing a garment from a surface you built rather than from yardage.
Design Inspirations – Digitally Modified Images. Texture and color may vary from the actual product.
A Note on Boro
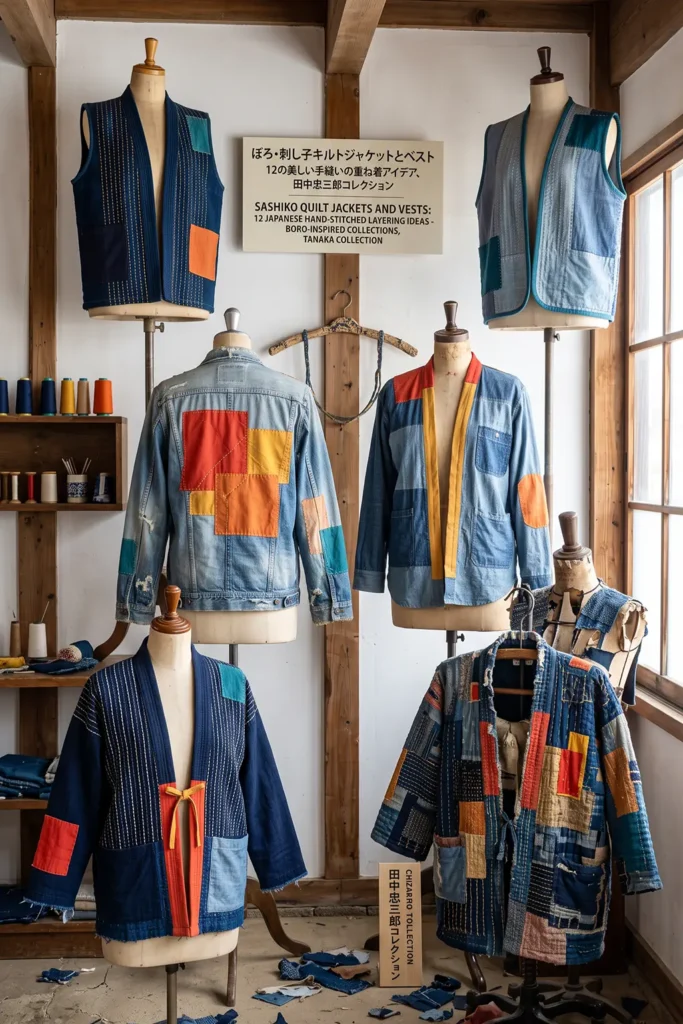
Boro — ぼろ, meaning rags or tattered cloth — describes textiles built up over years or generations by patching worn cloth with whatever was available and stitching it down. It comes from the same conditions as sashiko: cotton was expensive in northern Japan, Edo-period sumptuary laws restricted what rural people could wear, and nothing was discarded while it still had any use.
A single boro garment might contain cloth from several decades and several original garments. Museum-held examples have been analyzed and found to hold dozens of distinct fabrics, layered so densely that the original base is no longer identifiable. Futon covers, work coats, and aprons were passed down, patched by successive owners, and only stopped being repaired when they finally fell apart.
The reversal in how boro is regarded is the interesting part. For most of the twentieth century, boro was an embarrassment — evidence of a poverty families were keen to leave behind, and much of it was thrown out during Japan’s postwar economic expansion. Very little survived by accident. What survived is largely thanks to Chuzaburo Tanaka, a folklorist from Aomori who spent decades from the 1960s onward collecting textiles people were discarding. His collection eventually ran to tens of thousands of pieces and was designated an Important Tangible Folk Cultural Property in 2009. Boro now hangs in museums and sells at prices unimaginable to the people who made it.
Two related terms are worth knowing. Sakiori is a weaving technique in which old cloth is torn into narrow strips and used as weft, producing a dense, ribbed fabric from garments too worn to patch. Tsugihagi simply means patched-together, and describes the technique rather than the cultural object.
The modern practice of visible mending draws directly on boro, though with a distinction worth keeping in mind: boro was not a choice, and the people making it would likely have preferred whole cloth.
Finished Size
This guide makes a relaxed, hip-length unlined jacket with dropped shoulders, built from a patched surface.
Sample finished measurements for a loose medium:
- Finished chest: about 48 inches
- Finished length: about 28 inches from shoulder to hem
- Sleeve length: about 19 inches from the dropped shoulder seam
- Sleeve width at bicep: about 17 inches
- Cuff opening: about 11 inches
- Armhole depth: about 11½ inches
- Front style: open front with a narrow band, single tie optional
- Collar: none — a bound neckline
Patch and stitch measurements:
- Patch sizes: anywhere from 3 x 4 inches to 9 x 12 inches
- Patch overlap: ½ to 1 inch where patches meet
- Stitch length: about ⅛ inch, with gaps roughly half the stitch length
- Stitch row spacing: ⅜ to ½ inch apart
- Row direction: parallel rows running the length of each panel, crossing all patches
Add 8 inches of ease at the chest. This silhouette should be visibly oversized.
Materials Needed
For one boro-inspired sashiko jacket, gather:
- Base cloth: 3 yards of mid-weight indigo cotton — this is the foundation every patch sits on
- Backing cloth: 3 yards of lighter indigo or natural cotton
- Patch fabrics: about 2 yards total, in as many indigo shades as you can gather — deep indigo, navy, faded denim, slate, chambray, plus scraps of old denim, worn shirting, and any indigo-dyed cotton
- Accent patches: ½ yard total across vermilion, persimmon, saffron gold, and deep teal
- Sashiko thread: 8 to 10 skeins across white, ecru, saffron, and vermilion
- Sashiko needles: a set of 3 to 5 in varied lengths
- Thimble: a Japanese palm thimble, or a leather ring thimble
- Accent fabric for bands and bindings: ½ yard in vermilion or saffron
- Chalk marker
- Quilting ruler
- Rotary cutter and cutting mat
- Sewing clips and long basting pins
- Sewing machine for garment construction and optional patch tacking
- Machine needles: 90/14 or 100/16 for stitching through multiple layers
- Iron and ironing board
- Boxy jacket pattern with dropped shoulders
Beginner tip: collect patch fabrics from worn clothing rather than buying new. Old denim, faded work shirts, and washed chambray all bring a softness and irregularity that new fabric does not, and the mixed weights are part of what makes the surface look genuine. A jacket built entirely from new quilting cotton looks like a costume.
Vibrant Boro Palette
A weathered blue field with burning accents could include:
Base and patches:
- Deep indigo
- Midnight navy
- Faded denim
- Slate blue
- Washed chambray
- Pale sun-bleached indigo
Accents — sparingly: 7. Vermilion red 8. Persimmon orange 9. Saffron gold 10. Deep teal
Thread: 11. Bright white 12. Natural ecru 13. Saffron gold 14. Vermilion
Keep the blues at roughly 85 percent of the surface and the accents at 15 percent. Vermilion and persimmon are extremely loud against indigo — three or four patches across a whole jacket is plenty, and more than that tips the garment from striking into busy.
Vary the thread color between rows. A run of white stitching, then two rows of saffron, then back to ecru, reads as work done at different times by different hands, which is exactly what a real boro surface records.
Place your brightest accent patch somewhere not central — a lower sleeve, one hip, off to one side of the back. Centered brights look designed; off-center brights look accumulated.
Cutting Measurements
Cut everything 1½ inches larger than your pattern pieces in every direction. Dense stitching through multiple patch layers draws the cloth in significantly — expect 1 to 1½ inches of shrinkage across a large panel.
From base cloth, cut oversized:
- Back: one piece, about 28 x 32 inches
- Fronts: two pieces, about 17 x 32 inches each
- Sleeves: two pieces, about 20 x 24 inches each
From backing cloth, cut the same five pieces at the same sizes.
Patches — cut irregularly, not to a template:
- Large patches: 8 to 10 at roughly 7 x 9 to 9 x 12 inches
- Medium patches: 15 to 20 at roughly 5 x 6 to 6 x 8 inches
- Small patches: 20 to 25 at roughly 3 x 4 to 4 x 5 inches
- Accent patches: 4 to 6 at mixed sizes
Cut patches with slightly uneven edges. A ruler-straight patch fights the aesthetic. Tearing rather than cutting works well for softer fabrics and produces a naturally frayed edge.
From accent fabric, cut:
- Front bands: two strips at 3½ x 32 inches
- Neckline binding: one bias strip at 2½ inches x neckline length plus 2 inches
- Cuff bindings: two strips at 2½ x 13 inches
- Optional tie: one strip at 2½ x 24 inches
For seam binding: bias strips at 1½ inches wide, about 4 yards total.
Use a ½-inch seam allowance for garment construction.
Step-by-Step Guide
Step 1: Choose the Pattern and Prewash Everything
Start with a boxy jacket pattern with dropped shoulders, a plain neckline, and a straight body. No darts, no set-in sleeves, no collar.
Wash and dry every fabric before you begin, including salvaged clothing. Indigo bleeds heavily on early washes, and mixing prewashed and unwashed cloth in one garment guarantees uneven shrinkage and dye transfer onto your white stitching.
Wash indigo pieces two or three times, alone, in cold water.
Step 2: Sort the Patches by Value
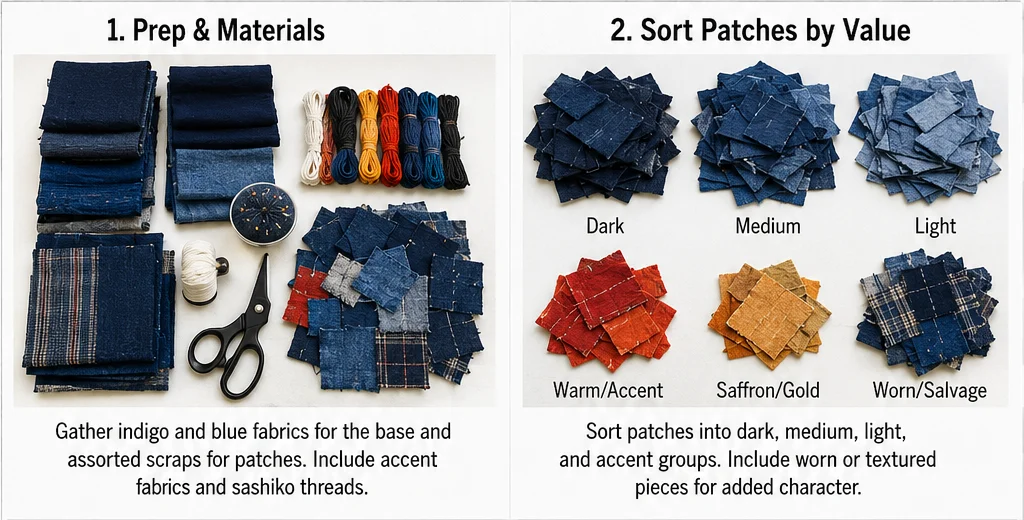
Lay all your patch fabrics out and sort them by lightness and darkness, not by color.
A boro surface works because the blues sit in a narrow but visible range — dark patches next to slightly lighter ones, with the occasional pale sun-bleached piece for contrast. Sorting by value tells you which patches will read as distinct and which will disappear into their neighbors.
Set the accent patches aside separately. Place them deliberately, not scattered.
Step 3: Build the Base Layer
Lay the base cloth panel flat, right side up.
This is the foundation. Every patch sits on top of it, and it never shows except where you leave it deliberately exposed.
Leave roughly 20 to 30 percent of the base visible across each panel. A surface with no exposed base looks over-designed; one where the base breathes through in places looks accumulated.
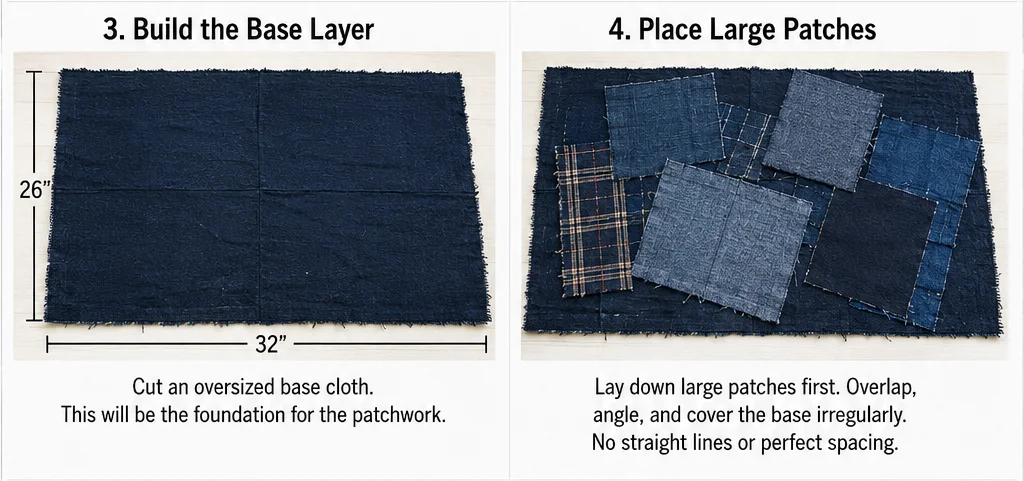
Step 4: Place the Large Patches
Position your large patches across the panel first, overlapping edges by ½ to 1 inch where they meet.
Angle them. Nothing should sit perfectly square to the panel edges — a few degrees of tilt on most patches is what stops the surface from reading as a grid.
Do not plan the whole panel. Place four or five large patches, look at it, then continue. Boro surfaces accumulate rather than being composed.
Pin generously as you go.
Step 5: Fill with Medium and Small Patches
Add medium patches over the gaps and across the joins of the large ones, then small patches into whatever remains.
Let small patches sit partly on top of larger ones rather than only in the gaps. Layering three deep in places is correct—those areas will be the thickest and most textured.
Deliberately leave two or three areas where the base cloth shows through for several inches.
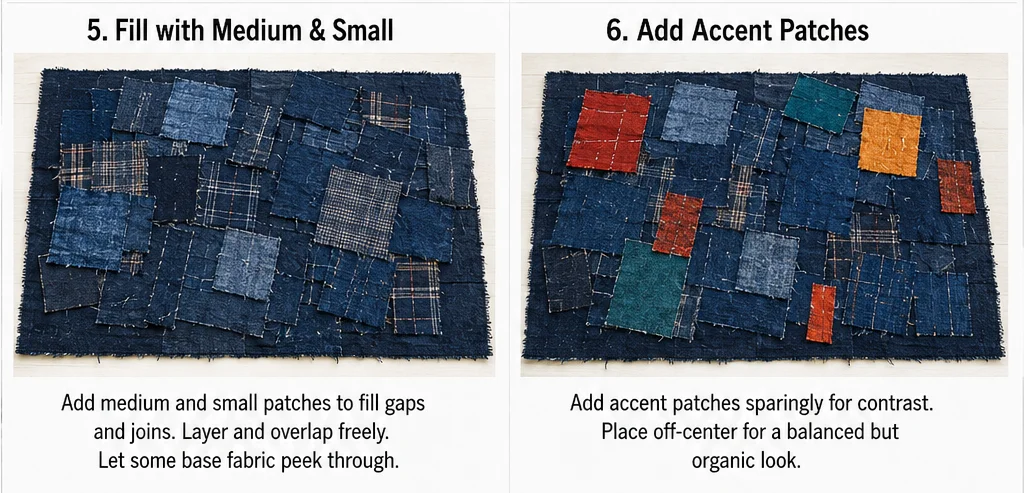
Step 6: Place the Accent Patches
Now add your vermilion, persimmon, saffron, and teal patches.
Place three to five across the entire jacket, not per panel. One on a lower sleeve, one at a hip, perhaps one small piece near a shoulder.
Keep them off-center and unevenly spaced. Two accents close together on one side with none on the other is better than a balanced distribution.
Step back and check the whole set of panels together before committing. This is the last easily reversible decision.
Step 7: Baste the Layers
Layer the backing cloth beneath each base panel — backing wrong side up, base cloth on top, patches on top of that.
Baste all three layers together with long running stitches in a contrasting thread, working in a grid roughly 4 inches apart across the whole panel.
Baste thoroughly. You are about to hand stitch through three to five layers of shifting cloth, and inadequate basting is the most common reason a boro panel distorts.
Optional: machine-tack the patch edges with a long straight stitch before hand stitching. This is not traditional, but it holds everything firmly and disappears under the sashiko rows.
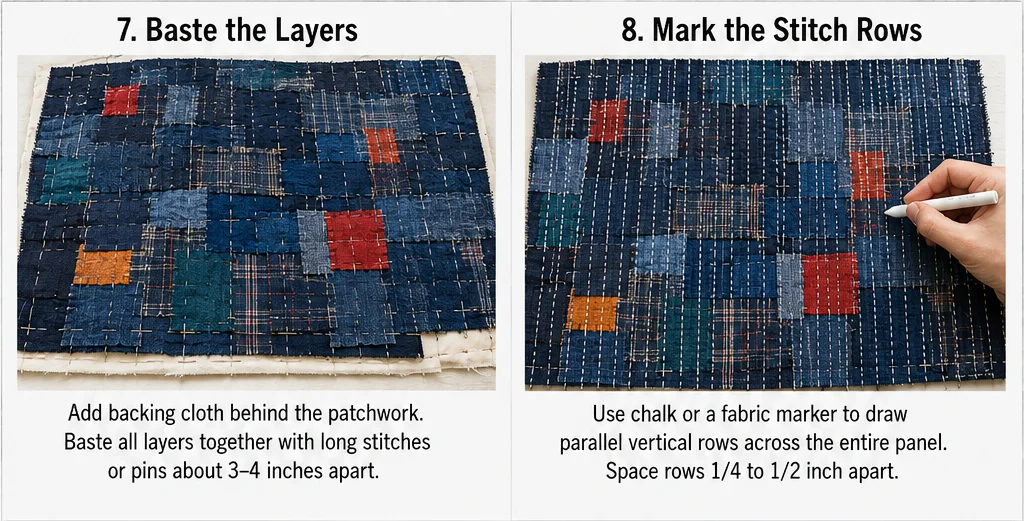
Step 8: Mark the Stitch Rows
Mark parallel lines across the entire panel with chalk, spaced ⅜ to ½ inch apart.
Run the rows in one direction only across each panel — usually vertically on the body, and along the length of the sleeves.
The rows must cross every patch and every join without deviation. This is the defining visual feature of boro stitching: the rows ignore the patches entirely, binding a chaotic surface into one cloth.
Do not stitch around patches. Do not change direction at a patch edge.
Step 9: Stitch the Rows
Thread a long sashiko needle with about 18 to 20 inches of thread. Wear the thimble on your palm and push from there.
Work a running stitch about ⅛ inch long with gaps roughly half that, loading five to ten stitches onto the needle before pulling through.
Where the needle crosses a thick multi-layer area, take fewer stitches per pass — sometimes only one or two. Forcing a full load through five layers bends needles and produces uneven spacing.
Change thread color every few rows. White, then saffron, then ecru, then vermilion, in no particular pattern.
Keep tension relaxed. Pulled stitching puckers a patched surface far more visibly than a plain one.
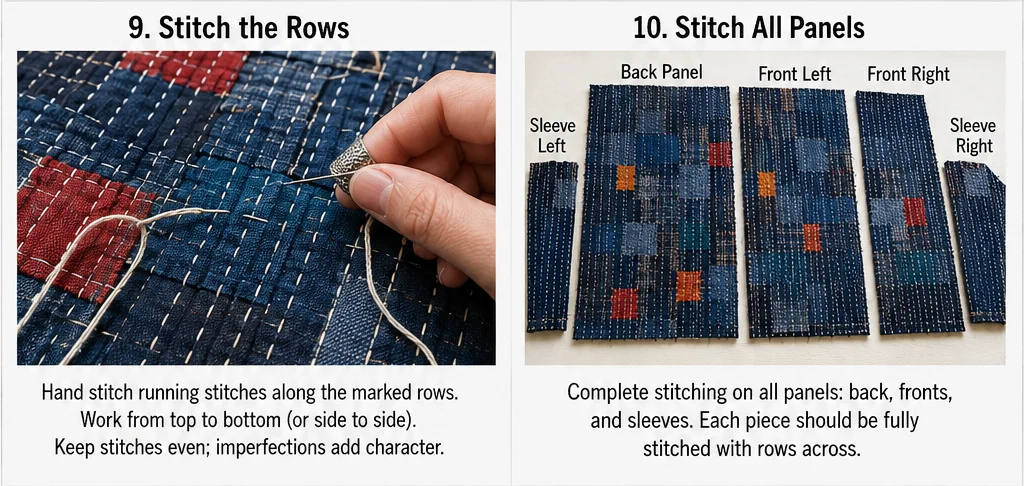
Step 10: Stitch All Five Panels
Work the back, both fronts, and both sleeves.
Expect 50 to 80 hours for a full jacket. The patched surface is faster than a formal sashiko grid because the rows are simple parallel lines with no geometry to maintain, but there is more cloth thickness to push through.
Take regular breaks. Pushing a needle through five layers strains the hand considerably more than plain sashiko.
Step 11: Press and Measure
Gently press each panel from the reverse with a pressing cloth. Do not press the stitching flat.
Measure each panel. Expect 1 to 1½ inches of shrinkage across a large piece.
If a panel is short, add another patch to the edge and stitch it down. On a boro jacket, this is not a repair — it is the method.
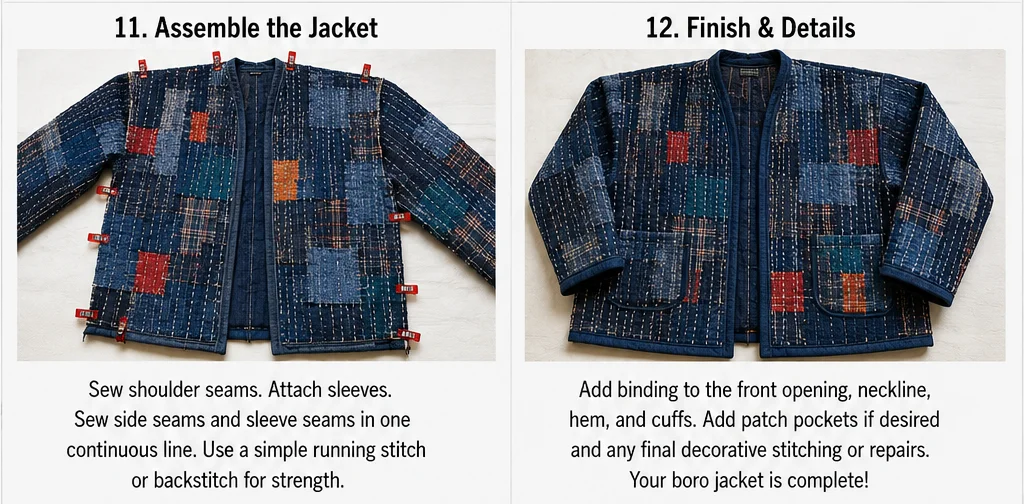
Step 12: Cut the Garment Pieces
Place your pattern pieces on the stitched panels and cut the back, both fronts, and both sleeves.
Position the pieces so your accent patches fall where you want them — check that a vermilion patch you placed for a sleeve is not about to be cut in half at the armhole.
Cutting through the patched surface will leave raw patch edges at the cut lines. That is expected and gets handled by the seam finishing.
Step 13: Assemble the Jacket
Sew the fronts to the back at the shoulders with a ½-inch seam allowance. Press open and bind the seam allowances with 1½-inch bias strips.
Open the jacket flat, match each sleeve center to the shoulder seam, and sew the sleeves on with a ½-inch seam allowance. Because the shoulder is dropped and the armhole edge is straight, there is nothing to ease.
Fold right sides together and sew from cuff to underarm and along the side seam in one continuous line. Bind these seams too.
Leave a 4-inch opening at the lower underarm on each side if you want the traditional ventilation.
Bind every seam allowance. An unlined jacket constantly shows its interior, and on a boro garment the inside is part of what people will look at.
Step 14: Add the Bands, Neckline, Cuffs, and Hem
Sew a 3½-inch accent strip to each front edge, fold to the inside, turn the raw edge under, and stitch down. The band should finish about 1½ inches wide.
Bind the neckline with a 2½-inch bias strip, easing around the curve.
Bind each cuff with a 2½ x 13-inch strip joined into a loop.
Hem by turning under ½ inch twice and topstitching, or bind to match the cuffs.
Add a single 2½ x 24-inch tie at the left front band if you want a closure.
Remove chalk marks with a spritz of cold water, dry flat, press lightly, and add a label at the inside back neck.
Assembly at a Glance
- Prepare — prewash every fabric, including salvage; sort patches by value not color
- Build the surface — base cloth, then large patches angled and overlapping, then medium and small, leaving base exposed in places
- Accent — place three to five bright patches off-center across the whole jacket
- Baste — layer backing beneath, baste on a 4-inch grid through all layers
- Mark and stitch — parallel rows ⅜ to ½ inch apart running straight across every patch and join, changing thread color as you go
- Measure and cut — allow for 1 to 1½ inches of shrinkage, then cut pattern pieces with accents positioned deliberately
- Assemble and finish — shoulders, sleeves flat, side seams, binding every seam, then bands, neckline, cuffs, and hem
Vibrant Boro Combination Ideas
For a classic boro jacket, use six indigo shades with three vermilion patches and stitching alternating white and ecru.
For a persimmon jacket, use deep indigo and navy patches with four persimmon orange accents and saffron gold stitching throughout.
For a sun-bleached jacket, use pale and faded indigos with slate and chambray, two deep teal accents, and white stitching only.
For a denim jacket, build entirely from salvaged denim in every wash state, with vermilion patches and vermilion stitching.
For a high-contrast jacket, use only the darkest indigos as the base field with bright white stitching and a single saffron patch on one cuff.
For a many-hands jacket, change thread color every two rows across the whole garment — white, saffron, ecru, vermilion, teal — so the surface records apparent decades of separate mending.
Beginner Tips for Success
Prewash everything, including salvaged clothing. Mixed shrinkage across a patched surface distorts the whole panel, and indigo bleed turns white stitching gray.
Collect patches from worn clothing where you can. New quilting cotton produces a jacket that looks like a costume rather than a garment with a history.
Sort by value, not color. It tells you which patches will read as distinct and which will vanish into their neighbors.
Angle every patch a few degrees. Square patches produce a grid, and a grid is the one thing boro should never look like.
Leave the base cloth showing in places. A fully covered surface looks over-designed.
Run the stitch rows straight across everything. Rows that detour around patches destroy the entire effect.
Take fewer stitches per pass through thick areas. Forcing a full needle load through five layers bends needles and ruins spacing.
Place accent patches off-center. Centered brights look designed; off-center brights look accumulated.
Styling Tip
A boro-inspired jacket is a textural piece, so everything underneath should be plain — a white tee, a gray linen shirt, an oatmeal knit. Wide trousers, straight denim, or a simple dress all work. Avoid anything patterned entirely; the jacket already contains thirty or more fabrics.
It layers particularly well in transitional weather, since the patched surface adds real warmth without batting and the garment stays supple. Left open, it reads as a light coat; the visible interior seam binding means it looks finished from every angle.
Silver, brass, and oxidized metal all suit the palette. If your jacket has vermilion patches, a single accessory in that color connects them.
Wash rarely, by hand, in cold water, and hang it rather than fold it. The surface improves with age — patches soften, edges fray slightly, and the stitching settles into the cloth. This is one of very few garments that is genuinely better after five years than it was new, and adding another patch when something wears through is not a repair but a continuation.
Gift Pairings for the Pockets
If you add patch pockets, or as a set alongside the finished jacket:
- A set of sashiko needles in varied lengths in a fabric roll
- A Japanese palm thimble — hard to find and transformative to use
- A sashiko thread set in white, ecru, saffron, and vermilion
- A boro-style pieced pouch from leftover patches with visible stitching
- A bundle of salvaged indigo fabric scraps for a future project
- A hand-stitched needle book in patched indigo with a vermilion lining
- A pair of small sharp scissors and a leather thimble ring
Other Design Inspirations – Digitally Modified Images. Texture and color may vary from the actual product.
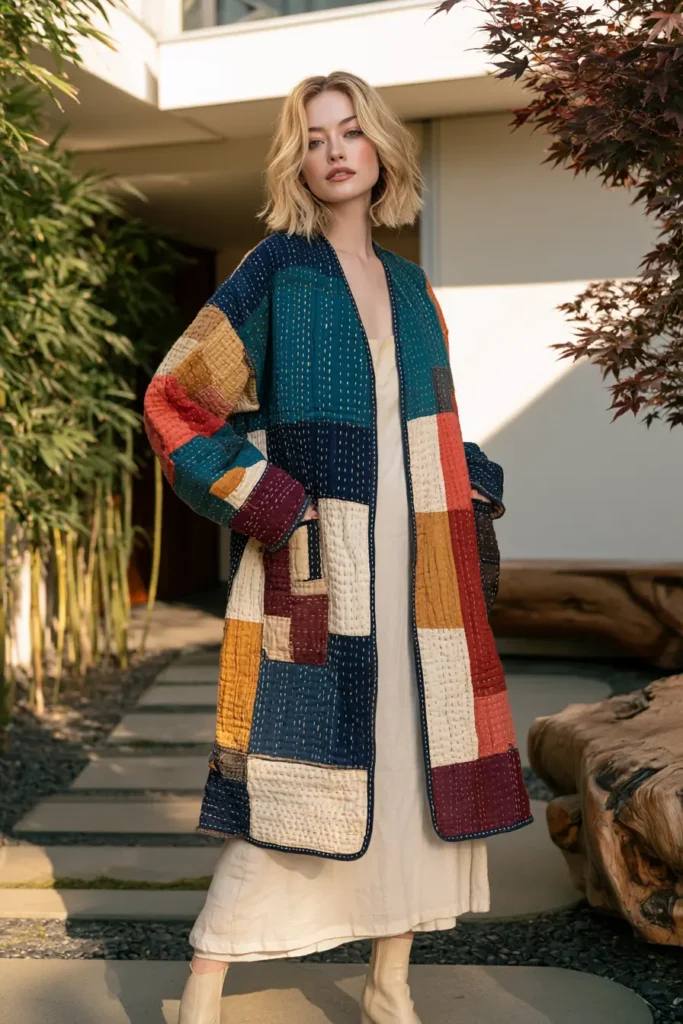
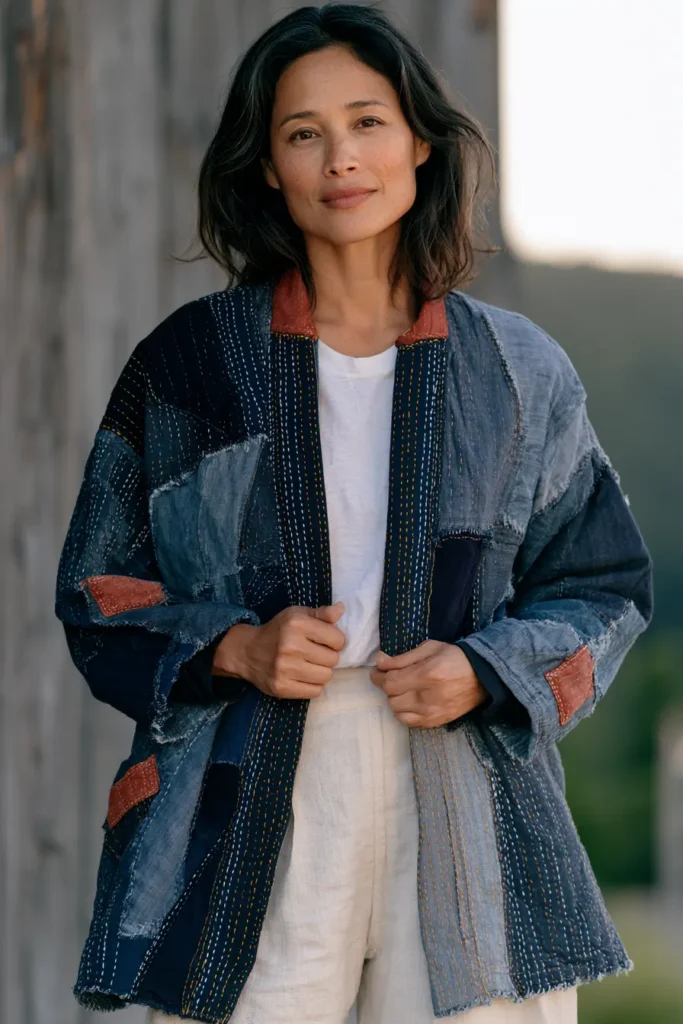
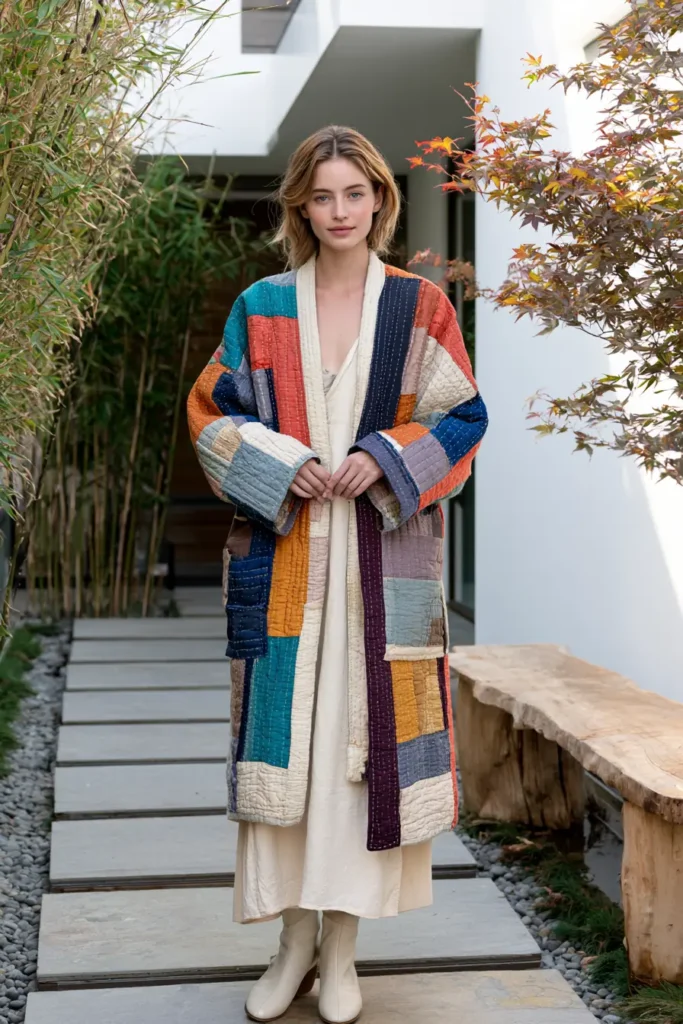
3. Reversible Sashiko Quilted Vest for Versatile Everyday Wear
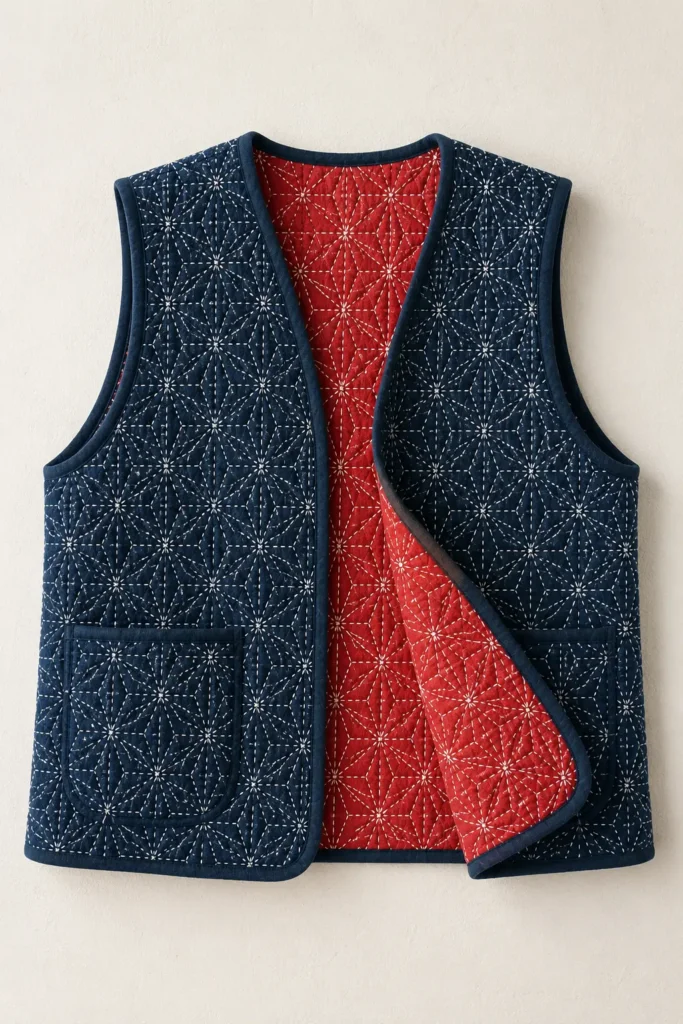
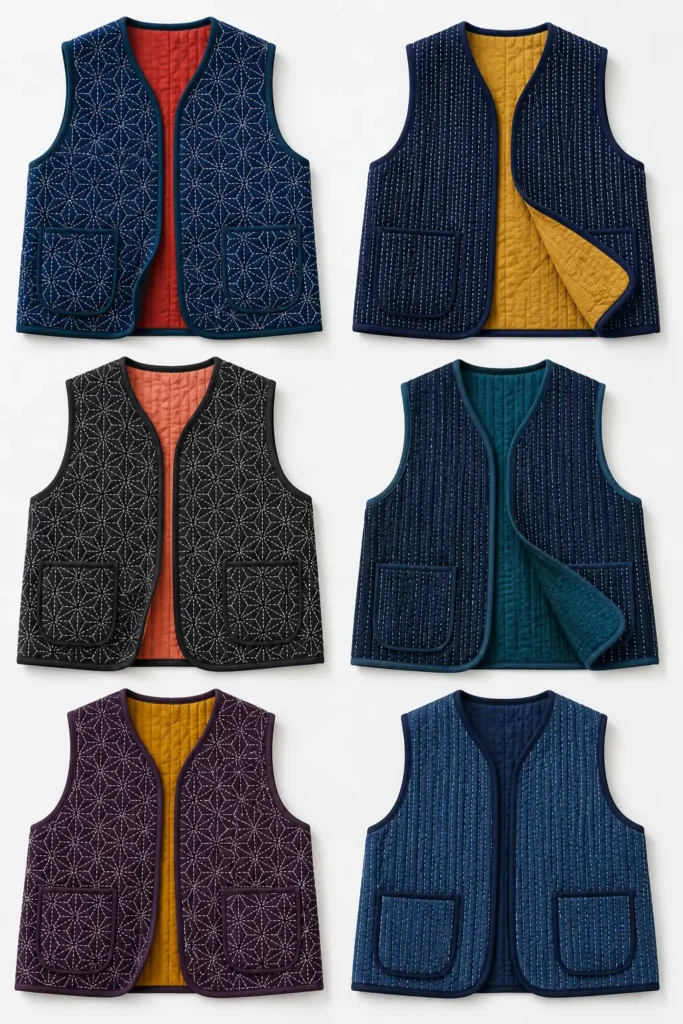
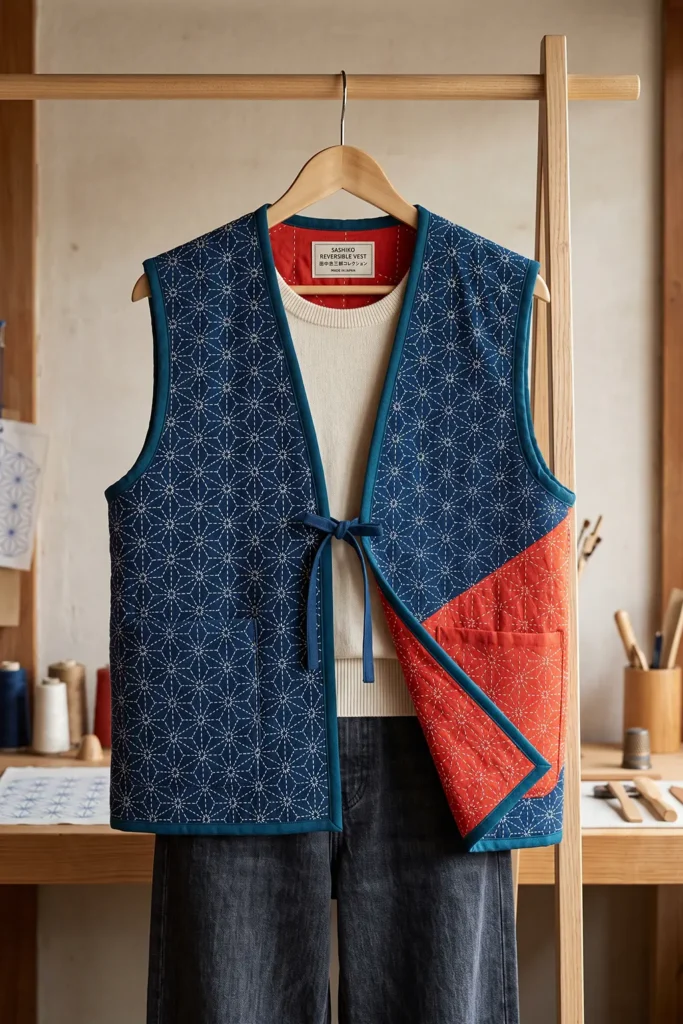
A reversible sashiko vest exploits something about running stitch that most quilting techniques cannot match: it is genuinely two-sided. Machine quilting produces a locked stitch with a bobbin thread and a clear front and back. A hand-worked running stitch passes through the cloth in a simple up-and-down rhythm, which means the reverse is not a lesser version of the front — it is the same stitching, inverted.
That single property is what makes a truly reversible garment possible with no lining, no batting, and no hidden construction. Two layers of cloth, one line of stitching, and both sides finished.
The palette takes advantage of it. Put deep indigo on one face and something loud on the other — vermilion red, saffron gold, persimmon orange, deep teal, or aubergine. Then stitch with a thread that works against both, or use two threads and stitch in sections. A vest that is quiet indigo one day and burning persimmon the next is doing something no single-sided garment can, and it is why this is the most practical piece in the collection.
Why This Design Works
The reversibility rests on a stitch property worth understanding before you begin. In sashiko, the visible stitch is longer than the gap — the convention is roughly two-thirds stitch, one-third gap on the working face. On the reverse, that ratio inverts: what was a gap becomes a stitch, and what was a stitch becomes a gap. The reverse shows a dashed line of shorter marks with wider spaces.
Neither side is wrong. They are different rhythms of the same line, and a viewer sees a hand-stitched geometric pattern on both. Aiming for a 60/40 ratio instead of 70/30 narrows the difference further and gives you two faces that read almost identically in weight.
The absence of batting matters just as much. A vest with wadding inside has a right side and a wrong side by definition — the batting has to be enclosed. Two layers of cloth stitched together have no inside at all, which is why a sashiko vest can be genuinely reversible where a conventional quilted one cannot.
Sleeveless construction removes the last obstacle. There is no sleeve to line, no armhole seam to hide, and only three edges to finish. Every seam can be bound so it reads as deliberate from both faces.
Skills you build here: two-sided stitch control, self-finished seam construction, binding that presents cleanly on both faces, and planning a garment where there is no wrong side to hide anything on.
Design Inspirations – Digitally Modified Images. Texture and color may vary from the actual product.
A Note on Two-Sided Stitching
Reversible garments have a long history in Japanese dress, driven by the same economy that produced sashiko and boro.
The haori — a hip-length jacket worn over a kimono — was frequently made with an elaborate lining, and during the Edo period this became a way around sumptuary laws that restricted outward display of wealth. The exterior stayed plain and compliant; the lining carried the expensive silk, the hand-painting, the pattern. This inversion has a name: ura no oshare, roughly “the elegance of the hidden side.” A garment that appeared modest in public revealed something else at the cuff turn-back or when it swung open.
The related hanten and happi work coats were often made genuinely reversible — one side plain for hard work, the other carrying the crest or dye pattern of a household or trade. A single garment covered both circumstances, which mattered when clothing was a substantial expense.
The kasuri weaving tradition is worth mentioning too. In kasuri, threads are bound and resist-dyed before weaving, so the pattern emerges as the cloth is woven and appears identically on both faces. A kasuri fabric has no back. Pairing kasuri with sashiko stitching produces a cloth where nothing at all distinguishes one side from the other, which is about as far as reversibility can be taken.
Finished Size
This guide makes a relaxed, hip-length open-front reversible vest with no collar and no closure.
Sample finished measurements for a loose medium:
- Finished chest: about 44 inches
- Finished length: about 25 inches from shoulder to hem
- Shoulder width: about 15 inches
- Armhole depth: about 10½ inches
- Front style: open front, no closure, or a single tie
- Collar: none — bound neckline
- Optional: two patch pockets, one on each face
Stitch measurements:
- Stitch length: about ⅛ inch on the working face
- Gap length: about 1/12 inch, giving a 60/40 ratio
- Row spacing: ⅜ to ½ inch
- Grid patterns: asanoha on a 1-inch grid, or plain parallel rows
Add 4 inches of ease at the chest. A vest layers over a shirt but does not need the volume a jacket does.
Materials Needed
For one reversible sashiko vest, gather:
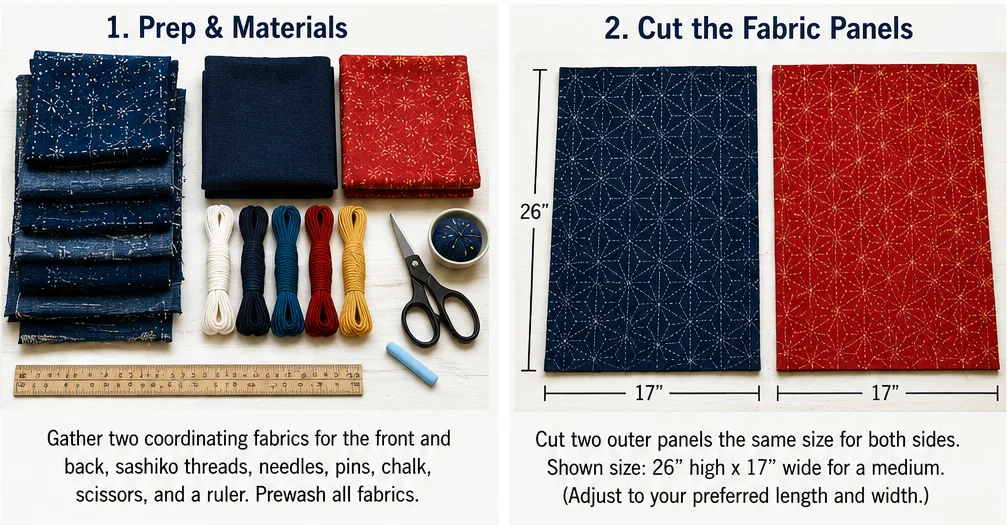
- Face A fabric: 2 yards of deep indigo cotton, mid-weight sheeting or chambray at about 5 oz
- Face B fabric: 2 yards in vermilion, saffron gold, persimmon, deep teal, or aubergine, in the same weight
- Sashiko thread: 5 to 6 skeins — white or ecru if stitching in one color, or two contrasting colors if working in sections
- Sashiko needles: a set of 3 to 5 in varied lengths
- Thimble: a Japanese palm thimble, or a leather ring thimble
- Binding fabric: ¾ yard, in a third color that works against both faces
- Chalk marker or water-soluble pen
- Quilting ruler
- Rotary cutter and cutting mat
- Sewing clips
- Sewing machine for construction seams
- Machine needles: 90/14
- Iron and ironing board
- Simple sleeveless vest pattern, or a vest to trace
Beginner tip: match the two face fabrics in weight, not just color. A heavy denim on one side and a light chambray on the other will shrink at different rates under dense stitching, and the vest will curl toward the heavier face and never lie flat.
Vibrant Two-Face Palette
Choose one from each column:
Face A — the quiet side:
- Deep indigo
- Midnight navy
- Charcoal
- Slate blue
Face B — the loud side: 5. Vermilion red 6. Saffron gold 7. Persimmon orange 8. Deep teal 9. Aubergine
Thread: 10. Bright white — reads well on both indigo and saffron 11. Natural ecru — softer, works on almost anything 12. Saffron gold — striking on indigo, subtle on vermilion 13. Black — dramatic on saffron and persimmon, invisible on indigo
Binding: 14. A third color entirely — deep teal binding on an indigo and vermilion vest ties both faces together without matching either
The thread choice is the decision that matters most. A single thread color must work against both faces, since the same stitching shows on each. White and ecru are the safest — they read clearly on every color listed above.
For a bolder result, stitch in two colors by section: white across the upper half and saffron across the lower, so both faces show the same two-tone division. This costs nothing extra and is far more interesting than a single color.
Cutting Measurements
Cut everything 1 inch larger than your pattern pieces in every direction. Dense stitching draws the cloth in by ½ to 1 inch across a large panel.
From Face A fabric, cut oversized:
- Back: one piece, about 26 x 28 inches
- Fronts: two pieces, about 16 x 28 inches each
From Face B fabric, cut the same three pieces at the same sizes.
From binding fabric, cut:
- Armhole binding: two bias strips at 2½ inches x armhole circumference plus 2 inches
- Front and neckline binding: one bias strip at 2½ inches x the full perimeter of the front opening and neckline, plus 4 inches
- Hem binding: one strip at 2½ inches x hem width plus 2 inches
- Optional tie: one strip at 2½ x 24 inches
Optional pockets:
- Two from Face A and two from Face B, at 8 x 9 inches each
Use a ½-inch seam allowance for construction seams.
Step-by-Step Guide
Step 1: Prewash Both Fabrics Separately
Wash and dry each face fabric separately, two or three times, in cold water.
Indigo bleeds heavily on early washes. Vermilion and persimmon bleed even more — reds are among the least stable dyes in cotton. Washing them together at this stage will stain both.
This step is not optional on a reversible garment. No hidden side will go unnoticed.
Step 2: Choose the Pattern and Adjust
Start with a simple sleeveless vest pattern with a plain back, two front pieces, no darts, no collar, and no closure.
Deepen the armhole by about ½ inch. Two layers of stitched cloth are thicker than one layer of woven fabric, and the binding adds a little more.
Check the shoulder width. On a reversible vest, the shoulder seam shows on both faces, so a narrower shoulder — around 15 inches — keeps that seam out of the most visible area.
Step 3: Layer the Panels
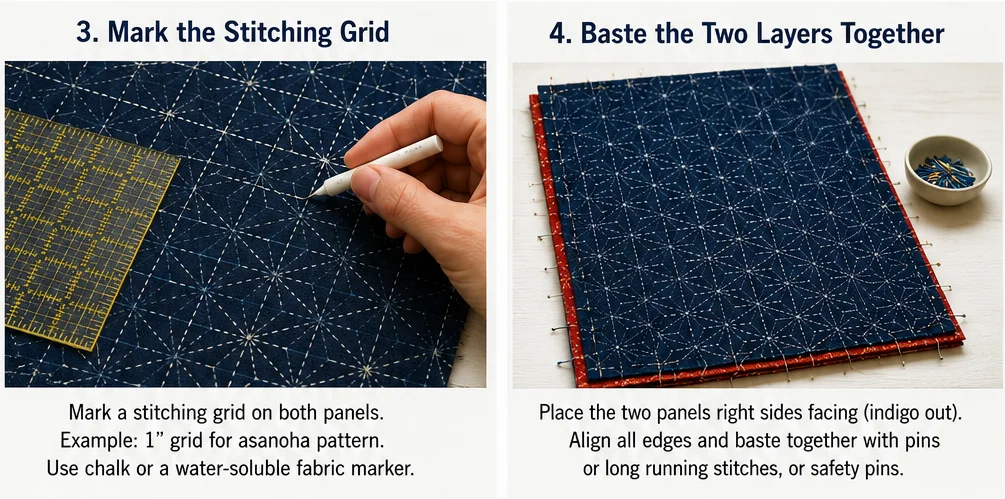
For each panel, place Face A right side down, then Face B right side up directly on top of it.
Both fabrics are right side out, facing away from each other. This construction has no wrong side.
Smooth thoroughly and baste with long running stitches in a contrasting thread, working in a grid about 4 inches apart across the whole panel.
Baste generously. Two layers of smooth cotton with nothing between them shift more than a batting sandwich does.
Step 4: Decide Which Face You Will Stitch From
Mark and stitch from one face only, and be consistent across all three panels.
Stitch from the face where your stitch-to-gap ratio matters most — usually the one you expect to wear more often. That face will show the longer stitches and the crisper line.
Chalk marks on the darker fabric are also easier to remove, which is a practical argument for marking on the indigo side.
Step 5: Mark the Pattern
Mark your grid on the chosen face.
For asanoha: rule a grid of 1-inch squares across the whole panel, add both diagonals in each square, then add the shorter connecting lines that form the six-pointed leaf units.
For parallel rows: rule straight lines ⅜ to ½ inch apart running vertically down the panel. It’s simpler, faster, and reads beautifully on both faces.
For a two-section design: mark asanoha across the upper half of each panel and plain parallel rows across the lower half. Both faces will show the same division.
Mark the entire panel before stitching. Marking as you go produces alignment drift.
Step 6: Set the Stitch Ratio
Before starting the real work, stitch a 6-inch test row on a scrap of both fabrics layered together.
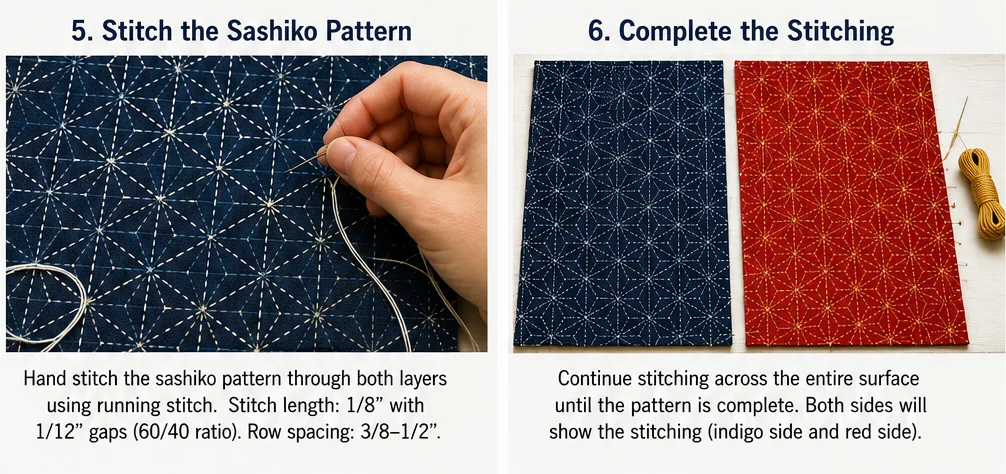
Aim for a stitch of about ⅛ inch with a gap of about 1/12 inch — a 60/40 ratio.
Now turn the scrap over. The reverse should show a slightly finer dashed line, and the two should look like siblings rather than a front and a back.
Adjust until you are satisfied. This test takes ten minutes and determines how the whole garment reads.
Step 7: Work the Stitching
Thread a long sashiko needle with about 18 to 20 inches of thread. Wear the thimble on your palm and push from there.
Load five to ten stitches onto the needle before pulling through, which is the core sashiko rhythm.
Keep tension relaxed. Pulled stitching puckers the cloth, and on a two-layer garment with no batting, puckering shows equally on both faces.
Knots are a problem here. On a single-faced piece, you hide the knot on the back. This vest has no back. Two solutions:
- Begin and end with three or four tiny backstitches worked between the two layers, so no knot exists at all
- Or bury the knot by pushing the needle in between the layers, traveling an inch, and coming up at your starting point, then giving a gentle tug so the knot pops between the layers
The second method is faster and completely invisible from both faces.
Step 8: Stitch All Three Panels
Work the back and both fronts.
Expect 25 to 40 hours for a full vest in asanoha, or 15 to 25 hours in plain parallel rows. A vest is roughly half the work of a jacket, making it a sensible first sashiko garment.
Change thread color at your section division if you are working a two-tone design.
Step 9: Press and Measure
Gently press each panel from either face with a pressing cloth. Do not press the stitching flat.
Measure each panel. Expect ½ to 1 inch of shrinkage.
Check that the panels lie flat and do not curl toward one face. Curling means the two fabrics are shrinking at different rates—usually a weight mismatch —which is why Step 1 and the weight-matching tip matter.
Step 10: Cut the Vest Pieces
Place your pattern pieces on the stitched panels and cut the back and both fronts.
Position the pieces so the pattern repeat sits symmetrically — centered on the back and matching across the two fronts, since both faces will be seen.
Step 11: Sew the Shoulder Seams
This seam has to work from both sides, and there are two good approaches.
Bound seam, the simpler method: sew the shoulder seams with a ½-inch seam allowance, press open, then cover the seam allowances with a 1½-inch bias strip folded over the raw edges and stitched down. The binding shows on one face as a deliberate line.
Flat-felled seam, the cleaner method: sew with a ½-inch allowance, trim one side of the allowance to ¼ inch, fold the wider side over it, press flat, and topstitch. This produces a seam that looks intentional and finished from both faces, which is the better result if you have the patience.
Whichever you choose, do the same on both shoulders.
Step 12: Sew the Side Seams
Sew each side seam from armhole to hem with a ½-inch seam allowance, using the same finish as the shoulders.
Try the vest on. Check the chest ease, the armhole depth, and the length before binding anything.
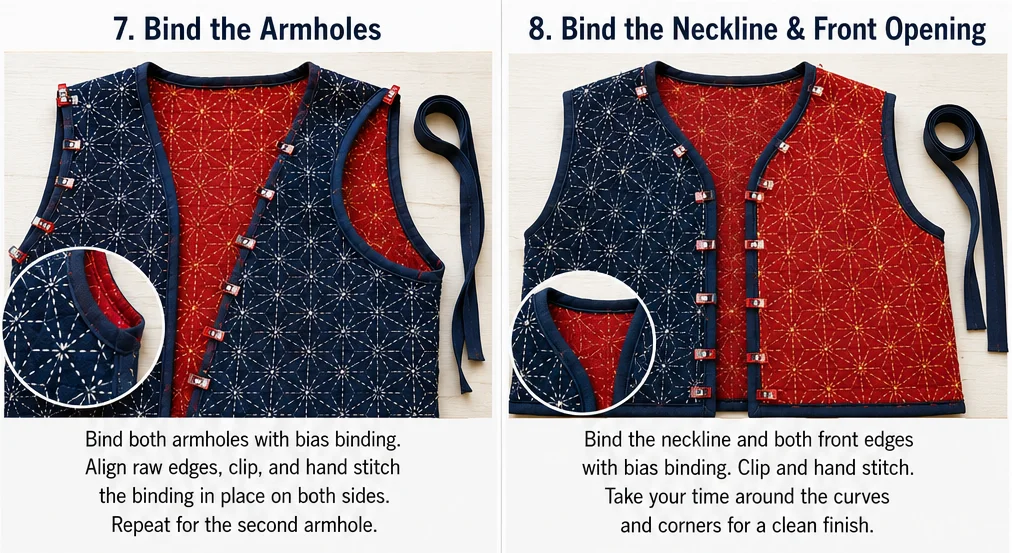
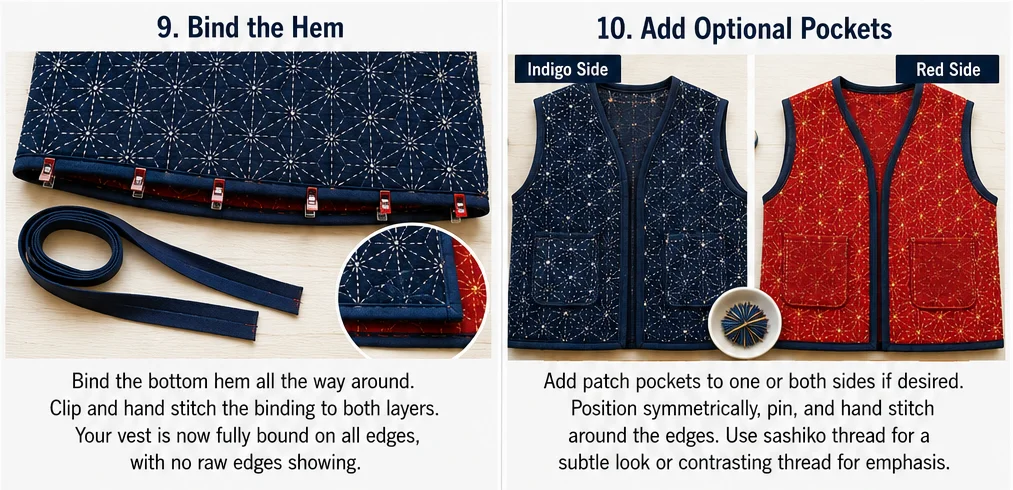
Step 13: Bind the Armholes, Front, Neckline, and Hem
All binding on this vest must present cleanly on both faces, which means a standard double-fold binding applied by machine on one side and hand-finished on the other.
Bind in this order:
- Armholes — join a 2½-inch bias strip into a loop, apply, ease around the curve
- Front opening and neckline — one continuous strip from the hem, up the right front, around the back neck, down the left front
- Hem — a separate strip, ends folded in where they meet the front binding
Machine-stitch the binding to one face, fold it over the raw edge, and hand-stitch the fold down on the other face. Machine topstitching the second side is faster but leaves a visible stitch line that will not match the hand-worked look on that face.
Ease the binding around every curve rather than pulling it. Stretched binding cups the edge.
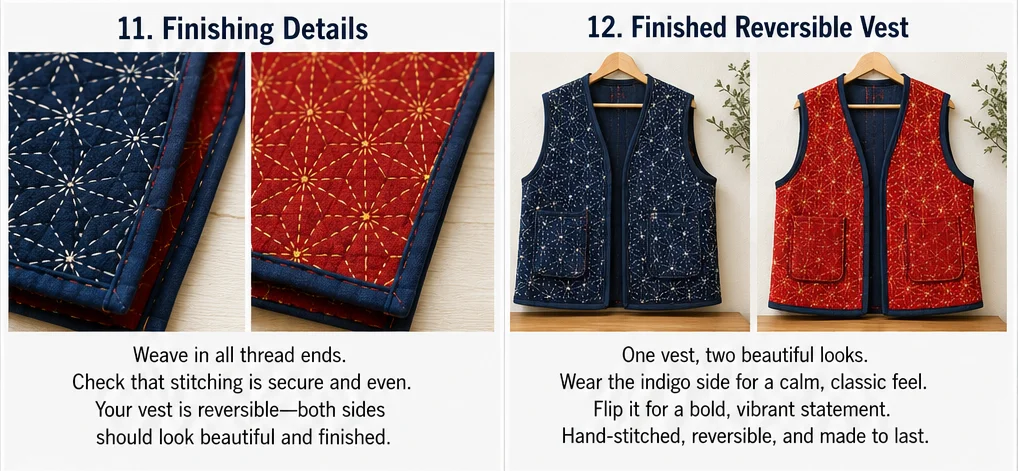
Step 14: Add Optional Pockets and Finish
If you want pockets, make one for each face: layer two 8 x 9-inch pieces — one Face A, one Face B — stitch them with a few sashiko rows, bind the top edge, turn the other three edges under, and topstitch onto the vest.
Position pockets at 3½ inches above the hem and 2½ inches in from the side seam. A pocket only appears on one face, so give each face its own.
Remove chalk marks with cold water and dry flat.
Press lightly, add a label at the inside back neck of one face only, and hang the vest rather than folding it.
Assembly at a Glance
- Prepare — prewash each face fabric separately two to three times, matching them for weight
- Layer — place both fabrics right sides out facing away from each other, baste on a 4-inch grid
- Test the ratio — stitch a 6-inch sample, check both faces, aim for 60/40 stitch to gap
- Mark and stitch — mark the full grid on one chosen face, bury knots between the layers, keep tension relaxed
- Measure and cut — allow ½ to 1 inch of shrinkage, cut with the repeat centered
- Assemble — flat-fell or bind the shoulder and side seams so they read from both faces
- Finish — bind armholes, front and neckline, then hem, machine on one face and hand-finish the other
Vibrant Reversible Combination Ideas
For a classic reversible vest, use deep indigo and vermilion with white asanoha stitching and deep teal binding.
For a sunrise vest, use midnight navy and saffron gold with ecru parallel-row stitching and persimmon binding.
For a persimmon vest, use charcoal and persimmon orange with white stitching and indigo binding.
For a two-tone stitch vest, use indigo and deep teal with white stitching on the upper half and saffron on the lower, with vermilion binding.
For a jewel vest, use aubergine and saffron gold with ecru stitching and black binding.
For a quiet reversible vest, use two close indigos with white stitching—the reversibility becomes a private detail rather than a visible feature.
Beginner Tips for Success
Match your two fabrics for weight. Mismatched weights shrink at different rates, and the vest will curl toward the heavier face permanently.
Prewash each fabric separately. Reds and indigos both bleed heavily, and there is no hidden side to absorb dye transfer.
Stitch a test row before starting. Ten minutes checking the ratio on both faces determines how the whole garment reads.
Aim for a 60/40 stitch-to-gap ratio rather than 70/30. It narrows the difference between the two faces considerably.
Bury your knots between the layers. A knot has nowhere to hide on a reversible garment, and this technique makes it disappear entirely.
Flat-fell the seams if you can. It is more work than binding and looks deliberately finished from both faces.
Hand-finish the second side of every binding. Machine topstitching there leaves a line that does not match the hand-worked face.
Give each face its own pocket. A single pocket only serves one side.
Styling Tip
A reversible vest earns its place by being two garments, so think of the two faces as separate outfits rather than one garment with a spare side.
The indigo face layers over white linen, gray tees, and natural knits, and reads as understated workwear. The vermilion or saffron face wants everything else kept plain — a black or cream base and nothing patterned, since the loud face is doing all the work.
The binding color is the only element visible on both faces, so choose it deliberately. A third color at the edges — deep teal on an indigo and vermilion vest — reads as intentional from either side and stops the vest looking like it was made face-first.
Hang it rather than folding it, alternate which face you wear so both age evenly, and wash rarely by hand in cold water.
Gift Pairings for the Pockets
The patch pockets hold small gifts well, and these suit a reversible-vest set:
- A set of sashiko needles in varied lengths in a fabric roll
- A Japanese palm thimble — hard to find and genuinely transformative
- A sashiko thread set in white, ecru, saffron, and vermilion
- A small reversible coaster set stitched from the same two fabrics
- A hand-stitched needle book with indigo on one face and vermilion on the other
- A two-sided pieced pouch in matching fabrics
- A pair of small sharp scissors and a leather thimble ring
Other Design Inspirations – Digitally Modified Images. Texture and color may vary from the actual product.
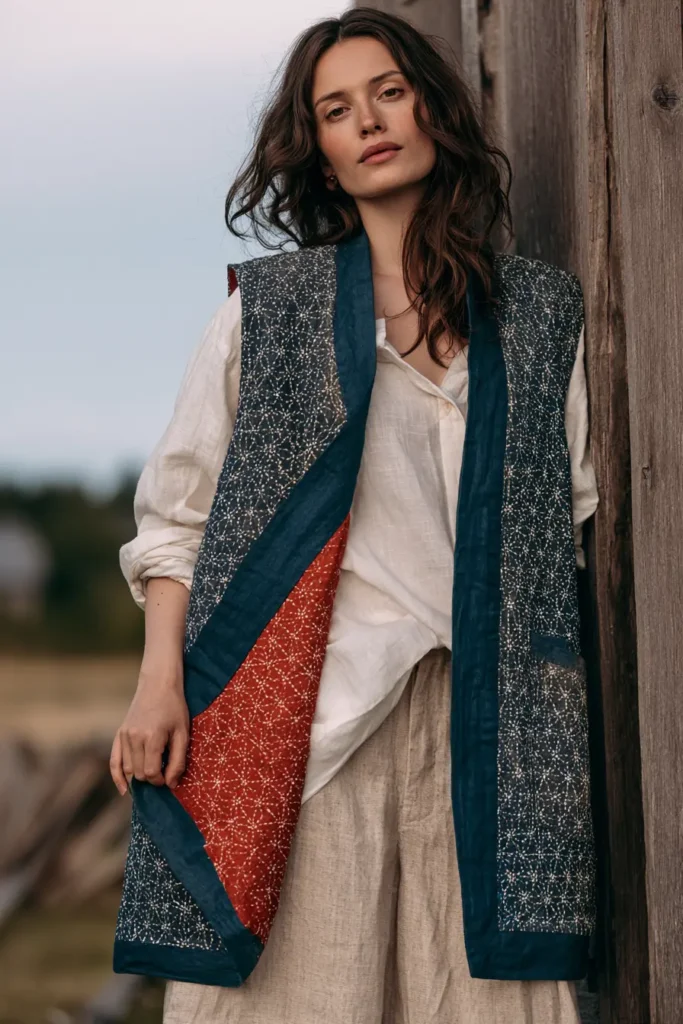
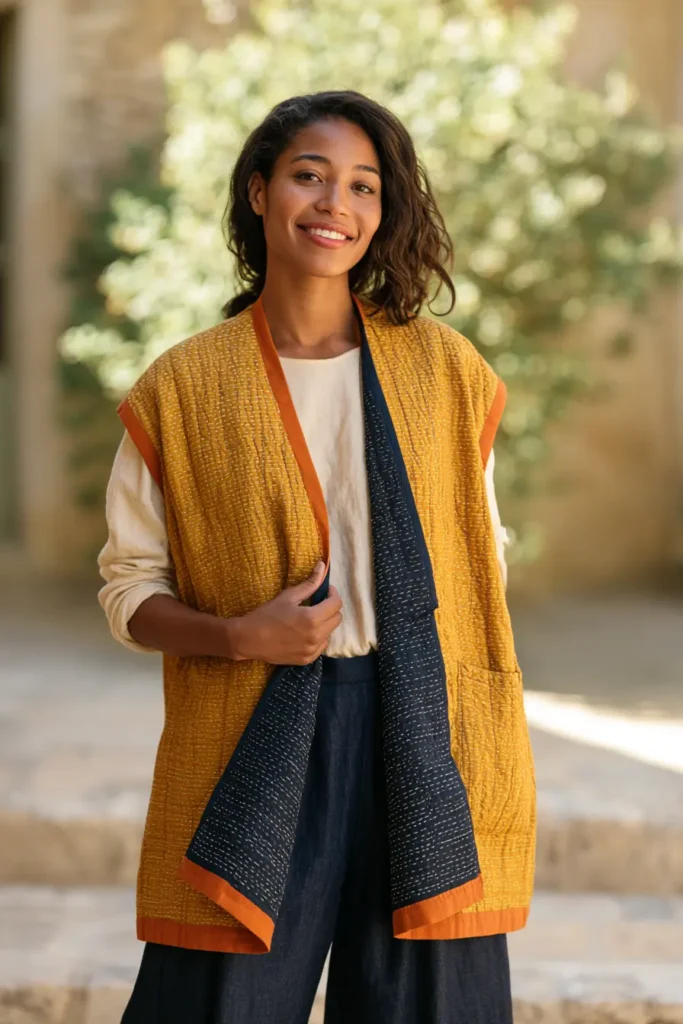
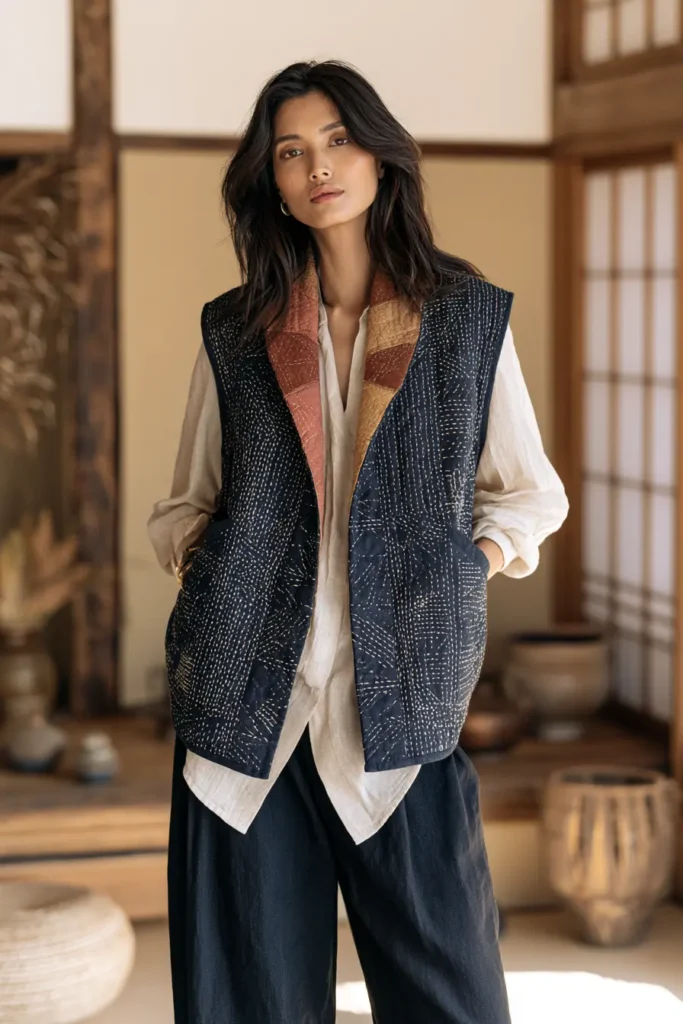

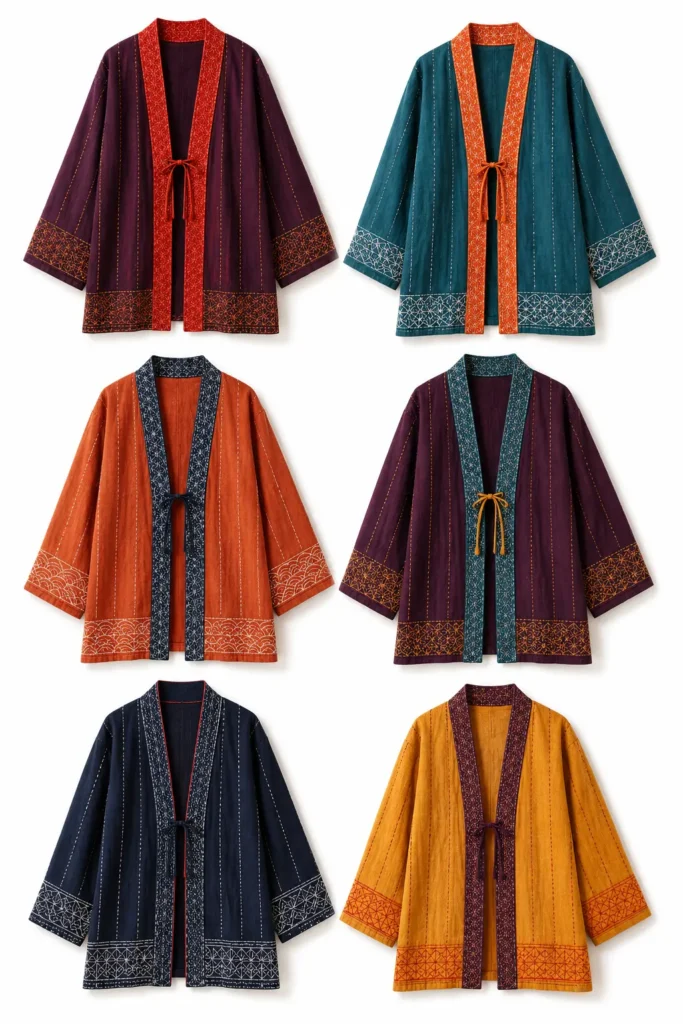
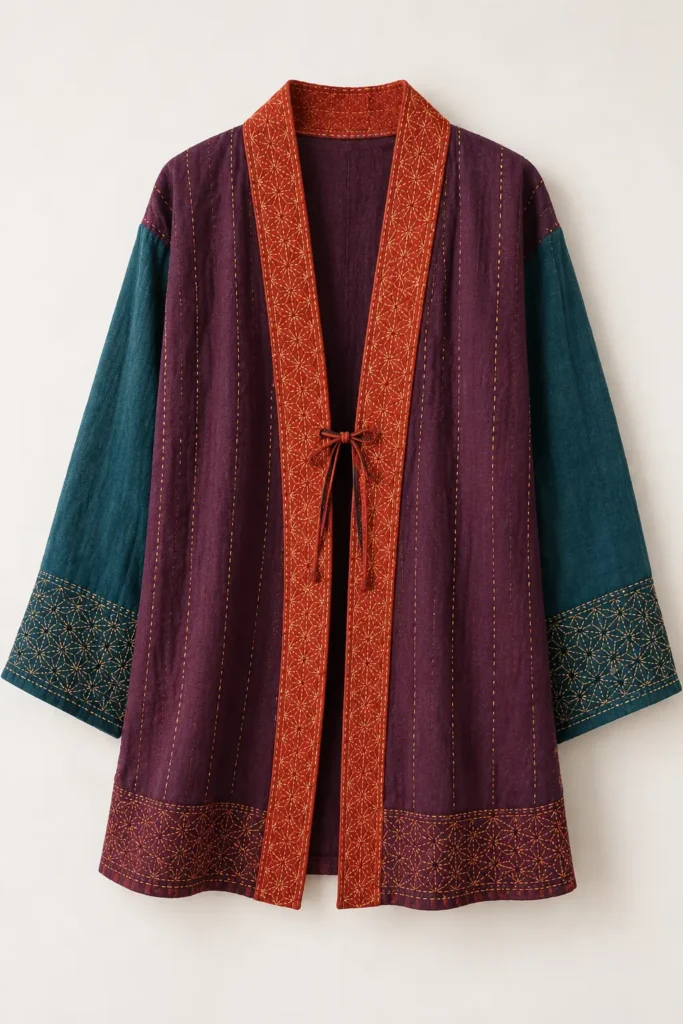
4. Kimono-Style Sashiko Jacket for Elegant Feminine Draping
A kimono-style jacket is built from straight lines only. Every piece is a rectangle — body panels, sleeves, overlap panel, collar band — and the garment gets its shape entirely from how those rectangles are joined and how the cloth falls. There is no armhole curve, no shoulder slope, no bust shaping, and nothing to ease. The drape does all the work a Western jacket does.
That construction logic makes it the most flattering silhouette in this collection and the one where sashiko needs the lightest hand. Dense stitching stiffens cloth, and a garment that depends on movement cannot afford to be stiff. This guide stitches at roughly half the density of the other jackets, with the pattern concentrated where it will be seen and open space left where the fabric needs to fall.
For a vibrant palette, this is the section to let go. Where indigo sashiko is restrained by tradition, a kimono-style jacket takes color the way a haori lining always did: aubergine, deep teal, vermilion red, saffron gold, persimmon orange, plum, and midnight navy for the cloth, with stitching in bright white, ecru, saffron gold, or vermilion. A deep aubergine jacket with saffron stitching and a vermilion collar band fits perfectly with the tradition it draws from.
Why This Design Works
Rectangular construction exists because of the loom. Traditional Japanese cloth is woven as tanmono — a bolt roughly 14 inches wide and 12 to 13 yards long — and a kimono is cut from a single bolt with essentially no waste. Every piece is a rectangle because the bolt width determined the pattern, not the other way round. The garment uses a narrow cloth efficiently, and everything elegant about it follows from that constraint.
Two structural features do the shaping. The okumi, a narrow overlap panel added to each front edge, extends the front so the two sides cross generously at the body rather than meeting edge to edge. The eri, a long collar band, runs from one hem up around the back neck and down to the other hem in one continuous strip, producing the deep V and the clean line down the front.
The sleeves attach to a straight edge, not a curved armhole, and hang as open rectangles. That is why the sleeve drapes rather than fits, and why the silhouette reads as fluid.
Stitch density is the one thing you control that can ruin it all. Rows at ¾ to 1 inch apart — roughly double the spacing of a structured sashiko jacket — keep the cloth supple. Concentrated pattern at the hem, cuffs, and collar with open space through the body is both more traditional in effect and better for drape.
Skills you build here: rectangular garment drafting, working with the grain across long panels, applying a continuous collar band, controlled low-density stitching, and finishing a garment where every seam is straight.
Design Inspirations – Digitally Modified Images. Texture and color may vary from the actual product.
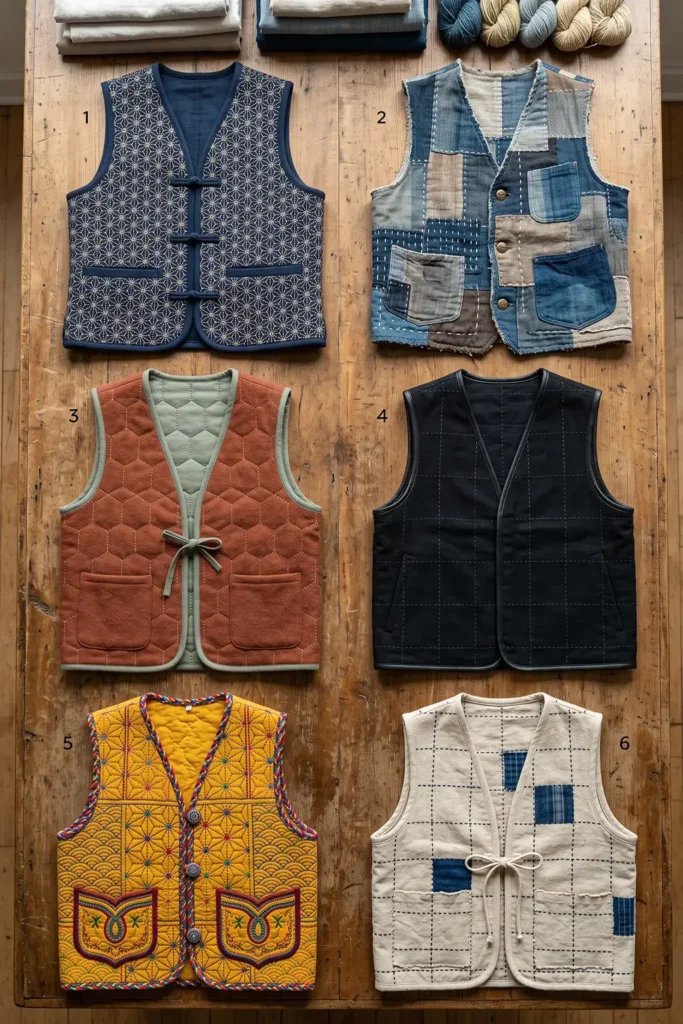
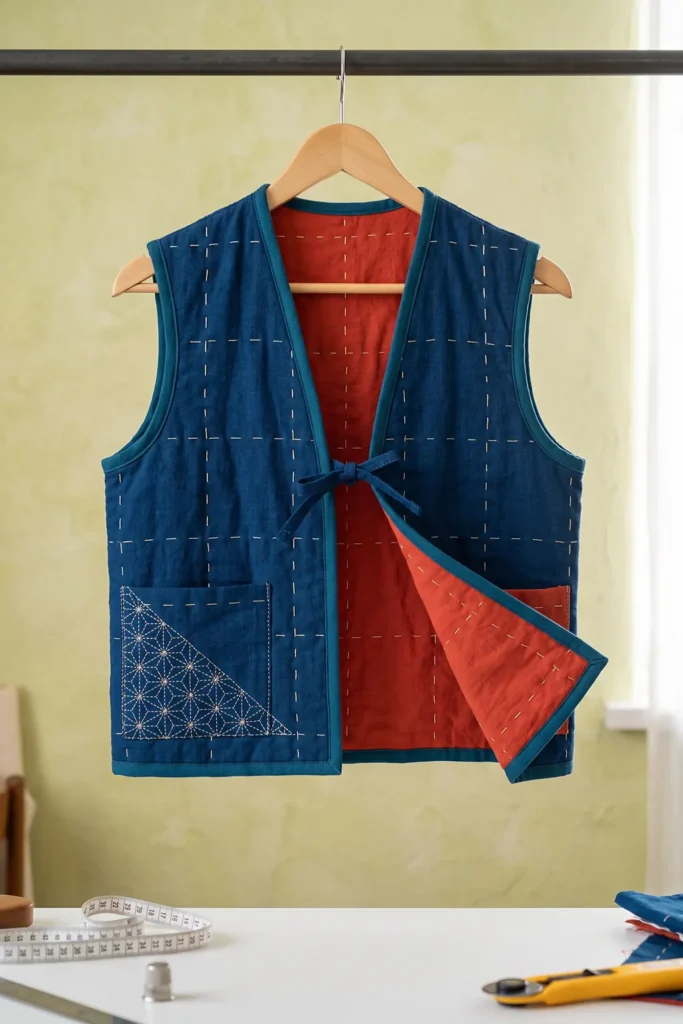
A Note on Kimono Construction
The word kimono simply means “thing to wear,” and it came into use to distinguish Japanese dress from Western clothing after the Meiji period opened Japan to foreign trade in the 1860s. Before that, it was just clothing.
This jacket borrows the construction geometry, not the garment. A true kimono is a full-length robe worn with an obi and a set of undergarments, and the way it is worn is as much a part of it as the cloth. A hip-length jacket built on the same rectangular logic is properly called kimono-style or kimono-inspired, and the distinction is worth keeping.
The garment this jacket most resembles is the haori — a hip-length or thigh-length jacket worn over a kimono, open at the front, sometimes with a short tie at the chest. Haori were originally menswear and became widely worn by women in the late nineteenth century. Their linings were where the interesting things happened: under Edo-period sumptuary laws restricting visible luxury, the outside stayed plain while the inside carried hand-painted silk, elaborate patterns, and color. The practice has a name — ura no oshare, the elegance of the hidden side.
Three details worth knowing if you wear or photograph one.
The front always wraps left over right, regardless of the wearer’s gender. The reverse, right over left, is used only when dressing the dead, and it is a genuinely jarring error to Japanese eyes. If your jacket has any asymmetry, build it to wrap left over right.
Sleeve length signaled status. The furisode, with sleeves hanging nearly to the floor, was worn by unmarried young women; married women wore the shorter tomesode. Sleeve length signaled status before it became a style choice.
And the mon — a family crest — appears on formal garments in sets of one, three, or five, placed at the back neck, the outer sleeves, and the chest. The number indicated formality, with five being the most formal.
Finished Size
This guide makes a hip-length kimono-style jacket with rectangular sleeves, an overlap panel, and a continuous collar band.
Sample finished measurements for a loose medium:
- Finished chest with overlap: about 50 inches
- Finished length: about 30 inches from shoulder fold to hem
- Body panel width: 14 inches each, before the overlap panel
- Overlap panel width: 5 inches finished, each front
- Sleeve length: about 15 inches from the shoulder fold
- Sleeve depth: about 13 inches
- Sleeve opening: about 10 inches
- Collar band: 2½ inches finished width
- Front style: open, wrapping left over right, with an optional chest tie
Stitch measurements:
- Stitch length: about ⅛ inch, with gaps about half that
- Row spacing: ¾ to 1 inch — deliberately open
- Concentrated areas: hem band 6 inches deep, cuff bands 4 inches deep, collar band fully stitched
- Body: widely spaced rows only
Because the body panels are cut at 14 inches wide, this jacket uses the traditional bolt width even though you will be cutting from standard 44-inch fabric.
Materials Needed
For one kimono-style sashiko jacket, gather:
- Main fabric: 3½ yards of mid-weight cotton, rayon-cotton, or lightweight linen at about 4 to 6 oz — the fabric must drape, so avoid denim and heavy sheeting
- Backing layer: 3½ yards in a lighter cotton, or omit for a single-layer jacket in warm weather
- Collar band fabric: ¾ yard in a contrasting vibrant color
- Sashiko thread: 4 to 5 skeins — less than the other jackets, because the density is lower
- Sashiko needles: a set of 3 to 5 in varied lengths
- Thimble: a Japanese palm thimble, or a leather ring thimble
- Chalk marker or water-soluble pen
- Quilting ruler, at least 24 inches
- Rotary cutter and cutting mat
- Sewing clips
- Sewing machine
- Machine needles: 80/12 for lighter fabrics
- Iron and ironing board
No pattern is needed. Every piece is a rectangle and the measurements are below.
Beginner tip: choose fabric by how it falls, not how it looks flat. Hold a length up by one corner in the shop — if it hangs in soft folds, it will work. If it stands out stiffly, the finished jacket will hang like a board no matter how lightly you stitch it. Rayon-cotton blends and washed linen both drape beautifully.
Vibrant Kimono Palette
A garment that takes color the way a haori lining did:
Cloth:
- Aubergine
- Deep teal
- Plum
- Midnight navy
- Vermilion red
- Persimmon orange
- Saffron gold
Thread: 8. Bright white 9. Natural ecru 10. Saffron gold 11. Vermilion
Collar band and accents: 12. A strong contrast to the body — vermilion on aubergine, saffron on deep teal, plum on persimmon
The collar band is the single most visible element on this garment. It runs from hem to hem in an unbroken line down both fronts and around the neck, framing the face. Choose it for contrast rather than coordination.
If you want a hidden-luxury detail in the haori tradition, back the collar band in a third color entirely — a saffron band lined in vermilion, showing only where the collar turns.
Cutting Measurements
Everything is a rectangle. Cut all pieces 1 inch larger than the sizes below in every direction to allow for stitch shrinkage, then trim to size after stitching.
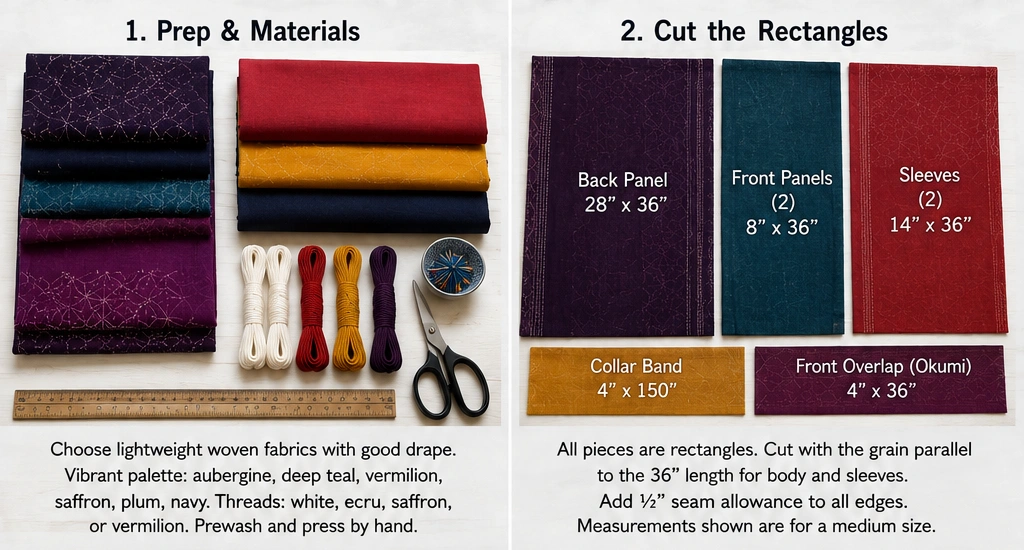
From main fabric, cut:
- Body panels: two pieces at 15 x 62 inches each
These run from the front hem, up over the shoulder, down the back to the back hem, in one continuous piece with no shoulder seam. This is the defining feature of kimono construction and it is why the panel is so long.
- Overlap panels (okumi): two pieces at 6 x 32 inches each
- Sleeves: two pieces at 16 x 28 inches each
- Collar band (eri): one piece at 6 x 80 inches, pieced from shorter lengths if needed
From backing fabric, cut the same five pieces at the same sizes, if making a two-layer jacket.
From collar band fabric, cut:
- Collar band: one piece at 6 x 80 inches
- Optional tie: two pieces at 2½ x 14 inches
Total main fabric needed: about 3½ yards at 44 inches wide.
Use a ½-inch seam allowance throughout.
Step-by-Step Guide
Step 1: Prewash and Test the Drape
Wash and dry all fabrics twice before cutting. Rayon blends in particular shrink substantially on the first wash.
Then test: hold a yard of the washed fabric by one corner and let it hang. It should fall in soft vertical folds. If it holds a stiff shape, choose a different fabric — no amount of careful stitching will make a stiff cloth drape.
Step 2: Cut All the Rectangles
Cut the two body panels, two overlap panels, two sleeves, and the collar band, all at the oversized measurements above.
Cut everything on the straight grain, with the long dimension running along the fabric length. Grain direction matters more here than in any other garment in this collection, because a rectangular garment with no shaping relies entirely on the cloth hanging true. A panel cut slightly off-grain will twist as it hangs, and the twist will get worse with wear.
Check that each rectangle is genuinely square before moving on.
Step 3: Mark the Shoulder Fold
On each 62-inch body panel, measure to the center point at 31 inches and mark a line across the width.
This is the shoulder fold. The panel will fold here, with 31 inches falling to the front hem and 31 inches to the back hem.
Mark it clearly. Every other measurement on the panel references it.
Step 4: Plan the Stitch Zones
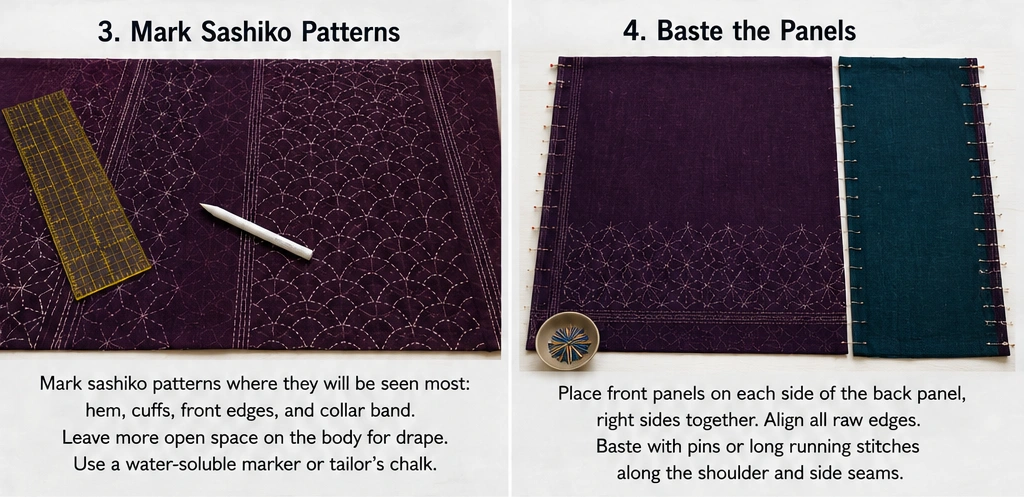
This is the decision that determines whether the jacket drapes.
Mark three zones on each panel:
- Hem band: the bottom 6 inches of both front and back, densely stitched at ½-inch row spacing
- Body: everything between, stitched at ¾ to 1 inch row spacing — open and light
- Shoulder area: a band about 4 inches either side of the fold line, left almost unstitched or with rows 1½ inches apart
The shoulder is where the garment hangs from, and dense stitching creates a stiff yoke that prevents the whole jacket from hanging properly. Keeping it open is the single most important choice in this section.
On the sleeves, mark a 4-inch densely stitched band at the cuff end and open spacing elsewhere.
Step 5: Mark the Pattern
For the hem and cuff bands, mark a proper geometric pattern — asanoha on a 1-inch grid, or seigaiha overlapping waves on a 1½-inch grid, both of which read well in a horizontal band.
For the body, mark simple parallel rows at ¾ to 1 inch spacing, running vertically down the panel. Vertical rows lengthen the line and move with the drape; horizontal rows fight it.
For the collar band, mark parallel rows running the length of the band at ½-inch spacing. The collar is narrow enough that denser stitching won’t affect the drape, and it gives the most visible element some weight.
Mark each full panel before stitching.
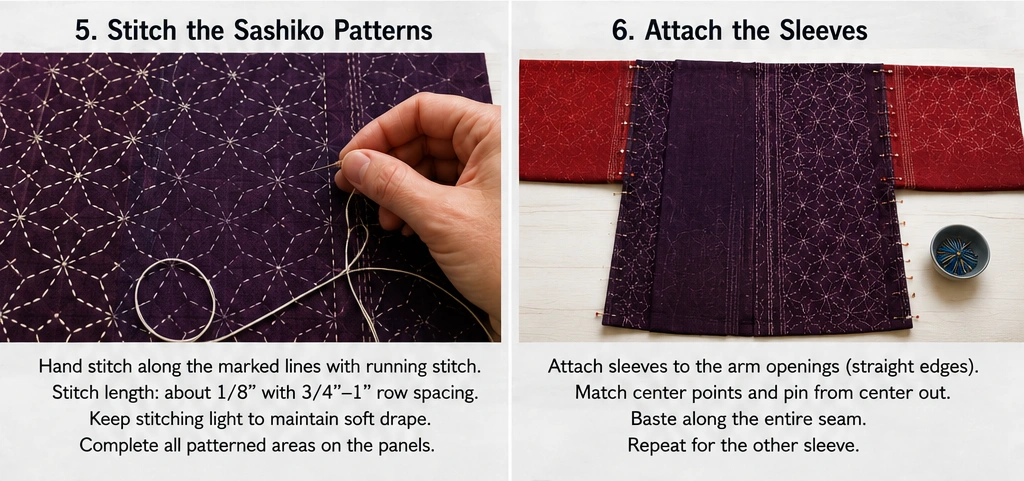
Step 6: Layer and Baste
If making a two-layer jacket, lay each backing piece down, place the main fabric on top right side up, and baste on a 4-inch grid.
For a single-layer jacket, skip this — sashiko on a single layer of cloth works perfectly well and produces the lightest, most fluid result. The stitching then reads as pure surface decoration rather than as quilting.
The single-layer version is the better choice for a first attempt and for warm-weather wear.
Step 7: Stitch the Bands
Start with the hem bands, cuff bands, and collar band, since these are the densest work and the most visible.
Thread a long sashiko needle with about 18 to 20 inches of thread. Wear the thimble on your palm.
Work a running stitch of about ⅛ inch with gaps roughly half that, loading five to ten stitches per pass.
Keep tension relaxed. On a garment chosen for drape, pulled stitching is more damaging than on any other piece in this collection.
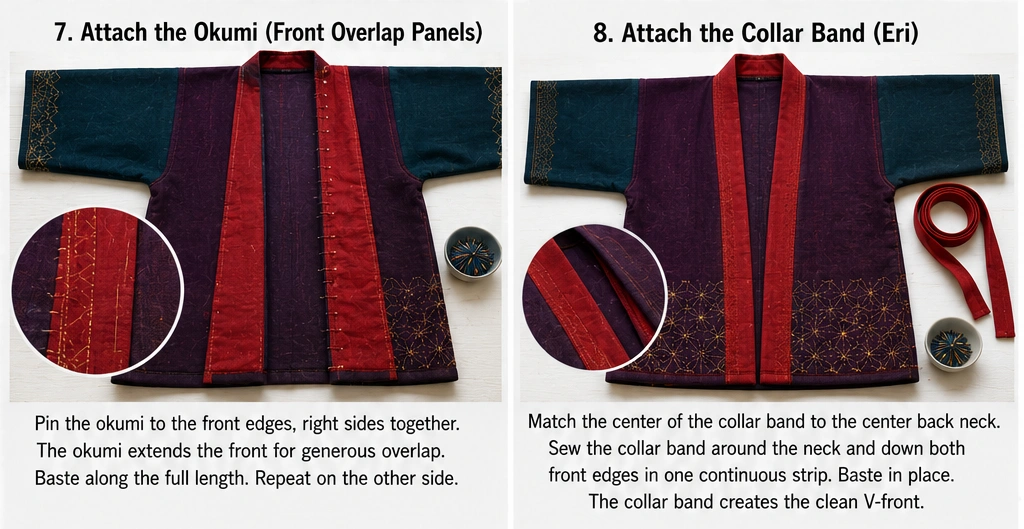
Step 8: Stitch the Body Rows
Work the widely spaced vertical rows across the body of each panel.
This goes quickly — at ¾ to 1 inch spacing, a body panel takes a fraction of the time a densely stitched one would.
Leave the shoulder zone open as planned. Resist the urge to fill it.
Expect 30 to 45 hours for the full jacket, considerably less than a densely stitched sashiko jacket, because most of the surface is open.
Step 9: Press, Measure, and Trim
Gently press each piece from the reverse with a pressing cloth.
Measure and trim to the finished sizes:
- Body panels: 15 x 62 inches
- Overlap panels: 6 x 32 inches
- Sleeves: 16 x 28 inches
- Collar band: 6 x 80 inches
Expect less shrinkage than on the other jackets — perhaps ¼ to ½ inch — because the stitching is lighter.
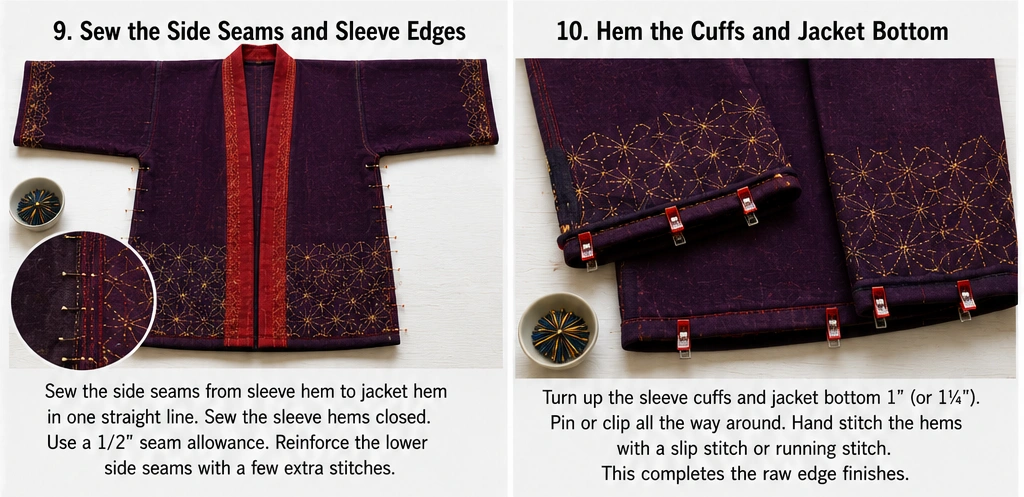
Step 10: Join the Body Panels at the Center Back
Place the two body panels right sides together and sew along one long edge with a ½-inch seam allowance, from the back hem up to the shoulder fold line and no further.
This is the center back seam. It stops at the fold because there is no seam above it— the panels simply continue over the shoulder to become the fronts.
Press the seam open and finish it with a flat-fell or a bound edge.
Step 11: Attach the Overlap Panels
Sew a 6 x 32-inch overlap panel to each front edge, right sides together, with a ½-inch seam allowance, running from the front hem up to about 9 inches below the shoulder fold.
The overlap panel widens each front so the two sides cross generously at the body. Without it, a kimono-style jacket meets edge to edge and loses the deep wrapped V that defines the silhouette.
Press seams toward the body panel and finish them.
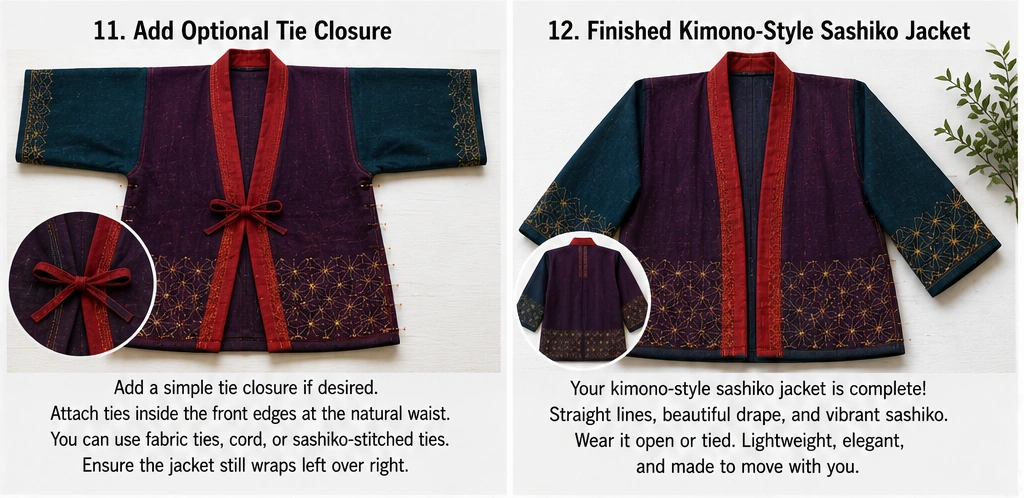
Step 12: Attach the Sleeves
Fold each 16 x 28-inch sleeve rectangle in half to measure 16 x 14 inches.
Center the folded edge of the sleeve against the shoulder fold of the body, right sides together, and sew along the straight edge with a ½-inch seam allowance. The sleeve seam runs about 13 inches down from the fold on each side.
There is no curve and nothing to ease. This is a straight seam joining two straight edges.
Then sew the underarm seam of each sleeve and continue down the body side seam in one line, leaving the lower 10 inches of each side seam open below the sleeve. That open side vent is traditional, aids movement, and helps the jacket swing as you walk.
Finish all these seams — an unlined jacket shows its interior.
Step 13: Attach the Collar Band
Fold the 6 x 80-inch collar band in half lengthwise, wrong sides together, and press. It now measures 3 inches wide and finishes at 2½ inches.
Find the center of the band and match it to the center back neck. Pin outward in both directions from there.
Sew the band to the neckline and down both front edges in one continuous seam, with a ½-inch seam allowance, working from the center back down to each hem.
Fold the band to the inside, turn the raw edge under, and hand-stitch it down along the seam line.
The band should lie flat down the front and stand slightly at the back neck. Ease it around the neck curve rather than stretching it — a stretched collar band will ripple down the front, and it is the most visible part of the garment.
Step 14: Hem, Add Ties, and Finish
Hem the jacket and the sleeve openings by turning under ½ inch twice and topstitching, or bind them to match the collar.
If you want a closure, make two 2½ x 14-inch ties, fold and stitch each into a narrow strap, and attach one to each front edge at about chest height, 9 inches below the shoulder fold. Attach them so the jacket wraps left over right when tied.
Remove chalk marks with cold water and dry flat.
Press lightly, add a label at the inside back neck, and hang the jacket. Never fold a garment that depends on drape.
Assembly at a Glance
- Prepare — prewash twice, test the drape by hanging a length from one corner
- Cut — two body panels at 15 x 62 inches, two overlap panels, two sleeves, one long collar band, all on the straight grain
- Plan the zones — dense bands at hem and cuffs, open rows through the body, shoulder area almost unstitched
- Stitch — bands first, then widely spaced vertical body rows, keeping tension relaxed throughout
- Trim — press and cut to finished rectangle sizes
- Assemble — center back seam to the shoulder fold, overlap panels to each front, sleeves onto straight edges, side seams left open at the lower 10 inches
- Finish — attach the continuous collar band from center back to both hems, hem, add ties wrapping left over right
Vibrant Kimono Combination Ideas
For an aubergine jacket, use deep aubergine cloth with saffron gold stitching and a vermilion collar band.
For a teal jacket, use deep teal with white asanoha bands and a persimmon orange collar.
For a persimmon jacket, use persimmon orange with ecru stitching and a midnight navy collar band.
For a plum jacket, use plum with saffron stitching and a deep teal collar, with saffron ties.
For a hidden luxury jacket, use midnight navy with white stitching and a plain navy collar band lined in vermilion — the color shows only at the collar turn.
For a saffron jacket, use saffron gold cloth with vermilion stitching and an aubergine collar band. The loudest option, and closest to what a haori lining actually looked like.
Beginner Tips for Success
Choose fabric by drape, not appearance. Hold it up by one corner in the shop — if it stands stiff, no stitching technique will rescue the finished garment.
Cut everything on the straight grain. A rectangular garment with no shaping relies on the cloth hanging true, and off-grain panels twist permanently.
Leave the shoulder area almost unstitched. A stiff yoke stops the entire jacket from falling properly, and it is the most common mistake in kimono-style construction.
Space body rows at ¾ to 1 inch. Roughly half the density of a structured sashiko jacket, and the difference between a jacket that flows and one that hangs like cardboard.
Do not skip the overlap panels. Without them, the fronts meet edge to edge, and the deep wrapped V disappears.
Ease the collar band around the neck curve. A stretched band ripples down the front of the most visible part of the garment.
Leave the lower side seams open. The vents are traditional, and they are why the jacket swings.
Wrap left over right. Right over left is used only for the dead, and it is a jarring error to anyone who knows.
Styling Tip
A kimono-style jacket is a drape garment, so everything under it should be close-fitting: a fitted tee, a slim knit, a narrow dress, straight or wide trousers. Volume under volume cancels the silhouette entirely.
Worn open, the long, unbroken collar band draws a vertical line from shoulder to hem, which makes this the most lengthening shape in the collection. Tied at the chest, it creates a deep V and a soft blouson above the tie.
Keep neck jewelry minimal — the collar band already frames the face. Bracelets work better than necklaces with this silhouette, since the wide sleeves draw attention to the wrists as you move.
Hang it, never fold it. A crease across a drape garment is very difficult to remove and shows every time the fabric moves.
Gift Pairings for the Pockets
This silhouette traditionally has no pockets, so these work as a set alongside the finished jacket, or in a small drawstring pouch worn with it:
- A set of sashiko needles in varied lengths in a fabric roll
- A Japanese palm thimble — hard to find and genuinely transformative
- A sashiko thread set in white, ecru, saffron, and vermilion
- A small drawstring pouch in the collar band fabric, in the tradition of a kinchaku
- A hand-stitched fan case from leftover cloth
- A sashiko-stitched eyeglasses case in the contrast color
- A 24-inch quilting ruler — the tool that makes long straight rectangles accurate
Other Design Inspirations – Digitally Modified Images. Texture and color may vary from the actual product.
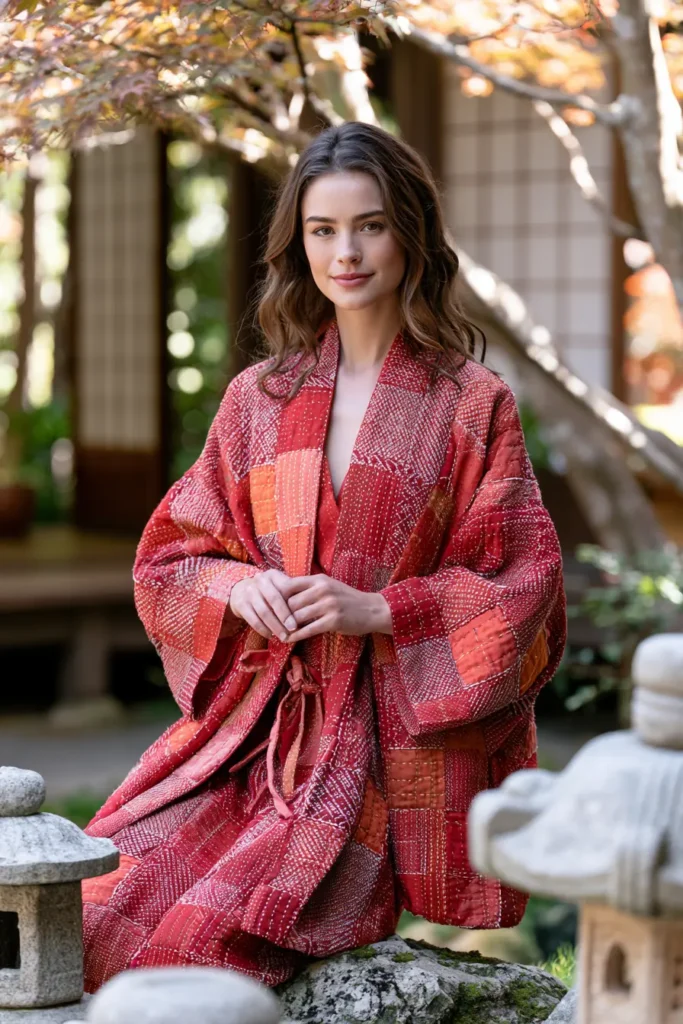
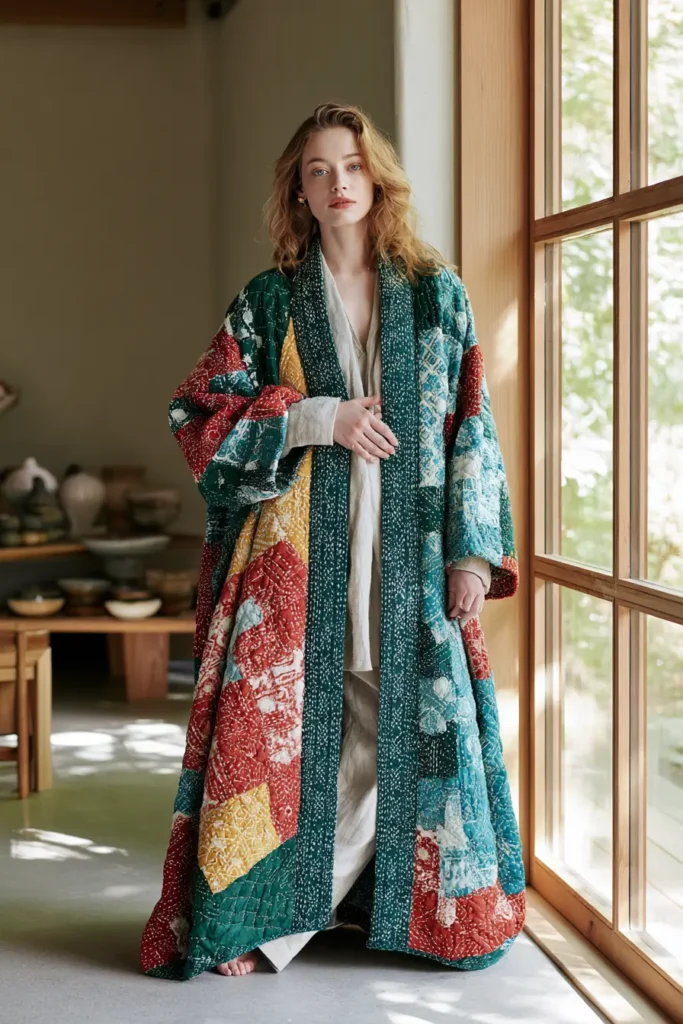
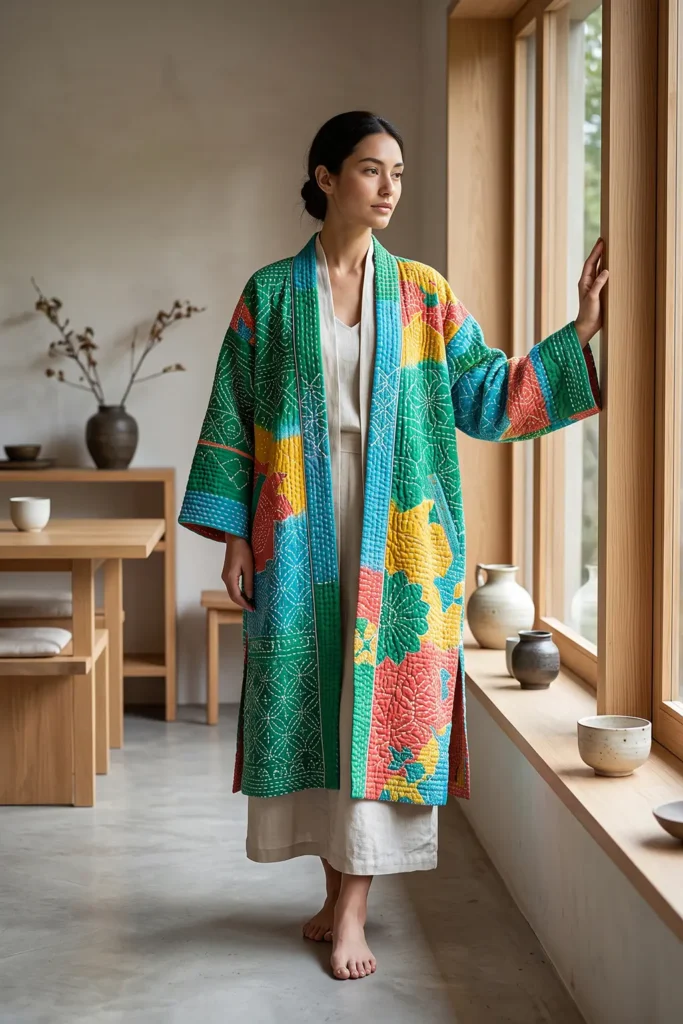
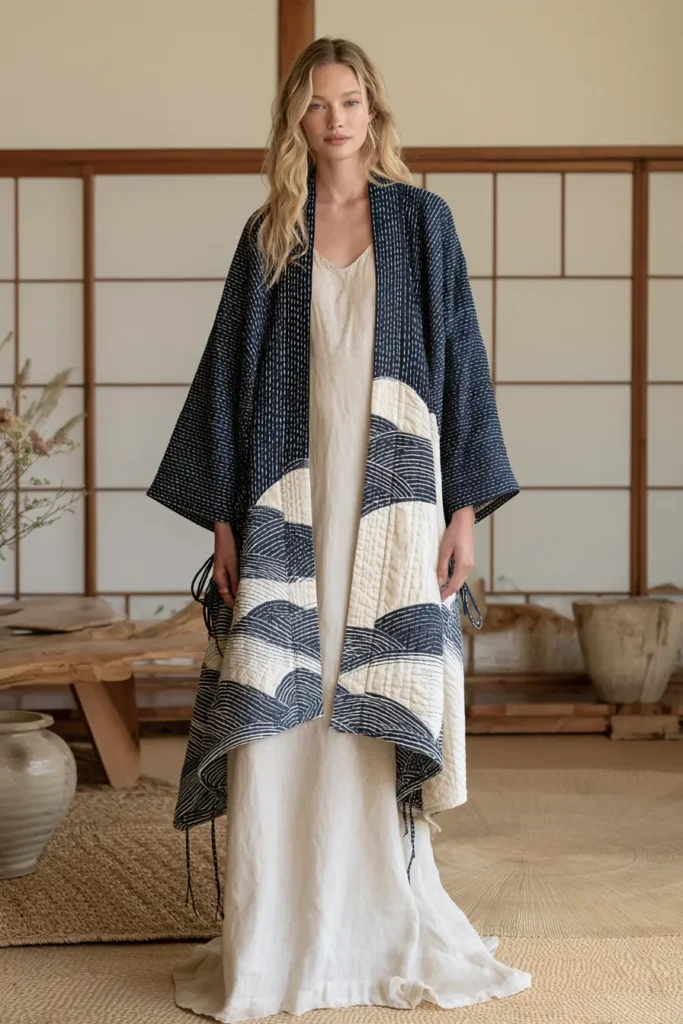
5. Cropped Sashiko Quilted Vest for Chic Modern Layering
A cropped sashiko vest is the smallest garment in this collection and the one that demands the most deliberate pattern planning. On a full-length jacket, a sashiko grid has room to establish itself — twenty or thirty motif repeats across a panel, so the eye reads texture. On a cropped vest with a 15-inch body, a standard grid produces perhaps three complete motifs per panel, and three repeats do not read as a pattern. They read as fragments.
The solution is to scale the grid down, not to use less of it. A hemp-leaf unit at 1¼ inches instead of 2 gives you the same visual density on a much smaller garment, and the finer stitching suits a modern cropped silhouette better than a large traditional grid would.
This is also the section to be boldest with color. A cropped vest is a modern garment with no traditional precedent to answer to, and it covers little enough area that a loud color stays wearable. Build it from vermilion red, persimmon orange, saffron gold, deep teal, aubergine, magenta, or chartreuse, and stitch in bright white, ecru, black, or a second contrasting bright. A persimmon vest with white stitching over a plain black dress is a considerably stronger look than any indigo version of the same shape.
Why This Design Works
Cropped garments work by proportion rather than by drape, which makes them the structural opposite of the kimono-style jacket. Where that garment needed light stitching to fall properly, a cropped vest benefits from density. A firm, tightly stitched panel holds the boxy shape, keeps the hem sitting level, and stops the vest riding up when the wearer moves. Stitch this one at ⅜-inch row spacing or closer.
The hem placement is the decision that makes or breaks it. A cropped vest should end at the natural waist or just above the high hip — around 20 to 22 inches from the shoulder on most people. Two inches longer and it reads as a short vest that doesn’t fit; two inches shorter and it becomes a bolero, a different garment entirely. This guide gives a measuring method rather than a fixed number, because the correct length depends on the wearer’s torso rather than on a size chart.
The small scale brings real practical advantages. A cropped vest uses under a yard of face fabric, takes 10 to 18 hours of stitching rather than 60 to 100, and can be built entirely from leftover pieces. It is by a wide margin the best entry point into sashiko garment making, and the fastest way to find out whether you enjoy the stitching before committing to a jacket.
Skills you build here: scaling a traditional grid to fit a garment, centering a pattern on a small panel, dense stitch control, and precise hem placement.
Design Inspirations – Digitally Modified Images. Texture and color may vary from the actual product.
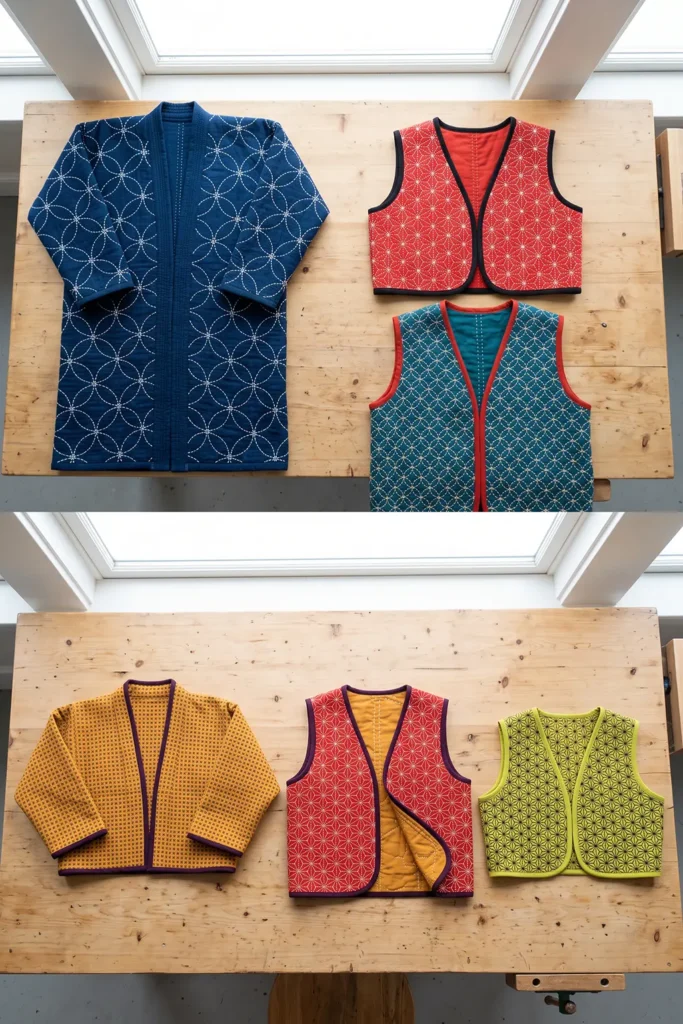
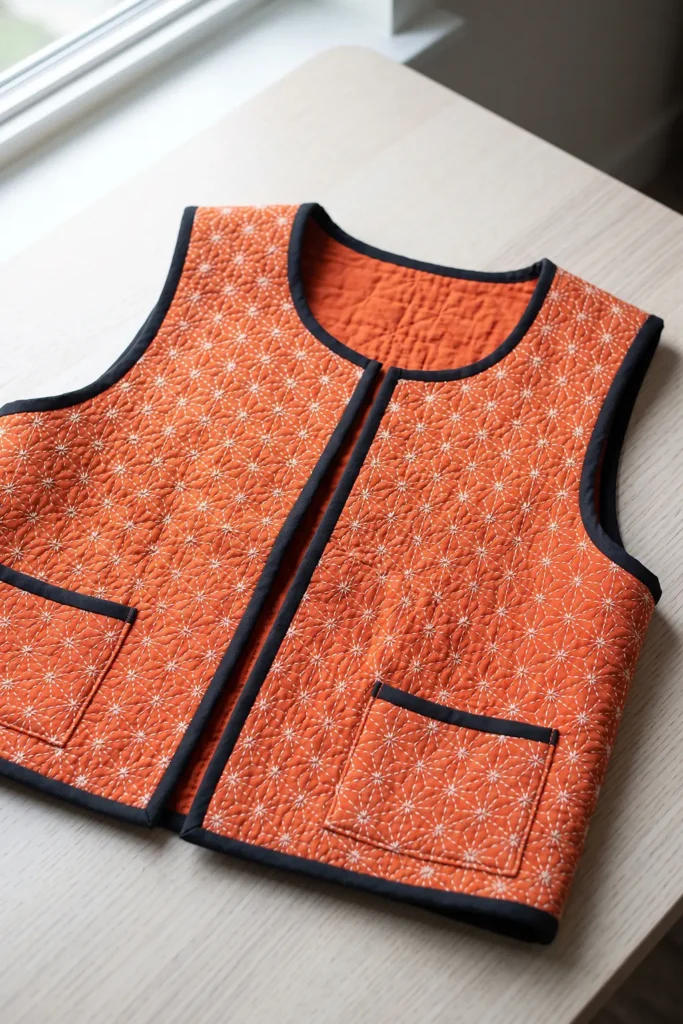
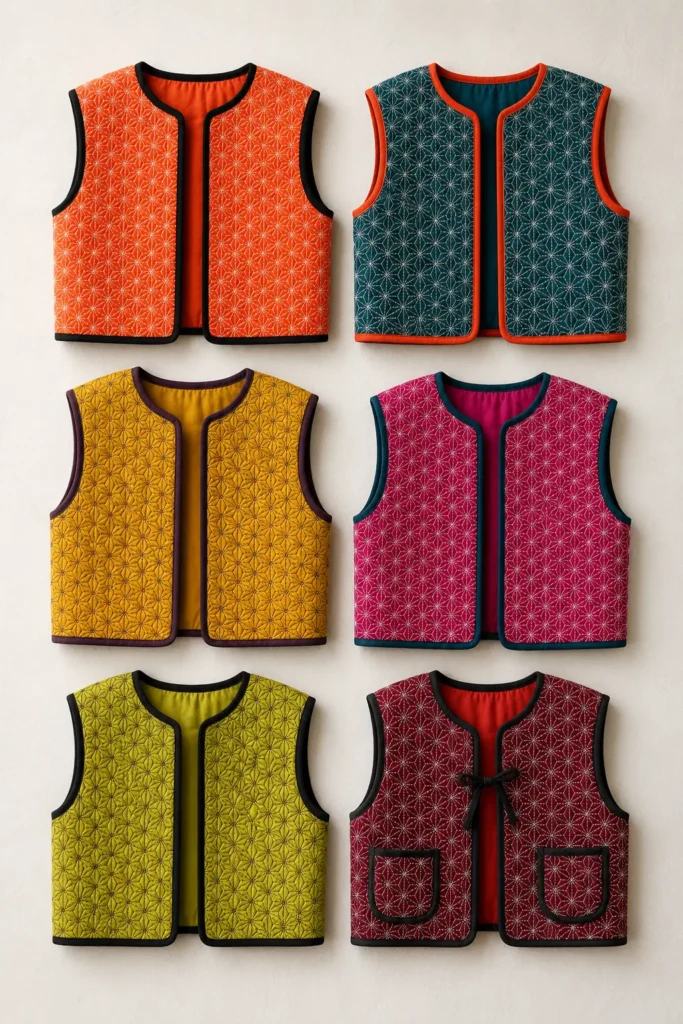
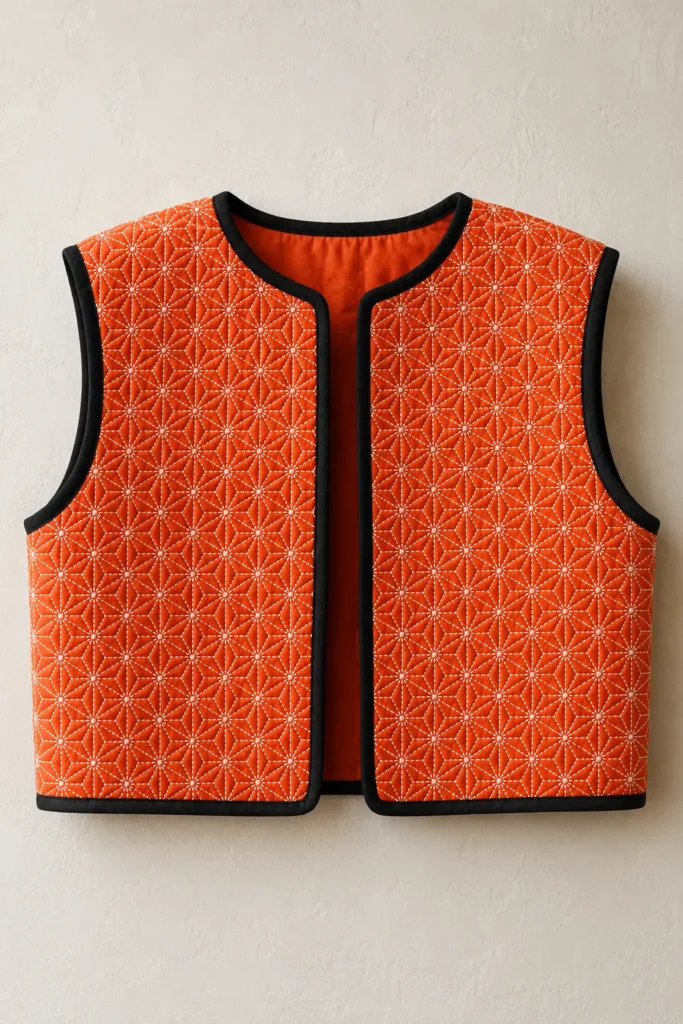
A Note on Scale and Pattern
Japanese textile tradition has treated the relationship between motif size and garment size as a formal consideration for centuries.
In kimono, komon describes fine repeating patterns — the word means “small crest” — applied by stencil dyeing so densely that from a distance the cloth reads as a solid color, and only up close does the pattern appear. Edo komon, developed for samurai formal wear during the same period as the sumptuary laws, took this to an extreme: patterns cut from stencils at densities of hundreds of dots per square inch, deliberately subtle enough to comply with restrictions on visible display while remaining unmistakably expensive to anyone who looked closely.
The opposite tradition, ōgara, uses large bold motifs and was considered appropriate for younger wearers and for informal or festive garments. The convention held that pattern scale should decrease with the formality of the occasion and with the age of the wearer.
The practical rule underneath all this is one that applies directly to a cropped vest: motif size must relate to the area it sits on. A pattern that reads beautifully across a full-length robe becomes disjointed on a small panel, and the traditional answer was always to change the scale rather than to change the pattern.
For sashiko specifically, this is why the classic grids are drafted from a base grid measurement rather than a fixed motif size. Asanoha built on a ½-inch grid and asanoha built on a 1-inch grid are the same pattern at different scales, and choosing between them is the same decision a kimono maker was making about komon.
Finished Size
This guide makes a cropped, boxy, open-front vest ending at the natural waist.
Sample finished measurements for a loose medium:
- Finished chest: about 42 inches
- Finished length: about 21 inches from shoulder to hem
- Shoulder width: about 14½ inches
- Armhole depth: about 9½ inches
- Front style: open, no closure, or a single tie at the chest
- Collar: none — bound neckline
- Optional: two small patch pockets
How to find your correct length: measure from the top of your shoulder, beside the neck, straight down to your natural waist — the narrowest point of your torso, usually about an inch above the navel. That measurement is your finished length. Most people land between 19 and 23 inches.
Stitch measurements:
- Stitch length: about 3/32 inch — slightly finer than on a full jacket
- Gap: about half the stitch length
- Row spacing: ⅜ inch
- Asanoha grid: ¾ inch, producing motifs about 1½ inches across
- Shippou grid: 1-inch circles overlapping by half
Add 3 inches of ease at the chest. A cropped vest sits close and needs less volume than a hip-length one.
Materials Needed
For one cropped sashiko vest, gather:
- Face fabric: 1¼ yards of mid-weight cotton in a vibrant color — sheeting, chambray, or a firm cotton at about 5 to 6 oz
- Backing fabric: 1¼ yards in the same weight, in a coordinating or contrasting color
- Sashiko thread: 3 to 4 skeins
- Sashiko needles: a set of 3 to 5 in varied lengths
- Thimble: a Japanese palm thimble, or a leather ring thimble
- Binding fabric: ½ yard in a contrasting color
- Chalk marker or water-soluble pen
- Quilting ruler
- Rotary cutter and cutting mat
- Sewing clips
- Sewing machine
- Machine needles: 90/14
- Iron and ironing board
- Simple cropped vest pattern, or a vest to trace and shorten
Beginner tip: this is the one garment in the collection you can make entirely from leftovers. A cropped vest needs under a yard of each fabric, so half-yard cuts, fat quarters pieced together, and remnants all work. If you have been saving a piece of expensive cloth that was never quite enough for a project, this is the project.
Vibrant Cropped Palette
A modern garment with no tradition to answer to:
Face fabric:
- Vermilion red
- Persimmon orange
- Saffron gold
- Deep teal
- Aubergine
- Magenta
- Chartreuse
Thread: 8. Bright white 9. Natural ecru 10. True black 11. A second contrasting bright
Binding: 12. A third color — black binding on a persimmon vest, vermilion on teal, deep teal on saffron
Because a cropped vest covers little area, it can carry a color that would be overwhelming on a full jacket. Chartreuse or magenta across a hip-length garment is a lot; across a 21-inch vest it is a strong accent piece.
White or black thread gives the sharpest result. White on persimmon, aubergine, or teal reads crisply from across a room. Black on saffron or chartreuse is graphic and modern, and it is the option that looks least traditional — which suits this silhouette.
The binding is proportionally more visible on a cropped garment than on a long one, because the edges are closer together and there are more of them per square inch of fabric. Choose it as a deliberate third color rather than as a match.
Cutting Measurements
Cut everything ¾ inch larger than your pattern pieces in every direction. Dense stitching draws the cloth in, though less on a small panel than a large one — expect about ⅜ to ½ inch of shrinkage.
From face fabric, cut oversized:
- Back: one piece, about 24 x 24 inches
- Fronts: two pieces, about 15 x 24 inches each
From backing fabric, cut the same three pieces at the same sizes.
From binding fabric, cut:
- Armhole binding: two bias strips at 2½ inches x armhole circumference plus 2 inches
- Front and neckline binding: one bias strip at 2½ inches x the full front and neckline perimeter plus 4 inches
- Hem binding: one strip at 2½ inches x hem width plus 2 inches
- Optional tie: one strip at 2½ x 20 inches
Optional pockets: two pieces at 6 x 6½ inches from face fabric and two from backing.
Use a ½-inch seam allowance for construction.
Step-by-Step Guide
Step 1: Measure for the Correct Length
Before anything else, measure from the top of your shoulder beside the neck straight down to your natural waist.
Write that number down. It is the single most important measurement in this project, and it is the difference between a vest that looks intentional and one that looks like it shrank.
If you are between measurements, go shorter rather than longer. A cropped vest that is slightly too short still reads as cropped; one that is slightly too long reads as ill-fitting.
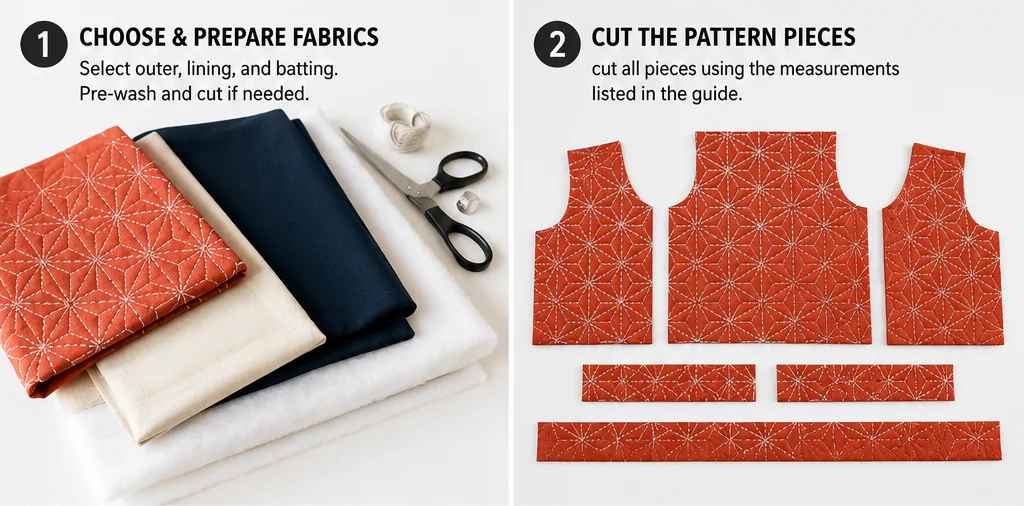
Step 2: Prewash Both Fabrics Separately
Wash and dry each fabric on its own, twice, in cold water.
Saturated colors — vermilion, magenta, persimmon — bleed heavily on early washes, and washing them together will stain the lighter one.
Step 3: Adjust the Pattern
Take a simple sleeveless vest pattern and shorten it to your measured length, removing the length from the hem rather than the shoulder.
Deepen the armhole by about ½ inch to account for the thickness of two stitched layers plus binding.
Check the shoulder width. On a cropped vest, a narrower shoulder — around 14½ inches — keeps the proportions balanced. A wide shoulder on a short body makes the whole garment look square.
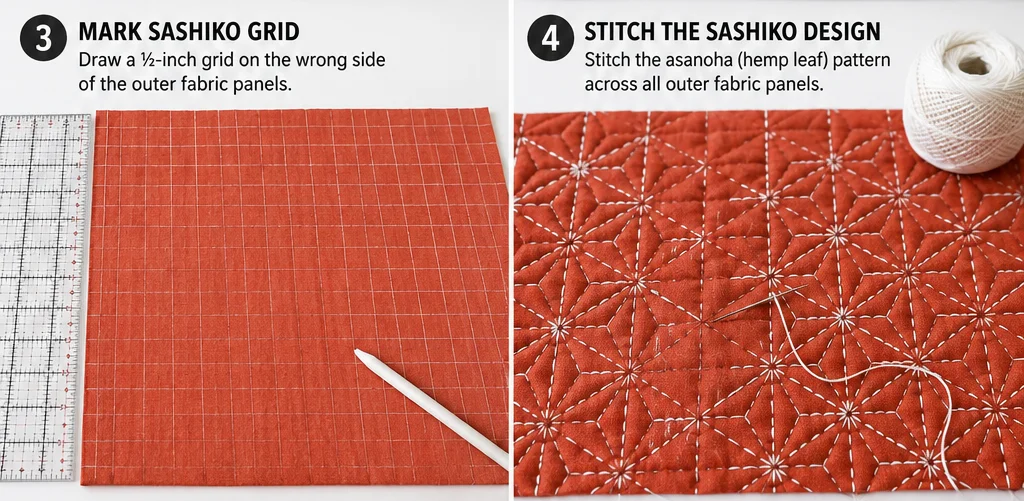
Step 4: Choose the Grid Scale
This decision separates a good cropped vest from a disappointing one.
Measure the width of your front pattern piece. Divide it by the width of one complete motif to find how many repeats will fit.
You want at least 8 motif repeats across a front panel. Fewer than that and the pattern reads as fragments rather than as surface.
For a typical 13-inch front panel:
- Asanoha on a ¾-inch grid gives motifs about 1½ inches across — about 8 repeats. Correct.
- Asanoha on a 1-inch grid gives motifs about 2 inches across — about 6 repeats. Marginal.
- Asanoha on a 1½-inch grid gives motifs about 3 inches across — 4 repeats. Too large.
Scale down rather than switching to a simpler pattern. A fine grid on a small garment is the traditional answer and the better-looking one.
Step 5: Layer and Baste
For each panel, lay the backing fabric right side down, then the face fabric right side up on top.
For a reversible-adjacent effect, lay both right sides out as in the reversible vest—the stitching shows on both sides, and the inside becomes a second face even though the seams aren’t finished for full reversibility.
Baste on a 3-inch grid across each panel. Small panels distort easily under dense stitching, and closer basting than usual is worth the extra ten minutes.
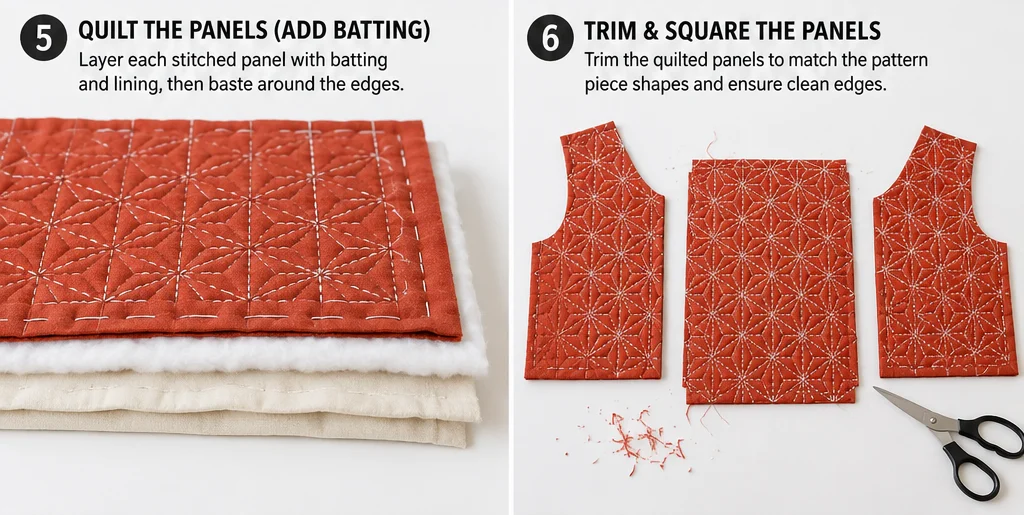
Step 6: Mark the Grid
Mark your chosen pattern across each full panel before stitching anything.
For asanoha at ¾-inch scale: rule a grid of ¾-inch squares, add both diagonals in each square, then add the shorter connecting lines forming the six-pointed leaf units.
For shippou at 1-inch scale: set a compass to a ½-inch radius and mark circle centers on a 1-inch grid so each circle crosses its four neighbors at their midpoints.
Marking a fine grid takes longer than a coarse one. Budget an hour per panel and use a sharp marker — a thick chalk line is a significant proportion of a ¾-inch grid square, and inaccuracy compounds visibly at this scale.
Step 7: Center the Pattern
Before stitching, check where the pattern will sit on the finished garment, not on the oversized panel.
Lay your trimmed-to-size pattern piece over the marked panel and look at what falls inside the cutting line. On a small garment, a motif cut in half at the center front or at the neckline is far more noticeable than it would be on a jacket.
Shift your marked grid if needed so that complete motifs sit at the center front edges and along the hem line, which are the two places the eye goes first.
This adjustment takes ten minutes and is invisible when done and obvious when skipped.
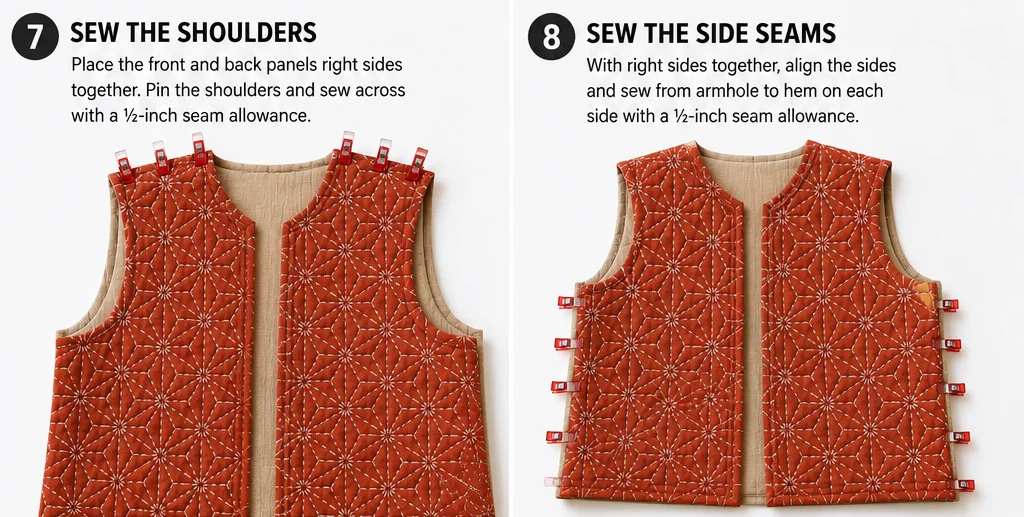
Step 8: Stitch the Panels
Thread a long sashiko needle with about 18 inches of thread. Wear the thimble on your palm and push from there.
Work a running stitch of about 3/32 inch — slightly finer than on a full jacket, to match the finer grid — with gaps about half that.
Load five to eight stitches per pass. A finer grid means shorter runs between direction changes, so you will load fewer stitches than on a large-scale pattern.
Stitch complete lines across the panel rather than completing motifs individually: all horizontals first, then all verticals, then each diagonal direction. This keeps tension even and the geometry accurate.
Stitch densely. Unlike the kimono-style jacket, this garment wants firmness.
Step 9: Complete All Three Panels
Work the back and both fronts.
Expect 10 to 18 hours total. A cropped vest is roughly a fifth of the work of a full jacket, which is why it is the right first sashiko garment.
Keep the stitch density consistent between panels. A back stitched more densely than the fronts will shrink more and the side seams will not match.
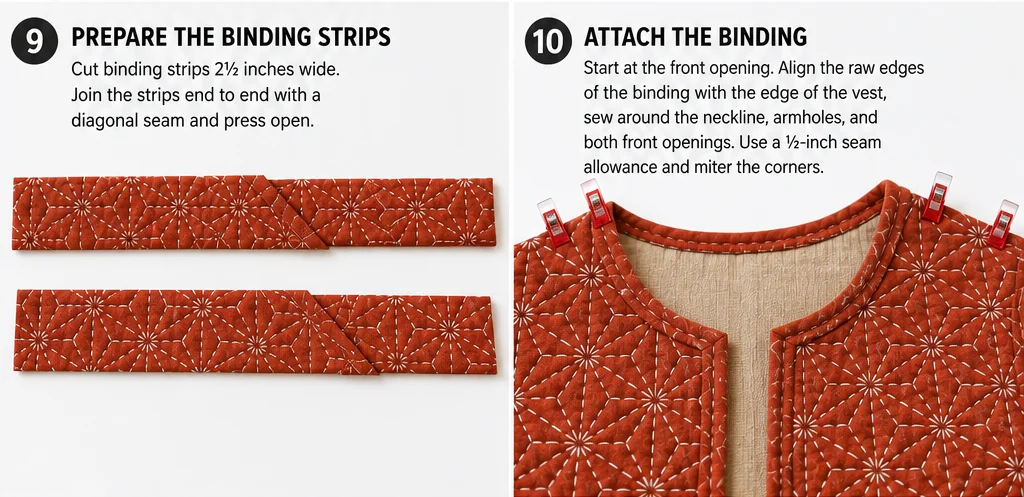
Step 10: Press, Measure, and Cut
Press each panel gently from the reverse with a pressing cloth. Do not flatten the stitching.
Measure each panel — expect ⅜ to ½ inch of shrinkage.
Place your pattern pieces on the stitched panels and cut the back and both fronts, checking the pattern centering one final time before you cut.
Step 11: Sew the Shoulder Seams
Sew the fronts to the back at the shoulders with a ½-inch seam allowance.
Press open and finish the seam allowances — bind them with a 1½-inch bias strip, or flat-fell them.
On a cropped vest the shoulder seam sits high and is visible whenever the garment is worn open, so a clean finish matters more here than on a longer piece.
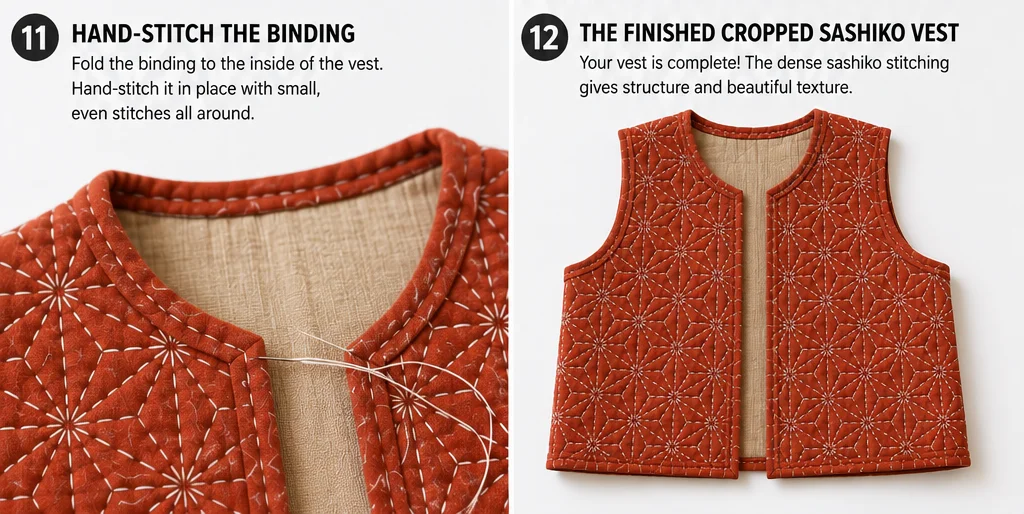
Step 12: Sew the Side Seams
Sew each side seam from armhole to hem with a ½-inch seam allowance, using the same finish as the shoulders.
Try the vest on now. Check that the hem is sitting at your natural waist and that the armholes are comfortable over a shirt.
This is the last easy moment to shorten it. If the hem is sitting low, trim now rather than after binding.
Step 13: Bind the Armholes, Front, Neckline, and Hem
Bind in this order:
- Armholes — join a 2½-inch bias strip into a loop and apply, easing around the curve
- Front opening and neckline — one continuous strip from the hem, up the right front, around the back neck, down the left front
- Hem — a separate strip, ends folded in neatly where they meet the front binding
Machine-stitch the binding to the face, fold over the raw edge, and hand-stitch the fold down on the inside.
Keep the binding narrow — a ½-inch finished binding suits a cropped garment, where a ¾-inch binding would look heavy. Trim the seam allowance to ¼ inch before folding if your binding is coming out wide.
Ease the binding around each curve. On a small garment, a cupped armhole is immediately visible.
Step 14: Add Optional Pockets and Finish
If you want pockets, keep them small — 6 x 6½ inches finished at most. A standard patch pocket overwhelms a cropped vest.
Layer, stitch a few sashiko rows, bind the top edge, turn the other three edges under, and topstitch in place at 2 inches above the hem and 2½ inches in from the side seam.
If you want a closure, attach a single 2½ x 20-inch tie at chest height on the left front.
Remove chalk marks with cold water and dry flat.
Press lightly, add a label at the inside back neck, and hang the vest.
Assembly at a Glance
- Measure — shoulder to natural waist, and go shorter rather than longer if between measurements
- Scale the grid — choose a motif size giving at least 8 repeats across a front panel, usually a ¾-inch asanoha grid
- Layer and mark — baste on a 3-inch grid, mark the full fine grid with a sharp marker
- Center — lay the pattern piece over the marked panel and shift the grid so complete motifs sit at the front edges and hem
- Stitch — dense rows at ⅜-inch spacing, working complete lines rather than individual motifs
- Cut and assemble — allow ⅜ to ½ inch shrinkage, then shoulder seams, side seams, finishing both
- Bind — armholes, front and neckline, then hem, keeping the binding narrow at ½ inch finished
Vibrant Cropped Combination Ideas
For a persimmon vest, use persimmon orange with white asanoha stitching and black binding.
For a teal vest, use deep teal with ecru shippou stitching and vermilion binding.
For a saffron vest, use saffron gold with black stitching and aubergine binding — the most graphic and least traditional option.
For a magenta vest, use magenta with white stitching and deep teal binding.
For a chartreuse vest, use chartreuse with black stitching and black binding for a hard modern edge.
For a two-face vest, use vermilion on the outside and saffron gold as the backing, with white stitching showing on both, bound in aubergine.
Beginner Tips for Success
Measure to your natural waist first. Length is the one thing that decides whether a cropped garment looks intentional, and no amount of good stitching compensates for getting it wrong.
Go shorter rather than longer if you are between measurements.
Scale the grid down, do not simplify the pattern. Eight motif repeats across a front panel is the minimum for the pattern to read as surface rather than fragments.
Use a sharp marker. On a ¾-inch grid, a thick chalk line is a meaningful proportion of the square.
Center the pattern before stitching. A motif cut in half at the front edge is far more visible on a small garment.
Stitch densely. This garment wants firmness, unlike the drape-dependent pieces in this collection.
Keep the stitch density consistent between panels, or the side seams will not match after shrinkage.
Keep the binding narrow. Half an inch finished suits a cropped garment; three quarters looks heavy.
Styling Tip
A cropped vest works by exposing what is underneath it, so the layer beneath should be worth showing. It sits best over a high-waisted skirt or trousers, where the vest hem and the waistband meet at roughly the same line, or over a long straight dress, where the crop creates a strong horizontal against the vertical.
Avoid low-rise trousers with it — the strip of shirt between the vest hem and the waistband is the detail that makes a cropped garment look accidental rather than styled.
Because the vest carries a saturated color across a small area, keep everything else quiet: black, cream, white, or denim. A persimmon vest over a plain black dress is the sharpest version of this look, and it needs nothing else.
Necklaces work well here, since the vest ends well above where a pendant would sit. Keep them simple and metal rather than beaded—the fine stitching already provides texture.
Gift Pairings for the Pockets
The small patch pockets suit small gifts, and these work as a set alongside the finished vest:
- A set of sashiko needles in varied lengths in a fabric roll
- A Japanese palm thimble — hard to find and genuinely transformative
- A sashiko thread set in white, ecru, black, and saffron
- A sashiko-stitched card holder from leftover cloth
- A hand-stitched needle book in the vest’s contrast colors
- A small stitched coaster set using the same fine grid
- A fine chalk marker set and a ¾-inch grid stencil
Other Design Inspirations – Digitally Modified Images. Texture and color may vary from the actual product.
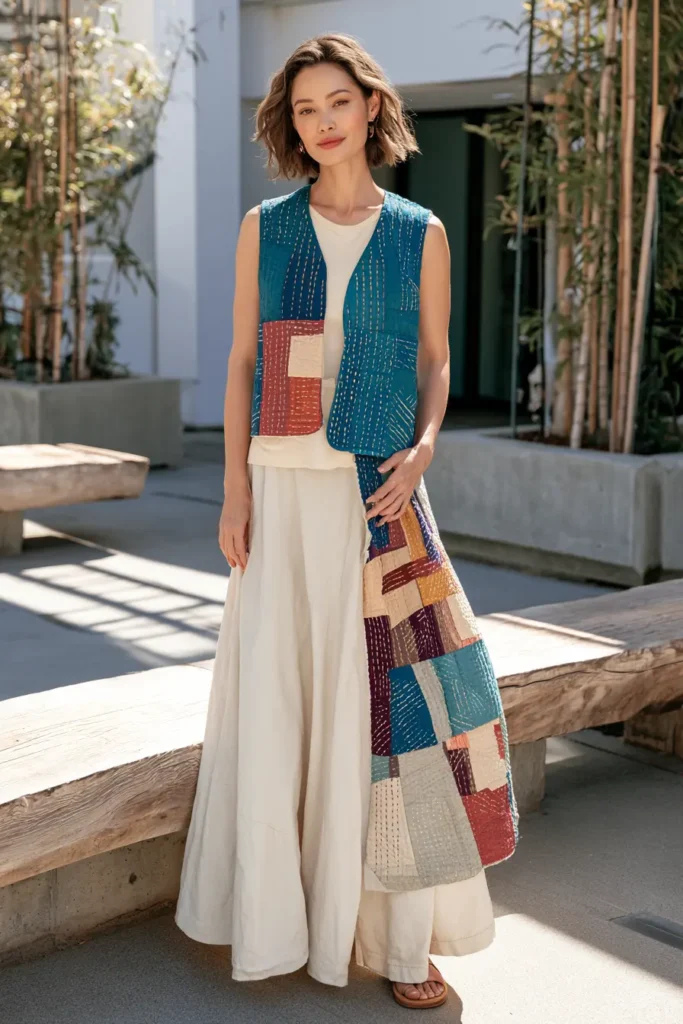
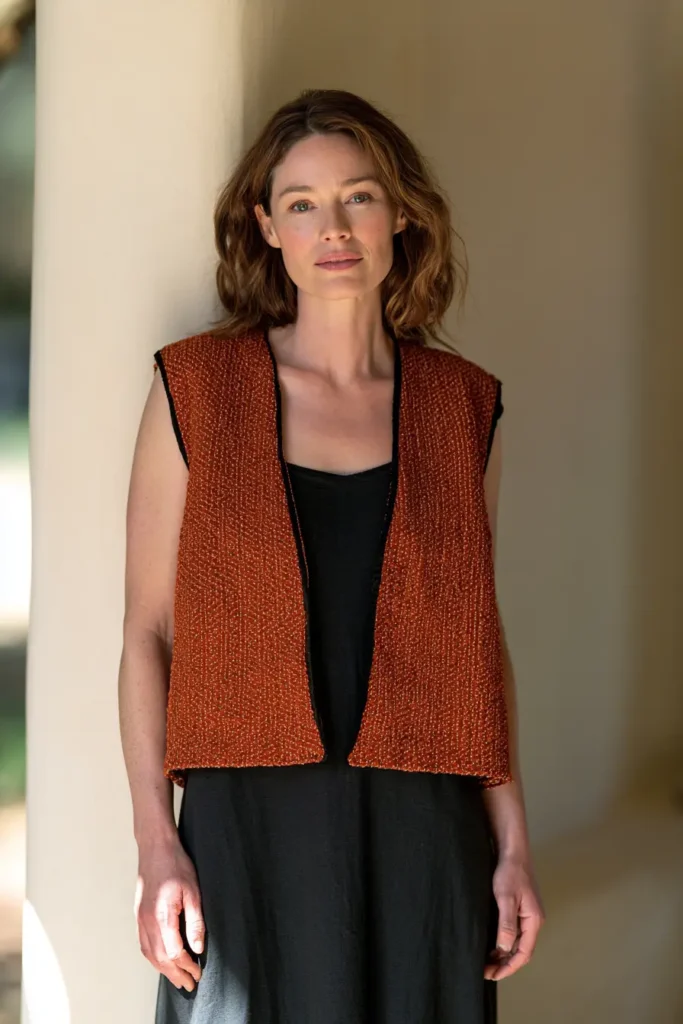
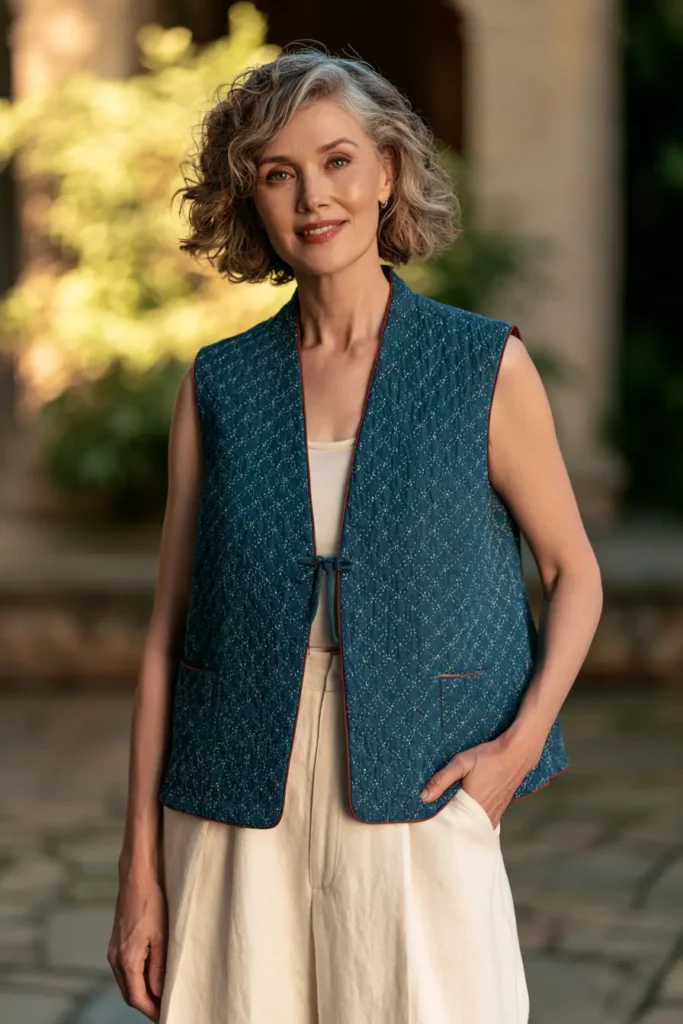
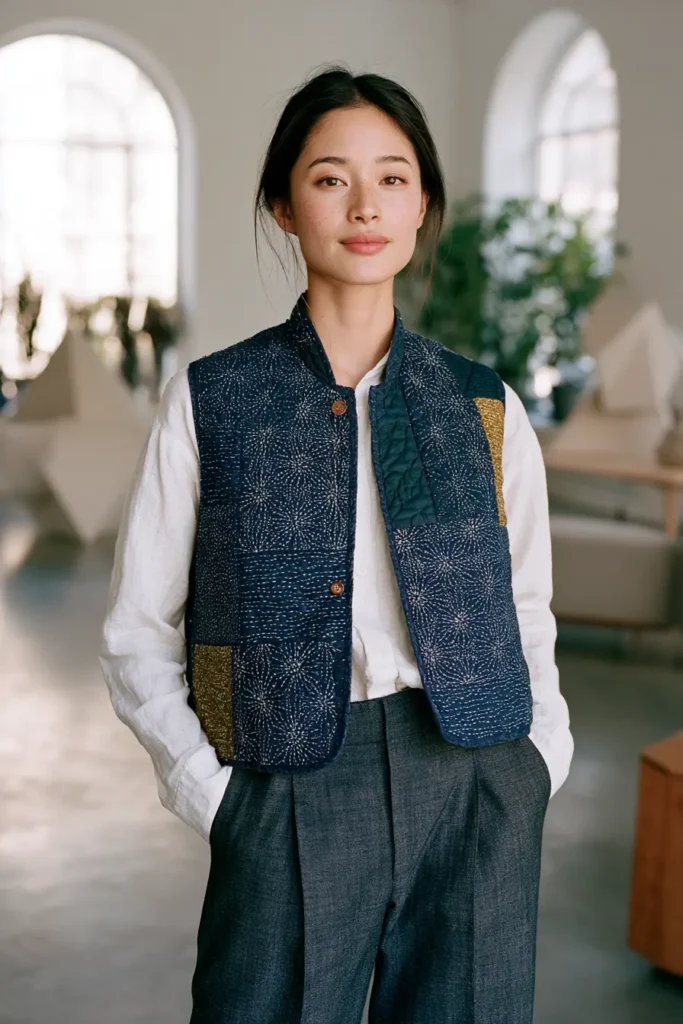
6. Hand-Stitched Sashiko Denim Jacket for Casual Cool Style
This is the only garment in this collection you do not build. You start with a denim jacket that already exists — new, secondhand, or one you have worn for years — and stitch into it. That changes everything about the process. There is no cutting, no assembly, and no seam finishing, but there are constraints no from-scratch project has: you cannot lay the panels flat, you cannot avoid the existing seams, and every decision has to work around a garment whose shape is already fixed.
It is also, by some distance, the most wearable result. A sashiko-stitched denim jacket reads as something between visible mending and deliberate design, and it goes with everything already in a wardrobe.
The color comes entirely from the thread. Against indigo denim, use vermilion red, saffron gold, persimmon orange, chartreuse, magenta, deep teal, and bright white — and use several of them on one jacket. Where a from-scratch sashiko piece often uses a single thread color for coherence, a denim jacket benefits from the opposite: patches of different-colored stitching worked at different times, which is what the garment would look like if it had genuinely accumulated repairs over years.
Why This Design Works
Denim is the ideal ground for sashiko, and the reason is structural. Denim is a warp-faced twill, meaning the indigo-dyed warp threads dominate the surface while the undyed weft threads sit mostly underneath. The diagonal ribbing you can see on any pair of jeans is that twill structure, and it gives the cloth both its strength and its characteristic fading — as the surface abrades, the white weft shows through.
Sashiko stitching sits on that ribbed surface beautifully. The running stitch crosses the twill diagonal, which makes the stitch line read crisply rather than sinking into the weave. And because denim already fades, sashiko stitching on a worn jacket ages into the cloth in a way it never does on flat-woven cotton.
The weight is the constraint. A 10 to 12 oz denim jacket is comfortable to hand stitch. A 14 oz or heavier raw denim jacket is genuinely hard work, and a rigid unwashed one is close to impractical without a strong palm thimble and considerable patience. Check the weight before you commit — this is the single factor that determines whether the project is enjoyable or exhausting.
Working on a finished garment means planning around its architecture. Flat-felled seams on a denim jacket are four to six layers thick, and hand stitching through them is slow and hard on needles. The workable approach is to treat each flat area between seams as its own panel and let the pattern stop at the seams rather than crossing them.
Skills you build here: stitching on a three-dimensional garment, working through heavy cloth, planning a design around existing seams, patch application on denim, and needle management.
Design Inspirations – Digitally Modified Images. Texture and color may vary from the actual product.
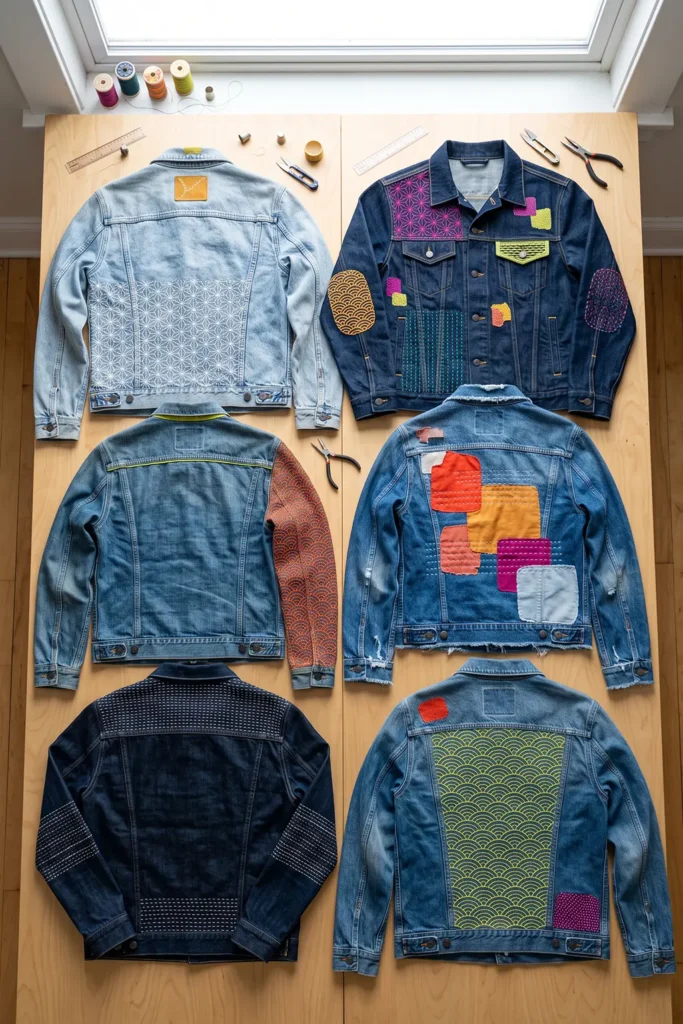
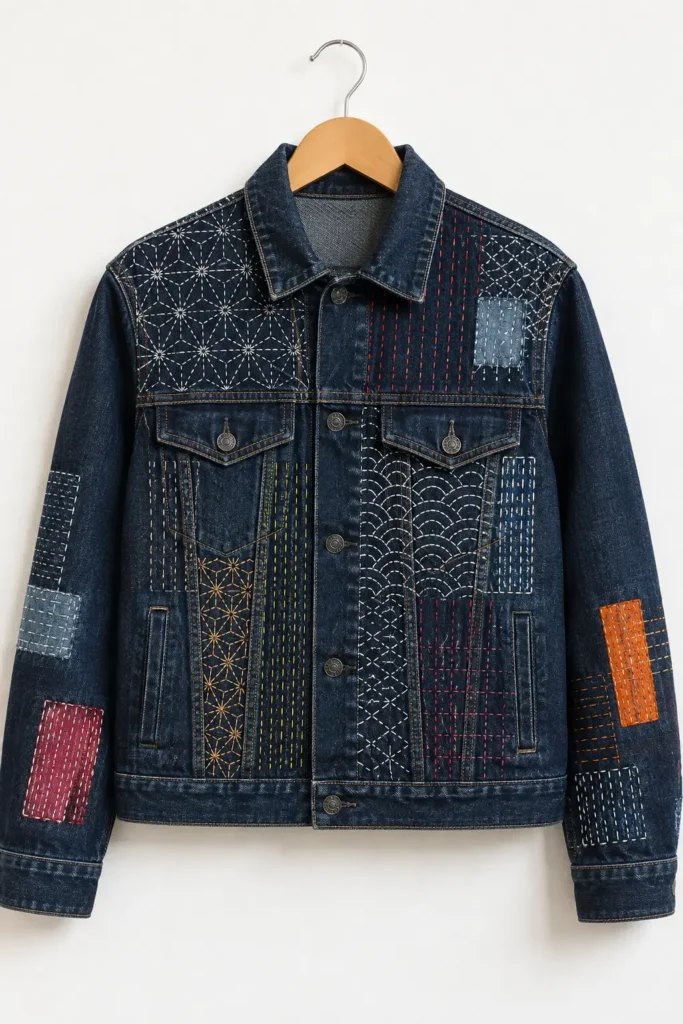
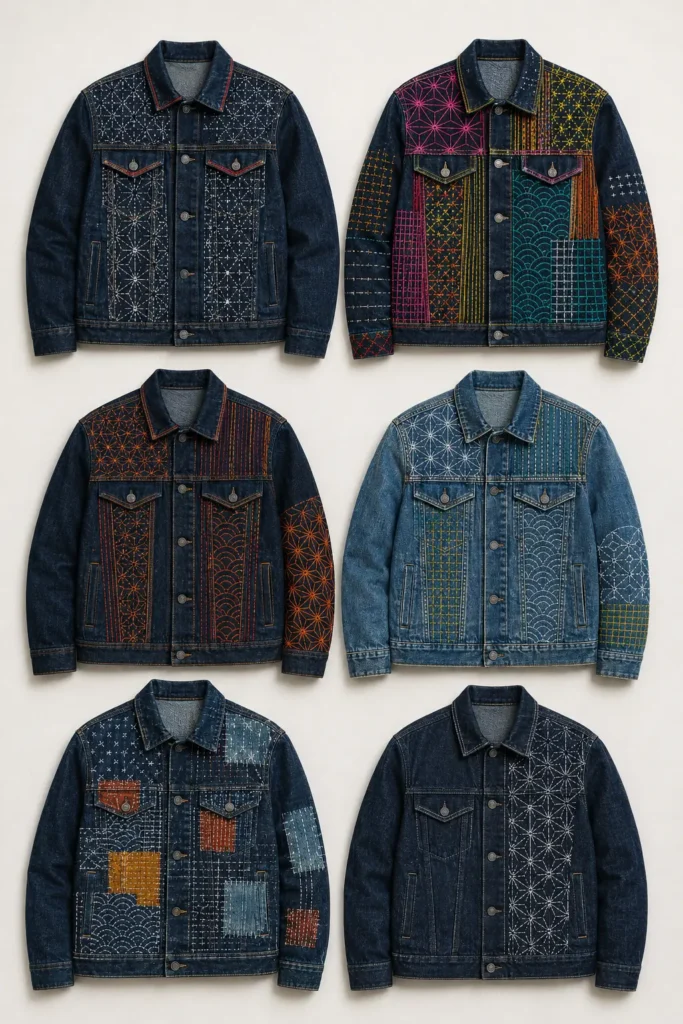
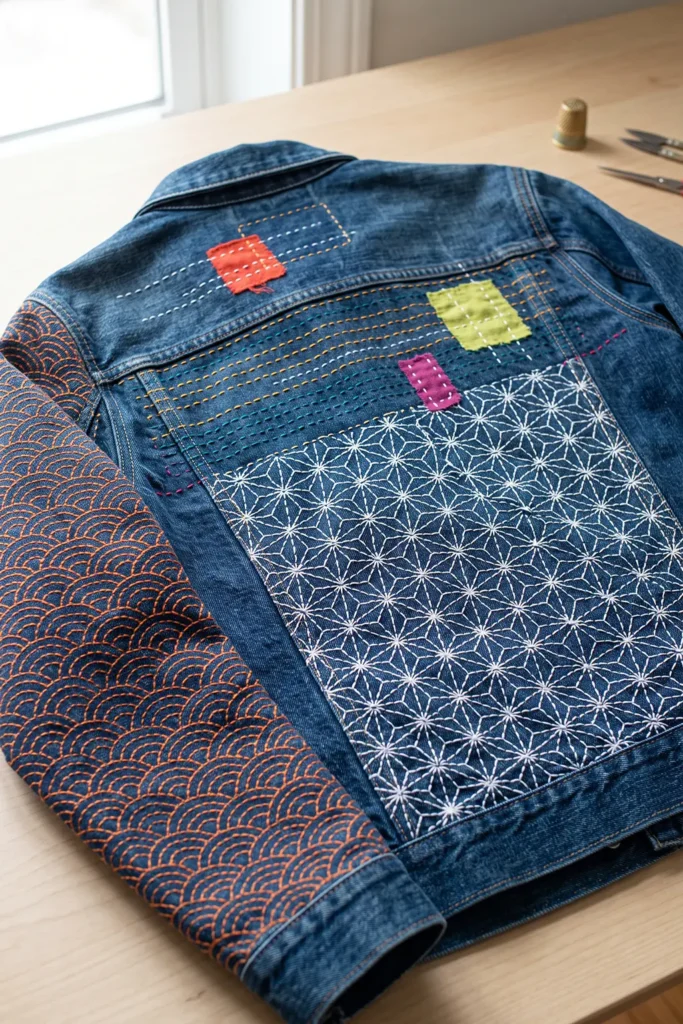
A Note on Denim and Japan
The relationship between denim and sashiko is genuinely circular, and the loop is worth knowing.
The word denim is usually traced to serge de Nîmes, a fabric from Nîmes in France, though textile historians note the French fabric was not the same cloth and the etymology is contested. Jean is on firmer ground — it derives from Gênes, the French name for Genoa, where a similar cotton twill was made and exported. Both words predate American work clothing by centuries.
The riveted work pant was patented in 1873 by Jacob Davis, a Latvian-born tailor in Reno, together with Levi Strauss, who supplied his cloth. Davis had been reinforcing pocket corners with copper rivets for customers and could not afford the patent fee alone. The garment was workwear, and it stayed workwear for roughly eighty years.
The circular part comes later. When American mills shifted to faster projectile and air-jet looms in the 1970s, the old narrow shuttle looms that produced selvedge denim were sold off or scrapped. A number went to Japan, where mills in Kojima, in Okayama Prefecture, were building a domestic denim industry. Japanese makers kept the slower shuttle looms running, refined the indigo dyeing, and by the 1980s were producing denim widely regarded as the best in the world — using machinery American mills had discarded.
Kojima had been a cotton and textile region for centuries, and the same area had long-established traditions of indigo dyeing and utilitarian stitching. So a jacket made from Japanese selvedge denim and hand-stitched with sashiko is not a fusion of two unrelated traditions. It is one indigo cotton tradition applied to cloth made by another, on looms that traveled halfway around the world and back.
Finished Size
There are no garment measurements to give — the jacket already exists. What follows are the stitching layout measurements that make the design work on a standard trucker-style denim jacket.
Typical stitchable panel areas on a standard jacket:
- Back yoke panel: about 20 x 5 inches
- Lower back panel: about 20 x 14 inches — the largest single area and the best place for a full pattern
- Front chest panels: about 6 x 7 inches each, above the pockets
- Front lower panels: about 6 x 9 inches each, below the pockets
- Sleeve panels: about 9 x 16 inches each, between the shoulder and cuff seams
- Pocket flaps: about 5 x 2½ inches each
- Collar: about 16 x 3 inches
Stitch measurements:
- Stitch length: about ⅛ inch, with gaps roughly half that
- Row spacing: ½ inch for open work, ⅜ inch for dense panels
- Asanoha grid: 1 inch, producing motifs about 2 inches across
- Seigaiha grid: 1½-inch circles overlapping by half
Optional patches:
- Large patches: 5 x 6 to 7 x 8 inches
- Small patches: 3 x 3 to 4 x 5 inches
Materials Needed
For one hand-stitched sashiko denim jacket, gather:
- A denim jacket at 10 to 12 oz, washed and broken in — secondhand is ideal
- Sashiko thread: 4 to 6 skeins across vermilion, saffron gold, persimmon, chartreuse, magenta, deep teal, and white
- Sashiko needles: a set of 5 or more. You will bend or break some
- Thimble: a Japanese palm thimble is close to essential on denim. A leather ring thimble is the minimum
- Patch fabrics, optional: ¼ yard total in contrasting cotton, or salvaged scraps
- Chalk marker in white or a light color, or a water-soluble pen
- Quilting ruler and a small flexible ruler for curved areas
- Small sharp scissors
- Sewing clips
- Needle-nose pliers — for pulling a needle through a thick spot
- Beeswax or thread conditioner
- A firm flat surface to work on
Beginner tip: buy more needles than you think you need and keep pliers within reach. Denim dulls and bends needles quickly, especially near seams, and trying to force a dull needle through heavy twill is how they snap. A fresh needle every few hours transforms the experience.
Vibrant Thread Palette
On indigo denim, every one of these reads clearly:
Threads:
- Bright white
- Natural ecru
- Vermilion red
- Persimmon orange
- Saffron gold
- Chartreuse
- Magenta
- Deep teal
Optional patch fabrics: 9. Vermilion cotton 10. Saffron gold cotton 11. Deep teal cotton 12. Contrasting lighter denim
Use three to five thread colors across one jacket, assigned by panel rather than mixed within a panel. The back panel in white, one sleeve in saffron, a chest panel in vermilion, the collar in chartreuse. That per-panel assignment reads as accumulated work rather than as a color scheme.
White reads sharpest and is the safe anchor. Use it for the largest panel, and let the brights sit in the smaller areas where they will not overwhelm.
If you are adding patches, keep them to two or three colors maximum and let the stitching over them do the work.
Cutting Measurements
There is almost nothing to cut. If you are adding patches:
From patch fabric, cut:
- Large patches: 2 to 3 at 5 x 6 to 7 x 8 inches
- Small patches: 3 to 5 at 3 x 3 to 4 x 5 inches
Cut with slightly uneven edges rather than to a ruler. A perfectly rectangular patch on a denim jacket looks applied; an irregular one looks like a repair.
Fold and press ⅜ inch under on all four sides of each patch before applying, or leave the edges raw for a frayed look — raw edges will fray further with washing, which is a legitimate finish rather than a fault.
No seam allowances are needed for anything else.
Step-by-Step Guide
Step 1: Choose and Assess the Jacket
Pick a jacket at 10 to 12 oz that is already washed and softened. A secondhand jacket that has been worn for a few years is easier to stitch and looks better afterward than a stiff new one.
Check the weight by feel: if it folds softly and creases easily, it is in range. If it stands up on its own, it is likely 14 oz or heavier and will be hard work.
Check the lining. Many denim jackets are unlined, which is ideal. If yours has a quilted or blanket lining, you can still stitch it, but the stitching will show inside and you will be pushing through more layers.
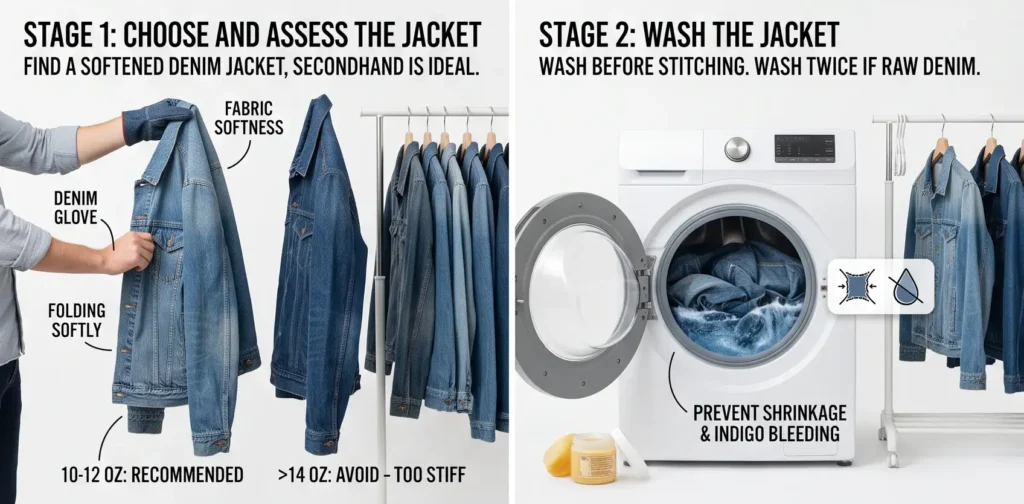
Step 2: Wash the Jacket
Wash and dry the jacket before stitching, even if it looks clean.
A new jacket will shrink on its first wash — sometimes an inch or more in length — and stitching before that shrinkage happens will cause the stitched areas to pucker against the shrinking cloth.
If the jacket is raw or unwashed denim, wash it twice. Indigo bleeds heavily and will discolor white thread.
Step 3: Map the Panels
Lay the jacket flat and identify every area you can stitch without crossing a seam.
On a standard trucker jacket that gives you: the lower back, the back yoke, two upper chest panels, two lower front panels, two sleeve panels, two pocket flaps, and the collar.
Mark the boundaries of each with chalk. These are your working panels, and the pattern will stop at each boundary.
Trying to run a pattern across a flat-felled seam is possible but slow, hard on needles, and rarely looks better than stopping cleanly.
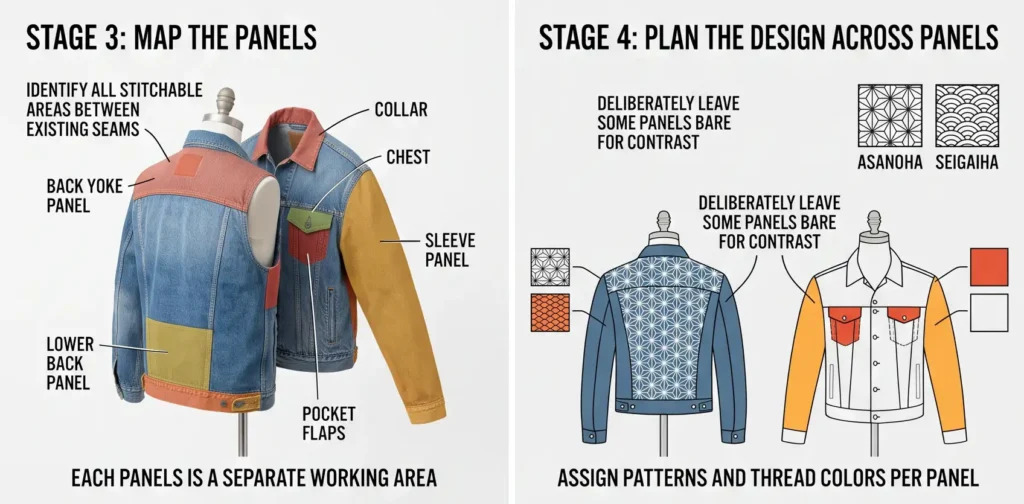
Step 4: Plan the Design Across Panels
Decide which panels get stitched and which stay bare. Stitching every panel is a mistake — a fully covered denim jacket loses the denim, and the contrast between worked and unworked areas is what makes the garment read.
A good starting distribution:
- Lower back: full pattern, densely worked. This is your anchor
- One sleeve: full pattern in a different thread color
- Other sleeve: left bare, or a single narrow band at the cuff
- One chest panel: small pattern
- Other chest panel: bare
- Pocket flaps: both worked, in a third color
- Collar: narrow band of stitching along its length
Asymmetry is the point. A jacket worked identically on both sides looks manufactured.
Step 5: Add Patches First, If Using Them
If you are adding patches, apply them before any stitching so the sashiko rows can run across them.
Position each patch, pin or clip it, and tack the edges down with a running stitch about ¼ inch in from the edge — or machine-stitch them if you prefer, since the sashiko will largely cover the tacking.
Place patches off-center and at slight angles. One at an elbow, one at a lower front, one across a shoulder blade.
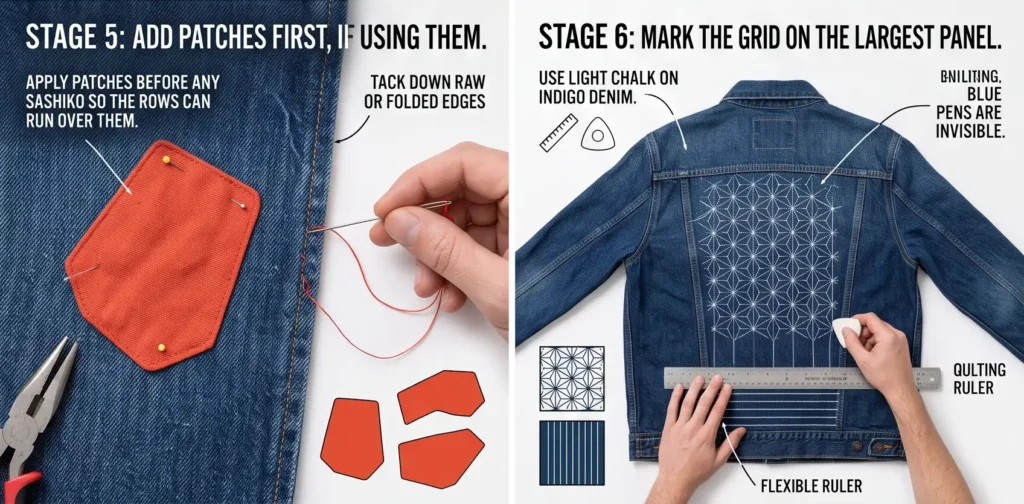
Step 6: Mark the Grid on the Largest Panel
Start with the lower back panel, which is your largest working area and where a full pattern will read best.
Use a white or light chalk marker on indigo. A water-soluble blue pen disappears against dark denim and is difficult to see as you work.
Mark the full grid before stitching:
- Asanoha: rule a grid of 1-inch squares, add both diagonals, then the connecting lines that form the six-pointed leaf units
- Seigaiha: set a compass to a ¾-inch radius and mark circle centers on a 1½-inch grid so circles overlap by half
- Parallel rows: rule straight lines ½ inch apart, the simplest and fastest option
Work with the jacket flat on a firm surface. Marking on a curved or hanging garment produces distortion you will not see until the stitching is done.
Step 7: Prepare the Thread and Needle
Cut sashiko thread to about 18 inches. Longer thread abrades badly passing repeatedly through denim.
Run the thread through beeswax or a thread conditioner and pull it between your fingers to smooth it. This is not usually necessary for sashiko on light cotton, but on denim it noticeably reduces fraying and drag.
Wear the thimble on your palm. On denim this is not a preference — pushing a needle through 12 oz twill from the fingertip is painful within twenty minutes.
Keep pliers beside you. Where the needle jams in a thick spot, gripping it with pliers and pulling straight through is far better than forcing it by hand.
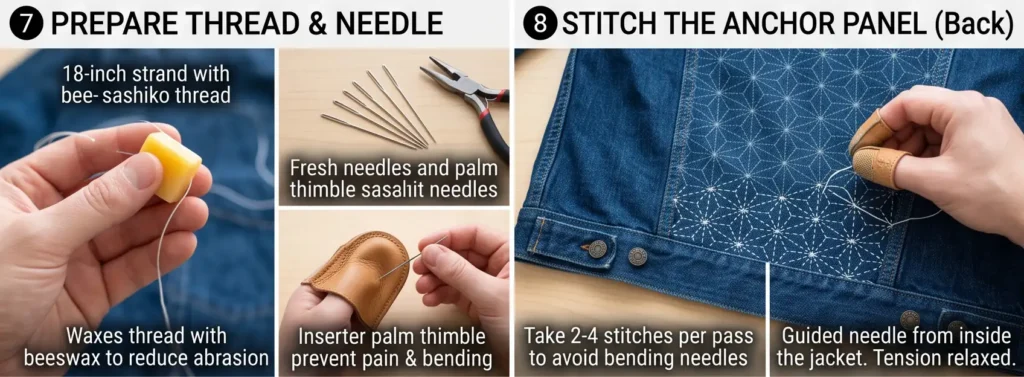
Step 8: Stitch the Anchor Panel
Work the lower back panel first, in white thread.
Take two to four stitches per pass rather than the five to ten you would load on light cotton. Denim does not fold onto the needle the way sheeting does, and forcing a long load produces uneven spacing and bent needles.
Aim for stitches of about ⅛ inch with gaps roughly half that.
Keep tension relaxed. Denim is stable enough that puckering is less of a risk than on lighter cloth, but pulled stitching still stiffens the panel.
Reach inside the jacket to guide the needle from beneath. This is the main practical difference from stitching flat panels — one hand works inside the garment throughout.
Step 9: Work Around the Existing Seams
As you approach a seam, stop the pattern cleanly about ¼ inch short and end the row.
Do not let rows peter out at different distances. A clean boundary line where the pattern stops looks deliberate; a ragged edge looks abandoned.
If a row must cross a seam, use pliers and expect to take one stitch at a time through the felled section. Consider whether it is worth it — usually it is not.
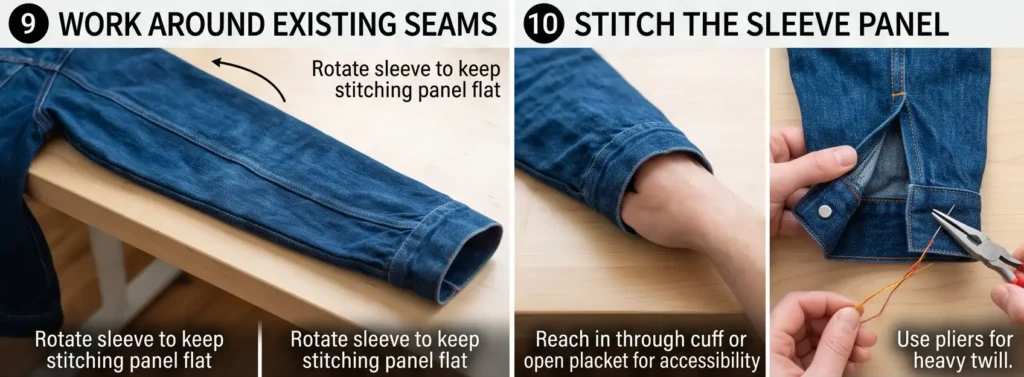
Step 10: Stitch the Sleeve Panel
Sleeves are the hardest area because they are tubes.
Work with the sleeve turned so the panel you are stitching lies flat across your work surface, and rotate as you go. Do not try to stitch a sleeve while it is in its natural cylindrical position.
If the sleeve is narrow, reach in through the cuff. On a tight sleeve, opening the cuff placket with a seam ripper, stitching, then re-stitching the placket closed is a legitimate approach and much easier than fighting the tube.
Change to a different thread color here — saffron or vermilion against the white back panel.
Step 11: Stitch the Smaller Panels
Work the chest panel, pocket flaps, and collar in your remaining thread colors.
On pocket flaps, keep the pattern small — a 1-inch asanoha grid on a 2½-inch flap gives only one complete motif. Drop to a ½-inch grid here, or use simple parallel rows.
On the collar, work rows following the collar’s length rather than a grid. A geometric pattern on a narrow curved band rarely resolves well.
Stitch through only the outer layer of a pocket flap or collar if you can, so the inside stays clean.
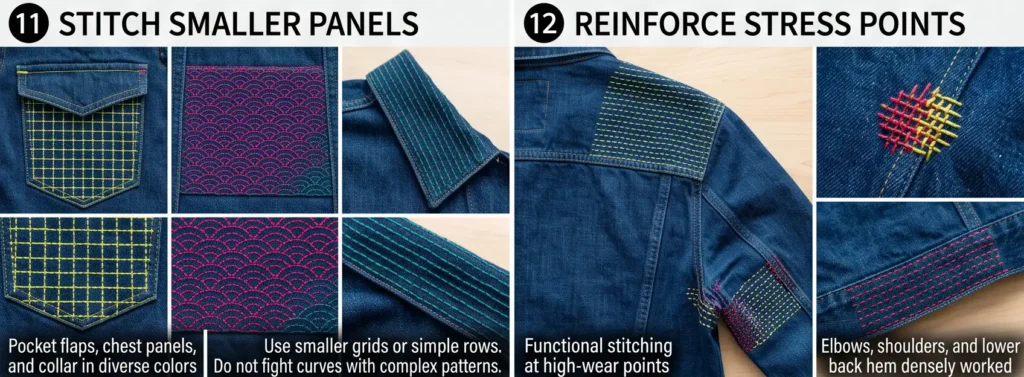
Step 12: Reinforce the Stress Points
While you have the needle out, add functional stitching at the points that wear first.
Dense rows across the elbows, the shoulder tops, and the lower back hem add genuine reinforcement — this is what sashiko was for originally, and on a jacket you actually wear it makes a measurable difference.
Work these areas at ⅜-inch row spacing or closer. They will be the most durable parts of the jacket.
Step 13: Remove the Markings and Check the Work
Remove chalk with a soft brush or a damp cloth. Water-soluble pen marks need a genuine spritz of cold water rather than a wipe — heat sets them permanently, so do this before any pressing.
Turn the jacket inside out and check the reverse. Long floats of thread traveling between areas should be trimmed or secured; anything over an inch will catch and eventually pull.
Trim all loose ends close to the cloth.
Step 14: Wash and Wear
Wash the finished jacket by hand or on a cold gentle cycle, inside out, and hang to dry.
The first wash after stitching does something worth waiting for: the denim relaxes around the stitching, the thread settles into the twill, and the slightly raised, obviously-new look softens into something that reads as part of the garment.
From here, wash rarely. Both the denim and the stitching improve with wear, and each fade cycle increases the contrast between the indigo ground and the bright thread.
Assembly at a Glance
- Choose — a washed 10 to 12 oz jacket, secondhand if possible, checked for weight by feel
- Wash — before any stitching, twice if the denim is raw
- Map — chalk the boundaries of every panel that can be stitched without crossing a seam
- Plan — assign patterns and thread colors per panel, deliberately leaving some panels bare
- Patch and mark — apply any patches first, then mark the full grid on the largest panel with light chalk
- Stitch — anchor panel in white, two to four stitches per pass, one hand working inside the jacket, stopping cleanly at every seam
- Reinforce and finish — dense rows at elbows and shoulders, remove markings with cold water, wash and hang dry
Vibrant Denim Combination Ideas
For a classic jacket, use white stitching on the back and sleeves with vermilion on the pocket flaps and collar.
For a carnival jacket, use a different bright on every panel — magenta back, chartreuse sleeve, saffron chest, vermilion collar.
For a fire jacket, use vermilion, persimmon, and saffron only, worked densely across the back and one sleeve.
For a cool jacket, use deep teal and chartreuse with white, on a light-wash jacket rather than dark indigo.
For a mended jacket, add four patches in vermilion and saffron cotton with white stitching running across all of them and across the surrounding denim.
For a minimal jacket, stitch only the back panel in white and leave everything else bare. The least work in the collection, and arguably the sharpest result.
Beginner Tips for Success
Check the denim weight before committing. At 14 oz and above, hand stitching stops being pleasant, and no technique makes heavy raw denim easy.
Wash the jacket first. Post-stitch shrinkage puckers the worked panels against the shrinking cloth.
Buy more needles than you expect to use and keep pliers beside you. Denim bends and dulls needles fast.
Use a palm thimble. Fingertip pushing through 12 oz twill is painful within twenty minutes.
Take two to four stitches per pass, not five to ten. Denim will not fold onto the needle the way light cotton does.
Stop the pattern cleanly at every seam. A crisp boundary looks deliberate; a ragged one looks abandoned.
Leave some panels bare. A fully covered jacket loses the denim, and the contrast is the whole effect.
Use light chalk, not a blue water-soluble pen. Blue is invisible on indigo.
Condition the thread with beeswax. It measurably reduces fraying on heavy twill.
Styling Tip
A sashiko denim jacket already carries pattern and multiple colors, so everything under it should be plain — a white tee, a black turtleneck, a gray sweatshirt, a simple dress. Avoid anything patterned entirely.
It works over most things a plain denim jacket works over, with one exception: not with denim trousers in a similar wash. Either go noticeably lighter or darker below, or switch to black, khaki, or a skirt.
Because the stitching is concentrated on the back, this is a jacket that reads strongest from behind — worth knowing if you are photographing it, and worth choosing the back panel pattern with more care than the rest.
Wash rarely, inside out, in cold water, and hang dry. The jacket will keep improving for years, and the contrast between the fading indigo and the bright thread increases with every wash cycle rather than diminishing.
Gift Pairings for the Pockets
A denim jacket has pockets already, which makes this the easiest garment in the collection to build a gift set around:
- A set of sashiko needles in varied lengths in a fabric roll
- A Japanese palm thimble — close to essential on denim and hard to find
- A sashiko thread set in white, vermilion, saffron, and chartreuse
- A pair of needle-nose pliers and a beeswax block
- A white chalk marker set for marking on dark cloth
- A small sashiko-stitched denim card holder from a leftover scrap
- A bundle of salvaged denim scraps for future patching
Other Design Inspirations – Digitally Modified Images. Texture and color may vary from the actual product.
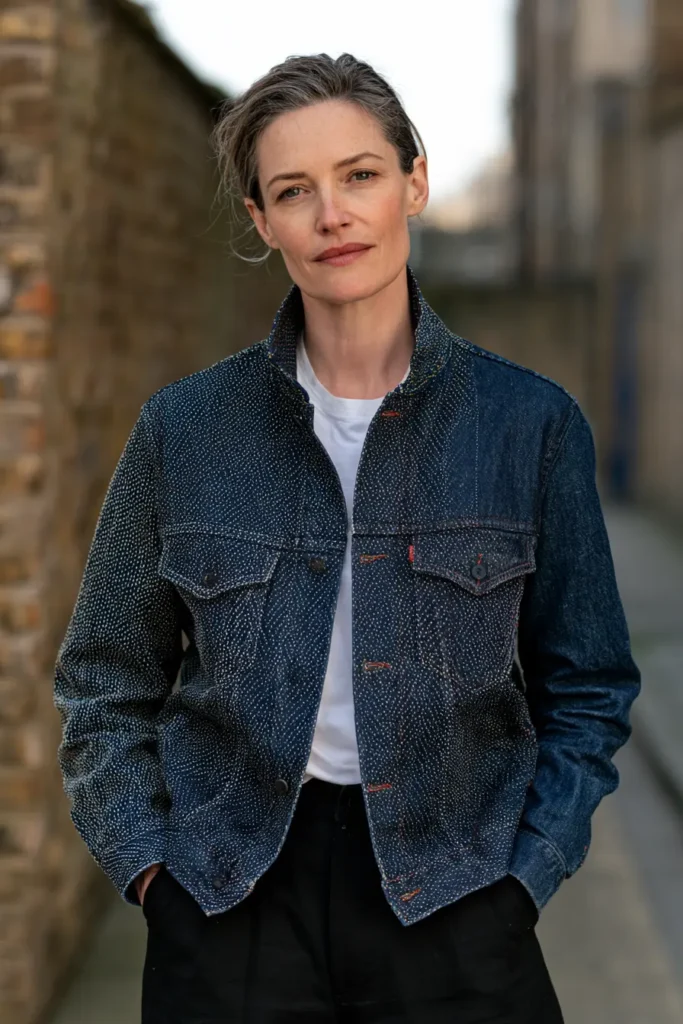
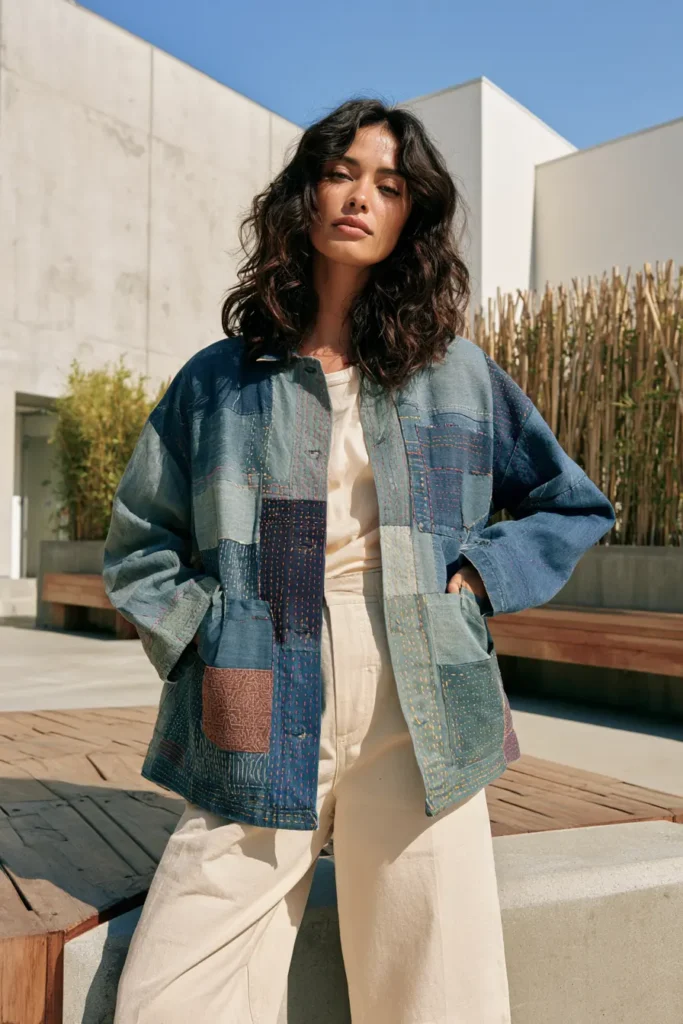
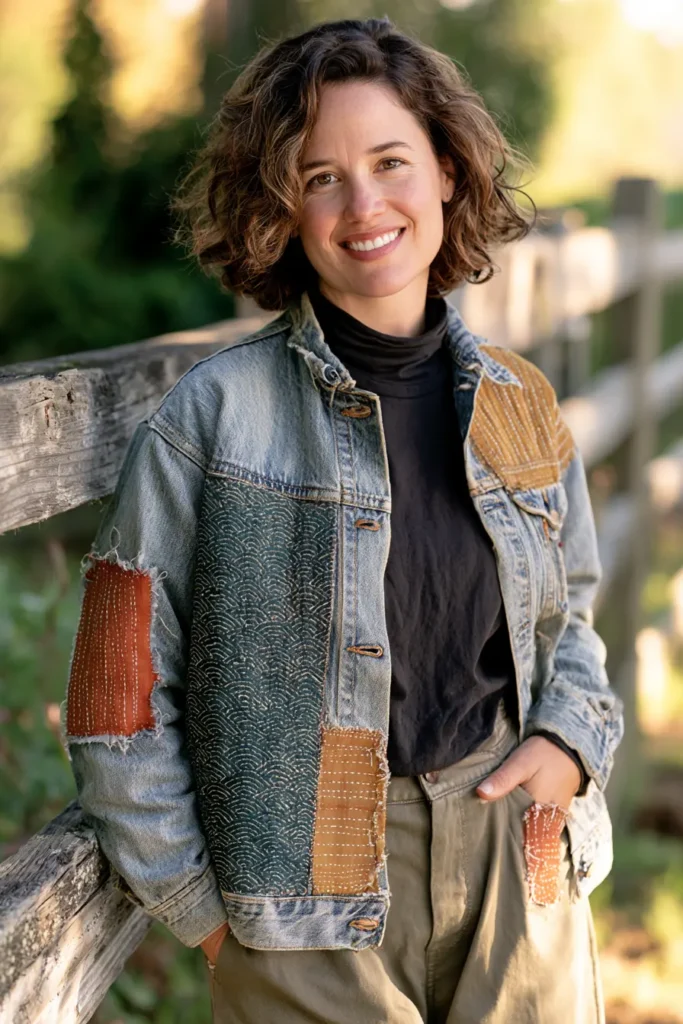

7. Longline Sashiko Duster Vest for Graceful Statement Layers
A longline duster is the largest garment in this collection and the one where scale creates problems nothing shorter does. On a 21-inch cropped vest, a marking error of a thirty-second of an inch per row is invisible. On a 48-inch duster panel with sixty rows of stitching, that same error accumulates into nearly two inches of skew by the time you reach the hem — enough that the pattern visibly tilts and the hem hangs crooked.
Everything about this garment is a response to length. The marking method uses registration lines rather than continuous measurement. The stitch density increases toward the hem rather than staying uniform. The grain direction matters more than in any other piece here. And the shrinkage allowance is nearly double, because a long panel loses proportionally what a short one loses in absolute terms.
For a vibrant palette, a duster carries color across a large area, so the choice is between a saturated ground with quiet stitching or a deep ground with loud stitching. Both work. Use aubergine, deep teal, plum, midnight navy, charcoal, or oxblood for the cloth, stitched in saffron gold, vermilion, persimmon, chartreuse, or bright white. A charcoal duster with saffron stitching that gets denser toward the hem is the version that photographs best and moves best.
Why This Design Works
Length changes what stitching does. On a short garment, dense stitching adds structure. On a long one, it adds weight, and weight at the hem is what makes a duster hang straight and swing when the wearer walks. A duster stitched uniformly from shoulder to hem hangs limply; one with open stitching at the shoulders and dense stitching through the lower third hangs from a light yoke and swings from a weighted hem.
That density gradient is the central design decision, and it is the opposite of what you might expect. Rows at ¾ inch near the shoulders, ½ inch through the body, and ⅜ inch across the bottom 12 inches give the garment its movement.
The absence of batting matters again here. A long quilted vest with wadding inside becomes heavy and stiff, and it swings like a coat rather than falling like cloth. Two layers of cotton, held together with sashiko, stay supple at any length.
Side vents are structural, not decorative. A vest that reaches mid-calf will bind at the knees when walking unless you leave the lower side seams open. Vents from the hem up to the high hip — roughly 16 inches — are what allow a normal stride.
Skills you build here: registration-based marking on long panels, managing grain over length, graduated stitch density, and constructing a garment where the weight of the cloth is itself a design element.
Design Inspirations – Digitally Modified Images. Texture and color may vary from the actual product.
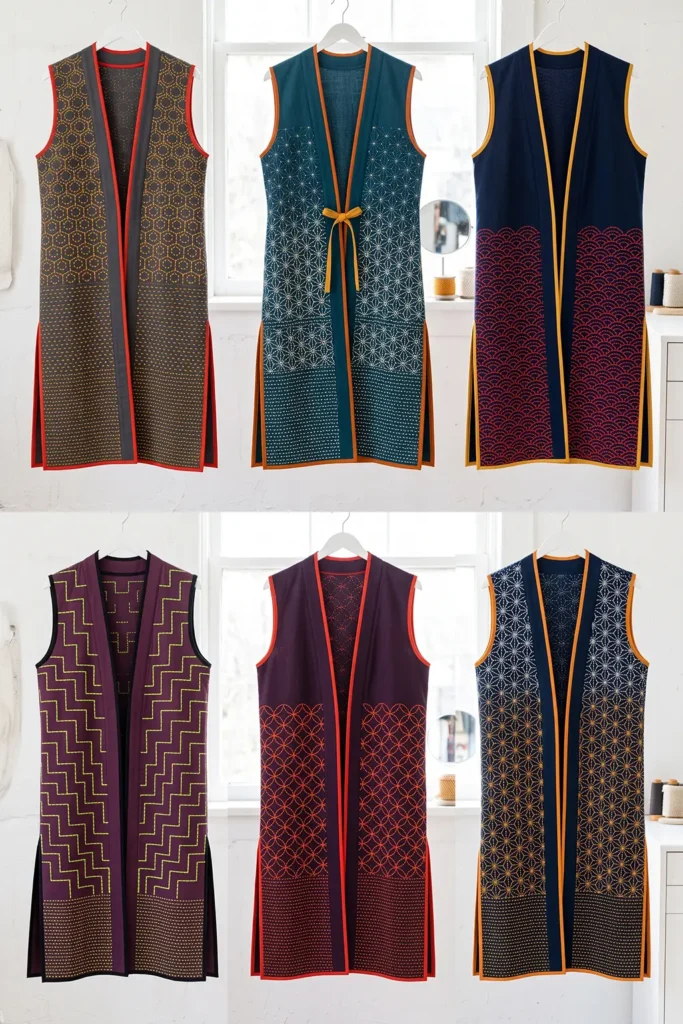
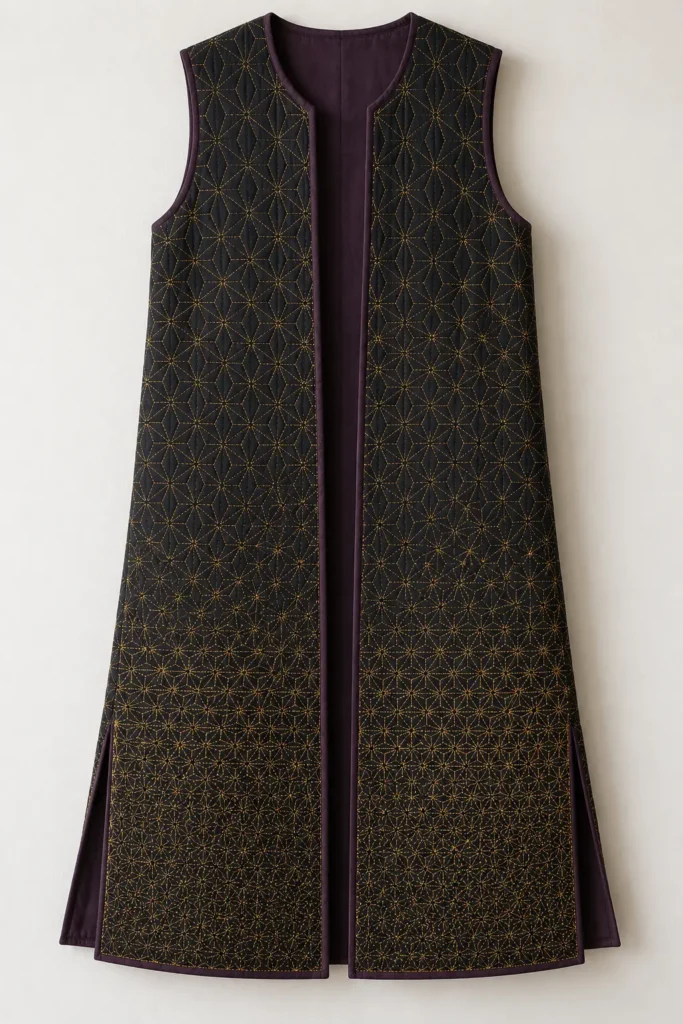
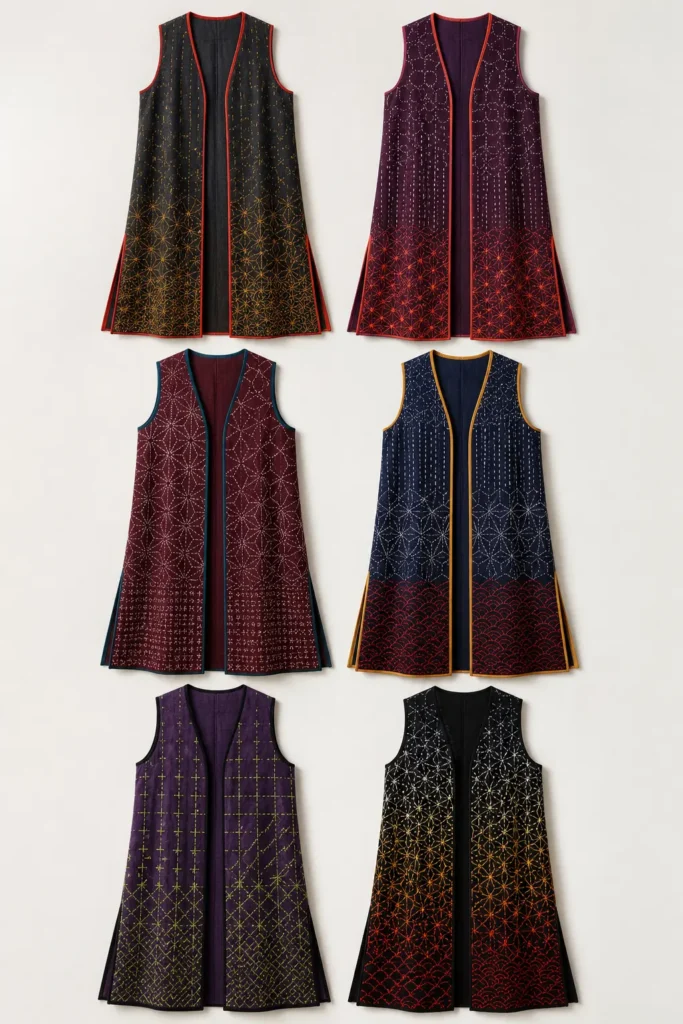
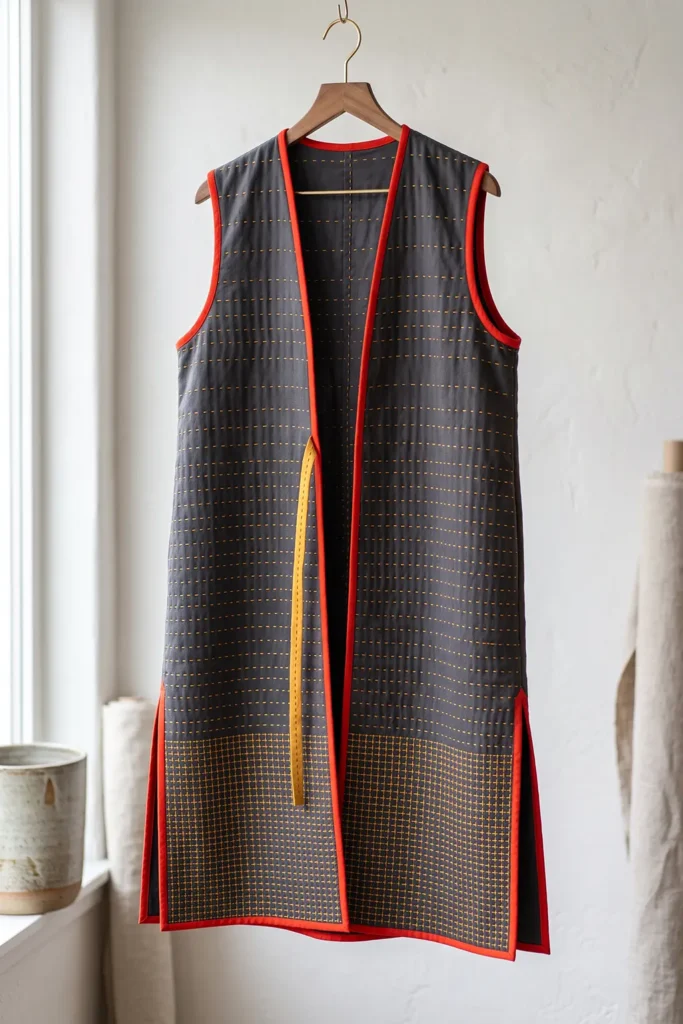
A Note on Long Garments
Japanese dress has a specific vocabulary for the outer layers worn over a kimono, and the distinctions were once precise.
The dōchūgi — literally “on-the-road wear” — was a travel coat, worn over a kimono to protect it from dust and weather on a journey. It closed with front ties and was cut generously enough to fit over a full kimono without crushing it. The michiyuki served a similar purpose but with a distinctive square neckline and a front that fastened with hidden snaps or buttons, giving a cleaner line. Both were outerwear in the practical sense — you took them off when you arrived.
The most useful fact for anyone making a long garment concerns how kimono handle length. A kimono is deliberately made longer than the wearer, and the excess is folded into a tuck at the waist called the ohashori, hidden under the obi. The tuck is not a mistake or a temporary fit — it is how the garment is designed to be worn, and it means one kimono can fit people of different heights, be passed between generations, and be adjusted rather than altered. In a clothing tradition where cloth was expensive and garments were inherited, adjustability was built in at the pattern stage.
There is also a Japanese textile term worth borrowing: koshi, which describes the body or backbone of a cloth — its resistance to collapse, distinct from both stiffness and weight. A fabric with good koshi falls in defined folds rather than clinging or crumpling. It is exactly the property a duster needs, and exactly what the density gradient in this guide is manipulating.
Finished Size
This guide makes a long, open-front sleeveless duster reaching mid-calf.
Sample finished measurements for a loose medium:
- Finished chest: about 46 inches
- Finished length: about 46 inches from shoulder to hem — mid-calf on a wearer of 5’5″
- Shoulder width: about 15 inches
- Armhole depth: about 11 inches
- Side vents: 16 inches up from the hem
- Hem sweep: about 52 inches
- Front style: open, no closure, or a single tie at the waist
- Collar: none — bound neckline
How to find your correct length: measure from the top of your shoulder beside the neck straight down to the point you want the hem to reach. Mid-calf is about 44 to 48 inches on most adults. Below the calf, the vest starts catching on the ankles when walking; above the knee, it stops reading as a duster.
Stitch measurements:
- Stitch length: about ⅛ inch, gaps roughly half that
- Shoulder zone, top 10 inches: row spacing ¾ inch
- Body zone, middle 24 inches: row spacing ½ inch
- Hem zone, bottom 12 inches: row spacing ⅜ inch
- Registration lines: horizontal reference lines every 6 inches down each panel
Add 4 inches of ease at the chest.
Materials Needed
For one longline sashiko duster, gather:
- Face fabric: 3½ yards of mid-weight cotton with good body — sheeting, chambray, or a firm lightweight linen at about 5 to 6 oz
- Backing fabric: 3½ yards in the same weight
- Sashiko thread: 7 to 9 skeins — this is the largest surface area in the collection
- Sashiko needles: a set of 3 to 5 in varied lengths
- Thimble: a Japanese palm thimble, or a leather ring thimble
- Binding fabric: 1 yard in a contrasting color
- Chalk marker or water-soluble pen
- Quilting ruler, at least 24 inches — a shorter ruler will not work on panels this long
- A long straightedge or metal yardstick for the registration lines
- Rotary cutter and cutting mat
- Sewing clips
- Sewing machine
- Machine needles: 90/14
- Iron and ironing board
- A large flat working surface — a bed or a floor, since a 50-inch panel will not fit on most tables
Beginner tip: choose a fabric with koshi — body without stiffness. Hold a length by one corner: it should fall in a few defined folds rather than clinging limply or standing out rigidly. Chambray, washed linen, and cotton sheeting all have it. Voile and lawn do not, and a duster made from them will cling rather than swing.
Vibrant Duster Palette
Two approaches, both valid:
Saturated ground with quiet stitching:
- Aubergine with ecru
- Oxblood with white
- Deep teal with ecru
- Plum with white
Deep ground with loud stitching: 5. Charcoal with saffron gold 6. Midnight navy with vermilion 7. Charcoal with chartreuse 8. Aubergine with persimmon orange
Binding — a deliberate third color: 9. Vermilion on aubergine 10. Saffron on charcoal 11. Deep teal on oxblood 12. Persimmon on midnight navy
The binding runs the entire perimeter of this garment — up both fronts, around the neck, along a 52-inch hem, around two armholes, and up both side vents. That is roughly six yards of visible binding, considerably more than any other piece in this collection, which makes it a genuine design element rather than an edge finish.
Because the density gradient makes the hem visually heavier, consider a thread that shifts as well: white through the shoulders and body, then saffron across the bottom 12 inches. The change lands where the stitching is densest and reads as deliberate weighting.
Cutting Measurements
Cut everything 2 inches longer than your target finished length and 1 inch wider. A long densely stitched panel loses 1½ to 2 inches in length, which is far more than the shorter garments in this collection.
From face fabric, cut oversized:
- Back: one piece, about 26 x 50 inches
- Fronts: two pieces, about 17 x 50 inches each
From backing fabric, cut the same three pieces at the same sizes.
From binding fabric, cut:
- Armhole binding: two bias strips at 2½ inches x armhole circumference plus 2 inches
- Front and neckline binding: one bias strip at 2½ inches x about 108 inches, pieced
- Hem binding: one strip at 2½ x 54 inches
- Side vent binding: two strips at 2½ x 34 inches
- Optional tie: one strip at 2½ x 30 inches
Total binding: about 6 yards of 2½-inch strip.
Use a ½-inch seam allowance for construction.
Step-by-Step Guide
Step 1: Measure for Length
Measure from the top of your shoulder beside the neck straight down to where you want the hem — mid-calf is 44 to 48 inches on most adults.
Then add 2 inches for stitch shrinkage and 1 inch for the hem binding seam. That total is your cutting length.
Getting this wrong is expensive on a garment this size. A duster that ends two inches too low catches at the ankle with every stride, and a duster two inches too short reads as an awkward long vest rather than as a deliberate silhouette.
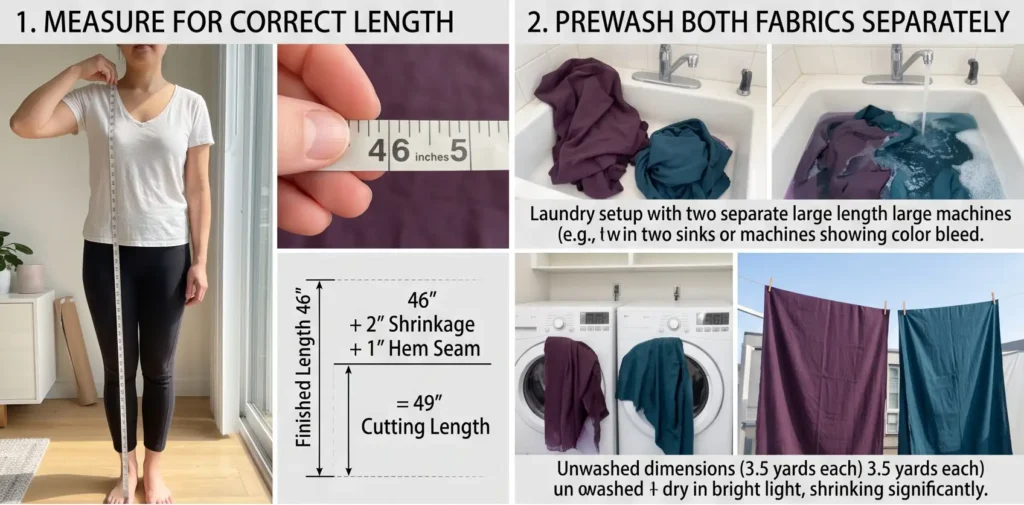
Step 2: Prewash Both Fabrics Separately
Wash and dry each fabric separately, twice, in cold water.
At 3½ yards each, these are the largest fabric quantities in the collection, and unwashed shrinkage on a 50-inch panel is substantial — often 2 to 3 inches on cotton.
Step 3: Cut on the Straight Grain
Cut all six panels with the long dimension running along the fabric’s lengthwise grain, parallel to the selvage.
Grain matters more here than in any other garment in this collection. The lengthwise grain has the least stretch, and a 46-inch panel cut even slightly off-grain will twist as it hangs under its own weight. The twist appears within weeks of wear and cannot be pressed out.
Check by pulling gently on each cut edge. The lengthwise direction should feel firm; if it gives noticeably, you have cut off-grain.
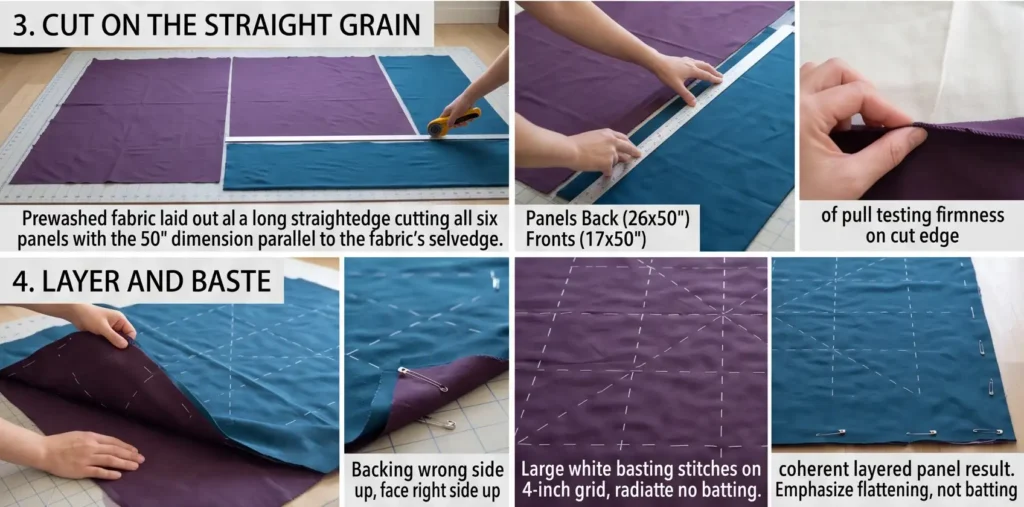
Step 4: Layer and Baste
For each panel, lay the backing right side down and the face fabric right side up on top.
Baste on a 4-inch grid across the whole panel, working from the center outward toward the edges rather than from one end to the other. Working outward from the center is what keeps a long panel from developing a bubble at one end.
Baste thoroughly. A 50-inch panel with no batting between the layers will shift considerably during hours of stitching.
Step 5: Mark the Registration Lines
This step makes a long panel possible.
Before marking any pattern, rule horizontal reference lines across each panel every 6 inches, from the top edge down to the hem. Use a long straightedge and measure each line from the panel’s top edge, rather than from the previous line.
Measuring from the top each time means an error at line three does not carry into line four. Measuring line to line means every error accumulates, and over eight intervals, that is how you end up with two inches of skew at the hem.
Check that each registration line is genuinely perpendicular to the panel edge before moving on.
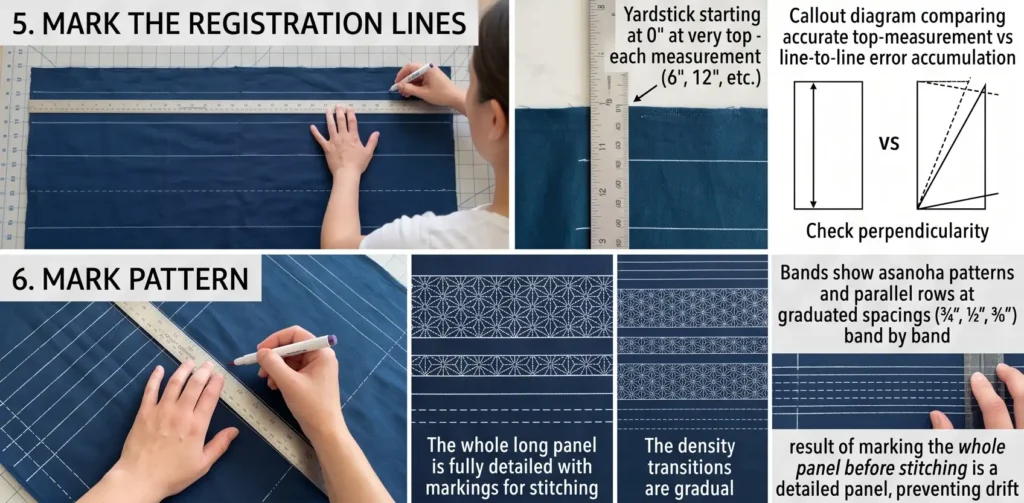
Step 6: Mark the Pattern Between the Registration Lines
Now fill in your grid, working one 6-inch band at a time between consecutive registration lines.
Because each band starts fresh from a verified horizontal, errors reset every 6 inches instead of compounding down the full panel.
For asanoha: rule a 1-inch grid within the band, add both diagonals, then the connecting lines forming the six-pointed leaf units.
For parallel rows: rule straight lines at the spacing appropriate to that zone — ¾ inch in the top band, ½ inch through the middle, ⅜ inch in the bottom two bands.
Mark the whole panel before stitching. Marking as you go across a panel this long guarantees drift.
Step 7: Plan the Density Gradient
Confirm your three zones before stitching:
- Top 10 inches: rows at ¾ inch — light, so the shoulders stay soft
- Middle 24 inches: rows at ½ inch — the transition
- Bottom 12 inches: rows at ⅜ inch — dense, adding weight at the hem
Make the transitions gradual rather than abrupt. Rather than jumping from ¾ inch to ½ inch at a hard line, spend two or three rows easing between them. A visible density step reads as a mistake; a gradient reads as intentional.
If you are changing thread color at the hem zone, do it there.
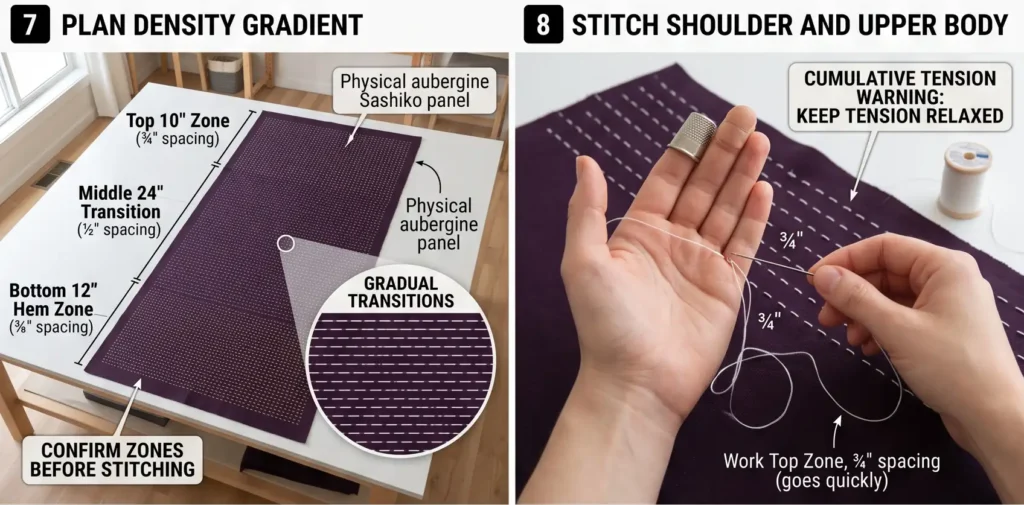
Step 8: Stitch the Shoulder and Upper Body
Thread a long sashiko needle with about 18 to 20 inches of thread. Wear the thimble on your palm.
Work a running stitch of about ⅛ inch with gaps roughly half that, loading five to ten stitches per pass.
Work the top zone first, at the open ¾-inch spacing. This goes quickly.
Keep tension relaxed. On a long panel, cumulative tension is a real problem — a slight pull on each of sixty rows produces a panel that is measurably narrower at the stitched end.
Step 9: Stitch the Body Zone
Work the middle 24 inches at ½-inch row spacing.
Check the panel width every 10 rows. Measure across the panel at the top and at your current position. If the stitched section is narrowing, your tension is too tight — relax it before continuing rather than trying to correct later.
Roll or fold the unworked portion of the panel rather than letting it hang off the table. An unsupported 30-inch tail pulls on the area you are stitching and distorts it.
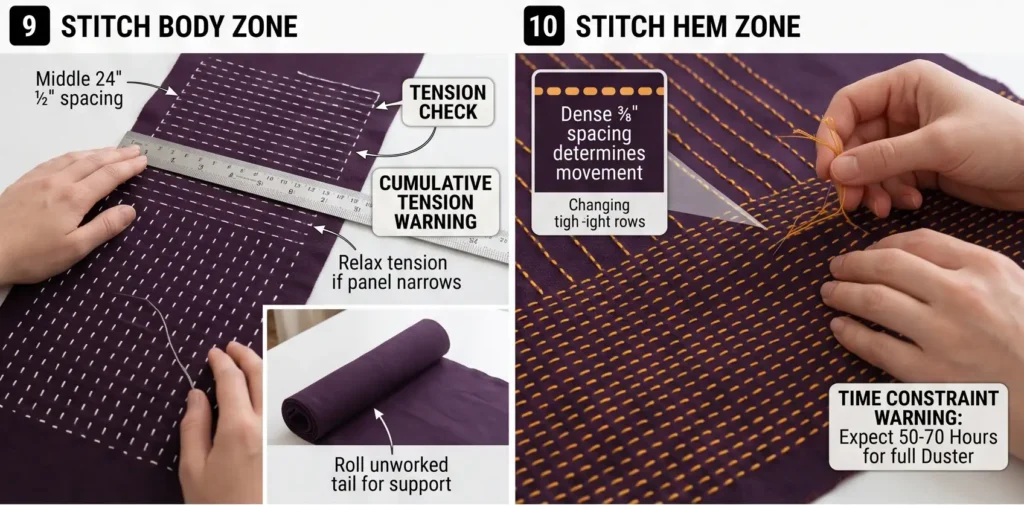
Step 10: Stitch the Hem Zone
Work the bottom 12 inches at ⅜-inch spacing, changing thread color here if that is your plan.
This is the densest and slowest section, and it is the one that determines how the finished garment moves.
Expect 50 to 70 hours for the full duster. It is the largest project in this collection, though not the hardest — the technique is straightforward and it is the sheer area that takes the time.
Step 11: Press, Measure, and Cut
Press each panel gently from the reverse with a pressing cloth. Do not flatten the stitching.
Measure each panel. Expect 1½ to 2 inches of length shrinkage and roughly ½ inch of width.
Lay the panels side by side and check they have shrunk equally. If one is noticeably shorter, it was stitched more tightly, and you will need to trim all three to match the shortest.
Cut the back and both fronts to final size.
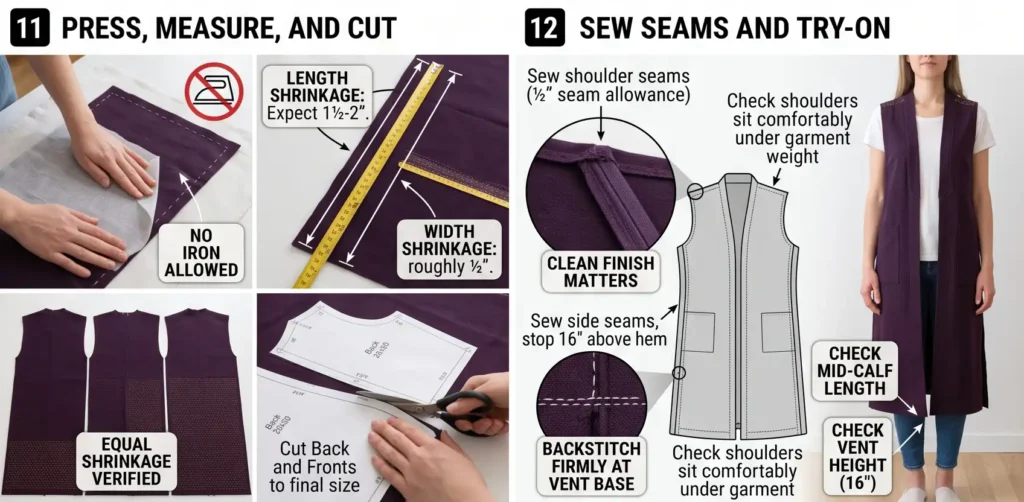
Step 12: Sew the Shoulder and Side Seams
Sew the shoulder seams with a ½-inch seam allowance, press open, and finish with bound edges or a flat-fell.
Sew each side seam from the armhole down, stopping 16 inches above the hem to leave the side vents open.
Backstitch firmly at the base of each vent. That point takes strain every time the wearer walks, and it is the first place an unreinforced seam fails.
Try the duster on. Check the length, the vent height, and that the shoulders sit comfortably under the weight of the garment.
Step 13: Bind the Armholes, Vents, Front, Neckline, and Hem
This is roughly six yards of binding, so work in a sensible order:
- Armholes — join a bias strip into a loop and apply to each
- Side vents — bind each vent opening from the hem up to the seam end and back down, treating it as a continuous U
- Front opening and neckline — one continuous strip from the hem, up the right front, around the back neck, down the left front
- Hem — a separate strip across the full 52-inch sweep, ends folded in where they meet the front and vent binding
Machine-stitch each binding to the face, fold over the raw edge, and hand-stitch it down inside.
Ease the hem binding rather than pulling it. A 52-inch hem is long enough that a slightly stretched binding will visibly pull the hem inward and make it hang unevenly.
Step 14: Add a Tie and Finish
If you want a closure, make a single 2½ x 30-inch tie, fold and stitch it into a narrow strap, and attach it at the left front at natural waist height. A duster tied at the waist creates a completely different silhouette from one worn open, so it is worth having both options.
Remove chalk marks with cold water and dry flat, not hanging. A wet 46-inch panel hung to dry will stretch under its own weight.
Once dry, press lightly and hang the finished garment. Never fold a duster — a crease across the body of a long garment shows every time it moves.
Assembly at a Glance
- Measure — shoulder to mid-calf, plus 2 inches for shrinkage and 1 inch for the hem seam
- Cut on grain — all six panels along the lengthwise grain, or the finished garment will twist as it hangs
- Register — rule horizontal reference lines every 6 inches, each measured from the panel top independently
- Mark — fill the grid one 6-inch band at a time so errors reset rather than accumulate
- Stitch the gradient — ¾-inch rows at the shoulders, ½ inch through the body, ⅜ inch across the bottom 12 inches
- Check and cut — verify all three panels shrank equally, trim to match, then sew shoulders and side seams stopping 16 inches above the hem
- Bind — armholes, vents, front and neckline, then the hem, easing rather than pulling on the long edges
Vibrant Duster Combination Ideas
For a charcoal duster, use charcoal cloth with saffron gold stitching throughout and vermilion binding.
For an aubergine duster, use aubergine with ecru stitching in the body and persimmon across the hem zone, bound in persimmon.
For an oxblood duster, use oxblood with white stitching and deep teal binding.
For a navy duster, use midnight navy with white through the body and vermilion across the hem, bound in saffron.
For a plum duster, use plum with chartreuse stitching and black binding — the sharpest and most modern of the set.
For a gradient duster, keep one cloth color but run three thread colors down the length: white at the shoulders, saffron through the body, vermilion across the hem, so the color shift and the density shift happen together.
Beginner Tips for Success
Use registration lines every 6 inches, measured independently from the panel top. This is the difference between a hem that hangs straight and one that visibly tilts.
Cut on the lengthwise grain. An off-grain long panel twists under its own weight within weeks, and it cannot be pressed out.
Keep the stitch tension consistent across all three panels. Panels stitched at different tensions shrink differently, and mismatched side seams on a 46-inch garment show up easily.
Check panel width every 10 rows. Cumulative tension narrows a long panel gradually enough that you will not notice until it is too late.
Support the unworked portion of the panel. A 30-inch tail hanging off the table distorts the area you are stitching.
Make the density transitions gradual. A hard step between spacings reads as an error.
Leave 16-inch side vents. Without them the garment binds at the knees with every stride.
Dry flat, never hanging. A wet panel this long stretches under its own weight.
Styling Tip
A duster is a vertical line, and everything about styling it should support that. Wear it over narrow or straight shapes — slim trousers, a column dress, straight denim. Volume underneath a long open vest cancels the line entirely and the whole silhouette collapses.
Worn open, the two front edges create a strong unbroken vertical from shoulder to hem, and the binding color runs the full length of that line — which is why the binding choice matters so much on this garment.
Tied at the waist, it becomes a different piece: a defined waist with soft volume above and a swinging skirt below. Worth trying both before deciding whether to add the tie.
Because the hem is weighted with dense stitching, this garment moves when you walk, and it looks best in motion. It is a poor choice for sitting at a desk and an excellent one for anywhere you are on your feet.
Hang it on a wide hanger rather than a wire one — the weight of a long stitched garment will mark the shoulders on a narrow hanger over time.
Gift Pairings for the Pockets
This silhouette usually has no pockets, so these work as a set alongside the finished garment, or in a small pouch worn with it:
- A set of sashiko needles in varied lengths in a fabric roll
- A Japanese palm thimble — hard to find and genuinely transformative
- A sashiko thread set in white, ecru, saffron, and vermilion
- A 24-inch quilting ruler — the tool that makes long panels accurate, and essential for this project
- A long metal yardstick for marking registration lines
- A wide wooden hanger in the tradition of a kimono hanger
- A hand-stitched drawstring pouch in the binding fabric
Other Design Inspirations – Digitally Modified Images. Texture and color may vary from the actual product.
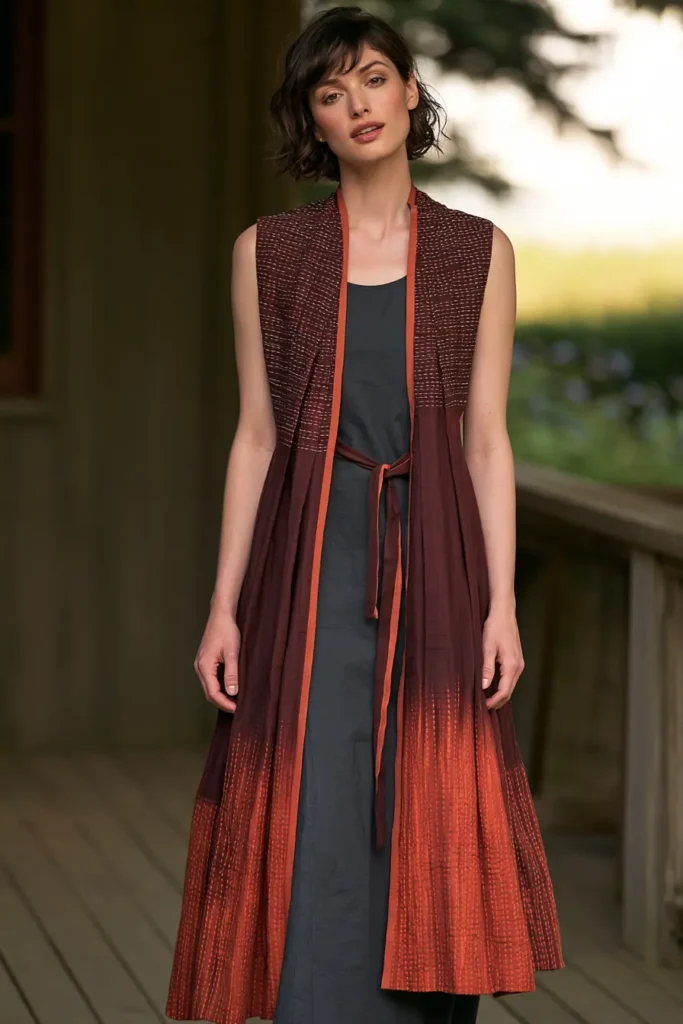
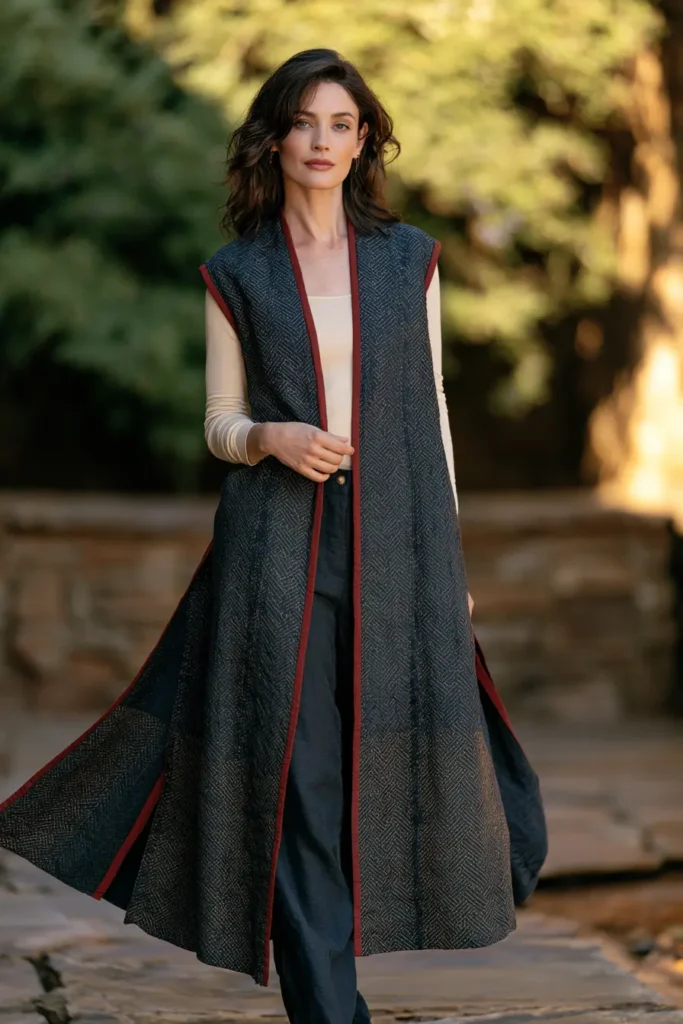
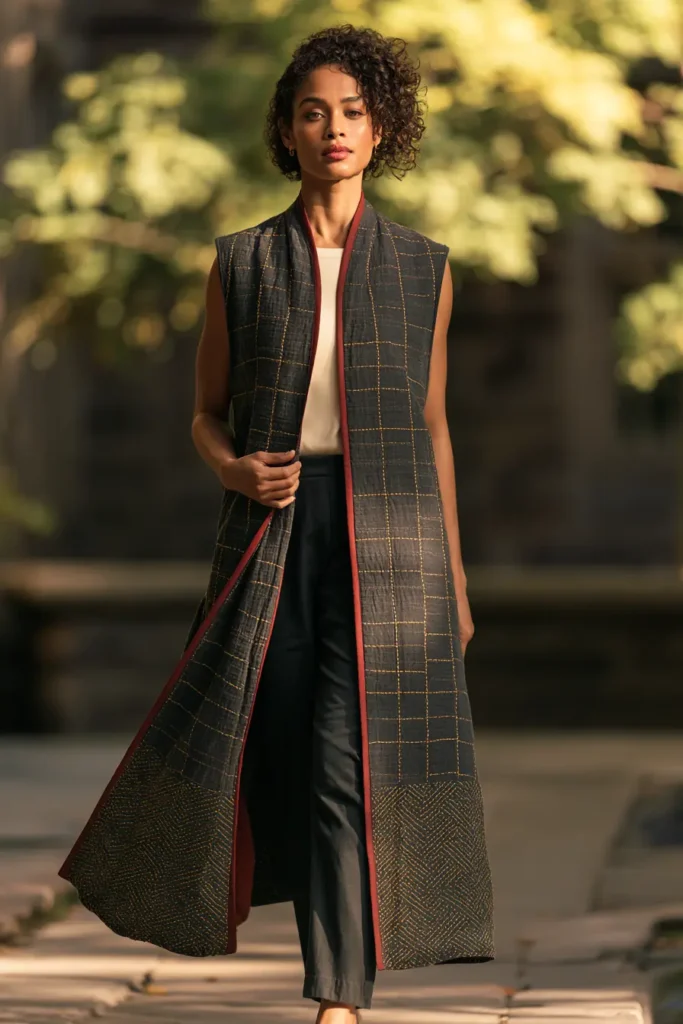
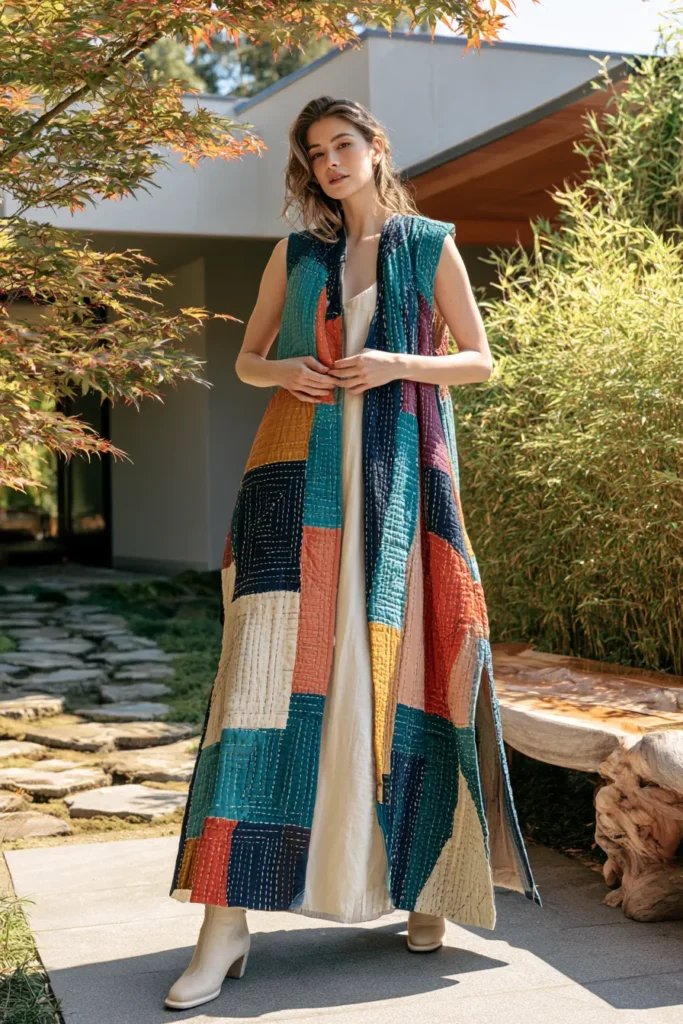
8. Noragi-Style Sashiko Jacket for Relaxed Japanese-Inspired Comfort
A noragi is a farmer’s jacket, and every feature it has exists because someone had to work in it. The collar band is short and stops at chest height rather than running to the hem, so it does not flap open when you bend. The sleeves are narrow tubes rather than the wide rectangles of a kimono, so they do not catch on tools or drag through what you are harvesting. The body is hip-length and cut generously through the shoulders for reaching. Historically, the stitching went where the garment wore out.
That last point is what makes this the most interesting sashiko project in the collection. Instead of covering the garment evenly, you map the stitching to the stress points — dense across the shoulders and upper back, dense at the elbows, dense along the front edges where hands grip and pull. The result looks composed and asymmetric, and every dense area is doing structural work rather than decorative work. This collection comes closest to sashiko as it was actually practiced.
For a vibrant palette, keep the ground grounded — deep indigo, midnight navy, charcoal, olive, or oxblood — and put the color entirely in the thread and the collar. Stitch in saffron gold, vermilion, persimmon, chartreuse, or bright white, and make the collar band a hard contrast. A charcoal noragi with a vermilion collar band and saffron reinforcement stitching across the shoulders reads as workwear that someone cared about.
Why This Design Works
Two construction details separate a noragi from the kimono-style jacket, and both are functional.
The short collar band runs from the back neck down each front only to the chest, ending roughly 9 to 11 inches below the shoulder. Below that the front edges are simply bound. A full-length band like a haori’s holds the front closed by weight and drape; a short band lets the lower jacket swing free, which is what you want when you are moving.
The tsutsusode — tube sleeve — is the second. Where a kimono or haori sleeve is a wide rectangle hanging open, a noragi sleeve is a narrow tube tapering toward the wrist, typically 11 to 12 inches at the opening rather than 15 or more. It is the difference between a sleeve that drapes and a sleeve you can work in.
The reinforcement logic follows from both. A work jacket wears at the shoulders where a load sits, the upper back where the garment stretches as you reach forward, the elbows, and the front edges where hands grip. Concentrating stitching there adds real durability and produces a distribution that looks nothing like a uniformly covered garment.
Skills you build here: mapping stitch density to function rather than to pattern, narrow tube sleeve construction, short collar band application, and building a garment where the decoration and the structure are the same thing.
Design Inspirations – Digitally Modified Images. Texture and color may vary from the actual product.
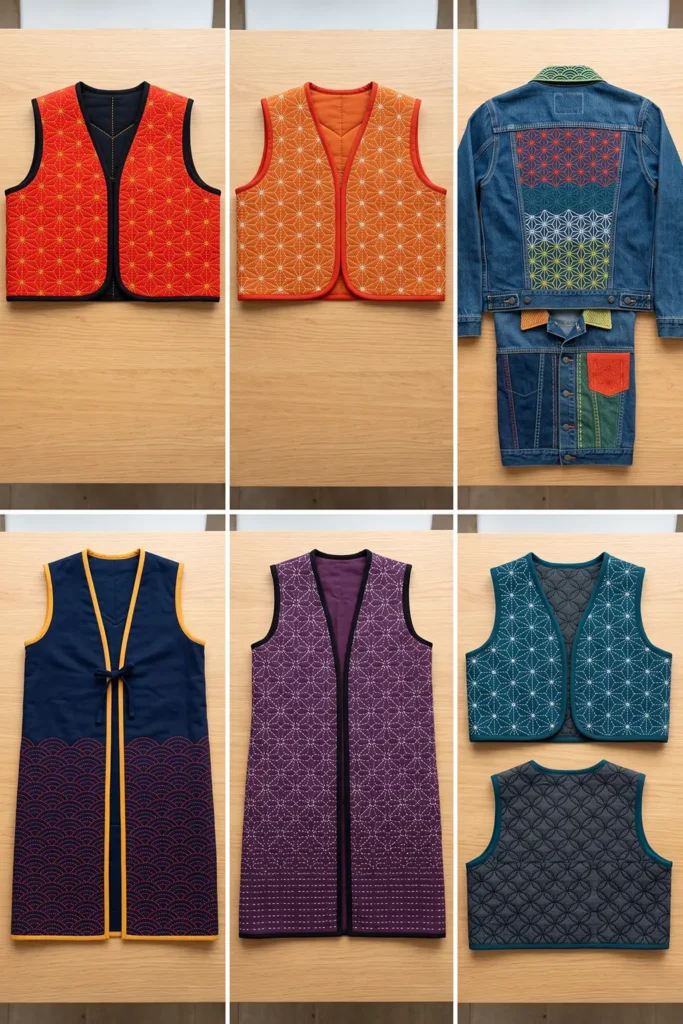
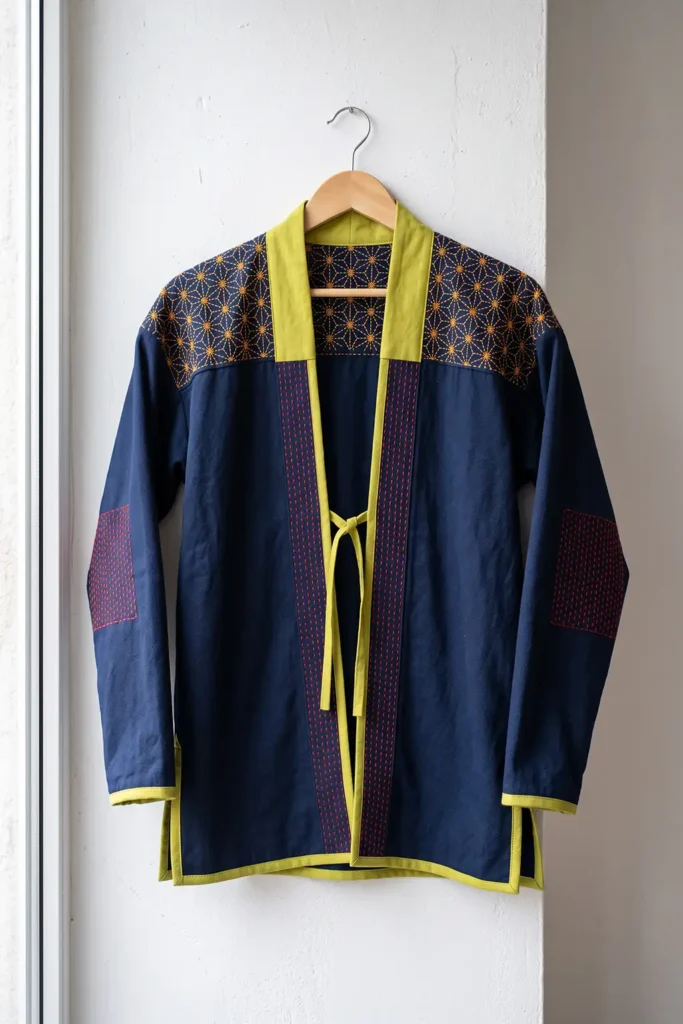
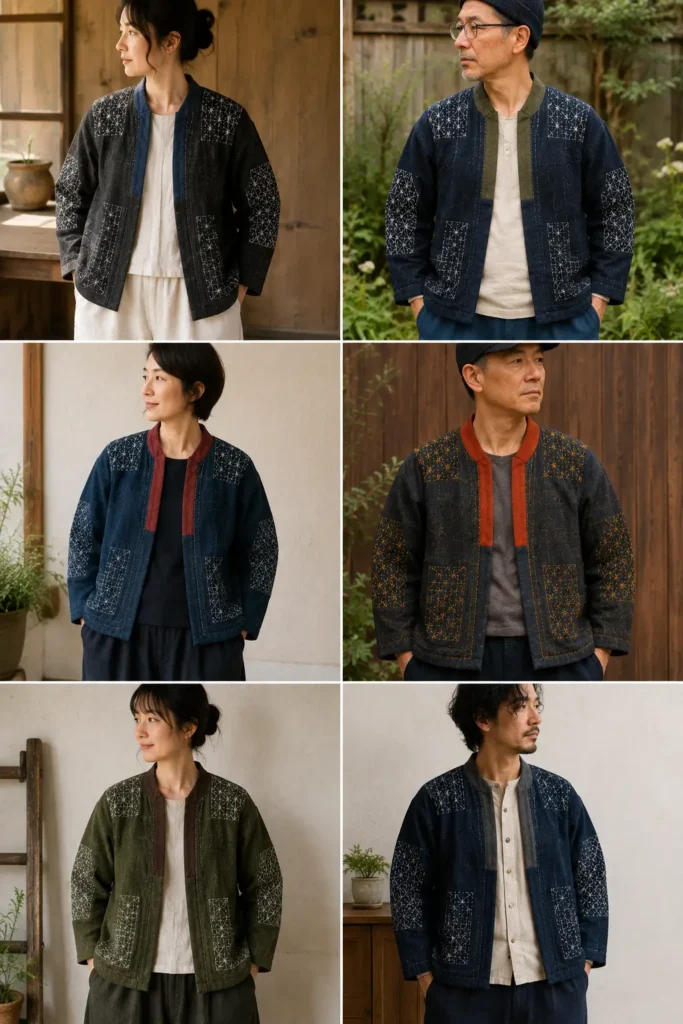
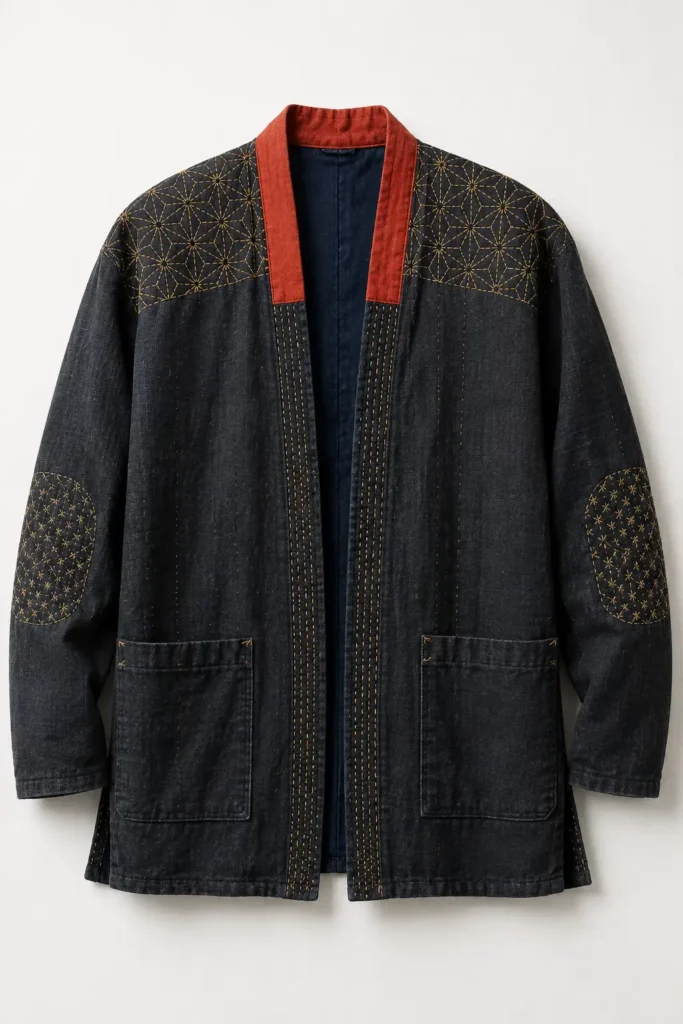
A Note on Noragi
Noragi — 野良着 — means field clothing, from nora, cultivated land, and gi, garment. It was rural workwear across Japan, and there was never one standard design; construction varied by region, by trade, and by what cloth was available.
What noragi were made from is the interesting part. Very few were sewn from new cloth. They were commonly assembled from worn kimono, futon covers, and old work garments, cut down and reassembled, which is why surviving examples so often show mismatched panels and multiple fabrics in one jacket. The kasuri cloth frequently found in them — with its soft-edged woven patterns from resist-dyed threads — was itself a rural product, woven in farming households during the winter months when field work stopped.
The jacket was usually worn with mompe, loose gathered work trousers narrow at the ankle, which became near-universal for Japanese women during the Second World War when practical clothing was mandated, and kimono were unsuitable for factory and field work. Many mompe were made by cutting up kimono, and a considerable amount of fine prewar silk became work trousers.
Like boro, noragi were regarded as poor people’s clothing well into the postwar period and were discarded in large numbers. They now sell as vintage garments at prices that would astonish the people who wore them, and menswear brands have widely adopted the silhouette—usually without the reinforcement stitching that was the entire point.
Finished Size
This guide makes a relaxed, hip-length noragi-style jacket with narrow tube sleeves and a short collar band.
Sample finished measurements for a loose medium:
- Finished chest: about 48 inches
- Finished length: about 28 inches from shoulder to hem
- Body panel width: 15 inches each
- Sleeve length: about 20 inches from the shoulder seam
- Sleeve width at the top: about 15 inches
- Sleeve opening at the wrist: about 11½ inches
- Collar band: 2 inches finished width, ending 10 inches below the shoulder on each front
- Side vents: 6 inches up from the hem
- Front style: open, with a single tie or a pair of himo ties at chest height
- Optional: two patch pockets at the hip
Reinforcement zone measurements:
- Shoulder and upper back yoke: the top 8 inches of the back and 5 inches of each front, rows at ⅜ inch
- Elbow patches: an area about 7 x 8 inches centered 11 inches down each sleeve, rows at ⅜ inch
- Front edge bands: a 3-inch wide strip down each front edge, rows at ⅜ inch
- Everything else: rows at 1 inch, or left unstitched
Materials Needed
For one noragi-style sashiko jacket, gather:
- Main fabric: 3 yards of mid-weight cotton — sheeting, chambray, or lightweight canvas at about 6 to 8 oz. This is workwear, so a firmer cloth than the drape-dependent pieces
- Backing fabric: 3 yards in a lighter cotton, or omit for a single-layer jacket
- Collar band fabric: ⅓ yard in a strong contrast
- Sashiko thread: 4 to 5 skeins — less than a fully covered jacket, since much of this garment stays open
- Sashiko needles: a set of 3 to 5 in varied lengths
- Thimble: a Japanese palm thimble, or a leather ring thimble
- Binding fabric: ½ yard
- Chalk marker or water-soluble pen
- Quilting ruler
- Rotary cutter and cutting mat
- Sewing clips
- Sewing machine
- Machine needles: 90/14
- Iron and ironing board
No commercial pattern is needed. Every piece is a rectangle and the measurements are given below.
Beginner tip: for the most authentic result, build the body panels from two or three different fabrics rather than one. Historic noragi were assembled from whatever was to hand, so a back panel in one indigo and fronts in another is closer to the tradition than a perfectly matched jacket, and it uses up cloth you already have.
Vibrant Noragi Palette
Grounded cloth, loud thread:
Cloth:
- Deep indigo
- Midnight navy
- Charcoal
- Olive
- Oxblood
- Slate blue
Thread: 7. Saffron gold 8. Vermilion red 9. Persimmon orange 10. Chartreuse 11. Bright white
Collar band and ties: 12. Vermilion on charcoal 13. Saffron on indigo 14. Persimmon on olive 15. Chartreuse on oxblood
The collar band is the loudest element on this garment and it should be. It frames the face, it is only 2 inches wide and 30 inches long, and against a dark work jacket it does the entire job of turning utility into style.
Consider using two thread colors by zone: saffron for the shoulder and upper back reinforcement, vermilion for the elbows and front edges. Different zones stitched in different colors reads as work done at separate times, which is exactly what a genuinely reinforced jacket would look like.
Cutting Measurements
Cut everything 1 inch larger than the sizes below in every direction. Stitching draws the cloth in, though less here than on fully covered garments — expect ½ inch in the reinforced zones and almost none elsewhere.
From main fabric, cut:
- Body panels: two pieces at 16 x 58 inches each
These run from the front hem, over the shoulder, down to the back hem in one continuous piece with no shoulder seam, as in kimono construction.
- Sleeves: two pieces at 16 x 22 inches each
- Collar band: one piece at 5 x 32 inches
From backing fabric, cut the same pieces at the same sizes, if making a two-layer jacket.
From collar band fabric, cut:
- Collar band: one piece at 5 x 32 inches
- Ties: two pieces at 2½ x 16 inches
From binding fabric, cut:
- Front edge binding, below the collar: two strips at 2½ x 22 inches
- Hem binding: one strip at 2½ x 52 inches
- Cuff binding: two strips at 2½ x 14 inches
- Side vent binding: two strips at 2½ x 14 inches
Optional patch pockets: two at 8 x 9 inches from main fabric.
Use a ½-inch seam allowance throughout.
Step-by-Step Guide
Step 1: Prewash Everything
Wash and dry all fabrics twice in cold water before cutting, including the collar band fabric.
If you are building the body from several different fabrics, wash them separately — mixed shrinkage rates across panels in one garment will show at the seams.
Step 2: Cut the Rectangles
Cut two body panels at 16 x 58 inches, two sleeves at 16 x 22 inches, and the collar band at 5 x 32 inches, all at the oversized measurements.
Cut everything on the straight grain, with the long dimension along the fabric length.
Check that each rectangle is genuinely square before proceeding. A rectangular garment has no shaping to disguise a crooked cut.
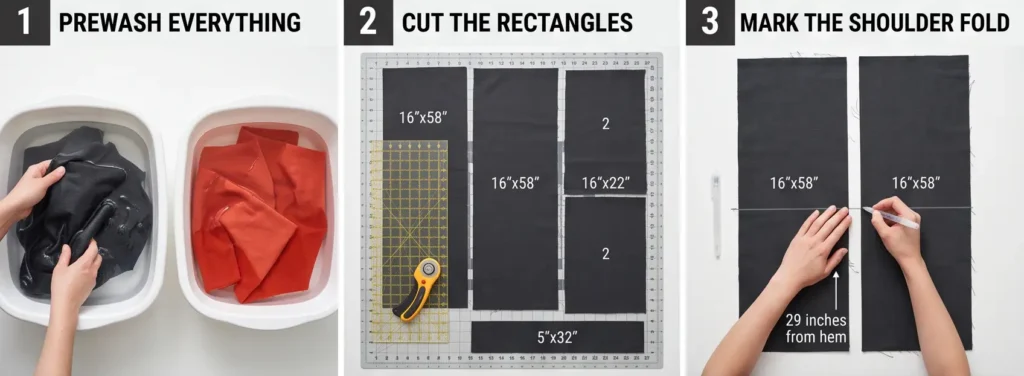
Step 3: Mark the Shoulder Fold
On each 58-inch body panel, measure to the center at 29 inches and mark a line across the width.
This is the shoulder fold. Twenty-nine inches falls to the front hem and 29 to the back hem.
Take every reinforcement zone measurement below from this line, so mark it clearly.
Step 4: Map the Reinforcement Zones
This is the step that defines the section, and it is worth doing carefully with chalk before any stitching.
On each body panel, mark:
- Shoulder zone: a band extending 8 inches to the back and 5 inches to the front of the fold line, across the full panel width
- Front edge band: a 3-inch wide strip running down the front edge from the collar band end to the hem
On each sleeve, mark:
- Elbow patch: an area about 7 x 8 inches, centered 11 inches down from the shoulder edge
Everything outside these zones is either lightly stitched at 1-inch row spacing or left bare.
Stand back and look at the distribution. It should be visibly asymmetric and clustered, not evenly spread. That clustering is the whole point.
Step 5: Mark the Patterns
Within the reinforcement zones, mark a proper geometric pattern — asanoha on a 1-inch grid works well and is dense enough to add real strength.
For the collar band, mark parallel rows at ½-inch spacing running its length.
For the light zones, mark simple parallel rows at 1-inch spacing, running vertically on the body and along the length of the sleeves.
Mark each full panel before stitching anything.
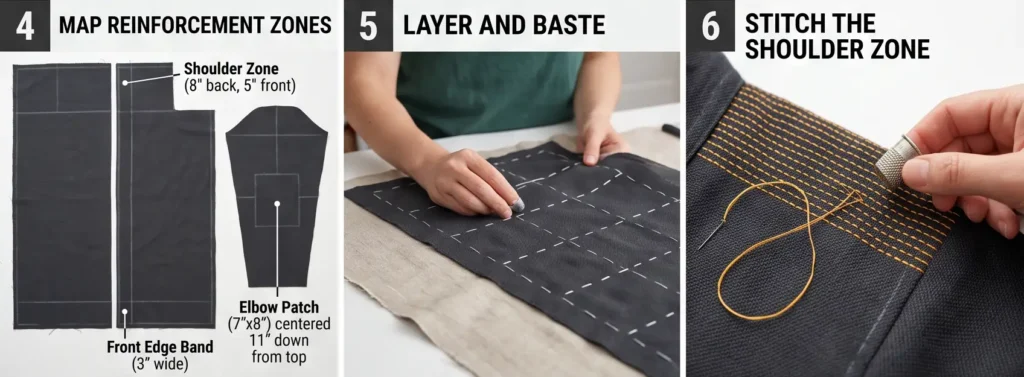
Step 6: Layer and Baste
If making a two-layer jacket, lay each backing piece down, place the main fabric on top right side up, and baste on a 4-inch grid.
For a single-layer jacket, skip this. A single-layer noragi is entirely authentic — many originals were unlined — and the stitching then reads as pure reinforcement, which suits the design logic.
The single-layer version is also lighter for warm weather and considerably faster.
Step 7: Stitch the Shoulder Zone
Start here, because it is the largest reinforcement area and the most visible.
Thread a long sashiko needle with about 18 to 20 inches of thread. Wear the thimble on your palm.
Work a running stitch of about ⅛ inch with gaps roughly half that, at ⅜-inch row spacing, loading five to ten stitches per pass.
Work in your first thread color — saffron or white.
Keep tension relaxed. Dense stitching across the shoulder is where the garment carries its weight, and pulled stitching there will make the whole jacket sit badly.
Step 8: Stitch the Front Edge Bands
Work the 3-inch strips down each front edge, spaced ⅜ inch apart.
These bands do two jobs: they reinforce the edge that takes the most handling, and they create a strong vertical line down the front of the jacket that reads as intentional design.
Consider switching to your second thread color here — vermilion against saffron shoulders.
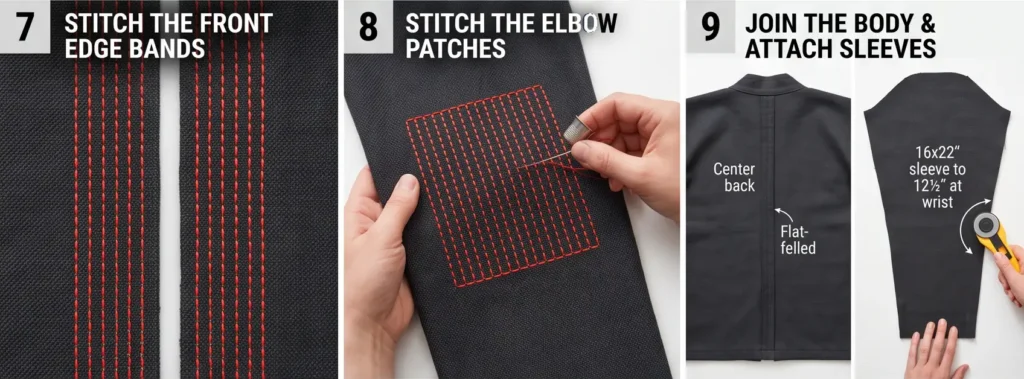
Step 9: Stitch the Elbow Patches
Work each 7 x 8-inch elbow area at ⅜-inch spacing.
Position matters: 11 inches down from the shoulder edge puts the dense area where an elbow actually sits when the arm is bent. Measure it on yourself if you are unsure — put the flat sleeve rectangle against your arm and mark where your elbow falls.
Use the same thread color as the front edge bands so the zones group visually.
Step 10: Stitch the Light Zones and the Collar Band
Work the remaining areas at 1-inch row spacing, which goes quickly. Or leave them bare — both are legitimate, and a jacket with bare mid-body panels and dense reinforcement zones is the more striking of the two.
Stitch the collar band at ½-inch spacing along its full length. It is narrow, so this takes under two hours and it is the most visible stitching on the garment.
Expect 30 to 45 hours total for the jacket, considerably less than a fully covered one because most of the surface stays open.
Step 11: Press, Measure, and Trim
Press each piece gently from the reverse with a pressing cloth.
Measure and trim to finished sizes:
- Body panels: 16 x 58 inches
- Sleeves: 16 x 22 inches
- Collar band: 5 x 32 inches
Expect up to ½ inch of shrinkage in the reinforced zones and very little elsewhere. Because the shrinkage is uneven, check that the reinforced areas have not pulled the panel out of square — if a shoulder zone has drawn in, trim the whole panel to the narrowest point rather than leaving a stepped edge.
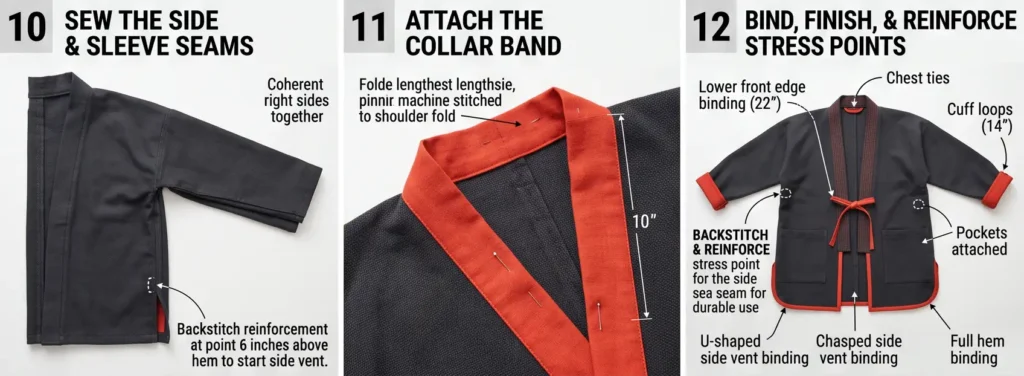
Step 12: Join the Body and Attach the Sleeves
Place the two body panels right sides together and sew along one long edge with a ½-inch seam allowance, from the back hem up to the shoulder fold line and no further. This is the center back seam.
Press open and finish it with a flat-fell or bound edge.
Now taper each sleeve. Fold the 16 x 22-inch sleeve rectangle in half lengthwise, and cut a gentle taper from 16 inches at the shoulder end down to 12½ inches at the wrist end, removing the excess evenly from the underarm edge only. This taper is what makes it a tube sleeve rather than a kimono sleeve.
Center the sleeve’s shoulder edge against the body’s shoulder fold, right sides together, and sew along the straight edge with a ½-inch seam allowance, running about 15 inches down from the fold on each side.
There is no curve and nothing to ease.
Step 13: Sew the Side and Sleeve Seams
Fold the jacket right sides together, matching underarm points.
Sew from each cuff down to the underarm and continue along the side seam, stopping 6 inches above the hem to leave a short side vent.
Finish all these seams — flat-fell them if you can, since a work jacket’s interior takes handling.
Try the jacket on. Check the sleeve length, the body length, and that the shoulders allow you to reach forward comfortably. This silhouette should not restrict a reaching movement at all.
Step 14: Attach the Collar Band, Bind, and Finish
Fold the 5 x 32-inch collar band in half lengthwise, wrong sides together, and press. It now measures 2½ inches, finishing at 2 inches.
Find the center of the band, match it to the center back neck, and pin outward in both directions. Sew it to the neckline and down each front edge, ending 10 inches below the shoulder fold on each side.
Fold the band to the inside, turn the raw edge under, and hand-stitch it down.
Then bind, in this order:
- Front edges below the collar — a 2½ x 22-inch strip on each side, running from the collar band end down to the hem
- Cuffs — a 2½ x 14-inch strip joined into a loop on each sleeve
- Side vents — bind each vent opening as a continuous U
- Hem — one strip across the full width, ends folded in where they meet the front and vent binding
Attach the two 2½ x 16-inch ties at chest height, one on each front edge just below where the collar band ends, positioned so the jacket wraps left over right.
If you want pockets, topstitch two 8 x 9-inch patch pockets at hip height, 3 inches above the hem and 2½ inches in from the side seam.
Remove chalk marks with cold water, dry flat, press lightly, and add a label.
Assembly at a Glance
- Prepare — prewash everything twice, washing mixed fabrics separately
- Cut — two body panels at 16 x 58 inches, two sleeves, one short collar band, all on the straight grain
- Map — mark the shoulder zone, front edge bands, and elbow patches in chalk before any stitching
- Stitch by zone — dense ⅜-inch rows in the reinforcement areas, 1-inch rows or bare elsewhere, changing thread color between zones
- Trim — check the reinforced zones have not pulled the panels out of square, trim to the narrowest point
- Assemble — center back seam to the shoulder fold, taper the sleeves to 12½ inches at the wrist, attach flat, side seams stopping 6 inches above the hem
- Finish — short collar band ending 10 inches below the shoulder, bind the lower front edges, cuffs, vents, and hem, add chest ties
Vibrant Noragi Combination Ideas
For a classic noragi, use deep indigo with white shoulder stitching, vermilion elbows and front bands, and a vermilion collar.
For a charcoal noragi, use charcoal cloth with saffron gold reinforcement throughout and a vermilion collar band.
For an olive noragi, use olive with persimmon orange stitching and a persimmon collar with matching ties.
For an oxblood noragi, use oxblood with chartreuse stitching and a black collar band — the sharpest and most modern of the set.
For a pieced noragi, build the back from one indigo and the fronts from another, with white stitching running across both and a saffron collar.
For a two-color zone noragi, use saffron across the shoulders and upper back with vermilion at the elbows and front edges, on midnight navy, with a chartreuse collar band.
Beginner Tips for Success
Map the reinforcement zones in chalk before stitching anything. The clustered, asymmetric distribution is what distinguishes this jacket, and it is hard to judge once you have started.
Measure the elbow position on yourself. Eleven inches down from the shoulder edge is typical, but arm length varies and a misplaced elbow patch looks like a mistake.
Taper the sleeves. A 12½-inch wrist opening is what makes it a noragi rather than a haori, and it is the detail most often skipped.
End the collar band at 10 inches. A band running to the hem turns this into a different garment entirely.
Use two thread colors by zone. It reads as work done at different times, which is what a genuinely reinforced jacket looks like.
Check for uneven shrinkage. The reinforced zones draw in and the light zones do not, so a panel can end up stepped rather than straight.
Consider a single-layer version. Many originals were unlined, and the stitching then reads as pure reinforcement.
Build from mixed fabrics if you can. Historic noragi were assembled from whatever was available, and a matched jacket is less authentic.
Styling Tip
A noragi-style jacket is workwear, so it goes with everything workwear goes with — straight denim, canvas trousers, a plain tee, a chambray shirt. It sits comfortably in a Western wardrobe in a way some other pieces in this collection do not, and it is the one you will reach for most often.
Worn open, the short collar band and the stitched front edge bands create a strong frame at the chest without the long vertical line of a duster or a haori. Tied at the chest with the himo ties, it blouses slightly above the tie and sits closer through the body.
The narrow sleeves mean it layers under a coat, which none of the wide-sleeved pieces in this collection do. That makes it genuinely three-season wear, not a transitional piece.
Keep everything underneath plain and let the collar band be the color. Roll the cuffs back an inch to show the binding — a small detail that reads as deliberate.
Wash rarely, by hand or on a cold, gentle cycle, and hang to dry. Like denim, a noragi improves as the cloth softens around the reinforcement stitching.
Gift Pairings for the Pockets
The patch pockets suit small gifts, and these work as a set alongside the finished jacket:
- A set of sashiko needles in varied lengths in a fabric roll
- A Japanese palm thimble — hard to find and genuinely transformative
- A sashiko thread set in white, saffron, vermilion, and chartreuse
- A hand-stitched needle book in the collar band fabric
- A small drawstring pouch in the tradition of a kinchaku
- A bundle of kasuri or indigo fabric scraps for future patching
- A sashiko-stitched tool roll for scissors and markers
Other Design Inspirations – Digitally Modified Images. Texture and color may vary from the actual product.
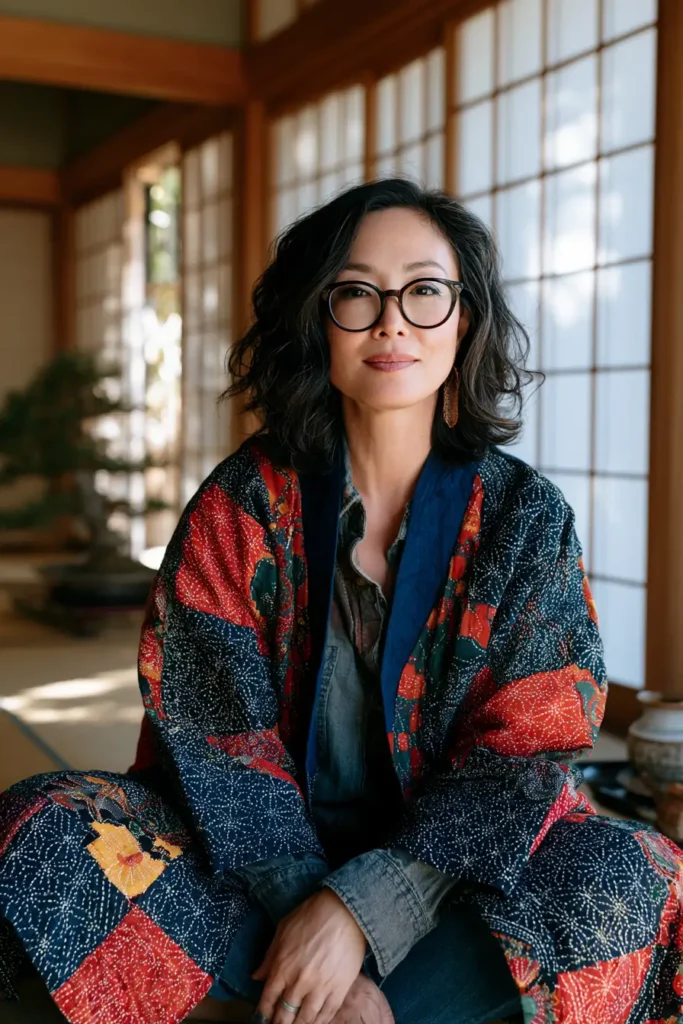
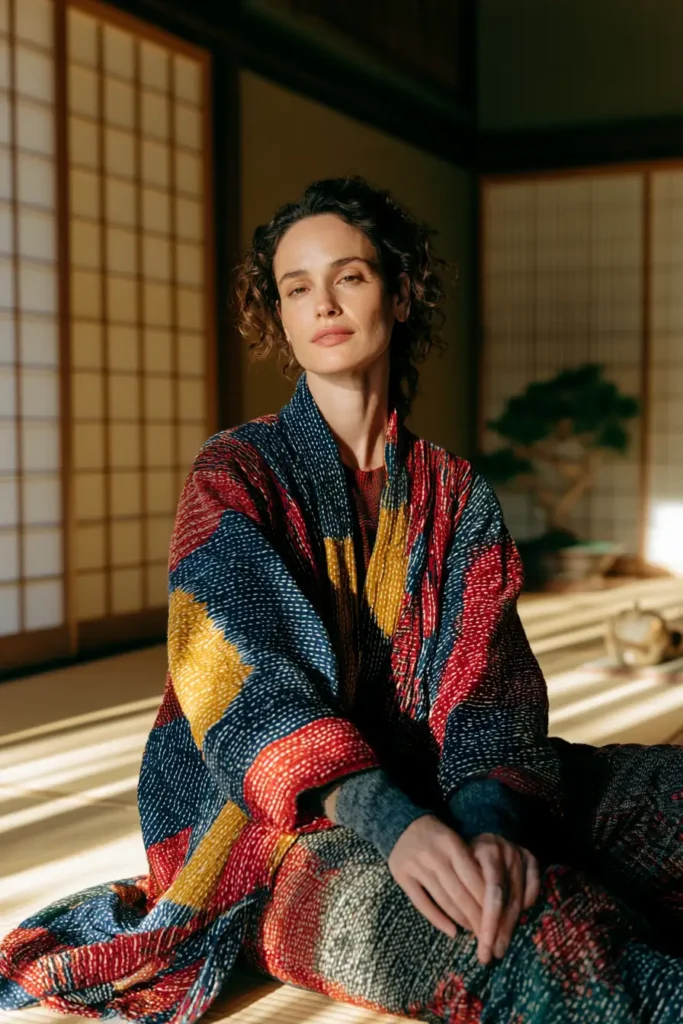
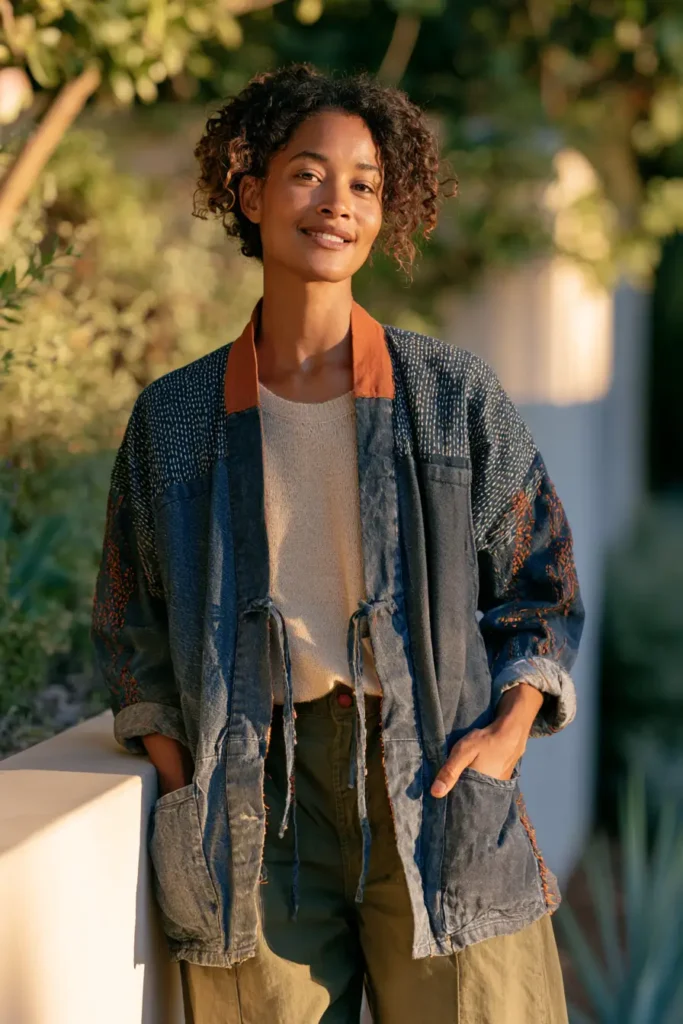
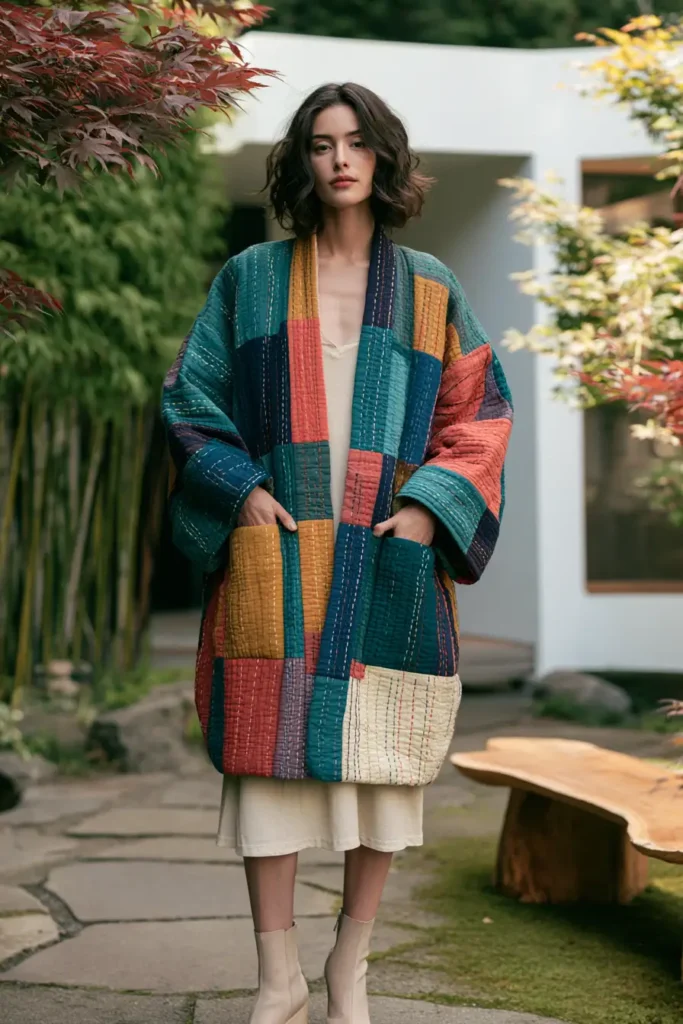
9. Minimalist Neutral Sashiko Vest for Understated Elegance
Every other garment in this collection relies on contrast. White thread on indigo, saffron on charcoal, vermilion on denim — the pattern reads because the thread is a different color from the cloth. Remove that contrast and something changes fundamentally: the stitching stops being a drawn line and becomes physical relief. The pattern is only visible because the thread sits proud of the surface and casts a shadow.
That shift makes this the most technically demanding vest in the collection, despite being the simplest to construct. On indigo with white thread, a stitch that runs slightly long or a row that drifts a sixteenth of an inch is invisible — the eye reads the color, not the geometry. On ecru thread over oatmeal cloth, there is no color to hide behind. Every irregularity in stitch length, spacing, and tension shows, because irregularity is the only thing producing variation in the surface.
The vibrancy here is tonal rather than chromatic. Neutrals can be rich or they can be dead, and the difference is saturation and warmth: kinari, oatmeal, sand, clay, warm putty, and stone rather than cold beige and flat gray. Then one controlled accent — a persimmon, saffron, or rust binding, or a single band of colored stitching at one hem — which reads far louder in a quiet garment than it would in a loud one.
Why This Design Works
Low-contrast stitching works through shadow, which means the direction of the light determines how much of the pattern you see. In flat overhead light, the vest reads as a plain neutral garment. In raking light from the side — late afternoon, a window, a lamp — the geometry appears in full. A garment that changes with the light is doing something no printed or high-contrast textile can.
Three technical choices maximize that effect.
Thread thickness over thread color. A thicker sashiko thread sits higher on the surface and casts a deeper shadow. Where a high-contrast garment can use fine thread and rely on color, this one needs the heaviest sashiko thread you can comfortably pull through the cloth.
Pattern choice matters more than usual. Patterns with long unbroken lines — seigaiha waves, parallel rows, kaki no hana — read well in relief because the eye follows a continuous ridge. Patterns built from many short segments meeting at points, like asanoha, lose definition without color contrast and can read as noise.
Cloth with a matte, slightly textured surface holds shadow better than a smooth, sheeted cotton. Washed linen, cotton-linen blends, and slubby cottons all work; sateen and anything with a sheen will bounce light and flatten the relief.
Skills you build here: stitch consistency under conditions where nothing hides it, thread and cloth selection for relief rather than contrast, and restraint in placing a single accent.
Design Inspirations – Digitally Modified Images. Texture and color may vary from the actual product.
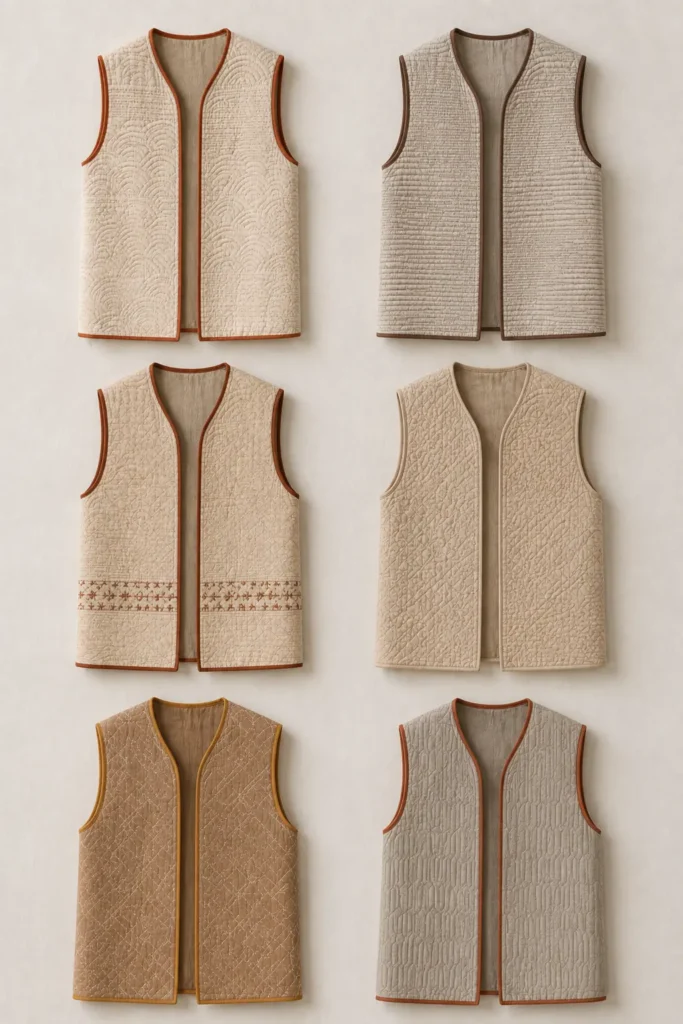
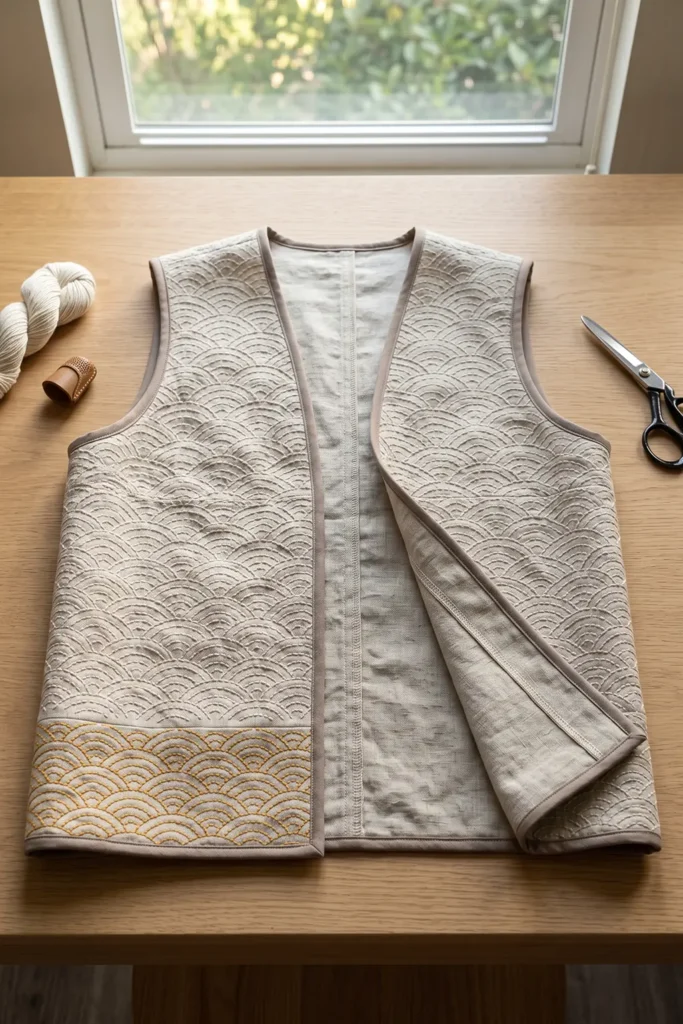
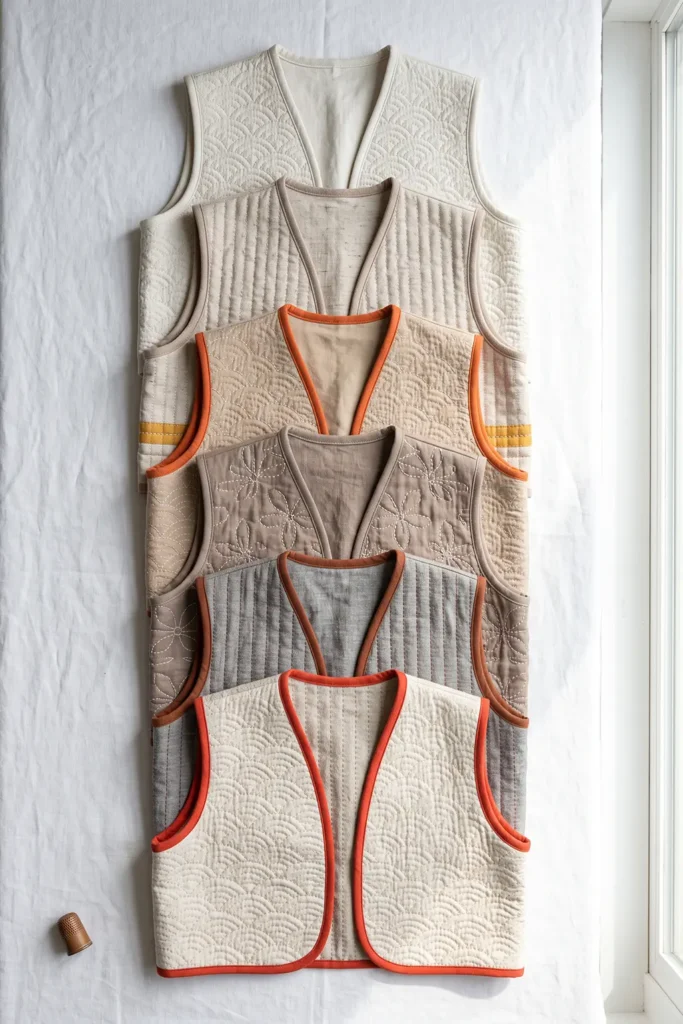
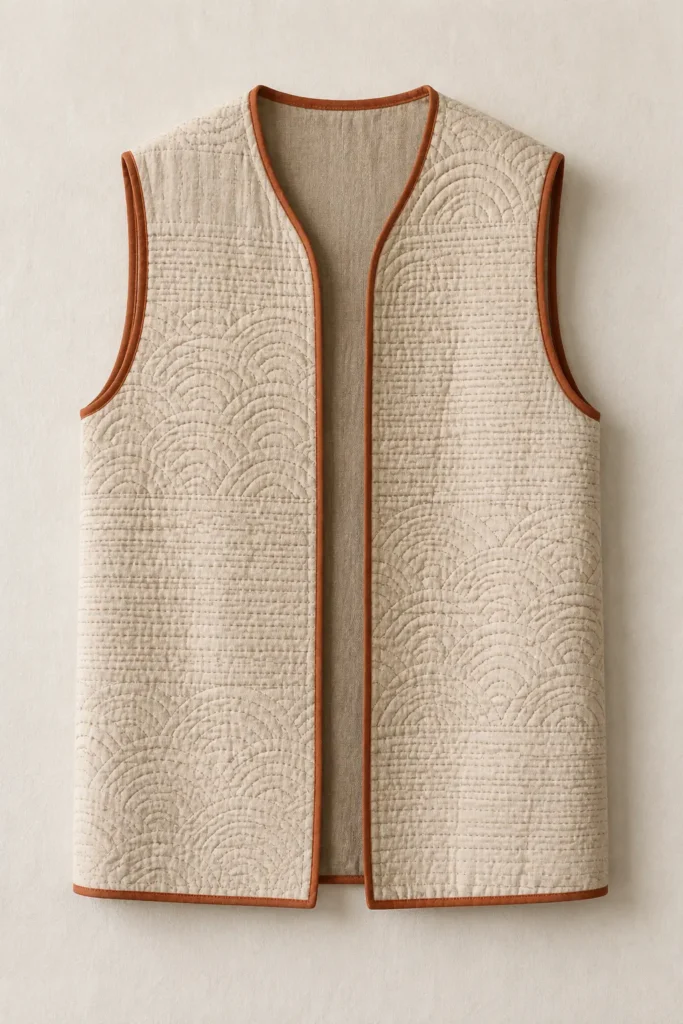
A Note on Understatement
Japanese aesthetics has a precise term for what this garment is doing.
Shibui — 渋い — describes beauty that is understated, restrained, and unobtrusive, revealing itself gradually rather than announcing itself. The associated noun is shibusa. The word originally described the astringency of an unripe persimmon, and it carries that sense still: something not immediately sweet, that becomes more interesting the longer you stay with it.
The formal characteristics of shibui, as articulated in Japanese design writing, map almost exactly onto a low-contrast sashiko vest. Simplicity that contains complexity. Surface plainness with underlying richness. Texture rather than ornament. And crucially, an object that does not reveal everything at once — the viewer has to come closer, or the light has to change, before the detail appears.
Shibui was applied to tea ceremony wares, indigo cloth, unglazed pottery, and garments where quality showed in the making rather than the decoration. It stood in explicit contrast to hade — showy, flashy, bright — which was not a term of praise.
The relevant material word is kinari — 生成り — meaning undyed, unbleached, natural cotton in its raw off-white state. Kinari cloth was the default for garments where dye was unavailable or unnecessary, and it has a warmth that bleached white cotton does not. The tradition of white-on-white sashiko in kinari thread on kinari cloth exists because the technique doesn’t require contrast to be worth doing.
Finished Size
This guide makes a relaxed, hip-length open-front vest with a bound neckline and no collar.
Sample finished measurements for a loose medium:
- Finished chest: about 44 inches
- Finished length: about 25 inches from shoulder to hem
- Shoulder width: about 15 inches
- Armhole depth: about 10½ inches
- Front style: open, no closure, or a single narrow tie
- Collar: none — bound neckline
- Optional: two patch pockets
Stitch measurements:
- Stitch length: about ⅛ inch — and consistent to within a sixteenth, which matters more here than anywhere else in this collection
- Gap: about half the stitch length
- Row spacing: ½ inch
- Seigaiha grid: 1½-inch circles overlapping by half
- Parallel rows: ½ inch apart
- Accent band, if used: the bottom 4 inches of each front panel
Add 4 inches of ease at the chest.
Materials Needed
For one minimalist neutral sashiko vest, gather:
- Face fabric: 1¾ yards of matte cotton-linen, washed linen, or slubby cotton in a warm neutral at about 5 to 6 oz — avoid anything with a sheen
- Backing fabric: 1¾ yards in the same weight, in the same or a closely related neutral
- Sashiko thread: 4 to 5 skeins in kinari, ecru, or a neutral one or two shades from the cloth. Choose the thickest sashiko thread you can pull comfortably
- Accent thread, optional: 1 skein in persimmon, saffron, or rust
- Sashiko needles: a set of 3 to 5, with large enough eyes for heavy thread
- Thimble: a Japanese palm thimble, or a leather ring thimble
- Binding fabric: ½ yard, in a deeper neutral or a single controlled accent color
- Chalk marker or water-soluble pen — in a color visible on pale cloth
- Quilting ruler and a compass for marking circles
- Rotary cutter and cutting mat
- Sewing clips
- Sewing machine
- Machine needles: 80/12
- Iron and ironing board
- A good directional light source at your stitching position
Beginner tip: set up a lamp to one side of your work rather than overhead. Low-contrast stitching is nearly invisible under flat light, and you cannot judge the evenness of what you are making if you cannot see it. A raking light shows you exactly what a viewer will see in the finished garment.
Vibrant Neutral Palette
Warm and saturated rather than pale and cold:
Cloth:
- Kinari — warm undyed off-white
- Oatmeal
- Sand
- Warm putty
- Clay
- Stone gray with a warm cast
Thread: 7. Kinari 8. Ecru 9. A neutral one or two shades deeper than the cloth 10. Optional accent: persimmon, saffron gold, or rust
Binding: 11. A deeper neutral — clay binding on oatmeal, stone on sand 12. Or a single controlled accent — persimmon, rust, or saffron
The thread-to-cloth relationship is the key decision. Three options, in increasing visibility:
- Same tone, same value — pure relief, visible only in raking light. The most refined and the least forgiving
- One shade deeper — a faint line plus relief. The best balance, and what most people should choose
- Two to three shades deeper — a visible line with relief supporting it. The most forgiving, and still unmistakably minimal
Avoid cold neutrals. A blue-gray cloth with a gray thread reads as institutional. The warmth in kinari, sand, and clay is what stops a neutral garment from looking drab, and it is entirely the difference between rich and dead.
If using an accent, use it in exactly one place. A persimmon binding, or a saffron band at one hem, or a rust tie — not two of them. In a quiet garment, a single accent is a statement, and two is a color scheme.
Cutting Measurements
Cut everything ¾ inch larger than your pattern pieces in every direction. Expect ⅜ to ½ inch of shrinkage.
From face fabric, cut oversized:
- Back: one piece, about 26 x 28 inches
- Fronts: two pieces, about 16 x 28 inches each
From backing fabric, cut the same three pieces at the same sizes.
From binding fabric, cut:
- Armhole binding: two bias strips at 2½ inches x armhole circumference plus 2 inches
- Front and neckline binding: one bias strip at 2½ inches x about 76 inches, pieced
- Hem binding: one strip at 2½ x 48 inches
- Optional tie: one strip at 2 x 24 inches
Optional pockets: two at 7 x 8 inches from face fabric and two from backing.
Use a ½-inch seam allowance for construction.
Step-by-Step Guide
Step 1: Test the Cloth and Thread Together
Before buying quantities, stitch a 4-inch test square using your intended cloth and thread.
Then take it to a window and turn it in the light. Does the pattern appear in raking light and recede in flat light? If it stays invisible in every light, your thread is too fine or your cloth too smooth. If it reads as a clear line in flat light, your contrast is higher than minimal.
This ten-minute test determines everything about the finished garment, and it is the step to spend money on getting right.
Step 2: Prewash Both Fabrics
Wash and dry both fabrics twice in warm water, then dry fully.
Linen and cotton-linen blends shrink substantially — often 5 to 8 percent on the first wash — and they continue to relax over subsequent washes. Two prewashes remove most of it.
Neutrals also pick up color from anything else in the machine, so wash them alone.
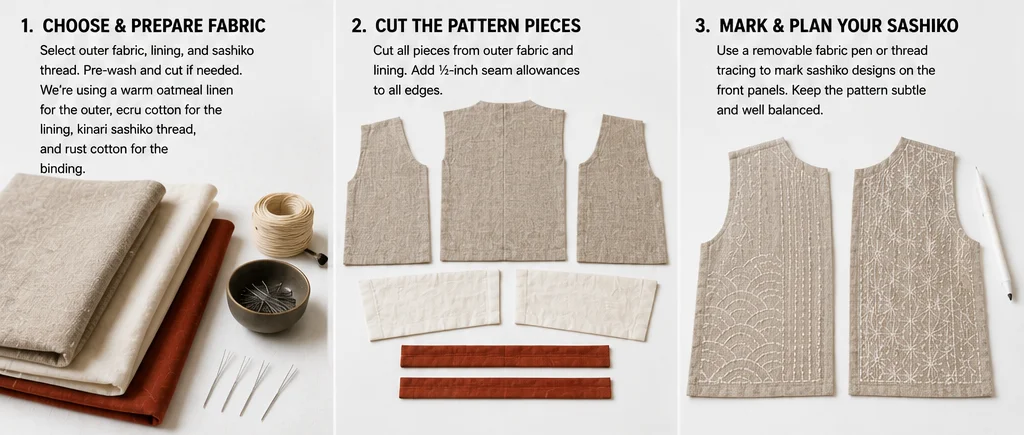
Step 3: Choose a Pattern That Reads in Relief
Select a pattern built from long continuous lines rather than short segments:
- Seigaiha — overlapping waves. The best choice, since the arcs form long unbroken ridges
- Parallel rows — the simplest and, at ½-inch spacing, genuinely elegant in relief
- Kaki no hana — persimmon flower, built from long crossing lines
- Yabane — arrow feather, long diagonals
Avoid asanoha here, even though it’s the default sashiko pattern. It is built from many short segments meeting at points, and without color contrast those segments read as scattered texture rather than as a motif.
Step 4: Layer and Baste
For each panel, lay the backing fabric right side down and the face fabric right side up on top.
Baste on a 3-inch grid. Linen and linen blends shift more than plain cotton, and the extra basting is worth it.
Baste in a contrasting color — you will not be able to see pale basting thread against pale cloth, and finding it to remove afterward becomes tedious.
Step 5: Mark the Pattern
Mark the full pattern on each panel before stitching.
Use a chalk marker in a color you can actually see on pale cloth — a light blue or gray water-soluble pen works better than white chalk here, which is the reverse of every other section in this collection.
For seigaiha: set a compass to a ¾-inch radius, mark circle centers on a 1½-inch grid, and draw overlapping arcs so each circle crosses its four neighbors at their midpoints.
For parallel rows: rule lines ½ inch apart running vertically down each panel.
Mark accurately. On a low-contrast garment, there is no color to distract from a wandering line.
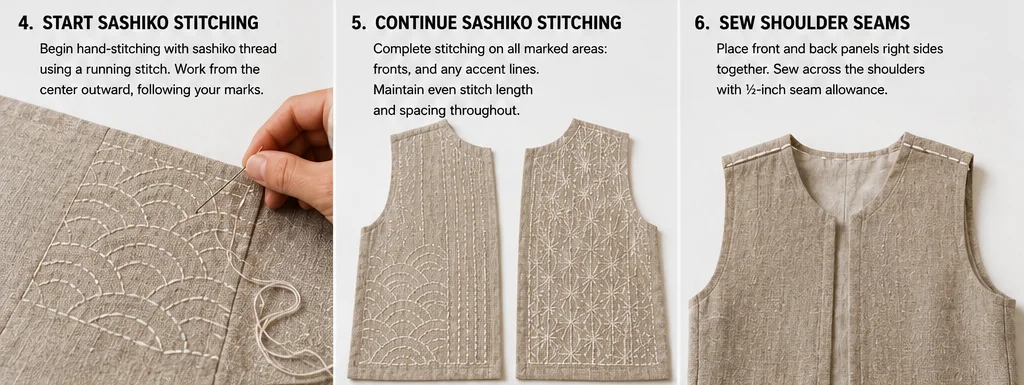
Step 6: Set the Stitch Length and Practice
Before starting the real work, stitch a 6-inch practice row and measure it.
Count your stitches per inch and check they are consistent. You are aiming for 8 stitches per inch — a ⅛-inch stitch with a 1/16-inch gap.
Then look at it in raking light. Irregular stitches produce an uneven shadow line, and that unevenness is the single most visible flaw in a low-contrast garment.
Spend twenty minutes here. It will save the appearance of the whole vest.
Step 7: Thread the Needle with Heavy Thread
Use the thickest sashiko thread you can pull through the cloth without distorting it.
Cut to about 18 inches. Heavy thread abrades faster than fine thread, and a long length will fray visibly by the end of a run — which, in a garment where the thread is the only design element, matters.
Wear the thimble on your palm.
Step 8: Stitch the Back Panel
Start with the back, which is the largest panel and where your stitch consistency will settle.
Work a running stitch at 8 stitches per inch, loading five to ten stitches per pass.
Keep the tension absolutely consistent. Tension variation changes how high the thread sits, which changes the shadow—and in a low-contrast garment, that is the only thing the viewer sees.
Check your work in raking light every twenty minutes or so. Turn the panel toward a side light and look along the surface rather than at it. Problems that are invisible under your working light will appear immediately.
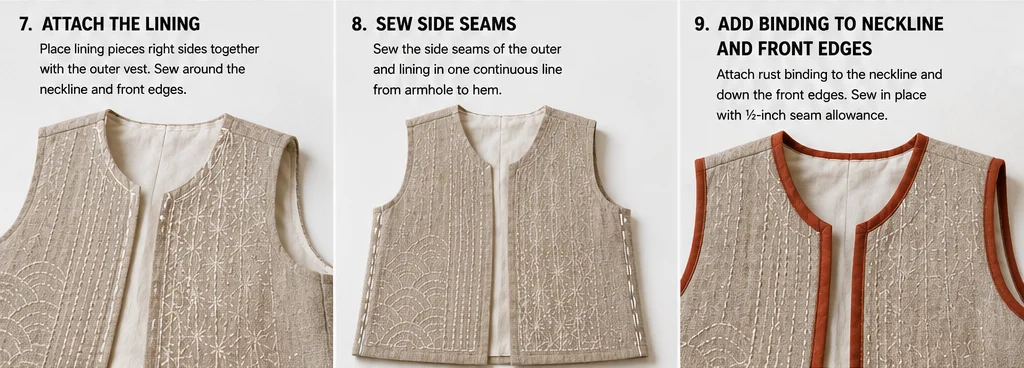
Step 9: Stitch the Front Panels
Work both fronts, matching your stitch density and tension to the back.
If you are adding an accent band, work it now: the bottom 4 inches of each front panel in persimmon, saffron, or rust, using the same pattern and spacing as the rest.
Keep the accent band to the fronts only, or to one front only. An accent that appears on the back as well starts to become a color scheme rather than a note.
Expect 20 to 30 hours for the full vest. Slower than a high-contrast vest of the same size, because the consistency demands more attention per stitch.
Step 10: Press, Measure, and Cut
Press each panel very gently from the reverse with a pressing cloth.
Pressing matters more here than anywhere else in this collection: the entire design is the height of the thread above the cloth, and a firm press flattens it. Use a low iron, minimal pressure, and steam rather than weight.
Measure each panel — expect ⅜ to ½ inch of shrinkage.
Place your pattern pieces and cut the back and both fronts.
Step 11: Sew the Shoulder Seams
Sew the fronts to the back at the shoulders with a ½-inch seam allowance.
Press open and finish with a bound edge or a flat-fell.
On a minimal garment, seam finishing quality is disproportionately visible — there is no pattern or color to distract from a messy interior, and an open vest shows its inside constantly. This is the section to take the extra time.
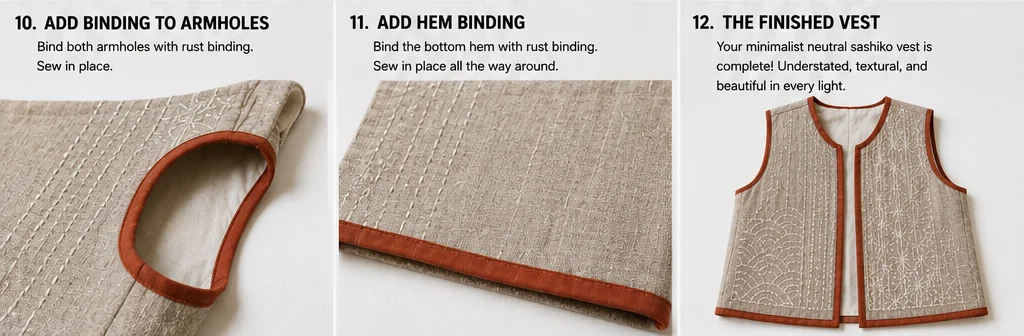
Step 12: Sew the Side Seams
Sew each side seam from armhole to hem with a ½-inch seam allowance, using the same finish.
Try the vest on. Check the chest ease, armhole depth, and length before binding anything.
Step 13: Bind the Armholes, Front, Neckline, and Hem
Bind in this order:
- Armholes — join a 2½-inch bias strip into a loop and apply to each, easing around the curve
- Front opening and neckline — one continuous strip from the hem, up the right front, around the back neck, down the left front
- Hem — a separate strip, ends folded in neatly where they meet the front binding
Machine-stitch each binding to the face, fold over the raw edge, and hand-stitch it down inside. On this garment machine topstitching the second side is a visible shortcut — there is nothing else on the surface to look at.
Keep the binding at ½ inch finished. Wider binding becomes a design feature, and on a minimal garment, it competes with the relief.
If your binding is your single accent color, this is where the garment gets its one note of vibrancy.
Step 14: Add Optional Pockets and Finish
If you want pockets, keep them plain — layer, stitch a few rows in the same pattern, bind the top edge, turn the other three edges under, and topstitch at 3 inches above the hem and 2½ inches in from the side seam.
Remove all markings with cold water. Rinse water-soluble pen marks rather than wipe them, and don’t heat-set them —so do this before any final pressing.
Dry flat, press very lightly, add a label at the inside back neck, and hang the vest.
Assembly at a Glance
- Test — stitch a 4-inch sample and check it in raking light before buying materials
- Prepare — prewash both fabrics twice, choose a pattern built from long continuous lines
- Mark — baste in contrasting thread, mark with a marker visible on pale cloth
- Calibrate — practice a 6-inch row at 8 stitches per inch and check the shadow line before starting
- Stitch — heaviest thread you can pull comfortably, consistent tension throughout, checking in raking light regularly
- Press and cut — very light pressing only, since a firm press flattens the relief the design depends on
- Finish — clean seam finishes, ½-inch binding hand-stitched on the inside, single accent color if using one
Vibrant Neutral Combination Ideas
For a kinari vest, use warm undyed cotton with kinari thread and a persimmon binding.
For an oatmeal vest, use oatmeal linen with ecru stitching one shade deeper and a clay binding.
For a sand vest, use sand cotton-linen with stone thread and a rust binding.
For a clay vest, use clay linen with kinari stitching — the reverse relationship, lighter thread on deeper cloth — and a saffron binding.
For an accent band vest, use warm putty with matching thread throughout, plus a persimmon band across the bottom 4 inches of both fronts, bound in persimmon.
For a pure relief vest, use one cloth and one thread in the identical shade, with binding in the same fabric. Nothing but shadow. The most demanding version in this collection and the most quietly impressive.
Beginner Tips for Success
Test the cloth and thread together before buying. Ten minutes and a 4-inch sample determine whether the whole garment works.
Set a lamp to one side of your work. You cannot judge low-contrast stitching under flat overhead light, and you cannot fix what you cannot see.
Use the heaviest thread you can pull comfortably. Thread height is what creates shadow, and shadow is the entire design.
Choose a pattern of long continuous lines. Seigaiha and parallel rows read in relief; asanoha does not.
Aim for 8 stitches per inch and check your consistency. Irregularity is the only variation in the surface, so it is the only thing anyone will see.
Mark with a marker you can actually see. This is the one section where white chalk is the wrong tool.
Press very lightly. A firm press flattens the relief and there is no recovering it.
Choose warm neutrals over cold ones. The warmth is the difference between rich and drab.
Use exactly one accent. Two makes it a color scheme.
Styling Tip
A minimalist neutral vest works in ways the louder pieces in this collection do not: it goes over almost anything, it reads as quiet rather than as a statement, and it can be worn somewhere a vermilion sashiko jacket cannot.
It layers best over other neutrals in different textures — a linen shirt, a fine knit, a cotton dress — where the interest comes from the surfaces rather than from color. A tonal outfit in three different textures is exactly what this garment was designed for.
It also works as a calm layer over something loud, which is worth knowing. A neutral vest over a saturated dress lowers the outfit’s volume without dulling it.
Because the pattern appears and disappears with the light, this garment rewards being worn somewhere with directional light — near windows, outdoors in late afternoon. Under flat fluorescent light it will read as a plain vest, which is either a limitation or a feature depending on where you are wearing it.
Keep jewelry textural rather than shiny. Matte metal, wood, ceramic, and stone all suit it; anything highly polished competes with the shadow.
Gift Pairings for the Pockets
The plain patch pockets suit small quiet gifts, and these work as a set alongside the finished vest:
- A set of sashiko needles with large eyes for heavy thread
- A Japanese palm thimble — hard to find and genuinely transformative
- A sashiko thread set in kinari, ecru, oatmeal, and sand
- A small adjustable task lamp — the tool that makes low-contrast stitching possible
- A hand-stitched needle book in matching neutrals
- A set of water-soluble marking pens in light blue and gray
- A kinari cotton pouch with a single row of relief stitching
Other Design Inspirations – Digitally Modified Images. Texture and color may vary from the actual product.
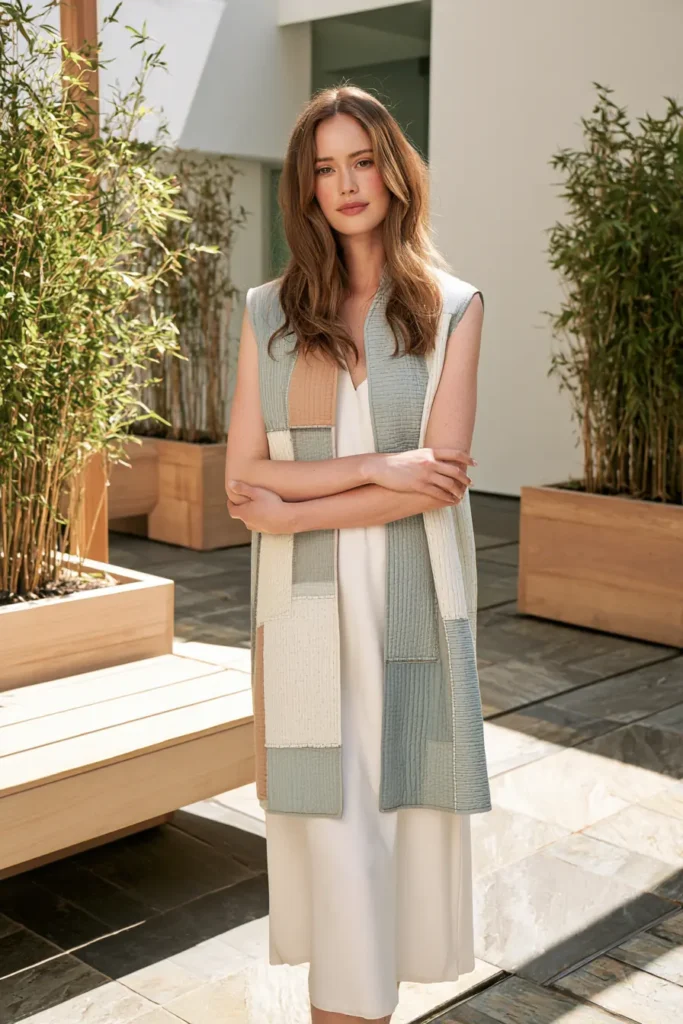
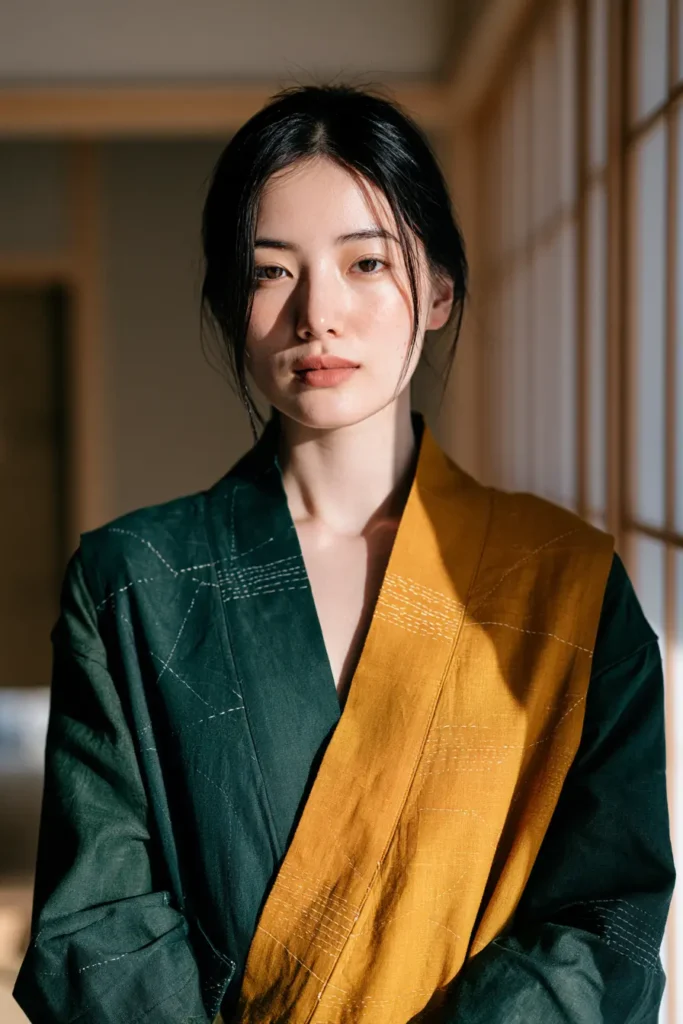
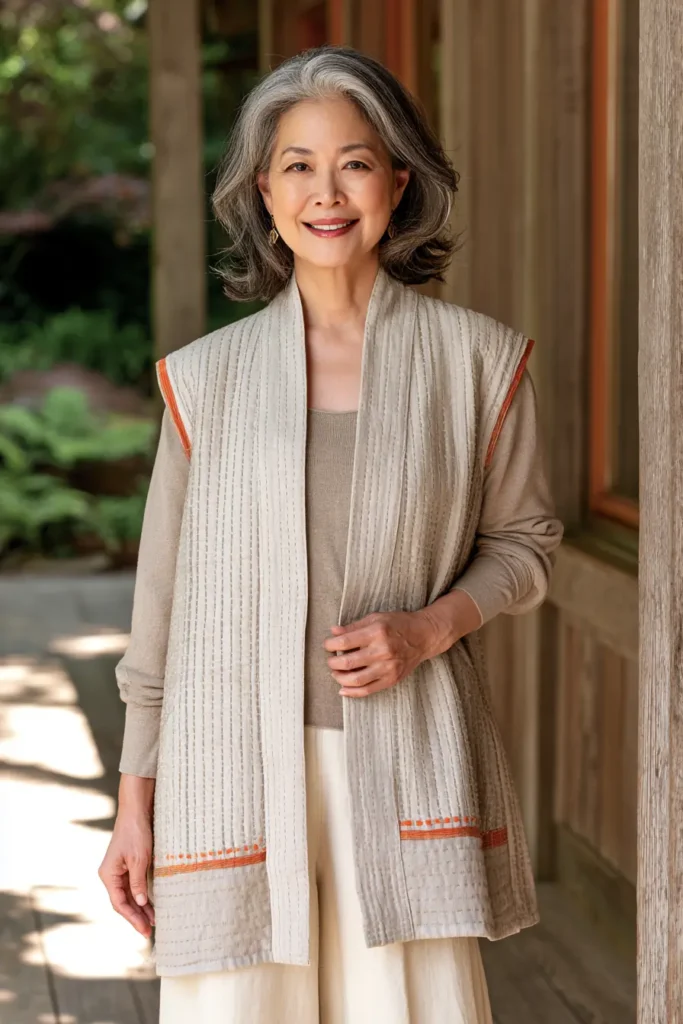
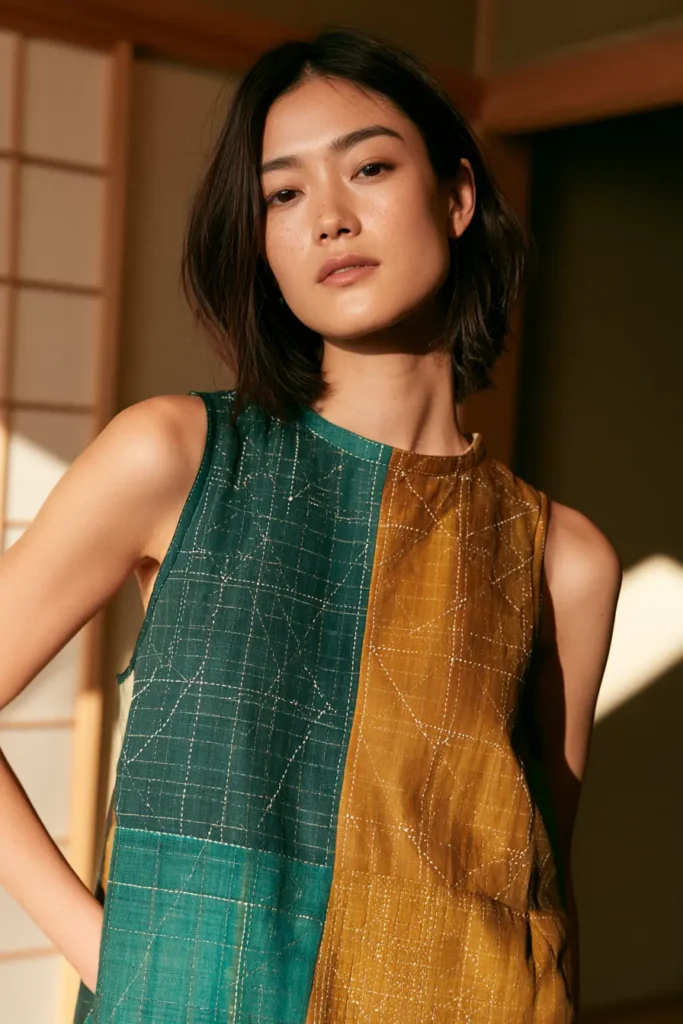
10. Traditional Asanoha Pattern Sashiko Jacket for Artful Detail
Asanoha is the pattern most people picture when they hear the word sashiko, and it is the one that separates a competent sashiko garment from an accomplished one. The six-pointed hemp leaf looks like a simple star until you try to draft it, at which point it becomes clear that every unit shares its points with six neighbors, and a single misplaced grid line propagates outward through the entire panel.
It is worth the trouble. A well-executed asanoha jacket has a density and a rhythm no other sashiko pattern produces, because the motif interlocks in every direction — there are no gaps, no background, and no resting points. The eye reads it as a continuous crystalline field rather than as a repeating tile.
This is also the section where color can go furthest, because the pattern is strong enough to carry it. Build the jacket from deep indigo, aubergine, oxblood, midnight navy, charcoal, or deep teal, and stitch in saffron gold, vermilion, persimmon, chartreuse, or bright white. A vermilion asanoha grid on aubergine is not traditional and it is spectacular — the interlocking geometry holds a loud color in a way a scattered pattern could not.
Why This Design Works
Asanoha’s structure is what makes it work and what makes it demanding. Each hemp-leaf unit is built from six triangular segments radiating from a center point, and each of those segments is shared with the unit beside it. There is no space between motifs. Draft one unit slightly large and its six neighbors are all displaced, and by the fourth ring outward the error is unmistakable.
The compensation is that a correct grid is self-checking. Because every line runs through multiple units, an error shows immediately as a line that fails to meet its intersection. You find mistakes while marking rather than after stitching, which is not true of patterns built from independent tiles.
The stitching order matters more here than in any other pattern. Asanoha contains lines running in four directions — horizontal, vertical, and two diagonals — and the efficient approach is to work all lines in one direction across the entire panel before starting the next. Four passes across a panel is considerably faster than completing motifs individually, and it keeps tension even, which is what stops the panel distorting.
Scale is the last decision. A 1-inch grid produces hemp-leaf units about 2 inches across, which is the traditional garment scale and reads well on a jacket. Smaller grids produce a finer, denser field; larger grids lose the interlocking quality and start to look like isolated stars.
Skills you build here: geometric drafting from first principles, four-direction stitch path planning, tension control across a dense field, and matching a continuous pattern across garment seams.
Design Inspirations – Digitally Modified Images. Texture and color may vary from the actual product.
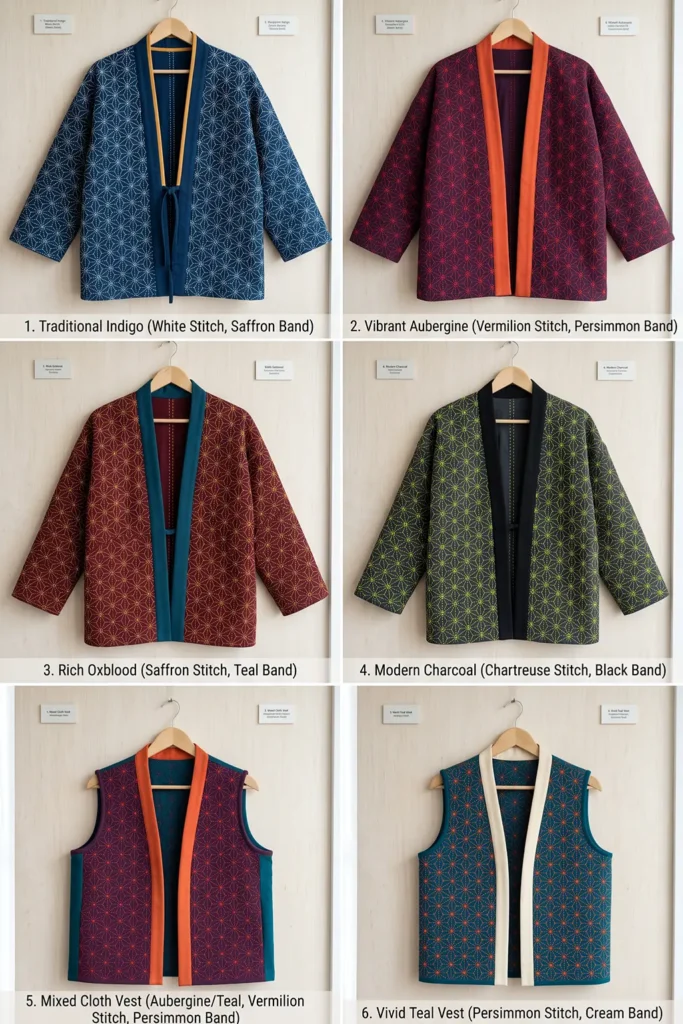
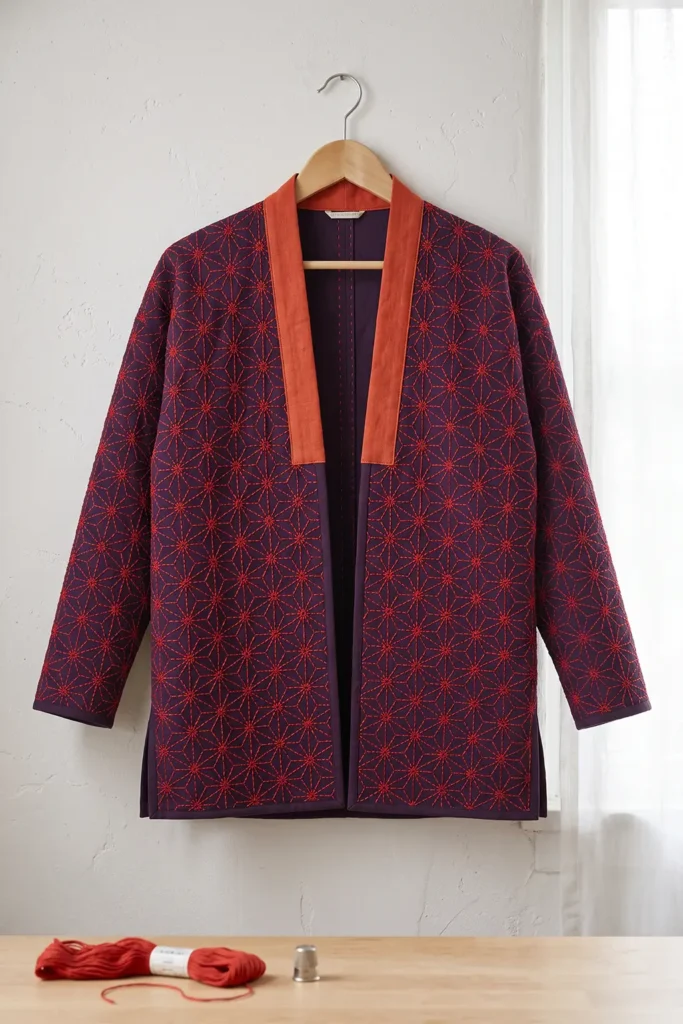
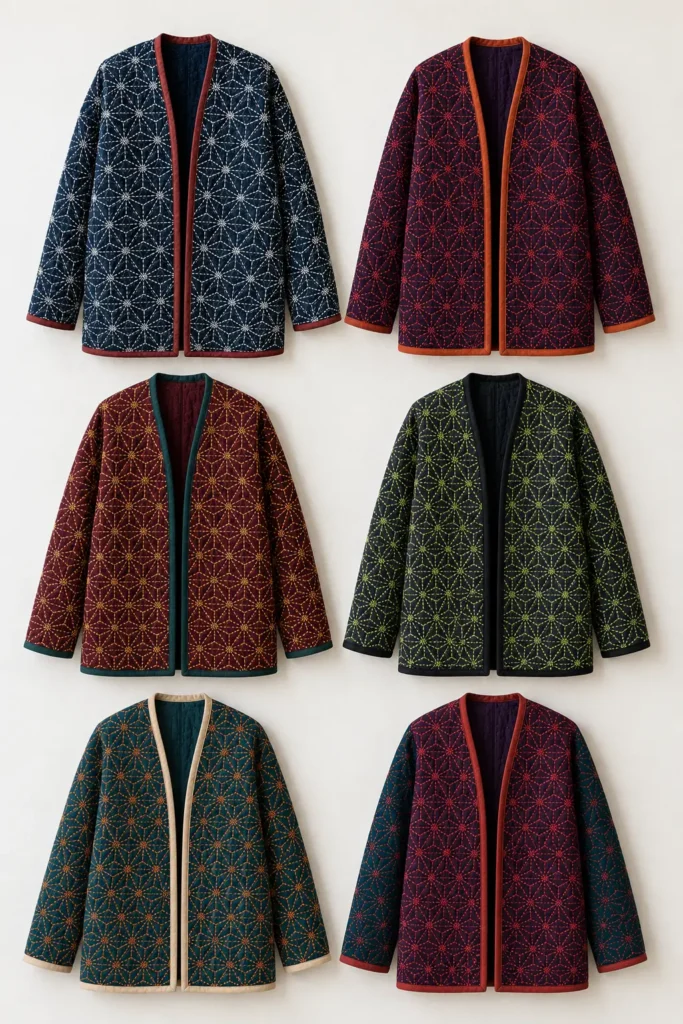
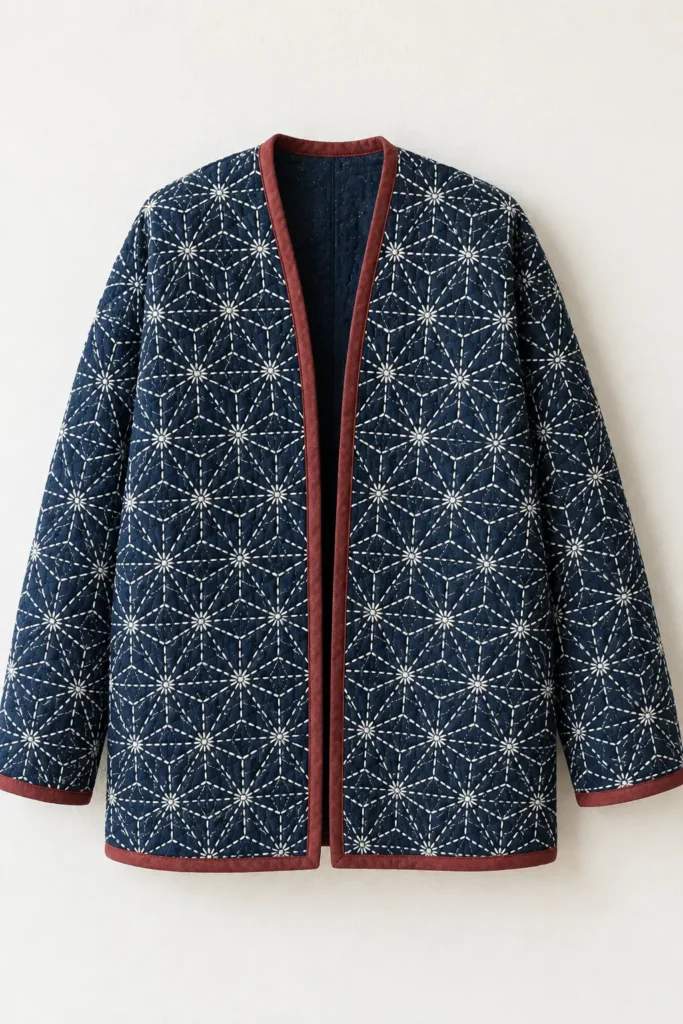
A Note on Asanoha
Asanoha — 麻の葉 — means hemp leaf, and the pattern is a stylized representation of the leaf’s radiating structure. It appears in Japanese decorative art from at least the Heian period, where it was used in the carved and painted decoration on Buddhist statuary, and it became widespread in textiles during the Edo period.
The meaning attached to it comes from the plant. Hemp grows fast, straight, and tall without much tending — a mature plant reaches 10 to 13 feet in a season, and it needs no particular care to do it. That made it an obvious emblem for healthy growth, and asanoha became the traditional pattern for children’s kimono and infant clothing, stitched or dyed onto garments in the hope that the child would grow as vigorously as the plant. The association is still current: asanoha baby clothing is sold in Japan today on exactly that basis.
Hemp itself was the everyday cloth of rural Japan before cotton became widely available, which gives the pattern a second layer of meaning — it is a picture of the plant that most people’s clothes were actually made from.
The pattern also carried a protective sense. The interlocking geometry was understood to ward off ill fortune, and asanoha appears frequently on garments intended for vulnerable people. There is a well-known association with theatrical costume as well: the pattern is strongly linked to Yaoya Oshichi, a figure from an Edo-period story whose asanoha kimono became iconic through kabuki performance and woodblock prints.
The six-fold symmetry is worth noting as a technical point rather than a cultural one. Most Western patchwork geometry is four-fold, built on squares and their diagonals. Asanoha’s hexagonal logic is why it feels different to draft, and why quilters trained on square grids often find it counterintuitive at first.
Finished Size
This guide makes a relaxed, hip-length jacket with dropped shoulders and full asanoha coverage.
Sample finished measurements for a loose medium:
- Finished chest: about 46 inches
- Finished length: about 27 inches from shoulder to hem
- Sleeve length: about 19 inches from the dropped shoulder seam
- Sleeve width at bicep: about 16 inches
- Cuff opening: about 11 inches
- Armhole depth: about 11 inches
- Front style: open, narrow bands, single tie optional
- Collar: none — bound neckline
Asanoha grid measurements:
- Base grid: 1-inch squares
- Finished hemp-leaf unit: about 2 inches across, point to point
- Stitch length: about ⅛ inch, gaps roughly half that
- Lines per unit: 6 long radiating lines plus 6 shared edges
- Approximate stitching: about 260 linear inches of stitch line per square foot of panel
That last figure is worth knowing before you start. Asanoha is the densest pattern in this collection by a considerable margin.
Materials Needed
For one asanoha sashiko jacket, gather:
- Face fabric: 3 yards of mid-weight cotton in a saturated color — sheeting or chambray at about 5 to 6 oz
- Backing fabric: 3 yards in a lighter cotton
- Sashiko thread: 8 to 10 skeins. Asanoha consumes considerably more thread than any other pattern here
- Sashiko needles: a set of 3 to 5 in varied lengths
- Thimble: a Japanese palm thimble, or a leather ring thimble
- Binding and band fabric: ¾ yard in a contrasting color
- Chalk marker or water-soluble pen, plus spares — you will use a lot
- Quilting ruler with a 45-degree line marked
- A long straightedge for registration lines
- Rotary cutter and cutting mat
- Sewing clips
- Sewing machine
- Machine needles: 90/14
- Iron and ironing board
- Optional: an asanoha stencil or ruler — these exist and are sold specifically for this pattern
Beginner tip: buy more thread than you think you need, and buy it all at once in the same dye lot. Asanoha uses roughly double the thread of a parallel-row design over the same area, and a color shift partway through a panel is glaringly visible in an interlocking pattern.
Vibrant Asanoha Palette
The pattern is strong enough to carry a loud thread:
Cloth:
- Deep indigo
- Aubergine
- Oxblood
- Midnight navy
- Charcoal
- Deep teal
Thread: 7. Saffron gold 8. Vermilion red 9. Persimmon orange 10. Chartreuse 11. Bright white
Bands and binding: 12. A third color — persimmon bands on an aubergine jacket with vermilion stitching, or chartreuse bands on charcoal with saffron stitching
Use one thread color across the whole jacket. This is the one section in this collection where mixing thread colors is a mistake — asanoha’s interlocking structure means every line is shared between units, so a color change lands mid-motif and breaks the geometry rather than reading as a deliberate zone.
If you want variation, put it in the cloth instead: a jacket with body panels in aubergine and sleeves in deep teal, unified by a single vermilion thread throughout, gives you color variation without disturbing the pattern.
Bright white is the safest and sharpest option. Saffron gold is the most striking on a dark ground. Chartreuse is the most modern and the least traditional.
Cutting Measurements
Cut everything 1 inch larger than your pattern pieces in every direction. Asanoha is dense, and dense stitching draws the cloth in — expect ¾ to 1 inch of shrinkage across a large panel.
From face fabric, cut oversized:
- Back: one piece, about 28 x 30 inches
- Fronts: two pieces, about 17 x 30 inches each
- Sleeves: two pieces, about 19 x 24 inches each
From backing fabric, cut the same five pieces at the same sizes.
From band and binding fabric, cut:
- Front bands: two strips at 3½ x 30 inches
- Neckline binding: one bias strip at 2½ inches x neckline length plus 2 inches
- Cuff binding: two strips at 2½ x 13 inches
- Hem binding: one strip at 2½ x 50 inches
- Optional tie: one strip at 2½ x 24 inches
Use a ½-inch seam allowance for construction.
Step-by-Step Guide
Step 1: Understand the Drafting Method
Before marking anything, draft one small section on paper so you understand the construction.
Asanoha is built on a grid of squares, and each finished hemp-leaf unit spans a 2 x 2 block of grid squares.
Within each 2 x 2 block:
- Draw both diagonals of the full block, corner to corner, crossing at the block center
- Draw the horizontal and vertical center lines of the block, dividing it into its four squares
- From the block center, you now have eight lines radiating outward — four to the corners, four to the edge midpoints
- Then draw the short connecting lines that close the leaf shape: from each edge midpoint, short segments running to the two nearest corners of that same block
The result is a six-pointed star form with triangular segments radiating from the center. Draft two adjacent blocks on paper and you will see how they share their edges.
Spend twenty minutes on paper. Marking a full panel without understanding the construction is where this pattern goes wrong.
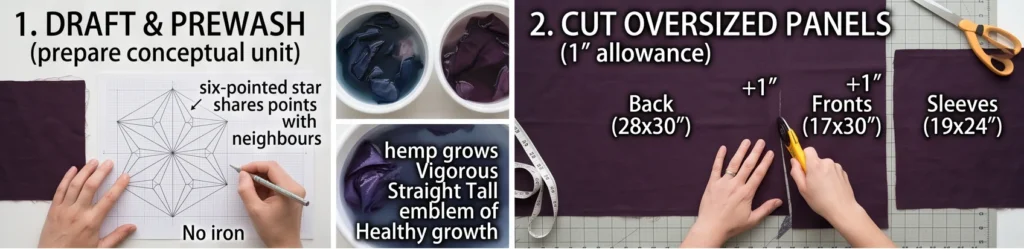
Step 2: Prewash Both Fabrics Separately
Wash and dry each fabric on its own, twice, in cold water.
Saturated cloth — aubergine, oxblood, vermilion — bleeds substantially on early washes, and asanoha’s density means a great deal of thread sitting on that cloth to pick up the dye.
Step 3: Cut the Panels and Layer
Cut all five face pieces and five backing pieces at the oversized measurements, on the straight grain.
Layer each: backing right side down, face fabric right side up on top. Baste on a 3-inch grid.
Baste more closely than usual. Asanoha’s four-direction stitching pulls the cloth in every direction over many hours, and generous basting is what keeps the panel square.
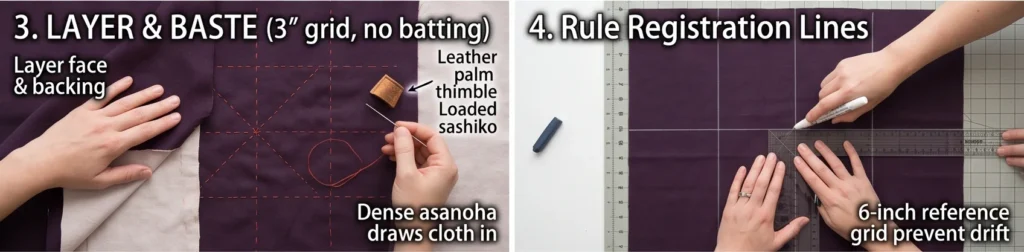
Step 4: Rule the Registration Lines
Before marking the pattern, rule horizontal reference lines every 6 inches down each panel, measuring each one independently from the panel’s top edge.
Then rule vertical reference lines every 6 inches across, measured independently from one side edge.
You now have a 6-inch check grid. Because a 1-inch asanoha grid means every sixth line should land exactly on a reference line, any drift becomes visible immediately rather than after you have marked the whole panel.
This is the single most useful thing you can do on a dense interlocking pattern.
Step 5: Mark the 1-Inch Base Grid
Fill in a 1-inch grid of squares across each panel, working one 6-inch block at a time between your registration lines.
Check as you go: each 6-inch block should contain exactly six squares in each direction, with the sixth line landing on your registration line. If it does not, correct that block before moving on rather than letting the error carry.
Accuracy here determines everything. A 1/32-inch error per square becomes ⅜ inch over a 12-inch span, and in an interlocking pattern that is visible.
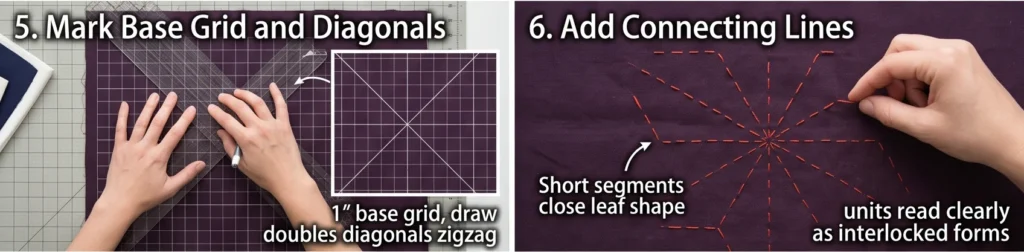
Step 6: Draw the Diagonals
Working across the whole panel, draw both diagonals through every 2 x 2 block of grid squares.
Use a ruler with a 45-degree line marked and align it to the grid rather than eyeballing the corners.
The diagonals should form a continuous zigzag running across the full panel in both directions, and every intersection should land exactly on a grid point. Any diagonal that misses an intersection tells you which grid square is off.
Step 7: Add the Connecting Lines
Add the short segments that close each hemp leaf: from each edge midpoint of a 2 x 2 block, short lines running to the two nearest block corners.
Work systematically — complete all of them in one row of blocks before starting the next. It is very easy to lose track of which segments you have drawn in a field of this density.
Stand back when the panel is fully marked. The hemp-leaf units should read clearly as six-pointed forms. If any look wrong, that is the moment to fix them.
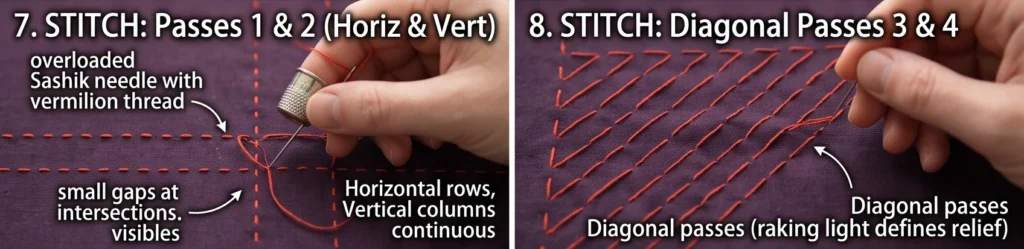
Step 8: Plan the Stitch Path
Asanoha contains lines in four directions, and you will make four passes across each panel:
- Pass one: every horizontal line, worked as continuous rows across the full panel
- Pass two: every vertical line, worked as continuous columns
- Pass three: every diagonal running one way
- Pass four: every diagonal running the other way
Then a fifth stage: the short connecting segments, which cannot be worked continuously and must be stitched individually.
Working by direction rather than by motif is dramatically faster and keeps tension even across the panel. Completing motifs one at a time is the most common beginner approach and it produces both slower work and a distorted panel.
Step 9: Stitch Passes One and Two
Thread a long sashiko needle with about 18 to 20 inches of thread. Wear the thimble on your palm.
Work a running stitch of about ⅛ inch with gaps roughly half that, loading five to ten stitches per pass.
Complete every horizontal line across the panel, then every vertical.
At each intersection, aim to leave a small gap rather than stitching directly over a previous stitch. Stitches landing on top of each other create lumps at every crossing, and in asanoha there are a great many crossings.
Keep tension relaxed and check the panel width every 10 rows. A dense pattern worked tightly will visibly narrow the panel.
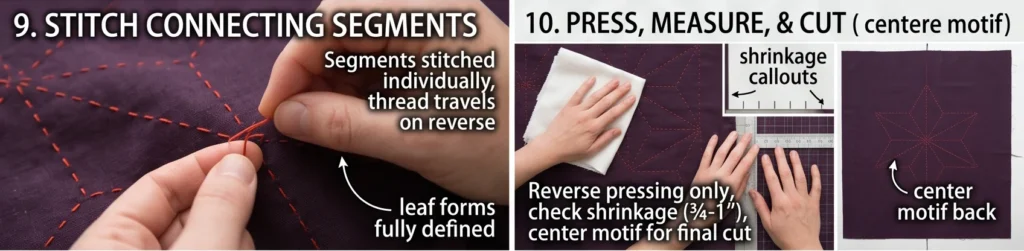
Step 10: Stitch Passes Three and Four
Work both diagonal directions.
Diagonals are stitched across the grain rather than along it, and the cloth behaves slightly differently — you may find the needle loads fewer stitches per pass. That is normal.
Where a diagonal crosses a horizontal or vertical you have already stitched, adjust your stitch placement to fall either side of the existing stitch rather than on it.
Step 11: Stitch the Connecting Segments
Work the short connecting lines individually.
These are slow because each one requires starting and stopping, and there are twelve per 2 x 2 block. Where two segments are close together, travel between them on the reverse rather than floating thread across the surface.
This stage is roughly a third of the total stitching time on an asanoha panel. It is also the stage that completes the leaf shapes, so the pattern only fully appears at the very end.
Expect 70 to 100 hours for the full jacket. Asanoha is the most time-consuming pattern in this collection.
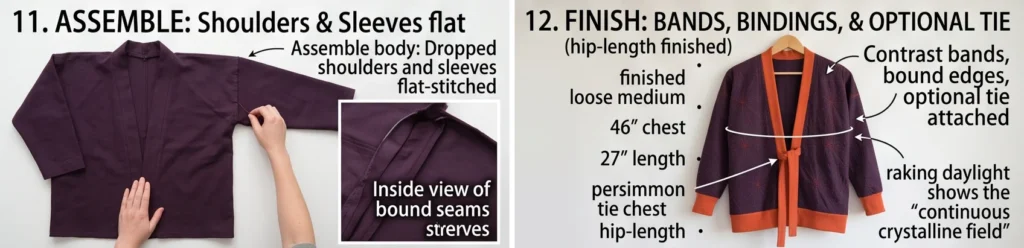
Step 12: Press, Measure, and Cut
Press each panel gently from the reverse with a pressing cloth. Do not flatten the stitching.
Measure each panel — expect ¾ to 1 inch of shrinkage.
Now place your pattern pieces, and take time over the positioning. Center a complete hemp-leaf unit at the center back, and position the fronts so the pattern mirrors across the front opening. On a pattern this regular, an off-center motif is immediately visible.
Where possible, plan the side seams so the pattern continues across them — align the same grid row on both pieces at the seam line, allowing for the ½-inch seam allowance on each side.
Cut the back, both fronts, and both sleeves.
Step 13: Assemble the Jacket
Sew the fronts to the back at the shoulders with a ½-inch seam allowance. Press open and bind or flat-fell the seam allowances.
Open the jacket flat, match each sleeve center to the shoulder seam, and sew the sleeves on with a ½-inch seam allowance. Because the shoulder is dropped and the armhole edge is straight, there is nothing to ease.
Fold right sides together and sew from each cuff down to the underarm and along the side seam in one continuous line. Bind these seams as well.
Try the jacket on before finishing any edges.
Step 14: Add the Bands, Binding, and Finish
Sew a 3½-inch contrast strip to each front edge, right sides together, fold to the inside, turn the raw edge under, and stitch down. The band should finish about 1½ inches wide.
Bind the neckline with a 2½-inch bias strip, easing around the curve.
Bind each cuff with a 2½ x 13-inch strip joined into a loop, and bind the hem with a strip across the full width.
Attach a 2½ x 24-inch tie at the left front band at chest height if you want a closure.
Remove all chalk and pen marks with cold water — there will be a great deal of marking to remove, so rinse thoroughly rather than spot-treating, and do it before any pressing since heat sets water-soluble ink permanently.
Dry flat, press lightly, add a label, and hang the jacket.
Assembly at a Glance
- Draft — build one hemp-leaf unit on paper from a 2 x 2 grid block before marking anything
- Register — rule 6-inch reference lines both directions, each measured independently from the panel edge
- Mark — fill a 1-inch grid one 6-inch block at a time, then diagonals, then the short connecting segments
- Stitch in four passes — all horizontals, all verticals, then each diagonal direction, leaving small gaps at every intersection
- Segments — work the short connecting lines individually, traveling on the reverse between them
- Position and cut — center a complete unit at center back, mirror the pattern across the front opening, align the grid across side seams
- Assemble and finish — shoulders, sleeves flat, side seams, then contrast front bands, bound neckline, cuffs and hem
Vibrant Asanoha Combination Ideas
For an aubergine jacket, use aubergine cloth with vermilion asanoha and persimmon front bands.
For an indigo jacket, use deep indigo with bright white asanoha and a saffron gold band — the closest to traditional, and still vivid.
For an oxblood jacket, use oxblood with saffron gold asanoha and deep teal bands.
For a charcoal jacket, use charcoal with chartreuse asanoha and black bands. The most modern of the set.
For a teal jacket, use deep teal with persimmon orange asanoha and cream bands.
For a mixed-cloth jacket, use aubergine body panels and deep teal sleeves with a single vermilion thread throughout — color variation without breaking the pattern.
Beginner Tips for Success
Draft one unit on paper first. Twenty minutes understanding the geometry prevents hours of unpicking.
Rule 6-inch registration lines in both directions. In an interlocking pattern, drift compounds fast and shows immediately.
Check that every sixth grid line lands on a registration line. Correct each 6-inch block before moving on rather than letting errors carry.
Use a ruler with a marked 45-degree line for the diagonals. Eyeballing corner to corner is where accuracy is lost.
Stitch in four directional passes, not motif by motif. It is faster and it keeps the panel square.
Leave small gaps at intersections. Stitches landing on top of each other create lumps, and asanoha has crossings everywhere.
Use one thread color throughout. Every line is shared between units, so a color change lands mid-motif and breaks the geometry.
Buy all your thread in one dye lot. A color shift partway through a panel is glaringly visible in an interlocking field.
Center a complete unit at center back before cutting. An off-center motif on a regular pattern is the first thing anyone notices.
Styling Tip
An asanoha jacket is a dense, highly patterned garment, so everything underneath should be plain — a solid tee, a fine knit, a simple dress in one color. Anything patterned nearby will fight a field this regular.
Because the pattern is uniform across the whole garment, it reads as texture from a distance and as geometry up close, which makes it work in more settings than a jacket with a bold isolated motif. From across a room it is a colored jacket with a fine surface; up close the hemp leaves resolve.
Pick up the thread color in one accessory rather than the cloth color — a saffron scarf with a saffron-stitched jacket ties the outfit to the detail rather than to the ground.
Hang it, wash rarely by hand in cold water, and dry flat. Given the hours involved, this is the garment in the collection most worth taking care of.
Gift Pairings for the Pockets
If you add patch pockets, or as a set alongside the finished jacket:
- An asanoha stencil or pattern ruler — the single most useful tool for this pattern and hard to find locally
- A set of sashiko needles in varied lengths in a fabric roll
- A Japanese palm thimble — hard to find and genuinely transformative
- A large sashiko thread bundle in a single color, in one dye lot
- A ruler with a marked 45-degree line for accurate diagonals
- A small asanoha-stitched coaster set from leftover cloth
- A hand-stitched needle book with a single hemp-leaf unit on the cover
Other Design Inspirations – Digitally Modified Images. Texture and color may vary from the actual product.
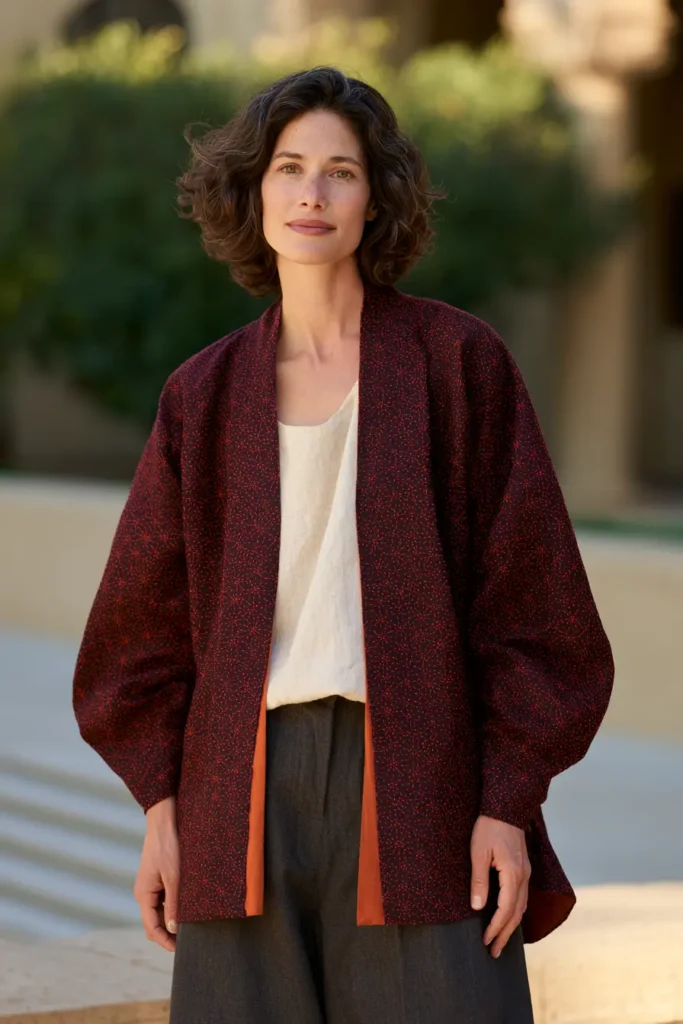
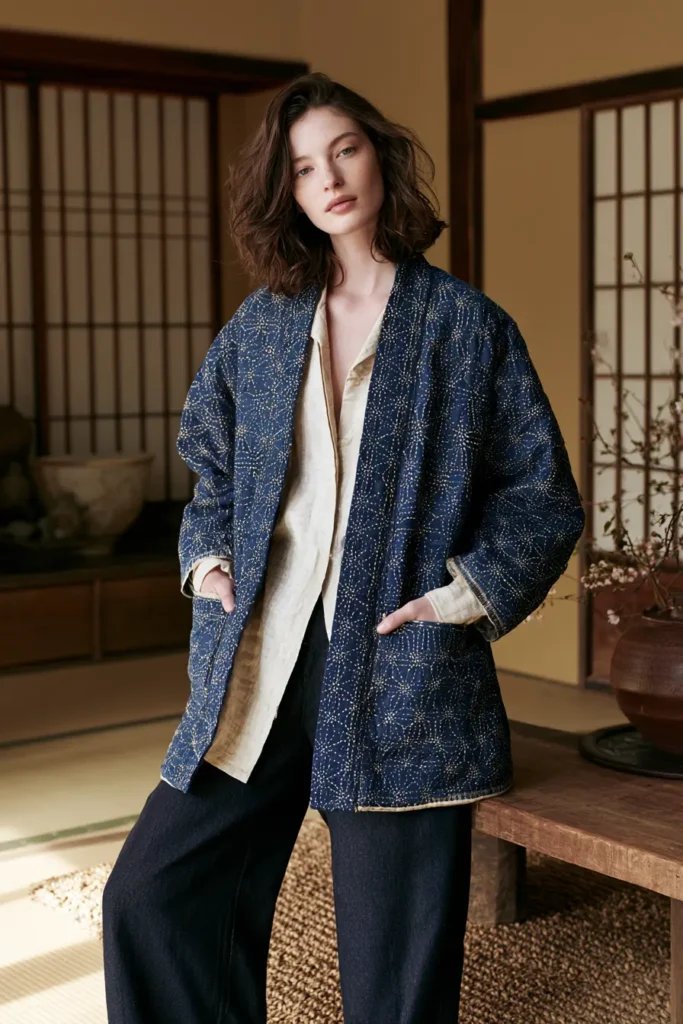
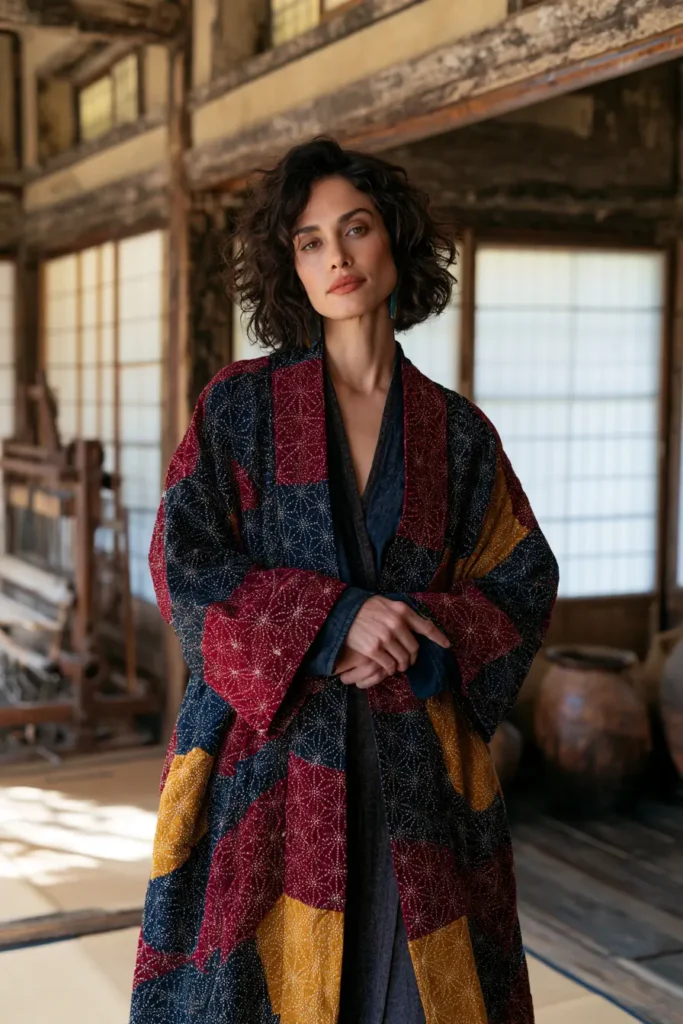
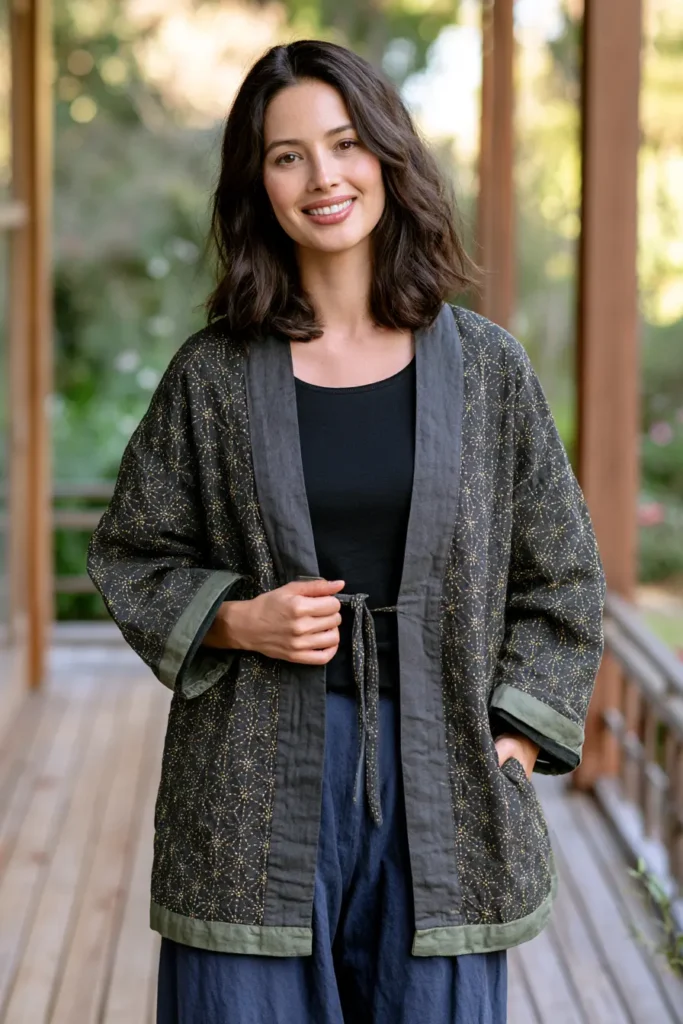
11. Hitomezashi Stitch Sashiko Vest for Bold Geometric Style
Every other sashiko project in this collection works the same way: you draw the pattern you want, then you stitch along the lines you drew. Hitomezashi does something else entirely. You draw nothing but a plain grid of squares, then stitch single-unit stitches along the grid lines according to a simple rule about where each row starts — and the pattern appears on its own, generated by the interaction between the horizontal rows and the vertical ones.
You do not design the motif. You choose a rule, and the motif emerges.
That property makes it the fastest pattern in this collection to mark and the most surprising to stitch, because you cannot see what you are making until both directions are complete. A panel that looks like meaningless dashes after the horizontal pass resolves into crosses, squares, or persimmon flowers the moment the vertical pass goes in.
It also takes the boldest color of any project here. The geometry is graphic and repetitive, so it holds saturated combinations that a subtler pattern could not: vermilion, magenta, chartreuse, electric violet, persimmon, or saffron gold cloth, stitched in bright white, black, or a second contrasting bright. A chartreuse vest with black hitomezashi is closer to modern graphic design than to traditional textile, and the technique carries it.
Why This Design Works
Hitomezashi — 一目刺し — means “one stitch sashiko,” and the name is literal. Every stitch spans exactly one grid unit and no more. There are no long lines, no curves, and no motif to follow.
The pattern comes from offset. Working horizontally across a grid, you stitch one unit and skip one unit, alternating. If every row starts at the same point, you get vertical columns of stitches. If every row shifts by one unit, you get a diagonal drift. If rows alternate between two starting positions, you get a checkered arrangement. Then you do the same vertically, and the two layers combine.
Four classic results, all from the same grid:
- Jūji-zashi — crosses, where horizontal and vertical stitches meet at shared points
- Komezashi — the rice stitch, a denser interlocking form
- Kaki no hana — persimmon flower, produced by a particular offset pairing
- Yokogushi — horizontal comb, the simplest, with rows offset in a running sequence
Because the rule governs everything, changing one variable across a garment produces a pattern that shifts gradually — a genuinely modern effect that requires no extra drafting at all.
The marking is trivial by comparison with asanoha. A grid of squares is all you need, and there are no diagonals, no arcs, and no connecting segments to draw.
Skills you build here: grid-rule stitching, single-unit stitch control, two-pass pattern generation, and reading a pattern from its underlying logic rather than from a drawn line.
Design Inspirations – Digitally Modified Images. Texture and color may vary from the actual product.
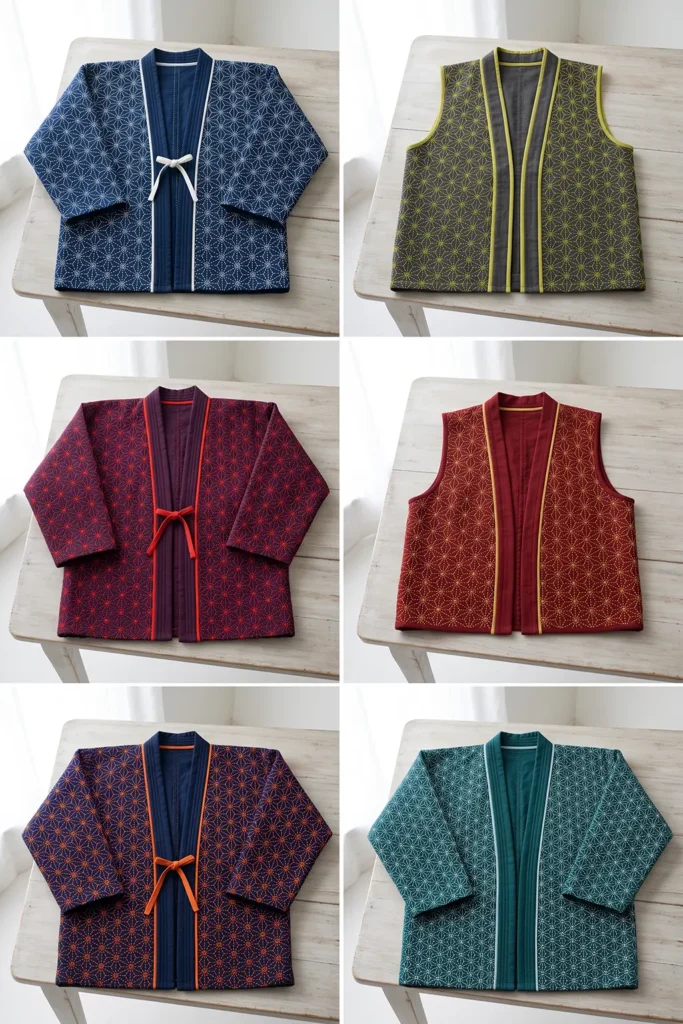
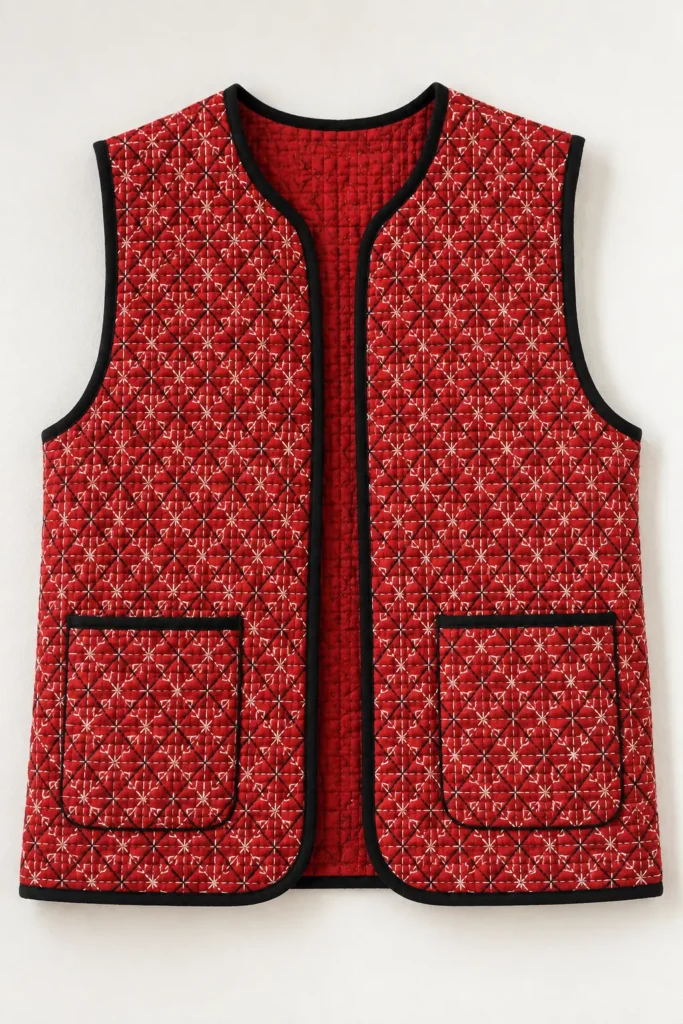
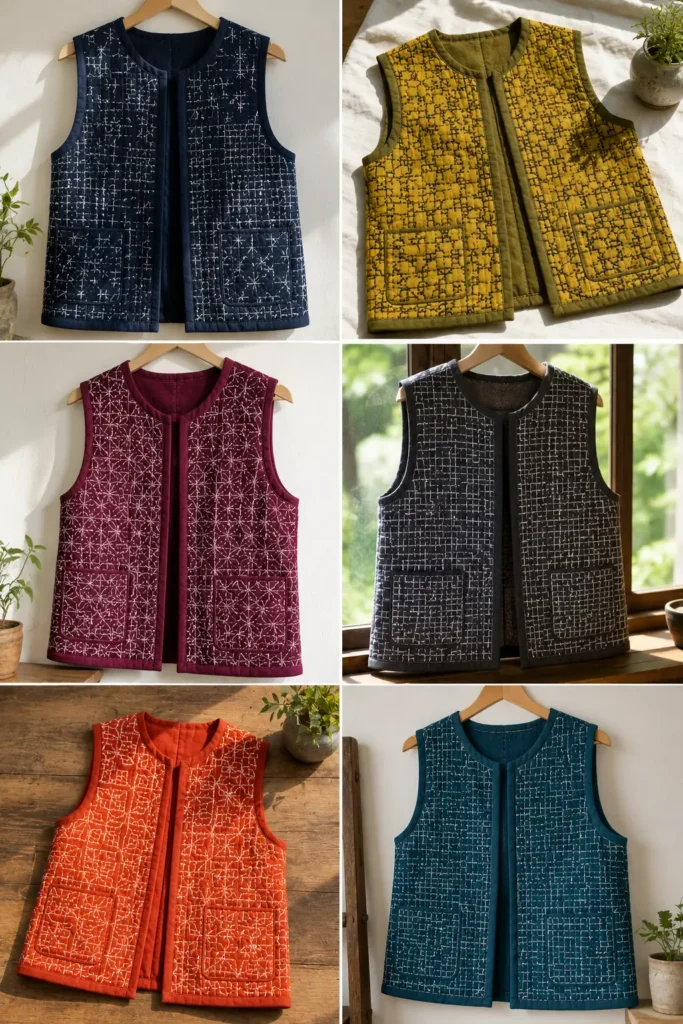
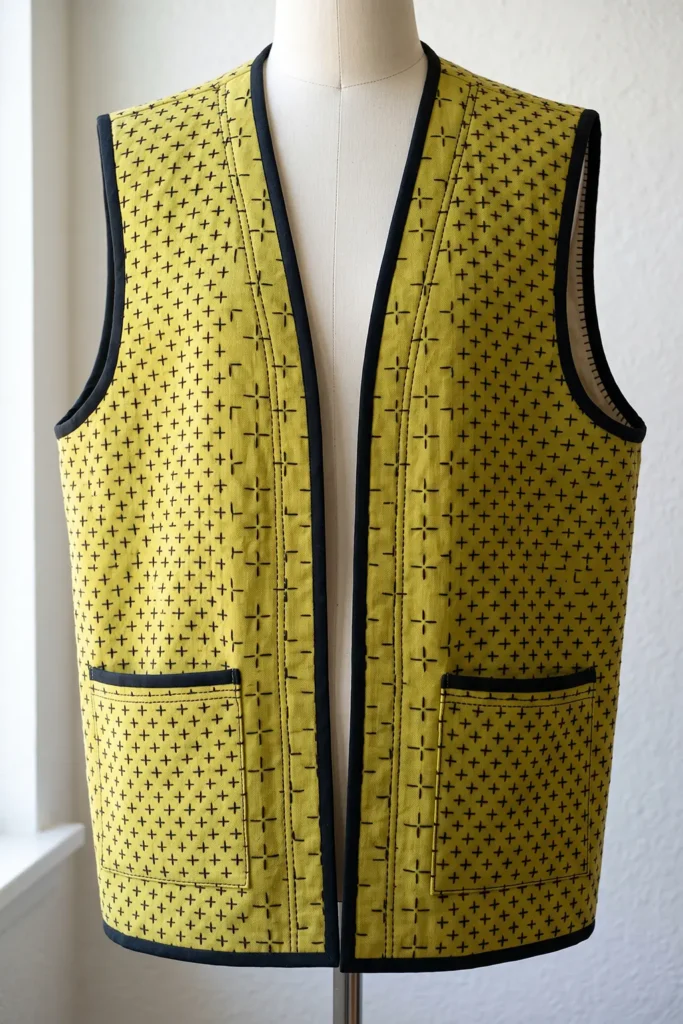
A Note on Hitomezashi
Hitomezashi belongs to the northern Japanese counted-stitch traditions, alongside kogin-zashi from Tsugaru in Aomori and hishizashi from the neighboring Nanbu region. All three developed among farming households during the Edo period under the same conditions that produced sashiko generally: cotton was scarce in the north, sumptuary laws restricted what rural people could wear, and dense stitching was how you made thin cloth warm.
The distinction between them is technical. Kogin counts across odd numbers of warp threads and builds diamond-based motifs; hishizashi counts across even numbers and produces different geometry as a result. Hitomezashi is worked on a marked grid rather than by counting threads, which makes it the most accessible of the three and the one that transfers most easily to modern fabrics.
The most interesting recent development is mathematical. Because hitomezashi patterns are generated by binary sequences — each row either starts on a stitch or on a gap — they can be described formally, and mathematicians have taken an interest. Work published in the early 2020s examined the closed loops that form in hitomezashi patterns and connected them to problems in percolation theory and statistical physics, and the Australian mathematician Katherine Seaton has published on the mathematics of sashiko and kogin more broadly. A pattern developed by farming women working with limited cloth turns out to encode structures that are still generating research papers.
Worth knowing while you stitch: the reason you cannot predict what you are making is not inexperience. The output of these rules is genuinely difficult to predict from the input, which is precisely what makes them mathematically interesting.
Finished Size
This guide makes a relaxed, hip-length open-front vest with a bound neckline and no collar.
Sample finished measurements for a loose medium:
- Finished chest: about 44 inches
- Finished length: about 25 inches from shoulder to hem
- Shoulder width: about 15 inches
- Armhole depth: about 10½ inches
- Front style: open, no closure, or a single tie
- Collar: none — bound neckline
- Optional: two patch pockets
Grid and stitch measurements:
- Grid unit: ¼ inch — the standard hitomezashi scale
- Stitch length: ¼ inch, spanning exactly one grid unit
- Gap: ¼ inch, spanning exactly one skipped unit
- Grid lines: ¼ inch apart in both directions
- Stitches per inch of row: 2 stitches and 2 gaps
A ¼-inch grid across a 25-inch panel gives 100 rows in each direction. That number is worth absorbing before you start.
Add 4 inches of ease at the chest.
Materials Needed
For one hitomezashi sashiko vest, gather:
- Face fabric: 1¾ yards of mid-weight cotton in a saturated color — sheeting or chambray at about 5 oz
- Backing fabric: 1¾ yards in the same weight
- Sashiko thread: 6 to 8 skeins. Hitomezashi covers the whole surface in both directions and uses more thread than it appears it should
- Sashiko needles: a set of 3 to 5 in varied lengths
- Thimble: a Japanese palm thimble, or a leather ring thimble
- Binding fabric: ½ yard in a contrasting color
- Grid marking tool: a ¼-inch grid ruler, a hera marker, or a hitomezashi grid stencil
- Chalk marker or water-soluble pen
- Quilting ruler
- Rotary cutter and cutting mat
- Sewing clips
- Sewing machine
- Machine needles: 90/14
- Iron and ironing board
Beginner tip: mark dots at the grid intersections rather than ruling full lines. Hitomezashi stitches run between intersection points, so dots are all you actually need — and marking a hundred rows of dots is considerably faster and less messy than ruling two hundred full lines across a panel. A pounce pad and a pre-punched stencil is the fastest method of all if you can find one.
Vibrant Hitomezashi Palette
The most graphic pattern in this collection takes the boldest color:
Cloth:
- Vermilion red
- Magenta
- Chartreuse
- Electric violet
- Persimmon orange
- Saffron gold
- Deep teal
Thread: 8. Bright white 9. True black 10. A second contrasting bright — black on chartreuse, white on magenta, chartreuse on electric violet
Binding: 11. A third color entirely — black binding on a chartreuse vest with white stitching
Black thread on a bright ground is the sharpest combination available and the least traditional. It reads as graphic design rather than as textile, which suits a pattern built from a rule.
Two-color hitomezashi is a genuine option and unique to this technique: work the horizontal pass in one color and the vertical pass in another. Because the two passes are physically separate and only interact at intersection points, the resulting pattern shows both colors woven through each other. White horizontals and black verticals on vermilion produces something no drawn pattern can.
Use one color per direction and do not mix within a pass, or the logic breaks down visually.
Cutting Measurements
Cut everything ¾ inch larger than your pattern pieces in every direction. Expect ½ inch of shrinkage — less than asanoha despite the density, because the short stitches pull the cloth less.
From face fabric, cut oversized:
- Back: one piece, about 26 x 28 inches
- Fronts: two pieces, about 16 x 28 inches each
From backing fabric, cut the same three pieces at the same sizes.
From binding fabric, cut:
- Armhole binding: two bias strips at 2½ inches x armhole circumference plus 2 inches
- Front and neckline binding: one bias strip at 2½ inches x about 76 inches, pieced
- Hem binding: one strip at 2½ x 48 inches
- Optional tie: one strip at 2 x 24 inches
Optional pockets: two at 7 x 8 inches from face fabric and two from backing.
Use a ½-inch seam allowance for construction.
Step-by-Step Guide
Step 1: Understand the Rule
Before marking anything, work a small sample so you understand what generates the pattern.
On a scrap, mark a ¼-inch grid about 3 inches square.
Now stitch horizontal rows only, one stitch on and one stitch off, using this rule: odd-numbered rows start with a stitch, even-numbered rows start with a gap.
Look at it. You have a checkered field of dashes and it does not look like anything.
Now stitch vertical rows using the same rule. As the vertical pass goes in, jūji-zashi crosses appear where the two layers meet.
That is the whole technique. The pattern is a product of two simple passes, not a drawn design.
Step 2: Choose Your Pattern Rule
Four rules, all worked on the same grid:
- Jūji-zashi (crosses): both directions alternate start — odd rows begin with a stitch, even rows begin with a gap
- Yokogushi (comb): every horizontal row starts with a stitch, verticals alternate
- Komezashi (rice): rows shift start position in a repeating three-step sequence rather than a two-step alternation
- Kaki no hana (persimmon flower): horizontals alternate in pairs — two rows starting with a stitch, then two starting with a gap — with verticals alternating singly
Sample each on a scrap before committing. They take five minutes apiece and the results are genuinely hard to predict from the description.
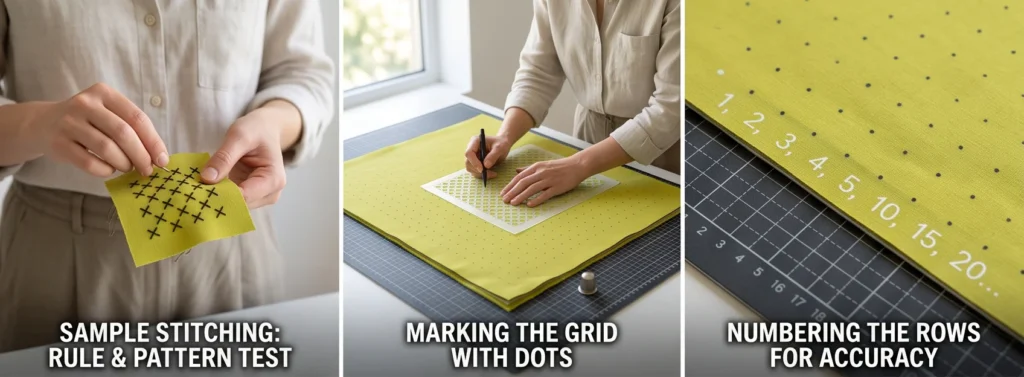
Step 3: Prewash Both Fabrics Separately
Wash and dry each fabric on its own, twice, in cold water.
Saturated brights — vermilion, magenta, chartreuse — bleed heavily on early washes, and this pattern puts a very large amount of thread on the surface to absorb it.
Step 4: Layer and Baste
For each panel, lay the backing right side down and the face fabric right side up on top.
Baste on a 3-inch grid.
Hitomezashi’s two-directional stitching pulls the cloth evenly rather than in one direction, which means it distorts less than long-line patterns — but a hundred rows in each direction still requires thorough basting.
Step 5: Mark the Grid
Mark a ¼-inch grid across each panel, using dots at the intersections rather than full ruled lines.
Work with a ¼-inch grid ruler if you have one, or mark 6-inch registration lines first and fill the grid between them.
Accuracy matters, but less than in asanoha. Because every stitch is independent and spans a single unit, a slightly irregular grid produces a slightly irregular pattern rather than a compounding failure — which is one reason hitomezashi is more forgiving for a first geometric project.
Mark the whole panel before stitching.
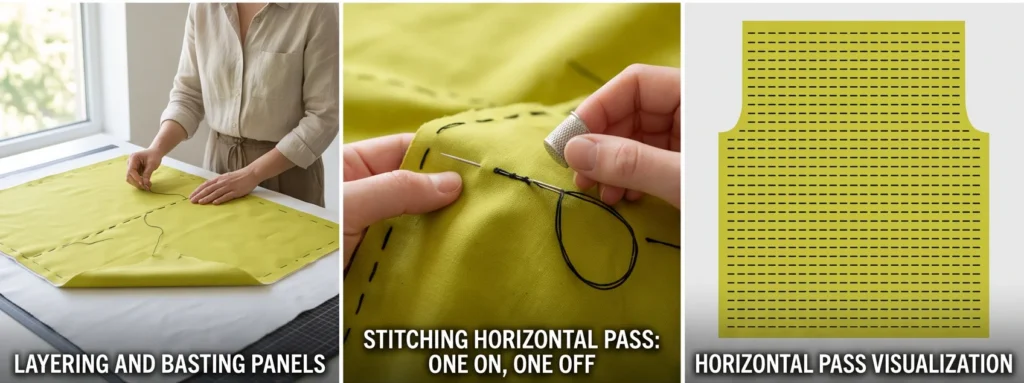
Step 6: Number Your Rows
Mark the row numbers along one edge of the panel, or at minimum mark every fifth row.
You are about to follow a rule that depends on whether a row is odd or even, across a hundred rows, over many hours. Losing your place is the most common failure in hitomezashi, and a single row started on the wrong beat displaces the pattern for everything after it.
Numbering takes ten minutes and prevents the one error that is genuinely tedious to fix.
Step 7: Stitch the Horizontal Pass
Thread a long sashiko needle with about 18 to 20 inches of thread. Wear the thimble on your palm.
Work across the panel one row at a time, stitching one grid unit, skipping one grid unit, following your chosen rule for where each row begins.
Because the stitches are short and regular, you can load eight to twelve stitches onto the needle per pass — more than in any other pattern here. Hitomezashi is faster to stitch than it looks precisely because the rhythm is so uniform.
Keep the stitch exactly one unit long. Consistency matters more than in patterns where the eye follows a continuous line, because every stitch here is an isolated mark and irregular ones stand out.
Step 8: Resist the Urge to Evaluate
After the horizontal pass, the panel will look like a field of unrelated dashes.
This is correct. The pattern does not exist yet. Nothing about the horizontal pass tells you whether it is working, and comparing it to a finished photograph at this stage is discouraging and uninformative.
Complete the pass and move on.
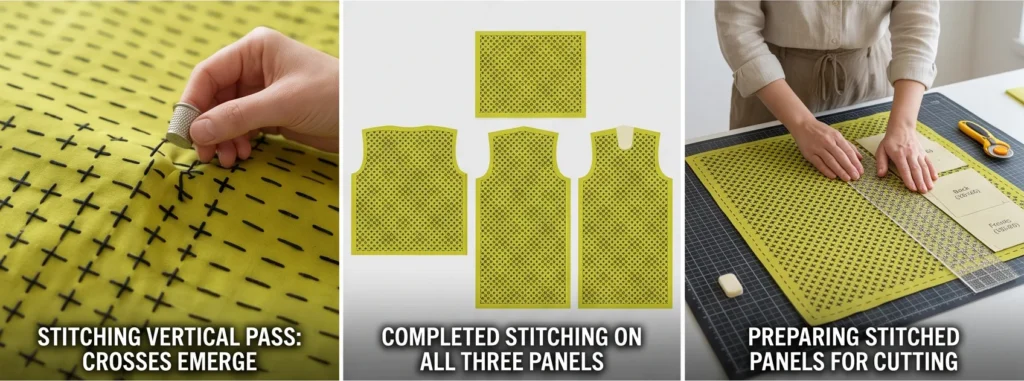
Step 9: Stitch the Vertical Pass
Turn the panel 90 degrees and work the vertical rows using the same rule, following your row numbering.
The pattern will begin to appear after about ten rows, and it is the most satisfying moment in this collection.
Where a vertical stitch meets a horizontal one at a grid intersection, let them share the point rather than stitching over each other. The two stitches should meet cleanly at the corner.
Check every ten rows or so that your pattern is developing as expected. If the motifs are drifting, a row has been started on the wrong beat, and it is far easier to unpick five rows than fifty.
Step 10: Complete All Three Panels
Work the back and both fronts, keeping the row rule consistent across all three so the pattern will align across the seams.
Expect 35 to 50 hours for the full vest. That is more than a simple parallel-row vest and considerably less than asanoha, and the uniform rhythm makes it less mentally demanding than either.
If you are working two-color hitomezashi, complete all horizontals in the first color across every panel before switching thread, rather than changing color per panel.
Step 11: Press, Measure, and Cut
Press each panel gently from the reverse with a pressing cloth. Do not flatten the stitching.
Measure each panel — expect about ½ inch of shrinkage.
Place your pattern pieces and cut the back and both fronts.
Position the pieces so a complete pattern unit falls at the center back and mirrors across the front opening. Hitomezashi is regular enough that an off-center motif reads as a mistake.
Where possible, align the same grid row on both pieces at each side seam so the pattern continues across it.
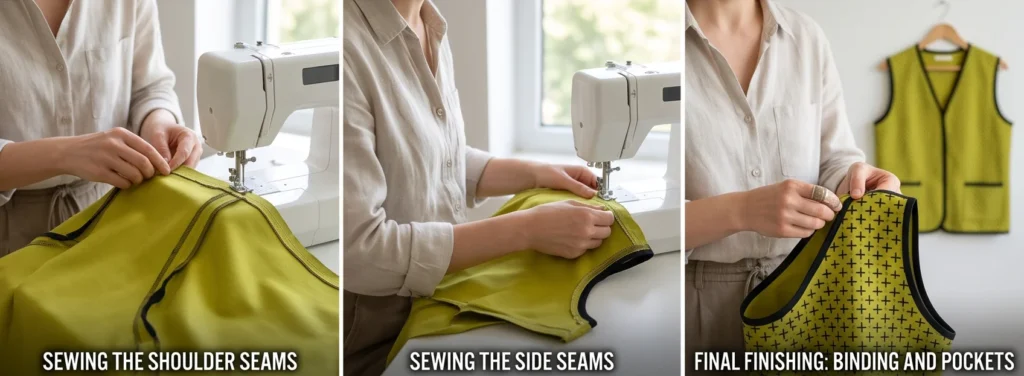
Step 12: Sew the Shoulder Seams
Sew the fronts to the back at the shoulders with a ½-inch seam allowance.
Press open and finish the seam allowances with a bound edge or a flat-fell.
Check the pattern alignment across the shoulder before pressing. On a regular grid pattern, a seam where the motifs jump by half a unit is noticeable.
Step 13: Sew the Side Seams
Sew each side seam from armhole to hem with a ½-inch seam allowance, using the same finish.
Try the vest on. Check the chest ease, armhole depth, and length before binding anything.
Step 14: Bind, Add Optional Pockets, and Finish
Bind in this order:
- Armholes — join a 2½-inch bias strip into a loop and apply to each, easing around the curve
- Front opening and neckline — one continuous strip from the hem, up the right front, around the back neck, down the left front
- Hem — a separate strip, ends folded in where they meet the front binding
Machine-stitch the binding to the face, fold over the raw edge, and hand-stitch it down inside.
A contrasting binding works particularly well here — a hard-edged solid border containing a busy geometric field is what stops the vest reading as chaotic.
If you want pockets, layer, work a small area of the same hitomezashi pattern, bind the top edge, turn the other three under, and topstitch at 3 inches above the hem.
Remove all markings with cold water — there will be a great many dots to rinse out, so rinse thoroughly rather than spot-treating, and do it before pressing since heat sets water-soluble ink permanently.
Dry flat, press lightly, add a label, and hang the vest.
Assembly at a Glance
- Sample — stitch a 3-inch test in both directions to see how the rule generates the pattern
- Choose the rule — jūji-zashi, yokogushi, komezashi, or kaki no hana, sampled before committing
- Mark — a ¼-inch grid of dots at the intersections, not full ruled lines, then number every fifth row
- Horizontal pass — one unit on, one unit off, following the row rule, loading eight to twelve stitches per pass
- Vertical pass — turn 90 degrees and repeat, letting stitches share intersection points cleanly
- Cut — allow ½ inch shrinkage, center a complete unit at center back, align the grid across side seams
- Finish — shoulder and side seams with clean finishes, then bind armholes, front and neckline, and hem in a contrast
Vibrant Hitomezashi Combination Ideas
For a chartreuse vest, use chartreuse cloth with black jūji-zashi and black binding.
For a magenta vest, use magenta with bright white kaki no hana and deep teal binding.
For a vermilion vest, use vermilion with black horizontals and white verticals, bound in black — two-color hitomezashi at its most graphic.
For an electric violet vest, use electric violet with chartreuse komezashi and black binding.
For a persimmon vest, use persimmon orange with white yokogushi and midnight navy binding.
For a shifting-rule vest, keep one cloth and one thread but change the row rule every 8 inches down the panel, so the pattern transforms from crosses through comb to rice stitch as it descends. Nothing extra to draft, and the effect is entirely modern.
Beginner Tips for Success
Sample the rules before committing. The output is genuinely hard to predict from the description, and five minutes each will save you from a pattern you did not want.
Mark dots at intersections, not full lines. Stitches run between points, so dots are all you need, and it halves the marking time.
Number your rows, or at least every fifth one. Losing track of odd and even across a hundred rows is the one error that is genuinely tedious to fix.
Do not evaluate after the horizontal pass. The pattern does not exist until the verticals go in, and the intermediate stage looks like nothing.
Keep every stitch exactly one grid unit. Isolated marks show their irregularity far more than stitches in a continuous line.
Let stitches share intersection points. Crossing over a previous stitch creates a lump at every meeting point, and there are thousands of them.
Check every ten vertical rows. Catching a misaligned row early means unpicking five rows instead of fifty.
Use a contrasting binding. A hard border is what contains a busy geometric field.
Styling Tip
A hitomezashi vest is a graphic garment and works best treated as one. Wear it over plain solids in a single color — black, white, cream, denim — and let the geometry be the entire event. Anything patterned nearby will fight a field this regular.
It sits well in a modern wardrobe in a way the more traditional pieces in this collection do not. A chartreuse vest with black crosses over a black column dress reads as contemporary design rather than as heritage craft, which makes it the most versatile of the bold pieces here.
Because the pattern is uniform and small in scale, it reads as texture from a distance and as geometry up close — the same property asanoha has, but with a harder edge.
Keep jewelry minimal and geometric. Matte metal in simple shapes suits it; anything ornate or organic competes.
Hang it, wash rarely by hand in cold water, and dry flat.
Gift Pairings for the Pockets
The patch pockets suit small gifts, and these work as a set alongside the finished vest:
- A ¼-inch grid ruler or a hitomezashi grid stencil — the single most useful tool for this technique
- A hera marker for scoring grid lines without ink
- A set of sashiko needles in varied lengths in a fabric roll
- A Japanese palm thimble — hard to find and genuinely transformative
- A sashiko thread set in white, black, and two brights
- A small hitomezashi coaster set from leftover cloth, each worked to a different rule
- A pounce pad and stencil set for fast grid marking
Other Design Inspirations – Digitally Modified Images. Texture and color may vary from the actual product.
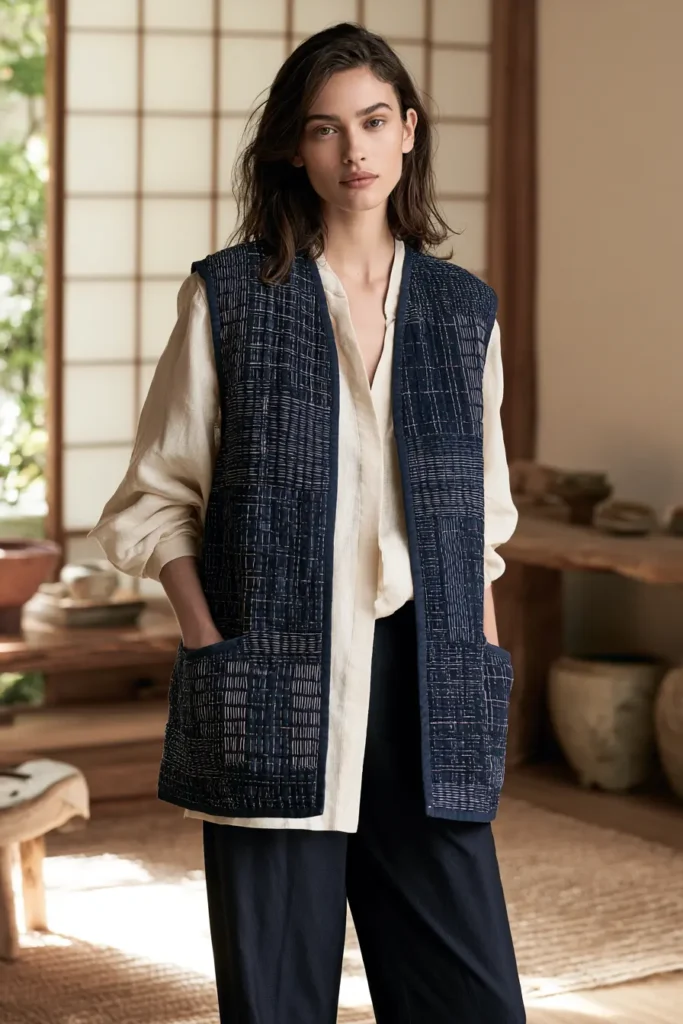
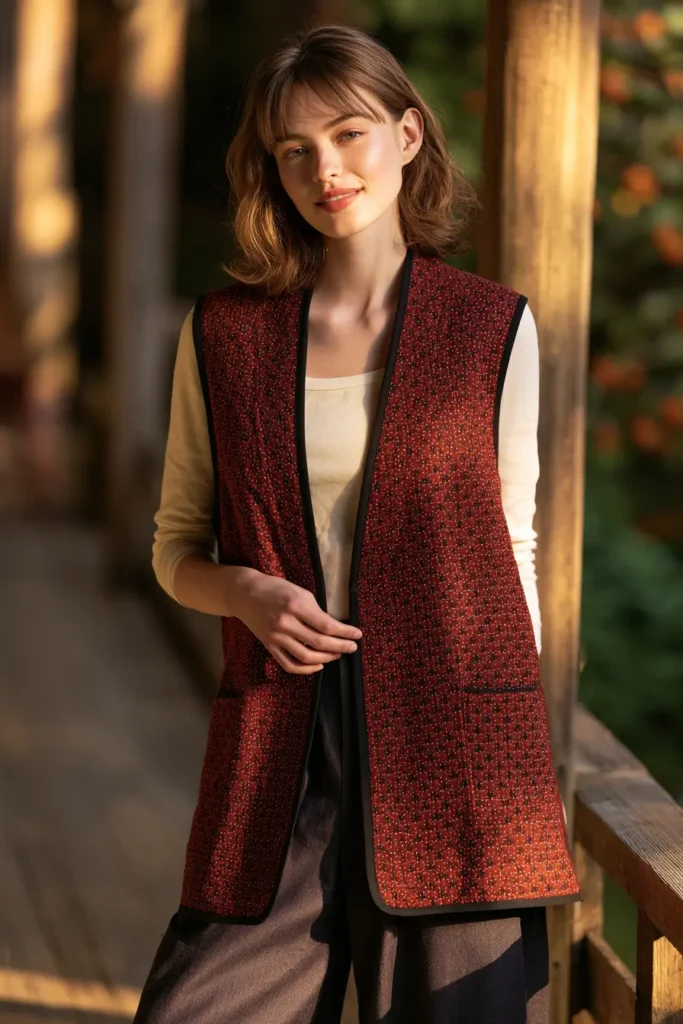
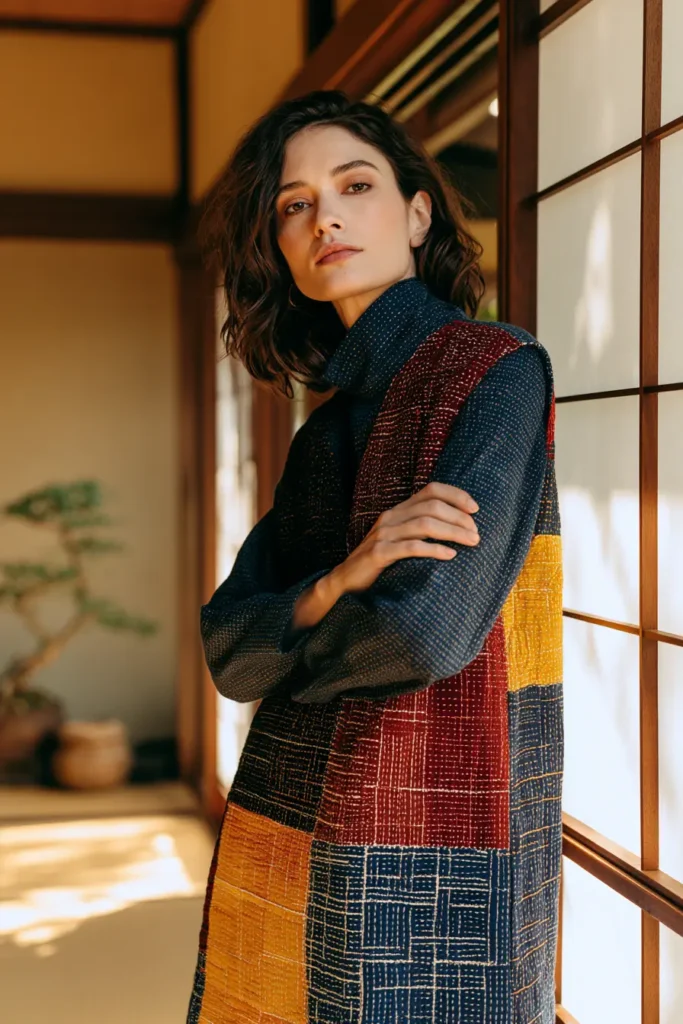
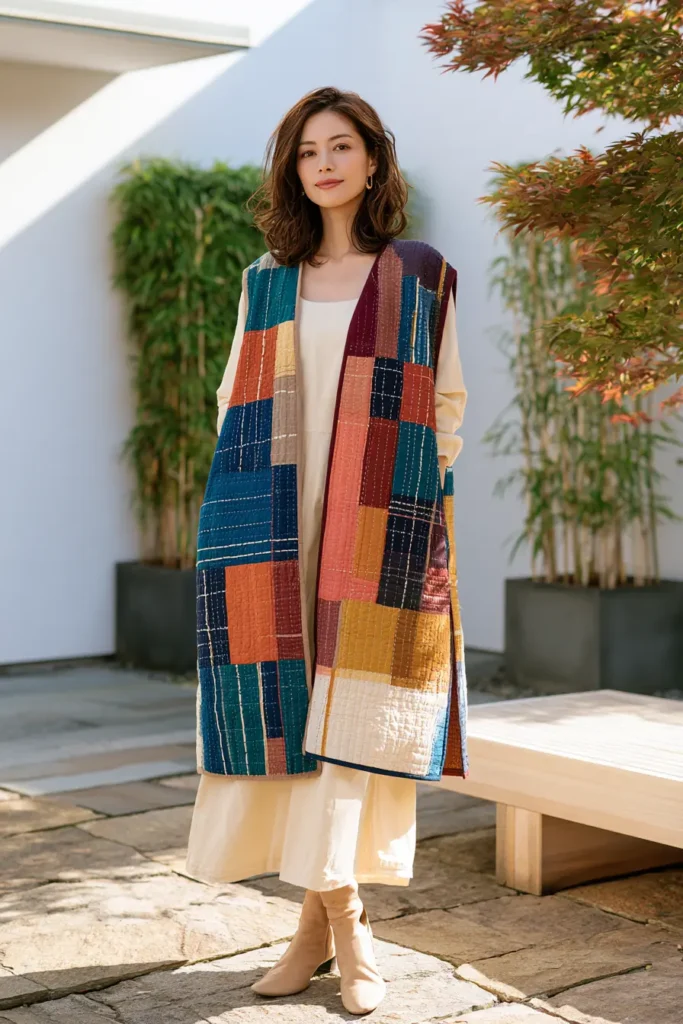
12. Lightweight Sashiko Quilted Jacket for Transitional Weather
Warmth in a garment does not come from the weight of the fabric. It comes from trapped still air, and that is a genuinely useful thing to understand before making a jacket for spring and autumn, because it turns the usual assumption inside out.
Dense stitching compresses the layers of a quilted garment and squeezes out exactly the air that keeps you warm. A heavily stitched jacket is therefore often less warm than a lightly stitched one made from the same materials — it is just heavier and stiffer. That is fine on a garment made for winter over a shirt, and it is entirely wrong for a jacket you want to wear on a cool April morning and carry by lunchtime.
This section builds a jacket around that principle: open stitching, a lofted lightweight middle layer, and deliberate ventilation zones where you do not want warmth at all. The target finished weight is 500 to 700 grams for a hip-length jacket, roughly half what a conventionally quilted one would be.
For a vibrant palette, transitional weather suits colors that read as neither summer nor winter: persimmon orange, saffron gold, chartreuse, deep teal, terracotta, and sage for the cloth, stitched in bright white, ecru, vermilion, or black. A persimmon jacket with white stitching over a linen shirt is exactly the register this garment wants.
Why This Design Works
The thermal logic is straightforward once stated. Two layers of cloth with a lofted layer between them trap air in the loft. Stitching passes through all three and compresses the loft along every stitch line. The more stitch lines you put in, the less loft survives, and the less air the garment holds.
So warmth is controlled by row spacing, not by fabric weight:
- Rows at ¼ to ⅜ inch: the loft is almost entirely compressed. Firm, structured, not especially warm for its weight
- Rows at ¾ to 1 inch: loft survives between the lines. Noticeably warmer and lighter
- Rows at 1½ to 2 inches: maximum loft retention, but the layers begin to shift and the garment loses definition
The sweet spot for a transitional jacket is 1 inch, which retains most of the loft while holding the layers stable.
Double gauze is the ideal face fabric and it is worth seeking out. It is two fine layers of woven cotton bound together at regular intervals during weaving, so the cloth itself holds a permanent air gap. It is Japanese in origin, extremely light at around 120 to 150 gsm, and it is genuinely warmer than a single-layer cotton of twice the weight.
The last element is ventilation. A transitional jacket needs to fail gracefully when the day warms up, and the way to do that is to leave certain areas without loft at all — underarm panels, the lower sides, and optionally a back yoke vent. Heat leaves the body fastest at the armpits, so an unlofted, lightly stitched underarm panel does more for comfort than any amount of adjusting elsewhere.
Skills you build here: thermal zoning through stitch density, working with lofted and unlofted areas in one garment, handling double gauze, and constructing ventilation into a quilted piece.
Design Inspirations – Digitally Modified Images. Texture and color may vary from the actual product.
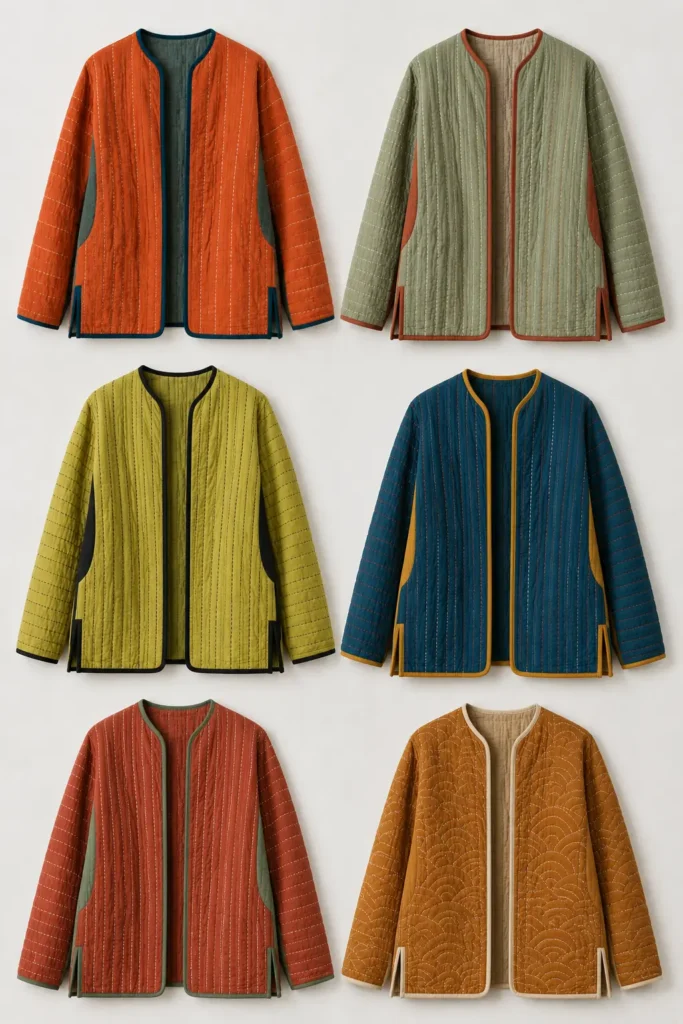
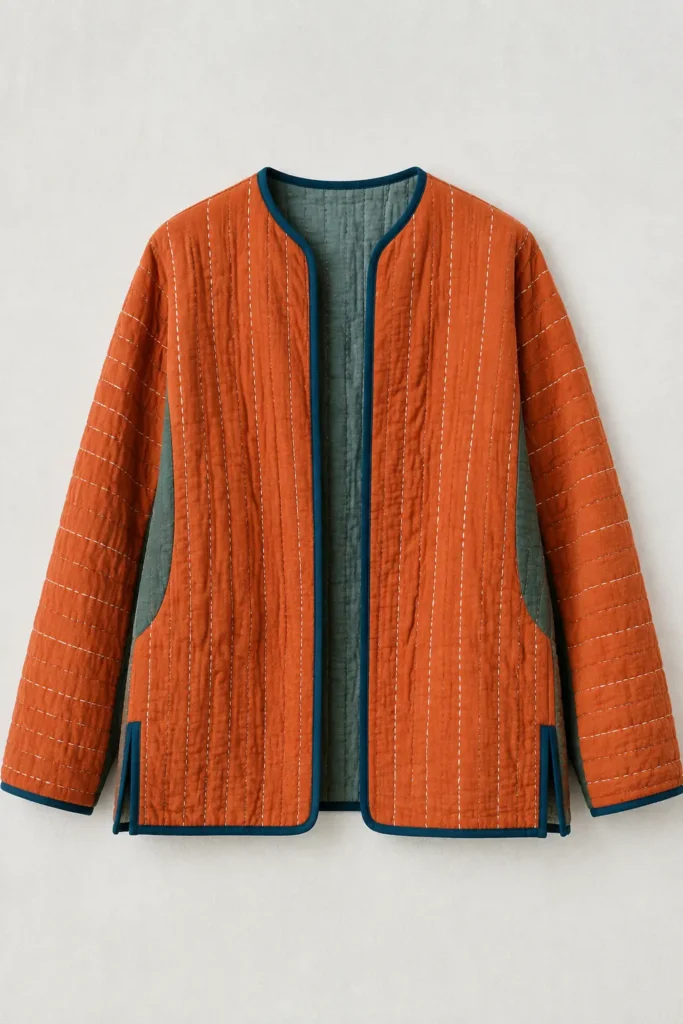
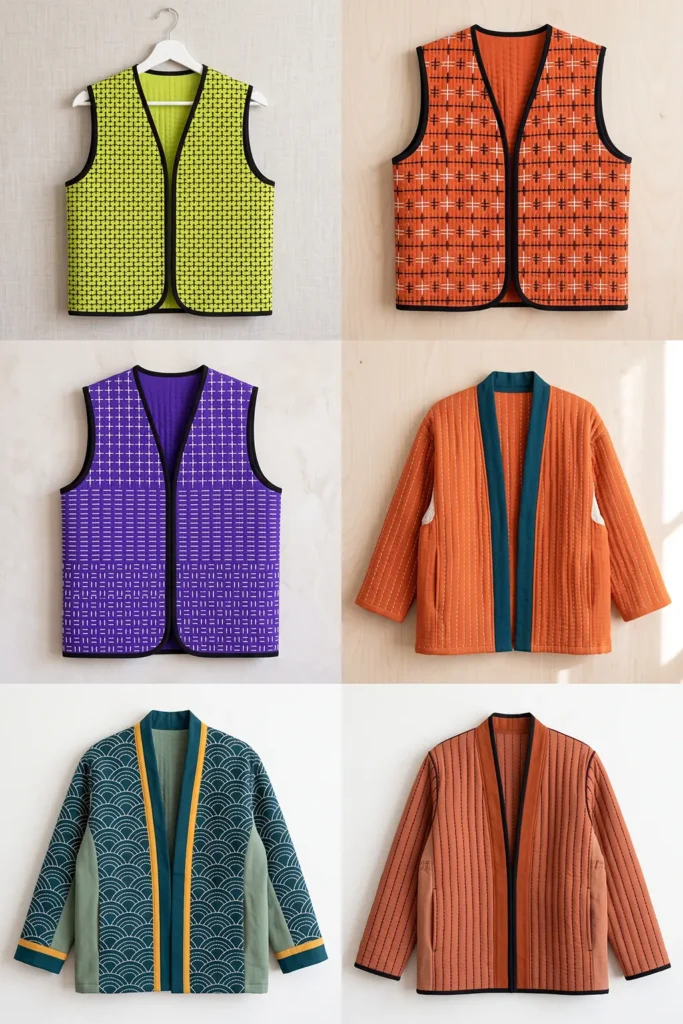
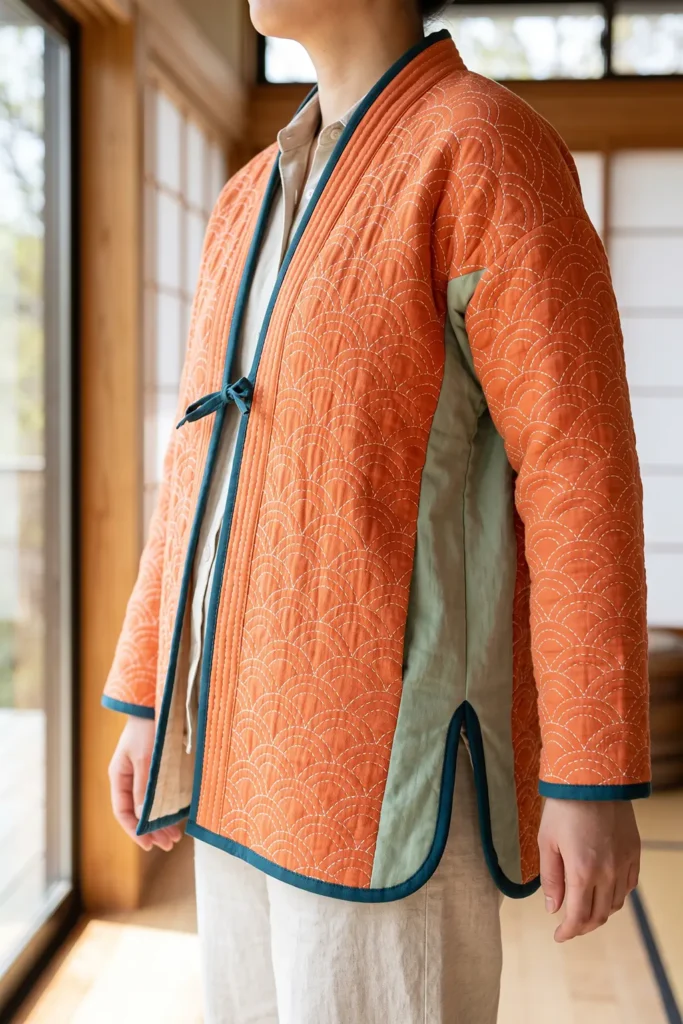
A Note on Seasonal Dressing
Japanese clothing tradition treats seasonal transition with a precision that is genuinely useful to a garment maker.
Kimono are formally divided by construction. Awase are lined kimono, worn from roughly October through May. Hitoe are unlined, single-layer kimono for June and September. And ro or sha — open-weave gauzy silks — are for the height of summer in July and August. The changeover dates were conventional and, historically, fairly strictly observed: wearing an awase in July was a visible error, not just a matter of comfort.
That system encodes something worth borrowing. It treats transitional weather as its own category requiring its own garment, rather than as an awkward gap between winter and summer clothing. The hitoe exists specifically for the two shoulder months.
The ventilation detail is equally instructive. A woman’s kimono has openings called miyatsukuchi under each arm, where the sleeve meets the body and the seam is deliberately left partly open. They serve several purposes — adjusting the fit of the garment under the obi is one — but temperature regulation is genuinely among them. Air moves through the garment at exactly the point where the body sheds most heat.
The related furi, the open underside of a long sleeve, does the same thing. A garment that appears enclosed is in practice quite deliberately vented, and that combination of coverage and airflow is precisely what a transitional jacket needs.
Finished Size
This guide makes a relaxed, hip-length jacket with dropped shoulders, zoned stitching, and underarm ventilation.
Sample finished measurements for a loose medium:
- Finished chest: about 46 inches
- Finished length: about 26 inches from shoulder to hem
- Sleeve length: about 19 inches from the dropped shoulder seam
- Sleeve width at bicep: about 16 inches
- Cuff opening: about 11 inches
- Armhole depth: about 11 inches
- Underarm vent openings: 4 inches at each lower side seam
- Front style: open, narrow bands, single tie optional
- Collar: none — bound neckline
- Target finished weight: 500 to 700 grams
Thermal zone measurements:
- Core zone — back panel and upper fronts, lofted, rows at 1 inch
- Sleeve zone — lofted, rows at 1¼ inches for maximum flexibility
- Underarm panels — an area about 7 x 9 inches under each arm, no loft, rows at 1 inch
- Lower side panels — a 4-inch strip up from the hem at each side, no loft
Stitch measurements:
- Stitch length: about ⅛ inch, gaps roughly half that
- Pattern: parallel rows, or seigaiha at a 2-inch grid — anything open
Materials Needed
For one lightweight sashiko jacket, gather:
- Face fabric: 3 yards of double gauze at 120 to 150 gsm, or a lightweight cotton or cotton-linen at about 4 oz
- Backing fabric: 3 yards of lightweight cotton voile, lawn, or a second double gauze
- Middle layer: 2 yards of the lightest cotton batting available — look for 2 to 3 oz weights, or use a single layer of cotton flannel for a thinner result
- Band and binding fabric: ¾ yard in a contrasting color
- Sashiko thread: 3 to 4 skeins — open stitching uses far less than a dense pattern
- Sashiko needles: a set of 3 to 5 in varied lengths
- Thimble: a Japanese palm thimble, or a leather ring thimble
- Chalk marker or water-soluble pen
- Quilting ruler
- Rotary cutter and cutting mat
- Sewing clips — pins mark double gauze
- Sewing machine
- Machine needles: 80/12, sharp
- Iron and ironing board
- A kitchen scale for checking the finished weight
Beginner tip: double gauze is lovely to wear and slightly awkward to sew. It shifts, it frays, and it shows pin marks. Use clips instead of pins, cut with a rotary cutter rather than scissors, and finish every raw edge promptly. None of it is difficult, but treating it like ordinary quilting cotton produces frustration.
Vibrant Transitional Palette
Colors that belong to neither summer nor winter:
Cloth:
- Persimmon orange
- Saffron gold
- Chartreuse
- Deep teal
- Terracotta
- Sage green
- Warm rust
Thread: 8. Bright white 9. Natural ecru 10. Vermilion red 11. True black
Bands and binding: 12. A third color — deep teal bands on persimmon, terracotta bands on sage, black bands on chartreuse
Because the stitching is open, the thread does less visual work here than in any other section of this collection. That shifts the emphasis onto the cloth color and the bands, so choose both more deliberately than you would on a densely stitched garment.
Double gauze takes dye beautifully and has a slightly matte, softly textured surface, which makes saturated colors read as rich rather than flat.
Consider making the underarm and lower side panels a different color from the body. Because those zones have no loft, they will hang slightly differently anyway, and turning that into a visible design feature — a contrasting panel under each arm — is more elegant than trying to disguise it.
Cutting Measurements
Cut everything ¾ inch larger than your pattern pieces in every direction. Open stitching draws the cloth in far less than dense stitching — expect only ¼ to ⅜ inch of shrinkage.
From face fabric, cut oversized:
- Back: one piece, about 28 x 29 inches
- Fronts: two pieces, about 17 x 29 inches each
- Sleeves: two pieces, about 19 x 24 inches each
From backing fabric, cut the same five pieces at the same sizes.
From batting, cut — note these are smaller than the fabric pieces:
- Back batting: 28 x 29 inches, then cut away a 4-inch strip along the bottom edge for the unlofted hem zone
- Front batting: two pieces at 17 x 29 inches, each with a 4-inch strip removed from the bottom and a 7 x 9-inch section removed from the lower armhole corner
- Sleeve batting: two pieces at 19 x 24 inches, each with a 7 x 9-inch section removed from the underarm corner
Those removed sections are your ventilation zones. Cutting them out of the batting rather than out of the fabric is what makes them work.
From band and binding fabric, cut:
- Front bands: two strips at 3½ x 29 inches
- Neckline binding: one bias strip at 2½ inches x neckline length plus 2 inches
- Cuff binding: two strips at 2½ x 13 inches
- Hem binding: one strip at 2½ x 50 inches
- Vent binding: two strips at 2½ x 10 inches
- Optional tie: one strip at 2½ x 24 inches
Use a ½-inch seam allowance for construction.
Step-by-Step Guide
Step 1: Prewash Everything
Wash and dry all fabrics twice before cutting.
Double gauze shrinks substantially — often 5 to 8 percent on the first wash, and it will keep relaxing on the second. Cutting before washing on this fabric guarantees a garment that no longer fits.
Wash the batting according to its instructions, or not at all if it is a type that should not be prewashed. Check the packaging.
Step 2: Weigh Your Materials
Put your fabrics on a kitchen scale and record their weight per square yard.
Add the face, backing, and batting weights together, multiply by the roughly 3 square yards a jacket uses, and you have an approximate finished weight before hardware.
If the total exceeds about 800 grams, substitute a lighter component before cutting anything. It is far easier to change fabrics now than to finish a jacket that turns out to be too warm for its purpose.
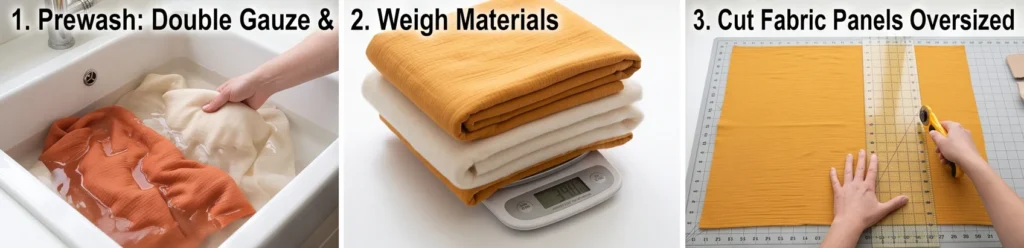
Step 3: Cut the Fabric Panels
Cut all five face pieces and five backing pieces at the oversized measurements, on the straight grain.
Use a rotary cutter rather than scissors. Double gauze distorts under scissor pressure, and a rotary cut is cleaner.
Serge or zigzag the raw edges of the face pieces if your machine will do it. Double gauze frays readily, and you will be handling these panels for hours.
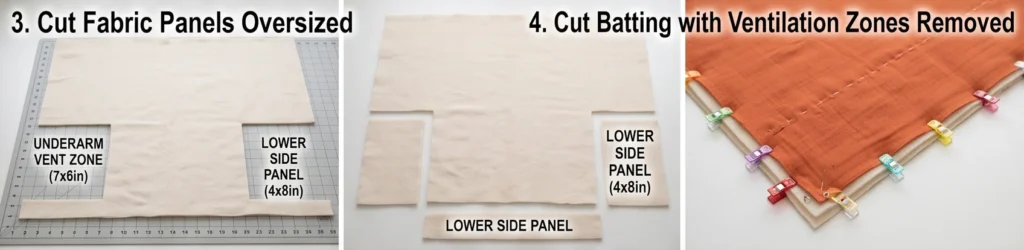
Step 4: Cut the Batting with the Ventilation Zones Removed
Cut the batting pieces and then remove the ventilation sections:
- A 4-inch strip along the bottom edge of the back and both fronts
- A 7 x 9-inch section at the lower armhole corner of each front
- A 7 x 9-inch section at the underarm corner of each sleeve
Keep the removed pieces — they are useful for testing your stitch spacing.
These unlofted areas are why the finished jacket vents. Cutting them out of the batting means the face and backing fabrics still meet there and the garment looks continuous, but there is no insulation at the points where you shed heat.
Step 5: Layer and Baste
For each panel, layer backing right side down, batting on top with the ventilation sections missing, then face fabric right side up.
Where a batting section has been removed, the two fabrics will simply lie against each other. That is correct.
Baste on a 4-inch grid with clips or safety pins around the edges and spray or hand basting through the middle.
Do not use straight pins through the face fabric — double gauze holds pin marks visibly.
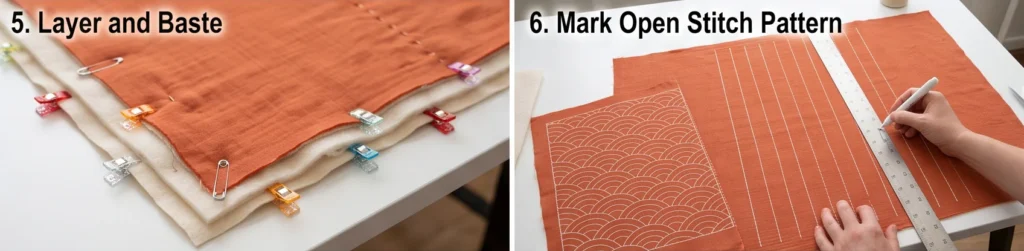
Step 6: Mark the Open Stitch Pattern
Mark simple parallel rows at 1 inch apart running vertically down each body panel, and 1¼ inches apart along each sleeve.
For a more decorative option, mark seigaiha overlapping waves on a 2-inch grid — large enough to keep the row spacing open while still reading as a pattern.
Across the unlofted zones, keep the same spacing so the stitching looks continuous. The difference in loft will be felt rather than seen.
Marking is quick here compared with the dense patterns in this collection — an hour for the whole jacket rather than an hour per panel.
Step 7: Test the Loft Before Committing
Take a scrap of each fabric plus a piece of your leftover batting, layer them, and stitch three rows at 1 inch apart.
Squeeze it. Compare it to an unstitched sandwich of the same materials.
If it feels flat and hard, your batting is too light or your rows too close — widen to 1¼ inches. If the layers shift and bubble, tighten to ¾ inch.
Five minutes here calibrates the whole garment.
Step 8: Stitch the Body Panels
Thread a long sashiko needle with about 18 to 20 inches of thread. Wear the thimble on your palm.
Work a running stitch of about ⅛ inch with gaps roughly half that, loading five to ten stitches per pass.
Keep the tension noticeably looser than usual. Every other section in this collection warns against pulling the thread; here it matters more, because pulled stitching compresses loft and compressing loft is exactly what you are trying to avoid. The thread should sit on the surface with no tension at all.
Expect 20 to 30 hours for the full jacket. Open stitching over a large area is one of the faster projects here.
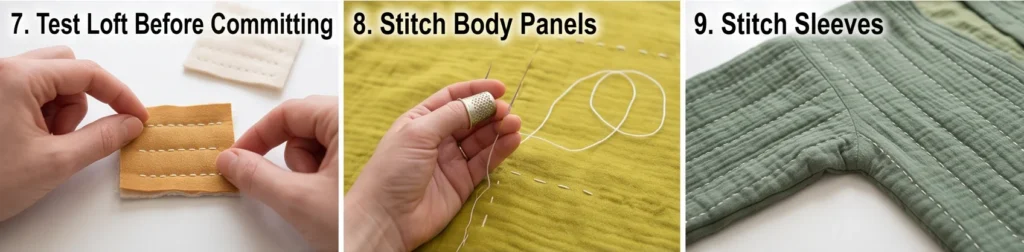
Step 9: Stitch the Sleeves
Work the sleeves at 1¼-inch spacing.
Wider spacing on the sleeves does two things: it keeps more loft where you want warmth on the arms, and it keeps the sleeve flexible at the elbow. A stiff sleeve is the most common reason a quilted jacket goes unworn.
Keep the stitching light through the unlofted underarm sections.
Step 10: Check the Weight
Weigh all five stitched panels together on the kitchen scale.
You are aiming for a total that will finish at 500 to 700 grams once bands, binding, and thread are added — so panels totaling around 450 to 600 grams at this stage.
If it is coming in heavy, you can still remove more batting from the lower body before assembly.
Step 11: Press, Measure, and Cut
Press each panel gently from the reverse with a pressing cloth and a low iron.
Press very lightly. A firm press flattens the loft permanently, which undoes the warmth you designed in. On this garment, pressing is the most likely way to damage your own work.
Measure each panel — expect ¼ to ⅜ inch of shrinkage.
Place your pattern pieces and cut the back, both fronts, and both sleeves, checking that the unlofted zones land where you intended relative to the armhole.
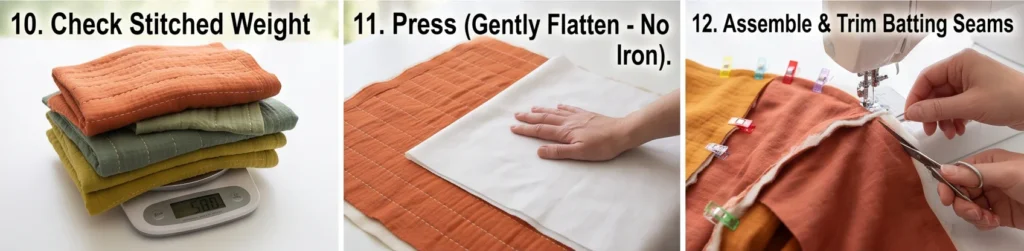
Step 12: Assemble the Jacket
Sew the fronts to the back at the shoulders with a ½-inch seam allowance. Trim only the batting from inside the seam allowance and press open.
Open the jacket flat, match each sleeve center to the shoulder seam, and sew the sleeves on with a ½-inch seam allowance. There is nothing to ease.
Fold right sides together and sew from each cuff down to the underarm and along the side seam, stopping 4 inches above the hem on each side to leave the lower vents open.
Bind or flat-fell all seams. On a lightweight unlined jacket the interior shows constantly.
Step 13: Add the Bands and Bind
Sew a 3½-inch contrast strip to each front edge, fold to the inside, turn the raw edge under, and stitch down. The band should finish about 1½ inches wide.
Bind the neckline with a 2½-inch bias strip, easing around the curve.
Bind each cuff with a 2½ x 13-inch strip joined into a loop.
Bind each side vent as a continuous U with a 2½ x 10-inch strip, then bind the hem across the full width, folding the ends in where they meet the vent and front binding.
Attach a 2½ x 24-inch tie at the left front band if you want a closure.
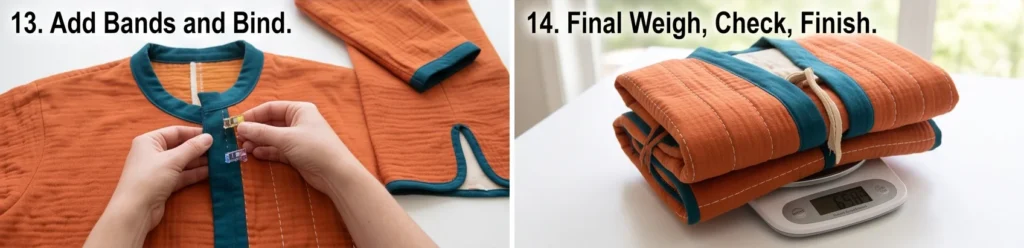
Step 14: Weigh, Check, and Finish
Weigh the finished jacket. It should come in at 500 to 700 grams. Anything over 900 is a winter jacket, whatever you intended.
Remove chalk marks with cold water, dry flat, and press very lightly if at all.
Add a label at the inside back neck.
Store it folded loosely or on a wide hanger. A lofted garment compressed under other clothes in a drawer for a season will lose loft, and loft is the entire point of the design.
Assembly at a Glance
- Prewash and weigh — wash everything twice, weigh the materials, substitute lighter components if the total exceeds 800 grams
- Cut with zones — cut fabric panels normally, then remove the ventilation sections from the batting only
- Layer and test — baste with clips, then test-stitch three rows on a scrap to calibrate the loft
- Stitch open — 1-inch rows on the body, 1¼ inches on the sleeves, with the thread sitting entirely untensioned
- Weigh again — panels should total 450 to 600 grams before assembly
- Assemble — shoulders, sleeves flat, side seams stopping 4 inches above the hem for the vents
- Finish — contrast front bands, bound neckline, cuffs, vents and hem, then weigh the finished jacket
Vibrant Transitional Combination Ideas
For a persimmon jacket, use persimmon double gauze with white stitching and deep teal bands.
For a sage jacket, use sage green with ecru stitching and terracotta bands and binding.
For a chartreuse jacket, use chartreuse with black stitching and black bands — the most graphic option.
For a teal jacket, use deep teal with vermilion stitching and saffron gold bands.
For a terracotta jacket, use terracotta with white stitching and sage bands, with sage underarm panels.
For a visible-vent jacket, make the unlofted underarm and lower side panels in a contrasting cloth, turning the ventilation zones into a deliberate two-color design feature.
Beginner Tips for Success
Understand that dense stitching makes a jacket colder, not warmer. Every stitch line compresses the loft that holds the air.
Weigh your materials before cutting. It is the only reliable way to know what the finished garment will weigh, and it is far cheaper to change fabrics now.
Prewash double gauze twice. It shrinks 5 to 8 percent on the first wash and continues on the second.
Use clips, not pins. Double gauze holds pin marks visibly.
Test-stitch three rows on a scrap before committing. Five minutes calibrates the loft for the whole jacket.
Keep the thread completely untensioned. Pulled stitching compresses loft, which is the one thing this design is built to avoid.
Press very lightly, with a low iron. A firm press permanently flattens the loft.
Cut the ventilation zones out of the batting, not the fabric. The garment stays continuous while losing insulation exactly where you shed heat.
Store it loosely. Compressed loft does not fully recover.
Styling Tip
A lightweight sashiko jacket is a genuinely three-season garment, and its best quality is that it works both worn and carried. Over a linen shirt in April, over a fine knit in October, and rolled into a bag by midday in either.
Because the stitching is open, this jacket reads more as colored cloth with a fine surface than as a heavily worked textile, which makes it the most wearable of the vibrant pieces in this collection. A persimmon jacket over white linen and stone trousers is a complete outfit that does not look like a craft project.
The loft gives it a soft, slightly rounded silhouette rather than the flat drape of an unbatted piece, so it balances best over slim or straight shapes rather than volume.
Keep the layer underneath breathable — linen, cotton, or a fine knit. Putting a synthetic base layer under a garment designed around airflow defeats the design.
Wash by hand in cold water and dry flat. Tumble drying will felt and compress a light cotton batting permanently.
Gift Pairings for the Pockets
If you add patch pockets, or as a set alongside the finished jacket:
- A kitchen or postal scale — genuinely the most useful tool for garment weight control
- A set of sashiko needles in varied lengths in a fabric roll
- A Japanese palm thimble — hard to find and genuinely transformative
- A double gauze fat quarter bundle in coordinating colors
- A pack of quilting clips — essential for fabrics that mark
- A sashiko thread set in white, ecru, and two brights
- A wide wooden hanger for storing a lofted garment without crushing it
Other Design Inspirations – Digitally Modified Images. Texture and color may vary from the actual product.
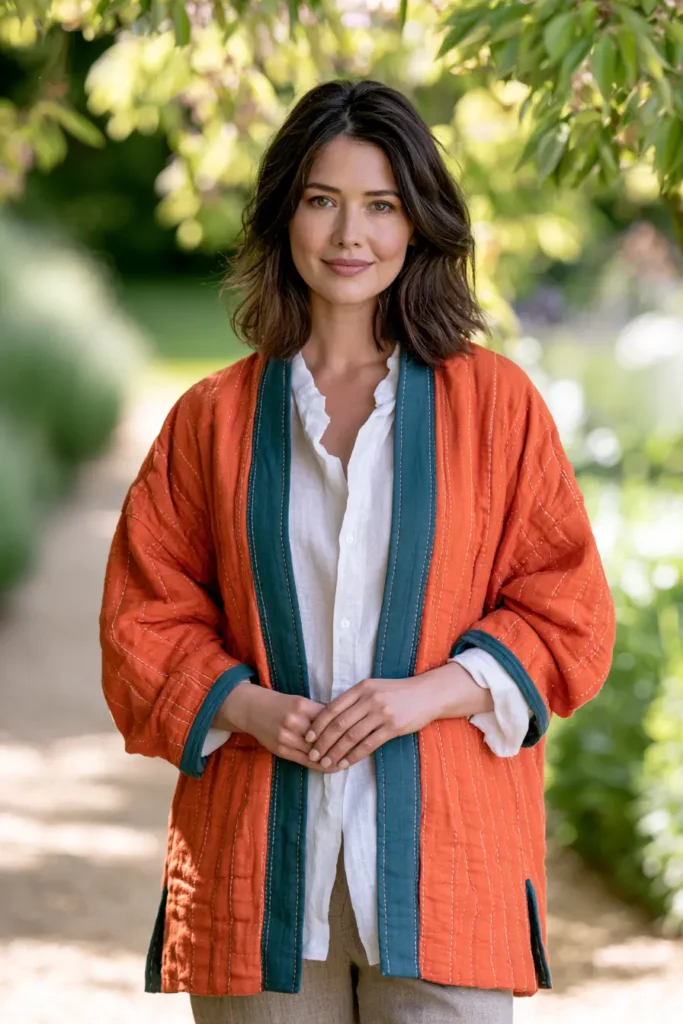
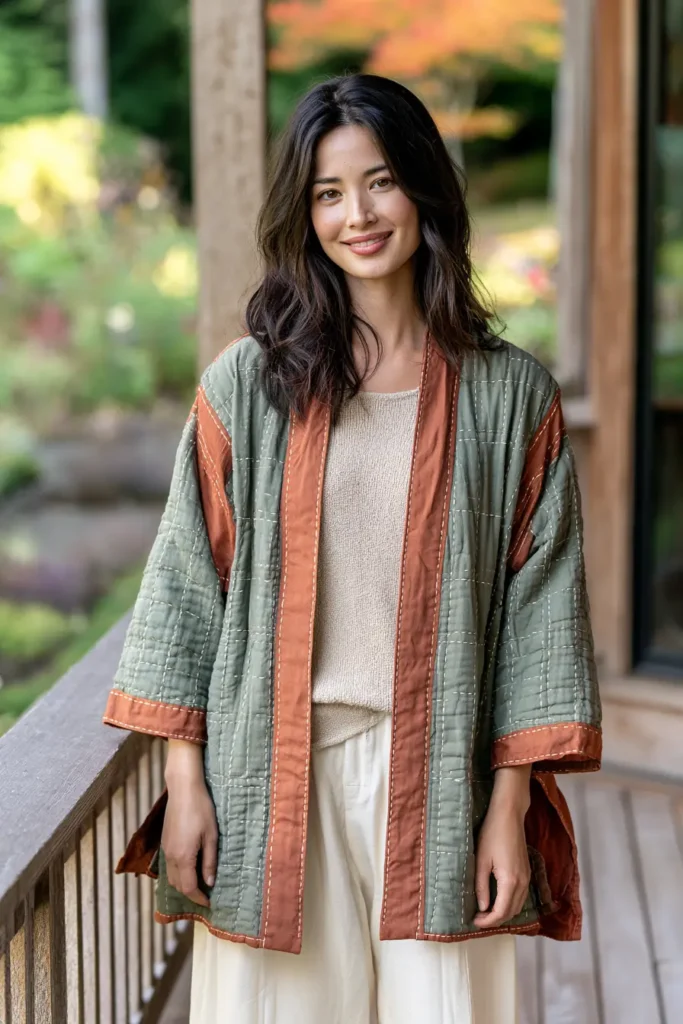
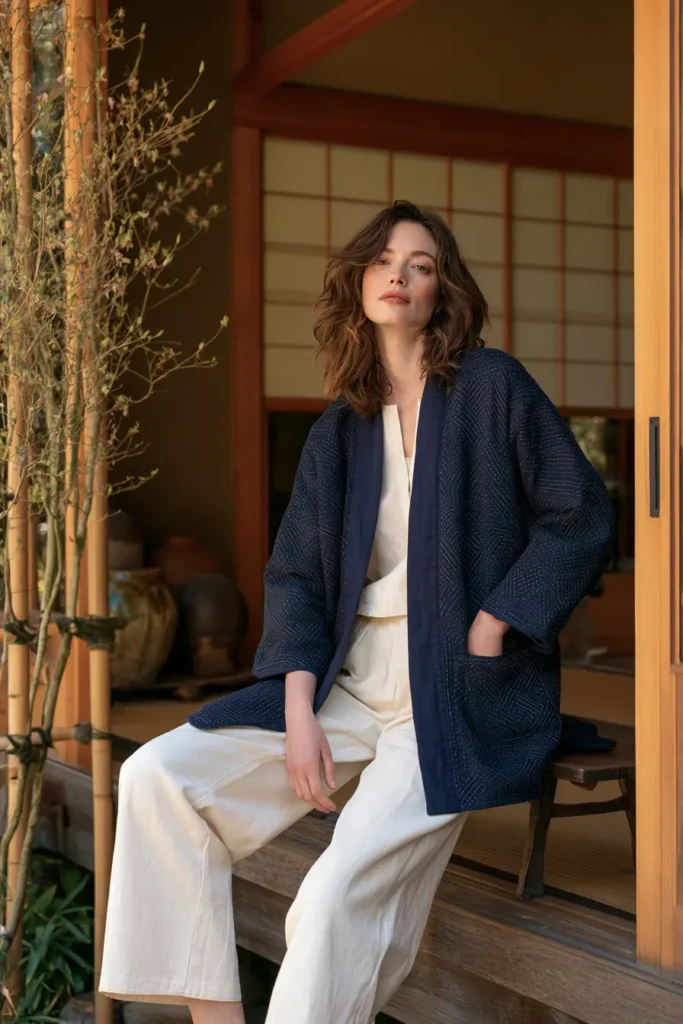
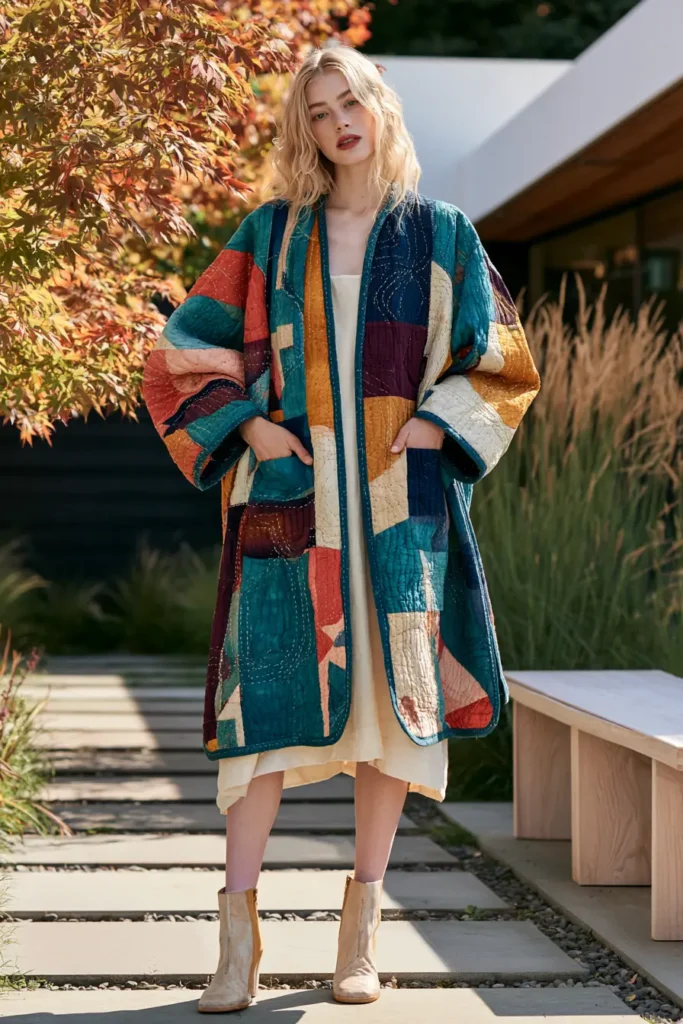
Conclusion
The beauty of a sashiko jacket or vest is that it carries so much in every stitch – warmth, durability, history, and the unmistakable mark of something made by hand. These garments are meant to be lived in and loved for years, growing softer and more characterful with every wear, and quietly telling the story of the hours and care that went into them. In a world of disposable clothing, a hand-stitched sashiko layer is a genuine antidote: sustainable, personal, and timeless, honoring a Japanese craft tradition that has valued patience, thrift, and beauty for centuries.
The best Sashiko Quilt Jackets and Vests Ideas are the ones that suit your style and your life. Reach for a classic indigo jacket or a traditional asanoha pattern if you love timeless, artful craft; choose a reversible or cropped vest for versatile, easy everyday layering; try a kimono, noragi, or longline silhouette for graceful, statement shapes; or keep it minimalist and neutral for understated modern elegance. Whether you hand-stitch an entire garment or add sashiko accents to a jacket you love, each idea is a chance to slow down, stitch something meaningful, and wear wearable art that no one else in the world will have quite like yours.

