
Quilted Christmas Table Runner Ideas: 12 Festive Patterns to Sew This Season
A Quilted Christmas Table Runner is the quickest way to make a dining table feel like the holidays. It’s a long, narrow strip of patchwork – typically somewhere between 14 and 16 inches wide and 40 to 72 inches long, depending on the table – quilted through three layers and bound at the edges, laid down the center of the table with candles, greenery, or plates on top. Unlike a full quilt, which takes weeks, a table runner can be started and finished in a weekend. It sits where everyone at the table looks; it comes out for every meal through December, and it gets used rather than admired from across a room.
Quilted Christmas Table Runner Ideas
This collection of Quilted Christmas Table Runner ideas gathers twelve patterns for every taste and every table. The classic red-and-green patchwork and log cabin runners are reliable traditional choices; the star block and snowflake versions add graphic elegance, and the Christmas tree runner most openly announces the season. For speed, try a jelly roll runner or a scrappy one built from leftovers; for versatility, choose a reversible runner that gives two looks from one piece. The gold-and-cream runner suits a dressed-up table, the Scandinavian version suits a spare modern one, the plaid and buffalo check runner brings farmhouse warmth, and the vintage appliqué-and-embroidery runner is something else entirely – slow, considered, and built to be kept.
See also: Quilted Christmas Throw – Farmhouse Quilt Jackets & Vests – Sashiko Quilt Jackets and Vests – Fall Quilted Jacket and Vest – Nakshi Kantha Jackets and Vests
Why Make a Quilted Christmas Table Runner
A table runner earns its place in a way that a full quilt doesn’t quite, because it’s used rather than stored. It sits under the food, the candles, and the hands reaching across the table every day of December, which means everyone who sits down sees the handwork. What makes a quilted runner different from a plain one is the texture – the stitching creates surface interest that a flat piece of fabric simply doesn’t have, and that texture catches the light from candles beautifully.
It’s also a genuinely achievable project for anyone who has made a quilt before, since the construction is identical – piece, quilt, bind – just compressed to a fraction of the size. Most runners take two or three yards of fabric at most, so they’re a low-risk way to try a new pattern, use up Christmas fabric that has been accumulating, or make several gifts from a single afternoon of cutting.
Tips for Choosing Fabrics and Colors
Size your runner to the table first, before anything else. The standard advice is to leave about 6 inches of bare table at each end, or to let the runner overhang by 6 to 8 inches – both look deliberate. Stopping flush with the edge does not. Adjust the length in whole blocks rather than changing the border width, since that keeps the proportions right.
For fabric, 100 percent quilting cotton washes and presses well and holds a crease at the binding – it’s the most forgiving choice for a piece that gets handled constantly. Flannel is warmer and cozier but shrinks more, so prewash it twice before cutting. For color, the same rule that governs Christmas quilts applies here: red and green are often the same value, so a runner made only from those two can muddy together. Include a proportion of cream, ivory, or white to separate them and give the eye somewhere to rest.
For something dressier, gold and cream reads elegant with none of the traditional associations, and blue and silver reads winter rather than specifically Christmas. Whatever the palette, keep the binding in the darkest color in the runner – it frames the piece and stops the edge from dissolving into the tablecloth beneath.
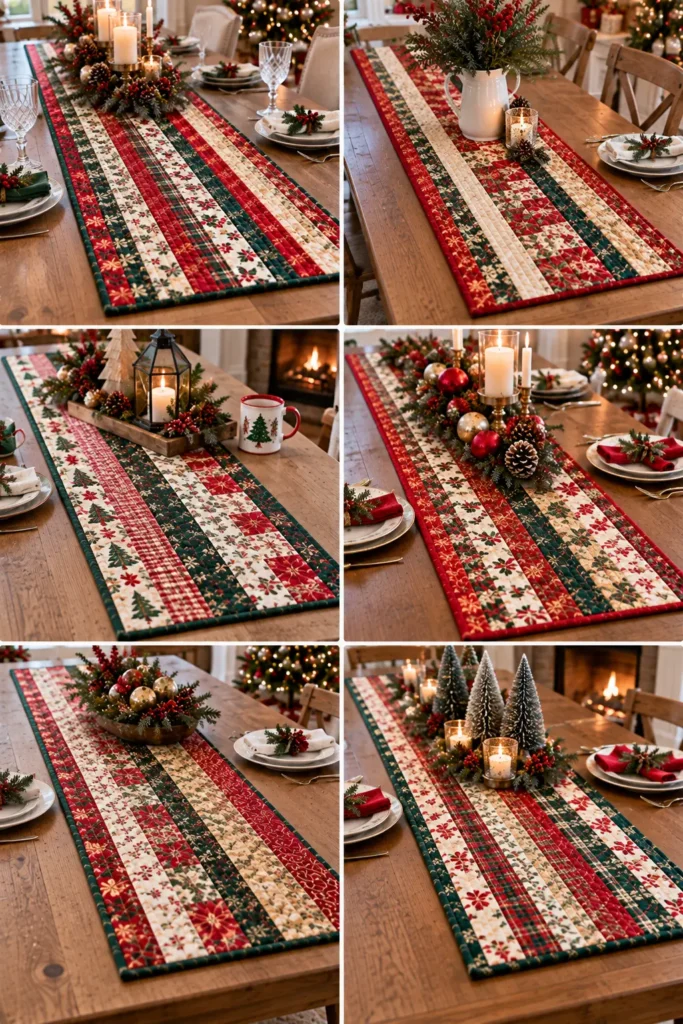
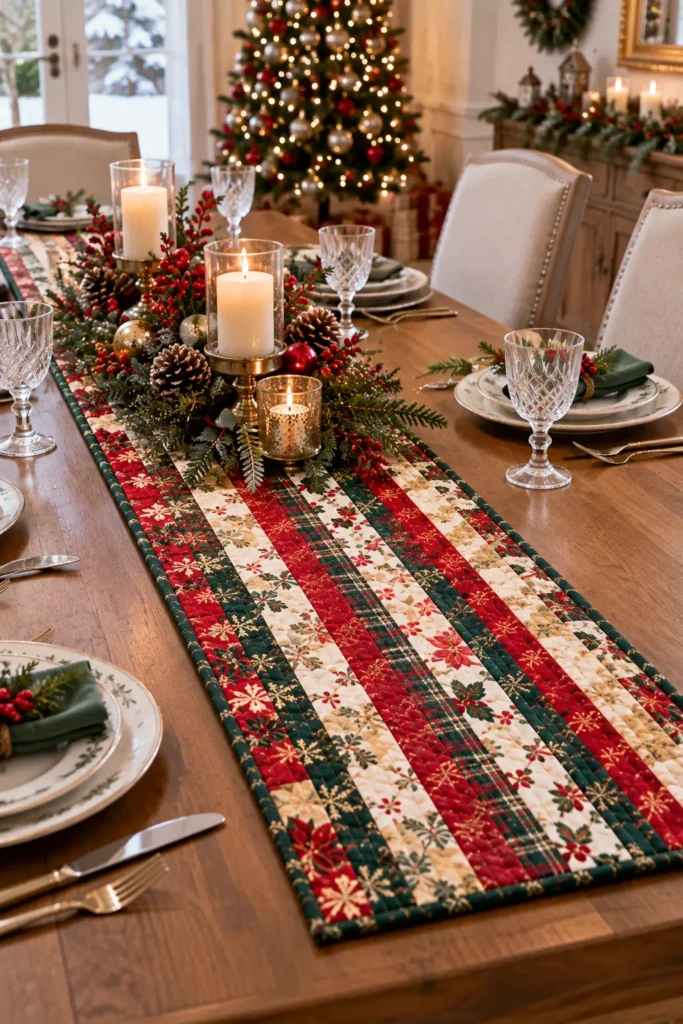
1. Classic Red and Green Patchwork Christmas Table Runner for Timeless Holiday Charm
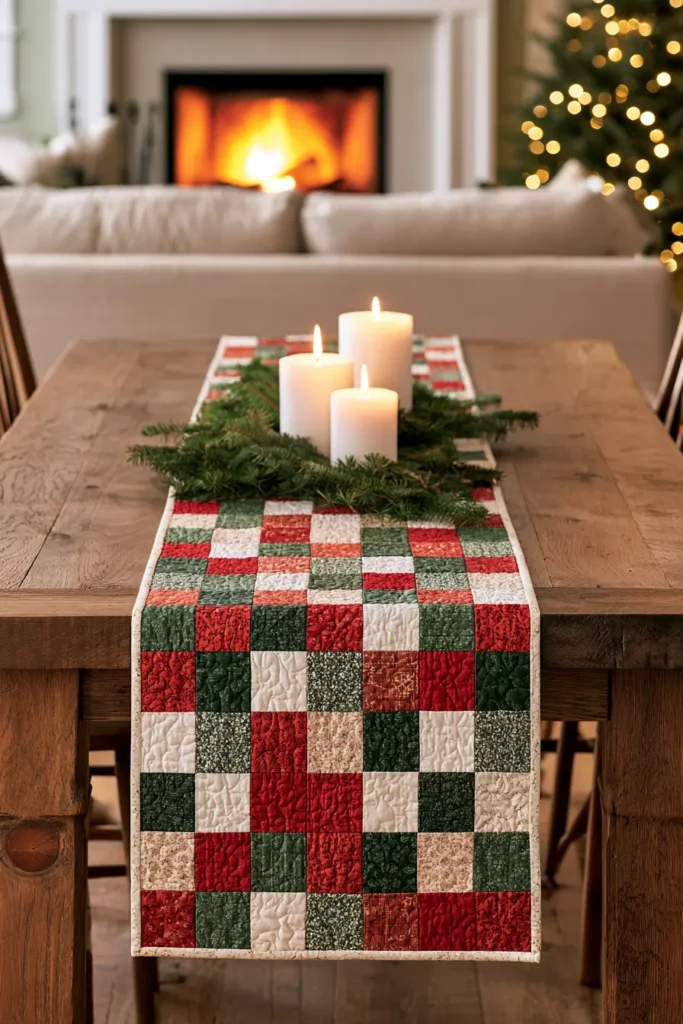
A quilted Christmas table runner is a smaller quilt made to sit along the center of a dining table, console, buffet, or coffee table. Like a full quilt, it is built from three layers—a pieced top, a batting middle, and a backing—stitched together for structure and softness. This version uses a classic red and green patchwork layout with a few lighter tones worked in, giving it that familiar holiday look that feels festive year after year without becoming dated.
Red and green have been associated with Christmas for generations, partly because of holly, evergreen boughs, winter berries, and Victorian holiday cards that helped popularize the pairing. That history is part of the charm. A patchwork table runner in these colors brings that traditional holiday mood to the table, but in a form that is practical, washable, and easy to store. This design finishes at approximately 15 × 54 inches, a versatile size that works on most dining tables while still leaving space for place settings or seasonal centerpieces.
Why This Design Works So Well
This runner is intentionally simple: a 3 × 12 patchwork grid made from 36 squares, bordered to give it a finished frame. The simplicity is what makes it timeless. Instead of relying on one novelty motif, it lets the color do the seasonal work—cranberry red, holly green, warm cream, and a touch of gold or plaid if you like. That makes it easy to coordinate with many different Christmas decorating styles, from farmhouse to traditional to slightly formal.
It is also a very approachable quilted project. The piecing is straightforward, the measurements are realistic, and the long, narrow format makes it ideal for trying quilting techniques without committing to a full throw or bed quilt. A table runner also makes an excellent seasonal gift, especially because it is both decorative and useful.
Design Inspirations – Digitally Modified Images. Texture and color may vary from the actual product.
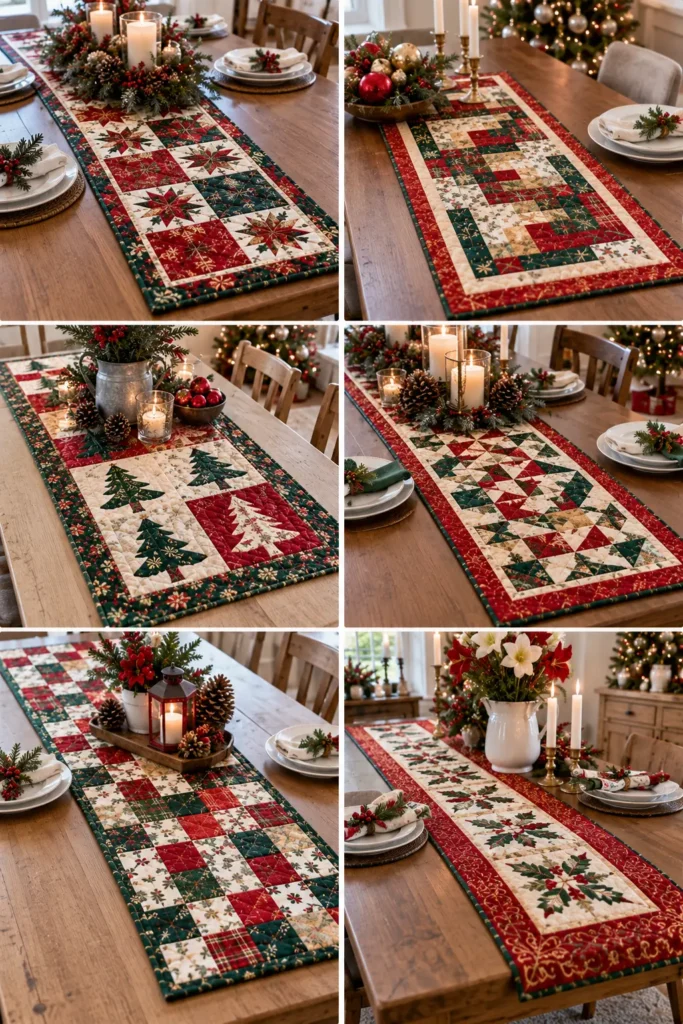
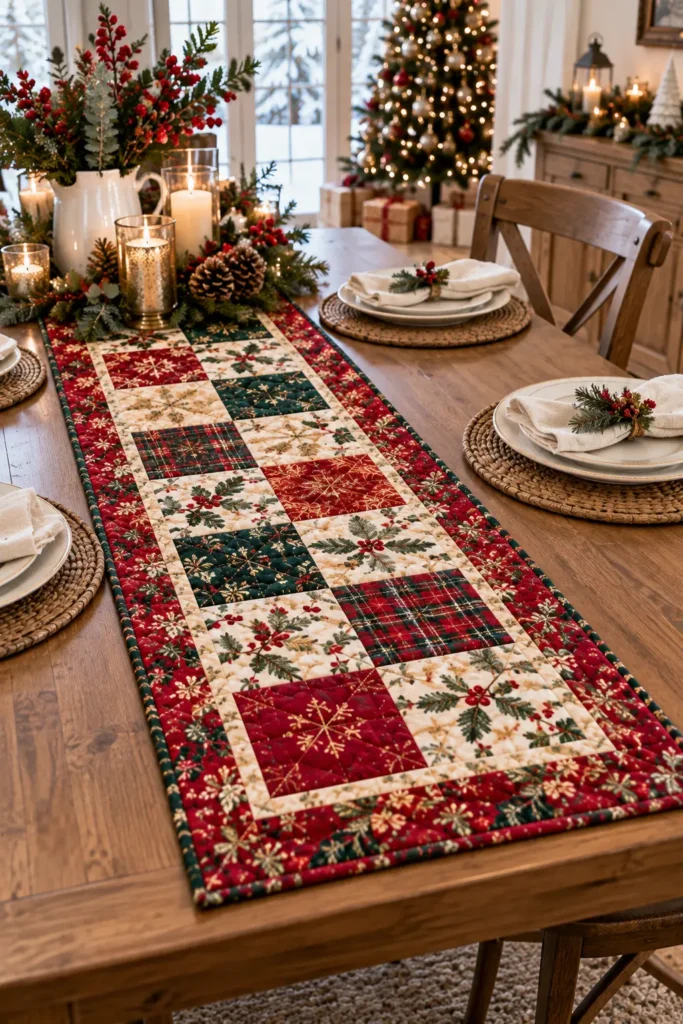
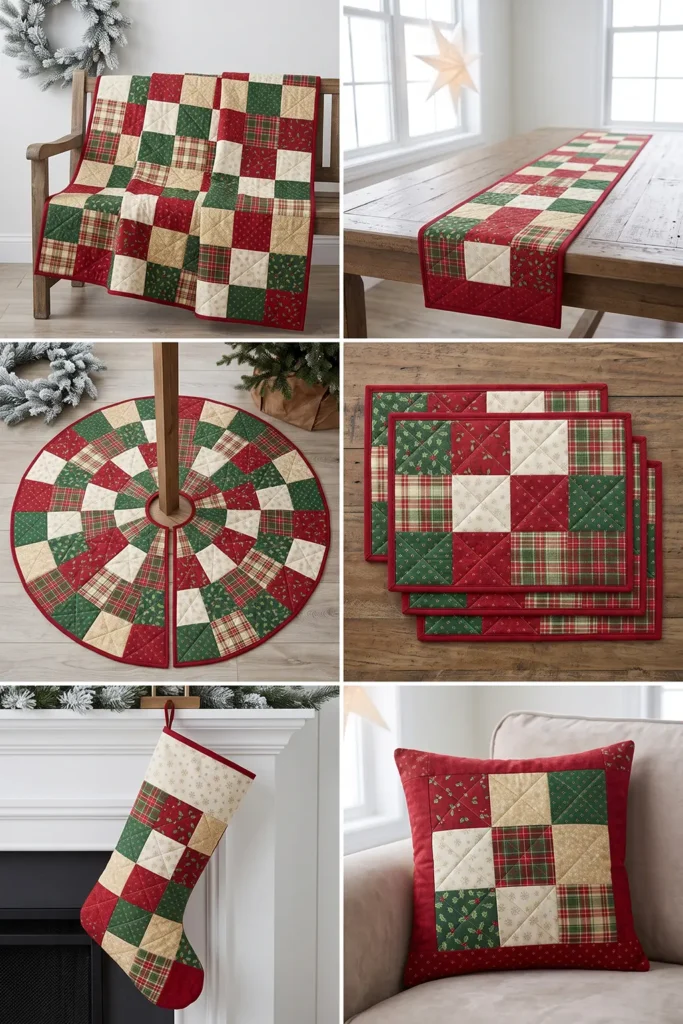
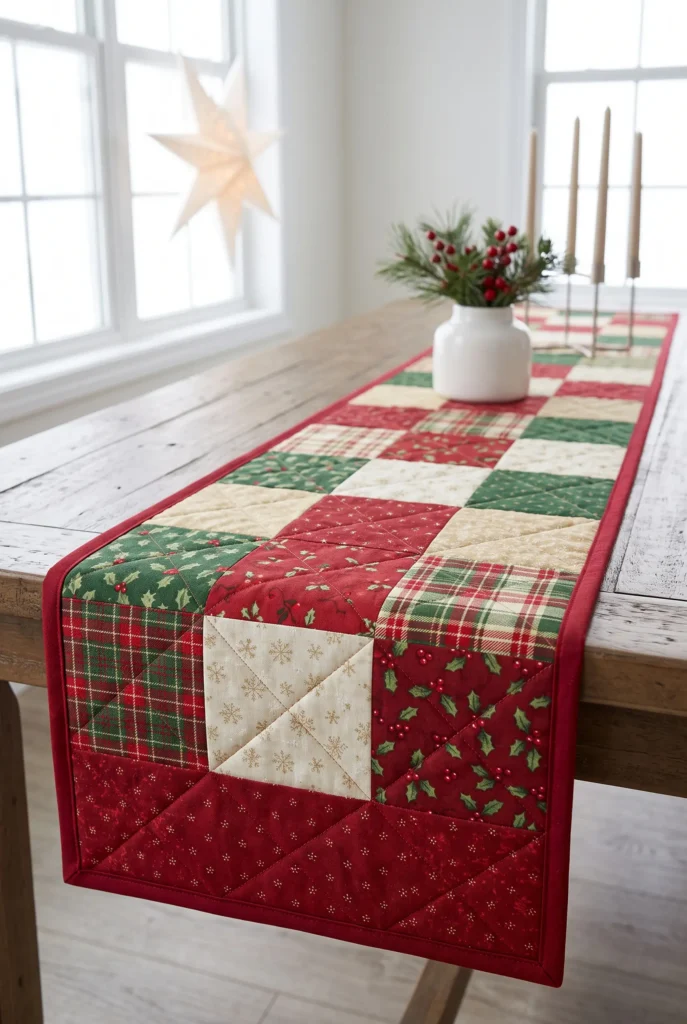
Finished Table Runner
- Finished size: approximately 15 × 54 inches
- Center patchwork size: approximately 12 × 48 inches finished
- Grid layout: 3 rows × 12 columns
- Total patchwork squares: 36
- Finished square size: 4 inches
- Square cut size: 4½ inches
- Finished side border width: 1½ inches
- Finished end border width: 3 inches
- Seam allowance: ¼ inch
- Skill level: beginner
Materials Needed
- 36 squares cut at 4½ × 4½ inches
- Use a mix of red, green, cream, and optional gold or plaid prints
- About ¾ to 1 yard total assorted quilting cottons for the patchwork, or a mix of scraps/fat quarters
- Side borders: 2 strips cut at 2 × 48½ inches
- End borders: 2 strips cut at 3½ × 15½ inches
- About ½ yard border fabric if using one consistent border fabric
- Backing fabric: 1 piece at approximately 21 × 60 inches, or enough fabric to cut that size
- Batting: 1 piece at approximately 21 × 60 inches
- Binding: 4 strips cut at 2¼ inches × width of fabric
- Neutral piecing thread
- Quilting thread
- Rotary cutter
- Cutting mat
- Acrylic ruler
- Sewing machine
- Walking foot for quilting
- Quilting pins or spray baste
- Iron and pressing surface
- Optional color catcher for first wash
Fabric and Color Suggestions
A traditional palette works beautifully here:
- cranberry red
- cherry red
- holly green
- pine green
- warm cream
- soft gold accents
The runner usually looks best if you include some lighter fabrics among the red and green prints. Cream or ivory prevents the surface from becoming too dark and helps the stronger holiday colors stand out. Small plaids, berries, stars, tone-on-tone prints, and tiny florals all work well in 4½-inch squares.
Cutting Measurements
For the patchwork center:
- Cut 36 squares at 4½ × 4½ inches
For the borders:
- Cut 2 side border strips at 2 × 48½ inches
- Cut 2 end border strips at 3½ × 15½ inches
For the quilt sandwich:
- Cut 1 backing piece at approximately 21 × 60 inches
- Cut 1 batting piece at approximately 21 × 60 inches
For the binding:
- Cut 4 strips at 2¼ inches × width of fabric
- Join them end to end with diagonal seams
Step-by-Step Guide
Step 1 – Choose the Final Palette and Runner Size
Decide on the overall look before cutting.
This table runner finishes at approximately 15 × 54 inches, which suits many dining tables, sideboards, and consoles. A classic palette of red, green, cream, and a little gold or plaid gives it a timeless Christmas look.

Step 2 – Gather and Sort the Fabrics
Pull together your patchwork fabrics and sort them into rough groups:
- reds
- greens
- lights
- accents
This makes it easier to balance the layout later. Try to keep a good mix of medium and light values so the patchwork does not feel heavy.
Step 3 – Prewash and Press the Fabrics
If you usually prewash quilting cotton, do it now, especially if you are using strong reds.
Dry the fabrics completely and press them flat. This helps the patchwork squares stay accurate and reduces the chance of shrinkage surprises later.

Step 4 – Cut the 36 Patchwork Squares
Cut 36 squares measuring 4½ × 4½ inches.
These will finish at 4 inches each after sewing. Accuracy matters here because even small cutting differences can affect the long narrow shape of the finished runner.
Step 5 – Lay Out the Patchwork Grid
Arrange the 36 squares in a 3-row by 12-column grid.
Spread the reds, greens, and lighter prints across the layout so no area becomes too dark or too repetitive. If using plaid or gold accents, scatter them rather than clustering them in one spot.

Step 6 – Adjust the Balance and Photograph the Layout
Stand back and look at the overall arrangement.
Move any squares that feel too similar beside one another. Once the balance looks right, take a quick photo. This makes it much easier to keep the order intact during sewing.
Step 7 – Sew Row 1
Sew the 12 squares of Row 1 together using a ¼-inch seam allowance.
Keep the order exactly as arranged. A long row can shift while sewing, so check occasionally that the edges remain aligned.

Step 8 – Sew Row 2
Sew the 12 squares of Row 2 together in the same way.
Try to keep the seam allowance consistent. This helps all three rows match in length when it is time to join them.
Step 9 – Sew Row 3
Sew the 12 squares of Row 3 together.
You should now have three long pieced rows, each measuring approximately 48½ inches long unfinished.

Step 10 – Press the Row Seams
Press the seam allowances in alternating directions.
For example:
- Row 1 seams to the right
- Row 2 seams to the left
- Row 3 seams to the right
This alternating method helps the seams nest together more neatly when the rows are joined.
Step 11 – Join Rows 1 and 2
Place Row 1 and Row 2 right sides together and sew along the long edge with a ¼-inch seam allowance.
Match the square intersections carefully. Because the seam allowances were pressed in opposite directions, the joins should sit together neatly.

Step 12 – Add Row 3 to Complete the Patchwork Center
Sew Row 3 to the combined Row 1/Row 2 unit.
Press the completed patchwork center well. It should measure approximately 12½ × 48½ inches unfinished, which will finish at about 12 × 48 inches once the borders are sewn on.
Step 13 – Inspect, Press, and Square the Center
Trim loose threads and check that the patchwork center lies flat.
If needed, square the edges lightly, but do not over-trim. The center should remain close to 12½ × 48½ inches unfinished.

Step 14 – Cut and Attach the Side Borders
Cut 2 side border strips at 2 × 48½ inches.
Sew one strip to each long side of the patchwork center using a ¼-inch seam allowance. Press the borders outward. These narrow side borders finish at 1½ inches wide, bringing the runner width to approximately 15½ inches unfinished.
Step 15 – Cut and Attach the End Borders
Cut 2 end border strips at 3½ × 15½ inches.
Sew one border strip to each short end of the runner. Press outward. The runner top should now measure approximately 15½ × 54½ inches unfinished, which will finish at about 15 × 54 inches after quilting and binding.

Step 16 – Prepare the Backing and Make the Quilt Sandwich
Cut the backing and batting to approximately 21 × 60 inches.
Lay the backing wrong side up, place the batting on top, and center the runner top right side up over the batting. This extra allowance around the top makes quilting easier and gives room for trimming later.
Step 17 – Baste and Quilt the Runner
Baste the three layers with safety pins, spray baste, or thread basting.
Then quilt the runner. Good quilting options include:
- straight lines ¼ inch from selected seam lines
- diagonal crosshatching
- evenly spaced vertical lines
- a simple grid
Because the runner is narrow, it is a good project for practicing neat, even quilting.
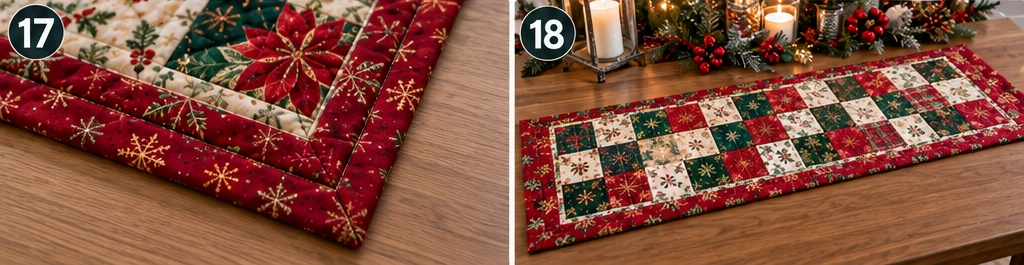
Step 18 – Trim, Bind, and Finish
Trim away the excess batting and backing so the edges are straight and even.
Join the 4 binding strips end to end, fold the binding in half lengthwise, and sew it to the front of the runner with a ¼-inch seam allowance, mitering the corners neatly. Fold the binding to the back and stitch it down by hand or machine.
Trim loose threads and give the runner a final press. If your reds are strongly saturated, wash the finished runner with a color-catching sheet the first time.
Assembly at a Glance
- Choose the color palette and finished size.
- Gather and sort the patchwork fabrics.
- Prewash and press the fabrics.
- Cut 36 squares at 4½ inches.
- Lay out the 3 × 12 grid.
- Adjust the balance and photograph the layout.
- Sew Row 1.
- Sew Row 2.
- Sew Row 3.
- Press row seams in alternating directions.
- Join Rows 1 and 2.
- Add Row 3 to complete the center.
- Inspect and square the patchwork center.
- Add the side borders.
- Add the end borders.
- Layer the backing, batting, and top.
- Baste and quilt.
- Trim, bind, and finish.
Beginner Tips for Success
- Include some cream or light prints to brighten the runner.
- Keep your ¼-inch seam allowance accurate.
- Take a photo of the layout before sewing.
- Press carefully rather than dragging the iron across the fabric.
- Match intersections slowly when joining the long rows.
- Use a walking foot for smoother quilting.
- Keep the quilting simple so the patchwork remains the focus.
- Use low-loft batting so the runner lies flat on the table.
- Wash red fabrics carefully the first time to prevent color bleed.
Styling Ideas
This table runner looks especially beautiful:
- on a dining table beneath a candle centerpiece
- across a sideboard with greenery and ceramic houses
- on a console under a festive tray
- across a coffee table with a small arrangement of pine and berries
Because the design is traditional rather than overly novelty-driven, it can easily return every December and still feel fresh.
Final Thoughts
A classic red and green patchwork Christmas table runner is one of those seasonal quilted projects that remains appealing because it is both simple and enduring. The patchwork grid is easy to piece, the measurements are manageable, and the finished runner brings immediate Christmas color to the room without taking up much space. It has the warmth of a full quilt, but in a smaller, more accessible form.
That practicality is a large part of its charm. It is decorative enough to set the holiday mood, but sturdy enough for real use throughout the season. With balanced color placement, neat borders, and clean quilting, it becomes the kind of handmade piece that feels at home every Christmas and only gets more familiar and loved over time.
Other Design Inspirations – Digitally Modified Images. Texture and color may vary from the actual product.
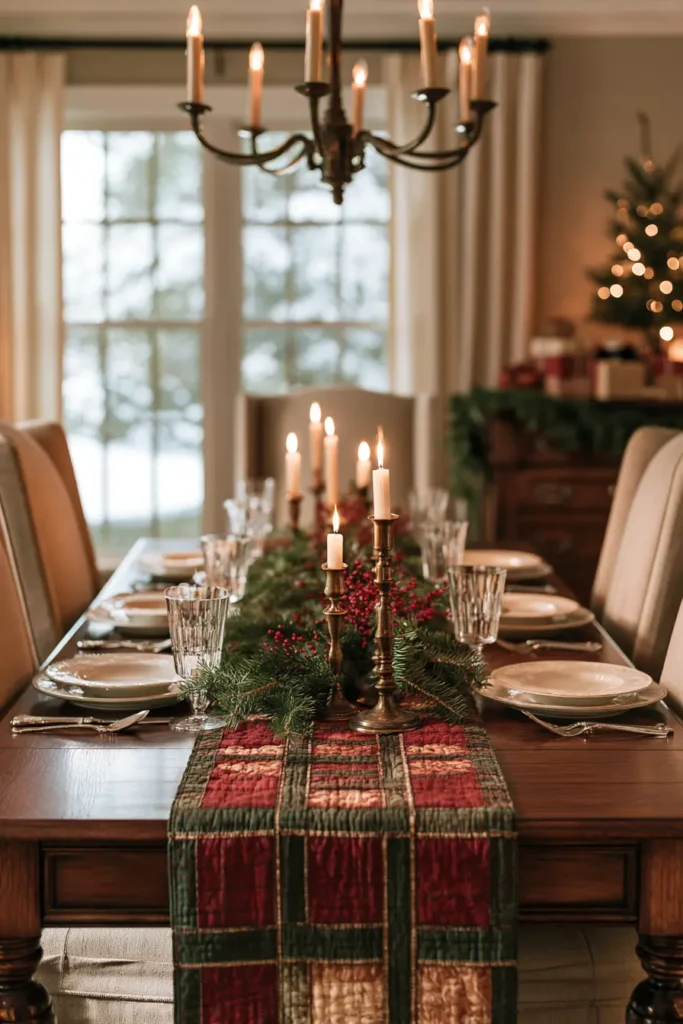
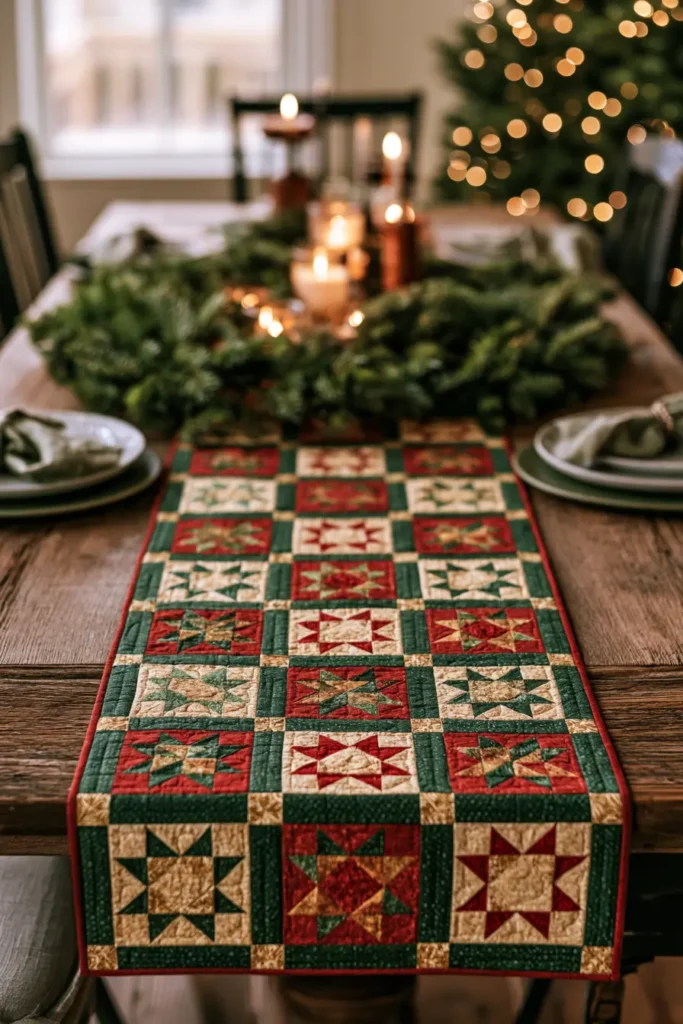
2. Jelly Roll Christmas Table Runner for Quick Holiday Sewing
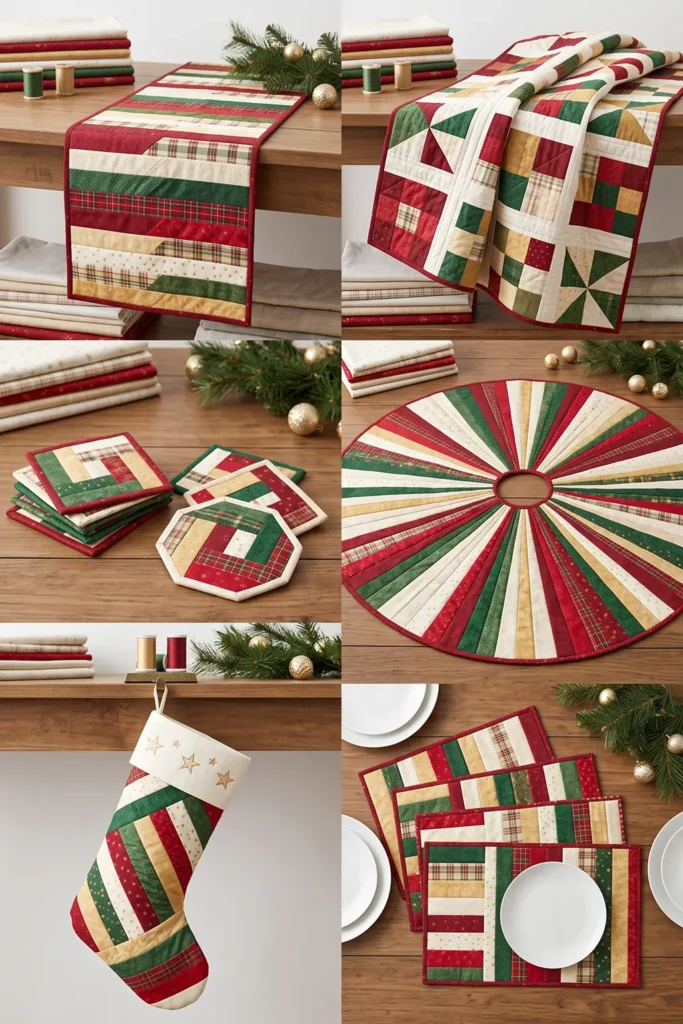
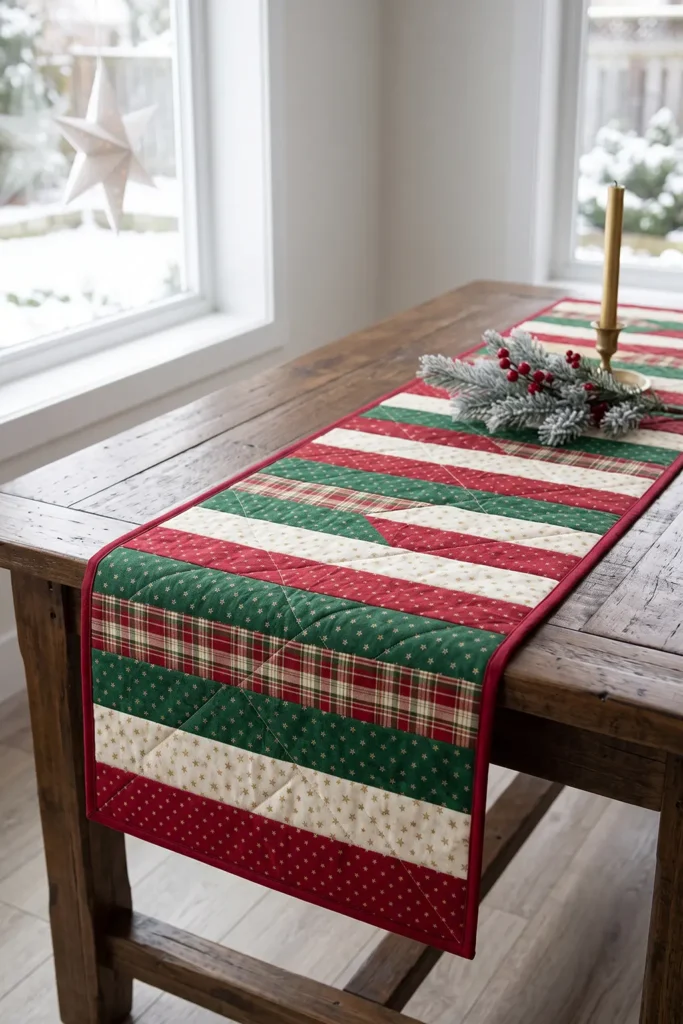
A Jelly Roll Christmas table runner is the kind of holiday project that gives a surprisingly polished result without asking for complicated cutting or dozens of individually pieced blocks. It begins with 2½-inch precut fabric strips, traditionally about 40–42 inches long, which are joined into longer lengths and then sewn side by side to create a striped patchwork top. In Christmas colors—cranberry, cherry red, emerald, pine, cream, gold, and a few playful plaids or stars—the narrow strips create plenty of movement while keeping the construction wonderfully straightforward.
This version finishes at approximately 16 × 54 inches, a useful size for a six-seat dining table, console, buffet, or long coffee table. It uses 16 Jelly Roll strips, paired end to end to make 8 long strips, then pieced lengthwise into the runner top. The staggered joins give the surface a little patchwork character without slowing the project down, making it a particularly good choice when Christmas is getting close and you still want something genuinely handmade for the table.
A Little Jelly Roll Background
A Jelly Roll is a coordinated collection of fabric strips generally cut 2½ inches wide by the width of the fabric, usually around 40–42 inches long. The name is particularly associated with Moda Fabrics, while other manufacturers sell similar precuts under names such as strip rolls or roll-ups.
They became popular with quilters because much of the repetitive cutting has already been done. For a table runner, that advantage is especially useful: the strips are already a convenient scale for narrow patchwork, and a relatively small number can make a full runner top.
Design Inspirations – Digitally Modified Images. Texture and color may vary from the actual product.
How This Runner Is Built
The construction is deliberately simple:
- Choose 16 Jelly Roll strips.
- Pair them to create 8 long strip units.
- Trim each long unit to 54½ inches.
- Arrange the 8 units side by side.
- Sew them together along their long edges.
- Quilt the top with batting and backing.
- Square the runner and bind the edges.
Because each 2½-inch strip finishes at approximately 2 inches wide, eight strips sewn side by side create a runner approximately 16 inches wide finished.
Finished Table Runner
- Finished size: approximately 16 × 54 inches
- Number of Jelly Roll strips: 16
- Number of long pieced units: 8
- Strip width: 2½ inches cut, approximately 2 inches finished
- Top size before quilting: approximately 16½ × 54½ inches
- Seam allowance: ¼ inch
- Binding: approximately 150 inches prepared
- Skill level: beginner
- Best use: dining table, console table, sideboard, buffet, coffee table, handmade Christmas gift
Materials Needed
- 16 Jelly Roll strips, each approximately 2½ × 40–42 inches
- Choose a mix of:
- cranberry red
- cherry red
- emerald
- pine green
- warm cream
- ivory
- antique gold
- festive plaids, stars, dots, or tiny geometrics
- Backing: approximately 22 × 60 inches
- Batting: approximately 22 × 60 inches
- Binding: about ⅜ yard, or enough to cut 4 strips at 2¼ inches × width of fabric
- Neutral piecing thread
- Coordinating quilting thread
- Rotary cutter
- Cutting mat
- Acrylic ruler
- Sewing machine
- Walking foot for quilting
- Iron and pressing surface
- Pins or clips
- Safety pins or spray baste
- Optional color catcher for the first wash
A solid deep pine, cranberry, navy, or antique gold binding works especially well because it gives the striped patchwork a clean outer frame.
Choosing Your Christmas Colors
A vibrant traditional palette might include:
- Cherry red
- Cranberry
- Deep pine
- Emerald
- Warm cream
- Ivory
- Antique gold
Try not to make every strip equally dark. Christmas reds and greens often sit surprisingly close in value, so including several pale cream or ivory strips gives the stronger colors room to breathe.
For more visual interest, mix:
- small plaids
- tiny stars
- dots
- narrow stripes
- tone-on-tone leaves
- small festive florals
- near-solids
Large novelty motifs are less effective because a 2½-inch strip may show only a fragment of the original design.
Cutting Measurements
For the runner top:
- Begin with 16 Jelly Roll strips at 2½ inches wide
- Join them into 8 pairs
- Trim each finished pair to 54½ inches long
For the quilt sandwich:
- Cut batting at approximately 22 × 60 inches
- Cut backing at approximately 22 × 60 inches
For binding:
- Cut 4 strips at 2¼ inches × width of fabric
- Join them end to end with diagonal seams
The finished runner perimeter is approximately:
- 16 + 16 + 54 + 54 = 140 inches
Four width-of-fabric binding strips provide comfortably more than that after joining and trimming.
Step-by-Step Guide
Step 1 – Choose the 16 Jelly Roll Strips
Select 16 coordinated strips from the Jelly Roll.
Aim for a balanced mix of red, green, cream, and accent colors. For example:
- 4 red strips
- 4 green strips
- 4 light strips
- 4 accent or mixed festive prints
You do not have to follow those numbers exactly, but a balance like this prevents the runner from becoming overwhelmingly dark or red-heavy.
Step 2 – Arrange the Strips by Color and Value
Lay all 16 strips on a table.
Move them around until no two nearly identical strips sit together.
Try alternating stronger and lighter colors:
cranberry
cream
pine
gold
cherry
ivory
emerald
plaid
This creates a lively striped surface without making the arrangement look mechanically repetitive.
Step 3 – Pair the Strips
Divide the 16 strips into 8 pairs.
Each pair will eventually become one long strip approximately 54½ inches long.
Try pairing contrasting fabrics rather than two almost identical ones. A cranberry strip joined to cream, for example, creates a more interesting transition than cranberry joined to another nearly identical red.
Step 4 – Mark Staggered Join Positions
The joins will be visible in the finished runner, so avoid placing all eight joins at exactly the same point.
For the first pair, plan the join about 12 inches from one end of the finished strip.
For the next pairs, stagger the join approximately at:
- 16 inches
- 20 inches
- 24 inches
- 30 inches
- 34 inches
- 38 inches
- 42 inches
They do not need to be mathematically exact. The goal is simply to prevent one obvious vertical line of seams across the runner.
Step 5 – Join Each Strip Pair
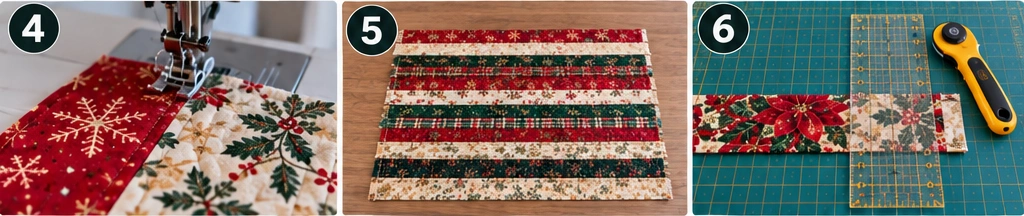
Take the first pair and place the strip ends right sides together.
For less bulk, sew them with a diagonal seam rather than a straight seam.
Draw a diagonal line from corner to corner, stitch along it, then trim the excess fabric to approximately ¼ inch beyond the stitching.
Repeat for all eight pairs.
Step 6 – Press the Eight Join Seams
Press the diagonal seams open.
Open seams distribute the bulk more evenly and help the pieced strips lie flatter when they are later joined side by side.
Trim away any small protruding points or “dog ears.”
You now have 8 long pieced strips.
Step 7 – Trim Each Long Strip to 54½ Inches
Lay each strip flat on the cutting mat.
Trim it to exactly 54½ inches long.
When trimming, position the fabric so the joined seam remains where you planned it rather than accidentally cutting the interesting contrast away.
Repeat for all eight long strips.
Step 8 – Arrange the Eight Long Strips
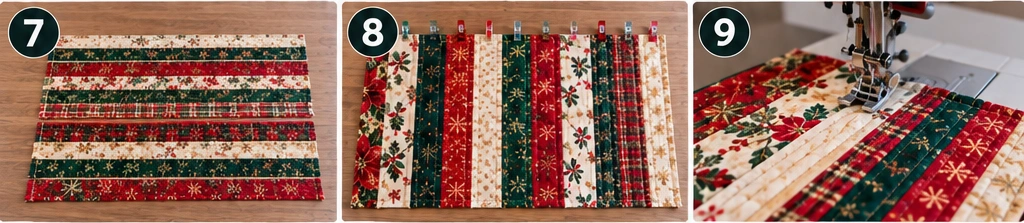
Place the 8 strips side by side in the order you want them to appear.
Each strip remains 2½ inches wide at this stage.
Look for a good balance of:
- red
- green
- light
- dark
- print scale
Also check that the diagonal joining seams are scattered rather than aligned.
Take a photo once the arrangement looks right.
Step 9 – Sew the First Two Long Strips Together
Place Strip 1 and Strip 2 right sides together.
Pin or clip along the long edge and sew with an accurate ¼-inch seam allowance.
Because the seam is 54½ inches long, work steadily rather than pulling the fabric through the machine.
Step 10 – Add the Remaining Long Strips
Continue adding Strip 3, Strip 4, and so on until all 8 long strips have been joined into one runner top.
Keep checking the photograph of your original arrangement so the strip order does not change.
Once all strips are sewn, the top should measure approximately 16½ × 54½ inches unfinished.
Step 11 – Press the Runner Top
Press the long seam allowances carefully.
You can press them consistently in one direction or alternate directions to spread the bulk.
Avoid dragging the iron sideways across the long strips, since that can distort the runner. Lift and press instead.
Lay the runner flat afterward and check that the sides remain reasonably straight.
Step 12 – Square the Runner Top
Use a long acrylic ruler to straighten the two long edges and both short ends.
Keep the top close to 16½ × 54½ inches.
Only remove what is necessary to square the runner. Excessive trimming will reduce the finished size and may make the outer strips noticeably narrower than the others.
Step 13 – Prepare the Backing and Batting
Cut:
- 1 backing piece at approximately 22 × 60 inches
- 1 batting piece at approximately 22 × 60 inches
These pieces are intentionally larger than the runner top.
A few inches of excess around every edge make basting and quilting much easier than trying to align three pieces that are exactly the same size.
Step 14 – Make the Quilt Sandwich
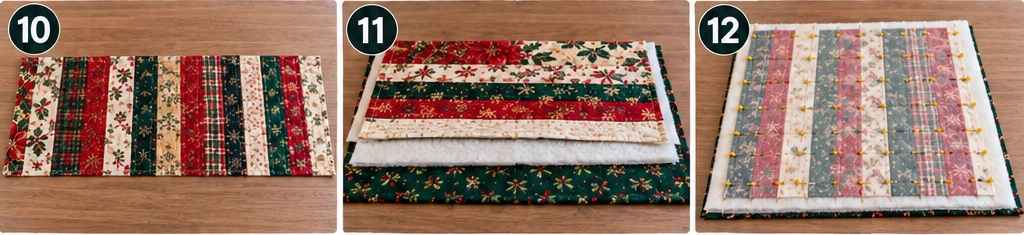
Lay the backing wrong side up on a clean flat surface.
Place the batting on top.
Center the runner top right side up over the batting.
Smooth all three layers from the center outward.
Check underneath to make sure the backing has no wrinkles or folded areas.
Step 15 – Baste the Three Layers
Secure the quilt sandwich using:
- curved safety pins
- quilt-basting spray
- thread basting
If using pins, place them roughly 4 inches apart.
Pay particular attention to the long outer edges because narrow runners can shift slightly during quilting if the layers are not well secured.
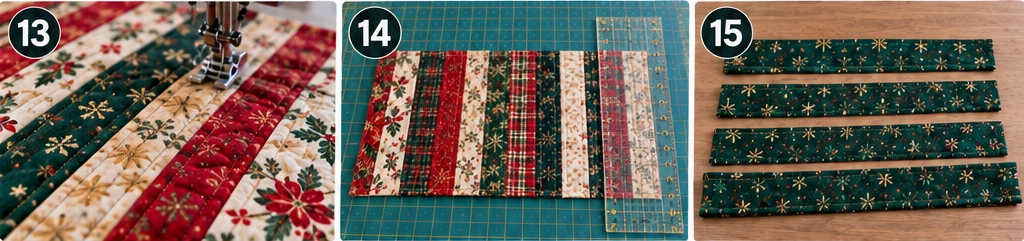
Step 16 – Quilt the Table Runner
Quilt through all three layers.
Simple quilting suits strip piecing beautifully. Try:
- quilting ¼ inch from each strip seam
- straight lines down the center of every strip
- diagonal lines spaced about 2 inches apart
- gentle wavy lines running the length of the runner
For a clean modern finish, quilting approximately ¼ inch on both sides of selected strip seams emphasizes the long linear design.
Use a walking foot if available.
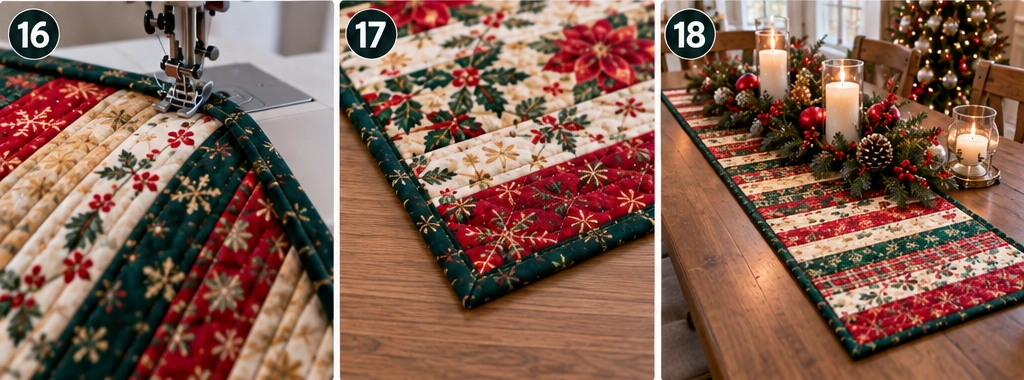
Step 17 – Trim and Prepare the Binding
Once quilting is complete, trim the excess batting and backing level with the quilt top.
Check that all four corners are square.
Join the four 2¼-inch binding strips end to end with diagonal seams.
Press the joining seams open, then fold the entire binding strip in half lengthwise, wrong sides together, and press.
Step 18 – Bind and Finish the Runner
Sew the folded binding to the front of the runner with approximately a ¼-inch seam allowance.
Miter all four corners neatly.
Join the beginning and ending binding tails, then fold the binding to the back and hand stitch or machine stitch it in place.
Give the finished runner a final press.
If you plan to wash it, use cool water and a color-catching sheet the first time, especially if the fabrics include saturated Christmas reds.
Assembly at a Glance
- Choose 16 festive Jelly Roll strips.
- Arrange them by color and value.
- Divide them into 8 pairs.
- Plan staggered join positions.
- Join each strip pair diagonally.
- Press the joining seams open.
- Trim each long strip to 54½ inches.
- Arrange the 8 long strips side by side.
- Join the first two strips.
- Add the remaining six strips.
- Press the completed runner top.
- Square it to approximately 16½ × 54½ inches.
- Cut the oversized backing and batting.
- Layer the quilt sandwich.
- Baste thoroughly.
- Quilt the runner.
- Trim and prepare the binding.
- Bind and finish.
Beginner Tips for Success
- Choose several cream or ivory strips to separate stronger reds and greens.
- Stagger the strip joins rather than lining them up.
- Use diagonal joins to distribute seam bulk.
- Photograph the strip layout before sewing.
- Keep the ¼-inch seam allowance consistent along the long seams.
- Do not pull the strips while sewing; stretching can make the runner bow.
- Press rather than dragging the iron across the top.
- Square the runner before layering it.
- Use low-loft batting so plates, bowls, and decorations sit steadily on the finished runner.
- A walking foot helps prevent shifting during quilting.
- Solid binding gives a colorful strip-pieced top a cleaner finish.
- Use a color catcher when washing strong reds for the first time.
Color Variations to Try
Traditional Christmas
Cranberry, cherry red, pine, emerald, cream, and antique gold.
Bright Candy Christmas
Scarlet, apple green, peppermint pink, aqua, bright white, and candy-cane stripes.
Elegant Winter Holiday
Deep navy, icy blue, silver grey, winter white, and champagne.
Rustic Christmas
Barn red, forest green, oatmeal, blackwatch plaid, cream, and muted gold.
Styling and Gift Ideas
A Jelly Roll Christmas table runner is easy to style because the strip piecing already provides plenty of color and movement.
Try it:
- beneath an evergreen-and-candle centerpiece
- along a farmhouse dining table with white stoneware
- across a console beneath ceramic houses
- on a buffet with brass candlesticks and greenery
- on a coffee table with a low bowl of ornaments
Because it is relatively fast to sew, it also makes a useful handmade Christmas gift. You can make several runners from a coordinated strip collection and change the strip order so each one feels different.
Final Thoughts
A Jelly Roll Christmas table runner is exactly the sort of seasonal sewing project that proves simple construction does not have to look plain. The narrow strips create plenty of color and rhythm, while the staggered joins add just enough patchwork detail to make the surface feel handmade rather than merely striped. At approximately 16 × 54 inches, the finished runner is generous enough for a dining table but compact enough to cut, piece, quilt, and bind without the commitment of a full-size quilt.
It is also a design that adapts easily to the kind of Christmas you actually decorate for. Make it bright with cranberry, emerald, cream, and gold for a traditional table; switch to blue, silver, and white for a more elegant winter setting; or bring in plaid, oatmeal, and forest green for farmhouse warmth. Keep the seams accurate, the joins staggered, and the batting thin enough for table use, and you end up with a quick holiday project that can return to the table every December.
Other Design Inspirations – Digitally Modified Images. Texture and color may vary from the actual product.
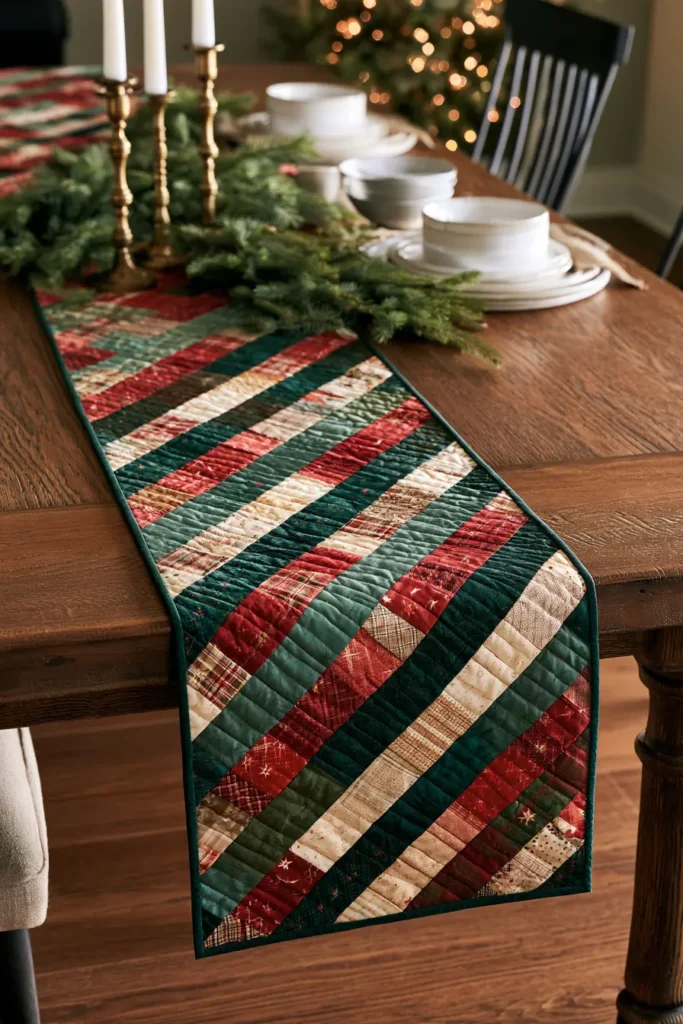
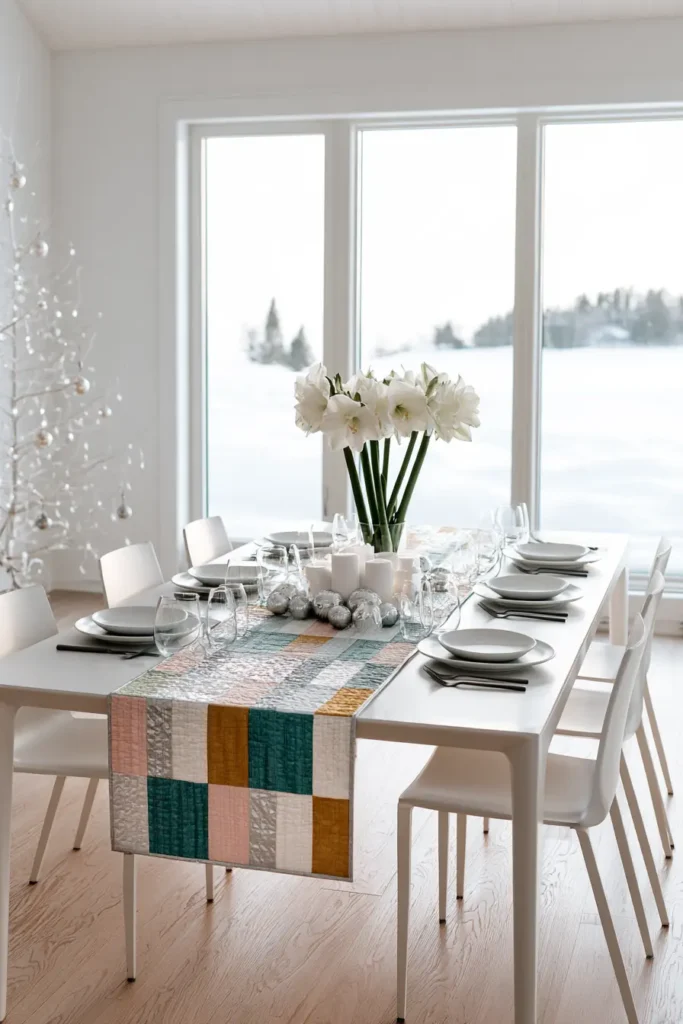
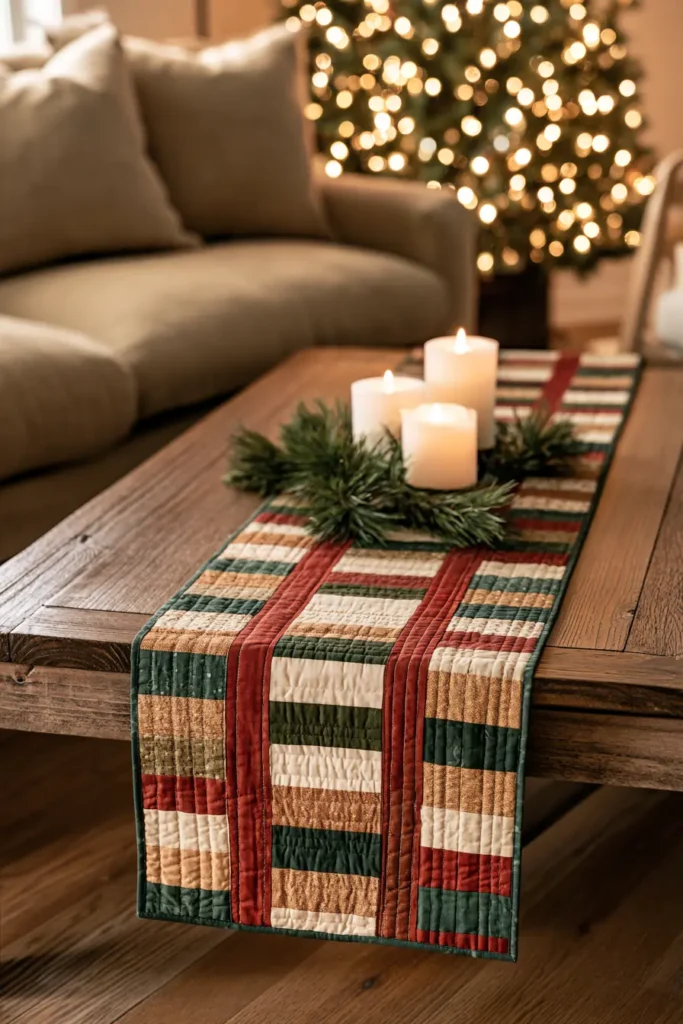
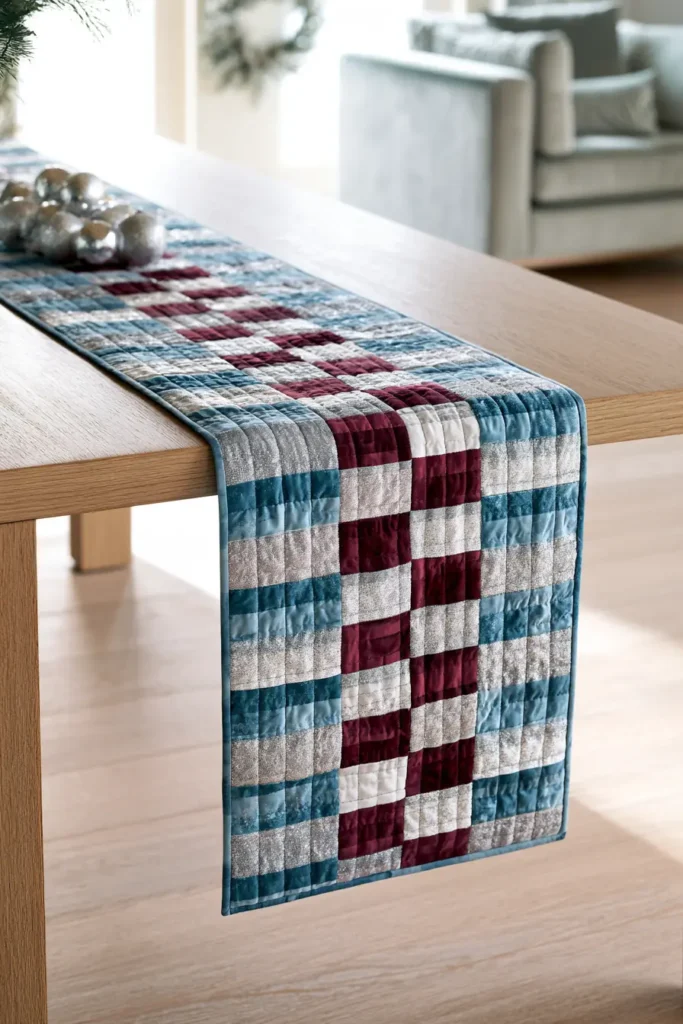
3. Star Block Quilted Christmas Table Runner for Timeless Festive Style
Design Inspirations – Digitally Modified Images. Texture and color may vary from the actual product.
Other Design Inspirations – Digitally Modified Images. Texture and color may vary from the actual product.
4. Christmas Tree Quilted Table Runner for Festive Dining
Design Inspirations – Digitally Modified Images. Texture and color may vary from the actual product.
Other Design Inspirations – Digitally Modified Images. Texture and color may vary from the actual product.
5. Snowflake Quilted Christmas Table Runner for Winter Elegance
Design Inspirations – Digitally Modified Images. Texture and color may vary from the actual product.
Other Design Inspirations – Digitally Modified Images. Texture and color may vary from the actual product.
6. Plaid and Buffalo Check Christmas Table Runner for Rustic Charm
Design Inspirations – Digitally Modified Images. Texture and color may vary from the actual product.
Other Design Inspirations – Digitally Modified Images. Texture and color may vary from the actual product.
7. Log Cabin Christmas Table Runner in Traditional Holiday Colors
Design Inspirations – Digitally Modified Images. Texture and color may vary from the actual product.
Other Design Inspirations – Digitally Modified Images. Texture and color may vary from the actual product.
8. Scrappy Quilted Christmas Table Runner Using Fabric Leftovers
Design Inspirations – Digitally Modified Images. Texture and color may vary from the actual product.
Other Design Inspirations – Digitally Modified Images. Texture and color may vary from the actual product.
9. Reversible Quilted Christmas Table Runner for Two Festive Looks
Design Inspirations – Digitally Modified Images. Texture and color may vary from the actual product.
Other Design Inspirations – Digitally Modified Images. Texture and color may vary from the actual product.
10. Elegant Gold and Cream Quilted Christmas Table Runners
Design Inspirations – Digitally Modified Images. Texture and color may vary from the actual product.
Other Design Inspirations – Digitally Modified Images. Texture and color may vary from the actual product.
Design Inspirations – Digitally Modified Images. Texture and color may vary from the actual product.
Other Design Inspirations – Digitally Modified Images. Texture and color may vary from the actual product.
12. Vintage-Inspired Appliqué and Embroidery Holiday Table Runners
Design Inspirations – Digitally Modified Images. Texture and color may vary from the actual product.
Other Design Inspirations – Digitally Modified Images. Texture and color may vary from the actual product.
Conclusion
The thing about a handmade Christmas table runner is that it becomes part of the ritual. It comes out when the decorations go up, and it covers the table for every breakfast, every dinner, every occasion through December. Nobody asks where it came from – they just sit down, and it’s there, under the candles and the plates, doing its job.
Quilted Christmas Table Runner Ideas
The best Quilted Christmas Table Runner Ideas match how you actually use your table. Choose classic red-and-green patchwork, log cabin, or star block for a traditional table that suits any decoration style. Reach for the snowflake or Scandinavian runner when you want an elegant, calm palette. Use the jelly roll or scrappy version when you’re on a deadline or have a basket of Christmas fabric waiting to be used. Make the reversible runner when the table needs to look different for Christmas dinner and for New Year’s. And if you want the one piece in this collection that will be genuinely passed down, start the vintage appliqué runner – it takes the most time and rewards it.

