
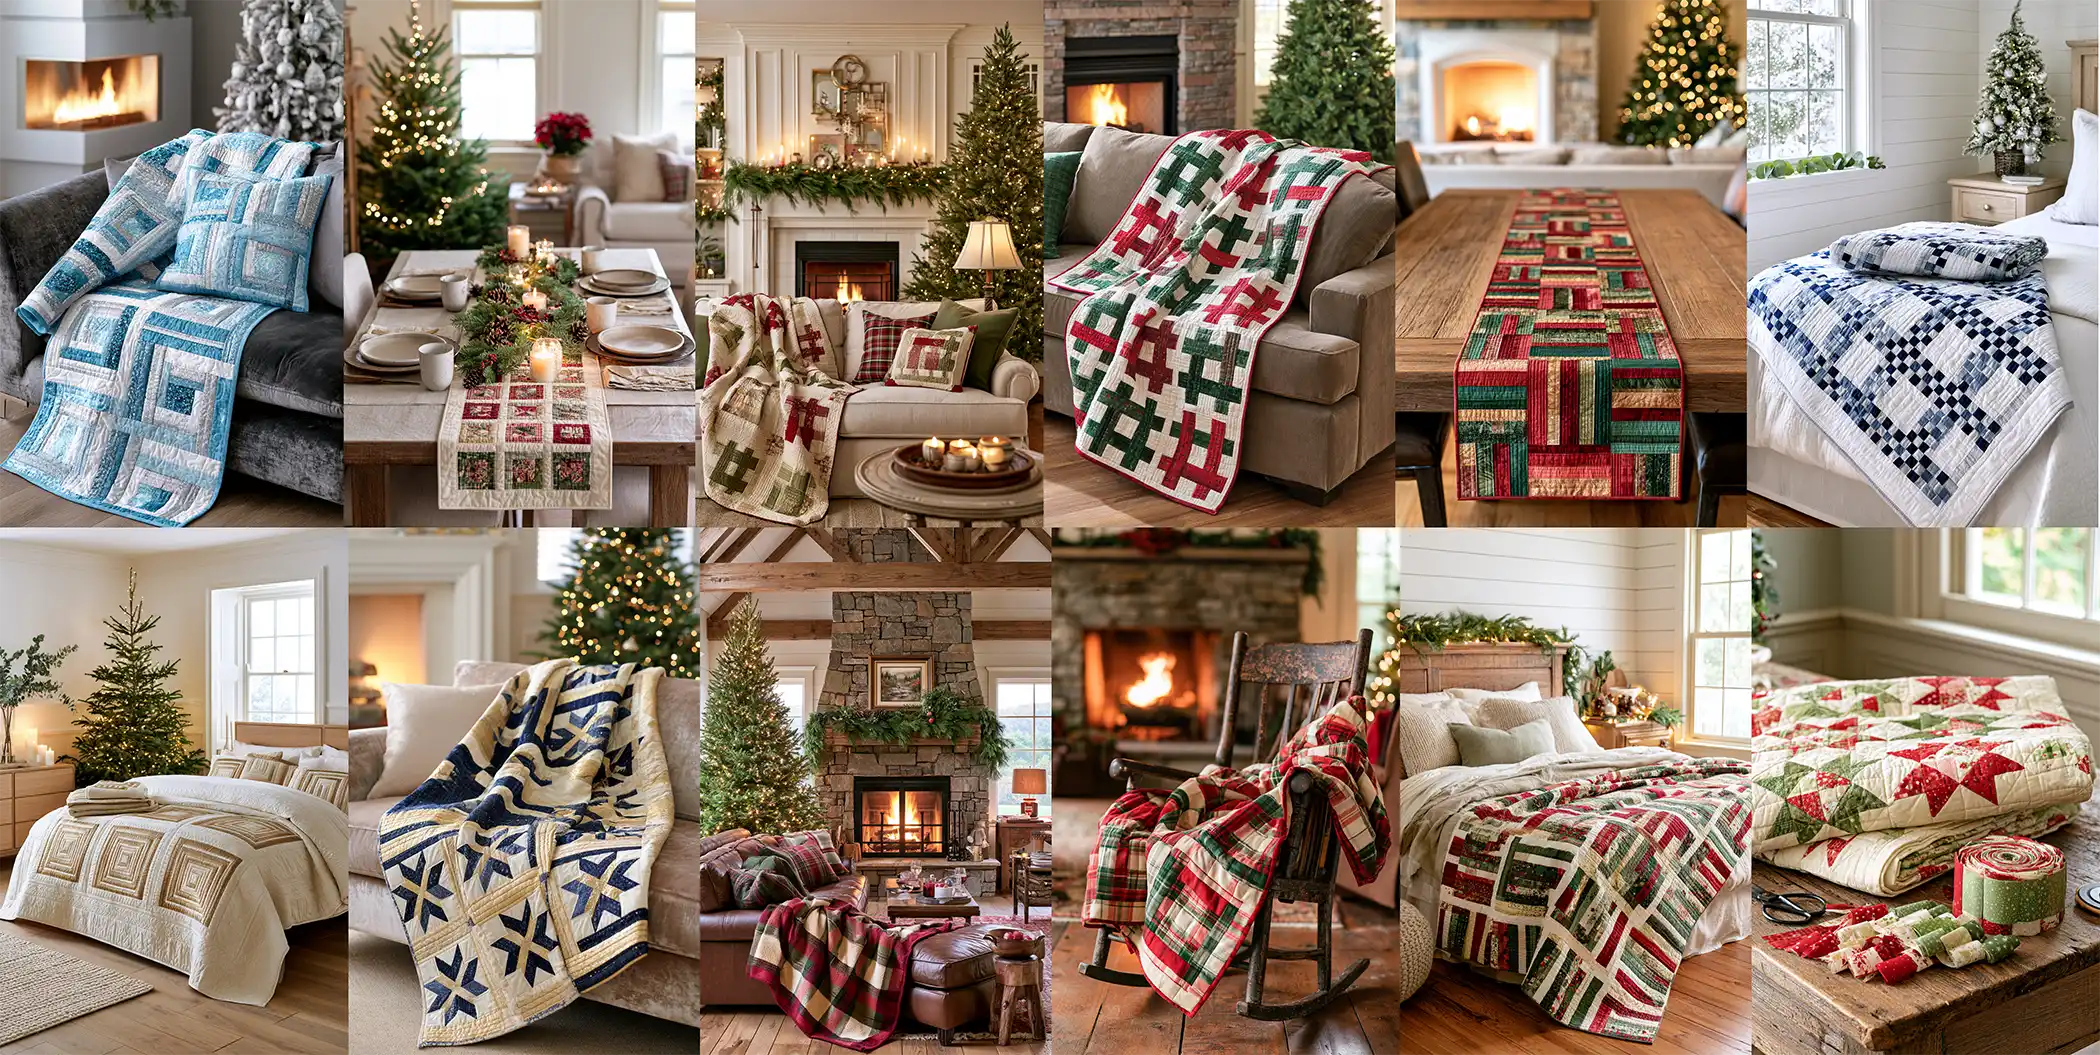
Jelly Roll Christmas Quilt Pattern Ideas: 14 Festive Designs Using 2½-Inch Strips
There’s a particular pressure to Christmas sewing – you want something handmade under the tree, but the calendar is not on your side. That’s exactly why Jelly Roll Christmas Quilt Pattern Ideas are so popular this time of year. A jelly roll is a precut bundle of about 40 fabric strips, each 2½ inches wide and running the full width of the fabric, all coordinated from a single collection. The cutting is done, the colors already work together, and because you’re sewing long strips rather than fiddly little pieces, a jelly roll quilt comes together remarkably fast. For a festive quilt you actually need finished by December, that head start makes all the difference.
Jelly Roll Christmas Quilt Pattern Ideas
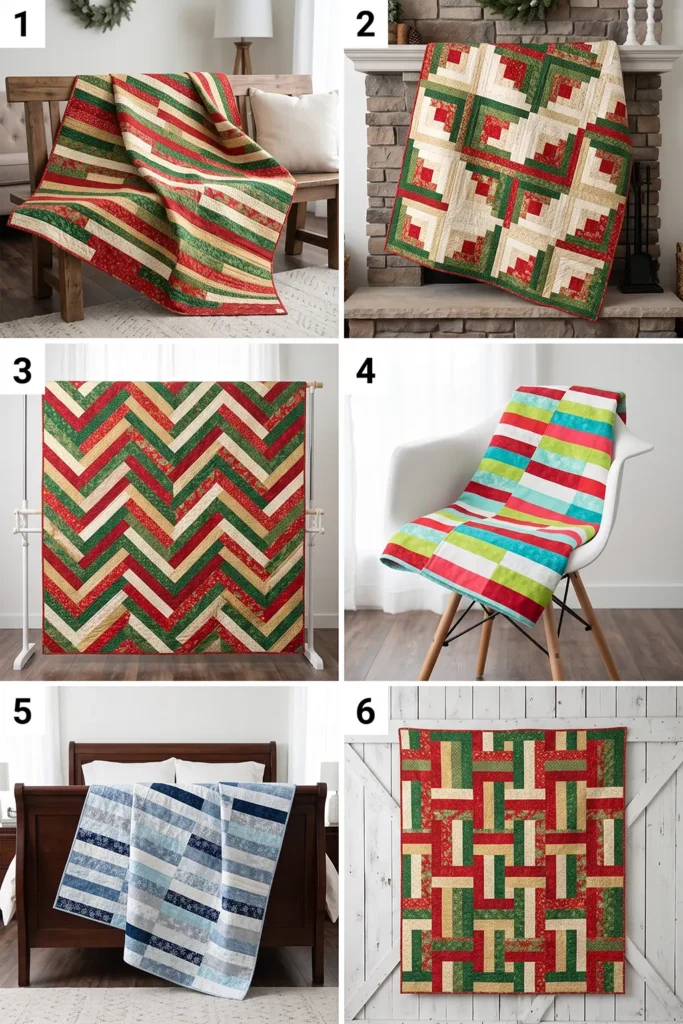
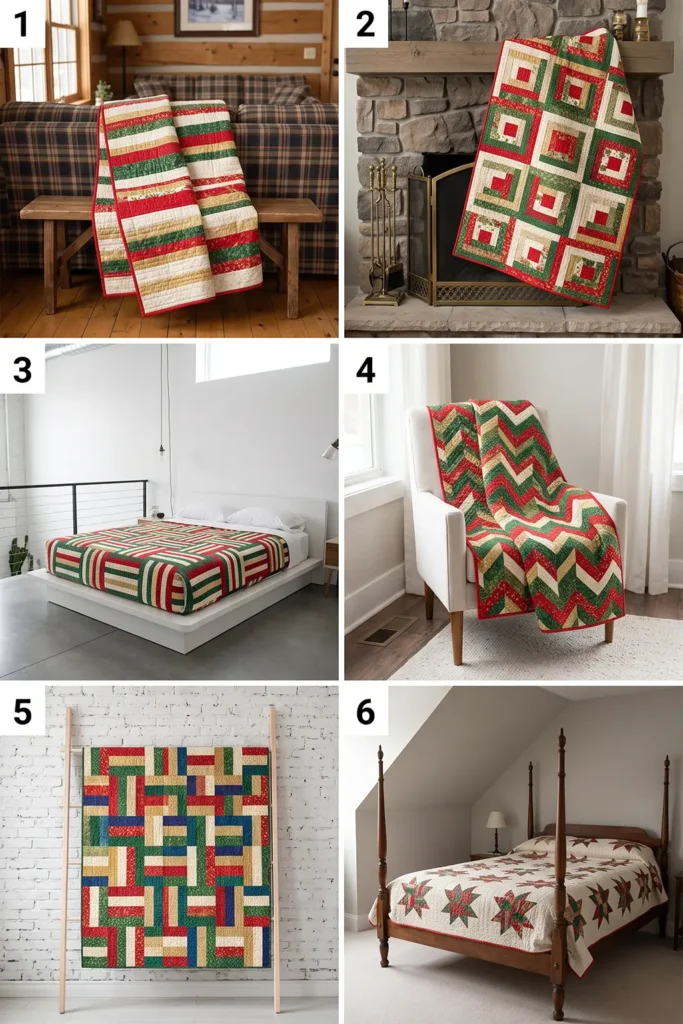
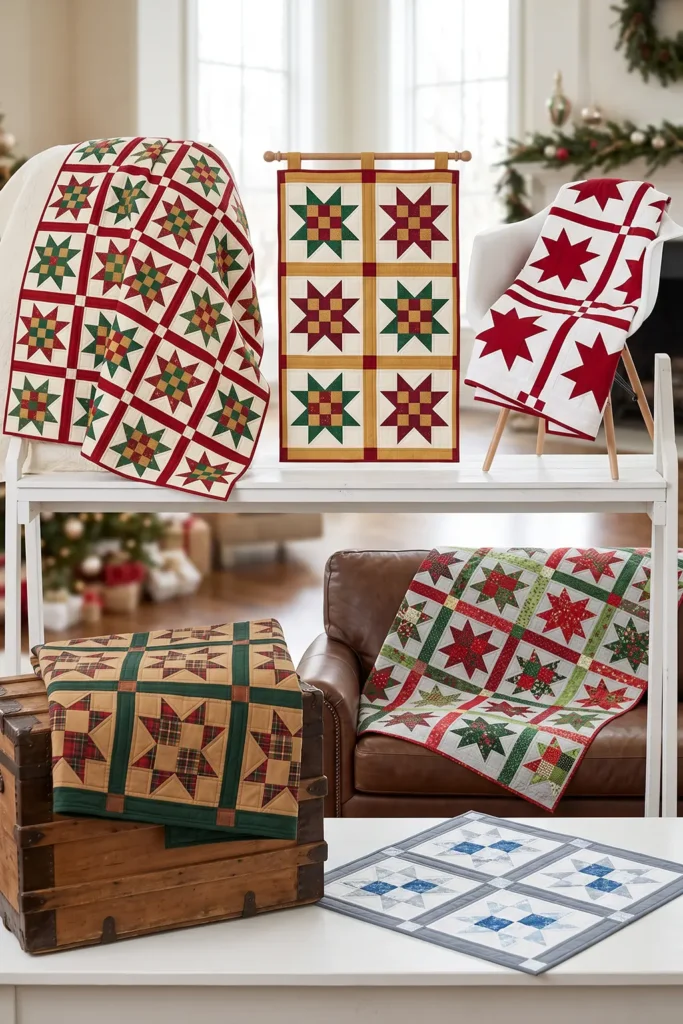
This collection of Jelly Roll Christmas Quilt Pattern Ideas gathers fourteen festive ways to turn those 2½-inch strips into finished holiday projects, from a quilt you can piece in an afternoon to elegant pieces worth taking your time over. You’ll find quick strip-based techniques like the famous jelly roll race, rail fence, and chevron, classic blocks like log cabin and Christmas stars, and seasonal favorites including Christmas trees, candy cane stripes, and Nordic snowflakes.
There are palettes for every kind of holiday home too – traditional red and green, rustic plaid flannel, minimalist gold and cream, and frosty blue and silver – plus quick festive projects like a table runner and a handmade tree skirt. Whether you’re making a gift, dressing the house, or starting a new family heirloom, something here will suit your time.
Why Make a Jelly Roll Christmas Quilt
Jelly roll quilts are worth making because they remove the two things that slow holiday sewing down: cutting and color choosing. Every strip arrives pre-cut and pre-coordinated, so you go straight to piecing, and strip-based construction is inherently fast – sewing long seams covers far more ground than assembling small blocks. What sets a jelly roll apart from other precuts is its shape. A 2½-inch strip is wonderfully versatile: leave strips whole for stripes and race quilts, cut them into squares for stars and chains, angle them for chevrons, or build them outward for log cabins.
One bundle, dozens of possible designs. For Christmas specifically, that speed genuinely matters – a jelly roll race top can be finished in an evening, which means a handmade gift is still realistic in December. And because holiday fabric collections are designed as coordinated ranges, even a scrappy-looking quilt comes out looking beautifully cohesive.
Tips for Choosing Fabrics and Colors
The easiest route is a holiday jelly roll from a single collection, since the designer has already balanced the colors for you – but a few choices still make a real difference. Look for a bundle with a good range of values, meaning clear lights, mediums, and darks; patterns like chevrons, stars, and log cabins only show up properly when there’s genuine contrast between strips. Check the print scale too: a mix of large festive prints, small tossed motifs, and near-solid blenders reads as far more balanced than a bundle where every strip competes.
Think about your palette beyond the obvious – traditional red and green is timeless, plaid and flannel brings rustic farmhouse warmth, gold and cream feels elegant and modern, and blue, silver, and white gives a frosty Scandinavian look that stays up long after Christmas. Whichever you choose, buy coordinating yardage for sashing, borders, backing, and binding – a solid or blender in cream, red, or green ties everything together and lets you size the quilt up. And if you’re using flannel for extra coziness, prewash it, since it shrinks noticeably more than quilting cotton.
See also: Quilted Christmas Gift Bag – Fall Quilt Pattern Ideas – Jelly Roll Quilted Jackets and Vests – Jelly Roll Quilt Tote Bag – Star Quilt Pattern Ideas – Halloween Quilt Pattern
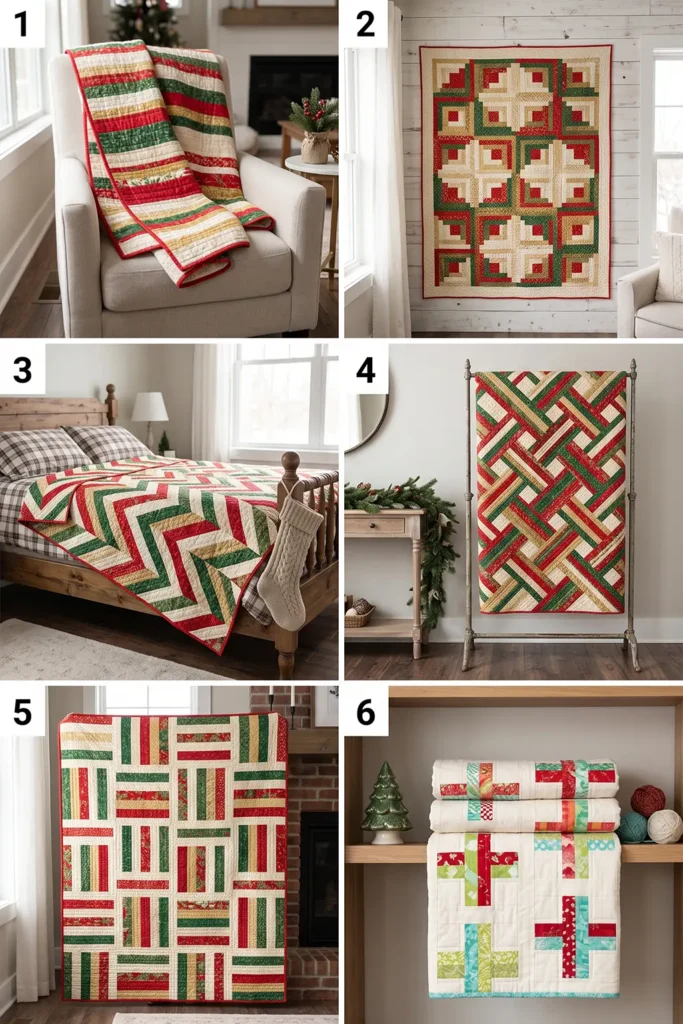
1. Classic Jelly Roll Race Quilt for a Fast Christmas Finish
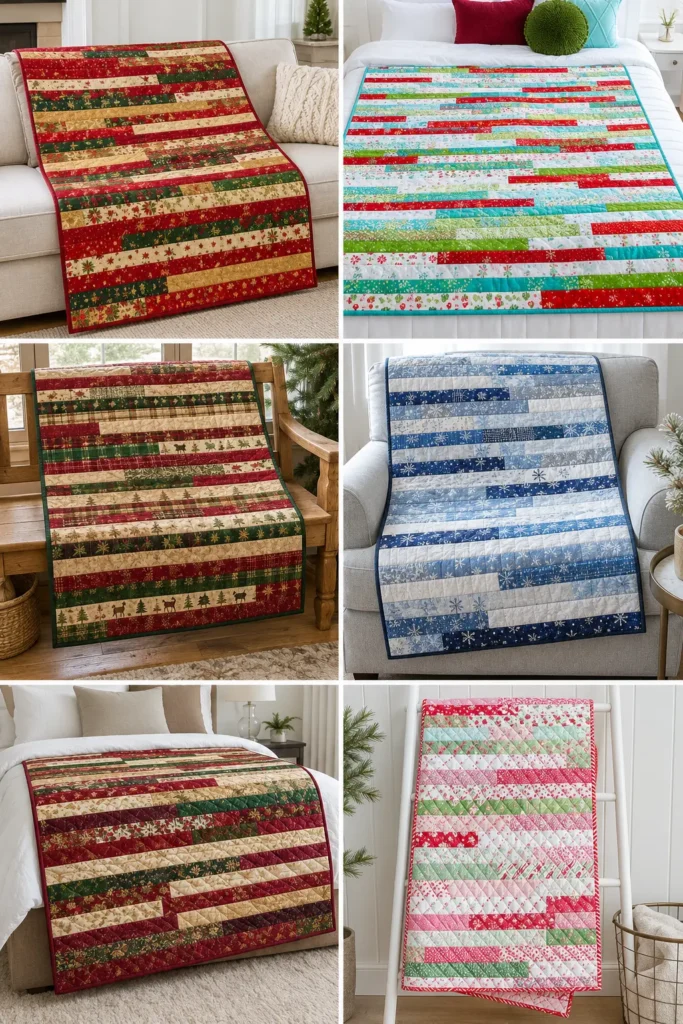
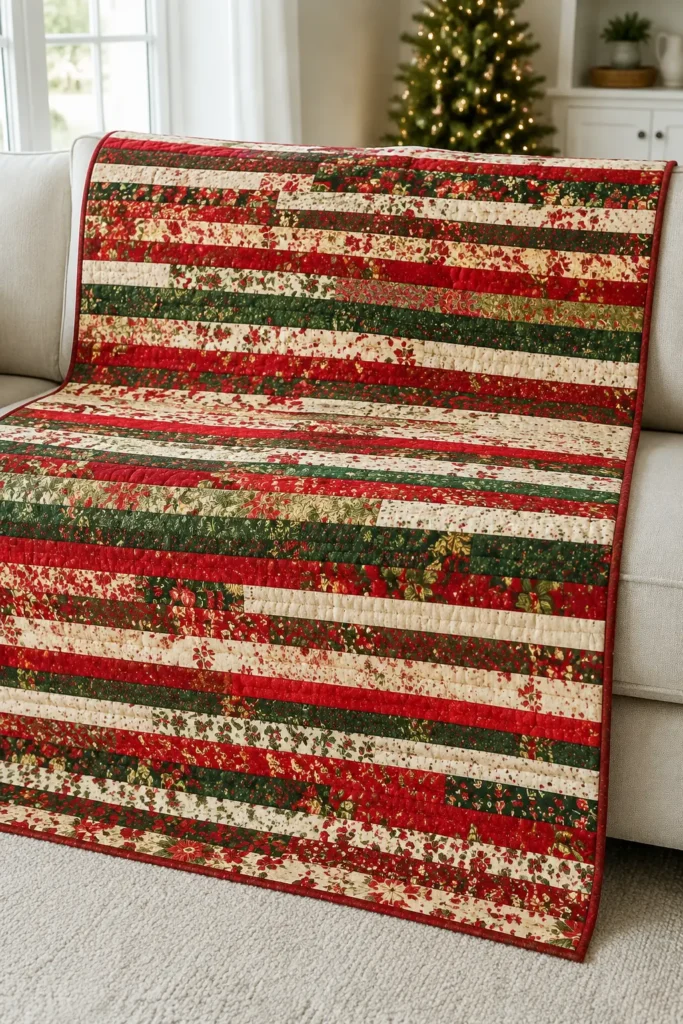
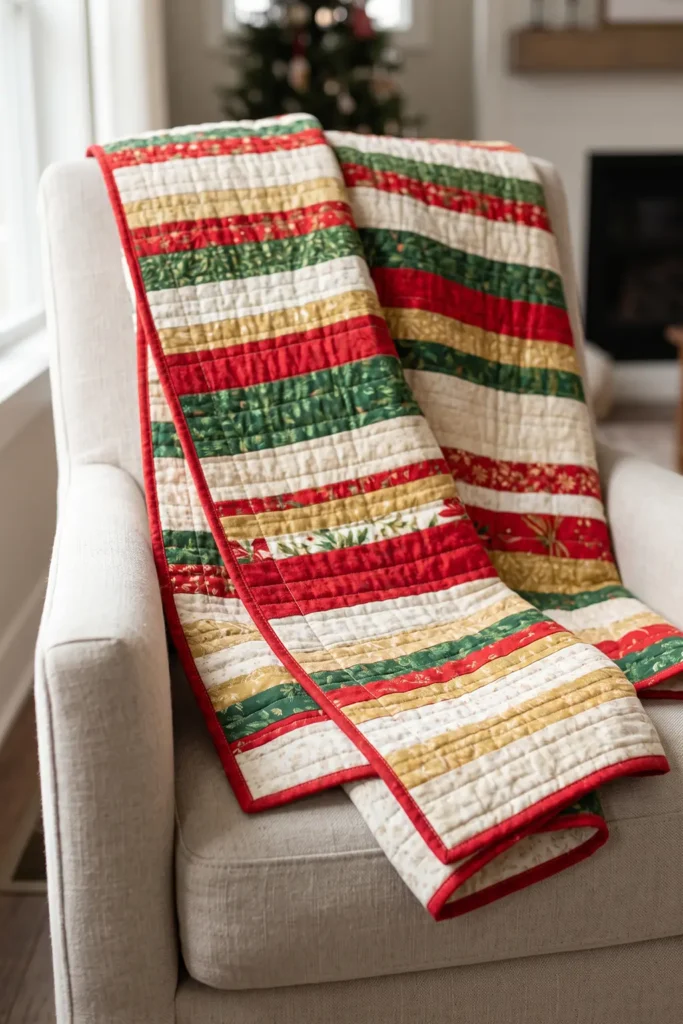
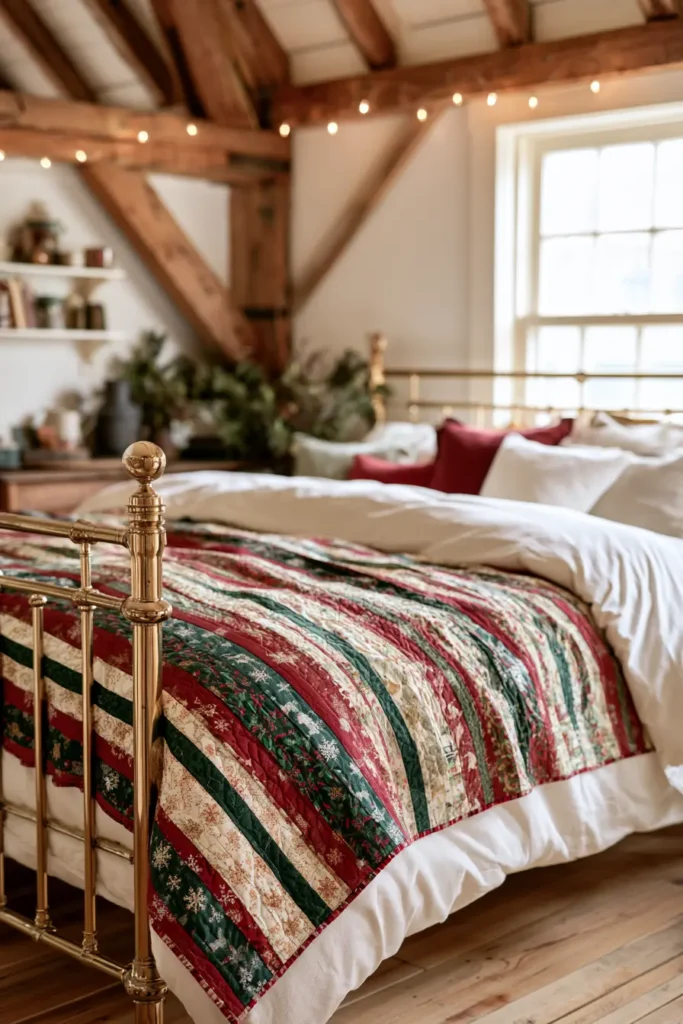
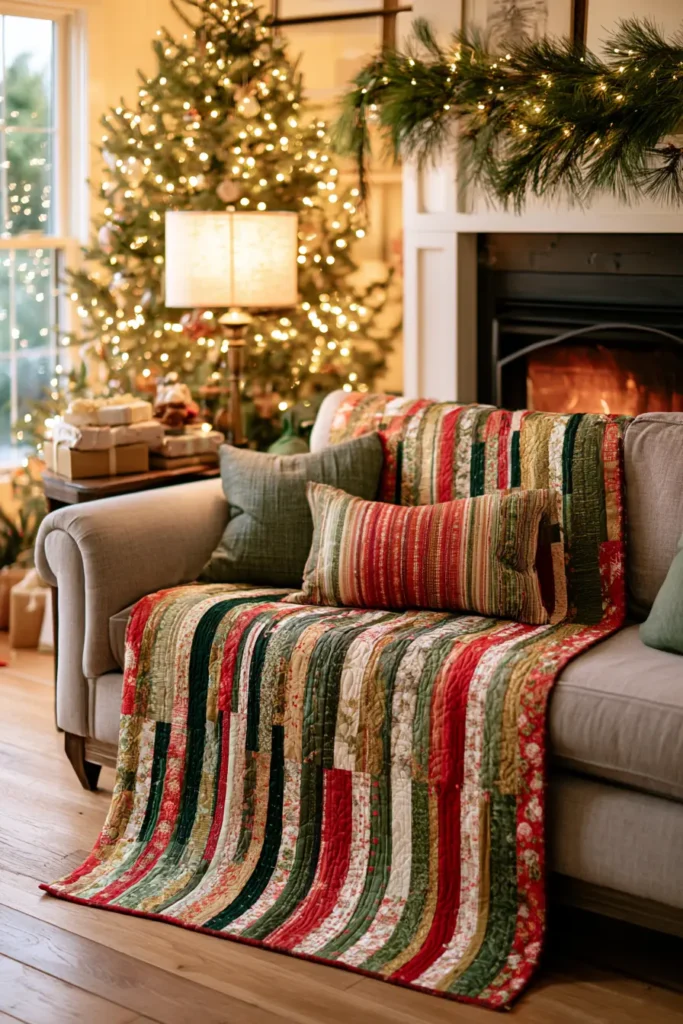
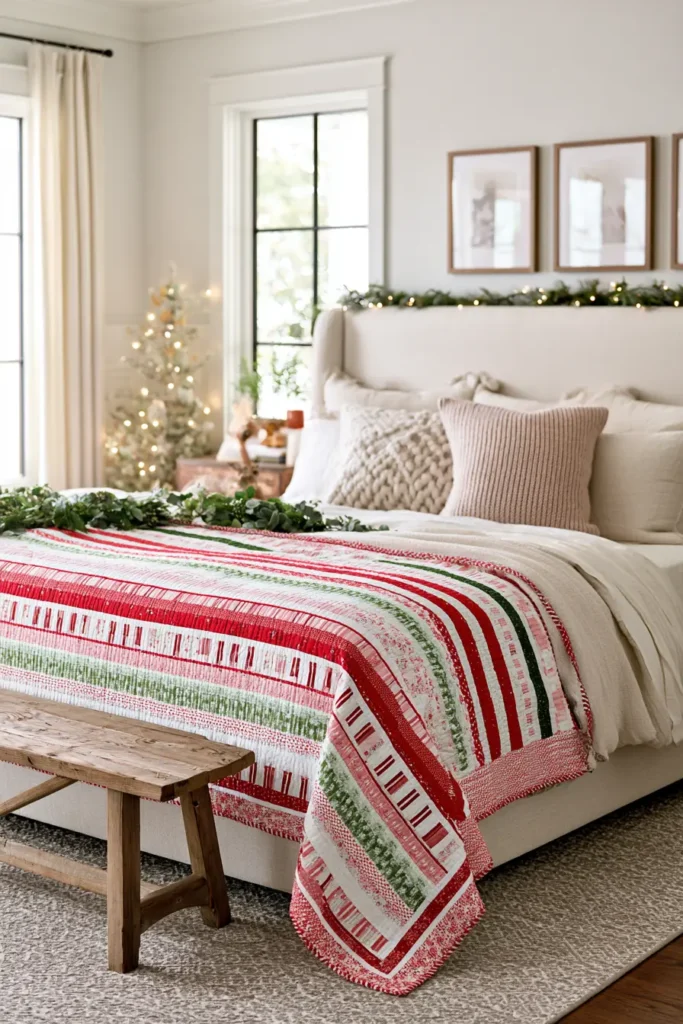
If you need a Christmas quilt finished this week, this is the one. The jelly roll race is quilting’s most famous speed technique: you sew all 40 strips from a jelly roll end to end into one enormous strip, then fold it in half and sew the long edges together, over and over, until a full quilt top appears. Each round halves the length and doubles the width, and you can genuinely finish the whole top in an evening. In vibrant Christmas reds, greens, golds, and creams, the finished quilt looks like a beautiful modern stripe – and nobody needs to know it took you less time than wrapping the presents.
One small step makes or breaks it, and it takes thirty seconds. Skip it, and your seams stack up in ugly vertical columns; do it, and they scatter randomly across the quilt like they were placed there on purpose. Step 3 covers it, and it’s the single most important instruction on this page.
Why It’s Called a “Race”
The name is literal. The technique spread through quilt shops that held jelly roll race events – a room full of quilters, everyone with the same bundle of strips, all starting at once to see who could finish a quilt top first. It’s a genuinely sociable, slightly chaotic way to sew, and it turned a clever construction trick into something of a phenomenon.
It’s also known as the 1600 quilt, after the arithmetic: 40 strips at roughly 40 usable inches each gives you about 1,600 inches of continuous fabric – a strip more than 44 yards long before you start folding. That single enormous strip is the whole secret. Instead of piecing dozens of small units, you sew a handful of very long seams, and long seams cover ground fast.
Design Inspirations – Digitally Modified Images. Texture and color may vary from the actual product.
How the Race Math Works
Understanding the doubling makes the whole process click. Starting from one continuous strip about 1,660 inches long and 2½ inches wide:
| Round | Width | Length |
|---|---|---|
| Start | 2½ in | ~1,660 in |
| After 1 | 4½ in | ~830 in |
| After 2 | 8½ in | ~415 in |
| After 3 | 16½ in | ~208 in |
| After 4 | 32½ in | ~104 in |
| After 5 | 64½ in | ~52 in |
Five rounds, and you have a quilt top of roughly 52 × 64 inches – a generous throw. (Each round loses ½ inch of width to the seam, which is why the numbers aren’t exact doubles.)
Finished Size
- Finished quilt: about 50 × 62 inches after squaring up – a generous throw or lap quilt
- Strip width: 2½ inches, as they come
- Rounds of sewing: 5
- Skill level: true beginner – no blocks, no points, no matching
- Core techniques: continuous strip piecing, offset staggering, folding and sewing long seams, binding
Materials Needed
- 1 Christmas jelly roll (about 40 strips, 2½ inches × width of fabric)
- Backing: 3½ yards (or wide backing)
- Batting: at least 56 × 68 inches
- Binding: ⅝ yard of a coordinating red, green, or cream solid
- Thread: neutral cotton
- Rotary cutter, cutting mat, quilting ruler, pins or clips, iron
- A large flat surface – a table, a bed, or a clear floor. This is genuinely useful; you’ll be handling a very long strip
Beginner tip: wind two or three bobbins before you start. Running out mid-seam on a 400-inch strip is a special kind of frustration, and it happens more often than you’d think.
Choosing Your Colors
Because the strips end up scattered randomly, a jelly roll race looks best with a bundle that has good variety and clear contrast:
- Traditional Christmas: vibrant reds, deep greens, cream, and gold
- Bright and modern: cherry red, lime, turquoise, and white for a fresh holiday look
- Rustic: cranberry, forest green, plaid, and warm tan
- Frosty: icy blue, silver, white, and navy for a wintry palette that stays up past December
Look for a jelly roll with a genuine mix of lights, mediums, and darks. If every strip is a similar depth of red and green, the finished quilt will read as muddy rather than lively. And check the print scale – a mix of large festive prints, small motifs, and near-solid blenders gives the best result.
Cutting Measurements
There’s almost nothing to cut:
- Strips: use all 40 jelly roll strips as they come
- The offset cut: trim 18 inches off the end of one strip (see Step 3) – keep the offcut for your binding scraps or a pieced label
- Backing: 56 × 68 inches
- Batting: 56 × 68 inches
- Binding: six strips, 2½ inches × width of fabric
Step-by-Step Guide
Step 1 – Open and sort your jelly roll. Unroll the strips and lay them out. Remove any you don’t like, and shuffle the order so similar prints aren’t adjacent in the pile – the order you sew them in is the order they’ll appear across the quilt.
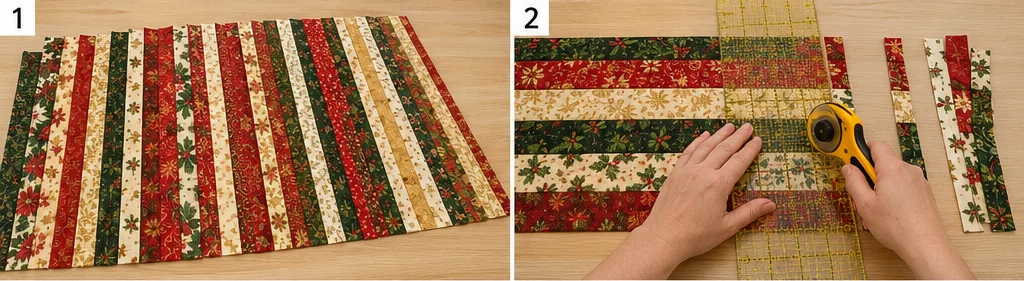
Step 2 – Trim the selvages. Snip the selvage edge off both ends of each strip. It’s tempting to skip this, but selvages are more tightly woven and will pucker your seams.
Step 3 – Make the offset cut. Take one strip and cut 18 inches off the end, setting the shorter piece aside to use first. This is the critical step: if every strip is the same length, all your end-to-end seams will land in the same place each time you fold, stacking into obvious vertical columns down the finished quilt. Removing 18 inches from one strip throws the whole sequence out of alignment, so the seams scatter randomly and look intentional.
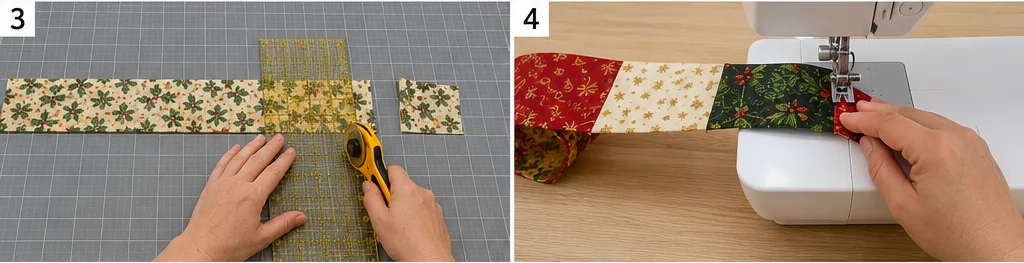
Step 4 – Sew all strips end to end. Starting with your shortened strip, sew the strips together end to end with a ¼-inch seam, right sides together, to form one continuous strip roughly 1,660 inches long. Chain-piecing helps here – just keep feeding them through. (For less bulk, you can join them on a 45-degree diagonal instead of straight across, trimming to ¼ inch.)
Step 5 – Press all the joining seams. Press each end-to-end seam to one side, consistently. Then wind the whole strip loosely into a ball or drape it over a chair – it’s long, and it tangles easily if you let it.
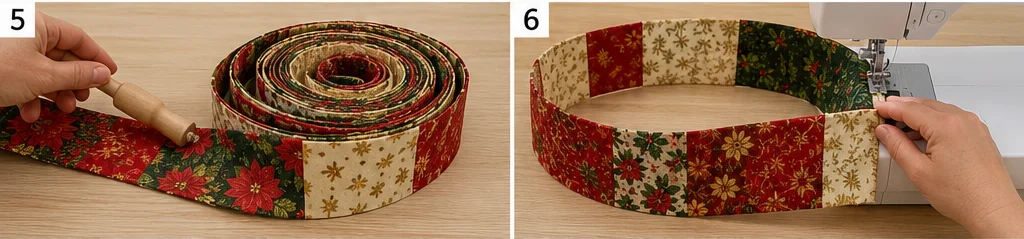
Step 6 – Round one: fold and sew. Bring the two ends of the long strip together, right sides facing, and align them along the entire length. Sew down the full length with a ¼-inch seam. Take care not to twist the strip – run your hand along it as you go to keep it flat. You now have a strip about 4½ inches wide and 830 inches long.
Step 7 – Press, then round two. Press the new long seam to one side. Fold in half again, right sides together, align the edges, and sew the full length. You’re now at about 8½ inches wide and 415 inches long.
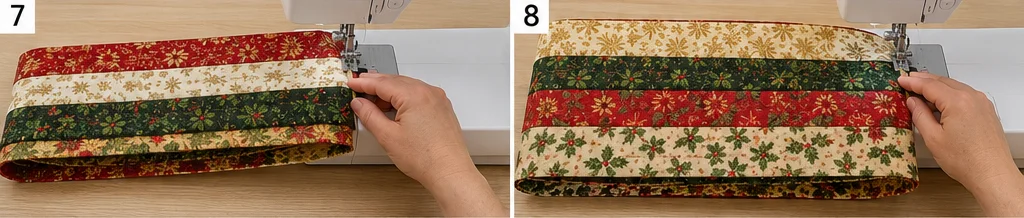
Step 8 – Round three. Press, fold, align, and sew again. The strip becomes roughly 16½ inches wide and 208 inches long. From here it starts to feel like a quilt rather than a ribbon.
Step 9 – Round four. Press, fold, align, and sew. You’re now at about 32½ inches wide and 104 inches long – and the doubling is doing its work fast.
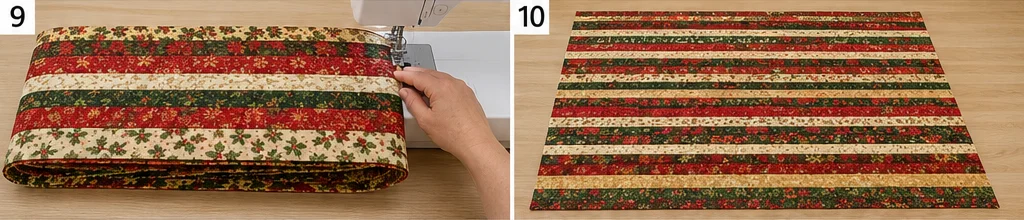
Step 10 – Round five. Press, fold, align, and sew one final time. The result is a quilt top roughly 64½ inches wide and 52 inches long. Press the whole thing well.
Step 11 – Square up the top. Lay the top out flat and trim the edges straight, squaring the corners. The ends will be slightly uneven from the offset – that’s expected, and trimming is what tidies it. Aim for about 50 × 62 inches.
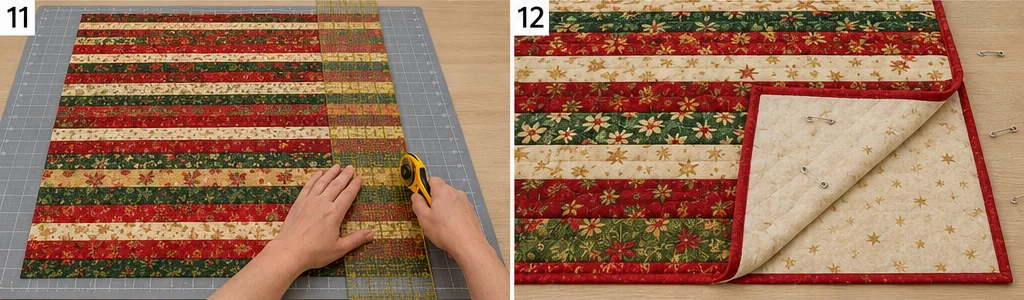
Step 12 – Make the quilt sandwich. Lay the backing wrong side up, center the batting, then the quilt top right side up. Smooth from the center outward and baste with pins or spray.
Step 13 – Quilt it. Straight-line quilting suits the stripe beautifully – quilt down the length parallel to the strips, or across them for a grid. An all-over meander is fine too, and fastest. Keep it simple; the strips are the design.
Step 14 – Bind and finish. Trim to 50 × 62 inches, join the 2½-inch binding strips into one long strip, press in half, and sew to the front, then fold to the back and stitch down. Press, wash gently on cold with a color catcher (Christmas reds bleed), and tumble dry low for a soft crinkle.
Assembly at a Glance
- Unroll, sort, and shuffle the strip order.
- Trim selvages from both ends of every strip.
- Cut 18 inches off one strip and use it first – this staggers the seams.
- Sew all strips end to end (¼-inch) → one strip ~1,660 inches.
- Press the joining seams; coil the strip so it doesn’t tangle.
- Fold in half, sew the full length → 4½ in × 830 in.
- Press, fold, sew → 8½ × 415.
- Press, fold, sew → 16½ × 208.
- Press, fold, sew → 32½ × 104.
- Press, fold, sew → 64½ × 52.
- Square up to about 50 × 62 inches.
- Layer backing, batting, and top; baste.
- Quilt simply – straight lines or an all-over meander.
- Bind, wash cold with a color catcher, tumble low.
Beginner Tips for Success
- Don’t skip the 18-inch offset cut – it’s the difference between scattered seams and ugly stacked columns.
- Trim selvages; they pucker.
- Check for twists before sewing each long seam. Running your hand down the full length takes seconds and saves unpicking hundreds of inches.
- Wind extra bobbins in advance.
- Press consistently in one direction so the seams lie flat.
- Choose a jelly roll with real value contrast; similar-depth strips look muddy.
- Use a color catcher in the first wash – festive reds bleed.
Styling It & Gift Ideas
A jelly roll race quilt has a clean, modern stripe that suits almost any room – folded at the foot of a bed, draped over a sofa arm through December, or spread on a chair by the tree. Because the strips are randomly scattered, it reads as cheerful rather than formal, so it sits happily alongside traditional Christmas decorations without competing with them.
Its speed makes it the ultimate gift quilt:
- A last-minute Christmas gift – genuinely achievable in a weekend, start to finish
- Several gifts in one season, since each quilt uses exactly one jelly roll and one evening of piecing
- A teacher, neighbor, or host gift, sized down by using half a jelly roll for a lap quilt
- A first quilt for a beginner you’re teaching – there are no points to match, so success is almost guaranteed
- A hostess gift table topper using leftover strips
If you’re gifting several, buy your jelly rolls from the same collection in different colorways – the quilts will look like a coordinated set.
Final Thoughts
The classic jelly roll race is the fastest route from a bundle of strips to a finished Christmas quilt, and it earns its name honestly – people really do race through these in an evening. Sew your strips into one enormous ribbon, remember that 18-inch offset cut, then fold and sew five times and watch a quilt top appear almost by magic. It’s the perfect answer when December is closing in, and you still want something handmade under the tree.
Other Design Inspirations – Digitally Modified Images. Texture and color may vary from the actual product.
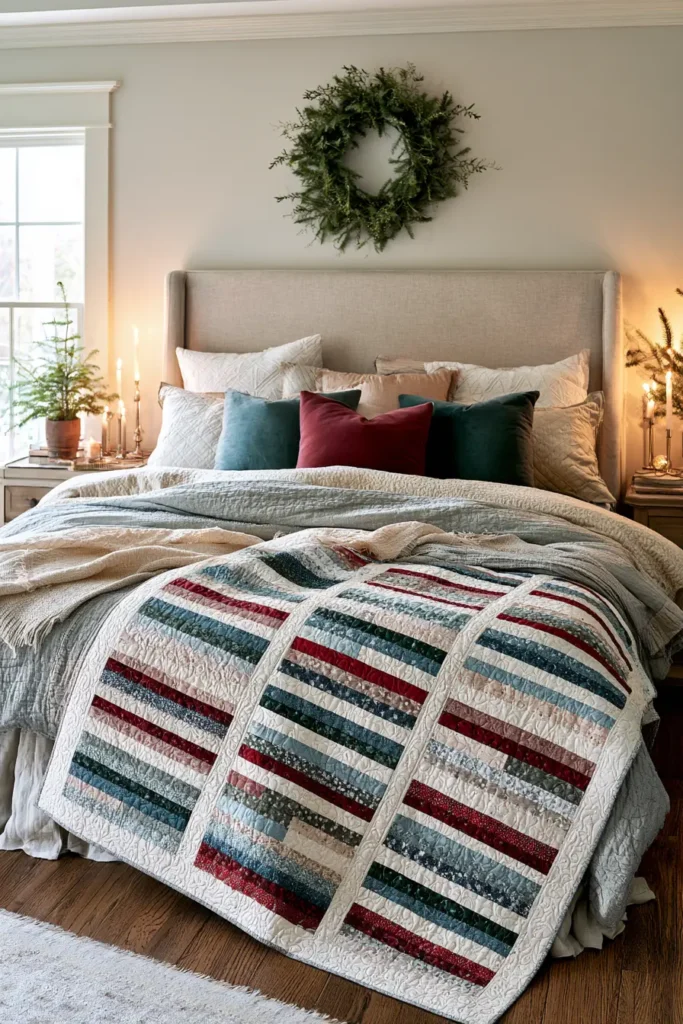
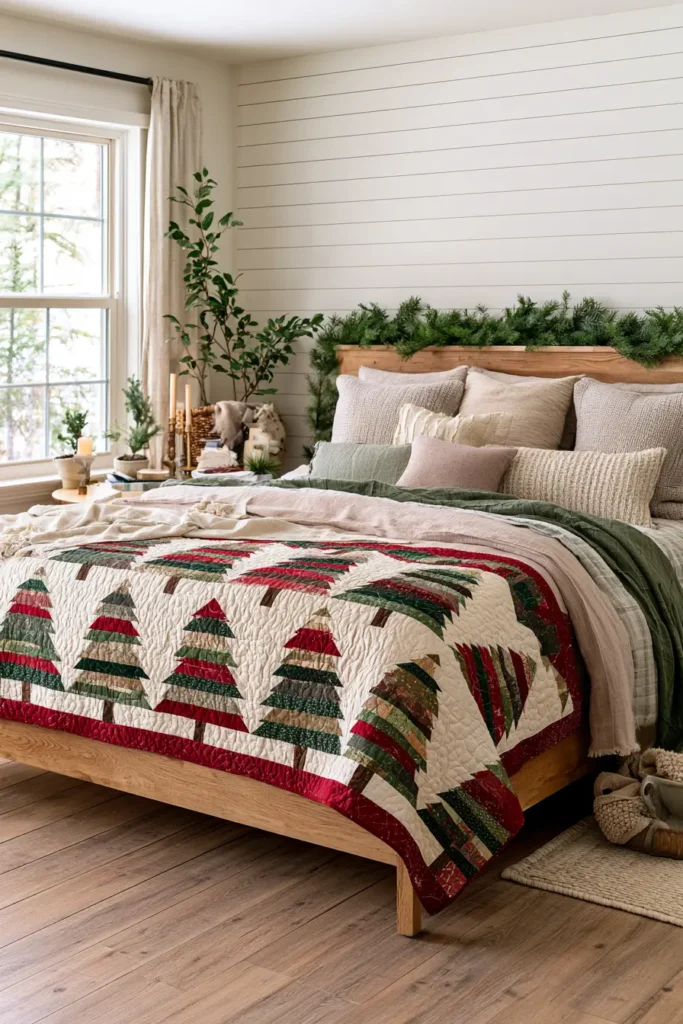
2. Christmas Tree Jelly Roll Quilt Patterns for Festive Holiday Décor
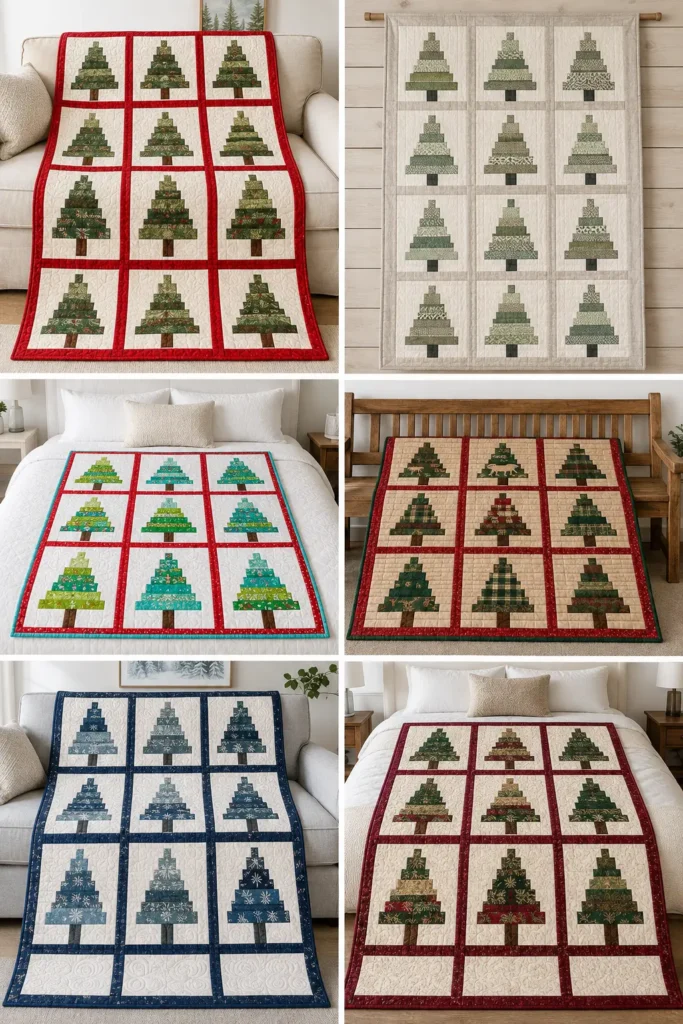
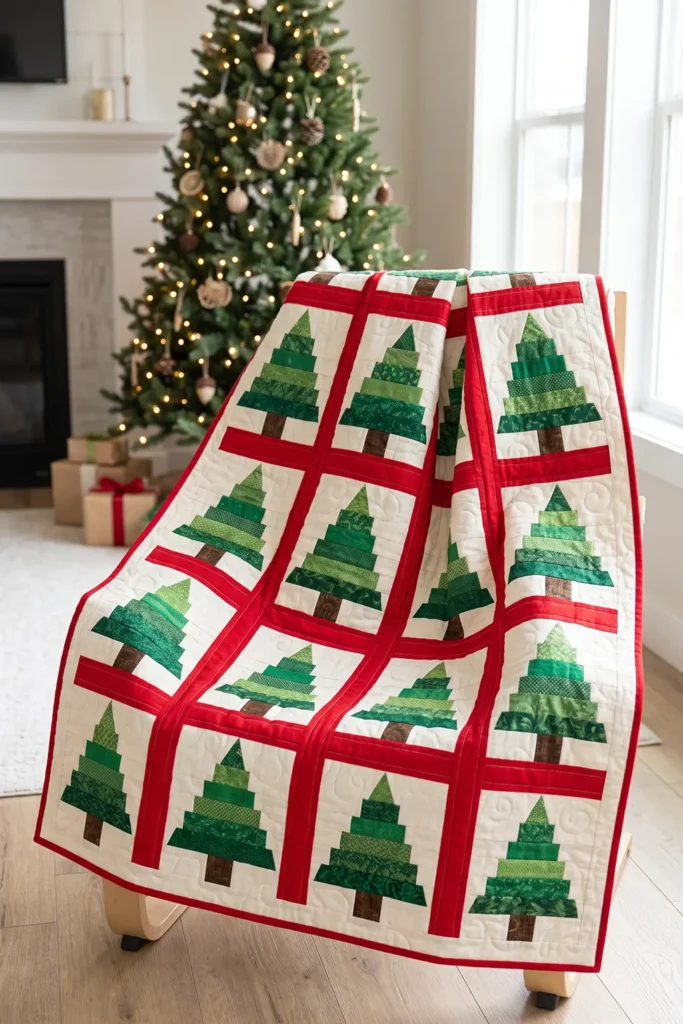
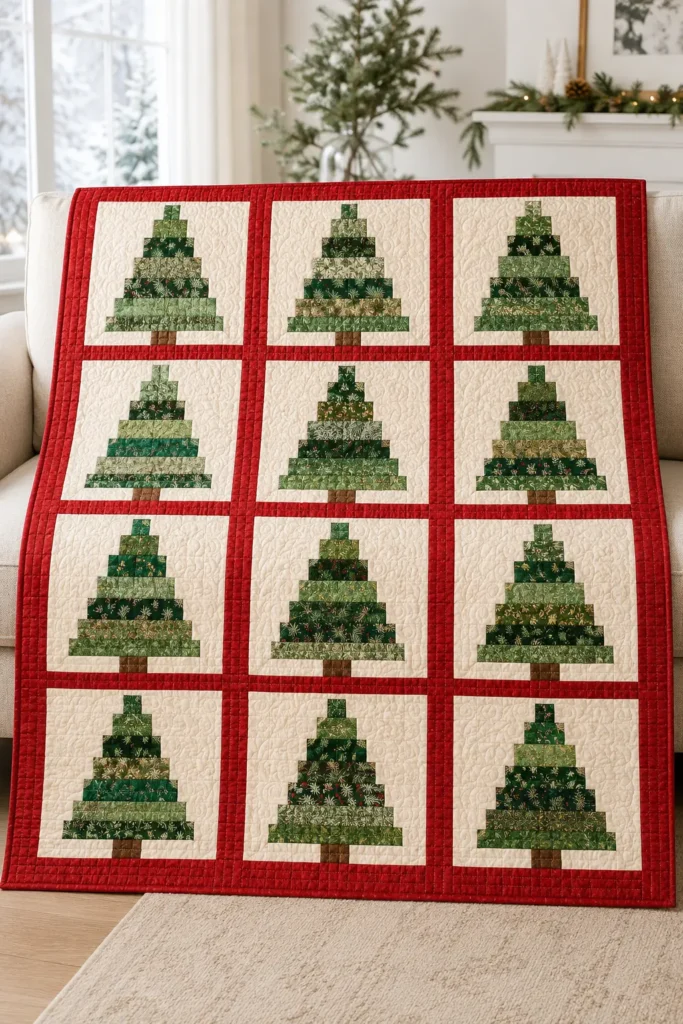
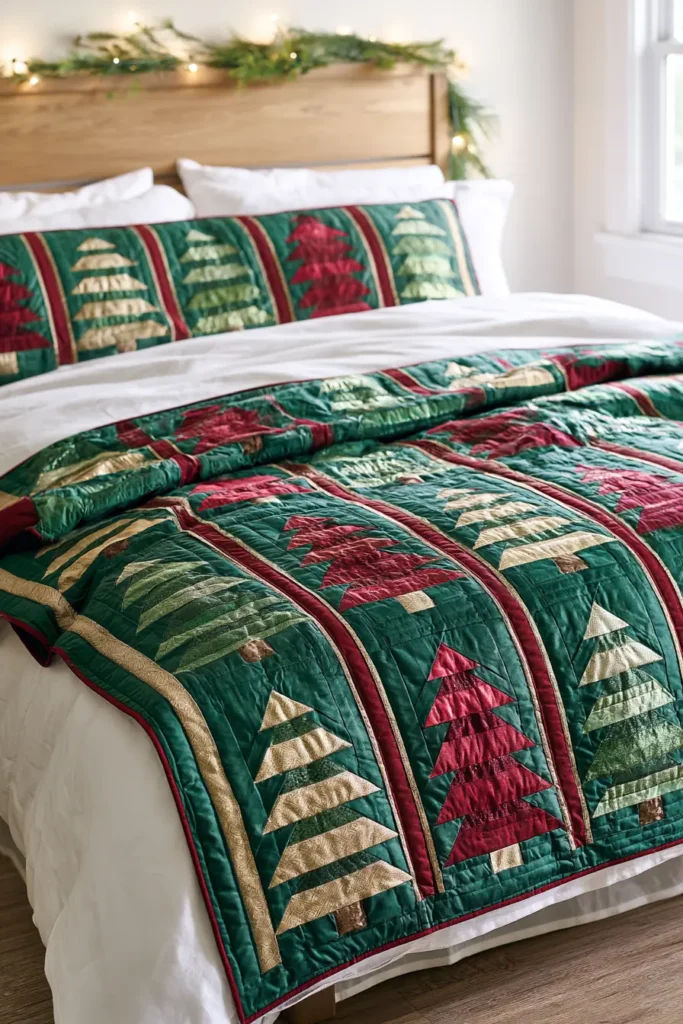
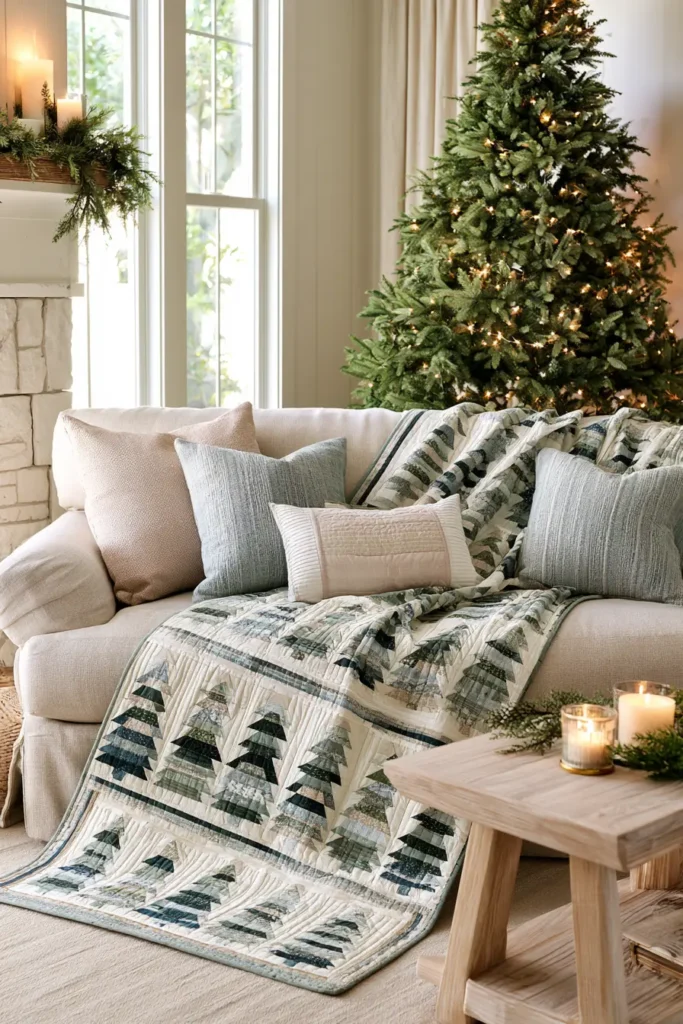
Nothing says Christmas quite like a forest of little trees marching across a quilt. This design turns 2½-inch strips into a row of cheerful stepped trees – each one built from five green tiers that widen as they descend, topped off with a small brown trunk – set in crisp sashing so every tree has room to stand. It’s graphic, modern, and unmistakably festive, and the whole thing is built from nothing but strips cut to length. In vibrant greens against cream, with pops of red in the sashing, it’s the quilt that makes a room feel like Christmas the moment you unfold it.
The clever part is how well a jelly roll suits this design. Because each strip is exactly 2½ inches wide, that width becomes the height of every tier of every tree. You never cut across a strip’s width – you only cut it to length. That means no fiddly measuring, no wasted fabric, and blocks that come out square every time.
How the Stepped Tree Works
Each tree is a 12-inch finished block, built from six horizontal rows, each row 2 inches finished (2½ inches cut – the width of your strips):
- Row 1 (top): a short green center, widest background on both sides
- Rows 2-5: the green center grows wider by 2 inches each row, and the background shrinks to match
- Row 6: a small brown trunk with background either side
Stack them and the tree steps outward as it descends. It’s a pixelated, modern take on a tree shape – far easier than piecing angled seams, and genuinely charming.
Design Inspirations – Digitally Modified Images. Texture and color may vary from the actual product.
Per-Block Cutting Chart
Every piece below is cut from a 2½-inch strip, so the measurement given is the length you cut:
| Row | Green (or trunk) | Background × 2 |
|---|---|---|
| 1 (top) | 2½ in | 5½ in each |
| 2 | 4½ in | 4½ in each |
| 3 | 6½ in | 3½ in each |
| 4 | 8½ in | 2½ in each |
| 5 | 10½ in | 1½ in each |
| 6 (trunk) | 2½ in brown | 5½ in each |
Each row totals 13½ inches of cut fabric, which loses 1 inch to its two seams and finishes at 12½ inches unfinished. Six rows stack to a 12½-inch unfinished block – 12 inches finished.
Per tree you’ll use: about 32½ inches of green strip, 46 inches of background strip, and 2½ inches of brown.
Finished Size
- Finished quilt: about 44 × 58 inches – a generous throw or festive wall quilt
- Finished block: 12 inches (12½ inches unfinished)
- Layout: 3 blocks across × 4 blocks down = 12 trees, separated by 2-inch sashing
- Skill level: confident beginner – straight seams only, no points to match
- Core techniques: strip cutting to length, row piecing, sashed settings, binding
Materials Needed
- 1 Christmas jelly roll (about 40 strips, 2½ inches × width of fabric)
- Extra background fabric: 1 yard of cream or white, cut into 2½-inch strips – most Christmas jelly rolls don’t include enough light strips for 12 trees, so plan to supplement
- Backing: 3 yards
- Batting: at least 50 × 64 inches
- Binding: ½ yard of a vibrant red solid
- Thread: neutral cotton
- Rotary cutter, cutting mat, quilting ruler, pins or clips, iron
Beginner tip: count your strips before you start. For 12 trees you need roughly 10 green strips, 14 background strips, 1 brown strip, and 11 strips for sashing. Lay them out in those piles first – it takes five minutes and saves discovering you’re three cream strips short halfway through.
Choosing Your Colors
Trees give you a lovely excuse to use several greens:
- Mix your greens. Use four or five different green prints across the tiers – forest, pine, sage, emerald, and olive. Trees made from a single green look flat; mixed greens look like a real woodland.
- Keep the background consistent. One cream, white, or pale gray throughout, so every tree reads cleanly. This matters more than anything else in the design.
- Trunks: warm brown, chocolate, or even a dark gray for a modern look.
- Sashing: vibrant red is the classic festive choice, and it frames the greens beautifully. Cream sashing gives a softer, more Scandinavian feel; charcoal gives a striking modern one.
For a fun detail, use a gold or yellow print for one tier on a few trees, as though the tree is strung with lights.
A Little History: The Christmas Tree
The decorated Christmas tree as we know it traces back to sixteenth-century Germany, where evergreens were brought indoors and decorated during Advent. The custom spread slowly through Europe, but its real breakthrough came in 1848, when an illustration of Queen Victoria and Prince Albert – who was German – gathered around a decorated tree was published in London. The image was hugely popular, the fashion swept Britain, and within a few decades the tree had become a fixture of Christmas across the English-speaking world.
There’s something fitting about stitching that symbol into cloth. Textiles have always carried the images that matter to people – in the Nakshi Kantha tradition of my own family’s background, everyday quilts were embroidered with trees of life, flowers, and symbols of home and abundance. A quilt covered in little evergreens sits comfortably in that very old habit of stitching what you love into something warm.
Cutting Measurements
Per tree block (multiply by 12) – all cut from 2½-inch strips:
- Greens: 2½, 4½, 6½, 8½, and 10½-inch lengths
- Backgrounds: two each at 5½, 4½, 3½, 2½, 1½, and 5½-inch lengths
- Trunk: one brown at 2½ inches
For the quilt:
- Vertical sashing: sixteen strips at 2½ × 12½ inches
- Horizontal sashing: five strips at 2½ × 44½ inches (piece from full-length strips)
- Backing: 50 × 64 inches
- Batting: 50 × 64 inches
- Binding: six strips, 2½ inches × width of fabric
Step-by-Step Guide
Step 1 – Sort your strips. Divide the jelly roll into greens, browns, backgrounds, and sashing colors, supplementing with your extra cream yardage. Trim selvages from every strip.
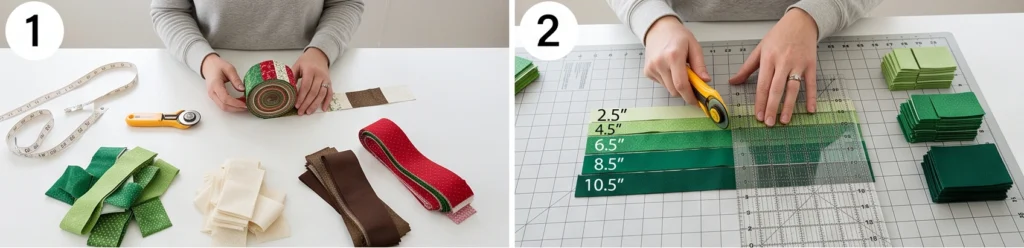
Step 2 – Cut the green tiers. For each tree, cut green lengths of 2½, 4½, 6½, 8½, and 10½ inches. Cutting all 12 trees’ worth at once is far more efficient – stack and cut in batches, keeping each length in its own pile.
Step 3 – Cut the background pieces. For each tree, cut background pairs at 5½, 4½, 3½, 2½, 1½, and 5½ inches. Again, batch-cut all twelve trees at once.
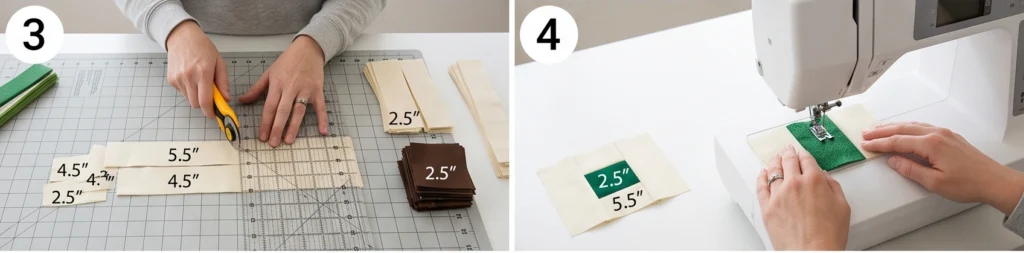
Step 4 – Cut the trunks. Cut twelve brown pieces at 2½ inches.
Step 5 – Piece row one. Sew a 5½-inch background to each side of a 2½-inch green, using a ¼-inch seam. Press the seams toward the background. The row should measure 12½ inches long.
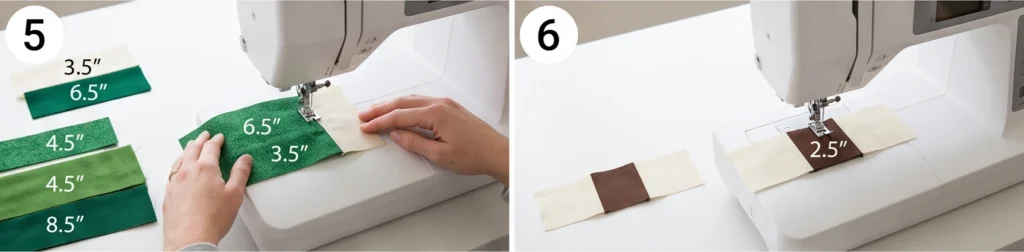
Step 6 – Piece rows two through five. Repeat with each pair: 4½ background + 4½ green, 3½ + 6½, 2½ + 8½, 1½ + 10½. Press all seams toward the background. Check each row measures 12½ inches as you go – it’s much easier to fix a row now than a whole block later.
Step 7 – Piece the trunk row. Sew a 5½-inch background to each side of the 2½-inch brown trunk. Press toward the background.
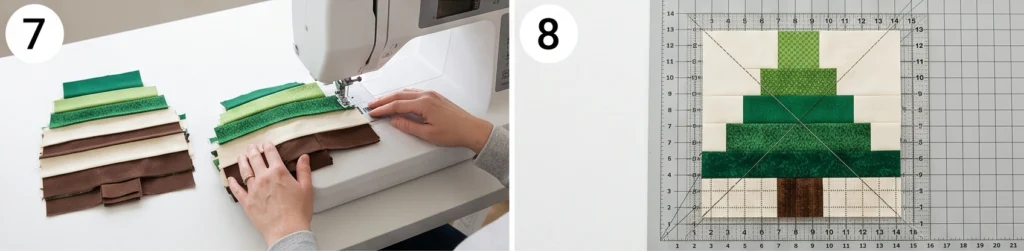
Step 8 – Assemble the tree block. Stack the six rows in order – narrowest green at the top, widest green fifth, trunk at the bottom – and sew them together with ¼-inch seams. Because all seams were pressed the same way, they’ll nest neatly. The block should measure exactly 12½ × 12½ inches. Make 12 blocks.
Step 9 – Lay out the quilt. Arrange the trees 3 across × 4 down, spreading your different greens evenly so no two identical trees sit side by side. Photograph the layout.
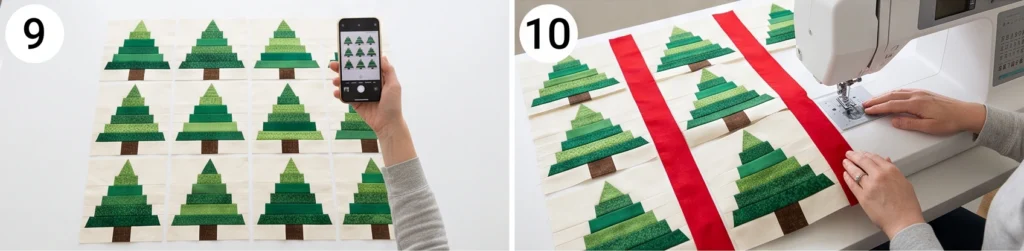
Step 10 – Build the rows with vertical sashing. For each row, alternate: sashing, tree, sashing, tree, sashing, tree, sashing – four 2½ × 12½-inch strips per row. Each finished row measures 44½ inches wide.
Step 11 – Join the rows with horizontal sashing. Sew a 2½ × 44½-inch strip above the first row, between each pair of rows, and below the last – five strips in all. Press the seams toward the sashing. The top should measure about 44½ × 58½ inches.
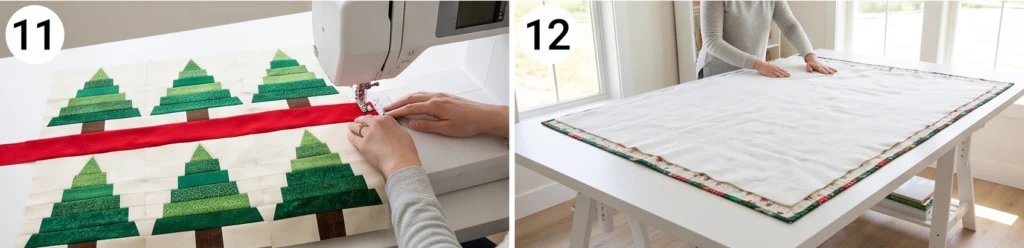
Step 12 – Make the quilt sandwich. Lay the backing wrong side up, center the batting, then the top right side up. Smooth from the center outward and baste with pins or spray.
Step 13 – Quilt it. Keep the quilting simple so the trees stay crisp – straight lines through the sashing, an all-over grid, or outline quilting around each tree. For a festive touch, quilt loose spirals in the background like falling snow.
Step 14 – Bind and finish. Trim to 44 × 58 inches, square the corners, and bind with the 2½-inch red strips. Wash gently on cold with a color catcher (festive reds and greens bleed), and tumble dry low.
Assembly at a Glance
- Sort strips into greens, browns, backgrounds, sashing; trim selvages.
- Batch-cut green tiers: 2½, 4½, 6½, 8½, 10½ inches × 12 trees.
- Batch-cut background pairs: 5½, 4½, 3½, 2½, 1½, 5½ inches × 12 trees.
- Cut twelve 2½-inch brown trunks.
- Piece row one: 5½ bg + 2½ green + 5½ bg → 12½ inches.
- Piece rows two to five; check each measures 12½ inches.
- Piece the trunk row.
- Stack six rows in order and sew → 12½-inch block. Make 12.
- Lay out 3 × 4, spreading the greens; photograph.
- Build rows with four 2½ × 12½ sashing strips each → 44½ inches wide.
- Join rows with five 2½ × 44½ horizontal strips → 44½ × 58½ top.
- Layer, baste.
- Quilt simply; spirals in the background look like snow.
- Trim to 44 × 58 inches; bind in red and wash with a color catcher.
Beginner Tips for Success
- Batch-cut everything before you sew – it turns a fiddly project into an assembly line.
- Check every row measures 12½ inches before assembling the block.
- Press all seams toward the background so rows nest automatically.
- Use four or five different greens; single-green trees look flat.
- Keep the background consistent – that’s what makes the trees read clearly.
- Add a gold tier to a few trees for a strung-with-lights effect.
- Color catcher in the first wash; Christmas reds and greens bleed.
Styling It & Gift Ideas
A tree quilt is festive décor in its own right, so hang it as a wall quilt behind a sideboard, drape it over a sofa arm through December, or fold it at the end of a bed in a guest room. The graphic rows of trees look wonderful against plain walls and simple furniture, and the red sashing ties it to the rest of your Christmas decorating without any effort. Store it with the decorations and bringing it out becomes part of the seasonal ritual.
Its unmistakably Christmassy design makes it a lovely gift:
- A family Christmas quilt meant to come out every December – the kind that becomes a tradition
- A wall quilt or table topper, sized down to four or six trees for a faster gift
- A first-Christmas-in-a-new-home gift, which doubles as instant holiday décor
- A grandparent gift, since a handmade tree quilt tends to get displayed proudly every year
For a personal touch, quilt the recipient’s family name or the year into the sashing – it turns a seasonal quilt into a keepsake.
Final Thoughts
A Christmas tree jelly roll quilt is festive décor you build one strip at a time. Because the strips are already 2½ inches wide, that width becomes every tier of every tree, so you’re only ever cutting to length – which makes a whole forest of trees far more achievable than it looks. Mix your greens, keep the background steady, and check those rows at 12½ inches, and you’ll have a graphic, cheerful quilt that turns any room Christmassy the moment it comes out of the closet.
Other Design Inspirations – Digitally Modified Images. Texture and color may vary from the actual product.
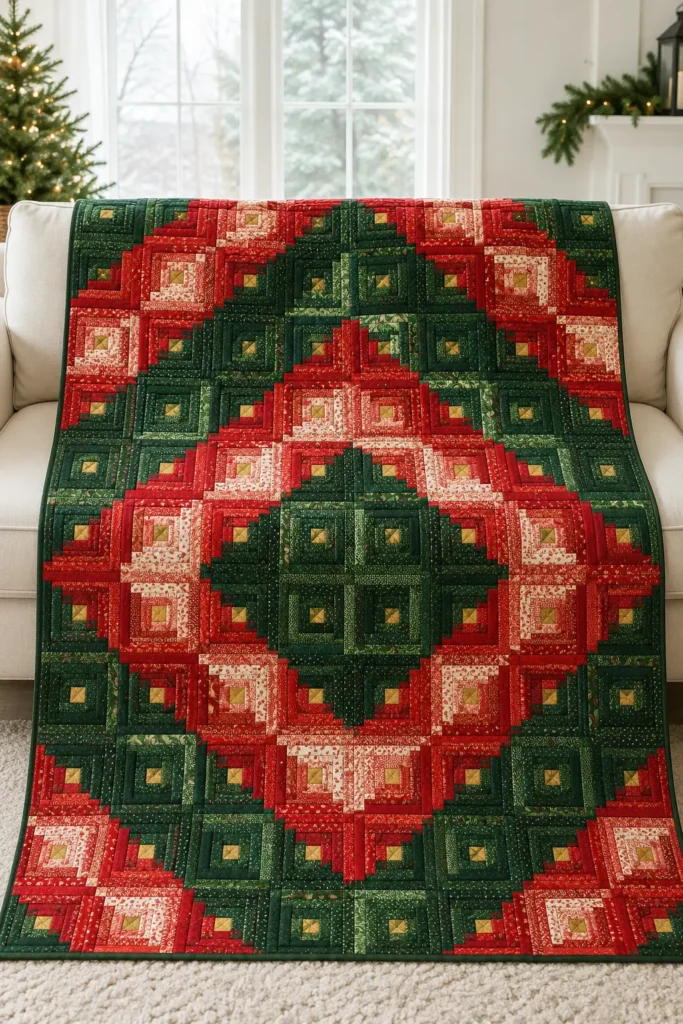
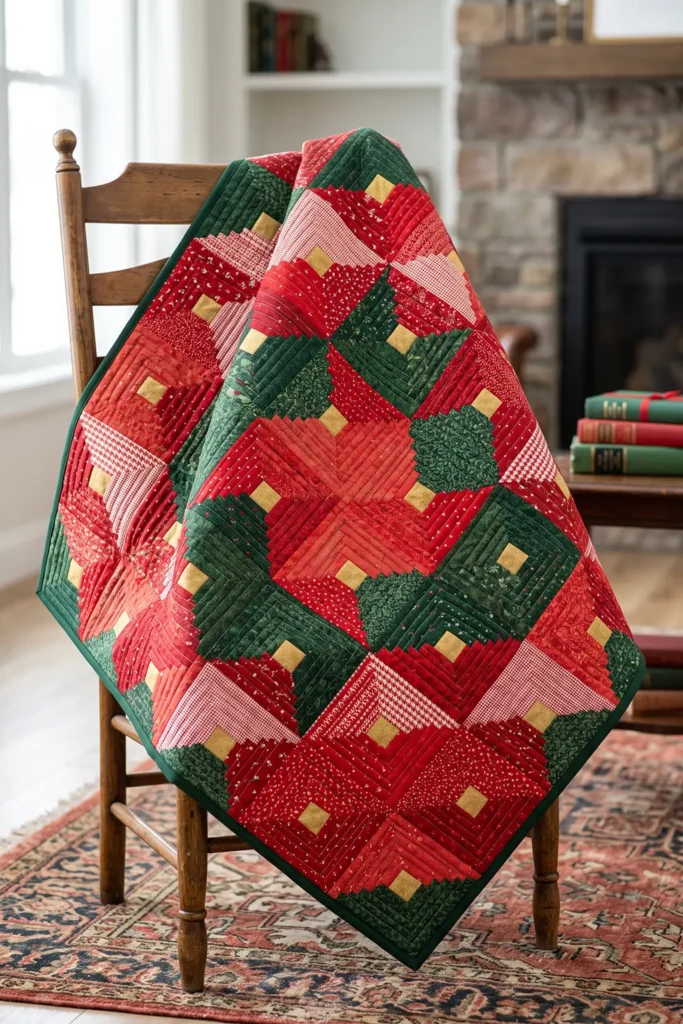
3. Red and Green Log Cabin Jelly Roll Quilt for Timeless Holiday Style
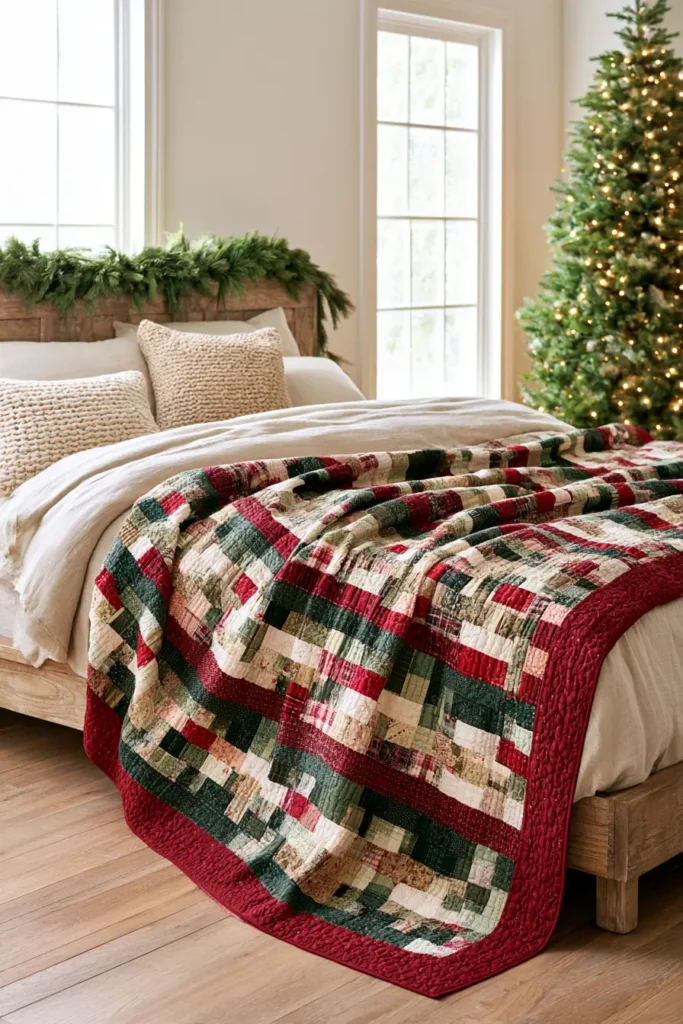
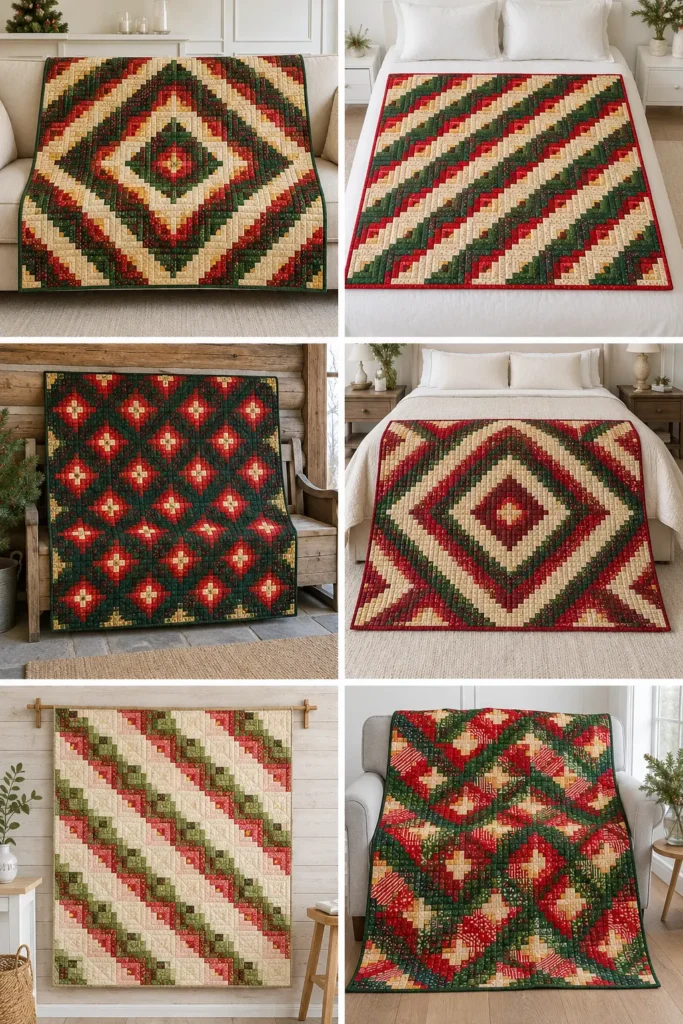
The log cabin is quilting’s most beloved classic, and in Christmas red and green it becomes something genuinely timeless – the kind of quilt that comes out every December for thirty years. Each block is built like the cabin it’s named for: strips of fabric added round and round a small center square, growing outward. Here, one half of every block is red and the other half green, so a crisp diagonal line splits each block corner to corner. Arrange the blocks different ways and those diagonals form radiating diamonds, sweeping stripes, or glowing fields of color. And because log cabins are built from strips, a jelly roll is very nearly the perfect starting point.
There’s one thing to think about before you buy your fabric, though, and it catches a lot of people out. A traditional log cabin works by light against dark – and Christmas red and green are often almost identical in value. Get that wrong and your beautiful diagonal disappears into a muddy blur.
The Red-and-Green Problem (and How to Solve It)
Squint at a typical Christmas jelly roll. A deep pine green and a rich cranberry red look completely different in color, but photograph them in black and white and they’re often the same shade of medium gray. A log cabin needs contrast to work, and hue alone doesn’t provide it.
Three ways to fix it:
- Split by value as well as color. Choose your reds from the light-to-medium end – cherry, scarlet, tomato, red-and-white prints – and your greens from the medium-to-dark end – pine, forest, hunter. Now the diagonal reads clearly.
- Bring in cream. Use red-and-cream prints on one side against solid deep greens on the other. The lighter overall value of the red side does the work.
- Test in grayscale. Lay your reds in one pile and greens in another, photograph them, and convert the image to black and white on your phone. If the two piles look like the same gray, swap fabrics until they don’t. This takes two minutes and saves the whole quilt.
Design Inspirations – Digitally Modified Images. Texture and color may vary from the actual product.
Understanding the Block
Each block is a 10-inch finished square, built from a center and eight logs, all cut 2½ inches wide – the exact width of a jelly roll strip:
- A center square (traditionally red or gold – see the history below)
- Logs added around it in order, always rotating the same direction
- Logs 1 and 2 are red, logs 3 and 4 green, logs 5 and 6 red, logs 7 and 8 green – four of each, so the block splits evenly on the diagonal
Eight logs gives you a balanced block with equal red and green. Keep the reds on the same two sides in every single block – that consistency is what makes the layout work later.
Cutting Chart (per block)
All logs are cut 2½ inches wide; the measurement below is the length:
| Piece | Color | Cut length |
|---|---|---|
| Center | cream or gold | 2½ in |
| Log 1 | red | 2½ in |
| Log 2 | red | 4½ in |
| Log 3 | green | 4½ in |
| Log 4 | green | 6½ in |
| Log 5 | red | 6½ in |
| Log 6 | red | 8½ in |
| Log 7 | green | 8½ in |
| Log 8 | green | 10½ in |
Center plus eight logs finishes at 10½ inches unfinished, 10 inches finished. Per block you’ll use about 22 inches of red strip and 30 inches of green.
Finished Size
- Finished quilt: about 50 × 60 inches – a generous throw
- Finished block: 10 inches (10½ inches unfinished)
- Layout: 5 blocks across × 6 blocks down = 30 blocks
- Skill level: beginner – no points, no curves, just straight strips in order
- Core techniques: strip-piecing, color and value placement, block-rotation layouts, binding
Materials Needed
- 1 Christmas jelly roll (about 40 strips, 2½ inches × width of fabric)
- Extra fabric: 1 yard red and 1¼ yards green, cut into 2½-inch strips – thirty blocks need roughly 660 inches of red and 900 inches of green, which is more than one jelly roll can supply on its own
- Center squares: ¼ yard of cream or gold
- Backing: 3¼ yards
- Batting: at least 56 × 66 inches
- Binding: ⅝ yard of a deep green or red solid
- Thread: neutral cotton
- Rotary cutter, cutting mat, quilting ruler, pins or clips, iron
Beginner tip: sort every strip firmly into a red pile and a green pile before you cut a single log, then squint at both piles. If a fabric is hard to place, set it aside entirely. Clean separation between the two sides is the whole secret to a log cabin that reads well.
A Little History: The Hearth at the Center
The log cabin is steeped in meaning, and it happens to be beautifully suited to Christmas. It surged in popularity in nineteenth-century America, and by tradition the center square was stitched in red or gold to represent the hearth – the warm fire at the heart of the home – while the light and dark sides stood for the sunny and shadowed walls of the house. A block built around a glowing hearth, in a quilt about warmth and welcome, is about as festive a symbol as quilting offers.
The log cabin also teaches quilting’s most useful lesson: that value – light against dark – carries a design more than color does. That’s exactly why the red-and-green version needs the care described above. And it’s a truth that runs through textile traditions everywhere, including the Jamdani and Nakshi Kantha weaving and stitching of my own family’s background, where the play of tone against tone has always mattered as much as the pattern itself.
Choosing Your Colors
- Reds (lighter side): cherry, scarlet, tomato, red-and-white prints, candy stripes
- Greens (darker side): pine, forest, hunter, deep sage, evergreen prints
- Centers: classic red, or gold for a warm glow against both sides
- Binding: deep green frames the quilt beautifully; red gives a bolder edge
Mix several prints within each color group for depth – four or five reds and four or five greens look far richer than one of each.
Cutting Measurements
- Per block: center 2½ in; red logs at 2½, 4½, 6½, 8½ in; green logs at 4½, 6½, 8½, 10½ in (multiply by 30)
- Backing: 56 × 66 inches
- Batting: 56 × 66 inches
- Binding: six strips, 2½ inches × width of fabric
Step-by-Step Guide
Step 1 – Sort and grayscale-test. Divide all strips into reds and greens. Photograph the two piles, convert to black and white, and check the reds read lighter than the greens. Swap fabrics until they do.
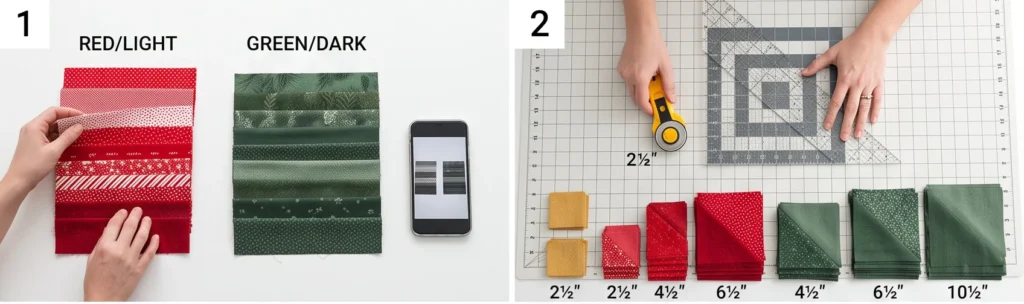
Step 2 – Cut the centers. Cut thirty 2½-inch squares from your cream or gold fabric.
Step 3 – Batch-cut the logs. Cut all your red lengths (2½, 4½, 6½, 8½ inches × 30) and green lengths (4½, 6½, 8½, 10½ inches × 30), keeping each length in its own labeled pile. Batch cutting turns this into an assembly line.

Step 4 – Add red log 1. Sew the 2½-inch red log to one side of the center square with a ¼-inch seam. Press the seam outward, away from the center. Pressing outward every time is what keeps the block flat.
Step 5 – Add red log 2. Rotate the unit a quarter turn in your chosen direction (clockwise or counterclockwise – just pick one and never change it) and add the 4½-inch red log to the next side. Press outward. The center now has red on two adjacent sides.

Step 6 – Add green logs 3 and 4. Continuing the same rotation, add the 4½-inch green log, then the 6½-inch green log, to the remaining two sides, pressing outward after each. Round one is complete: red on two sides, green on two.
Step 7 – Add red logs 5 and 6. Keeping the same rotation and the same sides red, add the 6½-inch and then the 8½-inch red logs. Press outward.
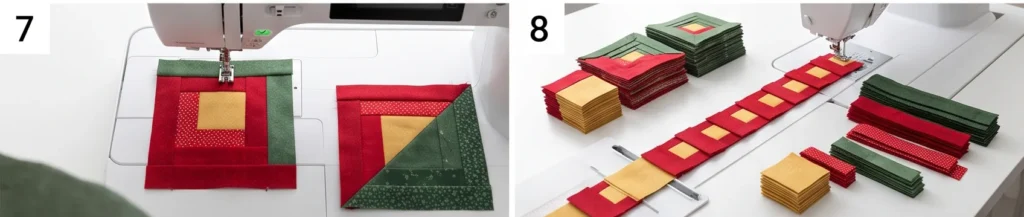
Step 8 – Add green logs 7 and 8. Add the 8½-inch and then the 10½-inch green logs to complete the block. Press well and check it measures exactly 10½ × 10½ inches.
Step 9 – Make all thirty blocks. Repeat, always keeping red on the same two sides. Chain-piecing helps enormously here – add log 1 to all thirty centers, then log 2 to all thirty, and so on.
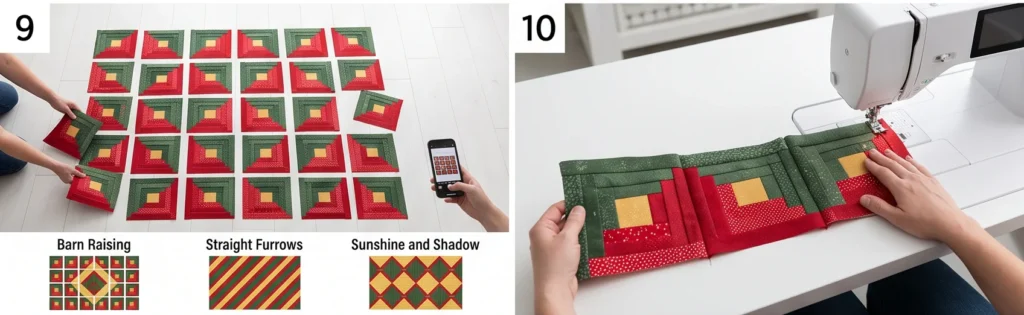
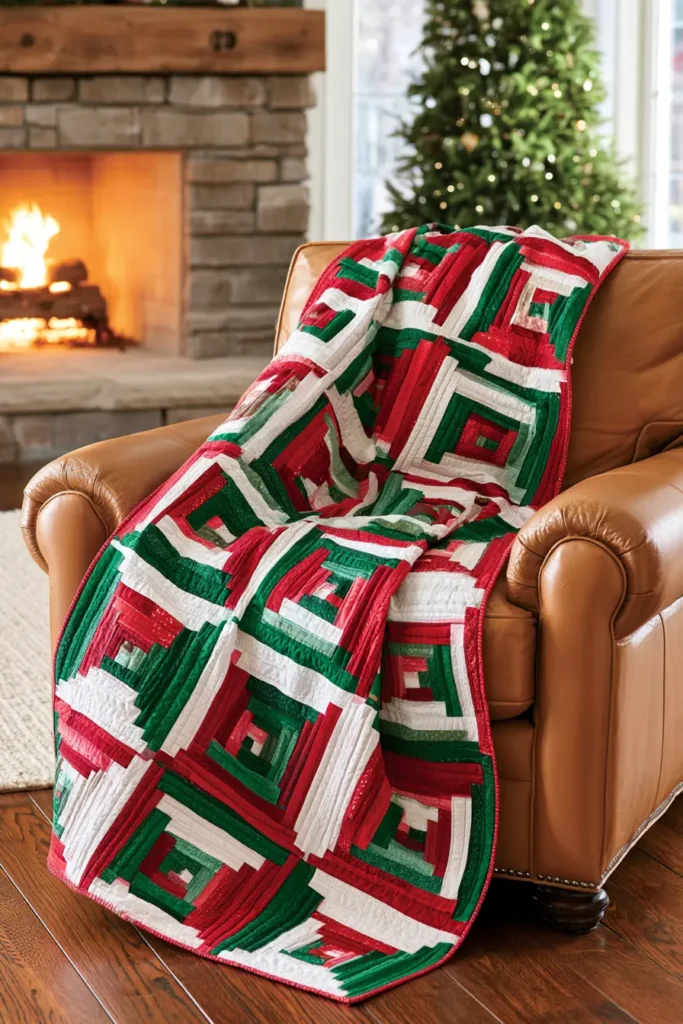
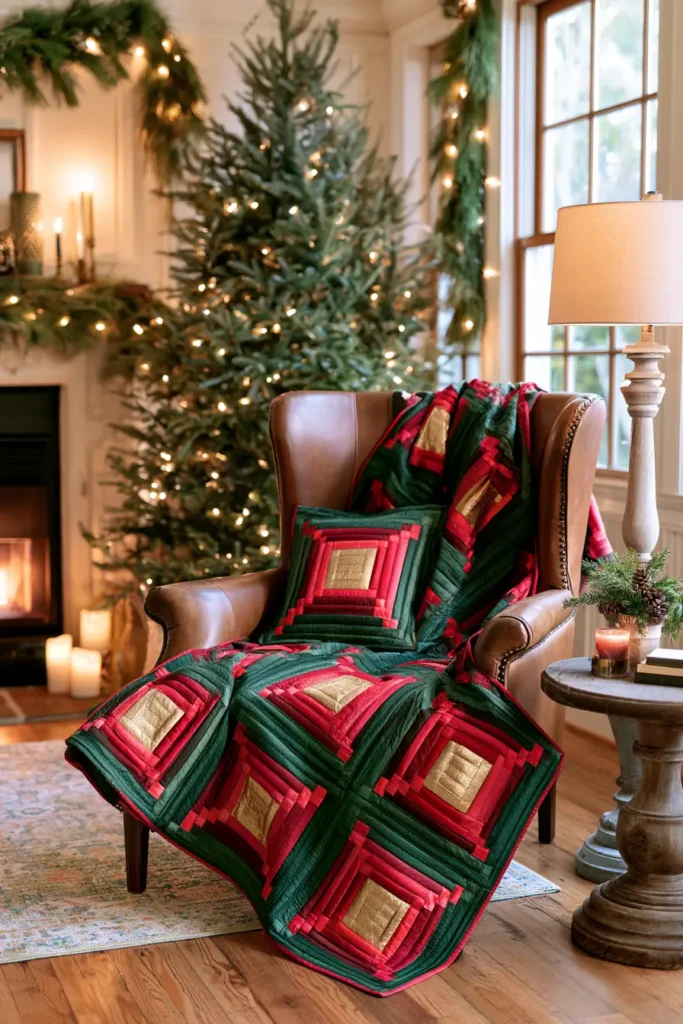
Step 10 – Choose your layout. This is the best part. Arrange the blocks 5 across × 6 down, rotating them to form a setting:
- Barn Raising: concentric diamonds radiating from the center
- Straight Furrows: diagonal stripes of red and green across the quilt
- Sunshine and Shadow: alternating diamonds of each color
Lay them out on the floor and photograph two or three arrangements before you commit – the same blocks make dramatically different quilts.
Step 11 – Sew the blocks into rows. Sew each row of five blocks with a ¼-inch seam, checking each block’s orientation against your photo as you go. Press the seams of alternate rows in opposite directions so they nest.
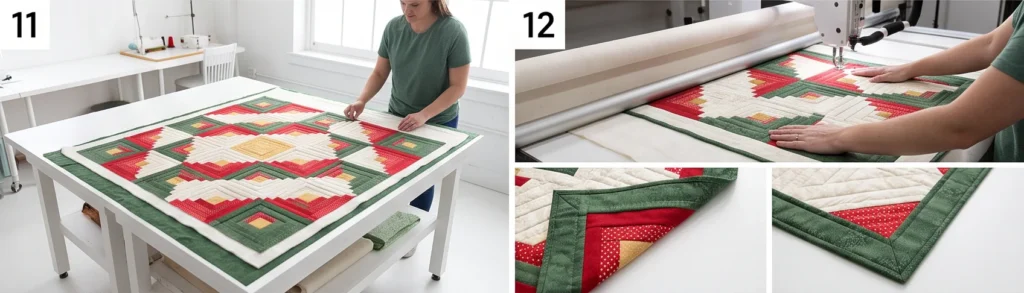
Step 12 – Join the rows. Sew the six rows together, nesting the seams and pinning at each junction. Press. The top should measure about 50½ × 60½ inches.
Step 13 – Make the quilt sandwich and quilt. Layer the backing wrong side up, batting centered, then the top right side up; baste well. Quilt with straight lines – echoing the logs, or diagonal lines running through the red/green seams both look excellent.
Step 14 – Bind and finish. Trim to 50 × 60 inches, square the corners, and bind with the 2½-inch strips. Wash gently on cold with a color catcher – Christmas reds and greens both bleed heavily – and tumble dry low.
Assembly at a Glance
- Sort into reds and greens; grayscale-test that reds read lighter.
- Cut thirty 2½-inch centers.
- Batch-cut red logs (2½, 4½, 6½, 8½) and green logs (4½, 6½, 8½, 10½) × 30.
- Add red log 1; press outward.
- Rotate and add red log 2; press outward.
- Add green logs 3 and 4 to the remaining sides.
- Add red logs 5 and 6, same sides as before.
- Add green logs 7 and 8 → block measures 10½ inches.
- Make 30 blocks, chain-piecing by log number.
- Arrange 5 × 6, rotating into a setting; photograph options.
- Sew into rows, checking orientation; press alternate rows opposite.
- Join rows, nesting seams → 50½ × 60½ top.
- Layer, baste, and quilt with straight lines.
- Trim to 50 × 60 inches; bind and wash with a color catcher.
Beginner Tips for Success
- Grayscale-test your reds and greens – similar values will kill the diagonal.
- Always rotate in the same direction, or the block won’t build square.
- Press every log outward, away from the center.
- Keep the reds on the same two sides in every block, or your layout won’t work.
- Chain-piece by log number across all thirty blocks; it’s far faster than finishing one block at a time.
- Photograph two or three layouts before sewing – the setting is where the magic happens.
- Use a color catcher; festive reds and greens bleed heavily.
Styling It & Gift Ideas
A red and green log cabin quilt is classic Christmas décor that never looks dated. Fold it at the foot of a bed through December, drape it over a wing chair by the tree, or spread it on the sofa for present-opening morning. Its strong geometry anchors a room, so let the rest of your decorating stay simple around it – greenery, candles, and warm light are all it needs.
Rich in meaning as well as looks, it makes a deeply special gift:
- A family heirloom Christmas quilt, brought out every December and eventually handed down
- A wedding or first-Christmas-together gift – the hearth symbolism at the center of the block suits a new home perfectly
- A milestone gift where you want something classic rather than trendy
- A grandparent gift, since traditional red-and-green log cabin has enormous nostalgic appeal
If you’re giving it, include a short note about the hearth tradition at the center of the block – it turns a beautiful quilt into a quilt with a story.
Final Thoughts
A red and green log cabin jelly roll quilt is timeless holiday style built from the simplest strips imaginable. The construction asks only that you rotate the same way and press outward every time; the artistry is in choosing reds that read lighter than your greens, so that diagonal split shows crisply. Get that right, arrange your thirty blocks into a barn raising or straight furrows, and you’ll have a Christmas quilt with a glowing hearth at the center of every block – and a place in the family for decades.
Other Design Inspirations – Digitally Modified Images. Texture and color may vary from the actual product.
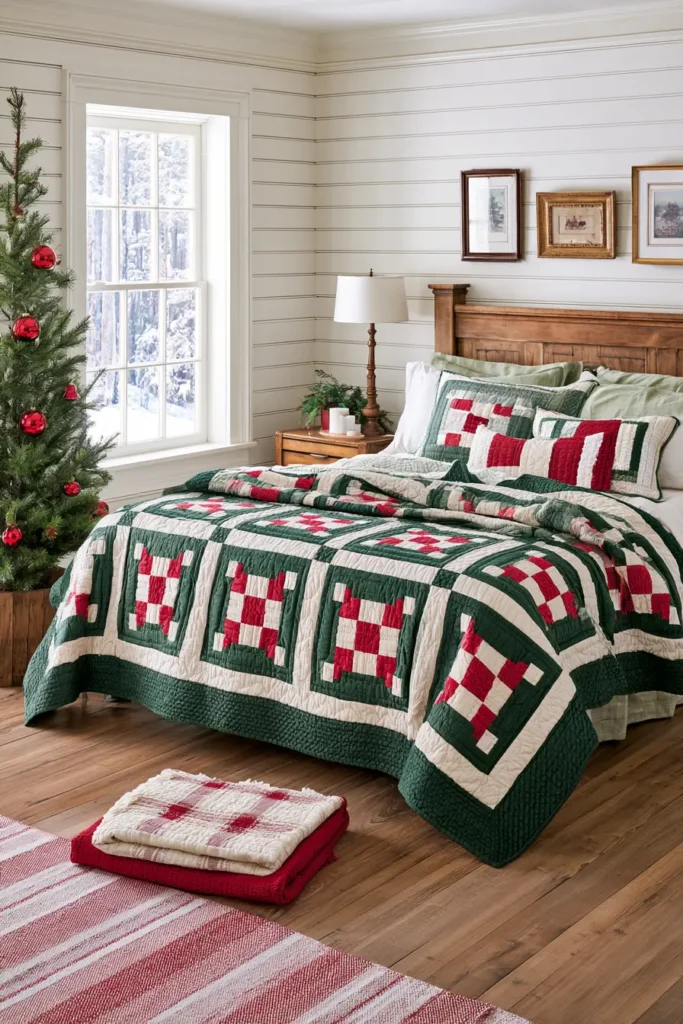
4. Candy Cane Stripe Jelly Roll Quilt for Cheerful Christmas Charm
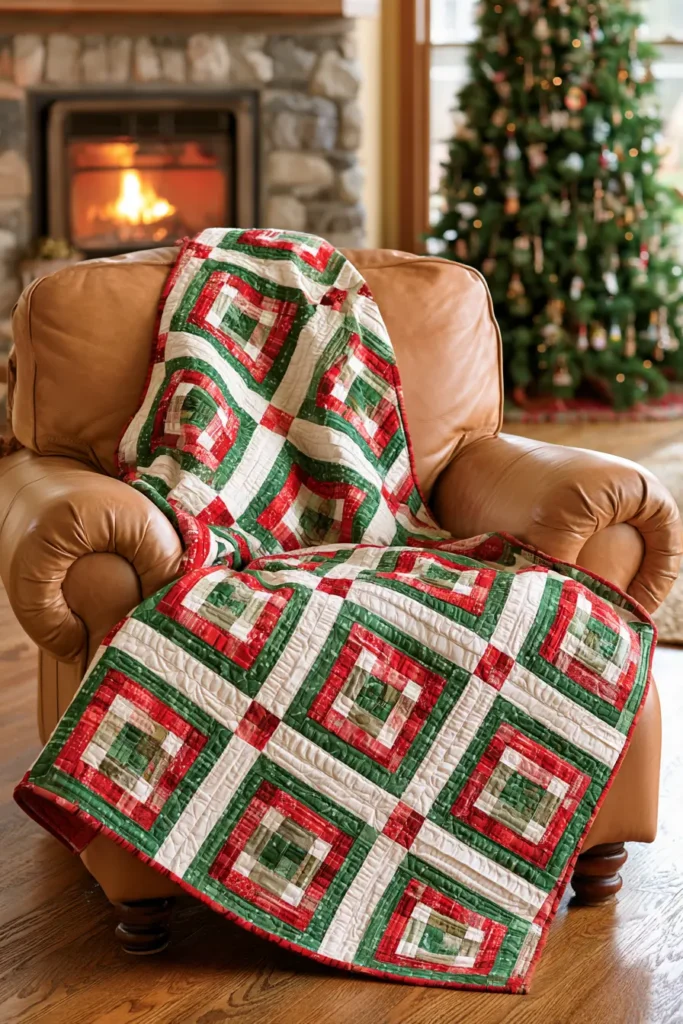
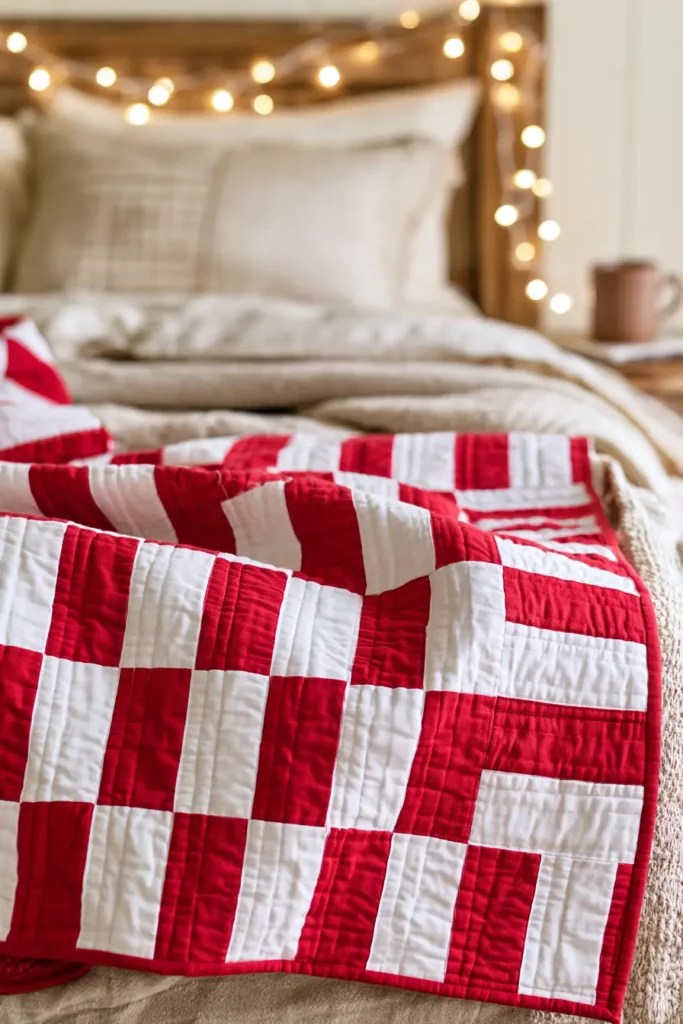
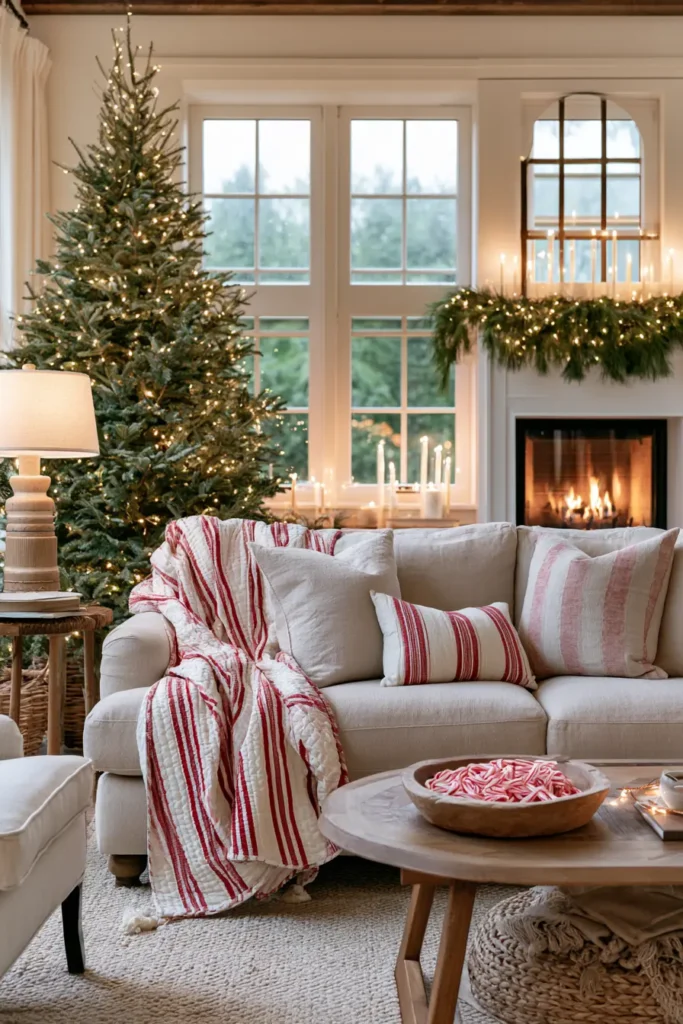
Few things are as instantly, cheerfully Christmassy as red and white stripes running on the diagonal. A candy cane stripe quilt takes that simple idea and runs with it – alternating red and white 2½-inch strips, sewn into strip sets and then cut at a 45-degree angle, so every block comes out with crisp diagonal stripes. Set them all facing the same way and the stripes march across the quilt in one continuous sweep; rotate alternate blocks and you get zigzags and chevrons. It’s bright, graphic, and joyful, and it looks far more complicated than it is.
The diagonal is what makes it, and it’s also what makes this quilt different from every other strip project. Cutting at 45 degrees means every edge of every block lands on the bias – the stretchiest direction in woven fabric. Bias edges are wonderfully cooperative if you know how to handle them and genuinely maddening if you don’t, so that’s where this section starts.
Handling Bias Edges
When fabric is cut along the straight grain, it barely stretches. Cut at 45 degrees and it stretches noticeably – and stretched edges mean wavy blocks, rippling seams, and a quilt that won’t lie flat. Four habits solve it completely:
- Starch your strip sets before cutting. Spray starch (or best-press sizing) and press firmly. Starched fabric behaves almost like paper on the bias – crisp, stable, and easy to cut accurately. This is the single most useful thing you can do.
- Don’t tug. Ever. Lift and place blocks rather than sliding or pulling them. Let the fabric sit rather than stretching it to meet a pin.
- Pin generously. Bias edges wander under the presser foot, so pin every couple of inches rather than at the ends alone.
- Handle blocks as little as possible. Cut, stack, and sew. Every extra shuffle stretches the edges a little more.
Do these four things and bias is a non-issue. Skip them and you’ll fight the quilt the whole way.
Design Inspirations – Digitally Modified Images. Texture and color may vary from the actual product.
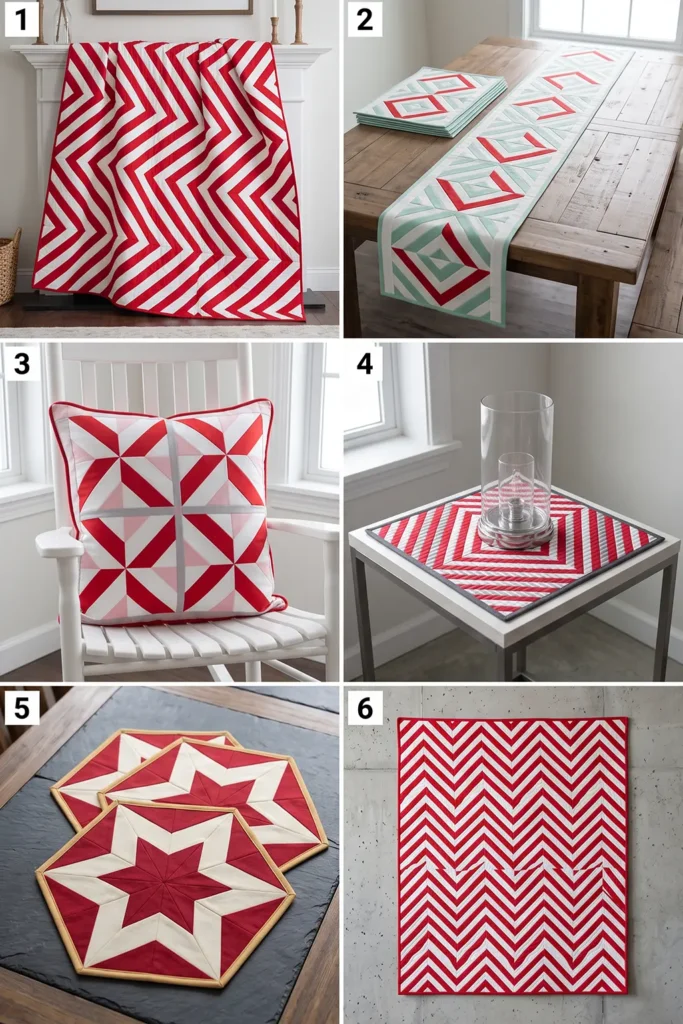
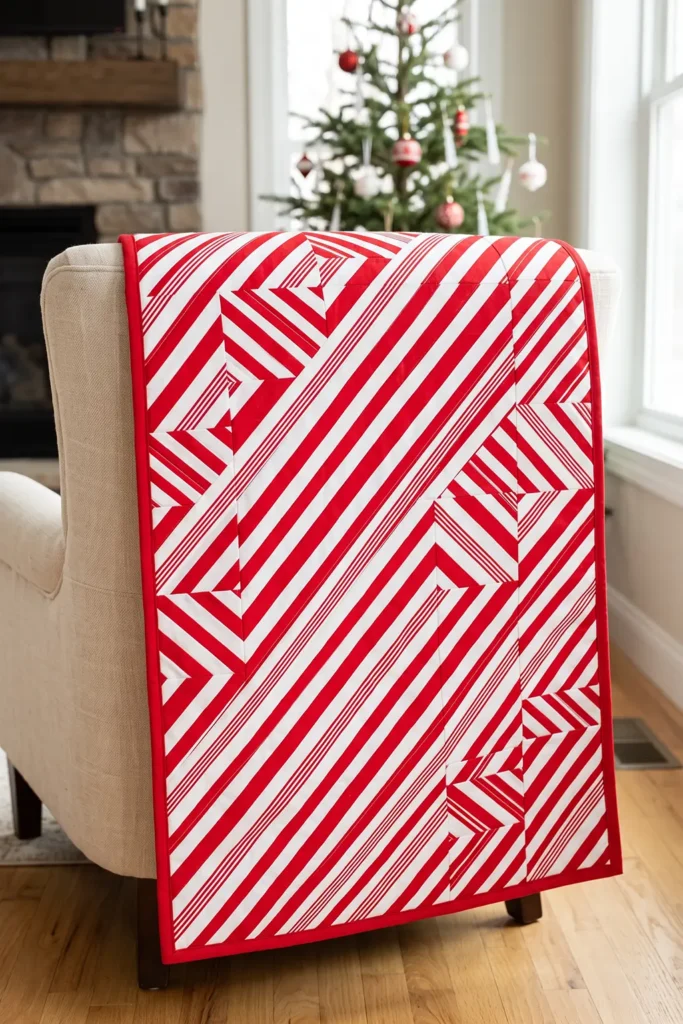
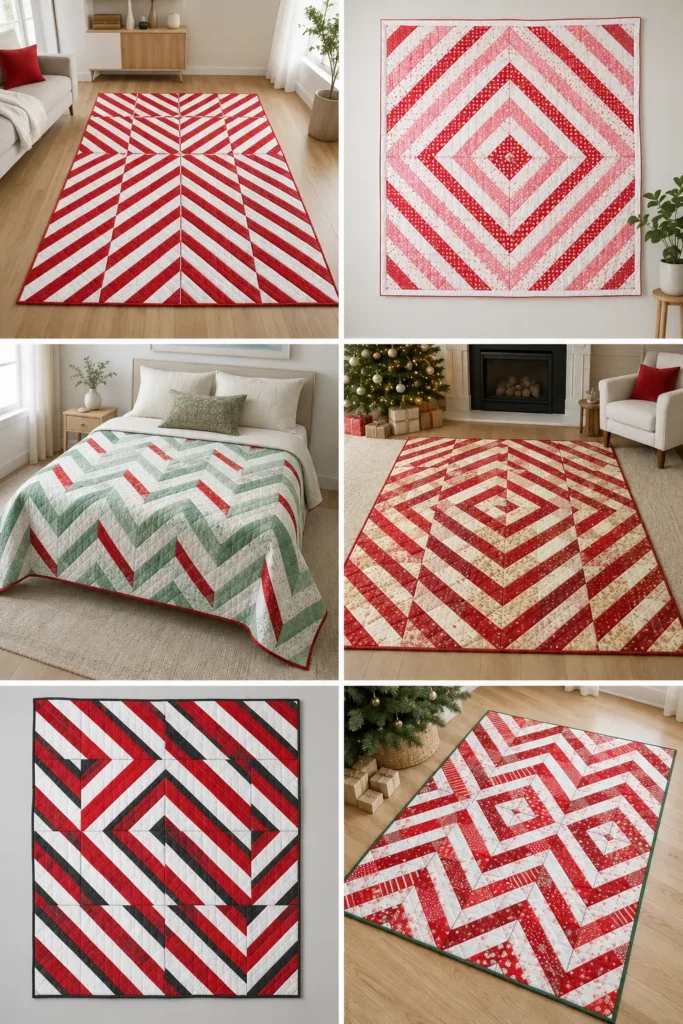
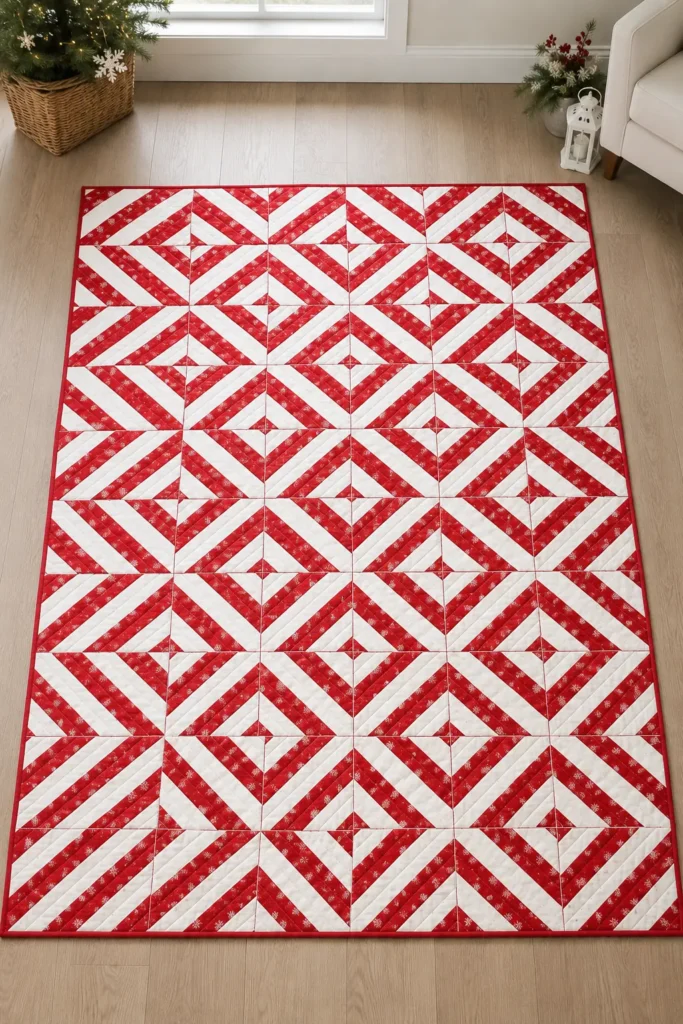
A Little History: The Candy Cane
Candy canes started out plain white. Straight sticks of pulled sugar were a common European sweet, and there’s a well-loved story that in 1670 a choirmaster in Cologne bent them into shepherd’s crooks to hand out to children during long services – charming, though historians have never verified it. What’s better documented is that the familiar red-and-white stripes only appear around the turn of the twentieth century; before that, illustrated candy canes were consistently white.
The mass-produced version came later still, when mid-century machinery made it possible to bend and stripe them at scale, turning the candy cane into the Christmas fixture we know. So those red and white diagonals – the pattern this whole quilt is built on – are barely a century old, which makes them younger than most of the quilt blocks in this collection.
Choosing Your Colors
The classic is unbeatable, but there’s room to play:
- Classic candy cane: true red and crisp white – the brightest, most instantly recognizable version
- Peppermint twist: red, white, and a touch of pale pink or cool gray for depth
- Winter mint: mint green and white, with a few red strips scattered through
- Rich holiday: cranberry, cream, and gold for something warmer and less graphic
- Modern: red, white, and charcoal for a sharper, contemporary look
Whatever you choose, keep the contrast high. Candy cane stripes depend entirely on crisp light-dark alternation – a soft pink against cream will blur into nothing at a distance.
Finished Size
- Finished quilt: about 48 × 64 inches – a generous throw
- Finished block: 8 inches (8½ inches unfinished), diagonally striped
- Layout: 6 blocks across × 8 blocks down = 48 blocks
- Skill level: confident beginner – simple sewing, but bias needs respect
- Core techniques: strip sets, 45-degree cutting, bias handling, block rotation
Materials Needed
- Red strips: about 40 strips, 2½ inches × width of fabric – one Christmas jelly roll will supply some, so plan to supplement with 1½ yards of red yardage cut into strips if your bundle is mixed
- White or cream strips: about 40 strips – roughly 2½ yards of yardage cut into 2½-inch strips
- Spray starch or sizing – genuinely essential here
- Backing: 3¼ yards
- Batting: at least 54 × 70 inches
- Binding: ⅝ yard of red solid
- Thread: neutral cotton
- Rotary cutter with a fresh blade, cutting mat, and a square ruler with a clearly marked 45-degree line
Beginner tip: diagonal cutting is fabric-hungry – the triangles trimmed from the ends of each strip set can’t be reused for blocks. Budget roughly 40-45% more fabric than a straight-cut quilt of the same size, and save the offcuts for a scrappy cushion or table topper.
How the Diagonal Cut Works
Here’s the whole technique in four lines:
- Sew 10 strips together along their long edges, alternating red and white. Your strip set measures about 20½ inches wide × 42 inches long.
- Starch and press it firmly.
- Place your square ruler on the strip set with the 45-degree line running along a seam, and cut an 8½-inch square.
- Every square you cut this way has stripes running corner to corner.
You’ll get roughly 6 squares from each strip set, so you’ll need 8 strip sets for a 48-block quilt.
Cutting Measurements
- Strip sets: 8 sets, each of 10 strips (5 red, 5 white) alternating → each about 20½ × 42 inches
- Blocks: forty-eight 8½-inch squares, cut with the 45-degree line on a seam
- Backing: 54 × 70 inches
- Batting: 54 × 70 inches
- Binding: seven strips, 2½ inches × width of fabric
Step-by-Step Guide
Step 1 – Trim selvages and sort. Trim the selvage from both ends of every strip, and separate them into red and white piles.
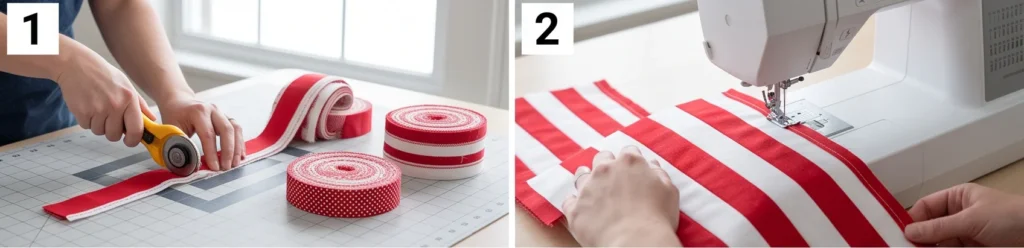
Step 2 – Sew the first strip set. Alternating red and white, sew ten strips together along their long edges with a ¼-inch seam. Sew each seam in the opposite direction to the last (down, up, down, up) – this stops the strip set bowing into a curve, which is a common and very annoying problem.
Step 3 – Press and starch. Press all seams in one direction, then spray the whole strip set generously with starch and press again until it feels crisp. Do not skip this – it’s what makes the bias behave.
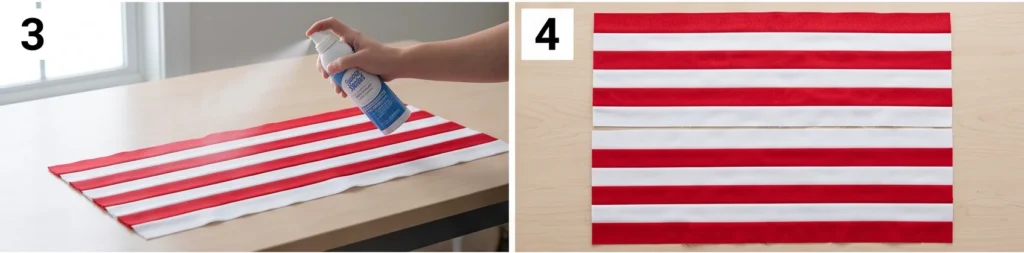
Step 4 – Make all eight strip sets. Repeat steps 2 and 3 until you have eight starched strip sets, each about 20½ × 42 inches.
Step 5 – Set up your first diagonal cut. Lay a strip set flat. Place your square ruler on it with the 45-degree line running exactly along one of the seam lines, positioned near one end. Check the alignment twice – this first cut sets the angle for everything that follows.
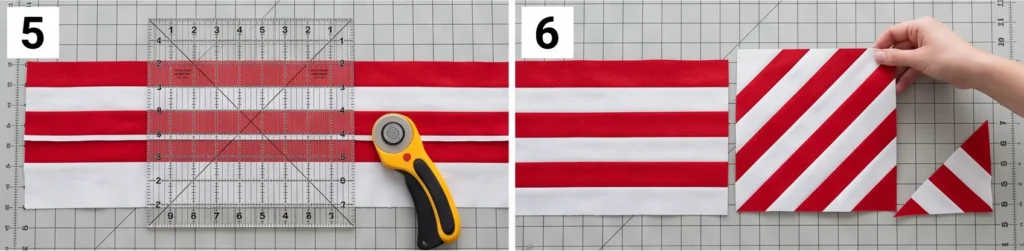
Step 6 – Cut your first 8½-inch square. With a fresh rotary blade, cut along two sides of the ruler to release an 8½-inch square with stripes running corner to corner. Lift the square away rather than sliding it.
Step 7 – Continue cutting along the strip set. Reposition the ruler along the same diagonal line and cut the next square, working along the length of the strip set. You should get about 6 squares per set. The triangular offcuts at the ends go in your scrap bin.
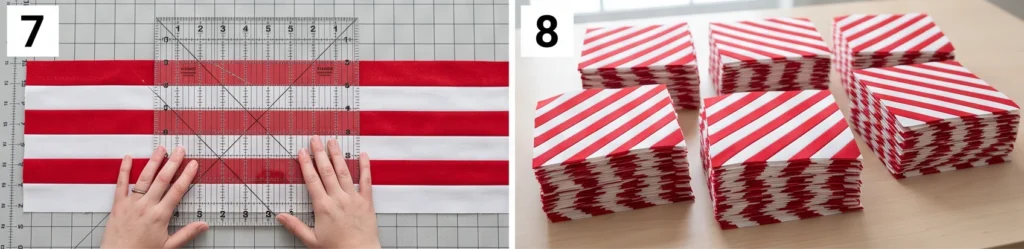
Step 8 – Cut all 48 blocks. Work through all eight strip sets, stacking your finished squares carefully and flat. Resist the urge to shuffle through the pile – every handling stretches the edges slightly.
Step 9 – Choose your stripe direction. This is the design decision. Lay the blocks out 6 across × 8 down and try two arrangements:
- All facing the same way: stripes run in one continuous diagonal sweep across the entire quilt – clean and dramatic
- Alternating rotation: turn every other block 90 degrees for zigzags and chevrons – livelier and more playful
Photograph both before committing.
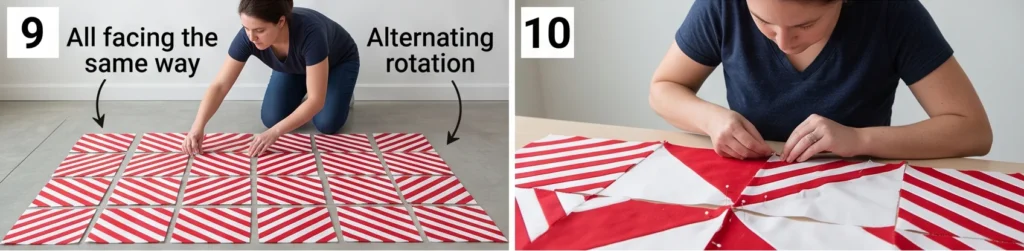
Step 10 – Sew the blocks into rows. Sew each row of six blocks with a ¼-inch seam, pinning every couple of inches to stop the bias edges wandering. Check each block’s orientation against your photo as you go.
Step 11 – Press the rows carefully. Press seams to alternate directions row by row, but press rather than iron – lift and lower the iron instead of pushing it along, which would stretch the bias.
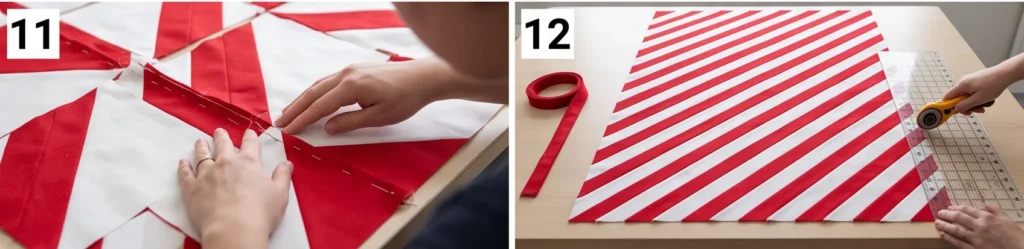
Step 12 – Join the rows. Sew the eight rows together, nesting seams and pinning generously at every junction. Press. The top should measure about 48½ × 64½ inches.
Step 13 – Make the quilt sandwich and quilt. Layer the backing wrong side up, batting centered, then the top right side up; baste well. Quilt with straight lines – either following the stripes for emphasis or running against them in a grid for contrast.
Step 14 – Bind and finish. Trim to 48 × 64 inches, square the corners, and bind with the 2½-inch red strips. Wash gently on cold with a color catcher – red on white is exactly the combination where bleeding shows most – and tumble dry low.
Assembly at a Glance
- Trim selvages; sort reds and whites.
- Sew ten strips into a set, alternating sewing direction to prevent bowing.
- Press, starch generously, press again until crisp.
- Make 8 strip sets (~20½ × 42 inches each).
- Align the ruler’s 45-degree line on a seam; check twice.
- Cut an 8½-inch square; lift, don’t slide.
- Continue along the set – about 6 squares each.
- Cut all 48 blocks; stack flat, handle minimally.
- Lay out 6 × 8; choose continuous stripes or alternating chevrons.
- Sew rows of six, pinning every couple of inches.
- Press (lift and lower, never push) alternate rows opposite.
- Join rows, pinning generously → 48½ × 64½ top.
- Layer, baste, quilt with straight lines.
- Trim to 48 × 64 inches; bind in red, wash with a color catcher.
Beginner Tips for Success
- Starch every strip set before cutting – this is the whole trick to bias.
- Sew strip-set seams in alternating directions so the set doesn’t bow.
- Align the ruler’s 45-degree line on a seam, not on the fabric edge.
- Lift blocks, never slide them, and pin every couple of inches.
- Press, don’t iron – pushing the iron along stretches bias edges.
- Budget 40-45% extra fabric; diagonal cutting produces real waste.
- Keep contrast high; soft tones blur the stripe at a distance.
Styling It & Gift Ideas
A candy cane quilt is pure cheer, so let it be the bright spot – draped over a sofa arm, folded on a bench in the hall, or spread across a bed in a guest room during December. The bold red-and-white graphic works beautifully against neutral furniture and plain walls, and it pairs naturally with greenery, brass, and warm lights. It’s also one of the most photogenic quilts you can make, which is worth knowing if you like to document your work.
Its bright, playful charm makes it a wonderful gift:
- A children’s Christmas quilt – the bold stripes are exactly the kind of thing kids love
- A gift for someone who decorates enthusiastically, since it works as décor as much as bedding
- A table topper or cushion made from the leftover diagonal offcuts – a matching second gift for free
- A teacher or neighbor gift at a smaller lap size, using half the blocks
Because red and white reads as festive without being tied to any particular tradition, it also suits people who decorate for winter generally rather than Christmas specifically.
Final Thoughts
A candy cane stripe jelly roll quilt is cheerful Christmas charm at its most graphic – crisp red and white diagonals sweeping across the whole quilt, built from nothing more than strip sets and a 45-degree cut. The technique is simple; the craft is in respecting the bias. Starch your strip sets, align that ruler line on a seam, lift rather than slide, and pin more than feels necessary – and you’ll end up with a bright, joyful quilt that looks like it took far more skill than it actually did.
Other Design Inspirations – Digitally Modified Images. Texture and color may vary from the actual product.
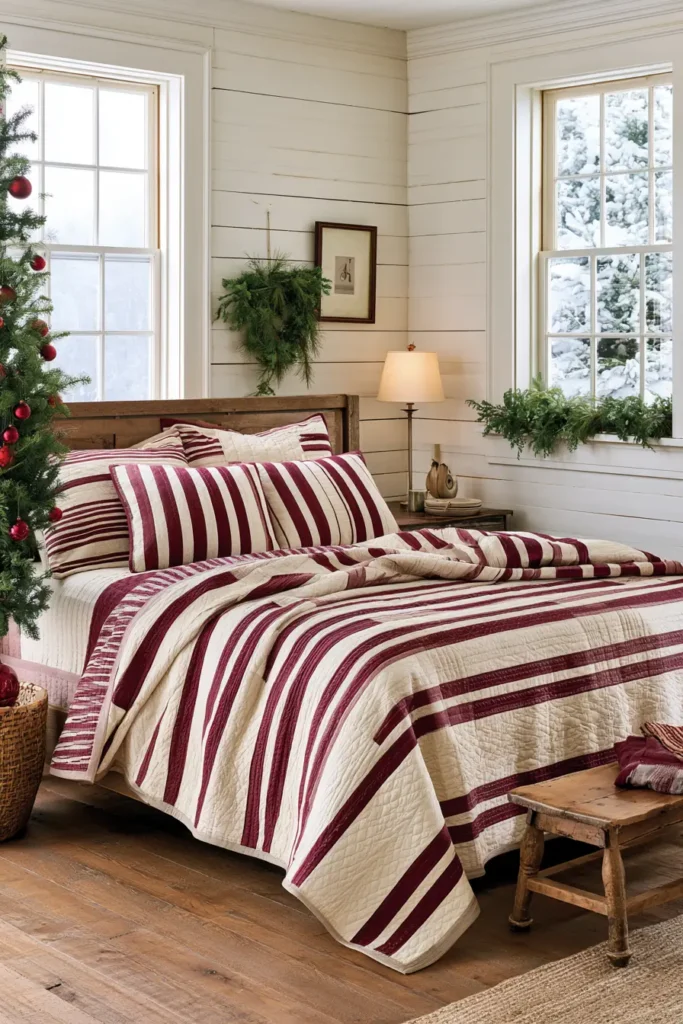
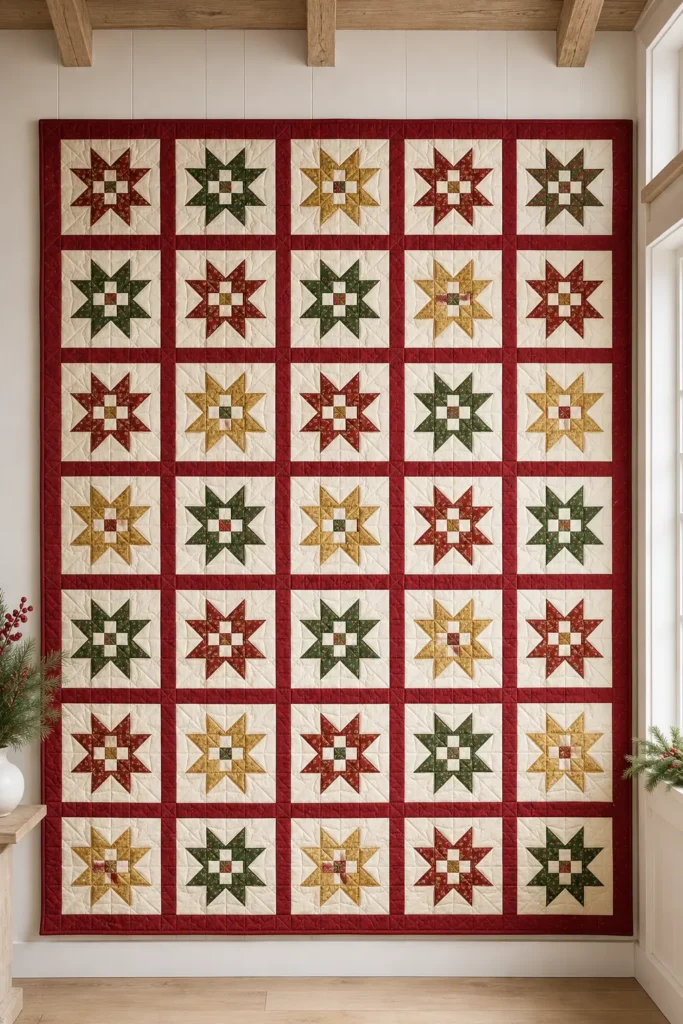
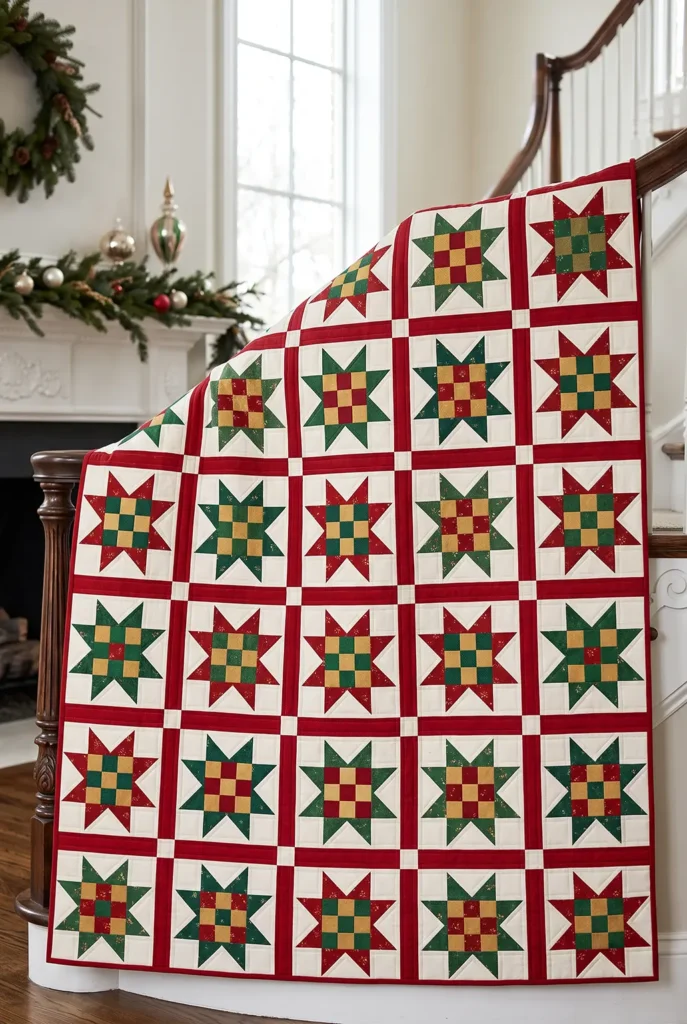
5. Jelly Roll Christmas Star Quilt for an Elegant Holiday Statement
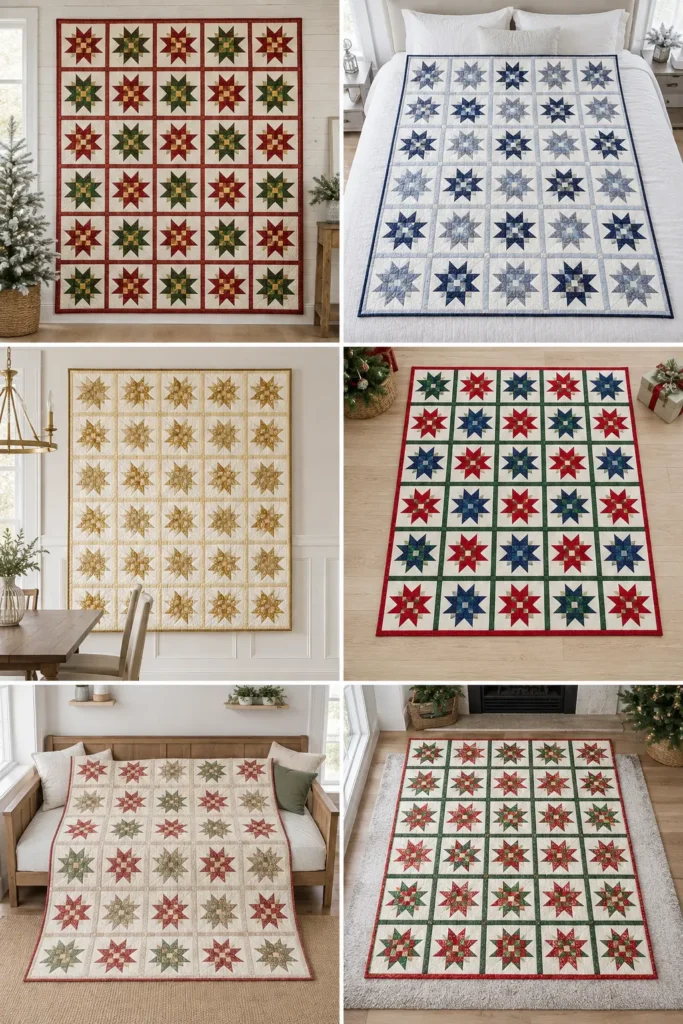
If most Christmas quilts are cheerful, a star quilt is elegant. The sawtooth star – a center square framed by eight sharp points radiating outward – is one of quilting’s most enduring blocks, and in festive reds, greens, and gold against a crisp background it becomes something genuinely refined. Set with clean sashing so each star has room to breathe, it’s the quilt you’d hang over a banister or lay across a bed for Christmas dinner guests, and it looks far more like an heirloom than a seasonal decoration.
There’s a neat problem to solve when you make stars from a jelly roll, though. A sawtooth star traditionally has a large square at its center – and a 2½-inch strip simply isn’t wide enough to cut one. The solution turns out to be a genuine improvement: piece the center from four small squares instead. That little four-patch heart adds a second layer of pattern to every star, and it’s built from exactly the strips you already have.
How the Block Works
Each star is an 8-inch finished block, arranged as a 3 × 3 grid of units:
- A four-patch center – four 2½-inch squares, finishing 4 inches square
- Four flying-geese units – each finishing 2 × 4 inches, carrying two star points apiece for eight points in total
- Four corner squares – each finishing 2 inches
Every single piece is cut from a 2½-inch strip, so you’re only ever cutting to length. That’s what makes this design so well suited to a jelly roll.
Per-Block Cutting Chart
All pieces cut from 2½-inch strips:
| Unit | Fabric | Cut size | Quantity |
|---|---|---|---|
| Center four-patch | star + accent | 2½ × 2½ in | 4 |
| Geese backgrounds | background | 2½ × 4½ in | 4 |
| Star points | star fabric | 2½ × 2½ in | 8 |
| Corner squares | background | 2½ × 2½ in | 4 |
Per block, that’s roughly 28 inches of background strip and 30 inches of star fabric.
Design Inspirations – Digitally Modified Images. Texture and color may vary from the actual product.
The One Thing That Makes or Breaks a Star
Star points get chopped off more often than any other quilting mistake, and it comes down to a quarter inch.
When you finish each flying-geese unit, the apex of the background triangle must sit exactly ¼ inch below the top raw edge. That quarter inch is the seam allowance the block assembly will consume. If the point sits any higher, it gets sliced off when you sew the rows together, and you end up with eight blunt stubs instead of eight sharp points.
Check every unit as you make it. It takes two seconds and it’s the difference between a crisp star and a disappointing one.
Finished Size
- Finished quilt: about 52 × 62 inches – a generous throw
- Finished block: 8 inches (8½ inches unfinished)
- Layout: 5 blocks across × 6 blocks down = 30 stars, separated by 2-inch sashing
- Skill level: confident beginner – the most precision-focused design in this collection
- Core techniques: four-patch centers, stitch-and-flip flying geese, point matching, sashed settings
Materials Needed
- 1 Christmas jelly roll (about 40 strips) – for the stars and centers
- Background fabric: 1½ yards of cream, white, or pale gray, cut into 2½-inch strips. Thirty stars need around 840 inches of background, far more than a jelly roll can supply, and a consistent background is what makes the stars read cleanly
- Sashing: 1 yard of a coordinating red or green solid, cut into 2½-inch strips
- Backing: 3½ yards
- Batting: at least 58 × 68 inches
- Binding: ⅝ yard
- Thread: neutral cotton
- Rotary cutter, cutting mat, quilting ruler, pins, iron
Beginner tip: sew a scant ¼-inch seam – a thread’s width narrower than a true quarter inch, which allows for the fold the fabric makes when pressed. Test it on scraps first. On a star block, that thread’s width is the difference between points that meet and points that don’t.
Choosing Your Colors
Stars look most elegant with a controlled palette rather than a free-for-all:
- Traditional: deep cranberry and forest green stars on cream, with gold four-patch centers
- Rich jewel: ruby, emerald, and sapphire stars against warm white
- Gold and cream: metallic golds and warm neutrals for an understated, sophisticated version
- Frosty: silver, icy blue, and white for a wintry look that stays up past Christmas
- Scrappy but controlled: many different reds and greens, all against one consistent background
Whatever you choose, keep the background identical throughout. Star points need clean, consistent contrast to look sharp, and a varied background is the fastest way to lose them.
For the four-patch centers, use two contrasting fabrics arranged checkerboard-style – a tiny secondary pattern at the heart of every star.
A Little History: The Christmas Star
The star has been Christmas’s central symbol for centuries. The Star of Bethlehem gave the tradition its meaning, and the custom of topping a Christmas tree with a star spread through nineteenth-century Europe alongside the decorated tree itself, quickly becoming the most recognizable ornament in the house.
Stars are equally at home in quilting. They’re among the oldest and most widespread quilt motifs, appearing in countless variations – sawtooth, Ohio, LeMoyne, feathered – across two centuries of American quilts, prized because their sharp geometry showcased a quilter’s skill. Putting the two traditions together, a star quilt at Christmas is about as fitting as patchwork gets.
Stitching meaningful symbols into cloth is a very old habit. In the Nakshi Kantha tradition of my own family’s background, everyday quilts were covered with stars, trees, and emblems of home – the things worth wishing for, stitched into something warm.
Cutting Measurements
Per block (multiply by 30):
- Four 2½-inch squares for the center four-patch
- Four 2½ × 4½-inch background rectangles
- Eight 2½-inch star-fabric squares
- Four 2½-inch background corner squares
For the quilt:
- Vertical sashing: thirty-six strips at 2½ × 8½ inches
- Horizontal sashing: seven strips at 2½ × 52½ inches (piece from full-length strips)
- Backing: 58 × 68 inches
- Batting: 58 × 68 inches
- Binding: six strips, 2½ inches × width of fabric
Step-by-Step Guide
Step 1 – Cut and sort everything. Batch-cut all your squares and rectangles, keeping each type in its own pile: center squares, star points, geese backgrounds, corners. Thirty blocks is a lot of pieces, and sorted piles turn it into an assembly line.
Step 2 – Test your seam allowance. Sew two scrap squares together, press, and measure. Two 2½-inch squares joined should give exactly 4½ inches. If yours measures less, your seam is too wide – adjust before you sew anything real.
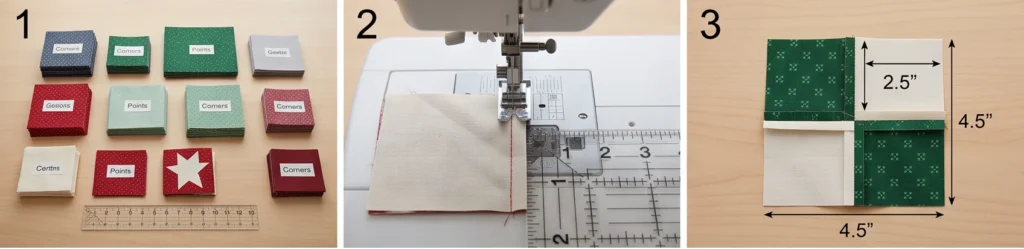
Step 3 – Make the four-patch centers. Sew two squares together, then another two, pressing the seams in opposite directions. Join the two pairs, nesting the center seam, to make a four-patch measuring 4½ inches. Make 30.
Step 4 – Draw your diagonals. On the back of each 2½-inch star square, draw a diagonal line corner to corner. You’ll need 240 of them, so put on something to listen to and work through the pile.
Step 5 – Make the first half of each goose. Place a marked star square on the left end of a 2½ × 4½-inch background rectangle, right sides together. Sew directly on the drawn line, trim the excess to ¼ inch, and press the triangle open.
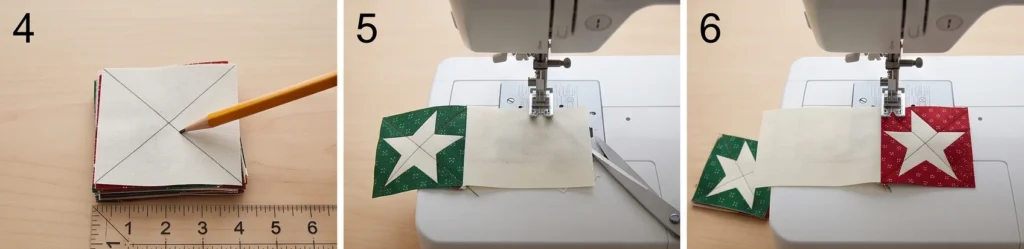
Step 6 – Complete the goose. Place a second marked square on the right end of the same rectangle, overlapping slightly in the middle. Sew on the line, trim, and press open. You now have one flying-geese unit with two star points. Make 120 in total – four per block.
Step 7 – Check the apex clearance. Measure each unit: it should be exactly 2½ × 4½ inches, with the point of the background triangle sitting ¼ inch below the top raw edge. Set aside any that don’t measure up and remake them – this check saves more star points than anything else you can do.
Step 8 – Gather one block’s worth of units. You now have all the pieces for a star, but they don’t look like one yet. For a single block, collect: one four-patch center, four flying-geese units, and four 2½-inch background corner squares – nine pieces in total. Lay them on your table so you can see them all.
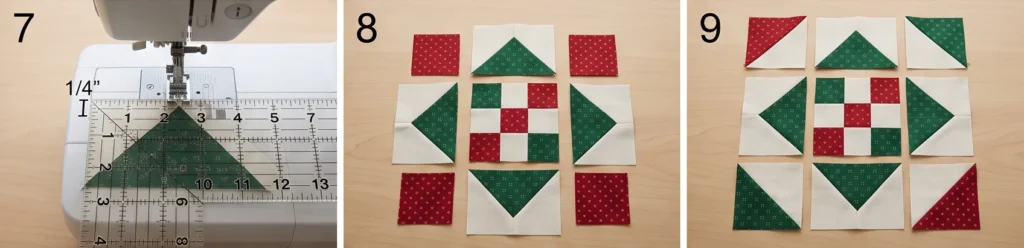
Step 9 – Understand the layout. The star is a 3 × 3 grid, and this is where it comes together. The four geese form the eight points, the four corners fill the gaps, and the four-patch sits at the heart:
| Top row | ||
|---|---|---|
| corner square | goose – point up | corner square |
| goose – point left | four-patch center | goose – point right |
| corner square | goose – point down | corner square |
The single rule to remember: every goose points away from the center. The two small star-fabric triangles on each geese unit sit against the center, and the big background triangle points outward. Get one goose turned around and that arm of the star vanishes, so check all four before you sew anything.
Step 10 – Sew the top row. Sew a corner square to the left of a geese unit (point facing up and away from you), then a corner square to its right. Use a scant ¼-inch seam. Press the seams toward the corner squares. The row should measure 8½ × 2½ inches.
Step 11 – Sew the middle row. Sew a geese unit (point facing left) to the left side of the four-patch center, and another (point facing right) to the right side. Press the seams toward the center four-patch. The row should measure 8½ × 4½ inches. Notice that this row is twice as tall as the other two – that’s correct, because the center is 4 inches finished.
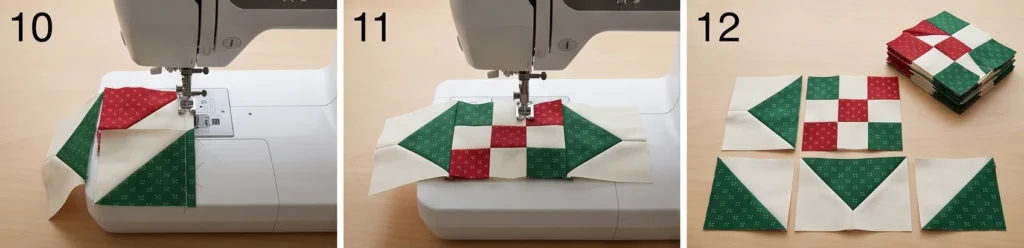
Step 12 – Sew the bottom row. Repeat the top row: corner, geese unit (point facing down), corner. Press toward the corners. It should measure 8½ × 2½ inches.
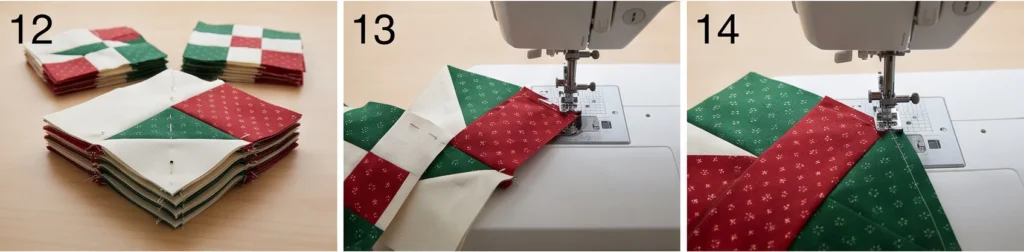
Step 13 – Join the three rows and meet your star. Stack the rows in order – top, middle, bottom – and sew them together with a scant ¼-inch seam, pinning at every point so the star tips meet the seam cleanly. Press the geese seams open to reduce bulk where the points converge. The finished block should measure exactly 8½ × 8½ inches, and the eight-pointed star will now be clearly visible.
Step 14 – Make all thirty blocks. Repeat steps 8 to 13 until you have 30 stars. This goes much faster in batches – sew all thirty top rows, then all thirty middle rows, then all thirty bottom rows, then join. Check each finished block measures 8½ inches and set aside any that need trimming.
Step 15 – Lay out the quilt. Arrange the stars 5 across × 6 down, spreading your star colors evenly so no two identical stars sit together. Photograph the layout so you can put it back the same way.
Step 16 – Build the rows with vertical sashing. For each row, alternate: sashing, star, sashing, star, and so on – six 2½ × 8½-inch sashing strips per row. Each finished row measures 52½ inches wide.
Step 17 – Join the rows with horizontal sashing. Sew a 2½ × 52½-inch strip above the first row, between each pair of rows, and below the last – seven strips in all. Press the seams toward the sashing. The top should measure about 52½ × 62½ inches.
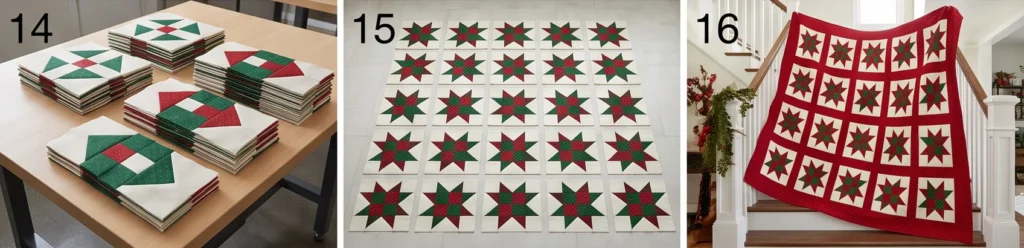
Step 18 – Make the quilt sandwich and quilt. Layer the backing wrong side up, center the batting, then layer the top right side up; baste well. Keep the quilting restrained so the stars lead – outline quilting around each star, straight lines through the sashing, or a simple all-over grid.
Step 19 – Bind and finish. Trim to 52 × 62 inches, square the corners, and bind with the 2½-inch strips. Wash gently on cold with a color catcher – festive reds and greens bleed – and tumble dry low.
Assembly at a Glance
- Batch-cut all pieces; sort into labeled piles.
- Test your seam allowance – two 2½-inch squares should join to 4½ inches.
- Make 30 four-patch centers (4½ inches each).
- Draw diagonals on all 240 star-point squares.
- Stitch-and-flip the left end of each geese rectangle.
- Stitch and flip the right end → 120 geese units.
- Check each unit is 2½ × 4½ with ¼-inch apex clearance.
- Gather one block’s nine units: 1 four-patch, 4 geese, 4 corners.
- Lay them in a 3 × 3 grid; every goose points away from the center.
- Sew the top row: corner + goose (point up) + corner → 8½ × 2½ in.
- Sew the middle row: goose (point left) + four-patch + goose (point right) → 8½ × 4½ in.
- Sew the bottom row: corner + goose (point down) + corner → 8½ × 2½ in.
- Join the three rows, pinning at every point; press geese seams open → 8½-inch star.
- Repeat for 30 blocks, working in batches by row.
- Arrange 5 × 6, spreading colors; photograph.
- Build rows with six 2½ × 8½ sashing strips each → 52½ inches wide.
- Join rows with seven 2½ × 52½ horizontal strips → 52½ × 62½ top.
- Layer, baste, and quilt simply.
- Trim to 52 × 62 inches; bind and wash with a color catcher.
Beginner Tips for Success
- Sew a scant ¼-inch seam and test it before you start.
- Check the ¼-inch apex clearance on every geese unit – it’s the single best habit for sharp points.
- Press geese seams open to reduce bulk where eight points converge.
- Keep the background identical across all thirty blocks.
- Make the four-patch centers from two contrasting fabrics for a secondary pattern.
- Batch-work each step across all blocks rather than finishing one star at a time.
- Use a color catcher; Christmas reds and greens bleed heavily.
Styling It & Gift Ideas
A star quilt is the elegant end of Christmas decorating, so treat it accordingly – laid across a bed in a guest room, folded over the arm of a wing chair, or draped along a banister with greenery. The sashing gives each star breathing room, which means it suits refined spaces that a busy scrappy quilt would overwhelm. Keep the surroundings simple – candles, greenery, warm light – and let the stars do the work.
Its heirloom quality makes it a genuinely special gift:
- A wedding or first-Christmas gift, since stars carry meanings of hope and guidance
- A milestone or anniversary gift where you want something classic rather than novelty
- A smaller wall quilt or table topper made from four or six stars, for a faster but equally elegant gift
- A keepsake quilt with the year quilted into the sashing
Because the four-patch centers are so small, they’re a lovely place to tuck in a meaningful fabric – a scrap from a wedding dress, a child’s outgrown Christmas outfit, or a piece of a grandmother’s quilt.
Final Thoughts
A jelly roll Christmas star quilt is the elegant statement of this collection – thirty sharp-pointed stars, each with a little four-patch heart, floating in crisp sashing. Because a 2½-inch strip is too narrow for a traditional star center, piecing that center turns a limitation into a feature and gives every block a second layer of pattern. Test your seam, check that quarter-inch apex clearance, and keep your background consistent, and you’ll have a Christmas quilt that looks like an heirloom from the first year you bring it out.
Other Design Inspirations – Digitally Modified Images. Texture and color may vary from the actual product.
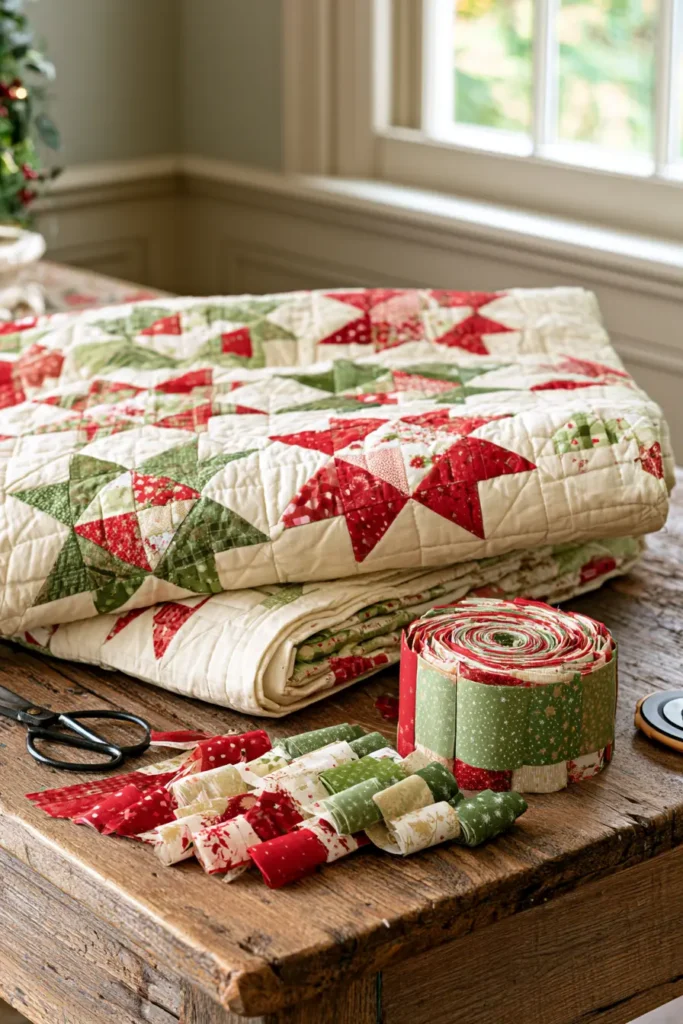
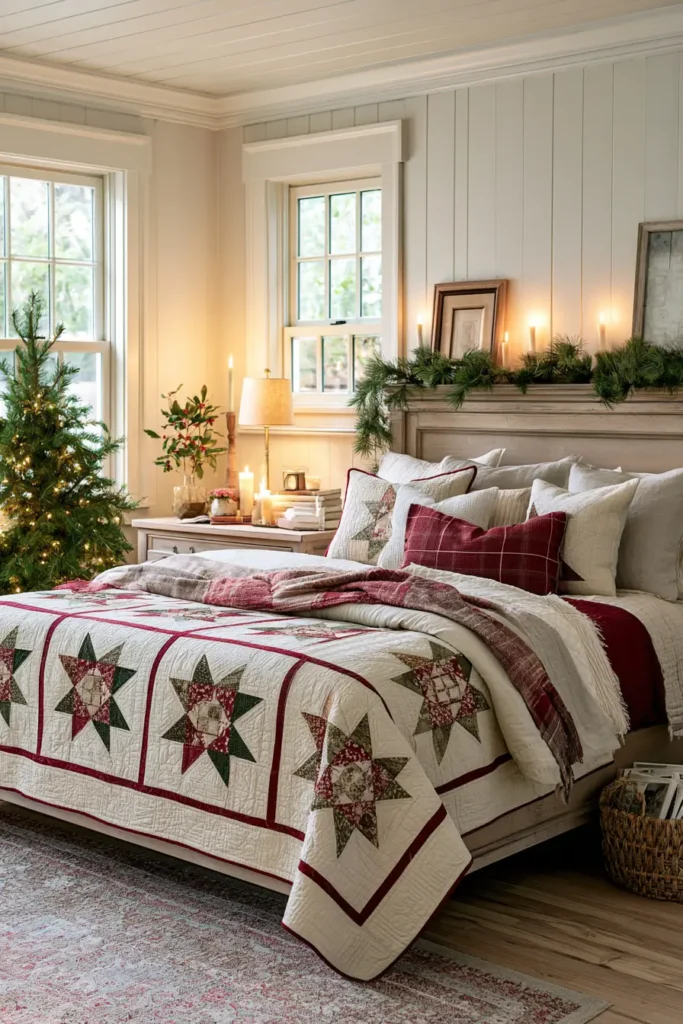
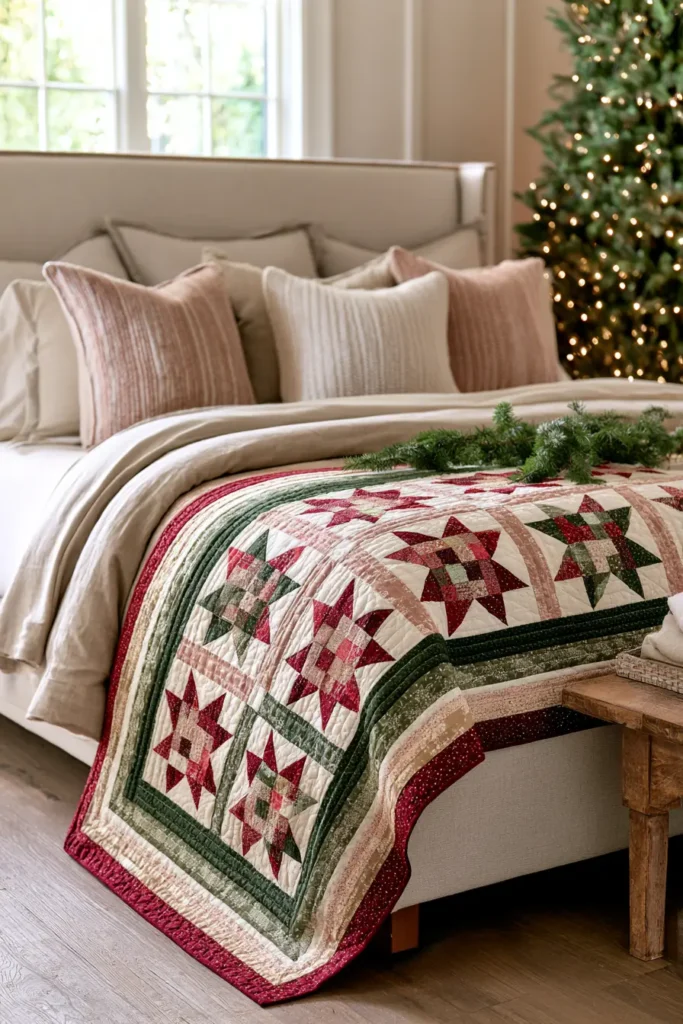
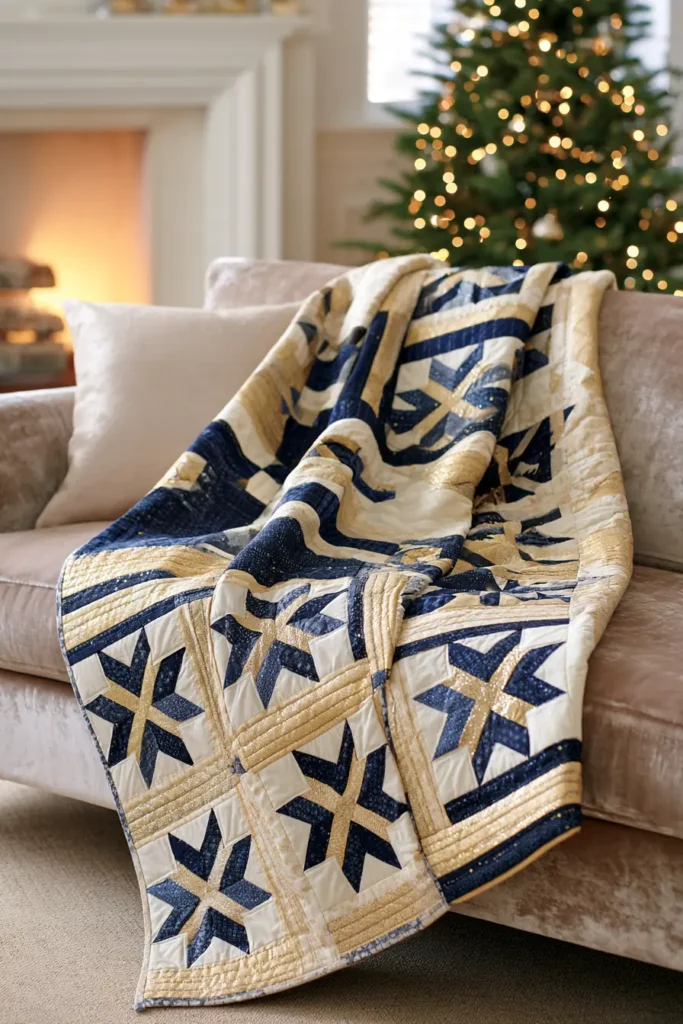
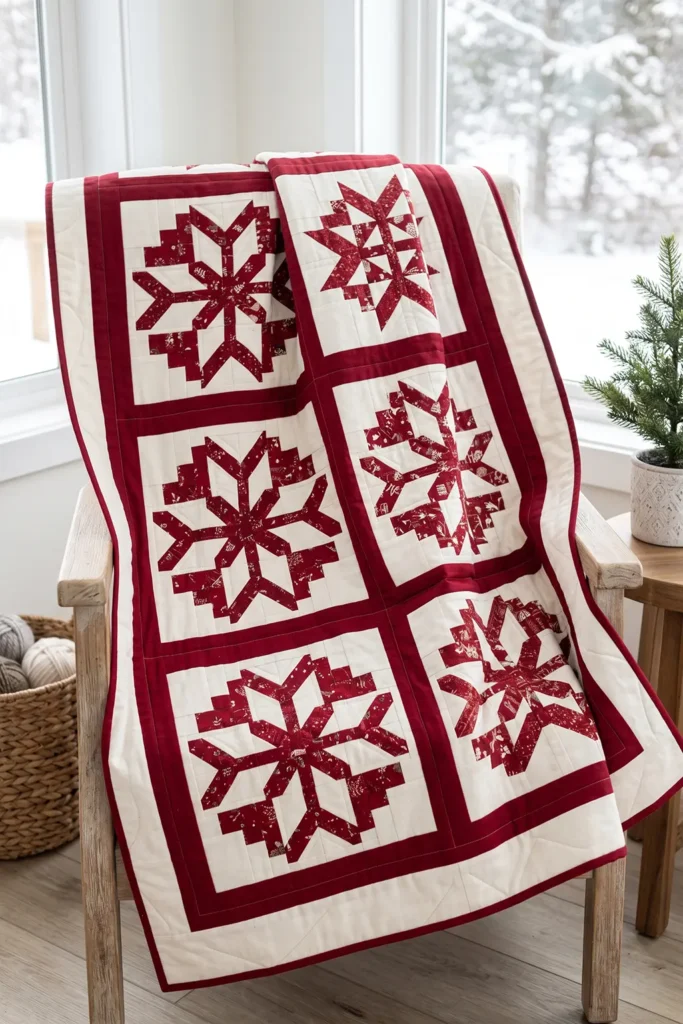
6. Nordic Snowflake Jelly Roll Quilt for Cozy Winter Elegance
Scandinavian winter design has a particular calm to it – clean geometry, a restrained palette, and motifs built from small repeating shapes. This quilt captures exactly that: six large snowflakes, each charted on a grid and pieced entirely from 2½-inch squares, floating in crisp sashing. It’s elegant rather than cute, and because snowflakes belong to winter generally rather than Christmas specifically, it stays out happily through January and February when the rest of the decorations have been packed away.
There’s a lovely bit of logic behind building a snowflake this way. Nordic motifs have always been drawn on grids – and once you know that, piecing one from squares stops feeling like a compromise and starts feeling like the most authentic possible method.
A Little History: Why Nordic Snowflakes Are Grids
Traditional Scandinavian patterns come from knitting, and knitted colorwork is inherently a grid: each stitch is one square on a chart, one color or the other. The most famous of them, the eight-petal Selburose, takes its name from the village of Selbu in Norway, where a young woman named Marit Emstad is credited with knitting the first patterned mittens in the 1850s. The motif spread across Norway and then far beyond, and today it’s the pattern most people picture when they think of a Nordic snowflake.
So a snowflake pieced from squares isn’t a simplification of a Nordic motif – it is a Nordic motif, rendered in the same charted, one-square-at-a-time logic that knitters have used for nearly two centuries. Working from a grid chart is common to many textile traditions, including the counted stitchwork I grew up around in my own family’s Nakshi Kantha background, where patterns were built stitch by stitch rather than drawn freehand.
Design Inspirations – Digitally Modified Images. Texture and color may vary from the actual product.
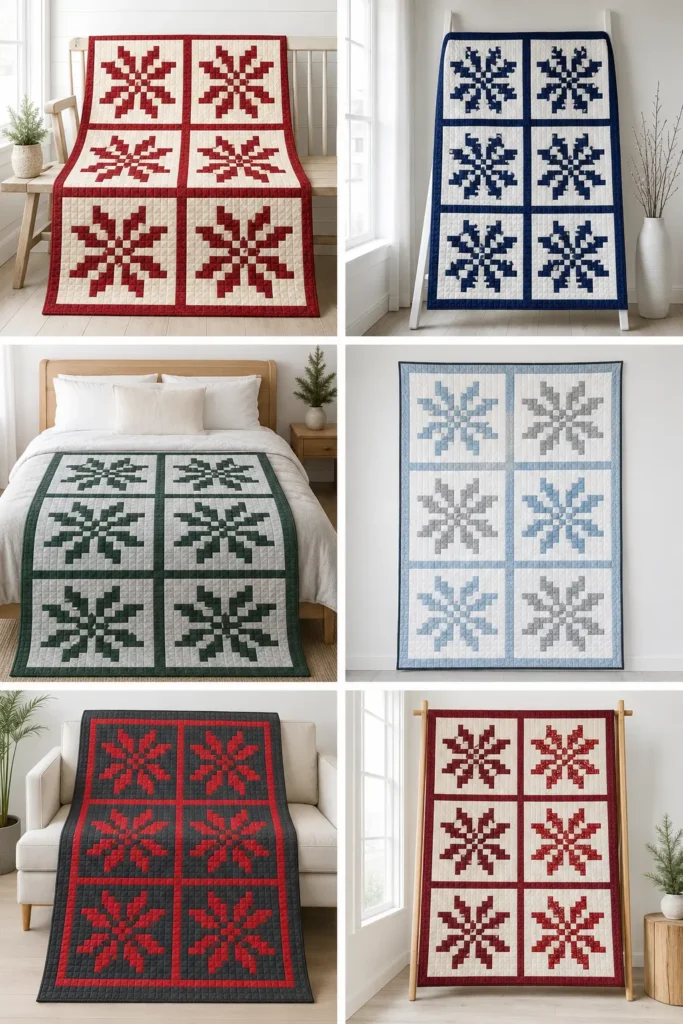
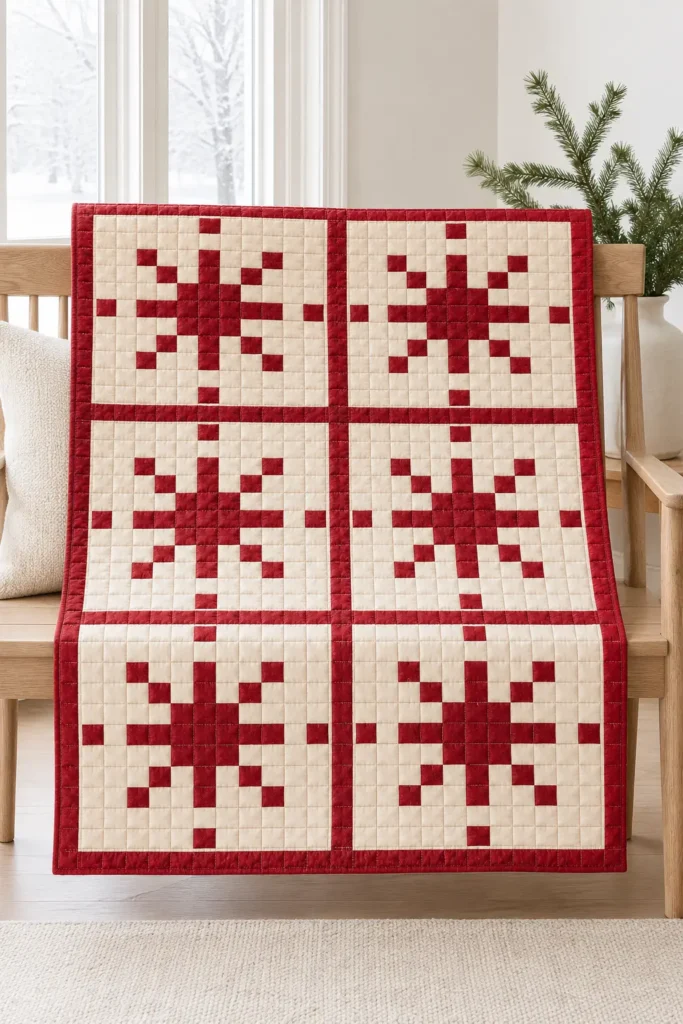
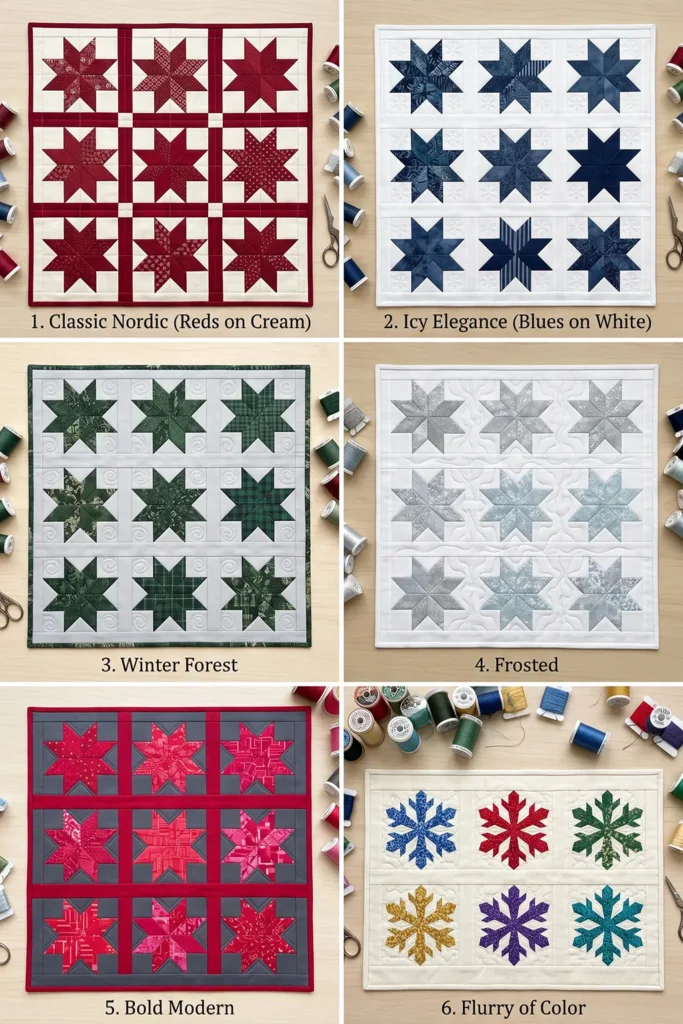
The Snowflake Chart
Each block is a 9 × 9 grid of 2-inch finished squares, giving an 18-inch finished block. Here’s the chart – X is snowflake fabric, · is background:
Row 1   ·  ·  ·  ·  X  ·  ·  ·  ·
Row 2   ·  X  ·  ·  X  ·  ·  X  ·
Row 3   ·  ·  X  ·  X  ·  X  ·  ·
Row 4   ·  ·  ·  X  X  X  ·  ·  ·
Row 5   X  X  X  X  X  X  X  X  X
Row 6   ·  ·  ·  X  X  X  ·  ·  ·
Row 7   ·  ·  X  ·  X  ·  X  ·  ·
Row 8   ·  X  ·  ·  X  ·  ·  X  ·
Row 9   ·  ·  ·  ·  X  ·  ·  ·  ·
Four long arms reach the edges of the block, and four shorter diagonal arms branch outward from the center – the classic eight-armed snowflake. Count them, and each block uses 29 snowflake squares and 52 background squares, 81 in all.
Print this chart or copy it onto graph paper before you start. You’ll refer to it constantly, and it’s far easier than working from memory.
Finished Size
- Finished quilt: 42 × 62 inches – a generous lap quilt or sofa throw
- Finished block: 18 inches (18½ inches unfinished)
- Grid square: 2 inches finished (2½ inches cut)
- Layout: 2 blocks across × 3 blocks down = 6 snowflakes, with 2-inch sashing between and all around
- Skill level: confident beginner – only straight seams, but a lot of them
- Core techniques: working from a chart, grid piecing, row assembly, sashed settings
Materials Needed
- 1 Christmas or winter jelly roll – for the snowflakes; you need about 11 strips in your snowflake colors
- Background fabric: 1½ yards of white, cream, or pale ice blue, cut into 20 strips at 2½ inches × width of fabric. A jelly roll won’t contain nearly enough light strips, and a consistent background is what makes the snowflakes read
- Sashing: ⅔ yard of a coordinating solid, cut into nine 2½-inch strips
- Backing: 3 yards of standard 42-44 inch fabric (cut into two panels and seamed), or 1⅞ yards of 108-inch wide backing
- Batting: at least 48 × 68 inches
- Binding: ½ yard, cut into six 2½-inch strips
- Thread: neutral cotton
- Rotary cutter, cutting mat, quilting ruler, pins, iron, and a design wall or clear floor space
Beginner tip: each 2½-inch strip yields 16 squares (42 usable inches ÷ 2½ inches). That’s the number to work from when you’re counting strips – you need 174 snowflake squares and 312 background squares in total, which is 11 and 20 strips respectively.
Choosing Your Colors
Nordic style is about restraint, so pick one strong snowflake color against one clean background:
- Classic Nordic: deep red snowflakes on cream – the most traditional and the most striking
- Icy elegance: navy or steel blue on white
- Winter forest: deep pine green on pale gray
- Frosted: silver-gray and pale blue on white, for something very soft
- Bold modern: vibrant crimson on charcoal, which reverses the usual scheme beautifully
The one rule that matters: use a single consistent background across all six blocks. These snowflakes are read as shapes, and a varied background breaks them up. You can happily vary the snowflake fabrics – six different reds across six blocks looks wonderful, as though each flake is its own – but the background must stay steady.
For sashing, a solid in your snowflake color frames the blocks crisply; a background-matched sashing makes the snowflakes appear to float.
Cutting Measurements
- Snowflake squares: 174 at 2½ × 2½ inches (29 per block × 6)
- Background squares: 312 at 2½ × 2½ inches (52 per block × 6)
- Vertical sashing: 9 pieces at 2½ × 18½ inches
- Horizontal sashing: 4 pieces at 2½ × 42½ inches – each one must be pieced from two strips, since a single width-of-fabric strip is not long enough once selvages are removed
- Backing panel: 48 × 68 inches (seam two lengths together to reach this size)
- Batting: 48 × 68 inches
- Binding: six strips, 2½ inches × width of fabric
Step-by-Step Guide
Step 1 – Prewash the yardage only. Wash, dry, and press your background fabric, sashing fabric, and backing. Do not prewash the jelly roll strips – precut strips have pinked edges, and washing 2½-inch strips causes fraying, distortion, and shrinkage that ruins their accuracy. Instead, test a scrap of your red fabric for colorfastness, and use a color catcher when you wash the finished quilt.
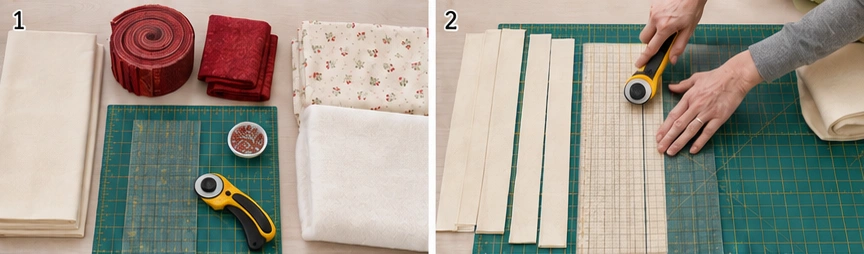
Step 2 – Cut the background into strips. From your 1½ yards of background fabric, cut 20 strips at 2½ inches across the width of the fabric. Trim the selvages from each.
Step 3 – Cut the sashing into strips. From your sashing fabric, cut nine strips at 2½ inches. You’ll need about 336 linear inches of sashing in total, which is more than eight strips can provide once you trim the selvages. Set these aside for now – you won’t need them until the blocks are finished.
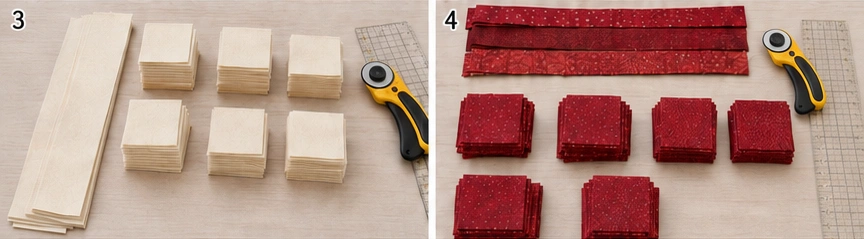
Step 4 – Sort your snowflake strips. From the jelly roll, choose about 11 strips in your snowflake color or colors. If you want each snowflake to be a different fabric, set aside two strips per block. Trim the selvages.
Step 5 – Cut the snowflake squares. Sub-cut your snowflake strips into 2½-inch squares, giving 16 squares per strip. Cut a total of 174 squares. If you’re making each block a different color, keep them in six piles of 29.
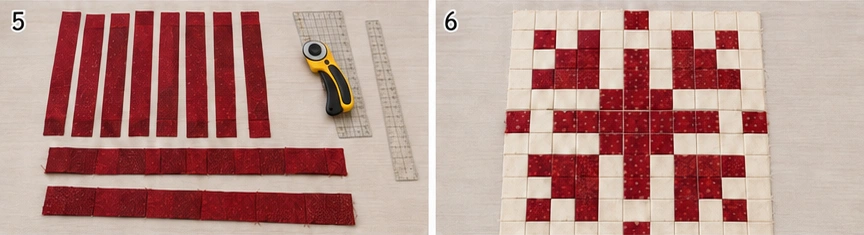
Step 6 – Cut the background squares. Sub-cut your 20 background strips into 2½-inch squares for a total of 312 squares. Keep these in one large pile.
Step 7 – Print the chart. Print or copy the 9 × 9 snowflake chart onto paper and keep it beside your machine. Every following step refers to it.
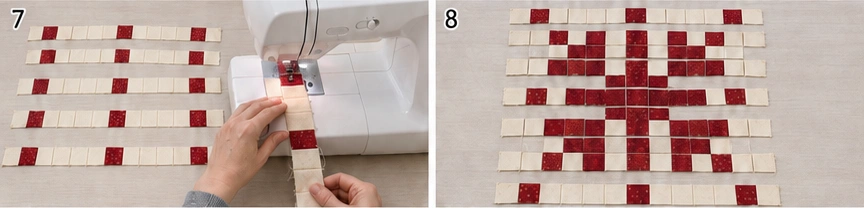
Step 8 – Lay out the first block. On a design wall or a clear patch of floor, lay out 81 squares in a 9 × 9 grid, following the chart exactly: 29 snowflake squares in the marked positions, 52 background squares everywhere else. Step back and check it against the chart before you sew anything – a misplaced square is far easier to fix now.
Step 9 – Photograph the layout. Take a photo on your phone. You’ll lift squares away row by row, and the photo will be your reference for putting everything back correctly.
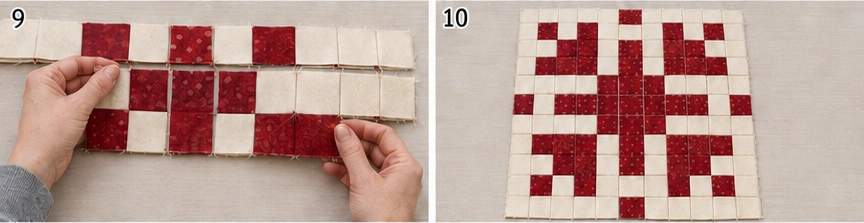
Step 10 – Sew row 1. Working left to right, sew the nine squares of the top row together with a ¼-inch seam. The finished row should measure 18½ × 2½ inches. Press the seams to the right.
Step 11 – Sew row 2. Sew the nine squares of row 2 together the same way, and press the seams to the left. Alternating the pressing direction row by row is what makes the seams nest when you join the rows later.
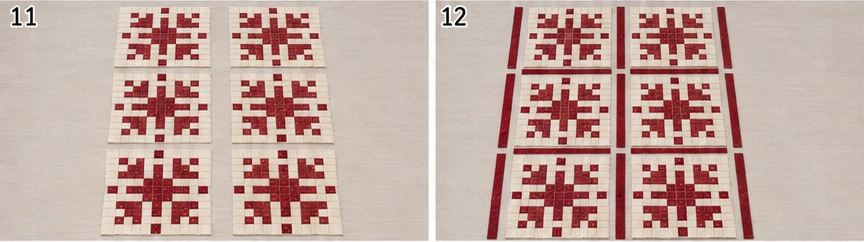
Step 12 – Sew rows 3 through 9. Continue row by row, pressing odd-numbered rows to the right and even-numbered rows to the left. Return each finished row to its position on the design wall so the snowflake stays intact. You’ll have nine rows, each 18½ inches long.
Step 13 – Join rows 1 and 2. Place row 2 on top of row 1, right sides together, and pin at every seam junction – the opposing press directions mean the seams will lock together neatly. Sew with a ¼-inch seam and press the new seam downward.

Step 14 – Join the remaining rows. Add row 3 to the bottom of that unit, then row 4, and so on through row 9, pinning at each junction and pressing each new seam downward as you go. Working in order keeps the snowflake correct.
Step 15 – Check the block. Measure it: the block should be 18½ × 18½ inches unfinished – it will finish at 18 inches once it’s sewn into the quilt, because the outer ¼ inch on each side becomes seam allowance. Lay it flat and compare it to the chart one more time. Square it up gently only if it’s genuinely off; don’t trim away that seam allowance.
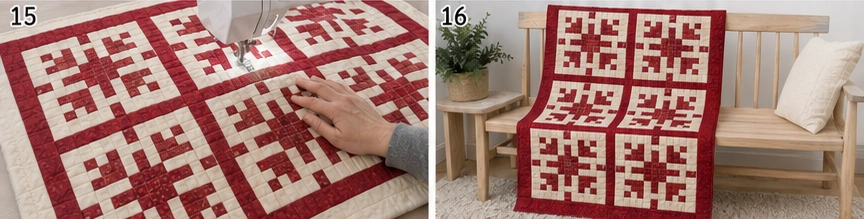
Step 16 – Make the remaining five blocks. Repeat steps 8 through 15 five more times, for 6 snowflake blocks in all, each measuring 18½ inches unfinished. If you’re using a different snowflake fabric for each, this is where the quilt starts to look like a real flurry.
Step 17 – Lay out the quilt. Arrange the six blocks 2 across × 3 down, deciding which snowflake goes where. Photograph the arrangement.
Step 18 – Build the block rows with vertical sashing. For each of the three rows, sew: sashing, block, sashing, block, sashing – using three 2½ × 18½-inch vertical sashing pieces per row (one at each end and one in the middle). Press the seams toward the sashing. Each row now measures 42½ × 18½ inches.
Step 19 – Piece and add the horizontal sashing. First join pairs of sashing strips end to end and trim each to exactly 2½ × 42½ inches – a single strip won’t reach that length once the selvages are off, so all four must be pieced. Then sew one to the top of row 1. Then add row 2 beneath it, another horizontal strip, row 3, and a final horizontal strip along the bottom – four horizontal strips in total, one above each row and one below the last. Press all seams toward the sashing.
Step 20 – Check the top. The completed quilt top should measure 42½ × 62½ inches. Give it a thorough press from the back, then the front.
Step 21 – Make the quilt sandwich. Lay the backing wrong side up, center the batting on it, then lay the quilt top right side up. Smooth everything from the center outward and baste with pins or basting spray.
Step 22 – Quilt it. Keep the quilting simple so the snowflakes stay crisp – straight lines following the grid, an all-over grid, or outline quilting around each snowflake. For a wintry touch, quilt loose swirls in the background like drifting snow.
Step 23 – Trim and square up. Trim the excess batting and backing level with the edge of the quilt top, squaring the corners as you go. Do not trim into the quilt top itself – it should still measure 42½ × 62½ inches at this stage, because that outer ¼ inch on every side is the seam allowance the binding needs.
Step 24 – Bind and finish. Join the six 2½-inch binding strips into one long strip, press in half lengthwise, and sew to the front of the quilt with a ¼-inch seam. Fold to the back and stitch down. The binding consumes that outer ¼ inch, so the finished quilt measures about 42 × 62 inches. Wash gently on cold with a color catcher and tumble dry low.
Assembly at a Glance
- Prewash the yardage only – never the jelly roll strips.
- Cut 20 background strips at 2½ inches.
- Cut nine sashing strips at 2½ inches; set aside.
- Select and trim about 11 snowflake strips.
- Sub-cut 174 snowflake squares (16 per strip).
- Sub-cut 312 background squares.
- Print the 9 × 9 chart.
- Lay out 81 squares for block one, following the chart.
- Photograph the layout.
- Sew row 1 (18½ × 2½ in); press seams right.
- Sew row 2; press seams left.
- Sew rows 3-9, alternating press direction; return each to the wall.
- Join rows 1 and 2, pinning at nested seams; press down.
- Add rows 3 through 9 in order, pressing each seam down.
- Check the block measures 18½ inches.
- Repeat for 6 blocks.
- Arrange blocks 2 × 3; photograph.
- Build each row with three 2½ × 18½ sashing pieces → 42½ × 18½.
- Piece four horizontal strips to 2½ × 42½ inches; join the rows with them.
- Confirm the top measures 42½ × 62½ inches; press.
- Layer backing, batting, and top; baste.
- Quilt simply; swirls in the background look like drifting snow.
- Trim batting and backing level with the top (still 42½ × 62½); don’t cut into the top.
- Bind with six strips – finishes at about 42 × 62 inches; wash cold with a color catcher.
Beginner Tips for Success
- Print the chart and keep it beside your machine; don’t work from memory.
- Photograph each block layout before you start lifting squares away.
- Press odd rows right, even rows left so every seam nests when you join them.
- Return each sewn row to the design wall in position – it’s the easiest way to avoid sewing rows out of order.
- Keep the background identical across all six blocks so the snowflakes read as shapes.
- Vary the snowflake colors between blocks if you like – it looks like a real flurry.
- Use a color catcher in the first wash, especially with red on white.
- Never prewash jelly roll strips – pinked edges fray and 2½-inch strips distort. Prewash yardage only.
- When trimming after quilting, cut level with the quilt top – the outer ¼ inch is the binding’s seam allowance, not excess.
Styling It & Gift Ideas
A Nordic snowflake quilt suits calm, uncluttered rooms beautifully – folded at the end of a bed, over the arm of a pale sofa, or draped on a chair beside a window. Because snowflakes read as winter rather than Christmas, they work from the first cold snap through early spring, making them far more useful than a quilt covered in trees and holly. Style it simply: white candles, greenery, pale wood, a wool throw.
Its long season and restrained elegance make it a genuinely thoughtful gift:
- A winter housewarming gift that doesn’t have to be packed away in January
- A wedding or anniversary gift in a quiet, timeless palette
- A single-block wall quilt or cushion for a faster gift with the same look
- A gift for someone who loves Scandinavian design but finds traditional Christmas decorating too busy
If you’re making it as a gift, consider a single-block version – one 18-inch snowflake makes a beautiful cushion cover or small wall hanging, and it’s an afternoon’s work rather than a fortnight’s.
Final Thoughts
A Nordic snowflake jelly roll quilt is cozy winter elegance built one small square at a time. Because Scandinavian motifs have always been charted on grids, piecing a snowflake from 2½-inch squares isn’t a shortcut – it’s the same logic Norwegian knitters have used since the 1850s, worked in cotton instead of wool. Print the chart, lay out each block before you sew, alternate your pressing, and you’ll end up with six crisp snowflakes and a quilt that stays beautiful long after the tinsel comes down.
Other Design Inspirations – Digitally Modified Images. Texture and color may vary from the actual product.
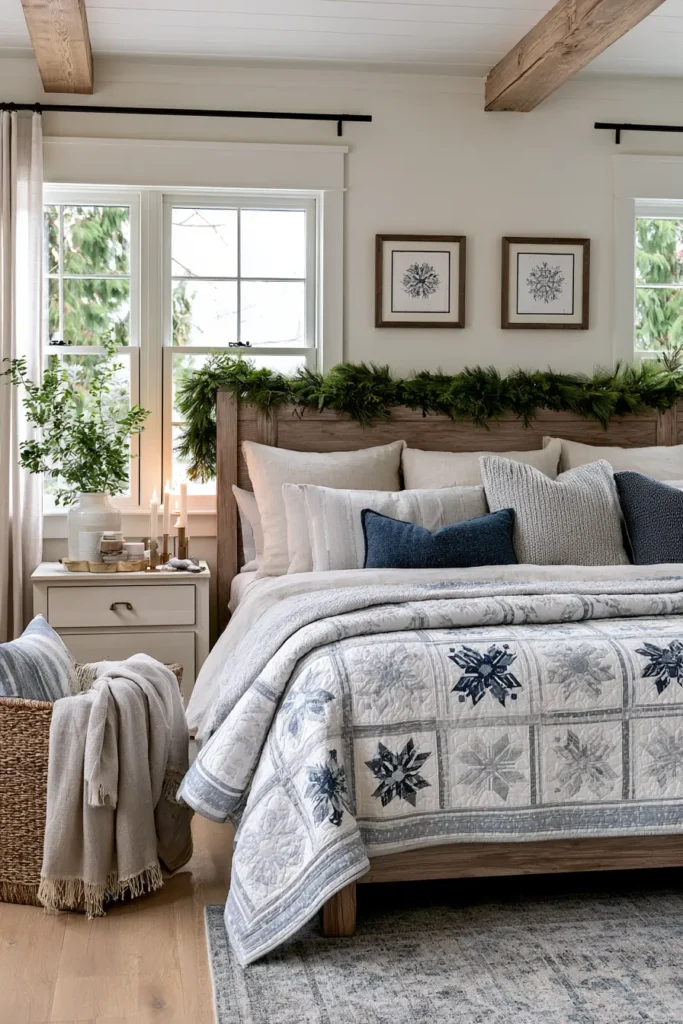
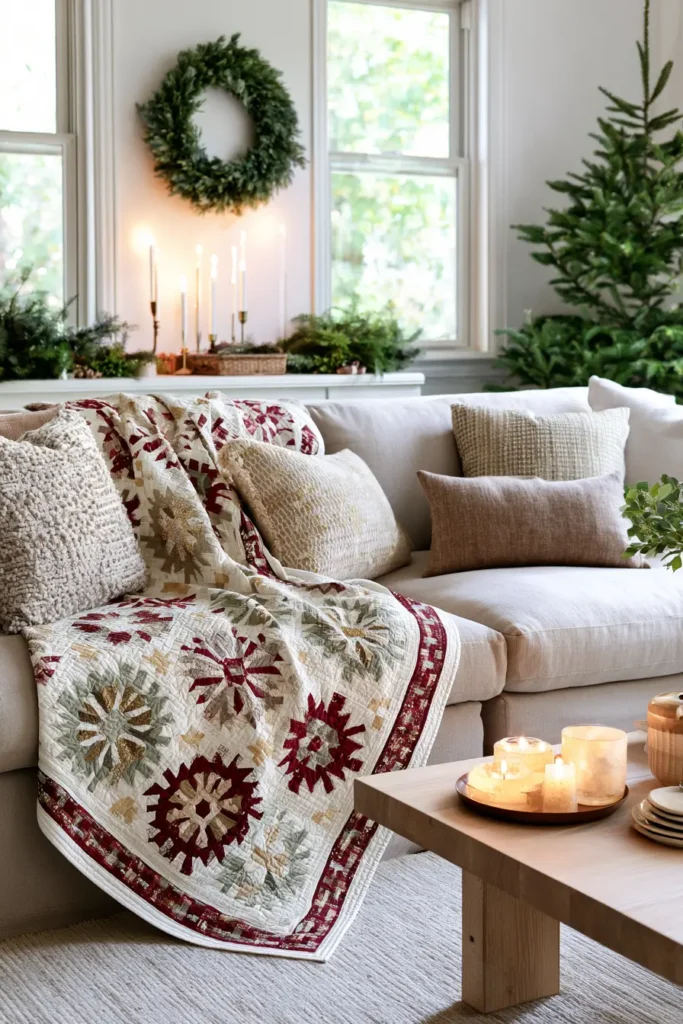
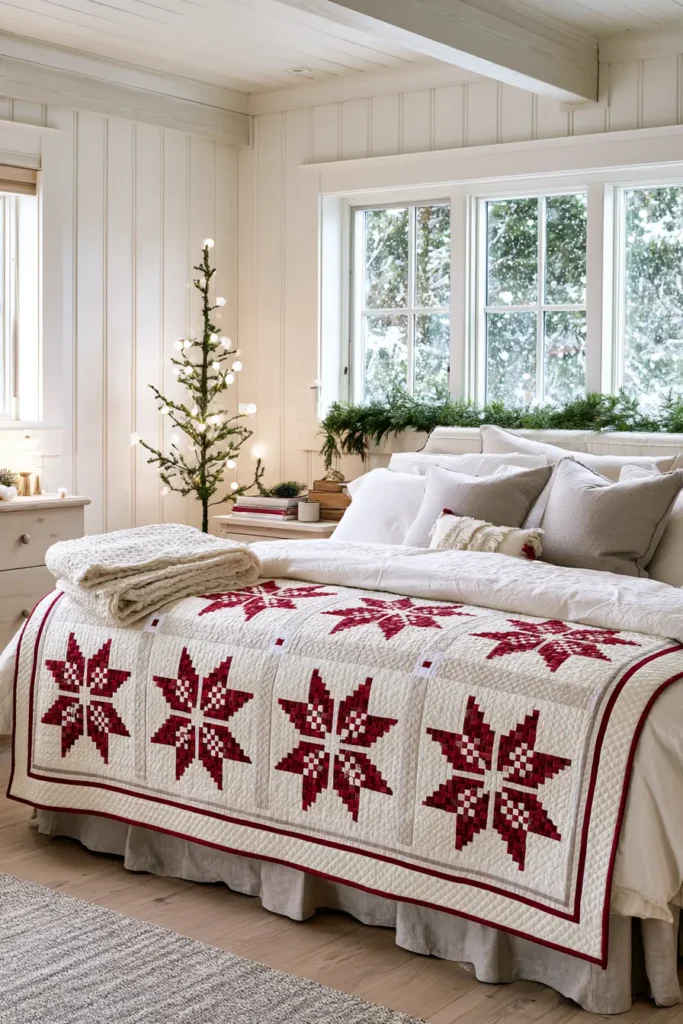
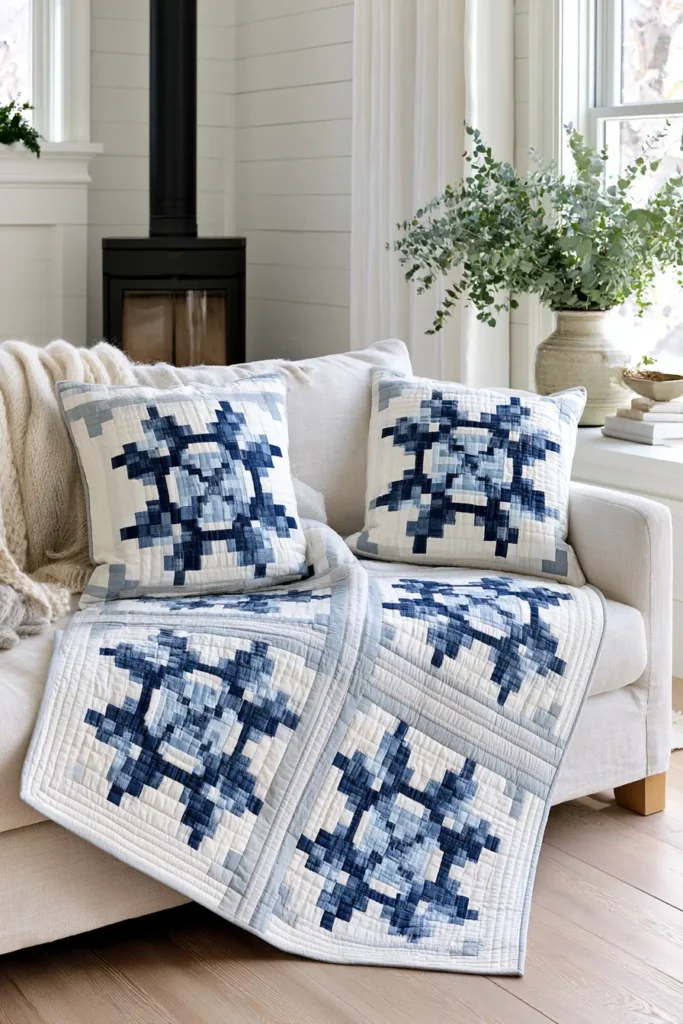
7. Jelly Roll Chevron Christmas Quilt for Modern Festive Appeal
Chevrons are the most contemporary look in this whole collection – bold zigzag Vs marching across the quilt in crisp diagonal bands. Made in vibrant Christmas reds, greens, and gold against cream, the effect is graphic and modern rather than traditional- the kind of quilt that suits a bright, uncluttered room and looks equally good folded on a sofa in July. It’s the design to choose if you want your Christmas quilt to feel current.
The method is genuinely clever. You sew strips into a striped panel, cut that panel into diagonal slices, and then join a right-leaning slice to a left-leaning one so the stripes meet point to point and form a V. It’s very satisfying to watch happen – but it involves cutting on the bias, so there’s some preparation worth doing properly before you start.
Before You Begin: Two Honest Notes
This design uses considerably more than one jelly roll. Cutting a rectangular panel at 45 degrees is fabric-hungry: the very first diagonal cut removes a large triangle, and that triangle eats about 12½ inches off the length of the panel before you get a single usable slice. Realistically each panel yields four slices, not more. You’ll need 60 strips in total – one jelly roll plus about 1½ yards of coordinating fabric cut into twenty more strips. (Two jelly rolls also works, leaving spares for another project.) It’s much better to know this at the fabric shop than halfway through.
Every cut edge will be on the bias. Bias stretches, and stretched pieces won’t sit square. That’s not a reason to avoid this design – it’s the only way to get true chevrons – but it does mean starching your panels until they’re crisp, handling the slices gently, and pinning more than usual. The technique section below covers exactly what to do.
Design Inspirations – Digitally Modified Images. Texture and color may vary from the actual product.
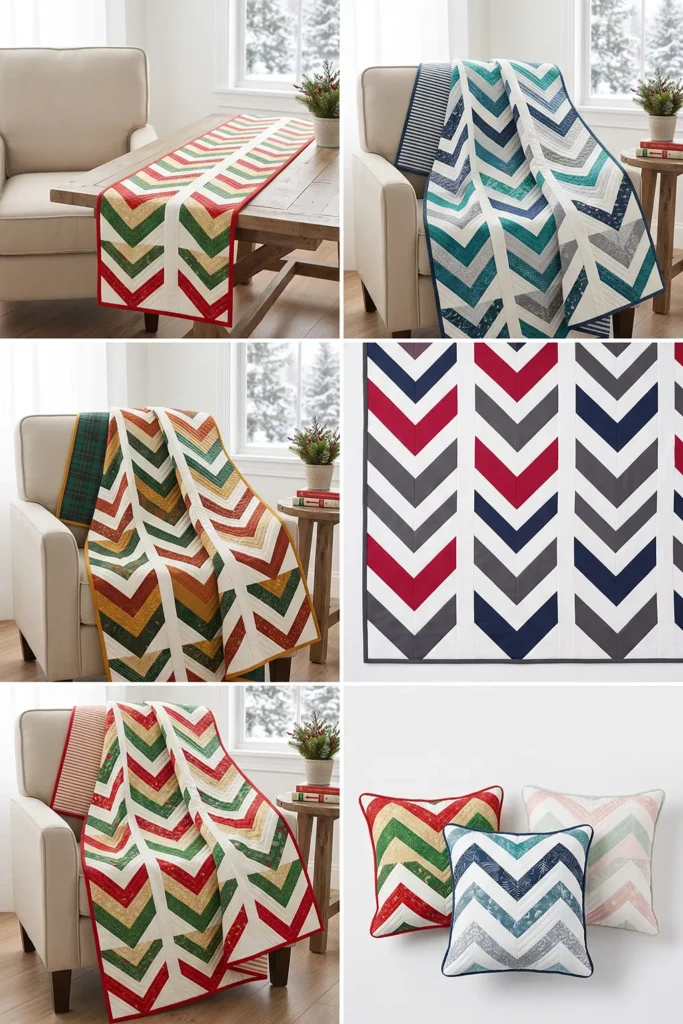
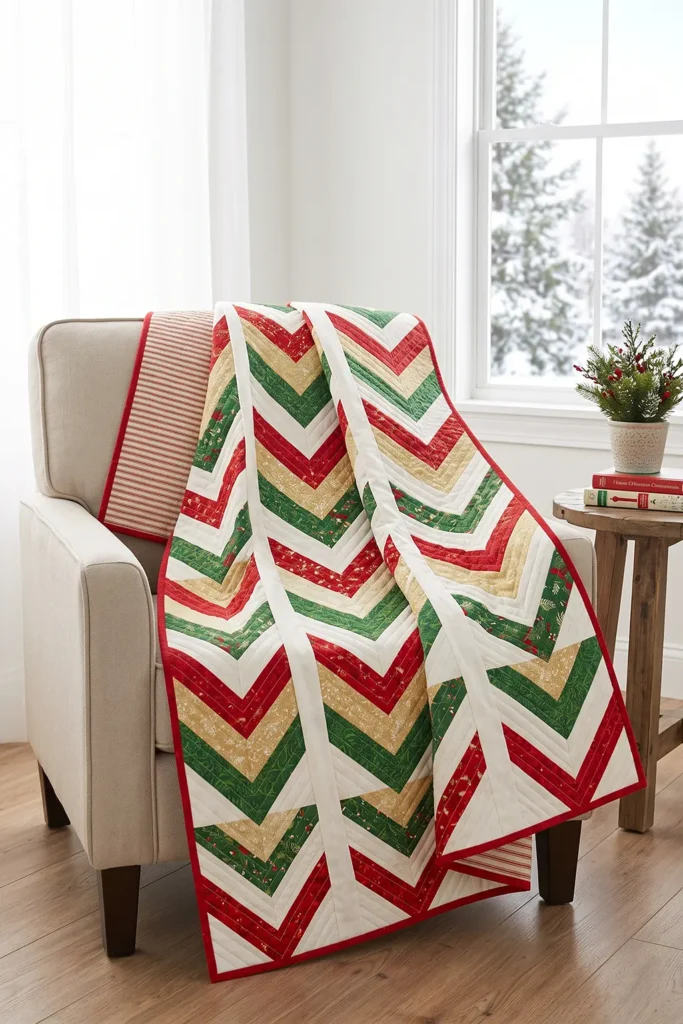
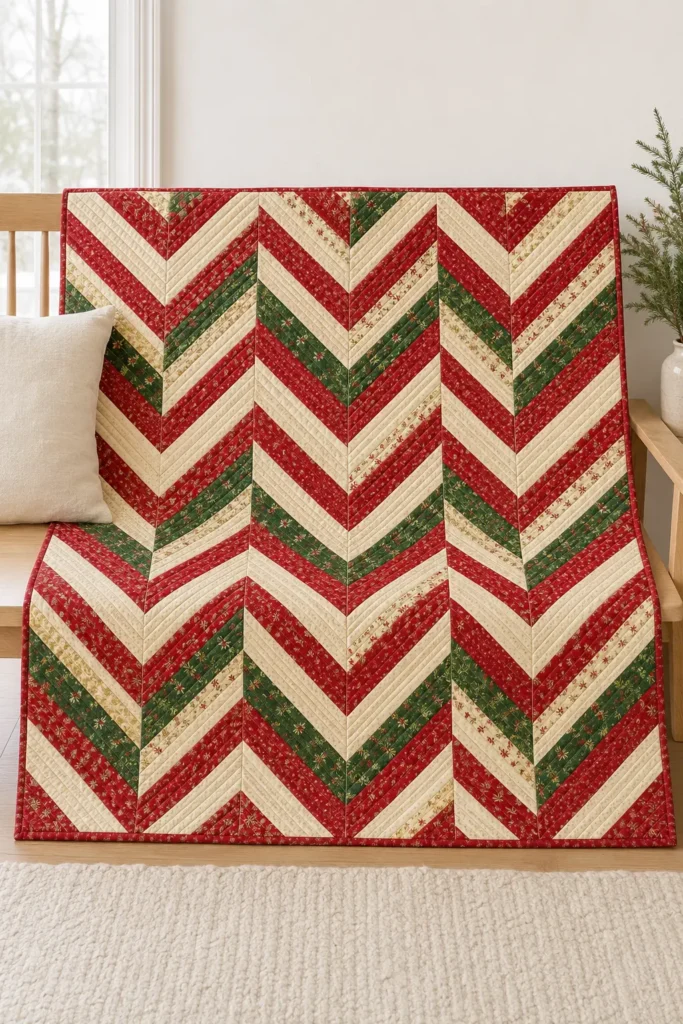
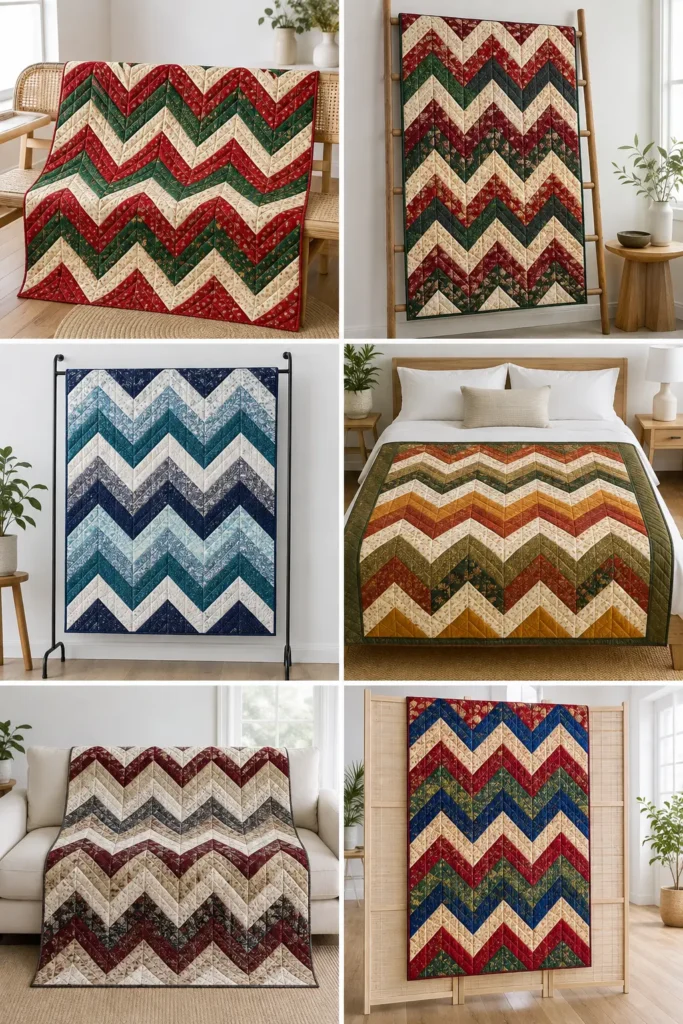
A Little History: Streak of Lightning
Zigzag quilts are far older than the modern chevron trend. Nineteenth-century American quilters made zigzag designs under the wonderful name “Streak of Lightning,” usually built from strips or triangles arranged into jagged vertical bands. The name is descriptive and slightly ominous, which suits a pattern that looks like a bolt frozen across the surface of a quilt.
The chevron came back into fashion enormously in the modern quilting movement, where its clean geometry and strong sense of movement fit perfectly with a preference for bold, simple, graphic design. So a chevron Christmas quilt sits in both camps at once: a very old quilting idea and a very current one.
How the Chevron Is Built
The construction has four stages, and it helps to picture them before you start:
- Sew a striped panel. Six strips joined along their long edges make a panel of horizontal stripes.
- Cut diagonal slices. Cutting that panel at 45 degrees produces slices where the stripes run diagonally.
- Join mirrored slices. A slice cut leaning right, sewn to a slice leaning left, makes the stripes meet in a V down the join.
- Trim to size. Trim the joined unit to a neat square, centered on the row of Vs.
Everything below is those four stages, repeated.
Finished Size
- Finished quilt: 48 × 60 inches – a generous lap quilt or throw
- Finished unit: 12 inches square (12½ inches unfinished)
- Layout: 4 units across × 5 units down = 20 chevron units
- Skill level: intermediate – simple sewing, but bias handling demands care
- Core techniques: strip sets, 45-degree cutting, bias control, matching stripes, trimming to size
Materials Needed
- 1 Christmas jelly roll (about 40 strips, 2½ inches × width of fabric)
- Extra coordinating fabric: 1½ yards, cut into twenty strips at 2½ inches – you need 60 strips in total
- Spray starch – not optional on this one
- Backing: 3¾ yards of standard 42-44 inch fabric, to be cut into two lengths and seamed along the long edges into a panel at least 54 × 66 inches; or 1⅞ yards of 108-inch wide backing
- Batting: at least 54 × 66 inches
- Binding: ⅝ yard, cut into six strips at 2½ inches
- Thread: neutral cotton
- Rotary cutter with a fresh blade, cutting mat, a large square ruler with a clear 45-degree line, a long ruler, pins, iron
Beginner tip: do not prewash the jelly roll strips. Precut strips have pinked edges, and washing 2½-inch strips causes fraying and distortion that ruins their accuracy. Prewash only your backing and any yardage. Test a scrap of red for colorfastness and use a color catcher when you wash the finished quilt.
Choosing Your Colors
Chevrons need clear separation between the stripes, or the Vs blur together:
- Bright modern Christmas: cherry red, kelly green, white, and gold – crisp and cheerful
- Traditional: cranberry, forest green, and cream
- High contrast: alternate a festive color with white or cream in every other position, which makes the zigzag unmistakable
- Frosty modern: teal, silver, navy, and white for a wintry version
- Warm modern: rust, mustard, cream, and deep green
The most effective arrangement is to alternate light and dark strips within each panel – red, cream, green, cream, red, cream, for example. Alternating values is what makes the zigzag read from across the room. Six strips of similar depth will produce a muddy panel no matter how well you sew it.
Whatever order you choose, use the same order in every panel. That consistency is what lets the Vs line up when you join the slices.
Cutting Measurements
- Strip panels: ten panels, each made from 6 strips sewn along their long edges. Each panel measures 12½ inches wide × about 40-41 inches long once the selvages are removed
- Diagonal slices: cut at 45 degrees, measuring 6½ inches along the lower edge of the panel. Expect about 4 usable slices per panel – 40 slices in total, 20 leaning each way
- Chevron units: trim each joined pair to 12½ × 12½ inches – 20 units
- Backing panel: 54 × 66 inches
- Batting: 54 × 66 inches
- Binding: six strips, 2½ inches × width of fabric
Step-by-Step Guide
Step 1 – Prepare your fabrics. Prewash and press your backing and coordinating yardage. Leave the jelly roll strips alone – precut strips have pinked edges, and washing 2½-inch strips causes fraying and distortion. Cut your 1½ yards of coordinating fabric into twenty strips at 2½ inches, giving 60 strips in total. Trim the selvages from every strip.
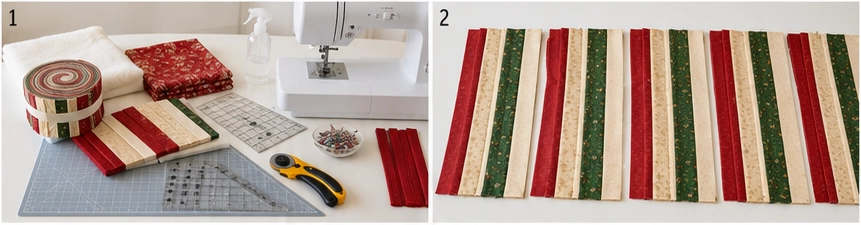
Step 2 – Decide your color sequence. Choose the sequence of six positions you’ll use in every panel – for example, red, cream, green, cream, red, cream. What has to stay consistent is the color-and-value sequence, not the exact print: an assorted jelly roll won’t contain ten identical strips of anything, so position three might be a holly print in one panel and a pine stripe in another. As long as each position stays in the same color and value family, the stripes will align visually when you join the slices.
Step 3 – Sort all sixty strips into ten groups of six. Before you sew anything, divide your strips into ten piles, each following your chosen sequence. This is the moment to discover you’re two creams short – not after six panels are already sewn.
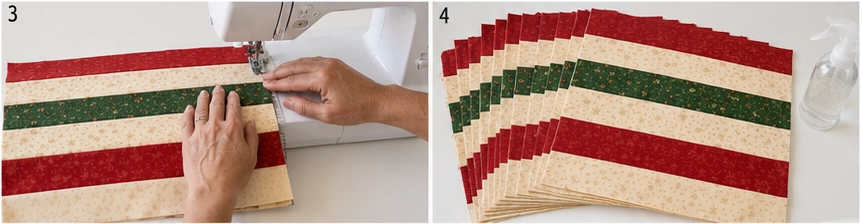
Step 4 – Sew the first strip panel. Sew six strips together along their long edges in your chosen order, using a ¼-inch seam. Feed them through gently without stretching. The panel should measure 12½ inches wide × about 40-41 inches long.
Step 5 – Press the panel. Press all the seams in the same direction, from the back first and then the front. Consistent pressing keeps the panel flat and stops the stripes from bowing.
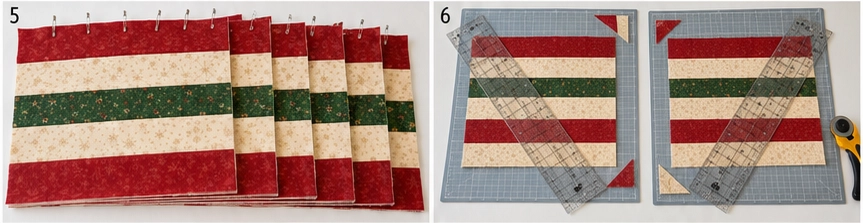
Step 6 – Starch the panel. Spray generously with starch and press until it feels crisp, almost papery. Every edge you’re about to cut will be on the bias, and starch is what makes bias behave.
Step 7 – Mark the top edge. Put a safety pin or a removable marker at the top edge of the panel. Every panel needs this. If a panel gets flipped end for end during cutting, its slices will lean the wrong way and won’t pair with anything.
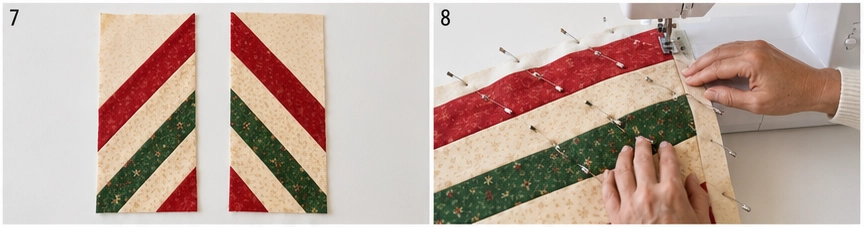
Step 8 – Make the remaining nine panels. Repeat steps 4 to 7 until you have ten starched, marked panels, all following the same color-and-value sequence.
Step 9 – Establish a right-leaning edge on one panel. Take one panel. Lay your square ruler so its 45-degree line runs along one of the seam lines, angled so the cut runs from lower left to upper right, and trim off the corner triangle. This is your right-leaning reference panel.
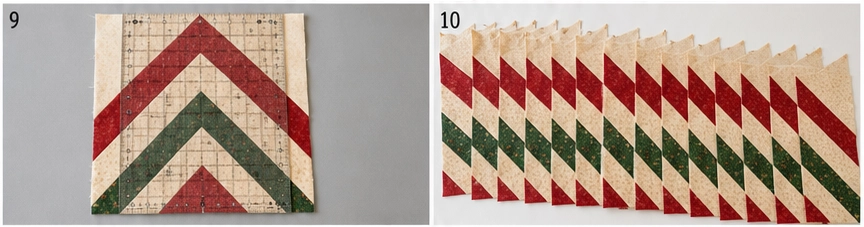
Step 10 – Establish a left-leaning edge on a second panel. Take a second panel and repeat, but angle the ruler the opposite way so the cut runs from upper left to lower right. This is your left-leaning reference panel. Keep both panels the right way up, with their marked top edges at the top.
Step 11 – Cut one test slice from each. From the right-leaning panel, measure 6½ inches along the lower straight edge from the angled cut, and make a parallel 45-degree cut. Do the same on the left-leaning panel. You now have one slice of each orientation. Always measure along the same lower edge – measuring at an angle or from a different edge will give inconsistent slices.
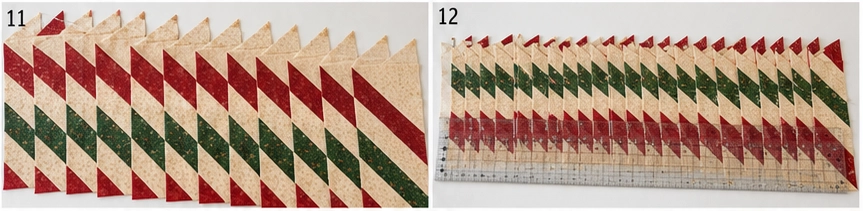
Step 12 – Sew and check the test unit. Place the two slices right sides together with their stripes meeting, pin at every seam intersection, and sew with a ¼-inch seam. Open it out: you should see a clear row of Vs where the stripes meet point to point. Now lay a 12½-inch square ruler over it with the V points running down the center, and confirm the unit is big enough to trim to that size all round.
Step 13 – Diagnose the test unit if it fails. Don’t reach straight for a wider slice. First check three things: that your seam allowance is a true ¼ inch, that both 45-degree cuts were genuinely accurate, and that each slice was measured 6½ inches along the same lower reference edge. An error in any of those is the usual culprit. If the stripes don’t meet cleanly at the join, the two panels weren’t cut in true mirror directions – check your marked top edges and your ruler angle.
Only if a wider slice is genuinely necessary should you change the cutting width – and if you do, recalculate your panel count before cutting anything else. Widening to 7 inches means 12½ + (4 × 7) = 40½ inches, which leaves no margin on a 40-41 inch panel, so the yield drops to three slices per panel and you’ll need more panels than ten. Do not cut the remaining panels until a test unit passes.

Step 14 – Cut the remaining right-leaning slices. Carry on cutting the right-leaning reference panel, then cut four more panels the same way – five panels in total, yielding about four slices each for 20 right-leaning slices overall. One of those twenty is already sewn into your test unit, so you need 19 more from here. Measure along the lower edge every time.
Step 15 – Cut the remaining left-leaning slices. Repeat with the other five panels, angling every first cut the opposite way, for 20 left-leaning slices overall – again, one is already in the test unit, so you need 19 more. Keep the two orientations in clearly separate piles; they look similar and are easy to mix up.
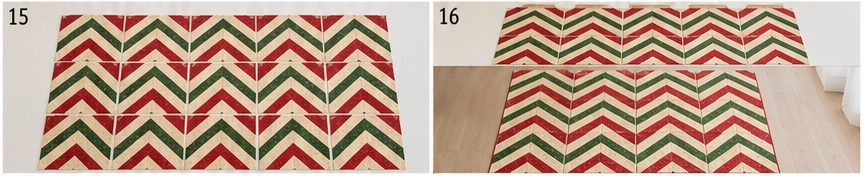
Step 16 – Move the slices carefully. Bias slices stretch under their own weight. Never pick one up by a narrow end; slide a long ruler, a mat, or a piece of cardboard underneath and carry it flat. Stack each pile between sheets of paper if you’re not sewing straight away.
Step 17 – Join the remaining pairs. Sew one right-leaning slice to one left-leaning slice for each unit, pinning at every stripe intersection and sewing slowly so the bias doesn’t shift. Make 19 more joined units – together with your test unit, that gives you 20 chevron units in all.

Step 18 – Press the joined units. Press each unit’s center seam open to reduce bulk where all the stripe seams converge. Lift and press rather than dragging the iron, so the bias edges don’t distort.
Step 19 – Trim each unit to size. Lay a unit on the mat and position your square ruler so the row of V points runs down the center of a 12½-inch square, then trim all four sides. Every unit should now measure exactly 12½ × 12½ inches with the chevron centered. Trim all 20.
Step 20 – Lay out the quilt. Arrange the units 4 across × 5 down, all oriented the same way so the Vs stack into continuous vertical zigzag columns. Photograph the layout.
Step 21 – Sew the units into rows. Sew each row of four units together with a ¼-inch seam, pinning where the chevron points meet at the block seams. Press the seams of alternate rows in opposite directions so they nest.
Step 22 – Join the rows. Sew the five rows together, nesting the seams and pinning at every point where a chevron crosses a row seam. Press. The quilt top should measure about 48½ × 60½ inches.
Step 23 – Prepare the backing. Cut your 3¾ yards into two equal lengths, trim the selvages, and sew them together along the long edges to make a panel at least 54 × 66 inches. Press the seam open.
Step 24 – Make the quilt sandwich. Lay the backing wrong side up, center the batting on it, then lay the quilt top right side up. Smooth everything from the center outward and baste with pins or basting spray.
Step 25 – Quilt it. Straight-line quilting suits chevrons beautifully – stitch parallel to the diagonal stripes to emphasize the zigzag, or quilt straight vertical lines for a crisp modern contrast. Keep the spacing even so the geometry stays clean.
Step 26 – Trim and square up. Trim the excess batting and backing level with the edge of the quilt top, squaring the corners. Don’t trim into the top itself – it should still measure 48½ × 60½ inches, because that outer ¼ inch on each side is the seam allowance the binding needs.
Step 27 – Bind and finish. Join the six 2½-inch binding strips into one long strip, press in half lengthwise, and sew to the front of the quilt with a ¼-inch seam. Fold to the back and stitch down. The binding takes up that outer quarter inch, so the finished quilt measures about 48 × 60 inches. Wash gently on cold with a color catcher and tumble dry low.
Assembly at a Glance
- Prewash yardage only (never the jelly roll strips); cut 20 extra strips → 60 total.
- Fix a six-position color-and-value sequence (prints may vary).
- Sort all 60 strips into ten groups of six following that sequence.
- Sew six strips into a panel → 12½ × 40-41 in.
- Press all seams one direction.
- Starch until crisp.
- Mark the top edge of the panel.
- Repeat for ten panels.
- Angle a right-leaning 45° edge on one panel.
- Angle a left-leaning 45° edge on a second panel.
- Cut one 6½-inch slice from each, measuring along the lower edge.
- Join them; check the unit trims to 12½ inches with the V centered.
- If it fails, diagnose (seam allowance, cut angle, reference edge) before changing the slice width – and recalculate panels if you do.
- Cut 19 more right-leaning slices (five panels give 20 including the test slice).
- Cut 19 more left-leaning slices (same five-panel count).
- Move bias slices flat on a ruler or mat, never by one end.
- Join the 19 remaining pairs → 20 chevron units with the test unit.
- Press each center seam open.
- Trim every unit to 12½ × 12½ inches, V centered.
- Lay out 4 × 5, all facing the same way; photograph.
- Sew rows of four; press alternate rows opposite.
- Join the five rows → 48½ × 60½ top.
- Seam the backing into a 54 × 66-inch panel.
- Layer and baste.
- Quilt along or across the diagonals.
- Trim batting and backing level with the top; don’t cut the top.
- Bind with six strips; finishes at about 48 × 60 inches.
Beginner Tips for Success
- Starch every panel until crisp before cutting – bias behaves when it’s stiff.
- Use a square ruler with a 45-degree line; freehanding the angle is far harder.
- Always measure slice width along the same lower edge of the panel, never at an angle.
- Mark the top edge of every panel so none gets flipped and cut the wrong way.
- Alternate light and dark strips in your panel, or the zigzag won’t read.
- Keep the same color-and-value sequence in all ten panels – the prints can vary, the colors can’t.
- Sort all sixty strips into ten groups before sewing, so you don’t run short of one color midway.
- Keep right-leaning and left-leaning slices in separate piles.
- Test one pair before cutting the rest – that single test protects the whole project, and the test unit counts as one of your twenty.
- Expect about four usable slices per panel; the first diagonal cut wastes a large triangle.
- Never lift a bias slice by one end – slide a ruler or mat underneath and carry it flat.
- Press the center seam open to reduce bulk where the stripes converge.
- Lift and press rather than dragging the iron across bias edges.
- Don’t prewash jelly roll strips; prewash yardage only.
Styling It & Gift Ideas
A chevron quilt is graphic and modern, so it looks best in a simple, uncluttered setting – draped over a plain sofa, folded at the end of a bed, or hung over a banister with minimal greenery. Because the design is bold, it doesn’t need much around it. And since chevrons read as contemporary rather than seasonal, it happily stays out after the tree comes down, especially in a frosty teal-and-silver palette.
Its modern, high-impact look makes it a great gift:
- A housewarming gift for someone with a modern home, where a traditional Christmas print would feel out of place
- A wedding or milestone gift in a palette that works year-round
- A gift for a design-loving friend – chevrons photograph beautifully and always draw comment
- A college or first-apartment quilt, since the graphic style suits a younger, simpler space
If you’re making it as a gift, choose a palette that isn’t strictly Christmas – teal and silver, or rust and cream – and it becomes a quilt they can use all year.
Final Thoughts
A jelly roll chevron Christmas quilt is the most modern design in this collection, and the most satisfying to watch appear. Sew your strips into striped panels, cut them on the diagonal, and join a right-leaning slice to a left-leaning one, and those stripes snap together into a crisp row of Vs. Starch everything, alternate your light and dark strips, and sew one test unit before committing to twenty – do that, and you’ll end up with a bold, graphic quilt that carries the old “Streak of Lightning” idea into something thoroughly current.
Other Design Inspirations – Digitally Modified Images. Texture and color may vary from the actual product.
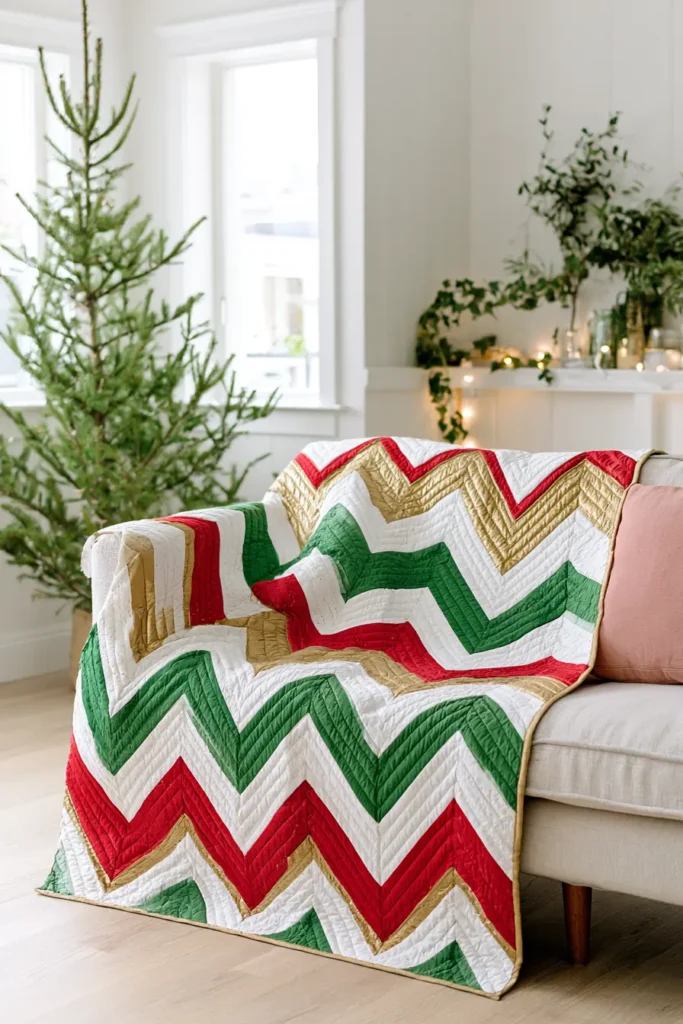
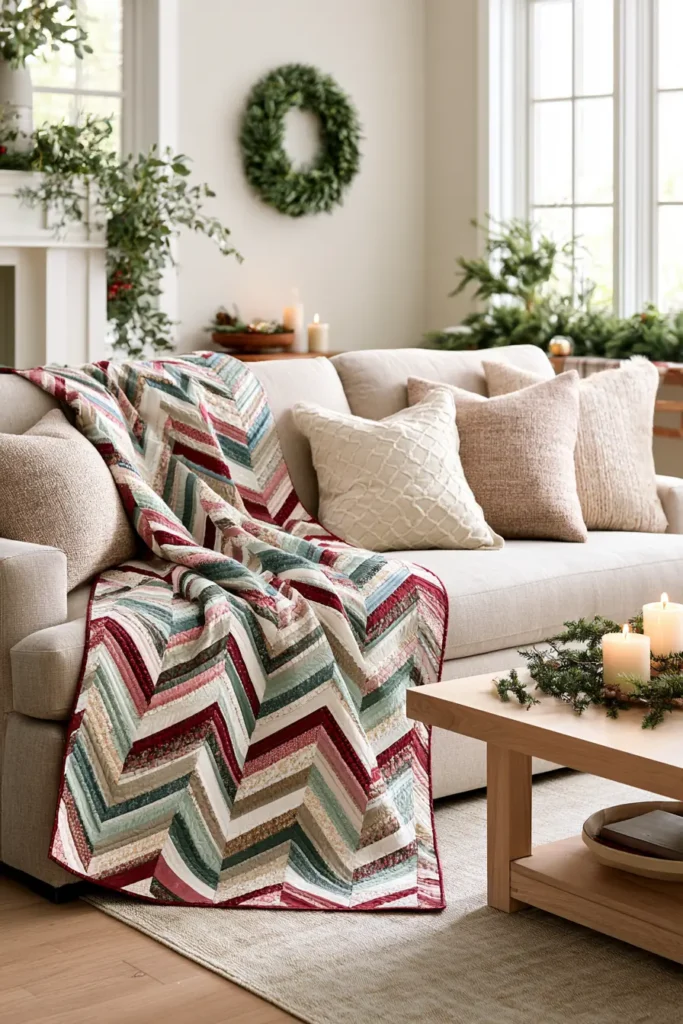
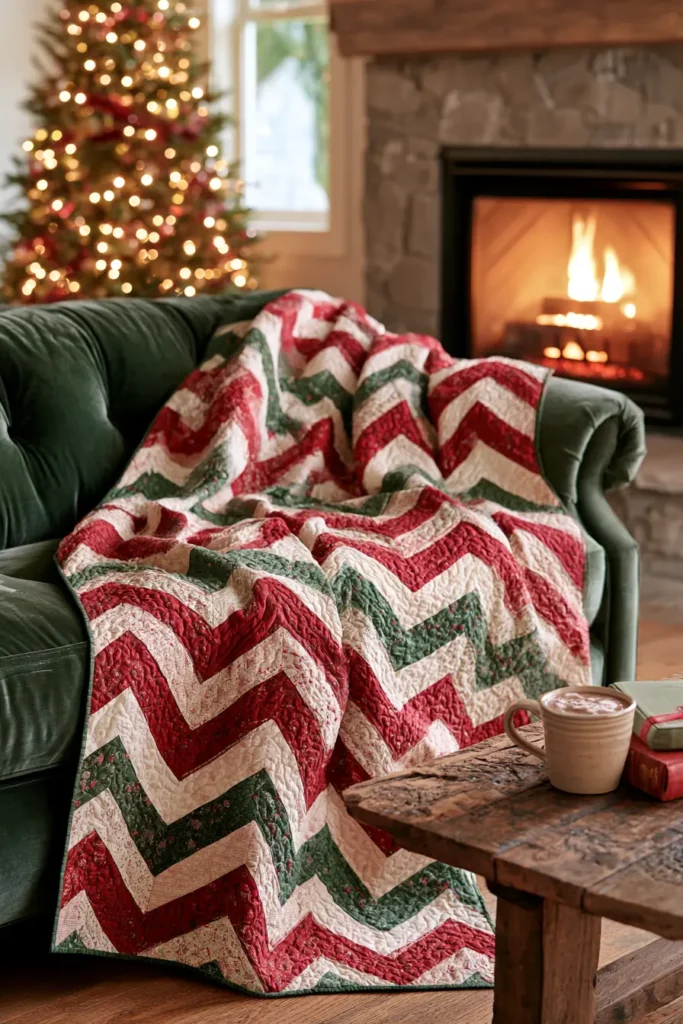
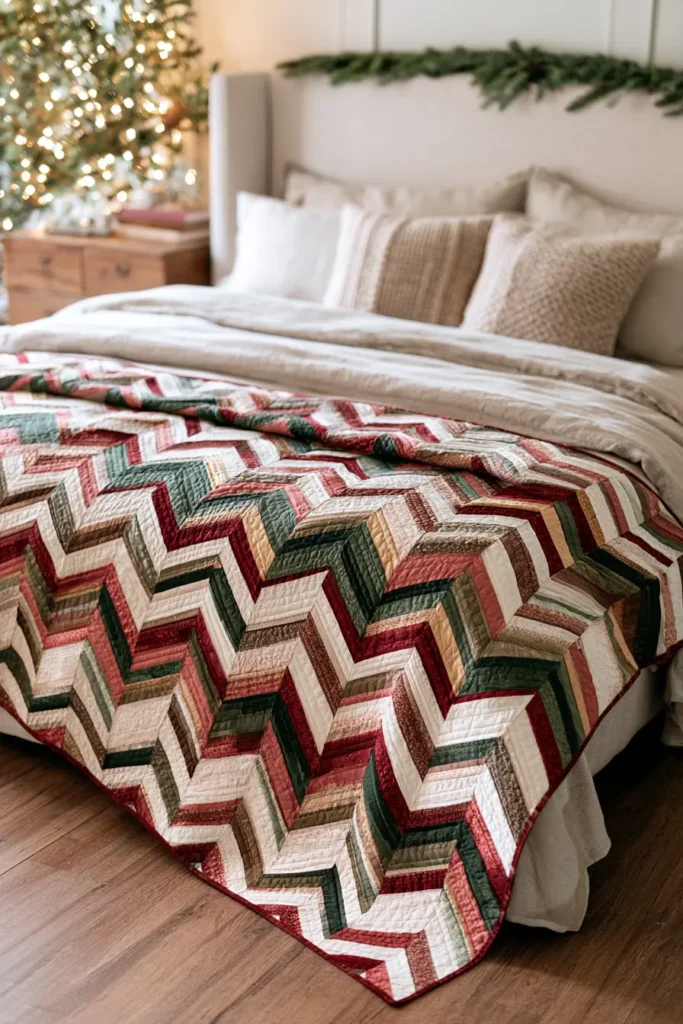
8. Rail Fence Jelly Roll Christmas Quilt for Easy Beginner Sewing
If you’ve never made a quilt before, this is the one to start with. The rail fence is quilting’s friendliest block: four strips sewn side by side into a square, and that’s it. No triangles, no diagonal points to match, no bias edges, and no angled cutting. The magic happens purely in how you turn the finished blocks – alternate them horizontal, vertical, horizontal, vertical, and the strips appear to interlock into a woven basket-weave pattern that looks far more complicated than it is.
In vibrant Christmas reds, greens, gold, and cream, that woven effect is warm and traditional without being fussy, and the whole quilt is built from straight seams alone. It’s also a genuinely efficient use of a jelly roll: you’re sewing whole strips together and cutting squares straight across, so there’s very little waste.
Why This Is the Easiest Design Here
Worth knowing before you start, because it’s genuinely reassuring:
- No edge is on the bias. Every block edge sits on the straight lengthwise or crosswise grain, so the pieces resist stretching and distortion.
- There are no triangular or diagonal points to match. You’ll still align square block corners and row intersections, but opposing seam directions make that straightforward.
- The block is square by construction. Four 2½-inch strips sewn with ¼-inch seams come to exactly 8½ inches wide, so an 8½-inch cut square needs no trimming – provided the strip set is straight and your first cut is truly perpendicular.
- The design comes from rotation, not piecing. Every block is identical; the pattern appears when you turn them.
If your seam allowance wanders slightly, this quilt will forgive you. That’s not true of stars or chevrons.
Design Inspirations – Digitally Modified Images. Texture and color may vary from the actual product.
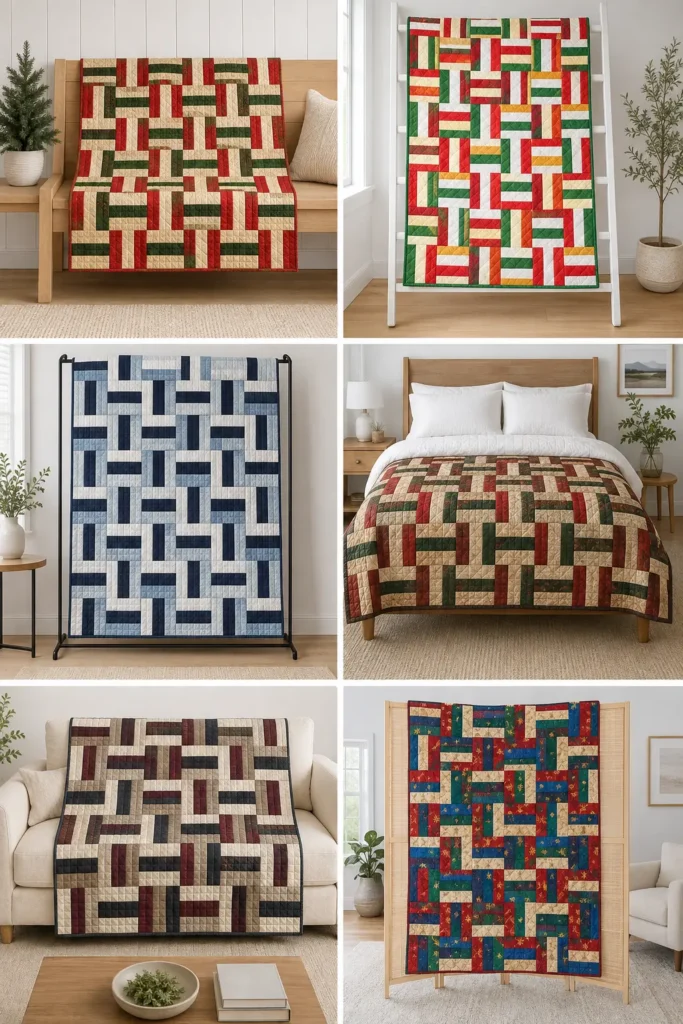
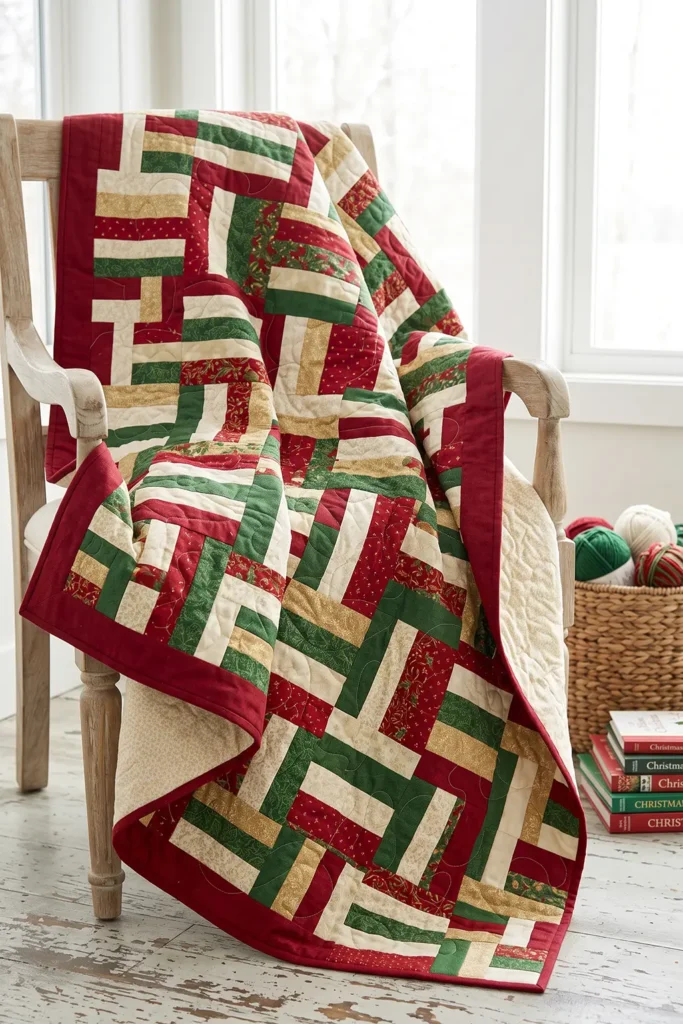
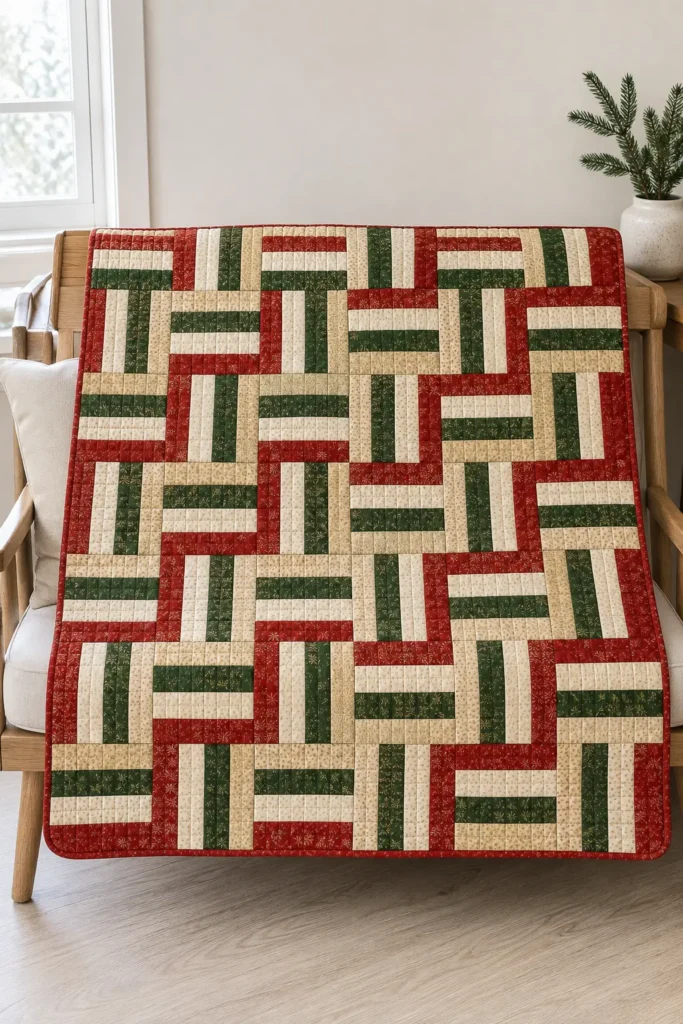
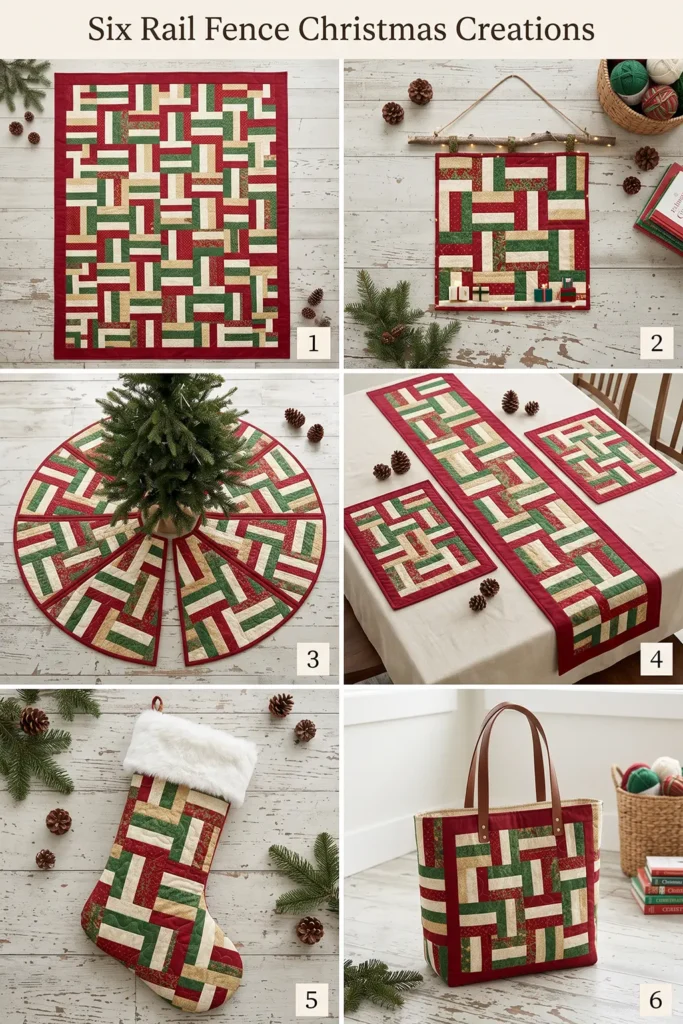
A Little History: The Fence and the First Quilt
The block takes its name from the split-rail fences of early rural America, where wooden rails were stacked in an interlocking zigzag to enclose fields without a single nail. Look at a rail fence quilt, and you can see it – the strips lock together exactly like those old stacked rails.
For generations, it has also been one of the patterns most often taught to beginning quilters, alongside the nine patch and the four patch. There’s a practical reason for that beyond its simplicity: rail fence uses strips end to end, which made it perfect for scrap-thrifty quilters who had long, narrow offcuts and nothing else. That same quality is exactly why it suits a jelly roll so well over a century later.
How the Block Works
Every block in this quilt is identical:
- Four 2½-inch strips sewn together along their long edges
- Sewn with ¼-inch seams, they measure 8½ inches wide – so you cut 8½-inch squares straight across the strip set
- Each block finishes at 8 inches in the quilt
The woven look comes from the layout. Lay the blocks in a checkerboard of directions – one with its strips running horizontally, the next with them vertical, and so on – and where a horizontal block meets a vertical one, the strips appear to pass over and under each other.
Finished Size
- Finished quilt: about 48 × 64 inches – a generous throw
- Finished block: 8 inches (8½ inches unfinished)
- Layout: 6 blocks across × 8 blocks down = 48 blocks
- Skill level: true beginner – the easiest quilt in this collection
- Core techniques: strip sets, straight cutting, block rotation, binding
Materials Needed
- 1 Christmas jelly roll (about 40 strips, 2½ inches × width of fabric)
- Extra coordinating fabric: ⅔ yard, cut into 8 strips at 2½ inches – you need 48 strips in total
- Backing: 3¾ yards of standard 42-44 inch fabric – cut into two equal lengths and seamed along their long edges, which gives a panel roughly 67 × 83 inches, comfortably more than the 54 × 70 inches needed; or 2⅛ yards of 108-inch wide backing
- Batting: at least 54 × 70 inches
- Binding: ⅝ yard, cut into seven strips at 2½ inches
- Thread: neutral cotton
- Rotary cutter, cutting mat, quilting ruler, pins or clips, iron
Beginner tip: do not prewash the jelly roll strips – and don’t prewash the coordinating fabric either. Precut strips have pinked edges, and washing 2½-inch strips causes fraying and distortion. More importantly, all 48 rail strips need to go into the quilt in the same state: if half are prewashed and half aren’t, they’ll shrink at different rates the first time the finished quilt is washed, and the blocks will pull out of square. The backing and binding can be prewashed if you prefer. Test a scrap of red for colorfastness, and use a color catcher on the finished quilt.
Choosing Your Colors
The woven effect depends on the strips within each block being clearly different from one another:
- Traditional Christmas: red, cream, green, cream – the alternating light strip is what makes the weave read
- Bright modern: cherry red, white, kelly green, gold
- Rustic: cranberry, tan, forest green, cream
- Frosty: navy, white, silver-blue, cream
- Warm gold: deep red, gold, green, cream
The single most useful rule: keep the same color-and-value sequence in every strip set. The actual prints can vary – an assorted jelly roll won’t contain twelve identical strips of anything – but if position one is always a dark red and position two always a cream, the weave will read cleanly across the whole quilt. Mix up the sequence between blocks and the basket-weave dissolves into randomness.
Including one light strip in each set of four is what gives the weave its depth. Four medium-dark strips will look muddy no matter how neatly you sew.
Cutting Measurements
- Strip sets: 12 sets, each made from 4 strips sewn along their long edges. Each set measures 8½ inches wide × about 40-41 inches long once selvages are removed
- Blocks: cut 8½-inch squares across each strip set – 4 squares per set, for 48 blocks in total
- Backing panel: 54 × 70 inches
- Batting: 54 × 70 inches
- Binding: seven strips, 2½ inches × width of fabric
Step-by-Step Guide
Step 1 – Prepare your fabrics. Leave both the jelly roll and the coordinating strip fabric unwashed, so all 48 strips shrink together later. Cut your ⅔ yard of coordinating fabric into 8 strips at 2½ inches, giving 48 strips in total, and trim the selvages from every strip. Prewash the backing separately if you like, but buy a little extra yardage to allow for its shrinkage.
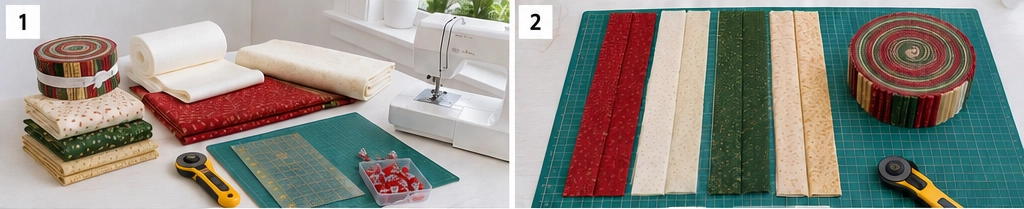
Step 2 – Decide your color sequence. Choose the four-position order you’ll repeat in every strip set – for example dark red, cream, green, cream. Write it down. This sequence creates the woven look, so it must be the same in all twelve sets.
Step 3 – Sort the strips into twelve groups of four. Divide all 48 strips into twelve piles, each following your chosen sequence. Do this before you sew anything – it’s how you find out now that you’re short two creams, rather than after eight sets are already sewn.

Step 4 – Sew the first strip set. Take one group of four and sew the strips together along their long edges in order, using a ¼-inch seam. Feed them through gently without pulling.
Step 5 – Press the seams. Press all three seams in the same direction, from the back first and then the front. Consistent pressing keeps the set flat and stops it bowing into a curve.

Step 6 – Check the width. Measure across the pressed strip set: it should be exactly 8½ inches wide. If it’s narrower, your seam allowance is too wide – adjust your machine now, before making eleven more sets. This one check is worth the thirty seconds.
Step 7 – Make the remaining eleven strip sets. Repeat steps 4 to 6 until you have twelve strip sets, all following the same color sequence and all measuring 8½ inches wide.

Step 8 – Square up one end of a strip set. Lay a set on the cutting mat and trim a clean, square edge at one end, cutting at a true right angle to the long seams. Everything you cut from this set will be square only if this first cut is.
Step 9 – Cut and check the first block. Measuring from that squared end, cut one 8½-inch section straight across the strip set. Now turn it on the mat and check with a square ruler that it measures 8½ inches in both directions with four square corners. A bowed strip set or a slightly angled first cut produces a parallelogram rather than a square, and it’s far better to find that out on block one.

Step 10 – Cut the remaining blocks. Once the first block checks out, cut three more from that strip set, then work through all twelve sets for 48 blocks in total. Give the occasional block a quick square-ruler check as you go.
Step 11 – Understand the rotation. Take two blocks and set them side by side. Turn one so its strips run horizontally and the other so its strips run vertically. That alternation is the entire design – where the two meet, the strips appear to weave over and under each other.

Step 12 – Lay out the quilt. Arrange all 48 blocks 6 across × 8 down, alternating the direction of every block like a checkerboard: horizontal, vertical, horizontal, vertical along each row, and starting each new row with the opposite direction to the row above. Step back and check the weave reads correctly across the whole quilt.
Step 13 – Photograph and label the rows. Take a photo on your phone before you pick anything up. Then place a numbered paper label beside each row, gather each row from left to right, and pin its label to the top block of the stack. Keep every stack facing upward. Blocks are extremely easy to rotate by accident on the way to the machine, and between the photo and the labels you can always put things right.

Step 14 – Sew the first row. Sew the six blocks of the top row together with a ¼-inch seam, checking each block’s direction against your photo as you go. The finished row should measure 48½ × 8½ inches.
Step 15 – Press the first row. Press the seams of this row to the right.

Step 16 – Sew and press the remaining rows. Sew each of the other seven rows the same way, checking directions against your photo. Press odd-numbered rows to the right and even-numbered rows to the left, so the seams will nest when you join the rows.
Step 17 – Join the rows. Sew the eight rows together in order, pinning at each seam junction where the opposing press directions lock together. Press the quilt top well. It should measure 48½ × 64½ inches.

Step 18 – Prepare the backing. Cut your 3¾ yards into two equal lengths of about 67 inches, trim the selvages, and sew them together along their long (67-inch) edges. This gives a panel roughly 67 × 83 inches – more than enough for the 54 × 70 you need. Press the seam open and trim the panel down to at least 54 × 70 inches.
Step 19 – Make the quilt sandwich. Lay the backing wrong side up, center the batting on it, then lay the quilt top right side up. Smooth everything from the center outward and baste with pins or basting spray.
Step 20 – Quilt it. Simple quilting suits this design perfectly – an all-over diagonal grid, straight lines running the length of the quilt, or stitching in the ditch along the block seams. A walking foot keeps the layers feeding evenly.
Step 21 – Trim and square up. Trim the excess batting and backing level with the edge of the quilt top, squaring the corners. Don’t trim into the top itself – it should still measure 48½ × 64½ inches, because that outer ¼ inch on every side is the seam allowance the binding needs.
Step 22 – Bind and finish. Join the seven 2½-inch binding strips into one long strip, press in half lengthwise, and sew to the front of the quilt with a ¼-inch seam. Fold to the back and stitch down. The binding takes up that outer quarter inch, so the finished quilt measures about 48 × 64 inches. Wash gently on cold with a color catcher and tumble dry low.
Assembly at a Glance
- Leave all 48 strips unwashed; cut 8 extra strips from coordinating fabric.
- Fix a four-position color sequence and write it down.
- Sort all 48 strips into twelve groups of four.
- Sew four strips into a set (¼-inch seams).
- Press all three seams one direction.
- Check the set measures 8½ inches wide.
- Make twelve strip sets the same way.
- Square up one end of a strip set.
- Cut one 8½-inch block and check it’s square in both directions.
- Cut the rest – 4 per set → 48 blocks.
- Turn two blocks to see the horizontal/vertical weave.
- Lay out 6 × 8, alternating direction like a checkerboard.
- Photograph and label the eight rows.
- Sew row 1 → 48½ × 8½ in.
- Press row 1 seams right.
- Sew all eight rows; press odd rows right, even rows left.
- Join the rows, nesting seams → 48½ × 64½ top.
- Seam the backing along its long edges → panel about 67 × 83 in; trim to 54 × 70.
- Layer and baste.
- Quilt with a simple grid or straight lines.
- Trim batting and backing level with the top; don’t cut the top.
- Bind with seven strips; finishes at about 48 × 64 inches.
Beginner Tips for Success
- Check your first strip set measures 8½ inches before making the rest – it’s the whole block’s accuracy in one measurement.
- Keep the same color-and-value sequence in every set; the prints can vary, the order can’t.
- Include one light strip in each set of four – that’s what gives the weave its depth.
- Square up one end of each strip set before cutting squares.
- Photograph the layout before you start sewing; blocks are easy to rotate by accident.
- Press odd rows right and even rows left so the seams nest at every junction.
- Don’t prewash any of the 48 strips – jelly roll or coordinating. Mixing washed and unwashed fabric means uneven shrinkage later.
- Check the first block is square in both directions before cutting the other 47.
- Use a color catcher in the first wash – Christmas reds and greens bleed.
Styling It & Gift Ideas
A rail fence quilt has a warm, traditional, slightly homespun look that suits cozy rooms beautifully – folded over the back of a sofa, spread on a chair by the tree, or laid across a bed in a guest room. The woven texture reads as classic rather than trendy, so it sits happily alongside whatever decorations you already have.
Because it’s quick and forgiving, it’s an excellent gift:
- A first quilt to make with someone – a child, a partner, or a friend learning to sew, since success is almost guaranteed
- A last-minute Christmas gift, given how fast twelve strip sets come together
- Several gifts at once – strip-piecing makes it easy to batch out quilts for teachers, neighbors, or cousins
- A baby or lap quilt, scaled down to 4 blocks across by 5 down for a 32 × 40-inch finish
If you’re teaching someone to quilt, this is the pattern to use. There’s nothing in it that punishes a slightly wobbly seam, and the finished result looks genuinely impressive.
Final Thoughts
A rail fence jelly roll Christmas quilt is the easiest, most forgiving design in this whole collection, and one of the most satisfying. Four strips make a block, forty-eight blocks make a quilt, and the woven basket-weave pattern appears from nothing more than turning every other block a quarter turn. Keep your color sequence consistent, check that first strip set at 8½ inches, and photograph your layout before you sew – do those three things and you’ll have a warm, classic Christmas quilt with no bias, no points, and no stress.
Other Design Inspirations – Digitally Modified Images. Texture and color may vary from the actual product.
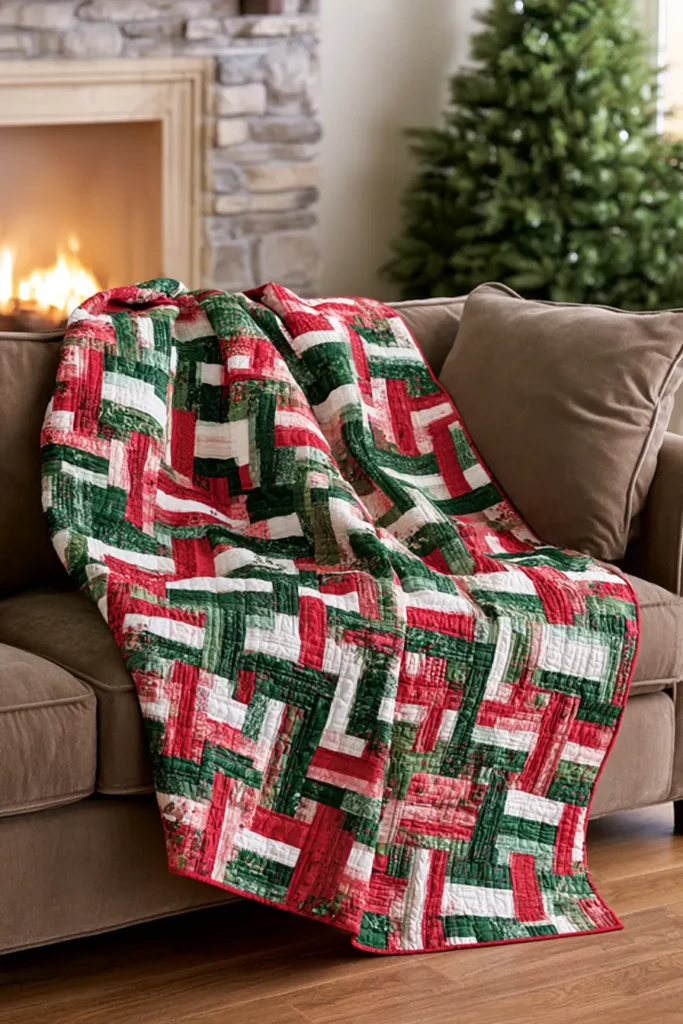
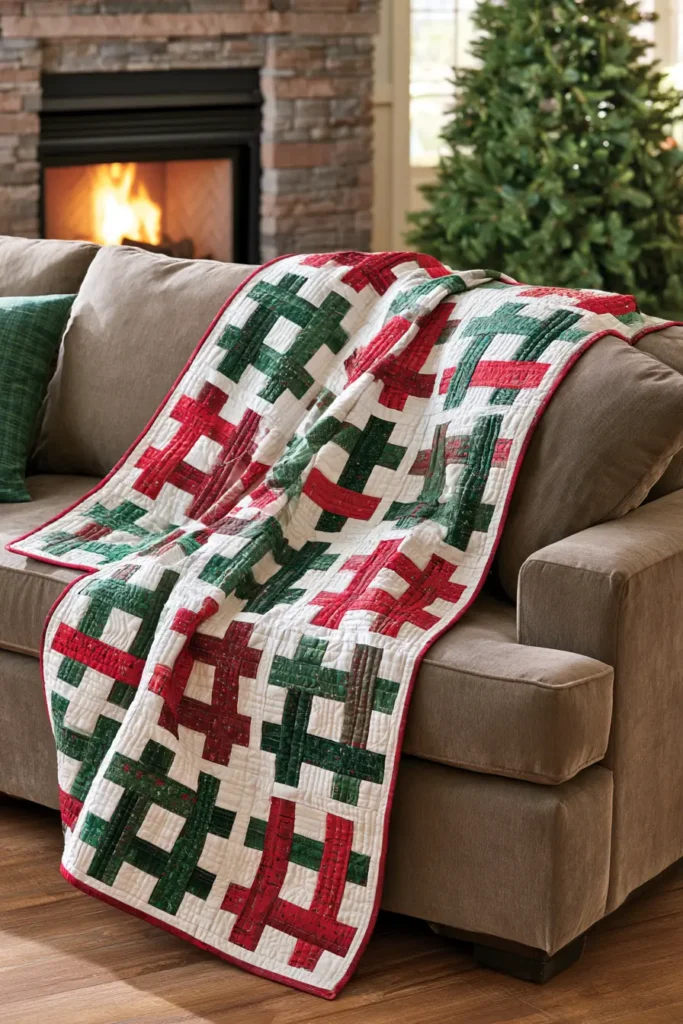
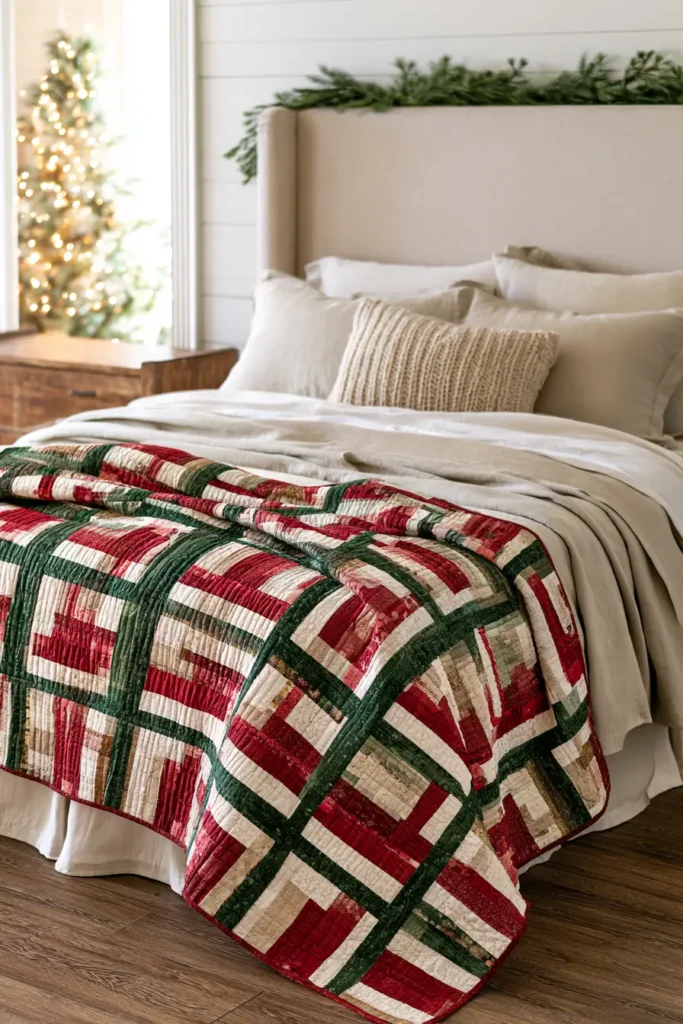
9. Plaid Flannel Jelly Roll Christmas Quilt for Rustic Farmhouse Warmth
If you want a Christmas quilt that people actually burrow under, make it in flannel. Brushed cotton flannel has a soft napped surface that traps air, so a flannel quilt is noticeably warmer and heavier than the same quilt in quilting cotton – and in rich holiday plaids of cranberry, forest green, buffalo check, and warm cream, it has a rustic farmhouse look that suits a cabin, a porch, or a sofa by the fire.
The design here is a brick pattern, sometimes called running bond: rows of rectangles offset by half a brick, exactly like a garden wall. That’s a deliberate choice. Flannel stretches more than quilting cotton, so the smart approach is large, simple pieces and long straight seams, with nothing cut on the bias and nothing fiddly to match. The plaids themselves do all the decorative work.
Working With Flannel: What Changes
Flannel is lovely to sew once you know its habits, and there are four:
- It shrinks – a lot. Cotton flannel commonly shrinks 3 to 5 percent, considerably more than quilting cotton. Your 48 × 64-inch quilt will come out of its first wash somewhere around 46-47 × 61-62 inches, with a soft crinkled surface. The exact figure varies with the flannel, the batting, and how densely you quilt it. That crinkle is desirable and part of the charm, but plan for the size change rather than being surprised by it.
- It stretches. The looser weave and brushed surface mean flannel pulls out of shape if you tug it. Use a walking foot, let the machine feed the fabric rather than helping it along, and handle cut pieces gently.
- It frays. Flannel’s weave sheds threads readily, so cut edges get messy if you handle pieces repeatedly. Cut in batches close to when you’ll sew them.
- It sheds lint. Enormous amounts of it. Clean the bobbin area partway through and again at the end, and expect to clean the lint trap two or three times when you dry the finished quilt.
Use a 90/14 needle – flannel is thicker than quilting cotton and a smaller needle will struggle through the seam intersections.
Design Inspirations – Digitally Modified Images. Texture and color may vary from the actual product.
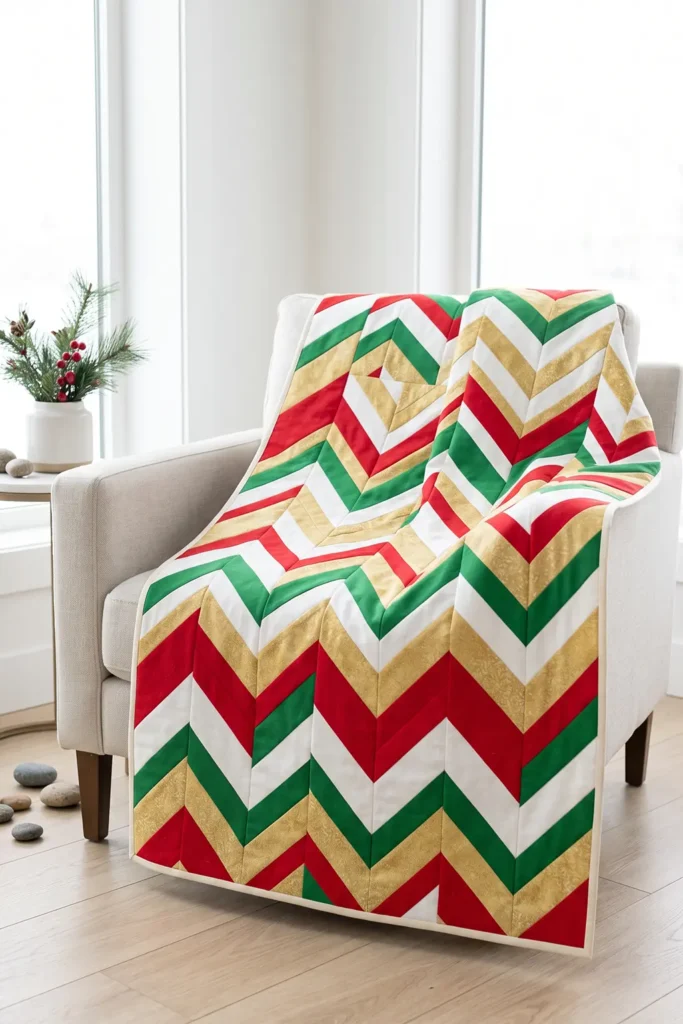
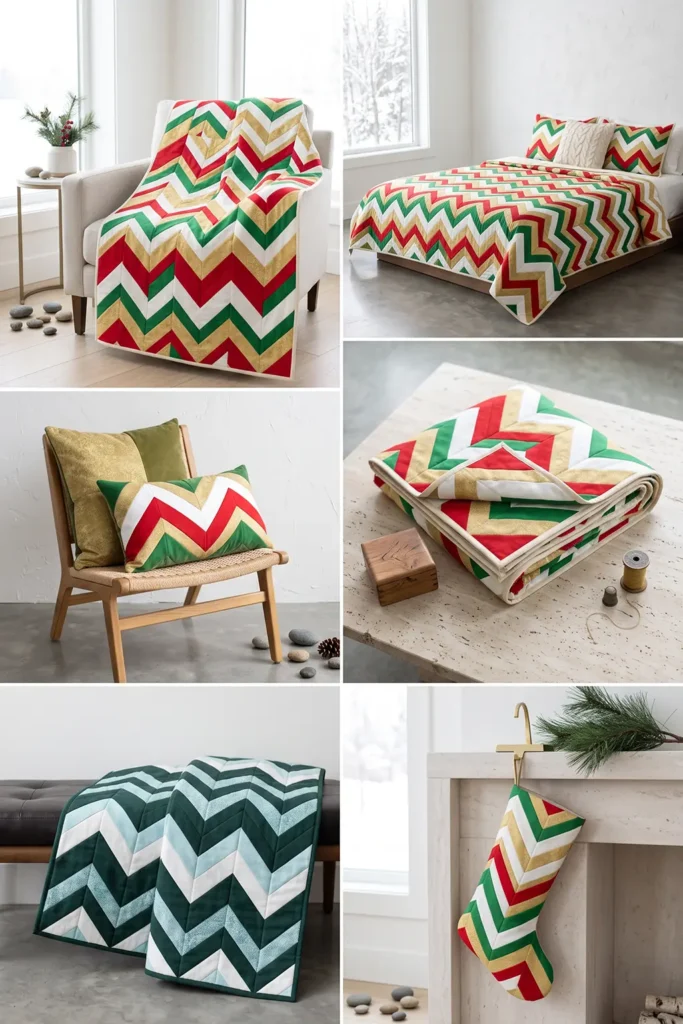
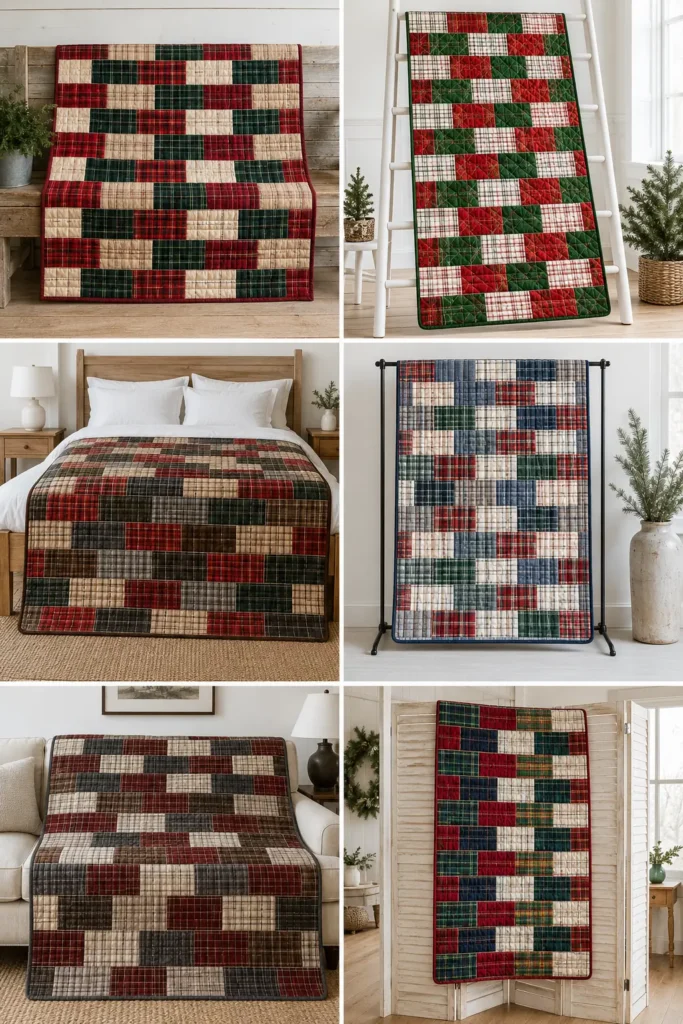
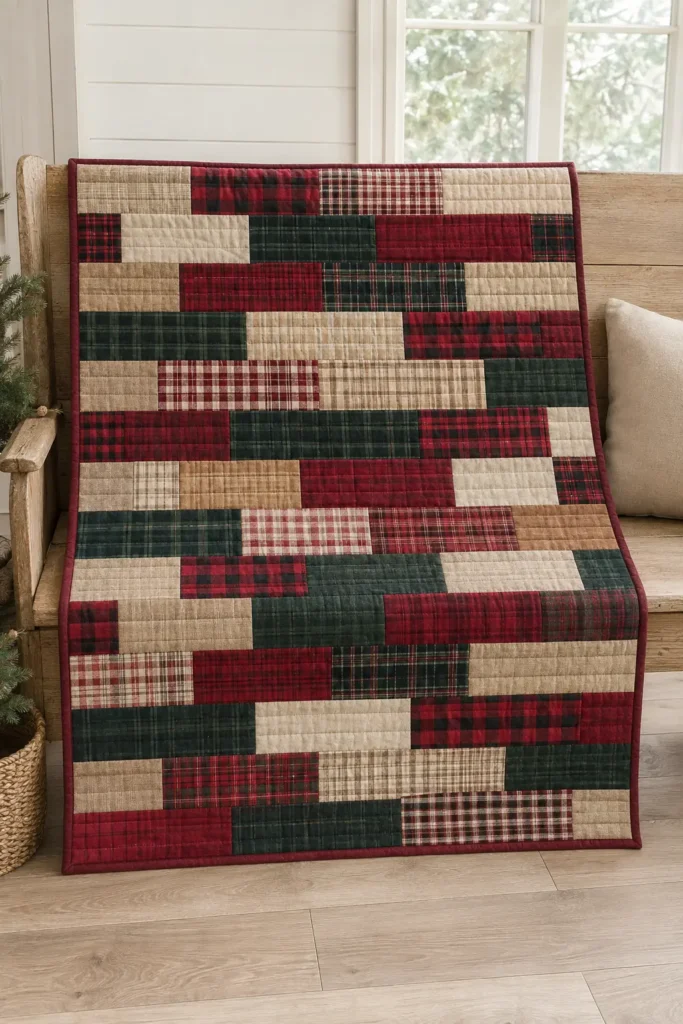
A Note on Prewashing
Here’s the honest tension. Flannel shrinks more than most fabrics, which normally argues for prewashing – but you can’t sensibly prewash 2½-inch precut strips, because the pinked edges fray and the strips distort until they’re no longer accurate.
The practical answer: leave all the strips unwashed, and leave your coordinating fabric unwashed too. What matters most is that every piece of the quilt top is in the same condition, so it all shrinks together evenly in the first wash rather than pulling against itself. If your backing is also flannel, leave that unwashed as well. Test a scrap of your darkest red for colorfastness, and use a color catcher when you wash the finished quilt.
A Little History: Flannel
Flannel began as a Welsh wool cloth, and the name most likely comes from the Welsh gwlanen, meaning a woolen article. It was being woven in Wales by the seventeenth century, prized for warmth and durability in a cold, damp climate, and it spread across Britain and then to America as a hard-wearing fabric for working people.
Cotton flannel came later, made warm by napping – a finishing process that raises tiny fibers on the surface with fine wire brushes, creating the fuzzy texture that traps air. That soft nap is precisely why a flannel quilt feels warmer than a cotton one of the same weight, and why plaid flannel became the fabric of lumberjack shirts, winter sheets, and cabin blankets.
How the Brick Pattern Works
Every row is made from the same two components:
- Full bricks: rectangles measuring 4½ × 8½ inches cut (4 × 8 inches finished)
- Half bricks: squares measuring 4½ × 4½ inches cut (4 × 4 inches finished)
Note that a “brick” here is not one uninterrupted piece of plaid. Because every brick is cut from a two-strip set, each one contains two parallel bands of fabric across its 4½-inch height. The word brick refers to the complete rectangular unit, not to a single fabric.
Rows alternate:
- Odd rows (1, 3, 5 and so on) = six full bricks
- Even rows (2, 4, 6 and so on) = half brick, five full bricks, half brick
That half-brick offset is what staggers the vertical seams from row to row and gives the pattern its brickwork look. Both row types finish at exactly the same width.
Finished Size
- Quilt top: 48½ × 64½ inches unfinished
- Finished quilt: about 48 × 64 inches after binding
- After the first wash: roughly 46-47 × 61-62 inches, depending on the flannel, batting, quilting density, and how you dry it
- Layout: 16 rows, each 4 inches finished
- Skill level: confident beginner – simple pieces, but flannel needs a gentle hand
- Core techniques: flannel handling, strip sets, crosscutting, offset row assembly
Materials Needed
- 1 flannel Christmas jelly roll (about 40 strips, 2½ inches × width of fabric)
- Extra coordinating flannel: ⅓ yard, cut into 4 strips at 2½ inches – you need 44 strips in total
- Backing: 4 yards of standard-width flannel or cotton left unwashed (or 4¼ yards if you intend to prewash it), cut into two equal lengths and seamed along their long edges to give a panel comfortably larger than the 54 × 70 inches required; or 2 yards of 108-inch wide backing, 2⅛ if prewashing
- Batting: at least 54 × 70 inches. Use low-loft cotton – flannel is already warm and heavy, and a thick batting makes the quilt unmanageable
- Binding: ⅝ yard, cut into seven strips at 2½ inches. Use quilting cotton rather than flannel; cotton binding wears far better on an edge that gets handled
- Thread: good-quality cotton, plus 90/14 needles
- Walking foot (strongly recommended), rotary cutter with a fresh blade, cutting mat, quilting ruler, pins or clips, iron
Beginner tip: buy the ⅓ yard of coordinating flannel from the same shop and range as your jelly roll if you can. Flannel weights vary noticeably between manufacturers, and mixing a heavy flannel with a light one in the same quilt makes the seams pull unevenly.
Choosing Your Colors
Plaid flannel is at its best when the checks vary in scale:
- Classic farmhouse: cranberry buffalo check, forest green tartan, cream, and warm tan
- Bright Christmas: cherry red, kelly green, white check, and gold
- Rustic cabin: brick red, charcoal, hunter green, and oatmeal
- Soft nordic: dusty red, gray-blue, cream, and pine
Mix a large buffalo check with a medium tartan and a fine gingham rather than using three checks of the same size – varied scale is what stops a plaid quilt from reading as visual noise. Include one light or cream fabric to give the eye somewhere to rest.
Because bricks are large pieces, big plaids show beautifully here in a way they never would in small patchwork.
Cutting Measurements
- Strip sets: 22 sets, each made from 2 strips sewn along their long edges. Each set measures 4½ inches wide × about 40-41 inches long after selvages are removed
- Full bricks: cut 4½ × 8½-inch rectangles – 4 per strip set, for 88 full bricks
- Half bricks: cut 4½ × 4½-inch squares – 1 per strip set, giving 22 (you need 16)
- Backing panel: at least 54 × 70 inches
- Batting: 54 × 70 inches
- Binding: seven strips, 2½ inches × width of fabric
Step-by-Step Guide
Step 1 – Prepare your fabrics. Leave the jelly roll and the coordinating flannel unwashed so everything shrinks together later. Cut the ⅓ yard of coordinating flannel into 4 strips at 2½ inches, giving 44 strips in total. Trim the selvages from every strip.
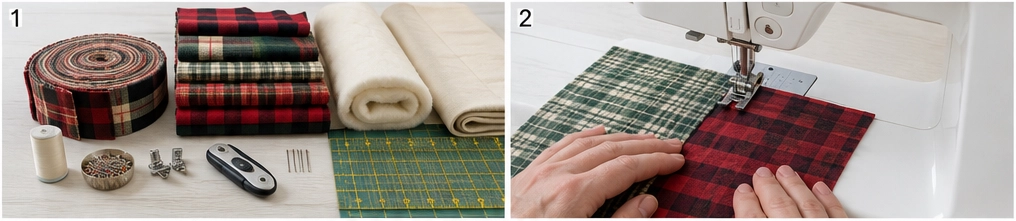
Step 2 – Set up your machine. Fit a 90/14 needle and a walking foot. Sew a test seam on two flannel scraps and check that the feed is even and the fabric isn’t being pushed ahead of the foot.
Step 3 – Sort the strips into 22 pairs. Pair the strips so each set has good contrast – a dark plaid with a lighter one, or a large check with a fine one. Set the pairs aside in a stack.

Step 4 – Sew the first strip set. Sew one pair together along their long edges with a ¼-inch seam, letting the walking foot pull the fabric through without helping it. Don’t stretch the strips as they feed.
Step 5 – Press the set. Press the seam to one side, pressing rather than ironing – lift and place the iron rather than sliding it, because flannel distorts under a moving iron. Press from the back first, then the front.

Step 6 – Check the width. Measure across the pressed set: it should be exactly 4½ inches. If it’s narrower, your seam is too wide – adjust now, before making twenty-one more sets.
Step 7 – Make the remaining 21 strip sets. Repeat steps 4 to 6 until you have 22 strip sets, all measuring 4½ inches wide. Clean the lint from your machine when you’re done.

Step 8 – Square one end of a strip set. Lay a set on the mat and trim a clean edge at one end, cutting at a true right angle to the long seam. Every piece you cut from this set depends on that first cut being square.
Step 9 – Cut and check the first brick. Measure from the squared end and cut one 8½-inch section. Check it with a ruler: it should measure 4½ × 8½ inches with four square corners. A bowed strip set or an angled first cut gives a parallelogram instead – much better to find that now than on brick eighty-eight.

Step 10 – Cut the rest of the first set. Cut three more full bricks (four in total from this set), then cut one 4½-inch half brick from what remains. Set the small offcut aside.
Step 11 – Cut all remaining sets. Work through all 22 sets the same way, giving 88 full bricks and 22 half bricks. You need 16 half bricks; keep the spares in case one gets misshapen.

Step 12 – Understand the offset. Lay out two rows to see how it works. Odd rows are six full bricks end to end. Even rows are a half brick, five full bricks, then a half brick. Both come to the same width, but the vertical seams land in different places – that stagger is the whole pattern.
Step 13 – Lay out the quilt. Arrange 16 rows on a design wall or floor, alternating odd and even row types, starting with an odd row. Distribute the two-fabric brick combinations so identical pairs don’t sit directly beside or above one another.

Step 14 – Photograph and label the rows. Take a photo, then place a numbered label beside each row. Gather each row from left to right and pin its label to the first piece. Sixteen rows of similar-looking plaid bricks are remarkably easy to muddle.
Step 15 – Sew the odd rows. For each odd row, sew six full bricks together along their 4½-inch ends with a ¼-inch seam. Each finished row should measure 48½ × 4½ inches. There are eight odd rows.

Step 16 – Sew the even rows. For each even row, sew a half brick, then five full bricks, then a half brick, in that order. Each should also measure 48½ × 4½ inches. There are eight even rows.
Step 17 – Press the rows. Press the brick-joining seams within each row consistently to one side – odd rows to the right and even rows to the left, which distributes the bulk evenly across the quilt. Note that these seams will not nest when you join the rows: the whole point of the brick offset is that the vertical seams in adjacent rows are four inches apart and never meet. Press, don’t slide.

Step 18 – Join the rows. Sew the sixteen rows together in order. Because the vertical seams are staggered rather than aligned, you can’t match them – instead, pin the two ends first, then the center, then the quarter points, and fill in with pins or clips every few inches. That’s what keeps a flannel row from creeping and finishing longer than its neighbor. Press well. The top should measure 48½ × 64½ inches.
Step 19 – Prepare the backing. Cut your 4 yards into two equal lengths, trim the selvages, and sew them together along their long edges. Press the seam open and trim the panel to at least 54 × 70 inches.
Step 20 – Make the quilt sandwich. Lay the backing wrong side up, center the low-loft batting, then the quilt top right side up. Smooth from the center outward and baste generously – a flannel top is heavy and shifts more than cotton.
Step 21 – Quilt it. Keep the quilting simple and not too dense. Straight lines following the rows, an all-over grid, or stitching in the ditch all work well. Dense quilting on flannel makes a stiff quilt and defeats the softness you chose the fabric for.
Step 22 – Trim and square up. Trim the excess batting and backing level with the edge of the quilt top, squaring the corners. Don’t trim into the top – it should still measure 48½ × 64½ inches, because that outer ¼ inch is the seam allowance the binding needs.
Step 23 – Bind the quilt. Join the seven 2½-inch cotton binding strips into one long strip, press in half lengthwise, and sew to the front with a ¼-inch seam. Fold to the back and stitch down. The binding takes up that outer quarter inch, so the quilt now measures about 48 × 64 inches.
Step 24 – Wash and let it crinkle. Wash gently on cold with a color catcher, then tumble dry on low. Clean the dryer lint trap two or three times during the cycle. The quilt will shrink to roughly 46-47 × 61-62 inches and develop the soft, crinkled, well-loved texture that makes a flannel quilt worth making.
Assembly at a Glance
- Leave all 44 strips unwashed; cut 4 extra strips from coordinating flannel.
- Fit a 90/14 needle and walking foot; test the feed.
- Sort strips into 22 contrasting pairs.
- Sew a pair into a set (¼-inch seam), no stretching.
- Press the seam to one side – lift and place, don’t slide.
- Check the set measures 4½ inches wide.
- Make 22 sets; clean machine lint.
- Square one end of a set.
- Cut one 8½-inch brick and check it’s 4½ × 8½ with square corners.
- Cut 3 more full bricks + 1 half brick from that set.
- Cut all sets → 88 full bricks, 22 half bricks (16 needed).
- Study the offset: odd rows = 6 full; even rows = half + 5 full + half.
- Lay out 16 rows, starting with an odd row.
- Photograph and label every row.
- Sew the eight odd rows → 48½ × 4½ in each.
- Sew the eight even rows → same size.
- Press odd rows right, even rows left (for bulk, not nesting).
- Join all sixteen rows – pin ends, center, quarters, then every few inches (seams don’t nest) → 48½ × 64½ top.
- Seam the backing along its long edges; trim to 54 × 70.
- Layer with low-loft batting; baste generously.
- Quilt simply – avoid dense quilting.
- Trim batting and backing level with the top.
- Bind with seven cotton strips → about 48 × 64 inches.
- Wash cold with a color catcher; expect it to finish near 46-47 × 61-62 inches.
Beginner Tips for Success
- Use a walking foot and a 90/14 needle; flannel is thick and shifts easily.
- Don’t prewash any of the 44 strips – and don’t prewash the coordinating flannel either. Everything must shrink together.
- Press, don’t slide. Lift and place the iron, or flannel distorts.
- Check the first strip set at 4½ inches and the first brick at 4½ × 8½ before cutting in bulk.
- Buy your extra flannel from the same range as the jelly roll so the weights match.
- Pin ends, center, and quarter points when joining rows, then every few inches. The staggered brick seams don’t align, so there’s nothing to match – pinning is purely to stop flannel creeping.
- Choose low-loft batting – flannel supplies plenty of warmth on its own.
- Bind with cotton, not flannel; it wears far better.
- Expect 3-5 percent shrinkage and a lot of lint. Both are normal.
Styling It & Gift Ideas
A plaid flannel quilt belongs in rooms that already feel warm – draped over a leather sofa, folded on a porch swing, spread across a bed in a cabin, or bundled in a basket by the fire. The rustic checks sit happily with wood, wool, and stone, and because plaid reads as winter rather than strictly Christmas, it stays out comfortably from November through February.
Its weight and warmth make it a genuinely useful gift:
- A cabin or lake-house gift, where a heavy plaid quilt gets real use
- A cozy gift for someone who’s always cold – flannel is noticeably warmer than a cotton quilt
- A college or first-apartment quilt in buffalo check, which suits almost any room
- A wedding gift for an outdoorsy couple, in cranberry and forest green
If you’re giving it, mention that it will shrink and crinkle in the first wash. People who haven’t used flannel before sometimes think they’ve done something wrong, when in fact that soft crinkle is exactly what they should be hoping for.
Final Thoughts
A plaid flannel jelly roll Christmas quilt is rustic farmhouse warmth in its most literal form – genuinely heavier, genuinely warmer, and soft in a way cotton never quite manages. The brick layout keeps the pieces large and the seams straight, which is exactly what flannel wants, and lets those big holiday checks show at full scale. Sew gently, press without sliding, pin more than you think you need, then wash it and enjoy the crinkle. That first soft, rumpled result out of the dryer is the whole reason to make a quilt in flannel.
Other Design Inspirations – Digitally Modified Images. Texture and color may vary from the actual product.
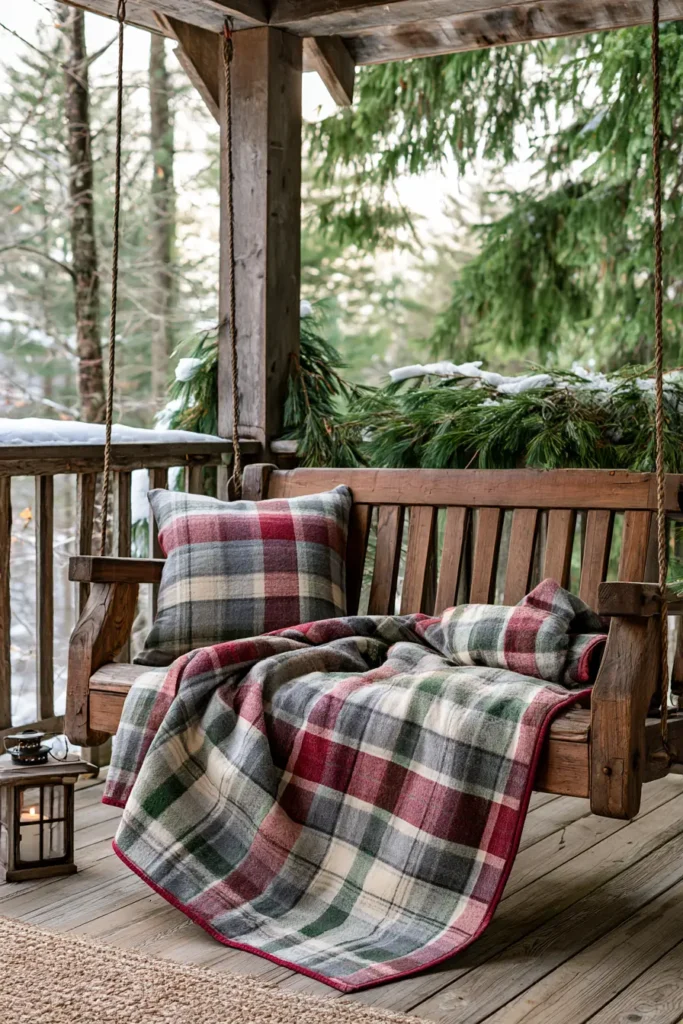
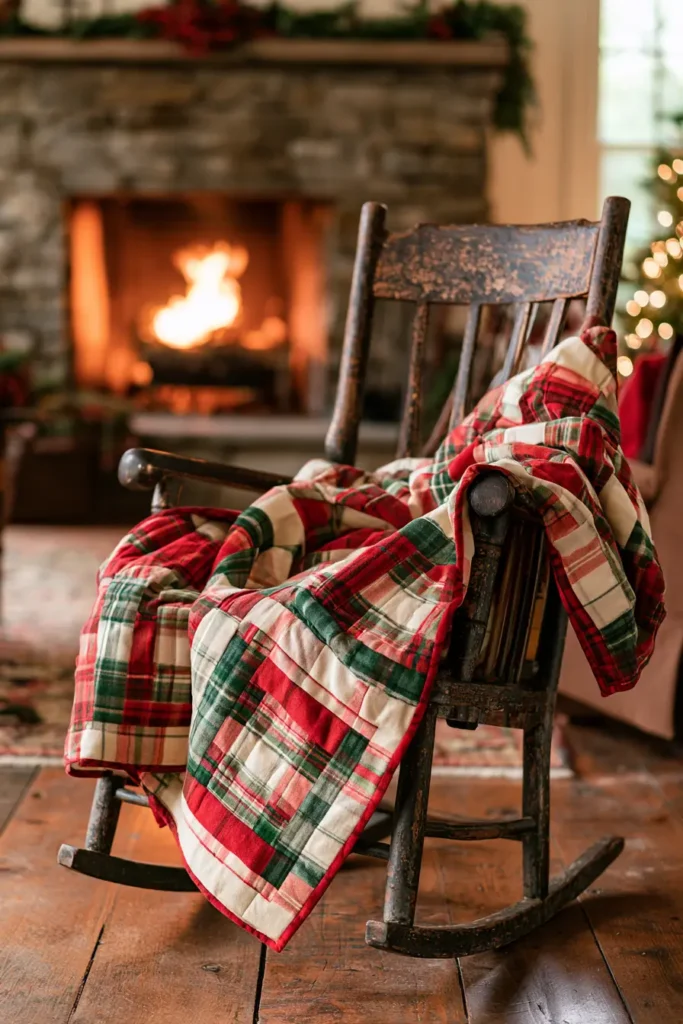
10. Scrappy Jelly Roll Christmas Throw for Colorful Holiday Comfort
This is the quilt that draws on everything. A scrappy Christmas throw pulls from the full variety of a jelly roll – the reds, greens, creams, novelty prints, and the odd colorway you weren’t sure about – and stacks selected strips into vertical columns of short “coins,” separated by clean sashing. It makes excellent use of a mixed bundle while still leaving strips for the binding and a small project on the side. The result is joyfully colorful and completely unrepeatable, because no two scrappy quilts ever come out the same. In vibrant reds, greens, gold, and cream it reads as cheerful rather than formal, which makes it the throw people actually grab off the sofa rather than admire from a distance.
The layout is a quilting classic called Chinese Coins, and it happens to be the single best use for a mixed bundle of strips. Short segments stacked in a column make color variety look deliberate instead of chaotic, and the sashing between the columns gives the eye somewhere to rest.
The One Rule That Makes Scrappy Work
Scrappy quilts fail when there’s nothing holding them together. Fifty different prints with no common thread read as noise, not design.
The fix is a unifying element, and in this quilt it’s the sashing. Every column is a riot of different fabrics, but the strips between the columns are all the same – one solid cream, or one solid red – and that repetition frames the chaos and turns it into a pattern. Choose a single sashing fabric and use it throughout; it does more work than anything else in the design.
Two smaller habits help too: spread your brightest and darkest coins evenly through the columns rather than letting them clump, and don’t put the same fabric twice in a row within a column.
Design Inspirations – Digitally Modified Images. Texture and color may vary from the actual product.
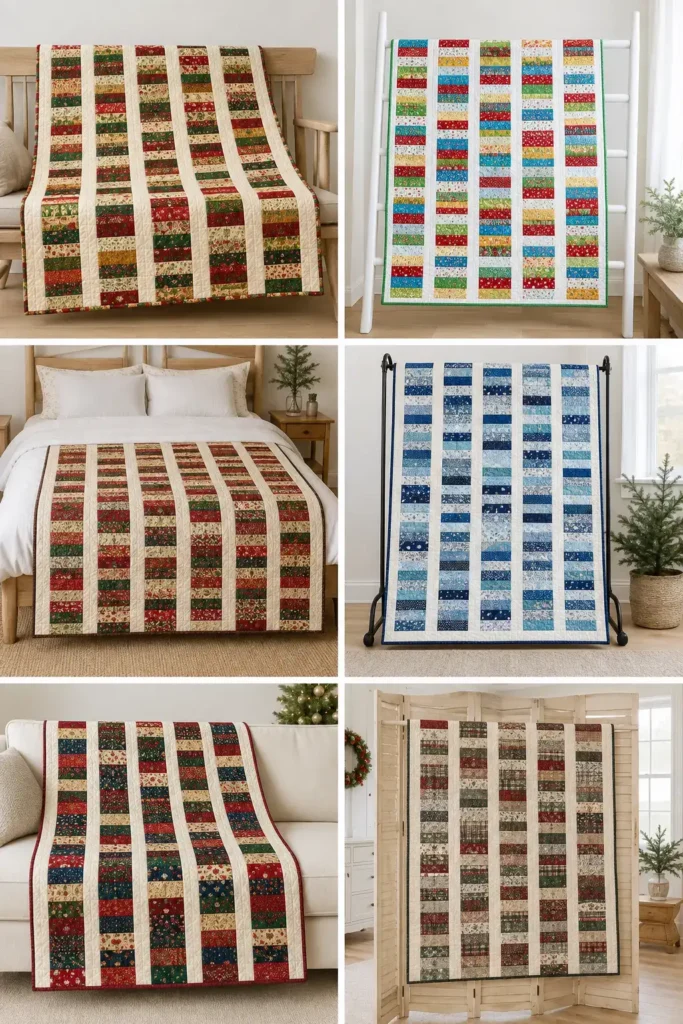
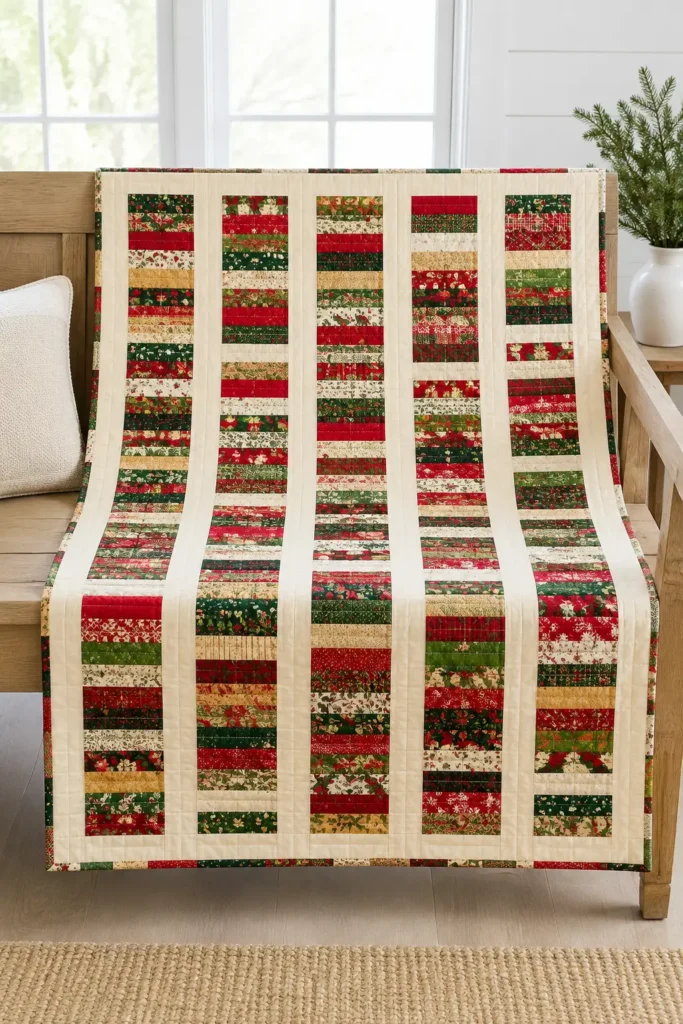
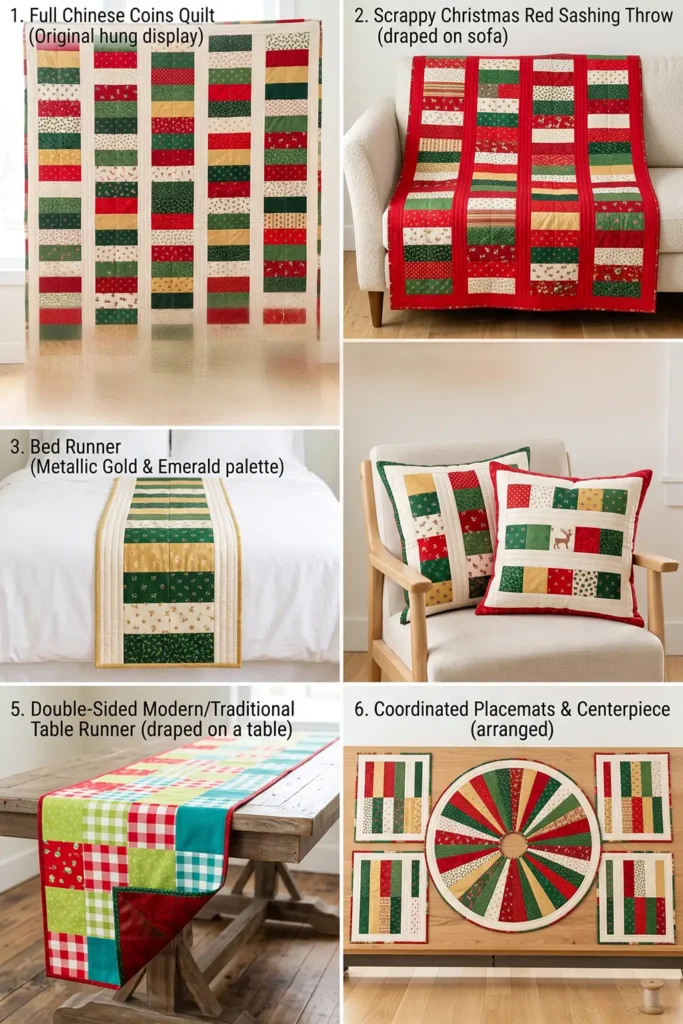
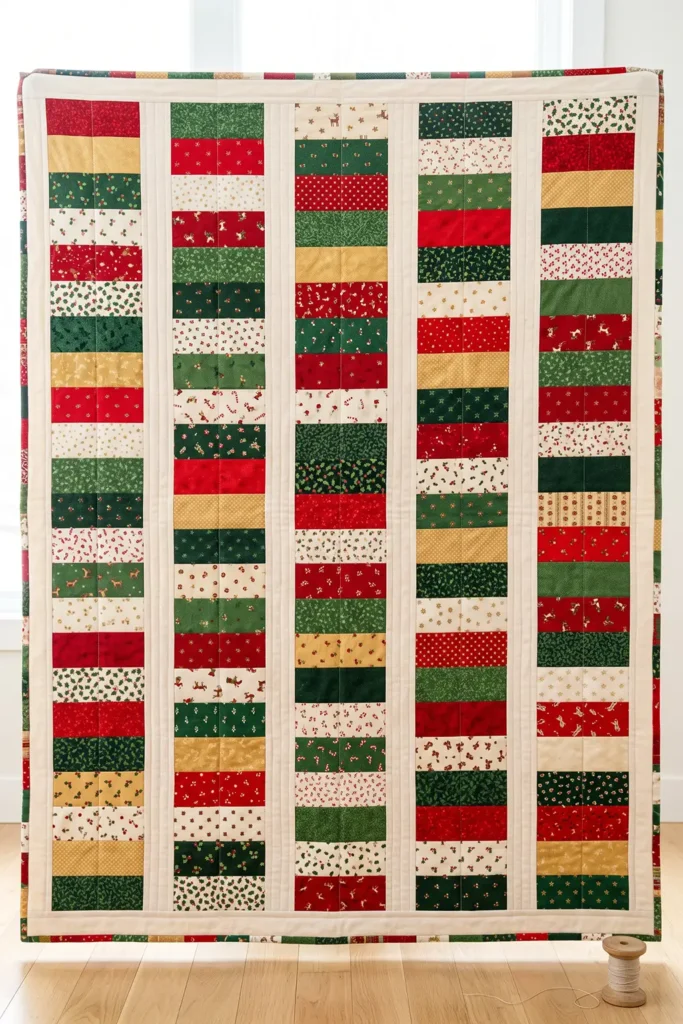
A Little History: Chinese Coins
The coin layout is an old pattern, most closely associated with Amish quiltmaking, where columns of short strips in bold solid colors were set between plain sashing and framed with deep borders. The name comes from the resemblance to stacked coins, or to strings of old Chinese cash coins threaded together.
What made it popular in Amish communities is exactly what makes it useful now: it’s a superb way to use up narrow offcuts. Nothing is wasted, and the format forgives whatever colors happen to be in the scrap basket. A jelly roll is really just a tidy, pre-cut version of that same basket.
How the Quilt Is Built
Three components, and that’s all:
- Coins: rectangles cut 2½ × 6½ inches (2 × 6 inches finished)
- Columns: 30 coins stacked vertically, finishing 6 inches wide × 60 inches long
- Sashing: strips 2½ inches wide, pieced to 60½ inches long, running between the columns and along both outer edges
Five columns and six sashing strips make the whole quilt.
Finished Size
- Quilt top: 42½ × 60½ inches unfinished
- Finished throw: about 42 × 60 inches after binding
- Coins: 150 used (30 per column × 5 columns)
- Skill level: true beginner – straight seams only, nothing to match
- Core techniques: crosscutting strips, chain piecing, column assembly, pieced sashing
Materials Needed
- 1 Christmas jelly roll (about 40 strips, 2½ inches × width of fabric). You’ll use 26 strips for the coins, leaving plenty for a scrappy binding
- Sashing fabric: 1 yard of a single solid – cream, red, or deep green – cut into 12 strips at 2½ inches
- Backing: 3¾ yards of unwashed standard-width fabric (4 yards if you plan to prewash it), cut into two equal lengths and seamed along their long edges; or 1⅞ yards of unwashed 108-inch wide backing, 2 yards if prewashing
- Batting: at least 48 × 66 inches
- Binding: six strips at 2½ inches – use leftover jelly roll strips for a scrappy edge, or ½ yard of a solid
- Thread: neutral cotton
- Rotary cutter, cutting mat, quilting ruler, pins or clips, iron
Beginner tip: don’t prewash the jelly roll strips, and don’t prewash the sashing fabric either. Everything in the quilt top should go in unwashed so it all shrinks together evenly in the first wash. The backing can be prewashed if you prefer. Test a scrap of your darkest red for colorfastness and use a color catcher on the finished quilt.
Choosing Your Colors
Scrappy means variety, but variety within a lane:
- Traditional Christmas: every red, green, gold, and cream in the bundle, mixed freely
- Bright modern: cherry, lime, turquoise, and white for a fresher take
- Warm rustic: cranberry, brick, forest, tan, and gold
- Full spectrum: use absolutely everything in the jelly roll, including the prints you’re unsure about – scrappy quilts are famously forgiving of individual fabrics
For the sashing, cream is the safest and most effective choice – it separates the columns crisply and makes every color beside it look better. Red gives a bolder, more traditional feel. Deep green is handsome but darker overall, so choose it if you want the quilt to feel richer and heavier.
Avoid using a busy print as sashing. It competes with the coins and the whole structure collapses.
Cutting Measurements
- Coins: cut 26 jelly roll strips into 6½-inch segments – 6 coins per strip, giving 156 coins (you need 150, so there are six spares)
- Sashing: cut 12 strips at 2½ inches from the sashing yardage. These get joined in pairs and trimmed to make six sashing strips at 2½ × 60½ inches
- Backing panel: at least 48 × 66 inches
- Batting: 48 × 66 inches
- Binding: six strips, 2½ inches × width of fabric
Step-by-Step Guide
Step 1 – Prepare your fabrics. Leave the jelly roll strips and the sashing yardage unwashed so everything shrinks together later. Cut the 1 yard of sashing fabric into 12 strips at 2½ inches across the width of the fabric. Trim the selvages from those and from your jelly roll strips.
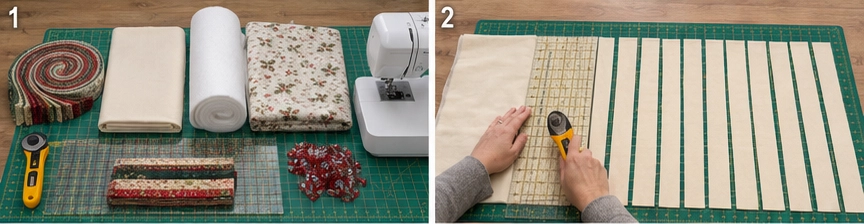
Step 2 – Select your coin strips. Choose 26 strips from the jelly roll, taking the widest spread of colors and prints you can. Set the remaining strips aside; you’ll use some of them for binding at the end.
Step 3 – Cut the coins. Cut each of the 26 strips into 6½-inch segments. Each strip yields 6 coins, for 156 coins in total. Tip them all into one large pile or basket – you’ll be picking from it at random, which is exactly the point.
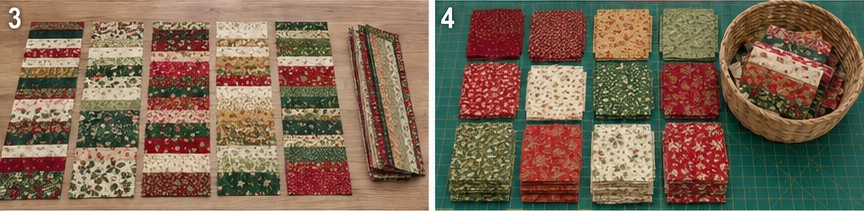
Step 4 – Understand the layout. Each column is 30 coins stacked vertically, one above the next, finishing 6 inches wide and 60 inches long. Five of those columns, with a sashing strip between each and at both outer edges, make the quilt. Nothing needs to align between columns, which is what makes this so relaxing to sew.
Step 5 – Lay out the first column. Pull 30 coins from your pile and lay them in a vertical stack on a design wall or the floor. Now adjust: move things so no two identical fabrics sit next to each other, and so the brightest and darkest coins are spread through the column rather than clustered at one end. Step back and check the balance.
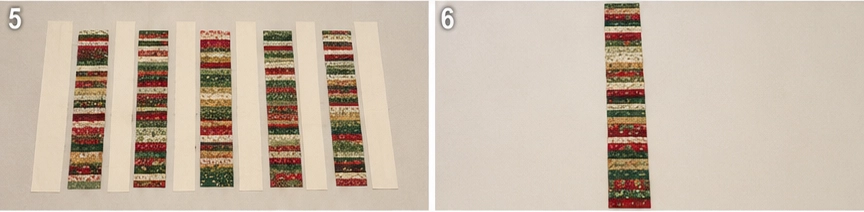
Step 6 – Lay out the remaining four columns. Do the same for columns two through five, using 150 coins in total. Look at all five together and even out any obvious clumps of a single color across the whole quilt.
Step 7 – Photograph and label the columns. Take a photo before you pick anything up. Then place a numbered label (1 to 5) above each column, gather each column from the top down, and keep its label with the stack. Don’t let coins from different columns mix once they’re off the wall – with 150 similar pieces, a photo alone won’t save you.
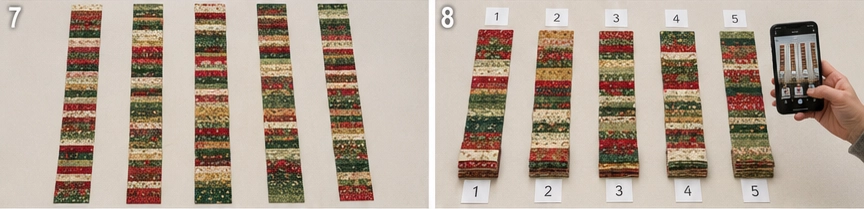
Step 8 – Chain-piece the first column into pairs. Working down column one in order, sew coin 1 to coin 2, coin 3 to coin 4, and so on, feeding them through one after another without cutting the thread between. You’ll have 15 pairs. Snip them apart, keeping them in order.
Step 9 – Join the pairs in order. Working from the top of the column down, sew pair 1 to pair 2, then add pair 3, then pair 4, and so on through pair 15. Keep the pairs in their original order as you go – lay the growing strip back on the wall between seams if that helps.
A note on why it’s done this way: 30 coins don’t divide evenly into fours and eights, so repeatedly halving leaves awkward leftovers that are easy to lose track of. Joining pairs sequentially avoids that entirely, and it’s still far quicker than adding one coin at a time.
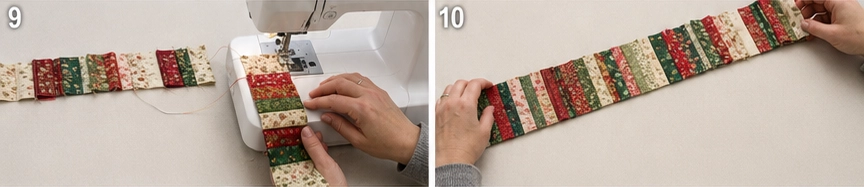
Step 10 – Press the column. Once all 15 pairs are joined into a single strip of 30 coins, press every horizontal seam consistently in the same direction.
Step 11 – Check the column length. Measure it: 30 coins at 2½ inches, minus 29 seams at ½ inch, gives 60½ inches, and it should be 6½ inches wide. If it’s short, your seam allowance is running wide – much better to catch that now than after four more columns.
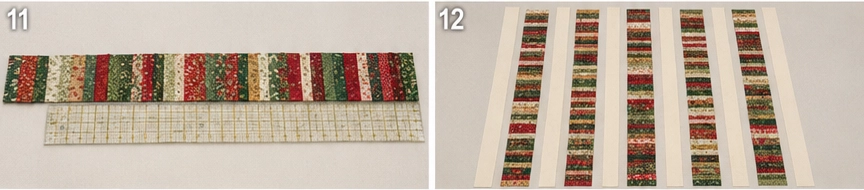
Step 12 – Make the remaining four columns. Repeat steps 8 to 11 for columns two through five, so you have five columns, each 6½ × 60½ inches unfinished.
Step 13 – Piece the sashing strips. Join your 12 sashing strips in six pairs using diagonal seams, the same way you would join binding: lay two strip ends at right angles, right sides together, sew corner to corner across the overlap, trim the excess to ¼ inch, and press the seam open. A diagonal join spreads the bulk across the strip instead of stacking it in one visible cross seam. A diagonal join consumes a little length, so each pieced strip will measure roughly 77½-79½ inches depending on your usable fabric width – still comfortably more than you need. Trim each to exactly 2½ × 60½ inches. You now have six sashing strips.
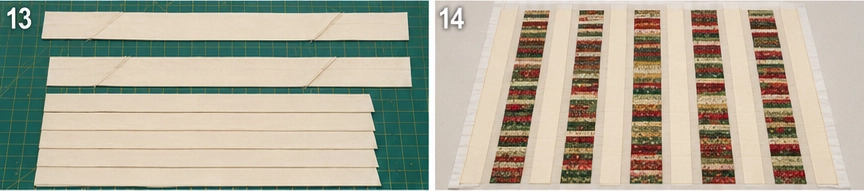
Step 14 – Join the columns and sashing. Sew in this order: sashing, column 1, sashing, column 2, sashing, column 3, sashing, column 4, sashing, column 5, sashing. Pin the tops and bottoms first, then the centers, then fill in – these are long seams, and pieces creep out of alignment without pinning. Press the seams toward the sashing.
Step 15 – Check the quilt top. It should measure 42½ × 60½ inches. Press it thoroughly from the back, then the front.

Step 16 – Prepare the backing. Cut your 3¾ yards into two equal lengths of about 67½ inches, trim the selvages, and sew them together along their long edges. Press the seam open, then trim the panel to at least 48 × 66 inches. If you prewashed the backing, start from 4 yards instead to allow for shrinkage.
Step 17 – Make the quilt sandwich. Lay the backing wrong side up, center the batting on it, then lay the quilt top right side up. Smooth everything from the center outward and baste with pins or basting spray.
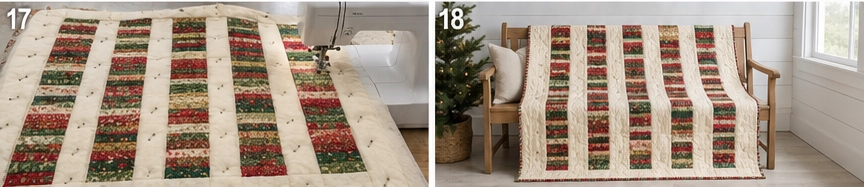
Step 18 – Quilt it. Straight lines running the length of the quilt suit the coin columns beautifully and emphasize the vertical stacks. An all-over meander is quicker and works just as well on something this busy. Avoid anything intricate – it’ll be lost among the prints.
Step 19 – Trim and square up. Trim the excess batting and backing level with the edge of the quilt top, squaring the corners. Don’t trim into the top itself – it should still measure 42½ × 60½ inches, because that outer ¼ inch is the seam allowance the binding needs.
Step 20 – Make the binding. Take six leftover jelly roll strips for a scrappy binding, or cut six strips from a solid. Join them into one long strip and press in half lengthwise.
Step 21 – Bind and finish. Sew the binding to the front of the quilt with a ¼-inch seam, then fold it to the back and stitch down. The binding takes up that outer quarter inch, so the finished throw measures about 42 × 60 inches. Wash gently on cold with a color catcher and tumble dry low for a soft crinkle.
Assembly at a Glance
- Leave everything unwashed; cut 12 sashing strips at 2½ inches.
- Select 26 jelly roll strips for coins; set the rest aside for binding.
- Cut each into 6½-inch coins – 6 per strip → 156 coins.
- Note the structure: five columns of 30 coins, six sashing strips.
- Lay out column one, spreading colors and avoiding repeats.
- Lay out columns two to five (150 coins used).
- Photograph and label columns 1-5; keep each stack separate.
- Chain-piece each column’s coins into 15 pairs.
- Join the pairs in order from the top down (30 doesn’t halve evenly).
- Press every horizontal seam one direction.
- Check it measures 6½ × 60½ inches.
- Make all five columns.
- Join sashing strips in pairs with diagonal seams; trim to 2½ × 60½ → six strips.
- Sew sashing and columns alternately, starting and ending with sashing.
- Confirm the top is 42½ × 60½ inches; press.
- Cut 3¾ yards into two ~67½-inch lengths; seam along the long edges; trim to 48 × 66.
- Layer and baste.
- Quilt with vertical straight lines or an all-over meander.
- Trim batting and backing level with the top; don’t cut the top.
- Join six binding strips (scrappy or solid); press in half.
- Bind → about 42 × 60 inches; wash cold with a color catcher.
Beginner Tips for Success
- Use one consistent sashing fabric – that repetition is what makes scrappy read as designed.
- Avoid a busy print for sashing; it competes with the coins.
- Spread your brightest and darkest coins through the columns rather than clumping them.
- Don’t place the same fabric twice in a row within a column.
- Chain-piece 15 pairs first, then join the pairs in order – much faster than one coin at a time, and it avoids the leftovers you get trying to halve 30.
- Join sashing strips with diagonal seams so the join doesn’t show as a bulky cross seam.
- Check the first column at 6½ × 60½ inches before sewing the other four.
- Pin the ends, centers, and quarter points on the long sashing seams to stop creep.
- Don’t prewash the strips or the sashing; keep the whole top in the same condition.
Styling It & Gift Ideas
A scrappy coin throw is cheerful and unfussy, so it belongs where people actually sit – over the arm of a sofa, bundled in a basket by the tree, or spread on the floor for present opening. Its vertical columns suit a narrower space nicely, and because it’s so colorful, it works best against plain furniture and simple decorations. Don’t be precious with it; a scrappy throw is meant to be used.
Its warmth and unrepeatable character make it a lovely gift:
- A family throw for the sofa, made to be fought over every December
- A memory quilt using scraps that mean something – fabric from old Christmas dresses, a grandmother’s stash, or leftovers from other gifts you’ve sewn
- A housewarming or first-Christmas gift, cheerful enough to suit almost any room
- A narrower version – three columns instead of five makes a 26 × 60-inch bed runner or sofa throw
If you’re making it as a memory quilt, note which fabric came from where and tuck it in with the gift. That’s what turns a colorful throw into something someone keeps forever.
Final Thoughts
A scrappy jelly roll Christmas throw is the most forgiving quilt in this collection and one of the most joyful. There’s nothing to match, nothing to align between columns, and no wrong fabric – the whole point is variety. Choose one calm sashing to frame all that color, spread your brights evenly, build your columns in halves, and you’ll end up with a warm, cheerful, entirely one-of-a-kind throw that carries on the old Chinese Coins tradition of making something beautiful out of whatever you happen to have.
Other Design Inspirations – Digitally Modified Images. Texture and color may vary from the actual product.
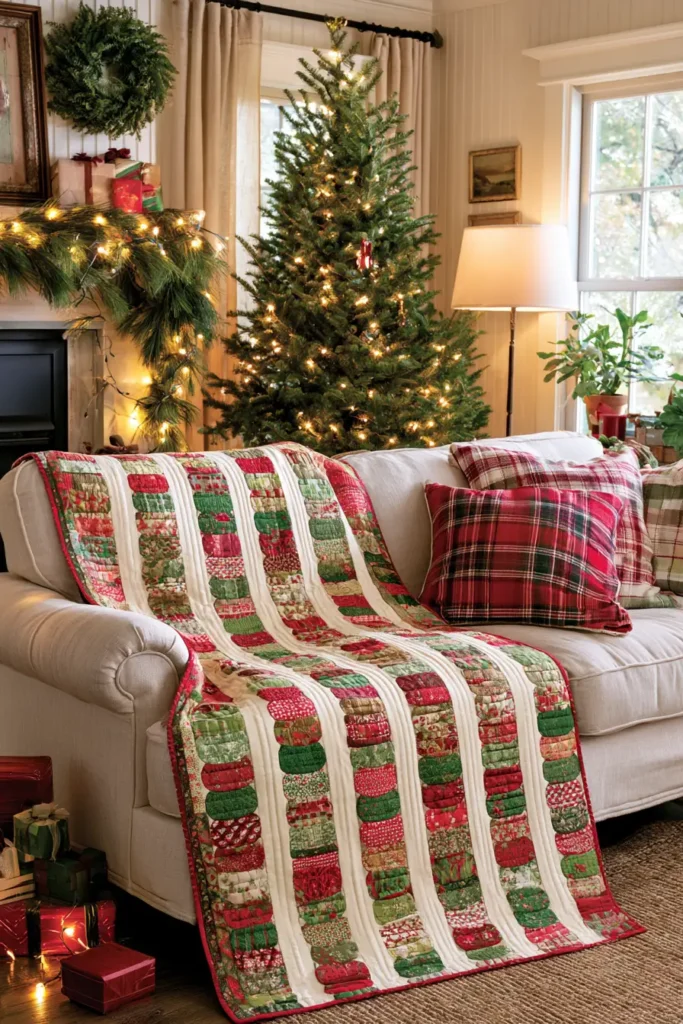
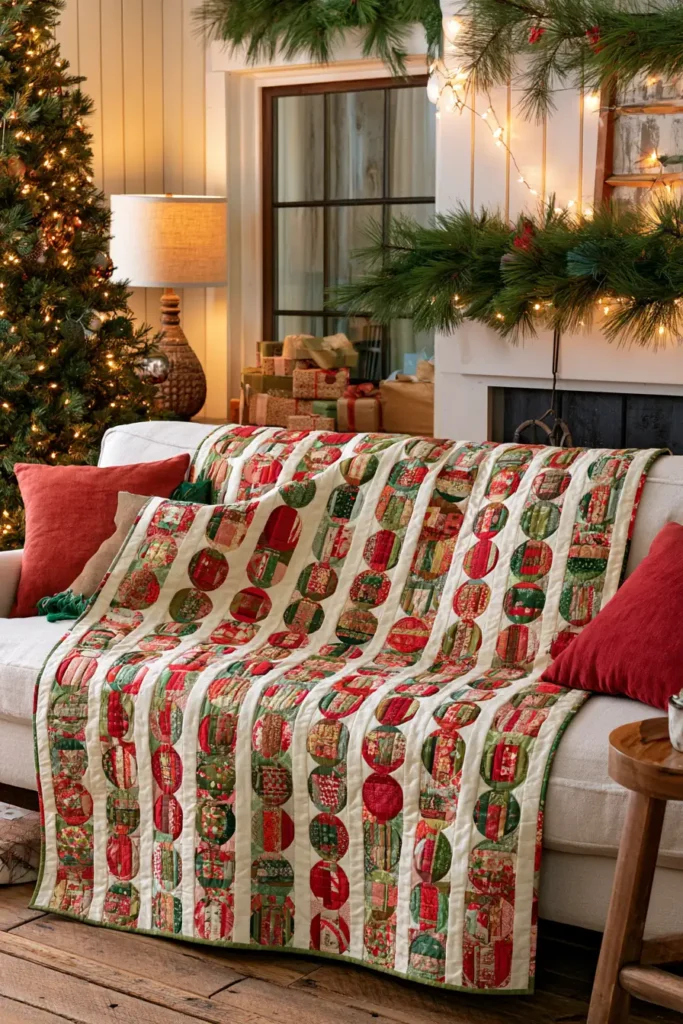
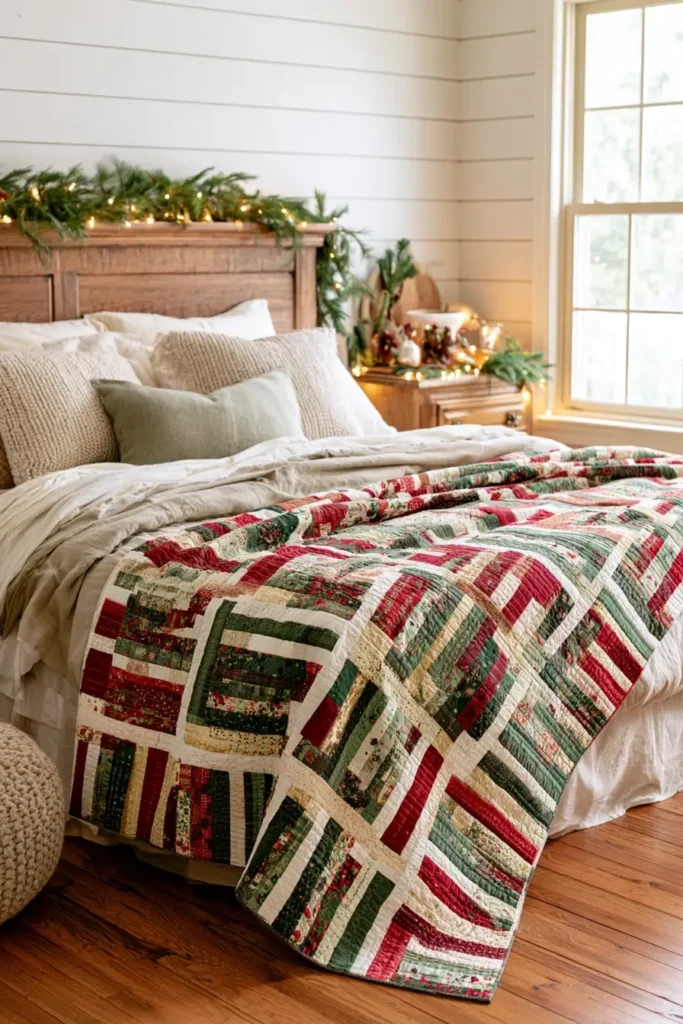
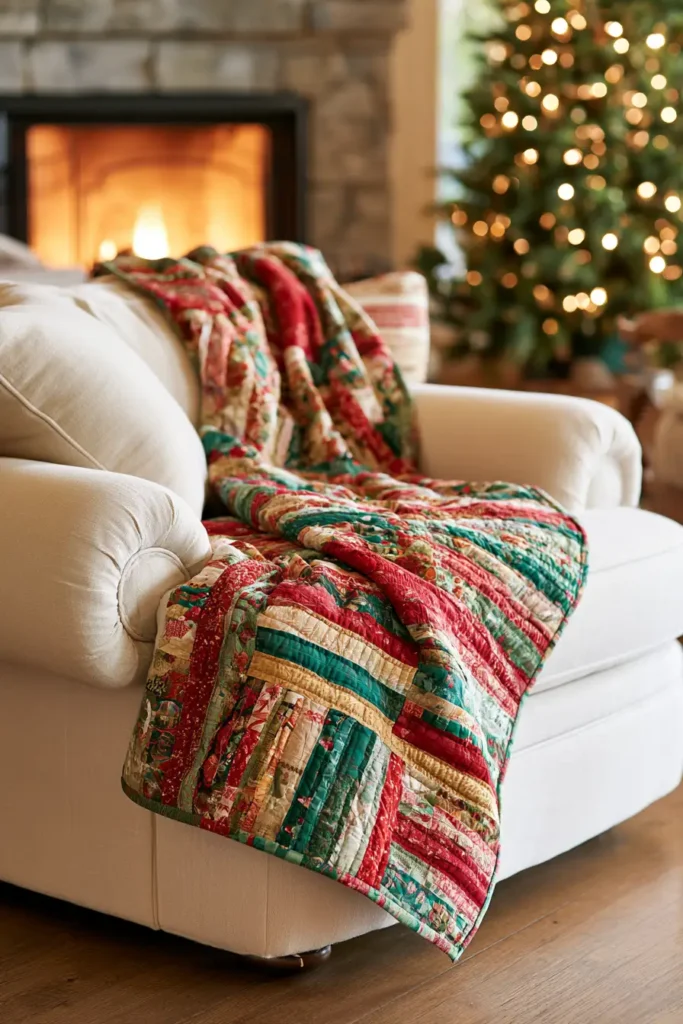
11. Elegant Gold and Cream Jelly Roll Quilt for Minimalist Holiday Style
Not every Christmas quilt needs red and green. A gold-and-cream quilt is the quiet, grown-up alternative – warm metallic golds, soft champagne, and ivory arranged in clean concentric squares, framed by a generous cream border. The effect is calm and expensive-looking rather than festive in the obvious sense, and because it reads as winter rather than Christmas, it stays out comfortably from November through February.
The block here is Courthouse Steps, a close cousin of the log cabin. Instead of building logs around the center in a rotating spiral, you add them in opposite pairs – left and right, then top and bottom – which produces a symmetrical, concentric square rather than a diagonal light-and-dark split. That symmetry suits a minimalist palette: with only two colors in play, the structure has to carry the design.
How Courthouse Steps Differs From Log Cabin
Both are strip blocks built outward from a center square, but the assembly order changes everything:
- Log cabin adds one log at a time, rotating in the same direction, so light gathers on two adjacent sides and dark on the other two. The result is a block split on the diagonal.
- Courthouse Steps adds logs in matched pairs on opposite sides – left and right together, then top and bottom together. Nothing gathers on one side. The result is a series of concentric rectangles, like tiered steps seen head-on.
For this quilt, alternating gold and cream by round gives you a gold center, a cream ring, and a gold ring – clean and symmetrical.
Design Inspirations – Digitally Modified Images. Texture and color may vary from the actual product.
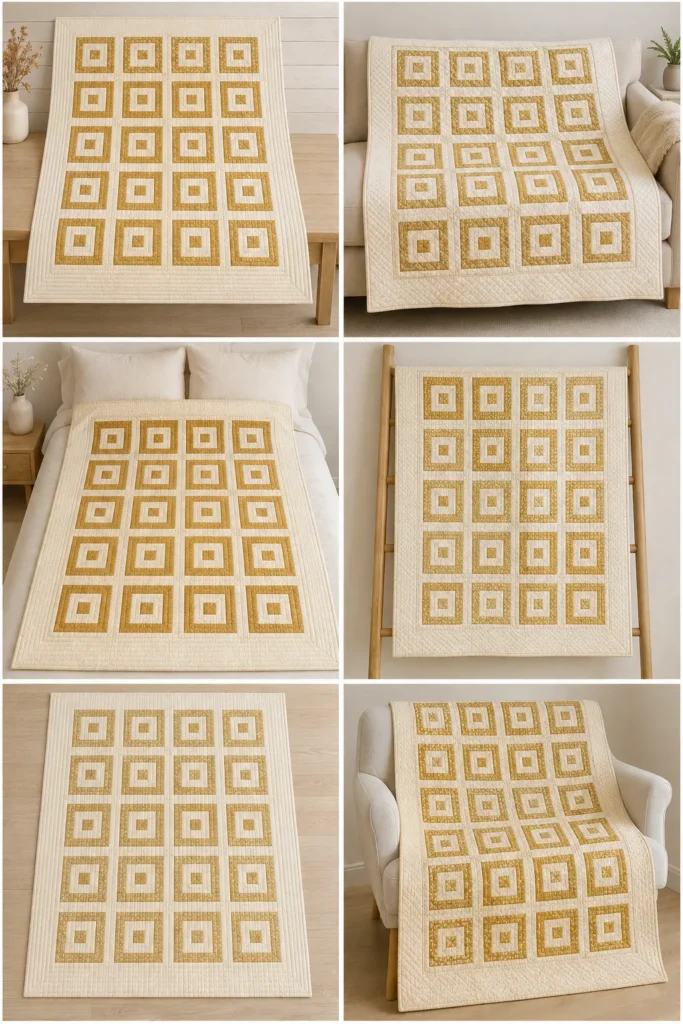
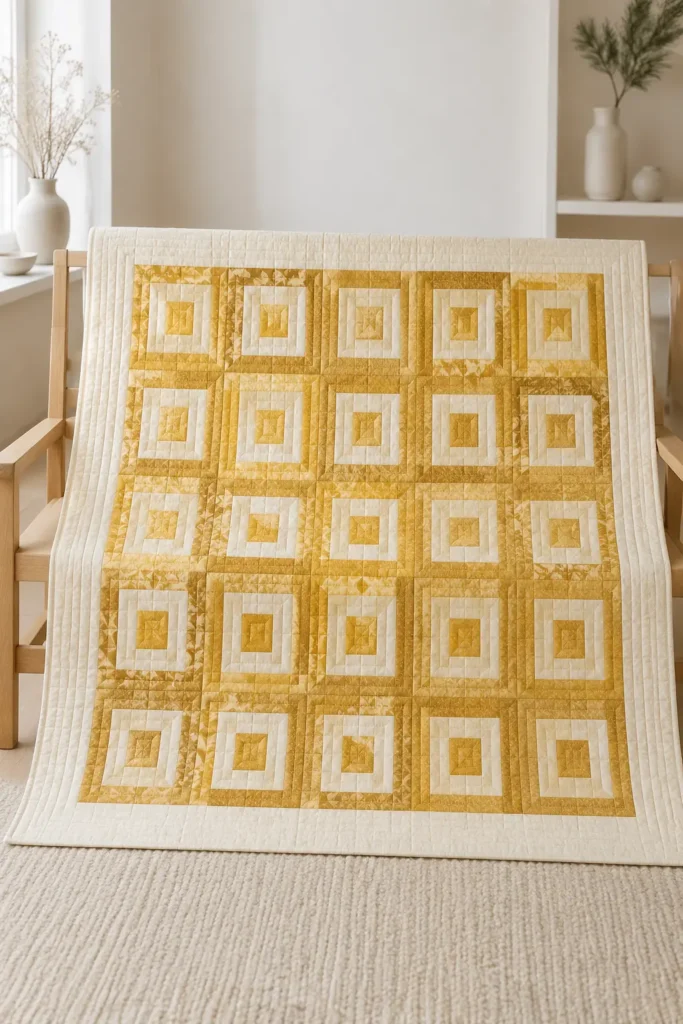
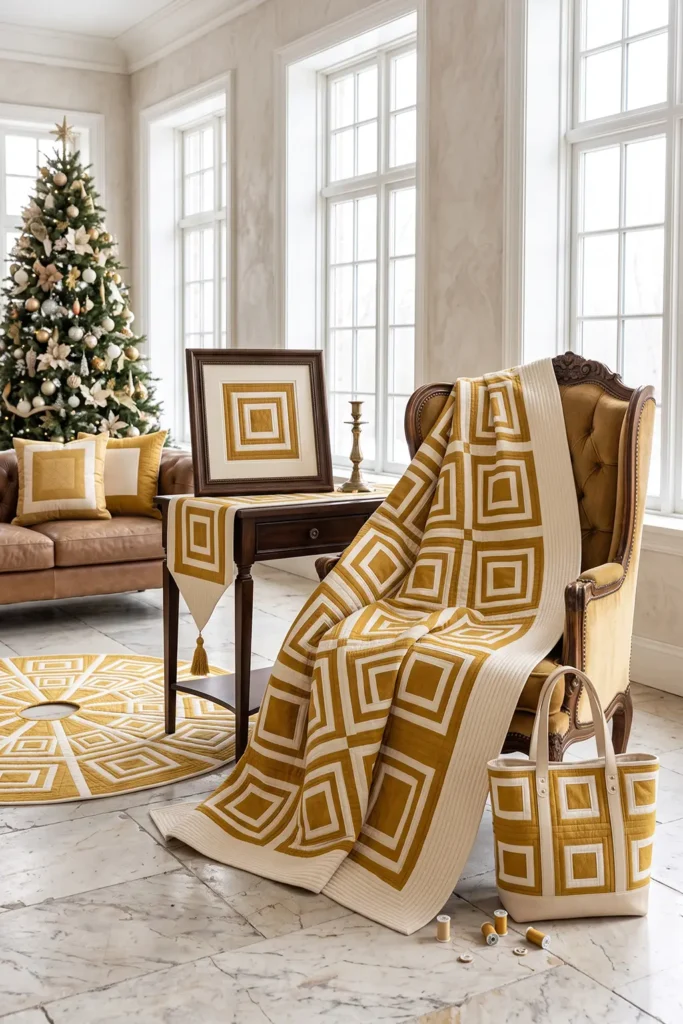
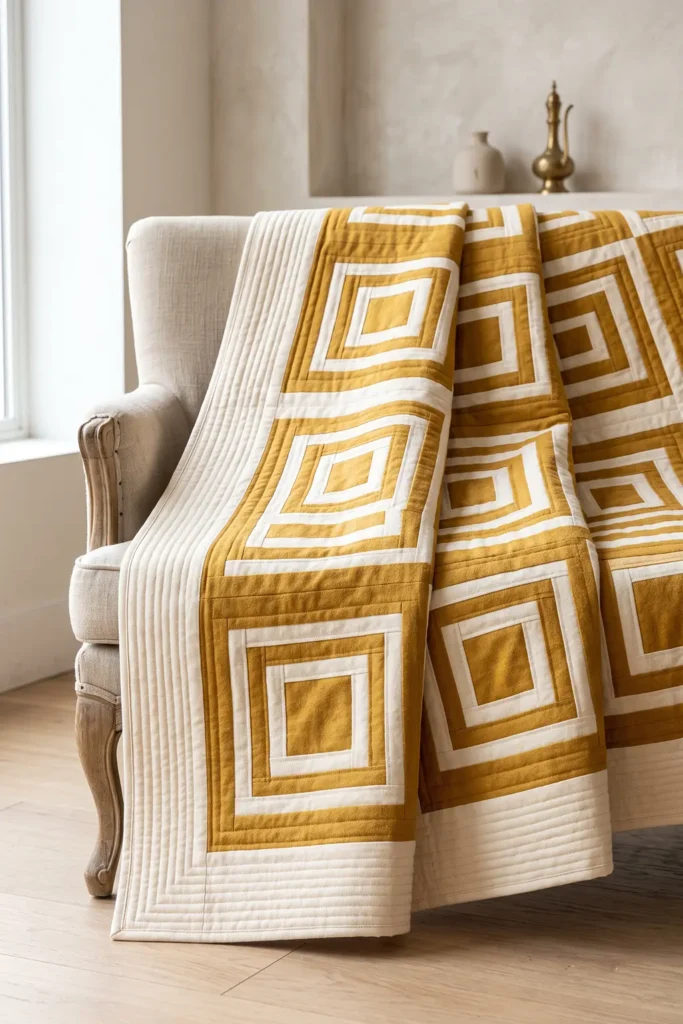
A Little History: The Courthouse Steps
The name comes from the block’s resemblance to the wide tiered steps rising to the entrance of a nineteenth-century American courthouse – rows stacking evenly on either side of a central point. Like the log cabin it descends from, it was a favorite of strip-thrifty quilters because it uses narrow offcuts efficiently and needs no templates or angles.
It has a nice symmetry for a minimalist quilt. It’s one of the oldest strip-pieced blocks, and its appeal now is exactly what it was then: order, repetition, and a shape that reads clearly from across the room.
The Block
Each block is a 10-inch finished square (10½ inches unfinished), made from a center square and eight logs, all cut 2½ inches wide:
| Piece | Color | Cut size | Quantity |
|---|---|---|---|
| Center | gold | 2½ × 2½ in | 1 |
| Round 1 – sides | cream | 2½ × 2½ in | 2 |
| Round 1 – top & bottom | cream | 2½ × 6½ in | 2 |
| Round 2 – sides | gold | 2½ × 6½ in | 2 |
| Round 2 – top & bottom | gold | 2½ × 10½ in | 2 |
That’s 54½ inches of strip per block – about 36½ inches of gold and 18 inches of cream. Across 20 blocks that comes to roughly 730 inches of gold and 360 inches of cream, which is why the strip counts below are what they are.
Variation: for a more traditional look, make the side logs cream and the top-and-bottom logs gold in every round. That gives horizontal bands rather than concentric rings.
Finished Size
- Block: 10 inches finished (10½ inches unfinished)
- Center panel: 4 blocks across × 5 down = 20 blocks, measuring 40½ × 50½ inches unfinished
- Border: 5 inches finished all around
- Quilt top: 50½ × 60½ inches unfinished
- Finished quilt: about 50 × 60 inches after binding
- Skill level: confident beginner – straight seams, no points, no bias
- Core techniques: strip cutting, paired-log assembly, borders
Materials Needed
- Gold and cream 2½-inch strips: 30 in total – 20 gold and 10 cream. A 40-strip jelly roll works only if it actually contains that many strips in each color family, so count the colors before you buy; mixed bundles often don’t. Otherwise cut your own: 1½ yards of gold gives 20 strips, and ¾ yard of cream gives 10
- Border and background fabric: 1¾ yards of cream, cut lengthwise into four strips 5½ inches wide × about 60 inches long, so the borders need no piecing
- Backing: 3¾ yards of unwashed standard-width fabric (4 yards if prewashing), cut into two equal lengths and seamed along their long edges; or 1⅞ yards of unwashed 108-inch wide backing, 2 yards if prewashing
- Batting: at least 56 × 66 inches
- Binding: ⅝ yard, cut into seven strips at 2½ inches
- Thread: neutral cotton
- Rotary cutter, cutting mat, quilting ruler, pins or clips, iron, pressing cloth
Beginner tip: if your gold fabrics have a metallic print, press them with a pressing cloth on a lower heat setting. Metallic surface printing can dull, flake, or stick to a hot iron plate, and a cheap cotton pressing cloth between the two prevents all of it.
A Note on Prewashing
Don’t prewash the jelly roll strips. Precut strips have pinked edges, and washing 2½-inch strips causes fraying and distortion. Leave the border fabric unwashed too, so everything in the quilt top shrinks together evenly in the first wash. You can prewash the backing if you prefer. Metallic gold prints are generally colorfast, but test a scrap and use a color catcher on the finished quilt.
Choosing Your Colors
With only two colors, the values have to be clearly different or the concentric rings disappear:
- Classic: rich antique gold against ivory cream
- Soft and modern: champagne and pale gold against warm white
- Warmer: honey and amber gold against oatmeal
- Higher contrast: deep bronze-gold against crisp cream, for a bolder version
- With a whisper of color: add one soft sage or pale blush strip per block for a subtle third note
Mix several golds rather than using one – a metallic, a tone-on-tone, and a small print together give depth that a single fabric can’t. Keep the cream consistent, though. That fabric does the framing.
Choose your border fabric to match the cream in the blocks, so the repeated cream reads as coordinated and the wide border gives the gold blocks room to breathe. (The blocks won’t merge seamlessly into the border, since their outer round is gold – but matching the creams still ties the whole quilt together.)
Cutting Measurements
Per block (multiply by 20), all cut from 2½-inch strips:
- 1 gold square at 2½ × 2½ in
- 2 cream squares at 2½ × 2½ in
- 2 cream logs at 2½ × 6½ in
- 2 gold logs at 2½ × 6½ in
- 2 gold logs at 2½ × 10½ in
For the quilt:
- Side borders: two strips at 5½ × 50½ inches
- Top and bottom borders: two strips at 5½ × 50½ inches
- Backing panel: at least 56 × 66 inches
- Batting: 56 × 66 inches
- Binding: seven strips, 2½ inches × width of fabric
Step-by-Step Guide
Step 1 – Prepare your fabrics. Leave the jelly roll strips and border fabric unwashed. Trim the selvages from every strip you use.
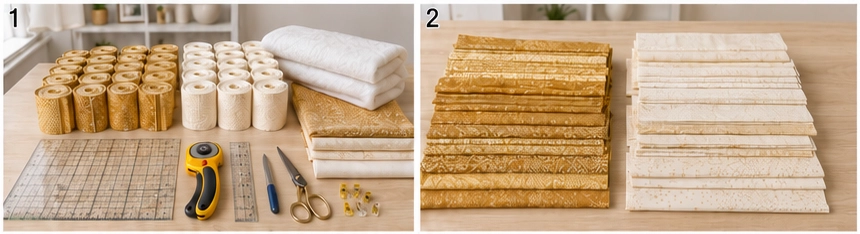
Step 2 – Sort and count the strips. Separate 20 usable gold strips and 10 cream strips, and check that each yields roughly 40 usable inches once you trim the selvages and any pinked ends. Short or damaged strips are the usual reason a project runs out of fabric two blocks from the end. Then hold the two piles against each other: the gold should read clearly darker than the cream, or the concentric rings won’t show.
Step 3 – Cut the first gold and cream strip, and check the pieces. Cut your first gold strip to the plan: 10½ + 10½ + 6½ + 6½ + 2½ + 2½ inches. Cut your first cream strip as four 6½-inch logs plus five 2½-inch squares. Now pull out the nine pieces needed for one block and measure them – the center square should be a true 2½ inches, and the logs accurate at 6½ and 10½. It’s a two-minute check, and it matters most when the gold is a metallic you may not be able to rebuy.
Everything you cut in this step counts toward the quilt totals – put the remaining pieces straight into their labeled piles rather than setting them aside as samples.
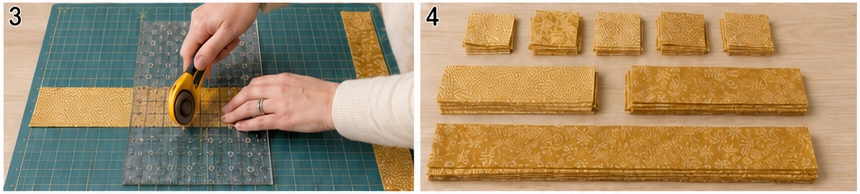
Step 4 – Cut the remaining nineteen gold strips. Cut each one to the same plan: 10½ + 10½ + 6½ + 6½ + 2½ + 2½ inches, using 39 of the 40 usable inches. Including the first strip, twenty gold strips produce 40 logs at 10½ inches, 40 logs at 6½ inches, and 40 squares at 2½ inches. You need only 20 of those squares as block centers – keep the best 20 and set the rest aside as spares or for another project.
Step 5 – Cut the remaining nine cream strips. Cut each as four 6½-inch logs plus five 2½-inch squares, using 38½ of the 40 usable inches. Including the first strip, ten cream strips produce 40 logs and 50 squares. You need 40 squares; keep the extra ten as replacements.
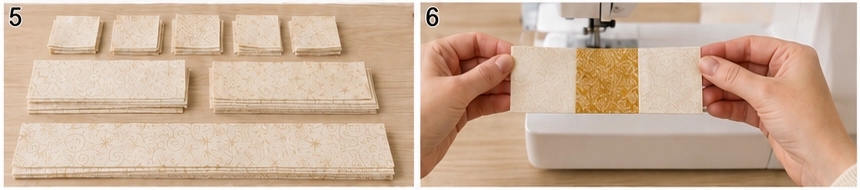
Step 6 – Start the first block. Take one gold center square and sew a cream 2½-inch square to its left side and another to its right, both with a ¼-inch seam. Press both seams outward, away from the center. The unit now measures 6½ inches wide × 2½ inches tall.
Step 7 – Complete round one. Sew a cream 2½ × 6½-inch log across the top of that unit and another across the bottom. Press both outward. The block now measures 6½ × 6½ inches – a gold square with a complete cream ring around it.
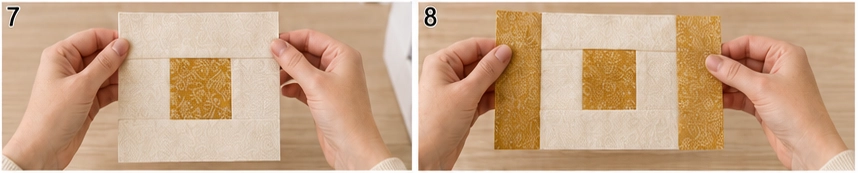
Step 8 – Add the round-two sides. Sew a gold 2½ × 6½-inch log to the left side and another to the right. Press outward. The block now measures 10½ inches wide × 6½ inches tall.
Step 9 – Complete round two. Sew a gold 2½ × 10½-inch log across the top and another across the bottom. Press outward. The block is now complete.
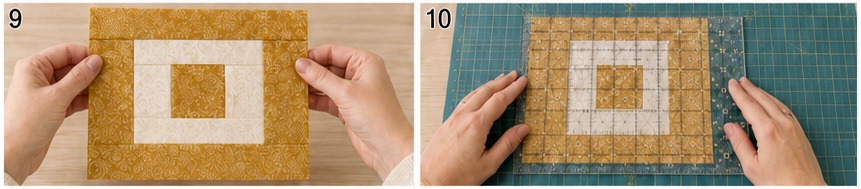
Step 10 – Check the block. It should measure exactly 10½ × 10½ inches, with the gold center sitting square in the middle. If it’s undersized, your seam allowance is running wide – correct it now rather than after nineteen more blocks.
Step 11 – Make the remaining nineteen blocks. Repeat steps 6 to 9 for a total of 20 blocks. Chain-piecing is much faster: add the two cream side squares to all twenty centers, then the cream top and bottom logs to all twenty, then the gold side logs, and finally the gold top and bottom logs.
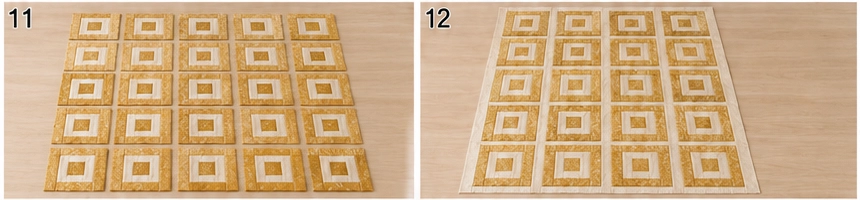
Step 12 – Lay out the center panel. Arrange the blocks 4 across × 5 down. Since every block is identical, this is quick – just check that they’re all oriented the same way and that no block has ended up rotated.
Step 13 – Sew the blocks into rows. Sew each row of four blocks with a ¼-inch seam. Press the seams of odd rows to the right and even rows to the left, so they nest. Each row should measure 40½ × 10½ inches.
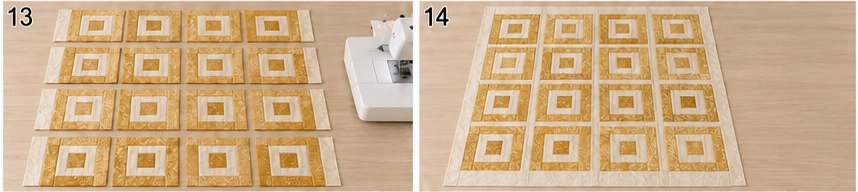
Step 14 – Join the rows. Sew the five rows together, pinning at each seam junction where the pressed seams lock. Press. The center panel should measure 40½ × 50½ inches.
Step 15 – Cut the borders. From your 1¾ yards of cream, cut four strips 5½ inches wide along the length of the fabric, each at least 60 inches long. Cutting lengthwise means no piecing and no join to disguise. Trim two of them to 5½ × 50½ inches.
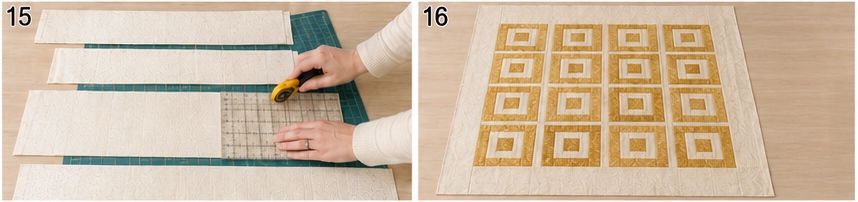
Step 16 – Add the side borders. Sew one 5½ × 50½-inch strip to each long side of the center panel. Pin the ends, the center, and the quarter points first – long border seams are where a quilt goes wavy if the border is stretched to fit. Press the seams toward the border. The panel now measures 50½ × 50½ inches.
Step 17 – Add the top and bottom borders. Trim the remaining two border strips to 5½ × 50½ inches, then sew one across the top and one across the bottom, pinning the same way. Press toward the border. The quilt top should now measure 50½ × 60½ inches.
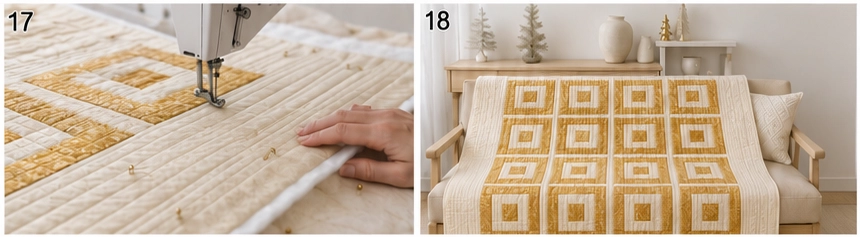
Step 18 – Prepare the backing. Cut your 3¾ yards into two equal lengths of about 67½ inches, trim the selvages, and sew them together along their long edges. Press the seam open and trim the panel to at least 56 × 66 inches.
Step 19 – Make the quilt sandwich. Lay the backing wrong side up, center the batting, then the quilt top right side up. Smooth from the center outward and baste with pins or basting spray.
Step 20 – Quilt it. This is where a minimalist quilt earns its keep: with so much plain cream, the quilting itself becomes the decoration. Straight lines echoing the concentric squares look wonderful, or quilt a simple grid across the blocks and something more decorative in the wide border – gentle curves, a feather, or closely spaced parallel lines. Avoid anything so dense that the quilt stiffens.
Step 21 – Trim and square up. Trim the excess batting and backing level with the edge of the quilt top, squaring the corners. Don’t trim into the top – it should still measure 50½ × 60½ inches, because that outer ¼ inch is the seam allowance the binding needs.
Step 22 – Bind and finish. Join the seven 2½-inch binding strips into one long strip, press in half lengthwise, and sew to the front with a ¼-inch seam. Fold to the back and stitch down. The binding takes up that outer quarter inch, so the finished quilt measures about 50 × 60 inches. Wash gently on cold with a color catcher and tumble dry low.
Assembly at a Glance
- Leave strips and border fabric unwashed; trim selvages.
- Sort and count 20 gold and 10 cream strips; check ~40 usable inches each.
- Cut the first gold and cream strip to plan; measure one block’s nine pieces. These count toward the totals.
- Cut all 20 gold strips 10½ + 10½ + 6½ + 6½ + 2½ + 2½ → 40 long logs, 40 short logs, 40 squares (use 20).
- Cut all 10 cream strips four 6½ logs + five 2½ squares → 40 logs, 50 squares (use 40).
- Sew cream squares left and right of a gold center → 6½ × 2½.
- Add cream 6½-inch logs top and bottom → 6½ × 6½.
- Add gold 6½-inch logs left and right → 10½ × 6½.
- Add gold 10½-inch logs top and bottom → block complete.
- Check the block is 10½ × 10½ inches.
- Make 20 blocks, chain-piecing round by round.
- Lay out 4 × 5, all blocks the same way up.
- Sew rows of four; press odd rows right, even rows left → 40½ × 10½.
- Join the five rows → 40½ × 50½ center panel.
- Cut four 5½-inch border strips lengthwise from the cream.
- Add side borders (5½ × 50½), pinning ends, center, quarters → 50½ × 50½.
- Add top and bottom borders (5½ × 50½) → 50½ × 60½ top.
- Seam the backing along its long edges; trim to 56 × 66.
- Layer and baste.
- Quilt – let the border quilting be decorative.
- Trim batting and backing level with the top.
- Bind with seven strips → about 50 × 60 inches.
Beginner Tips for Success
- Press every log outward, away from the center, or the block won’t lie flat.
- Add logs in opposite pairs – left and right together, then top and bottom – never one at a time.
- Cut one block’s pieces and check them before batch-cutting, and check the first finished block at 10½ inches before making nineteen more.
- Follow the per-strip cutting plans – they’re what make 20 gold and 10 cream strips enough.
- Use a pressing cloth on lower heat for metallic gold prints.
- Keep the cream consistent and match the border fabric to it, so the blocks appear to float.
- Mix several golds for depth, but keep them all clearly darker than the cream.
- Pin border seams at ends, center, and quarters – stretched borders are the commonest cause of a wavy quilt.
- Plan your border quilting deliberately; on a minimalist quilt the stitching is the decoration.
Styling It & Gift Ideas
A gold-and-cream quilt suits calm, uncluttered rooms – folded at the end of a bed, over the arm of a pale sofa, or on a chair beside a simply decorated tree. It sits beautifully with white candles, greenery, brass, and pale wood, and because it has no red or green, it doesn’t clash with a room’s existing palette the way traditional Christmas fabric can. Pack it away in March if you like, or leave it out all winter.
Its restrained elegance makes it a very safe gift:
- A wedding or anniversary gift, since gold and cream read as celebratory rather than seasonal
- A gift for someone with a neutral home who wouldn’t use a bright Christmas quilt
- A milestone gift – the concentric block structure and quiet palette both feel considered
- A hostess or housewarming gift in a palette that works with almost any décor
If you’re giving it, a single block made up as a cushion cover makes a lovely matching extra, and uses barely any extra fabric.
Final Thoughts
An elegant gold-and-cream jelly roll quilt proves that a Christmas quilt doesn’t have to shout. Courthouse Steps gives you concentric, symmetrical blocks built from nothing more than straight strips added in pairs, and a wide cream border gives all that structure room to breathe. Keep your golds clearly darker than your creams, press every log outward, and save some thought for the quilting in that border – and you’ll have a calm, quietly luxurious quilt that looks at home long after the decorations come down.
Other Design Inspirations – Digitally Modified Images. Texture and color may vary from the actual product.
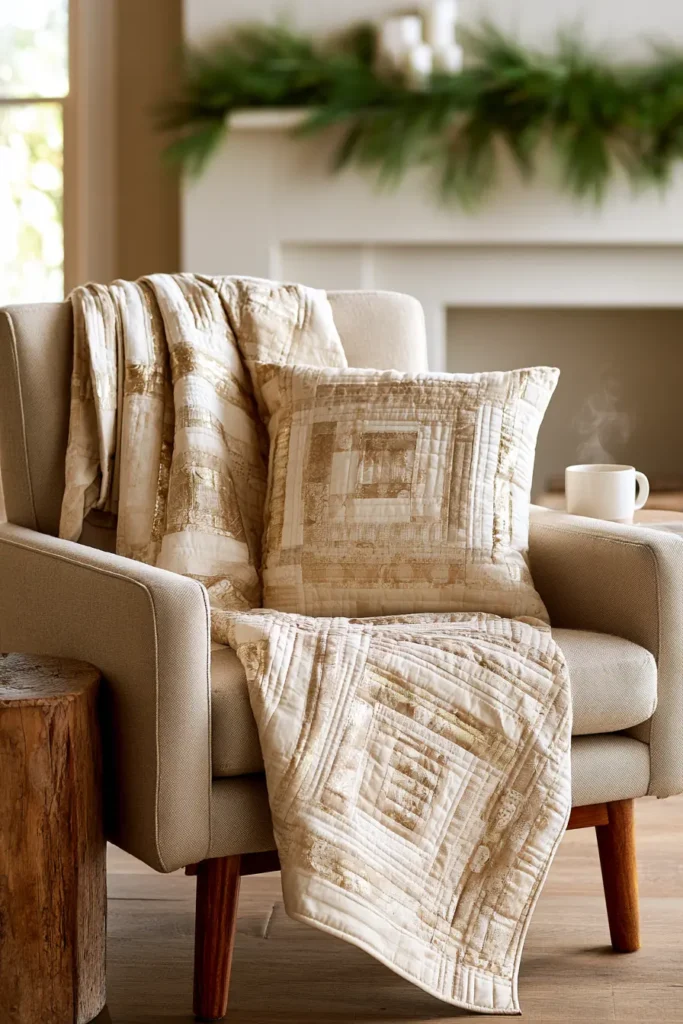
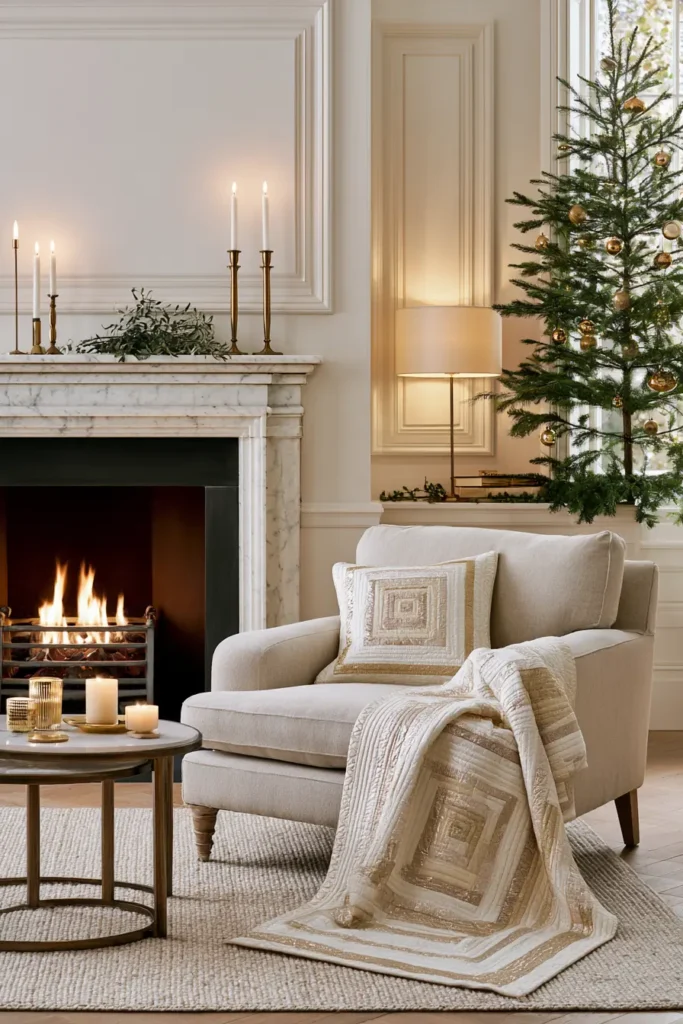
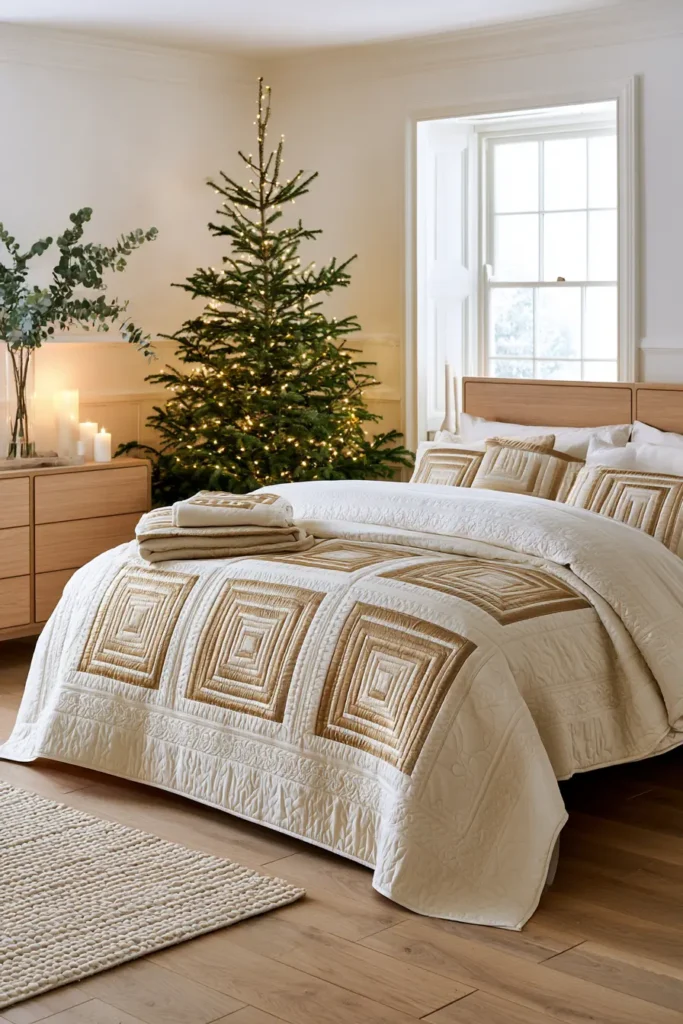

12. Winter Blue and Silver Jelly Roll Quilt for Frosty Holiday Elegance
Icy blue, silver, and white make a Christmas quilt that feels like a hard frost – crisp, cool, and quietly elegant rather than cozy and traditional. Because it has no red or green, it reads as winter rather than Christmas, so it can go out in late November and stay until the snow’s gone.
The pattern is an Irish Chain variation: diagonal lines of small squares running corner to corner across the quilt, crossing and re-crossing over a pale background. Traditional Irish Chains come in Single, Double, and Triple forms with slightly different block structures; this one uses a diagonal-cross block paired with a large-center alternate block, which produces the same connected lattice with considerably less piecing. It suits a two-color scheme perfectly, because the whole effect depends on a clean contrast between chain and background.
How the Chain Is Built
The quilt alternates two blocks in a checkerboard, both 10 inches finished:
- Chain blocks carry a diagonal cross of blue squares from corner to corner
- Alternate blocks are mostly plain, with a single blue square in each corner
When you lay them in a checkerboard, the corner squares of the alternate blocks meet the corner squares of the chain blocks, and the diagonals join into unbroken lines that run right across the quilt. Nothing about the chain is drawn or measured – it emerges from the arrangement.
Design Inspirations – Digitally Modified Images. Texture and color may vary from the actual product.
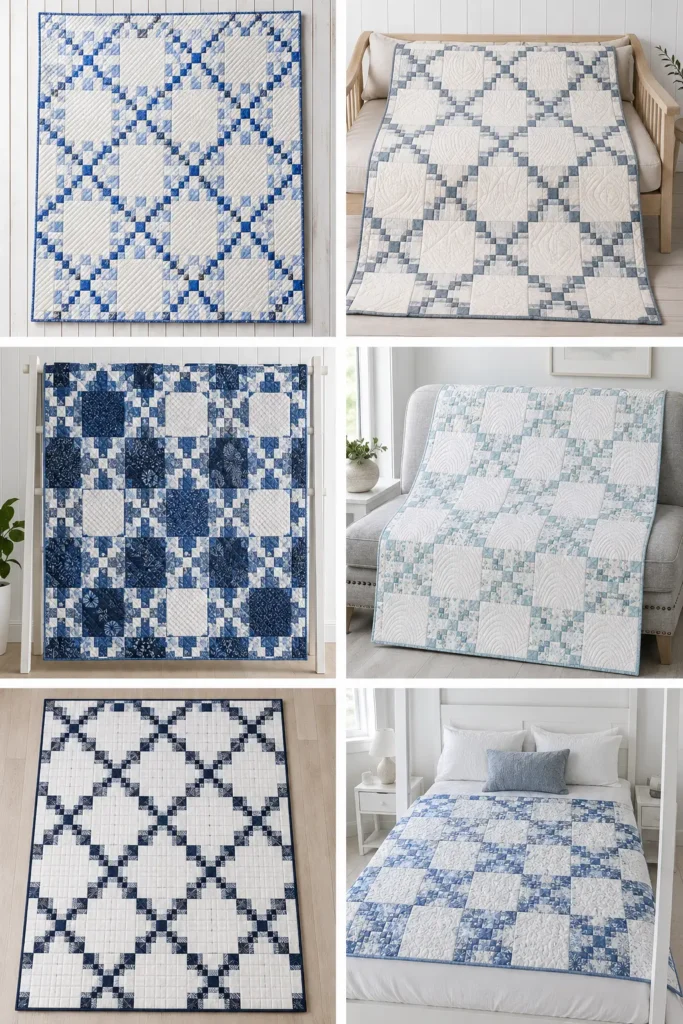
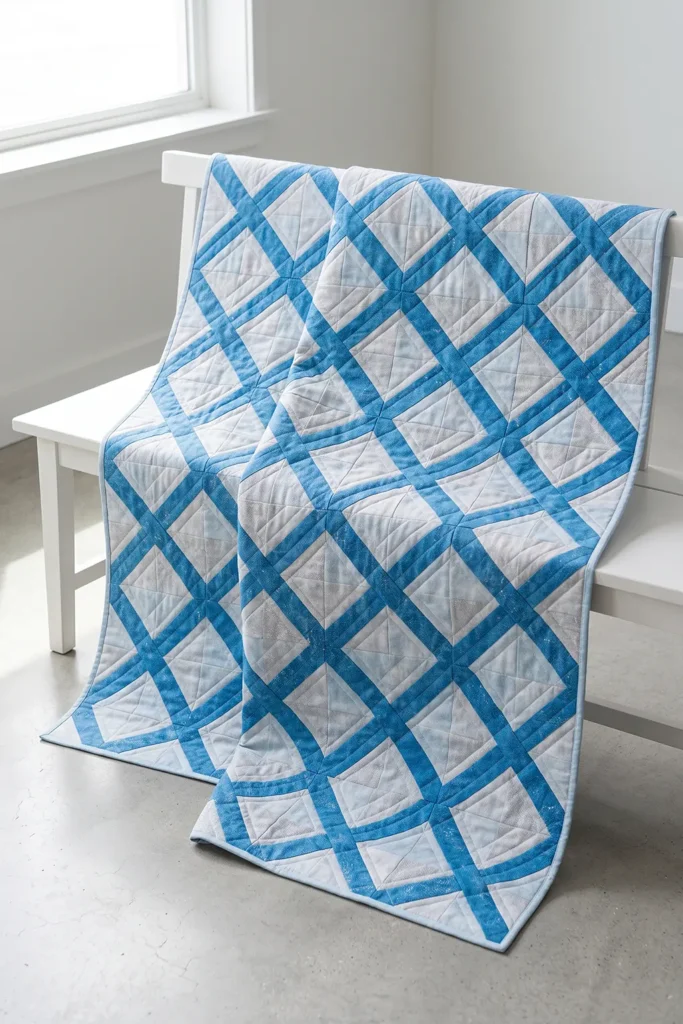
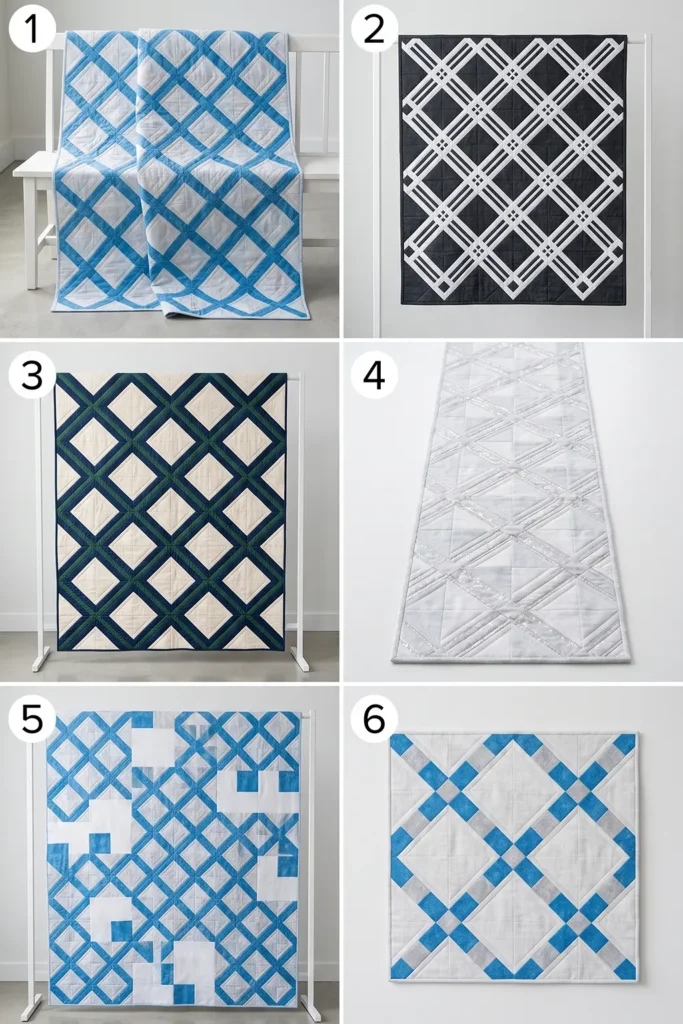
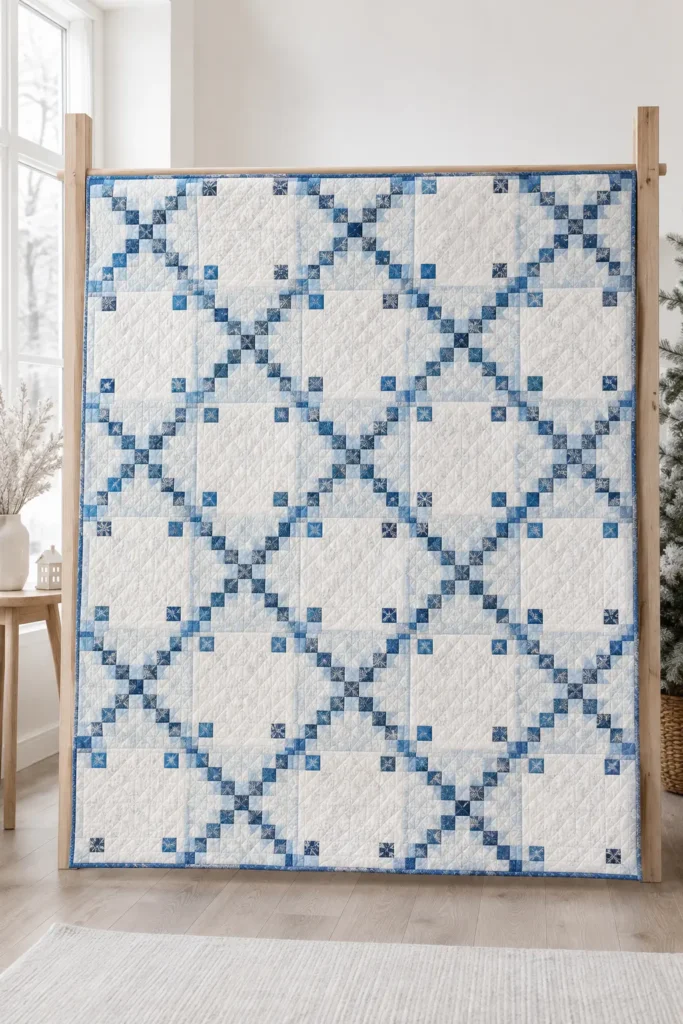
The Strip-Piecing Shortcut
Here’s what saves you from cutting 375 individual squares. Each chain block is a 5 × 5 grid of 2-inch finished squares, and its five rows come in only three different patterns:
| Row | Sequence (B = blue, S = silver) | Used in rows |
|---|---|---|
| Type 1 | B, S, S, S, B | 1 and 5 |
| Type 2 | S, B, S, B, S | 2 and 4 |
| Type 3 | S, S, B, S, S | 3 |
So instead of piecing squares one at a time, you sew five strip sets using three different color arrangements and crosscut them into ready-made rows. Five strips joined with ¼-inch seams give a set 10½ inches wide, and a 40-inch set crosscut at 2½ inches reliably yields 15 rows once you’ve squared one end.
A Little History: The Irish Chain
The Irish Chain is one of the oldest and most enduring patterns in American quilting, appearing in quilts from the early 1800s onward and never really going out of fashion. It comes in Single, Double, and Triple versions, each adding another parallel line to the chain.
The name’s origin is less certain than the pattern’s age. It’s often linked to Irish immigrant quiltmakers, though quilt historians treat that connection as traditional rather than documented. What isn’t in doubt is why it lasted: it’s built entirely from squares, it works in just two fabrics, and the diagonal movement gives it far more life than a simple grid.
Finished Size
- Blocks: 10 inches finished (10½ inches unfinished)
- Layout: 5 blocks across × 6 down = 30 blocks – 15 chain blocks and 15 alternate blocks
- Quilt top: 50½ × 60½ inches unfinished
- Finished quilt: about 50 × 60 inches after binding
- Skill level: confident beginner – many pieces, but only straight seams
- Core techniques: strip sets, crosscutting into rows, alternating block layout
Materials Needed
- Blue strips: 13 at 2½ inches × width of fabric
- Silver, pale gray, and white strips: 26 at 2½ inches × width of fabric
- A winter or icy-toned jelly roll may cover both, but count the colors before buying – you need 13 clearly darker blues and 26 pale strips, which many mixed bundles won’t contain. Otherwise cut your own from 1 yard of blue (which yields 14 strips) and 2 yards of pale fabric (26 strips need 65 inches, so 1¾ yards falls just short)
- Background fabric for the alternate block centers: ⅝ yard, cut into 15 squares at 6½ × 6½ inches
- Backing: 3¾ yards of unwashed standard-width fabric (4 yards if prewashing), cut into two equal lengths and seamed along their long edges; or 1⅞ yards of unwashed 108-inch wide backing, 2 yards if prewashing
- Batting: at least 56 × 66 inches
- Binding: ⅝ yard, cut into seven strips at 2½ inches
- Thread: neutral cotton
- Rotary cutter, cutting mat, quilting ruler, pins or clips, iron
Beginner tip: don’t prewash the strips, and leave the background yardage unwashed too, so everything in the quilt top shrinks together in the first wash. You can prewash the backing if you prefer.
Choosing Your Colors
The chain only reads if the blue is clearly darker than everything around it:
- Classic frost: navy or denim blue chains on white and pale silver-gray
- Icy: steel blue and cool aqua chains on soft white
- Silvered: deep blue-gray chains on pale platinum and cream
- With sparkle: a silver metallic print among the background fabrics, which catches the light beautifully
- Deeper: midnight blue chains on pale gray, for a richer, more dramatic version
You can happily vary the blues between blocks – three or four different blues make the chains look richer. But keep the pale fabrics consistent in value, even if the prints differ, because they’re doing the framing.
Cutting Measurements
Strip sets (each 5 strips wide, finishing 10½ inches):
- Set A (rows type 1): blue, silver, silver, silver, blue – make 2 sets
- Set B (rows type 2): silver, blue, silver, blue, silver – make 2 sets
- Set C (rows type 3): silver, silver, blue, silver, silver – make 1 set
From the remaining strips:
- 60 blue squares at 2½ × 2½ inches – cut 15 from each of four strips; a longer strip may give a spare sixteenth
- 60 pale rectangles at 2½ × 6½ inches (10 strips, 6 per strip)
From the background yardage:
- 15 squares at 6½ × 6½ inches
For the quilt:
- Backing panel at least 56 × 66 inches, batting 56 × 66 inches, seven binding strips
Step-by-Step Guide
Step 1 – Prepare and sort. Leave everything unwashed. Sort out 13 blue strips and 26 pale strips, and remove any selvage. For the strips going into strip sets, leave the ends untouched while you sew – you’ll square one end of the finished set just before crosscutting, which wastes far less length than squaring five strips separately. For strips, you’ll subcut individually into squares and rectangles; square one end first. Hold the two piles side by side and check the blues read clearly darker; that contrast is the whole design.
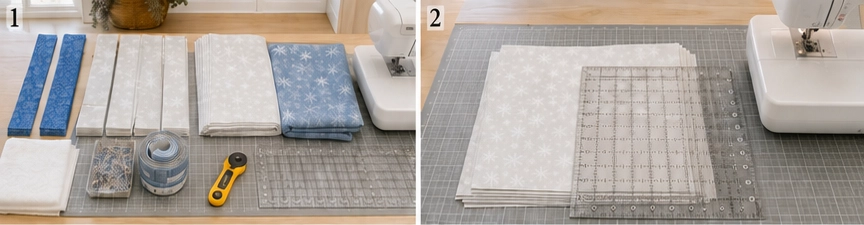
Step 2 – Cut the alternate block centers. From your ⅝ yard of background fabric, cut 15 squares at 6½ × 6½ inches. Set them aside.
Step 3 – Sew the Set A strip sets. Sew five strips together along their long edges in the order blue, silver, silver, silver, blue, using a ¼-inch seam. Make two of these sets. Press all seams in one direction.
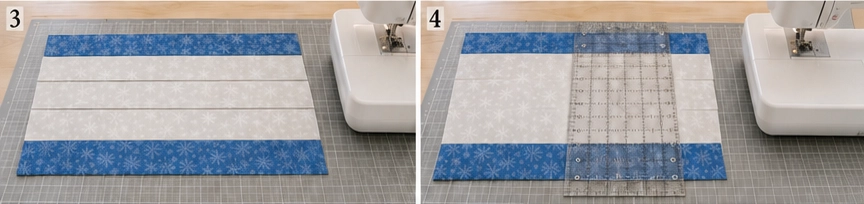
Step 4 – Check the set width. Measure across a pressed set: it should be exactly 10½ inches. If it’s narrower, your seam allowance is too wide – fix it now, before sewing three more sets.
Step 5 – Sew the Set B strip sets. Sew five strips in the order silver, blue, silver, blue, silver. Make two of these sets, pressing seams in the opposite direction to Set A so the rows will nest when you build the blocks.
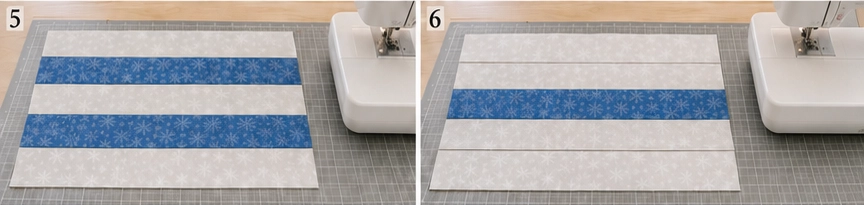
Step 6 – Sew the Set C strip set. Sew five strips in the order silver, silver, blue, silver, silver. Make one set, pressing in the same direction as Set A.
Step 7 – Crosscut the sets into rows. Square one end of each set, then crosscut across the strips at 2½-inch intervals. Forty usable inches gives 15 rows per set once you account for the squaring cut; a slightly longer set may give a sixteenth.
Your five sets therefore provide 30 type-1 rows, 30 type-2 rows, and 15 type-3 rows – exactly what fifteen chain blocks need. There’s no spare, so cut carefully and keep the three types in separate labeled piles. They look very similar at a glance, and a row filed in the wrong pile is the easiest way to come up short.
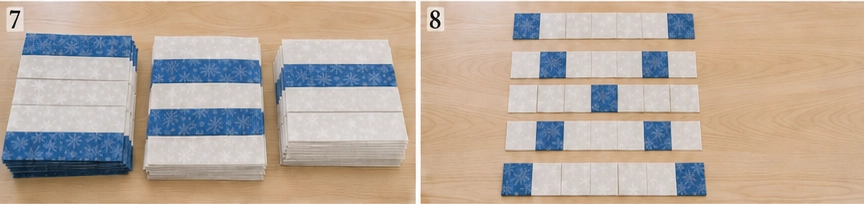
Step 8 – Build the first chain block. Lay out five rows in this order from top to bottom: type 1, type 2, type 3, type 2, type 1. Check that the blue squares form a clean diagonal cross before sewing.
Step 9 – Sew the chain block. Join the five rows with a ¼-inch seam, pinning at each seam junction where the opposing press directions lock together. Press. The block should measure exactly 10½ × 10½ inches.
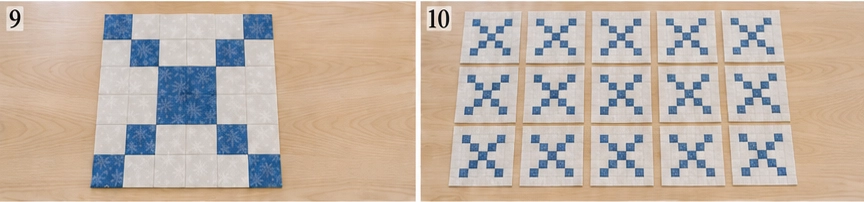
Step 10 – Make all fifteen chain blocks. Repeat steps 8 and 9 until you have 15 chain blocks. Chain-piecing helps: join all fifteen type-1/type-2 pairs first, then add the type-3 rows, and so on.
Step 11 – Cut the alternate block pieces. From four remaining blue strips, cut 60 squares at 2½ inches – 15 from each strip, keeping any sixteenth as a spare. From ten remaining pale strips, cut 60 rectangles at 2½ × 6½ inches, six per strip.

Step 12 – Sew the alternate block’s top and bottom rows. For each block, sew a blue 2½-inch square to each end of a pale 2½ × 6½-inch rectangle. The row should measure 10½ × 2½ inches. Make 30 of these rows – two per block. Press the seams toward the rectangle.
Step 13 – Sew the alternate block’s middle row. Sew a pale 2½ × 6½-inch rectangle to each side of a 6½-inch background square, with the rectangles standing vertically. The row should measure 10½ × 6½ inches. Make 15. Press the seams toward the rectangles.
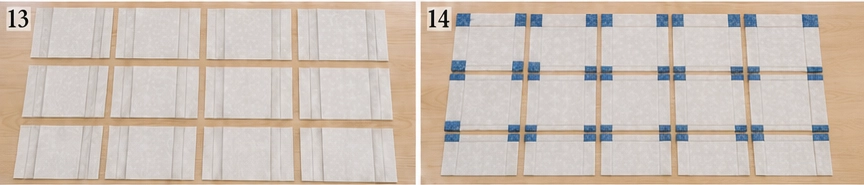
Step 14 – Assemble the alternate blocks. For each block, sew a top row to the top of a middle row and another to the bottom. Press. The block should measure 10½ × 10½ inches, with a single blue square in each corner. Make 15.
Step 15 – Lay out the quilt. Arrange the blocks 5 across × 6 down in a checkerboard, starting the first row with a chain block: chain, alternate, chain, alternate, chain. Start the second row with an alternate block, and continue alternating. That gives 15 of each. Stand back and check the diagonal chains run unbroken across the whole quilt.
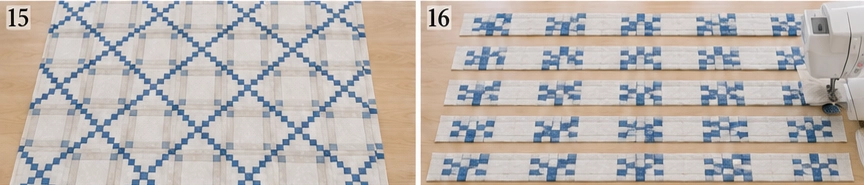
Step 16 – Photograph the layout. Take a photo before you pick anything up. The two block types are easy to confuse once they’re stacked.
Step 17 – Sew the blocks into rows. Sew each row of five blocks with a ¼-inch seam, pinning where the corner squares meet so the chains line up across the block seams. Press odd rows to the right and even rows to the left. Each row measures 50½ × 10½ inches.
Step 18 – Join the rows. Sew the six rows together, nesting the seams and pinning at every point where a chain crosses a row seam – those junctions are what make the diagonals look continuous. Press. The top should measure 50½ × 60½ inches.
Step 19 – Prepare the backing. Cut your 3¾ yards into two equal lengths of about 67½ inches, trim the selvages, and sew them together along their long edges. Press the seam open and trim the panel to at least 56 × 66 inches.
Step 20 – Make the quilt sandwich. Lay the backing wrong side up, center the batting, then the quilt top right side up. Smooth from the center outward and baste with pins or basting spray.
Step 21 – Quilt it. Quilting along the diagonal chains emphasizes the movement beautifully. Alternatively, quilt a grid through the squares, or something softer – loose curves or feathers – in the plain centers of the alternate blocks, where there’s room for it to show.
Step 22 – Trim and square up. Trim the excess batting and backing level with the edge of the quilt top, squaring the corners. Preserve as much of the original top as you can – quilting always draws the layers up a little, so the finished top may measure slightly under 50½ × 60½ inches, and that’s normal. What matters is not trimming into the top yourself: that outer ¼ inch is the seam allowance the binding needs.
Step 23 – Bind and finish. Join the seven 2½-inch binding strips into one long strip, press in half lengthwise, and sew to the front with a ¼-inch seam. Fold to the back and stitch down. The finished quilt measures about 50 × 60 inches. Wash gently on cold with a color catcher and tumble dry low.
Assembly at a Glance
- Leave everything unwashed; sort 13 blue and 26 pale strips.
- Cut 15 background squares at 6½ inches.
- Sew two Set A strip sets: blue, silver, silver, silver, blue.
- Check a set measures 10½ inches wide.
- Sew two Set B sets: silver, blue, silver, blue, silver (press opposite).
- Sew one Set C set: silver, silver, blue, silver, silver.
- Square each set, then crosscut at 2½ inches → 30 type-1, 30 type-2, 15 type-3 rows (no spares).
- Lay five rows as 1, 2, 3, 2, 1.
- Sew the rows → 10½-inch chain block.
- Make 15 chain blocks.
- Cut 60 blue squares (2½) and 60 pale rectangles (2½ × 6½).
- Sew 30 top/bottom rows: square + rectangle + square → 10½ × 2½.
- Sew 15 middle rows: rectangle + 6½ square + rectangle → 10½ × 6½.
- Assemble 15 alternate blocks → 10½ inches.
- Lay out 5 × 6 checkerboard, starting with a chain block.
- Photograph the layout.
- Sew rows of five; press odd right, even left → 50½ × 10½.
- Join the six rows → 50½ × 60½ top.
- Seam the backing along its long edges; trim to 56 × 66.
- Layer and baste.
- Quilt along the diagonals or in the open centers.
- Trim batting and backing level with the top; slight draw-up from quilting is normal.
- Bind with seven strips → about 50 × 60 inches.
Beginner Tips for Success
- Check the first strip set at 10½ inches before sewing the other four.
- Each set reliably yields 15 rows – exactly what’s needed, with no guaranteed spares – so cut carefully.
- Press Set A and Set C one way and Set B the other, so the rows nest inside the block.
- Keep the three row types in separate labeled piles after crosscutting – they look alike.
- Keep the pale fabrics consistent in value; vary the blues if you like.
- Pin where the corner squares meet across block seams – that’s what makes the chains look continuous.
- Count your colors before buying a jelly roll; you need 13 blues and 26 pale strips.
- Don’t prewash the strips or the background yardage.
Styling It & Gift Ideas
A blue-and-silver quilt suits cool, calm rooms and looks especially good against white walls, pale wood, and glass. Fold it at the end of a bed, drape it over a pale sofa, or use it in a guest room over the holidays. Because it isn’t tied to Christmas colors, it works alongside silver and white decorations in December and carries on looking right through January and February.
Its long season and restrained palette make it a thoughtful gift:
- A winter housewarming gift that doesn’t have to be packed away after Christmas
- A wedding or anniversary quilt in a timeless two-color scheme
- A guest room quilt, since blue and white suits almost any décor
- A smaller version – three blocks across by four down makes a 30 × 40-inch baby or lap quilt
If you’re giving it, the Irish Chain’s long history makes a nice thing to mention in a note; it’s a pattern that has been passed down through generations of quilters for two hundred years.
Final Thoughts
A winter blue and silver Irish Chain variation is frosty elegance built from nothing more complicated than squares. The strip-set shortcut turns what looks like hundreds of tiny pieces into a handful of sewn panels crosscut into ready-made rows, and the chains appear on their own once the two block types are laid out in a checkerboard. Keep your blues clearly darker than your pales, check that first strip set at 10½ inches, and pin those corner squares where the blocks meet – and you’ll have a crisp, calm quilt that carries a two-hundred-year-old idea into a cool modern palette.
Other Design Inspirations – Digitally Modified Images. Texture and color may vary from the actual product.
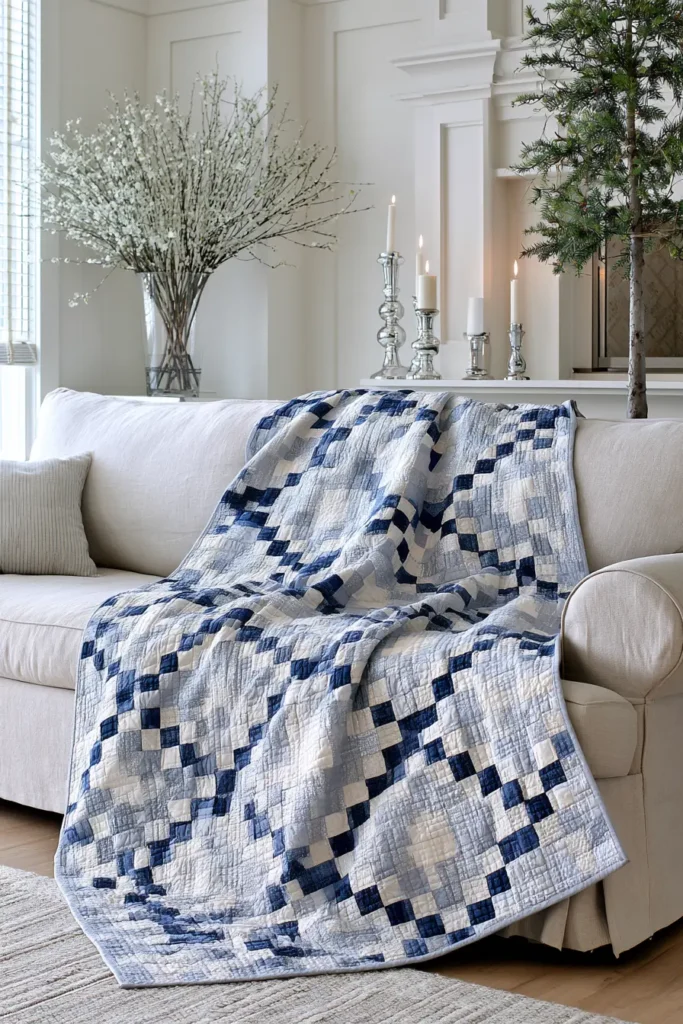
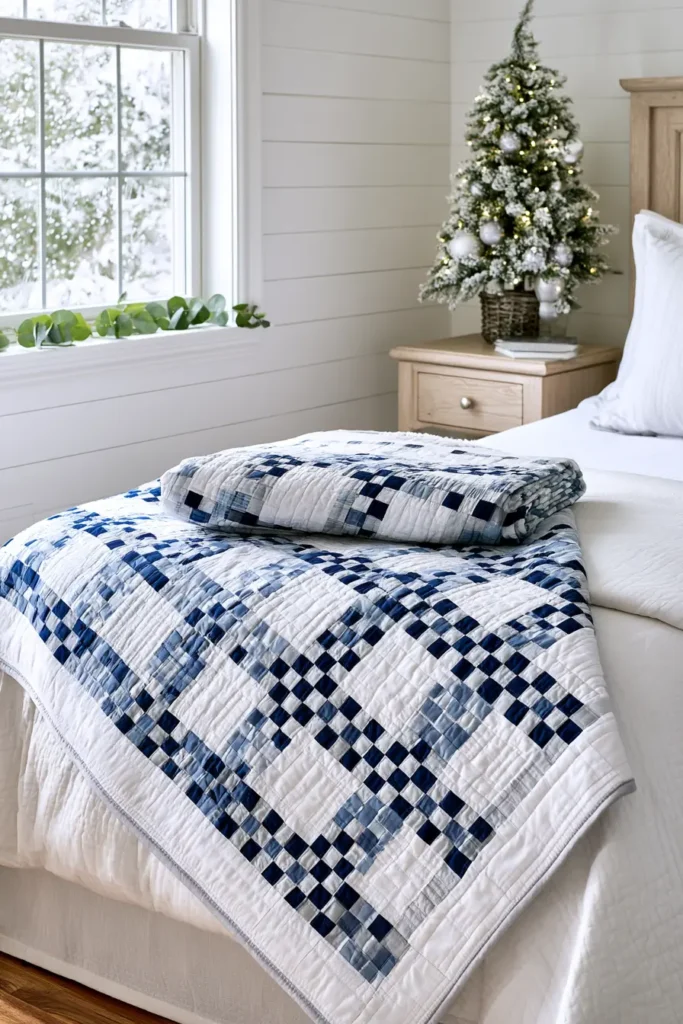
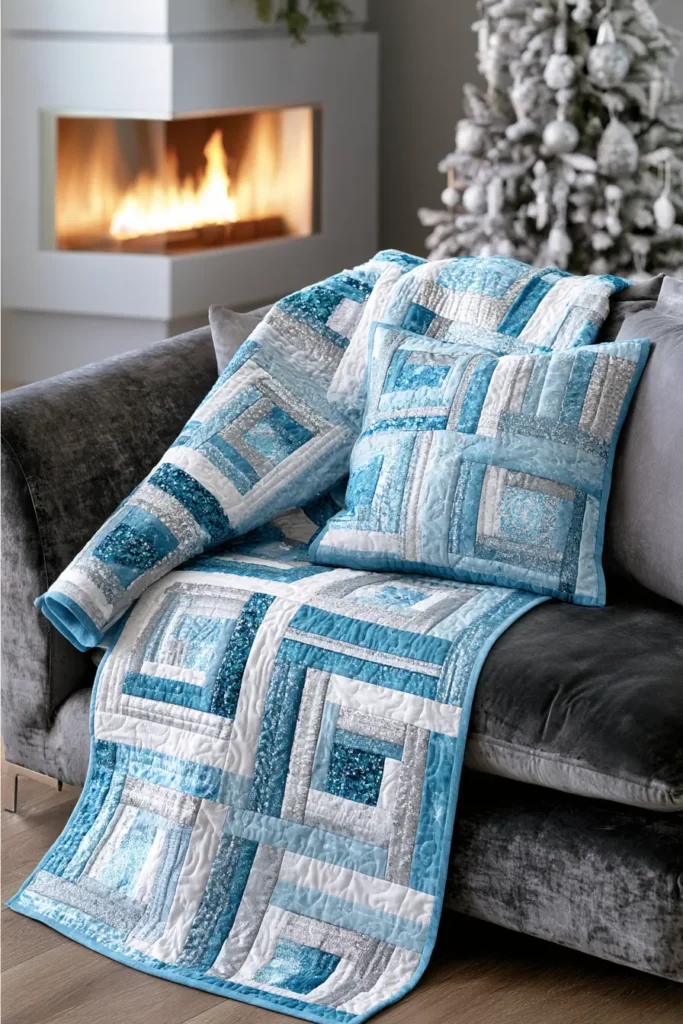
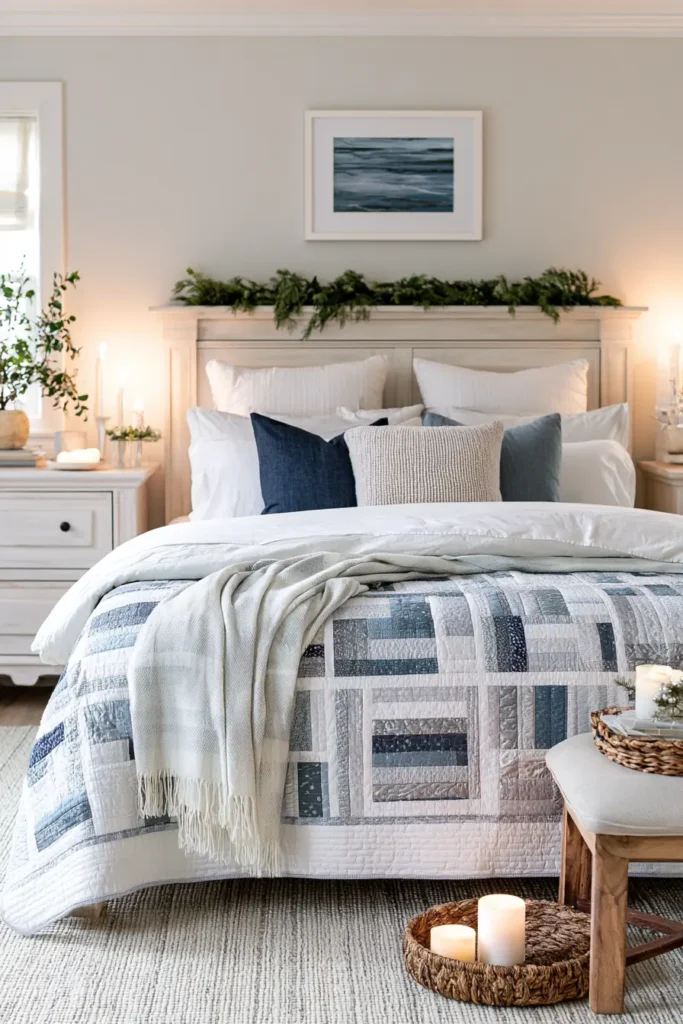
13. Jelly Roll Christmas Table Runner Patterns for Holiday Dining
A table runner is the fastest way to make a room feel like Christmas. It takes an afternoon rather than a fortnight, uses barely any fabric, and it sits right where everyone gathers – down the center of the dining table under the candles, along a sideboard beside the platters, or across a hall console with a bowl of clementines on top. In vibrant reds, greens, and gold against cream, a simple pieced runner does more for a room than its size suggests.
This one uses four-patch blocks alternating with plain squares in a checkerboard, framed by a narrow border. It’s the ideal project for leftover strips from a larger quilt, since the whole runner needs only about eleven strips in total – so if you’ve just finished one of the bigger designs in this collection, you very likely have everything you need already.
A Little History: The Four-Patch
The four-patch is one of the oldest and simplest blocks in quilting – four squares in a two-by-two grid, and nothing more. For generations, it was the block girls were taught first, precisely because it teaches the two fundamentals of piecing in one small unit: an accurate ¼-inch seam and how to make seams nest so the center point matches.
It’s also the foundation of a surprising number of more complex designs. Double Four-Patch, Jacob’s Ladder, and Broken Dishes all build on it. Few blocks have taught more people to quilt, and it’s still the fastest route to a finished piece when time is short – which is exactly what a table runner is for.
Design Inspirations – Digitally Modified Images. Texture and color may vary from the actual product.
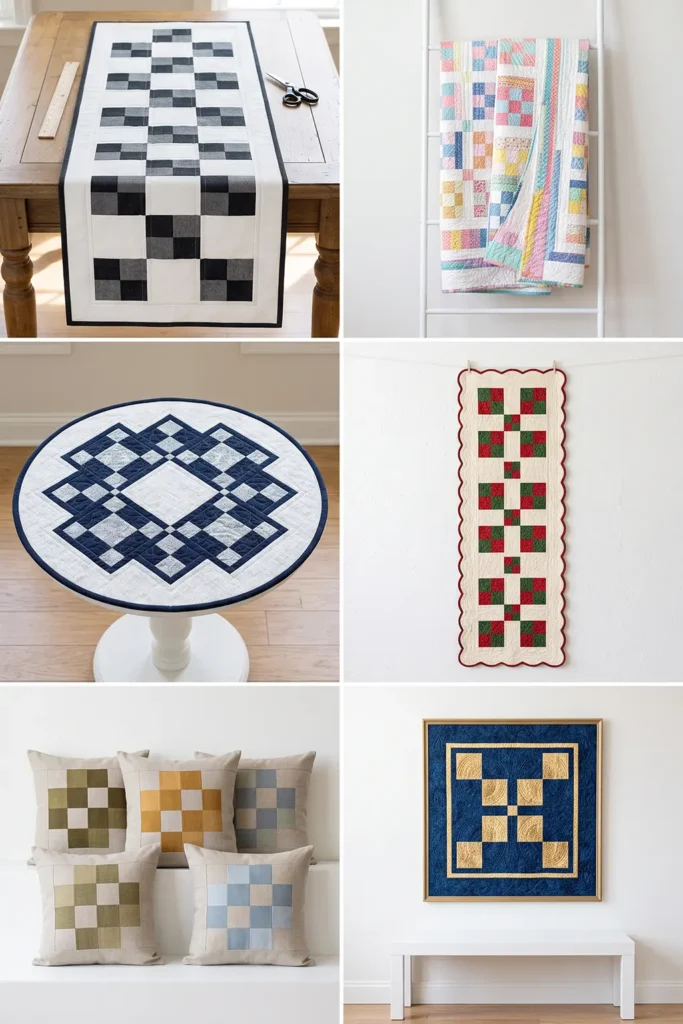
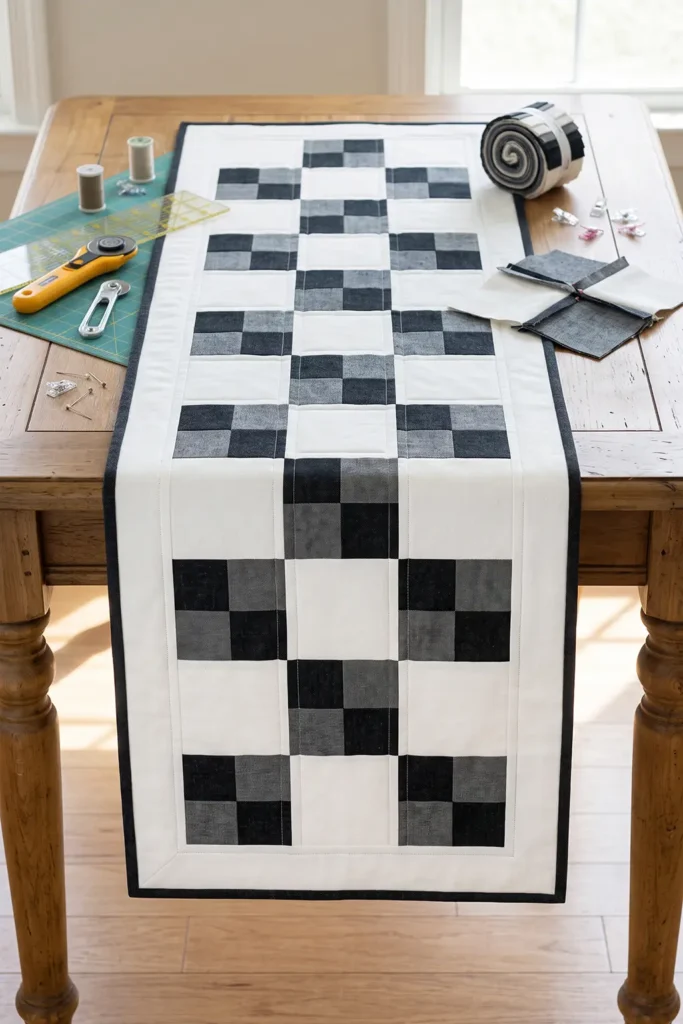
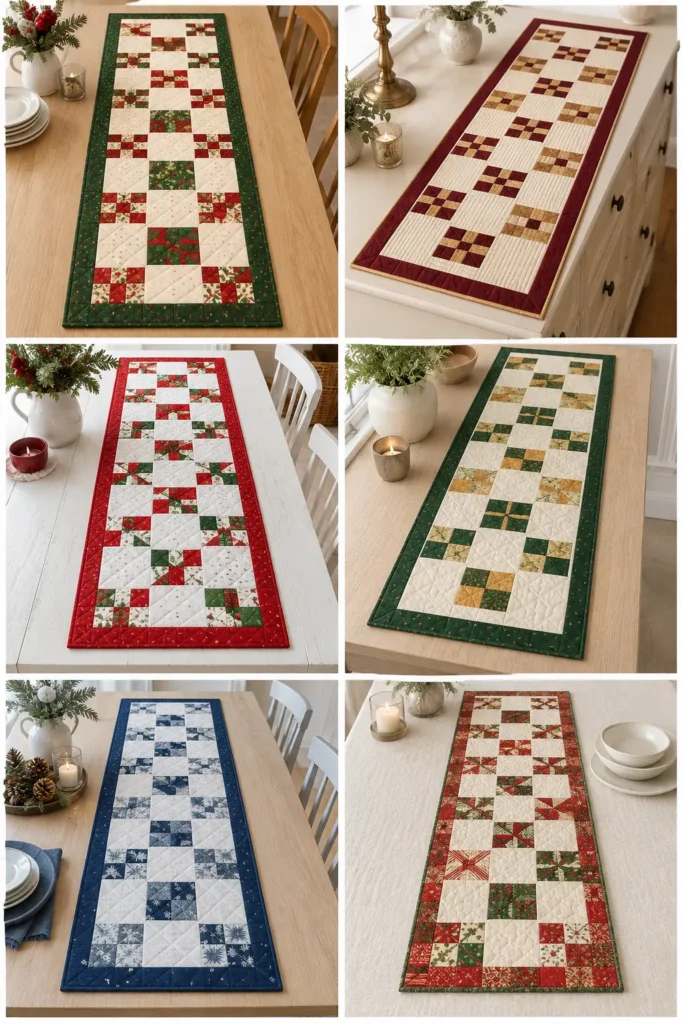
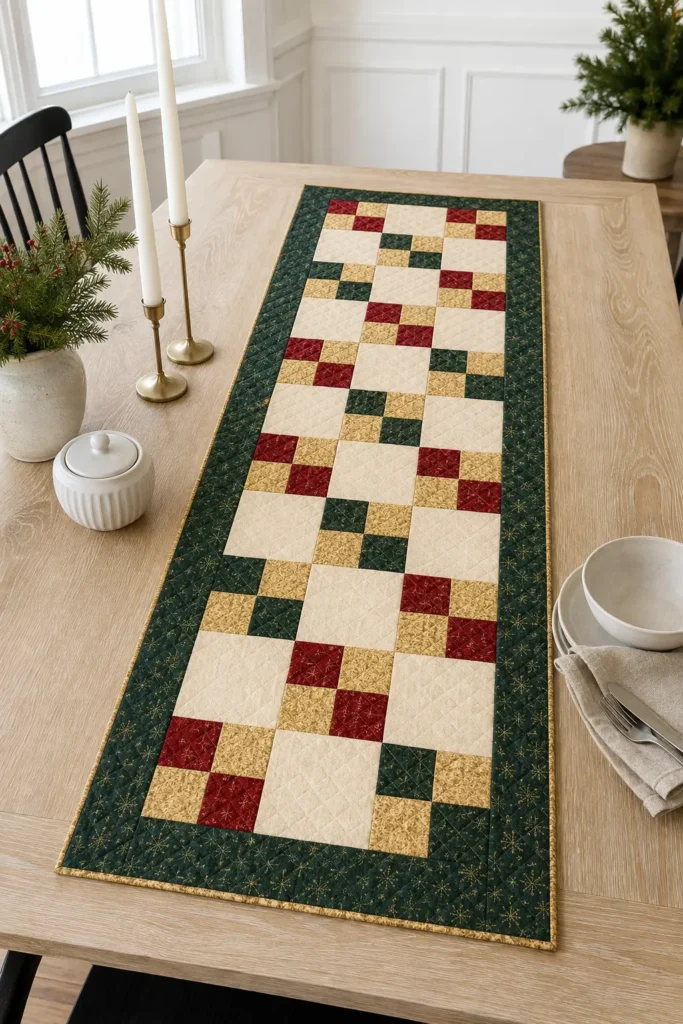
How the Runner Is Built
Three components:
- Four-patch blocks: 4½ inches unfinished (4 inches finished), made from two crosscut segments
- Plain squares: 4½ inches, cut from a background fabric
- Border: 2½ inches wide, cut from strips, finishing 2 inches
The blocks alternate in a 3 across × 9 down checkerboard, which works out to 14 four-patches and 13 plain squares.
Finished Size
- Finished runner: 16 × 40 inches – suits a standard dining table or a long sideboard
- Center panel: 12½ × 36½ inches unfinished
- With border: 16½ × 40½ inches unfinished
- Blocks: 4 inches finished
- Skill level: beginner – one afternoon’s work
- Core techniques: strip sets, crosscutting, four-patch assembly, borders
Materials Needed
- Jelly roll strips: about 11 in total
- 4 strips for the four-patch blocks (two contrasting pairs)
- 3 strips for the border
- 4 strips for the binding
- Background fabric: ⅓ yard, for thirteen 4½-inch squares
- Backing: 1½ yards – a single piece, no seaming required
- Batting: at least 22 × 46 inches
- Thread: neutral cotton
- Rotary cutter, cutting mat, quilting ruler, pins or clips, iron
Beginner tip: don’t prewash the jelly roll strips, and leave the background and border fabric unwashed too, so the whole runner shrinks together in the first wash. Because a runner lives on a dining table, use a color catcher in that first wash – festive reds bleed, and cranberry sauce is enough of a hazard without help from the fabric.
Choosing Your Colors
A runner is small, so the contrast between the four-patch fabrics has to be strong or the checkerboard disappears:
- Traditional: cherry red and deep green four-patches on a cream background
- Bright modern: red and white four-patches on a gold or kraft background
- Elegant: deep green and gold on ivory
- Frosty: navy and silver on white
- Scrappy: mix several reds and greens across the fourteen blocks, keeping the background constant
Pair a dark strip with a light strip in each strip set. Two mediums together will look muddy at this scale. For the border, pick whichever color you want to frame the runner – a deep green or red border reads crisply against a cream background.
Cutting Measurements
- Strip sets: two sets, each made from 2 contrasting strips sewn along their long edges. Each set measures 4½ inches wide × about 40 inches long
- Segments: square one end of each set, then crosscut at 2½ inches. Each set reliably gives 15 segments once the squaring cut is accounted for, so two sets give 30. You need 28, leaving two guaranteed spares – a longer set may give a sixteenth
- Plain squares: thirteen at 4½ × 4½ inches from the background fabric
- Side borders: two strips at 2½ × 36½ inches
- End borders: two strips at 2½ × 16½ inches
- Backing: 22 × 46 inches
- Batting: 22 × 46 inches
- Binding: four strips at 2½ inches × width of fabric
Step-by-Step Guide
Step 1 – Choose and sort your strips. Leave everything unwashed. Pick 4 strips for the blocks – two contrasting pairs, each pairing a dark with a light – plus 3 strips for the border and 4 for the binding. Leave the ends of the four block strips intact while you sew the strip sets; you’ll square the completed sets just before crosscutting, which wastes less length than squaring four strips separately. Remove the selvages from the border and binding strips as you subcut or join them.

Step 2 – Cut the plain squares. From your ⅓ yard of background fabric, cut thirteen squares at 4½ × 4½ inches. Set them aside.
Step 3 – Sew the first strip set. Sew one dark and one light strip together along their long edges with a ¼-inch seam, feeding them gently so neither stretches.

Step 4 – Press toward the dark. Press the seam toward the darker strip. This matters more than it sounds: pressing consistently toward the dark is what lets the four-patch centers nest in Step 8.
Step 5 – Check the set width. Measure across: the set should be exactly 4½ inches wide. If it’s narrower, your seam allowance is running wide – correct it before sewing the second set.

Step 6 – Sew the second strip set. Repeat steps 3 to 5 with your other pair of strips, pressing that seam toward the dark as well.
Step 7 – Crosscut the segments. Square one end of each set, then crosscut across the strips at 2½-inch intervals. Each set reliably gives 15 segments measuring 2½ × 4½ inches once the squaring cut is allowed for, so the two sets give 30. You need 28, which leaves two spares.

Step 8 – Make the first four-patch. Take two segments and rotate one 180 degrees, so a dark square sits opposite a dark square diagonally. Place them right sides together – the center seams should nest against each other, because you pressed both toward the dark. Pin at that junction and sew with a ¼-inch seam.
Step 9 – Check the block. Open it out and press. The four-patch should measure exactly 4½ × 4½ inches, with the four squares meeting cleanly at the center point.

Step 10 – Make all fourteen four-patches. Make seven blocks from each strip set, using 14 segments from each – that keeps each block to a single fabric pairing and leaves one spare segment per set. (If you’d rather the runner looked scrappier, mix segments from both sets freely instead.) Chain-piecing makes short work of it: feed all fourteen pairs through one after another, then snip them apart and press.
Step 11 – Lay out the runner. Arrange the blocks 3 across × 9 down in a checkerboard, starting the first row with a four-patch: four-patch, plain, four-patch. Start row two with a plain square, and keep alternating. That uses exactly 14 four-patches and 13 plain squares.

Step 12 – Sew the rows. Sew each row of three blocks with a ¼-inch seam. Press odd rows to the right and even rows to the left so the seams nest. Each row measures 12½ × 4½ inches.
Step 13 – Join the rows. Sew the nine rows together in order, pinning at each junction. Press. The center panel should measure 12½ × 36½ inches.

Step 14 – Cut the border strips. From your three border strips, cut two side borders at 2½ × 36½ inches (one from each of two strips) and two end borders at 2½ × 16½ inches (both from the third strip, which is long enough for the pair).
Step 15 – Add the side borders. Sew a 2½ × 36½-inch strip along each long side of the center panel. Pin the ends first, then the center, then the quarter points – a stretched border is what makes a runner ripple instead of lying flat. Press the seams toward the border. The panel now measures 16½ × 36½ inches.
Step 16 – Add the end borders. Sew a 2½ × 16½-inch strip across each short end, pinning the same way. Press toward the border. The runner top should now measure 16½ × 40½ inches.
Step 17 – Cut the backing and batting. Cut a piece of backing and a piece of batting, each 22 × 46 inches. No seaming is needed – a runner fits comfortably within a single width of fabric.

Step 18 – Layer and baste. Lay the backing wrong side up, center the batting on it, then the runner top right side up. Smooth from the center outward and baste with pins or basting spray.
Step 19 – Quilt it. Keep it simple and not too dense – a runner needs to lie flat, and heavy quilting makes it stiff and prone to curling at the ends. Straight lines through the blocks, an all-over diagonal grid, or stitching in the ditch all work well.
Step 20 – Trim and square up. Trim the excess batting and backing level with the edge of the runner top, squaring the corners. Preserve as much of the top as you can – quilting always draws the layers up slightly, so it may come in a little under 16½ × 40½ inches, which is normal. Just don’t trim into the top yourself; that outer ¼ inch is the binding’s seam allowance.
Step 21 – Bind and finish. Join the four 2½-inch binding strips into one long strip, press in half lengthwise, and sew to the front with a ¼-inch seam. Fold to the back and stitch down. The finished runner measures about 16 × 40 inches. Wash gently on cold with a color catcher and press flat.
Assembly at a Glance
- Leave everything unwashed; select 4 block strips, 3 border, 4 binding.
- Cut thirteen 4½-inch background squares.
- Sew a dark and light strip into a set (¼-inch seam).
- Press the seam toward the dark.
- Check the set is 4½ inches wide.
- Sew the second set the same way.
- Square one end; crosscut at 2½ inches → 30 segments (28 needed, two spare).
- Rotate one segment 180°, nest the center seams, and sew.
- Check the four-patch is 4½ inches.
- Make 14 four-patches, chain-piecing.
- Lay out 3 × 9 checkerboard starting with a four-patch.
- Sew rows of three; press odd right, even left → 12½ × 4½.
- Join the nine rows → 12½ × 36½ center panel.
- Cut two 2½ × 36½ side borders and two 2½ × 16½ end borders.
- Add the side borders, pinning ends, center, quarters → 16½ × 36½.
- Add the end borders → 16½ × 40½ top.
- Cut backing and batting at 22 × 46 inches.
- Layer and baste.
- Quilt simply – avoid dense quilting.
- Trim batting and backing level with the top.
- Bind with four strips → about 16 × 40 inches.
Beginner Tips for Success
- Press both strip sets toward the dark – that’s what makes the four-patch centers nest.
- Check the strip set at 4½ inches and the first block at 4½ inches before making the rest.
- Pair a clear dark with a clear light; two mediums will look muddy at this scale.
- Pin borders at ends, center, and quarters – a stretched border makes a runner ripple.
- Don’t over-quilt. A runner has to lie flat on a table; dense quilting stiffens it and the ends start to curl.
- Use a color catcher in the first wash, and press the runner flat before it goes on the table.
- This is an ideal use for leftover strips from a bigger project.
Styling It & Gift Ideas
Run it down the center of a dining table with candles, greenery, and a few pinecones along its length, or use it on a sideboard beneath serving dishes. It also works on a hall console, a piano, or a chest of drawers. Because it’s narrow, it leaves plenty of table showing, which suits a wooden table beautifully – and it protects the surface from hot dishes better than a bare table does.
Its speed makes it one of the best gifts in this collection:
- A hostess gift, taken to someone’s Christmas dinner and left behind
- Several at once– a four-patch chain-piece so quickly you can make three or four runners in a weekend for teachers, neighbors, or colleagues
- A matching set with placemats made from the same strips
- A first sewing gift for someone learning, since a runner is finished long before enthusiasm runs out
If you’re giving one, pop a note in about washing it with a color catcher – it’ll be used at a table, and it will eventually need a wash.
Final Thoughts
A jelly roll Christmas table runner is the highest reward for the least work in this whole collection. Two strip sets, fourteen four-patches, thirteen plain squares, and a narrow border – and by the end of an afternoon you have something that sits at the center of every meal from December onward. Press both sets toward the dark so the centers nest, keep the quilting light so it lies flat, and it’ll come out of the cupboard year after year.
Other Design Inspirations – Digitally Modified Images. Texture and color may vary from the actual product.
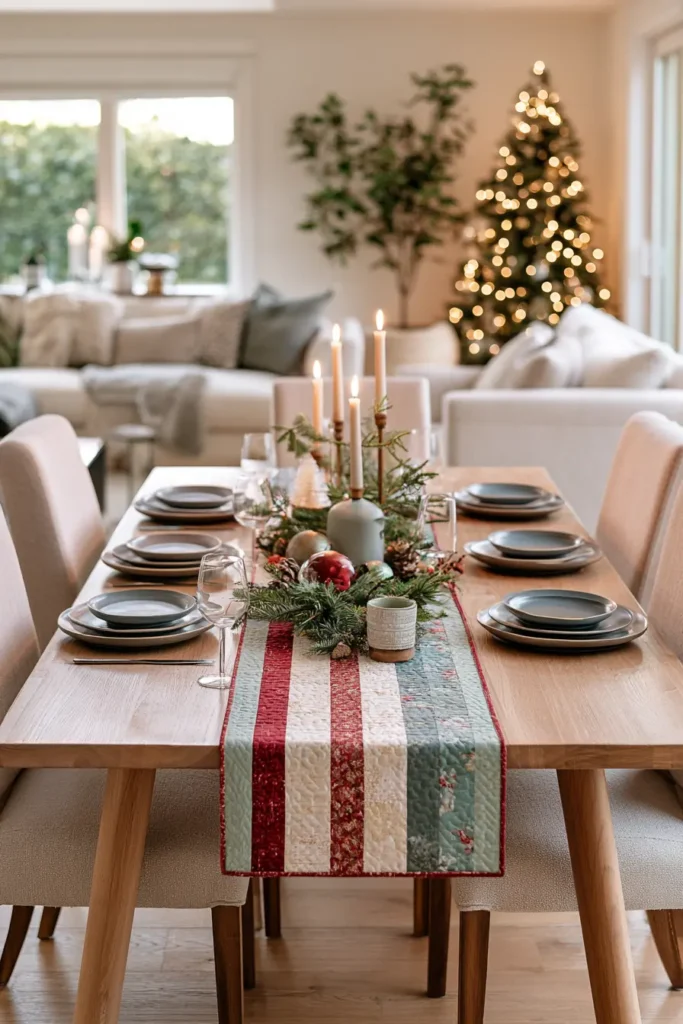
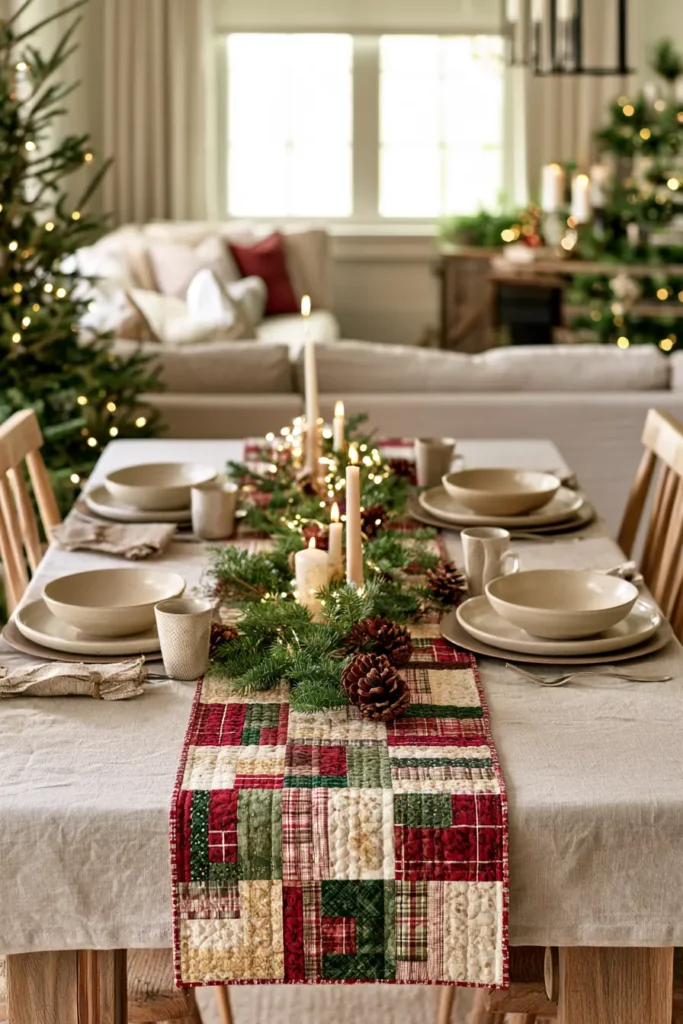
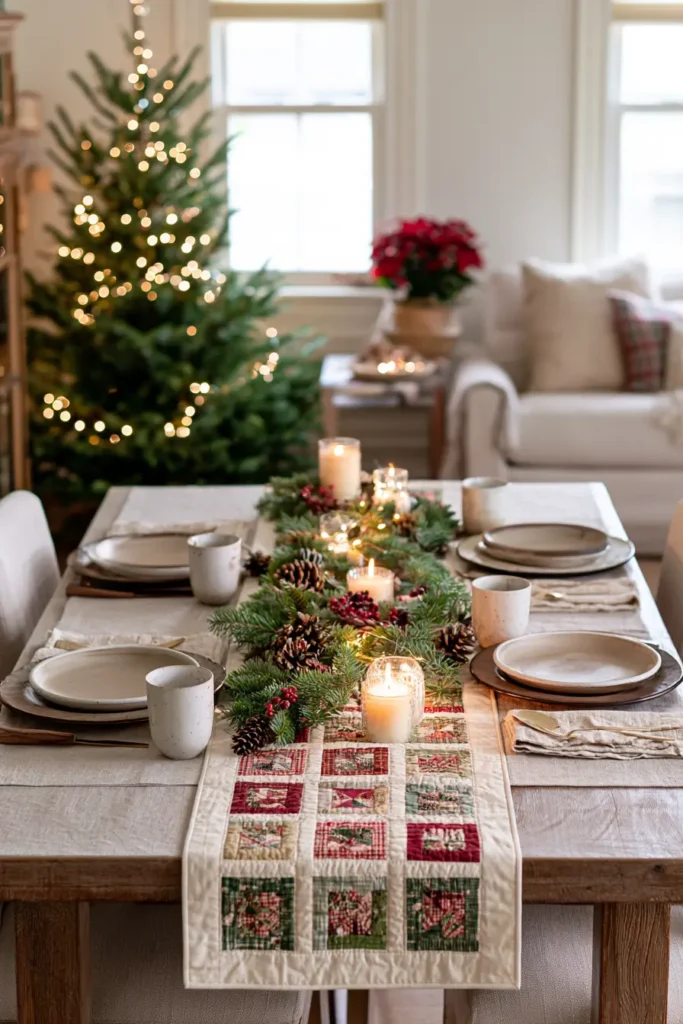
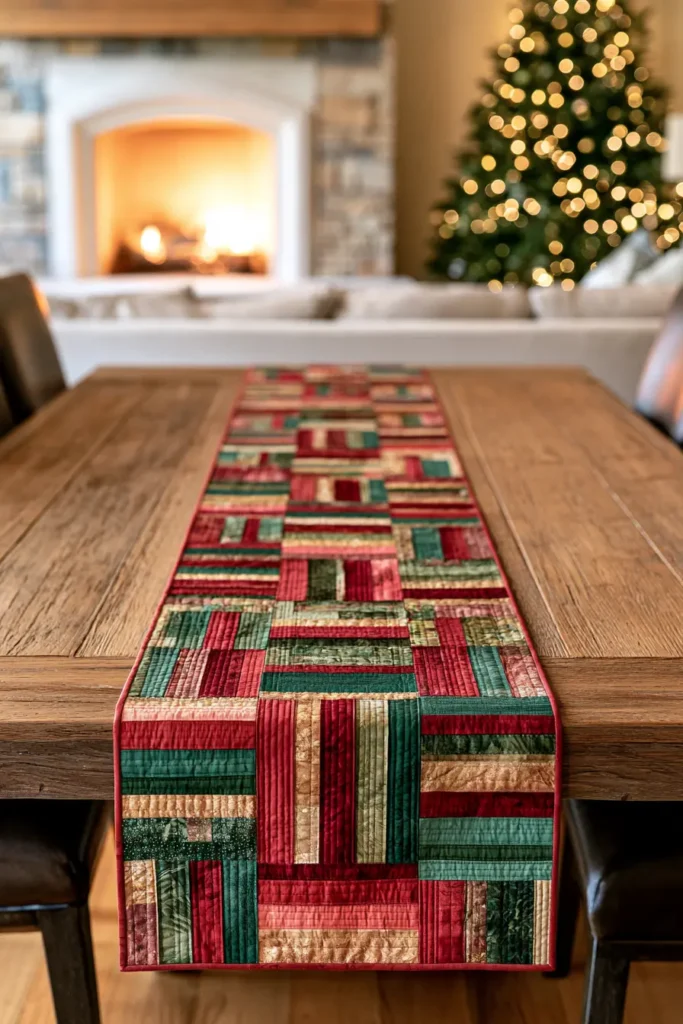
14. Jelly Roll Christmas Tree Skirt for a Handmade Holiday Finish
A tree skirt is the finishing touch that most people leave until last and then buy in a hurry. Making one changes the whole look of a tree – it hides the stand, catches the needles, gives the presents something to sit on, and ties the tree into the rest of the room. This one is pieced from 2½-inch strips in vibrant reds, greens, gold, and cream, quilted, and then cut into a circle, which is far simpler than it sounds and produces a beautifully soft, handmade finish.
The construction has one important quirk: you quilt the panel first and cut the circle afterward. That order does two useful things at once. It means you’re quilting a flat square rather than wrestling a circle under the machine, and it means the curved edges are cut through all three layers at once, so nothing shifts out of alignment.
A Little History: Why Tree Skirts Exist
Tree skirts began as a practical necessity. In the nineteenth century, Christmas trees were lit with real candles clipped to the branches, and a cloth spread beneath the tree caught the dripping wax before it reached the floor or the carpet. Early ones were plain and functional – a length of white cloth, or a piece of felt.
When electric lights arrived and the fire risk receded, the skirt stayed on, having found two new jobs: hiding the increasingly ungainly tree stand, and catching the endless fall of dried needles. Somewhere along the way it also became decorative, which is how a piece of drip cloth ended up as one of the most-embroidered, most-appliquéd, most-quilted objects in the Christmas box.
Design Inspirations – Digitally Modified Images. Texture and color may vary from the actual product.
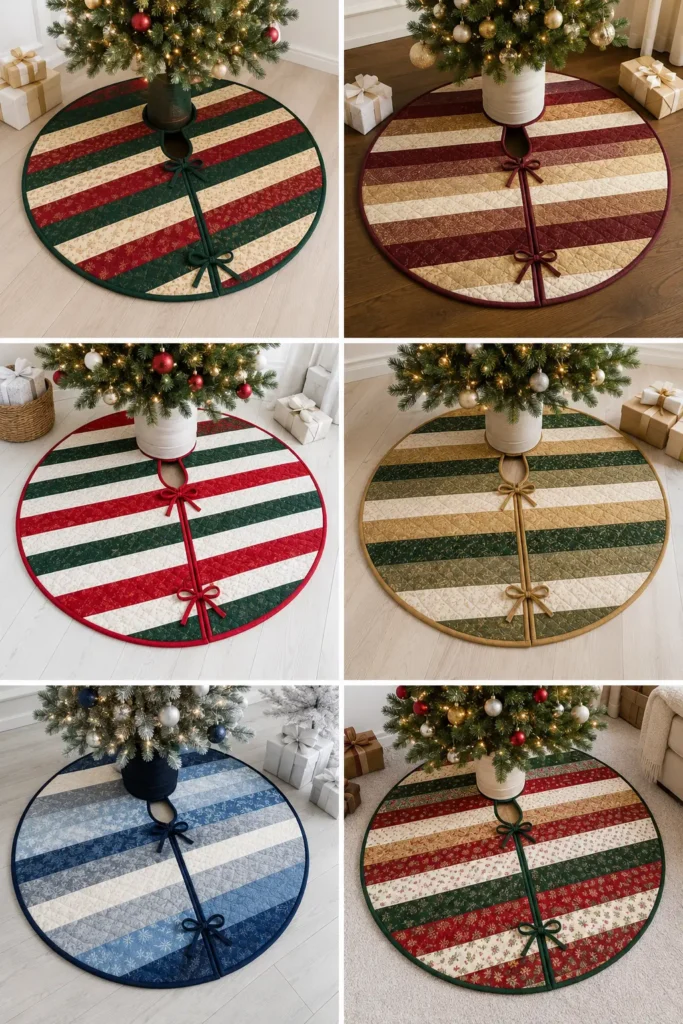
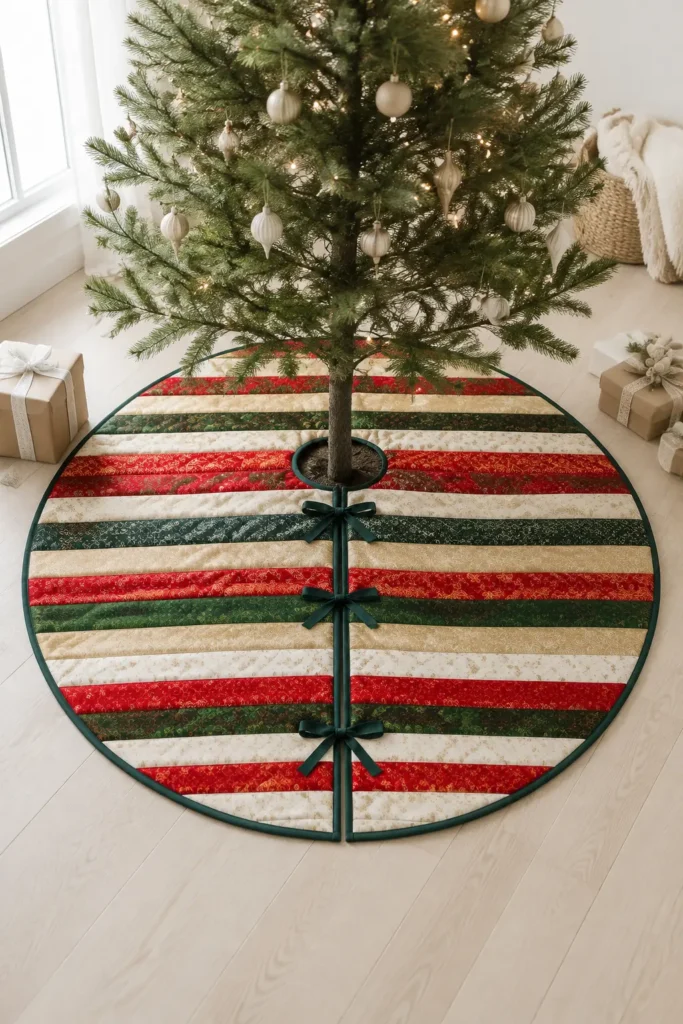
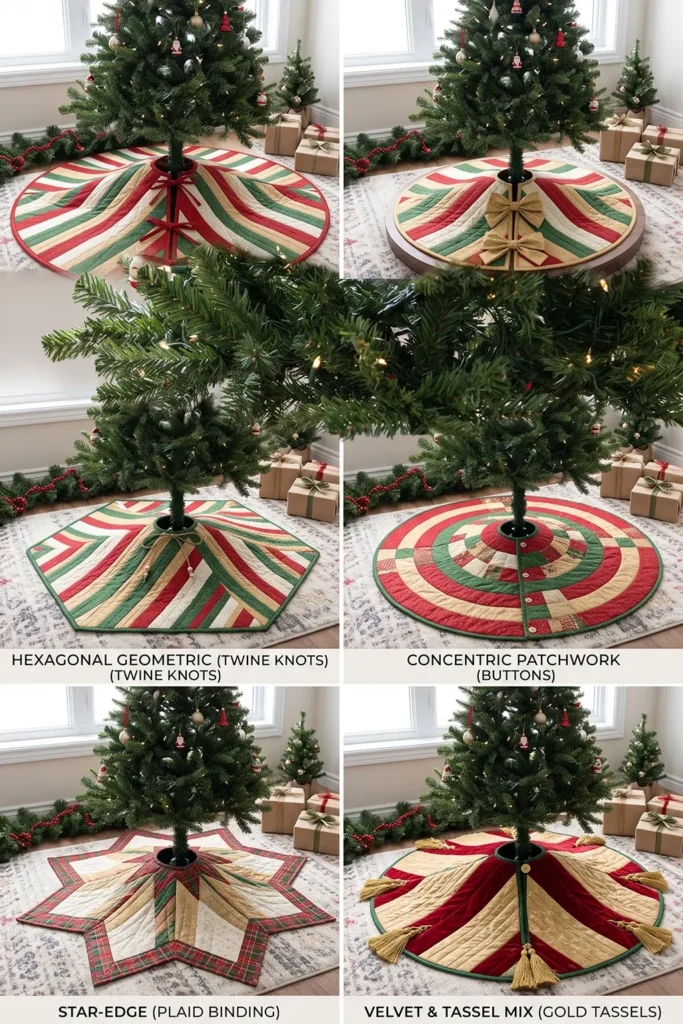
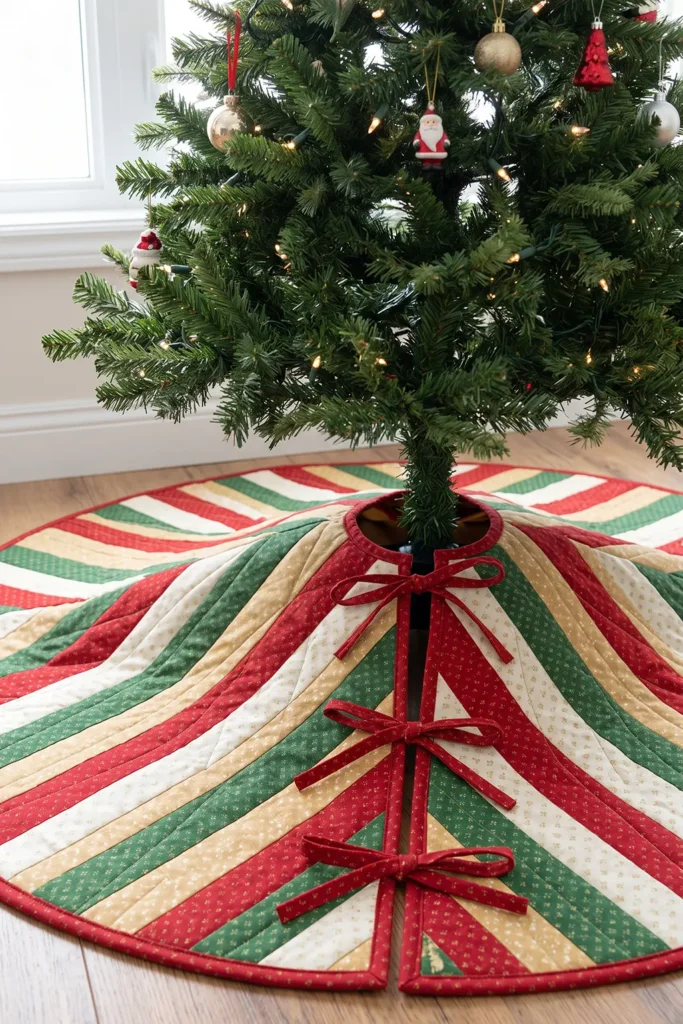
A Note on Size
The finished skirt here is 36 inches across, which suits compact 6-to-7-foot trees, slim or pencil trees, and smaller stands. Beneath a broad, full-width traditional tree, it can look undersized – if that’s your tree, you’ll want a 48-inch skirt or larger. That size isn’t arbitrary – it’s set by the strips themselves.
A strip-pieced panel has to be larger than the finished circle, and a jelly roll strip gives about 40 usable inches once the selvages are off. That allows a panel just under 38½ inches square, which comfortably contains a 36-inch circle. Going larger would mean piecing every single strip end to end, which wastes a great deal of fabric for very little gain. If you need a 48 or 60-inch skirt for a big tree, this design isn’t the efficient way to get there.
How It’s Built
Four stages:
- Sew 19 strips together into a square panel
- Quilt the panel flat, with batting and backing
- Cut the circle – an 18-inch radius, with a 2½-inch radius hole at the center and a straight opening at the back so it fits round the trunk
- Bind every cut edge with bias binding, and add ties
Finished Size
- Finished skirt: 36 inches in diameter
- Center hole: 5 inches across (2½-inch radius) – large enough for most tree stands’ central post
- Back opening: a single straight cut from the outer edge to the center hole
- Pieced panel: 19 strips, finishing about 38½ inches square
- Skill level: confident beginner – the piecing is simple; the binding takes patience
- Core techniques: strip piecing, quilting a flat panel, cutting curves, bias binding
Materials Needed
- 21 jelly roll strips in total: 19 for the panel and 2 for the ties (each tie strip gives two 12-inch pieces). The 19 panel strips are used at full length, so the ties genuinely need their own strips
- Backing: 1¼ yards, cut as large a square as your fabric’s usable width allows – 42 × 42 inches is comfortable, 40 × 40 is the absolute minimum. Check the usable width after removing selvages; if it’s under 40 inches, piece the backing or use a wider one
- Batting: one 42 × 42-inch square (cut generously – batting is easy to trim and impossible to add back)
- Bias binding: ¾ yard of a coordinating solid, cut into 2½-inch bias strips and joined to about 180 inches. The raw edges alone total roughly 160 inches, so the extra 20 covers joins, corners, and finishing the ends
- Ties: four pieces at 2½ × 12 inches, cut from the two tie strips
- Thread: neutral cotton
- Rotary cutter, cutting mat, quilting ruler, a pencil and a length of string (for marking the circle), a safety pin or drawing pin, pins or clips, iron
Beginner tip: the binding must be cut on the bias. Straight-cut binding will not travel around a curve without puckering, and a tree skirt is almost entirely curves. Bias strips stretch and ease smoothly, which is exactly what those edges need. This is the one place in the project where a shortcut will show.
Don’t prewash the jelly roll strips, and leave the backing unwashed too, so everything shrinks together. Test a scrap of red for colorfastness.
Choosing Your Colors
Because the strips run straight across, the finished skirt has parallel stripes rather than concentric rings. Plan the order deliberately and it looks designed rather than random:
- Symmetrical: arrange the 19 strips so the sequence mirrors around the center strip. Once it’s cut into a circle, the pattern reads as balanced from every side
- Gradient: run the colors from light at one edge through to dark at the other, for an ombre effect across the tree skirt
- Classic stripes: alternate red, cream, green, cream all the way across
- Scrappy: mix everything, but keep a consistent cream every third strip so the eye has a rhythm
Vibrant reds and greens against cream look best against the dark green of a tree, and a little gold catches the lights beautifully. Avoid a palette much darker than your tree, or the skirt will disappear into the shadows underneath.
Cutting Measurements
- Panel strips: 19 strips at 2½ inches, sewn together and then trimmed square to about 38½ × 38½ inches
- Backing: one square, 42 × 42 inches if the fabric width allows (40 × 40 minimum)
- Batting: one square, 42 × 42 inches
- Circle: 18-inch radius (36-inch diameter)
- Center hole: 2½-inch radius (5-inch diameter)
- Bias binding: about 180 inches of joined 2½-inch bias strip
- Ties: four at 2½ × 12 inches, from two dedicated strips
Step-by-Step Guide
Step 1 – Choose and arrange your strips. Leave everything unwashed. Set aside 2 strips for the ties, then select 19 strips for the panel and lay them out side by side in the order you want, choosing a symmetrical, gradient, or alternating sequence. Photograph the arrangement.
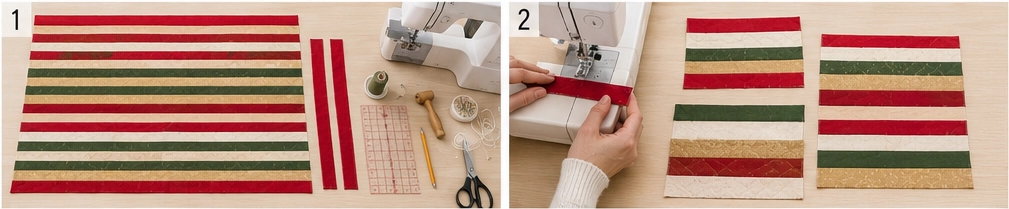
Step 2 – Sew the panel. Sew the strips together along their long edges with a ¼-inch seam, in order, keeping them from stretching as they feed. Sew in pairs first, then join the pairs – a 19-strip panel sewn one strip at a time tends to bow.
Step 3 – Press the panel. Press all seams in the same direction, from the back first and then the front. Lift and place the iron rather than sliding it, so the panel stays square.

Step 4 – Trim the panel square. The panel should measure about 38½ inches across the strips (19 strips at 2½ inches, less 18 seams at ½ inch). Trim its length down to match, giving a square roughly 38½ × 38½ inches. It doesn’t need to be exact – it just needs to be square and at least 37 inches in both directions.
Step 5 – Make the quilt sandwich. Lay the backing square wrong side up, center the 42-inch batting on it, then the pieced panel right side up. A 38½-inch panel on a 40-inch backing leaves only ¾ inch of margin per side, which is tight for basting – 42 inches gives you a comfortable 1¾ inches all round. Smooth from the center outward and baste with pins or basting spray.

Step 6 – Quilt the panel. Quilt while it’s still a flat square – this is much easier than quilting a circle. Straight lines along or across the strips both work well, as does a simple diagonal grid. Keep the quilting light so the finished skirt lies flat around the tree stand rather than cupping.
Step 7 – Fold the quilted panel into quarters. Fold it in half, then in half again, and press the folds lightly so they hold. The folded corner that contains both folds is the center of your circle – mark it clearly with a pin.

Step 8 – Mark the outer circle. Tie a pencil to a length of string, then pin the string’s other end at the marked center corner so that exactly 18 inches of string reaches the pencil. Draw an arc from one folded edge to the other. That arc is a quarter of your 36-inch circle.
Step 9 – Mark the center hole. Shorten the string to 2½ inches and draw a second, small arc near the center corner. That’s a quarter of your 5-inch center hole.

Step 10 – Cut both arcs. Folded in quarters, your quilted sandwich is twelve layers thick – four each of top, batting, and backing – so use sharp, heavy fabric shears and cut slowly along both marked lines. Don’t use a rotary cutter on a tightly folded curve; it will skate and cut unevenly.
If the folded stack is simply too thick to cut accurately, unfold it, trace the quarter-circle marks around into a complete circle and hole, and cut through the flat sandwich instead. It takes longer, but it’s far safer than forcing shears through twelve layers. Either way, you end up with a 36-inch circle with a 5-inch hole in the middle.
Step 11 – Cut the back opening. Decide which side will face the wall, then cut a single straight line from the outer edge in to the center hole. Use a long ruler and cut through all layers in one confident pass. This is the opening that lets the skirt go around the trunk.

Step 12 – Make the bias binding. Cut 2½-inch strips on the bias from your ¾ yard – lay a 45-degree line on your ruler along the fabric’s straight edge and cut parallel strips from there. Join them end to end with diagonal seams until you have about 180 inches, then press the whole strip in half lengthwise. The raw edges themselves come to roughly 160 inches; the extra covers the joins, the two corners, and finishing the ends.
Step 13 – Bind the center hole. Sew binding around the small inner circle first, with a ¼-inch seam, easing the bias gently around the tight curve without stretching it. Fold to the back and stitch down. Doing the smallest, fiddliest edge first gets it out of the way while you’re fresh.

Step 14 – Bind the outer edge and opening in one pass. Starting at the center hole on one side of the back opening, sew binding down that straight edge, all the way around the outer circle, and back up the other straight edge. Doing it in one continuous run means only two joins rather than six, and gives you a neat corner where each straight edge meets the outer curve.
Step 15 – Finish the binding. Fold the binding to the back all the way around and stitch it down, taking extra care at the two outer corners and where the straight edges meet the bound center hole.

Step 16 – Make the ties. Fold each 2½ × 12-inch strip in half lengthwise, right sides together, and sew along the long edge and one short end. Turn right side out, press flat, and tuck in the raw end. Make four.
Step 17 – Attach the ties. Stitch two ties to one side of the back opening and two to the other, positioning them so they meet as pairs – place one pair about 4 inches from the outer edge and the other about 4 inches from the center hole. Stitch them firmly; they take a tug every time the skirt goes on.

Step 18 – Press and fit. Give the finished skirt a light press, then take it to the tree, slip it around the trunk through the back opening, and tie the pairs. Wash on cold with a color catcher when the season’s over.
Assembly at a Glance
- Set aside 2 tie strips; arrange 19 panel strips and photograph the order.
- Sew them into a panel in pairs, then join pairs (¼-inch seams).
- Press all seams one direction.
- Trim the panel square to about 38½ × 38½ inches.
- Layer with a 42-inch backing and batting square; baste.
- Quilt while flat – lightly, so it lies flat later.
- Fold into quarters; mark the double-folded corner as the center.
- Mark an 18-inch radius arc with pencil and string.
- Mark a 2½-inch radius arc for the center hole.
- Cut both arcs with heavy shears (12 layers – no rotary cutter); or unfold and cut flat.
- Cut a straight back opening from outer edge to center hole.
- Cut and join about 180 inches of 2½-inch bias binding.
- Bind the center hole first.
- Bind the opening and outer circle in one continuous pass.
- Fold the binding to the back and stitch down.
- Make four ties from 2½ × 12-inch strips.
- Attach ties in two pairs along the opening.
- Press, fit around the tree, and tie.
Beginner Tips for Success
- Quilt the panel flat before cutting the circle. Quilting a circle is far harder, and cutting through all three layers keeps everything aligned.
- Cut the binding on the bias. Straight-cut binding will pucker around every curve.
- Mark the circle while folded in quarters so it’s symmetrical – but cut with heavy shears, not a rotary cutter, or unfold and cut flat if twelve layers is too thick.
- Cut backing and batting at 42 inches, not 40; ¾ inch of margin isn’t enough to baste against.
- Sew the 19 strips in pairs, then join the pairs; sewing one at a time makes a long panel bow.
- Keep the quilting light so the skirt lies flat around the stand instead of cupping.
- Bind the center hole first, while your patience is intact – it’s the tightest curve in the project.
- Plan the strip order deliberately; parallel stripes look best symmetrical or graded.
- Stitch the ties firmly – they’re pulled every time the skirt goes on and off.
Styling It & Gift Ideas
Spread the skirt so the back opening faces the wall, and let it sit flat with the presents on top. Because it’s pieced from the same fabrics as the rest of this collection, it ties the tree to any other quilts, runners, or stockings you’ve made – which is what makes a handmade Christmas feel coherent rather than assembled from bits.
Its size and speed make it a lovely gift:
- A first-Christmas-in-a-new-home gift, which is exactly when people realize they don’t own one
- A wedding or newlywed gift for a couple’s first tree together
- A matching set with a table runner from the same strips
- A family heirloom, since a tree skirt comes out once a year and lasts decades
If you’re giving it, a small label with the year stitched into the binding makes it a keepsake rather than just a furnishing.
Final Thoughts
A jelly roll Christmas tree skirt is the finishing touch that makes a tree look properly dressed, and it’s far simpler to make than the finished circle suggests. Sew nineteen strips into a square, quilt it flat, then cut your circle through all three layers at once and bind the edges on the bias. Half a jelly roll, one afternoon of piecing and one of binding, and you’ll have the piece that sits under the tree every December for the next twenty years.
Other Design Inspirations – Digitally Modified Images. Texture and color may vary from the actual product.
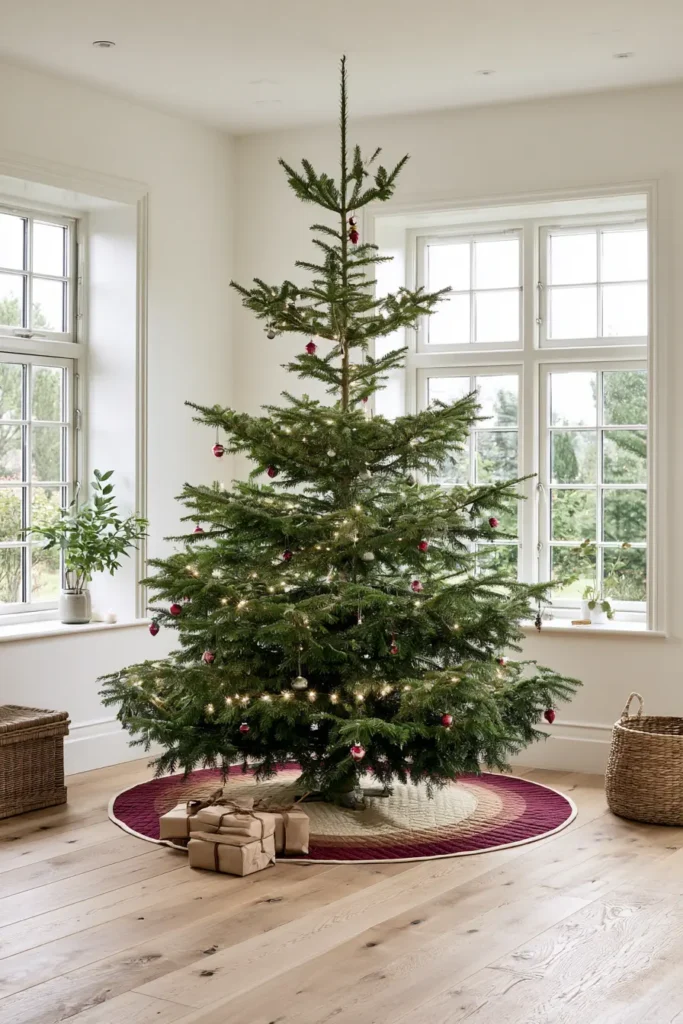
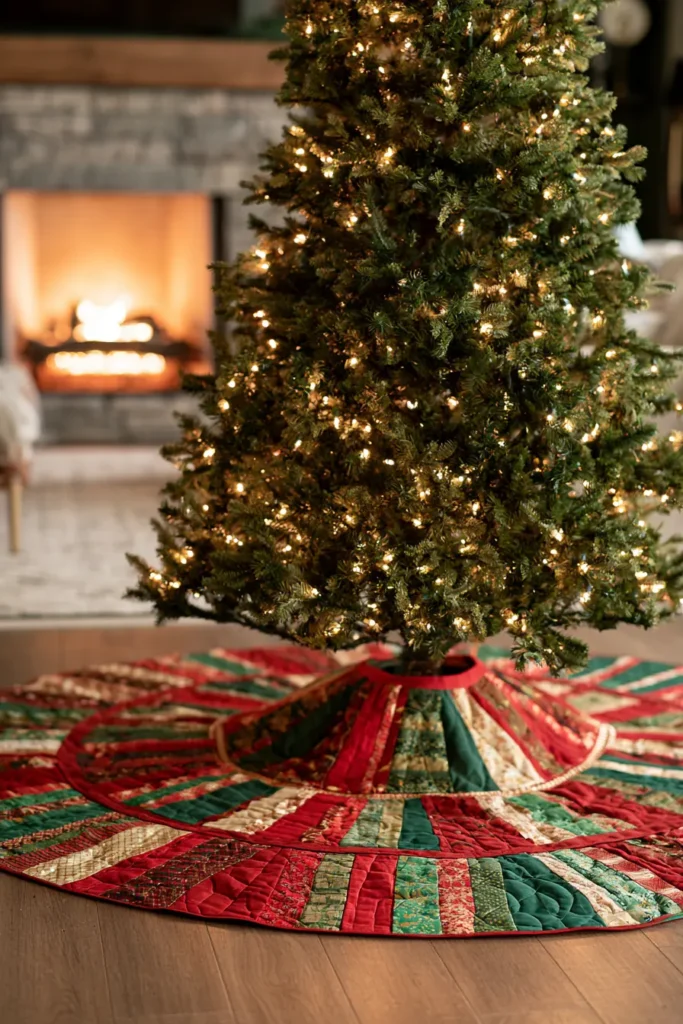
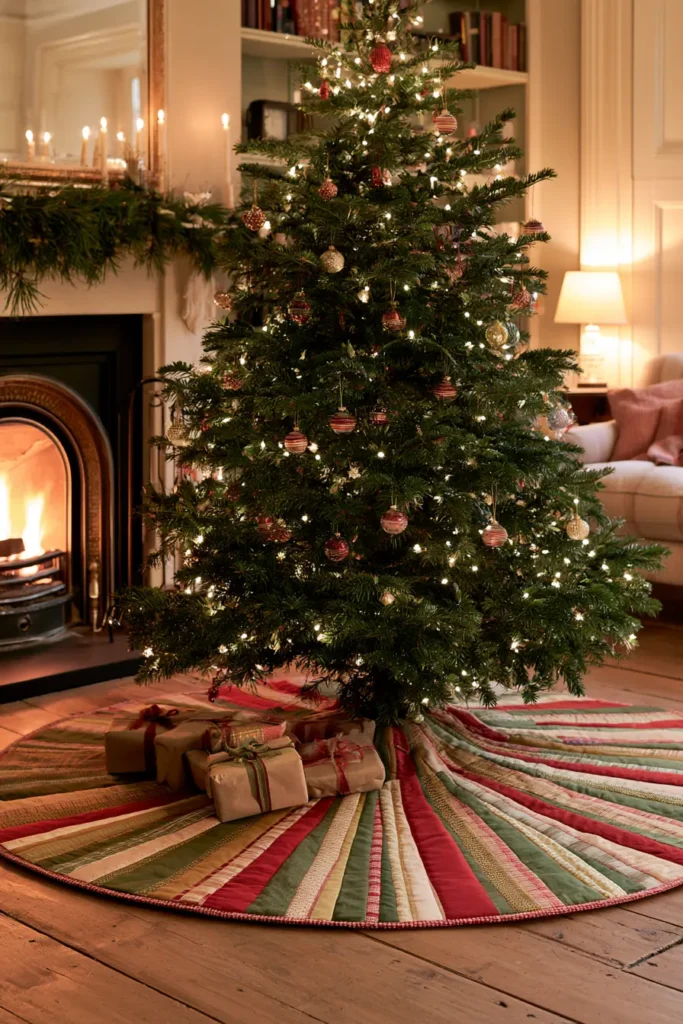
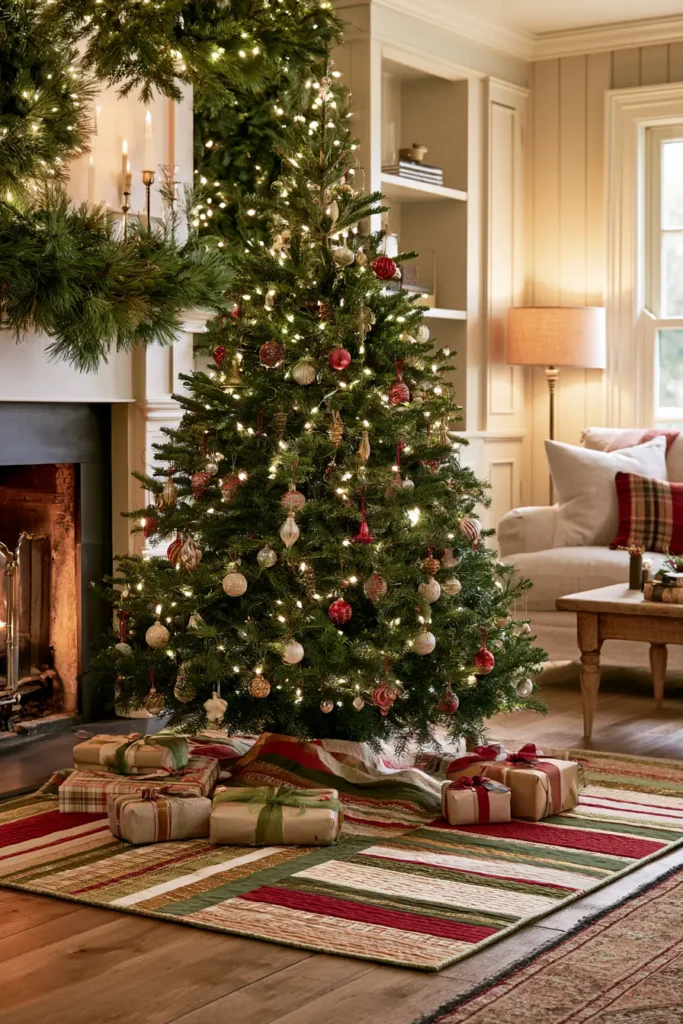
Conclusion
The real gift of a jelly roll at Christmas is time. Precut, pre-coordinated strips let you skip straight to the part that’s actually enjoyable – watching strips of festive fabric come together into something warm and beautiful – and strip piecing is fast enough that a handmade quilt stays realistic even in a busy December. Whether it ends up folded at the foot of a bed, wrapped around someone on the sofa, or given away with a ribbon around it, a handmade holiday quilt is the kind of gift you use every year and remember long after anything bought in a hurry.
Jelly Roll Christmas Quilt Pattern Ideas
The best Jelly Roll Christmas Quilt Pattern Ideas are the ones that fit your time. Reach for a jelly roll race, rail fence, or chevron when the deadline is close and you need a beautiful finish fast; choose a log cabin, Christmas star, or tree design when you want a traditional heirloom worth the extra hours.
Candy cane stripes and Nordic snowflakes bring unmistakable seasonal charm, while gold-and-cream or blue-and-silver palettes suit homes that prefer understated holiday décor. And when you only have an afternoon, a table runner or tree skirt adds handmade warmth to the house for very little time at the machine. Whichever you choose, one bundle of 2½-inch strips is all it takes to make Christmas feel a little more handmade this year.

