
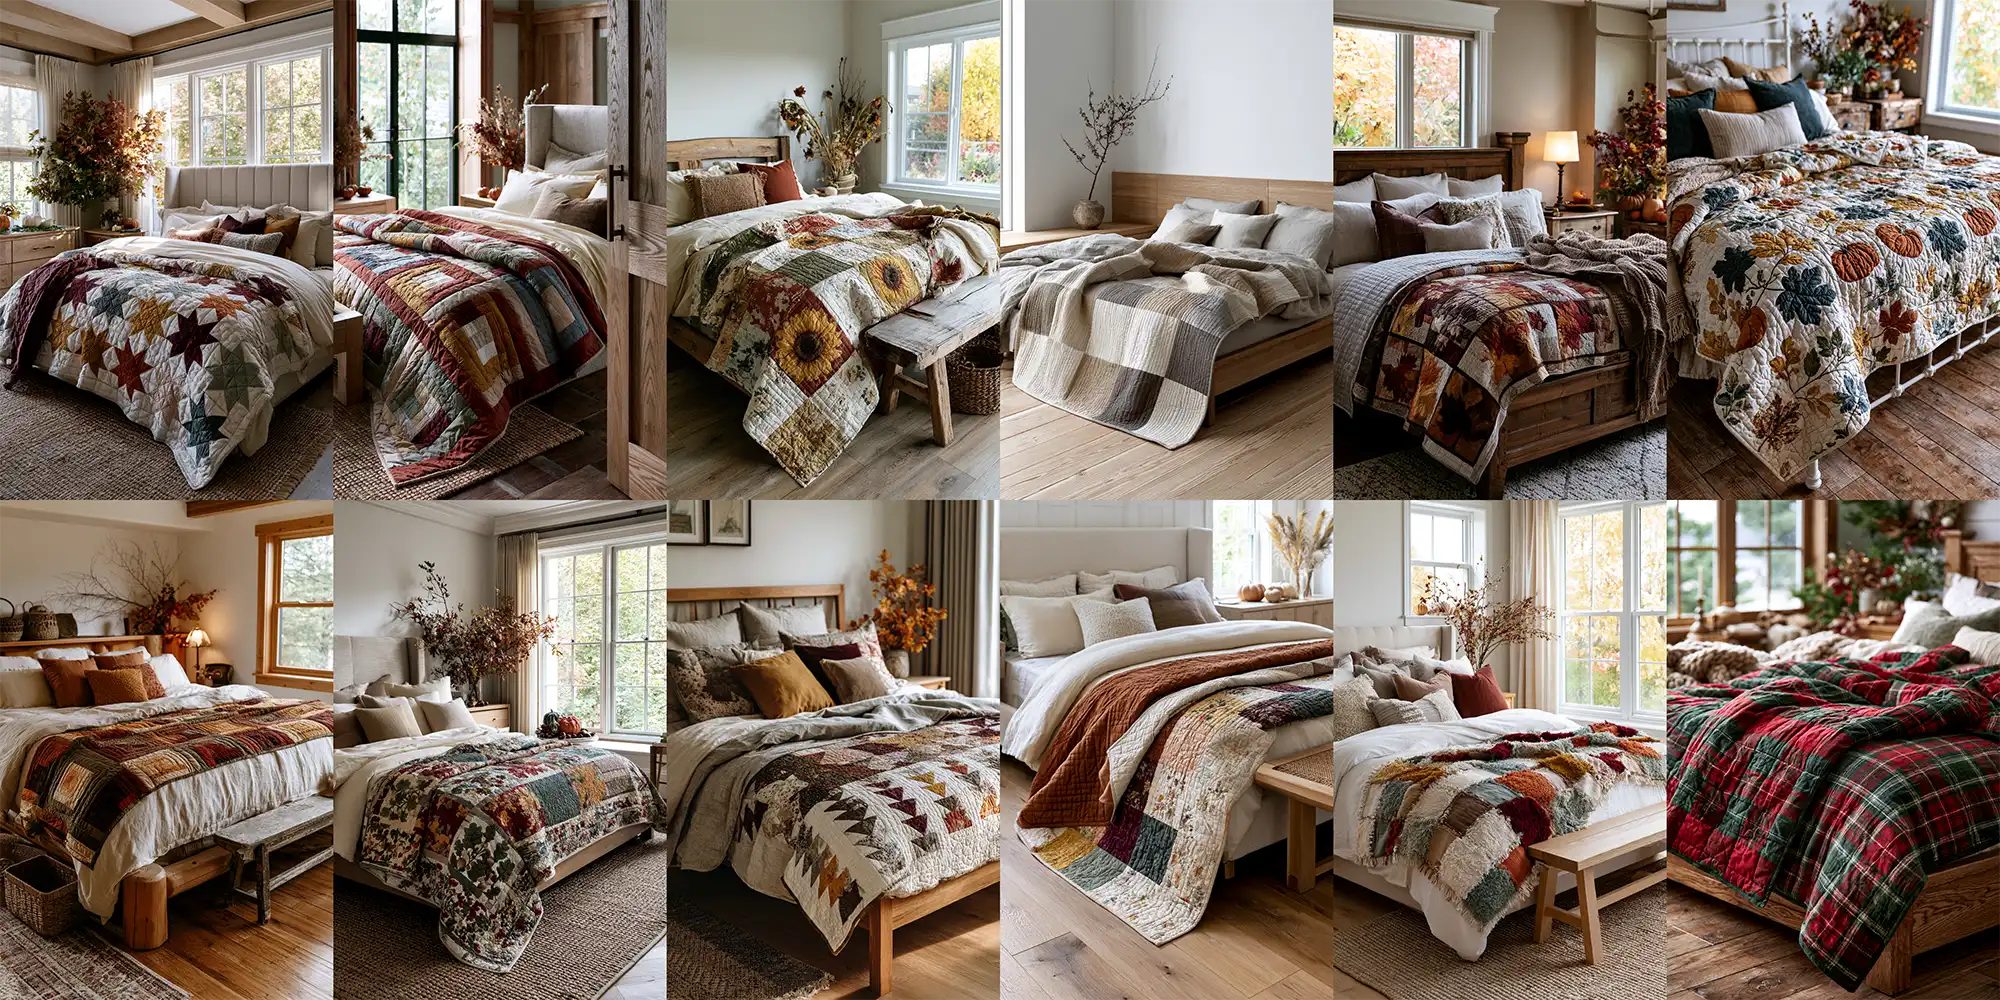
12 Fall Quilt Pattern Ideas: Cozy Autumn Designs for Warm, Stylish Homes
Few things say autumn quite like a quilt. As the light turns golden and the evenings cool, Fall Quilt Pattern Ideas become the easiest way to bring warmth, color, and handmade character into a home. A fall quilt isn’t only a blanket — it’s a layered textile made of a patterned top, a soft batting middle, and a backing, stitched through to hold it all together. What makes it autumnal is the palette and the motifs: rust, amber, mustard, and deep burgundy, worked into maple leaves, pumpkins, harvest stars, and cozy plaids that echo the season outside your window.
Fall Quilt Pattern Ideas
This collection of Fall Quilt Pattern Ideas spans the full range of what the season has to offer, from traditional pieced blocks to modern color-led designs. You’ll find classic quilting patterns like log cabin, flying geese, and star blocks reimagined in harvest tones, alongside seasonal motifs — maple leaves, acorns and oak leaves, pumpkins, and golden sunflowers. There are color treatments too, from warm amber-and-rust ombre to serene minimalist neutrals, plus construction ideas built purely for comfort, like soft flannel rag quilts and versatile reversible throws. Whether you’re an experienced quilter or picking up a needle for the first time, each idea is offered as inspiration for making your home feel warmer, cozier, and beautifully in step with the season.
See also: Cozy Winter Quilt Designs – Summer Quilt Pattern – Christmas Star Quilting Pattern
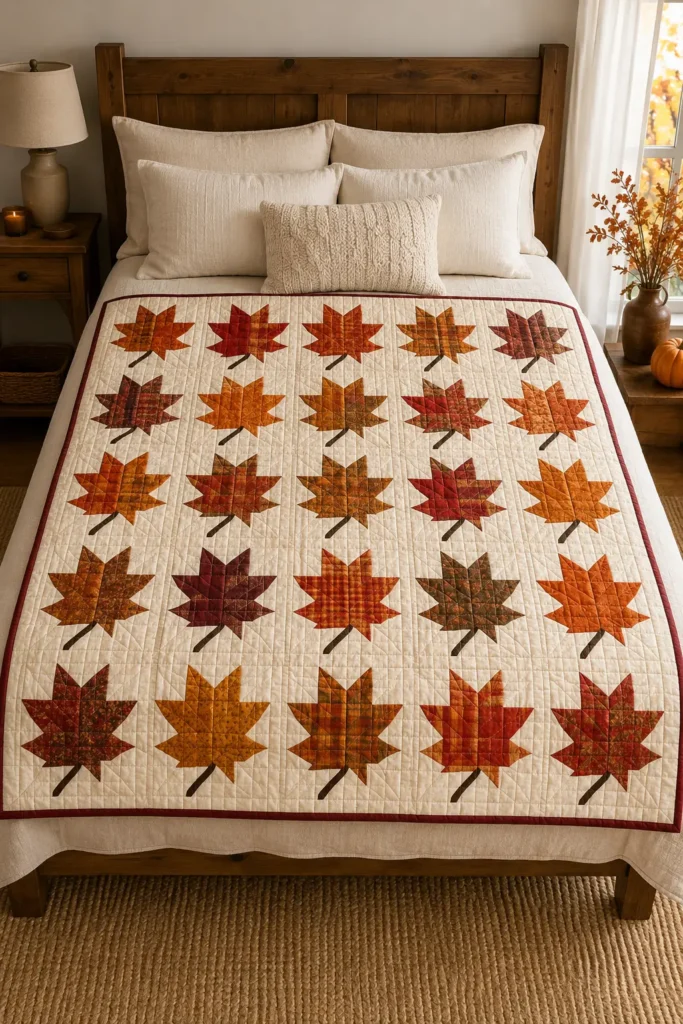
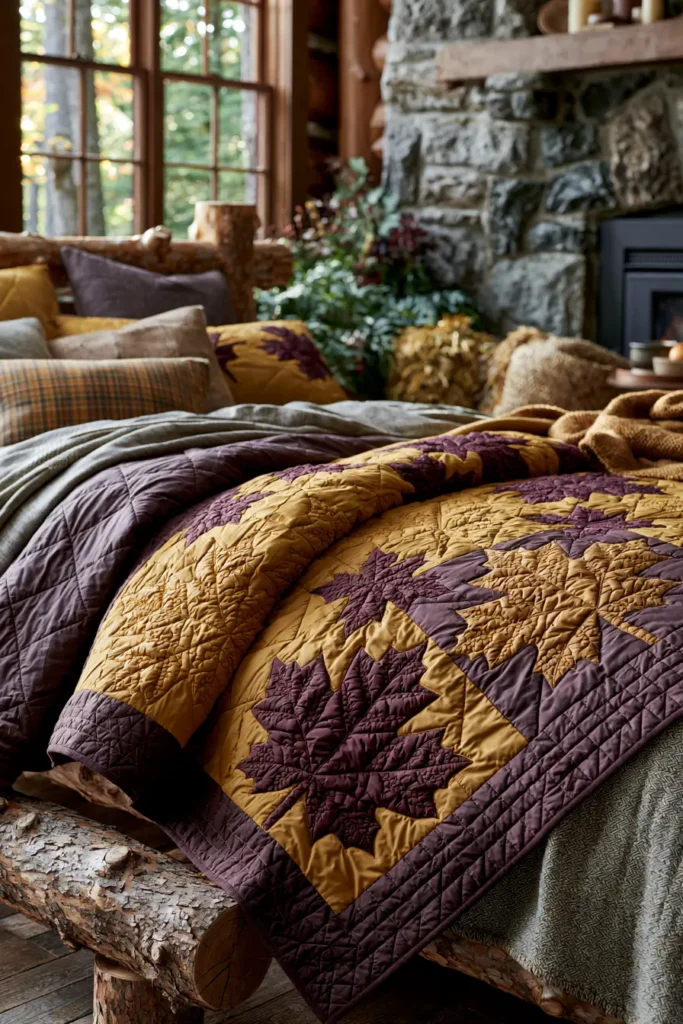
1. Rustic Maple Leaf Quilt Patterns for Warm Autumn Bedrooms
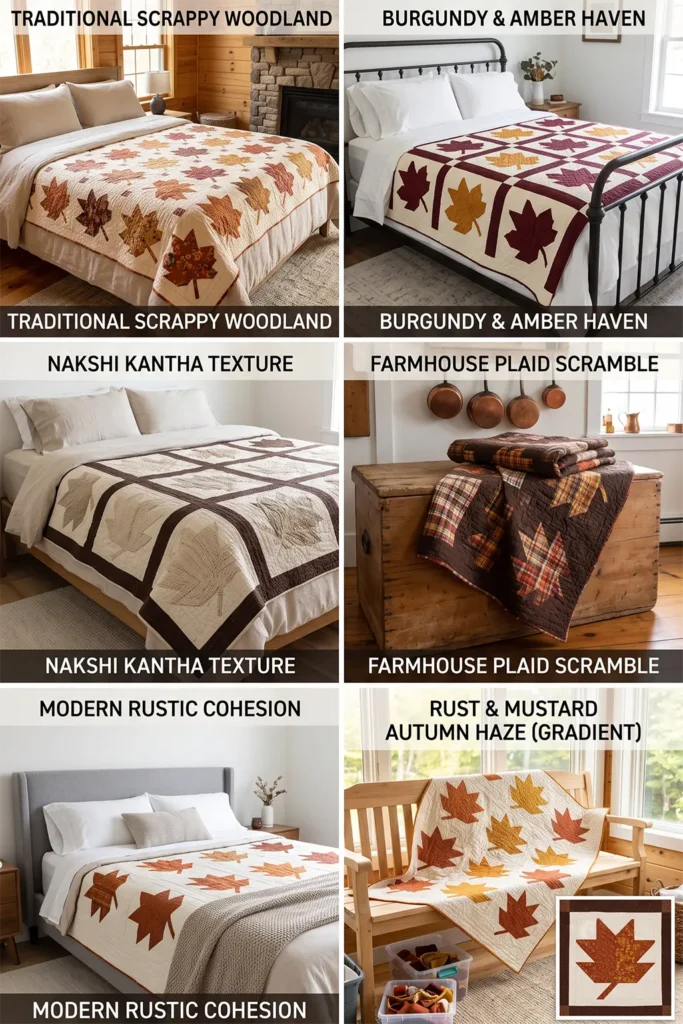
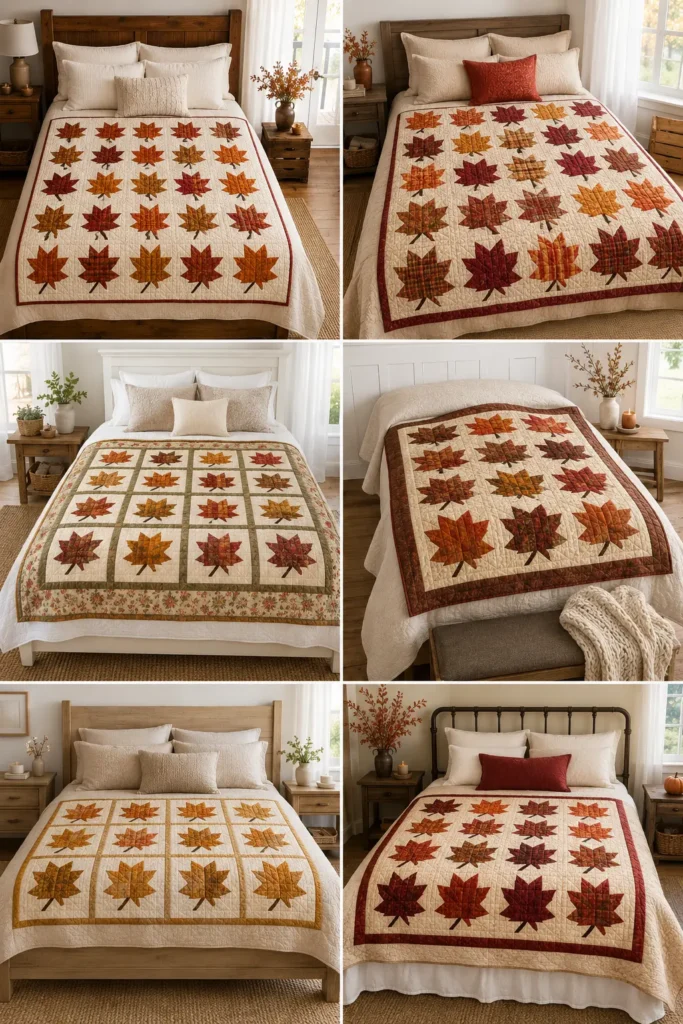
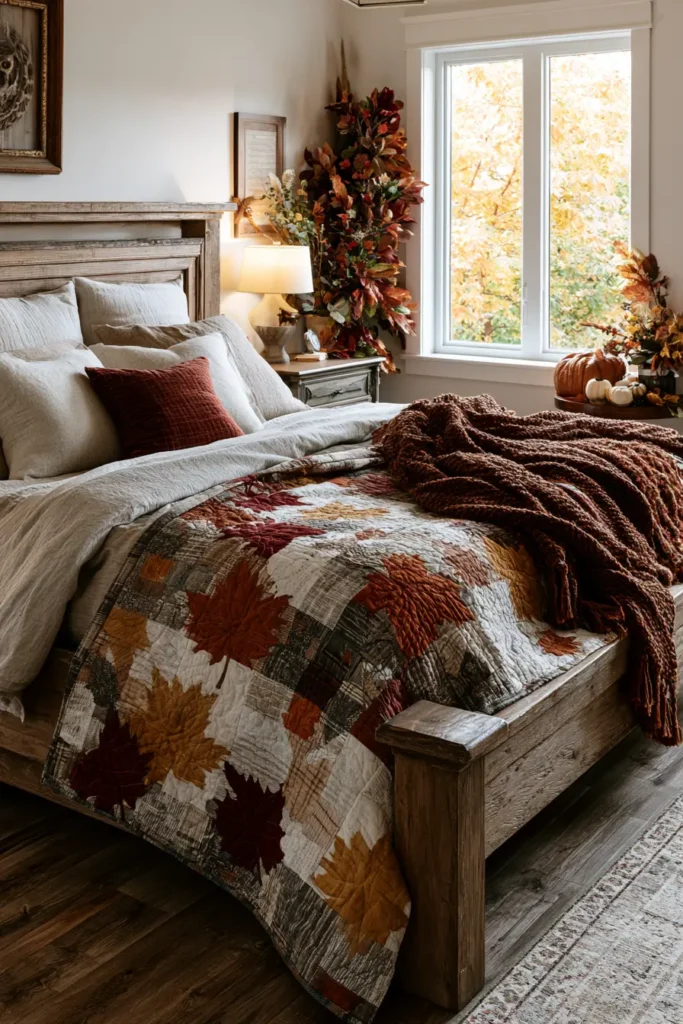
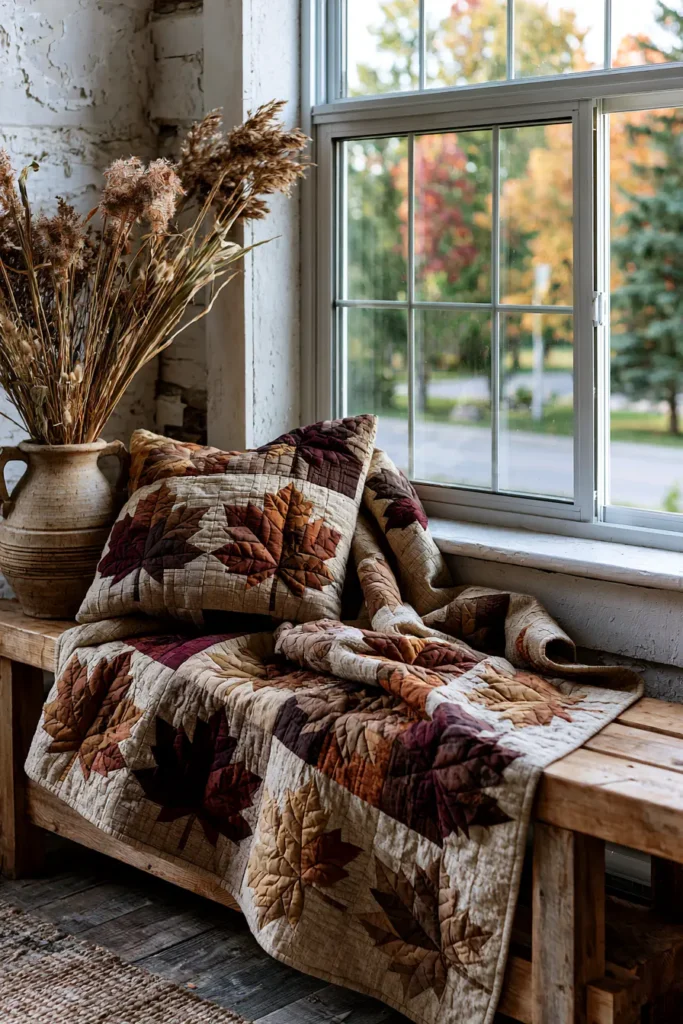
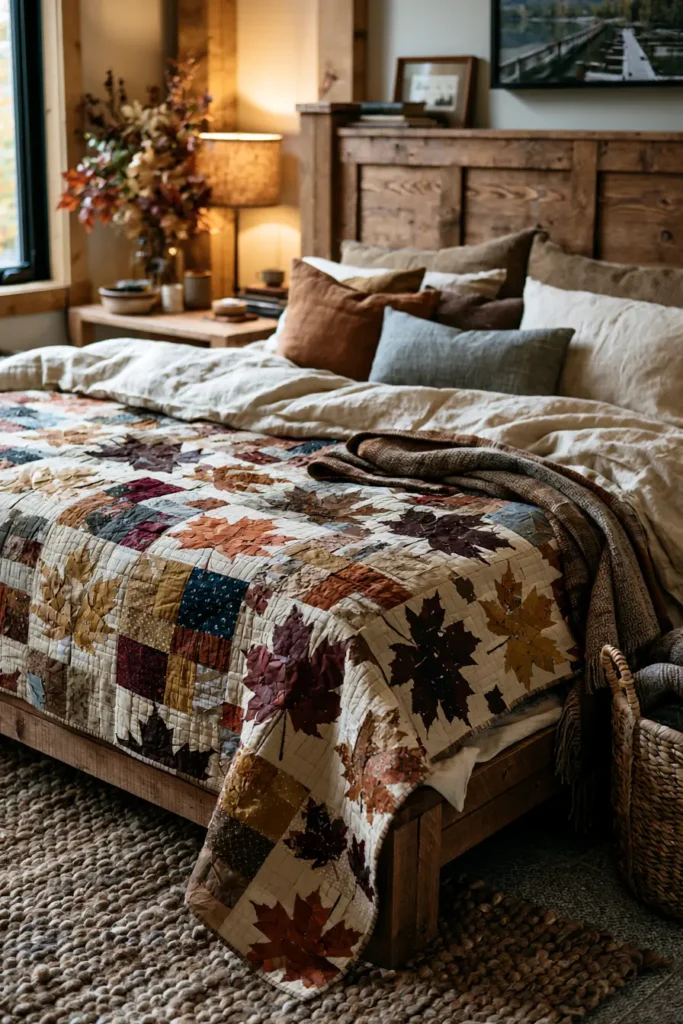
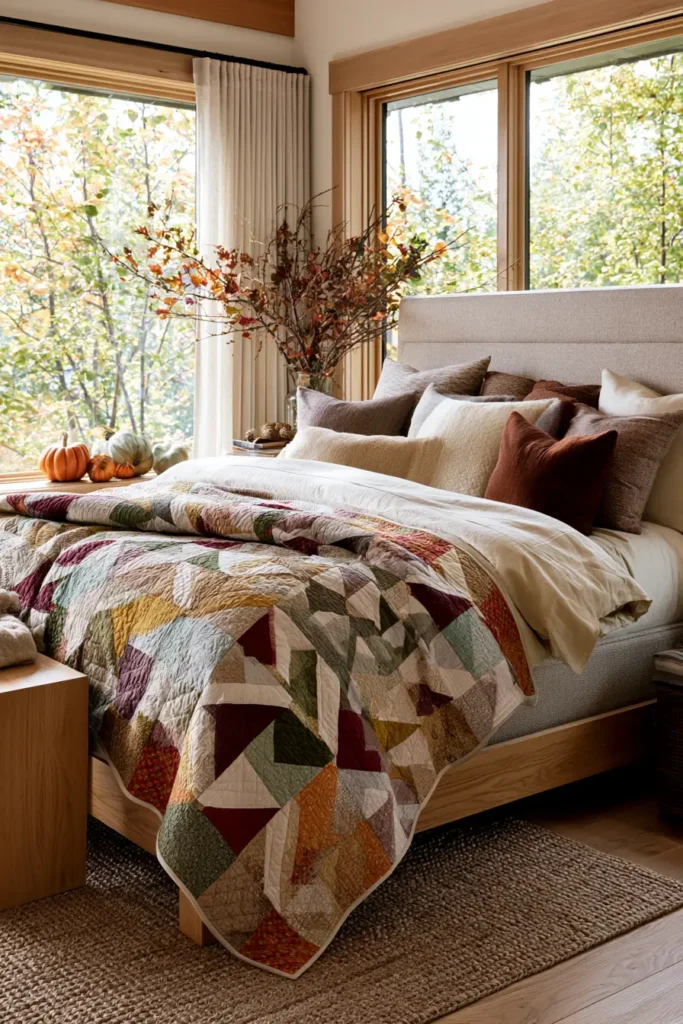
Nothing announces autumn in a bedroom quite like a maple leaf quilt. The block itself is a quilting classic — a stylized leaf built from squares and triangles, with a single appliquéd stem angling off one corner — and when you scatter those leaves across a quilt in rust, amber, gold, and deep burgundy, the effect is like catching the whole season mid-fall. It’s rustic, warm, and unmistakably seasonal, the kind of quilt that makes a bed look like the coziest place in the house from October right through November.
The maple leaf has deep roots in American quilting. Its ancestors are the nineteenth-century “Autumn Leaf” and “Turkey Tracks” blocks, patterns pieced from scraps by quilters who worked with whatever the harvest season left them. That scrappy, make-do origin is part of the block’s charm — no two leaves need to match, and the quilt only looks richer when they don’t.
Why I Made It
I made this because a maple leaf block is quilting’s most generous invitation to play with color. Every leaf can be a different fabric, so a single quilt becomes a whole autumn woodland — one leaf in burnt orange, its neighbor in gold, another in deep wine — and the more variety you allow, the more alive the quilt looks. After a summer of restrained palettes, there’s real joy in reaching for every warm color at once.
The construction speaks to me too. Coming from generations of hand-stitching in my family, I was raised around the Nakshi Kantha tradition, where old cloth is layered and held together with patient rows of running stitch. A scrappy maple leaf quilt follows the same honest logic — small pieces of fabric, gathered and joined, becoming something warm and whole. Different continent, same instinct: make beauty from what you have.
Why This Idea Is Worth Making
This idea is worth making because it teaches the two foundational skills of patchwork — half-square triangles and simple appliqué — inside a block that’s genuinely beautiful. The leaf reads as intricate but is built from basic squares and triangles, so it’s an ideal confident-beginner project. It’s also endlessly forgiving: because scrappy leaves are the tradition, mismatched fabrics are a feature rather than a flaw. And the finished quilt delivers the most recognizable autumn statement in quilting, warming a bedroom the moment it’s laid across the bed.
Finished Size
- Finished quilt: 60 × 72 inches — a generous throw or twin bed topper
- Finished block: 12 inches square (12½ inches unfinished)
- Layout: 5 blocks across × 6 blocks down = 30 maple leaf blocks
- Skill level: confident beginner
- Core techniques: half-square triangles, four-patch block assembly, stem appliqué, straight-line quilting, binding
Materials Needed
- Leaf fabrics: 30 fat quarters, or scraps — one per leaf, in rust, burnt orange, gold, mustard, deep burgundy, and warm brown (about ⅓ yard per leaf if buying yardage)
- Background fabric: 3½ yards of cream, oatmeal, or warm ivory
- Stem fabric: ¼ yard of dark brown
- Backing: 4 yards (or wide backing)
- Batting: at least 66 × 78 inches (cotton, or wool for extra autumn warmth)
- Binding: ⅝ yard, in a deep rust or burgundy
- Thread: neutral for piecing, and a warm tone for quilting
- Fusible web (for easy stem appliqué), rotary cutter, cutting mat, quilting ruler, pins, iron, sewing machine
Beginner tip: use a consistent ¼-inch seam allowance throughout. It’s the single most important habit in patchwork — everything in the block math depends on it.
Choosing Your Colors
The maple leaf shines when the palette is warm and varied. Aim for six or so fabrics that share a season rather than a shade:
- Burnt orange and pumpkin for the classic fall leaf
- Golden mustard and amber for sunlit foliage
- Deep burgundy and wine for the richest, latest-turning leaves
- Warm rust and brick as the anchor tones
- Cinnamon brown for depth
- All set against a cream or oatmeal background, so every leaf glows
For maximum rustic charm, don’t coordinate too carefully — a scrappy mix of prints, plaids, and solids looks the most authentic.
The Block: A 12-Inch Maple Leaf
Each 12-inch block is a 3 × 3 grid of nine 4-inch finished units (4½ inches unfinished):
- Three plain leaf squares
- Four half-square triangle units (leaf + background)
- One plain background square
- One background square with the diagonal stem appliquéd across it
Cutting Measurements
Per block (repeat for all 30):
- Leaf fabric: three squares at 4½ × 4½ inches (plain leaf units)
- Leaf fabric: two squares at 5 × 5 inches (for half-square triangles)
- Background: two squares at 5 × 5 inches (for half-square triangles)
- Background: two squares at 4½ × 4½ inches (one plain, one for the stem)
- Stem: one strip about 1 × 6 inches of dark brown
For the quilt:
- Sashing (optional): 2½-inch strips between blocks, if you want the leaves to float
- Backing: 66 × 78 inches
- Batting: 66 × 78 inches
- Binding: seven strips, 2½ inches × width of fabric
Step-by-Step Guide
Step 1 — Cut all your pieces. Working block by block, cut the three 4½-inch leaf squares, two 5-inch leaf squares, two 5-inch background squares, two 4½-inch background squares, and the stem strip. Keeping each block’s pieces in their own stack saves confusion later.
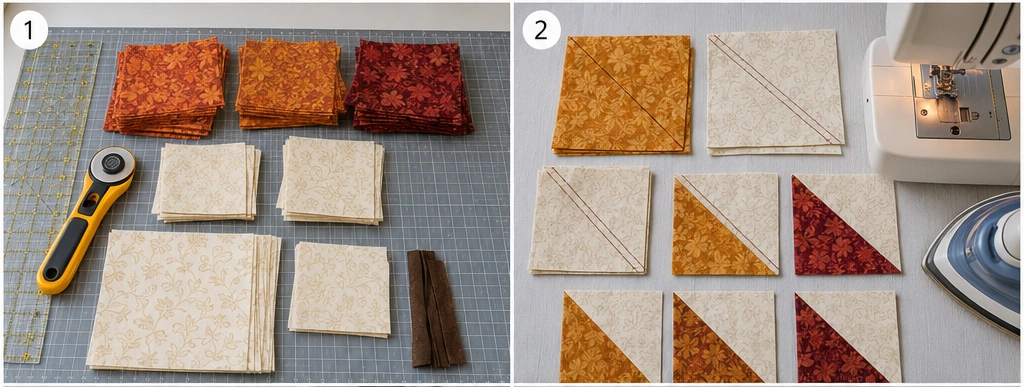
Step 2 — Make the half-square triangles. Pair each 5-inch leaf square with a 5-inch background square, right sides together. Draw a diagonal line from corner to corner on the lighter square, sew ¼ inch on both sides of that line, then cut along the drawn line. Press open and trim each unit to exactly 4½ × 4½ inches. Each pair yields two units; two pairs give you the four HSTs each block needs.
Step 3 — Appliqué the stem. Fold the raw edges of the stem strip under (or back it with fusible web) to make a finished strip about ½ inch wide. Position it diagonally across one 4½-inch background square, from corner toward center. Fuse or pin, then stitch down both long edges.
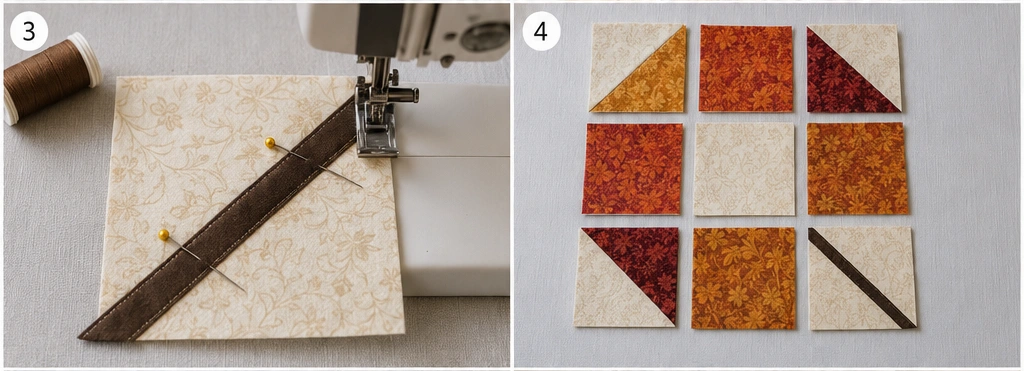
Step 4 — Lay out the block. Arrange the nine units in a 3 × 3 grid: the plain background square in one corner, the stem square in the opposite corner, the three plain leaf squares filling the leaf body, and the four HSTs positioned so their triangle points shape the leaf’s outer edges. Check the orientation before sewing — HST direction is where most mistakes happen.
Step 5 — Sew the block together. Sew the units into three rows using a ¼-inch seam, pressing the seams of adjacent rows in opposite directions so they nest. Then sew the three rows together. Your block should measure exactly 12½ × 12½ inches unfinished. Repeat for all 30 blocks.
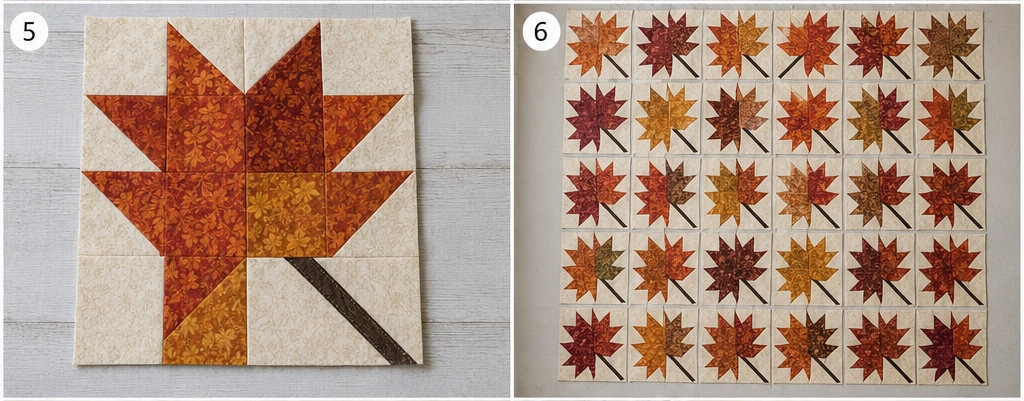
Step 6 — Assemble the quilt top. Lay the blocks out 5 across × 6 down, rotating leaves in different directions for a scattered, natural look. Sew the blocks into rows, press, then join the rows. The finished top measures about 60½ × 72½ inches.
Step 7 — Layer and baste. Lay the backing wrong side up, center the batting, then the quilt top right side up. Smooth from the center outward and baste with pins or thread.
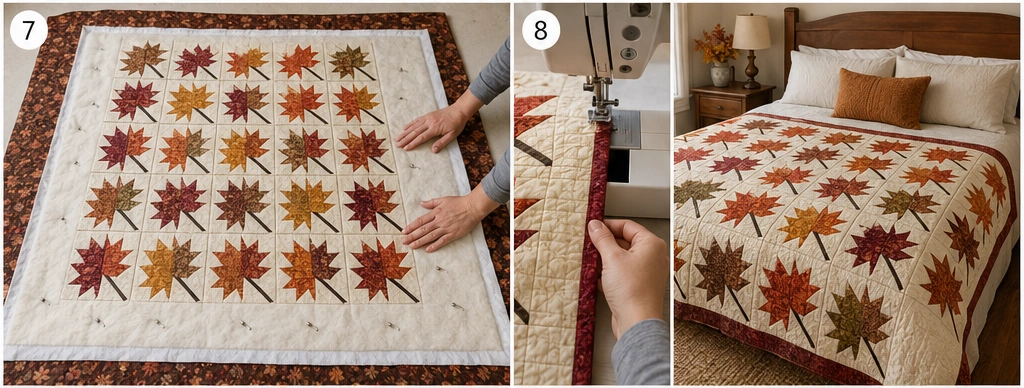
Step 8 — Quilt it. Straight-line quilting suits this block beautifully — stitch in the ditch around each leaf, or quilt an all-over diagonal grid. For a rustic touch, hand-quilt with a heavier thread using a simple running stitch.
Step 9 — Trim, bind, and wash. Trim to 60 × 72 inches, square the corners, and bind with the 2½-inch strips in rust or burgundy. Wash gently in cold water with a color catcher (deep reds can bleed), and tumble dry low for that soft, crinkled, rustic finish.
Assembly at a Glance
- Cut all pieces, stacked by block.
- Make four 4½-inch half-square triangles per block.
- Appliqué the diagonal stem onto one of the background squares.
- Lay out the nine units in a 3 × 3 grid, checking HST direction.
- Sew into three rows, press opposite, join rows → 12½-inch block.
- Repeat for 30 blocks; arrange 5 × 6, rotating leaves.
- Sew blocks into rows, then join rows → 60½ × 72½ inch top.
- Layer backing, batting, and top; baste well.
- Quilt, trim to 60 × 72 inches, bind, and wash.
Beginner Tips for Success
- Hold a scant ¼-inch seam throughout — the whole block math depends on it.
- Cut HST squares at 5 inches and trim down to 4½ inches; that half-inch of insurance guarantees crisp points.
- Press seams in opposite directions row to row so they nest, and your points meet cleanly.
- Lay each block out fully before sewing — reversed HSTs are the classic maple leaf mistake.
- Use a color catcher in the first wash; rich autumn reds and burgundies love to bleed.
Styling It
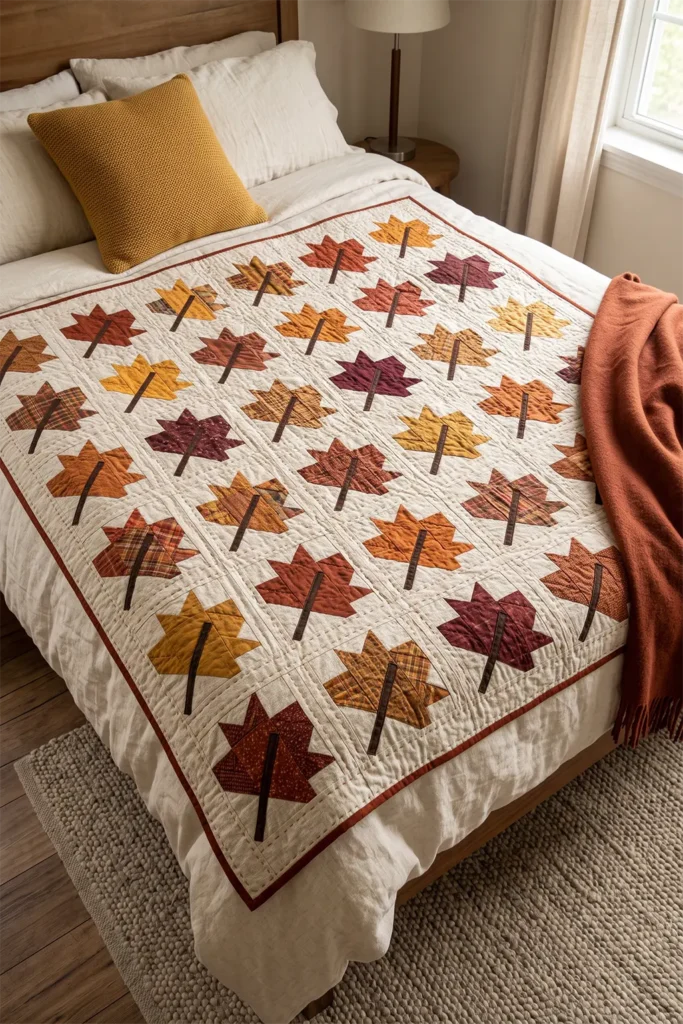
Spread the finished quilt across a bed dressed in cream or oatmeal linen so the leaves read clearly against the calm bedding. Echo one or two of the leaf colors — a rust throw, a mustard cushion — and keep the rest of the room warm and simple: wood tones, a wool rug, soft lamplight. The scrappy variety of the leaves does all the decorative work, so let everything around it stay quiet.
Final Thoughts
A rustic maple leaf quilt is autumn made tangible. Built from the humble half-square triangle and a single appliquéd stem, it turns scraps of rust, gold, and burgundy into a scattered woodland across your bed — the same scrappy, resourceful spirit that shaped the nineteenth-century Autumn Leaf blocks it descends from. It’s warm to sleep under, welcoming to look at, and the most unmistakable way to bring the season indoors.
Other Design Inspirations – Digitally Modified
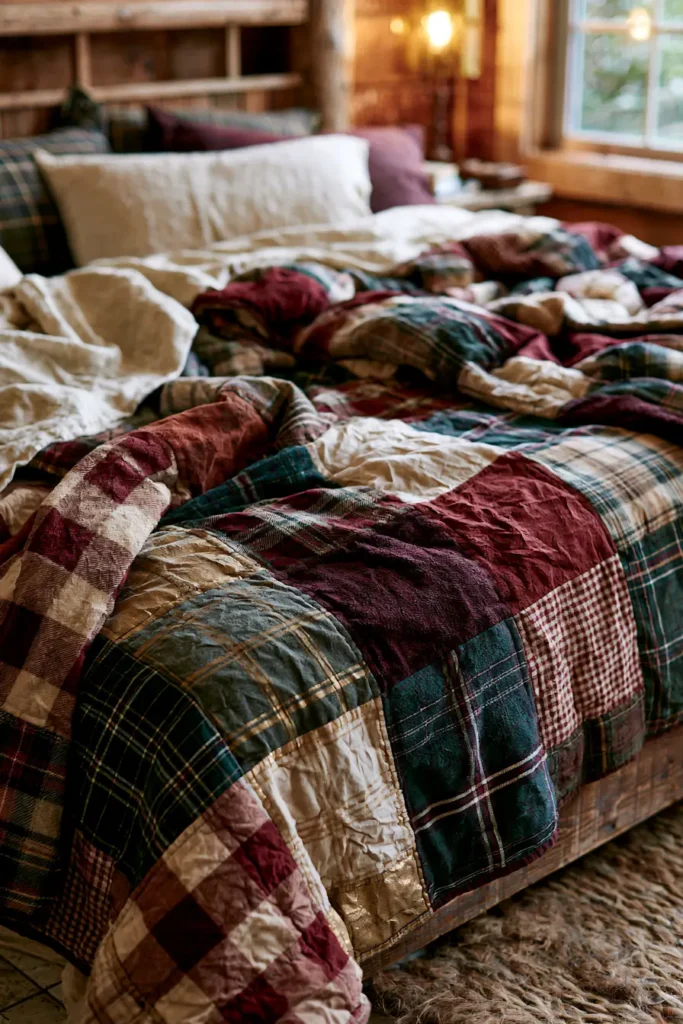
2. Cozy Plaid and Flannel Fall Quilts for Chilly Nights
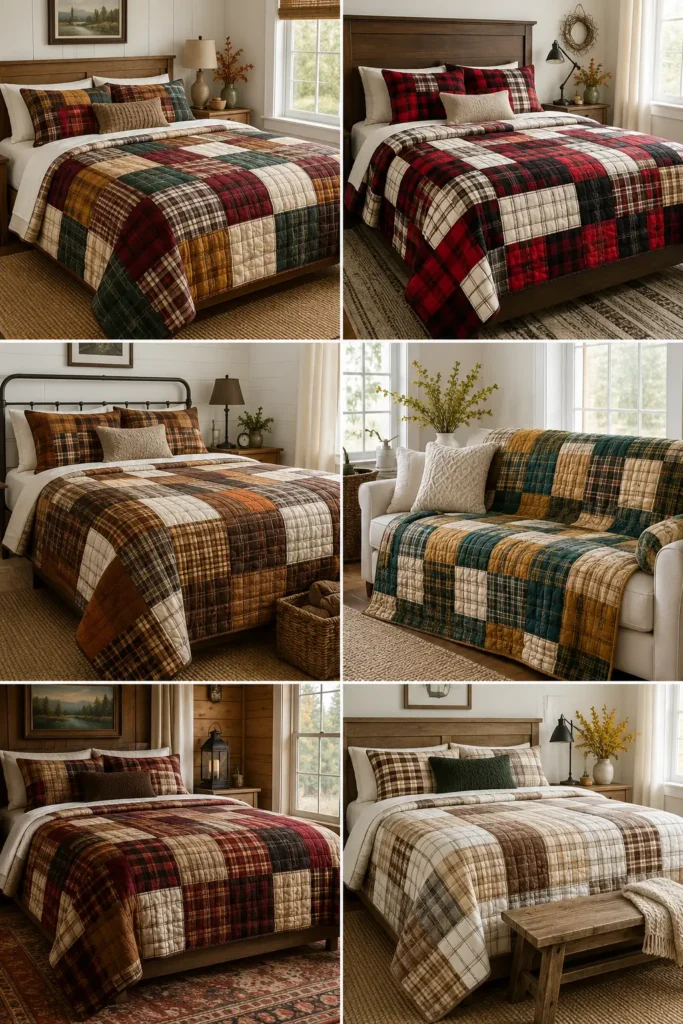
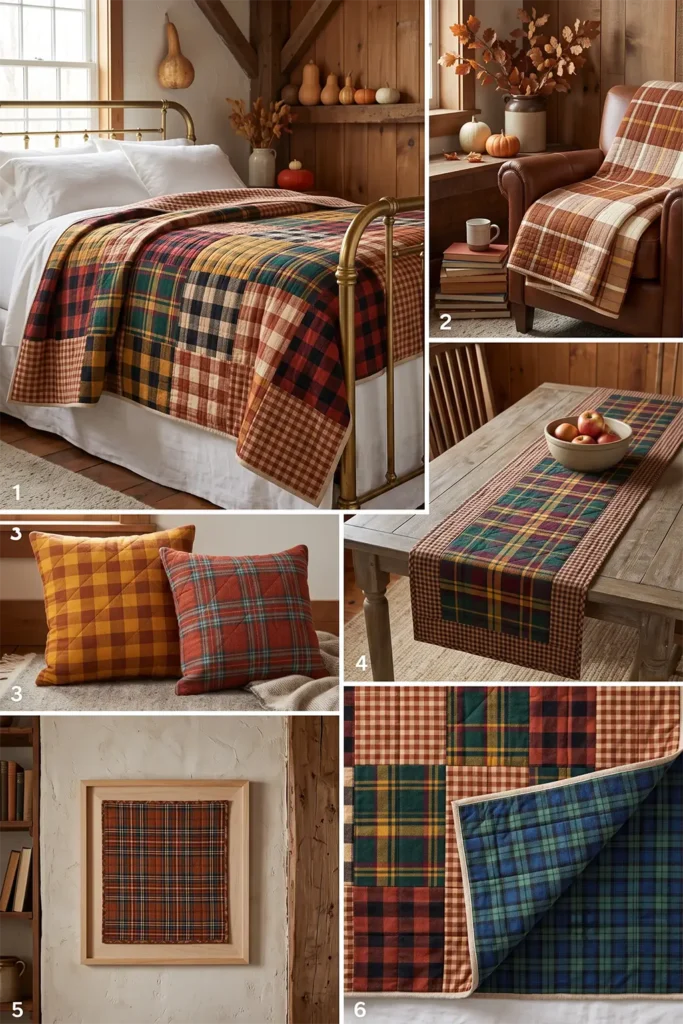
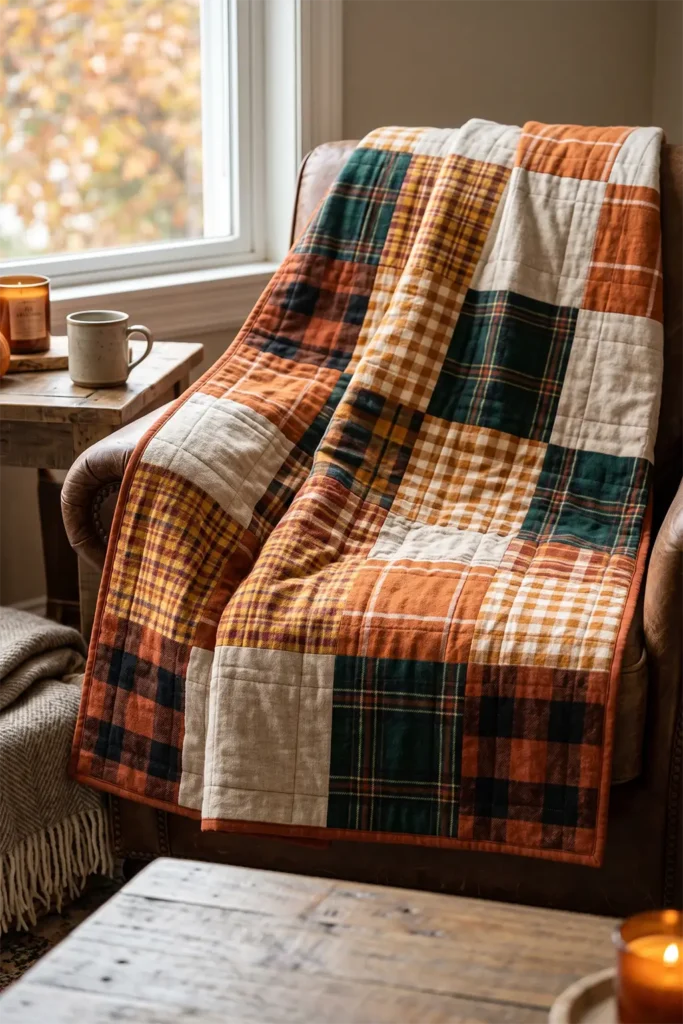
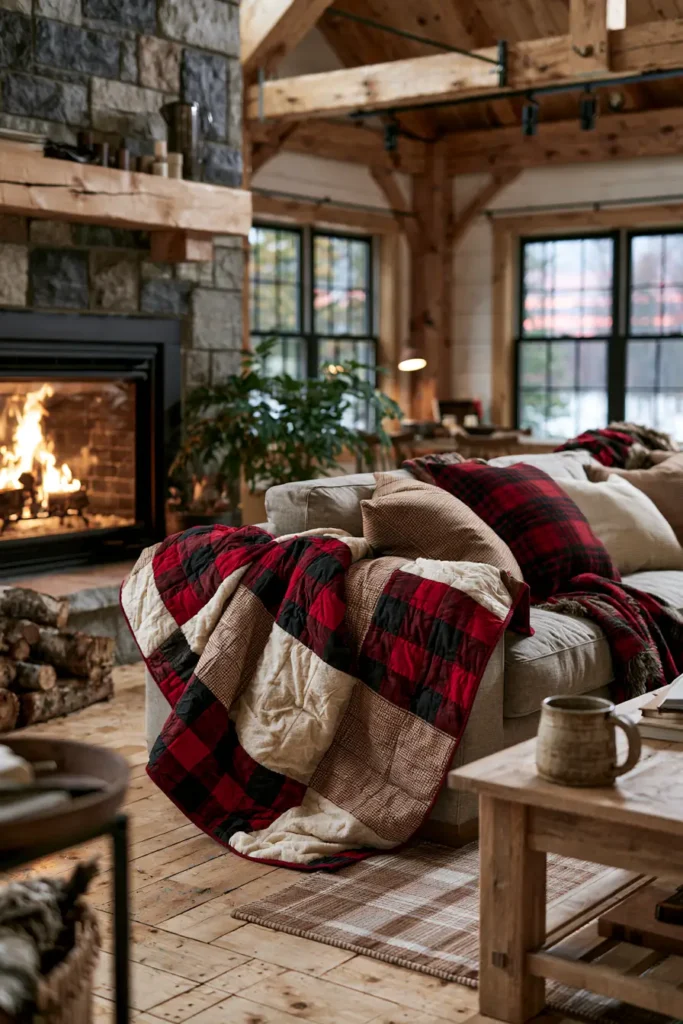
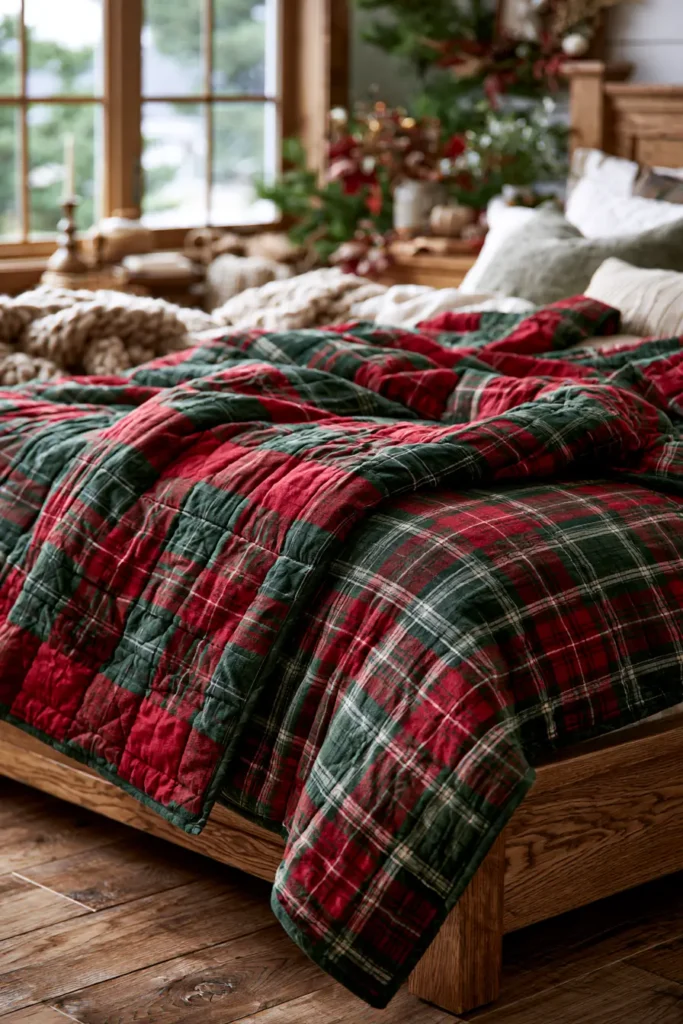
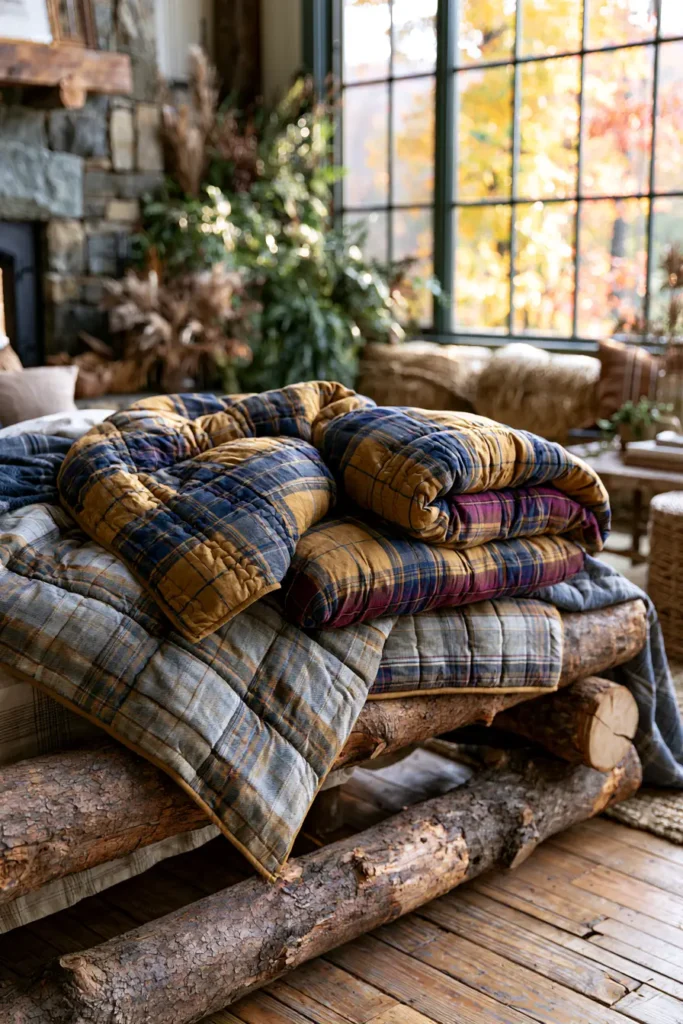
When the nights turn genuinely cold, no quilt beats flannel. Where most fall quilts bring autumn’s look, a plaid flannel quilt brings its warmth — brushed cotton with a soft, napped surface that traps air and feels immediately cozy against the skin. Pair that texture with the timeless charm of plaid, and you get the quintessential chilly-night quilt: warm buffalo checks, rich tartans, and rustic ginghams in rust, forest green, gold, and deep burgundy, pieced into something you’ll want wrapped around you all season.
The beauty of a plaid flannel quilt is that the fabric does most of the design work. Plaid is already a pattern, so the smartest construction is the simplest — big, generous squares that let each check breathe. Fussy little piecing fights flannel and hides the plaid; large blocks show it off and come together fast.
Why I Made It
I made this because it’s the quilt you reach for, not the one you admire from across the room. There’s a specific pleasure in a flannel quilt on a cold night — that instant, enveloping warmth the moment it settles over you. After making quilts that are primarily beautiful, it’s deeply satisfying to make one that’s primarily warm and lets its beauty come from the honest texture of the cloth.
I’m drawn to how unfussy it is, too. Coming from generations of hand-stitching in my family, raised around the Nakshi Kantha tradition of layering worn cloth into something warm and whole, I’ve always believed the best textiles are the practical ones. A flannel quilt is that idea in its purest form: soft, sturdy, made to be used hard on the coldest nights, and better-looking for the wear.
Why This Idea Is Worth Making
This idea is worth making because it delivers maximum coziness for minimum piecing. Large plaid squares mean fewer seams, faster assembly, and a beginner-friendly build — you can finish a top in a weekend. Flannel’s brushed nap makes it genuinely warmer than a standard cotton quilt, so this is the one that earns its place through the coldest months. And because plaid is inherently rustic and rich, the quilt looks like a designer piece with almost no design effort. It’s the warmest, easiest, most-used quilt you’ll make this fall.
Finished Size
- Finished quilt: 64 × 80 inches — a generous throw or twin bed quilt
- Finished block: 8 inches square (8½ inches unfinished)
- Layout: 8 blocks across × 10 blocks down = 80 squares
- Skill level: beginner (simple squares, but flannel needs care)
- Core techniques: large-square patchwork, flannel handling, straight-line quilting, binding
Materials Needed
- Flannel plaids: about 4 yards total across 6–8 different plaids (buffalo check, tartan, gingham, windowpane) in your fall palette — roughly ½ yard of each
- Backing: 4¾ yards of flannel (for a double-flannel quilt) or cotton (for a lighter finish)
- Batting: at least 70 × 86 inches — use a low-loft cotton batting, since flannel is already warm and bulky
- Binding: ⅝ yard of a solid or small-scale plaid flannel, or a sturdy quilting cotton
- Thread: a good-quality cotton thread, plus a 90/14 needle (flannel is thick)
- Spray starch or sizing — the single most useful tool for taming flannel
- Walking foot, rotary cutter (fresh blade), cutting mat, quilting ruler, pins, iron
Beginner tip: buy about 20% extra flannel. It shrinks significantly — often 3 to 5 percent — and you must prewash it before cutting.
Working With Flannel: What to Know First
Flannel isn’t quilting cotton, and treating it like quilting cotton is where most projects go wrong. Four rules:
- Prewash and dry it, twice if you can. Flannel shrinks hard and unevenly. Prewashing before cutting means your finished quilt won’t distort in its first wash.
- Starch it before cutting. A good spray starch turns floppy flannel into something that behaves like crisp cotton — accurate cuts, stable seams, no stretching.
- Use a slightly wider seam. A generous ¼-inch seam (or a scant ⅜) holds better in flannel, which frays more than quilting cotton.
- Use a walking foot. Flannel’s nap grips itself and shifts under a regular presser foot; a walking foot feeds both layers evenly.
Expect lint — clean your machine’s bobbin area as you go.
Choosing Your Colors
Plaid is at its best when the checks share a palette but differ in scale. Mix six to eight plaids across these families:
- Buffalo check in black-and-red, or rust-and-cream
- Rich tartan in forest green, burgundy, and gold
- Warm gingham in pumpkin or mustard
- Windowpane check in cinnamon brown
- Small-scale plaid in amber or brick
- A solid or near-solid flannel in cream or oatmeal, to give the eye a rest
Vary the check size — a big buffalo check beside a fine gingham creates rhythm. Keep everything in the warm autumn family and the scrappy mix will read as intentional.
The Block: Simple, Generous Squares
There’s no pieced motif here; the plaid is the pattern:
- Each block is a single 8½-inch cut square (8 inches finished)
- Cut 80 squares total, roughly 10 from each of your 8 plaids
- Arrange them randomly so no two identical plaids touch
- Cut on the straight grain, following a line in the plaid where possible — this keeps the checks running true and prevents wavy blocks
Cutting Measurements
- Blocks: eighty squares at 8½ × 8½ inches
- Backing: 70 × 86 inches (piece widths together, pressing the seam open)
- Batting: 70 × 86 inches
- Binding: eight strips, 2½ inches × width of fabric, joined into one strip
Step-by-Step Guide
Step 1 — Prewash and starch. Wash and dry all flannel before you cut a thing, then press with spray starch until the fabric feels crisp. Do not skip this — it’s the difference between a flat quilt and a wavy one.
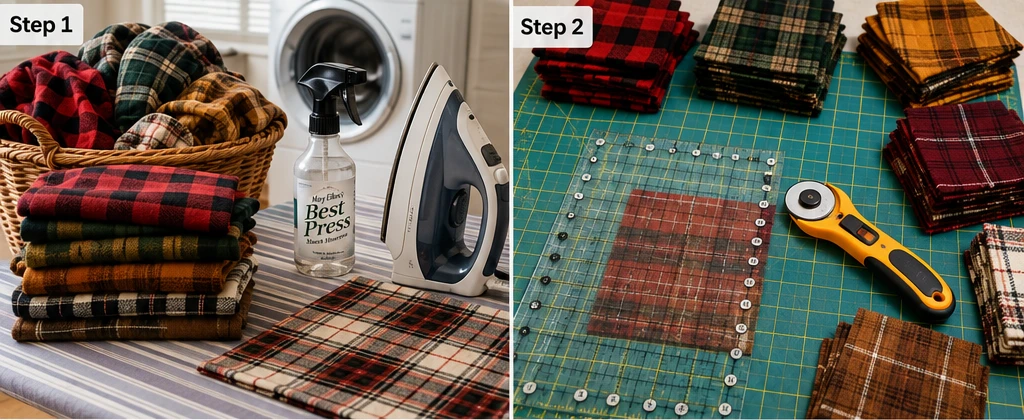
Step 2 — Cut the squares. With a fresh rotary blade, cut eighty 8½-inch squares, following the plaid’s straight grain so the checks stay square. Stack them by fabric.
Step 3 — Lay out the top. Arrange the squares 8 across × 10 down, mixing plaids so no two of the same fabric sit side by side. Step back and photograph the layout on your phone — it’s the easiest way to spot clumps of color.
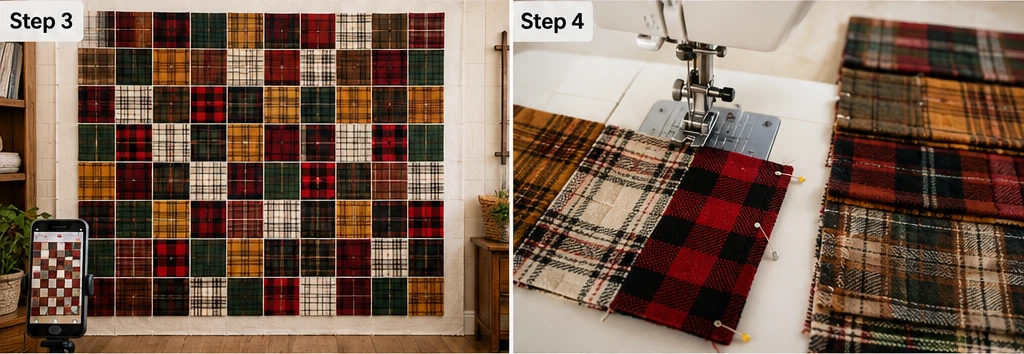
Step 4 — Sew the rows. With a walking foot and a generous ¼-inch seam, sew each row of eight squares. Pin more than you think you need; flannel shifts. Press seams in opposite directions row to row so they nest.
Step 5 — Join the rows. Sew the ten rows together, matching seams carefully. Press well. The finished top should measure about 64½ × 80½ inches.
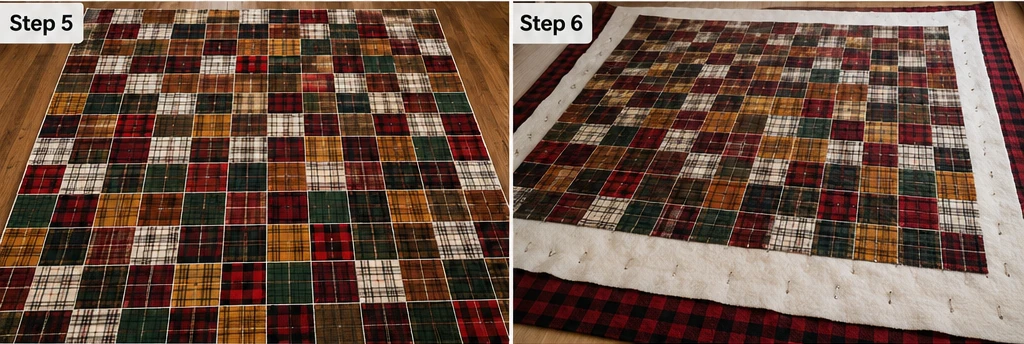
Step 6 — Layer and baste. Lay the backing wrong side up, center the low-loft batting, then the top right side up. Smooth from the center outward and baste generously — a heavy flannel top shifts more than cotton.
Step 7 — Quilt it. Keep it simple: quilt in the ditch along the seam lines, or stitch an all-over grid. Flannel is thick, so avoid dense quilting, which stiffens the quilt and defeats the purpose. A 9-inch grid is plenty.
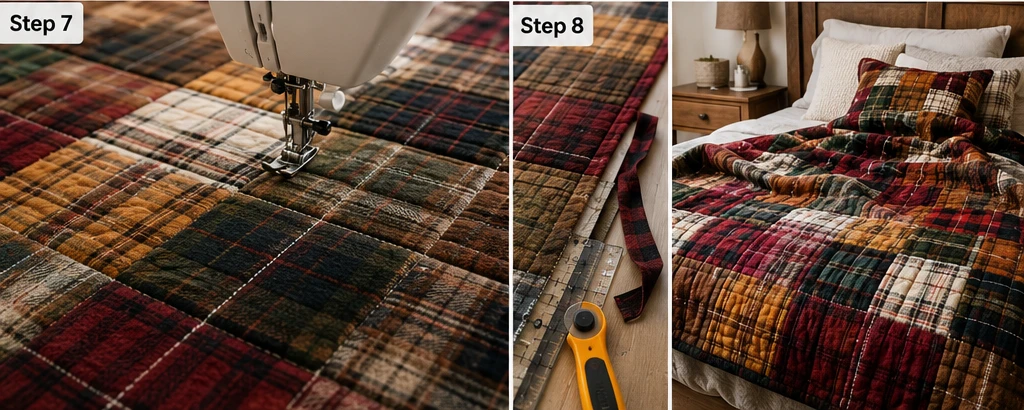
Step 8 — Trim and bind. Trim to 64 × 80 inches and square the corners. Bind with the 2½-inch strips — a sturdy quilting-cotton binding wears better on a flannel quilt than a flannel one.
Step 9 — Wash and enjoy the crinkle. Wash gently in cold with a color catcher (plaid reds bleed), and tumble dry low. The flannel will soften and crinkle beautifully — that lived-in texture is the whole reward.
Assembly at a Glance
- Prewash, dry, and starch all flannel.
- Cut eighty 8½-inch squares on the straight grain.
- Lay out 8 across × 10 down, mixing plaids.
- Sew rows with a walking foot and generous ¼-inch seams.
- Press rows in opposite directions; join rows → 64½ × 80½ inch top.
- Layer backing, low-loft batting, and top; baste generously.
- Quilt simply — in the ditch or a wide grid.
- Trim to 64 × 80 inches; bind with sturdy cotton binding.
- Wash cold with a color catcher; tumble low for the crinkle.
Beginner Tips for Success
- Prewash flannel, always. Unwashed flannel will shrink your finished quilt into a wavy mess.
- Starch before cutting — it makes floppy flannel cut-and-sew like crisp cotton.
- Use a walking foot and plenty of pins; flannel’s nap grips and shifts.
- Choose low-loft batting; flannel supplies its own bulk and warmth.
- Don’t over-quilt. Dense stitching makes a flannel quilt stiff instead of snuggly.
- Clean lint from your machine as you sew — flannel sheds constantly.
Styling It
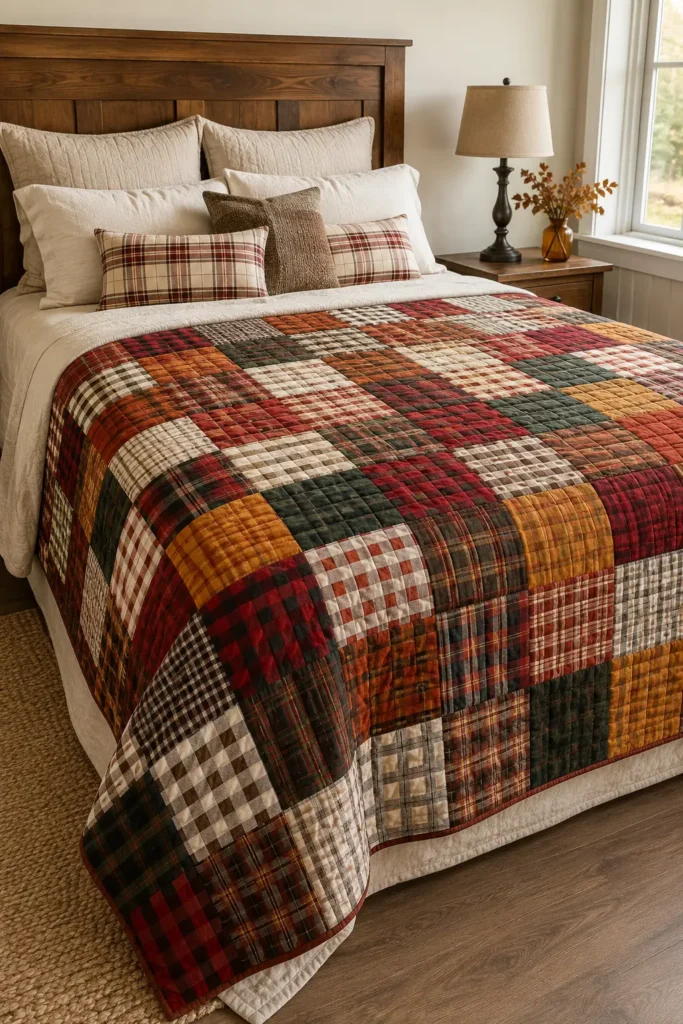
Drape the quilt over a bed in cream or oatmeal bedding so the plaids read clearly, or fold it across the arm of a sofa for chilly evenings. Echo one plaid color in a cushion or wool throw, and keep everything else textural and warm — wood, wool, stoneware, a low lamp. Because plaid is inherently rustic, this quilt looks best in rooms that already feel lived-in rather than styled.
Final Thoughts
A cozy plaid flannel quilt is the most honest quilt you can make for autumn. Its beauty comes from the cloth itself — the soft brushed nap, the warm checks, the crinkle that arrives with the first wash — and its purpose is simply to keep you warm on cold nights. Handle the flannel well, keep the piecing generous and simple, and you’ll end up with the quilt that never quite makes it back to the linen closet all season.
Other Design Inspirations – Digitally Modified
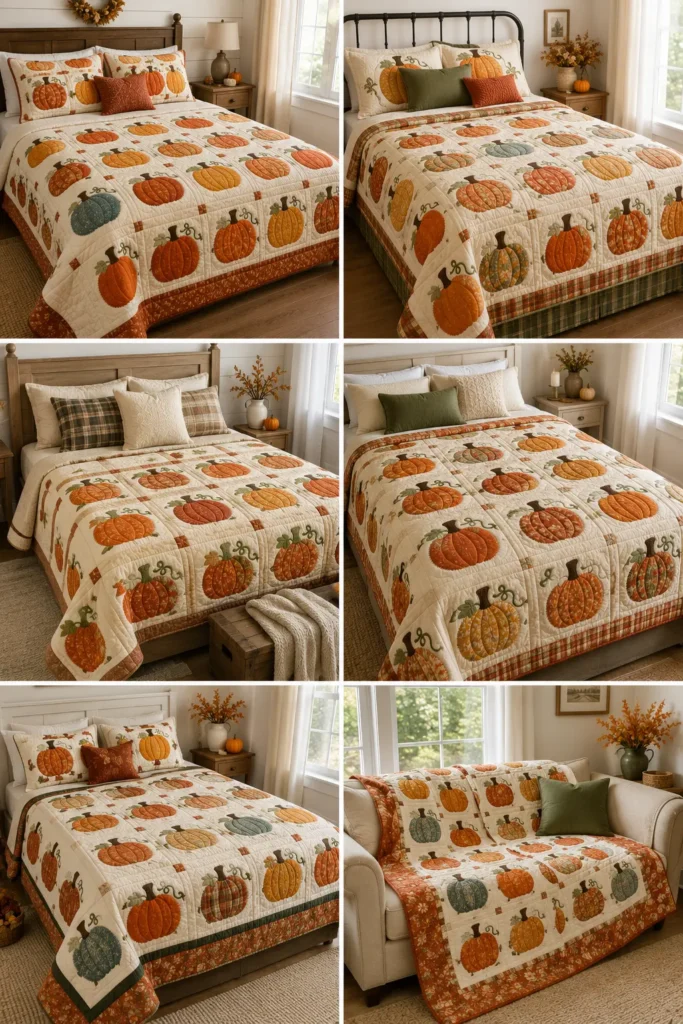
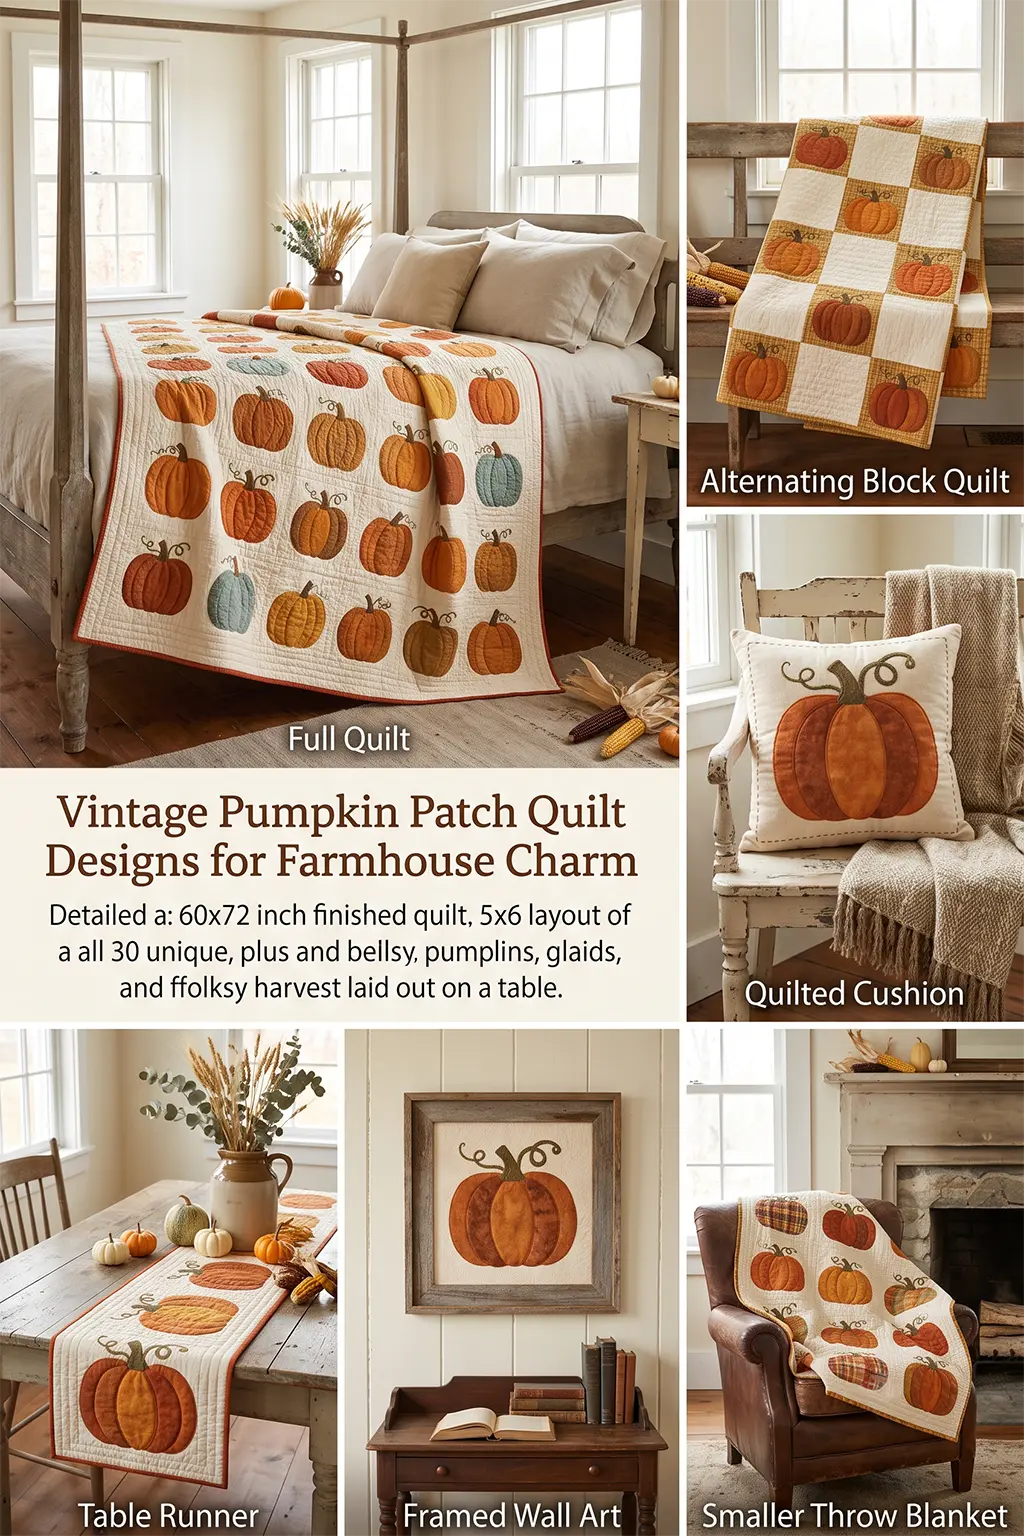
3. Vintage Pumpkin Patch Quilt Designs for Farmhouse Charm
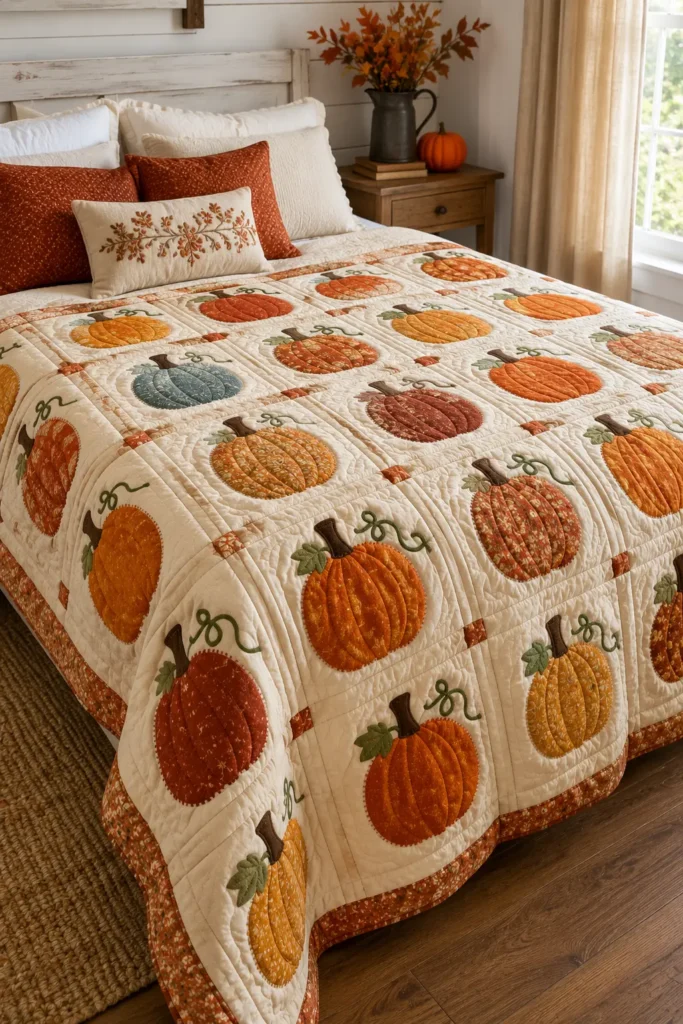
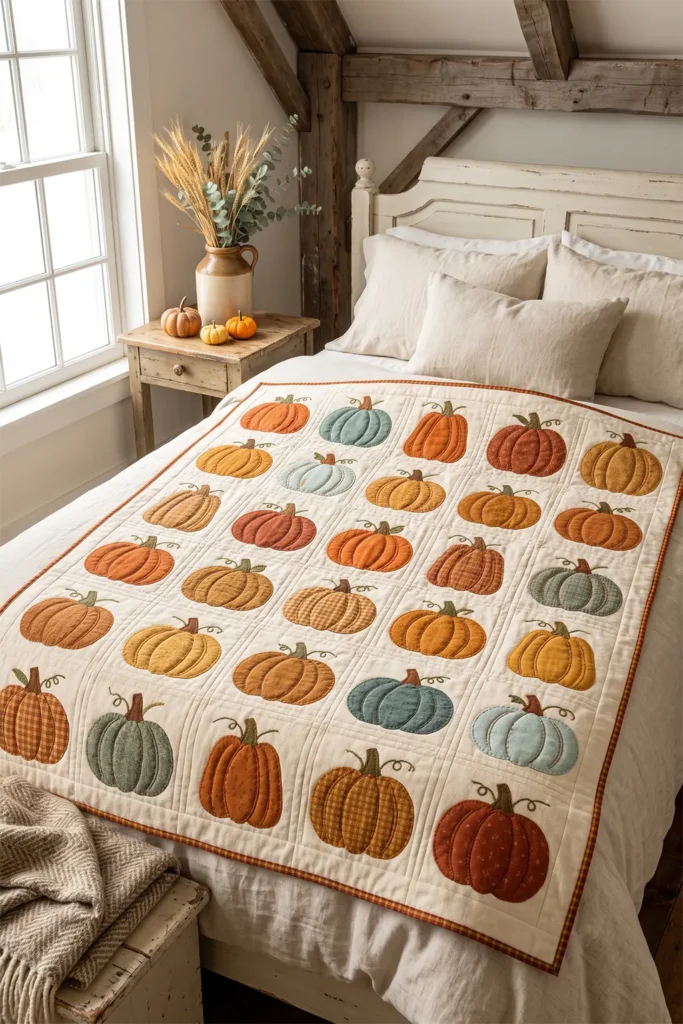
Nothing captures autumn’s cozy, homespun spirit like a pumpkin patch quilt. Instead of pieced geometry, this design uses appliqué — plump pumpkin shapes stitched onto plain background blocks — which gives it a soft, folksy, unmistakably farmhouse look. Rows of pumpkins in pumpkin orange, warm rust, golden amber, and even a few heirloom blues sit against a cream or oatmeal background like a harvest laid out on a table. It’s charming rather than formal, the kind of quilt that makes a bedroom feel like a farmhouse in October no matter where you actually live.
Appliqué has a rich history in American quilting, from the elaborate Baltimore album quilts of the 1840s to the simple folk-art motifs stitched onto everyday bedding. Pumpkins belong squarely in that folk tradition — humble, seasonal, and full of character. And because appliqué lets you draw with fabric, no two pumpkins on your quilt need to be quite alike, which is exactly what gives a vintage pumpkin patch its handmade warmth.
Why I Made It
I made this because appliqué is where a quilt gets to have personality. Pieced blocks are precise and architectural; appliqué is loose and expressive — a slightly lopsided pumpkin, a jaunty curl of vine, a stem that leans. That imperfection is the charm, and it’s a wonderful antidote to the exactness of patchwork. A pumpkin patch quilt feels less engineered and more drawn, like a page from a harvest sketchbook.
I also love how it connects to older ways of making. Coming from generations of hand-stitching in my family, raised around the Nakshi Kantha tradition — where motifs are stitched freely onto layered cloth, telling little stories in thread — appliqué feels deeply familiar. Both are about decorating cloth by hand with shapes that mean something, and both reward a relaxed, personal touch over mechanical precision.
Why This Idea Is Worth Making
This idea is worth making because appliqué opens up a whole vocabulary of shapes that piecing can’t easily make — curves, stems, and soft organic forms — and the pumpkin is the friendliest place to start. With fusible web, it’s genuinely beginner-accessible: no tricky points to match, no exact seams, just iron down a shape and stitch around it. The result is a warm, characterful, thoroughly farmhouse quilt, and the skills you learn transfer to any appliqué motif — leaves, apples, flowers — you want to make next.
Finished Size
- Finished quilt: 60 × 72 inches — a throw or twin bed topper
- Finished block: 12 inches square (12½ inches unfinished)
- Layout: 5 blocks across × 6 blocks down = 30 blocks (20 pumpkin blocks + 10 plain, or all 30 pumpkins for a fuller patch)
- Skill level: confident beginner
- Core techniques: fusible or needle-turn appliqué, block assembly, straight-line quilting, binding
Materials Needed
- Pumpkin fabrics: ¼ yard each of 6–8 oranges, rusts, ambers, golds, and a couple of heirloom blue-greens — scraps and fat quarters are ideal
- Stem fabric: ¼ yard of dark brown or warm green
- Vine/leaf fabric (optional): ⅛ yard of warm green
- Background fabric: 3¾ yards of cream, oatmeal, or warm ivory
- Backing: 4 yards
- Batting: at least 66 × 78 inches
- Fusible web (paper-backed, like a lightweight fusible) — about 3 yards
- Binding: ⅝ yard in rust, gold, or a small plaid
- Thread: matching or contrasting for appliqué (a warm gold or brown outlines pumpkins nicely)
- Rotary cutter, cutting mat, quilting ruler, sharp appliqué scissors, pins, iron, sewing machine
Beginner tip: choose fusible appliqué for your first pumpkin patch. It fuses shapes in place with an iron so nothing shifts while you stitch — far easier than pinning curves.
Two Ways to Appliqué
Both work beautifully; pick the one that suits your patience:
- Fusible appliqué (easy, fast): trace the shape onto paper-backed fusible web, iron it to the back of your fabric, cut it out, peel the paper, iron it onto the block, then finish the edges with a machine stitch (satin, blanket, or a small zigzag). Best for beginners.
- Needle-turn appliqué (traditional, heirloom): cut the shape with a scant ¼-inch turn-under allowance, then hand-stitch it down while tucking the raw edge under with your needle as you go. Slower, softer, and the most vintage finish.
Choosing Your Colors
A pumpkin patch is the place to be generous and varied — real pumpkins are never one orange:
- Classic pumpkin orange and pumpkin spice for the anchor pumpkins
- Warm rust and brick for depth
- Golden amber and mustard for sunlit gourds
- Heirloom blue-green and sage for the vintage Cinderella-pumpkin touch
- Cinnamon and warm brown for stems
- All against a cream or oatmeal background, so every pumpkin pops
Mixing prints, tone-on-tones, and a plaid or two makes the patch look collected over time — exactly the vintage feel you want.
The Block: A 12-Inch Appliquéd Pumpkin
Each block is a plain background square with one pumpkin appliquéd on:
- Background square: 12½ × 12½ inches (cut)
- Pumpkin body: roughly 7 inches wide × 6 inches tall, a slightly squashed oval — cut freehand or from a template
- Pumpkin ribs (optional): two narrow curved sections in a slightly different orange, layered over the body for dimension
- Stem: about 1½ × 2 inches, a small trapezoid or curved shape
- Leaf/vine (optional): a small leaf and a curl of vine at the stem
Vary the pumpkin shapes block to block — tall, round, squat — for that real-patch look.
Cutting Measurements
- Background blocks: thirty squares at 12½ × 12½ inches (or 20 if you’re alternating with plain blocks)
- Pumpkins, stems, leaves: cut per block using your templates and fusible web
- Backing: 66 × 78 inches
- Batting: 66 × 78 inches
- Binding: seven strips, 2½ inches × width of fabric
Step-by-Step Guide
Step 1 — Cut the background blocks. Cut thirty 12½-inch background squares (or twenty, if alternating with plain squares). Press them flat.
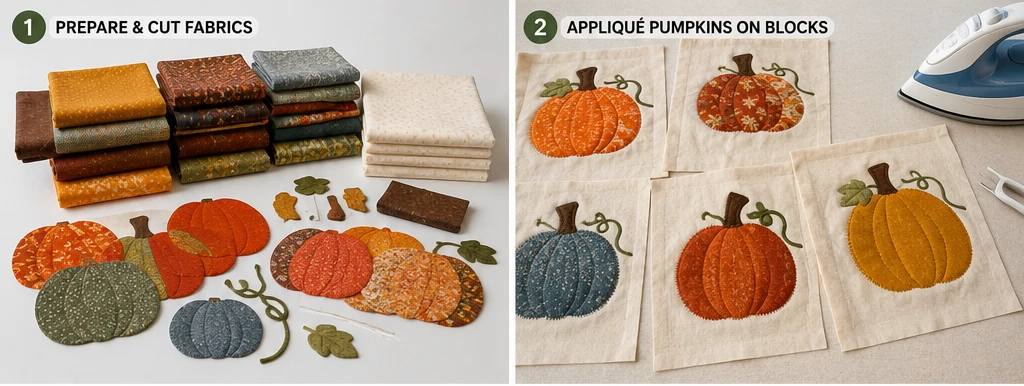
Step 2 — Prepare the pumpkin shapes. Trace pumpkin bodies, ribs, stems, and leaves onto the paper side of the fusible web, varying the shapes. Iron each onto the back of your chosen fabric and cut out precisely on the lines. (For needle-turn, cut with a scant ¼-inch allowance instead.)
Step 3 — Build each pumpkin. On a background square, peel the paper backing and position the pumpkin body, then layer the ribs, tuck the stem behind the top edge, and add a leaf and vine curl. Once you’re happy with the arrangement, fuse it all in place with a hot iron.
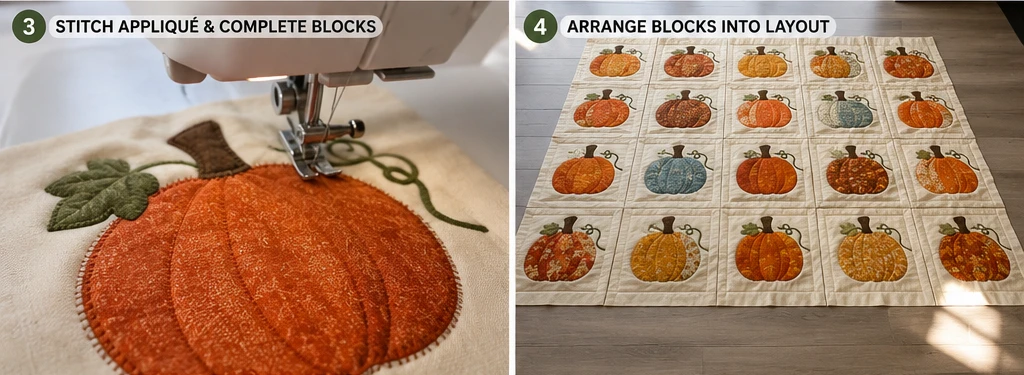
Step 4 — Stitch the appliqué. Finish every raw edge with your chosen stitch — a machine blanket stitch or small satin stitch for fusible, or a hidden hand stitch for needle-turn. Stitch the body first, then ribs, then stem and leaf, so layers sit correctly.
Step 5 — Add detail lines (optional). For extra dimension, stitch two or three curved vertical lines up the pumpkin body to suggest ribs, and a little curl on the vine. This small step is what makes a flat shape read as a plump pumpkin.
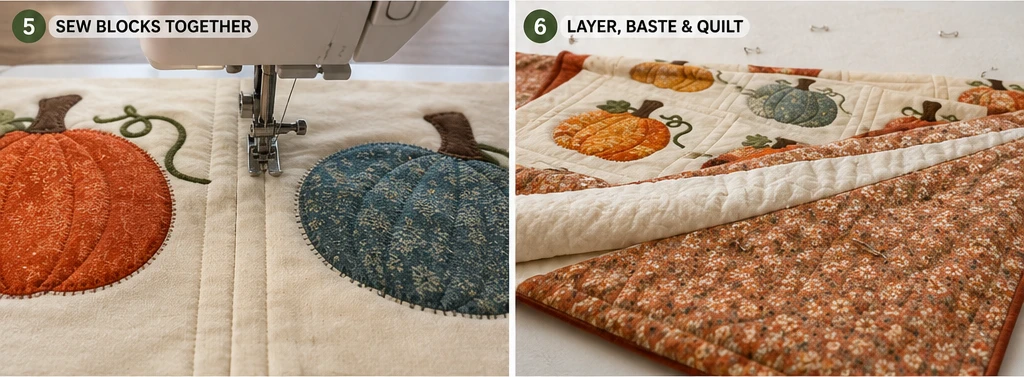
Step 6 — Lay out the quilt. Arrange your blocks 5 across × 6 down, mixing pumpkin colors and shapes (and alternating with plain blocks, if using) so the patch feels natural and scattered.
Step 7 — Assemble the top. Sew the blocks into rows with a ¼-inch seam, press seams in alternating directions, then join the rows. The finished top measures about 60½ × 72½ inches.
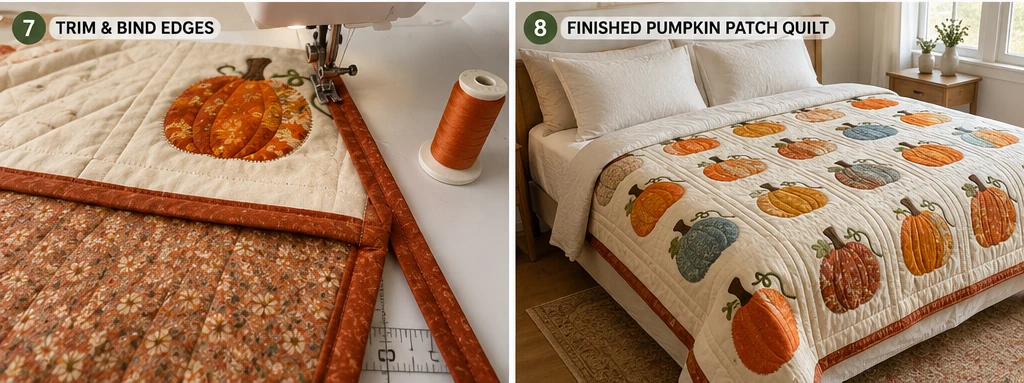
Step 8 — Layer and baste. Lay the backing wrong side up, center the batting, then the top right side up. Smooth from the center and baste with pins or thread.
Step 9 — Quilt, trim, and bind. Quilt around each pumpkin and add an all-over grid or gentle wavy lines in the background. Trim to 60 × 72 inches, bind with the 2½-inch strips, and wash gently with a color catcher.
Assembly at a Glance
- Cut thirty 12½-inch background squares.
- Trace and cut pumpkins, ribs, stems, and leaves (fusible web or needle-turn).
- Arrange and fuse each pumpkin onto a block.
- Stitch all appliqué edges; add rib and vine detail lines.
- Lay out blocks 5 × 6, mixing colors and shapes.
- Sew into rows, press alternating, join rows → 60½ × 72½ inch top.
- Layer backing, batting, and top; baste.
- Quilt around the pumpkins and background.
- Trim to 60 × 72 inches, bind, and wash with a color catcher.
Beginner Tips for Success
- Start with fusible appliqué — it holds curves in place so you can focus on stitching.
- Vary pumpkin shapes and colors; a patch of identical pumpkins looks stiff, not charming.
- Stitch layers in order (body, ribs, stem, leaf) so edges tuck correctly.
- Use a stabilizer behind the block if your machine’s blanket stitch puckers the background.
- Add curved rib lines — that single detail turns a flat oval into a real pumpkin.
Styling It
Lay the finished quilt across a bed dressed in cream or oatmeal linen, and lean into the farmhouse mood around it — a woven throw, a wooden bench, a stoneware jug of dried wheat or eucalyptus. Echo a pumpkin color in a cushion or two, and keep everything warm, natural, and a little rustic. The quilt’s folksy charm shines brightest in a room that feels gathered rather than polished.
Final Thoughts
A vintage pumpkin patch quilt is farmhouse charm you can wrap up in. Built through friendly, beginner-accessible appliqué, it turns scraps of orange, rust, and heirloom blue into a scattered harvest across your bed — carrying on the same folk-art tradition of decorating cloth with meaningful shapes that quilters have loved for generations. Loose, characterful, and warm, it’s the quilt that makes autumn feel like home.
Other Design Inspirations – Digitally Modified
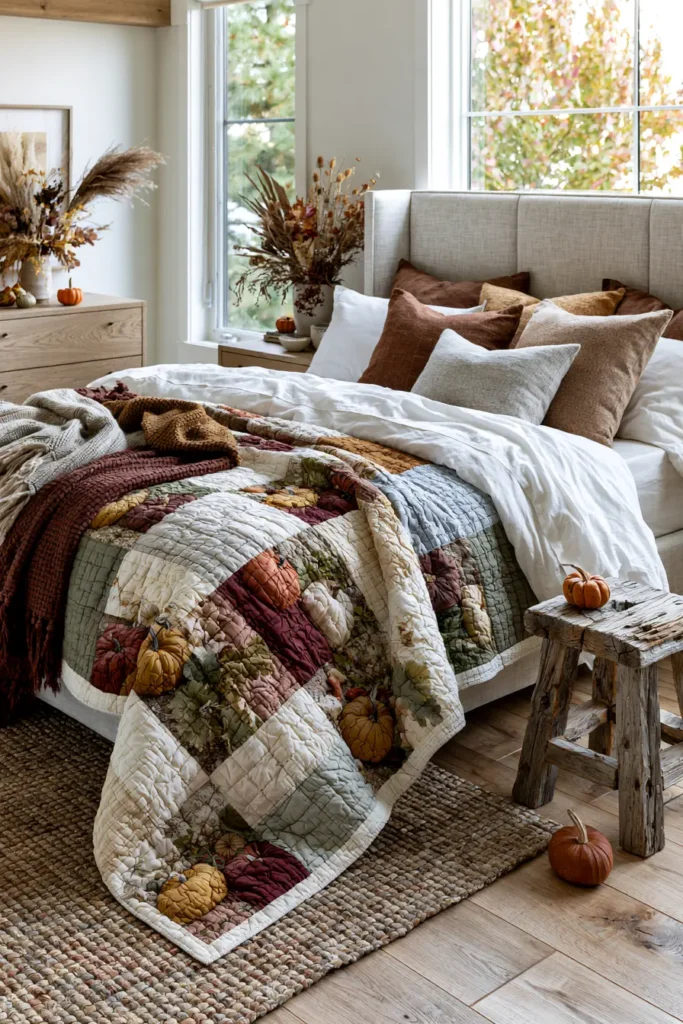
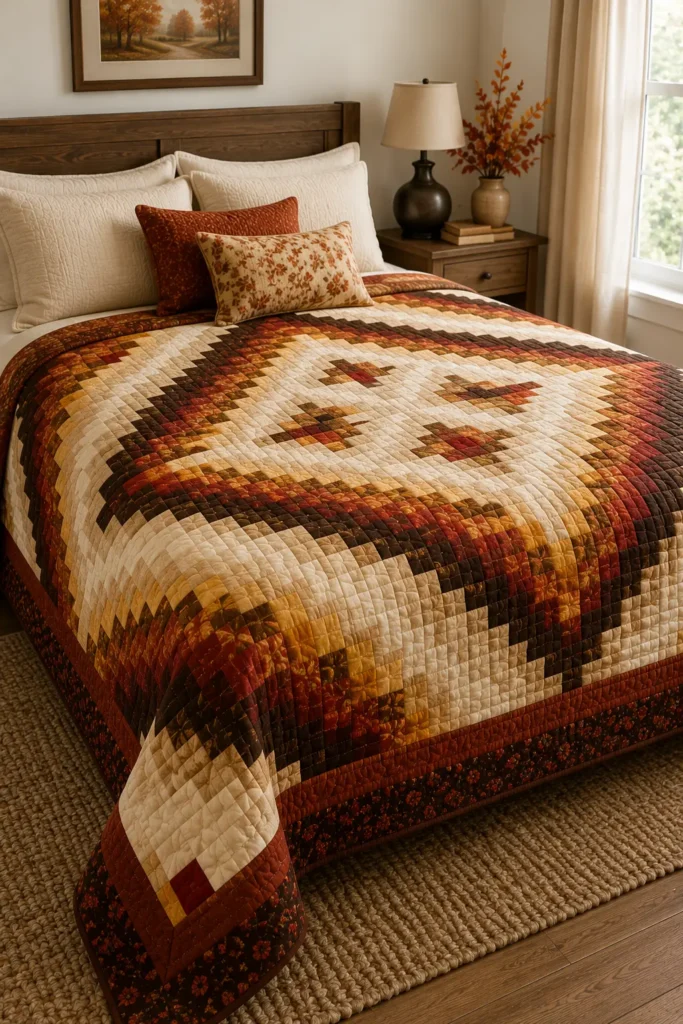
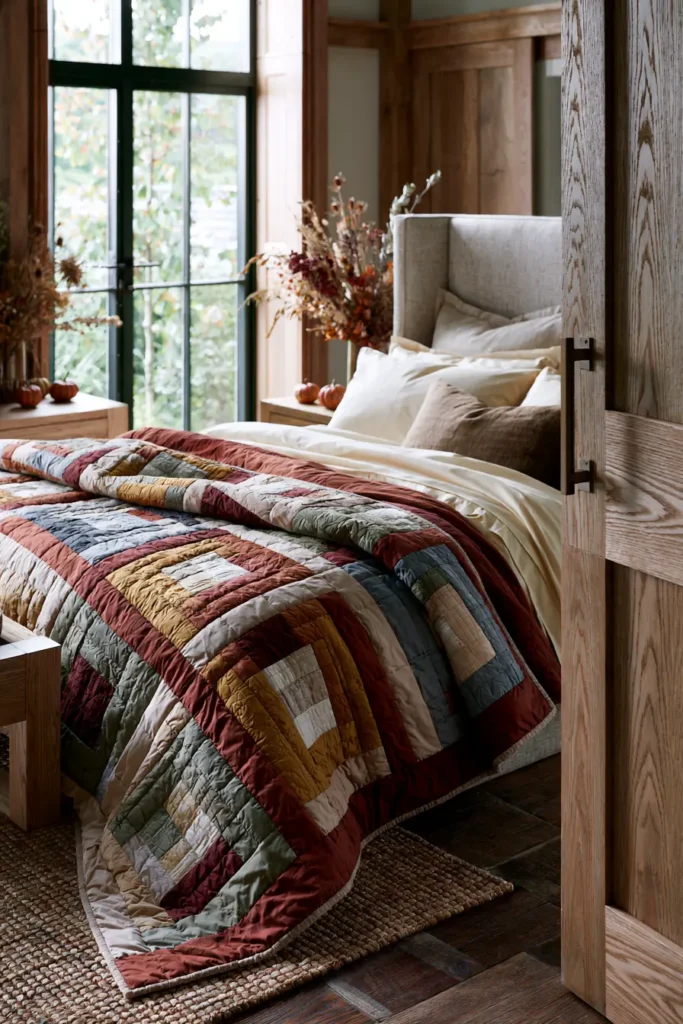
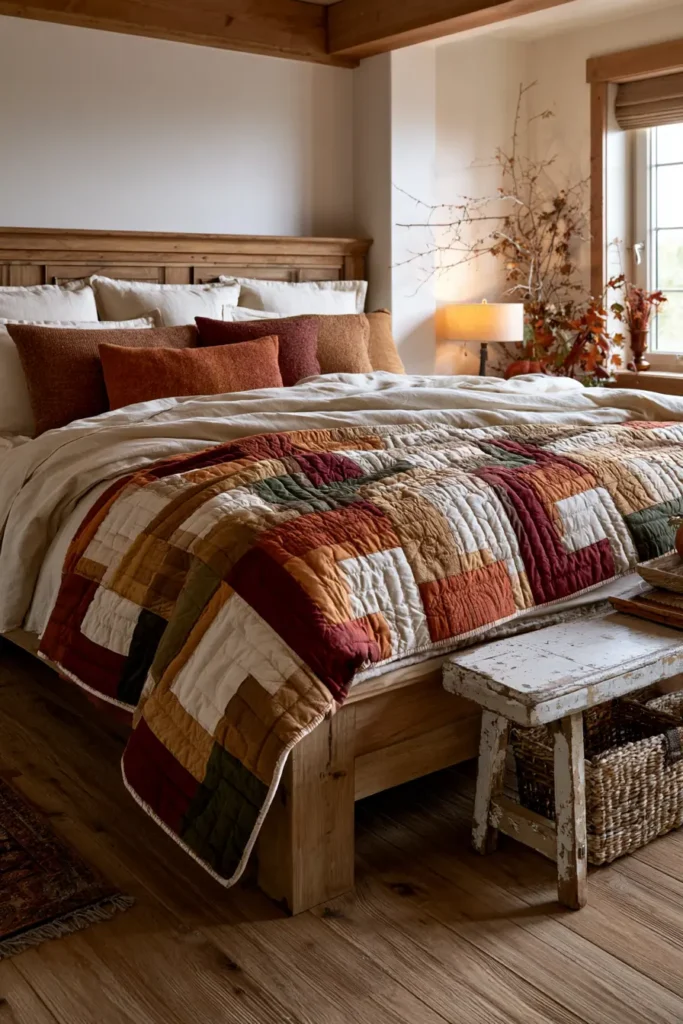
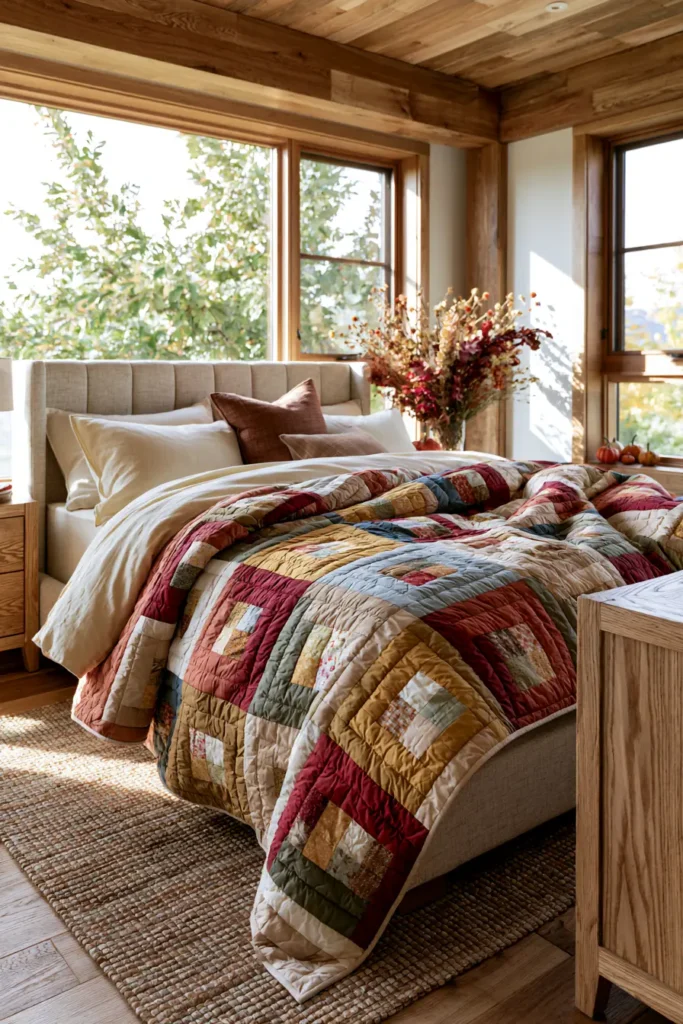
4. Classic Log Cabin Quilt Patterns in Warm Harvest Colors
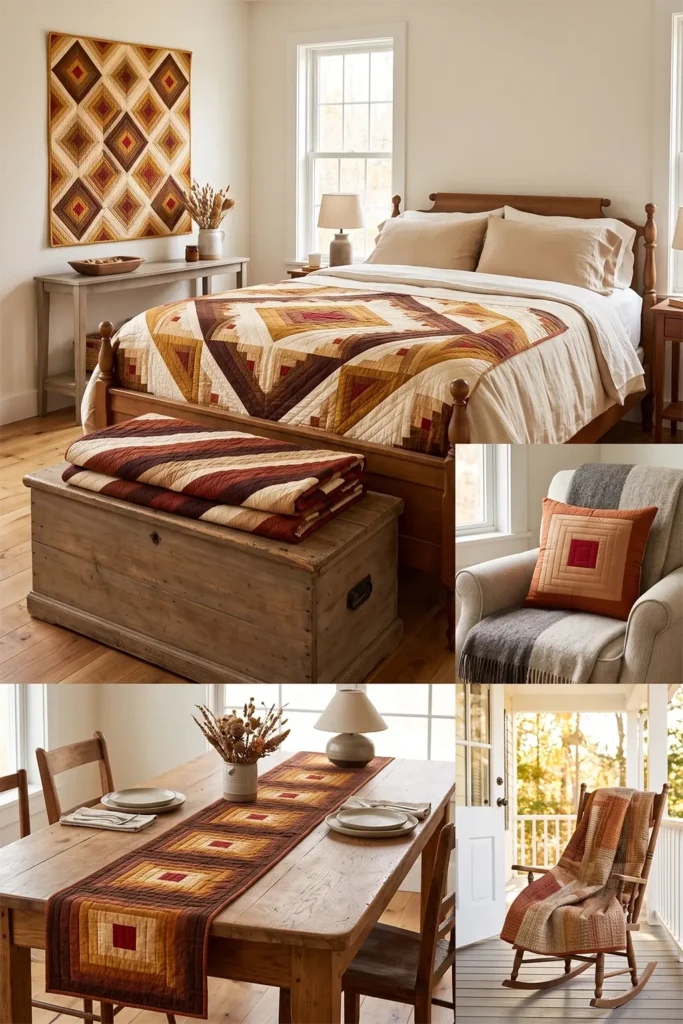
The log cabin is one of the oldest and most beloved quilt blocks there is, and in warm harvest colors it becomes pure autumn. The block is built like its namesake — strips of fabric (“logs”) added round and round a small center square, growing outward like the walls of a cabin. What makes it magical is the light-and-dark split: one half of every block uses light logs, the other half dark, so a diagonal line of shadow runs through each block. Worked in golds, rusts, ambers, and deep browns against warm creams, that light-dark rhythm turns a simple quilt into a glowing harvest of color.
The log cabin carries real history and meaning. It surged in popularity in nineteenth-century America, and by tradition the center square was stitched in red or gold to represent the hearth — the warm fire at the heart of the home — while the light and dark sides stood for the sunny and shadowed sides of the house. Few blocks are as symbolically cozy, which makes it a perfect fit for a quilt built to warm both a bed and a room.
Why I Made It
I made this because the log cabin is the block that taught generations of quilters that value — light versus dark — matters more than color itself. You can use almost any harvest fabrics you like, and as long as you keep the lights light and the darks dark, the block sings. That’s a liberating, forgiving kind of design, and it makes the log cabin endlessly rewarding: the same simple block, arranged different ways, produces a dozen completely different quilts.
There’s a personal pull, too. Coming from generations of hand-stitching in my family, raised around the Nakshi Kantha tradition of building warmth from layered, ordered rows of stitching, I’ve always loved patterns with an honest, repetitive logic. The log cabin is exactly that — a calm, meditative build of strip after strip — and the hearth at its center speaks to the same idea every textile tradition I know comes back to: the home, and keeping it warm.
Why This Idea Is Worth Making
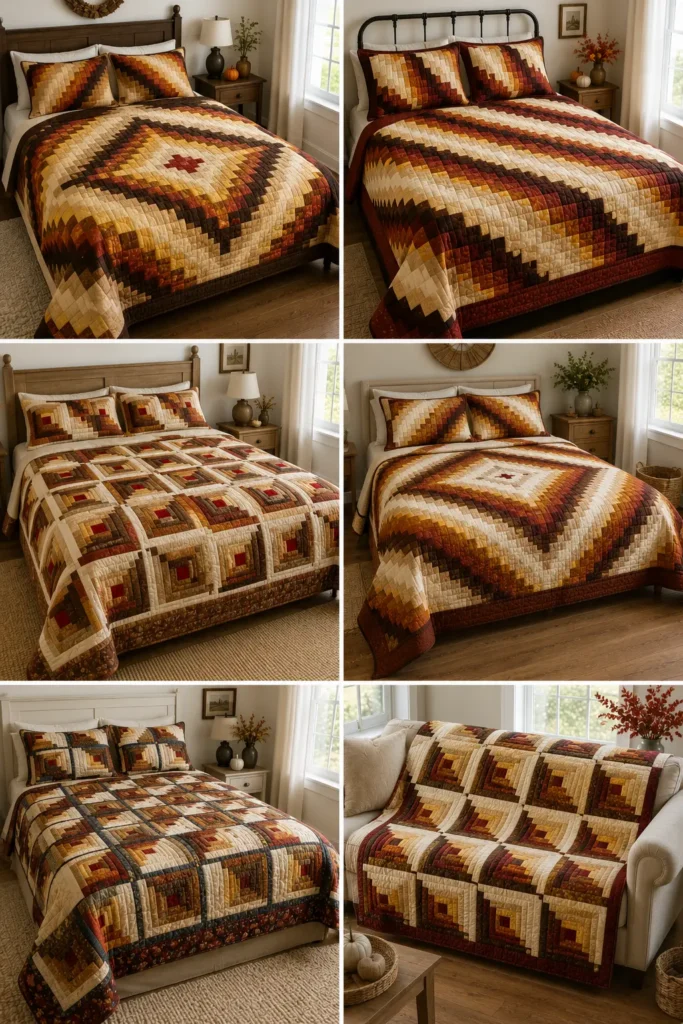
This idea is worth making because the log cabin is beginner-friendly, strip-pieced (so it’s fast), and astonishingly versatile. There are no points to match and no curves — just straight strips added in order — yet the finished quilt looks rich and intricate. Best of all, the way you arrange the blocks changes everything: rotate the light-dark halves one way for a “Barn Raising” diamond, another for “Straight Furrows” stripes. One block, endless quilts. In warm harvest colors, it’s the coziest, most timeless fall quilt you can make.
Finished Size
- Finished quilt: 60 × 72 inches — a throw or twin bed topper
- Finished block: 12 inches square (12½ inches unfinished)
- Layout: 5 blocks across × 6 blocks down = 30 blocks
- Log width: 2 inches finished (2½ inches cut)
- Skill level: beginner
- Core techniques: strip-piecing, light/dark value placement, block rotation layouts, binding
Materials Needed
- Center squares: ¼ yard of red or gold (the traditional “hearth”)
- Light logs: about 1½ yards total across 3–4 warm creams, tans, and pale golds
- Dark logs: about 2 yards total across 4–5 rusts, deep golds, ambers, browns, and burgundies
- Backing: 4 yards
- Batting: at least 66 × 78 inches
- Binding: ⅝ yard in a deep rust or brown
- Thread: neutral for piecing
- Rotary cutter, cutting mat, quilting ruler, pins, iron, sewing machine
Beginner tip: separate your fabrics into two clear piles — “lights” and “darks” — before you start, and squint at them. If a fabric is hard to sort, leave it out. Clean value separation is what makes the log cabin work.
Understanding the Block: Light, Dark, and the Hearth
Every log cabin block follows the same logic:
- A center square (the hearth), traditionally red or gold
- Logs added around it in order, working outward
- Two adjacent sides get light logs; the other two get dark logs, so a diagonal light/dark line splits the block corner to corner
- Each round adds four logs; this block has three rounds plus the center
Keep the light logs always on the same two sides as you build, and the dark on the other two — that consistency is the whole secret.
Cutting Measurements (per 12-inch block)
All logs are cut 2½ inches wide. Cut them to these lengths as you build (or cut long strips and trim as you go):
- Center square: 2½ × 2½ inches
- Log 1 (light): 2½ × 2½ inches
- Log 2 (light): 2½ × 4½ inches
- Log 3 (dark): 2½ × 4½ inches
- Log 4 (dark): 2½ × 6½ inches
- Log 5 (light): 2½ × 6½ inches
- Log 6 (light): 2½ × 8½ inches
- Log 7 (dark): 2½ × 8½ inches
- Log 8 (dark): 2½ × 10½ inches
- Log 9 (light): 2½ × 10½ inches
- Log 10 (light): 2½ × 12½ inches
- Log 11 (dark): 2½ × 12½ inches
That’s the center plus eleven logs, finishing at 12½ inches unfinished. Repeat for all 30 blocks.
For the quilt:
- Backing: 66 × 78 inches
- Batting: 66 × 78 inches
- Binding: seven strips, 2½ inches × width of fabric
Step-by-Step Guide
Step 1 — Cut your strips. Cut all logs 2½ inches wide from your lights and darks, and the center squares from your hearth fabric. Cutting long 2½-inch strips and trimming to length as you sew is the fastest method.
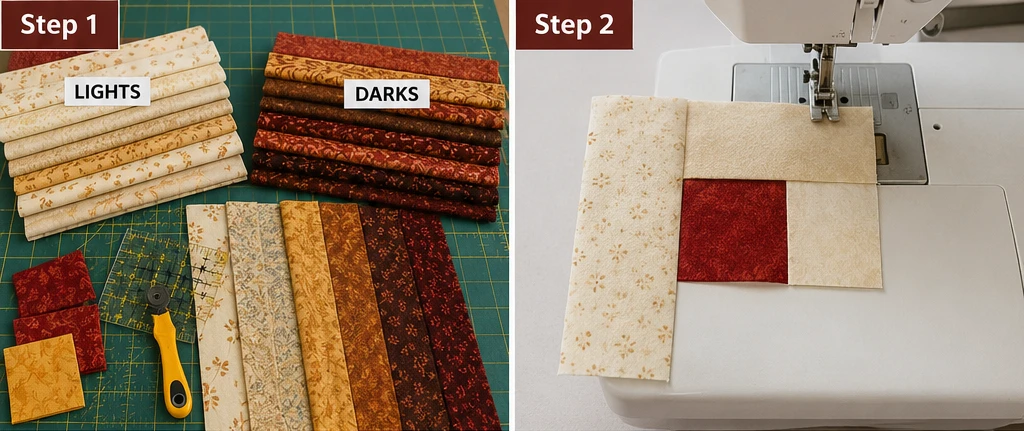
Step 2 — Add the first two light logs. Sew a 2½-inch light log to one side of the center square with a ¼-inch seam; press outward. Rotate and add the 4½-inch light log to the next side; press. The center now has light on two adjacent sides.
Step 3 — Add the first two dark logs. Continuing around in the same direction, add the 4½-inch dark log, then the 6½-inch dark log, to the remaining two sides. Press each outward. You’ve completed the first round — light on two sides, dark on two.
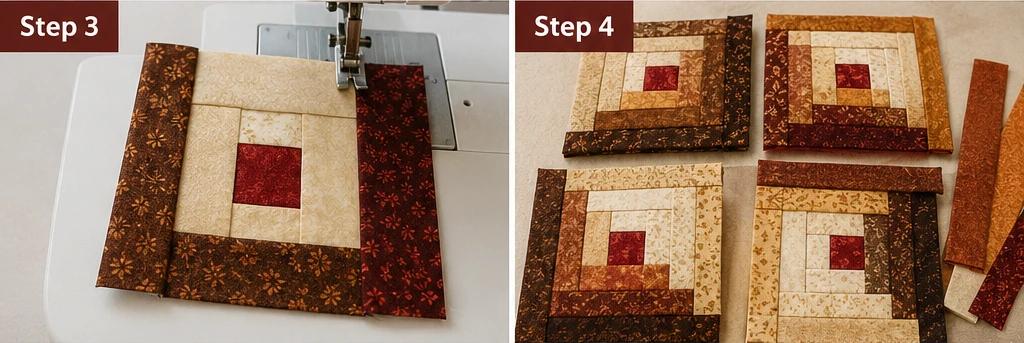
Step 4 — Build the second round. Keeping the same rotation and the light/dark sides consistent, add logs 5 and 6 (light) and logs 7 and 8 (dark), pressing outward after each.
Step 5 — Build the third round. Add logs 9 and 10 (light) and logs 11 (dark), finishing the block. Press well and check it measures exactly 12½ × 12½ inches. Trim if needed. Repeat for all 30 blocks.
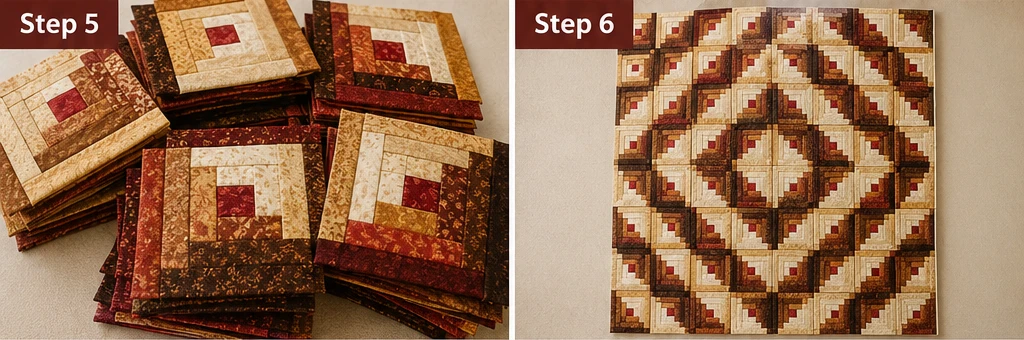
Step 6 — Choose your layout. This is the fun part. Arrange the blocks 5 across × 6 down, rotating the light/dark halves to form a setting:
- Barn Raising: concentric diamonds of light and dark radiating from the center
- Straight Furrows: diagonal stripes of light and dark across the quilt
- Sunshine and Shadow: alternating light and dark diamonds. Play with the layout on the floor before you commit — the same blocks make radically different quilts.
Step 7 — Assemble the top. Once you love the arrangement, sew the blocks into rows with a ¼-inch seam, pressing seams in alternating directions row to row, then join the rows. The finished top measures about 60½ × 72½ inches.
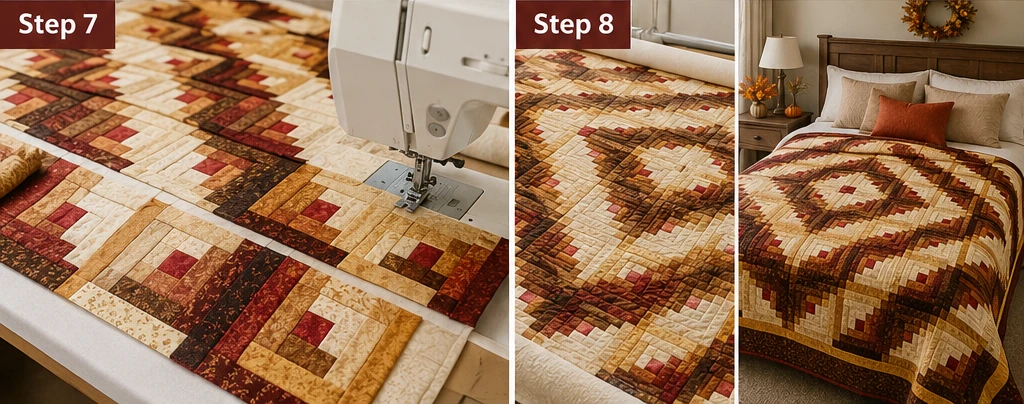
Step 8 — Layer and baste. Lay the backing wrong side up, center the batting, then the top right side up. Smooth from the center outward and baste with pins or thread.
Step 9 — Quilt, trim, and bind. Straight-line quilting suits the log cabin — echo the logs, or stitch diagonal lines through the light/dark seams. Trim to 60 × 72 inches, bind with the 2½-inch strips, and wash gently with a color catcher.
Assembly at a Glance
- Sort fabrics firmly into lights and darks; cut all logs 2½ inches wide.
- Add two light logs to adjacent sides of the center square.
- Add two dark logs to the remaining sides → round one complete.
- Repeat for rounds two and three, keeping light/dark sides consistent → 12½-inch block.
- Make all 30 blocks.
- Arrange 5 × 6, rotating halves into a setting (Barn Raising, Straight Furrows…).
- Sew into rows, press, and join rows → 60½ × 72½-inch top.
- Layer backing, batting, and top; baste.
- Quilt, trim to 60 × 72 inches, bind, and wash.
Choosing Your Colors
The log cabin wants clear value contrast in a warm harvest palette:
- Hearth center: classic red, or golden yellow
- Lights: cream, warm tan, pale gold, buttermilk
- Darks: rust, deep gold, amber, cinnamon brown, burgundy
- Mix prints and tone-on-tones within each value group for depth
The rule that never fails: keep lights clearly light and darks clearly dark. Color can vary wildly, but value must stay sorted.
Beginner Tips for Success
- Sort by value, not color — squint at your fabrics; if you can’t tell light from dark, neither will the quilt.
- Always add logs in the same rotational direction, or the block won’t build square.
- Press every log outward, away from the center, for flat blocks and crisp seams.
- Keep the light logs on the same two sides in every block so your layout works.
- Lay the whole quilt out and photograph it before sewing — the setting is where the magic happens.
Styling It
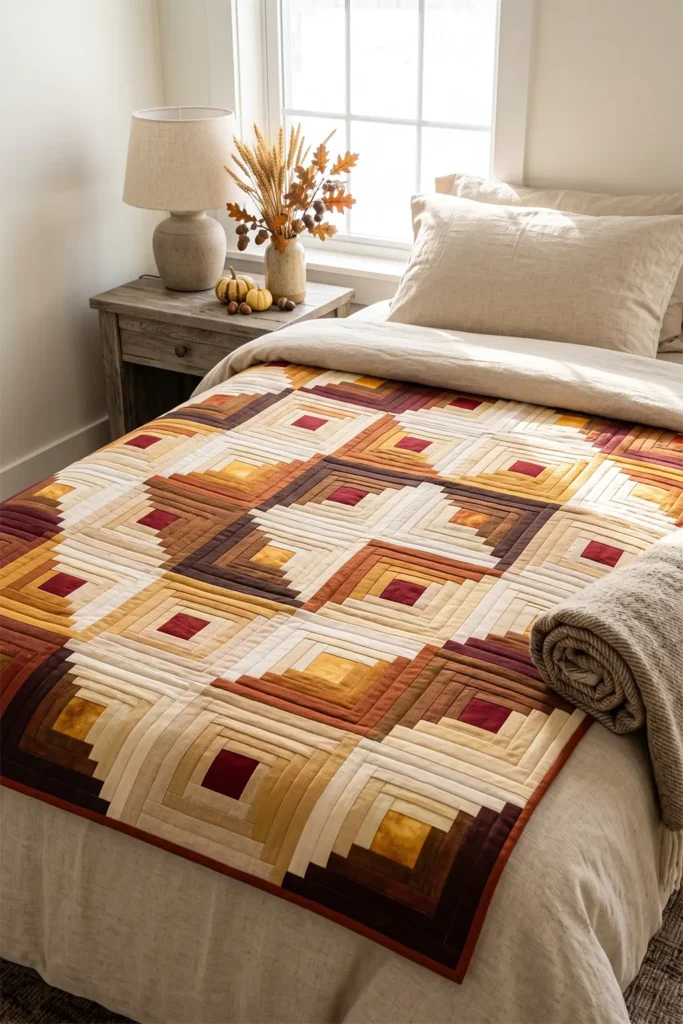
Drape the finished quilt over a bed in warm neutral bedding so the light/dark pattern reads clearly, and lean into harvest textures around it — wood, wool, a stoneware lamp, dried botanicals. Echo the hearth red or a deep rust in a cushion or throw. The log cabin’s strong geometry anchors a room, so keep the surrounding decor warm and simple and let the quilt lead.
Final Thoughts
A classic log cabin quilt in warm harvest colors is autumn quilting at its most timeless. Built from simple strips around a glowing hearth center, it teaches the single most useful lesson in quilting — that value carries a design — while rewarding you with a block you can arrange a dozen ways. Cozy in meaning and in warmth, it’s the quilt that has kept homes beautiful for generations, and it belongs on a bed every fall.
Other Design Inspirations – Digitally Modified
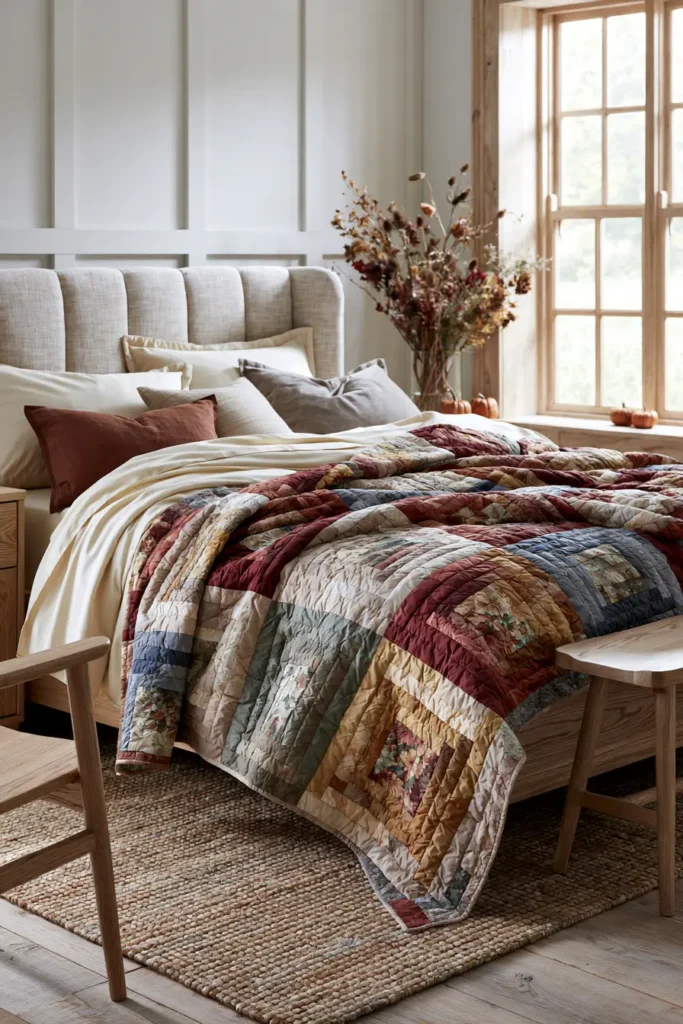
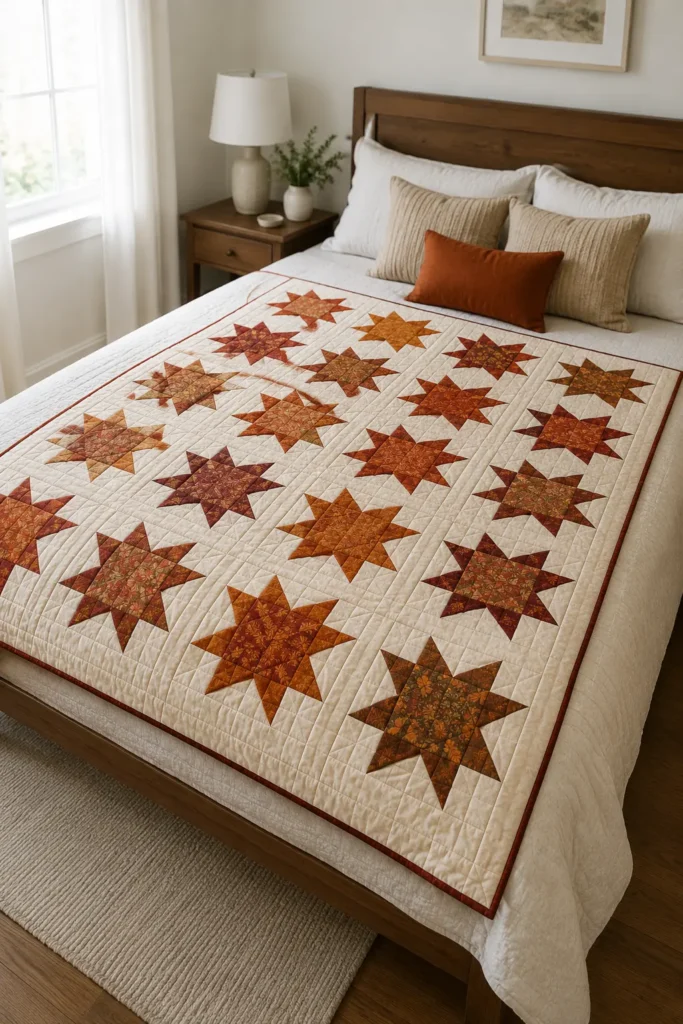
5. Autumn Star Quilt Patterns for Timeless Fall Elegance
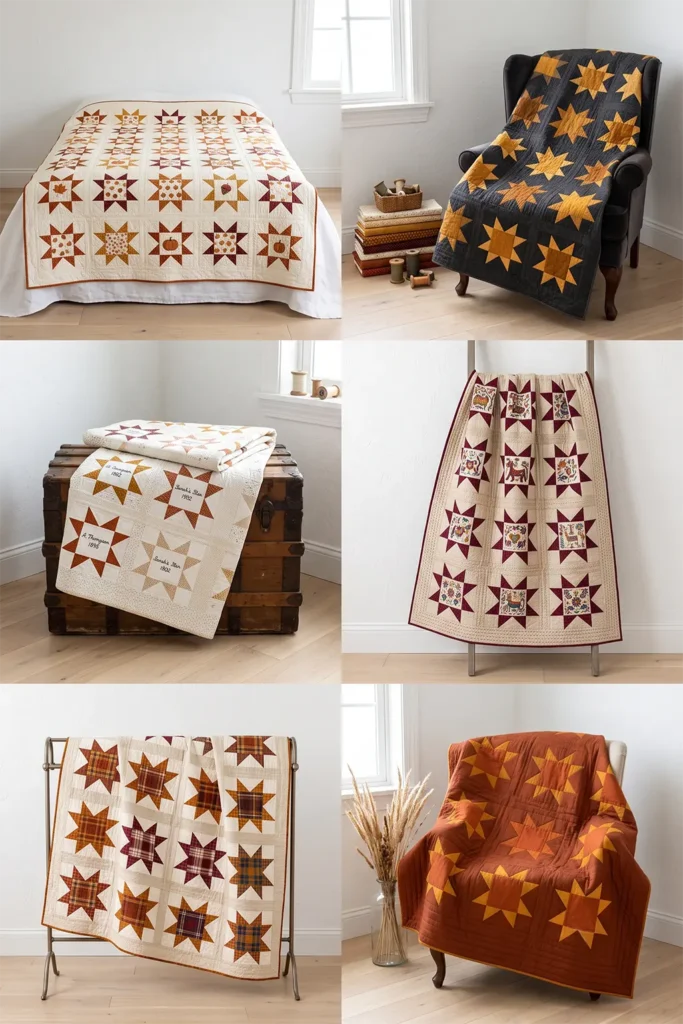
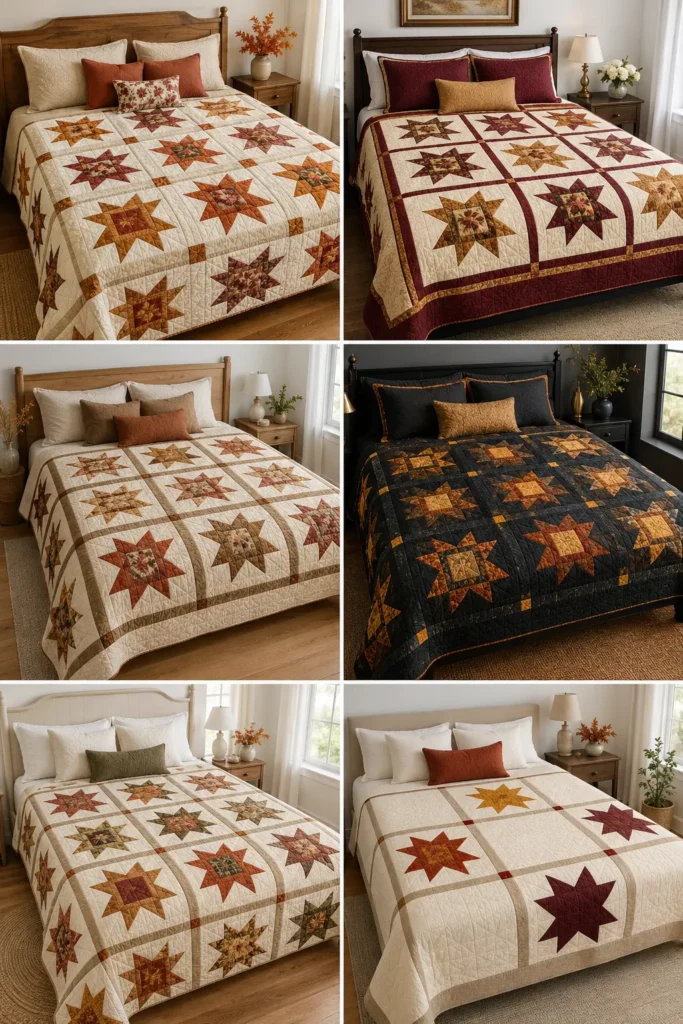
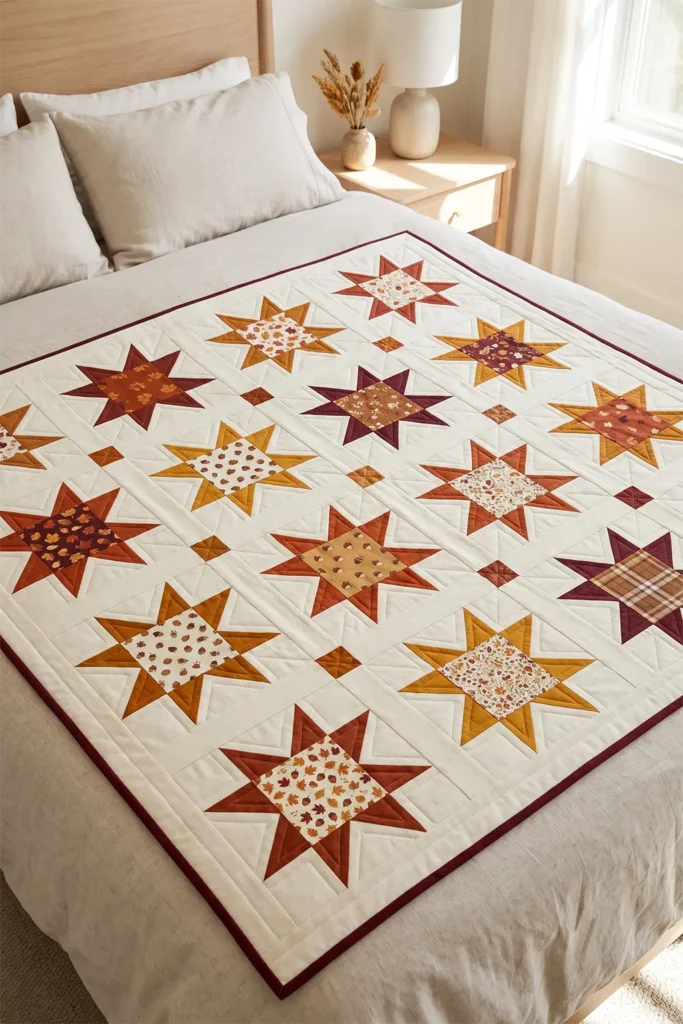
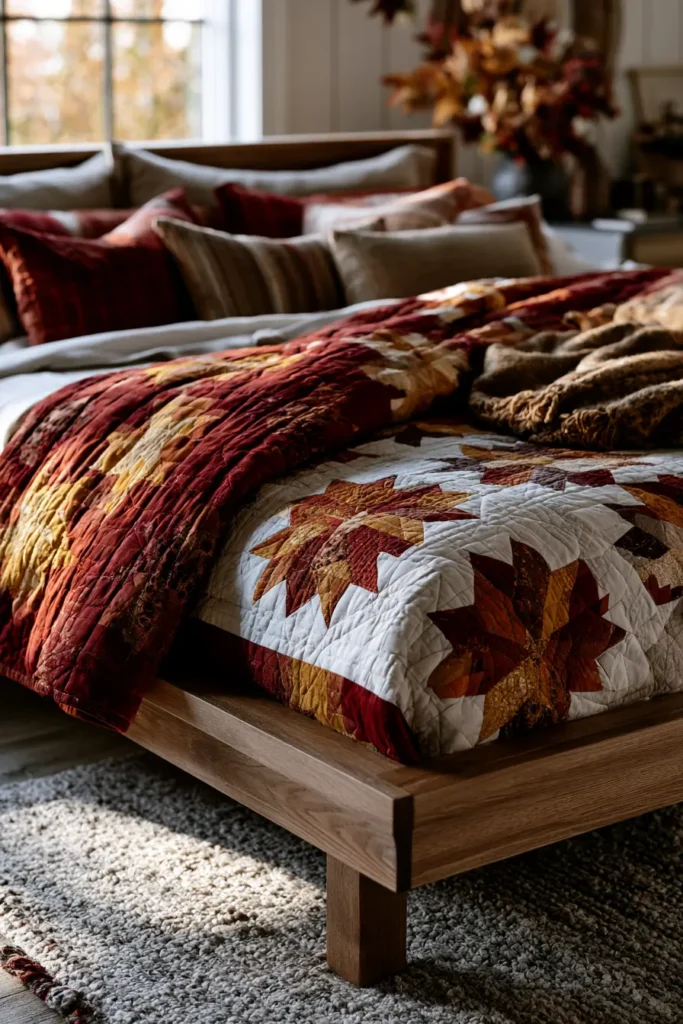
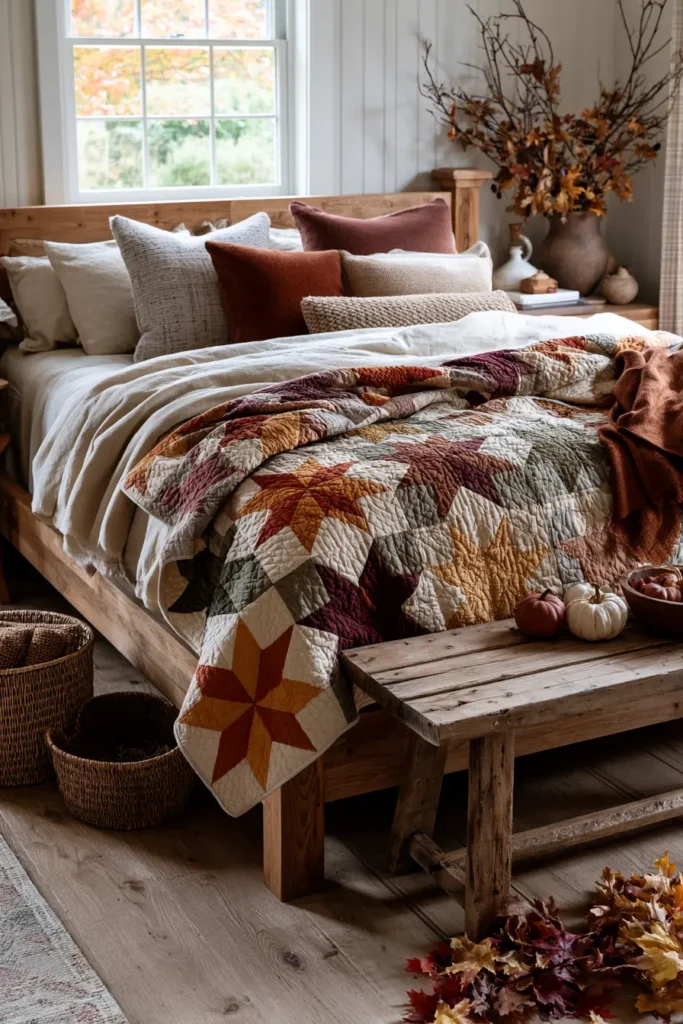
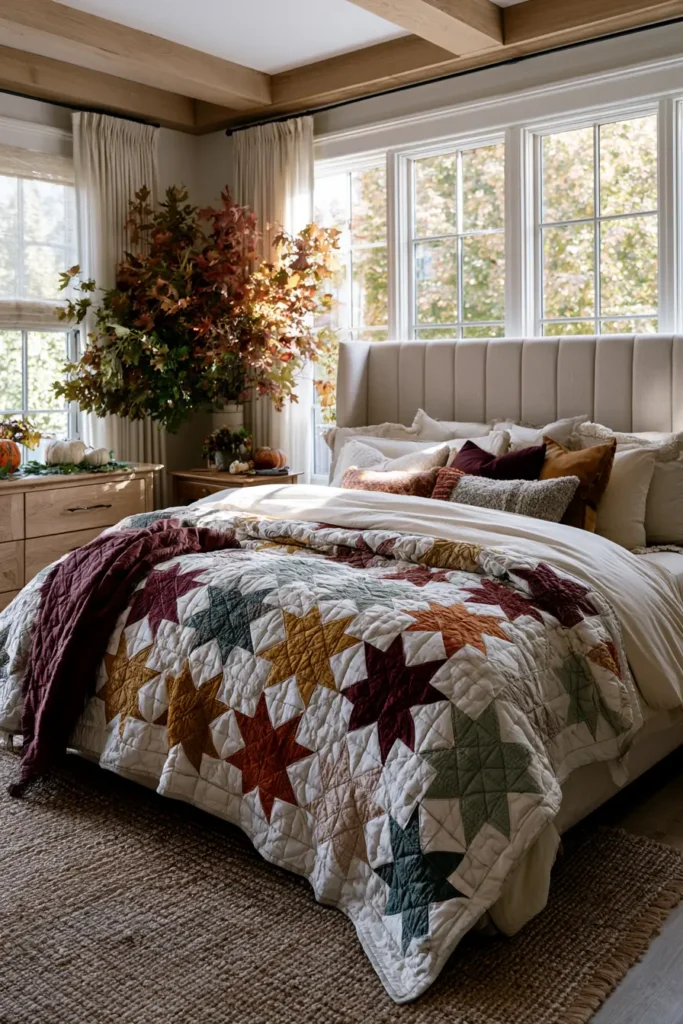
If the maple leaf is autumn’s most obvious quilt and the flannel plaid its coziest, the star is its most elegant. The Sawtooth Star is one of quilting’s great classics — a center square framed by eight sharp points radiating outward — and in warm harvest colors it becomes something quietly spectacular. Rust, gold, burgundy, and amber stars glowing against a cream background, set apart with clean sashing, give a bed the kind of timeless, composed beauty that never looks seasonal in a novelty way. It’s the fall quilt you’d happily leave out all year.
There’s a reason stars belong to autumn. As the season turns, the nights grow longer, the air clears, and the sky puts on its best show — the harvest moon, the first properly dark evenings. Quilters have loved star blocks for two centuries for exactly that reason: they carry the night sky indoors. The Sawtooth Star is also known as the Variable Star, and the name is a small piece of quilting history in itself. The center square was the “variable” — the spot where a quilter showcased a favorite fabric, a fussy-cut motif, or a signature. It was the block’s little stage.
Why I Made It
I made this because the star is where quilting stops being a craft and starts being geometry you can feel. There’s a real thrill the first time eight points meet crisply around a center square — nothing else in patchwork gives quite that satisfaction. It demands more care than a log cabin or a plaid square, and that care is precisely the point: this is the block that teaches you to sew accurately, and the reward is a quilt that looks genuinely refined.
I’m also drawn to the Variable Star’s little tradition of a special center. Coming from generations of hand-stitching in my family, raised around the Nakshi Kantha tradition — where the finest cloth and the most personal motifs go at the heart of a piece — the idea of saving your best fabric for the middle of the star feels like an old, shared instinct. Every making tradition seems to understand that the center is where you put what you love.
Why This Idea Is Worth Making
This idea is worth making because it delivers the most elegant result in this collection while teaching the single most valuable skill in quilting: accurate points. The Sawtooth Star is built entirely from squares and simple stitch-and-flip flying geese — no templates, no curves, no set-in seams — so it’s achievable for a confident beginner. But because those points must land precisely, it sharpens your seam allowance and pressing habits permanently. Master this block and every quilt you make afterward gets better. And in harvest tones with crisp sashing, the finished quilt is pure timeless fall elegance.
Finished Size
- Finished quilt: 58 × 72 inches — a generous throw or twin bed topper
- Finished block: 12 inches square (12½ inches unfinished)
- Layout: 4 blocks across × 5 blocks down = 20 star blocks, separated by 2-inch sashing
- Skill level: confident beginner (precision matters here)
- Core techniques: stitch-and-flip flying geese, point matching, sashed settings, binding
Materials Needed
- Star point fabrics: ¼ yard each of 6–8 warm fabrics — rust, burnt orange, golden amber, mustard, deep burgundy, cinnamon (about 1½ yards total)
- Center squares: ¾ yard of a feature print, or scraps if you’d like every star’s center to differ
- Background and sashing: 4 yards of cream, oatmeal, or warm ivory
- Backing: 4 yards
- Batting: at least 64 × 78 inches
- Binding: ⅝ yard in deep rust or burgundy
- Thread: good-quality neutral cotton
- Rotary cutter, cutting mat, quilting ruler, pins, iron, sewing machine
Beginner tip: the star lives or dies on a scant ¼-inch seam — a thread’s width narrower than a true quarter inch. That tiny allowance accounts for the fabric’s fold when pressed, and it’s the difference between crisp points and blunted ones. Test it on scraps before you start.
Understanding the Block: The Sawtooth Star
Each 12-inch star is a 3 × 3 arrangement built from three unit types:
- One center square — 6 inches finished, the “variable” showcase spot
- Four flying geese units — each 3 × 6 inches finished, sitting on the four sides of the center
- Four corner squares — 3 inches finished, in background fabric
Each flying geese unit carries two star points, so four units give the star its eight points. The large triangle in the middle of each unit is background; the two small triangles at either end are your star fabric.
Cutting Measurements
Per block (repeat for all 20):
- Center square: one at 6½ × 6½ inches (feature fabric)
- Star points: eight squares at 3½ × 3½ inches (star fabric — use two or more fabrics per star if you like)
- Geese backgrounds: four rectangles at 3½ × 6½ inches (background)
- Corner squares: four at 3½ × 3½ inches (background)
For the quilt:
- Vertical sashing: twenty-five strips at 2½ × 12½ inches
- Horizontal sashing: six strips at 2½ × 58½ inches (piece from width-of-fabric strips)
- Backing: 64 × 78 inches
- Batting: 64 × 78 inches
- Binding: seven strips, 2½ inches × width of fabric
Step-by-Step Guide
Step 1 — Cut everything and sort by block. Cut all centers, star squares, geese rectangles, corner squares, and sashing. Keeping each block’s pieces in their own stack prevents mix-ups once the star fabrics multiply.
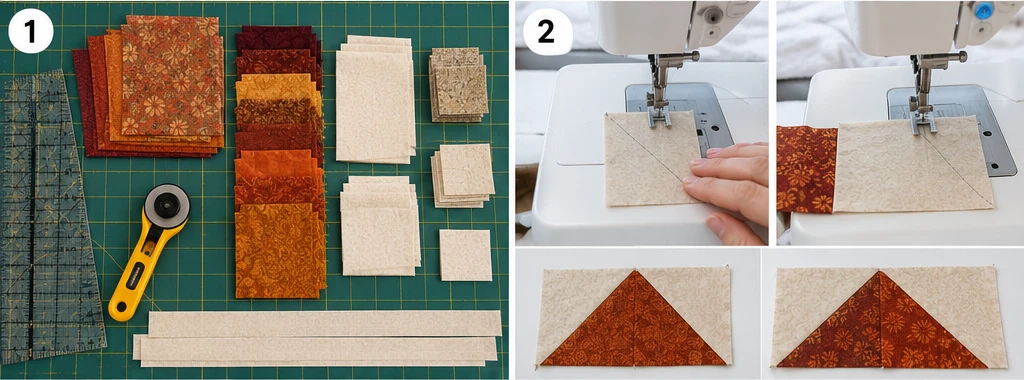
Step 2 — Make the flying geese (stitch and flip). Draw a diagonal line corner to corner on the back of each 3½-inch star square. Place one right sides together on the left end of a 3½ × 6½ background rectangle, aligning the edges. Sew directly on the drawn line, then trim the excess ¼ inch outside the seam and press the triangle open. Repeat on the right end with a second star square, overlapping slightly in the middle. You now have one geese unit with two star points. Make four per block — eighty in total.
Step 3 — Collect the bonus triangles (optional). Before trimming each corner, sew a second line ½ inch away from the first. Cut between the two seams and you’ll have a free half-square triangle — enough, across eighty units, to piece a matching cushion or the quilt’s backing.
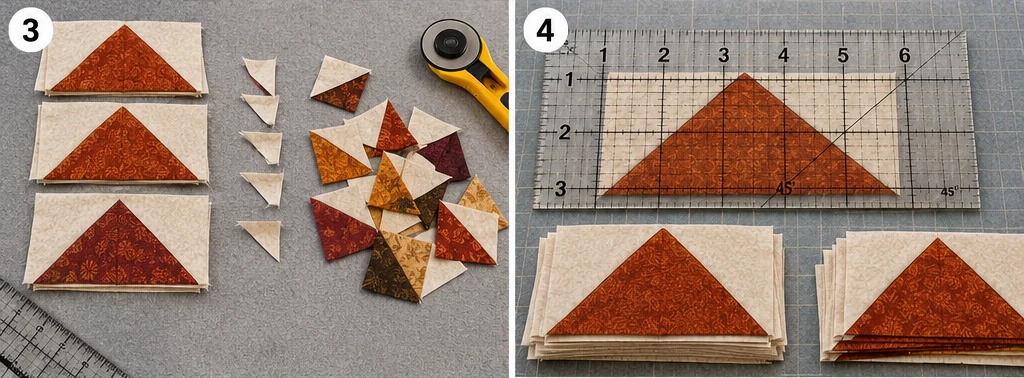
Step 4 — Trim and check the geese. Each unit should measure exactly 3½ × 6½ inches, and this is the critical check: the apex of the large background triangle must sit ¼ inch below the top raw edge. That quarter inch is the breathing room your seam will consume — without it, the star points get sliced off when the block goes together.
Step 5 — Lay out and sew the block. Arrange the nine pieces in three rows: corner square, geese unit (points facing outward), corner square across the top; geese unit, center square, geese unit across the middle; and corners and geese again along the bottom. Sew each row with a scant ¼-inch seam, pressing the geese seams open to reduce bulk where the points meet. Join the three rows. The block should measure exactly 12½ × 12½ inches. Make 20 blocks.
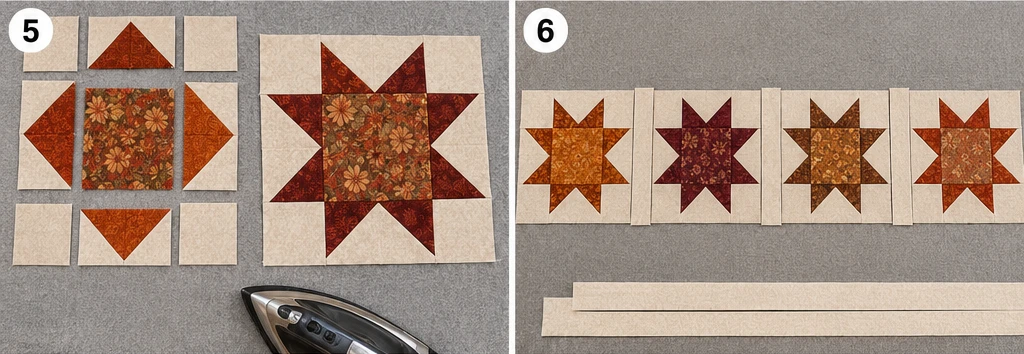
Step 6 — Add the vertical sashing. Lay the blocks out 4 across × 5 down, mixing your star colors. Build each row by alternating sashing and blocks: sashing, block, sashing, block, sashing, block, sashing, block, sashing — five 2½ × 12½-inch strips per row. Each finished row measures 58½ inches wide.
Step 7 — Join the rows with horizontal sashing. Sew a 2½ × 58½-inch strip above the first row, between each pair of rows, and below the last — six strips in all. Press seams toward the sashing. The finished top measures about 58½ × 72½ inches.
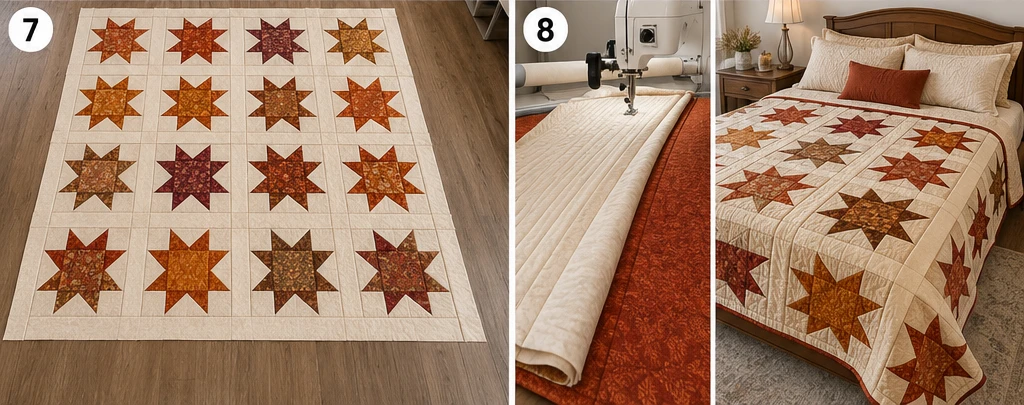
Step 8 — Layer and baste. Lay the backing wrong side up, center the batting, then the top right side up. Smooth from the center outward and baste with pins or thread.
Step 9 — Quilt, trim, and bind. Keep the quilting elegant and restrained so the stars lead — echo quilting around each star, straight lines through the sashing, or a simple all-over grid. Trim to 58 × 72 inches, bind with the 2½-inch strips, and wash gently with a color catcher.
Assembly at a Glance
- Cut all pieces, stacked by block.
- Stitch-and-flip eighty flying geese units (four per block).
- Trim each unit to 3½ × 6½ inches, checking for the ¼-inch apex clearance.
- Sew each block in three rows; press geese seams open; join rows → 12½-inch block.
- Make 20 blocks.
- Build each row: five 2½ × 12½ sashing strips alternating with four blocks → 58½ inches wide.
- Join rows with six 2½ × 58½ horizontal sashing strips → 58½ × 72½ top.
- Layer backing, batting, and top; baste.
- Quilt, trim to 58 × 72 inches, bind, and wash.
Choosing Your Colors
Two palettes work beautifully here, and they give completely different quilts:
Harvest daylight — the classic, warm and glowing:
- Star points in rust, burnt orange, golden amber, mustard, deep burgundy, cinnamon
- Centers in a feature print — a small floral, a plaid, or a fussy-cut motif
- Background and sashing in cream or oatmeal, so every point stays crisp
Autumn night sky — elegant, dramatic, and unexpected:
- Star points in gold, amber, and rust
- Background and sashing in deep charcoal, midnight navy, or dark plum
- Centers in a warm gold, so the stars genuinely glow against the dark
Whichever you choose, keep strong contrast between star and background. Sharp points need a sharp value difference to read.
Beginner Tips for Success
- Sew a scant ¼-inch seam — test it first; it’s the whole ballgame for points.
- Check the ¼-inch clearance above each geese apex before assembling. This one check saves more star points than anything else.
- Press geese seams open to reduce bulk where eight points converge.
- Nest your seams when joining rows so the points align on both sides.
- Trim every geese unit to exact size. Small errors multiply fast across eighty units.
- Don’t rush the center. Fussy-cutting a motif for that “variable” square is the block’s oldest pleasure.
Styling It
Lay the finished quilt across a bed in cream or oatmeal linen so the sashing frames each star cleanly, and keep the room elegant rather than rustic — smooth wood, a simple lamp, one or two cushions echoing a star color. The night-sky version looks stunning in a darker, more dramatic room, where the gold points really do glow. Because the sashing gives every star breathing space, this quilt suits refined spaces that would find a scrappy quilt too busy.
Final Thoughts
An autumn star quilt is timeless fall elegance in its purest form. Built from simple squares and stitch-and-flip geese, it asks for care rather than complexity, and it repays that care with eight crisp points around a center square you chose because you loved it. Warm harvest colors give it the season; the star gives it permanence. It’s the fall quilt that looks just as beautiful in February — and the one that will quietly make you a better quilter.
Other Design Inspirations – Digitally Modified
6. Scrappy Flying Geese Quilt Patterns in Rich Fall Tones
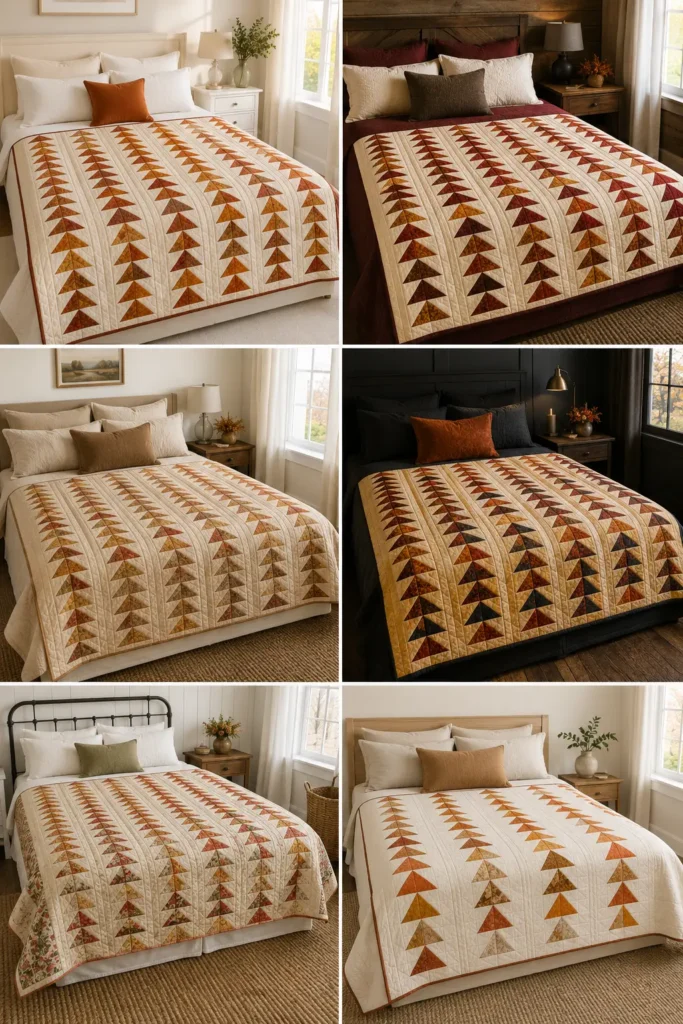
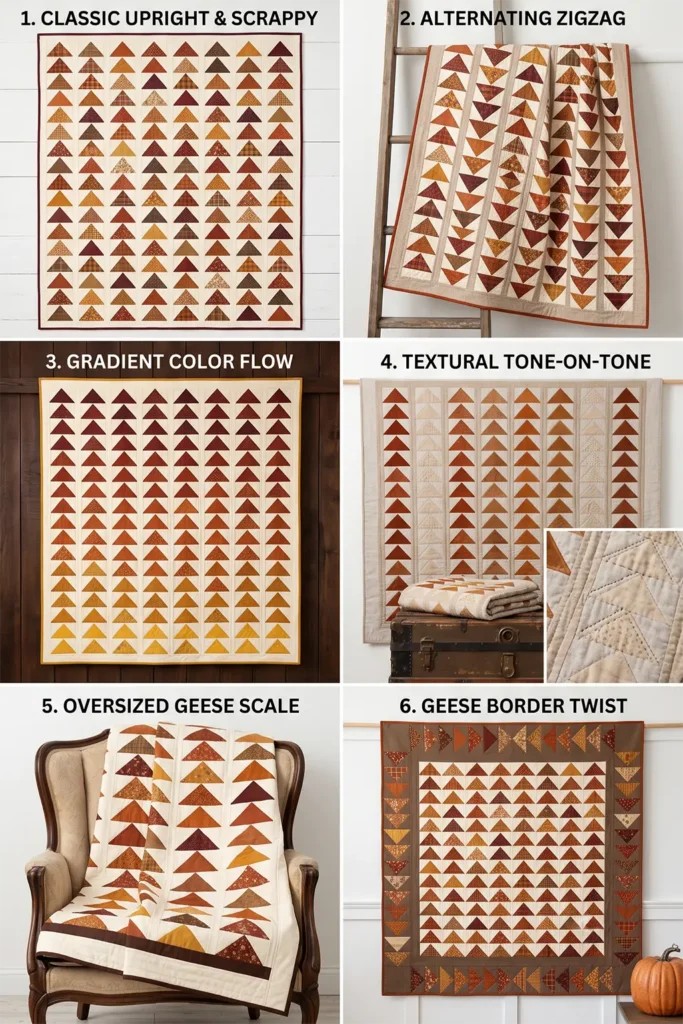
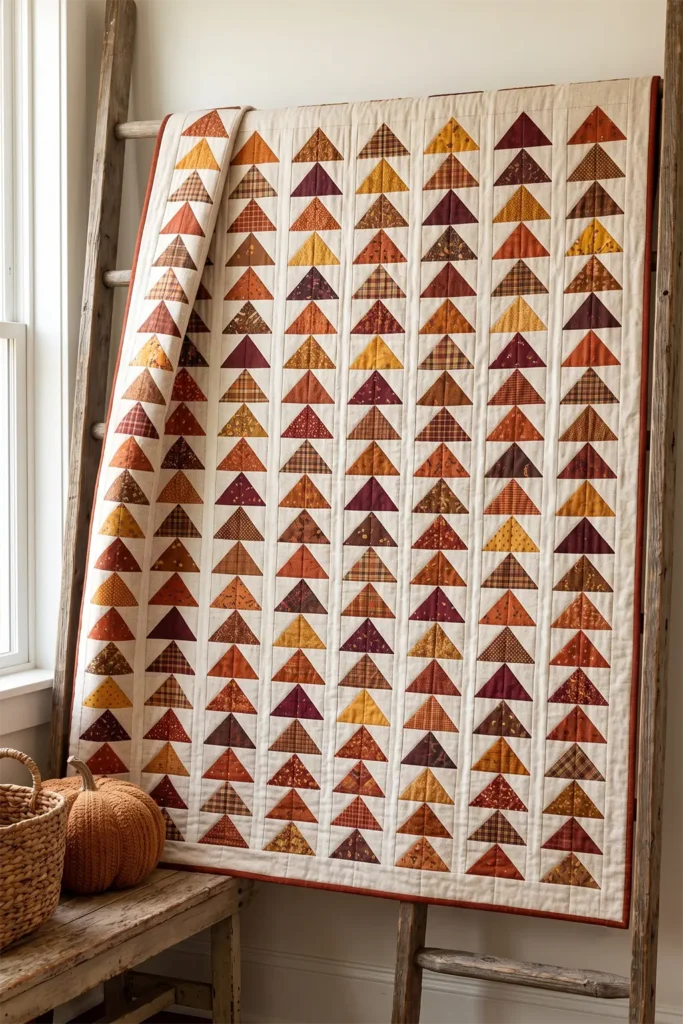
Flying geese is one of quilting’s most satisfying units, and when you set the geese free to march across an entire quilt — rather than caging them into a star — you get something with real movement and energy. Each unit is a large triangle (the “goose”) flanked by two smaller background triangles (the “sky”), and stacked into long columns, they stream up the quilt like a flock crossing an autumn sky. Worked scrappy, in rich fall tones — rust, pumpkin, gold, burgundy, cinnamon — every goose a different fabric, it becomes a warm, glowing river of color that feels alive.
The name isn’t decorative; it’s literal. The block is called flying geese because that’s exactly what a column of them looks like: birds in formation, all pointing the same way. And few images are more autumnal than migrating geese crossing a cool October sky, which makes this one of the most quietly seasonal quilts you can make. (If you’ve already pieced the Autumn Star block, you know this unit — here it simply gets to be the whole show.)
Why I Made It
I made this because a scrappy flying geese quilt is the most forgiving way to make something that looks genuinely sophisticated. Scrappiness isn’t a compromise here — it’s the design. The more fabrics you throw in, the richer and more alive the flock looks, so it’s the ideal home for your leftover fall fabrics, orphan blocks, and scraps too pretty to toss. There’s deep satisfaction in turning a messy basket of remnants into something with this much motion and grace.
I love its rhythm, too. Coming from generations of hand-stitching in my family, raised around the Nakshi Kantha tradition of building beauty from row upon patient row, I’m drawn to patterns with a steady, directional pulse. A column of flying geese has exactly that — a calm, repeating forward motion — and stitching them scrappy means every goose is a small, individual decision inside a larger, orderly flock. Order and improvisation at once, which is my favorite kind of making.
Why This Idea Is Worth Making
This idea is worth making because it delivers movement, warmth, and a use for every scrap you own — with a unit that’s beginner-friendly and endlessly repeatable. There are no points to match the way a star demands, since the geese simply stack; you just need each unit trimmed true. It’s a fast, rhythmic sew, the scrappy approach hides small imperfections, and the finished quilt has a directional energy that few blocks can match. In rich fall tones, it’s a glowing, flowing celebration of the season.
Finished Size
- Finished quilt: 60 × 72 inches — a throw or twin bed topper
- Finished geese unit: 3 × 6 inches (3½ × 6½ inches unfinished)
- Layout: 10 columns × 24 geese per column = 240 geese, with narrow background sashing between columns
- Skill level: beginner (repetitive and forgiving)
- Core techniques: no-waste flying geese, column assembly, scrappy value control, binding
Materials Needed
- Geese (“goose”) fabrics: about 3 yards total in scraps — the more variety the better — across rust, pumpkin, gold, mustard, burgundy, cinnamon, and warm brown
- Background (“sky”) fabric: 3½ yards of cream, oatmeal, or a soft warm neutral (a single consistent background makes a scrappy flock read clearly)
- Backing: 4 yards
- Batting: at least 66 × 78 inches
- Binding: ⅝ yard in deep rust or burgundy
- Thread: neutral for piecing
- Rotary cutter, cutting mat, quilting ruler, pins, iron, sewing machine
Beginner tip: keep the background a single consistent fabric even though the geese are scrappy. A steady “sky” is what lets a wildly varied flock look intentional instead of chaotic.
The No-Waste Flying Geese Method (4 at a Time)
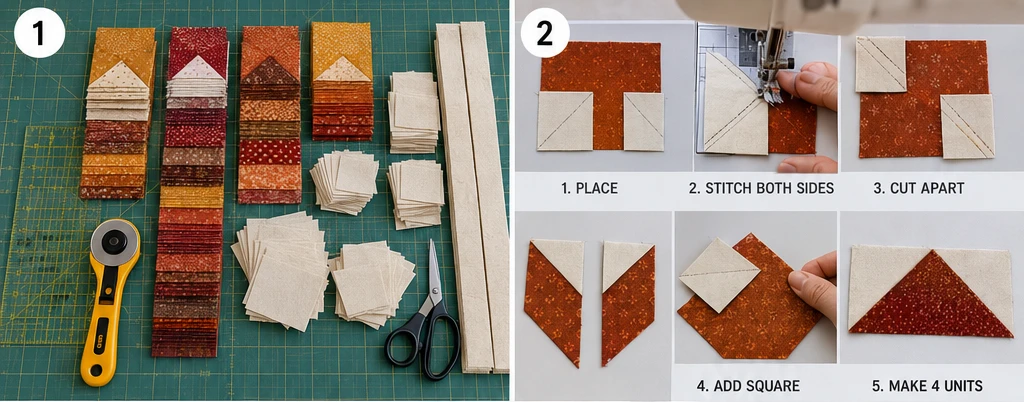
A scrappy quilt needs a lot of geese, so use the four-at-once method — it’s faster and wastes nothing. For four finished 3 × 6-inch geese, you need:
- One large “goose” square: 7¼ × 7¼ inches
- Four small “sky” squares: 3⅞ × 3⅞ inches
The steps:
- On the back of each small square, draw a diagonal line corner to corner.
- Place two small squares on opposite corners of the large square, right sides together, overlapping slightly in the center, drawn lines forming one continuous diagonal. Sew ¼ inch on each side of the line, then cut along the line. You’ll get two heart-shaped units.
- On each unit, place a third small square on the remaining corner, sew ¼ inch on each side of its line, and cut. Press open.
- You now have four flying geese, each trimming to 3½ × 6½ inches.
Repeat sixty times for the 240 geese the quilt needs.
Choosing Your Colors
Scrappy is the goal, but “scrappy” still needs a lane. Pull your geese from one warm family:
- Pumpkin and burnt orange for the brightest birds
- Golden amber and mustard for warmth
- Deep burgundy and wine for depth
- Rust, brick, and cinnamon as the anchors
- Warm brown to ground the flock
- All flying against one calm cream or oatmeal sky
Mix prints, plaids, and tone-on-tones freely within that palette. The single unifying background is what turns “random” into “rich.”
Cutting Measurements
- Geese: sixty large squares at 7¼ × 7¼ inches (scrappy) + 240 small background squares at 3⅞ × 3⅞ inches
- Column sashing: eleven strips at 1½ × 72½ inches (background), between and outside the ten columns
- Backing: 66 × 78 inches
- Batting: 66 × 78 inches
- Binding: seven strips, 2½ inches × width of fabric
Step-by-Step Guide
Step 1 — Cut the pieces. Cut sixty 7¼-inch goose squares from your scraps and 240 3⅞-inch background squares. Cut the eleven 1½ × 72½-inch sashing strips.
Step 2 — Batch the geese. Using the no-waste method above, make your geese in batches of four. This is a repetitive, meditative step — settle in and work through all sixty sets to get 240 geese.
Step 3 — Trim every unit true. Trim each goose to exactly 3½ × 6½ inches, checking that the point sits ¼ inch below the top raw edge, so it survives the seam. Consistent trimming is what keeps long columns straight.
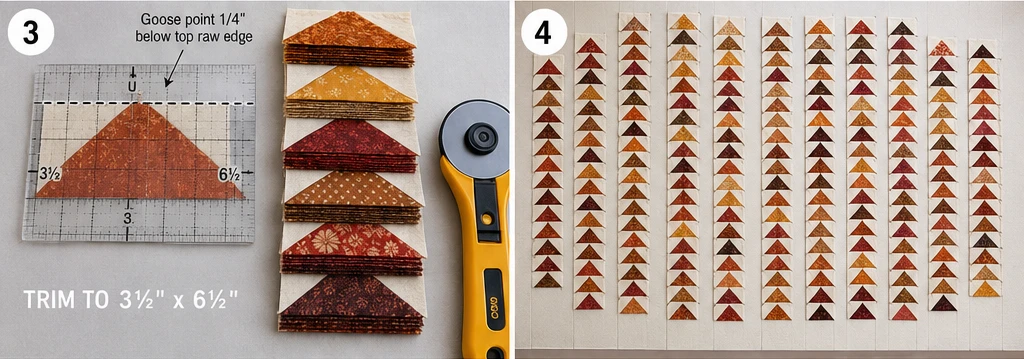
Step 4 — Build the columns. Decide your direction — all geese pointing up the quilt gives a strong, unified flock; alternating direction column to column gives a zigzag rhythm. Sew 24 geese into a column, all oriented your chosen way, pressing seams up (or open) as you go. Each column finishes about 72½ inches long. Make 10 columns.
Step 5 — Add the sashing. Sew a 1½ × 72½-inch background strip to the right of each column, and one on the far left, so narrow “sky” separates each stream of geese. This keeps the columns crisp and stops the points from crowding.
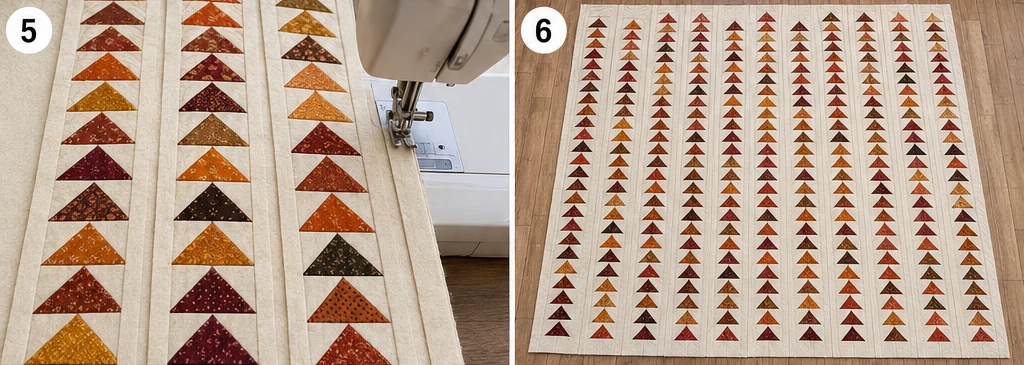
Step 6 — Join the columns. Sew the ten sashed columns together side by side, matching the tops carefully so the flock stays level. Press. The finished top measures about 60½ × 72½ inches.
Step 7 — Layer and baste. Lay the backing wrong side up, center the batting, then the top right side up. Smooth from the center outward and baste with pins or thread.
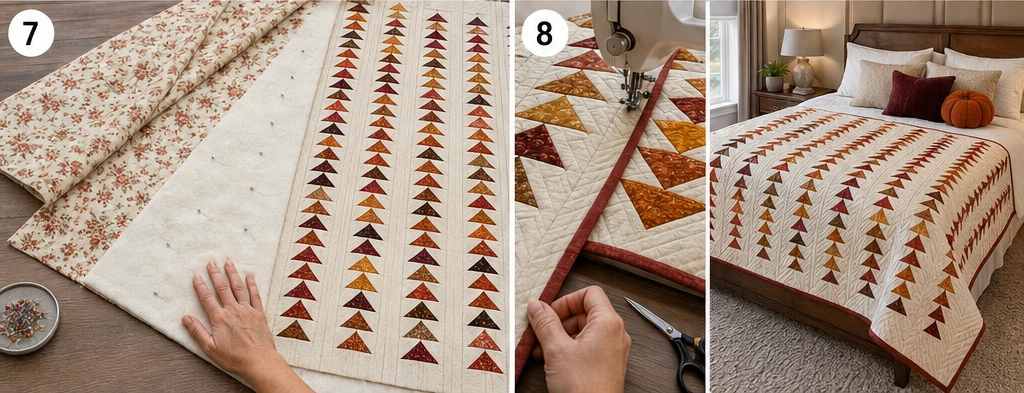
Step 8 — Quilt it. Quilting that follows the geese looks wonderful — straight lines up each column, or gentle chevrons echoing the points. Keep it even so the directional flow stays clean. Trim to 60 × 72 inches.
Step 9 — Bind and wash. Bind with the 2½-inch strips in rust or burgundy, then wash gently with a color catcher (rich reds bleed) and tumble dry low for a soft finish.
Assembly at a Glance
- Cut sixty 7¼ goose squares (scrappy) and 240 3⅞ background squares.
- Make geese four-at-a-time with the no-waste method → 240 geese.
- Trim each to 3½ × 6½ inches, checking the ¼-inch point clearance.
- Sew 24 geese per column, all facing your chosen direction → 10 columns.
- Add 1½ × 72½ background sashing between and outside the columns.
- Join the columns, matching tops → 60½ × 72½ inch top.
- Layer backing, batting, and top; baste.
- Quilt following the geese; trim to 60 × 72 inches.
- Bind and wash with a color catcher.
Beginner Tips for Success
- Keep one consistent background — a steady “sky” is what makes a scrappy flock read.
- Use the no-waste 4-at-once method; making 240 geese one at a time is a long road.
- Trim every unit to the exact size and check the ¼-inch point clearance before assembling columns.
- Decide your direction up front — all-one-way for calm, alternating for zigzag energy.
- Chain-piece the geese in batches to keep the rhythm going and the sewing fast.
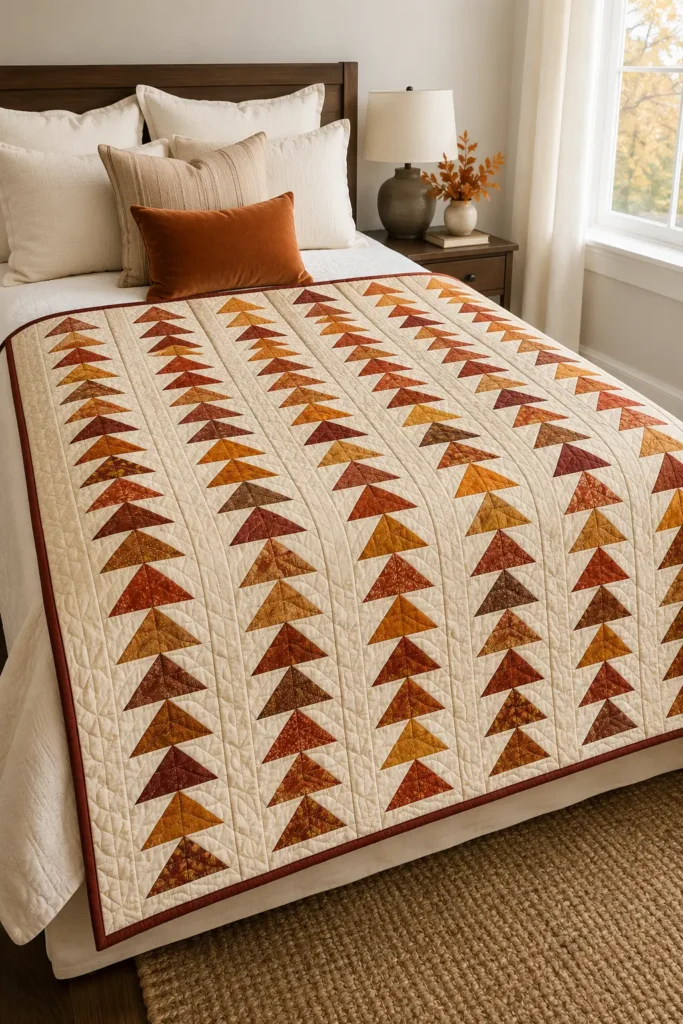
Styling It
Hang or lay the quilt so the geese fly upward — directional patterns look best oriented with intention. Over a bed, let the columns run head to foot; the eye follows them, making the bed feel longer and calmer. Keep the bedding neutral so the flock leads, and echo one goose color — a pumpkin or burgundy cushion — nearby. The strong movement suits both modern and rustic rooms, as long as you give it a quiet background to stand out against.
Final Thoughts
A scrappy flying geese quilt is autumn in motion. Named for the very birds crossing the fall sky, it turns a basketful of rich harvest scraps into a warm, glowing flock with real directional energy — no points to match, just geese to stack, row after satisfying row. It’s the most forgiving way to make something that looks this alive, and the perfect companion piece to a star quilt built from the very same unit. Set your geese flying, and let the season stream across your bed.
Other Design Inspirations – Digitally Modified
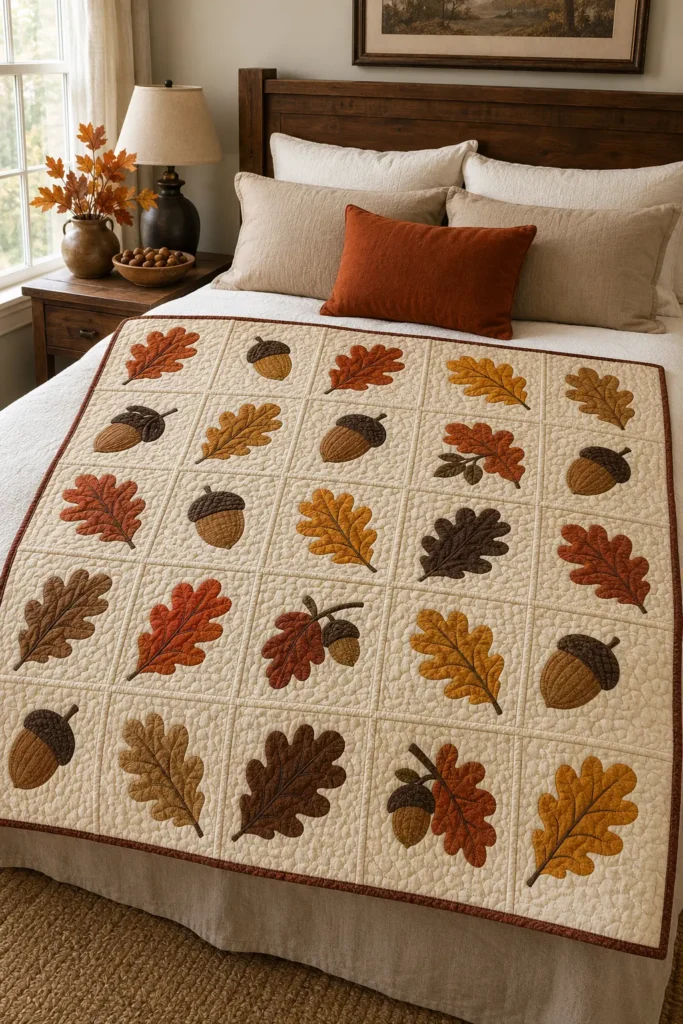
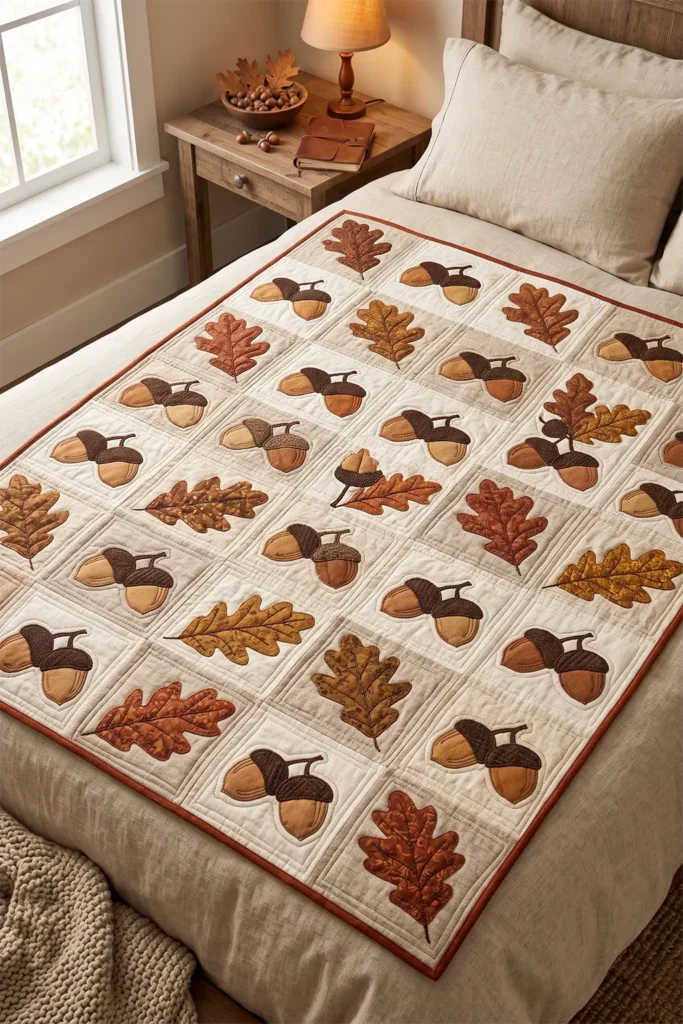
7. Acorn and Oak Leaf Quilt Designs for Woodland Warmth
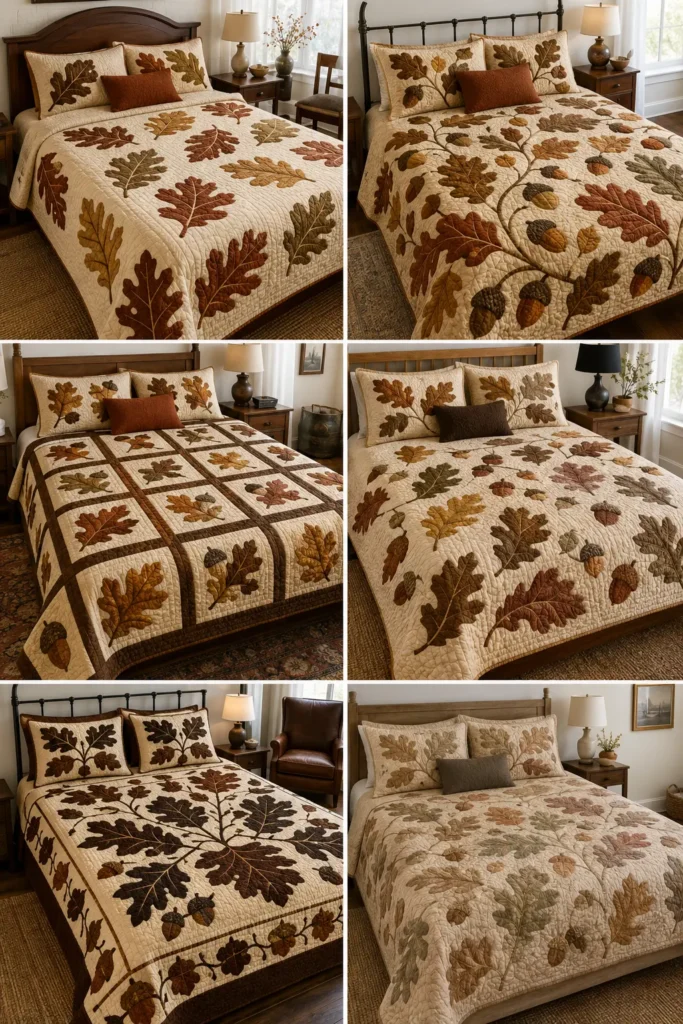
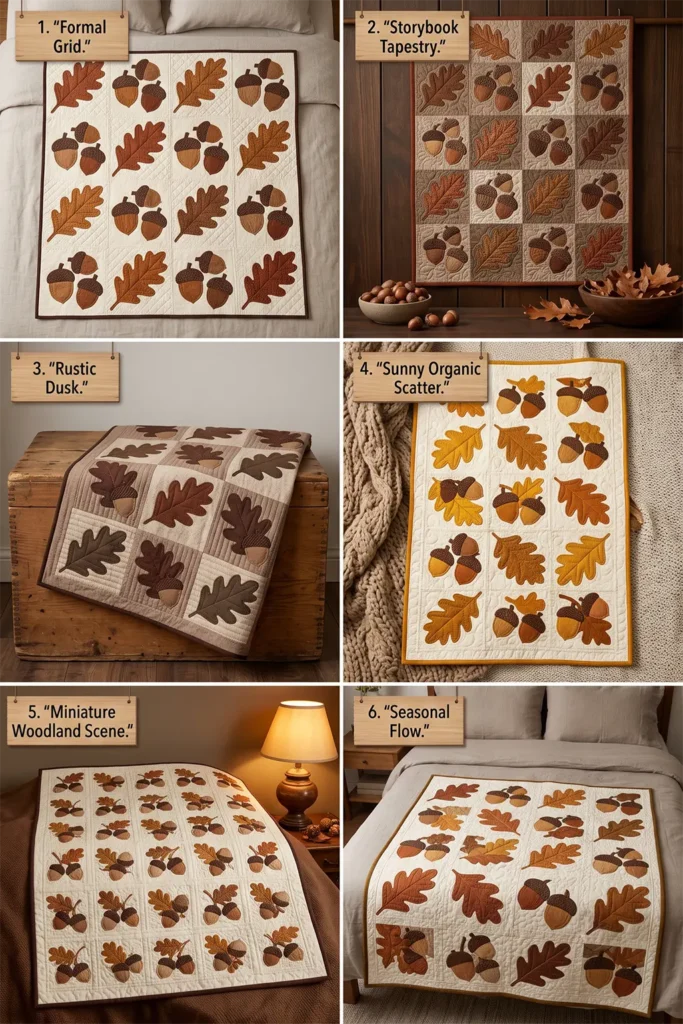
An acorn and oak leaf quilt brings the deep, sheltering feeling of an autumn forest indoors. Where a pumpkin patch is all farmhouse cheer, this design is woodland and grounded — lobed oak leaves in russet, bronze, and deep gold scattered with plump little acorns across warm background blocks, like the floor of an oak wood in late October. It’s appliqué again, but with more character in the shapes: an oak leaf’s distinctive scalloped lobes and an acorn’s two-part cap-and-nut give the quilt a naturalistic, storybook warmth that feels both rustic and quietly elegant.
Oaks carry real meaning, which gives this quilt a lovely undertone. The oak has long stood for strength, endurance, and steadfastness — the tree that stands for centuries, that shelters everything beneath it. There’s a fitting natural fact behind an autumn oak quilt, too: oaks are famously reluctant to drop their leaves, often holding their coppery foliage deep into winter when every other tree is bare. That stubborn, lingering warmth is exactly the spirit of this quilt — the last, richest color of the season, holding on.
Why I Made It
I made this because I wanted a quilt with the feeling of a walk in the woods — the crunch of leaves, the surprise of an acorn underfoot, the low bronze light through the branches. The oak leaf is one of the most beautiful shapes in nature to render in fabric, all those rhythmic lobes, and pairing it with the small, cheerful punctuation of acorns gives a quilt genuine storytelling charm. It’s the design I’d make for someone who loves being outdoors as the year turns.
It also lets me combine two things I love: the freedom of appliqué and the structure of piecing. Coming from generations of hand-stitching in my family, raised around the Nakshi Kantha tradition — where motifs are stitched onto cloth and then detailed with fine running-stitch lines that bring them to life — I especially love adding embroidered veins to each oak leaf. That small hand-stitched step is pure kantha instinct, and it’s what turns a flat fabric leaf into something that looks like it drifted down from a branch.
Why This Idea Is Worth Making
This idea is worth making because it teaches multi-piece appliqué and simple embroidery inside a warm, characterful design — a real step up in expressiveness from single-shape appliqué, but still beginner-accessible with fusible web. The acorn’s cap-and-nut and the oak leaf’s veins introduce layering and detail with ease, and the finished quilt has a naturalistic depth that plain appliqué can’t match. Set on a softly pieced background, it’s a woodland quilt with genuine coziness and craft, and the skills carry straight into any nature-motif quilt you make next.
Finished Size
- Finished quilt: 60 × 72 inches — a throw or twin bed topper
- Finished block: 12 inches square (12½ inches unfinished)
- Layout: 5 blocks across × 6 blocks down = 30 blocks (alternating oak-leaf and acorn blocks, plus a few combined)
- Skill level: confident beginner
- Core techniques: multi-piece fusible appliqué, embroidered detail, block assembly, binding
Materials Needed
- Oak leaf fabrics: ¼ yard each of 5–6 russets, bronzes, deep golds, and warm browns
- Acorn nut fabric: ⅛ yard of warm tan or caramel
- Acorn cap fabric: ⅛ yard of dark brown (a subtle texture print reads like a real cap)
- Background fabric: 3¾ yards of warm cream, oatmeal, or a soft mushroom neutral
- Backing: 4 yards
- Batting: at least 66 × 78 inches
- Fusible web (paper-backed) — about 2½ yards
- Embroidery floss in dark brown (for leaf veins and acorn details)
- Binding: ⅝ yard in russet or deep brown
- Thread: matching or contrasting for appliqué edges
- Rotary cutter, cutting mat, ruler, sharp appliqué scissors, embroidery needle, iron, sewing machine
Beginner tip: fussy little acorn caps and leaf tips can fray. Fusible appliqué with a machine blanket stitch seals every edge and is far kinder to small, detailed shapes than needle-turn on your first woodland quilt.
Choosing Your Colors
Woodland means warm, earthy, and slightly muted — the palette of a forest floor rather than a candy bowl:
- Russet and bronze for the classic turning oak leaf
- Deep gold and ochre for sunlit leaves
- Warm brown and chestnut for depth
- Caramel and tan for acorn nuts
- Dark chocolate brown for acorn caps and embroidered veins
- All against a cream, oatmeal, or soft mushroom background
Keep the palette earthy and let a few leaves go brighter (a pop of pumpkin or deep red) for spark. Woodland color is rich but never neon.
The Blocks: Oak Leaf and Acorn
Two simple appliqué blocks, plus optional combined ones:
- Oak leaf block: a 12½-inch background square with one large lobed oak leaf (about 8 inches long) appliquéd diagonally, veins embroidered down the center and out to each lobe
- Acorn block: a 12½-inch background square with a cluster of two or three acorns (each nut about 2½ inches, capped with a 1½-inch cap), with tiny embroidered stem tops and cap texture
- Combined block (optional): a single oak leaf with one or two acorns tucked beside it
Vary leaf direction and acorn clusters block to block for a natural, scattered woodland feel.
Cutting Measurements
- Background blocks: thirty squares at 12½ × 12½ inches
- Oak leaves, acorn nuts, acorn caps: cut per block from templates + fusible web
- Backing: 66 × 78 inches
- Batting: 66 × 78 inches
- Binding: seven strips, 2½ inches × width of fabric
Step-by-Step Guide
Step 1 — Cut the background blocks. Cut thirty 12½-inch background squares and press flat. Decide roughly how many will be oak-leaf, acorn, or combined blocks — a mix of about 15 leaf, 12 acorn, and 3 combined works well.
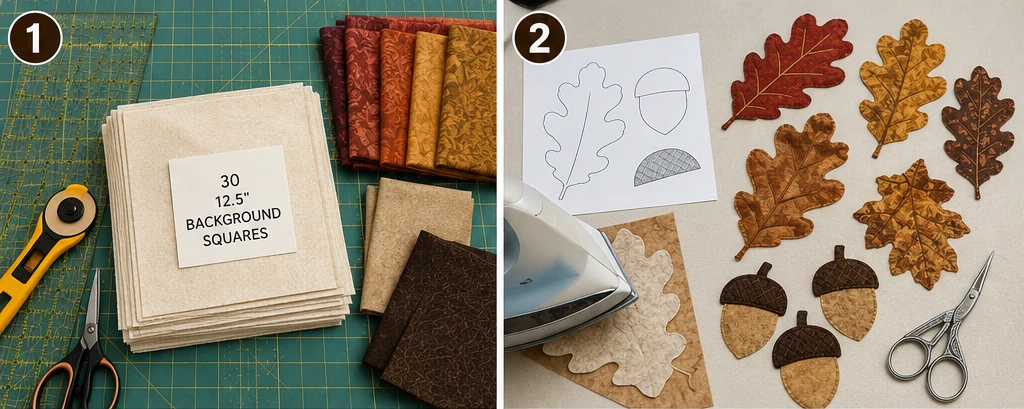
Step 2 — Prepare the appliqué shapes. Trace oak leaves, acorn nuts, and acorn caps onto the paper side of fusible web, varying the leaf shapes and directions. Iron each onto the back of the chosen fabric and cut out precisely — take care with the oak leaf’s lobed edges and the acorn cap’s curve.
Step 3 — Build the acorns (layered). For each acorn, position the tan nut first, then overlap the dark cap across its top so the cap sits over the nut. This layering is what gives an acorn its realistic look. Fuse in place.
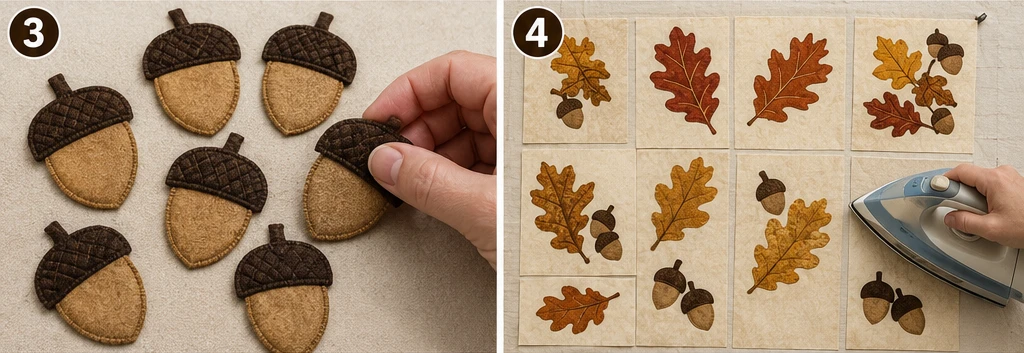
Step 4 — Arrange and fuse the blocks. On each background square, position the leaf or acorn cluster, checking the direction and balance, then fuse everything down with a hot iron.
Step 5 — Stitch the appliqué edges. Finish every raw edge with a machine blanket stitch (or small satin stitch), working the underneath layers first — nut before cap, leaf before any overlapping acorn.
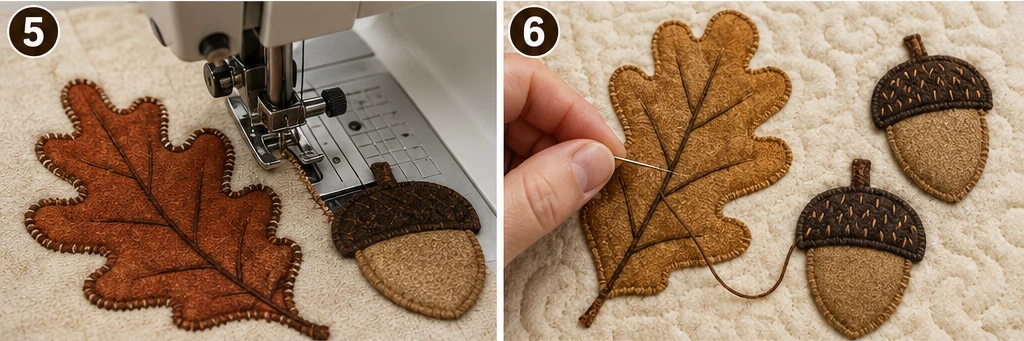
Step 6 — Add the embroidered detail. This is the step that brings it alive. With dark brown floss, embroider a central vein down each oak leaf and short veins out to each lobe using a simple stem stitch or backstitch. Add a few tiny stitches to suggest the acorn cap’s texture and a small stem at each acorn top.
Step 7 — Lay out and assemble the top. Arrange the finished blocks 5 across × 6 down, mixing leaf directions and acorn clusters so the woodland feels scattered and natural. Sew into rows with a ¼-inch seam, press seams in alternating directions, then join the rows. The finished top measures about 60½ × 72½ inches.
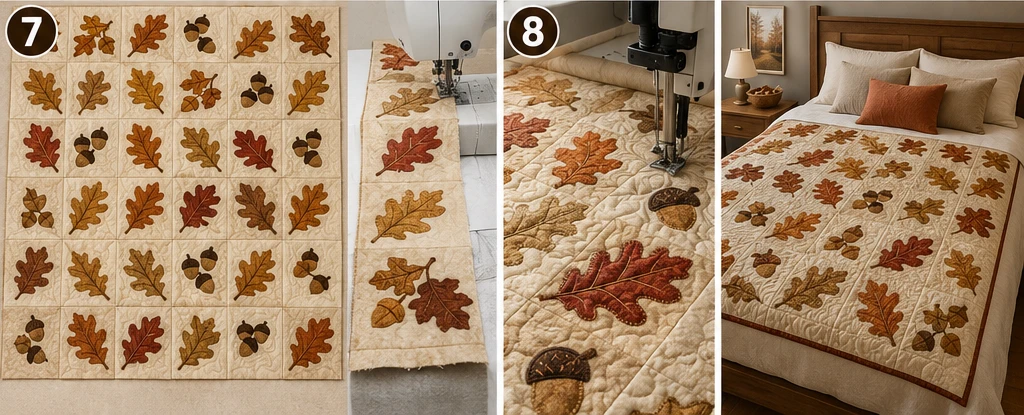
Step 8 — Layer and baste. Lay the backing wrong side up, center the batting, then the top right side up. Smooth from the center and baste with pins or thread.
Step 9 — Quilt, trim, and bind. Quilt around each leaf and acorn to make them stand out, with gentle all-over lines or a leafy meander in the background. Trim to 60 × 72 inches, bind with the 2½-inch strips, and wash gently with a color catcher.
Assembly at a Glance
- Cut thirty 12½-inch background squares; plan the leaf/acorn/combined mix.
- Trace and cut oak leaves, acorn nuts, and caps (fusible web).
- Layer each acorn — nut first, cap overlapping on top.
- Arrange and fuse leaves and acorns onto the blocks.
- Blanket-stitch all edges, underneath layers first.
- Embroider oak-leaf veins and acorn details in dark brown floss.
- Lay out 5 × 6, mixing directions; sew rows, press alternating, join → 60½ × 72½ top.
- Layer backing, batting, and top; baste.
- Quilt around the motifs, trim to 60 × 72 inches, bind, and wash.
Beginner Tips for Success
- Use fusible appliqué with a blanket stitch — it seals the fray-prone lobes and acorn caps.
- Layer acorns nut-first, cap-on-top, for a realistic look.
- Don’t skip the embroidered veins; that one detail is what makes an oak leaf read as an oak leaf.
- Vary leaf direction and acorn placement so the woodland looks scattered, not lined up.
- Keep the palette earthy — a couple of brighter leaves add spark, but woodland color stays warm and muted.
Styling It
Lay the finished quilt across a bed dressed in warm neutral or soft mushroom linen, and build a woodland mood around it — wood tones, a chunky knit, a bowl of real acorns or dried oak leaves, a low warm lamp. Echo a russet or bronze from the leaves in a cushion or throw. This quilt suits cozy, nature-leaning rooms beautifully, the kind that already feel like a cabin in the woods.
Final Thoughts
An acorn-and-oak-leaf quilt is woodland warmth you can wrap around yourself. Through layered appliqué and a few hand-embroidered veins, it turns russet, bronze, and gold into a scattered forest floor — carrying the oak’s old meaning of strength and endurance, and its stubborn habit of holding onto color long after the other trees let go. Cozy, characterful, and grounded in nature, it’s the quilt that brings the quiet warmth of an autumn wood right into your home.
Other Design Inspirations – Digitally Modified
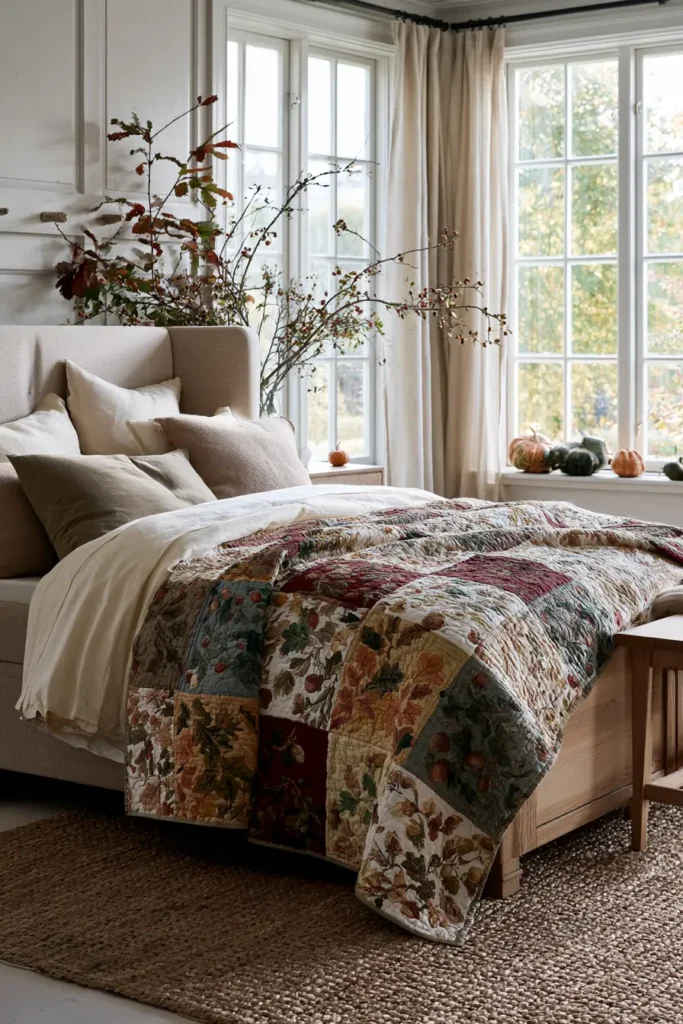
8. Golden Sunflower Quilt Patterns for Bright Autumn Décor
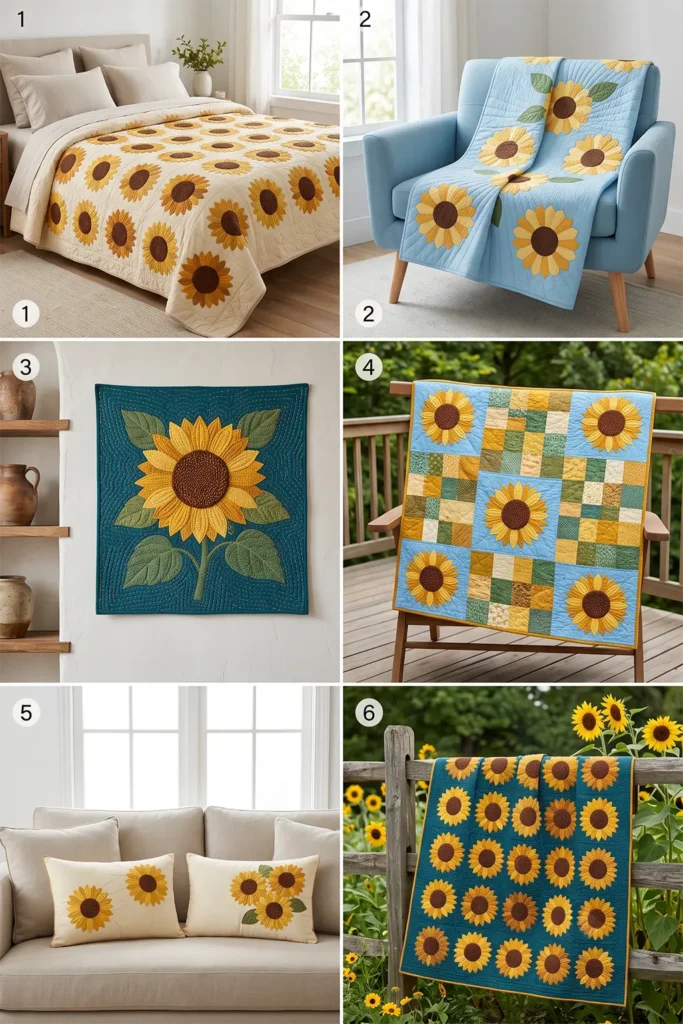
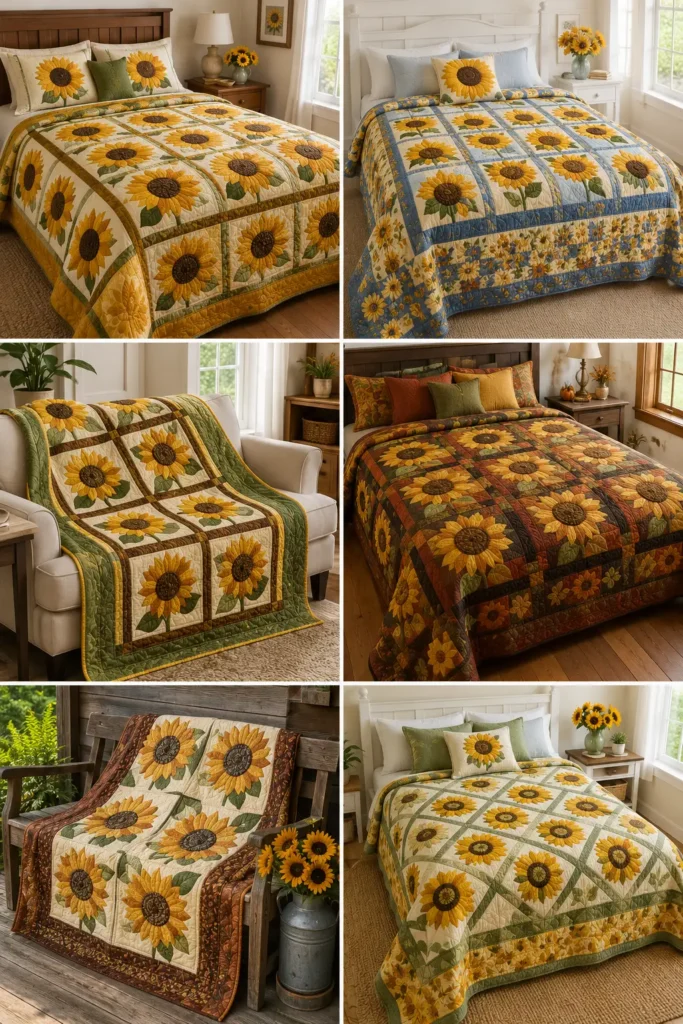
Not every fall quilt has to be muted and woodsy. A golden sunflower quilt is autumn at its most joyful — big, sunny blooms in gold, amber, and butter yellow with rich chocolate-brown centers, radiating warmth across a quilt like a field caught in late-summer light. Sunflowers bridge the seasons perfectly: they’re the last great bloom of summer and the first flower of harvest, so they bring brightness and cheer to fall décor without tipping into somber. For a room that wants autumn’s warmth but not its shadows, this is the quilt.
Sunflowers carry a lovely meaning to match their looks. They’ve long symbolized adoration, loyalty, warmth, and the pursuit of light — the flower that literally turns its face to follow the sun across the sky. There’s real botany behind that image (young sunflowers track the sun each day before settling to face east), and it makes the sunflower a quietly hopeful motif: a bloom that always looks toward the light. Stitched into a quilt, that’s a warm thought to wrap up in as the days grow shorter.
Why I Made It
I made this because autumn décor leans so heavily rustic and dim that a burst of pure gold feels like a gift. A sunflower quilt is unapologetically bright, and there’s real joy in that — the same joy as a jar of sunflowers on a kitchen table. It’s the fall quilt I’d make for someone who loves warmth and cheer, who wants the coziness of the season without the moodiness.
I also love the making of a sunflower — it’s a small exercise in radial design, a ring of petals circling a rich center, and getting that circle to feel balanced is deeply satisfying. Coming from generations of hand-stitching in my family, raised around the Nakshi Kantha tradition, I especially love finishing the sunflower’s center with a cluster of hand-stitched French knots, the way kantha builds texture with tiny raised stitches. That handful of knots turns a flat brown circle into a seeded, dimensional sunflower heart — a small step with a big payoff.
Why This Idea Is Worth Making
This idea is worth making because it brings bold, mood-lifting color to a season that often forgets to be cheerful, using approachable appliqué. Building a sunflower teaches you layered, radial appliqué — a petal ring around a center — which is a genuinely useful skill, yet it stays beginner-friendly with fusible web. The French-knot center adds gorgeous texture with the simplest of embroidery. And the finished quilt is a warm, sunny statement piece that makes a whole room feel brighter the moment it’s laid out. It’s the happiest quilt in this collection to make and to live with.
Finished Size
- Finished quilt: 60 × 72 inches — a throw or twin bed topper
- Finished block: 12 inches square (12½ inches unfinished)
- Layout: 5 blocks across × 6 blocks down = 30 blocks (about 20 sunflower blocks + 10 plain, or a fuller field of 30)
- Skill level: confident beginner
- Core techniques: layered radial appliqué, French-knot texture, block assembly, binding
Materials Needed
- Petal fabrics: ¼ yard each of 4–5 golds, ambers, butter yellows, and a deeper marigold-orange
- Center fabric: ¼ yard of dark chocolate brown (a speckled or textured print reads like sunflower seeds)
- Leaf fabric: ⅛ yard of warm green (optional, for a leaf or two per bloom)
- Background fabric: 3¾ yards — a soft sky blue, warm cream, or deep teal all work beautifully
- Backing: 4 yards
- Batting: at least 66 × 78 inches
- Fusible web (paper-backed) — about 3 yards
- Embroidery floss in gold and dark brown (for French knots and petal detail)
- Binding: ⅝ yard in marigold, brown, or a small check
- Rotary cutter, cutting mat, ruler, sharp appliqué scissors, embroidery needle, iron, sewing machine
Beginner tip: cut all your petals for one flower from a simple template so they’re identical, then arrange them in a ring — even spacing is what makes a sunflower look like a sunflower rather than a scribble.
The Petals: Two Ways to Build the Ring
The sunflower’s petal ring can be made two ways:
- Fusible appliqué (easy, recommended): cut 12–16 identical pointed-oval petals with fusible web, arrange them in an even ring around the center circle, overlapping slightly, and fuse. Finish edges with a machine blanket stitch. Beginner-friendly and quick.
- Dresden-style pieced petals (advanced, optional): sew the petals into a fabric “fan” ring on the machine, points folded and turned, then appliqué the whole ring down. More work and more precision, but a heirloom, dimensional result. Save this for when you’re comfortable.
Either way, the center circle goes on last, covering the inner ends of all the petals.
Choosing Your Colors
Sunflowers want warmth and brightness — this is the place to go bold:
- Golden yellow and butter for the classic sunny petal
- Rich amber and marigold for depth and glow
- A touch of rust or burnt orange on some petals for autumn warmth
- Dark chocolate brown for the seeded centers
- Warm green for the odd leaf
- Background choices: soft sky blue (fresh and cheerful), warm cream (classic), or deep teal (dramatic — makes the gold positively glow)
The background is your big mood decision: cream reads warm and traditional, blue reads bright and sunny, teal reads rich and modern. All three make the gold sing.
The Block: A 12-Inch Sunflower
Each block is a background square with one appliquéd sunflower:
- Background square: 12½ × 12½ inches (cut)
- Petal ring: 12–16 pointed petals, each about 3 inches long, arranged in a ring roughly 9 inches across
- Center circle: about 4 inches across, dark brown, covering the petal ends
- Leaf (optional): one or two green leaves at the base
Cutting Measurements
- Background blocks: thirty squares at 12½ × 12½ inches (or twenty, if alternating with plain blocks)
- Petals, centers, leaves: cut per block from templates + fusible web
- Backing: 66 × 78 inches
- Batting: 66 × 78 inches
- Binding: seven strips, 2½ inches × width of fabric
Step-by-Step Guide
Step 1 — Cut the background blocks. Cut thirty 12½-inch background squares (or twenty, if alternating with plain squares) in your chosen background color. Press flat.
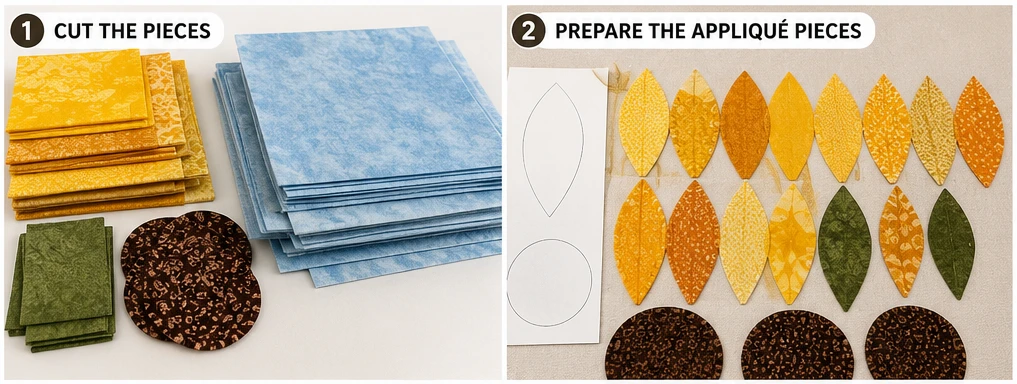
Step 2 — Cut the petals and centers. Using a petal template, trace 12–16 identical petals per flower onto fusible web, plus a center circle and any leaves. Iron onto the backs of your fabrics and cut out precisely. Mixing two or three golds among the petals of a single flower adds gorgeous depth.
Step 3 — Arrange the petal ring. On a background square, lay the petals in an even ring, points facing outward, inner ends meeting toward the middle, overlapping slightly and evenly. Take your time spacing them — a lightly marked circle guideline helps. Fuse when the ring looks balanced.
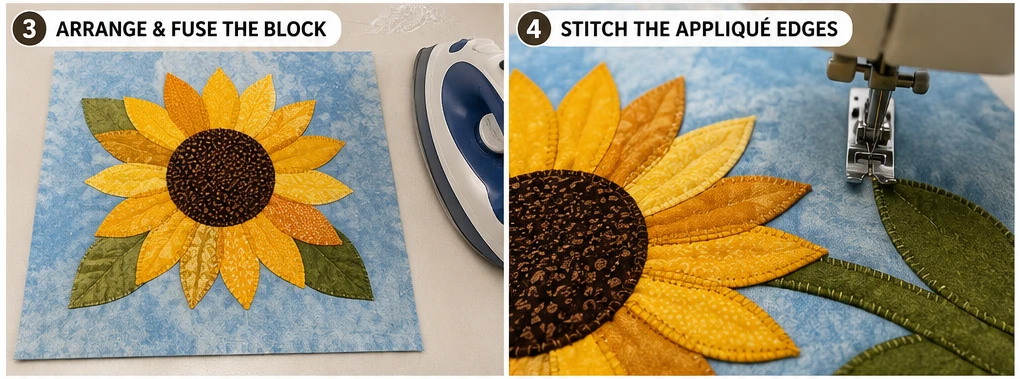
Step 4 — Add the center. Peel and place the dark brown center circle over the inner ends of all the petals, covering them cleanly, and fuse. Add leaves at the base if using.
Step 5 — Stitch the appliqué edges. Finish every petal, the center, and the leaves with a machine blanket stitch (or small satin stitch), stitching petals first, then the center over them.
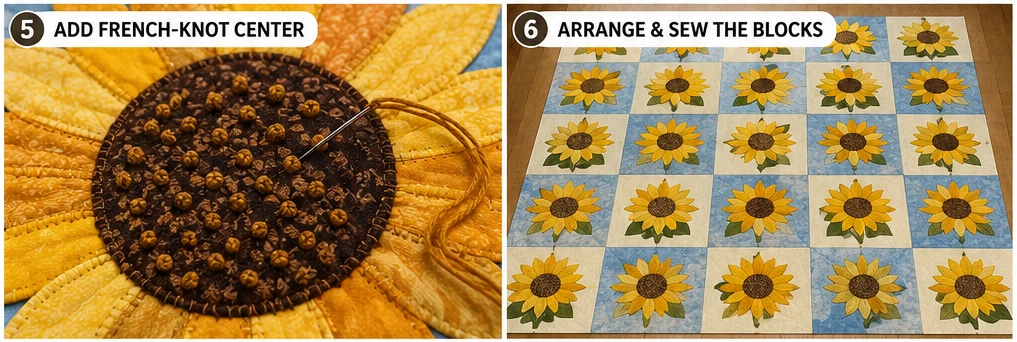
Step 6 — Add the French-knot center. With dark brown and gold floss, stitch a cluster of French knots across the center circle to suggest sunflower seeds — dense in the middle, sparser toward the edge. This raised, seeded texture is what makes the bloom look real. Add a few gold straight stitches at the petal bases if you like.
Step 7 — Lay out and assemble the top. Arrange the blocks 5 across × 6 down (mixing in plain blocks if using), turning some flowers slightly for a natural field. Sew into rows with a ¼-inch seam, press seams alternating, and join the rows. The finished top measures about 60½ × 72½ inches.
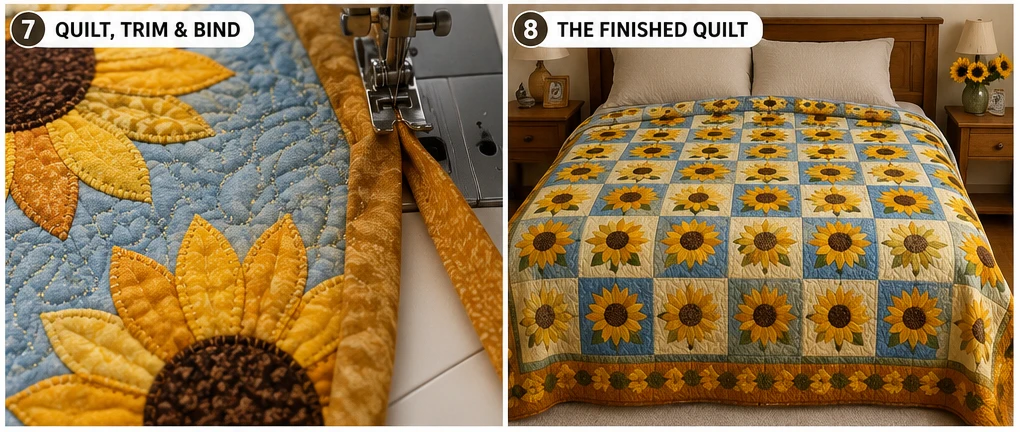
Step 8 — Layer and baste. Lay the backing wrong side up, center the batting, then the top right side up. Smooth from the center and baste with pins or thread.
Step 9 — Quilt, trim, and bind. Quilt around each sunflower and add gentle rays or an all-over pattern in the background. Trim to 60 × 72 inches, bind with the 2½-inch strips, and wash gently with a color catcher.
Assembly at a Glance
- Cut thirty 12½-inch background squares.
- Cut 12–16 identical petals per flower, plus centers and leaves (fusible web).
- Arrange the petal ring evenly on each block and fuse.
- Fuse the brown center circle over the petal ends.
- Blanket-stitch all edges (petals first, then center).
- Embroider a French-knot center for seeded texture.
- Lay out 5 × 6, turning some flowers; sew rows, press alternating, join → 60½ × 72½ top.
- Layer backing, batting, and top; baste.
- Quilt around the blooms, trim to 60 × 72 inches, bind, and wash.
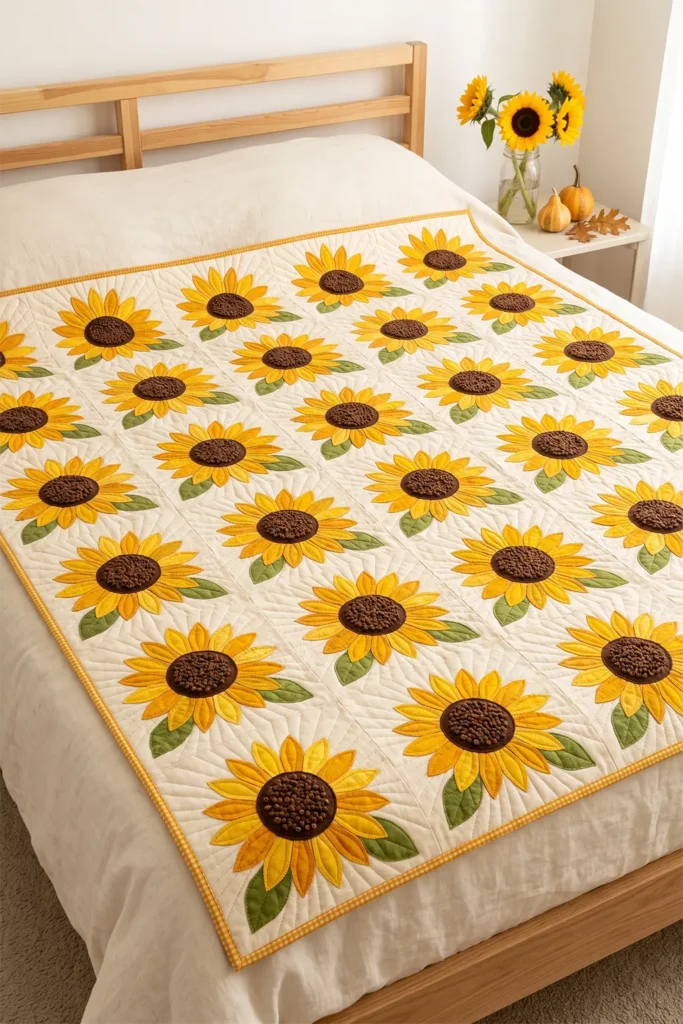
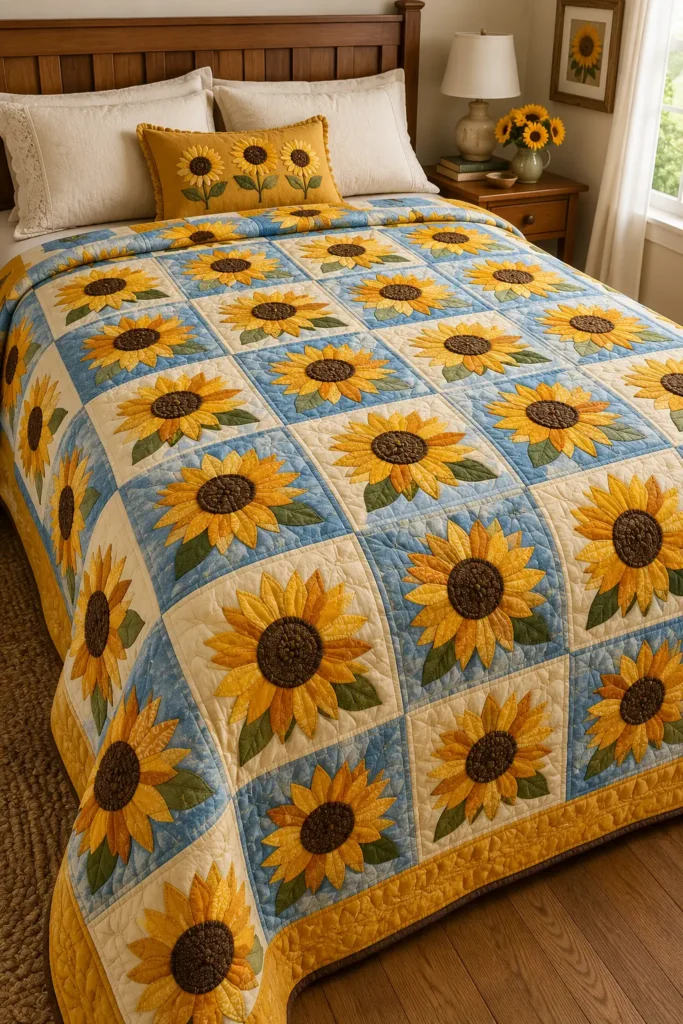
Beginner Tips for Success
- Cut petals from one template so they’re identical — even petals make a believable flower.
- Mark a light circle guideline and space the petals evenly before fusing.
- Mix two or three golds within a single flower for depth and glow.
- Don’t skip the French knots; that seeded texture is what makes a sunflower look real.
- Choose your background deliberately — cream, sky blue, and teal each give a very different mood.
Styling It
Lay the finished quilt across a bed or sofa where it can be the room’s bright spot, and keep everything around it simpler and warmer so the gold leads — natural wood, a cream throw, and, of course, a jar of real sunflowers nearby. On a teal or blue background version, echo the background color in a cushion to tie it in. This is a quilt that lifts a room’s whole mood, so let it be the star and build calm, warm neutrals around it.
Final Thoughts
A golden sunflower quilt is the brightest, happiest way to bring autumn indoors. Built from a simple ring of golden petals around a French-knotted center, it turns gold, amber, and butter-yellow into blooms that seem to hold the sun — carrying the sunflower’s warm, old meaning of light, loyalty, and looking toward brighter days. Cheerful, bold, and genuinely mood-lifting, it’s the fall quilt for anyone who wants the season’s warmth with none of its gloom.
Other Design Inspirations – Digitally Modified
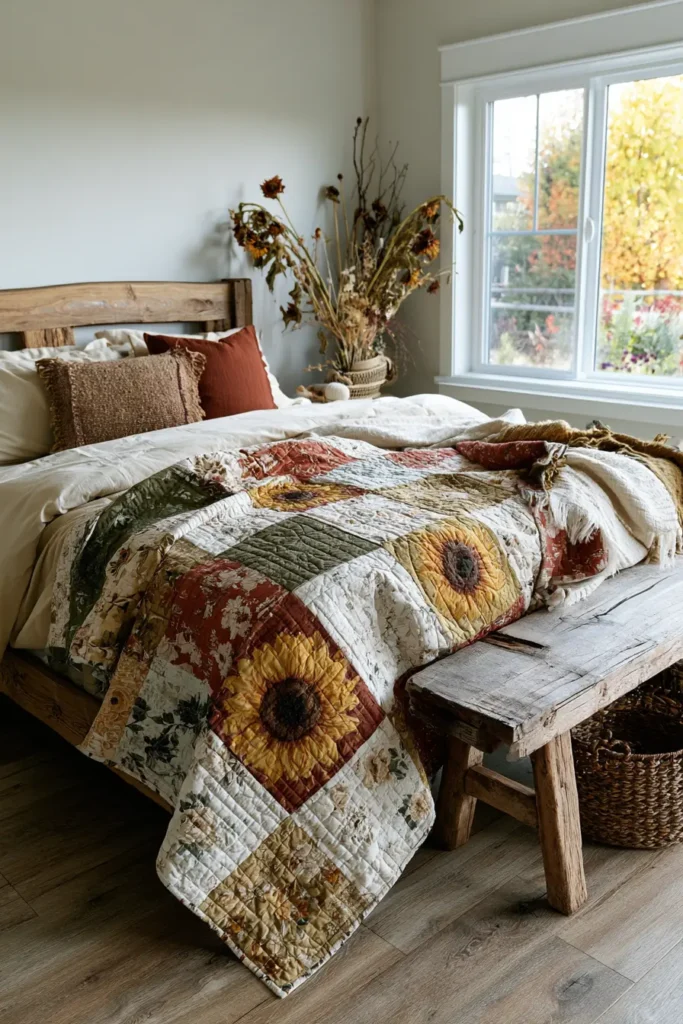
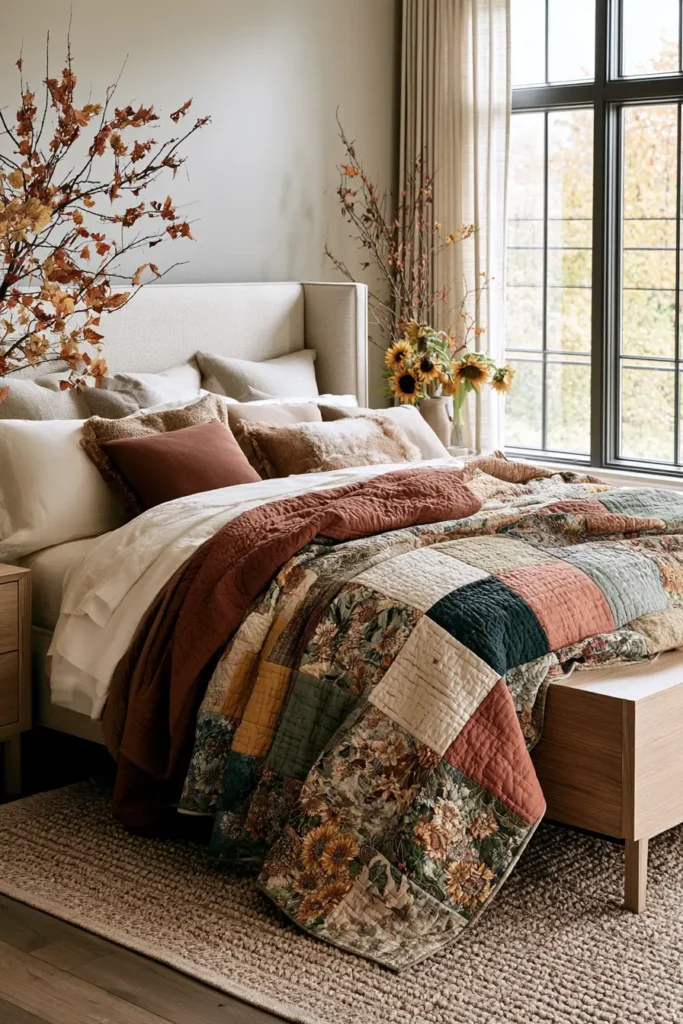
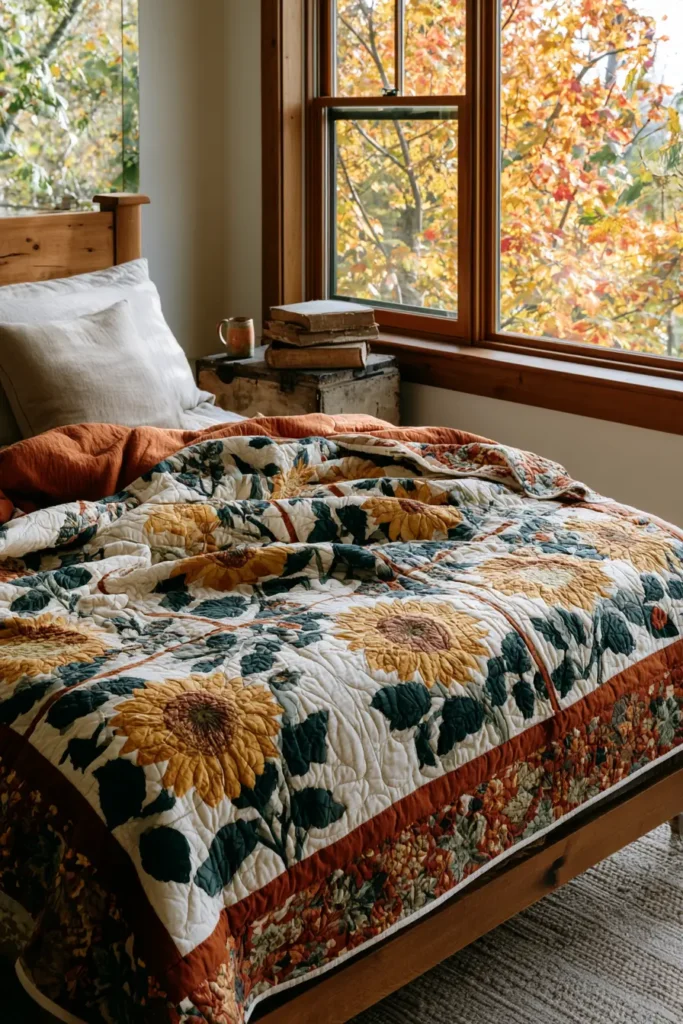
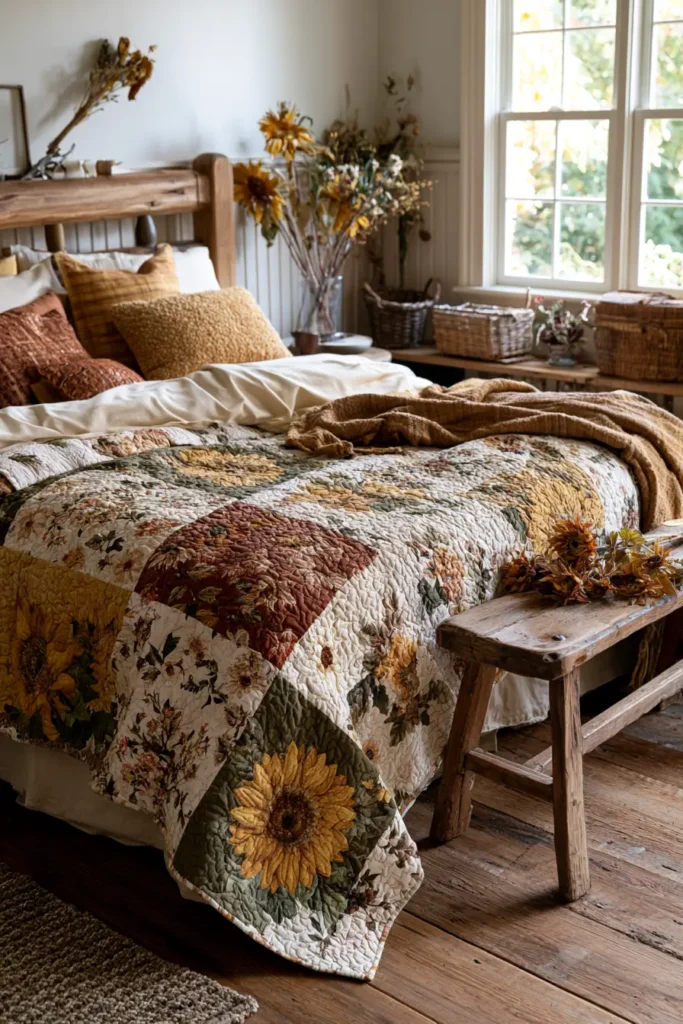
9. Warm Amber and Rust Ombre Quilts for Elegant Bed Covers
Not every fall quilt needs a leaf or a pumpkin on it. A warm amber and rust ombre quilt captures autumn through pure color — a gradient of fabrics flowing from pale butter and honey through amber and pumpkin into deep rust and burgundy, like the light of an October afternoon shifting across a field. There’s no motif and no fussy piecing; the quilt’s beauty comes entirely from the arrangement of color, from lightest to darkest, in a smooth, sophisticated flow. That restraint is exactly what makes it read as elegant rather than seasonal-cute, so it works as a refined bed cover in a room that wants autumn’s warmth in a modern, grown-up way.
“Ombre” comes from the French ombré, meaning “shaded,” and the technique of grading color from light to dark is one of the oldest in textile design — you’ll find it in dip-dyed silks, in painted fans, in gradient weaving across many cultures. In a quilt, that same graded flow does something quietly luxurious: the eye travels across the surface the way it travels across a sunset, and the whole piece feels considered and calm. It’s proof that the most elegant fall quilt might have no autumn motif at all — just autumn’s colors, arranged with care.
Why I Made It
I made this because an ombre quilt is where quilting comes closest to painting. Instead of piecing a picture, you’re composing with pure color and value, blending one warm tone into the next until the whole cover glows like a gradient. There’s a real, absorbing pleasure in laying out fabrics on the floor and nudging them lighter-to-darker until the flow feels perfect — it’s part quilting, part color study, and deeply satisfying.
It also plays directly to how I think about cloth. Coming from generations of hand-stitching in my family, raised around the Nakshi Kantha and Jamdani traditions — where color and tone are read as carefully as pattern — I was taught to see value and gradient as their own kind of design. An ombre quilt is that idea distilled: no motif needed, just the disciplined, beautiful arrangement of warm color from light to deep. It’s the most painterly quilt in this collection, and the most elegant.
Why This Idea Is Worth Making
This idea is worth making because it delivers the most sophisticated result in this collection from the simplest possible construction. It’s just squares sewn in a grid — no points to match, no appliqué, no templates — which makes it genuinely the easiest fall quilt here to sew. The skill is entirely in planning the gradient, arranging your ambers and rusts from light to dark, and that’s a wonderful, low-pressure way to train your eye for color and value. The finished cover is calm, modern, and quietly luxurious, an elegant statement piece that suits refined bedrooms beautifully.
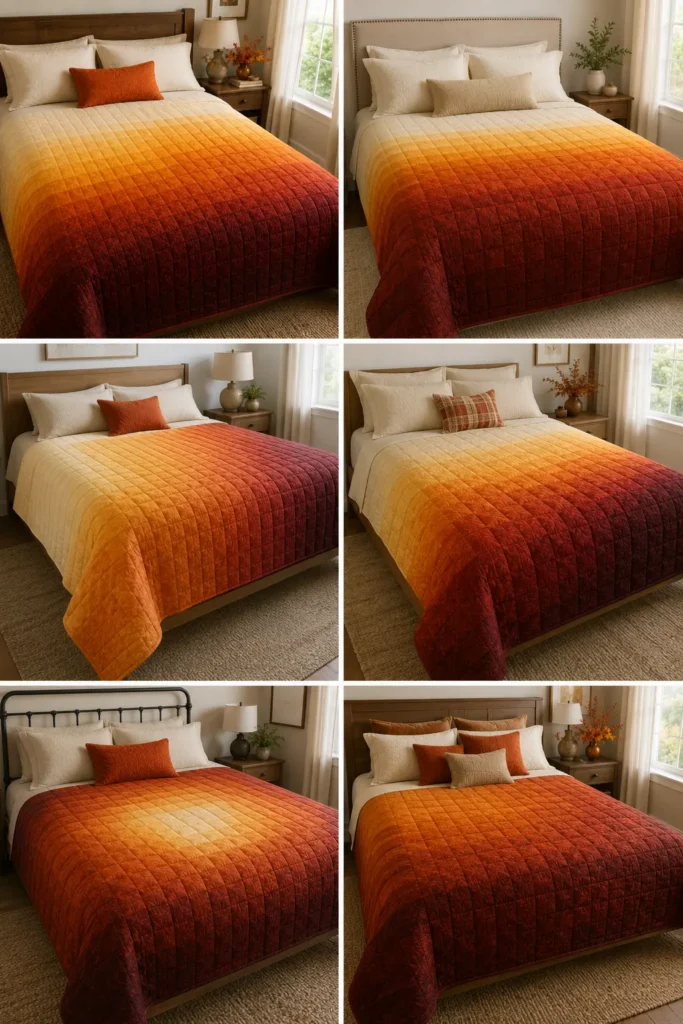
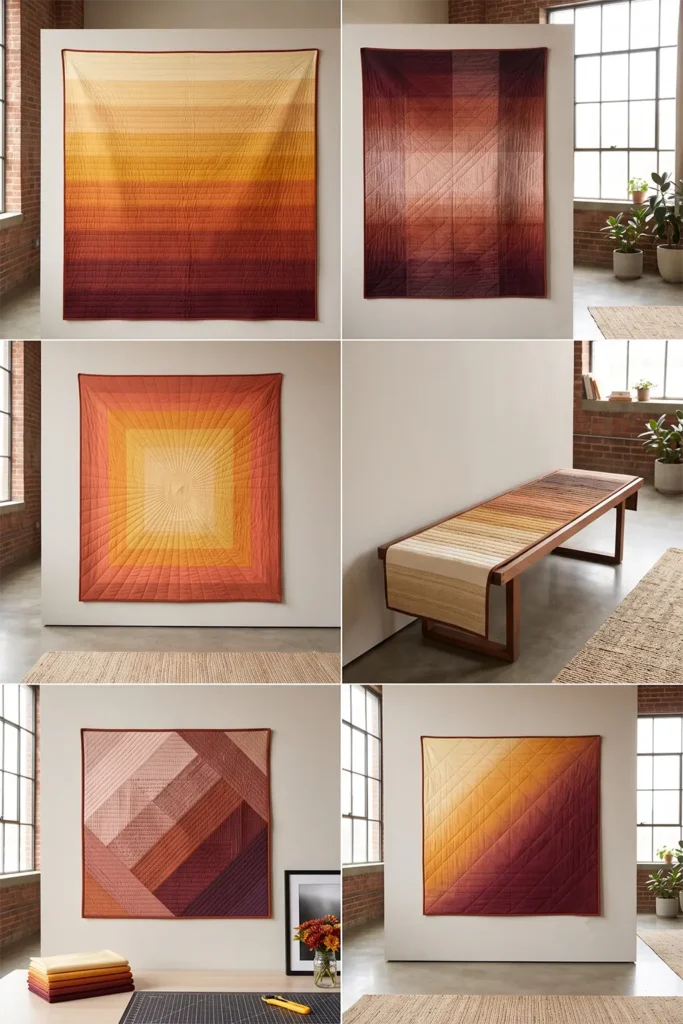
Finished Size
- Finished bed cover: 84 × 92 inches — a generous queen coverlet (this one is sized to dress a bed, not just fold at the foot)
- Finished square: 6 inches (6½ inches unfinished)
- Layout: 14 squares across × 15 squares down = 210 squares, graded top to bottom
- Twin cover: scale to about 66 × 90 inches (11 × 15 squares)
- Skill level: beginner (the sewing is simple; the planning is the art)
- Core techniques: value-gradient planning, simple square-grid patchwork, binding
Materials Needed
- Gradient fabrics: 7–9 fabrics running from light to dark — pale butter, honey gold, amber, warm orange, pumpkin, rust, brick, deep burgundy — about ½ yard of each (more of the tones you want to feature)
- Backing: 7¾ yards (or wide backing)
- Batting: at least 90 × 98 inches (queen)
- Binding: ¾ yard in deep rust or burgundy
- Thread: neutral for piecing
- Rotary cutter, cutting mat, quilting ruler, design wall or clear floor space, pins, iron, sewing machine
Beginner tip: choose fabrics that step evenly from light to dark. Lay them in a row and squint — if two neighbors look like the same value, your gradient will stall there. You want smooth, even steps, not a jump.
The Real Skill: Planning the Gradient
The sewing is easy; the gradient is everything. A few principles:
- Work in bands. Assign each fabric to one or more horizontal rows. With 15 rows and, say, 8 fabrics, each fabric fills about two rows, blending into the next.
- Blend the transitions. For a smoother flow, mix the two neighboring fabrics within the transition row (half one, half the next), so the colors melt rather than stripe.
- Decide your direction. Light at the top fading to dark at the bottom is classic and elegant. Dark-to-light, or light in the center fading dark to both edges, are equally beautiful — just decide before you cut.
- Photograph your layout in black and white. This is the pro trick: a grayscale photo strips away color and shows you value alone, instantly revealing any spot where the gradient jumps or stalls.
Choosing Your Colors
The classic amber-to-rust flow is stunning, but the ombre method works with any warm range:
- Amber to rust (classic): butter, honey, amber, pumpkin, rust, brick, burgundy
- Golden sunset: pale gold, marigold, orange, coral, deep rust
- Harvest earth: cream, wheat, ochre, cinnamon, chocolate brown
- Moody autumn: blush, terracotta, rust, wine, plum
Whatever the range, keep it all in one temperature (warm) and make sure the steps are even. A gradient is only as smooth as its most abrupt transition.
Cutting Measurements
- Squares: 210 at 6½ × 6½ inches, cut proportionally across your fabrics (e.g., roughly 26 squares from each of 8 fabrics)
- Backing: 90 × 98 inches (piece widths together, seams pressed open)
- Batting: 90 × 98 inches
- Binding: nine strips, 2½ inches × width of fabric, joined into one strip
Step-by-Step Guide
Step 1 — Cut your squares. Cut 210 squares at 6½ × 6½ inches, keeping each fabric in its own labeled stack so you can control the gradient precisely.
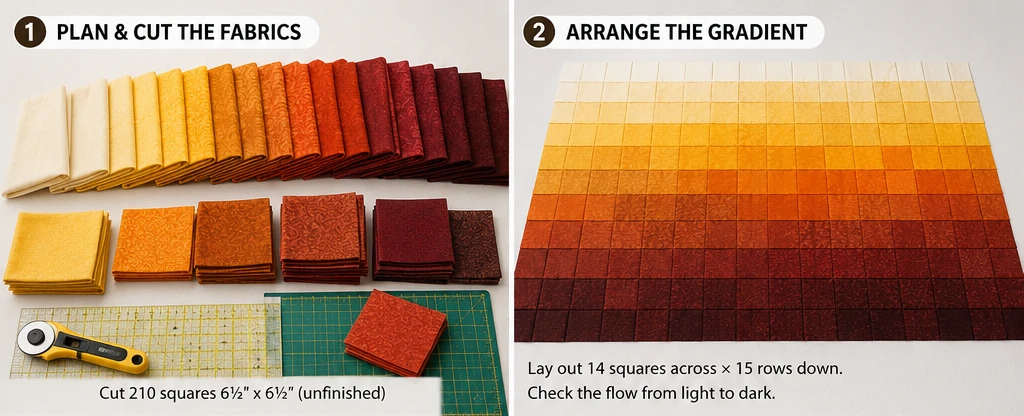
Step 2 — Plan the gradient on a design wall. Lay the squares out 14 across × 15 down on a design wall or floor, arranging your fabrics in bands from lightest at the top to darkest at the bottom. Blend the transition rows by mixing two neighboring fabrics. Take your time here — this is the whole quilt.
Step 3 — Check it in grayscale. Photograph the full layout, then convert the photo to black and white on your phone. Any place the gradient jumps or flattens will jump out instantly. Adjust squares until the grayscale flow is smooth.
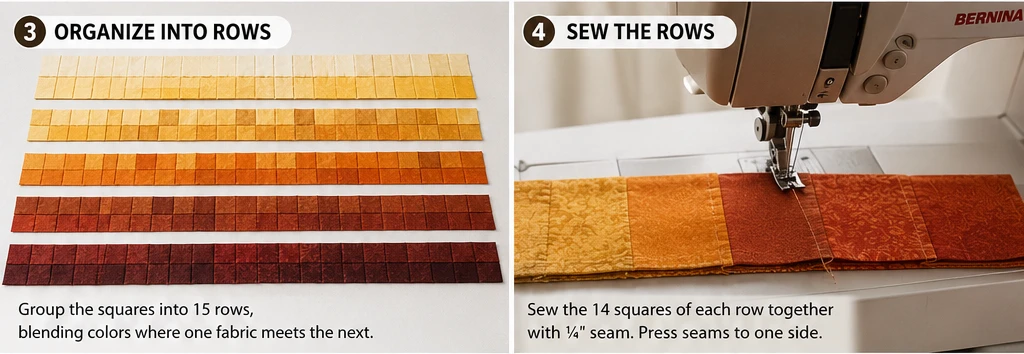
Step 4 — Sew the rows. Working one row at a time so you don’t lose your arrangement, sew each row of 14 squares with a ¼-inch seam. Press the seams of odd rows one way and even rows the other, so they nest. Return each finished row to its place.
Step 5 — Join the rows. Sew the 15 rows together in order, matching seams, always keeping the light-to-dark direction correct. Press well. The finished top measures about 84½ × 90½ inches (add a top and bottom row for the full 92 inches if you want extra length).
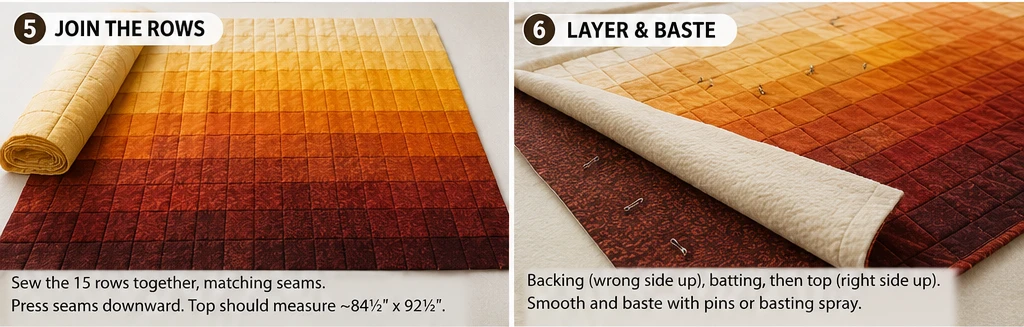
Step 6 — Layer and baste. Lay the backing wrong side up, center the batting, then the top right side up. Smooth from the center outward and baste generously — a large coverlet needs plenty of basting.
Step 7 — Quilt it. Keep the quilting simple and horizontal so it doesn’t fight the gradient — straight lines across the rows, or an all-over grid, both let the color flow lead. Avoid busy motifs that would distract from the ombre.
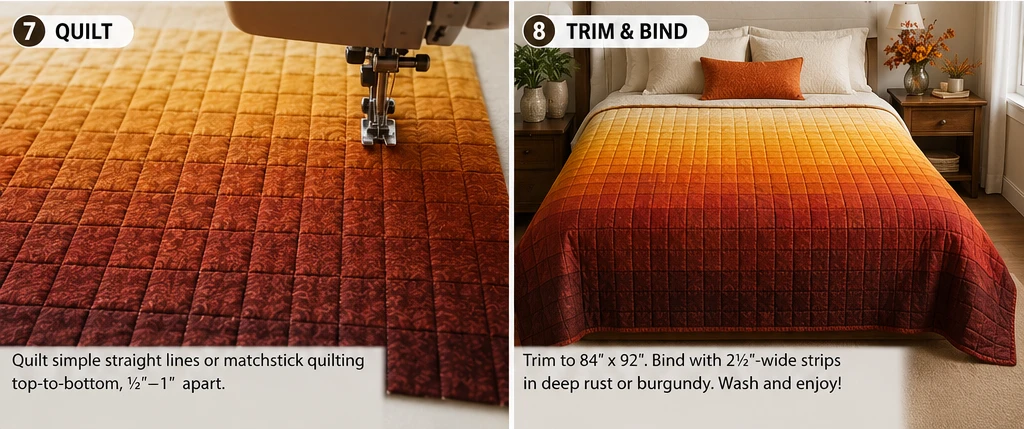
Step 8 — Trim and bind. Trim to 84 × 92 inches, square the corners, and bind with the 2½-inch strips in a deep rust or burgundy that echoes the darkest band.
Step 9 — Wash and finish. Wash gently in cold with a color catcher (deep rusts and burgundies bleed), and tumble dry low for a soft, elegant drape.
Assembly at a Glance
- Cut 210 squares at 6½ inches, stacked by fabric.
- Lay out 14 × 15 on a design wall, graded light-to-dark, blending transitions.
- Check the layout in a black-and-white photo; smooth any jumps.
- Sew rows of 14, pressing odd/even rows opposite; keep them in order.
- Join the 15 rows, keeping the gradient direction → 84½ × 90½ top.
- Layer backing, batting, and top; baste generously.
- Quilt with simple horizontal lines so the flow leads.
- Trim to 84 × 92 inches; bind in a deep rust.
- Wash cold with a color catcher; tumble low.
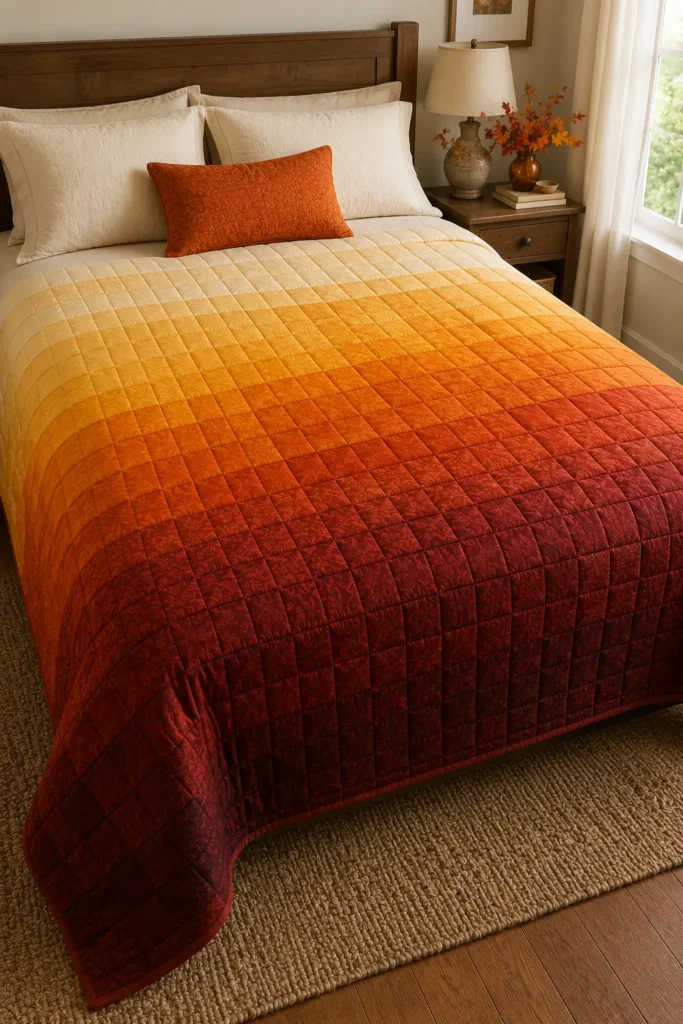
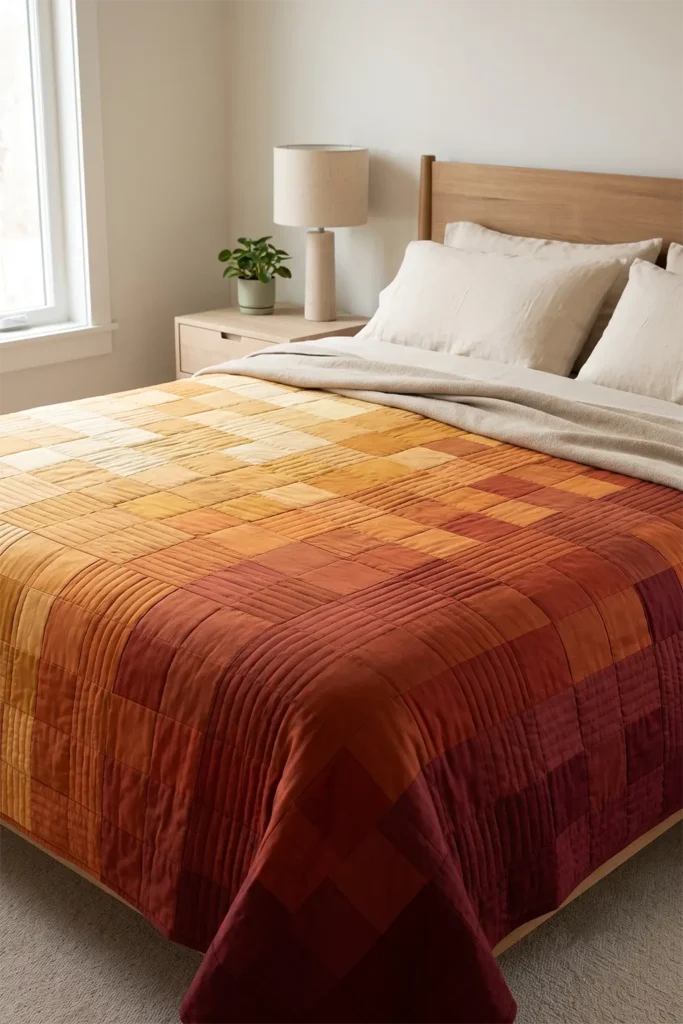
Beginner Tips for Success
- Choose fabrics that step evenly light-to-dark — even steps make a smooth gradient.
- Plan the whole layout before sewing; the gradient is the design.
- Use the grayscale-photo trick to check value flow — it never lies.
- Blend transition rows (half one fabric, half the next) for the smoothest melt.
- Keep quilting simple and horizontal so nothing competes with the color flow.
Styling It
Dress the bed fully with the ombre cover so the gradient reads across the whole surface — light pooling at the head, deepening toward the foot (or however you’ve oriented it). Keep everything else quiet and tonal: cream or rust linen, natural wood, a single amber or rust cushion. Because the quilt is all about color flow, a calm, uncluttered room lets it breathe and look its most luxurious. This is the fall quilt that suits an elegant, modern bedroom rather than a rustic one.
Final Thoughts
A warm amber and rust ombre quilt proves that the most elegant fall quilt might carry no autumn motif at all — just autumn’s colors, arranged with care from light to deep. Built from the simplest squares but composed like a painting, it flows across an elegant bed like shifting October light, calm and quietly luxurious. It’s the easiest quilt in this collection to sew and the most sophisticated to look at — pure color, doing all the work.
Other Design Inspirations – Digitally Modified
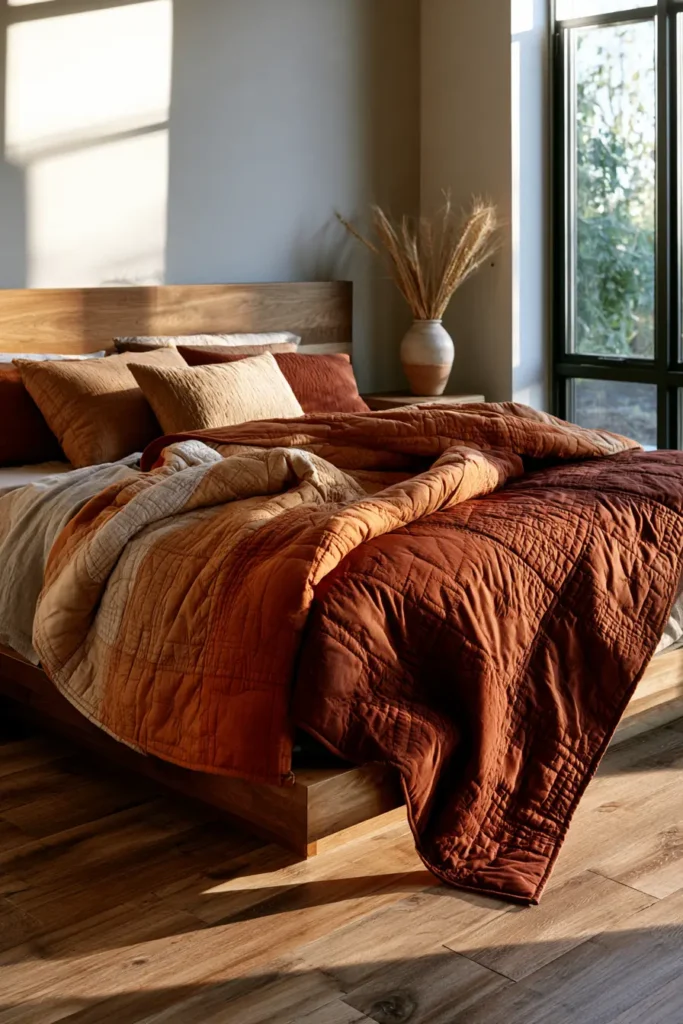
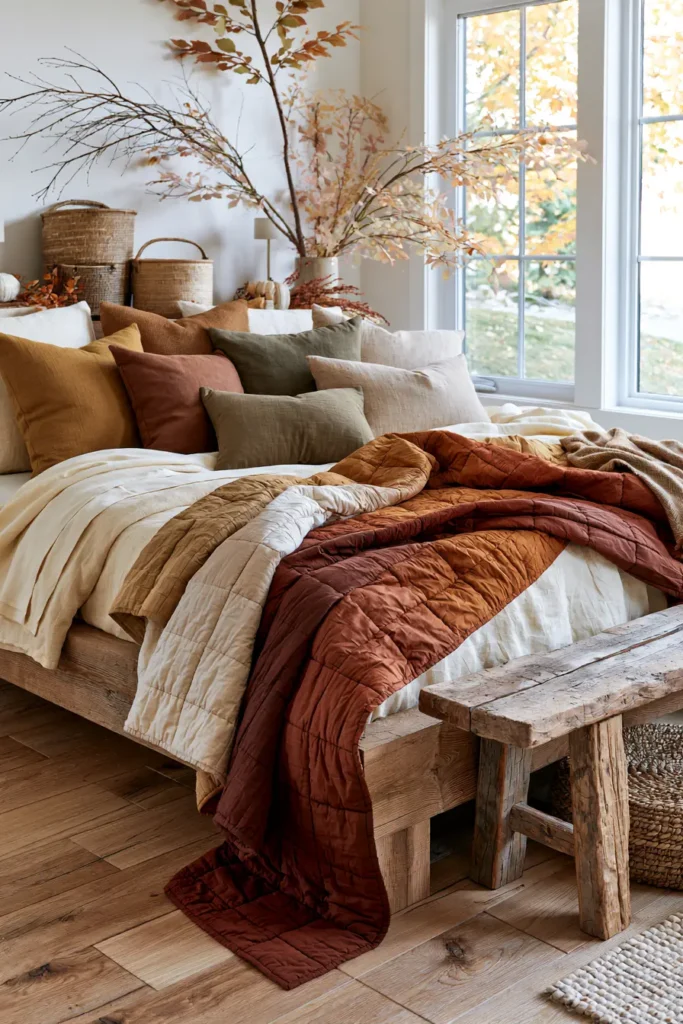
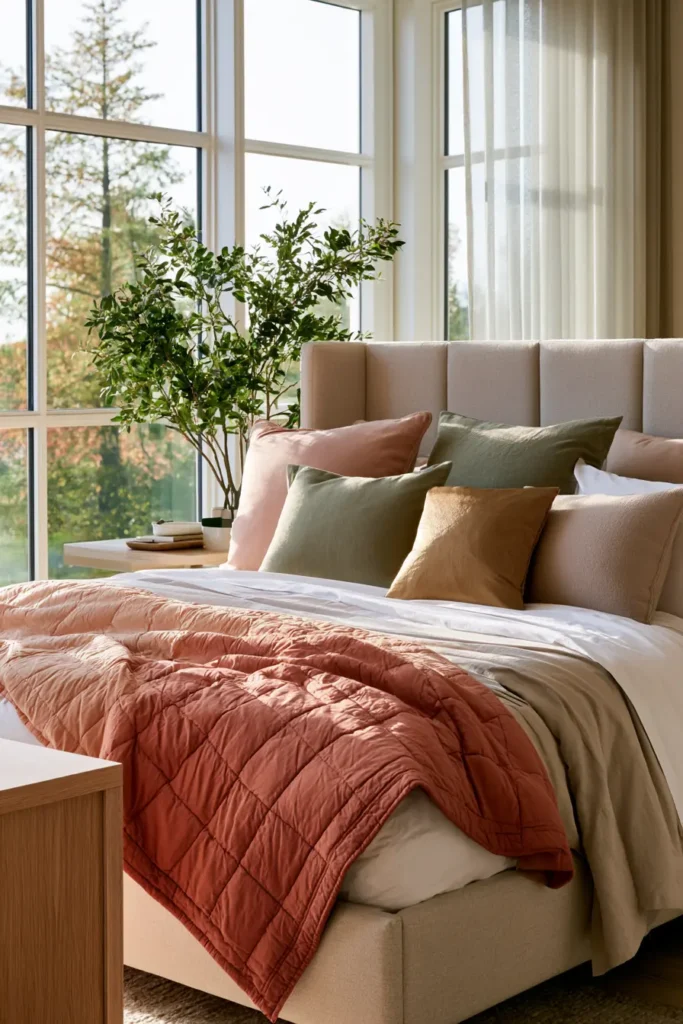
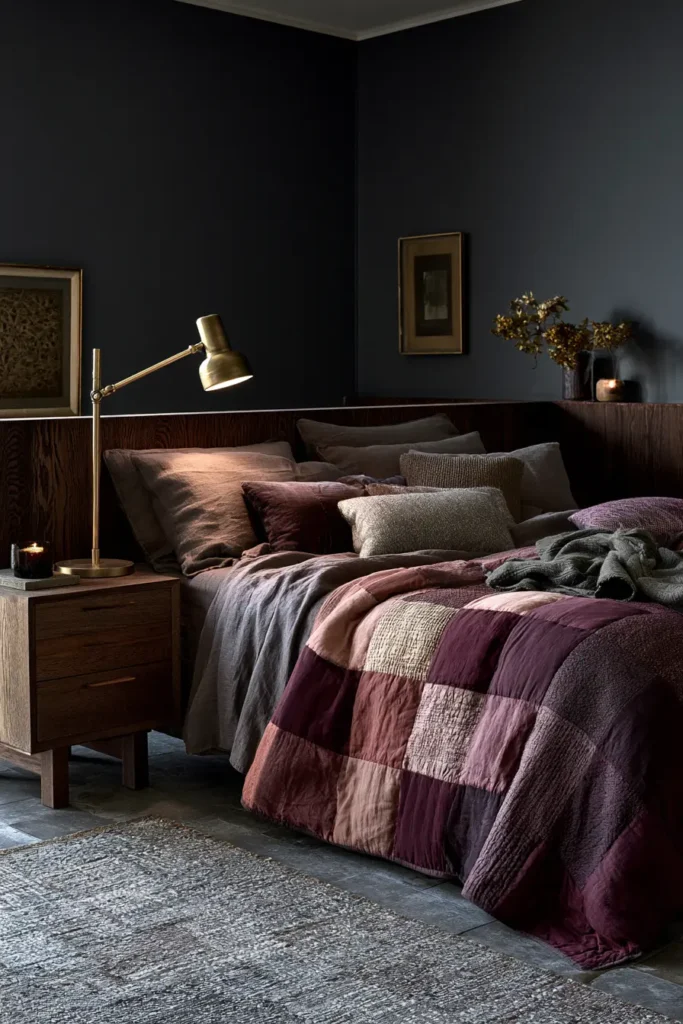
10. Minimalist Neutral Fall Quilts for Serene, Cozy Spaces
Autumn doesn’t only arrive in bright orange and gold. There’s a quieter side to the season — bare branches, morning fog, oatmeal wool, warm stone — and a minimalist neutral fall quilt captures exactly that mood. Instead of leaves and pumpkins, this quilt works in a soft, tonal palette of creams, oatmeals, warm greys, taupes, and sandy browns, letting texture and form do what color usually does. The result is calm, modern, and deeply cozy: a quilt that brings autumn’s warmth into a serene, pared-back space without a single loud note. For anyone whose home leans Scandinavian, Japandi, or simply quiet, this is the fall quilt that fits.
Minimalism in quilting isn’t about doing less — it’s about letting each element carry more weight. When you remove bright color and busy motifs, three things step forward: negative space (generous areas of calm background), tonal contrast (the subtle difference between a cream and a warm grey), and the quilting itself, whose stitched lines become the real pattern. Modern minimalist quilters have made an art of exactly this, and it’s a beautiful, meditative way to work — proof that a quilt can feel rich and warm while staying almost entirely quiet.
Why I Made It
I made this because not every autumn room wants to shout about the season. Some of the coziest spaces I know are almost colorless — all warm neutrals and soft texture — and they feel like autumn precisely because they’re so calm and enveloping. A minimalist neutral quilt is the piece I’d make for a serene modern bedroom, where the goal is stillness and warmth rather than seasonal decoration.
I also find it the most disciplined and rewarding kind of quilting. Coming from generations of hand-stitching in my family, raised around the Nakshi Kantha tradition — where the running stitch itself creates the texture and the beauty, not just bright thread — I love a quilt where the stitching is the star. In a neutral quilt, the quilting lines aren’t a finishing step; they’re the whole design. That’s pure kantha thinking: let the stitch carry the meaning.
Why This Idea Is Worth Making
This idea is worth making because it teaches the most sophisticated lessons in quilting — negative space, tonal contrast, and quilting-as-design — inside a genuinely simple, beginner-friendly build. There are few pieces and no fussy points, so the sewing is easy; the artistry is in restraint and in the quilting. The finished quilt is calm, modern, and endlessly livable — it won’t date, won’t clash with anything, and brings warmth to a serene space without visual noise. It’s the quilt for people who love autumn’s feeling more than its clichés.
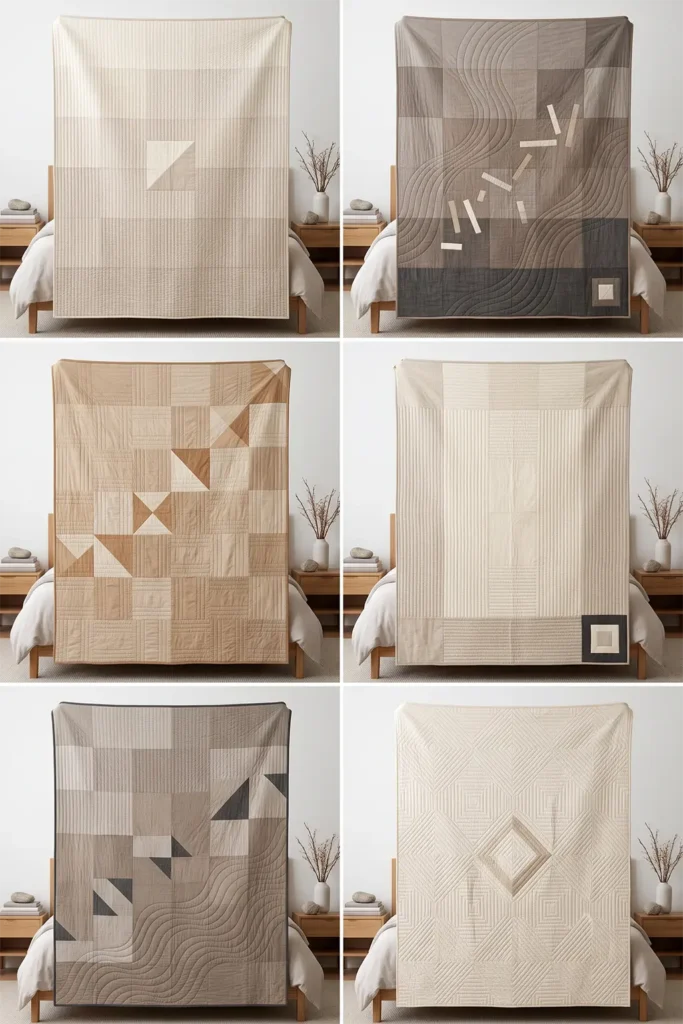
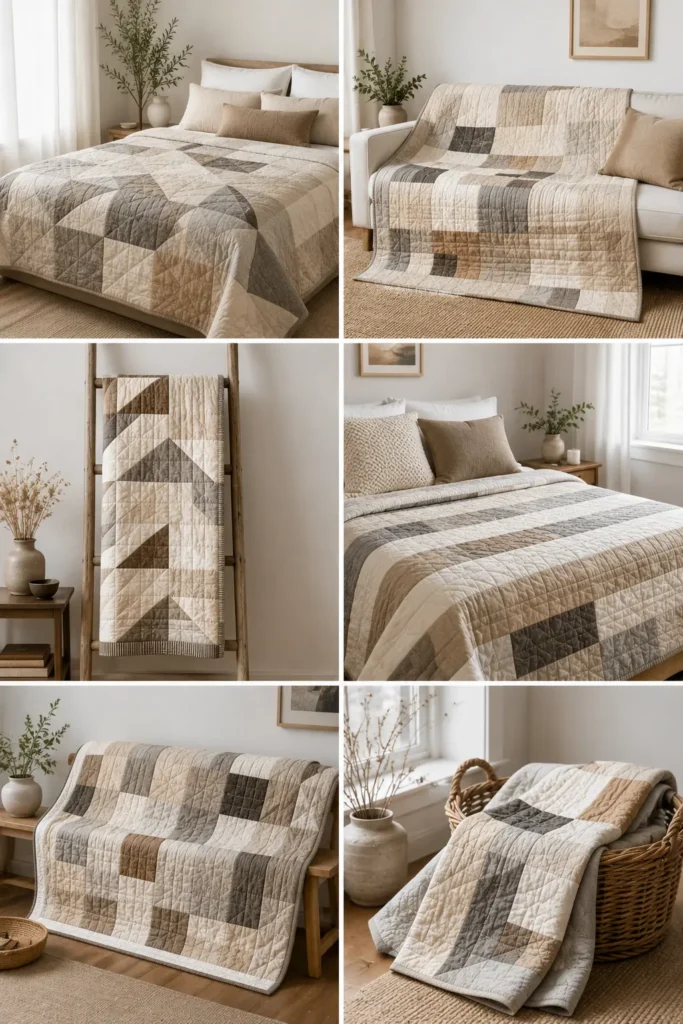
Finished Size
- Finished quilt: 60 × 80 inches — a throw or twin bed cover
- Structure: large simple blocks with generous negative space, in a modern grid
- Layout: a 6 × 8 grid of 10-inch finished blocks (48 blocks), most left plain, a scattered few lightly pieced
- Skill level: beginner (simple piecing; the art is in the quilting)
- Core techniques: tonal fabric selection, negative-space layout, decorative quilting, binding
Materials Needed
- Neutral fabrics: 5–7 tonal solids or near-solids — cream, ivory, oatmeal, warm greige, soft taupe, sandy brown, warm grey — about ¾ yard each
- One grounding accent (optional): ¼ yard of a deeper tone — charcoal, rust, or espresso — used sparingly for a single quiet anchor
- Backing: 4 yards
- Batting: at least 66 × 86 inches (wool batting adds warmth and shows quilting texture beautifully)
- Quilting thread: a warm neutral, or a slightly darker tone so the stitching shows as texture
- Binding: ⅝ yard in oatmeal, taupe, or your accent tone
- Rotary cutter, cutting mat, quilting ruler, pins, iron, sewing machine (a walking foot helps with decorative quilting)
Beginner tip: choose fabrics with texture — a slub linen, a woven chambray, a subtle tone-on-tone print. In a neutral quilt, textured fabric adds the interest that color usually would, without breaking the calm.
The Real Skill: Texture Over Color
With the palette stripped back, three quiet elements do the work:
- Negative space. Leave generous areas unpieced. Large calm blocks give the eye room to rest and make the few design moments feel intentional. Resist the urge to fill every inch.
- Tonal contrast. Your “pattern” comes from the subtle steps between neutrals — cream against greige, taupe against warm grey. Keep the contrast gentle; too much and it stops being minimalist.
- Quilting as the design. This is where a neutral quilt comes alive. Dense, decorative quilting — straight-line grids, close parallel lines, big organic curves, or a matchstick field — casts soft shadows and becomes the real pattern. Plan your quilting as carefully as your piecing.
Choosing Your Colors
“Neutral” still spans a warm, cozy range for autumn:
- Cream and ivory for the lightest ground
- Oatmeal and warm greige for the soft middle
- Taupe and mushroom for gentle depth
- Sandy brown and warm grey for the deepest neutrals
- A single grounding accent — charcoal, rust, or espresso — used in just a block or two, if you want one quiet anchor
Keep everything warm (avoid cool blue-greys), so the quilt feels autumnal and cozy rather than cold. The whole palette should look like a handful of natural materials: wool, stone, sand, unbleached linen.
The Layout: Calm Grid with Quiet Moments
- Work on a 6 × 8 grid of 10-inch finished blocks (10½ inches cut)
- Leave most blocks plain, cut as single squares in your various neutrals, arranged so the tones drift gently across the quilt
- Piece just a few blocks simply — a two-tone half-square-triangle, a single off-center strip, a small square within a square — scattered asymmetrically for modern interest
- Let the negative space and the quilting carry the design, not the piecing
Cutting Measurements
- Plain blocks: cut most of the 48 as 10½ × 10½-inch squares across your neutrals
- Pieced blocks: for the handful of accent blocks, cut the simple units to finish at 10 inches (e.g., two 10⅞-inch squares for a half-square-triangle pair, trimmed to 10½ inches)
- Backing: 66 × 86 inches
- Batting: 66 × 86 inches
- Binding: seven strips, 2½ inches × width of fabric
Step-by-Step Guide
Step 1 — Cut the blocks. Cut the plain 10½-inch squares across your neutral fabrics and the few simple pieced units. Keep the tones in separate stacks.
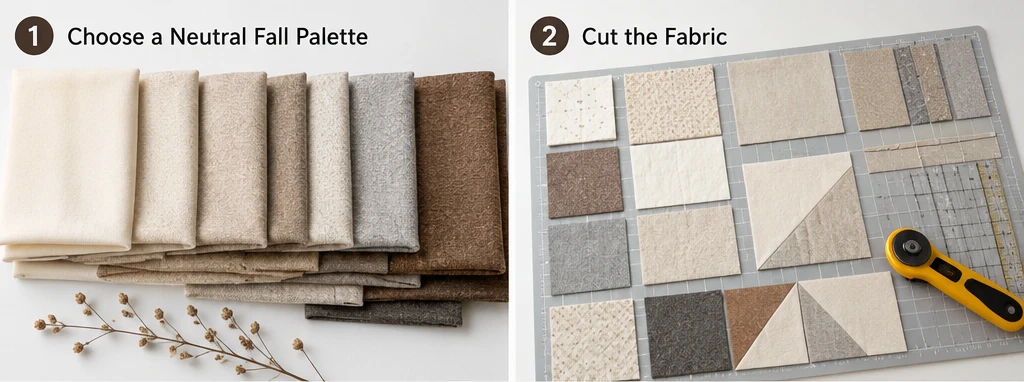
Step 2 — Make the few pieced blocks. Sew your handful of simple accent blocks — a couple of half-square triangles, a single strip block, a small square-in-a-square — using a ¼-inch seam. Keep them subtle; these are quiet punctuation, not focal points.
Step 3 — Plan the tonal layout. Arrange all 48 blocks in the 6 × 8 grid, drifting the tones gently (lights pooling one way, deeper neutrals another) and scattering the few pieced blocks asymmetrically. Photograph it in black and white to check the tonal flow is soft and balanced.
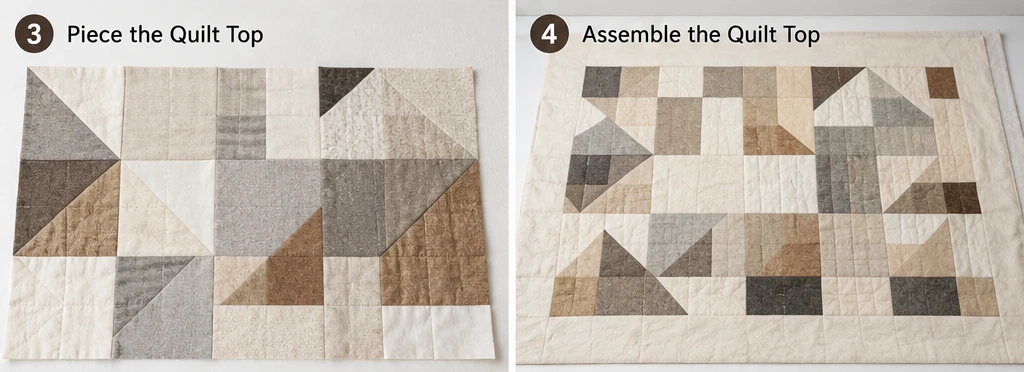
Step 4 — Assemble the top. Sew the blocks into rows with a ¼-inch seam, press seams in alternating directions, then join the rows. The finished top measures about 60½ × 80½ inches.
Step 5 — Plan the quilting. This is the design step. Decide on a decorative quilting plan — an all-over matchstick grid, wide organic curves, dense straight lines in one area against open space in another. Sketch it; in a neutral quilt, the quilting matters more than the piecing.
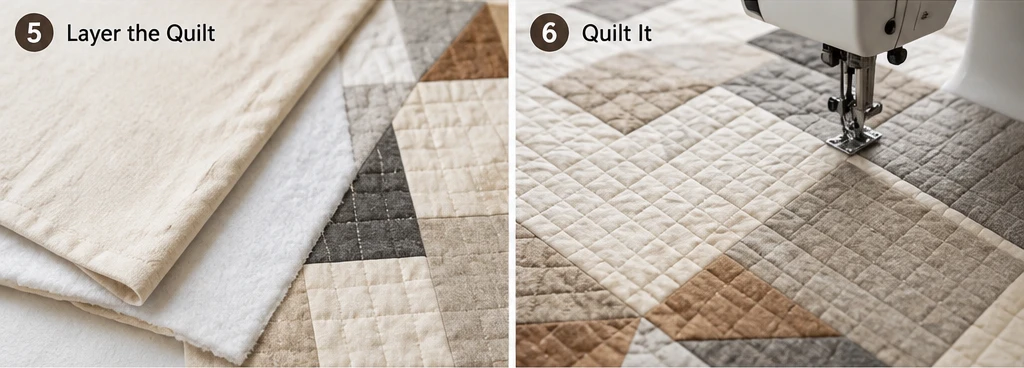
Step 6 — Layer and baste. Lay the backing wrong side up, center the batting (wool shows quilting beautifully), then the top right side up. Smooth from the center and baste generously — dense quilting needs a stable sandwich.
Step 7 — Quilt it richly. Quilt your plan with a walking foot, using thread a shade darker than the fabric so the stitched lines read as soft texture and shadow. Don’t rush — the quilting is the pattern, so even, deliberate lines are the whole reward.
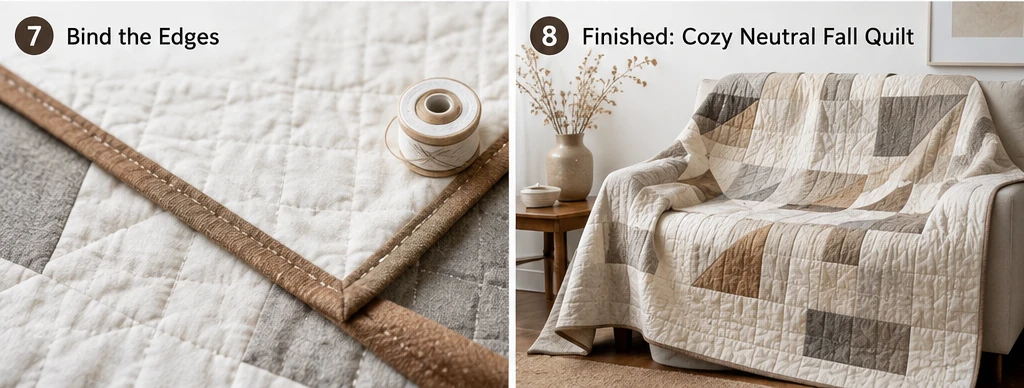
Step 8 — Trim and bind. Trim to 60 × 80 inches, square the corners, and bind in oatmeal, taupe, or your accent tone for a clean, quiet edge.
Step 9 — Wash and finish. Wash gently in cool water and tumble dry low. The quilting will crinkle softly, deepening the texture — exactly the cozy, tactile finish a neutral quilt is made for.
Assembly at a Glance
- Cut plain 10½-inch blocks across neutrals, plus a few simple pieced units.
- Make the handful of subtle accent blocks.
- Arrange the 6 × 8 grid, drifting tones, and scattering pieced blocks; check in grayscale.
- Sew rows, press alternating, join rows → 60½ × 80½ top.
- Plan the decorative quilting — this is the real design.
- Layer backing, wool batting, and top; baste generously.
- Quilt richly with slightly darker thread so the lines read as texture.
- Trim to 60 × 80 inches; bind in a quiet, neutral color.
- Wash cool, tumble low for a soft crinkle.
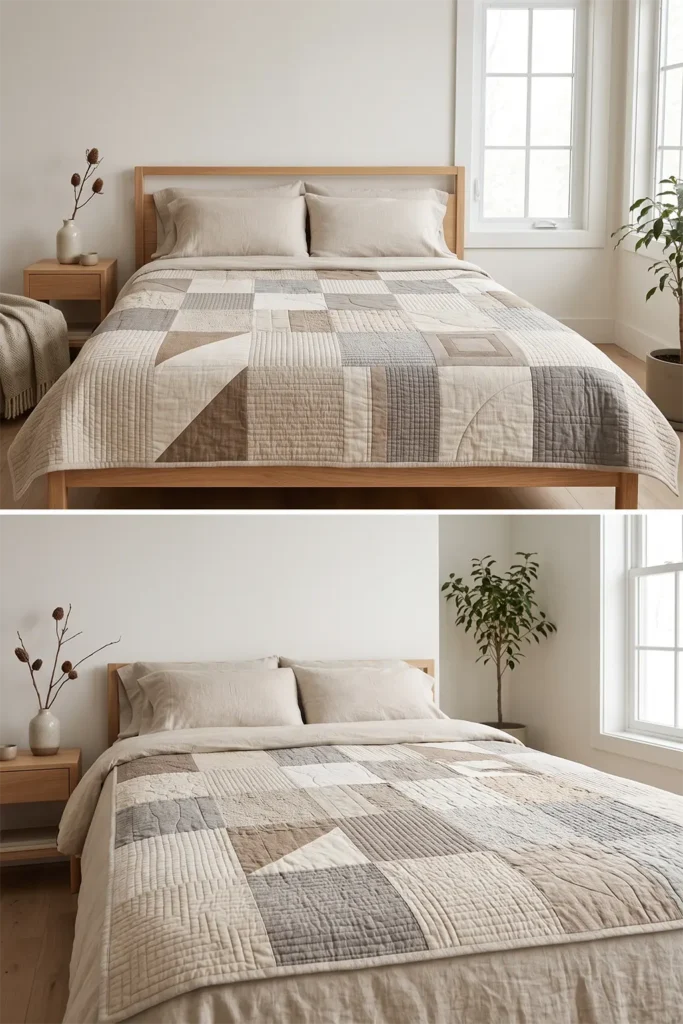
Beginner Tips for Success
- Choose textured fabrics — slub linen and woven tone-on-tones add the interest color usually would.
- Keep tonal contrast gentle; minimalism lives in subtle steps, not sharp jumps.
- Leave generous negative space; the calm areas make the quilt feel intentional.
- Plan the quilting as carefully as the piecing — here, the stitching is the pattern.
- Use wool batting and slightly darker thread so the quilting casts soft, cozy shadows.
Styling It
Lay the finished quilt in a serene, pared-back room and let it blend into a palette of warm naturals — linen, wood, wool, stone, a single dried branch. Because the quilt is tonal, it won’t compete with anything; it simply adds warmth and soft texture. Keep accessories minimal and materials natural, and the quilt becomes part of a calm, cocooning whole. This is the fall quilt for Scandinavian, Japandi, and modern-minimal spaces — cozy through texture rather than color.
Final Thoughts
A minimalist neutral fall quilt captures the quiet side of autumn — fog, wool, bare branches, warm stone — in a palette of creams, oatmeals, and soft greys. By trading bright color for negative space, tonal contrast, and rich decorative quilting, it becomes a calm, modern, endlessly livable piece that brings the season’s warmth to a serene space without a single loud note. It’s the most disciplined quilt in this collection, and for a peaceful home, quite possibly the coziest.
Other Design Inspirations – Digitally Modified
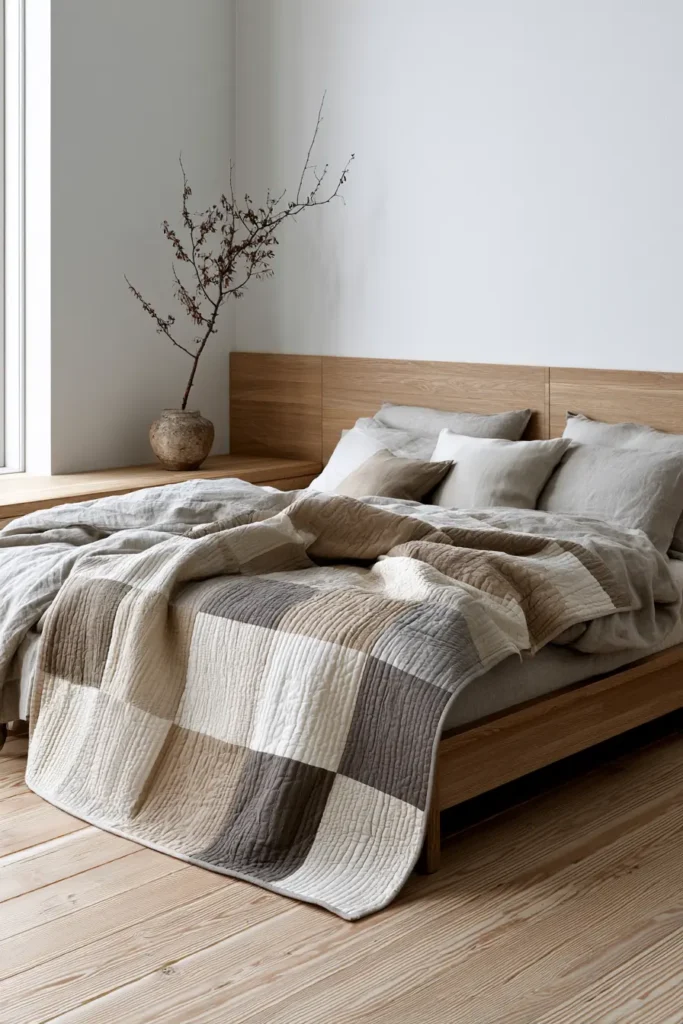
11. Cozy Flannel Rag Quilts for Soft Autumn Comfort
If there’s a quilt that feels like a hug, it’s a flannel rag quilt. Rag quilts are built completely differently from any other quilt — inside out, with the seam allowances on the outside, where they’re clipped and washed until they fray into soft, fluffy chenille ridges. Run your hand over a finished rag quilt and you feel those seams like little rivers of fleece between the blocks. Made in warm autumn flannels — buffalo checks, tartans, and plaids in rust, gold, forest green, and burgundy — it becomes the softest, coziest, most snuggle-ready quilt of the whole season. It’s the one that never makes it back to the closet.
Rag quilts also happen to be the friendliest quilt a beginner can make. There’s no batting to wrestle, no basting a giant sandwich, no binding to finish, and no precision points to match — the charming, homespun frayed seams are the finish. Each block is its own little quilt-in-miniature, self-batted and quilted with a simple X, then joined seam-side-out. It’s forgiving, fast, and endlessly cozy, which is exactly why rag quilts are so beloved.
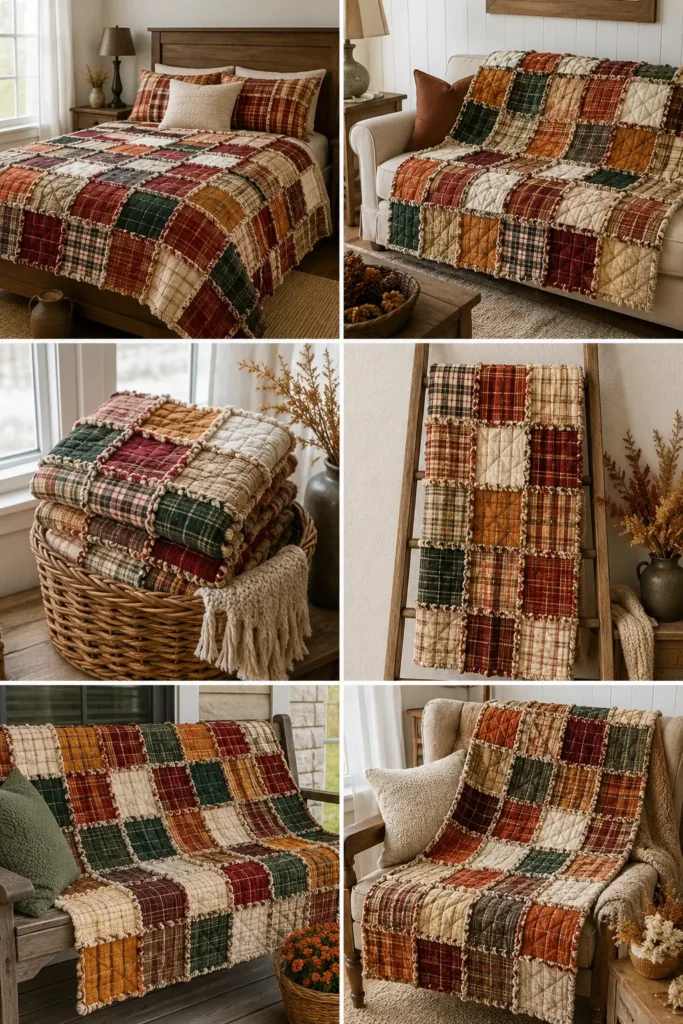
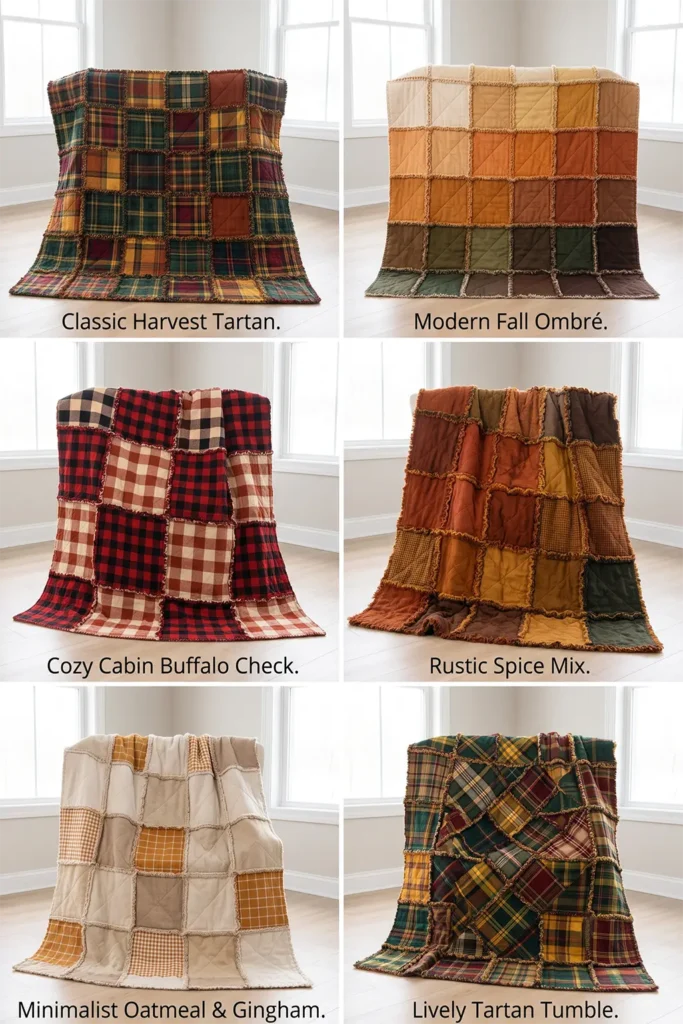
Why I Made It
I made this because it’s the quilt people actually live under. Some quilts are admired; a flannel rag quilt gets grabbed off the couch, wrapped around shoulders, dragged to the floor for movie nights, and washed a hundred times — and it only gets softer and fluffier with every wash. There’s real joy in making something meant to be used that hard and loved that much.
I love how honest the construction is, too. Coming from generations of hand-stitching in my family, raised around the Nakshi Kantha tradition — where old, soft cloth is layered for warmth and the seams and stitches are part of the beauty, not hidden away — a rag quilt feels deeply familiar. It celebrates its own seams rather than concealing them, as the best homespun textiles always have. Exposed, frayed, and soft: that’s not a flaw, that’s the whole point.
Why This Idea Is Worth Making
This idea is worth making because it’s the easiest, coziest quilt in this collection — genuinely beginner-proof. No batting layer, no basting, no binding, no matched points; you simply quilt each block, sew them together with seams facing out, clip, and wash. The frayed chenille seams hide every imperfection, so it’s impossible to make it look “wrong.” And the payoff is the softest, warmest, most huggable quilt imaginable, in cozy autumn plaids. For a first quilt, or the fiftieth, it’s pure comfort with almost no stress.
Finished Size
- Finished quilt: about 60 × 72 inches — a generous throw or twin quilt
- Finished block: about 6½ inches (each block is cut 8 inches, with a ⅝-inch seam allowance all around that frays)
- Layout: 8 blocks across × 10 blocks down = 80 blocks
- Skill level: true beginner — the easiest quilt here
- Core techniques: self-batted blocks, X-quilting, exposed seams, clipping and fraying (no batting layer, no binding)
Materials Needed
- Flannel fabrics (front + back of each block): about 5 yards total across 6–8 autumn plaids — you need a front and a back square for each of the 80 blocks
- Batting middles: cotton batting, or use a third layer of flannel as the middle for extra softness — enough for 80 squares cut smaller than the blocks
- Coordinating thread: a warm neutral
- Spring-loaded rag snips or sharp small scissors — clipping 80 blocks’ worth of seams is much easier on your hand with the right tool
- Rotary cutter, cutting mat, quilting ruler, walking foot, iron
- A note: no batting sandwich, no basting spray, and no binding — rag quilts skip all three
Beginner tip: buy all-cotton flannel. Cotton frays into that soft chenille beautifully; polyester blends barely fray at all and will ruin the whole effect. And always prewash nothing here — for rag quilts you want the fraying to happen after it’s built, so skip prewashing the flannel.
How a Rag Quilt Is Different
Everything you learned about quilt construction gets turned inside out — literally:
- Seams face out. You sew blocks together with wrong sides together, so the seam allowances sit on the front of the quilt, ready to fray.
- Each block is self-contained. A block is a little stack — flannel back, batting or flannel middle, flannel front — quilted with an X before assembly. There’s no big three-layer sandwich to baste.
- The seam allowance is generous. A full ⅝-inch seam allowance (not ¼-inch) gives the fray something to work with.
- No binding. The outer edge frays too, finishing the quilt for you.
- The wash makes it. The quilt looks plain and seamy until its first wash and dry, when all those clipped seams bloom into soft chenille. That transformation is the magic.
Choosing Your Colors
Warm autumn plaids are the classic choice, and mixing scales looks best:
- Buffalo check in red-and-black or rust-and-cream
- Rich tartan in forest green, burgundy, and gold
- Warm gingham in pumpkin or mustard
- Windowpane and small plaids in cinnamon and amber
- A few solid flannels in cream or oatmeal to rest the eye
Because the frayed seams add their own soft texture, busy plaids read as cozy rather than chaotic. Keep everything in the warm autumn family and mix freely.
Cutting Measurements
- Block fronts: 80 squares at 8 × 8 inches (flannel plaids)
- Block backs: 80 squares at 8 × 8 inches (flannel — can be a coordinating plaid or a single backing plaid)
- Block middles: 80 squares at 6½ × 6½ inches (cotton batting or flannel — cut smaller so they don’t reach the seam allowance, keeping seams easy to clip)
- No binding needed
Step-by-Step Guide
Step 1 — Cut all your layers. Cut 80 front squares and 80 back squares at 8 inches, and 80 middle squares at 6½ inches. Cutting the middle smaller keeps it out of the fraying seam allowance.
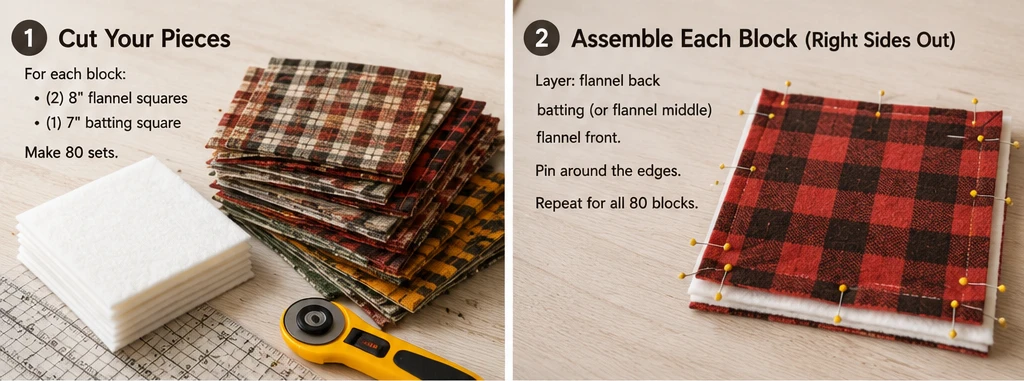
Step 2 — Build each block stack. For each block, layer: back square wrong side up, middle square centered on top, then front square right side up. The middle floats in the center, ¾ inch in from each edge. You’ll have 80 little stacks.
Step 3 — Quilt each block with an X. Sew diagonally corner to corner both ways, making an X across each stack. This quilts the three layers together. A walking foot keeps the flannel from shifting. This is your “quilting” — done block by block, no giant sandwich.
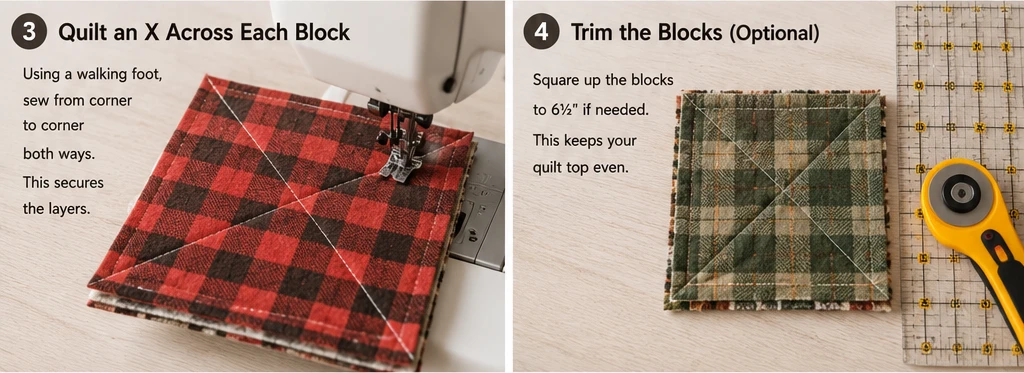
Step 4 — Lay out the quilt. Arrange the 80 blocks 8 across × 10 down, mixing plaids so no two identical fabrics touch. Photograph the layout to check the color balance before you sew.
Step 5 — Sew blocks into rows (seams OUT). Sew blocks together with wrong sides together and a ⅝-inch seam, so the seam allowances stick out on the front. Join eight blocks into each row. This “seams-out” step is the one thing beginners always do backward — the ugly side faces up on purpose.
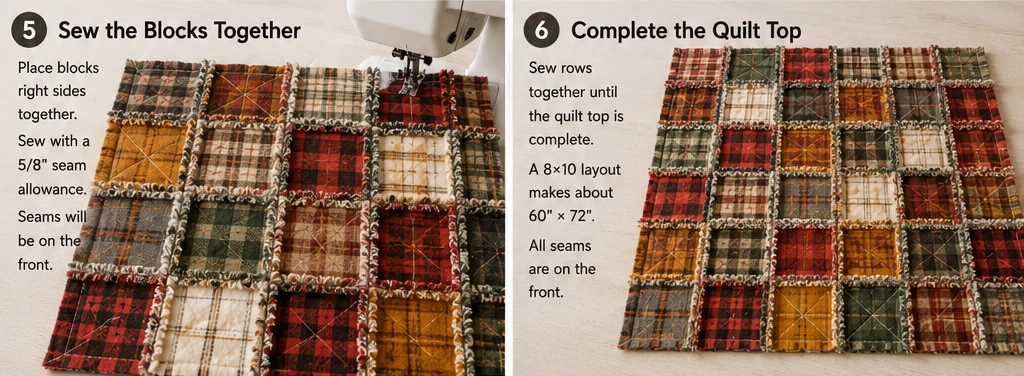
Step 6 — Join the rows. Sew the rows together the same way — wrong sides together, ⅝-inch seam, all seam allowances on the front. Match the block seams as you go. When you join rows, clip a tiny snip into the seam intersections so they’ll fray and lie flat.
Step 7 — Finish the outer edge. Sew all the way around the entire outer edge with a ⅝-inch seam (right through the single layer of the border blocks) so the outside edge frays to match. No binding — this is the finish.
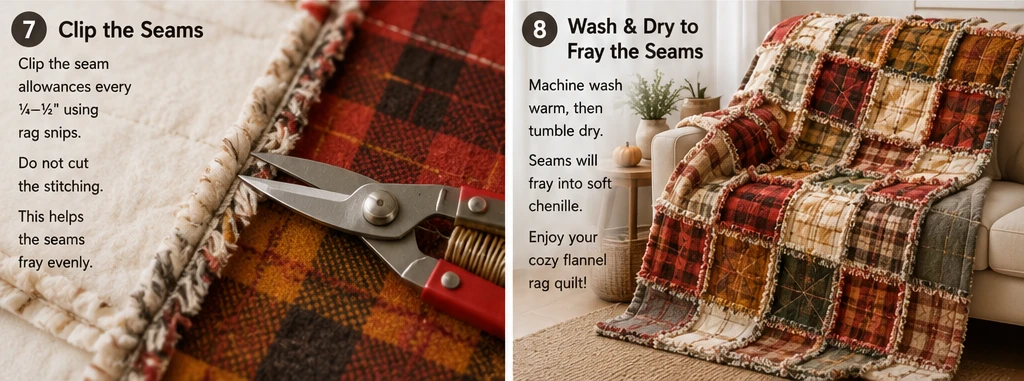
Step 8 — Clip all the seams. Here’s the labor of love: with your rag snips, clip into every seam allowance every ¼ inch or so, all the way around each seam and the outer edge, being careful not to cut through the stitching. This is what lets the seams fray. Put on a podcast — 80 blocks is a lot of clipping, but it’s oddly satisfying.
Step 9 — Wash, dry, and watch it bloom. Wash the quilt on a gentle cycle and tumble dry — ideally at a laundromat’s large machine, since flannel sheds enormous amounts of lint (clean the lint trap several times). The clipped seams will fray into soft, fluffy chenille ridges, and your plain seamy quilt transforms into the coziest rag quilt imaginable. Shake it out well afterward.
Assembly at a Glance
- Cut 80 fronts and 80 backs at 8 inches; 80 middles at 6½ inches.
- Stack each block: back (wrong side up), middle (centered), front (right side up).
- Quilt each block with a diagonal X.
- Lay out 8 × 10, mixing plaids.
- Sew blocks into rows wrong sides together, ⅝-inch seams (seams OUT).
- Join rows the same way; snip the seam intersections.
- Sew around the whole outer edge (⅝ inch) — no binding.
- Clip every seam allowance every ¼ inch, not cutting the stitches.
- Wash and tumble dry (huge lint!) to bloom the frayed chenille.
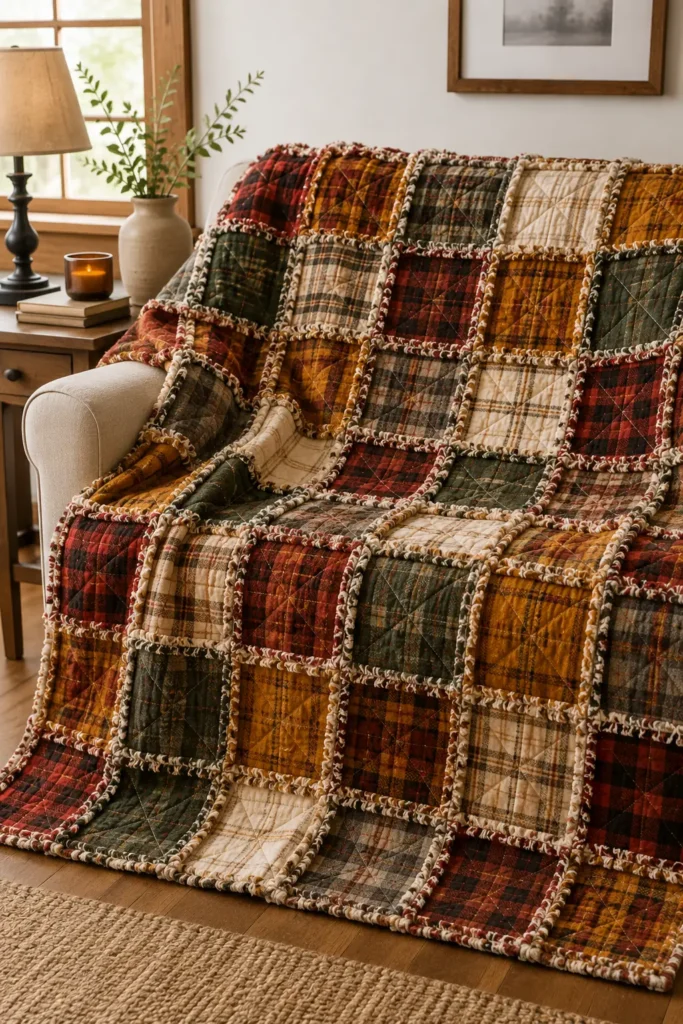
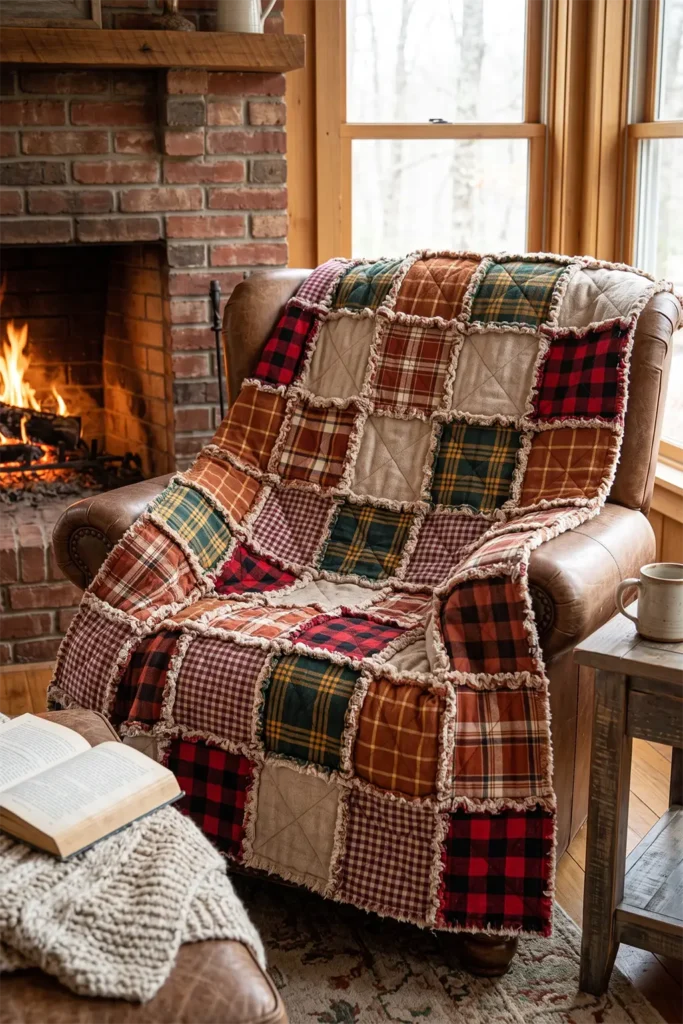
Beginner Tips for Success
- Use all-cotton flannel — blends won’t fray into chenille.
- Don’t prewash; you want the fraying to happen after the quilt is built.
- Remember: wrong sides together, seams on the front. This is the one counterintuitive step.
- Cut the middle layer smaller so it stays out of the seam allowance and clips easily.
- Invest in spring-loaded rag snips; clipping 80 blocks by hand is hard on the fingers.
- Wash the first time at a laundromat — the lint is genuinely enormous.
Styling It
A flannel rag quilt is made to be seen in use — draped over a sofa arm, tumbled in a basket by the fireplace, wrapped around someone on the porch. Its chunky frayed seams and cozy plaids suit rustic, farmhouse, and cabin rooms perfectly, so lean into that: wood, wool, warm lamplight, a mug of something hot. Don’t style it too neatly; the whole charm of a rag quilt is that it looks loved and lived-in from day one.
Final Thoughts
A cozy flannel rag quilt is soft autumn comfort in its purest form. Built inside out — seams proudly on the outside, frayed into fluffy chenille — it’s the easiest quilt in this collection and quite possibly the coziest, celebrating its own seams the way the best homespun textiles always have. No batting to baste, no binding to finish, just warm plaids, an X in every block, and a wash that blooms it soft. Make one, and it’ll be the quilt everyone in the house fights over all season long.
Other Design Inspirations – Digitally Modified
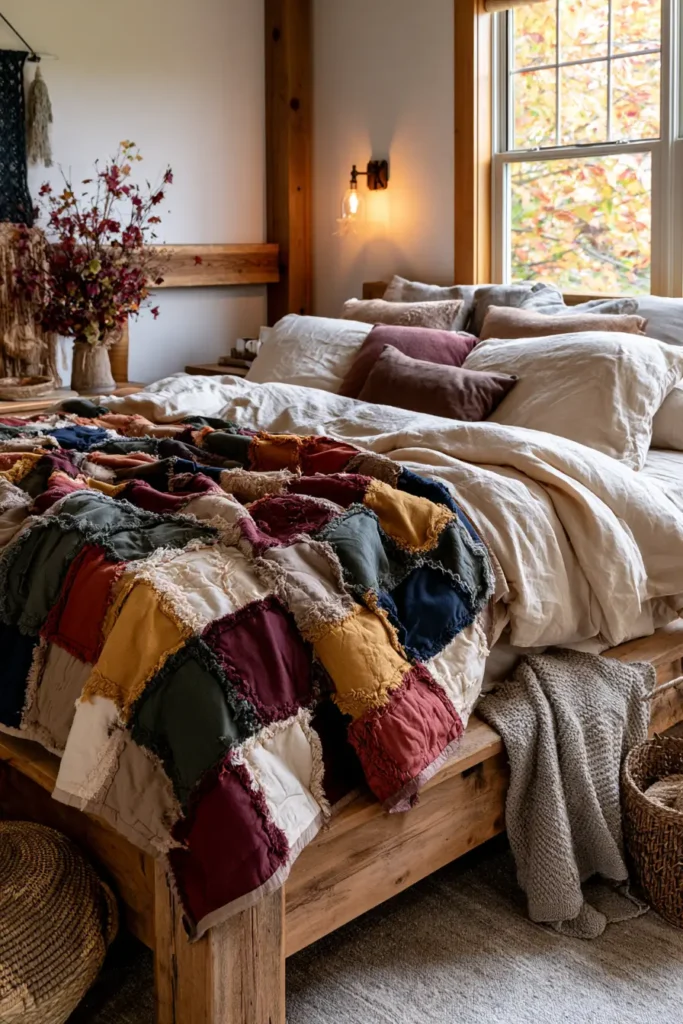
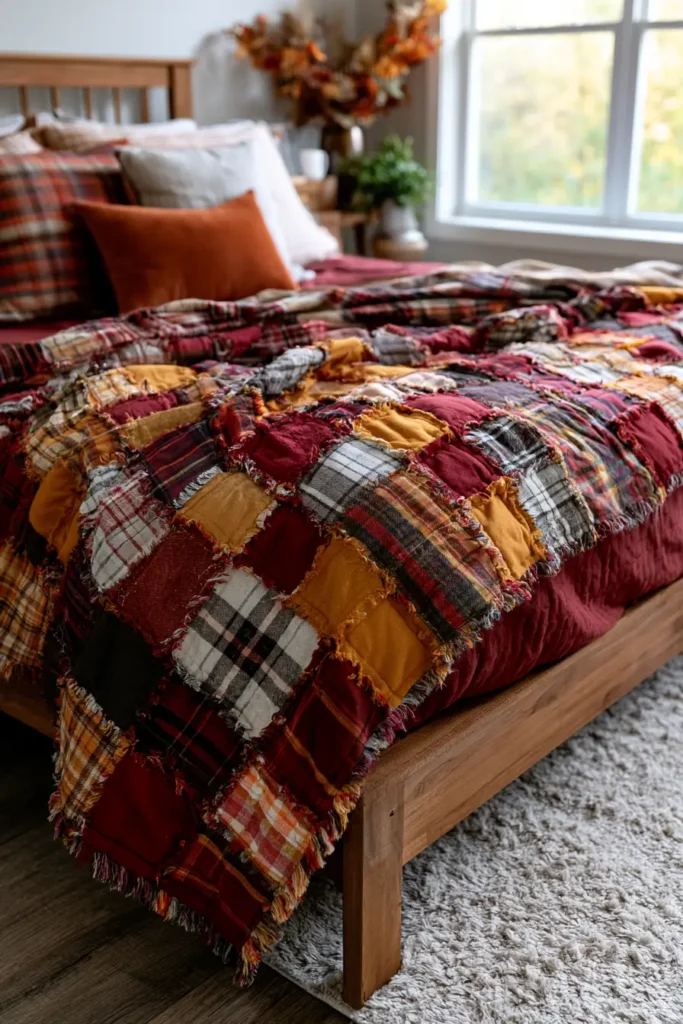
12. Reversible Fall Quilted Throws for Versatile Seasonal Styling
A reversible fall throw is the smartest, most versatile piece you can make for the season — two completely different quilts sharing a single body. One side might be a bright, cheerful patchwork of pumpkin and gold; flip it, and the reverse is a calm, moody plaid in rust and charcoal. Change your mind, change the room, or change the moment, and you simply turn the throw over. For a season that swings from crisp sunny afternoons to dark cozy nights, a throw that offers two moods in one is genuinely useful — and endlessly stylish.
Unlike a single-sided quilt with a plain backing, a true reversible throw is built from two fully designed tops with the batting hidden between them, so neither face is a “back.” That’s the whole idea: both sides are the front. It takes a little planning to make both faces work, but the payoff is a piece that earns its keep all autumn long — practical, space-saving, and quietly clever, the throw you reach for every single day.
Why I Made It
I made this to close out the season with the most useful fall quilt of all. Throughout autumn a home shifts — bright and open in early October, dim and cocooning by November — and I love the idea of one throw that moves with it. Flip to the sunny side for a bright morning; flip to the deep, moody side for a fireside evening. It’s two quilts’ worth of styling from one project, which feels genuinely smart.
There’s a practical honesty to it that appeals to me, too. Coming from generations of hand-stitching in my family, raised around the Nakshi Kantha tradition — where cloth was always layered to be useful and lovely on both faces, never wasted — a reversible throw feels like a natural idea. Nothing hidden, nothing wasted; every surface earns its place. Making a piece where both sides are beautiful is just good textile sense.
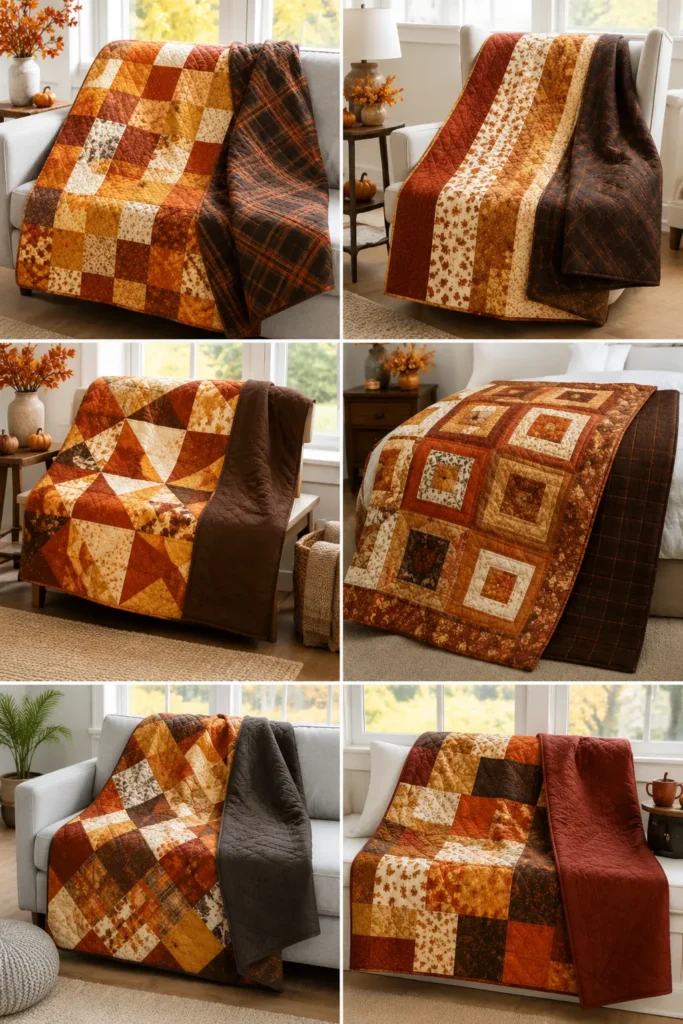
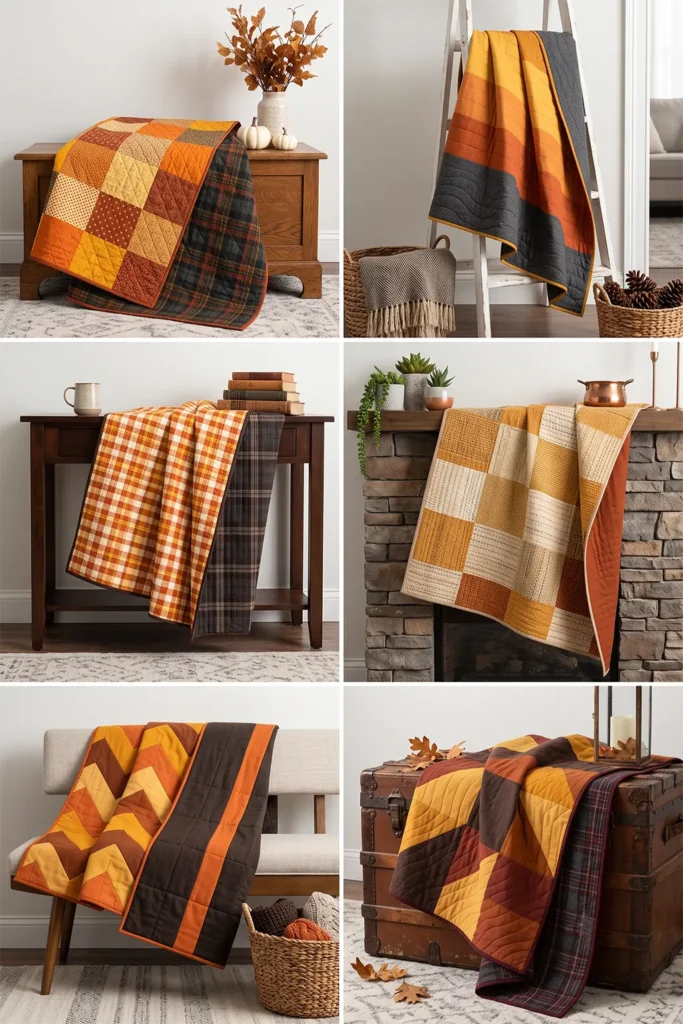
Why This Idea Is Worth Making
This idea is worth making because it delivers two looks, two moods, and maximum versatility from a single throw — the most flexible piece in this collection. It’s also a wonderful way to use up the fall fabrics and orphan blocks you’ve accumulated: bright scraps on one side, a calm plaid on the other. The construction is straightforward (you can even skip binding with the turn method), and the result adapts to your room, your day, and your whole autumn. One throw, endlessly restyled.
Finished Size
- Finished throw: 50 × 60 inches — a generous snuggle throw for sofa or bed
- Two designed faces: a bright patchwork side and a calm plaid side (or any two looks you like)
- Skill level: confident beginner
- Core techniques: piecing two coordinated tops, batting-between construction, turn-and-topstitch or reversible binding
Materials Needed
- Side-one fabrics (bright side): about 1½ yards total in scraps — pumpkin, gold, rust, amber for a cheerful patchwork
- Side-two fabrics (calm side): about 1¾ yards — a moody plaid, a solid rust, or a simple two-block design in deeper tones
- Batting: low-loft cotton, at least 54 × 64 inches (a throw wants drape, not bulk)
- Thread: neutral for piecing, plus a coordinating thread for quilting
- Binding (only if not using the turn method): ½ yard in a tone that suits both sides
- Rotary cutter, cutting mat, quilting ruler, walking foot, pins, iron, sewing machine
Beginner tip: choose a quilting thread that flatters both sides — the same stitching shows on each face, so pick a warm neutral that looks good against both your bright and calm fabrics.
The Key Idea: Two Fronts, No Back
A reversible throw is designed differently from the start:
- Piece two separate tops, each to the same finished size (50 × 60 inches). Make them coordinate — see below — but don’t make them match.
- The batting hides between them. There’s no plain backing fabric; side two is the backing, and it’s beautiful.
- The quilting shows on both faces. Whatever lines you quilt appear on both sides, so choose an all-over pattern (a grid, diagonal lines, gentle waves) that suits both designs rather than one tied to a single side’s blocks.
- Two ways to finish the edge: the turn method (sew the two tops right sides together with batting, leave a gap, turn it right-side out, then topstitch — no binding needed) or a reversible binding (attach binding so it finishes cleanly on both faces).
Coordinating the Two Sides
The art of a reversible throw is making both faces feel like they belong together without being identical:
- Share a palette thread. Let one color appear on both sides — a rust that’s bright on side one and deep on side two — so flipping feels intentional.
- Contrast the mood, not the family. Bright-and-busy on one face, calm-and-simple on the other, is the classic pairing. One side does the work; the other rests the eye.
- Keep the quilting neutral to both. An all-over grid or diagonal lines flatter any design; avoid quilting that outlines one side’s motifs.
Choosing Your Colors
Two coordinated fall palettes, one for each face:
Bright side (cheerful):
- Pumpkin, gold, amber, and rust in a simple patchwork of squares or strips
Calm side (moody):
- A deep plaid, or solids in charcoal, deep rust, and espresso, for a quiet, grown-up reverse
Tie them together with one shared color — rust works beautifully as the bridge, reading warm and bright on side one and rich and deep on side two.
Cutting Measurements
- Side one (bright): piece a patchwork top finishing at 50½ × 60½ inches (for example, a grid of 5½-inch cut squares, 9 across × 11 down)
- Side two (calm): piece or cut a top finishing at 50½ × 60½ inches (large plaid squares, or a simple two-fabric design)
- Batting: 54 × 64 inches
- Binding (if used): six strips, 2½ inches × width of fabric
Step-by-Step Guide
Step 1 — Piece side one. Make your bright patchwork top to finish at 50½ × 60½ inches — a simple grid of pumpkin, gold, rust, and amber squares is quick and cheerful. Press well.
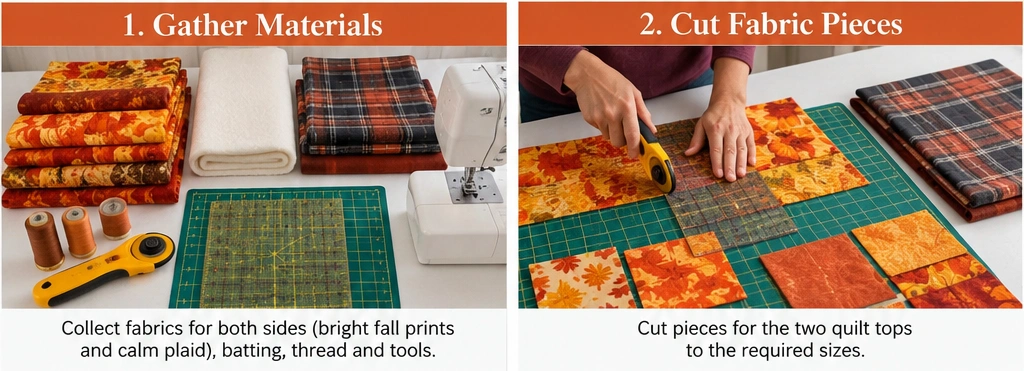
Step 2 — Piece side two. Make your calm reverse top to the same 50½ × 60½ inches — a moody plaid, big simple squares, or a two-fabric design in deeper tones. Press well.
Step 3 — Plan the shared quilting. Choose an all-over quilting pattern that suits both faces — a diagonal grid or straight lines are safe, flattering choices. Remember it’ll show identically on each side.
Step 4 (Turn method) — Layer for turning. Lay side one right side up, place side two right side down on top (right sides together), then the batting on top of both. Pin around all edges.
Step 5 — Sew the edge and turn. Sew around all four sides with a ½-inch seam, leaving a 10-inch gap on one side. Trim the corners, then reach in and turn the whole throw right-side out through the gap, so the batting ends up hidden in the middle and both tops face out. Push the corners out and press the edges flat.
Step 6 — Close the gap and topstitch. Fold in the gap’s raw edges and press, then topstitch all the way around the throw ¼ inch from the edge, closing the gap and giving a crisp finish. (This replaces binding entirely.)
Step 7 — Quilt through all layers. Now quilt your all-over pattern through both tops and the batting, smoothing as you go with a walking foot. This holds the layers together and shows beautifully on both faces. Work from the center outward.
Step 8 (Binding alternative). If you’d rather bind: skip the turn — simply layer side two (down), batting, side one (up), quilt through all layers, trim to 50 × 60 inches, then attach a reversible binding, machine-stitching one side and hand-finishing the other so it’s clean on both faces.
Step 9 — Wash and enjoy both sides. Wash gently in cold with a color catcher (fall reds bleed) and tumble dry low. Then flip it back and forth and decide which mood you’re in today.
Assembly at a Glance
- Piece side one (bright) to finish 50½ × 60½ inches.
- Piece side two (calm) to the same size.
- Choose an all-over quilting pattern that flatters both faces.
- Turn method: layer side one up, side two down, batting on top; pin.
- Sew around with a ½-inch seam, leaving a 10-inch gap; turn right-side out.
- Press, fold in the gap, and topstitch all around (no binding).
- Quilt the all-over pattern through all layers, center outward.
- (Or: layer, quilt, trim to 50 × 60, and add a reversible binding.)
- Wash cold with a color catcher; tumble low, then flip and style.
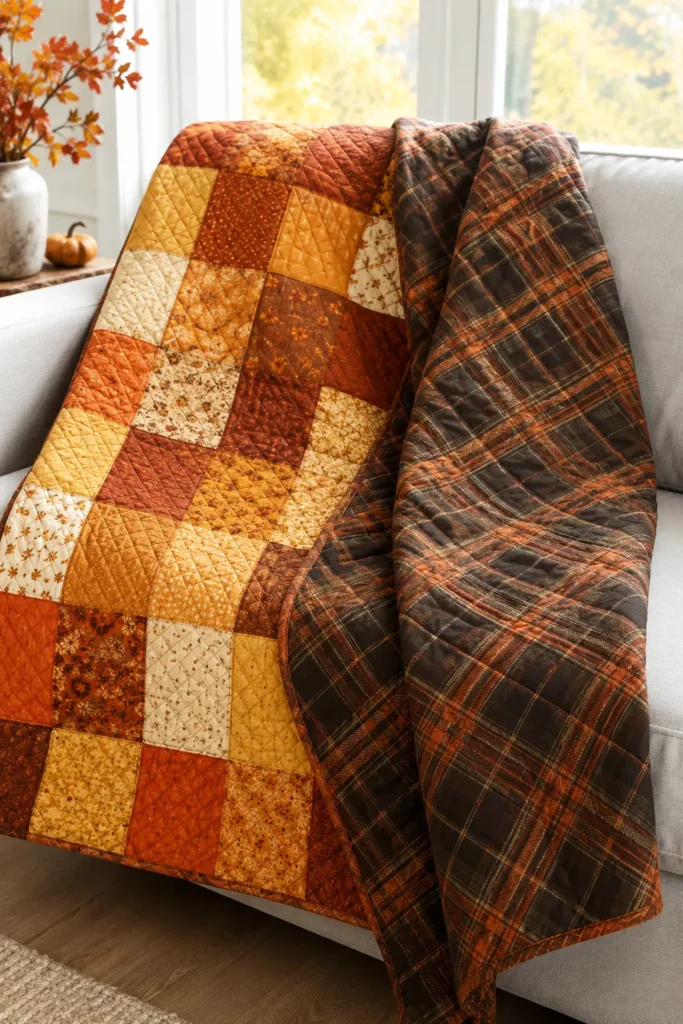
Beginner Tips for Success
- Make both tops the exact same finished size, or the layers won’t align when you turn it.
- Choose an all-over quilting pattern — it shows on both sides, so don’t tie it to one face’s design.
- Pick a quilting thread that flatters both palettes; a warm neutral is safest.
- Share one bridge color across both sides so flipping feels intentional.
- Use low-loft batting; a throw wants soft drape, and turning is far easier without bulk.
Styling It
Show whichever side suits the moment — the bright face for a sunny early-autumn afternoon, the moody face for a fireside November evening — and keep an accent pillow in each side’s palette so a quick flip genuinely restyles the room. Draped over a sofa with a teasing fold that reveals the second color, it hints at its own versatility. Because it flips, it’s the throw that keeps a room feeling fresh right through the season without a single new purchase.
Final Thoughts
A reversible fall throw is versatile seasonal styling in its most useful form — two designed faces, two moods, one clever piece that turns over as autumn shifts around it. Built with the batting hidden between two beautiful tops, it wastes nothing and hides nothing, in the honest spirit of the best layered textiles. Bright on one side, calm on the other, and cozy on both, it’s the throw you’ll restyle a dozen ways — and the perfect note to end an autumn of quilting on.
Other Design Inspirations – Digitally Modified
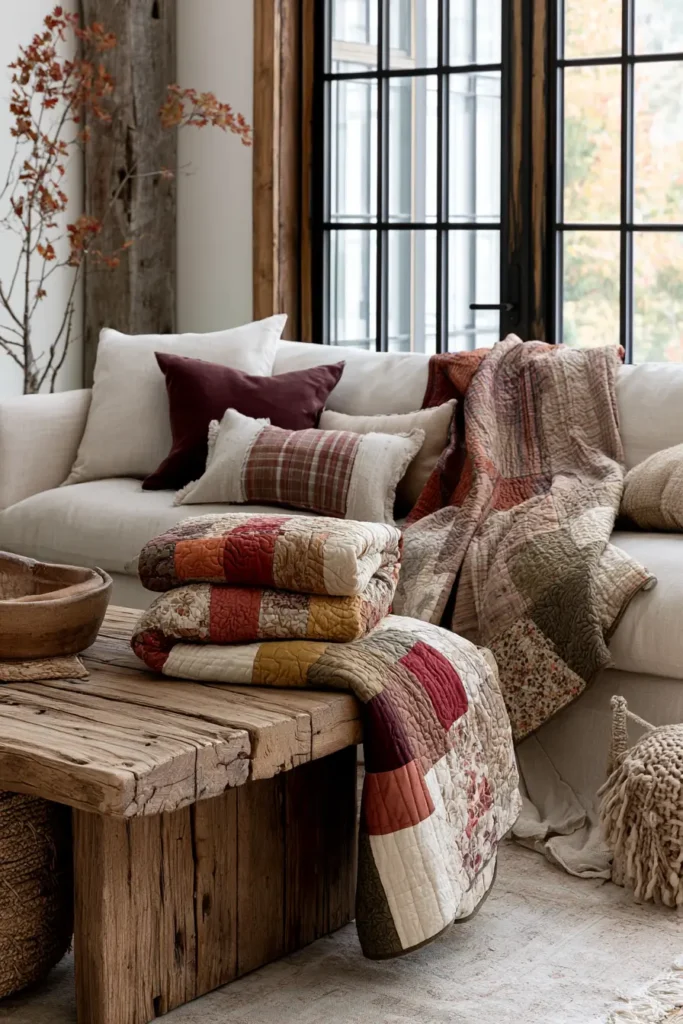
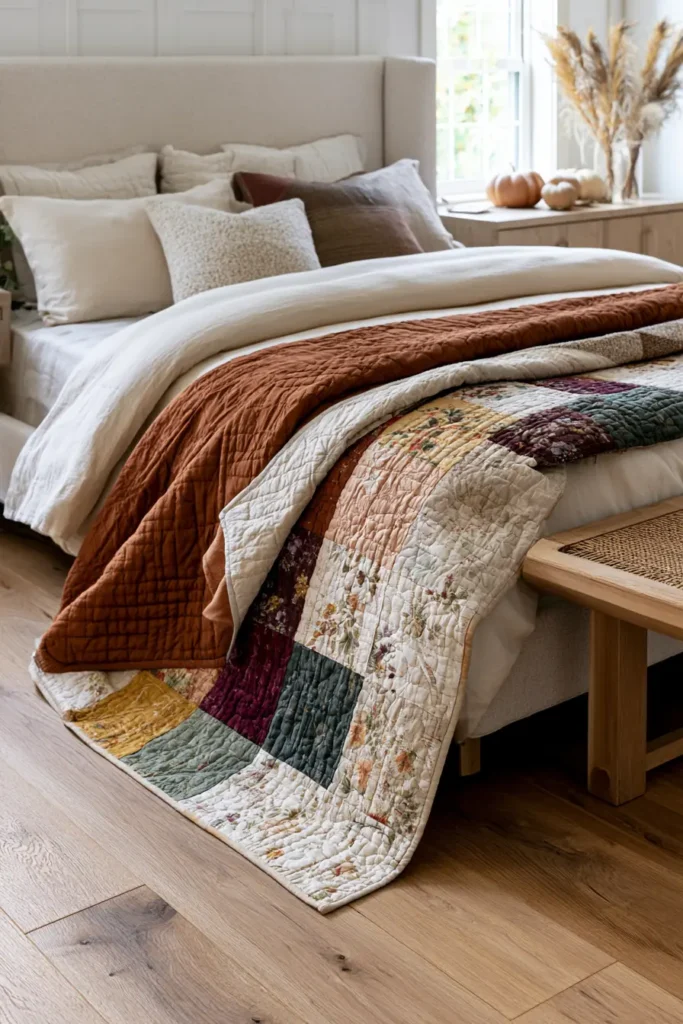
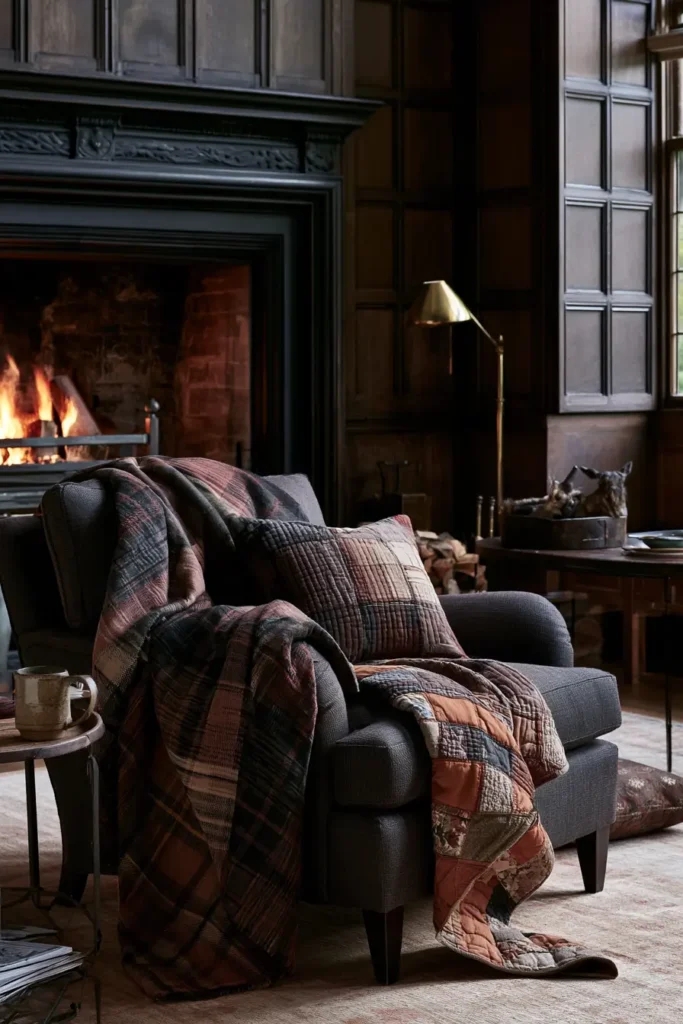
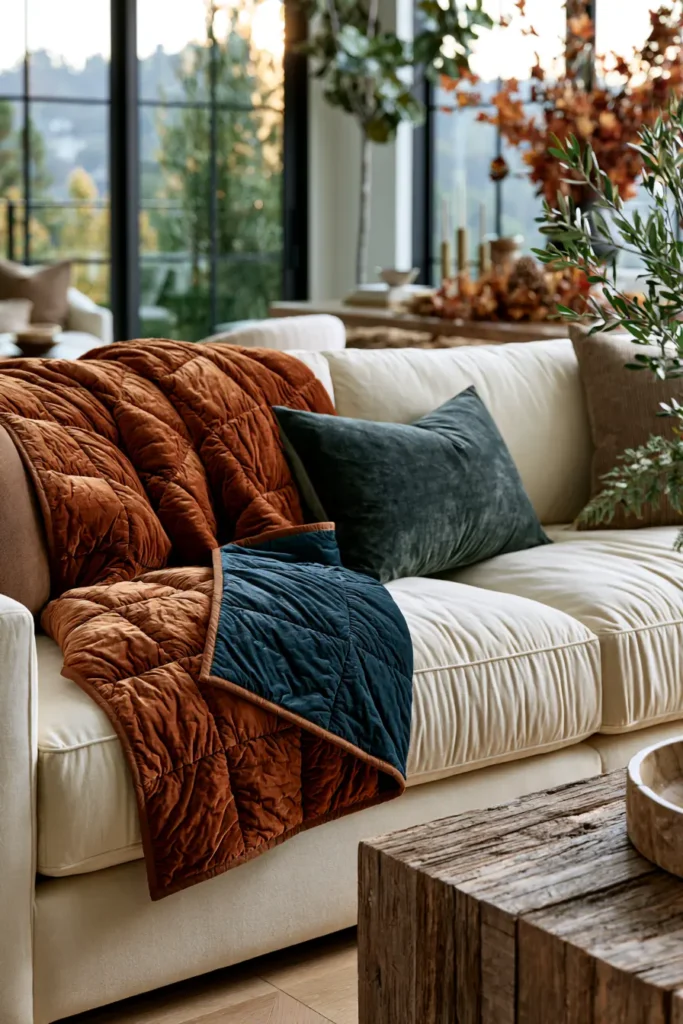
Conclusion
The beauty of a fall quilt is that it works on two levels at once. Visually, the rich harvest palette and seasonal motifs bring autumn indoors, softening a room with texture and color. Practically, that middle layer of batting does exactly what quilts have always done — it keeps you warm when the nights turn cold. A handmade quilt is one of the rare things in a home that’s genuinely beautiful and genuinely useful, and fall is the season that makes you grateful for both.

