
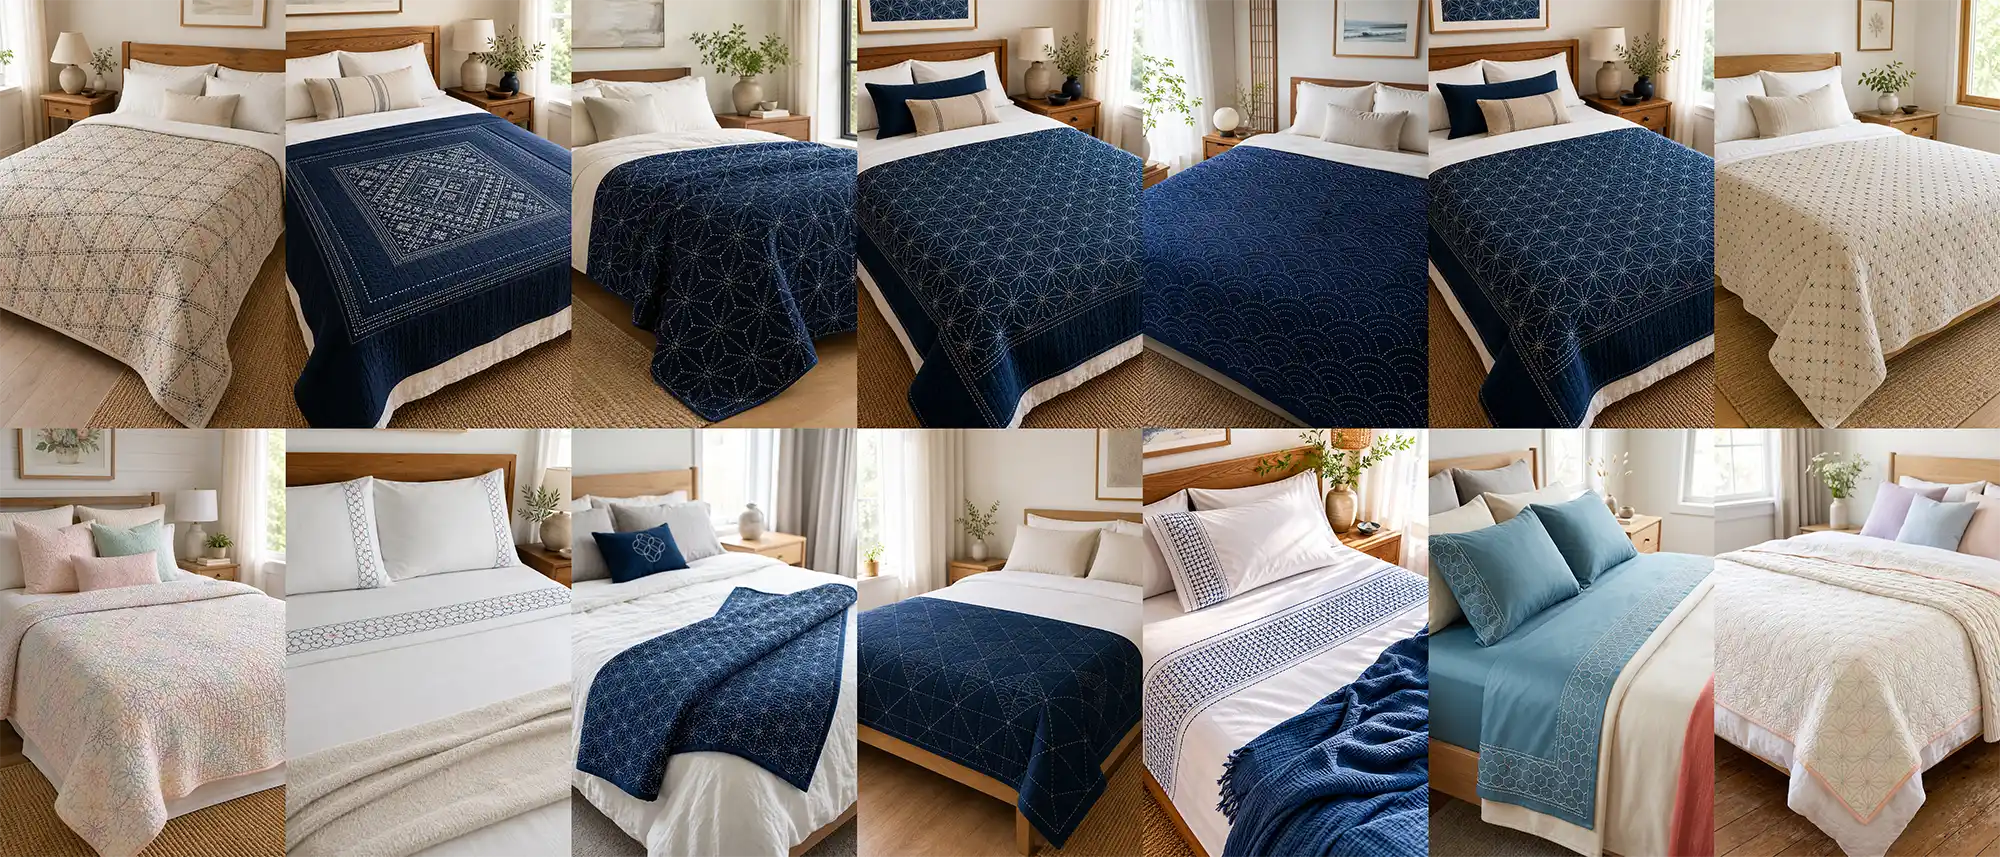
20 Sashiko Quilt Pattern Ideas: Elegant, Cozy & Stylish Designs for Serene Homes
Discovering Sashiko Quilt Pattern Ideas is a quiet way to bring order, warmth, and a little bit of history into a room. Sashiko is a Japanese hand-stitching technique built on the simplest tool in any sewist’s kit: the running stitch. It began in rural northern Japan as plain necessity — families stitched layers of worn cotton together to reinforce work clothes and make them warmer through hard winters, traditionally working white thread across deep indigo cloth.
Over time, those practical rows of stitches grew into the geometric patterns we admire today. I have a soft spot for this craft because the Nakshi Kantha quilts I grew up around in Bangladesh are built on the same idea — running stitches layering old cloth into something useful and beautiful. Different countries, same humble, mending-born logic, and the same calm texture in the finished piece.
Sashiko Quilt Pattern Ideas
This collection of Sashiko Quilt Pattern Ideas moves past the single running stitch into the real range of the craft, organized the way the tradition actually works: techniques, regional styles, and named motifs.
You’ll see the flowing, grid-guided geometry of moyozashi (pattern sashiko) and the denser, intersecting lines of hitomezashi (one-stitch sashiko), alongside distinctive regional traditions like kogin from Aomori and shonai from Yamagata. From there, the ideas spread across quilts, bed sheets, bed covers, bed runners, and pillow covers, carrying classic symbolic motifs — asanoha (hemp leaf) for growth, seigaiha (ocean waves) for calm, shippō (seven treasures) for harmony, and more. Each one is offered as a styling inspiration to help you fold a little serene, handcrafted texture into a modern home.
See also: Sashiko Quilt Jackets and Vests, Elegant Japanese Quilt Ideas, Japanese Patchwork Quilt Ideas, Japanese Quilted Bag Ideas, and Elegant Japanese Quilt Jackets and Vests
1. Elegant Moyozashi (Pattern Sashiko) Quilts for Serene Minimalist Bedrooms
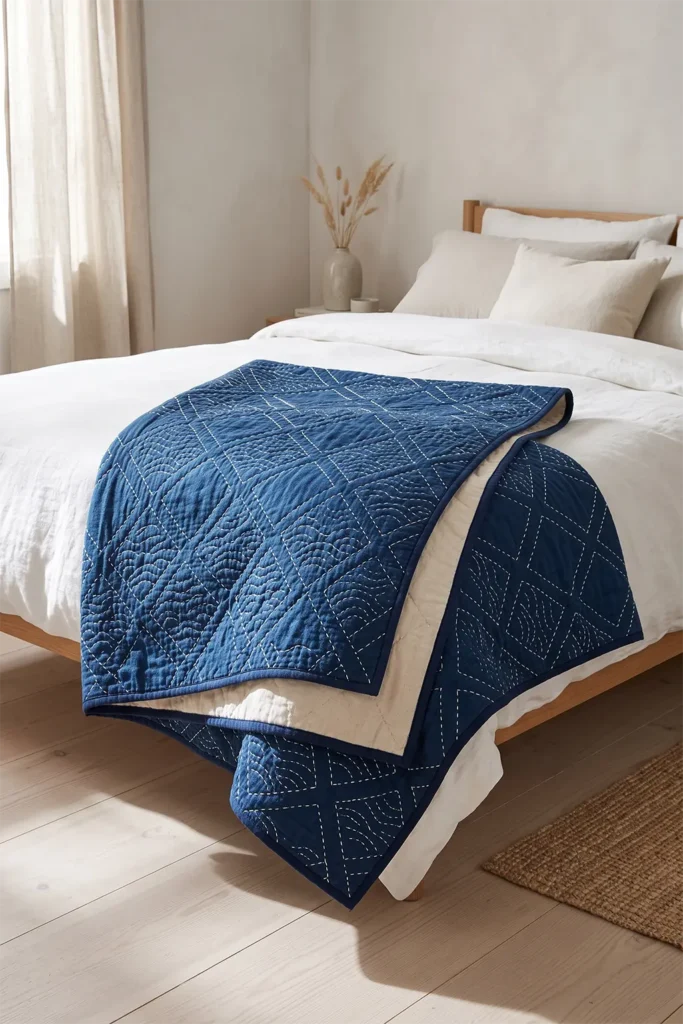
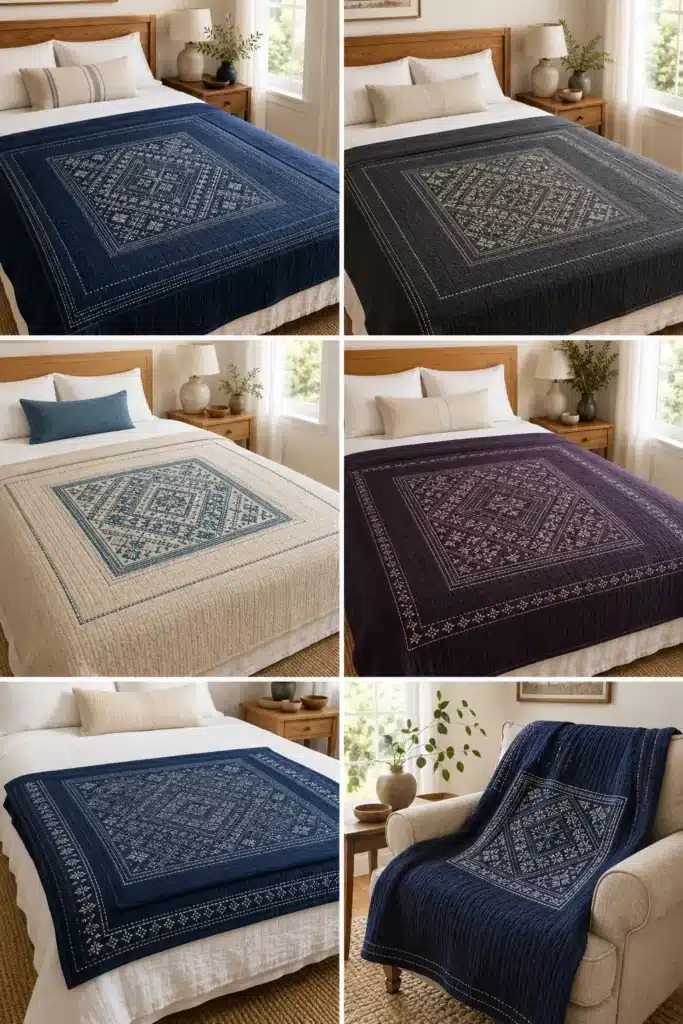
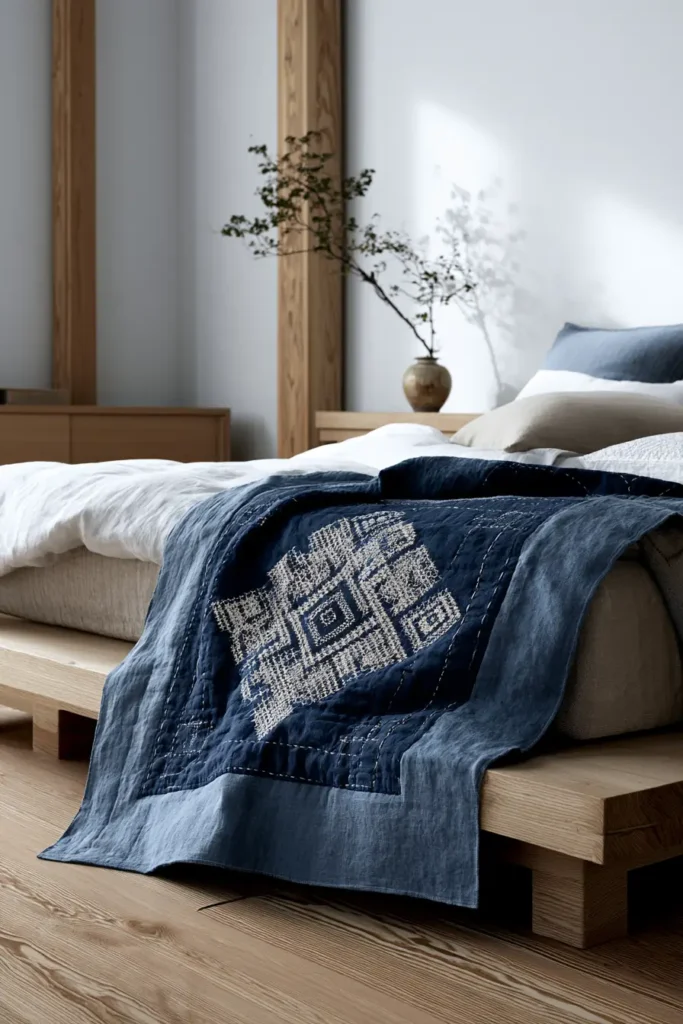
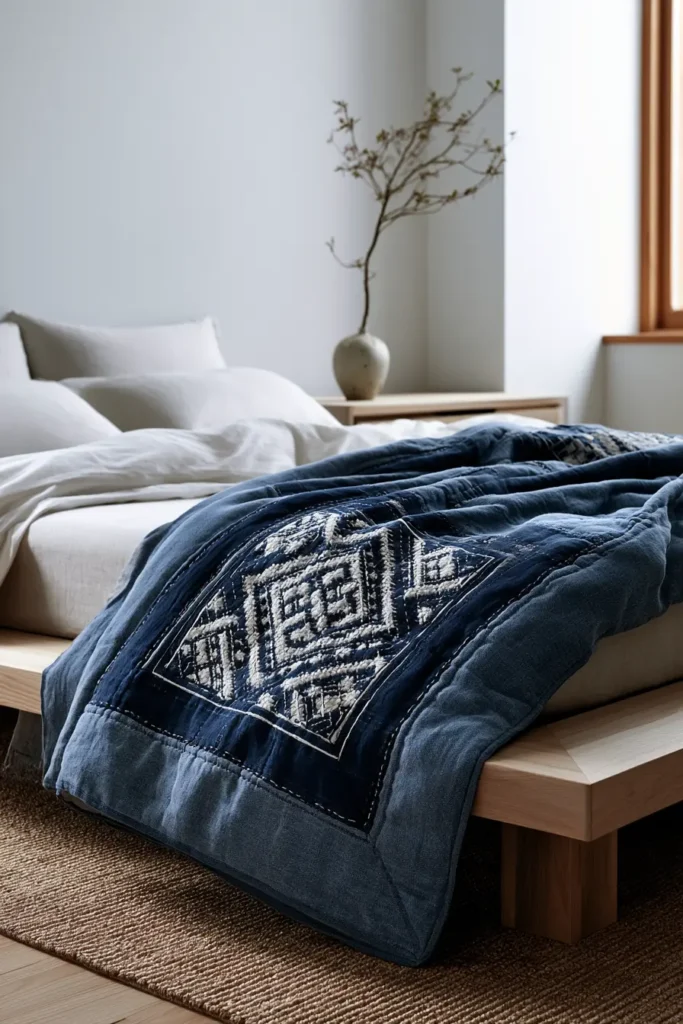
An elegant moyozashi sashiko quilt brings quiet texture and handmade calm to a minimalist bedroom without crowding it. Moyozashi means “pattern sashiko” — running stitches worked along a marked grid into flowing, repeating geometric designs. Because the stitches sit apart rather than being packed tightly together (as in hitomezashi), moyozashi reads as open and airy, which is exactly what suits a quilt meant to be the one quiet focal point in a pared-back room. Better still, it skips fiddly patchwork: you build the beauty from a whole-cloth top and the rhythm of the stitching, so it stays friendly for a confident beginner.
Why I Made It
I made this one because minimalist bedrooms can tip from “calm” to “flat,” and a moyozashi quilt fixes that with texture rather than clutter. There’s a personal pull, too. I grew up around Nakshi Kantha in Bangladesh, where layers of worn cotton are held together with long rows of running stitch — the same humble logic that gave rise to Japan’s sashiko. Sitting down to stitch indigo and white, I kept thinking about how two traditions, an ocean apart, arrived at nearly the same answer: mend the cloth, and somewhere along the way, the mending turns beautiful.
That history is worth carrying with you as you stitch. Sashiko began as a winter necessity in rural northern Japan, where running stitches layered worn fabric into something warmer and sturdier. The decorative patterns came later — which is why even the prettiest moyozashi motifs (waves, diamonds, linked circles, hemp leaves) still feel grounded rather than fussy.
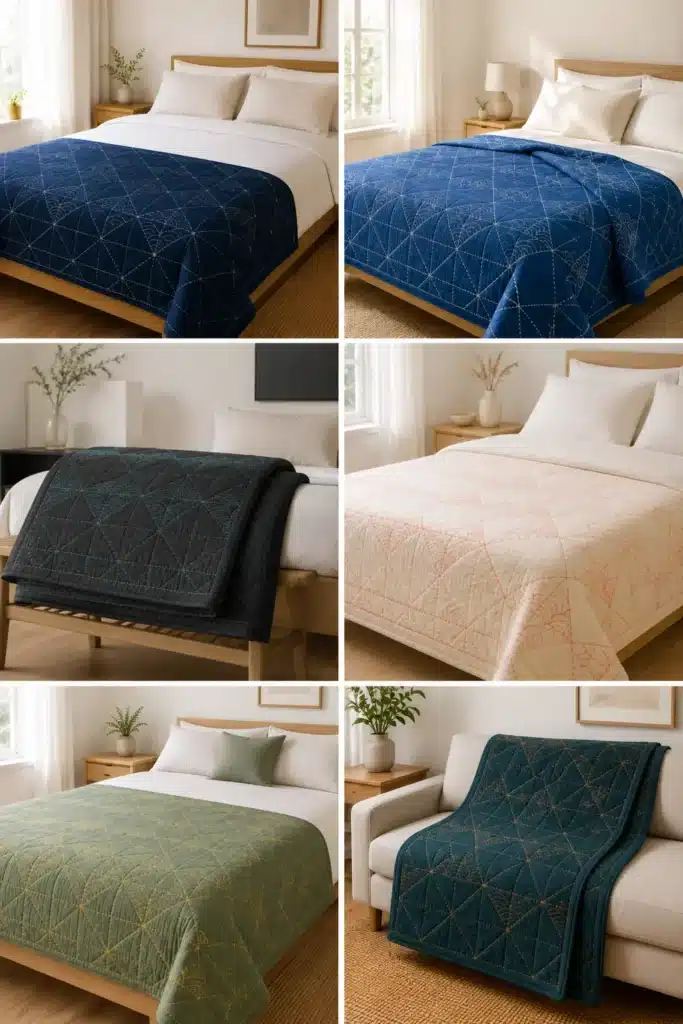
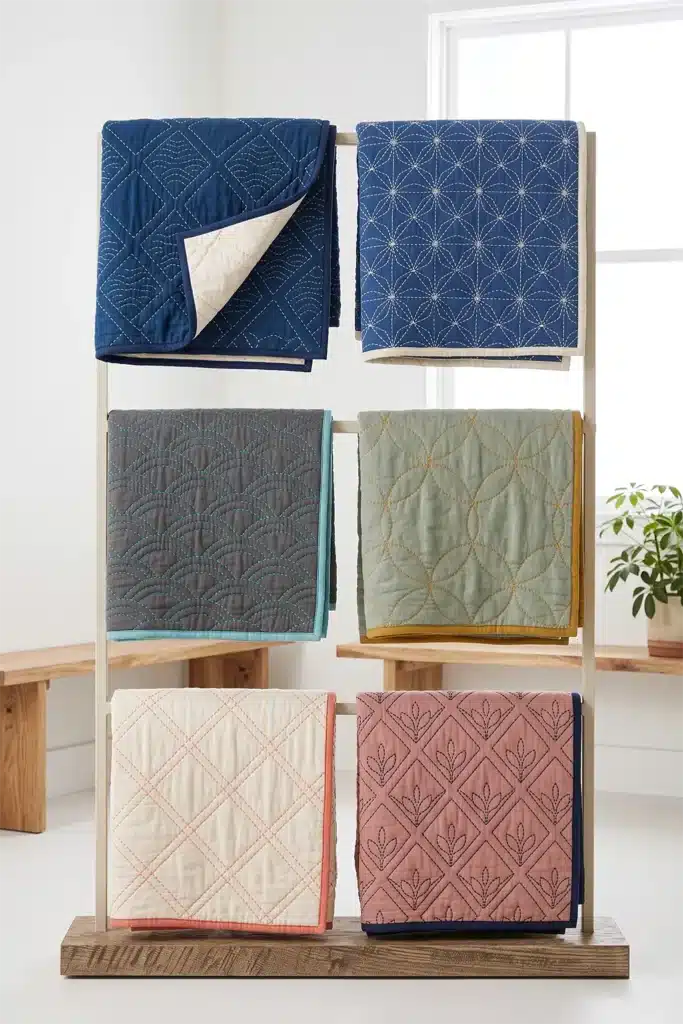
Why This Idea Is Worth Making
This idea is worth making because it gives you a genuinely elegant quilt without complex piecing. You start with large fabric panels, mark a repeating pattern, and let the stitches do the decorating. It is also deeply calming to make — the steady rhythm of the running stitch is the whole point — and the finished hand-stitched texture has a softness and movement that machine quilting can’t fully imitate. For a serene bedroom, that’s exactly the right balance of comfort, craft, and quiet detail.
Finished Size
- Approximate finished quilt: 54 × 66 inches — a lightweight throw or bed accent
- Twin coverlet: scale up to about 60 × 80 inches
- Queen coverlet: scale up to about 84 × 90 inches
- Best used: folded at the foot of a bed, layered over a duvet, or draped as a sofa throw
- Skill level: confident beginner
- Core techniques: whole-cloth quilting, sashiko running stitch, basting, binding
Materials Needed
For one 54 × 66-inch quilt:
- Quilt top: 2 yards of solid cotton, linen-cotton, chambray, or quilting cotton
- Backing: 3½ yards
- Lightweight cotton batting or flannel: one piece at least 60 × 72 inches
- Sashiko thread or pearl cotton: in your chosen contrast color
- Sashiko needle (or a long embroidery needle)
- Binding fabric: ½ yard
- Marking tool: washable fabric marker, chalk pencil, or Hera marker
- Quilting ruler, rotary cutter, and cutting mat
- Basting pins or basting thread
- Iron, and a sewing machine (optional, for the binding)
Beginner tip: Choose a medium-weight cotton or linen-cotton blend for the top. Very thin fabric puckers; very heavy fabric is harder to hand-stitch.
Choosing Your Colors
Pick one solid top fabric and one contrasting thread so the stitching itself becomes the pattern.
- Traditional: deep indigo top, crisp white thread, navy or indigo binding, natural cotton backing
- Cobalt blue top with ivory stitching
- Charcoal top with turquoise stitching
- Cream top with coral stitching
- Sage green top with golden-yellow stitching
- Dusty rose top with navy stitching
- Deep teal top with soft-peach stitching
For binding, echo the thread (coral, turquoise, mustard gold, teal, indigo) or keep it classic with navy or ivory.
The Pattern: A Diamond-and-Wave Grid
A beginner-friendly moyozashi layout is a repeating large diamond grid with optional wave lines inside:
- Mark vertical guide lines every 3 inches
- Mark horizontal guide lines every 3 inches
- Add diagonal lines across the grid to form diamonds
- For more decoration, add a gentle curved wave inside every other diamond
Stitch only the diamond grid for a simpler quilt, or layer in waves, linked circles, or leaf-like arcs for a richer surface.
Cutting Measurements
- Quilt top panel: 55 × 67 inches (½ inch larger all around for trimming)
- Backing panel: 60 × 72 inches
- Batting or flannel: 60 × 72 inches
- Binding: seven strips, 2½ inches × width of fabric
Optional framed border: cut the center top at 48 × 60 inches, add two side borders 3½ × 60 inches and two top/bottom borders 3½ × 54 inches, using a ¼-inch seam allowance.
Step-by-Step Guide
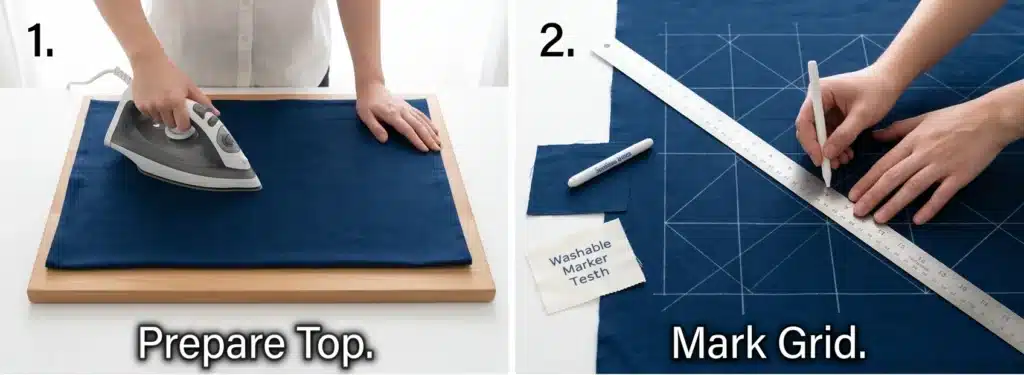
Step 1 — Press and prepare the top. Cut the quilt top to 55 × 67 inches and press it flat; wrinkles will distort the marked grid. If you’re adding borders, sew them on now, before marking.
Step 2 — Mark the grid. With a washable marker or Hera tool, draw light vertical and horizontal lines every 3 inches, then add diagonals to form diamonds. Keep marks faint and removable, and test your marker on a scrap first.
Step 3 — Add the decorative lines. Inside alternate diamonds, lightly mark your motif — soft waves are the easiest, elegant choice. Diamonds with waves look intricate but follow a simple, repeating logic.
Step 4 — Build the quilt sandwich. Lay the backing wrong side up, center the batting on top, then the marked quilt top right side up. Smooth from the center outward so nothing shifts.
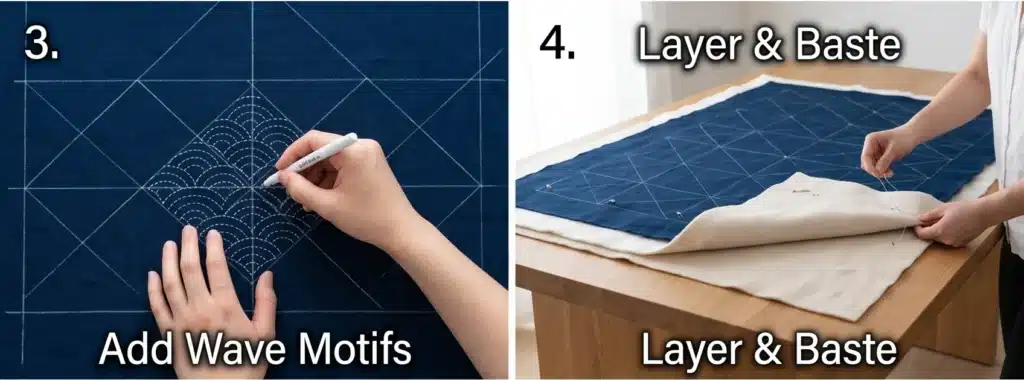
Step 5 — Baste. Pin-baste or thread-baste the three layers. For mostly hand-stitched quilts, thread basting is gentler to work around than a field of safety pins.
Step 6 — Start the running stitch. Thread the sashiko needle, knot the end, and stitch along a marked line. Aim for a ⅛–¼ inch stitch with about ⅛ inch between stitches, keeping the visible stitch slightly longer than the gap — that ratio gives the classic sashiko rhythm.
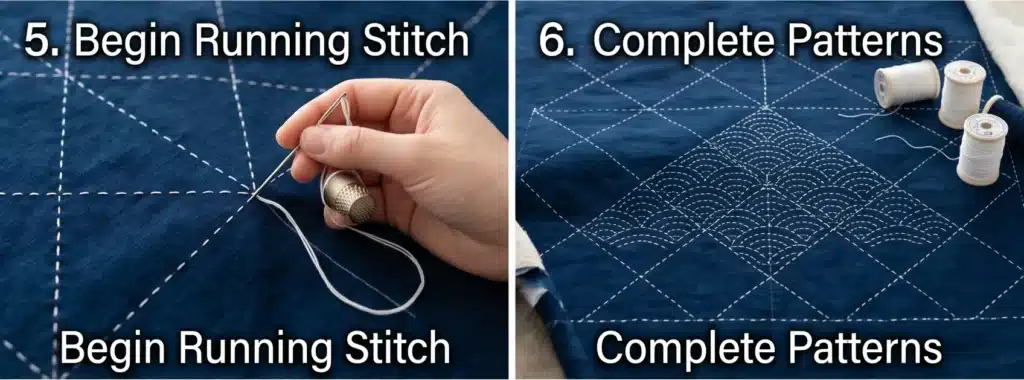
Step 7 — Work the main pattern, center outward. Stitch all the diamond grid lines first, then go back for the waves or decorative motifs. Don’t pull the thread tight; sashiko should rest on the surface with a relaxed hand, or the quilt will pucker.
Step 8 — Secure thread ends neatly. Finish a thread with a small knot buried between the layers or a few tiny backstitches along the line. Avoid bulky knots on the front, and on dark tops with light thread, trim tails closely so they don’t shadow through.
Step 9 — Optional machine quilting. If you want extra stability, stitch ½ inch from the edge and add a few straight lines roughly every 6 inches — but keep it minimal so the hand stitching stays the star.
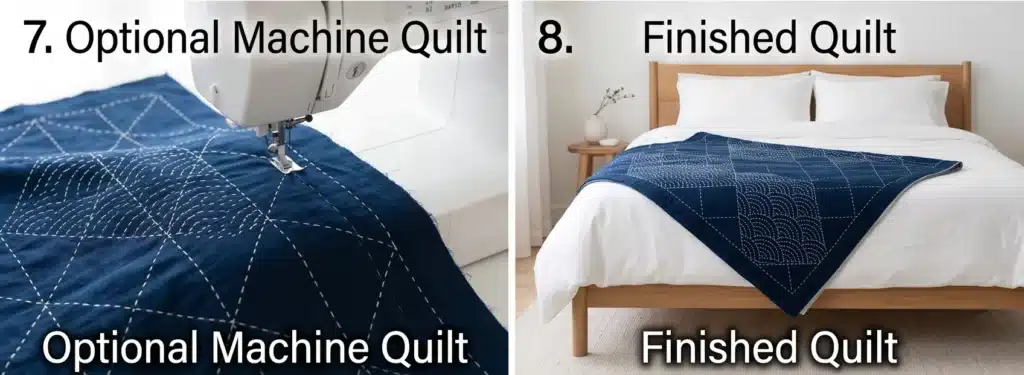
Step 10 — Trim, square, and bind. Trim to about 54 × 66 inches and square the corners. Join the 2½-inch binding strips, press in half lengthwise, sew to the front, then fold to the back and finish by hand or machine.
Step 11 — Wash and soften. Once you’ve confirmed all marks are removable, wash gently in cold water with mild detergent (no bleach) and air-dry or tumble low. The first wash settles the stitches and softens the whole quilt beautifully.
Assembly at a Glance
- Press the top; cut to 55 × 67 inches (add borders if using).
- Mark a 3-inch grid; add diagonals for diamonds.
- Mark decorative waves inside alternate diamonds.
- Cut backing and batting to 60 × 72 inches.
- Layer backing, batting, and top; smooth from the center.
- Baste securely.
- Stitch the diamond grid with even running stitches, center outward.
- Add the wave or motif lines.
- Add optional light machine quilting.
- Trim to 54 × 66 inches and square.
- Bind with 2½-inch strips.
- Wash gently and let the stitches soften in.
Beginner Tips for Success
- Start simple — diamonds and waves are far easier than tiny, detailed motifs.
- Keep a high contrast between fabric and thread so the pattern reads clearly.
- Never pull the thread tight; relaxed stitching keeps the quilt soft and flat.
- Mark lightly and always scrap-test your marker.
- Use a larger needle for thicker fabrics — sashiko thread is heavier than sewing thread.
- Work in short sessions. The slow rhythm is part of the pleasure, not a chore to rush.
Styling It
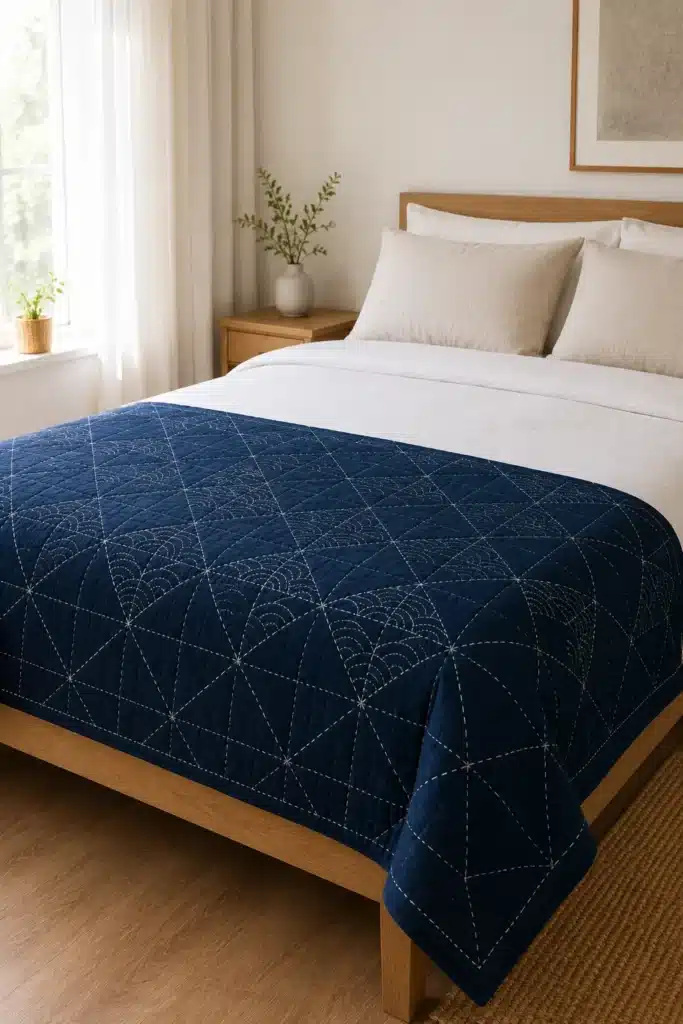
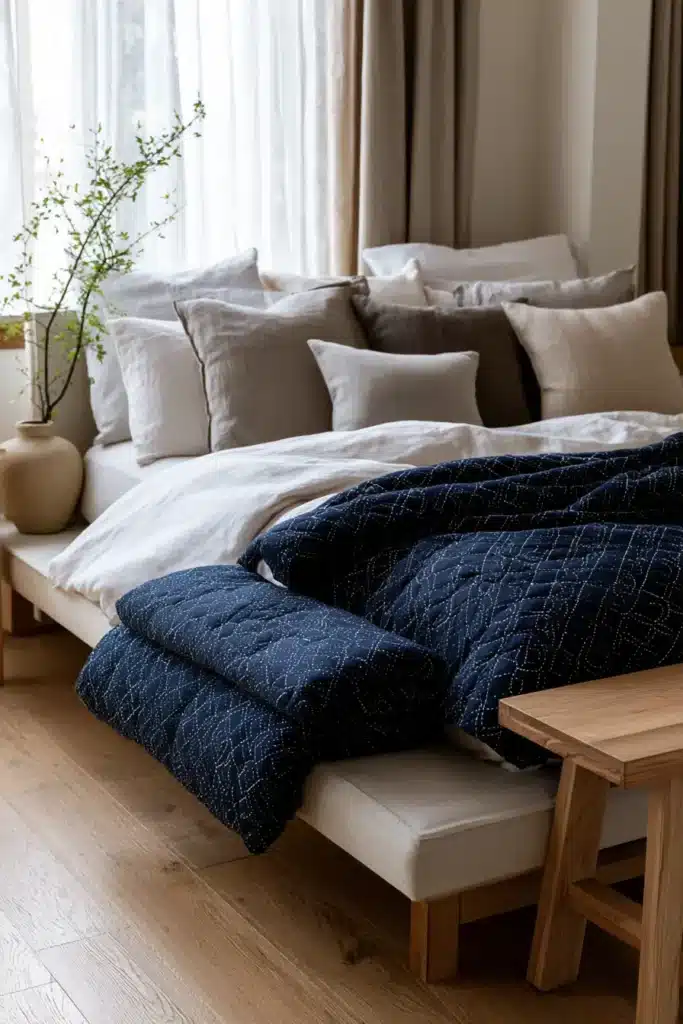
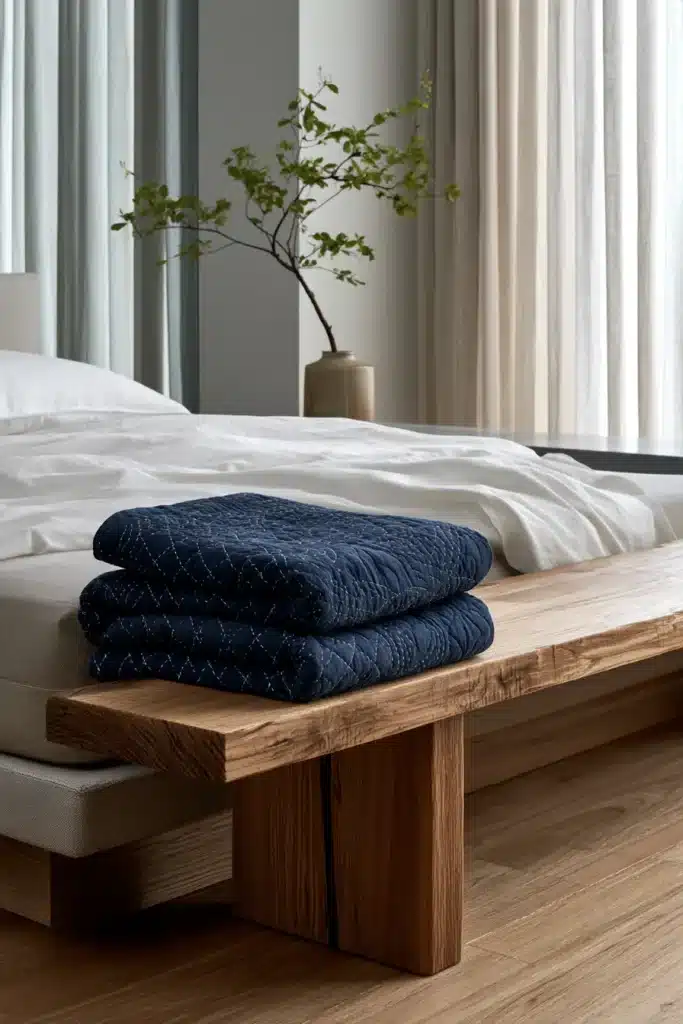
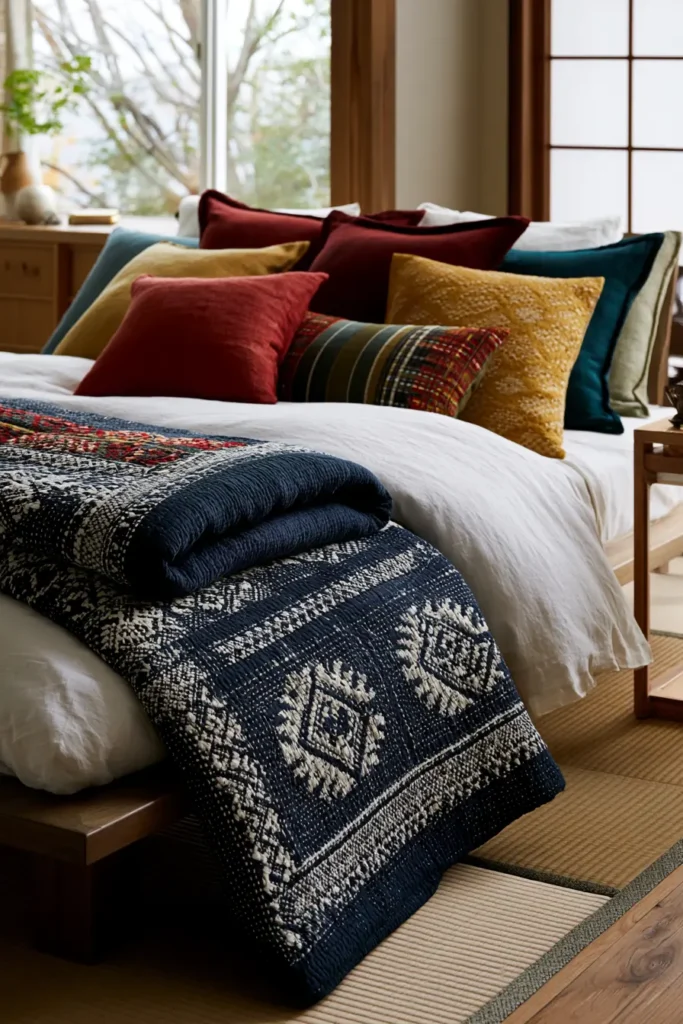
Set the finished quilt in a serene bedroom with white sheets, linen pillowcases, a natural wood bench, and soft neutral curtains, folded across the foot of the bed so the stitched pattern becomes the quiet focal point. Pull one or two accent pillows in your thread color — coral, mustard, teal, peach, or deep indigo — to tie the palette together.
Final Thoughts
An elegant moyozashi sashiko quilt is more than a decorative layer. It’s a slow, rhythmic project that turns plain cloth into something textured, meaningful, and calm. The repeated stitches create a quiet sense of movement, while the large surface keeps the pattern feeling spacious rather than crowded — the most beautiful way I know to add handmade warmth to a minimalist room without adding a single bit of clutter.
Other Design Inspirations – Digitally Modified


2. Cozy Hitomezashi (One-Stitch) Sashiko Bed Sheets for Textured Modern Homes
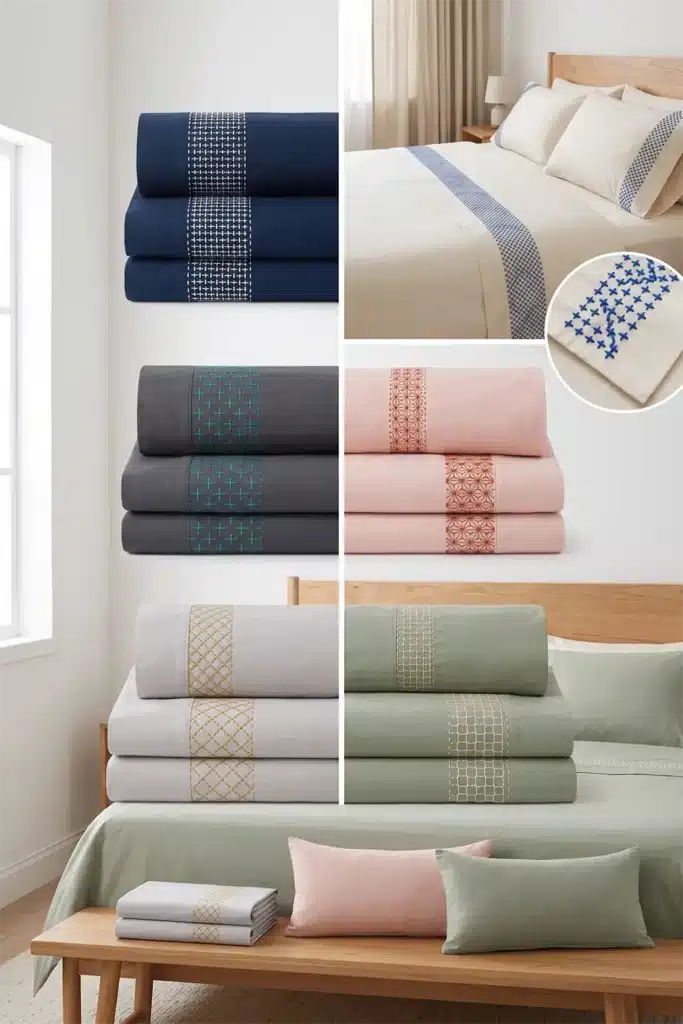
A hitomezashi sashiko bed-sheet set brings dense, woven-looking texture to the one thing you touch every single night. Hitomezashi means “one-stitch sashiko” — each stitch spans a single square of a marked grid, and you build the pattern by stitching rows in both directions. Where the horizontal and vertical stitches meet at the grid crossings, crisp geometric designs appear: little crosses, squares, and basket-weave effects that look intricate but come from very simple, repeated stitches. That structured density is exactly what gives a modern bedroom quiet, tactile interest.
A quick, honest note on scope: you don’t hand-stitch an entire bed sheet in hitomezashi — that would take months and make the sheet stiff. Instead, you stitch the fold-down top border of a flat sheet and matching pillowcase cuffs, the parts that show when the bed is made. The result reads as a designer sashiko sheet set, but it stays breathable and usable.
Why I Made It
I made this because I wanted sashiko on something lived-in, not just folded at the foot of the bed for show. Sheets are touched, slept on, and seen every morning, so a stitched border turns an everyday object into something quietly special. Growing up around hand-stitched textiles, I learned that the most loved pieces are usually the ones you use, not the ones you protect — and a sashiko-trimmed sheet earns its keep that way.
There’s a nice bit of history behind hitomezashi’s density, too. In the cold north of Japan, more stitching meant more warmth and a stronger, longer-lasting cloth, so the tightly packed one-stitch grids weren’t just decorative — they were practical insulation. Knowing that, the dense little crosses on your pillowcase cuff feel less like fashion and more like a craft that always had a job to do.
Why This Idea Is Worth Making
This idea is worth making because it delivers a high-end, handmade sheet set for the cost of a plain one, plus a few skeins of thread. You start with a smooth cotton sheet set, mark a grid on the visible borders, and stitch — no garment construction, no patchwork. It’s also forgiving: hitomezashi is counted and grid-based, so the rhythm is steady, and the pattern almost builds itself once the grid is marked. For a modern bedroom that wants texture without busyness, a stitched sheet border is one of the simplest ways to get it.
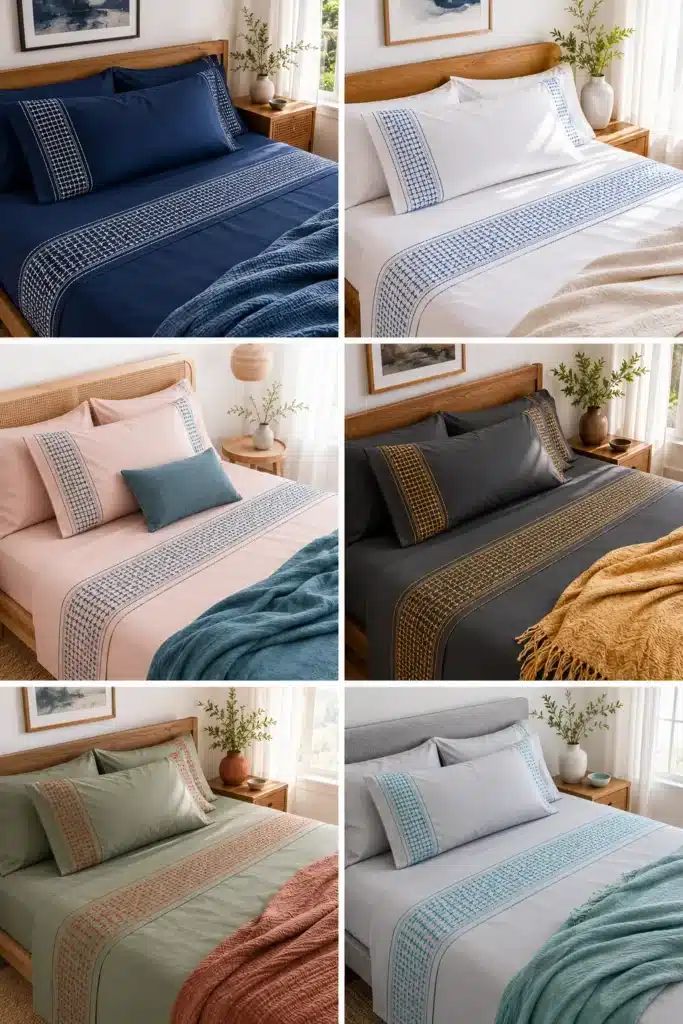
Finished Project
- What you make: a flat sheet with a stitched top border + two stitched pillowcase cuffs
- Stitched band depth: about 4–6 inches on the flat sheet, 3–4 inches on each pillowcase cuff
- Works for: twin, full, queen, or king sets (you stitch only the visible borders, so size barely changes the effort)
- Skill level: beginner — counted, repetitive, low-pressure
- Core techniques: grid marking, hitomezashi horizontal and vertical rows, securing ends
Materials Needed
- A cotton bed-sheet set: a smooth percale or sateen flat sheet plus two pillowcases (a tight, even weave holds stitches best)
- Sashiko thread or pearl cotton in your contrast color (1–3 skeins, depending on band depth)
- Sashiko needle (or long embroidery needle)
- Washable fabric marker, chalk pencil, or Hera marker
- Quilting ruler with a clear grid
- Embroidery hoop (optional, helps keep tension even)
- Iron and ironing board
- Small scissors
Beginner tip: Prewash and press the sheet set before marking. Cotton shrinks slightly on the first wash, and you want the grid laid on its final dimensions.
Choosing Your Colors
Pick a smooth base sheet and one bold contrasting thread so the grid pattern pops:
- Traditional: indigo sheet, crisp white thread
- White or natural sheet with cobalt or indigo thread
- Soft blush sheet with deep teal thread
- Charcoal or slate sheet with coral or mustard-gold thread
- Sage green sheet with warm ivory or terracotta thread
- Pale grey sheet with turquoise thread
For a coordinated look, match the pillowcase thread to the flat sheet, or flip the combo (white thread on the sheet, the colored version on the cases) for a subtle set.
The Pattern: A Simple Cross (Jūji) Grid
The most beginner-friendly hitomezashi pattern is the cross, or jūji, which forms neat plus-signs across the band:
- Mark a grid of ¼-inch squares (traditional sashiko often uses a finer 5 mm grid — start at ¼ inch and tighten later if you like)
- Stitch every horizontal line, one square at a time, leaving a one-square gap between stitches
- Stitch every vertical line the same way
- Keep the rows aligned so the stitches meet at the crossings — that alignment is what forms the crosses
Want a woven, denser effect instead? Offset every other row by one square, and the pattern shifts into a basket-weave texture.
Marking Measurements
- Flat sheet band: measure in from the top hem and mark a band the full width of the sheet × 5 inches deep
- Pillowcase cuffs: mark a band the full width of the cuff × 3½ inches deep, sitting just above the opening
- Fill each band with the ¼-inch grid, keeping lines light and removable
Step-by-Step Guide
Step 1 — Prep the set. Wash and press the flat sheet and pillowcases. Lay the flat sheet flat and decide which edge is the top (the wide hem that folds down over a blanket).
Step 2 — Mark the bands. On the flat sheet, measure a 5-inch-deep band along the full top width. On each pillowcase, mark a 3½-inch band above the opening. Keep marks faint and scrap-test your marker first.
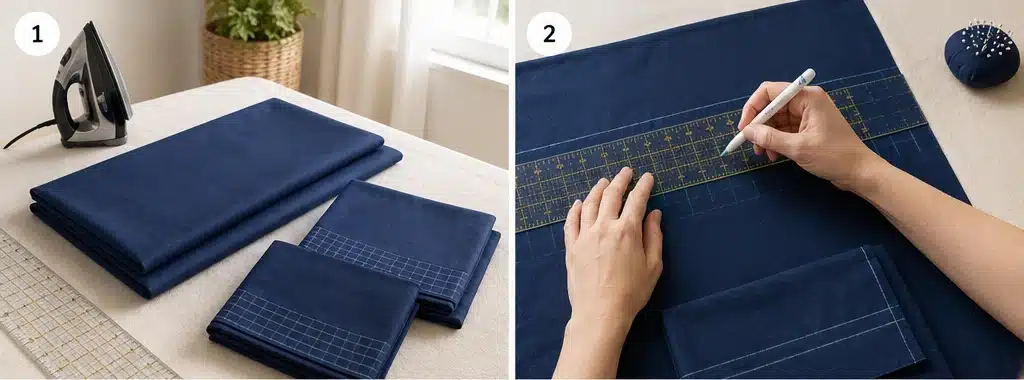
Step 3 — Draw the grid. Fill each band with a ¼-inch square grid using your ruler. Accuracy here matters more than anywhere else — an even grid makes an even pattern.
Step 4 — Hoop and start stitching. If using a hoop, frame one section. Thread the sashiko needle, knot the end, and begin the first horizontal row: one stitch per square, one square skipped between each.
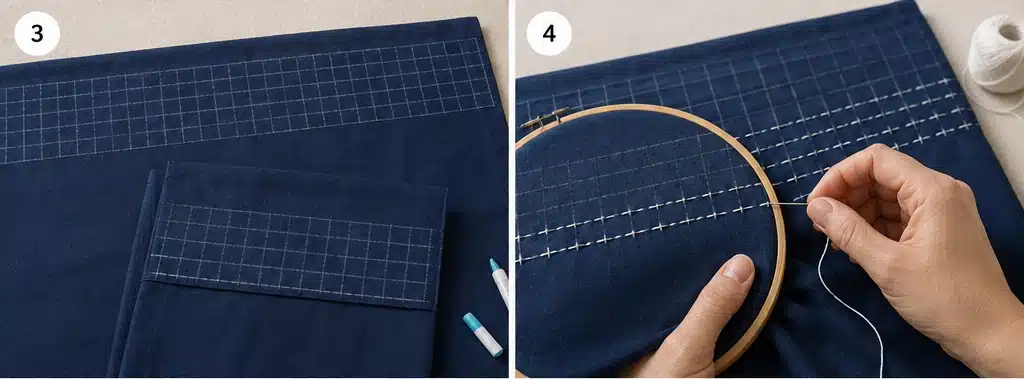
Step 5 — Work all horizontal rows. Stitch row by row across the whole band, keeping stitches a consistent ¼-inch and the tension relaxed so the fabric stays flat. Don’t pull tight.
Step 6 — Work all vertical rows. Turn the work and stitch the vertical lines the same way. As the verticals cross the horizontals at each grid point, the cross pattern emerges.
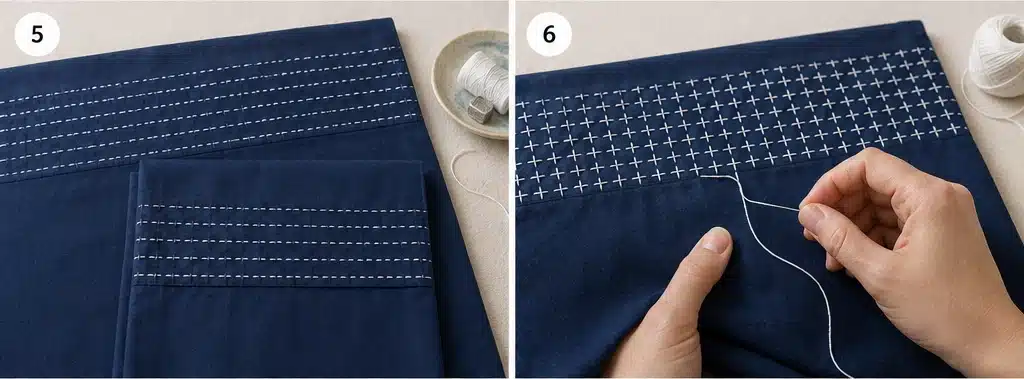
Step 7 — Secure thread ends. Finish each thread with a small knot or a few tiny backstitches on the wrong side of the band, so the sleeping surface stays smooth against skin. Trim tails close.
Step 8 — Press and remove marks. Gently press the stitched bands from the back. Remove any remaining marking lines per your marker’s instructions (a damp cloth for washable markers).
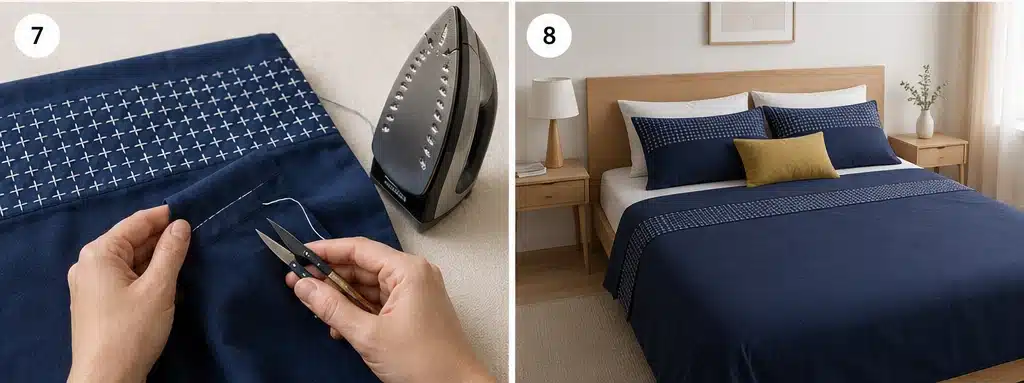
Step 9 — Final wash. Wash the finished set gently in cold water with mild detergent, no bleach. Air-dry or tumble low. The first wash softens the bands and settles the stitches into the cloth.
Assembly at a Glance
- Prewash and press the sheet set.
- Mark a 5-inch band on the flat sheet, 3½-inch bands on the cuffs.
- Fill each band with a ¼-inch grid.
- Stitch all horizontal rows, one square per stitch.
- Stitch all vertical rows to form the crosses.
- Secure all ends on the wrong side.
- Press and remove the grid marks.
- Wash gently and let the stitching soften in.
Beginner Tips for Success
- Mark the grid carefully — uneven squares are the only thing that makes hitomezashi look off.
- Keep stitch length consistent; the eye reads rhythm more than perfection.
- Never pull the thread tight, or the band will pucker against the flat sheet.
- Keep all knots and tails on the wrong side for comfort against the skin.
- Work in short, calm sessions. Counted stitching is meant to be unhurried.
Styling It
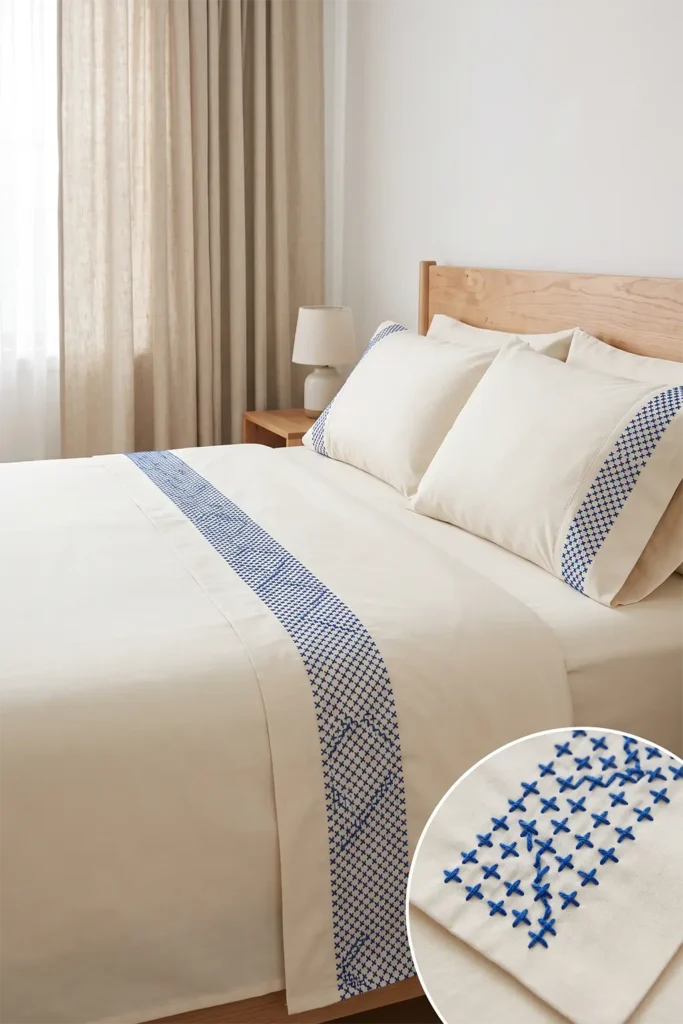
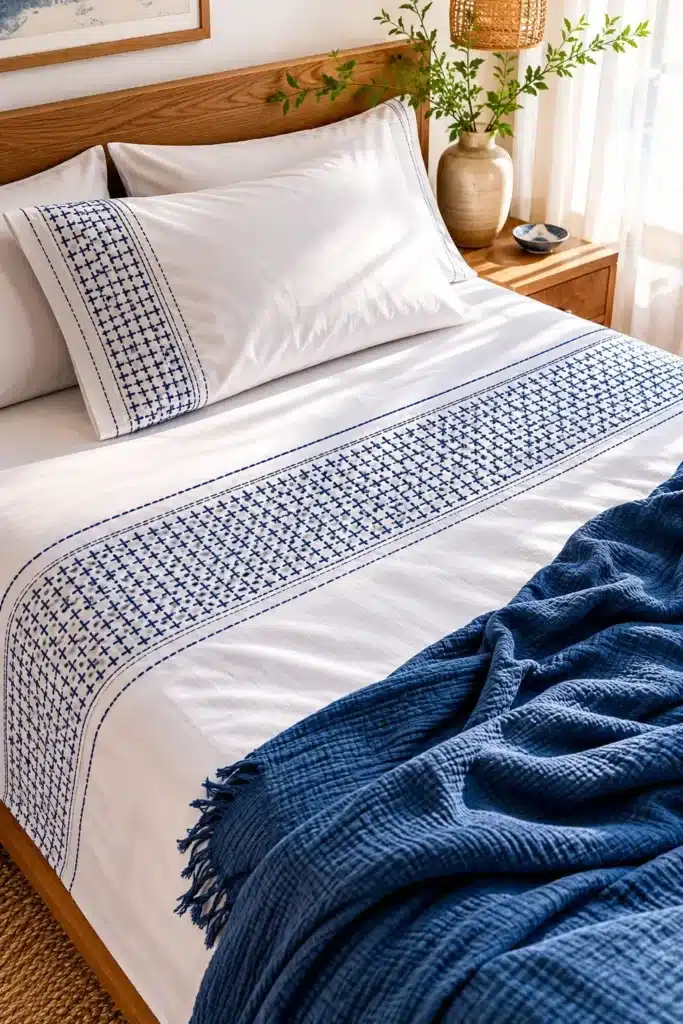
Make the bed and fold the stitched border down over a plain blanket or duvet so the sashiko band frames the top of the bed. Set the matching pillowcases with the cuffs facing out, and pull in one accent throw or lumbar pillow in your thread color — teal, coral, mustard, or indigo — to tie the palette together. Against white walls and natural wood, the textured border becomes a clean, modern focal point.
Final Thoughts
A hitomezashi sashiko sheet set proves that sashiko doesn’t have to live on a wall hanging or a folded quilt — it can be something you sleep in. The dense one-stitch grid adds real, touchable texture to a modern bedroom, while the project itself stays calm, counted, and beginner-friendly. Best of all, it turns an ordinary sheet set into a handmade piece you’ll actually use every night.
Other Design Inspirations – Digitally Modified


3. Traditional Kogin Sashiko Quilt Designs for Authentic Japanese Style
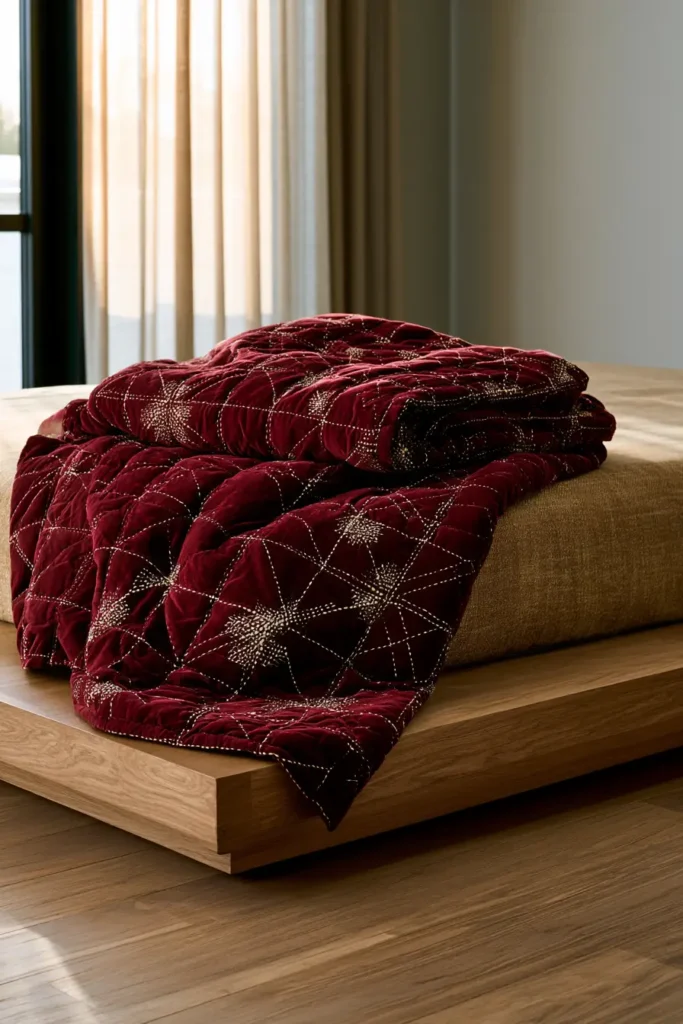
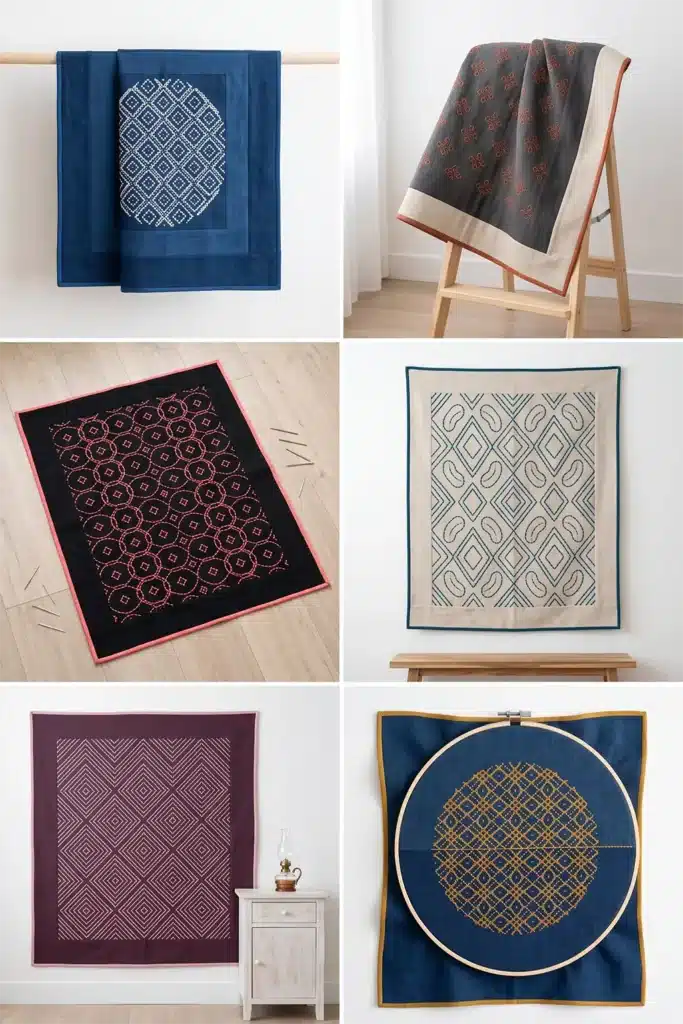
A kogin sashiko quilt puts one of Japan’s most striking counted-stitch traditions at the center of your bed. Kogin-zashi comes from the Tsugaru region of Aomori, in the far north, and it’s technically distinct from other sashiko: it’s counted-thread embroidery worked over odd numbers of fabric threads — one, three, five, seven — which builds dense, diamond-based geometric motifs called modoko. Those modular diamond units lock together into the elaborate lattices that make kogin instantly recognizable and genuinely authentic.
Because kogin is counted, it’s worked on an even-weave fabric whose threads you can see and count, not ordinary quilting cotton. So the honest, traditional approach is to stitch a kogin panel on even-weave linen, then make that panel the hero of the quilt — a central medallion framed with borders, layered, lightly quilted, and bound. The stitching is the star; the quilting just supports it.
Why I Made It
I made this one because Kogin carries one of my favorite stories in all of textile craft — a story about beauty born from hardship. In old Tsugaru, sumptuary laws barred farming families from wearing cotton, so they wore thin hemp that did little against brutal northern winters. Women stitched precious cotton thread densely into the weave to trap warmth and strengthen the cloth, and out of that pure necessity came these dazzling diamond patterns. As someone whose family has long worked in handicraft, I find that the kind of history I find impossible to resist is the quiet turning of constraint into art.
That backstory is worth keeping in mind as you stitch. Every diamond you build was once insulation against the cold before it was an ornament. Knowing it gives the slow, counted work a weight that a purely decorative project never quite has.
Why This Idea Is Worth Making
This idea is worth making because it produces a true heirloom — a quilt with a hand-stitched centerpiece that resembles museum textile art yet follows a simple, repeatable counting rule. Kogin is methodical rather than freehand: once you understand the odd-count rhythm, the diamonds almost build themselves, and mistakes are easy to see and fix because everything sits on a counted grid. It’s slow stitching in the best sense, and the finished medallion gives a bedroom a focal point with real cultural depth, not just decoration.
A fair heads-up: Kogin is the most time-intensive project in this collection. Treat it as a labor of love, and start with a modest panel — you can always make the next one bigger.
Finished Size
- Approximate finished quilt: 50 × 60 inches — a lap or throw quilt
- Kogin center medallion: about 16 × 16 inches of stitched even-weave linen
- Smaller-panel option: an 8 × 8 inch medallion for a faster first project
- Best used: draped over the foot of a bed, on a reading chair, or as a wall-hung textile feature
- Skill level: patient beginner to intermediate
- Core techniques: counted-thread kogin stitching, simple borders, basting, minimal quilting, binding
Materials Needed
- Even-weave linen or kogin cloth (around 18–22 count, so threads are countable): one piece at least 20 × 20 inches for the panel
- Border and backing fabric: 2 yards of indigo or solid cotton
- Lightweight cotton batting: one piece at least 56 × 66 inches
- Kogin or sashiko thread / pearl cotton: in your contrast color (kogin thread is slightly thicker and covers well)
- Blunt tapestry needle (it slides between threads instead of splitting them)
- Embroidery hoop or frame
- Binding fabric: ½ yard
- A kogin modoko chart (printed grid pattern), ruler, scissors, iron
Beginner tip: a blunt tapestry needle is the right tool here — kogin counts threads, so you want the needle passing between fabric threads, never piercing them.
Choosing Your Colors
Kogin is traditionally white thread on deep indigo, and that contrast is hard to beat. For vibrant modern versions, keep the base dark and let the thread sing — or flip to a pale base with a jewel-tone thread:
- Traditional: indigo linen, crisp white thread
- Indigo linen with turquoise, coral, or mustard-gold thread
- Charcoal linen with warm ivory or terracotta thread
- Natural oatmeal linen with deep teal or cobalt thread
- Deep plum linen with soft blush thread
Match the quilt borders and binding to the linen base (indigo borders on an indigo panel) so the stitched medallion stays the focal point.
The Pattern: Diamond Modoko
Kogin builds from modoko — small modular diamond units that repeat and combine. Work from a charted grid:
- Each stitch passes over an odd number of threads (1, 3, 5, 7), then under a thread, following the chart
- Stitch in horizontal rows, building the diamond shapes line by line
- Start at the center of the panel and work outward symmetrically so the medallion stays balanced
- Combine simple units — such as the bean and cat’s-eye modoko — into a larger central diamond
Start with one clean central diamond for an 8-inch panel; layer concentric diamonds outward for the full 16-inch medallion.
Cutting & Layout Measurements
- Even-weave panel: start with 20 × 20 inches; stitch a 16 × 16 inch medallion centered in it, then trim the panel to 17 × 17 inches (½-inch seam allowance)
- Inner border: two strips 2½ × 17 inches (sides) + two strips 2½ × 21 inches (top/bottom)
- Outer border: cut to bring the top to about 51 × 61 inches
- Backing: 56 × 66 inches
- Batting: 56 × 66 inches
- Binding: six strips, 2½ inches × width of fabric
- Use a ¼-inch seam allowance throughout
Step-by-Step Guide
Step 1 — Prepare the linen. Press the even-weave panel and find the exact center by folding it in quarters. Mark the center point lightly; kogin medallions are built outward from the middle.
Step 2 — Set up your chart and hoop. Frame the center of the panel in a hoop. Keep your printed Modoko chart beside you — kogin is read from the grid, not improvised.
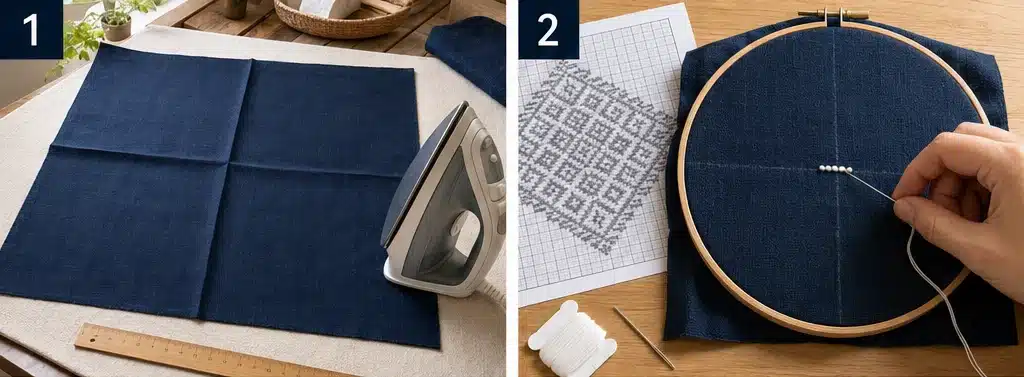
Step 3 — Stitch the first central row. Thread the blunt tapestry needle. Starting at the center, work the first horizontal row, passing the thread over the odd thread counts specified in the chart. Don’t pull tight — the thread should lie flat on the surface.
Step 4 — Build the diamonds row by row. Work outward from the center, one horizontal row at a time, letting the diamond modoko take shape. Re-frame the hoop as you move into new areas.
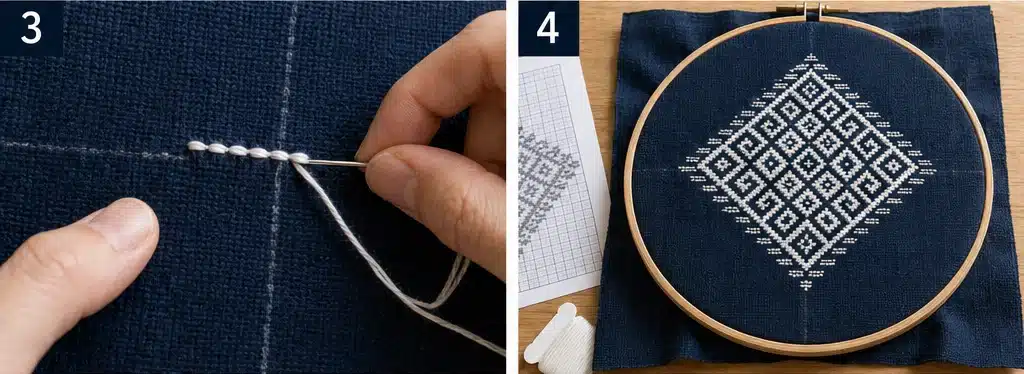
Step 5 — Complete the medallion symmetrically. Mirror your stitching above and below, left and right of center, until the full diamond lattice is finished. Keep tension even throughout for a crisp lattice.
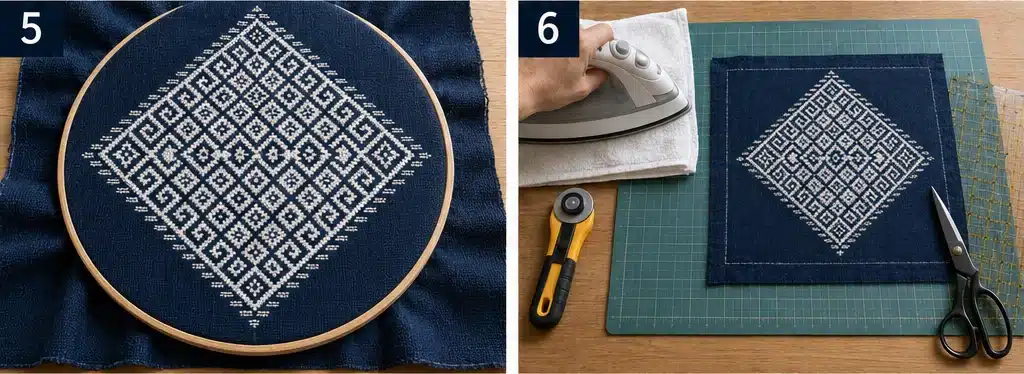
Step 6 — Press and trim the panel. Press the finished kogin from the back over a towel so you don’t crush the stitches. Trim the panel to 17 × 17 inches, keeping the medallion centered.
Step 7 — Add the borders. Sew the inner border strips to the panel, then the outer border strips, pressing the seams outward, until the top measures about 51 × 61 inches.
Step 8 — Build and baste the sandwich. Layer backing (wrong side up), batting, and quilt top (right side up). Smooth from the center and baste with pins or thread.
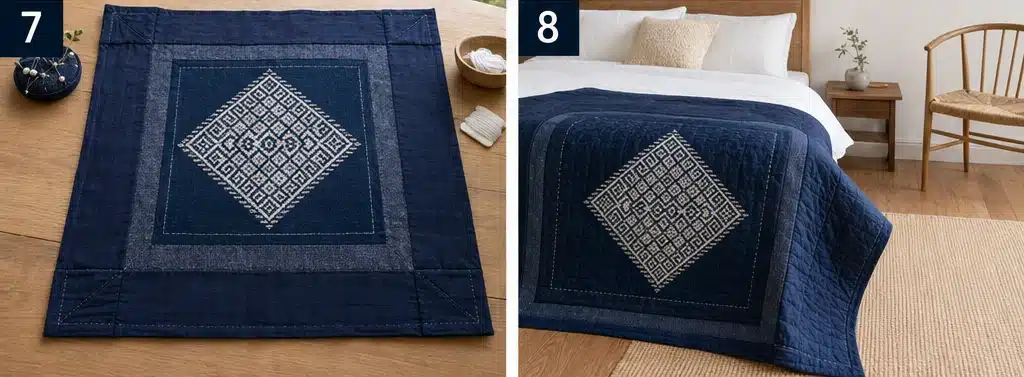
Step 9 — Quilt minimally. Quilt simply so the kogin stays the star: stitch in the ditch around the medallion and inner border, and add a few straight lines in the outer border only. Leave the stitched panel itself unquilted.
Step 10 — Trim, bind, and wash. Trim to 50 × 60 inches, square the corners, and bind with the 2½-inch strips. Wash gently in cold water, no bleach, and air-dry to let everything settle softly.
Assembly at a Glance
- Find and mark the center of the even-weave panel.
- Stitch the kogin medallion from the center outward, over odd thread counts.
- Press and trim the panel to 17 × 17 inches.
- Add inner and outer borders to reach 51 × 61 inches.
- Layer top, batting, and 56 × 66 inch backing.
- Baste securely.
- Quilt minimally around the medallion and borders.
- Trim to 50 × 60 inches and bind.
- Wash gently and let it soften.
Beginner Tips for Success
- Always count threads carefully — kogin lives or dies on accurate counting, so check each row before moving on.
- Use a blunt needle so you slide between threads instead of splitting them.
- Start small. An 8-inch medallion teaches the rhythm before you commit to a 16-inch one.
- Keep the thread relaxed; pulled-tight stitches distort the diamonds.
- Work the medallion before assembling the quilt — it’s far easier to stitch a flat panel than a layered one.
Styling It
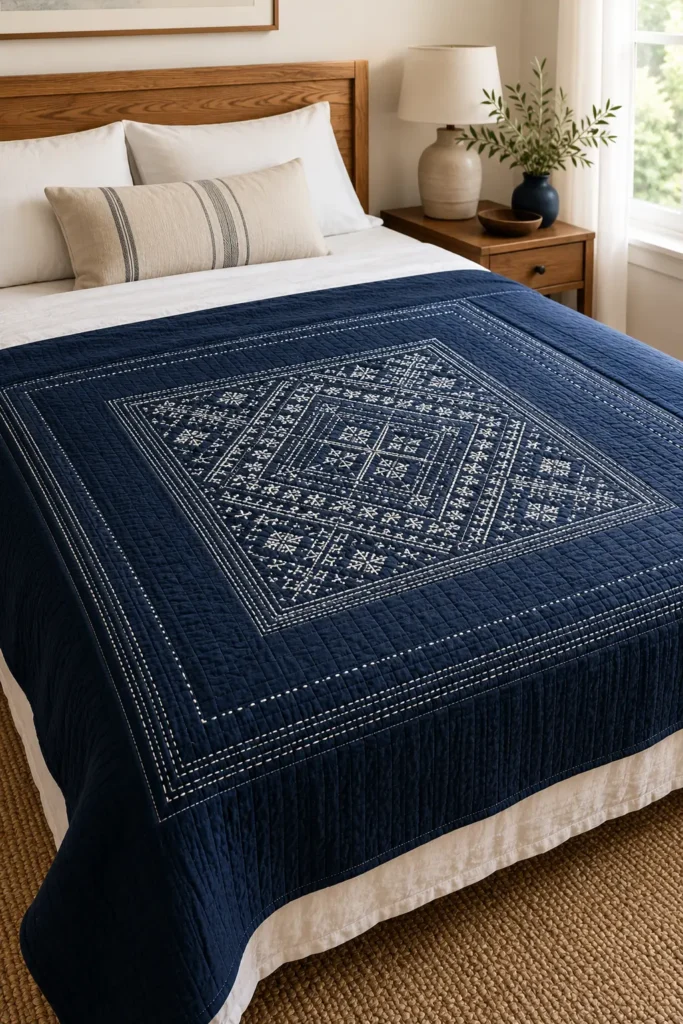
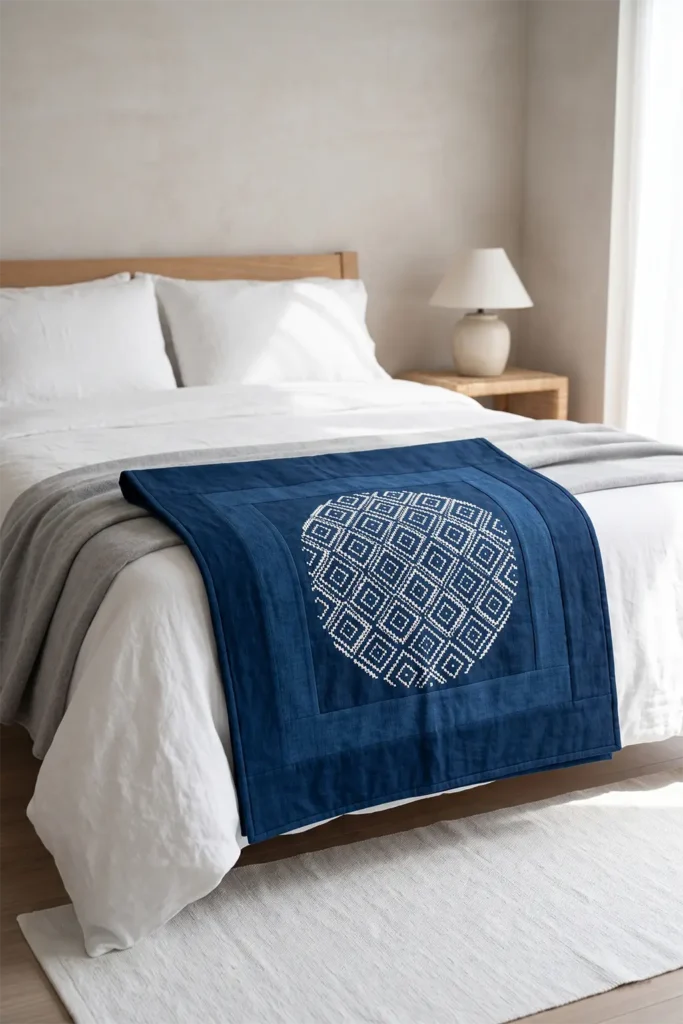
Drape the finished quilt over the foot of an indigo-and-white bed, or hang it as a textile panel above a low bench so the medallion reads like framed art. Keep the surrounding palette quiet — natural wood, white walls, linen pillows — and let one accent in your thread color (coral, mustard, teal) tie the room to the stitching. Kogin’s bold geometry does best with calm space around it.
Final Thoughts
A traditional kogin sashiko quilt is the most ambitious idea in this collection, and the most rewarding. Its diamond lattices carry centuries of northern Japanese history — warmth stitched into thin cloth, beauty drawn out of hardship — and the counted method makes that artistry surprisingly approachable once you settle into the rhythm. Finished, it’s not just a quilt but a quiet heirloom, the kind of handmade piece that anchors a room and outlasts a trend.
Other Design Inspirations – Digitally Modified
4. Shonai Sashiko Bed Runners with Timeless Regional Motifs
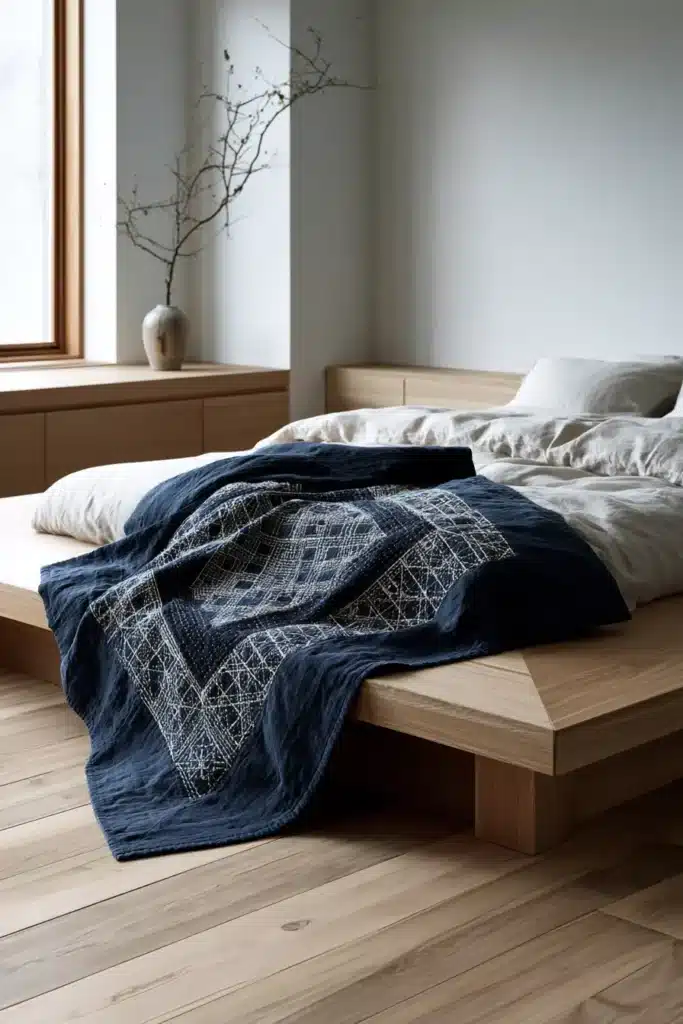
A Shonai sashiko bed runner lays a long band of fine, even hand-stitching across the foot of your bed — the kind of quiet, textured detail that finishes a room. Shonai-zashi comes from the Shōnai region of Yamagata, on Japan’s northern Sea of Japan coast, and it’s one of the country’s great regional sashiko traditions. Its signature isn’t a special motif so much as a quality of stitch: Shonai work is known for being remarkably dense, fine, and even, developed in a hard-working farming and fishing region where sashiko had to reinforce garments against constant wear. Stitchers often use a palm thimble to load many stitches at once, which is part of how the work stays so uniform.
That makes a bed runner the perfect project. It’s narrow enough to stitch densely the way Shonai is meant to be worked, long enough to show off the even rhythm, and it doubles the stitching as the quilting — you stitch straight through all the layers, so the pattern decorates and holds the runner together at the same time.
Why I Made It
I made this because a bed runner is the most practical way to add sashiko to a bed. A full quilt is a big commitment; a runner gives you a real, finished piece on a manageable strip of fabric, and it’s the part of the bed people actually see and touch first. Shonai felt like the right tradition for it because Shonai stitching was always meant for things that got used hard — workwear, not display — and a runner gets folded, sat on, and tugged into place every day.
There’s an honesty in that history I keep coming back to. Shonai’s beauty came from making everyday cloth tougher and warmer, the stitches packed close for strength. Coming from a family rooted in handicraft, I love that the most refined-looking sashiko grew out of the most practical need. A runner carries that spirit perfectly: lovely to look at, but built to be lived with.
Why This Idea Is Worth Making
This idea is worth making because it gives you an authentic, high-impact sashiko piece without the scale of a quilt. The runner is small enough to finish in a reasonable stretch of evenings, the stitching doubles as the quilting, so there’s no separate quilting step, and the long, narrow shape makes a repeating geometric pattern look intentional and elegant. It’s also endlessly adaptable — change the base and thread colors and the same runner shifts from traditional indigo to bold modern, suiting almost any bedroom.
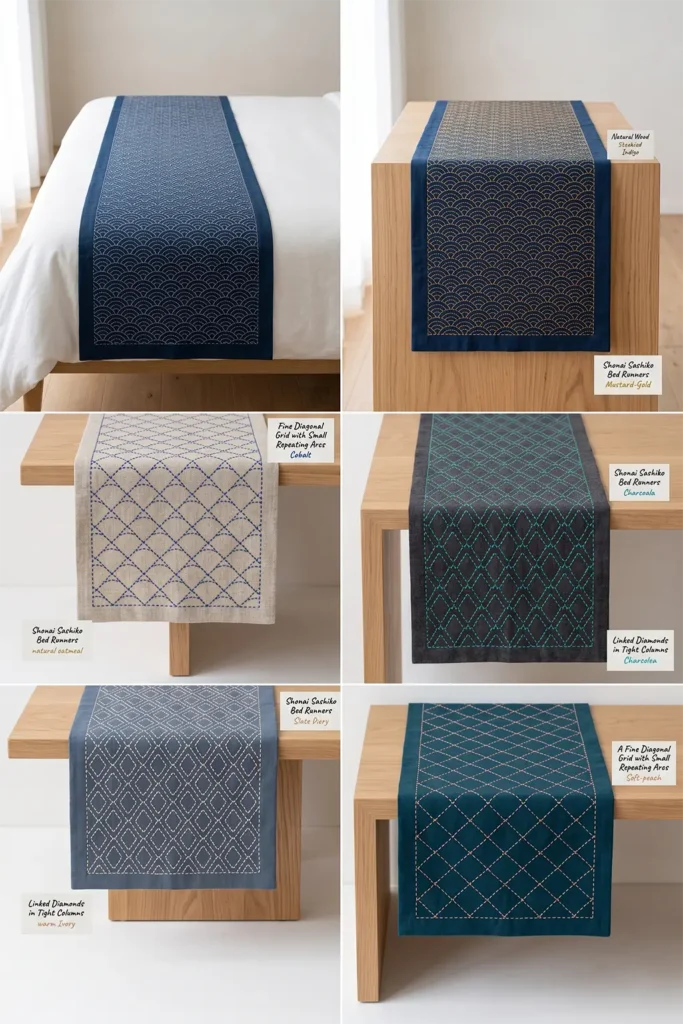
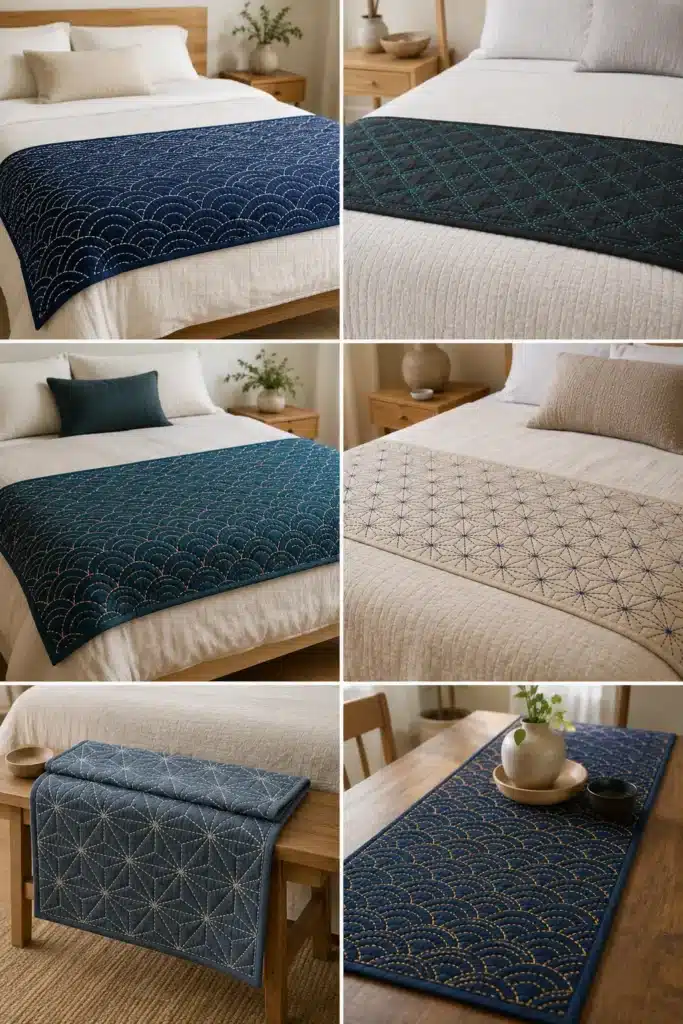
Finished Size
- Approximate finished runner (queen): 20 × 90 inches
- Twin: about 18 × 75 inches
- King: about 24 × 108 inches
- Best used: across the foot of the bed, draping evenly on both sides; also works on a bench or as a table runner
- Skill level: confident beginner
- Core techniques: sashiko running stitch through all layers (quilting as you go), basting, binding
Materials Needed
For one 20 × 90-inch runner:
- Top fabric: 2¾ yards of solid cotton, linen-cotton, or chambray
- Backing fabric: 2¾ yards
- Lightweight cotton batting or flannel: one piece at least 22 × 92 inches
- Sashiko thread or pearl cotton in your contrast color (Shonai’s density uses plenty — have 3–4 skeins)
- Sashiko needle (and a palm or leather thimble, optional but traditional)
- Binding fabric: ½ yard
- Washable fabric marker, chalk pencil, or Hera marker
- Long quilting ruler, rotary cutter, cutting mat, basting pins, and iron
Beginner tip: a longer sashiko needle lets you load several stitches at once — the heart of the even Shonai rhythm. Pair it with a palm thimble, and you’ll stitch faster and straighter.
Choosing Your Colors
Pick a solid base and one strong contrasting thread so the dense pattern reads clearly:
- Traditional: deep indigo base, crisp white thread
- Indigo base with mustard-gold or coral thread
- Charcoal base with turquoise thread
- Deep teal base with soft-peach thread
- Natural oatmeal base with cobalt or navy thread
- Slate blue base with warm ivory thread
Match the binding to the thread color for a crisp frame, or to the base for a seamless edge.
The Pattern: A Dense Repeating Geometric
Shonai shines with fine, closely spaced, repeating motifs. Good beginner-friendly choices that suit a long runner:
- Overlapping waves (seigaiha) running the length of the runner
- Linked diamonds in tight columns
- A fine diagonal grid with small repeating arcs
Whatever you choose, keep the repeat small, and the stitching close — density and evenness are what make it read as Shonai rather than open moyozashi. A ½-inch grid provides tighter, more refined spacing.
Cutting Measurements
- Top panel: 21 × 91 inches
- Backing panel: 22 × 92 inches
- Batting: 22 × 92 inches
- Binding: six strips, 2½ inches × width of fabric (joined into one long strip)
For twin or king, adjust length to your mattress width plus about 15 inches of drape on each side.
Step-by-Step Guide
Step 1 — Cut and press. Cut the top to 21 × 91 inches and press it smooth. Cut the batting and backing slightly larger at 22 × 92 inches.
Step 2 — Mark the grid. With a washable marker, draw a ½-inch grid down the length of the runner. Keep a clean 1-inch margin at each long edge so the binding sits on plain fabric. Scrap-test the marker first.
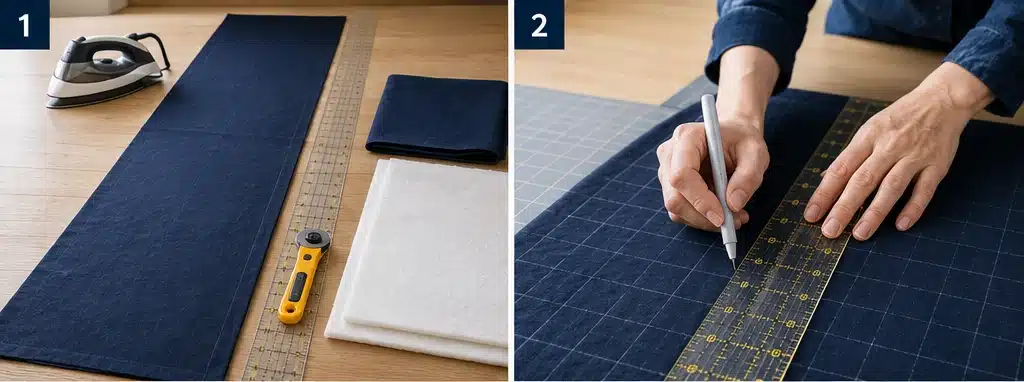
Step 3 — Mark the pattern. Over the grid, draw your repeating motif — waves, linked diamonds, or arcs — keeping the repeat tight and consistent along the full length.
Step 4 — Layer and baste. Lay the backing wrong side up, center the batting, then the marked top right side up. Smooth from the center outward and baste well; on a long runner, baste generously so nothing shifts.
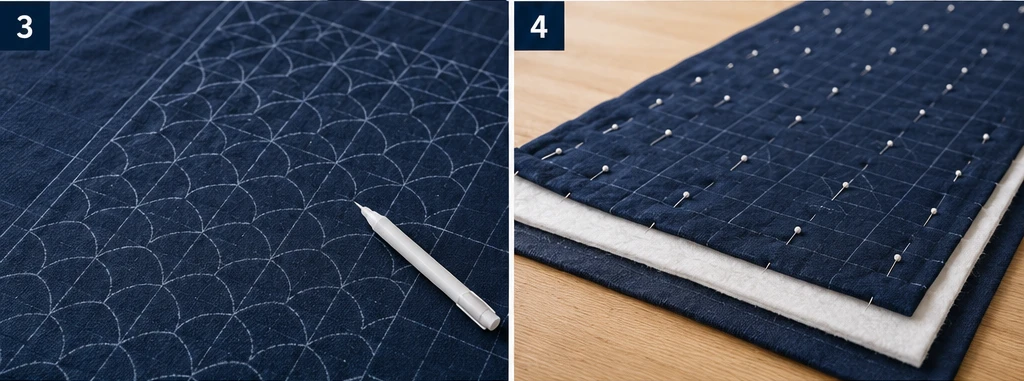
Step 5 — Stitch through all layers. Thread the needle and stitch the sashiko pattern through all three layers, so the stitching quilts the runner as you go. Aim for an even ⅛–¼ inch stitch with a small, consistent gap. Work down the length in one direction at a time, keeping tension relaxed.
Step 6 — Build the density. Complete one set of pattern lines fully, then layer in the next (for waves, all the first arcs, then the offsetting ones). The closer and more evenly your rows are, the more authentically Shonai the runner looks.
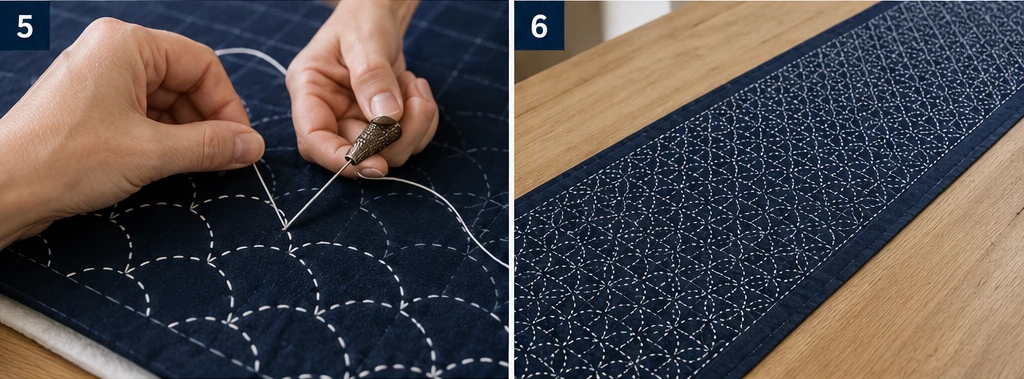
Step 7 — Secure thread ends. Finish threads with a small knot buried between the layers or a few tiny backstitches. Keep the front clean and trim the tails close.
Step 8 — Trim and square. Trim the runner to 20 × 90 inches, squaring the corners and straightening the long edges with a ruler.
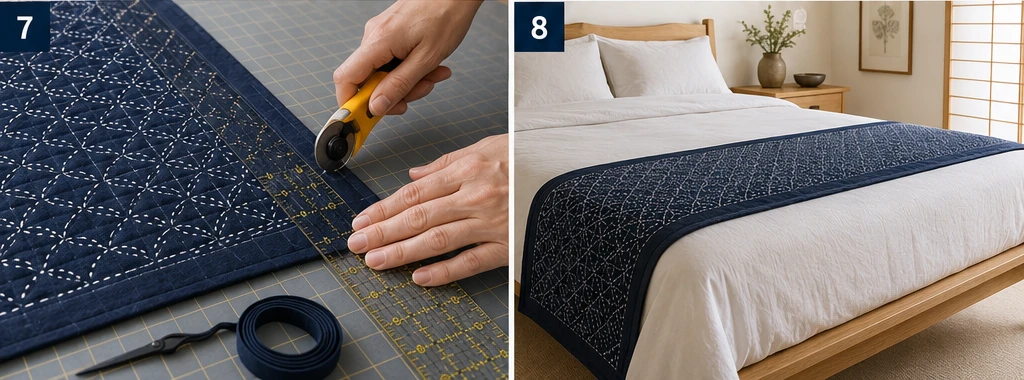
Step 9 — Bind and wash. Join the 2½-inch binding strips, press in half, sew to the front, fold to the back, and finish. Wash gently in cold water, no bleach, and air-dry so the stitches settle and soften.
Assembly at a Glance
- Cut the top to 21 × 91 inches; batting and backing to 22 × 92 inches.
- Mark a ½-inch grid with a 1-inch margin at the long edges.
- Draw the repeating motif over the grid.
- Layer top, batting, and backing; baste generously.
- Stitch the pattern through all layers (this quilts it).
- Build density with each layer of pattern lines.
- Secure all thread ends neatly.
- Trim to 20 × 90 inches and square.
- Bind with 2½-inch strips, then wash gently.
Beginner Tips for Success
- Load several stitches on the needle at once for the even, efficient Shonai rhythm.
- Keep the repeat small and the rows close — density is the whole point.
- Baste a long runner more than feels necessary; length invites shifting.
- Don’t pull the thread tight, or the runner will ripple along its length.
- Mark a clean margin at the edges so the binding lands on plain fabric.
Styling It
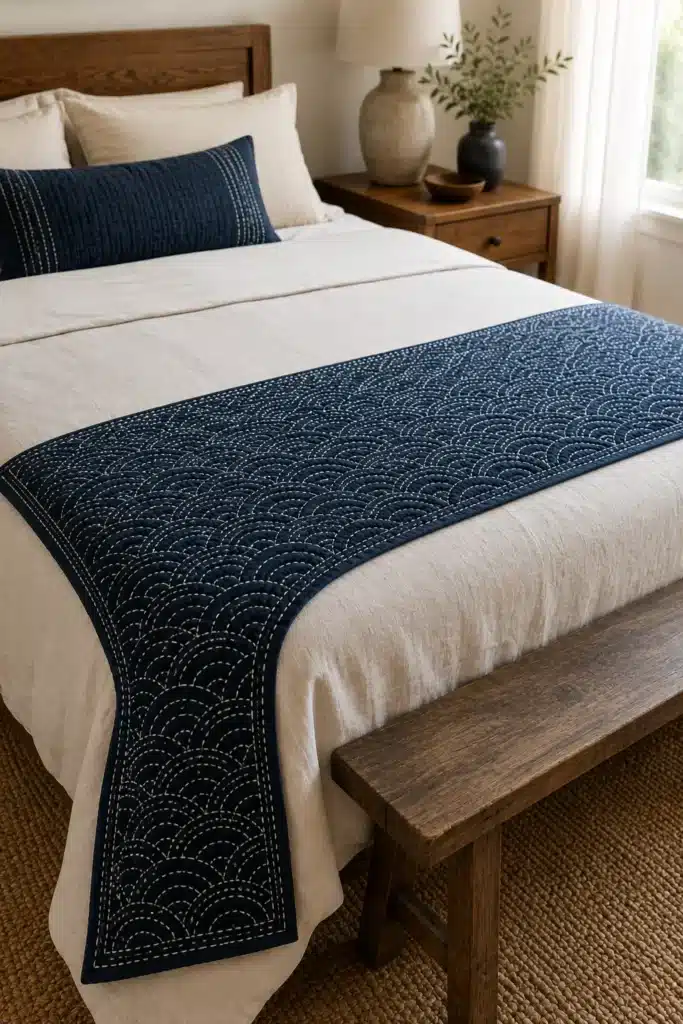
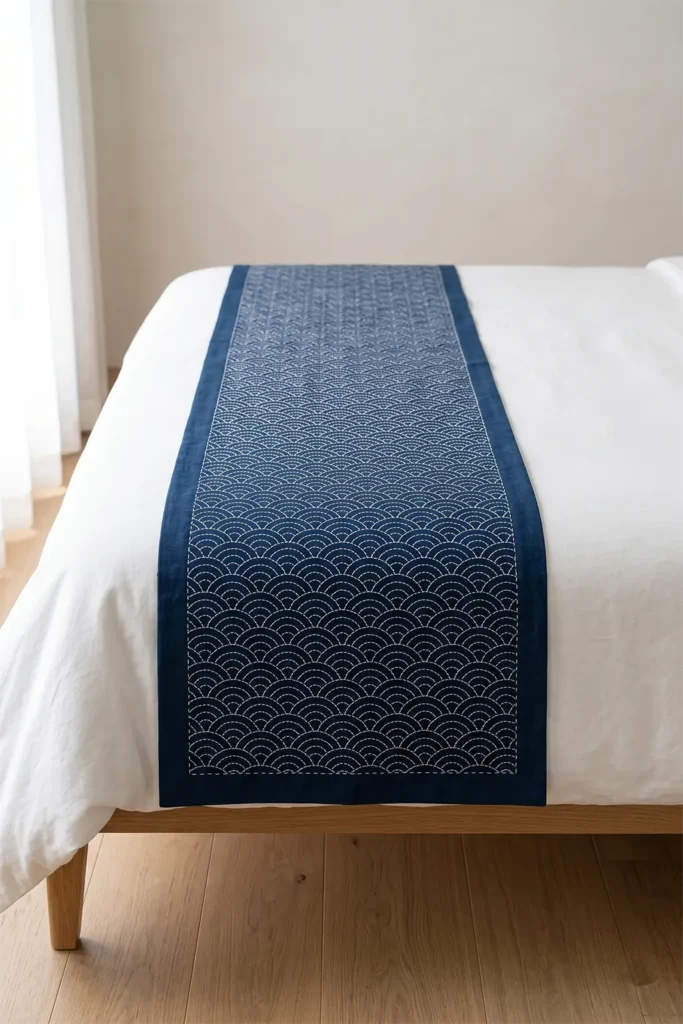
Lay the finished runner across the foot of a made bed so it drapes evenly on both sides, with the dense stitched pattern facing up. Echo the thread color in one or two accent pillows — mustard, coral, turquoise, or indigo — and keep the rest of the bedding simple so the runner’s texture takes the lead. It also looks beautiful folded over a bench at the foot of the bed or repurposed as a table runner.
Final Thoughts
A Shonai sashiko bed runner captures the heart of one of Japan’s finest regional stitching traditions on a piece you’ll use every day. The close, even stitches give a bed a real, handmade texture without the scale of a full quilt, and the long format turns a simple repeating motif into something quietly elegant. Built to be lived with, just as Shonai stitching always was, it’s the kind of cozy, timeless detail that makes a bedroom feel finished.
Other Design Inspirations – Digitally Modified
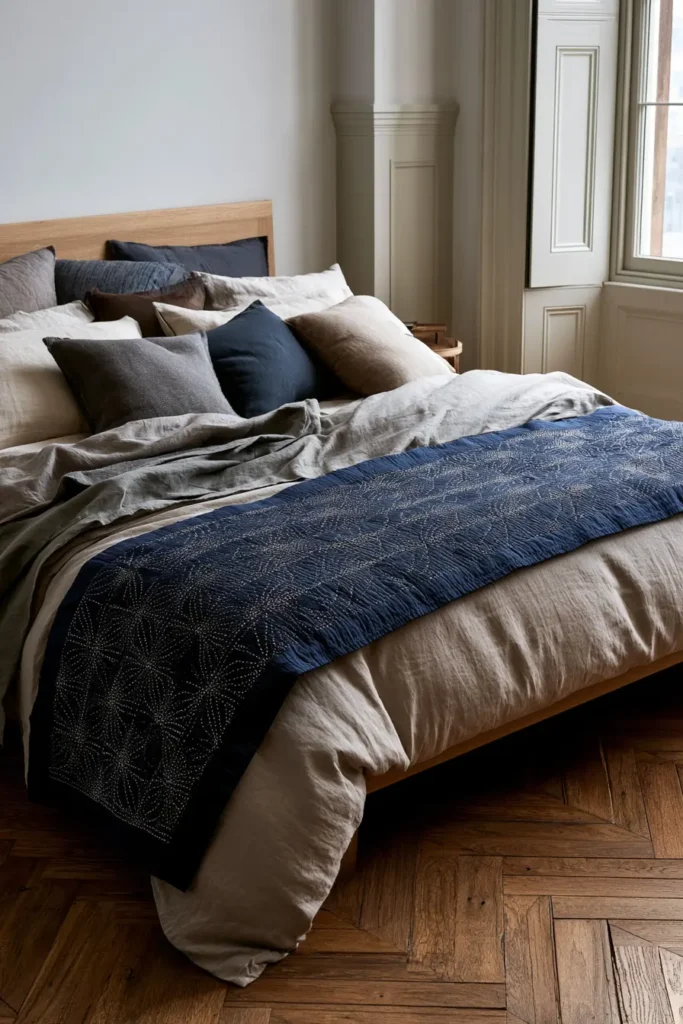
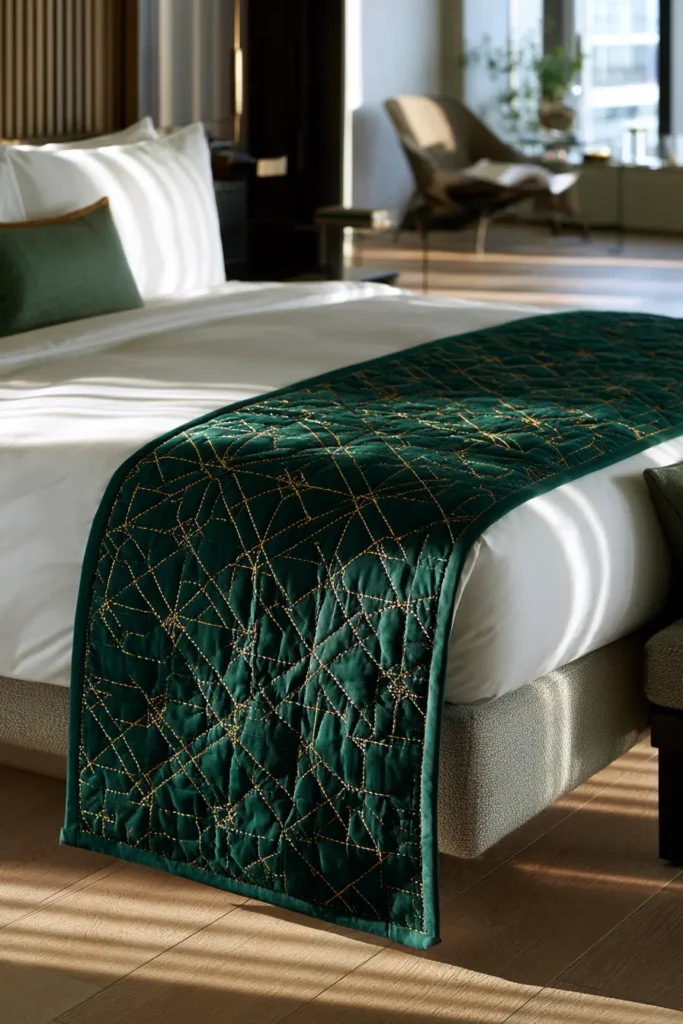
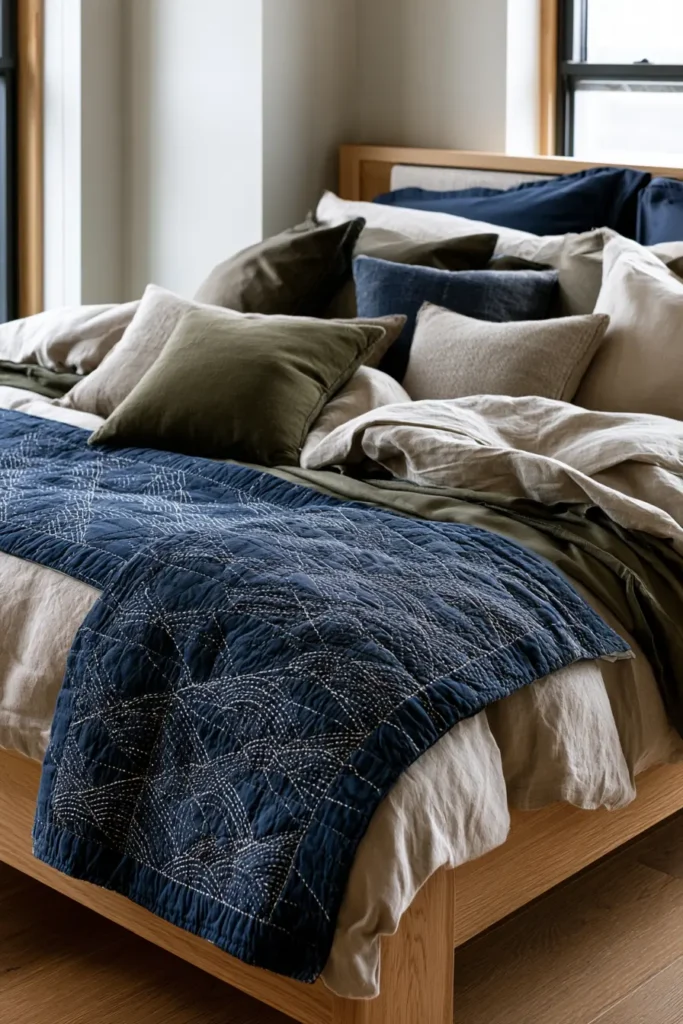
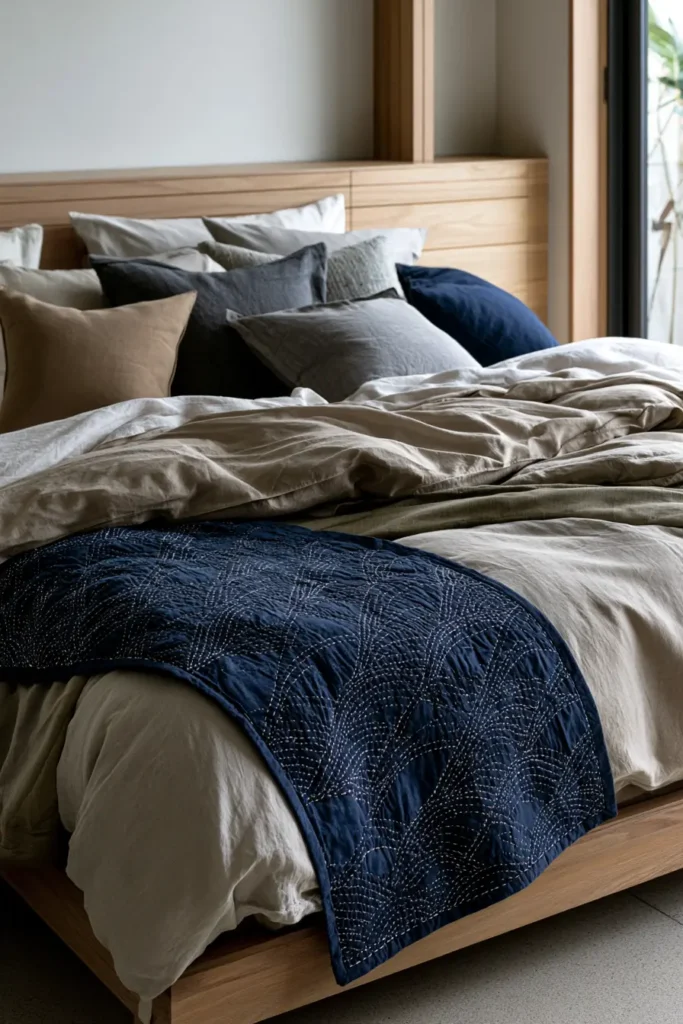
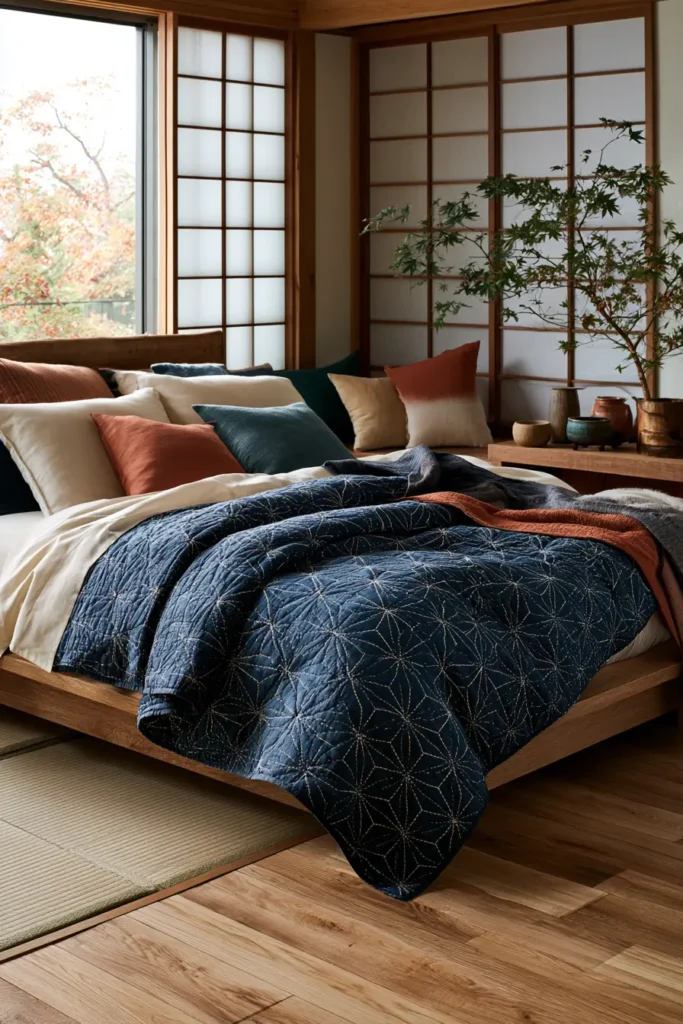
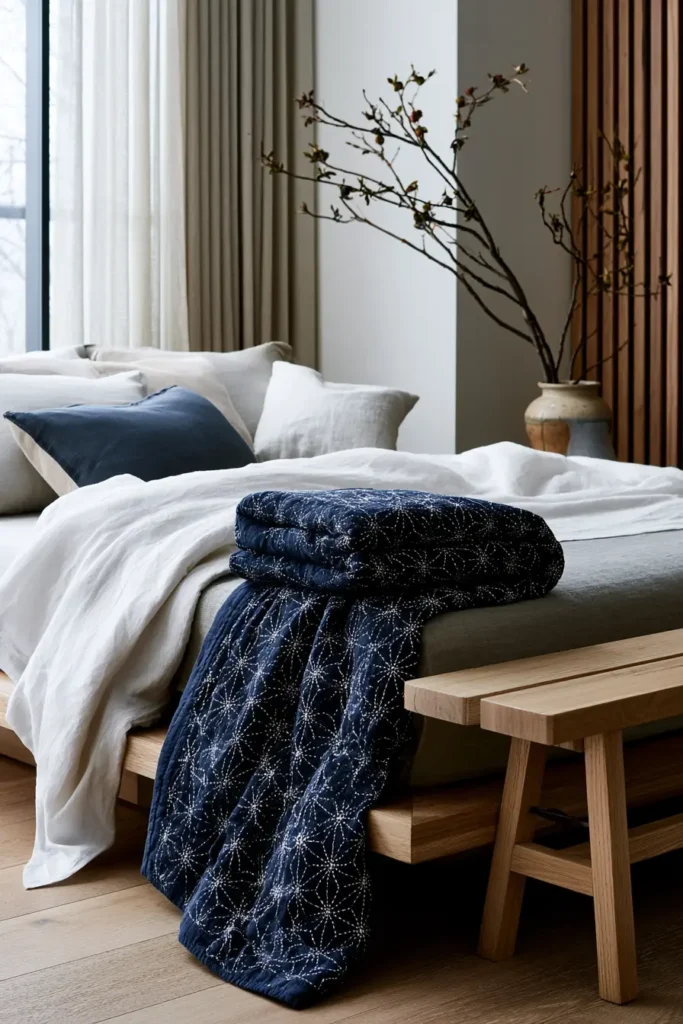
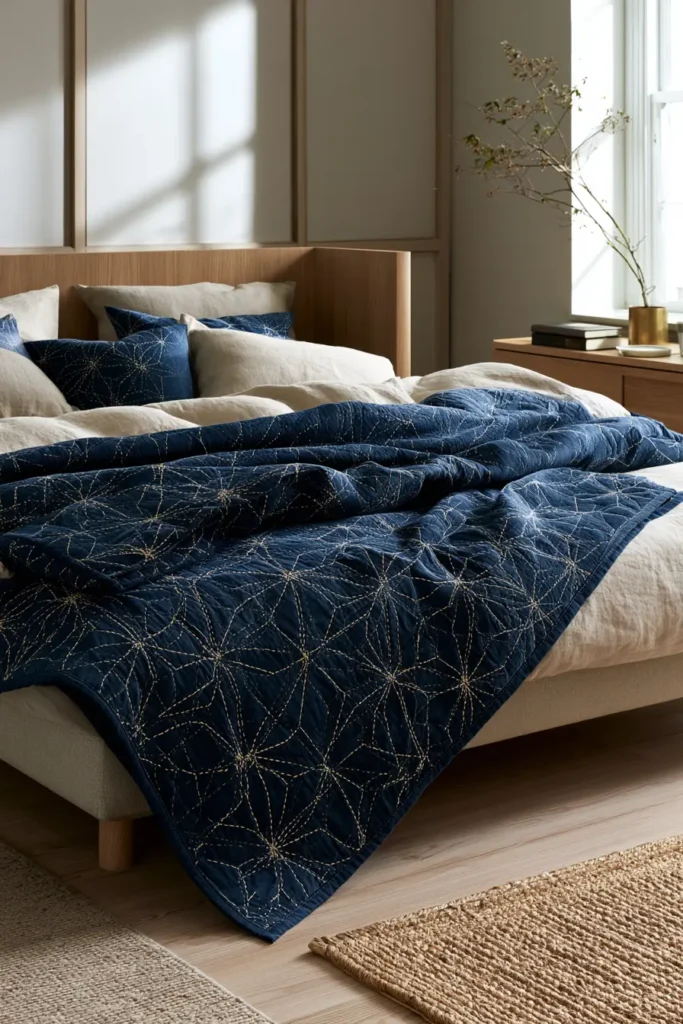
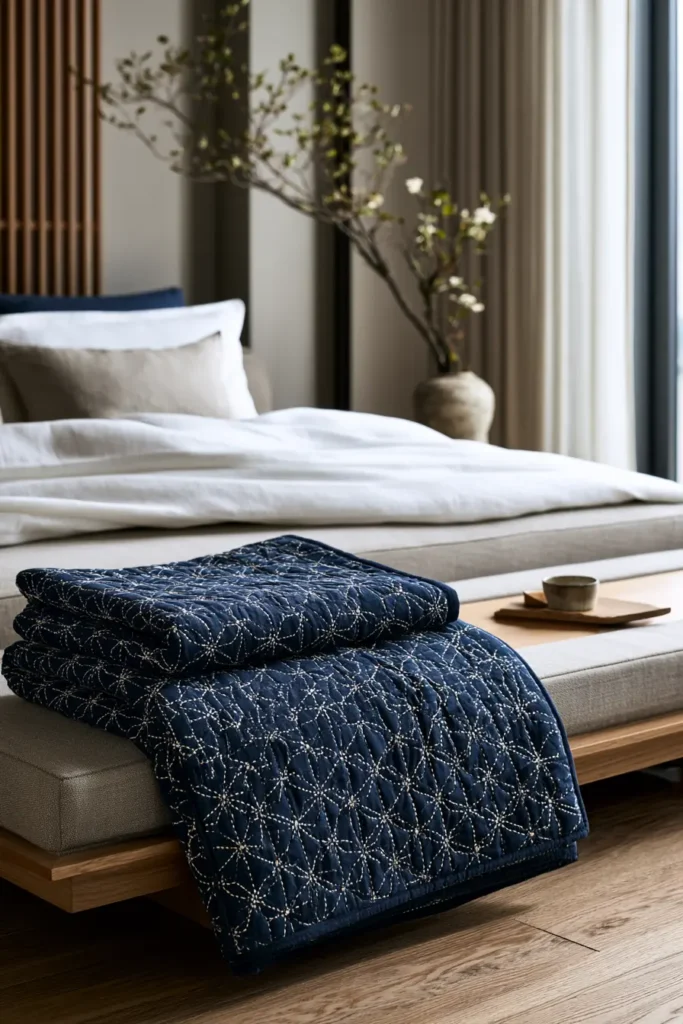
5. Asanoha Hemp Leaf Sashiko Quilts for Elegant Bedrooms
An asanoha sashiko quilt brings one of Japan’s most beloved patterns to the center of a bedroom. Asanoha means “hemp leaf,” and the design is a tessellating lattice of six-pointed stars that echo the shape of hemp foliage. It’s instantly recognizable — you’ve likely seen it on kimono, woodwork, and paper — and as a sashiko motif, it’s worked moyozashi-style, with running stitches following a marked geometric grid. The repeating stars give a quilt a refined, almost architectural elegance while still reading as soft and handmade.
The pattern carries real meaning, which is part of why it suits a quilt you’ll keep. Hemp grows fast, straight, and strong with very little care, so asanoha came to symbolize vigorous growth, health, strength, and protection. It was traditionally stitched onto babies’ and children’s clothing as a wish for them to grow up healthy and resilient — a lovely layer of significance to carry into a hand-made piece.
Why I Made It
I made this one into a quilt with a specific intention. So many of the patterns in this collection are admired for how they look, but asanoha is admired for what it wishes on the person who uses it. That makes it the motif I’d reach for to mark something — a new home, a new baby, a fresh start — where you want the object to mean well, not just look well. Stitching a wish for health and strong growth into a quilt, star by star, turns a slow craft into something close to a blessing.
There’s a nice practical footnote to the symbolism, too: because asanoha was the classic pattern for children, it makes an exceptional nursery or crib quilt as well as an elegant bedroom throw. The same stars that look sophisticated folded across a bed carry centuries of meaning over a cradle.
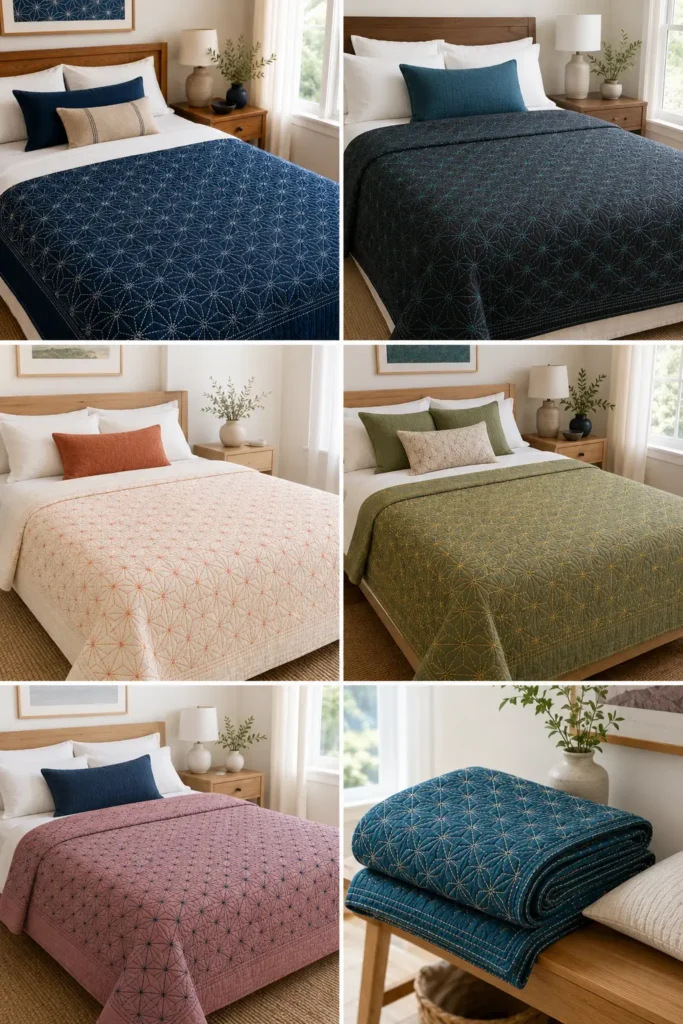
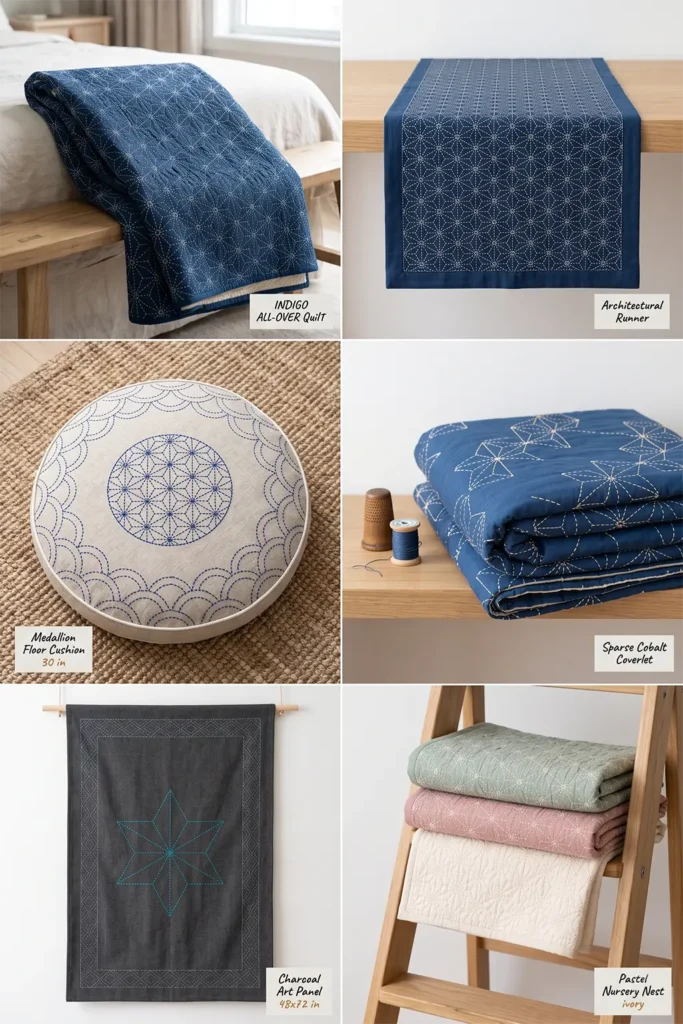
Why This Idea Is Worth Making
This idea is worth making because it gives you a quilt that’s beautiful, meaningful, and built from a single repeating unit you only need to learn once. The asanoha star looks intricate, but it’s the same small shape tessellated across the whole top — master one, and the rest is rhythm. It’s also a quilt that earns its place over time: the symbolism makes it a natural heirloom or gift, and the geometric precision gives an elegant bedroom a calm, considered focal point that never feels fussy.
A fair heads-up: asanoha’s geometry is more exacting to mark than a plain diamond grid, so I’ll give you both a shortcut and a hand method below.
Finished Size
- Approximate finished quilt: 54 × 66 inches — a lightweight throw or bed accent
- Crib/nursery option: scale down to about 36 × 52 inches (a fitting nod to the motif’s heritage)
- Queen coverlet: scale up to about 84 × 90 inches
- Best used: folded at the foot of a bed, layered over a duvet, or as a meaningful gift quilt
- Skill level: confident beginner with patience for accurate marking
- Core techniques: whole-cloth quilting, asanoha sashiko running stitch, basting, binding
Materials Needed
For one 54 × 66-inch quilt:
- Quilt top: 2 yards of solid cotton, linen-cotton, or chambray
- Backing: 3½ yards
- Lightweight cotton batting or flannel: at least 60 × 72 inches
- Sashiko thread or pearl cotton in your contrast color
- Sashiko needle (or long embroidery needle)
- Binding fabric: ½ yard
- Marking tools: washable fabric marker, chalk pencil, or Hera marker — plus a 60° triangle ruler or isometric grid, or a pre-printed asanoha stencil/panel
- Quilting ruler, rotary cutter, cutting mat, basting pins, and iron
Beginner tip: Asanoha rewards an accurate grid. A 60° triangle ruler, isometric grid paper transferred onto fabric, or a ready-made asanoha stencil will save you far more time than they cost.
Choosing Your Colors
Pick a solid top and one contrasting thread so the stars stand out cleanly:
- Traditional: deep indigo top, crisp white thread
- Cobalt blue top with ivory thread
- Charcoal top with turquoise thread
- Cream top with coral thread
- Sage green top with golden-yellow thread
- Dusty rose top with navy thread
- Deep teal top with soft-peach thread
For a nursery version, soft pastels with white stitching keep the symbolism gentle; for an elegant bedroom, high indigo-and-white contrast looks the most refined.
The Pattern: Asanoha Hemp-Leaf Stars
Asanoha is built on a triangular (isometric) grid of six-pointed stars that tessellate into the hemp-leaf lattice. Two ways to mark it:
The shortcut (recommended for a first quilt): use a pre-printed asanoha sashiko panel or stencil so the geometry is exact and you can go straight to stitching.
By hand:
- Mark rows of dots 2 inches apart across the top.
- Space the rows about 1¾ inches apart, offsetting every other row by 1 inch, so the dots form a grid of equilateral triangles.
- Connect the dots to draw the triangles and the hexagons they form.
- Inside each hexagon, draw three lines through the center connecting opposite points — those radiating lines create the hemp-leaf star.
Keep all marks light and removable, and work a small test patch before committing to the full top.
Cutting Measurements
- Quilt top panel: 55 × 67 inches
- Backing panel: 60 × 72 inches
- Batting or flannel: 60 × 72 inches
- Binding: seven strips, 2½ inches × width of fabric
Step-by-Step Guide
Step 1 — Choose your marking method and press the top. Decide between a stencil or hand-marking, then cut the top to 55 × 67 inches and press it perfectly flat — wrinkles distort the asanoha geometry.
Step 2 — Mark the triangular grid. Lay out the 2-inch dot grid with rows 1¾ inches apart, offset by 1 inch, using your 60° ruler or iso-grid (or skip straight to the stencil).
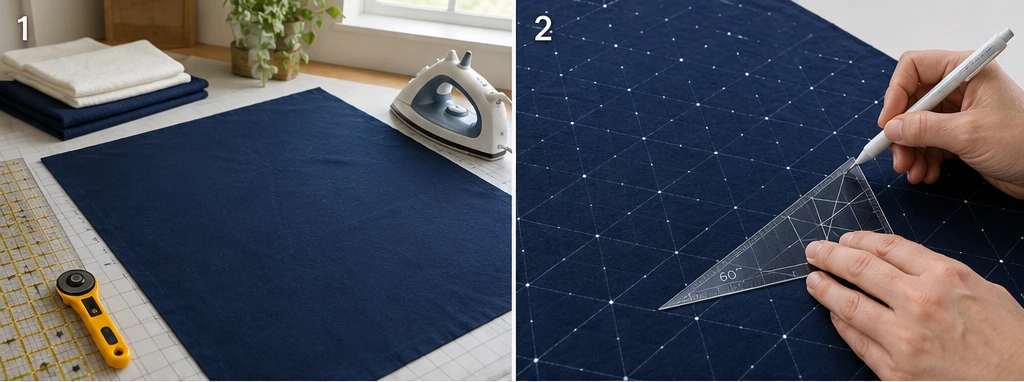
Step 3 — Draw the hemp-leaf stars. Connect the grid into hexagons and add radiating center lines to form six-pointed asanoha stars across the entire top.
Step 4 — Layer the quilt sandwich. Lay the backing wrong side up, center the batting, then the marked top right side up. Smooth from the center outward.
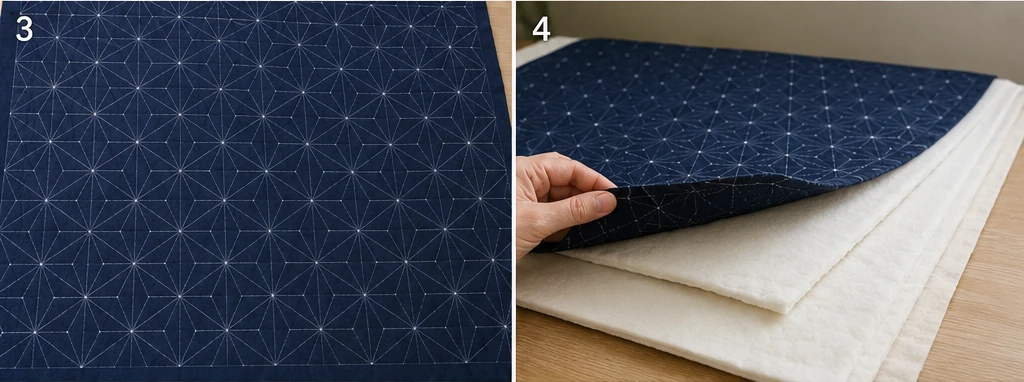
Step 5 — Baste. Pin- or thread-baste the layers securely; thread basting is gentler to work around for a mostly hand-stitched top.
Step 6 — Stitch the stars. Thread the sashiko needle and follow the asanoha lines with an even running stitch — about ⅛–¼ inch with a small consistent gap. Work each direction of the star lines in turn, keeping tension relaxed so the quilt stays flat.
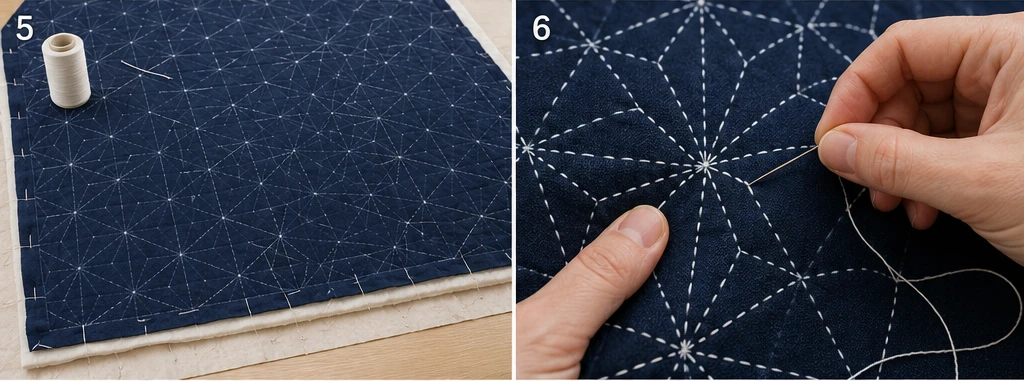
Step 7 — Work the center outward. Move from the middle of the quilt toward the edges to reduce shifting and complete the full lattice.
Step 8 — Secure thread ends. Finish threads with a small knot buried between the layers, or with a few tiny backstitches; keep the front clean and trim the tails close.
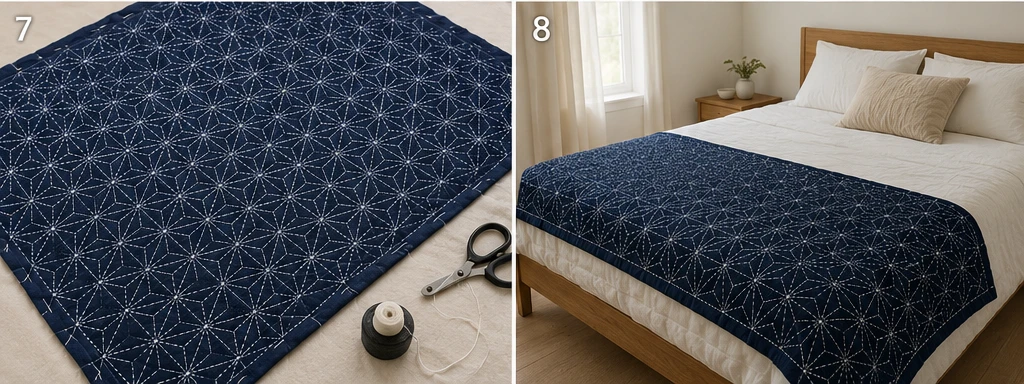
Step 9 — Trim, bind, and wash. Trim to 54 × 66 inches, square the corners, and bind with the 2½-inch strips. Wash gently in cold water, no bleach, and air-dry so the stitches settle and soften.
Assembly at a Glance
- Press the top; cut to 55 × 67 inches.
- Mark the triangular dot grid (2 in apart, rows 1¾ in apart, offset 1 in) — or use a stencil.
- Draw the hemp-leaf stars across the top.
- Cut backing and batting to 60 × 72 inches.
- Layer top, batting, and backing; smooth from the center.
- Baste securely.
- Stitch the asanoha lattice with even running stitches, center outward.
- Secure all thread ends neatly.
- Trim to 54 × 66 inches, bind, and wash gently.
Beginner Tips for Success
- Get the grid right before you stitch a single star — accurate marking is 90% of asanoha.
- Use a stencil or 60° ruler; freehand asanoha rarely stays even.
- Keep a high contrast between the fabric and the thread so the stars read clearly.
- Don’t pull the thread tight; relaxed stitching keeps the quilt flat and soft.
- Stitch a small test block first to learn the star’s stitching order.
Styling It
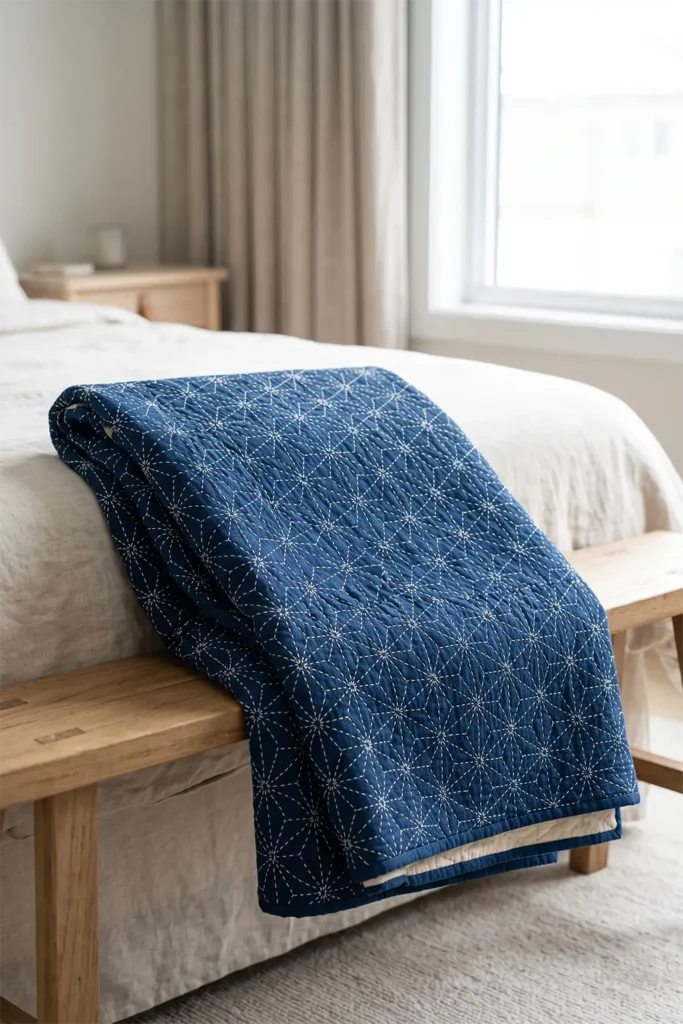
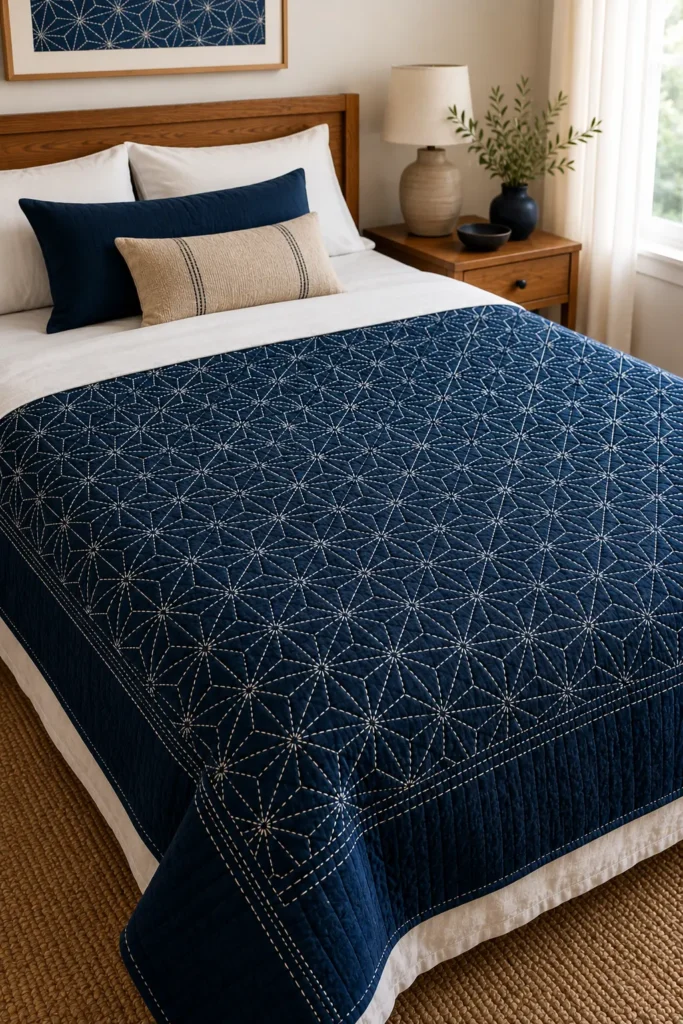
Fold the finished asanoha quilt across the foot of a bed dressed in white or natural linen, with a wood bench and soft neutral curtains, so the star lattice becomes the room’s quiet geometric focal point. Pull one or two accent pillows in your thread color — coral, mustard, teal, or indigo — to echo the stitching. For a nursery, layer it over a simple crib in pale, calming tones to let the pattern’s meaning take the lead.
Final Thoughts
An asanoha hemp-leaf sashiko quilt is as meaningful as it is beautiful. The tessellating stars give an elegant bedroom a refined, architectural calm, while the pattern’s wish for health, growth, and protection turns the quilt into something you make for someone — yourself, a child, a new beginning. It takes patience to mark and time to stitch, but the result is a heirloom-quality piece that carries centuries of good intention in every star.
Other Design Inspirations – Digitally Modified
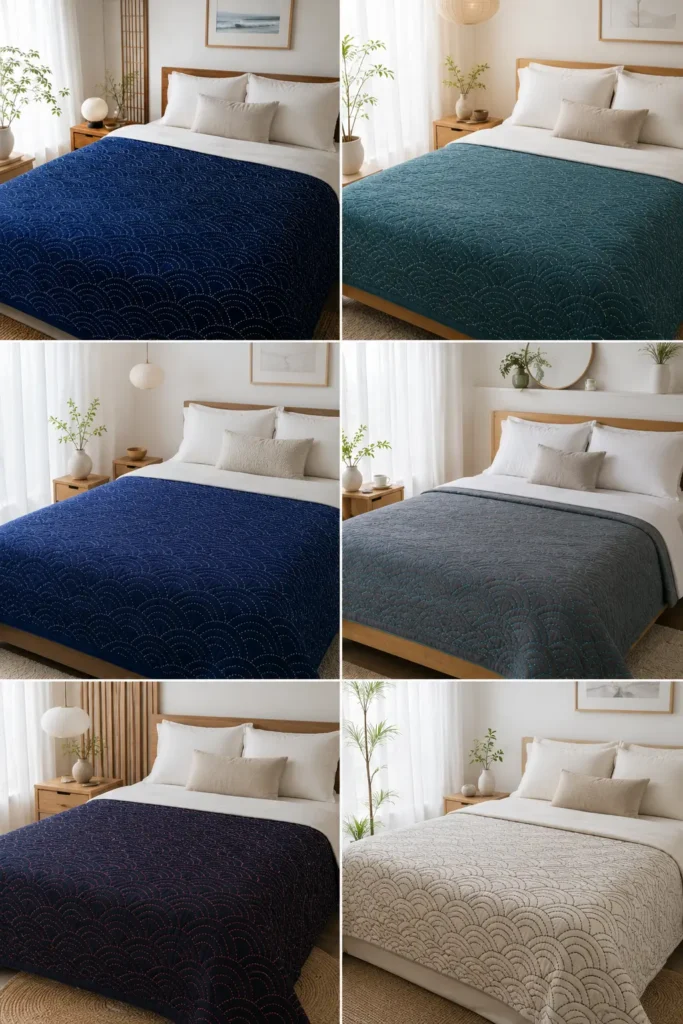
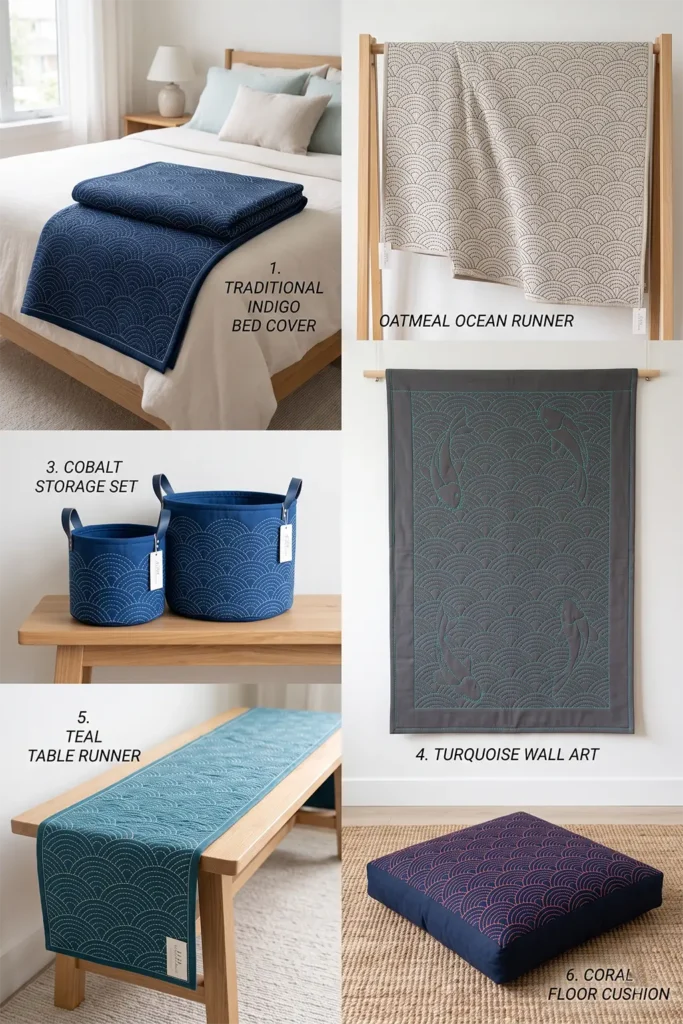
6. Seigaiha Ocean Wave Sashiko Bed Covers for a Calming Retreat
A seigaiha sashiko bed cover wraps your bed in one of Japan’s oldest and most soothing patterns. Seigaiha means “blue ocean waves,” and the design is built from overlapping arcs — nested half-circles that ripple outward in offset rows like calm water or fish scales. Worked as sashiko, it’s a flowing moyozashi-style motif: rows of concentric arcs stitched across the fabric until the whole surface seems to move like a quiet tide. On a bed cover, that gentle, repeating rhythm is deeply calming to look at, which makes it ideal for a bedroom meant to feel like a retreat.
The pattern’s meaning matches its mood. Those endless, peaceful waves have long symbolized tranquility, good fortune, and the wish for calm, happy continuity — good luck rolling in steadily, like a sea at peace. It’s an ancient motif, too, with roots that traveled the Silk Road and a place in Japan’s classical court dance, so every wave you stitch carries a very long history of meaning the same thing: peace.
Why I Made It
I made this because I wanted the bed itself to set the tone for the room. A bed cover is the largest soft surface in most bedrooms, so whatever pattern lives there quietly shapes how the whole space feels — and there’s no better candidate for calm than waves that have meant calm for over a thousand years. When I picture a restful bedroom, I picture still water, and seigaiha is the closest a pattern gets to that feeling.
What I love most is that the meaning is built into the making. Seigaiha’s waves stand for peace and steady good fortune, so stitching them row after row feels less like decorating and more like setting an intention for the room — that it stay a place to rest. For a retreat you actually want to retreat into, that intention matters as much as the look.
Why This Idea Is Worth Making
This idea is worth making because it turns the largest surface in the bedroom into a source of calm, using a single repeating shape. The seigaiha arc is easy to learn — it’s the same nested half-circle over and over — and on a bed cover the repetition becomes hypnotic and elegant rather than busy. Stitching the waves directly through all the quilt layers means the pattern doubles as the quilting, so there’s no separate step, and the finished cover gives a room an instant sense of serenity that store-bought bedding rarely achieves.
A fair heads-up: a full bed cover is a large surface, so this is a generous, slow project. Start at the throw-cover size below and scale up once you love the rhythm.
Finished Size
- Approximate finished bed cover: 60 × 80 inches — covers a twin fully, or sits as a feature coverlet on a larger bed
- Full/Queen: scale up to about 88 × 92 inches (a big, beautiful commitment)
- Best used: as a top-of-bed coverlet, layered over a duvet, or draped to one side as a calming accent
- Skill level: confident beginner
- Core techniques: sashiko running stitch through all layers (quilting as you go), basting, binding
Materials Needed
For one 60 × 80-inch bed cover:
- Top fabric: 2½ yards of solid cotton, linen-cotton, or chambray (44–60 inch width; piece if needed)
- Backing fabric: 5 yards (or wide backing)
- Lightweight cotton batting or flannel: at least 64 × 84 inches
- Sashiko thread or pearl cotton in your contrast color (4–5 skeins for an all-over pattern)
- Sashiko needle (or long embroidery needle)
- Binding fabric: ¾ yard
- A circle/arc template or seigaiha stencil, plus a washable marker, chalk pencil, or Hera marker
- Long quilting ruler, rotary cutter, cutting mat, basting pins, iron
Beginner tip: An arc template or seigaiha stencil makes the marking quick and consistent. Freehand arcs drift, and the wave effect depends on even, repeating curves.
Choosing Your Colors
The ocean theme makes blues and teals a natural fit, but the contrast is what matters — a solid base with one clear thread:
- Traditional: deep indigo base, crisp white thread
- Teal base with soft-white thread
- Cobalt blue base with pale aqua thread
- Slate grey base with turquoise thread
- Deep navy base with coral thread (for a warmer, modern contrast)
- Natural oatmeal base with deep ocean-blue thread
Match the binding to the thread for a crisp edge, or to the base for a seamless wave that runs to the border.
The Pattern: Overlapping Wave Arcs
Seigaiha is rows of nested arcs, each row offset so the waves overlap like scales:
- Each “wave” is a set of 3 concentric arcs, the outer one about a 2-inch span, the inner arcs spaced roughly ⅜ inch apart
- Mark arc centers 2 inches apart along each row
- Space rows 1 inch apart vertically and offset every other row by 1 inch, so each row’s arcs rise into the gaps of the row below
- This overlap is what creates the continuous rippling-water effect
A stencil handles all of this at once; by hand, mark the center dots first, then draw the three arcs at each.
Cutting Measurements
- Top panel: 61 × 81 inches (piece widths together if your fabric is narrow, pressing the seam open)
- Backing panel: 64 × 84 inches
- Batting or flannel: 64 × 84 inches
- Binding: seven strips, 2½ inches × width of fabric, joined into one strip
Step-by-Step Guide
Step 1 — Cut and press. Cut (and piece, if needed) the top to 61 × 81 inches and press it flat. Cut batting and backing to 64 × 84 inches.
Step 2 — Mark the wave grid. Mark arc-center dots 2 inches apart in rows 1 inch apart, offsetting alternate rows by 1 inch. Keep a clean 1-inch margin at the edges for binding, and scrap-test your marker.
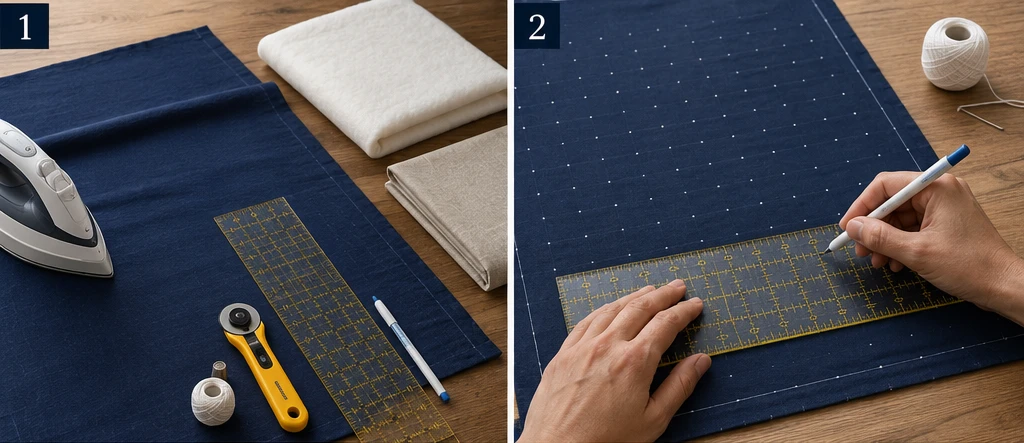
Step 3 — Draw the arcs. Using a stencil or arc template, draw 3 concentric arcs at each center so the waves overlap row to row across the whole top.
Step 4 — Layer and baste. Lay the backing wrong side up, center the batting, then the marked top right side up. Smooth from the center outward and baste generously — a large cover needs plenty of basting.
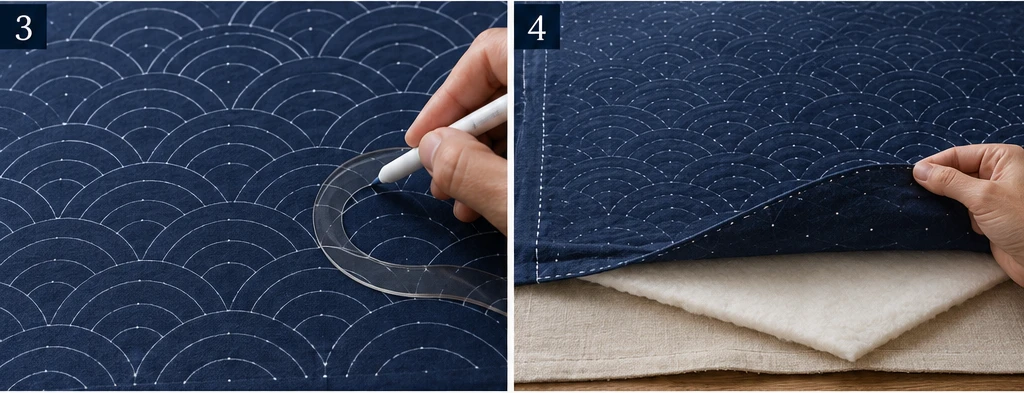
Step 5 — Stitch the waves through all layers. Thread the needle and stitch along the arcs with an even ⅛–¼ inch running stitch, passing through all three layers so the pattern quilts the cover. Stitch the same arc position across a whole row before moving on, keeping tension relaxed.
Step 6 — Build the rows outward. Work from the center of the cover toward the edges, completing each row of waves before the next, so the fabric stays flat and shift-free.
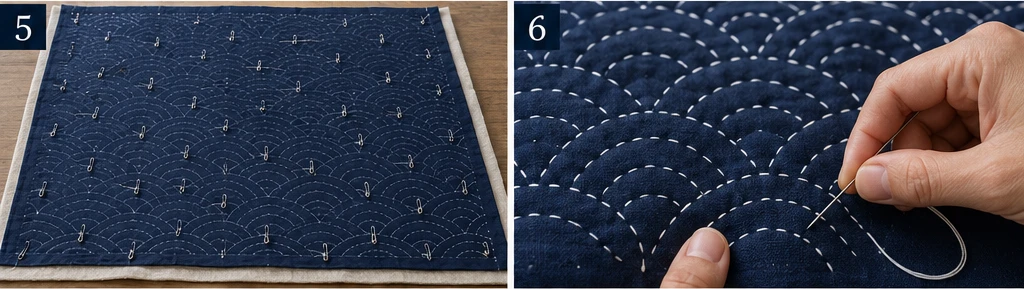
Step 7 — Secure thread ends. Finish threads with a small knot buried between the layers, or with a few tiny backstitches; keep the front clean and trim the tails close.
Step 8 — Trim and square. Trim the cover to 60 × 80 inches, squaring the corners and straightening the edges with a long ruler.
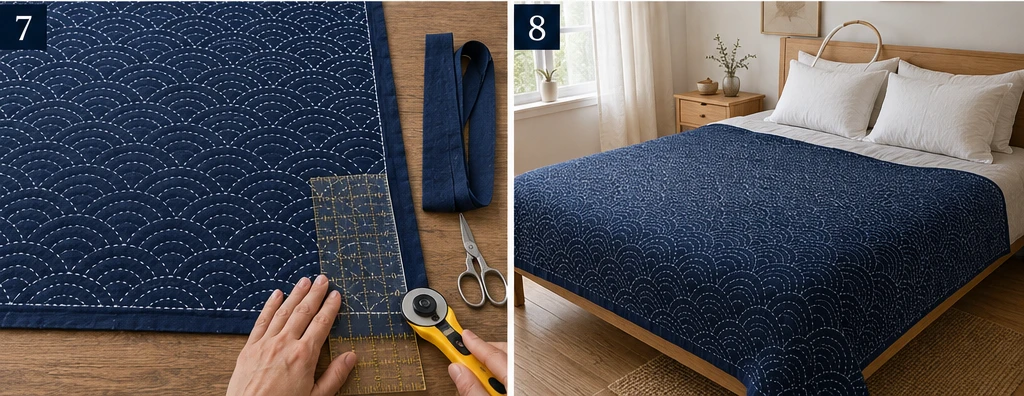
Step 9 — Bind and wash. Join the 2½-inch binding strips, press in half, sew to the front, fold to the back, and finish. Wash gently in cold water, no bleach, and air-dry so the waves settle and soften.
Assembly at a Glance
- Cut/piece the top to 61 × 81 inches; batting and backing to 64 × 84 inches.
- Mark the wave grid (centers 2 in apart, rows 1 in apart, offset 1 in) with a 1-inch edge margin.
- Draw 3 concentric arcs at each center.
- Layer top, batting, and backing; baste generously.
- Stitch the arcs through all layers, row by row (this quilts it).
- Work from the center outward to keep it flat.
- Secure all thread ends neatly.
- Trim to 60 × 80 inches and square.
- Bind with 2½-inch strips, then wash gently.
Beginner Tips for Success
- Use a stencil or arc template — even, repeating curves are what make seigaiha read as water.
- Keep the row offset consistent; uneven offset breaks the overlapping-wave illusion.
- Baste a large cover more than feels necessary to prevent shifting.
- Don’t pull the thread tight, or the waves will pucker.
- Stitch one full row before starting the next so the rhythm — and the tension — stays even.
Styling It
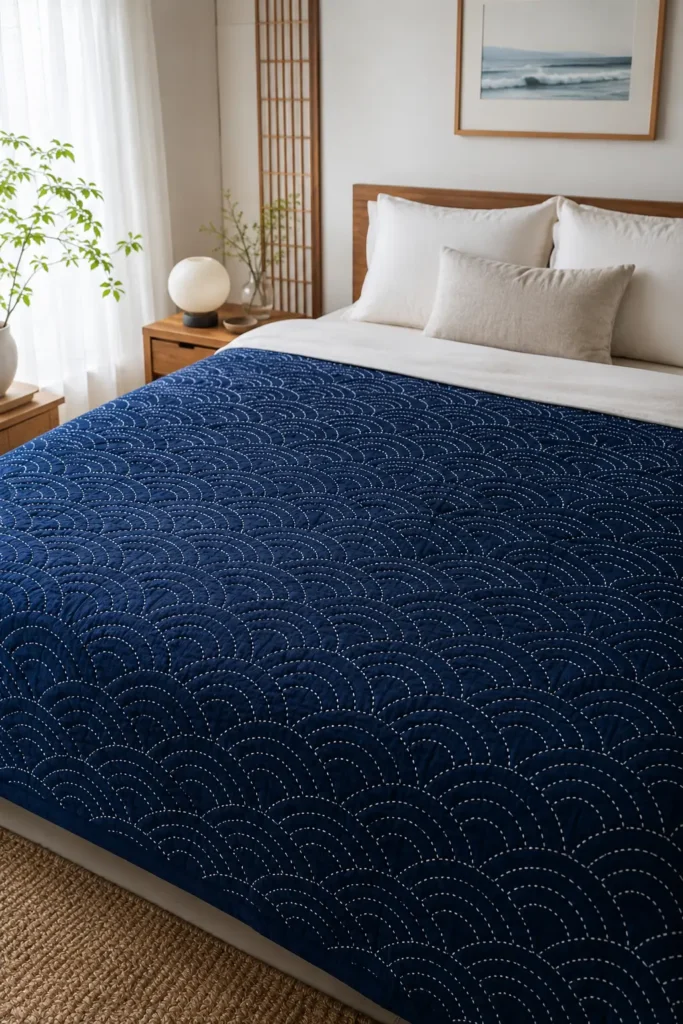
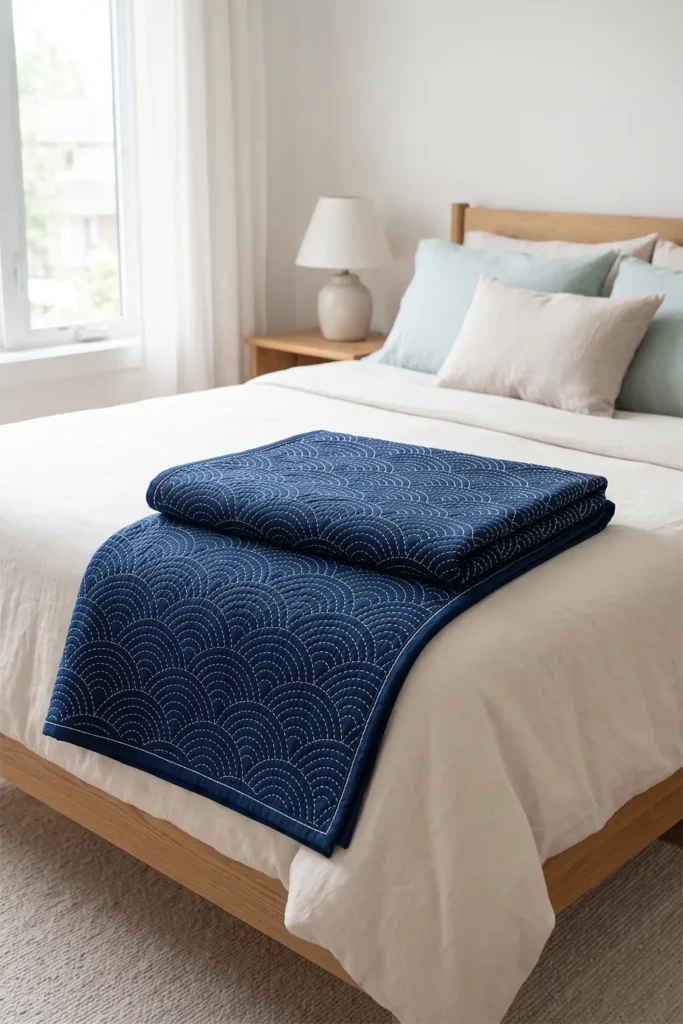
Spread the finished cover smoothly over the bed so the waves run from the foot upward, and keep the surrounding palette soft and watery — white or pale linen pillows, natural wood, sheer curtains. Add one or two accent pillows in your thread color (aqua, turquoise, coral, or deep indigo) to echo the stitching. The calmer the room around it, the more the wave pattern does its quieting work.
Final Thoughts
A seigaiha ocean-wave sashiko bed cover does something few patterns can: it makes a room feel calmer just by being there. The overlapping arcs carry an ancient wish for peace and steady good fortune, and stitched across the largest surface in the bedroom, they turn the whole bed into a still, rippling expanse of quiet. It’s a generous project, but the payoff is a true retreat — a bed that looks, and genuinely feels, like calm water.
Other Design Inspirations – Digitally Modified
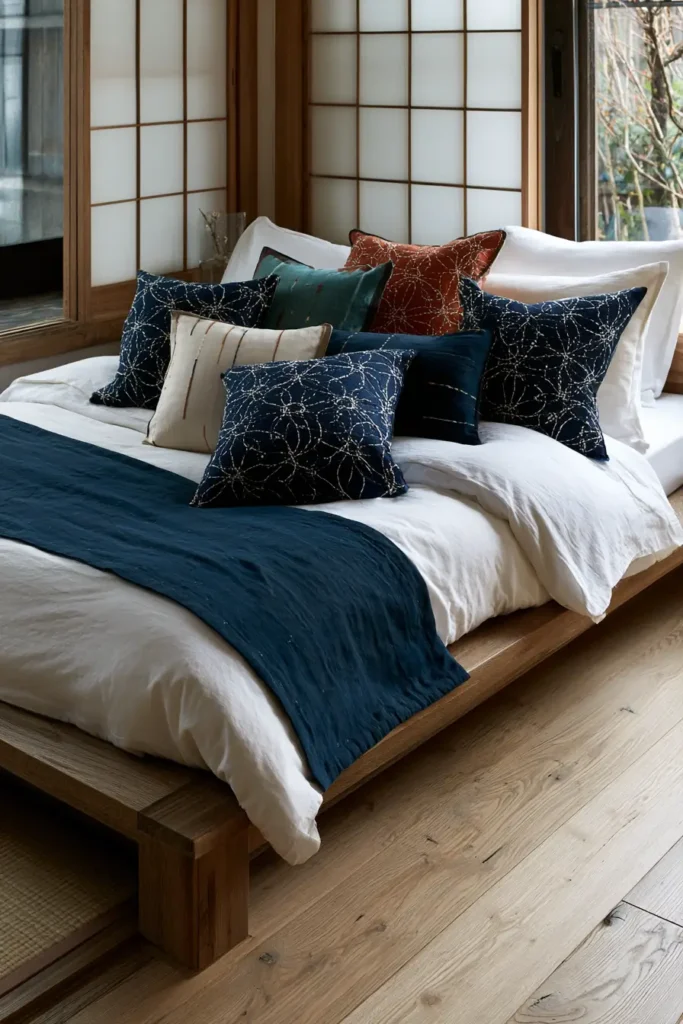
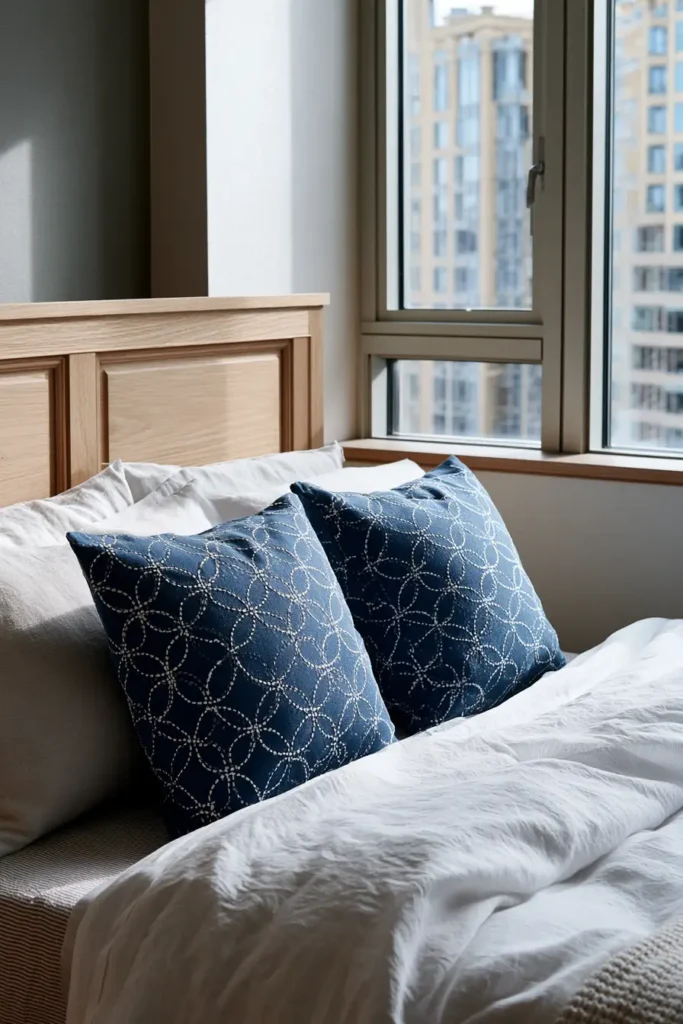
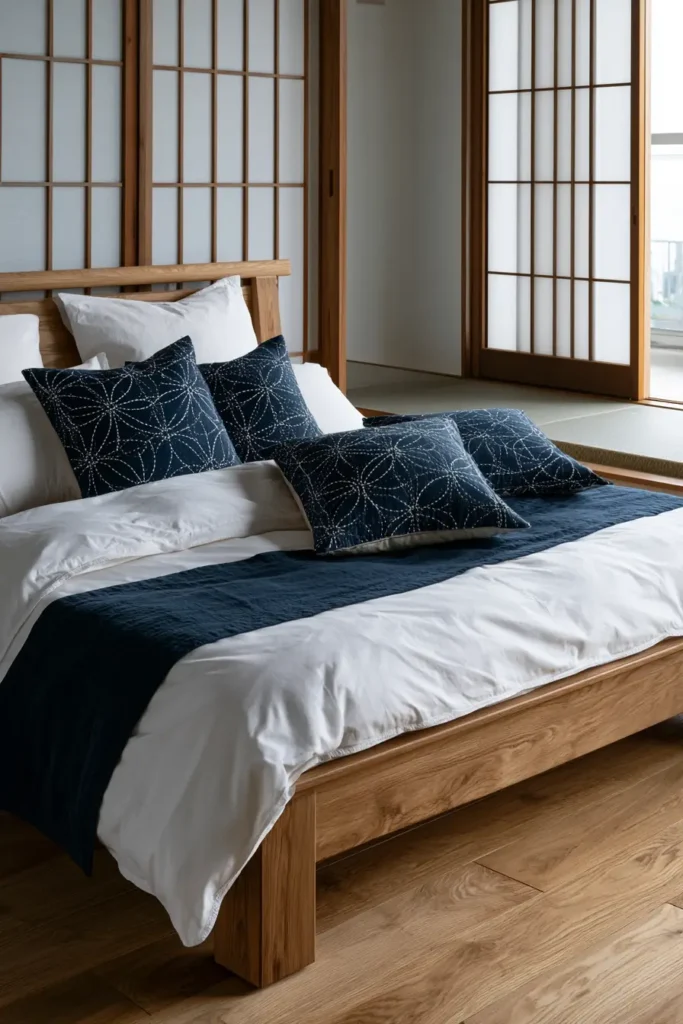
7. Shippō Seven Treasures Sashiko Pillow Covers for Timeless Charm
A pair of shippō sashiko pillow covers brings one of Japan’s most meaningful patterns into a bedroom at just the right scale. Shippō means “seven treasures,” and the design is a lattice of interlocking circles, each one overlapping its neighbors so they chain together endlessly. Where the circles cross, they form soft pointed-oval petals and tiny four-point stars, giving the pattern a jewel-like intricacy that more than earns its name. Worked as sashiko, it’s a classic moyozashi motif — circles traced over a grid and filled with even running stitches — and on a pillow cover, that small, detailed lattice reads as quietly luxurious.
The meaning is the loveliest part. The unbroken chain of circles symbolizes harmony, connection, and lasting relationships — the idea that harmonious bonds between people are as precious as the seven treasures themselves. That makes shippō a natural choice for pillows, which usually come in pairs and sit side by side on a shared bed.
Why I Made It
I made these as a pair on purpose, because shippō is really a pattern of togetherness. The circles only become the seven-treasures lattice when they link to one another — alone, a single circle is just a circle. Two pillows stitched in the same pattern, resting against the same headboard, quietly say the thing the motif has always meant: that connection is the treasure.
It’s also the most approachable way I know to put a meaningful sashiko motif into a room. A quilt is a season’s worth of stitching; a pillow cover is an evening or two, and you end with something finished, useful, and full of intention. When I want to make a small handmade gift that means something — for a couple, a new home, a close friend — shippō pillows are the first thing I reach for.
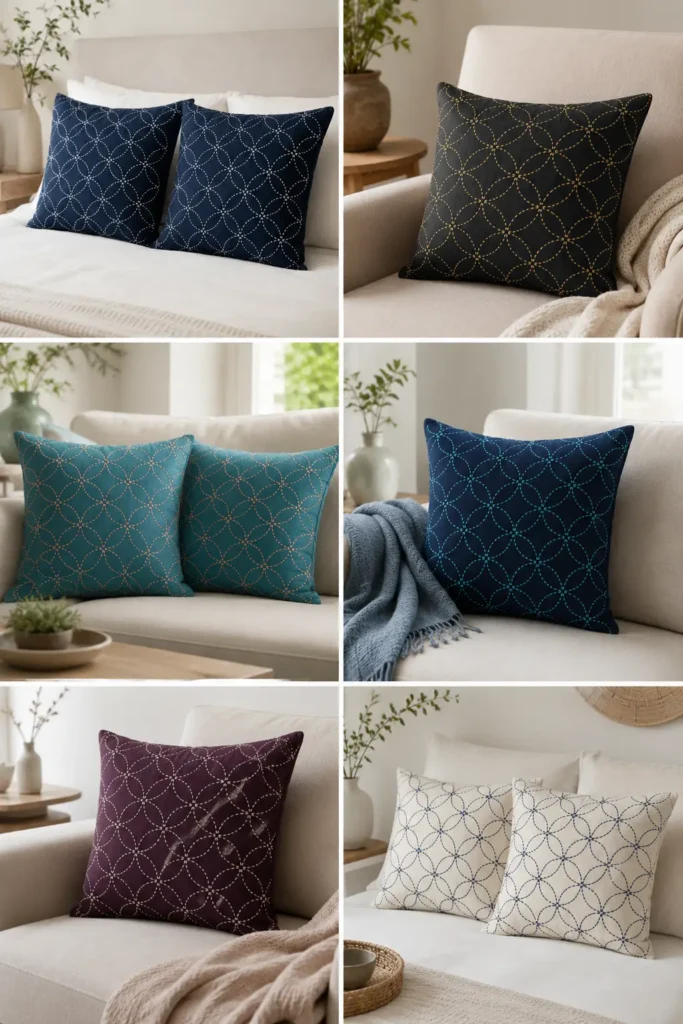
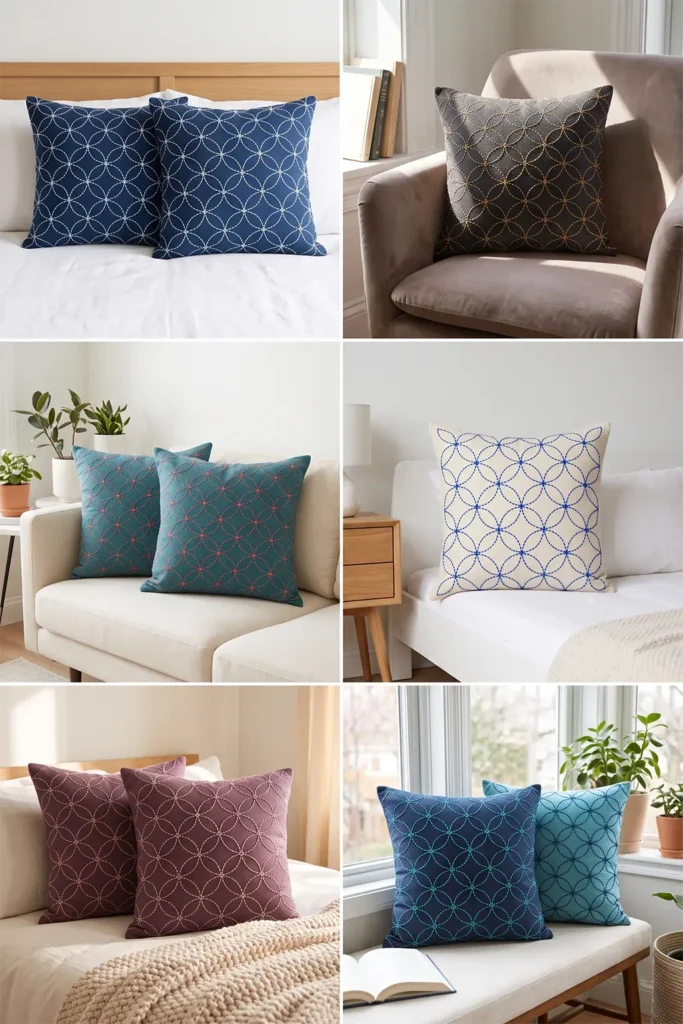
Why This Idea Is Worth Making
This idea is worth making because it delivers maximum charm for minimal commitment. The pillow scale means you can finish a cover quickly, learn the pattern on a small surface, and instantly refresh a bed or sofa. The interlocking-circle motif looks far more advanced than it is — it’s one circle traced over and over — and the seven-treasures meaning turns a simple accent pillow into a thoughtful, giftable keepsake. Made as a pair or a set, the covers tie a whole room together with handmade, symbolic detail.
Finished Size
- Finished cover: 18 × 18 inches (fits an 18- or 20-inch pillow form; a 20-inch form gives a fuller look)
- Other sizes: scale the method to 16 × 16 or 20 × 20 inches
- Makes: one cover per set of measurements below — double everything for a pair
- Best used: on the bed against the pillows, on a reading chair, or on a sofa
- Skill level: beginner — small, quick, and forgiving
Materials Needed
For one 18 × 18-inch cover:
- Front fabric: one piece 19 × 19 inches of solid cotton, linen-cotton, or chambray
- Optional muslin backing (adds body behind the stitching): one piece 19 × 19 inches
- Envelope back fabric: two pieces 19 × 13 inches
- Sashiko thread or pearl cotton in your contrast color
- Sashiko needle (or long embroidery needle)
- A circle template or shippō stencil, plus a washable marker, chalk pencil, or Hera marker
- 18- or 20-inch pillow form
- Quilting ruler, rotary cutter, cutting mat, pins, iron, sewing machine
Beginner tip: a circle template or shippō stencil is the key tool here — the pattern lives or dies on evenly sized, evenly spaced circles, which are hard to keep consistent freehand.
Choosing Your Colors
“Seven treasures” invites richer, jewel-toned palettes. Pick a solid front and one contrasting thread:
- Traditional: deep indigo front, crisp white thread
- Charcoal front with gold thread (a literal nod to the treasures)
- Teal front with coral thread
- Navy front with turquoise thread
- Plum front with blush thread
- Cream front with cobalt thread
For a coordinated pair, stitch both covers in the same combination, or flip the base and thread colors between the two for a subtle set.
The Pattern: Interlocking Seven-Treasure Circles
Shippō is a set of circles of the same size overlapping on a grid so they link into a continuous chain:
- Use a 2-inch-diameter circle
- Mark circle centers on a grid spaced 1½ inches apart, in even rows, so each circle overlaps its four neighbors
- Trace a full circle at every center; the overlaps create the petal and star shapes between them
- Stitch around each circle with an even running stitch — the linked circles form the lattice automatically
A stencil traces the whole grid at once; by hand, mark the center dots first, then trace each circle with the template.
Cutting Measurements
- Front panel: 19 × 19 inches (plus optional muslin 19 × 19 inches)
- Envelope back: two pieces, 19 × 13 inches
- Seam allowance: ½ inch throughout
Step-by-Step Guide
Step 1 — Cut and press. Cut the front to 19 × 19 inches and the two back pieces to 19 × 13 inches. Press everything flat. If using muslin for the body, baste it behind the front panel.
Step 2 — Mark the circle grid. On the front, mark circle centers 1½ inches apart across the panel, keeping a clean 1½-inch margin from the edges so stitching stays clear of the seams. Scrap-test your marker first.
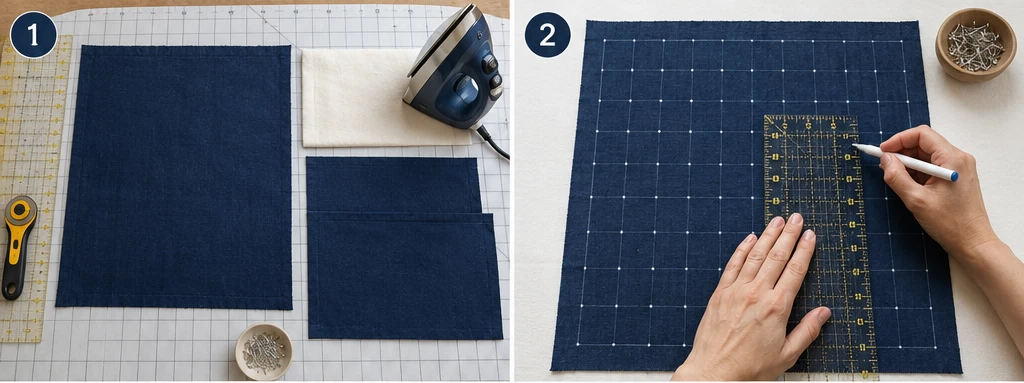
Step 3 — Trace the circles. Using a 2-inch circle template or shippō stencil, draw a full circle at each center so they overlap into the linked lattice.
Step 4 — Stitch the pattern. Thread the sashiko needle and stitch around the circles with an even ⅛–¼ inch running stitch, keeping tension relaxed so the fabric stays flat. Work in a consistent order — all the circles in one direction, then fill in — so stitching flows smoothly.
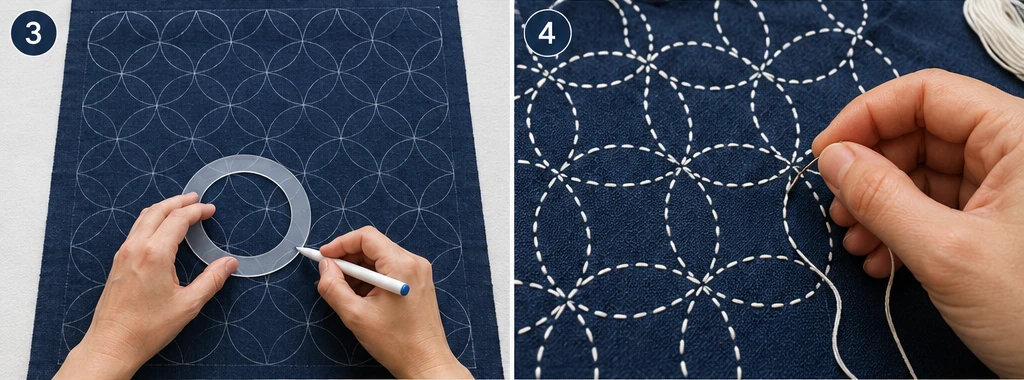
Step 5 — Press and remove marks. Press the stitched front from the back and remove any remaining marking lines per your marker’s instructions.
Step 6 — Hem the back pieces. On one 19-inch edge of each back piece, fold over ½ inch twice and stitch a clean hem. These hemmed edges will form the envelope opening.
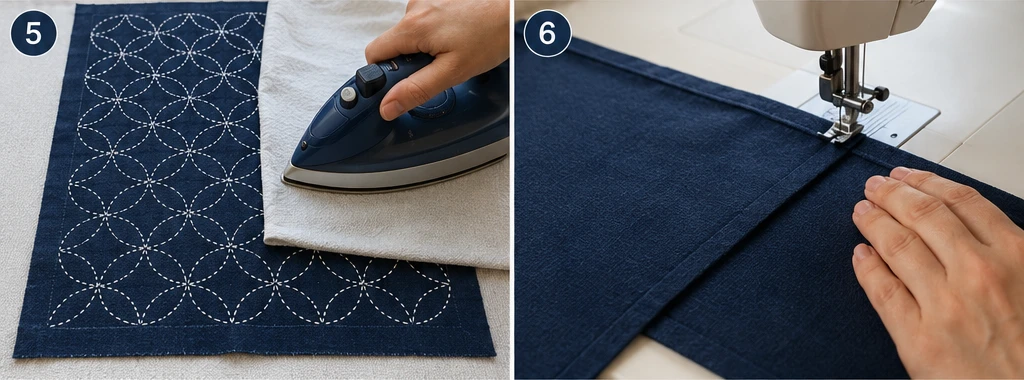
Step 7 — Assemble the cover. Lay the stitched front right side up. Place the two back pieces right side down on top, hemmed edges overlapping in the center, raw edges matching the front. Pin all around.
Step 8 — Sew and turn. Sew around all four sides with a ½-inch seam allowance. Clip the corners, turn right side out through the envelope opening, and press the edges crisply.
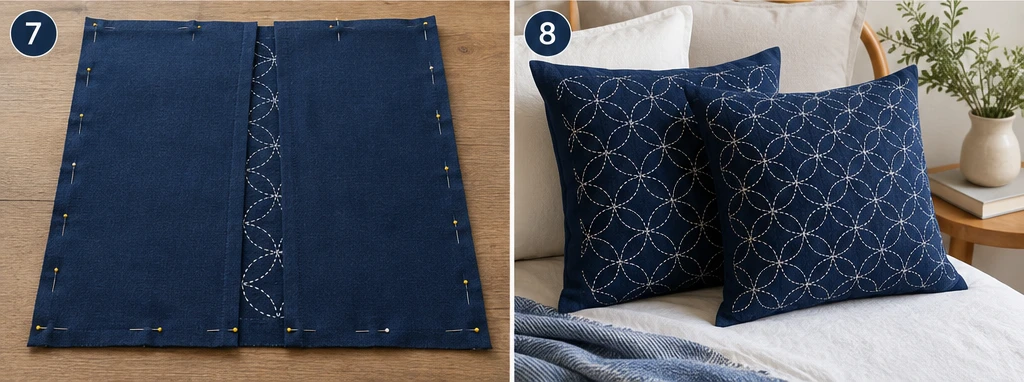
Step 9 — Insert the form. Slip the pillow form through the back opening. For an heirloom finish, wash the cover gently before its first use so the stitches settle.
Assembly at a Glance
- Cut front 19 × 19 inches; two back pieces 19 × 13 inches.
- Mark circle centers 1½ inches apart with a 1½-inch edge margin.
- Trace 2-inch circles into the linked-circle lattice.
- Stitch the shippō pattern with even running stitches.
- Press and remove marks.
- Double-hem one 19-inch edge of each back piece.
- Layer front (up) and back pieces (down, overlapping); pin.
- Sew all four sides with ½-inch seams; clip corners and turn.
- Press, insert the pillow form, and wash gently.
Beginner Tips for Success
- Use a circle template or stencil — even identical circles make up the whole pattern.
- Keep the stitching margin clear of the seam allowance so no pattern is lost in construction.
- Don’t pull the thread tight, or the front will pucker against the form.
- Overlap the envelope-back pieces by at least 6 inches to keep the form tucked in.
- Make two at once — the second cover goes much faster than the first.
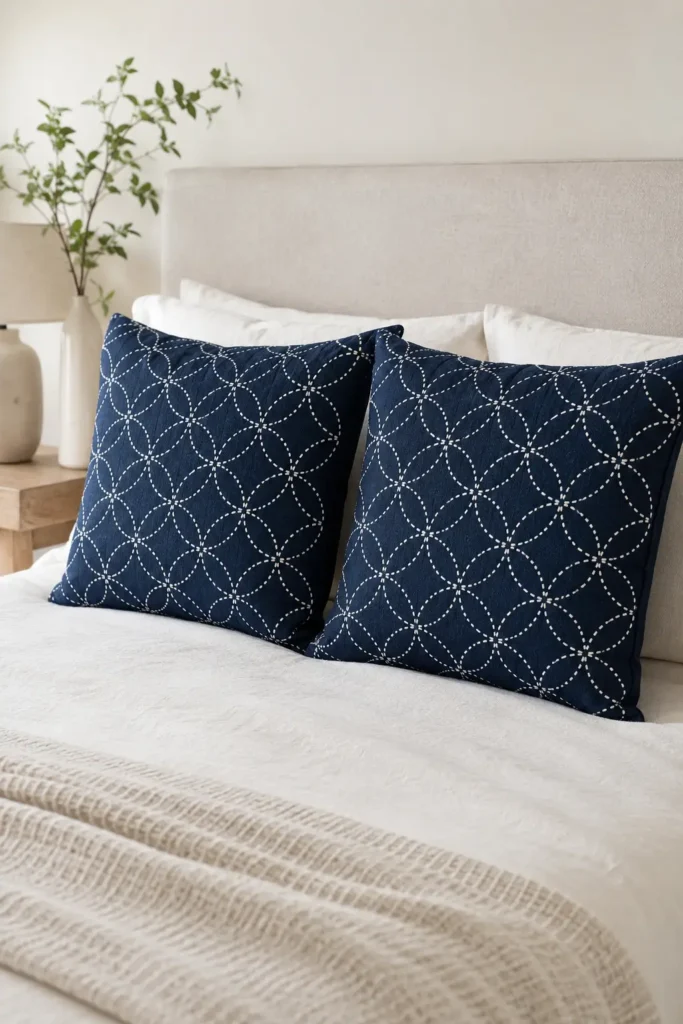
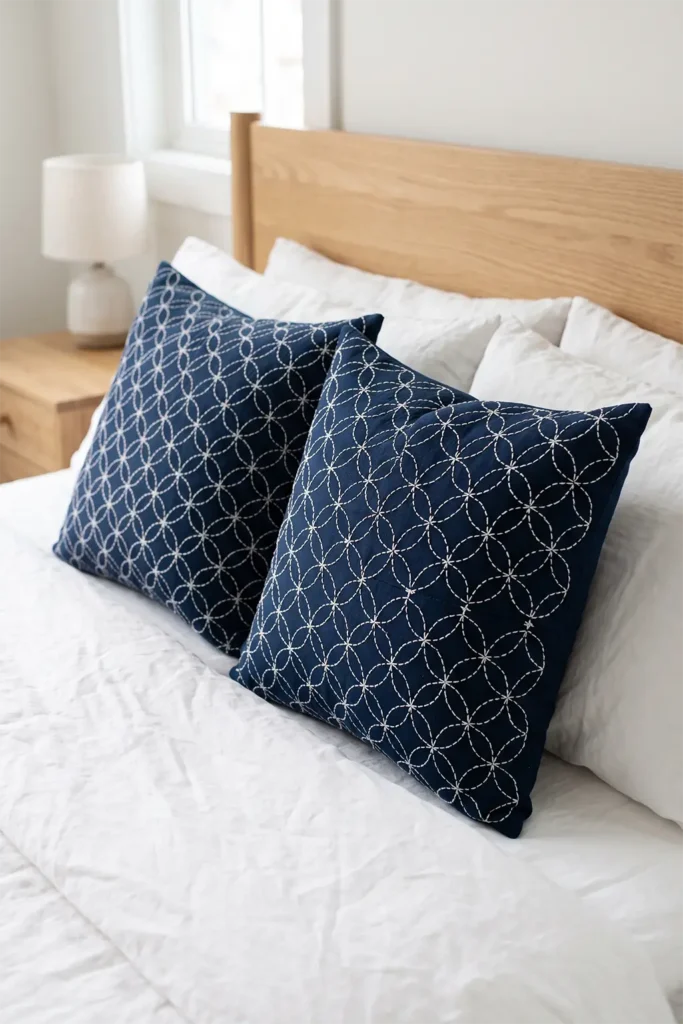
Styling It
Set a pair of shippō covers against the bed pillows so the linked circles face outward, keeping the rest of the bedding simple — white or linen shams, a quiet quilt — so the detailed lattice takes the lead. Echo the thread color in a throw or a single lumbar pillow (gold, coral, turquoise) to pull the palette together. The same covers look just as charming on a reading chair or sofa, carrying the seven-treasures motif through the room.
Final Thoughts
A pair of shippō seven-treasure sashiko pillow covers is small in scale but rich in meaning. The interlocking circles bring jewel-like intricacy and a timeless wish for harmony and connection to a bed, a chair, or a sofa — and because each cover takes only an evening or two, it’s the most approachable way in this collection to make something handmade, beautiful, and full of intention. Made as a pair, they quietly carry the motif’s truest message: that connection is the real treasure.
Other Design Inspirations – Digitally Modified

8. Tate-Jima Vertical Stripe Sashiko Bed Runners for Modern Style
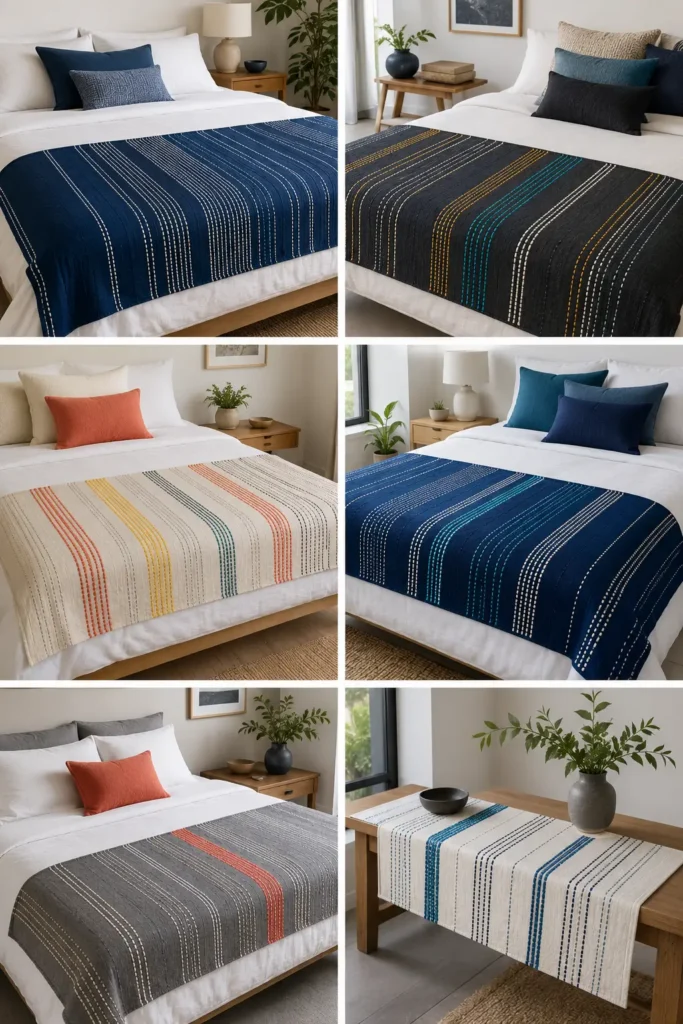
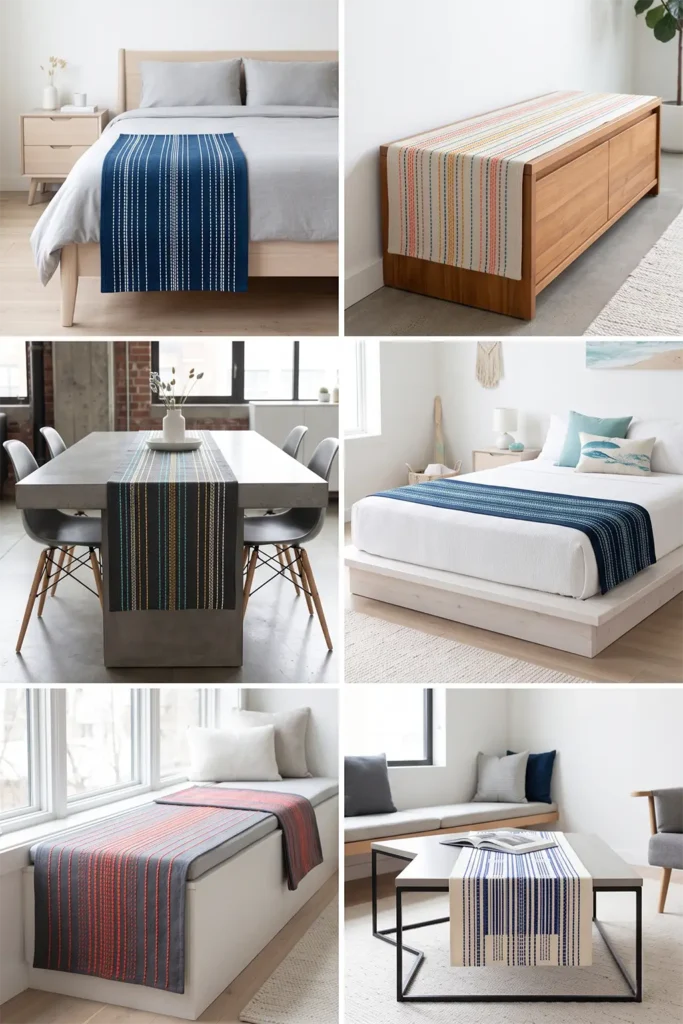
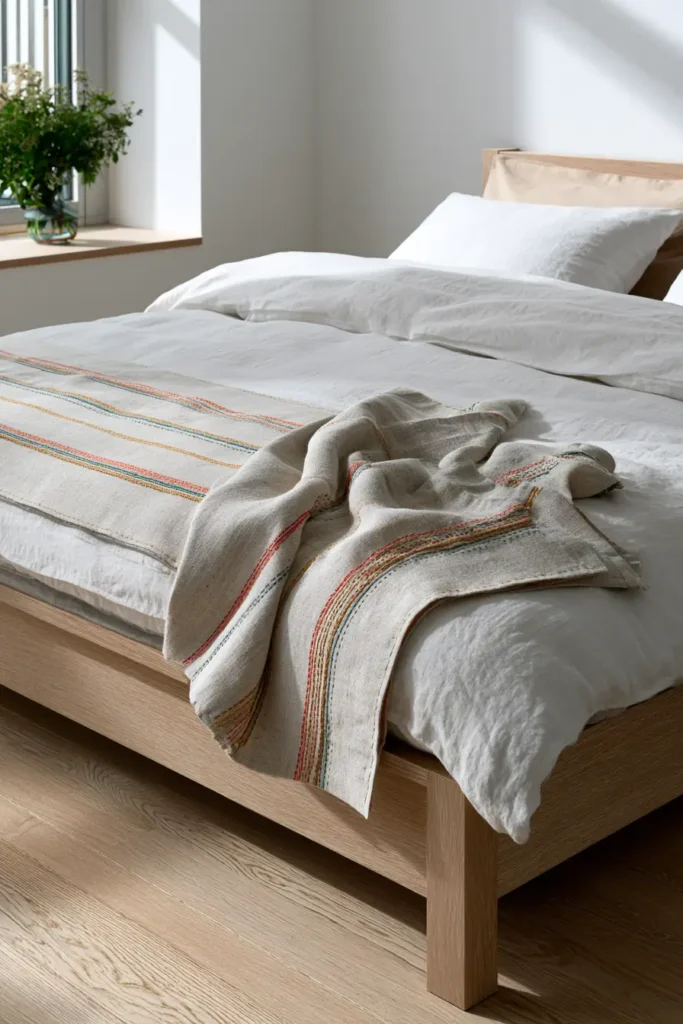
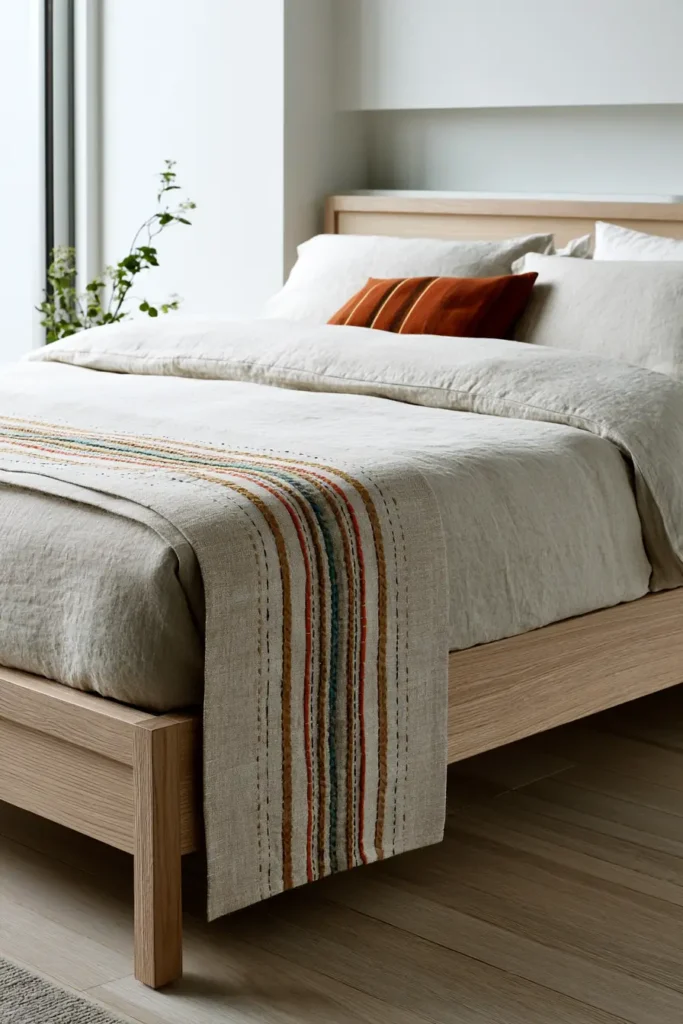
A Tate-jima sashiko bed runner is where traditional Japanese stitching meets clean, modern design. Tate-jima means “vertical stripes,” part of the broader shima (stripe) family that has long held a special place in Japanese textiles. Worked as sashiko, the pattern is beautifully simple: columns of running stitches arranged into vertical bands of varying width and density, running across the runner like a graphic, hand-drawn barcode. The result feels contemporary and minimalist while still carrying the warmth of hand stitching — exactly right for a modern bedroom that wants texture without ornament.
There’s a lovely bit of history in the name. The word shima is thought to come from island, because striped cloth first arrived in Japan through overseas trade, brought back from distant islands. By the Edo period, stripes had become the height of understated chic — the refined, effortless style the townspeople called iki. So a striped runner isn’t just modern by accident; stripes have been quietly stylish in Japan for centuries.
Why I Made It
I made this because it’s the most modern-feeling piece in the whole collection, and the easiest to start with. No complex grids, no counted threads — just clean vertical lines and the rhythm of varying their width and spacing. When someone tells me they love the look of sashiko but feel intimidated by the geometry, this is the project I point them to first. It looks graphic and contemporary, but it’s genuinely a beginner’s runner.
I also love that stripes give you permission to play with color. Most sashiko patterns rely on a single thread color for contrast, but a striped runner can carry several — a coral band beside a mustard one beside a teal one — without ever looking busy, because the vertical structure keeps everything orderly. It’s the perfect place to be bold while staying tasteful, which is very much the iki spirit.
Why This Idea Is Worth Making
This idea is worth making because it offers the cleanest, most modern way into sashiko, with the most room for color. The vertical-stripe layout is simple to mark and forgiving to stitch, so it’s an ideal first runner, yet the play of wide and narrow bands gives it real designer polish. Because the stitching runs straight through all the quilt layers, the stripes double as the quilting, and the finished runner brings a graphic, contemporary calm to a bed that store-bought bedding rarely matches.
Finished Size
- Approximate finished runner (queen): 20 × 90 inches
- Twin: about 18 × 75 inches
- King: about 24 × 108 inches
- Best used: across the foot of the bed, draping evenly on both sides; also works on a bench or as a table runner
- Skill level: beginner — the simplest project in this collection
- Core techniques: vertical-column sashiko running stitch through all layers, basting, binding
Materials Needed
For one 20 × 90-inch runner:
- Top fabric: 2¾ yards of solid cotton, linen-cotton, or chambray
- Backing fabric: 2¾ yards
- Lightweight cotton batting or flannel: at least 22 × 92 inches
- Sashiko thread or pearl cotton in one to four contrast colors (stripes love multiple colors)
- Sashiko needle (or long embroidery needle)
- Binding fabric: ½ yard
- Long quilting ruler (essential for straight vertical lines), washable marker, or Hera marker
- Rotary cutter, cutting mat, basting pins, and iron
Beginner tip: a long ruler is your most important tool here — the whole charm of tate-jima depends on crisp, straight vertical lines, so mark carefully.
Choosing Your Colors
Stripes are the one pattern in this collection that welcomes several thread colors at once. Pick a solid base and one to four threads:
- Traditional: indigo base, crisp white thread
- Natural oatmeal base with coral, mustard, and teal stripes
- Charcoal base with turquoise, gold, and ivory stripes
- Deep navy base with aqua and white stripes
- Slate grey base with a single bold coral
- Cream base with cobalt and indigo stripes
A single thread color reads classic and minimal; three or four reads modern and lively. Match the binding to the base for a clean frame.
The Pattern: A Rhythm of Vertical Stripes
Tate-jima is all about varying the width and density of vertical bands so the eye finds a rhythm:
- Plan a repeating stripe sequence across the runner’s length — for example, a 6-inch repeat of: a 2-inch dense band, a 1-inch gap, a ¾-inch band, a 1-inch gap, a 1¼-inch band, then a gap
- The stripes run across the 20-inch depth of the runner (each stitched column is about 20 inches long)
- Within each “on” band, stitch vertical columns of running stitch spaced about ⅜ inch apart
- Leave the “gap” bands unstitched, so the plain fabric becomes part of the design
Mix wide and narrow bands, and vary the colors, to keep the rhythm modern rather than uniform.
Cutting Measurements
- Top panel: 21 × 91 inches
- Backing panel: 22 × 92 inches
- Batting: 22 × 92 inches
- Binding: six strips, 2½ inches × width of fabric, joined into one strip
Step-by-Step Guide
Step 1 — Cut and press. Cut the top to 21 × 91 inches and press it flat. Cut batting and backing to 22 × 92 inches.
Step 2 — Plan and mark the stripes. Using a long ruler, mark your repeating stripe sequence down the length of the runner, drawing the band edges and the ⅜-inch column lines inside each “on” band. Keep a 1-inch margin at the long edges for binding, and scrap-test your marker.
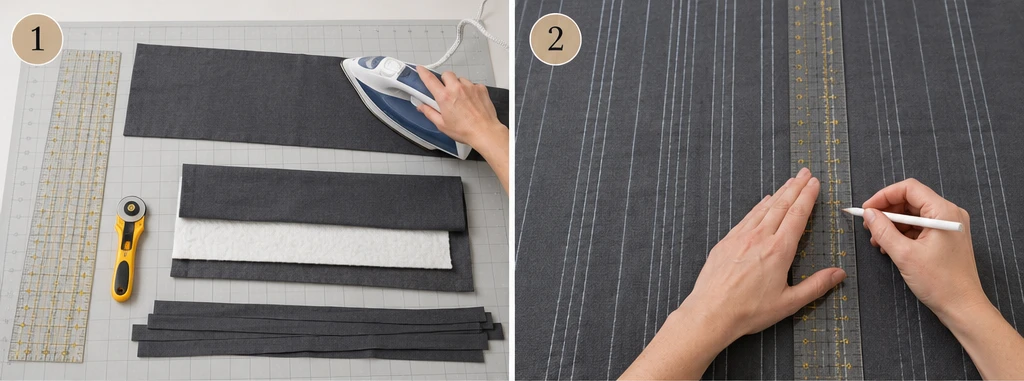
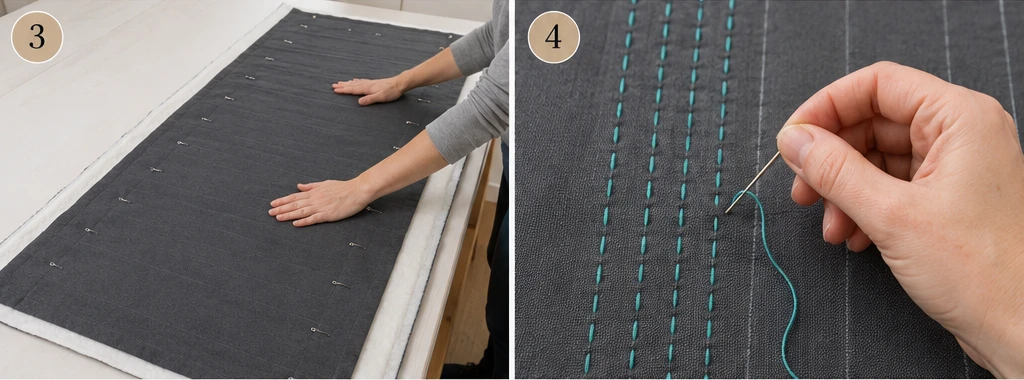
Step 3 — Layer and baste. Lay the backing wrong side up, center the batting, then the marked top right side up. Smooth from the center and baste generously along the full length.
Step 4 — Stitch the first color’s stripes. Thread your first thread color and stitch the vertical columns of those bands through all three layers, using an even ⅛–¼ inch running stitch. Keep tension relaxed so the runner stays flat.
Step 5 — Add the remaining colors. Switch threads and stitch the next color’s bands, and so on, until all stripes are filled. Working color by color keeps the rhythm clean, and the thread changes tidy.
Step 6 — Vary the density. For extra modern interest, stitch some bands with closely spaced columns and others more open, so the stripes differ in weight as well as width.
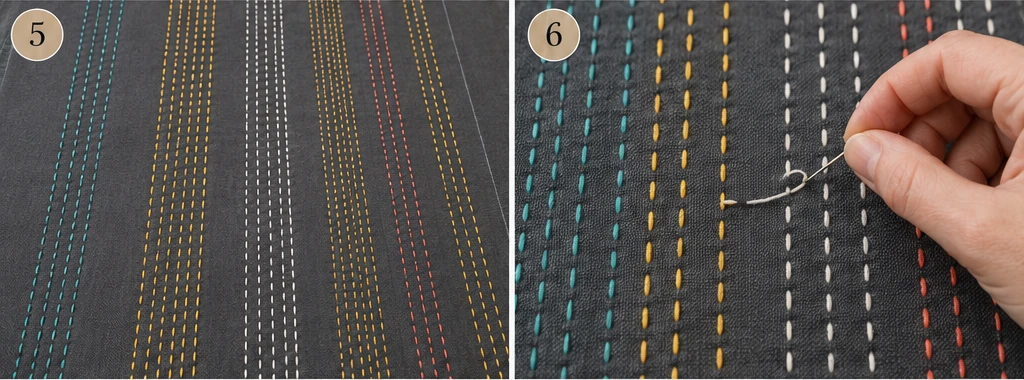
Step 7 — Secure thread ends. Finish each thread with a small knot buried between the layers or a few tiny backstitches; keep the front clean and trim tails close.
Step 8 — Trim and square. Trim the runner to 20 × 90 inches, squaring the corners and straightening the long edges with a ruler.
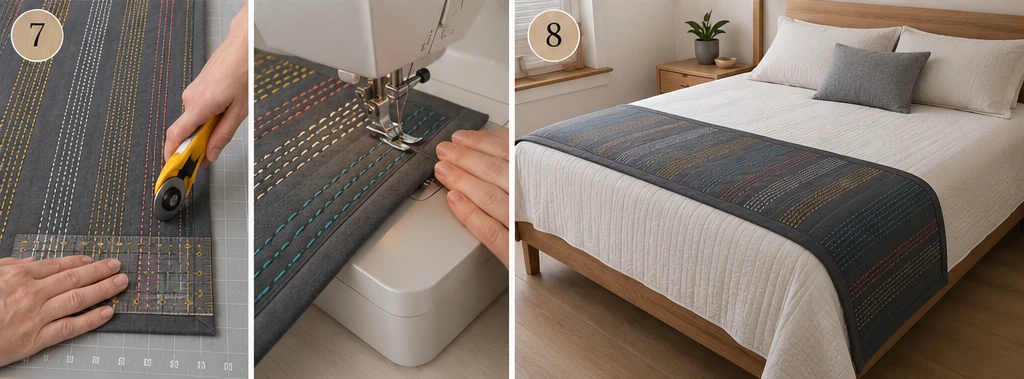
Step 9 — Bind and wash. Join the 2½-inch binding strips, press in half, sew to the front, fold to the back, and finish. Wash gently in cold water, no bleach, and air-dry so the stitches settle and soften.
Assembly at a Glance
- Cut the top to 21 × 91 inches; batting and backing to 22 × 92 inches.
- Mark a repeating vertical-stripe sequence with ⅜-inch column lines, leaving a 1-inch edge margin.
- Layer top, batting, and backing; baste generously.
- Stitch the first color’s bands through all layers.
- Switch threads and stitch the remaining colors.
- Vary band density for modern rhythm.
- Secure all thread ends neatly.
- Trim to 20 × 90 inches and square.
- Bind with 2½-inch strips, then wash gently.
Beginner Tips for Success
- Mark with a long ruler — crisp, straight verticals are the entire effect.
- Vary band widths; evenly spaced identical stripes look flat, while a mix looks designed.
- Keep stitches relaxed so the runner doesn’t pucker along its length.
- Work one color fully before switching to keep thread changes clean.
- Leave some bands plain — the unstitched gaps are part of the pattern.
Styling It
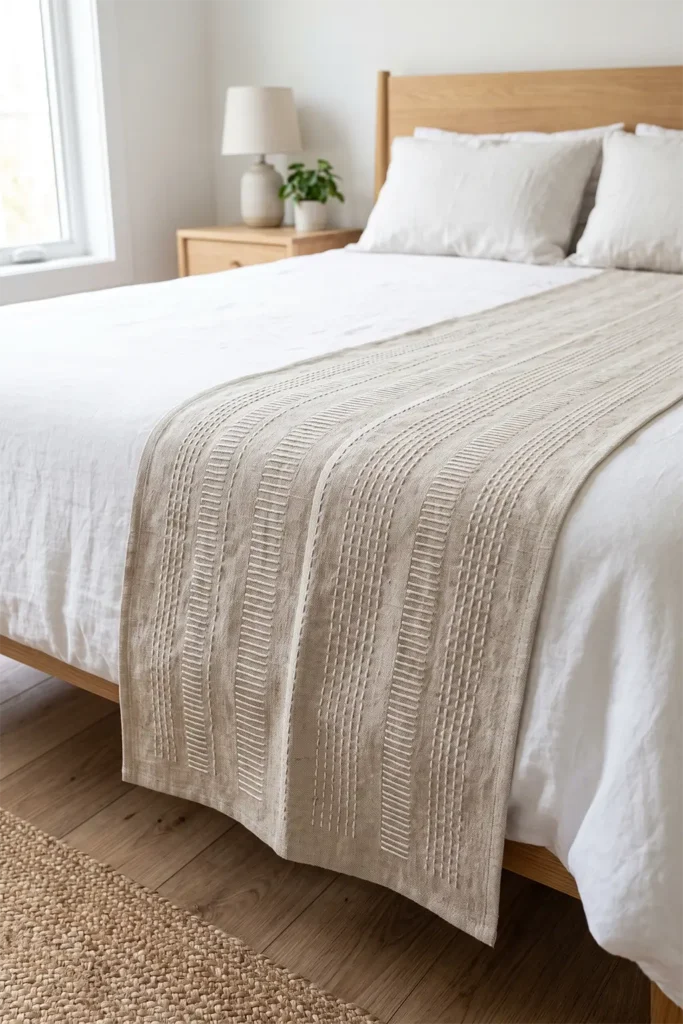
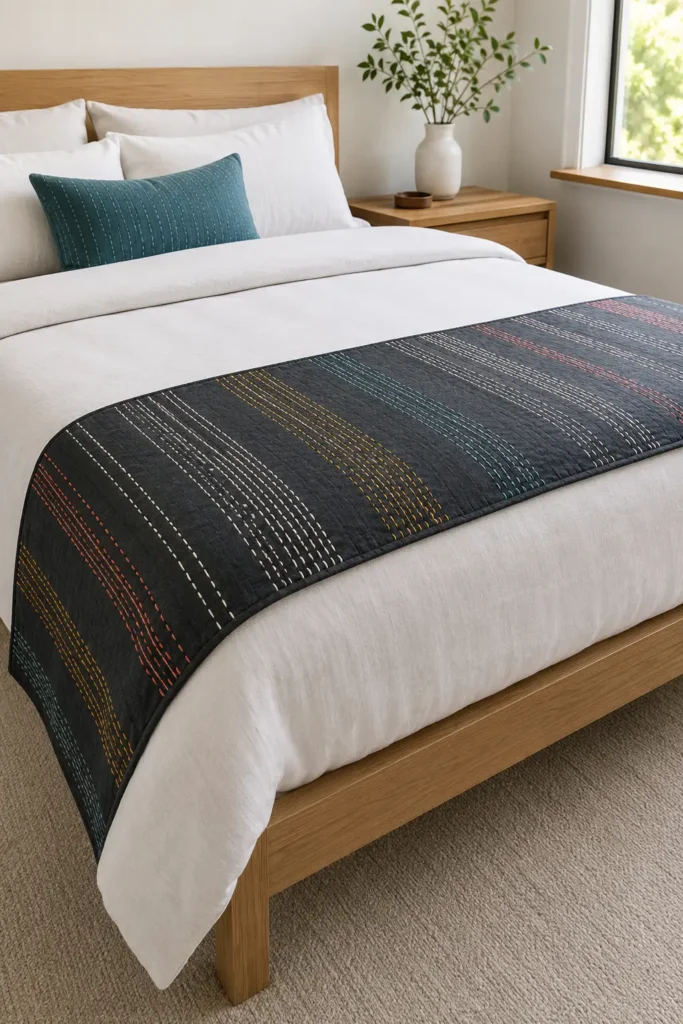
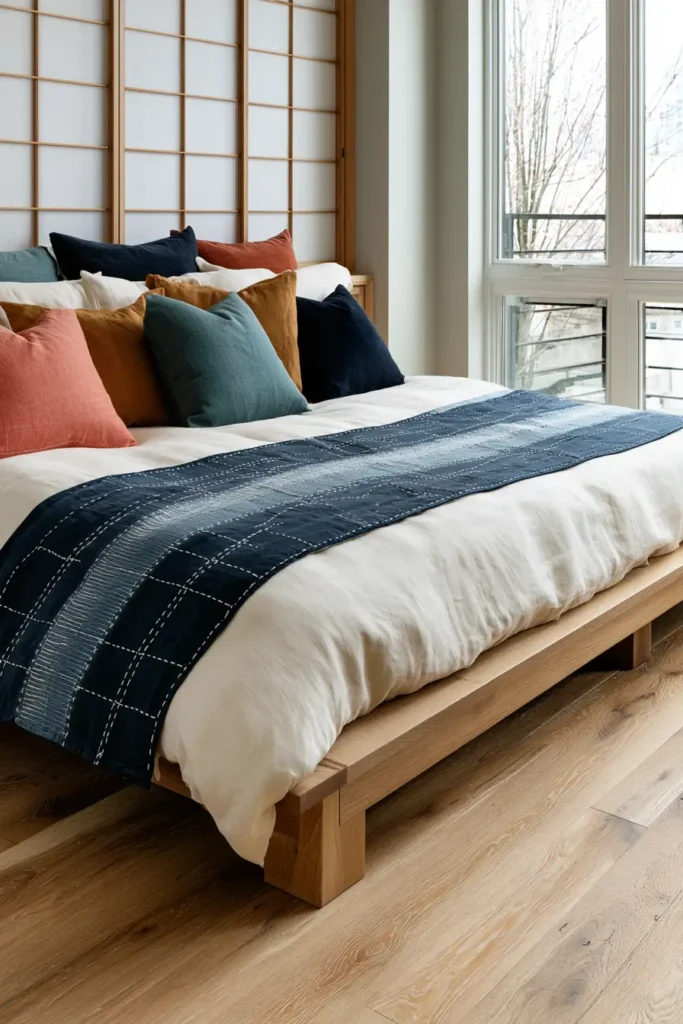
Lay the finished runner across the foot of a simply dressed bed — white or grey linens, natural wood — so the vertical stripes read as a crisp graphic band. Echo one of the stripe colors in a single accent pillow or throw to tie the palette together. Because the look is modern and minimal, it pairs especially well with contemporary, uncluttered bedrooms, and works just as cleanly folded over a bench or used as a table runner.
Final Thoughts
A Tate-jima vertical-stripe sashiko bed runner proves that sashiko can feel thoroughly modern. The clean vertical bands carry centuries of striped-textile style — the understated iki chic of Edo Japan — into a contemporary bedroom, while the simple marking and multi-color freedom make it the friendliest project in this collection. Graphic, colorful, and quick, it’s the easiest way to bring a little handmade modern edge to your bed.
Other Design Inspirations – Digitally Modified
9. Kōshi Checkered Sashiko Bed Sheets for Sophisticated Sleep Spaces
A kōshi sashiko bed-sheet set brings a crisp, plaid-inspired pattern to the part of the bed you see and touch most. Kōshi means “lattice,” and it’s the checked member of Japan’s shima (stripe) textile family — vertical and horizontal lines of running stitch crossing to form an orderly grid of checks or plaid. Where tate-jima stripes run one direction, kōshi runs both, and that crossing structure gives it a tailored, architectural elegance. Worked as a stitched border on a sheet set, it reads less like rustic craft and more like a quietly sophisticated design detail.
The name itself is evocative. Kōshi is the same word used for the wooden lattice screens and window grids of traditional Japanese townhouses — those calm, orderly frameworks of crossing slats. So a kōshi pattern carries a sense of structure and refinement, the beauty of clean lines meeting at right angles, which is exactly the mood for a sophisticated sleep space.
A practical note on scope, as with any sashiko sheets: you don’t stitch an entire bed sheet — it would take forever and stiffen the fabric. Instead, you stitch the fold-down top border of a flat sheet and matching pillowcase cuffs, the parts that show when the bed is made, so the set stays breathable and usable.
Why I Made It
I made this because I wanted the everyday sheet set to feel quietly upscale, and nothing says “considered” quite like a clean plaid. A check is inherently tidy and structured — it’s the pattern equivalent of a well-made bed — so a kōshi border turns an ordinary set into something that looks intentional and refined every single morning. There’s real pleasure in opening up a blanket to reveal a crisp, stitched plaid underneath.
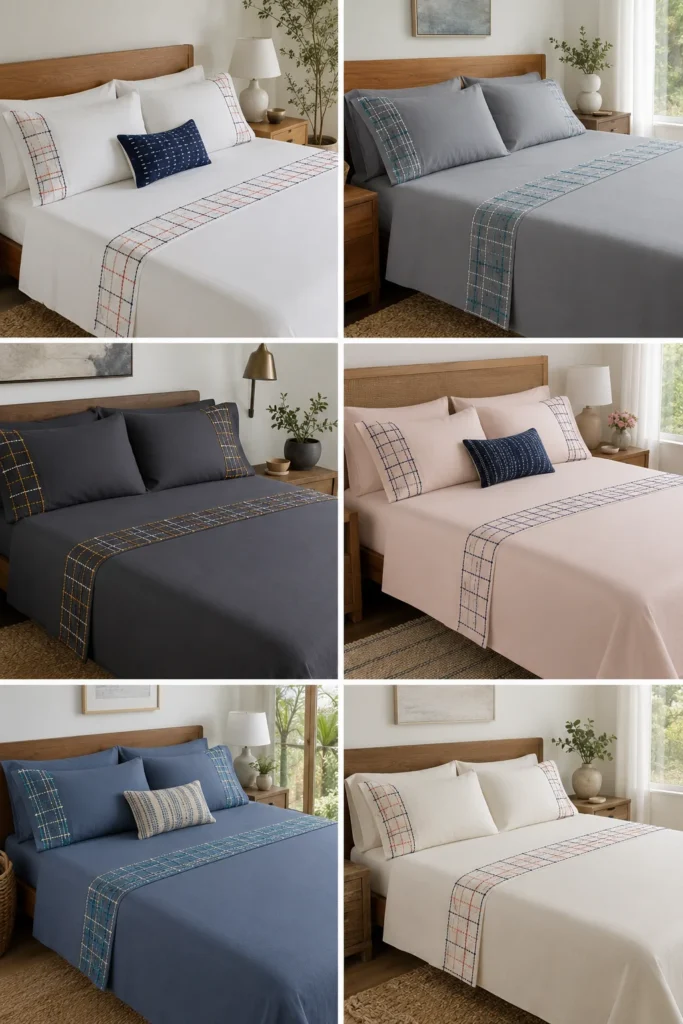
I’m also drawn to the lattice idea behind it. Kōshi shares its name with the wooden window grids of old Japanese homes, and I like the thought of bringing that same orderly, architectural calm to the bed. Where some sashiko patterns are soft and flowing, kōshi is structured and grown-up — the sophisticated cousin in the family.
Why This Idea Is Worth Making
This idea is worth making because it produces a designer-looking plaid sheet set for the price of a plain one plus thread. The crossing-line structure is simple — straight verticals, straight horizontals — so it’s beginner-friendly, yet the plaid result looks tailored and expensive. Because you only stitch the visible borders, it’s an achievable weekend project rather than a months-long one, and the check pattern’s clean order brings instant sophistication to a modern bedroom. Like all checks, it also welcomes more than one color, so you can make it as subtle or as bold as your room calls for.
Finished Project
- What you make: a flat sheet with a stitched plaid border + two stitched pillowcase cuffs
- Stitched band depth: about 5 inches on the flat sheet, 3½ inches on each pillowcase cuff
- Works for: twin, full, queen, or king sets (you stitch only the visible borders)
- Skill level: beginner — straight lines, no complex grid to fill
- Core techniques: plaid grid marking, vertical and horizontal sashiko running stitch, securing ends
Materials Needed
- A cotton bed-sheet set: a smooth percale or sateen flat sheet plus two pillowcases (a tight, even weave holds stitches best)
- Sashiko thread or pearl cotton in one to three contrast colors (plaid loves a second and third color)
- Sashiko needle (or long embroidery needle)
- Washable fabric marker, chalk pencil, or Hera marker
- Long quilting ruler (essential for straight plaid lines)
- Iron, ironing board, small scissors
Beginner tip: prewash and press the set before marking — cotton shrinks slightly on the first wash, and you want the plaid laid out on its final dimensions.
Choosing Your Colors
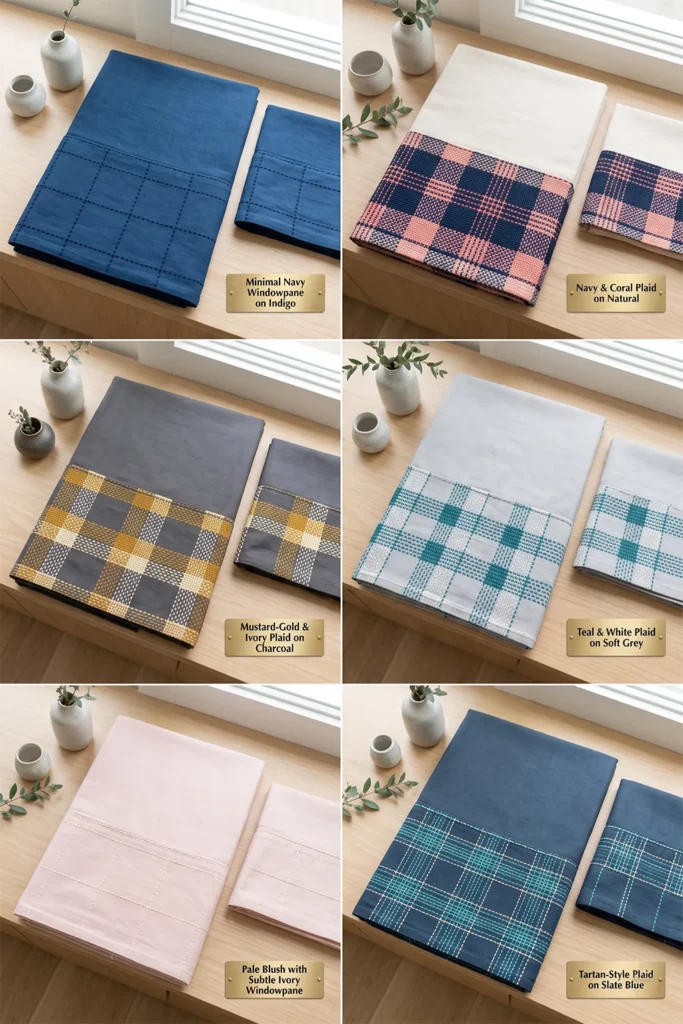
Checks invite layered color the way tartan does. Pick a smooth base sheet and one to three threads:
- Traditional: indigo sheet, crisp white thread
- White or natural sheet with navy and coral plaid
- Charcoal sheet with mustard-gold and ivory plaid
- Soft grey sheet with teal and white plaid
- Pale blush sheet with a single deep navy windowpane
- Slate blue sheet with turquoise and cream plaid
A single-color windowpane reads minimal and crisp; two or three colors give a fuller, tartan-like plaid. Match the pillowcase plaid to the flat sheet for a coordinated set.
The Pattern: A Crossing-Line Plaid
Kōshi is vertical and horizontal lines that cross to form checks. Vary their grouping to go from a simple windowpane to a richer plaid:
- Simple windowpane: single vertical and horizontal lines every 1 inch, both directions
- Fuller plaid: groups of lines — for example, two lines ¼ inch apart, then a 1-inch gap — repeated in both directions, optionally in alternating colors
- Stitch all vertical lines first, then all horizontal lines; the crossings form the checks automatically
- The open spaces between lines are part of the pattern, so keep the grid airy rather than dense
Marking Measurements
- Flat sheet band: measure in from the top hem and mark a band the full width of the sheet × 5 inches deep
- Pillowcase cuffs: mark a band the full width of the cuff × 3½ inches deep, just above the opening
- Fill each band with your chosen plaid grid, keeping lines light and removable
Step-by-Step Guide
Step 1 — Prep the set. Wash and press the flat sheet and pillowcases. Lay the flat sheet flat and identify the top hem — the wide edge that folds down over a blanket.
Step 2 — Mark the bands. Mark a 5-inch-deep band along the full top width of the flat sheet, and a 3½-inch band above the opening on each pillowcase. Scrap-test your marker first.
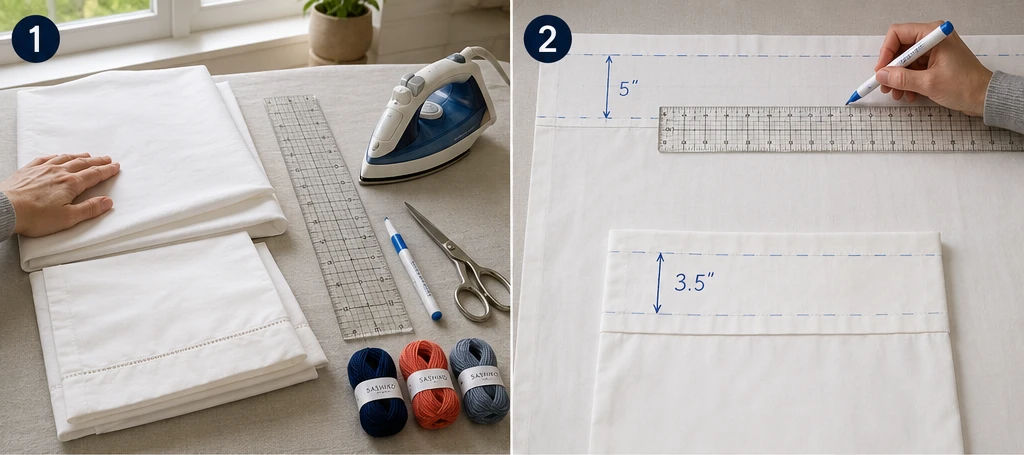
Step 3 — Draw the plaid grid. With a long ruler, mark your vertical and horizontal lines (single windowpane or grouped plaid) across each band. Straight lines are everything here, so take your time.
Step 4 — Stitch the vertical lines. Thread your first color and stitch every vertical line with an even ⅛–¼ inch running stitch, keeping tension relaxed so the fabric stays flat.
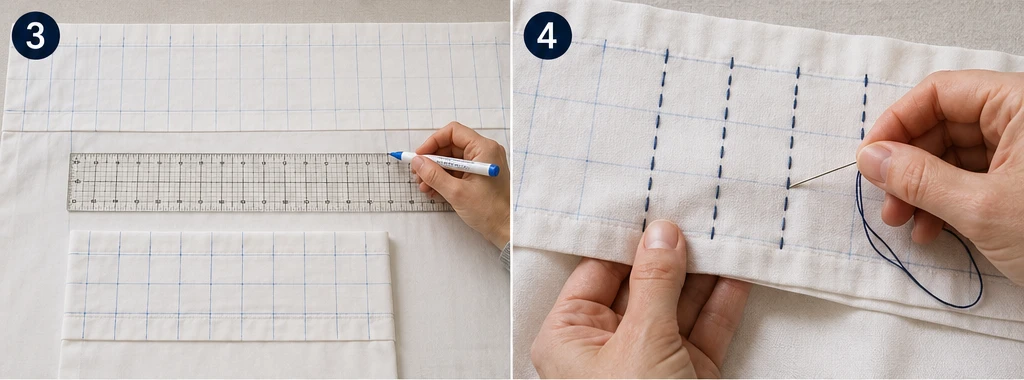
Step 5 — Stitch the horizontal lines. Stitch every horizontal line the same way (in a second color if you like). As they cross the verticals, the check pattern appears.
Step 6 — Add the third color, if using. For a fuller plaid, add an accent line or grouping in a third color to build a tartan-like rhythm.
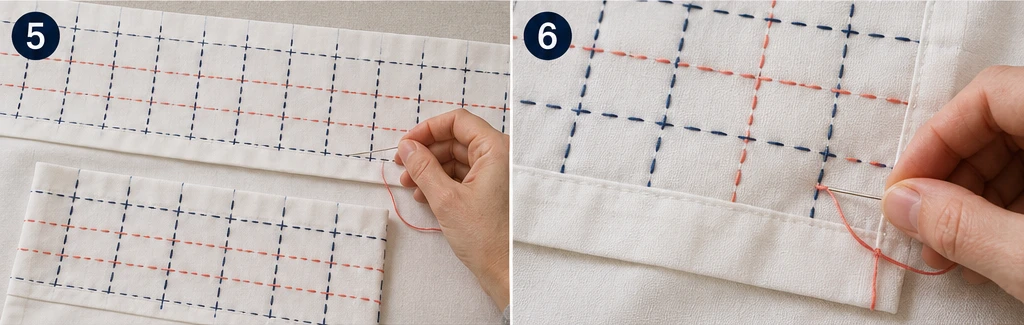
Step 7 — Secure thread ends. Finish each thread with a small knot or a few tiny backstitches on the wrong side of the band, so the sleeping surface stays smooth against skin. Trim tails close.
Step 8 — Press and remove marks. Gently press the stitched bands from the back and remove any remaining marking lines per your marker’s instructions.
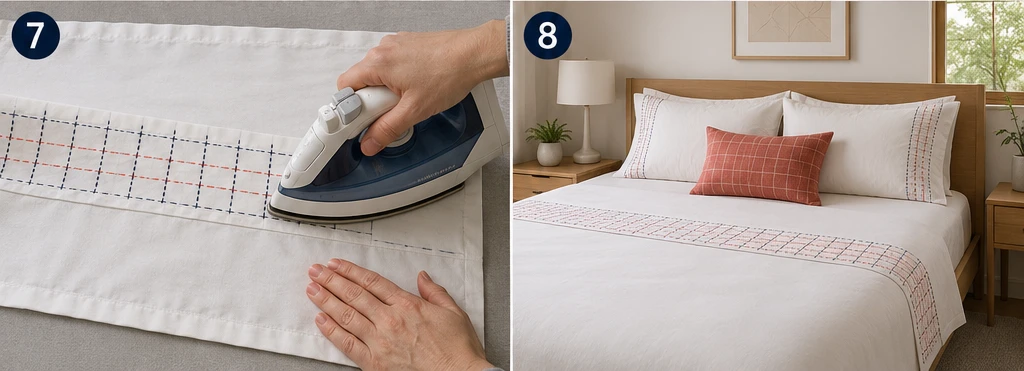
Step 9 — Final wash. Wash the finished set gently in cold water with mild detergent, no bleach. Air-dry or tumble low; the first wash softens the bands and settles the stitches.
Assembly at a Glance
- Prewash and press the sheet set.
- Mark a 5-inch band on the flat sheet, 3½-inch bands on the cuffs.
- Draw the plaid grid (windowpane or grouped lines) with a long ruler.
- Stitch all vertical lines.
- Stitch all horizontal lines to form the checks.
- Add a third accent color if making a fuller plaid.
- Secure all ends on the wrong side.
- Press and remove the grid marks.
- Wash gently and let the stitching soften in.
Beginner Tips for Success
- Mark with a long ruler — crisp, straight lines are what make a plaid look tailored.
- Keep the grid airy; kōshi is an open lattice, not a densely filled grid.
- Stitch all in one direction before the other so the crossings stay even.
- Keep knots and tails on the wrong side for comfort against the skin.
- Add color gradually — you can always stitch a second or third line, but it’s harder to remove one.
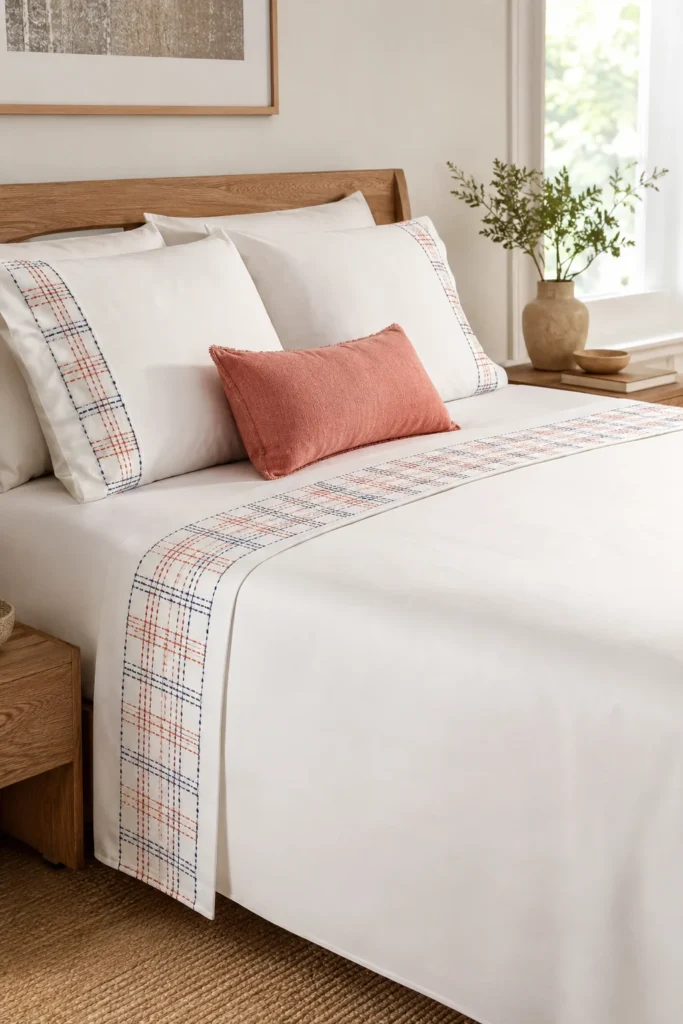
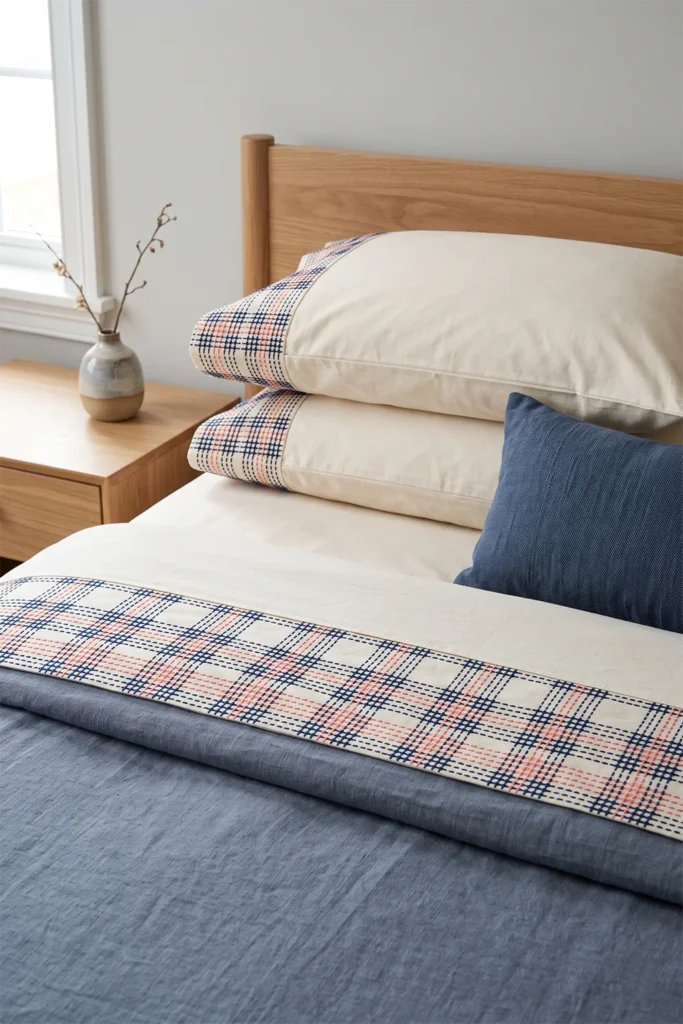
Styling It
Make the bed and fold the plaid border down over a plain blanket so the check frames the top of the bed, with the matching pillowcase cuffs facing out. Keep the rest of the bedding quiet — solid duvet, simple shams — and pull one accent in a plaid color (navy, coral, mustard) into a throw or lumbar pillow. Against neutral walls and natural wood, the tailored check reads as understated sophistication.
Final Thoughts
A kōshi checkered sashiko sheet set shows the structured, grown-up side of sashiko. The crossing lattice lines carry the same orderly elegance as the wooden window grids that share their name, turning an everyday sheet set into something tailored and refined. Simple to stitch, open to color, and worked only where it shows, it’s an achievable way to bring quiet, plaid-inspired sophistication to a sleep space you’ll enjoy every morning.
Other Design Inspirations – Digitally Modified
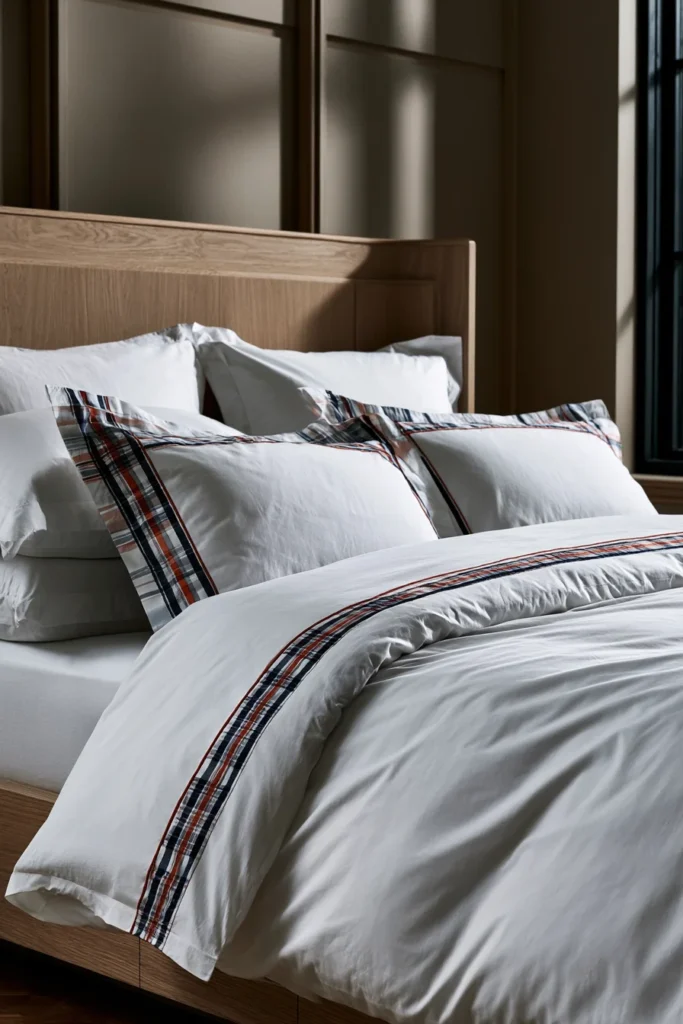

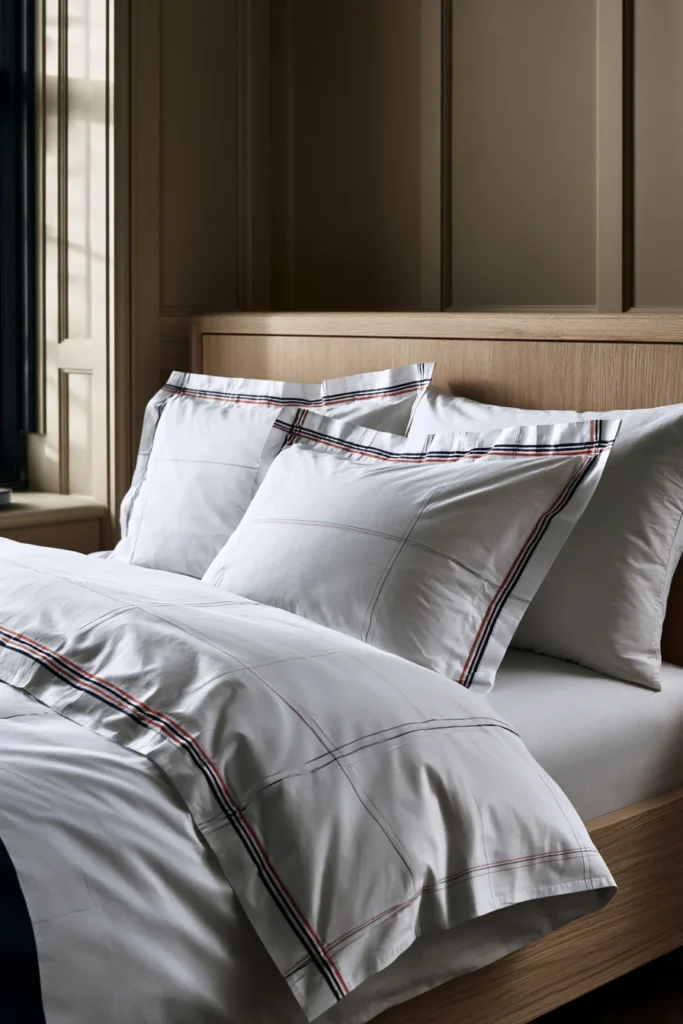

10. Yabane Arrow Feather Sashiko Pillow Covers for Stylish Accents
A pair of yabane sashiko pillow covers adds bold, directional energy to a bed or sofa. Yabane means “arrow feathers” — the fletching at the back of an arrow — and the pattern stacks those feather shapes into crisp, repeating chevron columns. It’s one of Japan’s most recognizable motifs (you’ve seen the arrow-feather yagasuri on classic kimono), and as sashiko it’s worked in angular running-stitch chevrons that give a pillow a graphic, modern punch while still feeling traditional. Where curved patterns soothe, yabane moves — it points, it rises, it carries the eye forward.
That sense of motion is the whole meaning. An arrow, once released, flies straight ahead and never returns, so yabane came to symbolize moving forward, determination, and good fortune that wards off bad luck. Arrows were given as good-luck talismans, and arrow-feather kimonos were traditionally given to brides as a wish for a life that moves only forward. It’s a pattern with built-in momentum.
Why I Made It
I made these as the “fresh start” piece in the collection. Most decorative motifs wish you calm or harmony; yabane wishes you forward. That makes a pair of arrow-feather pillows the thing I’d stitch to mark a new chapter — a new home, a new job, a graduation, a move — anything where you want the object to quietly say keep going, don’t look back. There’s something encouraging about resting against a pattern that means momentum.
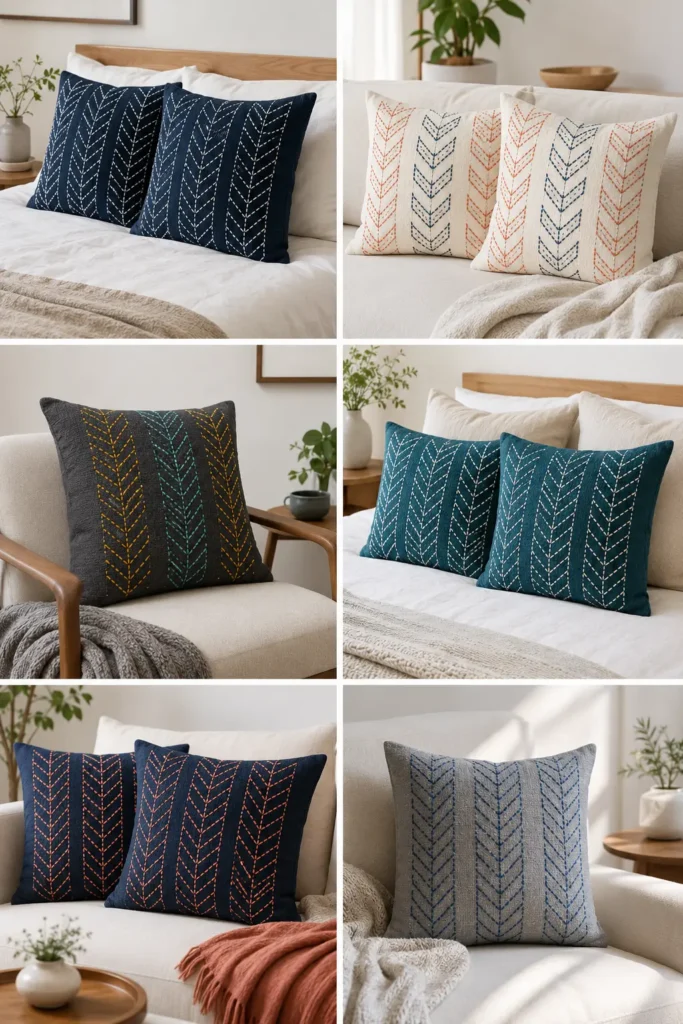
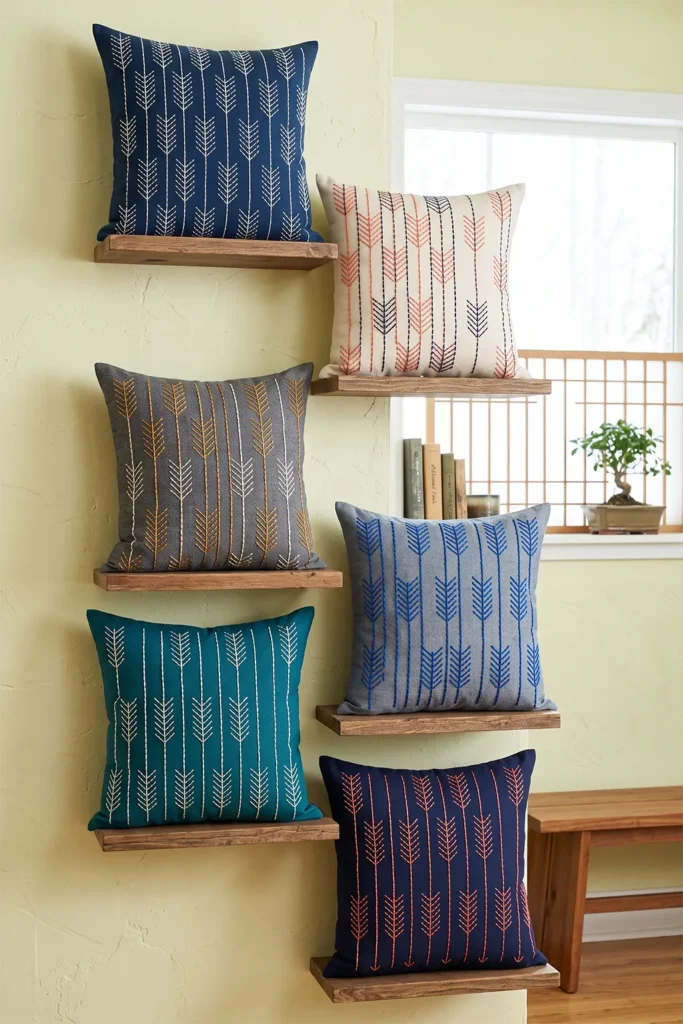
I also love how graphic it is. After all the curves and lattices in this collection, the sharp chevrons of yabane feel refreshingly bold and contemporary, and on a pillow scale they read as a confident, stylish accent rather than a busy one. It’s the motif that proves sashiko can be striking, not just serene.
Why This Idea Is Worth Making
This idea is worth making because it brings bold, modern graphic style and a genuinely uplifting meaning to a quick, beginner-friendly project. The arrow-feather chevron is just angled straight lines — no curves to keep even — so it’s easy to stitch cleanly, yet the stacked result looks dynamic and designed. Made as a pair, the covers add directional energy and a forward-looking wish to a bed or sofa, and because each takes only an evening or two, they’re an ideal handmade gift for someone starting something new.
Finished Size
- Finished cover: 18 × 18 inches (fits an 18- or 20-inch pillow form; a 20-inch form gives a fuller look)
- Other sizes: scale the method to 16 × 16 or 20 × 20 inches
- Makes: one cover per set of measurements below — double everything for a pair
- Best used: on the bed against the pillows, on a reading chair, or on a sofa
- Skill level: beginner — straight angled lines, no curves
Materials Needed
For one 18 × 18-inch cover:
- Front fabric: one piece 19 × 19 inches of solid cotton, linen-cotton, or chambray
- Optional muslin backing (adds body behind the stitching): one piece 19 × 19 inches
- Envelope back fabric: two pieces 19 × 13 inches
- Sashiko thread or pearl cotton in one or two contrast colors
- Sashiko needle (or long embroidery needle)
- Washable fabric marker, chalk pencil, or Hera marker, plus a ruler and a 45° triangle (or stencil)
- 18- or 20-inch pillow form
- Quilting ruler, rotary cutter, cutting mat, pins, iron, sewing machine
Beginner tip: a 45° triangle ruler keeps every chevron angle identical, which is the secret to crisp arrow feathers.
Choosing Your Colors
Yabane’s bold lines carry strong color beautifully, and the feathers can alternate in two colors for a classic look. Pick a solid front and one or two threads:
- Traditional: deep indigo front, crisp white thread
- Cream front with coral and navy feathers
- Charcoal front with mustard-gold and turquoise feathers
- Teal front with ivory thread
- Navy front with coral thread
- Slate grey front with a single bold cobalt
A single thread color reads clean and graphic; two alternating colors give the traditional yagasuri rhythm. Match both covers for a coordinated pair.
The Pattern: Stacked Arrow Feathers
Yabane is chevron feather shapes stacked in vertical columns:
- Mark a grid of cells about 2 inches wide × 2 inches tall across the front
- In each cell, draw a chevron — two diagonal lines rising from the bottom corners to meet at the center top — plus a short vertical center line for the arrow shaft
- Stack the chevrons up each column so the feathers point in one direction
- For the classic look, alternate the direction (or color) of neighboring columns so the feathers mirror each other
A stencil or 45° triangle keeps the angles uniform; by hand, mark the grid first, then the chevrons.
Cutting Measurements
- Front panel: 19 × 19 inches (plus optional muslin 19 × 19 inches)
- Envelope back: two pieces, 19 × 13 inches
- Seam allowance: ½ inch throughout
Step-by-Step Guide
Step 1 — Cut and press. Cut the front to 19 × 19 inches and the two back pieces to 19 × 13 inches. Press everything flat. If using muslin for the body, baste it behind the front panel.
Step 2 — Mark the grid. On the front, mark a grid of 2 × 2 inch cells, keeping a clean 1½-inch margin from the edges so stitching stays clear of the seams. Scrap-test your marker first.
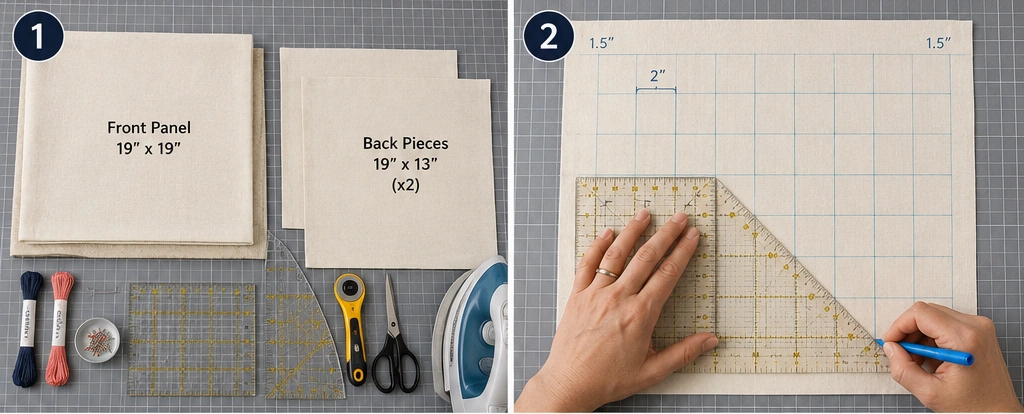
Step 3 — Draw the arrow feathers. In each cell, draw the chevron diagonals and the center shaft line, stacking them up each column. Alternate column direction or color for the traditional yagasuri rhythm.
Step 4 — Stitch the feathers. Thread the sashiko needle and stitch the chevron and shaft lines with an even ⅛–¼ inch running stitch, keeping tension relaxed. Work column by column for a clean rhythm, switching thread colors as needed.
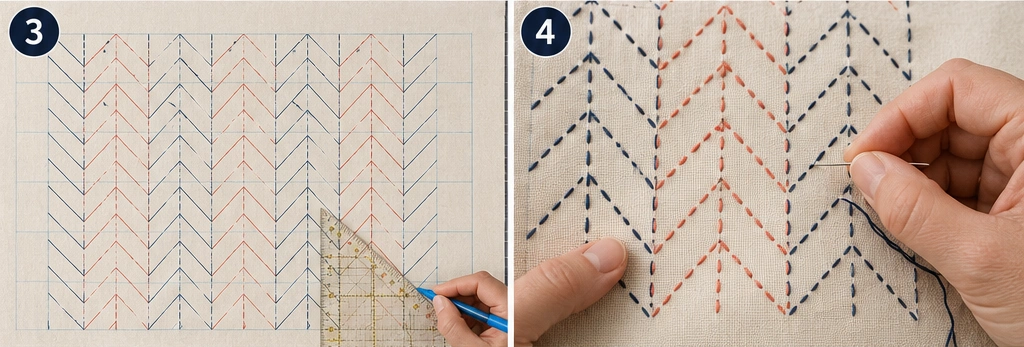
Step 5 — Press and remove marks. Press the stitched front from the back and remove any remaining marking lines per your marker’s instructions.
Step 6 — Hem the back pieces. On one 19-inch edge of each back piece, fold over ½ inch twice and stitch a clean hem. These hemmed edges form the envelope opening.
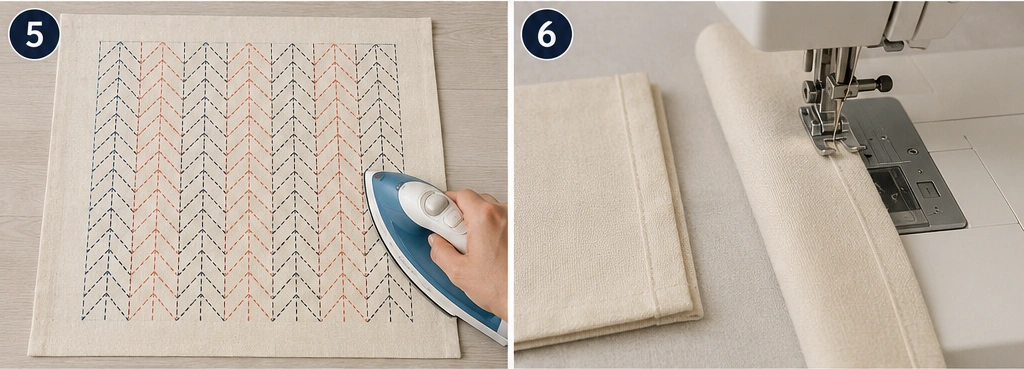
Step 7 — Assemble the cover. Lay the stitched front right side up. Place the two back pieces right side down on top, with hemmed edges overlapping in the center and raw edges matching the front. Pin all around.
Step 8 — Sew and turn. Sew around all four sides with a ½-inch seam allowance, clip the corners, turn right side out through the opening, and press the edges crisply.
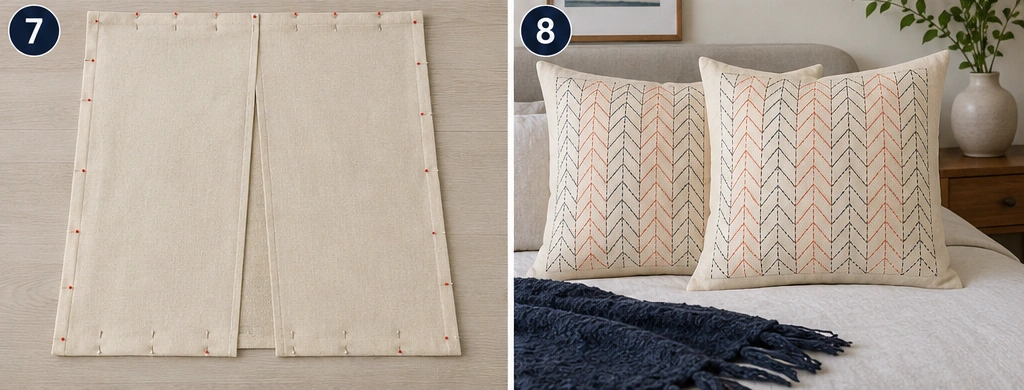
Step 9 — Insert the form. Slip the pillow form through the back opening, and wash the cover gently before first use so the stitches settle.
Assembly at a Glance
- Cut front 19 × 19 inches; two back pieces 19 × 13 inches.
- Mark a 2 × 2 inch grid with a 1½-inch edge margin.
- Draw stacked arrow-feather chevrons with shaft lines.
- Stitch the feathers with even running stitches, column by column.
- Press and remove marks.
- Double-hem one 19-inch edge of each back piece.
- Layer front (up) and back pieces (down, overlapping); pin.
- Sew all four sides with ½-inch seams; clip corners and turn.
- Press, insert the pillow form, and wash gently.
Beginner Tips for Success
- Use a 45° triangle or stencil so every chevron angle matches — uneven angles are the only thing that makes yabane look off.
- Keep the stitching margin clear of the seam allowance so no feathers are lost in construction.
- Don’t pull the thread tight, or the front will pucker against the form.
- Alternate column color or direction for the most authentic arrow-feather rhythm.
- Make two at once — the second cover goes much faster than the first.
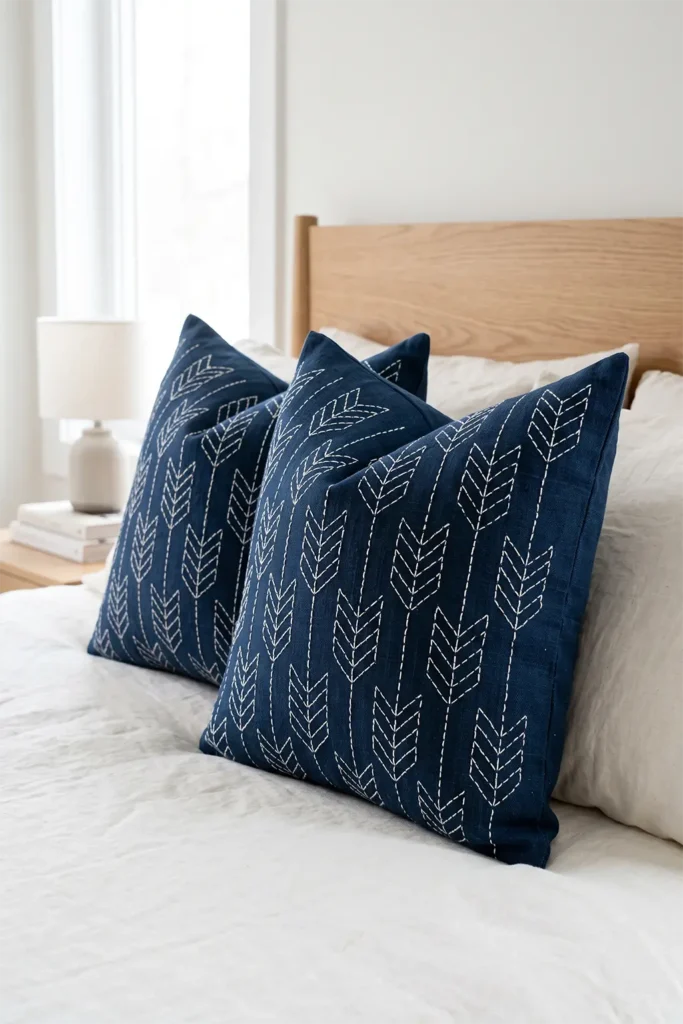
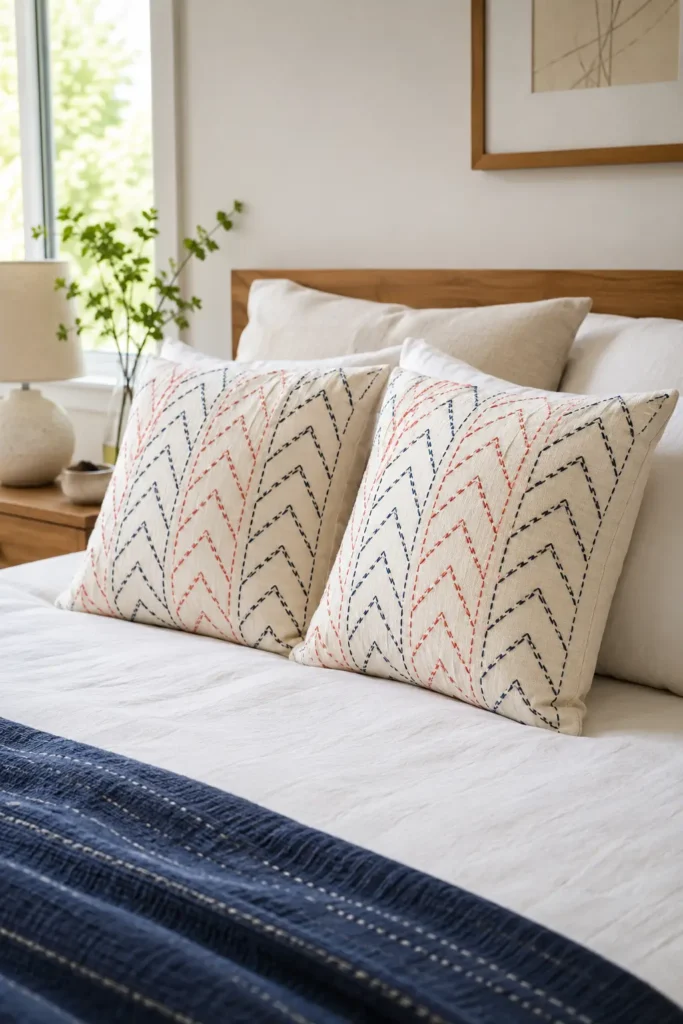
Styling It
Set a pair of yabane covers against the bed pillows so the arrow feathers point upward, keeping the rest of the bedding simple so the bold chevrons lead. Echo a feather color in a throw or a single lumbar pillow (coral, mustard, turquoise) to tie the palette together. The graphic, directional look pairs especially well with modern, uncluttered rooms, and the same covers bring energy to a reading chair or sofa.
Final Thoughts
A pair of yabane arrow-feather sashiko pillow covers is the boldest, most uplifting accent in this collection. The stacked chevrons bring crisp, modern graphic style to a bed or sofa, while the arrow’s meaning — moving forward, never turning back, good fortune ahead — turns a simple pillow into an encouraging, giftable keepsake. Quick to stitch and striking to look at, they’re proof that sashiko can carry real momentum.
Other Design Inspirations – Digitally Modified

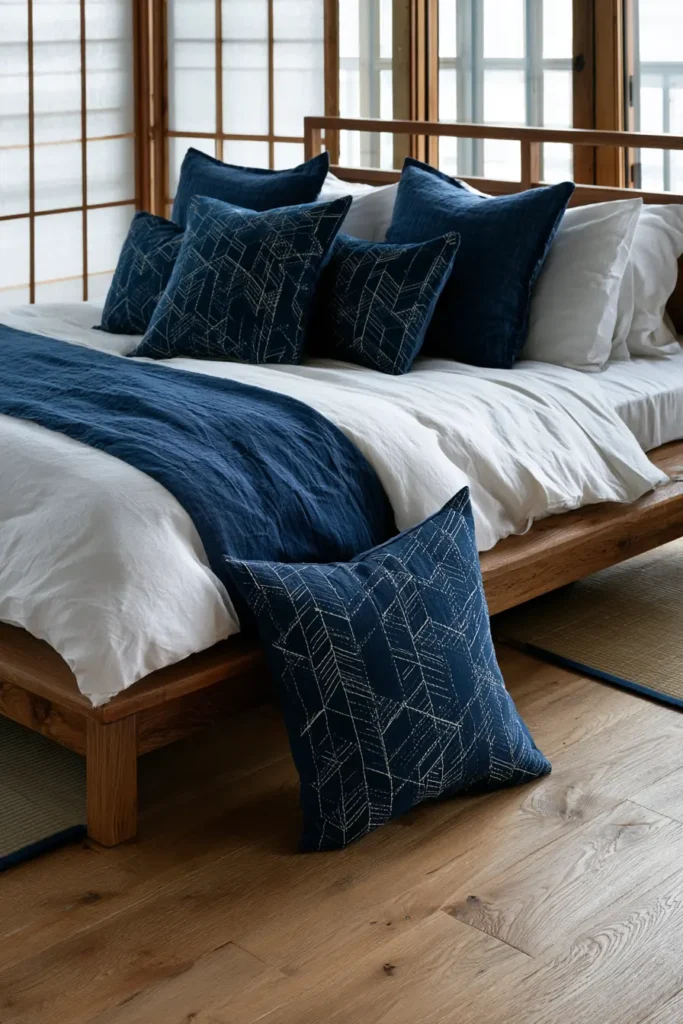
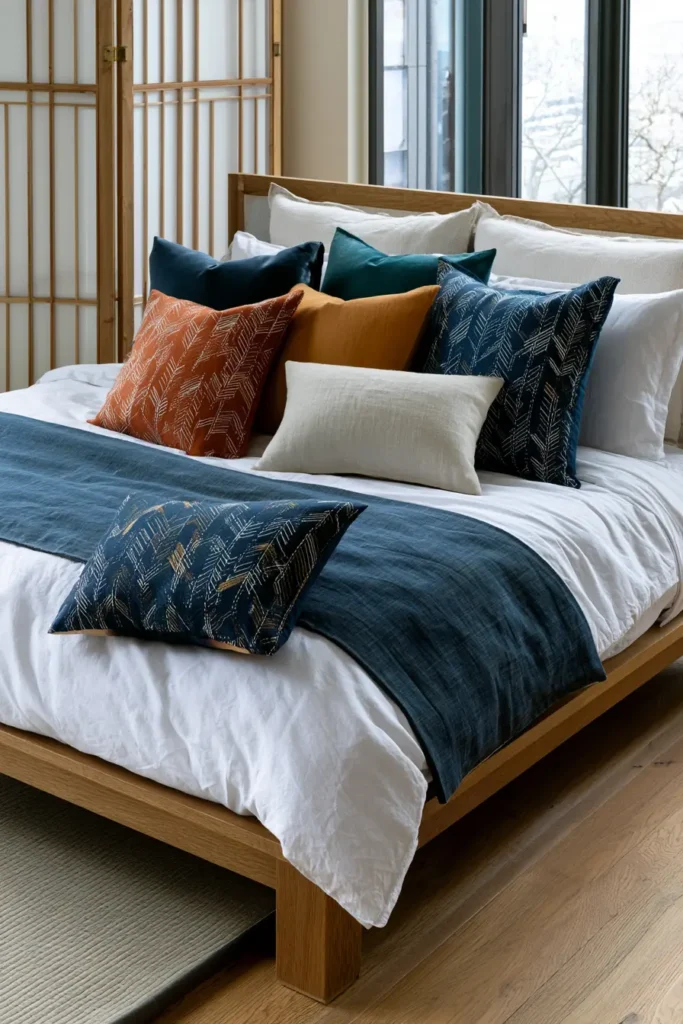

11. Kagome Basket Weave Sashiko Quilts for Textured Comfort
A kagome sashiko quilt wraps a bed or sofa in the warm, woven look of handcraft. Kagome means “basket eyes” — the pattern of openings you see in woven bamboo — and the design is a triangular lattice of interlacing lines that read like the over-under structure of a basket. Worked as sashiko, it’s a flowing geometric motif: lines running in three directions across the fabric, crossing to form a repeating web of triangles and hexagons. The effect is genuinely tactile, all texture and rhythm, which makes it perfect for a cozy quilt you want to touch as much as look at.
The pattern carries a quietly protective meaning, too. The woven basket-eye openings, and the six-pointed stars they form where lines cross, were long believed to ward off evil and offer protection — the tight weave thought to trap or repel bad spirits. So a kagome quilt isn’t just texturally comforting; it’s a pattern that has always been about keeping what matters safe and whole.
Why I Made It
I made this one because it speaks to where I come from. My family’s roots run deep in woven handicraft — I grew up around looms and weavers — and kagome is, at heart, a weave translated into stitch. Recreating the over-under logic of a basket with a needle and thread felt like a natural bridge between two traditions I love: the woven cloth of home and the stitched cloth of Japan. There’s a real pleasure in watching a flat fabric take on the look of something woven, just from the rhythm of running stitches.
It’s also the coziest-feeling pattern in the collection. The lattice gives the quilt a dense, touchable texture, and its protective meaning makes it the kind of throw you want to pull over yourself on the sofa — comfort you can feel and comfort in what the pattern stands for. Texture and protection, stitched into one warm layer.
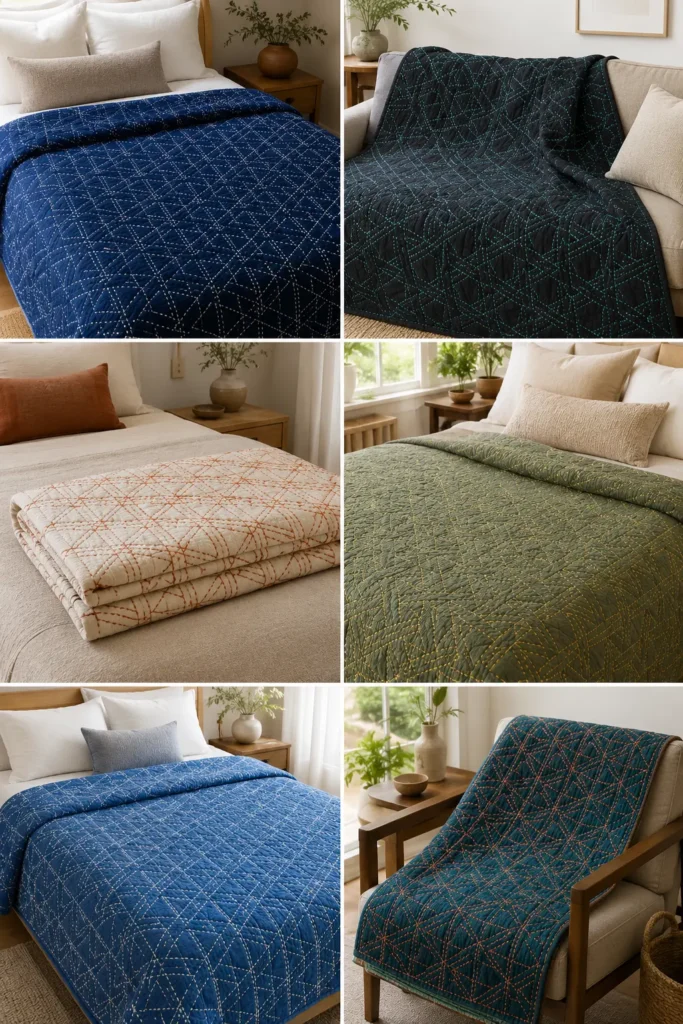
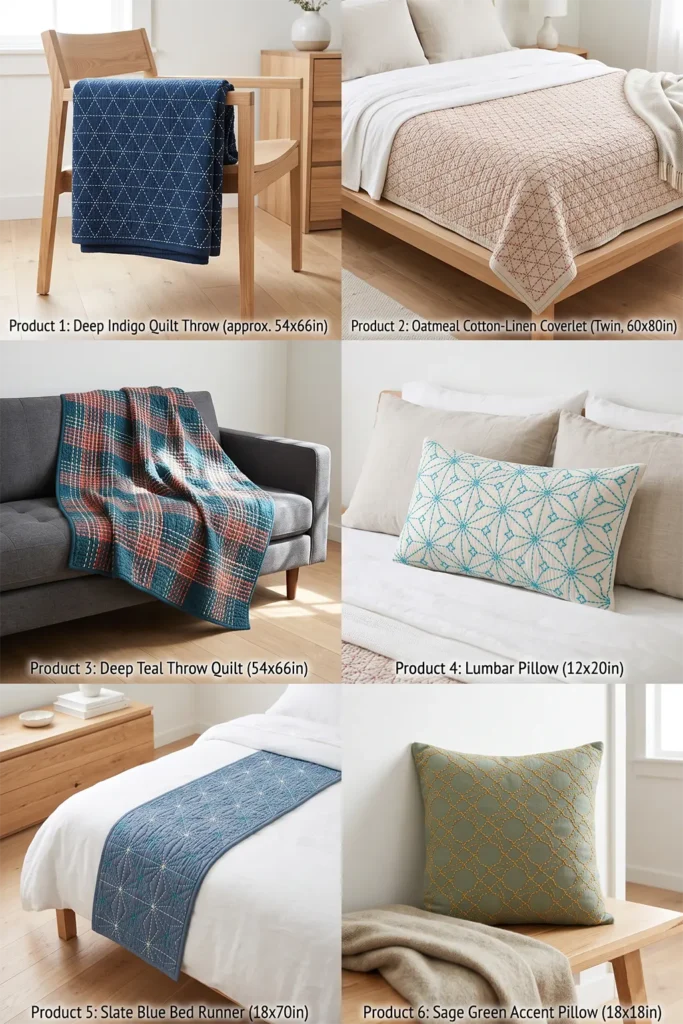
Why This Idea Is Worth Making
This idea is worth making because it delivers a rich, woven texture from one repeating geometric grid, with a meaning of protection that suits a quilt made to comfort. The triangular lattice looks intricate but is built from straight lines in three directions, so it’s approachable once the grid is marked. The dense stitching gives the finished quilt a wonderfully tactile, cozy surface, and the basket-weave look feels both traditional and modern — equally at home folded on a bed or draped over a reading chair. It’s comfort you can see, touch, and feel good about.
Finished Size
- Approximate finished quilt: 54 × 66 inches — a cozy throw for bed or sofa
- Twin coverlet: scale up to about 60 × 80 inches
- Queen coverlet: scale up to about 84 × 90 inches
- Best used: draped over a sofa, folded at the foot of a bed, or as a snuggly reading throw
- Skill level: confident beginner with patience for accurate marking
- Core techniques: whole-cloth quilting, kagome lattice sashiko running stitch, basting, binding
Materials Needed
For one 54 × 66-inch quilt:
- Quilt top: 2 yards of solid cotton, linen-cotton, or chambray
- Backing: 3½ yards
- Lightweight cotton batting or flannel: at least 60 × 72 inches (flannel adds extra cozy texture)
- Sashiko thread or pearl cotton in one or two contrast colors
- Sashiko needle (or long embroidery needle)
- Binding fabric: ½ yard
- Marking tools: washable marker, chalk pencil, or Hera marker — plus a 60° triangle ruler, isometric grid, or a kagome stencil
- Quilting ruler, rotary cutter, cutting mat, basting pins, and iron
Beginner tip: Like all triangular-lattice patterns, kagome rewards an accurate grid. A 60° triangle ruler, iso-grid transferred to fabric, or a stencil makes the three directions line up cleanly.
Choosing Your Colors
Pick a solid top and one or two contrasting threads so the woven lattice stands out:
- Traditional: deep indigo top, crisp white thread
- Charcoal top with turquoise thread
- Natural oatmeal topped with terracotta thread
- Sage green top with golden-yellow thread
- Cobalt blue top with ivory thread
- Deep teal top with coral thread
For an extra-woven effect, stitch two of the three lattice directions in one color and the third in another — it emphasizes the over-under basket look.
The Pattern: A Woven Triangular Lattice
Kagome is built from lines running in three directions, crossing into the basket-eye lattice:
- Mark parallel lines in three directions at 60° to each other (one set roughly horizontal, two diagonal), spaced about 1½ inches apart
- Where the three directions overlap, they form the triangles, hexagons, and six-pointed stars of the kagome weave
- Stitch along all the lines with an even running stitch to build the woven texture
- Keep the spacing consistent so the lattice reads as a regular weave
A stencil or 60° ruler handles the angles; by hand, mark one direction fully, then the next, then the third.
Cutting Measurements
- Quilt top panel: 55 × 67 inches
- Backing panel: 60 × 72 inches
- Batting or flannel: 60 × 72 inches
- Binding: seven strips, 2½ inches × width of fabric
Step-by-Step Guide
Step 1 — Choose your marking method and press the top. Decide between a stencil or hand-marking with a 60° ruler, then cut the top to 55 × 67 inches and press it flat — wrinkles distort the lattice angles.
Step 2 — Mark the first direction. Using your ruler or iso-grid, mark parallel lines 1½ inches apart in the first direction across the whole top. Keep marks light and removable.
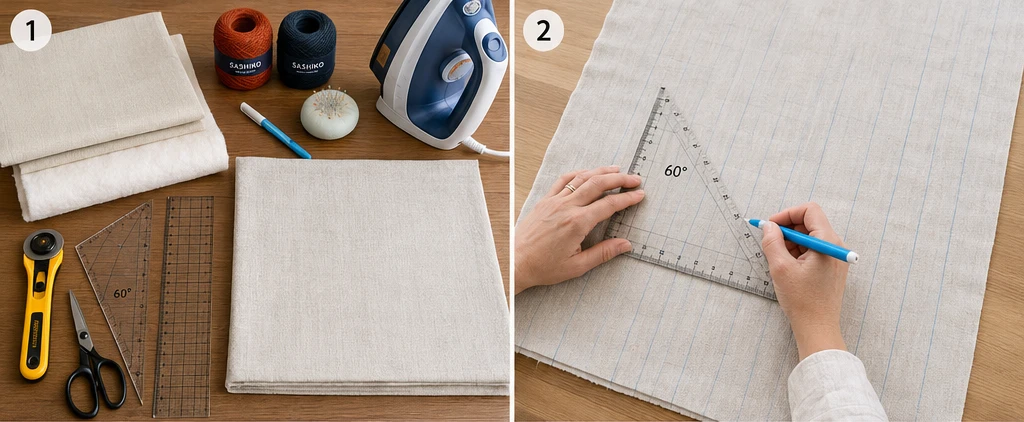
Step 3 — Mark the second and third directions. Add two more sets of parallel lines at 60° to the first, so the three directions cross into the kagome triangular lattice.
Step 4 — Layer the quilt sandwich. Lay the backing wrong side up, center the batting, then the marked top right side up. Smooth from the center outward.
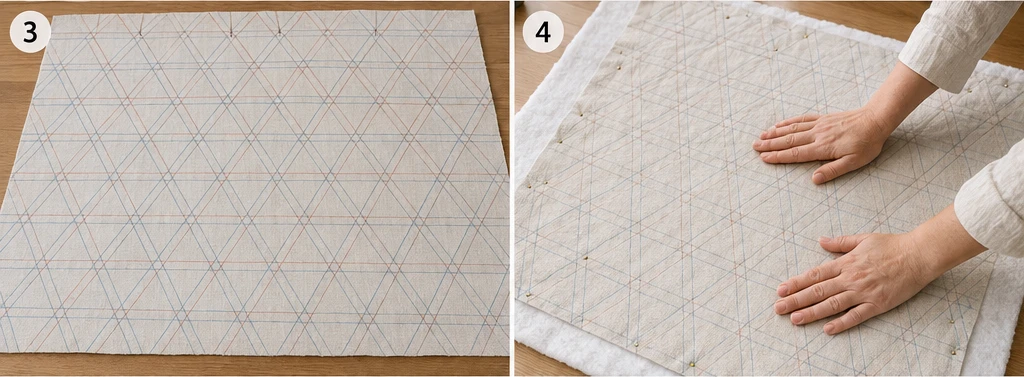
Step 5 — Baste. Pin- or thread-baste the layers securely; thread basting is gentler to work around for a mostly hand-stitched top.
Step 6 — Stitch the lattice. Thread the sashiko needle and stitch along the lattice lines with an even ⅛–¼ inch running stitch, keeping tension relaxed so the quilt stays flat. Stitch one direction fully, then the next, then the third.
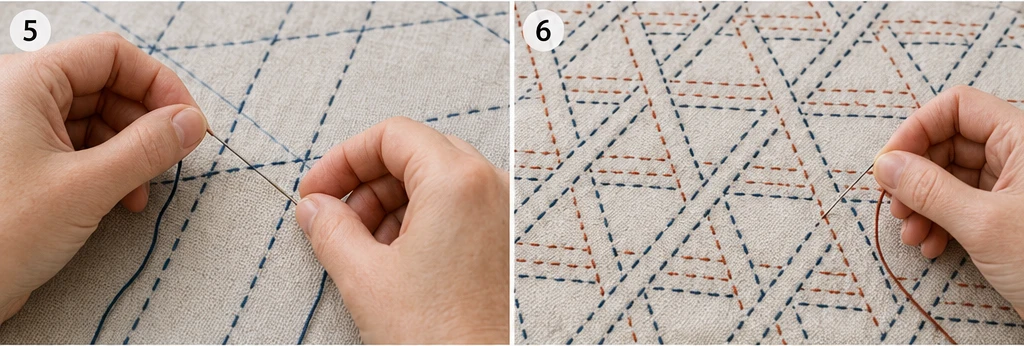
Step 7 — Work the center outward. Move from the middle of the quilt toward the edges to reduce shifting, completing the full woven lattice.
Step 8 — Secure thread ends. Finish threads with a small knot buried between the layers or a few tiny backstitches; keep the front clean and trim tails close.
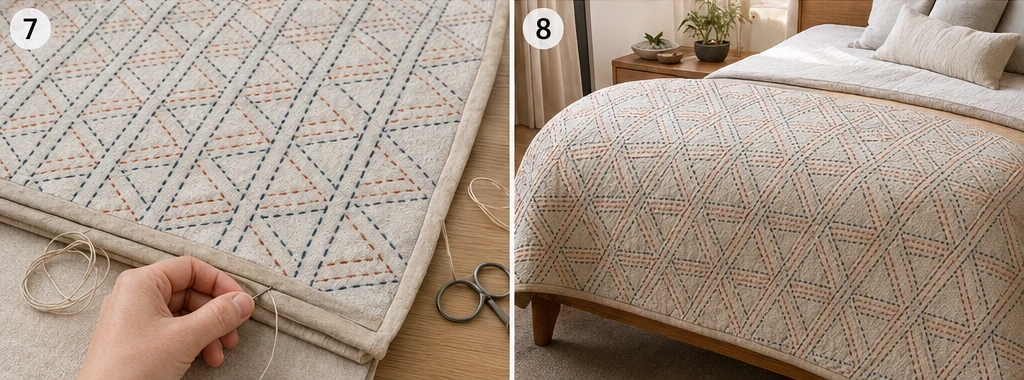
Step 9 — Trim, bind, and wash. Trim to 54 × 66 inches, square the corners, and bind with the 2½-inch strips. Wash gently in cold water, no bleach, and air-dry so the stitches settle and the texture softens.
Assembly at a Glance
- Press the top; cut to 55 × 67 inches.
- Mark parallel lines 1½ inches apart in three directions at 60° — or use a stencil.
- Cut backing and batting to 60 × 72 inches.
- Layer top, batting, and backing; smooth from the center.
- Baste securely.
- Stitch the lattice, one direction at a time, center outward.
- Add a second thread color on one direction for a woven effect, if desired.
- Secure all thread ends neatly.
- Trim to 54 × 66 inches, bind, and wash gently.
Beginner Tips for Success
- Get the grid right before stitching — accurate 60° angles are 90% of kagome.
- Use a stencil or 60° ruler; freehand lattice lines rarely stay parallel.
- Keep high contrast between fabric and thread so the weave reads clearly.
- Don’t pull the thread tight; relaxed stitching keeps the quilt flat and soft.
- Stitch one direction fully before the next to keep the lattice even.
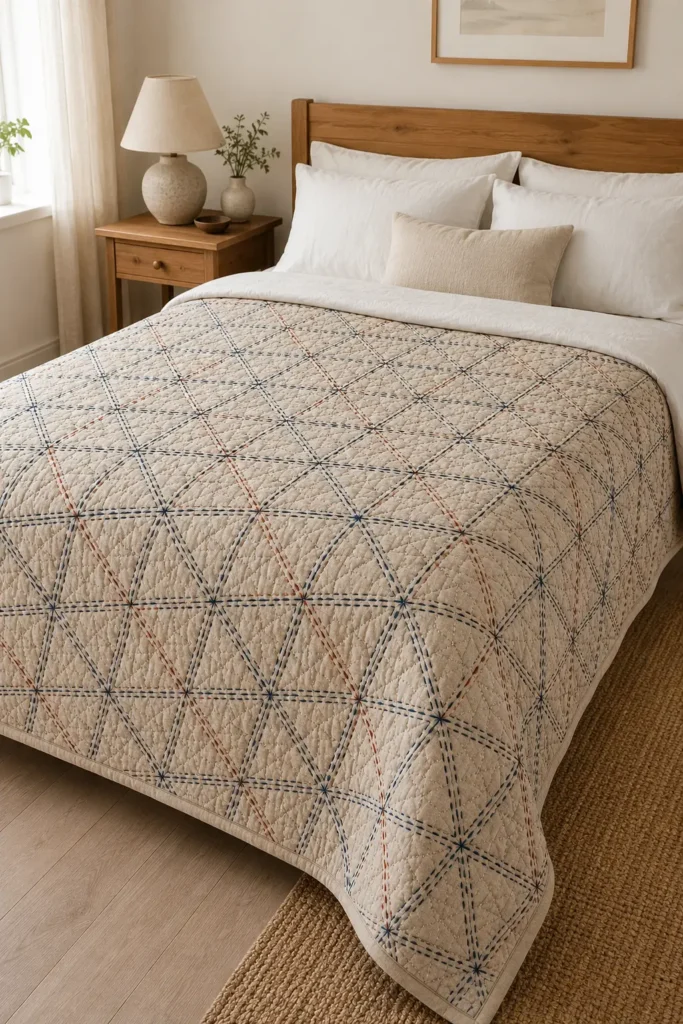
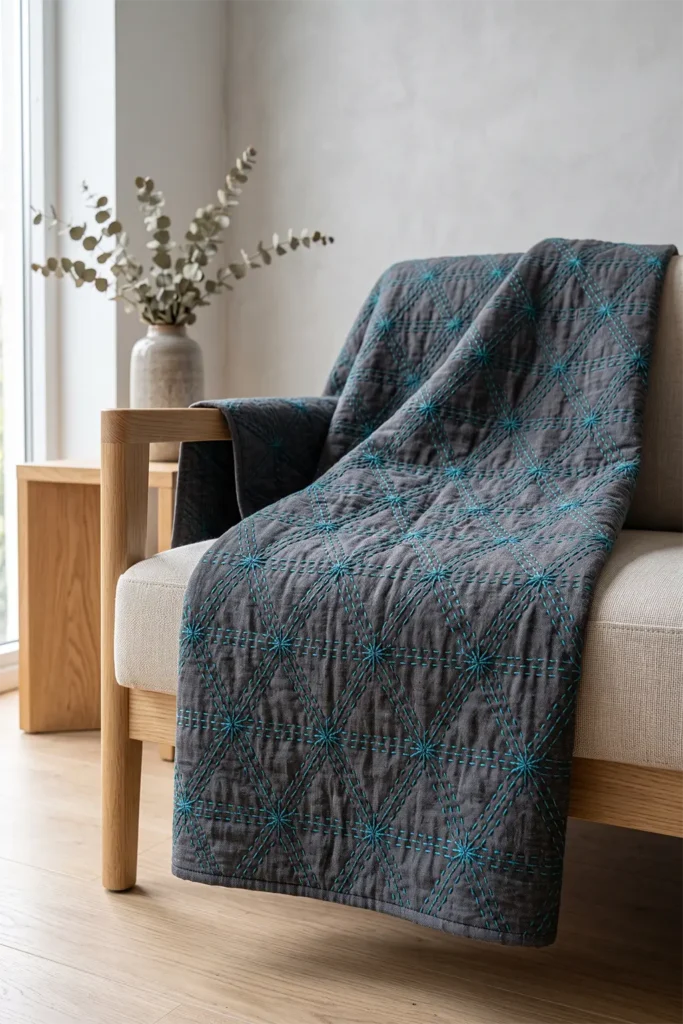
Styling It
Drape the finished kagome quilt over the arm of a sofa or fold it at the foot of a bed so the woven texture invites a closer look. Keep the surrounding palette simple — natural wood, linen pillows, warm neutrals — and pull one accent in your thread color (terracotta, turquoise, gold) into a cushion to tie it together. Because the pattern reads as texture more than picture, it layers beautifully with other soft, tactile materials like chunky knits and wool.
Final Thoughts
A kagome basket-weave sashiko quilt is a comfort you can feel in every sense. The woven triangular lattice gives the quilt a rich, tactile texture that begs to be touched, while the pattern’s old meaning — protection, warding off harm, keeping what matters whole — makes it a throw worth reaching for. Built from simple lines in three directions, it turns flat fabric into something that looks beautifully woven and feels like a layer made to keep you cozy and safe.
Other Design Inspirations – Digitally Modified
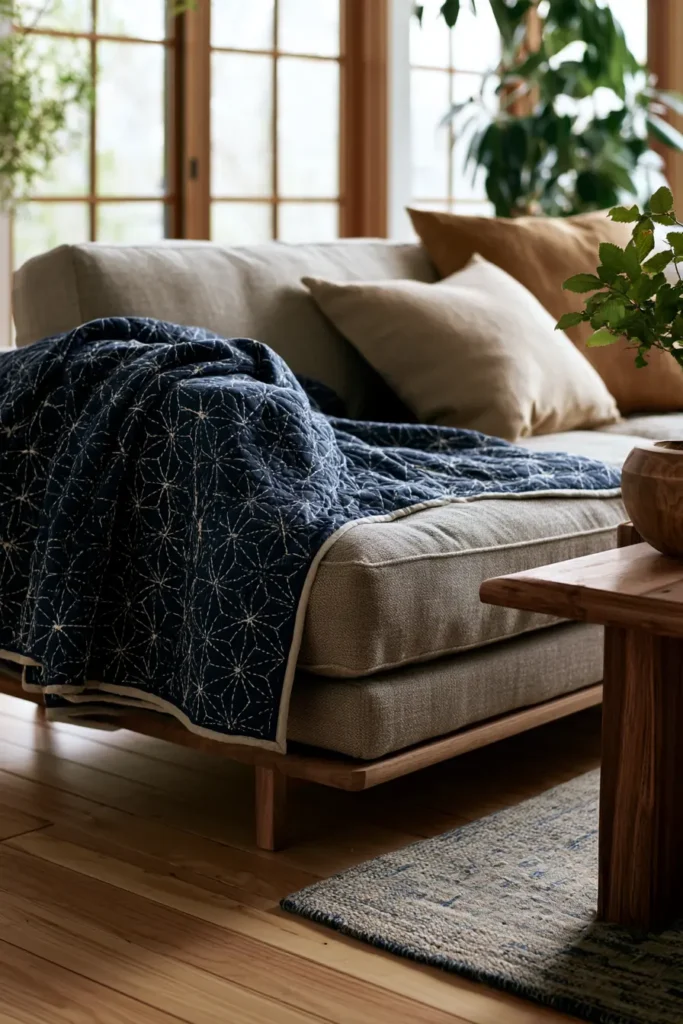
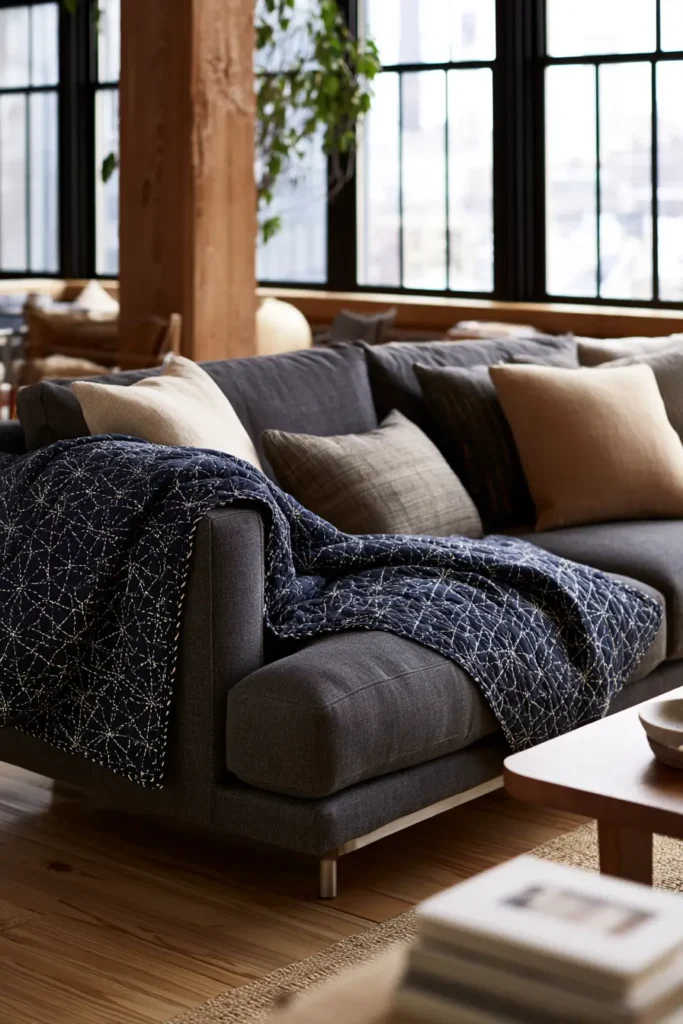
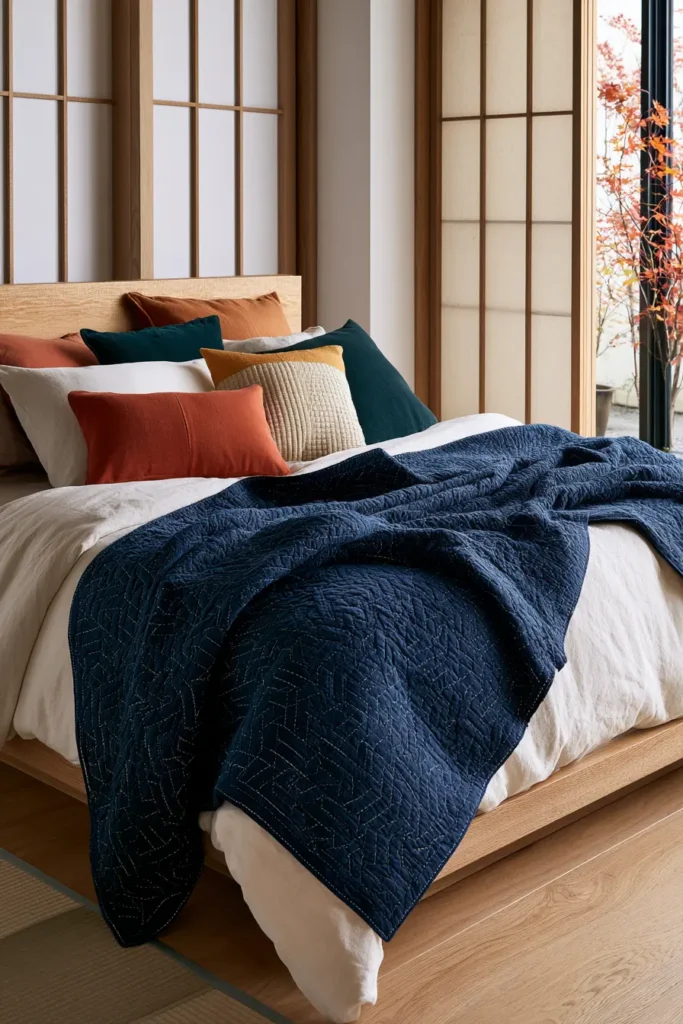
12. Juji Cross Sashiko Bed Covers for Subtle Geometric Detail
A juji sashiko bed cover brings quiet, all-over geometric texture to a bed without a hint of busyness. Jūji means “cross” — and literally “ten,” because the kanji for ten (十) is shaped exactly like a plus sign. The pattern is just that: a calm, even field of small crosses stitched across the fabric, each one a tiny plus mark repeated in a regular grid. It’s one of the most foundational shapes in all of sashiko, and on a bed cover it reads as soft, understated detail — pattern you notice on a second look rather than a first. For anyone who loves geometry but wants restraint, juji is the perfect choice.
There’s a gentle meaning in it, too. The cross shape comes from the character for ten, a number long associated with completeness and wholeness — ten as the full count, nothing missing. A field of these quiet crosses gives a bed cover a sense of calm, ordered completeness, which is part of why such a simple mark has stayed beloved for so long.
Why I Made It
I made this for the times when a room doesn’t need a statement — it needs a whisper. So many beautiful patterns compete for attention; juji does the opposite. It adds the warmth and texture of hand stitching while staying so understated that it works with almost any bedding, any palette, any style. When I want a bed cover that feels considered and handmade but never loud, this is the one I reach for.
I’m also fond of it because it’s the pattern I keep coming back to. The cross is one of the first marks any sashiko stitcher learns, and there’s something grounding about a motif that’s both a beginner’s starting point and an expert’s quiet favorite. Stitching an even field of small crosses is meditative in the truest sense — simple, rhythmic, and calming, mark by mark.
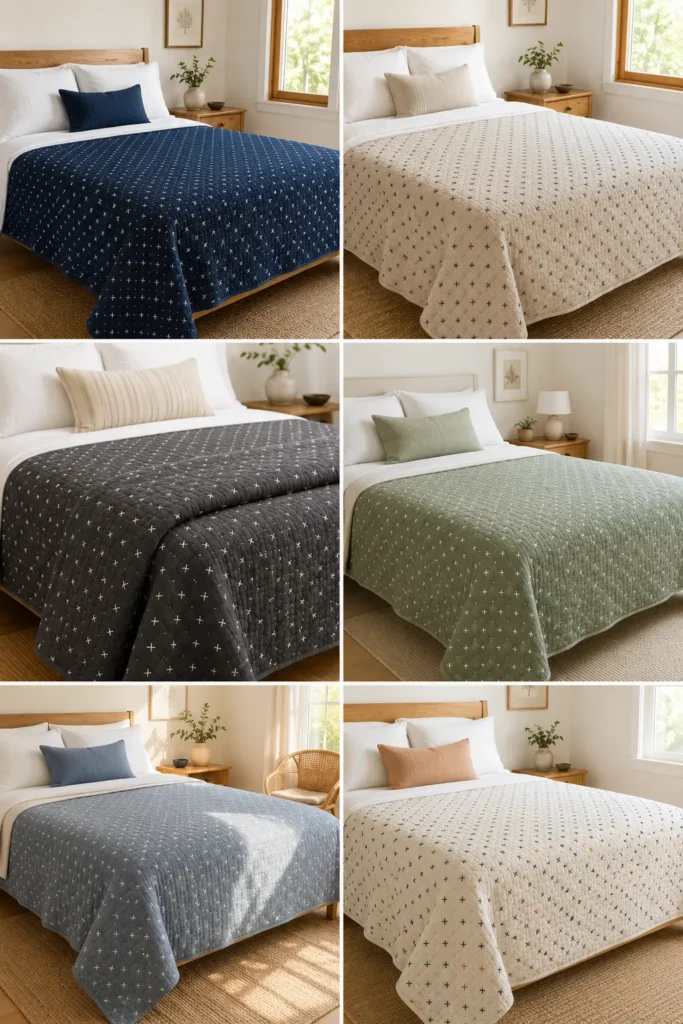
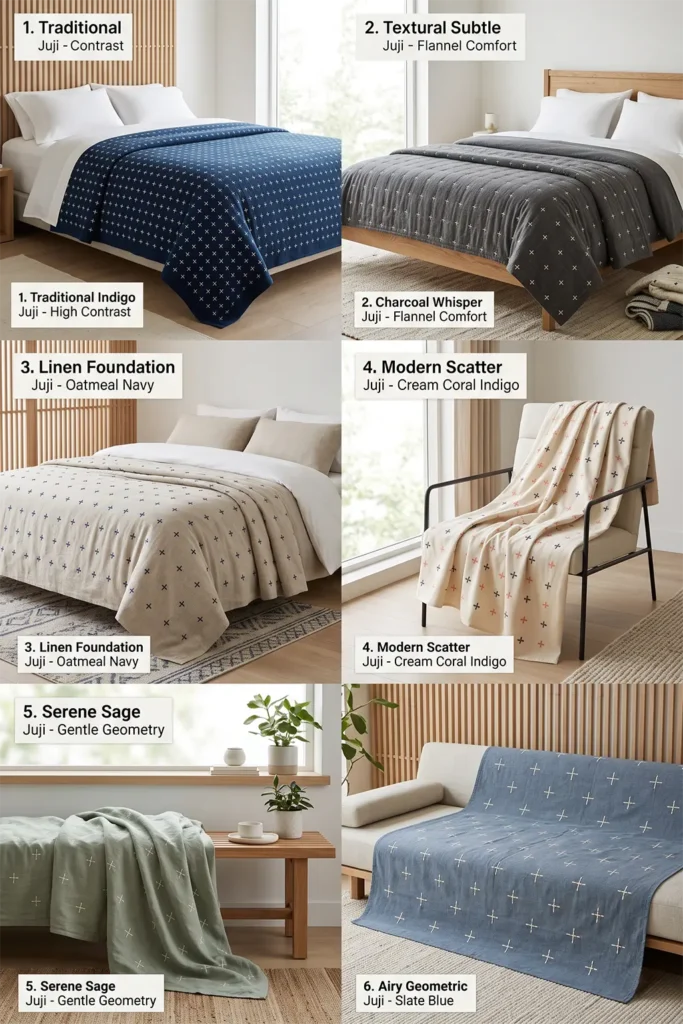
Why This Idea Is Worth Making
This idea is worth making because it gives a bed cover a subtle, sophisticated texture using the simplest sashiko stitch. The cross is beginner-friendly — just a small plus repeated on a grid — yet an all-over field of them looks refined and intentional, never plain. Because the crosses are evenly spaced, they quilt the cover at regular intervals as you stitch, and the understated result pairs effortlessly with any bedroom decor. It’s the most versatile, hardest-to-tire-of pattern in this collection: quiet enough to live with for years.
Finished Size
- Approximate finished bed cover: 60 × 80 inches — covers a twin fully, or sits as a feature coverlet on a larger bed
- Full/Queen: scale up to about 88 × 92 inches
- Best used: as a top-of-bed coverlet, layered over a duvet, or as a calm, textured throw
- Skill level: beginner — the simplest motif in this collection
- Core techniques: small cross sashiko stitch through all layers (quilting as you go), basting, binding
Materials Needed
For one 60 × 80-inch bed cover:
- Top fabric: 2½ yards of solid cotton, linen-cotton, or chambray (piece widths if needed)
- Backing fabric: 5 yards (or wide backing)
- Lightweight cotton batting or flannel: at least 64 × 84 inches
- Sashiko thread or pearl cotton in one or two contrast colors
- Sashiko needle (or long embroidery needle)
- Binding fabric: ¾ yard
- Washable fabric marker, chalk pencil, or Hera marker
- Long quilting ruler, rotary cutter, cutting mat, basting pins, and iron
Beginner tip: an evenly marked grid is the only thing juji needs to look polished — a clear ruler and consistent spacing do all the work.
Choosing Your Colors
Juji’s restraint suits a subtle palette, but the contrast still matters. Pick a solid base and one or two threads:
- Traditional: deep indigo base, crisp white thread
- Natural oatmeal base with soft navy crosses
- Charcoal base with ivory crosses
- Sage green base with warm white crosses
- Slate blue base with cream crosses
- Cream base with coral and indigo crosses (a gentle two-color scatter)
For the most subtle effect, keep the thread close in tone to the base; for a little more definition, raise the contrast. Two soft colors scattered evenly add quiet interest without breaking the calm.
The Pattern: An Even Field of Crosses
Juji is small plus marks repeated on a grid:
- Mark grid points about 1¼ inches apart across the whole top, in even rows
- At each point, stitch a small cross: one short horizontal stitch and one short vertical stitch crossing at the center, each arm about ½ inch
- Keep the crosses aligned and evenly spaced so the field reads as a calm, regular texture
- For an airier look, widen the spacing to 1¾ inches; for a denser texture, tighten to 1 inch
The whole pattern is one small mark, repeated — easy to learn, and soothing to stitch.
Cutting Measurements
- Top panel: 61 × 81 inches (piece widths if your fabric is narrow, pressing the seam open)
- Backing panel: 64 × 84 inches
- Batting or flannel: 64 × 84 inches
- Binding: seven strips, 2½ inches × width of fabric, joined into one strip
Step-by-Step Guide
Step 1 — Cut and press. Cut (and piece, if needed) the top to 61 × 81 inches and press it flat. Cut batting and backing to 64 × 84 inches.
Step 2 — Mark the grid. Mark grid points 1¼ inches apart across the whole top, keeping a clean 1-inch margin at the edges for binding. Scrap-test your marker first.
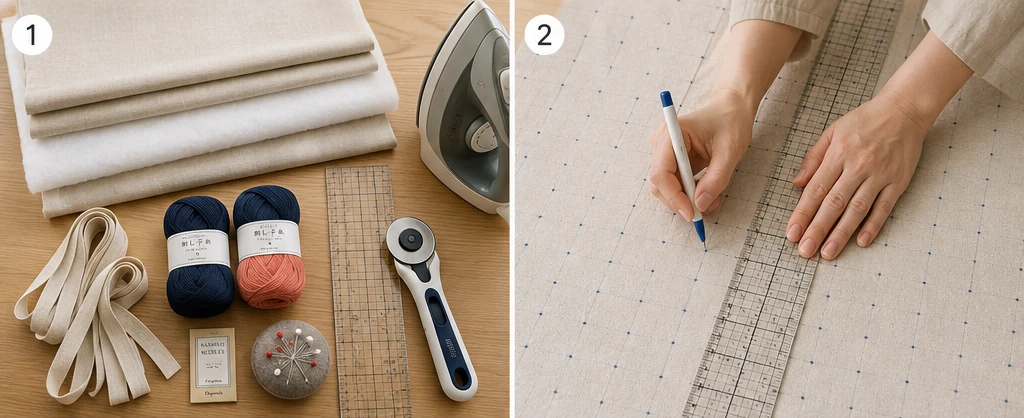
Step 3 — Layer and baste. Lay the backing wrong side up, center the batting, then the marked top right side up. Smooth from the center outward and baste generously — a large cover needs plenty of basting.
Step 4 — Stitch the crosses. Thread the needle and stitch a small ½-inch cross at each grid point, passing through all three layers so the crosses quilt the cover. Keep tension relaxed so the fabric stays flat.
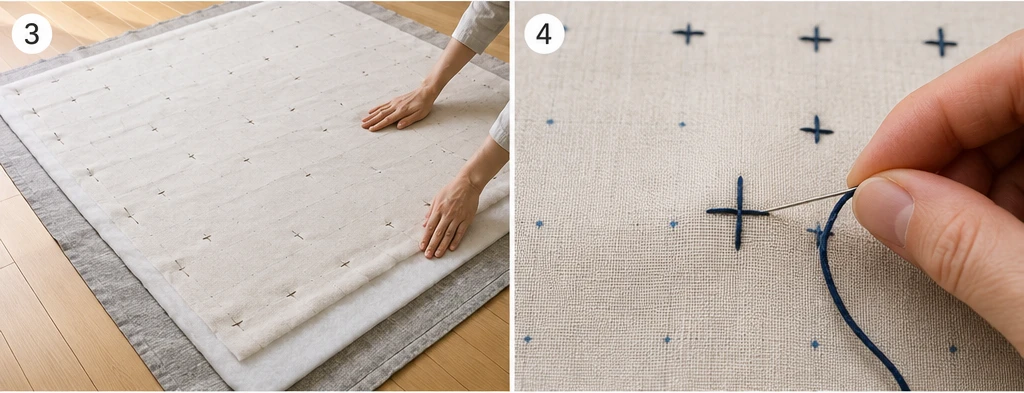
Step 5 — Work in rows, center outward. Stitch the crosses row by row, moving from the middle of the cover toward the edges so nothing shifts, keeping the spacing even throughout.
Step 6 — Add a second color, if using. For a gentle two-tone scatter, stitch alternating crosses (or whole rows) in a second thread color, keeping the overall effect calm.
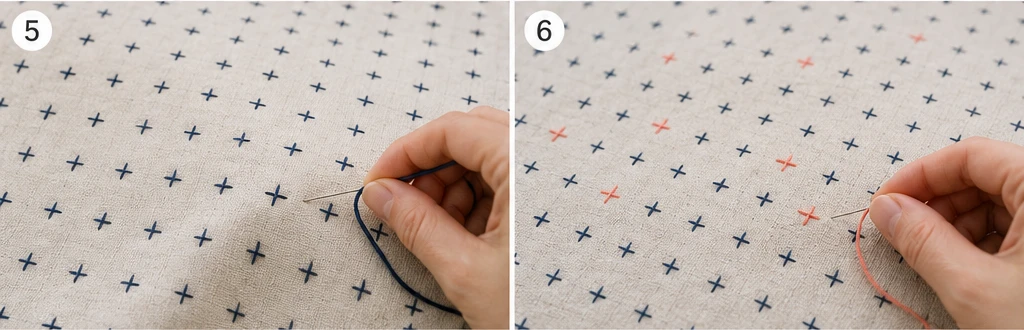
Step 7 — Secure thread ends. Finish threads with a small knot buried between the layers or a few tiny backstitches; keep the front clean and trim tails close.
Step 8 — Trim and square. Trim the cover to 60 × 80 inches, squaring the corners and straightening the edges with a long ruler.
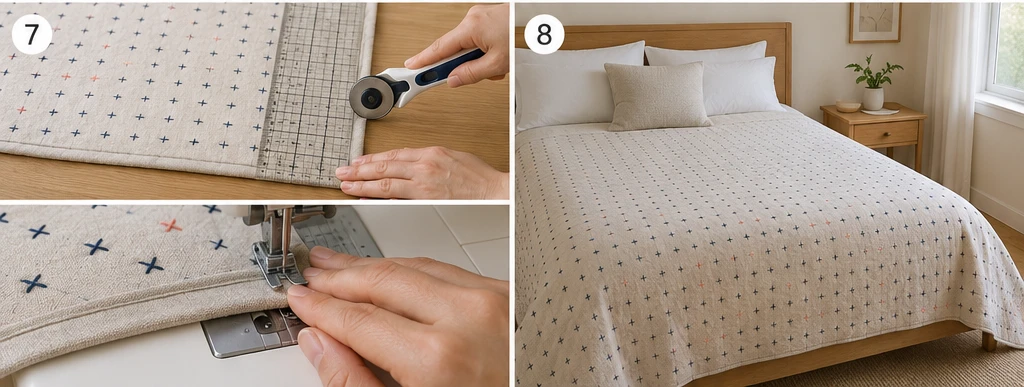
Step 9 — Bind and wash. Join the 2½-inch binding strips, press in half, sew to the front, fold to the back, and finish. Wash gently in cold water, no bleach, and air-dry so the crosses settle and soften.
Assembly at a Glance
- Cut/piece the top to 61 × 81 inches; batting and backing to 64 × 84 inches.
- Mark grid points 1¼ inches apart with a 1-inch edge margin.
- Layer top, batting, and backing; baste generously.
- Stitch a small ½-inch cross at each point through all layers.
- Work row by row, center outward, keeping spacing even.
- Add a second color scatter if desired.
- Secure all thread ends neatly.
- Trim to 60 × 80 inches and square.
- Bind with 2½-inch strips, then wash gently.
Beginner Tips for Success
- Mark the grid evenly — consistent spacing is the whole secret to a polished juji field.
- Keep each cross the same size so the texture stays calm and regular.
- Don’t pull the thread tight, or the cover will pucker between crosses.
- Baste a large cover well to prevent shifting as you stitch.
- Keep the spacing wide enough that the cover stays soft; very dense crosses stiffen a large piece.
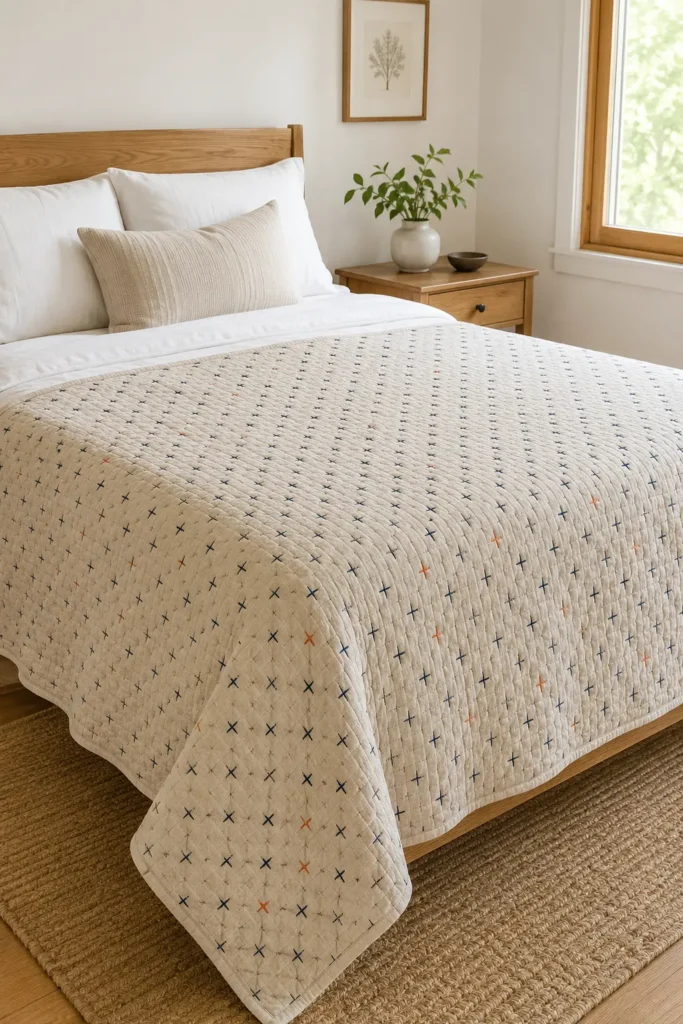
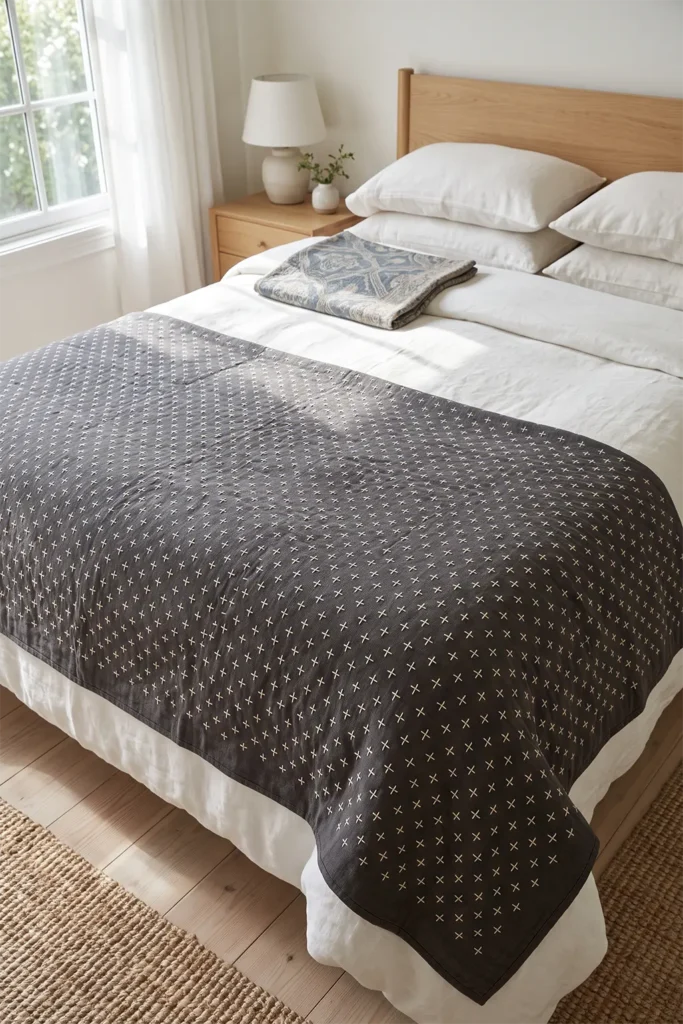
Styling It
Spread the finished cover smoothly over the bed so the even crosses give a calm, textured surface, and keep the surrounding bedding simple — solid duvet, linen pillows, natural wood. Because juji is so understated, it layers beautifully under bolder accents: add a patterned throw or a colorful lumbar pillow on top, and the cross field becomes the quiet foundation that holds the look together.
Final Thoughts
A juji cross sashiko bed cover is proof that the simplest mark can be the most versatile. The even field of small crosses gives a bed subtle, sophisticated texture and a quiet sense of completeness, while staying understated enough to live with for years and pair with anything. Built from the most foundational stitch in sashiko, it’s the calm, considered choice — handmade detail that whispers rather than shouts.
Other Design Inspirations – Digitally Modified
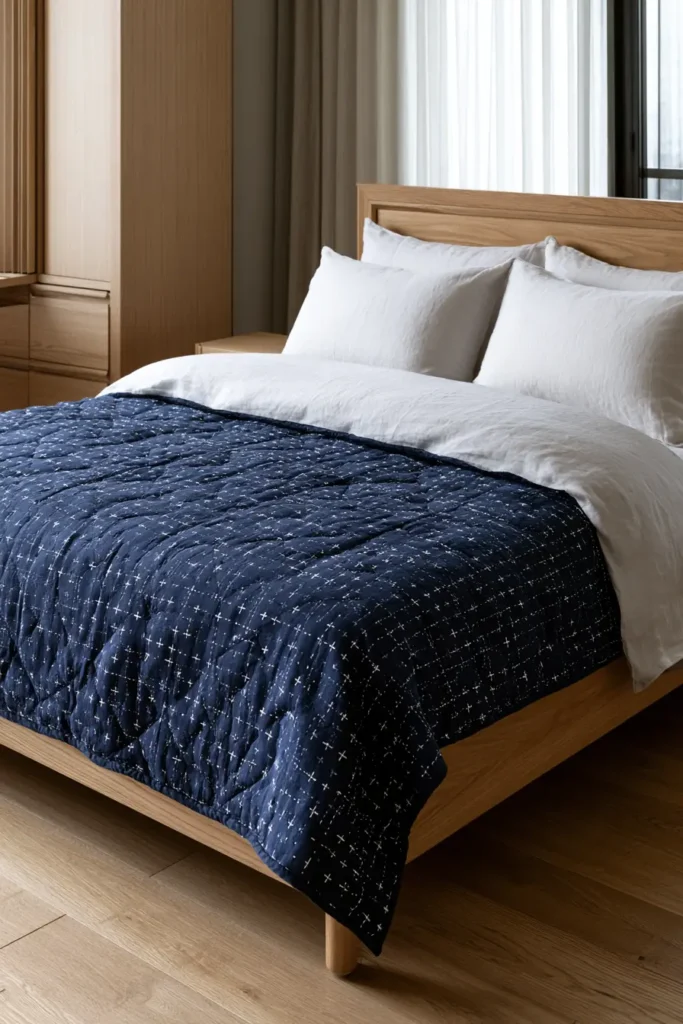
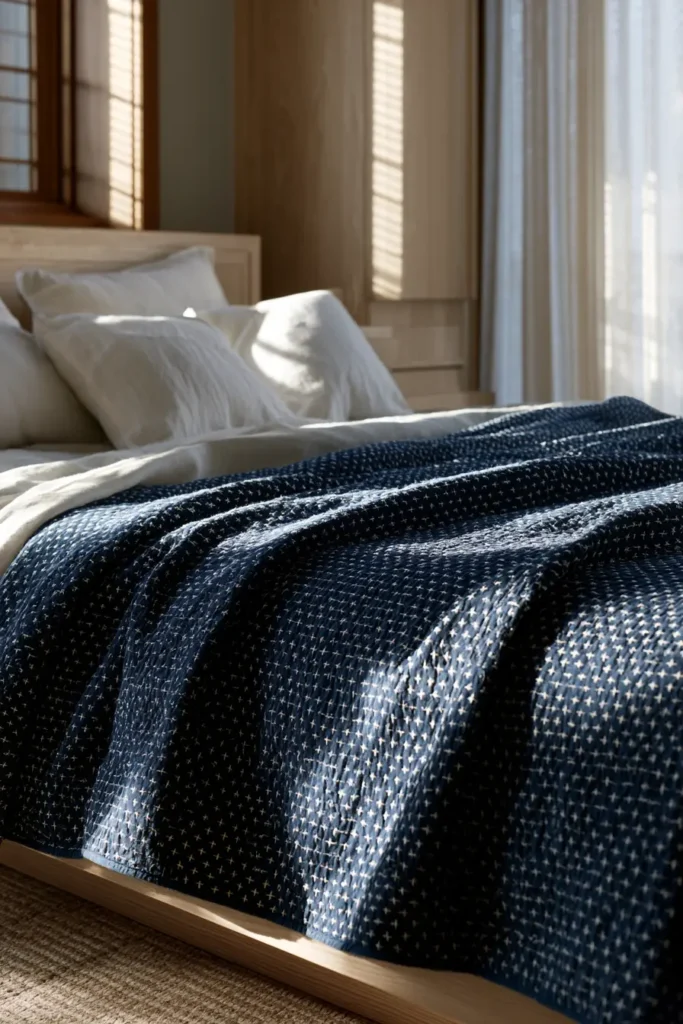
13. Kikkō Tortoise Shell Sashiko Bed Sheets for Stylish Bedrooms
A kikkō sashiko bed-sheet set crowns the bed with one of Japan’s most auspicious patterns. Kikkō means “tortoise shell,” and the design is a repeating hexagonal lattice — a clean honeycomb of six-sided cells that mirrors the segments of a tortoise’s shell. Worked as a stitched border on a sheet set, it has a calm, geometric elegance that reads as quietly upscale, the kind of detail that makes a plain bed look styled. The tessellating hexagons give a sense of order and refinement without any fuss, which suits a stylish bedroom beautifully.
The meaning is as lovely as the look. The tortoise is a celebrated symbol of longevity, good fortune, and protection in Japan — folklore says it lives ten thousand years, and it’s often paired with the long-lived crane as a double emblem of long life and luck. So kikkō has long appeared on celebratory and formal textiles, carrying a wish for a long, fortunate, well-protected life. Stitched onto the bedding you use every night, that’s a quietly generous thing to fold over yourself.
A practical note on scope, as with any sashiko sheets: you don’t stitch an entire bed sheet — it would take forever and stiffen the fabric. Instead, you stitch the fold-down top border of a flat sheet and matching pillowcase cuffs, the parts that show when the bed is made, so the set stays breathable and usable.
Why I Made It
I made this because I wanted a sheet set that wishes something good on the person sleeping in it. A tortoise-shell border isn’t only handsome — it carries a centuries-old wish for long life and good fortune, which turns ordinary bedding into something warmer than decoration. It’s the set I’d make for a housewarming or a wedding, where the meaning matters as much as the look.
I’m also drawn to the honeycomb itself. There’s something deeply satisfying about a tessellating hexagon — nature uses it for strength and efficiency, and on a sheet border it gives a clean, orderly elegance that feels both timeless and modern. Stitching hexagon after hexagon is calming in the way the best sashiko always is, and the auspicious meaning makes every cell feel purposeful.
Why This Idea Is Worth Making
This idea is worth making because it gives a sheet set a refined, geometric style and a genuinely meaningful blessing, for the price of a plain set plus thread. The hexagon lattice looks sophisticated but is built from simple straight lines, so it’s approachable with a stencil or grid, and because you only stitch the visible borders, it’s an achievable project rather than a months-long one. The longevity-and-good-fortune meaning makes it a standout handmade gift, and the clean honeycomb suits almost any stylish bedroom.
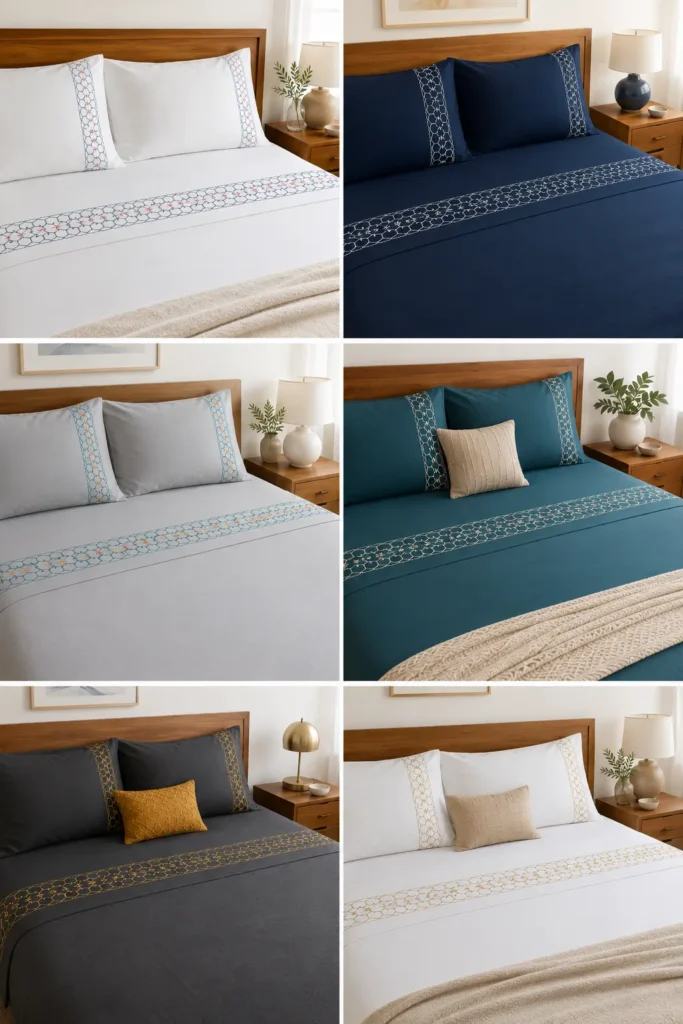
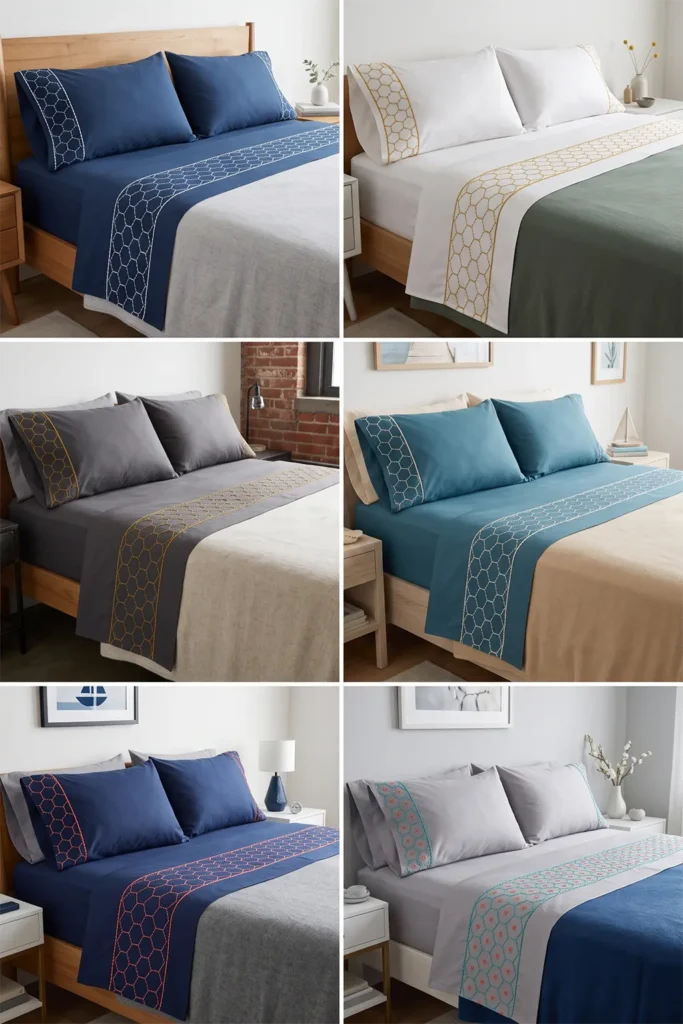
Finished Project
- What you make: a flat sheet with a stitched hexagon border + two stitched pillowcase cuffs
- Stitched band depth: about 5 inches on the flat sheet, 3½ inches on each pillowcase cuff
- Works for: twin, full, queen, or king sets (you stitch only the visible borders)
- Skill level: beginner — straight-sided hexagons, easiest with a stencil
- Core techniques: hexagon lattice marking, sashiko running stitch, securing ends
Materials Needed
- A cotton bed-sheet set: a smooth percale or sateen flat sheet plus two pillowcases (a tight, even weave holds stitches best)
- Sashiko thread or pearl cotton in one or two contrast colors
- Sashiko needle (or long embroidery needle)
- Washable fabric marker, chalk pencil, or Hera marker, plus a hexagon stencil or 60° triangle ruler / isometric grid
- Quilting ruler, iron, ironing board, small scissors
Beginner tip: a hexagon stencil makes a perfect tessellating honeycomb in minutes. Hand-marking works with a 60° ruler or iso-grid, but the stencil is the easy route to clean cells.
Choosing Your Colors
Kikkō is celebratory, so it carries rich and even metallic-looking colors well. Pick a smooth base sheet and one or two threads:
- Traditional: indigo sheet, crisp white thread
- White or natural sheet with gold thread (a celebratory, auspicious touch)
- Charcoal sheet with mustard-gold thread
- Teal sheet with cream thread
- Navy sheet with coral thread
- Soft grey sheet with turquoise hexagons and a coral flower center
For extra richness, add a tiny flower or dot inside each hexagon in a second color — a nod to the classic kikkō-hanabishi (tortoise-shell-with-flower) variation. Match the pillowcase pattern to the flat sheet for a coordinated set.
The Pattern: A Tortoise-Shell Honeycomb
Kikkō is a tessellating hexagon lattice:
- Use a hexagon about 2 inches across, point to point
- Tessellate the hexagons so they share edges into a continuous honeycomb across each band
- Stitch around each hexagon edge with an even running stitch — shared edges are stitched once
- For a richer look, add a small flower, diamond, or single cross inside each hexagon in a second thread color
A stencil tessellates the whole band at once; by hand, build the hexagons from an iso-grid, then trace.
Marking Measurements
- Flat sheet band: measure in from the top hem and mark a band the full width of the sheet × 5 inches deep
- Pillowcase cuffs: mark a band the full width of the cuff × 3½ inches deep, just above the opening
- Fill each band with the 2-inch hexagon honeycomb, keeping lines light and removable
Step-by-Step Guide
Step 1 — Prep the set. Wash and press the flat sheet and pillowcases. Lay the flat sheet flat and identify the top hem — the wide edge that folds down over a blanket.
Step 2 — Mark the bands. Mark a 5-inch-deep band along the full top width of the flat sheet, and a 3½-inch band above the opening on each pillowcase. Scrap-test your marker first.
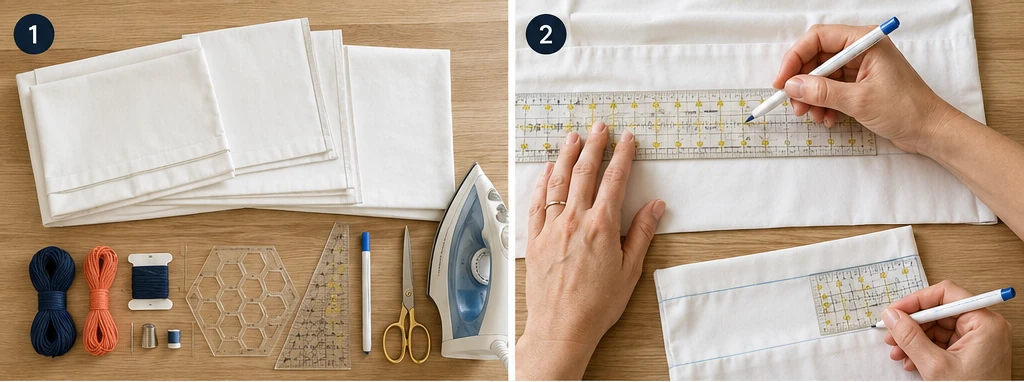
Step 3 — Draw the honeycomb. Using a hexagon stencil or iso-grid, fill each band with tessellating 2-inch hexagons so they form a continuous tortoise-shell lattice.
Step 4 — Stitch the hexagons. Thread the sashiko needle and stitch around the hexagon edges with an even ⅛–¼ inch running stitch, keeping tension relaxed so the fabric stays flat. Plan a path that stitches each shared edge only once.
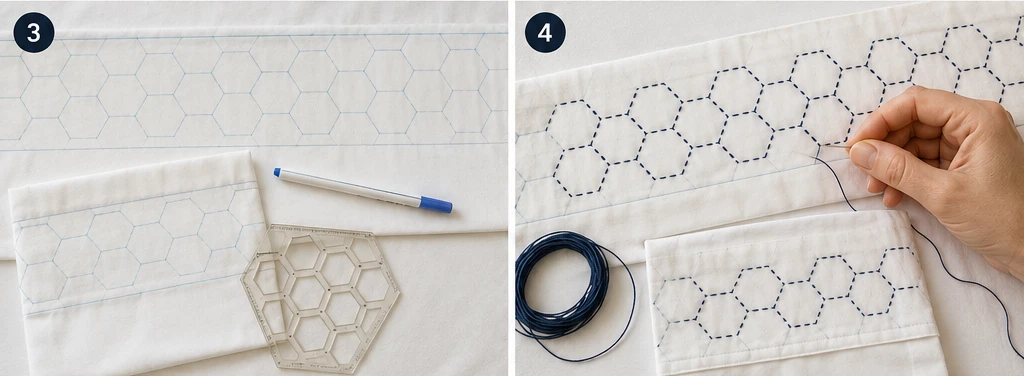
Step 5 — Add the centers, if using. For the hanabishi look, stitch a small flower, diamond, or cross inside each hexagon in a second color.
Step 6 — Secure thread ends. Finish each thread with a small knot or a few tiny backstitches on the wrong side of the band, so the sleeping surface stays smooth against skin. Trim tails close.
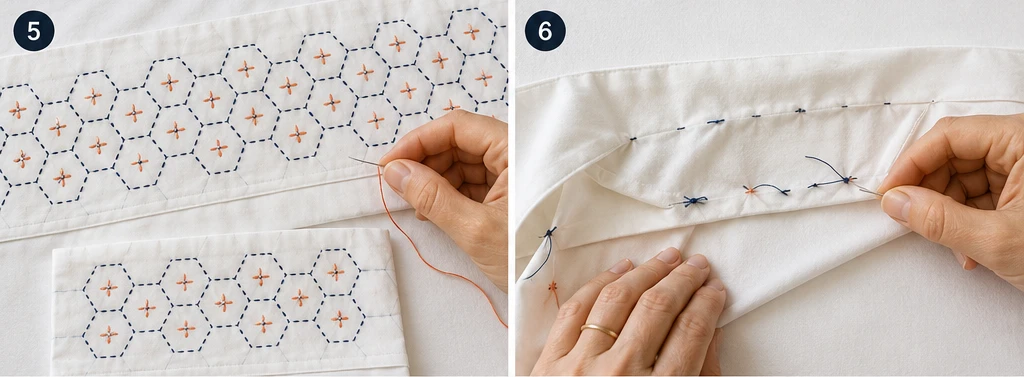
Step 7 — Press and remove marks. Gently press the stitched bands from the back and remove any remaining marking lines per your marker’s instructions.
Step 8 — Final wash. Gently wash the finished set in cold water with mild detergent, no bleach. Air-dry or tumble low; the first wash softens the bands and settles the stitches.
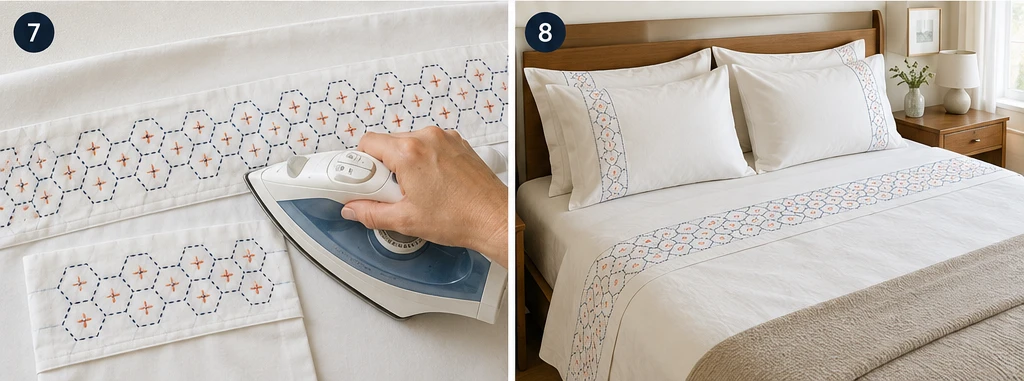
Assembly at a Glance
- Prewash and press the sheet set.
- Mark a 5-inch band on the flat sheet, 3½-inch bands on the cuffs.
- Fill each band with a tessellating 2-inch hexagon honeycomb.
- Stitch around the hexagon edges (each shared edge once).
- Add a flower or dot inside each hexagon in a second color, if desired.
- Secure all ends on the wrong side.
- Press and remove the marks.
- Wash gently and let the stitching soften in.
Beginner Tips for Success
- Use a hexagon stencil — even, tessellating cells are what make kikkō look crisp.
- Plan your stitching path so shared hexagon edges aren’t stitched twice.
- Keep knots and tails on the wrong side for comfort against skin.
- Don’t pull the thread tight, or the band will pucker.
- Add the inside motifs only after the honeycomb is done, so the lattice stays your guide.
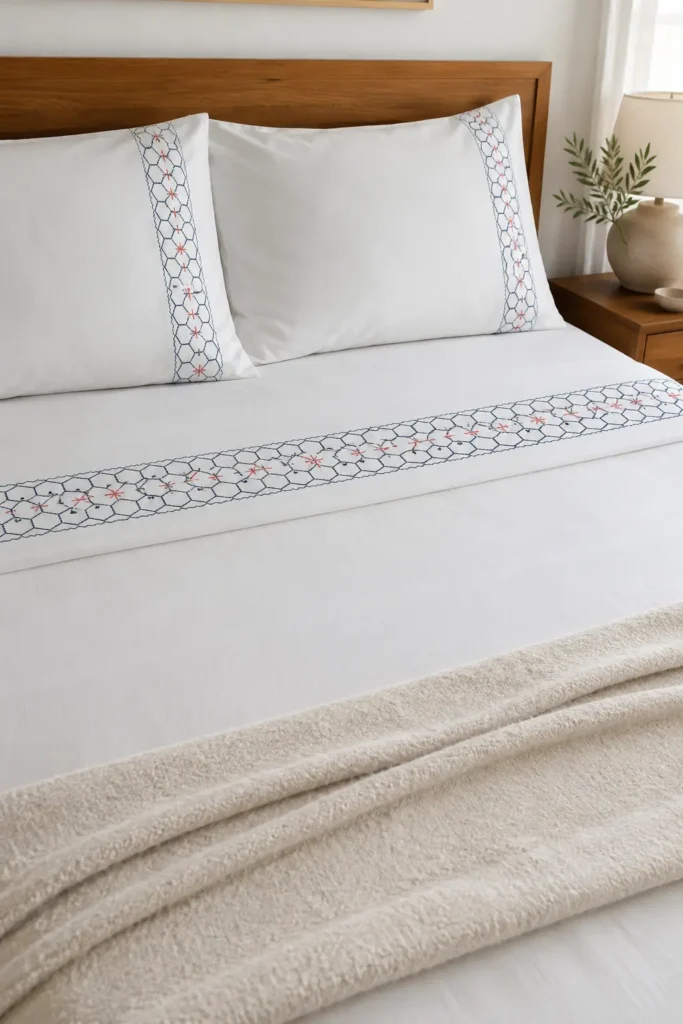
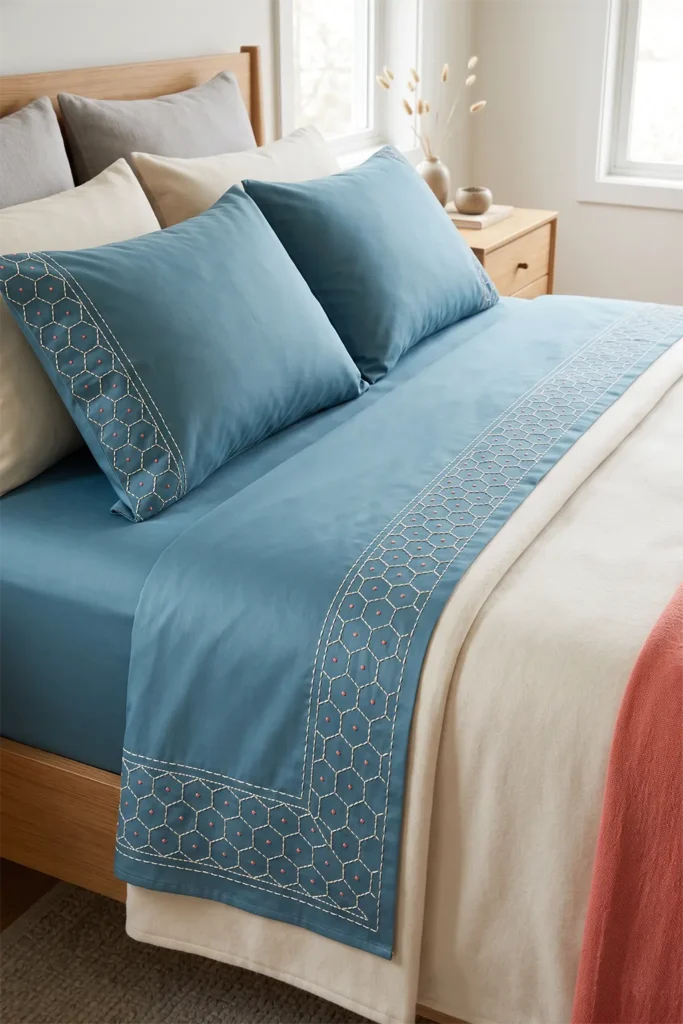
Styling It
Make the bed and fold the hexagon border down over a plain blanket so the honeycomb frames the top of the bed, with the matching pillowcase cuffs facing out. Keep the rest of the bedding simple — solid duvet, neutral shams — and pull one accent in a band color (gold, coral, teal) into a throw or lumbar pillow. Against calm walls and natural wood, the tortoise-shell lattice reads as an understated, auspicious style.
Final Thoughts
A kikkō tortoise-shell sashiko sheet set brings refined geometry and a centuries-old blessing to the bed you use every night. The clean honeycomb lattice gives a stylish bedroom quiet, orderly elegance, while the tortoise’s meaning — long life, good fortune, and protection — turns everyday bedding into something quietly generous. Worked only where it shows and is simple to stitch with a stencil, it’s an achievable, meaningful way to make a plain sheet set feel both beautiful and lucky.
Other Design Inspirations – Digitally Modified
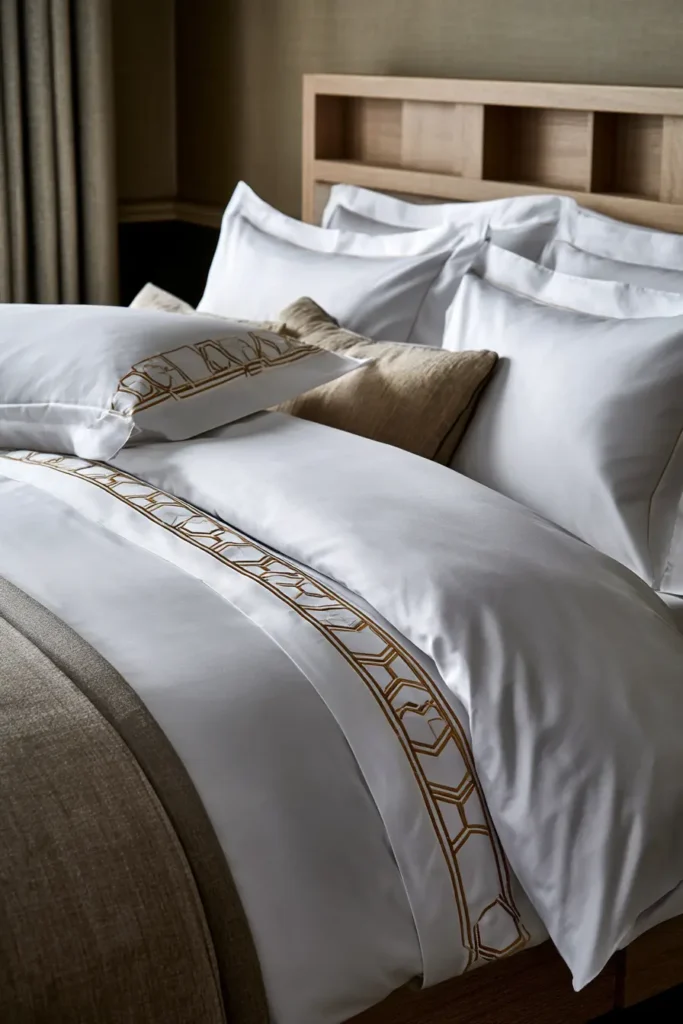
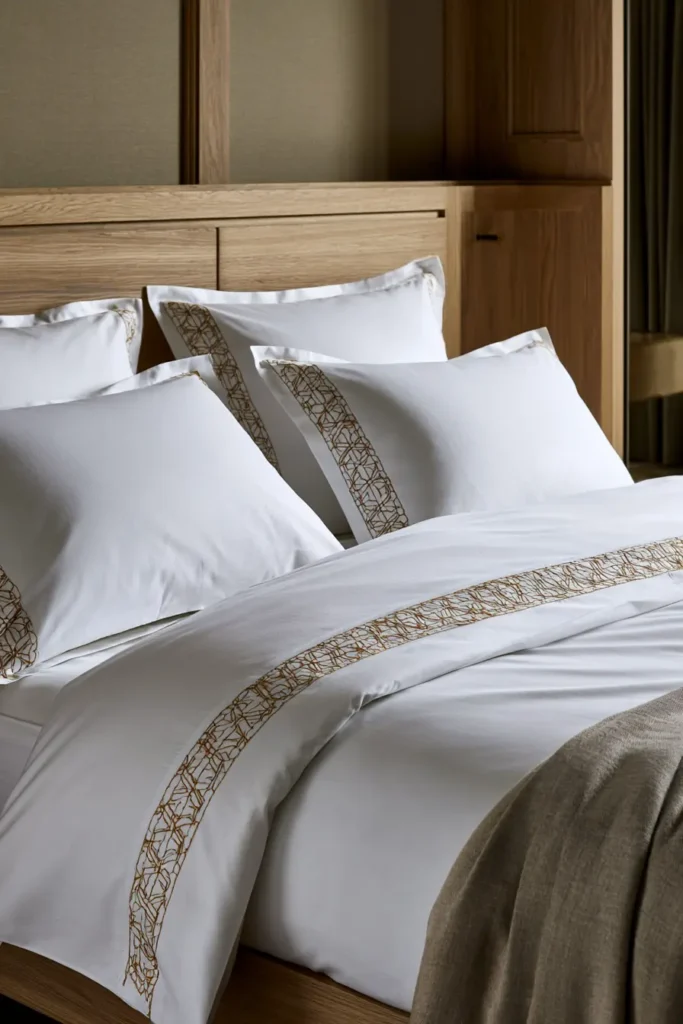
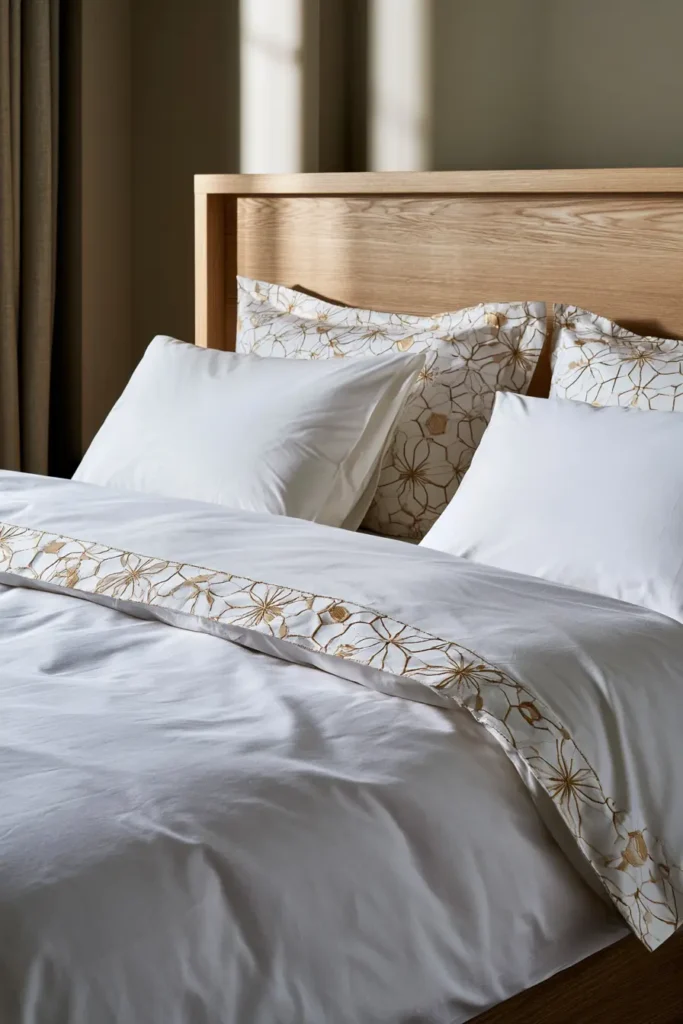
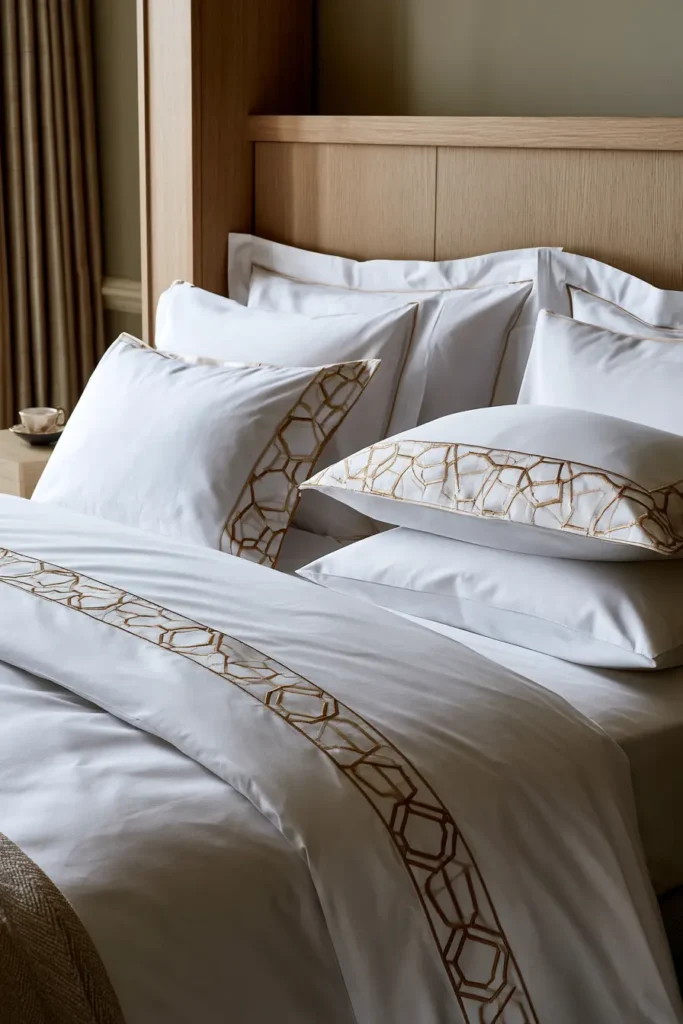
14. Plaid-Inspired Sashiko Bed Runners for Chic Room Layering
A plaid-inspired sashiko bed runner brings the cozy, collected charm of tartan to the foot of your bed, stitched entirely by hand. Where traditional sashiko leans on single-color geometry, this runner goes full plaid — multiple thread colors crossing in groups of lines to build a rich, layered check. It’s a contemporary fusion: the slow-stitch craft of sashiko meeting the warm, woven-wool feeling of a good tartan. The result is a runner made for layering, the kind of textured, colorful band that pulls a styled bed together and makes a room feel gathered and lived-in rather than matched from a set.
There’s a natural logic to the pairing, too. Japan has its own long love of checks — kōshi, the lattice patterns of the shima textile family — so plaid and sashiko aren’t strangers. This runner simply leans into the globally beloved tartan look, mixing colors more freely than a traditional motif would, to create something chic, modern, and built to mix.
Why I Made It
I made this because layering is my favorite way to make a bed feel finished. A perfectly matched bedding set can look a little flat; the magic happens when you layer textures and patterns that talk to each other — a solid duvet, a chunky knit, and a plaid runner across the foot to tie it all together. A runner is the ideal layering piece, and a plaid one brings just enough color and structure to anchor the whole arrangement.
I’m also someone who loves mixing textile traditions. My roots are in handwoven cloth, I’ve fallen for Japanese sashiko, and a plaid runner sits happily at the crossroads of both — woven-look color worked in hand stitch. Making one feels like a small, friendly conversation between craft traditions, and the cozy tartan result is something almost any room welcomes.
Why This Idea Is Worth Making
This idea is worth making because it’s the most color-rich, layer-friendly project in this collection, and it’s genuinely easy to stitch. Plaid is just straight lines crossing — no curves, no complex geometry — so the only skill is planning a pleasing color sequence and keeping the lines straight. The multi-color tartan looks designer and inviting, the runner format makes it a manageable hand-stitch project, and because the stitching runs through all the layers, the plaid doubles as the quilting. Best of all, it’s a born layering piece: it instantly elevates a styled bed and brings cozy, collected warmth to a room.
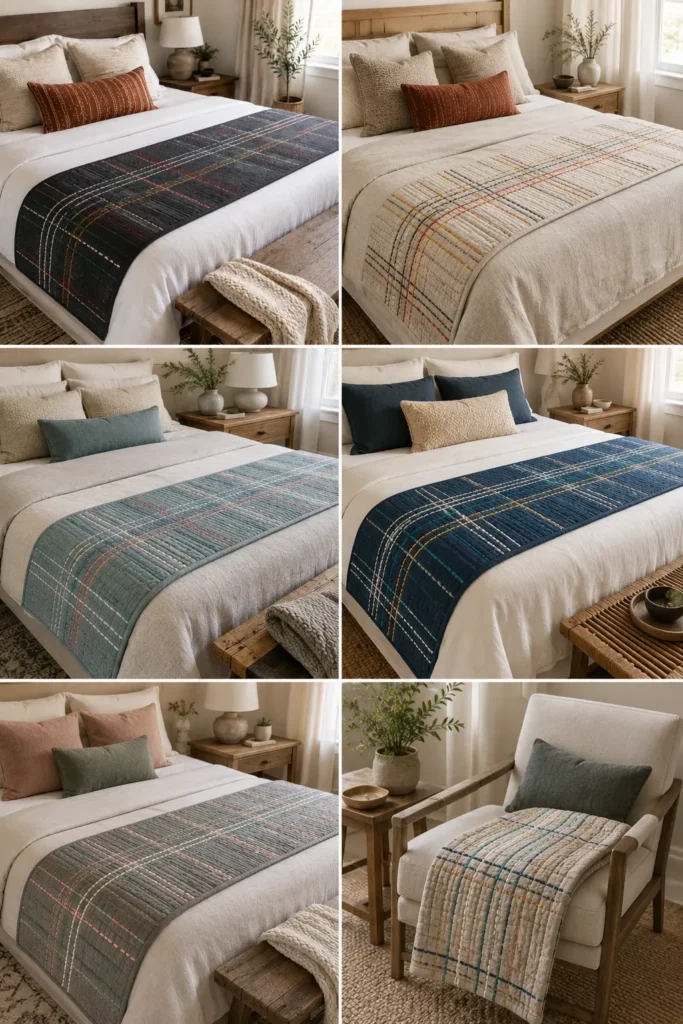
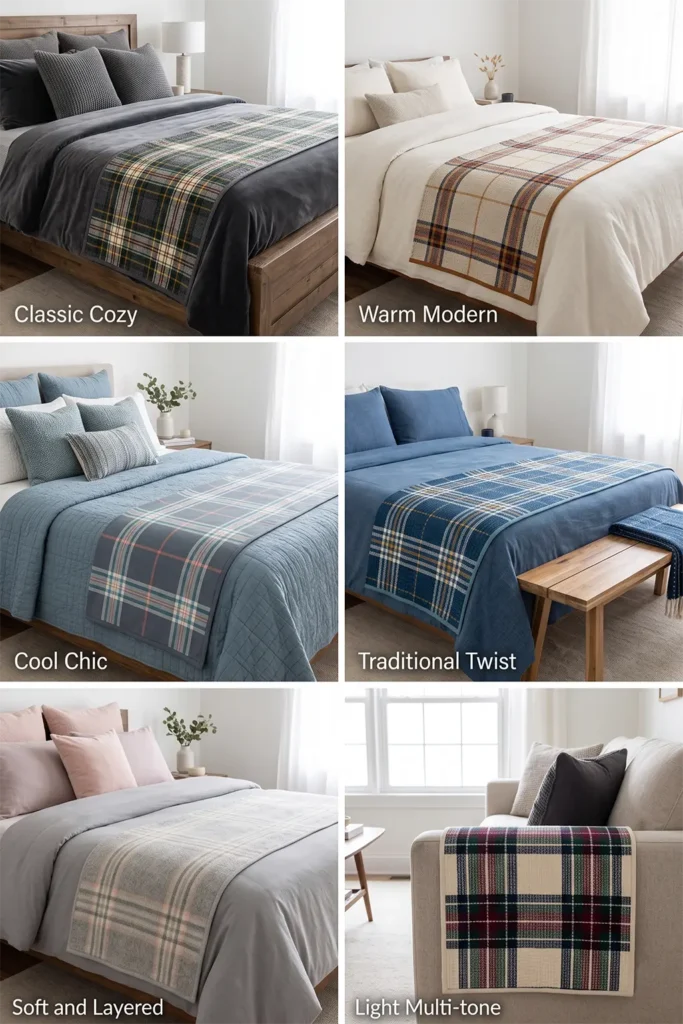
Finished Size
- Approximate finished runner (queen): 20 × 90 inches
- Twin: about 18 × 75 inches
- King: about 24 × 108 inches
- Best used: layered across the foot of the bed over a duvet or quilt; also a bench or sofa throw runner
- Skill level: beginner — straight lines, the fun is in the color planning
- Core techniques: plaid (tartan-sett) sashiko running stitch through all layers, basting, binding
Materials Needed
For one 20 × 90-inch runner:
- Top fabric: 2¾ yards of solid cotton, linen-cotton, or chambray (a heathered or flannel-look base adds cozy tartan warmth)
- Backing fabric: 2¾ yards
- Lightweight cotton batting or flannel: at least 22 × 92 inches
- Sashiko thread or pearl cotton in three to five contrast colors (plaid wants a palette)
- Sashiko needle (or long embroidery needle)
- Binding fabric: ½ yard
- Long quilting ruler (essential for straight plaid lines), washable marker or Hera marker
- Rotary cutter, cutting mat, basting pins, iron
Beginner tip: sketch your plaid color sequence on paper first. Tartan looks complicated, but it’s just one repeating sequence of colored lines run in both directions.
Choosing Your Colors
Plaid is the place to be bold with a coordinated palette. Pick a solid base and three to five threads that play well together:
- Classic cozy: charcoal base with forest green, mustard, cream, and a fine red accent
- Warm modern: oatmeal base with rust, navy, and gold
- Cool chic: slate base with teal, white, and a coral accent
- Traditional twist: indigo base with white, mustard, and turquoise
- Soft and layered: grey base with blush, sage, and cream
Choose one or two dominant colors and one or two thin accent lines — that contrast in line weight is what makes a plaid feel designed rather than busy. Match the binding to the base or to a dominant thread.
The Pattern: A Plaid Sett
Plaid is built from a sett — a repeating sequence of colored line groups, run the same way in both directions so they cross into checks:
- Plan a repeating sequence across the runner, for example: a 2-inch base gap, a navy double line (two lines ¼ inch apart), a ½-inch gap, a single mustard line, a ½-inch gap, a cream double line, then repeat
- Mark this same sequence both directions — across the 20-inch depth and along the 90-inch length
- Stitch all lines of one color first, then the next color, and so on
- Where different colored lines cross, the plaid’s woven, layered look appears
Vary line weights (single vs. double lines) and let some base color show through — the gaps are part of the pattern.
Cutting Measurements
- Top panel: 21 × 91 inches
- Backing panel: 22 × 92 inches
- Batting: 22 × 92 inches
- Binding: six strips, 2½ inches × width of fabric, joined into one strip
Step-by-Step Guide
Step 1 — Cut and press. Cut the top to 21 × 91 inches and press it flat. Cut batting and backing to 22 × 92 inches.
Step 2 — Plan and mark the sett. Sketch your color sequence, then mark the plaid lines in both directions with a long ruler, keeping a 1-inch margin at the long edges for binding. Scrap-test your marker first.
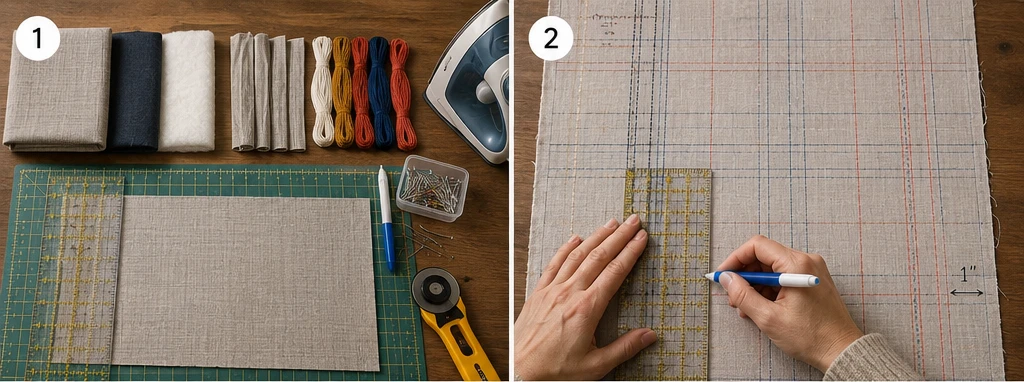
Step 3 — Layer and baste. Lay the backing wrong side up, center the batting, then the marked top right side up. Smooth from the center and baste generously along the full length.
Step 4 — Stitch the first color. Thread your first color and stitch all of its lines (both directions) through all three layers, using an even ⅛–¼ inch running stitch with relaxed tension.
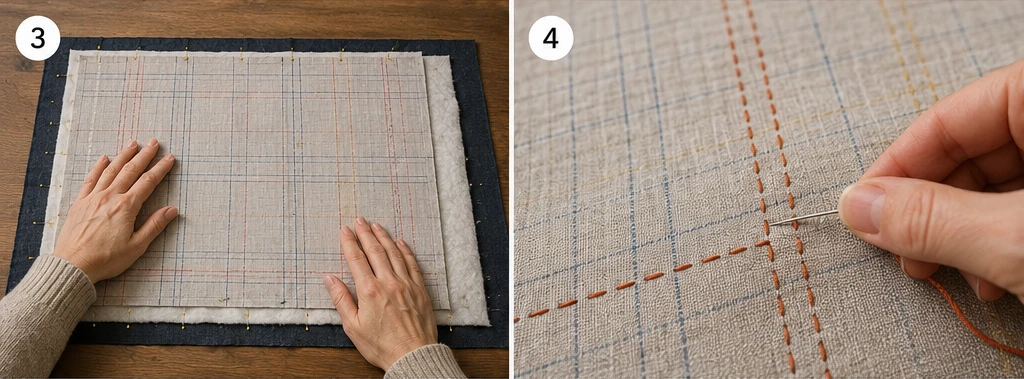
Step 5 — Add the remaining colors. Work through the palette one color at a time — second color, third, and so on — until the full plaid is built. Working color by color keeps the thread changes tidy and the sett accurate.
Step 6 — Place the accent lines. Stitch the thin accent-color lines last so they sit crisply over the established plaid.
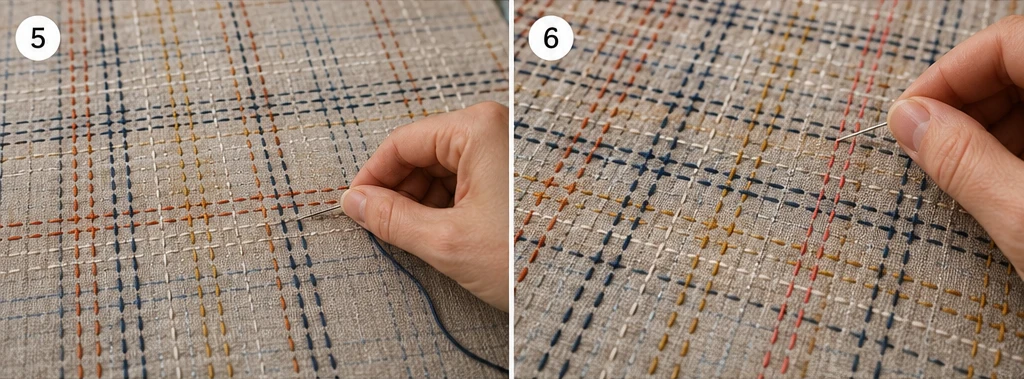
Step 7 — Secure thread ends. Finish each thread with a small knot buried between the layers or a few tiny backstitches; keep the front clean and trim tails close.
Step 8 — Trim and square. Trim the runner to 20 × 90 inches, squaring the corners and straightening the long edges with a ruler.
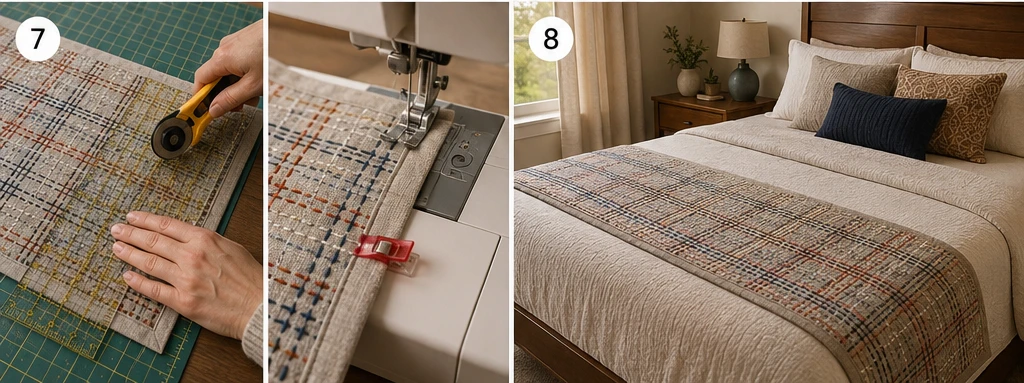
Step 9 — Bind and wash. Join the 2½-inch binding strips, press in half, sew to the front, fold to the back, and finish. Wash gently in cold water, no bleach, and air-dry so the stitches settle and soften.
Assembly at a Glance
- Cut the top to 21 × 91 inches; batting and backing to 22 × 92 inches.
- Plan a plaid sett and mark it in both directions, 1-inch edge margin.
- Layer top, batting, and backing; baste generously.
- Stitch the first color’s lines through all layers.
- Work through the palette one color at a time.
- Add the thin accent lines last.
- Secure all thread ends neatly.
- Trim to 20 × 90 inches and square.
- Bind with 2½-inch strips, then wash gently.
Beginner Tips for Success
- Sketch the set first — planning the color sequence on paper saves a lot of unpicking.
- Use a long ruler; crisp, straight lines are what make plaid look tailored.
- Vary line weights (singles and doubles) so the plaid reads as designed, not uniform.
- Stitch one color fully before the next to keep the sett accurate.
- Let the base color show in the gaps — a plaid that’s all stitching loses its rhythm.
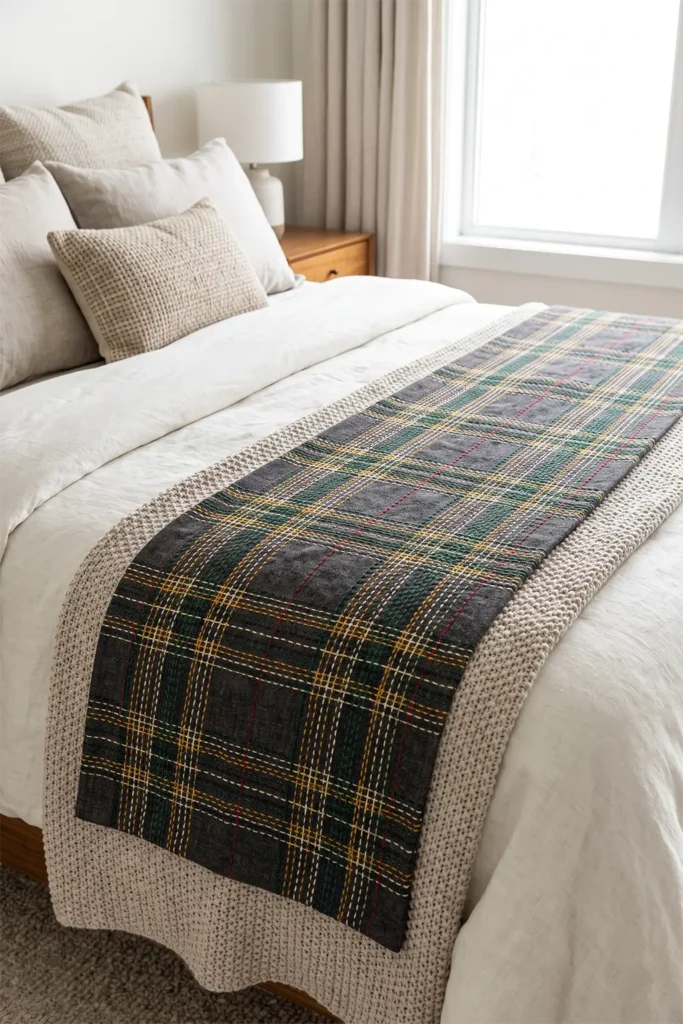
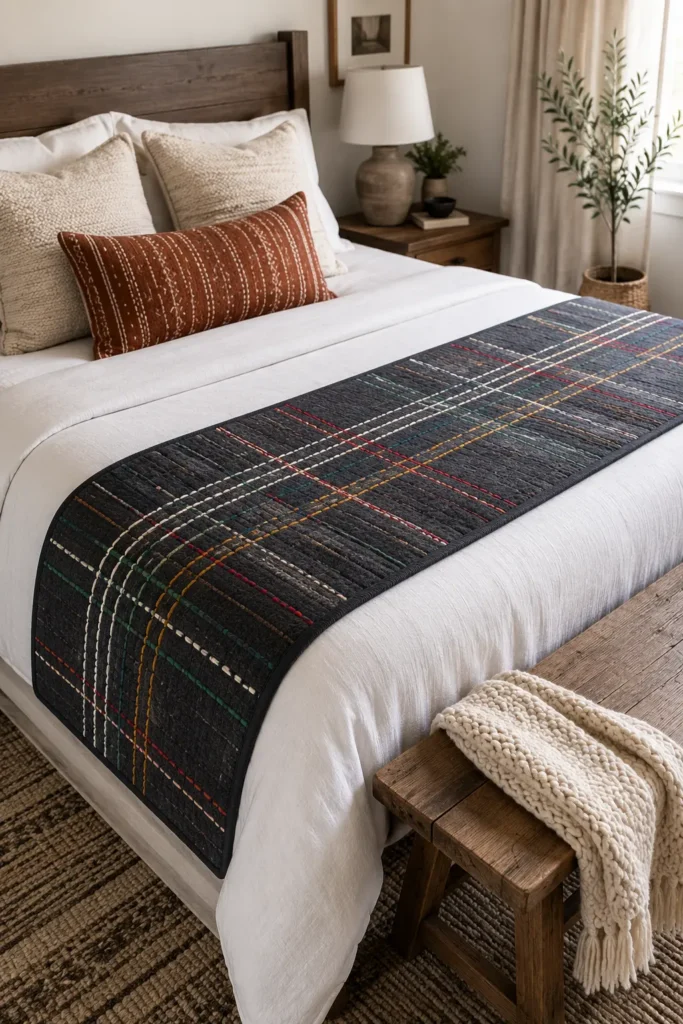
Styling It
Lay the finished runner across the foot of a layered bed — solid duvet, a chunky knit throw, a couple of textured pillows — so the plaid ties the textures together. Pull one or two of the plaid’s colors into the surrounding pillows or throw to make the layering feel intentional. Because plaid is cozy and collected by nature, it shines in rooms that mix materials and tones, and it works just as well draped over a bench or the arm of a sofa.
Final Thoughts
A plaid-inspired sashiko bed runner is the cozy, color-rich layering piece every styled bed wants. It blends the slow-stitch craft of sashiko with the warm, gathered charm of tartan, and because it’s built from simple crossing lines, the only real art is in choosing colors you love. Layered across a bed of mixed textures, it pulls the whole arrangement together — chic, handmade, and inviting in a way no store-bought runner quite manages.
Other Design Inspirations – Digitally Modified
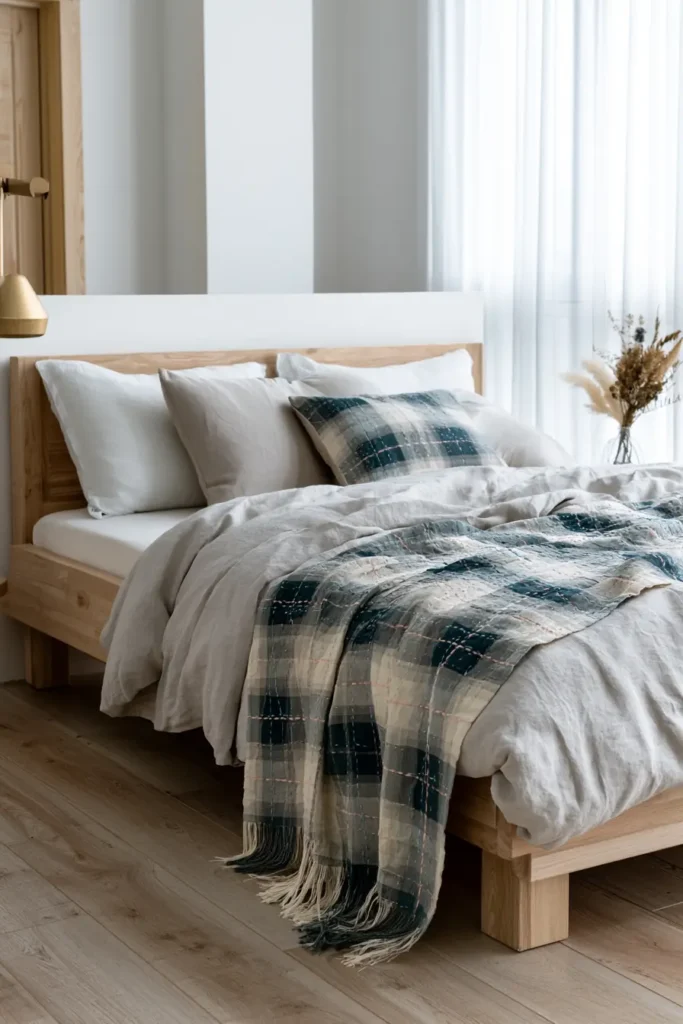
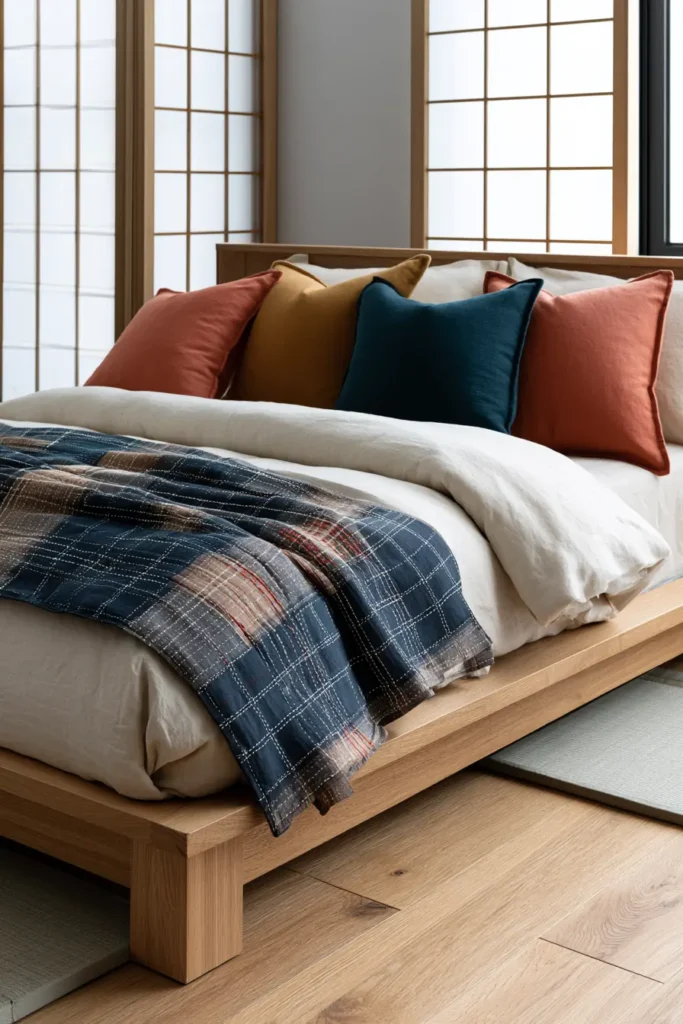


15. Classic Indigo and White Sashiko Quilts for Elegant Spaces
A classic indigo-and-white sashiko quilt is sashiko at its most timeless. Before any single motif, this is the look people picture when they think of the craft: crisp white running stitches glowing against deep indigo cloth. It’s not really one pattern — it’s the palette, the high-contrast pairing that has defined sashiko for centuries and still feels effortlessly elegant in a modern room. Choose almost any sashiko design — a flowing wave, a hemp-leaf star, a simple cross field — and worked in white on indigo, it becomes instantly sophisticated. For an elegant space, few things are as quietly striking as that blue-and-white contrast folded across a bed.
The pairing isn’t arbitrary; it’s history. Sashiko grew up on indigo-dyed cloth because indigo was the color of everyday Japanese life — so common that a visiting Westerner once dubbed the ubiquitous shade “Japan Blue.” The dye, made through the patient fermentation craft of aizome, did more than look beautiful: indigo was prized for making cloth stronger, more hard-wearing, and even insect-repellent, which is exactly why it clothed the working people whose mending became sashiko.
Why I Made It
I made this one because indigo is personal to me. I come from Bengal, a land with its own deep and complicated history with this same blue — indigo was once one of the most important and most fought-over dyes in the region, woven into our textile heritage in ways both beautiful and hard. So when I stitch white thread into indigo cloth, I feel two traditions meeting: the aizome blue of Japan and the indigo of home, the same plant-born color carrying different stories. That connection makes the classic palette feel less like a trend and more like a thread between places.
I also simply find it the most elegant combination in textiles. Indigo and white never date, never clash, and never try too hard. A quilt in this palette doesn’t shout for attention; it earns it, quietly, the way the best classic things do.
Why This Idea Is Worth Making
This idea is worth making because the indigo-and-white palette guarantees an elegant result no matter which pattern you choose. It’s the most flexible idea in this collection: pick any sashiko motif you love, work it in white on indigo, and you have a timeless quilt. The high contrast makes your stitching show beautifully, the classic colors suit any decor from traditional to modern, and the finished quilt carries the authentic look and long heritage of sashiko at its purest. It’s the safest path to a piece that looks both handmade and genuinely refined.
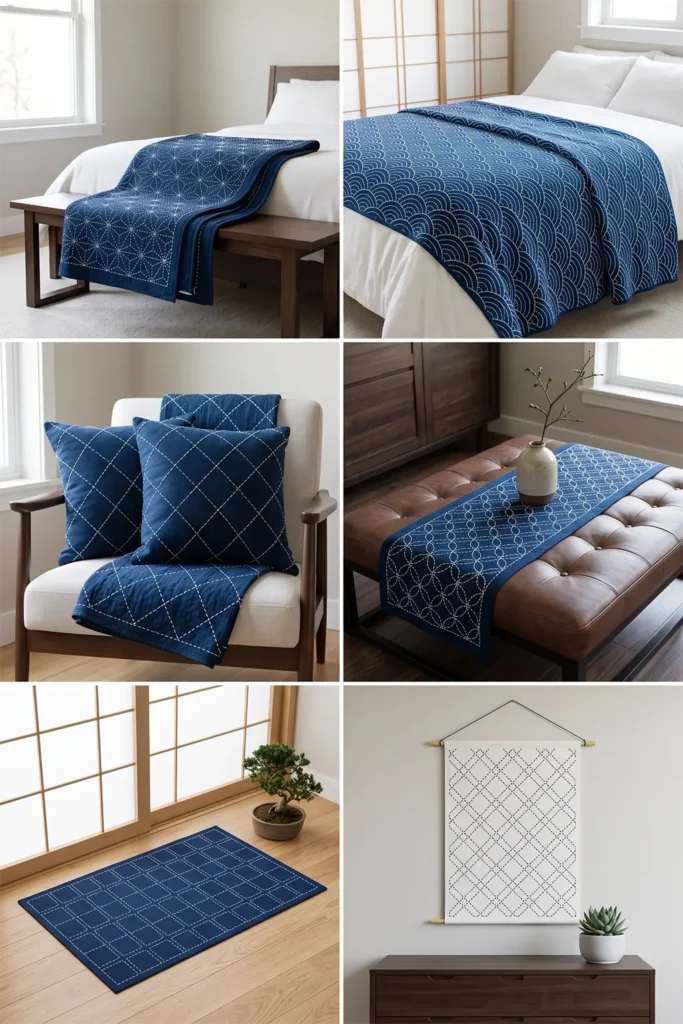
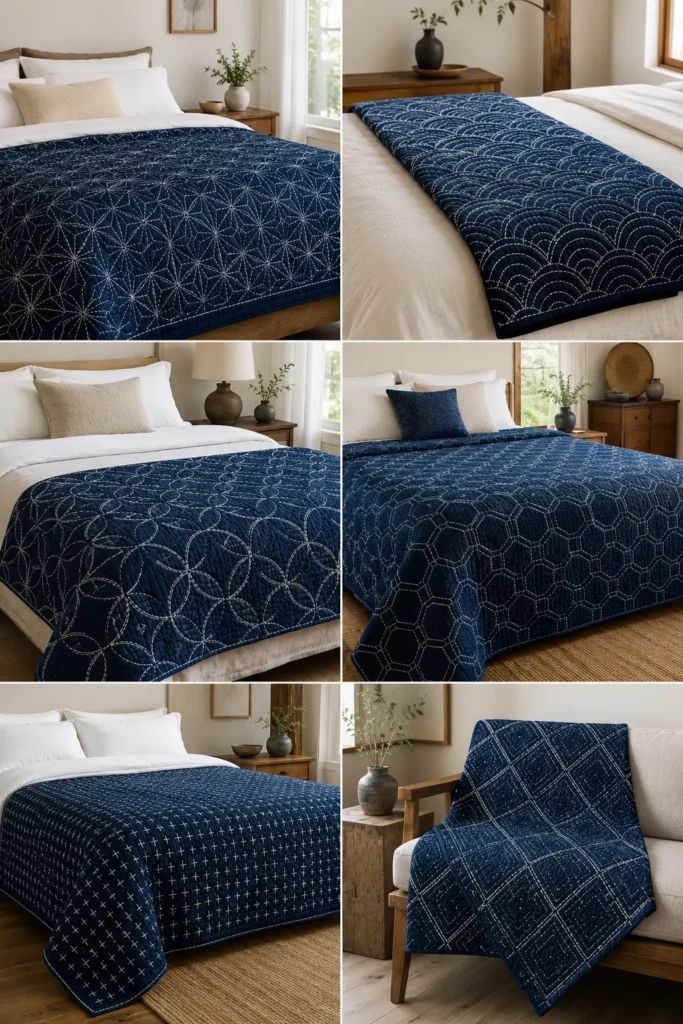
Finished Size
- Approximate finished quilt: 54 × 66 inches — a lightweight throw or bed accent
- Twin coverlet: scale up to about 60 × 80 inches
- Queen coverlet: scale up to about 84 × 90 inches
- Best used: folded at the foot of a bed, layered over a duvet, or as an elegant sofa throw
- Skill level: confident beginner (the difficulty depends on the pattern you choose)
- Core techniques: whole-cloth quilting, sashiko running stitch, basting, binding
Materials Needed
For one 54 × 66-inch quilt:
- Quilt top: 2 yards of solid indigo cotton, linen-cotton, or chambray (a true, deep indigo gives the best contrast)
- Backing: 3½ yards (indigo or natural cotton)
- Lightweight cotton batting or flannel: at least 60 × 72 inches
- White sashiko thread or pearl cotton (a crisp, bright white for maximum contrast)
- Sashiko needle (or long embroidery needle)
- Binding fabric: ½ yard (indigo or white)
- Marking tools: a white or silver chalk pencil or Hera marker (dark fabric needs a light marker), plus a ruler and any stencil for your chosen pattern
- Quilting ruler, rotary cutter, cutting mat, basting pins, and iron
Beginner tip: Indigo dye can bleed, so prewash the indigo fabric before you start. This sets the dye and keeps your bright white thread from picking up a blue cast later.
Choosing Your Colors
The classic is deep indigo with crisp white — but “indigo” spans a beautiful range, and a small accent can modernize it:
- The classic: deep indigo top, bright white thread, indigo binding
- Lighter denim indigo top with white thread for a softer, modern look
- Deep navy-indigo top with cream thread for a warmer feel
- Indigo top with a single bright accent — a few lines or a motif centered in coral, gold, or turquoise — for a contemporary pop
- Reverse it: white or natural top with indigo thread, for a fresh, bright version of the same palette
Keep white the dominant stitch and let any accent stay sparing; the elegance comes from restraint.
The Pattern: Your Choice, in White on Indigo
The beauty of this idea is flexibility — the palette is the hero, so choose a sashiko pattern to suit your skill and style:
- Simplest: an even field of crosses or a straight diamond grid
- Flowing: overlapping waves or linked circles
- Iconic: a hemp-leaf star or hexagon honeycomb
- Mark your chosen pattern with a light chalk or Hera marker (essential on dark fabric), keeping lines faint and removable
Whatever you pick, the white-on-indigo contrast will make it sing.
Cutting Measurements
- Quilt top panel: 55 × 67 inches
- Backing panel: 60 × 72 inches
- Batting or flannel: 60 × 72 inches
- Binding: seven strips, 2½ inches × width of fabric
Step-by-Step Guide
Step 1 — Prewash and press the indigo. Wash the indigo fabric first to set the dye and prevent bleeding, then press it flat and cut the top to 55 × 67 inches.
Step 2 — Mark your pattern. Using a light chalk pencil or a Hera marker (dark fabric won’t show up on dark pens), mark your chosen sashiko pattern across the top. Keep marks faint and removable, and test first.
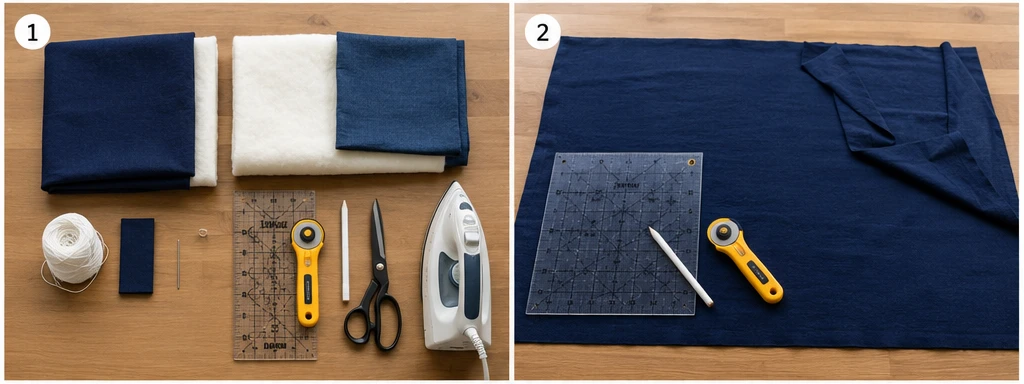
Step 3 — Layer the quilt sandwich. Lay the backing wrong side up, center the batting, then the marked top right side up. Smooth from the center outward.
Step 4 — Baste. Pin- or thread-baste the layers securely; thread basting is gentler to work around for a mostly hand-stitched top.
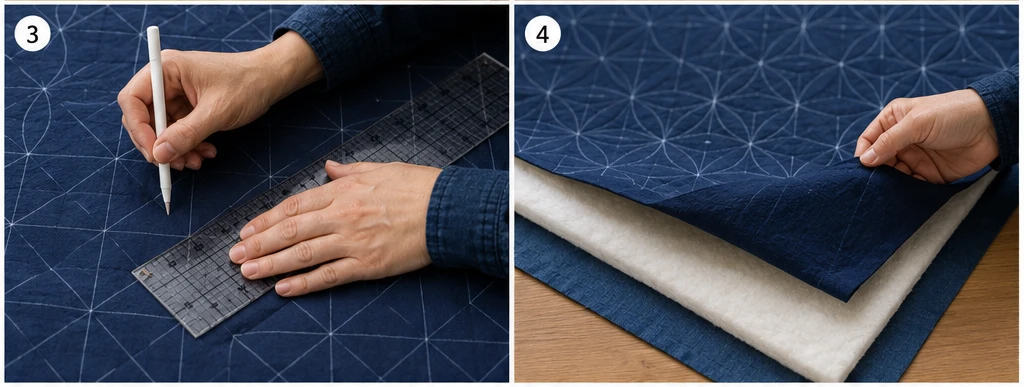
Step 5 — Stitch in white. Thread the sashiko needle with bright white thread and stitch your pattern with an even ⅛–¼ inch running stitch, keeping tension relaxed so the quilt stays flat. Work from the center outward.
Step 6 — Add an accent, if using. For a modern touch, stitch a sparing accent — a motif center or a few lines — in coral, gold, or turquoise once the white pattern is complete.
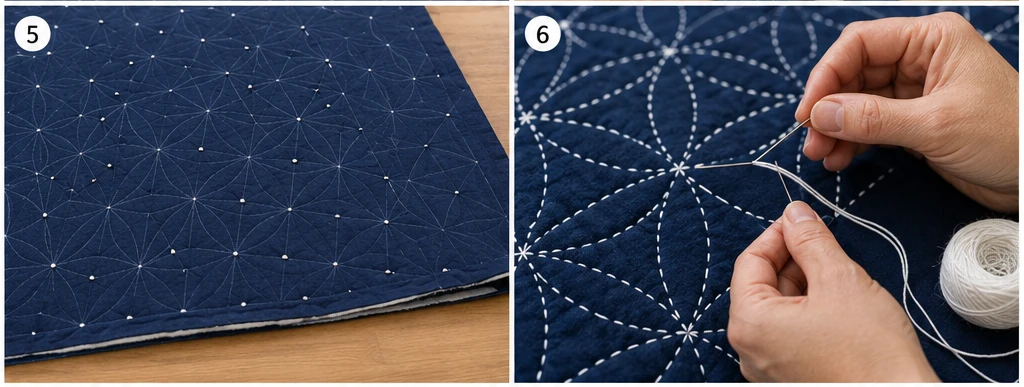
Step 7 — Secure thread ends. Finish threads with a small knot buried between the layers, or with a few tiny backstitches; keep the front clean and trim the tails close.
Step 8 — Trim and square. Trim to 54 × 66 inches, squaring the corners and straightening the edges with a ruler.
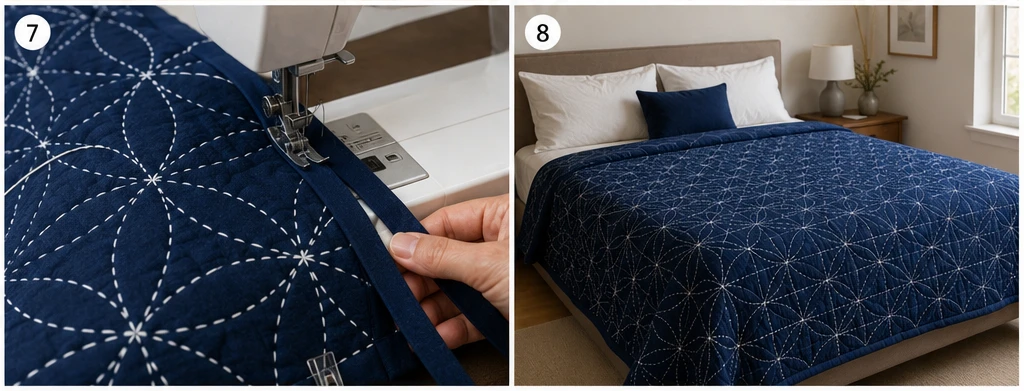
Step 9 — Bind and wash. Bind with the 2½-inch strips in indigo or white. Wash gently in cold water on its own for the first wash (in case of any remaining indigo). No bleach. Air-dry so the stitches settle and soften.
Assembly at a Glance
- Prewash the indigo, press, and cut the top to 55 × 67 inches.
- Mark your chosen pattern with a light chalk or Hera marker.
- Cut backing and batting to 60 × 72 inches.
- Layer top, batting, and backing; smooth from the center.
- Baste securely.
- Stitch the pattern in white, center outward.
- Add a sparing color accent, if desired.
- Secure thread ends; trim to 54 × 66 inches.
- Bind in indigo or white, then wash gently on its own.
Beginner Tips for Success
- Always prewash indigo — it’s the single best way to avoid blue bleeding into your white.
- Use a light marker (chalk or silver); dark fabric needs a light line you can actually see.
- Choose bright white thread for the crispest contrast; cream reads softer if you prefer.
- Keep any color accent sparing — the elegance is in the classic two-tone restraint.
- Don’t pull the thread tight; relaxed stitching keeps the quilt flat and soft.
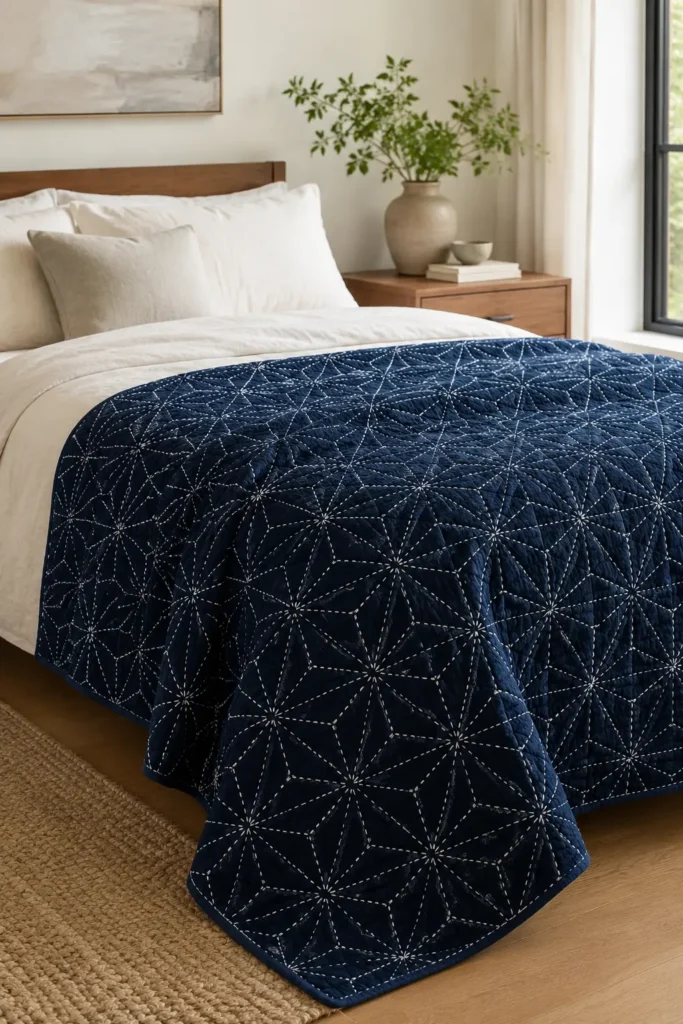
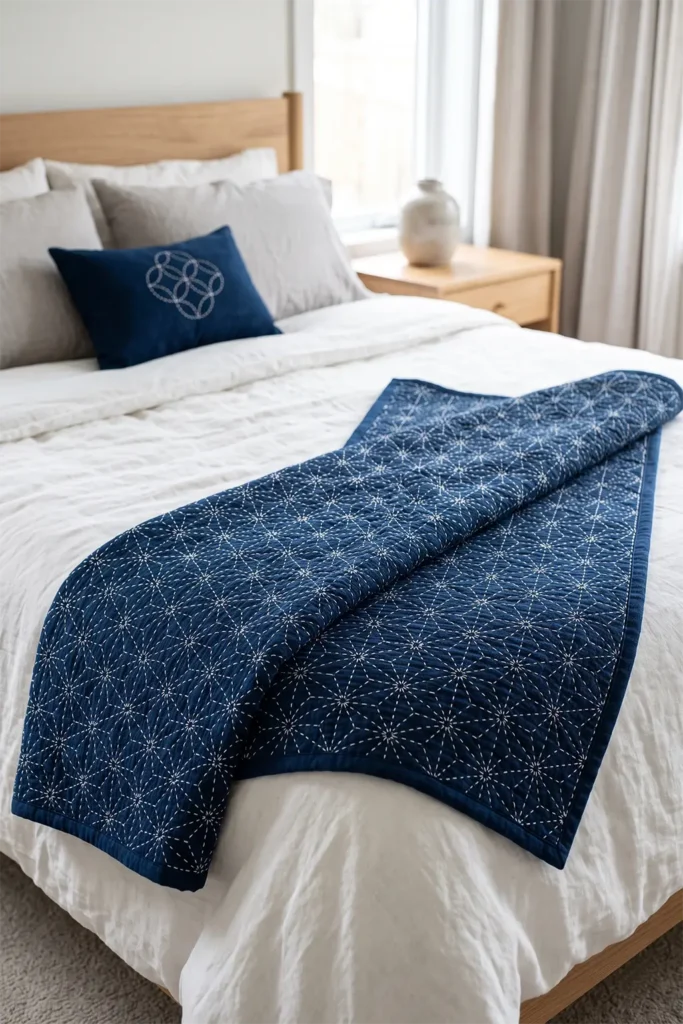
Styling It
Fold the finished indigo-and-white quilt across the foot of a bed dressed in white or natural linen, with natural wood and soft neutral tones around it, so the blue-and-white contrast becomes a calm, elegant focal point. The palette pairs beautifully with both traditional and modern rooms — add a single indigo or white accent pillow to echo it, and let the classic combination do the rest. It’s equally at home draped over a sofa in a refined living space.
Final Thoughts
A classic indigo-and-white sashiko quilt is the most timeless idea in this collection because it isn’t tied to a single pattern — it’s tied to the palette that made sashiko famous. Crisp white stitches on deep, aizome-blue cloth carry centuries of heritage and an elegance that never dates. Choose any motif you love, work it in this classic combination, and you’ll have a quilt that looks authentic, refined, and quietly beautiful in any elegant space.
Other Design Inspirations – Digitally Modified
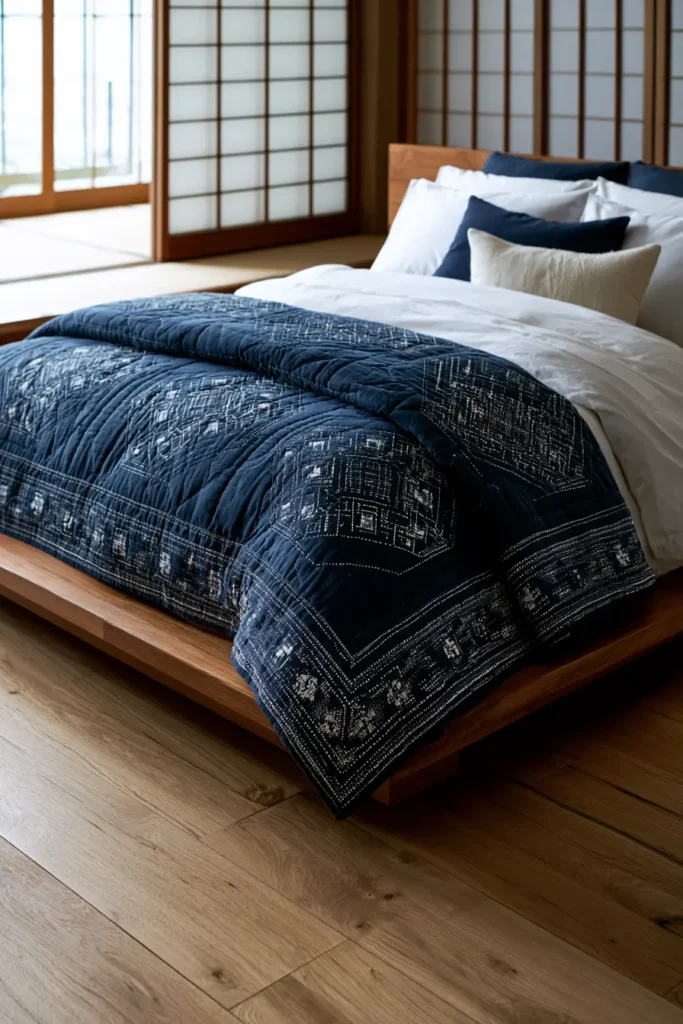
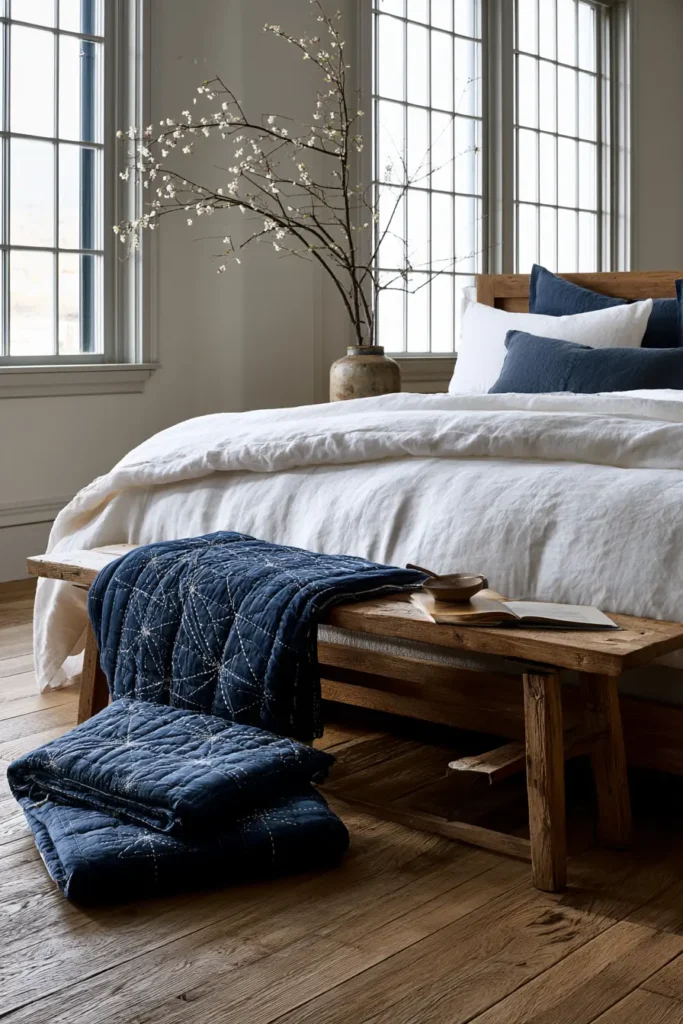
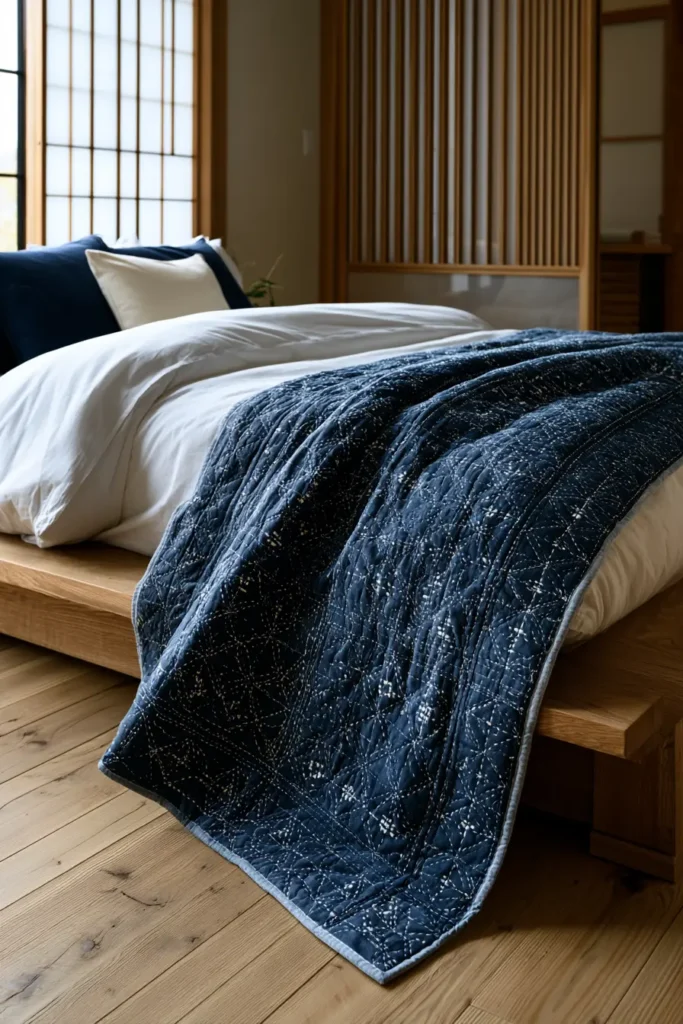
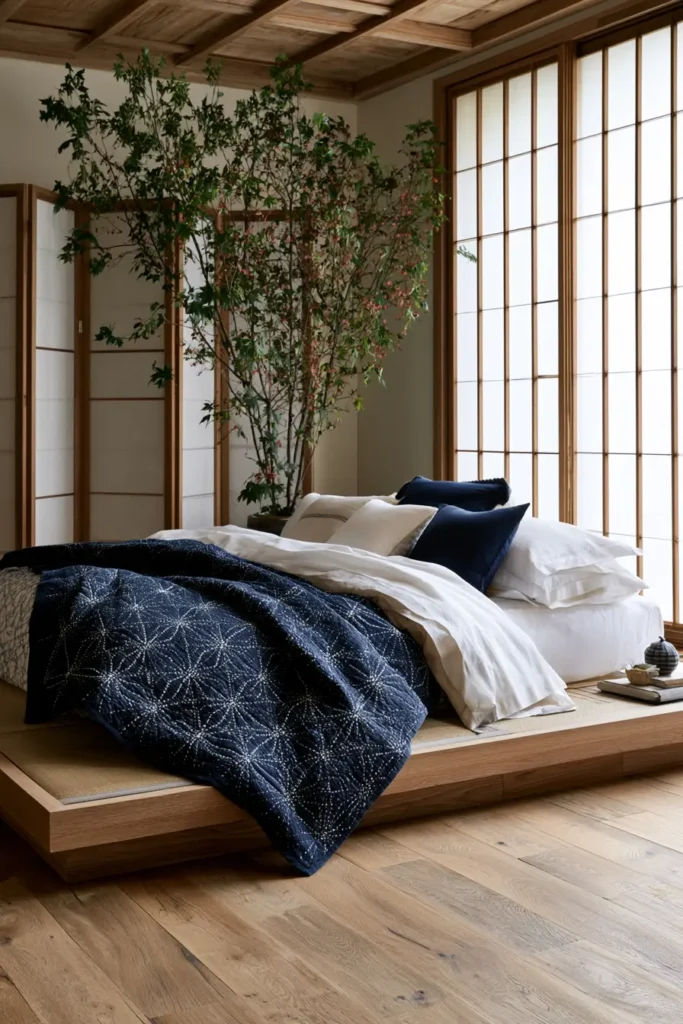
16. Monochrome Sashiko Pillow Covers for Chic Minimalist Accents
A pair of monochrome sashiko pillow covers brings the warmth of hand stitching to a minimalist room without a hint of clutter. Where most sashiko relies on bold contrast — white on indigo — monochrome does the opposite: the thread sits just a shade away from the base fabric, so the pattern reads as quiet texture and shifting shadow rather than a graphic statement. Tilt the pillow toward the light and the stitches catch it; turn it away and they melt back into the cloth. It’s sashiko reduced to its most refined essence, and on a pillow it makes the kind of subtle, sophisticated accent that minimalist spaces are built on.
The appeal here is dimensional, not decorative. Worked tone-on-tone, a sashiko pattern stops being about color and starts being about texture — the low relief of the stitches, the soft play of light and shadow across them. That’s a more architectural, modern way to enjoy the craft, and it’s why monochrome sashiko feels so at home in contemporary, pared-back interiors.
Why I Made It
I made these for the rooms that don’t want more color — they want more texture. Minimalism can drift toward cold and flat, and tone-on-tone sashiko is the perfect remedy: it adds depth, craft, and a human touch while staying within a single calm color. As someone who loves restraint in design, I find this to be the most quietly luxurious way to use the sashiko pattern; you discover it slowly rather than all at once.
There’s real pleasure in stitching it, too. Without high contrast to hide behind, every stitch matters a little more, so monochrome work makes you slow down and stitch evenly — and the reward is a surface that looks less like a craft project and more like a beautifully textured designer textile. It’s subtlety as sophistication.
Why This Idea Is Worth Making
This idea is worth making because it brings a handmade texture to minimalist decor without breaking its calm. The tone-on-tone effect is endlessly chic — it works in any color family, layers with any bedding, and never competes with the rest of a room. The pillow scale means you can finish a cover in an evening or two, the subtle palette makes it forgiving for beginners (small irregularities simply vanish), and the finished accent looks like something from a high-end home store. For anyone who loves clean, modern spaces but craves a little warmth, it’s the ideal small project.
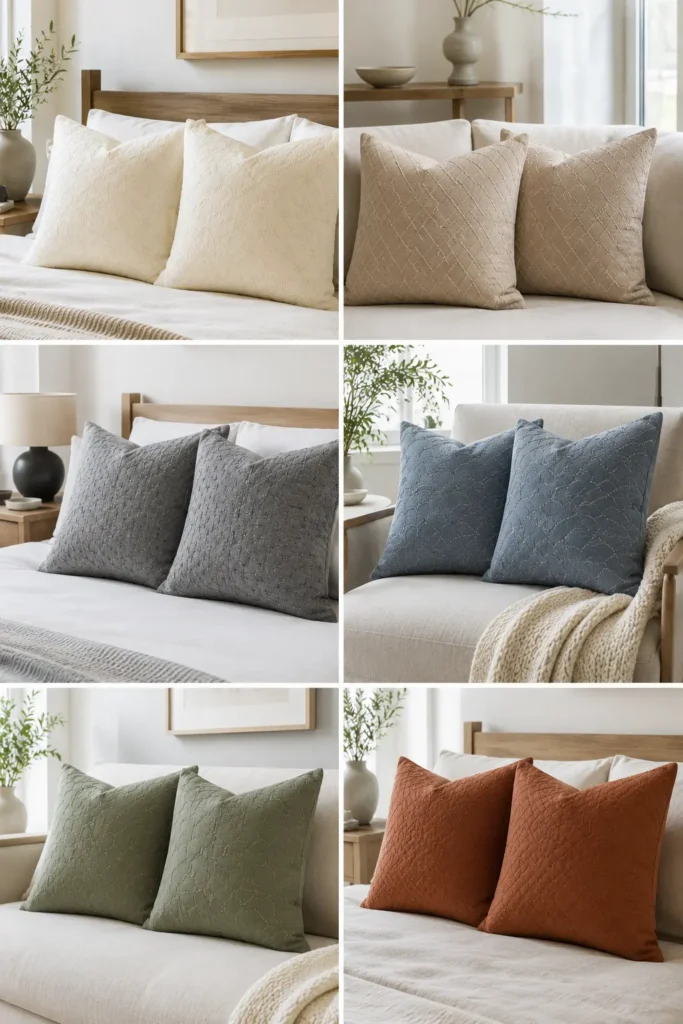
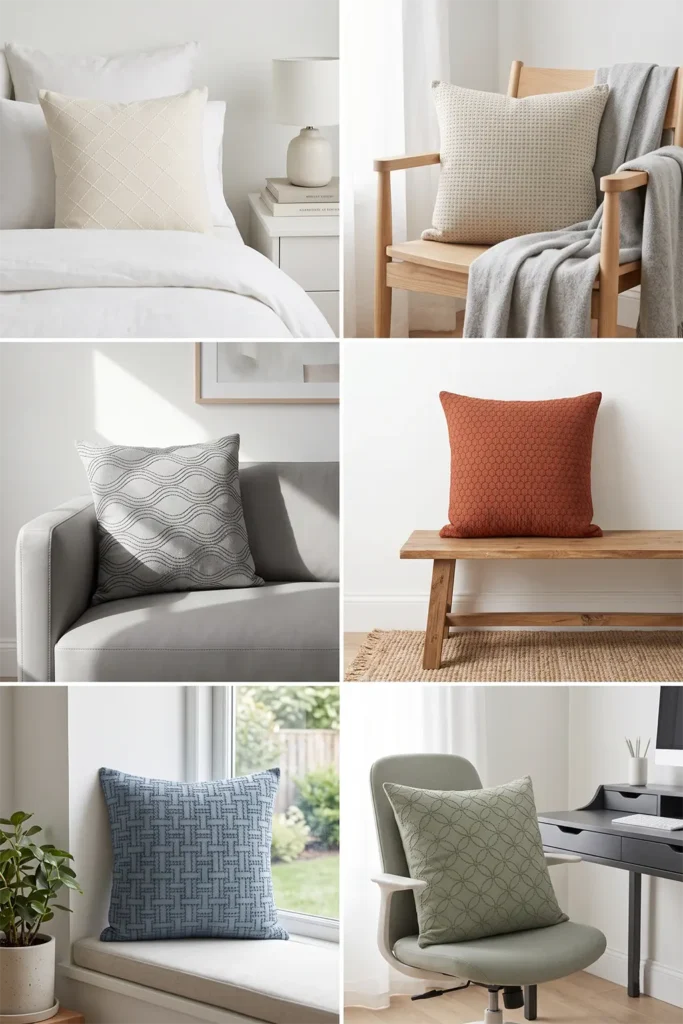
Finished Size
- Finished cover: 18 × 18 inches (fits an 18- or 20-inch pillow form; a 20-inch form gives a fuller look)
- Other sizes: scale the method to 16 × 16 or 20 × 20 inches
- Makes: one cover per set of measurements below — double everything for a pair
- Best used: on a bed, a reading chair, or a sofa as a subtle textured accent
- Skill level: beginner — the low contrast hides small irregularities
Materials Needed
For one 18 × 18-inch cover:
- Front fabric: one piece 19 × 19 inches of solid cotton, linen, or linen-cotton
- Optional muslin backing (adds body behind the stitching): one piece 19 × 19 inches
- Envelope back fabric: two pieces 19 × 13 inches
- Sashiko thread or pearl cotton in a shade close to the base fabric (one or two steps lighter or darker)
- Sashiko needle (or long embroidery needle)
- Washable fabric marker, chalk pencil, or Hera marker (a Hera marker is ideal — it creases a line without ink that could show on a subtle cover)
- 18- or 20-inch pillow form
- Quilting ruler, rotary cutter, cutting mat, pins, iron, sewing machine
Beginner tip: a Hera marker is your best friend here — it presses a temporary crease line rather than leaving ink, which matters when there’s no high contrast to hide the marks.
Choosing Your Colors
“Monochrome” means tone-on-tone, not grey-only — pick any color family and choose a thread a shade or two off the base:
- Soft and pale: cream base with white thread
- Warm neutral: oatmeal base with a slightly deeper sand thread
- Cool modern: soft grey base with charcoal thread
- Earthy and bold: terracotta base with a deeper rust thread
- Calm blue: dusty blue base with a deeper slate thread
- Sage: sage base with a soft moss thread
Aim for a gentle, visible tonal difference: a thread identical to the base will disappear, while excessive contrast will lose the monochrome effect. One or two shades apart is the sweet spot.
The Pattern: Your Choice, Worked Tone-on-Tone
Because the color treatment is the star, the pattern is up to you — and a slightly denser pattern reads as richer texture:
- Clean and modern: a fine diamond grid or even a cross field
- Flowing: overlapping waves or linked circles
- Textural: a tight hexagon honeycomb or basket-weave lattice
- Mark your chosen pattern lightly with a Hera marker or chalk, keeping the scale small enough that the stitches build a satisfying tactile surface
Cutting Measurements
- Front panel: 19 × 19 inches (plus optional muslin 19 × 19 inches)
- Envelope back: two pieces, 19 × 13 inches
- Seam allowance: ½ inch throughout
Step-by-Step Guide
Step 1 — Cut and press. Cut the front to 19 × 19 inches and the two back pieces to 19 × 13 inches. Press everything flat. If using muslin for the body, baste it behind the front panel.
Step 2 — Mark the pattern. On the front, mark your chosen sashiko pattern with a Hera marker or light chalk, keeping a clean 1½-inch margin from the edges so stitching stays clear of the seams.
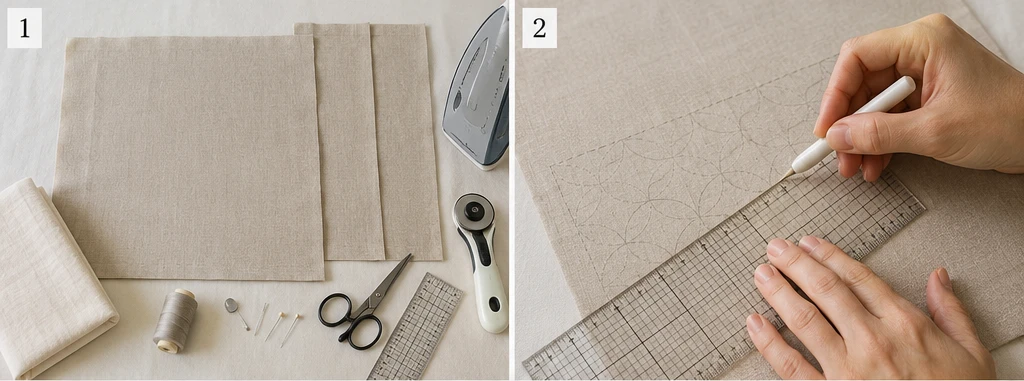
Step 3 — Stitch tone-on-tone. Thread the sashiko needle with your close-tone thread and stitch the pattern with an even ⅛–¼ inch running stitch. With low contrast, evenness matters most — take your time and keep the rhythm steady.
Step 4 — Press and check in raking light. Press the front from the back, then hold it at an angle to a light to see the texture emerge — that shadow play is the whole effect.
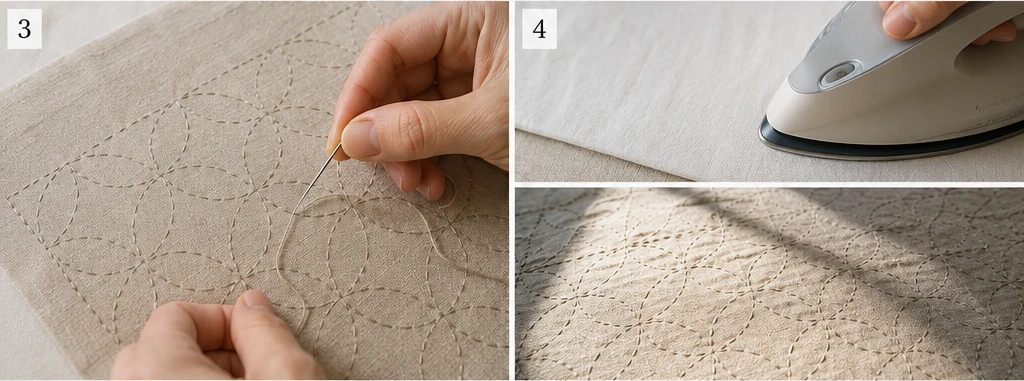
Step 5 — Hem the back pieces. On one 19-inch edge of each back piece, fold over ½ inch twice and stitch a clean hem. These hemmed edges form the envelope opening.
Step 6 — Assemble the cover. Lay the stitched front right side up. Place the two back pieces right side down on top, hemmed edges overlapping in the center, raw edges matching the front. Pin all around.
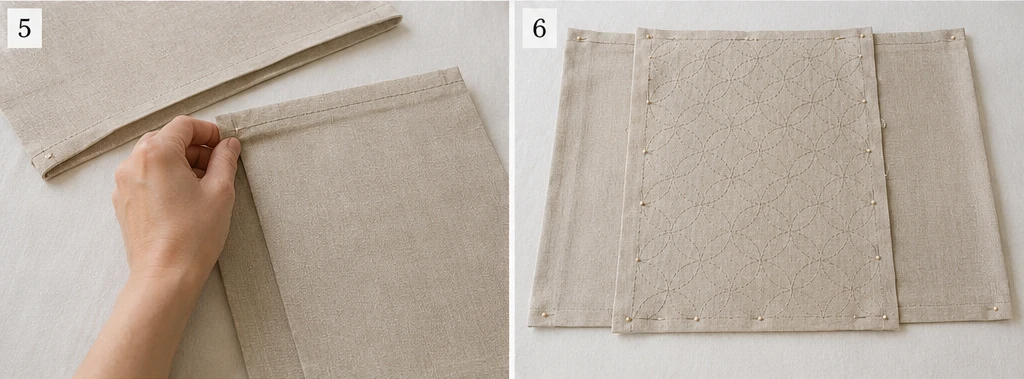
Step 7 — Sew and turn. Sew around all four sides with a ½-inch seam allowance, clip the corners, turn right side out through the opening, and press the edges crisply.
Step 8 — Insert the form. Slip the pillow form through the back opening, and wash the cover gently before first use so the stitches settle.
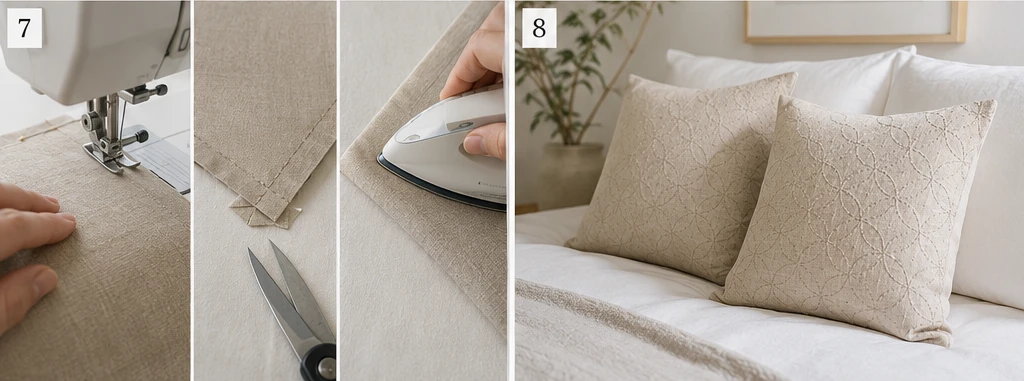
Assembly at a Glance
- Cut front 19 × 19 inches; two back pieces 19 × 13 inches.
- Mark your chosen pattern with a Hera marker, 1½-inch edge margin.
- Stitch tone-on-tone with even running stitches.
- Press and check the texture in the raking light.
- Double-hem one 19-inch edge of each back piece.
- Layer front (up) and back pieces (down, overlapping); pin.
- Sew all four sides with ½-inch seams; clip corners and turn.
- Press, insert the pillow form, and wash gently.
Beginner Tips for Success
- Choose thread one or two shades off the base — identical disappears, high contrast breaks the monochrome look.
- Use a Hera marker so there’s no ink to show on the subtle surface.
- Stitch evenly; with low contrast, the texture is the design, so consistency reads.
- Keep the stitching margin clear of the seam allowance so no pattern is lost in construction.
- A slightly denser pattern gives richer texture — worth the extra stitching on a small cover.
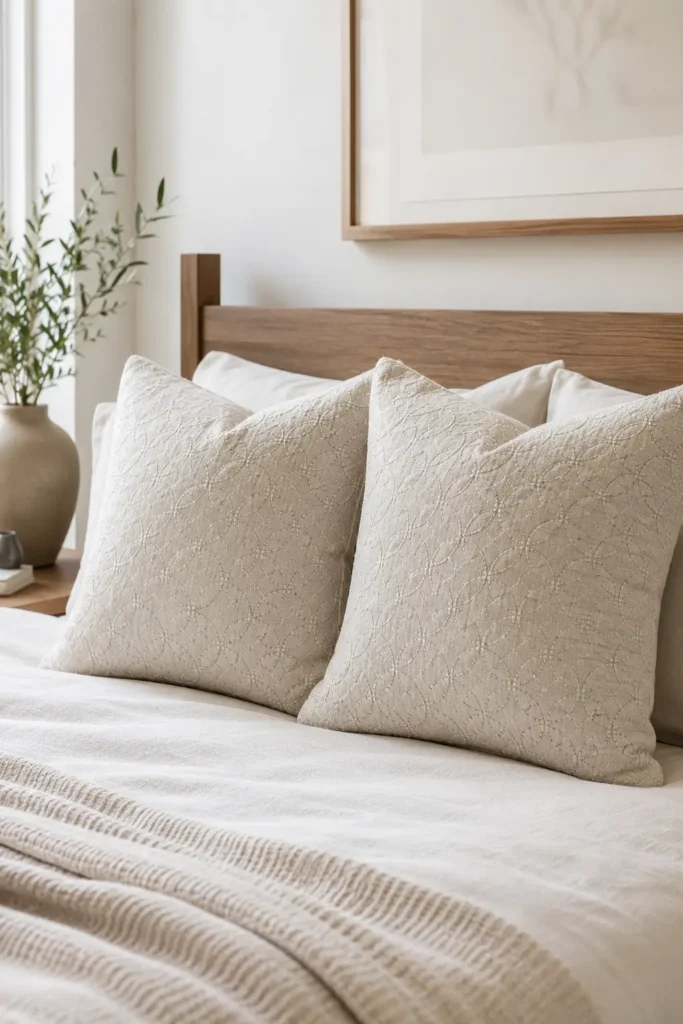
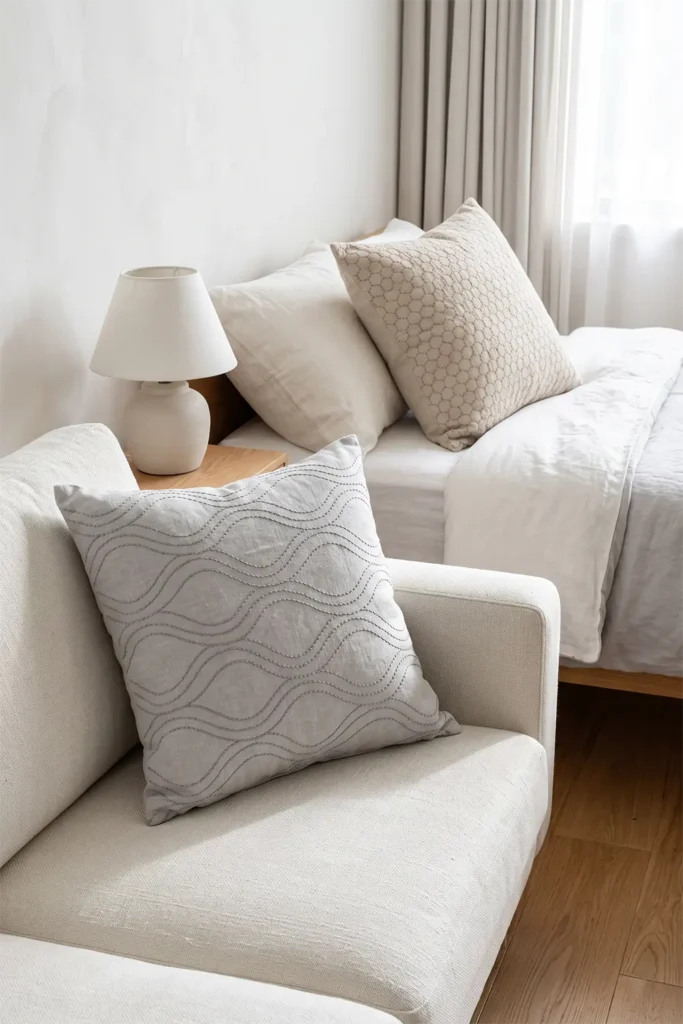
Styling It
Set a pair of monochrome covers against the bed pillows or on a sofa where the texture can catch side light from a window or lamp — that’s when the pattern reveals itself. Keep the surrounding palette in the same tonal family for a serene, layered minimalist look, or use the pillows as the quiet textured element beneath a single bolder accent. Either way, they add warmth and craft without adding visual noise.
Final Thoughts
A pair of monochrome sashiko pillow covers is minimalism with a heartbeat. By working the stitches tone-on-tone, the pattern becomes pure texture — soft relief and shifting shadow rather than loud contrast — which is exactly what a chic, pared-back room wants. Quick to make, forgiving to stitch, and endlessly easy to live with, they prove that the most sophisticated accent is sometimes the quietest one in the room.
Other Design Inspirations – Digitally Modified

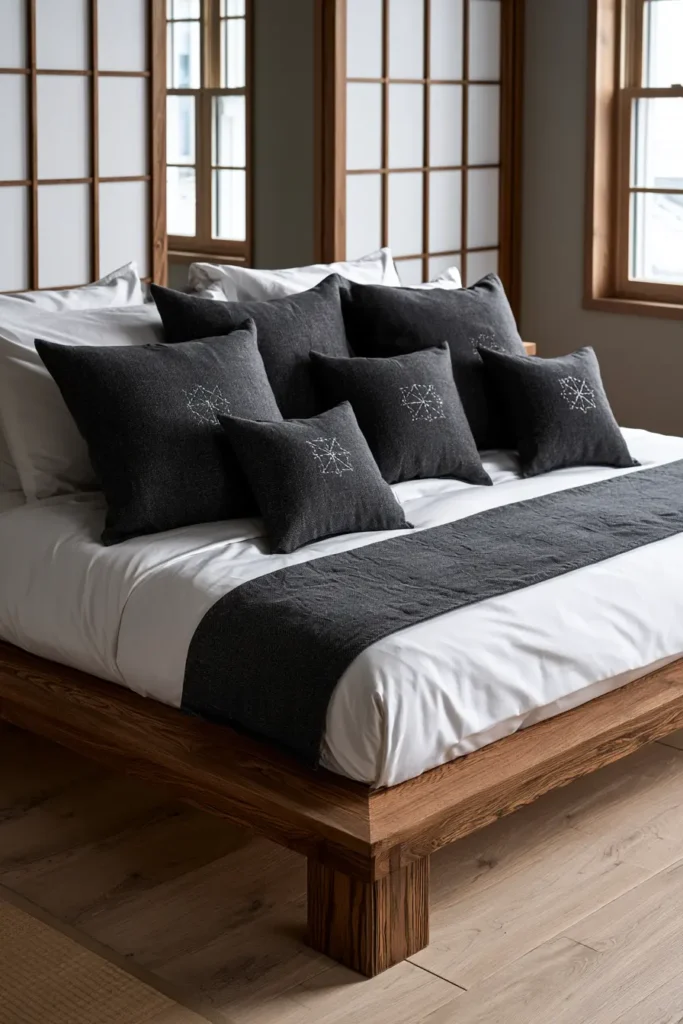
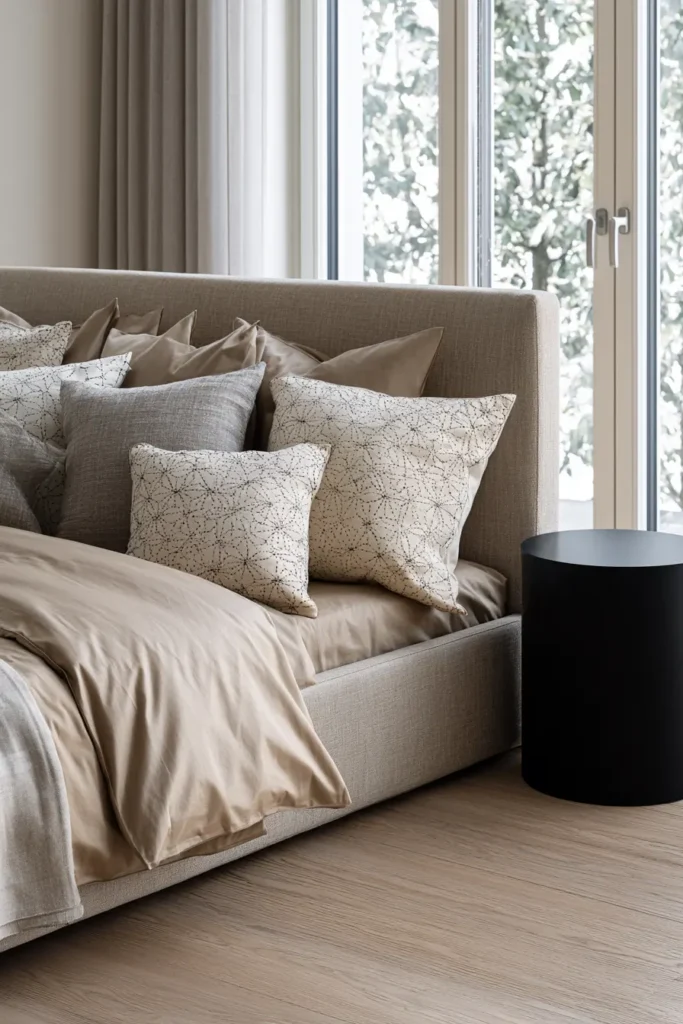
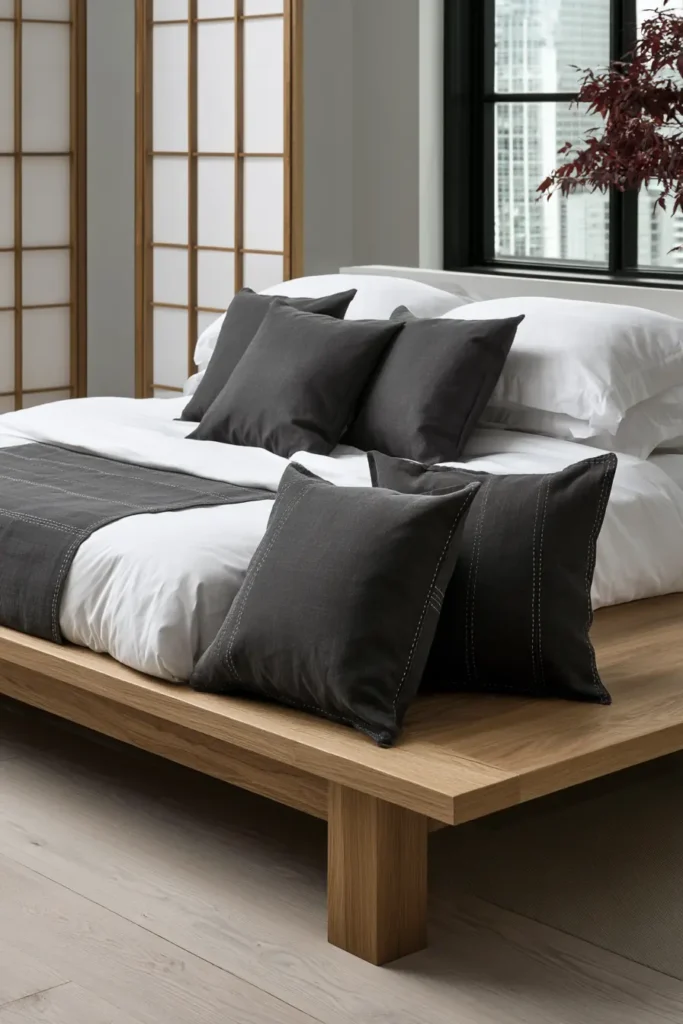
17. Pastel Sashiko Bed Covers for Soft, Cozy Bedroom Style
A pastel sashiko bed cover trades sashiko’s bold indigo roots for something gentle, soft, and deeply cozy. Here the palette is the whole idea: pick any sashiko pattern you love, work it in soft, cheerful pastels, and the geometry that can feel crisp and graphic in indigo turns tender and warm instead. Powder blue, blush, mint, butter yellow, lavender, soft peach — these colors give a bed cover a light, airy, restful quality that suits a soft bedroom beautifully. It’s sashiko at its most welcoming, the kind of cover that makes a room feel like a calm, sunny morning.
There’s an interesting little shift behind this. Traditional sashiko was almost always bold indigo and white — partly for beauty, but largely for practical reasons, since indigo was the everyday, hard-wearing dye of working people and white thread showed clearly for mending. Pastels are a thoroughly modern, purely decorative choice: sashiko set free from its workwear origins and reimagined for comfort and softness. That freedom is part of the fun.
Why I Made It
I made this because not every bedroom wants drama — some want to feel like a soft exhale. Pastels do something to sashiko that I love: they take a centuries-old craft built for tough winters and make it tender, gentle, almost lullaby-like. A pastel cover is the piece I’d make for a restful retreat, a romantic room, or a nursery, anywhere the goal is calm and coziness rather than bold contrast.
I also enjoy how it modernizes the craft. Working sashiko in soft color is a quiet reminder that traditions stay alive by evolving — the same patient running stitch, freed from its indigo past, speaking a softer, sunnier language. There’s something joyful about stitching a strong old pattern in the gentlest possible colors.
Why This Idea Is Worth Making
This idea is worth making because soft color makes sashiko approachable, cozy, and instantly at home in gentle modern decor. The pastel palette is forgiving and welcoming — it suits any pattern, layers beautifully with soft bedding, and brings warmth to a room without weight. Because the stitching runs straight through all the quilt layers, the pattern doubles as the quilting, and the finished cover gives a bedroom a tender, handmade softness that store-bought bedding rarely manages. It’s also a lovely, low-pressure way to enjoy the craft in colors that simply make you happy.
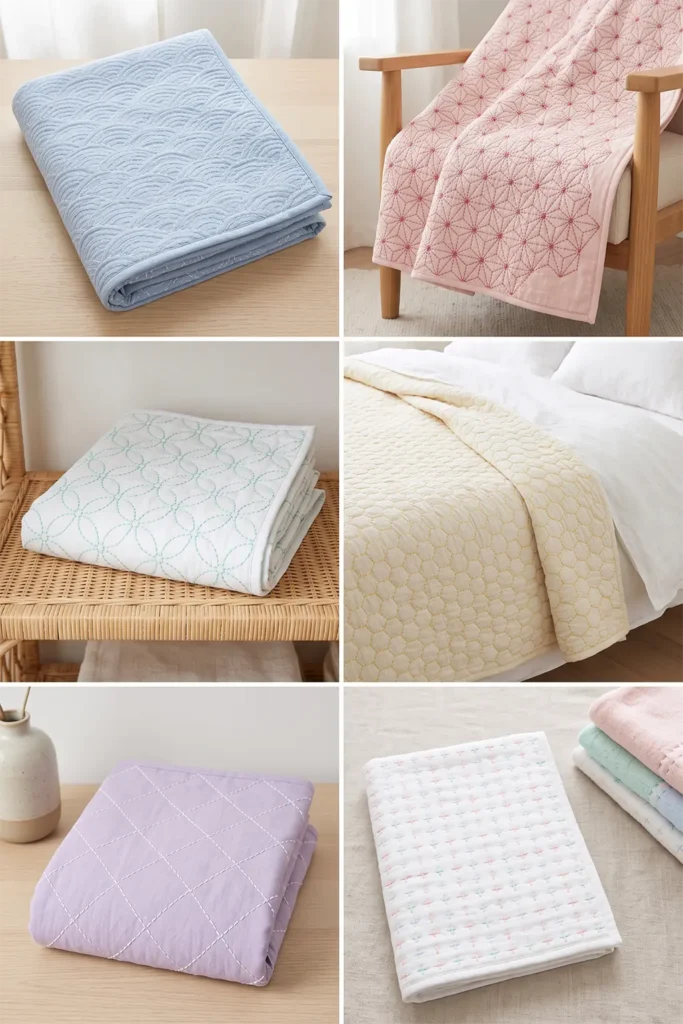
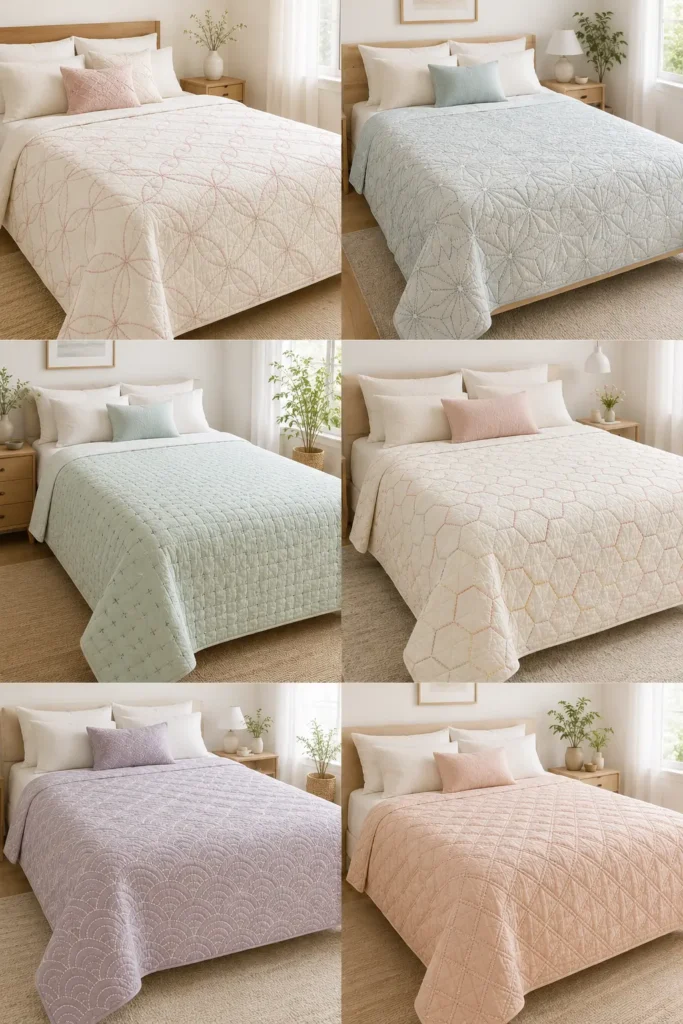
Finished Size
- Approximate finished bed cover: 60 × 80 inches — covers a twin fully, or sits as a feature coverlet on a larger bed
- Full/Queen: scale up to about 88 × 92 inches
- Crib/nursery option: scale down to about 36 × 52 inches (pastels are perfect here)
- Best used: as a top-of-bed coverlet, layered over a duvet, or as a soft, cozy throw
- Skill level: confident beginner (difficulty depends on the pattern you choose)
- Core techniques: sashiko running stitch through all layers (quilting as you go), basting, binding
Materials Needed
For one 60 × 80-inch bed cover:
- Top fabric: 2½ yards of solid pastel (or white/cream) cotton, linen-cotton, or chambray (piece widths if needed)
- Backing fabric: 5 yards (or wide backing)
- Lightweight cotton batting or flannel: at least 64 × 84 inches
- Sashiko thread or pearl cotton in your pastel palette (one to three soft colors)
- Sashiko needle (or long embroidery needle)
- Binding fabric: ¾ yard
- Washable fabric marker or air-erasable marker (test that it removes cleanly from light fabric), plus a ruler and any stencil for your pattern
- Long quilting ruler, rotary cutter, cutting mat, basting pins, and iron
Beginner tip: on pale fabric, choose a marker that removes completely and test it on a scrap first — marks show more easily on light cloth than on indigo.
Choosing Your Colors
“Pastel” can be soft and still cheerful. Build it one of two ways — a pastel base with a deeper-toned or white thread, or a white base with pastel thread as the pop:
- Soft and serene: powder-blue base with white thread
- Romantic: blush base with a soft rose thread
- Fresh: white base with mint-green stitching
- Sunny: cream base with butter-yellow stitching
- Dreamy: lavender base with soft white thread
- Multi-pastel: white base with a gentle scatter of blush, mint, and powder-blue (lovely for a nursery)
Aim for enough contrast that the pattern reads softly — pastel-on-pastel can disappear if the tones are too close. White-on-pastel or pastel-on-white is the easiest, prettiest balance.
The Pattern: Your Choice, in Soft Color
Because the palette is the hero, choose a sashiko pattern to suit your mood and skill:
- Simple and sweet: an even cross-field or straight diamond grid
- Flowing: overlapping waves or linked circles
- Charming: hemp-leaf stars or a hexagon honeycomb
- Mark your chosen pattern lightly, keeping the scale comfortable for a large cover
Softer colors make even bold patterns feel gentle, so don’t be afraid to pick a striking design.
Cutting Measurements
- Top panel: 61 × 81 inches (piece widths if narrow, pressing the seam open)
- Backing panel: 64 × 84 inches
- Batting or flannel: 64 × 84 inches
- Binding: seven strips, 2½ inches × width of fabric, joined into one strip
Step-by-Step Guide
Step 1 — Cut and press. Cut (and piece, if needed) the top to 61 × 81 inches and press it flat. Cut batting and backing to 64 × 84 inches.
Step 2 — Mark the pattern. Mark your chosen sashiko pattern across the top with a well-tested removable marker, keeping a 1-inch margin at the edges for binding.
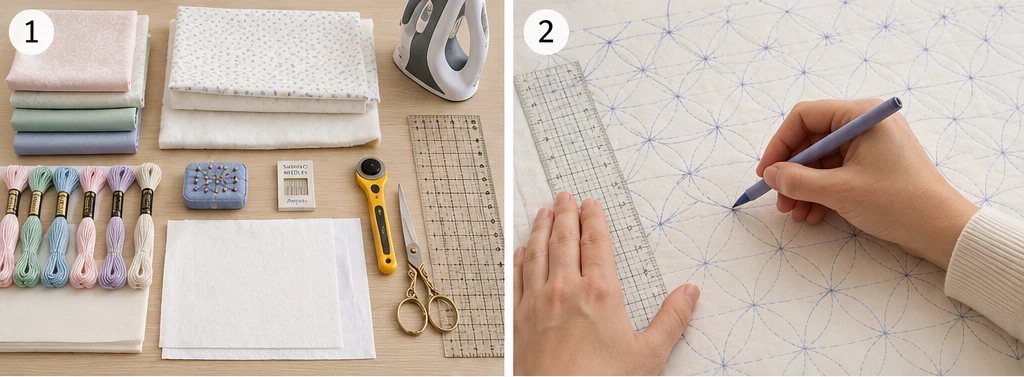
Step 3 — Layer and baste. Lay the backing wrong side up, center the batting, then the marked top right side up. Smooth from the center outward and baste generously — a large cover needs plenty of basting.
Step 4 — Stitch in your pastel. Thread the needle and stitch the pattern with an even ⅛–¼ inch running stitch, passing through all three layers so the pattern quilts the cover. Keep tension relaxed so it stays flat.
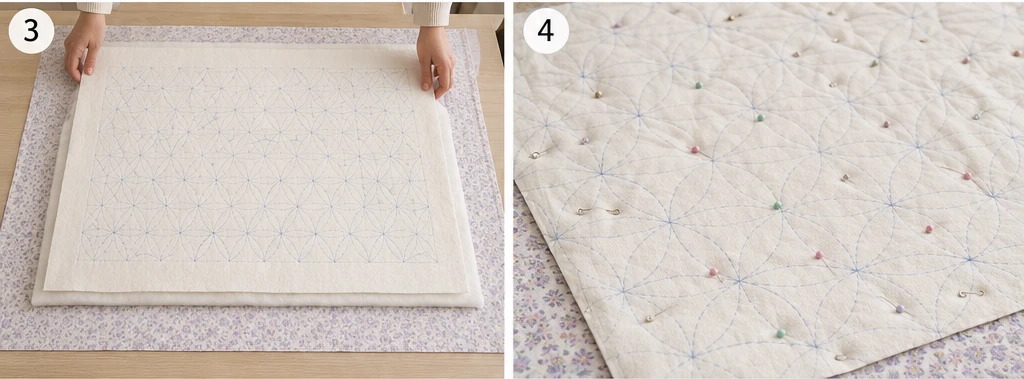
Step 5 — Work the center outward. Stitch from the middle of the cover toward the edges to reduce shifting, completing the full pattern.
Step 6 — Add more pastels, if using. For a multi-pastel look, stitch additional areas or motifs in your second and third soft colors, keeping the overall effect gentle.
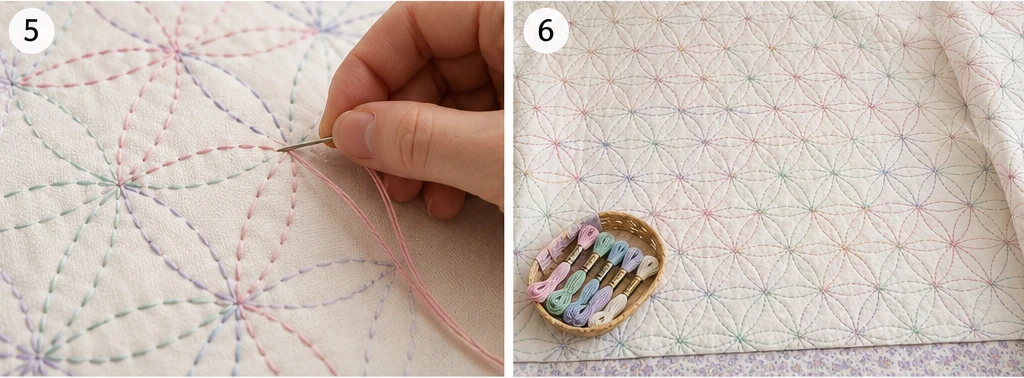
Step 7 — Secure thread ends. Finish threads with a small knot buried between the layers, or with a few tiny backstitches; keep the front clean and trim the tails close.
Step 8 — Trim and square. Trim the cover to 60 × 80 inches, squaring the corners and straightening the edges with a long ruler.
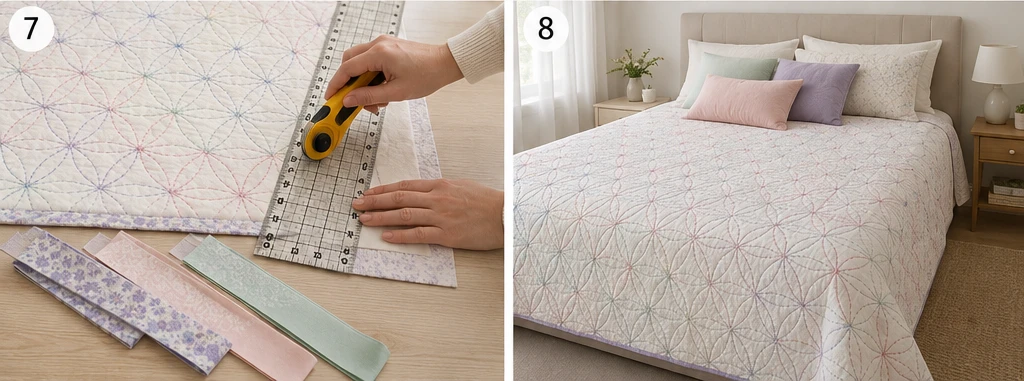
Step 9 — Bind and wash. Join the 2½-inch binding strips, press in half, sew to the front, fold to the back, and finish. Wash gently in cold water, no bleach, and air-dry so the stitches settle and soften.
Assembly at a Glance
- Cut/piece the top to 61 × 81 inches; batting and backing to 64 × 84 inches.
- Mark your chosen pattern with a tested, removable marker, leaving a 1-inch edge margin.
- Layer top, batting, and backing; baste generously.
- Stitch the pattern in pastel through all layers (this quilts it).
- Work from the center outward to keep it flat.
- Add second or third pastel colors if desired.
- Secure all thread ends neatly.
- Trim to 60 × 80 inches and square.
- Bind with 2½-inch strips, then wash gently.
Beginner Tips for Success
- Test your marker on light fabric — pale cloth shows marks, so make sure they fully remove.
- Keep enough tonal contrast that the pattern reads; pastel-on-near-identical-pastel can vanish.
- White-on-pastel or pastel-on-white is the easiest, prettiest balance.
- Don’t pull the thread tight, or the cover will pucker.
- Choose colorfast pastel thread and wash gently to keep the soft colors true.
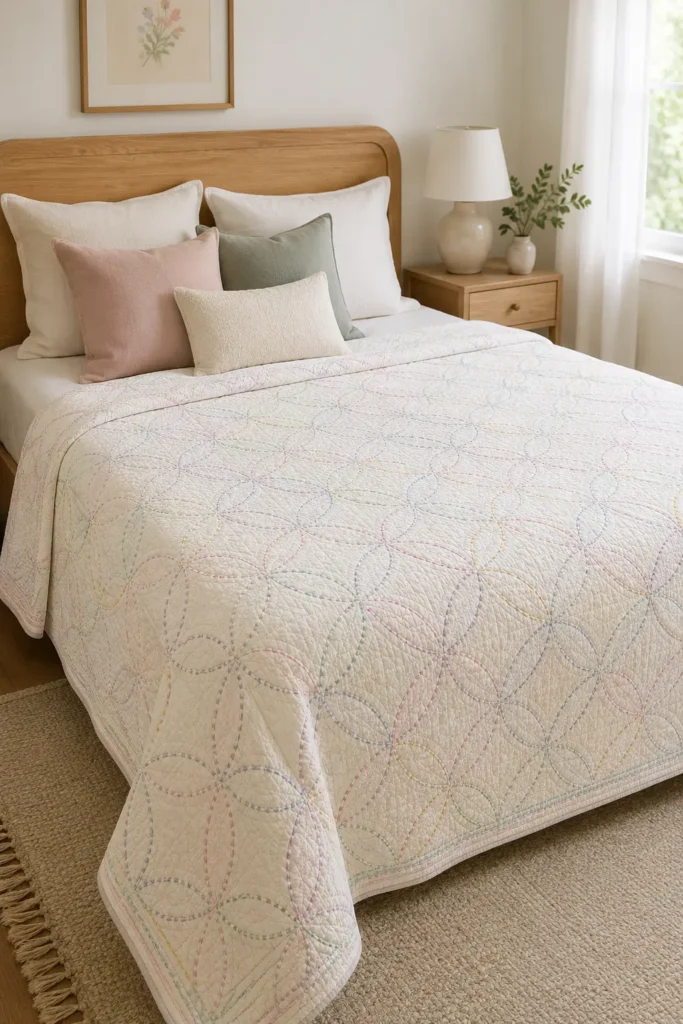
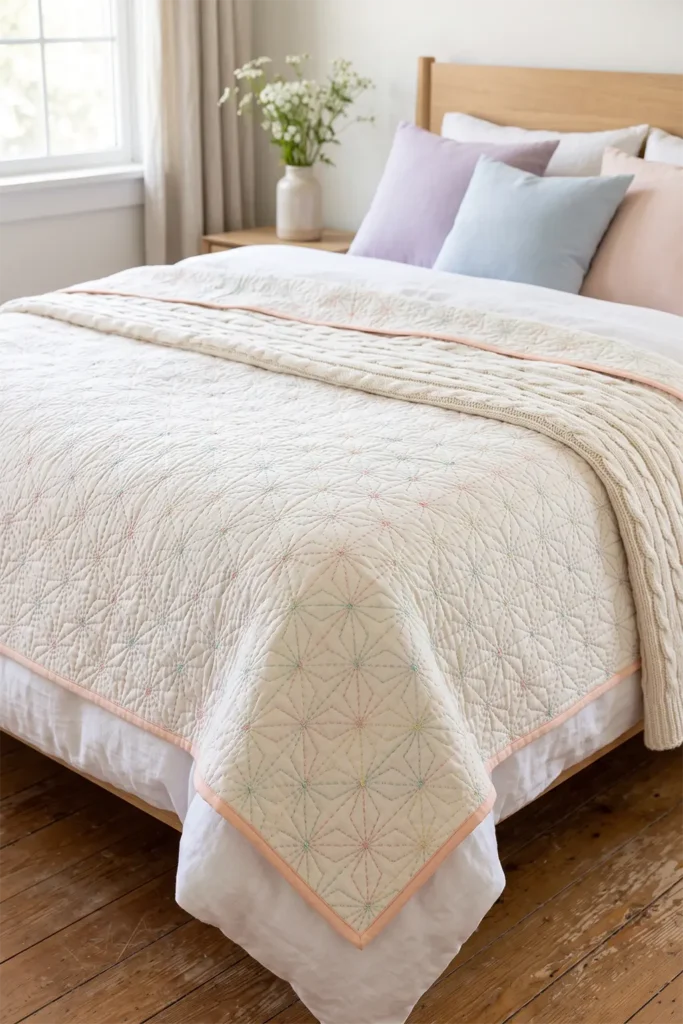
Styling It
Spread the finished cover over the bed and surround it with soft, layered textures — white linen, a chunky cream knit, a couple of gentle pastel pillows — for a cozy, restful look. Pull one of the cover’s pastel colors into a throw or cushion to tie the palette together, and keep walls and wood light and warm. The soft colors make the bed feel inviting to linger, and the same cover adds a tender touch to a nursery or a romantic guest room.
Final Thoughts
A pastel sashiko bed cover is the cozy, gentle heart of this collection. By trading bold indigo for soft, cheerful color, it turns a centuries-old craft into something tender and welcoming — the same patient stitching, speaking a sunnier language. Easy to make, lovely to live with, and endlessly soothing to look at, it’s the perfect way to bring soft, handmade warmth to a bedroom built for rest.
Other Design Inspirations – Digitally Modified
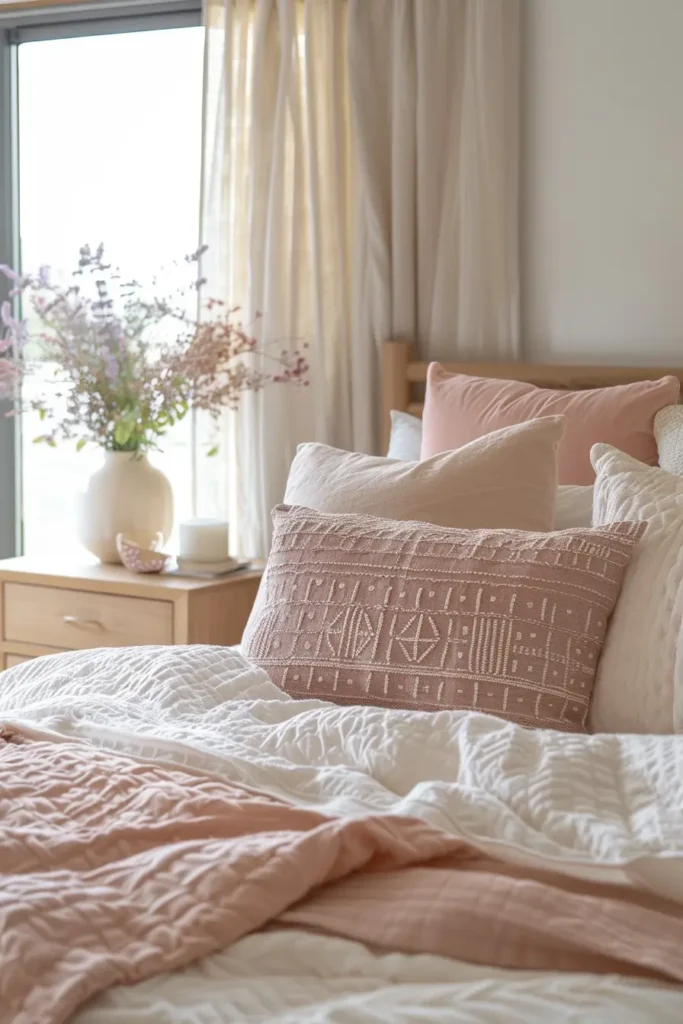
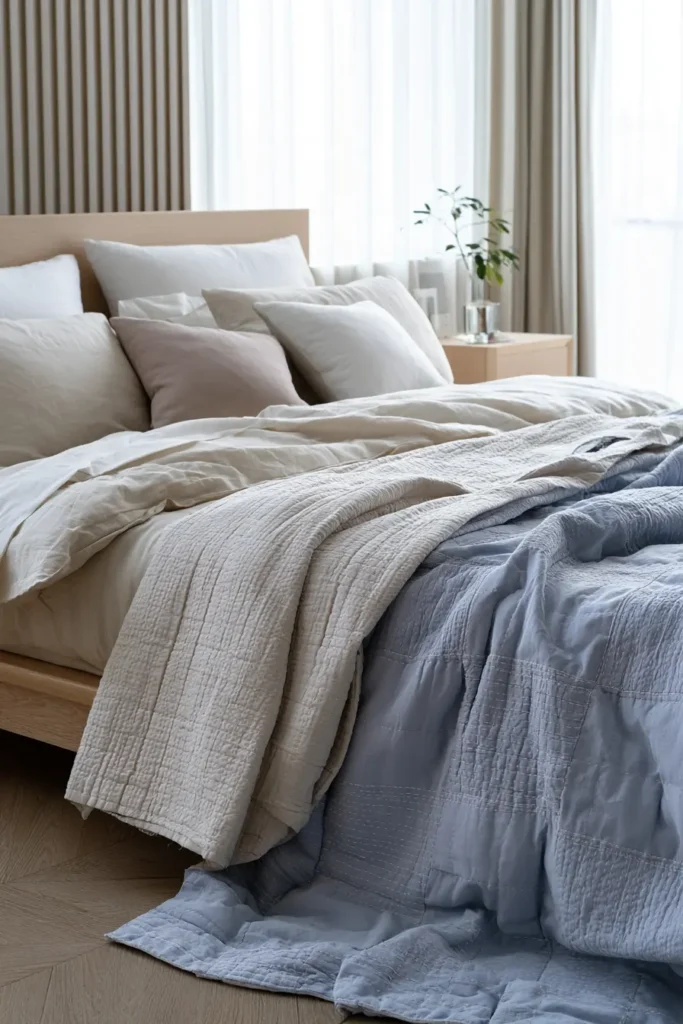
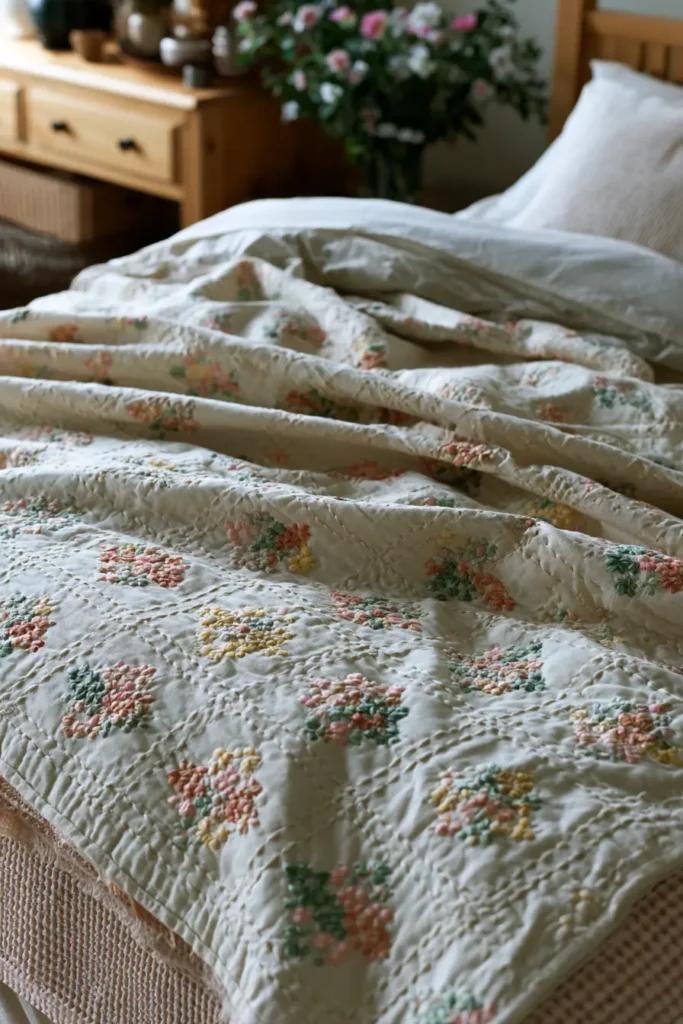
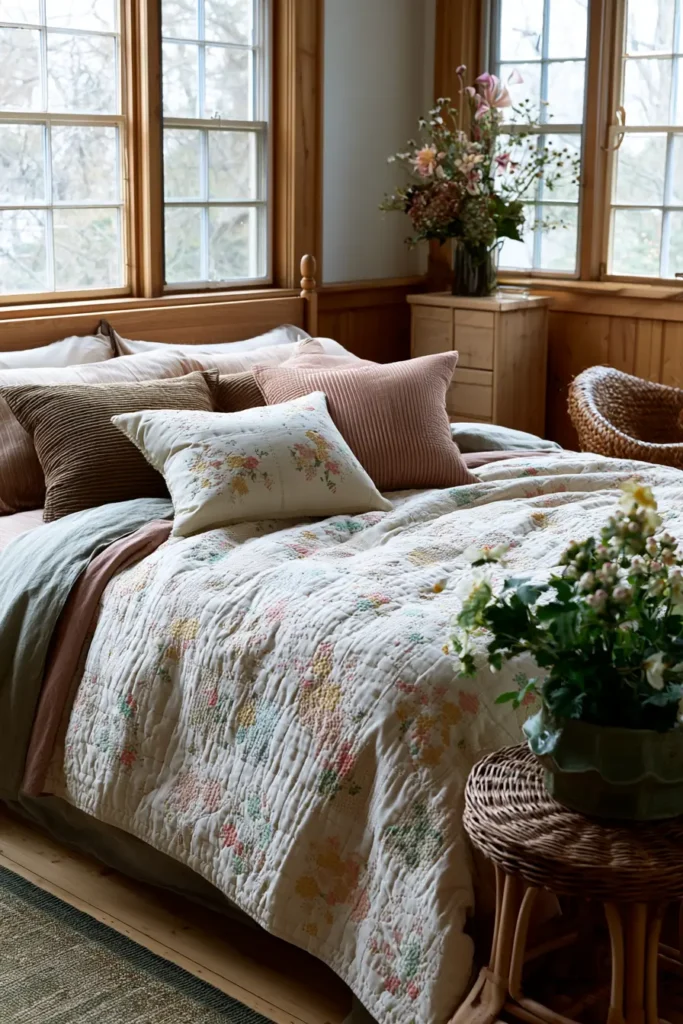
18. Reversible Sashiko Bed Covers for Versatile Everyday Style
A reversible sashiko bed cover gives you two looks in a single handmade piece — flip it over and the whole bed changes. It’s a wonderfully practical idea, and it suits sashiko perfectly, because of a built-in quirk of the craft: the running stitch passes up and down through every layer, so the pattern naturally appears on both faces. Reversibility isn’t a trick you have to engineer; it’s almost native to sashiko. By using two different fabrics as the two outer faces, you get the same stitched pattern set against two different colors — one calm side, one bold side, or two complementary tones — ready to switch whenever the mood or season does.
That two-sided nature is one of sashiko’s quiet pleasures. Look at the back of any sashiko piece, and you’ll find the pattern there too, in a softly offset “negative” of the front. A reversible cover simply celebrates that, turning what’s usually hidden into a second, intentional design. One cover, two everyday styles.
Why I Made It
I made this out of a love of versatility. I’m drawn to objects that earn their keep — that adapt to a room instead of demanding the room adapt to them — and a reversible cover is exactly that. Tired of the indigo side? Flip to the warm side. Redecorating, changing seasons, or just wanting a refresh? Turn it over, and the bed feels new, no new purchase required. For anyone with limited storage or a love of variety, getting two looks from one handmade piece feels genuinely smart.
I also love that it honors something sashiko does on its own. The craft has always been two-sided, the back as quietly beautiful as the front. Building a cover that shows off both feels less like inventing a feature and more like finally giving the hidden side its due.
Why This Idea Is Worth Making
This idea is worth making because it doubles the value of your stitching — one project, two finished looks. Sashiko’s naturally two-sided running stitch means you don’t have to do any extra work to get the reverse side; you simply choose two fabrics worth showing. The result is endlessly versatile: flip it for a different colorway, season, or mood, all from a single cover. It’s practical, space-saving, and quietly clever, and it gives a bed handmade character that adapts to your life rather than locking you into one look.
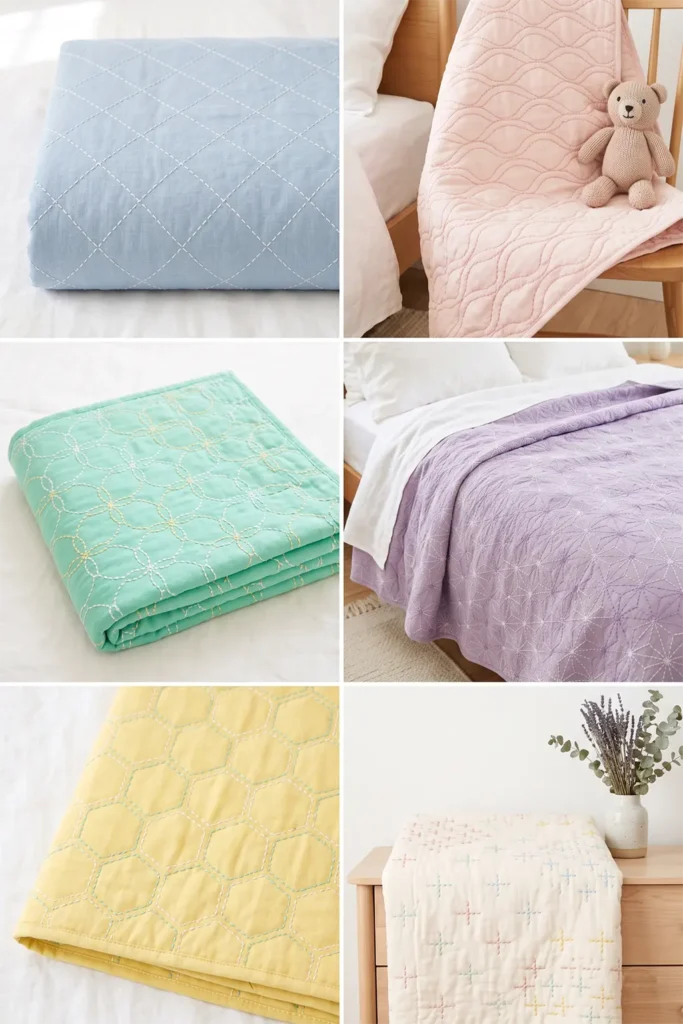
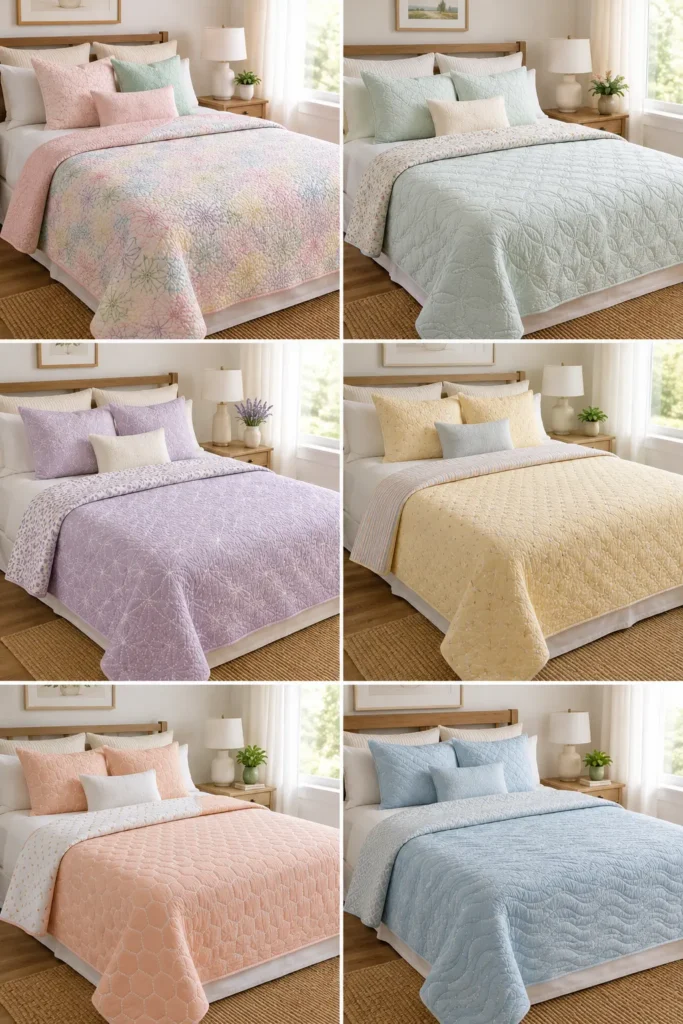
Finished Size
- Approximate finished bed cover: 60 × 80 inches — covers a twin fully, or sits as a feature coverlet on a larger bed
- Full/Queen: scale up to about 88 × 92 inches
- Best used: as a top-of-bed coverlet shown either side up, layered over a duvet, or as a flip-it throw
- Skill level: confident beginner
- Core techniques: two-fabric reversible construction, sashiko running stitch through all layers, knots buried in batting, binding
Materials Needed
For one 60 × 80-inch reversible cover:
- Side-one fabric: 2½ yards of solid cotton, linen-cotton, or chambray (piece widths if needed)
- Side-two fabric: 2½ yards in a contrasting color (this becomes the reverse face — no separate backing needed)
- Lightweight cotton batting: at least 64 × 84 inches
- Sashiko thread or pearl cotton in a color that shows well on both fabrics
- Sashiko needle (or long embroidery needle)
- Binding fabric: ¾ yard (choose a color that suits both sides, or a neutral)
- Washable fabric marker, chalk pencil, or Hera marker, plus a ruler and any stencil for your pattern
- Long quilting ruler, rotary cutter, cutting mat, basting pins, iron
Beginner tip: the trickiest choice is the thread. Pick a color that contrasts nicely with both fabrics — white or cream pops on two mid-to-dark colors, while a soft gold reads well on both warm and cool tones. Test it on scraps of each fabric first.
Choosing Your Colors
Reversibility is the place for two confident, contrasting fabrics. Pick a pair plus a thread that suits both:
- Indigo + mustard gold, with white or cream thread
- Deep teal + coral, with cream thread
- Charcoal + dusty rose, with white thread
- Navy + terracotta, with soft gold thread
- Forest green + warm cream, with ivory or sage thread
- Plum + soft sage, with cream thread
Choose two fabrics of similar value (both mid-tone, or both deep) so one thread color can pop on each side equally. Two very different values can leave the thread invisible on one face.
The Pattern: One Pattern, Two Faces
Because the same stitching shows on both sides, choose an all-over geometric pattern that reads well as both a positive and a softly offset negative:
- Best choices: even diamond grids, overlapping waves, hexagon honeycomb, or a cross field — repeating patterns look intentional on both faces
- Mark your pattern on side one (the face you’ll stitch from); it will mirror onto side two automatically
- Keep the pattern even and all-over so neither side has an obvious “wrong” look
Cutting Measurements
- Side-one panel: 61 × 81 inches (piece widths if narrow)
- Side-two panel: 61 × 81 inches
- Batting: 64 × 84 inches
- Binding: seven strips, 2½ inches × width of fabric, joined into one strip
Step-by-Step Guide
Step 1 — Cut and press. Cut both fabric panels to 61 × 81 inches and press flat. Cut batting to 64 × 84 inches.
Step 2 — Mark the pattern. On side-one fabric, mark your chosen all-over pattern with a removable marker, keeping a 1-inch margin at the edges for binding. Scrap-test your marker first.
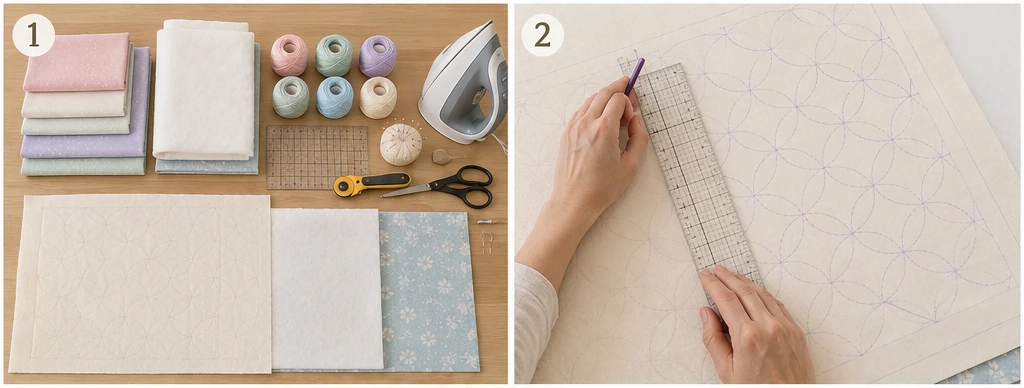
Step 3 — Layer the reversible sandwich. Lay side-two fabric right side down, center the batting, then side-one fabric right side up (marked side showing). Both fabrics face outward — there’s no hidden backing. Smooth from the center.
Step 4 — Baste generously. Pin- or thread-baste the layers well; a large reversible cover needs secure basting so neither face shifts.
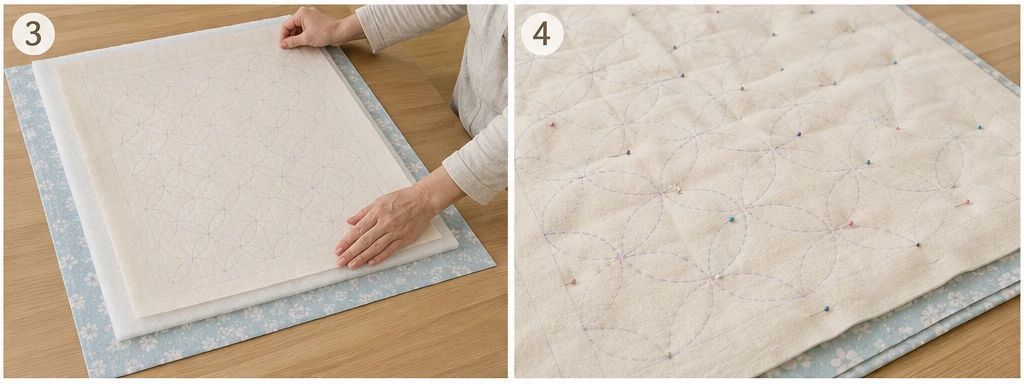
Step 5 — Bury the starting knot. Slip the needle in through side one only, into the batting, and tug the knot to pop it between the layers so it hides in the middle — never on either face.
Step 6 — Stitch through all layers. Stitch your pattern with an even ⅛–¼ inch running stitch through all three layers, working from the center outward. The same pattern appears on both faces against the two different fabrics.
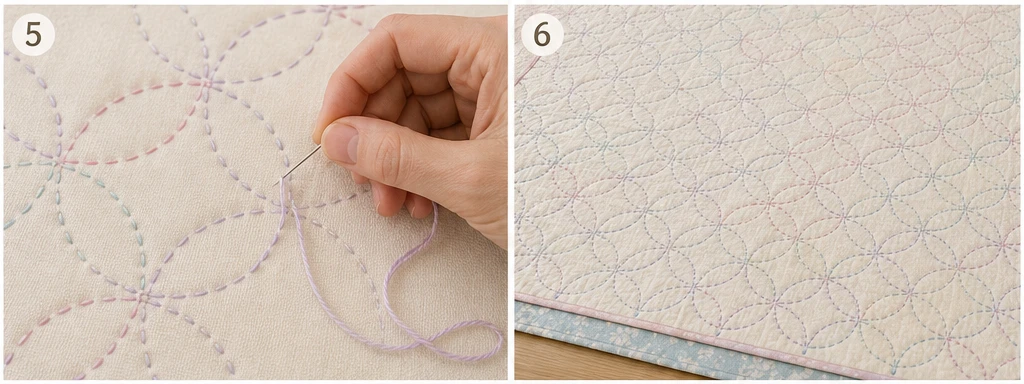
Step 7 — End knots in the batting. Finish each thread the same way — a small knot or a few tiny backstitches buried inside the batting, so neither side ever shows a knot or tail.
Step 8 — Trim and square. Trim the cover to 60 × 80 inches, squaring the corners and straightening the edges with a long ruler.
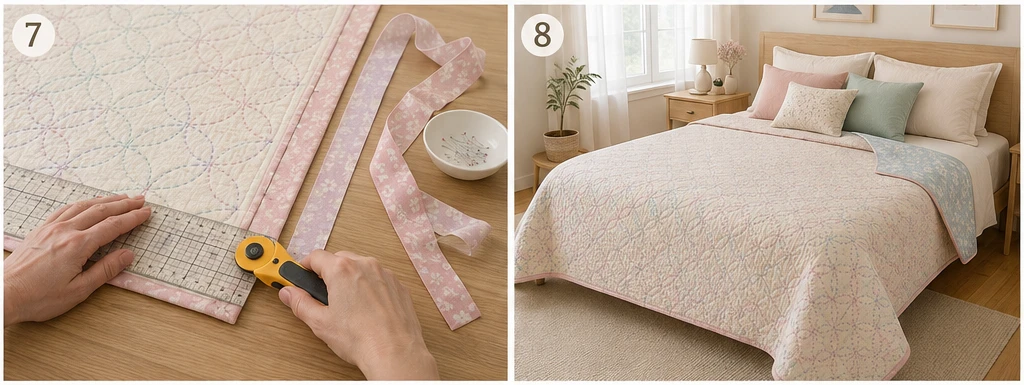
Step 9 — Bind and wash. Join the 2½-inch binding strips, press in half, and attach so the binding finishes cleanly on both sides (machine to one side, hand-finish the other for the tidiest reversible edge). Wash gently in cold water, no bleach, and air-dry.
Assembly at a Glance
- Cut both fabric panels to 61 × 81 inches; batting to 64 × 84 inches.
- Mark the all-over pattern on side one with a 1-inch edge margin.
- Layer side two (down), batting, side one (up) — both faces out.
- Baste generously.
- Bury the starting knot in the batting.
- Stitch the pattern through all layers, center outward.
- Bury all end knots in the batting so neither face shows them.
- Trim to 60 × 80 inches and square.
- Bind cleanly on both sides, then wash gently.
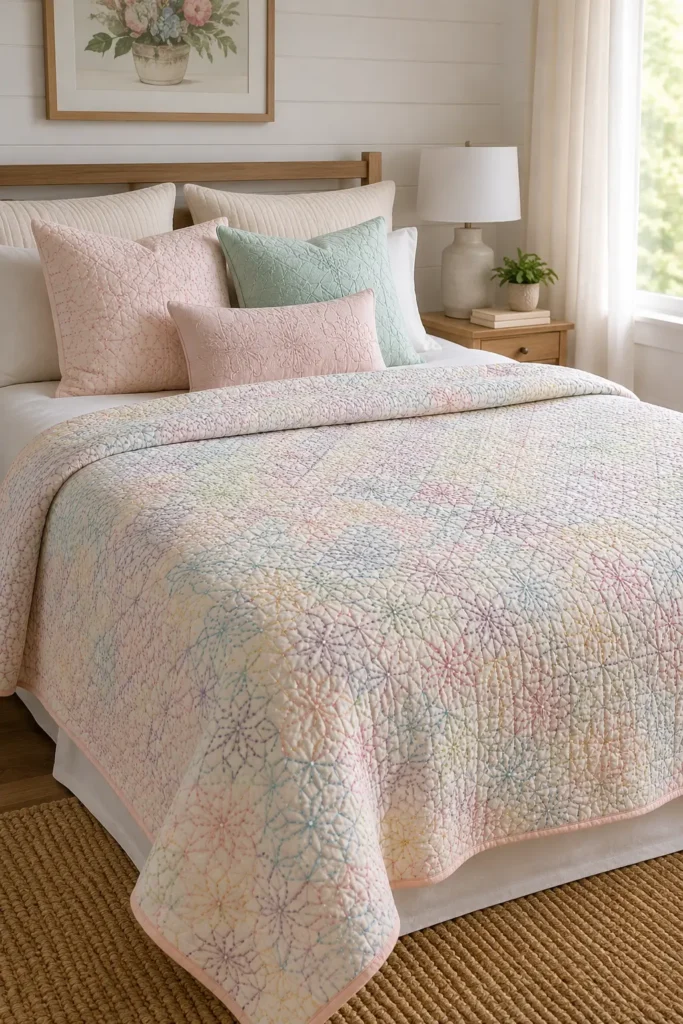
Beginner Tips for Success
- Choose a thread that contrasts with both fabrics — test on scraps of each before committing.
- Pick two fabrics of similar value so the thread shows equally on each side.
- Always bury knots in the batting; with no hidden backing, a knot on either face will show.
- Use an all-over, even pattern so both faces look intentional, with no obvious “back.”
- Hand-finish the binding on the second side for a clean edge that works either way up.
Styling It
Show whichever side suits the moment — the calm color for a serene look, the bold one for energy — and pull an accent pillow or throw in that side’s color to tie the bed together. Because it flips, keep a couple of accent pieces in each colorway so a quick turnover genuinely refreshes the room. It works just as well folded at the foot of the bed, where a soft fold can reveal a teasing glimpse of the second color.
Final Thoughts
A reversible sashiko bed cover is versatile and beautiful. It leans into something sashiko has always done — showing its pattern on both faces — and turns that two-sided nature into a practical, adaptable piece that gives you two looks for the effort of one. Stitch two colors you love, bury your knots in the middle, and you’ll have a cover that changes with your mood, your season, and your room, season after season.
Other Design Inspirations – Digitally Modified
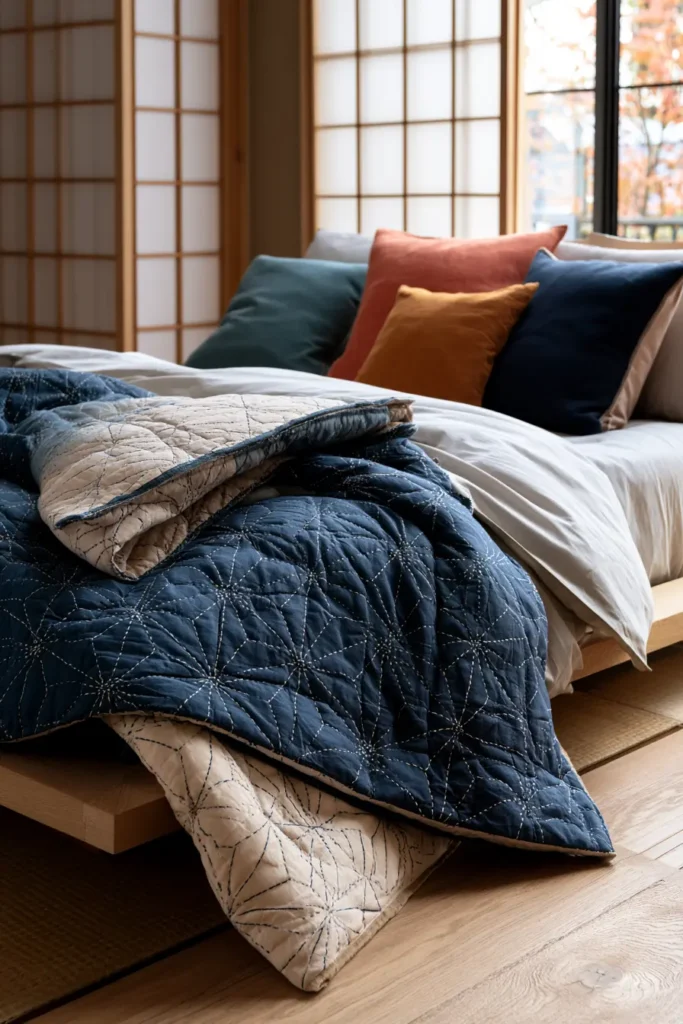
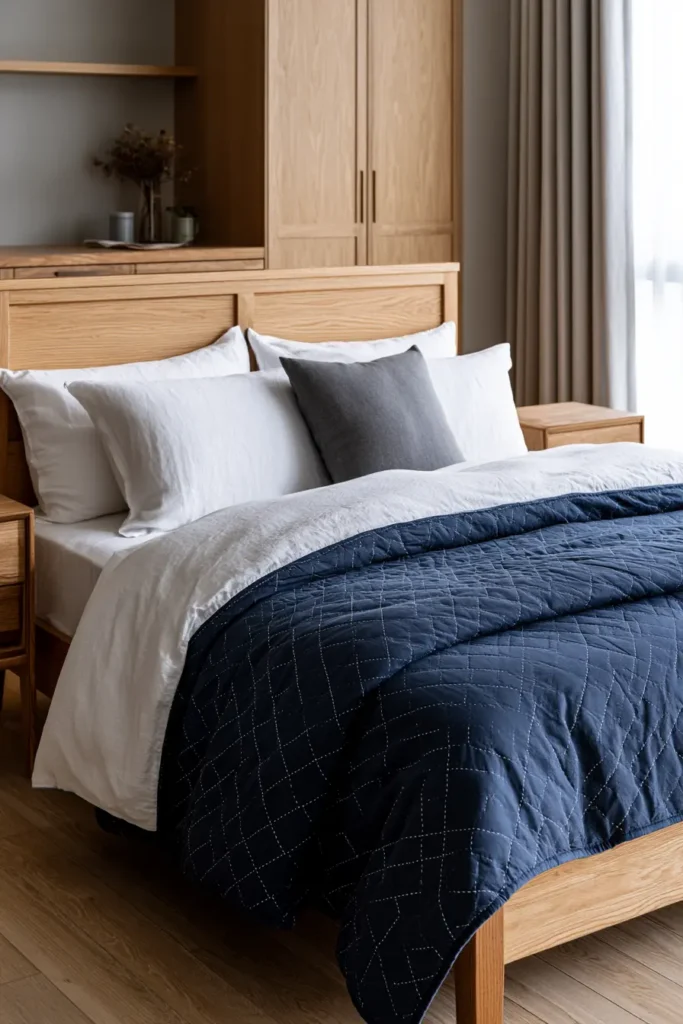
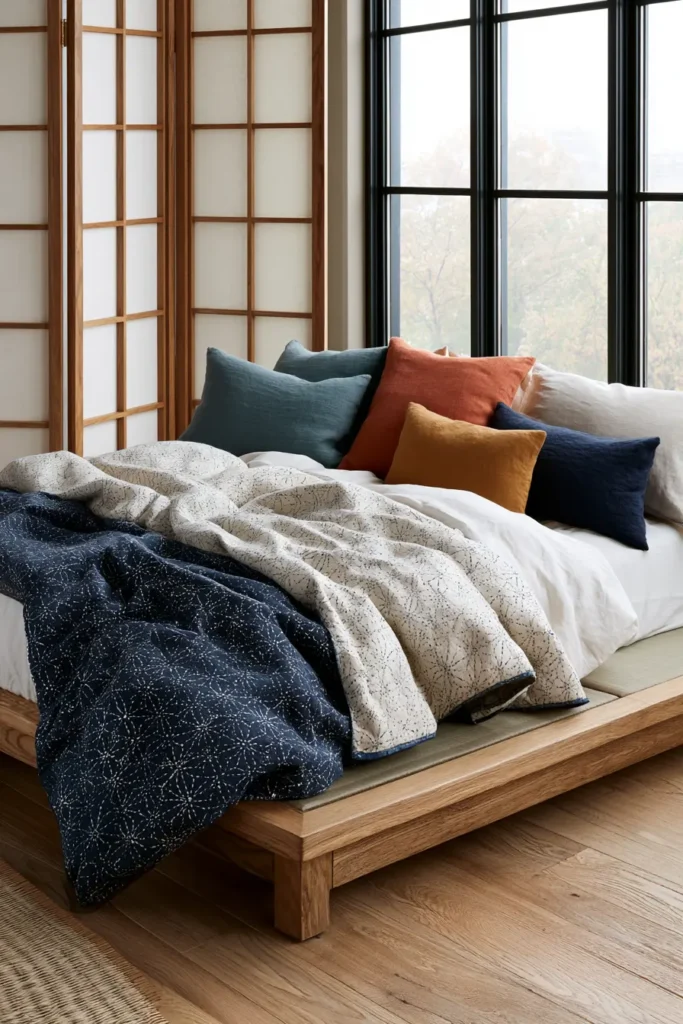
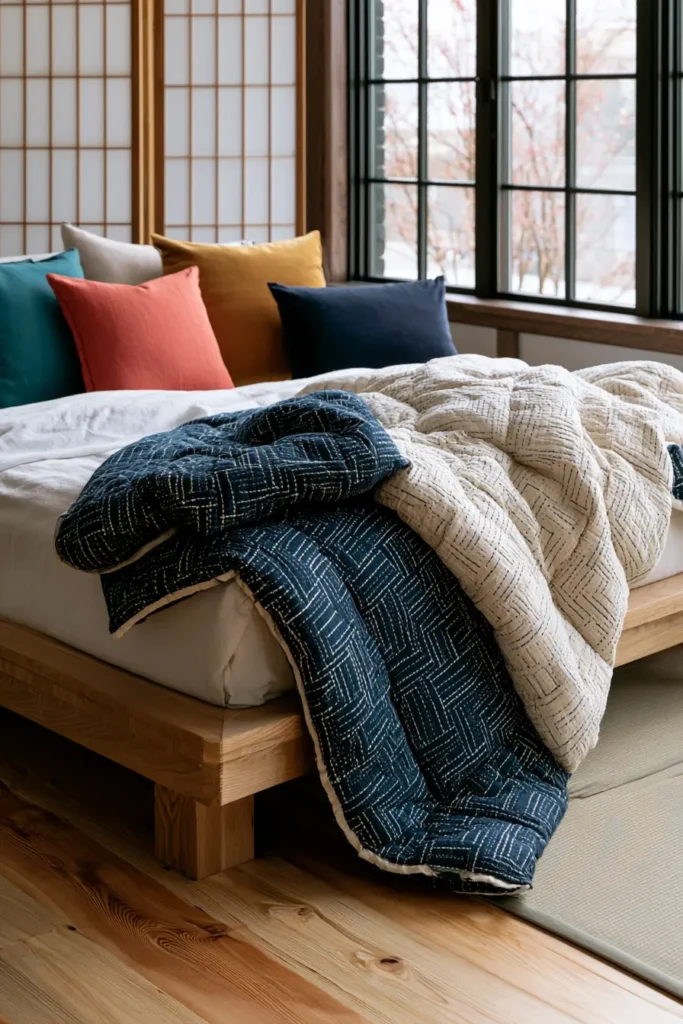
19. Sashiko Throw Quilts for Cozy Living Room Styling
A sashiko throw quilt brings handmade warmth to the busiest, coziest spot in the home — the living room sofa. Smaller and more snuggle-friendly than a bed quilt, a throw is the piece you actually reach for: grabbed for movie nights, pulled over your legs with a book, tossed across the couch, and used every single day. Worked in sashiko, it pairs that everyday coziness with real craft and texture, a hand-stitched pattern that makes an ordinary throw feel special. Draped over a sofa arm or folded in a basket, it adds the kind of warm, lived-in character that pulls a whole living room together.
There’s a reason a throw suits sashiko so well. The craft was born to reinforce — running stitches layered into work clothes to make them tougher and last longer through hard use. A living-room throw is exactly the kind of hard-working textile sashiko was made for: the more it’s used, the more that sturdy, dense stitching earns its place. Beauty that genuinely holds up.
Why I Made It
I made this because the living room deserves handmade comfort as much as the bedroom does — maybe more, since it’s where everyone gathers. The throw is the most-touched textile in most homes, the one that gets daily, affectionate, slightly rough use, and I wanted that everyday object to be something crafted rather than something disposable. There’s a quiet joy in reaching for a handmade throw on an ordinary evening.
I also love that sashiko makes a throw better, not just prettier. The stitching that decorates it is the same stitching that strengthens it, which is deeply true to the craft’s origins. A sashiko throw is built to be used, washed, snuggled under, and used again — and to look better for the wear, the way the best handmade things do.
Why This Idea Is Worth Making
This idea is worth making because it puts craft where life actually happens. A throw is a smaller, faster project than a full quilt, so it’s an achievable way to enjoy sashiko, and its dense stitching makes it genuinely durable for daily living room use. It instantly styles a sofa or armchair, layers beautifully with cushions, and brings cozy, handmade texture to the room where you spend the most time. Practical, snuggly, and beautiful all at once, it’s the sashiko piece you’ll use the most.
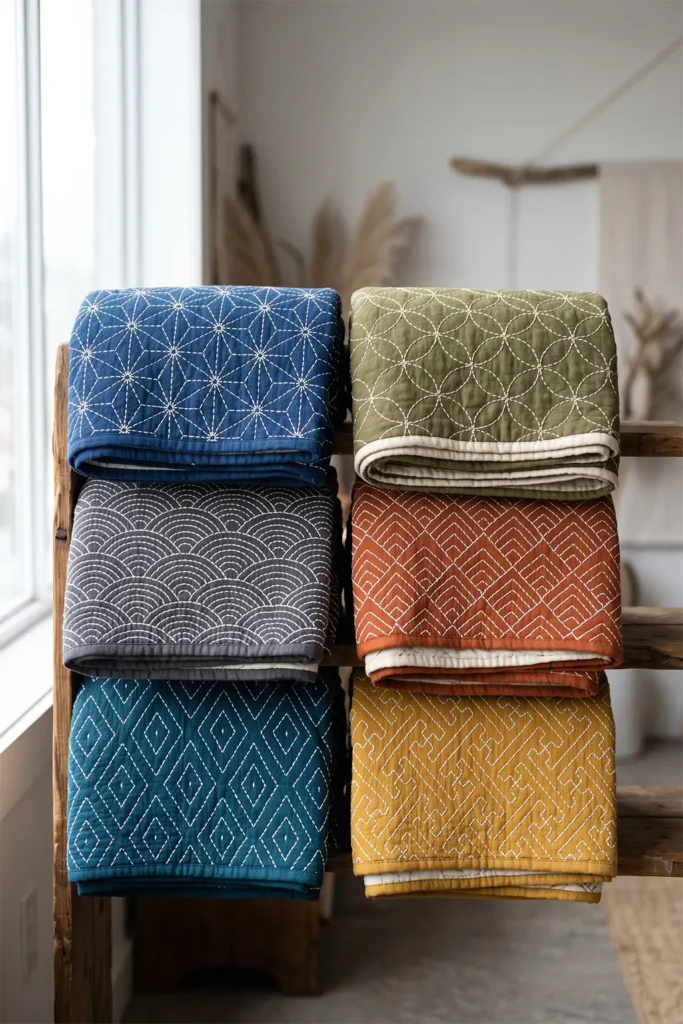
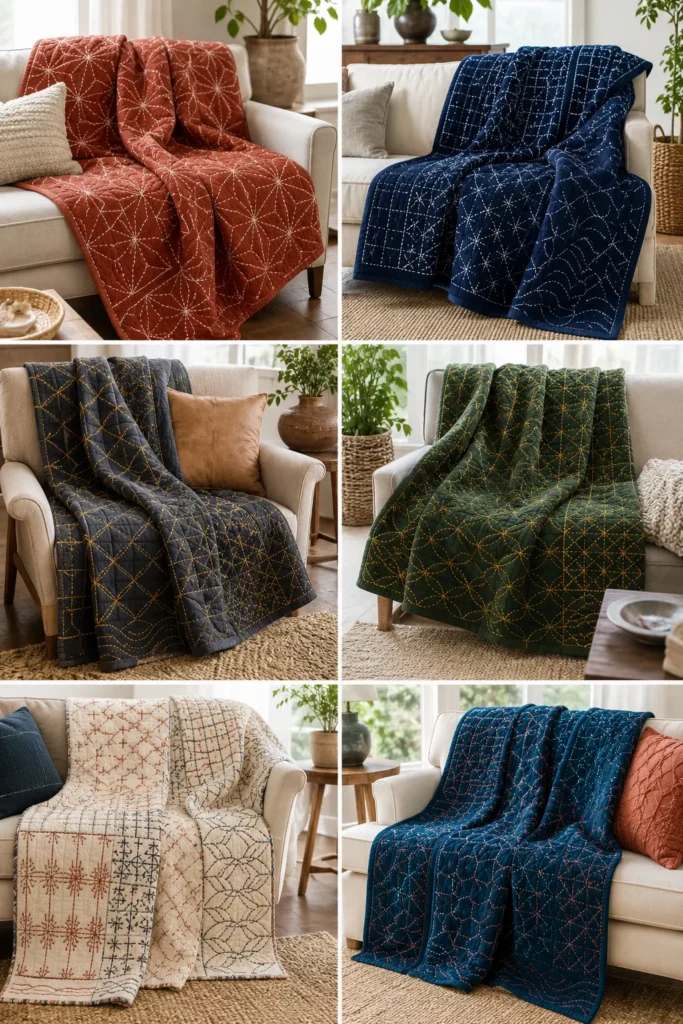
Finished Size
- Approximate finished throw: 50 × 60 inches — a generous single-person snuggle throw
- Lap throw: scale down to about 40 × 54 inches
- Generous throw: scale up to about 54 × 72 inches (room to share)
- Best used: draped over a sofa back or arm, folded in a basket, or pulled over you on the couch
- Skill level: confident beginner
- Core techniques: sashiko running stitch through all layers, basting, durable binding
Materials Needed
For one 50 × 60-inch throw:
- Top fabric: 1¾ yards of solid cotton, linen-cotton, or chambray (a heathered or flannel-look base feels extra cozy)
- Backing fabric: 1¾ yards (flannel backing adds wonderful snuggle warmth)
- Cotton or cotton-blend batting: at least 54 × 64 inches (a slightly lofted batting gives a throw nice body and warmth)
- Sashiko thread or pearl cotton in one or two contrast colors
- Sashiko needle (or long embroidery needle)
- Binding fabric: ½ yard (durable, tightly woven — it takes the most wear on a throw)
- Washable fabric marker, chalk pencil, or Hera marker, plus a ruler and any stencil for your pattern
- Quilting ruler, rotary cutter, cutting mat, basting pins, iron
Beginner tip: for a throw that gets daily use, choose a tightly woven, sturdy binding fabric and stitch the binding securely — the edges take the most handling.
Choosing Your Colors
A living-room throw can be richer and cozier than bedroom bedding — coordinate it with your sofa and cushions. Pick a solid base and one or two contrasting threads:
- Warm and cozy: terracotta base with cream thread
- Classic: indigo base with white thread
- Earthy modern: charcoal base with mustard-gold thread
- Rich: forest green base with gold thread
- Soft warm: oatmeal base with rust and navy threads
- Bold: deep teal base with coral thread
Choose colors that talk to your existing cushions and rug so the throw layers in naturally. Match the binding to the base or a thread color.
The Pattern: Your Choice, Built for Coziness
Because a throw is about comfort, choose a pattern you’ll enjoy living with — and denser stitching adds both texture and durability:
- Cozy and textural: a tight hexagon honeycomb or basket-weave lattice
- Flowing: overlapping waves or linked circles
- Simple and classic: a diamond grid or cross field
- Mark your chosen pattern lightly, keeping the scale comfortable for hand stitching
Cutting Measurements
- Top panel: 51 × 61 inches
- Backing panel: 54 × 64 inches
- Batting: 54 × 64 inches
- Binding: six strips, 2½ inches × width of fabric, joined into one strip
Step-by-Step Guide
Step 1 — Cut and press. Cut the top to 51 × 61 inches and press it flat. Cut batting and backing to 54 × 64 inches.
Step 2 — Mark the pattern. Mark your chosen sashiko pattern across the top with a removable marker, keeping a 1-inch margin at the edges for binding. Scrap-test your marker first.
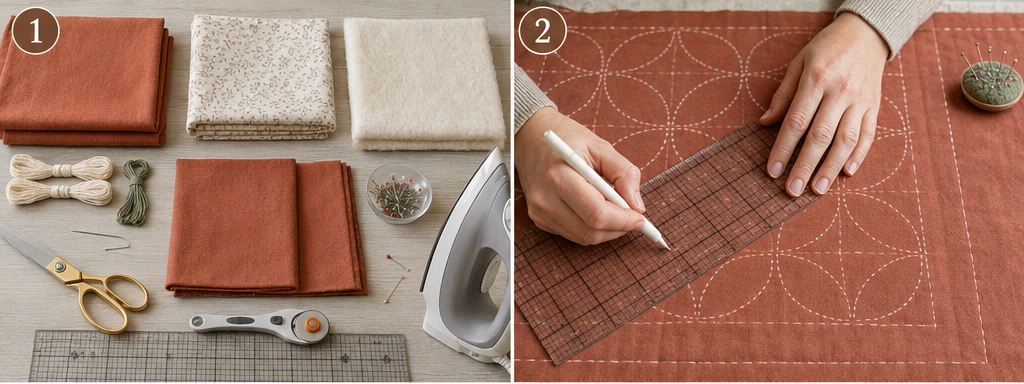
Step 3 — Layer and baste. Lay the backing wrong side up, center the batting, then the marked top right side up. Smooth from the center outward and baste securely.
Step 4 — Stitch through all layers. Thread the needle and stitch the pattern with an even ⅛–¼ inch running stitch, passing through all three layers so the stitching quilts the throw. Keep tension relaxed so it stays flat and soft.
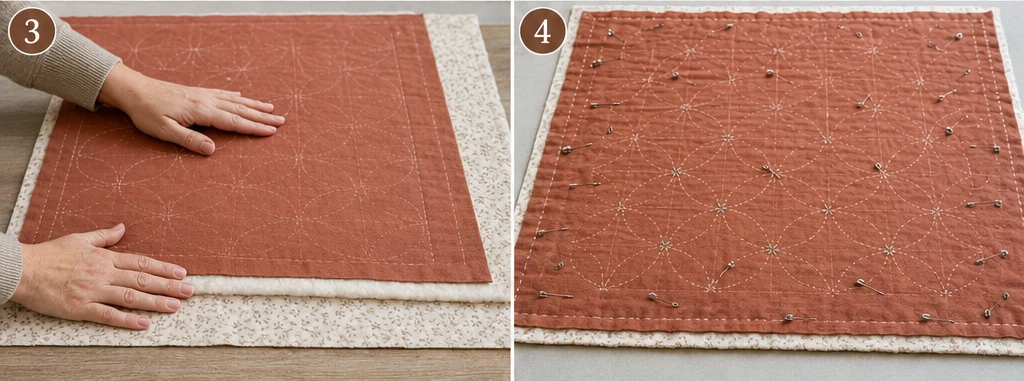
Step 5 — Work center outward. Stitch from the middle toward the edges to prevent shifting, completing the full pattern. Denser stitching means a sturdier, cozier throw.
Step 6 — Add a second color, if using. For extra interest, stitch part of the pattern or an accent in a second thread color, keeping it cohesive with your room.
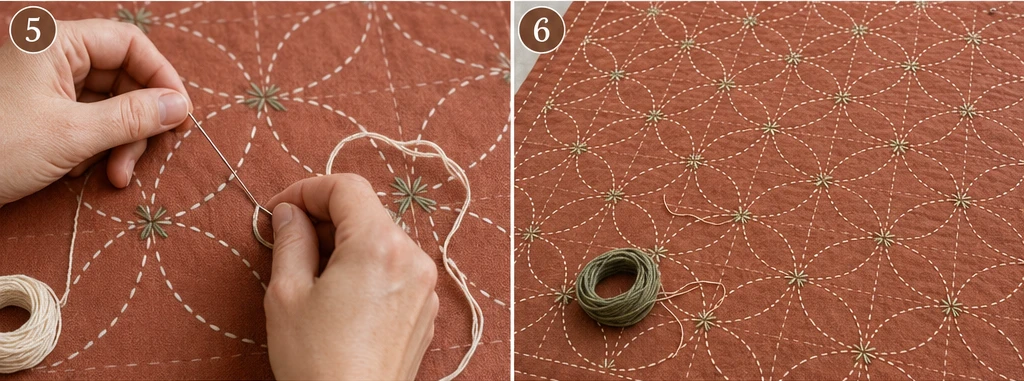
Step 7 — Secure thread ends. Finish threads with a small knot buried between the layers, or with a few tiny backstitches; keep the front clean and trim the tails close.
Step 8 — Trim and square. Trim the throw to 50 × 60 inches, squaring the corners and straightening the edges with a ruler.
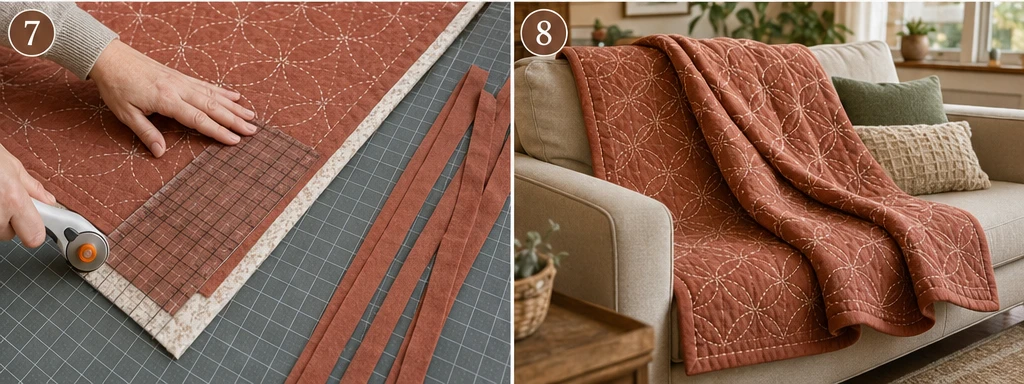
Step 9 — Bind and wash. Join the 2½-inch binding strips, press in half, and sew securely to front and back — a throw’s edges get the most wear. Wash gently in cold water, no bleach, and air-dry; the first wash softens it into a snugglier piece.
Assembly at a Glance
- Cut the top to 51 × 61 inches; batting and backing to 54 × 64 inches.
- Mark your chosen pattern with a removable marker, 1-inch edge margin.
- Layer top, batting, and backing; baste securely.
- Stitch the pattern through all layers (this quilts it).
- Work center outward; denser stitching adds durability.
- Add a second color if desired.
- Secure all thread ends neatly.
- Trim to 50 × 60 inches and square.
- Bind securely front and back, then wash gently.
Beginner Tips for Success
- Pick a sturdy, tightly woven binding and attach it securely — throw edges take the most handling.
- A flannel backing or slightly lofted batting makes the throw cozier and more snuggle-worthy.
- Coordinate colors with your sofa, cushions, and rug so the throw layers in naturally.
- Don’t pull the thread tight; relaxed stitching keeps the throw soft and drapey.
- Denser stitching looks richer and lasts longer — well worth it on a piece used daily.
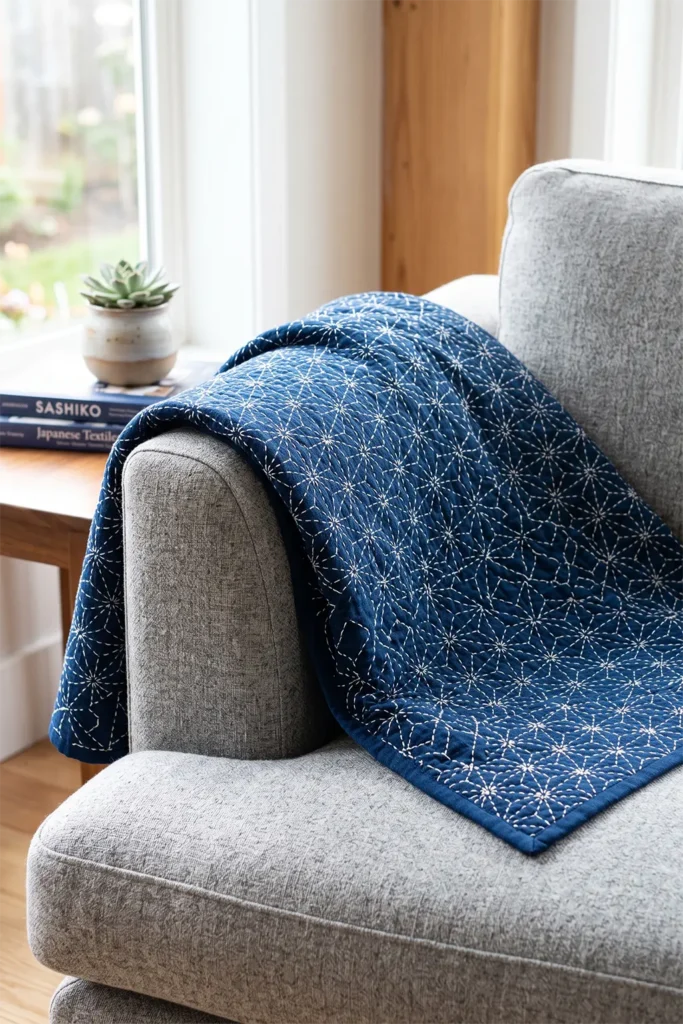
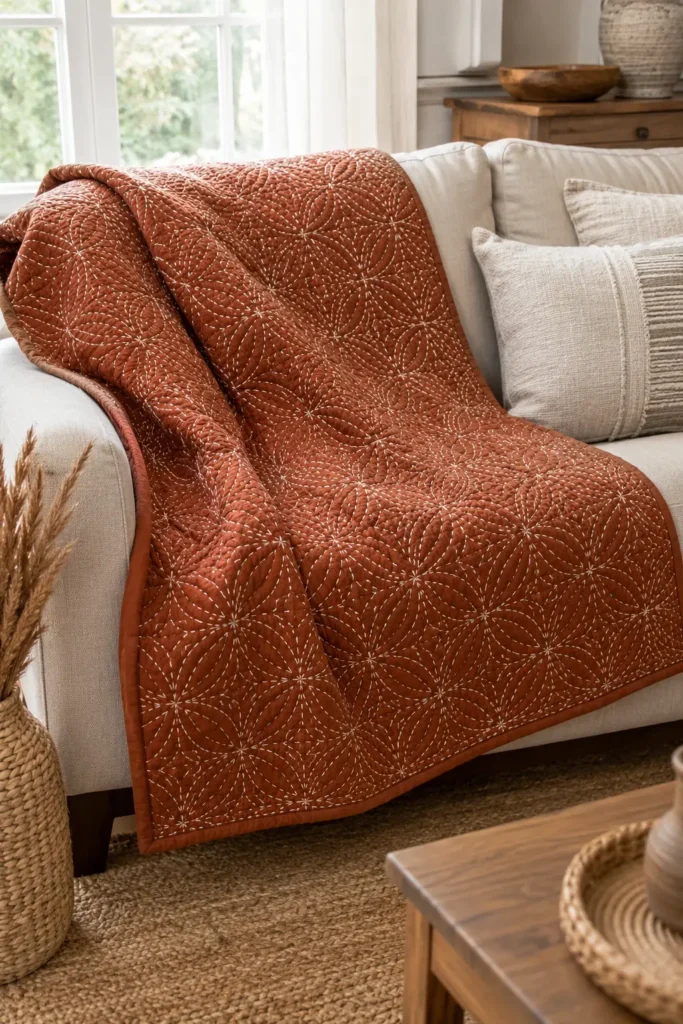
Styling It
Drape the finished throw over the back or arm of a sofa with a casual fold, or roll it in a basket beside the couch for easy reach. Pull one or two of its colors into your cushions so it looks intentional rather than tossed, and let it layer with other textures — a chunky knit, a sheepskin, a patterned pillow. Because it’s made to be used, don’t be precious with it; the lived-in look is exactly the point.
Final Thoughts
A sashiko throw quilt is a craft made for everyday life. Smaller and cozier than a bed quilt, it brings hand-stitched warmth and texture to the living room sofa, and because sashiko was born to reinforce, the very stitching that makes it beautiful makes it tough enough for daily snuggling. Style it on a couch, share it on movie nights, wash it and use it again — it’s the handmade piece that earns its place by being loved, not saved.
Other Design Inspirations – Digitally Modified

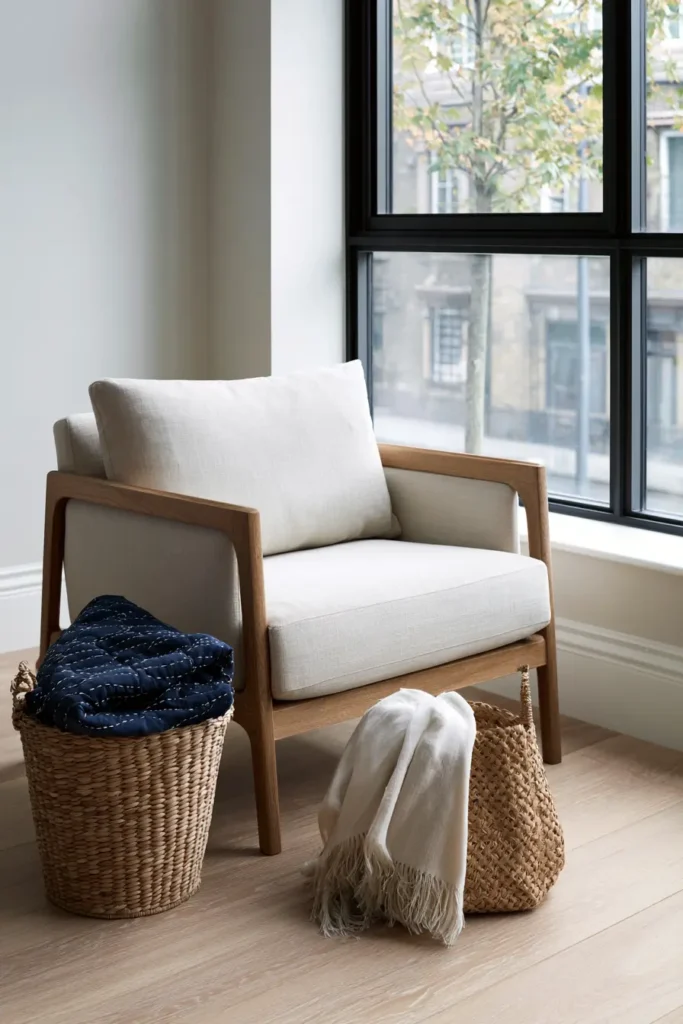


20. Layered Sashiko Bed Runner & Pillow Set for Coordinated Serene Decor
A layered sashiko bed runner and pillow set is where everything in this collection comes together. Instead of a single piece, you make a coordinated trio — a bed runner plus a pair of matching pillow covers — designed to work as one calm, cohesive ensemble. That coordination is the whole point: a bed dressed in pieces that clearly belong together feels styled, intentional, and serene in a way that mismatched accents never do. Worked in sashiko, a set of ties hand-stitched right through the look of the bed, from the runner across the foot to the pillows at the head, for a quietly pulled-together, designer-calm result.
Here’s the styling secret that makes a set work: unify the palette, vary the scale. Coordinated doesn’t mean identical. The most elegant sets share one color story and one family of patterns, but let each piece play its own role — a bolder hero pattern on the runner, a simpler relative on the pillows. Repeating the colors creates harmony; varying the pattern keeps it from feeling monotonous. That balance of repetition and variation is exactly what makes a bed look professionally styled rather than matchy.
Why I Made It
I made this because a truly serene bedroom usually isn’t about one stunning piece — it’s about cohesion. When the elements of a bed speak the same visual language, the whole room exhales. A coordinated sashiko set lets me carry one calm palette and one stitch tradition across the bed, so nothing competes and everything belongs. There’s deep satisfaction in designing a little collection rather than a single object.
I also love the flexibility sashiko gives a maker here. Because every pattern in the tradition shares the same simple running stitch and the same quiet sensibility, it’s easy to make pieces that harmonize — a wave runner with cross-field pillows, all in one indigo-and-white palette, reads instantly as a family. Designing a set is the most creative, most rewarding way I know to use everything the craft has to offer at once.
Why This Idea Is Worth Making
This idea is worth making because a coordinated set elevates a whole bed in a way single pieces can’t. It teaches you to think like a stylist — unifying color, balancing pattern scale, building a cohesive look — and the payoff is a bedroom that feels intentional and serene. It’s also efficient: you plan one palette and one pattern family, then make the pieces together, so the design work is done once. The finished set looks like a curated, high-end bedding collection, but it’s entirely handmade and entirely yours.
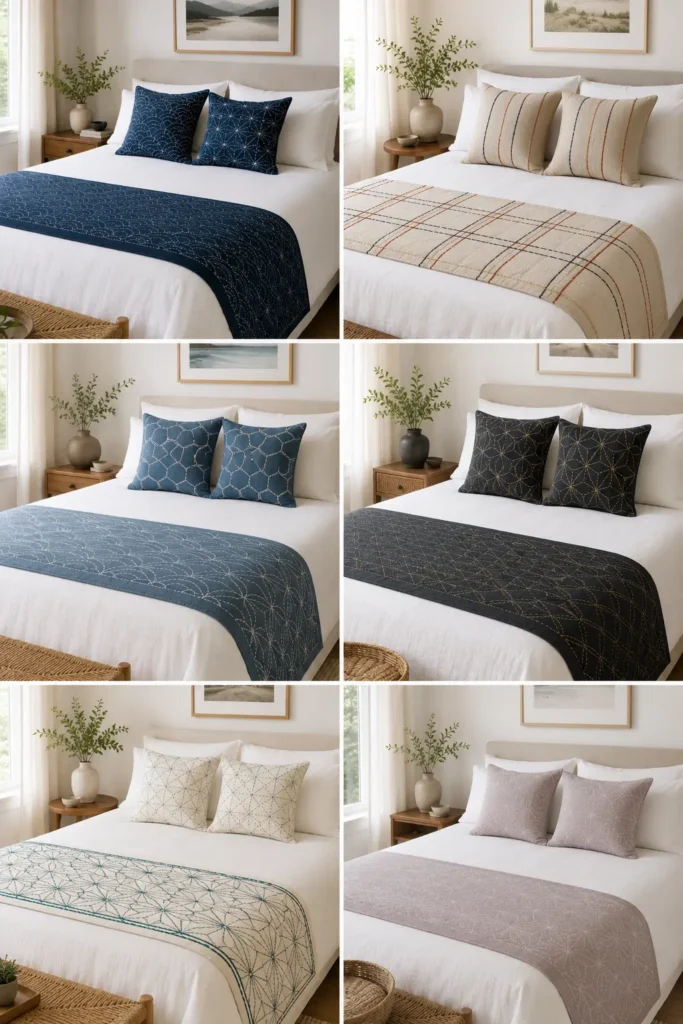
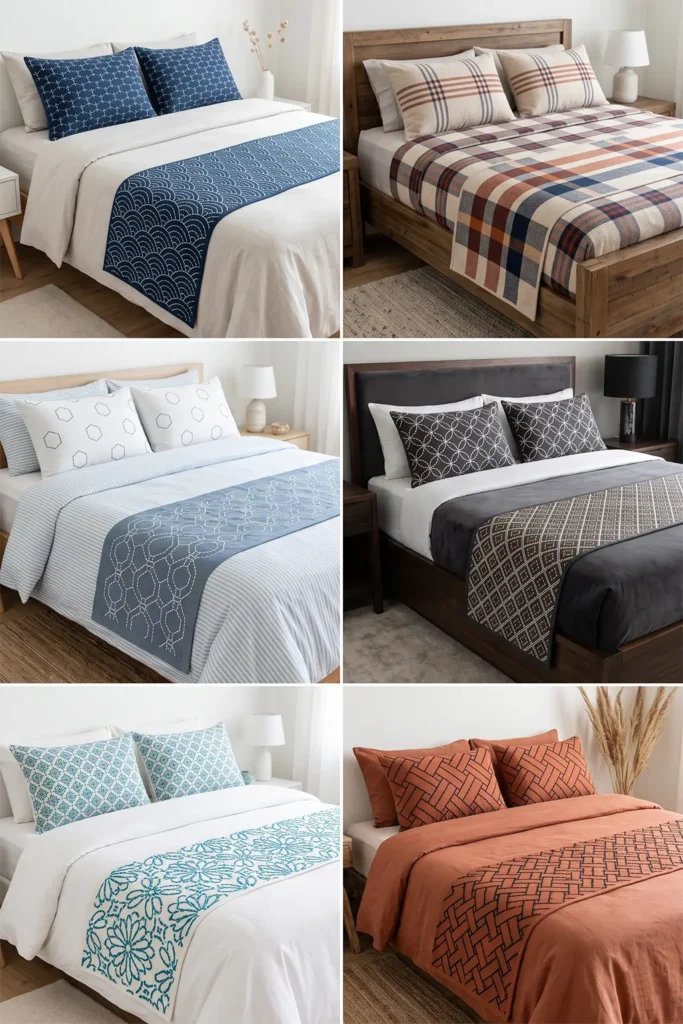
What the Set Includes
- One bed runner: about 20 × 90 inches (queen; adjust for twin or king)
- Two pillow covers: each 18 × 18 inches
- Best used: runner across the foot of the bed, pillow covers at the head, for a fully coordinated look
- Skill level: confident beginner (it combines two simple projects)
- Core techniques: runner sashiko stitched through all layers, pillow-cover envelope construction, coordinated pattern planning, binding
Materials Needed
For the full set:
- Base fabric (all pieces): about 4½ yards of one solid cotton, linen-cotton, or chambray, so every piece matches
- Backing fabric (runner): 2¾ yards
- Batting (runner): at least 22 × 92 inches
- Optional muslin (behind pillow fronts): two pieces 19 × 19 inches
- Sashiko thread or pearl cotton in one shared palette (one to three colors used across all pieces)
- Sashiko needle, binding fabric (½ yard), washable marker or Hera marker, stencils for your patterns
- Two 18- or 20-inch pillow forms
- Quilting ruler, rotary cutter, cutting mat, basting pins, iron, sewing machine
Beginner tip: buy all the base fabric and thread at once, from the same dye lot, so every piece in the set matches exactly — small color differences between lots can break the coordinated look.
Choosing Your Colors & Patterns
Pick one palette and one pattern family for the whole set:
- Serene classic: indigo base, white thread — wave pattern on the runner, cross field on the pillows
- Warm modern: oatmeal base, rust and navy threads — plaid runner, simple stripe pillows
- Calm coastal: slate base, white thread — seigaiha waves on the runner, hexagons on the pillows
- Soft elegant: charcoal base, gold thread — diamond grid runner, linked-circle pillows
- Fresh: white base, teal thread — bold motif runner, fine version of it on the pillows
The rule: same base, same thread palette, related (not identical) patterns — bolder on the runner, simpler on the pillows.
Cutting Measurements
Runner:
- Top panel: 21 × 91 inches
- Backing: 22 × 92 inches
- Batting: 22 × 92 inches
- Binding: six strips, 2½ inches × width of fabric
Each pillow cover (cut two of each):
- Front: 19 × 19 inches (plus optional muslin 19 × 19 inches)
- Envelope back: two pieces 19 × 13 inches
Step-by-Step Guide
Step 1 — Plan the set. Choose your one palette and pattern family, deciding which “hero” pattern goes on the runner and which simpler relative goes on the pillows. Sketch it so the whole set is planned before you cut.
Step 2 — Cut everything. Cut the runner top (21 × 91), backing and batting (22 × 92), and the two pillow fronts (19 × 19) and four back pieces (19 × 13). Press all flat.
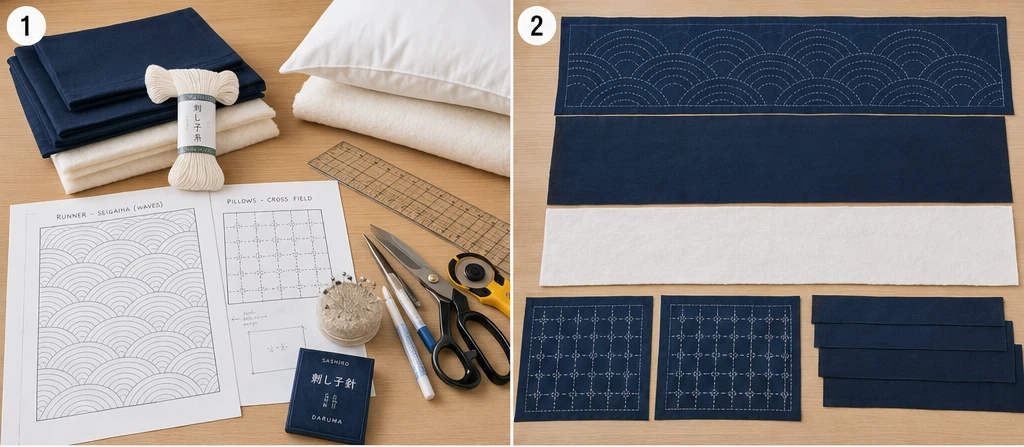
Step 3 — Mark the patterns. Mark the hero pattern on the runner top and the coordinating pattern on each pillow front, keeping appropriate edge margins. Scrap-test your marker first.
Step 4 — Stitch and finish the runner. Layer the runner (backing down, batting, marked top up), baste, and stitch the pattern through all three layers with an even ⅛–¼ inch running stitch, center outward. Trim to 20 × 90 inches and bind with the 2½-inch strips.
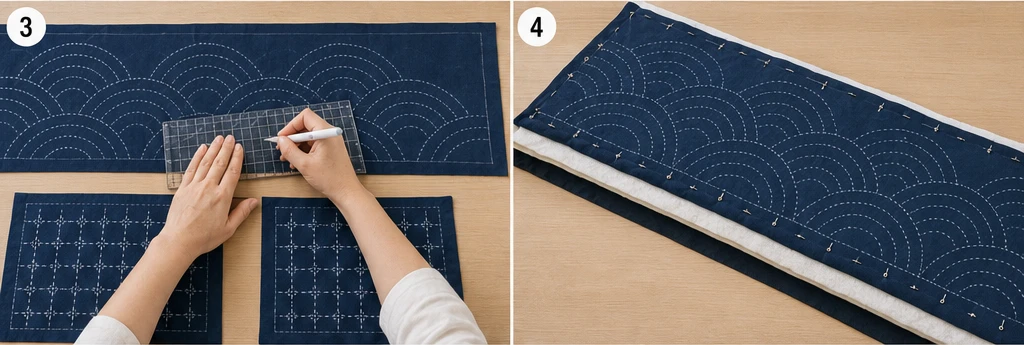
Step 5 — Stitch the pillow fronts. Stitch the coordinating pattern onto each pillow front (with muslin behind the body, if using), leaving a 1½-inch margin from the edges. Press and remove marks.
Step 6 — Build the pillow covers. Hem one 19-inch edge of each back piece. Lay each stitched front right side up, place its two back pieces right side down with hemmed edges overlapping, pin, and sew around with a ½-inch seam allowance. Clip corners and turn.
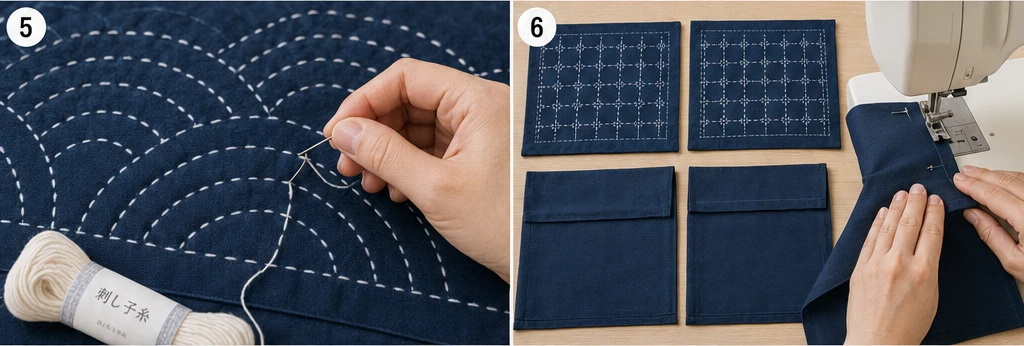
Step 7 — Secure all thread ends. Throughout, bury knots between the layers (runner) or on the wrong side (pillows) so no surface shows knots.
Step 8 — Insert and wash. Slip the forms into the covers, then wash the whole set gently together in cold water, no bleach, so all pieces soften and settle as a matched group.
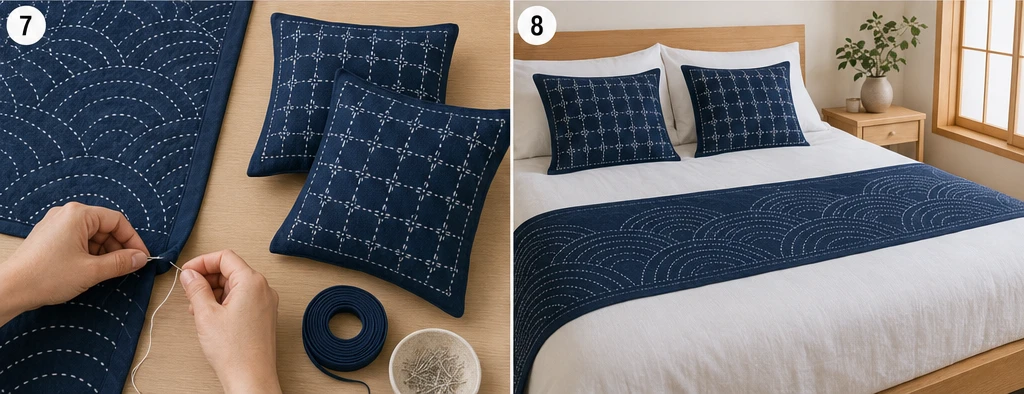
Assembly at a Glance
- Plan one palette and pattern family; assign the hero pattern to the runner, and the simpler to the pillows.
- Cut all pieces: runner (21 × 91, batting/backing 22 × 92), two pillow fronts (19 × 19), four backs (19 × 13).
- Mark the coordinated patterns on all pieces.
- Layer, baste, and stitch the runner through all layers; trim to 20 × 90 and bind.
- Stitch the pillow fronts with a 1½-inch margin.
- Hem the pillow backs; assemble each cover and turn.
- Bury all thread ends out of sight.
- Insert the forms and wash the whole set together.
Beginner Tips for Success
- Buy the base fabric and thread from the same dye lot so every piece matches exactly.
- Unify the palette, vary the pattern scale — that’s the secret to a coordinated, not matchy, set.
- Keep the pillows simpler than the runner so the eye has a clear hero and a calm supporting cast.
- Wash the set together so all pieces age and soften at the same rate.
- Plan the whole set on paper before cutting — coordination is a design decision made up front.
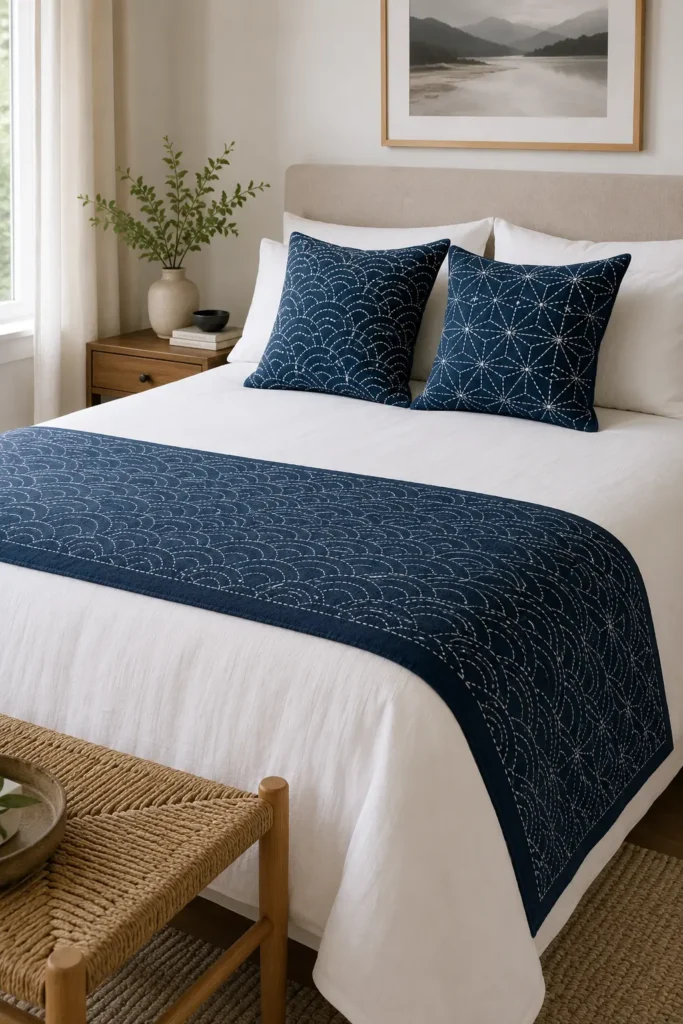
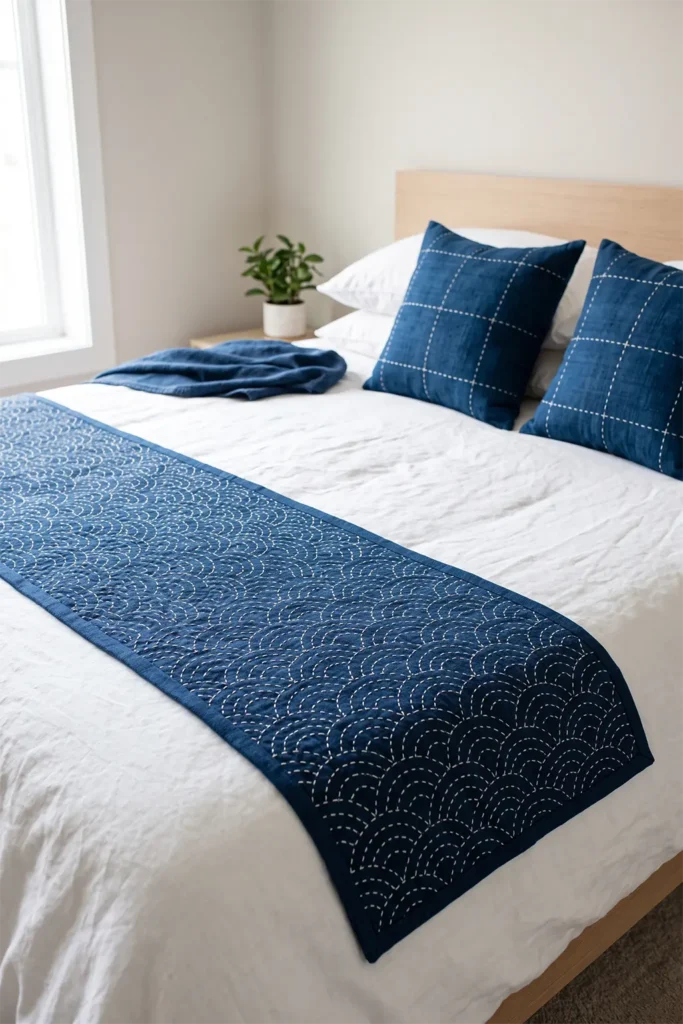
Styling It
Lay the runner across the foot of the bed and place the matching pillow covers at the head, so the set frames the bed from top to bottom in the same palette. Keep the core bedding simple — white or solid linen — so the coordinated sashiko pieces lead, and add one accent (a throw or lumbar pillow) in a palette color to complete the look. The result is a bed that reads as a single calm, considered composition rather than a collection of separate buys.
Final Thoughts
A layered sashiko bed runner and pillow set is the most polished idea in this collection because it’s about the whole picture, not a single piece. By unifying one palette and varying one pattern family across a runner and matching pillows, you create the cohesive, serene look of a curated bedding collection — entirely handmade. It’s the satisfying finale to any sashiko journey: not just one beautiful object, but a calm, coordinated set that gently pulls the entire bed and the whole room together.
Other Design Inspirations – Digitally Modified
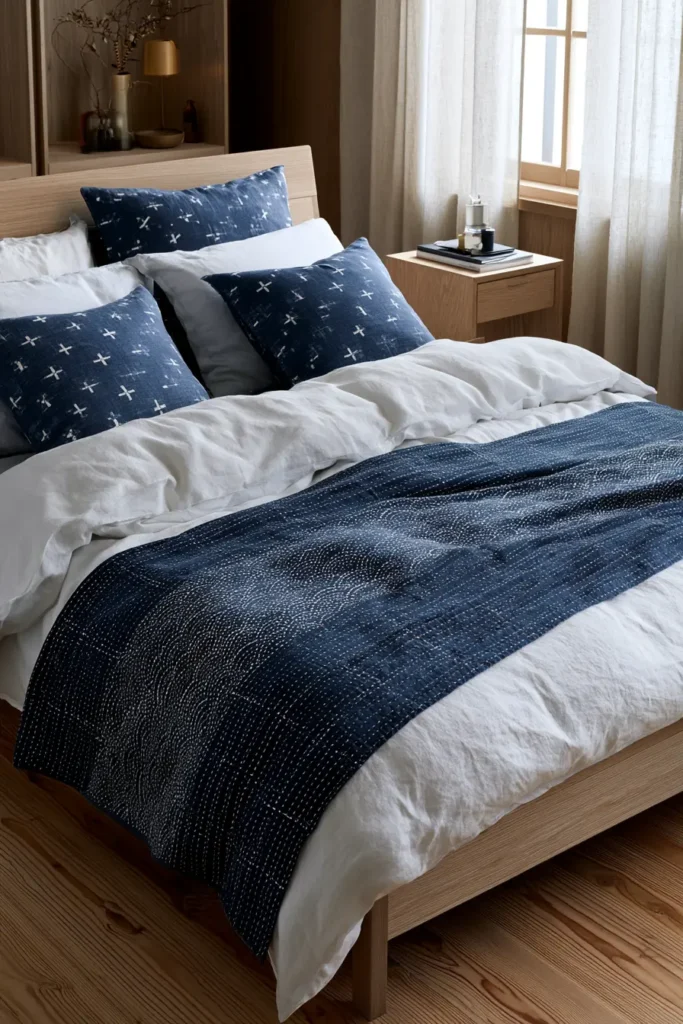
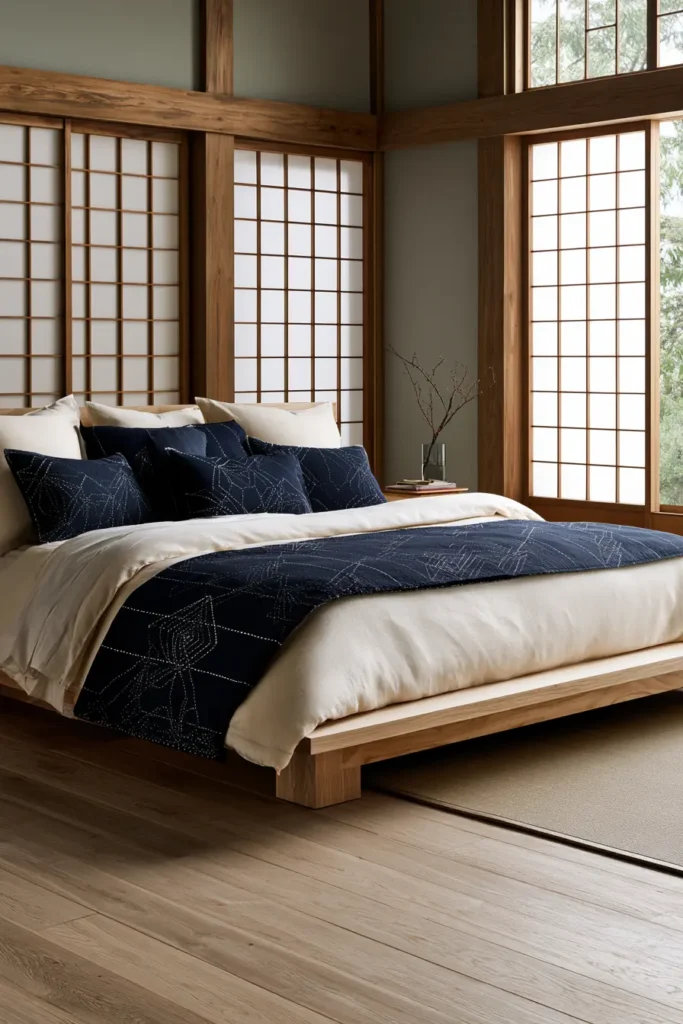
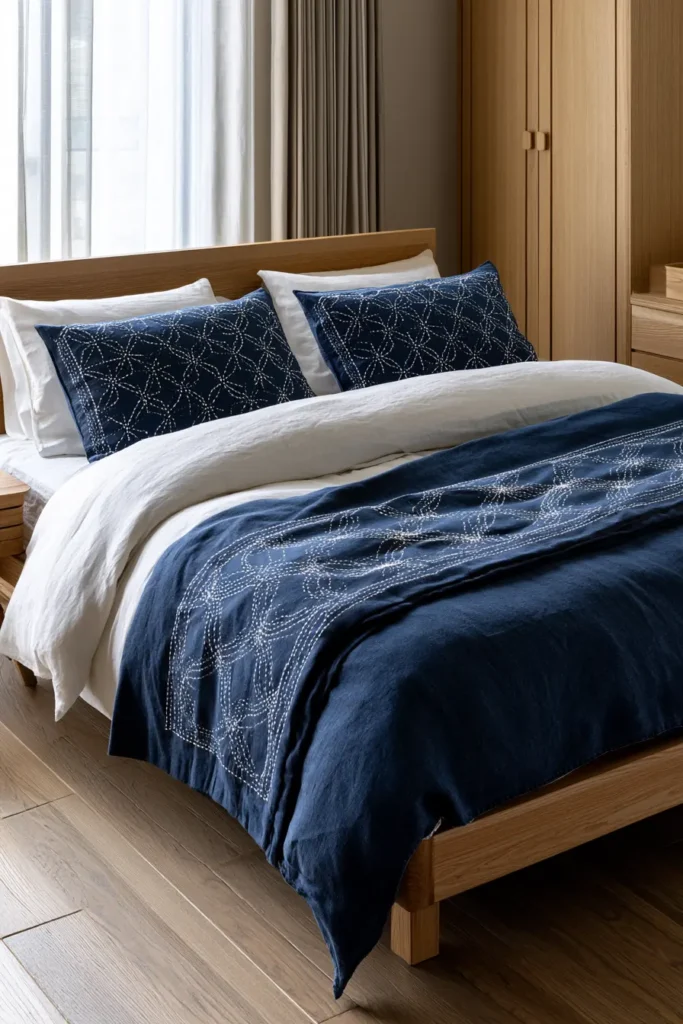
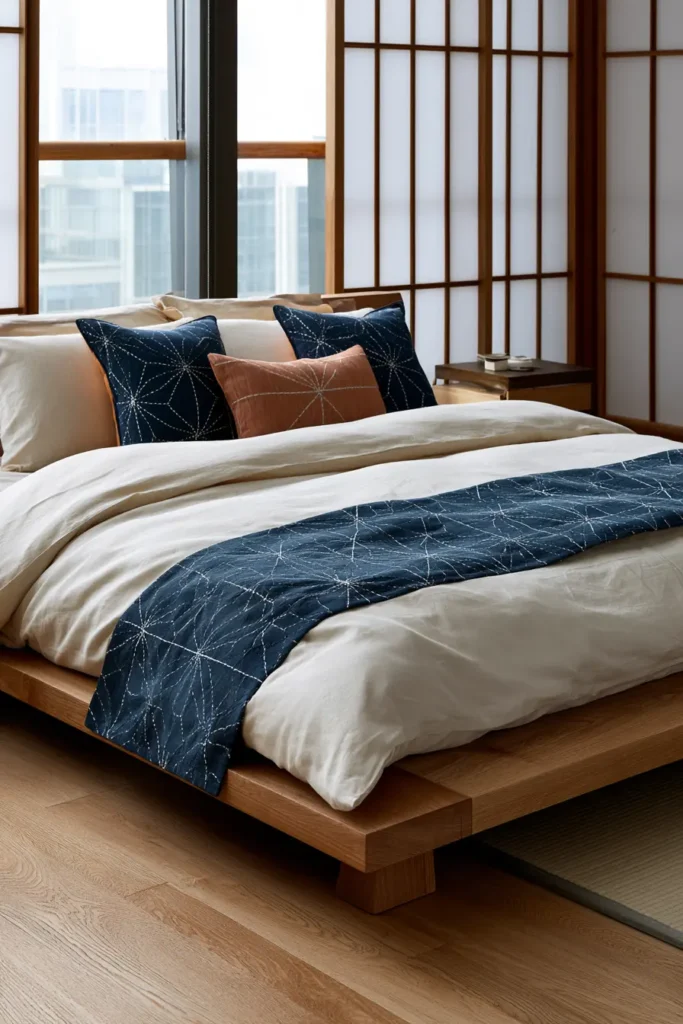
Conclusion
What makes sashiko work so well in a home is restraint. The stitches repeat enough to create real texture, but the indigo-and-white palette and the orderly geometry keep a room feeling calm rather than busy — structure and softness at the same time. Whether you’re drawn to the crisp contrast of a classic indigo quilt, the gentle quiet of a pastel bed cover, or the tactile rhythm of a monochrome hitomezashi grid, these pieces turn ordinary bedding into a thoughtful focal point. That’s the gift of a mending craft: it was never about decoration first, so the beauty always feels earned rather than added on.
The strongest Sashiko Quilt Pattern Ideas do more than look good — they carry meaning in every stitch. Moyozashi brings flowing geometry, hitomezashi adds dense, modern texture, kogin and shonai lend regional character, and motifs such as asanoha, seigaiha, shippō, kagome, and kikkō weave centuries-old symbolism into everyday decor. Across serene bedrooms and relaxed living rooms — in quilts, sheets, runners, and pillow covers — sashiko offers a rare balance of comfort, style, and quiet sophistication that suits a slow, intentional home beautifully.

