
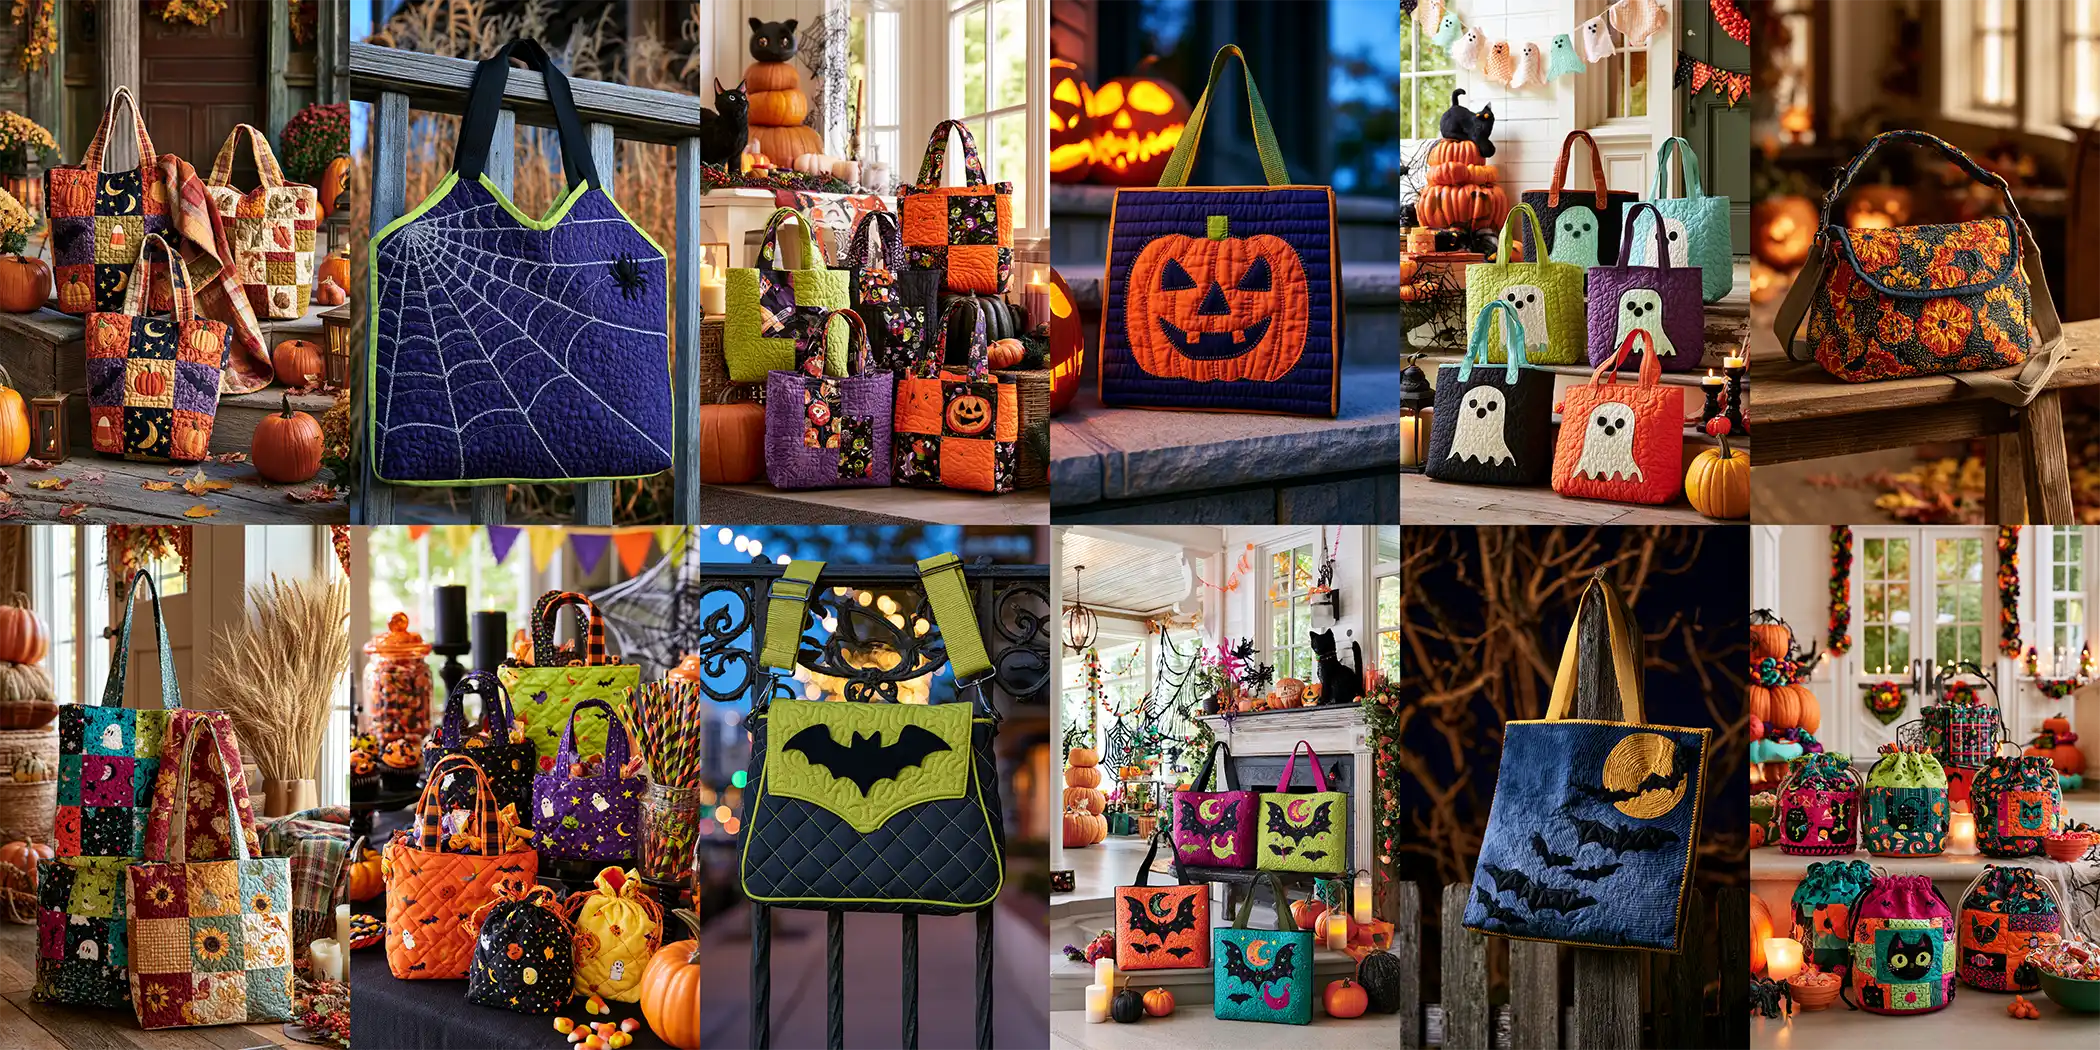
Quilted Halloween Treat Bag Ideas: 12 Cute & Spooky Totes for Trick-or-Treat Night
There’s a particular sound a plastic pumpkin bucket makes when it hits the pavement halfway down the block — that hollow crack, followed by candy scattering into someone’s hedge. Most of us have heard it. The quilted Halloween treat bag ideas in this collection exist as a direct answer to that moment: bags built with three layers of cotton, batting, and backing, stitched through and bound at the edges, that hold up to a full night of running, swinging, and overstuffing. A quilted treat bag is essentially a small quilt sewn into a tote shape — the same construction logic behind a bed quilt, scaled down to something a seven-year-old can carry.
The batting gives the sides enough body to stand open while candy goes in, the quilting stitches keep those layers from shifting, and the binding seals off the raw edges so the bag doesn’t fray after two Octobers in a storage bin. That structure is the entire difference between a bag that gets used once and one that a kid asks for again next year.
Quilted Halloween Treat Bag Ideas
What follows are twelve distinct approaches, and they’re deliberately spread across skill levels and time commitments. Some are straightforward patchwork — squares sewn into a grid, quilted in straight lines, done in an evening. Others involve appliqué, where a shape like a pumpkin or a ghost gets fused to the bag front and stitched down around its outline, which takes longer but produces the kind of bag that reads clearly from across a dark street.
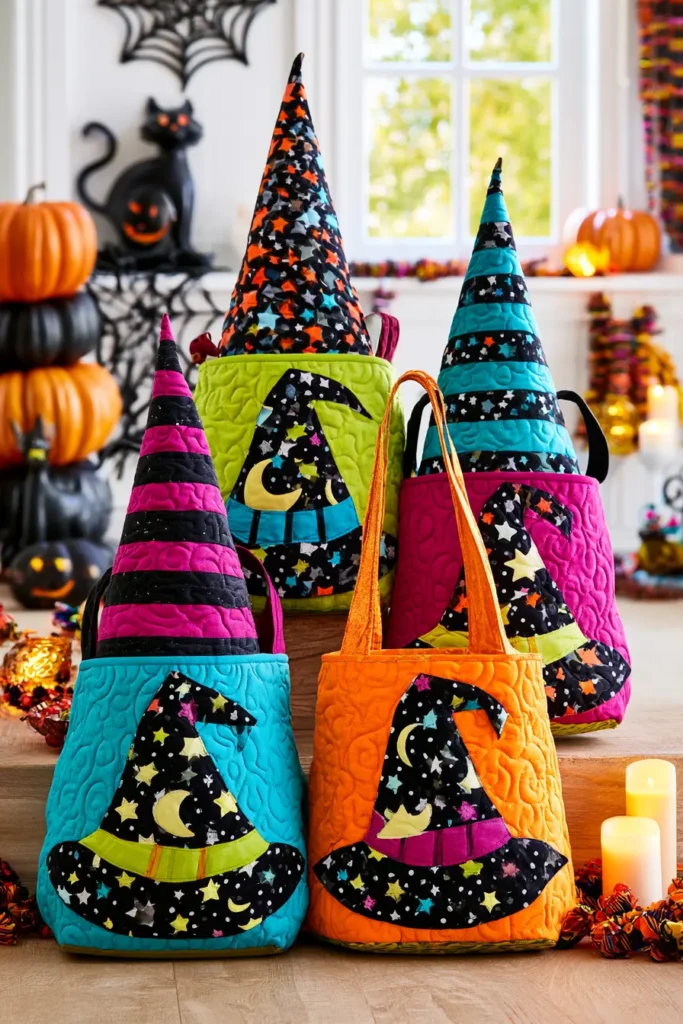
A few solve specific problems: glow-in-the-dark thread for visibility after sunset, reversible construction so one bag covers both Halloween and the general fall season, and mini versions sized for party favor tables rather than trick-or-treating. Each idea below covers what the design involves, which fabrics suit it, and roughly what level of sewing it asks for, so you can match a project to the time you actually have before October 31st.
Why Make a Quilted Halloween Treat Bag?
The practical case is durability and capacity — a quilted bag holds more than a bucket, distributes weight across a shoulder or two hands instead of one thin plastic handle, and survives being dragged. But the more compelling reason is that a handmade treat bag becomes a repeat object. Store-bought Halloween carriers are disposable by design; they crack, they get thrown out, and they’re replaced annually.
A well-constructed quilted tote with a child’s name on it turns into something they recognize from previous years and expect to see come out of the closet each September. It’s also one of the few beginner-friendly quilting projects with a hard deadline and an immediate audience, which is a surprisingly effective motivator for finishing. And practically speaking, these bags are scrap-friendly — a treat bag needs maybe a fat quarter’s worth of fabric per side, making it a genuine use for the orange, black, and purple remnants that accumulate from larger Halloween projects.
Tips for Choosing Fabrics
Quilting cotton is the default for good reason: it presses crisply, holds a seam, and comes in the widest range of Halloween prints. For the outer layer, choose prints with small-to-medium scale motifs — large-scale novelty prints get chopped into unrecognizable fragments once they’re cut into patchwork squares. If you want a bold statement print, save it for the bag back or a reversible side where it stays intact. For batting, a low-loft cotton or cotton-poly blend around 80/20 is ideal; high-loft polyester batting makes the bag puffy and floppy rather than structured.
Some makers add a layer of fusible fleece or lightweight interfacing alongside the batting for extra stand-up body, which is worth doing on bucket-style bags. Line the interior with a tightly woven cotton in a solid or small print — candy wrappers snag on loose weaves. For handles, cotton webbing or a doubled strip of fabric reinforced with interfacing both work; whichever you choose, box-stitch the handle attachment points, because that’s where the failure happens when a bag gets heavy. Finally, prewash everything if you’re mixing saturated oranges, blacks, and purples, since Halloween palettes are exactly the dye combinations most prone to bleeding.
See also: Halloween Porch Decor Ideas – Fun and Kid-Friendly Monster Mash – Haunted Patio Halloween Ideas – Chic and Eerie Sophisticated Halloween Patio
1. Classic Orange and Black Patchwork Quilted Treat Bags
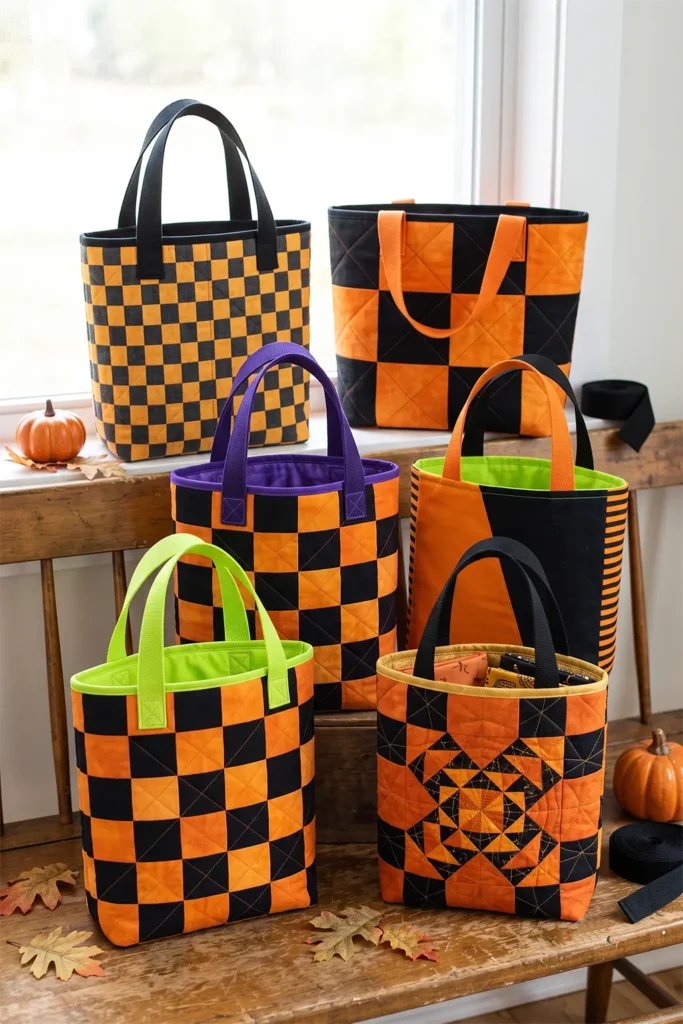
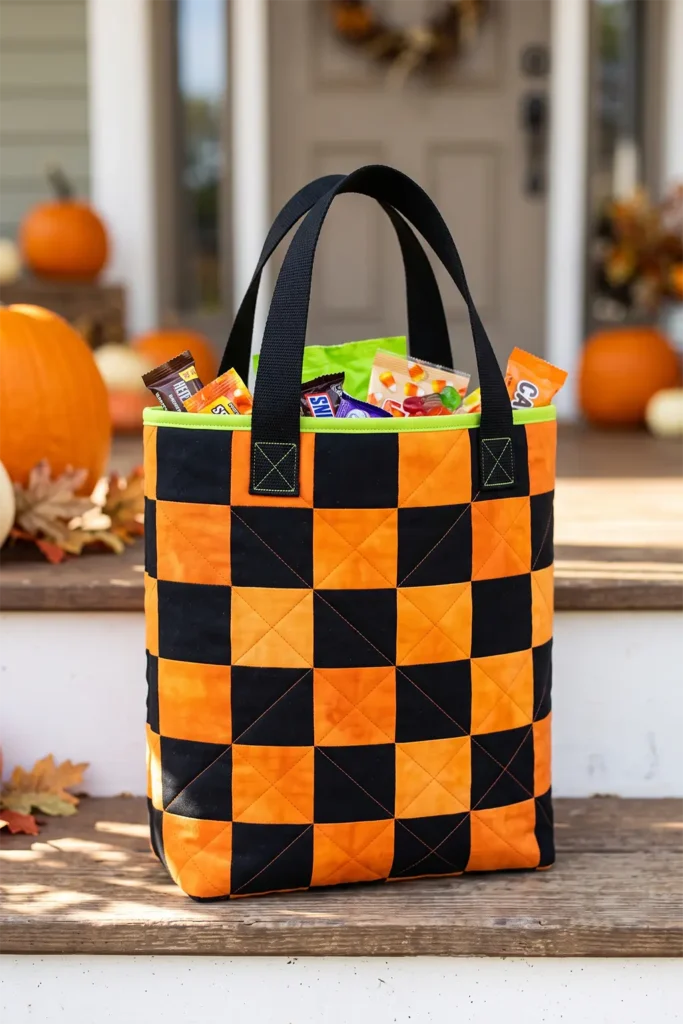
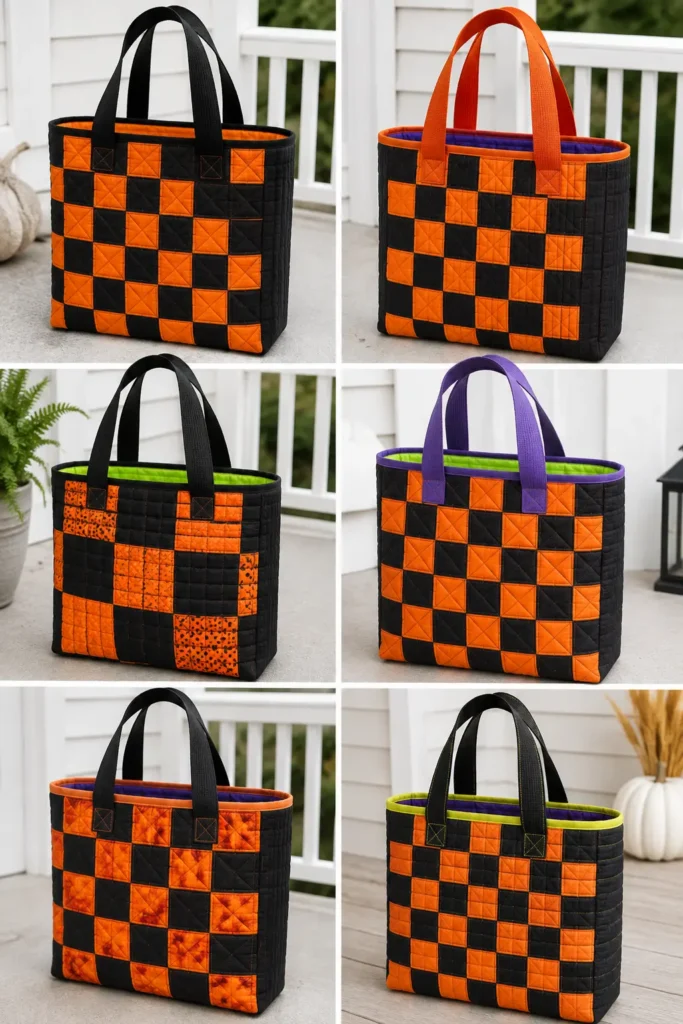
Orange and black wasn’t always the Halloween palette — it hardened into convention around the early 1900s, when American postcard printers and party-goods manufacturers needed a two-color scheme that read instantly on cheap presses. Orange stood in for harvest and firelight, black for the long night. Quilters inherited that shorthand, and the two-color patchwork treat bag is now about as close to a traditional Halloween block as the craft has. What makes this version worth sewing over a novelty-print tote is contrast: a simple grid of alternating squares in saturated pumpkin orange and true black reads clearly from a distance, holds up under porch light, and doesn’t depend on a print you’ll be tired of by next October.
The build below produces a finished bag roughly 11″ wide × 12″ tall × 3″ deep — big enough for a serious candy haul, small enough that a child can carry it full.
Design Inspirations – Digitally Modified
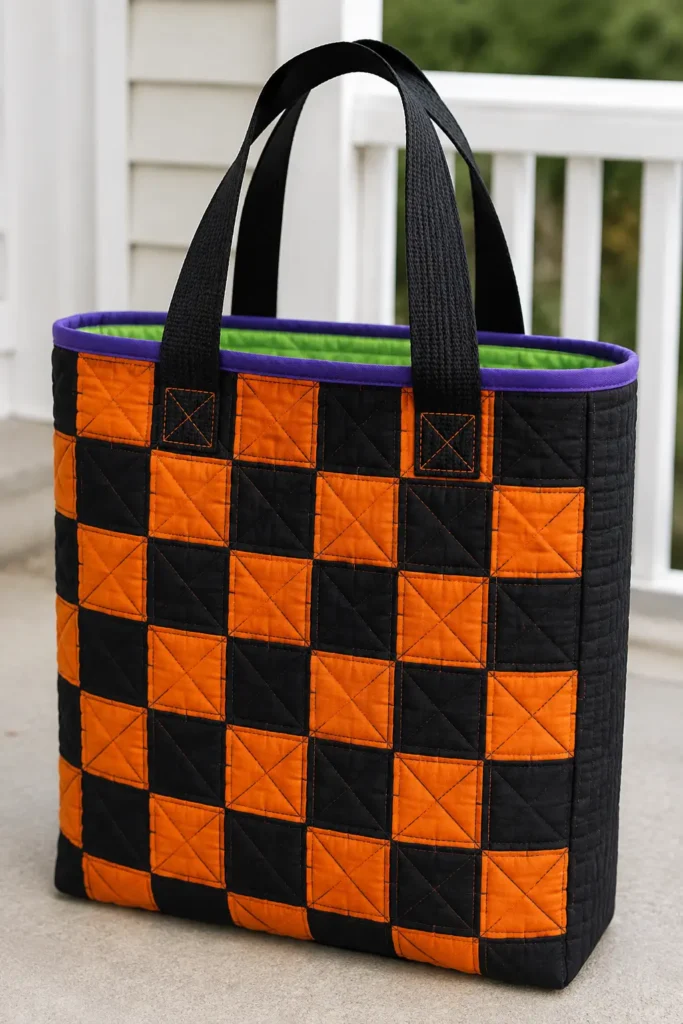
Materials
- Orange quilting cotton — 1/2 yard (pumpkin, marigold, or a hand-dyed orange with tonal variation)
- Black quilting cotton — 1/2 yard (true black, not charcoal)
- Lining cotton — 1/2 yard (a bright acid green or violet makes the interior pop when the bag is open)
- Low-loft cotton batting — 1/2 yard
- Fusible fleece or lightweight interfacing — 1/2 yard (optional, for extra body)
- Cotton webbing — 1″ wide, 1 1/4 yards (black or orange)
- Binding fabric — 1/8 yard for a 2 1/2″ × 45″ strip
- 50wt cotton thread in orange and black
Step 1 — Cut the Patchwork Squares
Cut 3 1/2″ squares: 24 in orange, 24 in black. This yields two 6×4 grids, one for each side of the bag.
Cut the gusset (the bag’s bottom and sides) as a single strip: 3 1/2″ × 32″ in black. Cutting it as one continuous piece rather than three separate pieces eliminates two seams at the corners, which are the highest-stress points on a loaded bag.
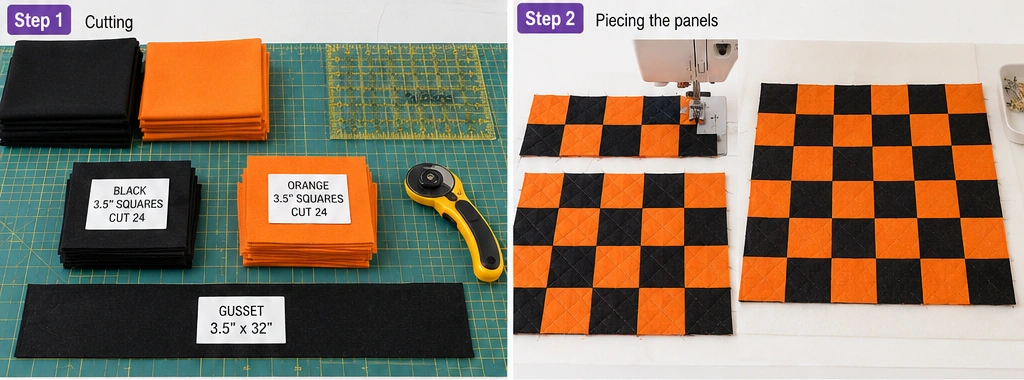
Step 2 — Piece the Two Panels
Lay out each panel as a 6-column × 4-row checkerboard, alternating orange and black. Sew squares into rows with a 1/4″ seam allowance, pressing seams toward the black squares on odd rows and toward the orange on even rows. That alternating press direction lets the seams nest when you join the rows, which keeps the intersections flat and the grid lines sharp.
Join the four rows. Each finished panel measures 18 1/2″ × 12 1/2″ raw, which will trim down to roughly 11″ × 12″ finished after quilting shrinkage and seam allowances.
Tip: Press with a dry iron on cotton setting. Steam on a two-color quilt with heavy contrast can push black dye into the orange at the seam line.
Step 3 — Baste and Quilt
Cut batting and a backing muslin slightly larger than each panel — about 20″ × 14″. Layer backing, batting, patchwork top; spray-baste or pin.
Quilt with straight lines stitched 1/4″ from each seam on both sides (stitch-in-the-ditch plus echo lines), or run diagonal lines corner-to-corner through the squares for an X grid. Use orange thread over orange squares and black over black if you want the quilting to disappear; use a single contrasting thread — bright lime or gold — if you want the stitching to read as a design element.
Quilt the gusset strip the same way, with lines running across the 3 1/2″ width every inch.
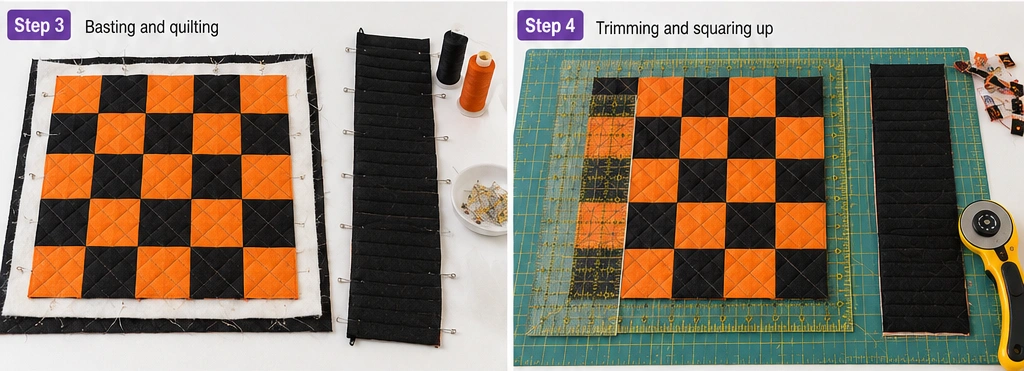
Step 4 — Trim and Square Up
Trim both panels to 18 1/2″ × 12 1/2″ and the gusset to 3 1/2″ × 32″. Squaring up after quilting rather than before is what keeps the finished bag from torquing — quilting always draws the fabric in slightly, and it never draws evenly.
Step 5 — Assembly
This is the stage where most treat bags fail, so take it slowly.
- Mark the gusset. With the strip laid flat, mark the center point, then mark 11″ out in each direction from center. Those two marks are the bottom corners of the bag.
- Pin the front panel to the gusset, matching the panel’s bottom edge to the 11″-wide center section of the strip. Clip the gusset seam allowance to within 1/8″ of the stitch line at each corner mark so it can pivot.
- Sew with a 1/4″ seam, pivoting at each corner with the needle down. Sew slowly through the corners — you’re going through six layers there.
- Repeat with the back panel.
- Turn right side out and press the seams flat with a point turner from the inside.
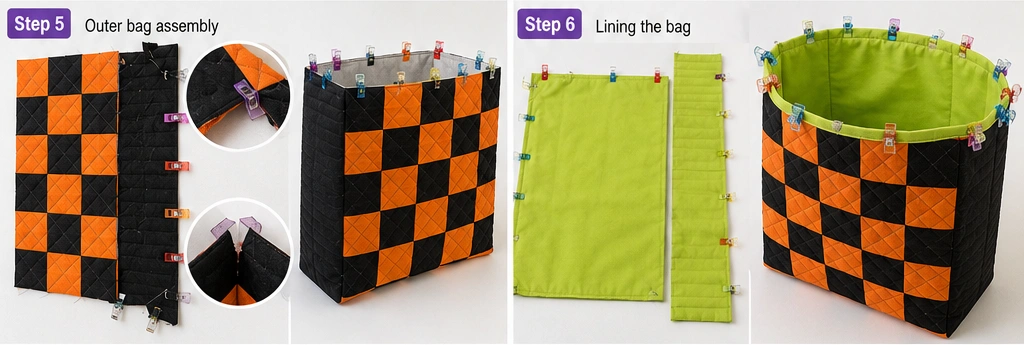
Step 6 — Line the Bag
Cut lining panels 18 1/2″ × 12 1/2″ (×2) and a lining gusset 3 1/2″ × 32″. Assemble identically to Step 5, but sew with a 3/8″ seam allowance instead of 1/4″. The slightly deeper seam makes the lining marginally smaller, so it sits inside the outer shell without bunching.
Drop the lining into the bag, wrong sides together, and baste around the top edge at 1/8″.
Step 7 — Attach the Handles
Cut two lengths of webbing at 22″ each. Position the ends 3 1/2″ in from each side seam on the front and back panels, with 1″ of webbing overlapping the raw top edge.
Stitch each handle end with a box-and-X: sew a 1″ square, then stitch both diagonals inside it. This is the single most important reinforcement in the entire bag. A straight line of stitching across a webbing end will pull out under a load of candy; a box-and-X distributes the pull across four seam lines and won’t.
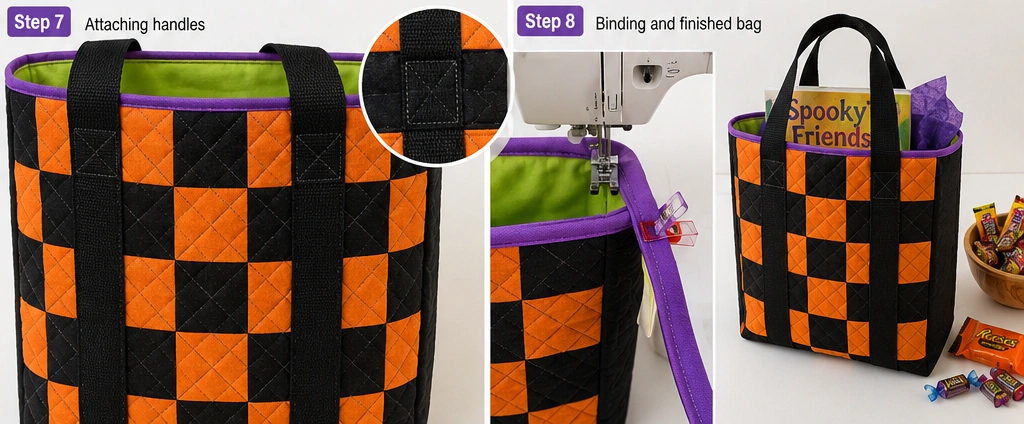
Step 8 — Bind the Top Edge
Cut a 2 1/2″ × 45″ strip, fold in half lengthwise, press. Sew to the outside top edge with a 1/4″ seam, joining the ends with a diagonal seam. Fold to the inside and either hand-stitch down or stitch-in-the-ditch from the outside.
Choose the binding color for punch: a violet or electric lime binding against orange-and-black patchwork lifts the whole bag out of predictable territory. Black binding is the safe classic; orange reads warmer.
Color Notes
Two-color patchwork lives or dies on value contrast, not just hue. If the orange is too muted, the checkerboard turns to mud under porch light. Reach for a saturated pumpkin or safety orange rather than a dusty terracotta. Adding a third accent in acid green, deep violet, or gold — in the binding, the handles, or the lining — is what shifts the bag from “Halloween decoration” to something with actual visual life. Hand-dyed or batik oranges with tonal shift within a single square add depth that flat solids can’t.
Gift Ideas That Fit This Bag
At 11″ × 12″ × 3″, this bag holds considerably more than candy:
- A hardcover picture book (standard 8″ × 10″ formats fit flat with room to spare)
- A small quilted lap blanket or folded flannel throw
- A bundle of fat quarters — six to eight fit comfortably, making this a fun wrapping for a fellow quilter
- Board games in flat boxes, or a deck-building card game
- A bakery gift set: tea towel, cookie cutters, and a jar of sprinkles
- Teacher gifts — mugs, gift cards, and a small plant all nest inside
- Halloween movie night kit: popcorn, a candle, and a DVD or streaming gift card
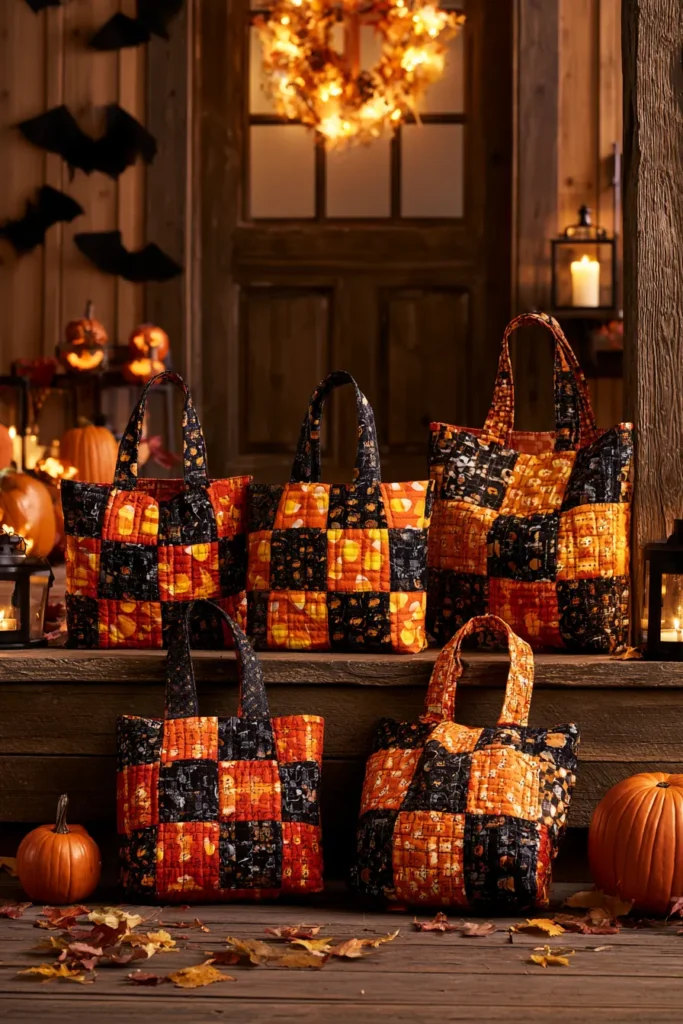
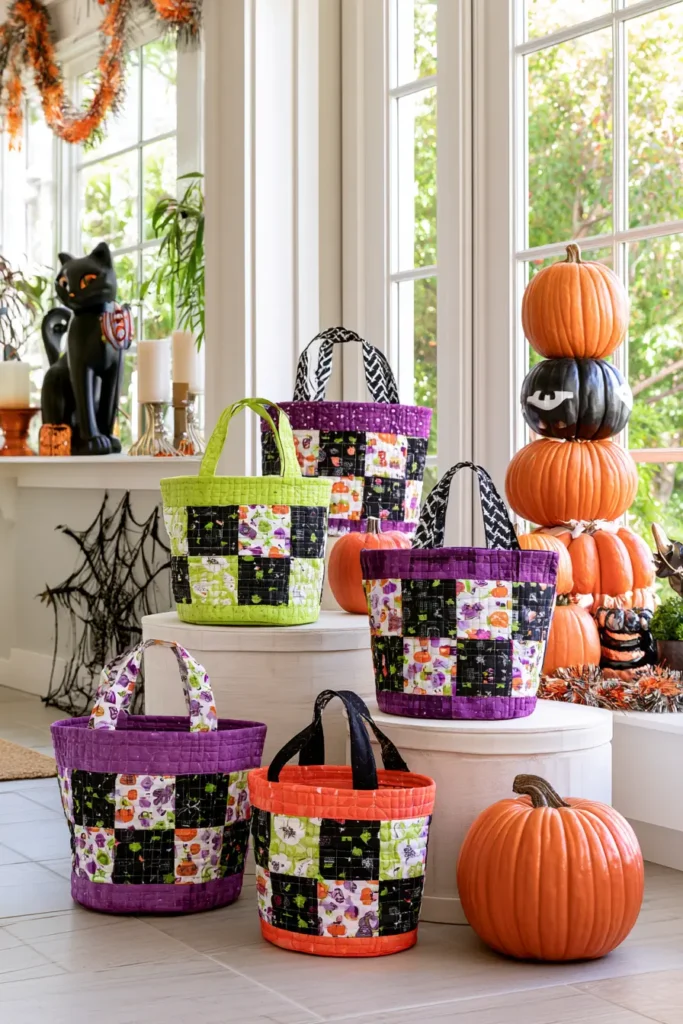
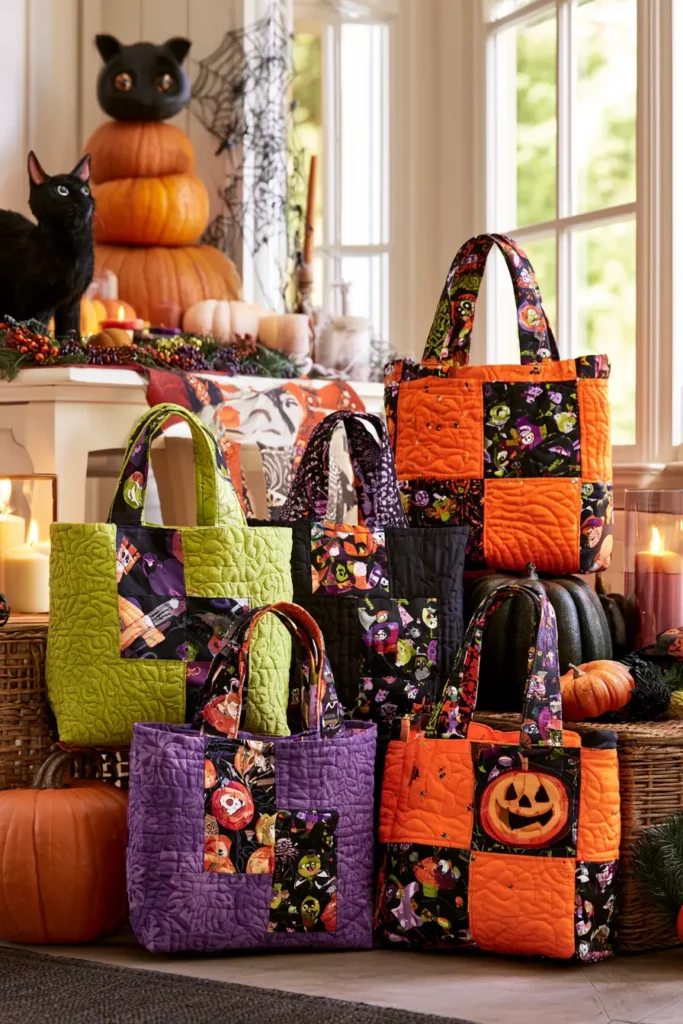
Other Design Inspirations – Digitally Modified
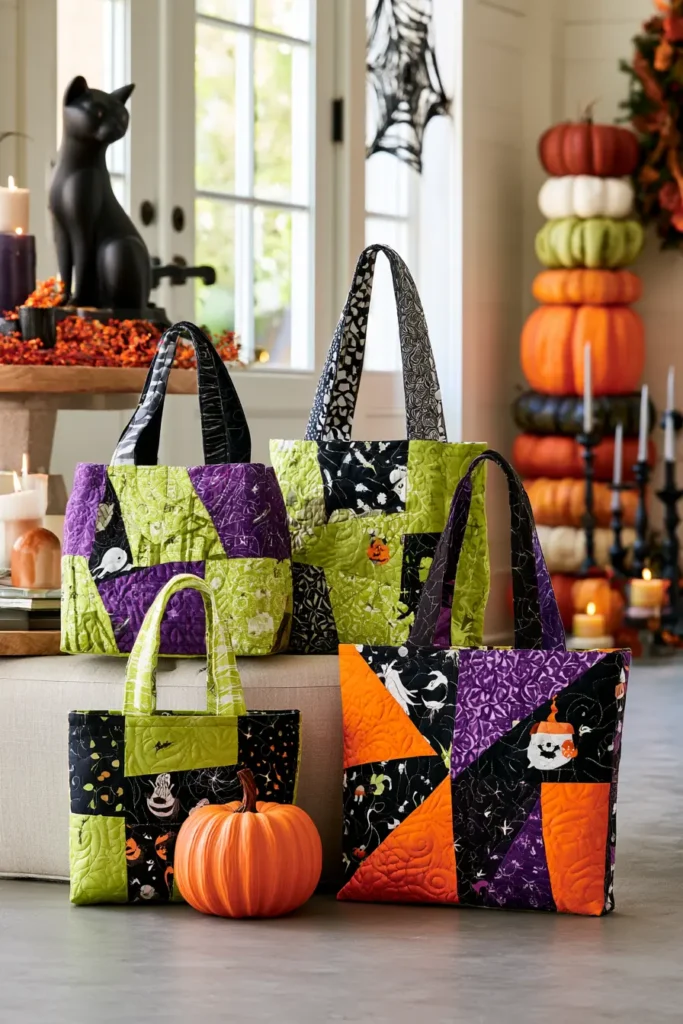
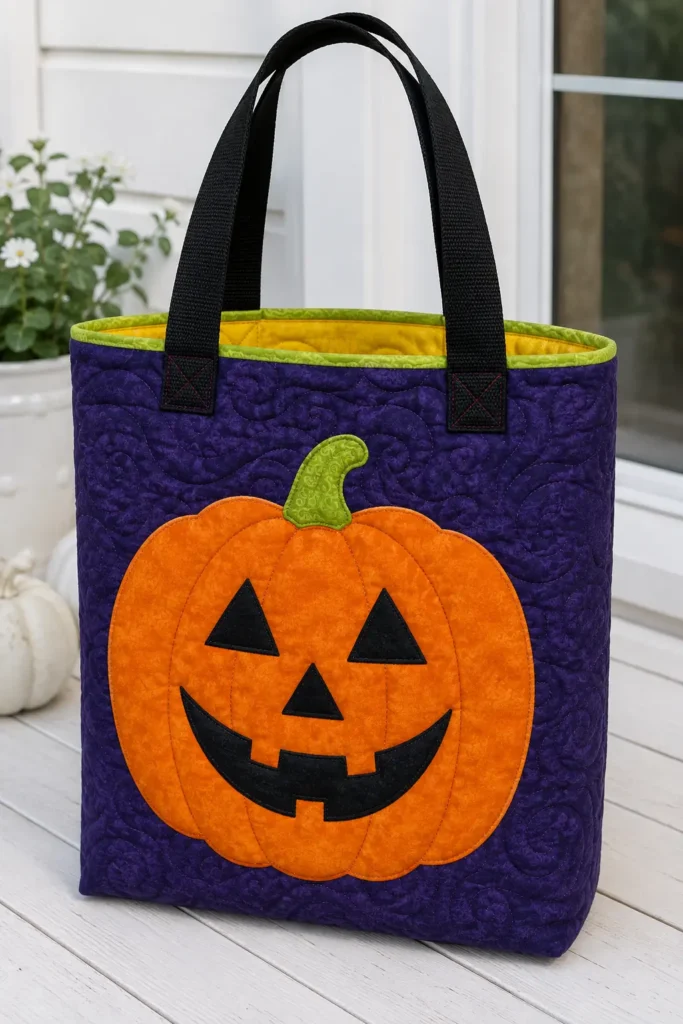
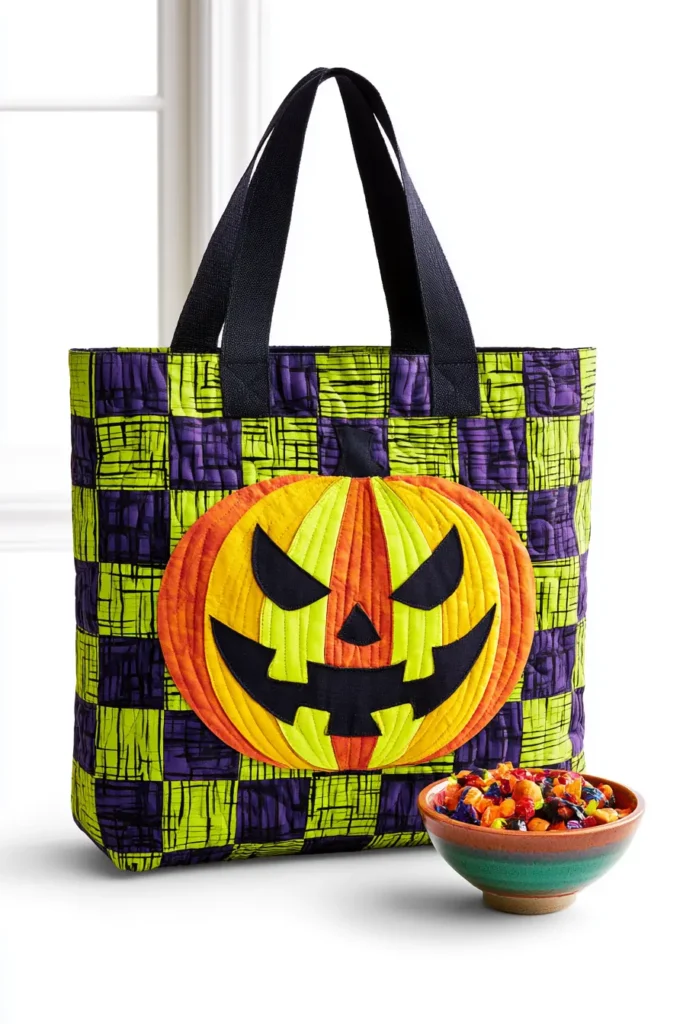
2. Jack-o’-Lantern Appliqué Quilted Trick-or-Treat Bags
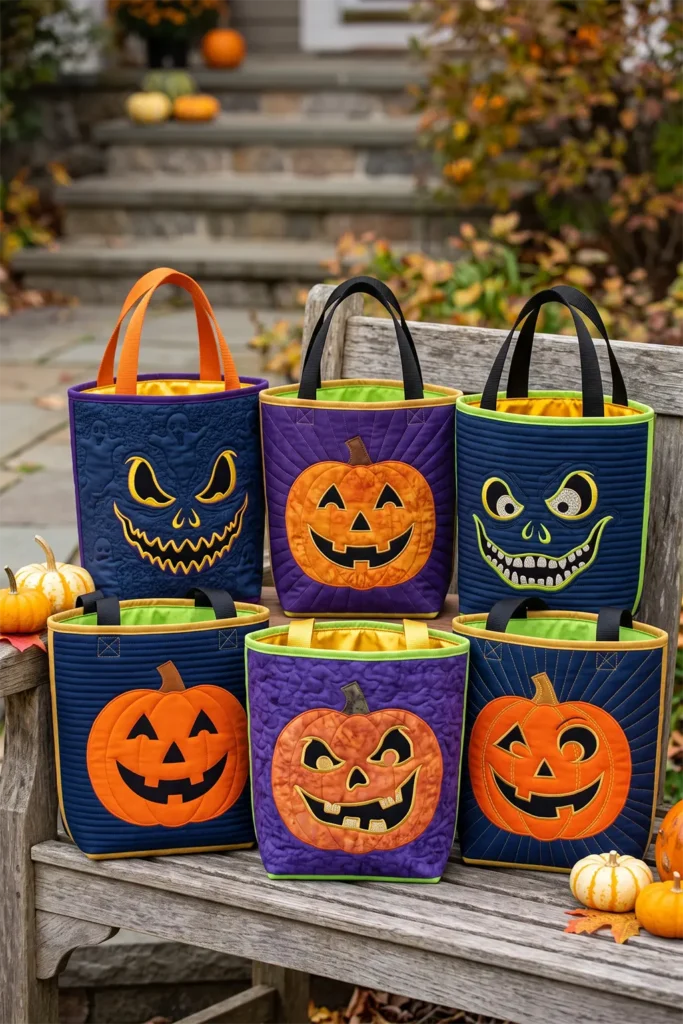
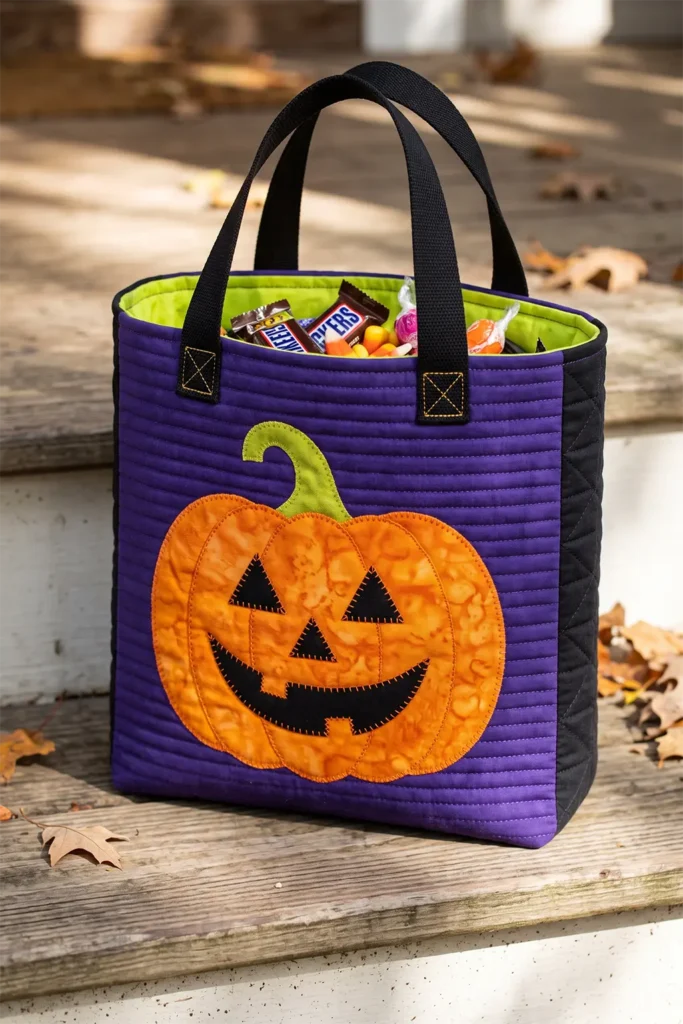
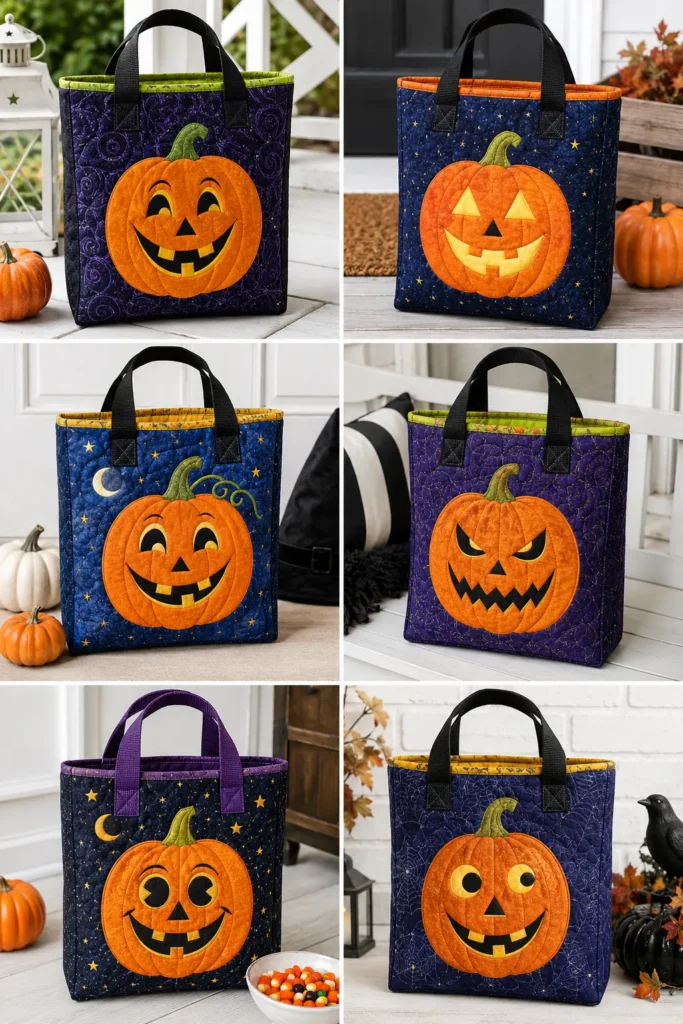
The carved jack-o’-lantern arrived in America as an Irish import, and it wasn’t originally a pumpkin at all — turnips and large beets were the traditional carving vegetable in Ireland and Scotland, hollowed out and lit with an ember to ward off wandering spirits on Samhain night. Irish immigrants in the 1800s found the native North American pumpkin far easier to carve, and the switch was permanent. That history matters for an appliqué design, because the earliest jack-o’-lantern faces weren’t cute — they were deliberately grotesque, meant to frighten. You get to choose which end of that spectrum to sew: a wide friendly grin or a genuinely unsettling one. The construction is identical either way.
Appliqué is the technique of layering a fabric shape onto a background and stitching it down, and it’s what lets you put a recognizable image on a bag rather than an abstract patchwork grid. This build produces a finished bag around 11″ wide × 13″ tall × 3″ deep, with the pumpkin face centered on both front and back.
Design Inspirations – Digitally Modified
Materials
- Background fabric — 1/2 yard deep violet or midnight blue quilting cotton (a night sky reads better behind an orange pumpkin than black does; black flattens the silhouette)
- Pumpkin orange cotton — 1/3 yard, saturated pumpkin or a tonal batik with mottling
- Black cotton — fat quarter, for the carved face pieces
- Acid green cotton — small scrap, for the stem
- Lining — 1/2 yard bright gold or lime
- Low-loft cotton batting — 1/2 yard
- Paper-backed fusible web (HeatnBond Lite or Wonder-Under) — 1/2 yard
- Cotton webbing — 1″ wide, 1 1/4 yards
- Binding — 1/8 yard for a 2 1/2″ × 45″ strip
- 50wt thread: orange, black, green; optional gold for topstitching
Step 1 — Cut the Background Panels
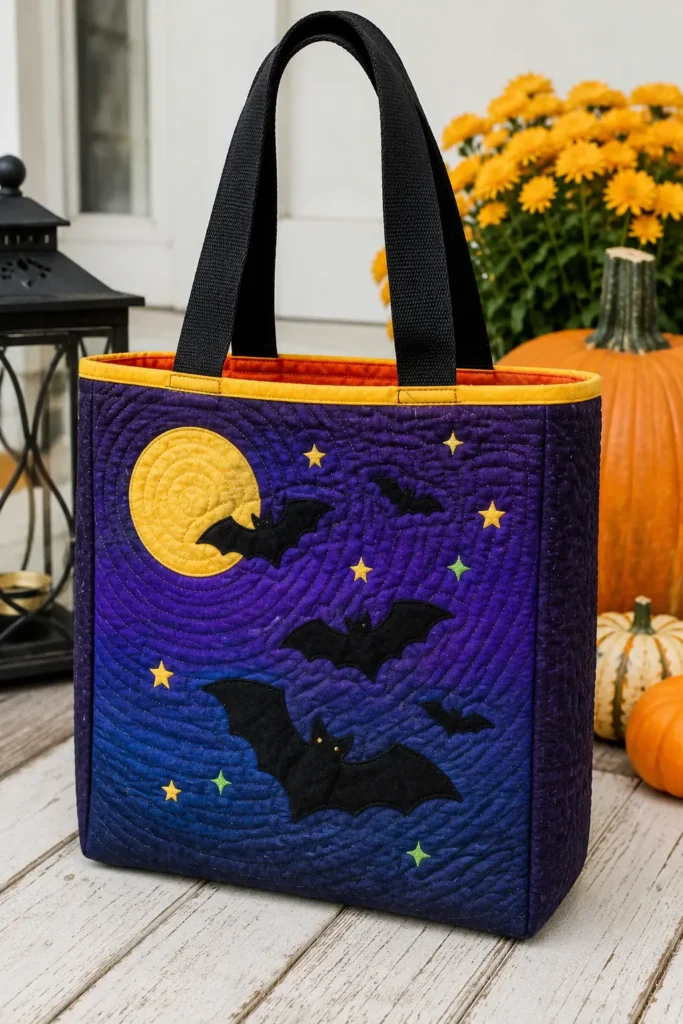
Cut two background rectangles at 12 1/2″ × 14 1/2″ and one gusset strip at 3 1/2″ × 34″. Cut identical pieces from batting and muslin backing, adding about 2″ to each dimension for quilting shrinkage.
Cutting the gusset as one continuous strip rather than three pieces removes two seams at the bottom corners — the exact spots that fail first when a bag is loaded with candy.
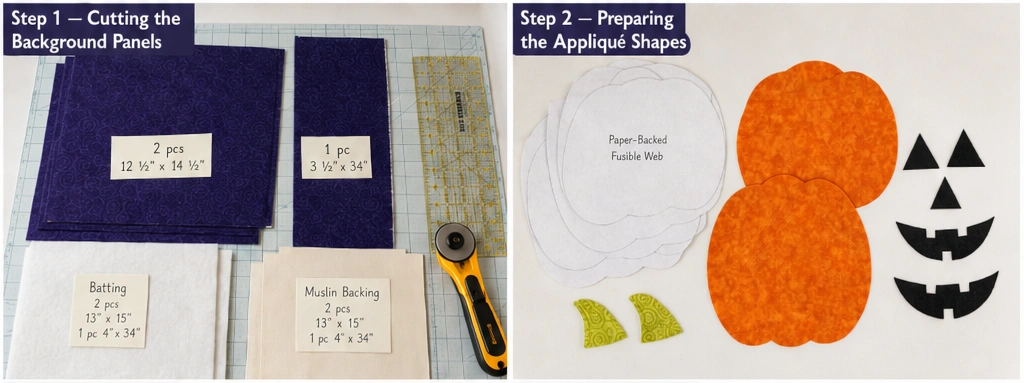
Step 2 — Prepare the Appliqué Shapes
Draw or trace your pumpkin at roughly 8″ wide × 7″ tall — large enough to dominate the panel without crowding the seam allowances. Remember to reverse the image before tracing onto the paper side of the fusible web, since the shape flips when you turn it over.
Trace and cut:
- Pumpkin body — one 8″ × 7″ rounded shape per panel (2 total)
- Stem — 1 1/2″ × 2″ curved shape in acid green (2 total)
- Face pieces — two triangular eyes about 1 1/2″ per side, a small triangular nose, and a grin roughly 4″ wide, all in black (2 sets)
Fuse the web to the wrong side of each fabric, cut out on the traced lines, then peel the paper backing.
Tip: Cut the pumpkin’s outer edge with a slight scallop rather than a smooth oval — three or four gentle lobes suggest the ridges of a real pumpkin without requiring separate pieced sections.
Step 3 — Fuse and Stitch the Appliqué
Center the pumpkin on each background panel, roughly 3″ up from the bottom raw edge. Position the stem so it tucks slightly under the pumpkin’s top edge, then fuse everything with a hot dry iron, holding 8–10 seconds per section.
Stitch every appliqué edge down. Three options, in order of durability:
- Blanket stitch — the traditional choice, visible and decorative
- Narrow zigzag (1.5mm width, 1.0mm length) — fast and secure
- Straight stitch 1/8″ inside the edge — softest look, but the raw edge will fray slightly with washing, which some makers want
Stitch the face pieces last, on top of the fused pumpkin body.
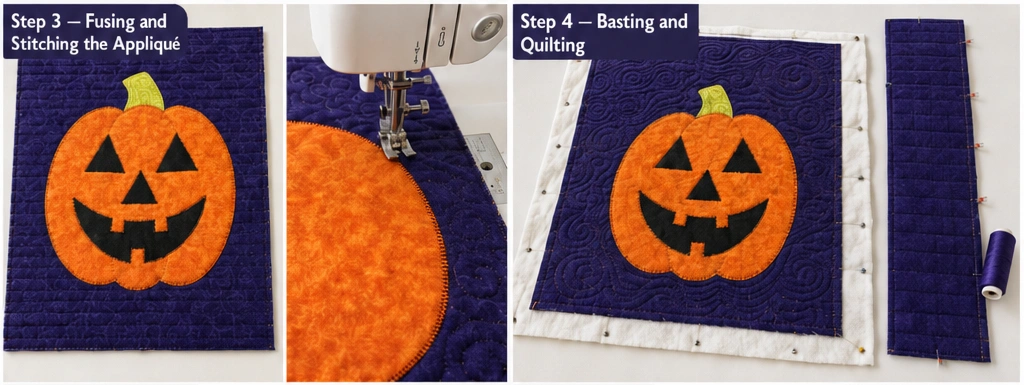
Step 4 — Baste and Quilt
Layer muslin backing, batting, and the appliquéd top. Spray-baste or pin.
Quilt the background only — leave the pumpkin unquilted or lightly quilted so it stays slightly raised against the sky. Good background options:
- Dense horizontal lines 1/2″ apart, which push the pumpkin forward
- A loose swirl or stipple suggesting wind
- Radiating lines from the pumpkin outward, like light emanating from the carved face
If you quilt inside the pumpkin at all, follow the scalloped lobe lines vertically — it reinforces the ridge illusion.
Quilt the gusset strip with lines across its width every inch.
Step 5 — Trim and Square Up
Trim both quilted panels to exactly 12 1/2″ × 14 1/2″ and the gusset to 3 1/2″ × 34″. Always square up after quilting, never before — quilting draws fabric in, and it never draws in evenly.
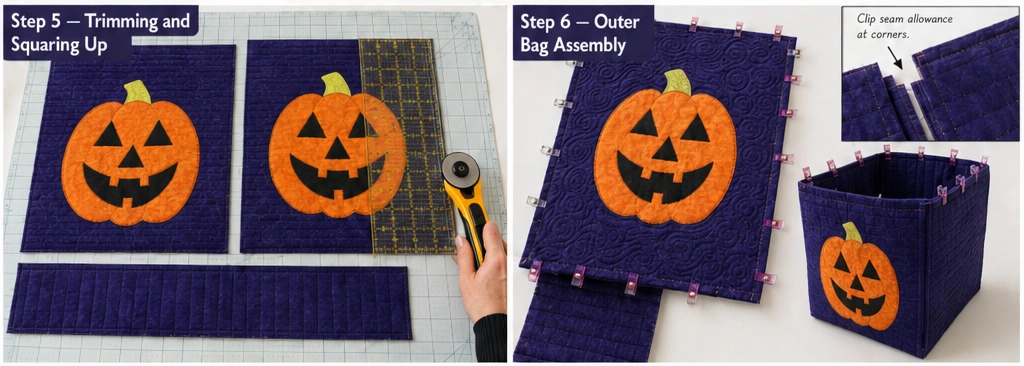
Step 6 — Assembly
- Mark the gusset. Find and mark the center. Measure 11″ out in each direction from that center mark. Those two marks become the bottom corners.
- Pin the front panel to the gusset, aligning the panel’s bottom edge with the 11″ center section.
- Clip the gusset seam allowance to within 1/8″ of the stitch line at each corner mark, so the strip can pivot around the corner without buckling.
- Sew at 1/4″, needle down at each pivot. Go slowly through the corners — six layers stack up there.
- Repeat with the back panel, checking that the pumpkin faces sit at matching heights on both sides before you sew.
- Turn right side out; press seams from the inside with a point turner.
Step 7 — Line the Bag
Cut lining panels at 12 1/2″ × 14 1/2″ (×2) and a lining gusset at 3 1/2″ × 34″. Assemble exactly as in Step 6, but sew at a 3/8″ seam allowance. That deeper seam makes the lining slightly smaller than the shell, so it drops in without bunching at the corners.
Insert wrong sides together and baste around the top edge at 1/8″.
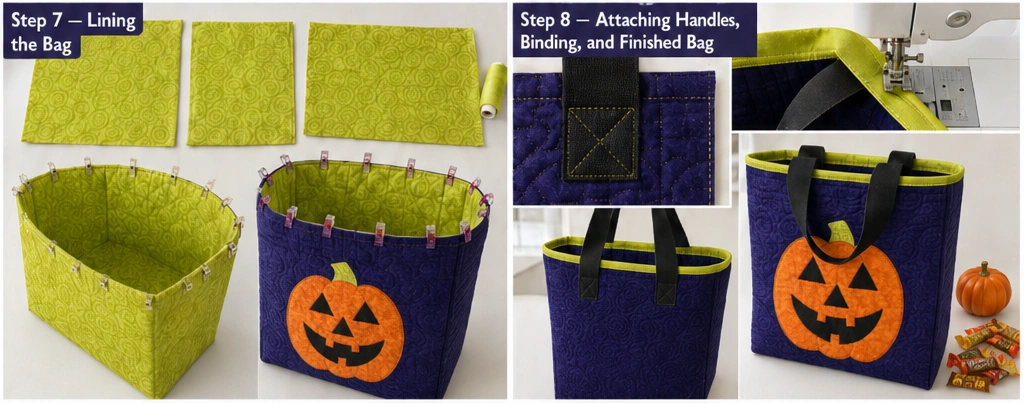
Step 8 — Attach the Handles
Cut two webbing lengths at 22″. Place each end 3 1/2″ in from the side seams, overlapping the raw top edge by 1″.
Secure each end with a box-and-X stitch: a 1″ stitched square with both diagonals sewn inside it. A straight bar tack across webbing will eventually pull free under weight; a box-and-X spreads the load across four seam lines and won’t.
Step 9 — Bind the Top Edge
Cut a 2 1/2″ × 45″ strip, press in half lengthwise, and sew to the outside top edge at 1/4″, joining the ends with a diagonal seam. Fold to the inside and finish by hand or stitch-in-the-ditch.
Gold or acid green binding is the move here — it picks up the stem color and frames the violet background without competing with the orange.
Color Notes
The whole design rests on the orange reading hot against a cool background. Violet, indigo, and midnight blue all do this better than black, which absorbs too much and makes the pumpkin look pasted on rather than glowing. If you want the carved face to appear genuinely lit, back the face openings with a thin layer of gold or acid yellow fabric and cut the black slightly smaller, leaving a 1/8″ rim of yellow around each eye and the grin. It’s a small addition that reads as candlelight from across a dark yard.
Gift Ideas That Fit This Bag
At 11″ × 13″ × 3″, the interior handles more than candy:
- A medium hardcover book or a stack of paperbacks
- Baking supplies — cookie cutters, a rolling pin, and a bag of sprinkles nest together well
- A folded flannel throw or child-size quilt
- Art supplies: sketchbook, marker set, and a pencil case
- A thermos and mug set with a bag of coffee or cocoa
- Fat quarter bundles — eight to ten fit upright
- A fall candle wrapped in tissue, with a tin of tea
- Game night kit: card game, dice bag, and a bag of popcorn kernels
Other Design Inspirations – Digitally Modified
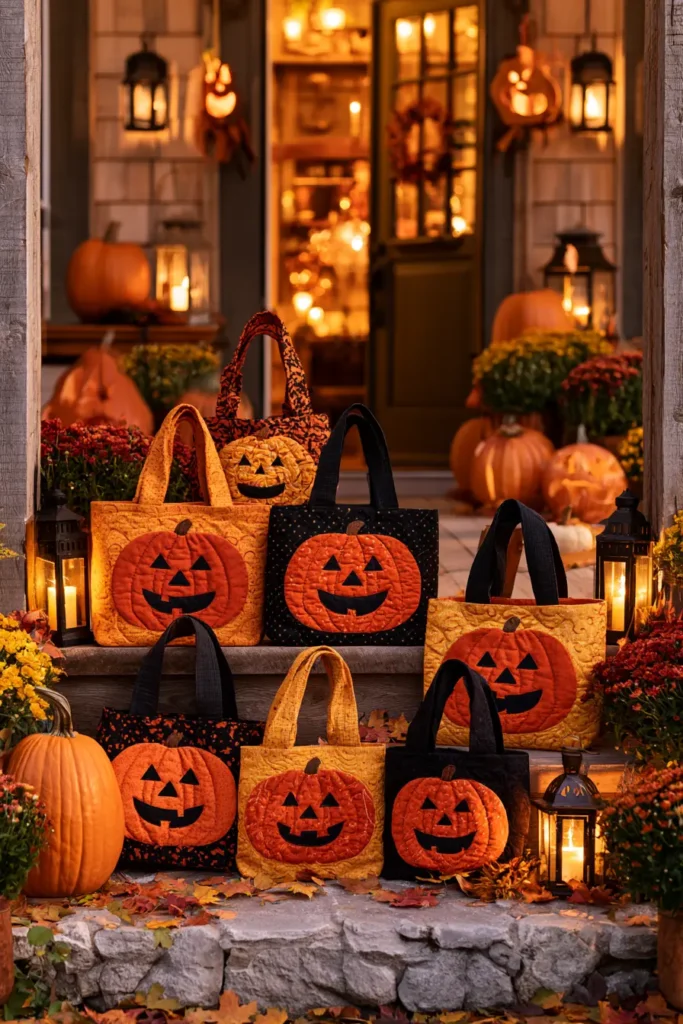
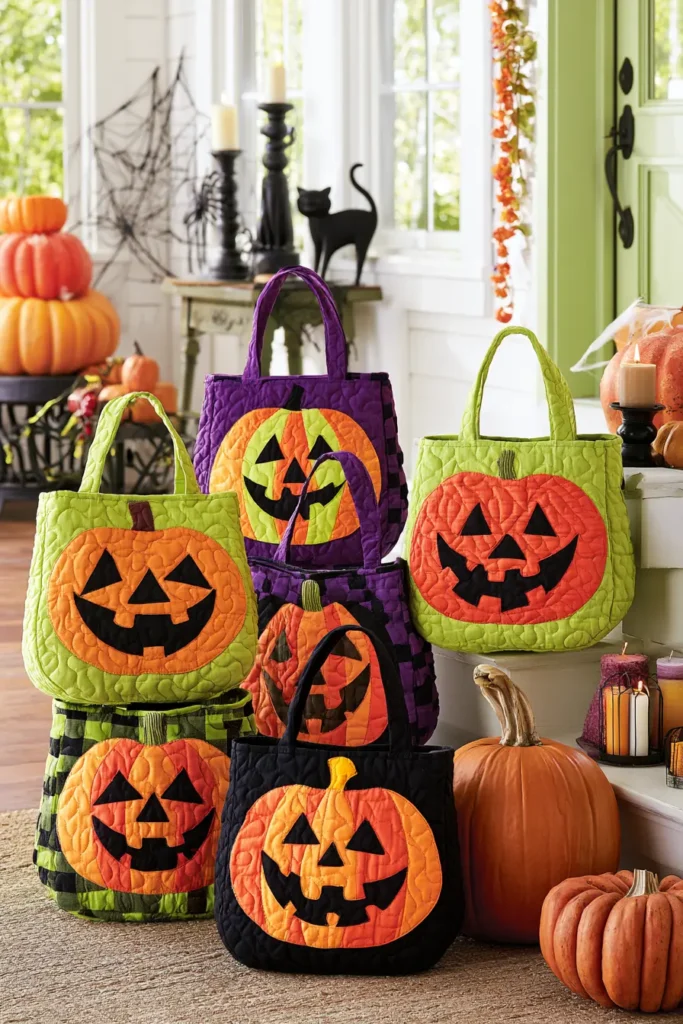
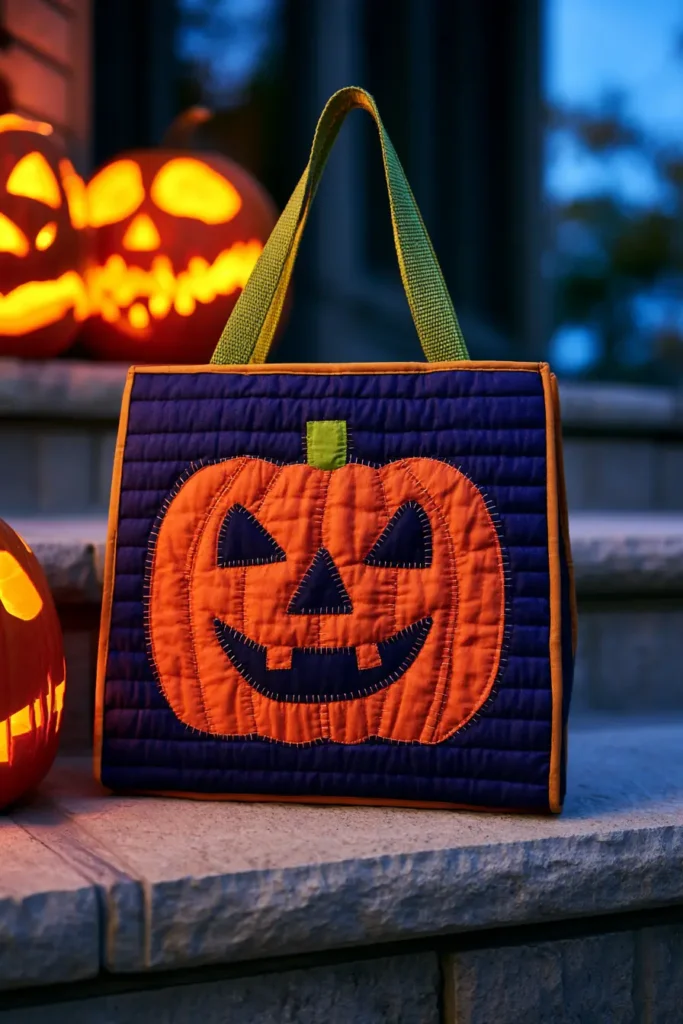
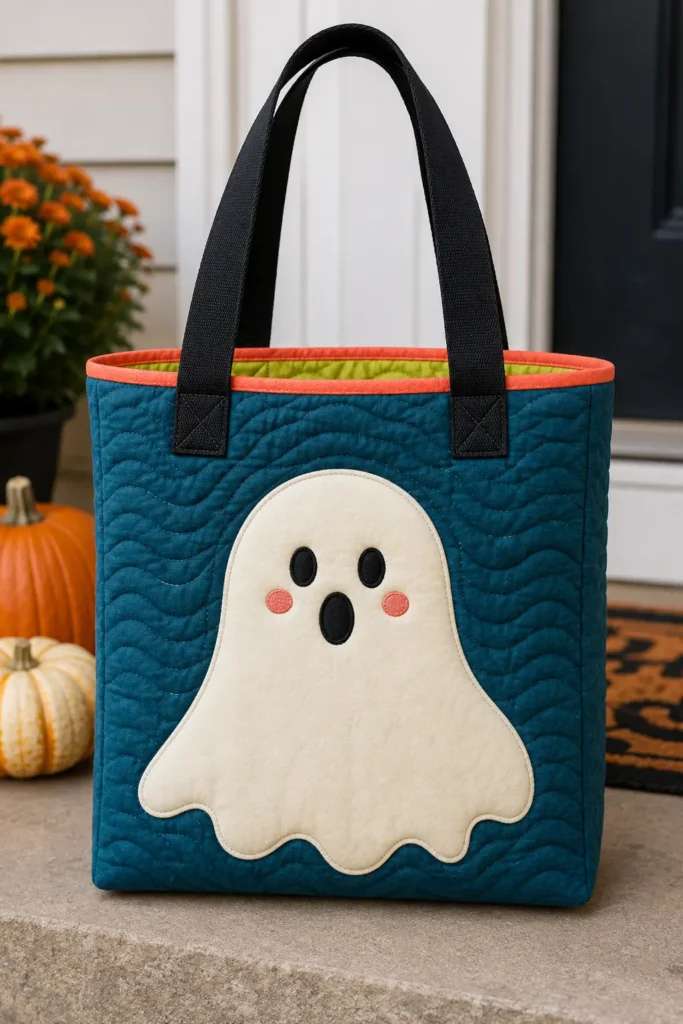
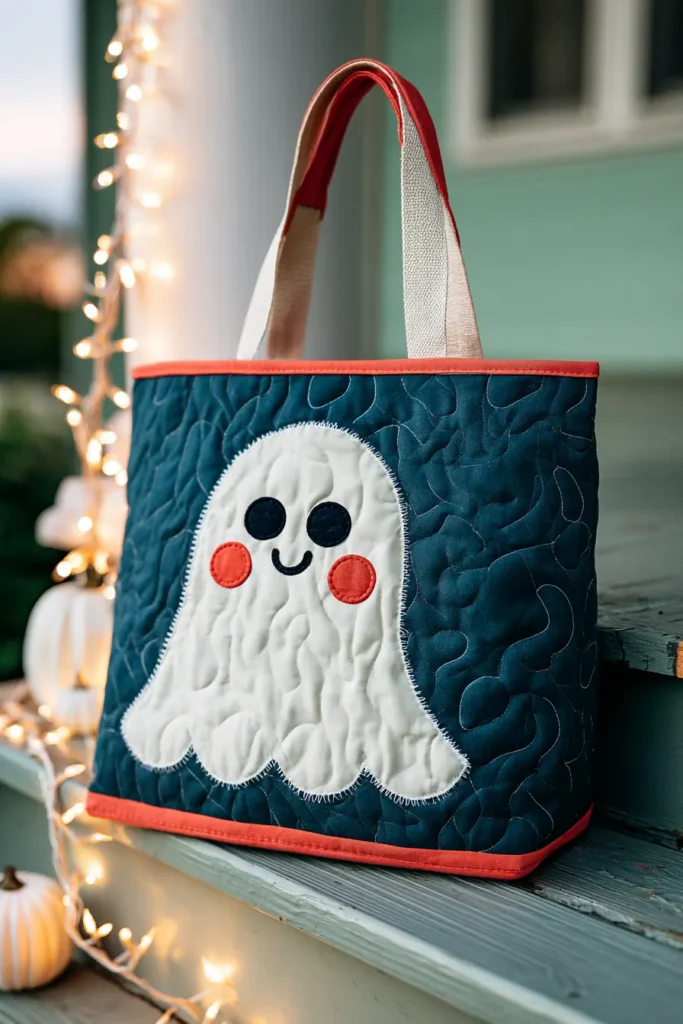
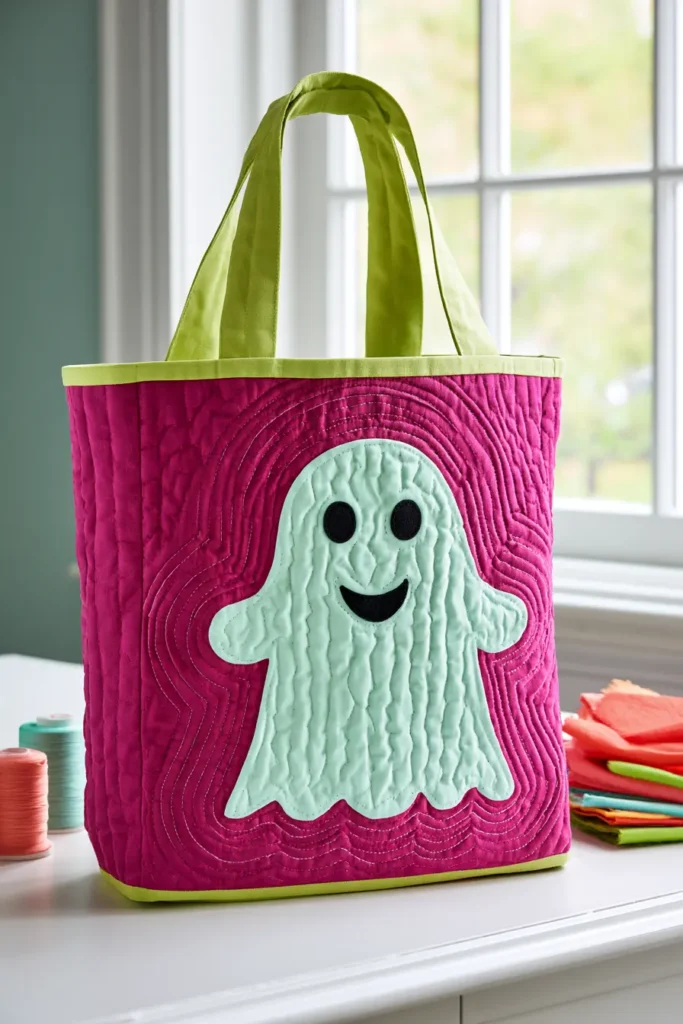
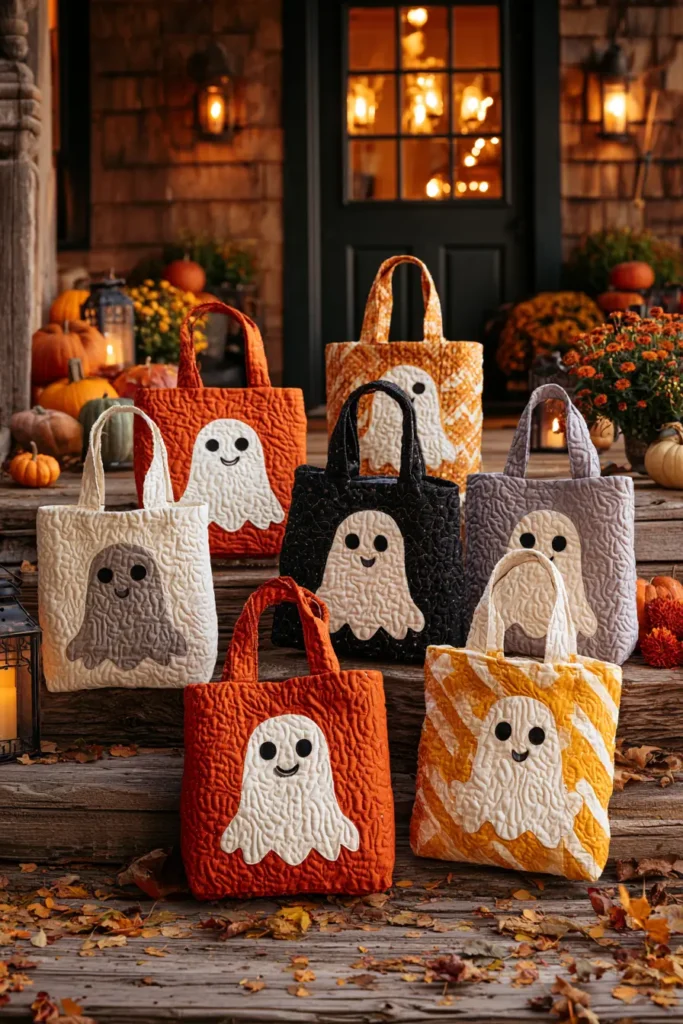
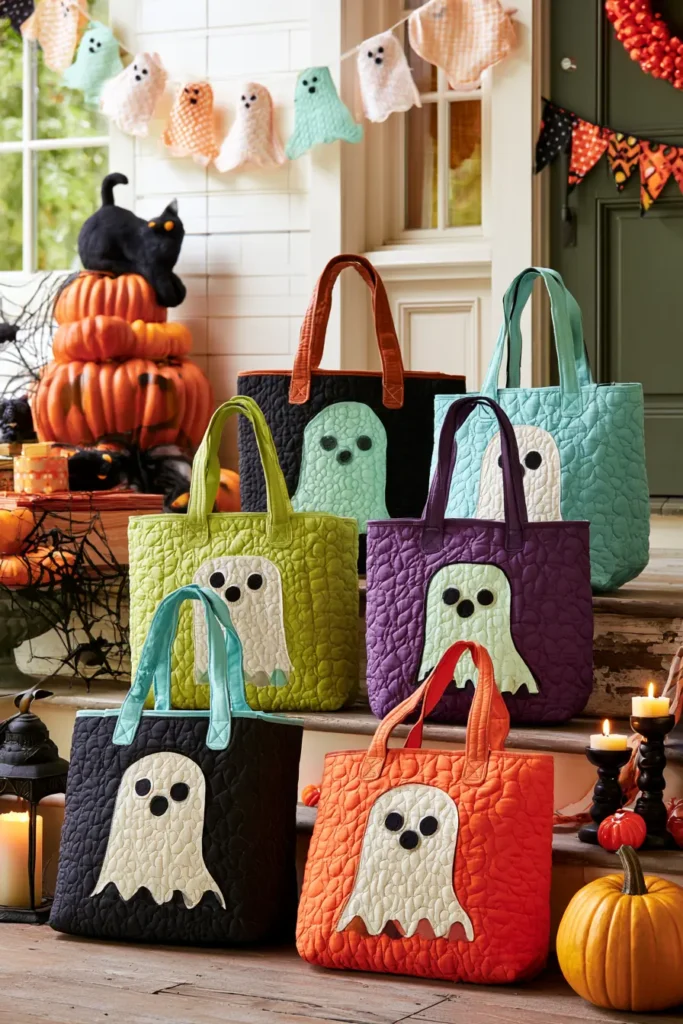
3. Cute Ghost Appliqué Quilted Halloween Totes
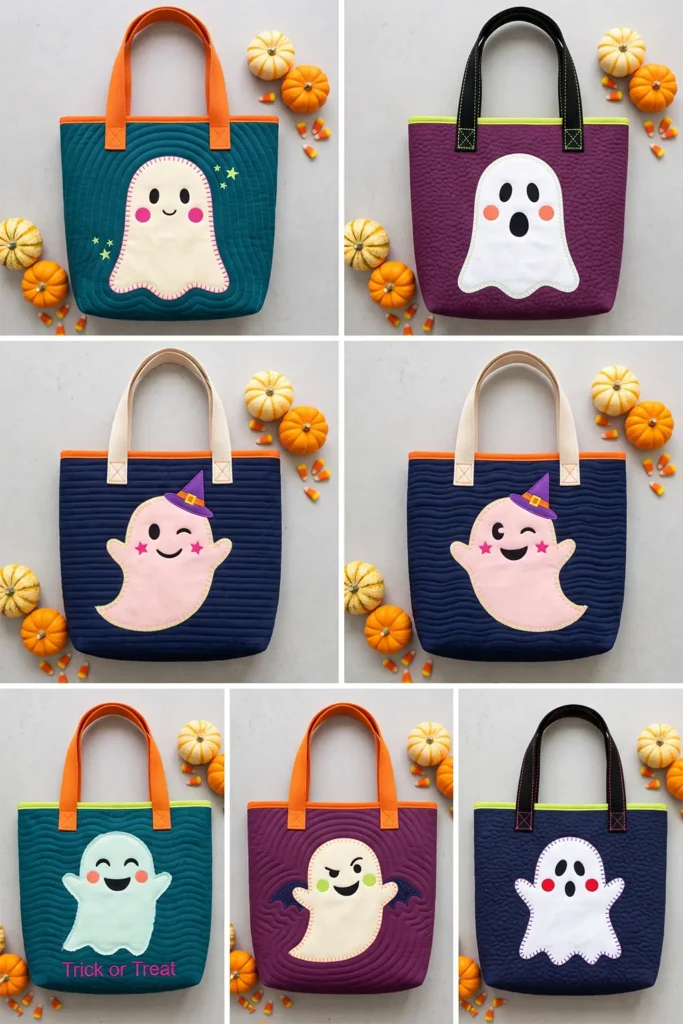
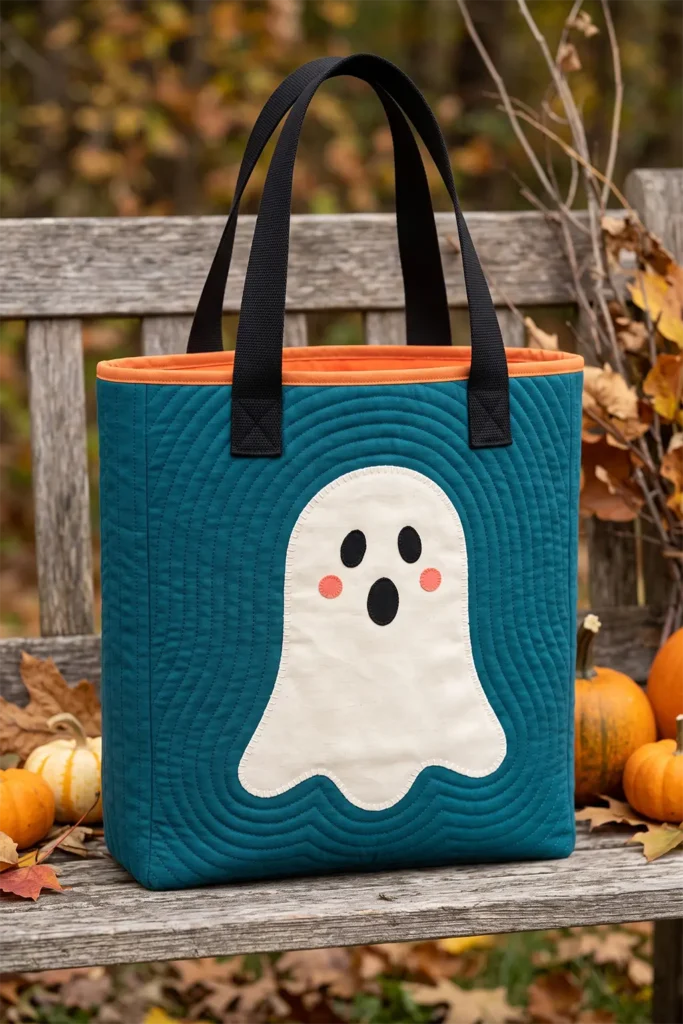
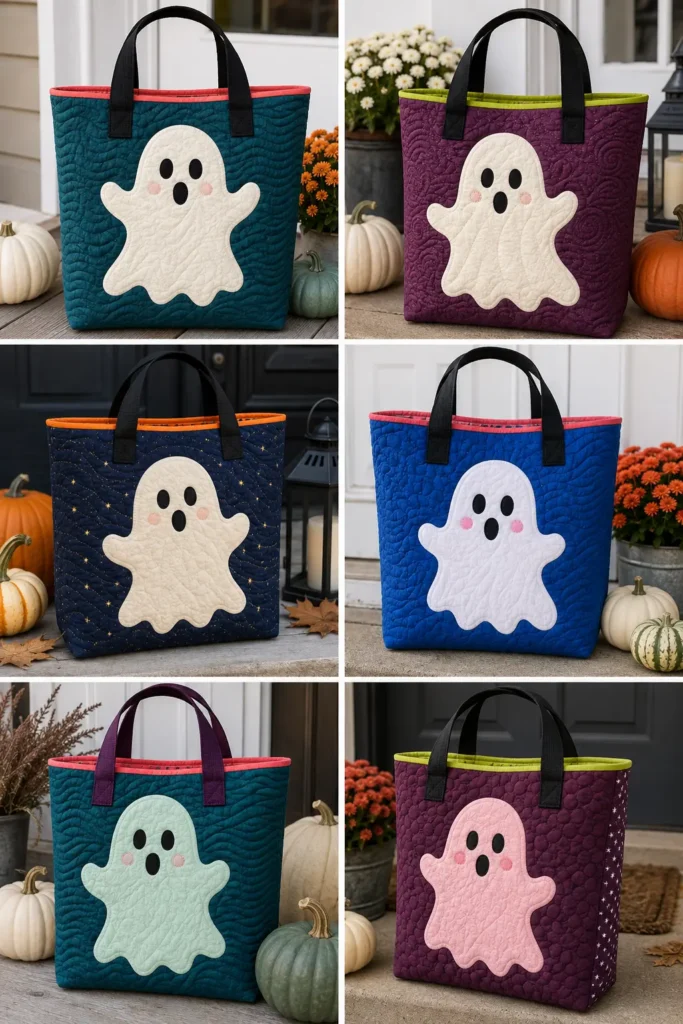
The sheet ghost is a surprisingly modern invention. Medieval and early modern ghosts were described as appearing in the clothes they died in — armor, robes, whatever they’d worn in life. The white sheet came from Victorian burial practice, when bodies were wrapped in winding sheets before coffins became standard, and by the time stage productions needed a cheap way to costume a spirit, a draped white sheet was the obvious shortcut. Theatre made it a convention; Halloween made it permanent. For quilters, that history is convenient — the sheet ghost is essentially a simple curved blob, which makes it the friendliest appliqué shape in the entire Halloween vocabulary. No sharp inner corners, no fussy points, nothing that punishes a beginner.
This build produces a finished tote around 12″ wide × 13″ tall × 4″ deep, with a single large ghost on the front and a smaller companion ghost on the back.
Design Inspirations – Digitally Modified
Materials
- Background fabric — 1/2 yard in deep teal, plum, or midnight navy quilting cotton
- White or cream cotton — fat quarter, for the ghost bodies (a slightly off-white or warm cream reads softer than stark white and photographs better)
- Black cotton — small scrap, for eyes and mouths
- Accent fabric — small scrap of coral or hot pink, for optional blush cheeks
- Lining — 1/2 yard in tangerine or acid lime
- Low-loft cotton batting — 1/2 yard
- Paper-backed fusible web — 1/3 yard
- Cotton webbing — 1″ wide, 1 1/4 yards
- Binding — 1/8 yard for a 2 1/2″ × 45″ strip
- 50wt thread: white, black, background color
Step 1 — Cut the Background Panels
Cut two background rectangles at 13 1/2″ × 14 1/2″ and one gusset strip at 4 1/2″ × 36″. Cut batting and muslin backing about 2″ larger in each dimension to allow for quilting draw-in.
Cut the gusset as one continuous strip. Piecing it from three separate sections adds two seams at the bottom corners, which is precisely where a loaded bag splits.
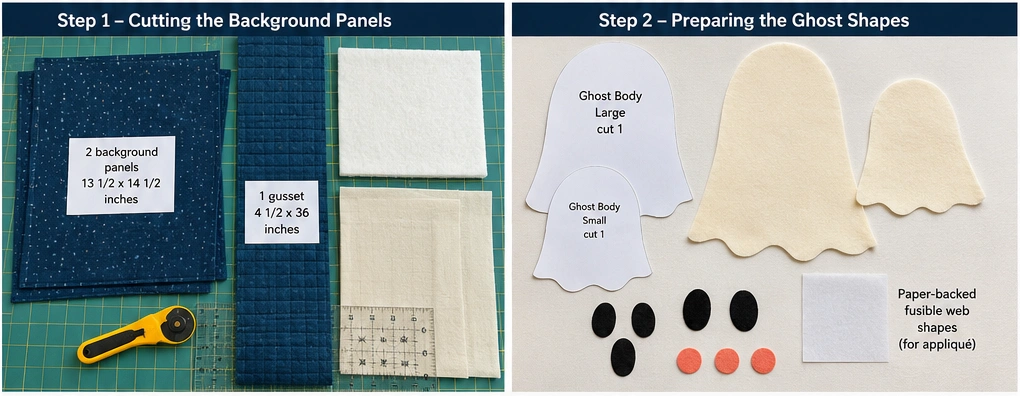
Step 2 — Prepare the Ghost Shapes
Draw the front ghost at roughly 8″ tall × 6″ wide. The shape is a rounded dome for the head and shoulders, tapering slightly, with a wavy bottom edge of three or four soft lobes. Keep the lobes shallow — deep scallops read as flames rather than fabric drape.
Draw the back ghost smaller, around 5″ tall × 4″ wide.
Reverse the shapes before tracing onto the paper side of the fusible web, since they flip when turned over. Trace, fuse to the wrong side of the white cotton, cut on the lines, peel the paper.
Cut face pieces from black: two oval eyes about 3/4″ tall and an open oval mouth about 1″ wide. Cut two small coral circles at 3/4″ diameter for cheeks if you want them.
Tip: Cut a spare ghost from scrap first and audition the face placement with pins before committing. Eyes set slightly wide and low read cute; set high and close together they read startled. Same shape, entirely different character.
Step 3 — Fuse and Stitch the Appliqué
Center the large ghost on the front panel, about 3 1/2″ up from the bottom raw edge. Fuse with a hot dry iron, 8–10 seconds per section. Position the small ghost on the back panel, offset slightly to one side rather than dead center — it makes the pair feel like a scene rather than a repeat.
Stitch every edge down. For ghosts specifically:
- Blanket stitch in white thread — the edge stays soft and the ghost keeps its cloth quality
- Narrow zigzag in white (1.5mm width, 1.0mm length) — most durable
- Blanket stitch in a contrasting bright like acid lime — turns the outline into a graphic element
Stitch the face pieces after the body is secured. Cheeks go on last, overlapping nothing.
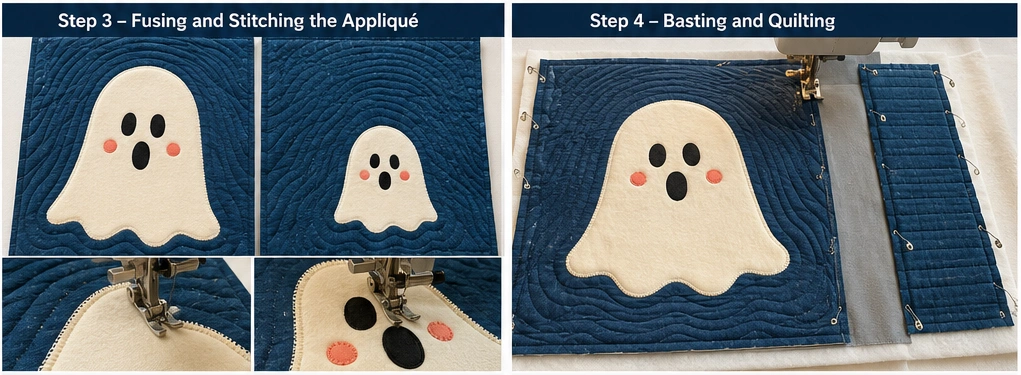
Step 4 — Baste and Quilt
Layer muslin, batting, and appliquéd top. Spray-baste or pin.
Quilt the background densely and the ghost not at all. That contrast is what makes the ghost puff forward and appear to float. Background options that work:
- Horizontal wavy lines 1/2″ apart, flowing around the ghost like air currents
- Tight stipple in matching thread, which recedes completely
- Concentric echo lines radiating outward from the ghost at 1/2″ intervals — the strongest option for a floating effect
Quilt the gusset with straight lines across its width every inch.
Step 5 — Trim and Square Up
Trim panels to exactly 13 1/2″ × 14 1/2″ and the gusset to 4 1/2″ × 36″. Square up after quilting, never before — quilting always pulls fabric in, and never symmetrically.
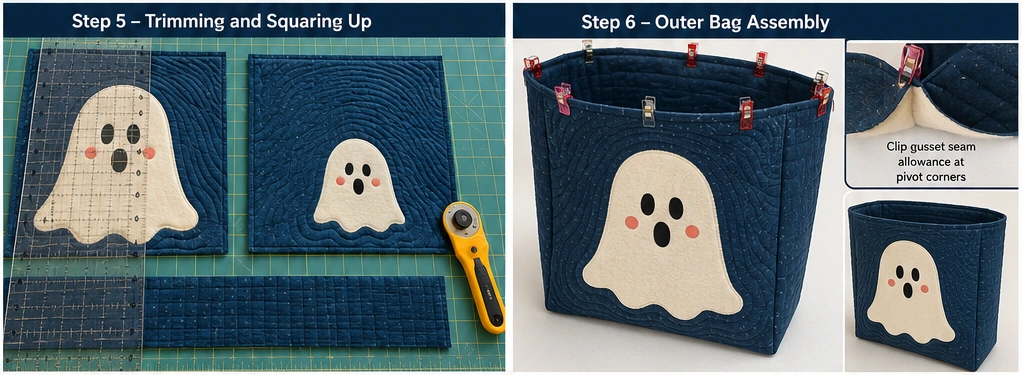
Step 6 — Assembly
- Mark the gusset center, then measure 12″ out in each direction and mark. Those two marks are the bottom corners.
- Pin the front panel to the gusset, matching the panel’s bottom edge to the 12″ center section.
- Clip the gusset seam allowance to within 1/8″ of the stitch line at each corner mark so the strip pivots cleanly.
- Sew at 1/4″, stopping with the needle down at each pivot point. Six layers stack at the corners — go slowly.
- Repeat with the back panel. Check that both ghosts sit at heights that look intentional relative to each other before sewing.
- Turn right side out and press seams from the inside with a point turner.
Step 7 — Line the Bag
Cut lining panels at 13 1/2″ × 14 1/2″ (×2) and a lining gusset at 4 1/2″ × 36″. Assemble exactly as above but sew at 3/8″. The deeper seam makes the lining marginally smaller so it seats inside the shell without rippling.
Drop in wrong sides together, baste around the top edge at 1/8″.
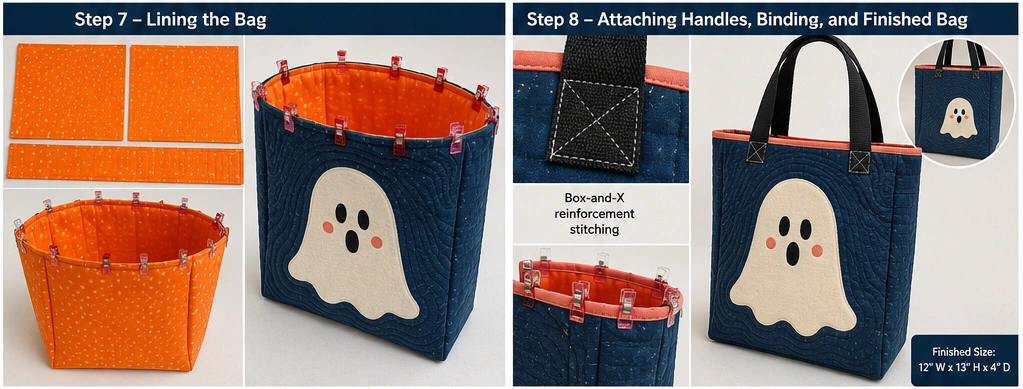
Step 8 — Attach the Handles
Cut two webbing lengths at 23″. Position each end 4″ in from the side seams, overlapping the raw top edge by 1″.
Finish each end with a box-and-X stitch — a 1″ stitched square with both diagonals sewn inside. A single bar tack across webbing pulls loose under load; the box-and-X spreads that pull across four seam lines and holds.
Step 9 — Bind the Top Edge
Cut a 2 1/2″ × 45″ strip, fold in half lengthwise and press. Sew to the outside top edge at 1/4″, joining ends with a diagonal seam. Fold to the inside and finish by hand or stitch-in-the-ditch.
Tangerine or hot coral binding against a teal background is the strongest pairing here — it pulls the lining color to the outside and keeps the palette from going somber.
Color Notes
Cute ghosts fail when the palette goes gothic. White on black is a horror-movie combination; white on teal, plum, or a bright cobalt is a children’s-book combination, and that’s the register this design wants. Warm cream rather than optical white keeps the ghost from looking like a cutout. A coral or magenta accent — cheeks, binding, or a stitched blanket-stitch outline — is what tips the whole thing from spooky to charming. If you want to push further, try ghosts in pale mint or blush pink instead of white; the shape still reads as a ghost, and the unexpected color is what makes these pins perform.
Gift Ideas That Fit This Bag
At 12″ × 13″ × 4″, this is the roomiest option in the collection:
- A child’s picture book set — three or four standard hardcovers stack easily
- A plush toy or stuffed animal with room to spare
- Bath and self-care bundle: soap, a candle, and a rolled hand towel
- A folded lap quilt or flannel throw
- Craft kit for kids: felt sheets, embroidery hoop, blunt needles, and floss
- A cozy set — chunky socks, a mug, and a box of tea
- Fat quarter bundle of 10–12, standing upright
- Movie night kit: popcorn, candy, and a blanket
Other Design Inspirations – Digitally Modified
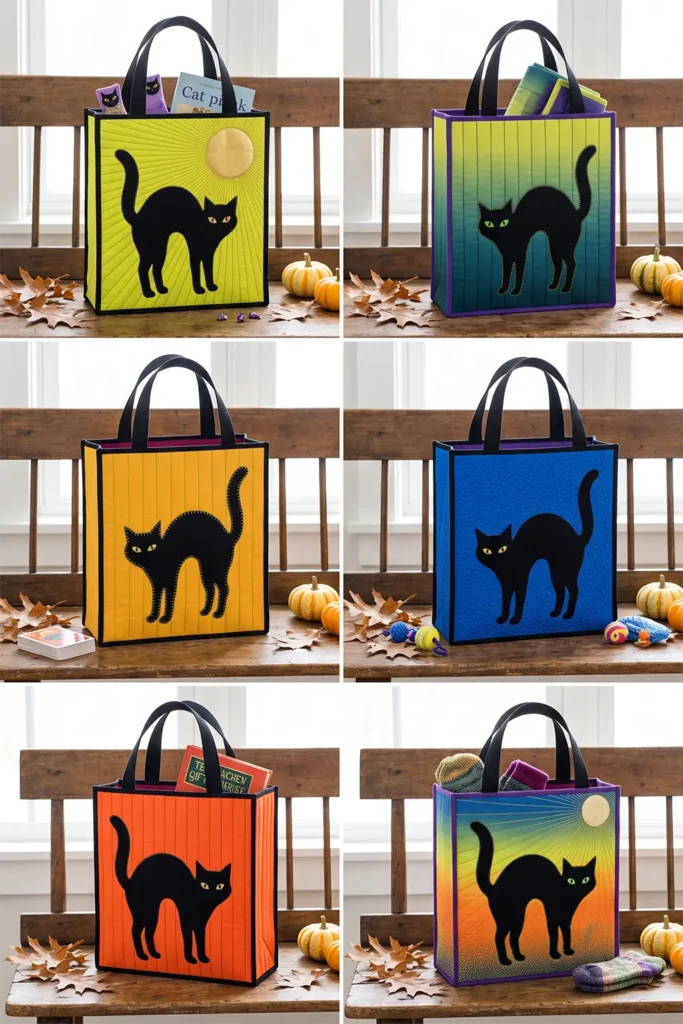
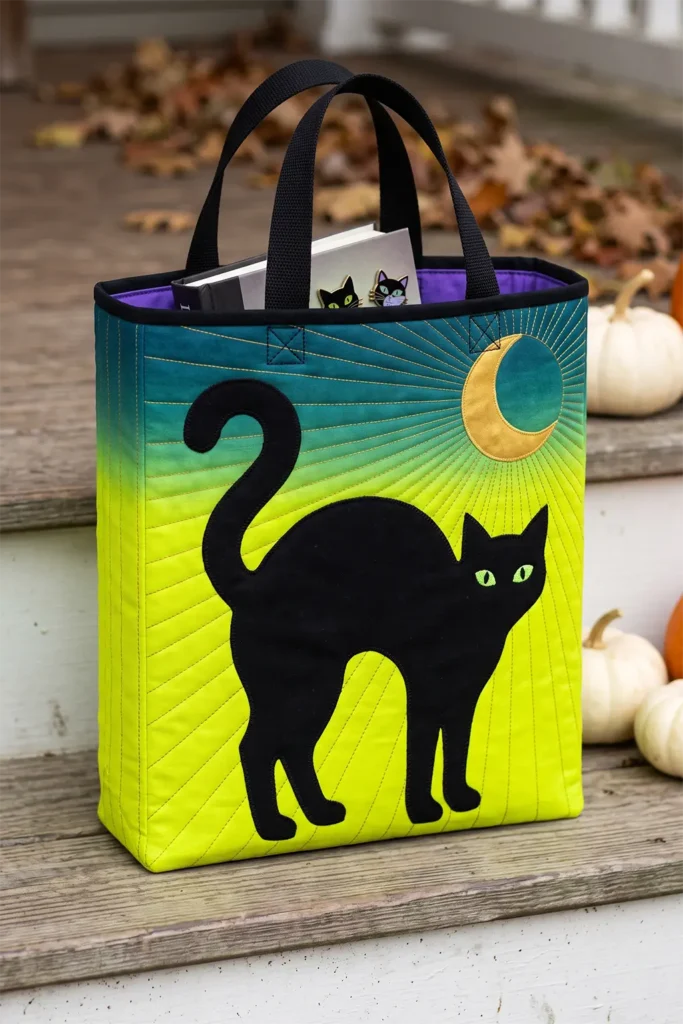
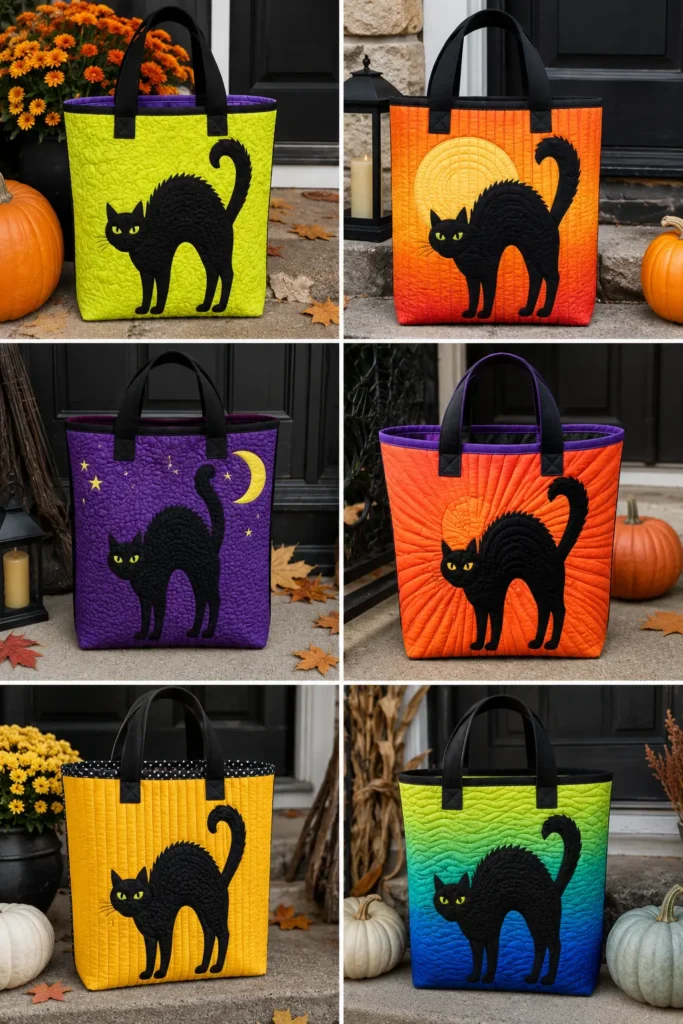
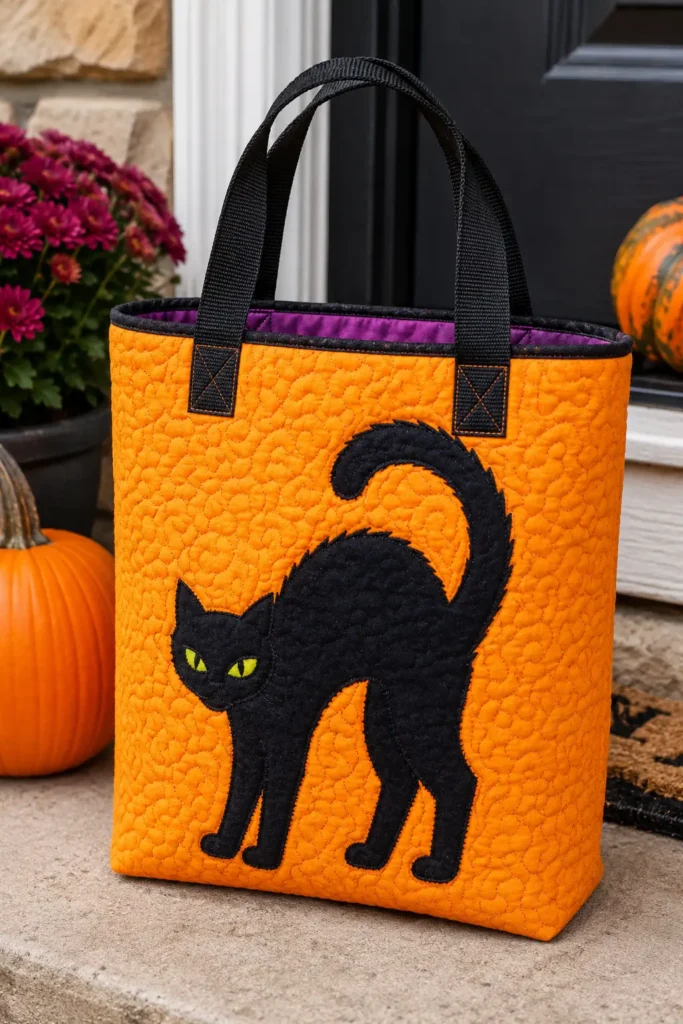
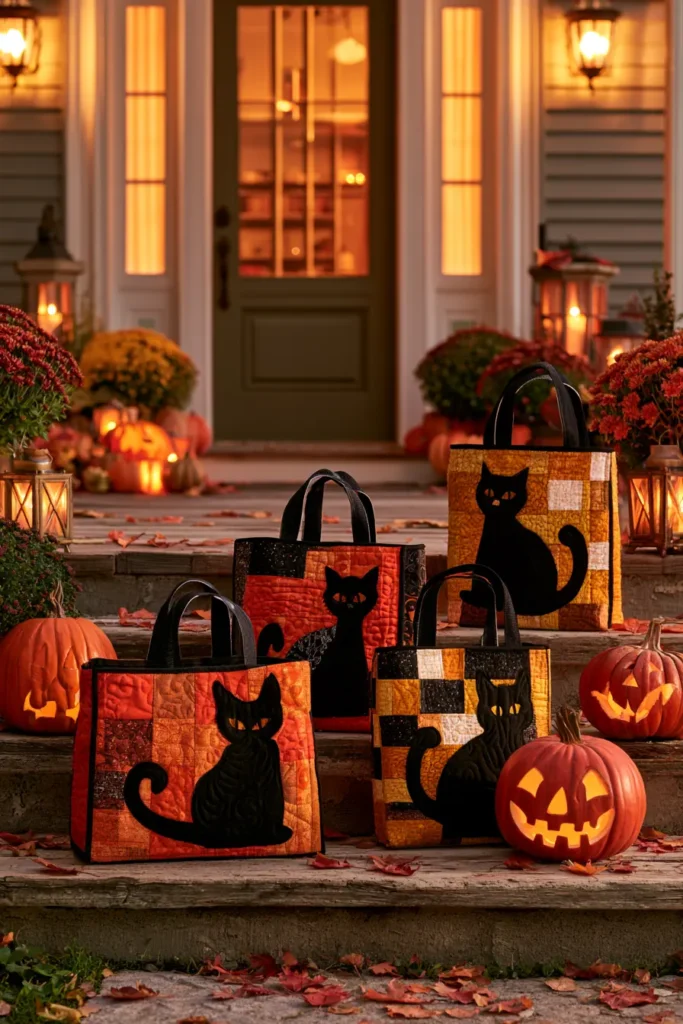
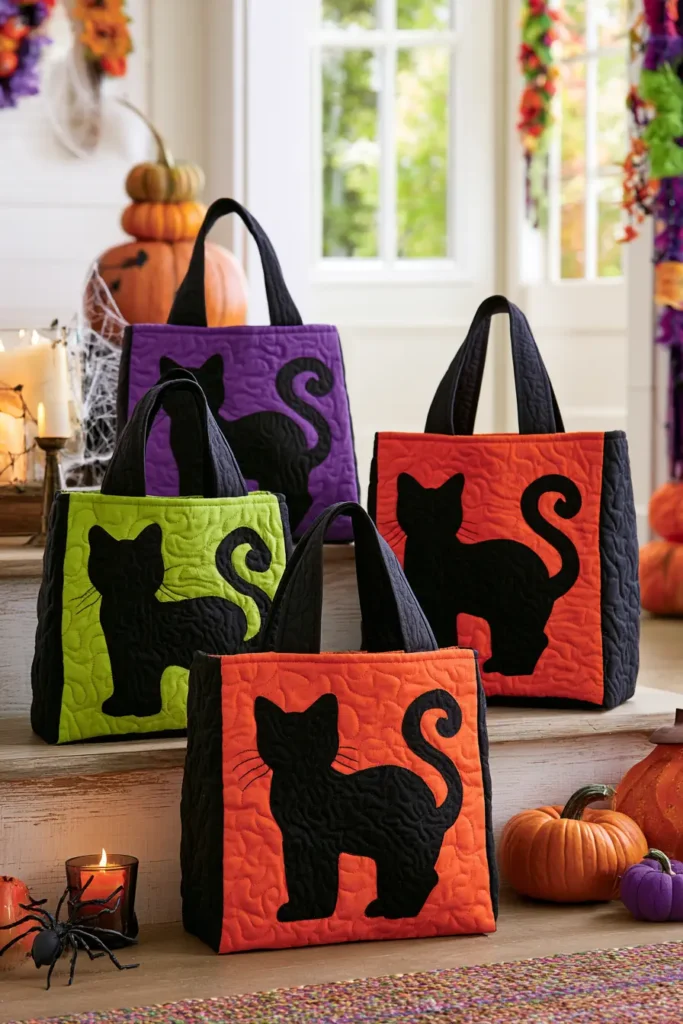
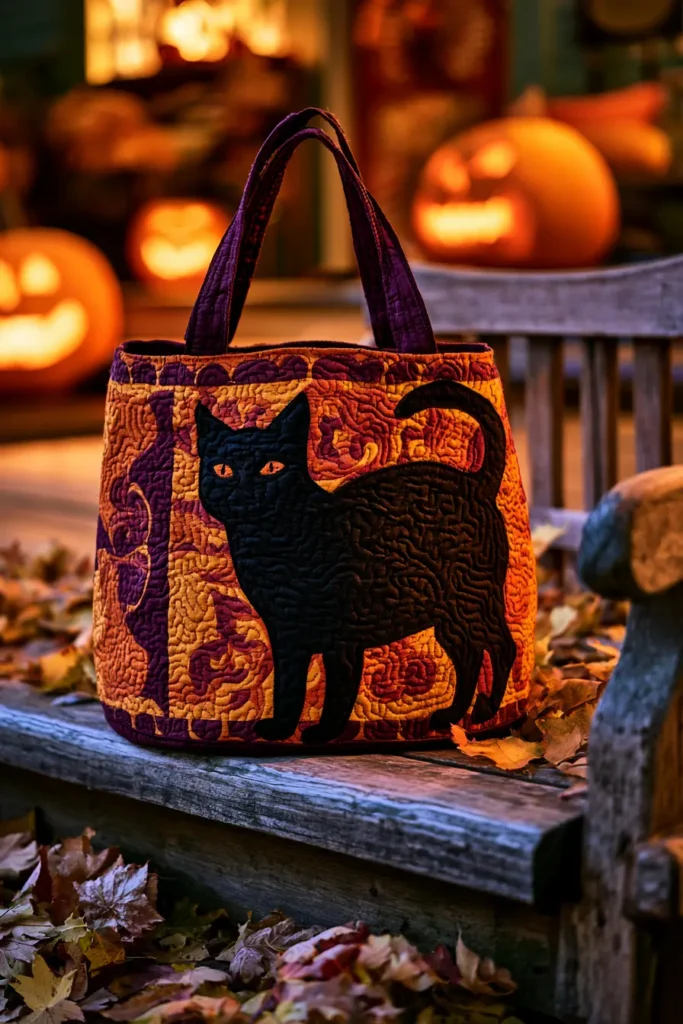
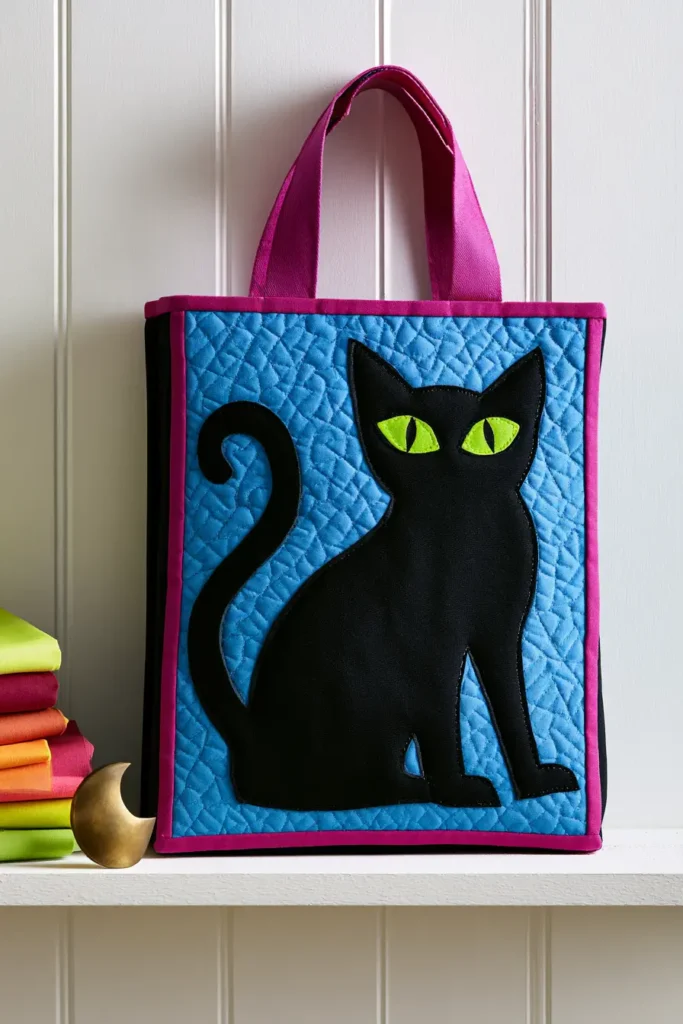
4. Black Cat Silhouette Quilted Candy Bags
The black cat’s association with bad luck is regional and relatively recent — in Britain and Japan, a black cat crossing your path has traditionally been a good omen, and English sailors’ wives kept black cats specifically to ensure safe voyages. The unlucky version spread through medieval European folklore linking cats to witchcraft, and American Halloween iconography inherited that darker reading through Victorian greeting cards. Either way, the visual that survived is a pure silhouette: arched back, upright tail, ears in sharp profile. That’s a gift for quilters, because silhouettes are all about outline. There’s no interior detail to render, no shading to approximate — just one crisp shape against a bright ground.
This build produces a finished bag around 11″ wide × 13″ tall × 3″ deep, with a full-body cat silhouette on the front and a smaller seated cat on the back.
Design Inspirations – Digitally Modified
Materials
- Background fabric — 1/2 yard in electric chartreuse, marigold, or hot tangerine quilting cotton
- Black cotton — fat quarter for the silhouettes (a solid true black, not a print; prints muddy a silhouette)
- Accent scraps — small pieces of acid green or gold for the eyes
- Lining — 1/2 yard in violet or deep magenta
- Low-loft cotton batting — 1/2 yard
- Paper-backed fusible web — 1/3 yard
- Cotton webbing — 1″ wide, 1 1/4 yards (black)
- Binding — 1/8 yard for a 2 1/2″ × 45″ strip
- 50wt thread: black, background color, gold
Step 1 — Cut the Background Panels
Cut two background rectangles at 12 1/2″ × 14 1/2″ and one gusset strip at 3 1/2″ × 34″. Cut batting and muslin backing roughly 2″ larger in each direction.
Cut the gusset in one continuous piece — separate sections put seams at the bottom corners, which carry the most stress on a loaded bag.
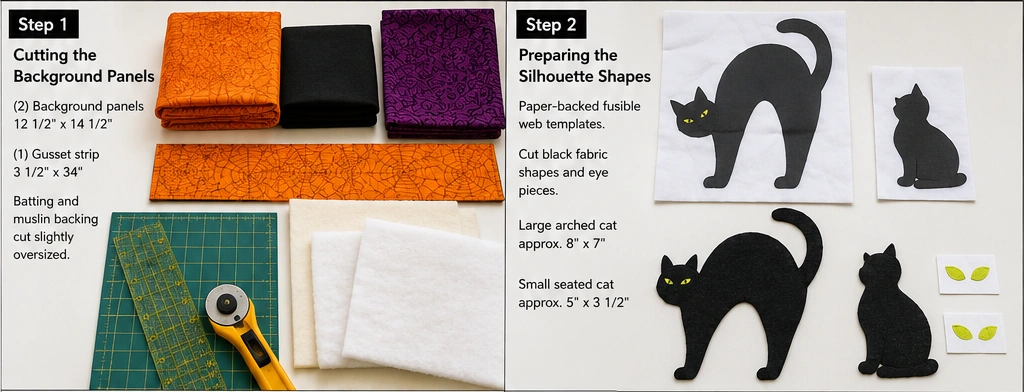
Step 2 — Prepare the Silhouette Shapes
Draw the front cat at roughly 8″ tall × 7″ wide in the classic arched-back pose: front legs planted, spine curved high, tail raised in a question-mark curve, ears pricked. Draw the back cat seated in profile, about 5″ tall × 3 1/2″ wide, tail curled around the front paws.
Reverse both shapes before tracing onto the paper side of the fusible web — they flip when turned over, and an asymmetrical cat pointing the wrong direction is the most common mistake in this project.
Trace, fuse to the wrong side of the black cotton, cut precisely on the traced lines, peel the paper backing.
Tip: Cut the tail slightly thicker than looks correct — at least 5/8″ wide at its narrowest point. Thin appliqué tails fray, lift at the edges, and are miserable to stitch around. The visual difference is negligible; the durability difference is not.
Step 3 — Fuse and Stitch the Appliqué
Position the front cat about 3″ up from the bottom raw edge, centered or shifted slightly left so the tail curve has room. Fuse with a hot dry iron, 8–10 seconds per section.
Stitch the outline down. For silhouettes specifically, a narrow zigzag in black thread (1.5mm width, 1.0mm length) is the best choice — it disappears into the black fabric and keeps the outline crisp. Blanket stitch works too but reads as a visible border, which softens the hard-edge quality a silhouette depends on.
Add the eyes last: two small almond shapes about 1/2″ long in acid green or gold, fused and stitched with matching thread. Two tiny bright marks against solid black are what animate the whole shape.
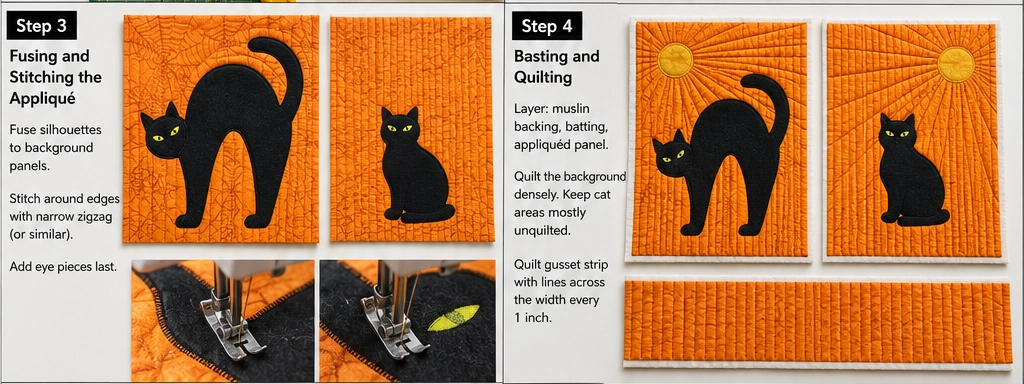
Step 4 — Baste and Quilt
Layer muslin, batting, appliquéd top. Baste.
Quilt the background heavily and leave the cat unquilted. On a silhouette this matters more than on any other design in the collection — dense background quilting compresses the ground and makes the unquilted black shape stand proud, which is exactly the trompe-l’œil effect you want. Options:
- Straight vertical lines 3/8″ apart across the entire background — clean and graphic
- Radiating lines from a moon position in the upper corner
- Tight stipple in matching thread
If you want a moon, appliqué a 3 1/2″ gold or cream circle in the upper right before quilting, and radiate the quilting lines outward from it.
Quilt the gusset with straight lines across the width every inch.
Step 5 — Trim and Square Up
Trim panels to 12 1/2″ × 14 1/2″ and the gusset to 3 1/2″ × 34″. Square up after quilting only — quilting draws fabric in unevenly, and squaring beforehand guarantees a crooked bag.
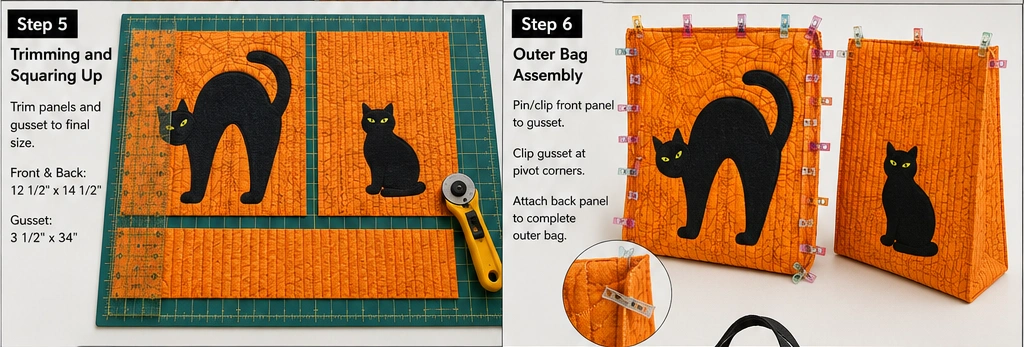
Step 6 — Assembly
- Mark the gusset center, then measure and mark 11″ out in each direction. Those marks are the bottom corners.
- Pin the front panel to the gusset, aligning its bottom edge with the 11″ center section.
- Clip the gusset seam allowance to within 1/8″ of the stitch line at each corner mark so the strip can pivot without buckling.
- Sew at 1/4″, needle down at each pivot. Six layers meet at the corners — reduce speed.
- Repeat with the back panel, confirming both cats face a direction that makes sense as a pair.
- Turn right side out; press seams from inside with a point turner.
Step 7 — Line the Bag
Cut lining panels at 12 1/2″ × 14 1/2″ (×2) and a lining gusset at 3 1/2″ × 34″. Assemble identically but sew at 3/8″ — the deeper seam makes the lining slightly smaller so it drops into the shell without bunching at the corners.
Insert wrong sides together; baste around the top edge at 1/8″.
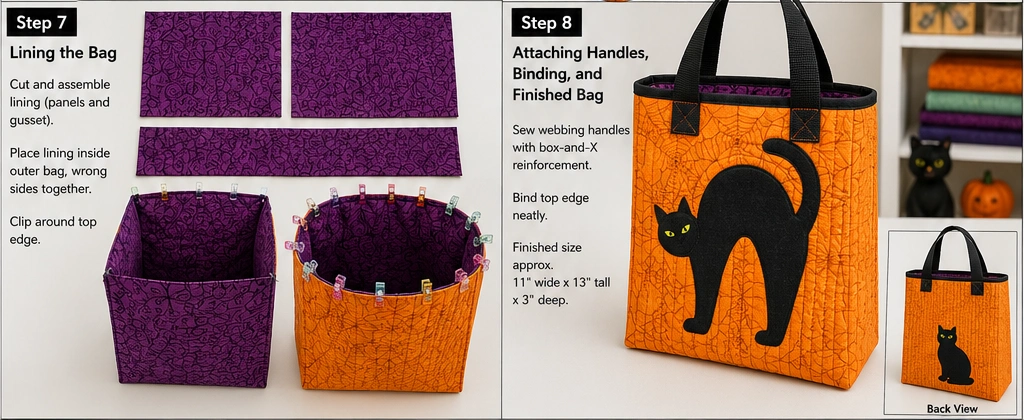
Step 8 — Attach the Handles
Cut two webbing lengths at 22″. Set each end 3 1/2″ in from the side seams, overlapping the raw top edge by 1″.
Secure with a box-and-X stitch — a 1″ square with both diagonals stitched inside it. Straight bar tacks pull out of webbing under weight; the box-and-X distributes the load across four seam lines.
Step 9 — Bind the Top Edge
Cut a 2 1/2″ × 45″ strip, press in half lengthwise, sew to the outside top edge at 1/4″, joining ends with a diagonal seam. Fold to the inside and finish by hand or stitch-in-the-ditch.
Black binding frames the bag like a hard border and echoes the silhouette. Violet binding pulls the lining outward and adds a second color note. Both work; black is the graphic choice, violet the livelier one.
Color Notes
A silhouette needs maximum value contrast, which means the background has to be genuinely bright — this is the one design in the collection where a muted or dusty background actively ruins the effect. Electric chartreuse is the strongest option and photographs exceptionally well; marigold, hot tangerine, and cobalt all work. Avoid orange-on-black, which is the expected pairing and makes the cat read as a generic Halloween decal rather than a designed image.
Ombré or gradient backgrounds are worth the extra effort here — a chartreuse fading to deep teal at the top suggests dusk behind the cat without adding a single extra appliqué piece.
Gift Ideas That Fit This Bag
At 11″ × 13″ × 3″:
- Cat-themed gift set — enamel pins, a mug, and a small book
- A hardcover novel or two stacked paperbacks
- Tea or coffee bundle: bagged tea, a small pot, and a tin of biscuits
- A folded child’s quilt or flannel throw
- Stationery set: notebook, pen case, and washi tape
- Fat quarter bundle of eight to ten, standing upright
- A candle and a pair of chunky socks wrapped in tissue
- Pet gift bag — toys, treats, and a folded blanket for an actual cat
Other Design Inspirations – Digitally Modified
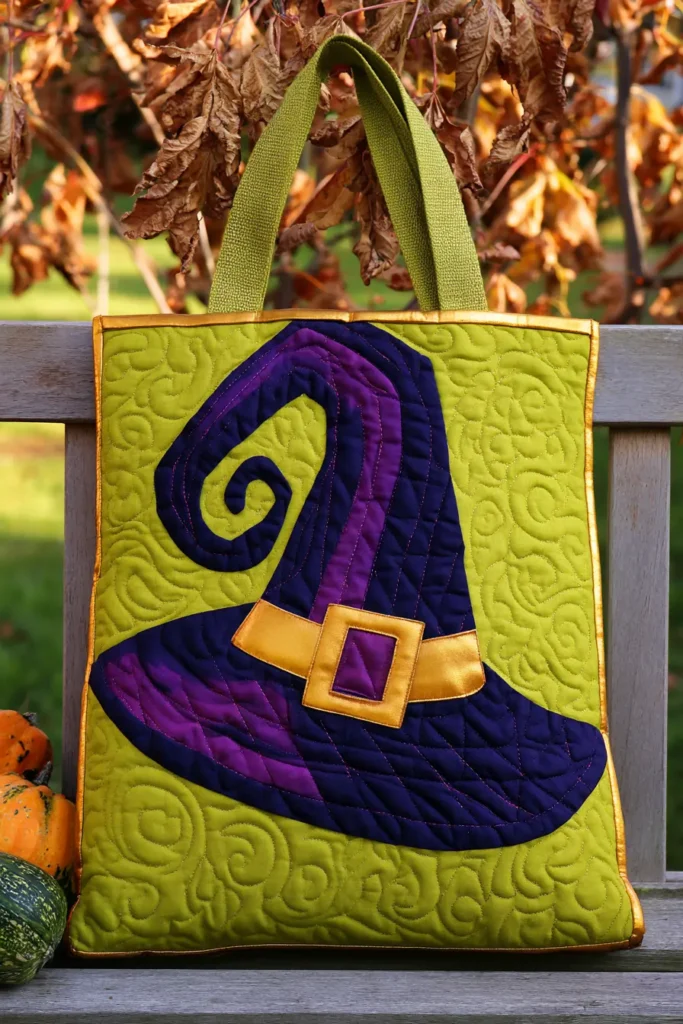
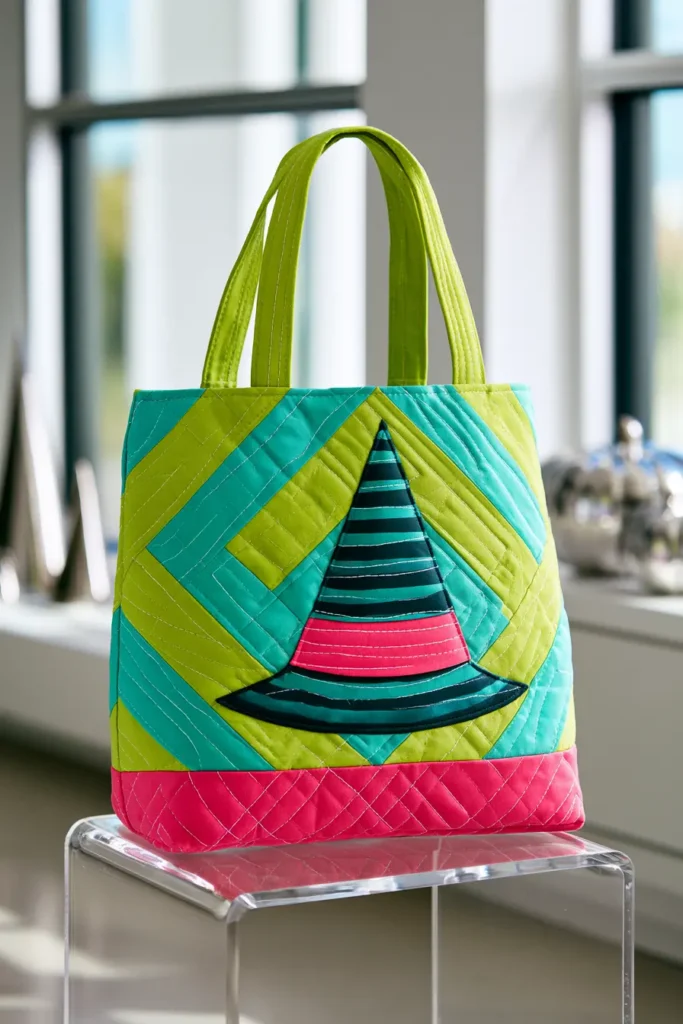
5. Witch Hat Quilted Halloween Treat Bags for Kids
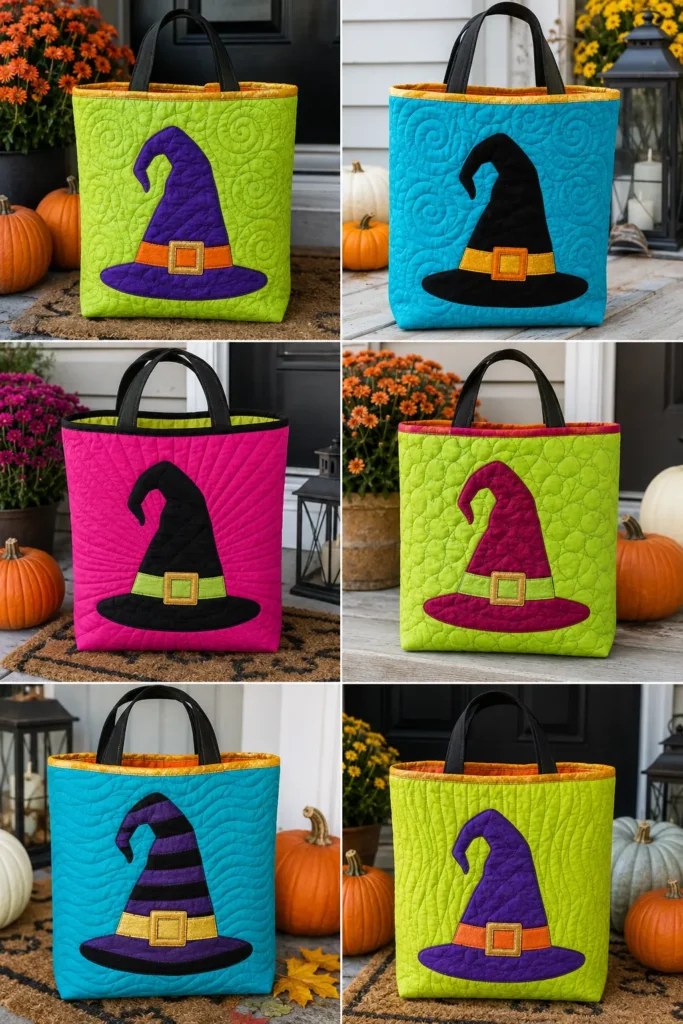
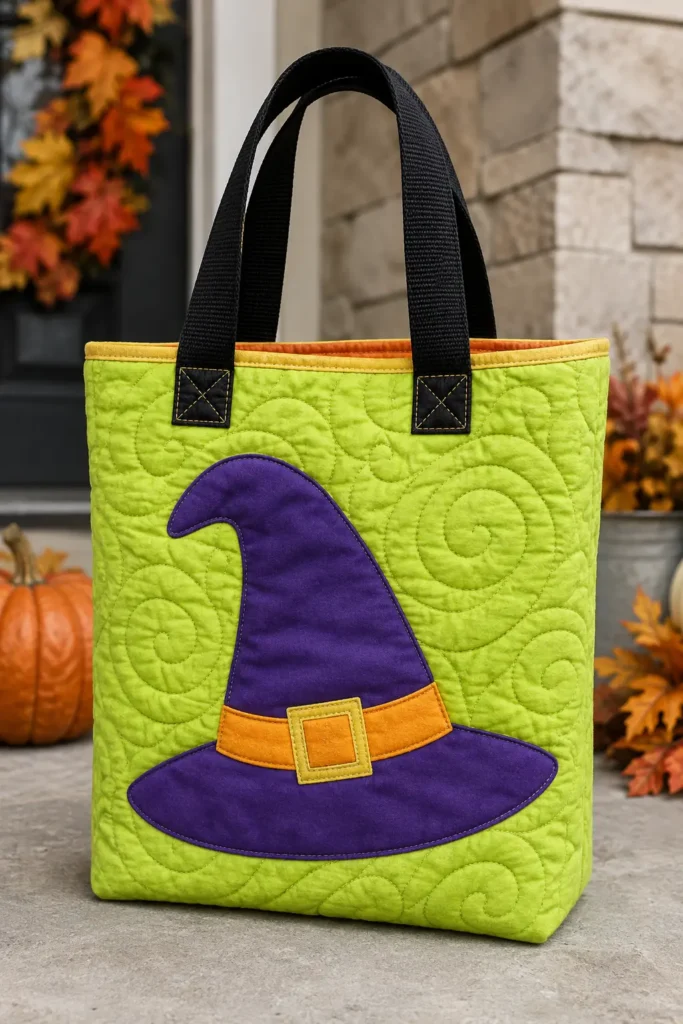
The pointed witch hat has no single documented origin, but the most persuasive theory traces it to the tall conical hats worn by alewives — medieval women who brewed and sold ale, often at market stalls where a distinctive high hat made them visible above the crowd. As brewing consolidated into male-dominated guilds, the alewife’s iconography drifted into caricature, and by the time witch trial pamphlets were being printed, the tall hat had attached itself to the witch. Whether or not that lineage holds, the shape it left behind is a gift for appliqué: a triangle, a rectangle brim, and a band. Three straight-edged pieces, no curves to ease, no inner corners to pivot around.
This build produces a finished bag around 11″ wide × 12″ tall × 3″ deep, sized for a child to carry comfortably when full.
Design Inspirations – Digitally Modified
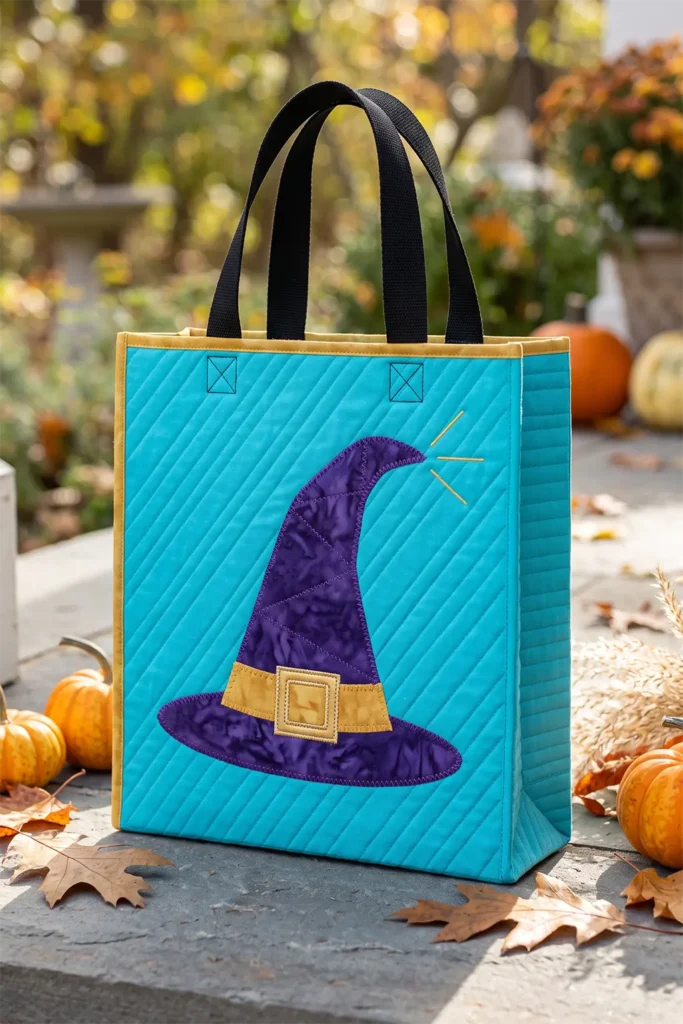
Materials
- Background fabric — 1/2 yard in acid lime, hot magenta, or bright turquoise quilting cotton
- Hat fabric — fat quarter in deep violet or black (a tonal batik with mottling gives the hat dimension a flat solid can’t)
- Band fabric — small scrap in gold or acid orange
- Buckle accent — 3″ square in metallic gold or bright yellow
- Lining — 1/2 yard in tangerine or lime
- Low-loft cotton batting — 1/2 yard
- Paper-backed fusible web — 1/3 yard
- Cotton webbing — 1″ wide, 1 1/4 yards
- Binding — 1/8 yard for a 2 1/2″ × 45″ strip
- 50wt thread: violet, gold, background color
Step 1 — Cut the Background Panels
Cut two background rectangles at 12 1/2″ × 13 1/2″ and one gusset strip at 3 1/2″ × 32″. Cut batting and muslin backing about 2″ larger in each direction to allow for quilting draw-in.
Cut the gusset as a single continuous strip—piecing it adds seams exactly at the bottom corners, where loaded bags split.
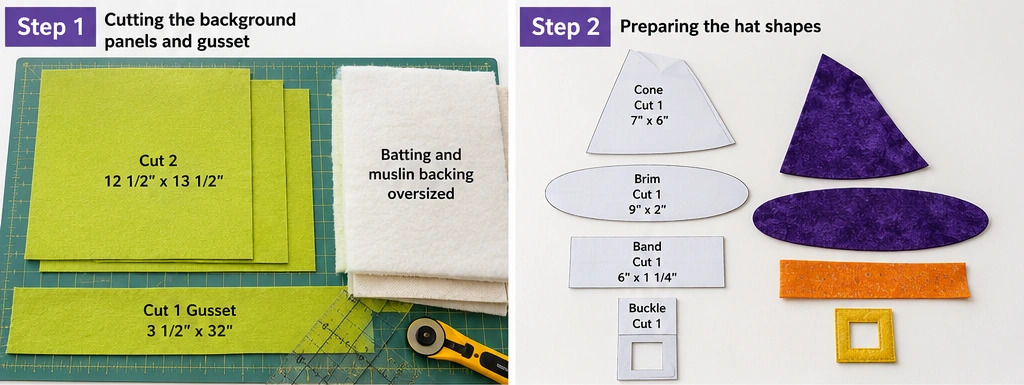
Step 2 — Prepare the Hat Shapes
The hat breaks into three pieces:
- Cone — a triangle roughly 7″ tall × 6″ wide at the base. Give the point a slight leftward lean and a gentle curve rather than a rigid straight edge; a bent tip reads as fabric, a straight one reads as a traffic cone.
- Brim — a shallow ellipse about 9″ wide × 2″ tall, wider than the cone base on both sides
- Band — a rectangle 6″ × 1 1/4″, sitting where cone meets brim
- Buckle — a small square about 1 1/4″, with a 1/2″ square cut from its center so the band shows through
Reverse all shapes before tracing onto the paper side of the fusible web. Trace, fuse to the wrong side of each fabric, cut on the lines, peel the backing.
Tip: Cut the brim as one continuous ellipse rather than two side pieces flanking the cone. Building it in halves means matching two edges perfectly across the cone base, and any misalignment is immediately visible as a step in the brim line.
Step 3 — Fuse and Stitch the Appliqué
Build the hat in layers, bottom up: brim first, positioned about 3″ from the bottom raw edge. Then the cone, overlapping the brim’s top edge by about 1/4″. Then the band across the joint, which conveniently hides that overlap. Then the buckle on the band.
Fuse each layer as you go with a hot dry iron, 8–10 seconds per section.
Stitch every edge down. Narrow zigzag (1.5mm width, 1.0mm length) in matching thread on the cone and brim; gold blanket stitch around the band and buckle to make them pop. Stitch the band’s long edges but leave its short ends unstitched where they meet the cone edges — they’re already secured underneath.
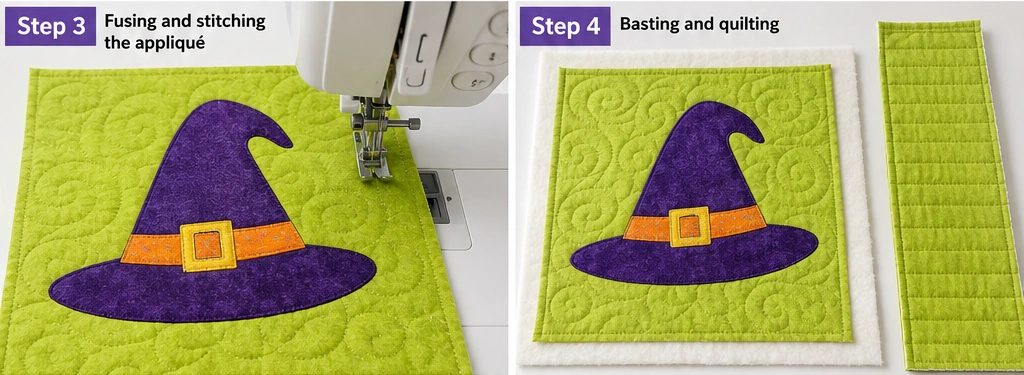
Step 4 — Baste and Quilt
Layer muslin, batting, appliquéd top. Baste.
Quilt the background, leaving the hat mostly unquilted so it sits proud. Options that suit this design:
- Curved lines swirling around the hat at 1/2″ intervals, suggesting wind
- Diagonal straight lines at 3/8″, angled to echo the cone’s lean
- Radiating lines from the hat tip outward to the panel edges
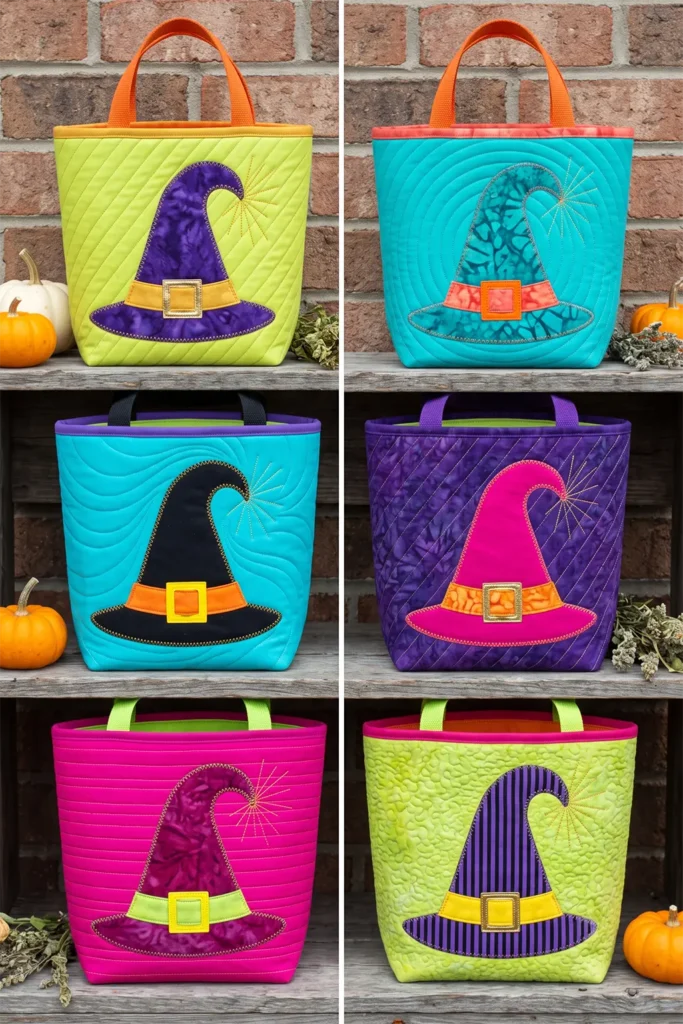
One optional addition: quilt three or four short straight lines radiating from the hat tip in gold thread, reading as a small spark of magic. It costs nothing and adds a detail kids notice immediately.
Quilt the gusset with lines across the width every inch.
Step 5 — Trim and Square Up
Trim panels to 12 1/2″ × 13 1/2″ and the gusset to 3 1/2″ × 32″. Square up after quilting, never before — quilting draws fabric in, and it never draws evenly across a panel.
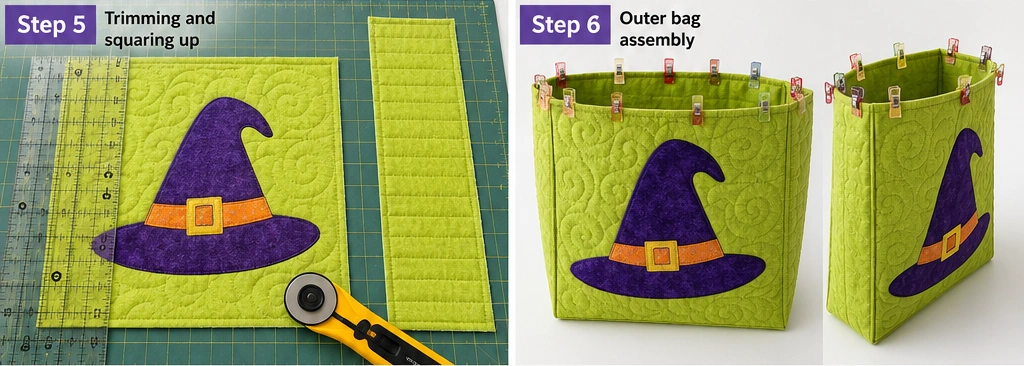
Step 6 — Assembly
- Mark the gusset center, then measure and mark 11″ out in each direction. Those two marks are the bottom corners.
- Pin the front panel to the gusset, matching its bottom edge to the 11″ center section.
- Clip the gusset seam allowance to within 1/8″ of the stitch line at each corner mark so the strip pivots cleanly around the turn.
- Sew at 1/4″, needle down at every pivot. Six layers meet at the corners — slow the machine.
- Repeat with the back panel. If you’ve appliquéd a second hat on the back, check that both sit at the same height before sewing.
- Turn right side out; press seams from the inside with a point turner.
Step 7 — Line the Bag
Cut lining panels at 12 1/2″ × 13 1/2″ (×2) and a lining gusset at 3 1/2″ × 32″. Assemble exactly as above but sew at 3/8″. The deeper seam allowance makes the lining slightly smaller so it seats inside the shell without rippling.
Drop in wrong sides together; baste the top edge at 1/8″.
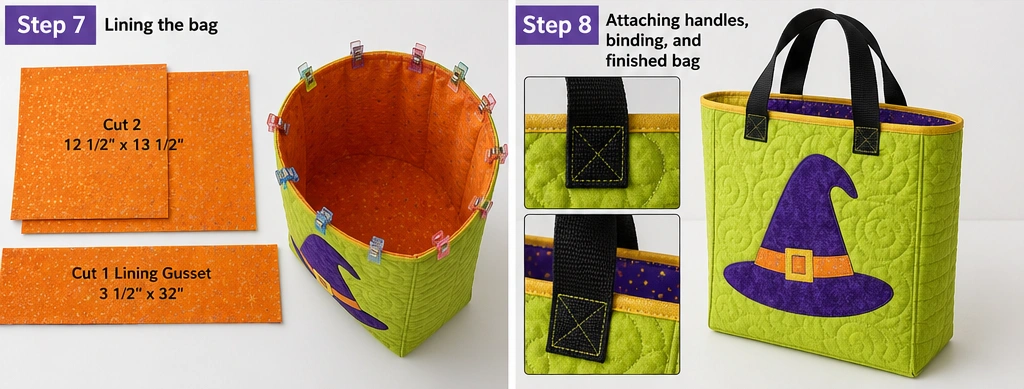
Step 8 — Attach the Handles
Cut two webbing lengths at 20″ — shorter than an adult bag, since this one is sized for a child and long handles drag on the ground when a kid carries a full bag.
Position each end 3 1/2″ in from the side seams, overlapping the raw top edge by 1″. Secure with a box-and-X stitch: a 1″ square with both diagonals sewn inside. A bar tack alone pulls out of webbing under weight; the box-and-X spreads the load across four seam lines.
Step 9 — Bind the Top Edge
Cut a 2 1/2″ × 45″ strip, press in half lengthwise, sew to the outside top edge at 1/4″, joining the ends with a diagonal seam. Fold to the inside and finish by hand or stitch-in-the-ditch.
Gold binding ties back to the hat band and buckle. Violet binding frames the hat color. Both read well; gold is the brighter, more child-friendly option.
Color Notes
The traditional witch palette is black-and-purple, which skews gloomy for a kids’ bag. Keeping the hat itself dark but setting it against acid lime, hot magenta, or turquoise is what flips the register from menacing to playful. The gold band and buckle are non-negotiable — they’re the only warm element, and without them the design goes flat.
For a bolder variation, make the hat itself deep magenta with a lime band, or teal with a coral band. The silhouette is recognizable enough that it survives any color; the shape does all the identifying work, which frees the palette entirely.
Adding a striped fabric for the cone — narrow vertical stripes in violet and black — gives the hat visual texture and is a good use of stash yardage that’s too busy for larger projects.
Gift Ideas That Fit This Bag
At 11″ × 12″ × 3″:
- A children’s book set — three or four picture books stack flat
- Costume accessories: a small toy wand, plastic jewelry, and face paint
- Craft kit for kids — felt sheets, safety scissors, glue stick, and stickers
- A plush toy with room to spare
- Baking set: cookie cutters, sprinkles, and a small apron
- A folded child’s quilt or fleece blanket
- Bath set — bubble bath, a rubber duck, and a hooded towel
- Fat quarter bundle of six to eight for a fellow quilter
Other Design Inspirations – Digitally Modified
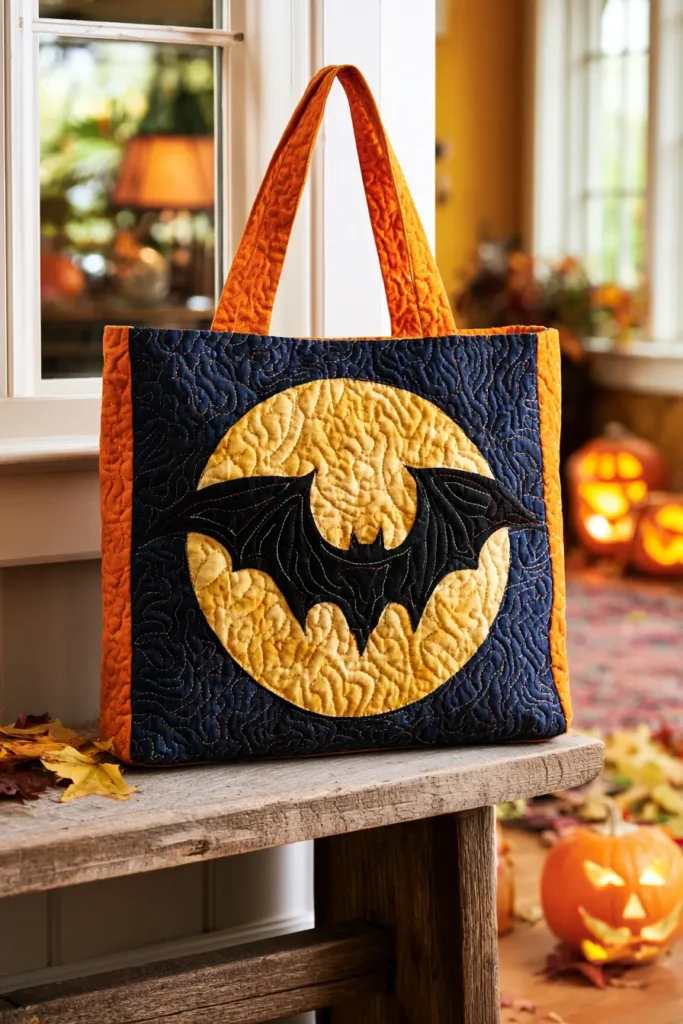
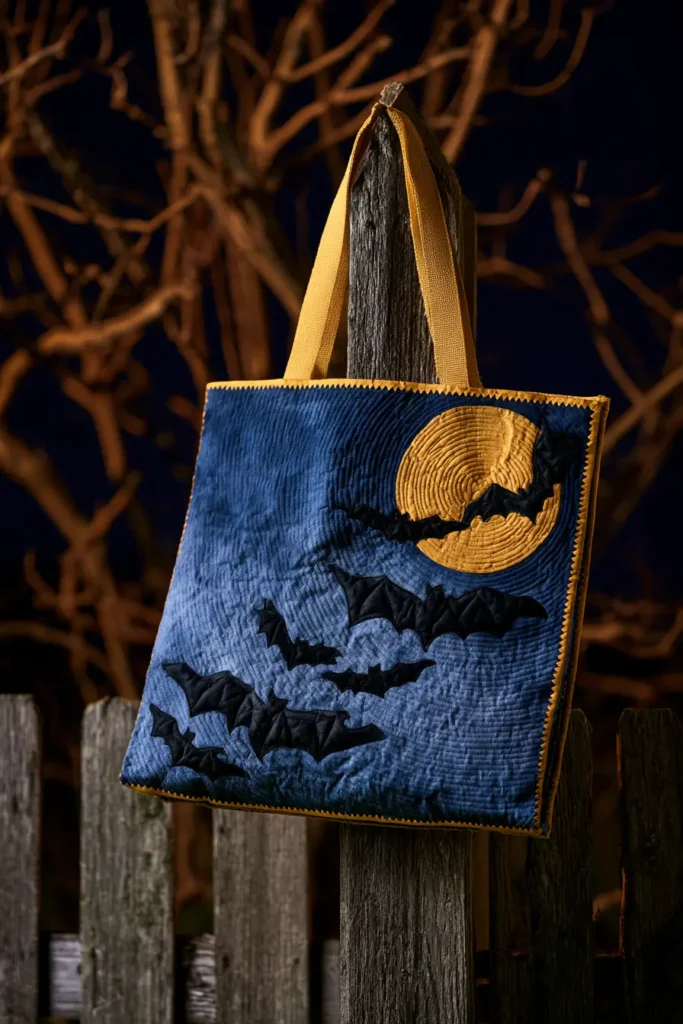
6. Bat and Moon Appliqué Quilted Halloween Totes
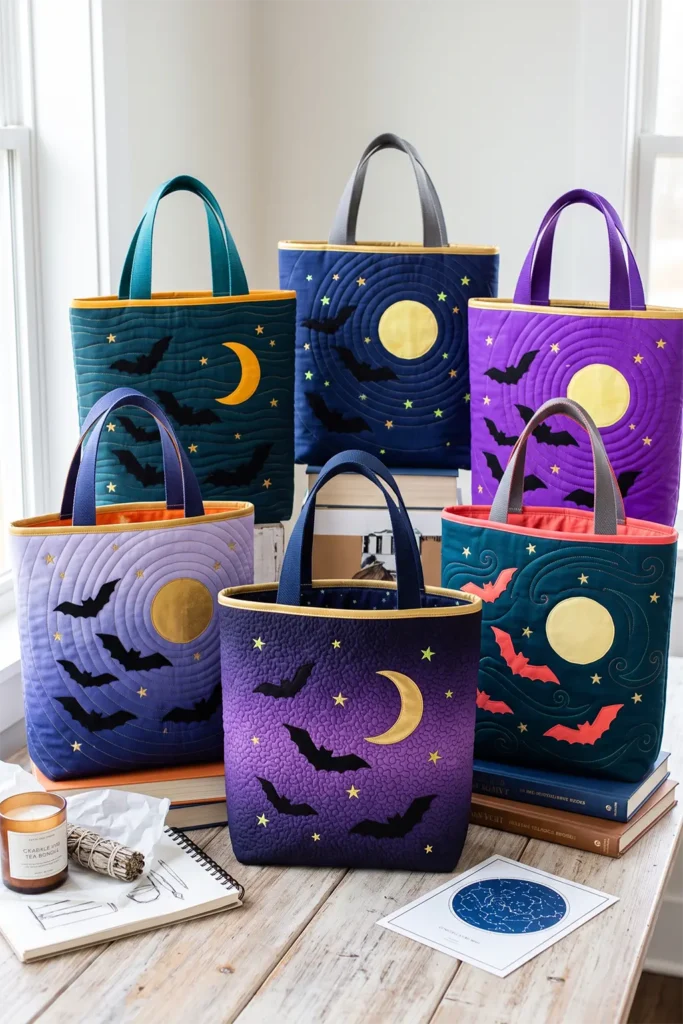
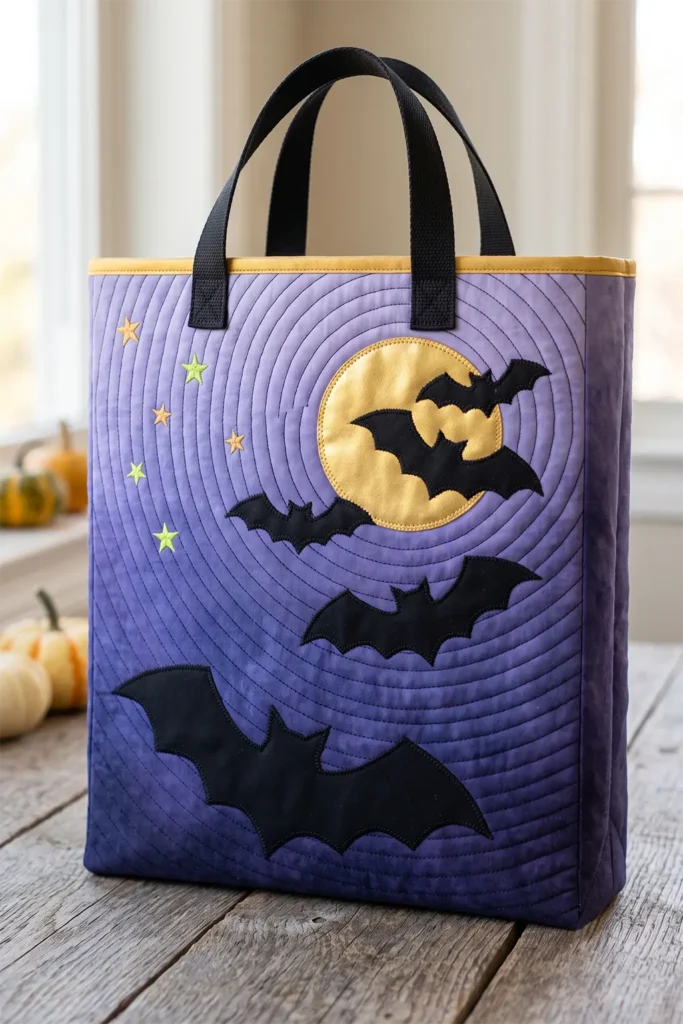
Bats got attached to Halloween through a practical accident: bonfires. Ancient Samhain fires drew insects, insects drew bats, and bats circling the flames became a fixed image of the night long before anyone connected them to vampires. Bram Stoker’s Dracula did that in 1897, borrowing the vampire bat — a real species, native only to Central and South America, and one that had been described in European natural history texts barely a century earlier. So the bat-as-monster is roughly 130 years old. The bat-as-Halloween-creature is closer to two thousand.
For appliqué, the bat is the most rhythmic shape in the collection. A single bat looks stranded; three or five bats at staggered heights read as flight, and that repetition is what carries the design. The moon anchors them.
This build produces a finished tote around 12″ wide × 13″ tall × 3″ deep.
Design Inspirations – Digitally Modified
Materials
- Background fabric — 1/2 yard in deep indigo, midnight teal, or violet quilting cotton (an ombré that shifts lighter toward the top is worth hunting for)
- Bat fabric — fat quarter in true black
- Moon fabric — 6″ square in bright gold, marigold, or pale butter yellow
- Star accents — small scraps in gold and acid green
- Lining — 1/2 yard in tangerine or hot coral
- Low-loft cotton batting — 1/2 yard
- Paper-backed fusible web — 1/3 yard
- Cotton webbing — 1″ wide, 1 1/4 yards
- Binding — 1/8 yard for a 2 1/2″ × 45″ strip
- 50wt thread: black, gold, background color
Step 1 — Cut the Background Panels
Cut two background rectangles at 13 1/2″ × 14 1/2″ and one gusset strip at 3 1/2″ × 34″. Cut batting and muslin backing about 2″ larger in each dimension.
Cut the gusset as one continuous strip. Piecing it puts seams at the bottom corners, where a loaded bag carries the most stress.
Step 2 — Prepare the Bat and Moon Shapes
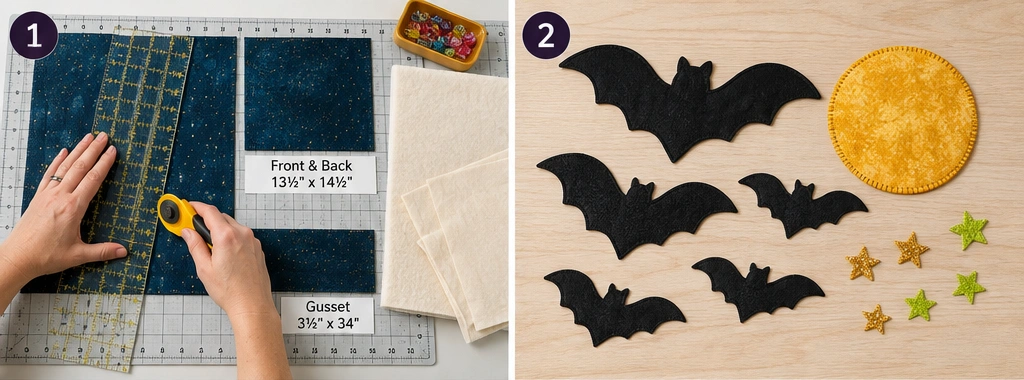
Moon — a circle 4 1/2″ in diameter. A full circle is cleaner and easier than a crescent; if you want a crescent, cut the circle then remove a curved bite from one side, keeping the remaining crescent at least 1″ wide at its thickest so it doesn’t fray.
Bats — cut five in graduated sizes for the front panel:
- One large at 5″ wingspan
- Two medium at 3 1/2″ wingspan
- Two small at 2 1/4″ wingspan
Cut three more small bats for the back panel.
The bat shape is a shallow W: two scalloped wings sweeping out from a small rounded body, with two short ear points on top. Keep the wing tips blunt — a sharp point under 1/4″ wide will lift and fray no matter how well you stitch it.
Stars — four or five small five-point stars at 3/4″ to 1 1/4″ across, or simple diamonds if points feel fussy.
Reverse every asymmetrical shape before tracing onto the fusible web’s paper side.
Tip: Cut all five bats from a single fused rectangle of black fabric rather than fusing five small pieces separately. Less waste, less iron time, and the grain stays consistent across all of them.
Step 3 — Fuse and Stitch the Appliqué
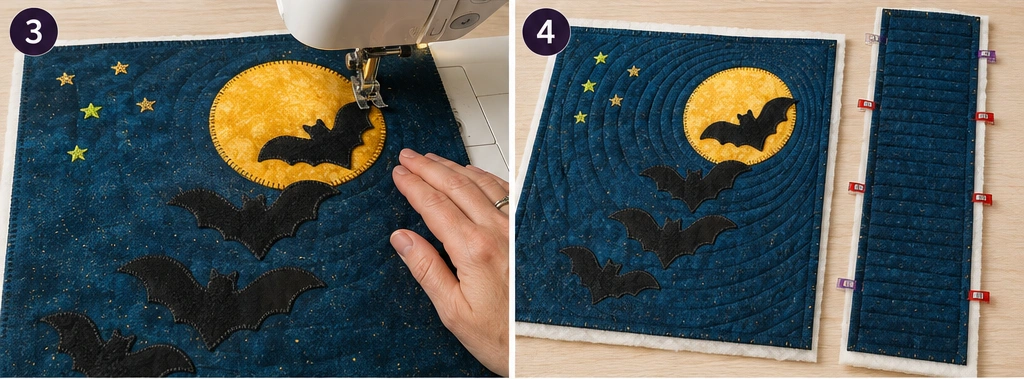
Layout order matters here. Place the moon in the upper third, offset to one side — roughly 2 1/2″ down from the top raw edge and 3″ in from a side edge. Dead center makes the composition static.
Arrange the bats on a diagonal drift from the moon downward across the panel, largest nearest the viewer at the bottom, smallest near the moon. Let one or two bats overlap the moon’s edge, which instantly creates depth. Scatter stars into the empty upper corner.
Audition the full arrangement with pins before fusing anything — bat placement is the entire design, and once fused it doesn’t move.
Fuse with a hot dry iron, 8–10 seconds per section. Stitch every edge: narrow zigzag in black (1.5mm width, 1.0mm length) on the bats, gold blanket stitch around the moon and stars.
Step 4 — Baste and Quilt
Layer muslin, batting, appliquéd top. Baste.
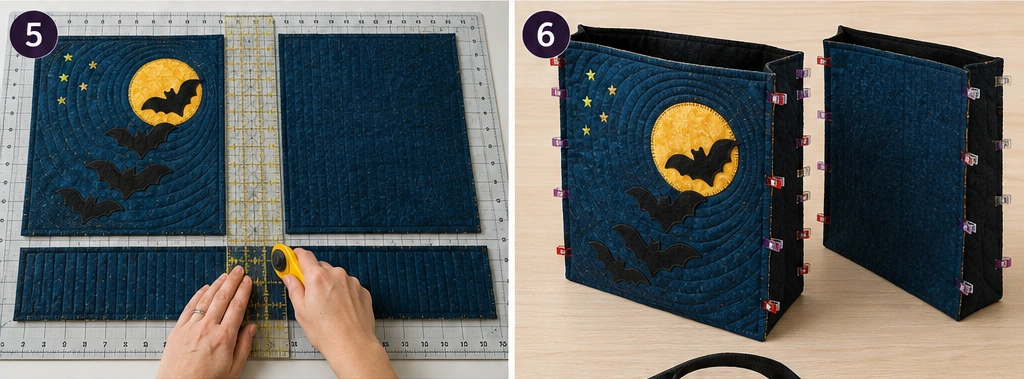
Quilt the background and leave the bats and moon unquilted so they lift off the surface. The best option for this design is concentric echo rings radiating outward from the moon at 1/2″ intervals across the whole panel — it reads as moonlight and unifies the scattered bats into a single scene. Alternatives:
- Loose curved swirls suggesting wind currents
- Horizontal wavy lines 1/2″ apart
- Tight stipple in matching thread
Quilt the gusset with straight lines across its width every inch.
Step 5 — Trim and Square Up
Trim panels to 13 1/2″ × 14 1/2″ and the gusset to 3 1/2″ × 34″. Square up only after quilting — quilting draws fabric in, and never evenly.
Step 6 — Assembly
- Mark the gusset center, then measure and mark 12″ out in each direction. Those marks become the bottom corners.
- Pin the front panel to the gusset, matching its bottom edge to the 12″ center section.
- Clip the gusset seam allowance to within 1/8″ of the stitch line at each corner mark so it pivots without buckling.
- Sew at 1/4″, needle down at each pivot. Six layers stack at the corners — slow down.
- Repeat with the back panel. Check that the back bats sit at a height that looks deliberate relative to the front composition.
- Turn right side out; press seams from the inside with a point turner.
Step 7 — Line the Bag
Cut lining panels at 13 1/2″ × 14 1/2″ (×2) and a lining gusset at 3 1/2″ × 34″. Assemble as above but sew at 3/8″. The deeper seam makes the lining marginally smaller so it seats inside the shell without rippling at the corners.
Insert wrong sides together; baste around the top edge at 1/8″.
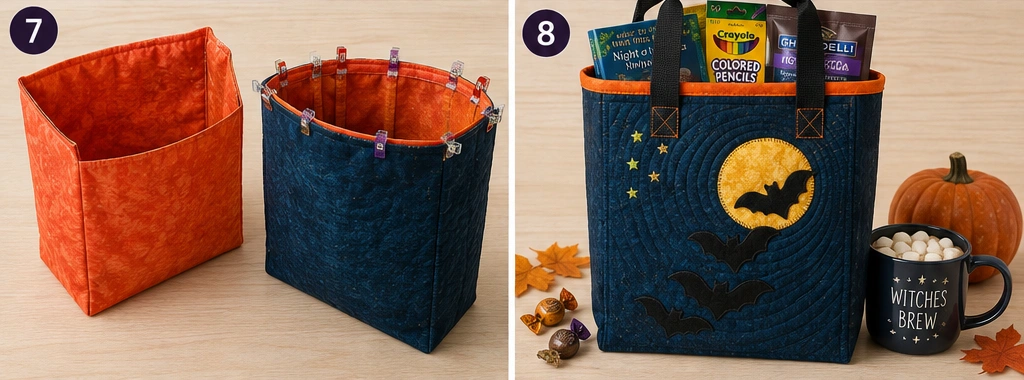
Step 8 — Attach the Handles
Cut two webbing lengths at 22″. Position each end 4″ in from the side seams, overlapping the raw top edge by 1″.
Finish with a box-and-X stitch — a 1″ square with both diagonals sewn inside. Bar tacks alone pull free from webbing under a full load; the box-and-X spreads the pull across four seam lines.
Step 9 — Bind the Top Edge
Cut a 2 1/2″ × 45″ strip, press in half lengthwise, sew to the outside top edge at 1/4″, joining ends with a diagonal seam. Fold to the inside and finish by hand or stitch-in-the-ditch.
Gold binding picks up the moon and closes the composition. Coral binding pulls the lining color outward for a warmer, brighter finish.
Color Notes
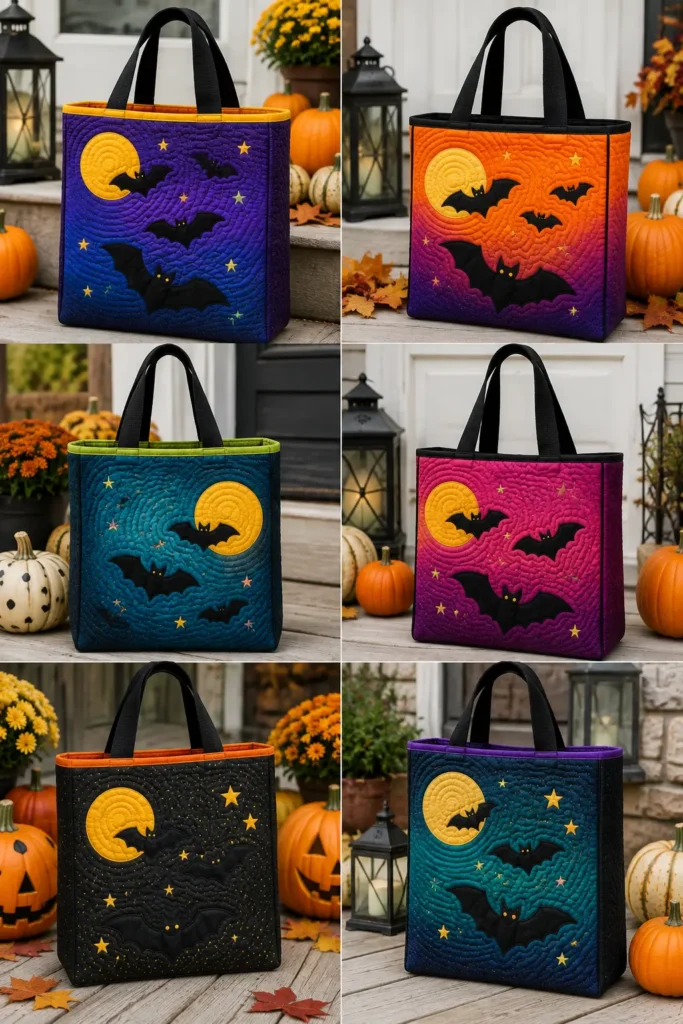
This is a night-sky design, which means the background needs depth rather than flat darkness. Indigo, midnight teal, and deep violet all hold more visual interest than black, and they let the gold moon glow instead of just sitting there. An ombré background — deep at the bottom fading to a lighter blue or lavender near the top — sells the sky illusion without a single extra appliqué piece, and it’s the single highest-impact upgrade available on this design.
For the moon, avoid pure white. Marigold, butter yellow, or a metallic gold reads warmer and reflects better in photographs. If you want to push the palette bright, try hot coral bats against a teal sky — the shape is recognizable enough that the color can go anywhere.
Gift Ideas That Fit This Bag
At 12″ × 13″ × 3″:
- An astronomy gift set — star chart, a small telescope eyepiece kit, or a constellation book
- Hardcover books, two or three stacked
- A folded lap quilt or flannel throw
- Candle and tea bundle wrapped in tissue
- Art supplies: sketchbook, watercolor set, and brushes
- A cozy set — chunky socks, cocoa mix, and a mug
- Fat quarter bundle of eight to ten, standing upright
- Kids’ science kit or a glow-in-the-dark star sticker set
Other Design Inspirations – Digitally Modified
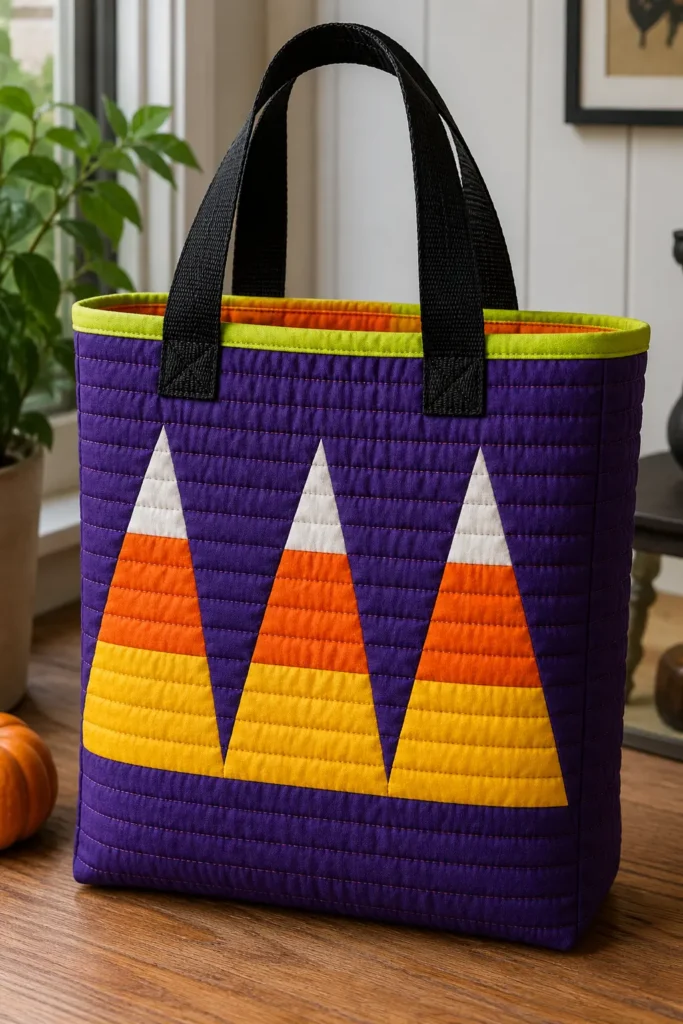
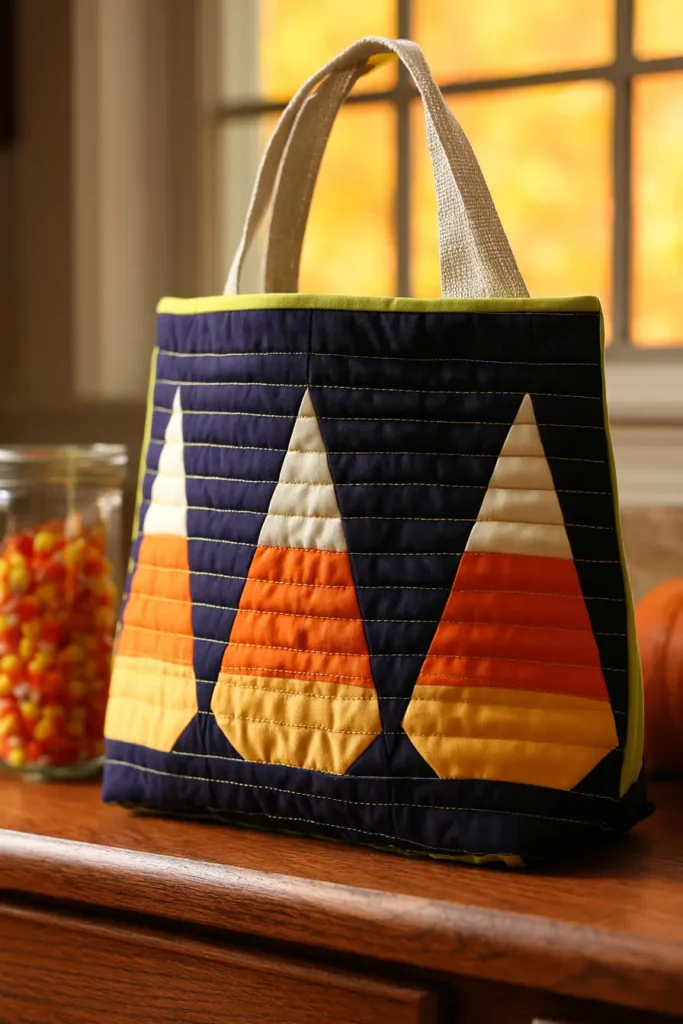
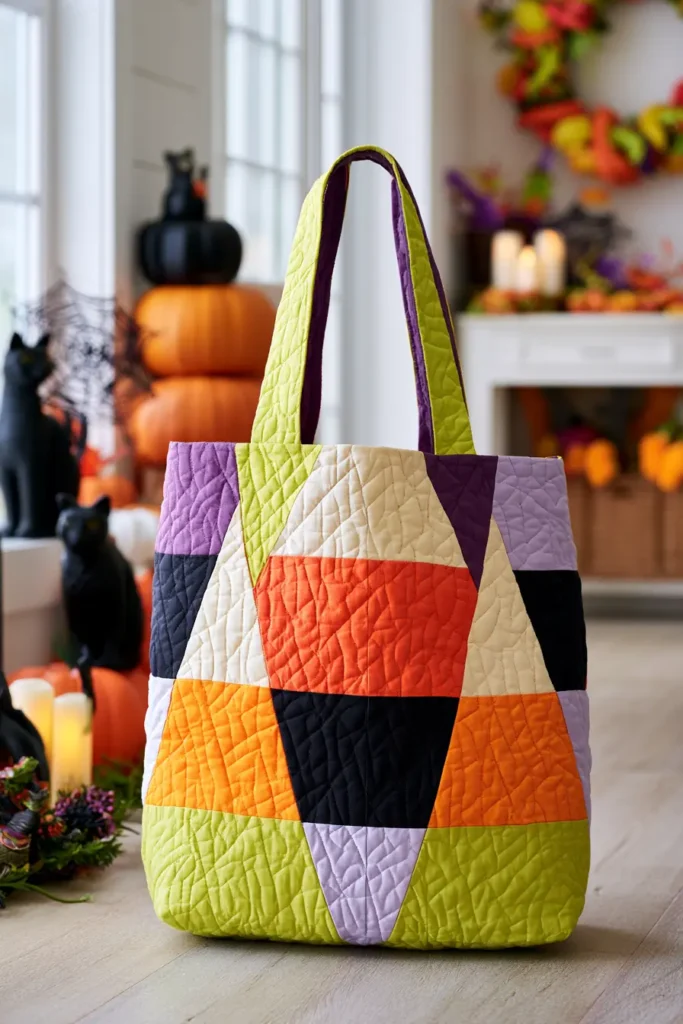
7. Candy Corn Quilted Treat Bag Patterns
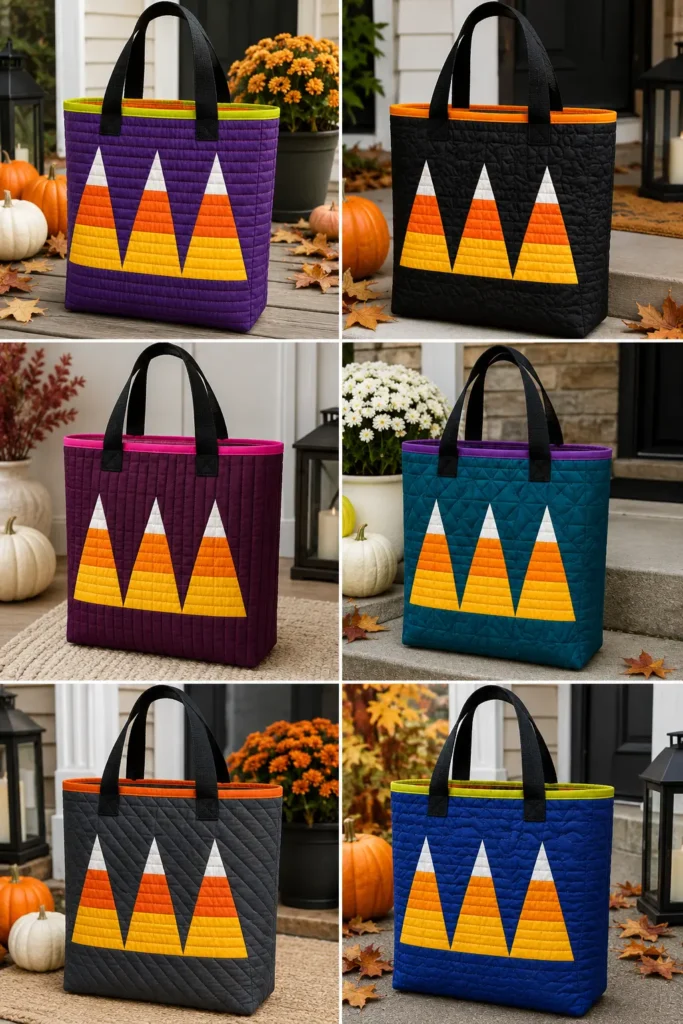
Candy corn was invented around 1880 by a Wunderle Candy Company employee named George Renninger, and for its first several decades it had nothing to do with Halloween — it was sold as “Chicken Feed,” year-round, to a largely agricultural America where corn kernels were an everyday sight. The three-color layering was genuinely difficult to produce: each stripe was poured by hand in separate passes, requiring three trips down the line per batch. Halloween only claimed it in the 1950s, when trick-or-treating went mainstream and candy makers needed individually wrappable product.
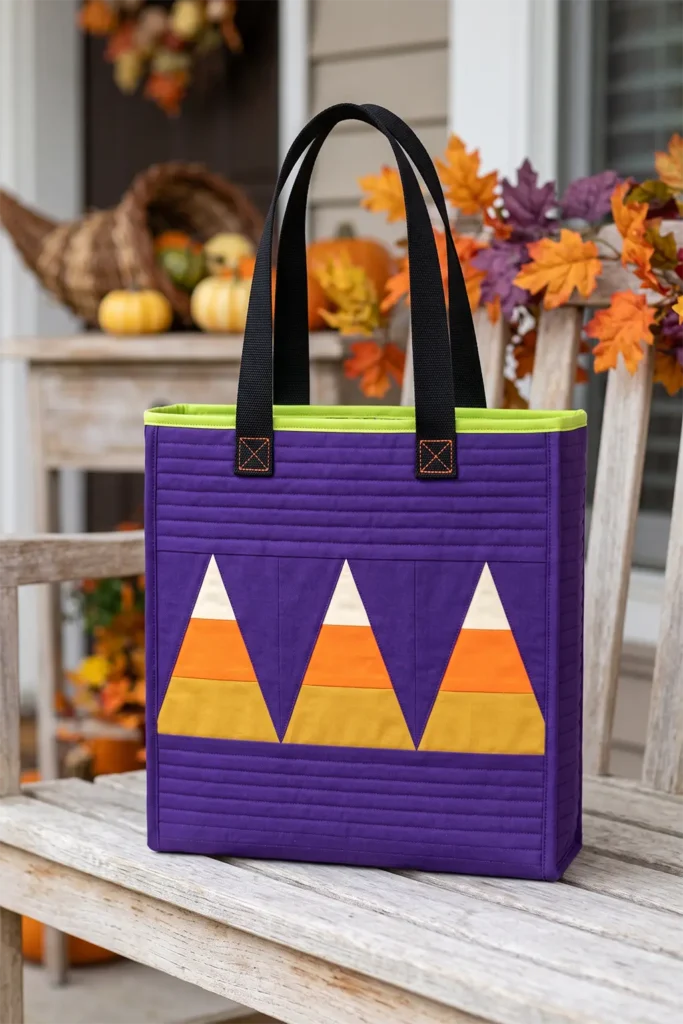
That three-band structure is what makes it a natural quilt block. Unlike the appliqué designs in this collection, the candy corn shape is best built as pieced triangles — the stripes become horizontal seams, which is faster and lies flatter than three fused layers stacked on top of each other.
This build produces a finished bag around 11″ wide × 12″ tall × 3″ deep.
Design Inspirations – Digitally Modified
Materials
- Gold/marigold cotton — 1/3 yard (the base stripe)
- Bright orange cotton — 1/3 yard (the middle stripe)
- Cream or ivory cotton — 1/4 yard (the tip)
- Background fabric — 1/2 yard in deep violet, teal, or charcoal
- Lining — 1/2 yard in acid lime or hot magenta
- Low-loft cotton batting — 1/2 yard
- Cotton webbing — 1″ wide, 1 1/4 yards
- Binding — 1/8 yard for a 2 1/2″ × 45″ strip
- 50wt thread in orange and background color
Step 1 — Build the Striped Fabric
Rather than cutting individual candy corn pieces, build one striped panel and cut all your triangles from it. This is the fastest method by a wide margin.
Cut across the width of fabric:
- Gold strip — 3 1/2″ × 22″
- Orange strip — 2 3/4″ × 22″
- Cream strip — 2 1/4″ × 22″
Sew them together lengthwise in that order with 1/4″ seams, gold at the bottom, cream at the top. Press seams toward the gold. The finished striped panel measures roughly 7 1/2″ × 22″.
The graduated strip widths matter — real candy corn has a wide gold base narrowing to a small white tip, and equal-width stripes lose that proportion immediately.
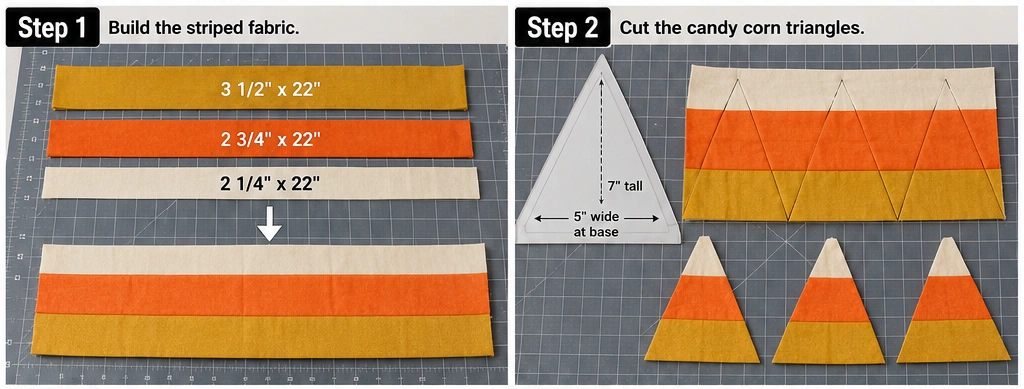
Step 2 — Cut the Candy Corn Triangles
From the striped panel, cut triangles 5″ wide at the base × 7″ tall, with the base on the gold edge and the point landing in the cream.
Make a paper or template-plastic triangle at those dimensions, flip it alternately as you cut across the strip to minimize waste, and you’ll get four to five triangles from one 22″ panel. Cut six triangles total for the bag — three per panel.
Tip: Add 1/4″ seam allowance all around your template before cutting. Cutting the finished size and discovering it mid-assembly is the single most common error in this design.
Step 3 — Set the Triangles into Background
Cut background pieces to fill between and around the triangles. For a three-across arrangement on a 12 1/2″ × 13 1/2″ panel:
- Cut background side triangles — right triangles roughly 4″ × 7″ — to fill the gaps between candy corns
- Cut a background top strip at 12 1/2″ × 4″
- Cut a background bottom strip at 12 1/2″ × 3 1/2″
Sew candy corn triangles alternating with background triangles into one horizontal row, press seams toward the background, then add the top and bottom strips. Repeat for the second panel.
Each finished panel should measure 12 1/2″ × 13 1/2″ raw.
Simpler alternative: appliqué three pre-cut striped triangles onto a whole-cloth background instead of piecing them in. Slightly bulkier, considerably faster, and visually near-identical once quilted.
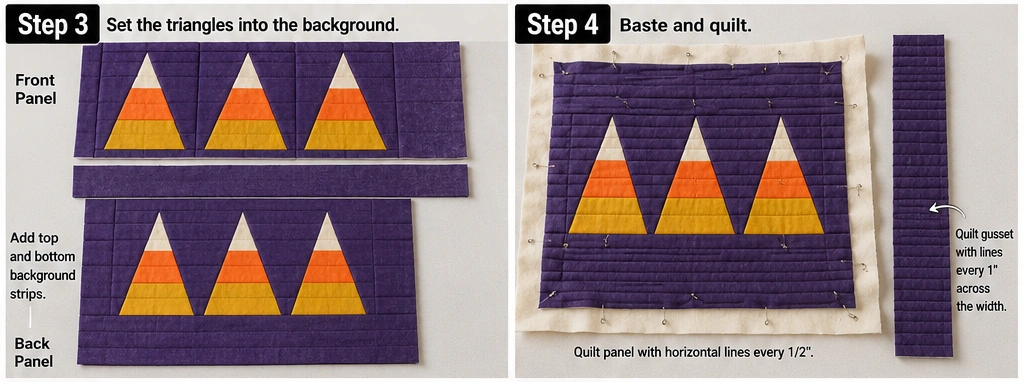
Step 4 — Baste and Quilt
Cut batting and muslin backing about 2″ larger than each panel. Layer and baste.
Quilt horizontal straight lines 1/2″ apart across the entire panel, running parallel to the candy corn stripes. This is the strongest option — the lines reinforce the horizontal banding and give the whole panel a unified texture. Alternatives:
- Stitch-in-the-ditch along each stripe seam plus echo lines 1/4″ out
- Chevron lines following the triangle angles
- Dense stipple in the background only, leaving the candy corns unquilted so they puff
Cut and quilt the gusset strip at 3 1/2″ × 32″, with lines across the width every inch.
Step 5 — Trim and Square Up
Trim both panels to 12 1/2″ × 13 1/2″ and the gusset to 3 1/2″ × 32″. Square up after quilting only — quilting draws fabric in, and it never draws evenly.
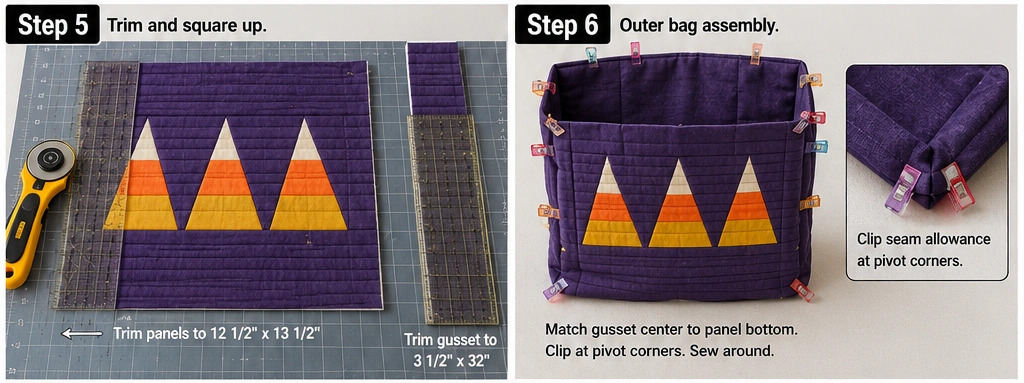
Step 6 — Assembly
- Mark the gusset center, then measure and mark 11″ out in each direction. Those two marks are the bottom corners.
- Pin the front panel to the gusset, aligning its bottom edge with the 11″ center section.
- Clip the gusset seam allowance to within 1/8″ of the stitch line at each corner mark so the strip pivots without buckling.
- Sew at 1/4″, needle down at every pivot. Six layers meet at the corners — reduce speed.
- Repeat with the back panel, checking that the candy corn rows sit at matching heights on both sides.
- Turn right side out; press seams from the inside with a point turner.
Step 7 — Line the Bag
Cut lining panels at 12 1/2″ × 13 1/2″ (×2) and a lining gusset at 3 1/2″ × 32″. Assemble exactly as above but sew at 3/8″. The deeper seam makes the lining slightly smaller so it drops in without bunching at the corners.
Insert wrong sides together; baste the top edge at 1/8″.
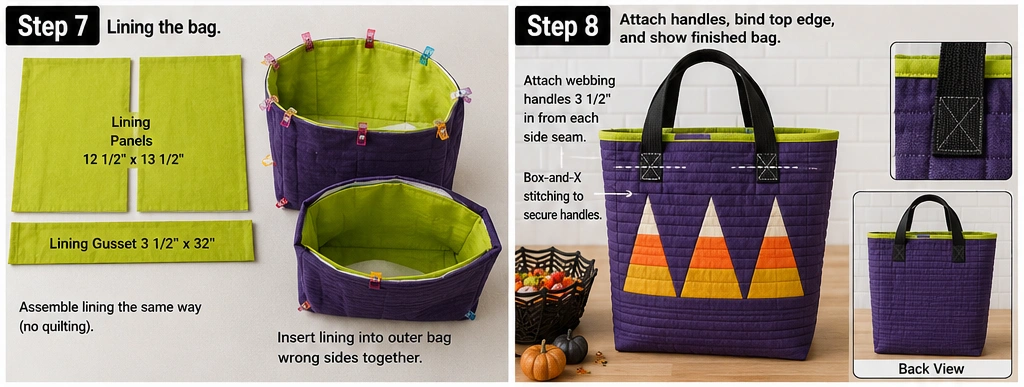
Step 8 — Attach the Handles
Cut two webbing lengths at 22″. Position each end 3 1/2″ in from the side seams, overlapping the raw top edge by 1″.
Secure with a box-and-X stitch — a 1″ square with both diagonals sewn inside it. Bar tacks alone pull free from webbing under a full load; the box-and-X spreads the pull across four seam lines and holds.
Step 9 — Bind the Top Edge
Cut a 2 1/2″ × 45″ strip, press in half lengthwise, sew to the outside top edge at 1/4″, joining ends with a diagonal seam. Fold to the inside and finish by hand or stitch-in-the-ditch.
Acid lime binding against gold and orange candy corns is the unexpected choice and by far the liveliest. Deep violet frames without competing. Skip cream or white binding — it reads as unfinished next to the cream tips.
Color Notes
The gold-orange-cream sequence is fixed by the reference object, so the design freedom lives entirely in the background. Deep violet is the strongest partner — it’s the complement to gold and makes both warm stripes glow. Teal and charcoal both work. Avoid black, which is the default and flattens the gold.
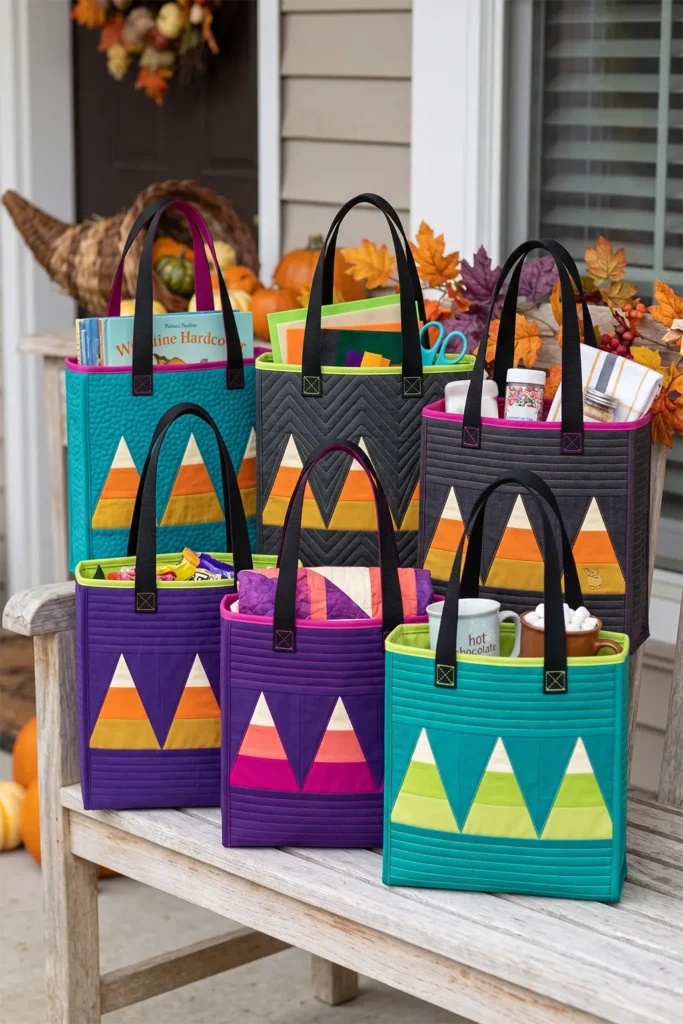
If you want a variant that still reads as candy corn, the shape survives recoloring: magenta-coral-cream or teal-lime-cream keep the graduated triangle instantly recognizable while breaking the expected palette. That’s a useful move if you’re making several bags and don’t want them identical.
For the cream tip, choose a warm ivory rather than optical white — pure white reads cold against saturated orange and gold.
Gift Ideas That Fit This Bag
At 11″ × 12″ × 3″:
- A candy or bakery bundle — sprinkles, cookie cutters, and a tea towel
- Hardcover picture books, three or four stacked
- A mug and hot chocolate set with marshmallows
- Fat quarter bundle of six to eight in coordinating autumn colors
- Kids’ craft kit: felt, glue, safety scissors, and stickers
- A folded flannel throw or child-size quilt
- Fall candle and a box of tea wrapped in tissue
- Board game in a flat box, or a card game with dice
Other Design Inspirations – Digitally Modified
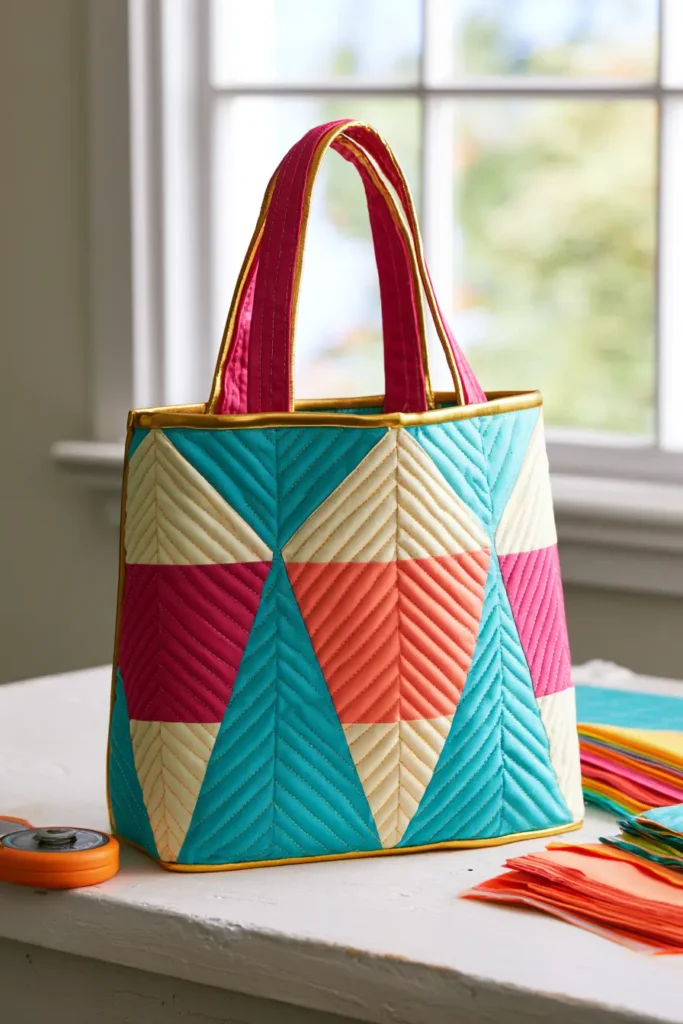
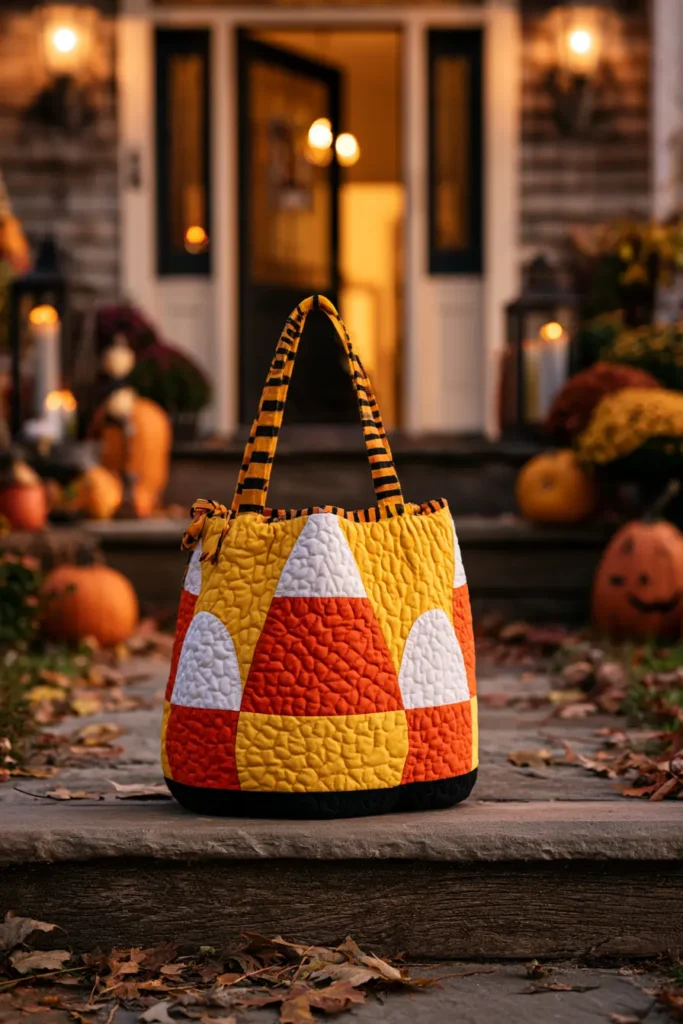
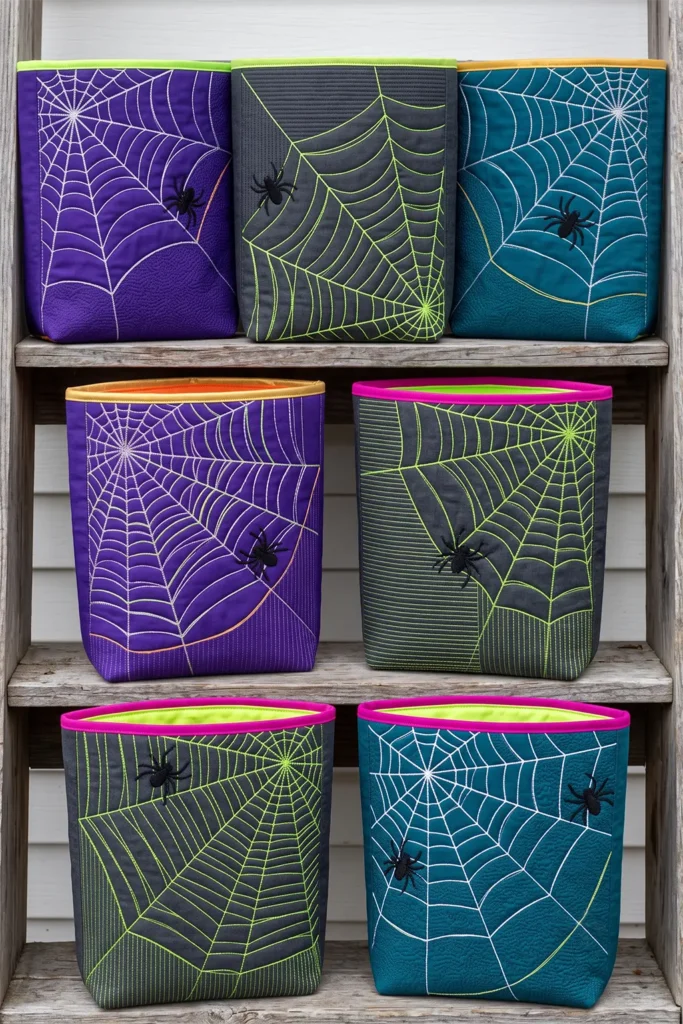
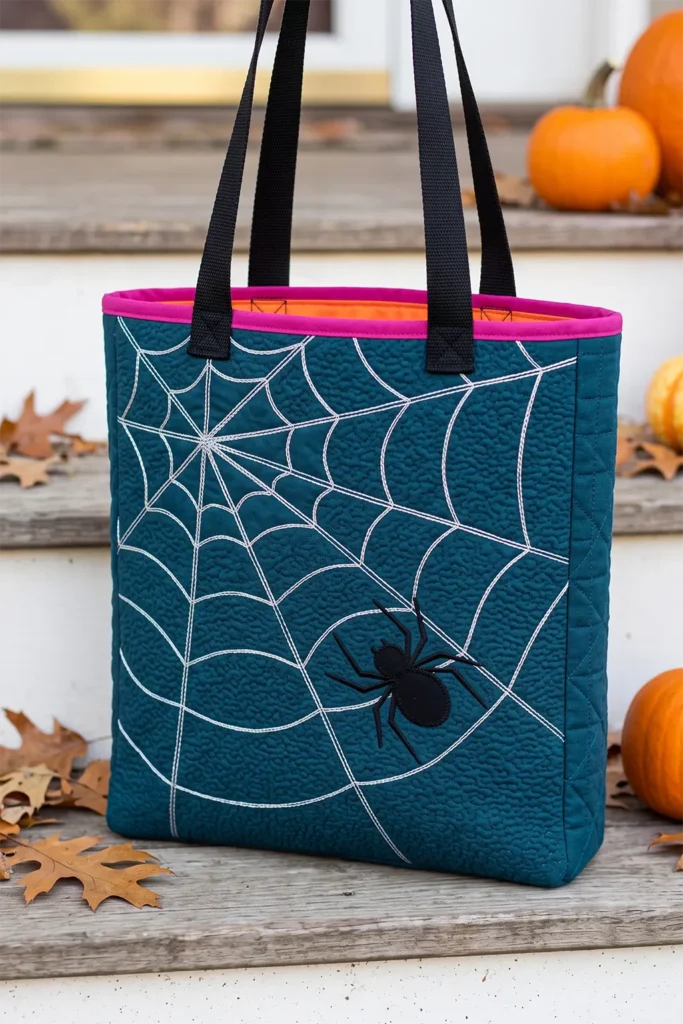
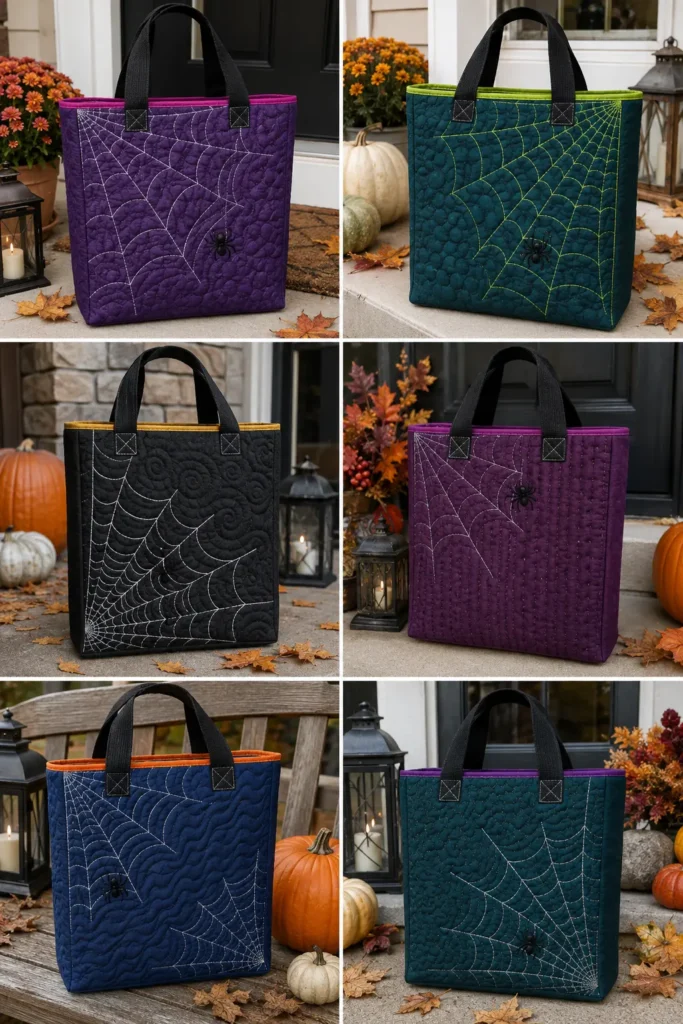
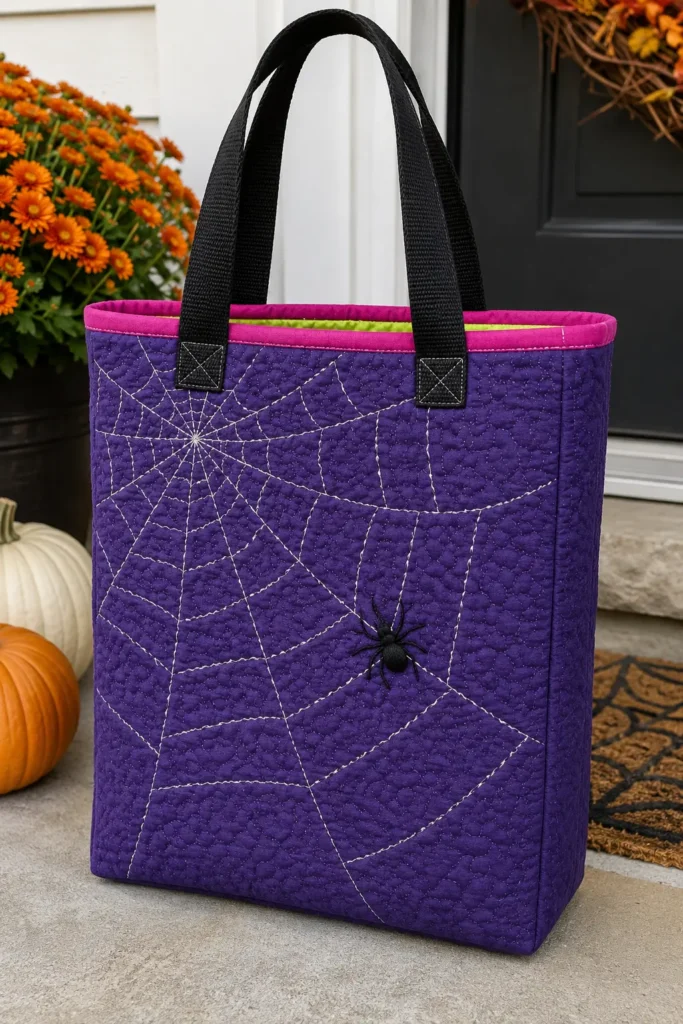
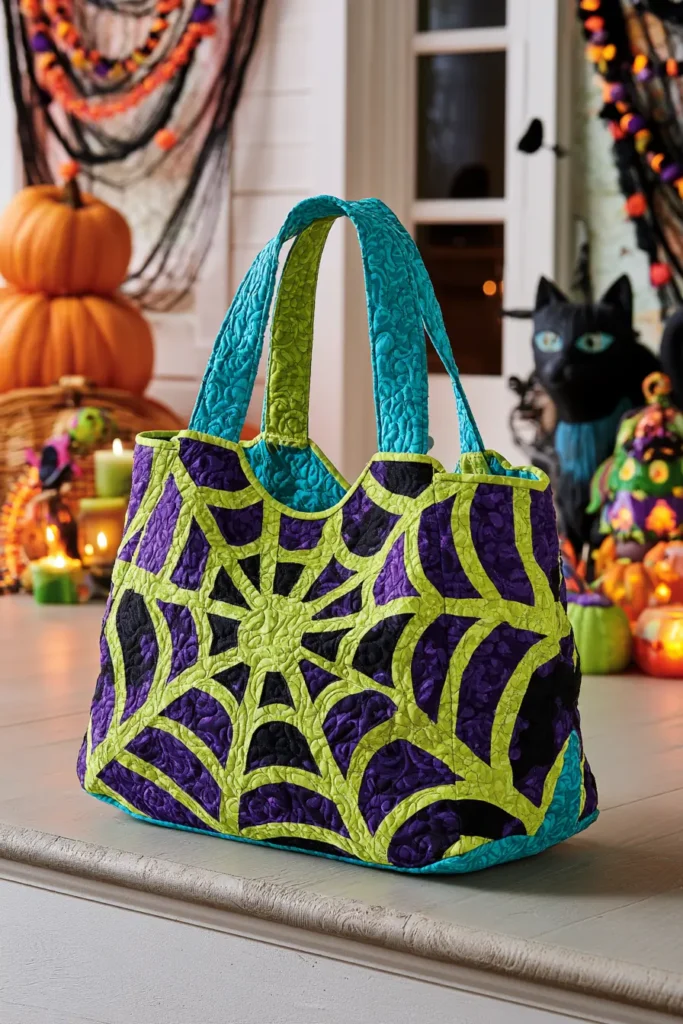
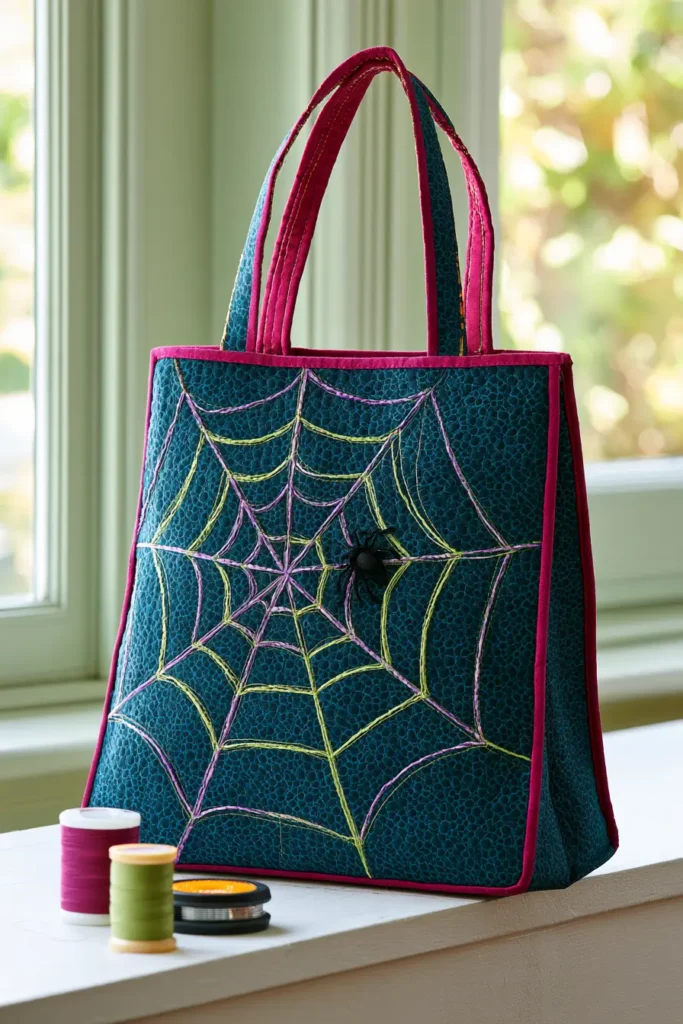
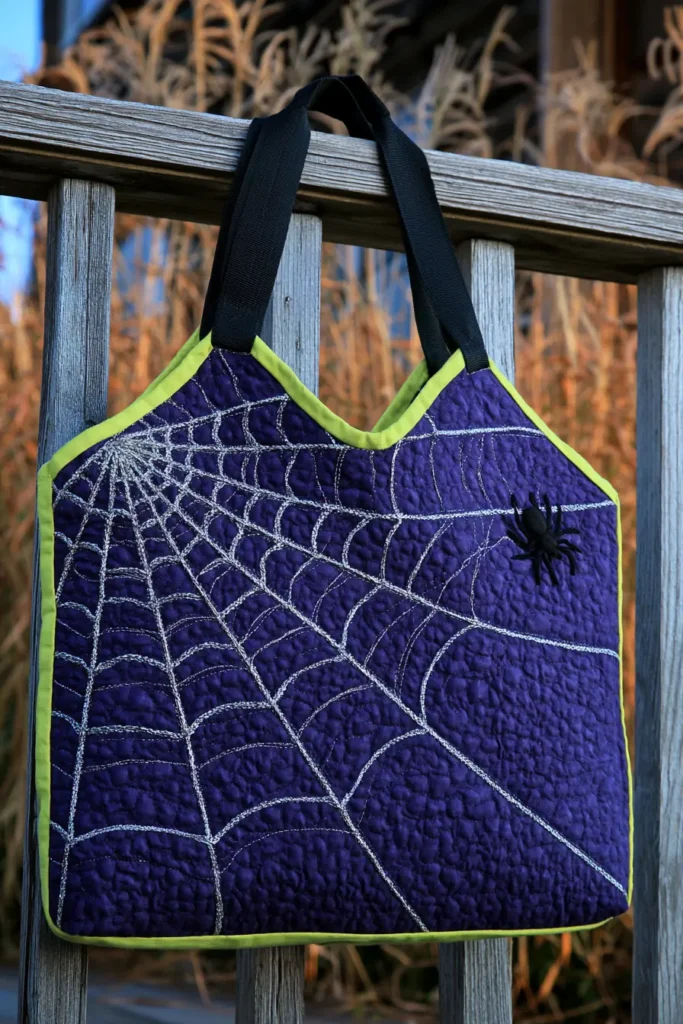
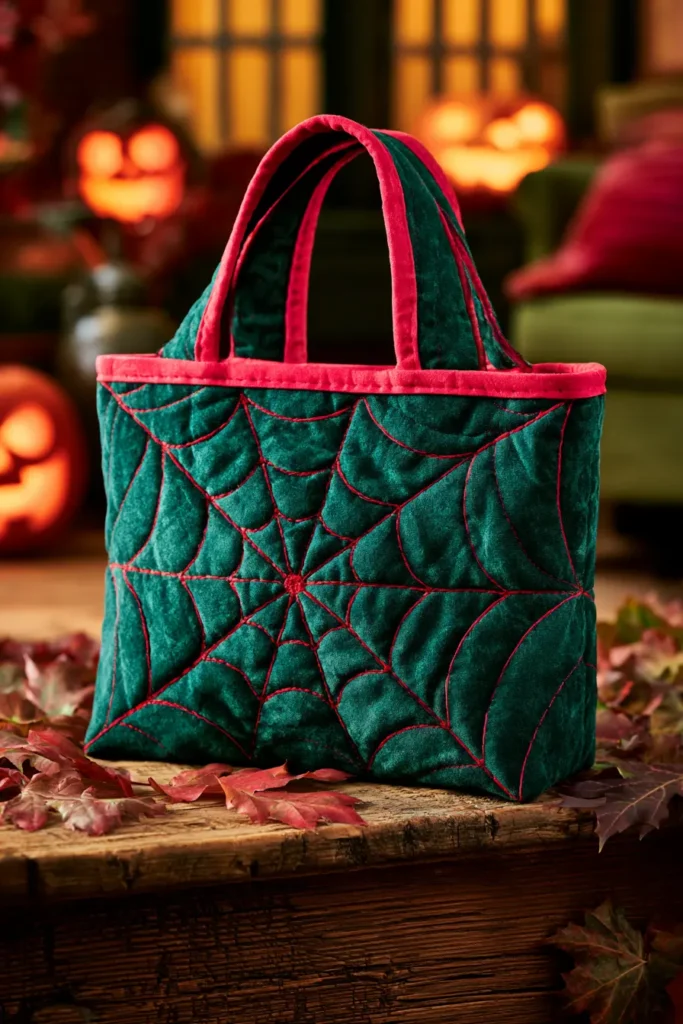
8. Spider Web Quilted Halloween Bags with Contrast Binding
The orb web that everyone draws for Halloween — radiating spokes crossed by concentric rings — is built in a specific order that most illustrations get wrong. An orb weaver lays down the radial spokes first, from a central hub outward, then spirals inward laying a temporary non-sticky guide spiral, then works back outward replacing it with the sticky capture spiral, eating the guide line as it goes. The whole structure takes about an hour and most orb weavers rebuild it daily. Also worth knowing: the spiral is never truly circular, and the hub is rarely centered. Real webs are lopsided.
That’s directly useful here, because a corner-anchored, off-center web looks far more convincing than a symmetrical one dead in the middle of the panel — and it’s easier to sew.
This build produces a finished bag around 11″ wide × 13″ tall × 3″ deep, with the web rendered in quilting stitches rather than appliqué, which is what separates it from every other design in this collection.
Design Inspirations – Digitally Modified
Materials
- Background fabric — 1/2 yard in deep violet, midnight teal, or charcoal quilting cotton
- Spider fabric — small scrap of true black
- Lining — 1/2 yard in acid lime or hot tangerine
- Low-loft cotton batting — 1/2 yard
- Paper-backed fusible web — small piece for the spider
- Cotton webbing — 1″ wide, 1 1/4 yards
- Binding — 1/8 yard in acid lime, hot magenta, or gold for a 2 1/2″ × 45″ strip
- Thread — 40wt or 30wt in bright white, silver, or acid lime for the web quilting; 50wt black for the spider
The heavier thread weight is the point. A 50wt web stitch vanishes into the fabric; 40wt or 30wt sits on the surface and reads as silk from across a room.
Step 1 — Cut the Background Panels
Cut two background rectangles at 12 1/2″ × 14 1/2″ and one gusset strip at 3 1/2″ × 34″. Cut batting and muslin backing about 2″ larger in each dimension.
Cut the gusset as one continuous strip — piecing it puts seams at the bottom corners, the highest-stress point on a loaded bag.
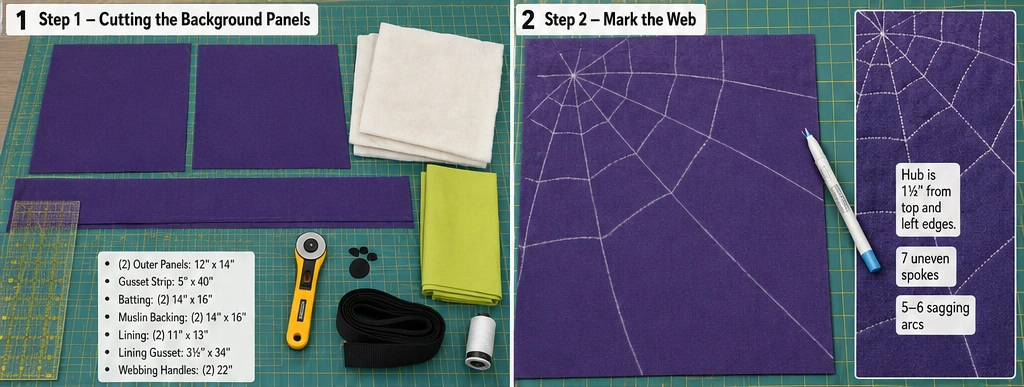
Step 2 — Mark the Web
Mark on the right side of the background fabric using a water-soluble pen or chalk marker. Test on a scrap first; some markers set permanently on dark saturated fabrics.
Place the hub in the upper left corner, about 1 1/2″ in from both raw edges. From that point:
- Draw seven radial spokes fanning out across the panel, spaced roughly 12–15° apart, extending to the opposite edges. Vary the angles slightly — evenly spaced spokes look mechanical.
- Draw five to six concentric arcs crossing the spokes, spaced 1 1/4″ to 2″ apart and widening as they move outward. Real webs have tighter spacing near the hub.
- Let the arcs sag slightly between spokes rather than drawing perfect curves. That small dip is the single detail that makes a stitched web look like silk under its own weight.
Tip: Mark only the spokes, then freehand the arcs while quilting. Arcs drawn on paper look stiff; arcs sewn by eye pick up natural irregularity.
Step 3 — Prepare and Place the Spider
Draw a spider body about 1 1/4″ long — a small oval abdomen and a smaller round head. Trace onto the paper side of the fusible web, fuse to black cotton, cut, and peel.
Position it off the hub, sitting on one of the outer arcs about two-thirds of the way down the web. A spider on the hub is the expected placement; one out on the web reads as caught mid-repair.
Fuse and stitch the body with a narrow zigzag in black. The eight legs get stitched, not appliquéd — draw them in Step 2’s marking pass and sew them during quilting with the same black thread, two or three passes over each line so they read as thin dark strokes.
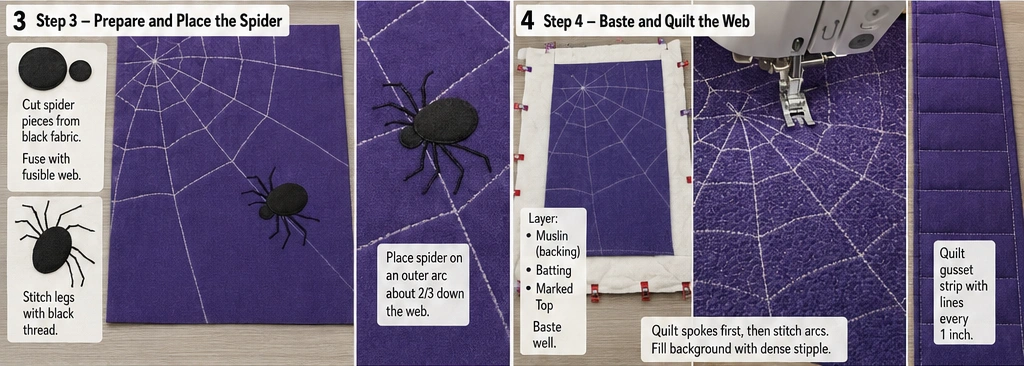
Step 4 — Baste and Quilt the Web
Layer muslin, batting, marked top. Baste thoroughly — this design has more stitching than any other in the collection and shifting layers will show.
Quilt the spokes first, hub outward, using the heavy bright thread. Then quilt the arcs, working outward from the hub. Stitch each line twice — sew out, then sew back over the same path. Doubled lines have real presence; single lines look tentative.
Fill the remaining background with dense stipple or tight straight lines in matching thread so the web sits proudly against a compressed ground. That density contrast is the entire effect.
Quilt the gusset with straight lines across the width every inch.
Step 5 — Trim and Square Up
Trim panels to 12 1/2″ × 14 1/2″ and the gusset to 3 1/2″ × 34″. Square up after quilting only — dense quilting like this draws in significantly, often 1/2″ or more across a panel, and never evenly.
Spritz with water to remove marking lines before assembly, and let the panels dry flat.
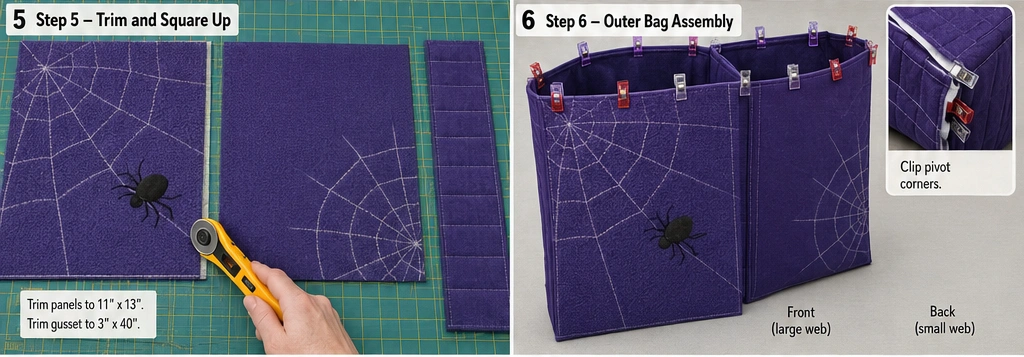
Step 6 — Assembly
- Mark the gusset center, then measure and mark 11″ out in each direction. Those two marks are the bottom corners.
- Pin the front panel to the gusset, aligning its bottom edge with the 11″ center section.
- Clip the gusset seam allowance to within 1/8″ of the stitch line at each corner mark so the strip pivots cleanly.
- Sew at 1/4″, needle down at every pivot. Six layers meet at the corners — slow the machine.
- Repeat with the back panel. If the back has its own smaller web, check the two hubs sit at complementary corners rather than mirroring each other.
- Turn right side out; press seams from inside with a point turner.
Step 7 — Line the Bag
Cut lining panels at 12 1/2″ × 14 1/2″ (×2) and a lining gusset at 3 1/2″ × 34″. Assemble as above but sew at 3/8″. The deeper seam makes the lining slightly smaller so it seats inside the shell without rippling.
Insert wrong sides together; baste the top edge at 1/8″.
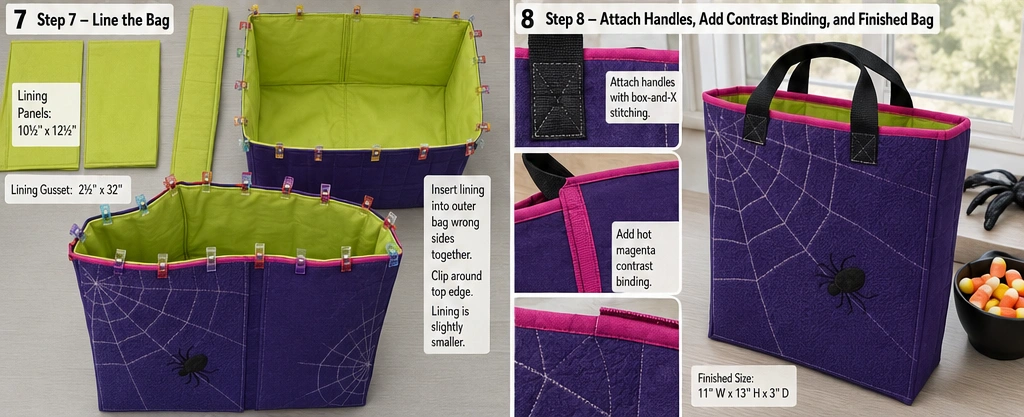
Step 8 — Attach the Handles
Cut two webbing lengths at 22″. Position each end 3 1/2″ in from the side seams, overlapping the raw top edge by 1″.
Secure with a box-and-X stitch — a 1″ square with both diagonals sewn inside. Bar tacks pull free from webbing under weight; the box-and-X spreads the load across four seam lines.
Step 9 — Bind with Contrast
This is the design element the section is named for, so commit to it. Cut a 2 1/2″ × 45″ strip in a color that has no business being near a spider web: acid lime, hot magenta, or bright gold.
Fold in half lengthwise, press, sew to the outside top edge at 1/4″ joining ends with a diagonal seam. Fold to the inside and finish by hand or stitch-in-the-ditch.
A 1/4″ finished binding is too thin to register here — cut the strip at 2 1/2″ so the finished binding lands around 3/8″, giving the contrast color enough visual weight to frame the whole bag.
Color Notes
The web thread and the binding are the two bright elements, and they should either match exactly or sit at opposite ends of the wheel — halfway between reads as an accident. Silver web thread with magenta binding is the most striking pairing. Acid lime for both is the loudest.
The background wants depth without lightness. Deep violet and midnight teal both hold a bright thread better than black, which swallows the stitching unless the thread is genuinely metallic.
For a version that photographs unusually well, quilt the web in variegated thread shifting from silver to lavender to lime across its length. The color change follows the spiral outward and gives the web a gradient no single-color thread can produce.
Gift Ideas That Fit This Bag
At 11″ × 13″ × 3″:
- Thread and notions bundle — a spool set, marking pens, and small scissors
- Hardcover books, two or three stacked
- A folded lap quilt or flannel throw
- Nature or insect field guide with a magnifying glass and a specimen box
- Candle, tea, and a small ceramic dish wrapped together
- Fat quarter bundle of eight to ten, standing upright
- Art supplies: sketchbook, ink pens, and a small watercolor set
- A cozy set — socks, cocoa, and a mug
Other Design Inspirations – Digitally Modified
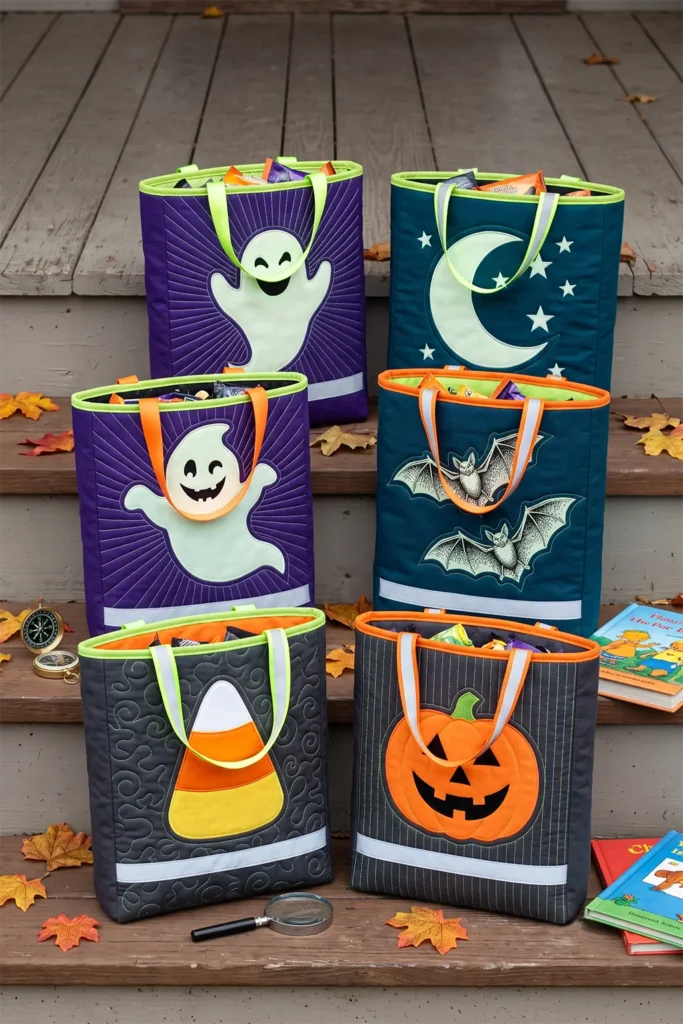
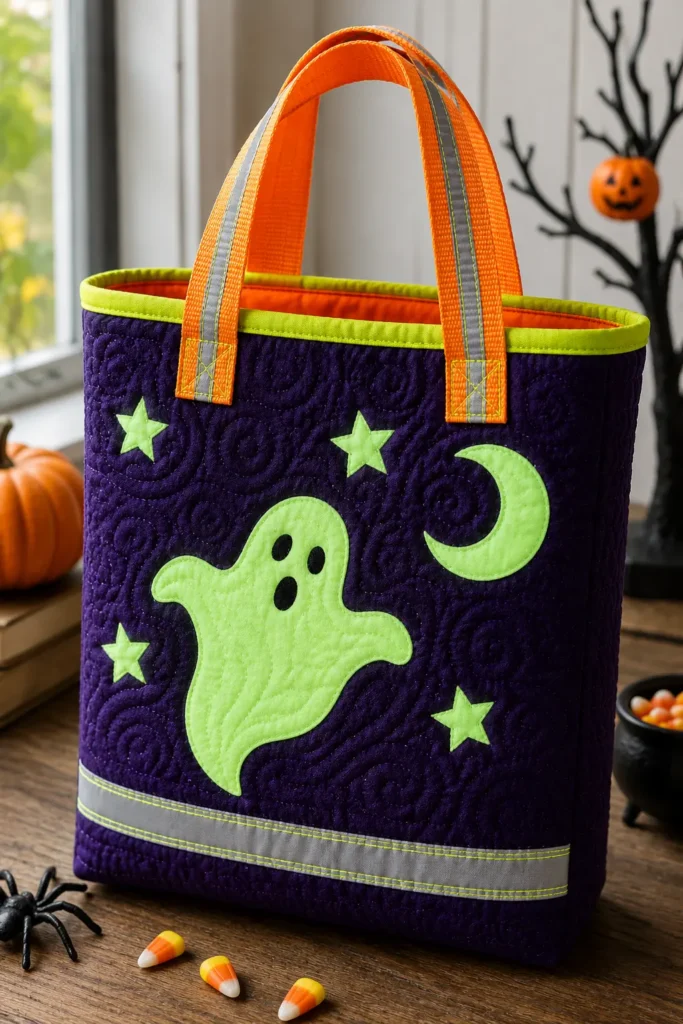
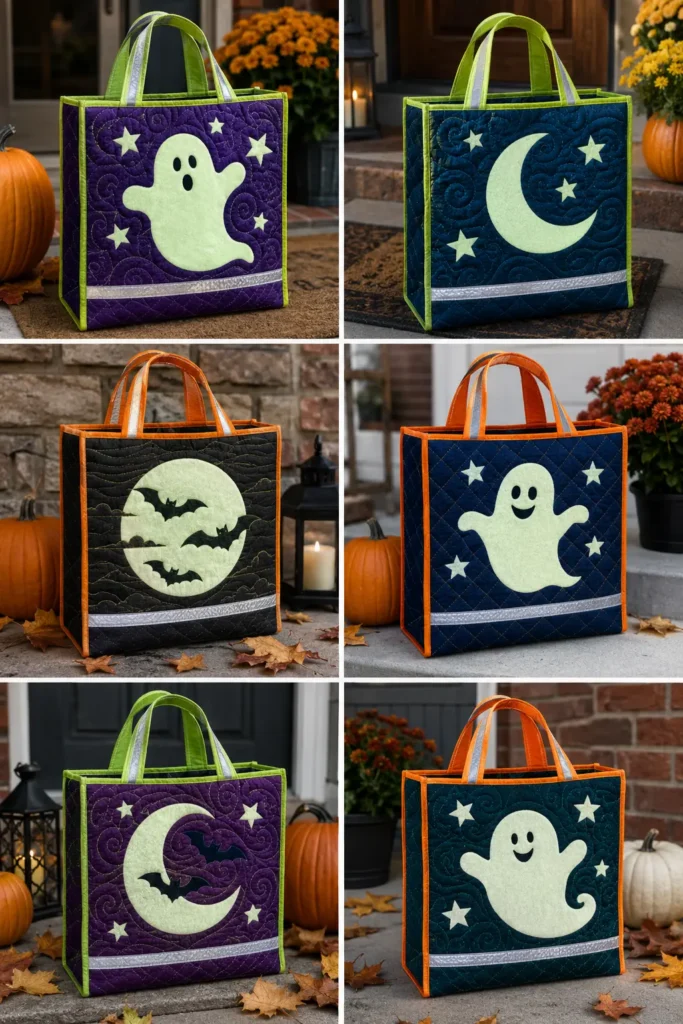
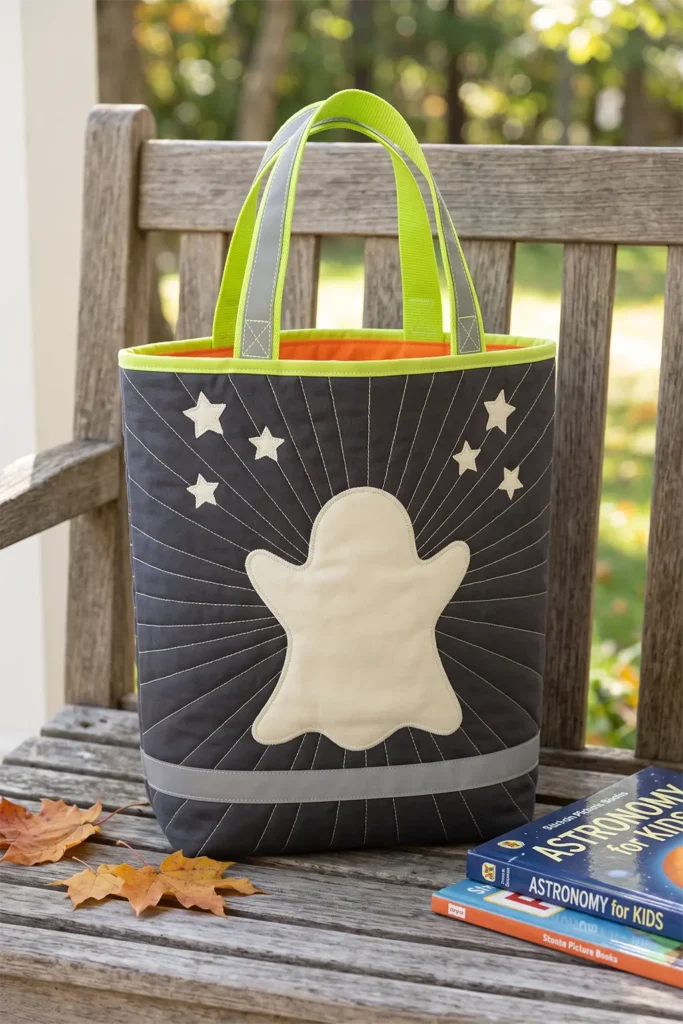
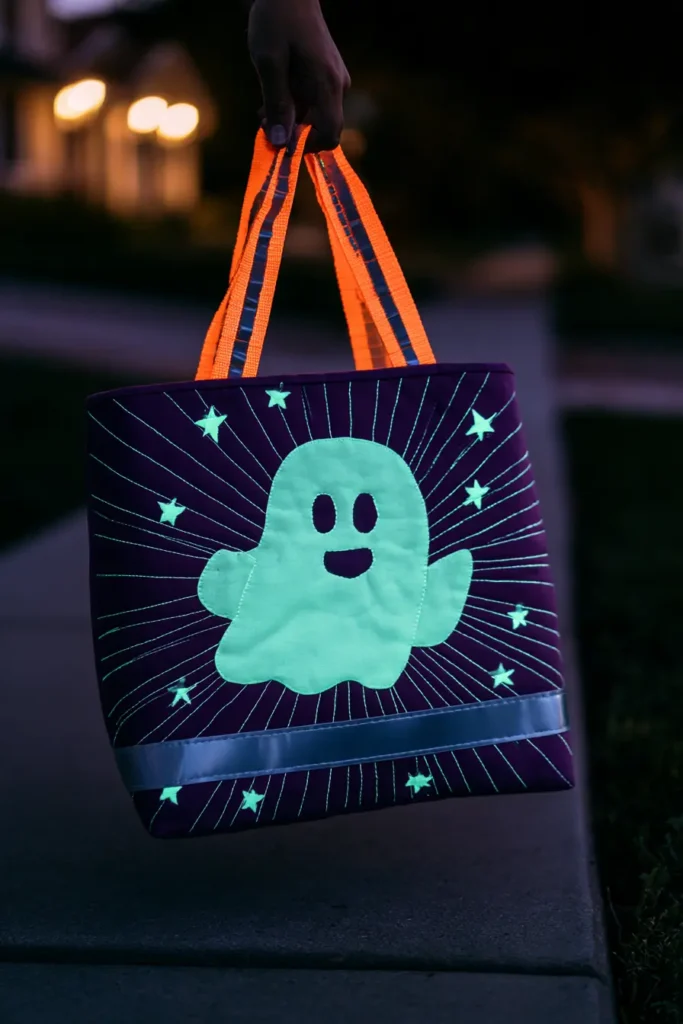
9. Glow-in-the-Dark Quilted Treat Bags for Nighttime Safety
Glow-in-the-dark materials work through phosphorescence, and the compound doing the work in modern products is strontium aluminate — introduced commercially in the early 1990s and roughly ten times brighter than the zinc sulfide that preceded it, with a glow that lasts hours rather than minutes. It charges under any light source but responds fastest to UV and blue wavelengths, which is why holding a phone flashlight against it for thirty seconds produces a visibly stronger glow than an hour under a lamp.
There’s a practical distinction worth understanding before cutting: glow materials charge and fade, while retroreflective materials bounce headlight beams straight back at a driver and never need charging. Glow makes a bag visible to people nearby; reflective makes it visible to cars. This build uses both, because they solve different halves of the same problem.
Finished size is around 11″ wide × 13″ tall × 3″ deep.
Design Inspirations – Digitally Modified
Materials
- Background fabric — 1/2 yard in deep violet, midnight teal, or charcoal quilting cotton
- Glow-in-the-dark cotton print — fat quarter (sold by Timeless Treasures, Hoffman, and others as “glow” novelty prints)
- Glow-in-the-dark thread — one spool, 40wt (Superior Glow in the Dark or Coats brands)
- Retroreflective ribbon or tape — 1″ wide, 1 yard, sew-on type
- Accent fabric — small scraps in acid lime and hot orange
- Lining — 1/2 yard in bright tangerine
- Low-loft cotton batting — 1/2 yard
- Paper-backed fusible web — 1/4 yard
- Cotton webbing — 1″ wide, 1 1/4 yards, in safety orange or lime
- Binding — 1/8 yard for a 2 1/2″ × 45″ strip
- 50wt thread in background color
Step 1 — Cut the Background Panels
Cut two background rectangles at 12 1/2″ × 14 1/2″ and one gusset strip at 3 1/2″ × 34″. Cut batting and muslin backing about 2″ larger in each dimension.
Cut the gusset as one continuous piece — separate sections put seams at the bottom corners, where a loaded bag carries its heaviest stress.
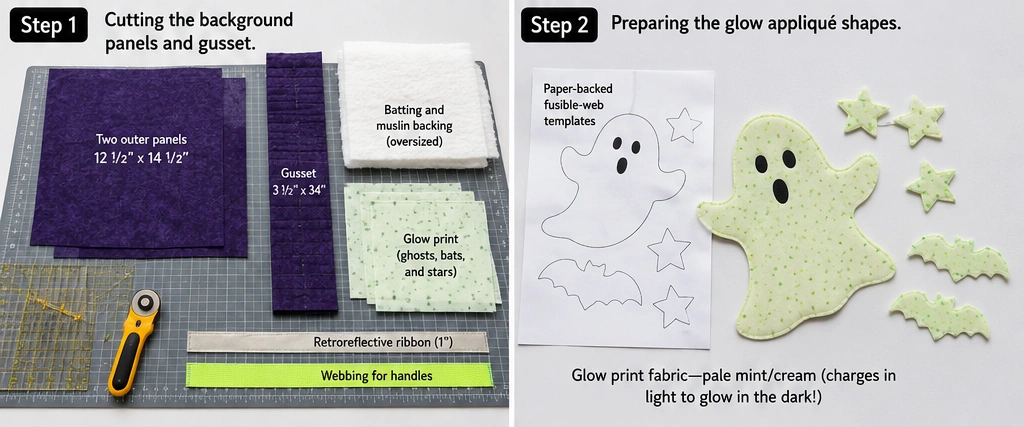
Step 2 — Prepare the Glow Appliqué Shapes
Cut simple, bold shapes with generous surface area — glow needs mass to be visible, so a large ghost outglows a scatter of small stars every time.
From the glow print:
- One large ghost or moon at roughly 7″ × 6″
- Three to four stars at 1 1/2″ to 2 1/2″ across
- Two small bats at 3″ wingspan for the back panel
Reverse asymmetrical shapes before tracing onto the paper side of the fusible web. Trace, fuse to the wrong side of the glow fabric, cut on the lines, peel the backing.
Tip: Glow prints have the phosphorescent compound printed on one face only. Check which side glows before fusing — fusing web to the wrong side is easy to do and impossible to undo.
Step 3 — Fuse and Stitch the Appliqué
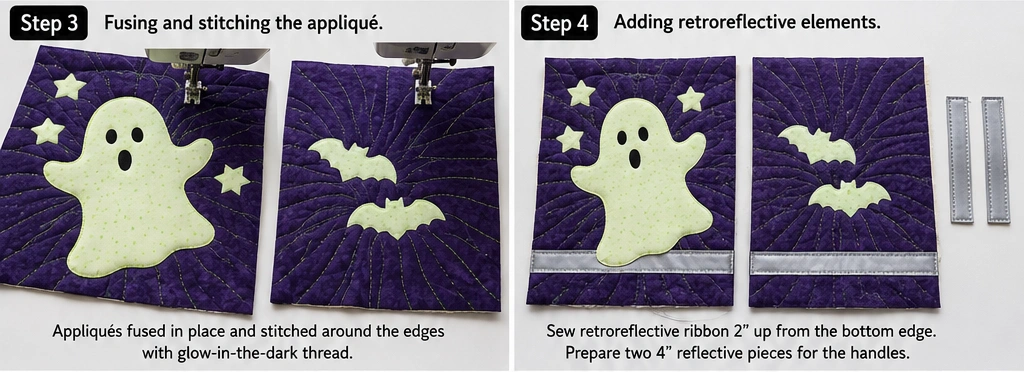
Position the large shape about 3 1/2″ up from the bottom raw edge, centered or slightly offset. Fuse with a hot dry iron, 8–10 seconds per section. Scatter the stars into the upper area.
Stitch every edge down with a narrow zigzag (1.5mm width, 1.0mm length) — but use glow thread rather than matching thread on these outlines. The stitched edge then glows as a bright rim around each shape, roughly doubling the visible glowing surface at no extra material cost.
Step 4 — Add the Retroreflective Elements
Cut two lengths of reflective ribbon at 12 1/2″ and stitch one horizontally across each panel, positioned about 2″ up from the bottom raw edge. Low placement is deliberate — it sits at roughly headlight height when a child carries the bag.
Stitch along both long edges with a regular straight stitch. Reflective tape does not like being sewn through repeatedly, so plan the placement before committing.
Cut two more short lengths at 4″ and set them aside for the handles in Step 8.
Step 5 — Baste and Quilt
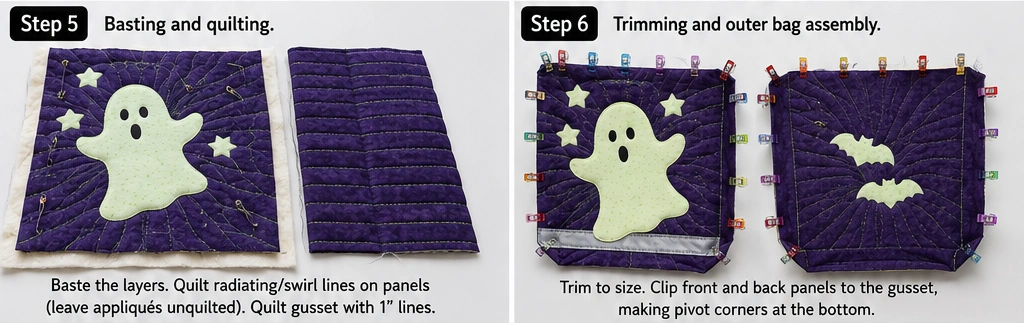
Layer muslin, batting, appliquéd top. Baste.
Quilt the background with glow thread, not matching thread — this is where the design earns its name. Options:
- Radiating lines outward from the large glow shape at 1/2″ intervals, which reads as emanating light
- Loose swirls across the whole background
- Dense straight lines 3/8″ apart, which puts the maximum length of glow thread on the surface
Leave the glow appliqué shapes unquilted so they lift forward.
Quilt the gusset with straight lines across the width every inch, again in glow thread.
Step 6 — Trim and Square Up
Trim panels to 12 1/2″ × 14 1/2″ and the gusset to 3 1/2″ × 34″. Square up after quilting only — dense quilting draws a panel in noticeably, and never evenly.
Step 7 — Assembly
- Mark the gusset center, then measure and mark 11″ out in each direction. Those marks become the bottom corners.
- Pin the front panel to the gusset, matching its bottom edge to the 11″ center section.
- Clip the gusset seam allowance to within 1/8″ of the stitch line at each corner mark so it pivots without buckling.
- Sew at 1/4″, needle down at every pivot. Six layers meet at the corners — slow down.
- Repeat with the back panel, confirming the reflective strips align at the same height on both sides.
- Turn right side out; press seams from inside with a point turner.
Press with care from here on — high heat can dull some glow prints and will deform reflective tape. Use a pressing cloth and keep the iron off the reflective strips entirely.
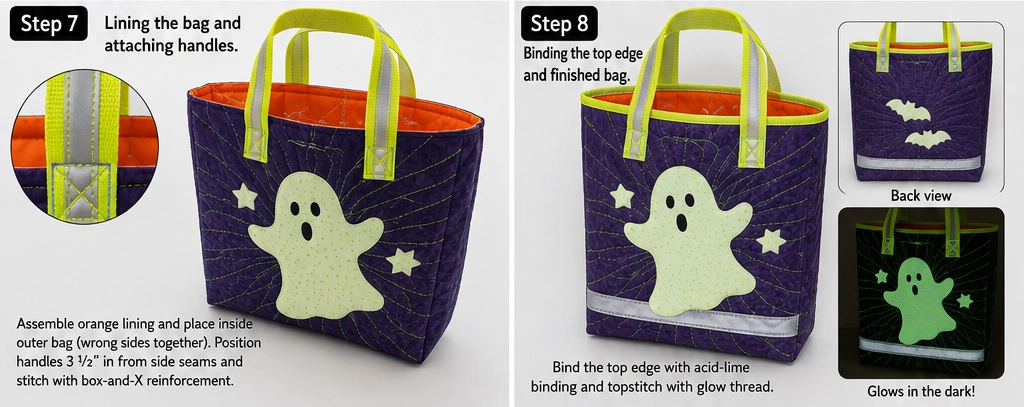
Step 8 — Line the Bag and Attach Handles
Cut lining panels at 12 1/2″ × 14 1/2″ (×2) and a lining gusset at 3 1/2″ × 34″. Assemble as above but sew at 3/8″ so the lining sits inside the shell without rippling. Insert wrong sides together and baste the top edge at 1/8″.
Cut two webbing lengths at 22″ in safety orange or lime. Before attaching, stitch a 4″ length of reflective ribbon onto the center of each handle — handles sit high and swing, which makes them the most visible moving element on the bag.
Position each handle end 3 1/2″ in from the side seams, overlapping the raw top edge by 1″. Secure with a box-and-X stitch: a 1″ square with both diagonals sewn inside. Bar tacks pull free from webbing under a candy load; the box-and-X spreads the pull across four seam lines.
Step 9 — Bind the Top Edge
Cut a 2 1/2″ × 45″ strip, press in half lengthwise, sew to the outside top edge at 1/4″, joining ends with a diagonal seam. Fold to the inside and finish by hand or stitch-in-the-ditch.
Acid lime or safety orange binding is the functional choice — both are high-visibility under a porch light and under a car’s headlights. Topstitching the binding down with glow thread adds a bright outline around the entire top edge.
Color Notes
Glow effects need a dark ground to register. Deep violet, midnight teal, and charcoal all work; a light background wastes the effect entirely, since a charged glow shape against pale fabric is invisible in daylight and barely distinguishable at night.
Glow prints are typically pale mint or cream in daylight and shift to green when charged. That daylight color is worth designing around: pale mint against violet looks intentional in the afternoon and functional after dark, whereas a cream glow shape can read as a laundry stain against a saturated background.
Add hot orange and acid lime in the binding, handles, and small accent shapes. Those two colors are the most visible in low light of any in the standard cotton range, and they carry the bag through the hours before the glow charges.
Charging note worth passing along: thirty seconds under a phone flashlight held close will fully charge a strontium aluminate print, and it’s worth doing right before leaving the house.
Gift Ideas That Fit This Bag
At 11″ × 13″ × 3″:
- Camping or outdoor kit — headlamp, compass, and a small first aid pouch
- A glow-in-the-dark star sticker set with an astronomy book
- Hardcover books, two or three stacked
- A folded lap quilt or fleece throw
- Safety bundle for a new cyclist: lights, reflective bands, and a bell
- Kids’ science kit or a night-sky field guide
- Craft supplies: sketchbook, glow paint set, and brushes
- A cozy set — socks, cocoa, and a mug
Other Design Inspirations – Digitally Modified
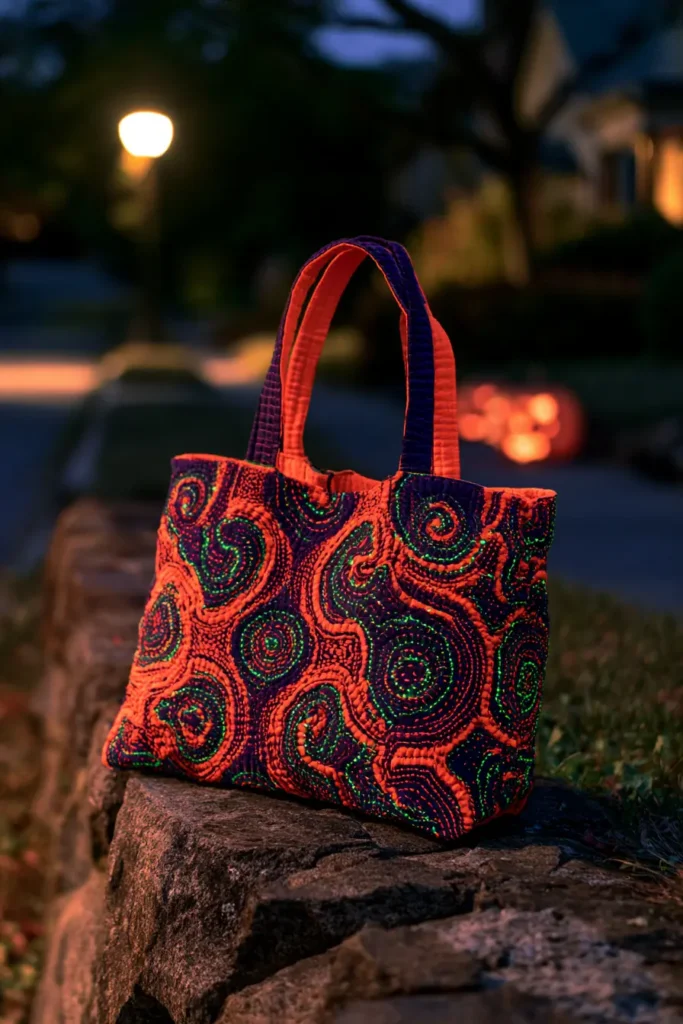
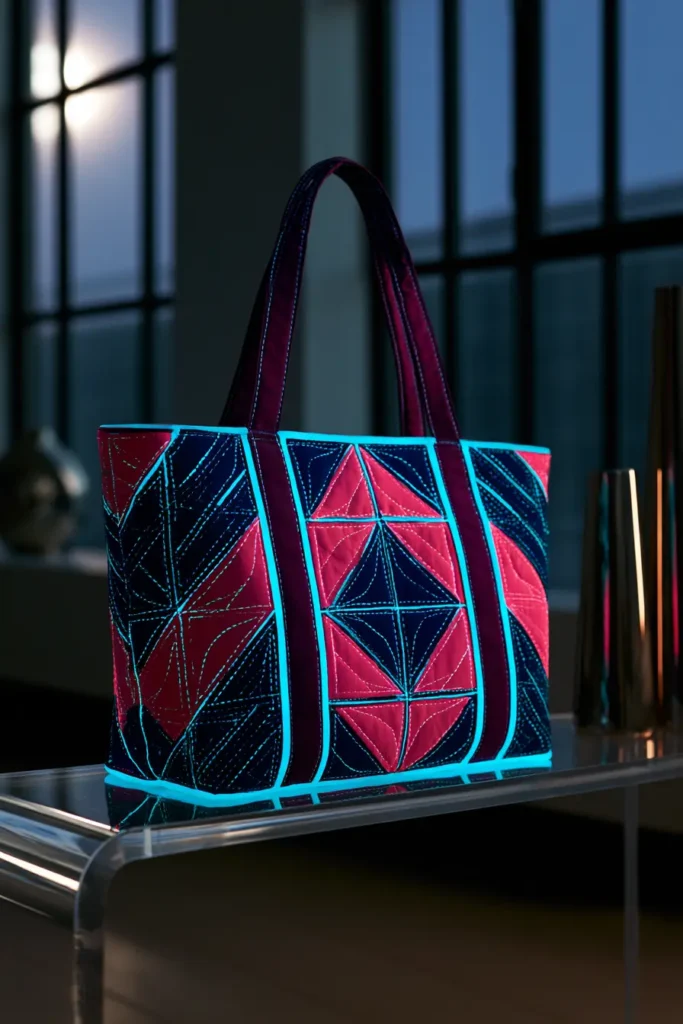
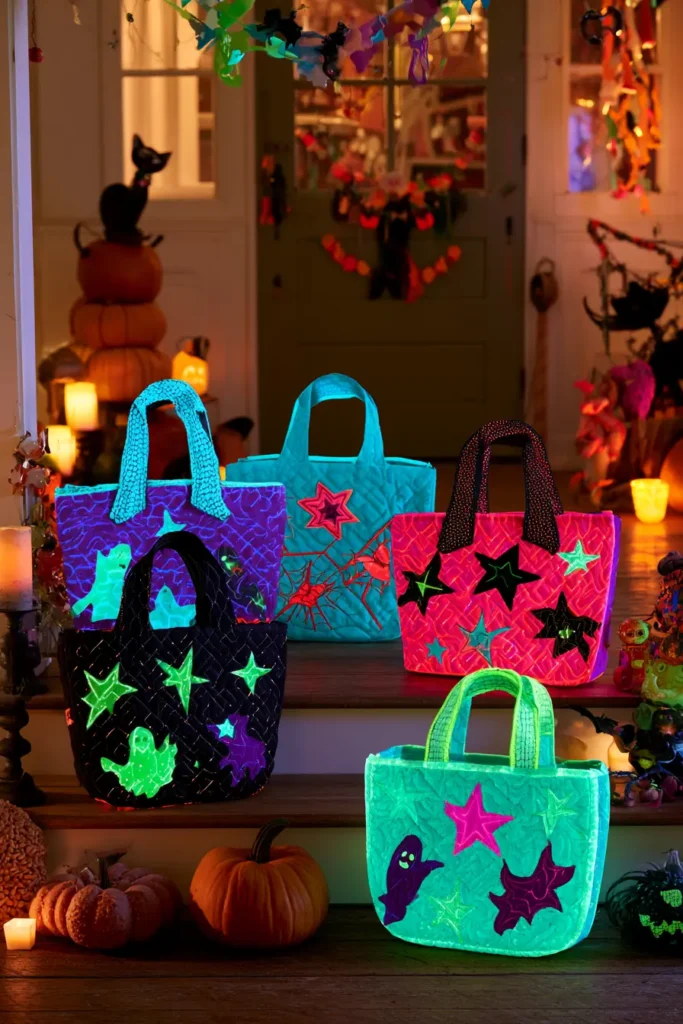
10. Personalized Quilted Halloween Bags with Kids’ Names
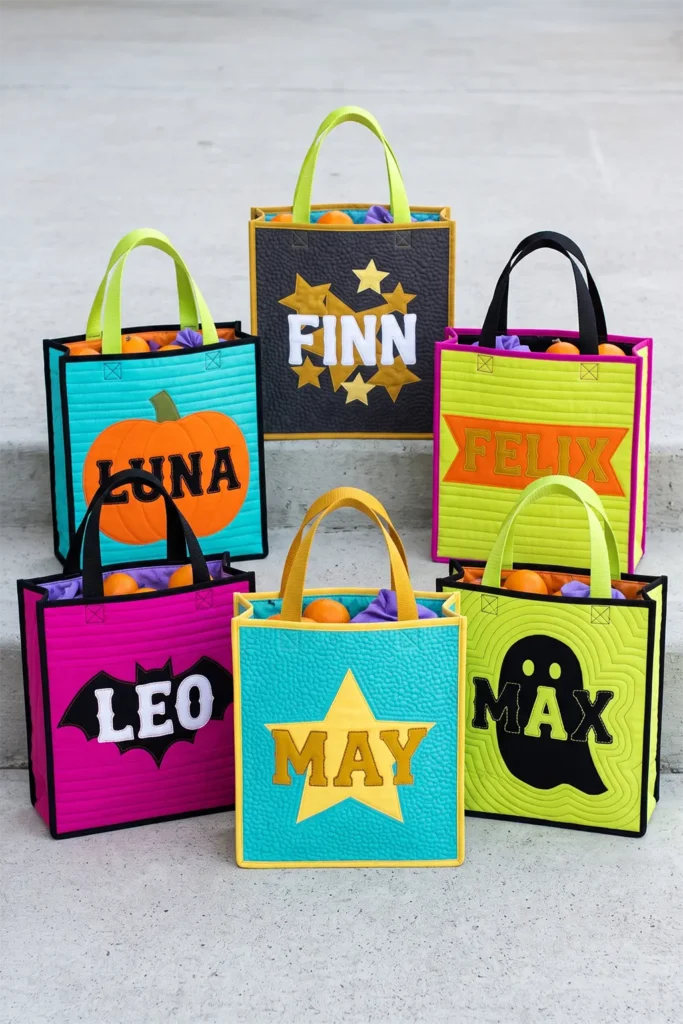
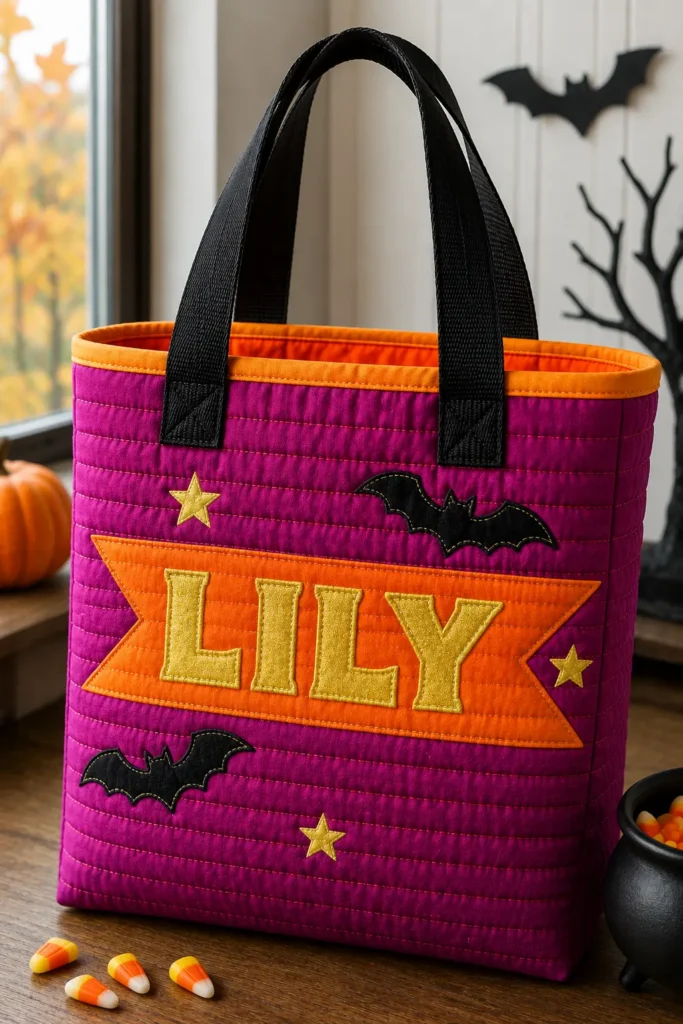
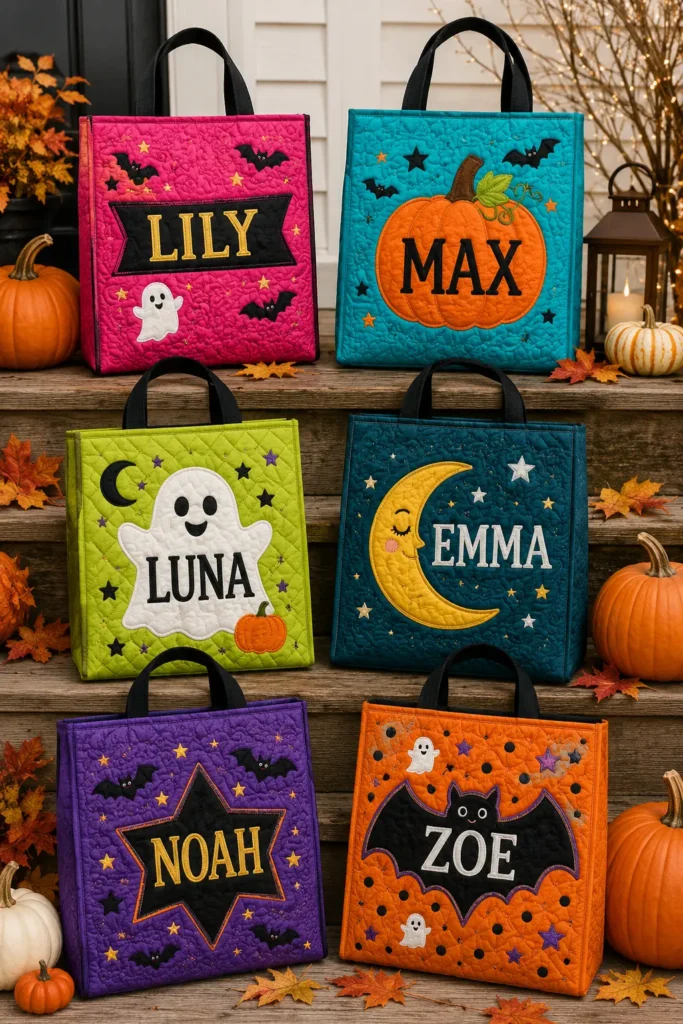
Stitching a name onto cloth is one of the oldest surviving textile practices. Sampler embroidery — the alphabet worked in thread by schoolgirls across Europe and colonial America — began as a functional exercise: household linens were marked with initials so laundry sent out could be identified on return. The decorative sampler grew out of that plain marking task. In Bengal, the same impulse runs through Nakshi Kantha, where the maker’s stitched motifs and occasionally initials recorded who made a piece and for whom, turning an ordinary layered cloth into something attributable.
A name on a treat bag does the same two jobs at once — it prevents mix-ups on a crowded porch, and it makes the bag belong to one specific person.
This build produces a finished bag around 11″ wide × 13″ tall × 3″ deep, with the name as the primary front design element.
Design Inspirations – Digitally Modified
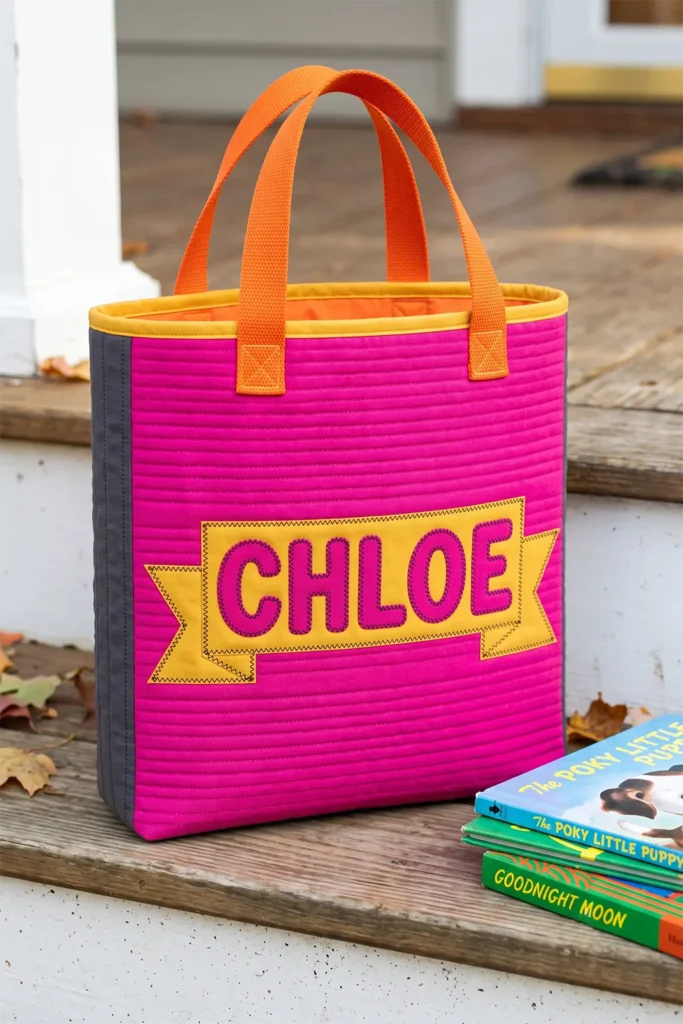
Materials
- Background fabric — 1/2 yard in hot magenta, turquoise, or acid lime quilting cotton
- Letter fabric — fat quarter in a high-contrast solid (gold, black, or white)
- Accent fabric — small scraps for a banner, star, or bat behind the name
- Lining — 1/2 yard in tangerine or violet
- Low-loft cotton batting — 1/2 yard
- Paper-backed fusible web — 1/3 yard
- Cotton webbing — 1″ wide, 1 1/4 yards
- Binding — 1/8 yard for a 2 1/2″ × 45″ strip
- 40wt thread in a bright contrast for outlining the letters; 50wt in background color
Step 1 — Cut the Background Panels
Cut two background rectangles at 12 1/2″ × 14 1/2″ and one gusset strip at 3 1/2″ × 34″. Cut batting and muslin backing about 2″ larger in each direction.
Cut the gusset as a single continuous strip — piecing it puts seams at the bottom corners, exactly where a loaded bag fails.
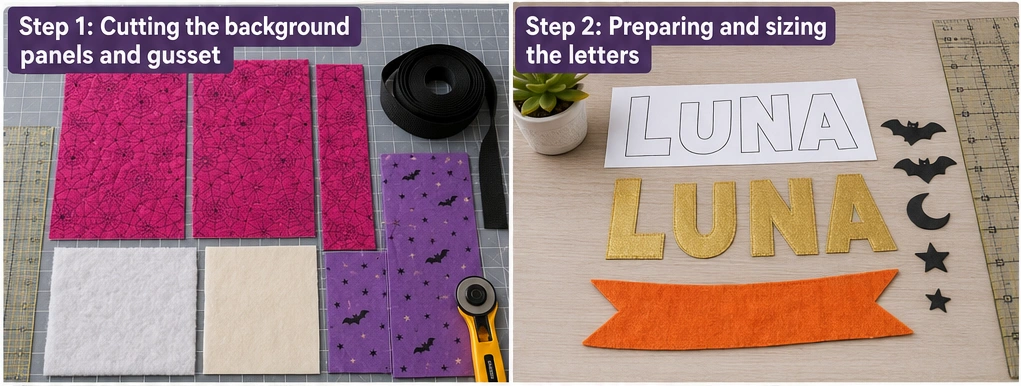
Step 2 — Size and Prepare the Letters
Letter height depends on name length. Working within a 10″ usable width on the panel:
| Name length | Letter height | Approx. letter width |
|---|---|---|
| 3–4 letters | 3 1/2″ | 2 1/4″ each |
| 5–6 letters | 2 1/2″ | 1 1/2″ each |
| 7–8 letters | 2″ | 1 1/8″ each |
Print letters from a word processor at the target size and use them as templates. Choose a bold, chunky typeface — anything with thin strokes under 1/4″ wide will fray at the edges and be miserable to stitch around. Rounded sans-serifs and slab serifs both work; scripts and thin serifs do not.
Reverse every letter before tracing onto the paper side of the fusible web. This is the step people skip, and a mirrored name is unfixable once fused.
Trace, fuse to the wrong side of the letter fabric, cut precisely on the lines, peel the backing.
Tip: Cut the counters — the enclosed holes in A, B, D, O, P, R — as part of the letter rather than trying to fuse a separate background piece into the gap. The background fabric shows through naturally once the letter is fused down.
Step 3 — Add a Backdrop Shape
A name floating alone on a panel looks unfinished. Place it on something:
- A banner — a rectangle 11″ × 4″ with swallowtail notches cut into each short end, appliquéd behind the letters
- A large pumpkin or ghost at roughly 8″ × 7″, with the name across its center
- A moon circle at 7″ diameter
Fuse the backdrop shape first, positioned about 4″ up from the bottom raw edge, then position the letters on top of it.
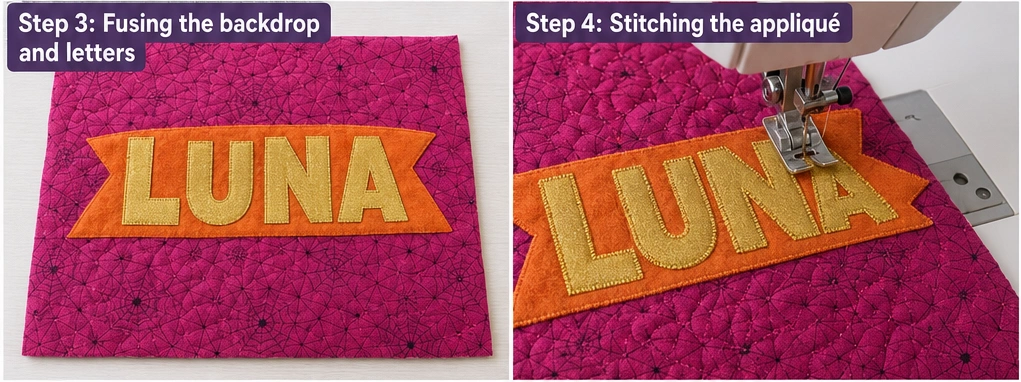
Step 4 — Fuse and Stitch the Letters
Draw a light horizontal baseline with a water-soluble marker and align every letter bottom to it — freehand placement drifts, and drift is very visible in a word.
Fuse with a hot dry iron, 8–10 seconds per section.
Stitch every letter edge with a narrow zigzag (1.5mm width, 1.0mm length) in a bright contrast thread. Going around a name is slower than any other appliqué in this collection — budget a full evening for a six-letter name and stitch with the needle down at every corner pivot.
Step 5 — Baste and Quilt
Layer muslin, batting, appliquéd top. Baste.
Quilt the background densely and leave the letters and backdrop unquilted so the name lifts forward. Options:
- Horizontal straight lines 3/8″ apart across the whole panel, which pushes the name forward hard
- Echo lines following the backdrop shape outward at 1/2″ intervals
- Tight stipple in matching thread
On the back panel, quilt a simple Halloween motif — a bat, a star cluster, or the child’s initial — in bright thread, so the bag reads from both sides.
Quilt the gusset with straight lines across the width every inch.
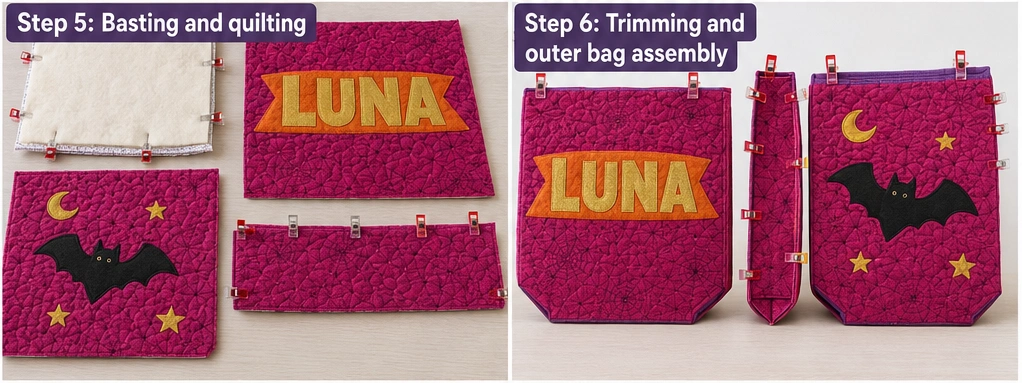
Step 6 — Trim and Square Up
Trim panels to 12 1/2″ × 14 1/2″ and the gusset to 3 1/2″ × 34″. Square up after quilting only — quilting draws fabric in, and never evenly.
Step 7 — Assembly
- Mark the gusset center, then measure and mark 11″ out in each direction. Those marks are the bottom corners.
- Pin the front panel to the gusset, matching its bottom edge to the 11″ center section.
- Clip the gusset seam allowance to within 1/8″ of the stitch line at each corner mark so the strip pivots cleanly.
- Sew at 1/4″, needle down at each pivot. Six layers meet at the corners — reduce speed.
- Repeat with the back panel.
- Turn right side out; press seams from inside with a point turner.
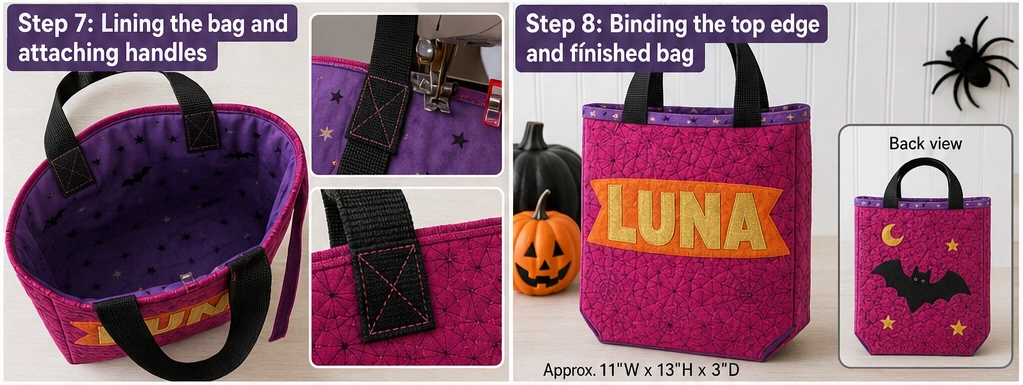
Step 8 — Line the Bag and Attach Handles
Cut lining panels at 12 1/2″ × 14 1/2″ (×2) and a lining gusset at 3 1/2″ × 34″. Assemble as above but sew at 3/8″ so the lining sits inside the shell without rippling. Insert wrong sides together; baste the top edge at 1/8″.
Cut two webbing lengths at 20″ for a child-sized bag — long handles drag on the ground when a kid carries a full load. Position each end 3 1/2″ in from the side seams, overlapping the raw top edge by 1″.
Secure with a box-and-X stitch: a 1″ square with both diagonals sewn inside. Bar tacks pull free from webbing under weight; the box-and-X spreads the pull across four seam lines.
Step 9 — Bind the Top Edge
Cut a 2 1/2″ × 45″ strip, press in half lengthwise, sew to the outside top edge at 1/4″, joining ends with a diagonal seam. Fold to the inside and finish by hand or stitch-in-the-ditch.
Bind in a color pulled from the letters — gold letters with gold binding frames the name and ties the panel together. Or bind in the lining color for a brighter, more unexpected finish.
Making Several at Once
If you’re making bags for siblings or a classroom, the efficiency gains come from batching:
- Cut all background panels, gussets, linings, and batting in one session. This is the single biggest time saver.
- Use one background color across all bags and vary only the letter and binding colors. Visual variety without extra cutting.
- Fuse all names in one ironing session, then take the whole stack to the machine.
- Chain-piece the assembly steps — sew every front panel to every gusset before switching to back panels.
Six bags built this way take roughly the time of three built individually.
A Removable Name Option
For a bag meant to last years, appliqué the name onto a separate 10″ × 4″ quilted panel finished with its own binding, then attach it to the bag front with sew-on hook-and-loop tape or four large snaps. A younger sibling gets the bag later with a new name panel, and the original panel keeps as a memento.
Color Notes
Personalized bags want to look celebratory rather than spooky, which argues for a bright background — hot magenta, turquoise, or acid lime — with gold or white letters. That reversal from the usual dark-background Halloween palette is what makes these read as a gift rather than a costume accessory.
If the child has a favorite color, use it for the background rather than the letters. Letters need maximum contrast to stay legible from a distance; backgrounds can go anywhere.
Ombré letter fabric is worth trying — a gradient running left to right across the name gives it dimension that a flat solid can’t, and costs nothing extra in effort.
Gift Ideas That Fit This Bag
At 11″ × 13″ × 3″:
- Personalized stationery set — notebook, pens, and stickers
- Picture books, three or four stacked flat
- A plush toy with room to spare
- Craft kit: felt sheets, safety scissors, glue, and embroidery floss
- A folded child’s quilt or fleece blanket
- Costume accessories — a wand, a mask, and face paint
- Bath set: bubble bath, a hooded towel, and a bath toy
- A cocoa and marshmallow bundle with a personalized mug
Other Design Inspirations – Digitally Modified
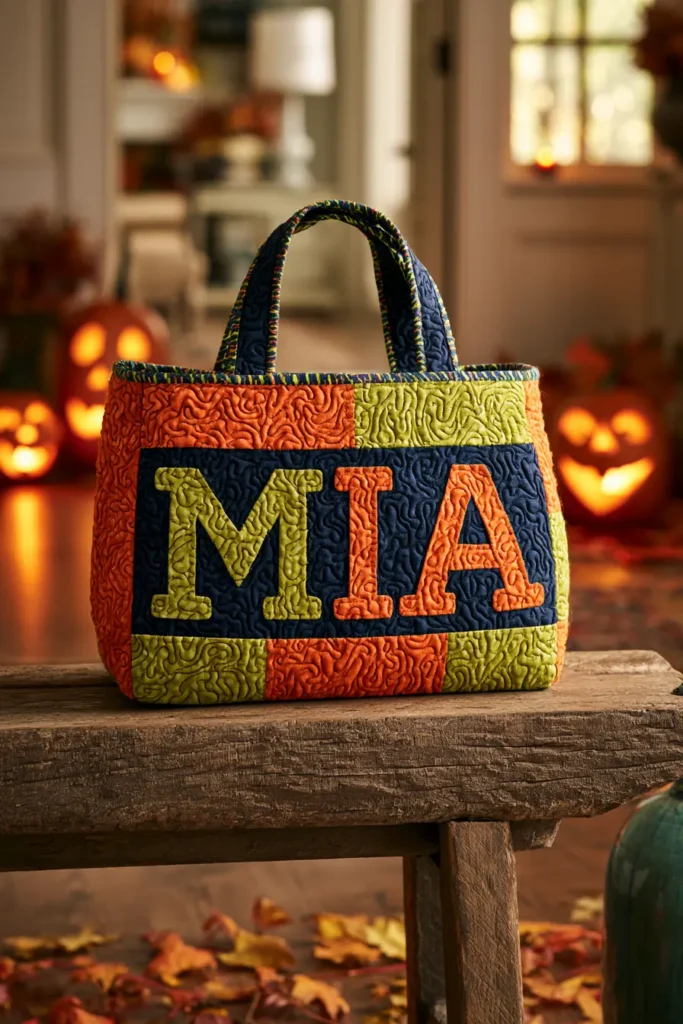
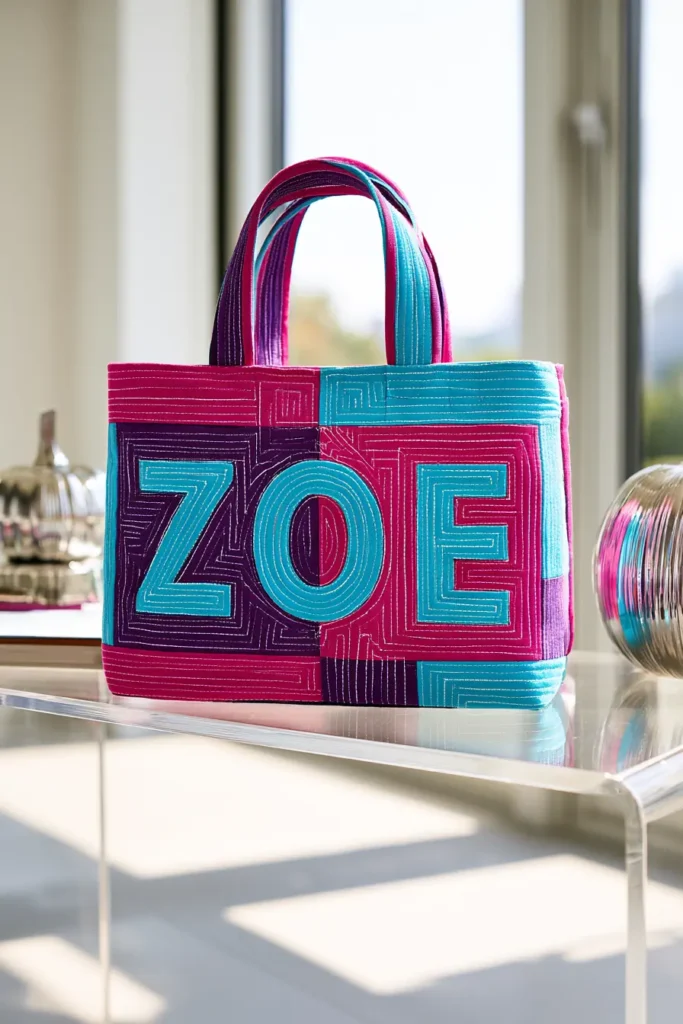
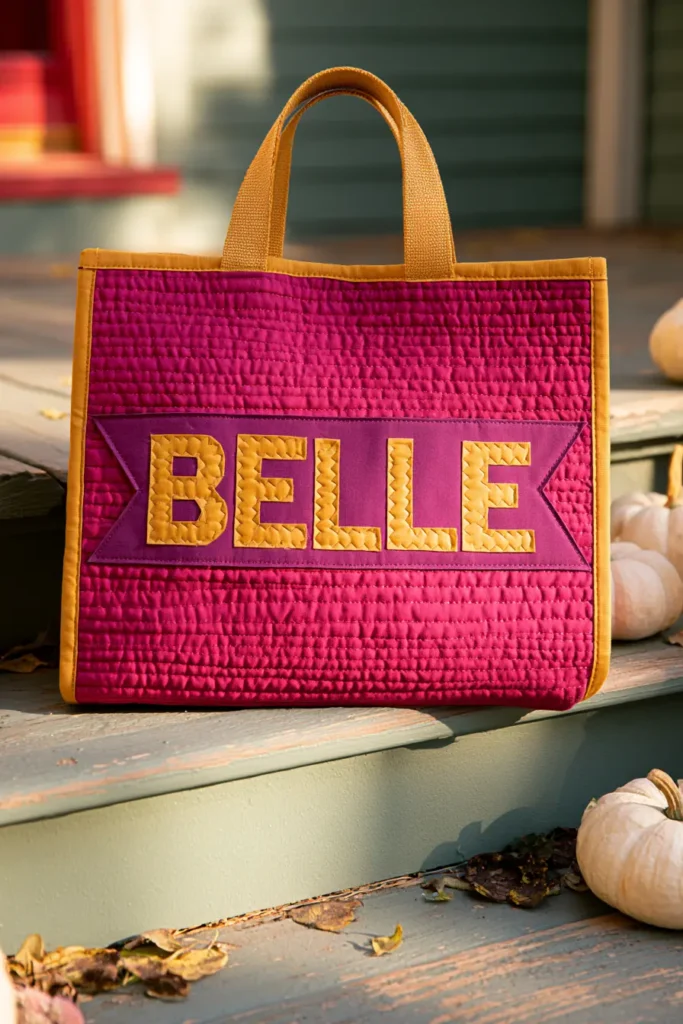
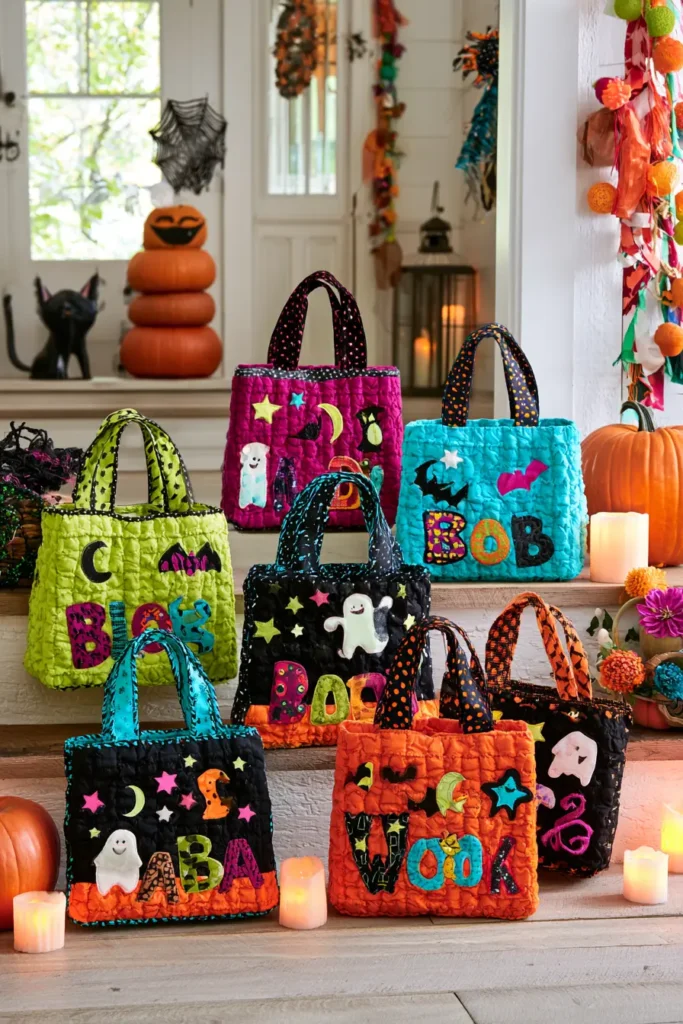
11. Reversible Quilted Halloween and Fall Harvest Totes
Reversible construction is older than the aesthetic argument for it. Before industrial textile production made cloth cheap, a two-faced garment or bag meant one set of materials doing two jobs — and in Bengal, kantha quilting arose from exactly this logic, layering worn saris into a cloth that had no wrong side because both faces were finished by the running stitch itself. Whole-cloth reversibility wasn’t a design choice there; it was what the technique produced.
The modern version borrows the principle. A bag with a Halloween face and a harvest face gets used from late September through Thanksgiving instead of one night in October, and the construction cost is a single extra quilted panel set.
The key structural difference from every other bag in this collection: there is no lining. Both faces are quilted outer layers, joined back to back, with the batting sandwiched between them. That changes the assembly order significantly.
Finished size is around 12″ wide × 13″ tall × 4″ deep.
Design Inspirations – Digitally Modified
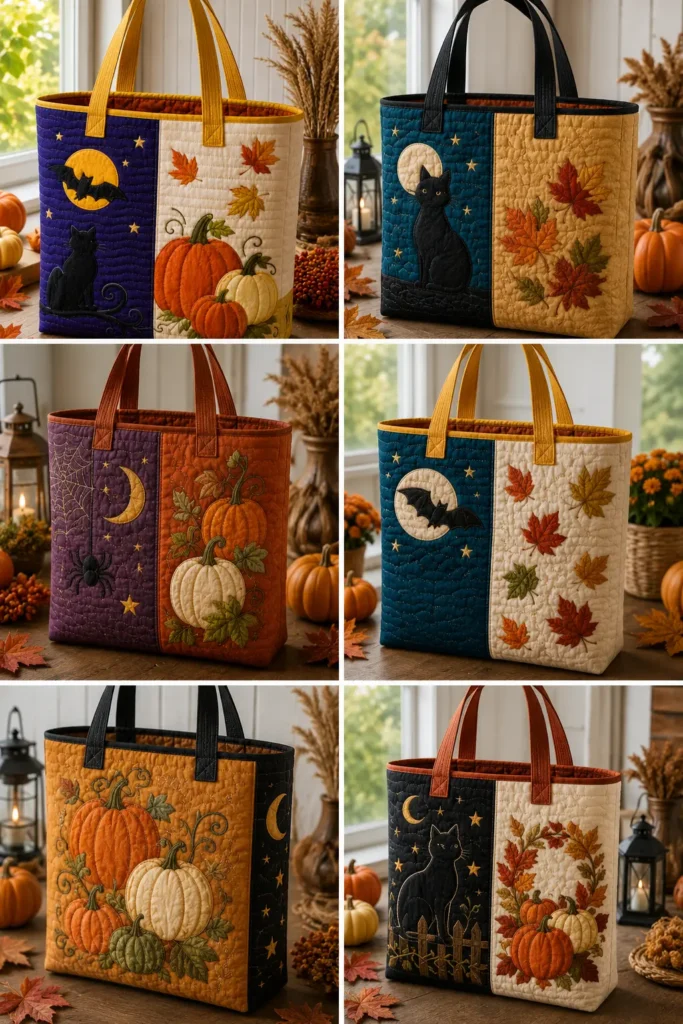
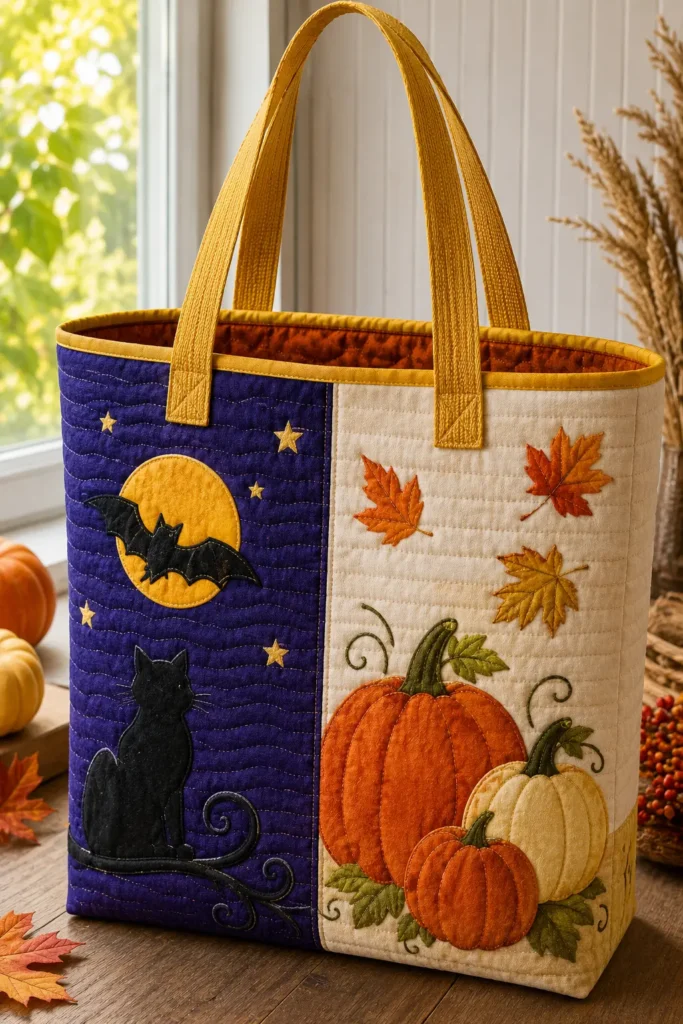
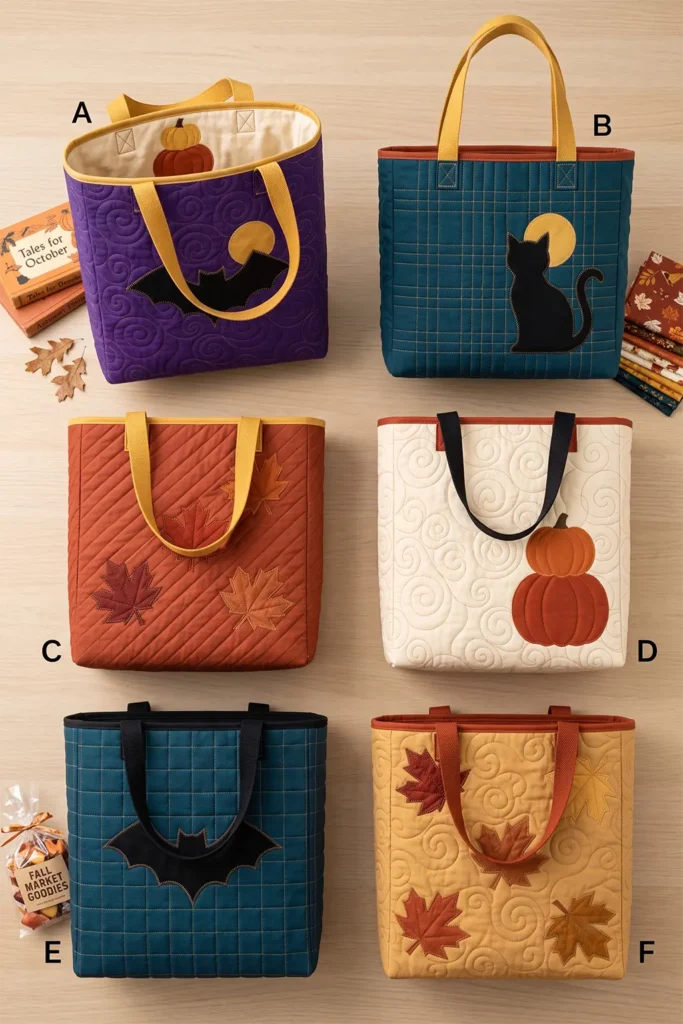
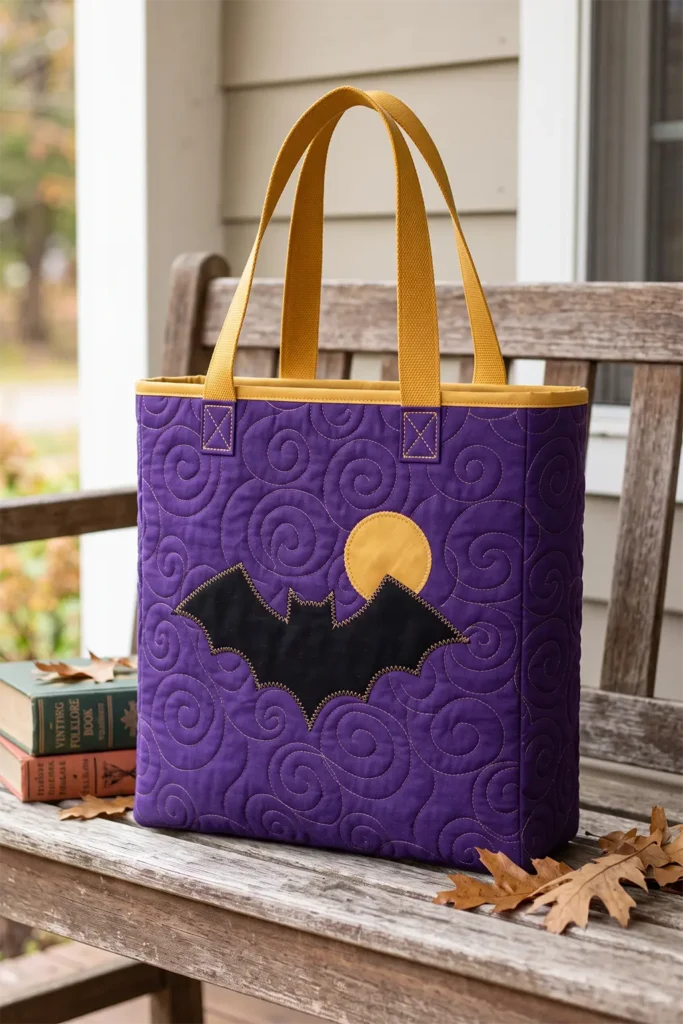
Materials
Halloween side:
- 1/2 yard background in deep violet or midnight teal
- Fat quarter black for a bat or cat silhouette
- Small scraps gold for a moon
Harvest side:
- 1/2 yard background in warm cream, wheat, or burnt sienna
- Fat quarter in burnt orange, rust, and gold for pumpkins or leaves
- Small scrap green for stems
Both:
- Low-loft cotton batting — 3/4 yard
- Paper-backed fusible web — 1/2 yard
- Cotton webbing — 1″ wide, 1 1/2 yards, in a color that works on both faces (gold, rust, or black)
- Binding — 1/8 yard for a 2 1/2″ × 50″ strip
- 50wt thread in both background colors
Step 1 — Cut Both Sets of Panels
Cut from each background fabric:
- Two panels at 13 1/2″ × 14 1/2″
- One gusset strip at 4 1/2″ × 36″
Cut batting: two pieces at roughly 15″ × 16″ and one at 6″ × 38″.
You will have four panels and two gussets total. Cut the gussets as single continuous strips — pieced gussets put seams at the bottom corners, which is where a loaded bag splits.
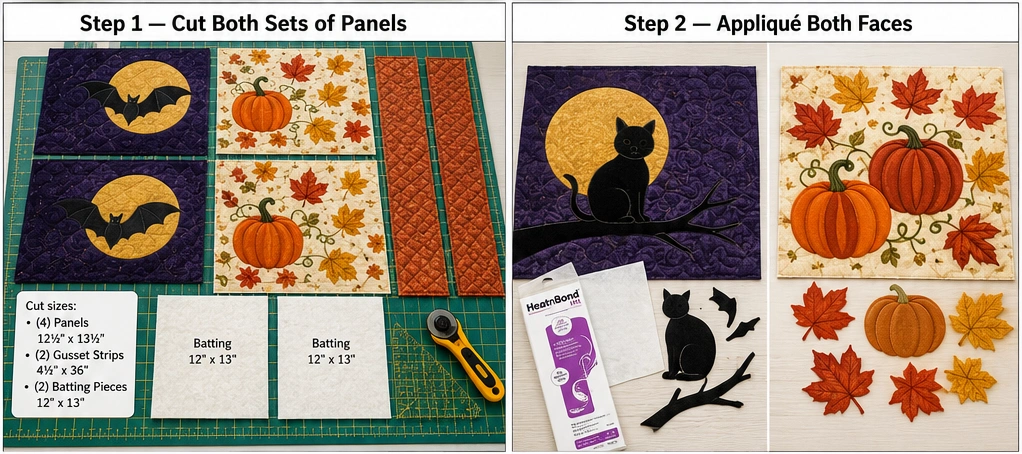
Step 2 — Appliqué Both Faces
Prepare and fuse shapes for each side separately.
Halloween face — a bat at 5″ wingspan and a 4 1/2″ gold moon circle, or a black cat silhouette at 8″ tall.
Harvest face — two or three pumpkins at 4″ to 5 1/2″ wide, or three maple leaves at 4 1/2″ across, in rust, burnt orange, and gold.
Reverse asymmetrical shapes before tracing onto the fusible web’s paper side. Fuse with a hot dry iron, 8–10 seconds per section, then stitch every edge with a narrow zigzag (1.5mm width, 1.0mm length) in matching thread.
Tip: Keep the appliqué at least 1 1/2″ clear of all raw edges on both faces. Reversible construction has more bulk at the seams than a lined bag, and appliqué caught in a seam allowance is both hard to sew through and visibly crowded.
Step 3 — Quilt the Sandwiched Panels
This is the step that differs most from a standard bag. Layer Halloween panel, batting, harvest panel — wrong sides facing the batting — and baste. You are quilting both faces simultaneously through one batting layer.
That means the quilting design must work on both sides. Choose one that reads as deliberate either way:
- Straight lines 1/2″ apart across the whole panel, angled diagonally
- A loose all-over swirl
- An open grid at 1 1/2″ intervals
Avoid motif quilting that echoes one face’s appliqué — echo rings around a moon look purposeful on the Halloween side and arbitrary on the harvest side.
Use matching bobbin thread, or better, a neutral gold or taupe in both top and bobbin that suits both palettes.
Repeat for the second panel pair and the two gusset strips.
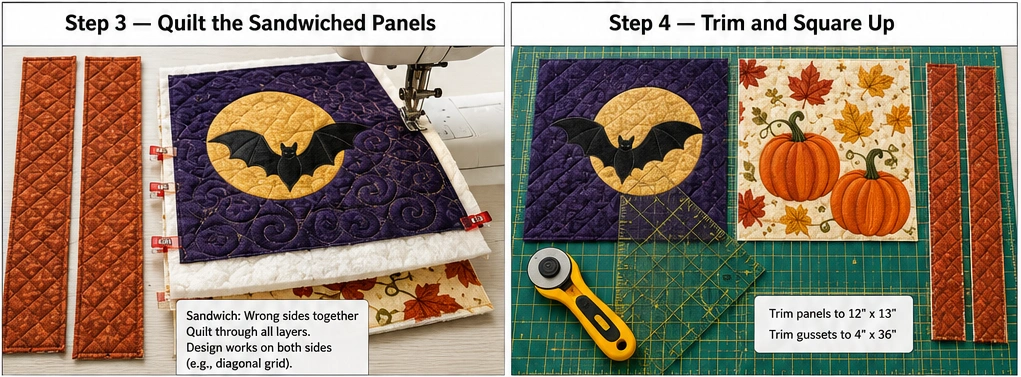
Step 4 — Trim and Square Up
Trim both quilted panels to exactly 13 1/2″ × 14 1/2″ and the quilted gusset to 4 1/2″ × 36″. Square up after quilting only — quilting draws fabric in, and never evenly.
Step 5 — Bind the Panel Edges (Optional but Recommended)
Because there’s no lining to hide seam allowances, the interior seams will be visible from whichever side is turned in. Two approaches:
Option A — Bound seams (cleaner). Assemble, then encase each interior seam allowance with a 1 1/4″ bias strip folded over the raw edge and stitched down. More work, but the bag looks finished from both faces.
Option B — Flat-felled seams (faster). Sew at 1/2″, trim one seam allowance to 1/4″, fold the wider one over it, and topstitch flat. Strong and tidy, with a visible topstitch line.
Choose before assembly, since Option B needs a 1/2″ seam allowance rather than 1/4″.
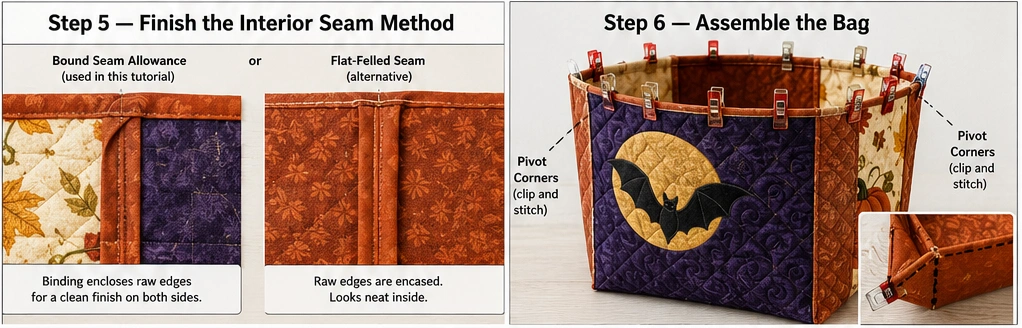
Step 6 — Assembly
- Mark the gusset center, then measure and mark 12″ out in each direction. Those two marks are the bottom corners.
- Decide which face goes out first — that face’s panels go right sides together with the gusset’s matching face.
- Pin the first panel to the gusset, matching its bottom edge to the 12″ center section.
- Clip the gusset seam allowance to within 1/8″ of the stitch line at each corner mark so it pivots without buckling.
- Sew at 1/4″ (Option A) or 1/2″ (Option B), needle down at every pivot. This bag has more layers at the corners than any other in the collection — two quilted sandwiches meeting a quilted gusset. Use a heavier needle (90/14) and go slowly.
- Repeat with the second panel.
- Finish the seams per your chosen method from Step 5.
- Turn right side out; press seams from the inside with a point turner.
Step 7 — Attach the Handles
Cut two webbing lengths at 24″. Reversible bags need handles that look correct from both faces, which means no raw ends tucked into a lining.
Position each end 4″ in from the side seams, overlapping the top raw edge by 1″. Since the binding in Step 8 will cover the overlap on the outside, the ends stay clean.
Secure with a box-and-X stitch — a 1″ square with both diagonals sewn inside. The stitching will be visible on both faces, so use a thread color that suits both palettes; gold is the safest choice across a violet-and-cream pairing.
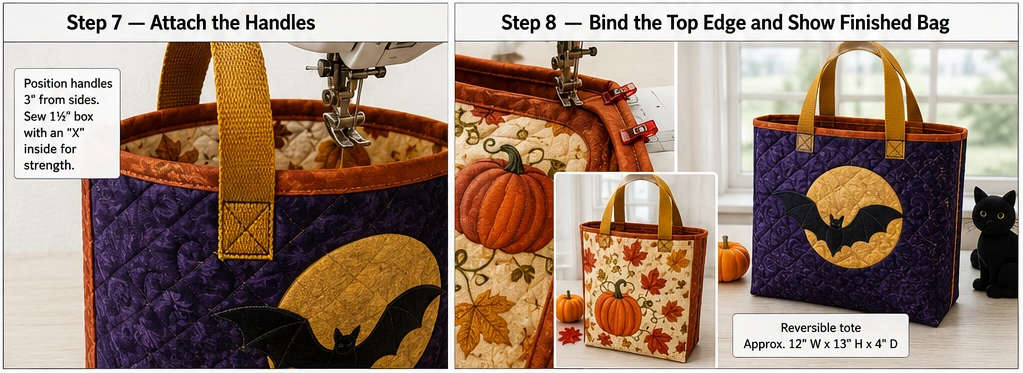
Step 8 — Bind the Top Edge
Cut a 2 1/2″ × 50″ strip — longer than the other bags, since a reversible top edge has no lining to fold over.
Fold in half lengthwise, press, sew to one face at 1/4″, joining ends with a diagonal seam. Fold to the other face and finish by stitch-in-the-ditch from the first side, catching the fold underneath. Both faces then show a clean bound edge.
Choose a binding that works with both palettes. Gold bridges violet and cream better than anything else. Rust works if the harvest side leans warm and the Halloween side leans dark.
Color Notes
The two faces should share at least one color or the bag reads as two unrelated projects stapled together. Gold is the natural bridge — it belongs to both a harvest palette (wheat, corn, late light) and a Halloween palette (moon, jack-o’-lantern glow).
Keep the Halloween face dark and saturated — violet, midnight teal — and the harvest face warm and lighter — cream, wheat, burnt sienna. That value contrast means the two faces don’t shadow through each other, which is a real risk when both are cotton over a single batting layer. If either fabric is light enough to show the other side’s appliqué through it, add a layer of white muslin between the batting and the lighter face.
Gift Ideas That Fit This Bag
At 12″ × 13″ × 4″, this is the largest bag in the collection:
- A folded lap quilt or full-size flannel throw
- Hardcover books, four or five stacked
- A harvest food bundle — jam, honey, a tea towel, and a loaf pan
- Craft supplies: a fat quarter bundle of 12, plus notions
- A plush toy with substantial room around it
- Cozy set — a chunky knit blanket, socks, and cocoa
- Farmers market haul, which is what this bag will actually be doing by November
- Baking kit: pie plate, cutters, spices, and a rolling pin
Other Design Inspirations – Digitally Modified
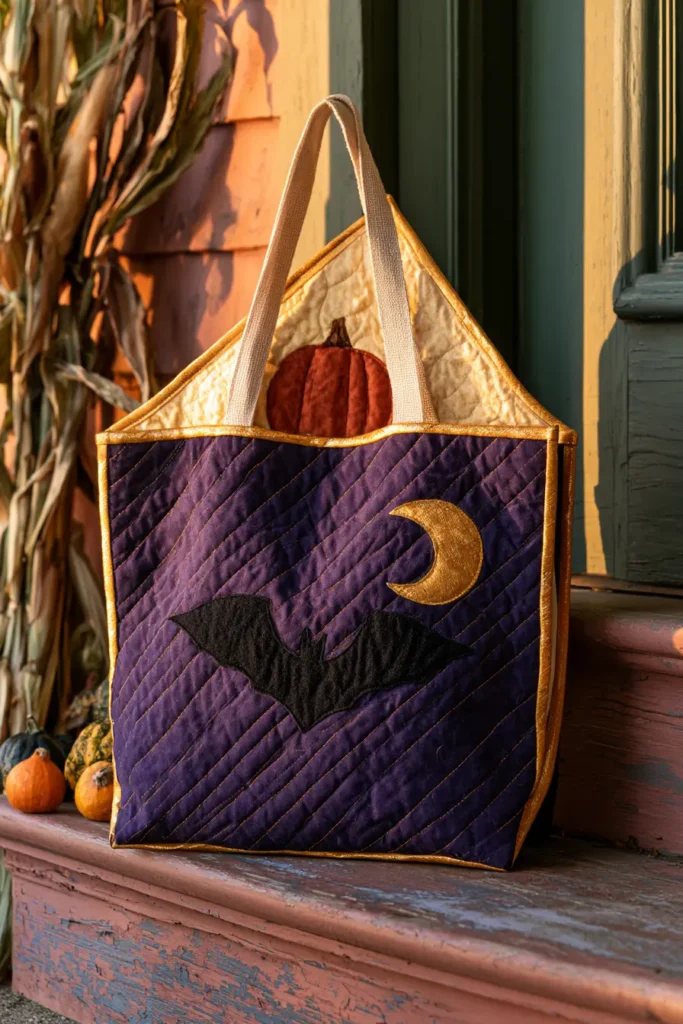
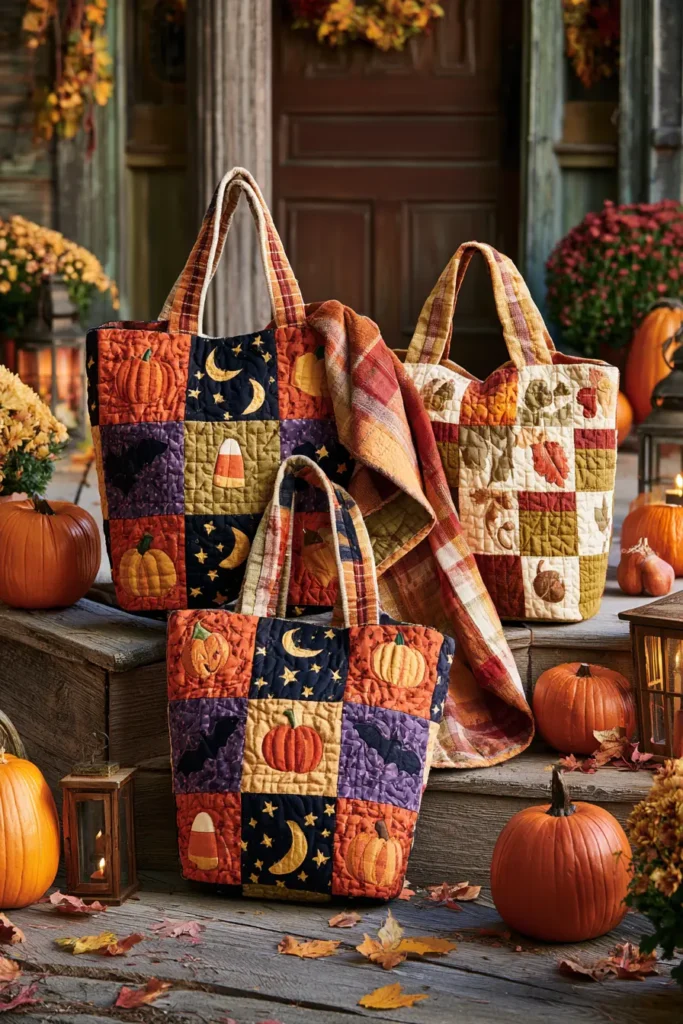
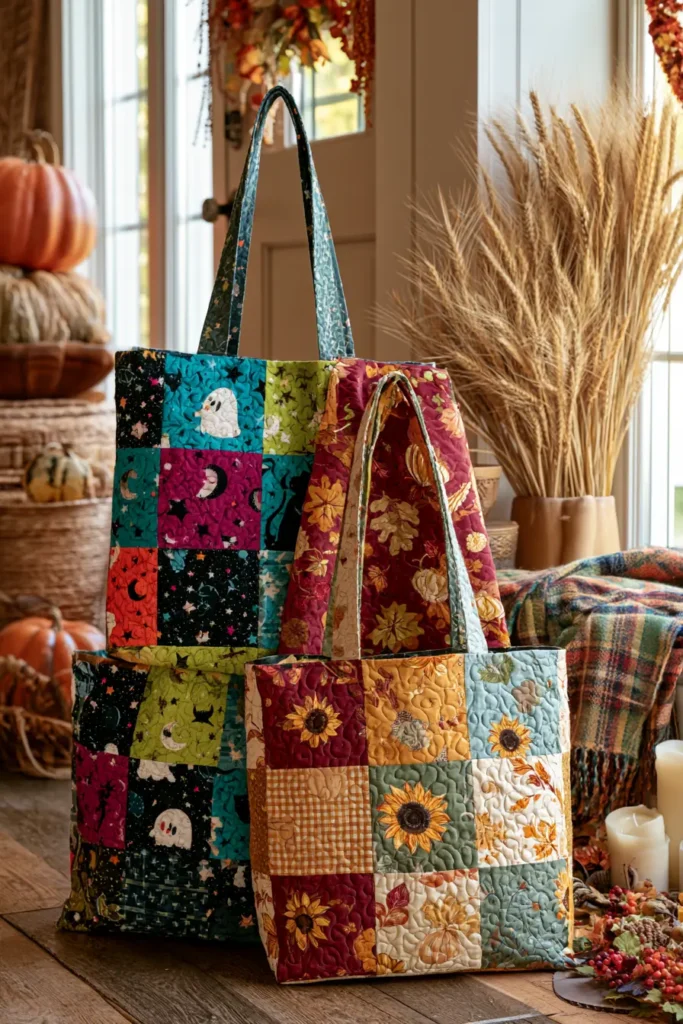
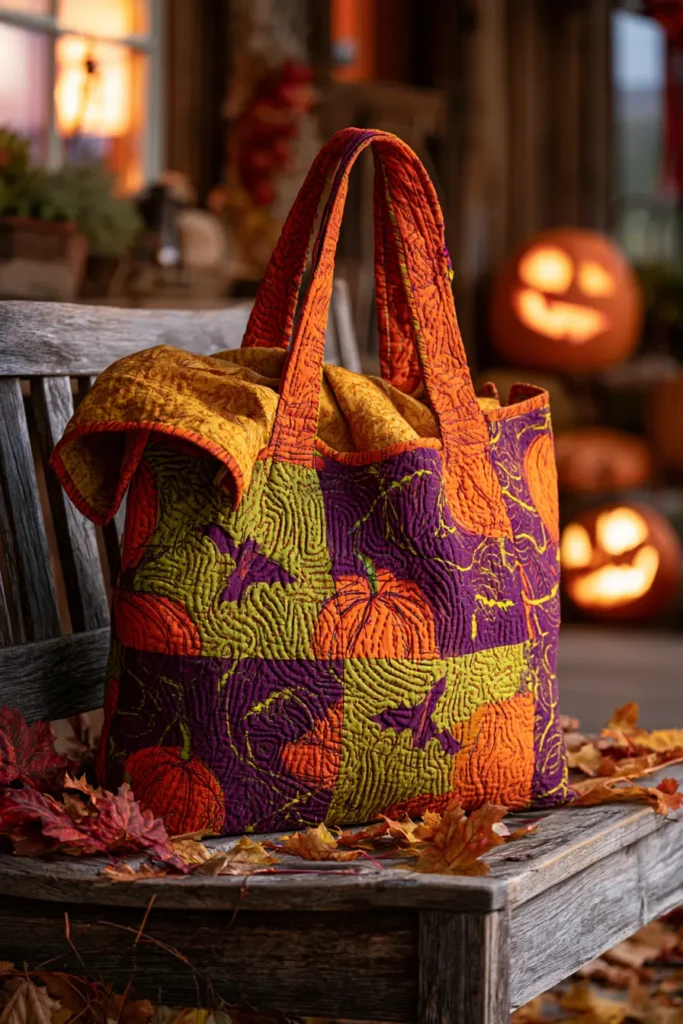
12. Mini Quilted Halloween Treat Bags for Party Favors
The party favor has a specific and fairly aristocratic origin: the bonbonnière, a small ornamental box of sugared almonds given to guests at European weddings and christenings from the sixteenth century onward, when sugar was expensive enough that giving it away was the point. The custom democratized as sugar prices collapsed, and by the Victorian era favor-giving had spread down through the middle classes and outward to every kind of gathering. What survived is the structure — a small container, a small treat, one per guest.
A mini quilted bag lands in the same tradition with one difference: the container outlasts the contents by about a decade.
This build produces finished bags around 5″ wide × 6″ tall × 2″ deep — sized for a handful of candy, a small toy, or a cookie. The instructions below cover making eight at once, because making one is a poor use of setup time.
Design Inspirations – Digitally Modified
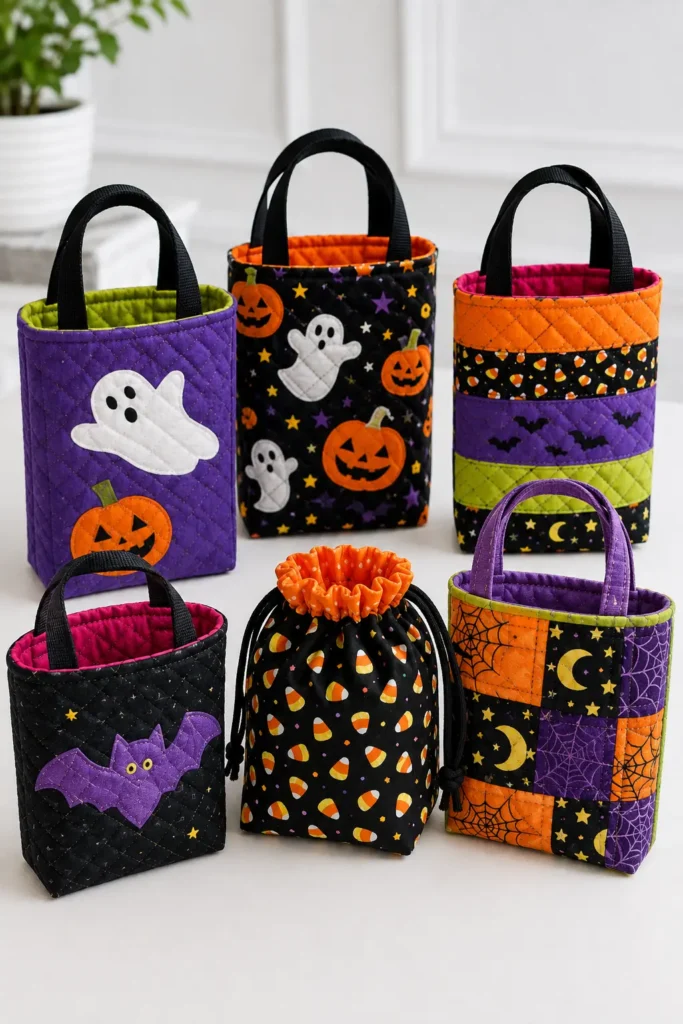
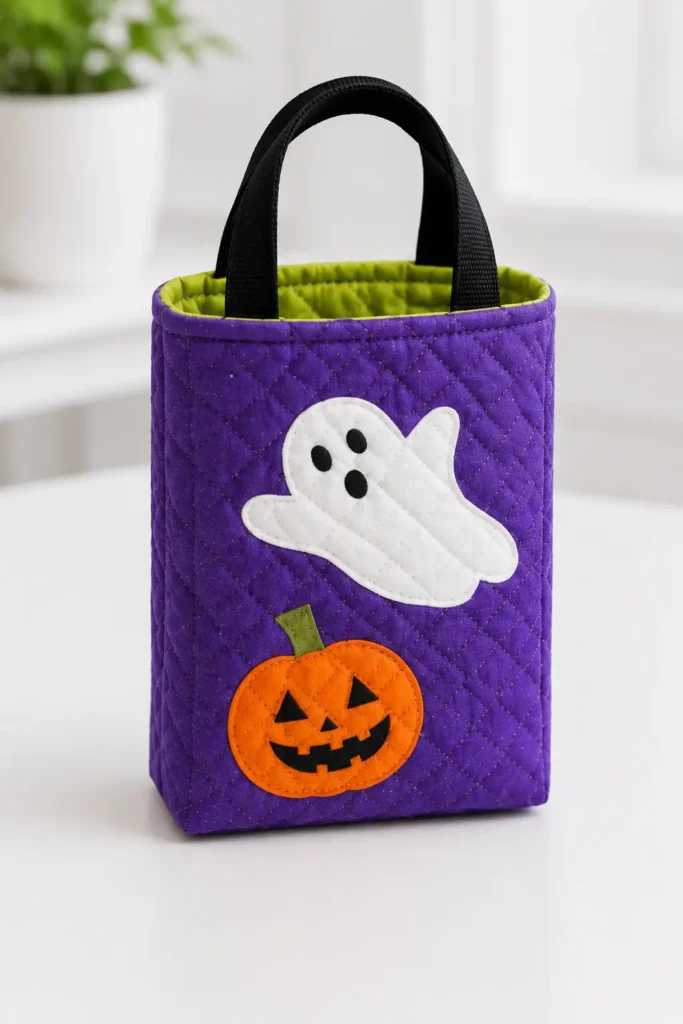
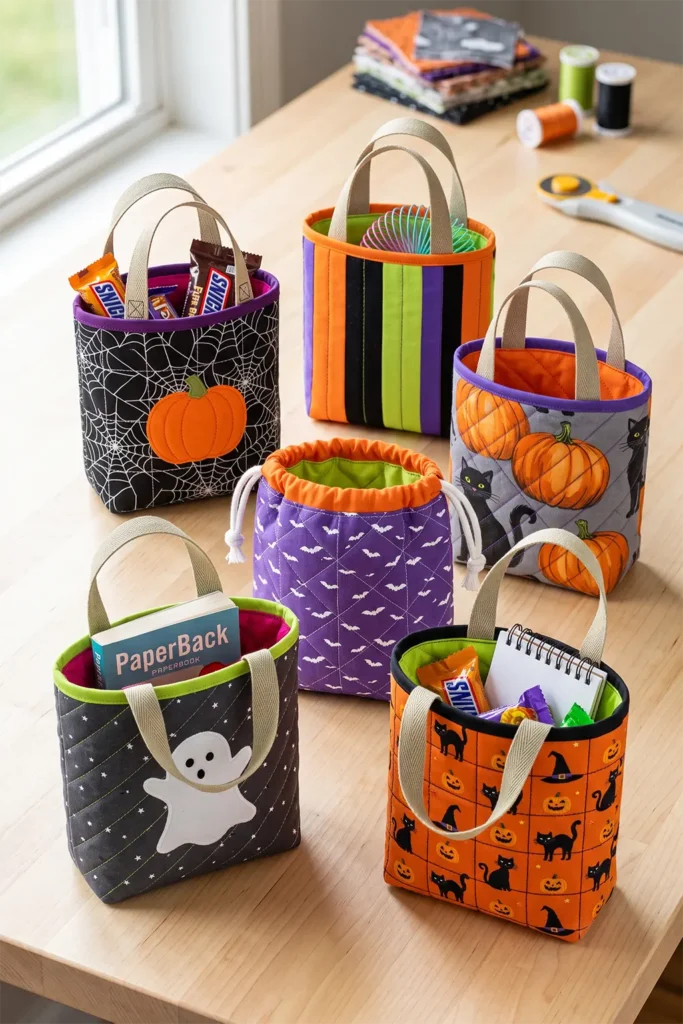
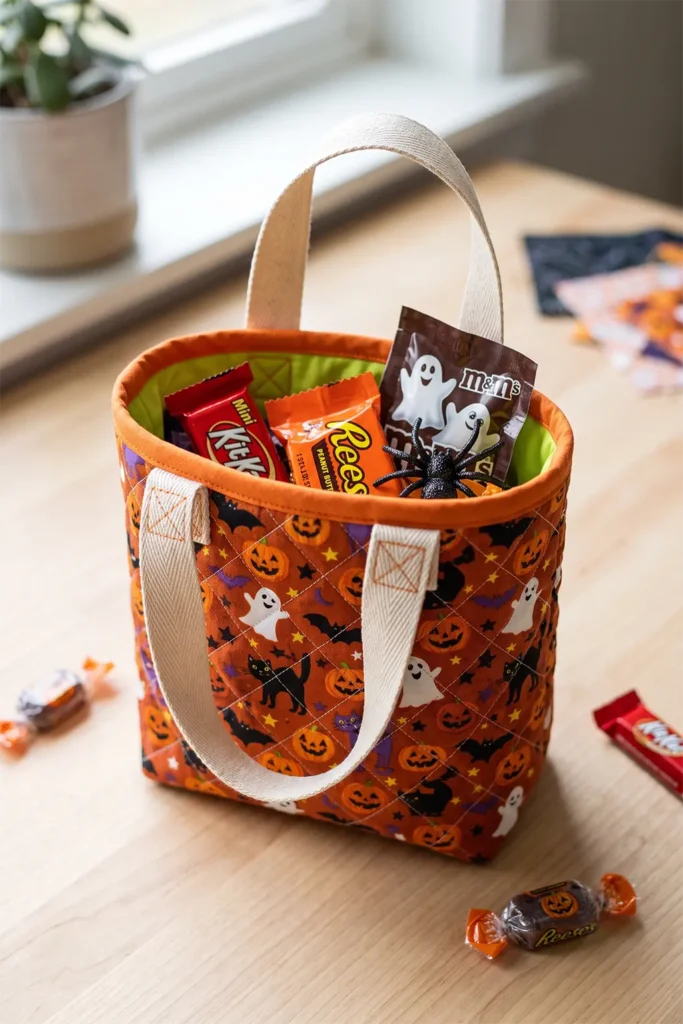
Materials (for eight bags)
- Assorted Halloween cottons — one Halloween-print fat quarter bundle, or 1 1/4 yards total in scraps
- Lining — 3/4 yard in acid lime, hot magenta, or tangerine
- Low-loft cotton batting — 3/4 yard
- Cotton twill tape or narrow webbing — 5/8″ wide, 4 yards
- Binding — 1/3 yard for four 2 1/2″ × 42″ strips
- Optional: cotton cord — 1/8″ diameter, 4 yards, for drawstring versions
- 50wt thread in a neutral that suits all your prints
Step 1 — Cut Everything at Once
This is where the batch efficiency lives. Cut in one session, sorted into stacks.
Per bag:
- Two outer panels at 6″ × 7 1/2″
- One outer gusset at 2 1/2″ × 18″
- Two lining panels at 6″ × 7 1/2″
- One lining gusset at 2 1/2″ × 18″
- Batting: two pieces at 8″ × 9 1/2″, one at 4″ × 20″
For eight bags that’s 16 outer panels, 16 lining panels, 8 outer gussets, 8 lining gussets, plus batting.
Tip: Mini bags are the single best use for orphan quilt blocks. A finished 6″ block trims to exactly the panel size with seam allowance to spare, which means leftover blocks from larger projects become the entire front of a bag with no piecing at all.
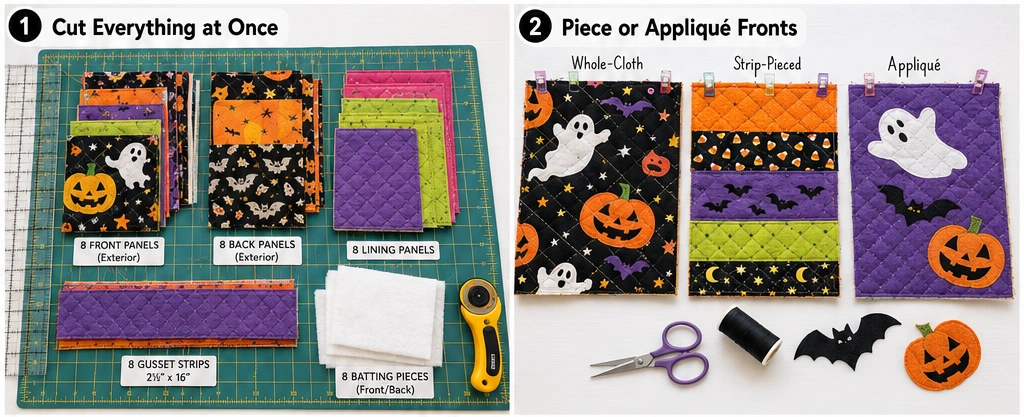
Step 2 — Piece or Appliqué the Fronts (Optional)
Three fast approaches, in order of speed:
Whole-cloth. Cut panels straight from a Halloween novelty print. Zero piecing, and this is where large-scale prints finally work — a print too big for patchwork squares fits perfectly on a 6″ × 7 1/2″ panel.
Strip-pieced. Cut 1 1/2″ strips in orange, black, violet, and lime; sew into a strip set; cut panels from it. Eight fronts from one strip set.
Simple appliqué. A 3″ pumpkin, a 3 1/2″ ghost, or a 2 1/2″ bat — small shapes only. Anything with fine detail disappears at this scale.
Step 3 — Baste and Quilt
Layer batting between muslin and each panel, or quilt panel-to-batting alone if you want less bulk (at this size, a backing layer is optional).
Quilt simply. Fine detail is invisible on a 6″ panel and the extra time multiplies by eight:
- Diagonal straight lines at 3/4″ intervals — fastest and cleanest
- A single crosshatch grid at 1″
- Straight lines following a strip-pieced seam
Quilt all sixteen panels in one machine session without rethreading. Quilt the gussets with lines across the width every inch.
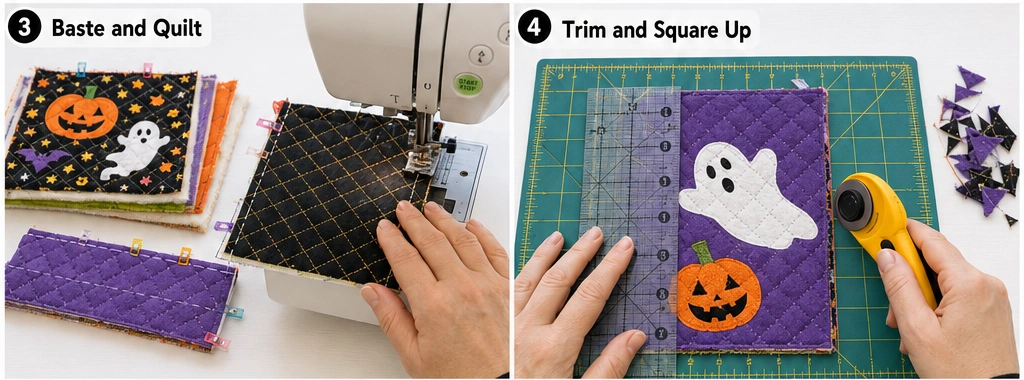
Step 4 — Trim and Square Up
Trim all panels to exactly 6″ × 7 1/2″ and gussets to 2 1/2″ × 18″. At this scale, a 1/8″ discrepancy shows badly, so use a rotary cutter against a ruler rather than trimming by eye.
Step 5 — Assembly
The mini gusset math differs from the full-size bags — the numbers are small enough that clipping accuracy matters more.
- Mark the gusset center, then measure and mark 5″ out in each direction. Those two marks are the bottom corners.
- Pin the front panel to the gusset, matching its bottom edge to the 5″ center section.
- Clip the gusset seam allowance to within 1/8″ of the stitch line at each corner mark. On a 2 1/2″ strip there’s very little room for error — clip precisely.
- Sew at 1/4″, needle down at each pivot. Consider a 1/4″ piecing foot for accuracy at this scale.
- Repeat with the back panel.
- Chain-piece across bags: sew every front panel to every gusset in one pass, then every back panel, rather than completing bags one at a time. This roughly halves the machine time.
- Turn right side out; press seams from inside with a chopstick or point turner.
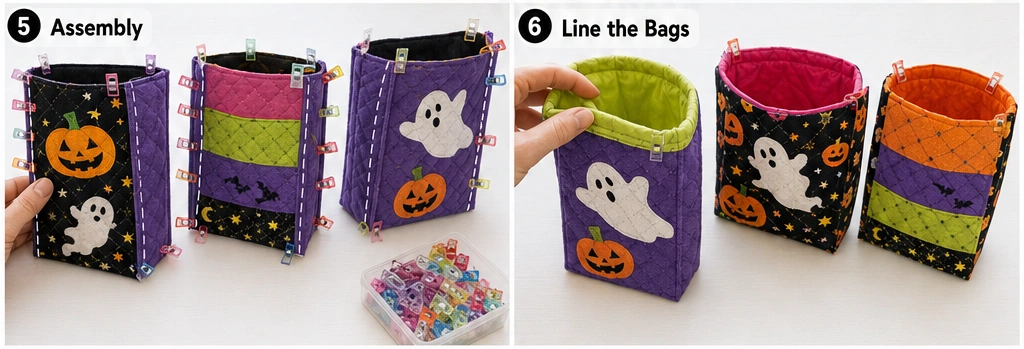
Step 6 — Line the Bags
Cut lining pieces as in Step 1 and assemble identically but sew at 3/8″. The deeper seam makes each lining slightly smaller so it drops into its shell without bunching at the corners.
Insert wrong sides together; baste around the top edge at 1/8″.
Step 7 — Add Handles or a Drawstring
Handle version: cut two lengths of twill tape at 9″ per bag. Position each end 1 1/2″ in from the side seams, overlapping the raw top edge by 3/4″. Secure with a box-and-X stitch in a 3/4″ square — smaller than on the full-size bags but the same principle, spreading the pull across four seam lines rather than one.
Drawstring version: skip the handles. After binding, stitch a casing 3/4″ down from the top edge through both layers, leaving a 1/2″ gap at one side seam, and thread an 18″ cord through with a safety pin. Knot the ends. This version closes completely, which suits favors that shouldn’t spill on a party table.
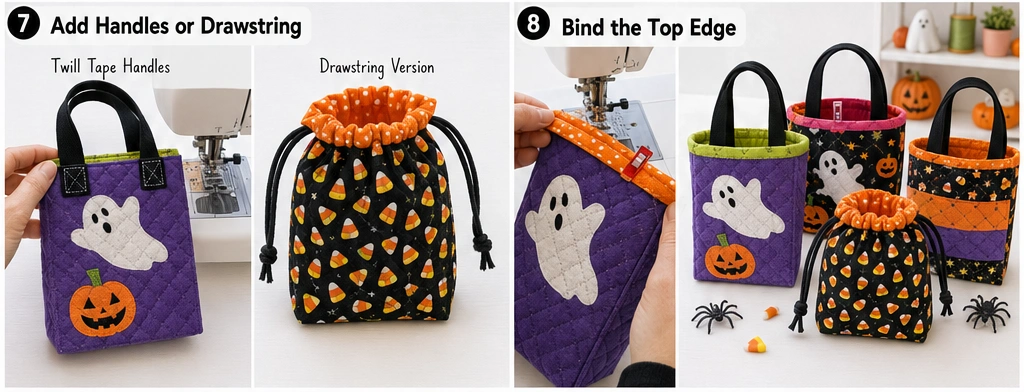
Step 8 — Bind the Top Edge
Cut 2 1/2″ × 42″ strips — each strip binds roughly two bags, so four strips covers eight bags.
Fold in half lengthwise, press, sew to the outside top edge at 1/4″, joining ends with a diagonal seam. Fold to the inside and stitch-in-the-ditch.
At this scale, cut the binding strip at 2 1/4″ instead of 2 1/2″ if you want a finer finished edge — a full-width binding can look chunky on a 6″ bag.
Vary the binding color across the set. Same prints, eight different bindings, and every child at the table gets a distinguishable bag. It’s the cheapest possible way to make a batch look bespoke.
What Actually Fits
At 5″ × 6″ × 2″, plan contents realistically:
- A generous handful of wrapped candy — roughly 12–15 fun-size bars
- A small paperback or a single picture book
- Two or three cookies in a cellophane sleeve
- A small toy — a yo-yo, a deck of cards, a slinky
- Craft supplies: a small sticker set, crayons, and a mini sketchpad
- A candle and a soap bar, for adult party favors
- Two fat quarters folded, for a quilting guild swap
- Jewelry or a small accessory in a box
Scaling Up for a Classroom
For 24 bags rather than 8:
- Buy a single Halloween print by the yard for all outers, and vary only the binding and lining. Cutting from one continuous piece is far faster than cutting from a scrap pile.
- Skip appliqué entirely and use a novelty print. Twenty-four appliqués is a week of evenings.
- Cut with a 6″ × 7 1/2″ acrylic template rather than measuring each cut.
- Quilt in long strips before cutting — quilt a full width of fabric with diagonal lines, then cut panels from the quilted yardage. This is by far the largest time saving available at volume.
Color Notes
A set of mini bags succeeds on variety within a limited palette. Pick three or four colors — orange, violet, lime, black — and let every bag use them in different proportions. That reads as a deliberate collection; eight unrelated prints reads as a scrap dump.
Bright linings matter more here than on the full-size bags, because a mini bag is usually seen open on a table with the interior showing. Acid lime and hot magenta both pop against Halloween-print exteriors.
Small scale also means large-scale novelty prints finally get their moment — a print with 4″ pumpkins that would be unusable in patchwork sits perfectly on a whole-cloth mini panel.
Other Design Inspirations – Digitally Modified
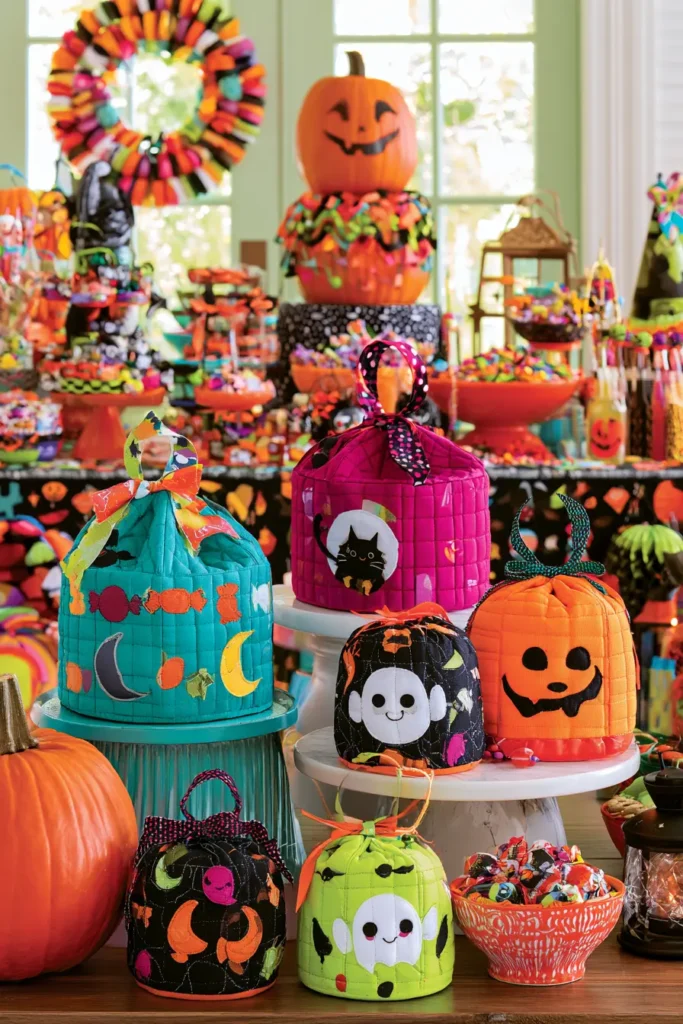
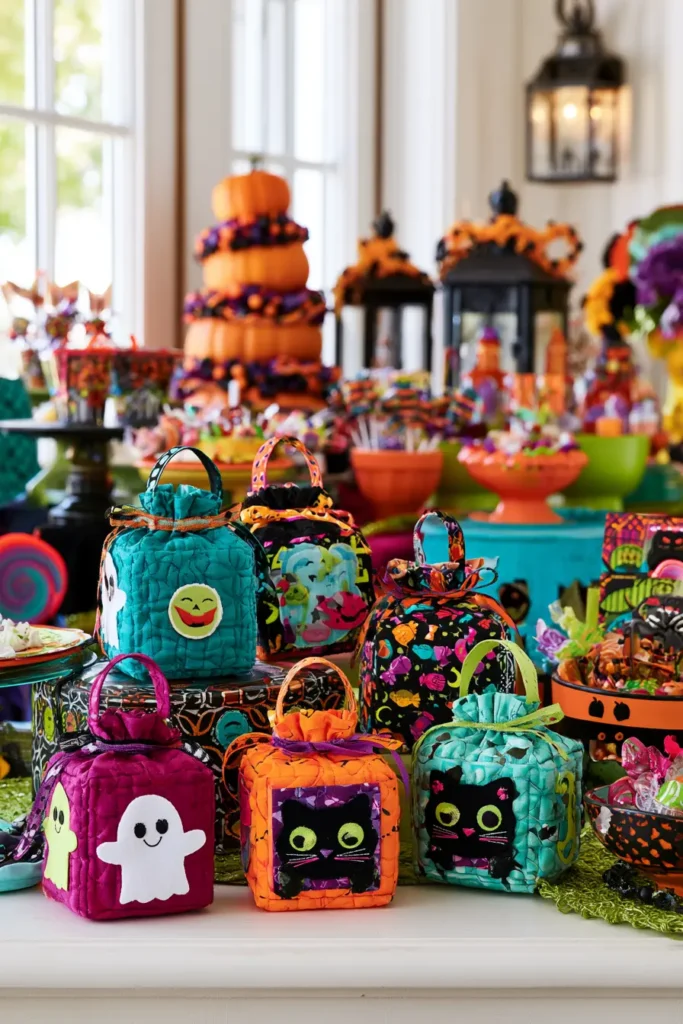
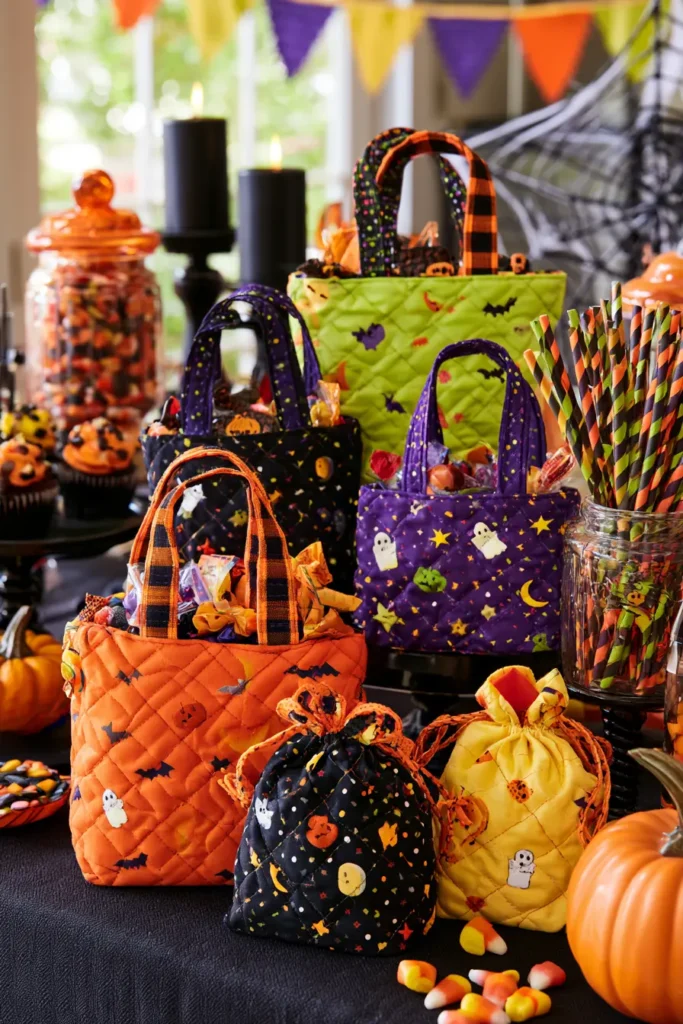
13. Quilted Drawstring Bucket Sacks for Halloween Candy
The drawstring bag is one of the oldest carrying solutions in existence — pouches gathered at the neck with a cord predate pockets by centuries, and in Europe up through the 1600s a drawstring purse hung from a belt was standard for anyone who needed to carry coins. Pockets only became common when tailoring caught up. The drawstring survived because it does something a flat tote can’t: it closes completely with one pull, without hardware, buttons, or a flap.
That’s a meaningful advantage for a candy bag being carried by a running seven-year-old. The other advantage here is structural — a circular quilted base lets the bag stand upright on its own, so it holds its shape on a table and stays open while candy goes in.
This build produces a finished sack around 7″ in diameter × 12″ tall, holding roughly the same volume as an 11″ × 13″ tote.
Design Inspirations – Digitally Modified
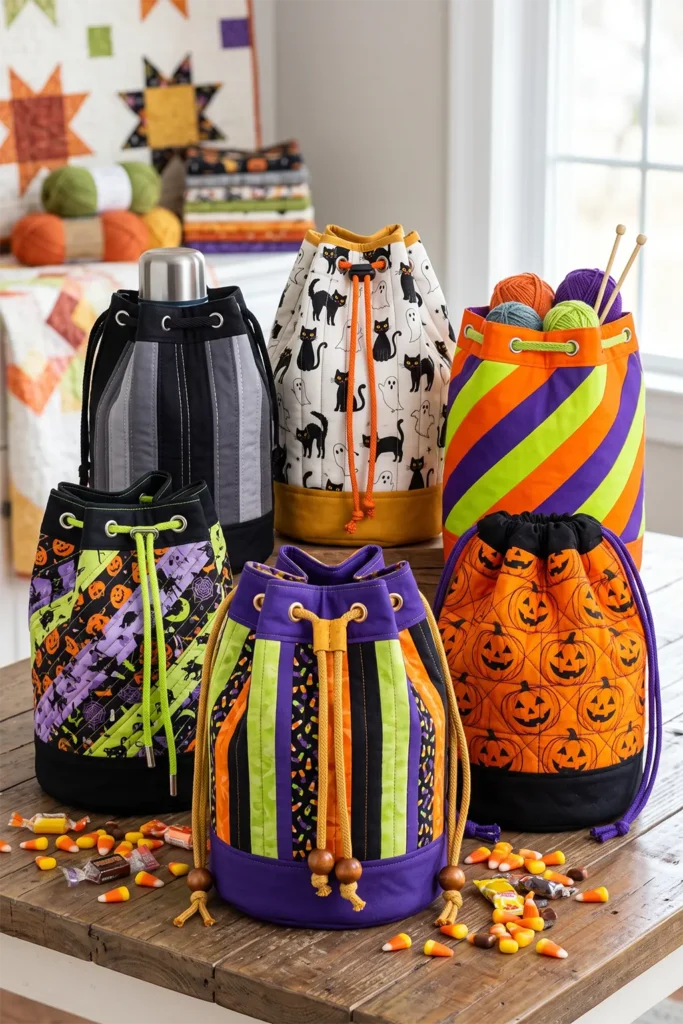
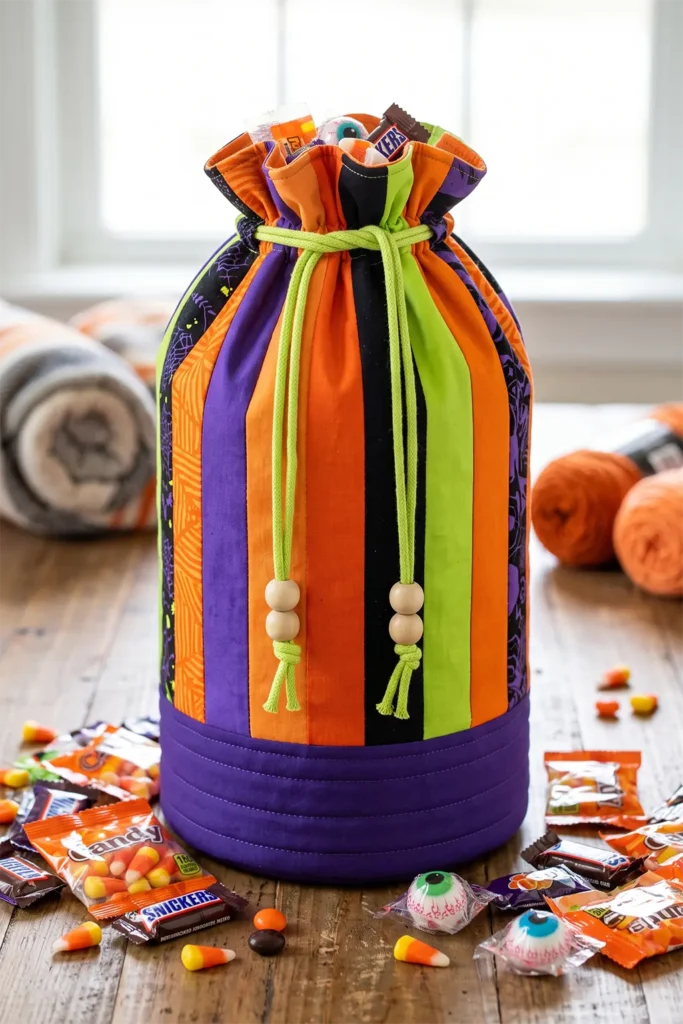
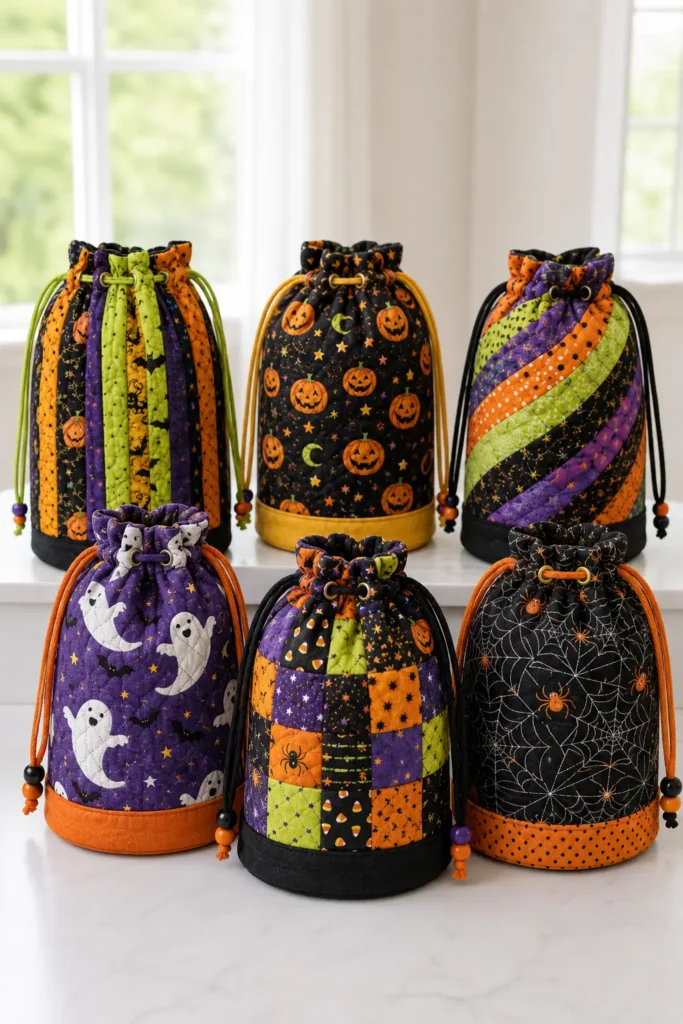
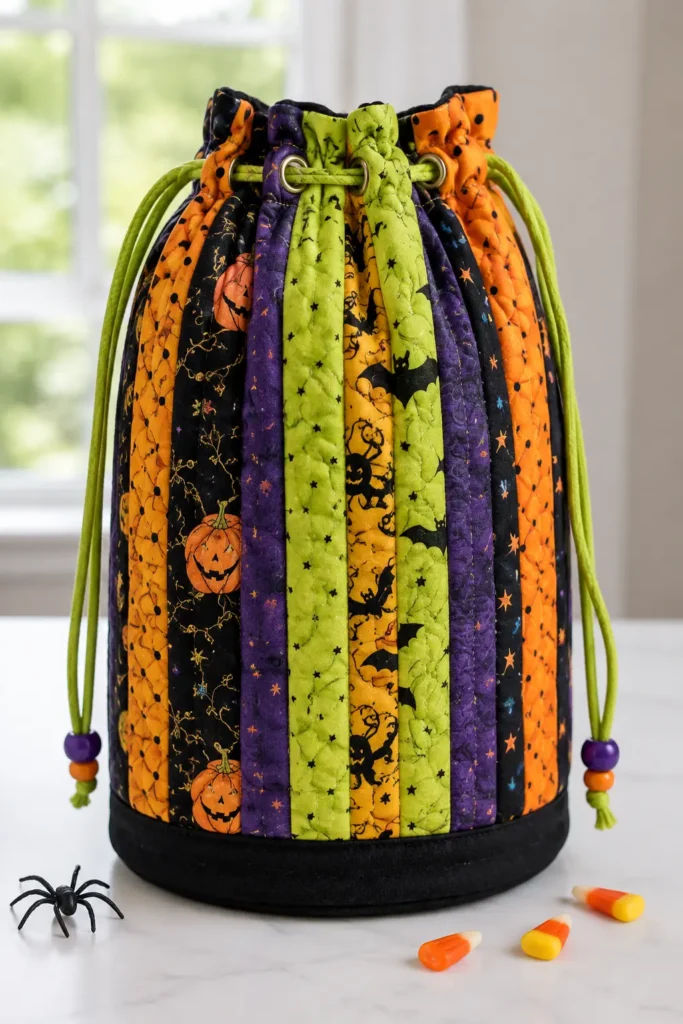
Materials
- Body fabric — 1/2 yard, or an assortment of Halloween cottons if strip-piecing
- Base fabric — fat quarter in a contrasting solid (black, violet, or gold)
- Lining — 1/2 yard in acid lime or hot tangerine
- Low-loft cotton batting — 1/2 yard
- Cotton cord — 1/4″ diameter, 2 yards
- Optional: cord stopper or two large beads
- 50wt thread in coordinating colors
- Optional: fusible fleece — 1/4 yard, for extra base stiffness
Step 1 — Cut the Pieces
Body panel — one rectangle at 23 1/2″ × 14″. That 23 1/2″ length becomes a tube with a 1/4″ seam, giving a 23″ circumference, which matches a 7 1/4″ diameter base with a little ease.
Base circle — one at 8″ diameter (that’s 7 1/4″ finished plus 3/8″ seam allowance all around).
Lining body — one rectangle at 23 1/2″ × 14″.
Lining base — one circle at 8″ diameter.
Batting — one rectangle at 25″ × 16″, one circle at 9″.
Tip: Cut the base circle with a compass or trace a dinner plate. An out-of-round base is the most visible flaw on a bucket bag, and it’s impossible to correct once the tube is attached.
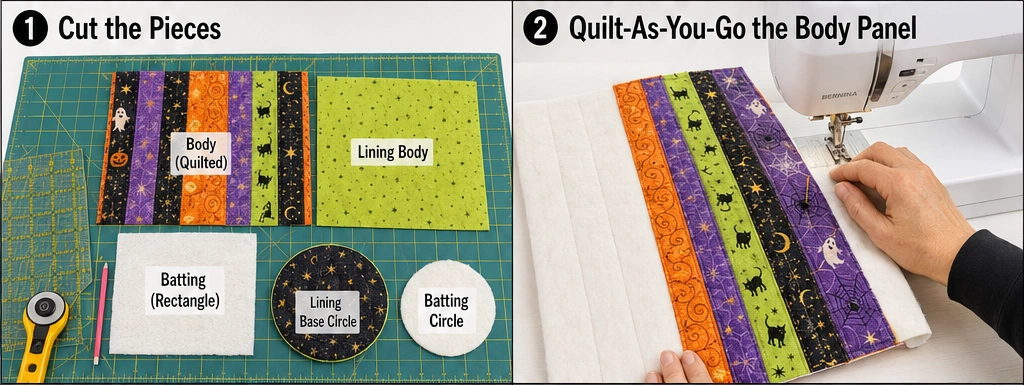
Step 2 — Quilt-As-You-Go the Body Panel
This method builds the piecing and quilting into a single pass, which is why it suits this shape so well.
Lay the batting rectangle flat. Cut Halloween cottons into strips 1 1/2″ to 3″ wide and place the first strip vertically down the center of the batting, right side up. Place the second strip face down on top of it, aligned along one edge, and sew through all layers at 1/4″. Flip the second strip open and press.
Continue outward in both directions until the batting is covered. Every seam is simultaneously piecing the strips and quilting them to the batting — no separate quilting step needed.
Strip direction matters. Vertical strips on a bucket bag produce vertical stripes around the body, which reads as a stave-built bucket. Diagonal strips produce a spiral. Both work; vertical is easier.
If you’d rather not strip-piece, use whole cloth and quilt vertical lines at 3/4″ intervals through the panel and batting.
Step 3 — Quilt the Base Circle
Layer the base fabric over the 9″ batting circle and quilt with concentric rings 3/4″ apart, or a simple crosshatch grid.
For a base that holds its shape better under weight, add a layer of fusible fleece beneath the batting before quilting. A soft base sags into a bowl when the bag fills; a stiff one keeps the cylinder standing.
Trim the quilted base to exactly 8″ diameter.
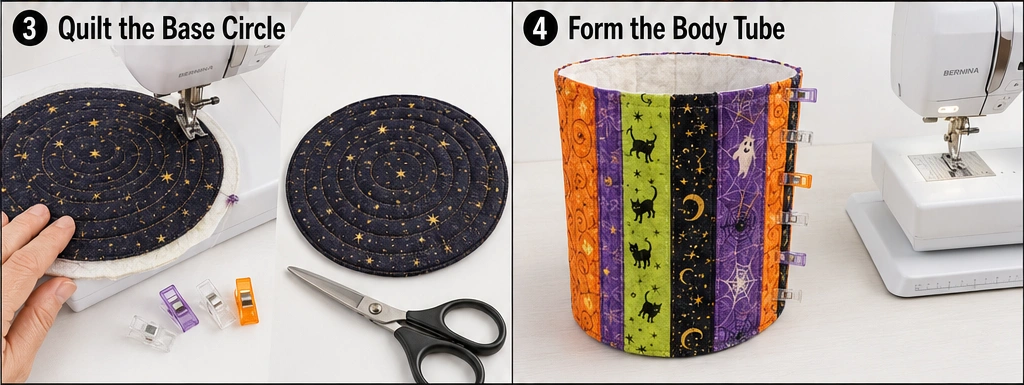
Step 4 — Form the Body Tube
Trim the quilted body panel to 23 1/2″ × 14″.
Fold in half with right sides together, bringing the two 14″ edges to meet. Sew at 1/4″ down the full length. Press the seam open — pressing open rather than to one side reduces bulk where this seam meets the base.
You now have a tube 23″ in circumference.
Step 5 — Attach the Base (Assembly)
This is the only genuinely tricky part of the build. A flat circle into a round tube requires easing, and the fix is aggressive clipping.
- Mark the base circle in quarters with pins or chalk. Mark the tube’s bottom edge in quarters as well, using the seam as one of the four points.
- Clip the tube’s bottom seam allowance every 1/2″, cutting to within 1/8″ of the stitch line. Do not skip this — an unclipped tube will not curve, and you’ll get hard pleats instead of a smooth join.
- Pin the tube to the circle, right sides together, matching the four quarter marks first, then easing and pinning between them. Pin densely — every 1/2″ is not excessive here.
- Sew at 3/8″ with the circle facing up so you can see and control the curve. Go slowly, removing pins as you reach them.
- Check for tucks before trimming anything. If a pleat formed, unpick that section and re-ease it.
- Turn right side out and press the base seam from the inside.
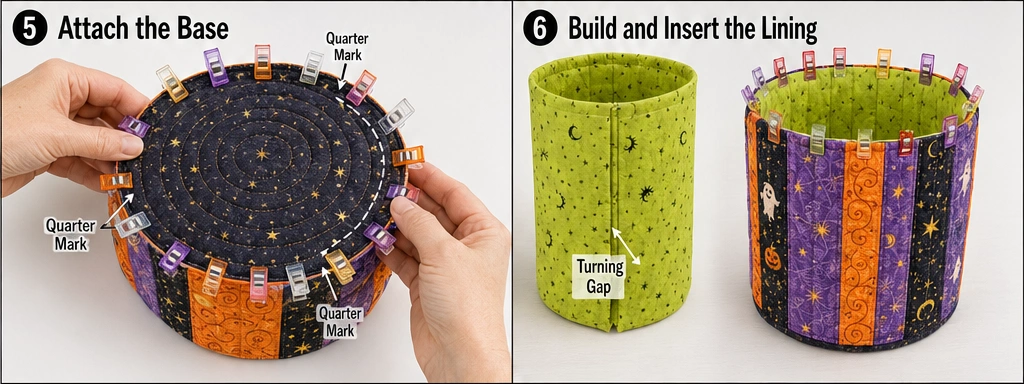
Step 6 — Build and Insert the Lining
Assemble the lining exactly as in Steps 4 and 5, but sew the side seam at 1/2″ and the base at 1/2″ as well. The larger seam allowances make the lining slightly smaller so it seats inside the outer shell without bunching.
Leave a 4″ gap in the lining’s side seam — you’ll turn the bag through it later.
Drop the lining into the outer bag, right sides together, aligning top raw edges and the side seams. Pin around the entire top edge.
Step 7 — Sew the Top Edge and Turn
Sew all the way around the top edge at 1/4″.
Pull the whole bag through the 4″ gap in the lining side seam. Press the top edge flat, rolling the seam so it sits exactly at the fold, then slipstitch the gap closed or machine-edge-stitch it.
Press the top edge again and topstitch 1/8″ from the fold all the way around to stabilize it.
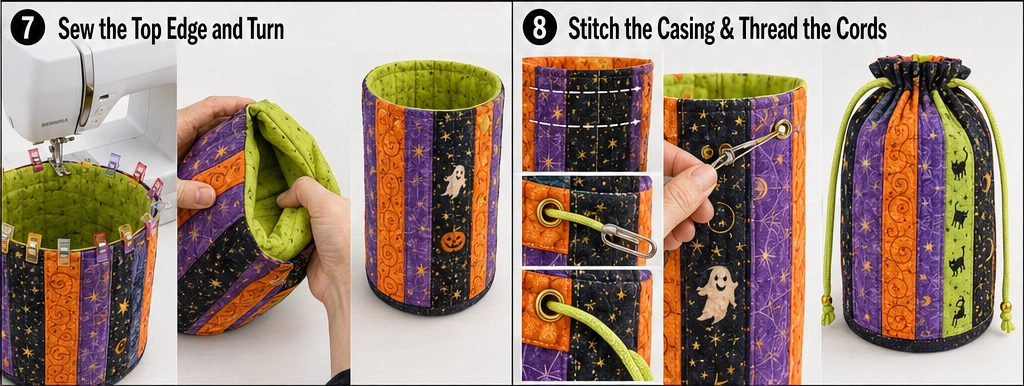
Step 8 — Stitch the Drawstring Casing
Mark a line 1 1/2″ down from the top edge and a second line 2 3/4″ down. Stitch both lines through all layers, all the way around, creating a 1 1/4″ channel.
Before stitching, decide on the opening:
Two-eyelet method (cleaner). Install two metal eyelets on the outer fabric only, on opposite sides of the bag, positioned within the channel area. Do this before sewing the casing lines.
Buttonhole method (no hardware). Sew two small horizontal buttonholes at 3/4″ long through the outer layer only, on opposite sides, before stitching the casing.
Either way, place the openings at opposite sides, not adjacent — that’s what allows a two-cord closure that pulls evenly.
Step 9 — Thread the Cords
Cut two lengths of cord at 32″ each.
Thread the first cord through one opening, around the channel, and back out the same opening. Knot the ends together. Thread the second cord through the opposite opening the same way, and knot.
Pulling both loops simultaneously cinches the top closed and gives you a shoulder carry. It’s a better closure than a single cord, which always pulls to one side.
Add cord stoppers or large wooden beads at the knots if you want the closure to stay put at a set height.
Color Notes
A bucket shape rewards vertical banding, which means this is the design in the collection where strip-piecing in bright alternating colors produces the strongest result. Orange, violet, lime, and black in 1 1/2″ to 3″ strips running vertically gives the bag a carnival-tent quality that a flat panel can’t achieve.
Contrast the base hard against the body. A black or deep violet base under bright strips grounds the whole cylinder visually and hides the scuffing that a bag set down on pavement will collect.
For the cord, acid lime or gold cotton cord reads better than black — the drawstring is a moving element seen against the body, and it should register as a design feature rather than disappear.
Gift Ideas That Fit This Sack
At 7″ diameter × 12″ tall, the cylinder shape suits tall and bundled items better than flat ones:
- A bottle — wine, cider, or a large thermos, standing upright
- Yarn skeins — three or four fit comfortably, making this a good knitter’s gift wrap
- A rolled blanket or fleece throw
- Baking supplies: a rolling pin, spice jars, and cookie cutters
- Art supplies — brushes, markers, and rolled paper stand upright well
- Loose candy in bulk, which is what a bucket shape genuinely does best
- A plush toy with room around it
- Tea or coffee set — a canister, a mug, and a small pot
Other Design Inspirations – Digitally Modified
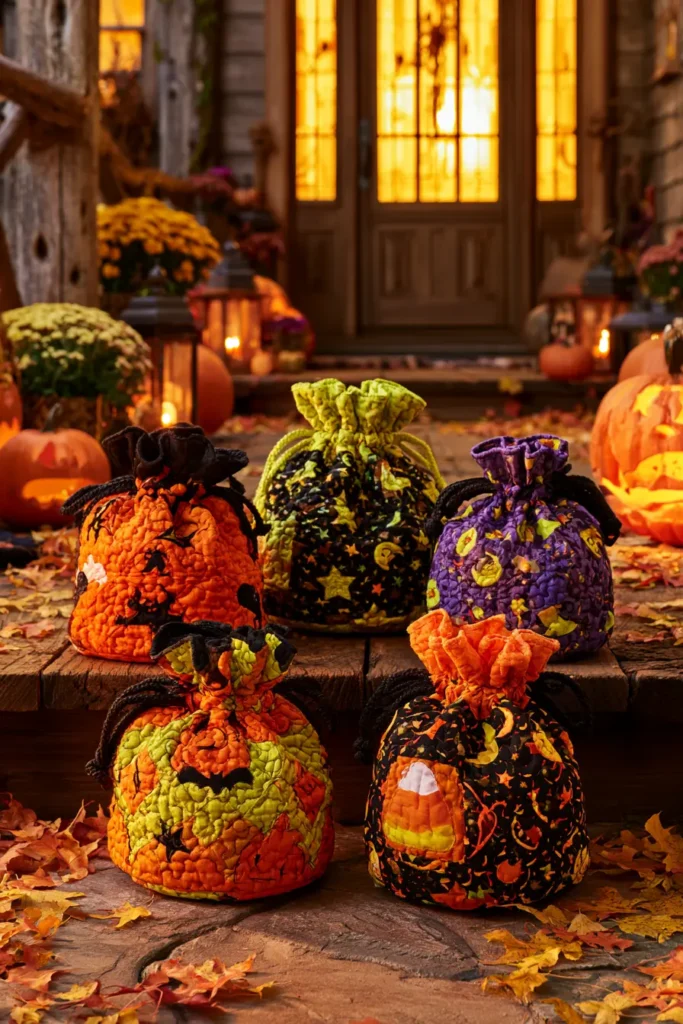
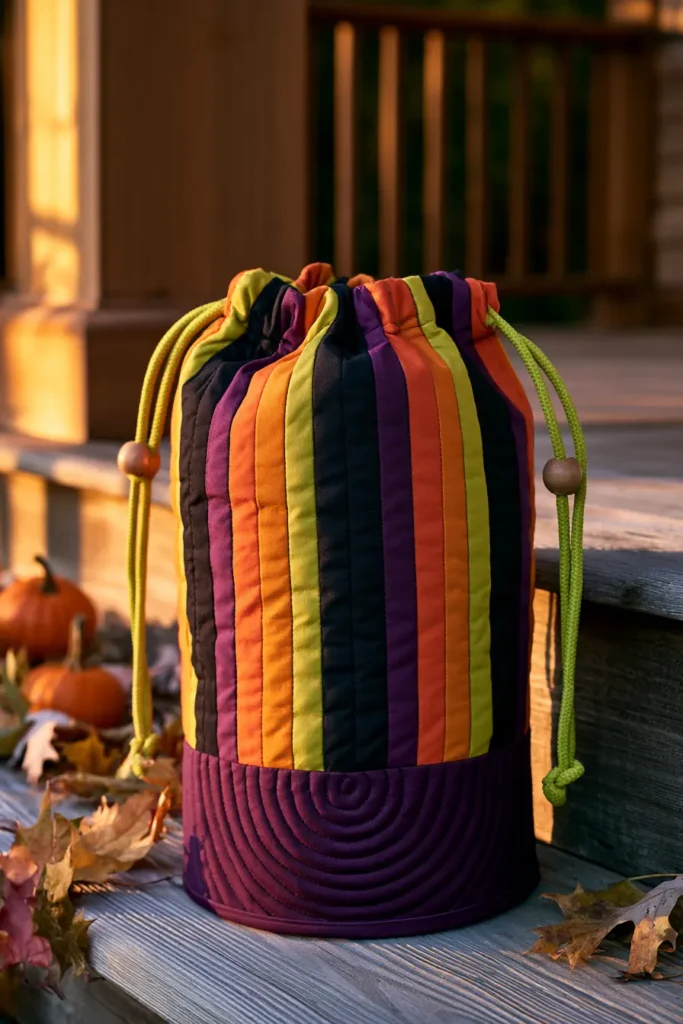
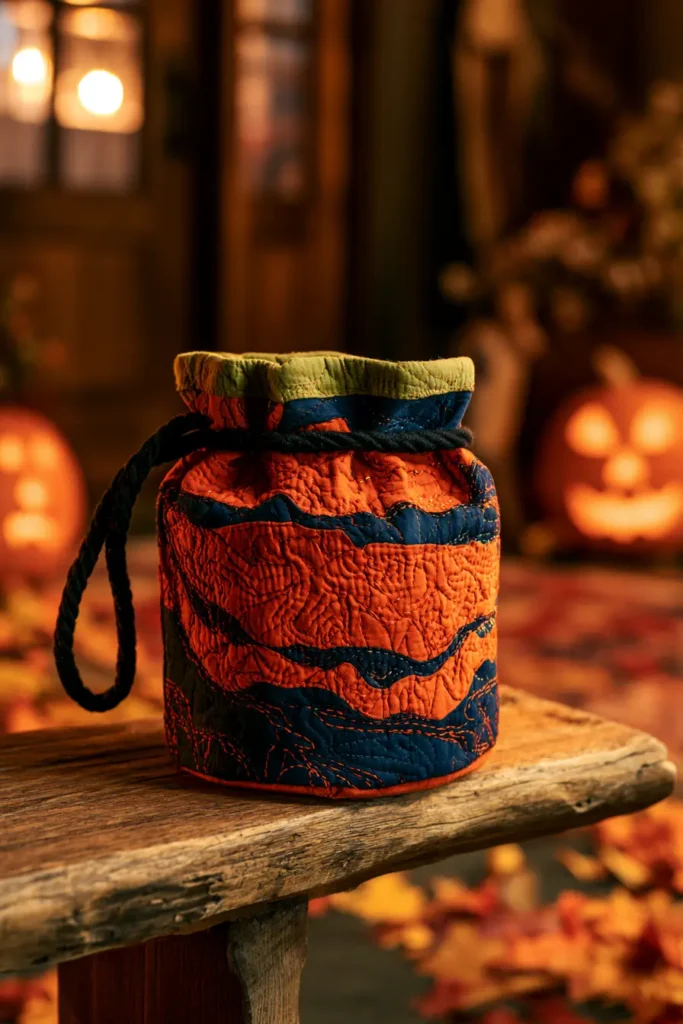
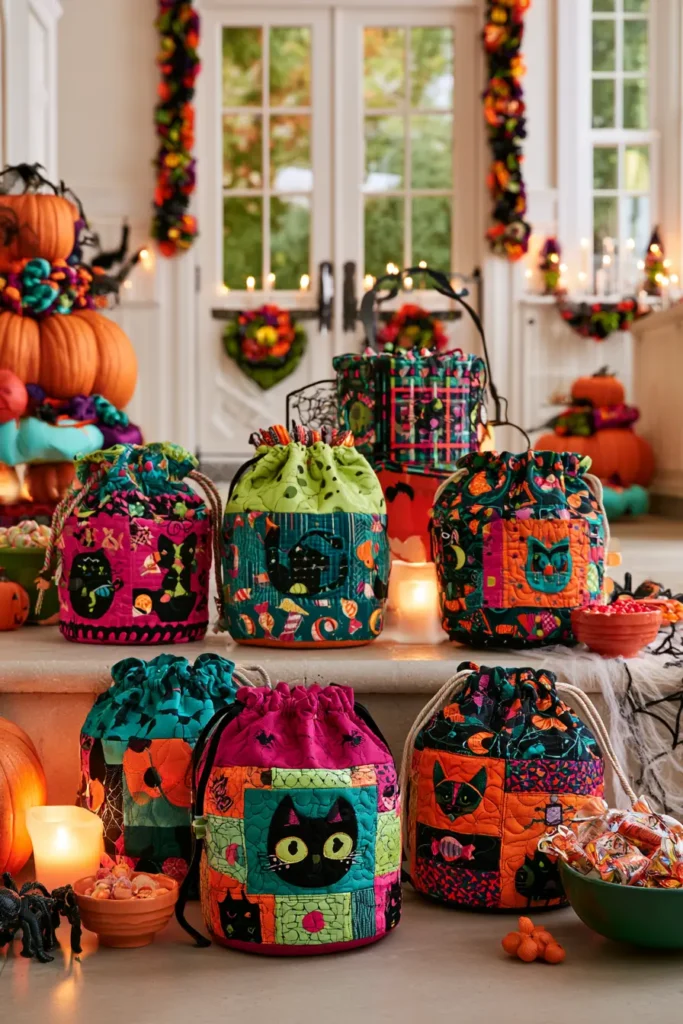
14. Quilted Crossbody Halloween Satchels for Tweens and Teens
The crossbody strap is a military inheritance. The messenger and dispatch bags carried by couriers — and later by postal workers, from whom the modern “messenger bag” takes its name — needed a strap that kept the bag stable against the body while the wearer ran or cycled, which a shoulder bag can’t do. The single diagonal strap distributes weight across the torso rather than hanging off one joint, and it doesn’t slide off when you move fast.
That’s the practical case for this design. The other case is social: tweens and teens have usually aged out of buckets and character totes, and a bag that reads as an actual accessory gets carried without argument. Keeping the Halloween content on a removable or restrained flap means the satchel stays in rotation after October 31st.
Finished size is around 9″ wide × 8″ tall × 2 1/2″ deep.
Design Inspirations – Digitally Modified
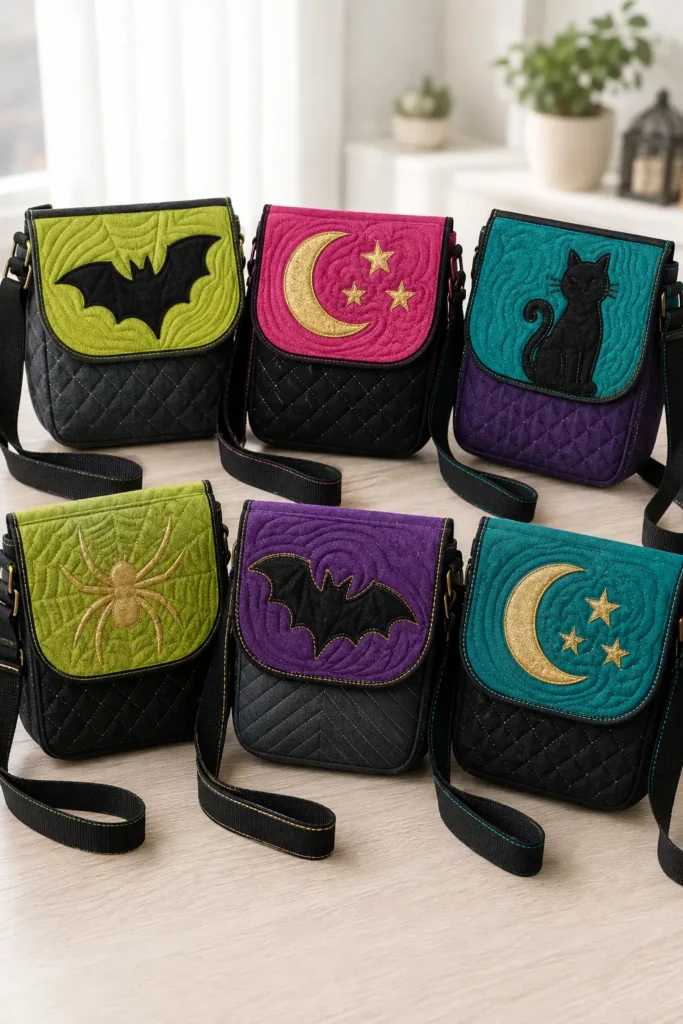
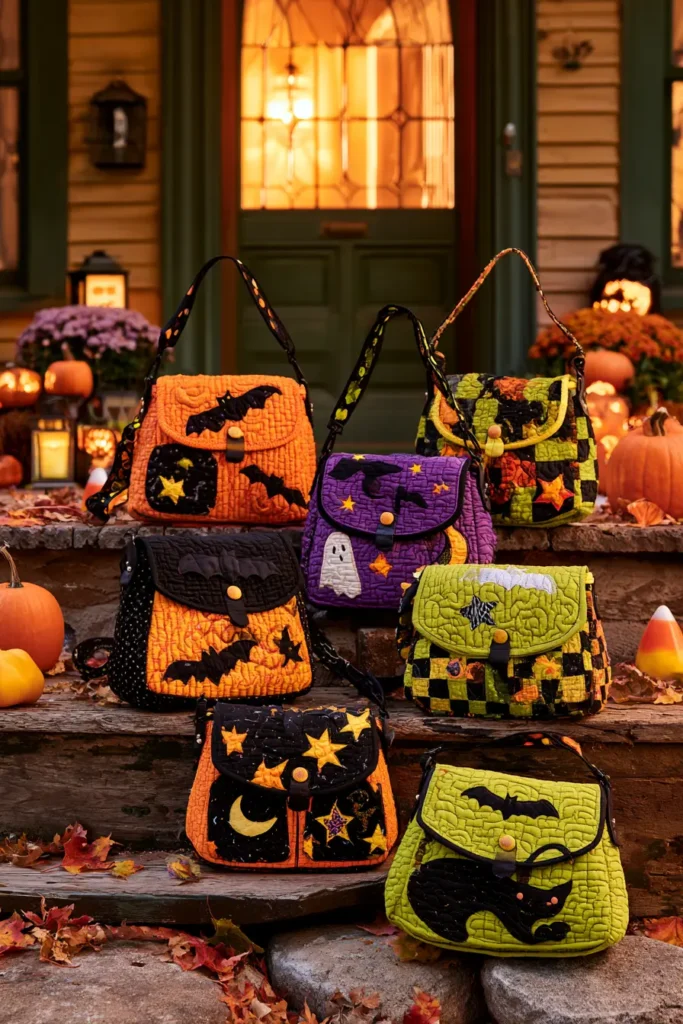
Materials
- Body fabric — 1/2 yard in charcoal, deep violet, or black quilting cotton
- Flap fabric — fat quarter in a contrasting saturated color (acid lime, magenta, or teal)
- Appliqué fabric — small scraps in black and gold
- Lining — 1/2 yard in hot orange or lime
- Low-loft cotton batting — 1/2 yard
- Fusible fleece — 1/2 yard
- Peltex or heavy stabilizer — 10″ × 12″ piece, for the flap and base
- Cotton webbing — 1 1/2″ wide, 2 yards
- Slider and rectangle rings — 1 1/2″, one set, for strap adjustment
- Magnetic snap — 1/2″, one set
- Binding — 1/8 yard for a 2 1/2″ × 40″ strip
- 50wt thread; 40wt bright thread for topstitching
Step 1 — Cut the Pieces
Outer:
- Two body panels at 10″ × 9″
- One gusset strip at 3″ × 26″
- One flap at 10″ × 7″ (with a curved or angled bottom edge, cut after quilting)
Lining:
- Two body panels at 10″ × 9″
- One gusset at 3″ × 26″
- One flap lining at 10″ × 7″
Batting: two at 12″ × 11″, one at 5″ × 28″, one at 12″ × 9″
Fusible fleece: same dimensions as the outer pieces
Peltex: one flap piece at 9 1/2″ × 6 1/2″, one base strip at 9″ × 2 1/2″
Cut the gusset as one continuous strip — a pieced gusset puts seams at the bottom corners, which carry the most stress.
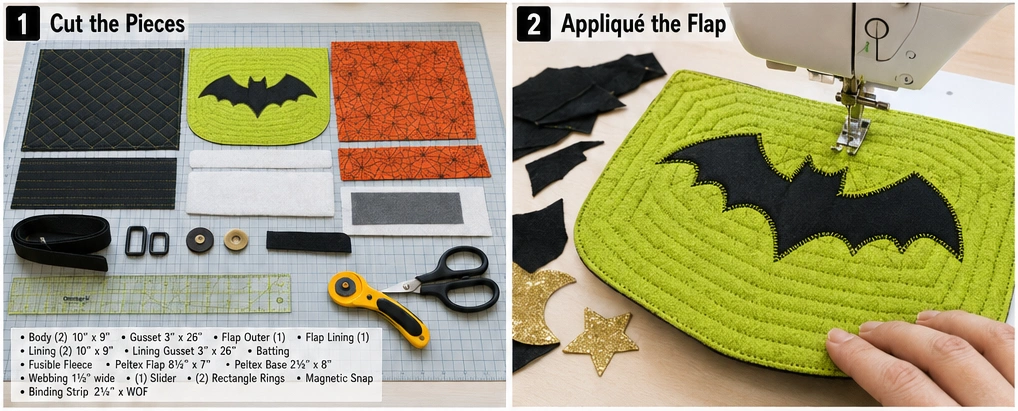
Step 2 — Appliqué the Flap
The flap is the only place the Halloween content lives, so it has to earn its space. Keep the shape bold and singular:
- A bat at 6″ wingspan
- A black cat silhouette at 5 1/2″ tall
- A crescent moon at 4 1/2″ with three small stars
- A single large spider at 4″ across
Reverse asymmetrical shapes before tracing onto the paper side of the fusible web. Fuse to the wrong side of the appliqué fabric, cut on the lines, peel the backing.
Position the shape centered on the flap piece, roughly 2 1/4″ down from the top edge. Fuse with a hot dry iron, 8–10 seconds per section, then stitch every edge with a narrow zigzag (1.5mm width, 1.0mm length) in matching thread.
Tip: Cut the flap’s bottom edge as a shallow curve or a wide angled point rather than a straight line. That single detail is what separates a bag that looks designed from one that looks like a rectangle with a lid.
Step 3 — Quilt Everything
Fuse the fleece to the wrong side of every outer piece before quilting. Fleece plus batting is what gives this bag its structure — a soft crossbody collapses and looks like a pouch.
Layer batting behind each fused piece and quilt:
- Body panels — diagonal lines at 3/4″ or a 1″ crosshatch grid. Even, all-over, structural.
- Flap — dense echo lines 1/4″ apart radiating around the appliqué. Density here keeps the flap flat; a lightly quilted flap curls at the edges, which is the most common failure on this style.
- Gusset — straight lines across the width every inch.
Use a bright 40wt thread for the body quilting — visible stitching on charcoal or black reads as a deliberate design element and is what makes the bag look intentional rather than plain.
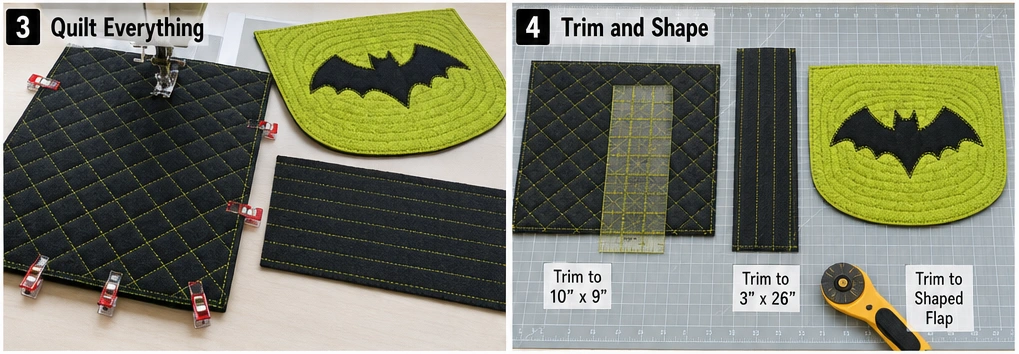
Step 4 — Trim and Shape
Trim body panels to 10″ × 9″, the gusset to 3″ × 26″, and the flap to 10″ × 7″ with your chosen curved or angled bottom edge.
Square up after quilting only — quilting draws fabric in and never evenly.
Step 5 — Build the Flap
Layer the quilted flap outer and the flap lining right sides together, with the Peltex piece on the outside of the lining. Sew around the sides and bottom edge at 1/4″, leaving the top edge open.
Clip corners and curves, trim the Peltex out of the seam allowances entirely, and turn right side out. Press hard and topstitch 1/8″ from the finished edge all the way around the three sewn sides.
Install the magnetic snap’s male half on the flap lining, centered and about 1″ up from the bottom edge. Reinforce behind it with a scrap of Peltex.
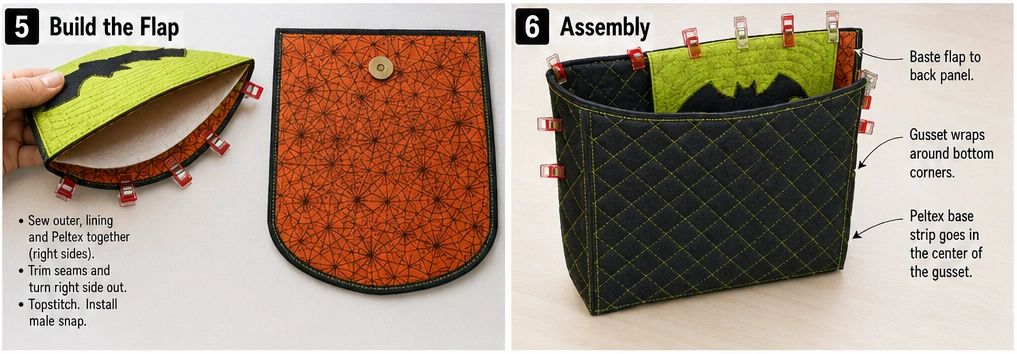
Step 6 — Assembly
- Fuse the Peltex base strip to the wrong side of the gusset’s center section, centered at the bottom. This is what keeps the bag from sagging when loaded.
- Mark the gusset center, then measure and mark 9″ out in each direction. Those marks are the bottom corners.
- Pin the front panel to the gusset, matching its bottom edge to the 9″ center section.
- Clip the gusset seam allowance to within 1/8″ of the stitch line at each corner mark so it pivots without buckling.
- Sew at 1/4″, needle down at every pivot. Fleece plus batting plus Peltex makes this bulkier than the totes — use a 90/14 needle and slow the machine.
- Repeat with the back panel.
- Baste the flap to the top edge of the back panel, right sides together, raw edges aligned, centered.
- Turn right side out; press seams from inside with a point turner.
Step 7 — Line the Bag
Cut and assemble the lining exactly as above but sew at 3/8″. The deeper seam makes the lining slightly smaller so it seats inside the shell without rippling.
Add an interior slip pocket before assembly — a 7″ × 10″ rectangle folded in half, sewn to one lining panel, and divided with a vertical stitch line to make two compartments. At this age, that’s where a phone goes.
Install the magnetic snap’s female half on the outer front panel, positioned to meet the flap’s snap when closed. Reinforce behind it.
Insert wrong sides together; baste around the top edge at 1/8″.
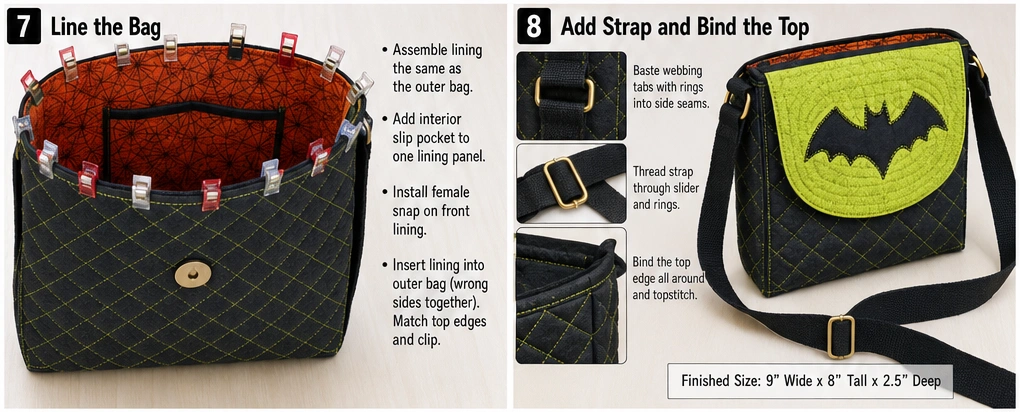
Step 8 — Build the Adjustable Strap
Cut the 1 1/2″ webbing to 50″ — long enough to cross most tween and teen torsos with adjustment range at both ends.
- Attach a rectangle ring to each side seam using a short webbing tab: cut two tabs at 4″, fold each in half through a ring, and baste the raw ends into the bag’s top edge at the side seams before binding.
- Thread one webbing end through the slider, fold back 2″, and stitch down with a box-and-X.
- Thread the free end through one rectangle ring, back up through the slider, then through the second rectangle ring.
- Fold the final end back 2″ and secure with a box-and-X stitch — a 1″ square with both diagonals sewn inside. A bar tack alone pulls free from webbing under load; the box-and-X spreads the pull across four seam lines.
The slider then adjusts strap length from roughly 32″ to 50″, which covers a wide range of heights and lets the bag ride at hip or waist level by preference.
Step 9 — Bind the Top Edge
Cut a 2 1/2″ × 40″ strip, fold in half lengthwise, and press. Sew to the outside top edge at 1/4″, catching the flap and the strap tabs as you go, and join the ends with a diagonal seam. Fold to the inside and finish by hand or stitch-in-the-ditch.
Bind in a color that echoes the flap — acid lime binding under a lime flap ties the two brightest elements together and frames the whole bag.
Making the Flap Removable
For a satchel that survives past Halloween, build the flap as an interchangeable piece:
Finish the flap completely on all four sides with its own 1 1/4″ binding, then attach it to the bag’s back panel with four large sew-on snaps or a 6″ strip of hook-and-loop tape stitched across the flap’s top edge and the corresponding spot on the bag back.
Make two or three flaps — a bat for October, a plain quilted one in a solid, a snowflake or star for December — and the same bag carries year-round. This is the single highest-value modification in the build.
Color Notes
The whole design rests on restraint in the body and intensity in the flap. A charcoal or black quilted body with bright topstitching reads as a real accessory; the same body with an all-over Halloween novelty print reads as a costume piece and gets left at home on November 1st.
Acid lime, hot magenta, and electric teal all work for the flap. Keep the appliqué silhouette in true black or gold so it stays legible against a saturated flap color.
The bright 40wt topstitching thread on a dark body is the detail that does the most work here. Lime stitching on charcoal, or gold on black, gives the bag a graphic quality that costs nothing beyond a spool of thread.
Gift Ideas That Fit This Bag
At 9″ × 8″ × 2 1/2″, this is sized for daily-carry items rather than bulk:
- A phone, wallet, and keys — which is what it will actually carry
- A paperback book with room to spare
- Makeup or skincare set — a compact bundle fits well
- Earbuds, a charger, and a small power bank
- Journal and pen set — a standard A5 notebook fits flat
- Candy haul, realistically about half a full-size tote’s worth
- A small camera with a lens cap and spare battery
- Concert or event kit: tickets, a water bottle sleeve, and lip balm
Other Design Inspirations – Digitally Modified
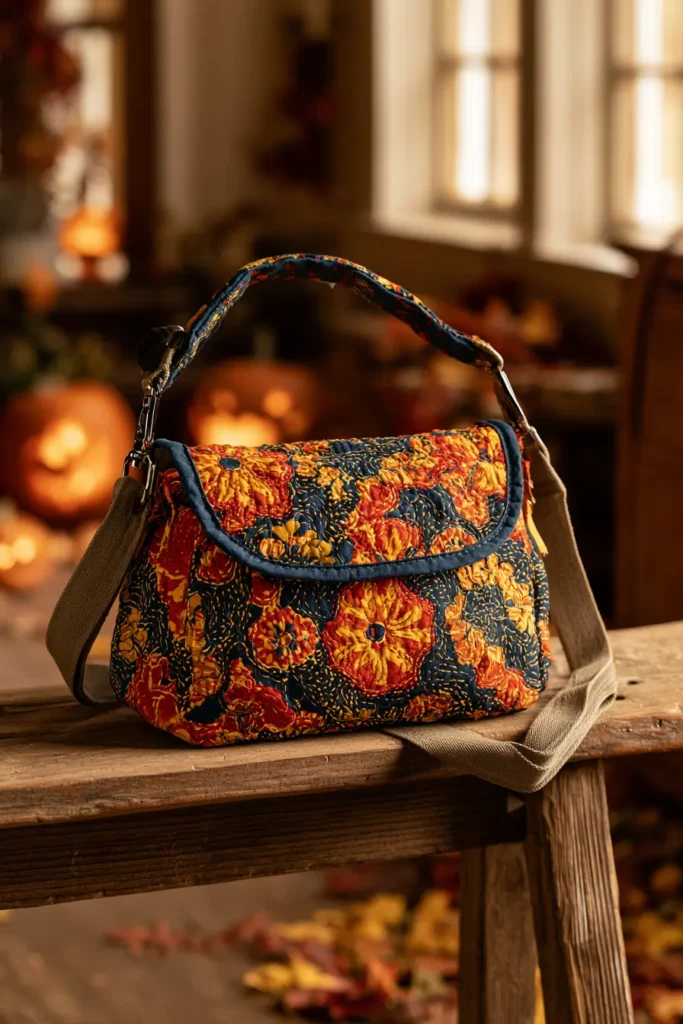
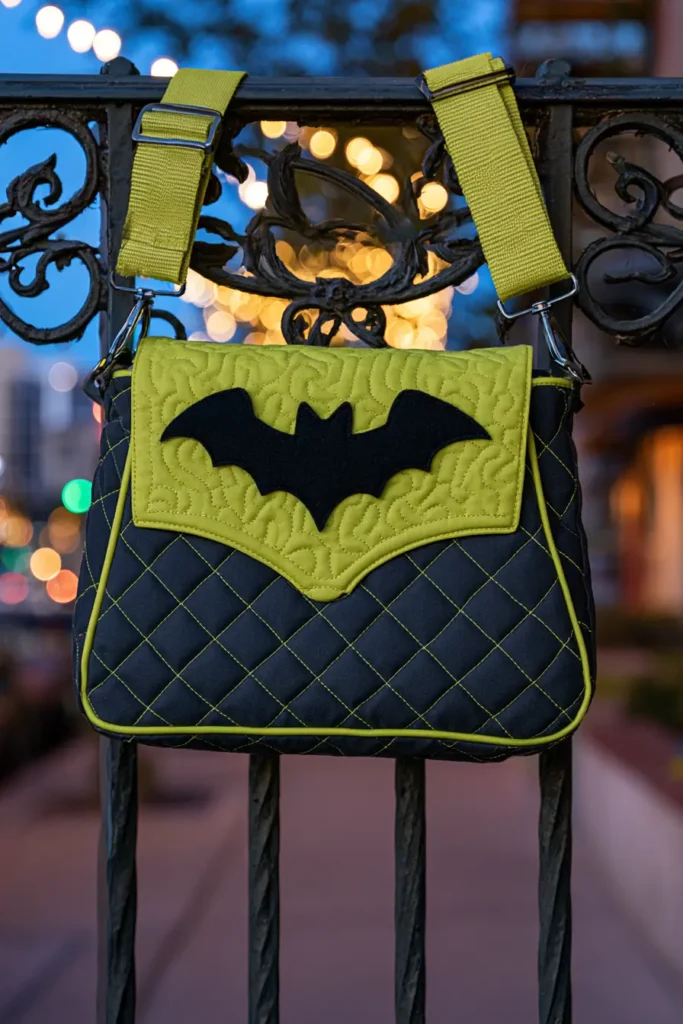
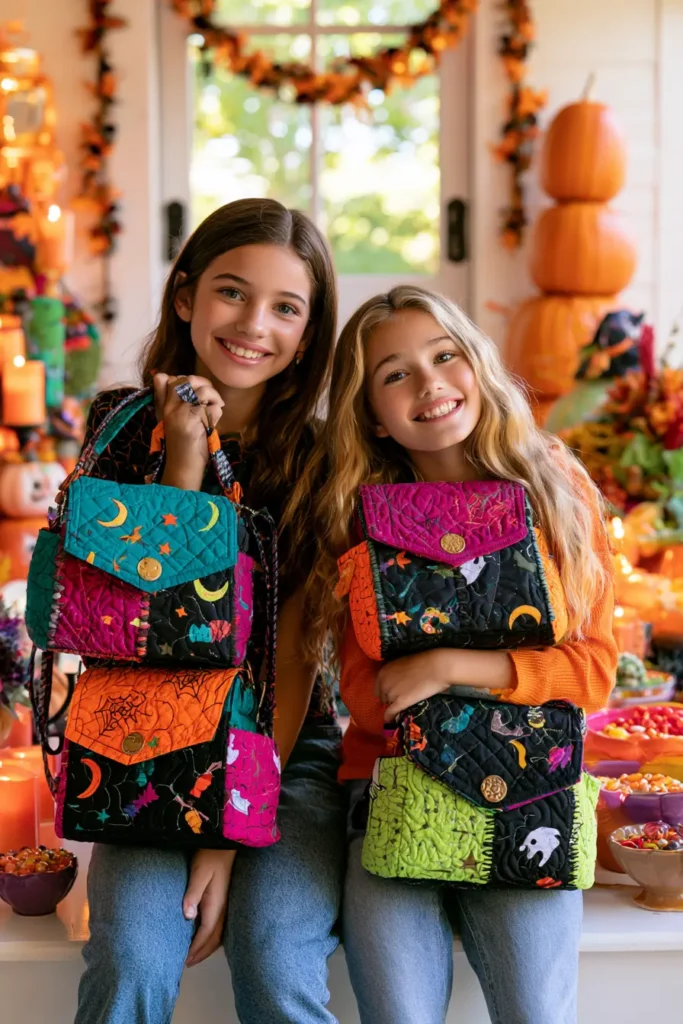
Conclusion
Twelve ideas are more than anyone needs for a single Halloween, and that’s intentional — the point is to find the one that matches your skill level, your fabric stash, and the number of evenings you have left before the end of October. If you’ve never quilted anything, start with the classic orange-and-black patchwork tote or the jelly-roll-style strip bag; both are just straight seams and straight-line quilting, and both look convincingly finished.
If you’ve made a quilt before and want something with more visual payoff, the appliqué designs — jack-o’-lantern, ghost, black cat, bat and moon — deliver the strongest silhouettes and photograph beautifully. And if you’re making several bags at once for a classroom or party, the mini treat bags scale down efficiently, since you can chain-piece a dozen at a time from the same fabric pull.
Whichever design you land on, the construction principles carry across all of them: three layers, quilted through, bound at the edge, with reinforced handles. Get those four things right, and the bag will outlast the candy by about a decade. That longevity is what separates a handmade treat bag from everything hanging on the seasonal aisle endcap — it’s an object that accumulates a history, gets associated with a specific kid and a specific costume year, and eventually gets passed to a younger sibling. Start with one bag this season, and there’s a reasonable chance it becomes the thing that comes out of the bin every September from here on.

