
20 Small Space Christmas Decor: How to Celebrate Big in a Cozy Home
Small Space Christmas Decor often feels like a challenge, but it is actually a unique opportunity to create a concentrated, magical atmosphere. When square footage is limited, you don’t have to sacrifice the festive spirit; you have to reimagine it. Instead of sprawling displays that clutter your walking paths, the secret lies in thinking vertically, using overlooked nooks, and choosing pieces that make a big impact without taking up much space. A cozy home can feel even more intimate and enchanting during the holidays when every corner is thoughtfully adorned with cheer.
Whether you are decorating a studio apartment, a tiny dorm, or a modest living room, there are countless ways to infuse your space with the warmth of the season. From innovative wall-mounted trees to shimmering light displays suspended above, the goal is to maximize joy while minimizing clutter. This guide explores 20 creative strategies to transform your compact dwelling into a winter wonderland, proving that you don’t need a grand hall to host a grand celebration. Let’s discover how to make every inch count this holiday season.
1. Compact Christmas Tree Alternatives for Tiny Living Rooms
Contents
- 1 1. Compact Christmas Tree Alternatives for Tiny Living Rooms
- 2 2. Wall-Mounted Wreath Displays to Save Floor Space
- 3 3. Festive Window Displays with Hanging Ornaments
- 4 4. Garland-Draped Doorways and Archways
- 5 5. Cozy Christmas Pillow Covers and Textiles
- 6 6. Slim Space-Saving Christmas Tree
- 7 7. Over-the-Door Card and Ornament Displays
- 8 8. Floating Shelves Styled for the Holidays
- 9 9. Magical Fairy Light Canopies and Drapes
- 10 10. Wreaths on Mirrors, Cabinets, and Windows
- 11 11. The Festive Bar Cart or Coffee Station Makeover
- 12 12. Opt for Miniature Christmas Villages & Dioramas
- 13 13. Corner Mantel Decor Ideas for Small Fireplaces
- 14 14. Vertical Ladder Displays for Blankets and Decor
- 15 15. Festive Kitchen Cabinet Ribbons and Wreaths
- 16 16. Ceiling Hook Hanging Star and Snowflake Mobiles
- 17 17. Bedside Tabletop Snow Globe Collections
- 18 18. Holiday Scentscaping with Candles and Diffusers
- 19 19. Compact Centerpieces for Small Dining Tables
- 20 20. Hanging Stockings Without a Mantel
- 21 Conclusion
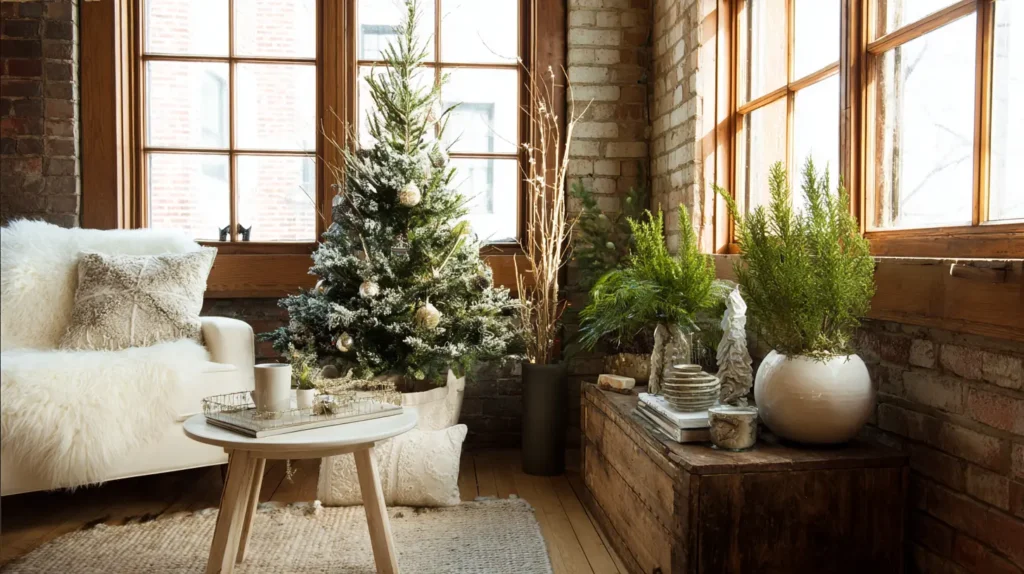
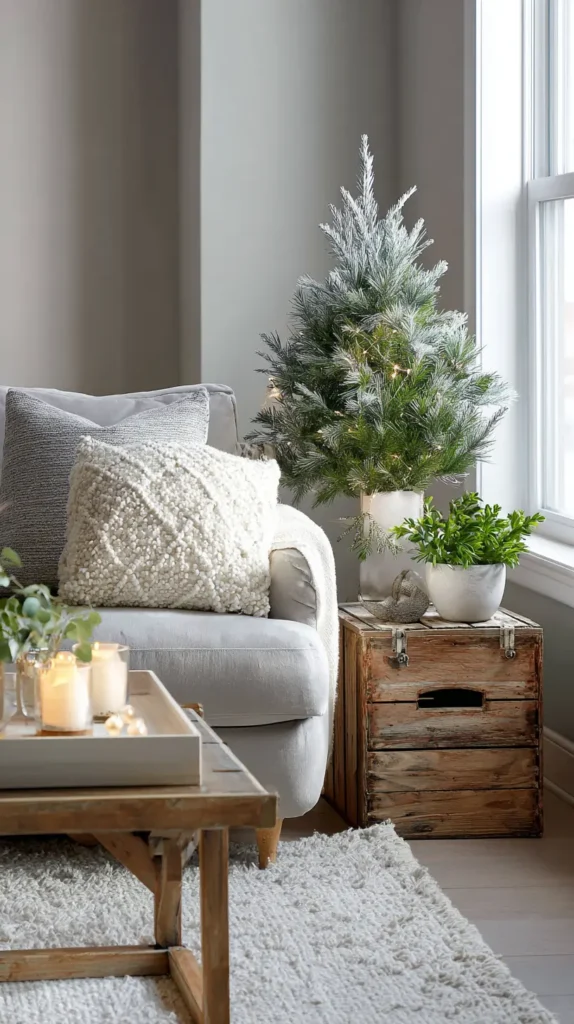
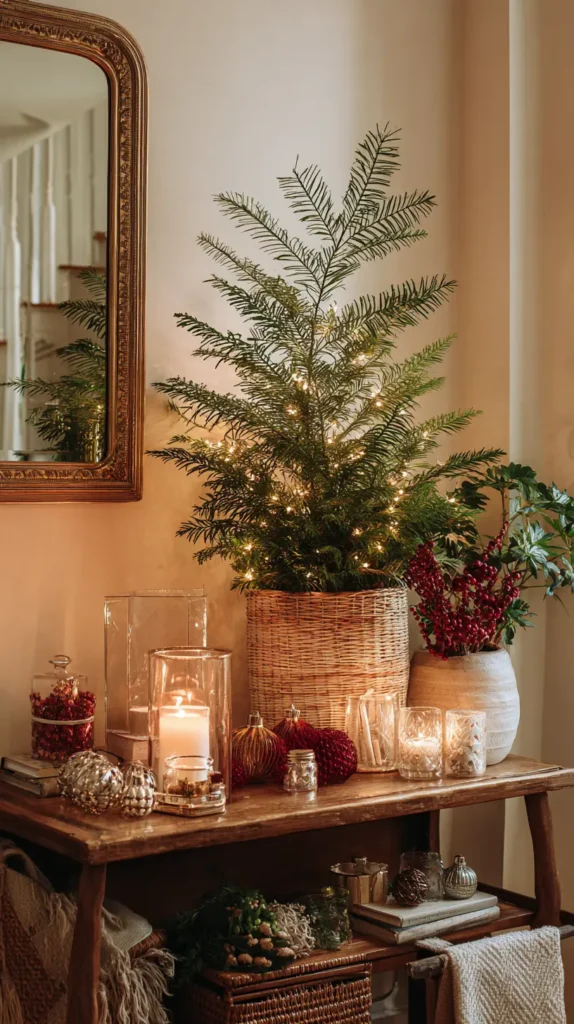
You don’t need a sprawling Douglas Fir to create a magical holiday focal point. Imagine a sleek, space-saving “pencil” tree tucked elegantly into a tight corner, its slender silhouette reaching toward the ceiling without encroaching on your walking path. Alternatively, picture a lush, miniature evergreen set atop a side table or a vintage wooden crate, giving it regal height and presence while leaving the floor completely open. These compact solutions capture all the sparkle, scent, and tradition of a full-sized tree but are scaled perfectly for cozy living, ensuring your room feels festive rather than stuffed.
- Go Slim: Opt for a “pencil” or “slim” artificial tree. These are designed with a narrow diameter (often just 18-24 inches wide) and full height, making them perfect for tight corners.
- Tabletop Glory: Use a 3-foot mini-tree placed on a sturdy table, stool, or crate. This raises the ornaments to eye level, making the tree feel grander than it actually is.
- The “Half” Tree: Consider a flat-back wall tree (a semi-circle shape) that pushes flush against the wall. It gives the illusion of a full tree from the front, but takes up half the depth.
- Wall-Mounted Magic: For a zero-floor-footprint display, create a 2D “tree” on the wall with garland, string lights in a zig-zag pattern, or foraged branches arranged by size.
- Sparse “Alpine” Look: Choose a sparse, Scandinavian-style tree with gapped branches. It looks airy and intentional in a small space, allowing light to pass through so the room doesn’t feel closed in.
Pro Design Tip: If you choose a small tabletop tree, treat the base as part of the decor. Place the tree inside a beautiful woven basket, a galvanized metal bucket, or wrap the base in a chunky knit blanket. This adds texture and volume, making the small tree feel anchored and substantial.
Budget Consideration: For a nearly free alternative, go foraging. Gather a few large, bare branches from outside (or buy fragrant eucalyptus stems), arrange them in a heavy ceramic vase, and hang your lightest, sparkliest ornaments on them. It’s a chic, minimalist look that costs nothing and smells amazing.

Other Related Interesting Ideas …
Living in an apartment or a cozy cottage doesn’t mean skipping the holidays; it just means getting creative. These space-saving techniques are perfect for adding cheer to 20 Office Christmas Decorating Ideas (For Cubicles, Desks & More) or maximizing comfort in 20 Cozy Small Christmas Dining Room Ideas: Create an Intimate Holiday Gathering. You can apply these same principles to intimate areas like 20 Bedroom Christmas Decor Ideas: Serene and Festive Holiday Retreats. The key is to focus on high-impact details, such as displaying 20 Magical Handcrafted Glass Ornaments to Elevate Your Christmas Tree in a bowl or on a garland, rather than on a massive tree.
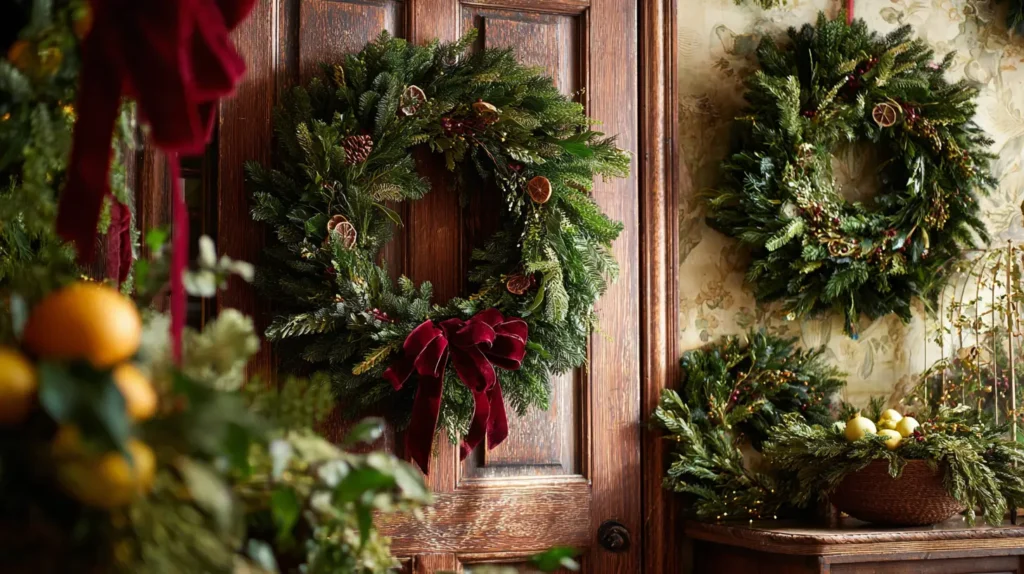
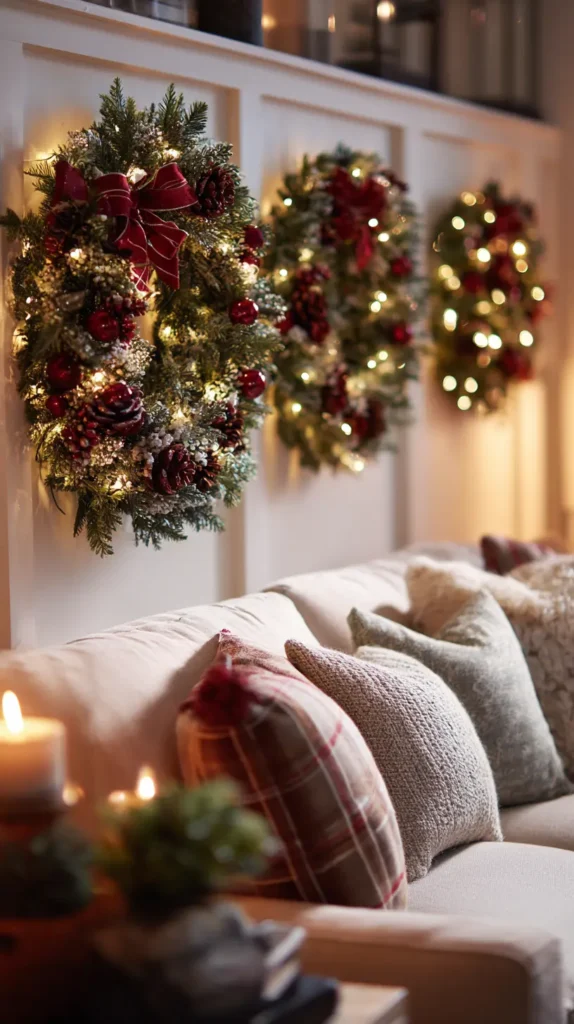
2. Wall-Mounted Wreath Displays to Save Floor Space
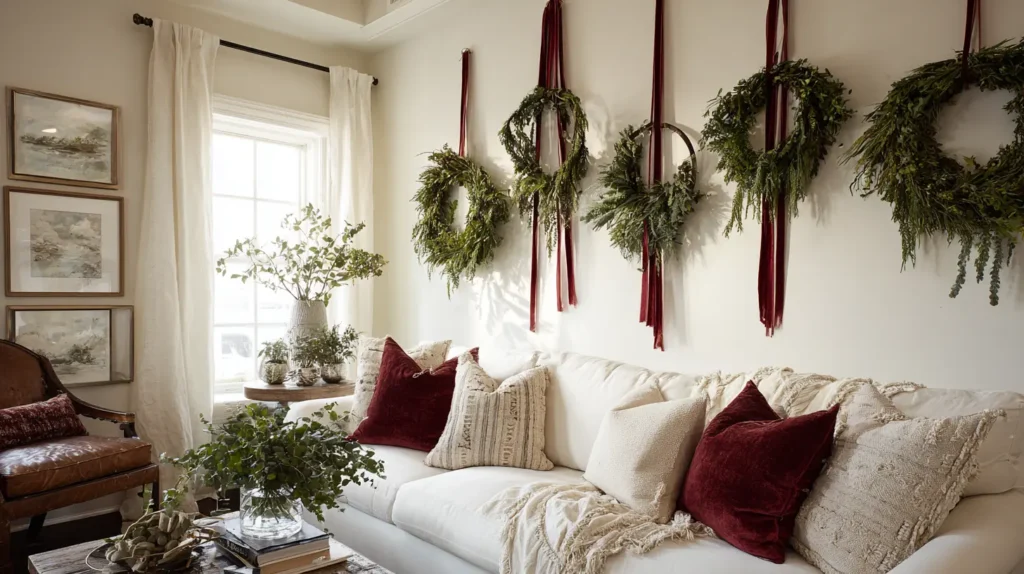
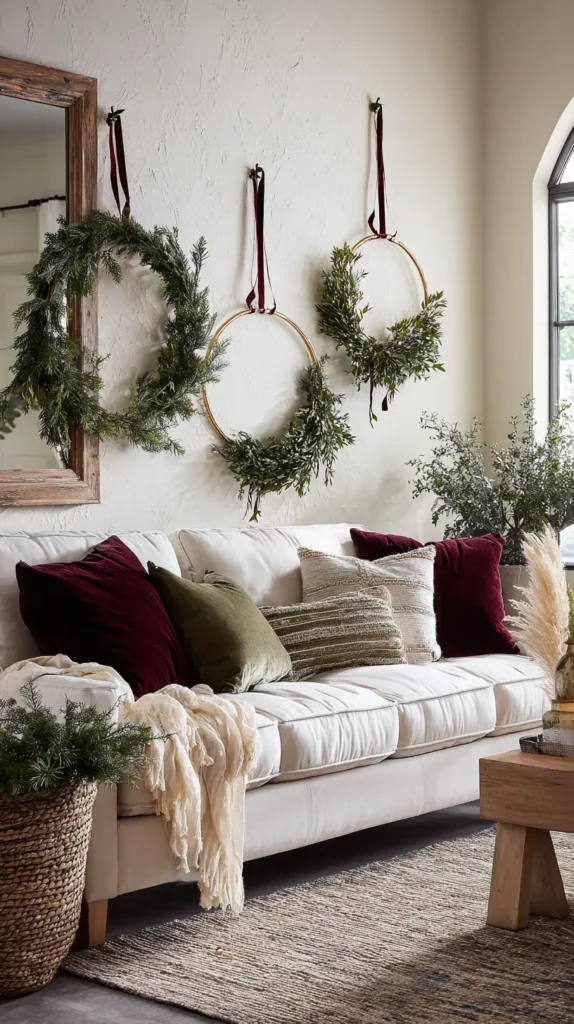
When floor space is premium real estate, look up. Imagine transforming your bare walls into a festive gallery of greenery. Instead of a single wreath on the front door, picture a trio of wreaths in varying sizes suspended over your sofa or buffet, connected by long, luxurious velvet ribbons in deep burgundy or forest green. This vertical approach draws the eye upward, making your ceilings feel taller while keeping the floor completely clear for traffic and gifts. Whether you opt for traditional evergreen, modern hoop wreaths, or fragrant dried eucalyptus rings, this styling trick envelops the room in holiday texture without sacrificing a single square inch of walking space.
- Create a Trio: Group three wreaths of different sizes (small, medium, large) together on one wall to create a high-impact art installation that replaces standard framed prints.
- Ribbon Drama: Don’t just hang them on a nail; suspend them from long lengths of satin or velvet ribbon. This vertical line adds elegance and fills the visual void on tall walls.
- Mirror Layering: Hang a small wreath directly over a large wall mirror or a leaning floor mirror. The reflection doubles the greenery and sparkle without taking up any extra space.
- Cabinet Adornment: Use mini-wreaths on the doors of your kitchen cabinets or media console. It’s a subtle way to spread cheer to functional furniture.
- Renter-Friendly: Use Command or over-the-door hooks to secure your displays without damaging paint or drilling holes.
Pro Design Tip: For a cohesive, designer look, swap out your existing wall art for the season. Take down your usual gallery wall frames and hang wreaths on the existing nails. This keeps the room from feeling cluttered with “too much” stuff and makes the greenery the star of the show.
Budget Consideration: You don’t need expensive, pre-decorated wreaths. Buy simple, plain faux pine wreaths (often $5-$10 at craft stores) and wire in your own foraged pinecones, dried orange slices, or leftover tree trimmings. It gives you a custom, organic look for a fraction of the price.
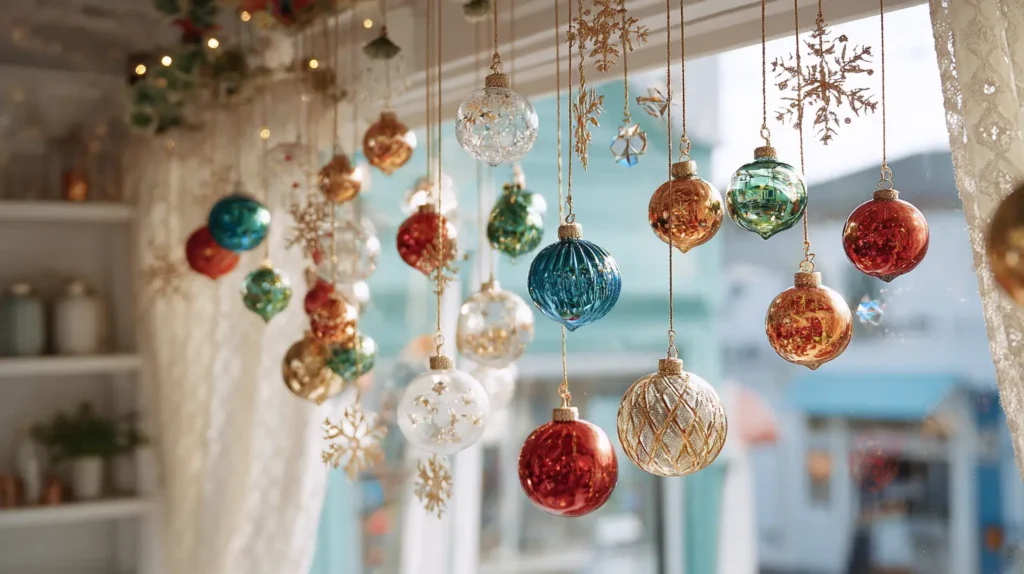
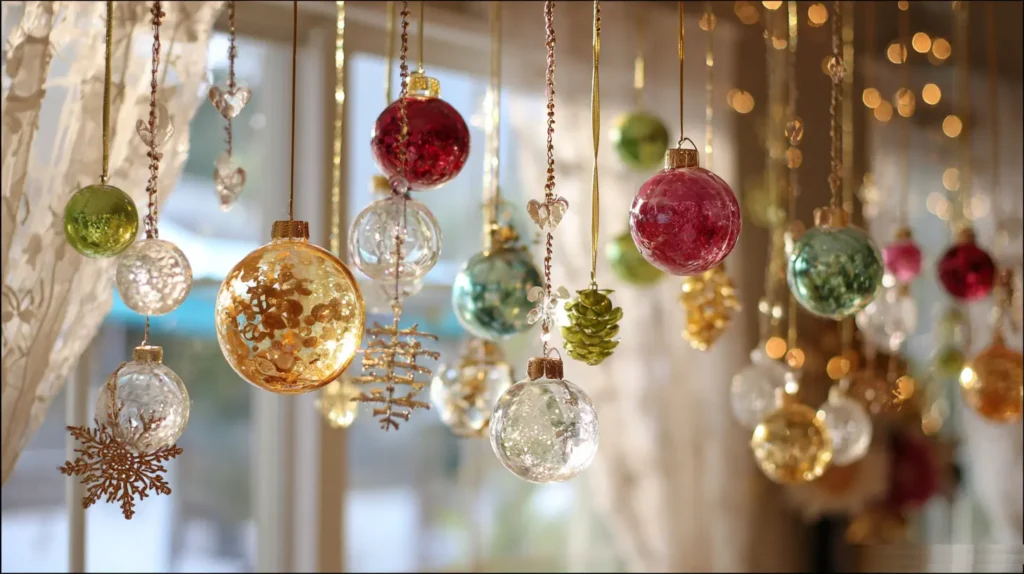
3. Festive Window Displays with Hanging Ornaments
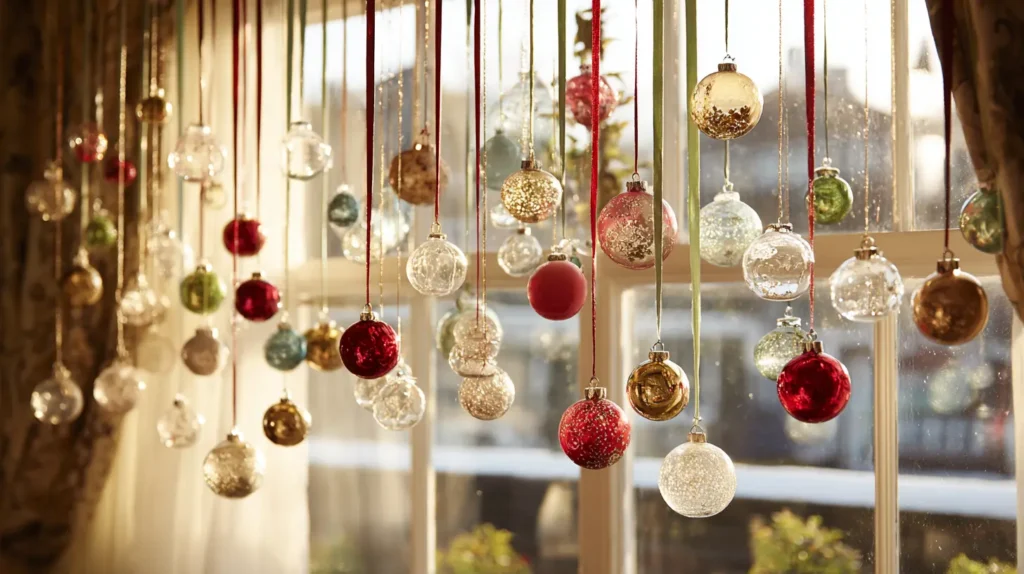
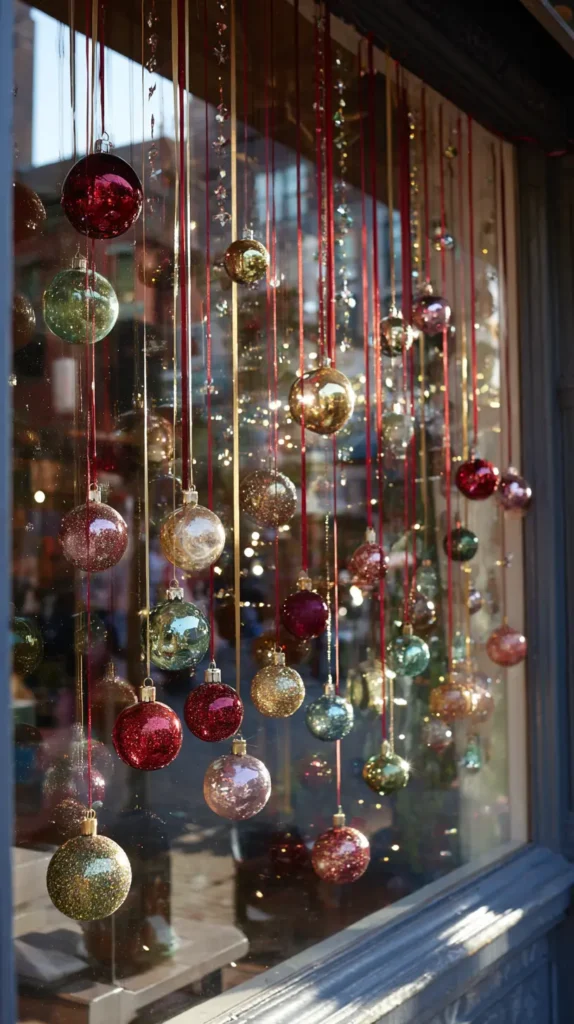
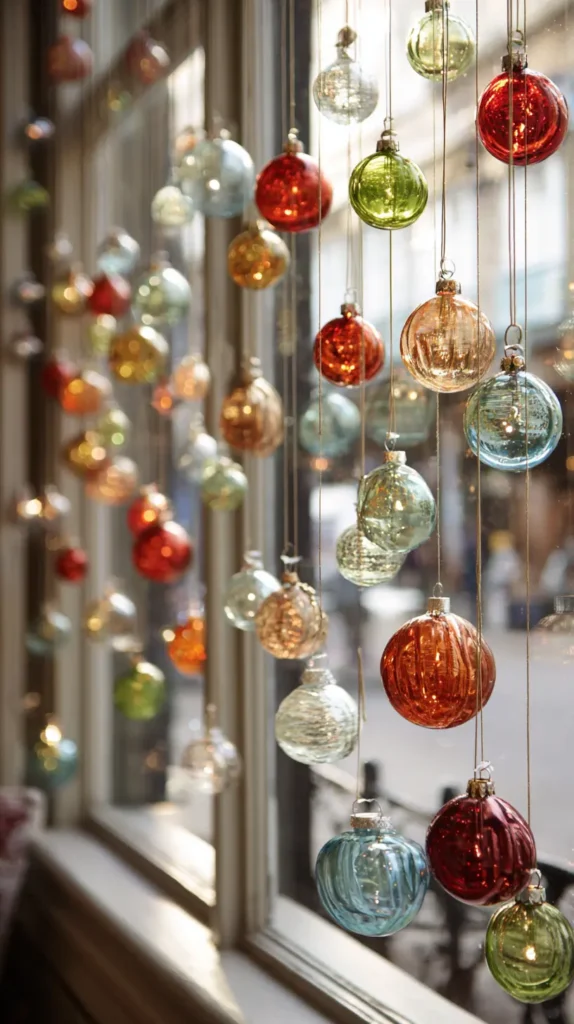
Turn your windows into a shimmering curtain of holiday magic without using a single inch of floor space. Imagine standing back and seeing a cascade of your favorite ornaments suspended in mid-air, catching the winter sunlight by day and twinkling against the dark glass by night. By hanging baubles at staggered heights using “invisible” fishing line or luxurious velvet ribbons, you create a floating art installation. This display frames the view outside and serves as a stunning focal point, eliminating the need for a bulky tree and turning the window itself into the festive centerpiece of the room.
- The Floating Effect: Use clear fishing line or monofilament to hang ornaments from your curtain rod. From a distance, they will appear to float magically in the window frame.
- Ribbon Elegance: For a more traditional look, suspend ornaments from varying lengths of red satin or moss-green velvet ribbon, tying bow knots at the top of the curtain rod.
- Stagger the Heights: Avoid a straight line. Hang ornaments at different levels—some high, some low—to create a dynamic, cascading “waterfall” effect.
- Catch the Light: Prioritize glass, crystal, or metallic ornaments. These materials capture and refract natural light, making the window sparkle even on gloomy days.
- Scale Variation: Mix large statement baubles with tiny filler ornaments to create visual texture and depth within the display.
Pro Design Tip: To hide the knots or hooks where the fishing line attaches to the rod, drape a simple, lush garland of faux cedar or pine across the top of the curtain rod. This “caps” the display with greenery, making the floating ornaments appear to drip from the boughs.
Budget Consideration: You don’t need expensive glass ornaments for this. Paper snowflakes (cut from white printer paper) or dried orange slices look absolutely stunning back-lit in a window. They are translucent, glowing beautifully when the sun hits them, and cost pennies to make.
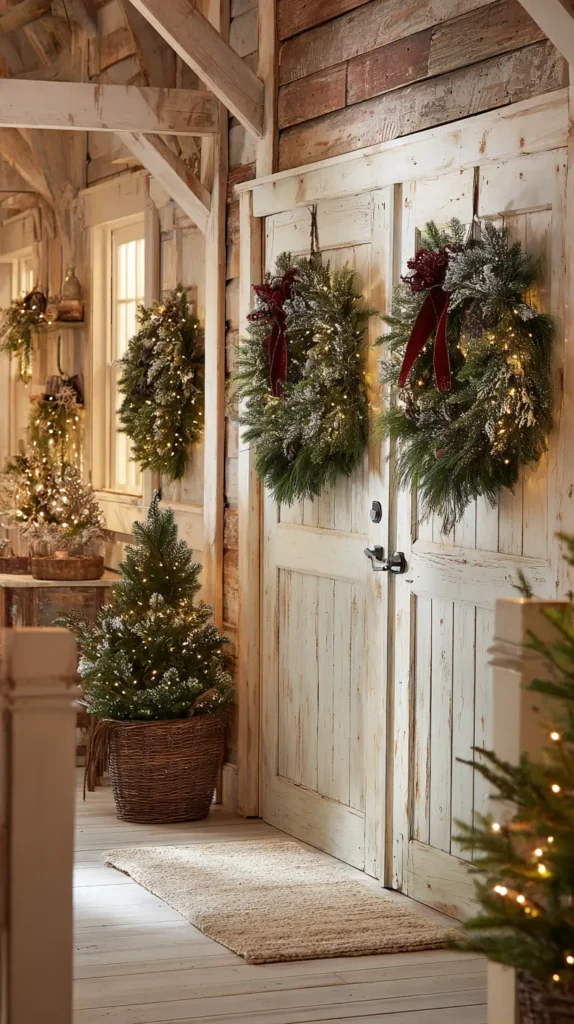
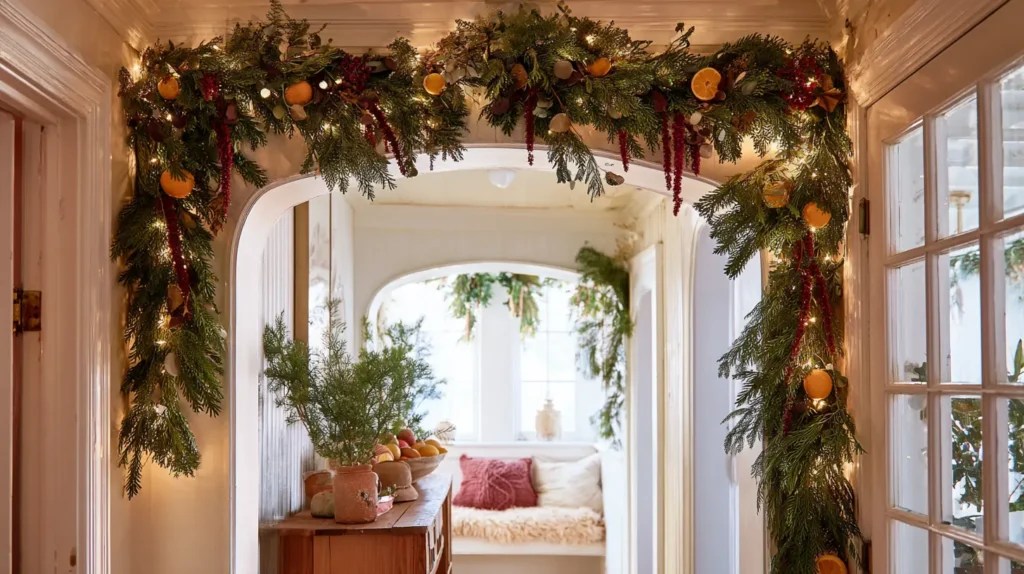
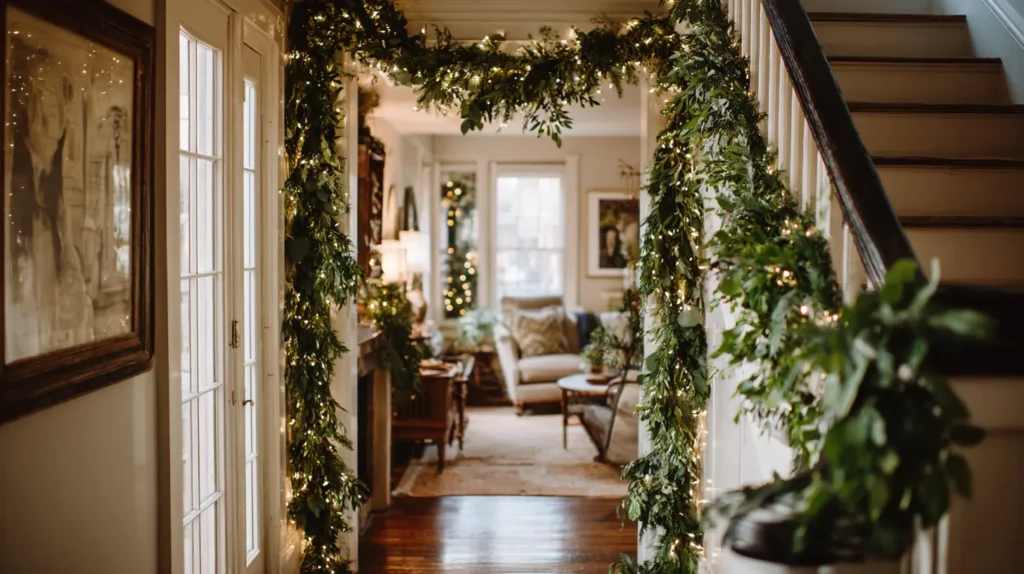
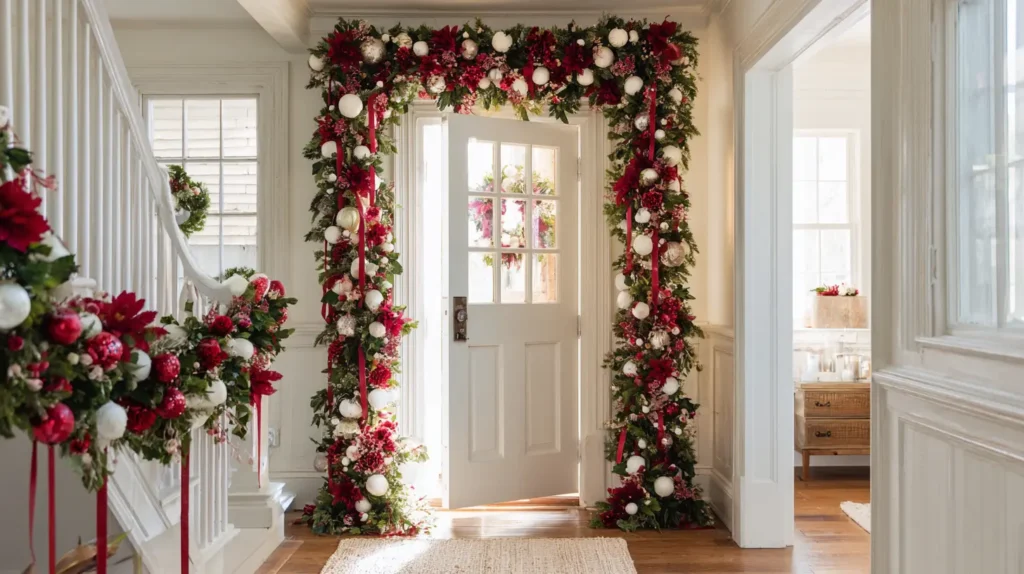
4. Garland-Draped Doorways and Archways

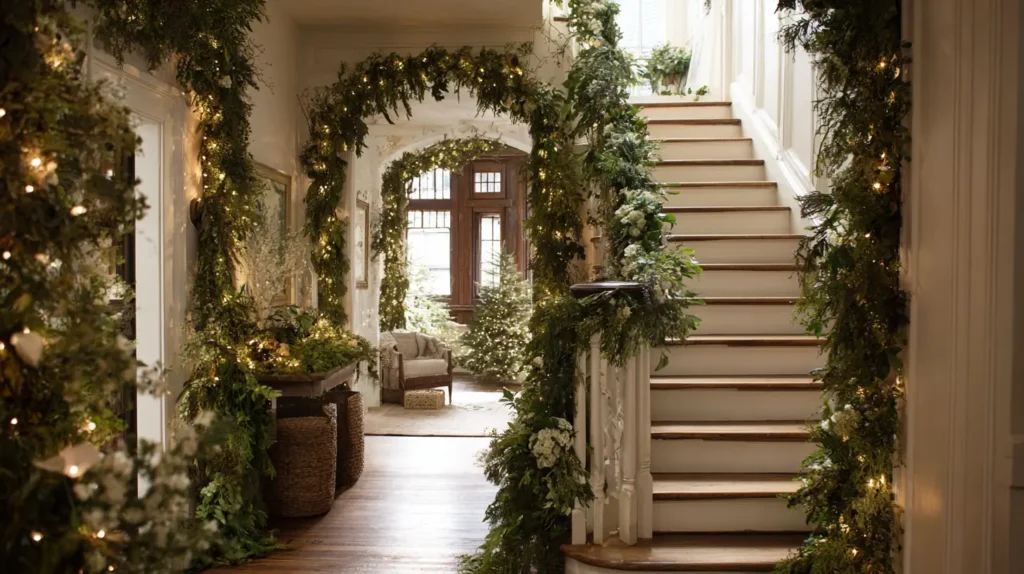
Transform the transitional spaces of your home into magical portals of holiday cheer. Imagine walking from your hallway into the living room through a frame of lush, cascading greenery. By draping thick garlands of cedar, pine, or magnolia leaves around your doorframes or open arches, you define the space without occupying a single square inch of floor. This technique draws the eye upward, emphasizing the room’s height, and adds a rich, architectural layer of texture. Whether illuminated by woven fairy lights or accented with velvet bows, a garland-wrapped doorway turns a “dead” structural element into a stunning, festive feature.
- Go Asymmetrical: For a modern, organic look, don’t make it perfect. Let the garland drape heavily down one side of the doorframe (touching the floor) and stop halfway down the other side.
- Secure Without Damage: Use clear Command hooks or tension rods disguised within the greenery to secure the garland to the frame without hammering nails into the wood.
- Add Sparkle: Weave battery-operated fairy lights into the boughs. This eliminates unsightly cords dangling down the wall to an outlet and creates a warm, inviting entry glow.
- Layer for Fullness: If your garland looks thin, twist two inexpensive strands together to create one thick, luxurious rope, or tuck in real branches to add volume.
- Sensory Detail: Attach small brass bells or dried cinnamon sticks to the garland. Every time you walk through the doorway, the air movement will trigger a subtle jingle or a waft of holiday scent.
Pro Design Tip: Focus on the “corners.” Place the bulk of your decorative accents—like large pinecones, clusters of ornaments, or a statement ribbon bow—at the upper corners of the doorframe. This highlights the architecture and keeps the decorations safely out of head-bumping range.
Budget Consideration: High-quality, realistic garland is expensive. Buy the cheapest, thin wire garland you can find as a base, and then “forage” your yard or a local park for free clippings of real pine, holly, or magnolia. Wire the real greenery into the fake base for a lush, expensive look that costs almost nothing.
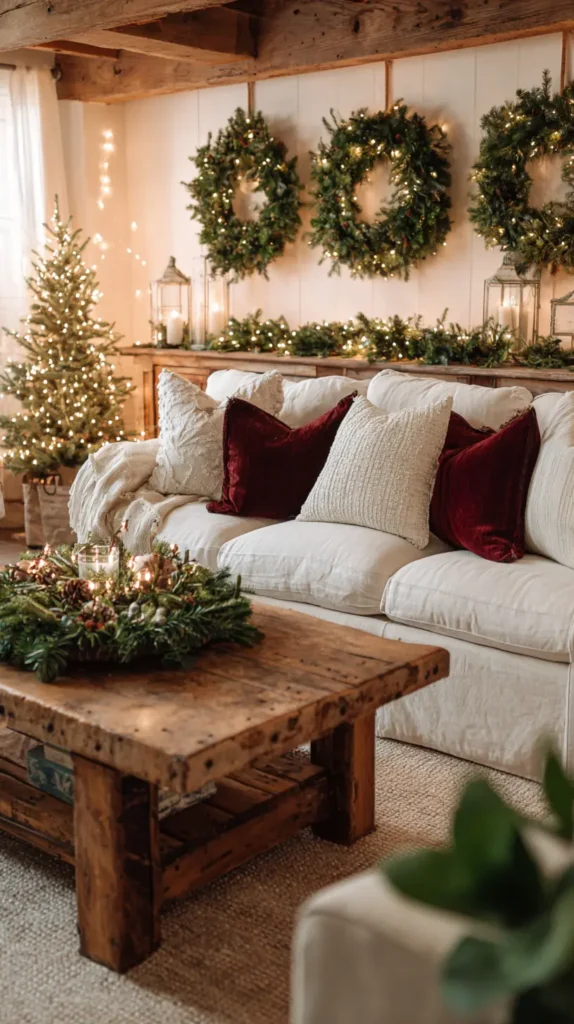
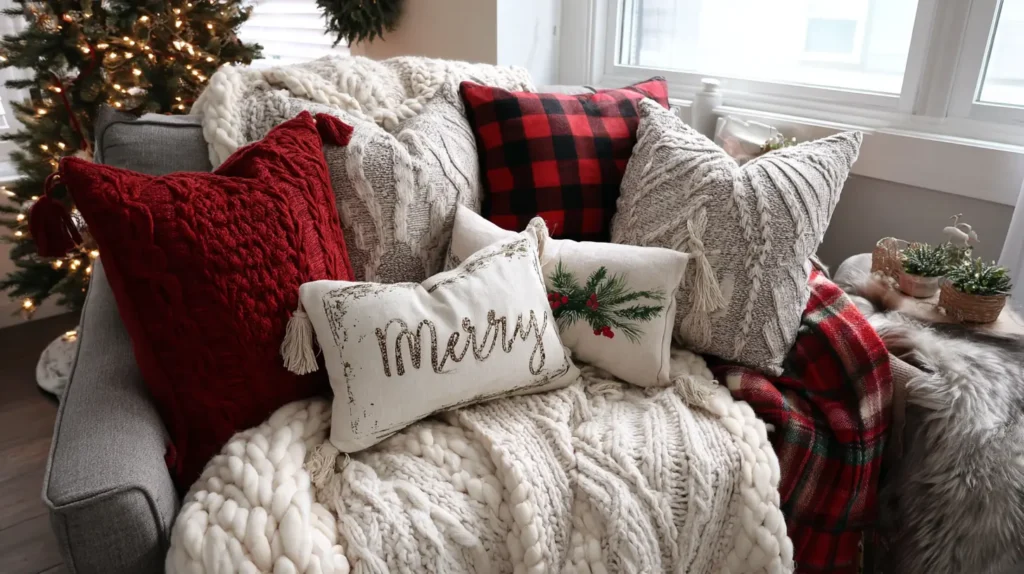
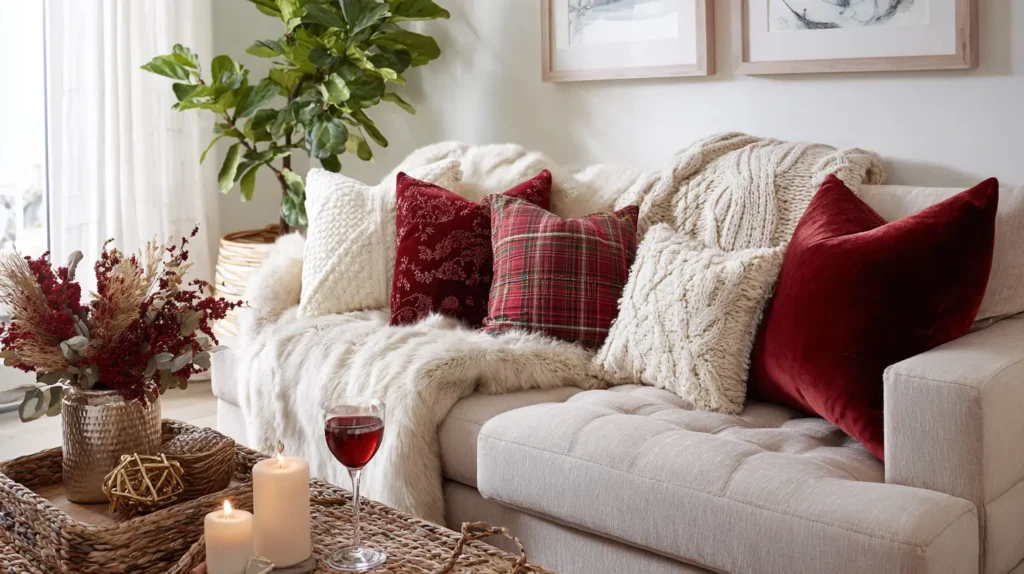
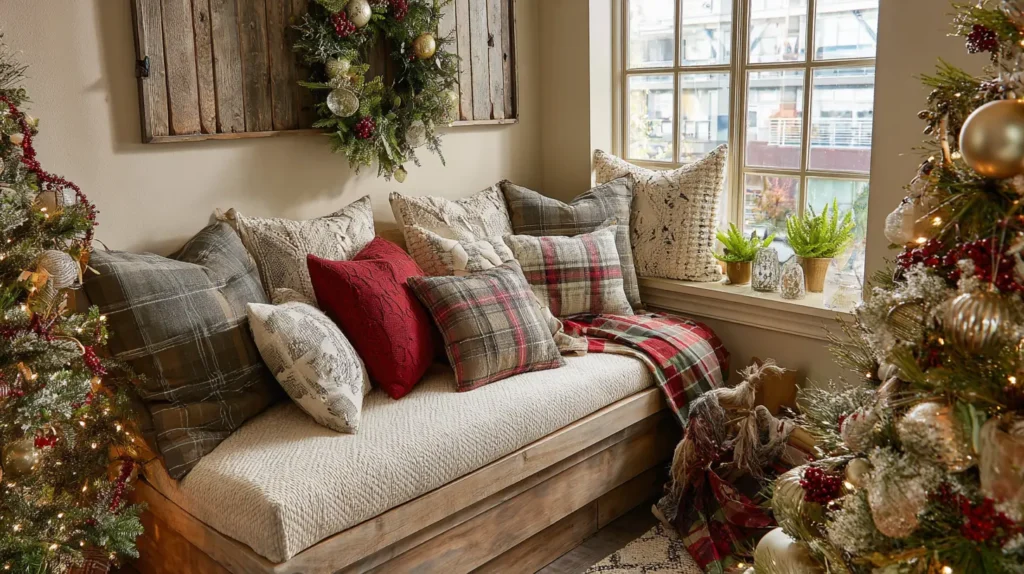
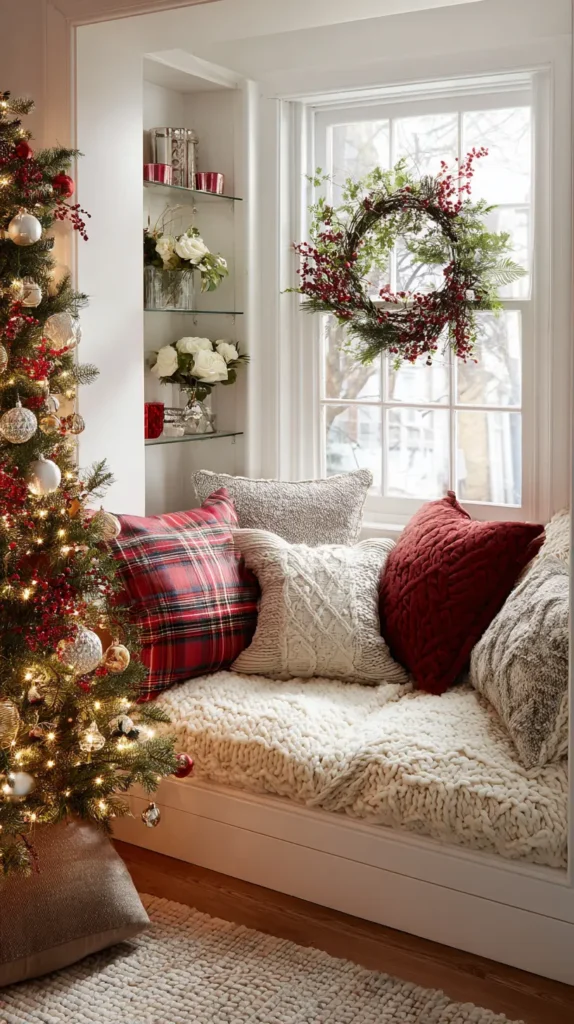
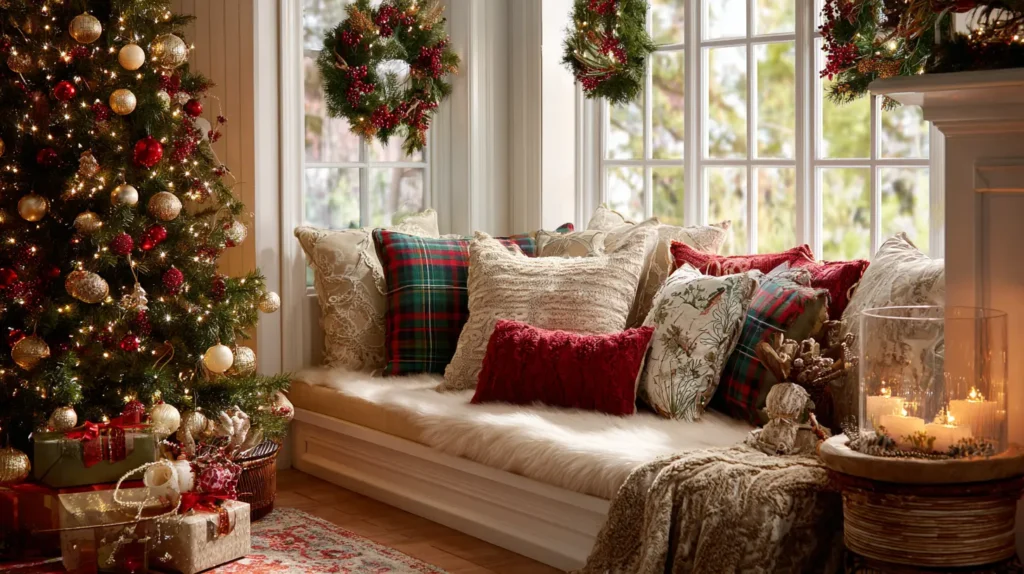
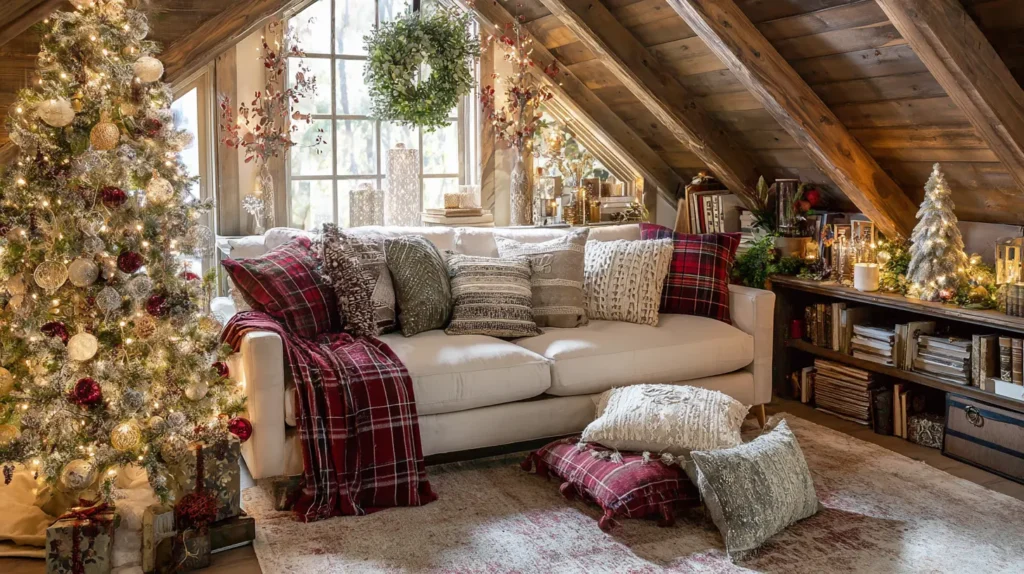
5. Cozy Christmas Pillow Covers and Textiles

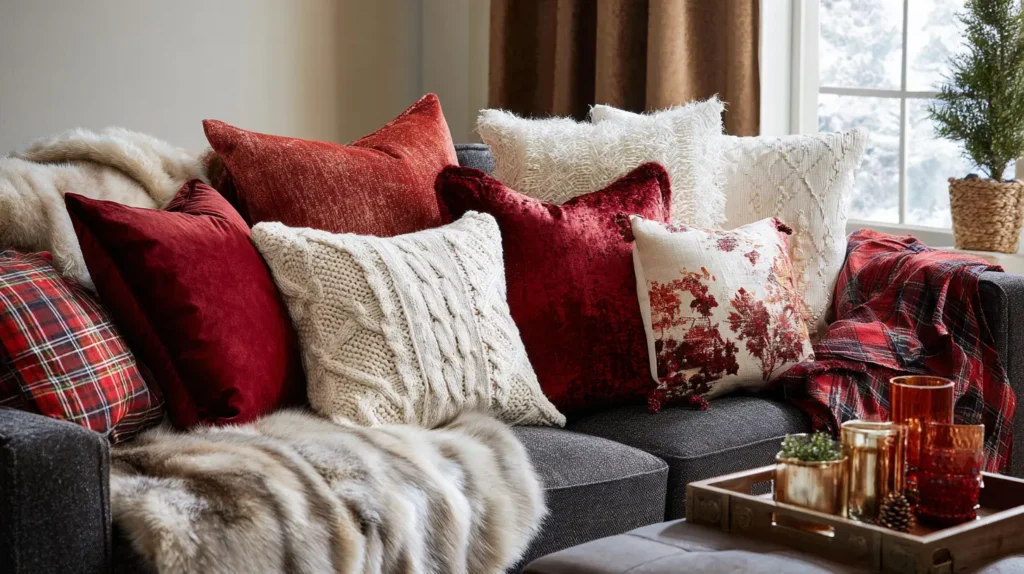
Transform the entire mood of your living room without adding a single piece of clutter to your tabletops. Imagine sinking into a sofa that feels like a warm winter hug, with your everyday throw pillows swapped for rich, festive textures. Picture a curated mix: a deep cranberry velvet pillow nestled against a chunky cream cable-knit that mimics your favorite sweater, accented by a classic tartan plaid. A luxe faux-fur throw blanket is casually draped over the chair arm. This “textile takeover” instantly signals the holiday season through touch and color, creating an irresistible invitation to curl up with hot cocoa while keeping your surfaces clear for drinks and gifts.
- The Storage Secret: Pillow covers are the ultimate small-space hack. Unlike bulky statues or wreaths, they fold flat and fit in a single drawer when the season is over.
- Texture Over Print: instead of cheesy “Santa” prints, opt for rich winter textures like velvet, wool, faux fur, or bouclé to create a sophisticated, cozy vibe.
- The “Rule of Three”: Mix three distinct textures on your sofa—for example, one fuzzy (faux fur), one smooth (velvet), and one patterned (plaid or snowflake knit).
- Layer Up: Add a heavy, knitted throw blanket to the mix. It adds visual warmth and is functional for chilly nights.
- Neutral Festivity: If red and green clash with your decor, go for a “Winter Wonderland” palette using whites, creams, silvers, and icy blues.
Pro Design Tip: To make your budget-friendly pillow covers look high-end and plush, use inserts that are 2 inches larger than the cover (e.g., use a 20-inch insert inside an 18-inch cover). This over-stuffing eliminates saggy corners and creates that firm, “choppable” magazine look.
Budget Consideration: Look in your own closet before buying new. Old, shrunken, or moth-eaten wool sweaters make incredible DIY pillow covers. Simply cut a square out of the sweater’s torso, sew the edges shut (or use fabric glue/hem tape), and stuff your pillow inside for a cozy, custom upcycle that costs zero dollars.
6. Slim Space-Saving Christmas Tree
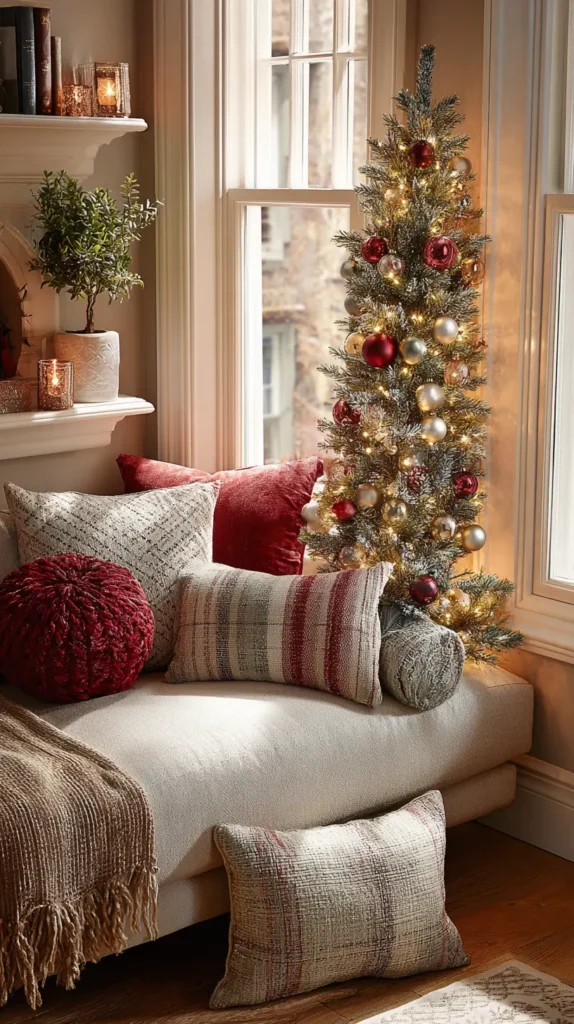
You don’t have to sacrifice the height and grandeur of a traditional Christmas tree just because you lack floor space. Enter the “pencil tree”—a slender, columnar evergreen designed specifically for city living. Imagine a lush, 7-foot tree that tucks perfectly into that awkward 2-foot gap between your sofa and the wall. Its narrow footprint preserves your walking paths, yet its verticality draws the eye upward, making your ceilings feel higher and the room more spacious. Whether you choose a classic deep green fir or a snowy, flocked variety, a slim tree delivers all the magical ambiance of the holidays without dominating your cozy living room.
- Check the Diameter: Look specifically for trees labeled “pencil,” “slim,” or “column.” Ideally, the base diameter should be between 18 to 28 inches.
- Go Tall: Since you are saving on width, splurge on height. A taller tree (7.5 or 9 feet) maximizes the visual impact and uses “dead” vertical space effectively.
- Pre-Lit is Best: In small spaces, managing a tangle of extension cords is a nightmare. A pre-lit tree keeps the look clean, streamlined, and wire-free.
- Scale Your Ornaments: Avoid massive, oversized baubles that can overwhelm the slender branches. Opt for medium and small-sized ornaments to keep the proportions balanced.
- Corner Placement: These trees are designed for corners. Place yours near a window or in an unused nook to turn dead space into a festive focal point.
Pro Design Tip: Because slim trees have less volume at the bottom, they can sometimes look top-heavy or floaty. Anchor the look by placing the tree stand inside a sturdy, oversized woven basket or a galvanized metal collar. This adds visual weight to the base and hides the utilitarian metal stand.
Budget Consideration: The beauty of a slim tree is that it has significantly less surface area than a full tree. This means you need far fewer lights, garlands, and ornaments to make it look full and luxurious, saving you money on decorations in the long run.
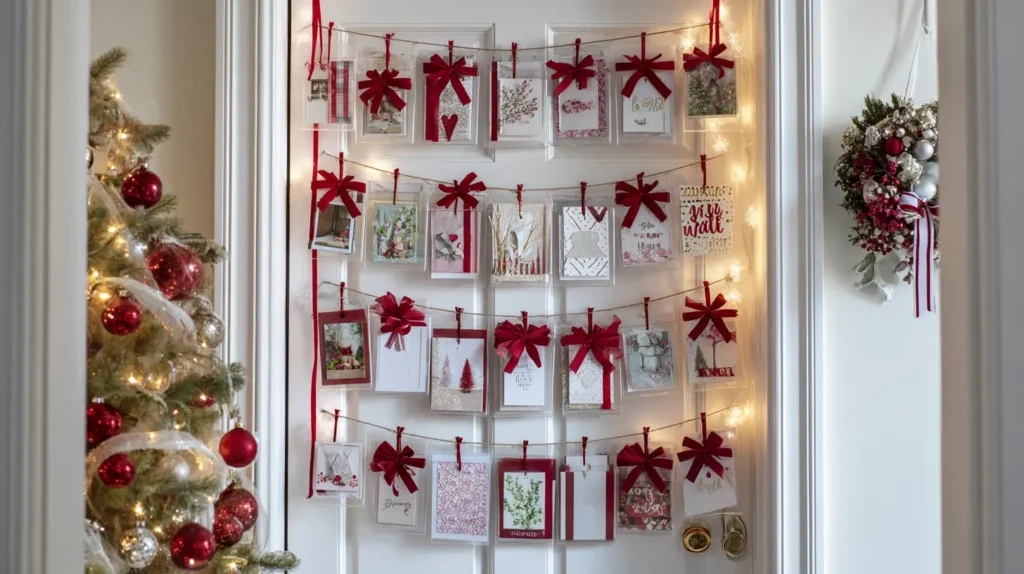
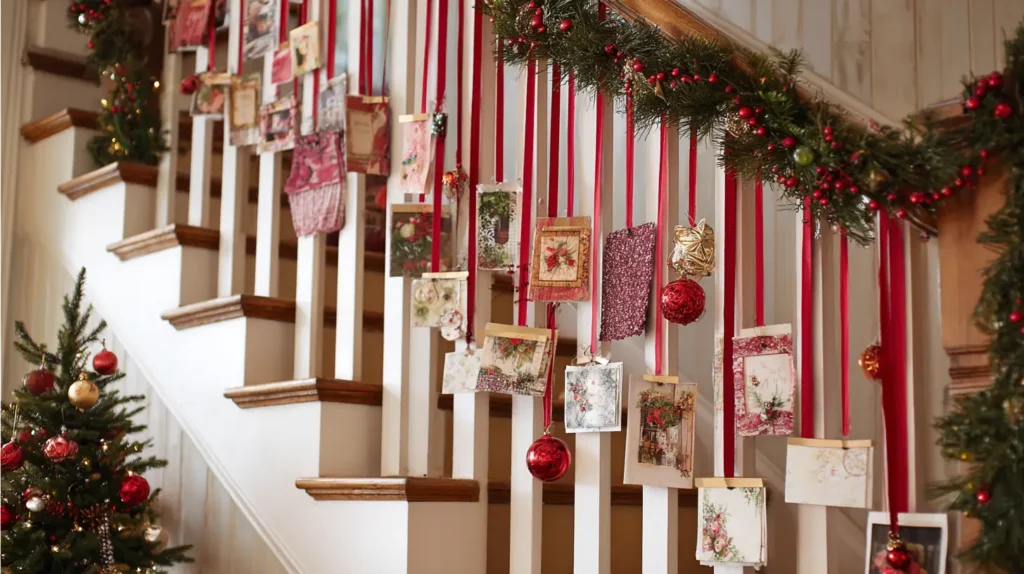
7. Over-the-Door Card and Ornament Displays
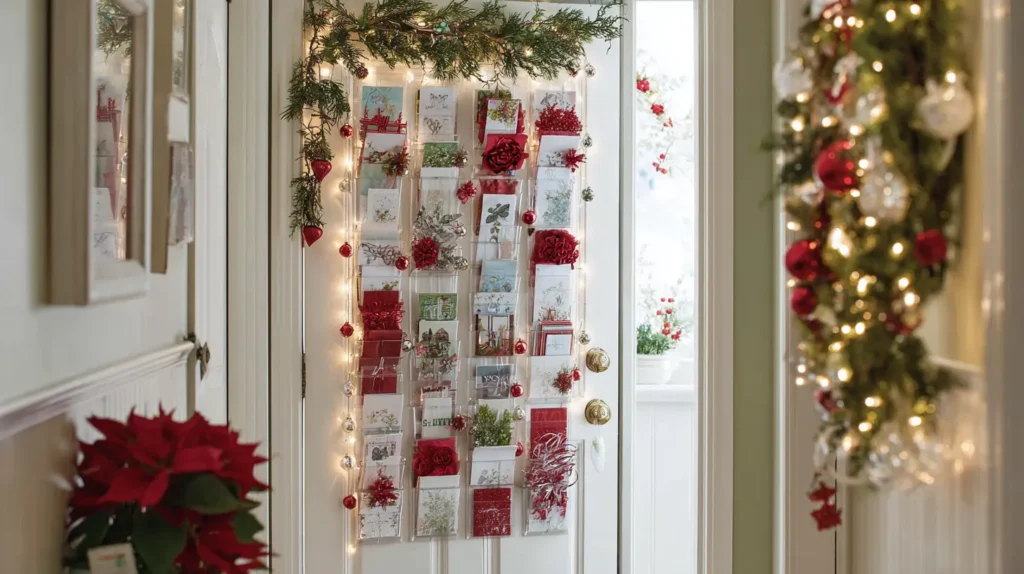
Reclaim your coffee table and countertops by moving the clutter of holiday cards and baubles to the often-ignored vertical real estate: your doors. Imagine the back of a door transformed into a cascading waterfall of festive memories. Wide lengths of lush velvet or satin ribbon run vertically from top to bottom, secured at the ends. Pinned along these ribbons are your holiday greeting cards, interspersed with lightweight, shimmering ornaments that twirl when the door opens. This setup turns a utilitarian surface into a vibrant, living scrapbook of the season, keeping your surfaces clear while giving your friends’ photos the spotlight they deserve.
- The Ribbon Method: Secure three or four strips of wide ribbon over the top edge of the door (using flat thumbtacks on the top edge where they won’t be seen).
- Clip Art: Use mini wooden clothespins to attach cards to the ribbons.
- Mix in Sparkle: Don’t just hang cards; clip lightweight shatterproof ornaments or sprigs of holly in between the cards to add texture and shine.
- Door Frame Garland: Alternatively, drape a garland over the door frame and use tiny hooks to hang ornaments and cards directly from the greenery, framing the entryway.
- Washi Tape Tree: If you have a flat door, use colorful, non-damaging Washi tape to tape cards directly to the door in the shape of a Christmas tree.
Pro Design Tip: Spray paint your mini wooden clothespins in metallic gold or silver before hanging them. It’s a tiny detail, but it makes the entire display look cohesive, intentional, and expensive, rather than like a craft project.
Budget Consideration: This is essentially a dollar-store project. All you need is a spool of ribbon and a pack of wooden pegs. It’s the most cost-effective way to display a large volume of holiday cheer without buying new furniture or shelving.
8. Floating Shelves Styled for the Holidays
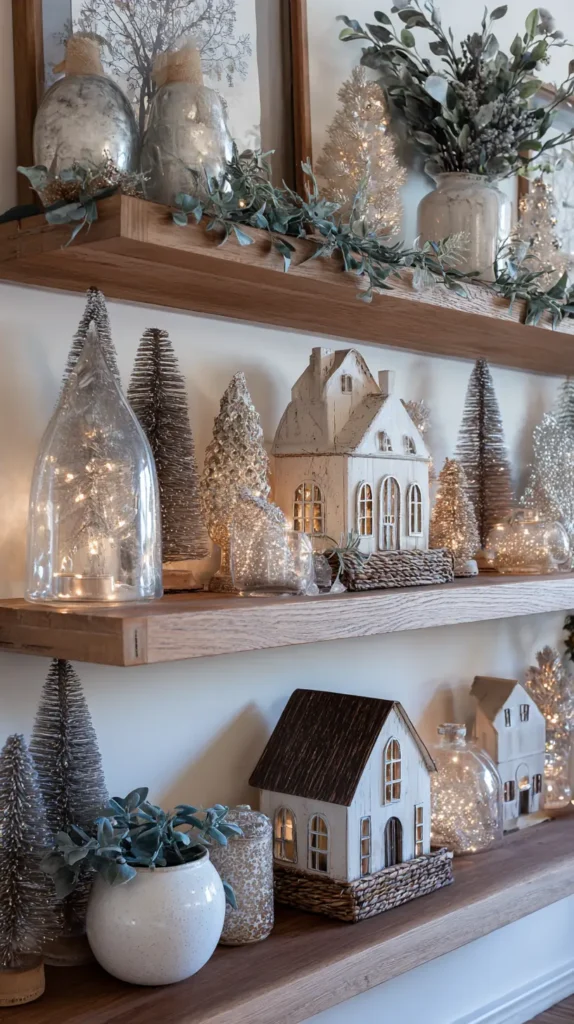
Give your everyday storage a magical makeover by turning your floating shelves into vertical holiday vignettes. Imagine clearing away the usual stack of paperbacks and succulents to make room for a whimsical winter village. Picture a curated collection of bottle brush trees in varying shades of green and gold, clustered next to ceramic white houses that glow with battery-operated tea lights.
A delicate cedar garland is draped along the front edge of the shelf, cascading down slightly to soften the hard lines, while copper wire fairy lights weave through the display, casting a warm, twinkling glow on the wall. This approach allows you to pack a huge amount of festive cheer into the room without occupying a single inch of floor space.
- The “Edit” Comes First: Clear the shelves completely before starting. You need a blank canvas, and removing everyday clutter ensures the holiday decor feels intentional rather than chaotic.
- Drape the Edge: Use double-sided tape or small removable hooks to secure a thin garland along the front lip of the shelf. Letting it hang down slightly adds lushness and texture.
- Create Height: Vary the scale of your objects. Place a tall nutcracker or candlestick next to a shorter stack of ornaments or a small pinecone to keep the eye moving.
- Stick to a Palette: To keep the look cohesive and not cluttered, stick to a tight color scheme—like all white and wood, classic red and green, or metallics.
- Lean, Don’t Hang: Swap out the framed photos leaning on your shelves for holiday-themed prints or vintage Christmas cards to create an instant backdrop for your display.
Pro Design Tip: Create a “waterfall” effect with your lighting. Instead of just wrapping lights around the objects on the shelf, let the tail end of a strand of fairy lights dangle down from one shelf to the shelf below it. This visually connects the levels and adds a dreamy, magical touch.
Budget Consideration: You don’t need to buy expensive shelf decor. Fill clear glass vases, mason jars, or hurricane lanterns you already own with inexpensive shatterproof ornaments, pinecones foraged from the yard, or even candy canes. It’s a high-impact, colorful look that costs pennies.
9. Magical Fairy Light Canopies and Drapes
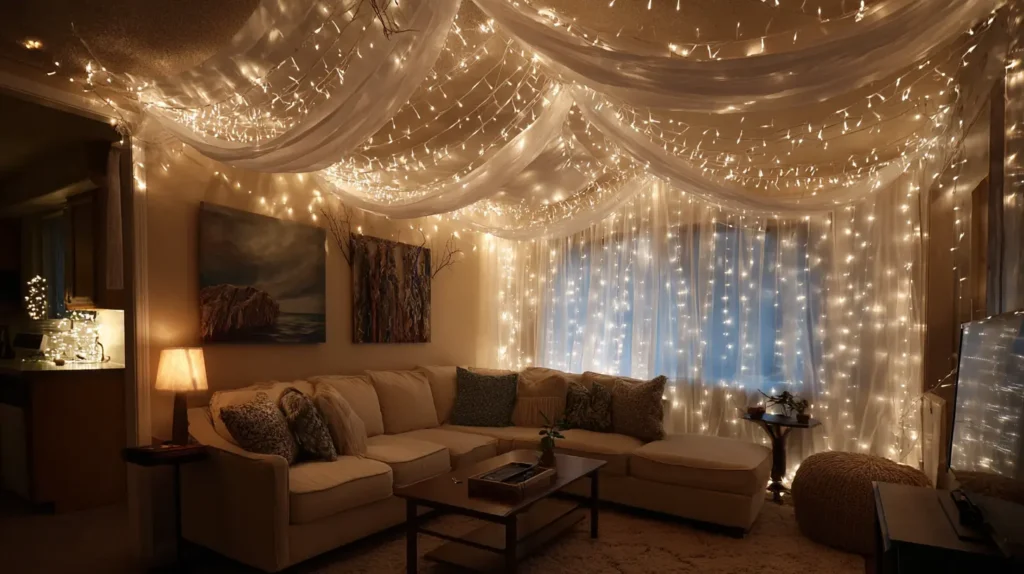
Lighting is the secret weapon for small spaces, capable of completely altering the mood without taking up a single inch of floor space. Imagine looking up to see a soft, glittering “tent” of warm white lights sweeping across your ceiling, instantly making your compact living room feel like an enchanted winter grotto. By draping strands of copper wire lights in a zig-zag pattern overhead or letting them cascade down sheer curtains like a glowing waterfall, you blur the harsh boundaries of the room. This softens the corners and shadows that make small spaces feel cramped, enveloping you in an ethereal, cozy glow that feels intimate and magical, perfect for long winter nights.
- The Ceiling Canopy: Use clear, damage-free adhesive hooks to string lights back and forth across the ceiling. This draws the eye upward and creates a cozy “fort-like” atmosphere.
- Curtain Cascades: Hang vertical strands of “curtain lights” behind your sheer window drapes. The fabric diffuses the LEDs, turning the window into a soft wall of glowing light that adds depth to the room.
- Warmth is Key: Always choose “warm white” (2700K) or copper wire lights. Cool white or blue-toned LEDs can feel clinical and harsh, killing the cozy “hygge” vibe.
- Frame the Features: If you can’t reach the ceiling, drape a loose garland of lights over the top of a tall mirror, bookshelf, or door frame to highlight the room’s architecture.
- Mirror Reflection: Position your light display opposite a wall mirror or floor mirror. The reflection will bounce the light around, doubling the sparkle and making the room feel twice as bright.
Pro Design Tip: To achieve a dreamy, cloud-like effect, drape swags of sheer white tulle or organza fabric along with the fairy lights on the ceiling. The fabric hides the wires and diffuses the bulbs, creating a soft, romantic glow that looks incredibly high-end.
Budget Consideration: You don’t need expensive smart lights. Basic battery-operated copper wire strands (often found in bulk packs) are incredibly cheap and versatile. Because they are battery-powered, you can place them anywhere—high on shelves or across the ceiling—without worrying about hiding ugly extension cords running down the wall.

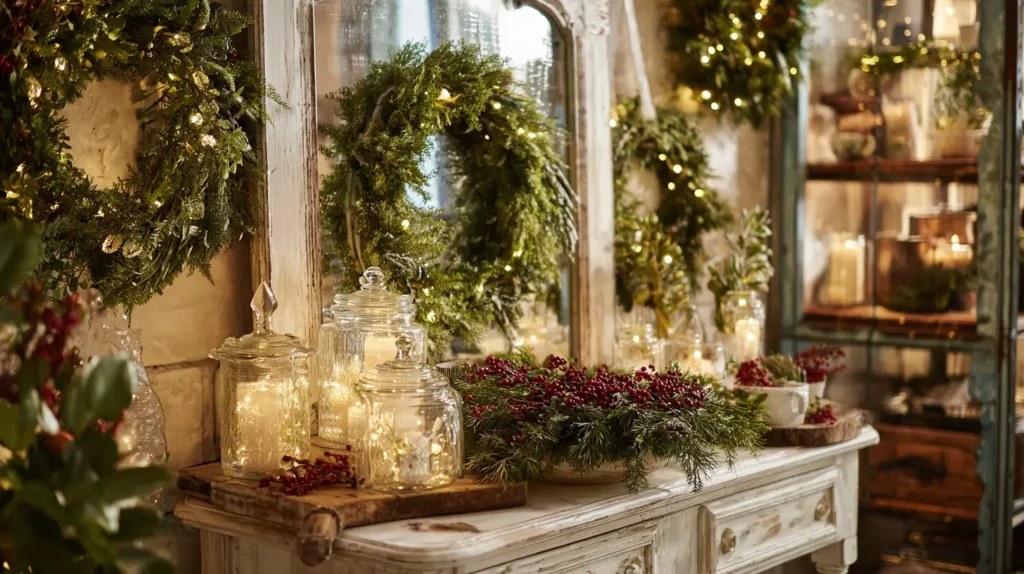
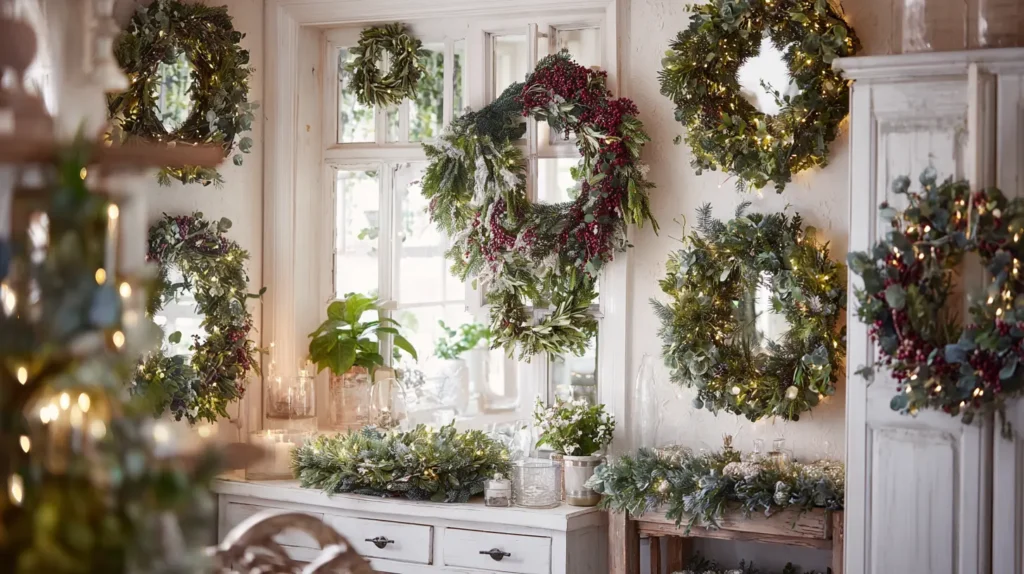
10. Wreaths on Mirrors, Cabinets, and Windows
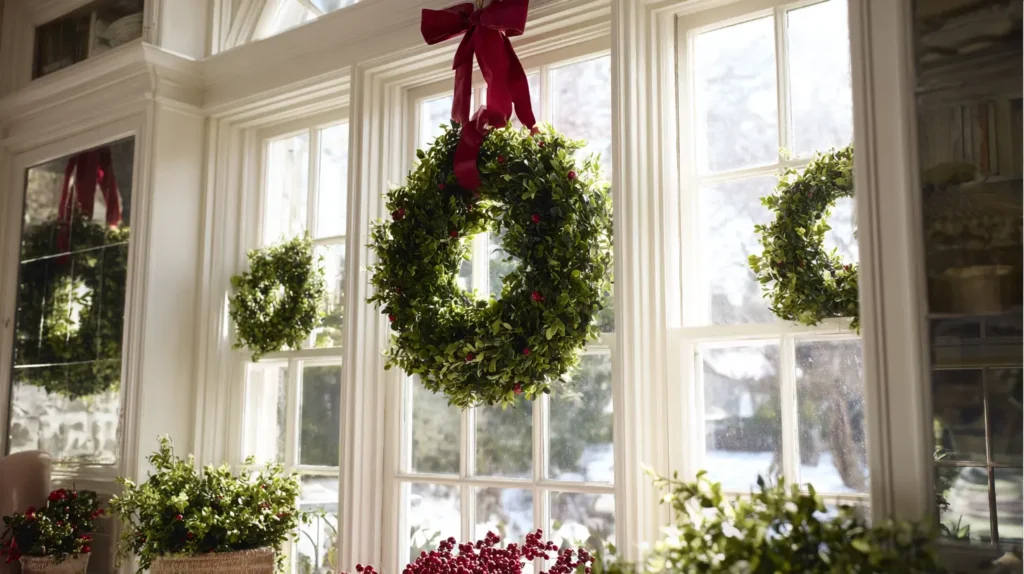
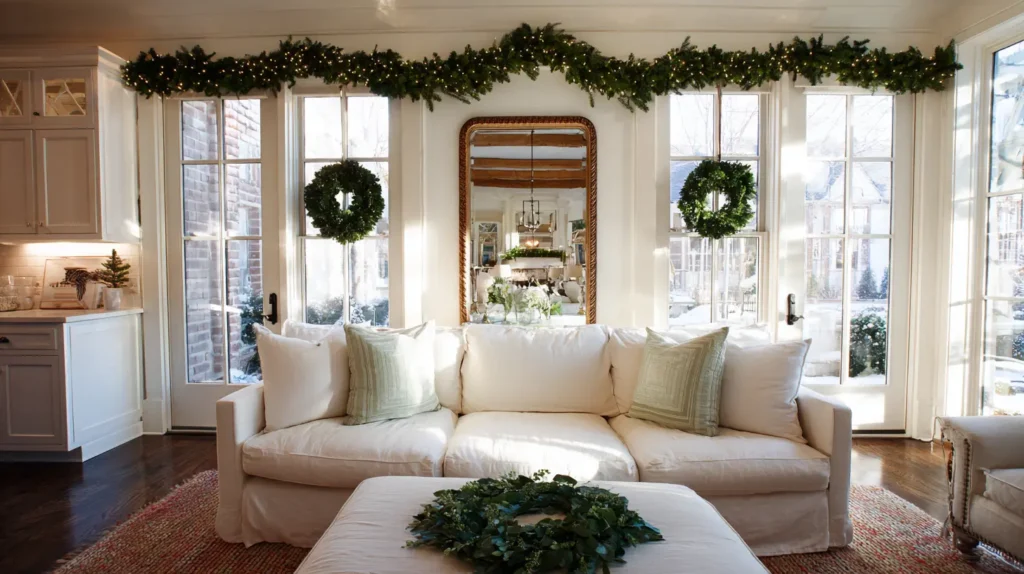
Maximize your festive impact by utilizing the vertical surfaces you already have. Imagine turning your home’s existing fixtures into elegant display spaces. Picture a lush, green boxwood wreath suspended by a long, cranberry-red velvet ribbon over the center of a large wall mirror; the reflection instantly doubles the greenery and bounces the twinkle of your Christmas lights around the room, creating depth in a small space. In the kitchen, visualize adorable mini-wreaths hanging on every cabinet door, turning a utilitarian space into a holiday baking haven. On the windows, wreaths frame the snowy view outside, creating a cozy boundary that looks beautiful from both the sofa and the street.
- The Mirror Trick: Hanging a wreath over a mirror is the ultimate small-space hack. It adds a layer of texture without blocking the glass’s light-reflecting qualities, making the room feel larger and brighter.
- Kitchen Charm: Use mini-wreaths (6–10 inches wide) for cabinet doors. Attach them using a ribbon looped over the top of the door and secured with a flat tack or tape on the inside surface so the hardware is hidden.
- Window Silhouette: Hang wreaths in your windows using clear suction cups or fishing line. For a classic look, hang them at the same height in every window to create a uniform, polished exterior.
- Ribbon Coordination: Use the ribbon color to tie the look together. If you use gold ribbon on the mirror wreath, use thinner gold ribbon for the cabinet wreaths to create a cohesive design thread throughout the home.
- Scented Accents: For kitchen cabinets, consider using wreaths made of dried herbs like rosemary or bay leaves. They look beautiful and smell amazing when you are cooking.
Pro Design Tip: To hang a wreath on a mirror without a visible hook or suction cup, place a Command hook upside down on the back of the mirror frame (at the top). Loop your ribbon through the wreath, pull it up over the front of the mirror, and hook the loop onto the hidden hook on the back. This creates a seamless, floating look where the ribbon appears to disappear over the edge.
Budget Consideration: Buying 10 mini-wreaths for kitchen cabinets can get expensive. Instead, buy one long, 9-foot unlit garland (the cheap, flexible wire kind). Cut it into 12-inch sections, then twist each into a small circle. You now have massive amounts of mini-wreaths for the price of one single garland—just add a bow!
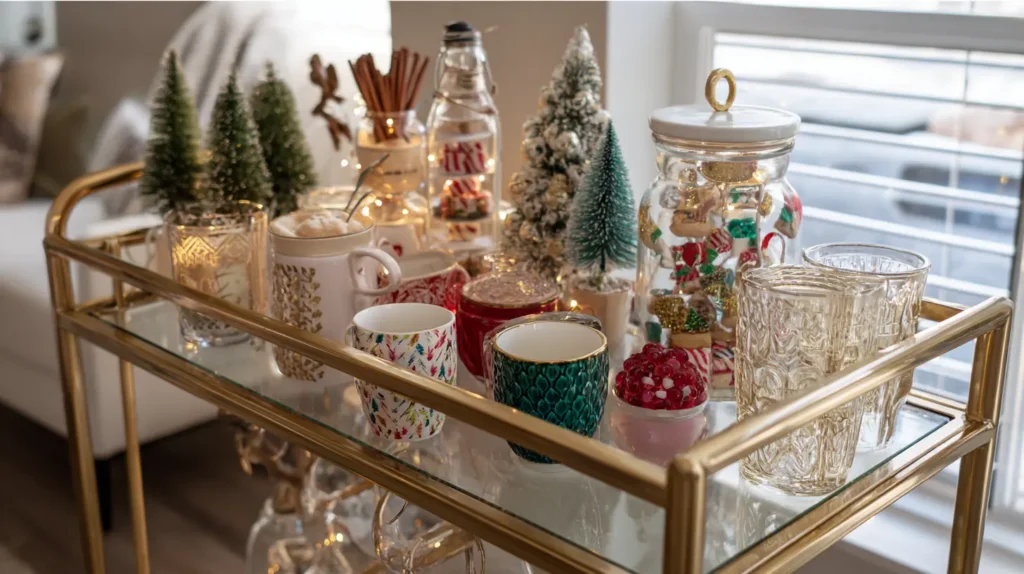
11. The Festive Bar Cart or Coffee Station Makeover
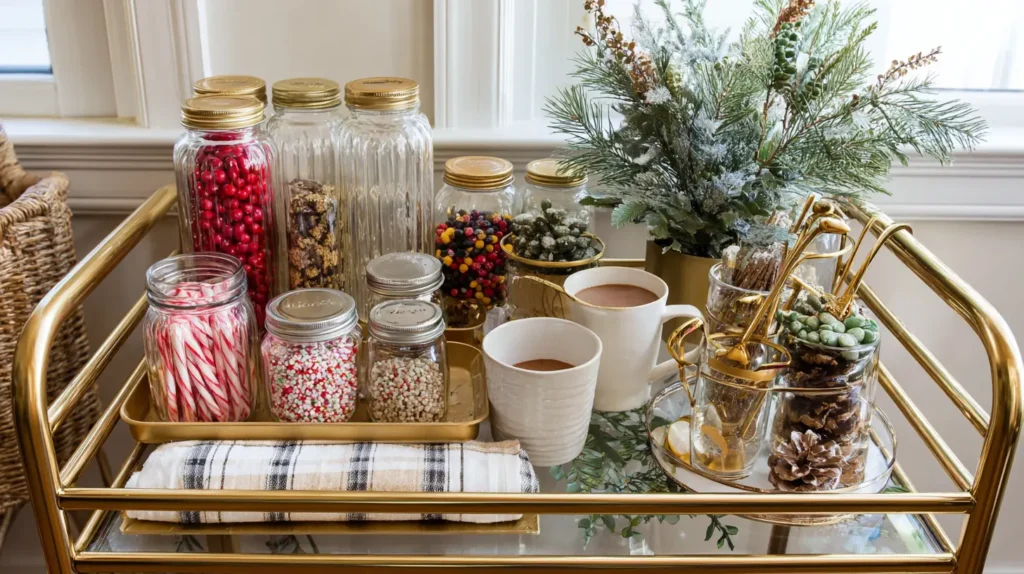
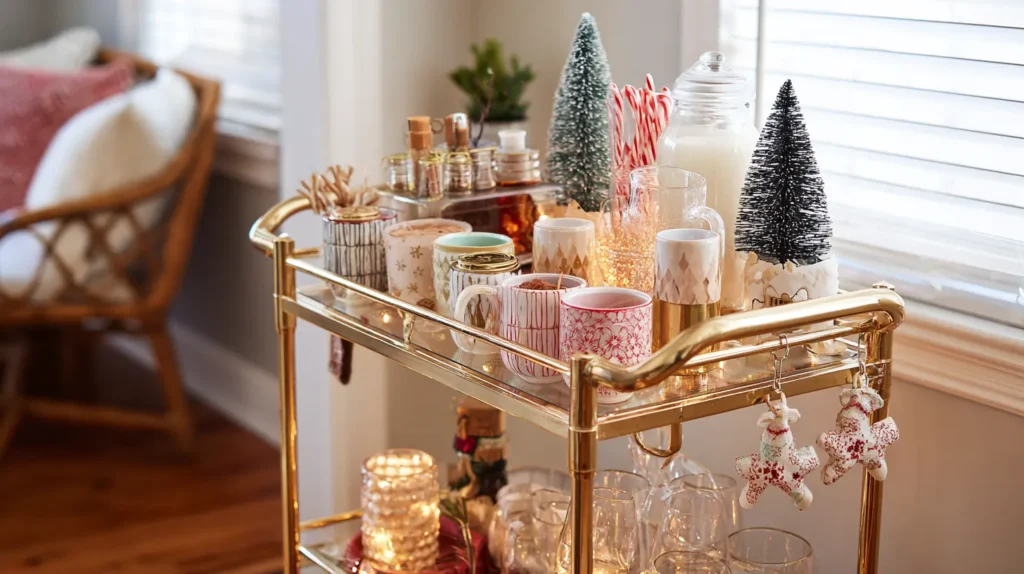
Turn your rolling bar cart or kitchen counter coffee nook into the sparkling life of the party. Imagine this small footprint transformed into a “Holiday Headquarters.” A lush faux-cedar garland is woven through the legs of the cart or draped along the backsplash, twinkling with battery-operated copper wire lights. On the shelves, your everyday mugs have been swapped for vintage Santa faces or gold-rimmed glassware that catches the light. Glass jars filled with red-and-white peppermint sticks, fluffy marshmallows, and cinnamon sticks act as edible decor, adding pops of festive color. It’s a functional, self-service station that looks like a high-end holiday display, inviting guests (and you) to craft a seasonal cocktail or a cozy cocoa.
- Weave the Greenery: Don’t just place a garland on top where it takes up valuable counter space. Weave it around the cart’s legs or handles, or drape it along the back edge of the counter.
- Edible Decor: Fill clear glass canisters with holiday staples like candy canes, red and green M&Ms, or dried cranberries. They look beautiful and serve a purpose.
- Swap the Textiles: Hang a festive tea towel—plaid, embroidered, or linen — with a holiday pun over the cart handle to add softness and pattern.
- Add Height: Use a 2-tier serving stand to stack mugs, tea bags, and cocoa mix vertically. This saves precious surface area on a small cart.
- Festive Touches: Add small, non-functional decor elements, such as a cluster of bottle brush trees or a small “Hot Cocoa” sign, to set the theme.
Pro Design Tip: Anchor the station visually by hanging a small wreath or a framed holiday print directly above the cart or coffee maker. This draws the eye up and defines the zone as a dedicated “station” separate from the rest of the room.
Budget Consideration: You don’t need expensive holiday syrups or decanters. Tie a simple velvet ribbon bow around the neck of your existing liquor bottles or mason jars. It instantly makes a $10 bottle of wine or a jar of sugar look like part of a curated, high-end holiday collection.

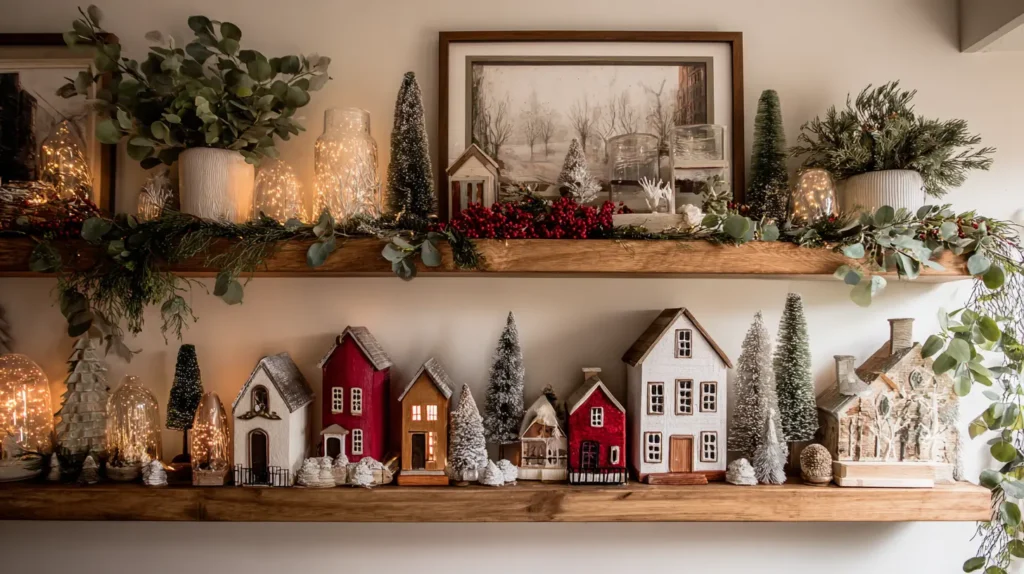
12. Opt for Miniature Christmas Villages & Dioramas
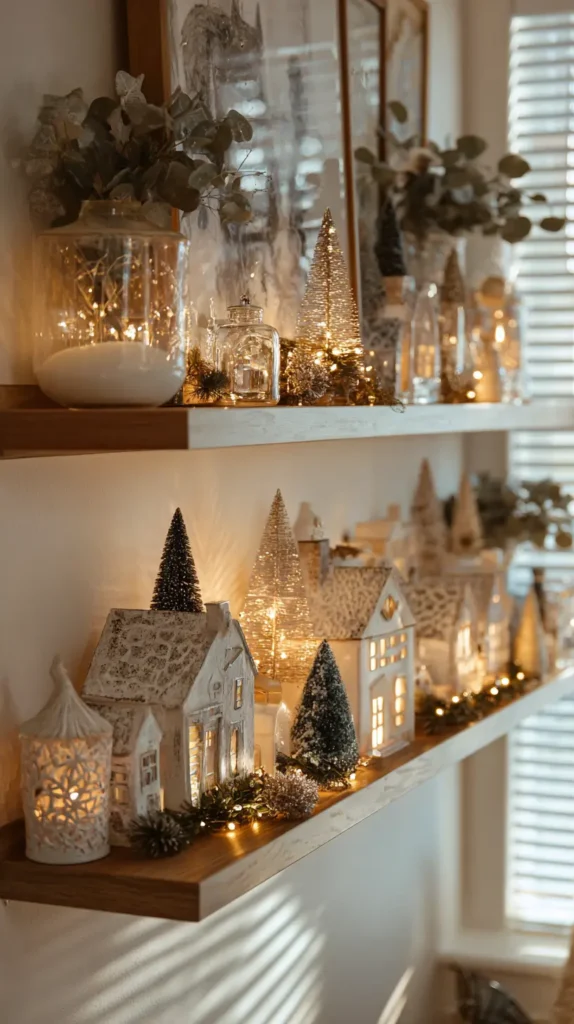
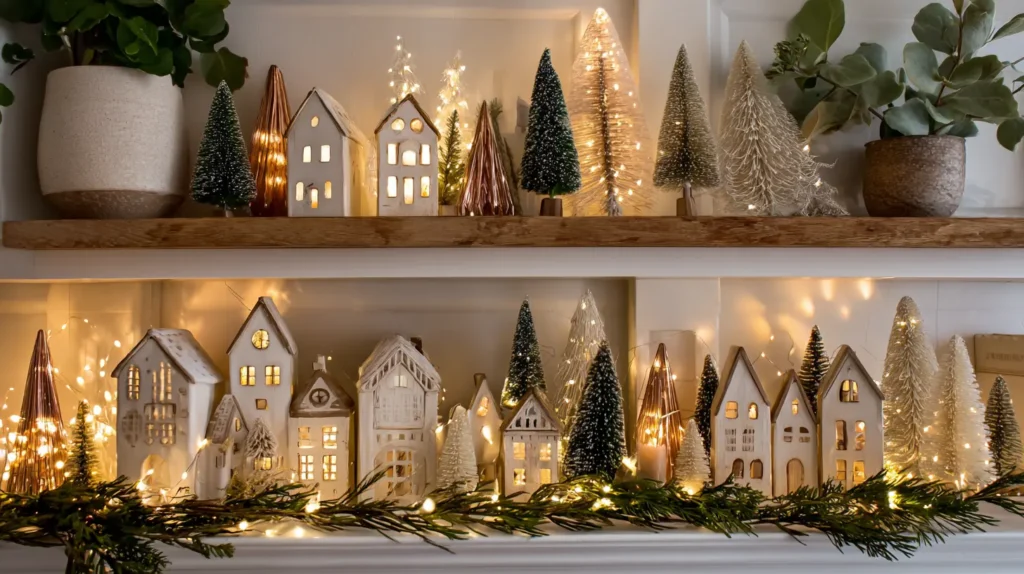
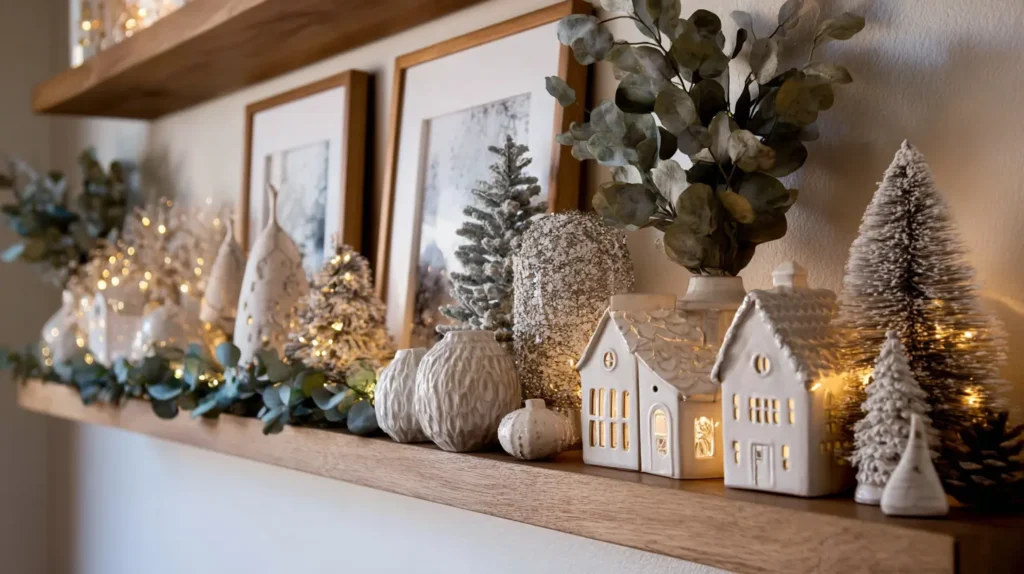
When you don’t have room for a massive tree, create a tiny, enchanting world that invites you to lean in close. Imagine clearing off a single bookshelf, a narrow console table, or even a deep windowsill to construct a snowy microcosm. Picture a row of porcelain houses or rustic wooden cabins, their windows glowing warmly with battery-operated tea lights. They are nestled amongst a forest of pastel-colored bottle brush trees and a dusting of faux snow. This miniature scene captures all the nostalgia and magic of the holidays in a compact footprint, acting as a detailed storytelling piece that guests will admire for its charm rather than its size.
- Go Vertical: If counter space is limited, build your village on a 2- or 3-tier cake stand. This creates a “mountain” effect, allowing you to display multiple houses and trees with only a 10-inch footprint.
- Contain the Mess: Build your diorama inside a glass cloche, a large lantern, or a wide glass vase. This creates a modern “snow globe” look and keeps the faux snow from spreading all over your apartment.
- Bookshelf Takeover: clear one eye-level shelf completely. Line the back with starry wrapping paper or a mirror to create depth, then arrange your village across the shelf for a contained, out-of-the-way display.
- Hide the Cords: Stick to battery-operated ceramic houses or use LED tea lights. Nothing ruins the illusion of a magical village faster than thick black power cords snaking through the snow.
- Mix Scales: Don’t worry about perfect proportions. Mixing larger houses with tiny trees and medium-sized figurines adds whimsy and visual interest to the scene.
Pro Design Tip: Create a “Mirror Lake.” Use a small, frameless mirror (flat on the surface) as the base for part of your village. Surround the edges with faux snow and place a few skating figurines or a bridge over it. The reflection mimics a frozen pond, adding a beautiful, light-reflecting dimension to the display.
Budget Consideration: Authentic collectible villages (like Department 56) are expensive. For a chic, budget-friendly Scandinavian look, print free “paper house” templates online. Cut them out of white cardstock, fold them, and place a battery-operated tea light inside. They glow beautifully and cost mere pennies to make. Alternatively, buy mismatched ceramic houses from the dollar store and spray paint them all matte white for a cohesive, modern set.
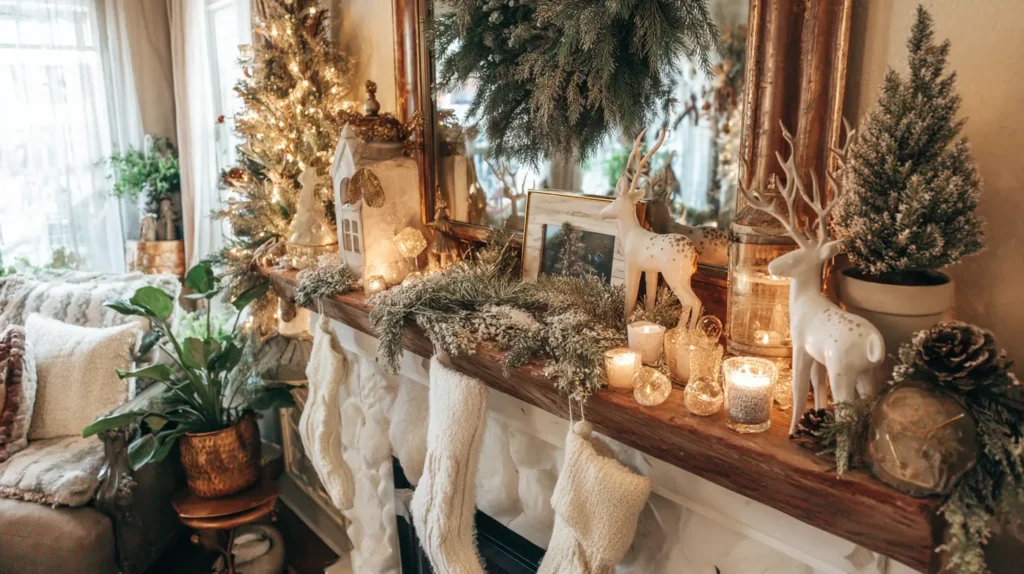
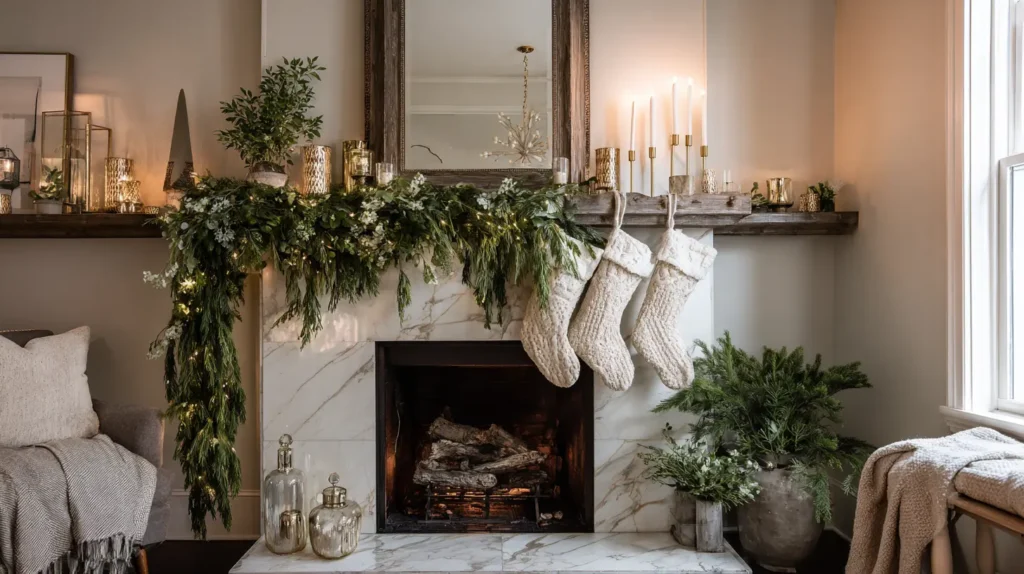
13. Corner Mantel Decor Ideas for Small Fireplaces
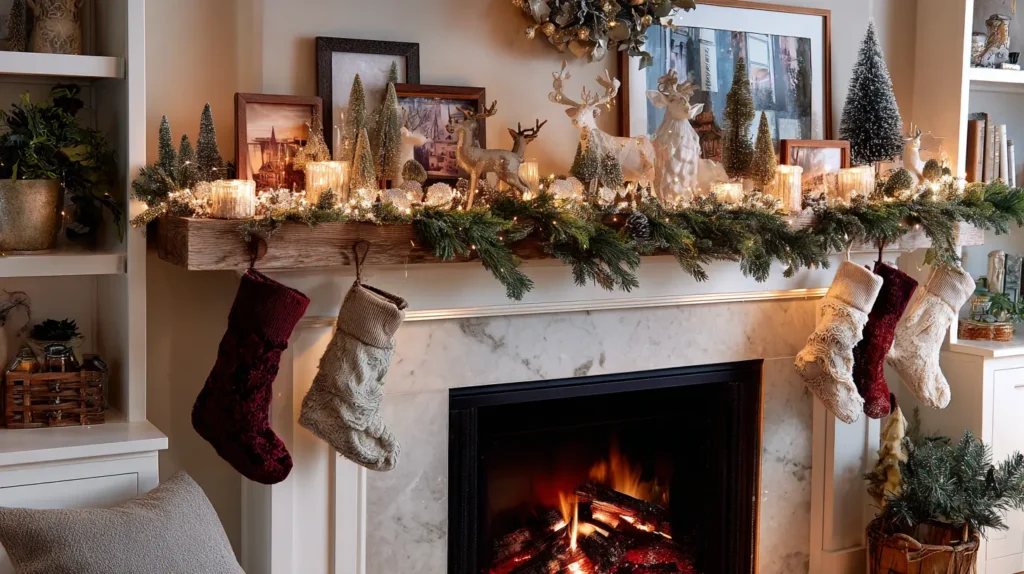
Transform your awkward corner fireplace into a stunning festive focal point by embracing asymmetry. Since you lack the expansive width of a traditional mantel, imagine a design that flows vertically rather than horizontally. Picture a lush, heavy garland that acts as a “waterfall,” bunched heavily on one side of the shelf and draping elegantly down toward the floor. To balance this cascading greenery, the other side of the mantel features a trio of tall, slender brass candlesticks and stockings hung at staggered heights. This dynamic arrangement draws the eye up and down, celebrating the corner’s unique architecture while keeping the display feeling airy and curated rather than cluttered.
- Embrace Asymmetry: Don’t try to center everything perfectly. Focus the bulk of your decor (like a large vase or the thickest part of the garland) on one side to create a modern, balanced tension.
- Go Vertical: Use tall, thin objects like tapered candles, bottle brush trees, or a slender mirror to emphasize height, which counters the mantel’s narrow width.
- Stocking Strategy: If the mantel is too small for the whole family’s stockings, hang them on a decorative ladder nearby instead. If you must hang them on the mantel, overlap them slightly to save horizontal space.
- Mirror Magic: Lean a tall, narrow mirror against the wall behind your decor. It reflects the room and the twinkling lights, making the tight corner feel twice as deep and bright.
- Secure Safely: Small mantels often have narrow ledges. Use weighted stocking holders or heavy-duty Command hooks to keep your garland from slipping off.
Pro Design Tip: Visually extend the fireplace’s footprint by styling the hearth (floor) as well. Place a tall woven basket filled with birch logs, or a large metallic lantern, on the floor next to the fireplace. This grounds the vignette and makes the small corner feel substantial and cozy.
Budget Consideration: You don’t need to buy a specific “mantel garland.” Gather leftover ornaments from your tree trimming, place them in a large glass bowl or hurricane vase, and set the bowl or vase on the mantel. It adds color and shine for free, and looks incredibly chic when paired with a few foraged pine branches.
14. Vertical Ladder Displays for Blankets and Decor
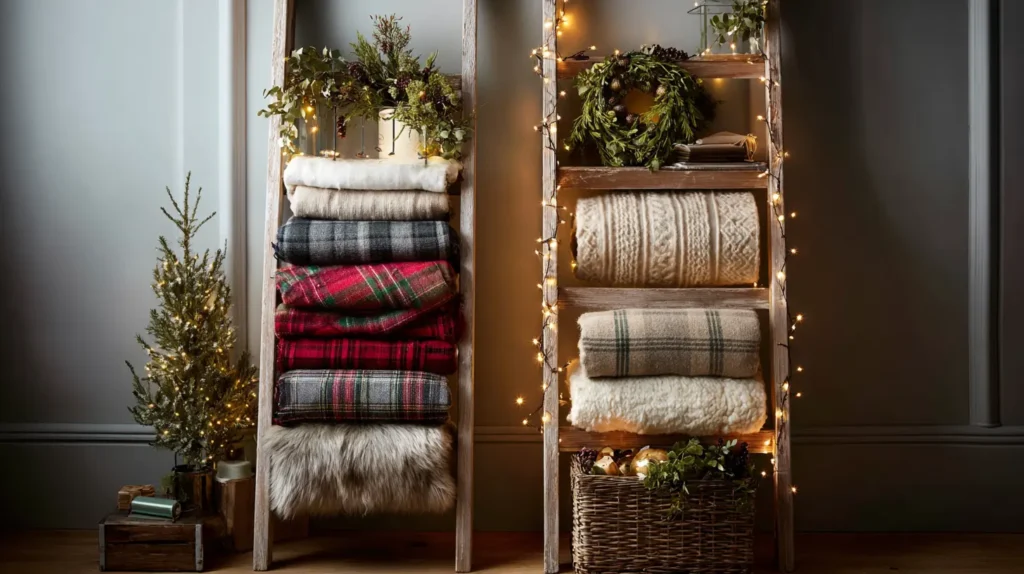
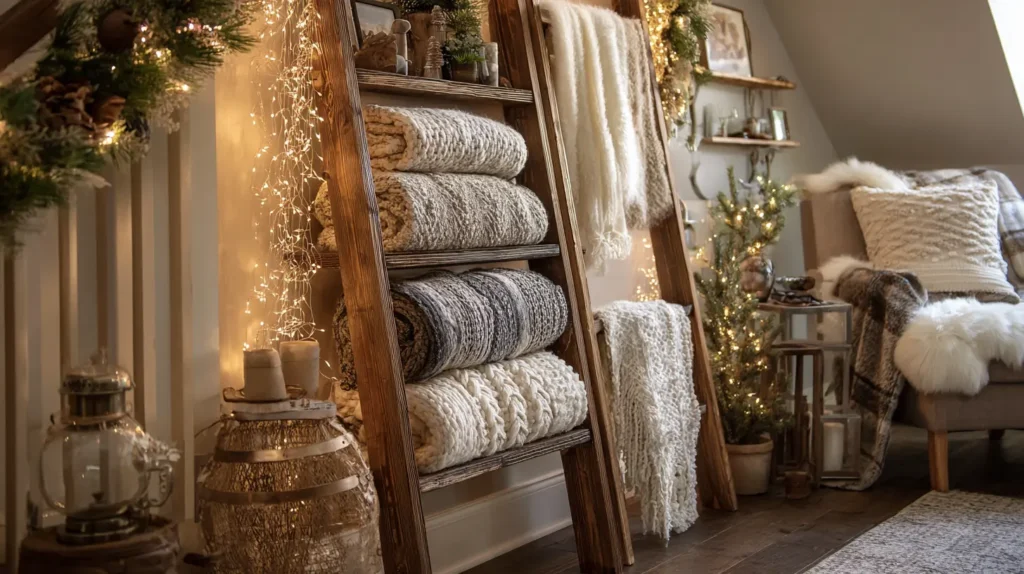
When floor space is scarce, the only way is up. Imagine a rustic wooden or sleek bamboo ladder leaning casually against a narrow strip of wall, transforming a few inches of floor into a towering tiered display of cozy textures. This isn’t just storage; it’s a vertical vignette. Each rung offers a place to drape chunky cable-knit throws, plaid wool blankets, and faux-fur sheepskins, creating a “waterfall” of holiday warmth that softens the room’s acoustics. Wrapped in copper wire fairy lights and adorned with a few hanging ornaments, the ladder becomes a functional, festive sculpture that keeps your sofa clutter-free while adding height and architectural interest to a small room.
- The Mantel Alternative: If you don’t have a fireplace, use the ladder rungs to hang your Christmas stockings. It’s a charming, rustic way to display them without needing a heavy shelf.
- Layer the Textures: Don’t just hang one blanket. Layer a smooth velvet throw over a rough wool one on the same rung to create depth and visual richness.
- Light It Up: Wind a strand of battery-operated fairy lights or a thin wire garland loosely around the ladder’s side rails to make it glow in the evening.
- Ornaments and Greenery: Tie a small bundle of eucalyptus or pine to the top corner of the ladder, or hang a single statement ornament from the middle rung for a subtle festive touch.
- Small Footprint: Because it leans, a ladder takes up almost zero floor space (unlike a basket or shelving unit), making it ideal for tight corners or behind a door.
Pro Design Tip: Treat the ladder as an “Advent” display. Tie 24 small, numbered muslin bags filled with treats to the rungs using red ribbon. It turns the ladder into an interactive holiday countdown that looks beautiful and serves a fun purpose for the family.
Budget Consideration: Decorative ladders can be pricey at boutiques, but you can make one easily for under $15. Buy two long 1×2 wooden boards and a few round dowels from a hardware store. A little wood glue and a few nails are all you need to build a custom-sized ladder that you can stain or paint to match your room perfectly.


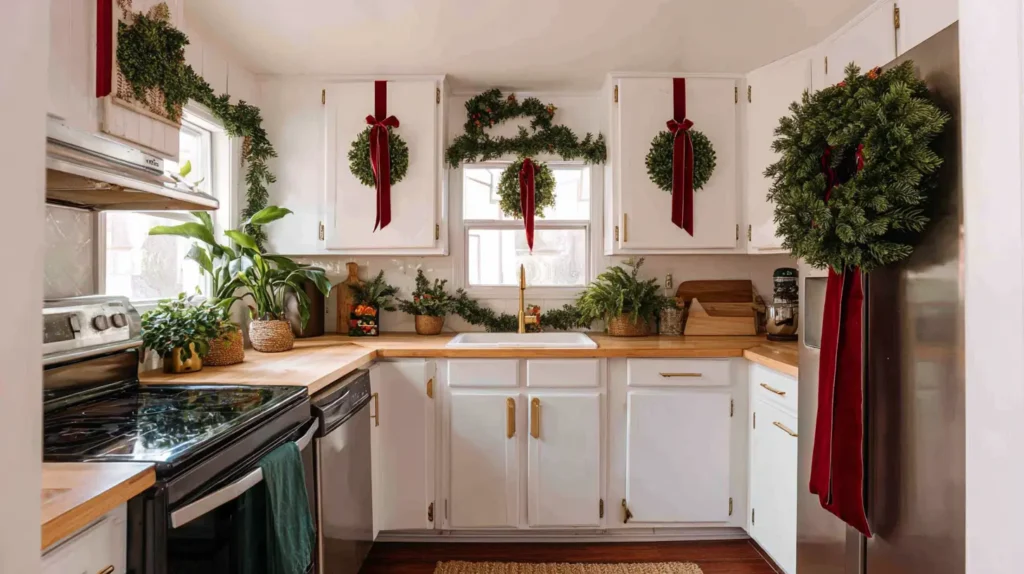
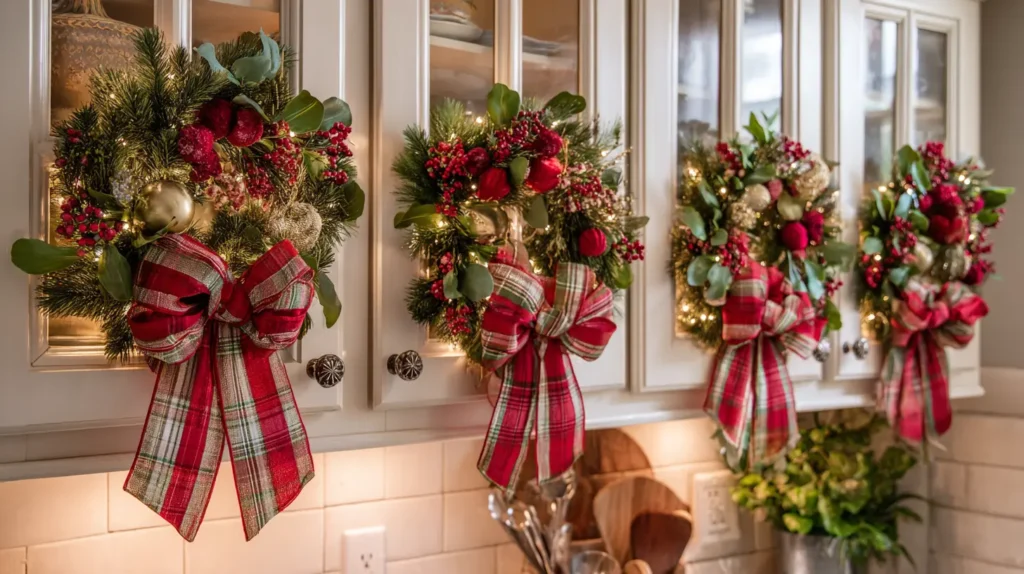
15. Festive Kitchen Cabinet Ribbons and Wreaths

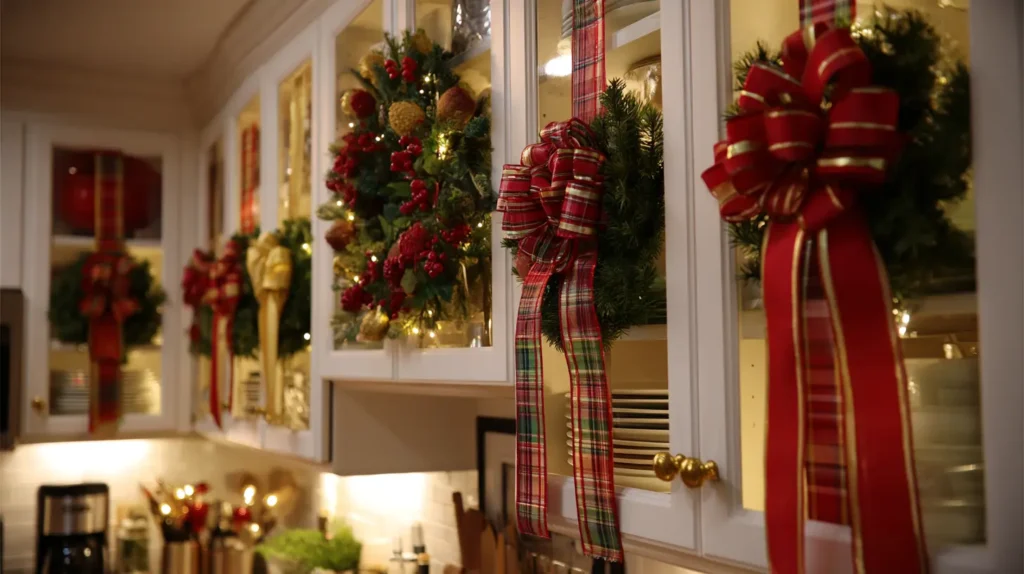
Turn the heart of your home into a holiday workshop by treating your kitchen cabinets like beautifully wrapped gifts. Imagine walking into your small kitchen to see every upper cabinet door adorned with a miniature boxwood or pine wreath, suspended by a crisp, vertical length of cranberry-red satin or emerald velvet ribbon. This simple addition brings the festivities into the most functional room of the house without cluttering your limited counter space. It creates a repetitive, cohesive rhythm that delights the eye, transforming plain white or wood doors into a charming, “gingerbread house” aesthetic that feels cozy and curated.
- Scale is Crucial: For standard cabinet doors, choose mini-wreaths that are 6 to 10 inches in diameter. Anything larger will make the doors difficult to open and look overwhelming.
- The “Gift Wrap” Look: Run the ribbon vertically over the center of the door, taping it securely to the inside top and bottom edges. This creates a clean, vertical line that mimics a wrapped present.
- Coordinate the Colors: Match your ribbon to your existing kitchen decor. If you have blue accents, use a navy velvet ribbon; for a farmhouse look, go with a burlap or red-striped grain sack ribbon.
- Uppers Only: In a small kitchen, stick to decorating the upper cabinets only. Hanging wreaths on lower cabinets can get in the way of your knees while cooking and attract curious pets.
- Scented Accents: Use wreaths made from dried herbs such as rosemary, bay leaf, or thyme. They look lush and release a savory, pleasant aroma whenever the kitchen warms up from baking.
Pro Design Tip: To prevent the wreaths from banging against the cabinet door every time you open it, stick a small piece of double-sided foam tape or a felt furniture pad to the back of the wreath frame. This keeps it silent and protects your cabinet finish from scratches.
Budget Consideration: “Mini wreaths” can be surprisingly expensive. A brilliant hack is to search for “greenery candle rings” instead. These are designed to sit around the base of a pillar candle but are the perfect size for cabinet doors and usually cost a fraction of the price of items labeled as “wreaths.”
16. Ceiling Hook Hanging Star and Snowflake Mobiles
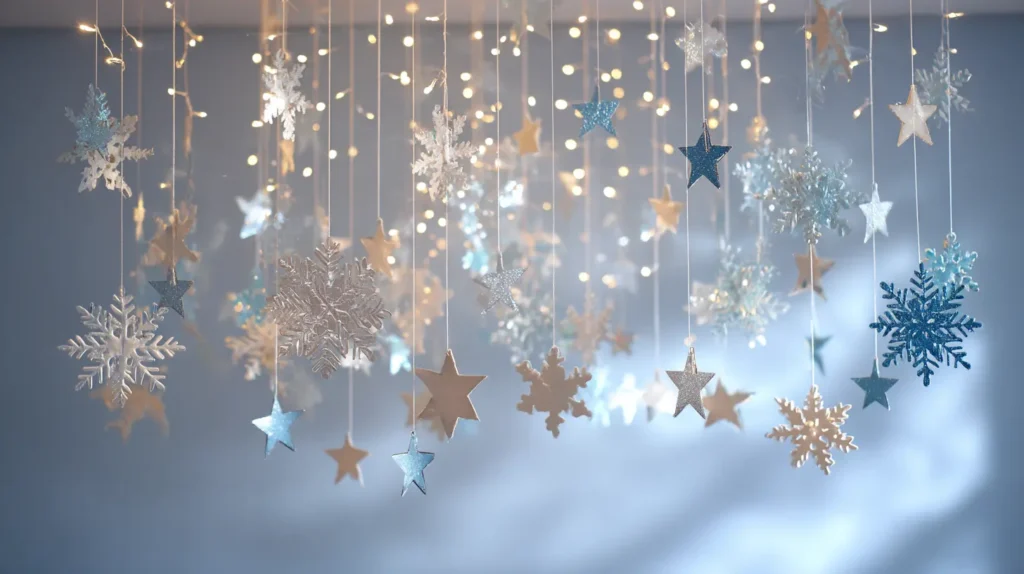
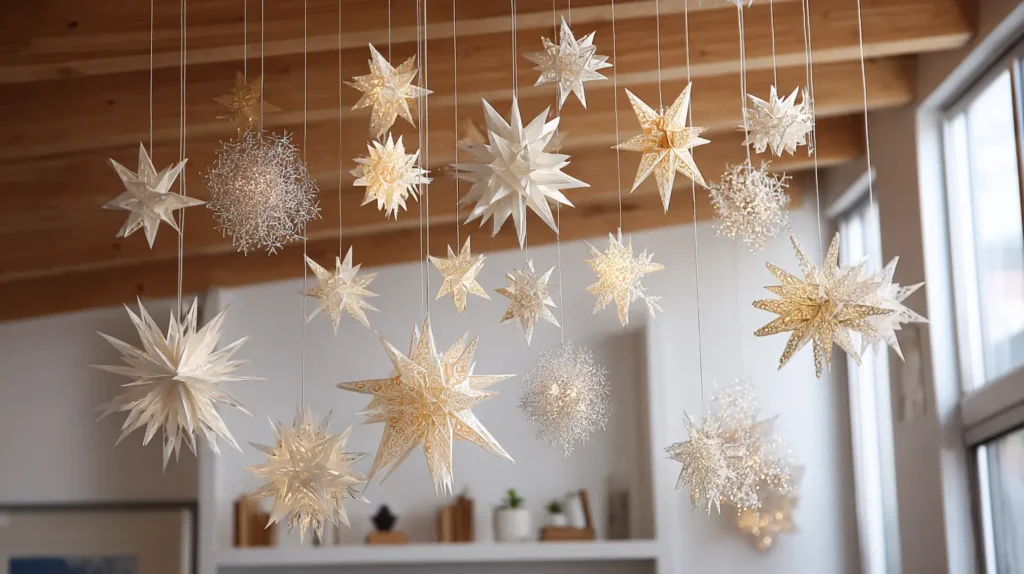
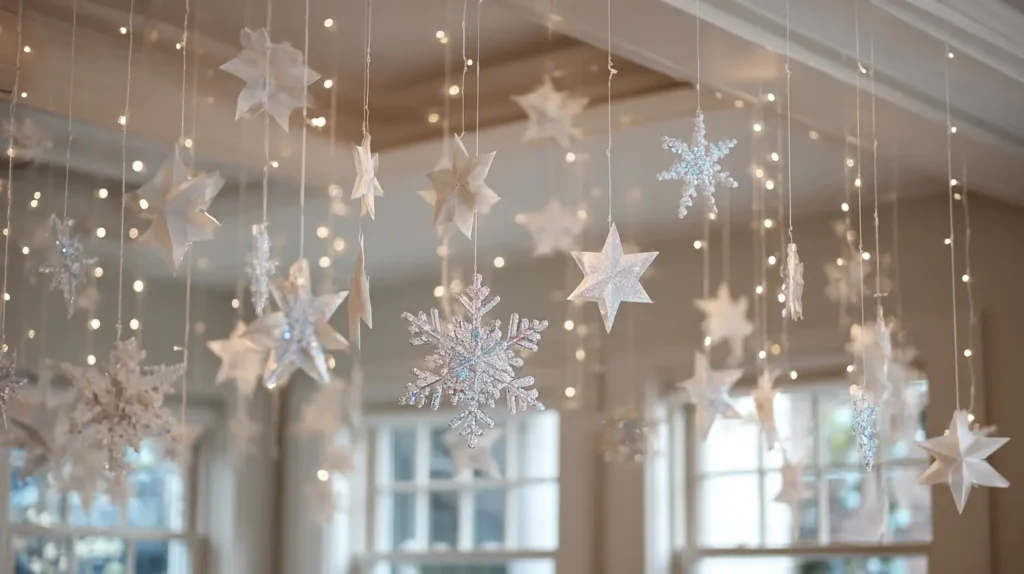
When floor space is nonexistent, look to the “fifth wall”—your ceiling. Envision walking into your living room and being greeted by a floating galaxy of oversized 3D paper stars and delicate, crystalline snowflakes suspended in mid-air. Hanging from simple, damage-free hooks, these lightweight sculptures gently spin and drift with the air currents, creating a mesmerizing, dynamic display. Whether you choose illuminated Moravian stars that glow warmly or glittering metallic snowflakes that catch the light, this decor strategy draws the eye upward, making your ceilings feel higher and creating an immersive “snow globe” effect that is pure magic.
- Invisible Suspension: Use clear monofilament (fishing line) to hang your ornaments. From a few feet away, the line disappears, making the stars and snowflakes look like they are truly floating by magic.
- Vary the Scale: Don’t just use one size. Mix massive 24-inch paper stars with smaller 6-inch snowflakes. The contrast in scale adds drama and depth to the arrangement.
- The “Chandelier” Effect: Instead of scattering them randomly across the whole room, cluster 5-7 items at varying heights directly over your coffee table or dining table to create a stunning, improvised chandelier.
- Material Mix: Combine different textures—matte white paper, shiny silver foil, and clear acrylic—to create a rich, layered look that sparkles during the day and glows at night.
- Renter-Friendly Hooks: Use “ceiling” specific Command hooks with the adjustable toggle. They hold surprisingly well on flat paint and can be removed cleanly in January without peeling the plaster.
Pro Design Tip: Intersperse battery-operated “fairy light” wire balls or single LED “balloon lights” amongst the paper stars. This adds a soft, internal glow to the mobile, turning the ceiling display into a source of ambient mood lighting for cozy movie nights.
Budget Consideration: The viral “Paper Bag Star” DIY is the ultimate budget hack here. Glue 7-9 brown or white paper lunch bags together, snip a pattern into the edges, and unfold them to create massive, stunning 3D snowflakes that cost pennies to make but look like high-end Scandinavian decor.
17. Bedside Tabletop Snow Globe Collections
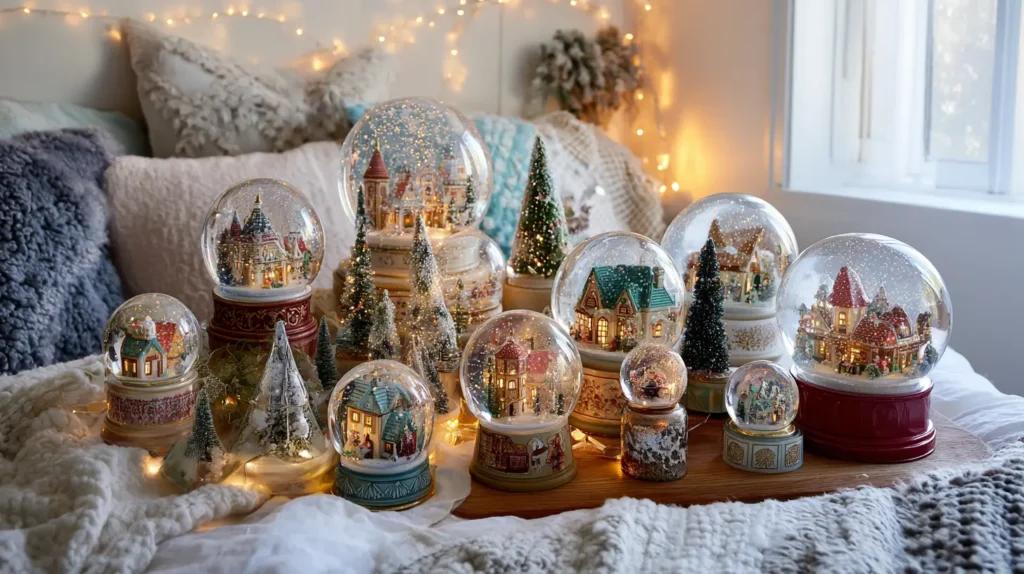
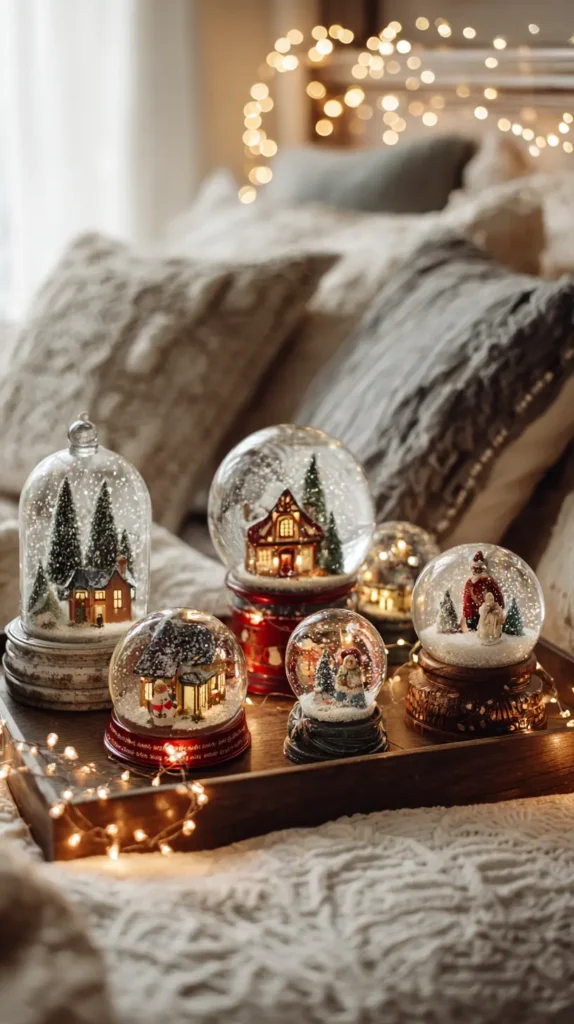
Bring the magic of a white Christmas right to your pillow with a dreamy, miniature display on your nightstand. Imagine clearing away the clutter of receipts and charging cables to create a mesmerizing little world under glass. Picture a curated cluster of snow globes—perhaps a vintage one with a music box base next to a sleek, modern globe with gold glitter—catching the soft glow of your bedside lamp. When you give them a shake, a silent blizzard swirls around tiny reindeer, snowy fir trees, or cityscape silhouettes, creating a private, nostalgic moment of wonder that is the perfect calming ritual before drifting off to sleep.
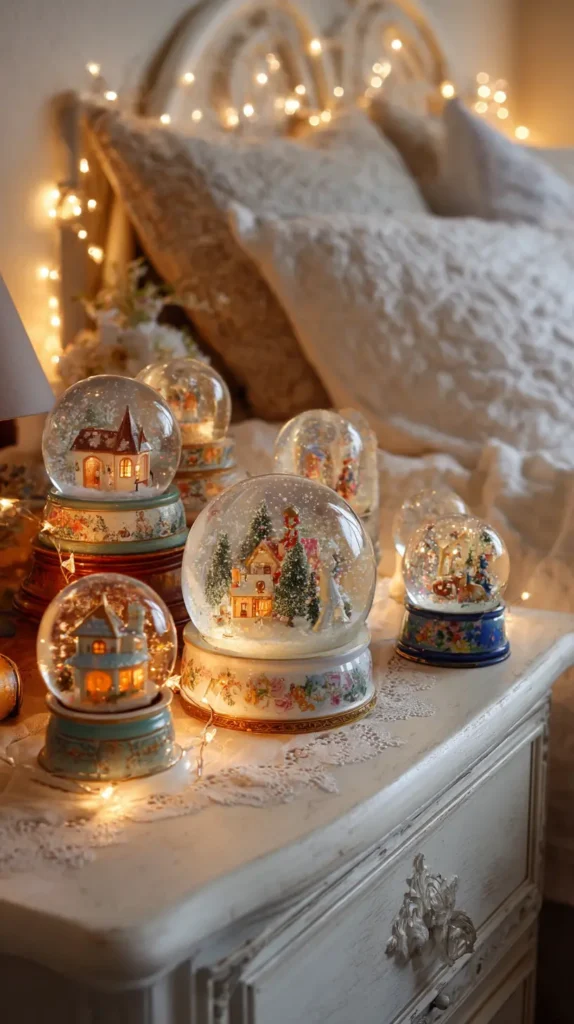
- The Rule of Odds: Group your snow globes in odd numbers (a cluster of three or five) to create an arranged collection rather than random clutter.
- Vary the Height: Create visual interest by placing small globes on top of a stack of books and taller ones directly on the table surface to keep the eye moving.
- Lighting is Key: Position the collection near your bedside lamp or a candle. The light shining through the liquid and glass magnifies the sparkle of the glitter.
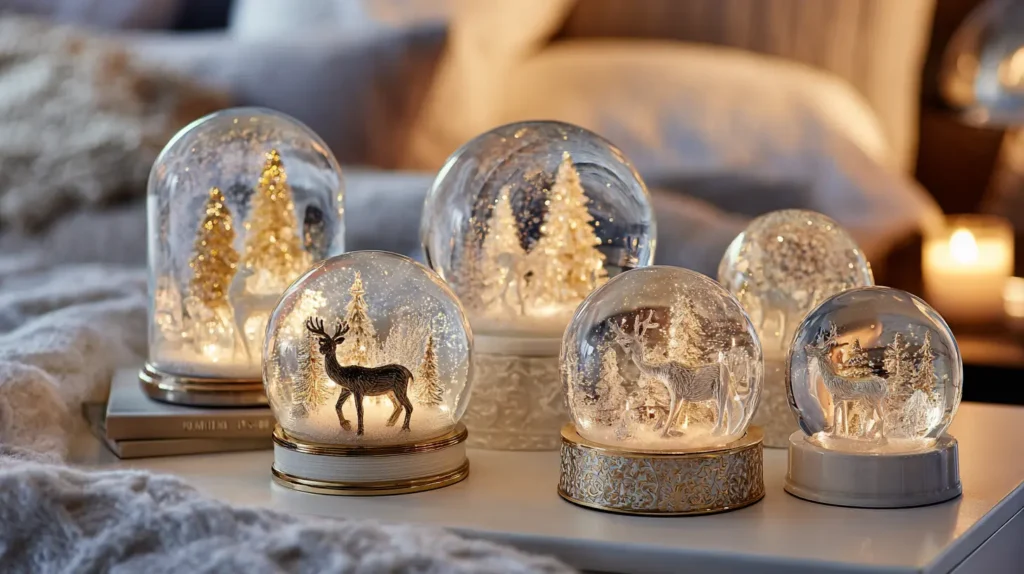
- Stick to a Theme: To keep it looking chic and not chaotic, choose a cohesive thread—like “all white snow,” “woodland animals,” or “city landmarks”—so they feel like a set.
- DIY Magic: Don’t overlook homemade globes. A mason jar filled with distilled water, glitter, and a tiny plastic deer glued to the lid can look just as charming as a store-bought version.
Pro Design Tip: Place your collection on a small mirrored tray or a round mirror candle plate. The reflection doubles the visual impact of the “snow” and bounces the light around, making your tiny collection feel twice as large and magical.
Budget Consideration: You don’t need expensive collectibles. DIY “waterless” snow globes are a huge trend and cost pennies. Simply glue bottle brush trees and fake snow into empty glass jars (apothecary jars or recycled food jars), then place the lid on. They capture the same snowy aesthetic without the risk of leaks or the need for glycerin.
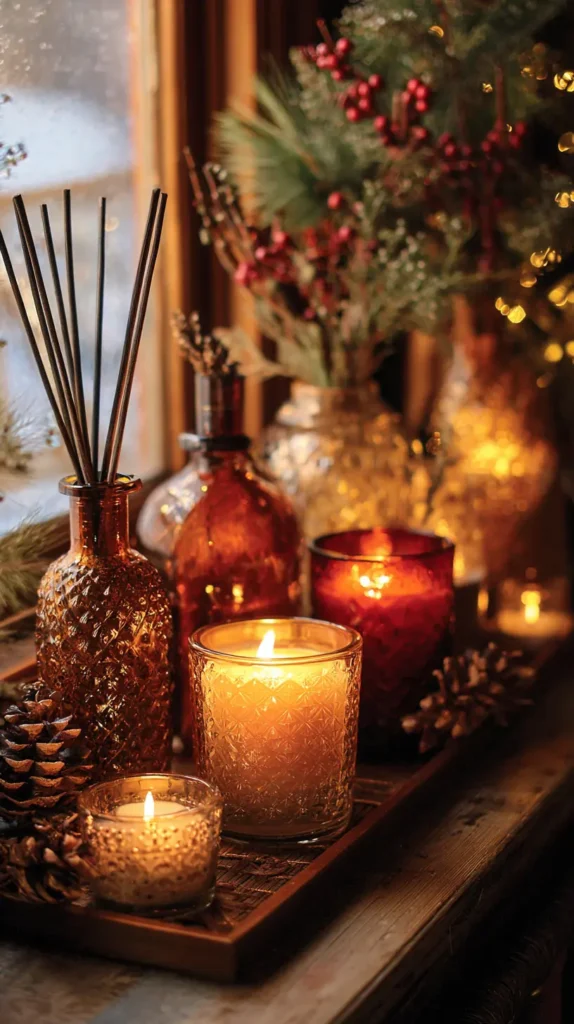
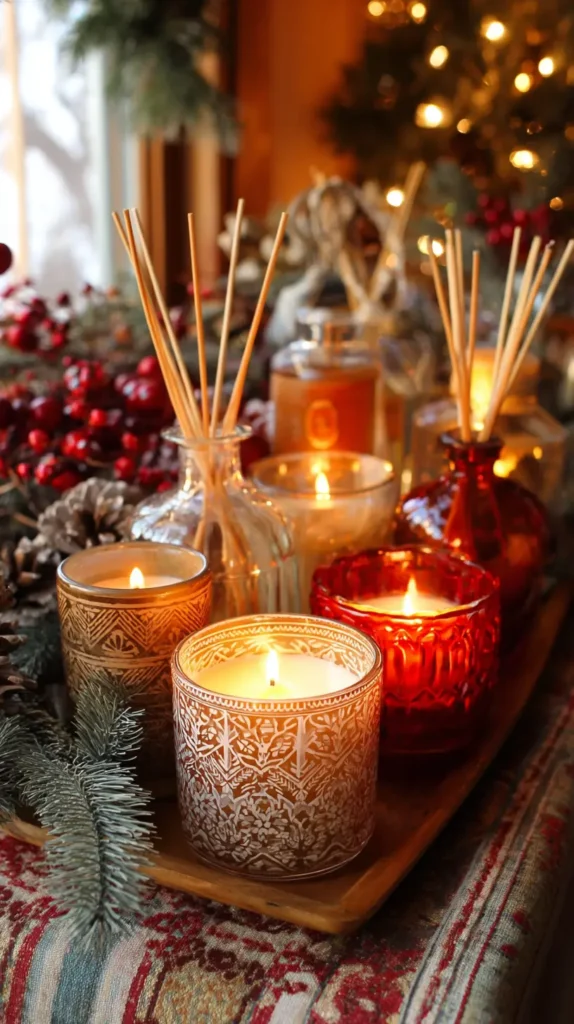
18. Holiday Scentscaping with Candles and Diffusers
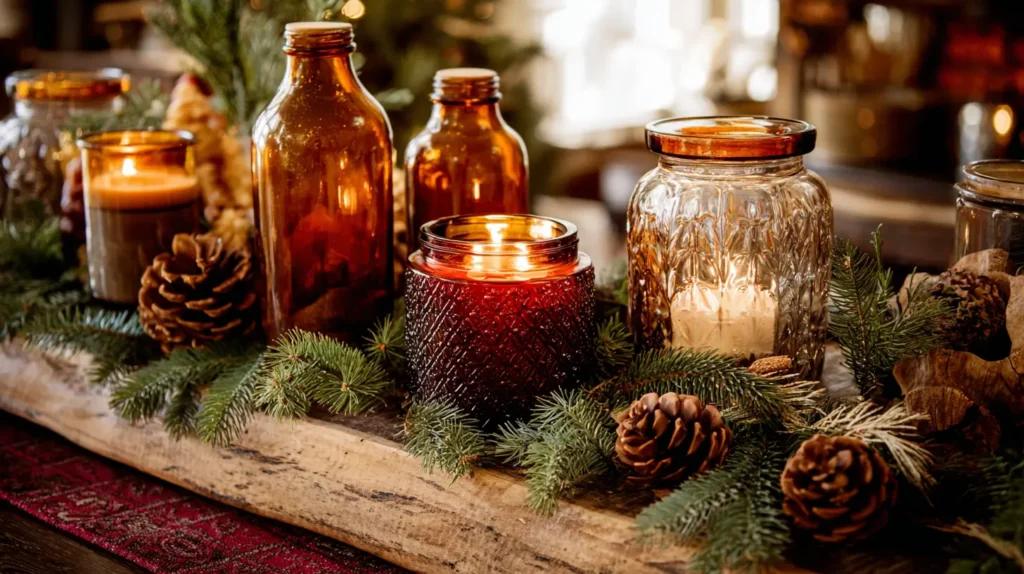


In a small home, “invisible decor” is your most powerful tool. Imagine walking through the door and being instantly transported by the nostalgic aroma of fresh pine needles, spicy cinnamon, or warm vanilla sugar. Scentscaping is the art of layering fragrance to set a mood without taking up a single inch of floor space. Picture a cluster of amber glass jars flickering on the coffee table, or a sleek ceramic stone diffuser quietly releasing a mist of cedarwood oil in the corner. This sensory layer makes the room feel fully immersive and festive, tricking the brain into perceiving a “Christmas tree farm” or “gingerbread bakery” atmosphere, even if your tree is artificial and your kitchen is tiny.
- Pick a Signature Theme: In a small space, avoid mixing too many clashing scents. Stick to one profile—like “Woody & Fresh” (balsam, cedar, eucalyptus) or “Warm & Spicy” (clove, orange, cinnamon)—to keep the air from feeling heavy or overwhelming.
- The “Fake it ‘Til You Make it”: If you have an artificial tree, place a “Fir & Firewood” scented candle or a reed diffuser hidden directly behind the tree base. It tricks guests into thinking your faux pine is the real deal.
- Flameless Safety: In tight spaces where flowing curtains or pets are nearby, opt for wax warmers or smart diffusers. They provide the same potent scent throw without the fire hazard of an open flame.
- Vessel Aesthetics: Treat your candles as decorative objects. Choose vessels in matte white, gold tin, or deep red glass that complement your visual theme so they look beautiful even when unlit.
- Timed Release: Use a programmable diffuser to start misting 15 minutes before you come home from work, so you are greeted by holiday cheer the moment you unlock the door.
Pro Design Tip: Create “Scented Ornaments” for your tree. Apply a few drops of essential oil (such as pine or spruce) onto porous clay discs or raw wooden beads, and hang them deep inside the branches of your tree. This diffuses the scent right at nose level, creating a localized, subtle, and realistic “fresh tree” smell.
Budget Consideration: The most authentic holiday scent is arguably the cheapest: a Stovetop Simmer Pot. Fill a small saucepan with water, cranberries, orange slices, a cinnamon stick, and a sprig of rosemary. Simmer it on low heat. It humidifies the dry winter air and fills your entire apartment with a rich, natural fragrance for the cost of a few pieces of fruit.

19. Compact Centerpieces for Small Dining Tables


Envision an intimate holiday dinner where the decor sparks conversation rather than blocking it. Instead of a sprawling floral arrangement that eats up precious plate space, picture a sleek, low-profile centerpiece running down the center of your table. Imagine a narrow bed of fresh cedar or eucalyptus sprigs, interspersed with slender brass candlesticks and a scattering of pomegranate or dried orange slices. This curated “runner” of texture and light creates a warm, festive atmosphere that feels sophisticated and airy. It leaves plenty of room for the food and wine while ensuring your guests can see each other across the table, making your small dining area feel cozy, not cluttered.
- Go Linear: For rectangular tables, create a narrow “spine” down the middle using a thin garland or a line of tea lights. This keeps the center festive while leaving the edges free for place settings.
- Tray Chic: For round tables, corral your decor (a candle, a small vase of berries, and a pinecone) onto a round serving tray. This keeps the display tidy and allows you to lift the entire centerpiece off in one second if you need room for serving dishes.
- Keep it Low: Follow the “elbow rule”—keep your centerpiece below eye level (about 12-14 inches max) so it doesn’t become a barricade between guests.
- Edible Decor: Use seasonal produce like red pears, artichokes, or walnuts in a bowl. They add beautiful organic texture and color, and you can eat them later!
- The Rule of Three: A simple cluster of three items—like one pillar candle, one small potted cypress, and one bowl of ornaments—is often all you need to make a statement without overcrowding.
Pro Design Tip: If your table is truly tiny, go vertical with a tiered cake stand. Place it in the center and fill the tiers with ornaments, greenery, and sweets. It provides a massive festive impact and height but occupies only 8–10 inches of space, leaving the rest of the table clear.
Budget Consideration: You don’t need to buy a florist’s arrangement. Visit the grocery store’s produce section. A bowl filled with bright red cranberries, whole nuts, or fragrant clementines with the leaves still attached makes for a stunning, vibrant, and incredibly cheap centerpiece that screams “holiday.”


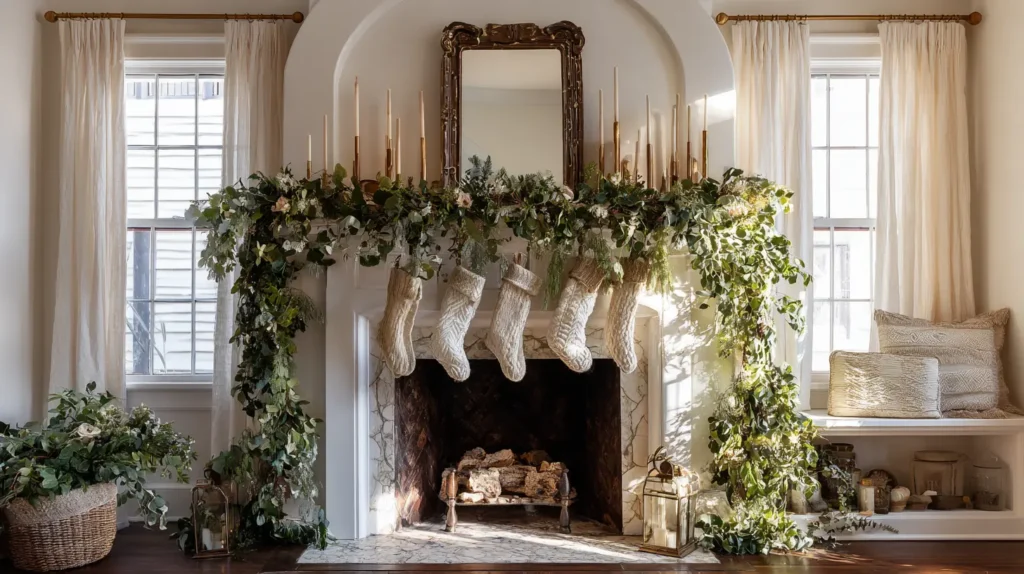
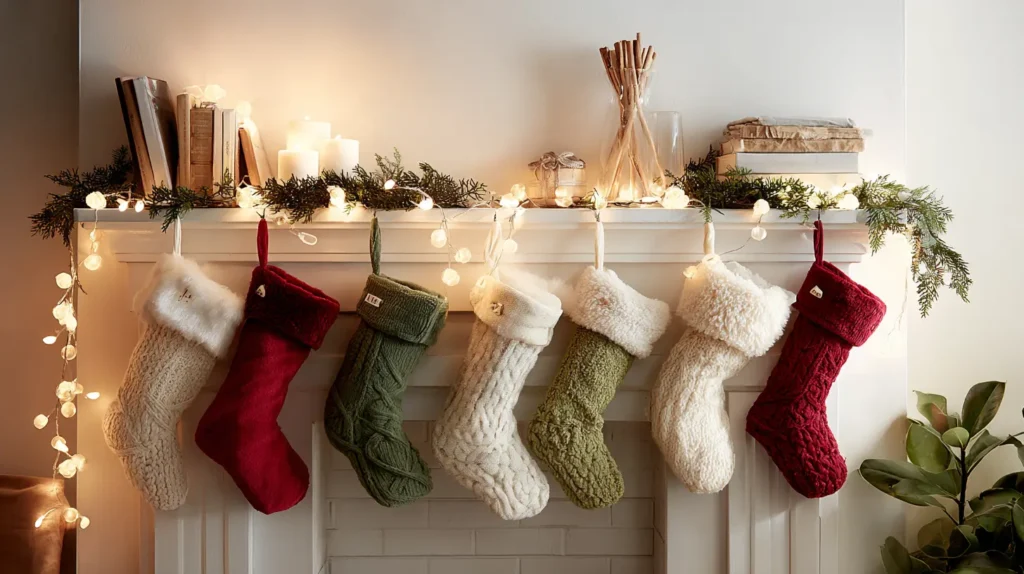
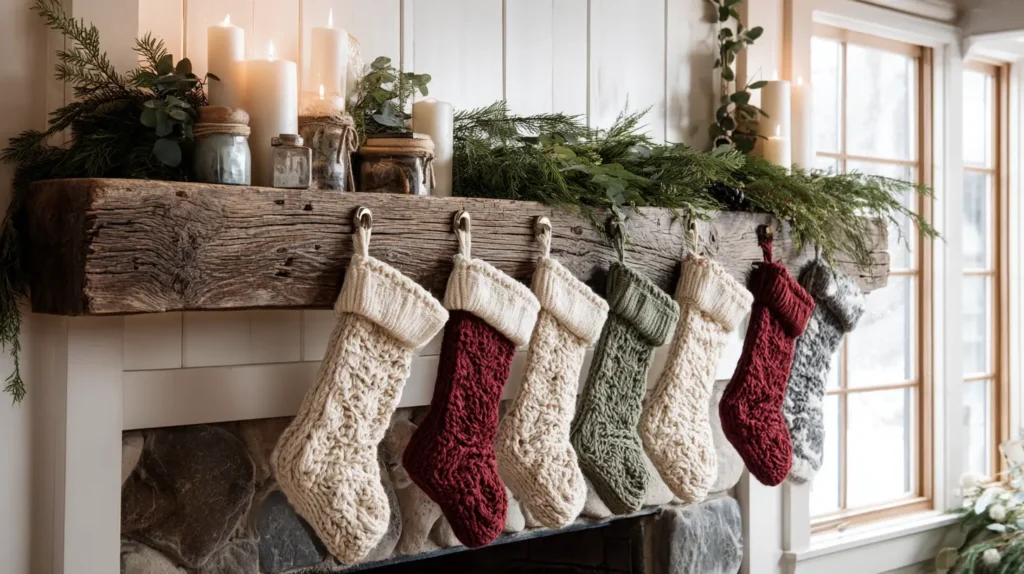
20. Hanging Stockings Without a Mantel
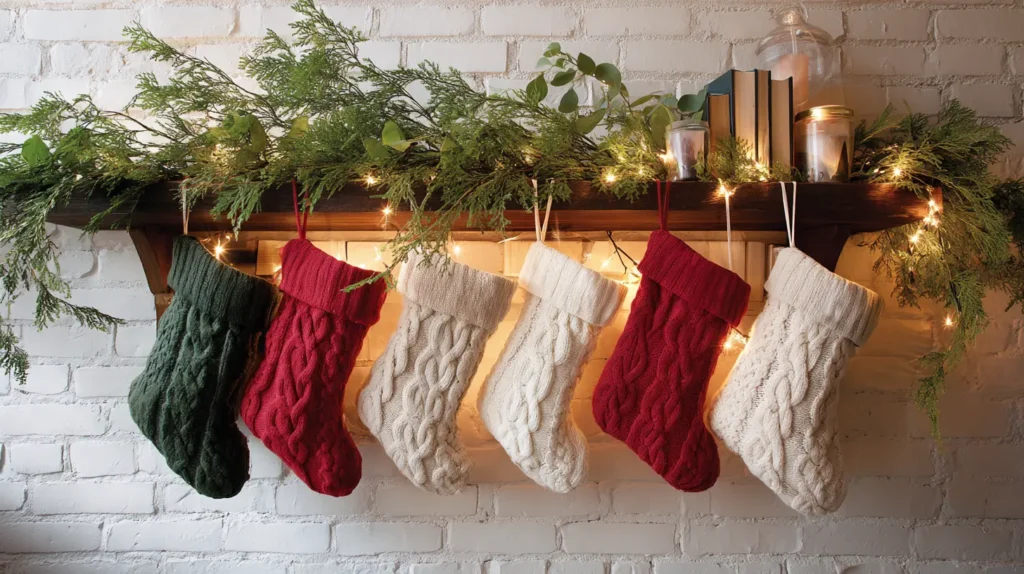

Who says you need a stone fireplace to hang your stockings with care? Imagine creating a charming “stocking station” that acts as a festive focal point in its own right. Picture a rustic, reclaimed wood coat rack mounted in your entryway, or a simple floating shelf in the living room, transformed into a mantel proxy.
The stockings hang from sturdy hooks, interspersed with a thick, lush garland of pine and eucalyptus that drapes over the edge, concealing the hardware. Below, on a console table or bench, a few pillar candles flicker, mimicking the warmth of a hearth. This setup proves that the tradition is about the display, not the architecture, allowing you to create a cozy landing zone for Santa’s gifts on any wall in your home.
- The Bookshelf Ledge: Clear a shelf at eye level on your bookcase. Use weighted stocking holders (the heavy iron kind) to hang stockings off the edge, just like a mantel.
- Window Sill Display: If you have deep window sills, place your stocking holders there. The stockings will frame the window nicely, silhouetted against the snowy view outside.
- Furniture Knobs: Utilize the hardware you already have. Loop stocking ribbons over the knobs of a tall dresser, a china cabinet, or the handles of your TV console.
- The “Branch” Hack: Find a sturdy, aesthetic birch branch. Mount it to the wall using leather straps or hooks, and hang your stockings from the branch for a Scandi-boho vibe.
- Coat Rack Conversion: For the month of December, clear the coats off your entryway rack and dedicate it entirely to stockings. It’s often the perfect height and already has sturdy hooks.
Pro Design Tip: Create a “digital hearth.” Hang your stockings on the front of your TV media console (using adhesive hooks or weighted holders on top). Then, stream a high-quality “Crackling Yule Log” video on your TV. The visual of the fire directly above the stockings creates a surprisingly cozy, realistic fireplace atmosphere.
Budget Consideration: You don’t need expensive weighted holders. Use heavy-duty, metallic Command hooks (the kind meant for bathrobes). They stick securely to walls, shelves, or the side of furniture, hold a full stocking’s weight, and can be removed in January without peeling off your paint. Paint them matte black or gold to make them look like built-in hardware.
Conclusion
Celebrating the holidays in a smaller footprint encourages a level of creativity and intimacy that larger homes often miss. By focusing on vertical solutions like ladder displays and garland-draped archways, or adding subtle festive touches through scentscaping and textiles, you can curate a holiday experience that feels abundant rather than cramped. The beauty of these ideas lies in their ability to layer texture, light, and nostalgia into your home without overwhelming your daily living space.
