
20 Kitchen Christmas Decor Ideas: Merry and Bright Holiday Cooking Spaces
Kitchen Christmas Decor Ideas: The Room That Actually Runs the Holidays
Kitchen Christmas Decor Ideas are consistently the last thing people think about and arguably the first thing that matters. The living room gets the tree. The entryway gets the wreath. The kitchen gets used — continuously, intensively, by everyone — from the first batch of November cookies through to the last of the Boxing Day leftovers. It is where the holidays are actually made rather than simply displayed, which is precisely why it deserves more decorating attention than it typically receives.
I have noticed in my own home and in clients’ homes that the kitchen’s mood in December shapes the entire season’s experience more than any other room. When it feels festive and considered, the ordinary tasks of the holiday — the morning coffee, the afternoon baking, the ten-minute tidy before guests arrive — feel like participation in something rather than just chores. When it is the one room left untouched while everything else is decorated, it creates a subtle dissonance that is hard to name but consistently felt.
The practical argument for kitchen Christmas decor is also straightforward: you do not need much, and what you use does not need to be expensive. The kitchen responds to small, layered additions more readily than larger rooms do, because it already has strong functional character. A set of festive tea towels, a few sprigs of greenery tucked behind a cabinet handle, a candle on the windowsill, a dedicated corner for the hot cocoa station that appears every December — these are decisions that take twenty minutes and change the room’s feeling for six weeks. That return on effort is unusual in interior design.
Kitchen Christmas Decor Ideas
Contents
- 1 Kitchen Christmas Decor Ideas
- 2 1. Classic Red and Green Kitchen Countertop Christmas Decor Ideas
- 3 2. Hanging Mini Wreaths and Christmas Garland on Kitchen Cabinet Doors
- 4 3. Christmas-themed Dish Soap and Hand Wash Display
- 5 4. Holiday Baking Corner Displays with Mason Jar Decor and Festive Utensil Holders
- 6 5. Christmas Mug Collections and Holiday Hot Cocoa and Coffee Station
- 7 6. Festive Kitchen Island Centerpieces with Greenery
- 8 7. Framing the Kitchen Window with Garland and Lights
- 9 8. Christmas Window Decorations for Kitchen Sinks
- 10 9. Santa and Reindeer Cookie Jar Collection
- 11 10. Swapping Everyday Linens for Christmas Tea Towels
- 12 11. A Countertop Forest of Mini Christmas Trees
- 13 12. Adorning Light Fixtures with Greenery and Ornaments
- 14 13. Gingerbread Kitchen Decor and House Village Display
- 15 14. Rustic Farmhouse Kitchen Decor with Wood and Pine
- 16 15. Styling Open Shelves with Festive Dishware and Mugs
- 17 16. Christmas Ornament Bowl, Red and White Kitchen Theme
- 18 17. Vintage Christmas Cookie Jars and Frosted Cranberry Glassware Display
- 19 18. Dressing Up Bar Stools with Ribbons and Wreaths
- 20 19. Placing Festive Runners and Rugs for Warmth
- 21 20. Creating Cozy Countertop Vignettes with Cutting Boards
- 22 Conclusion
The twenty ideas here range from the genuinely simple — swapping everyday linens, adding a small wreath to a cabinet door, dressing an open shelf with seasonal dishware — to the more considered: a gingerbread house village as a countertop centerpiece, garlands framing a kitchen window, a twinkling arrangement of miniature trees along a worktop. Each idea is chosen because it works within the specific constraints of a functional kitchen rather than treating the room as a display space that happens to have a sink.
The kitchen does not need to look like a Christmas shop. It needs to feel like Christmas is happening in it.
See also: Cozy small Christmas dining room ideas · Christmas bedroom decor ideas · Dining room lighting ideas
1. Classic Red and Green Kitchen Countertop Christmas Decor Ideas
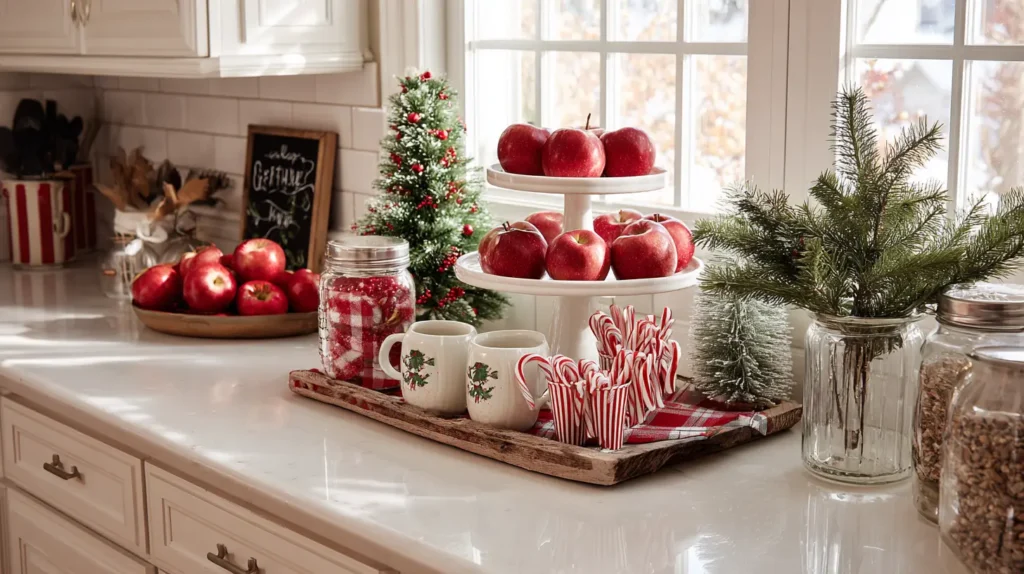
Infuse the heart of your home with the timeless, nostalgic spirit of the season by embracing the quintessential red-and-green palette. Imagine your kitchen counters popping with vibrant energy against a backdrop of white or wood cabinetry. A three-tiered galvanized tray sits in the corner, laden with jars of red-and-white peppermint sticks, green-wrapped chocolates, and festive mugs ready for hot cocoa. Nearby, a heavy wooden cutting board anchors a vignette featuring a small potted rosemary tree wrapped in burlap and a crock filled with red silicone spatulas and green whisk handles. This traditional look feels bustling, cheerful, and ready for a day of holiday baking, turning functional counter space into a merry display of color.
- Edible Decor: Fill clear glass canisters with layers of red and green ingredients—like red lentils, green split peas, or colorful holiday pasta—to add color without clutter.
- Textile Swap: Replace your everyday dish towels with high-contrast options in red buffalo check, green tartan, or embroidered holiday motifs.
- The Coffee Station: Add a splash of color to your coffee nook with a red runner, green ceramic mugs, and a jar of marshmallows.
- Miniature Greenery: Place small preserved boxwood wreaths on the backs of your counter stools or hang a mini-wreath on the window above the sink with a red satin ribbon.
- Ribbon Accents: Tie red velvet bows around the necks of your existing flour and sugar jars to instantly dress them up.
Pro Design Tip: To keep the “classic” look from feeling chaotic, anchor your decor on a tray or a wooden riser. By grouping your red and green items (like the soap dispenser, scrub brush, and a small plant) onto a single tray next to the sink, you turn scattered clutter into a deliberate, styled vignette.
Budget Consideration: You don’t need to buy new decor; look in your pantry. A glass bowl filled with shiny red apples or green Granny Smith apples makes for a stunning, fresh, and cheap centerpiece that lasts for weeks. Similarly, a simple red ribbon tied around your existing plant pots transforms them for the season for pennies.

Other Related Interesting Ideas …
The kitchen is the heart of the home, especially during the holidays, and the decor here should flow naturally into your 20 Cozy Small Christmas Dining Room Ideas: Create an Intimate Holiday Gathering. While you are baking cookies, enjoy the view framed by festive 20 Christmas Window Decoration Ideas: Captivating Ideas for Inside and Out. If you love a nostalgic aesthetic, this is the perfect place to implement 20 Rustic Farmhouse Christmas Decor Ideas for a Cozy Country Feel. For a finishing touch on your countertops, create a small vignette using 20 Magical Christmas Snow Globe Ideas for Cozy Holiday Vibes to bring a little winter magic indoors.
2. Hanging Mini Wreaths and Christmas Garland on Kitchen Cabinet Doors
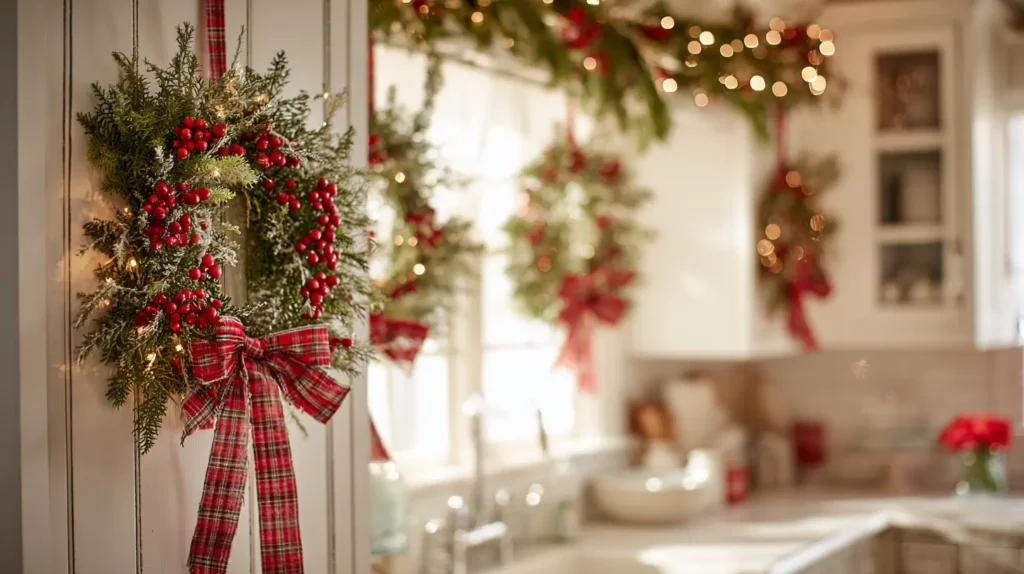
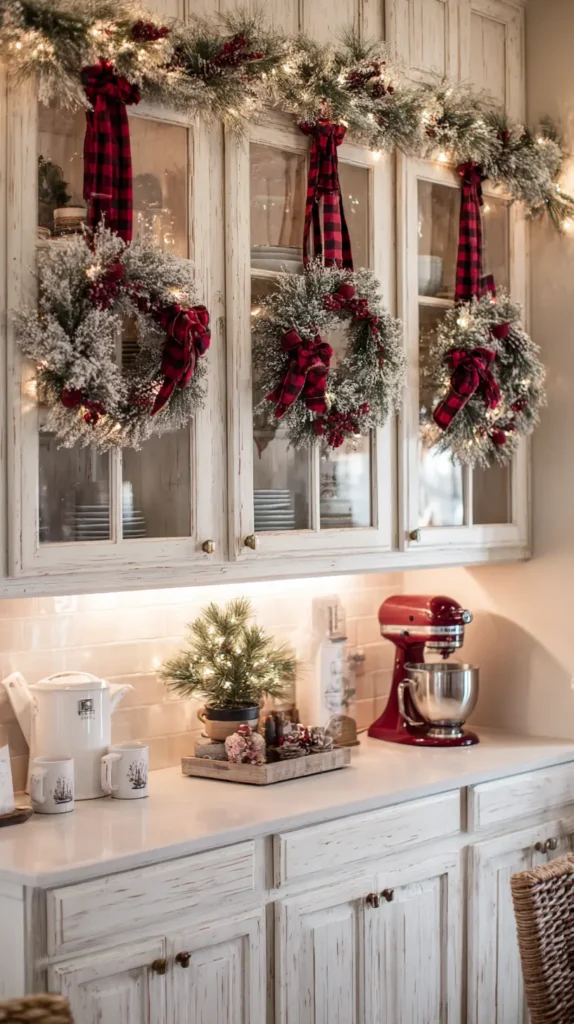
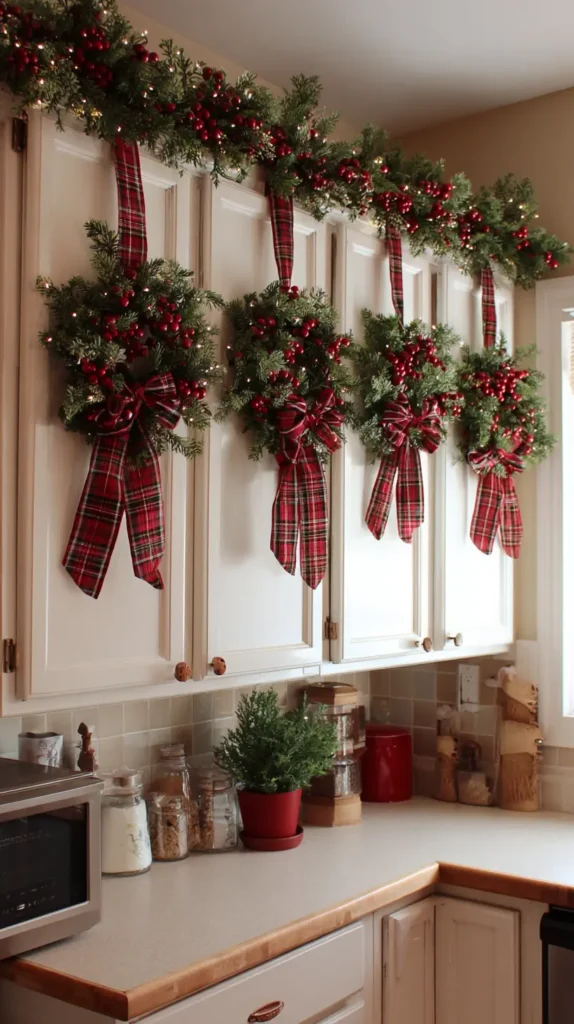
Turn the most dominant feature of your kitchen—the cabinetry—into a uniform display of holiday cheer. Imagine transforming your plain white or wood upper cabinets into a festive gallery by hanging a miniature wreath on every door. Suspended by a crisp, vertical length of ribbon in red velvet, navy satin, or rustic burlap, these wreaths create a satisfying, repetitive rhythm that instantly makes the room feel “dressed” and curated.
Alternatively, picture a delicate cedar garland, loosely swagged across the tops of the cabinets, drawing the eye upward and adding a crown of greenery to the room. This decor strategy mimics the charm of a holiday workshop, making the space feel cozy and enclosed without cluttering your precious countertop workspace.
- Scale is Critical: For standard cabinet doors, choose wreaths with diameters between 6 and 10 inches. Anything larger will impede the door handle and look overwhelming.
- The “Ribbon” Mount: The cleanest look comes from looping a ribbon through the wreath and taping it securely to the inside top edge of the cabinet door (upside down). This avoids visible hooks on the front.
- Uniform Height: Measure carefully to ensure every wreath hangs at the exact same level. Even a half-inch difference can make the kitchen look messy and crooked.
- Herbal Touches: Since this is the kitchen, opt for wreaths made of dried herbs like rosemary, bay leaves, or thyme. They look beautiful and release a savory scent when the oven heats up the room.
- Garland Placement: If you prefer garland, drape it along the top of the cabinets (if there is a gap between the cabinet and ceiling) or weave it through the handles for a lower-profile look.
Pro Design Tip: To prevent the wreaths from “thumping” against the wood every time you open a cabinet to get a glass, place a small felt furniture pad or a strip of removable double-sided tape on the back of the wreath frame. This protects your finish and keeps the wreath silent and centered.
Budget Consideration: “Mini wreaths” can be surprisingly expensive per unit. A clever hack is to search for “candle rings” (greenery circles designed to sit at the base of a pillar candle). They are the exact perfect size for cabinet doors and usually cost 50% less than items labeled as hanging wreaths. Tie a ribbon around them, and no one will know the difference.

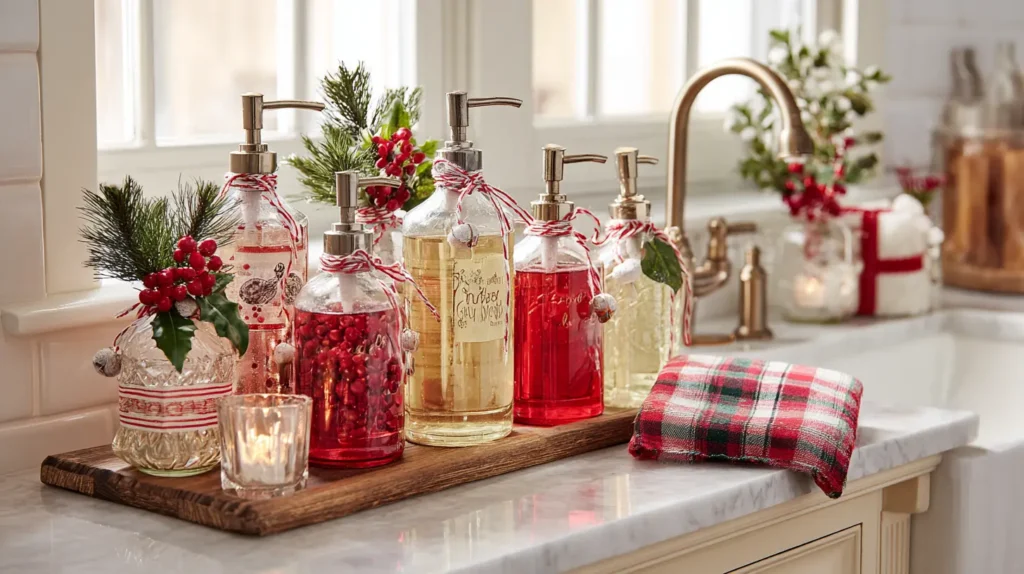
3. Christmas-themed Dish Soap and Hand Wash Display

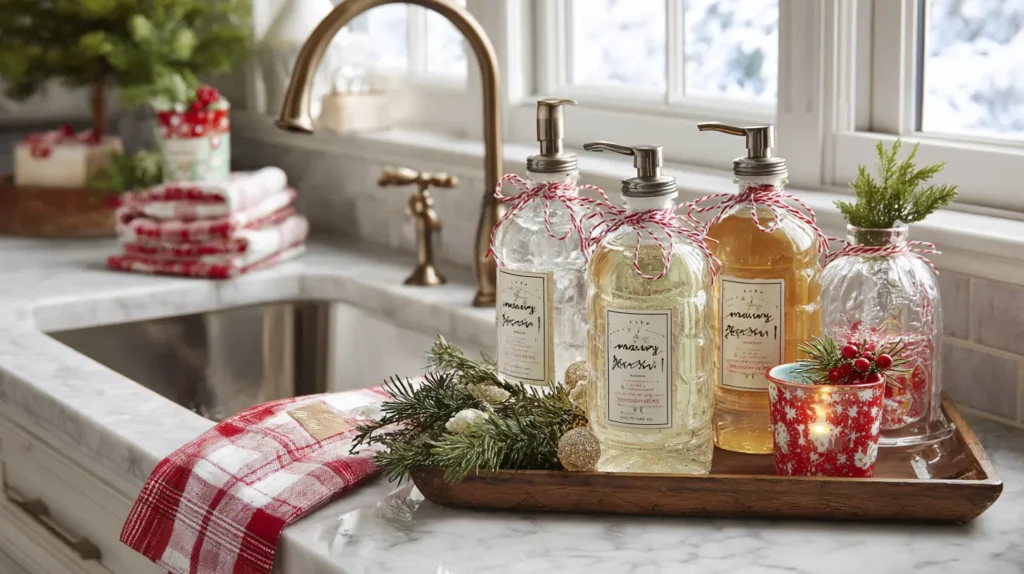
Transform the most utilitarian spot in your kitchen—the sink—into a sensory holiday delight. Imagine swapping out your standard blue dish detergent and plastic hand soap bottles for a curated, festive washing station. Picture a pair of matching amber glass or matte ceramic pump bottles sitting on a small marble tray, filled with soaps that smell like crushed peppermint, winter pine, or spiced cranberry. Next to them sits a wooden scrub brush and a festive red-and-white sponge. This small upgrade turns the mundane chore of washing dishes into a moment of aromatherapy, infusing the air with the scents of the season every time you turn on the tap.
- Scent Scaping: Choose soaps with seasonal fragrance notes. Peppermint is invigorating for dishwashing, while vanilla or fir balsam is soothing for hand washing.
- Vessel Upgrade: Decant bulk soaps into matching glass pump bottles. This immediately reduces visual clutter and makes the sink area look like a high-end hotel spa.
- Corral on a Tray: Place the bottles, your sponge, and a scrub brush on a small riser or tray (wood, marble, or ceramic) to keep them organized and off the wet counter.
- Festive Tools: Swap your yellow sponge for a red or green one, or look for sponges shaped like snowflakes or trees during the holidays.
- Natural Accent: Tuck a small, waterproof sprig of faux holly or a tiny bottle brush tree onto the back of the tray for a subtle decorative touch that won’t get in the way.
Pro Design Tip: Order custom waterproof vinyl labels for your bottles that feature a “vintage apothecary” style font or a simple holiday motif (like a reindeer silhouette). It adds a personalized, graphic design element that ties the sink area into the rest of your kitchen’s theme.
Budget Consideration: You don’t need to buy expensive boutique holiday soaps. Buy a large jug of clear, unscented castile soap and a small bottle of peppermint or pine essential oil. Mix them in your reusable pump bottles. You get a custom, natural holiday scent for a fraction of the price of brand-name seasonal detergents.

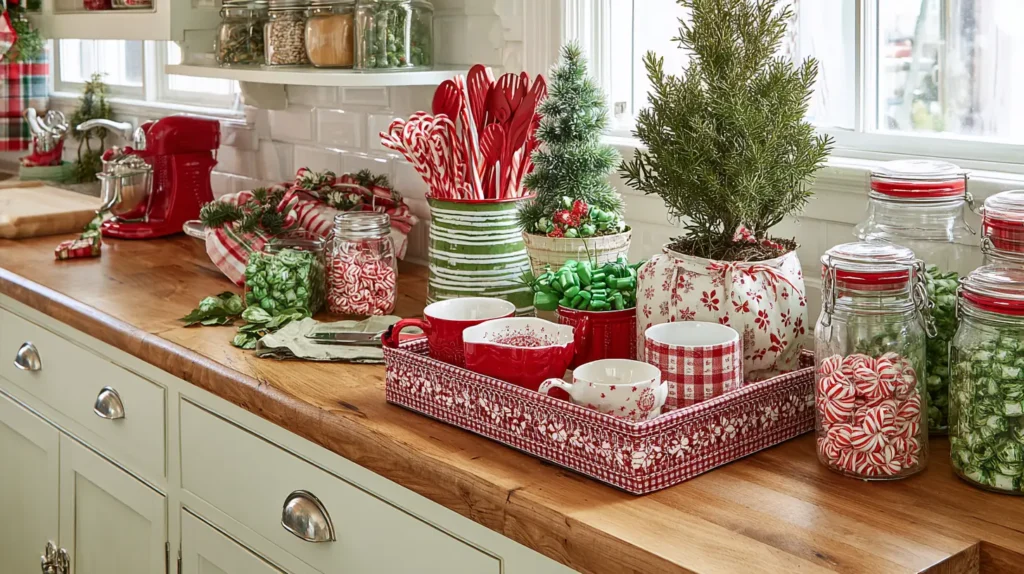
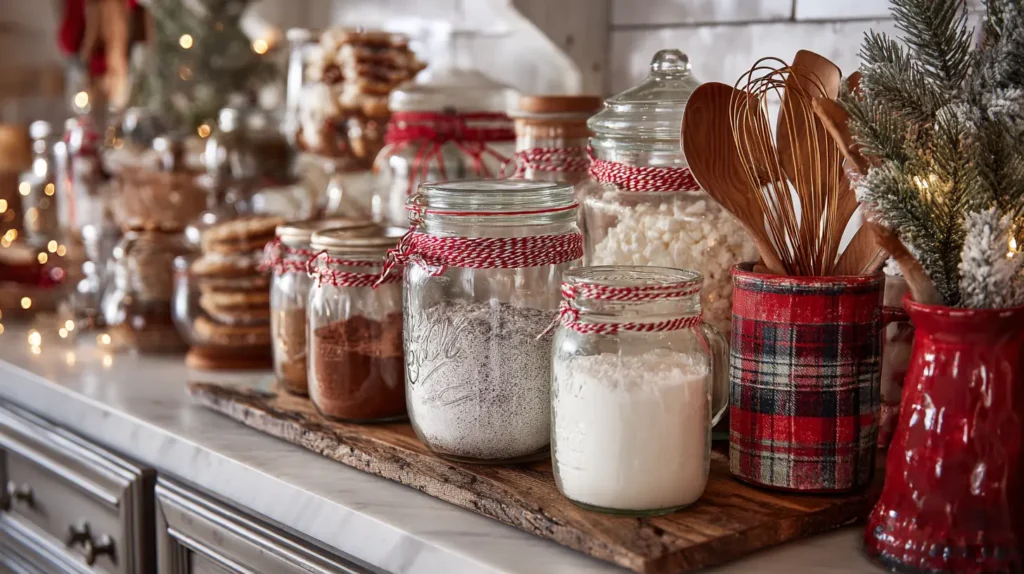
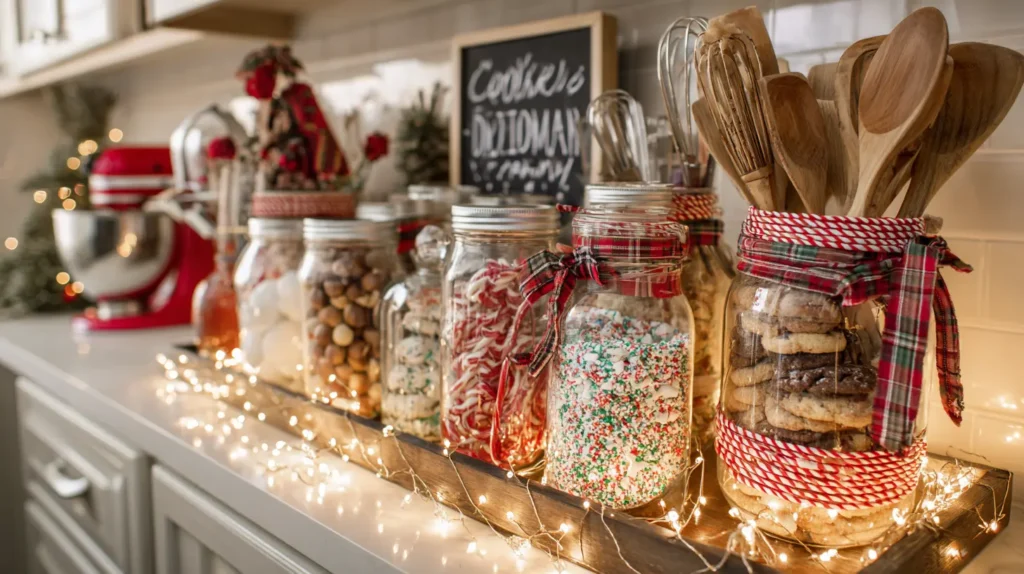
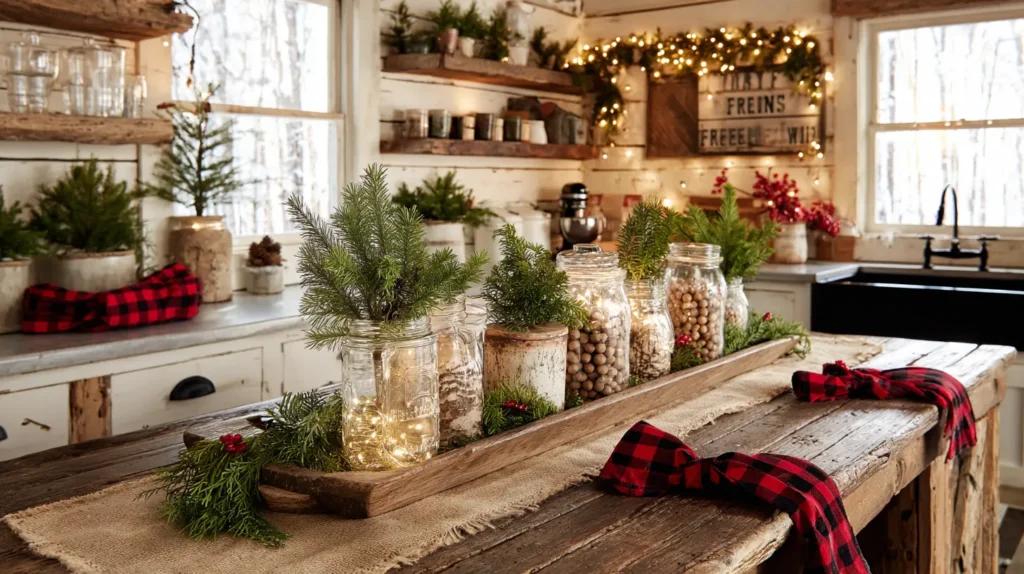
4. Holiday Baking Corner Displays with Mason Jar Decor and Festive Utensil Holders
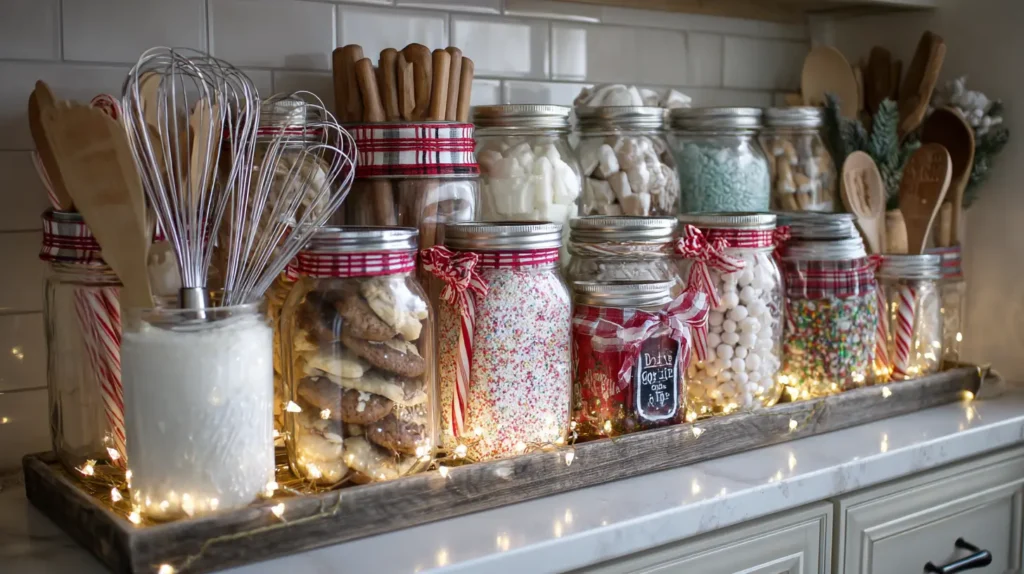
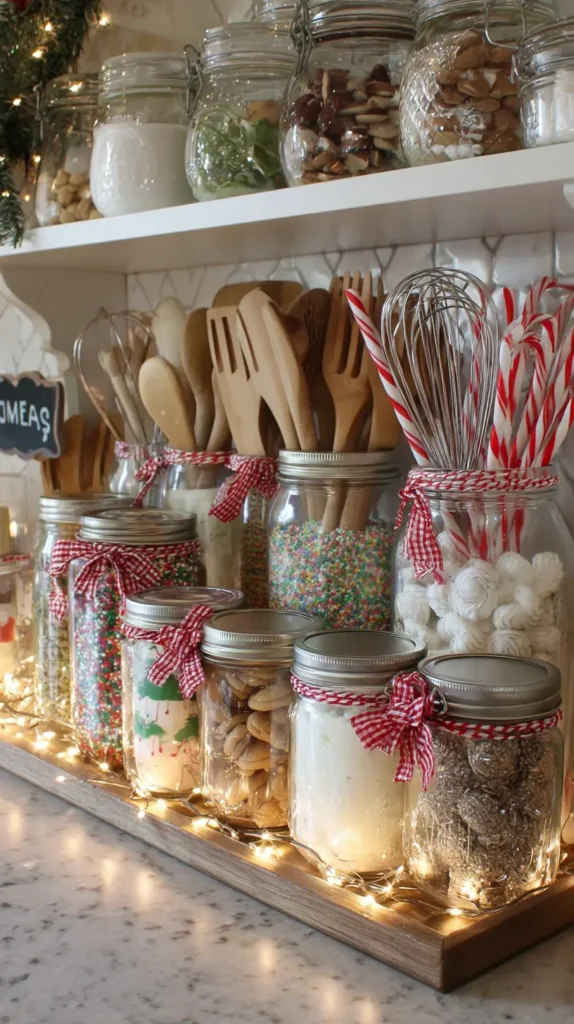
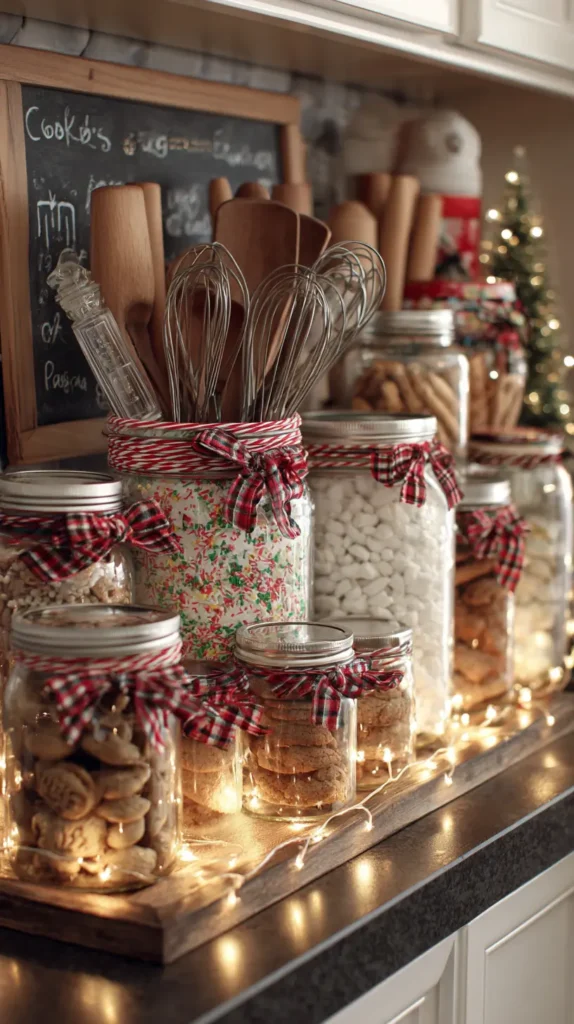
Carve out a dedicated zone on your countertop that feels like a scene from Mrs. Claus’s personal kitchen. Imagine a baking station anchored by a collection of large, clear mason jars showcasing the snowy textures of flour and sugar, or the rich brown of cocoa powder. Each jar is dressed for the season with a loop of red-and-white baker’s twine or a plaid ribbon.
Beside them, a vintage ironstone pitcher or a hand-painted jar serves as a festive utensil holder, bursting with wooden spoons, red silicone spatulas, and gold whisks. This vignette isn’t just decor; it’s a functional “cookie command center” that inspires you to whip up a batch of gingerbread at a moment’s notice, keeping your essential tools within arm’s reach and looking adorable.
- Ingredient Art: Use the ingredients themselves as decor. Layering hot cocoa mix, chocolate chips, and crushed peppermint in a jar creates a beautiful, edible sand-art look.
- The Utensil Crock: Swap your everyday stainless steel holder for something seasonal—a Santa mug, a red ceramic pitcher, or a wide-mouth mason jar painted matte white with a distressed finish.
- Cookie Cutter Display: Fill a medium-sized glass jar entirely with vintage metal cookie cutters. The shiny silver shapes (stars, trees, men) look industrial and nostalgic through the glass.
- Corral on a Board: Place the jars and utensil holder on a large wooden bread board or a marble slab. This grounds the arrangement and protects your counters from flour spills.
- Label Love: Use chalkboard labels or kraft paper tags tied with twine to label your jars “Elf Treats,” “Reindeer Food” (oats), or simply “Flour” and “Sugar” in a festive script.
Pro Design Tip: Add a touch of whimsy by tying a single metal cookie cutter to the ribbon around the neck of your flour jar. It acts as a cute charm and hints at the jar’s purpose, adding a layered 3D element to the display.
Budget Consideration: You don’t need to buy expensive canister sets. Save your large glass spaghetti sauce or pickle jars. Soak off the labels, scrub the lids, and spray-paint them a festive, bright red or metallic gold. You now have a matching set of airtight, glass storage jars for the cost of a can of spray paint.
5. Christmas Mug Collections and Holiday Hot Cocoa and Coffee Station
Transform a corner of your counter or a dedicated coffee cart into a self-service winter wonderland that delights guests and family alike. Imagine a bustling “Hot Cocoa Bar” anchored by a tiered tray or a wooden mug tree displaying your eclectic collection of holiday mugs—from vintage Santa heads and kitschy reindeer to sleek red-and-white patterns. Beside the mugs, clear glass canisters are filled to the brim with snowy marshmallows, chocolate shavings, and peppermint sticks, creating a visual feast of textures.
A small chalkboard sign reads “Warm Up Here,” inviting everyone to craft their perfect drink. This station becomes the social hub of the kitchen, filling the air with the scent of chocolate and creating a cozy ritual for cold winter mornings.
- Display the Mugs: Don’t hide your festive mugs in the cupboard. Hang them on a wall-mounted rack with hooks or stack them on a tiered serving stand to create a vertical tower of holiday color.
- The Toppings Bar: Use matching glass jars with spoons to hold essentials like cocoa powder, sugar, crushed candy canes, and mini marshmallows.
- Stirring Station: Place a small ceramic cup filled with festive stirrers—like chocolate-dipped spoons, cinnamon sticks, or long peppermint poles—for a functional decorative touch.
- Add Softness: Lay a holiday tea towel or a small buffalo check runner under the station to define the zone and catch any cocoa spills.
- Festive Signage: Add a small framed print or a mini easel chalkboard with a seasonal greeting like “Baby It’s Cold Outside” to theme the area.
Pro Design Tip: Include a “Syrup Bar” to elevate the experience. Buy small bottles of vanilla, hazelnut, or peppermint syrup and replace the ugly plastic labels with custom festive stickers. Group them on a small marble coaster next to the coffee maker for a professional coffee shop aesthetic.
Budget Consideration: You don’t need to buy a matching set of expensive holiday mugs. Hit the thrift stores! You can often find vintage Christmas mugs for under a dollar. The mismatched, “collected” look is actually more trendy and charming than a perfectly coordinated set.
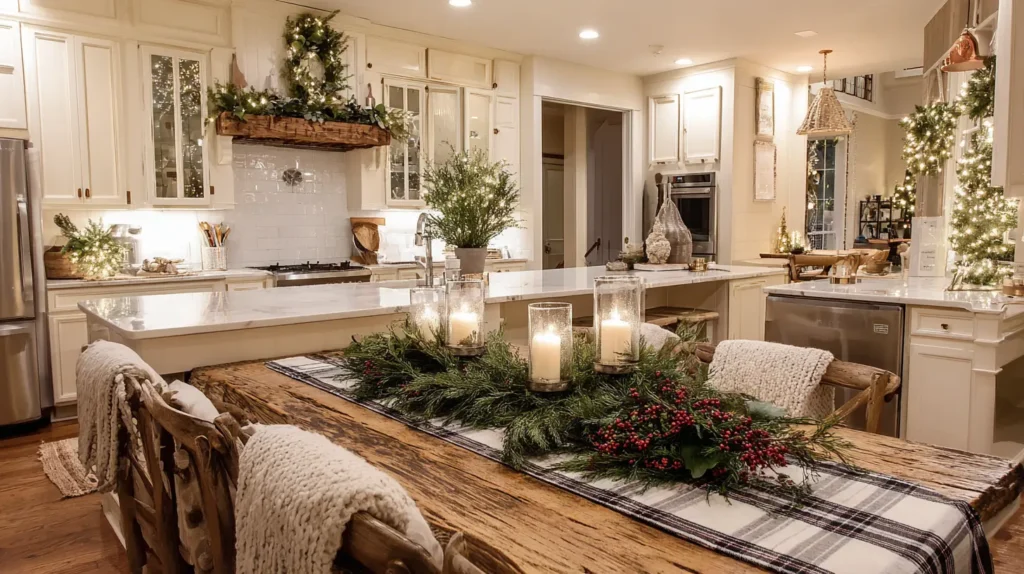
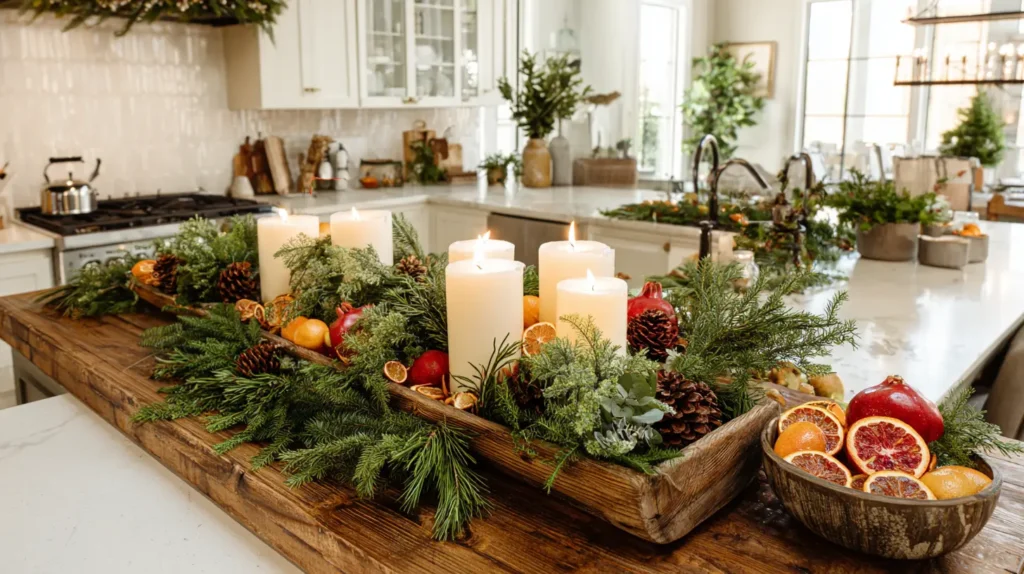
6. Festive Kitchen Island Centerpieces with Greenery
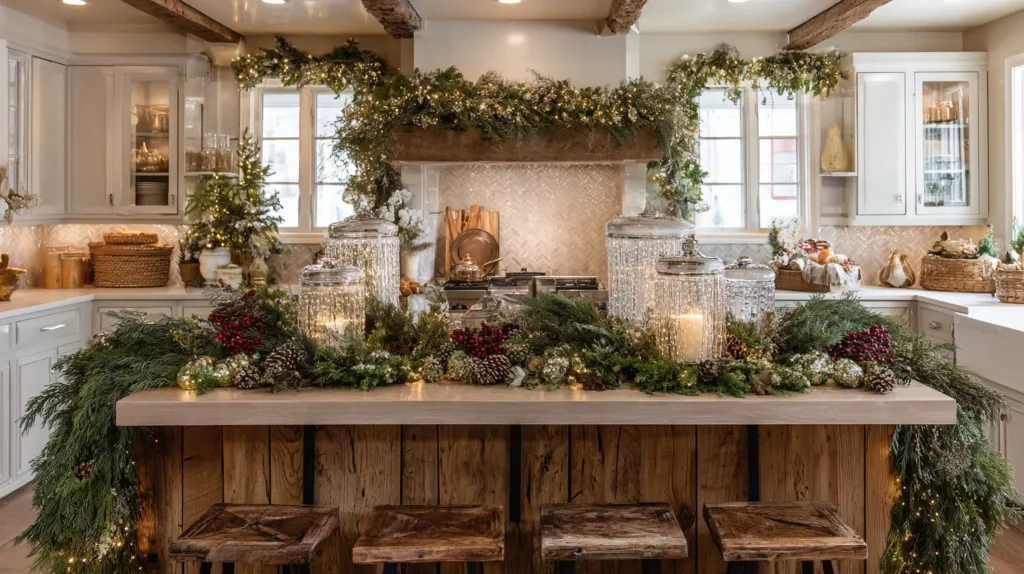

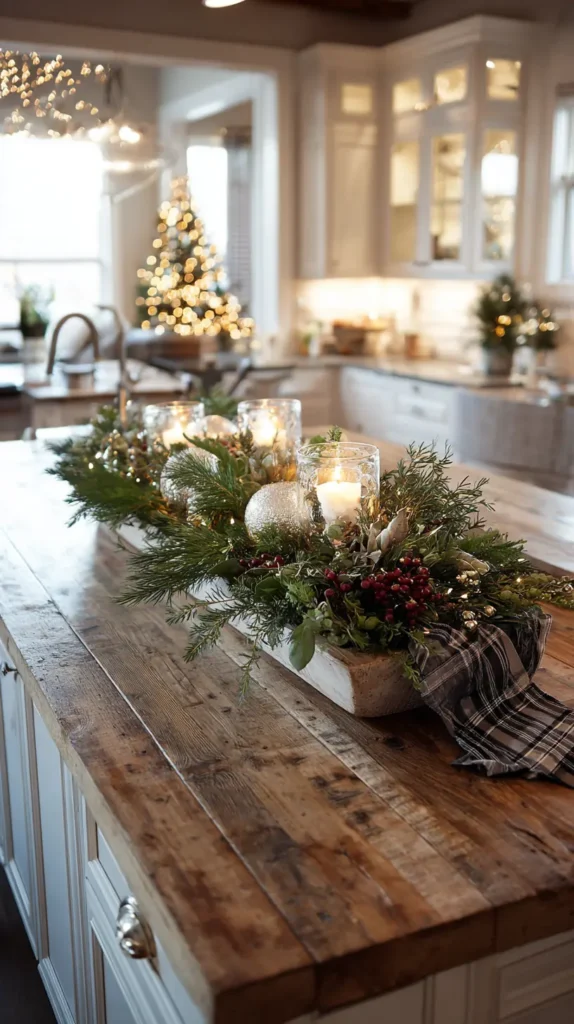
The kitchen island is the gathering spot for every holiday party, so it deserves a centerpiece that sparks joy without getting in the way. Imagine a rustic wooden dough bowl or a long, galvanized metal tray running down the center of your island, overflowing with a lush mix of fragrant greenery. Picture sprays of cedar and pine spilling over the edges, nestled alongside vibrant red pomegranates, dried orange slices, and large sugar pinecones. Interspersed throughout this natural display are chunky white pillar candles (or battery-operated votives) that cast a warm, flickering glow across the countertop, creating an inviting focal point that feels organic, abundant, and perfectly suited for the heart of the home.
- Contain the Mess: Use a tray, a wooden trough, or a long cutting board as the base. This keeps the pine needles contained and allows you to pick up the entire centerpiece and move it easily if you need the counter space for food prep.
- Low and Long: Keep the arrangement low profile (under 12 inches high). You want to be able to see your family members across the island while you eat or chat.
- Edible Accents: Incorporate whole fruits like red pears, pomegranates, or clementines into the greenery. They add a pop of color and texture that feels natural in a kitchen setting.
- Mix Your Greens: Don’t stick to just one type. Combine the drape of cedar, the fluffiness of pine, and the structure of magnolia leaves for a rich, textured look.
- Safe Lighting: Since the kitchen is a high-traffic zone with paper towels and sleeves nearby, opt for realistic battery-operated LED candles to get the glow without the fire hazard.
Pro Design Tip: Mix fresh herbs into your centerpiece. Tuck bundles of rosemary, sage, and thyme into the pine boughs. The heat from the kitchen will release their savory oils, making the room smell like holiday cooking even before you turn on the oven.
Budget Consideration: This centerpiece is free if you have a tree. Use the bottom branches you trimmed off your Christmas tree as the base greenery. Add pinecones found in the park and a few apples or oranges from your fruit bowl. It’s a stunning, high-end look that uses what you already have.
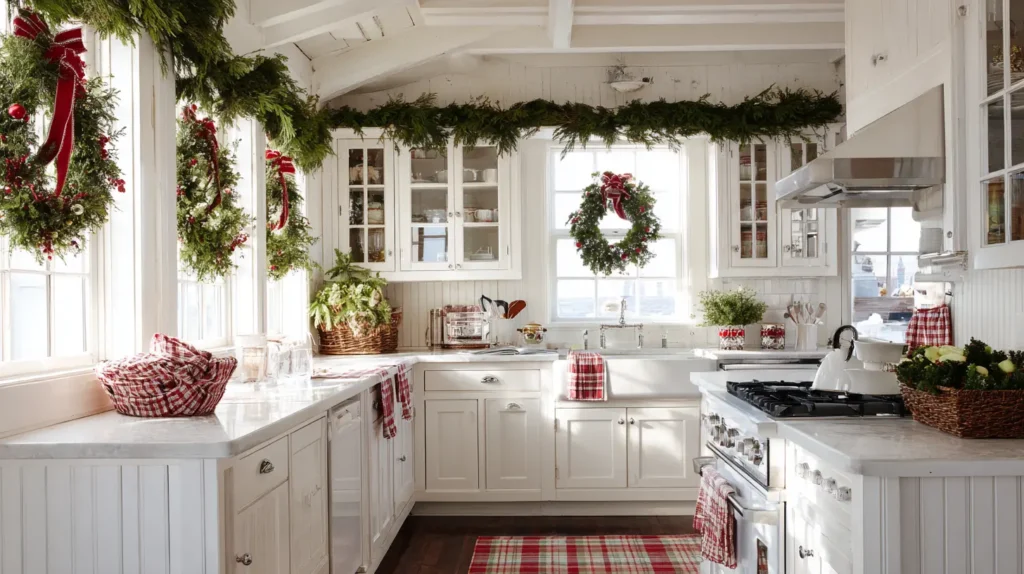
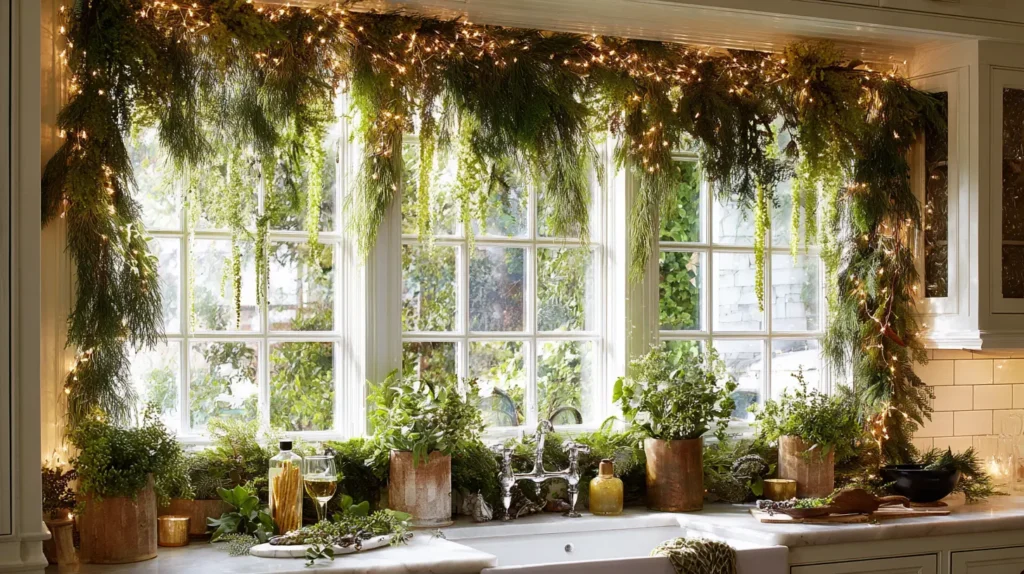
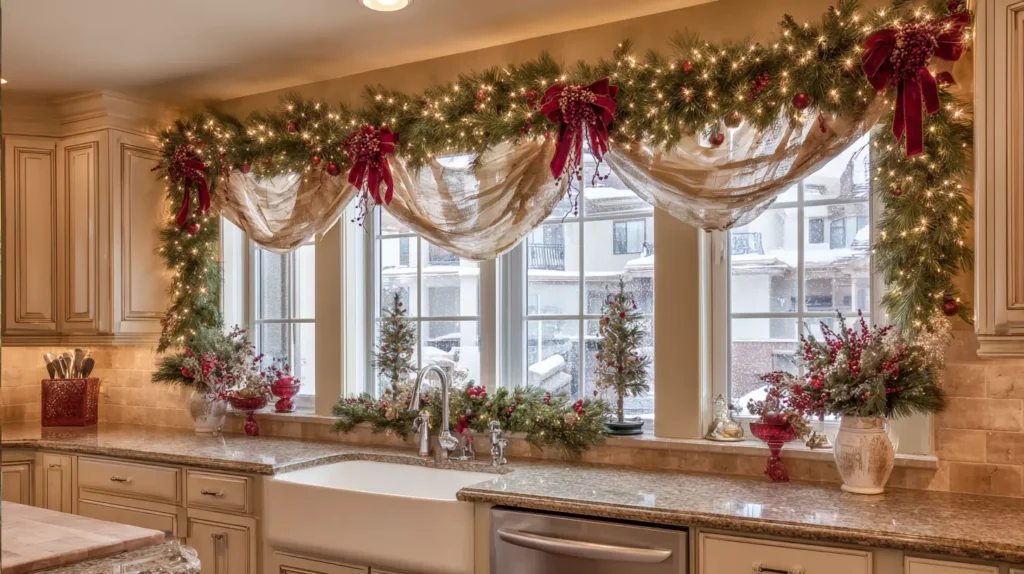
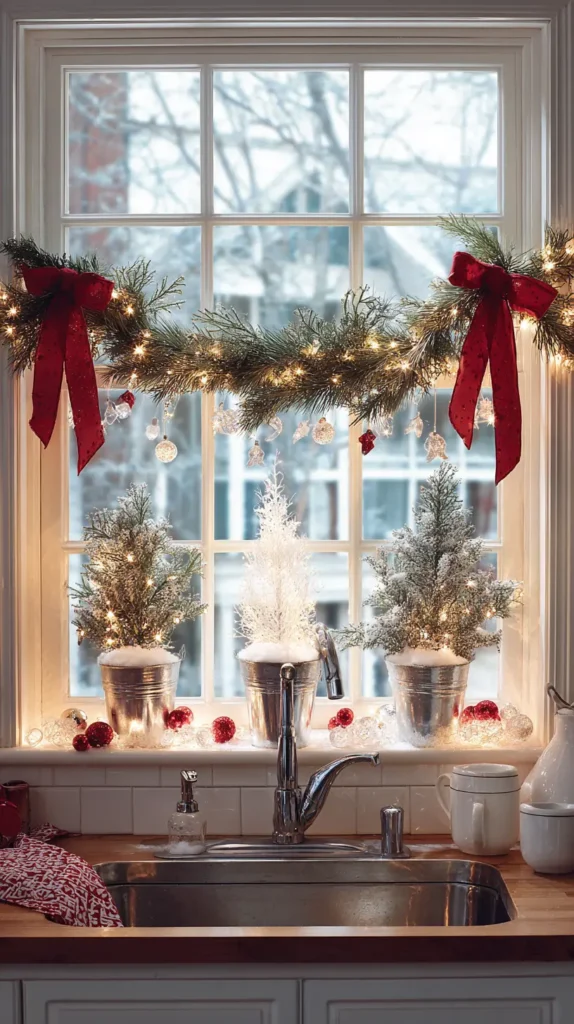
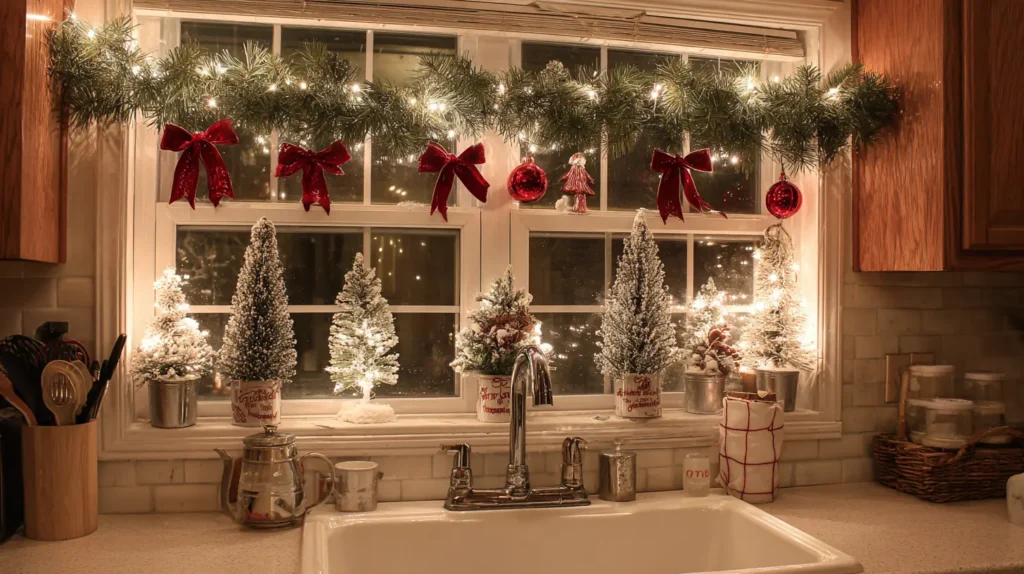
7. Framing the Kitchen Window with Garland and Lights
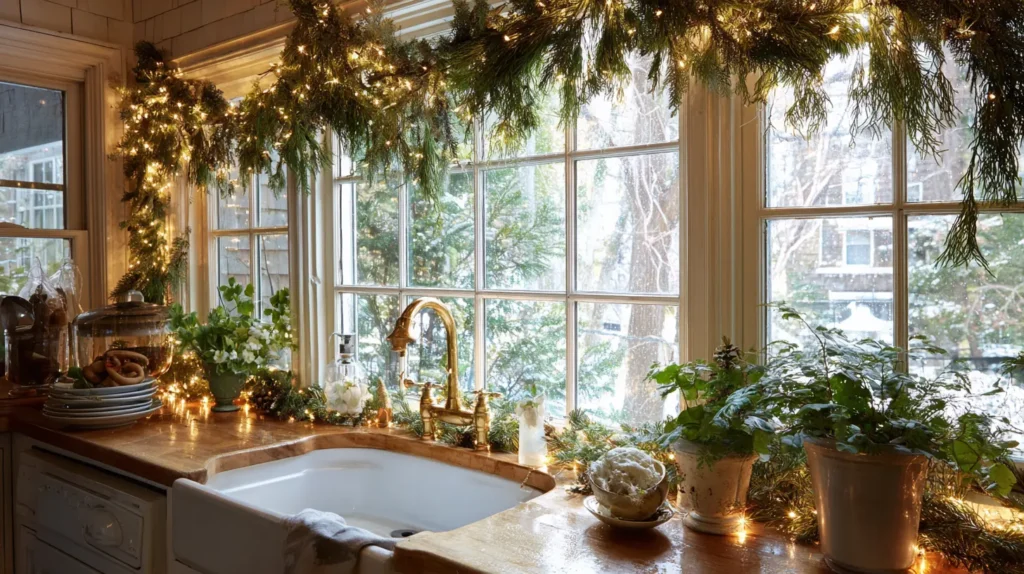
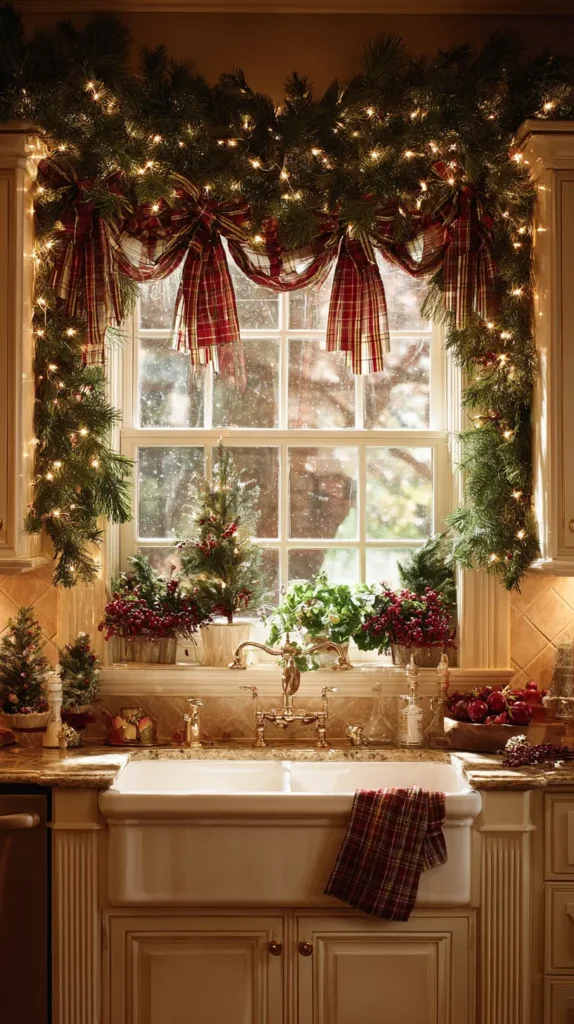
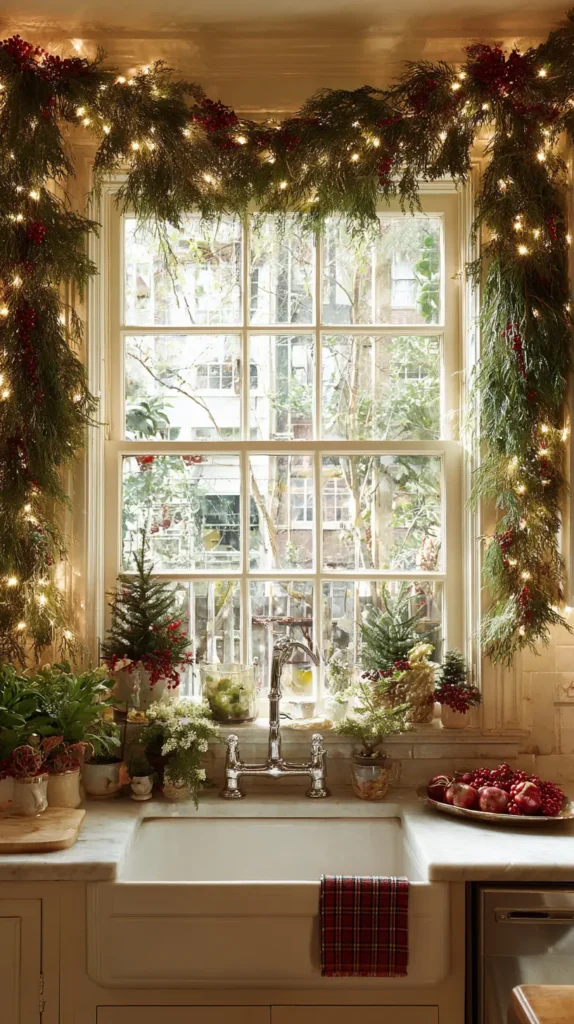
Turn the most frequented spot in the kitchen—the sink window—into a picturesque holiday scene that makes even washing dishes feel magical. Imagine a lush swag of cedar, pine, or eucalyptus draped over the window header, framing your view of the outdoors in verdant texture. Woven through the greenery are delicate copper wire lights that cast a warm, golden glow, reflecting against the glass at night. This festive border draws the eye immediately, blurring the line between your cozy kitchen and the winter landscape outside, and acting as a glowing nightlight during those late-night snack runs.
- High and Dry: Install the garland high on the frame, or even above the trim, to keep it clear of the faucet and prevent splashes of soapy water.
- The Tension Rod Hack: If you have deep windows, place a tension rod at the very top of the frame. Wrap your garland around the rod. It holds the weight securely and requires zero nails or sticky hooks.
- Cordless is Key: Near a sink, safety is paramount. Use battery-operated fairy lights so you don’t have dangerous cords draping across the counter near water.
- Scented Experience: Use fresh eucalyptus or cedar. The warmth and humidity in the sink area will help release the natural oils, keeping the kitchen smelling fresh and clean.
- Add a Centerpiece: Suspend a small wreath or a large red velvet bow from the center of the garland to fill the negative space in the middle of the window pane.
Pro Design Tip: For a cohesive look, match the greenery in the window to the view outside. If you have pine trees in the backyard, use a pine garland. If you have a boxwood hedge, use a boxwood wreath. This visual continuity makes the decor feel like an extension of nature.
Budget Consideration: You don’t need a heavy, expensive 9-foot garland for a small kitchen window. Buy a few individual “picks” or branches of faux greenery from a craft store. Wire them together in the center (stems facing inward) and cover the middle with a bow. It creates a custom-sized swag that fits perfectly without the bulk or cost of a full garland.
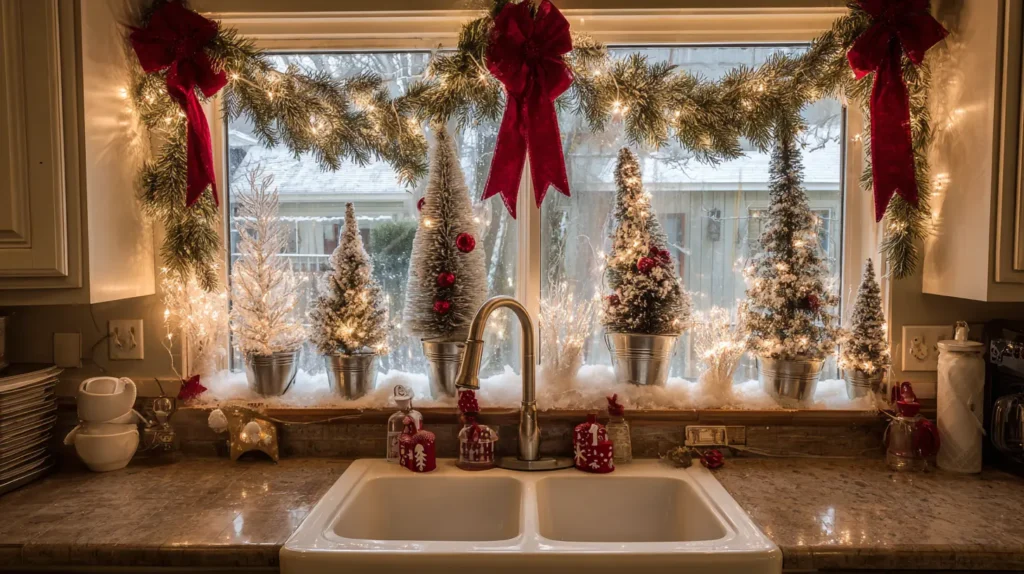
8. Christmas Window Decorations for Kitchen Sinks
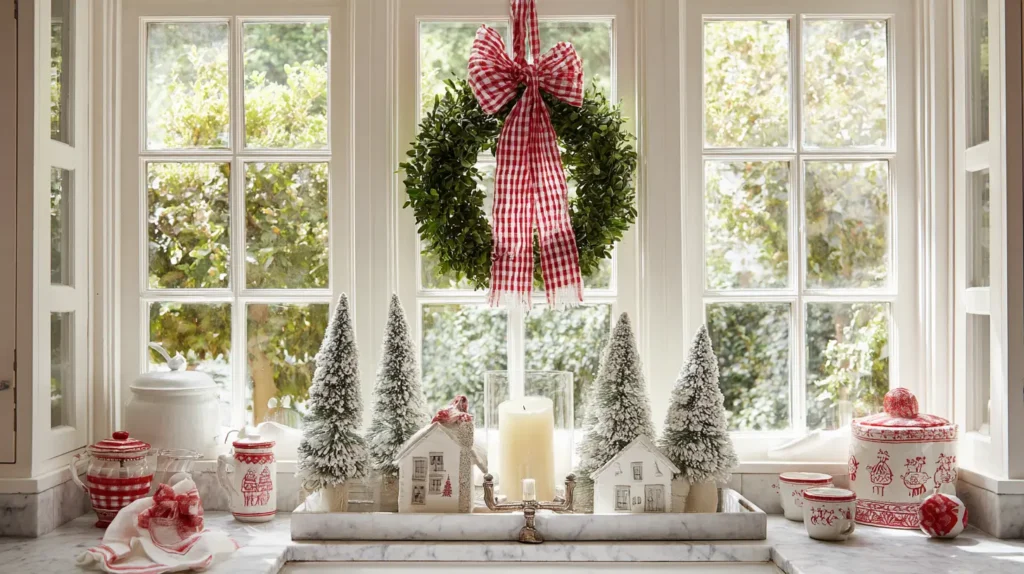
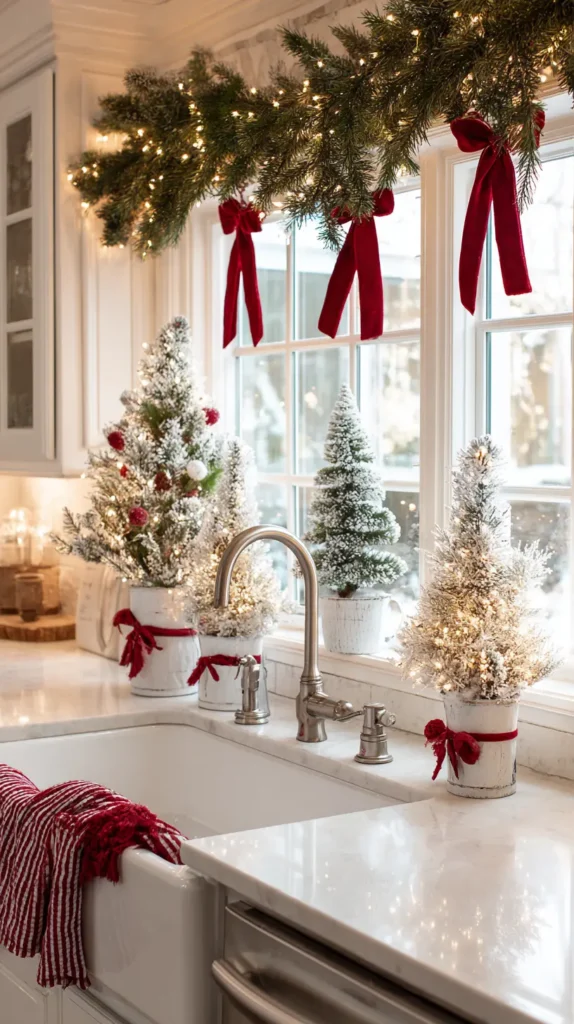
Transform the most frequented view in the house into a festive vignette that makes dishwashing a delight. Imagine a petite, preserved boxwood wreath suspended by a crisp red-and-white ticking stripe ribbon, hanging perfectly centered in the window pane. On the windowsill below, a charming trio of snowy bottle brush trees in varying heights sits on a small marble tray, flanked by a glowing battery-operated taper candle. This setup creates a layered, three-dimensional scene: the wreath frames the view of the outdoors, while the sill decor adds immediate cheer within arm’s reach, turning a utilitarian zone into a cozy holiday focal point.
- The Wreath Rule: Keep it small. A wreath for a kitchen window should be no larger than 10-14 inches to avoid blocking your view or natural light.
- Sill Styling: Treat the windowsill like a mini mantel. Line up festive items like ceramic houses, a collection of vintage Santa mugs, or a row of pinecones.
- Moisture Matters: Since this is a splash zone, opt for materials that can handle humidity and occasional water droplets (glass, ceramic, preserved greens) rather than delicate paper or unsealed wood.
- Hanging Mechanics: Use a clear suction cup hook directly on the glass to hold the wreath, or tie the ribbon to the window sash lock for a secure, nail-free hold.
- The “Cafe” Look: If you have a cafe curtain rod, swap the curtains for a row of hanging ornaments or a light garland in December.
Pro Design Tip: Ensure your decor is double-sided. Since the kitchen window is often visible from the driveway or backyard, choose a wreath that looks neat from the back, or hot-glue a second matching wreath back-to-back so it looks lush and finished from both the sink and the street.
Budget Consideration: Create a “Cookie-Cutter Mobile.” String vintage metal cookie cutters (stars, trees, gingerbread men) onto a piece of red-and-white baker’s twine and hang them vertically in the window. The shiny metal catches the light beautifully, fits the kitchen theme perfectly, and costs next to nothing.
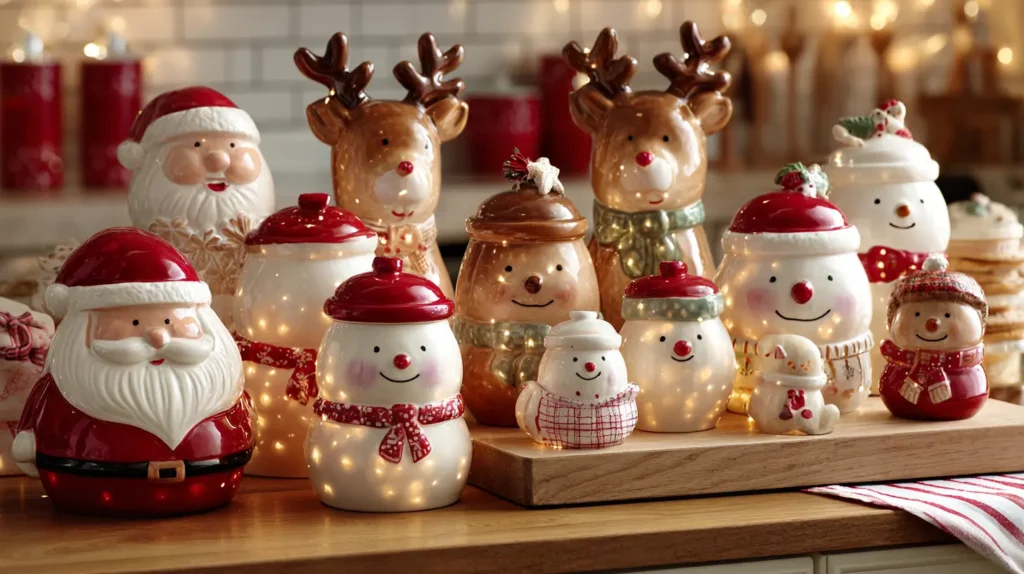
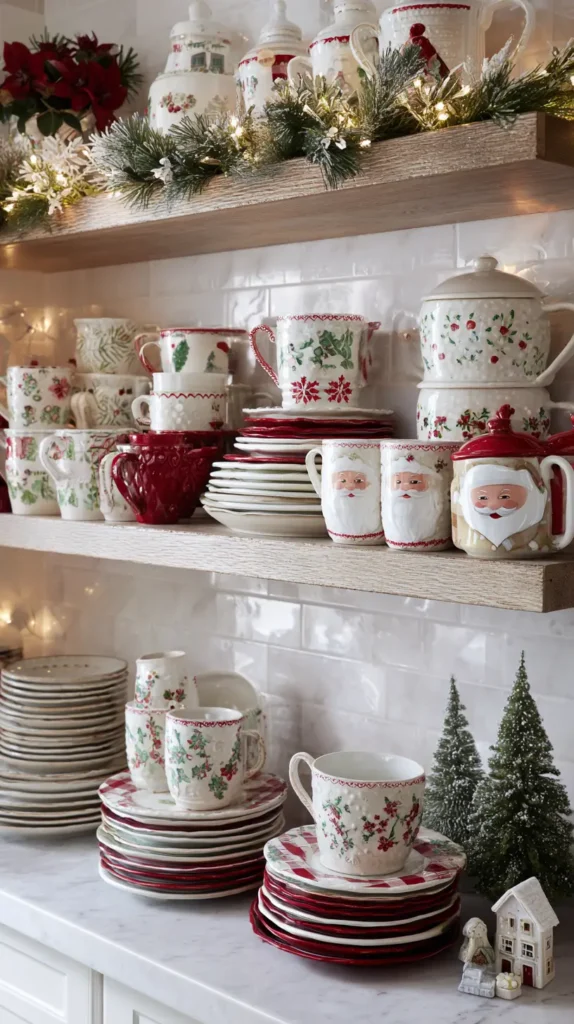
9. Santa and Reindeer Cookie Jar Collection
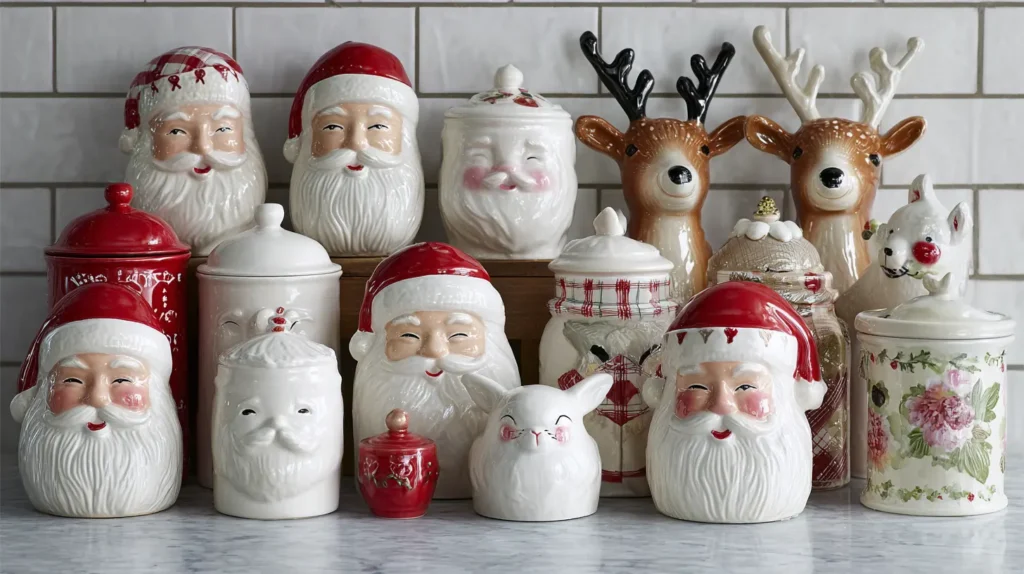
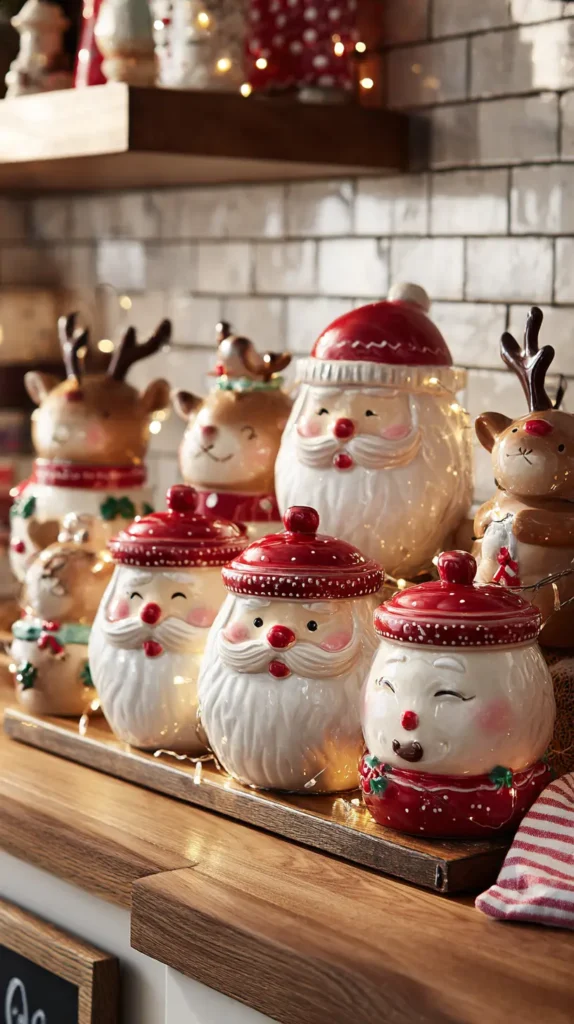
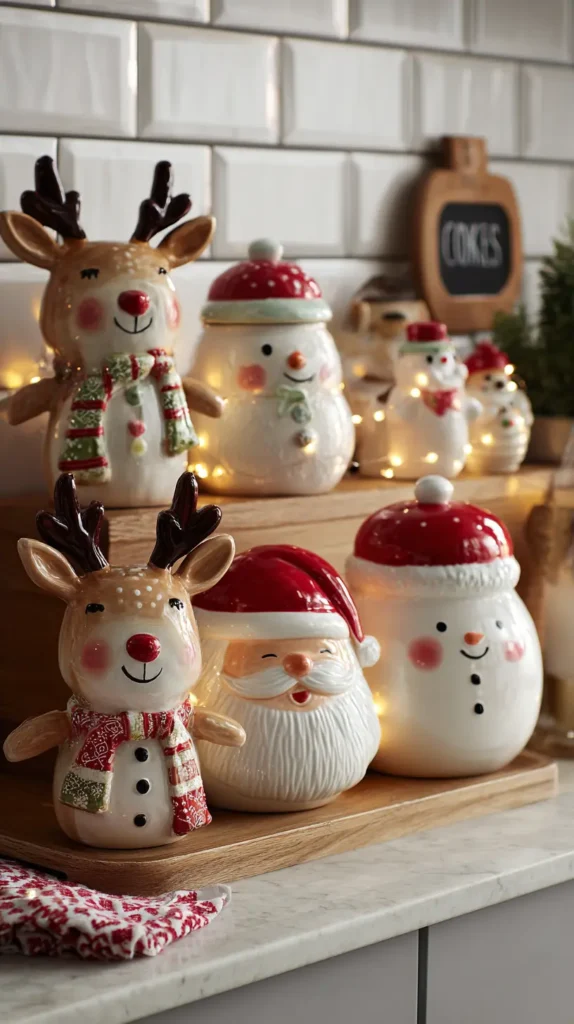
Turn your countertop or open shelving into a nostalgic gallery of holiday cheer with a curated collection of festive cookie jars. Imagine a lineup of jolly ceramic Santa faces—from vintage winking Santas with rosy cheeks to sleek, modern white porcelain silhouettes—grouped alongside adorable reindeer canisters. These aren’t just storage vessels; they are sculptural characters that bring personality and whimsy to the kitchen. Whether filled with homemade gingerbread men, store-bought treats, or even coffee pods, these glossy figures stand guard over the sweetest corner of the room, evoking childhood memories of sneaking a treat before dinner.
- Group for Impact: One cookie jar is functional; three is a collection. Group them together in a cluster rather than scattering them around the kitchen to create a strong visual focal point.
- Mix Eras: Don’t be afraid to mix chipped vintage jars found at flea markets with brand-new ones from Target. The mix of old and new adds soul and a “collected over time” aesthetic.
- Vary the Heights: Place smaller jars (like a reindeer mug or candy dish) in front of larger, taller Santa jars to ensure every face is visible and the display has depth.
- Functional Fillers: If you don’t bake that much, use the jars to hide kitchen clutter—store tea bags, sugar packets, or dog treats inside to keep them useful.
- Theme Continuity: Stick to a specific color story, like traditional red and white, or go for a retro pastel theme to keep the collection looking cohesive, not chaotic.
Pro Design Tip: Elevate the most special jar in your collection by placing it on a wooden cake stand or a small marble riser. This gives it “pride of place” and creates a visual hierarchy that makes the whole arrangement look styled like a boutique display.
Budget Consideration: Start your collection at the thrift store. Second-hand shops are often overflowing with holiday ceramics for $3-$5. Even if a jar is missing its lid, it can still be used as a utensil crock for wooden spoons or a planter for a holiday cactus!
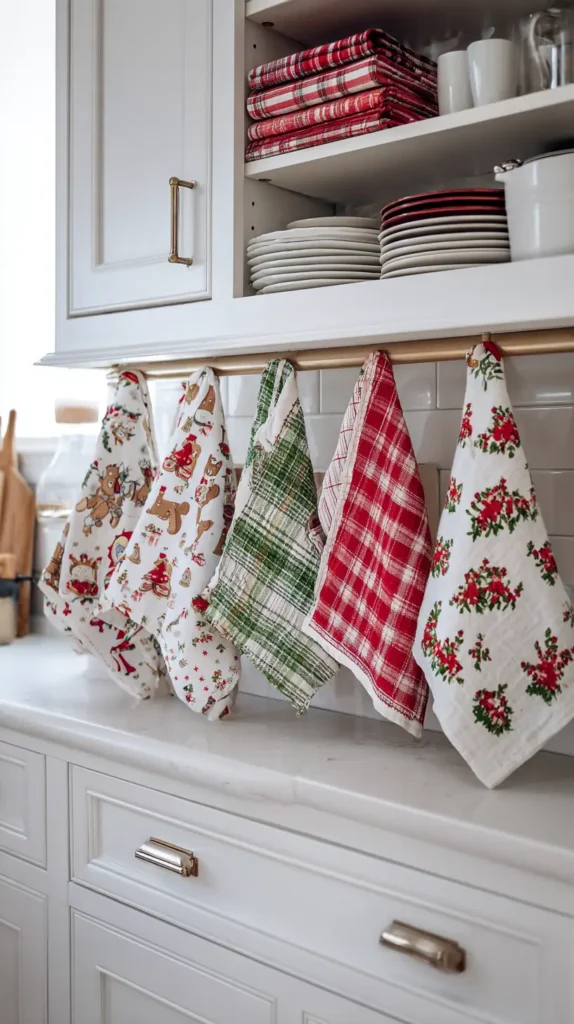
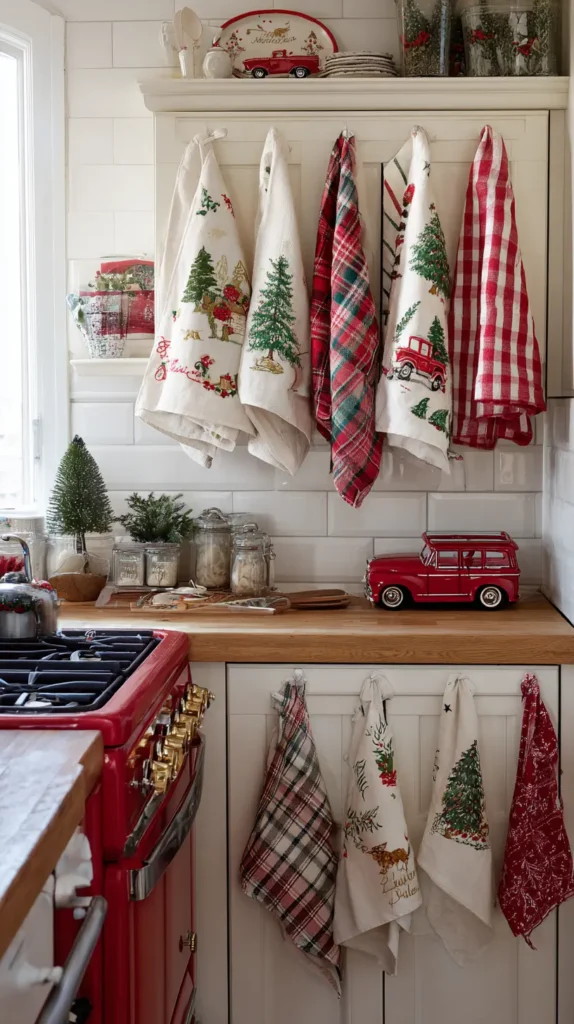
10. Swapping Everyday Linens for Christmas Tea Towels
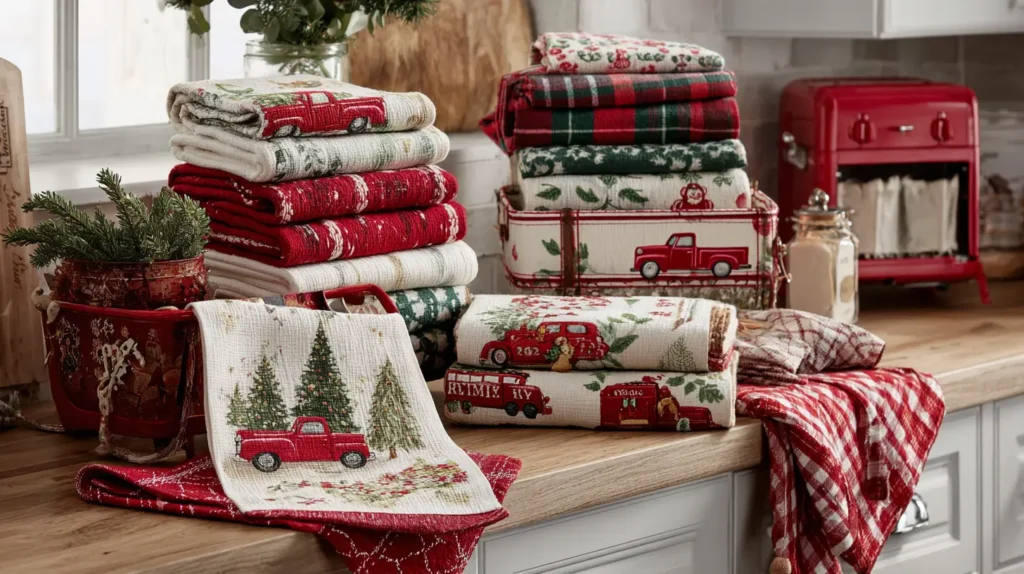
The quickest, most effective way to change the entire mood of your kitchen requires zero installation and takes about five seconds. Imagine replacing your faded, everyday dish rags with a crisp, vibrant collection of holiday textiles. Picture a waffle-knit towel in deep forest green hanging from the oven handle, layered over a crisp white linen towel embroidered with a sprig of holly. Over at the sink, a playful red-and-white gingham cloth waits to dry the dishes. These splashes of fabric soften the hard, cold surfaces of appliances and stone countertops, injecting warmth, pattern, and personality into the room. It’s a low-commitment update that makes the kitchen feel instantly “dressed” for the season.
- The Layered Look: Don’t just hang one towel. Layer a decorative, patterned towel (like a Santa print) over a solid-colored, textured towel (like a red waffle weave). This adds volume and looks professionally styled.
- Strategic Placement: Utilize every handle. Hang towels on the oven door, the dishwasher handle, and the refrigerator pull (if horizontal) to distribute color evenly around the room.
- Form vs. Function: Designate your “show” towels (the ones with delicate embroidery or pom-pom trim) for the oven handle, where they stay clean, and keep sturdy, absorbent cotton towels near the sink for actual work.
- Pattern Play: Mix patterns to keep it interesting. Pair a classic tartan plaid with a playful graphic print (like a holiday pun) or a simple stripe.
- Apron Decor: Don’t forget your apron! Hang a festive holiday apron on a hook or the pantry door. It acts as a large-scale textile decoration even when you aren’t cooking.
Pro Design Tip: To keep your towels from sliding off the oven handle every time you open the door, add a small strip of velcro to the inside of the towel where it folds over, or use a safety pin on the back to secure the fold. This keeps them perfectly straight and tidy, no matter how busy the kitchen gets.
Budget Consideration: You can make high-end-looking holiday towels for pennies using plain flour-sack towels (sold in bulk). Use potato stamps or fabric paint to create simple geometric tree patterns or stars, or sew a strip of festive ribbon along the bottom hem. It’s a fun craft that results in custom decor.
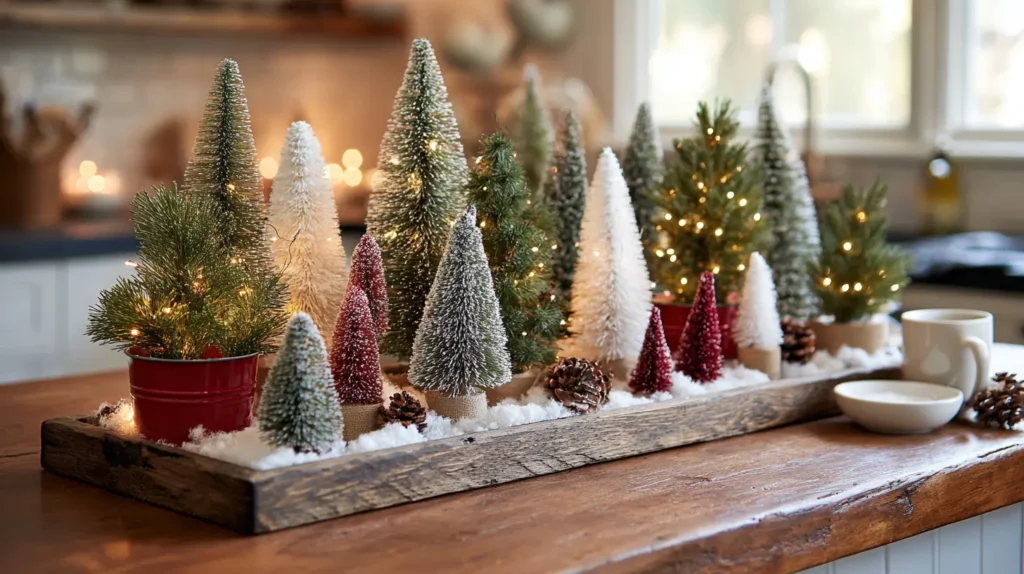
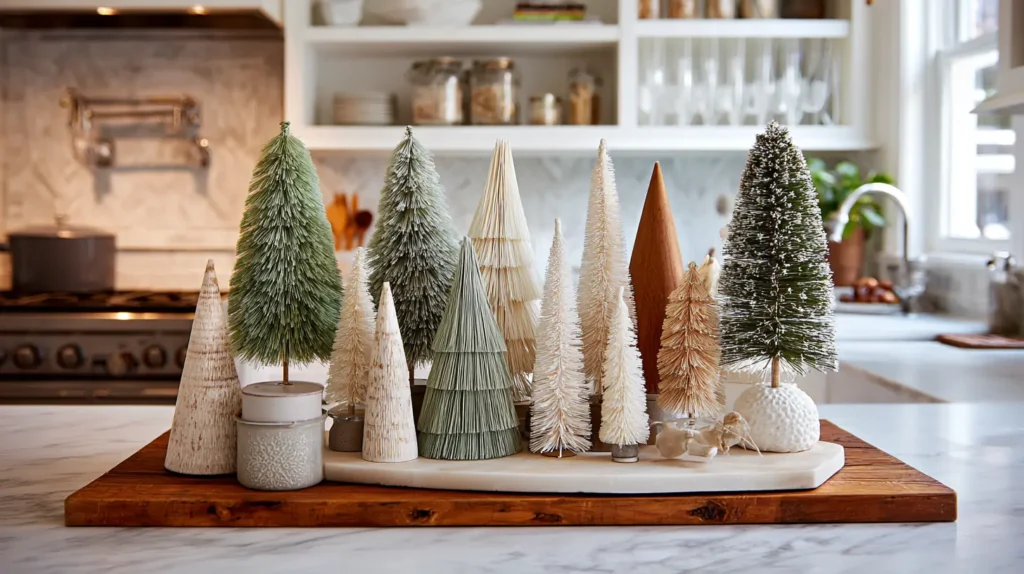
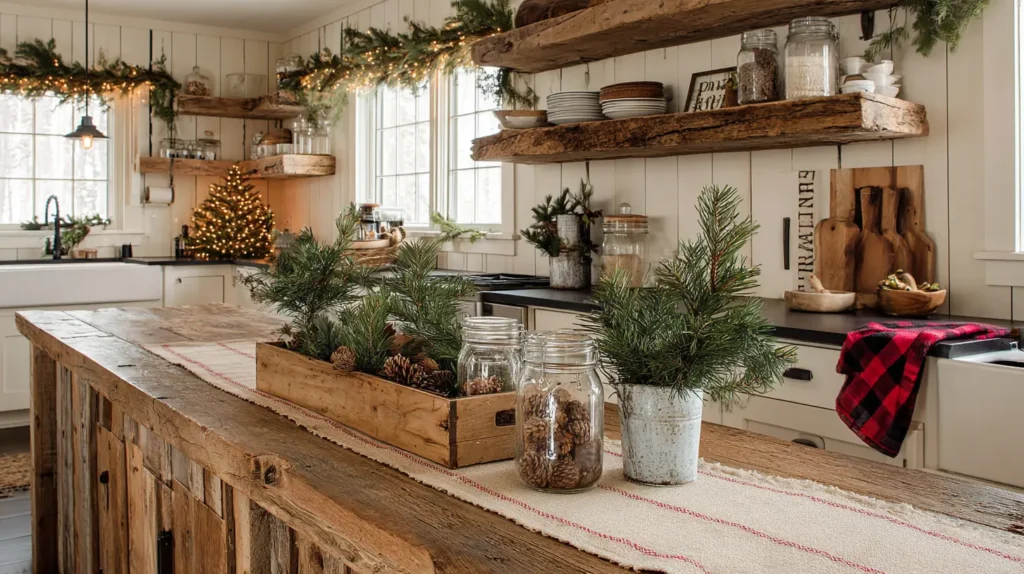
11. A Countertop Forest of Mini Christmas Trees
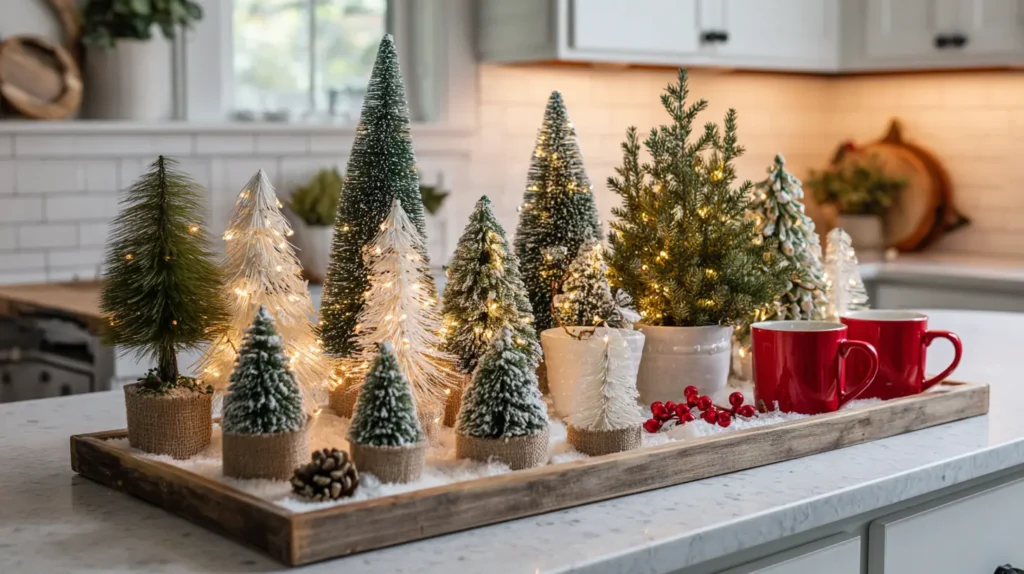

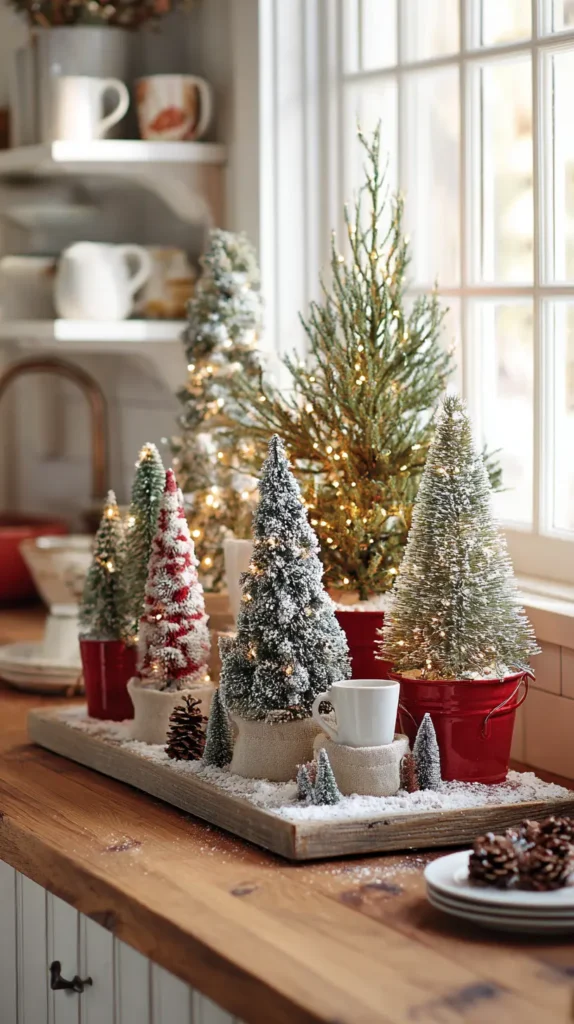
Reclaim the unused corners of your kitchen counters or the center of your island by planting a whimsical, miniature woodland. Imagine a clustered collection of trees in varying heights and textures: retro bottle brush trees dyed in sage green and tea-stained ivory, sleek ceramic cones in matte white, and rustic wooden trees carved from raw pine. Arranged together on a wooden bread board or a marble slab, this “forest” creates a striking, sculptural vignette that adds vertical interest to the flat expanse of the countertop. It’s a playful, textural display that brings the outdoors in without interfering with your prep space or cooking zones.
- The Rule of Odds: Group your trees in odd numbers (3, 5, or 7). The human eye finds odd-numbered groupings more natural and visually pleasing than even ones.
- Mix Materials: Don’t stick to just one type. Combine the fuzziness of sisal (bottle brush) with the smoothness of glass or ceramic and the roughness of wood for a rich, layered look.
- Corral the Collection: Always group the trees on a tray, cake stand, or cutting board. This turns many small objects into one cohesive “unit” that can be easily moved when you need to wipe down the counters.
- Vary the Height: Ensure you have a mix of tall, medium, and short trees to create a triangular “mountain” silhouette. If a tree is too short, prop it up on a small overturned bowl or block hidden in the cluster.
- Color Palette: Match the trees to your kitchen hardware. If you have gold handles, mix in a few metallic gold mercury glass trees for a chic, coordinated look.
Pro Design Tip: Create a “Snowy Floor” for your forest. Sprinkle a layer of coarse sea salt or desiccated coconut on the tray around the base of the trees. It looks exactly like fresh snow, adds texture, and is an inexpensive, kitchen-safe material that cleans up easily.
Budget Consideration: You can make your own stylish “yarn trees” for pennies. Roll poster board into cone shapes (or buy foam cones), coat them in glue, and wrap them tightly with leftover yarn, jute twine, or velvet ribbon. It’s a great way to use up scraps and create custom-colored decor.
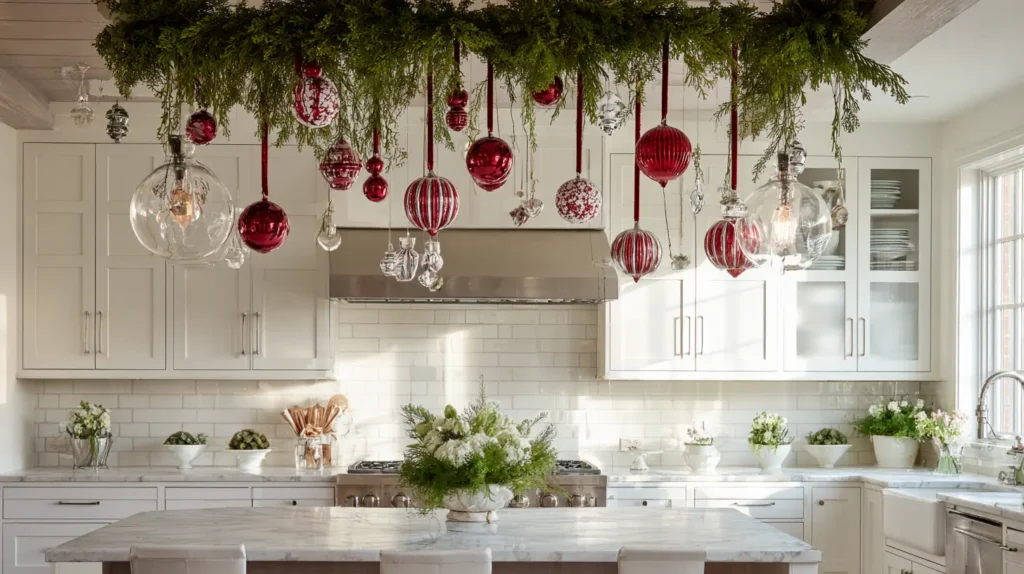
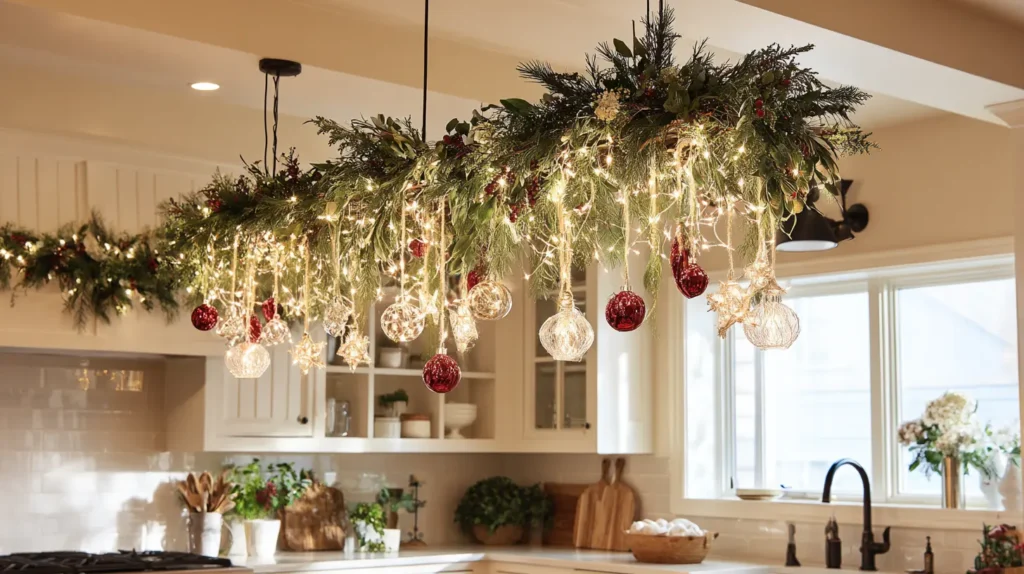
12. Adorning Light Fixtures with Greenery and Ornaments
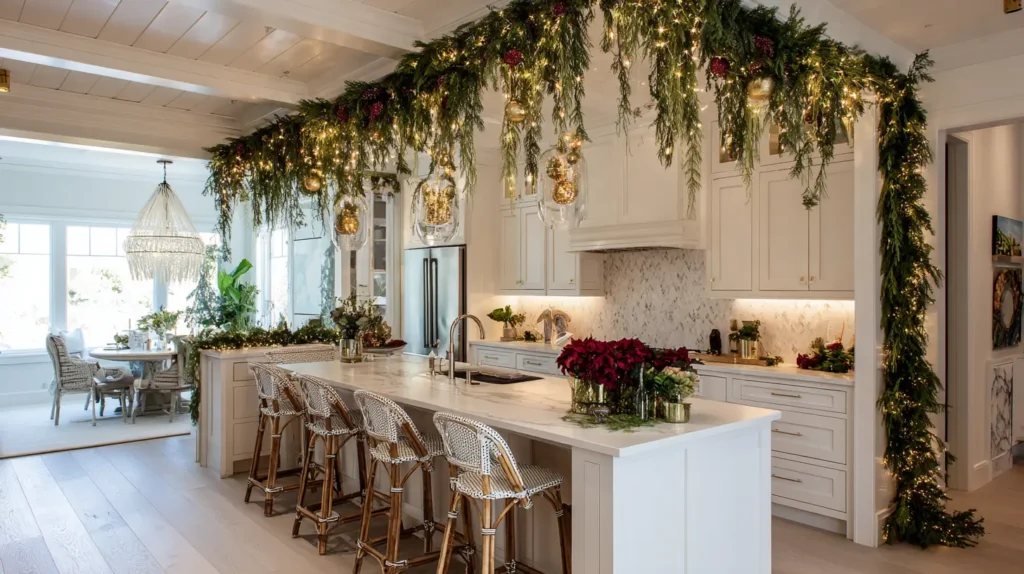

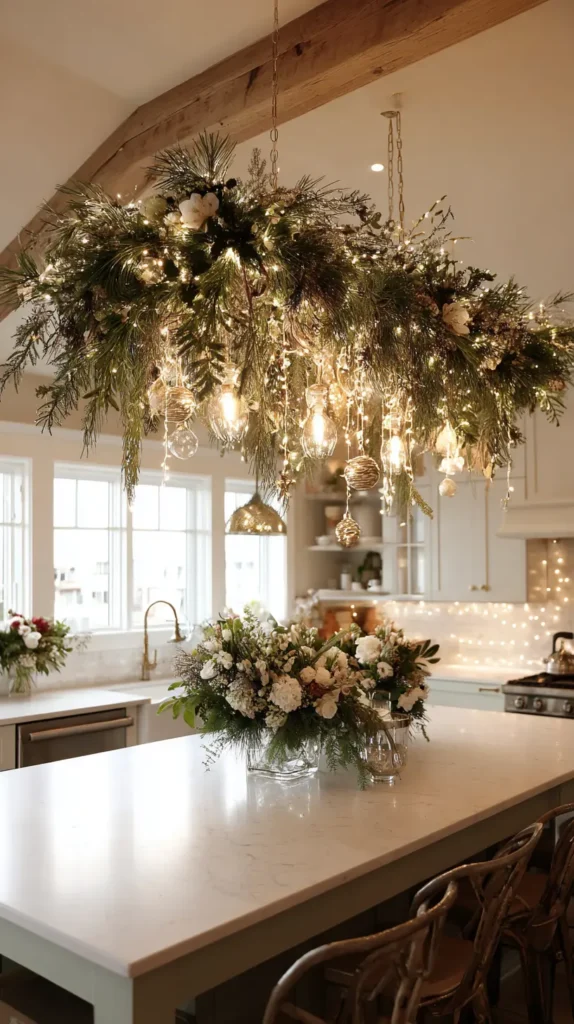
Look up and transform your kitchen’s functional lighting into a stunning holiday chandelier. Imagine your island pendant lights or breakfast nook fixture draped in delicate wisps of faux cedar or pine garland. Suspended from the greenery, glistening red and silver ornaments dangle at varying heights, catching the glow of the bulbs and casting festive sparkles across the room. This technique draws the eye upward, utilizing the vertical space to create a canopy of cheer that leaves your counters completely free for cooking. It turns standard hardware into a bespoke, festive art installation that feels grand and celebratory.
- Safety First: Keep your greenery and ribbons away from the actual light bulbs, especially if you use incandescent bulbs that get hot. Swapping to cool-touch LED bulbs is the safest move.
- The Swag Method: For linear chandeliers or pot racks, swag the garland loosely between the suspension chains for a relaxed, organic drape.
- Pendant Styling: For individual pendants, tie a small bunch of mistletoe or a single glass ornament to the light’s stem using a velvet ribbon.
- Secure Attachment: Use clear zip ties or green floral wire to secure the garland to the light fixture. They are strong, heat-resistant, and disappear visually into the greenery.
- Scale of Ornaments: Use smaller, lightweight shatterproof ornaments. Heavy glass baubles can weigh down the fixture or shatter if they bump against the metal shade.
Pro Design Tip: Create a “floating wreath” effect. If you have a drum-shade light or a round chandelier, place a lightweight wreath directly on top of the shade (or wire it to the frame). It instantly crowns the fixture with greenery without you having to wrap anything, creating a perfectly circular halo of pine.
Budget Consideration: You don’t need to buy expensive, long garlands. Use foraged twigs or holly from your garden. Tuck small sprigs into the existing frame of your light fixture or adhere them with a tiny bit of floral tape. A few free branches and a $2 spool of red ribbon can completely transform your lighting for almost no cost.
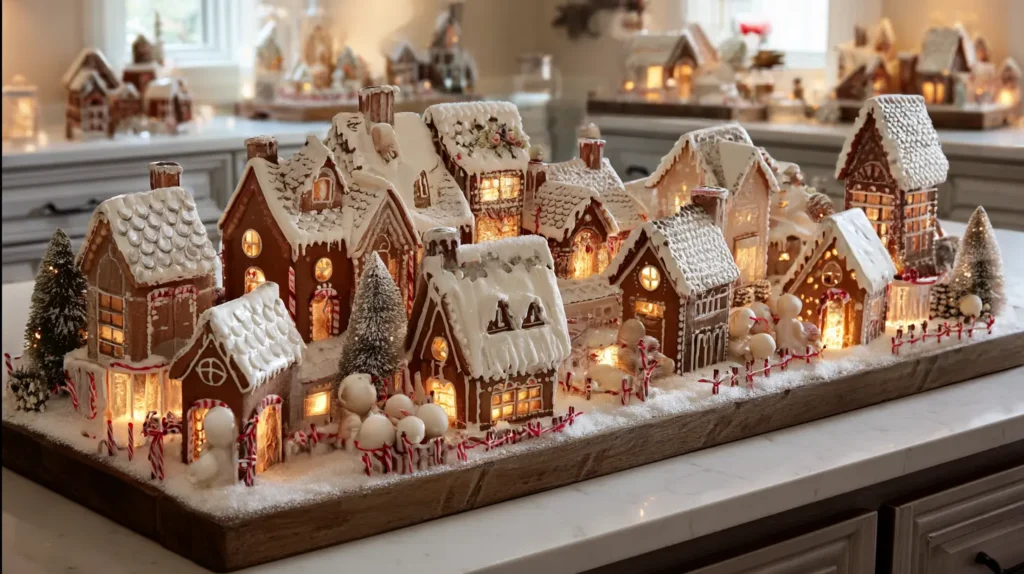
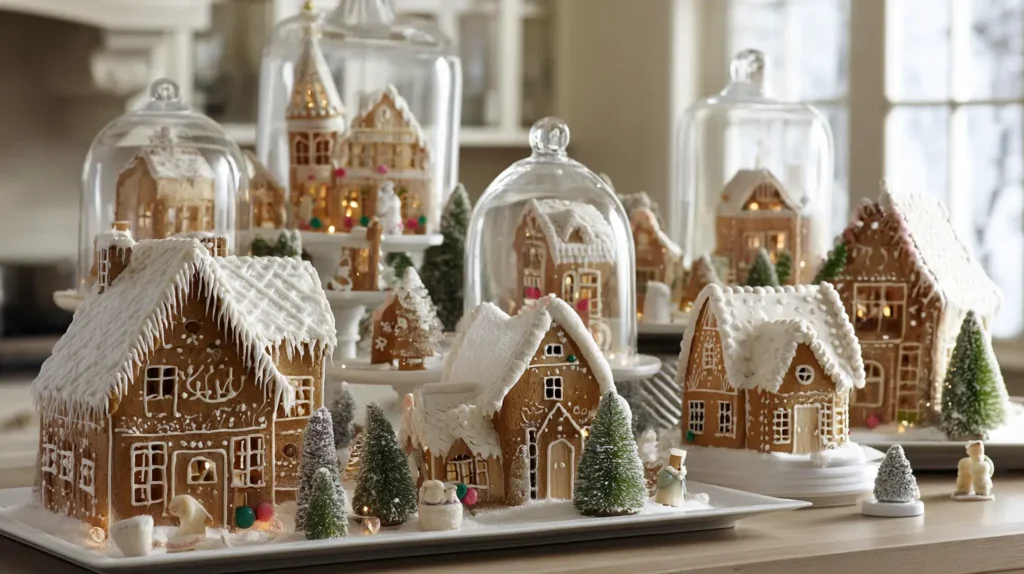
13. Gingerbread Kitchen Decor and House Village Display
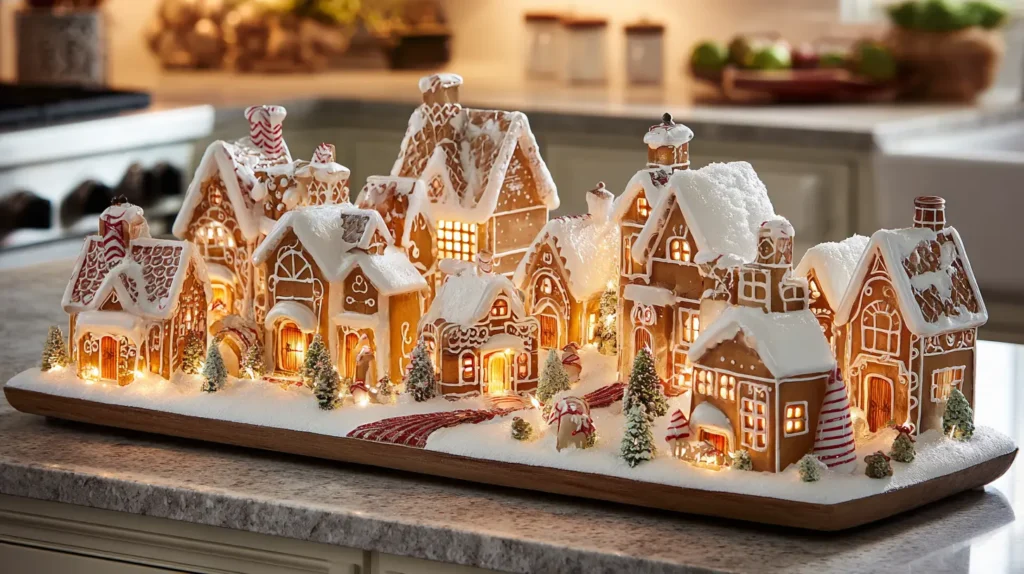
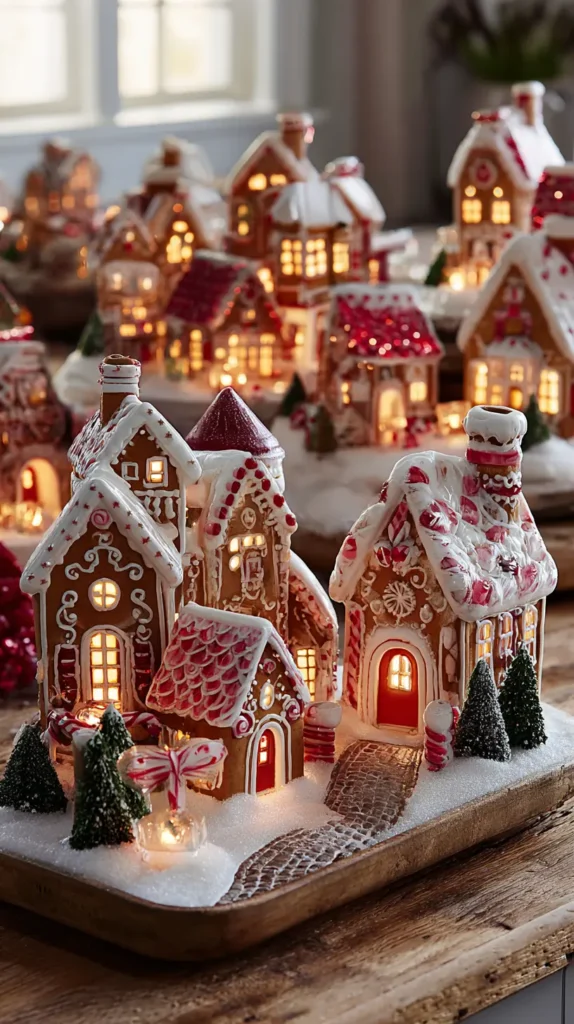
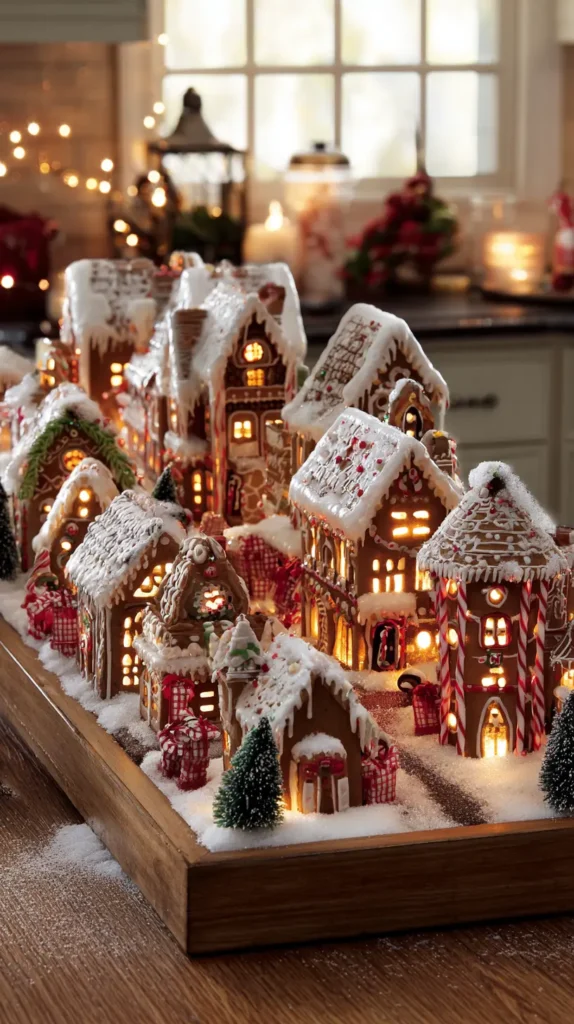
Turn a section of your countertop or open shelving into a sugary, storybook street scene. Imagine a charming village of gingerbread houses—whether baked from scratch with royal icing or crafted from enduring clay—clustered together on a white cake stand or a long wooden riser. The warm, biscuit-brown tones of the “cookies” pair perfectly with the snowy white piping and colorful gumdrop accents, creating a palette that is neutral yet festive. Interspersed with miniature snowy pine trees and tiny figurines, this display captures the whimsical essence of a holiday bakery. It serves as a sweet focal point that smells as good as it looks (if real!) and inspires everyone to grab a rolling pin.
- The “Cloche” Method: Place your most delicate gingerbread house under a glass cake dome or bell jar. This protects it from kitchen grease and dust while turning it into a museum-worthy centerpiece.
- Monochromatic Chic: For a sophisticated look, stick to white icing only. The simple combination of brown gingerbread and crisp white detail looks high-end and matches any kitchen decor.
- Village Riser: Use a tiered serving stand to create vertical height. Place smaller houses on top and larger ones on the bottom to fit a whole village into a small footprint.
- Faux vs. Real: If you want the look to last for years, invest in resin or ceramic “gingerbread” houses. They look realistic but won’t crumble or attract ants.
- Candy Accents: Fill nearby glass jars with supplies used to make the houses—peppermint swirls, gumdrops, and licorice—to tie the decor into the functional baking theme.
Pro Design Tip: Transform existing decor into “gingerbread.” Take old, mismatched ceramic village houses (from the thrift store) and spray paint them a matte “biscuit” brown. Once dry, use a white 3D puffy paint pen to trace the rooflines and windows. It creates a convincing “iced cookie” look for a fraction of the cost of buying new sets.
Budget Consideration: You don’t need to bake or buy ceramic. Use recycled cardboard (from cereal or shipping boxes). Cut out house shapes, assemble them with hot glue, and use a white chalk marker or a white paint pen to add the “icing” details. It’s a fun, free craft that looks surprisingly chic and modern on a shelf.
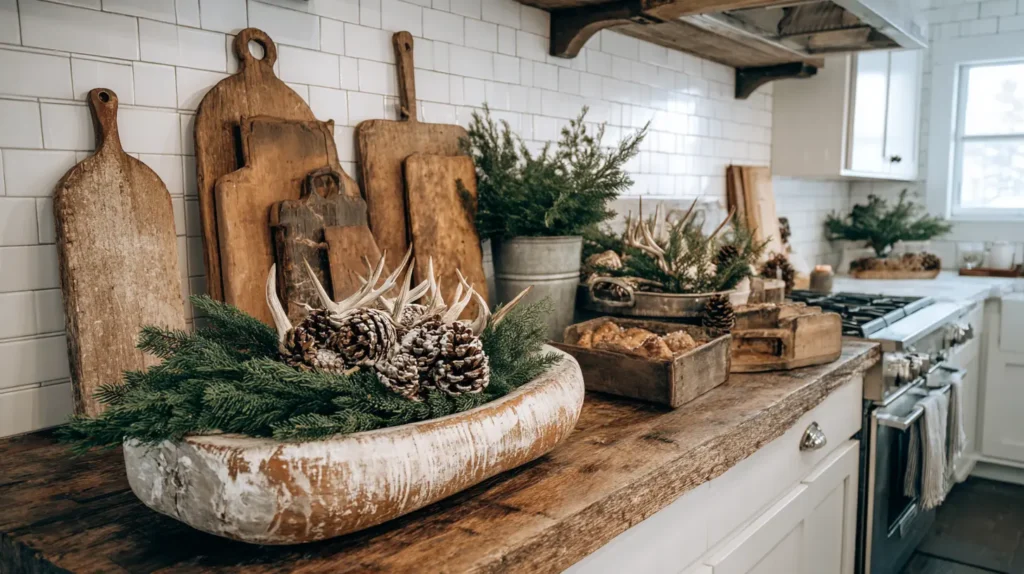
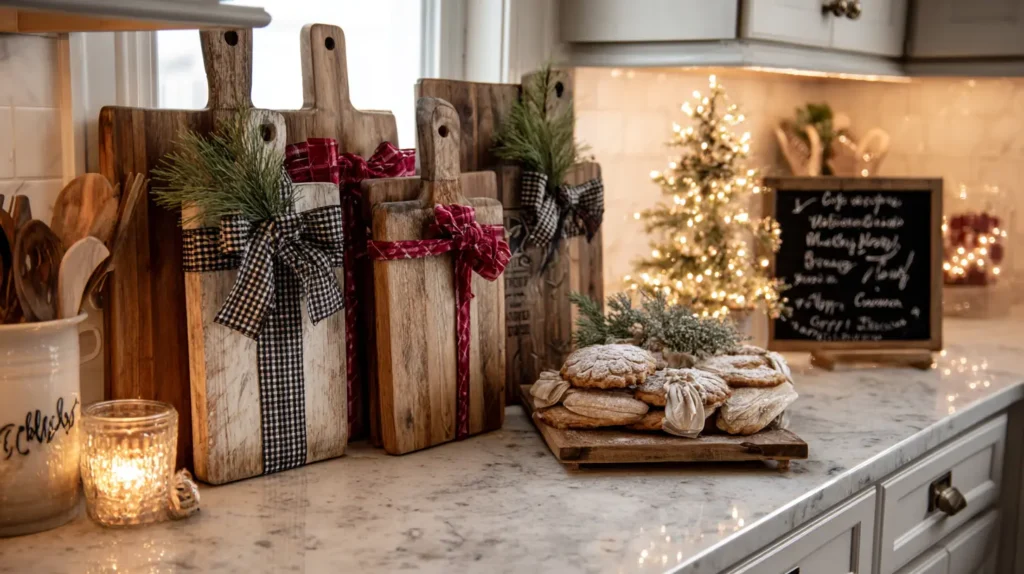
14. Rustic Farmhouse Kitchen Decor with Wood and Pine
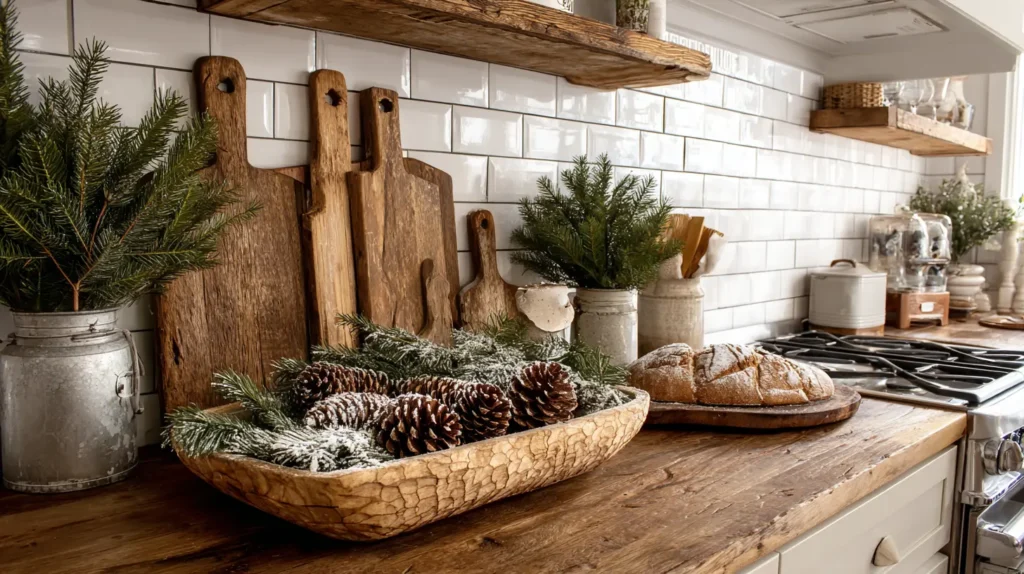
Ground your kitchen in the cozy, unpretentious charm of a winter cabin. Imagine a space defined by the warmth of raw materials: a collection of vintage wooden cutting boards stacked against a white subway tile backsplash, their worn surfaces telling stories of past feasts. On the island, a long, hand-carved dough bowl overflows with a wild arrangement of fresh pine branches, massive sugar pinecones, and antlers, bringing the scent of the forest indoors. This aesthetic creates a textured, organic contrast to sleek appliances, turning the kitchen into a humble, welcoming heart of the home where the decor feels gathered rather than bought.
- Layer the Wood: Create a backdrop by leaning wooden cutting boards or serving platters of different shapes and stains against the wall behind your stove or sink.
- The Dough Bowl Centerpiece: Use a long, shallow wooden bowl as your main vessel. Fill it with a base of pine boughs and nestle in rustic elements like whole walnuts, cinnamon sticks, or battery-operated candles.
- Galvanized Accents: Pair the warm wood with cool, galvanized metal. Use a metal olive bucket to hold a small pine tree or metal trays to corral your oils and spices.
- Natural Textures: Skip the glitter ribbon. Instead, use jute twine, burlap, or raw linen to tie back curtains or hang wreaths on cabinets.
- Scent of the Season: Fresh pine is essential here. The heat from the kitchen helps release the natural oils in the needles, acting as an organic air freshener.
Pro Design Tip: Don’t throw away your empty tin cans. Wash them out, strip the labels, and wrap them in a strip of birch bark or burlap. They make perfect, rustic vases for small pine clippings to place on the window sill or next to the soap dispenser.
Budget Consideration: This style is the ultimate “forager’s” look. You can find pinecones, interesting twigs, and evergreen clippings in your yard or a local park for free. Bake the pinecones in the oven on low heat for an hour to kill any bugs and dry up the sap, and you have free, high-end decor that lasts for years.
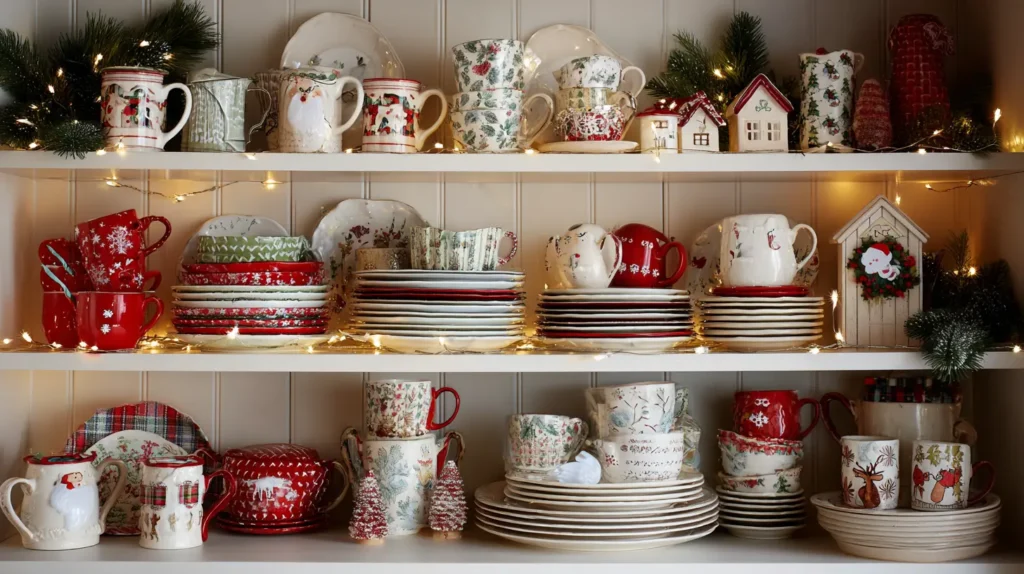
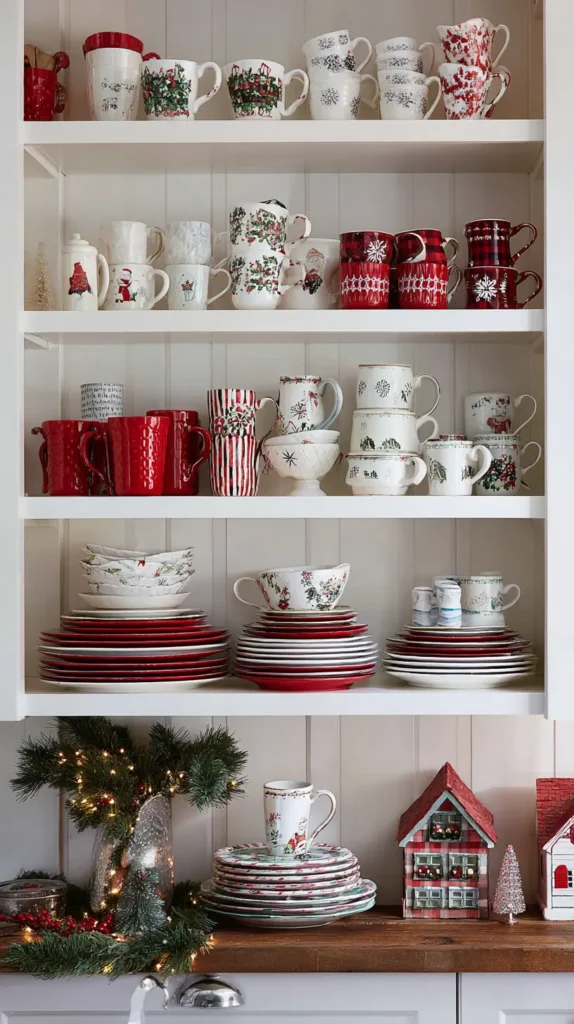
15. Styling Open Shelves with Festive Dishware and Mugs
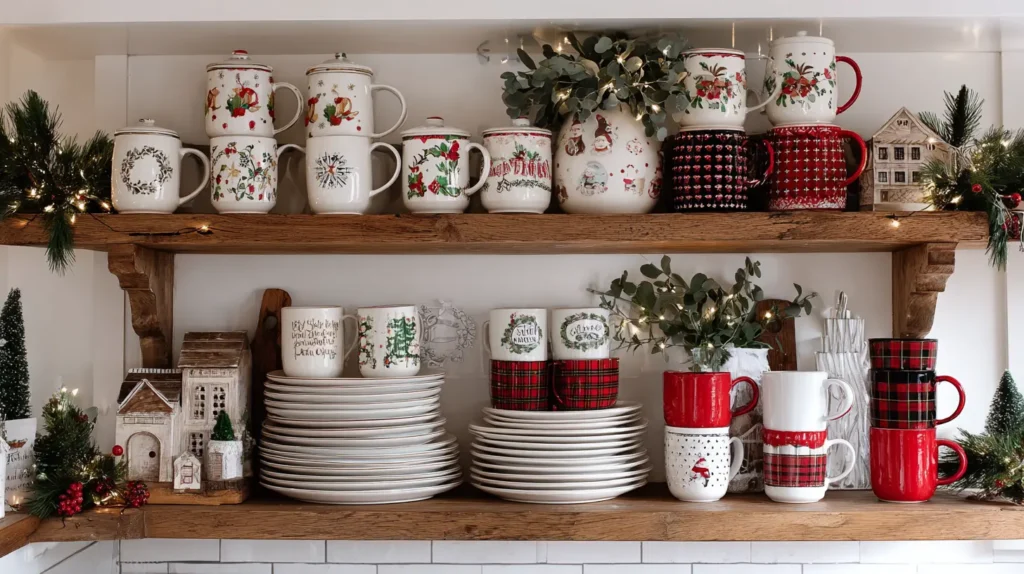

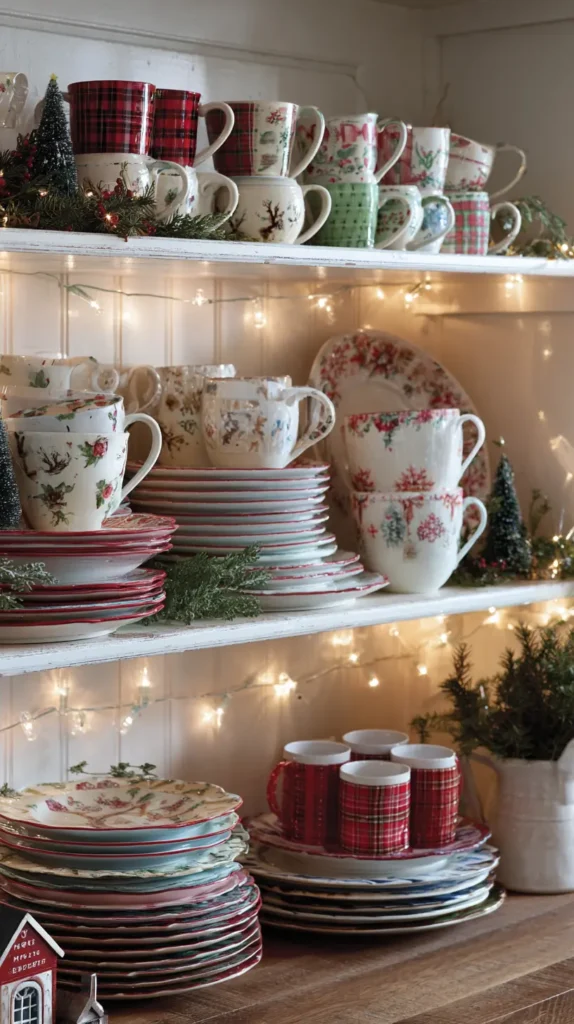
Turn your open shelving into a vertical gallery of holiday cheer by bringing your seasonal ceramics out of hiding. Imagine your shelves curated with a playful mix of function and festivity: neat stacks of creamy white dinner plates topped with accent bowls featuring red reindeer motifs or snowflake patterns. Hanging from hooks or lined up in a row, a collection of vintage Santa mugs adds a splash of nostalgia and color.
Interspersed among the ceramics are subtle organic touches—a sprig of holly tucked into an ironstone pitcher or a small bottle brush tree perched atop a stack of saucers. This approach turns storage into decor, ensuring your favorite festive pieces are not only admired but ready to be grabbed for every meal.
- The “Salad Plate” Strategy: You don’t need a full set of holiday china. Use your everyday white dinner plates as the base and stack a decorative seasonal salad plate or bowl on top to get the look without the bulk.
- Create Vignettes: Don’t just line things up. Group items in clusters—like a pitcher, a stack of bowls, and a candle—to create visual interest and depth.
- Add Greenery: Soften the hard lines of the ceramics and shelves by tucking small sprigs of faux cedar or pine into the gaps between stacks.
- Backdrop Art: Lean large holiday platters or framed seasonal prints against the back wall of the shelf to create a festive backdrop for the smaller items in front.
- Hang the Mugs: If you have under-shelf hooks, hang your most colorful mugs. It frees up shelf space and creates a dangling garland of color.
Pro Design Tip: Weave a strand of battery-operated “dew drop” fairy lights (the kind on thin wire) in and around the stacks of dishes. The wire is nearly invisible, but when turned on, it makes your glassware sparkle and casts a warm, magical highlight on your collection.
Budget Consideration: Thrift stores are gold mines for “mismatched” holiday transferware (the red-and-white patterned plates). You can often find single plates for a dollar. A stack of mismatched red-and-white plates looks incredibly high-end and curated, far more interesting than a perfectly matching box set from a department store.
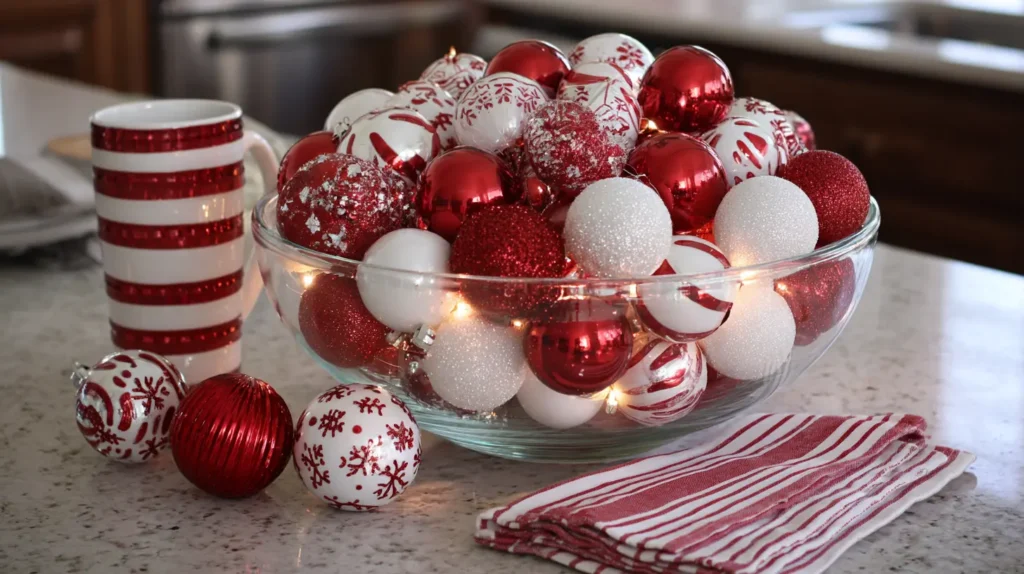
16. Christmas Ornament Bowl, Red and White Kitchen Theme
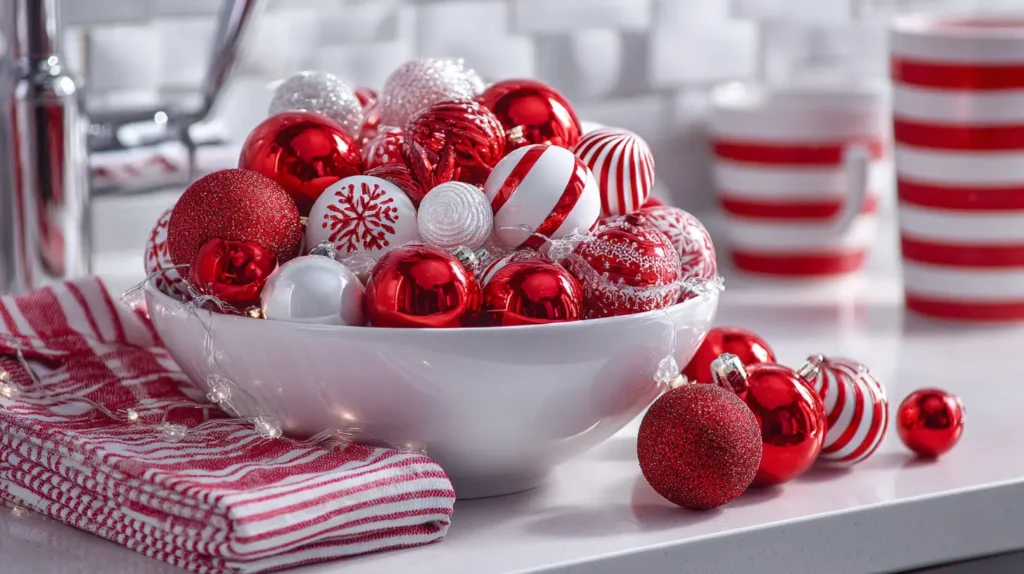
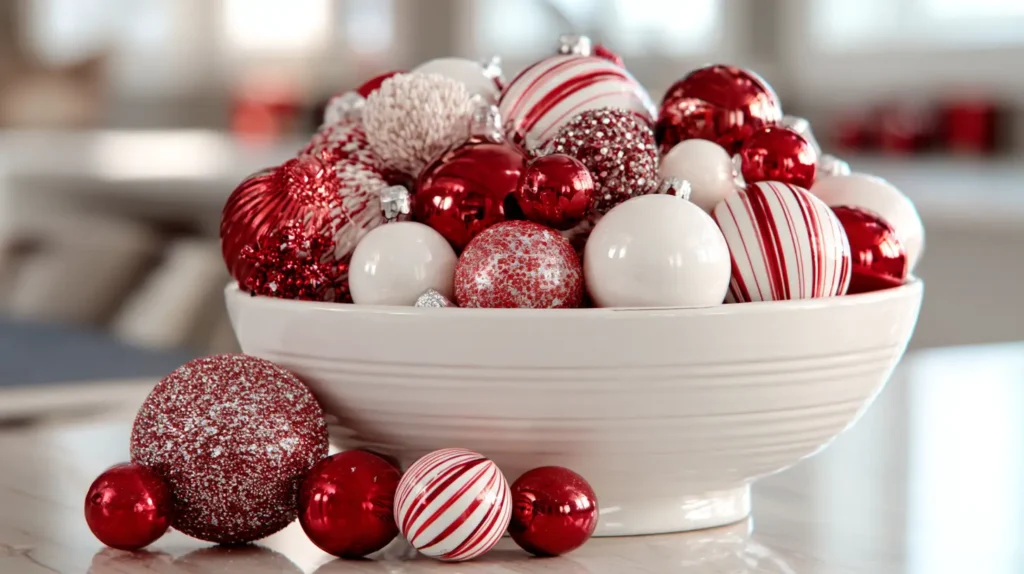
Create a striking, low-maintenance centerpiece that captures the crisp, sugary aesthetic of a peppermint stick. Imagine taking a large vessel—perhaps a vintage white ceramic mixing bowl, a clear glass trifle dish, or a rustic wooden dough bowl—and filling it to the brim with a collection of ornaments in a strict red-and-white palette. The mix of textures is mesmerizing: glossy ruby-red spheres reflecting the kitchen lights, matte white baubles that look like snowballs, and striped candy-cane ornaments that add graphic interest. Placed on the kitchen island or the breakfast table, this “bowl of bubbles” delivers an instant shot of festive cheer, mimicking a giant bowl of holiday candy without the calories.
- Vessel Choice: Use what you have. A white pedestal cake stand (inverted with the dome used as a bowl) or a simple wire fruit basket works perfectly to hold the ornaments.
- Texture Mix: Don’t use only shiny balls. Mix in matte, glittered, and flocked (fuzzy) white ornaments to create visual depth and richness.
- The Peppermint Twist: Stick to the two-tone palette. The high contrast between bright red and pure white looks clean, modern, and energizing in a kitchen space.
- Greenery Filler: Tuck small sprigs of fresh pine or cedar into the gaps between the ornaments. The pop of green breaks up the red and white and connects the decor to nature.
- Overflow Effect: Don’t be afraid to pile them high. Let a few ornaments “spill” out of the bowl onto the counter nearby for a relaxed, abundant look.
Pro Design Tip: If using a clear glass bowl or vase, hide a strand of battery-operated “fairy lights” (copper wire lights) in the center of the ornament pile. The glass balls will refract the light, making the entire bowl glow from within like a magical lantern during dinner.
Budget Consideration: You do not need expensive glass ornaments for this, especially in a high-traffic kitchen. Buy a bulk tube of shatterproof (plastic) ornaments from a discount store. They look identical to glass from a foot away, are safe if knocked over by kids or pets, and cost a fraction of the price.
17. Vintage Christmas Cookie Jars and Frosted Cranberry Glassware Display
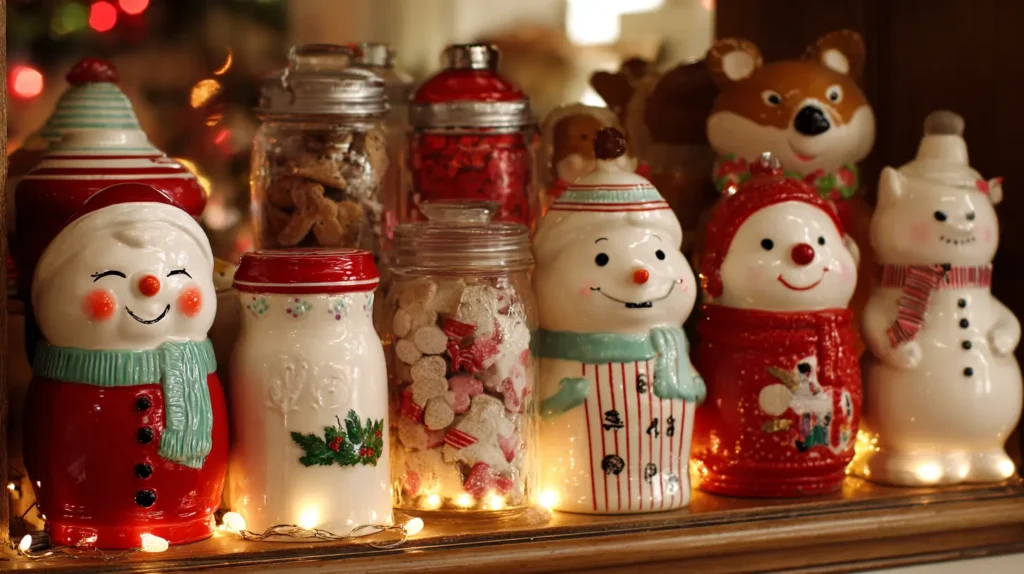
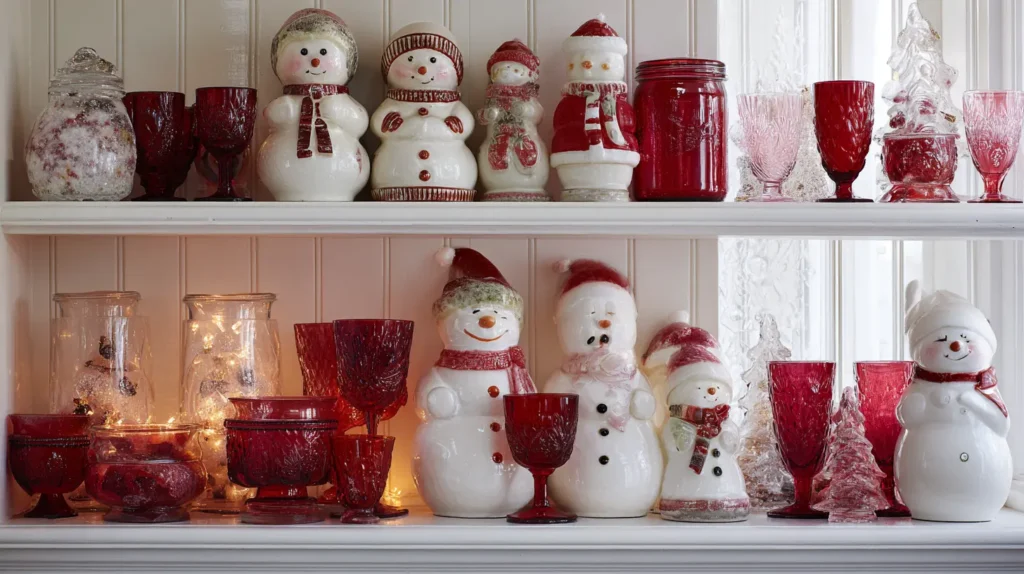
Curate a display that balances childhood whimsy with sophisticated sparkle by mixing nostalgic ceramics with jewel-toned glass. Imagine a shelf or hutch lined with smiling ceramic Santa and Snowman cookie jars, their paint slightly worn from years of love. Nestled among them is a collection of frosted cranberry glassware—goblets, tumblers, or cake stands—that glow with a deep, sugared-ruby hue. The matte, icy texture of the red glass contrasts beautifully with the glossy, kitschy ceramic jars, creating a vignette that feels both playful and elegant, reminiscent of a snowy Christmas morning from decades past.
- The Collector’s Look: Group the cookie jars together to create a “choir” of characters rather than scattering them. The impact is stronger when they are clustered.
- Light Catchers: Place the cranberry glass near a window or under-cabinet lighting. The translucent red glass will cast a warm, rosy glow across the counter or shelves.
- Dual Purpose: Use the glassware for serving holiday punch, or fill them with white bottle brush trees or votive candles for purely decorative use.
- Texture Play: The “frosted” or “sugared” finish on the glass mimics winter ice, tying in perfectly with a snowy theme while adding a pop of rich color.
- Storage Solutions: Use the cookie jars to hide non-holiday clutter like car keys, charging cables, or tea bags to keep the counters tidy.
Pro Design Tip: Turn the cranberry glasses into glowing luminaries. Drop a battery-operated tea light into each goblet. The frosted finish diffuses the light, creating a soft, pink-red ambiance that makes the kitchen feel cozy and magical after the overhead lights go out.
Budget Consideration: Authentic vintage cranberry glass is a collector’s item and can be pricey. Fake the look for pennies by taking plain thrift store glassware and applying a coat of “frosted glass” spray paint (available at hardware stores), or brush on decoupage glue and roll the glass in fine white glitter or Epsom salts for a DIY “sugared” effect.

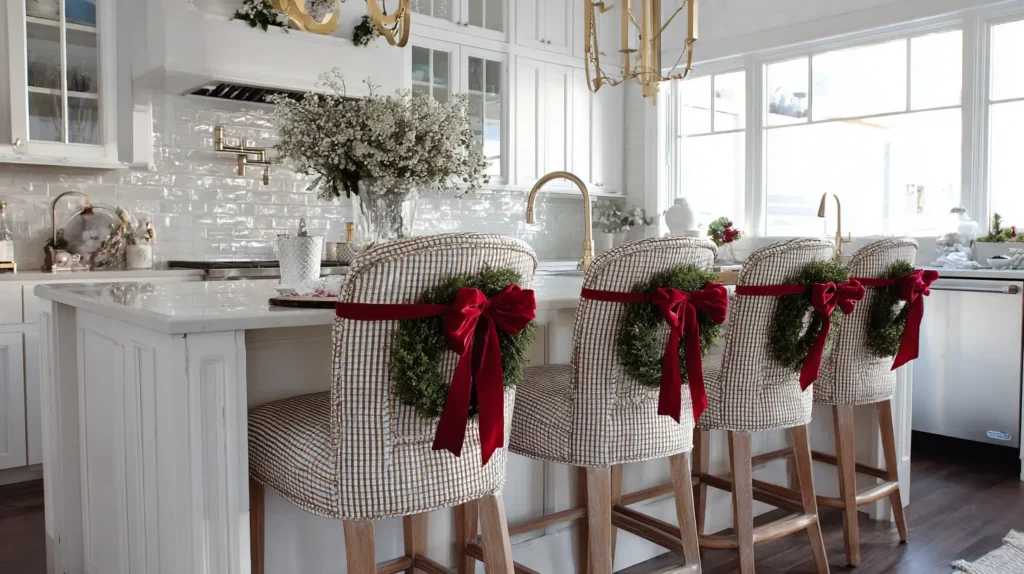
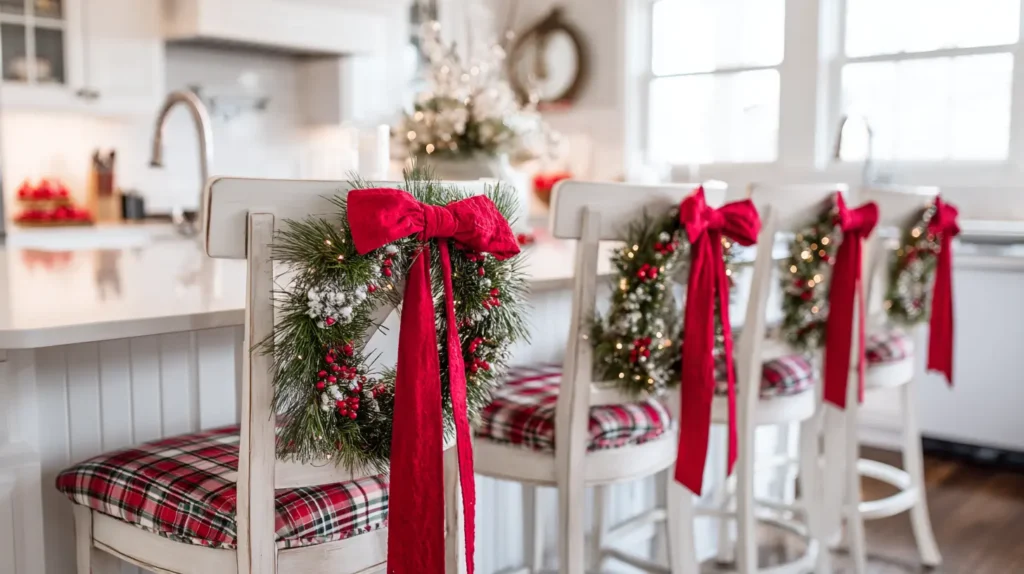
18. Dressing Up Bar Stools with Ribbons and Wreaths
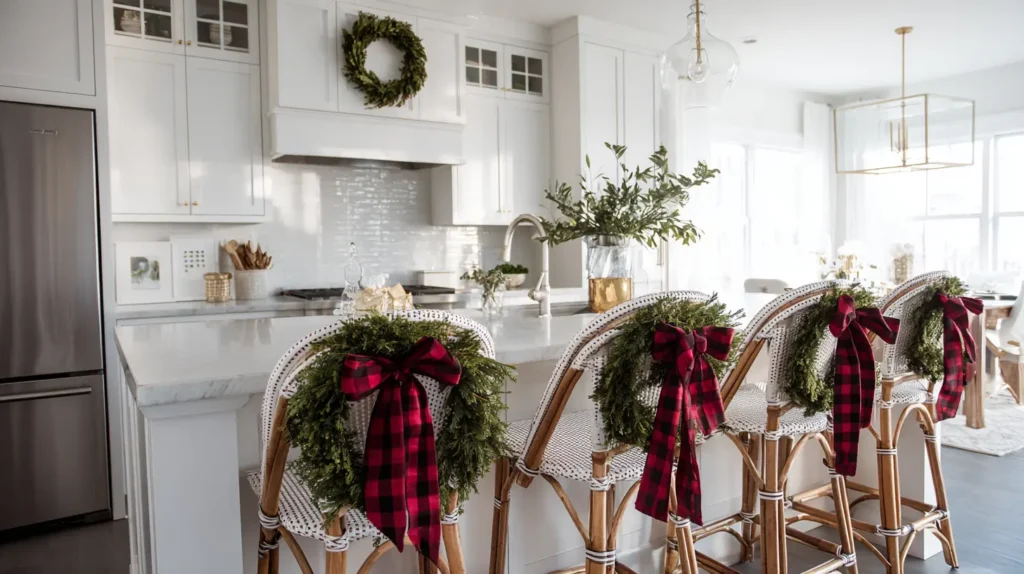
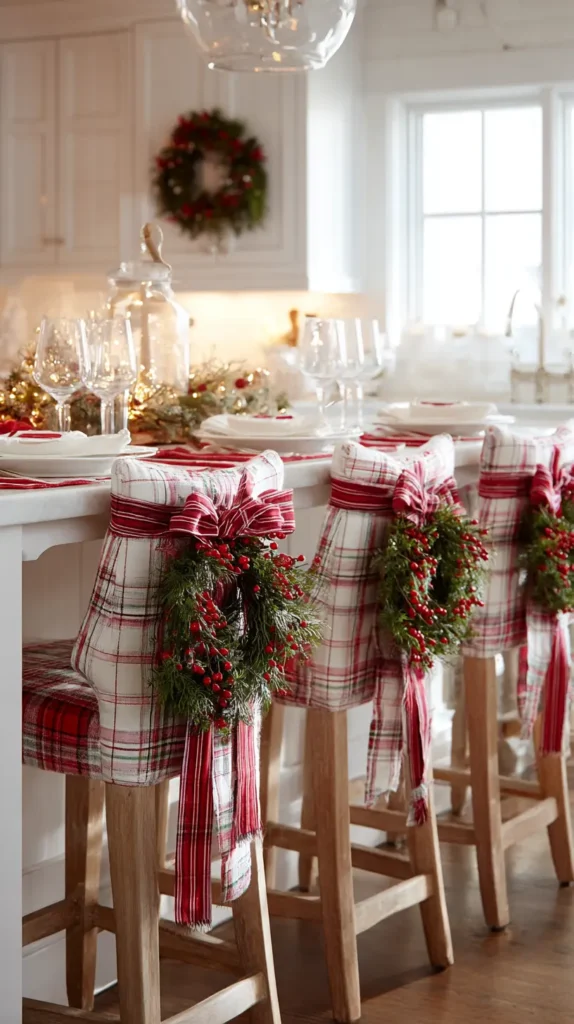
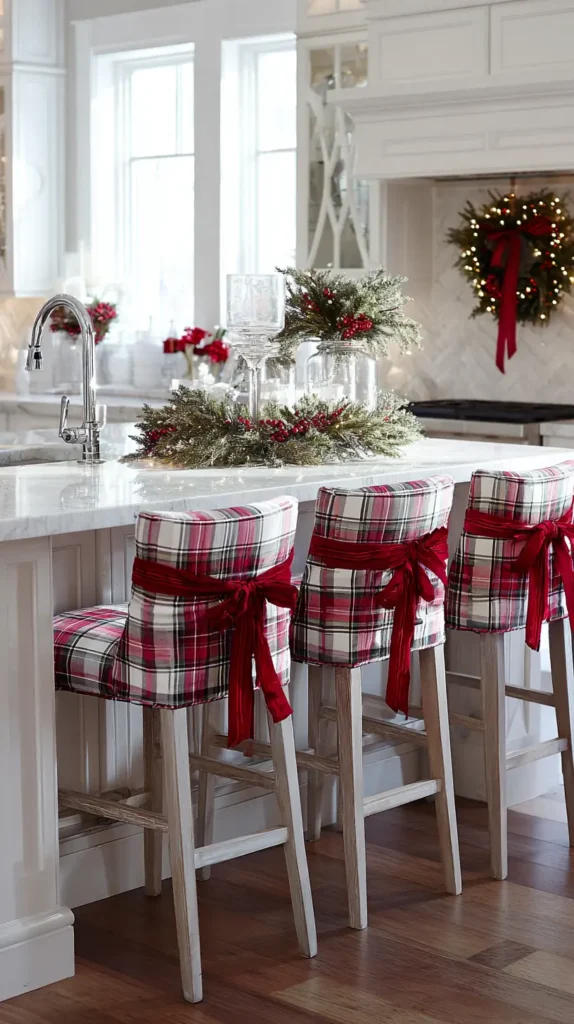
Transform your kitchen island seating into a row of festive guests that greet you every morning. Imagine the back of each bar stool adorned with a petite, verdant wreath—perhaps preserved boxwood or classic pine—suspended by a wide, luxurious ribbon in red velvet, buffalo check, or shimmering gold. This simple addition turns the backs of your chairs, which are usually overlooked, into a major decorative feature visible from the living room or dining area. It adds a splash of color and softness to the kitchen’s hard surfaces, making breakfast feel like a special occasion every single day of December.
- Size Matters: Keep the wreaths small—between 8 and 10 inches in diameter. Anything larger than the chair will overwhelm it, making it uncomfortable for the person sitting there.
- The Ribbon Loop: Loop a long ribbon around the top rail or splat of the chair back. Tie a secure knot or bow at the top to hold the wreath at the perfect height.
- Comfort Check: Ensure the wreath hangs low enough (or high enough) that it doesn’t poke the spine of the person sitting down. Soft, preserved boxwood is much more comfortable to lean against than prickly artificial pine.
- Coordinate the Look: Match the ribbon on the chairs to the ribbon on your tree, or match it to your kitchen towels to create a cohesive, designer look throughout the open-concept space.
- Shed-Free Zone: Since these are near food prep areas, opt for high-quality faux greenery or preserved leaves rather than dried, shedding naturals to keep the floor clean.
Pro Design Tip: If your stools have a solid back (no slats to tie ribbon around), use a Command hook upside down on the back of the chair. Loop the ribbon over the top of the chair back and hook it onto the hidden command hook. This keeps the wreath suspended perfectly, with no visible hardware on the front.
Budget Consideration: Don’t buy expensive “mini wreaths.” Search for “greenery candle rings” instead. They are the perfect size for chair backs (usually 6-10 inches) and are significantly cheaper than items marketed as wall decor. Simply tie a ribbon around the ring, and you’re done!
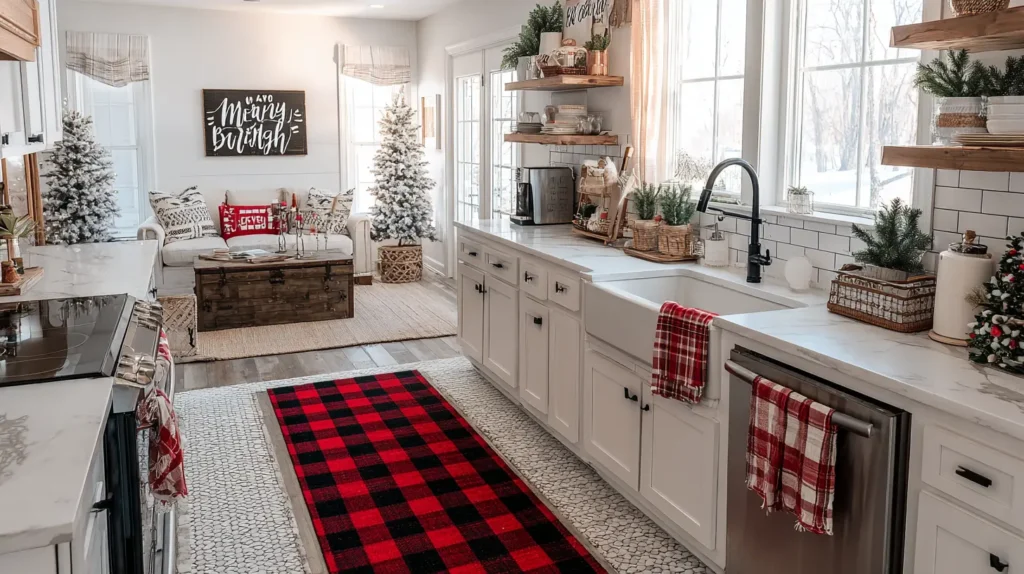
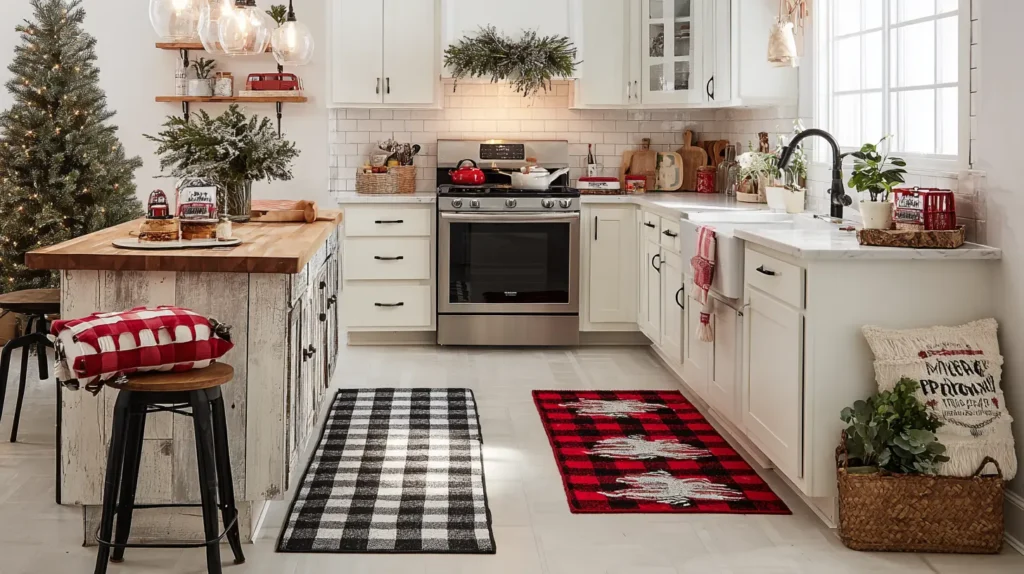
19. Placing Festive Runners and Rugs for Warmth
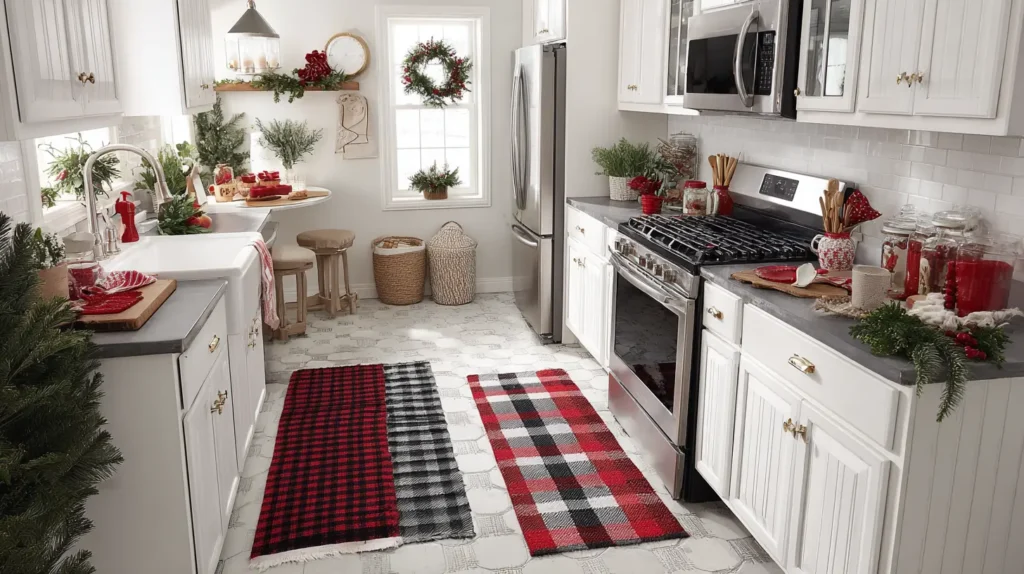
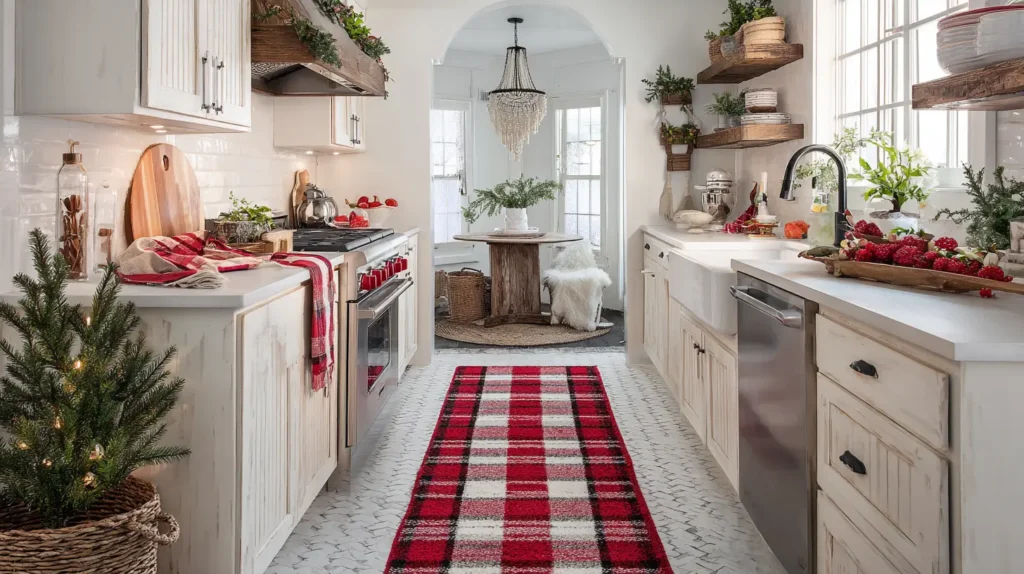
Ground your holiday kitchen design and banish the chill of cold tile floors by rolling out a festive runner or area rug. Imagine a long, vintage-inspired runner in deep crimson and charcoal stretching the length of your island, or a cheerful red-and-white buffalo plaid rug positioned in front of the sink. This textile layer does more than just add a pop of color at ground level; it creates a zone of comfort for the cook who stands for hours prepping holiday meals. Visually, it softens the hard lines of cabinetry and appliances, absorbing sound and making the kitchen feel as cozy and furnished as the living room.
- The “Work Triangle” Spot: Place rugs in the highest-traffic areas—usually in front of the sink, the stove, or along the prep side of the island—to provide ergonomic support.
- Washability is Key: Kitchens are messy. Opt for machine-washable rugs (like Ruggable) or flat-weave cottons that can be tossed in the laundry if gravy spills on them.
- Visual Elongation: A long runner rug draws the eye through the room, making a galley or narrow kitchen appear longer and more spacious.
- Hiding the Mess: Choose busy patterns, such as Persian motifs or tight plaids. They are excellent at camouflaging crumbs, flour dust, and minor spots between cleanings.
- Safety First: Always use a high-quality non-slip rug pad or rug tape corners to prevent the rug from sliding out from under you while you’re carrying hot dishes.
Pro Design Tip: If you have an open-concept kitchen, coordinate the kitchen rug with your living room tree decor. If your tree has gold ribbon, choose a rug with warm, honey tones. This visual link connects the two spaces, making the entire floor plan feel cohesive and festive.
Budget Consideration: You don’t need to buy a specific “kitchen rug.” Look at outdoor rugs or long bath runners. Outdoor rugs are incredibly durable, stain-resistant, often come in festive red/green patterns, and can be scrubbed clean with a sponge and soap for a fraction of the price of an indoor wool rug.
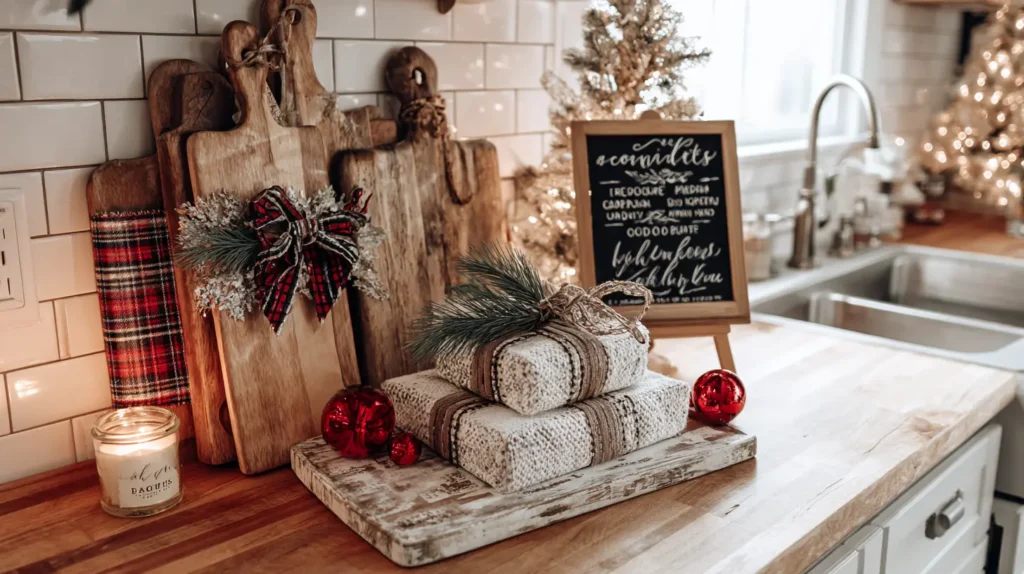
20. Creating Cozy Countertop Vignettes with Cutting Boards
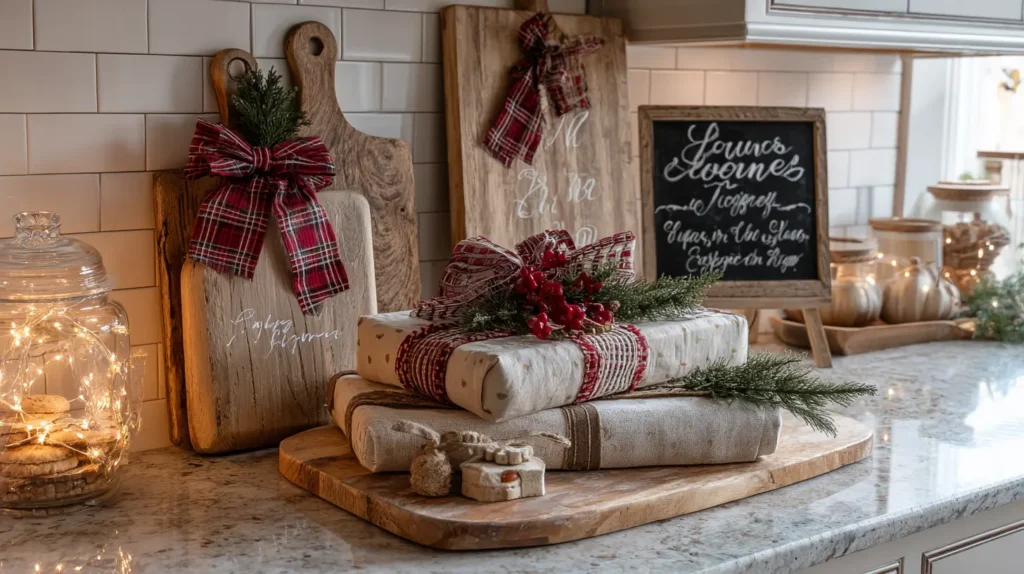
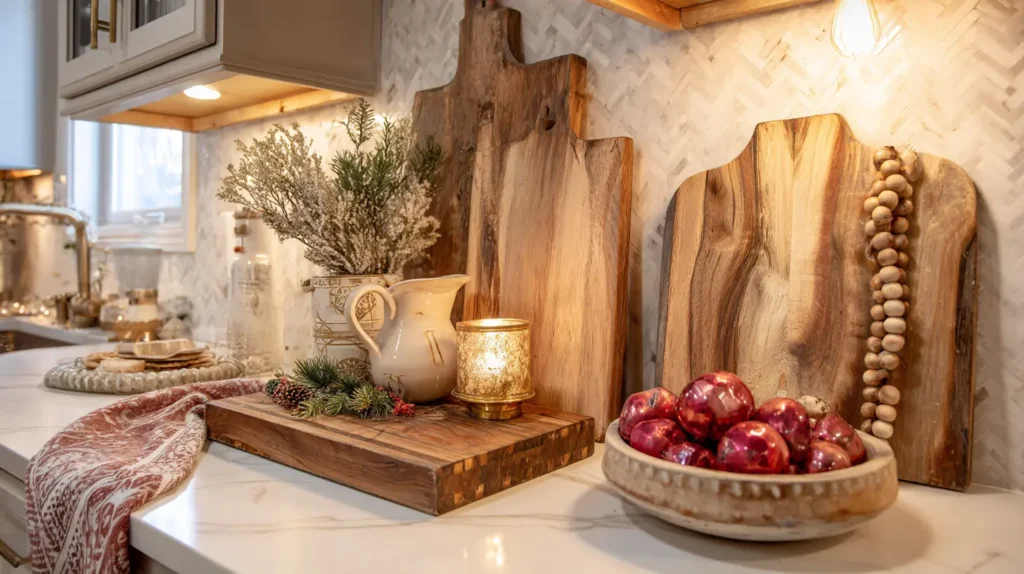
Soften the hard, cold surfaces of your kitchen by introducing the warm, organic texture of wood. Imagine leaning a collection of cutting boards against your backsplash—layering a large rectangular bread board behind a smaller, round charcuterie board. This wooden backdrop instantly warms up the room and serves as a stage for a festive vignette. Nested in front of the boards is a glowing candle in a brass holder, a small ironstone pitcher filled with pine, or a bowl of shiny red ornaments. The wood tones bridge the gap between sterile appliances and cozy holiday decor, making the kitchen feel like a rustic farmhouse kitchen ready for a feast.
- Layering Logic: Place the largest board at the back and layer smaller, differently shaped boards in front to create visual depth and interest.
- Hide the Ugly: Strategically lean boards against the wall to conceal unsightly electrical outlets, cords, or stained grout lines on the backsplash.
- Mix Wood Tones: Don’t worry about matching perfectly. Mixing dark walnut, warm cherry, and pale maple adds to the “collected” and lived-in aesthetic.
- Festive Accessorizing: Drape a strand of wooden beads or a small garland over the top corner of the boards to integrate them into the holiday theme.
- Functional Decor: Keep the display practical by placing your salt cellar, pepper grinder, or olive oil bottle in front of the boards, turning the decor into a functional cooking zone.
Pro Design Tip: Tie a small festive accent to the handle of the front-most cutting board. A vintage metal cookie cutter tied with red-and-white baker’s twine, or a tiny sprig of fresh rosemary tied with a velvet ribbon, adds a charming, 3D detail that screams “holiday baking.”
Budget Consideration: You don’t need expensive artisan boards. Scour thrift stores for scratched or dry-looking wooden boards. A quick sanding and a generous rub-down with food-safe mineral oil (about $5) will restore the wood’s rich color and grain, giving you a vintage look for pennies.
Conclusion
A kitchen decorated for Christmas does not need to be transformed — it needs to be acknowledged. The room already has warmth, activity, and the particular comfort of food being prepared. A few deliberate additions — greenery, candlelight, seasonal textiles, one small arrangement that becomes the year’s tradition — are enough to make the space feel like it is participating in the season rather than simply running it. Start with the surfaces you actually look at while cooking, add what genuinely pleases you rather than what looks complete on a guide, and let the kitchen be what it already is: the room where the holidays are made.
