
20 Adorable and Cozy Baby Quilt Pattern Ideas for Everyday Use
When creating a nurturing space for your little one, few projects are as rewarding as crafting a handmade quilt. Exploring Baby Quilt Pattern Ideas opens a world of possibilities to combine ultimate comfort with personal expression. These quilts are cherished for more than their warmth; they become heirlooms of love, providing security during naptime, a soft foundation for play, and a beautiful centerpiece for the nursery. This guide is designed to inspire you with practical and adorable patterns that are as functional as they are sentimental, perfect for everyday use and special occasions alike.
Baby Quilt Pattern Ideas
Contents
- 1 Baby Quilt Pattern Ideas
- 2 1. Soft Cotton Baby Quilt Patterns for Gentle Everyday Comfort
- 3 2. Adorable Patchwork Baby Quilts for Cozy Nursery Beds
- 4 3. Heirloom Whole Cloth Baby Quilts for Special Keepsakes
- 5 4. Portable Stroller Quilt Patterns for On-the-Go Warmth
- 6 5. Neutral Baby Quilt Designs for Calm and Peaceful Nurseries
- 7 6. Cute Animal-Themed Baby Quilt Pattern Ideas
- 8 7. Cuddly Cloud and Star Themed Quilts for Dreamy Bedtimes
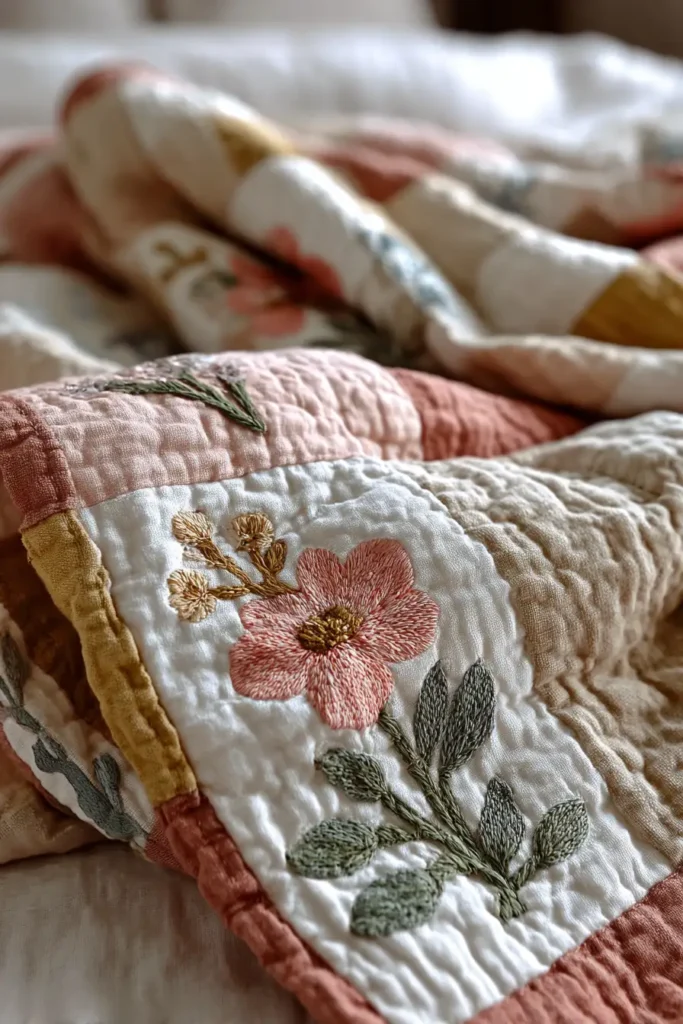
- 9 8. Sweet Floral Appliqué Quilt Designs for a Gentle Touch
- 10 9. Heartwarming ABC Baby Quilt Patterns for Educational Fun
- 11 10. Minimalist Two-Tone Baby Quilt Designs for Modern Parents
- 12 11. Soft Pastel Jelly Roll Quilt Patterns for Quick Gifts
- 13 12. Lightweight Muslin Quilt Ideas for Summer Babies
- 14 13. Reversible Baby Quilt Designs for Everyday Bed Covers
- 15 14. Boho Fringe and Tassel Baby Quilts for Stylish Nurseries
- 16 15. Matching Baby Quilt and Bed Sheet Pattern Ideas
- 17 16. Organic Cotton Quilted Crib Sheets for Sensitive Skin
- 18 17. Baby Quilt Bed Runner Ideas for Soft Nursery Accents
- 19 18. Adorable Star Quilt Pillow Covers for Nursery Gliders
- 20 19. Playful Patchwork Baby Pillow Cover Ideas for Decor
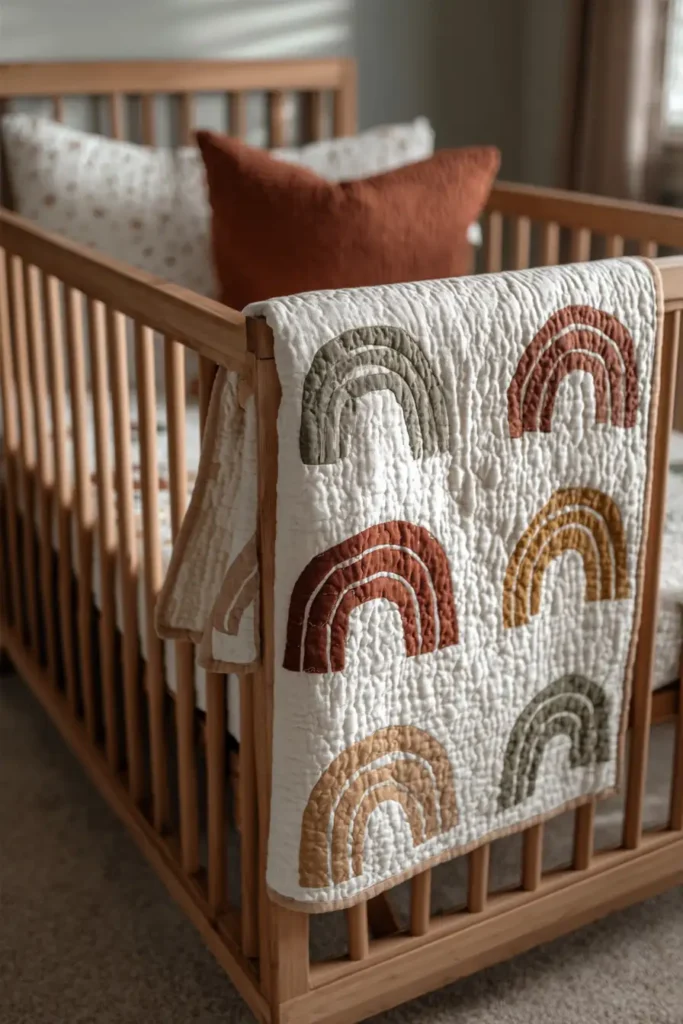
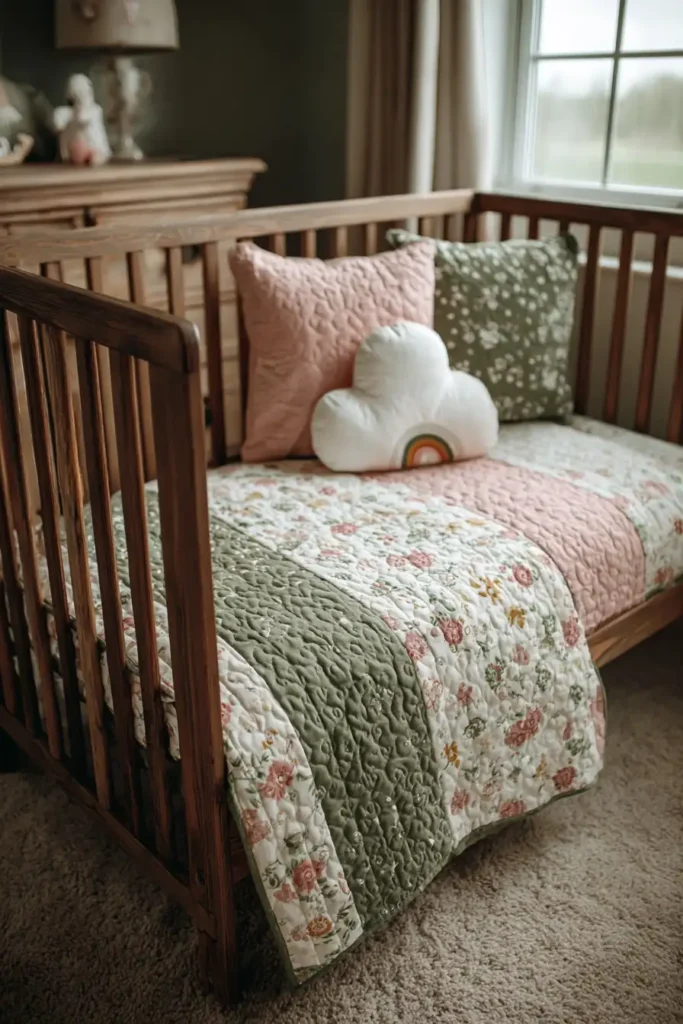
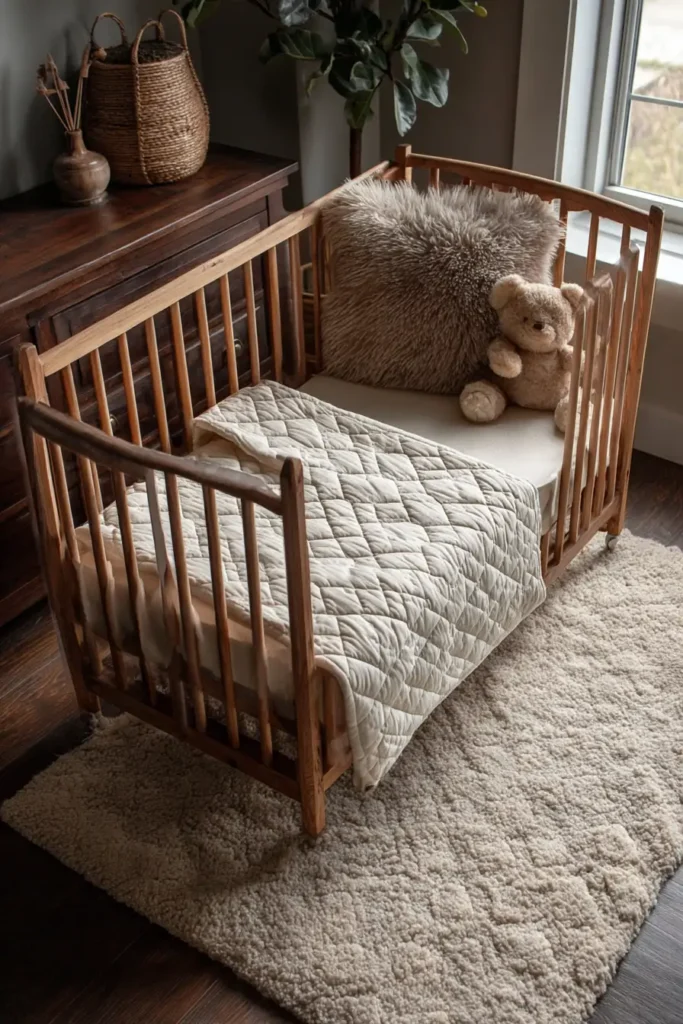
- 21 20. Cozy Baby Quilt Patterns for Crib and Toddler Beds
- 22 Conclusion
The beauty of baby quilts lies in their versatility throughout an infant’s life. From the Soft Cotton quilts designed for gentle, daily comfort in the crib to Portable Stroller Quilt Patterns that provide on-the-go warmth, each design serves a thoughtful purpose. Whether you are drawn to the timeless appeal of an Heirloom Whole Cloth Baby Quilt, the playful charm of Cute Animal-Themed patterns, or the modern simplicity of Minimalist Two-Tone Designs, there is a perfect project to match every style and need. These patterns consider everything from fabric choice for sensitive skin to designs that grow with your child from the crib to a toddler bed.
This collection emphasizes creating a cohesive and calming nursery environment. Beyond the main quilt, ideas extend to Matching Bed Sheet Patterns, Soft Nursery Accent bed runners, and decorative Adorable Star Quilt Pillow Covers for the glider. By integrating elements like Sweet Floral Appliqué or Heartwarming ABC patterns, you can craft a space that is not only visually cohesive and stylish but also enriched with educational fun and tactile comfort, ensuring the nursery is a true sanctuary for both baby and parents.
1. Soft Cotton Baby Quilt Patterns for Gentle Everyday Comfort
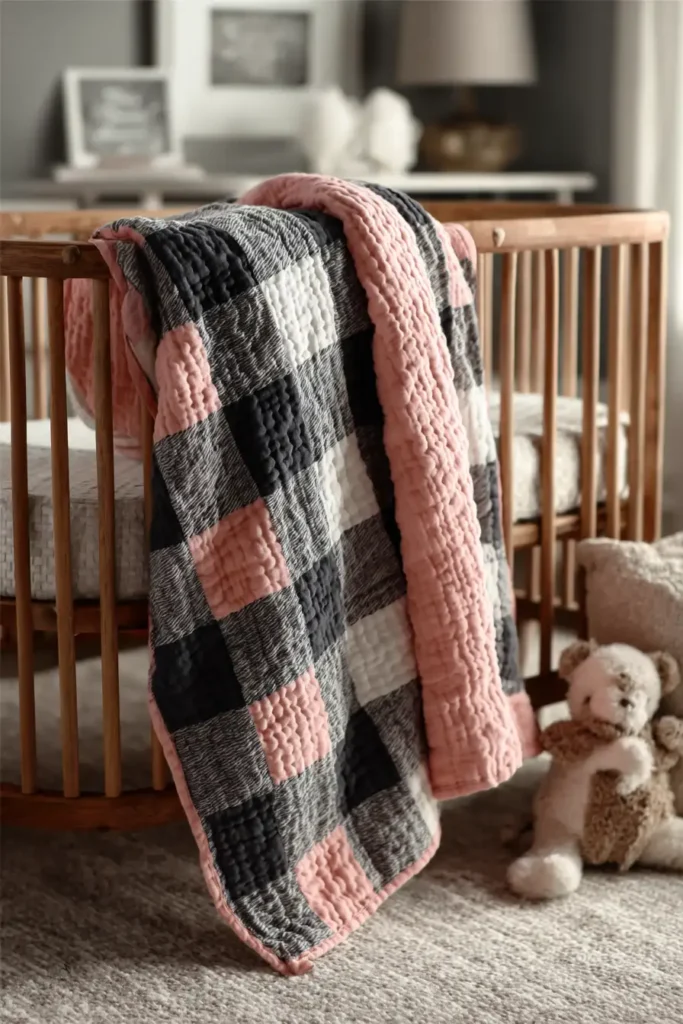
The “Lullaby Gingham” Buffalo Check Baby Quilt
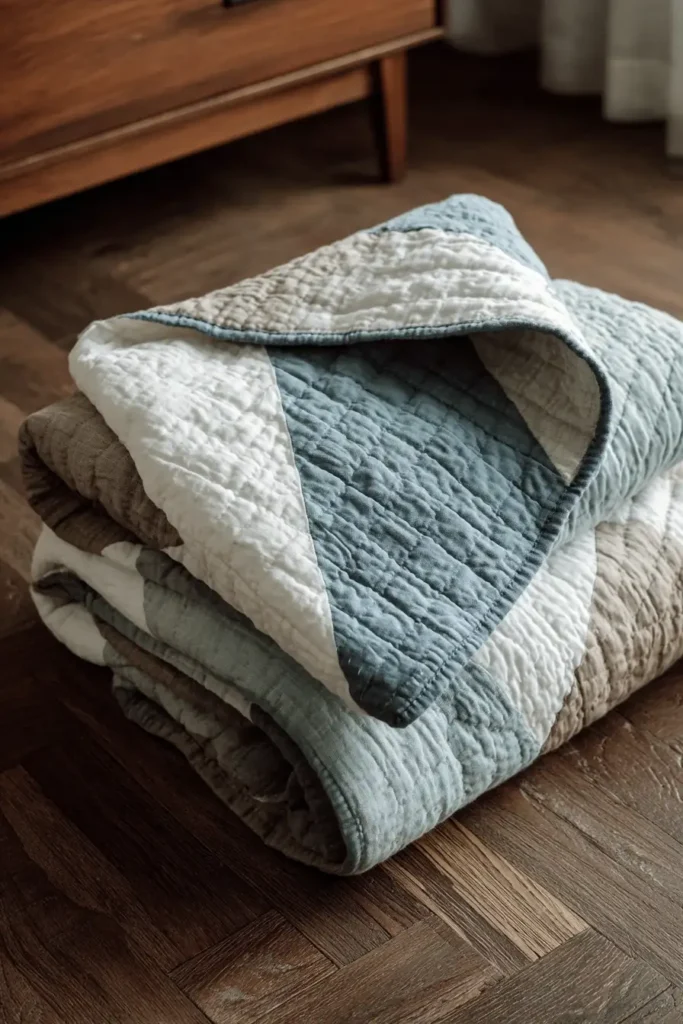
There is nothing more classic for a nursery than Gingham (Buffalo Plaid). It strikes the perfect balance between “adorable” and “sophisticated.” While it looks like complex weaving, this quilt is actually made using a simple trick of color values: you only need three fabrics (Light, Medium, and Dark) to create the illusion of transparent overlapping stripes. We recommend using Double Gauze or Premium Voile cottons for this project—these fabrics soften and crinkle with every wash, making them gentle enough for a newborn’s sensitive skin.
Finished Dimensions: Crib/Play Mat Size, 40″ x 50″.
Materials Needed:
- Fabric A (Dark): 1 yard of Slate Blue or Dusty Rose.
- Fabric B (Medium): 1 yard of a lighter shade of A (e.g., Chambray or Pale Pink).
- Fabric C (Light): 1 yard of White or Cream.
- Backing: 1.5 yards of Double Gauze (breathable and cloud-like).
- Batting: 100% Cotton (thin and breathable).
- Notions: Rotary cutter, quilting ruler.
Cultural Backstory: The word “Gingham” comes from the Malay adjective “genggang,” meaning “ajar” or “separate.” Originally a striped fabric imported from Dutch colonies in the 17th century, the mills of Manchester, England, later wove it into the check pattern we know today. By the Victorian era, it became the standard fabric for children’s clothing because it was durable, washable, and hid small stains better than pure white.
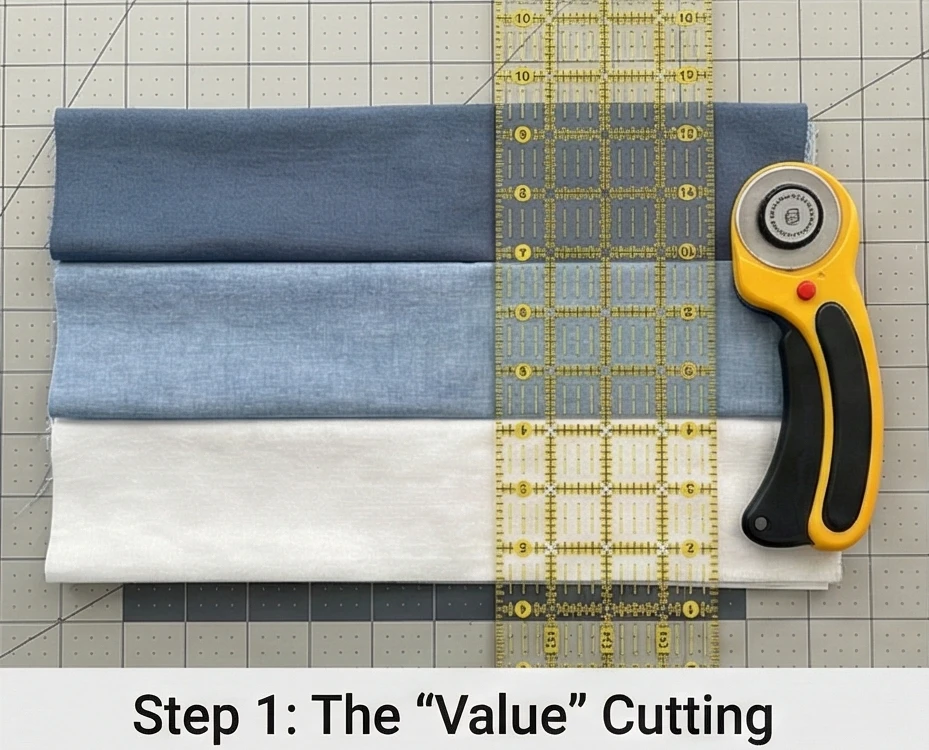
Step 1: The “Value” Cutting
To make the illusion work, you need two types of strip sets. Do not cut individual squares yet.
- Cut Strips: Cut 5-inch wide strips across the Width of Fabric (WOF).
- Fabric A (Dark): Cut 4 strips.
- Fabric B (Medium): Cut 8 strips.
- Fabric C (Light): Cut 4 strips.
Step 2: Creating Strip Sets
We will sew long panels first to speed up the process.
- Set 1 (The Dark Row): Sew a Fabric A (Dark) strip to a Fabric B (Medium) strip lengthwise. Repeat to make 4 sets.
- Set 2 (The Light Row): Sew a Fabric B (Medium) strip to a Fabric C (Light) strip lengthwise. Repeat to make 4 sets.
- Press: Press seams toward the darker fabric.

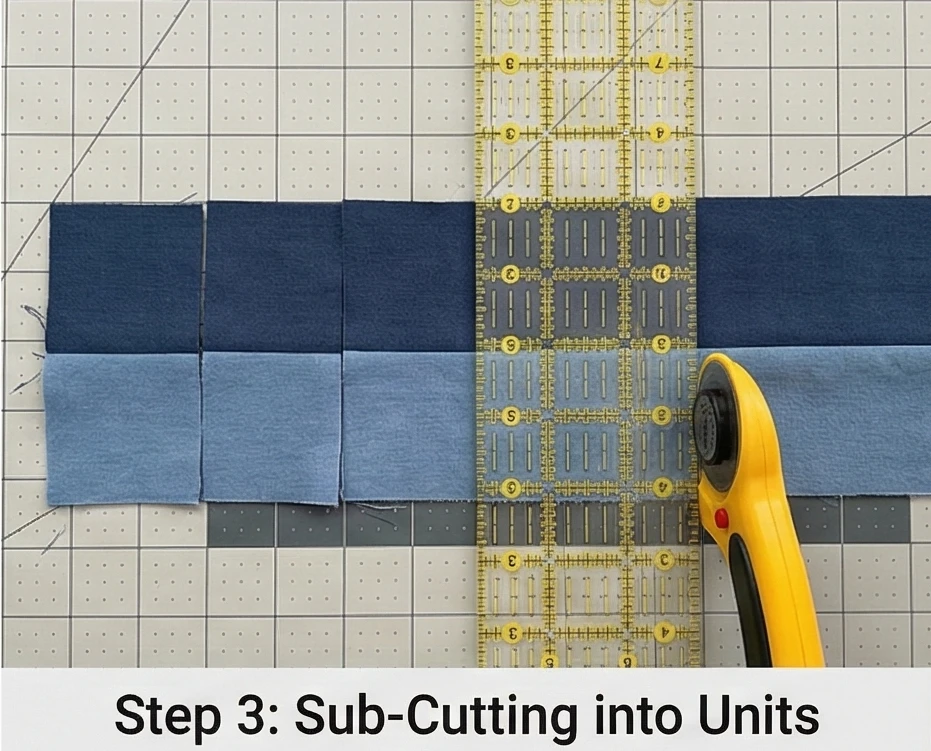
Step 3: Sub-Cutting into Units
Now we chop these long striped panels back into rectangles.
- Cut: Take your strip sets to the cutting mat. Cut them vertically into 5-inch-wide segments.
- Result: You will now have two-patch units (two squares sewn together).
- Unit 1: Dark + Medium.
- Unit 2: Medium + Light.
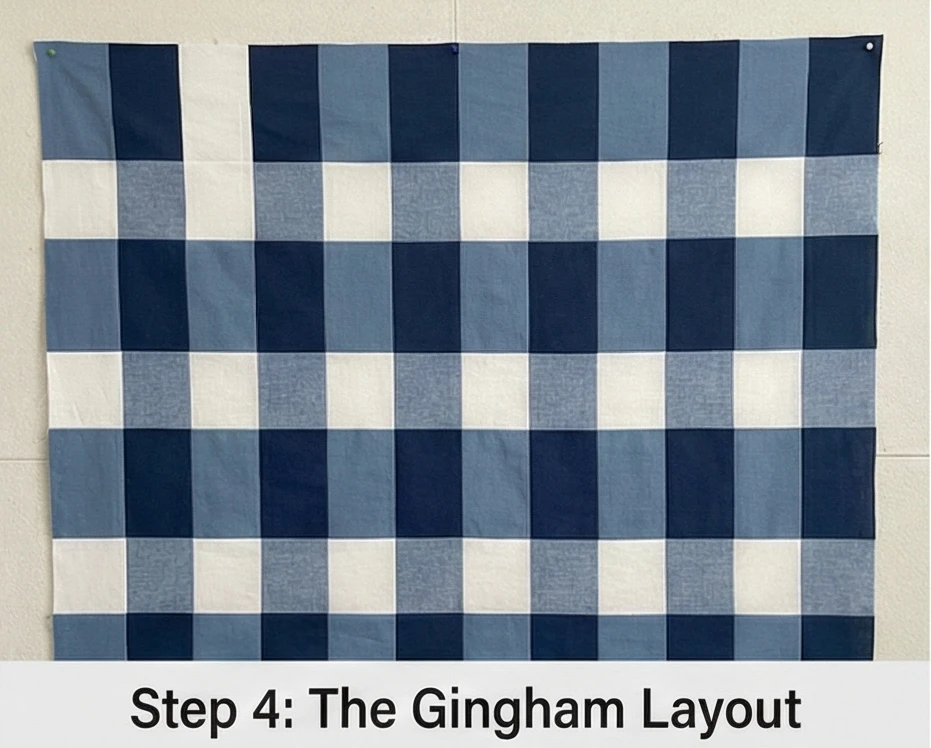
Step 4: The Gingham Layout
The magic happens in the arrangement.
- Row A: Alternate Unit 1 (Dark/Med) + Unit 1 (Dark/Med)… across the row.
- Visual: Dark – Med – Dark – Med – Dark…
- Row B: Alternate Unit 2 (Med/Light) + Unit 2 (Med/Light)… across the row.
- Visual: Med – Light – Med – Light – Med…
- Assemble: Alternate Row A and Row B all the way down the quilt.
- The Illusion: The “Medium” squares connect diagonally, and the “Dark” squares appear as the intersection of two stripes. Step back, and it looks exactly like woven plaid.
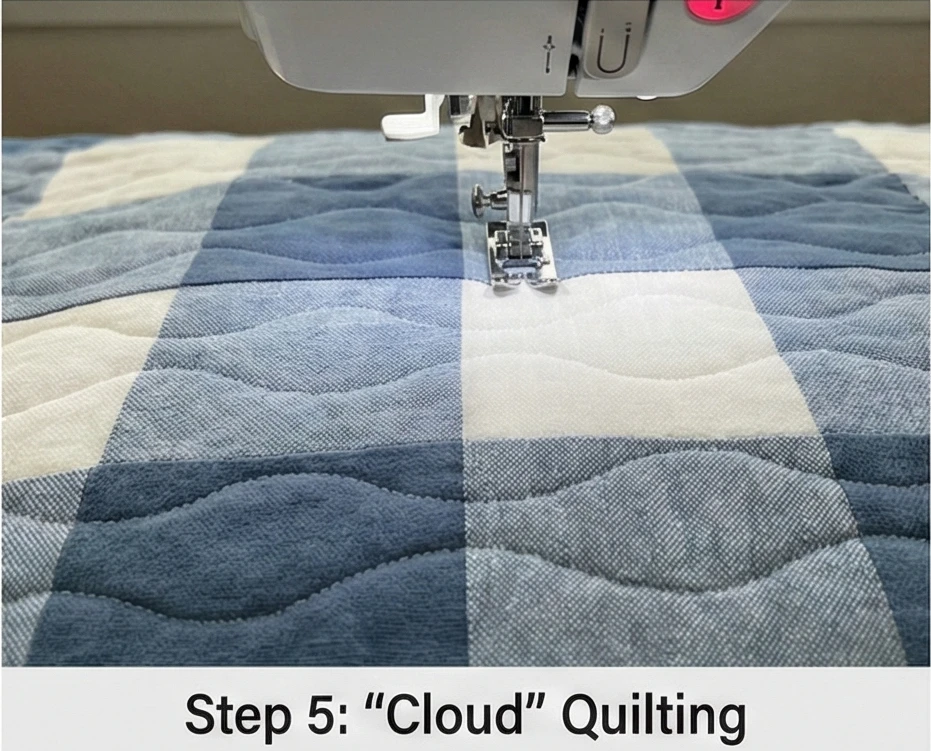
Step 5: “Cloud” Quilting
Rigid straight lines can make a baby quilt feel stiff. We want softness.
- Baste: Sandwich the Backing (Double Gauze) + Batting + Top.
- Quilt: Use a Walking Foot to quilt gentle, wavy, organic lines horizontally across the quilt, spaced about 2 inches apart.
- Why: The waves mimic the softness of the gauze and ensure the quilt drapes over a sleeping baby rather than standing up stiffly like cardboard.
Step 6: The Soft Binding
Baby quilts are often chewed on. The edge must be soft.
- Bias Binding: Cut your binding strips on the bias (at a 45-degree angle).
- Fabric: Use Fabric B (Medium) for the binding.
- Attach: Sew the binding to the front. When you reach the corners, try Rounded Corners (trace a small plate to round off the quilt corners before binding) rather than sharp 90-degree points. Bias binding stretches easily around these curves.
- Usability: Rounded corners are safer (no sharp points to poke eyes) and wear better over time with washing.

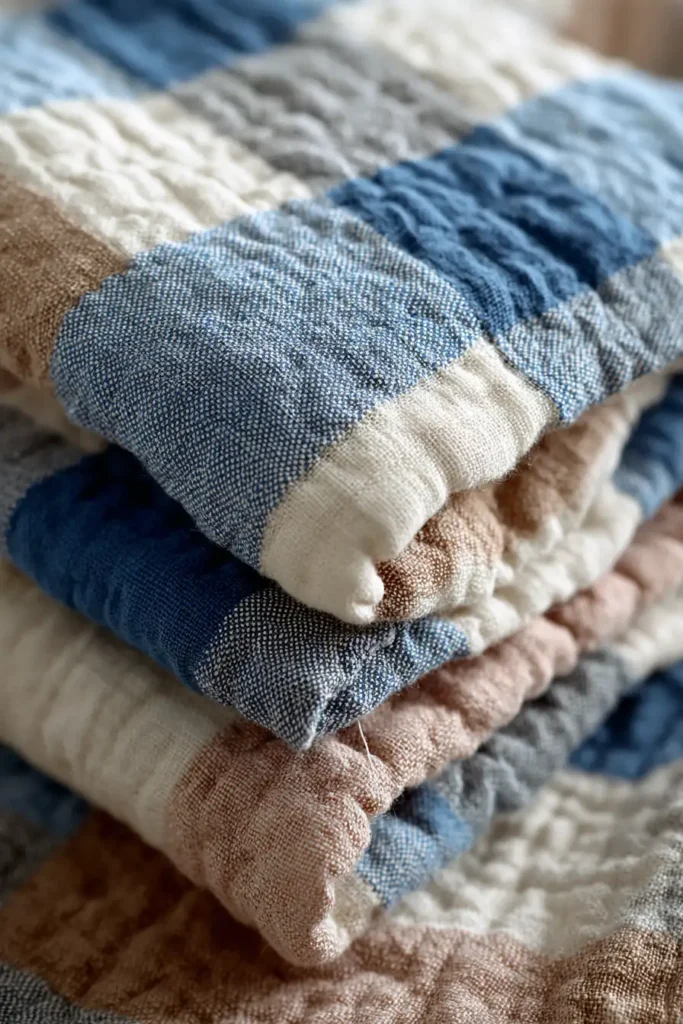
Usability Note: Double Gauze shrinks more than standard cotton. Always pre-wash your fabrics before sewing, or be prepared for the quilt to shrink about 5-8% into a lovely, crinkly texture (the “antique” look) after the first wash.
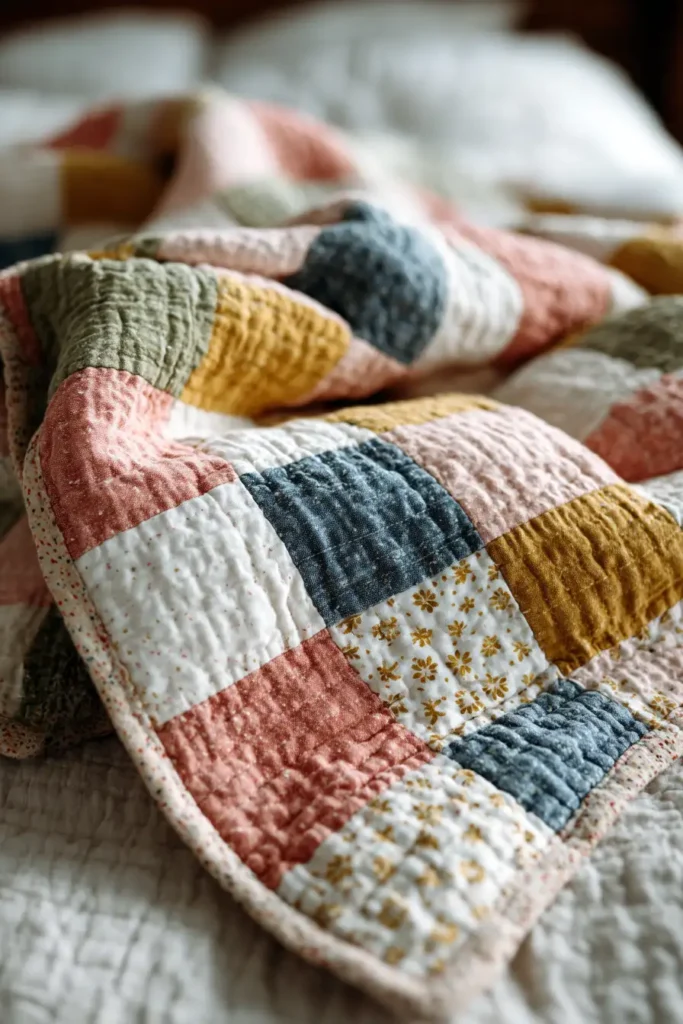
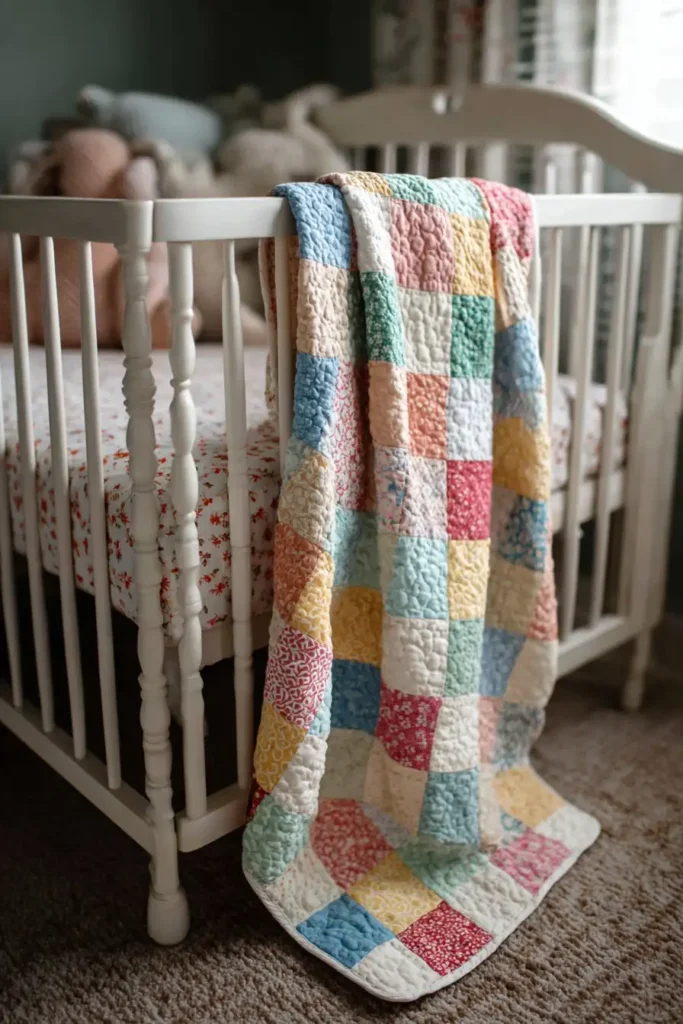
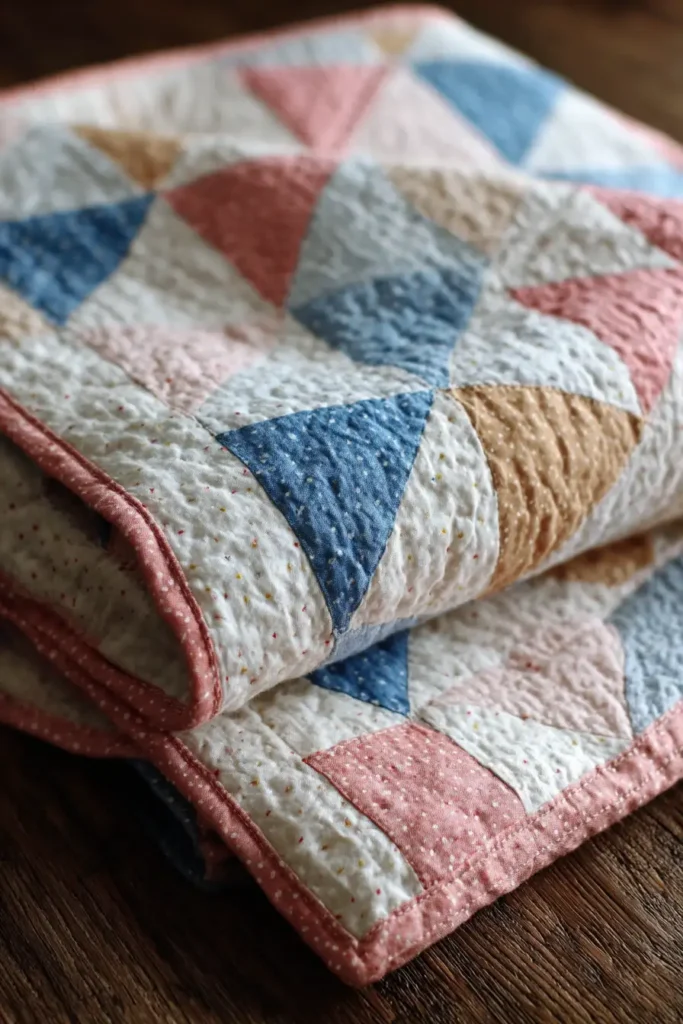
2. Adorable Patchwork Baby Quilts for Cozy Nursery Beds
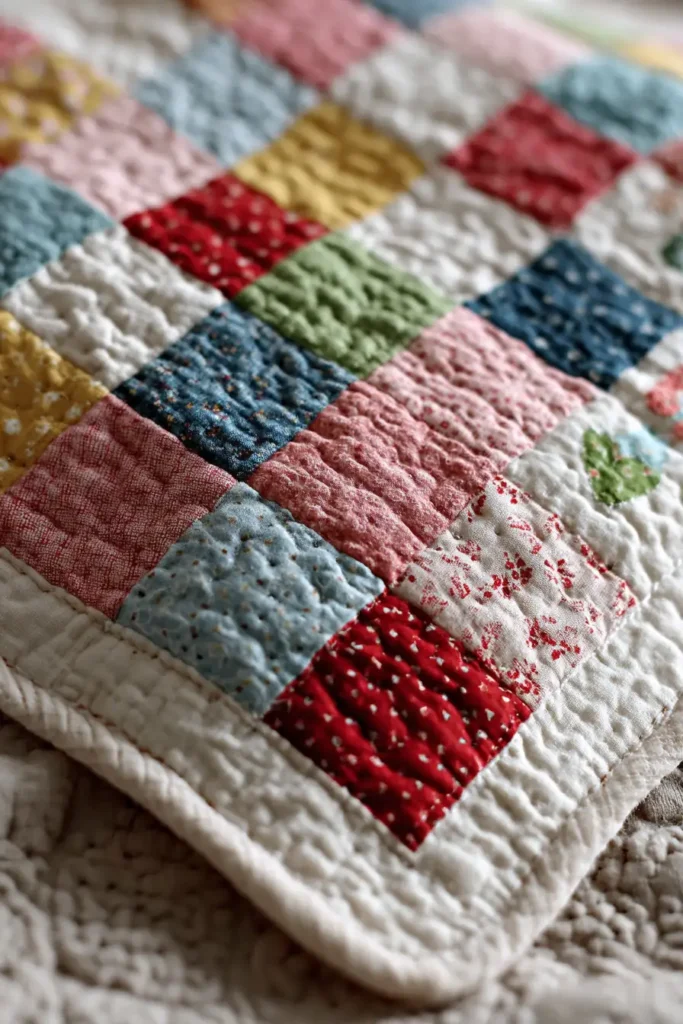
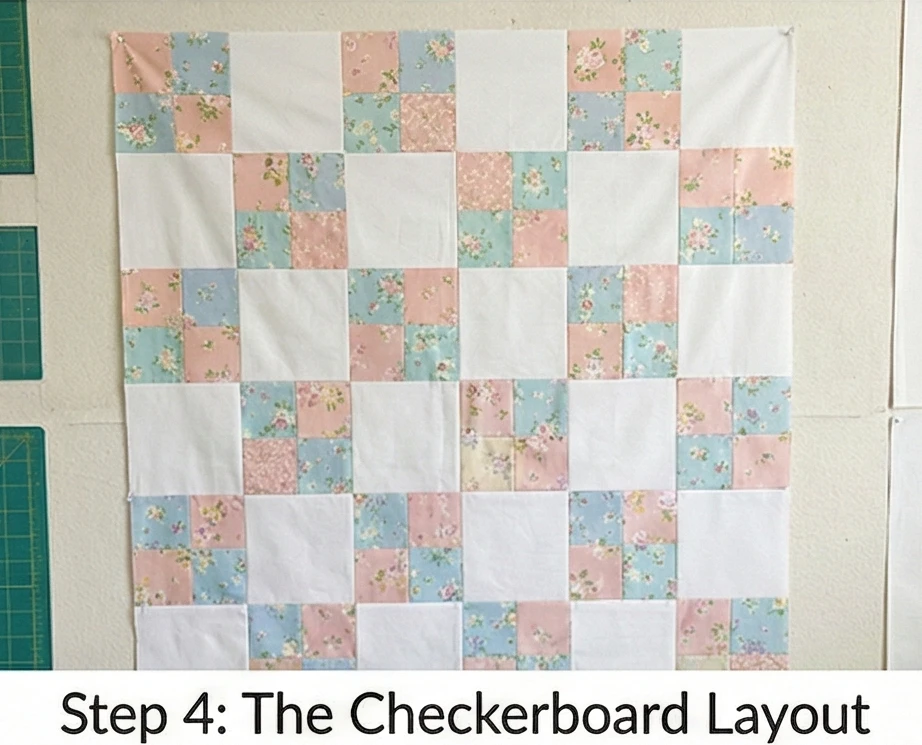
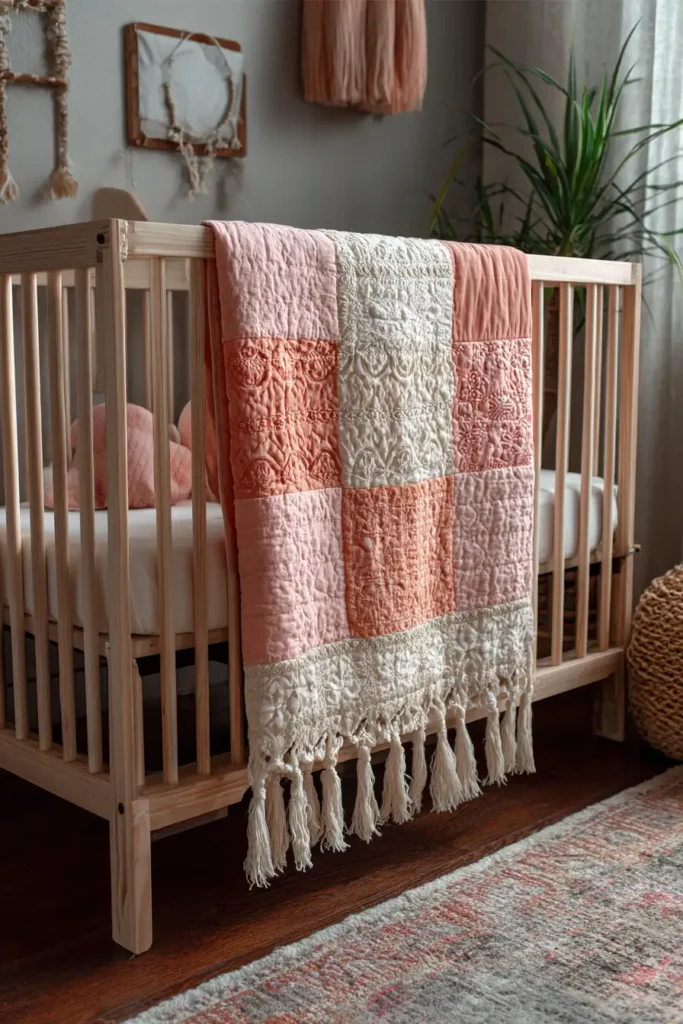
The “Vintage Charm” Checkerboard Quilt
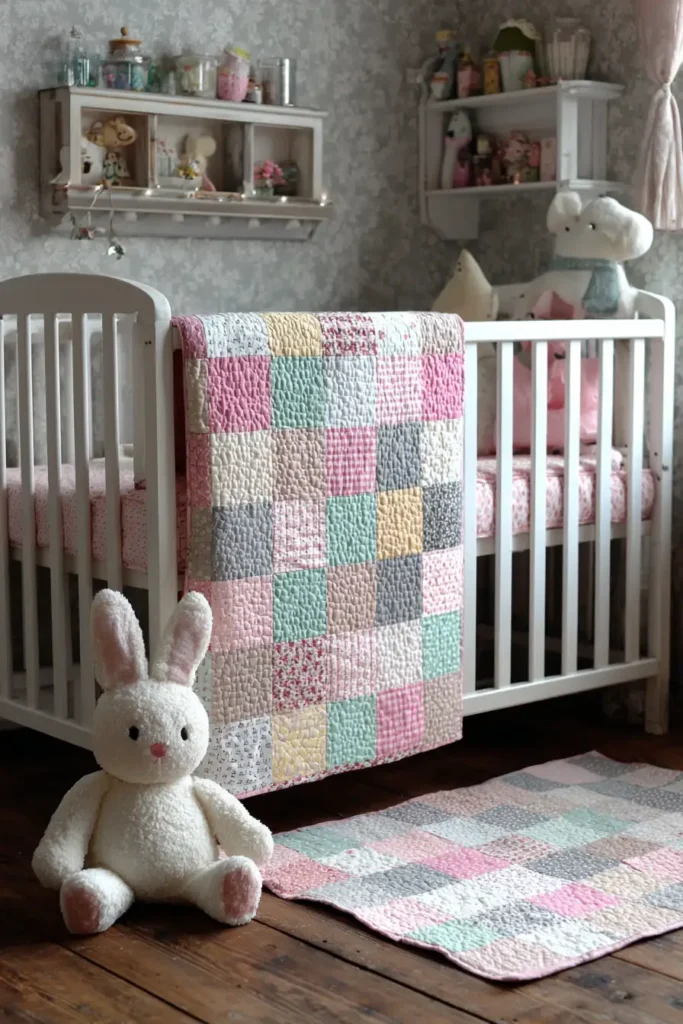
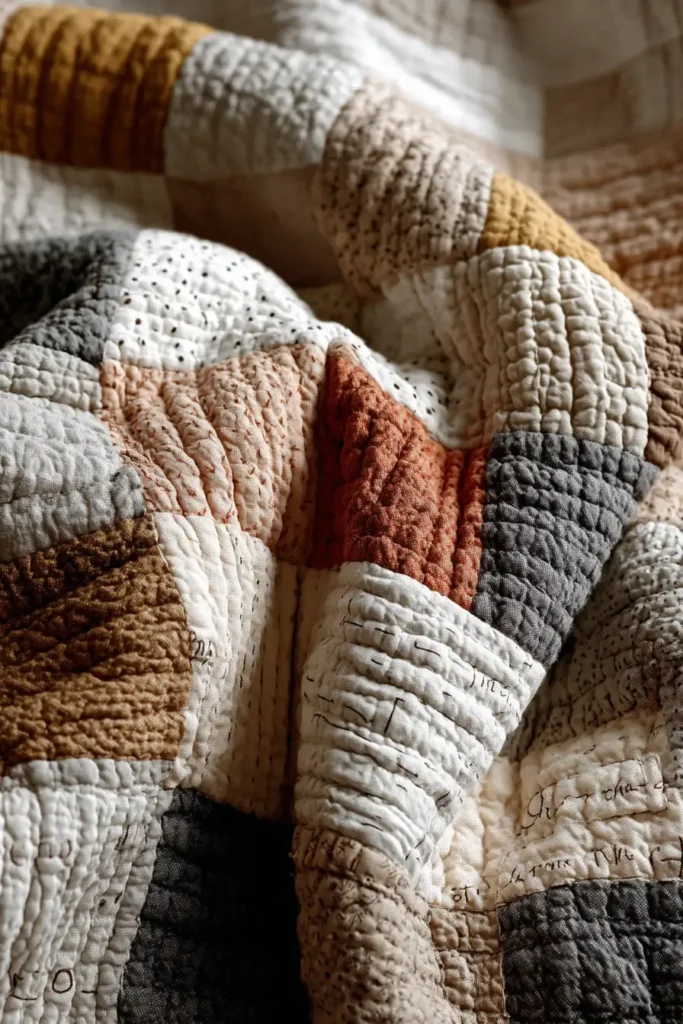
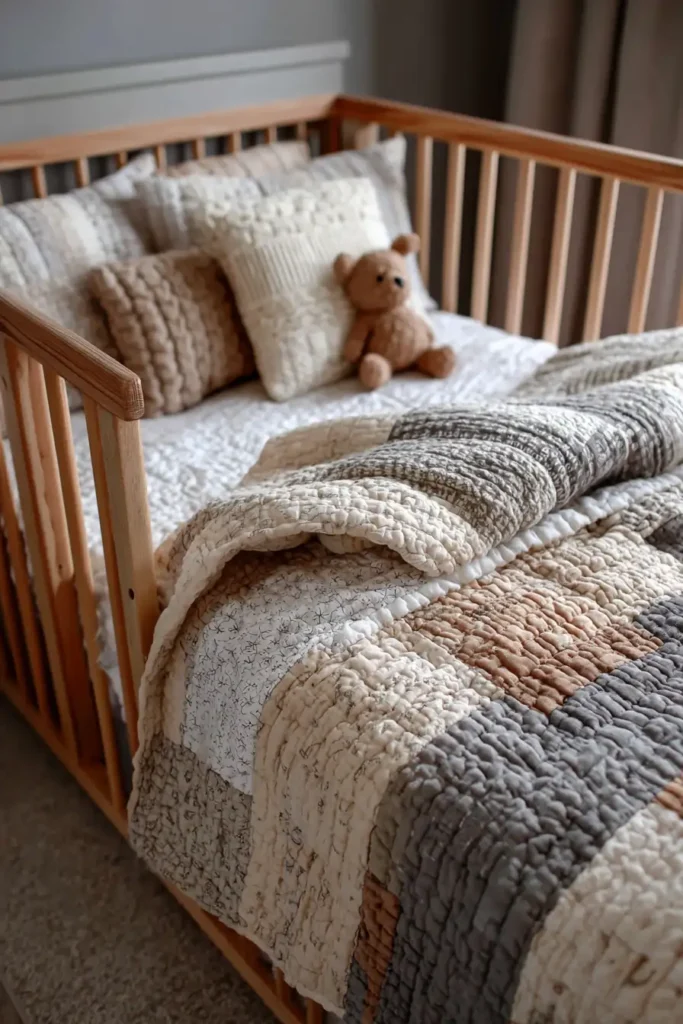
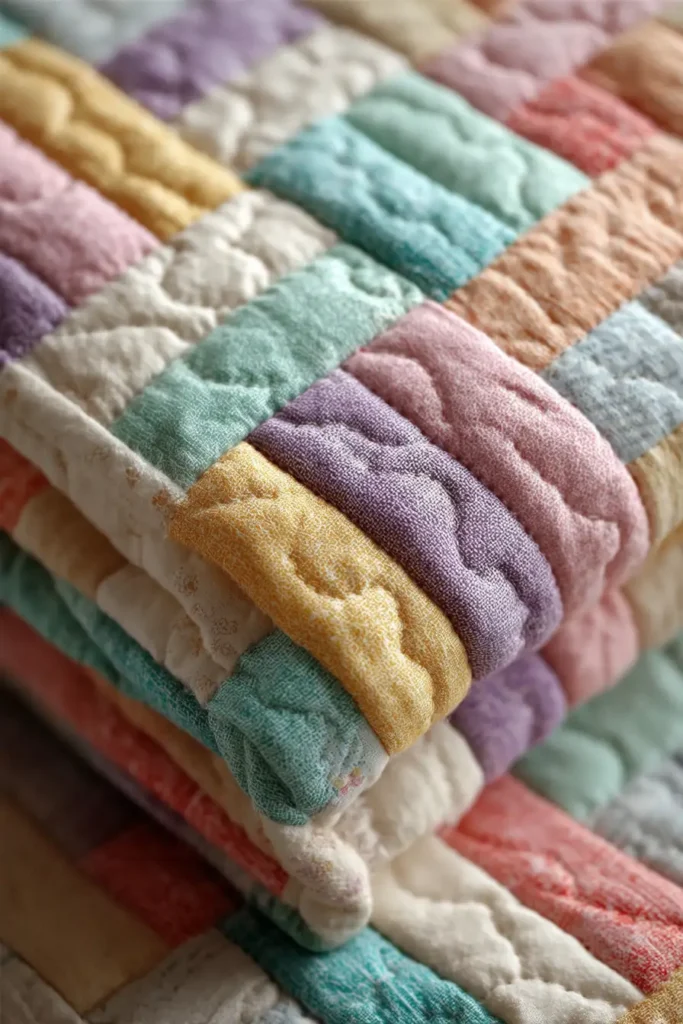
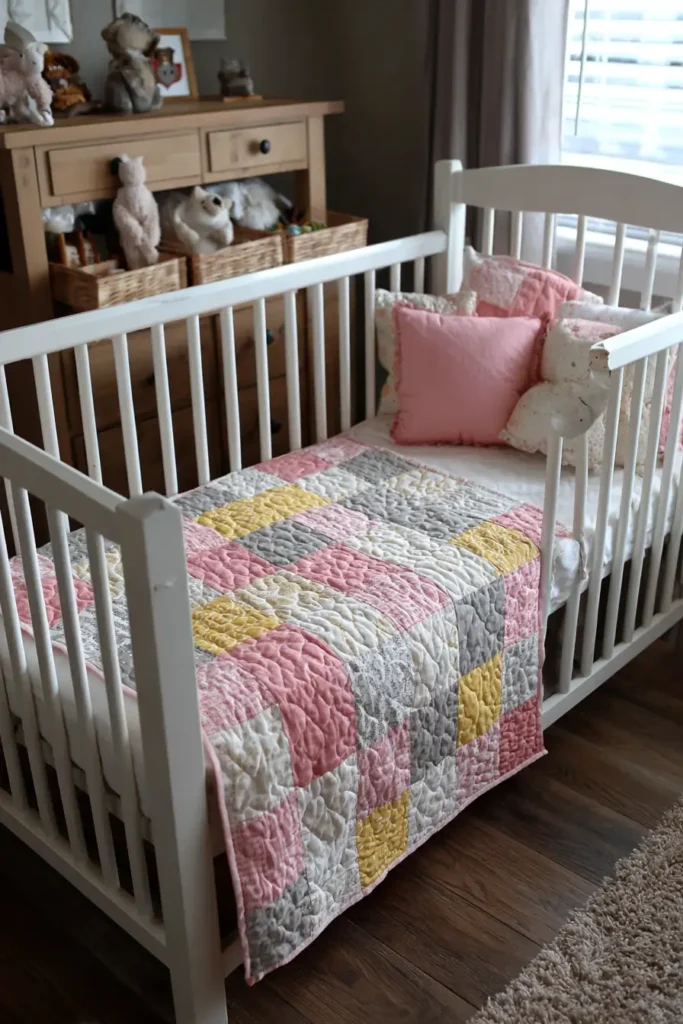
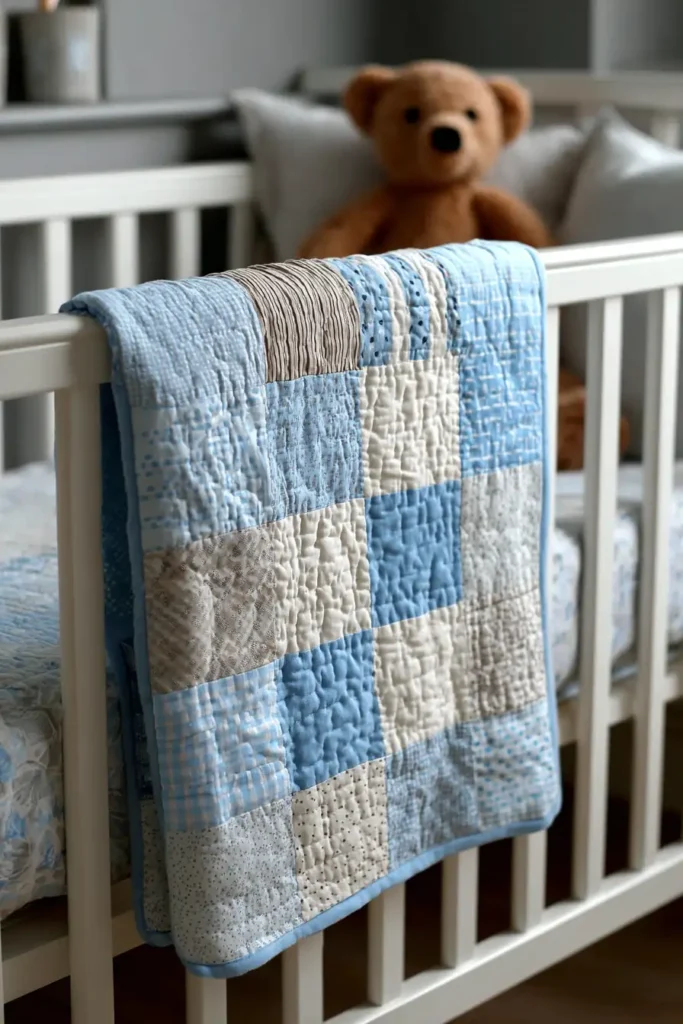
Patchwork quilts are the quintessential nursery item—they feel homemade, inherited, and full of stories. This “Vintage Charm” design updates the classic look by alternating Scrappy Four-Patch blocks with Solid Squares. This creates a checkerboard effect that gives the eye a place to rest, preventing the quilt from looking too busy or chaotic. By using a pre-cut Charm Pack (5-inch squares), you can easily get a coordinated variety of cute prints (bunnies, florals, dots) without buying dozens of yards of fabric.
Finished Dimensions: Standard Crib/Toddler Bed, 40″ x 50″.
Materials Needed:
- Fabric A (Prints): 2 Charm Packs (Total of roughly 80 squares, 5″ x 5″). Look for soft pastels or “1930s Reproduction” prints for that vintage feed-sack look.
- Fabric B (Solids): 1.5 yards of White or Soft Grey cotton (for the alternating squares).
- Backing: 2 yards of Minky or Flannel (for extra snuggle factor).
- Batting: Cotton/Bamboo blend.
- Notions: Rotary cutter, 5″ square ruler (optional).
Cultural Backstory: The Four-Patch block is historically significant as a “learner’s block.” In the 18th and 19th centuries, it was often the very first pattern a young child was taught to sew. Because it required joining small scraps, it taught thriftiness and precision. A crib quilt made of these blocks carries that tradition of maternal care and simple, honest craftsmanship.
Step 1: Sorting the “Charms”
Charm packs usually come with 42 squares. You need to curate them.
- Select: Pick out 80 print squares from your packs. Remove any duplicates you don’t like or colors that clash.
- Pair Up: Sort them into 40 pairs. Try to mix high contrast (e.g., a dark blue floral with a light yellow dot) so the individual patches stand out.

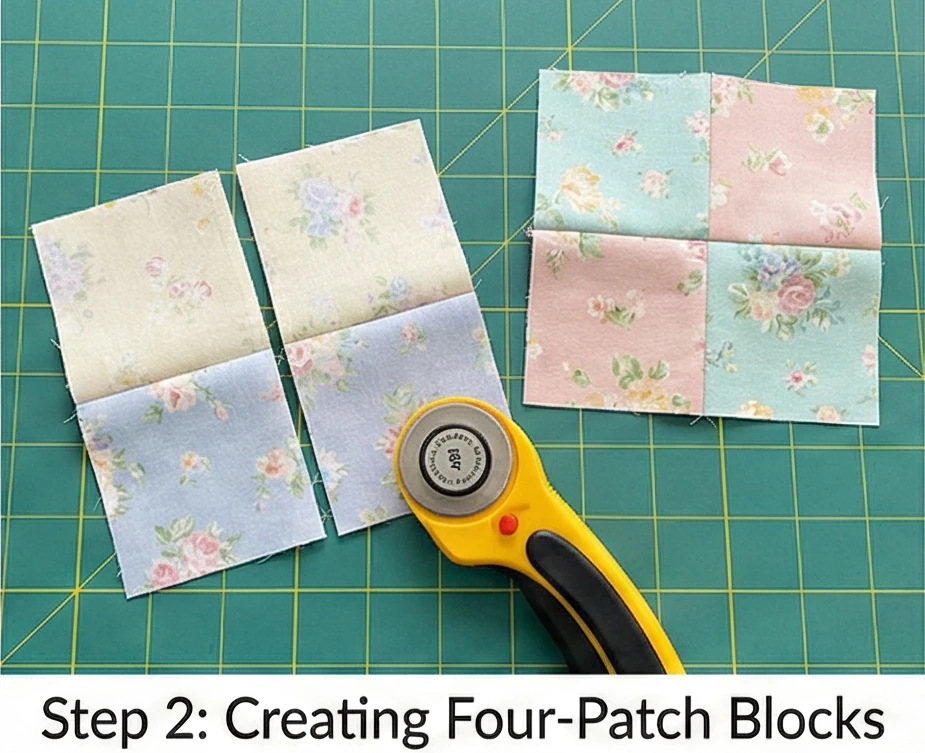
Step 2: Creating the Four-Patch Blocks
We are turning 5-inch squares into smaller 4-patch blocks.
- Sew Pairs: Take a pair of 5″ squares. Sew them together. Press the seam toward the darker fabric.
- Make: 40 pairs.
- Cut: Cut each pair in half vertically (perpendicular to the seam line).
- Result: You now have 80 units that are 2.5″ wide and 5″ tall.
- Spin: Take two of these new units. Rotate one 180 degrees so the fabrics alternate (checkerboard style).
- Sew: Stitch them together, nesting the center seam.
- Result: You have created a Four-Patch Block (measuring roughly 9″ or 9.5″ depending on your seam accuracy—wait, let’s adjust for standard charm math).
- Correction: If you sew two 5″ squares, cut in half, and re-sew, you get a Four-Patch that measures 5″ unfinished (4.5″ finished).
- Quantity: Make 40 Four-Patch Blocks.
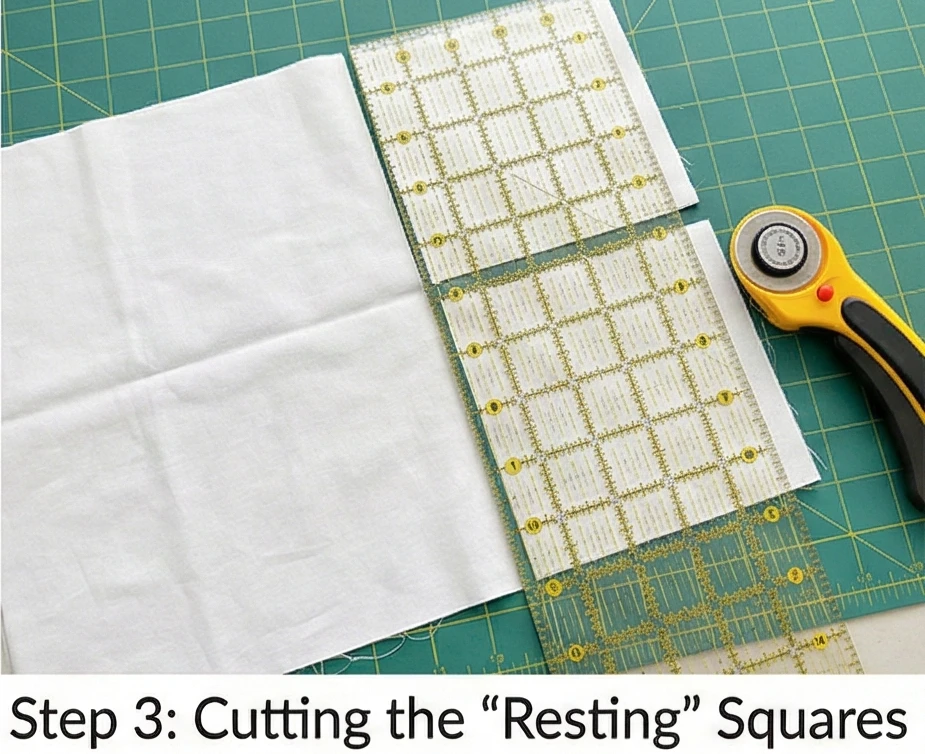
Step 3: Cutting the “Resting” Squares
The solid squares give the eye a break.
- Cut: From your solid Fabric B (White), cut 40 squares measuring exactly 5 inches x 5 inches (or whatever your Four-Patch blocks ended up measuring—measure them first!).
- Accuracy: These solid squares must match the size of your patchwork blocks perfectly for the rows to align.
Step 4: The Checkerboard Layout
Alternate the busy with the calm.
- Grid: Lay out the blocks in a grid of 8 blocks wide by 10 rows long.
- Row 1: Four-Patch / Solid / Four-Patch / Solid…
- Row 2: Solid / Four-Patch / Solid / Four-Patch…
- Visual Check: Step back. Ensure there are no two identical floral prints touching each other.
Step 5: Assembly
- Sew Rows: Stitch the blocks into horizontal rows. Press the seams toward the Solid Squares (this reduces bulk because the Solid Squares have no seams).
- Join Rows: Stitch the 10 rows together.
- Nesting: Because you pressed carefully, the seams between blocks should lock together perfectly at the intersections.
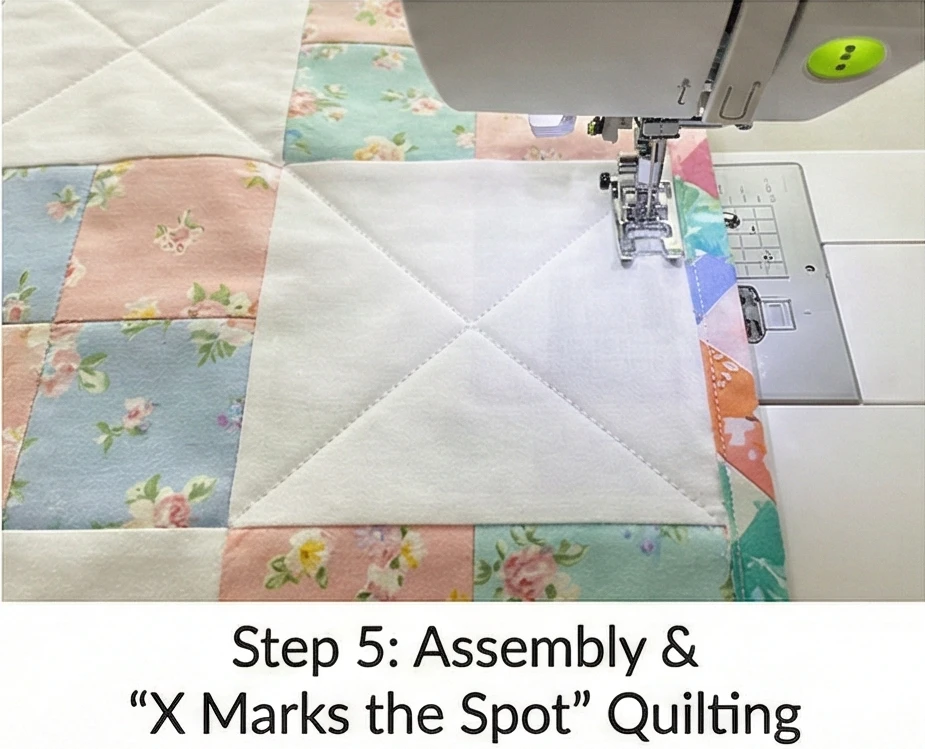
Step 6: “X Marks the Spot” Quilting
Simple geometric quilting looks best on patchwork.
- Baste: Sandwich the Minky Backing + Batting + Top.
- Tip: Minky is slippery! Use 50% more safety pins than usual, or spray baste heavily.
- Quilt: Stitch a large diagonal “X” through every Solid Square.
- Optional: Stitch a smaller “X” through every Four-Patch.
- Effect: This secures the layers without overriding the cute prints with heavy thread lines.
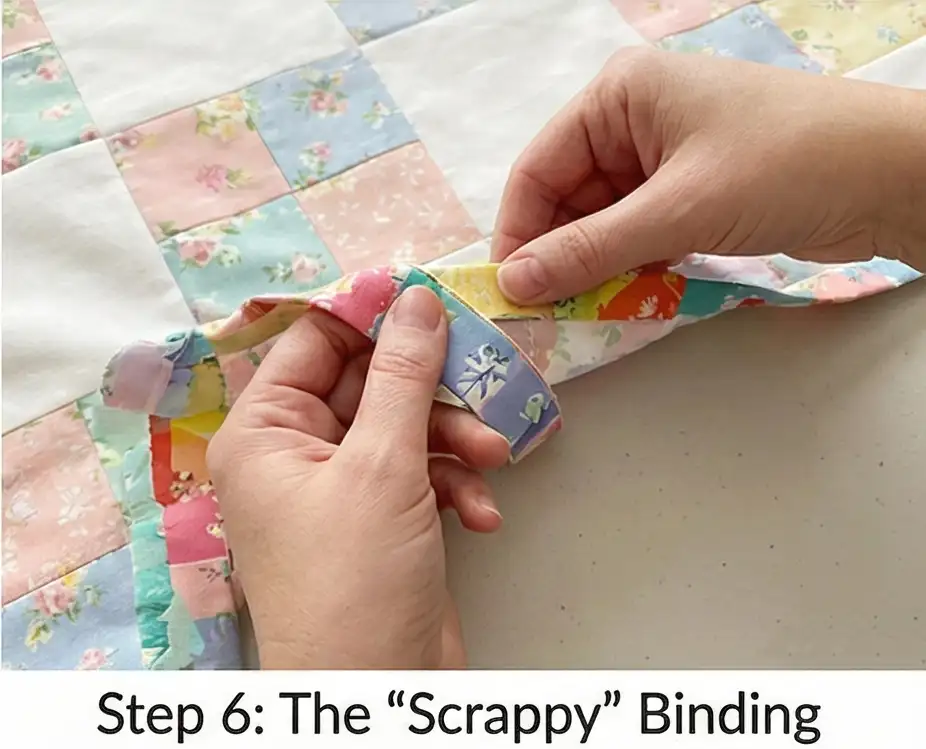
Step 7: The “Scrappy” Binding
Don’t waste those leftover charm squares!
- Make Binding: Take the leftover 5″ squares from your charm packs. Sew them all together in a long line, end-to-end.
- Press: Fold in half lengthwise and press.
- Attach: Use this colorful, scrappy strip to bind the quilt. It creates a playful, confetti-like frame around the edges.
Usability Note: Patchwork quilts with many seams can be stiff. Using a high-loft batting or a plush backing like Minky helps counteract this, ensuring the quilt remains cuddly enough for tummy time.
3. Heirloom Whole Cloth Baby Quilts for Special Keepsakes

The “Provencal Boutis” Whole Cloth Quilt
While patchwork is fun, nothing says “Heirloom” like a Whole Cloth quilt. This style mimics the French tradition of Boutis or Provençal quilting, where a single piece of exquisite white fabric is stitched with intricate motifs and then stuffed (trapunto style) to create a raised, sculpted surface. For a modern, usable baby version, we skip the heavy stuffing but keep the elegance. We use a single panel of ultra-soft Cotton Sateen or Bamboo Silk in a solid color (White, Buttercream, or Pale Sage) and let the quilting thread tell the story. This is a “Forever Quilt”—meant for christenings, photoshoots, and passing down to the next generation.
Finished Dimensions: Heirloom Crib Size, 36″ x 45″.
Materials Needed:
- Fabric A (Top): 1.5 yards of high-quality Cotton Sateen (white or pastel). Sateen has a slight sheen that highlights the quilting stitches.
- Fabric B (Backing): 1.5 yards of matching sateen or ultra-soft voile.
- Batting: Wool Batting. (This is non-negotiable for heirlooms. Wool has high “loft,” meaning the unquilted areas puff up beautifully, making the design pop in 3D).
- Thread: 100% Cotton or Silk thread in a color that matches the fabric exactly (or is one shade lighter).
- Notions: Water-soluble marking pen (blue) or Hera Marker (creasing tool), basting spray, safety pins.
Cultural Backstory: In 17th-century Marseille, France, these all-white quilts were status symbols. They were often made for wedding trousseaus or royal nurseries. The lack of colored patchwork meant there was no place to hide mistakes; the beauty relied entirely on the tiny, perfect stitches and the play of light and shadow on the fabric.
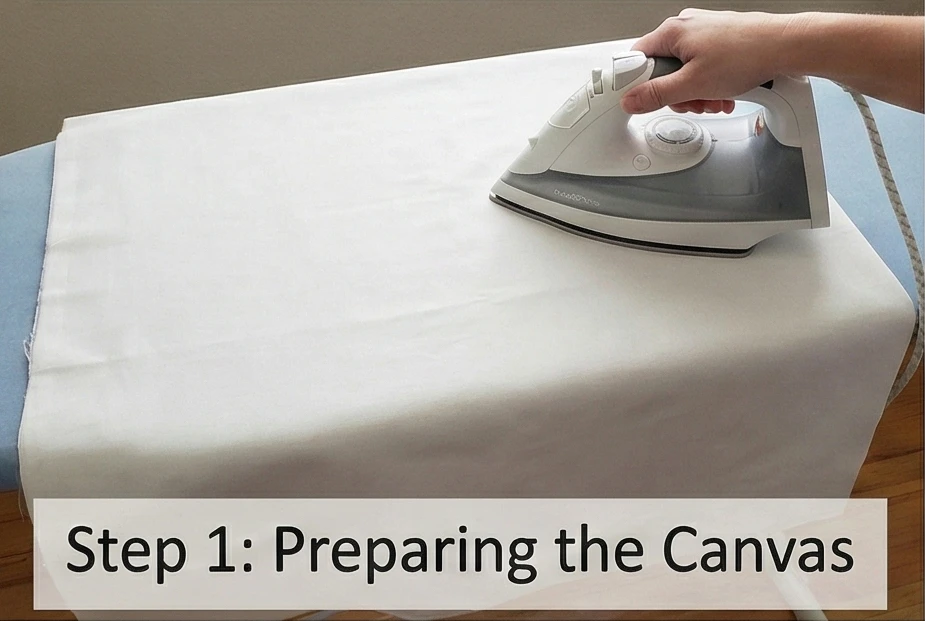
Step 1: Preparing the Canvas
Since there is no piecing, prep work is minimal but critical.
- Wash & Press: Pre-wash your fabric to shrink it. Press it perfectly flat with starch. Any wrinkle here will become a permanent pucker later.
- Cut: Cut the Top and Backing fabric to 40″ x 50″ (giving you room for shrinkage during quilting).
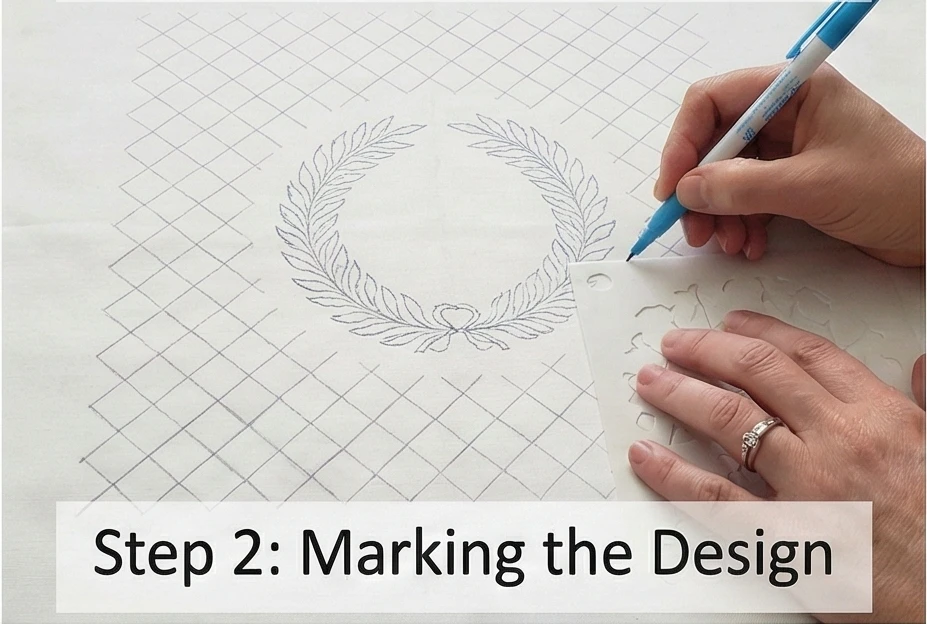
Step 2: Marking the Design
You are drawing the pattern directly onto the fabric before layering.
- The Center Medallion: Find the exact center of the fabric. Mark a large circular or oval medallion (approx 15 inches wide).
- Motif: Use a stencil to trace a classic motif inside, such as a Feathered Wreath, a Celtic Knot, or the baby’s Monogram.
- The Border: Mark a border 4 inches in from the edge. Draw a “Cable” or “Rope” design inside this border.
- The Grid: In the negative space between the center medallion and the border, mark a Cross-Hatch Grid (diagonal lines spaced 1 inch apart).
- Tool Tip: A Hera Marker is best here—it leaves a shiny crease line rather than ink, so you don’t have to worry about washing marks out later.
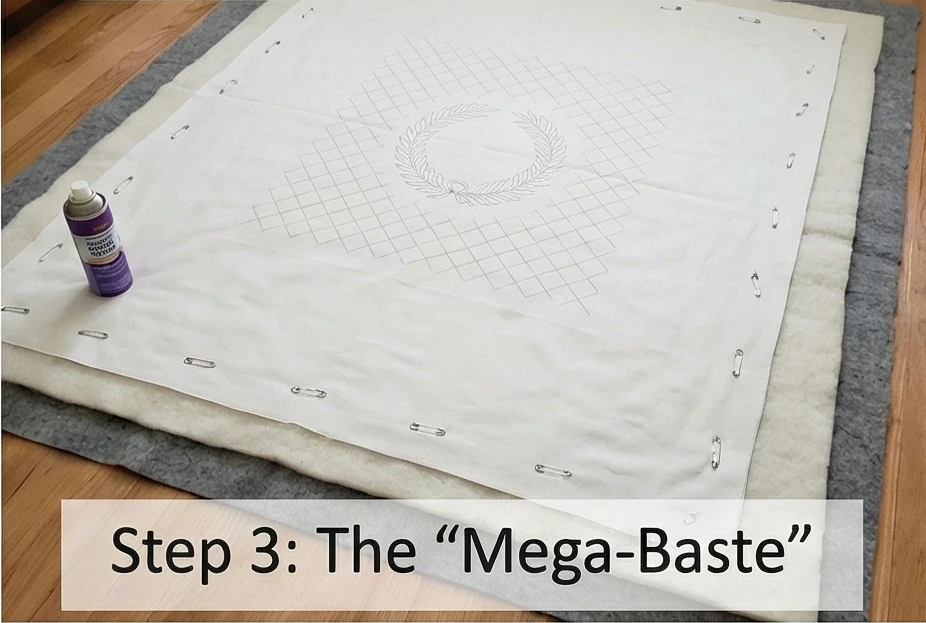
Step 3: The “Mega-Baste”
Whole cloth quilts show every pucker. Basting must be secure.
- Sandwich: Lay Backing (taped to floor) + Batting + Top.
- Baste: Use Spray Baste for the initial stick, then add safety pins every 3 inches. Do not skimp. The layers must act as one piece of fabric.
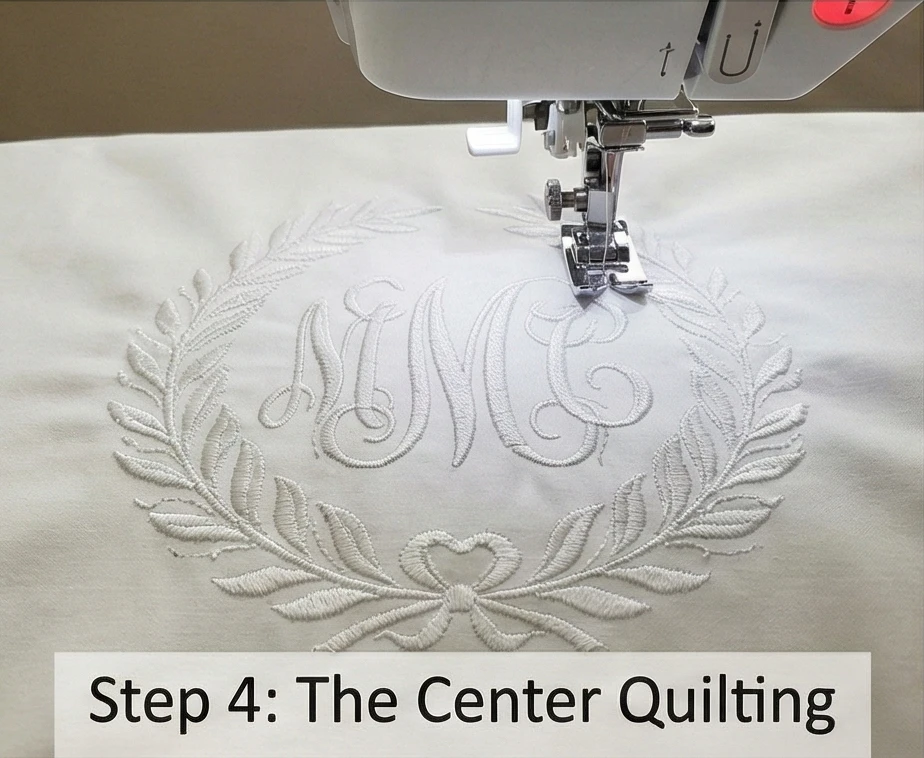
Step 4: The Center Quilting
Always quilt from the center outward.
- Outline: Stitch carefully along the marked lines of your center medallion/monogram.
- Stitch Length: Use a slightly smaller stitch (2.0mm) for curves to keep them smooth.
- Micro-Stippling (Optional): If you want the monogram to really pop, quilt tiny, dense squiggles around the letters. This flattens the background, causing the letters to puff up (faux trapunto).
Step 5: The Background Grid
This takes patience.
- Walking Foot: Switch to your walking foot for the straight grid lines.
- Sew: Stitch the diagonal cross-hatch lines.
- Direction: Sew all lines in one direction first, then come back and do the crossing lines. Avoid sewing back-and-forth (zigzagging) as it can warp the fabric.

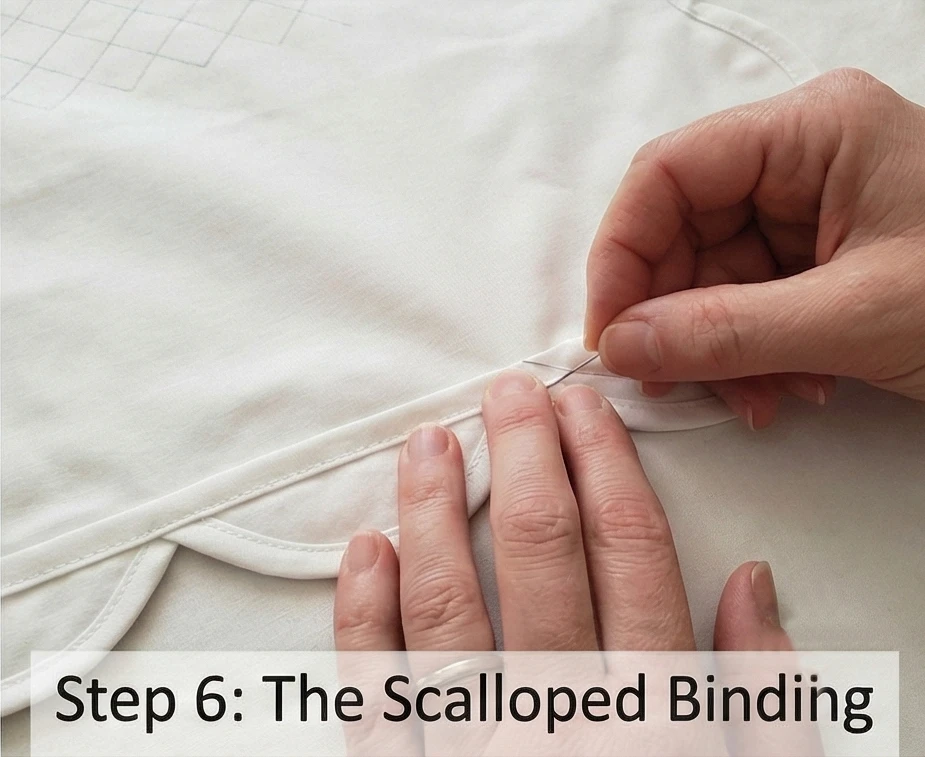
Step 6: The Scalloped Binding
A straight edge feels too harsh for an heirloom. Let’s scallop it.
- Mark Scallops: Use a bowl or cup to trace gentle curves along the raw edge of the quilt.
- Baste: Stitch 1/8 inch inside this scalloped line to secure the layers. Trim the excess batting/fabric away outside the line.
- Bias Binding: You must use Bias Binding (cut at 45 degrees) because it stretches.
- Attach: Sew the binding to the front, easing it gently around the curves and pivoting at the inner scallop points. Hand-stitch to the back for a flawless finish.
Usability Note: While this looks delicate, Cotton Sateen is robust. It can be machine-washed on a gentle cycle. In fact, washing it enhances the “antique” look as the cotton shrinks slightly around the wool batting, creating that coveted bubbly, crinkled texture found in museum quilts.

4. Portable Stroller Quilt Patterns for On-the-Go Warmth

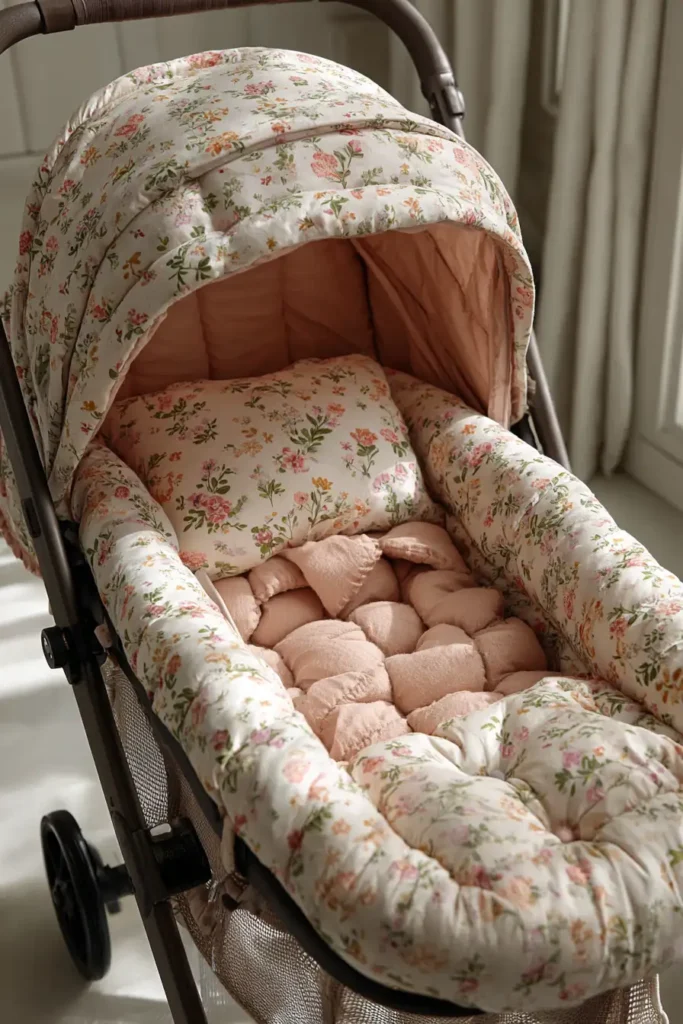
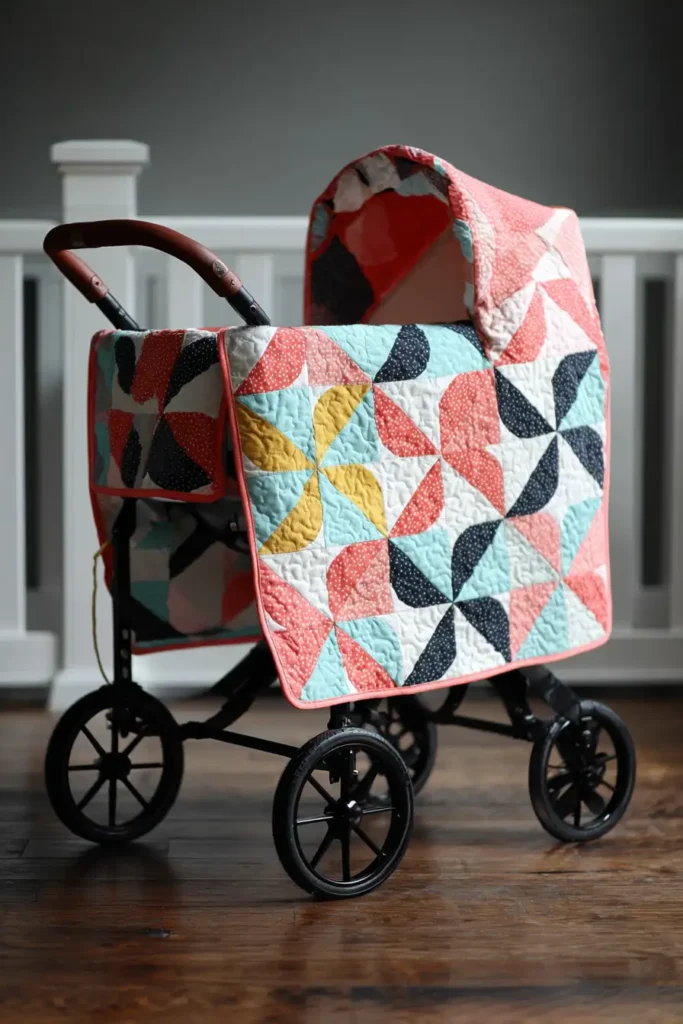
The “Pinwheel Parade” High-Contrast Stroller Quilt
A stroller quilt faces unique challenges: it must be warm enough for a walk in the park, small enough not to drag on the muddy wheels, and secure enough that a kicking baby won’t launch it onto the pavement. This pattern solves all three. Using the classic Pinwheel Block in a high-contrast palette (Black, White, and a pop of bright Turquoise or Yellow), it stimulates a baby’s developing vision. Crucially, this design includes “Stroller Straps”—fabric tabs with snaps or Velcro that attach the quilt to the stroller frame, keeping it from hitting the ground.
Finished Dimensions: Stroller/Car Seat Size, 30″ x 36″.
Materials Needed:
- Fabric A (Dark/Pinwheels): 1/2 yard of Black or Navy solid.
- Fabric B (Light/Pinwheels): 1/2 yard of White or Cream.
- Fabric C (Sashing/Pop Color): 1/2 yard of Bright Turquoise, Citron, or Red.
- Backing: 1 yard of Cuddle Fleece or Minky (adds wind resistance).
- Batting: Warm & Natural Cotton (breathable but warm).
- Notions: 2 sets of Kam Snaps or Velcro strips, rotary cutter.
Cultural Backstory: The Pinwheel motif has been popular in quilts since the late 18th century. It is a symbol of luck and transformation (turning bad luck into good). For a baby, the spinning geometry mimics the movement of the stroller wheels and provides excellent visual tracking practice for infants who are drawn to high-contrast edges.
Step 1: Making Half-Square Triangles (HSTs)
We need 48 HSTs to make 12 Pinwheel blocks.
- Cut Squares:
- Cut 24 squares of Fabric A (Black) measuring 4 inches.
- Cut 24 squares of Fabric B (White) measuring 4 inches.
- Mark & Sew:
- Draw a diagonal line on the back of the White squares.
- Place a White square on a Black square (Right Sides Together).
- Sew 1/4 inch away from the line on both sides.
- Cut & Press: Cut along the center line. Press seams toward the dark fabric.
- Trim: Trim all units to exactly 3.5 inches on a side.

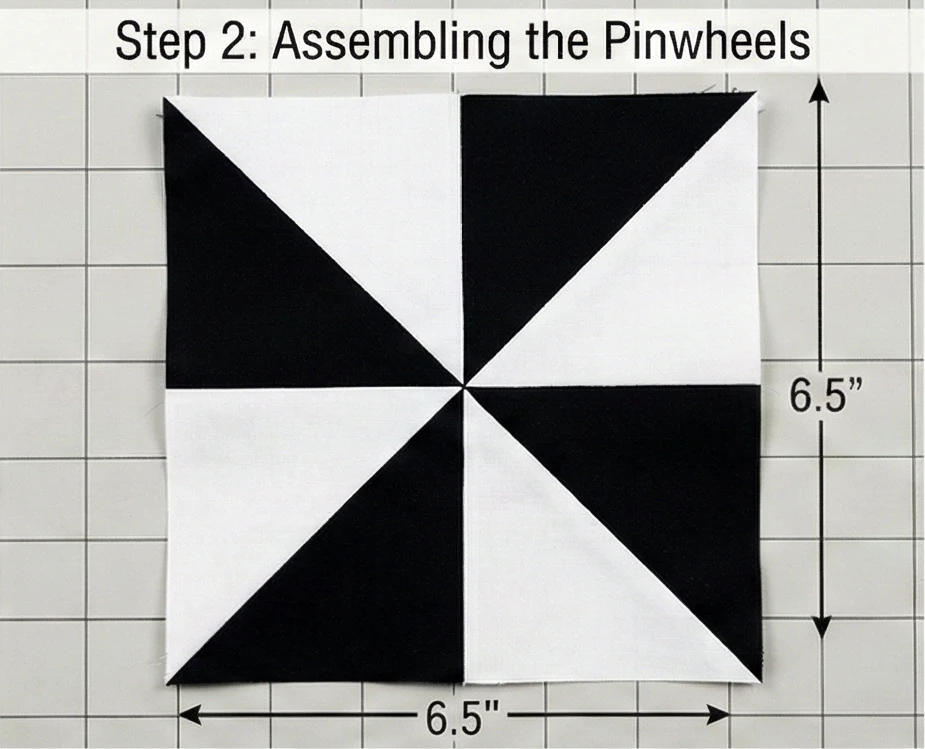
Step 2: Assembling the Pinwheels
Direction matters! If you mix up the direction, the pinwheels won’t spin.
- Layout: Arrange 4 HSTs in a square.
- Orientation: Rotate them so the Black triangles all point inward toward the center, creating a spinning motion (Black-White-Black-White).
- Sew: Sew the top two squares together. Sew the bottom two squares together.
- Join: Sew the top row to the bottom row.
- Spinning Centers: To reduce bulk in the middle, “pop” the center seam open so the allowances swirl around the center point.
- Size: Your block should measure 6.5 inches unfinished. Make 12 Blocks.
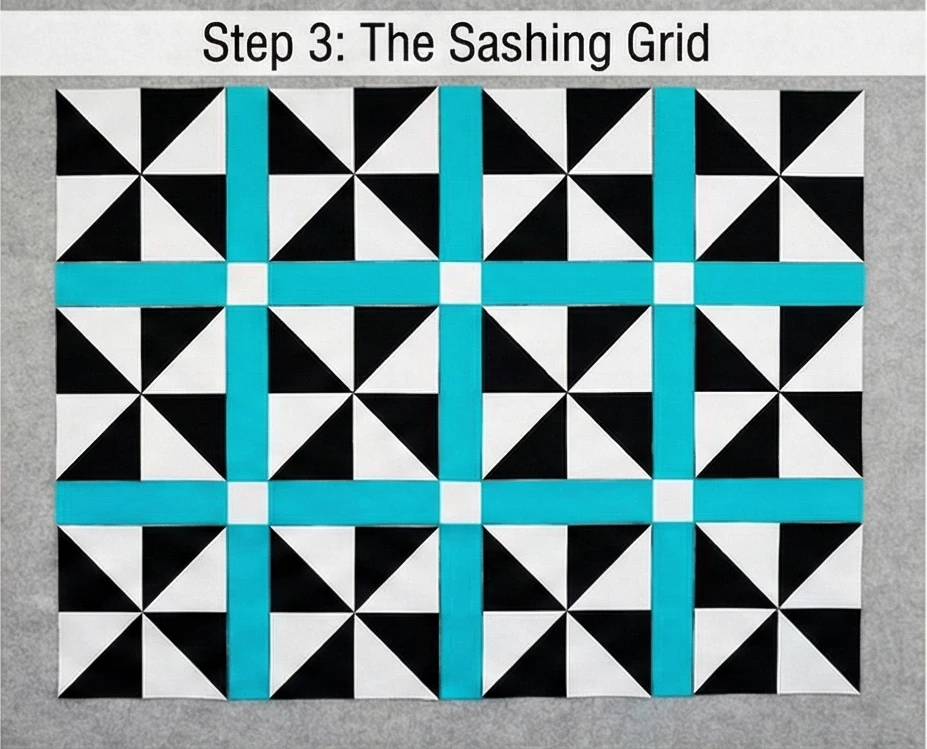
Step 3: The Sashing Grid
Sashing separates the busy pinwheels.
- Cut Sashing:
- From Fabric C (Pop Color), cut 31 strips measuring 6.5″ x 2.5″.
- Cut 20 squares of Fabric B (White) measuring 2.5″ x 2.5″ (Cornerstones).
- Layout: Arrange the blocks in a 3 x 4 grid.
- Place a sashing strip between every block.
- Place cornerstones at the intersections.
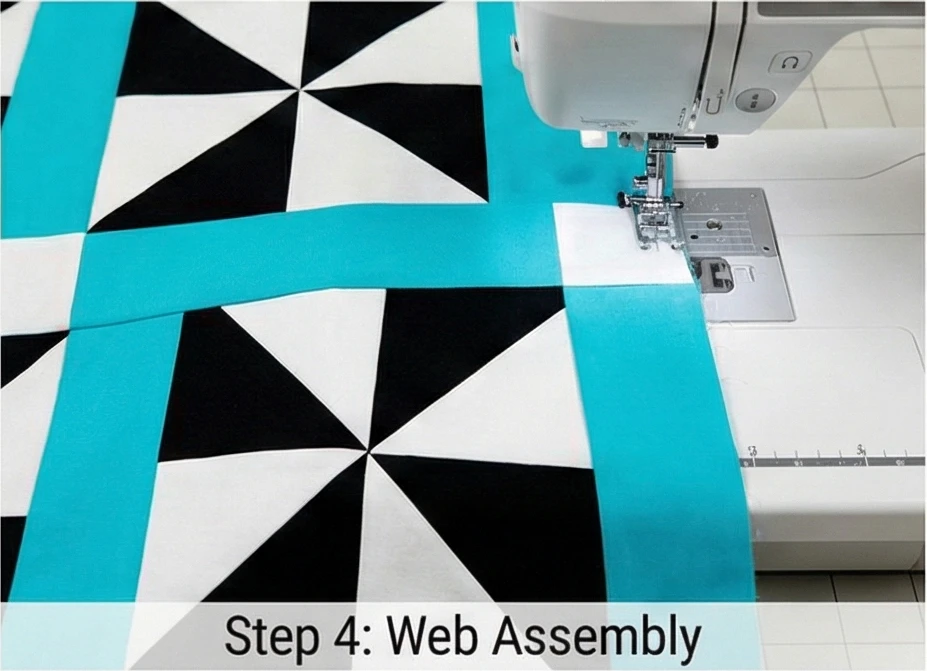
Step 4: Web Assembly
- Block Rows: Sew: Sashing – Pinwheel – Sashing – Pinwheel – Sashing – Pinwheel – Sashing.
- Sashing Rows: Sew: Cornerstone – Sashing – Cornerstone – Sashing – Cornerstone – Sashing – Cornerstone.
- Join: Alternate the rows to complete the top.
Step 5: The “Kick-Proof” Stroller Straps
The secret weapon against dirty blankets.
- Cut Tabs: Cut 2 rectangles of Fabric C measuring 4″ x 8″.
- Sew Tabs: Fold in half lengthwise (Right Sides Together). Sew the long edge and one short edge. Turn the right side out and press. Topstitch.
- Attach: Pin the raw edge of the tabs to the Top Edge of the quilt, about 4 inches in from the corners.
- Note: The tabs should be pointing inward toward the center of the quilt top.
- Sandwich: Place your Backing (face up), then the Top (face down with tabs sandwiched between), then Batting. Sew around the perimeter, leaving a gap. Turn the right side out.
- Result: The tabs now stick out from the top edge.
- Add Snaps: Install a snap (or Velcro) on the tabs so they can loop over a stroller bar.

Step 6: “Wind” Quilting
- Quilt: Use a walking foot to quilt a large Spiral starting from the center of the quilt and working outward.
- Why: The circular quilting contrasts with the pointy triangles and reinforces the “spinning” theme.
- Finish: Topstitch around the very edge to close the turning gap and secure the straps firmly.
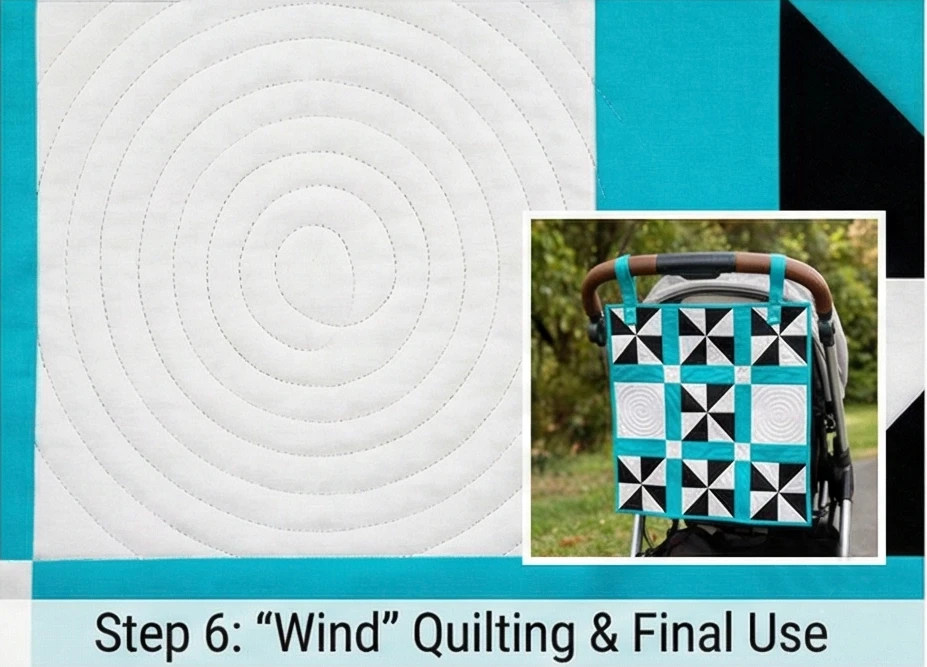
Usability Note: Because this quilt has straps, it can also double as a nursing cover (snap it around your neck) or a makeshift sunshade when snapped onto the car seat handle. Use high-contrast colors like Red/White/Black for newborns, as they engage their brains more than pastel colors do.
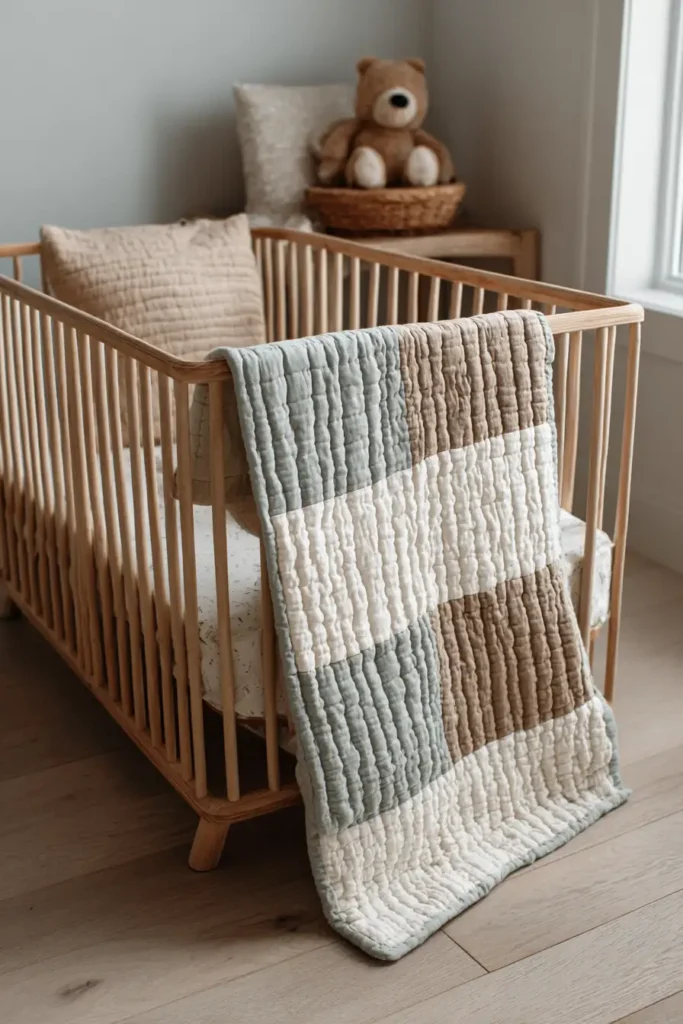
5. Neutral Baby Quilt Designs for Calm and Peaceful Nurseries
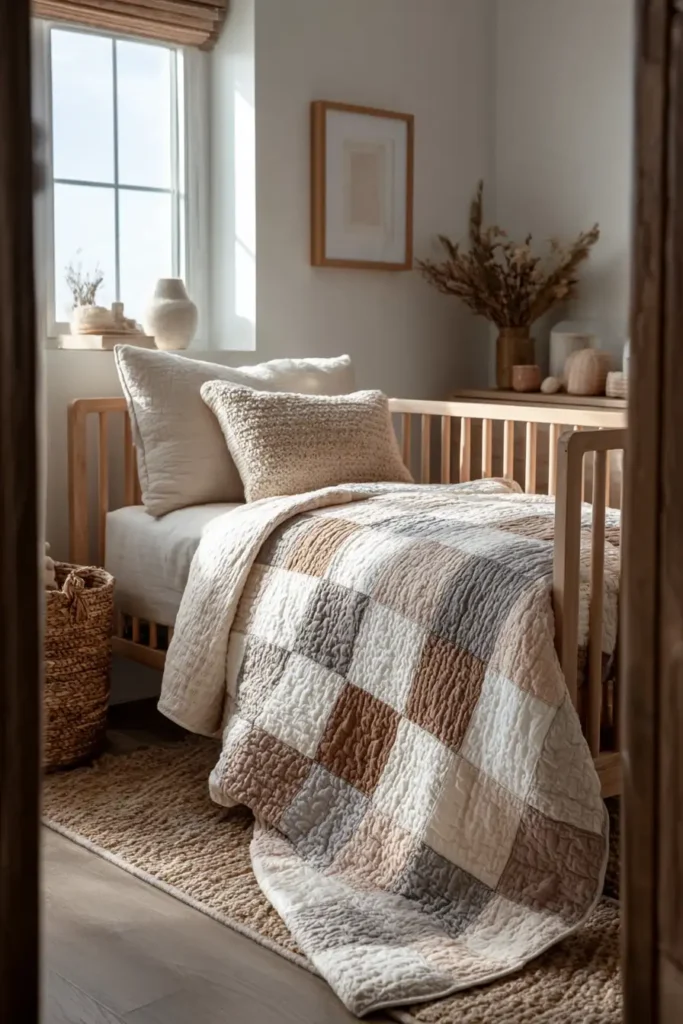

The “Driftwood Nest” Tonal Log Cabin
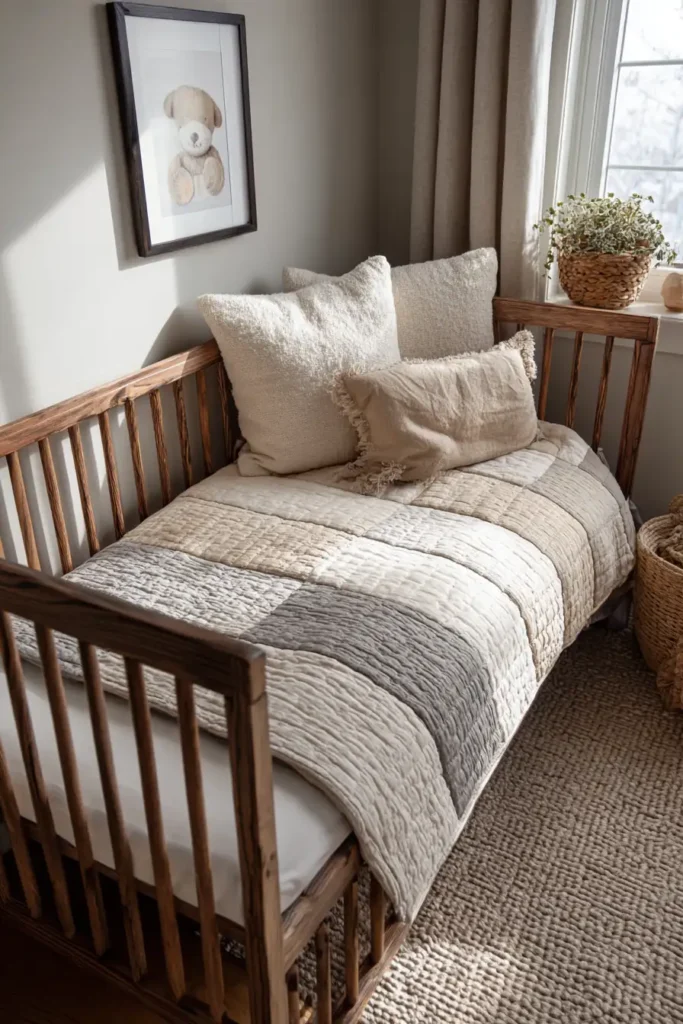
In Montessori and modern nursery design, the goal is often to reduce visual over-stimulation to promote deep sleep and calmness. This “Driftwood Nest” pattern takes the traditional Log Cabin block—usually a riot of contrasting colors—and reimagines it in a soothing, low-contrast palette of Cream, Oatmeal, Sand, and Dove Grey. The result is a textural masterpiece that looks like a woven basket or soft driftwood, providing warmth without the visual noise.
Finished Dimensions: Standard Crib Size, 40″ x 50″.
Materials Needed:
- Fabric A (Center “Hearth”): 1/4 yard of Warm Honey or Soft Peach solid (a tiny nod to the traditional red hearth).
- Fabric Group B (The Light Logs): 1 yard total of mixed low-volume prints (White with subtle grey dots, Cream with white text, etc.).
- Fabric Group C (The Dark Logs): 1 yard total of mixed neutrals (Taupe, Greige, Light Grey, Flax Linen).
- Backing: 1.5 yards of Unbleached Organic Cotton or Teddy Bear Fleece.
- Batting: Organic Cotton (breathable).
- Notions: Rotary cutter, square ruler.
Cultural Backstory: The Log Cabin is one of the oldest and most symbolic quilt patterns in America. Traditionally, the center square was Red (representing the hearth/fire of the home) or Yellow (representing a light in the window). By keeping the values close together (low contrast), we soften this symbolism into a gentle “nest,” perfect for a new baby.
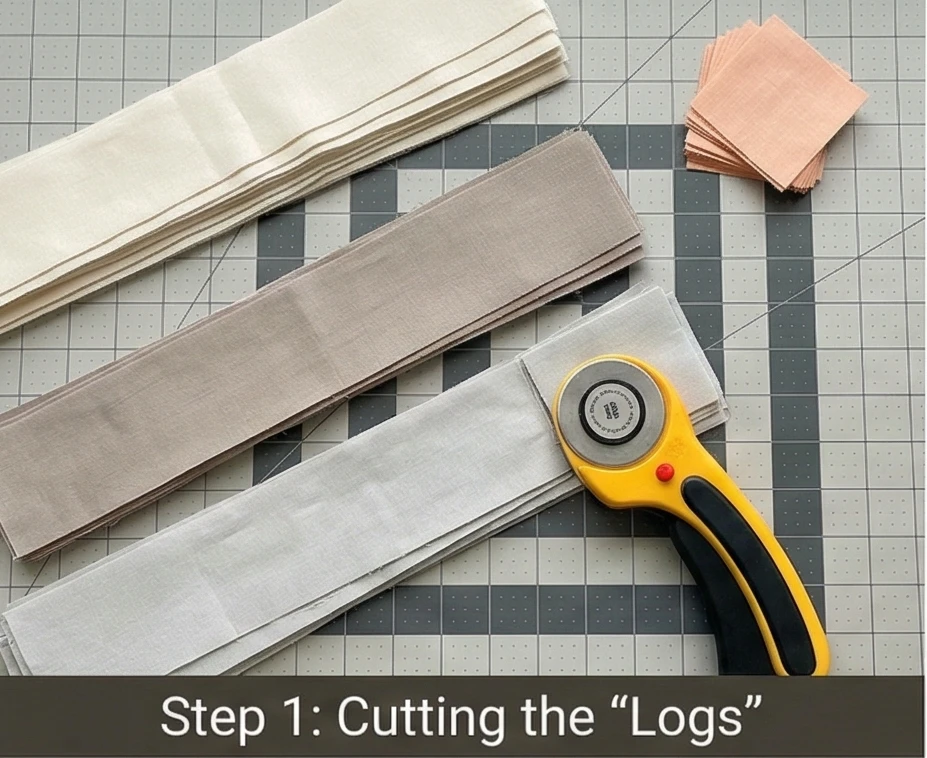
Step 1: Cutting the “Logs”
Precision cutting makes assembly easy. We are using narrow strips for a delicate look.
- Center Squares: Cut 20 squares of Fabric A measuring 2.5″ x 2.5″.
- The Strips: Cut all your Fabric B (Lights) and Fabric C (Darks) into 1.5-inch wide strips across the width of the fabric.
- Organization: Keep your Lights in one pile and your Darks in another.
Step 2: Round 1 (Building the Core)
We build the block spiraling outward.
- Log 1: Take a Center Square (Fabric A). Sew a Light Strip (Fabric B) to the top edge. Trim the strip even with the square. Press seam away from the center.
- Log 2: Sew a Light Strip to the right side. Trim and press.
- Log 3: Switch to Dark Strip (Fabric C). Sew to the bottom. Trim and press.
- Log 4: Sew a Dark Strip to the left side. Trim and press.
- Result: You have a center square surrounded by one round of logs (Lights on top/right, Darks on bottom/left).
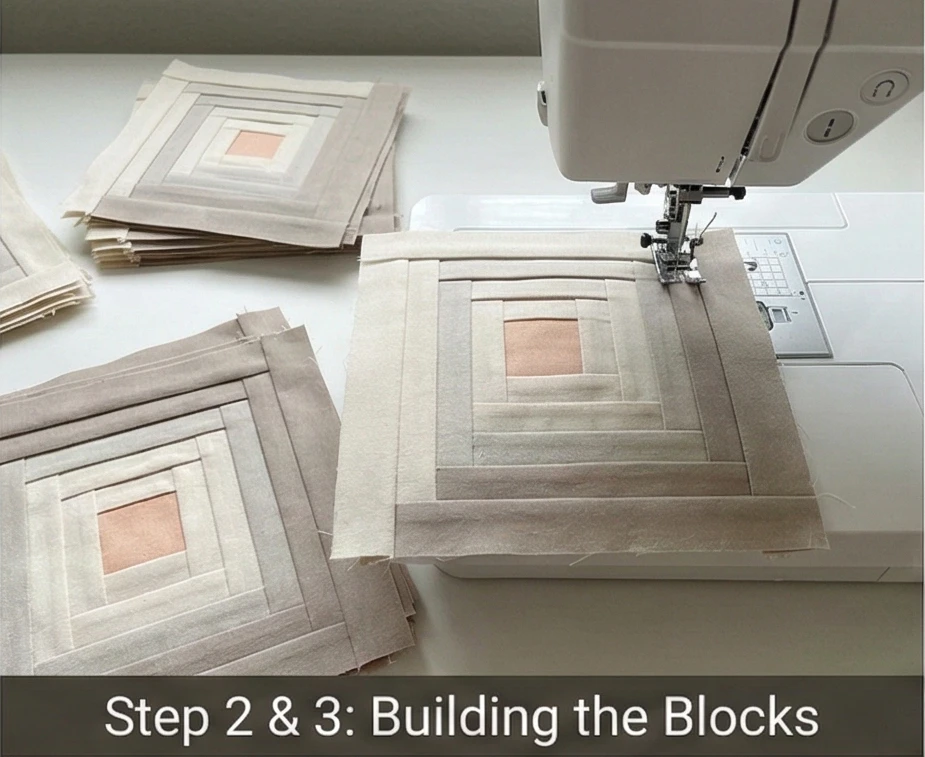
Step 3: Rounds 2 and 3
Continue the spiral pattern.
- Round 2: Add Light strips to the top and right. Add Dark strips to the bottom and Left.
- Round 3: Repeat.
- Sizing: Continue adding rounds until the block measures 10.5 inches square.
- Quantity: Make 20 Blocks.

Step 4: The “Barn Raising” Layout
This specific arrangement creates concentric diamonds.
- Orientation: The Log Cabin block is bisected diagonally (half light, half dark).
- Center: Arrange the 4 center blocks of the quilt so their Dark corners all meet in the middle. This forms a dark diamond.
- Radiate: Arrange the next ring of blocks so their dark sides touch the dark sides of the previous ring.
- Visual: The effect looks like concentric diamonds rippling out from the center of the quilt. Because your colors are neutral (Sand vs. Cream), the effect will be subtle and shadow-like, rather than bold.
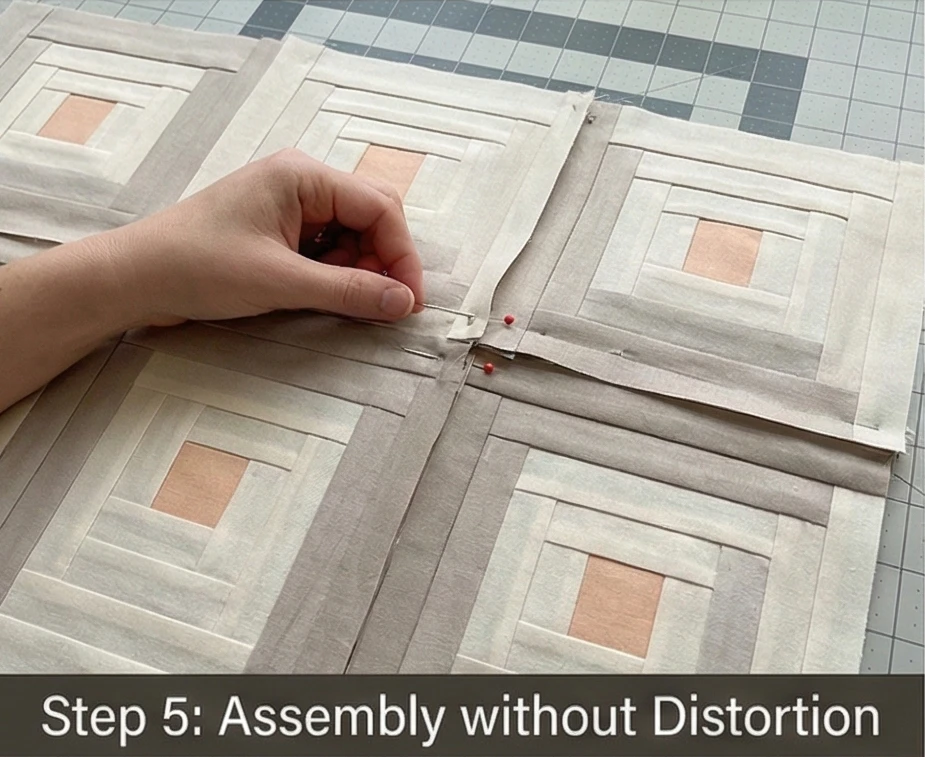
Step 5: Assembly without Distortion
Log cabin blocks have many seams and can stretch.
- Sew Rows: Stitch the blocks into 5 rows of 4 blocks.
- Pinning: Use plenty of pins at the intersections to keep the “logs” straight.
- Pressing: Press all row seams open to reduce the bulk where the heavy logs meet.
- Join: Sew the rows together to complete the top.

Step 6: “In the Ditch” Quilting
Keep the texture woven.
- Baste: Sandwich the layers.
- Quilt: Stitch “in the ditch” (directly inside the seam lines) of the spiral logs.
- Why: This reinforces the seams (making the quilt durable for washing) and creates a crinkly, waffle-like texture that babies love to touch.
- Alternative: For a modern look, ignore the block seams and quilt a large Diagonal Cross-Hatch (grid) across the whole quilt.
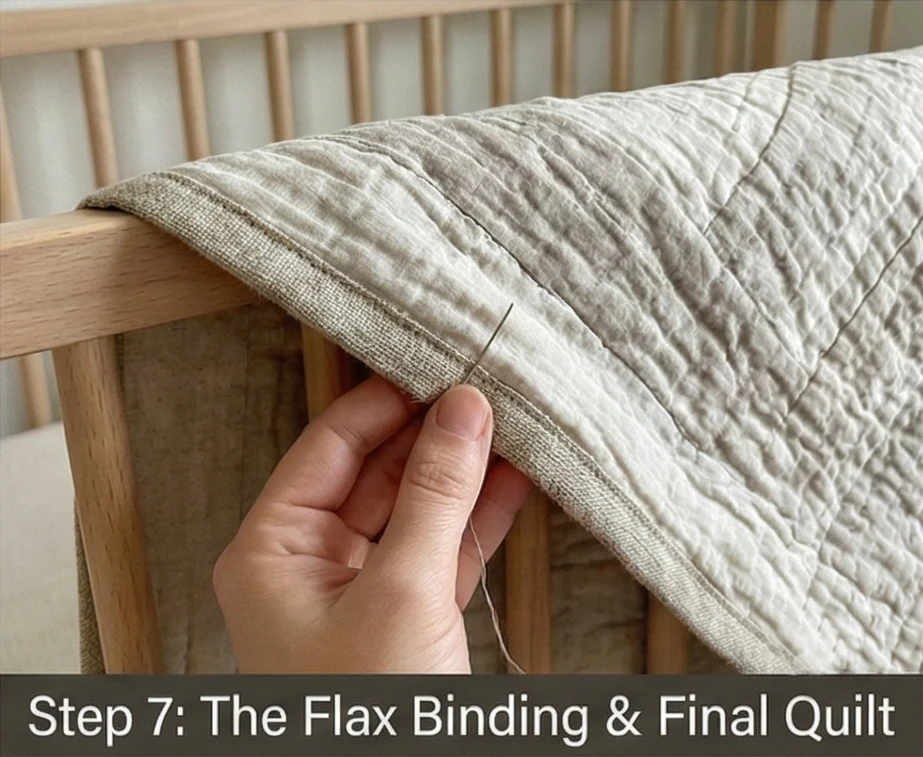
Step 7: The Flax Binding
- Material: Use a Textured Linen or Flax fabric for the binding.
- Finish: Machine sewn to the front and hand-stitched to the back.
- Tactile: The slightly rougher texture of linen binding provides a nice contrast to the soft cotton center, giving the baby different textures to explore with their fingers.
Usability Note: This neutral palette is the ultimate “safe” baby gift. It fits into any nursery decor style (Boho, Modern, Farmhouse) and works for any gender, ensuring it will be used for years, possibly even as a wall hanging later.
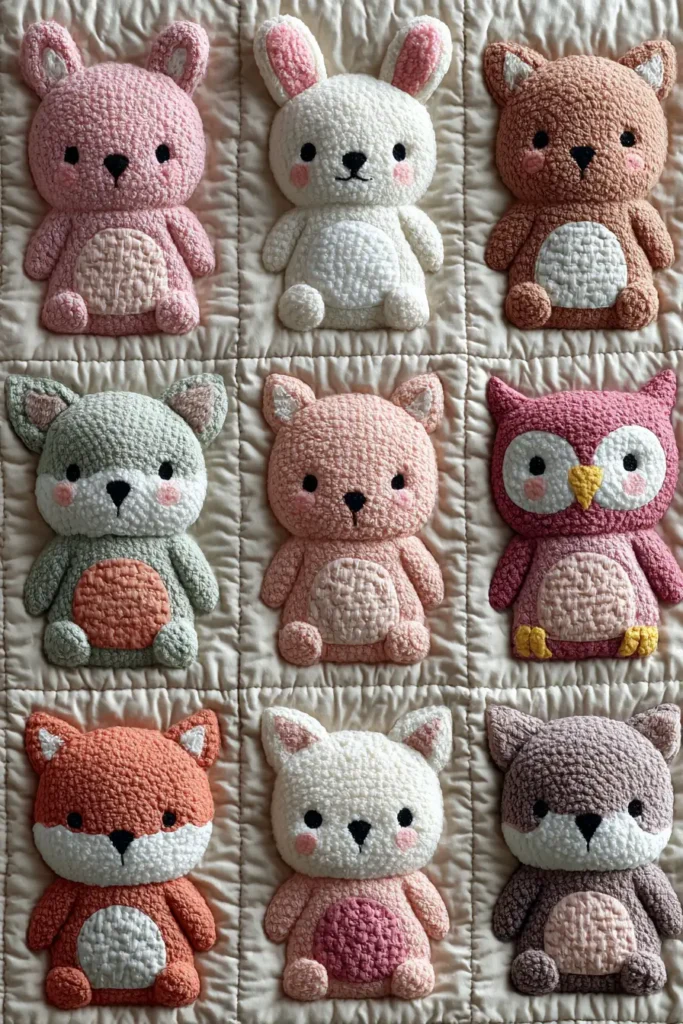
6. Cute Animal-Themed Baby Quilt Pattern Ideas

The “Forest Scout” Economy Block I-Spy Quilt
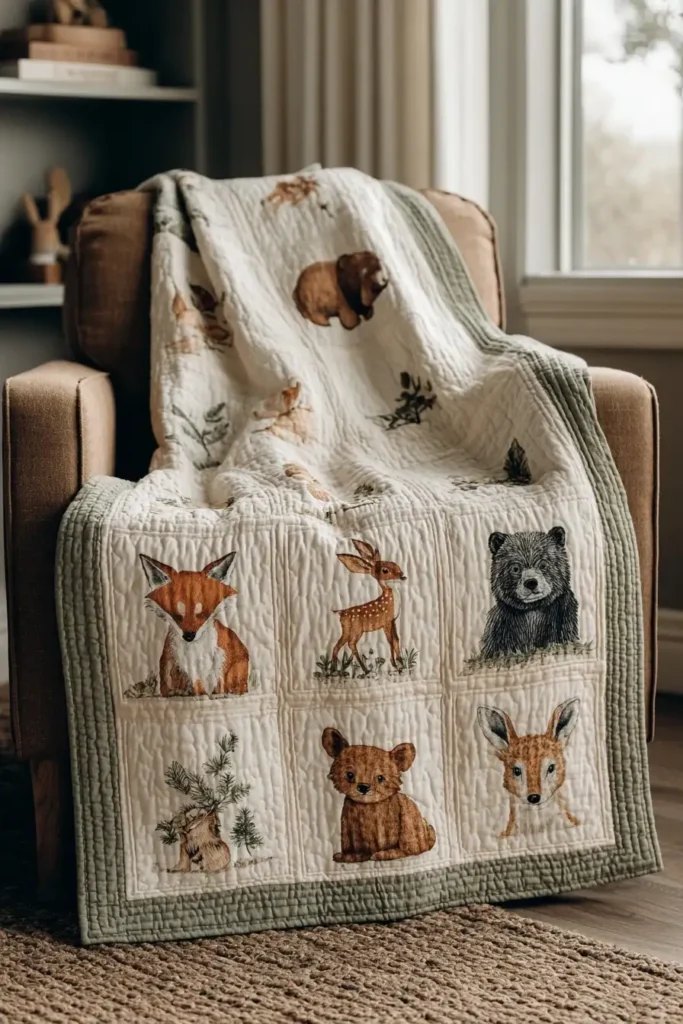
While many animal quilts rely on cartoonish appliqué, the “Forest Scout” uses the traditional Economy Block (also known as Square-in-a-Square) to create a sophisticated gallery of “portraits.” By “fussy cutting” the center of each block to feature a specific animal—a fox, a bear, a deer, or a bunny—the quilt becomes an interactive “I Spy” game for the baby as they grow. Using high-quality, illustrated fabrics (like those from Rifle Paper Co. or Art Gallery Fabrics) keeps the aesthetic elegant enough for a modern nursery while remaining undeniably cute.
Finished Dimensions: Crib Size, 40″ x 50″.
Materials Needed:
- Fabric A (The Animals): 1 yard total of various “Woodland” prints. (Look for fabrics with distinct, separated animals that can be cut out).
- Fabric B (Inner Frame): 1/2 yard of White or Cream solid.
- Fabric C (Outer Frame): 1 yard of Sage Green, Mustard, or Soft Grey (to frame the pictures).
- Backing: 1.5 yards of Minky (for tactile softness).
- Batting: Cotton batting.
- Notions: Rotary cutter, 6.5″ square ruler, and a “Fussy Cut” window template (you can make one from paper).
Cultural Backstory: The Economy Block became popular in the 19th century as a way to use up tiny scraps. However, in the “I Spy” tradition, quilts serve an educational purpose. By pointing to the blocks and asking “Where is the owl?”, parents use the quilt to help toddlers develop vocabulary and object permanence.
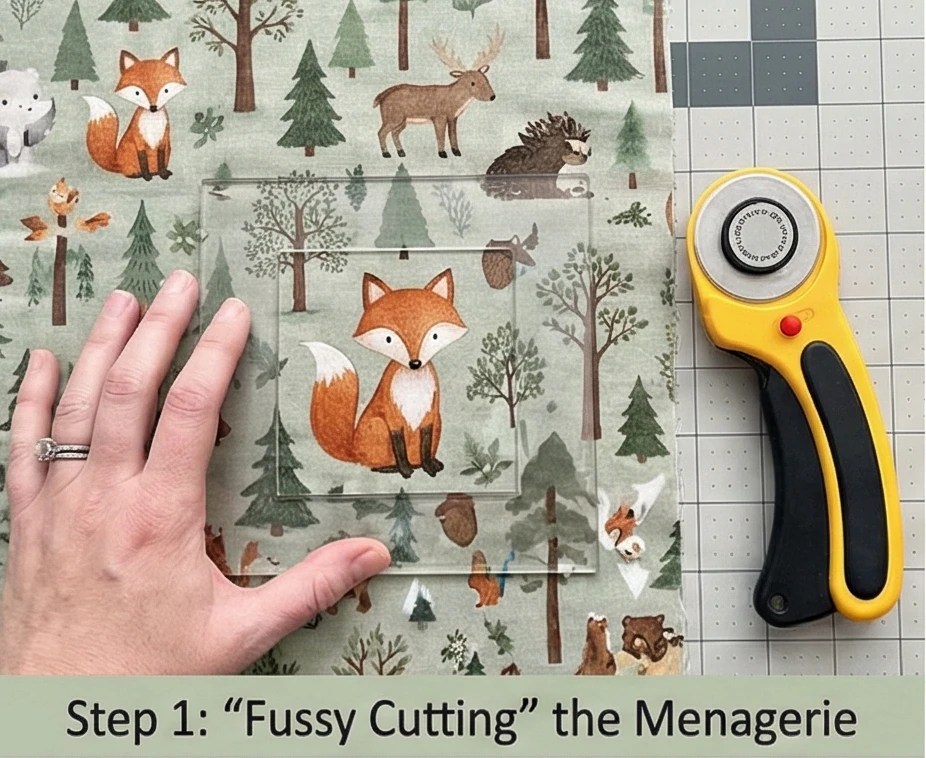
Step 1: “Fussy Cutting” the Menagerie
This is the most fun part—selecting your cast of characters.
- Make a Template: Cut a square of paper measuring 3.5″ x 3.5″. Cut a smaller window inside it, measuring 3″ x 3″ (this shows you what will be visible after seams).
- Hunt & Cut: Place your template over the animal fabric. Center a cute fox face or a sleeping bear inside the window.
- Cut: Cut the fabric into a square measuring exactly 3.5″ x 3.5″.
- Quantity: You need 48 Animal Centers.
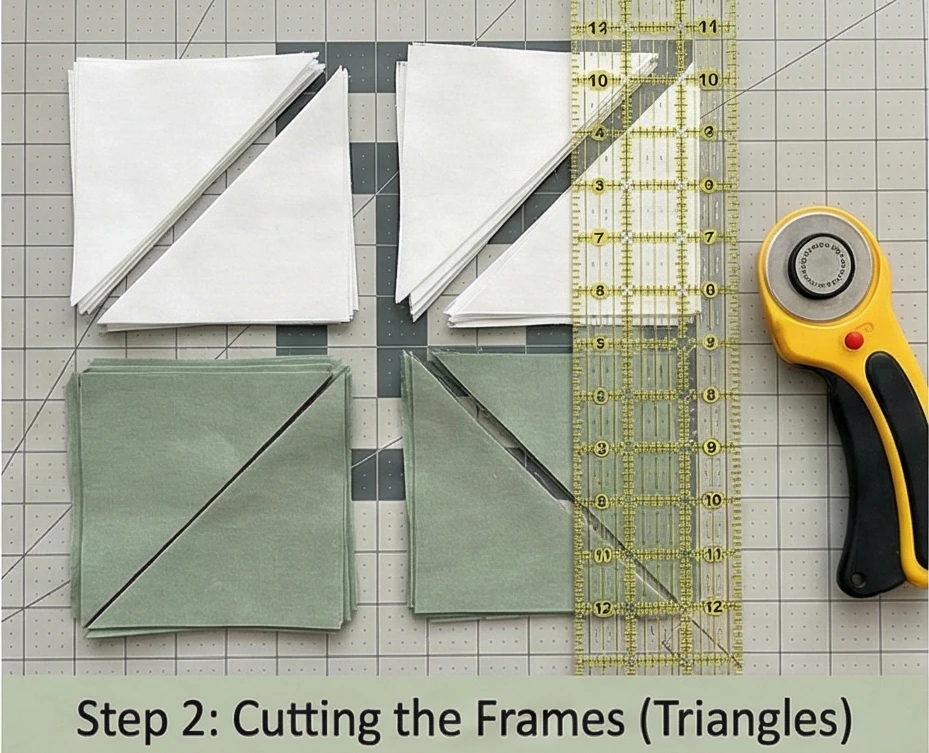
Step 2: Cutting the Frames (Triangles)
We build the frames using triangles.
- Inner Frame (Fabric B): Cut 24 squares measuring 4 inches. Cut each square in half diagonally to get 48 triangles.
- Outer Frame (Fabric C): Cut 24 squares measuring 5.5 inches. Cut each square in half diagonally to get 48 triangles.
- Note: These sizes are slightly oversized to allow for trimming later (crucial for precision).
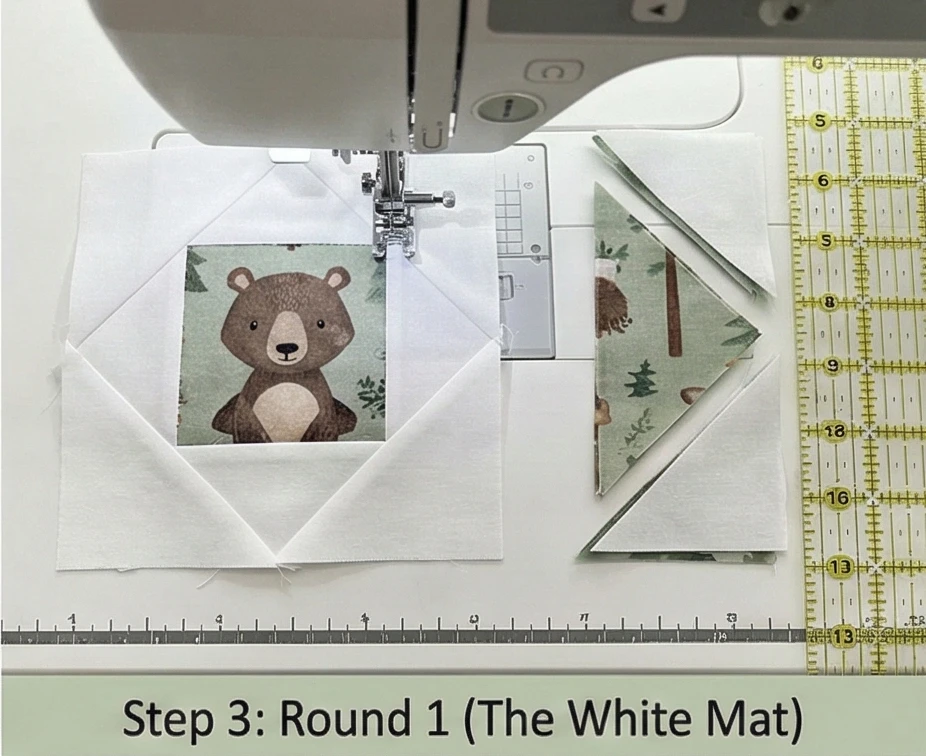
Step 3: Round 1 (The White Mat)
Framing the picture.
- Sew: Take an Animal Center (3.5″). Sew a Fabric B triangle to the top and bottom. Press outward.
- Sew: Sew a Fabric B triangle to the left and right sides. Press outward.
- Trim: Using your ruler, trim this unit to exactly 4.75″ x 4.75″. Ensure the animal remains perfectly centered (1/4 inch away from the points).
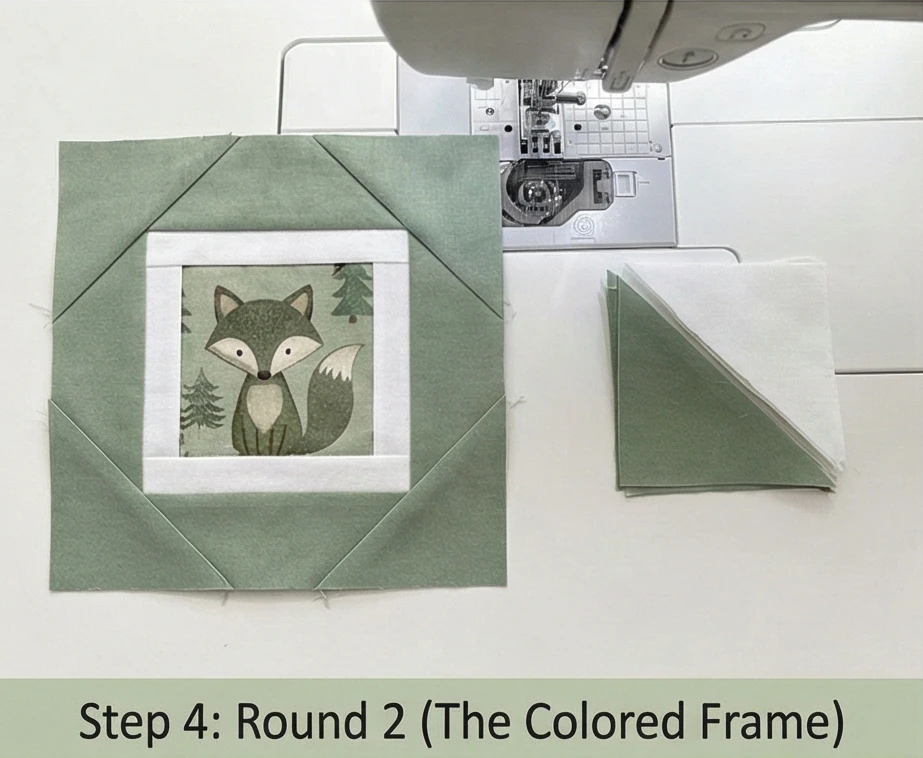
Step 4: Round 2 (The Colored Frame)
Adding the final border to the block.
- Sew: Sew a Fabric C triangle to the top and bottom of the unit. Press outward.
- Sew: Sew a Fabric C triangle to the left and right sides. Press outward.
- Trim: Trim the final block to exactly 6.5″ x 6.5″.
- Repeat: Make 48 Blocks.
Step 5: The Gallery Layout
Arranging the grid.
- Layout: Arrange the blocks in a grid of 6 blocks wide by 8 blocks long.
- Balance: Distribute the colors and animals evenly. Don’t put two foxes next to each other.
- Assembly: Sew the blocks into rows, then sew the rows together.
- Precision: Match the diamond points carefully at the intersections.

Step 6: “Echo” Quilting
Highlight the geometry.
- Baste: Sandwich the Minky Backing + Batting + Top.
- Quilt: Stitch “in the ditch” (along the seam lines) around the center animal square and again around the outer frame square.
- Effect: This quilting creates concentric square outlines that make the animals appear set inside recessed picture frames.
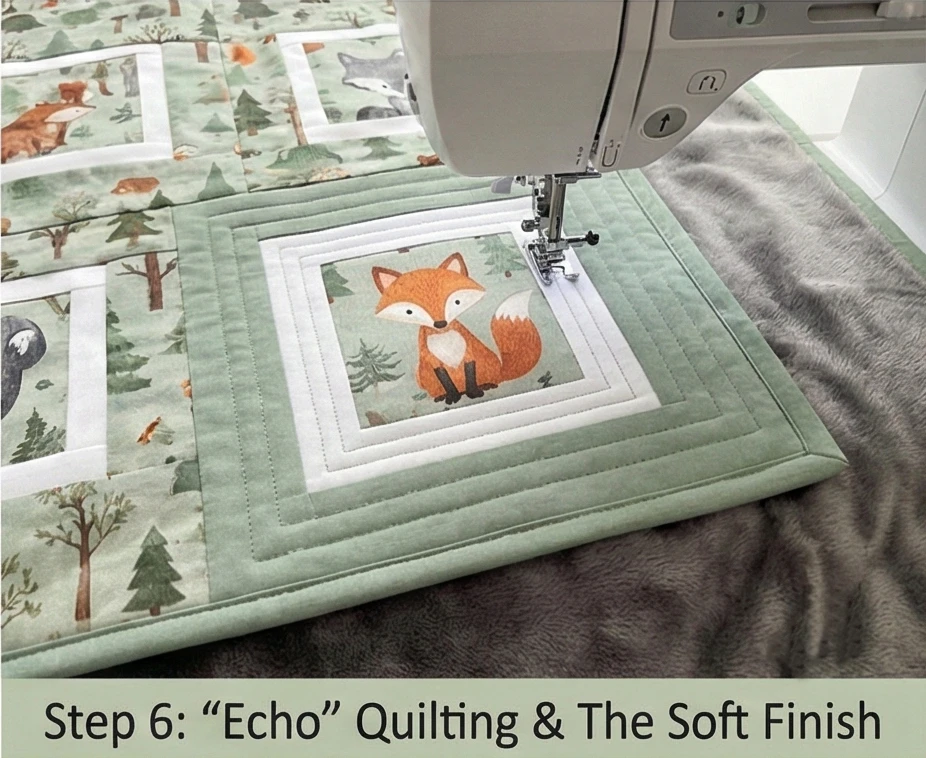
Step 7: The Soft Finish
- Binding: Bind with Fabric C (the outer frame color) or a fun striped fabric.
- Machine Finish: Because Minky backing is thick, machine sew the binding to the front, wrap it around to the back, and machine stitch it down using a zigzag or decorative stitch for durability.
Usability Note: Minky backing is incredibly popular for babies because of its texture, but it can stretch while sewing. Use a “Walking Foot” and plenty of basting spray to keep the quilt square. The result is a heavy, warm blanket perfect for cold stroller walks.

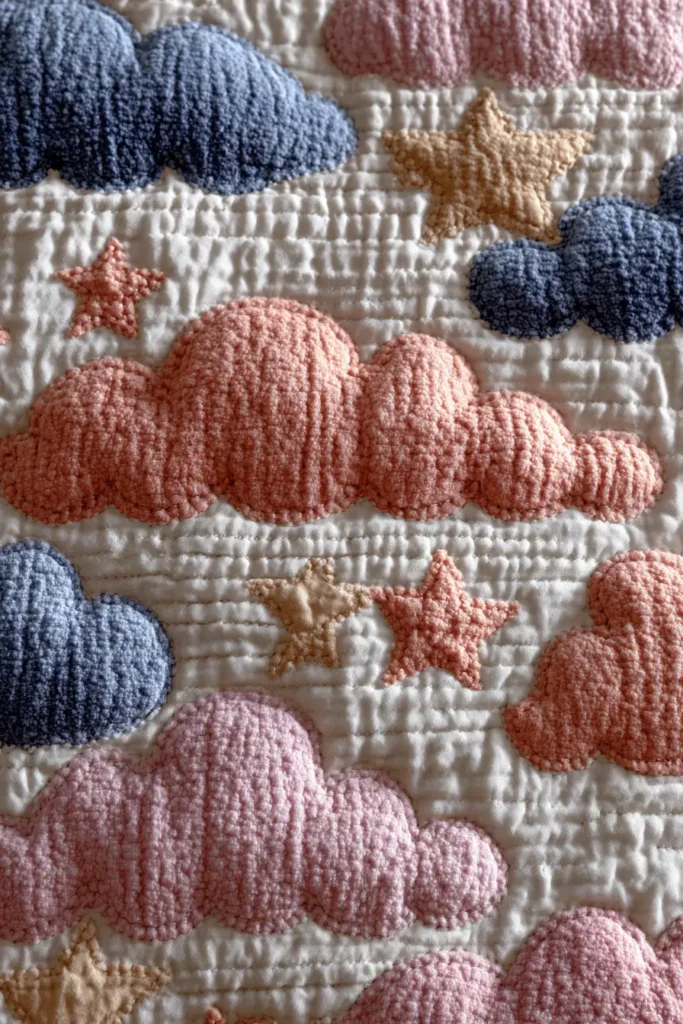
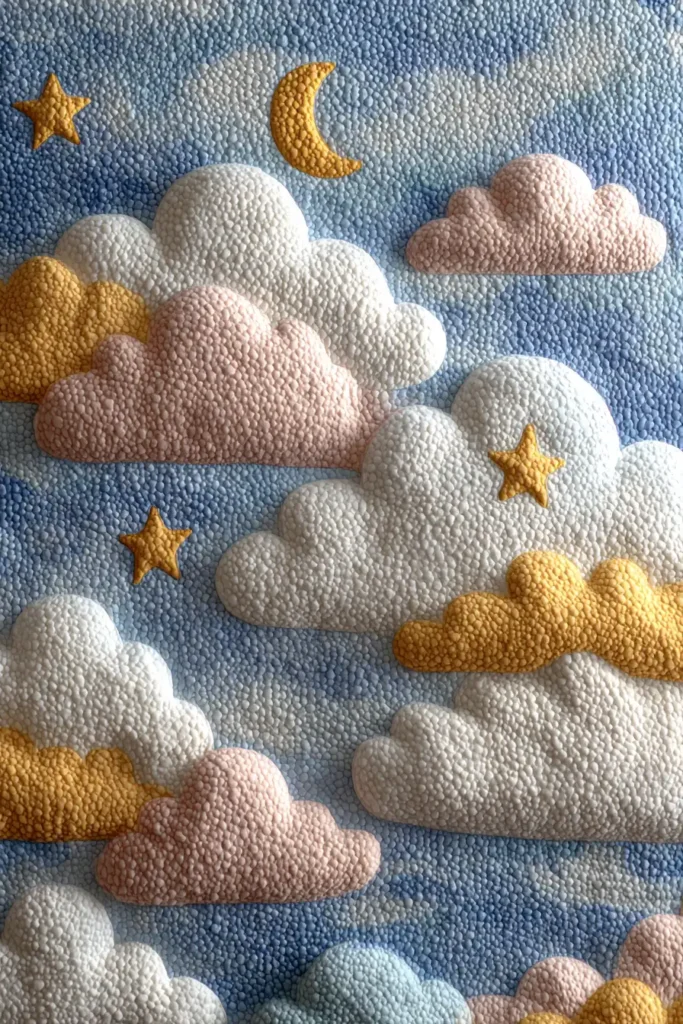
7. Cuddly Cloud and Star Themed Quilts for Dreamy Bedtimes
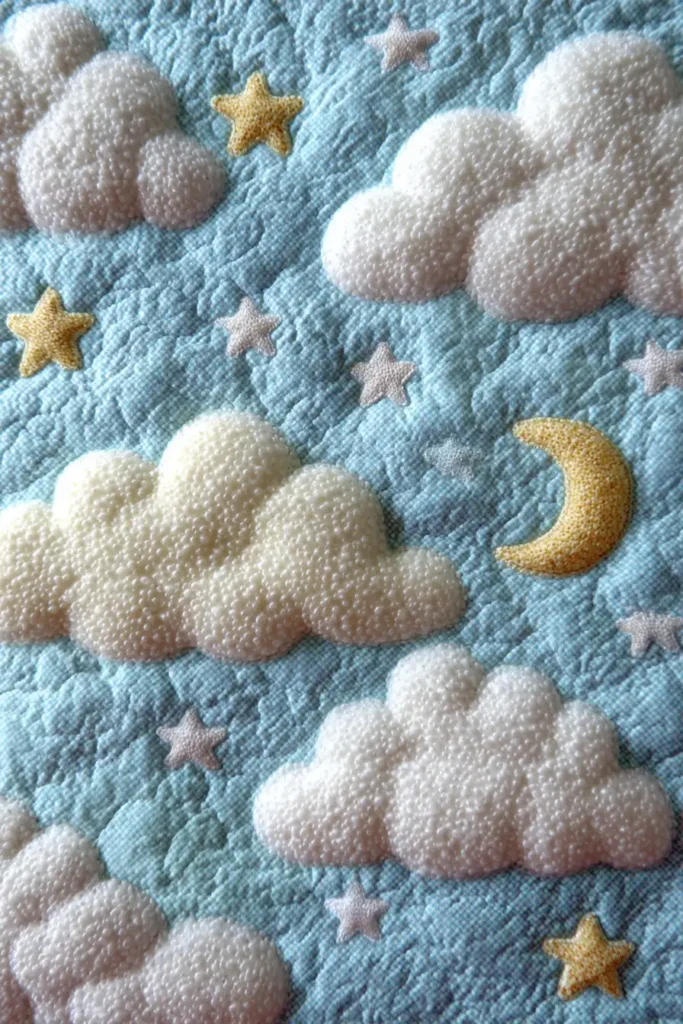

The “Starlight Slumber” Appliqué Cloud Quilt
Creating a dreamy nursery often involves motifs of the sky—clouds, moons, and stars. While many patterns rely on complex piecing for stars, the “Starlight Slumber” uses Raw-Edge Appliqué to create soft, fluffy cloud shapes that float over a simple patchwork sky. This technique is faster than traditional needle-turn appliqué and adds a wonderful texture that babies love to touch. Using White Flannel or Minky for the clouds against a Pale Blue background makes the quilt a tactile sensory map for sleepy fingers.
Finished Dimensions: Toddler Bed Size, 45″ x 60″.
Materials Needed:
- Fabric A (The Sky): 2 yards of assorted Pale Blue, Aqua, and Mint cottons (cut into squares).
- Fabric B (The Clouds): 1 yard of White Flannel or Low-Pile Minky (for texture).
- Fabric C (The Stars): Scraps of Yellow or Silver cotton.
- Backing: 3 yards of coordinating cotton print (e.g., moons and stars).
- Batting: Cotton/Polyester blend (medium loft).
- Notions: Double-sided fusible web (e.g., HeatnBond Lite), cloud template (draw your own or download), rotary cutter.
Cultural Backstory: In many cultures, the “Cloud Collar” motif represents the celestial realm and protection. In quilting, “Cloud” patterns often refer to the quilting stitches themselves (like the Baptist Fan), but here we use the literal shape. The floating cloud motif became particularly popular in Art Deco nursery illustrations of the 1920s, symbolizing a peaceful journey into the land of Nod.
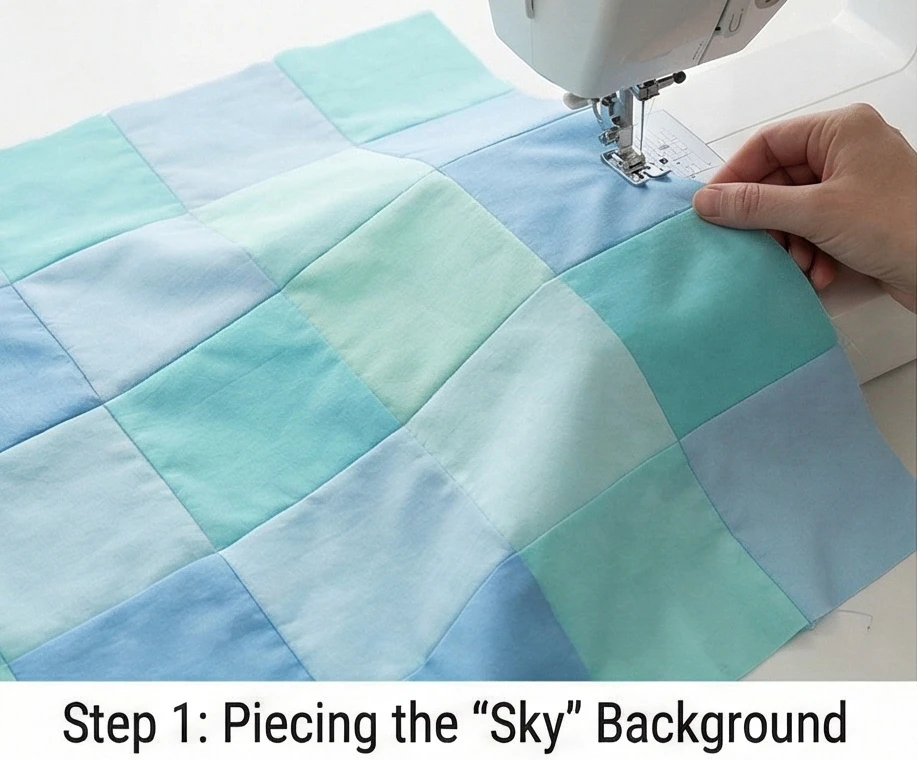
Step 1: Piecing the “Sky” Background
We want a scrappy, shimmering sky rather than a flat blue sheet.
- Cut Squares: Cut your Fabric A (Blues/Teals) into 5-inch squares. You need roughly 108 squares.
- Layout: Arrange them in a grid of 9 squares wide by 12 rows long.
- Gradient: For an ombre effect, place the darker blues at the bottom and fade to the lightest mints at the top.
- Assemble: Sew the squares into rows, then join the rows.
- Press: Press seams open to keep the background flat.
Step 2: Preparing the Appliqué Shapes
This is where the texture comes in.
- Trace: Trace 3 Large Cloud shapes and 5 Small Star shapes onto the paper side of your fusible web.
- Tip: Keep cloud shapes simple—like puffy cumulus clouds with rounded edges. Avoid sharp corners.
- Fuse: Iron the fusible web onto the wrong side of your Fabric B (Flannel/Minky) and Fabric C (Yellow).
- Cut: Cut out the shapes carefully along the traced lines. Peel off the paper backing.

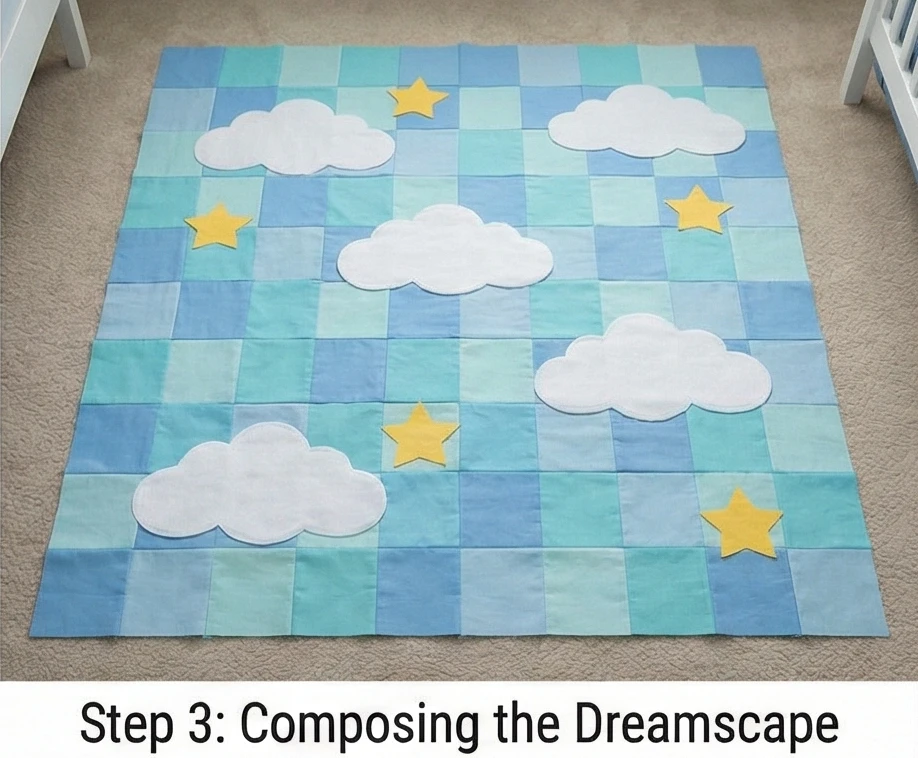
Step 3: Composing the Dreamscape
Design the scene.
- Placement: Lay your pieced Sky background on the floor.
- Arrangement: Place the large Flannel clouds on the quilt.
- Rule of Thirds: Avoid putting a cloud dead center. Place one near the top-left, one in the middle-right, and one at the bottom-left.
- Stars: Scatter the yellow stars around the clouds.
- Fuse: Once happy with the layout, fuse the shapes in place using a hot iron (use a pressing cloth if using Minky to avoid melting the fibers!).
Step 4: Raw-Edge Appliqué Stitching
Secure the shapes so they don’t peel off in the wash.
- Stitch: Use a Blanket Stitch or a small Zig-Zag Stitch around the edges of every cloud and star.
- Thread: Use White thread for clouds and Yellow for stars to blend in.
- Texture: The raw edge of the flannel will fray slightly over time, giving the clouds a soft, fuzzy outline that enhances the “cloud-like” feel.

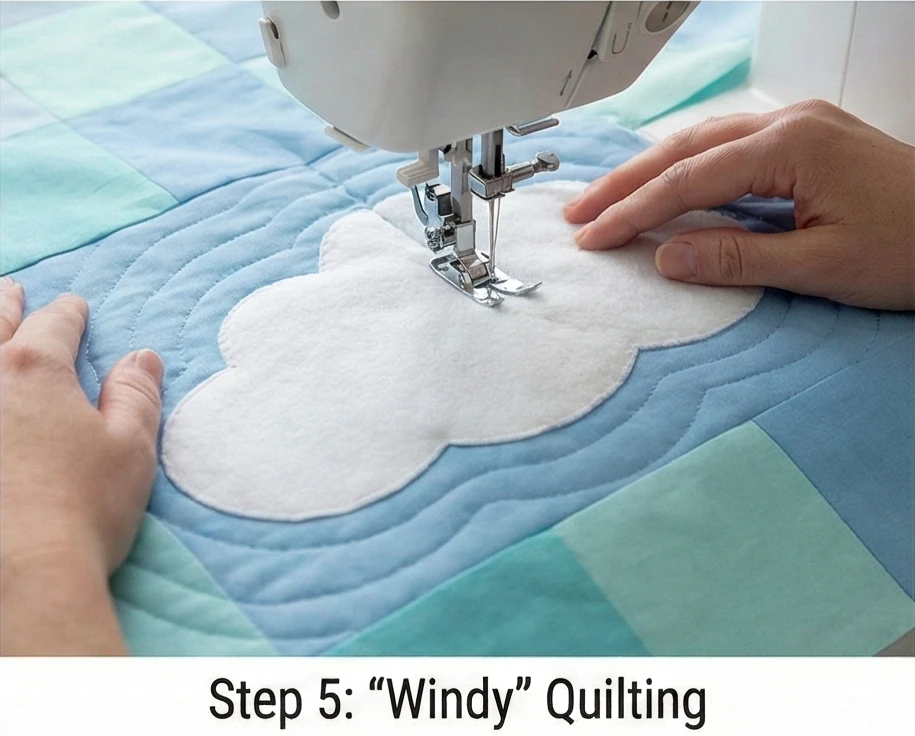
Step 5: “Windy” Quilting
The quilting should look like a breeze blowing through the sky.
- Baste: Sandwich the Backing + Batting + Top.
- Quilt: Use a walking foot to quilt gently curving horizontal lines across the entire quilt.
- The Path: When you reach a cloud appliqué, stop and echo-quilt around the cloud shape rather than stitching over it. This makes the cloud puff up, while the background sky gets flattened by the lines.
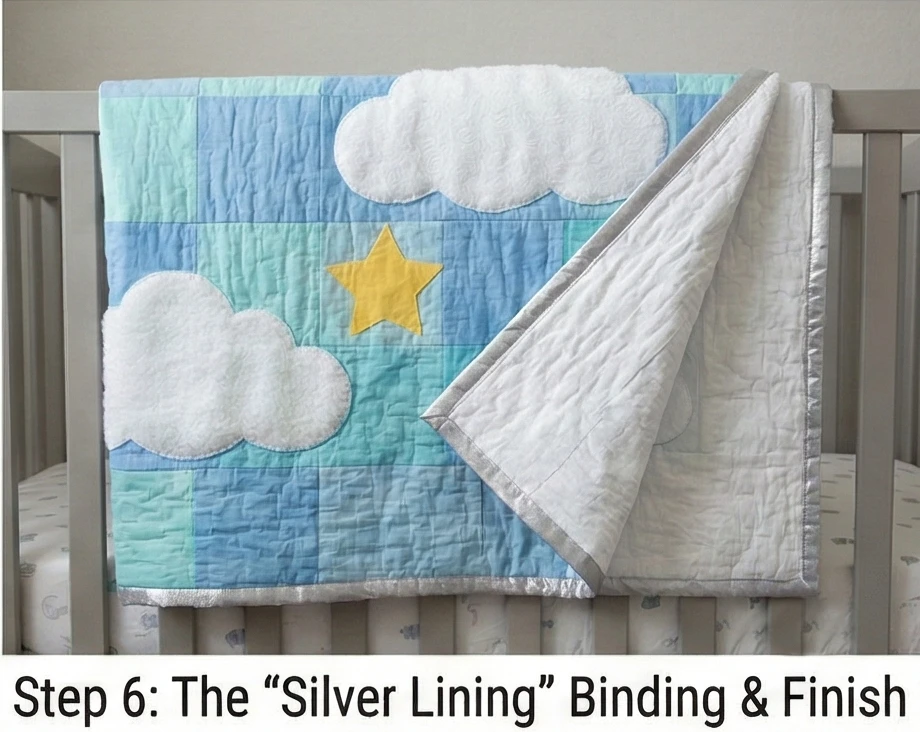
Step 6: The “Silver Lining” Binding
- Binding: Use a Silver or Light Grey fabric for the binding.
- Attach: Machine sew to the front and hand-stitch to the back.
- Finish: Wash the quilt immediately. The flannel clouds will crinkle up and become irresistibly soft, and the blue patchwork will soften into a cohesive sky.
Usability Note: Using Flannel or Minky for the appliqués creates a “fidget” element. Babies soothe themselves by rubbing soft textures. Placing these textures on top of the cool cotton background gives them sensory variety that helps calm them for sleep.
8. Sweet Floral Appliqué Quilt Designs for a Gentle Touch
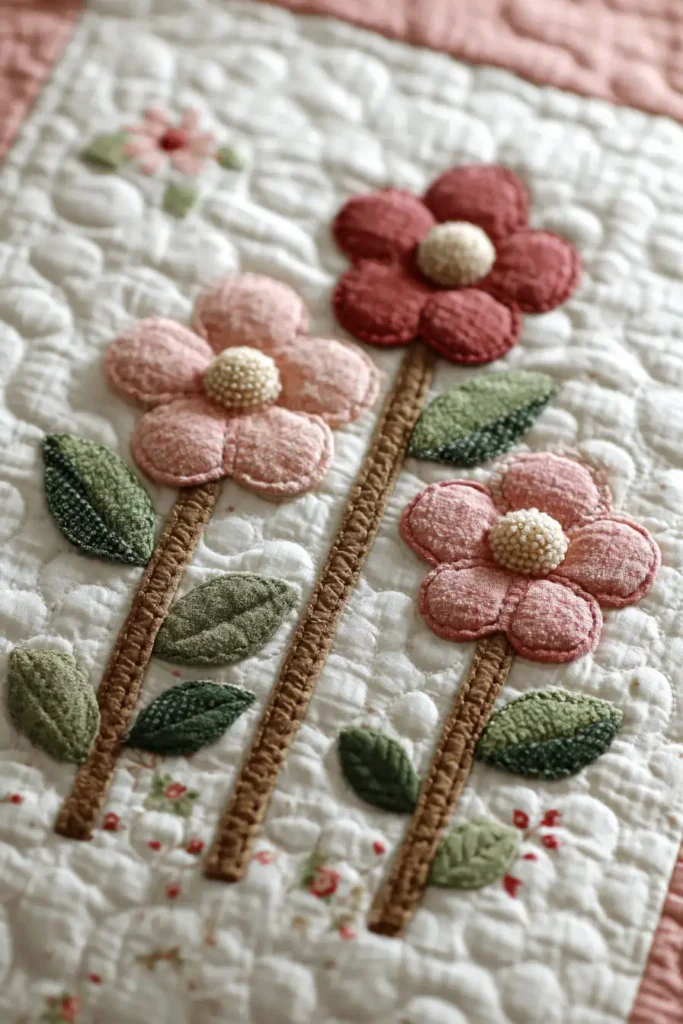
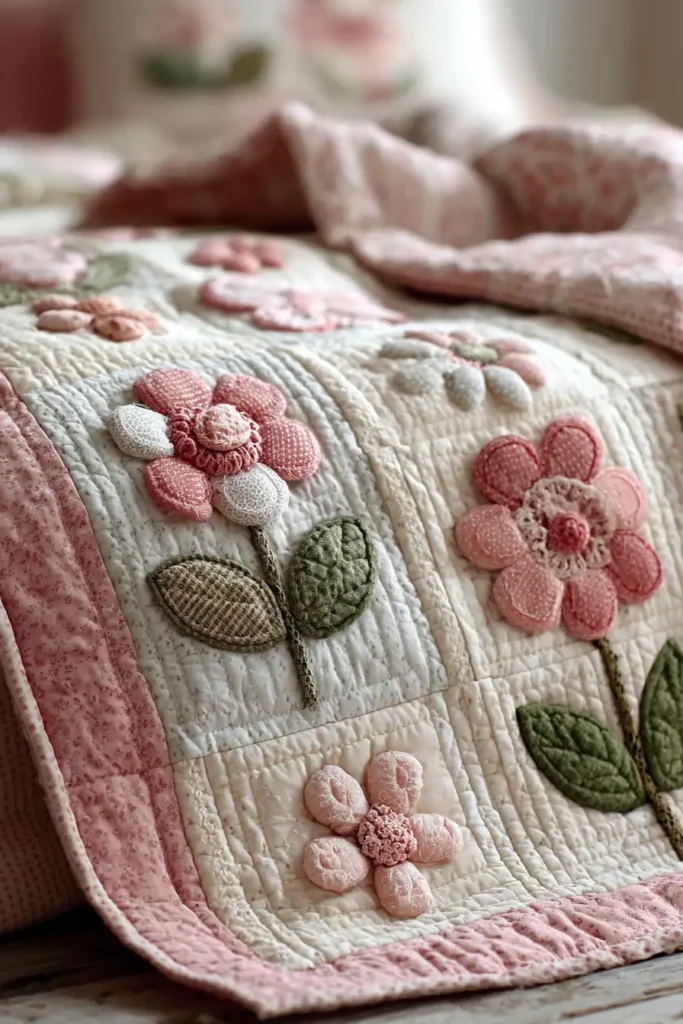
The “Meadow Bloom” Dresden Daisy Quilt
The “Dresden Plate” is one of the most recognizable quilt patterns in history, mimicking the ornate porcelain designs of Dresden, Germany. While traditional versions use sharp, pointed petals, this “Meadow Bloom” variation uses rounded, chunky petals to create soft, friendly daisies. By setting these large, cheerful flowers against a crisp White or Polka Dot background, you create a garden-themed nursery accent that is sophisticated enough for a wall hanging but durable enough for tummy time.
Finished Dimensions: Square Play Mat, 45″ x 45″.
Materials Needed:
- Fabric A (Petals): A variety of fat quarters in soft pastels (Blush, Lavender, Mint, Butter Yellow). You need enough to cut 48 petals.
- Fabric B (Flower Centers): 1/4 yard of Soft Yellow or Textured Chenille (for tactile centers).
- Fabric C (Background): 2 yards of White or Low-Volume Dot.
- Backing: 3 yards of floral print.
- Batting: Cotton (medium loft).
- Notions: A Dresden Ruler (18-degree wedge) or a paper template, turning tool (chopstick).
Cultural Backstory: The Dresden Plate pattern exploded in popularity during the 1920s and 30s. Despite the economic hardships of the Great Depression, quiltmakers used this pattern to bring joy and color into their homes, often constructing the petals from old feed sacks. It remains a symbol of optimism and “making do” with grace.
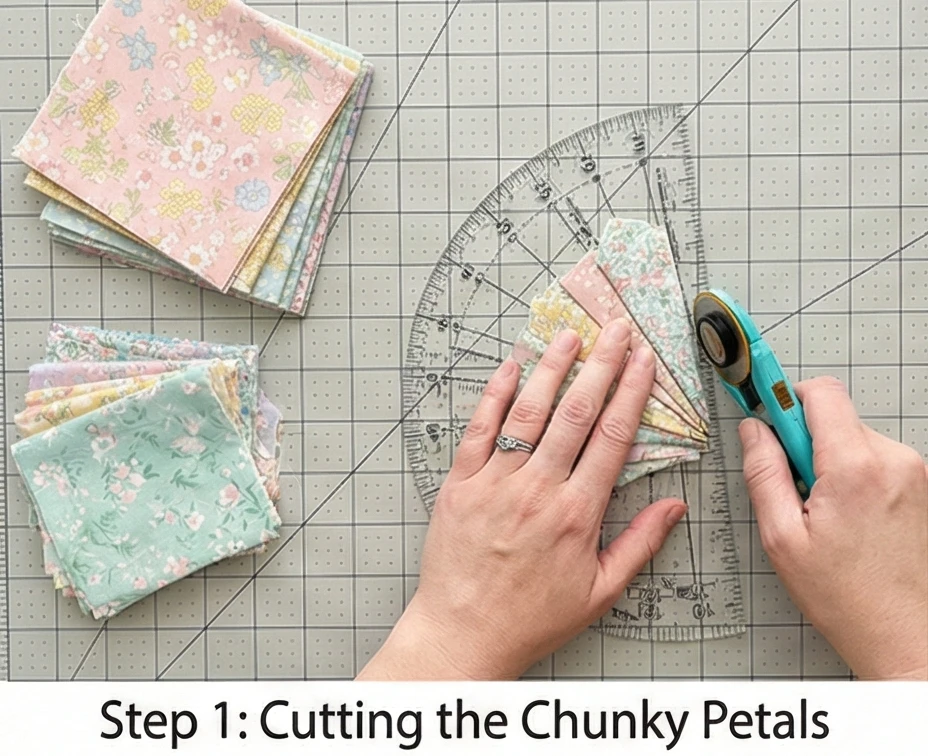
Step 1: Cutting the Chunky Petals
We are making 4 Large Flowers. Each flower needs 12 petals.
- Cut Strips: Cut fabric strips 5 inches wide.
- Cut Wedges: Using your Dresden Ruler (or a paper template), cut 48 wedges from your pastel fabrics.
- Variety: Mix and match the colors so each flower has a scrappy, garden look.
Step 2: Creating the Rounded Tips
This “sew and flip” trick turns a raw wedge into a finished petal.
- Fold: Fold a fabric wedge in half lengthwise (Right Sides Together).
- Sew Top: Stitch across the wide top edge with a 1/4 inch seam.
- Turn: Turn the wedge right side out. Use a chopstick to gently poke the corner out.
- Result: You now have a wedge with a finished, slightly rounded top edge.
- Press: Press the petal flat so the seam runs down the exact center of the back.

Step 3: Assembling the Flower Rings
- Sew: Place two petals Right Sides Together. Sew down the long side, starting at the outer edge and moving inward.
- Continue: Keep adding petals until you have a full circle of 12 petals.
- Press: Press all seams open or in one direction (clockwise) to reduce bulk.
- Result: You have a donut shape with a hole in the middle. Make 4 Rings.

Step 4: Mounting the Flowers
- Cut Backgrounds: Cut 4 squares of Fabric C (Background) measuring 18″ x 18″.
- Center: Fold the background square in half, then in half again to find the center. Place a Dresden Ring on top and center it perfectly.
- Appliqué: Pin securely. Stitch around the outer edge of the petals using a Blind Hem Stitch or a straight topstitch (1/8 inch from the edge) to secure the flower to the background block.
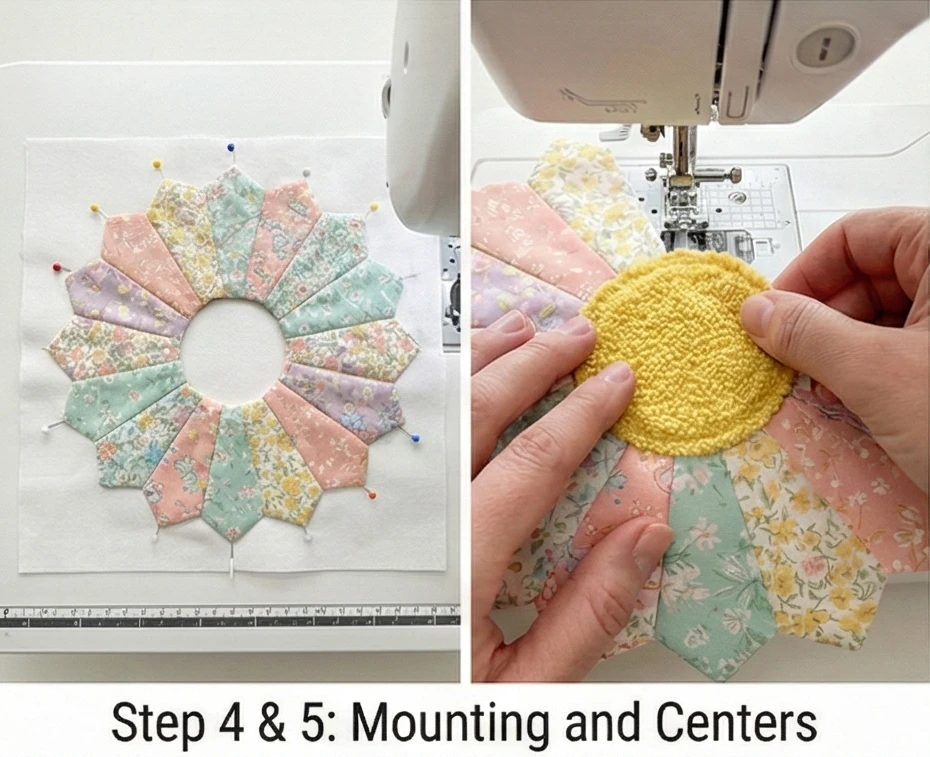
Step 5: The Tactile Center
The center covers the messy hole in the middle of the ring.
- Cut Circles: Cut 4 circles from Fabric B (Yellow), measuring 4 inches in diameter.
- Prep:
- Method A (Turned Edge): Hand-baste around the edge, pull the thread to gather it around a cardboard circle template, press, and remove the cardboard.
- Method B (Raw Edge): If using Chenille or Flannel, just leave the edge raw for texture.
- Attach: Place the yellow circle over the center hole of the flower. Stitch it down securely.

Step 6: Sashing and Assembly
- Sashing: Cut 5 strips of Fabric C (or a contrasting Green) measuring 18″ x 2.5″.
- Join:
- Sew two blocks together with a sashing strip in between. (Top Row).
- Sew the other two blocks together, with a sashing strip between them. (Bottom Row).
- Sew the long horizontal sashing strip between the Top and Bottom rows.
- Border: Add a 3-inch border around the entire quilt to frame the garden.
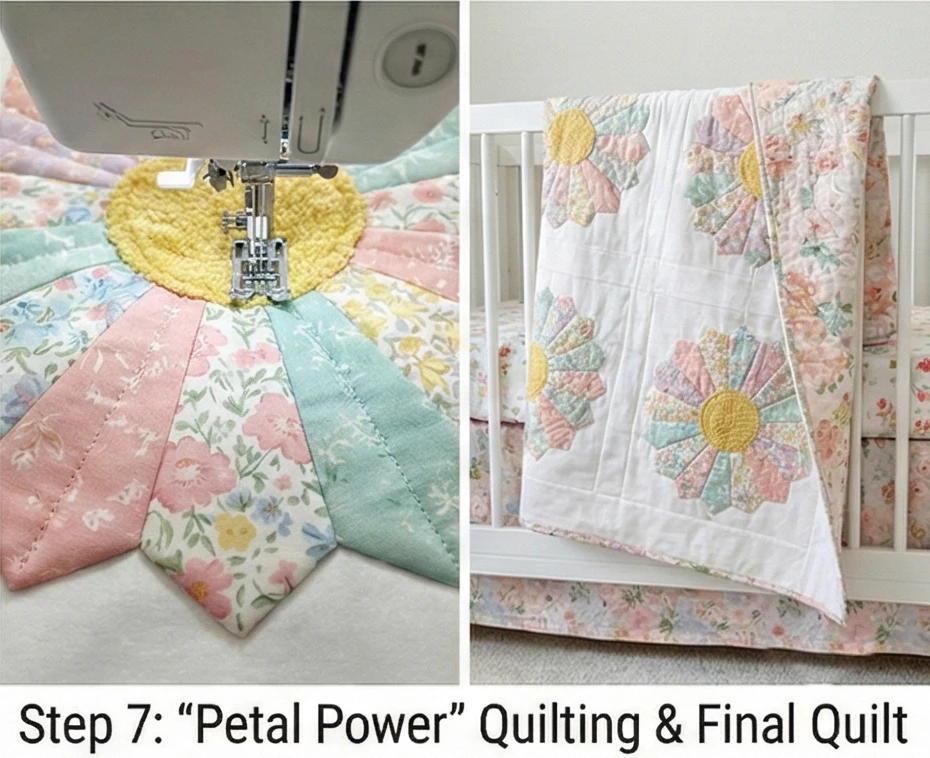
Step 7: “Petal Power” Quilting
- Quilt:
- Inside Petals: Quilt a straight line down the center of each petal (following the fold line). This adds dimension.
- Background: Quilt a “loop-de-loop” or stippling pattern in the white space to flatten it and make the flowers pop.
Usability Note: Never use buttons for flower centers on a baby quilt, as they are a choking hazard. Using a textured fabric like Chenille, Minky, or Velvet for the center circle provides a safe, sensory “button” that babies love to touch.
9. Heartwarming ABC Baby Quilt Patterns for Educational Fun
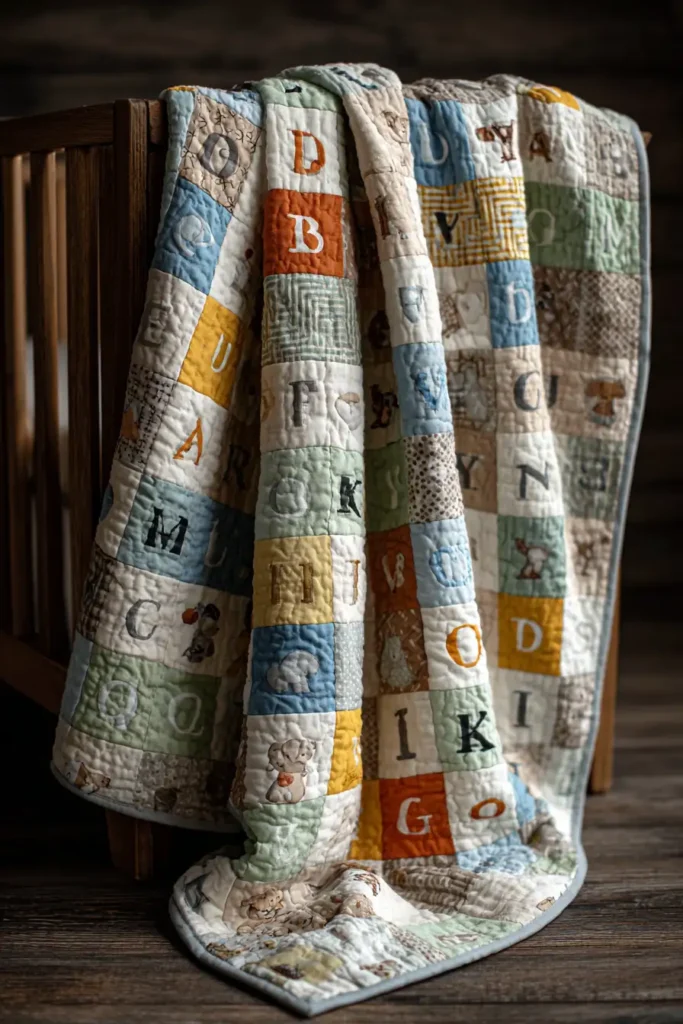
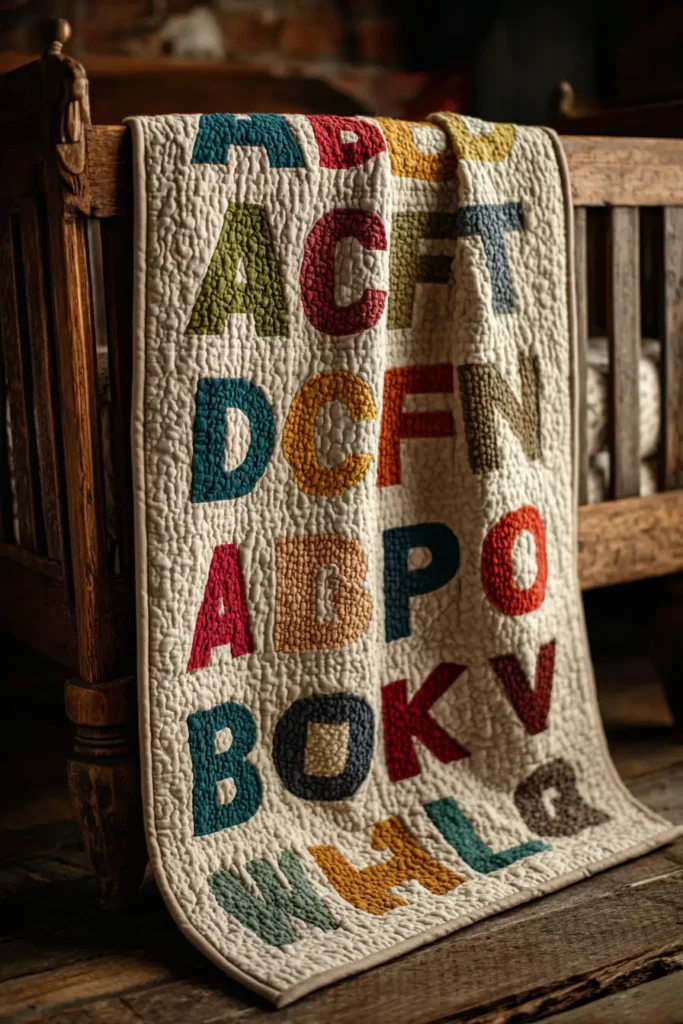
The “Primer Page” ABC Sampler Quilt
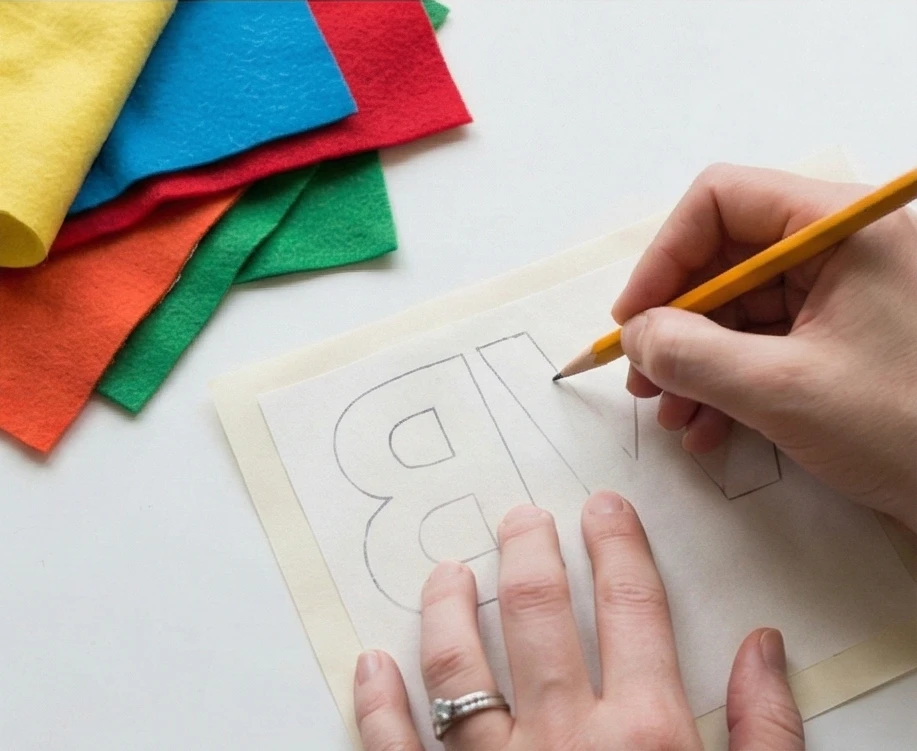
Before tablets and board books, quilts were among the first teaching tools in the home. “Primer” quilts typically featured the alphabet and numbers, allowing children to trace the shapes of letters with their fingers during naptime. This modern version uses Soft Flannel Appliqué for the letters against a crisp Linen-Cotton background. The tactile difference between the smooth linen and the fuzzy flannel creates a sensory learning experience, helping babies build “muscle memory” of the letter shapes while they self-soothe.
Finished Dimensions: Large Crib Size, 45″ x 56″.
Materials Needed:
- Fabric A (Background): 2 yards of Natural Linen or Light Grey Cotton (a neutral canvas makes the letters pop).
- Fabric B (The Letters): A “Jelly Roll” or varied scraps of Wool Felt, Flannel, or Velvet in a rainbow of colors. (Using textured fabric is key for the sensory aspect).
- Backing: 3 yards of a fun “school” print (numbers, rulers, or apples).
- Batting: Cotton (medium loft).
- Notions: Paper-Backed Fusible Web (like HeatnBond Lite), 4-inch Alphabet Stencils (or printed letters), thread to match letters.
Cultural Backstory: In the 1800s, paper was expensive and fragile. Mothers often stitched “Schoolhouse” or “Alphabet” quilts so their children could practice their ABCs by pointing to the blocks on the bed. This quilt continues that tradition of “textile tutoring,” turning the crib into a safe, cozy classroom.
Step 1: Cutting the “Page” Blocks
We need 30 blocks (26 letters + 4 punctuation/heart/star shapes to balance the grid).
- Cut Squares: Cut your Fabric A (Background) into 30 squares measuring 8.5″ x 8.5″.
- Tip: Using an 8.5″ square allows for a nice negative space border around standard 4-5 inch letters.
Step 2: Preparing the Alphabet
We use fusible web to make the letters stick before sewing.
- Trace: Trace your alphabet (A-Z) onto the paper side of the fusible web.
- Critical Rule: You MUST trace the letters in reverse (mirror image). If you don’t, your “B” will look backwards when you flip it over!
- Rough Cut: Cut around the traced letters loosely (don’t cut on the line yet).
- Fuse: Iron the fusible shapes onto the wrong side of your colorful Flannel/Felt scraps.
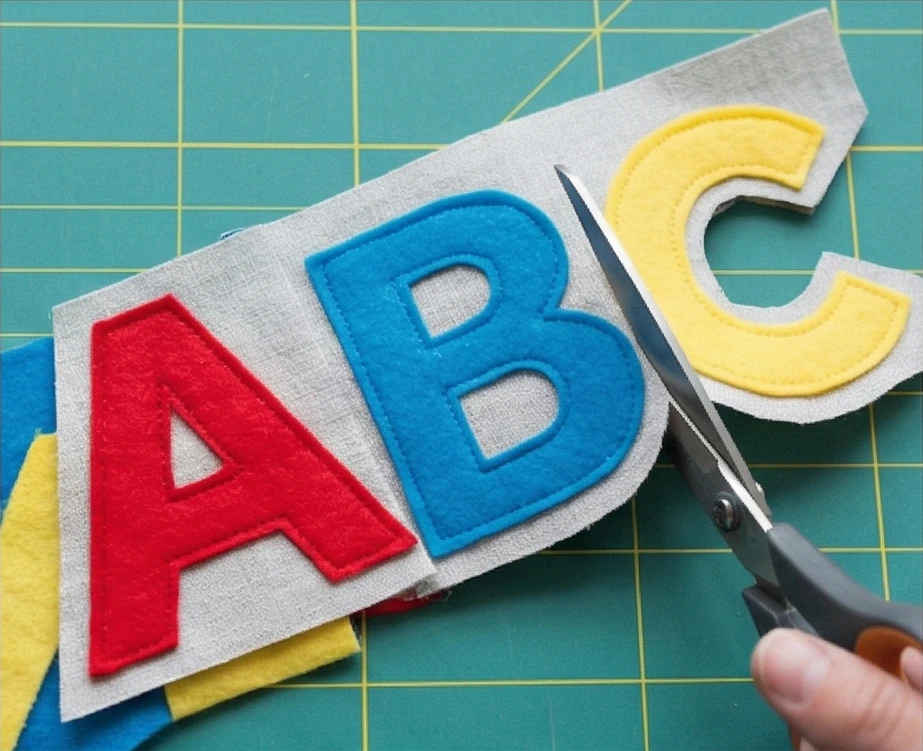
Step 3: Cutting the Letters
- Cut: Now, cut out the letters precisely along the traced lines.
- Peel: Peel off the paper backing. You now have a fuzzy letter with a sticky glue back.
- Design: Mix up the colors! Make vowels one color group (e.g., Reds/Pinks) and consonants another (Blues/Greens) for a hidden educational layer.
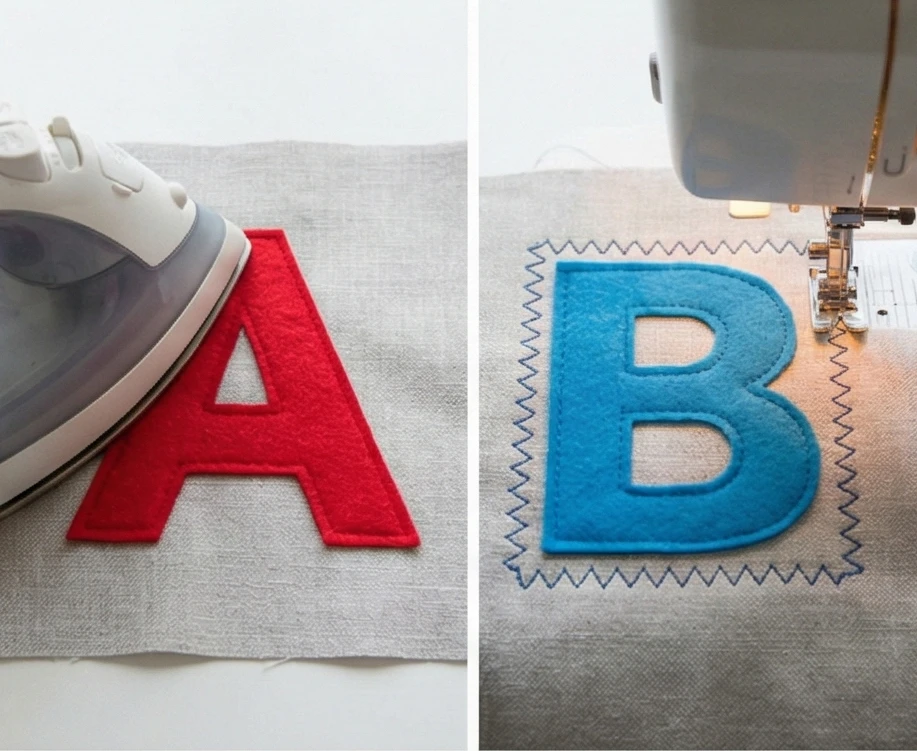
Step 4: Letter Application
- Center: Place one letter in the center of each background square.
- Fuse: Press with a hot iron to bond the letter to the background.
- Stitch: Use a Zig-Zag Stitch or Blanket Stitch around the edge of every letter.
- Durability: This stitching is essential. Babies will pick at the edges. A tight zigzag keeps the letter in place through hundreds of washes.
- Tactile Note: If using Wool Felt, you can use a straight stitch just inside the edge, as felt doesn’t fray.
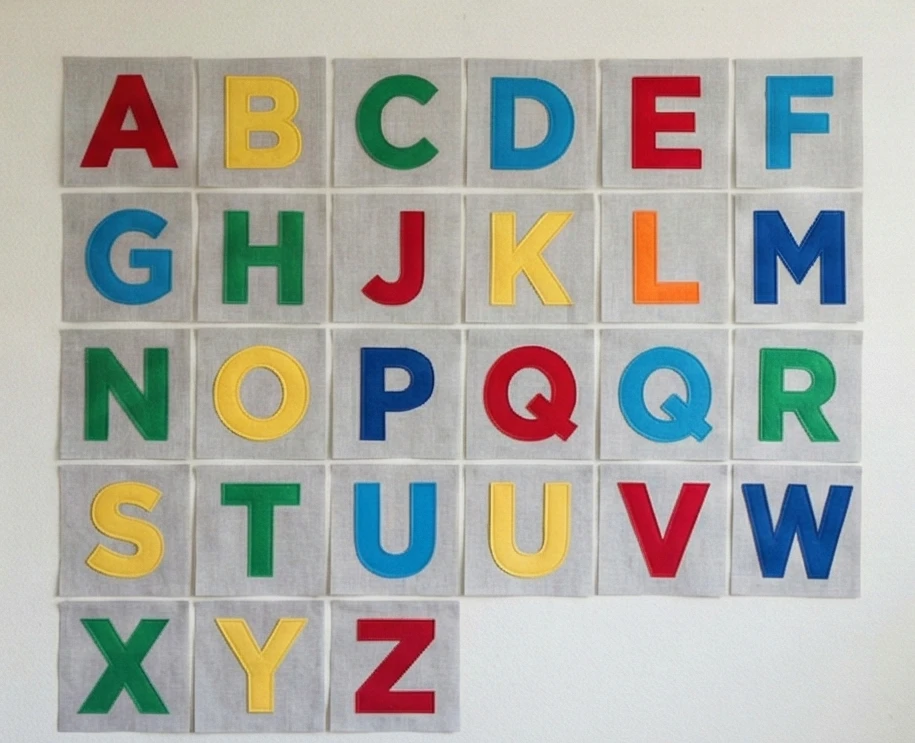
Step 5: Assembling the Grid
A simple grid layout works best to mimic a book page.
- Layout: Arrange the blocks in a grid of 5 blocks wide by 6 rows long.
- Order: A-E, F-J, K-O, P-T, U-Y, Z + [Heart] + [Star] + [!]
- Sashing (Optional): If you want to clearly separate the letters, cut 2.5-inch-wide strips of white fabric to sew between the blocks. (Without sashing, the blocks will touch, which is also a clean, modern look).
- Sew: Stitch the blocks into rows, pressing seams open. Stitch the rows together.
Step 6: “Notebook” Quilting
Mimic the lines of handwriting paper.
- Baste: Sandwich the layers (Backing + Batting + Top).
- Quilt: Using a neutral thread, quilt horizontal straight lines across the entire quilt, spaced 2 inches apart.
- The Look: This looks like the ruled lines of a composition notebook, reinforcing the school theme.
- Technique: You can quilt right over the flannel letters to secure them further, or skip over them to let them puff up.
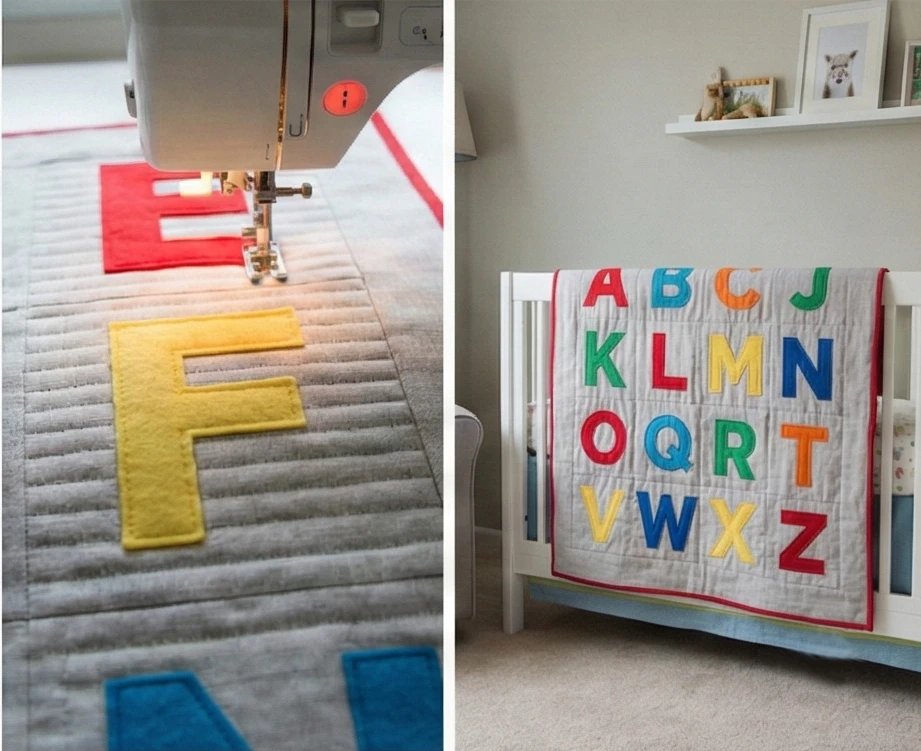
Usability Note: This quilt transitions perfectly from infancy to toddlerhood. For a baby, it’s a high-contrast visual stimulator. For a 2-year-old, it’s a game (“Find the ‘A’!”). For a preschooler, it’s a tracing tool for learning to write
10. Minimalist Two-Tone Baby Quilt Designs for Modern Parents

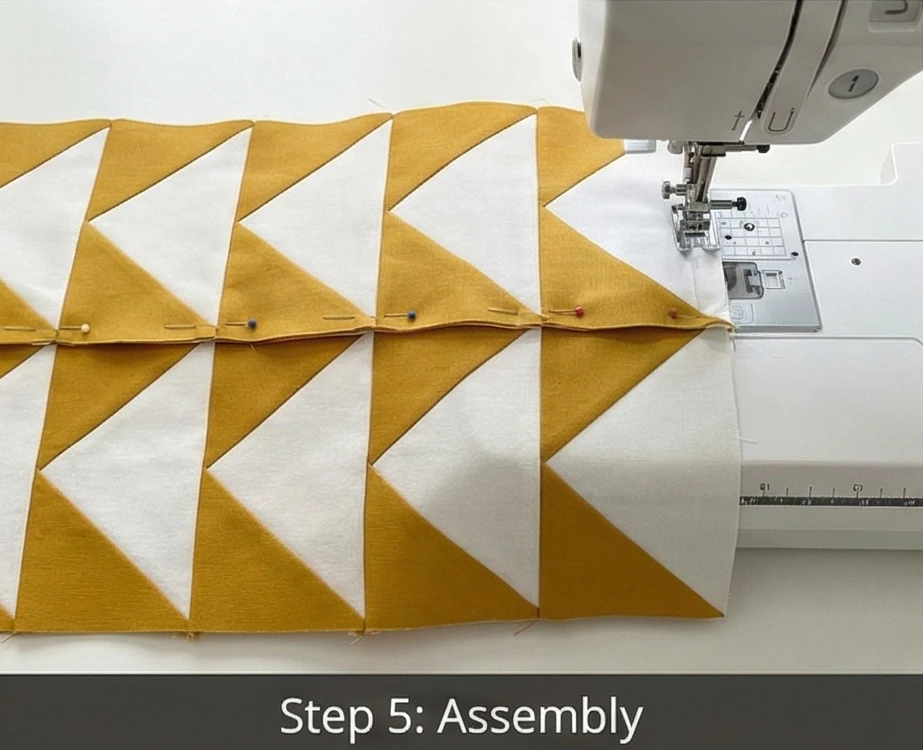
The “Nordic Chevron” Two-Tone Herringbone Quilt
Modern nurseries often favor clean lines and neutral palettes over busy prints. The “Nordic Chevron” meets this aesthetic perfectly by using just two colors—a bold Color (like Mustard, Sage, or Rust) and a crisp White—to create a graphic Herringbone pattern. This design relies entirely on the Half-Square Triangle (HST) block. Despite its simplicity, the high-contrast zigzag pattern is actually one of the best designs for a newborn’s visual development, as their eyes are drawn to sharp geometric boundaries.
Finished Dimensions: Standard Crib Size, 40″ x 48″.
Materials Needed:
- Fabric A (Color): 1.5 yards of Solid Mustard, Terracotta, or Deep Teal.
- Fabric B (Neutral): 1.5 yards of Bright White or Unbleached Linen.
- Backing: 3 yards of a simple geometric print (like a grid or stripes).
- Batting: 100% Cotton (low loft for a flat, modern look).
- Notions: Rotary cutter, large square ruler (at least 10″).
Cultural Backstory: While the “Chevron” pattern dates back to ancient pottery (1800 BC), in the quilting world, it represents the “Modern Quilt Movement” shift away from complex piecing toward bold, graphic impact. By stripping away borders and sashing, the design feels infinite and expansive—perfect for a modern, uncluttered space.
Step 1: The “Magic 8” Method
We need 120 HSTs total. Making them one by one takes forever. We will make 8 at a time.
- Cut Squares:
- Cut 15 squares of Fabric A (Color) measuring 10″ x 10″.
- Cut 15 squares of Fabric B (Neutral) measuring 10″ x 10″.
- Mark: Draw two diagonal lines (an “X”) on the back of every White square.
- Layer: Place a White square on top of a Colored square (Right Sides Together).
- Sew: Stitch a scant 1/4 inch on both sides of both diagonal lines. (You will have 4 lines of stitching total).

Step 2: The Magic Cuts
Turn one big square into 8 small ones.
- Vertical/Horizontal: Cut the square in half vertically (at the 5-inch mark) and horizontally (at the 5-inch mark). You now have 4 smaller squares.
- Diagonal: Cut the square in half diagonally on both original drawn lines (between your stitching).
- Result: When you pull the pieces apart, you end up with 8 Half-Square Triangles (HSTs).
- Repeat: Do this for all 15 pairs. You now have 120 HST units.

Step 3: Trimming to Size
Modern quilting requires precision.
- Press: Press the seams toward the dark fabric.
- Trim: Using a square ruler, trim every HST to exactly 4.5″ x 4.5″.
- Why: If you skip this, your chevrons won’t align, and the zigzag will look wobbly.

Step 4: The Herringbone Layout
This is where the triangles become chevrons.
- Grid: Plan for 10 blocks wide by 12 rows down.
- Row 1: Arrange the HSTs so the diagonal seam goes UP-Left.
- Row 2: Arrange the HSTs so the diagonal seam goes UP-Right.
- Visual: When Row 1 and Row 2 are placed next to each other, the diagonals meet to form a “V” shape.
- Repeat: Continue alternating row directions throughout. The “V”s will stack into zigzags.

Step 5: Assembly
- Join Rows: Stitch the blocks into rows.
- Join Quilt: Stitch the rows together.
- Pinning: You must pin at every intersection where the points of the chevrons meet. If the points are cut off, the sharp modern look is lost.
Step 6: “Matchstick” Quilting
Dense straight lines create a texture reminiscent of modern architecture.
- Baste: Sandwich the layers.
- Quilt: Using a walking foot and white thread, quilt straight vertical lines from top to bottom.
- Spacing: Space the lines randomly—some close together (1/8 inch), some further apart (1/2 inch).
- Texture: This “matchstick” quilting makes the quilt somewhat stiff and flat initially, but incredibly durable. It creates a “crinkle” texture after washing that looks very high-end.

Step 7: The Invisible Binding
A modern quilt often uses binding that matches the background.
- Binding: Use Fabric A (Color) for a bold frame, OR use Fabric B (Neutral) for a “faceless” binding that makes the chevrons look like they float off the edge.
- Machine Finish: Machine-stitch the binding for a clean, industrial finish that withstands frequent washing.
Usability Note: Two-tone quilts are the easiest to wash because you don’t have to worry about complex color bleeding. Use a “Color Catcher” sheet in the first wash, just in case the Mustard/Teal dye is strong.
11. Soft Pastel Jelly Roll Quilt Patterns for Quick Gifts
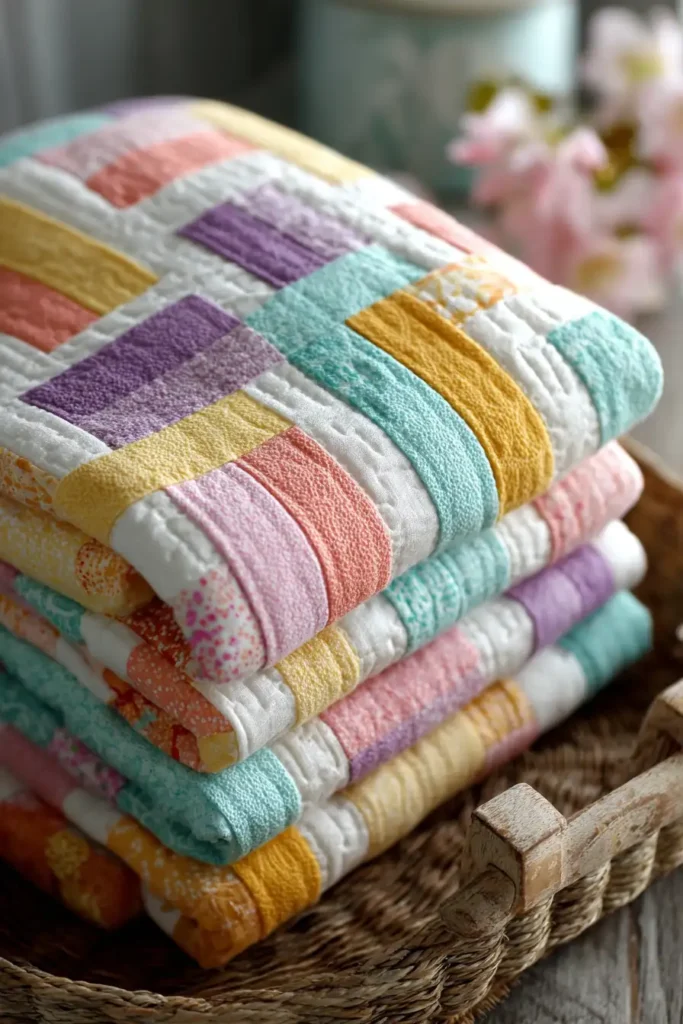
The “Sorbet Rails” Rail Fence Quilt
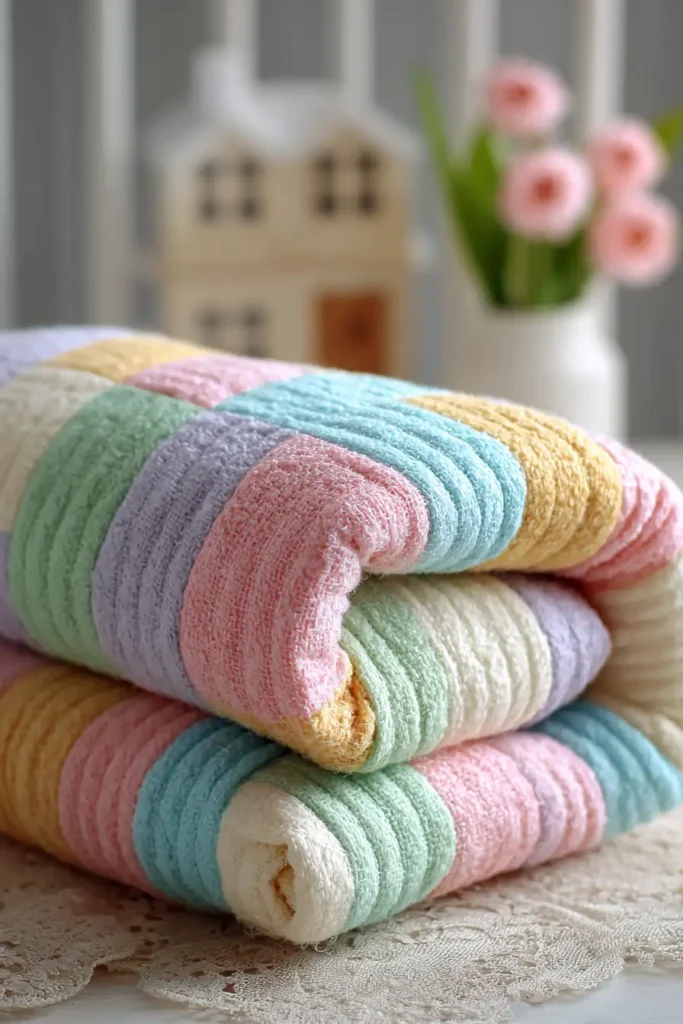
When you need a baby gift finished in a single weekend, the “Jelly Roll” (a pre-cut roll of 2.5-inch fabric strips) is your best friend. The Rail Fence pattern is a classic beginner-friendly design that looks intricate but requires zero point-matching. By using a “Sorbet” palette—soft mints, peaches, lemon yellows, and lavenders—arranged in a basketweave pattern, you create a soft, textured look that resembles a woven blanket. It is elegant, incredibly fast, and creates a durable quilt perfect for everyday wash-and-wear.
Finished Dimensions: Large Crib Size, 42″ x 54″.
Materials Needed:
- Fabric A (Top): 1 Jelly Roll (contains approx. 40 strips, 2.5″ x 42″) in soft pastel prints or solids.
- Backing: 3 yards of soft white flannel or a coordinating pastel print.
- Batting: Cotton or Bamboo blend (drapes well).
- Notions: Rotary cutter, 6.5″ square ruler.
Cultural Backstory: The Rail Fence pattern dates back to the early American frontier. It symbolized “home” and “protection,” representing the fences built to keep livestock safe and wild animals out. For a baby quilt, this symbolism of a safe, enclosed boundary is particularly sweet. It was often a pattern used to teach young girls to sew because it relies on straight seams rather than complex angles.
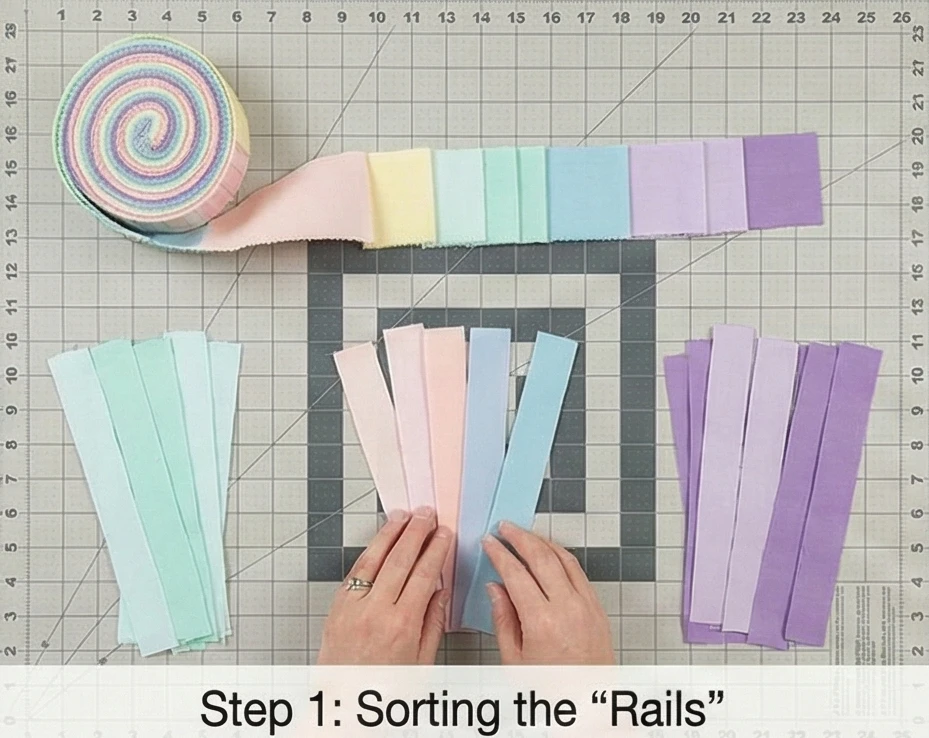
Step 1: Sorting the “Rails”
To keep the quilt from looking muddy, you need contrast within the blocks.
- Unroll: Unroll your Jelly Roll.
- Sort: Separate the strips into three piles: Lights (white backgrounds), Mediums (soft pastels), and Darks (saturated pastels or prints).
- Goal: You want each block to have a mix so the “rails” are visible.
Step 2: Strip Piecing (The Speed Secret)
Do not cut the strips yet! We sew them long to save time.
- Select: Pick 3 strips—one from each pile (Light, Medium, Dark).
- Sew: Sew the three strips together lengthwise with a 1/4-inch seam allowance.
- Press: Press the seams to one side (preferably toward the darker fabric).
- Measurement Check: Your strip set should measure exactly 6.5 inches wide. If it is smaller, your seam allowance is too big.
- Repeat: Continue sewing strip sets until you have used most of your Jelly Roll. (You need about 14-15 sets).

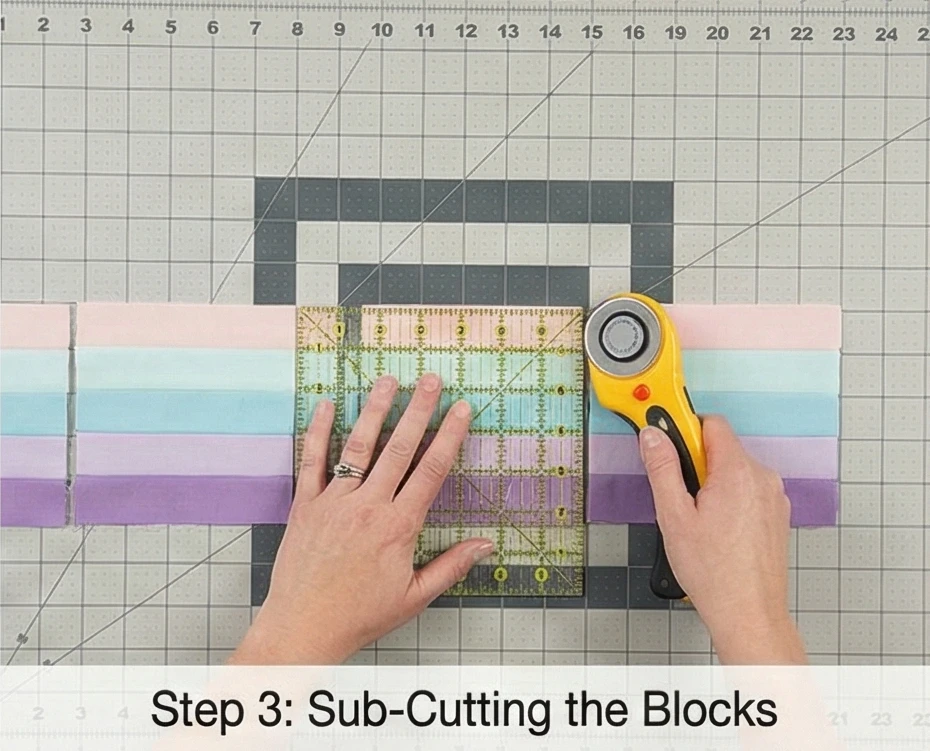
Step 3: Sub-Cutting the Blocks
Turning long strips into square blocks.
- Trim: Trim the “selvedge” ends off your strip set to make a clean edge.
- Cut: Cross-cut the strip set into 6.5-inch squares.
- Yield: You should get about 6 squares per strip set.
- Quantity: You need 63 blocks total.
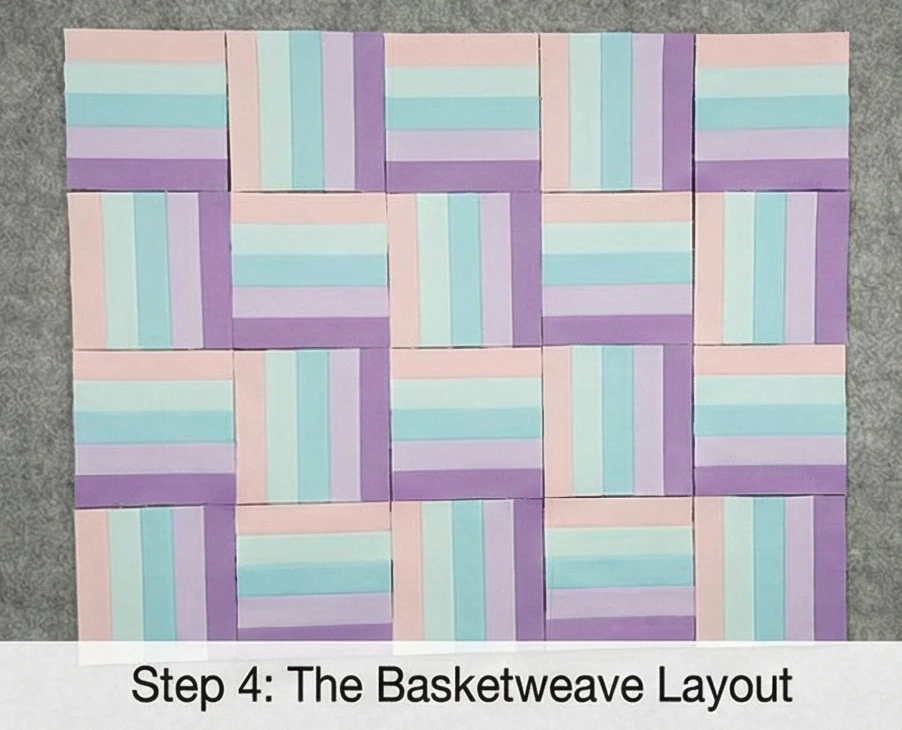
Step 4: The Basketweave Layout
This arrangement creates the woven illusion.
- Grid: Arrange the blocks in a 7-by-9 grid.
- Alternating:
- Block 1: Place with stripes running vertically.
- Block 2: Place with stripes running horizontally.
- Repeat: Alternate Vertical/Horizontal across the entire row.
- Row 2: Start with Horizontal (so it sits under the Vertical block of Row 1).
- Check: Squint at the layout. Do you see the “woven” texture? Ensure no two identical fabrics are touching.
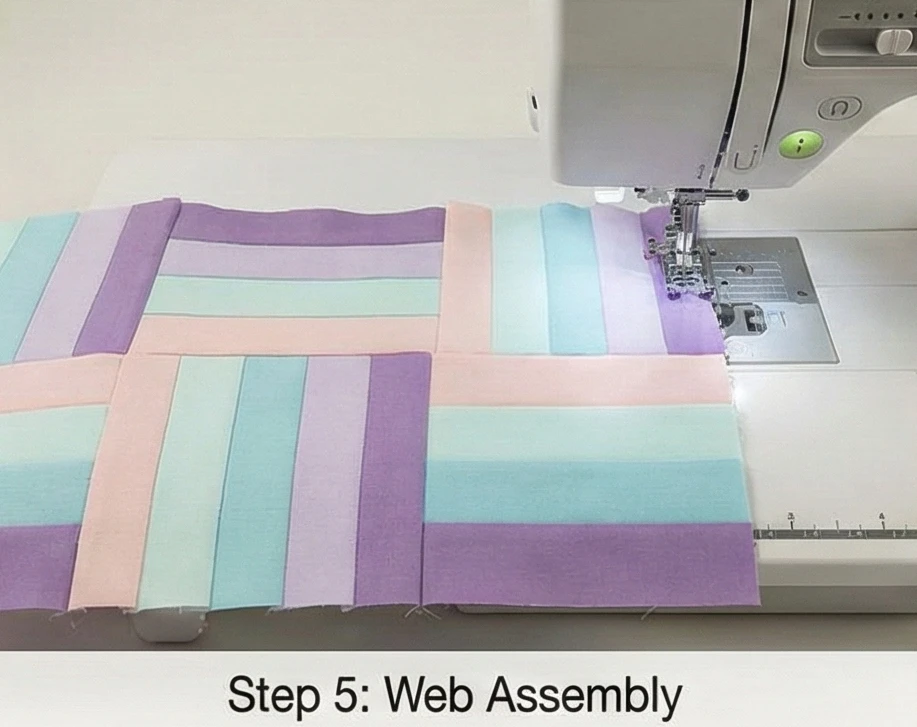
Step 5: Web Assembly
- Sew Rows: Stitch the blocks into rows.
- Nesting: If you pressed your seams correctly, you don’t have to worry about “nesting” seams because the seams don’t meet (one side is a flat edge, the other is a seam). This makes assembly very forgiving!
- Join Rows: Stitch the rows together.
Step 6: “Cross-Hatch” Quilting
Keep the quilting simple to let the colors shine.
- Baste: Sandwich the Flannel Backing + Batting + Top.
- Quilt: Stitch a large diagonal grid across the quilt.
- Path: Draw a diagonal line through the center of the blocks. Stitch lines spaced 3 to 4 inches apart.
- Why: Diagonal quilting contrasts with the square grid of the blocks, holding the layers securely without competing with the rail design.

Usability Note: Because this quilt has many seams (every 2 inches), it is very durable. The density of the seams adds a little weight and structure to the quilt, making it feel substantial and high-quality, almost like a weighted blanket for a baby.
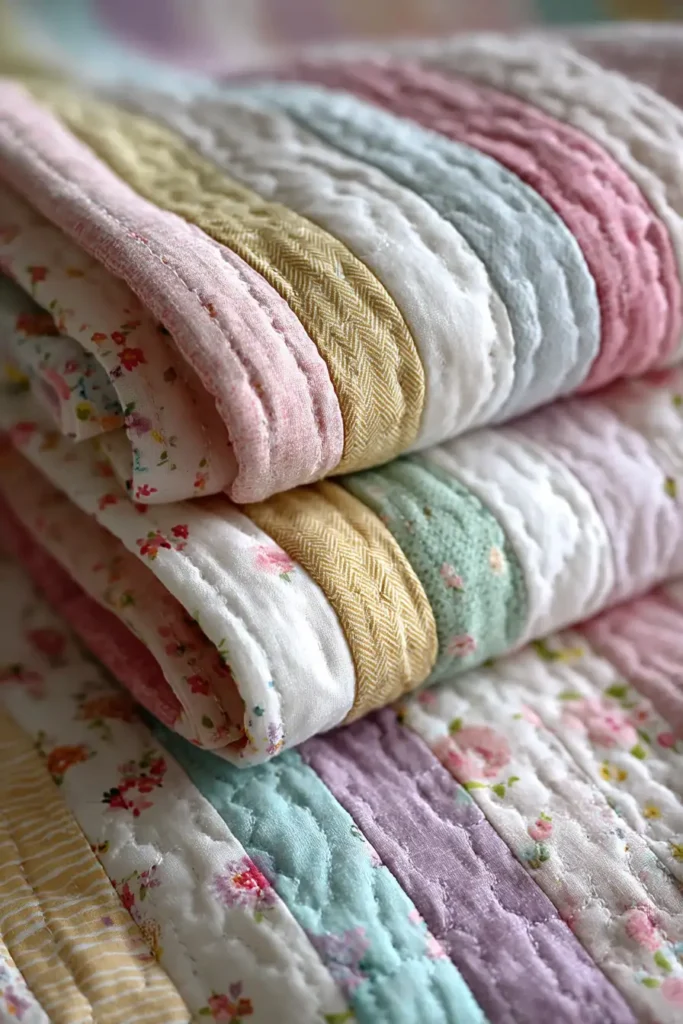
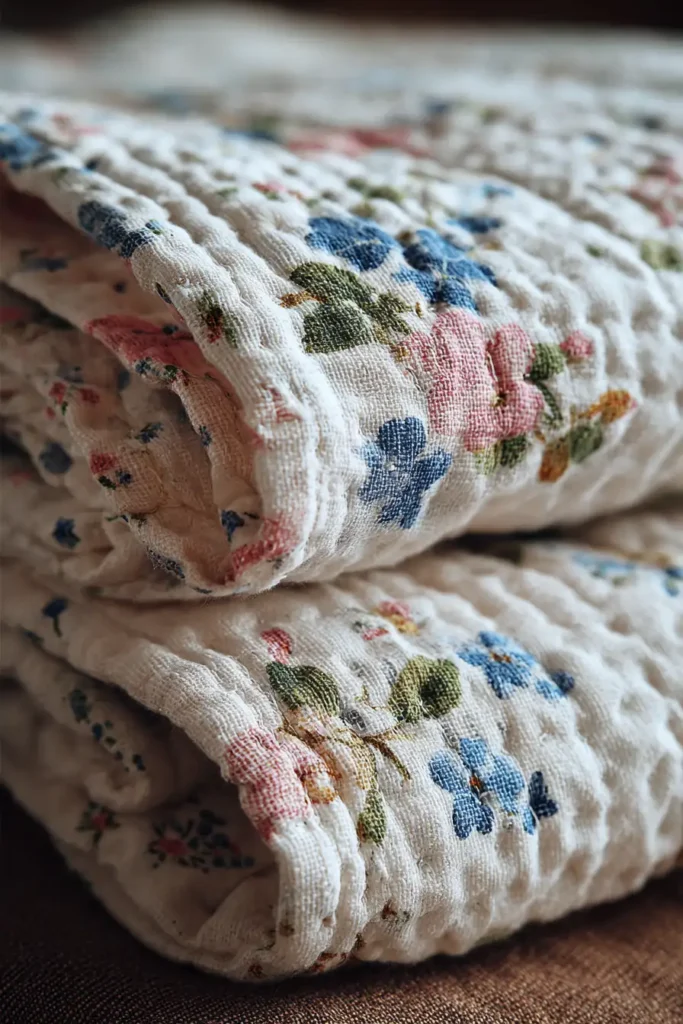
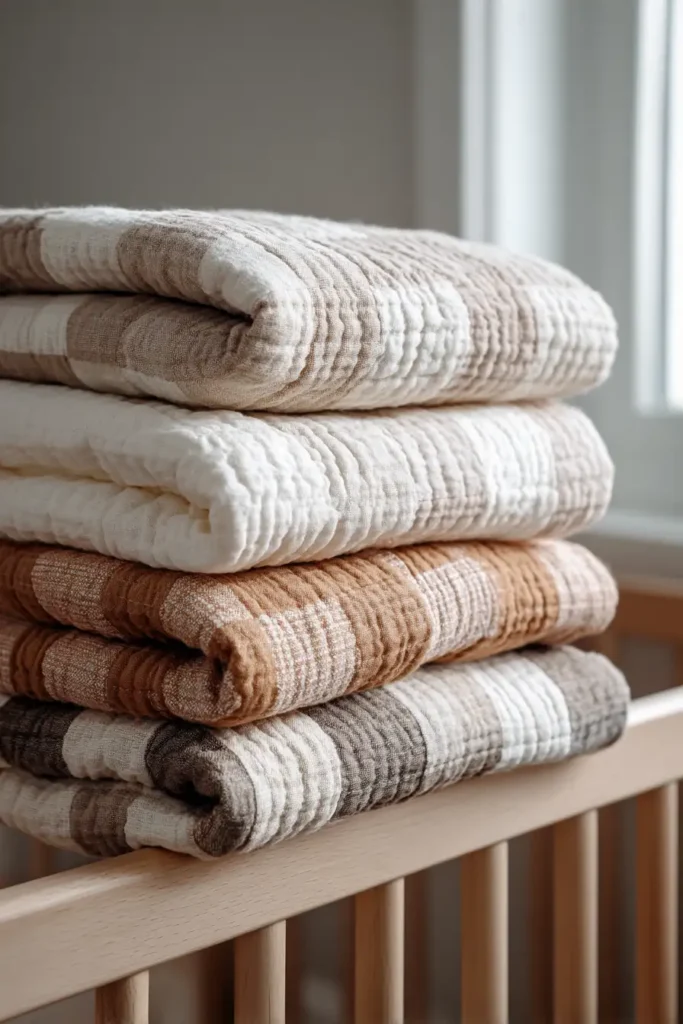
12. Lightweight Muslin Quilt Ideas for Summer Babies
The “Coastal Breeze” Tufted Muslin Quilt
Summer babies require a delicate balance: they need the comforting weight of a cover without the heat retention of heavy batting. The solution is Double Gauze (often called “Muslin” in the nursery world). This fabric consists of two thin layers of gauze tacked together, creating an airy, pillowy texture that breathes perfectly. Instead of dense machine quilting, which stiffens the fabric, this pattern uses Hand Tufting (or Tying). Small knots of embroidery floss secure the layers, keeping the quilt loose, drapey, and cloud-like—perfect for a beach nap or a warm evening.
Finished Dimensions: Stroller/Swaddle Size, 40″ x 40″.
Materials Needed:
- Fabric A (Top): 1.5 yards of Double Gauze in a soft color (Sage, Terracotta, or Dusty Blue).
- Fabric B (Backing): 1.5 yards of Double Gauze in a contrasting color or a neutral Cream.
- Batting: Bamboo Batting (Bamboo is naturally cooling, antibacterial, and has incredible drape, making it superior to cotton for summer).
- Thread: Perle Cotton (Size 8) or Embroidery Floss for tying.
- Notions: Walking foot (essential for sewing gauze), chenille needle (large eye), masking tape.
Cultural Backstory: Historically, “Muslin” referred to the legendary, whisper-thin cottons woven in Dhaka (now Bangladesh), prized by European royalty for their breathability in heat. Today’s “Double Gauze” has become a global nursery staple in Japan, where it is favored for handkerchiefs and baby jinbei robes because it softens and crinkles with every wash.
Step 1: The “Crinkle” Prep
Double gauze behaves differently from quilting cotton. It shrinks significantly.
- Pre-Wash: You must wash and dry both your top and backing fabrics before cutting. Use hot water and a dryer to force all the shrinkage to happen now.
- Press: Iron the fabric flat. It will want to crinkle up (that’s its nature), but pressing helps ensure accurate cutting.

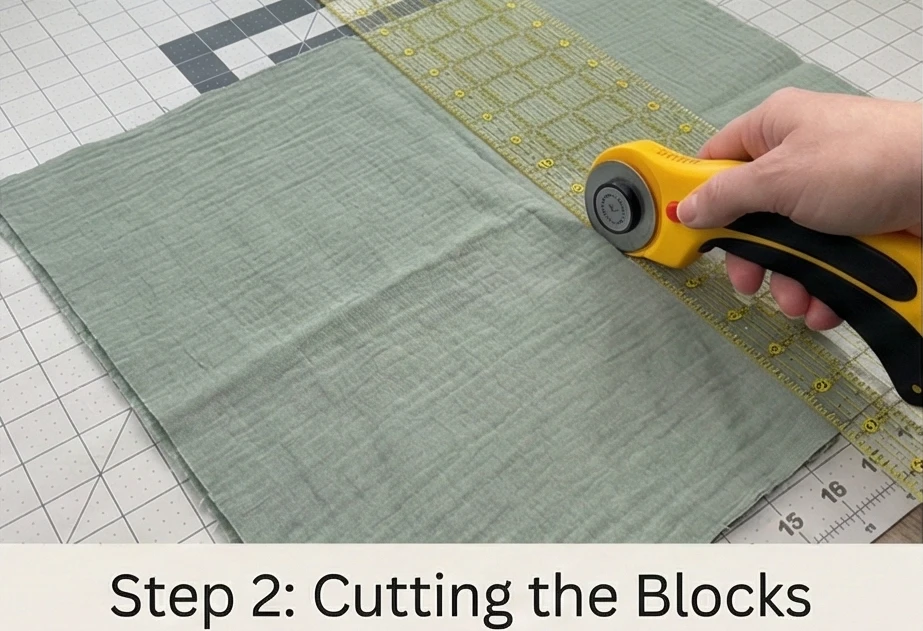
Step 2: Cutting the “Windowpane” Blocks
We will make a simple 4-Patch or 9-Patch design to minimize bulky seams.
- Design: Let’s create a “Four-Patch” design using large color blocks.
- Cut:
- From Fabric A (Top Color), cut 4 squares measuring 20.5″ x 20.5″.
- Alternatively: For a true “Wholecloth” look, just cut one piece 40.5″ x 40.5″ and skip to Step 4. However, seams add a little structure to the stretchy gauze.
Step 3: Assembling the Top
- Sew: Stitch two squares together to make a row. Repeat for the bottom row.
- Join: Stitch the two rows together to form a large square.
- Seam Finish: Because gauze frays easily, use a French Seam or press seams open and topstitch 1/8 inch on both sides to secure the raw edges inside.

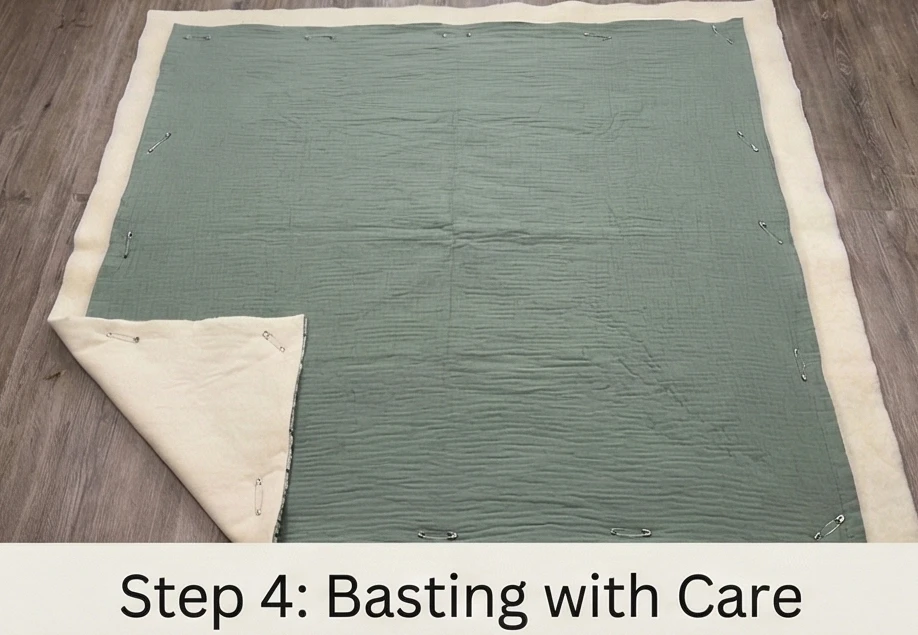
Step 4: Basting with Care
Gauze is shifty and stretchy.
- Tape: Tape the Backing fabric to the floor, pulling it taut but not stretching it out of shape.
- Layer: Add the Bamboo Batting and the Top.
- Baste: Use Safety Pins spaced closely (every 3-4 inches).
- Note: Avoid spray basting with gauze; it can sometimes gum up the loose weave.
Step 5: Hand Tufting (The Ties)
Instead of quilting lines, we use knots.
- Mark: Use masking tape to mark a grid. Plan to place a tie every 4 to 5 inches.
- Stitch: Thread your Chenille needle with Perle Cotton.
- Insert the needle down through all layers, then bring it back up 1/4 inch.
- Leave a 2-inch tail.
- Knot: Tie the two thread tails into a Square Knot (Right over Left, Left over Right). Pull tight.
- Trim: Trim the tails to about 1/2 inch.
- Result: The quilt is held together by these cute little tufts, leaving the fabric between them loose and puffy.

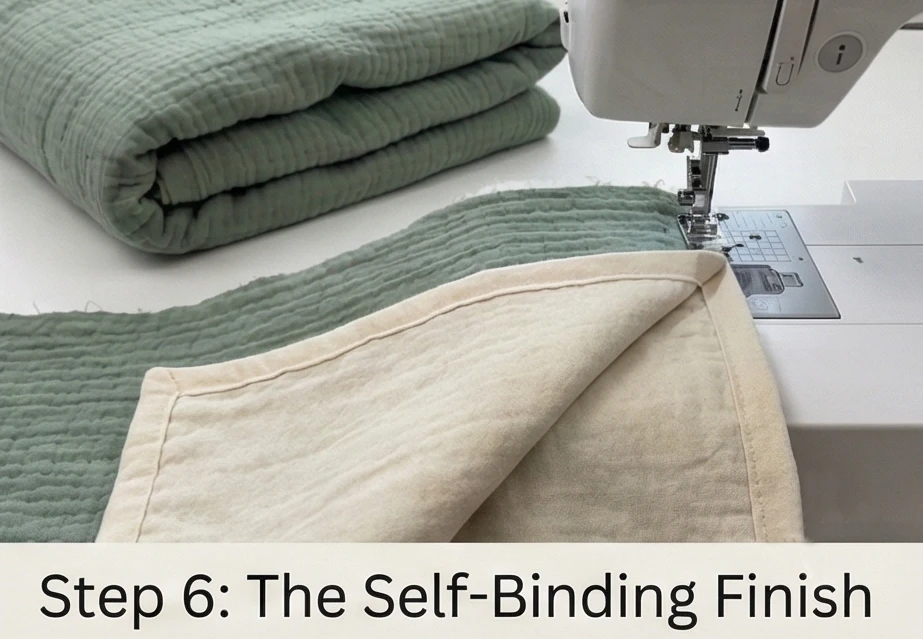
Step 6: The Self-Binding Finish
Gauze is too bulky for standard binding. We use the backing to wrap around.
- Trim: Trim the Batting and Top to make them even. Trim the Backing so it extends 1 inch beyond the Top on all sides.
- Fold: Fold the Backing edge in half (to meet the raw edge of the top), then fold it again over the top.
- Stitch: Machine stitch this folded edge down using a zigzag or straight stitch.
- Look: This creates a border of the backing color on the front of the quilt, framing it beautifully.
Usability Note: This quilt is designed to be “loved to death.” The bamboo batting wicks moisture away from the baby, preventing heat rash. The tufting ensures there are no stiff thread lines to scratch sensitive skin. It is the ultimate “security blanket” texture.
13. Reversible Baby Quilt Designs for Everyday Bed Covers
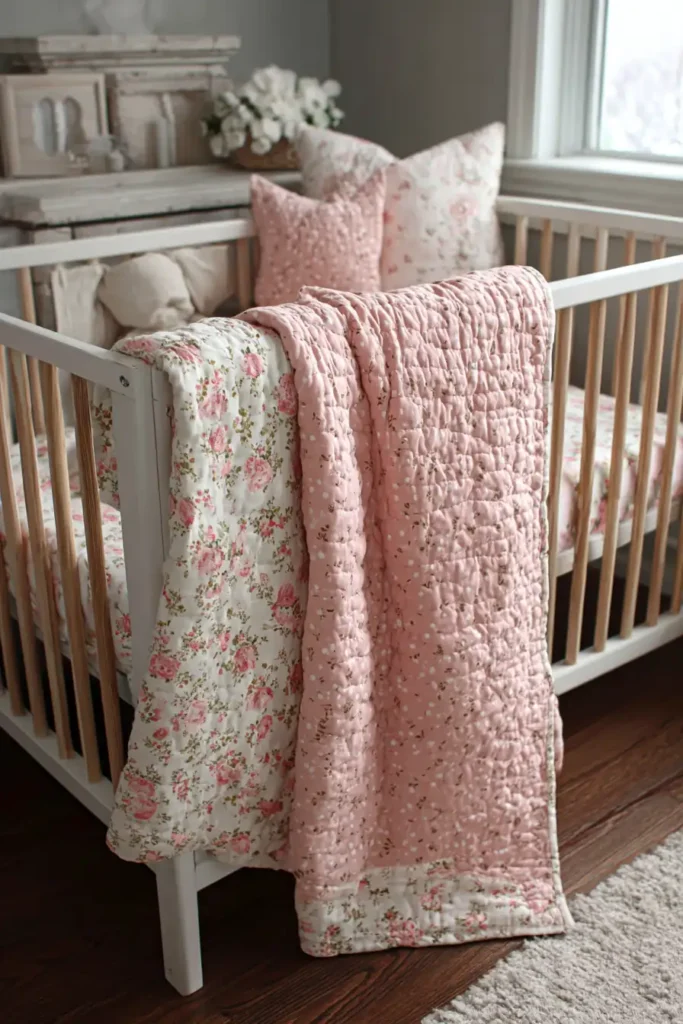

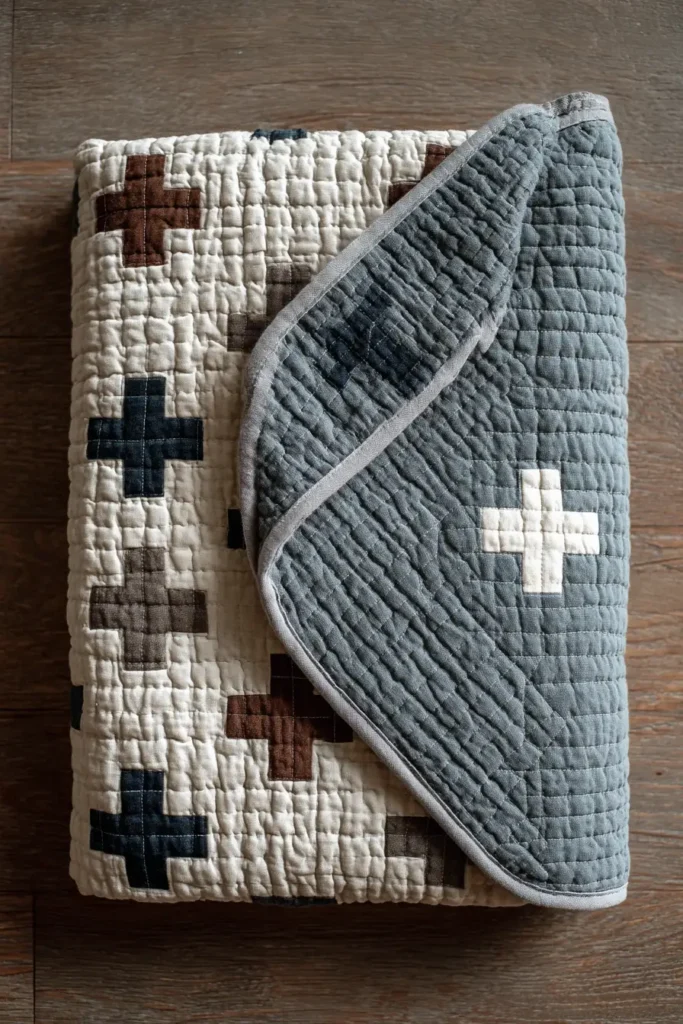
The “Day & Night” Reversible Swiss Cross Quilt
Babies live in a cycle of play and sleep. This reversible quilt is designed to match that rhythm. Side A (Day) features a bold, high-contrast Swiss Cross (Plus Sign) pattern to stimulate the baby’s brain during tummy time. Side B (Night) is a soothing, solid-colored Whole Cloth in a calming shade like Moon Grey, Lavender, or Sage, designed to reduce visual noise and promote sleep. It’s essentially two quilts in one: a play mat by day and a sleep cover by night.
Finished Dimensions: Standard Crib Size, 40″ x 50″.
Materials Needed:
- Fabric A (Crosses): 1 yard of Charcoal, Navy, or Mustard.
- Fabric B (Day Background): 1.5 yards of White or Natural Linen.
- Fabric C (Night Side): 2 yards of Solid Flannel or Double Gauze (choose a calming color).
- Batting: Cotton (low loft for a modern, flat finish).
- Notions: Rotary cutter, 4.5″ square ruler.
Cultural Backstory: The “Swiss Cross” or “Plus Sign” is a hallmark of modern minimalist design. Originally derived from the flag of Switzerland (representing neutrality and refuge), in the quilting world, it symbolizes “positive” energy. It became a staple of the Modern Quilt Guild movement in the early 2000s for its graphic simplicity and ease of construction.
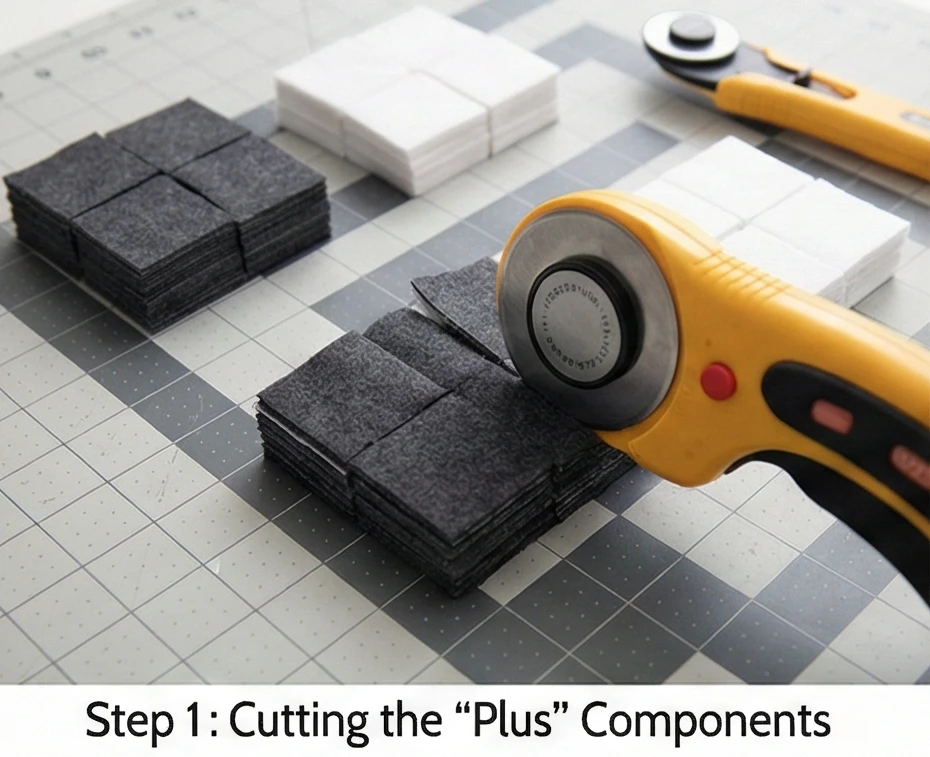
Step 1: Cutting the “Plus” Components
We will make 17 Swiss Cross Blocks. Each block requires 5 colored squares and varying background pieces.
- For the Crosses (Fabric A):
- Cut 85 squares measuring 2.5″ x 2.5″.
- For the Background (Fabric B):
- Cut 68 squares measuring 2.5″ x 2.5″ (Corners).
- Cut 68 rectangles measuring 2.5″ x 6.5″ (Sashing/Spacers? Actually, let’s assemble the block as a 9-patch for stability).
- Revised Cutting for 9-Patch Method:
- Fabric A: 5 squares per block (Total 85).
- Fabric B: 4 squares per block (Total 68).
- Result: This makes a single 6.5″ block.
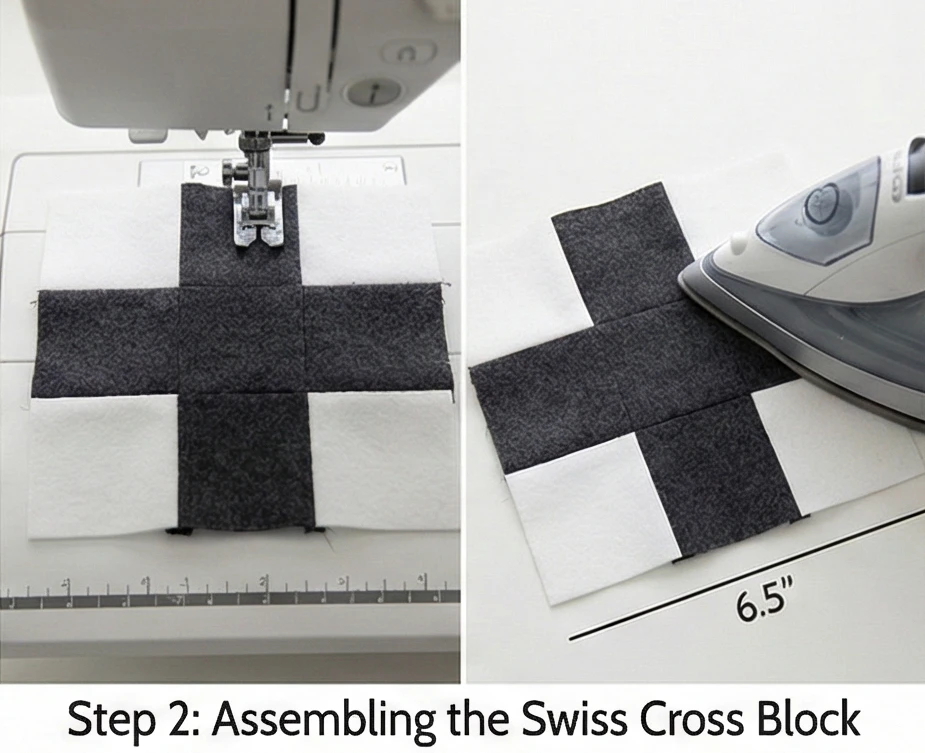
Step 2: Assembling the Swiss Cross Block
Think of it as a 9-Patch grid.
- Row 1: Background Square – Colored Square – Background Square.
- Row 2: Colored Square – Colored Square – Colored Square.
- Row 3: Background Square – Colored Square – Background Square.
- Sew: Stitch rows together.
- Press: Press seams toward the Colored squares.
- Size: Unfinished block measures 6.5″ x 6.5″. Make 17 Blocks.
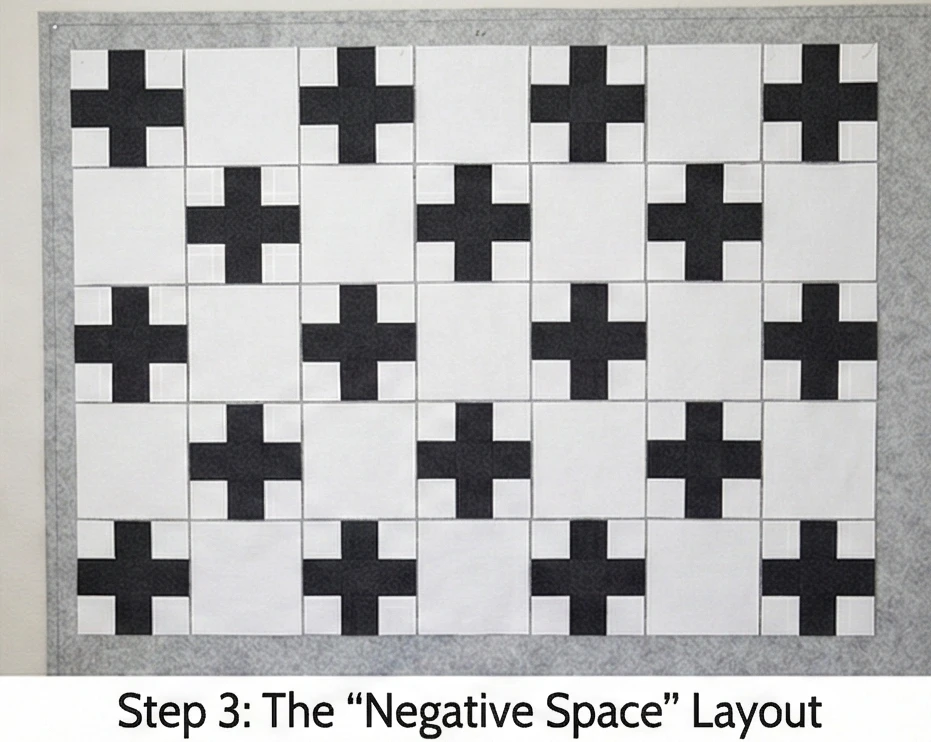
Step 3: The “Negative Space” Layout
To make it modern, we won’t fill the whole quilt. We’ll alternate Cross blocks with solid blank blocks.
- Cut Blank Blocks: From Fabric B (Background), cut 18 squares measuring 6.5″ x 6.5″.
- Arrangement: Lay out a checkerboard grid of 5 blocks wide by 7 rows long.
- Pattern: Alternate a Swiss Cross Block with a Blank White Block.
- Visual: This gives the crosses “breathing room” so the design isn’t too busy.
- Join: Sew the blocks into rows, then join the rows to complete Side A.
Step 4: Preparing the “Night” Side
Side B needs to be a calm sanctuary.
- Piece the Backing: Cut your Fabric C (Solid Flannel) into two large panels. Sew them together to create a piece at least 44″ x 54″.
- Press Seam Open: Press the center seam completely flat so you don’t feel a ridge when the baby is lying on it.
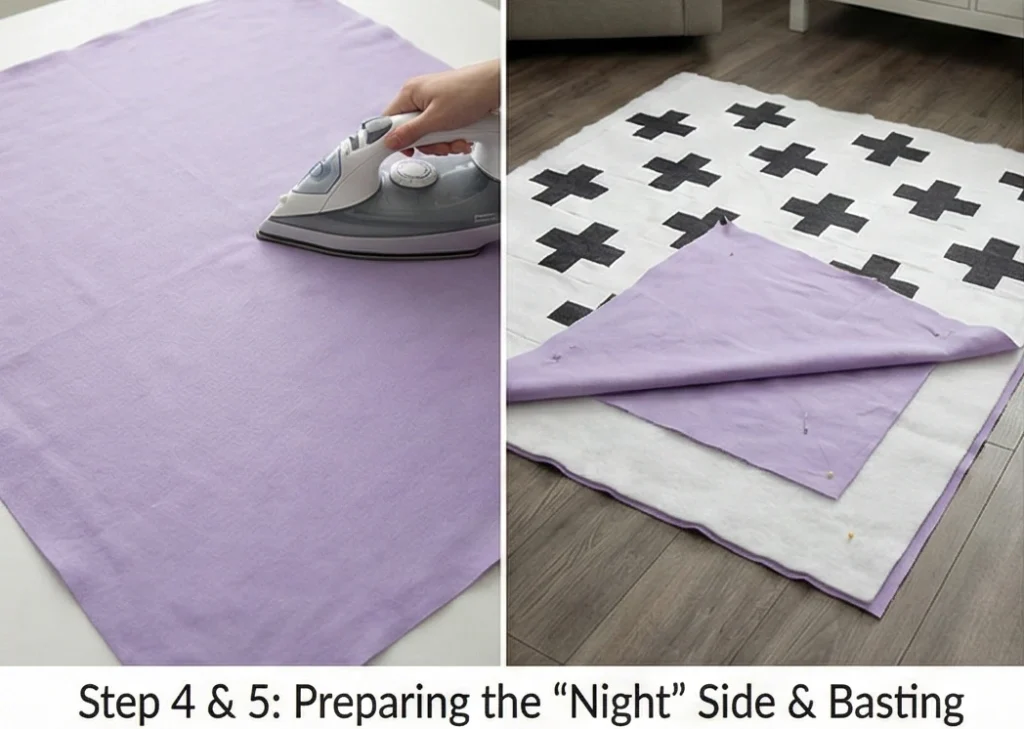
Step 5: Basting for Reversibility
When a quilt is reversible, wrinkles on the back are a disaster.
- Tape: Tape Side B (Night Side) face down on a hard floor. Stretch it taut.
- Layer: Add Batting. Add Side A (Day Side) face up.
- Pin: Use curved safety pins at 3-inch intervals.
- Check: Run your hand over the back frequently to check for puckers.
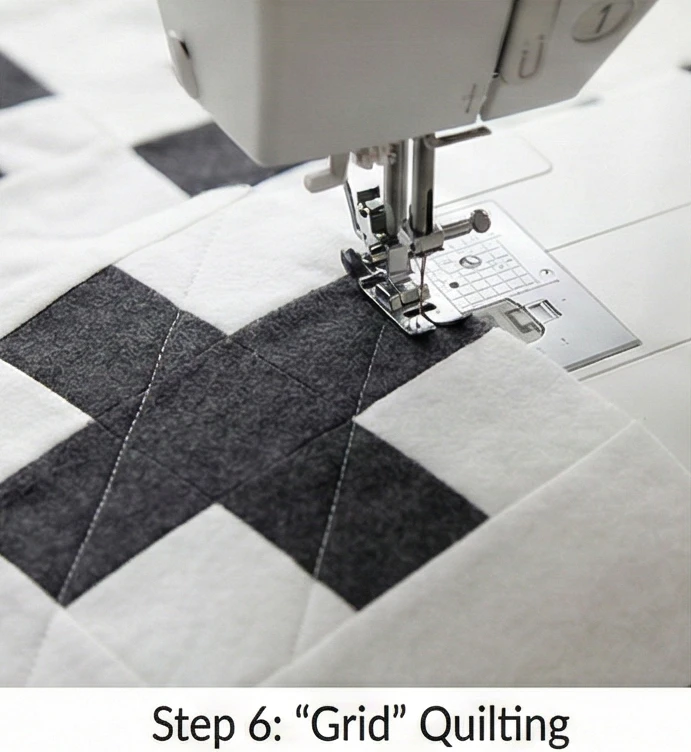
Step 6: “Grid” Quilting
A simple grid looks good on both sides.
- Mark: Use masking tape to mark a large Cross-Hatch Grid (diagonal lines) spaced 3 inches apart.
- Quilt: Stitch along the tape lines using a neutral thread (like Dove Grey) that blends into both sides.
- Why: A diagonal grid contrasts with the upright Swiss Crosses on Side A and adds a lovely diamond texture to the solid Side B.
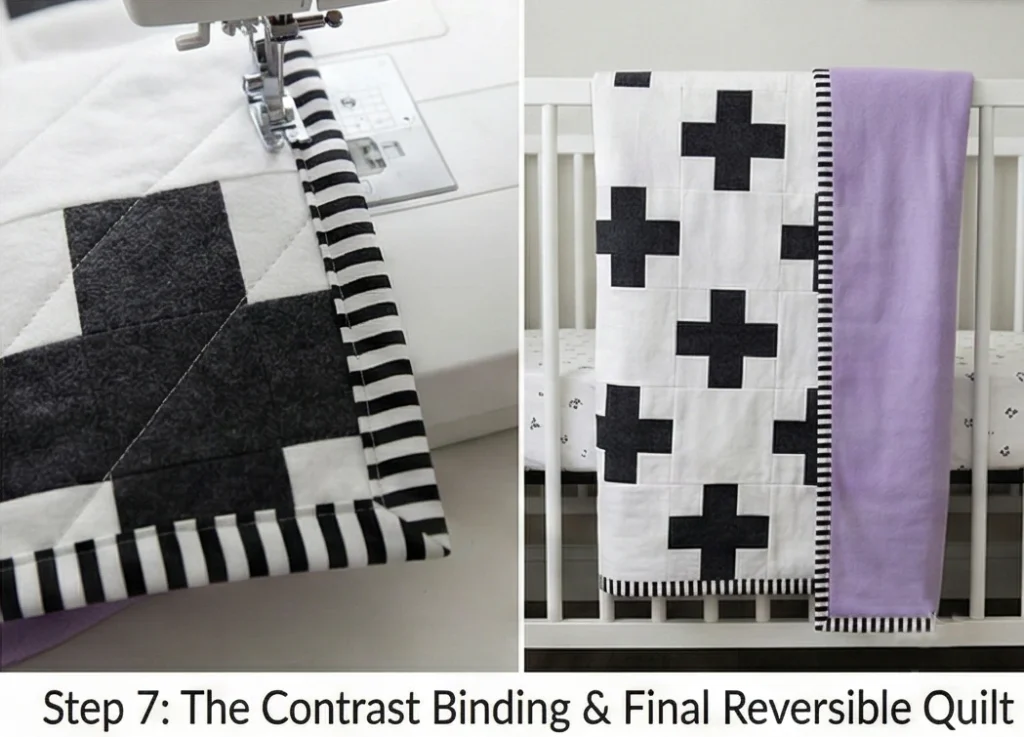
Step 7: The Contrast Binding
- Select: Choose a binding fabric that frames both sides well. A Black and White Stripe is a classic choice that pops against the solid Night side and complements the graphic Day side.
- Attach: Machine-sew to Side A, fold over, and hand-stitch to Side B for a clean, heirloom finish.
Usability Note: Having a “Night Mode” side is a subtle psychological cue for the baby (and parents). Flipping the quilt to the calm side signals that playtime is over and sleep is beginning.
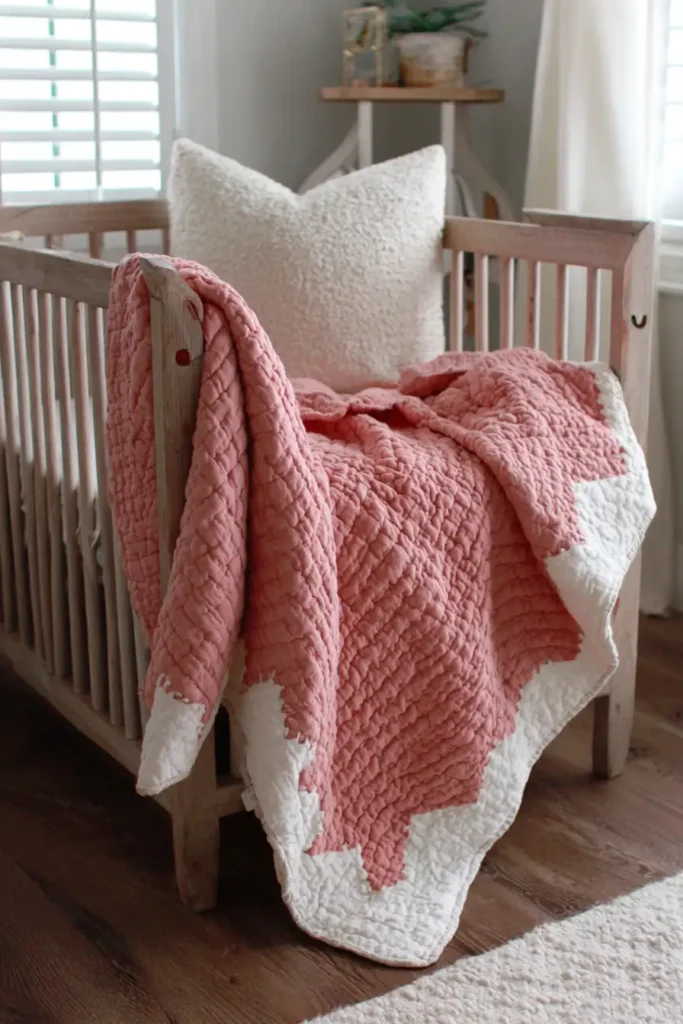
14. Boho Fringe and Tassel Baby Quilts for Stylish Nurseries
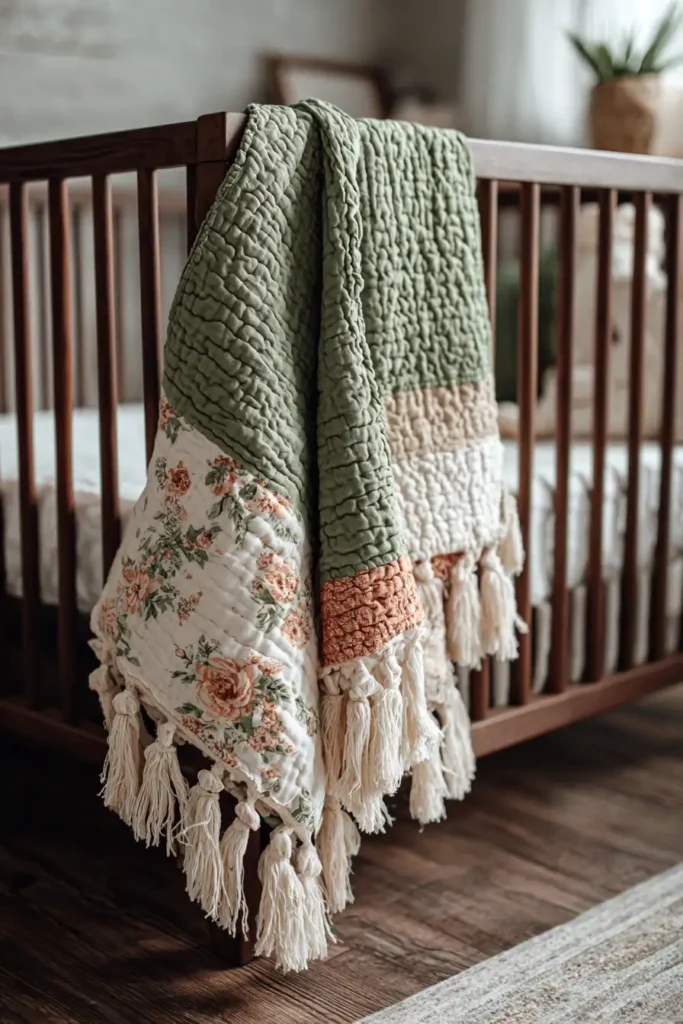
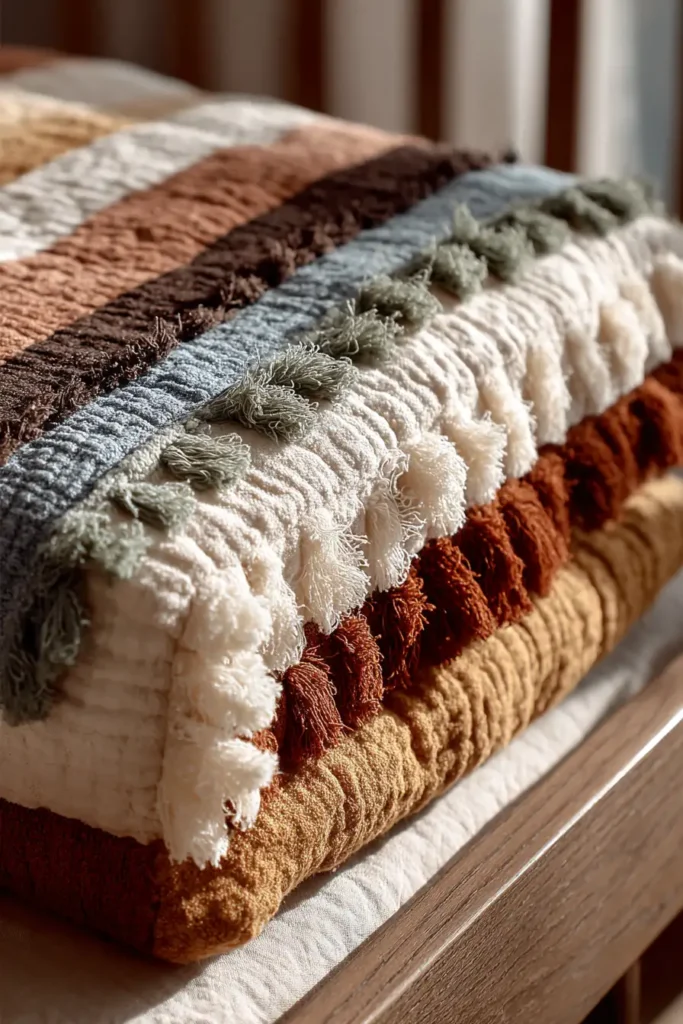
The “Mojave Horizon” Fringed Rag Quilt
The “Boho” (Bohemian) aesthetic is defined by earthy tones, eclectic textures, and a relaxed, free-spirited vibe. However, traditional tassels and long fringes can be choking hazards for infants. This pattern solves that problem by using the Rag Quilt Technique to create rows of soft, fluffy, safe fringe directly from the fabric itself. By arranging strips of Terra Cotta, Sage, Ochre, and Cream flannel, the quilt mimics a desert sunset. The “fringe” is created by sewing the seams open and clipping them, allowing the fabric to fray into a soft, tactile ridge that babies love to rub.
Finished Dimensions: Crib Size, 40″ x 50″.
Materials Needed:
- Fabric A, B, C, D (Top): 1 yard each of 4 different Flannel colors (Flannel frays best).
- Backing: 4 yards of Flannel (can be all one color or matching the front).
- Batting: High-loft Cotton or Polyester (cut into strips).
- Notions: Spring-loaded Rag Snips (or very sharp scissors), Walking Foot.
- Safety Note: We avoid attaching separate tassels or pom-poms for babies under 3. The “rag” fringe is built into the structure, making it indestructible and safe.
Cultural Backstory: The “Rag Quilt” originated on the American frontier as a purely utilitarian object—a way to layer worn-out blankets or clothes without hemming intricate edges. In the Boho context, this “raw edge” look aligns with the Wabi-Sabi philosophy of finding beauty in imperfection and natural textures.
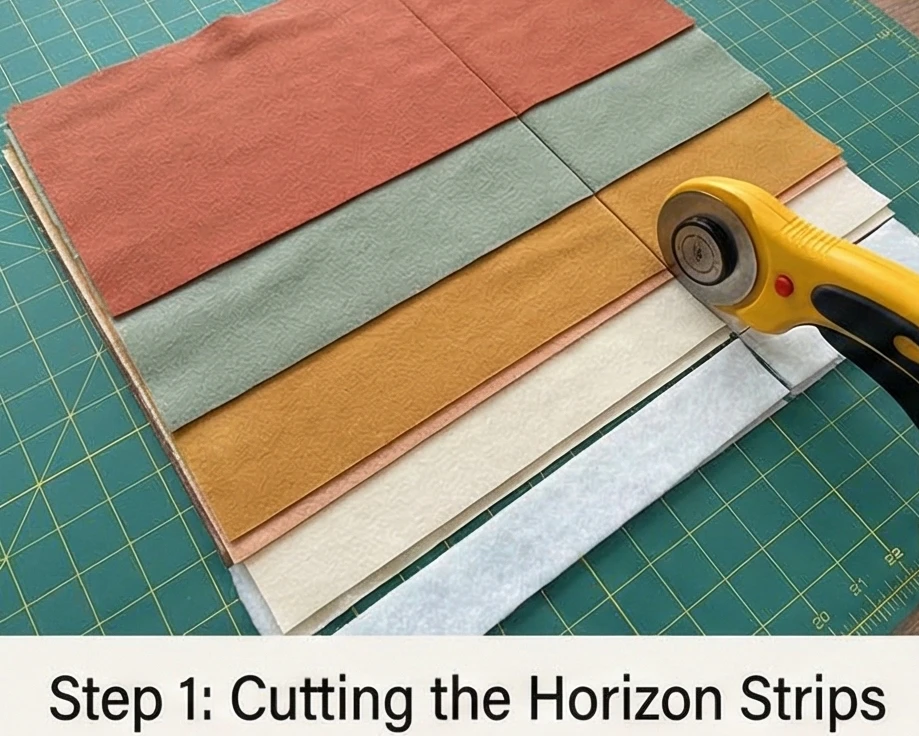
Step 1: Cutting the Horizon Strips
Instead of squares, we are using long panoramic strips to create a landscape effect.
- Cut Top & Backing: From your Flannel fabrics, cut 10 strips measuring 6.5″ x 42″ (the Width of the Fabric).
- Note: You need 10 strips for the Front and 10 strips for the Back.
- Cut Batting: Cut 10 strips of batting measuring 4.5″ x 40″.
- Note: The batting is narrower than the fabric to avoid it in the seam allowance (it makes the fringe lumpy).
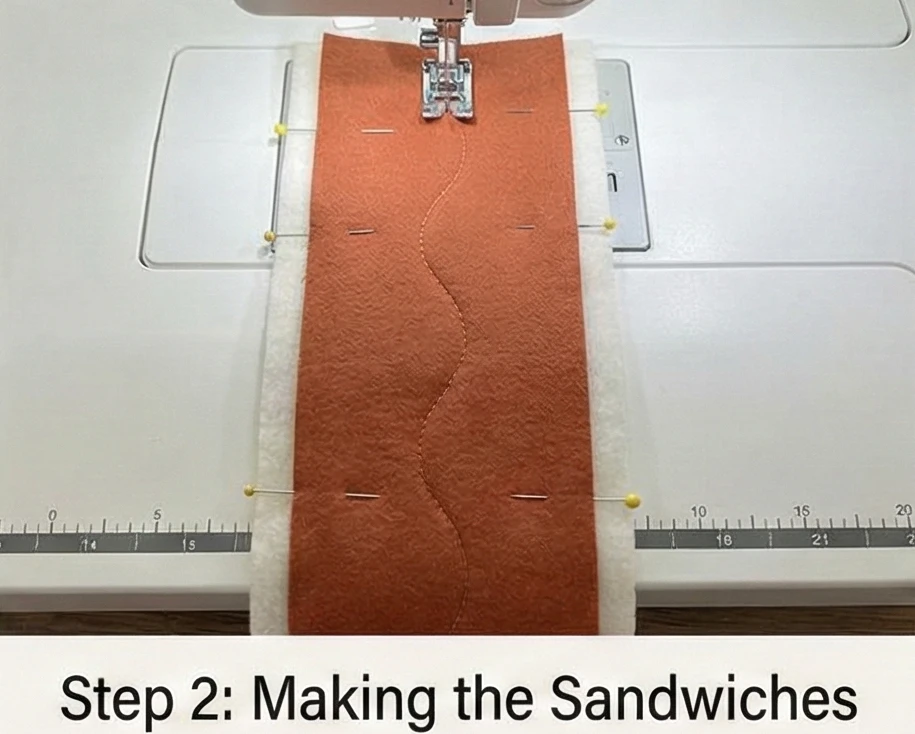
Step 2: Making the “Sandwiches”
We construct the quilt strip by strip (Quilt-As-You-Go).
- Layer: Place a Backing strip face down. Center a Batting strip on top of it. Place a Top strip face up.
- Alignment: The fabric strips should overhang the batting by 1 inch on all sides.
- Pin: Pin the layers together.
- Quilt: Stitch a wavy or straight line down the center of the strip to hold the three layers together.
- Repeat: Do this for all 10 strip sets.
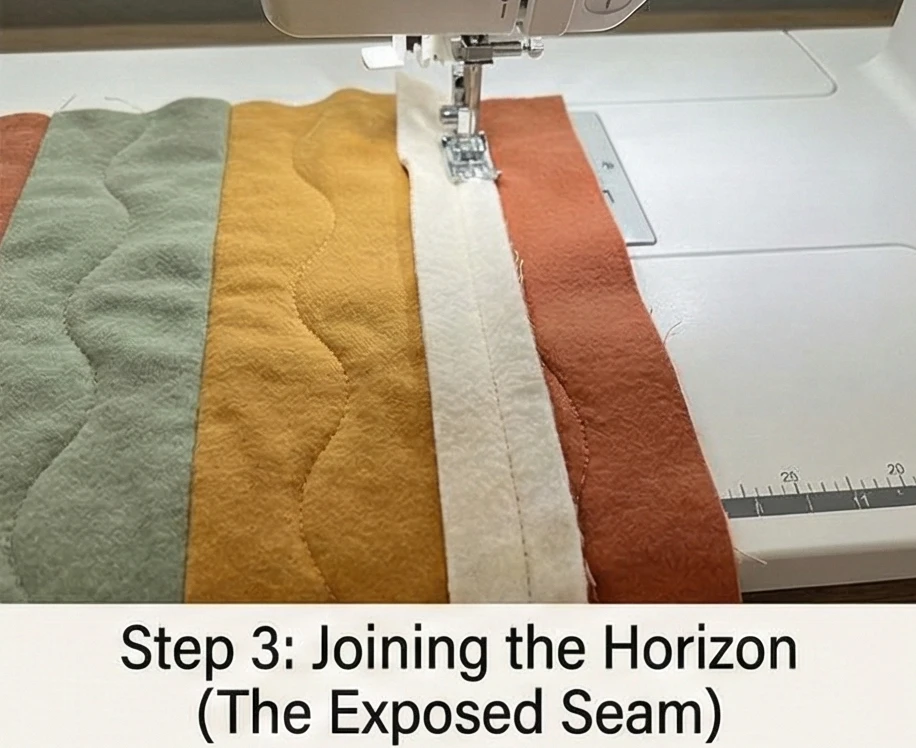
Step 3: Joining the Horizon (The Exposed Seam)
This is the reverse of normal quilting.
- Wrong Sides Together: Place two strip sets Wrong Sides Together (Backing touching Backing).
- Sew: Stitch them together with a heavy 1-inch seam allowance.
- Crucial: The raw edges of the seam should be standing up on the Front of the quilt, not hidden on the back.
- Continue: Keep adding strips until all 10 are joined. You will have a quilt with 9 ridges of raw fabric standing up across the face.
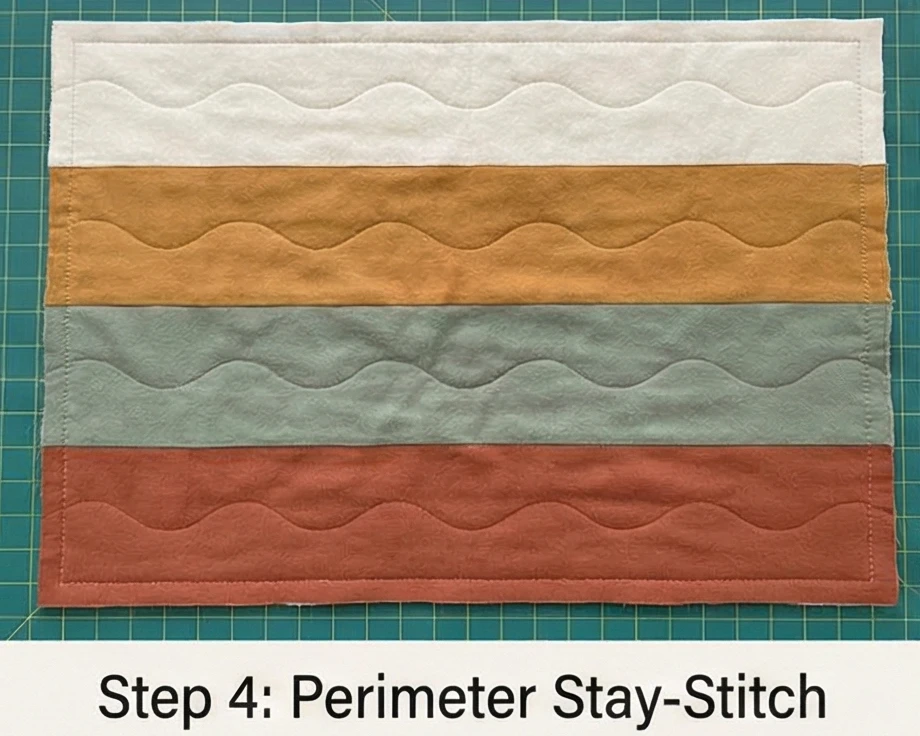
Step 4: Perimeter Stay-Stitch
- Sew Around: Stitch a 1-inch seam along the entire perimeter of the quilt.
- Why: This holds the outside edges together so you can fringe the border, too.
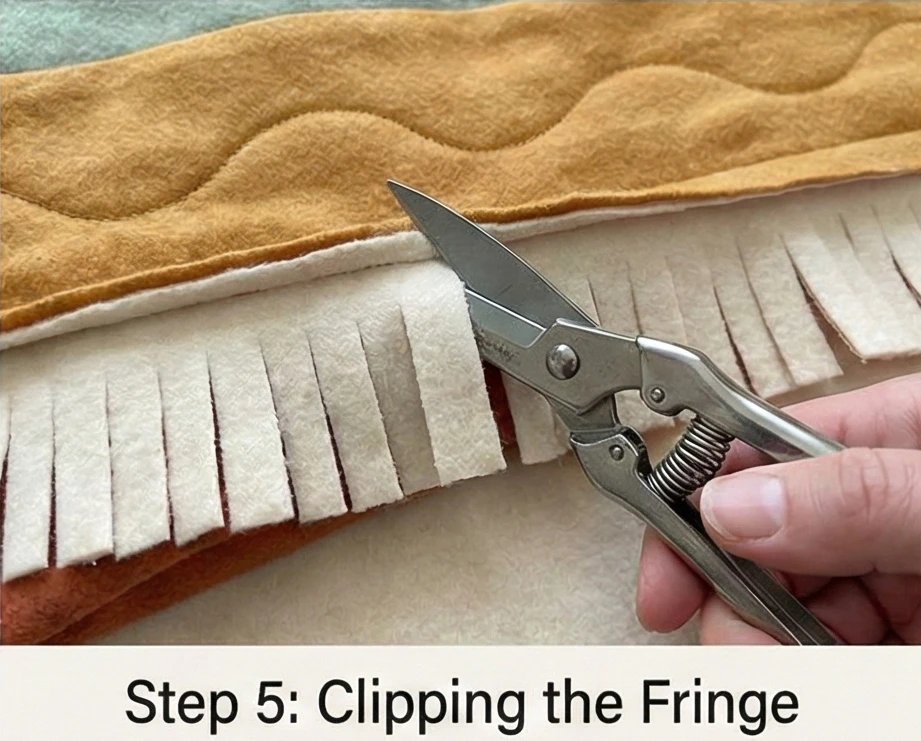
Step 5: Clipping the Fringe
The most time-consuming but satisfying step.
- Snip: Using your sharp scissors or rag snips, cut vertical slits into the exposed seam allowances.
- Spacing: Make cuts every 1/2 inch.
- Depth: Cut close to the seam line, but DO NOT cut the thread. If you cut the thread, you will have a hole.
- Repeat this for all horizontal seams and the outer perimeter border.
Step 6: The “Bloom” (Washing)
The quilt looks messy until you wash it.
- Wash: Throw the quilt in the washing machine on a cold cycle with a heavy towel (the towel helps agitate the fibers).
- Filter Warning: This will generate a LOT of lint. Check your machine’s filter afterward.
- Dry: Tumble dry on high heat.
- Result: The heat and agitation will cause the snipped flannel edges to curl up and fray, blooming into thick, soft caterpillars of chenille-like fringe.
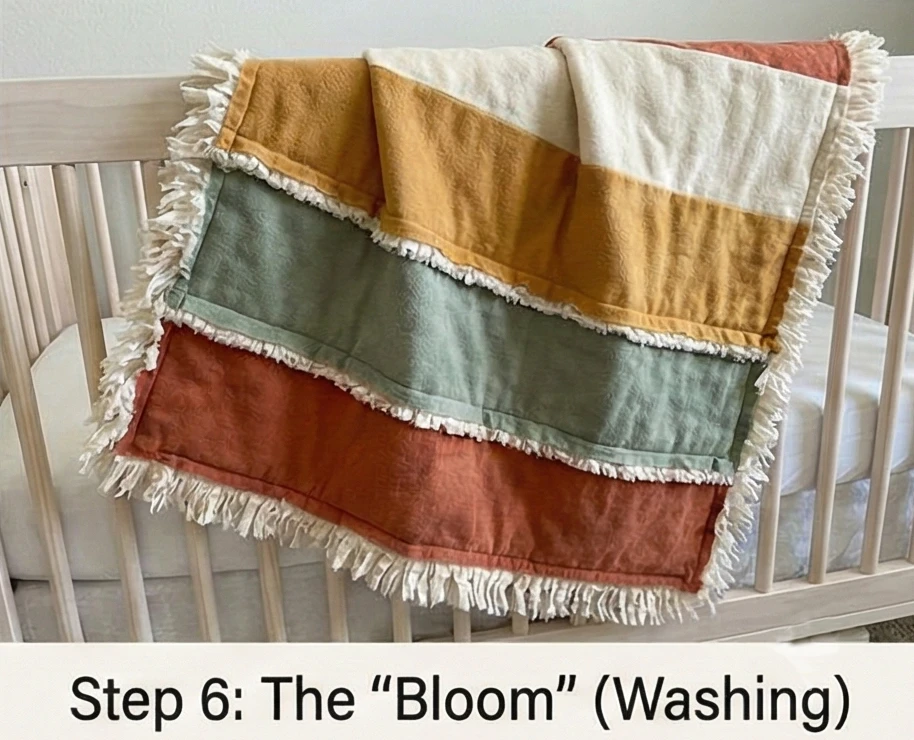
Usability Note: This is the ultimate sensory quilt. The ridges provide a “fidget” texture that helps soothe babies to sleep. Because it uses flannel and batting, it is very warm and heavy, making it excellent for drafty nurseries or winter stroller walks.

15. Matching Baby Quilt and Bed Sheet Pattern Ideas
The “Over the Rainbow” Quilt & Sheet Set
A coordinated nursery is the height of elegance, but finding a quilt and sheet that match perfectly can be impossible. The solution? Make both. This set features a modern, minimalist Rainbow Arch Quilt (in muted “earth tones” like Terracotta, Sage, and Mustard) and a custom Fitted Crib Sheet in a coordinating low-volume print. By making the sheet yourself, you can use high-quality Organic Cotton Knit or Double Gauze, ensuring the fabric touching the baby’s face is softer and safer than mass-produced polyester sheets.
Finished Dimensions:
- Quilt: Crib Size, 40″ x 50″.
- Sheet: Standard Crib Mattress, 28″ x 52″ x 6″.
Materials Needed:
- Quilt Top (Background): 1.5 yards of Natural Linen or Cream Cotton.
- Quilt Arches: 1/4 yard each of 3 Muted Colors (e.g., Rust, Gold, Sage).
- Sheet Fabric: 2 yards of 60-inch wide Cotton Knit or Double Gauze (Must be wide width! Standard 44″ cotton is a tight squeeze for a crib sheet).
- Sheet Notions: 2 yards of 1/4-inch Elastic.
- Quilt Notions: Fusible Web (HeatnBond Lite), Batting, Backing (1.5 yards).
Cultural Backstory: The rainbow has ancient roots as a bridge between the heavens and earth. In modern parenting culture, the “Rainbow Baby” (a child born after a loss) has made this motif deeply significant. This design uses the “Boho Rainbow” style—separated, imperfect arches in earth tones—rather than the traditional connected primary colors, representing a grounded, natural hope.
Part 1: The Rainbow Quilt (Appliqué)
We use raw-edge appliqué for a soft, modern finish.
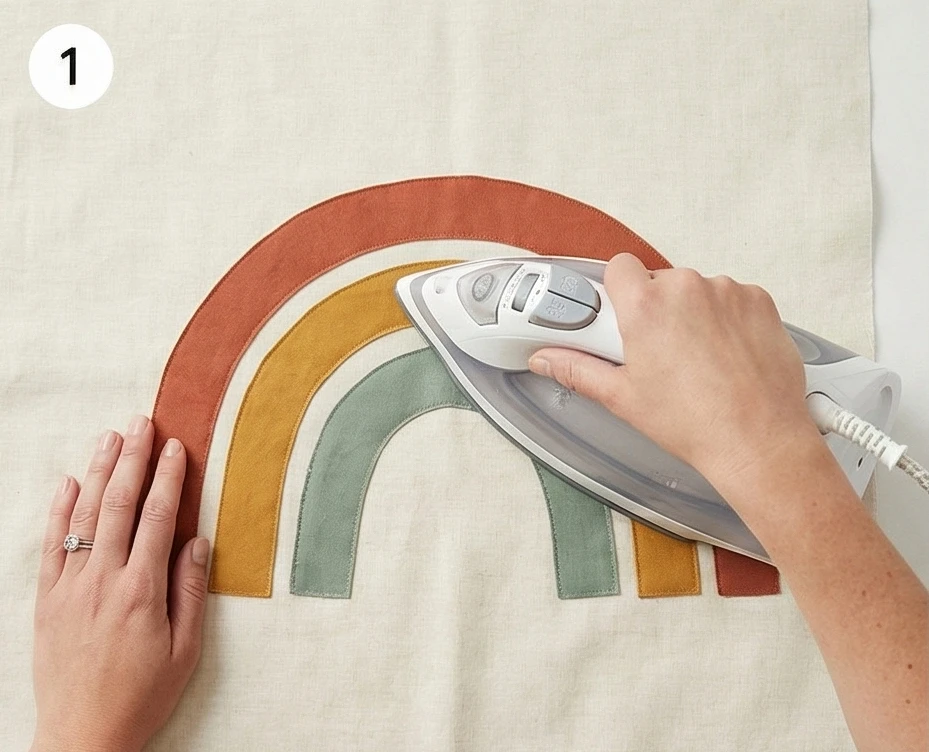
- Prepare Background: Cut your background fabric to 42″ x 52″. (It will shrink slightly during quilting).
- Create Arches:
- Draw 3 concentric arches on the paper side of your fusible web.
- Size: The outer arch should be about 20-25 inches wide. The stripes should be chunky (about 3-4 inches thick).
- Cut: Rough-cut the shapes, fuse them to the wrong side of your 3-colored fabrics, then cut them out precisely.
- Placement: Peel off the backing. Place the arches on the background fabric.
- Design Tip: Don’t center it. Place the rainbow in the bottom-right corner, “growing” out of the binding. This looks more artistic and leaves negative space for the baby’s head.
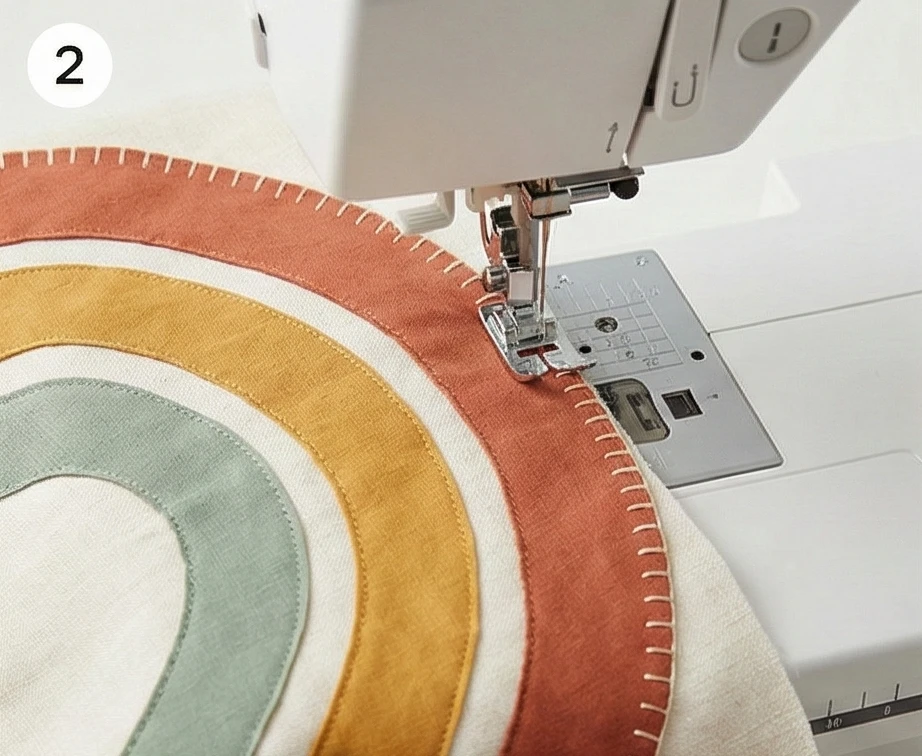
- Fuse & Stitch: Iron the arches down. Use a Zig-Zag Stitch or Blanket Stitch in matching thread to secure the edges.
- Quilt: Sandwich and quilt.
- Echo: Quilt ripples echoing the shape of the rainbow, radiating out into the background sky.
- Bind: Finish with a binding that matches the Sheet fabric to tie the set together.

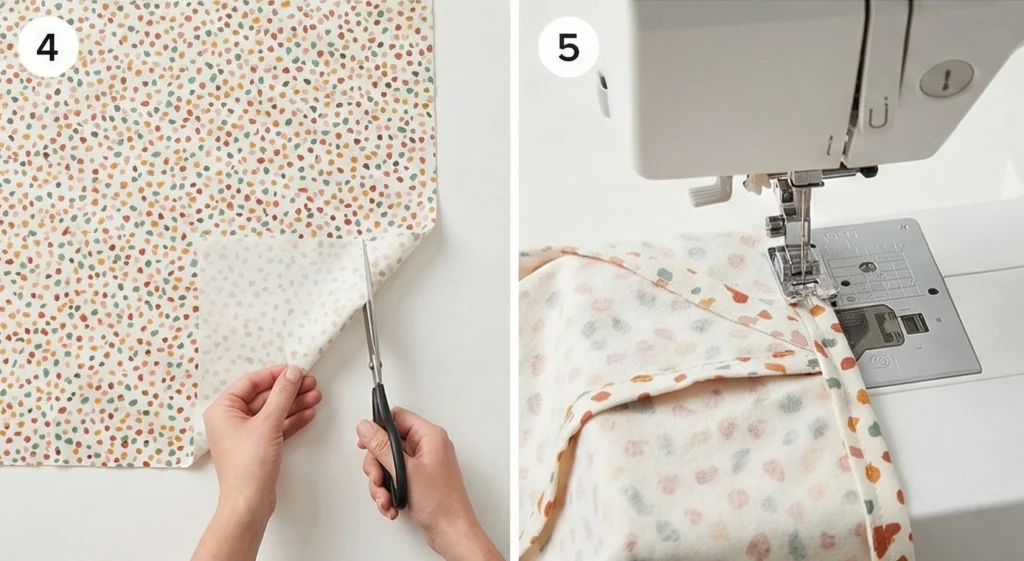
Part 2: The Custom Fitted Sheet
Making a sheet is easier than making a quilt!
- Cut Rectangle: Cut your sheet of fabric to 45″ x 69″.
- Math: This covers the top (28×52), the sides (6″ deep), plus 2.5″ for tuck-under on all sides.
- Cut Corners: Cut an 8-inch square out of each of the four corners.
- Visual: The fabric now looks like a big “plus” sign.
- Create Box Corners:
- Fold one corner so the two raw edges (where you cut the square out) meet.
- French Seam (for durability): Sew them Wrong Sides Together first (1/4 inch seam). Trim. Flip to Right Sides Together and sew again (3/8 inch seam). This encases the raw edge so it won’t fray in the wash.
- Repeat: Do this for all 4 corners. You now have a box shape.
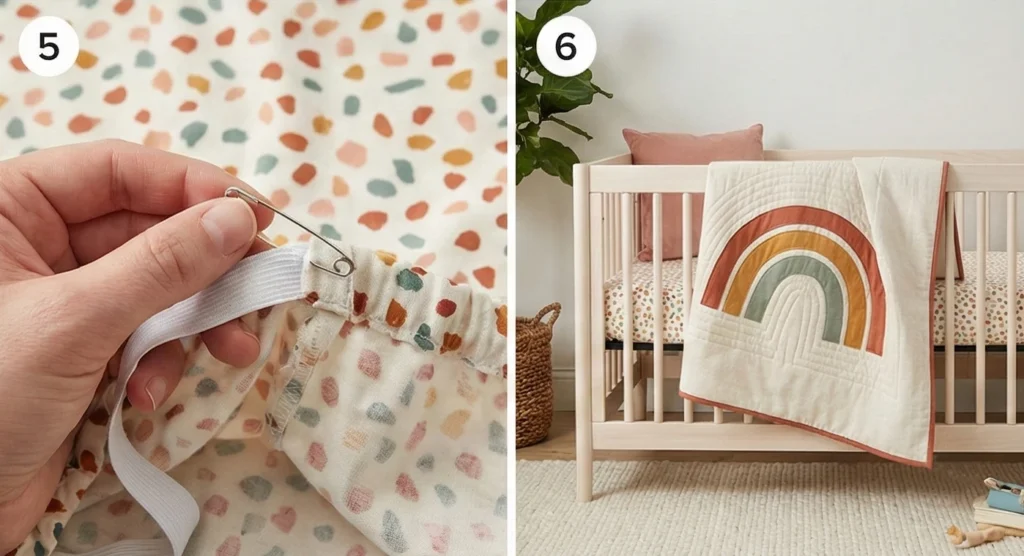
- Hem the Edge: Fold the entire bottom raw edge under by 1/2 inch, then another 1/2 inch. Press.
- Sew Casing: Stitch around the hem, leaving a 2-inch gap open.
- Insert Elastic: Thread the elastic through the casing using a safety pin. Pull it tight (until the opening is roughly the size of the mattress). Sew the elastic ends together. Stitch the gap closed.
Usability Note: Cotton Knit sheets are superior for safety because they stretch for a tight fit, reducing the risk of loose fabric in the crib. Plus, they feel like a favorite t-shirt against the skin.
16. Organic Cotton Quilted Crib Sheets for Sensitive Skin
The “Cloud Sleeper” Quilted Mattress Sheet
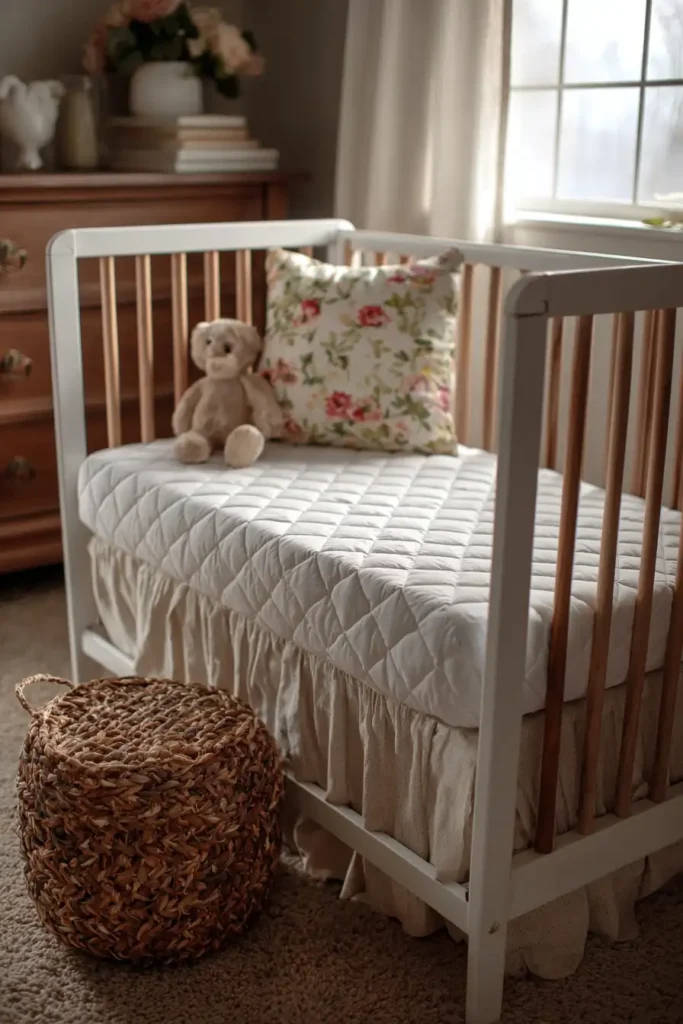
Most crib mattresses are covered in waterproof vinyl or plastic, which can be noisy (the dreaded “crinkle” sound) and sweaty against a baby’s back. This design solves that problem by creating a Quilted Fitted Sheet. It features a lightly padded, diamond-quilted top panel made of 100% Organic Cotton Jersey, attached to stretchy, un-quilted sides. It serves as both a sheet and a mattress pad, offering a silent, absorbent, cloud-soft surface that is hypoallergenic and ideal for babies with eczema or sensory sensitivities.
Finished Dimensions: Fits Standard Crib Mattress, 28″ x 52″.
Materials Needed:
- Fabric A (Quilted Top): 1.5 yards of Organic Cotton Jersey Knit (interlock is best as it’s thicker).
- Fabric B (Skirt): 1 yard of the same Jersey Knit (or a matching rib knit for stretch).
- Batting: 100% Organic Cotton or Bamboo (very thin/low loft). Do not use polyester, as it traps heat.
- Backing (Hidden Layer): 1.5 yards of thin organic muslin (to enclose the batting).
- Notions: 2 yards of 1/4″ elastic, ballpoint needles (for sewing knit), walking foot.
Cultural Backstory: The global movement toward GOTS (Global Organic Textile Standard) certified cotton began in the 1990s, driven by the realization that conventional cotton is among the most chemically treated crops worldwide. For a newborn, whose skin is 30% thinner than an adult’s and highly absorbent, dermatologists often recommend switching to organic textiles as the first step to prevent contact dermatitis.
Step 1: Creating the Quilt Sandwich
We only quilt the top surface where the baby sleeps.
- Layer: Place your thin Muslin backing face down. Place the Batting in the middle. Place the Organic Jersey (Fabric A) face up on top.
- Smoothing: Smooth gently. Do not stretch the jersey, or it will pucker later.
- Baste: Use safety pins or a temporary spray adhesive to hold the three layers together.
Step 2: The Diamond Quilting
Quilting keeps the batting from bunching up in the wash.
- Mark: Using a Hera marker or masking tape, mark a diagonal grid with lines spaced 2 to 3 inches apart.
- Quilt: Use a Walking Foot (crucial for knit fabric) and a stretch stitch or slightly longer straight stitch (3.0mm). Sew along the grid lines.
- Softness: The quilting compresses the jersey slightly, creating little “pillows” between the stitches that feel amazing to the touch.

Step 3: Cutting the Top Panel
Now that it’s quilted, we cut it to size.
- Measure: A standard crib mattress is 28″ x 52″.
- Cut: Trim your quilted sandwich to exactly 29″ x 53″.
- Why: We add 1/2 inch seam allowance on all sides.
- Corner Rounding: Crib mattresses have rounded corners. Use a small plate to gently round off the four corners of your rectangle.
Step 4: Preparing the Side Skirt
The sides need to be stretchy to grip the mattress.
- Cut Strips: Cut 8-inch wide strips of Fabric B (Jersey).
- Length: You need a total length of roughly 170 inches to go all the way around the perimeter (28+28+52+52 + overlap). You will likely need to sew 3 strips together end-to-end to get this length.
- Join: Sew the ends of the long strip together to form a giant loop. Make sure it matches the perimeter of your quilted top.
Step 5: Attaching Top to Sides
- Pin: Pin the raw edge of the Skirt Loop to the raw edge of the Quilted Top Panel (Right Sides Together).
- Ease: Because the skirt is stretchy knit and the top is quilted (stable), you may need to gently stretch the skirt to fit around the curves.
- Sew: Stitch around the entire perimeter using a Zig-Zag Stitch or a Serger.
- Stretch: The zigzag allows the seam to stretch when you pull the sheet over the mattress corners.
Step 6: The Elastic Casing
- Hem: Fold the bottom raw edge of the skirt under by 1/2 inch, then another 1/2 inch.
- Stitch: Sew around the hem to create a casing, leaving a 2-inch gap.
- Thread: Insert the elastic. Pull it tight enough that the sheet curls aggressively (the opening should shrink to about half the size of the mattress).
- Close: Sew the elastic ends together and stitch the gap closed.

Usability Note: Unlike a loose blanket, this quilted sheet cannot be kicked off or pulled over a baby’s face, adhering to safe sleep guidelines while still providing the “tucked in” comfort of a quilt.
17. Baby Quilt Bed Runner Ideas for Soft Nursery Accents
The “Velveteen Sash” Textured Nursery Runner
While safe sleep guidelines recommend keeping loose bedding out of the crib while the baby sleeps, a “Bed Runner” is the perfect way to style the nursery when the crib is not in use. More importantly, this versatile, narrow quilt doubles as a Glider Drape (to protect the back of your rocking chair from spit-up) or a Changing Table Runner (to add softness under a changing pad). This design focuses on Texture Mixing: combining cool Linen, fuzzy Flannel, and luxe Velvet in soft horizontal bands. It invites the baby to explore different sensations during tummy time.
Finished Dimensions: Nursery Runner / Glider Drape, 16″ x 54″.
Materials Needed:
- Fabric A (Linen): 1/4 yard of Natural Flax or Oatmeal (for a cool, rougher texture).
- Fabric B (Velvet): 1/4 yard of Washable Cotton Velvet in Blush, Sage, or Navy (for lush softness).
- Fabric C (Flannel): 1/4 yard of a Soft Floral or Geometric Print (for fuzzy warmth).
- Backing: 1 yard of Minky or Cotton.
- Batting: Thin Cotton (keeps it drape-y over a chair).
- Notions: Rotary cutter, walking foot (essential for sewing velvet).
Cultural Backstory: The “Runner” originated in the Victorian era as a way to protect expensive bedspreads from dirty shoes or luggage at the foot of the bed. In the modern nursery, it serves a similar protective role for upholstered gliders, while introducing the concept of “sensory play” through its varied tactile surfaces.
Step 1: Cutting the Texture Strips
We are creating a simple “stacked coin” or horizontal stripe layout.
- Prep: Wash and dry all fabrics (especially the linen and flannel, as they shrink differently). Do not wash velvet if it is dry-clean only (buy washable cotton velvet!).
- Cut:
- From Fabric A (Linen): Cut 4 strips measuring 4.5″ x 16.5″.
- From Fabric B (Velvet): Cut 4 strips measuring 4.5″ x 16.5″.
- From Fabric C (Flannel): Cut 5 strips measuring 4.5″ x 16.5″.
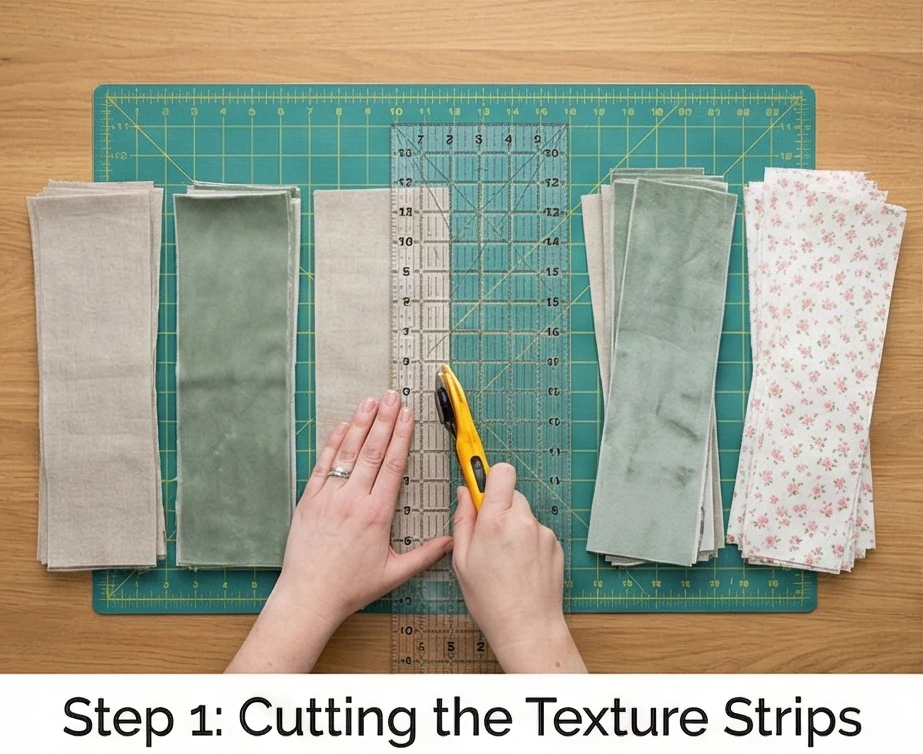
Step 2: The Sensory Layout
Arrange the strips to alternate textures.
- Pattern: Lay the strips out on the floor in a repeating pattern.
- Example: Flannel – Linen – Velvet – Flannel – Linen – Velvet…
- Balance: Ensure you start and end with the same fabric (Flannel) for visual symmetry.
- Visual Check: The mix of matte (flannel), textured (linen), and shiny (velvet) creates a sophisticated, high-end look.

Step 3: Sewing with Velvet (The Trick)
Velvet “creeps” when sewn due to its pile. Pinning is key.
- Pin: Place two strips, Right Sides Together. Use twice as many pins as usual, placed perpendicular to the seam.
- Sew: Stitch with a 1/4 inch seam allowance.
- Walking Foot: Use a Walking Foot to feed the top and bottom layers evenly.
- Direction: Sew with the nap of the velvet (pet it down), not against it.
- Pressing: Do not iron velvet directly (it crushes the pile). Press from the back, or use a fluffy towel on your ironing board to cushion the velvet face.
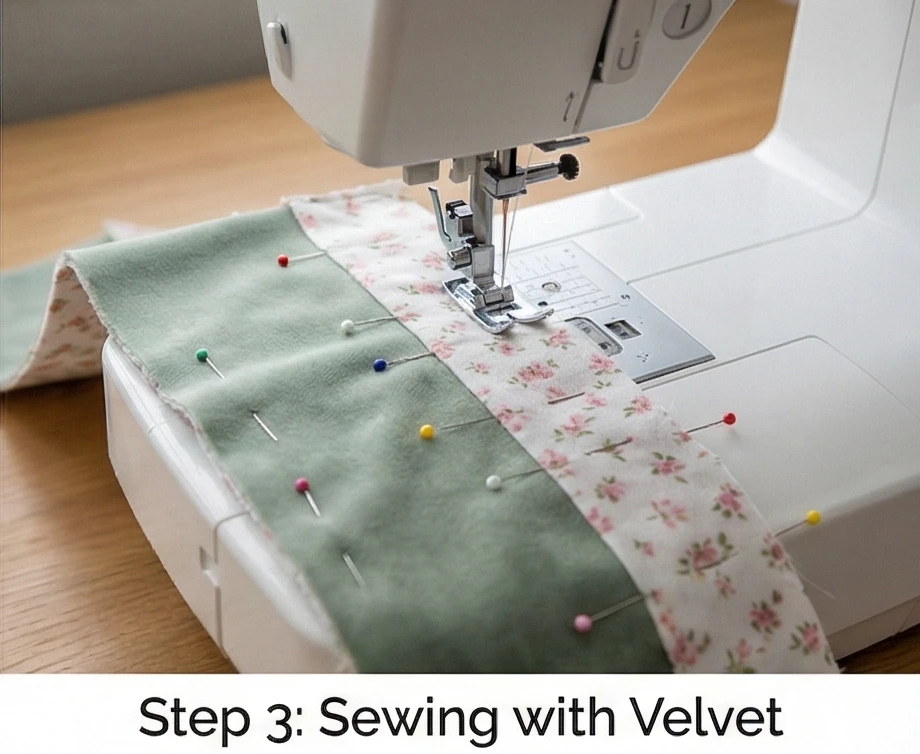
Step 4: Assembly
- Join: Continue joining strips until the runner is roughly 54 inches long.
- Square Up: Trim the long sides to ensure the runner is a perfect 16 inches wide all the way down.
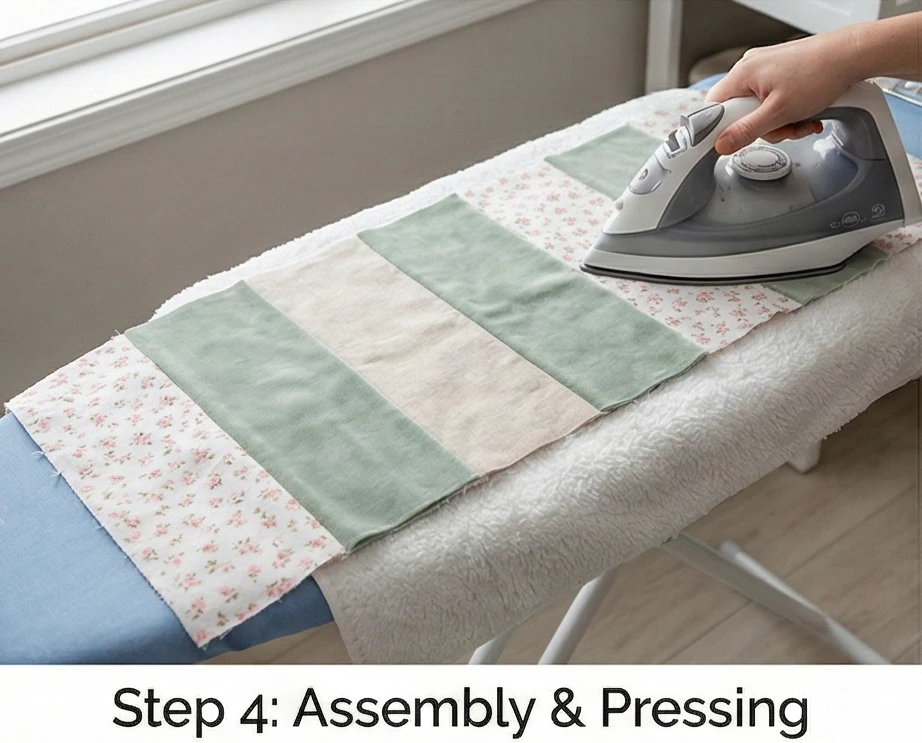
Step 5: “Channel” Quilting
Minimal quilting keeps the velvet plush.
- Baste: Sandwich the Backing + Batting + Top.
- Quilt: Stitch straight lines “in the ditch” (in the seams) between the fabric strips.
- Option: You can add one straight line down the very center of the runner to secure the width, but avoid heavy quilting on the velvet panels to keep them soft for the baby’s face.
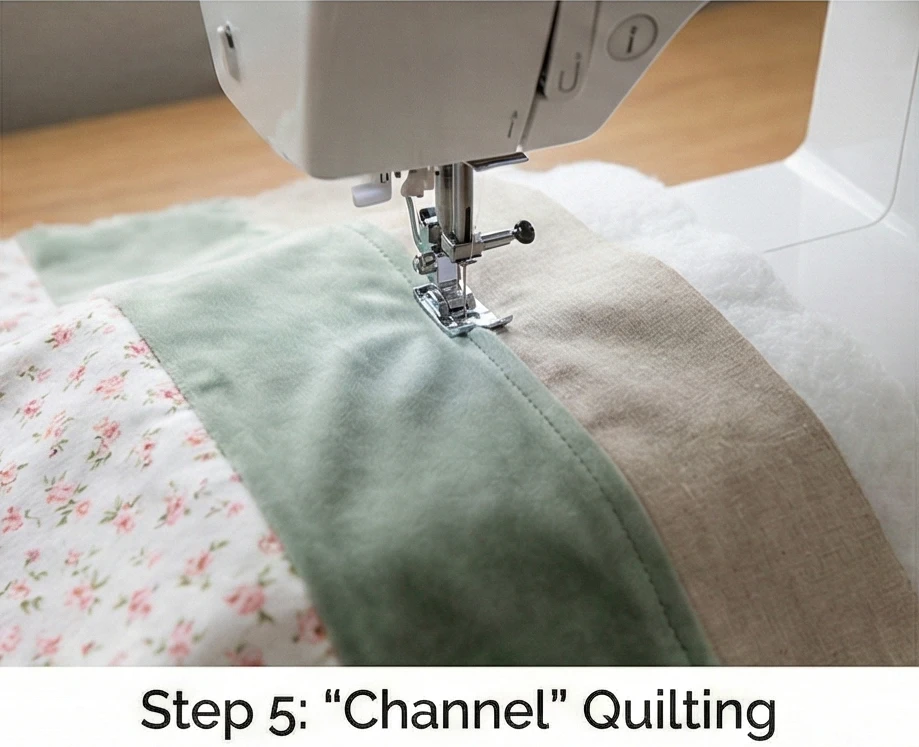
Step 6: The Self-Binding Method
Binding bulky velvet is hard. Let’s use the backing to wrap around.
- Trim: Trim the batting and top to the final size. Trim the Backing 1 inch larger on all sides.
- Fold: Fold the backing edge in half to meet the raw edge of the top, then fold it again over the front.
- Stitch: Topstitch this folded edge down.
- Effect: This frames the textured runner in the soft backing fabric (Minky or Cotton), eliminating the need to make a separate binding strip.

Usability Note: When draped over a rocking chair, the flannel/velvet texture provides friction, keeping the runner in place, unlike a slippery satin quilt. It catches burps and spills, so you don’t have to steam-clean the upholstery.
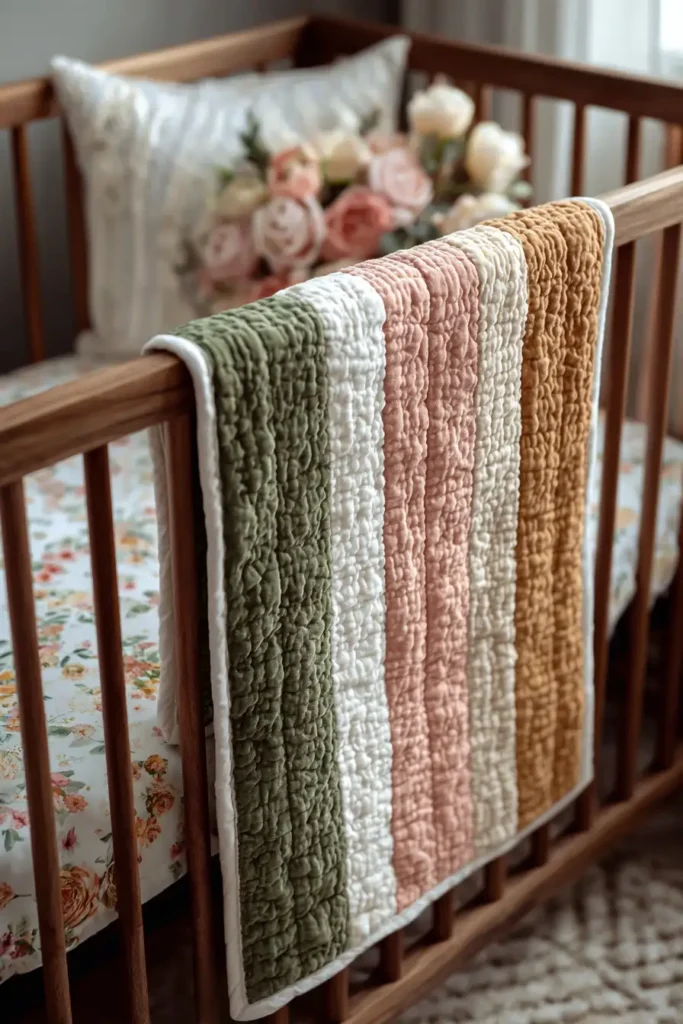
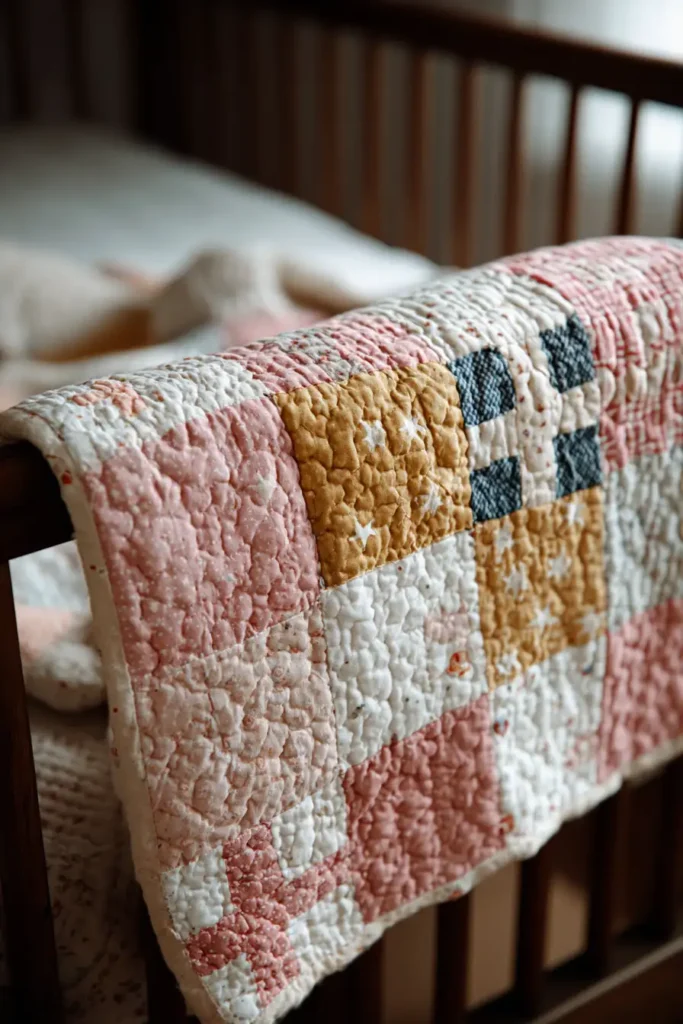
18. Adorable Star Quilt Pillow Covers for Nursery Gliders
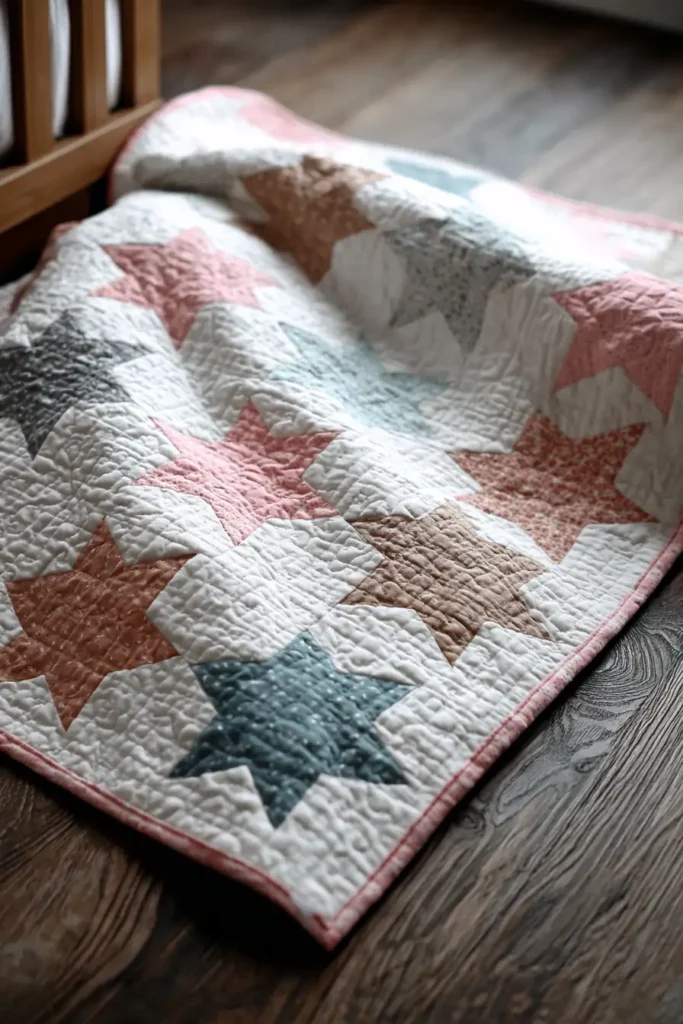
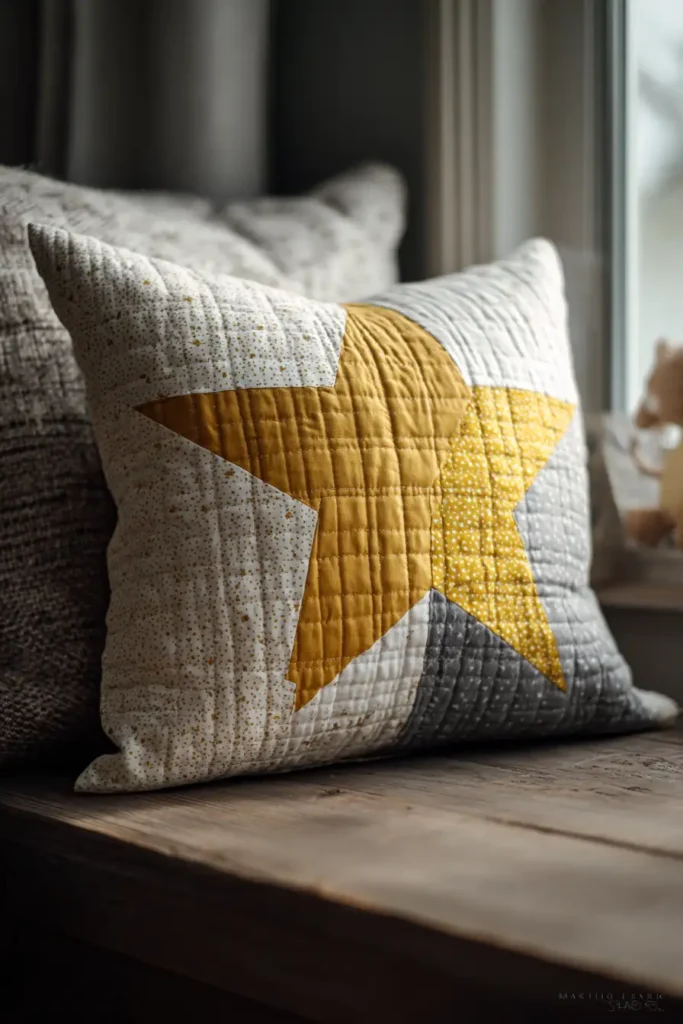
The “Little Dipper” Wonky Star Pillow
A nursery glider needs a good lumbar pillow for those long nights of rocking and feeding. This design features a single, large Improvisational (“Wonky”) Star. Unlike traditional stars that require perfect 45-degree points, the “Wonky Star” is intentionally asymmetrical and tilted. It looks playful, childlike, and modern—perfect for a nursery. By making it a removable cover with a safe Envelope Closure (no zippers or buttons to scratch the baby), it is practical, washable, and cozy.
Finished Dimensions: Fits a standard 18″ x 18″ pillow insert.
Materials Needed:
- Fabric A (Background): 1/2 yard of Navy, Charcoal, or Soft Grey (for a night sky effect).
- Fabric B (The Star): 1 Fat Quarter of Bright Yellow, Gold, or a Silver Metallic print.
- Backing (Envelope): 1/2 yard of coordinating fabric.
- Batting: A scrap piece measuring 20″ x 20″.
- Notions: Rotary cutter, pillow insert (down or polyester).
Cultural Backstory: The “Wonky” style emerged from the Modern Quilt Movement of the late 20th century, rejecting the rigid rules of traditional block construction. It embraces the Japanese concept of “Wabi-Sabi”—the finding of beauty in imperfection. For a baby, this asymmetrical star represents the joyful, unscripted nature of childhood.
Step 1: Cutting the “Wonky” Parts
We are building a 9-Patch structure, but the points will be irregular.
- Center Square: Cut one 4.5″ square from Fabric B (Yellow).
- Corner Squares: Cut four 4.5″ squares from Fabric A (Background).
- Point Rectangles: Cut four rectangles measuring 4.5″ x 6.5″ from Fabric A (Background).
- Star Points: Cut 8 squares measuring 3.5″ from Fabric B (Yellow).
- Note: These don’t need to be perfect; they will be trimmed down.
Step 2: Creating the Star Points (The Improv Method)
This is the fun, free-form part.
- Layer: Take one Background Rectangle (4.5″ x 6.5″). Place a Yellow Square (3.5″) on one corner, angled slightly (wonky).
- Tip: Make sure the yellow covers the corner completely with room to spare.
- Sew: Stitch a straight line across the yellow square.
- Trim & Flip: Trim the excess fabric 1/4 inch past your seam line. Flip the yellow triangle open and press.
- Repeat: Do the same on the other corner of the rectangle with another yellow square.
- Result: You now have a background rectangle with two yellow points sticking into it.
- Square Up: Trim the entire unit back down to exactly 4.5″ x 6.5″.
- Make: Repeat to create 4 Point Units.
Step 3: Assembling the Star Grid
- Row 1: Background Corner – Point Unit (points down) – Background Corner.
- Row 2: Point Unit (points right) – Center Square – Point Unit (points left).
- Row 3: Background Corner – Point Unit (points up) – Background Corner.
- Join: Sew the pieces into rows, then sew the rows together.
- Size: Your block should now be roughly 12.5″ square. It needs to be 18.5″.
Step 4: Adding Borders
- Cut: Cut 2 strips measuring 3.5″ x 12.5″ and sew to the sides. Cut 2 strips measuring 3.5″ x 18.5″ and sew to the top/bottom.
- Result: You now have an 18.5″ square pillow front.
Step 5: Quilt the Front Panel
Quilting adds durability and softness.
- Sandwich: Layer a scrap of muslin (lining) + Batting + Star Top.
- Quilt: Use a walking foot to quilt Echo Lines around the star. Start 1/2 inch away from the star shape and keep spiraling outward.
- Why: This makes the star “puff” out.
Step 6: The Safe Envelope Backing
No zippers means no scratches.
- Cut Panels: Cut two rectangles of Backing fabric measuring 18.5″ x 13″.
- Hem: Fold one long edge of each rectangle under by 1/2 inch, press, fold again, and topstitch to create a clean hem.
- Layer: Place your Quilted Top face up. Place the two backing panels face down on top of each other, overlapping them in the middle (the hemmed edges should overlap by about 4 inches).
- Sew: Stitch around the entire perimeter of the outer square with a 1/4-inch seam.
- Finish: Zig-zag the raw edges to prevent fraying. Turn the cover right side out through the envelope opening. Poke out corners and stuff with the pillow insert.
Usability Note: Always remove pillows from the crib when the baby is sleeping. This pillow is designed strictly for the parent’s comfort in the rocking chair or as a decorative accent on a shelf.
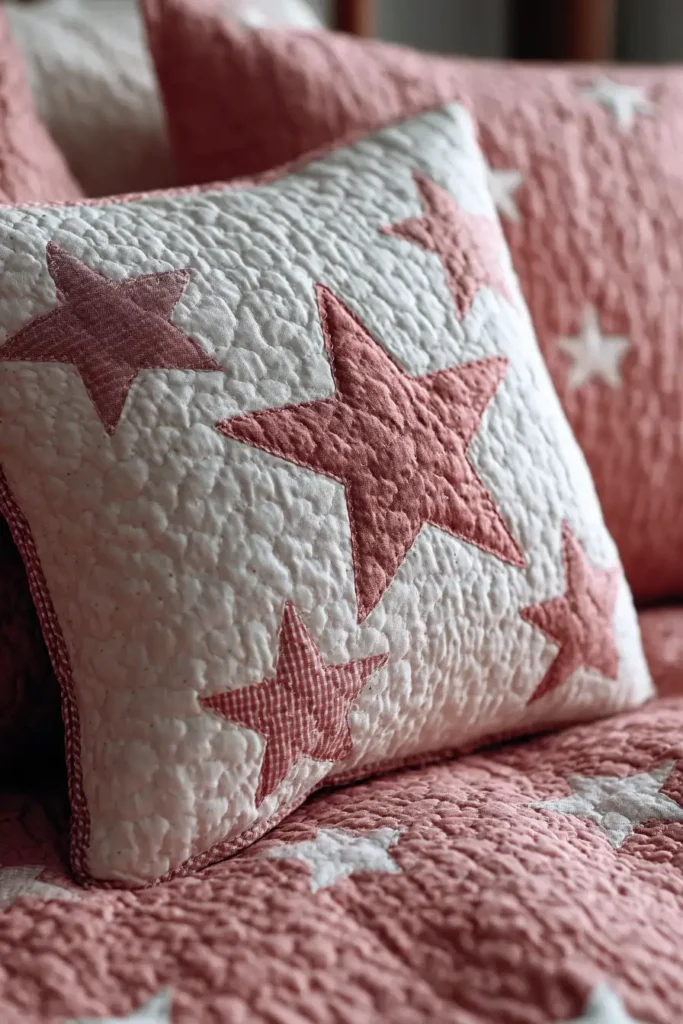

19. Playful Patchwork Baby Pillow Cover Ideas for Decor
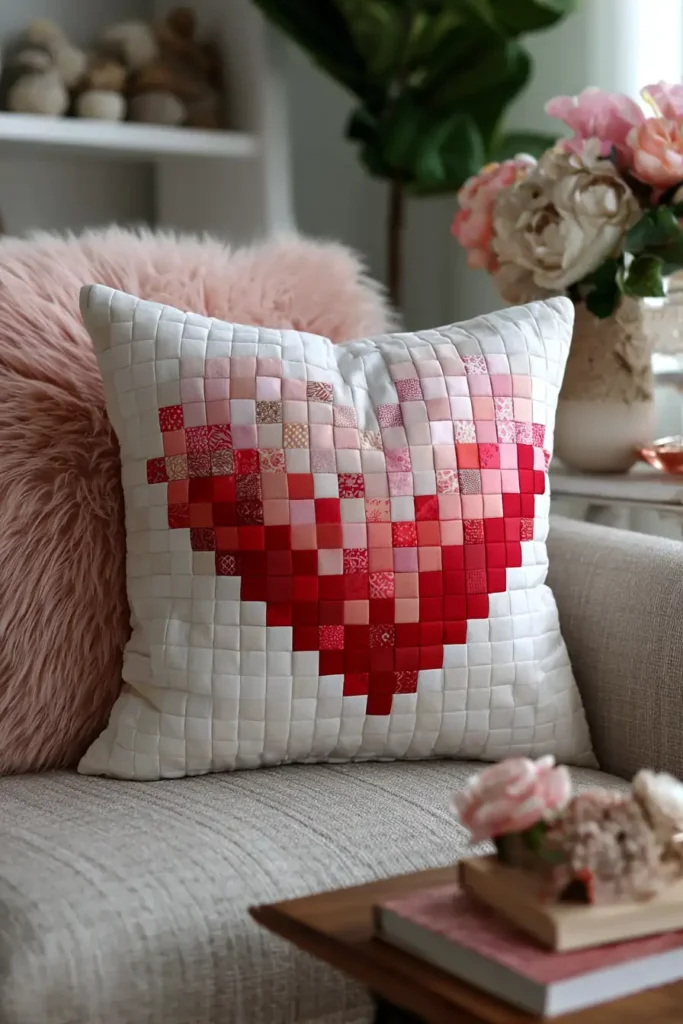
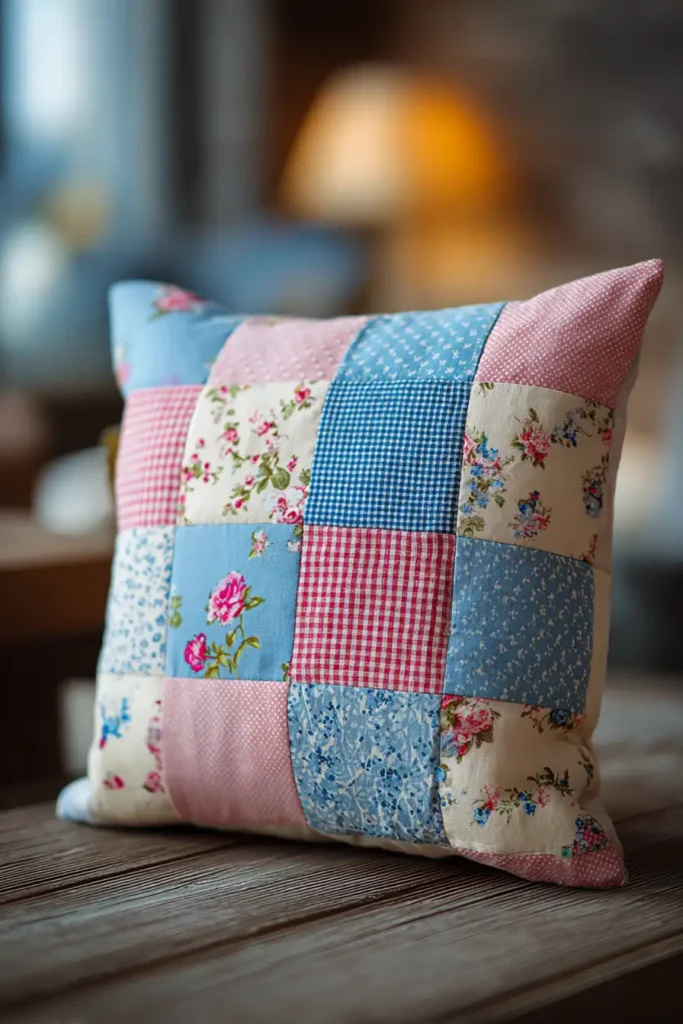
The “Pixel Love” Scrappy Heart Pillow
Nursery decor is the perfect place to use up those precious, tiny scraps of fabric you can’t bear to throw away. This “Pixel Love” pillow uses 2.5-inch squares to build a pixelated heart. It bridges the gap between digital-age modern aesthetics and the traditional warmth of grandmother’s patchwork. By using a mix of pinks, reds, and corals for the heart (scrappy style) against a calm Low-Volume background, you create a charming, textured accent piece that adds a pop of love to the rocking chair.
Finished Dimensions: Fits a standard 18″ x 18″ pillow insert.
Materials Needed:
- Fabric A (The Heart): Scraps of various pinks/reds to cut 28 squares (2.5″ x 2.5″).
- Fabric B (Background): 1/2 yard of White or Grey Linen (cut 53 squares).
- Backing: 1/2 yard of a coordinating print for the envelope back.
- Batting: A scrap piece measuring 20″ x 20″.
- Notions: Rotary cutter, 2.5″ square ruler (optional but helpful).
Cultural Backstory: Pixel quilts (or 8-bit quilts) became a massive trend in the early 2010s with the rise of “Geek Craft.” They translate the digital pixels of early video games into physical fabric squares. However, this technique is actually centuries old—traditional patterns like “Trip Around the World” or “Postage Stamp” quilts used the exact same grid logic long before computers existed.
Step 1: Cutting the “Pixels”
We are building a 9×9 grid. Each finished square will be 2 inches.
- The Heart Pixels: Select your favorite colorful scraps. Cut 28 squares measuring exactly 2.5″ x 2.5″.
- The Background Pixels: From your neutral background fabric, cut 53 squares measuring exactly 2.5″ x 2.5″.
- Total: You need 81 squares total for the 9×9 grid.

Step 2: The 8-Bit Layout
Arrange your pixels on the floor or a design wall.
- Grid: Set up a 9-by-9 grid.
- Row 1: All Background.
- Row 2: 2 Background / 2 Heart / 1 Background / 2 Heart / 2 Background. (The tops of the heart).
- Row 3: 1 Background / 7 Heart / 1 Background.
- Row 4: 1 Background / 7 Heart / 1 Background.
- Row 5: 2 Background / 5 Heart / 2 Background.
- Row 6: 3 Background / 3 Heart / 3 Background.
- Row 7: 4 Background / 1 Heart / 4 Background. (The tip).
- Row 8 & 9: All Background.
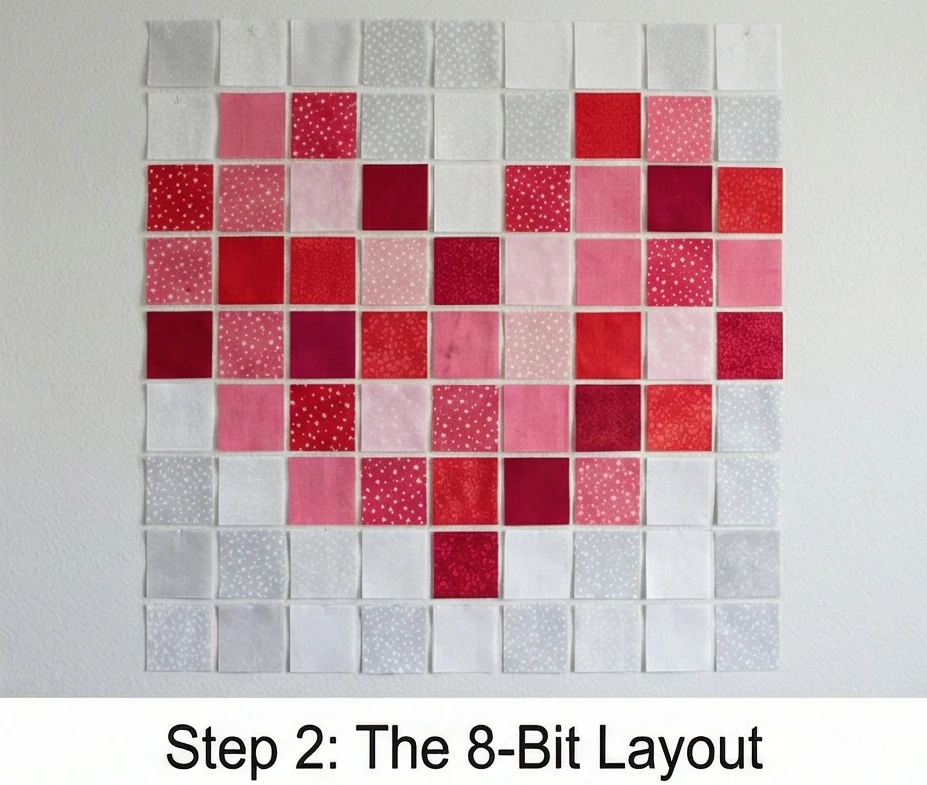
Step 3: Web Piecing (Chain Piecing)
To keep the pixels from getting mixed up, sew them into rows.
- Sew Rows: Stitch the squares of Row 1 together. Press seams to the left.
- Row 2: Stitch Row 2 together. Press seams to the right.
- Alternating Pressing: This ensures that when you sew the rows together, the seams “nest” (lock together) perfectly for sharp corners.
- Join: Sew all 9 rows together to complete the pillow top.
- Size Check: It should measure 18.5″ x 18.5″ unfinished.

Step 4: Quilt the Panel
Quilting prevents the patchwork from stretching over time.
- Sandwich: Layer a scrap of muslin (lining) + Batting + Patchwork Top.
- Quilt: Stitch a Diagonal Cross-Hatch through the squares.
- Path: Stitch diagonally through the corners of the pixels. This “X” pattern reinforces the seams and adds a classic look.

Step 5: The Envelope Backing
The safest closure for a nursery.
- Cut: Cut two rectangles of backing fabric measuring 18.5″ x 13″.
- Hem: On one long (18.5″) edge of each piece, fold under 1/2 inch twice and topstitch to create a finished hem.
- Layer:
- Place the quilted top face up.
- Place Backing Panel 1 face down (aligning with the top raw edges).
- Place Backing Panel 2 face down (aligning with bottom raw edges).
- Overlap: The hemmed edges should overlap in the middle.

Step 6: Sew and Turn
- Stitch: Sew around the entire perimeter with a 1/4 inch seam allowance.
- Reinforce: Backstitch over the spots where the envelope flaps overlap (this area gets stress when inserting the pillow).
- Finish: Clip the four corners (to reduce bulk). Turn the pillow cover right side out. Use a chopstick to poke out the corners for a sharp square shape.
- Stuff: Insert an 18″ pillow form.
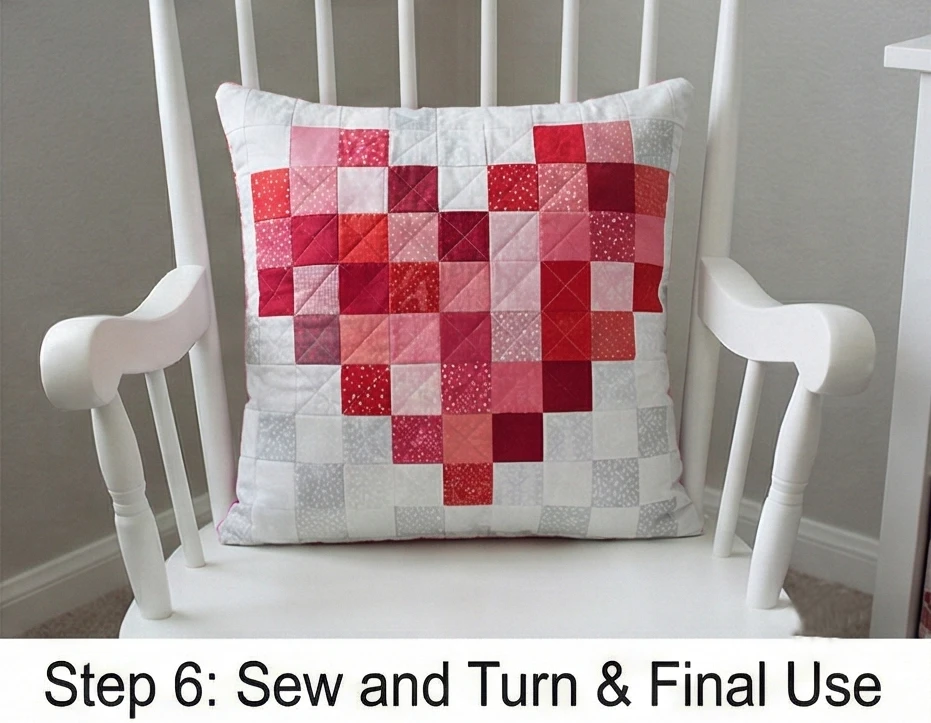
Usability Note: Patchwork pillows are great for using “memory fabrics”—old baby clothes, swaddles, or leftovers from the main crib quilt—tying the whole room design together.
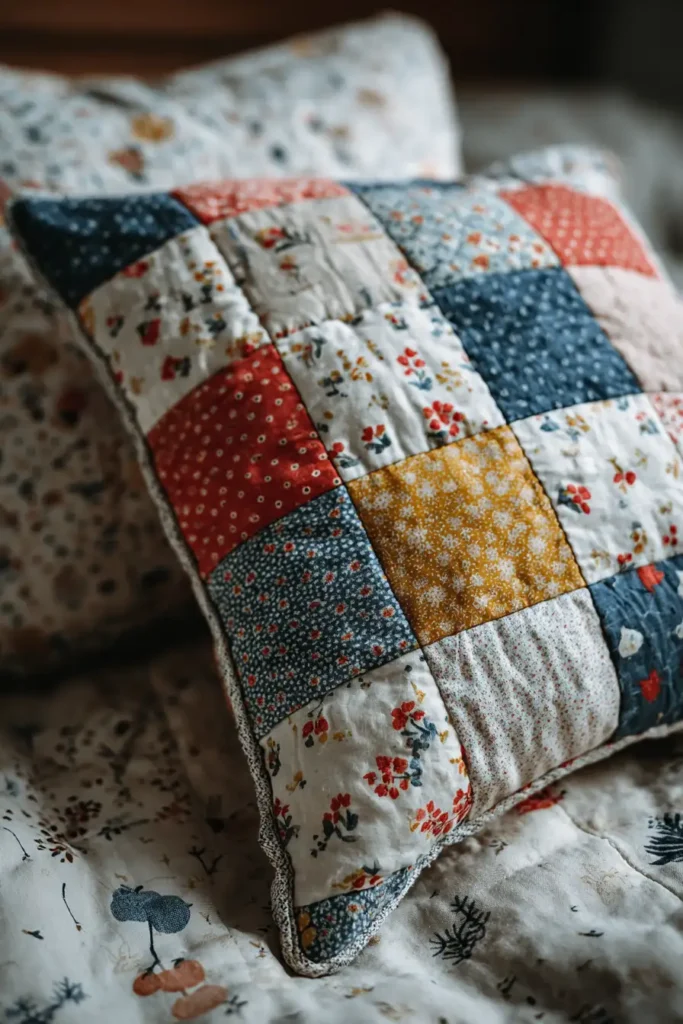
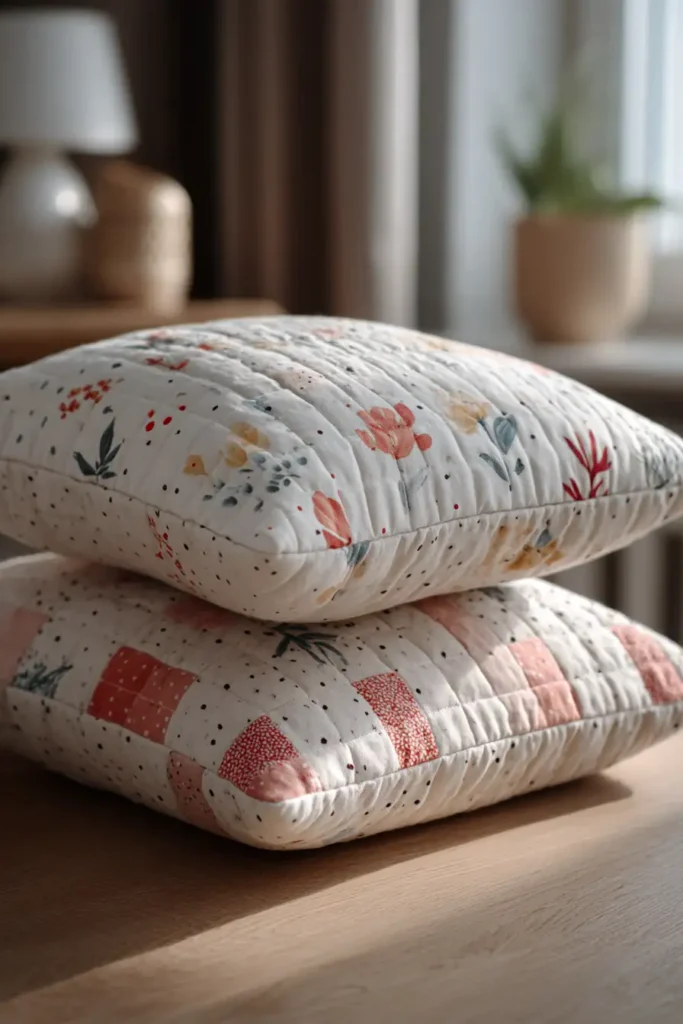
20. Cozy Baby Quilt Patterns for Crib and Toddler Beds
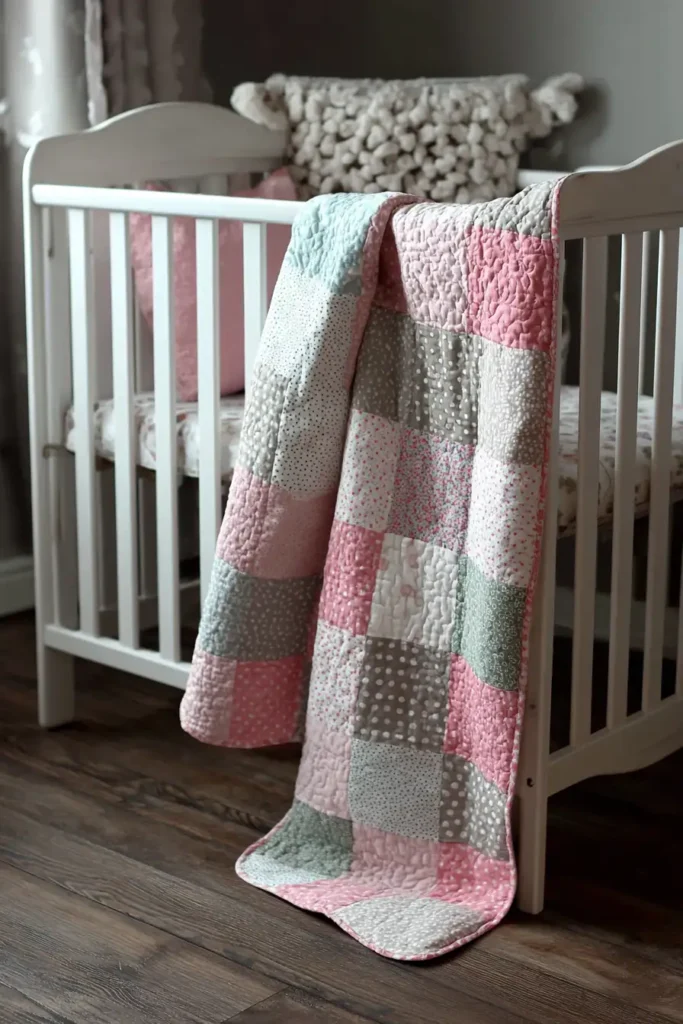
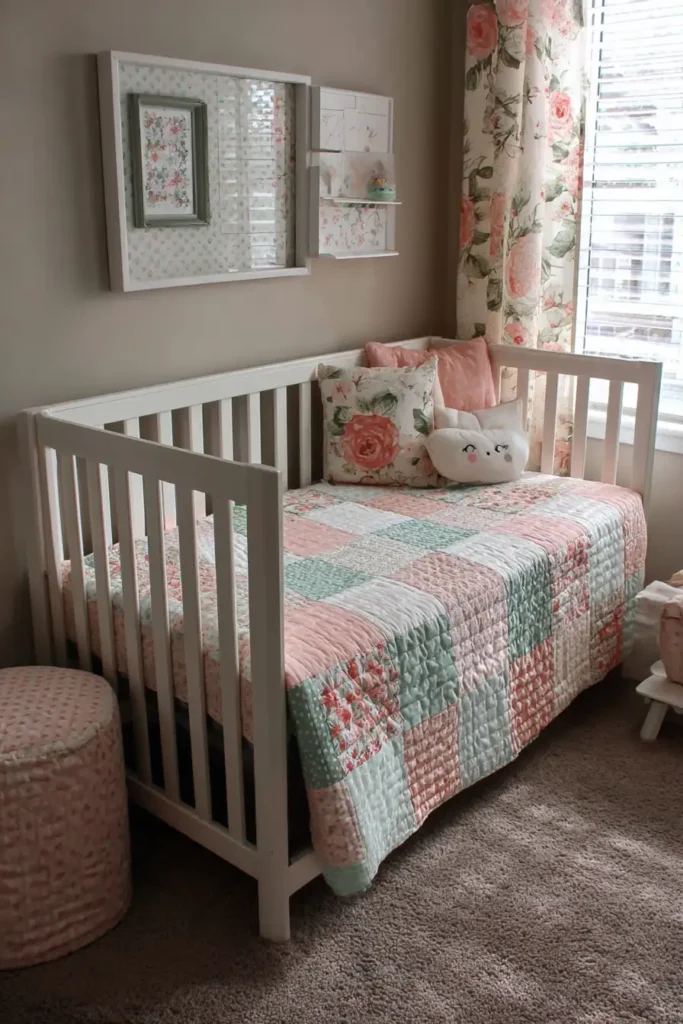
The “Cub’s Corner” Bear Paw Quilt
As babies graduate from cribs to toddler beds, they need a quilt that feels like a “big kid” blanket but still offers the security of a hug. The Bear Paw is one of the most beloved blocks in quilting history, symbolizing strength, healing, and the protective bond between a mother bear and her cub. This version uses Brushed Cotton or Flannel for the “claws” to add extra warmth, creating a rustic, cabin-style aesthetic that is perfect for a woodsy or adventure-themed room.
Finished Dimensions: Toddler Bed / Large Crib, 45″ x 60″.
Materials Needed:
- Fabric A (The Paws/Claws): 1.5 yards of Chocolate Brown, Rust, or Navy (Flannel or Quilting Cotton).
- Fabric B (Background): 2 yards of Unbleached Muslin or Cream.
- Fabric C (Sashing/Border): 1 yard of a coordinating plaid or check.
- Backing: 3 yards of soft fleece or flannel.
- Batting: Wool or High-Loft Poly (for a puffy, duvet-like feel).
- Notions: Rotary cutter, 2.5″ square ruler.
Cultural Backstory: The Bear Paw pattern is deeply rooted in American folklore. In some traditions, the claw-like geometry was believed to guide travelers to water and berries (sustenance) in the wild. In the nursery context, it represents the “Mama Bear” protection, watching over the sleeping child.
Step 1: Cutting the Components
We will make 12 Large Bear Paw Blocks (Finished size 12″).
For each block (multiply by 12 for the whole quilt):
- Paw Pad (Fabric A): Cut one 4.5″ square.
- Claws (Fabric A): Cut two 4.75″ squares (for HSTs).
- Background Claws (Fabric B): Cut two 4.75″ squares (for HSTs).
- Background Spacers (Fabric B): Cut four 2.5″ squares.
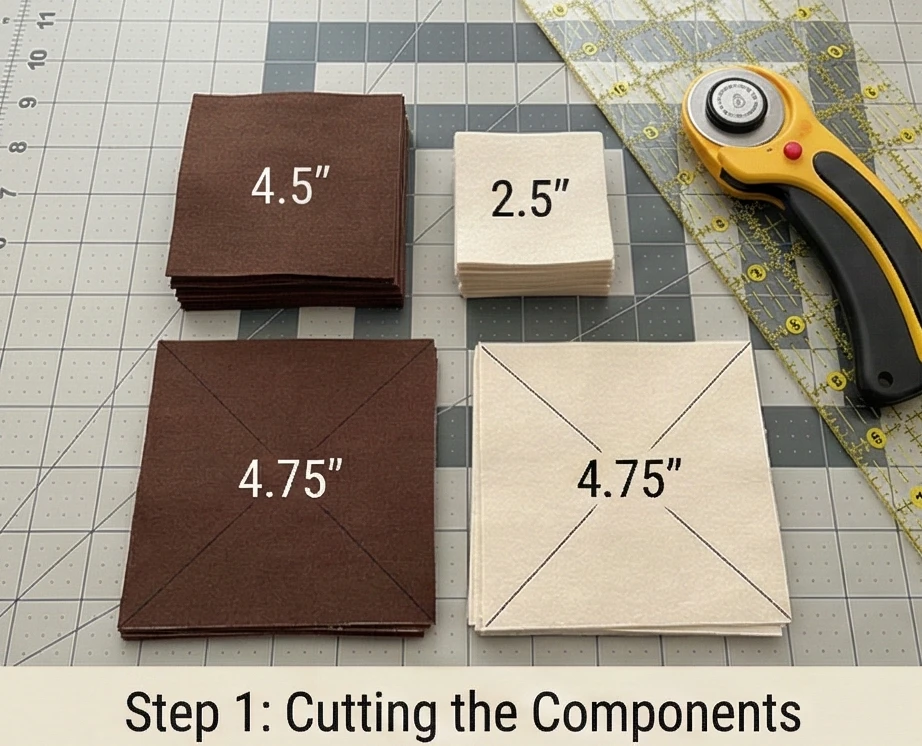
Step 2: Making the Claws (Half-Square Triangles)
The claws give the block its character.
- Mark: Draw a diagonal line on the back of the 4.75″ Background squares.
- Sew: Place a Background square on a colored Paw square (Right Sides Together). Sew 1/4 inch away from the line on both sides.
- Cut: Cut along the center line.
- Result: You get 2 Half-Square Triangles (HSTs).
- Repeat: Do this for all pairs. You need 4 HSTs per block.
- Trim: Trim the HSTs to exactly 2.5″ x 2.5″.
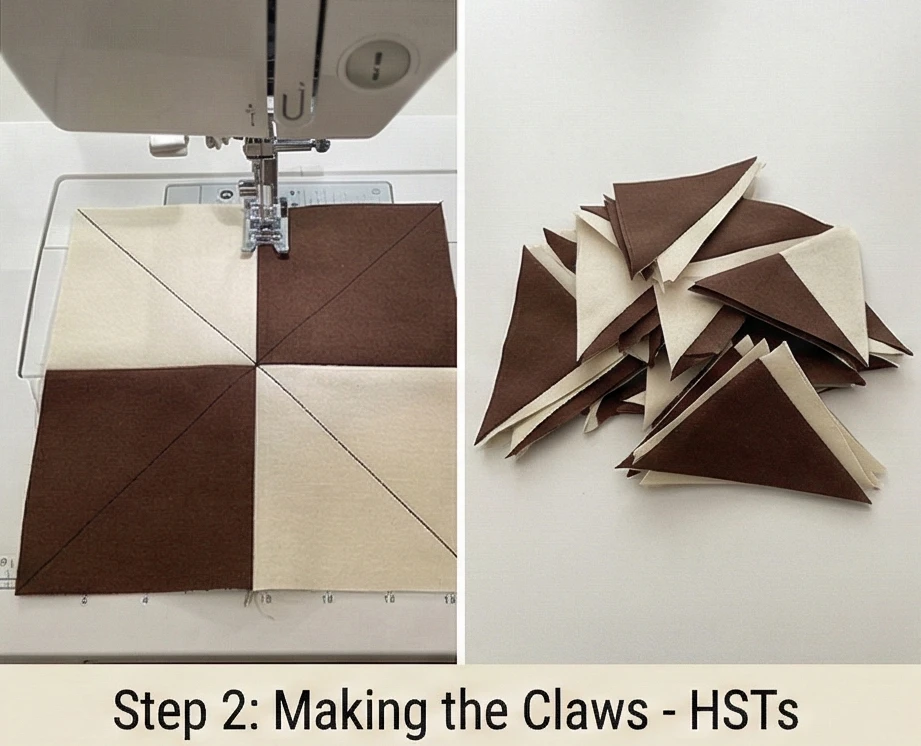
Step 3: Assembling the “Toes”
We assemble the claws into strips.
- Right Side Strip: Sew: [Spacer Square] + [HST (Dark pointing In)] + [HST (Dark pointing In)] + [Spacer Square].
- Wait, actually: A Bear Paw block is usually arranged in quadrants. Let’s simplify the assembly logic.
- Toe Unit: Sew one HST to one Spacer square. Make 4 of these pairs.
- Side Bar: Sew two Toe Units together so the dark triangles point toward the center of the block.
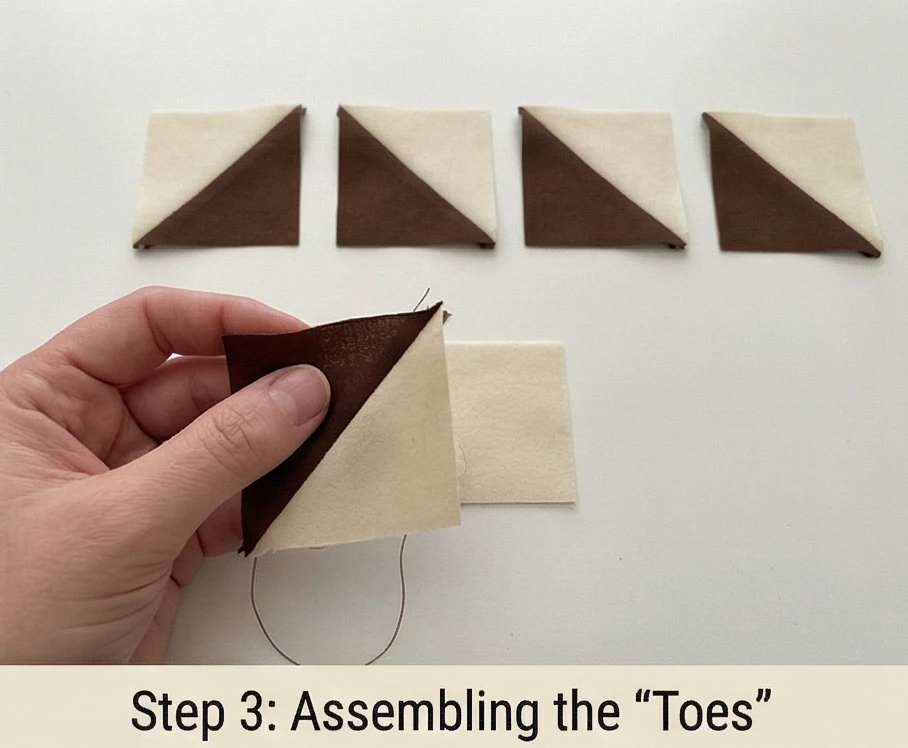
Step 4: The Block Assembly
- Top Row: Spacer (2.5″) – HST – HST – Spacer (2.5″).
- Middle Row: HST – Big Paw Pad (4.5″) – HST.
- Bottom Row: Spacer – HST – HST – Spacer.
- Correction: The classic Bear Paw has the “pad” in one corner and “claws” on two sides. Let’s use the “Sister’s Choice” or symmetrical Bear Paw variation, which is easier for beginners:
- Center: 4.5″ Square.
- Sides: Sew a “Toe Strip” (HST + Spacer) to the left and right.
- Top/Bottom: Sew a “Toe Strip” (HST + Spacer + HST + Spacer) to top and bottom? No, that’s getting confusing.
- Simpler Method: Treat it like a 9-Patch grid.
- Corner: 2.5″ Spacer square.
- Side: Pair of HSTs.
- Center: 4.5″ Solid Square.
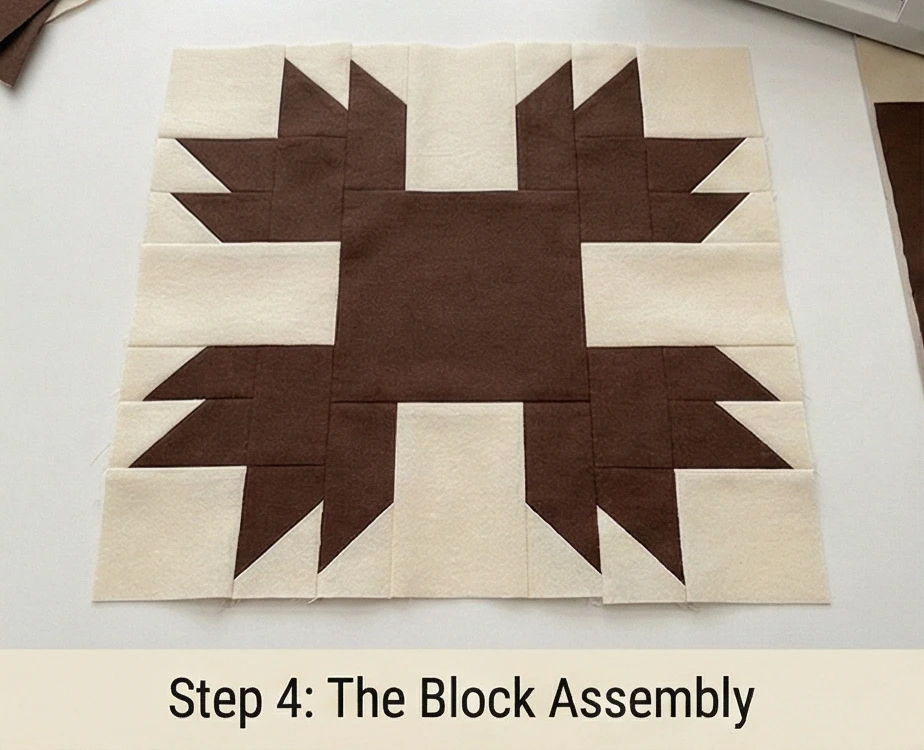
Step 5: Sashing and Setting
Give the bears some room to roam.
- Sashing Strips: Cut strips of Fabric C (Plaid) measuring 2.5″ x 12.5″.
- Cornerstones: Cut 2.5″ squares of Fabric A (Brown).
- Layout: Arrange blocks in a 3 x 4 grid. Place sashing strips between them vertically.
- Horizontal Rows: Create sashing rows (Cornerstone – Strip – Cornerstone…) to go between the block rows.
- Sew: Assemble the full top.
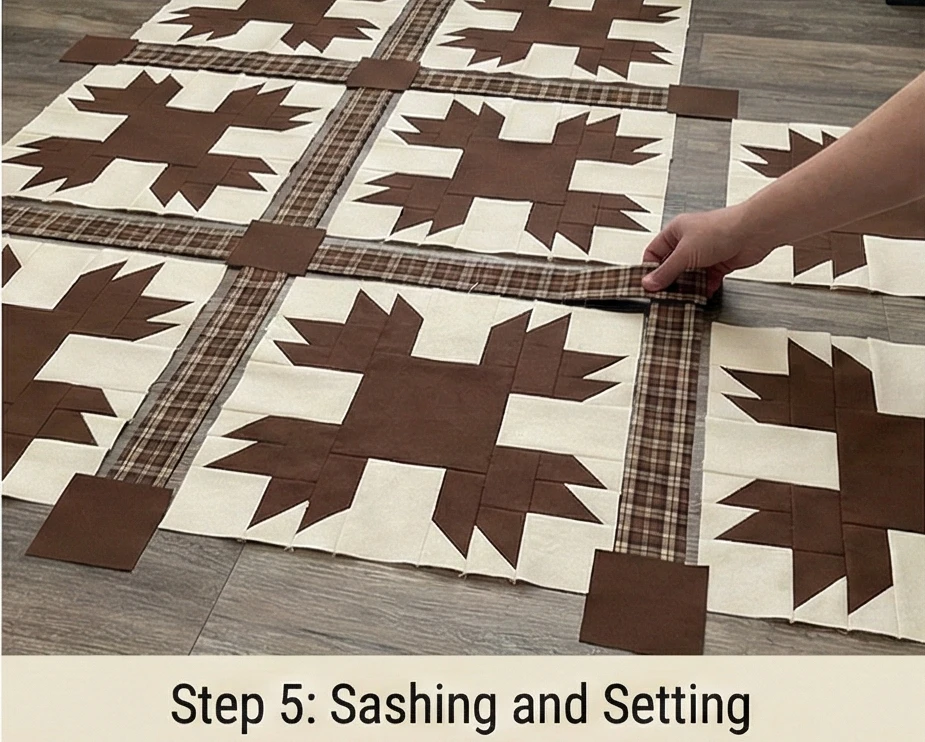
Step 6: “Hibernation” Quilting
This quilt should be thick and warm.
- Sandwich: Backing + Batting + Top.
- Quilt:
- In the Paws: Quilt an “X” through the center of every big paw pad.
- In the Sashing: Stitch in the ditch to hide the thread.
- Borders: Quilt a wavy “meander” stitch to look like a trail through the woods.
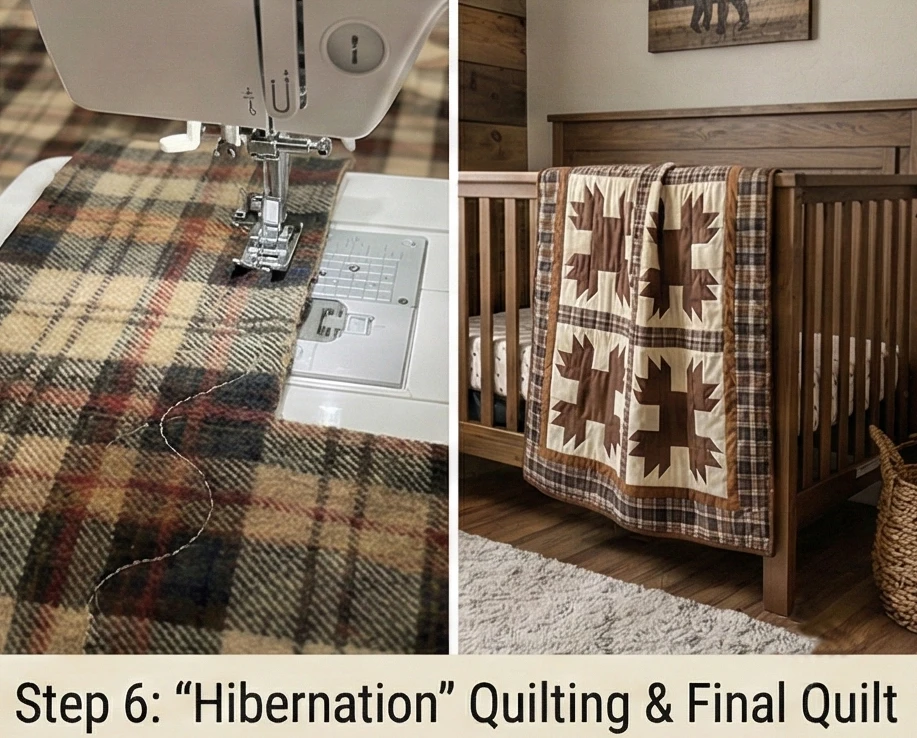
Step 7: The Flannel Binding
- Binding: Use the same Flannel as the paw pads.
- Attach: Machine sew to the front. Because it’s a toddler quilt, machine stitch the back as well (stitch-in-the-ditch from the front to catch the back binding) for maximum durability against dragging and washing.
Usability Note: If using flannel, always pre-wash it twice. Flannel shrinks significantly more than standard cotton. If you don’t pre-wash, your bears will look puckered and distorted after the first laundry day.
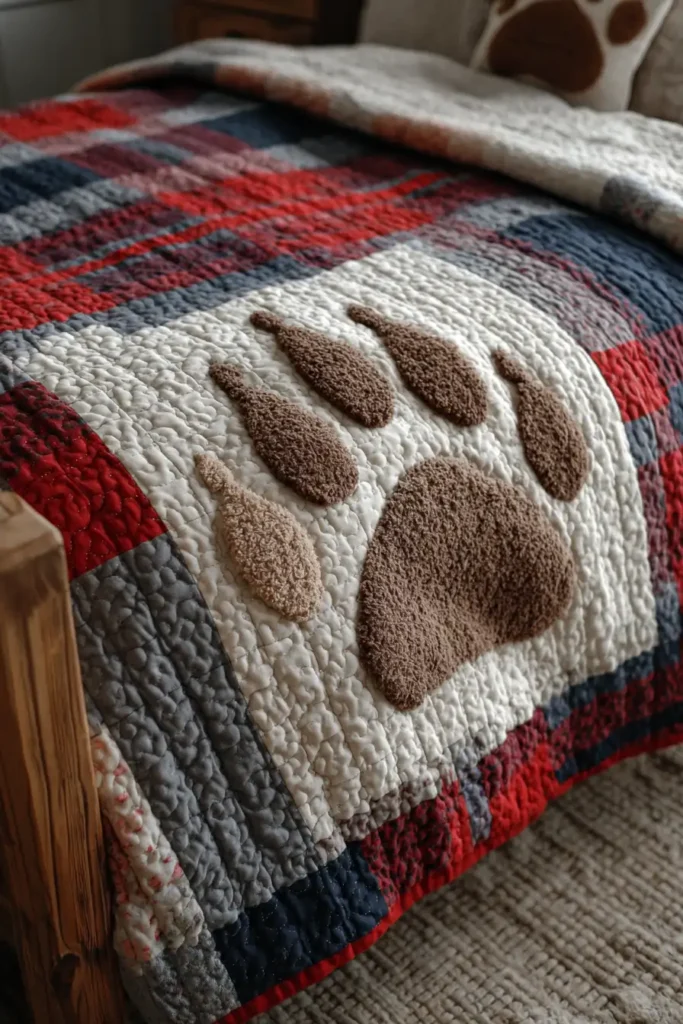
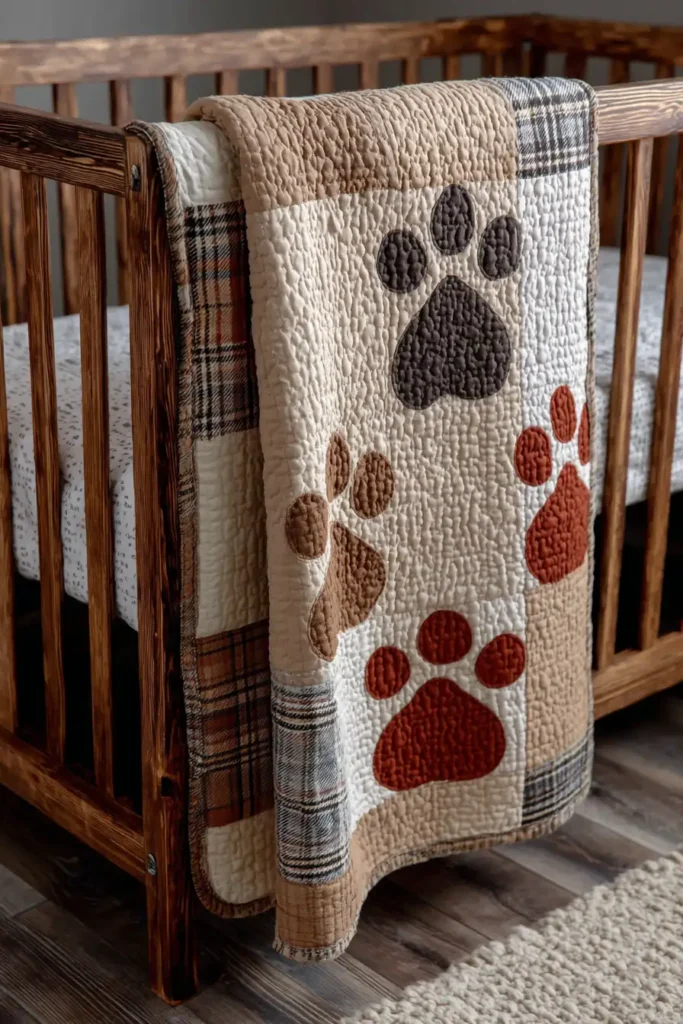
Conclusion
Selecting and creating from these Baby Quilt Pattern Ideas is a heartfelt way to welcome a new life, surrounding them with handmade comfort and care from their very first days. Each quilt, whether a Reversible design for flexible use or a Lightweight Muslin cover for a summer baby, represents a tangible hug—a daily source of softness, security, and love. The journey through charming patches, soothing appliqués, and cozy textures demonstrates how these functional items become foundational pieces of childhood, used for comfort, play, and sweet dreams.
The true value of these projects is measured in both their practical application and their lasting sentimental impact. A Boho Fringe and Tassel quilt adds stylish personality to the nursery, while an Organic Cotton Crib Sheet ensures a gentle touch. These creations are designed to be part of life’s most precious moments, from naptime snuggles to playtime on a quilted mat. They evolve from crib covers to beloved toddler companions, often becoming irreplaceable keepsakes that tell the story of a child’s earliest years.
Ultimately, this endeavor is about weaving love into every stitch. By choosing a Cuddly Cloud and Star theme for bedtime or a Playful Patchwork pillow for decor, you are building a nest of warmth and beauty. The finished quilt is more than bedding; it is a legacy of craftsmanship and affection, a cozy anchor for your child’s world that they will cherish for years to come. May these ideas inspire you to create a treasure filled with comfort, joy, and endless love.
